Embed Size (px)
Citation preview
5.1.2 | October 2016 | 3725-03137-006A
MILITARY UNIQUE DEPLOYMENT GUIDE
Polycom® RealPresence® Group Series 5.1.2 with Centro™ for Maximum Security Environments
2
Copyright© 2016, Polycom, Inc. All rights reserved. No part of this document may be reproduced, translated into another language or format, or transmitted in any form or by any means, electronic or mechanical, for any purpose, without the express written permission of Polycom, Inc.
6001 America Center DriveSan Jose, CA 95002USA
Trademarks Polycom®, the Polycom logo and the names and marks associated with Polycom products are trademarks and/or service marks of Polycom, Inc. and are registered and/or common law marks in the United States and various other countries.
All other trademarks are property of their respective owners. No portion hereof may be reproduced or transmitted in any form or by any means, for any purpose other than the recipient's personal use, without the express written permission of Polycom.
Disclaimer While Polycom uses reasonable efforts to include accurate and up-to-date information in this document, Polycom makes no warranties or representations as to its accuracy. Polycom assumes no liability or responsibility for any typographical or other errors or omissions in the content of this document.
Limitation of Liability Polycom and/or its respective suppliers make no representations about the suitability of the information contained in this document for any purpose. Information is provided "as is" without warranty of any kind and is subject to change without notice. The entire risk arising out of its use remains with the recipient. In no event shall Polycom and/or its respective suppliers be liable for any direct, consequential, incidental, special, punitive or other damages whatsoever (including without limitation, damages for loss of business profits, business interruption, or loss of business information), even if Polycom has been advised of the possibility of such damages.
End User License Agreement By installing, copying, or otherwise using this product, you acknowledge that you have read, understand and agree to be bound by the terms and conditions of the End User License Agreement for this product. The EULA for this product is available on the Polycom Support page for the product.
Patent Information The accompanying product may be protected by one or more U.S. and foreign patents and/or pending patent applications held by Polycom, Inc.
Open Source Software Used in this Product This product may contain open source software. You may receive the open source software from Polycom up to three (3) years after the distribution date of the applicable product or software at a charge not greater than the cost to Polycom of shipping or distributing the software to you. To receive software information, as well as the open source software code used in this product, contact Polycom by email at [email protected].
Customer Feedback We are striving to improve our documentation quality and we appreciate your feedback. Email your opinions and comments to [email protected].
Polycom Support Visit the Polycom Support Center for End User License Agreements, software downloads, product documents, product licenses, troubleshooting tips, service requests, and more.
Contents
Polycom, Inc. 3
Contents
5.1.2 Deployment Guide for Maximum Security Environments . . . . . . . . . . . . . . 3Document Change History . . . . . . . . . . . . . . . . . . . . . . . . . . . . . . . . . . . . . . . . . . . . . . . . . . . . 3
FIPS 140-2 Cryptography . . . . . . . . . . . . . . . . . . . . . . . . . . . . . . . . . . . . . . . . . . . . . . . . . . . . . 4
Locate Your System . . . . . . . . . . . . . . . . . . . . . . . . . . . . . . . . . . . . . . . . . . . . . . . . . . . . . . . . . 4
Configure Your System . . . . . . . . . . . . . . . . . . . . . . . . . . . . . . . . . . . . . . . . . . . . . . . . . . . . . . . 4
Preparation . . . . . . . . . . . . . . . . . . . . . . . . . . . . . . . . . . . . . . . . . . . . . . . . . . . . . . . . . . . . . 4
Install in a Non-DHCP Environment . . . . . . . . . . . . . . . . . . . . . . . . . . . . . . . . . . . . . . . 4
Install on a Network Using 802.1X . . . . . . . . . . . . . . . . . . . . . . . . . . . . . . . . . . . . . . . . 4
Install Certificates . . . . . . . . . . . . . . . . . . . . . . . . . . . . . . . . . . . . . . . . . . . . . . . . . . . . . 5
Install Software Options . . . . . . . . . . . . . . . . . . . . . . . . . . . . . . . . . . . . . . . . . . . . . . . . 5
Install the Software . . . . . . . . . . . . . . . . . . . . . . . . . . . . . . . . . . . . . . . . . . . . . . . . . . . . . . . 5
Use the Setup Wizard . . . . . . . . . . . . . . . . . . . . . . . . . . . . . . . . . . . . . . . . . . . . . . . . . . . . . 5
Initial Settings . . . . . . . . . . . . . . . . . . . . . . . . . . . . . . . . . . . . . . . . . . . . . . . . . . . . . . . . 6
LAN Settings . . . . . . . . . . . . . . . . . . . . . . . . . . . . . . . . . . . . . . . . . . . . . . . . . . . . . . . . . 6
Security Settings . . . . . . . . . . . . . . . . . . . . . . . . . . . . . . . . . . . . . . . . . . . . . . . . . . . . . . 7
Certificates . . . . . . . . . . . . . . . . . . . . . . . . . . . . . . . . . . . . . . . . . . . . . . . . . . . . . . . . . . 8
Revocation . . . . . . . . . . . . . . . . . . . . . . . . . . . . . . . . . . . . . . . . . . . . . . . . . . . . . . . . . . 8
Complete the Initial Configuration . . . . . . . . . . . . . . . . . . . . . . . . . . . . . . . . . . . . . . . . . . . . 9
Time Services . . . . . . . . . . . . . . . . . . . . . . . . . . . . . . . . . . . . . . . . . . . . . . . . . . . . . . . . 9
Numeric Keypad Function Settings . . . . . . . . . . . . . . . . . . . . . . . . . . . . . . . . . . . . . . 10
Home Screen Settings . . . . . . . . . . . . . . . . . . . . . . . . . . . . . . . . . . . . . . . . . . . . . . . . 10
Active Directory Server Settings . . . . . . . . . . . . . . . . . . . . . . . . . . . . . . . . . . . . . . . . . 10
Local Access Controls and SNMP . . . . . . . . . . . . . . . . . . . . . . . . . . . . . . . . . . . . . . . 11
Call Media Encryption . . . . . . . . . . . . . . . . . . . . . . . . . . . . . . . . . . . . . . . . . . . . . . . . . 11
PC LAN Port . . . . . . . . . . . . . . . . . . . . . . . . . . . . . . . . . . . . . . . . . . . . . . . . . . . . . . . . 11
IP Network Settings . . . . . . . . . . . . . . . . . . . . . . . . . . . . . . . . . . . . . . . . . . . . . . . . . . 12
Dial Preference Settings . . . . . . . . . . . . . . . . . . . . . . . . . . . . . . . . . . . . . . . . . . . . . . . 13
Log Management . . . . . . . . . . . . . . . . . . . . . . . . . . . . . . . . . . . . . . . . . . . . . . . . . . . . 13
Local Password Policy . . . . . . . . . . . . . . . . . . . . . . . . . . . . . . . . . . . . . . . . . . . . . . . . 14
Use Provisioning . . . . . . . . . . . . . . . . . . . . . . . . . . . . . . . . . . . . . . . . . . . . . . . . . . . . . . . . 18
Configure Enterprise Network Services . . . . . . . . . . . . . . . . . . . . . . . . . . . . . . . . . . . . . . 18
Use the System . . . . . . . . . . . . . . . . . . . . . . . . . . . . . . . . . . . . . . . . . . . . . . . . . . . . . . . . . . . . 18
View Network Interface and System Status . . . . . . . . . . . . . . . . . . . . . . . . . . . . . . . . . . . 19
Collect Log Files . . . . . . . . . . . . . . . . . . . . . . . . . . . . . . . . . . . . . . . . . . . . . . . . . . . . . . . . 19
Contents
Polycom, Inc. 4
Use the Camera Privacy Cover . . . . . . . . . . . . . . . . . . . . . . . . . . . . . . . . . . . . . . . . . . . . . 19
SD Memory Card Deep Erase Use USB Factory Restore . . . . . . . . . . . . . . . . . . . . . . . . 20
Conditions of Fielding . . . . . . . . . . . . . . . . . . . . . . . . . . . . . . . . . . . . . . . . . . . . . . . . . . . . . . . 20
Polycom, Inc. 3
5.1.2 Deployment Guide for Maximum Security Environments
This document provides guidance for configuring and using software version Version to be consistent with the conditions for deployment as listed in the UC APL listing for the Polycom RealPresence® Group Series with Centro™ product. For a listing of certified software versions, refer to
http://www.polycom.com/solutions/solutions-by-industry/us-federal-government/certification-accreditation.html
In the configuration sections of this document, if a setting is mandated by a DISA Security Technical Implementation Guide (STIG) requirement, the specific STIG reference is listed along with the setting.
Document Change HistoryThis information is required for listing on the US Department of Defense (DoD) Unified Capabilities (UC) Approve Products List (APL).
To request information or submit comments about this document, please contact Polycom Global Services.
Note: This software, when configured per the guidance provided in this guide, is designed to meet the latest U.S. Department of Defense (DoD) security requirements for listing on the Unified Capabilities (UC) Approved Products List (APL) as maintained by the Defense Information Systems Agency (DISA) Unified Capabilities Connection Office (UCCO).
For more information about the UC APL process, please visit the UCCO website.
Document Version Release Date Description
4.1.0J February 2014 Initial approved release
4.1.5 December 2014 DTR 1 - new version
PEI to AEI April 2015 DTR 2 - class change
4.3.0 August 2015 DTR 3 - new version
4.3.2 October 2015 DTR 4 - new version
5.1.2 October 2016 DTR 5 - new version
5.1.2 Deployment Guide for Maximum Security Environments
Polycom, Inc. 4
FIPS 140-2 CryptographyThe Polycom RealPresence Group software uses OpenSSL FIPS Object Module (Software Version: 2.0). This module provides FIPS-140-approved cryptography for the system. The validation certificate for this module can be found at
http://csrc.nist.gov/groups/STM/cmvp/documents/140-1/140val-all.htm#1747
Locate Your System The system should be placed in a secured location and on a firewall-protected network segment.
Configure Your SystemThis following sections describe how to manually configure system settings to meet the DoD security requirements.
● Preparation
● Install the Software
● Use the Setup Wizard
● Complete the Initial Configuration
● Use Provisioning
● Configure Enterprise Network Services
For detailed information about configuring your system, see Polycom RealPresence Group Series Administrator Guide, Version 5.1.0 at Polycom Support.
PreparationIn order to have everything you need to configure the system, consider the following conditions and if they apply, follow their guidance prior to beginning.
Install in a Non-DHCP EnvironmentIf you are installing the Polycom RealPresence Group system in a non-DHCP environment, you must manually configure the LAN properties during the setup wizard using the local interface and the remote control, so be sure to have the LAN information ready.
Install on a Network Using 802.1XIf you are installing the Polycom RealPresence Group system on a network that uses 802.1X, you have the following choices:
● Complete the setup wizard using the local interface and the remote control so you can enter the 802.1X credentials, which then allows the system to connect to the network.
● Connect the system to a local network that does not use 802.1X so you can use the web interface to complete the setup wizard. After you complete the wizard settings and enter the 802.1X credentials, you can connect the system to the network that uses 802.1X authentication.
5.1.2 Deployment Guide for Maximum Security Environments
Polycom, Inc. 5
Install CertificatesTo configure the system to use certificates or to customize other settings, you must access the Polycom RealPresence Group system web interface using a computer located on the same network segment as the Polycom RealPresence Group system.
Install Software OptionsIf you purchased software options for your Polycom RealPresence Group system, be sure to activate the software option licenses and get the corresponding software option “key codes” that activate the options on your system before you start installation. Store these key codes in a license file called sw_keys.txt. To do this, follow the instructions in Installing Software and Options for the Polycom RealPresence Group Series and Accessories.
Install the SoftwareIf your system did not come with version 5.1.2 already installed, you must download and install the Polycom RealPresence Group 5.1.2 software. The recommended procedure is to use the USB Factory Restore operation because it removes the previous version of software and any settings and data that accompanied it, installs the 5.1.2 software, and starts the system at the Setup Wizard where you can reconfigure the system from the beginning.
To install software version 5.1.2 using USB Factory Restore:
1 Download the 5.1.2 software from the Polycom UC APL Certified Software section of the following Polycom Government Certification and Accreditation website:
http://www.polycom.com/solutions/industry/federal_government/certification_accreditation.html
2 Using the downloaded software file, follow the instructions in the “Using a USB Device for a Factory Restore” section of the Polycom RealPresence Group Series Administrator Guide, Version 5.1.0. Polycom recommends invoking the optional “Zeroize” procedure on any system that has been previously deployed.
After the software is installed, the system runs the Setup Wizard.
Use the Setup WizardThe following sections describe how to use the Setup Wizard to meet the DoD security requirements:
● Initial Settings
● LAN Settings
● Security Settings
● Certificates
● Revocation
Note: The Polycom RealPresence Group Series with Centro requires two USB ports to update the software as well as the camera. For instructions on how to perform a factory restore using USB storage devices to install a specific software version, see Polycom RealPresence Centro Administrator Guide at Polycom Support.
5.1.2 Deployment Guide for Maximum Security Environments
Polycom, Inc. 6
For detailed information about configuring your system, see Polycom RealPresence Group Series Administrator Guide, Version 5.1.0 at Polycom Support.
Initial SettingsThe first few settings in the setup wizard enable you to select the language you want to use, along with the country and system name.
To complete the initial settings in the setup wizard:
1 Choose the language that you want to use, accept the End User License Agreement, then select the Advanced setup.
2 Select your country.
3 Choose a System Name. Since the RealPresence Group systems use the configured System Name as the default DNS host name, choose a name that is a valid DNS host name. Per RFC 1123, valid host names have the following characteristics:
Names are 1 to 63 characters long.
Names can consist of letters a through z (case-insensitive), numbers 0 through 9, and the hyphen character (-).
Host names cannot start or end with a hyphen.
LAN SettingsThese settings apply to your local area network (LAN).
To configure the LAN settings:
1 If the network uses 802.1X:
a Select Enable EAP/802.1X.
b Configure the Identity and Password fields with the credentials assigned to the RealPresence Group system.
2 If the network uses 802.1p/Q:
a Select Enable 802.1p/Q.
Note: You can enable your RealPresence Group system to be provisioned by a Polycom RealPresence® Resource Manager system. If you do so, use the same name for system name and DNS host name that the RealPresence Resource Manager system will provision to the RealPresence Group endpoint. That name will be registered within the local DNS server. Failing to use this naming scheme could lead to PKI certificate validation problems and communication failures that sometimes result when a host name changes but the PKI certificates, which contain the host name, have previous host name information.
Note: If you are installing a RealPresence Group 700 system and need to use the PC LAN port, you might need to enable 802.1Q VLAN tagging to ensure that the data coming from the Polycom RealPresence Group endpoint can be tagged and separated from the data coming from any device connected to the PC LAN port. Consult with your local network administrators for guidance.
5.1.2 Deployment Guide for Maximum Security Environments
Polycom, Inc. 7
b Enter the VLAN ID of the virtual LAN assigned to be used by the Polycom RealPresence Group system.
c Configure the 802.1p Class of Service (COS) values for Video Priority, Audio Priority, and Control Priority per the local network COS policy.
3 Choose the IP Address assignment mode (IPv4):
a If DHCP is to be used, select Obtain IP address automatically in the IP Address menu to automatically populate the remaining fields.
b If manual address assignment is to be used, select Enter IP address manually in the IP Address menu and then enter the assigned IP Address in the Your IP Address is field, along with the Default Gateway address and the Subnet Mask.
4 If the system is also to use IPv6:
a Select Enable IPv6.
b If DHCPv6 or SLAAC is to be used, select Obtain IP address automatically in the IP Address (IPv6) menu to automatically populate the remaining fields.
If DHCPv6 is available on the network, disable Enable SLAAC. Otherwise, leave the setting enabled.
c If manual address assignment is used, select Enter IP address manually in the IP Address menu, and then enter the assigned IP addresses along with the address of the Default Gateway.
Security SettingsThese settings control the defaults for the level of security you want on your Polycom RealPresence Group system and the passwords needed to use the system.
To configure security settings:
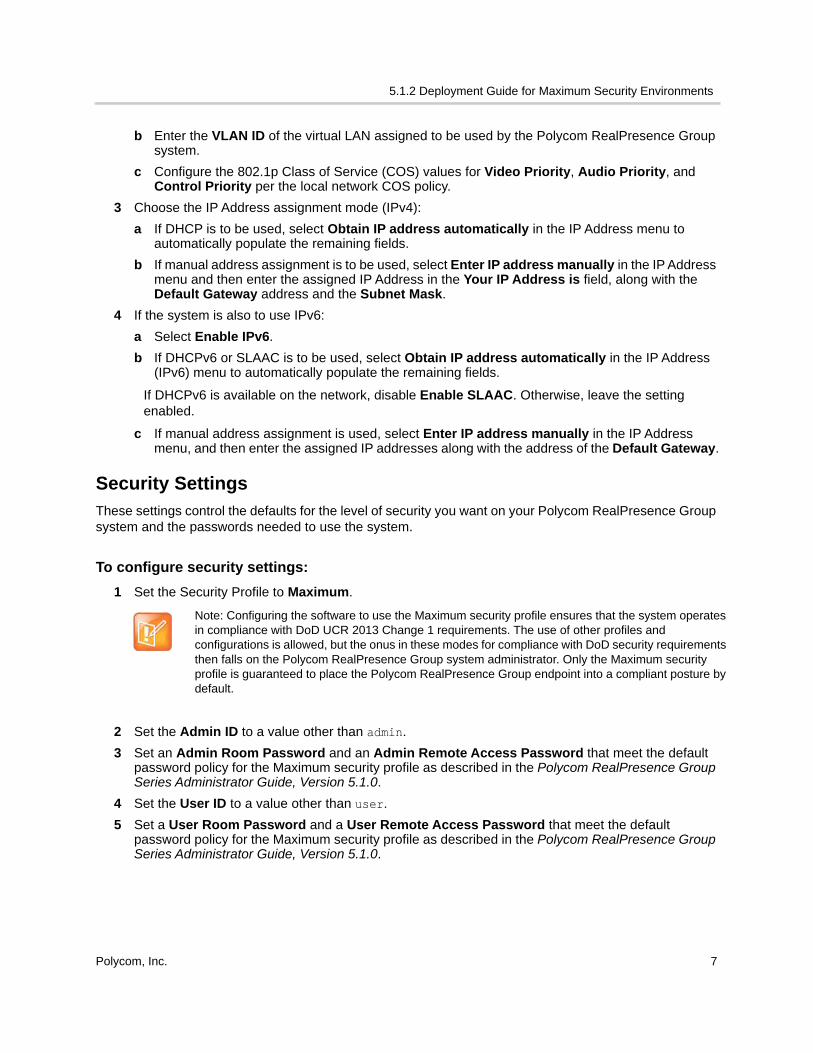
1 Set the Security Profile to Maximum.
2 Set the Admin ID to a value other than admin.
3 Set an Admin Room Password and an Admin Remote Access Password that meet the default password policy for the Maximum security profile as described in the Polycom RealPresence Group Series Administrator Guide, Version 5.1.0.
4 Set the User ID to a value other than user.
5 Set a User Room Password and a User Remote Access Password that meet the default password policy for the Maximum security profile as described in the Polycom RealPresence Group Series Administrator Guide, Version 5.1.0.
Note: Configuring the software to use the Maximum security profile ensures that the system operates in compliance with DoD UCR 2013 Change 1 requirements. The use of other profiles and configurations is allowed, but the onus in these modes for compliance with DoD security requirements then falls on the Polycom RealPresence Group system administrator. Only the Maximum security profile is guaranteed to place the Polycom RealPresence Group endpoint into a compliant posture by default.
5.1.2 Deployment Guide for Maximum Security Environments
Polycom, Inc. 8
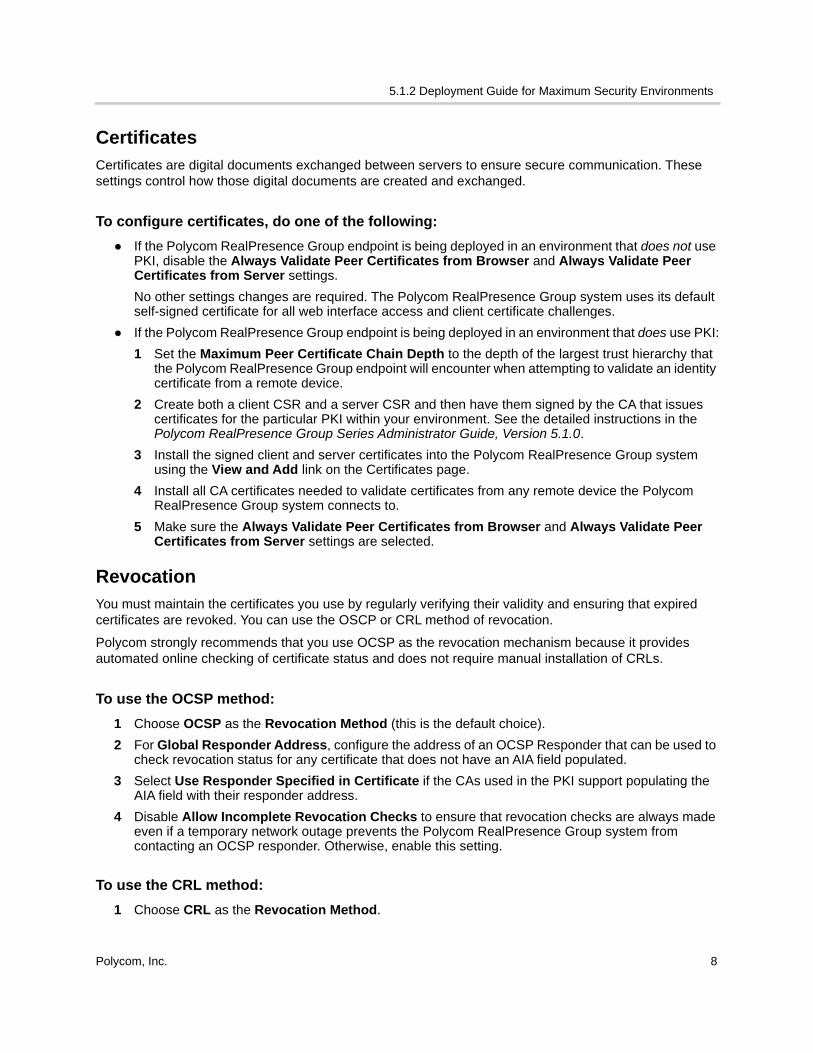
CertificatesCertificates are digital documents exchanged between servers to ensure secure communication. These settings control how those digital documents are created and exchanged.
To configure certificates, do one of the following:
● If the Polycom RealPresence Group endpoint is being deployed in an environment that does not use PKI, disable the Always Validate Peer Certificates from Browser and Always Validate Peer Certificates from Server settings.
No other settings changes are required. The Polycom RealPresence Group system uses its default self-signed certificate for all web interface access and client certificate challenges.
● If the Polycom RealPresence Group endpoint is being deployed in an environment that does use PKI:
1 Set the Maximum Peer Certificate Chain Depth to the depth of the largest trust hierarchy that the Polycom RealPresence Group endpoint will encounter when attempting to validate an identity certificate from a remote device.
2 Create both a client CSR and a server CSR and then have them signed by the CA that issues certificates for the particular PKI within your environment. See the detailed instructions in the Polycom RealPresence Group Series Administrator Guide, Version 5.1.0.
3 Install the signed client and server certificates into the Polycom RealPresence Group system using the View and Add link on the Certificates page.
4 Install all CA certificates needed to validate certificates from any remote device the Polycom RealPresence Group system connects to.
5 Make sure the Always Validate Peer Certificates from Browser and Always Validate Peer Certificates from Server settings are selected.
RevocationYou must maintain the certificates you use by regularly verifying their validity and ensuring that expired certificates are revoked. You can use the OSCP or CRL method of revocation.
Polycom strongly recommends that you use OCSP as the revocation mechanism because it provides automated online checking of certificate status and does not require manual installation of CRLs.
To use the OCSP method:
1 Choose OCSP as the Revocation Method (this is the default choice).
2 For Global Responder Address, configure the address of an OCSP Responder that can be used to check revocation status for any certificate that does not have an AIA field populated.
3 Select Use Responder Specified in Certificate if the CAs used in the PKI support populating the AIA field with their responder address.
4 Disable Allow Incomplete Revocation Checks to ensure that revocation checks are always made even if a temporary network outage prevents the Polycom RealPresence Group system from contacting an OCSP responder. Otherwise, enable this setting.
To use the CRL method:
1 Choose CRL as the Revocation Method.
5.1.2 Deployment Guide for Maximum Security Environments
Polycom, Inc. 9
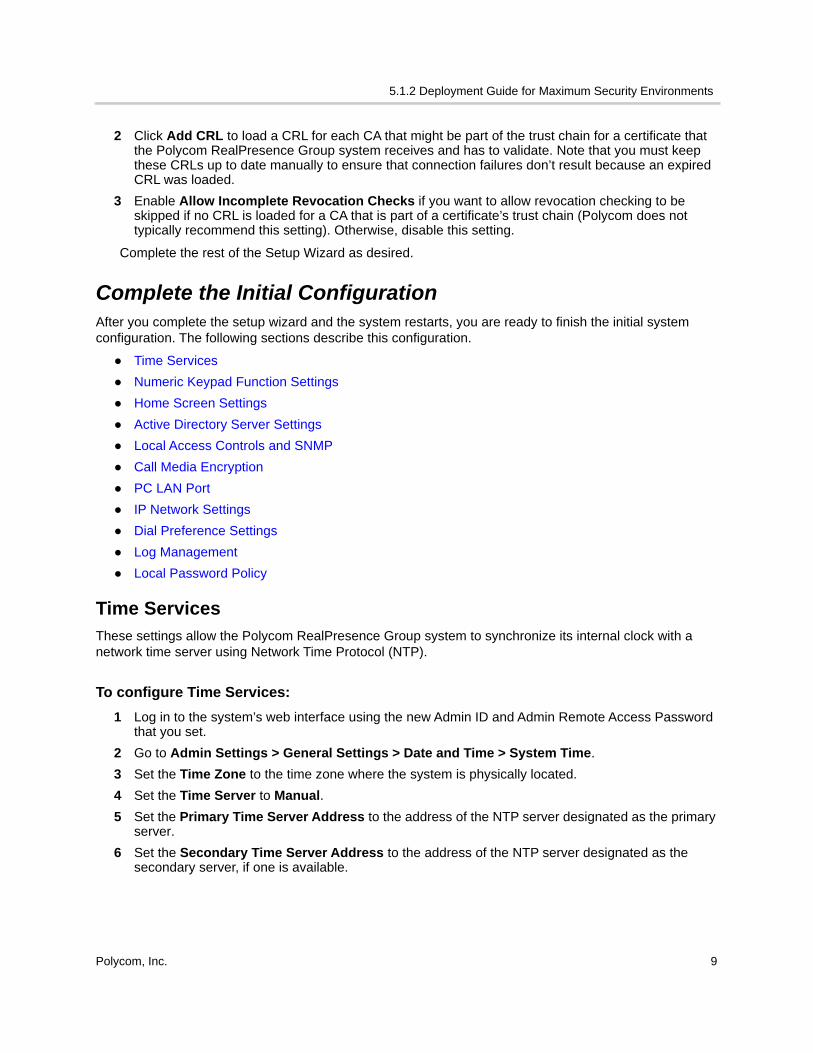
2 Click Add CRL to load a CRL for each CA that might be part of the trust chain for a certificate that the Polycom RealPresence Group system receives and has to validate. Note that you must keep these CRLs up to date manually to ensure that connection failures don’t result because an expired CRL was loaded.
3 Enable Allow Incomplete Revocation Checks if you want to allow revocation checking to be skipped if no CRL is loaded for a CA that is part of a certificate’s trust chain (Polycom does not typically recommend this setting). Otherwise, disable this setting.
Complete the rest of the Setup Wizard as desired.
Complete the Initial ConfigurationAfter you complete the setup wizard and the system restarts, you are ready to finish the initial system configuration. The following sections describe this configuration.
● Time Services
● Numeric Keypad Function Settings
● Home Screen Settings
● Active Directory Server Settings
● Local Access Controls and SNMP
● Call Media Encryption
● PC LAN Port
● IP Network Settings
● Dial Preference Settings
● Log Management
● Local Password Policy
Time ServicesThese settings allow the Polycom RealPresence Group system to synchronize its internal clock with a network time server using Network Time Protocol (NTP).
To configure Time Services:
1 Log in to the system’s web interface using the new Admin ID and Admin Remote Access Password that you set.
2 Go to Admin Settings > General Settings > Date and Time > System Time.
3 Set the Time Zone to the time zone where the system is physically located.
4 Set the Time Server to Manual.
5 Set the Primary Time Server Address to the address of the NTP server designated as the primary server.
6 Set the Secondary Time Server Address to the address of the NTP server designated as the secondary server, if one is available.
5.1.2 Deployment Guide for Maximum Security Environments
Polycom, Inc. 10
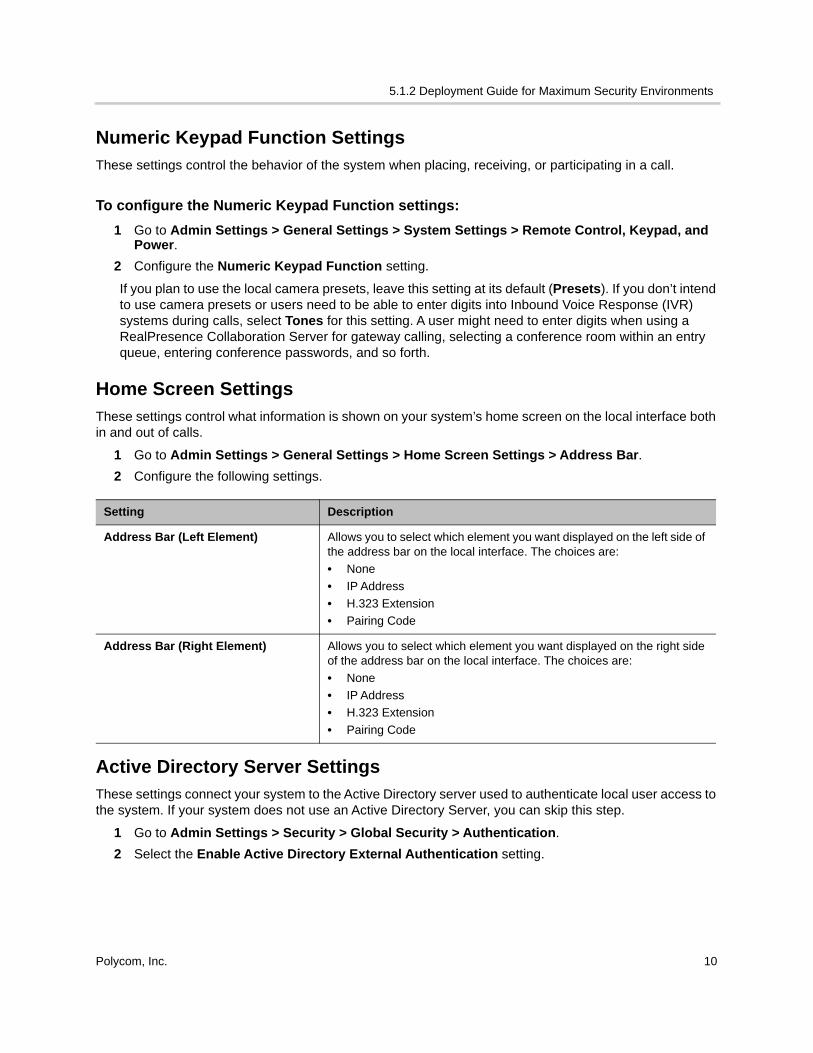
Numeric Keypad Function SettingsThese settings control the behavior of the system when placing, receiving, or participating in a call.
To configure the Numeric Keypad Function settings:
1 Go to Admin Settings > General Settings > System Settings > Remote Control, Keypad, and Power.
2 Configure the Numeric Keypad Function setting.
If you plan to use the local camera presets, leave this setting at its default (Presets). If you don’t intend to use camera presets or users need to be able to enter digits into Inbound Voice Response (IVR) systems during calls, select Tones for this setting. A user might need to enter digits when using a RealPresence Collaboration Server for gateway calling, selecting a conference room within an entry queue, entering conference passwords, and so forth.
Home Screen SettingsThese settings control what information is shown on your system’s home screen on the local interface both in and out of calls.
1 Go to Admin Settings > General Settings > Home Screen Settings > Address Bar.
2 Configure the following settings.
Active Directory Server SettingsThese settings connect your system to the Active Directory server used to authenticate local user access to the system. If your system does not use an Active Directory Server, you can skip this step.
1 Go to Admin Settings > Security > Global Security > Authentication.
2 Select the Enable Active Directory External Authentication setting.
Setting Description
Address Bar (Left Element) Allows you to select which element you want displayed on the left side of the address bar on the local interface. The choices are:
• None
• IP Address
• H.323 Extension
• Pairing Code
Address Bar (Right Element) Allows you to select which element you want displayed on the right side of the address bar on the local interface. The choices are:
• None
• IP Address
• H.323 Extension
• Pairing Code
5.1.2 Deployment Guide for Maximum Security Environments
Polycom, Inc. 11
3 Configure the other Active Directory settings according to the guidance in the “External Authentication” section of the Polycom RealPresence Group Series Administrator Guide, Version 5.1.0.
Local Access Controls and SNMPThese settings control who can access your system and how it can be accessed.
To configure the local access control and SNMP:
1 Go to Admin Settings > Security > Global Security > Access.
2 Enable or disable the Allow Access to User Settings setting per your local site guidelines.
3 If you plan to use SNMP, select Enable SNMP Access and then configure the SNMP settings per your site requirements and the guidance provided in the “Set Up SNMP” section of the Polycom RealPresence Group Series Administrator Guide, Version 5.1.0.
4 To limit web interface and SNMP access to a list of only known IP addresses, select the Enable Whitelist setting.
Edit the whitelist to add the IP address of the workstation you are currently using. Doing so prevents your workstation from being locked out when you apply the changes. If you plan to use SNMP, include the IP addresses of any SNMP consoles that need to access the system.
5 Configure the Idle Session Timeout in Minutes setting per your local site guidelines as needed.
Call Media EncryptionPolycom RealPresence Group systems use the Advanced Encryption Standard (AES) for call encryption. AES is a Federal Information Processing Standard (FIPS) Publication (FIP-197) that specifies a cryptographic algorithm for use by U.S. Government organizations to protect sensitive and unclassified information.
To configure encryption:
1 Go to Admin Settings > Security > Global Security > Encryption.
2 Configure the Require AES Encryption for Calls setting per your local site guidelines.
Polycom recommends that, for interoperability purposes, you use the When Available setting because it always uses encryption when available.
PC LAN Port Only Polycom RealPresence Group 700 systems have a PC LAN port on the back of the system. Configure this port to enable Ethernet use.
To configure the PC LAN port:
1 Go to Admin Settings > Network > LAN Properties > LAN Options.
Note: When you enable External Authentication, the local user account is disabled, so the User ID, User Room Password, and User Remote Access Password settings are not used.
5.1.2 Deployment Guide for Maximum Security Environments
Polycom, Inc. 12
2 Configure the Enable PC LAN Port setting, based on whether its use is required.
IP Network SettingsThese settings control the types of networks your system uses, as well as gatekeeper, network quality, and firewall settings.
For general guidance, on how to configure IP settings, see Polycom RealPresence Group Series Administrator Guide, Version 5.1.0 at Polycom Support.
To configure the IP network settings:
1 Go to Admin Settings > Network > IP Network.
2 Set up the following:
● Click H.323 to display the H.323 settings. Select Enable H.323 if H.323 calling is required. If you enable H.323, configure the other H.323 settings as needed.
● Click SIP to display the SIP settings. Select Enable SIP if SIP calling is required. Select AS-SIP if AS-SIP calling is required.
If you enable SIP, configure the other SIP settings as needed. Select TLS as the Transport Protocol to guarantee that only secured signaling is used.
If you enable SIP, the Force Connection Reuse option is disabled by default. This causes the Group Series system to use an ephemeral source port for all outgoing SIP messages. When this option is enabled, the Group Series system uses the active SIP listening port as the source port (5060 or 5061, depending on the negotiated SIP transport protocol in use). Enabling this option is beneficial when you need to establish correct operation with remote SIP peer devices that require that the source port match the contact port in SIP messages.
If you enable AS-SIP, configure the SIP Registrar and Proxy server addresses to point to the local session controller (LSC), and then configure the AS-SIP-specific settings as required. An LSC is the AS-SIP call server in an AS-SIP deployment. It is used by the RealPresence Group Series system as both the SIP registrar and proxy server.
3 If you enabled AS-SIP, click AS-SIP to display the AS-SIP settings. You might find the following information helpful:
● The default Network Domain (Default Domain) assigned to the system is uc. You can set it to any of the configured network domains.
● The default outgoing call precedence level (Default Precedence) is ROUTINE. You can change it to any precedence level defined within the configured Default Domain.
● The system is pre-configured for use on both the uc and dsn network domains, with default precedence levels and associated DSCP values for audio and video traffic per UCR 2013 Change 1. If these defaults do not apply to your deployment, you can change them. For details, see Polycom RealPresence Group Series Administrator Guide, Version 5.1.0 at Polycom Support.
Note: If you do enable the Enable PC LAN Port setting, be sure to also configure the Enable 802.1p/Q settings per your local site guidelines.
Note: If you enable AS-SIP and have the TIP option installed, go to Admin Settings > Network > Dialing Preference and disable the TIP setting. TIP signaling and AS-SIP signaling are incompatible with each other.
5.1.2 Deployment Guide for Maximum Security Environments
Polycom, Inc. 13
4 Click Quality of Service to configure the appropriate settings on the IP Network page.
Dial Preference SettingsThese settings control how calls are placed on systems that have multiple call protocols enabled.
To configure dialing preferences:
1 Go to Admin Settings > Network > Dialing Preference > Dialing Options.
2 Configure the Video Dialing Order:
● Select IP H.323 to place calls using H.323 first.
● Select SIP to place calls using SIP first.
Log ManagementThese settings control how system log information is stored on your system.
To configure log management:
1 Go to Admin Settings > Security > Log Management.
2 Configure these settings on the Log Management screen if periodic transfer of logs to an attached USB storage device is required.
Setting Description
Type of Service Configure this setting to match the type of IP Quality of Service tagging being used on the network to which the system is connected. If there is no QoS tagging on the network, leave the setting at IP Precedence and the other Type of Service settings at their default values.
If AS-SIP is enabled, select Diffserv.
Video Configure this setting with the IP Precedence or Diffserv DSCP value intended for video traffic.
If AS-SIP is enabled, set to 36. This is the value for video in non-AS-SIP calls (regular SIP or H.323 calls). AS-SIP calls take their video DSCP value from the AS-SIP network domain configuration settings.
Audio Configure this setting with the IP Precedence or Diffserv DSCP value intended for audio traffic.
If AS-SIP is enabled, set to 34. This is the value for audio in non-AS-SIP calls (regular SIP or H.323 calls). AS-SIP calls take their audio DSCP value from the AS-SIP network domain configuration settings.
Control Configure this setting with the IP Precedence or Diffserv DSCP value intended for call control traffic.
If AS-SIP is enabled, set to 40.
OA&M Configure this setting with the IP Precedence or Diffserv DSCP value intended for operations, administration, and management (OA&M) traffic.
If AS-SIP is enabled, set to 16.
5.1.2 Deployment Guide for Maximum Security Environments
Polycom, Inc. 14
3 If remote log storage is required, go to Diagnostics > System > System Log Settings to select the Enable Remote Logging setting, and then configure the Remote Log Server Address as needed.
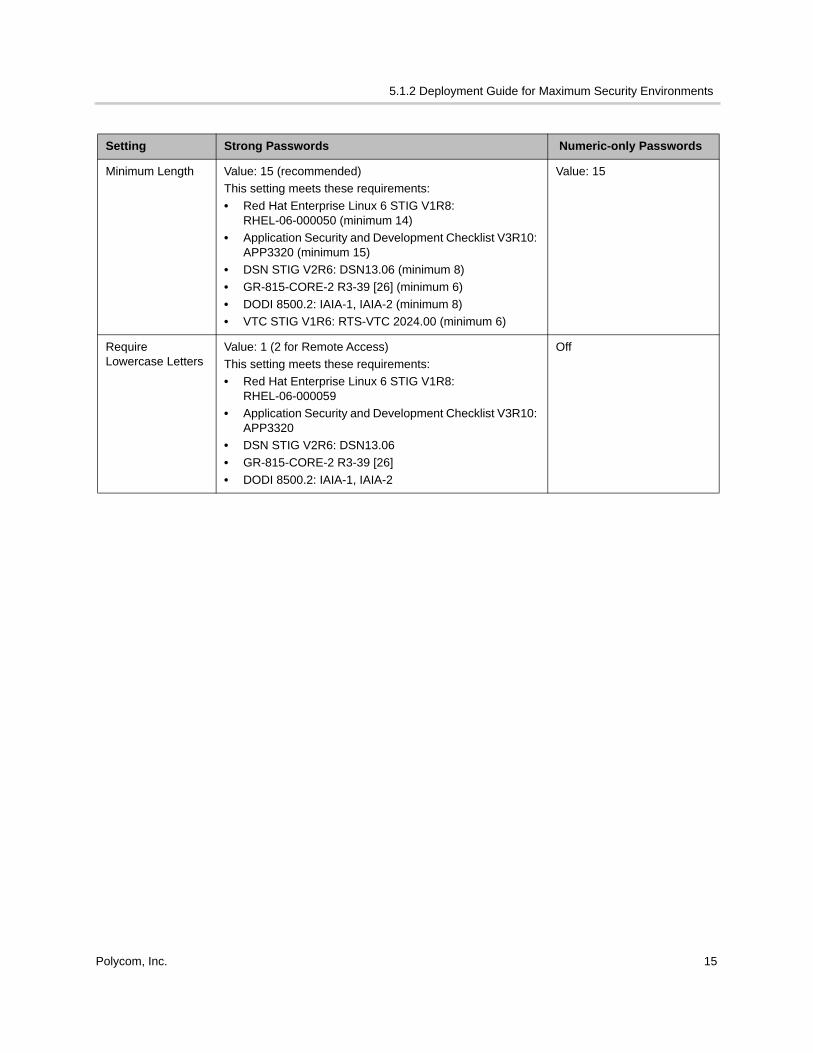
Local Password PolicyThe use of strong passwords (defined as passwords containing a sufficient number and diversity of character types, such as uppercase letters, lowercase letters, numbers, and special characters) is recommended for security purposes. It is prudent, however, to keep in mind that strong room passwords require the use of the onscreen virtual keyboard to enter letters and special characters. This requirement can make it possible for others to view a password as you enter it. You can mitigate this risk by using longer numeric-only passwords that you can enter using the remote control. You can also mitigate this risk by using a USB keyboard connected to the RealPresence Group system through the USB port.
The following tables give guidance for password policy settings that are compliant with U.S. DoD security requirements. If a setting is mandated by a Defense Information Systems Agency (DISA) Security Technical Implementation Guide (STIG) requirement, the specific STIG reference is listed along with the setting.
To configure your local password policy:
1 Go to Admin Settings > Security > Local Accounts > Password Requirements, and configure the following settings.
● If you are not using an external Active Directory Server, also configure the following settings for the User Room password.
● If you are using SNMPv3, also configure the following settings for the SNMP passwords, as applicable.
Setting Description
Percent Filled Threshold
• Specifies the percentage of the log file space that, when consumed, triggers a system alert. It can also trigger an automatic transfer of logs to an attached USB storage device if that setting is enabled. Suggested value: 70.
• This alert is mandated by the Application Security STIG (APP3650 in V3R3).
Transfer Frequency Set this to Auto at Threshold to enable periodic transfer of logs to an attached USB storage device
Set this to Manual to disable periodic transfer of logs to an attached USB storage device
Note: Support for the USB keyboard is specifically to enter complex login information such as for Active Directory accounts. For all other system interaction, use the remote control.
5.1.2 Deployment Guide for Maximum Security Environments
Polycom, Inc. 15
Setting Strong Passwords Numeric-only Passwords
Minimum Length Value: 15 (recommended)
This setting meets these requirements:
• Red Hat Enterprise Linux 6 STIG V1R8: RHEL-06-000050 (minimum 14)
• Application Security and Development Checklist V3R10: APP3320 (minimum 15)
• DSN STIG V2R6: DSN13.06 (minimum 8)
• GR-815-CORE-2 R3-39 [26] (minimum 6)
• DODI 8500.2: IAIA-1, IAIA-2 (minimum 8)
• VTC STIG V1R6: RTS-VTC 2024.00 (minimum 6)
Value: 15
Require Lowercase Letters
Value: 1 (2 for Remote Access)
This setting meets these requirements:
• Red Hat Enterprise Linux 6 STIG V1R8: RHEL-06-000059
• Application Security and Development Checklist V3R10: APP3320
• DSN STIG V2R6: DSN13.06
• GR-815-CORE-2 R3-39 [26]
• DODI 8500.2: IAIA-1, IAIA-2
Off
5.1.2 Deployment Guide for Maximum Security Environments
Polycom, Inc. 16
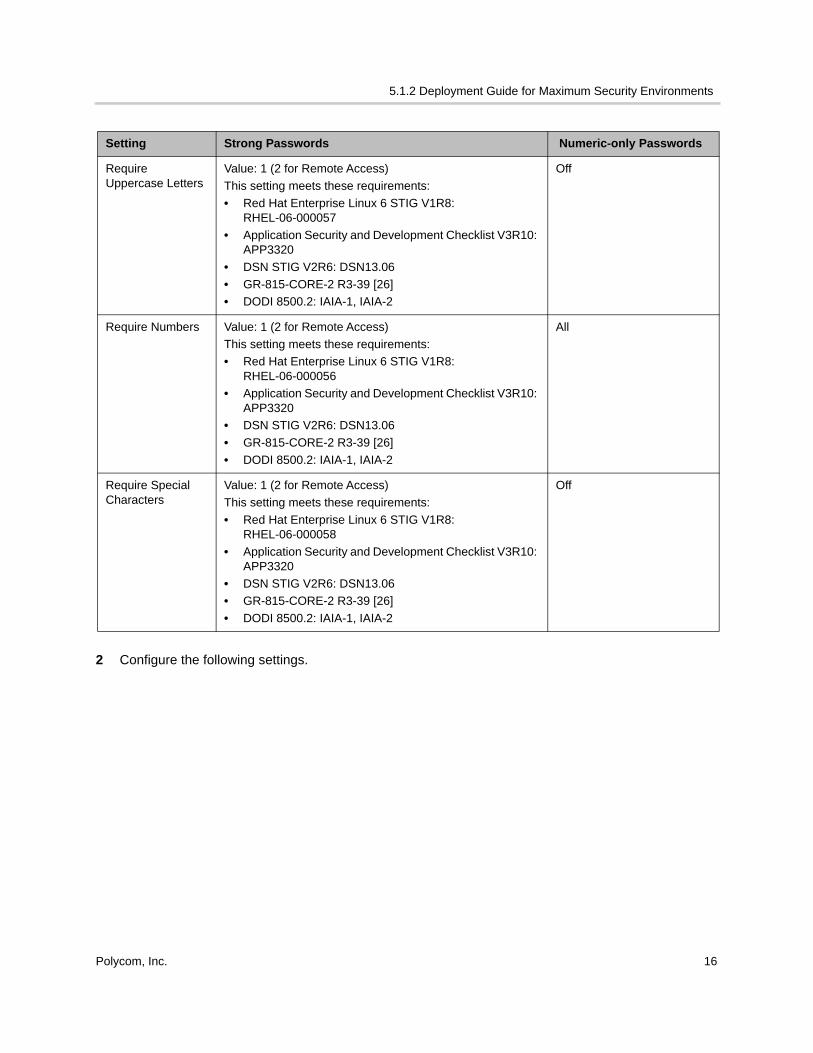
2 Configure the following settings.
Require Uppercase Letters
Value: 1 (2 for Remote Access)
This setting meets these requirements:
• Red Hat Enterprise Linux 6 STIG V1R8: RHEL-06-000057
• Application Security and Development Checklist V3R10: APP3320
• DSN STIG V2R6: DSN13.06
• GR-815-CORE-2 R3-39 [26]
• DODI 8500.2: IAIA-1, IAIA-2
Off
Require Numbers Value: 1 (2 for Remote Access)
This setting meets these requirements:
• Red Hat Enterprise Linux 6 STIG V1R8: RHEL-06-000056
• Application Security and Development Checklist V3R10: APP3320
• DSN STIG V2R6: DSN13.06
• GR-815-CORE-2 R3-39 [26]
• DODI 8500.2: IAIA-1, IAIA-2
All
Require Special Characters
Value: 1 (2 for Remote Access)
This setting meets these requirements:
• Red Hat Enterprise Linux 6 STIG V1R8: RHEL-06-000058
• Application Security and Development Checklist V3R10: APP3320
• DSN STIG V2R6: DSN13.06
• GR-815-CORE-2 R3-39 [26]
• DODI 8500.2: IAIA-1, IAIA-2
Off
Setting Strong Passwords Numeric-only Passwords
5.1.2 Deployment Guide for Maximum Security Environments
Polycom, Inc. 17
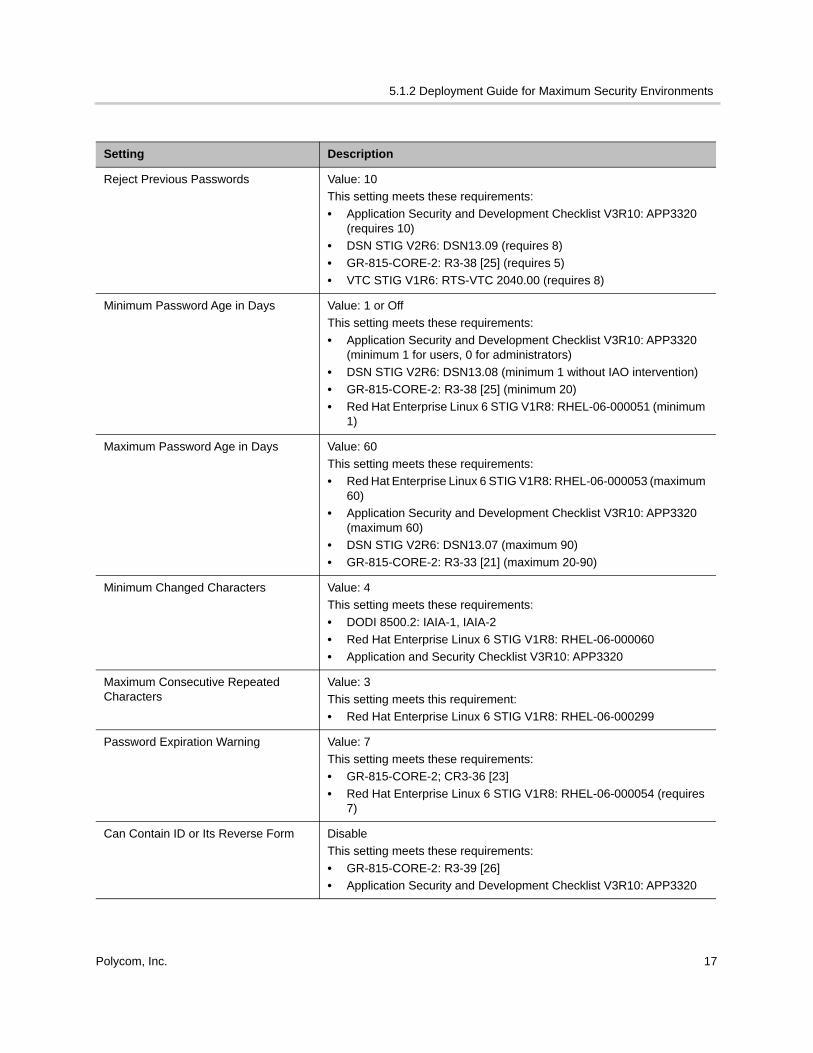
Setting Description
Reject Previous Passwords Value: 10
This setting meets these requirements:
• Application Security and Development Checklist V3R10: APP3320 (requires 10)
• DSN STIG V2R6: DSN13.09 (requires 8)
• GR-815-CORE-2: R3-38 [25] (requires 5)
• VTC STIG V1R6: RTS-VTC 2040.00 (requires 8)
Minimum Password Age in Days Value: 1 or Off
This setting meets these requirements:
• Application Security and Development Checklist V3R10: APP3320 (minimum 1 for users, 0 for administrators)
• DSN STIG V2R6: DSN13.08 (minimum 1 without IAO intervention)
• GR-815-CORE-2: R3-38 [25] (minimum 20)
• Red Hat Enterprise Linux 6 STIG V1R8: RHEL-06-000051 (minimum 1)
Maximum Password Age in Days Value: 60
This setting meets these requirements:
• Red Hat Enterprise Linux 6 STIG V1R8: RHEL-06-000053 (maximum 60)
• Application Security and Development Checklist V3R10: APP3320 (maximum 60)
• DSN STIG V2R6: DSN13.07 (maximum 90)
• GR-815-CORE-2: R3-33 [21] (maximum 20-90)
Minimum Changed Characters Value: 4
This setting meets these requirements:
• DODI 8500.2: IAIA-1, IAIA-2
• Red Hat Enterprise Linux 6 STIG V1R8: RHEL-06-000060
• Application and Security Checklist V3R10: APP3320
Maximum Consecutive Repeated Characters
Value: 3
This setting meets this requirement:
• Red Hat Enterprise Linux 6 STIG V1R8: RHEL-06-000299
Password Expiration Warning Value: 7
This setting meets these requirements:
• GR-815-CORE-2; CR3-36 [23]
• Red Hat Enterprise Linux 6 STIG V1R8: RHEL-06-000054 (requires 7)
Can Contain ID or Its Reverse Form Disable
This setting meets these requirements:
• GR-815-CORE-2: R3-39 [26]
• Application Security and Development Checklist V3R10: APP3320
5.1.2 Deployment Guide for Maximum Security Environments
Polycom, Inc. 18
Use ProvisioningProvisioning is a way to automatically or manually apply software updates to your Polycom RealPresence Group systems.
To provision a Polycom RealPresence Group system from the RealPresence Resource Manager:
1 Ensure that the RealPresence Resource Manager system has been configured to operate in Maximum Security Mode.
2 Create site, user group, and bundled profiles that are to be used to provision your RealPresence Group system. Make sure they are consistent with your local deployment policies and with the configuration guidance of this document.
3 Configure your RealPresence Group system as previously described in this document. Refer to the steps in Install the Software, Use the Setup Wizard, and Complete the Initial Configuration for more information.
4 After completing the configuration in this document, configure your RealPresence Group system to use a provisioning service as described in the “Use a Provisioning Service” section of the Polycom RealPresence Group Series Administrator Guide, Version 5.1.0. This allows the RealPresence Group system to be in a proper state for accepting provisioning information from the RealPresence Resource Manager when both systems are using their Maximum security configurations.
Configure Enterprise Network ServicesEnterprise network services control your directory server.
To configure enterprise network services:
1 Go to Admin Settings > Servers > Directory Servers.
2 If an LDAP directory server is available, select LDAP for the Server Type setting.
3 Configure the rest of the LDAP directory server configuration settings per the guidance in the Polycom RealPresence Group Series Administrator Guide associated with the software version running on the Polycom RealPresence Group system. Note the following:
● You can use the RealPresence Resource Manager server as the LDAP directory server (recommended), or you can use an Active Directory server.
● Select the Use SSL (Secure Socket Layer) setting to guarantee secure connections to the directory server.
Use the SystemIf you have completed the steps leading up to this section of the document, your RealPresence Group system is ready for use within your maximum security environment. The following is information you might find helpful as you use your system.
5.1.2 Deployment Guide for Maximum Security Environments
Polycom, Inc. 19
View Network Interface and System StatusYou can view the System Status screen on the local interface or by using the RealPresence Group web interface. The System Status screen displays system status information, including auto answer point-to-point, IP network, meeting password, and log threshold.
To view the system status in the local interface:
» Go to System > Status.
To view the System Status using the Polycom RealPresence Group system web interface:
1 Open a web browser, and in the browser address line enter the system IP address, for example, https://10.11.12.13, to go to thePolycom RealPresence Group system web interface.
2 Enter the user ID for an admin account (either the local admin account or an Active Directory account that is part of the Admin Group) and the associated password.
3 After you have successfully logged in, click Diagnostics > System > System Status from any page in the Polycom RealPresence Group system web interface.
4 For an explanation of any of the status items, click the More Info link.
Collect Log FilesThe Polycom RealPresence Group endpoint supports both local storage and offload of system log files (via either an attached USB storage device or via the Polycom RealPresence Group system web interface), as well as the use of remote storage via a Syslog server. For more information, see Polycom RealPresence Group Series Administrator Guide, Version 5.1.0 at Polycom Support.
Use the Camera Privacy CoverThe Polycom EagleEye camera goes to sleep when the Polycom RealPresence Group system does. For added security, Polycom offers a privacy cover (part number 2215-28454-001) that you can attach to the camera. You can open and close the cover as needed. Contact your Polycom distributor for more information.

5.1.2 Deployment Guide for Maximum Security Environments
Polycom, Inc. 20
SD Memory Card Deep Erase Use USB Factory RestoreYou can perform a "deep erase" of the system SD memory card by invoking the “Zeroize” procedure as part of a USB Factory Restore. This procedure erases all evidence and artifacts of the system's previous use in such a way that even a manual analysis of the SD memory card cannot retrieve information that resided there prior to the deep erase. This is important when deploying the system in highly sensitive environments.
To perform this operation, follow the instructions for using a USB Device for a factory restore” in the Polycom RealPresence Group Series Administrator Guide, Version 5.1.0 at Polycom Support and choose to add the optional “Zeroize” procedure.
Conditions of FieldingCONDITION OF FIELDING. When the system is deployed into an operational environment, the following security measures (at a minimum) must be implemented to ensure an acceptable level of risk for the sites' Designated Approving Authority:
a. The system must be incorporated in the site's PKI. If PKI is not incorporated, the following findings will be included in the site's architecture:
Application Security and Development Checklist:
APP3305, CAT 1, for RealPresence Resource Manager
APP3280, CAT II, for RealPresence Resource Manager
APP3290, CAT II, for RealPresence Resource Manager
APP3300, CAT II, for RealPresence Resource Manager
APS0110, CAT II, for RealPresence Resource Manager
Defense Switched Network (DSN):
DSN13.17, CAT II (x2), for RealPresence Group Series (GS300, GS310, GS500, GS700); RealPresence Resource Manager
Network Checklists:
NET0445, CAT II (x2), for RPGS (GS300, GS310, GS500, GS700); RealPresence Resource Manager
5.1.2 Deployment Guide for Maximum Security Environments
Polycom, Inc. 21
b. The system must be integrated into the site's AD environment for authentication and authorization requirements. If AD is not incorporated, the following findings will be included in the site's architecture:
Application Security and Development Checklist:
APP3390, CAT I, for RealPresence Group Series (GS300, GS310, GS500, GS700)
APP3400, CAT II, for RealPresence Group Series (GS300, GS310, GS500, GS700)
c.The site must use role-based security for user access and management of the vendor's device.
d. The site must disable all local user accounts on the device after initial setup/configuration with the exception of one emergency administrative account.
e. The site must ensure that the emergency administrative account's userid and password are locked up in separate safes, both of which are not accessible by any one individual, and procedures are implemented to log all access and usage.
f. The site must ensure that the emergency administrative account meets all DoD userid and password complexity requirements.
g. The site must ensure all unused ports are closed.
h. The site must use a STIG-compliant CAC-enabled workstation for management of the solution.
i. The configuration must be in compliance with the Polycom RealPresence Group Series Family Rel. 5.1.2 military-unique features deployment guide.j. The site must register the system in the Systems Networks Approval Process Database https://snap.dod.mil/index.cfm as directed by the DSAWG and Program Management Office.