Embed Size (px)
Citation preview
NC-Verilog Tutorial
Setting the Verilog environment in UNIX:
Pre-setup:
If you’re using MAC OS/X or Windows please refer to the appendix for software
requirements to connect to the UNIX sever at SFSU.
Windows:
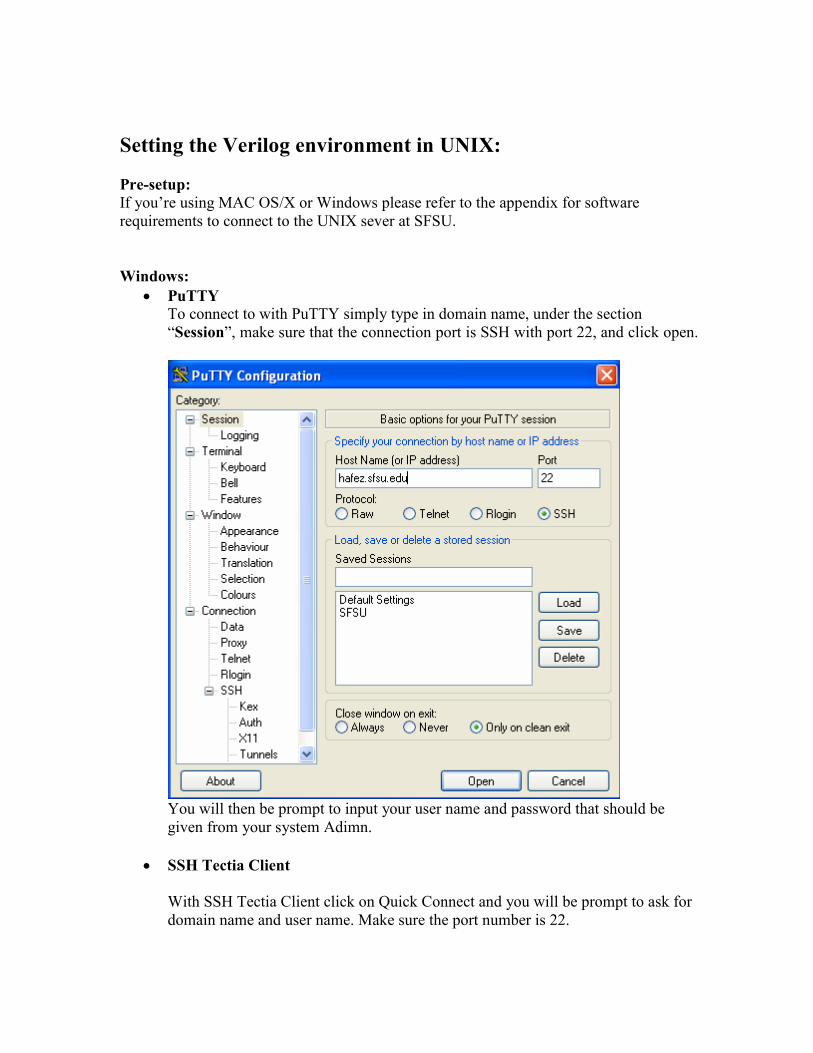
• PuTTY
To connect to with PuTTY simply type in domain name, under the section
“Session”, make sure that the connection port is SSH with port 22, and click open.
You will then be prompt to input your user name and password that should be
given from your system Adimn.
• SSH Tectia Client
With SSH Tectia Client click on Quick Connect and you will be prompt to ask for
domain name and user name. Make sure the port number is 22.
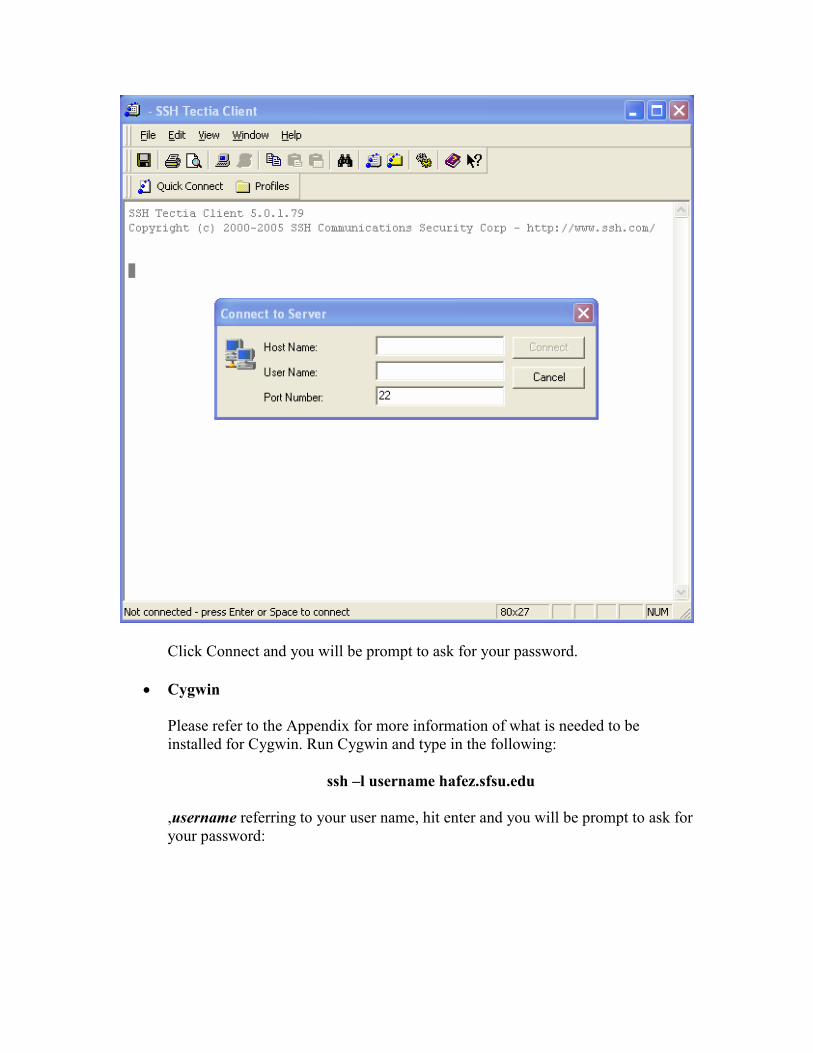
Click Connect and you will be prompt to ask for your password.
• Cygwin
Please refer to the Appendix for more information of what is needed to be
installed for Cygwin. Run Cygwin and type in the following:
ssh –l username hafez.sfsu.edu
,username referring to your user name, hit enter and you will be prompt to ask for
your password:
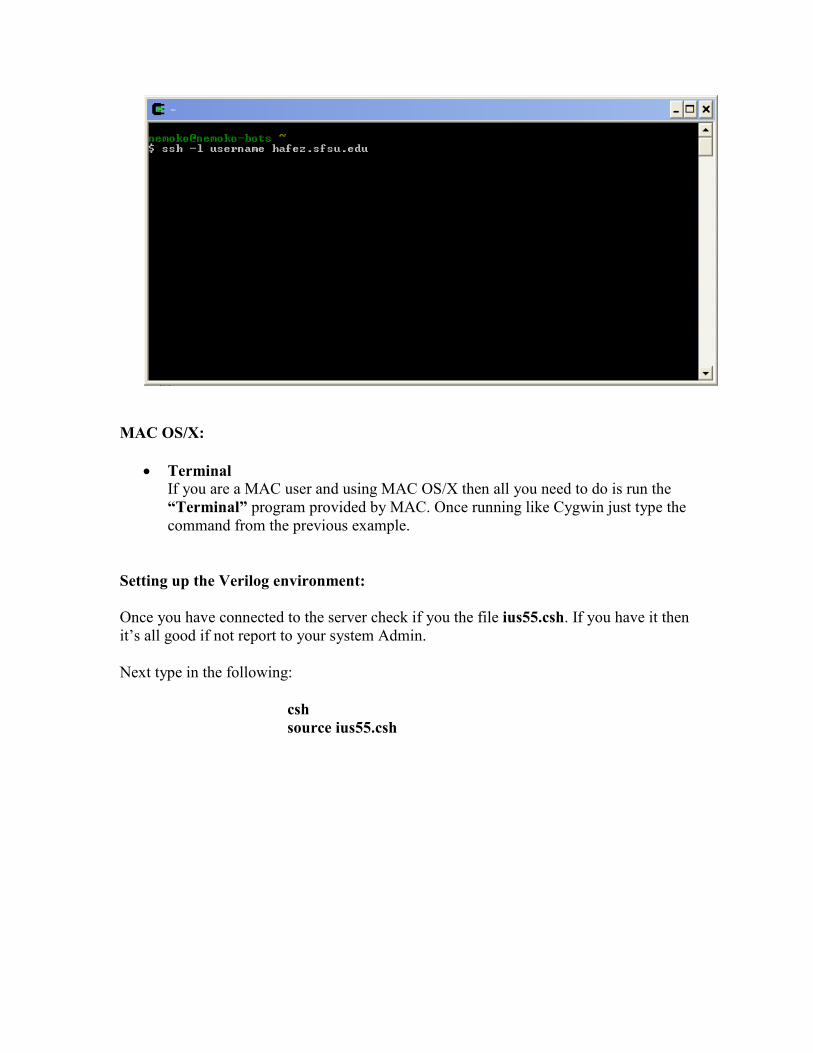
MAC OS/X:
• Terminal
If you are a MAC user and using MAC OS/X then all you need to do is run the
“Terminal” program provided by MAC. Once running like Cygwin just type the
command from the previous example.
Setting up the Verilog environment:
Once you have connected to the server check if you the file ius55.csh. If you have it then
it’s all good if not report to your system Admin.
Next type in the following:
csh
source ius55.csh
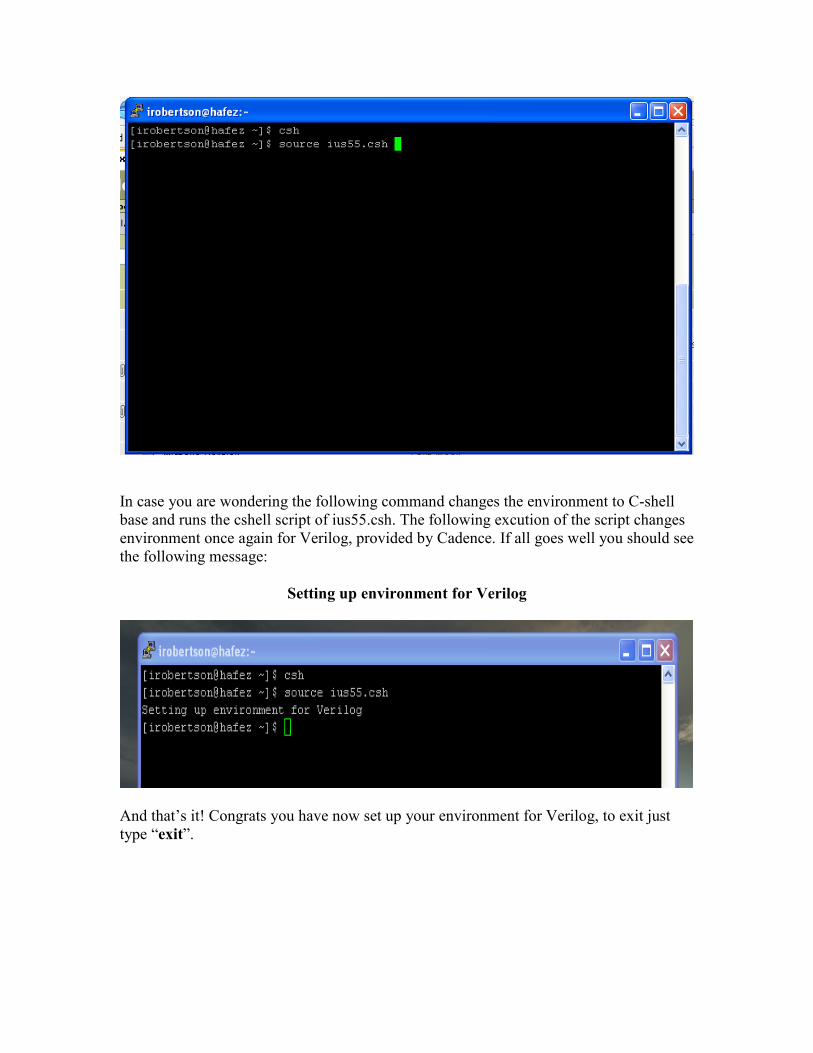
In case you are wondering the following command changes the environment to C-shell
base and runs the cshell script of ius55.csh. The following excution of the script changes
environment once again for Verilog, provided by Cadence. If all goes well you should see
the following message:
Setting up environment for Verilog
And that’s it! Congrats you have now set up your environment for Verilog, to exit just
type “exit”.
Creating/Editing Verilog Source Code
Editors:
There are many editors that one can choose, please refer to Appendix-C for more
information and links, it really depends on how the UNIX was installed. I prefer to use
EMACS and from the rest of the examples, everything will be done using EMACS.
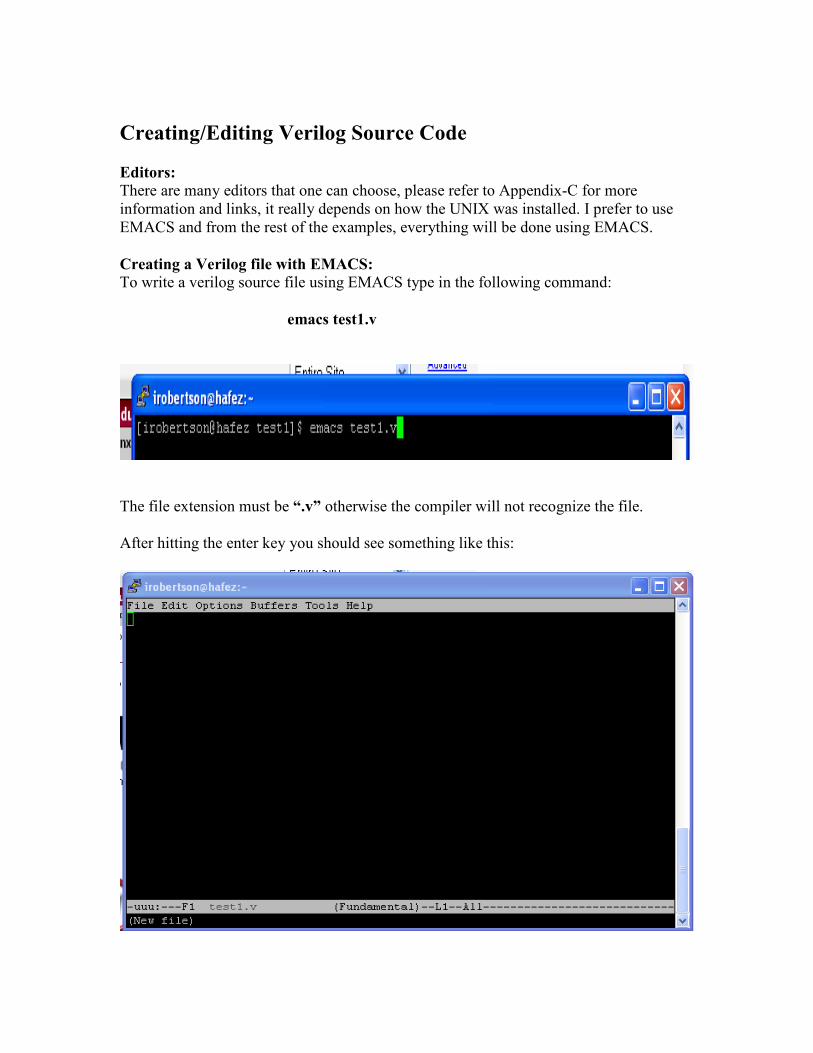
Creating a Verilog file with EMACS:
To write a verilog source file using EMACS type in the following command:
emacs test1.v
The file extension must be “.v” otherwise the compiler will not recognize the file.
After hitting the enter key you should see something like this:

Write your verilog code.
Examples of Verilog Code:
For this example I wrote a D flip flop module:
module d_ff(clk, D, Q, Q_bar);
//inputs
input clk, D;
//outputs
output Q, Q_bar;
reg Q, Q_bar;
always @ (posedge clk) begin
if (D == 1) begin
Q = 1;
Q_bar = 0;
end
if (D == 0) begin
Q = 0;
Q_bar = 1;
end
end
endmodule
//Test benchmark for test_1
module d_ff_tb;
reg clk, D;
wire Q, Q_bar;
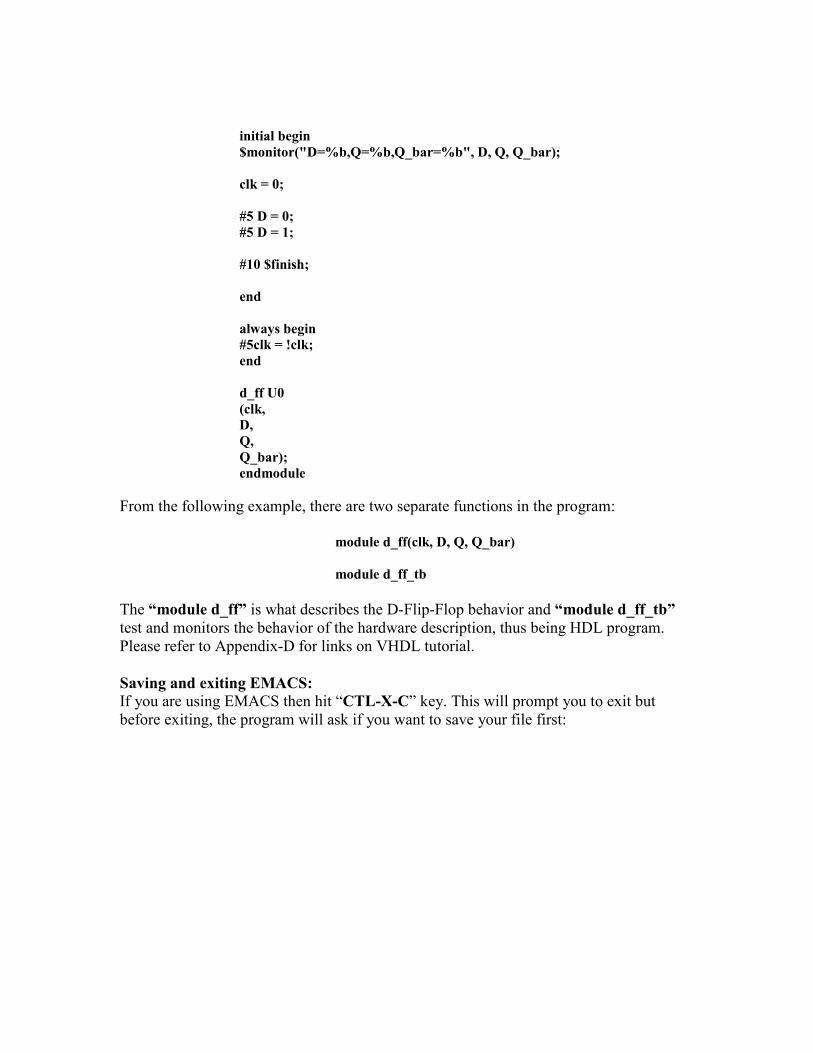
initial begin
$monitor("D=%b,Q=%b,Q_bar=%b", D, Q, Q_bar);
clk = 0;
#5 D = 0;
#5 D = 1;
#10 $finish;
end
//Test benchmark for test_1
module d_ff_tb;
reg clk, D;
wire Q, Q_bar;
initial begin
$monitor("D=%b,Q=%b,Q_bar=%b", D, Q, Q_bar);
clk = 0;
#5 D = 0;
#5 D = 1;
#10 $finish;
end
always begin
#5clk = !clk;
end
d_ff U0
(clk,
D,
Q,
Q_bar);
endmodule
From the following example, there are two separate functions in the program:
module d_ff(clk, D, Q, Q_bar)
module d_ff_tb
The “module d_ff” is what describes the D-Flip-Flop behavior and “module d_ff_tb”
test and monitors the behavior of the hardware description, thus being HDL program.
Please refer to Appendix-D for links on VHDL tutorial.
Saving and exiting EMACS:
If you are using EMACS then hit “CTL-X-C” key. This will prompt you to exit but
before exiting, the program will ask if you want to save your file first:
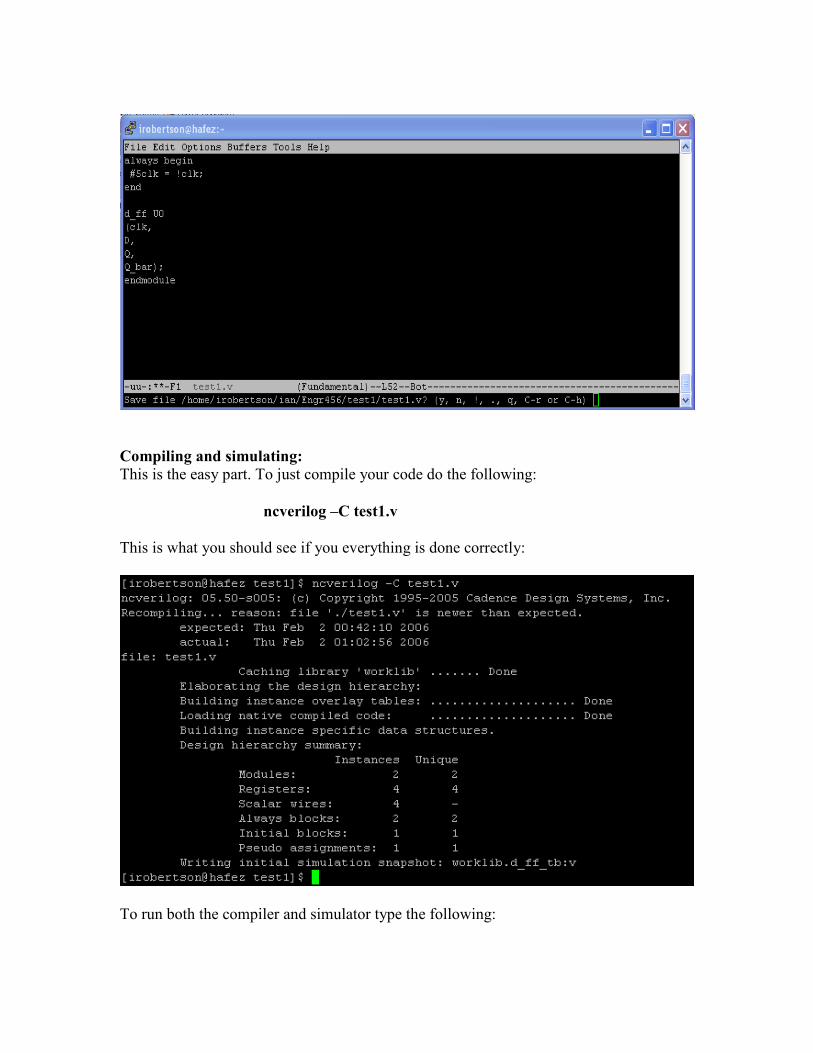
Compiling and simulating:
This is the easy part. To just compile your code do the following:
ncverilog –C test1.v
This is what you should see if you everything is done correctly:
To run both the compiler and simulator type the following:
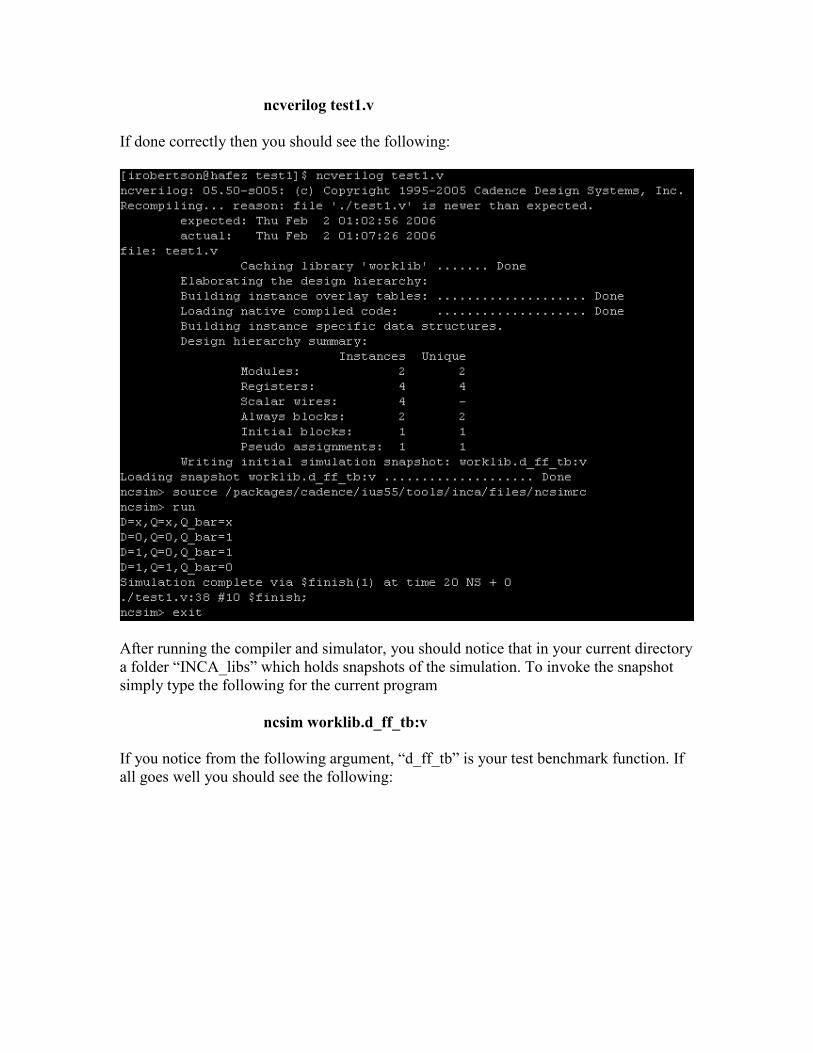
ncverilog test1.v
If done correctly then you should see the following:
After running the compiler and simulator, you should notice that in your current directory
a folder “INCA_libs” which holds snapshots of the simulation. To invoke the snapshot
simply type the following for the current program
ncsim worklib.d_ff_tb:v
If you notice from the following argument, “d_ff_tb” is your test benchmark function. If
all goes well you should see the following:
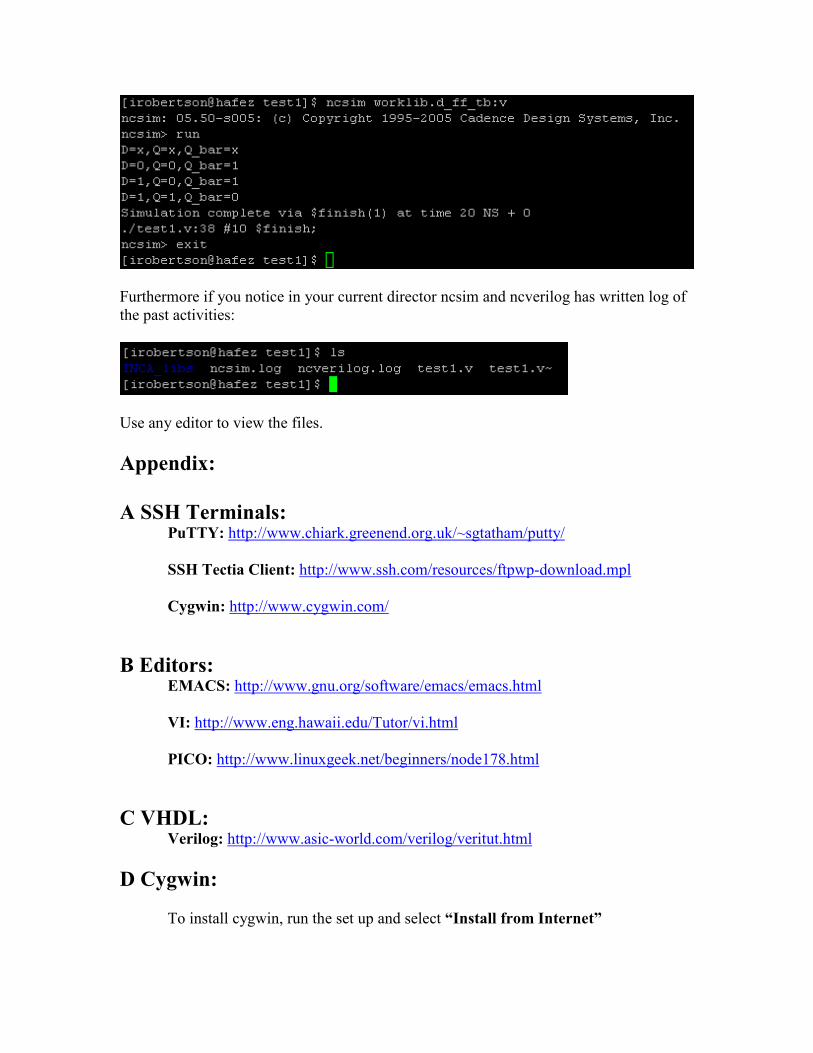
Furthermore if you notice in your current director ncsim and ncverilog has written log of
the past activities:
Use any editor to view the files.
Appendix:
A SSH Terminals: PuTTY: http://www.chiark.greenend.org.uk/~sgtatham/putty/
SSH Tectia Client: http://www.ssh.com/resources/ftpwp-download.mpl
Cygwin: http://www.cygwin.com/
B Editors: EMACS: http://www.gnu.org/software/emacs/emacs.html
VI: http://www.eng.hawaii.edu/Tutor/vi.html
PICO: http://www.linuxgeek.net/beginners/node178.html
C VHDL: Verilog: http://www.asic-world.com/verilog/veritut.html
D Cygwin:
To install cygwin, run the set up and select “Install from Internet”
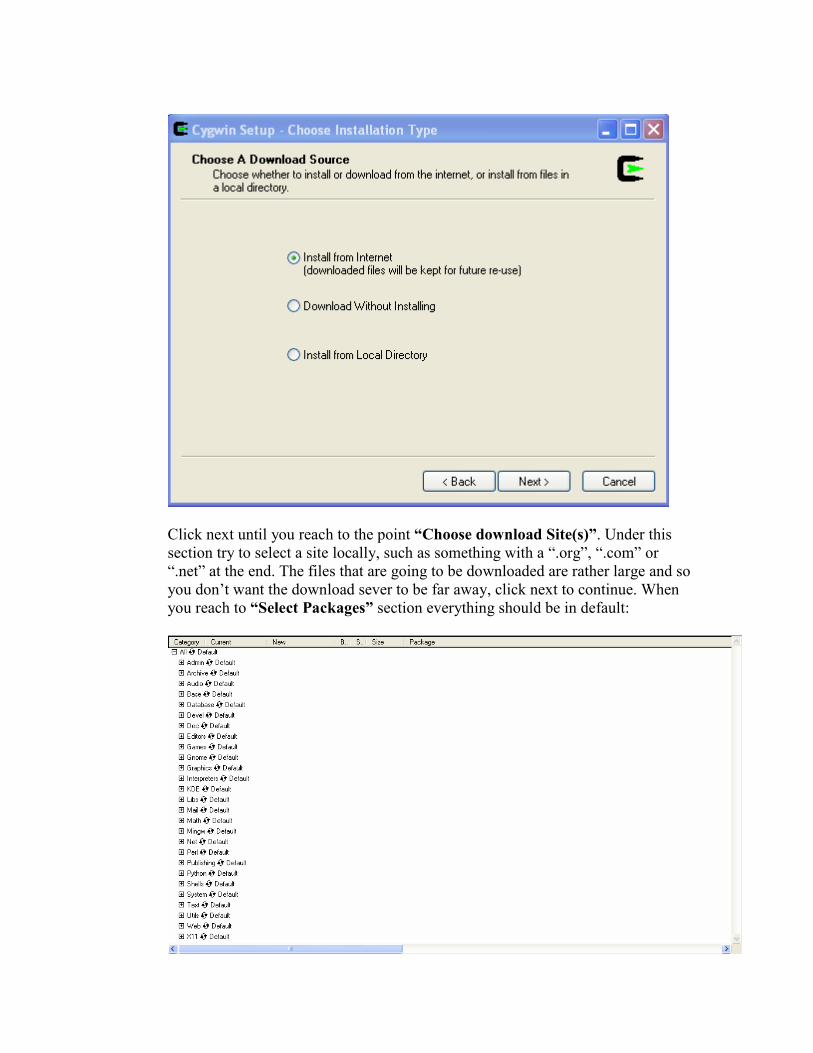
Click next until you reach to the point “Choose download Site(s)”. Under this
section try to select a site locally, such as something with a “.org”, “.com” or
“.net” at the end. The files that are going to be downloaded are rather large and so
you don’t want the download sever to be far away, click next to continue. When
you reach to “Select Packages” section everything should be in default:
Under the Net section make sure that openssh, openssl and opensll097 are
selected to be installed, since these are the basic tools to run the ssh client.
An easier way doing this is to click on the “Default” to “Install”. This will install
all the files under the “Net” section but, since the files are small it won’t take that
much of your hard drive space. Click next to install the program. The files will
take some time depending on your connection speed as well as which files are
selected to be downloaded to be installed. If you have a modem well…it’s going
to take some time.
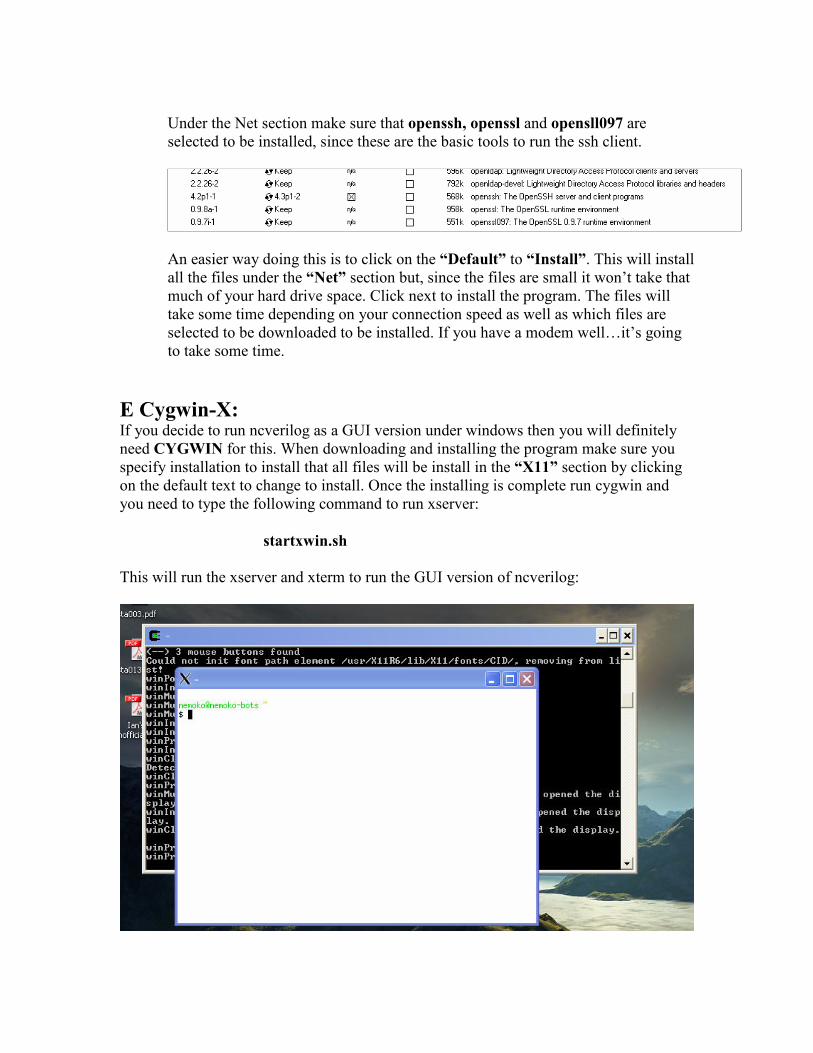
E Cygwin-X: If you decide to run ncverilog as a GUI version under windows then you will definitely
need CYGWIN for this. When downloading and installing the program make sure you
specify installation to install that all files will be install in the “X11” section by clicking
on the default text to change to install. Once the installing is complete run cygwin and
you need to type the following command to run xserver:
startxwin.sh
This will run the xserver and xterm to run the GUI version of ncverilog:
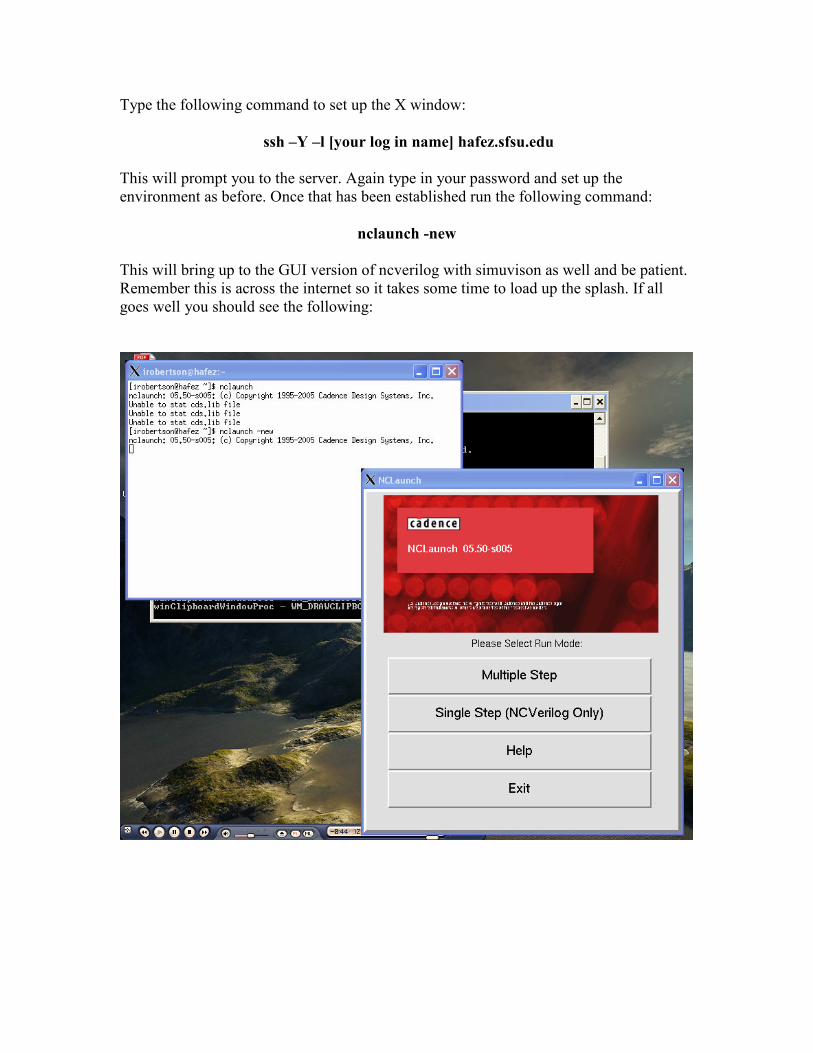
Type the following command to set up the X window:
ssh –Y –l [your log in name] hafez.sfsu.edu
This will prompt you to the server. Again type in your password and set up the
environment as before. Once that has been established run the following command:
nclaunch -new
This will bring up to the GUI version of ncverilog with simuvison as well and be patient.
Remember this is across the internet so it takes some time to load up the splash. If all
goes well you should see the following: