Embed Size (px)
Citation preview
Nero Digital Audio Encoder
Tutorial
Nero AG
2
Nero Digital Audio Encoder
Content
0
1 Compression using Nero Digital Audio Encoder 3
................................................................................................................................... 31 Downloading Nero Digital Audio Encoder
................................................................................................................................... 52 Converting files to WAV format
................................................................................................................................... 83 Use Nero Digital Audio Encoder
.......................................................................................................................................................... 8Opening the command line .......................................................................................................................................................... 10Compressing audio file .......................................................................................................................................................... 13Compressing audio albums ......................................................................................................................................................... 16Adding cover information
Index 0
Compression using Nero Digital Audio Encoder
3
1 Compression using Nero Digital Audio Encoder
Using Nero Digital Audio Reference MPEG-4 & 3GPP Audio Encoder, convertingyour audio files to Nero Digital Audio is simplicity itself. The encoder is available fordownload from our website free of charge.
Convert your source files to MP4 files with crystal-clear audio quality – atcompression ratios from ultra-high (corresponds to approx. 58 CDs all packed ontoone CD) to high-end audio (2.5:1) – or use the encoder to save an entire audioalbum as a single MP4 file offering all the features of an audio CD at a fraction of thememory. The Advanced Audio Coding Tool is operated via the command line.
This tutorial will explain how this is done easily and quickly.
The following requirements must be met:
- Nero Digital Audio Encoder is installed on your PC (see downloading Nero DigitalAudio Encoder).
- The desired source files are saved in PCM-Wave format (see converting files toWAV format).
1.1 Downloading Nero Digital Audio Encoder
To download and install Nero Digital Audio Encoder, follow the instructions below:
1. Load the ZIP archive to your hard disk.
You can download Nero Digital Audio Encoder for free. TheZIP archive is available from our website at:http://www.nero.com/link.php?topic_id=10001
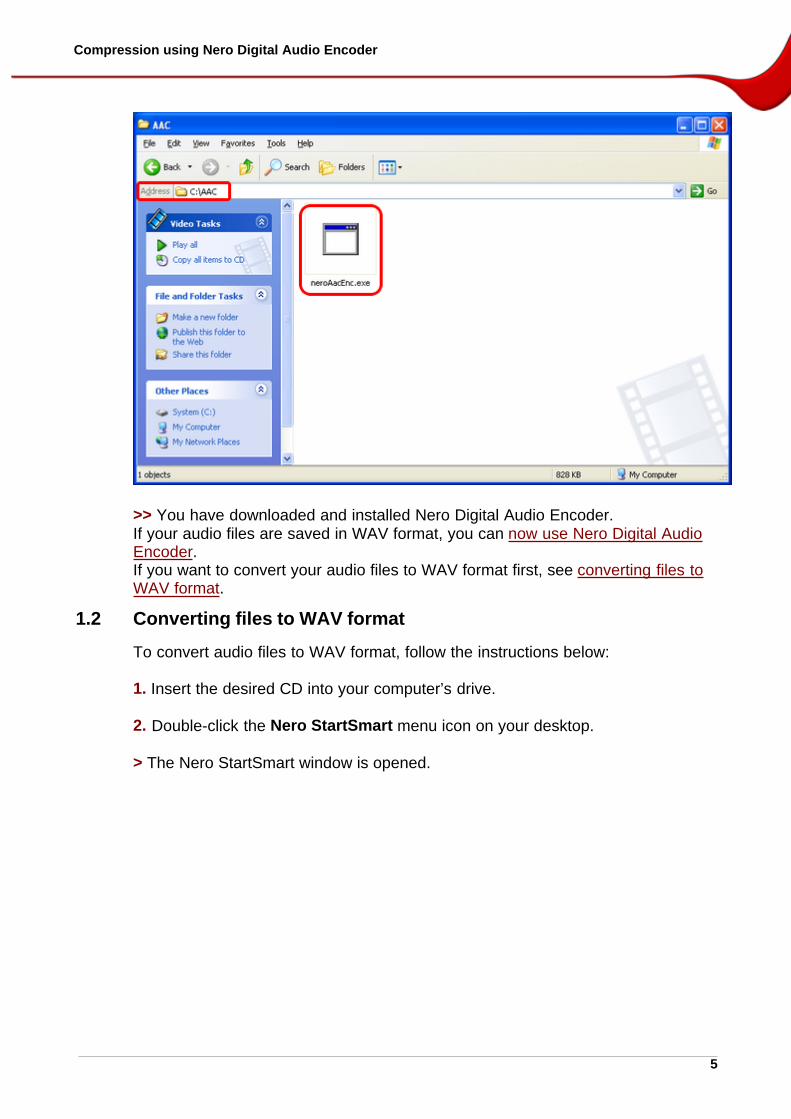
2. Unzip the ZIP archive.
> In the archive, you will find the decoder (neroAaDec.exe) as well as two versionsof the encoder (with and without SSE2 support) for application in the command-lineformat without graphic user interface.

4
3. On your hard disk, create a folder for the encoder (e.g. C:\aac).
The operation will be simpler if you save the encoder to afolder directly on your hard disk. This saves you entering longpath information.
4. Copy the desired encoder into the folder created.
If you do not know which command sets your processorsupports, choose the standard version without SSE2 support(neroAacEnc.exe).
Compression using Nero Digital Audio Encoder
5
>> You have downloaded and installed Nero Digital Audio Encoder.If your audio files are saved in WAV format, you can now use Nero Digital AudioEncoder. If you want to convert your audio files to WAV format first, see converting files toWAV format.
1.2 Converting files to WAV format
To convert audio files to WAV format, follow the instructions below:
1. Insert the desired CD into your computer’s drive.
2. Double-click the Nero StartSmart menu icon on your desktop.
> The Nero StartSmart window is opened.
6
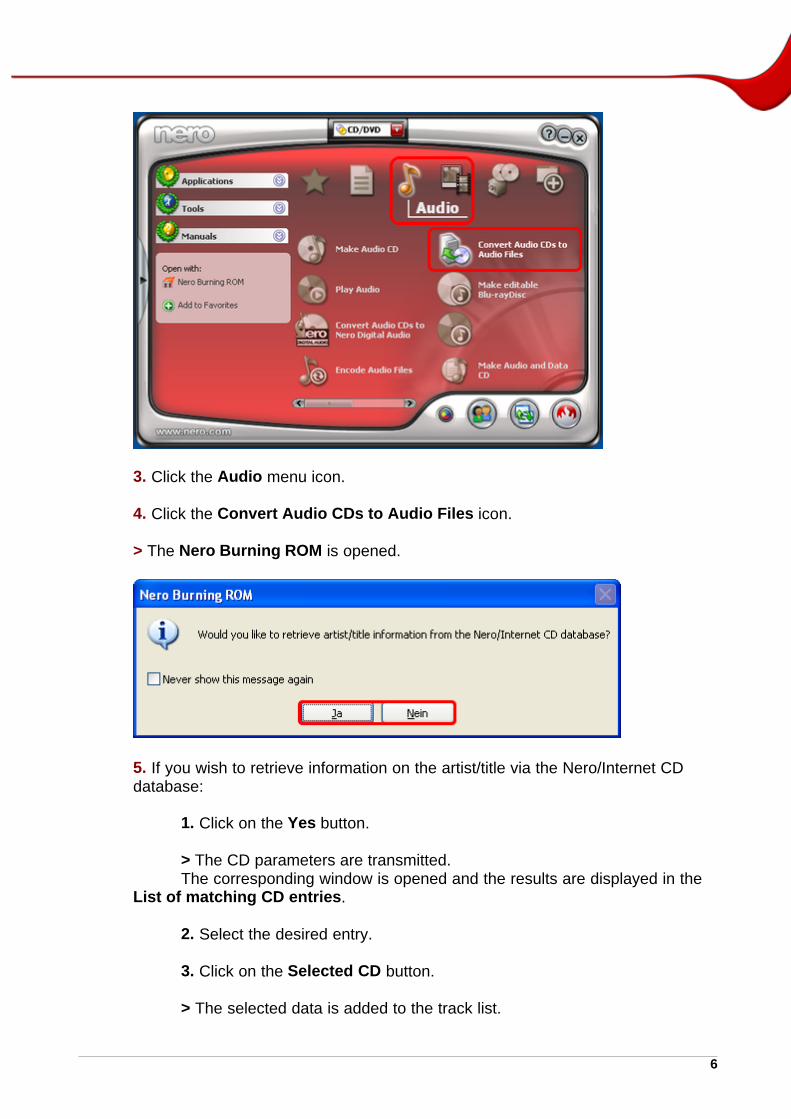
3. Click the Audio menu icon.
4. Click the Convert Audio CDs to Audio Files icon.
> The Nero Burning ROM is opened.
5. If you wish to retrieve information on the artist/title via the Nero/Internet CDdatabase:
1. Click on the Yes button.
> The CD parameters are transmitted.The corresponding window is opened and the results are displayed in the
List of matching CD entries.
2. Select the desired entry.
3. Click on the Selected CD button.
> The selected data is added to the track list.
Compression using Nero Digital Audio Encoder
7
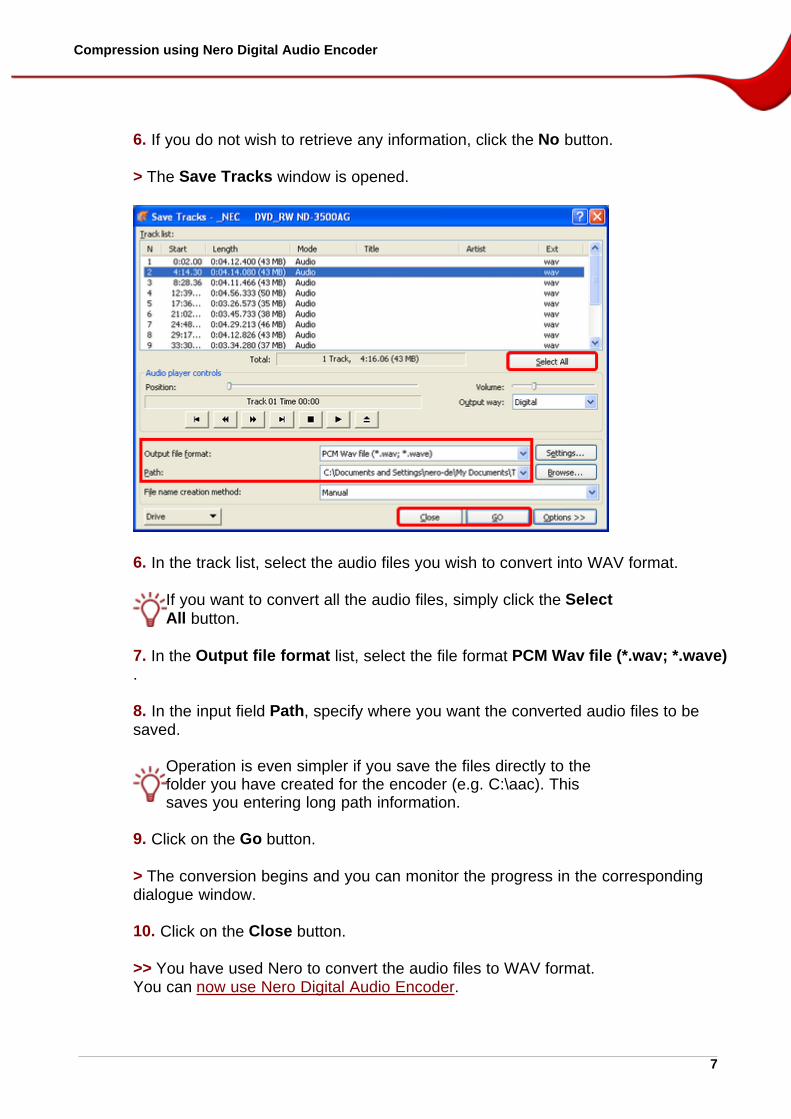
6. If you do not wish to retrieve any information, click the No button.
> The Save Tracks window is opened.
6. In the track list, select the audio files you wish to convert into WAV format.
If you want to convert all the audio files, simply click the SelectAll button.
7. In the Output file format list, select the file format PCM Wav file (*.wav; *.wave).
8. In the input field Path, specify where you want the converted audio files to besaved.
Operation is even simpler if you save the files directly to thefolder you have created for the encoder (e.g. C:\aac). Thissaves you entering long path information.
9. Click on the Go button.
> The conversion begins and you can monitor the progress in the correspondingdialogue window.
10. Click on the Close button.
>> You have used Nero to convert the audio files to WAV format.You can now use Nero Digital Audio Encoder.
8
1.3 Use Nero Digital Audio Encoder
Nero Digital Audio Encoder is operated via the command line. You can specifyquality settings and profile.
The complete command line consists of the following elements:neroaacenc [options] -if name of source file -of name of target file
You can also use the decoder to convert MPEG4/3GPP filesinto PCM Wave format. Further details on this can be found inthe readme.txt file contained in the ZIP archive.
Enter the command neraacenc -help in the command line andpress Enter to display the help text and further commandoptions. A help text is available for every file (encoder anddecoder).
The operation will be simpler if you save the encoder and thefiles to a single folder directly on your hard drive (e.g. C:\aac).This saves you entering long path information.
To avoid error messages, pay careful attention to blanks,hyphens and the precise spelling of the file names whenentering data. Entries are not case sensitive. If a file namecontains blanks, surround it with inverted commas, e.g. “Firstsong.wav”.
This tutorial explains the operation by example of the encoder and files that aresaved to C:\aac.
If you want to open the command line now, see opening command line.If you want to convert a WAV file to MP4 format now, see compressing audio file.If you want to compress an audio album to an MP4 file, see compressing audioalbums.If you want to add cover information to an already compressed album now, see adding cover information.
1.3.1 Opening the command line
To open the command line of Nero Digital Audio Encoder, follow the instructionsbelow:
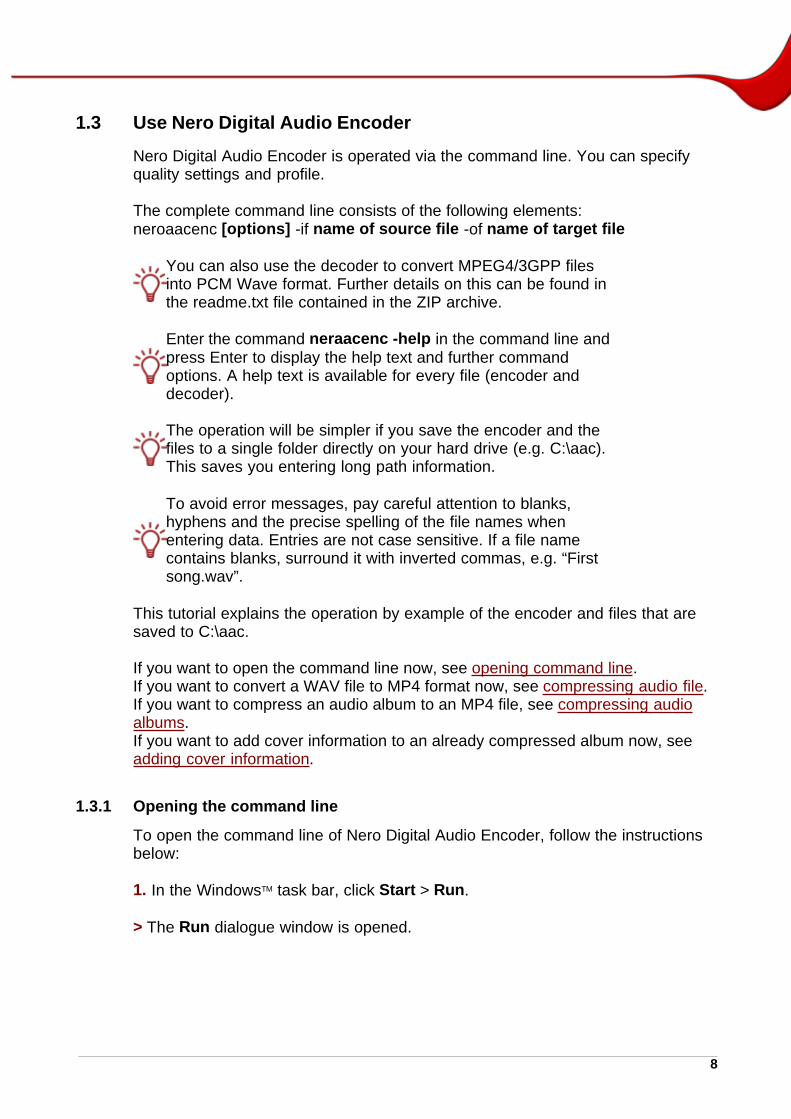
1. In the WindowsTM task bar, click Start > Run.
> The Run dialogue window is opened.
Compression using Nero Digital Audio Encoder
9
2. Enter cmd in the Open: input field.
3. Click on the OK button.
> The DOS window is opened.
To avoid error messages, pay careful attention to blanks,hyphens and the precise spelling of the file names whenentering data. Entries are not case sensitive. If a file namecontains blanks, surround it with inverted commas, e.g. “Firstsong.wav”.
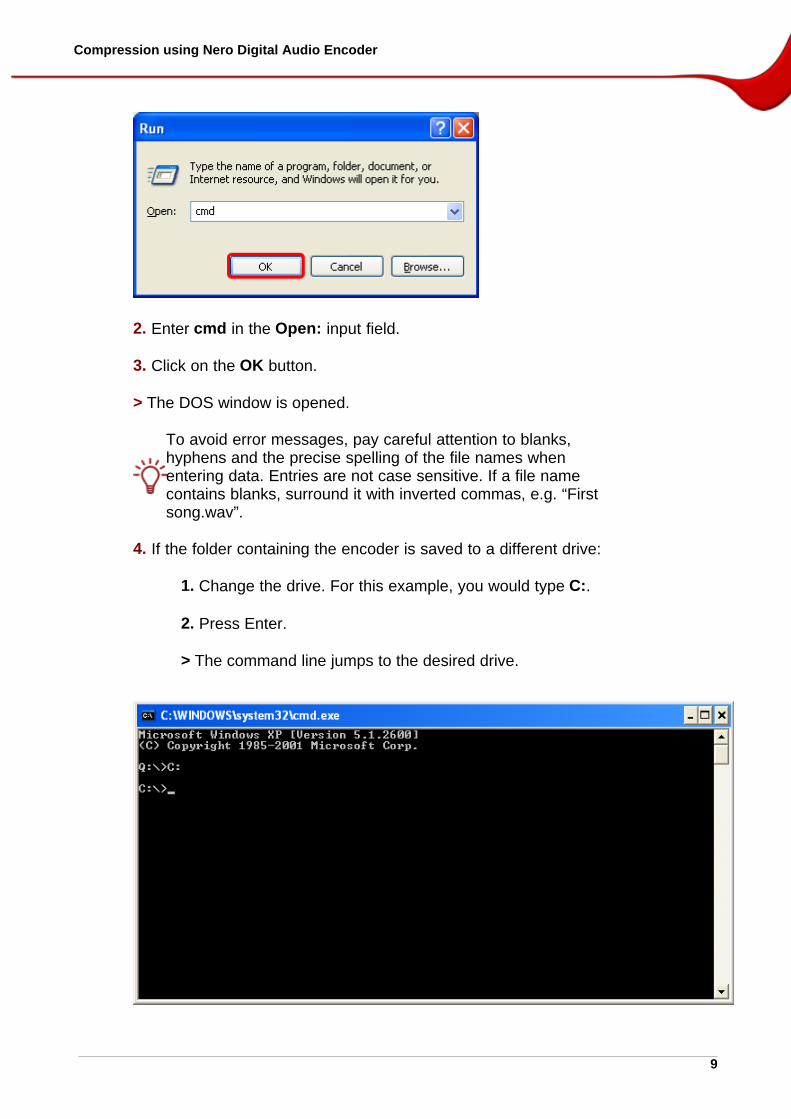
4. If the folder containing the encoder is saved to a different drive:
1. Change the drive. For this example, you would type C:.
2. Press Enter.
> The command line jumps to the desired drive.
10
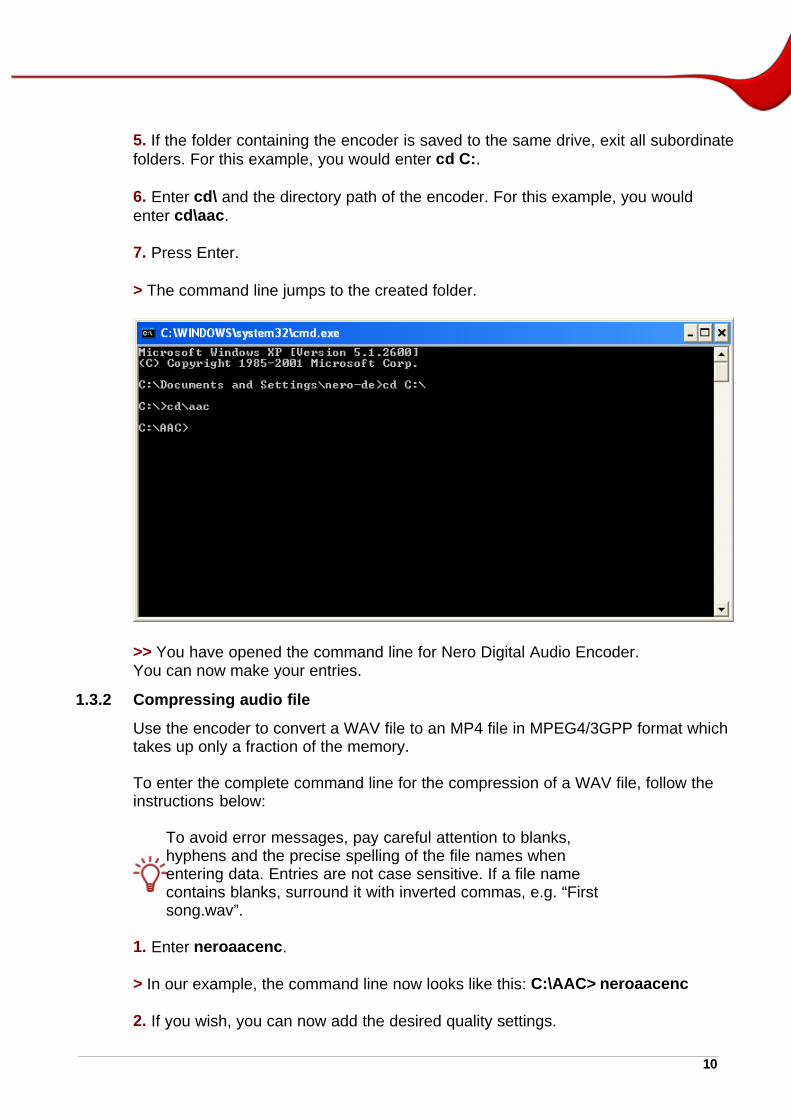
5. If the folder containing the encoder is saved to the same drive, exit all subordinatefolders. For this example, you would enter cd C:.
6. Enter cd\ and the directory path of the encoder. For this example, you wouldenter cd\aac.
7. Press Enter.
> The command line jumps to the created folder.
>> You have opened the command line for Nero Digital Audio Encoder.You can now make your entries.
1.3.2 Compressing audio file
Use the encoder to convert a WAV file to an MP4 file in MPEG4/3GPP format whichtakes up only a fraction of the memory.
To enter the complete command line for the compression of a WAV file, follow theinstructions below:
To avoid error messages, pay careful attention to blanks,hyphens and the precise spelling of the file names whenentering data. Entries are not case sensitive. If a file namecontains blanks, surround it with inverted commas, e.g. “Firstsong.wav”.
1. Enter neroaacenc.
> In our example, the command line now looks like this: C:\AAC> neroaacenc
2. If you wish, you can now add the desired quality settings.
Compression using Nero Digital Audio Encoder
11
If no quality settings are entered, the encoder automaticallycodes the files in VBR mode at -q 0.5 for the highest quality.
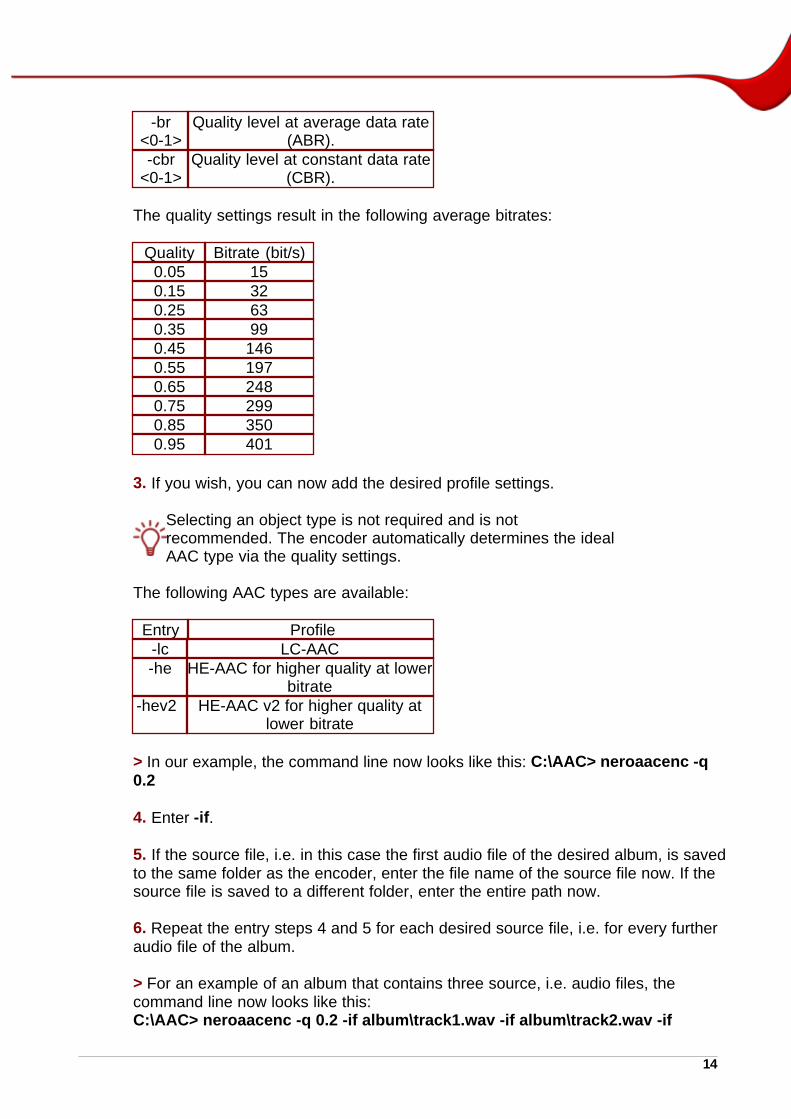
The following parameters can be set:
Entry Mode-q
<0-1>Quality level at variable data rate
(VBR).-br
<0-1>Quality level at average data rate
(ABR).-cbr
<0-1>Quality level at constant data rate
(CBR).
The quality settings result in the following average bitrates:
Quality Bitrate (bit/s)0.05 150.15 320.25 630.35 990.45 1460.55 1970.65 2480.75 2990.85 3500.95 401
3. If you wish, you can now add the desired profile settings.
Selecting an object type is not required and is notrecommended. The encoder automatically determines the idealAAC type via the quality settings.
The following AAC types are available:
Entry Profile-lc LC-AAC-he HE-AAC for higher quality at lower
bitrate-hev2 HE-AAC v2 for higher quality at
lower bitrate
> In our example, the command line now looks like this: C:\AAC> neroaacenc -q0.2
4. Enter -if.

12
5. If the source file is saved to the same folder as the encoder, enter the file name ofthe source file now. If the source file is saved to a different folder, enter the entirepath now.
> In our example, the command line now looks like this: C:\AAC> neroaacenc -q0.2 -if track.wav
6. Enter -of.
7. If you wish to save the target file to the same folder as the encoder, enter the filename of the target file now. If you wish to save the target file to a different folder,enter the desired path now.
> In our example, the complete command line now looks like this: C:\AAC>neroaacenc -q 0.2 -if track.wav -of track.mp4
8. Press Enter.
> The file is converted.
>> You have now converted a WAV file to an MP4 file and saved it to the desiredfolder.
Compression using Nero Digital Audio Encoder
13
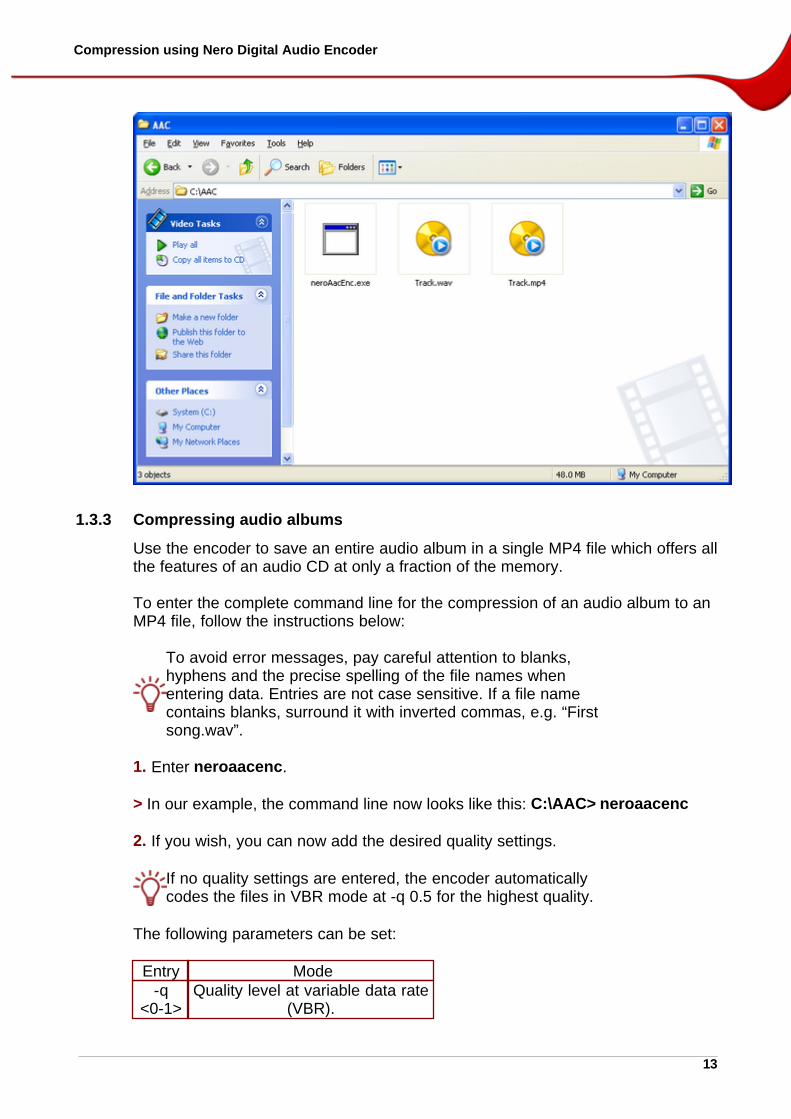
1.3.3 Compressing audio albums
Use the encoder to save an entire audio album in a single MP4 file which offers allthe features of an audio CD at only a fraction of the memory.
To enter the complete command line for the compression of an audio album to anMP4 file, follow the instructions below:
To avoid error messages, pay careful attention to blanks,hyphens and the precise spelling of the file names whenentering data. Entries are not case sensitive. If a file namecontains blanks, surround it with inverted commas, e.g. “Firstsong.wav”.
1. Enter neroaacenc.
> In our example, the command line now looks like this: C:\AAC> neroaacenc
2. If you wish, you can now add the desired quality settings.
If no quality settings are entered, the encoder automaticallycodes the files in VBR mode at -q 0.5 for the highest quality.
The following parameters can be set:
Entry Mode-q
<0-1>Quality level at variable data rate
(VBR).
14
-br<0-1>
Quality level at average data rate(ABR).
-cbr<0-1>
Quality level at constant data rate(CBR).
The quality settings result in the following average bitrates:
Quality Bitrate (bit/s)0.05 150.15 320.25 630.35 990.45 1460.55 1970.65 2480.75 2990.85 3500.95 401
3. If you wish, you can now add the desired profile settings.
Selecting an object type is not required and is notrecommended. The encoder automatically determines the idealAAC type via the quality settings.
The following AAC types are available:
Entry Profile-lc LC-AAC-he HE-AAC for higher quality at lower
bitrate-hev2 HE-AAC v2 for higher quality at
lower bitrate
> In our example, the command line now looks like this: C:\AAC> neroaacenc -q0.2
4. Enter -if.
5. If the source file, i.e. in this case the first audio file of the desired album, is savedto the same folder as the encoder, enter the file name of the source file now. If thesource file is saved to a different folder, enter the entire path now.
6. Repeat the entry steps 4 and 5 for each desired source file, i.e. for every furtheraudio file of the album.
> For an example of an album that contains three source, i.e. audio files, thecommand line now looks like this:C:\AAC> neroaacenc -q 0.2 -if album\track1.wav -if album\track2.wav -if
Compression using Nero Digital Audio Encoder
15
album\track3.wav
7. Enter -of.
8. If you wish to save the target file to the same folder as the encoder, enter the filename of the target file now. If you wish to save the target file to a different folder,enter the desired path now.
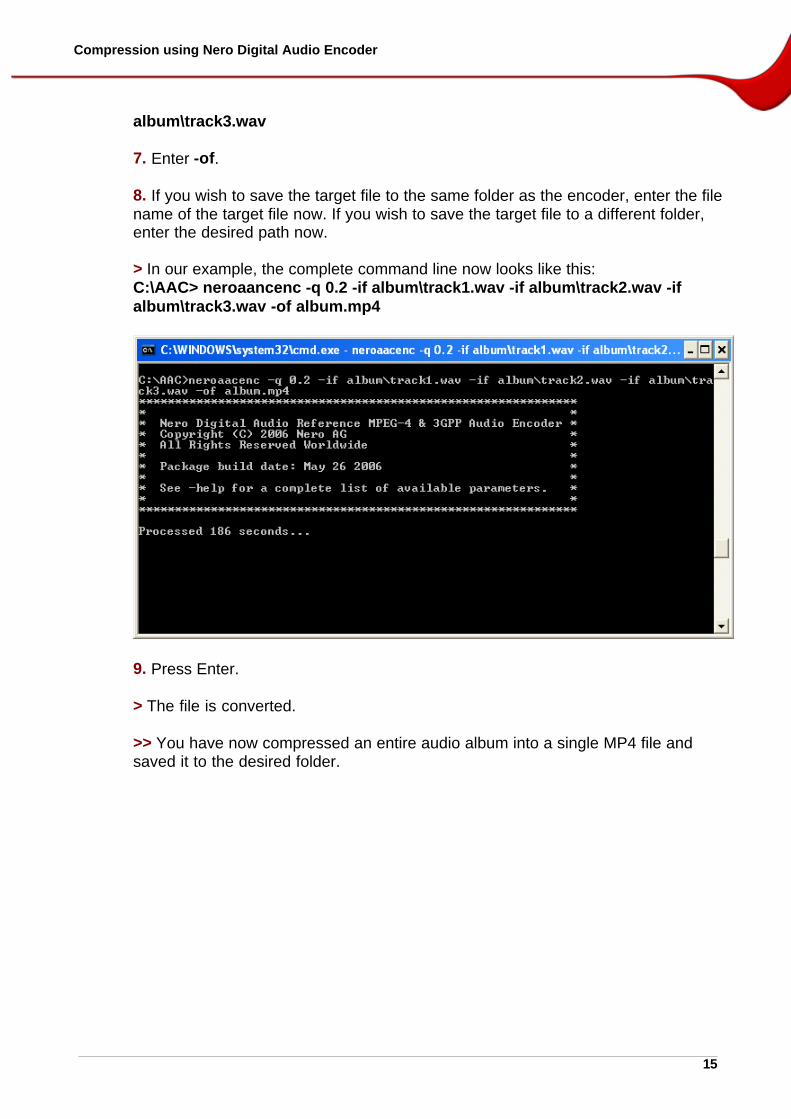
> In our example, the complete command line now looks like this:C:\AAC> neroaancenc -q 0.2 -if album\track1.wav -if album\track2.wav -ifalbum\track3.wav -of album.mp4
9. Press Enter.
> The file is converted.
>> You have now compressed an entire audio album into a single MP4 file andsaved it to the desired folder.
16
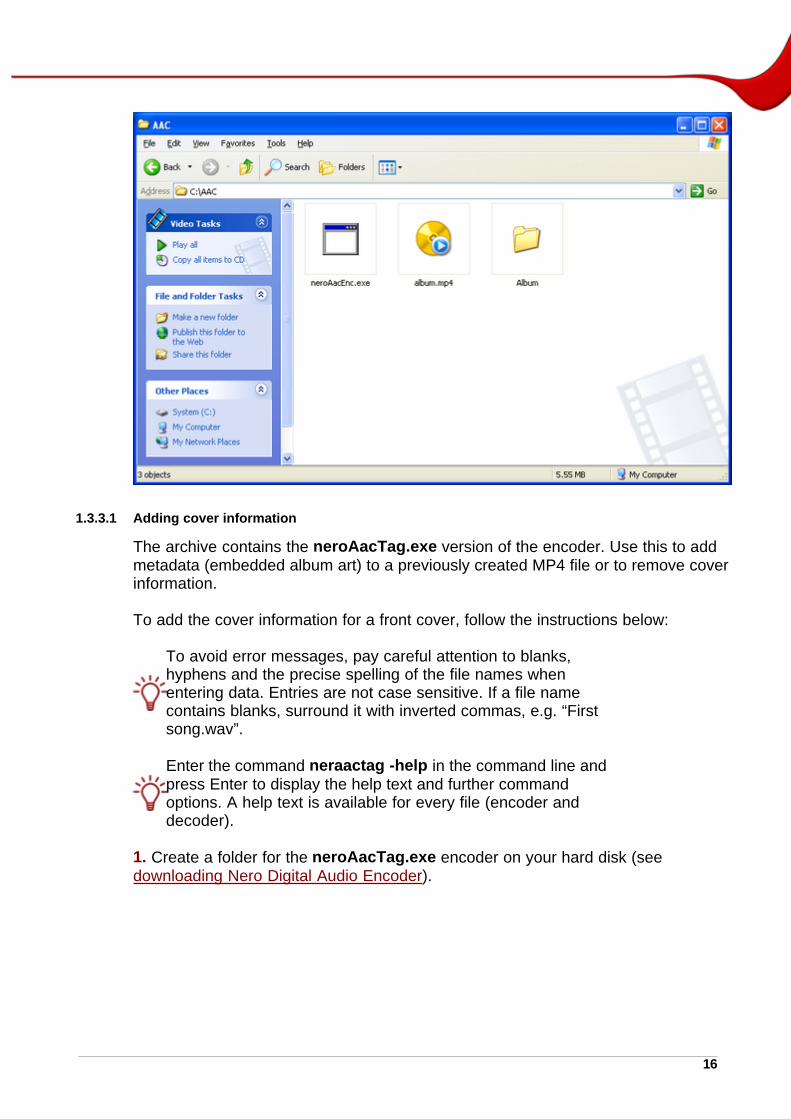
1.3.3.1 Adding cover information
The archive contains the neroAacTag.exe version of the encoder. Use this to addmetadata (embedded album art) to a previously created MP4 file or to remove coverinformation.
To add the cover information for a front cover, follow the instructions below:
To avoid error messages, pay careful attention to blanks,hyphens and the precise spelling of the file names whenentering data. Entries are not case sensitive. If a file namecontains blanks, surround it with inverted commas, e.g. “Firstsong.wav”.
Enter the command neraactag -help in the command line andpress Enter to display the help text and further commandoptions. A help text is available for every file (encoder anddecoder).
1. Create a folder for the neroAacTag.exe encoder on your hard disk (seedownloading Nero Digital Audio Encoder).

Compression using Nero Digital Audio Encoder
17
2. Open the command line (see opening the command line).
3. Enter neroaactag.
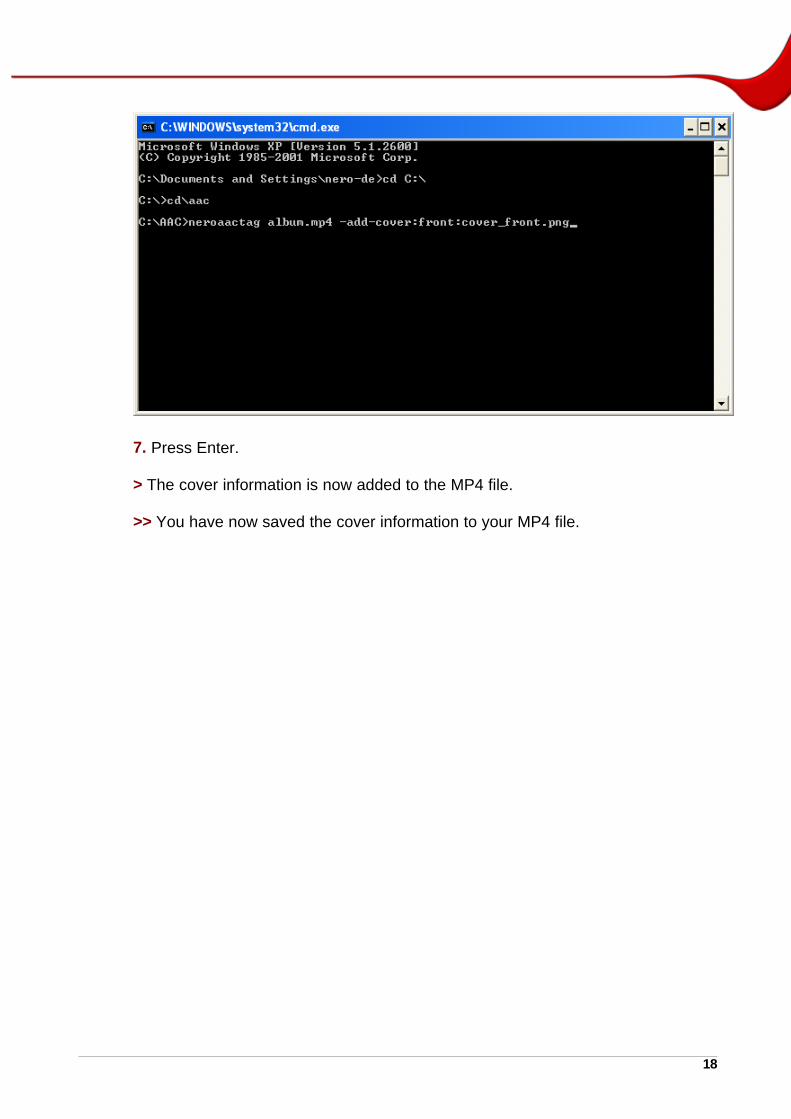
> In our example, the command line now looks like this: C:\AAC> neroaactag
4. If the source file, i.e. the previously created MP4 file, is saved to the same folderas the encoder, enter the file name of the source file now. If the source file is savedto a different folder, enter the entire path now.
> In our example, the command line now looks like this: C:\AAC> neroaactagalbum.mp4
5. Enter -add-cover:front:.
6. If the file containing the cover information is saved to the same folder as theencoder, enter the file name now. If the file is saved to a different folder, enter theentire path now.
> In our example, the complete command line now looks like this: C:\AAC>neroaactag album.mp4 -add-cover:front: cover_front.png
18
7. Press Enter.
> The cover information is now added to the MP4 file.
>> You have now saved the cover information to your MP4 file.