Embed Size (px)
Citation preview
NETGEAR TrekN300 Travel Router and Range ExtenderPR2000Installation Guide
WiFiU
SB
USB
LAN
Internet/LAN
Reset
NETGEAR
Power
Internet
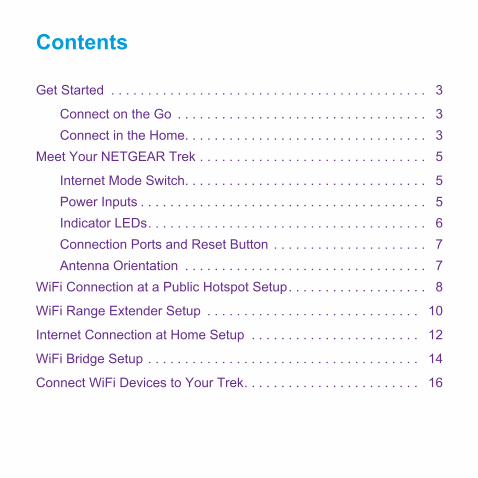
Contents
Get Started . . . . . . . . . . . . . . . . . . . . . . . . . . . . . . . . . . . . . . . . . . . 3
Connect on the Go . . . . . . . . . . . . . . . . . . . . . . . . . . . . . . . . . . 3Connect in the Home. . . . . . . . . . . . . . . . . . . . . . . . . . . . . . . . . 3
Meet Your NETGEAR Trek . . . . . . . . . . . . . . . . . . . . . . . . . . . . . . . 5
Internet Mode Switch. . . . . . . . . . . . . . . . . . . . . . . . . . . . . . . . . 5Power Inputs . . . . . . . . . . . . . . . . . . . . . . . . . . . . . . . . . . . . . . . 5Indicator LEDs. . . . . . . . . . . . . . . . . . . . . . . . . . . . . . . . . . . . . . 6Connection Ports and Reset Button . . . . . . . . . . . . . . . . . . . . . 7Antenna Orientation . . . . . . . . . . . . . . . . . . . . . . . . . . . . . . . . . 7
WiFi Connection at a Public Hotspot Setup. . . . . . . . . . . . . . . . . . . 8
WiFi Range Extender Setup . . . . . . . . . . . . . . . . . . . . . . . . . . . . . 10
Internet Connection at Home Setup . . . . . . . . . . . . . . . . . . . . . . . 12
WiFi Bridge Setup . . . . . . . . . . . . . . . . . . . . . . . . . . . . . . . . . . . . . 14
Connect WiFi Devices to Your Trek. . . . . . . . . . . . . . . . . . . . . . . . 16
Get StartedThank you for your purchase of the NETGEAR Trek N300 Travel Router and Range Extender PR2000.
Whether you use the Internet in the home or on the go (or both), the Trek is your solution to a better Internet experience.
Connect on the GoThe Trek gives you the means to connect to the Internet while away from home.
Do you want to connect your devices to the Internet at a WiFi hotspot? Connect your Trek to the WiFi hotspot and then connect your devices to your Trek. The Trek’s firewall protects your personal devices from known DoS attacks and port scans from the Internet. For more information, see WiFi Connection at a Public Hotspot Setup on page 8.
Connect in the HomeThe Trek provides you with the means to extend and expand the home network that you already have with your existing Internet connection. Use the Trek for any of the following situations:
3
• Add a WiFi router to your home network.Do you want to connect your wireless devices to your network? Convert your home network into a home WiFi network. For more information, see Internet Connection at Home Setup on page 12.
• Extend the range of your home WiFi network.Do you want to use your wireless devices at a greater distance from your WiFi router? Extend the range of your WiFi router with a WiFi range extender. For more information, see WiFi Range Extender Setup on page 10.
• Bridge the distance to your Internet-ready TV.Is your Internet-ready TV or other Ethernet-enabled device too far from your router for an Ethernet cable connection? Bridge the distance with a WiFi bridge. Examples of Ethernet-enabled devices include an Internet-ready TV, Blu-ray player, gaming console, and desktop or laptop computer. For more information, see WiFi Bridge Setup on page 14.
4
Meet Your NETGEAR TrekLocate the hardware features on your Trek.
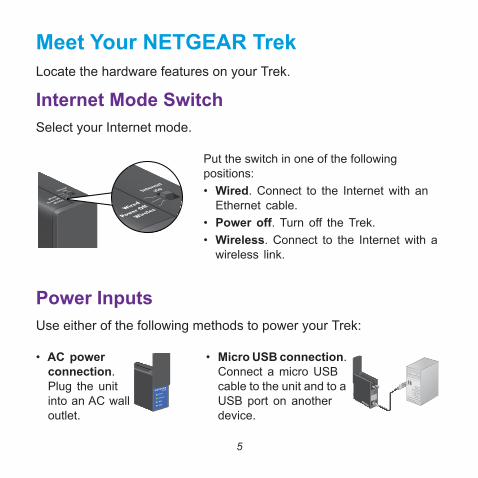
Internet Mode SwitchSelect your Internet mode.
Internetvia
Wired
Power Off
Wireles
Internetvia
Wired
Power Off
Wireles
• Wired. Connect to the Internet with an Ethernet cable.
• Power off. Turn off the Trek.• Wireless. Connect to the Internet with a
wireless link.
Power InputsUse either of the following methods to power your Trek:
• AC power connection. Plug the unit into an AC wall outlet.
Power
Internet
WiFi
USB
Wired
Power OffWireles
• Micro USB connection. Connect a micro USB cable to the unit and to a USB port on another device.
NETGEAR
Internetvia
Wired
Power Off
Wireles
Put the switch in one of the following positions:
5
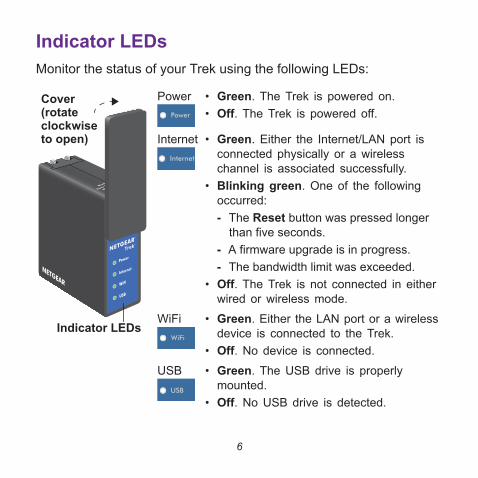
Indicator LEDsMonitor the status of your Trek using the following LEDs:
NETGEAR
Power
Internet
WiFi
USB
Wired
Power Off
Wireles
Cover(rotate
Indicator LEDs
clockwiseto open)
• Green. The Trek is powered on.• Off. The Trek is powered off.
• Green. Either the Internet/LAN port is connected physically or a wireless channel is associated successfully.
• Blinking green. One of the following occurred:
• Off. The Trek is not connected in either wired or wireless mode.
• Green. Either the LAN port or a wireless device is connected to the Trek.
• Off. No device is connected.• Green. The USB drive is properly
mounted.• Off. No USB drive is detected.
Power
Internet
- The Reset button was pressed longer than five seconds.
- A firmware upgrade is in progress.- The bandwidth limit was exceeded.
WiFi
USB
6
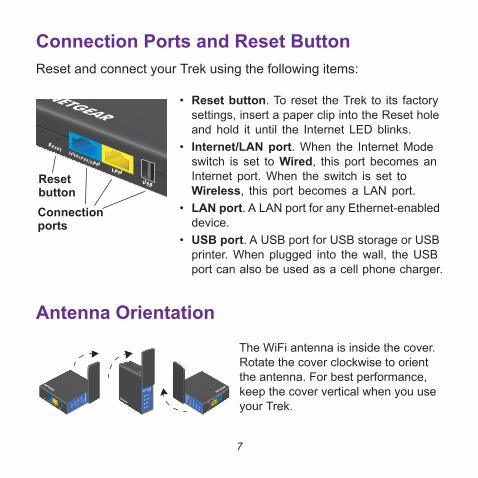
Connection Ports and Reset ButtonReset and connect your Trek using the following items:
USB
LAN
Internet/LAN
Reset
NETGEAR
ResetbuttonConnectionports
• Reset button. To reset the Trek to its factory settings, insert a paper clip into the Reset hole and hold it until the Internet LED blinks.
• Internet/LAN port. When the Internet Mode switch is set to Wired, this port becomes an Internet port. When the switch is set to Wireless, this port becomes a LAN port.
• LAN port. A LAN port for any Ethernet-enabled device.
• USB port. A USB port for USB storage or USB printer. When plugged into the wall, the USB port can also be used as a cell phone charger.
Antenna Orientation
NETGEAR
Internetvia
Wired
Power Off
Wireles
Power
Internet
WiFi
USB
WiFiU
SB
USB
LAN
Internet/LAN
Reset
NETGEAR
Power
Internet
NETGEAR
LAN
Internet/LAN
Reset
USB
WiF
i
USB
Pow
er
Inte
rnet
The WiFi antenna is inside the cover. Rotate the cover clockwise to orient the antenna. For best performance, keep the cover vertical when you use your Trek.
7

WiFi Connection at a Public Hotspot SetupUse the Trek as a WiFi connection to a wireless network in a WiFi hotspot zone. The Trek’s firewall protects your devices from known DoS attacks and port scans from the Internet.
CAUTION: Most public WiFi hotspots offer no security. NETGEAR recommends that you do not send personal information over the Internet from your connected devices.
NETGEAR
LAN
Internet/LAN
Reset
USB
WiF
i
USB
Pow
er
Inte
rnet
(Optional) Connecta USB device to
the USB port
To connect to a public WiFi hotspot:1. Connect the Trek to a power source.
For more information, see Power Inputs on page 5.2. Turn on power to the Trek by moving the Internet Mode switch
from the Power Off position to the Wireless position.3. Rotate the Trek’s cover clockwise to orient the antenna.
For more information, see Antenna Orientation on page 7.
8
4. Connect your computer or wireless device to the Trek's SSID, or connect your computer or wireless device to the Trek’s LAN port with an Ethernet cable.
5. Open a web browser on your computer or wireless device, type www.routerlogin.net in the address field, and press the Enter key.If a login screen displays, enter admin for your user name and password for your password. Then click the OK button.The Wireless as WAN screen displays, which shows the available wireless networks.
6. Make sure that the Extend my current wireless router's range check box is not selected.
7. Select the wireless network that you want to connect to and enter the related security information for that wireless network.
8. To be able to use these settings again without having to reenter them, select the To save a name for profile check box.
9. In the field provided, enter a name for the profile.10. Click the Apply button.
The Trek connects to the WiFi hotspot after a couple of minutes.11. Connect your other wireless devices to the Trek.
For more information, see Connect WiFi Devices to Your Trek on page 16.
9
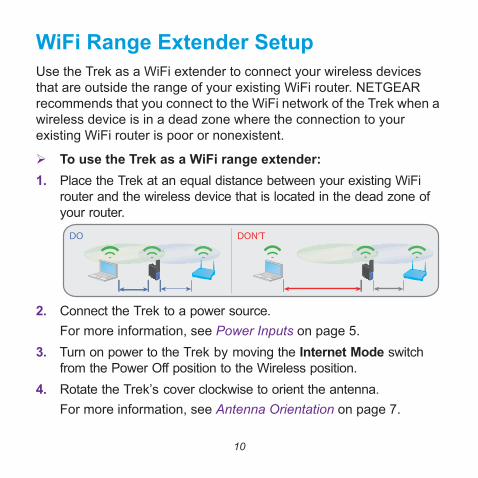
WiFi Range Extender SetupUse the Trek as a WiFi extender to connect your wireless devices that are outside the range of your existing WiFi router. NETGEAR recommends that you connect to the WiFi network of the Trek when a wireless device is in a dead zone where the connection to your existing WiFi router is poor or nonexistent.
To use the Trek as a WiFi range extender:1. Place the Trek at an equal distance between your existing WiFi
router and the wireless device that is located in the dead zone of your router.DO DON’T
NETGEAR
Power
Internet
WiFi
USB
Wired
Power Off
Wireles
NETGEAR
Power
Internet
WiFi
USB
Wired
Power Off
Wireles
2. Connect the Trek to a power source.For more information, see Power Inputs on page 5.
3. Turn on power to the Trek by moving the Internet Mode switch from the Power Off position to the Wireless position.
4. Rotate the Trek’s cover clockwise to orient the antenna.For more information, see Antenna Orientation on page 7.
10
5. Connect your computer or wireless device to the Trek's SSID, or connect your computer or wireless device to the Trek’s LAN port with an Ethernet cable.
6. Open a web browser on your computer or wireless device, type www.routerlogin.net in the address field, and press the Enter key.If a login screen displays, enter admin for your user name and password for your password. Then click the OK button.The Wireless as WAN screen displays, which shows the available wireless networks.
7. Make sure that the Extend my current wireless router's range check box is selected.
8. Select the wireless network that you want to connect to and enter the related security information for that wireless network.
9. To be able to use these settings again without having to reenter them, select the To save a name for profile check box.
10. In the field provided, enter a name for the profile.11. Click the Apply button.
The Trek connects to the WiFi hotspot after a couple of minutes.12. Connect your other wireless devices to the Trek.
For more information, see Connect WiFi Devices to Your Trek on page 16.
11
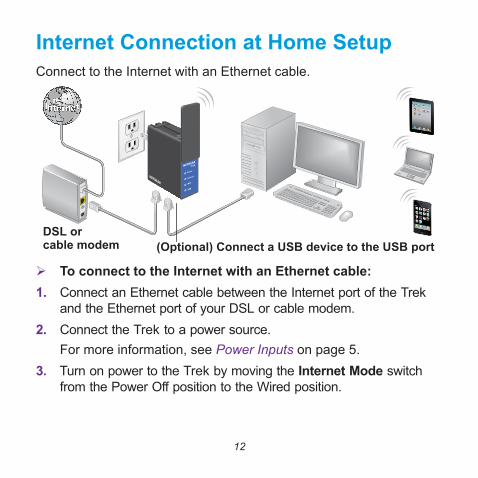
Internet Connection at Home SetupConnect to the Internet with an Ethernet cable.
NETGEAR
Power
Internet
WiFi
USB
Wired
Power Off
Wireles
DSL orcable modem (Optional) Connect a USB device to the USB port
To connect to the Internet with an Ethernet cable:1. Connect an Ethernet cable between the Internet port of the Trek
and the Ethernet port of your DSL or cable modem.2. Connect the Trek to a power source.
For more information, see Power Inputs on page 5.3. Turn on power to the Trek by moving the Internet Mode switch
from the Power Off position to the Wired position.
12
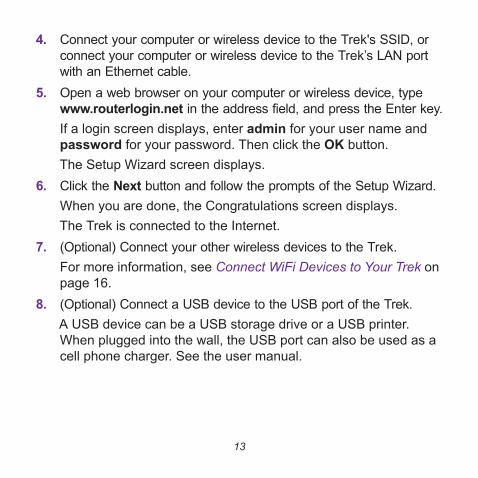
4. Connect your computer or wireless device to the Trek's SSID, or connect your computer or wireless device to the Trek’s LAN port with an Ethernet cable.
5. Open a web browser on your computer or wireless device, type www.routerlogin.net in the address field, and press the Enter key.If a login screen displays, enter admin for your user name and password for your password. Then click the OK button.The Setup Wizard screen displays.
6. Click the Next button and follow the prompts of the Setup Wizard.When you are done, the Congratulations screen displays.The Trek is connected to the Internet.
7. (Optional) Connect your other wireless devices to the Trek.For more information, see Connect WiFi Devices to Your Trek on page 16.
8. (Optional) Connect a USB device to the USB port of the Trek.A USB device can be a USB storage drive or a USB printer. When plugged into the wall, the USB port can also be used as a cell phone charger. See the user manual.
13
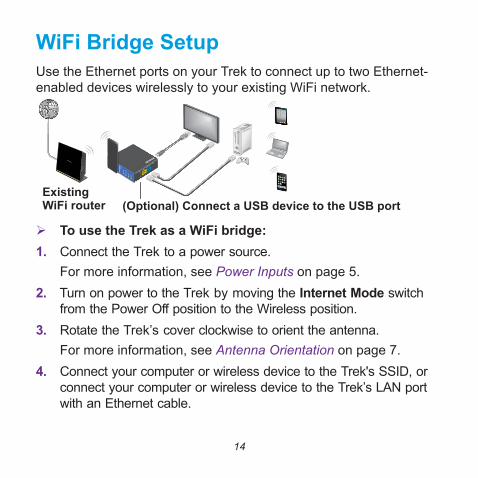
WiFi Bridge SetupUse the Ethernet ports on your Trek to connect up to two Ethernet-enabled devices wirelessly to your existing WiFi network.
NETGEAR
LAN
Internet/LAN
Reset
USB
WiF
i
USB
Pow
er
Inte
rnet
ExistingWiFi router (Optional) Connect a USB device to the USB port
To use the Trek as a WiFi bridge:1. Connect the Trek to a power source.
For more information, see Power Inputs on page 5.2. Turn on power to the Trek by moving the Internet Mode switch
from the Power Off position to the Wireless position.3. Rotate the Trek’s cover clockwise to orient the antenna.
For more information, see Antenna Orientation on page 7.4. Connect your computer or wireless device to the Trek's SSID, or
connect your computer or wireless device to the Trek’s LAN port with an Ethernet cable.
14
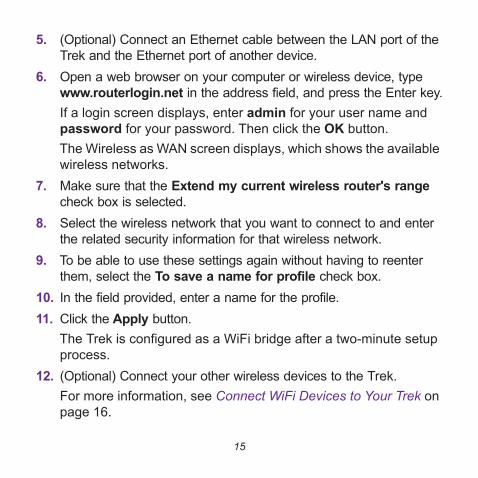
5. (Optional) Connect an Ethernet cable between the LAN port of the Trek and the Ethernet port of another device.
6. Open a web browser on your computer or wireless device, type www.routerlogin.net in the address field, and press the Enter key.If a login screen displays, enter admin for your user name and password for your password. Then click the OK button.The Wireless as WAN screen displays, which shows the available wireless networks.
7. Make sure that the Extend my current wireless router's range check box is selected.
8. Select the wireless network that you want to connect to and enter the related security information for that wireless network.
9. To be able to use these settings again without having to reenter them, select the To save a name for profile check box.
10. In the field provided, enter a name for the profile.11. Click the Apply button.
The Trek is configured as a WiFi bridge after a two-minute setup process.
12. (Optional) Connect your other wireless devices to the Trek.For more information, see Connect WiFi Devices to Your Trek on page 16.
15
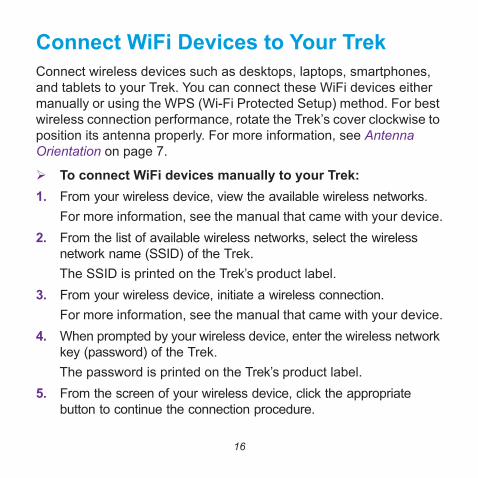
Connect WiFi Devices to Your TrekConnect wireless devices such as desktops, laptops, smartphones, and tablets to your Trek. You can connect these WiFi devices either manually or using the WPS (Wi-Fi Protected Setup) method. For best wireless connection performance, rotate the Trek’s cover clockwise to position its antenna properly. For more information, see Antenna Orientation on page 7.
To connect WiFi devices manually to your Trek:1. From your wireless device, view the available wireless networks.
For more information, see the manual that came with your device.2. From the list of available wireless networks, select the wireless
network name (SSID) of the Trek.The SSID is printed on the Trek’s product label.
3. From your wireless device, initiate a wireless connection.For more information, see the manual that came with your device.
4. When prompted by your wireless device, enter the wireless network key (password) of the Trek.The password is printed on the Trek’s product label.
5. From the screen of your wireless device, click the appropriate button to continue the connection procedure.
16
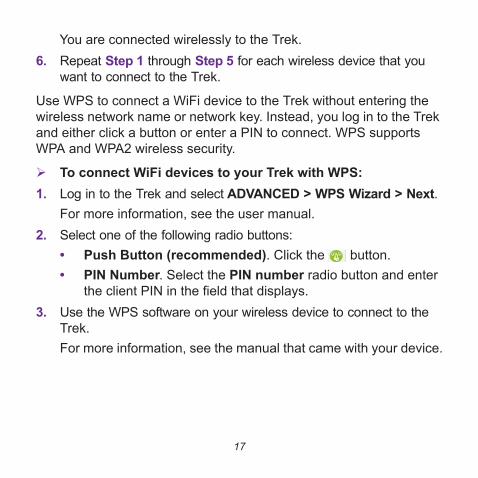
You are connected wirelessly to the Trek.6. Repeat Step 1 through Step 5 for each wireless device that you
want to connect to the Trek.
Use WPS to connect a WiFi device to the Trek without entering the wireless network name or network key. Instead, you log in to the Trek and either click a button or enter a PIN to connect. WPS supports WPA and WPA2 wireless security.
To connect WiFi devices to your Trek with WPS:1. Log in to the Trek and select ADVANCED > WPS Wizard > Next.
For more information, see the user manual.2. Select one of the following radio buttons:
• Push Button (recommended). Click the button.• PIN Number. Select the PIN number radio button and enter
the client PIN in the field that displays.3. Use the WPS software on your wireless device to connect to the
Trek.For more information, see the manual that came with your device.
17

18

19
NETGEAR, Inc.350 East Plumeria Drive
San Jose, CA 95134 USA
December 2013
SupportThank you for selecting NETGEAR products. After installing your device, locate the serial number on the label of your product and use it to register your product at https://my.netgear.com. You must register your product before you can use NETGEAR telephone support. NETGEAR recommends registering your product through the NETGEAR website.For product updates and web support, visit http://support.netgear.com.NETGEAR recommends that you use only the official NETGEAR support resources. You can get the user manual online at http://downloadcenter.netgear.com or through a link in the product’s user interface.
TrademarksNETGEAR, the NETGEAR logo, and Connect with Innovation are trademarks and/or registered trademarks of NETGEAR, Inc. and/or its subsidiaries in the United States and/or other countries. Information is subject to change without notice. © NETGEAR, Inc. All rights reserved.
ComplianceFor regulatory compliance information, visit http://www.netgear.com/about/regulatory/.For the current EU Declaration of Conformity, visit: http://support.netgear.com/app/answers/detail/a_id/11621/.