Embed Size (px)
Citation preview
NVIDIA Accelerated Linux Driver SetRelease 25 Notes
Software Version 1.0-3123
NVIDIA CorporationSeptember 7, 2002
N V I D I A C o r p o r a t i o n
N V I D I A A c c e l e r a t e d L i n u x D r i v e r S e t R e l e a s e 2 5 N o t e s
Confidential Information
Published byNVIDIA Corporation, Inc.2701 San Tomas Expressway Santa Clara, CA 95050
Copyright © 2002 NVIDIA Corporation. All rights reserved.
This software may not, in whole or in part, be copied through any means, mechanical, electromechanical, or otherwise, without the express permission of NVIDIA Corporation.
Information furnished is believed to be accurate and reliable. However, NVIDIA assumes no responsibility for the consequences of use of such information nor for any infringement of patents or other rights of third parties, which may result from its use. No License is granted by implication or otherwise under any patent or patent rights of NVIDIA Corporation.
Specifications mentioned in the software are subject to change without notice.
NVIDIA Corporation products are not authorized for use as critical components in life support devices or systems without express written approval of NVIDIA Corporation.
NVIDIA, the NVIDIA logo, Digital Vibrance Control, GeForce, nfiniteFX, nForce, Quadro, RIVA, TNT, TNT2, TwinView, and Vanta are registered trademarks or trademarks of NVIDIA Corporation in the United States and/or other countries.
Intel and Pentium are registered trademarks of Intel. Linux is a registered trademark of Linus Torvalds. Microsoft and Windows are registered trademarks of Microsoft Corporation. OpenGL is a registered trademark of Silicon Graphics Inc. Red Hat, RPM, Linux Library and all Red Hat-based trademarks and logos are trademarks or registered trademarks of Red Hat, Inc. in the United States and other countries. SPECglperf and SPECviewperf are trademarks of the Standard Performance Evaluation Corporation.
Other company and product names may be trademarks or registered trademarks of the respective owners with which they are associated.
N V I D I A A c c e l e r a t e d L i n u x D r i v e r S e t R e l e a s e 2 5 N o t e s
Table of Contents
1. IntroductionAbout Release Notes . . . . . . . . . . . . . . . 1About the NVIDIA Accelerated Linux Driver Set . 2Minimum Operating System Requirements . . . . 2Notes and Tips on Operating Systems . . . . . 2Supported NVIDIA Products. . . . . . . . . . . . 3
Notes and Tips on Supported NVIDIA Products5Features and Enhancements . . . . . . . . . . . 5Known Product Limitations . . . . . . . . . . . . 5
Software Issues . . . . . . . . . . . . . . . . 5Hardware Issues . . . . . . . . . . . . . . . . 7
2. NVIDIA Linux Driver HistoryNVIDIA Linux Driver Versions . . . . . . . . . . . 9Overview of Resolved Issues and Enhancements 9
Release 25: New Features, Enhancements, and Resolved Issues . . . . . . . . . . . . . . 10
Release 20: New Features, Enhancements, and Resolved Issues . . . . . . . . . . . . . . 12
Release 10: New Features, Enhancements, and Resolved Issues . . . . . . . . . . . . . . 13
Release 6: New Features, Enhancements, and Resolved Issues . . . . . . . . . . . . . . 16
3. Installing the NVIDIA Linux Drivers
Choosing the NVIDIA Packages for Your System21Installing the NVIDIA_kernel and NVIDIA_GLX
Packages . . . . . . . . . . . . . . . . . . . 22Before You Begin Driver Installation . . . . . 23Installing by RPM. . . . . . . . . . . . . . . 23Upgrading by RPM . . . . . . . . . . . . . . 23Installing & Upgrading by SRPM . . . . . . . 24Installing & Upgrading by Tar File . . . . . . 25
Editing Your XF86Config File . . . . . . . . . . 26Installed Components . . . . . . . . . . . . . . 27
Installing Libraries . . . . . . . . . . . . . . 29
4. Configuring NVIDIA Linux DriversXF86Config Options: Configuring AGP . . . . . 31
AGP Chipsets Supported by NVIDIA AGP . . 32Troubleshooting AGP Stability Problems . . 33
XF86Config Options: Introduced in Release 25 . 35Option �NoRenderExtension� �boolean� . . 35Option �NoTwinViewXineramaInfo� �boolean� 35
Option �UseClipIDs� �boolean�. . . . . . . . 36Option �Stereo� �integer� . . . . . . . . . . . 36Option �DigitalVibrance� �integer" . . . . . . 37Option �Overlay� �boolean� . . . . . . . . . 37Option �FlatPanelProperties� �string� . . . . 37
XF86Config Options: Introduced in Release 20 38Option �PageFlip� �boolean� . . . . . . . . . 39Option �UBB� �boolean� . . . . . . . . . . . 39Option �UseInt10Module� �boolean� . . . . . 39Option �WindowFlip� �boolean� . . . . . . . 40
XF86Config Options: Introduced in Release 10 40Option �ConnectedMonitor� �string� . . . 41Option �CursorShadow� �boolean� . . . . . . 42Option �CursorShadowAlpha� �integer� . . . 42Option �CursorShadowXOffset� �integer� . . 42Option �CursorShadowYOffset� �integer� . . 42Option �HWCursor� �boolean� . . . . . . 43Option �IgnoreEDID� �boolean�. . . . . . 43Option �NoDDC� �boolean� . . . . . . . . 43Option �NoLogo� �boolean�. . . . . . . . 43Option �NoRenderAccel� �boolean� . . . 43Option �NvAGP� �integer�. . . . . . . . . 44Option �SWCursor� �boolean� . . . . . . 44Option �UseEdidFreqs� �boolean� . . . . . . 44
XF86Config TV Options: Introduced in Release 10.45
Enabling and Configuring TV . . . . . . . . 45XF86Config File Settings . . . . . . . . . . 45Option �TVOutFormat� �string� . . . . . . . . 46Option �TVStandard� �string� . . . . . . . . 46
XF86Config TwinView Options: Introduced in Release 6 . . . . . . . . . . . . . . . . . . . 47
Enabling and Configuring TwinView . . . . . 47Option �TwinView� �boolean�. . . . . . . . . 48Option �SecondMonitorHorizSync� �range(s)� 48Option �SecondMonitorVertRefresh� �range(s)� .
48Option �MetaModes� �string� . . . . . . . . . 49Option �TwinViewOrientation� �string� . . . . 51Option �ConnectedMonitor� �string� . . . . . 51
OpenGL Environment Variable Settings . . . . 51Full-Scene Antialiasing (FSAA) . . . . . . . 51Anisotropic Texture Filtering . . . . . . . . . 52VBLANK Synchronizing . . . . . . . . . . . 53
Configuring a Laptop . . . . . . . . . . . . . . 53
N V I D I A C o r p o r a t i o n 3
V e r s i o n 1 . 0 - 2 8 8 0
Standard Functionality . . . . . . . . . . . . 53TwinView Functionality . . . . . . . . . . . . 54Using Hot Keys to Switch Display Devices. . 55Non-Standard Modes on LCD Displays . . . 56Known Laptop Issues . . . . . . . . . . . . 56
5. Frequently Asked Questions, Troubleshooting, & Other Resources
Frequently Asked Questions: General . . . . . 58Frequently Asked Questions: TwinView . . . . . 68Troubleshooting: ALi Chipset Users . . . . . . . 70Troubleshooting: NVIDIA TNT Users . . . . . . 71Contacting Us . . . . . . . . . . . . . . . . . . 71Additional Resources . . . . . . . . . . . . . . 72
A. Programming ModesIntroduction . . . . . . . . . . . . . . . . . . . 73Depth, Bits Per Pixel, and Pitch . . . . . . . . . 74Maximum Resolutions . . . . . . . . . . . . . . 75Useful Formulas . . . . . . . . . . . . . . . . . 75
Video Memory Used . . . . . . . . . . . . . 75Resolution, Pixel Clock, and Vertical Refresh
Rate . . . . . . . . . . . . . . . . . . . . 76Mode Validation . . . . . . . . . . . . . . . . . 77Additional Mode Constraints . . . . . . . . . . 78
Example Mode Line . . . . . . . . . . . . . 80
B. Proc Filesystem InterfaceC. XVMC SupportD. GLX Support
4 N V I D I A C o r p o r a t i o n
N V I D I A C o r p o r a t i o n 5
N V I D I A A c c e l e r a t e d L i n u x D r i v e r S e t R e l e a s e 2 5 N o t e s
Table 1.1 Minimum Operating System Requirements . . . . . . . . . . . . . . . . . . . . . . . . . . . . . . 2Table 1.2 Supported NVIDIA Products . . . . . . . . . . . . . . . . . . . . . . . . . . . . . . . . . . . . . . 3Table 2.1 NVIDIA Linux Driver Versions . . . . . . . . . . . . . . . . . . . . . . . . . . . . . . . . . . . . . 9Table 4.1 TV Output Formats by Country . . . . . . . . . . . . . . . . . . . . . . . . . . . . . . . . . . . . 46Table 4.2 Values for the __GL_FSAA_MODE Variable . . . . . . . . . . . . . . . . . . . . . . . . . . . . . . 52Table 4.3 Values for the __GL_DEFAULT_LOG_ANISO Variable . . . . . . . . . . . . . . . . . . . . . . . . 53Table A.1 Bits Per Pixel Used for Depth . . . . . . . . . . . . . . . . . . . . . . . . . . . . . . . . . . . . 74Table A.2 Maximum DAC Values . . . . . . . . . . . . . . . . . . . . . . . . . . . . . . . . . . . . . . . . 78
List of Tables
N V I D I A A c c e l e r a t e d L i n u x D r i v e r S e t R e l e a s e 2 5 N o t e s
C H A P T E R
1INTRODUCTION
This chapter contains the following major sections:
� �About Release Notes� on page 1
� �About the NVIDIA Accelerated Linux Driver Set� on page 2
� �Minimum Operating System Requirements� on page 2
� �Supported NVIDIA Products� on page 3
� �Features and Enhancements� on page 5
� �Known Product Limitations� on page 5
About Release NotesThese Release Notes contain information about the current Release 25 NVIDIA®Accelerated Linux® Driver Set. NVIDIA provides these notes to enable add-in-card (AIC) producers and original equipment manufacturers (OEMS) to monitor performance improvements and software problem (bug) resolutions in each documented version of the driver.
This guide explains how to install, configure, and use the NVIDIA Accelerated Linux Driver Set. It also describes current and historic software problem resolutions and software enhancements and contains Troubleshooting, Frequently Asked Questions, and other contact and support information.
Note: Most of the contents of this guide is also available in a Readme file, which is posted on the NVIDIA web site (www.nvidia.com) and is also installed in /usr/share/doc/NVIDIA_GLX-1.0/ when the NVIDIA_GLX package is installed.
1 N V I D I A C o r p o r a t i o n
C H A P T E R 1 I n t r o d u c t i o n
About the NVIDIA Accelerated Linux Driver SetThe NVIDIA Accelerated Linux Driver Set brings both accelerated 2D functionality and high performance OpenGL support to Linux x86 with the use of NVIDIA products, which are graphics processing units (GPUs). The NVIDIA nForce product is an integrated graphics processor (IGP).
NVIDIA has a Unified Driver Architecture (UDA) model, which means that one driver set can be used with all supported NVIDIA hardware. This driver set provides optimized hardware acceleration of OpenGL applications through a direct-rendering X Server.
Supported NVIDIA products are listed in Table 1.2 and supported features are discussed in �NVIDIA Linux Driver History� on page 9.
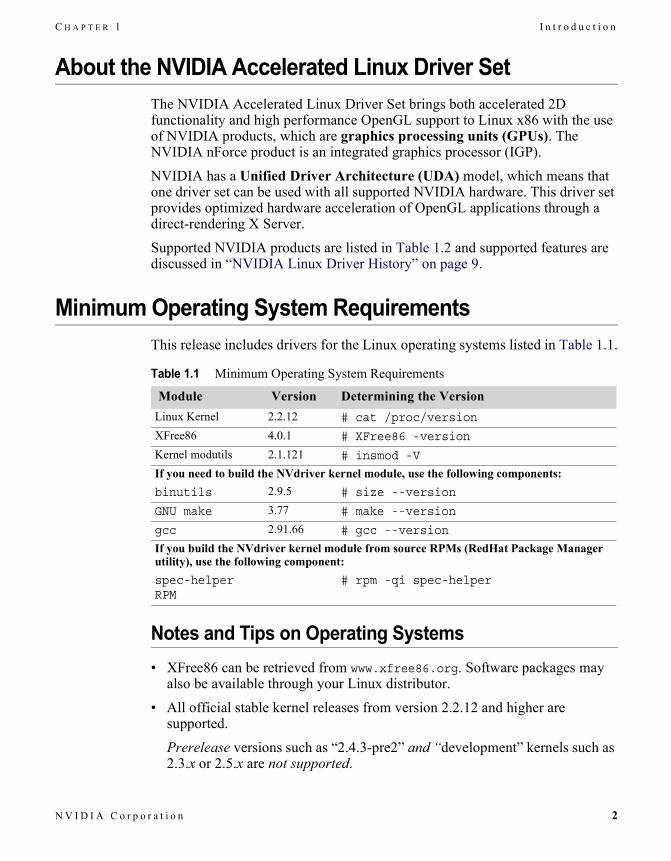
Minimum Operating System RequirementsThis release includes drivers for the Linux operating systems listed in Table 1.1.
Notes and Tips on Operating Systems� XFree86 can be retrieved from www.xfree86.org. Software packages may
also be available through your Linux distributor.
� All official stable kernel releases from version 2.2.12 and higher are supported.
Prerelease versions such as �2.4.3-pre2� and �development� kernels such as 2.3.x or 2.5.x are not supported.
Table 1.1 Minimum Operating System Requirements
Module Version Determining the VersionLinux Kernel 2.2.12 # cat /proc/version
XFree86 4.0.1 # XFree86 -version
Kernel modutils 2.1.121 # insmod -V
If you need to build the NVdriver kernel module, use the following components:binutils 2.9.5 # size --version
GNU make 3.77 # make --version
gcc 2.91.66 # gcc --version
If you build the NVdriver kernel module from source RPMs (RedHat Package Manager utility), use the following component:spec-helper RPM
# rpm -qi spec-helper
N V I D I A C o r p o r a t i o n 2
N V I D I A A c c e l e r a t e d L i n u x D r i v e r S e t R e l e a s e 2 5 N o t e s
The Linux kernel sources can be downloaded from www.kernel.org or one of its mirrors.
� binutils and gcc are required only if you install the NVIDIA_kernel package by SRPM (Source-RPM) or tar file and can be retrieved from www.gnu.org or one of its mirrors.
Note: binutils and gcc are not required by binary RPM installations.
� If you are using XFree86, but do not have a file /var/log/XFree86.0.log, then you probably have a version 3.x of XFree86 and must upgrade.
� If you are setting up XFree86 4.x for the first time, it is often easier to begin with one of the open source drivers that ships with XFree86 (either �nv�, �vga�, or �vesa�). Once XFree86 is operating properly with the open source driver, it is easier to switch to the NVIDIA driver.
� NVIDIA products may not work with older versions of the �nv� driver that shipped with XFree86. For example, the �nv� driver that shipped with XFree86 (version 4.0.1) did not support graphics cards based on the NVIDIA GeForce2 family and the Quadro2 MXR GPUs. However, this was fixed in XFree86 (version 4.0.2).
� GeForce2 Go (product for laptop computers) is supported by the NVIDIA Accelerated Linux Driver Set but not by the open source �nv� driver for XFree86.
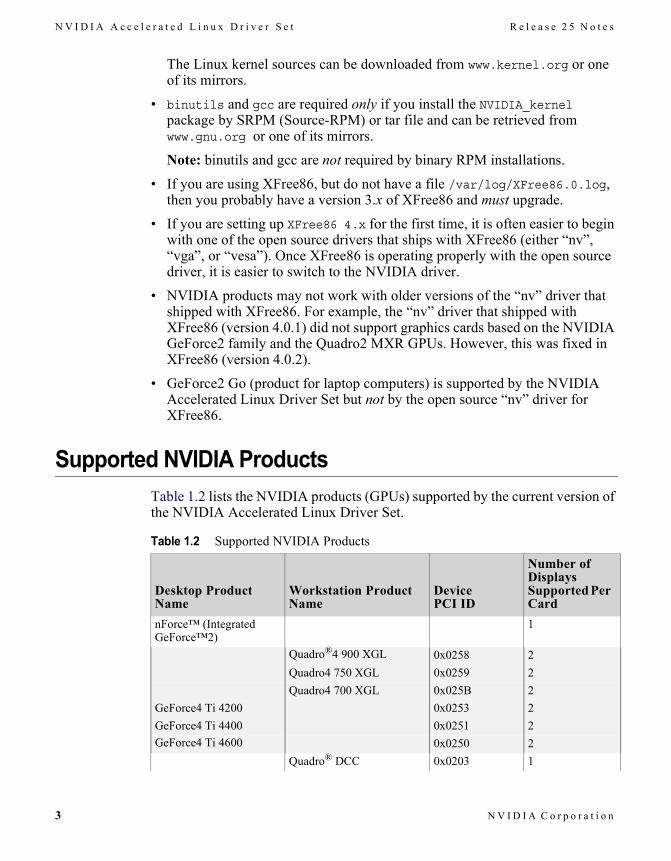
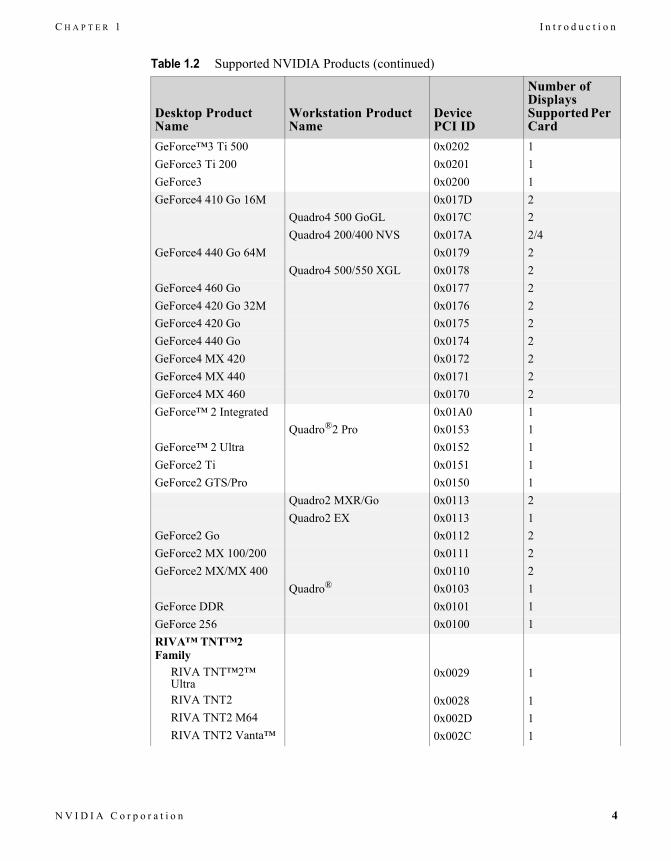
Supported NVIDIA ProductsTable 1.2 lists the NVIDIA products (GPUs) supported by the current version of the NVIDIA Accelerated Linux Driver Set.
Table 1.2 Supported NVIDIA Products
Desktop Product Name
Workstation Product Name
Device PCI ID
Number of Displays Supported Per Card
nForce� (Integrated GeForce�2)
1
Quadro®4 900 XGL 0x0258 2Quadro4 750 XGL 0x0259 2Quadro4 700 XGL 0x025B 2
GeForce4 Ti 4200 0x0253 2GeForce4 Ti 4400 0x0251 2GeForce4 Ti 4600 0x0250 2
Quadro® DCC 0x0203 1
3 N V I D I A C o r p o r a t i o n
C H A P T E R 1 I n t r o d u c t i o n
GeForce�3 Ti 500 0x0202 1GeForce3 Ti 200 0x0201 1GeForce3 0x0200 1GeForce4 410 Go 16M 0x017D 2
Quadro4 500 GoGL 0x017C 2Quadro4 200/400 NVS 0x017A 2/4
GeForce4 440 Go 64M 0x0179 2Quadro4 500/550 XGL 0x0178 2
GeForce4 460 Go 0x0177 2GeForce4 420 Go 32M 0x0176 2GeForce4 420 Go 0x0175 2GeForce4 440 Go 0x0174 2GeForce4 MX 420 0x0172 2GeForce4 MX 440 0x0171 2GeForce4 MX 460 0x0170 2GeForce� 2 Integrated 0x01A0 1
Quadro®2 Pro 0x0153 1GeForce� 2 Ultra 0x0152 1GeForce2 Ti 0x0151 1GeForce2 GTS/Pro 0x0150 1
Quadro2 MXR/Go 0x0113 2Quadro2 EX 0x0113 1
GeForce2 Go 0x0112 2GeForce2 MX 100/200 0x0111 2GeForce2 MX/MX 400 0x0110 2
Quadro® 0x0103 1GeForce DDR 0x0101 1GeForce 256 0x0100 1RIVA� TNT�2 Family
RIVA TNT�2� Ultra
0x0029 1
RIVA TNT2 0x0028 1RIVA TNT2 M64 0x002D 1RIVA TNT2 Vanta� 0x002C 1
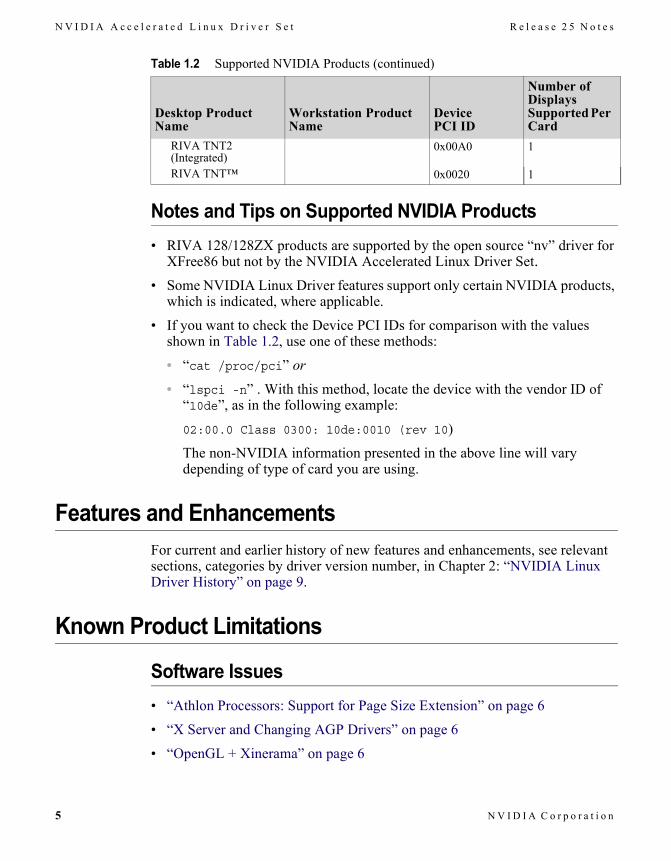
Table 1.2 Supported NVIDIA Products (continued)
Desktop Product Name
Workstation Product Name
Device PCI ID
Number of Displays Supported Per Card
N V I D I A C o r p o r a t i o n 4
N V I D I A A c c e l e r a t e d L i n u x D r i v e r S e t R e l e a s e 2 5 N o t e s
Notes and Tips on Supported NVIDIA Products� RIVA 128/128ZX products are supported by the open source �nv� driver for
XFree86 but not by the NVIDIA Accelerated Linux Driver Set.� Some NVIDIA Linux Driver features support only certain NVIDIA products,
which is indicated, where applicable.
� If you want to check the Device PCI IDs for comparison with the values shown in Table 1.2, use one of these methods:
� �cat /proc/pci� or � �lspci -n� . With this method, locate the device with the vendor ID of
�10de�, as in the following example:
02:00.0 Class 0300: 10de:0010 (rev 10)
The non-NVIDIA information presented in the above line will vary depending of type of card you are using.
Features and EnhancementsFor current and earlier history of new features and enhancements, see relevant sections, categories by driver version number, in Chapter 2: �NVIDIA Linux Driver History� on page 9.
Known Product Limitations
Software Issues� �Athlon Processors: Support for Page Size Extension� on page 6
� �X Server and Changing AGP Drivers� on page 6
� �OpenGL + Xinerama� on page 6
RIVA TNT2 (Integrated)
0x00A0 1
RIVA TNT� 0x0020 1
Table 1.2 Supported NVIDIA Products (continued)
Desktop Product Name
Workstation Product Name
Device PCI ID
Number of Displays Supported Per Card
5 N V I D I A C o r p o r a t i o n
C H A P T E R 1 I n t r o d u c t i o n
� �OpenGL and dlopen()� on page 6
� �DPMS and TwinView� on page 6
� �DPMS and Flat Panel� on page 6
� �Multi-Card, Multi-Display� on page 7
� �Laptop Issues� on page 7
� �Full-Scene Antialiasing (FSAA)� on page 7
Athlon Processors: Support for Page Size ExtensionFor details, see �Support for the Processor Page Size Extension on Athlon Processors� on page 33 under �Troubleshooting AGP Stability Problems� on page 33.
X Server and Changing AGP DriversUnder Linux32, after starting X twice with different AGP support, the X Server may crash causing the system to become unusable. To work around this problem, if you change your AGP driver, be sure to restart the system before restarting X.
OpenGL + XineramaCurrently, OpenGL will not display to anything other than the first display device in an Xinerama environment.
OpenGL and dlopen()There are some issues with the older version of the glibc dynamic loader (e.g., the version that shipped with RedHat 7.2) and applications such as Quake3 and Radiant that use the dlopen() function.
For further details, see �Frequently Asked Questions, Troubleshooting, & Other Resources� on page 58.
DPMS and TwinViewDPMS (Display Power Management System) modes �suspend� and �standby� do not work correctly on a second CRT when using TwinView. The screen becomes blank instead of the monitor being set to the requested DPMS state.
DPMS and Flat PanelThe DPMS modes �suspend� and �standby� do not work correctly on a flat panel display. The screen becomes blank instead of the flat panel being set to the requested DPMS state.
N V I D I A C o r p o r a t i o n 6
N V I D I A A c c e l e r a t e d L i n u x D r i v e r S e t R e l e a s e 2 5 N o t e s
Multi-Card, Multi-DisplayIn certain cases under a multi-card/multi-display configuration, the secondary card may not be initialized correctly by the NVdriver kernel module. You can work around this by enabling the "UseInt10Module" option in the XFree86 configuration file to soft-boot all secondary cards.
For further information, see �Option �UseInt10Module� �boolean�� on page 39.
Laptop IssuesFor a list of current known issues with the NVIDIA driver and laptops, refer to �Known Laptop Issues� on page 56.
Full-Scene Antialiasing (FSAA)When FSAA is enabled (i.e., the __GL_FSAA_MODE environment variable is set to a value that enables FSAA and a multisample visual is selected), the rendering may be corrupted when resizing the window.
For details on setting the __GL_FSAA_MODE environment variable, see �OpenGL Environment Variable Settings� on page 51.
Hardware IssuesThis section describes problems that will not be fixed. Usually, the source of the problem is beyond the control of NVIDIA.
� �Gigabyte GA-6BX Motherboard� on page 7
� �VIA KX133 and 694X Chipsets With AGP 2X� on page 8
� �Irongate Chipsets With AGP 1X� on page 8
� �ALi (Acer Laboratories Inc) Chipsets: ALi1541 and ALi1647� on page 8
Gigabyte GA-6BX MotherboardThis motherboard uses a LinFinity regulator on the 3.3-V rail that is rated to only 5 A � less than the AGP specification, which requires 6 A. When diagnostics or applications are running, the temperature of the regulator rises, causing the voltage to the NVIDIA chip to drop as low as 2.2 V. Under these circumstances, the regulator cannot supply the current on the 3.3-V rail that the NVIDIA chip requires.
This problem does not occur when the graphics card has a switching regulator or when an external power supply is connected to the 3.3-V rail.
7 N V I D I A C o r p o r a t i o n
C H A P T E R 1 I n t r o d u c t i o n
VIA KX133 and 694X Chipsets With AGP 2XOn Athlon motherboards with the VIA KX133 or 694X chipset, such as the ASUS K7V motherboard, NVIDIA drivers default to AGP 2x mode to work around insufficient drive strength on one of the signals.
You can force AGP 4x by setting NVreg_EnableVia4x to 1. However, note that doing so may cause the system to become unstable.
Irongate Chipsets With AGP 1XAGP 1X transfers are used on Athlon motherboards with the Irongate chipset to work around a problem with the signal integrity of the chipset.
ALi (Acer Laboratories Inc) Chipsets: ALi1541 and ALi1647On ALi1541 and ALi1647 chipsets, NVIDIA drivers disable AGP to work around timing issues and signal integrity issues. You can force AGP to be enabled on these chipsets by setting NVreg_EnableALiAGP to 1. However, note that doing so may cause the system to become unstable.
N V I D I A C o r p o r a t i o n 8
C H A P T E R 2 N V I D I A L i n u x D r i v e r H i s t o r y
C H A P T E R
2NVIDIA LINUX DRIVER HISTORY
This chapter contains the following major sections:
� �NVIDIA Linux Driver Versions� on page 9
� �Overview of Resolved Issues and Enhancements� on page 9
NVIDIA Linux Driver VersionsRelease 25 is the latest release of the NVIDIA Accelerated Linux Driver Set. Table 2.1 contains a summary of driver releases and the versions associated with them. Some versions listed may not have been released outside of NVIDIA.
Overview of Resolved Issues and EnhancementsThis section contains key software enhancements and resolved issues in the following releases of the NVIDIA Linux drivers:
� �Release 25: New Features, Enhancements, and Resolved Issues� on page 10
� �Release 20: New Features, Enhancements, and Resolved Issues� on page 12
Table 2.1 NVIDIA Linux Driver Versions
Driver Versions CommentsRelease 25 1.0-2802 through 1.0-3123 Releases ongoingRelease 20 1.0-2312 through 1.0-2313 Release 10 1.0-1101 through 1.0-1541Release 6 0.9-1 through 0. 9-769
9 N V I D I A C o r p o r a t i o n
N V I D I A A c c e l e r a t e d L i n u x D r i v e r S e t R e l e a s e 2 5 N o t e s
� �Release 10: New Features, Enhancements, and Resolved Issues� on page 13
� �Release 6: New Features, Enhancements, and Resolved Issues� on page 16
Release 25: New Features, Enhancements, and Resolved Issues
Version 1.0-3123 (current release)� Added Quadbuffered stereo visuals support for NVIDIA Quadro2-based,
Quadro4-based, and Quadro DCC-based graphics cards.
� Improved Viewperf numbers.
� Added support for up to sixteen display devices (monitors).
� Added support for the IBM T221 digital flat panel.
� Added support for RGB (red-green-blue) OpenGL overlays in TwinView mode on NVIDIA GeForce4 Ti-based and Quadro4 XGL-based graphics cards.
� Added support for hardware clip IDs on NVIDIA Quadro4-based graphics cards. The configuration option “UseClipIDs” enables them, as explained in �Option �UseClipIDs� �boolean�� on page 35
Version 1.0-2960� Fixed problem with loading the GLX extension in multi-head environments
with non-NVIDIA-based graphics cards.
� Significant performance improvements in Viewperf on NVIDIA Quadro-based graphics products.
� Added the configuration option "NoRenderExtension" to disable the RENDER extension. This is useful when running in 8 bpp (bits per pixel) where the RENDER extension preallocates a large portion of the default color map and thus corrupts many legacy applications. See �Option �NoRenderExtension� �boolean�� on page 35.
� Fixed a regression where I420 XvImages had the chroma planes swapped.
� Fixed some problems with moving overlay windows.
� Added a dynamic XvMC library "libXvMCNVIDIA_dynamic.so" so that applications can dynamically load the vendor-specific core XvMC support.
� Added XvMC motion-compensation acceleration for the Quadro4 XGL (700/750/900)-based and GeForce4 Ti (4200/4600)-based graphics cards.
N V I D I A C o r p o r a t i o n 10
C H A P T E R 2 N V I D I A L i n u x D r i v e r H i s t o r y
� Fixed certain issues with XvMC support under the GeForce4/Quadro4-based cards.
� Fixed some problems with full-scene antialiasing (FSAA) modes failing.
Version 1.0-2880� Fixed rendering problems which occurred in some cases when
GL_SYNC_TO_VBLANK was enabled.
� Fixed problem where the maximum pixel clock was set too low.
� Fixed a problem with image flicker when running full-screen applications with GeForce4-based graphics cards.
� Fixed a pixmap cache corruption problem when using GeForce3.
� Fixed some issues running multiple NVIDIA graphics cards simultaneously.
Version 1.0-2802� Improved support for NVIDIA nForce.
� Added support for the NVIDIA GeForce4-based and Quadro4-based graphics cards.
� Added support for anisotropic filtering.
� Added the configuration option �DigitalVibrance� to enable Digital Vibrance Control�, which is a mechanism for controlling color separation and intensity that boosts the color saturation of an image. see �Option �DigitalVibrance� �integer"� on page 37.
� Added the configuration option “FlatPanelProperties” to adjust dithering and scaling when X is started. See �Option �FlatPanelProperties� �string�� on page 37.
� Added support for SoftEDIDs. When this option is enabled, the driver generates an EDID (Extended Display Identification Data) based on the video BIOS instead of performing a table lookup. For further information, see �Standard Functionality� on page 53 under �Configuring a Laptop� on page 53.
� Added libXvMCNVIDIA.a, which is an implementation of XvMC 1.0. This allows MPEG acceleration on NVIDIA GeForce4-based and Quadro4-based graphics cards.
� Added RGB workstation overlays for Quadro4-based graphics cards. These are double-buffered, Z-buffered 16-bit visuals. The transparency key is 0x0000 hex.
� Added an 8:8:8:8 XRGB XvImage format to the video blitter.
11 N V I D I A C o r p o r a t i o n
N V I D I A A c c e l e r a t e d L i n u x D r i v e r S e t R e l e a s e 2 5 N o t e s
� Fixed problem of using SGIX_fbconfig and SGIX_pbuffer with indirect rendering, which was caused by an incorrect protocol.
� Fixed problem where the driver would fail on systems with 1GB or more of memory and a kernel configured to use all the memory.
Release 20: New Features, Enhancements, and Resolved Issues Note: The NVIDIA Linux Release 20 driver does not support features that are
new in Release 25.
Version 1.0-2313 � Support for NVIDIA nForce (IGP 220D/IGP 420D)
� Unified Back Buffer (UBB). See �Option �UBB� �boolean�� on page 38.
� Page Flipping. See �Option �PageFlip� �boolean�� on page 37.
� Window Flipping. See �Option �WindowFlip� �boolean�� on page 38
� Support for OpenGL 1.3 (the current ARB-approved version of OpenGL)
� pbuffer and fbconfig extensions provide support for accelerated off-screen rendering.
Version 1.0-2312� Improved performance of SPECviewperf, Quake, and immediate mode
applications.
� Improved driver stability on AMD platforms.
� Fixed TwinView problem that caused garbage to appear on the screen when starting X with a null option on head 0.
� Added workaround for XAA bug that caused systems to hang when Lisa Screensaver is run. The workaround is to add the following line to the �Device� section of the XF86Config file:
� Option “XaaNoSolidFillTrap”.
� This option prevents XAA from breaking wide lines (and polygons) into trapezoids and avoids an XAA clipping problem.
� Fixed a system hang that occurred on some GPUs when taking the X server down (after having run once successfully) and restarting it while using the DVI-I connected to a flat panel.
N V I D I A C o r p o r a t i o n 12
C H A P T E R 2 N V I D I A L i n u x D r i v e r H i s t o r y
� Fixed problem where the performer application Perfly would hang when run in forked-draw mode.
� Fixed problem where the X driver would segfault when given an invalid MetaMode.
� Fixed problem where the console was not restored properly after entering X and returning to the console.
� Fixed problem where X did not redraw completely after a screen blank on GeForce2 Go and Quadro2 Go.
� Fixed problem with initializing the secondary card. In most cases, the secondary card is posted correctly. In the cases where it isn't, a workaround was created to initialize the card via X. (See �Multi-Card, Multi-Display� on page 7.)
� Added workarounds to enable AGP on ALi chipsets and enable 4X AGP on VIA chipsets. (See �VIA KX133 and 694X Chipsets With AGP 2X� on page 8 and �ALi (Acer Laboratories Inc) Chipsets: ALi1541 and ALi1647� on page 8.)
Release 10: New Features, Enhancements, and Resolved Issues Note: The NVIDIA Linux Release 10 driver does not support features that are
new in Release 20.
GeForce 3 Release 10 is the first driver release to fully support the GeForce3 nfiniteFX� engine in OpenGL using Texture and Vertex programs. Developers can now expose the full functionality of GeForce3 under Linux.
GeForce2 Go and Quadro2 Go The Release 10 driver also added support for mobile (laptop) platforms with the GeForce2 Go and Quadro2 Go products, hot key switching, and improved driver stability on mobile platforms.
TV Output FeatureGraphics cards based on an NVIDIA GPU with a TV-Out (S-Video) connector can be used to send the display to a television as another display device, such as a CRT (monitor) or a digital flat panel (DFP) display. The TV can be used by itself, or (on appropriate graphics cards) in conjunction with another display device in a TwinView� configuration.
13 N V I D I A C o r p o r a t i o n
N V I D I A A c c e l e r a t e d L i n u x D r i v e r S e t R e l e a s e 2 5 N o t e s
If a TV is the only display device connected to your graphics card, it will be used as the primary display when you start up your system; that is, the display will come up on the TV just as if it was a CRT.
Release 10: Resolved Issues and EnhancementsResolved Issues and enhancements are categorized by the following versions:
�Version 1.0-1541� on page 14
�Version 1.0-1512� on page 14
�Version 1.0-1450� on page 14
�Version 1.0-1420� on page 15
�Version 1.0-1251� on page 15
Version 1.0-1541Fixed problem where starting X on GeForce3 caused screen corruption (e.g., red vertical lines).
Version 1.0-1512� Fixed problem where garbage appears on the screen and the LCD blooms
when X is started on the Toshiba 3000 series laptops.
� Changed behavior of the X server so that the NVIDIA splash screen only appears on the first run of X. The splash screen can also be disabled by setting an option in the XF86Config file; see �Option �NoLogo� �boolean�� on page 43 for details.
� Fixed problem where OpenGL applications would sometimes leave portions of their rendering behind when the window was closed using the �x� button on the window banner.
� Fixed problem on mobile where X would respond to the wrong hot key event under certain conditions.
� Fixed several more problems with indirect rendering.
� Fixed problem on SMP machines that occurred when VT switching while running gloss and gears with indirect rendering.
� Fixed problem where /proc/nv/card0 did not report Quadro DCC correctly.
Version 1.0-1450� Fixed problem on TNT2, where the driver would only support up to four
threads per process.
� Fixed X Server crash that occurred when running two X Servers with AGPGART.
N V I D I A C o r p o r a t i o n 14
C H A P T E R 2 N V I D I A L i n u x D r i v e r H i s t o r y
� Fixed some problems in GLX that occurred when running multi-threaded applications.
� Fixed problems with window borders picking up color values when moved across active OpenGL applications.
� Fixed problems so that the X Server detects a Quadro DCC-based graphics card and properly initializes.
� Fixed problem so that Redhat 7.1 SMP RPMs can correctly uninstall with the �rpm -e� command while X Server is running.
� Corrected default OpenGL state when indirect rendering.
Version 1.0-1420� Added xf86XVOffscreenImage support so the V4L module can use the
hardware scaler on YUV surfaces.
� Added support for hot key switching on mobile platforms, i.e., laptop computers.
� Fixed a hang on mobile that occurred after starting, stopping, and then restarting X.
� Fixed a problem on mobile platforms that prevented DVDs from displaying.
� Fixed a problem that caused OpenGL programs to segfault when using a graphical login with xdm/kdm, and doing the following sequence: login, mode switch, logout, log in and run an OpenGL application.
� Fixed some indirect rendering problems.
� Fixed a problem that caused XF86Config file to fail on NVIDIA drivers.
� Fixed a crash that occurred when X forwarding over SSH.
� Fixed OpenGL front buffer clipping bug.
� Improved X-Render acceleration.
� Fixed a problem that prevented X-Render acceleration on GeForce3.
� The NvAGP option now defaults to�3�, which causes the driver to use AGP GART, if it is available, and NVidia AGP, otherwise.
� Fixed issue with GeForce 256/DDR where Linux PCI adapter did not correctly initialize with AGP card installed.
� Fixed typo in error format string which caused error messages to report �%� when it should have printed one of several error messages.
Version 1.0-1251� Added preliminary GeForce2 Go support.
15 N V I D I A C o r p o r a t i o n
N V I D I A A c c e l e r a t e d L i n u x D r i v e r S e t R e l e a s e 2 5 N o t e s
� Added support for GeForce3 OpenGL and GLX extensions.
� Fixed many SMP issues.
� Added TV-Out support.
� Fixed DGA depth change problem.
� Rewrote 2D off screen memory allocation.
� Fixed X-Video in TwinView.
� Added acceleration for X-Render extension.
� Fixed GLXPixmap rendering.
� Fixed problem with glXMakeCurrent() to same drawable but different display.
� Fixed problem in which OpenGL caused a segfault when reading X atoms.
� Fixed issues so that X now gets the dots per inch (dpi) from the monitor's EDID instead of defaulting to 75 dpi.
� All DPMS modes are now supported. Some DPMS issues remain for flat panels and the second display in a TwinView configuration.
� Fixed support for AGP on systems with 1 GB or more of memory.
Release 6: New Features, Enhancements, and Resolved Issues
TwinView Note: The TwinView feature is only supported on NVIDIA products that
support dual-display functionality, such as GeForce2 MX, GeForce2 Go, Quadro2 MXR, Quadro2 Go, and any of the GeForce4 GPUs. You may want to consult with your graphics card vendor to confirm that TwinView is supported on your card.
TwinView is a mode of operation where two display devices can display the contents of a single X screen in any arbitrary configuration. TwinView supports a variety of display options, such as digital flat panels, RGB monitors, TVs, and analog flat panels. This method of using multiple displays has several distinct advantages over other techniques (such as Xinerama), as outlined here:
� A single X screen is used. The NVIDIA driver conceals all information about multiple display devices from the X Server, which only acknowledges one screen.
N V I D I A C o r p o r a t i o n 16
C H A P T E R 2 N V I D I A L i n u x D r i v e r H i s t o r y
� Both display devices share one frame buffer. Thus, all the functionality present on a single display (e.g. accelerated OpenGL) is available in TwinView.
� No additional overhead is needed to emulate having a single desktop.
Release 6: Resolved Issues and EnhancementsResolved Issues and enhancements are categorized by the following versions:
�Version 0.9-769� on page 17
�Version 0.96� on page 18
�Version 0.95� on page 18
�Version 0.94� on page 18
�Version 0.9-3� on page 19
�Version 0.9-2� on page 19
�Version 0.9-1� on page 20
Version 0.9-769 � Fixed problem where an old version of the release documentation was being
installed instead of the current one.
� Fixed problem where direct rendering applications were allowed to continue rendering after �xkill� was called.
� Fixed problem where Tribes 2 crashed when compressed (s3tc) textures were used.
� Some drawable leaks were fixed in X and GLX.
� Fixed problem where the application would hang when calling �glXMakeCurrent()� while holding the X Server grab.
� BIOS posting problems with GeForce2 GTS and GeForce Ultra were fixed. These problem caused a significant performance loss.
� Added support for the X Render extension.
� TwinView functionality was enhanced for each display to pan independently.
� Fixed problem on TNT and TNT2 where �Xv(Shm)PutImage� returned �BadAlloc� in high resolutions when there was not enough video bandwidth to correctly display the YUV video overlay. This works now but the resulting display has artifacts.
� Fixed problem with cursor hangs in X.
� Fixed problem with X console not restoring on some monitors.
17 N V I D I A C o r p o r a t i o n
N V I D I A A c c e l e r a t e d L i n u x D r i v e r S e t R e l e a s e 2 5 N o t e s
� Fixed problem with fork() and OpenGL rendering
� Fixed problem with X driver module, nvidia_drv.o, being stripped when RPM was rebuilt.
� Added missing PCI device IDs for some TNT2 variants and GeForce3.
� Fixed problem where the kernel would often hang during X and/or OpenGL operation when on an SMP machine and using the version 2.4 kernel.
� Fixed SYNC_TO_VBLANK hang with 2.4 kernels.
� Fixed DPMS so that it is possible to set the �off� option. DPMS options �suspend� and �standby� are not fully supported; these options simply blank the screen. (Be sure to include Option “DPMS” in your XF86Config file. Refer to the XF86Config man page for detailed information.)
Version 0.96� Fixed many SMP problems.
� Fixed memory management problems that arose with large RAM systems (500 MB plus).
� Added multi-monitor OpenGL support.
� Added TwinView support.
� Fixed more mode-line handling issues and added double-scan support.
� Fixed BIOS-posting problems with TNT2 M64 and GeForce2 MX.
� Added dynamic run-time selection between NVAGP and AGPGART.
� Fixed TNT2 OpenGL slowdowns, which were noticeable in UT.
Version 0.95� Improved XFree86 version 4.0.1 support.
� Re-fixed console switch lockup.
� Fixed some AGP regressions resulting in better detection/support of AGPGART.
� Fixed color palette problems (xgamma, direct color visuals).
� Added BIOS-posting override to help with NVIDIA products such as TNT2 M64.
� Update included version 2.4 support to newest test kernels.
Version 0.94� Added support for XFree86 version 4.0.1.
� Fixed mode-setting problem.
N V I D I A C o r p o r a t i o n 18
C H A P T E R 2 N V I D I A L i n u x D r i v e r H i s t o r y
� Added AGPGART support (NVAGPGART version 0.5-5).
� Added GeForce2 MX support.
� Fixed various hangs.
� Added full-scene antialiasing (FSAA) support.
� Fixed problem where an OpenGL application malfunctioning during a console switch would crash the X Server.
Version 0.9-3� Allowed mode-line directives in the XF86Config file to override NVIDIA
auto-detection of monitor resolutions and refresh rates.
� Implemented �correct� fix for TNT memory-type problems.
� Fixed VT switch lockups.
� Fixed general ALi chipset lockups.
� Added and documented some registry keys Check os-registry.c in the kernel source directory for more details and options.
� Implemented workaround for Quake3 mode switch problem that caused system to crash. Note that this was a problem in the dlopen()function.
� Implemented major improvement in multi-threading behavior.
� Display list sharing with glXCreateContext now works.
� Added faster implementation of glTexImage/glTexSubImage and glCopyTexImage/glCopytexSubImage calls.
� Fixed kernel memory leak, which was related to threaded OpenGL This problem was most noticeable with XMMS.
� Fixed build problems with older version 2.2.x kernels (RedHat 6.0)
Version 0.9-2� Fixed problem initializing TNT with SGRAM.
� Added better logging and messages for tracking problems.
� Added dynamic, rather than static, allocation of client data in kernel.
� Incorporated *unsupported* version 2.3 kernel changes for completeness.
� Makefile updates add �-D_LOOSE_KERNEL_NAMES� and default to �make install�.
� Improved mode switching in Quake3.
� Changed installation name of libraries. Added revision .1.0.1 in the libraries.
19 N V I D I A C o r p o r a t i o n
N V I D I A A c c e l e r a t e d L i n u x D r i v e r S e t R e l e a s e 2 5 N o t e s
� Temporarily forced disabling of AGP fast writes for all chips.
� Fixed monitor issues and allowed overriding of synchronization polarities.
Version 0.9-1Initial Release
N V I D I A C o r p o r a t i o n 20
C H A P T E R 3 I n s t a l l i n g t h e N V I D I A L i n u x D r i v e r s
C H A P T E R
3INSTALLING THE NVIDIA LINUX DRIVERS
This chapter contains the following major topics:
� �Choosing the NVIDIA Packages for Your System� on page 21
� �Installing the NVIDIA_kernel and NVIDIA_GLX Packages� on page 22
� �Editing Your XF86Config File� on page 26
� �Installed Components� on page 27
Choosing the NVIDIA Packages for Your SystemThe NVIDIA Accelerated Linux Driver Set consists of two packages that you need to download and install:
� NVIDIA_GLX package contains the OpenGL libraries and the XFree86 driver.
� NVIDIA_kernel package contains the NVdriver kernel module required by the X driver and OpenGL libraries in the NVIDIA_GLX package.
For detailed description of the components of each package, see �Installed Components� on page 27.
Note: You must install both packages with matching version numbers; i.e., NVIDIA_GLX-1.0-2960 should only be used with NVIDIA_kernel-1.0-2960 and not NVIDIA_kernel-1.0-2880.
21 N V I D I A C o r p o r a t i o n
N V I D I A A c c e l e r a t e d L i n u x D r i v e r S e t R e l e a s e 2 5 N o t e s
The packages are available in these three formats:
� RPM� SRPM� Tar file Installation of each package type is described in the sections that follow.
The package type is largely a matter of personal preference, though note that the binary RPMs are for use only with the kernel shipped with a particular distribution; i.e., NVIDIA_kernel-1.0-2960.rh73up.i386.rpm should only be used with the uni-processor kernel shipped with RedHat version 7.3.
Where appropriate, NVIDIA has provided separate RPMs for the distinct SMP and uni-processor kernels of each distribution. If you have upgraded your kernel (either manually, or through a distribution upgrade) or a specific NVIDIA_kernel RPM is not available for your distribution, then please use either the NVIDIA_kernel SRPM or tar file.
In the case where distributors ship multiple kernels (as is often the case with uni-processor and SMP systems), multiple RPMs are available, for example, NVIDIA_kernel-1.0-2960.rh73up.i686.rpm and NVIDIA_kernel-1.0-2960.rh73smp.i686.rpm.
The NVIDIA_GLX RPM, however, is not dependent upon the kernel version, and therefore an SRPM is not required. Install the NVIDIA_GLX package either by RPM or tar file.
Installing the NVIDIA_kernel and NVIDIA_GLX PackagesThis section contains the following sections:
� �Before You Begin Driver Installation� on page 23
� �Installing by RPM� on page 23
� �Upgrading by RPM� on page 23
� �Installing & Upgrading by SRPM� on page 24
� �Installing & Upgrading by Tar File� on page 25
N V I D I A C o r p o r a t i o n 22
C H A P T E R 3 I n s t a l l i n g t h e N V I D I A L i n u x D r i v e r s
Before You Begin Driver Installation1 Exit the X Server.
2 Set your default run level so you will boot to console and not start up X.
Note: If you are unsure about how to perform this step, refer to the documentation that came with your Linux distribution.
3 The package revision numbers have been omitted in the installation instructions to make them as general as possible.
For example, if the directions are NVIDIA_kernel.tar.gz, replace that with the name of the driver version you are installing; for example: "NVIDIA_kernel.1.0-2960.tar.gz".
Installing by RPM
Commands$ rpm -ivh NVIDIA_kernel.i386.rpm
$ rpm -ivh NVIDIA_GLX.i386.rpm
Commands Explained1 Before installing from RPM, be sure you have downloaded the
NVIDIA_kernel RPM that is appropriate for your kernel.
2 Once you have verified that you have the correct RPM, install NVIDIA_kernel with this command:$ rpm -ivh NVIDIA_kernel.i386.rpm
3 Next, install the NVIDIA_GLX RPM with this command:$ rpm -ivh NVIDIA_GLX.i386.rpm
Upgrading by RPM
Commands$ rpm -Uvh NVIDIA_kernel.i386.rpm
$ rpm -e NVIDIA_GLX
$ rpm -ivh NVIDIA_GLX.i386.rpm
Commands ExplainedBefore upgrading from RPM, be sure that you have downloaded the NVIDIA_kernel RPM that is appropriate for your kernel. Once you have verified
23 N V I D I A C o r p o r a t i o n
N V I D I A A c c e l e r a t e d L i n u x D r i v e r S e t R e l e a s e 2 5 N o t e s
that you have the correct RPM, upgrade the NVIDIA_kernel package using this command:
$ rpm -Uvh NVIDIA_kernel.i386.rpm
Note: You should not use the �-U� option to upgrade the NVIDIA_GLX RPM because a problem in the uninstall section of older NVIDIA RPMs will cause some files to be incorrectly removed. Instead, use �-e� to remove the old NVIDIA_GLX RPM and then install the new one using these commands:
$ rpm -e NVIDIA_GLX
$ rpm -ivh NVIDIA_GLX.i386.rpm
Installing & Upgrading by SRPM
Commands$ rpm --rebuild NVIDIA_kernel.src.rpm
$ rpm -ivh /path/to/rpms/RPMS/i386/NVIDIA_kernel.i386.rpm
$ rpm -ivh NVIDIA_GLX.i386.rpm
Commands ExplainedTo build a custom NVIDIA_kernel rpm for your system, first ensure that the headers for your kernel are installed (RedHat, for example includes the kernel headers in an rpm called �kernel-source�). Then, pass rpm the �--rebuild� flag, as in the following example:
$ rpm --rebuild NVIDIA_kernel.src.rpm
Watch for the line that looks something like (the path may be different):Wrote: /usr/src/redhat/RPMS/i386/NVIDIA_kernel.i386.rpm
and use that as input for RPM to install:$ rpm -ivh /usr/src/redhat/RPMS/i386/NVIDIA_kernel.i386.rpm
or upgrade:$ rpm -Uvh /usr/src/redhat/RPMS/i386/NVIDIA_kernel.i386.rpm
To install the NVIDIA_GLX package, follow the instructions above for either installing or upgrading NVIDIA_GLX from RPM.
N V I D I A C o r p o r a t i o n 24
C H A P T E R 3 I n s t a l l i n g t h e N V I D I A L i n u x D r i v e r s
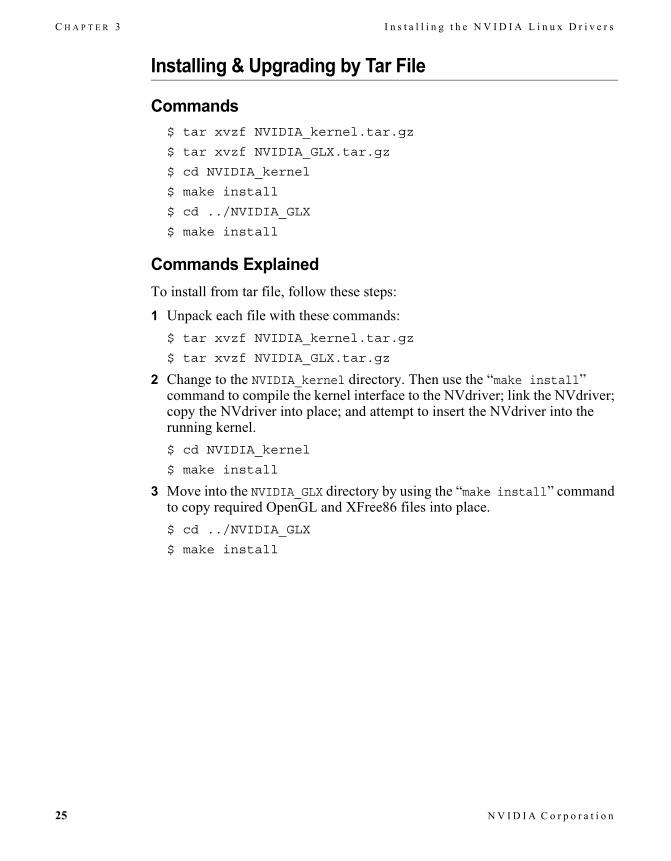
Installing & Upgrading by Tar File
Commands$ tar xvzf NVIDIA_kernel.tar.gz
$ tar xvzf NVIDIA_GLX.tar.gz
$ cd NVIDIA_kernel
$ make install
$ cd ../NVIDIA_GLX
$ make install
Commands ExplainedTo install from tar file, follow these steps:
1 Unpack each file with these commands:$ tar xvzf NVIDIA_kernel.tar.gz
$ tar xvzf NVIDIA_GLX.tar.gz
2 Change to the NVIDIA_kernel directory. Then use the �make install� command to compile the kernel interface to the NVdriver; link the NVdriver; copy the NVdriver into place; and attempt to insert the NVdriver into the running kernel.$ cd NVIDIA_kernel
$ make install
3 Move into the NVIDIA_GLX directory by using the �make install� command to copy required OpenGL and XFree86 files into place.$ cd ../NVIDIA_GLX
$ make install
25 N V I D I A C o r p o r a t i o n
N V I D I A A c c e l e r a t e d L i n u x D r i v e r S e t R e l e a s e 2 5 N o t e s
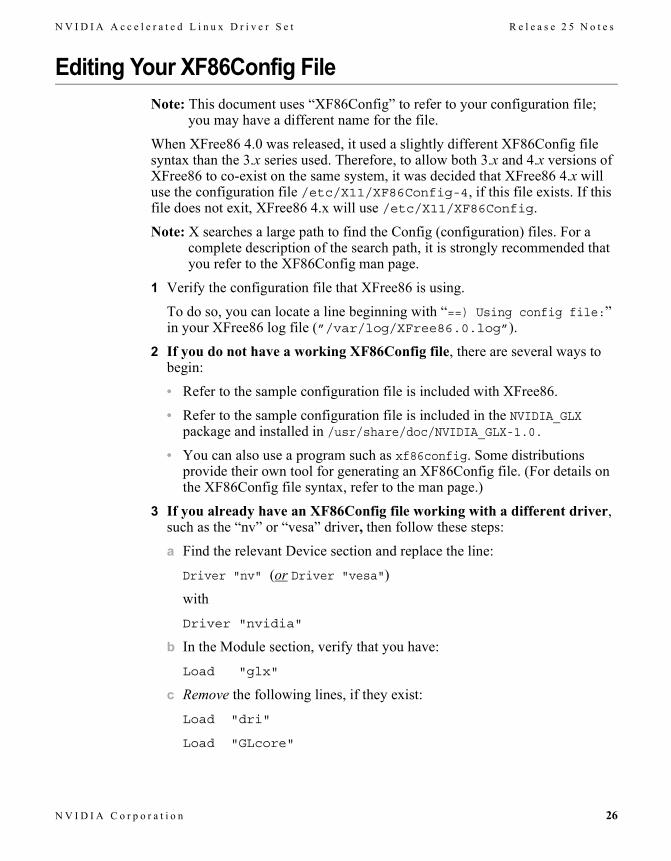
Editing Your XF86Config FileNote: This document uses �XF86Config� to refer to your configuration file;
you may have a different name for the file.
When XFree86 4.0 was released, it used a slightly different XF86Config file syntax than the 3.x series used. Therefore, to allow both 3.x and 4.x versions of XFree86 to co-exist on the same system, it was decided that XFree86 4.x will use the configuration file /etc/X11/XF86Config-4, if this file exists. If this file does not exit, XFree86 4.x will use /etc/X11/XF86Config.
Note: X searches a large path to find the Config (configuration) files. For a complete description of the search path, it is strongly recommended that you refer to the XF86Config man page.
1 Verify the configuration file that XFree86 is using.
To do so, you can locate a line beginning with �==) Using config file:� in your XFree86 log file (”/var/log/XFree86.0.log”).
2 If you do not have a working XF86Config file, there are several ways to begin:
� Refer to the sample configuration file is included with XFree86.
� Refer to the sample configuration file is included in the NVIDIA_GLX package and installed in /usr/share/doc/NVIDIA_GLX-1.0.
� You can also use a program such as xf86config. Some distributions provide their own tool for generating an XF86Config file. (For details on the XF86Config file syntax, refer to the man page.)
3 If you already have an XF86Config file working with a different driver, such as the �nv� or �vesa� driver, then follow these steps:
a Find the relevant Device section and replace the line:
Driver "nv" (or Driver "vesa")
with
Driver "nvidia"
b In the Module section, verify that you have:
Load "glx"
c Remove the following lines, if they exist:
Load "dri"
Load "GLcore"
N V I D I A C o r p o r a t i o n 26
C H A P T E R 3 I n s t a l l i n g t h e N V I D I A L i n u x D r i v e r s
Note: There are many options that you can add to the XF86Config file to fine tune the NVIDIA XFree86 driver. (See �Configuring NVIDIA Linux Drivers� on page 31 for a complete list of these options.)
4 Once you have configured your XF86Config file, you are ready to restart X and begin using the accelerated OpenGL libraries.
5 After you restart X, you can run any OpenGL application, which will automatically use the new NVIDIA libraries. If you encounter any problems, see �Frequently Asked Questions, Troubleshooting, & Other Resources� on page 58.
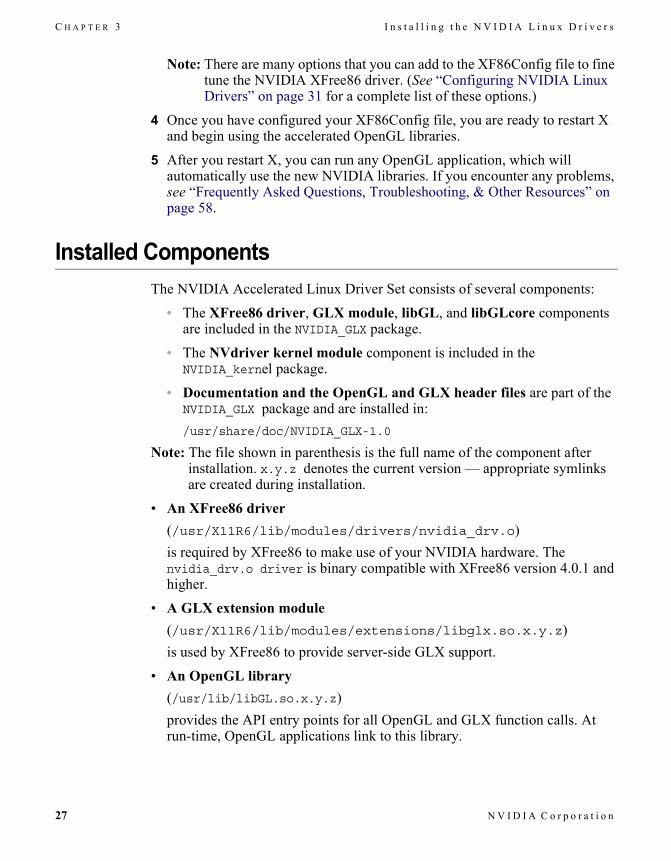
Installed ComponentsThe NVIDIA Accelerated Linux Driver Set consists of several components:
� The XFree86 driver, GLX module, libGL, and libGLcore components are included in the NVIDIA_GLX package.
� The NVdriver kernel module component is included in the NVIDIA_kernel package.
� Documentation and the OpenGL and GLX header files are part of the NVIDIA_GLX package and are installed in: /usr/share/doc/NVIDIA_GLX-1.0
Note: The file shown in parenthesis is the full name of the component after installation. x.y.z denotes the current version � appropriate symlinks are created during installation.
� An XFree86 driver (/usr/X11R6/lib/modules/drivers/nvidia_drv.o)is required by XFree86 to make use of your NVIDIA hardware. The nvidia_drv.o driver is binary compatible with XFree86 version 4.0.1 and higher.
� A GLX extension module (/usr/X11R6/lib/modules/extensions/libglx.so.x.y.z) is used by XFree86 to provide server-side GLX support.
� An OpenGL library (/usr/lib/libGL.so.x.y.z)provides the API entry points for all OpenGL and GLX function calls. At run-time, OpenGL applications link to this library.
27 N V I D I A C o r p o r a t i o n
N V I D I A A c c e l e r a t e d L i n u x D r i v e r S e t R e l e a s e 2 5 N o t e s
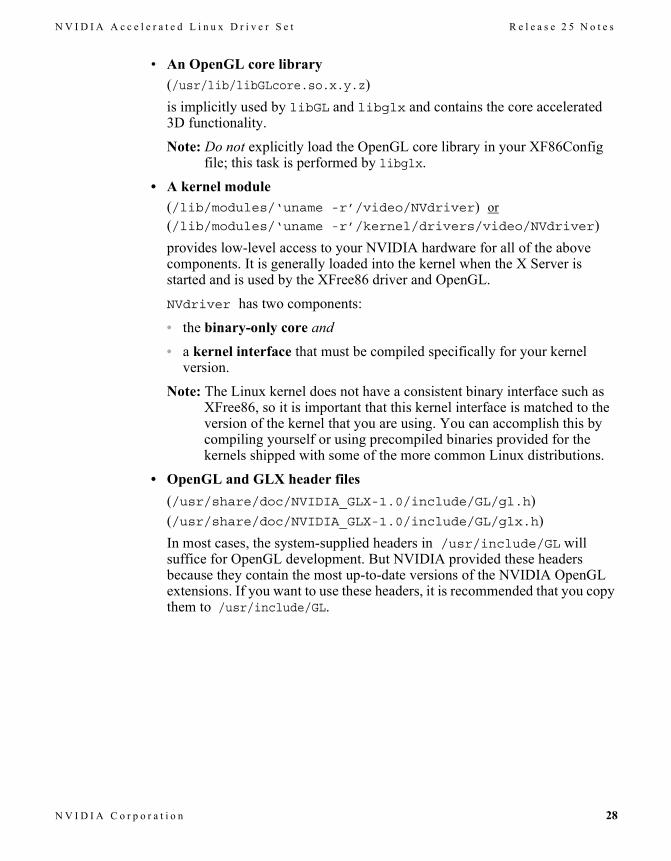
� An OpenGL core library (/usr/lib/libGLcore.so.x.y.z)is implicitly used by libGL and libglx and contains the core accelerated 3D functionality.
Note: Do not explicitly load the OpenGL core library in your XF86Config file; this task is performed by libglx.
� A kernel module (/lib/modules/‘uname -r’/video/NVdriver) or (/lib/modules/‘uname -r’/kernel/drivers/video/NVdriver)provides low-level access to your NVIDIA hardware for all of the above components. It is generally loaded into the kernel when the X Server is started and is used by the XFree86 driver and OpenGL.
NVdriver has two components:
� the binary-only core and� a kernel interface that must be compiled specifically for your kernel
version.
Note: The Linux kernel does not have a consistent binary interface such as XFree86, so it is important that this kernel interface is matched to the version of the kernel that you are using. You can accomplish this by compiling yourself or using precompiled binaries provided for the kernels shipped with some of the more common Linux distributions.
� OpenGL and GLX header files (/usr/share/doc/NVIDIA_GLX-1.0/include/GL/gl.h)(/usr/share/doc/NVIDIA_GLX-1.0/include/GL/glx.h)In most cases, the system-supplied headers in /usr/include/GL will suffice for OpenGL development. But NVIDIA provided these headers because they contain the most up-to-date versions of the NVIDIA OpenGL extensions. If you want to use these headers, it is recommended that you copy them to /usr/include/GL.
N V I D I A C o r p o r a t i o n 28
C H A P T E R 3 I n s t a l l i n g t h e N V I D I A L i n u x D r i v e r s
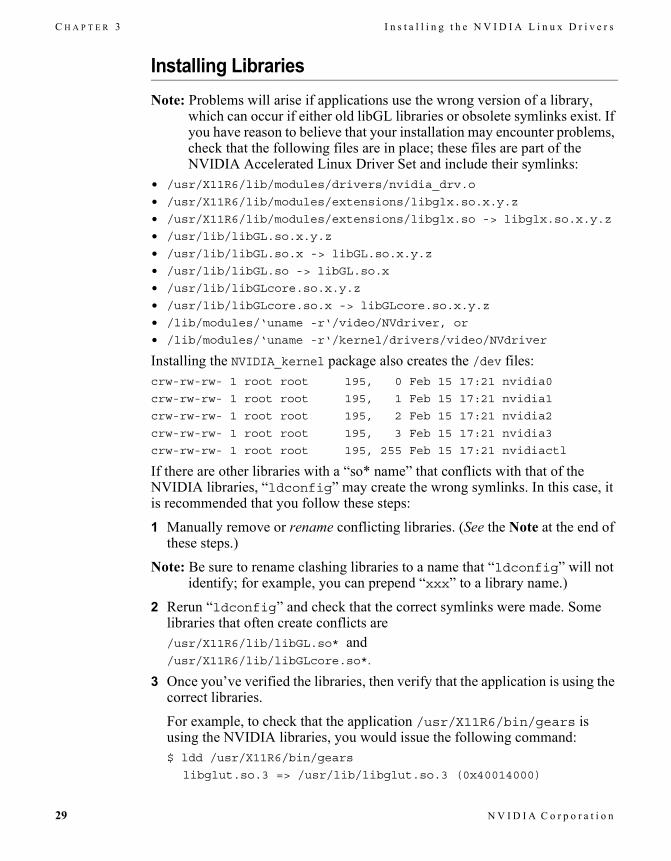
Installing LibrariesNote: Problems will arise if applications use the wrong version of a library,
which can occur if either old libGL libraries or obsolete symlinks exist. If you have reason to believe that your installation may encounter problems, check that the following files are in place; these files are part of the NVIDIA Accelerated Linux Driver Set and include their symlinks:
• /usr/X11R6/lib/modules/drivers/nvidia_drv.o
• /usr/X11R6/lib/modules/extensions/libglx.so.x.y.z
• /usr/X11R6/lib/modules/extensions/libglx.so -> libglx.so.x.y.z
• /usr/lib/libGL.so.x.y.z
• /usr/lib/libGL.so.x -> libGL.so.x.y.z
• /usr/lib/libGL.so -> libGL.so.x
• /usr/lib/libGLcore.so.x.y.z
• /usr/lib/libGLcore.so.x -> libGLcore.so.x.y.z
• /lib/modules/‘uname -r‘/video/NVdriver, or
• /lib/modules/‘uname -r‘/kernel/drivers/video/NVdriver
Installing the NVIDIA_kernel package also creates the /dev files:crw-rw-rw- 1 root root 195, 0 Feb 15 17:21 nvidia0
crw-rw-rw- 1 root root 195, 1 Feb 15 17:21 nvidia1
crw-rw-rw- 1 root root 195, 2 Feb 15 17:21 nvidia2
crw-rw-rw- 1 root root 195, 3 Feb 15 17:21 nvidia3
crw-rw-rw- 1 root root 195, 255 Feb 15 17:21 nvidiactl
If there are other libraries with a �so* name� that conflicts with that of the NVIDIA libraries, �ldconfig� may create the wrong symlinks. In this case, it is recommended that you follow these steps:
1 Manually remove or rename conflicting libraries. (See the Note at the end of these steps.)
Note: Be sure to rename clashing libraries to a name that �ldconfig� will not identify; for example, you can prepend �xxx� to a library name.)
2 Rerun �ldconfig� and check that the correct symlinks were made. Some libraries that often create conflicts are/usr/X11R6/lib/libGL.so* and /usr/X11R6/lib/libGLcore.so*.
3 Once you�ve verified the libraries, then verify that the application is using the correct libraries.
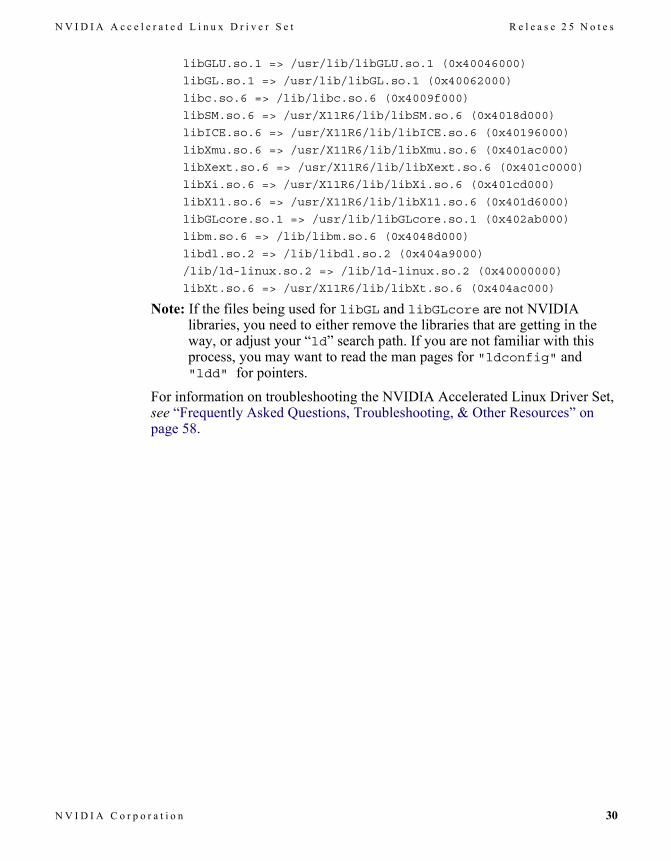
For example, to check that the application /usr/X11R6/bin/gears is using the NVIDIA libraries, you would issue the following command:$ ldd /usr/X11R6/bin/gears
libglut.so.3 => /usr/lib/libglut.so.3 (0x40014000)
29 N V I D I A C o r p o r a t i o n
N V I D I A A c c e l e r a t e d L i n u x D r i v e r S e t R e l e a s e 2 5 N o t e s
libGLU.so.1 => /usr/lib/libGLU.so.1 (0x40046000)
libGL.so.1 => /usr/lib/libGL.so.1 (0x40062000)
libc.so.6 => /lib/libc.so.6 (0x4009f000)
libSM.so.6 => /usr/X11R6/lib/libSM.so.6 (0x4018d000)
libICE.so.6 => /usr/X11R6/lib/libICE.so.6 (0x40196000)
libXmu.so.6 => /usr/X11R6/lib/libXmu.so.6 (0x401ac000)
libXext.so.6 => /usr/X11R6/lib/libXext.so.6 (0x401c0000)
libXi.so.6 => /usr/X11R6/lib/libXi.so.6 (0x401cd000)
libX11.so.6 => /usr/X11R6/lib/libX11.so.6 (0x401d6000)
libGLcore.so.1 => /usr/lib/libGLcore.so.1 (0x402ab000)
libm.so.6 => /lib/libm.so.6 (0x4048d000)
libdl.so.2 => /lib/libdl.so.2 (0x404a9000)
/lib/ld-linux.so.2 => /lib/ld-linux.so.2 (0x40000000)
libXt.so.6 => /usr/X11R6/lib/libXt.so.6 (0x404ac000)
Note: If the files being used for libGL and libGLcore are not NVIDIA libraries, you need to either remove the libraries that are getting in the way, or adjust your �ld� search path. If you are not familiar with this process, you may want to read the man pages for "ldconfig" and "ldd" for pointers.
For information on troubleshooting the NVIDIA Accelerated Linux Driver Set, see �Frequently Asked Questions, Troubleshooting, & Other Resources� on page 58.
N V I D I A C o r p o r a t i o n 30
C H A P T E R 4 C o n f i g u r i n g N V I D I A L i n u x D r i v e r s
C H A P T E R
4CONFIGURING NVIDIA LINUX DRIVERS
This chapter contains the following major topics:
� �XF86Config Options: Configuring AGP� on page 31
� �XF86Config Options: Introduced in Release 25� on page 35
� �XF86Config Options: Introduced in Release 20� on page 38
� �XF86Config Options: Introduced in Release 10� on page 40
� �XF86Config TV Options: Introduced in Release 10� on page 45
� �XF86Config TwinView Options: Introduced in Release 6� on page 47
� �OpenGL Environment Variable Settings� on page 51
� �Configuring a Laptop� on page 53
Note: This documentation uses �XF86Config� to refer to your configuration file; you may be using a different file name.
XF86Config Options: Configuring AGPThe "NvAgp" option in your XF86Config file provides several ways to configure the use of AGP by the NVdriver kernel module.
1 You can use either the NVIDIA AGP module (NVAGP) or the AGP module that comes with the Linux kernel (AGPGART).
Option "NvAgp" "0" ... disables AGP support
Option "NvAgp" "1" ... use NVAGP, if possible
Option "NvAgp" "2" ... use AGPGART, if possible
31 C O N F I D E N T I A L N V I D I A C o r p o r a t i o n
N V I D I A A c c e l e r a t e d L i n u x D r i v e r S e t R e l e a s e 2 5 N o t e s
Option "NvAgp" "3" ... try AGPGART; if that fails, try NVAGP
Default: "3"
(The default was "1" through NVIDIA Linux driver version 1.0-1251.)
2 It is recommended that you use the AGP module that works best with your AGP chipset. If you are experiencing problems with stability, you may want to start by disabling AGP and observing if that solves the problems. You can then experiment with either of the other AGP modules.
3 You can query the current AGP status at any time using the /proc file system interface. For further details, see �Proc Filesystem Interface� on page 82.
4 To use the Linux AGPGART module, you must compile it with your kernel, either statically linked in or built as a module.
Note: NVIDIA AGP support cannot be used if AGPGART is loaded in the kernel. It is recommended that you compile AGPGART as a module and verify that it is not loaded when trying to use NVIDIA AGP. Note that changing AGP drivers generally requires restarting your computer before the changes actually take effect.
5 Rebuild and reinstall the new driver using �make�, which forces the driver to ignore the BIOS of the NVIDIA product and use your values.
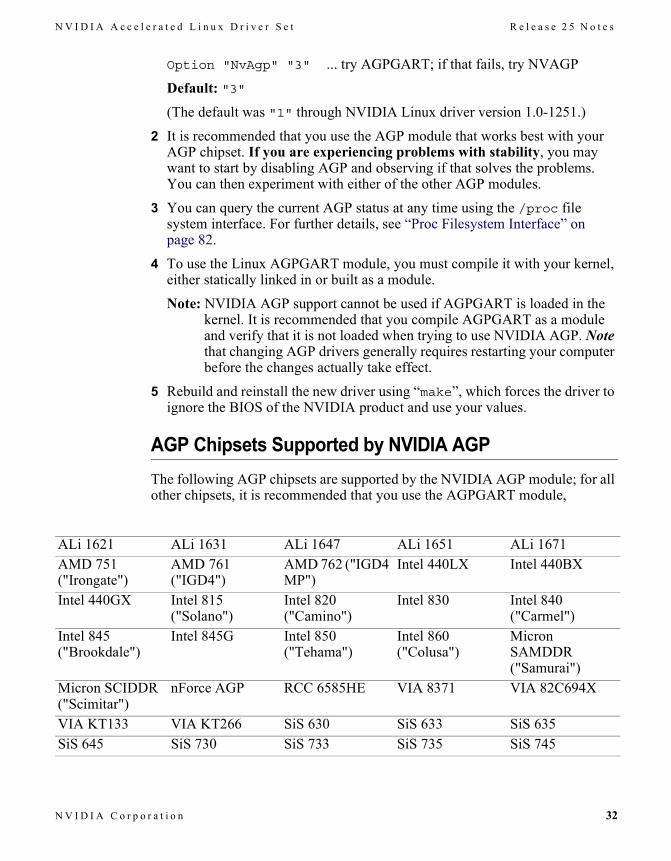
AGP Chipsets Supported by NVIDIA AGPThe following AGP chipsets are supported by the NVIDIA AGP module; for all other chipsets, it is recommended that you use the AGPGART module,
ALi 1621 ALi 1631 ALi 1647 ALi 1651 ALi 1671AMD 751 ("Irongate")
AMD 761 ("IGD4")
AMD 762 ("IGD4 MP")
Intel 440LX Intel 440BX
Intel 440GX Intel 815 ("Solano")
Intel 820 ("Camino")
Intel 830 Intel 840 ("Carmel")
Intel 845 ("Brookdale")
Intel 845G Intel 850 ("Tehama")
Intel 860 ("Colusa")
Micron SAMDDR ("Samurai")
Micron SCIDDR ("Scimitar")
nForce AGP RCC 6585HE VIA 8371 VIA 82C694X
VIA KT133 VIA KT266 SiS 630 SiS 633 SiS 635SiS 645 SiS 730 SiS 733 SiS 735 SiS 745
N V I D I A C o r p o r a t i o n 32
C H A P T E R 4 C o n f i g u r i n g N V I D I A L i n u x D r i v e r s
Troubleshooting AGP Stability ProblemsIf you are experiencing AGP stability problems, note the following issues:
Support for the Processor Page Size Extension on Athlon ProcessorsSome Linux kernels have a conflicting cache attribute bug that is exposed by advanced speculative caching in newer AMD Athlon family processors (AMD Athlon XP, AMD Athlon 4, AMD Athlon MP, and Models 6 and above AMD Duron). This kernel issue is usually encountered under heavy use of accelerated 3D graphics with an AGP graphics card.
Linux distributions based on kernel 2.4.19 and later �should� incorporate the fix for this issue. However, older kernels require help from the user in ensuring that a small portion of advanced speculative caching is disabled (normally done through a kernel patch) and a boot option is specified in order to apply the entire fix.
Note: The NVIDIA driver automatically disables the small portion of advanced speculative caching for the affected AMD processors without the need to patch the kernel; it can be used on kernels that already incorporate the kernel bug fix.
Additionally, for older kernels, the user needs to perform the startup (boot) option portion of the fix by explicitly disabling 4MB pages. This can be done from the startup command line by specifying: mem=nopentium
Or by adding the following line to etc/lilo.conf:append = "mem=nopentium"
AGP Drive Strength BIOS Setting (Via-based Motherboards)Many Via-based motherboards allow adjusting the AGP drive strength in the system BIOS.
Note: The setting of this option largely affects system stability; the range between 0xEA and 0xEE seems to work best for NVIDIA hardware. Setting either nibble to 0xF generally results in severe stability problems.
Caution: If you decide to experiment with this setting and, as a result, use improper settings, be advised that you may cause your system to be unbootable. In that case, you will need to reset to a working value by using either a PCI graphics card or by resetting the BIOS to its default values.
33 C O N F I D E N T I A L N V I D I A C o r p o r a t i o n
N V I D I A A c c e l e r a t e d L i n u x D r i v e r S e t R e l e a s e 2 5 N o t e s
System BIOS VersionMake sure you have the latest system BIOS provided by the graphics card manufacturer.
AGP RateYou may want to decrease the AGP rate setting if you are seeing lockups with the value you are currently using. You can do so with the NVreg_ReqAGPRate NVdriver module parameter.
� If you are inserting the module manually, enter one of the following lines:___________________________________________________________insmod NVdriver NVreg_ReqAGPRate=2 # force AGP Rate to 2x
insmod NVdriver NVreg_ReqAGPRate=1 # force AGP Rate to 1x
___________________________________________________________
� If you are using modprobe (/etc/modules.conf), enter the following lines:
___________________________________________________________alias char-major-195 NVdriver
options NVdriver NVreg_ReqAGPRate=2 # force AGP Rate to 2x
___________________________________________________________or___________________________________________________________alias char-major-195 NVdriver
options NVdriver NVreg_ReqAGPRate=1 # force AGP Rate to 1x
___________________________________________________________
Athlon Motherboards with the VIA KX133 or 694X ChipsetAthlon motherboards with the VIA KX133 or 694X chip set such as the ASUS K7V motherboard, NVIDIA drivers default to AGP 2x mode to work around insufficient drive strength on one of the signals. You can force AGP 4x by setting NVreg_EnableVia4x to 1.
Note: This procedure may cause the driver to become unstable.
ALi1541 and ALi1647 ChipsetsOn ALi1541 and ALi1647 chipsets, NVIDIA drivers disable AGP to work around timing issues and signal integrity issues. You can force AGP to be enabled on these chipsets by setting NVreg_EnableALiAGP to 1.
Note: This procedure may cause the driver to become unstable.
N V I D I A C o r p o r a t i o n 34
C H A P T E R 4 C o n f i g u r i n g N V I D I A L i n u x D r i v e r s
XF86Config Options: Introduced in Release 25The following options are supported by the NVIDIA XFree86 driver for Release 25 and need to be included in your XF86Config configuration file:
Note: These Release 25 features are not supported by Release 20 or older NVIDIA Linux drivers.
� �Option �NoRenderExtension� �boolean�� on page 35
� �Option �NoTwinViewXineramaInfo� �boolean�� on page 35
� �Option �UseClipIDs� �boolean�� on page 36
� �Option �Stereo� �integer�� on page 36
� �Option �DigitalVibrance� �integer"� on page 37
� �Option �Overlay� �boolean�� on page 37
� �Option �FlatPanelProperties� �string�� on page 37
Option �NoRenderExtension� �boolean�Default: Option “NoRenderExtension” “on” enables rendering, when possible.
Specifying “off” in the above statement disables the Render extension. Other than recompiling the X-server, XFree86 doesn�t seem to have another way of disabling the Render extesion. Because the NVIDIA Linux driver can control this functionality, this option is exported, which is useful in depth 8 where Render would normally utilize most of the default color map.
Option �NoTwinViewXineramaInfo� �boolean�Default: TwinView Xinerama information is provided.
When in TwinView, the NVIDIA X driver normally provides a Xinerama extension that allows X clients (such as window managers) to call XineramaQueryScreens() to discover the current TwinView configuration. This confuses some window mangers, so this option is provided to disable this behavior.
35 C O N F I D E N T I A L N V I D I A C o r p o r a t i o n
N V I D I A A c c e l e r a t e d L i n u x D r i v e r S e t R e l e a s e 2 5 N o t e s
Option �UseClipIDs� �boolean�Default: Option “UseClipIDs” “off” means that clip ID surfaces are not used.
Example: Option “UseClipIDs” “on” enables usage of hardware clip ID buffers to improve rendering performance to drawables that are clipped in a complex way.
This feature is only supported on Quadro4 chips when UBB is enabled. Enabling this feature sets aside a small amount of video RAM for the clip ID surfaces, which is typically less than two megabytes.
Option �Stereo� �integer�Note: Stereo is only available on Quadro cards, and is not supported in
TwinView. Currently, stereo operation may not be completely stable on the original Quadro chip and left-right flipping may be erratic. This issue will be resolved in a future release.
Default: Stereo is not enabled.
Example: Option “Stereo” “1” This option enables support of quadbuffered stereo visuals on Quadro-based graphics cards.
The �integer� indicates the type of stereo glasses being used, as explained below:
1 - DDC glasses: The synchronization signal is sent to the glasses through the DDC (Display Data Channel) signal to the display device (monitor), which usually involve a pass-through cable between the display device and the graphics card.
2 - �Blueline� glasses: These usually involve a pass-through cable between the display device and the graphics card. The glasses can detect the eye to display based on the length of a blue line visible at the bottom of the screen. When in this mode, the root window dimensions are one pixel shorter in the Y dimension than requested. This mode does not work with virtual root window sizes larger than the visible root window size (desktop panning).
3 - Onboard stereo support: This feature is usually only found on professional graphics cards. The glasses connect through a DIN connector on the back of the graphics card.
N V I D I A C o r p o r a t i o n 36

C H A P T E R 4 C o n f i g u r i n g N V I D I A L i n u x D r i v e r s
Option �DigitalVibrance� �integer"Note: This feature is only supported on GeForce2 MX (and 200/400), GeForce2
Go, Quadro2 MXR/EX, Quadro2 Go, nForce, GeForce3 and Ti variants, Quadro DCC, and all GeForce4 and Quadro4 family GPUs.
Digital Vibrance, a mechanism for controlling color separation and intensity, boosts the color saturation of an image.
Default: Option “DigitalVibrance” “0” disables Digital Vibrance.
The integer value can be must be in the range from 0 to 3, where 3 is the highest level of digital vibrance.
Option �Overlay� �boolean�Note: This feature is supported on Quadro4 (Quadro4 200/400 NVS excluded)
family GPUs in depth 24.
This option does the following:
� Enables RGB workstation overlay visuals.
� Causes the server to advertise the SERVER_OVERLAY_VISUALS root window property and GLX to report single and double-buffered Z-buffered 16-bit overlay visuals.
Also note the following:
� The transparency key is pixel 0x0000 (hex).
� There is no gamma correction support in the overlay plane.
� This feature requires XFree86 version 4.1.0 or newer and is not supported in TwinView mode.
� The overlay can only be used with virtual desktops smaller or equal to 2046x2047. For example, it will not work in 2048x1536 modes.
Default: Option “Overlay” “off” disables overlay.
To enable the option, specify “on” in the above statement.
Option �FlatPanelProperties� �string�This feature requests particular properties of any connected flat panels as a comma-separated list of �property = value� pairs.
Currently, the only two available properties are �Scaling� and �Dithering�, which can have any of the following values:
37 C O N F I D E N T I A L N V I D I A C o r p o r a t i o n
N V I D I A A c c e l e r a t e d L i n u x D r i v e r S e t R e l e a s e 2 5 N o t e s
� Scaling� default: The driver will use that scaling state that is current.
� native: The driver will use the flat panel's scaler, if there is one.
� scaled: The driver will use the NVIDIA scaler, if possible.
� centered: The driver will center the image, if possible.
� aspect-scaled: The driver will scale with the NVIDIA scaler, but keep the aspect ratio correct.
� Dithering� default: The driver determines when to dither.
� native: The driver will always dither, when possible.
� disabled: The driver will never dither.
� Example: An example properties string is:
Option “FlatPanelProperties” “Scaling = centered, Dithering = enabled”
XF86Config Options: Introduced in Release 20Note: These Release 20 features are also supported by Release 25 and newer
releases; they are not supported by Release 10 or older NVIDIA Linux drivers.
The following options are supported by the NVIDIA XFree86 driver for Release 20 and need to be included in your XF86Config configuration file:
� �Option �PageFlip� �boolean�� on page 39
� �Option �UBB� �boolean�� on page 39
� �Option �UseInt10Module� �boolean�� on page 39
� �Option �WindowFlip� �boolean�� on page 40
Unified Back Buffer (UBB), Page Flipping, and Window Flipping features provide performance gains under certain conditions.
N V I D I A C o r p o r a t i o n 38
C H A P T E R 4 C o n f i g u r i n g N V I D I A L i n u x D r i v e r s
Option �PageFlip� �boolean�Note: The Page Flipping feature is available on all NVIDIA GeForce or newer
hardware, which excludes TNT/TNT2 products.
Default: Option “PageFlip” “on” enables Page Flipping.
To disable the option, specify “off” in the above statement.
Page Flipping is enabled (by default) in the case of a single full-screen unobscured OpenGL application when synchronizing to VBLANK. Buffer swapping is done by changing the buffer rather than copying the back buffer contents to the front buffer.
This mechanism allows for a much higher performance and non-tearing swapping during the retrace (when __GL_SYNC_TO_VBLANK is set).
Option �UBB� �boolean�Note: The Unified Back Buffer (UBB) feature is only available under the
Quadro family of NVIDIA GPUs, with the exception of Quadro4 200/400NVS products.
Default: Option “UBB” “on” enables UBB.
To disable UBB, specify “off” in the above statement.
UBB is enabled by default when there is sufficient video memory available so that all windows share the same back, stencil, and depth buffer. When there are many windows, the back, stencil, and depth buffer usage will never exceed the size of that used by a full-screen window.
Note: For a single small window, the back, stencil, and depth buffer usage equals that of a full-screen window. In this case, the video RAM may be used more efficiently when UBB is disabled.
Option �UseInt10Module� �boolean�Default: Option “UseInt10Module” “off”In this �default� condition, POSTing the cards is done through the NVdriver kernel module.
To enable use of the XFree86 Int10 module to soft-boot all secondary cards rather than POSTing the cards through the NVdriver kernel module, specify “on” in the above statement.
39 C O N F I D E N T I A L N V I D I A C o r p o r a t i o n
N V I D I A A c c e l e r a t e d L i n u x D r i v e r S e t R e l e a s e 2 5 N o t e s
Option �WindowFlip� �boolean�Note: Window Flipping is a feature that requires UBB and therefore only
available on Quadro and Quadro2 family products.
Default: Option “WindowFlip” “off” disables Window Flipping.
To enable Window Flipping:
1 Confirm that UBB is enabled. (See �Option �UBB� �boolean�� on page 39 in the previous section.)
2 Include this line in your configuration file:
Option “WindowFlip” “on”.
Window Flipping only works when there is a single OpenGL window. This OpenGL windows�s buffers can be swapped by changing the buffer rather than copying the contents of the back buffer to the front buffer. This is similar to the Page Flipping functionality but removes the restriction that the window must be unobscured and full-screen in order for the feature to work.
XF86Config Options: Introduced in Release 10The following options are supported by the NVIDIA XFree86 driver and should be specified in your XF86Config file.
Note: These Release 10 options are supported by Release 20 or newer NVIDIA Linux drivers; they are not supported by older NVIDIA Linux drivers.
� �Option �ConnectedMonitor� �string�� on page 41
� �Option �CursorShadow� �boolean�� on page 42
� �Option �CursorShadowAlpha� �integer�� on page 42
� �Option �CursorShadowXOffset� �integer�� on page 42
� �Option �CursorShadowYOffset� �integer�� on page 42
� �Option �HWCursor� �boolean�� on page 43
� �Option �IgnoreEDID� �boolean�� on page 43
� �Option �NoDDC� �boolean�� on page 43
� �Option �NoLogo� �boolean�� on page 43
� �Option �NoRenderAccel� �boolean�� on page 43
� �Option �NvAGP� �integer�� on page 44
� �Option �SWCursor� �boolean�� on page 44
N V I D I A C o r p o r a t i o n 40
C H A P T E R 4 C o n f i g u r i n g N V I D I A L i n u x D r i v e r s
� �Option �UseEdidFreqs� �boolean�� on page 44
Option �ConnectedMonitor� �string�Default: String is NULL.
Examples: Option “ConnectedMonitor” “TV”
Option “ConnectedMonitor” “CRT”
Option “ConnectedMonitor” “CRT,DFP”
Option “ConnectedMonitor” “CRT,TV”
Note: As in all XF86Config entries, spaces are ignored and all entries are case insensitive.
This option allows you to override the device that the NVIDIA kernel module detects as connected to your graphics card.
This feature may be useful under these circumstances:
� If any of your display devices does not support detection using DDC protocols
� If you use a KVM (keyboard/video/mouse) switch and you are switched away when X is started. In such a situation, the NVIDIA kernel module cannot detect the display devices that are connected and the NVIDIA X driver assumes you have a single CRT connected.
� If you use a digital flat panel instead of a CRT, use this option to explicitly communicate to the NVIDIA X driver the device that is connected.
� Valid values for this option are:
� "CRT" (cathode ray tube / analog monitor)
� "DFP" (digital flat panel)
� "TV" (television)
� If using TwinView, this option may be a comma-separated list of display devices; for example:� "CRT,CRT"
� "CRT,DFP"
� "CRT,TV"
For details on configuring TwinView, see �Enabling and Configuring TwinView� on page 47.
41 C O N F I D E N T I A L N V I D I A C o r p o r a t i o n
N V I D I A A c c e l e r a t e d L i n u x D r i v e r S e t R e l e a s e 2 5 N o t e s
Option �CursorShadow� �boolean�This option is only available on GeForce2 or later hardware, which includes everything except TNT/TNT2, GeForce 256, GeForce DDR and Quadro.Default: Option “CursorShadow” “off” This option enables (“on”) or disables (“off”) use of a shadow with the hardware accelerated cursor. The shadow is a black translucent replica of your cursor shape at a given offset from the real cursor.
Option �CursorShadowAlpha� �integer�Default: Option “CursorShadowAlpha” “64”Integer must be in the range [0, 255].
Note: This option defines the alpha value to use for the cursor shadow and is applicable only if CursorShadow is enabled.
Option �CursorShadowXOffset� �integer�Default: Option “CursorShadowXOffset” “4”Integer must be in the range [0, 32].
This option defines the offset, in pixels, that the shadow image will be shifted to the right from the real cursor image. This option is only applicable if CursorShadow is enabled.
Option �CursorShadowYOffset� �integer�Default: Option “CursorShadowYOffset” “2”Integer must be in the range [0, 32].
This option defines the offset, in pixels, that the shadow image will be shifted down from the real cursor image. This option is only applicable if CursorShadow is enabled.
0: Completely transparent255: Completely opaque
N V I D I A C o r p o r a t i o n 42
C H A P T E R 4 C o n f i g u r i n g N V I D I A L i n u x D r i v e r s
Option �HWCursor� �boolean�Default: Option "HWCursor" "on"This option enables or disables (with the "off" setting) hardware rendering of the X cursor.
Option �IgnoreEDID� �boolean�Default: Option "IgnoreEDID" "off" means EDIDs are used to validate modes.
This option disables (“on”) or enables ("off") probing of EDIDs from your monitor. Requested modes are compared against values obtained from your monitor EDIDs (if any) during mode validation.
Option �NoDDC� �boolean�Synonym for Option �IgnoreEDID� �boolean�.
Option �NoLogo� �boolean�Default: Option “NoLogo” “off” enables the NVIDIA logo splash screen when the X server is started.
To disable the splash screen during X start-up, specify the “on” setting.
Option �NoRenderAccel� �boolean�Default: Option “NoRenderAccel” “off” enables hardware acceleration of the RENDER extension.
To disable acceleration of the RENDER extension, specify “on” in the above statement.
Caution: Some monitors may not provide accurate information about its physical capabilities. However, ignoring the values that the monitor provides (i.e., setting the option to �on�) may help to validate a certain mode but could result in serious problems and, therefore, should be used with extreme care.
43 C O N F I D E N T I A L N V I D I A C o r p o r a t i o n
N V I D I A A c c e l e r a t e d L i n u x D r i v e r S e t R e l e a s e 2 5 N o t e s
Option �NvAGP� �integer�Default: Option “NvAGP” “3”Note: The default was 1 through NVIDIA Linux driver version 1.0-1251.
This option configures AGP support; integer value can be one of:
0: Disable AGP.
1: Use the NVIDIA internal AGP support, if possible.
2: Use AGPGART, if possible.
3: Use any AGP support (try AGPGART, then the NVIDIA AGP).
Note: The NVIDIA internal AGP support cannot work if AGPGART is either statically compiled into your kernel or is built as a module and loaded into your kernel. (Some distributions load AGPGART into the kernel during system start-up.)
Option �SWCursor� �boolean� Default: Option “SWCursor” “off” disables software rendering of the X cursor.
To enable software rendering of the X cursor, specify “on” in the above statement.
Option �UseEdidFreqs� �boolean�Default: Option “UseEdidFreqs” “off” means that the frequencies provided by the display device�s EDID will not be used.
When “on” is specified in the above command, the X server uses the HorizSync and VertRefresh ranges given in a display device's EDID, if any. EDID-supplied range information will override the HorizSync and VertRefresh ranges specified in the �Monitor� section of the XFree86 configuration file.
If a display device does not provide an EDID, or the EDID does not specify an HSync or VRefresh range, then the X server will default to the HorizSync and VertRefresh ranges specified in the �Monitor� section of the XFree86 configuration file.
N V I D I A C o r p o r a t i o n 44
C H A P T E R 4 C o n f i g u r i n g N V I D I A L i n u x D r i v e r s
XF86Config TV Options: Introduced in Release 10
Enabling and Configuring TVThis sections contains the following topics:
� �XF86Config File Settings� on page 45
� �Option �TVOutFormat� �string�� on page 46
� �Option �TVOutFormat� �string�� on page 46
A TV monitor can be connected to an NVIDIA product-based graphics card with a TV-Out (S-Video) connector so that the TV functions as any other display device, such as a CRT or digital flat panel (DFP). The TV can be used by itself, or (on appropriate graphics cards) in conjunction with another display device in a TwinView configuration. (For TwinView features, see �XF86Config TwinView Options: Introduced in Release 6� on page 47).
If a TV is the only display device connected to your graphics card, the TV will be used as the primary display when you start-up your system; that is, the console will come up on the TV just as if it were a CRT.
XF86Config File SettingsTo use your TV with X, note the following settings in your XF86Config file:
� VertRefresh and HorizSync values in the �Monitor� section of the XF86Config file; confirm that the values are appropriate for your television. Values are generally:� HorizSync 30-50
� VertRefresh 60
� Valid modes for TV in the �Screen� section of the XF86Config file are:
� 640x480 � 800x600
� 1024x768 (if the TV encoder on your graphics card is a BrookTree 871)
Note: Your XFree86 log file should indicate the encoder that you have; locate the line: (--) NVIDIA(0): TV Encoder detected as
� �TV Standard� is an option that you need to add to the �Screen� section of your XF86Config file. See �Option �TVStandard� �string�� on page 46.
� Use the �ConnectedMonitor� option (�Option �ConnectedMonitor� �string�� on page 41) to tell X to use the TV for display. This option is required only if your TV is not detected by the graphics card, or you normally
45 C O N F I D E N T I A L N V I D I A C o r p o r a t i o n
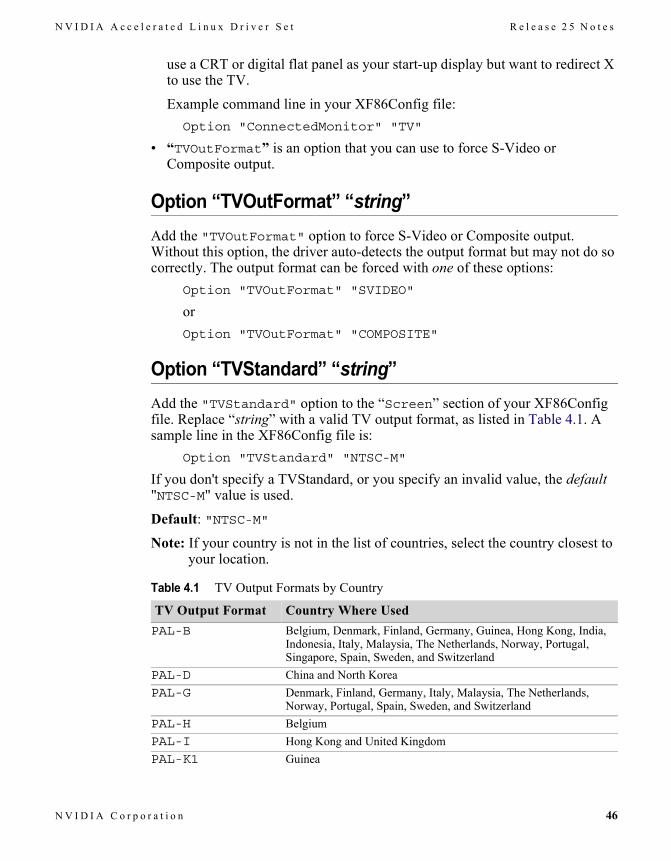
N V I D I A A c c e l e r a t e d L i n u x D r i v e r S e t R e l e a s e 2 5 N o t e s
use a CRT or digital flat panel as your start-up display but want to redirect X to use the TV.
Example command line in your XF86Config file:Option "ConnectedMonitor" "TV"
� �TVOutFormat� is an option that you can use to force S-Video or Composite output.
Option �TVOutFormat� �string�Add the "TVOutFormat" option to force S-Video or Composite output. Without this option, the driver auto-detects the output format but may not do so correctly. The output format can be forced with one of these options:
Option "TVOutFormat" "SVIDEO"
orOption "TVOutFormat" "COMPOSITE"
Option �TVStandard� �string�Add the "TVStandard" option to the �Screen� section of your XF86Config file. Replace �string� with a valid TV output format, as listed in Table 4.1. A sample line in the XF86Config file is:
Option "TVStandard" "NTSC-M"
If you don't specify a TVStandard, or you specify an invalid value, the default "NTSC-M" value is used.
Default: "NTSC-M"Note: If your country is not in the list of countries, select the country closest to
your location.
Table 4.1 TV Output Formats by Country
TV Output Format Country Where UsedPAL-B Belgium, Denmark, Finland, Germany, Guinea, Hong Kong, India,
Indonesia, Italy, Malaysia, The Netherlands, Norway, Portugal, Singapore, Spain, Sweden, and Switzerland
PAL-D China and North KoreaPAL-G Denmark, Finland, Germany, Italy, Malaysia, The Netherlands,
Norway, Portugal, Spain, Sweden, and SwitzerlandPAL-H BelgiumPAL-I Hong Kong and United KingdomPAL-K1 Guinea
N V I D I A C o r p o r a t i o n 46
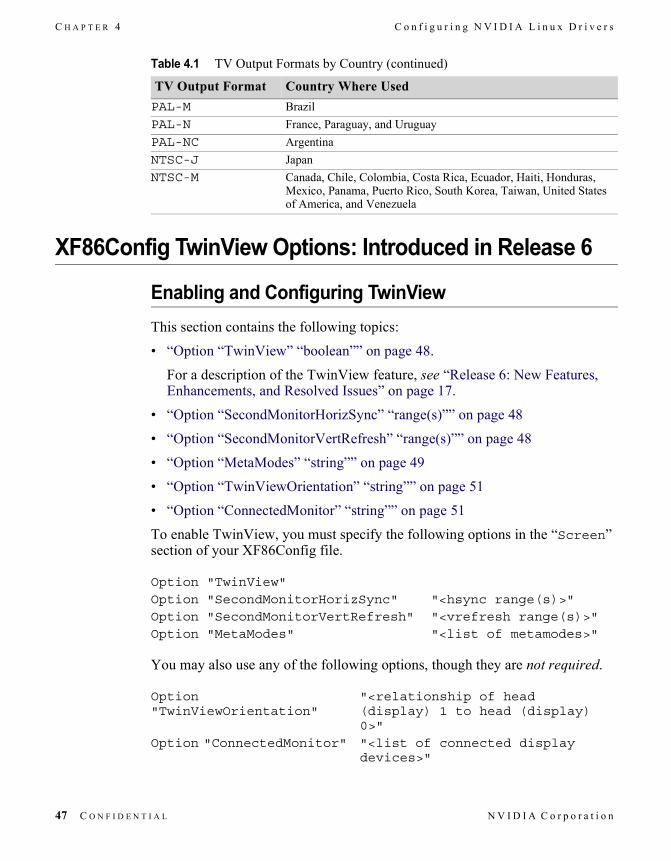
C H A P T E R 4 C o n f i g u r i n g N V I D I A L i n u x D r i v e r s
XF86Config TwinView Options: Introduced in Release 6
Enabling and Configuring TwinView This section contains the following topics:
� �Option �TwinView� �boolean�� on page 48.
For a description of the TwinView feature, see �Release 6: New Features, Enhancements, and Resolved Issues� on page 17.
� �Option �SecondMonitorHorizSync� �range(s)�� on page 48
� �Option �SecondMonitorVertRefresh� �range(s)�� on page 48
� �Option �MetaModes� �string�� on page 49
� �Option �TwinViewOrientation� �string�� on page 51
� �Option �ConnectedMonitor� �string�� on page 51
To enable TwinView, you must specify the following options in the �Screen� section of your XF86Config file.
You may also use any of the following options, though they are not required.
PAL-M BrazilPAL-N France, Paraguay, and UruguayPAL-NC ArgentinaNTSC-J JapanNTSC-M Canada, Chile, Colombia, Costa Rica, Ecuador, Haiti, Honduras,
Mexico, Panama, Puerto Rico, South Korea, Taiwan, United States of America, and Venezuela
Table 4.1 TV Output Formats by Country (continued)
TV Output Format Country Where Used
Option "TwinView"Option "SecondMonitorHorizSync" "<hsync range(s)>"Option "SecondMonitorVertRefresh" "<vrefresh range(s)>"Option "MetaModes" "<list of metamodes>"
Option "TwinViewOrientation"
"<relationship of head (display) 1 to head (display) 0>"
Option "ConnectedMonitor" "<list of connected display devices>"
47 C O N F I D E N T I A L N V I D I A C o r p o r a t i o n
N V I D I A A c c e l e r a t e d L i n u x D r i v e r S e t R e l e a s e 2 5 N o t e s
Descriptions of the options are provided in the sections that follow.
Option �TwinView� �boolean�Default: Option “TwinView” “off” (TwinView is disabled.) To enable TwinView, you must enable this option with the “on” setting as shown below; otherwise all other TwinView related options are ignored.Option “TwinView” “on”
Option �SecondMonitorHorizSync� �range(s)�Default: None
This option is similar to the “HorizSync” entry in the �Monitor� section of your XF86Config file, but applies to the second monitor when using TwinView.
According to the XF86Config man page, the �ranges� may be a comma-separated list of distinct values and/or ranges of values, where a range is given by two distinct values separated by a dash. The HorizSync value is given in KHz.
If you trust the EDID of your display device, you may want to use the "UseEdidFreqs" option instead of this option. (For details, see �Option �UseEdidFreqs� �boolean�� on page 44.)
Option �SecondMonitorVertRefresh� �range(s)� Default: None
This option is similar to the “VertRefresh” entry in the �Monitor� section of your XF86Config file, but applies to the second monitor when using TwinView.
According to the XF86Config man page, the �ranges� may be a comma-separated list of distinct values and/or ranges of values, where a range is given by two distinct values separated by a dash. The VertRefresh value is given in Hz.
If you trust the EDID of your display device, you may want to use the "UseEdidFreqs" option instead of this option. (For details, see �Option �UseEdidFreqs� �boolean�� on page 44.)
N V I D I A C o r p o r a t i o n 48
C H A P T E R 4 C o n f i g u r i n g N V I D I A L i n u x D r i v e r s
Option �MetaModes� �string�Default: None
A single MetaMode describes the mode that should be used on each display device at a given time. Multiple MetaModes list the combinations of modes and the sequence in which they should be used. When the NVIDIA driver communicates the available modes to X, it is really the minimal bounding box of the MetaMode that is communicated, while the �per display device� mode is kept internal to the NVIDIA driver. In MetaMode syntax, modes within a MetaMode are separated by a comma and multiple MetaModes are separated by semicolons. For example:"<mode name 0>, <mode name 1>; <mode name 2>, <mode name 3>; ..."
Where <mode name 0> is the name of the mode to be used on display device 0 concurrently with <mode name 1> used on display device 1. A mode switch will then cause <mode name 2> to be used on display device 0 and <mode name 3> to be used on display device 1.
� An actual MetaMode entry from the XF86Config TwinView sample configuration file is as follows:Option "MetaModes" "1280x1024,1280x1024; 1024x768,1024x768"
� If you do not want a display device to be active for a certain MetaMode, you can use the mode name "NULL", or simply omit the mode name entirely, as follows:
"1600x1200, NULL; NULL, 1024x768"
or"1600x1200; , 1024x768"
� Optionally, mode names can be followed by �offset� information to control the positioning of the display devices within the virtual screen space; for example:"1600x1200 +0+0, 1024x768 +1600+0; ..."
Offset descriptions follow the conventions used in the X "-geometry" command line option; i.e. both positive and negative offsets are valid, though negative offsets are only allowed when a virtual screen size is explicitly given in the XF86Config file.
When no offsets are given for a MetaMode, the offsets are computed following the value of the ”TwinViewOrientation” option. (See �Option �TwinViewOrientation� �string�� on page 51.)
49 C O N F I D E N T I A L N V I D I A C o r p o r a t i o n
N V I D I A A c c e l e r a t e d L i n u x D r i v e r S e t R e l e a s e 2 5 N o t e s
Note: If offsets are given for any one of the modes in a single MetaMode, then offsets are expected for all modes within that single MetaMode; in such a case, offsets are assumed to be +0+0 when not given.
When not explicitly given, the virtual screen size is computed as the bounding box of all MetaMode bounding boxes.
MetaModes with a bounding box larger than an explicitly given virtual screen size are discarded.
� A MetaMode string can be further modified with a �panning domain� specification; for example:"1024x768 @1600x1200, 800x600 @1600x1200"
A panning domain is the area in which a display device�s viewport is panned to follow the mouse.
Panning takes place on two levels under TwinView:
� First, an individual display device's viewport is panned within its panning domain, as long as the viewport is contained by the bounding box of the MetaMode.
� Second, once the mouse leaves the bounding box of the MetaMode, the entire MetaMode (i.e., all display devices) is panned to follow the mouse within the virtual screen.
Note: The panning domains of the display devices default to being clamped to the position of the display devices� viewports. Therefore, the default functionality is that viewports remain �locked� together and only perform the second type of panning.
The most beneficial use of panning domains is to eliminate dead areas, which are regions of the virtual screen that are inaccessible due to display devices with different resolutions. For example:
� Specifying "1600x1200, 1024x768" produces an inaccessible region below the 1024x768 display.
� Specifying "1600x1200, 1024x768 @1024x1200" as a panning domain for the second display device: provides access to that dead area by allowing you to pan the 1024x768 viewport up and down in the 1024x1200 panning domain.
� Offsets can be used in conjunction with panning domains to position the panning domains in the virtual screen space. The offset describes the panning domain and only affects the viewport in that the viewport must be contained within the panning domain. For example, the following line describes two modes, each with a panning domain width of 1900 pixels where the second display is positioned below the first:
"1600x1200 @1900x1200 +0+0, 1024x768 @1900x768 +0+1200"
N V I D I A C o r p o r a t i o n 50
C H A P T E R 4 C o n f i g u r i n g N V I D I A L i n u x D r i v e r s
Note: If a MetaMode string is not specified, then the X driver uses the modes listed in the relevant �Display� subsection of the XF86Config file, attempting to place matching modes on each display device.
Option �TwinViewOrientation� �string�Default: Option “TwinViewOrientation” “RightOf”Valid values are: • "RightOf"
• "LeftOf"
• "Above"
• "Below"
• "Clone"
This option controls the positioning of the second display device relative to the first within the virtual X screen, when offsets are not explicitly given in the MetaModes.
Note: Under the TwinView Clone option, both display devices are assigned offsets of 0,0.
Option �ConnectedMonitor� �string�See �Option �ConnectedMonitor� �string�� on page 41 for application to TwinView.
OpenGL Environment Variable SettingsThe following topics are discussed in this section:
� �Full-Scene Antialiasing (FSAA)� on page 51
� �Anisotropic Texture Filtering� on page 52
� �VBLANK Synchronizing� on page 53
Full-Scene Antialiasing (FSAA)Anti-aliasing is a technique used to smooth the edges of objects in a scene to reduce the jagged �stairstep� effect that sometimes appears in images.
Full-scene antialiasing is supported on GeForce2 (Quadro2) family and newer NVIDIA GPUs.
51 C O N F I D E N T I A L N V I D I A C o r p o r a t i o n

N V I D I A A c c e l e r a t e d L i n u x D r i v e r S e t R e l e a s e 2 5 N o t e s
Several antialiasing methods are available and you can select among them by setting the __GL_FSAA_MODE environment variable. Table 4.2 describes the possible values for __GL_FSAA_MODE and their effect on various NVIDIA GPUs.
Notes� Increasing the number of samples taken during FSAA rendering may
decrease performance.
� When FSAA is enabled (i.e., the __GL_FSAA_MODE environment variable is set to a value that enables FSAA and a multisample visual is chosen), the rendering may be corrupted when resizing the window.
Anisotropic Texture FilteringAutomatic anisotropic texture filtering can be enabled by setting the environment variable __GL_DEFAULT_LOG_ANISO. Table 4.3 describes the possible values for __GL_DEFAULT_LOG_ANISO and their effect on various NVIDIA GPUs.
Table 4.2 Values for the __GL_FSAA_MODE Variable
Value
GeForce, GeForce2, Quadro, and Quadro2 Pro
GeForce4 MX, Quadro4 500/550 XGL, and Quadro4 200/400 NVS
GeForce3, Quadro DCC, GeForce4 Ti, Quadro4 700 XGL, Quadro4 750 XGL, and Quadro4 900 XGL
0 FSAA is disabled. FSAA is disabled. FSAA is disabled.1 FSAA is disabled. 2x Bilinear
Multisampling2x Bilinear Multisampling
2 FSAA is disabled. 2x Quincunx Multisampling
2x Quincunx Mulisampling
3 1.5 x 1.5 Supersampling FSAA disabled FSAA is disabled.
42 x 2 Supersampling 2 x 2 Supersampling
4x Bilinear Multisampling
5FSAA is disabled. FSAA is disabled.
4x Gaussian Mulisampling
N V I D I A C o r p o r a t i o n 52
C H A P T E R 4 C o n f i g u r i n g N V I D I A L i n u x D r i v e r s
VBLANK SynchronizingSetting the environment variable __GL_SYNC_TO_VBLANK to a non-zero value forces glXSwapBuffers to synchronize to your monitor's vertical refresh rate. This implies that the code performs a swap only during the vertical blanking period on GeForce or newer hardware (i.e., any NVIDIA product except any in the TNT and TNT2 families).
Note: This option is available only on NVIDIA �3D� products, such as those in the GeForce/GeForce2/GeForce3 and equivalent workstation family.
Configuring a LaptopThis section contains the following topics:
� �Standard Functionality� on page 53
� �TwinView Functionality� on page 54
� �Using Hot Keys to Switch Display Devices� on page 55
� �Non-Standard Modes on LCD Displays� on page 56
� �Known Laptop Issues� on page 56
Standard FunctionalityInstallation and configuration of the NVIDIA Accelerated Linux Driver Set on a laptop is the same as for any desktop environment, with a few minor exceptions, listed below.
Starting with the NVIDIA Linux driver version 1.0-2802, information about the internal flat panel for use in initializing the display is, by default, generated on the fly from data stored in the Video BIOS.
Table 4.3 Values for the __GL_DEFAULT_LOG_ANISO Variable
ValueGeForce/Geforce2/Geforce4 MX Description
GeForce3/GeForce4 Ti Description
0 No anisotropic filtering. No anisotropic filtering.1 Enable automatic anisotropic filtering. Low anisotropic filtering2 Medium anisotropic filtering3 Maximum anisotropic filtering.
53 C O N F I D E N T I A L N V I D I A C o r p o r a t i o n
N V I D I A A c c e l e r a t e d L i n u x D r i v e r S e t R e l e a s e 2 5 N o t e s
� This information can be disabled by setting the "SoftEDIDs" kernel option to 0.
� If "SoftEDIDs" is turned off, then hardcoded data will be chosen from a table, based on the value of the “Mobile” kernel option.
� The “Mobile” kernel option can be set to any of the following values:
Again, the �Mobile� kernel option is only needed if SoftEDIDs is disabled; when it is used, it is usually safest to let the kernel module auto-detect the correct value, which is the default functionality.
If you need to alter either of these options, you can use any of the following methods:
� Edit os-registry.c in the NVIDIA_kernel package.
� Set the value on the modprobe command line. For example:modprobe NVdriver NVreg_SoftEDIDs=0 NVreg_Mobile=3
� Add an �options� line to your module configuration file, which is usually /etc/modules.conf. For example:options NVdriver NVreg_Mobile=5
TwinView FunctionalityAll mobile NVIDIA GPUs support TwinView.
TwinView on a laptop can be configured in the same way as on a desktop computer. (See �Configuring a Laptop� on page 53.)
In a TwinView configuration, when using the laptop's internal flat panel and an external CRT:
� The CRT is the primary display device. Specify the CRT�s HorizSync and VertRefresh values in the �Monitor� section of your XF86Config file.
� The flat panel is the secondary display device. Specify the flat panel�s HorizSync and VertRefresh values using the “SecondMonitorHorizSync” and “SecondMonitorVertRefresh”
Value Description0xFFFFFFFF Lets the kernel module auto detect the correct value1 Dell laptops2 non-Compal Toshiba laptops3 All other laptops4 Compal Toshiba laptops5 Gateway laptops
N V I D I A C o r p o r a t i o n 54
C H A P T E R 4 C o n f i g u r i n g N V I D I A L i n u x D r i v e r s
options. (See �Option �SecondMonitorHorizSync� �range(s)�� on page 48 and �Option �SecondMonitorVertRefresh� �range(s)�� on page 48.)
You can also use the “UseEdidFreqs” option to obtain the HorizSync and VertRefresh values from the EDID of each display device, in which case, you don�t have to set these values in your XF86Config file.
Note: Use this method of obtaining HorizSync and VertRefresh values only if you if you trust the reported EDIDs of your display device. For details, see �Option �UseEdidFreqs� �boolean�� on page 44.
Using Hot Keys to Switch Display DevicesLaptop computers using GeForce2 Go can react to an LCD/CRT hot key event, toggling between each of the connected display devices and each possible combination of the connected display devices
Note: Only two display devices may be active at a time.
Note: TwinView, as configured in your XF86Config file, and hot key functionality are mutually exclusive; that is, if you enable TwinView in your XF86Config file, then the NVIDIA X driver ignores hot key events.
Besides TwinView, mobile NVIDIA products can also react to an LCD/CRT hot key event, toggling between each of the connected display devices and each possible combination of the connected display devices; note that only two display devices may be active at a time.
TwinView as configured in your XF86Config file and hot key functionality are mutually exclusive; that is, if you enable TwinView in your XF86Config file, then the NVIDIA X driver will ignore LCD/CRT hot key events.
The hot key functionality lets you dynamically connect and remove display devices to/from your laptop and hot key to them without restarting X.
When using this feature, it is a good idea to use the “UseEdidFreqs” option so that the HorizSync and VertRefresh values for each display device can be retrieved from its EDID. Otherwise, the �Monitor� section of the XF86Config file will be interpreted differently with each hot key event.
When X is started, or when a change is detected in the list of connected display devices, a new hot key sequence list is constructed, which shows the display devices to be used with each hot key event.
When a hot key event occurs, then the next hot key state in the sequence is chosen. Each mode requested in the XF86Config file is validated against each display device's constraints, and the resulting modes are made available for that display device.
55 C O N F I D E N T I A L N V I D I A C o r p o r a t i o n
N V I D I A A c c e l e r a t e d L i n u x D r i v e r S e t R e l e a s e 2 5 N o t e s
If multiple display devices are to be active at once, then the modes from each display device are paired together. If an exact match (same resolution) is not found, then the closest fit is used and the display device with the lower resolution is panned within the resolution of the other display device.
When VT-switching away from X, the VGA console will always be restored on the display device on which it was present when X was started. Similarly, when VT-switching back into X, the same display device configuration will be used
Non-Standard Modes on LCD DisplaysSome users have had difficulty programming a 1400x1050 mode (the native resolution of some laptop LCDs). In version 4.0.3, XFree86 added several 1400x1050 modes to its database of default modes, but if you're using an older version of XFree86, here is a modeline that you can use.
Known Laptop IssuesThe following issues currently exist when NVDIA drivers are used with laptop computers:
� Power Management is currently not supported on laptop computers.
� The TwinView feature is currently not supported on Toshiba Satellite 2800 series laptops.
� LCD/CRT hot key switching is not currently functioning on any Toshiba laptops, with the exception of the Toshiba Satellite 3000 series.
� The video overlay only works on the first display device on which you started X.
For example, if you perform these steps, the video will not appear on the second display device:
a Start X on the internal LCD.
b Run a video application that uses the video overlay (i.e., the �Video Overlay� adaptor advertised through the XV extension).
c Hot key switch to add a second display device.
# -- 1400x1050 --
# 1400x1050 @ 60Hz, 65.8 kHz hsync
Modeline "1400x1050" 129 1400 1464 1656 1960
1050 1051 1054 1100 +HSync +VSync
N V I D I A C o r p o r a t i o n 56
C H A P T E R 4 C o n f i g u r i n g N V I D I A L i n u x D r i v e r s
Note: To work around this problem, you can either configure the video application to use the �Video Blitter� adaptor advertised through the XV extension (this is always available) or hot key switch to the display device on which you want to use the video overlay before starting X.
57 C O N F I D E N T I A L N V I D I A C o r p o r a t i o n
N V I D I A A c c e l e r a t e d L i n u x D r i v e r S e t R e l e a s e 2 5 N o t e s
C H A P T E R
5FREQUENTLY ASKED QUESTIONS,
TROUBLESHOOTING, & OTHERRESOURCES
This chapter contains the following major sections:
� �Frequently Asked Questions: General� on page 58
� �Frequently Asked Questions: TwinView� on page 68
� �Troubleshooting: ALi Chipset Users� on page 70
� �Troubleshooting: NVIDIA TNT Users� on page 71
� �Contacting Us� on page 71
� �Additional Resources� on page 72
Frequently Asked Questions: GeneralQuestion: Where should I start when diagnosing display problems?
Answer: One of the most useful tools for diagnosing problems is the XFree86 log file in /var/log; the file is named:
/var/log/XFree86.<#>.log
where <#> is the server number -- usually �0� (zero).
Note the following about this log file:
� Lines that begin with �(II)� are informational.
N V I D I A C o r p o r a t i o n 58
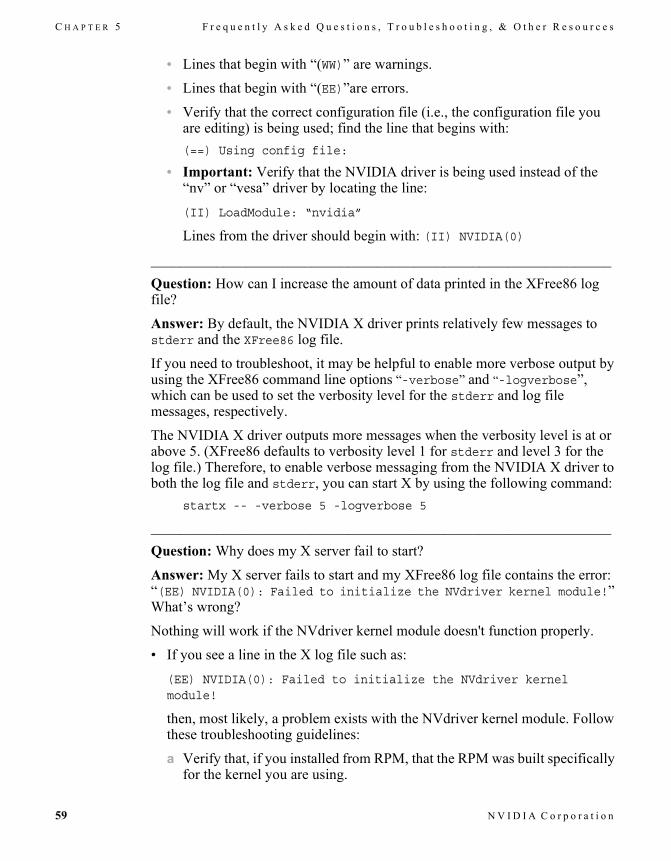
C H A P T E R 5 F r e q u e n t l y A s k e d Q u e s t i o n s , T r o u b l e s h o o t i n g , & O t h e r R e s o u r c e s
� Lines that begin with �(WW)� are warnings.
� Lines that begin with �(EE)�are errors.
� Verify that the correct configuration file (i.e., the configuration file you are editing) is being used; find the line that begins with: (==) Using config file:
� Important: Verify that the NVIDIA driver is being used instead of the �nv� or �vesa� driver by locating the line:
(II) LoadModule: “nvidia”
Lines from the driver should begin with: (II) NVIDIA(0)
_______________________________________________________________
Question: How can I increase the amount of data printed in the XFree86 log file?
Answer: By default, the NVIDIA X driver prints relatively few messages to stderr and the XFree86 log file.
If you need to troubleshoot, it may be helpful to enable more verbose output by using the XFree86 command line options �-verbose� and �-logverbose�, which can be used to set the verbosity level for the stderr and log file messages, respectively.
The NVIDIA X driver outputs more messages when the verbosity level is at or above 5. (XFree86 defaults to verbosity level 1 for stderr and level 3 for the log file.) Therefore, to enable verbose messaging from the NVIDIA X driver to both the log file and stderr, you can start X by using the following command:
startx -- -verbose 5 -logverbose 5
_______________________________________________________________
Question: Why does my X server fail to start?
Answer: My X server fails to start and my XFree86 log file contains the error: �(EE) NVIDIA(0): Failed to initialize the NVdriver kernel module!� What�s wrong?
Nothing will work if the NVdriver kernel module doesn't function properly.
� If you see a line in the X log file such as:
(EE) NVIDIA(0): Failed to initialize the NVdriver kernel module!
then, most likely, a problem exists with the NVdriver kernel module. Follow these troubleshooting guidelines:
a Verify that, if you installed from RPM, that the RPM was built specifically for the kernel you are using.
59 N V I D I A C o r p o r a t i o n

N V I D I A A c c e l e r a t e d L i n u x D r i v e r S e t R e l e a s e 2 5 N o t e s
b Check that the module �/sbin/lsmod� is loaded; if it is not loaded, try loading it explicitly with �insmod� or �modprobe�. (Be sure to exit the X Server before installing a new kernel module.)
� If you receive errors about unresolved symbols, the kernel module has most likely been built using header files for a different kernel revision than what you are running. You can explicitly control the kernel header files that are used by building NVdriver from the NVIDIA_kernel tar file by using the command:
make install SYSINCLUDE=/path/to/kernel/headers
Note: The convention for the location of kernel header files is in a state of transition, as is the location of kernel modules. If the kernel module fails to load properly, modprobe/insmod may be attempting to load an older kernel module, assuming you've upgraded. Changing to the directory with the new kernel module and using the command �insmod ./NVdriver� may help.
� Another cause may be that the /dev/nvidia* device files may be missing.
� Finally, the NVdriver may print error messages indicating a problem. To view these messages, check /var/log/messages, or where syslog has been directed to place kernel messages.
_______________________________________________________________Question: My X Server starts but why do OpenGL applications terminate immediately?
Answer: Most likely a problem exists with other libraries that are in the way or the presence of obsolete symlinks. (See �Installed Components� on page 27.)
Note: You may be able to fix this problem by rerunning �ldconfig�.
1 Use �xdpyinfo� to verify that the following (correct) extensions are present:GLX
NV-GLX
NVIDIA-GLX
If these three extensions are not present, then there is most likely a problem with the loading of the glx module or its inability to implicitly load GLcore.
2 Check your XF86Config file to verify that you are loading glx. (See �Editing Your XF86Config File� on page 26.)
If your XF86Config file is correct, then check the XFree86 log file for warnings and errors pertaining to GLX. Also check that all of the necessary symlinks are in place. (See �Installed Components� on page 27.)
_______________________________________________________________
N V I D I A C o r p o r a t i o n 60
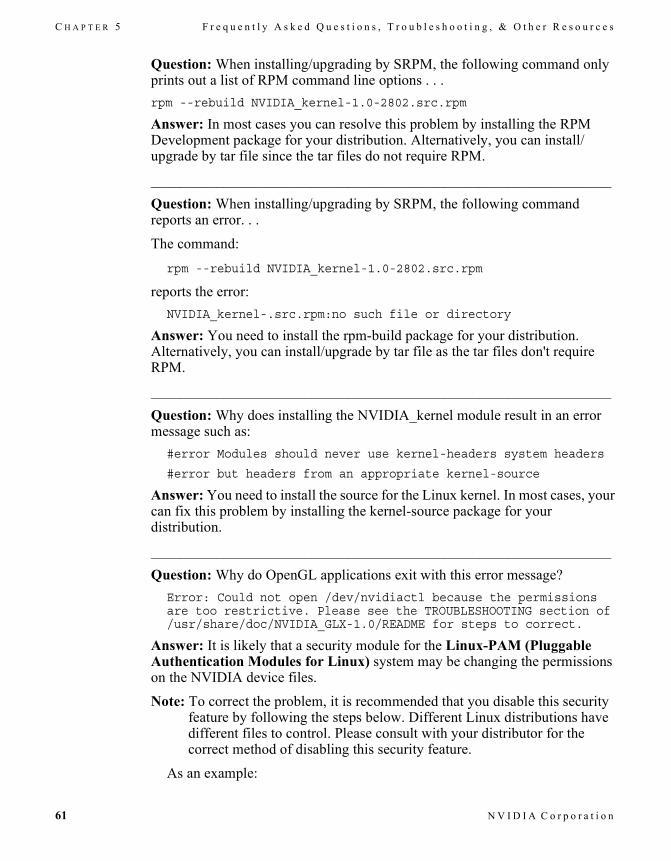
C H A P T E R 5 F r e q u e n t l y A s k e d Q u e s t i o n s , T r o u b l e s h o o t i n g , & O t h e r R e s o u r c e s
Question: When installing/upgrading by SRPM, the following command only prints out a list of RPM command line options . . . rpm --rebuild NVIDIA_kernel-1.0-2802.src.rpm
Answer: In most cases you can resolve this problem by installing the RPM Development package for your distribution. Alternatively, you can install/upgrade by tar file since the tar files do not require RPM.
_______________________________________________________________
Question: When installing/upgrading by SRPM, the following command reports an error. . .
The command:
rpm --rebuild NVIDIA_kernel-1.0-2802.src.rpm
reports the error:NVIDIA_kernel-.src.rpm:no such file or directory
Answer: You need to install the rpm-build package for your distribution. Alternatively, you can install/upgrade by tar file as the tar files don't require RPM.
_______________________________________________________________
Question: Why does installing the NVIDIA_kernel module result in an error message such as:
#error Modules should never use kernel-headers system headers
#error but headers from an appropriate kernel-source
Answer: You need to install the source for the Linux kernel. In most cases, your can fix this problem by installing the kernel-source package for your distribution.
_______________________________________________________________
Question: Why do OpenGL applications exit with this error message?Error: Could not open /dev/nvidiactl because the permissions are too restrictive. Please see the TROUBLESHOOTING section of /usr/share/doc/NVIDIA_GLX-1.0/README for steps to correct.
Answer: It is likely that a security module for the Linux-PAM (Pluggable Authentication Modules for Linux) system may be changing the permissions on the NVIDIA device files.
Note: To correct the problem, it is recommended that you disable this security feature by following the steps below. Different Linux distributions have different files to control. Please consult with your distributor for the correct method of disabling this security feature.
As an example:
61 N V I D I A C o r p o r a t i o n
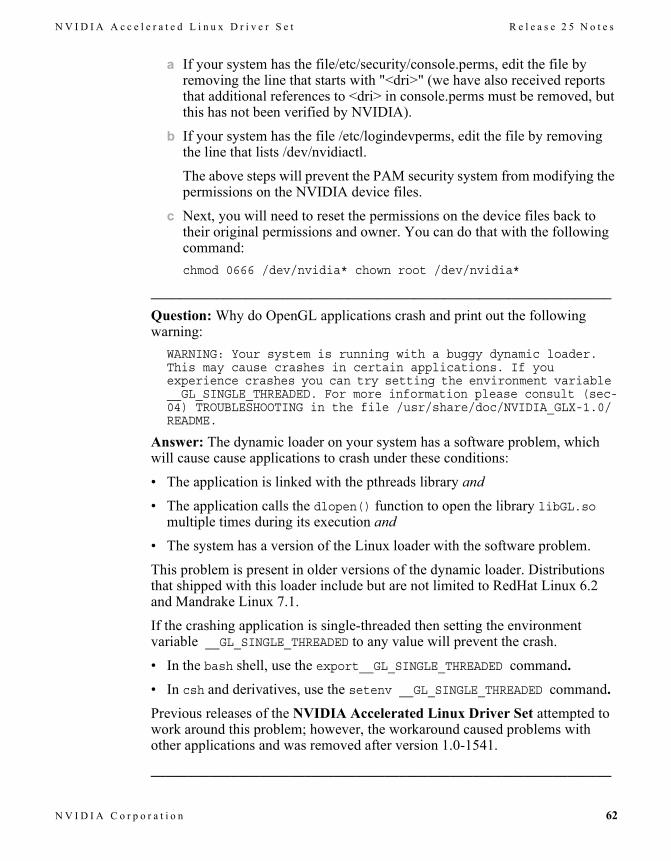
N V I D I A A c c e l e r a t e d L i n u x D r i v e r S e t R e l e a s e 2 5 N o t e s
a If your system has the file/etc/security/console.perms, edit the file by removing the line that starts with "<dri>" (we have also received reports that additional references to <dri> in console.perms must be removed, but this has not been verified by NVIDIA).
b If your system has the file /etc/logindevperms, edit the file by removing the line that lists /dev/nvidiactl.
The above steps will prevent the PAM security system from modifying the permissions on the NVIDIA device files.
c Next, you will need to reset the permissions on the device files back to their original permissions and owner. You can do that with the following command:chmod 0666 /dev/nvidia* chown root /dev/nvidia*
_______________________________________________________________Question: Why do OpenGL applications crash and print out the following warning:
WARNING: Your system is running with a buggy dynamic loader. This may cause crashes in certain applications. If you experience crashes you can try setting the environment variable __GL_SINGLE_THREADED. For more information please consult (sec-04) TROUBLESHOOTING in the file /usr/share/doc/NVIDIA_GLX-1.0/README.
Answer: The dynamic loader on your system has a software problem, which will cause cause applications to crash under these conditions:
� The application is linked with the pthreads library and� The application calls the dlopen() function to open the library libGL.so
multiple times during its execution and� The system has a version of the Linux loader with the software problem.
This problem is present in older versions of the dynamic loader. Distributions that shipped with this loader include but are not limited to RedHat Linux 6.2 and Mandrake Linux 7.1.
If the crashing application is single-threaded then setting the environment variable __GL_SINGLE_THREADED to any value will prevent the crash.
� In the bash shell, use the export__GL_SINGLE_THREADED command.� In csh and derivatives, use the setenv __GL_SINGLE_THREADED command.Previous releases of the NVIDIA Accelerated Linux Driver Set attempted to work around this problem; however, the workaround caused problems with other applications and was removed after version 1.0-1541.
_______________________________________________________________
N V I D I A C o r p o r a t i o n 62
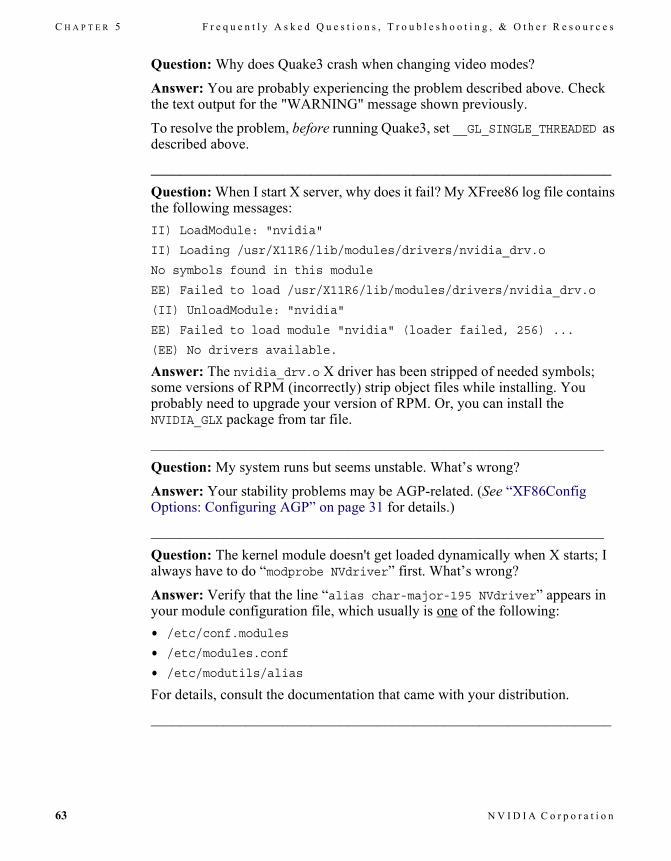
C H A P T E R 5 F r e q u e n t l y A s k e d Q u e s t i o n s , T r o u b l e s h o o t i n g , & O t h e r R e s o u r c e s
Question: Why does Quake3 crash when changing video modes?
Answer: You are probably experiencing the problem described above. Check the text output for the "WARNING" message shown previously.
To resolve the problem, before running Quake3, set __GL_SINGLE_THREADED as described above.
_______________________________________________________________Question: When I start X server, why does it fail? My XFree86 log file contains the following messages:II) LoadModule: "nvidia"
II) Loading /usr/X11R6/lib/modules/drivers/nvidia_drv.o
No symbols found in this module
EE) Failed to load /usr/X11R6/lib/modules/drivers/nvidia_drv.o
(II) UnloadModule: "nvidia"
EE) Failed to load module "nvidia" (loader failed, 256) ...
(EE) No drivers available.
Answer: The nvidia_drv.o X driver has been stripped of needed symbols; some versions of RPM (incorrectly) strip object files while installing. You probably need to upgrade your version of RPM. Or, you can install the NVIDIA_GLX package from tar file.
______________________________________________________________
Question: My system runs but seems unstable. What�s wrong?
Answer: Your stability problems may be AGP-related. (See �XF86Config Options: Configuring AGP� on page 31 for details.)
______________________________________________________________
Question: The kernel module doesn't get loaded dynamically when X starts; I always have to do �modprobe NVdriver� first. What�s wrong?
Answer: Verify that the line �alias char-major-195 NVdriver� appears in your module configuration file, which usually is one of the following:• /etc/conf.modules
• /etc/modules.conf
• /etc/modutils/alias
For details, consult the documentation that came with your distribution.
_______________________________________________________________
63 N V I D I A C o r p o r a t i o n
N V I D I A A c c e l e r a t e d L i n u x D r i v e r S e t R e l e a s e 2 5 N o t e s
Question: I can't build the NVdriver kernel module, or I can build the NVdriver kernel module but modprobe/insmod fails to load the module into my kernel. What's wrong?
Answer: These problems are generally caused by the build using the wrong kernel header files; i.e., header files for a different kernel version than the one you are running.
The previous convention was that kernel header files are stored in:/usr/include/linux/
but that is being deprecated in favor of: /lib/modules/‘uname -r‘/build/include.
The NVIDIA_kernel Makefile can determine the location on your system. However, if you encounter a problem, you can force the build to use certain header files by using this command: make SYSINCLUDE=/path/to/kernel/headers
Of course, for this process to work, you need the appropriate kernel header files installed on your system.
Note: Consult the documentation that came with your distribution; some distributions do not install the kernel header files by default, or they install headers that do not work properly with the kernel you are running.
_______________________________________________________________
Question: Why do OpenGL applications run so slowly?
Answer: The application is probably using a different library (that still remains on your system) instead of the NVIDIA-supplied OpenGL library.
For details, see �Installed Components� on page 27.
_______________________________________________________________
Question: Why are there are problems running Quake2.
Answer: Quake2 requires minor setup to get it started.
d First, in the Quake2 directory, the installation program creates a symlink called �libGL.so� that points to �libMesaGL.so.� Remove or rename this symlink.
e Then, to run Quake2 in OpenGL mode, use this command:
quake2 +set vid_ref glx +set gl_driver libGL.so
Quake2 does not seem to support any kind of full-screen mode but you can run your X Server at the resolution on which Quake2 runs in order to emulate full-screen mode.
N V I D I A C o r p o r a t i o n 64
C H A P T E R 5 F r e q u e n t l y A s k e d Q u e s t i o n s , T r o u b l e s h o o t i n g , & O t h e r R e s o u r c e s
Question: There are problems running Heretic II. What can I do?
Answer: Heretic II also installs, by default, a symlink called libGL.so in the application directory. You can remove or rename this symlink, since the system will then find the default libGL.so, which the NVIDIA drivers install in/usr/lib. From within Heretic II, you can then set your render mode to OpenGL in the video menu.
A patch is also available for Heretic II from lokigames at: http://www.lokigames.com/products/heretic2/updates.php3
_______________________________________________________________
Question: Where can I get gl.h or glx.h so I can compile OpenGL programs?
Answer: Most systems come with these headers installed. However, NVIDIA has provided its own gl.h and glx.h files in case your system does not have them or in case you want to develop OpenGL applications that use the new NVIDIA OpenGL extensions. These files have been installed in:
/usr/share/doc/NVIDIA_GLX-1.0/include/GL
to avoid conflicting with the system-installed versions. To use these headers, copy them to /usr/include/GL.
______________________________________________________________
Question: Can I receive E-mail notification of new NVIDIA Accelerated Linux Driver Set releases?
Answer: Yes. Complete the form at: http://www.nvidia.com/view.asp?FO=driver_update
_______________________________________________________________
Question: Why does my system hang when VT-switching if I have rivafb enabled?
Answer: Currently, you cannot use both rivafb and the NVdriver kernel module simultaneously due to software limitations.
Note: In general, using two independent software drivers to drive the same piece of hardware is not recommended.
_______________________________________________________________
Question: Why do I receive the following error message when compiling the NVdriver kernel module?
You appear to be compiling the NVdriver kernel module with a compiler different from the one that was used to compile the running kernel. This may be perfectly fine, but there are cases where this can lead to unexpected behavior and system crashes.
65 N V I D I A C o r p o r a t i o n
N V I D I A A c c e l e r a t e d L i n u x D r i v e r S e t R e l e a s e 2 5 N o t e s
If you know what you are doing and want to override this check, you can do so by setting IGNORE_CC_MISMATCH.
In any other case, set the CC environment variable to the name of the compiler that was used to compile the kernel.
Answer: You should compile the NVdriver kernel module with the same compiler version that was used to compile your kernel. Some Linux kernel data structures are dependent on the version of gcc used to compile them; for example, in include/linux/spinlock.h:
. . . . .* Most gcc versions have a nasty bug with empty initializers.
*/
#if (__GNUC__ > 2)
typedef struct { } rwlock_t;
#define RW_LOCK_UNLOCKED (rwlock_t) { }
#else
typedef struct { int gcc_is_buggy; } rwlock_t;
#define RW_LOCK_UNLOCKED (rwlock_t) { 0 }
#endif
If the kernel is compiled with gcc 2.x, but gcc 3.x is used when the open files in NVdriver are built (or vice versa), the size of rwlock_t will vary and internal function calls such as ioremap will fail.
To verify the version of gcc that was used to compile your kernel, you can examine the output of:
cat /proc/version
To verify the version of gcc that is currently in your $PATH, you can examine the output of:
gcc -v
_______________________________________________________________Question: Why does X fail with error "Failed to allocate LUT context DMA"?
Answer: This is one of the possible consequences of compiling NVdriver with a different gcc version than used to compile the Linux kernel (see above).
_______________________________________________________________Question: NVIDIA_kernel RPMs are not available for release N from <insert your favorite distro here>. I tried installing the RPM for version N-1, but that didn't work. What should I do?
N V I D I A C o r p o r a t i o n 66
C H A P T E R 5 F r e q u e n t l y A s k e d Q u e s t i o n s , T r o u b l e s h o o t i n g , & O t h e r R e s o u r c e s
Answer: As explained in �Choosing the NVIDIA Packages for Your System� on page 21, if a specific NVIDIA_kernel RPM is not available for your distribution, then use either the NVIDIA_kernel SRPM or tar file.
_______________________________________________________________
Question: The following messages appear when I install the NVIDIA_GLX package.
The above file(s) possibly belong to a conflicting MESA rpm.
--- They have been renamed to xxx.<originalFile>.RPMSAVE to
--- avoid conflicting with the files contained within this
--- package.
--- Please see FREQUENTLY ASKED QUESTIONS section of
--- /usr/share/doc/NVIDIA_GLX-1.0/README for more details
What's wrong?
Answer: This is an informational message stating that conflicting files have been moved aside to ensure that your applications find the newly installed OpenGL libraries. If you uninstall the NVIDIA_GLX package, the original files will be automatically restored.
_______________________________________________________________
Question: What is NVIDIA's policy towards development series Linux kernels?
Answer: NVIDIA does not officially support development series kernels. However, all the kernel module source code that interfaces with the Linux kernel is available in the NVIDIA_kernel package and NVIDIA encourages members of the Linux community to develop patches to these source files to support development series kernels. A �Google.com� search will most likely yield several community supported patches.
_______________________________________________________________
Question: I recently updated various libraries on my system using my Linux distributor's update utility, and the NVIDIA graphics driver no longer works. What's wrong?
Answer: Conflicting libraries may have been installed by your distribution's update utility.
For futher details on how to diagnose this problem, see �Installed Components� on page 27.
67 N V I D I A C o r p o r a t i o n
N V I D I A A c c e l e r a t e d L i n u x D r i v e r S e t R e l e a s e 2 5 N o t e s
Frequently Asked Questions: TwinViewQuestion: Nothing gets displayed on my second monitor; what's wrong?
Answer: Monitors (including most older monitors) that do not support monitor detection using DDC protocols cannot be detected by your NVIDIA product. You need to explicitly tell the NVIDIA XFree86 driver the type of device that is connected by using the "ConnectedMonitor" option; for example:
Option "ConnectedMonitor" "CRT, CRT"
For additional details on using this option, see �Option �ConnectedMonitor� �string�� on page 41.
______________________________________________________________
Question: Will window managers be able to appropriately place windows (i.e., avoid placing windows across both display devices or in inaccessible regions of the virtual desktop)?
Answer: Yes. The NVIDIA X driver provides a Xinerama extension that allows X clients (such as window managers) to call XineramaQueryScreens() to detect the current TwinView configuration. Note that the Xinerama protocol doesn�t provide a way to inform clients when a configuration change occurs. So, if you modeswitch to a different MetaMode, your window manager will continue to detect the previous configuration. By using the Xinerama extension in conjunction with the XF86VidMode extension to get modeswitch events, window managers should be able to determine the TwinView configuration at any given time.
Note: The data provided by XineramaQueryScreens() appears to confuse some window managers. To workaround such an issue, you can disable communication of the TwinView screen layout with the "NoTwinViewXineramaInfo" XF86Config Option. See �Option �NoTwinViewXineramaInfo� �boolean�� on page 35.
Another solution is to use panning domains to eliminate inaccessible regions of the virtual screen. See �Option �MetaModes� �string�� on page 49.
Note: Be aware that the NVIDIA driver cannot provide the Xinerama extension if XFree86�s Xinerama extension is being used. Explicitly specifying Xinerama in the XF86Config file or on the XFree86 command line will prevent the NVIDIA Xinerama extension from installing. Therefore, make sure that XFree86's /var/log/XFree86.0.log is not reporting: (++) Xinerama: enabled if you want the NVIDIA driver to provide the Xinerama extension while in TwinView
_____________________________________________________________
N V I D I A C o r p o r a t i o n 68
C H A P T E R 5 F r e q u e n t l y A s k e d Q u e s t i o n s , T r o u b l e s h o o t i n g , & O t h e r R e s o u r c e s
Question: Why can�t I get a resolution of 1600x1200 on the second display device when using a GeForce2 MX GPU?
Answer: Since the second display device was designed to be a digital flat panel, the Pixel Clock for the second display device is only 150 MHz. This effectively limits the resolution on the second display device to somewhere around 1280x1024. This constraint is not present on GeForce4 GPUs since the maximum pixel clock is the same on both heads.
Note: For a description of how Pixel Clock frequencies limit the programmable modes, see the XFree86 Video Timings How To documentation.
_______________________________________________________________
Question: Do video overlays work across both display devices?
Answer: Hardware video overlays only work on the first display device. The current solution is that blitted video is used on TwinView configuration.
_____________________________________________________________
Question: How are virtual screen dimensions determined in TwinView?
Answer: After all requested modes have been validated, and the offsets for the viewport for each MetaMode have been computed, the NVIDIA driver computes the bounding box of the viewports for each MetaMode. The maximum bounding box width and height is then figured.
Note: A side effect of this process is that the virtual width and virtual height may come from different MetaModes. Given the following MetaMode string:
�1600x1200,NULL; 1024x768+0+0, 1024x768+0+768�,
the resulting virtual screen size will be 1600 x 1536.
_____________________________________________________________
Question: Can I play full-screen games across both display devices?
Answer: Yes. While the details of configuration will vary among games, the basic idea is that a MetaMode presents X with a mode whose resolution is the bounding box of the viewports for that MetaMode. For example, the following lines:
Option "MetaModes" "1024x768,1024x768; 800x600,800x600"
Option "TwinViewOrientation" "RightOf"
produce two modes: one with a resolution of 2048x768 and another with a resolution of 1600x600. Games such as Quake 3 Arena use the VidMode extension to discover the resolutions of the modes currently available.
To configure Quake 3 Arena to use the above MetaMode string, add the following lines to your q3config.cfg file:
69 N V I D I A C o r p o r a t i o n
N V I D I A A c c e l e r a t e d L i n u x D r i v e r S e t R e l e a s e 2 5 N o t e s
seta r_customaspect "1"
seta r_customheight "600"
seta r_customwidth "1600"
seta r_fullscreen "1"
seta r_mode "-1"
Note: Given the above configuration, there is no mode with a resolution of 800x600 (remember that the MetaMode 800x600, 800x600 has a resolution of 1600x600), so if you change Quake 3 Arena to use a resolution of 800x600, it will display in the lower left corner of your screen with the rest of the screen grayed out.
To have single-display modes also available, an appropriate MetaMode string could be:"800x600,800x600; 1024x768,NULL; 800x600,NULL; 640x480,NULL"
More precise configuration information for specific games is beyond the scope of this document. However, the above examples coupled with numerous online sources can point you in the right direction.
Troubleshooting: ALi Chipset UsersThe NVIDIA Driver for Linux, Version 0.9-3, fixed the majority of problems with ALi chipsets, though some problems still exist. The following tips help stabilize problematic systems.
Tips: � Disable TURBO AGP MODE in the BIOS.
� When using a P5A, upgrade to BIOS Revision 1002 BETA 2.
� When using 1007, 1007A, or 1009, adjust the IO Recovery Time to 4 cycles.
� AGP is disabled by default on some ALi chipsets (e.g, ALi1541 and ALi1647) to work around severe system stability problems (e.g., timing and signal integrity issues) that occur when using these chipsets. You can force AGP on for these chipsets by enabling NVreg_EnableALiAGP in os-registry.c and rebuilding the NVIDIA kernel module. (See the comments for NVreg_EnableALiAGP in os-registry.c to force AGP on.).
Note: Forcing AGP on may cause the driver to become unstable on these chipsets.
N V I D I A C o r p o r a t i o n 70
C H A P T E R 5 F r e q u e n t l y A s k e d Q u e s t i o n s , T r o u b l e s h o o t i n g , & O t h e r R e s o u r c e s
Troubleshooting: NVIDIA TNT UsersThe NVIDIA Linux Driver (Version 0.9-3) corrected the problem with SGRAM/SDRAM TNT products.
Note: In the rare case that your NVIDIA TNT-based card has the wrong BIOS installed, the driver will fail.
If the driver fails, follow these steps:
1 Watch your monitor as the system starts up. The very first, brief screen will identify the type of video memory for your card, which will be either SGRAM or SDRAM.
2 Obtain the most recent NVIDIA_kernel tar file.
3 Edit the file os-registry.c from the kernel module sources.
4 Locate the variable NVreg_VideoMemoryTypeOverride and set the value of this variable to the type of memory you have. (Numerically, see the line just above it).
5 Since this variable is not normally used, change the �#if 0� (about 10 lines above the variable) to �#if 1�.
6 Rebuild and reinstall the new driver using the �make� command.
Contacting UsYou can access the NVIDIA Linux Driver web forum by going to:
www.nvnews.net
and following the �Forum� and �Linux Discussion Area� links. This is the preferable tool for seeking help; users can post questions, answer other users' questions, and search the archives of previous postings.
Note: If all else fails, you can contact NVIDIA for support at: [email protected]
But please only send email to this address after you've browsed the �Frequently Asked Questioins� sections in this chapter and have requested help on the nvnews.net web forum.
71 N V I D I A C o r p o r a t i o n
N V I D I A A c c e l e r a t e d L i n u x D r i v e r S e t R e l e a s e 2 5 N o t e s
Additional Resources� Linux OpenGL ABI
http://oss.sgi.com/projects/ogl-sample/ABI/
� NVIDIA Linux HowTohttp://www.linuxdoc.org/HOWTO/mini/Nvidia-OpenGL-Configuration/index.html
� OpenGL: www.opengl.org� The XFree86 Project: www.xfree86.org• #nvidia (irc.openprojects.net)
N V I D I A C o r p o r a t i o n 72
A P P E N D I X A P r o g r a m m i n g M o d e s
A P P E N D I X
APROGRAMMING MODES
This appendix contains the following major topics:
� �Introduction� on page 73
� �Depth, Bits Per Pixel, and Pitch� on page 74
� �Maximum Resolutions� on page 75
� �Useful Formulas� on page 75
� �Mode Validation� on page 77
� �Additional Mode Constraints� on page 78
IntroductionThe NVIDIA Accelerated Linux Driver Set supports all standard VGA and VESA modes, as well as most user-written custom mode lines.
Note: Double-scan modes are supported on all hardware, and interlaced modes are supported on GeForce 256, GeForce DDR, Quadro, GeForce2 GTS/GeForce2 Pro, GeForce2 Ti, GeForce2 Ultra, Quadro2 Pro, and all TNT products.
In general, your display device (such as a CRT, DFP, or TV) can be a greater constraint on usable modes than either your NVIDIA product-based graphics card or the NVIDIA Accelerated Linux Driver Set.
To request one or more standard modes for use in X, you can add a �Modes� line, as shown below, in the appropriate �Display� subsection of your XF86Config file:
Modes "1600x1200" "1024x768" "640x480"
73 N V I D I A C o r p o r a t i o n
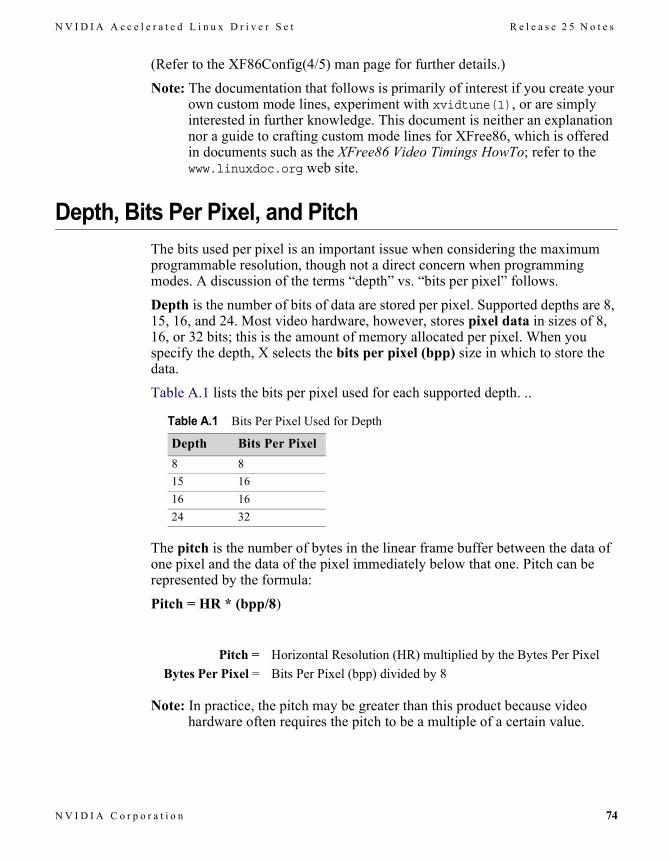
N V I D I A A c c e l e r a t e d L i n u x D r i v e r S e t R e l e a s e 2 5 N o t e s
(Refer to the XF86Config(4/5) man page for further details.)
Note: The documentation that follows is primarily of interest if you create your own custom mode lines, experiment with xvidtune(1), or are simply interested in further knowledge. This document is neither an explanation nor a guide to crafting custom mode lines for XFree86, which is offered in documents such as the XFree86 Video Timings HowTo; refer to the www.linuxdoc.org web site.
Depth, Bits Per Pixel, and PitchThe bits used per pixel is an important issue when considering the maximum programmable resolution, though not a direct concern when programming modes. A discussion of the terms �depth� vs. �bits per pixel� follows.
Depth is the number of bits of data are stored per pixel. Supported depths are 8, 15, 16, and 24. Most video hardware, however, stores pixel data in sizes of 8, 16, or 32 bits; this is the amount of memory allocated per pixel. When you specify the depth, X selects the bits per pixel (bpp) size in which to store the data.
Table A.1 lists the bits per pixel used for each supported depth. ..
The pitch is the number of bytes in the linear frame buffer between the data of one pixel and the data of the pixel immediately below that one. Pitch can be represented by the formula:
Pitch = HR * (bpp/8)
Note: In practice, the pitch may be greater than this product because video hardware often requires the pitch to be a multiple of a certain value.
Table A.1 Bits Per Pixel Used for Depth
Depth Bits Per Pixel8 815 1616 1624 32
Pitch = Horizontal Resolution (HR) multiplied by the Bytes Per PixelBytes Per Pixel = Bits Per Pixel (bpp) divided by 8
N V I D I A C o r p o r a t i o n 74
A P P E N D I X A P r o g r a m m i n g M o d e s
Maximum ResolutionsThe NVIDIA Accelerated Linux Driver Set and NVIDIA product-based graphics cards support resolutions up to 2048x1536, though the maximum resolution that your system can support is also limited by the amount of video memory (referenced in Useful Formulas in the next section) and the maximum supported resolution of your display device (i.e., CRT, DFP, or TV).
Note: While use of a video overlay does not limit the maximum resolution or refresh rate, video memory bandwidth used by a programmed mode does affect the quality of the overlay.
Useful Formulas
Video Memory UsedThe maximum resolution is a function of the amount of video memory and the bits per pixel (bpp) that you want to use, as represented by the formula:
Amount of Video Memory Used = HR * VR * (bpp/8)
Note: Technically, the Video Memory Used = (Pitch * Vertical Resolution) where the Pitch may be slightly greater than �HR * (bpp/8)� to accommodate hardware requirements that specify the pitch to be a multiple of a certain value.
This discussion only refers to memory usage for the frame buffer; video memory is also used by other operations, such as OpenGL or pixmap caching.
Amount of Video Memory Used = Horizontal Resolution (HR) multiplied by the Vertical Resolution (VR) multiplied by the Bytes Per Pixel
Bytes Per Pixel = Bits Per Pixel (bpp) divided by 8
75 N V I D I A C o r p o r a t i o n
N V I D I A A c c e l e r a t e d L i n u x D r i v e r S e t R e l e a s e 2 5 N o t e s
Resolution, Pixel Clock, and Vertical Refresh RateThe relationship between resolution, pixel clock (i.e., dot clock), and vertical refresh rate can be described by this formula:RR = PCLK / (HFL * VFL)
The frame length in VFL refers to the actual frame length and not simply the visible resolution.As described in the XFree86 Video Timings HowTo documentation, the above formula may be rewritten as:
PCLK = RR * HFL * VFLGiven a maximum pixel clock, you can adjust the RR, HFL and VFL as needed.
The pixel clock is reported in the log file when you run X with verbose logging, as shown below:
startx -- -logverbose 5
Your XFree86.0.log should contain several lines (as shown below) to indicate the maximum pixel clock at each bit per pixel size.(--) NVIDIA(0): Display Device 0: maximum pixel clock at 8 bpp: 350 MHz
(--) NVIDIA(0): Display Device 0: maximum pixel clock at 16 bpp: 350 MHz
(--) NVIDIA(0): Display Device 0: maximum pixel clock at 32 bpp: 300 MHz
Refresh Rate (RR) = Pixel Clock (PCLK) divided by the Total Number of Pixels
Total Number of Pixels = Horizontal Frame Length (HFL) multiplied by the Vertical Frame Length (VFL).
N V I D I A C o r p o r a t i o n 76

A P P E N D I X A P r o g r a m m i n g M o d e s
Mode ValidationDuring the pre-initialization phase of the X Server, the NVIDIA X driver validates all requested modes using these steps:
1 Takes the intersection of the HorizSync and VertRefresh ranges provided by the user in the XF86Config file with the ranges reported by the monitor in the EDID. This function can be disabled by using the “IgnoreEDID” option, in which case the X driver will accept the HorizSync and VertRefresh provided by the user.
2 Calls the xf86ValidateModes() helper function, which finds modes with the user-specified names in the XF86Config file, pruning out modes with:
� invalid horizontal sync frequencies or vertical refresh rates,
� pixel clocks larger than the maximum pixel clock for the graphics card, and
� resolutions larger than the virtual screen size, if a virtual screen size was specified in the XF86Config file.
Several other constraints are applied to this mode search. (See xc/programs/Xserver/hw/xfree86/common/xf86Mode.c:xf86ValidateModes().)
3 All modes returned from xf86ValidateModes() are then examined to ensure that their resolutions are not greater than the highest mode reported by the monitor's EDID. (As explained earlier, this function may be disabled with the "IgnoreEDID" option.)
If the display is a TV, each mode is checked to ensure that it has a resolution that is supported by the TV encoder. Usually, only resolutions of 800x600 and 640x480 are supported by the encoder.
4 All remaining modes are then checked to ensure sure they pass the constraints described in �Additional Mode Constraints� on page 78.
Note: In order to catch potentially invalid modes submitted by XF86VidModeExtension (e.g., xvidtune(1)), the last two steps are also performed when each mode is programmed.
Note: Under TwinView configuration, the above validation is performed for the requested modes for each display device.
77 N V I D I A C o r p o r a t i o n
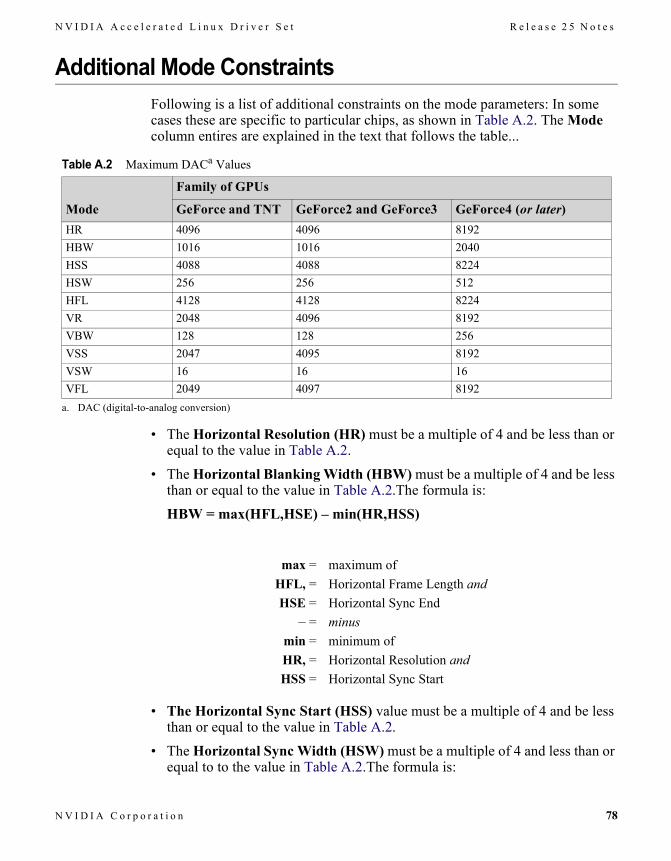
N V I D I A A c c e l e r a t e d L i n u x D r i v e r S e t R e l e a s e 2 5 N o t e s
Additional Mode ConstraintsFollowing is a list of additional constraints on the mode parameters: In some cases these are specific to particular chips, as shown in Table A.2. The Mode column entires are explained in the text that follows the table...
� The Horizontal Resolution (HR) must be a multiple of 4 and be less than or equal to the value in Table A.2.
� The Horizontal Blanking Width (HBW) must be a multiple of 4 and be less than or equal to the value in Table A.2.The formula is:
HBW = max(HFL,HSE) � min(HR,HSS)
� The Horizontal Sync Start (HSS) value must be a multiple of 4 and be less than or equal to the value in Table A.2.
� The Horizontal Sync Width (HSW) must be a multiple of 4 and less than or equal to to the value in Table A.2.The formula is:
Table A.2 Maximum DACa Values
Mode
Family of GPUs
GeForce and TNT GeForce2 and GeForce3 GeForce4 (or later)HR 4096 4096 8192HBW 1016 1016 2040HSS 4088 4088 8224HSW 256 256 512HFL 4128 4128 8224VR 2048 4096 8192VBW 128 128 256VSS 2047 4095 8192VSW 16 16 16VFL 2049 4097 8192
a. DAC (digital-to-analog conversion)
max = maximum ofHFL, = Horizontal Frame Length andHSE = Horizontal Sync End
� = minusmin = minimum ofHR, = Horizontal Resolution andHSS = Horizontal Sync Start
N V I D I A C o r p o r a t i o n 78
A P P E N D I X A P r o g r a m m i n g M o d e s
HSW = HSE � HSS
� The Horizontal Frame Length (HFL) must be a multiple of 4, must be greater than or equal to 40, and must be less than or equal to the value in Table A.2.
� The Vertical Resolution (VR) must be less than or equal to the value in Table A.2.
� The Vertical Blanking Width (VBW) must be less than or equal to the value in Table A.2. The formula is:
VBW = max(VFL,VSE) � min(VR,VSS)
� The Vertical Sync Start (VSS) value must be less than or equal to the value in Table A.2.
� The Vertical Sync Width (VSW) must be less than or equal to the value in Table A.2. The formula is:
VBW = VSE - VSS
� The Vertical Frame Length (VFL) must be greater than or equal to 2 and less than or equal to the value in Table A.2.
HSE = Horizontal Sync End � = minus
HSS = Horizontal Sync Start
max = maximum ofVFL, = Vertical Frame Length andVSE = Vertical Sync End
� = minusmin = minimum ofVR, = Vertical Resolution andVSS = Vertical Sync Start
VSE = Vertical Sync End � = minus
VSS = Vertical Sync Start
79 N V I D I A C o r p o r a t i o n
N V I D I A A c c e l e r a t e d L i n u x D r i v e r S e t R e l e a s e 2 5 N o t e s
Example Mode LineThe following is an example mode line that contains each abbreviation that is used in the constraints listed above:# Custom Mode line for the SGI 1600SW Flatpanel
# name PCLK HR HSS HSE HFL VR VSS VSE VFL
Modeline "sgi1600x1024" 106.9 1600 1632 1656 1672 1024 1027 1030 1067
Note: An XFree86 modeline generator conforming to the GTF Standard has been posted to the XFree86 Xpert mailing list:http://www.xfree86.org/pipermail/xpert/2001-October/012070.html
For additional modeline generators, search for �Modeline� on freshmeat.net.
N V I D I A C o r p o r a t i o n 80
A P P E N D I X A P r o g r a m m i n g M o d e s
81 N V I D I A C o r p o r a t i o n
N V I D I A A c c e l e r a t e d L i n u x D r i v e r S e t R e l e a s e 2 5 N o t e s
A P P E N D I X
BPROC FILESYSTEM INTERFACE
The /proc filesystem interface allows you to obtain run-time information about the driver, any installed NVIDIA graphics cards, and the AGP status. This information is contained in several files in /proc/driver/nvidia.
The following are brief descriptions of each one of these files:s
� versionLists the installed driver revision and the version of the GNU C compiler used to build the Linux kernel module.
� cards/0...3Provides information about each of the installed NVIDIA graphics adapters (model name, IRQ, BIOS version, Bus Type). Please note that the BIOS version is only available while X is running.
� agp/cardProvides information about the installed AGP card's AGP capabilities.
� agp/host-bridgeProvides information about the host bridge (model and AGP capabilities).
� agp/statusProvides information about the current AGP status. If AGP support has been enabled on your system, the AGP driver being used, the AGP rate, and information about the status of AGP Fast Writes and Side Band Addressing is shown.
The AGP driver is either one of NVIDIA (NVIDIA's built-in AGP driver) or AGPGART (the Linux kernel's agpgart.o driver). If you see �inactive� next
N V I D I A C o r p o r a t i o n 82
A P P E N D I X B P r o c F i l e s y s t e m I n t e r f a c e
to AGPGART, then this means that the AGP chipset was programmed by AGPGART, but is not currently in use.
SBA and Fast Writes indicate whether either one of the features is currently in use. Please note that several factors decide if support for either will be enabled. First of all, both the AGP card and the host bridge must support the feature. Even if both do support it, the driver may decide not to use it in favor of system stability. This is particularly true of AGP Fast Writes.
83 N V I D I A C o r p o r a t i o n
N V I D I A A c c e l e r a t e d L i n u x D r i v e r S e t R e l e a s e 2 5 N o t e s
A P P E N D I X
CXVMC SUPPORT
Note: This release of the NVIDIA Linux Driver Set includes includes support for the X-Video Motion Compensation (XvMC) version 1.0 API on GeForce4 and only GeForce4-based graphics cards.
There is a static library "libXvMCNVIDIA.a" and a dynamic one "libXvMCNVIDIA_dynamic.so" which is suitable for dlopening.
� GeForce4 MX products support both XvMC's "IDCT" and "motion-compensation" levels of acceleration.
� GeForce4 Ti products only support the motion-compensation level.
� AI44 and IA44 subpictures are supported.
� 4:2:0 Surfaces up to 2032x2032 are supported.
� libXvMCNVIDIA observes the XVMC_DEBUG environment variable and will provide some debug output to stderr when set to an appropriate integer value.
� �0� disables debug output.
� �1� enables debug output for failure conditions.
� �2� or higher enables output of warning messages.
N V I D I A C o r p o r a t i o n 84
A P P E N D I X C X V M C S u p p o r t
85 N V I D I A C o r p o r a t i o n
N V I D I A C o r p o r a t i o n 86
N V I D I A A c c e l e r a t e d L i n u x D r i v e r S e t R e l e a s e 2 5 N o t e s
A P P E N D I X
DGLX SUPPORT
This release of the NVIDIA Linux Driver Set supports GLX 1.2 with the fol-lowing extensions:
� GLX_EXT_visual_info
� GLX_EXT_visual_rating
� GLX_SGIX_fbconfig
� GLX_SGIX_pbuffer
� GLX_ARB_get_proc_address
For a description of these extensions, refer to the OpenGL extension registry at the following web site:
http://oss.sgi.com/projects/ogl-sample/registry/index.html
Note: GLX 1.3 is not yet supported.