Embed Size (px)
Citation preview
Wooldridge
Full Color
Ph
oto
sho
p® C
S5
Ad
ob
e®
Look Inside!
Are you a visual learner? Do you prefer instructions that show you how to do something — and skip the long-winded explanations? If so, then this book is for you. Open it up and you’ll find clear, step-by-step screen shots that show you how to tackle more than 165 Photoshop CS5 tasks. Each task-based spread covers a single technique — sure to help you get up and running on Photoshop CS5 in no time.
Mike Wooldridge
You’ll learn to:• Crop, straighten, and trim images• Change brightness and contrast• Edit by using layers and filters• Save images in different formats• Practice your skills using the sample images on the Web site
• Helpful sidebars offer practical tips and tricks
• Full-color screen shots demonstrate each task
• Succinct explanations walk you through step by step
• Two-page lessons break big topics into bite-sized modules
Adobe®
Photoshop® CS5
Are you a visual learner? Do you prefer instructions that show you how to do something — and skip the wlong-winded explanations? If so, then this book is for you. Open it up and you’ll find clear, step-by-step screen shots that show you how to tackle more than 165 Photoshop CS5 tasks. Each task-based spread covers a single technique — sure to help you get up and running on Photoshop CS5 in no time.
You’ll learn to:• Crop, straighten, and trim images• Change brightness and contrast• Edit by using layers and filters• Save images in different formats• Practice your skills using the sample images on the Web site
• Helpful sidebars offer practical tips and tricks
• Full-color screen shots demonstrate each task
• Succinct explanations walk you through step by step
• Two-page lessons break big topics into bite-sized modules
Image Processing
$29.99 USA • $35.99 CAN • £21.99 UK
www.wiley.com/go/photoshopcs5tyv

Adobe® Photoshop® CS5
by Mike Wooldridge
01_612637-ffirs.indd i01_612637-ffirs.indd i 4/13/10 1:02 PM4/13/10 1:02 PM
LIMIT OF LIABILITY/DISCLAIMER OF WARRANTY: THE PUBLISHER AND THE AUTHOR MAKE NO REPRESENTA-TIONS OR WARRANTIES WITH RESPECT TO THE ACCU-RACY OR COMPLETENESS OF THE CONTENTS OF THIS WORK AND SPECIFICALLY DISCLAIM ALL WARRANTIES, INCLUDING WITHOUT LIMITATION WARRANTIES OF FITNESS FOR A PARTICULAR PURPOSE. NO WARRANTY MAY BE CREATED OR EXTENDED BY SALES OR PROMO-TIONAL MATERIALS. THE ADVICE AND STRATEGIES CONTAINED HEREIN MAY NOT BE SUITABLE FOR EVERY SITUATION. THIS WORK IS SOLD WITH THE UNDER-STANDING THAT THE PUBLISHER IS NOT ENGAGED IN RENDERING LEGAL, ACCOUNTING, OR OTHER PROFES-SIONAL SERVICES. IF PROFESSIONAL ASSISTANCE IS REQUIRED, THE SERVICES OF A COMPETENT PROFES-SIONAL PERSON SHOULD BE SOUGHT. NEITHER THE PUBLISHER NOR THE AUTHOR SHALL BE LIABLE FOR DAMAGES ARISING HEREFROM. THE FACT THAT AN ORGANIZATION OR WEBSITE IS REFERRED TO IN THIS WORK AS A CITATION AND/OR A POTENTIAL SOURCE OF FURTHER INFORMATION DOES NOT MEAN THAT THE AUTHOR OR THE PUBLISHER ENDORSES THE INFORMATION THE ORGANIZATION OR WEBSITE MAY PROVIDE OR RECOMMENDATIONS IT MAY MAKE. FUR-THER, READERS SHOULD BE AWARE THAT INTERNET WEBSITES LISTED IN THIS WORK MAY HAVE CHANGED OR DISAPPEARED BETWEEN WHEN THIS WORK WAS WRITTEN AND WHEN IT IS READ.
FOR PURPOSES OF ILLUSTRATING THE CONCEPTS AND TECHNIQUES DESCRIBED IN THIS BOOK, THE AUTHOR HAS CREATED VARIOUS NAMES, COMPANY NAMES, MAILING, E-MAIL AND INTERNET ADDRESSES, PHONE AND FAX NUMBERS AND SIMILAR INFORMATION, ALL OF WHICH ARE FICTITIOUS. ANY RESEMBLANCE OF THESE FICTITIOUS NAMES, ADDRESSES, PHONE AND FAX NUMBERS AND SIMILAR INFORMATION TO ANY ACTUAL PERSON, COMPANY AND/OR ORGANIZATION IS UNINTENTIONAL AND PURELY COINCIDENTAL.
Contact UsFor general information on our other products and services please contact our Customer Care Department within the U.S. at 877-762-2974, outside the U.S. at 317-572-3993 or fax 317-572-4002.
For technical support please visit www.wiley.com/techsupport.
PermissionsBrianna Stuart
http://www.stuartphotography.net
Teach Yourself VISUALLY™ Adobe® Photoshop® CS5
Published by Wiley Publishing, Inc.10475 Crosspoint BoulevardIndianapolis, IN 46256
www.wiley.com
Published simultaneously in Canada
Copyright © 2010 by Wiley Publishing, Inc., Indianapolis, Indiana
No part of this publication may be reproduced, stored in a retrieval system or transmitted in any form or by any means, electronic, mechanical, photocopying, recording, scanning or otherwise, except as permitted under Sections 107 or 108 of the 1976 United States Copyright Act, without either the prior written permission of the Publisher, or authorization through payment of the appropriate per-copy fee to the Copyright Clearance Center, 222 Rosewood Drive, Danvers, MA 01923, (978) 750-8400, fax (978) 646-8600. Requests to the Publisher for permission should be addressed to the Permissions Department, John Wiley & Sons, Inc., 111 River Street, Hoboken, NJ 07030, 201-748-6011, fax 201-748-6008, or online at www.wiley.com/go/permissions.
Library of Congress Control Number: 2010925692
ISBN: 978-0-470-61263-7
Manufactured in the United States of America
10 9 8 7 6 5 4 3 2 1
Trademark AcknowledgmentsWiley, the Wiley Publishing logo, Visual, the Visual logo, Teach Yourself VISUALLY, Read Less - Learn More and related trade dress are trademarks or registered trademarks of John Wiley & Sons, Inc. and/or its affiliates. Photoshop is a registered trademark of Adobe Systems, Incorporated. All other trademarks are the property of their respective owners. Wiley Publishing, Inc. is not associated with any product or vendor mentioned in this book.
SalesContact Wiley at (877) 762-2974 or fax (317) 572-4002.
01_612637-ffirs.indd ii01_612637-ffirs.indd ii 4/13/10 1:02 PM4/13/10 1:02 PM

CreditsExecutive EditorJody Lefevere
Project EditorChristopher Stolle
Technical EditorBen Schupak
Copy EditorKim Heusel
Editorial DirectorRobyn Siesky
Business ManagerAmy Knies
Senior Marketing ManagerSandy Smith
Vice President and Executive Group PublisherRichard Swadley
Vice President and Executive PublisherBarry Pruett
Project CoordinatorKristie Rees
Graphics and Production SpecialistsAndrea HornbergerJennifer Mayberry
Quality Control TechnicianLauren Mandelbaum
ProofreaderMildred Rosenzweig
IndexerPotomac Indexing, LLC
Media Development Project ManagerLaura Moss
Media Development Assistant Project ManagerJenny Swisher
Media Development Associate ProducersJosh FrankShawn PatrickDoug KuhnMarilyn Hummel
Screen ArtistsAna CarrilloJill Proll
IllustratorsCheryl GrubbsMark PintoRonda David-Burroughs
01_612637-ffirs.indd iii01_612637-ffirs.indd iii 4/13/10 1:02 PM4/13/10 1:02 PM

About the AuthorMike Wooldridge is a Web developer in the San Francisco Bay area. He has authored more than 20 books for the Visual series.
Author’s AcknowledgmentsI would like to thank Brianna Stuart for the use of her beautiful photographs in the examples and for her help in preparing the hundreds of screenshots for this book. I would also like to thank Christopher Stolle for his top-notch project editing, Ben Schupak for his knowledgeable technical editing, Kim Heusel for his careful copyediting, and Ronda David-Burroughs, Cheryl Grubbs, and Mark Pinto for all their clever illustrations. This book is dedicated to my wife Linda and my 10-year-old son Griffin.
01_612637-ffirs.indd iv01_612637-ffirs.indd iv 4/13/10 1:02 PM4/13/10 1:02 PM
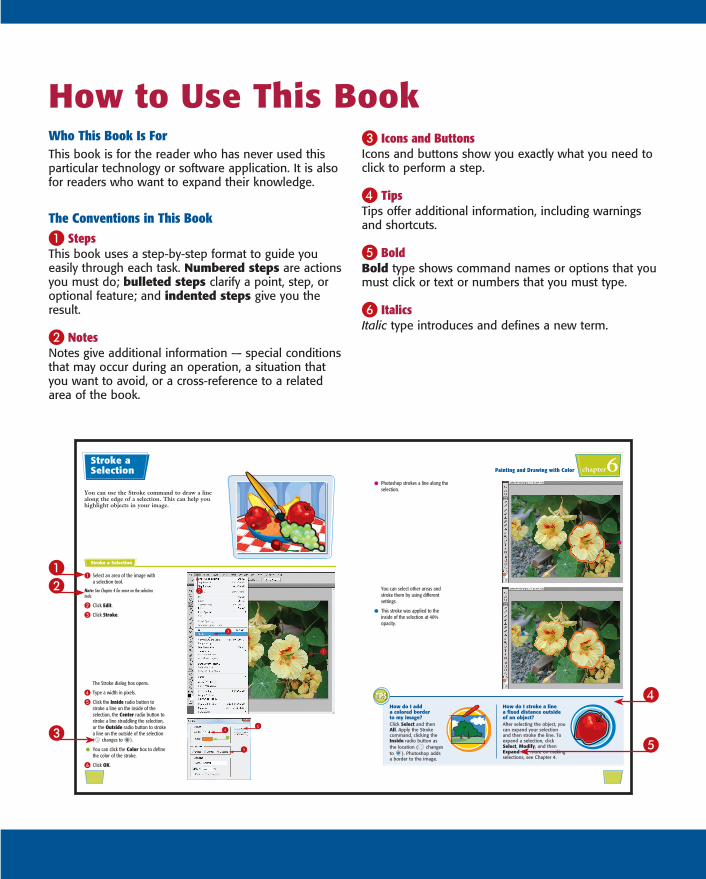
How to Use This BookWho This Book Is For This book is for the reader who has never used this particular technology or software application. It is also for readers who want to expand their knowledge.
The Conventions in This Book1 StepsThis book uses a step-by-step format to guide you easily through each task. Numbered steps are actions you must do; bulleted steps clarify a point, step, or optional feature; and indented steps give you the result.
2 NotesNotes give additional information — special conditions that may occur during an operation, a situation that you want to avoid, or a cross-reference to a related area of the book.
3 Icons and Buttons Icons and buttons show you exactly what you need to click to perform a step.
4 TipsTips offer additional information, including warnings and shortcuts.
5 BoldBold type shows command names or options that you must click or text or numbers that you must type.
6 ItalicsItalic type introduces and defines a new term.
Painting and Drawing with Color chapter6
33
6644
55
11
22
How do I stroke a line a fixed distance outside of an object?After selecting the object, you can expand your selection and then stroke the line. To expand a selection, click Select, Modify, and then Expand. For more on making selections, see Chapter 4.
How do I add a colored border to my image?Click Select and then All. Apply the Stroke command, clicking the Inside radio button as the location ( changes to ). Photoshop adds a border to the image.
You can select other areas and stroke them by using different settings.
● This stroke was applied to the inside of the selection at 40% opacity.
● Photoshop strokes a line along the selection.
The Stroke dialog box opens.
4 Type a width in pixels.
5 Click the Inside radio button to stroke a line on the inside of the selection, the Center radio button to stroke a line straddling the selection, or the Outside radio button to stroke a line on the outside of the selection ( changes to ).
● You can click the Color box to define the color of the stroke.
6 Click OK.
1 Select an area of the image with a selection tool.
Note: See Chapter 4 for more on the selection tools.
2 Click Edit.
3 Click Stroke.
Stroke a Selection
You can use the Stroke command to draw a line along the edge of a selection. This can help you highlight objects in your image.
Stroke a Selection
1
4
2
35
01_612637-ffirs.indd v01_612637-ffirs.indd v 4/13/10 1:02 PM4/13/10 1:02 PM
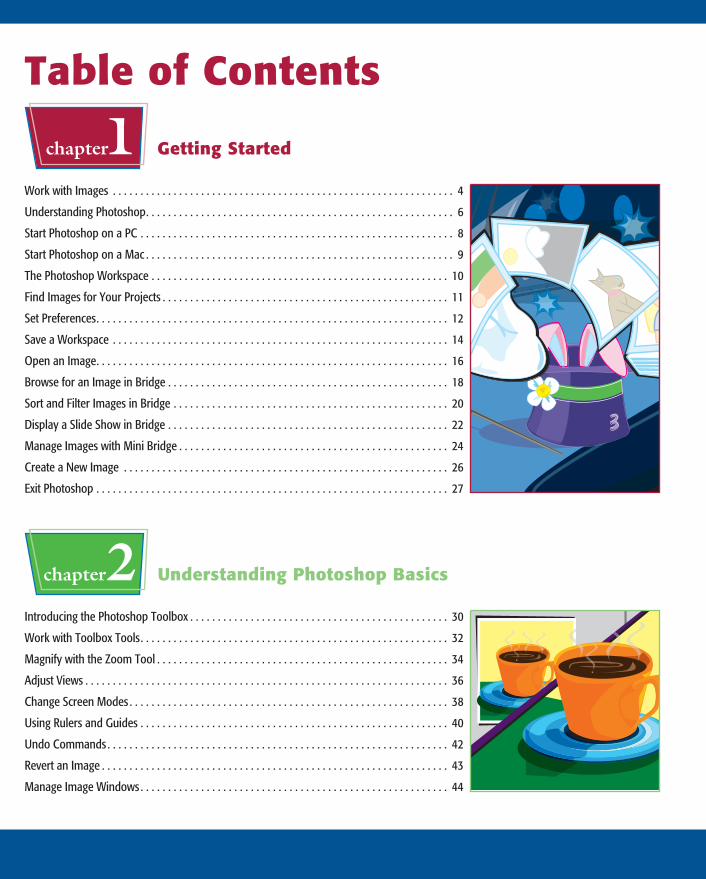
Table of Contents
chapter1 Getting Started
Work with Images . . . . . . . . . . . . . . . . . . . . . . . . . . . . . . . . . . . . . . . . . . . . . . . . . . . . . . . . . . . . . . 4
Understanding Photoshop . . . . . . . . . . . . . . . . . . . . . . . . . . . . . . . . . . . . . . . . . . . . . . . . . . . . . . . . 6
Start Photoshop on a PC . . . . . . . . . . . . . . . . . . . . . . . . . . . . . . . . . . . . . . . . . . . . . . . . . . . . . . . . . 8
Start Photoshop on a Mac . . . . . . . . . . . . . . . . . . . . . . . . . . . . . . . . . . . . . . . . . . . . . . . . . . . . . . . . 9
The Photoshop Workspace . . . . . . . . . . . . . . . . . . . . . . . . . . . . . . . . . . . . . . . . . . . . . . . . . . . . . . 10
Find Images for Your Projects . . . . . . . . . . . . . . . . . . . . . . . . . . . . . . . . . . . . . . . . . . . . . . . . . . . . 11
Set Preferences . . . . . . . . . . . . . . . . . . . . . . . . . . . . . . . . . . . . . . . . . . . . . . . . . . . . . . . . . . . . . . . . 12
Save a Workspace . . . . . . . . . . . . . . . . . . . . . . . . . . . . . . . . . . . . . . . . . . . . . . . . . . . . . . . . . . . . . 14
Open an Image . . . . . . . . . . . . . . . . . . . . . . . . . . . . . . . . . . . . . . . . . . . . . . . . . . . . . . . . . . . . . . . . 16
Browse for an Image in Bridge . . . . . . . . . . . . . . . . . . . . . . . . . . . . . . . . . . . . . . . . . . . . . . . . . . . 18
Sort and Filter Images in Bridge . . . . . . . . . . . . . . . . . . . . . . . . . . . . . . . . . . . . . . . . . . . . . . . . . . 20
Display a Slide Show in Bridge . . . . . . . . . . . . . . . . . . . . . . . . . . . . . . . . . . . . . . . . . . . . . . . . . . . 22
Manage Images with Mini Bridge . . . . . . . . . . . . . . . . . . . . . . . . . . . . . . . . . . . . . . . . . . . . . . . . . 24
Create a New Image . . . . . . . . . . . . . . . . . . . . . . . . . . . . . . . . . . . . . . . . . . . . . . . . . . . . . . . . . . . 26
Exit Photoshop . . . . . . . . . . . . . . . . . . . . . . . . . . . . . . . . . . . . . . . . . . . . . . . . . . . . . . . . . . . . . . . . 27
chapter2 Understanding Photoshop Basics
Introducing the Photoshop Toolbox . . . . . . . . . . . . . . . . . . . . . . . . . . . . . . . . . . . . . . . . . . . . . . . 30
Work with Toolbox Tools . . . . . . . . . . . . . . . . . . . . . . . . . . . . . . . . . . . . . . . . . . . . . . . . . . . . . . . . 32
Magnify with the Zoom Tool . . . . . . . . . . . . . . . . . . . . . . . . . . . . . . . . . . . . . . . . . . . . . . . . . . . . . 34
Adjust Views . . . . . . . . . . . . . . . . . . . . . . . . . . . . . . . . . . . . . . . . . . . . . . . . . . . . . . . . . . . . . . . . . . 36
Change Screen Modes . . . . . . . . . . . . . . . . . . . . . . . . . . . . . . . . . . . . . . . . . . . . . . . . . . . . . . . . . . 38
Using Rulers and Guides . . . . . . . . . . . . . . . . . . . . . . . . . . . . . . . . . . . . . . . . . . . . . . . . . . . . . . . . 40
Undo Commands . . . . . . . . . . . . . . . . . . . . . . . . . . . . . . . . . . . . . . . . . . . . . . . . . . . . . . . . . . . . . . 42
Revert an Image . . . . . . . . . . . . . . . . . . . . . . . . . . . . . . . . . . . . . . . . . . . . . . . . . . . . . . . . . . . . . . . 43
Manage Image Windows . . . . . . . . . . . . . . . . . . . . . . . . . . . . . . . . . . . . . . . . . . . . . . . . . . . . . . . . 44
02_612637-ftoc.indd vi02_612637-ftoc.indd vi 4/13/10 1:03 PM4/13/10 1:03 PM
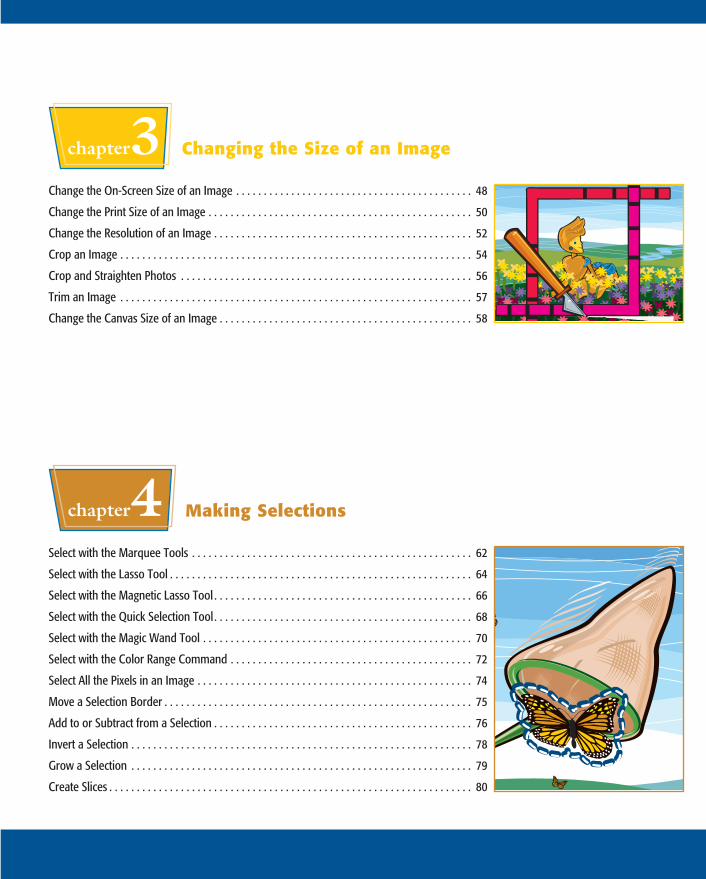
chapter3 Changing the Size of an Image
Change the On-Screen Size of an Image . . . . . . . . . . . . . . . . . . . . . . . . . . . . . . . . . . . . . . . . . . . 48
Change the Print Size of an Image . . . . . . . . . . . . . . . . . . . . . . . . . . . . . . . . . . . . . . . . . . . . . . . . 50
Change the Resolution of an Image . . . . . . . . . . . . . . . . . . . . . . . . . . . . . . . . . . . . . . . . . . . . . . . 52
Crop an Image . . . . . . . . . . . . . . . . . . . . . . . . . . . . . . . . . . . . . . . . . . . . . . . . . . . . . . . . . . . . . . . . 54
Crop and Straighten Photos . . . . . . . . . . . . . . . . . . . . . . . . . . . . . . . . . . . . . . . . . . . . . . . . . . . . . 56
Trim an Image . . . . . . . . . . . . . . . . . . . . . . . . . . . . . . . . . . . . . . . . . . . . . . . . . . . . . . . . . . . . . . . . 57
Change the Canvas Size of an Image . . . . . . . . . . . . . . . . . . . . . . . . . . . . . . . . . . . . . . . . . . . . . . 58
chapter4 Making Selections
Select with the Marquee Tools . . . . . . . . . . . . . . . . . . . . . . . . . . . . . . . . . . . . . . . . . . . . . . . . . . . 62
Select with the Lasso Tool . . . . . . . . . . . . . . . . . . . . . . . . . . . . . . . . . . . . . . . . . . . . . . . . . . . . . . . 64
Select with the Magnetic Lasso Tool . . . . . . . . . . . . . . . . . . . . . . . . . . . . . . . . . . . . . . . . . . . . . . . 66
Select with the Quick Selection Tool . . . . . . . . . . . . . . . . . . . . . . . . . . . . . . . . . . . . . . . . . . . . . . . 68
Select with the Magic Wand Tool . . . . . . . . . . . . . . . . . . . . . . . . . . . . . . . . . . . . . . . . . . . . . . . . . 70
Select with the Color Range Command . . . . . . . . . . . . . . . . . . . . . . . . . . . . . . . . . . . . . . . . . . . . 72
Select All the Pixels in an Image . . . . . . . . . . . . . . . . . . . . . . . . . . . . . . . . . . . . . . . . . . . . . . . . . . 74
Move a Selection Border . . . . . . . . . . . . . . . . . . . . . . . . . . . . . . . . . . . . . . . . . . . . . . . . . . . . . . . . 75
Add to or Subtract from a Selection . . . . . . . . . . . . . . . . . . . . . . . . . . . . . . . . . . . . . . . . . . . . . . . 76
Invert a Selection . . . . . . . . . . . . . . . . . . . . . . . . . . . . . . . . . . . . . . . . . . . . . . . . . . . . . . . . . . . . . . 78
Grow a Selection . . . . . . . . . . . . . . . . . . . . . . . . . . . . . . . . . . . . . . . . . . . . . . . . . . . . . . . . . . . . . . 79
Create Slices . . . . . . . . . . . . . . . . . . . . . . . . . . . . . . . . . . . . . . . . . . . . . . . . . . . . . . . . . . . . . . . . . . 80
02_612637-ftoc.indd vii02_612637-ftoc.indd vii 4/13/10 1:03 PM4/13/10 1:03 PM
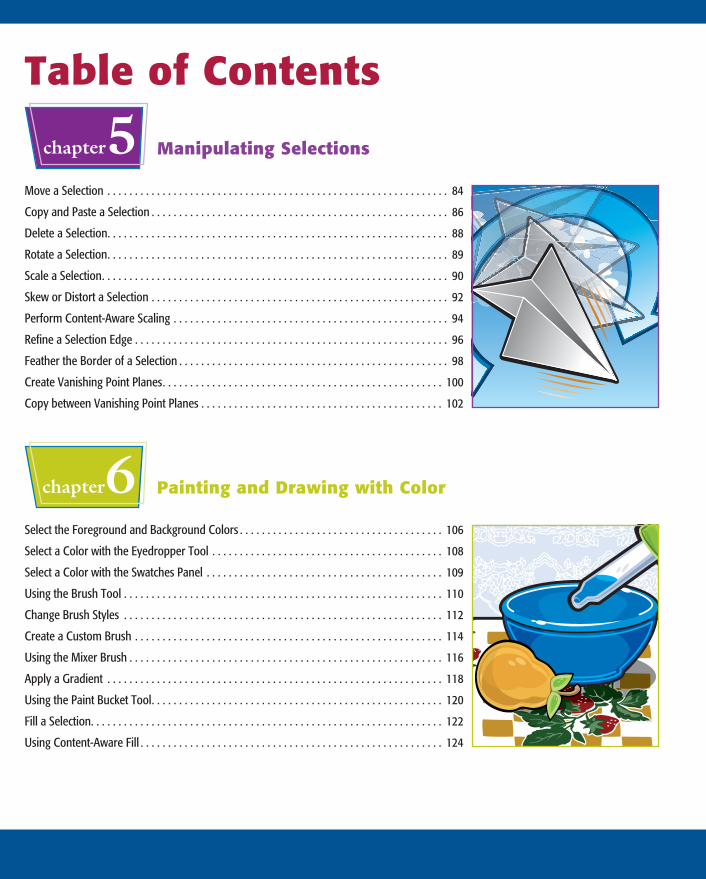
Table of Contents
chapter5 Manipulating Selections
Move a Selection . . . . . . . . . . . . . . . . . . . . . . . . . . . . . . . . . . . . . . . . . . . . . . . . . . . . . . . . . . . . . . 84
Copy and Paste a Selection . . . . . . . . . . . . . . . . . . . . . . . . . . . . . . . . . . . . . . . . . . . . . . . . . . . . . . 86
Delete a Selection. . . . . . . . . . . . . . . . . . . . . . . . . . . . . . . . . . . . . . . . . . . . . . . . . . . . . . . . . . . . . . 88
Rotate a Selection . . . . . . . . . . . . . . . . . . . . . . . . . . . . . . . . . . . . . . . . . . . . . . . . . . . . . . . . . . . . . . 89
Scale a Selection . . . . . . . . . . . . . . . . . . . . . . . . . . . . . . . . . . . . . . . . . . . . . . . . . . . . . . . . . . . . . . . 90
Skew or Distort a Selection . . . . . . . . . . . . . . . . . . . . . . . . . . . . . . . . . . . . . . . . . . . . . . . . . . . . . . 92
Perform Content-Aware Scaling . . . . . . . . . . . . . . . . . . . . . . . . . . . . . . . . . . . . . . . . . . . . . . . . . . 94
Refine a Selection Edge . . . . . . . . . . . . . . . . . . . . . . . . . . . . . . . . . . . . . . . . . . . . . . . . . . . . . . . . . 96
Feather the Border of a Selection . . . . . . . . . . . . . . . . . . . . . . . . . . . . . . . . . . . . . . . . . . . . . . . . . 98
Create Vanishing Point Planes . . . . . . . . . . . . . . . . . . . . . . . . . . . . . . . . . . . . . . . . . . . . . . . . . . . 100
Copy between Vanishing Point Planes . . . . . . . . . . . . . . . . . . . . . . . . . . . . . . . . . . . . . . . . . . . . 102
chapter6 Painting and Drawing with Color
Select the Foreground and Background Colors . . . . . . . . . . . . . . . . . . . . . . . . . . . . . . . . . . . . . 106
Select a Color with the Eyedropper Tool . . . . . . . . . . . . . . . . . . . . . . . . . . . . . . . . . . . . . . . . . . 108
Select a Color with the Swatches Panel . . . . . . . . . . . . . . . . . . . . . . . . . . . . . . . . . . . . . . . . . . . 109
Using the Brush Tool . . . . . . . . . . . . . . . . . . . . . . . . . . . . . . . . . . . . . . . . . . . . . . . . . . . . . . . . . . 110
Change Brush Styles . . . . . . . . . . . . . . . . . . . . . . . . . . . . . . . . . . . . . . . . . . . . . . . . . . . . . . . . . . 112
Create a Custom Brush . . . . . . . . . . . . . . . . . . . . . . . . . . . . . . . . . . . . . . . . . . . . . . . . . . . . . . . . 114
Using the Mixer Brush . . . . . . . . . . . . . . . . . . . . . . . . . . . . . . . . . . . . . . . . . . . . . . . . . . . . . . . . . 116
Apply a Gradient . . . . . . . . . . . . . . . . . . . . . . . . . . . . . . . . . . . . . . . . . . . . . . . . . . . . . . . . . . . . . 118
Using the Paint Bucket Tool . . . . . . . . . . . . . . . . . . . . . . . . . . . . . . . . . . . . . . . . . . . . . . . . . . . . . 120
Fill a Selection. . . . . . . . . . . . . . . . . . . . . . . . . . . . . . . . . . . . . . . . . . . . . . . . . . . . . . . . . . . . . . . . 122
Using Content-Aware Fill . . . . . . . . . . . . . . . . . . . . . . . . . . . . . . . . . . . . . . . . . . . . . . . . . . . . . . . 124
02_612637-ftoc.indd viii02_612637-ftoc.indd viii 4/13/10 1:03 PM4/13/10 1:03 PM
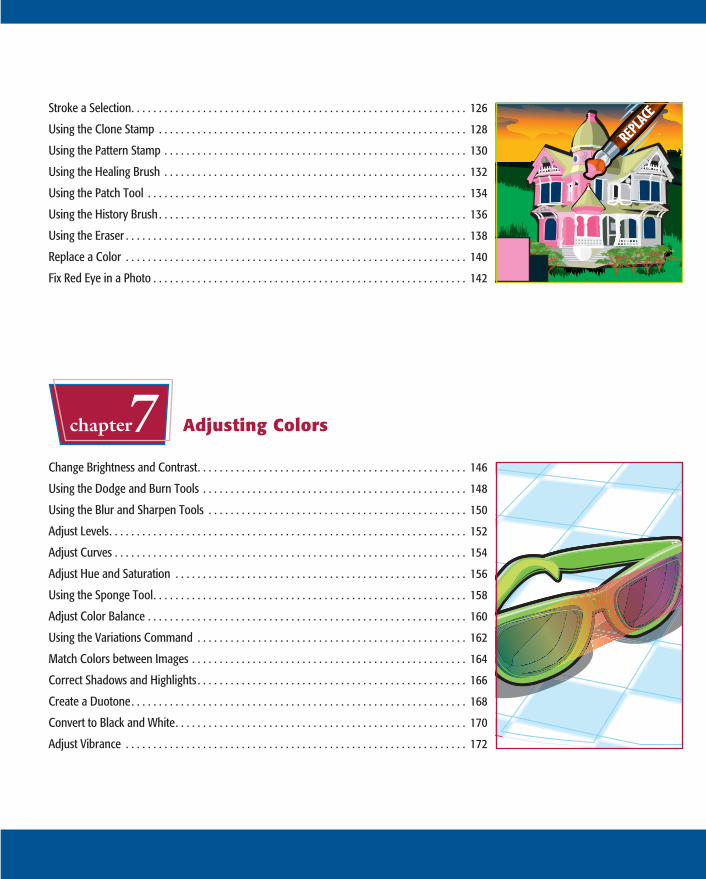
Stroke a Selection . . . . . . . . . . . . . . . . . . . . . . . . . . . . . . . . . . . . . . . . . . . . . . . . . . . . . . . . . . . . . 126
Using the Clone Stamp . . . . . . . . . . . . . . . . . . . . . . . . . . . . . . . . . . . . . . . . . . . . . . . . . . . . . . . . 128
Using the Pattern Stamp . . . . . . . . . . . . . . . . . . . . . . . . . . . . . . . . . . . . . . . . . . . . . . . . . . . . . . . 130
Using the Healing Brush . . . . . . . . . . . . . . . . . . . . . . . . . . . . . . . . . . . . . . . . . . . . . . . . . . . . . . . 132
Using the Patch Tool . . . . . . . . . . . . . . . . . . . . . . . . . . . . . . . . . . . . . . . . . . . . . . . . . . . . . . . . . . 134
Using the History Brush . . . . . . . . . . . . . . . . . . . . . . . . . . . . . . . . . . . . . . . . . . . . . . . . . . . . . . . . 136
Using the Eraser . . . . . . . . . . . . . . . . . . . . . . . . . . . . . . . . . . . . . . . . . . . . . . . . . . . . . . . . . . . . . . 138
Replace a Color . . . . . . . . . . . . . . . . . . . . . . . . . . . . . . . . . . . . . . . . . . . . . . . . . . . . . . . . . . . . . . 140
Fix Red Eye in a Photo . . . . . . . . . . . . . . . . . . . . . . . . . . . . . . . . . . . . . . . . . . . . . . . . . . . . . . . . . 142
chapter7 Adjusting Colors
Change Brightness and Contrast . . . . . . . . . . . . . . . . . . . . . . . . . . . . . . . . . . . . . . . . . . . . . . . . . 146
Using the Dodge and Burn Tools . . . . . . . . . . . . . . . . . . . . . . . . . . . . . . . . . . . . . . . . . . . . . . . . 148
Using the Blur and Sharpen Tools . . . . . . . . . . . . . . . . . . . . . . . . . . . . . . . . . . . . . . . . . . . . . . . 150
Adjust Levels . . . . . . . . . . . . . . . . . . . . . . . . . . . . . . . . . . . . . . . . . . . . . . . . . . . . . . . . . . . . . . . . . 152
Adjust Curves . . . . . . . . . . . . . . . . . . . . . . . . . . . . . . . . . . . . . . . . . . . . . . . . . . . . . . . . . . . . . . . . 154
Adjust Hue and Saturation . . . . . . . . . . . . . . . . . . . . . . . . . . . . . . . . . . . . . . . . . . . . . . . . . . . . . 156
Using the Sponge Tool . . . . . . . . . . . . . . . . . . . . . . . . . . . . . . . . . . . . . . . . . . . . . . . . . . . . . . . . . 158
Adjust Color Balance . . . . . . . . . . . . . . . . . . . . . . . . . . . . . . . . . . . . . . . . . . . . . . . . . . . . . . . . . . 160
Using the Variations Command . . . . . . . . . . . . . . . . . . . . . . . . . . . . . . . . . . . . . . . . . . . . . . . . . 162
Match Colors between Images . . . . . . . . . . . . . . . . . . . . . . . . . . . . . . . . . . . . . . . . . . . . . . . . . . 164
Correct Shadows and Highlights . . . . . . . . . . . . . . . . . . . . . . . . . . . . . . . . . . . . . . . . . . . . . . . . . 166
Create a Duotone . . . . . . . . . . . . . . . . . . . . . . . . . . . . . . . . . . . . . . . . . . . . . . . . . . . . . . . . . . . . . 168
Convert to Black and White . . . . . . . . . . . . . . . . . . . . . . . . . . . . . . . . . . . . . . . . . . . . . . . . . . . . . 170
Adjust Vibrance . . . . . . . . . . . . . . . . . . . . . . . . . . . . . . . . . . . . . . . . . . . . . . . . . . . . . . . . . . . . . . 172
REPLACE
02_612637-ftoc.indd ix02_612637-ftoc.indd ix 4/13/10 1:03 PM4/13/10 1:03 PM
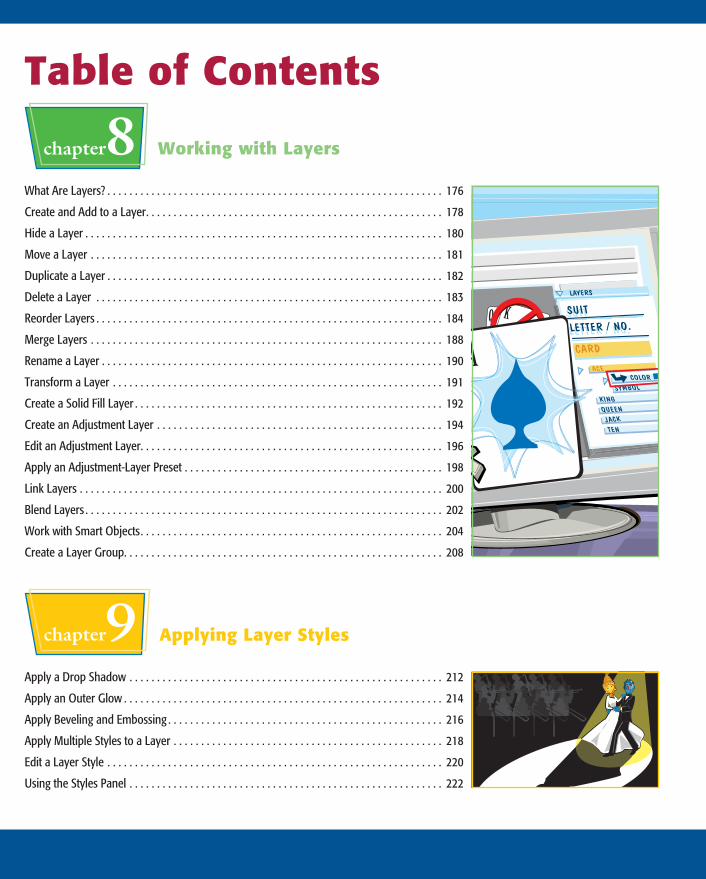
Table of Contents
chapter8 Working with Layers
What Are Layers? . . . . . . . . . . . . . . . . . . . . . . . . . . . . . . . . . . . . . . . . . . . . . . . . . . . . . . . . . . . . . 176
Create and Add to a Layer . . . . . . . . . . . . . . . . . . . . . . . . . . . . . . . . . . . . . . . . . . . . . . . . . . . . . . 178
Hide a Layer . . . . . . . . . . . . . . . . . . . . . . . . . . . . . . . . . . . . . . . . . . . . . . . . . . . . . . . . . . . . . . . . . 180
Move a Layer . . . . . . . . . . . . . . . . . . . . . . . . . . . . . . . . . . . . . . . . . . . . . . . . . . . . . . . . . . . . . . . . 181
Duplicate a Layer . . . . . . . . . . . . . . . . . . . . . . . . . . . . . . . . . . . . . . . . . . . . . . . . . . . . . . . . . . . . . 182
Delete a Layer . . . . . . . . . . . . . . . . . . . . . . . . . . . . . . . . . . . . . . . . . . . . . . . . . . . . . . . . . . . . . . . 183
Reorder Layers . . . . . . . . . . . . . . . . . . . . . . . . . . . . . . . . . . . . . . . . . . . . . . . . . . . . . . . . . . . . . . . 184
Merge Layers . . . . . . . . . . . . . . . . . . . . . . . . . . . . . . . . . . . . . . . . . . . . . . . . . . . . . . . . . . . . . . . . 188
Rename a Layer . . . . . . . . . . . . . . . . . . . . . . . . . . . . . . . . . . . . . . . . . . . . . . . . . . . . . . . . . . . . . . 190
Transform a Layer . . . . . . . . . . . . . . . . . . . . . . . . . . . . . . . . . . . . . . . . . . . . . . . . . . . . . . . . . . . . 191
Create a Solid Fill Layer . . . . . . . . . . . . . . . . . . . . . . . . . . . . . . . . . . . . . . . . . . . . . . . . . . . . . . . . 192
Create an Adjustment Layer . . . . . . . . . . . . . . . . . . . . . . . . . . . . . . . . . . . . . . . . . . . . . . . . . . . . 194
Edit an Adjustment Layer. . . . . . . . . . . . . . . . . . . . . . . . . . . . . . . . . . . . . . . . . . . . . . . . . . . . . . . 196
Apply an Adjustment-Layer Preset . . . . . . . . . . . . . . . . . . . . . . . . . . . . . . . . . . . . . . . . . . . . . . . 198
Link Layers . . . . . . . . . . . . . . . . . . . . . . . . . . . . . . . . . . . . . . . . . . . . . . . . . . . . . . . . . . . . . . . . . . 200
Blend Layers . . . . . . . . . . . . . . . . . . . . . . . . . . . . . . . . . . . . . . . . . . . . . . . . . . . . . . . . . . . . . . . . . 202
Work with Smart Objects . . . . . . . . . . . . . . . . . . . . . . . . . . . . . . . . . . . . . . . . . . . . . . . . . . . . . . . 204
Create a Layer Group. . . . . . . . . . . . . . . . . . . . . . . . . . . . . . . . . . . . . . . . . . . . . . . . . . . . . . . . . . 208
chapter9 Applying Layer Styles
Apply a Drop Shadow . . . . . . . . . . . . . . . . . . . . . . . . . . . . . . . . . . . . . . . . . . . . . . . . . . . . . . . . . 212
Apply an Outer Glow . . . . . . . . . . . . . . . . . . . . . . . . . . . . . . . . . . . . . . . . . . . . . . . . . . . . . . . . . . 214
Apply Beveling and Embossing . . . . . . . . . . . . . . . . . . . . . . . . . . . . . . . . . . . . . . . . . . . . . . . . . . 216
Apply Multiple Styles to a Layer . . . . . . . . . . . . . . . . . . . . . . . . . . . . . . . . . . . . . . . . . . . . . . . . . 218
Edit a Layer Style . . . . . . . . . . . . . . . . . . . . . . . . . . . . . . . . . . . . . . . . . . . . . . . . . . . . . . . . . . . . . 220
Using the Styles Panel . . . . . . . . . . . . . . . . . . . . . . . . . . . . . . . . . . . . . . . . . . . . . . . . . . . . . . . . . 222
02_612637-ftoc.indd x02_612637-ftoc.indd x 4/13/10 1:03 PM4/13/10 1:03 PM

chapter10 Applying Filters
Turn an Image into a Painting . . . . . . . . . . . . . . . . . . . . . . . . . . . . . . . . . . . . . . . . . . . . . . . . . . . 226
Blur an Image . . . . . . . . . . . . . . . . . . . . . . . . . . . . . . . . . . . . . . . . . . . . . . . . . . . . . . . . . . . . . . . . 228
Sharpen an Image . . . . . . . . . . . . . . . . . . . . . . . . . . . . . . . . . . . . . . . . . . . . . . . . . . . . . . . . . . . . 230
Distort an Image . . . . . . . . . . . . . . . . . . . . . . . . . . . . . . . . . . . . . . . . . . . . . . . . . . . . . . . . . . . . . . 232
Add Noise to an Image . . . . . . . . . . . . . . . . . . . . . . . . . . . . . . . . . . . . . . . . . . . . . . . . . . . . . . . . 234
Turn an Image into Shapes . . . . . . . . . . . . . . . . . . . . . . . . . . . . . . . . . . . . . . . . . . . . . . . . . . . . . 236
Turn an Image into a Charcoal Sketch . . . . . . . . . . . . . . . . . . . . . . . . . . . . . . . . . . . . . . . . . . . . 238
Apply Glowing Edges to an Image . . . . . . . . . . . . . . . . . . . . . . . . . . . . . . . . . . . . . . . . . . . . . . . 240
Add Texture to an Image . . . . . . . . . . . . . . . . . . . . . . . . . . . . . . . . . . . . . . . . . . . . . . . . . . . . . . . 242
Offset an Image . . . . . . . . . . . . . . . . . . . . . . . . . . . . . . . . . . . . . . . . . . . . . . . . . . . . . . . . . . . . . . 244
Using the Liquify Filter . . . . . . . . . . . . . . . . . . . . . . . . . . . . . . . . . . . . . . . . . . . . . . . . . . . . . . . . . 246
Apply Multiple Filters . . . . . . . . . . . . . . . . . . . . . . . . . . . . . . . . . . . . . . . . . . . . . . . . . . . . . . . . . . 248
Using Smart Filters . . . . . . . . . . . . . . . . . . . . . . . . . . . . . . . . . . . . . . . . . . . . . . . . . . . . . . . . . . . . 250
chapter11 Drawing Shapes
Draw a Shape . . . . . . . . . . . . . . . . . . . . . . . . . . . . . . . . . . . . . . . . . . . . . . . . . . . . . . . . . . . . . . . . 254
Draw a Custom Shape . . . . . . . . . . . . . . . . . . . . . . . . . . . . . . . . . . . . . . . . . . . . . . . . . . . . . . . . . 256
Draw a Straight Line. . . . . . . . . . . . . . . . . . . . . . . . . . . . . . . . . . . . . . . . . . . . . . . . . . . . . . . . . . . 258
Draw a Shape with the Pen . . . . . . . . . . . . . . . . . . . . . . . . . . . . . . . . . . . . . . . . . . . . . . . . . . . . . 260
Edit a Shape . . . . . . . . . . . . . . . . . . . . . . . . . . . . . . . . . . . . . . . . . . . . . . . . . . . . . . . . . . . . . . . . . 262
Shhappe Toooll
Shape Tool
02_612637-ftoc.indd xi02_612637-ftoc.indd xi 4/13/10 1:03 PM4/13/10 1:03 PM
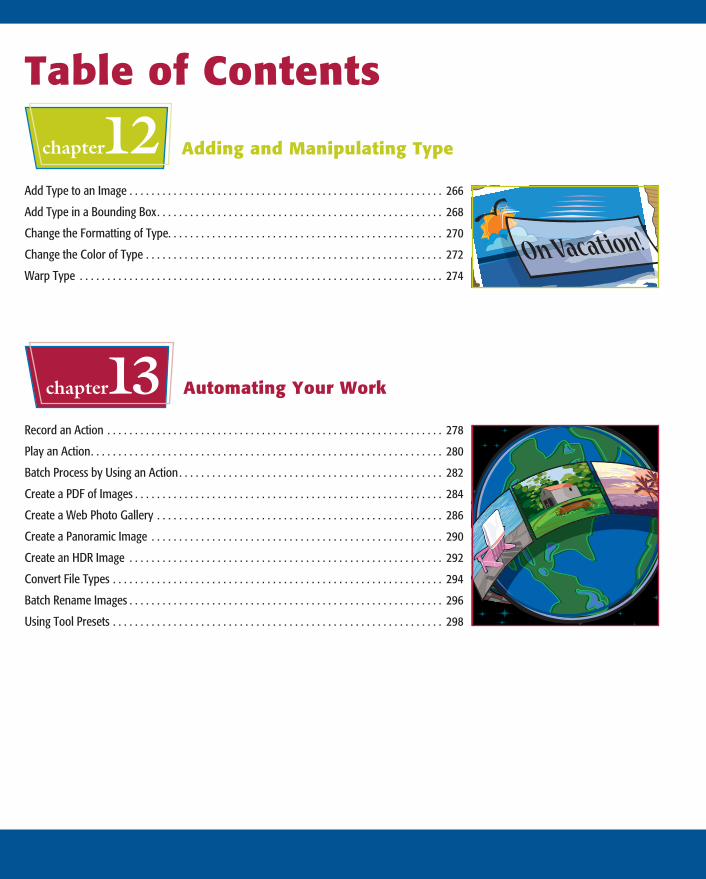
Table of Contents
chapter12 Adding and Manipulating Type
Add Type to an Image . . . . . . . . . . . . . . . . . . . . . . . . . . . . . . . . . . . . . . . . . . . . . . . . . . . . . . . . . 266
Add Type in a Bounding Box . . . . . . . . . . . . . . . . . . . . . . . . . . . . . . . . . . . . . . . . . . . . . . . . . . . . 268
Change the Formatting of Type. . . . . . . . . . . . . . . . . . . . . . . . . . . . . . . . . . . . . . . . . . . . . . . . . . 270
Change the Color of Type . . . . . . . . . . . . . . . . . . . . . . . . . . . . . . . . . . . . . . . . . . . . . . . . . . . . . . 272
Warp Type . . . . . . . . . . . . . . . . . . . . . . . . . . . . . . . . . . . . . . . . . . . . . . . . . . . . . . . . . . . . . . . . . . 274
chapter13 Automating Your Work
Record an Action . . . . . . . . . . . . . . . . . . . . . . . . . . . . . . . . . . . . . . . . . . . . . . . . . . . . . . . . . . . . . 278
Play an Action . . . . . . . . . . . . . . . . . . . . . . . . . . . . . . . . . . . . . . . . . . . . . . . . . . . . . . . . . . . . . . . . 280
Batch Process by Using an Action . . . . . . . . . . . . . . . . . . . . . . . . . . . . . . . . . . . . . . . . . . . . . . . . 282
Create a PDF of Images . . . . . . . . . . . . . . . . . . . . . . . . . . . . . . . . . . . . . . . . . . . . . . . . . . . . . . . . 284
Create a Web Photo Gallery . . . . . . . . . . . . . . . . . . . . . . . . . . . . . . . . . . . . . . . . . . . . . . . . . . . . 286
Create a Panoramic Image . . . . . . . . . . . . . . . . . . . . . . . . . . . . . . . . . . . . . . . . . . . . . . . . . . . . . 290
Create an HDR Image . . . . . . . . . . . . . . . . . . . . . . . . . . . . . . . . . . . . . . . . . . . . . . . . . . . . . . . . . 292
Convert File Types . . . . . . . . . . . . . . . . . . . . . . . . . . . . . . . . . . . . . . . . . . . . . . . . . . . . . . . . . . . . 294
Batch Rename Images . . . . . . . . . . . . . . . . . . . . . . . . . . . . . . . . . . . . . . . . . . . . . . . . . . . . . . . . . 296
Using Tool Presets . . . . . . . . . . . . . . . . . . . . . . . . . . . . . . . . . . . . . . . . . . . . . . . . . . . . . . . . . . . . 298
02_612637-ftoc.indd xii02_612637-ftoc.indd xii 4/13/10 1:03 PM4/13/10 1:03 PM

chapter14 Saving and Printing Images
Save in the Photoshop Format . . . . . . . . . . . . . . . . . . . . . . . . . . . . . . . . . . . . . . . . . . . . . . . . . . 302
Save an Image for Use in Another Application . . . . . . . . . . . . . . . . . . . . . . . . . . . . . . . . . . . . . 304
Save a JPEG for the Web . . . . . . . . . . . . . . . . . . . . . . . . . . . . . . . . . . . . . . . . . . . . . . . . . . . . . . . 306
Save a GIF for the Web . . . . . . . . . . . . . . . . . . . . . . . . . . . . . . . . . . . . . . . . . . . . . . . . . . . . . . . . 308
Save a PNG for the Web . . . . . . . . . . . . . . . . . . . . . . . . . . . . . . . . . . . . . . . . . . . . . . . . . . . . . . . 310
Add Descriptive and Copyright Information . . . . . . . . . . . . . . . . . . . . . . . . . . . . . . . . . . . . . . . 312
Save a Sliced Image . . . . . . . . . . . . . . . . . . . . . . . . . . . . . . . . . . . . . . . . . . . . . . . . . . . . . . . . . . . 314
Print by Using a PC. . . . . . . . . . . . . . . . . . . . . . . . . . . . . . . . . . . . . . . . . . . . . . . . . . . . . . . . . . . . 316
Print by Using a Mac . . . . . . . . . . . . . . . . . . . . . . . . . . . . . . . . . . . . . . . . . . . . . . . . . . . . . . . . . . 318
02_612637-ftoc.indd 102_612637-ftoc.indd 1 4/13/10 1:03 PM4/13/10 1:03 PM
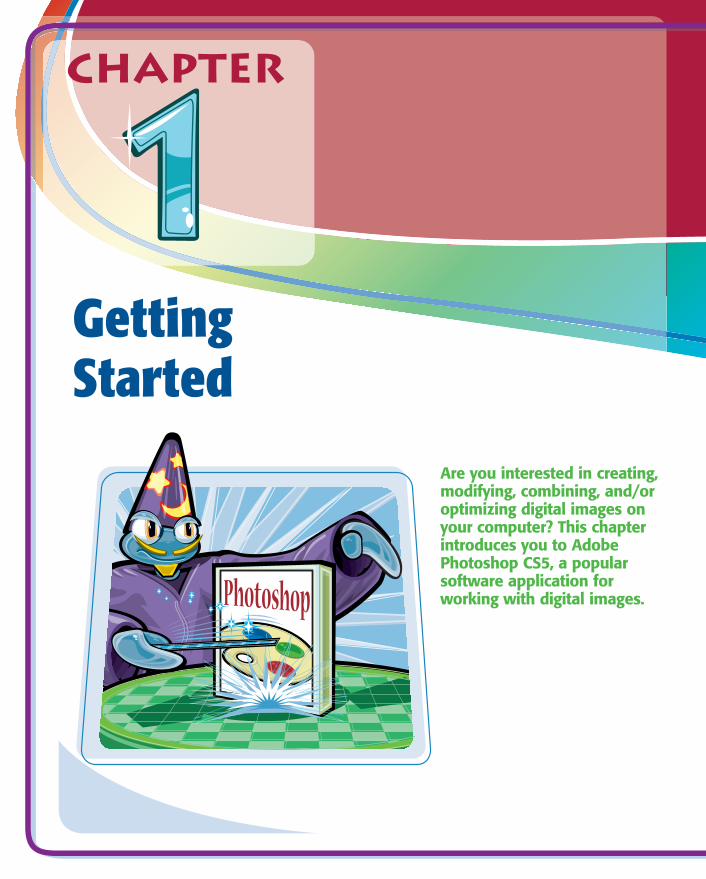
1 chapter
Getting Started
Are you interested in creating, modifying, combining, and/or optimizing digital images on your computer? This chapter introduces you to Adobe Photoshop CS5, a popular software application for working with digital images.
03_612637-ch01.indd 203_612637-ch01.indd 2 4/13/10 1:03 PM4/13/10 1:03 PM
Work with Images ................................................ 4
Understanding Photoshop ................................. 6
Start Photoshop on a PC .................................... 8
Start Photoshop on a Mac ................................. 9
The Photoshop Workspace ..............................10
Find Images for Your Projects ........................11
Set Preferences ...................................................12
Save a Workspace ..............................................14
Open an Image ...................................................16
Browse for an Image in Bridge ......................18
Sort and Filter Images in Bridge ....................20
Display a Slide Show in Bridge ......................22
Manage Images with Mini Bridge..................24
Create a New Image ..........................................26
Exit Photoshop ...................................................27
03_612637-ch01.indd 303_612637-ch01.indd 3 4/13/10 1:03 PM4/13/10 1:03 PM
4
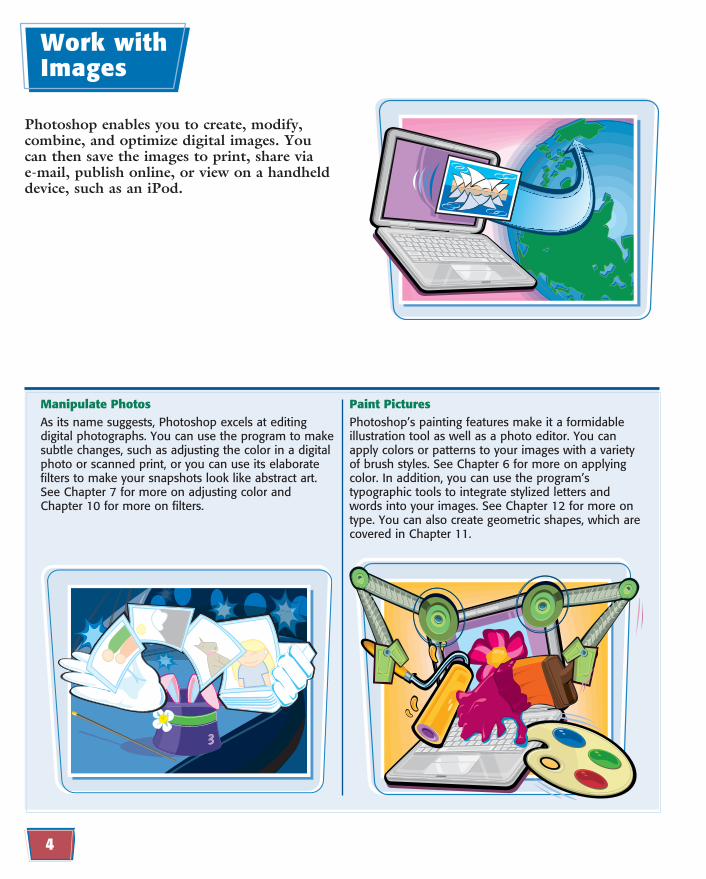
Paint PicturesPhotoshop’s painting features make it a formidable illustration tool as well as a photo editor. You can apply colors or patterns to your images with a variety of brush styles. See Chapter 6 for more on applying color. In addition, you can use the program’s typographic tools to integrate stylized letters and words into your images. See Chapter 12 for more on type. You can also create geometric shapes, which are covered in Chapter 11.
Manipulate PhotosAs its name suggests, Photoshop excels at editing digital photographs. You can use the program to make subtle changes, such as adjusting the color in a digital photo or scanned print, or you can use its elaborate filters to make your snapshots look like abstract art. See Chapter 7 for more on adjusting color and Chapter 10 for more on filters.
Photoshop enables you to create, modify, combine, and optimize digital images. You can then save the images to print, share via e-mail, publish online, or view on a handheld device, such as an iPod.
Work with Images
03_612637-ch01.indd 403_612637-ch01.indd 4 4/13/10 1:03 PM4/13/10 1:03 PM
5
Getting Started chapter1
Annu
al C
onfe
renc
e 201
0An
nual
Con
fere
nce 2
010
l Con
fere
nce
ence
2010
Va
cati
on 2
010
Va
cati
on 2
010
Va
cati
oVVVV
aV
aaaac
accaca
@
W W W
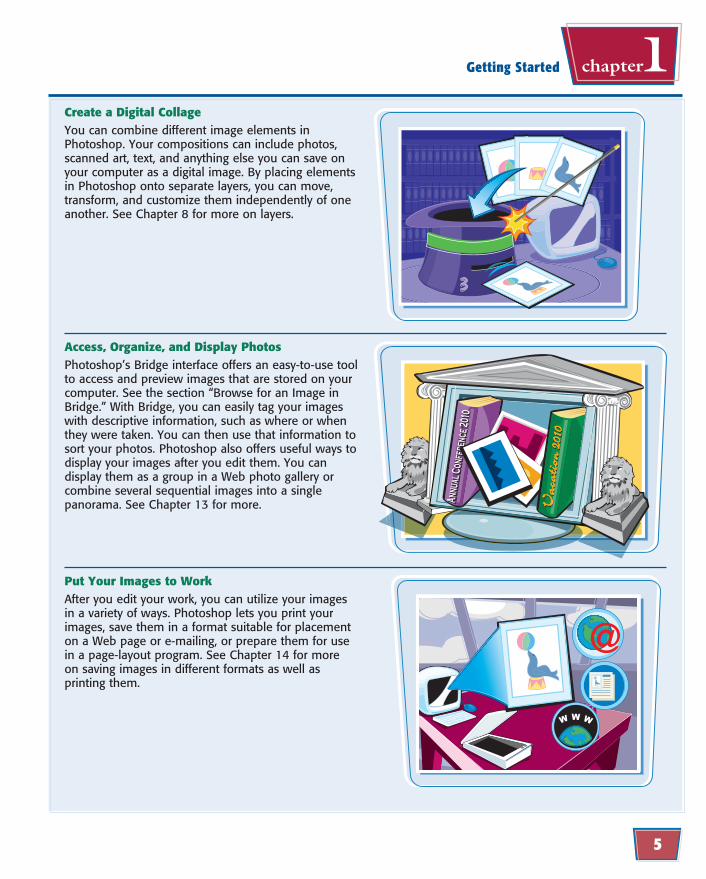
Create a Digital CollageYou can combine different image elements in Photoshop. Your compositions can include photos, scanned art, text, and anything else you can save on your computer as a digital image. By placing elements in Photoshop onto separate layers, you can move, transform, and customize them independently of one another. See Chapter 8 for more on layers.
Access, Organize, and Display PhotosPhotoshop’s Bridge interface offers an easy-to-use tool to access and preview images that are stored on your computer. See the section “Browse for an Image in Bridge.” With Bridge, you can easily tag your images with descriptive information, such as where or when they were taken. You can then use that information to sort your photos. Photoshop also offers useful ways to display your images after you edit them. You can display them as a group in a Web photo gallery or combine several sequential images into a single panorama. See Chapter 13 for more.
Put Your Images to WorkAfter you edit your work, you can utilize your images in a variety of ways. Photoshop lets you print your images, save them in a format suitable for placement on a Web page or e-mailing, or prepare them for use in a page-layout program. See Chapter 14 for more on saving images in different formats as well as printing them.
03_612637-ch01.indd 503_612637-ch01.indd 5 4/13/10 1:03 PM4/13/10 1:03 PM
6
Understanding Photoshop
Photoshop’s tools let you move, color, stylize, and add text to your images. You can optimize the contrast and lighting in photographs or turn them into interesting works of art by applying filters.
2 2
4 4
2
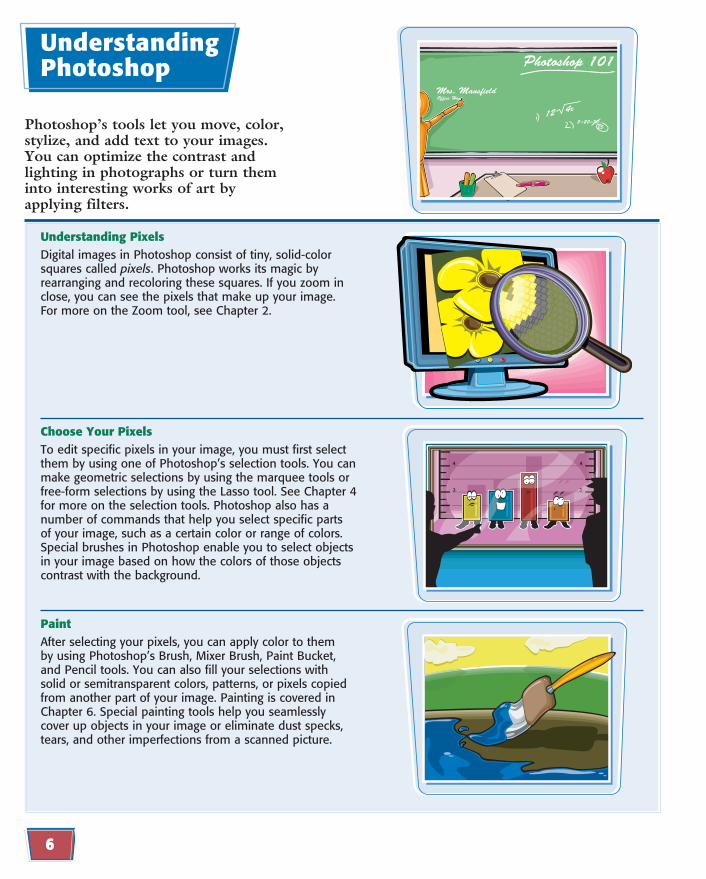
Understanding PixelsDigital images in Photoshop consist of tiny, solid-color squares called pixels. Photoshop works its magic by rearranging and recoloring these squares. If you zoom in close, you can see the pixels that make up your image. For more on the Zoom tool, see Chapter 2.
Choose Your PixelsTo edit specific pixels in your image, you must first select them by using one of Photoshop’s selection tools. You can make geometric selections by using the marquee tools or free-form selections by using the Lasso tool. See Chapter 4 for more on the selection tools. Photoshop also has a number of commands that help you select specific parts of your image, such as a certain color or range of colors. Special brushes in Photoshop enable you to select objects in your image based on how the colors of those objects contrast with the background.
PaintAfter selecting your pixels, you can apply color to them by using Photoshop’s Brush, Mixer Brush, Paint Bucket, and Pencil tools. You can also fill your selections with solid or semitransparent colors, patterns, or pixels copied from another part of your image. Painting is covered in Chapter 6. Special painting tools help you seamlessly cover up objects in your image or eliminate dust specks, tears, and other imperfections from a scanned picture.
Photoshop 101
Office HouMrs. Mansfield
12 4x5+20=30
25
03_612637-ch01.indd 603_612637-ch01.indd 6 4/13/10 1:03 PM4/13/10 1:03 PM
7
Getting Started chapter1
Snow Clear Rain
Add Typ
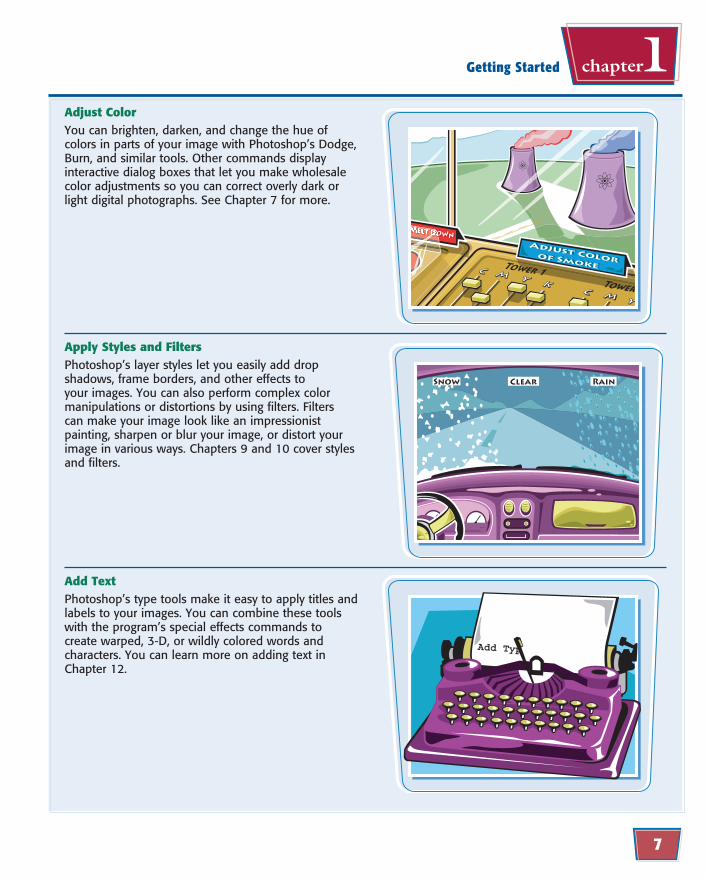
Adjust ColorYou can brighten, darken, and change the hue of colors in parts of your image with Photoshop’s Dodge, Burn, and similar tools. Other commands display interactive dialog boxes that let you make wholesale color adjustments so you can correct overly dark or light digital photographs. See Chapter 7 for more.
Apply Styles and FiltersPhotoshop’s layer styles let you easily add drop shadows, frame borders, and other effects to your images. You can also perform complex color manipulations or distortions by using filters. Filters can make your image look like an impressionist painting, sharpen or blur your image, or distort your image in various ways. Chapters 9 and 10 cover styles and filters.
Add TextPhotoshop’s type tools make it easy to apply titles and labels to your images. You can combine these tools with the program’s special effects commands to create warped, 3-D, or wildly colored words and characters. You can learn more on adding text in Chapter 12.
Melt DownMelt DownMelt DMelt DMelt DMelt DoDDoooDDoDot t
Tower 1Tower
C
C
M
M
Y
Y C C M M Y Y
K
C C M M Y Y K K
Adjust Color of Smoke
Adjust Color of Smoke
03_612637-ch01.indd 703_612637-ch01.indd 7 4/13/10 1:03 PM4/13/10 1:03 PM
8
33
2211
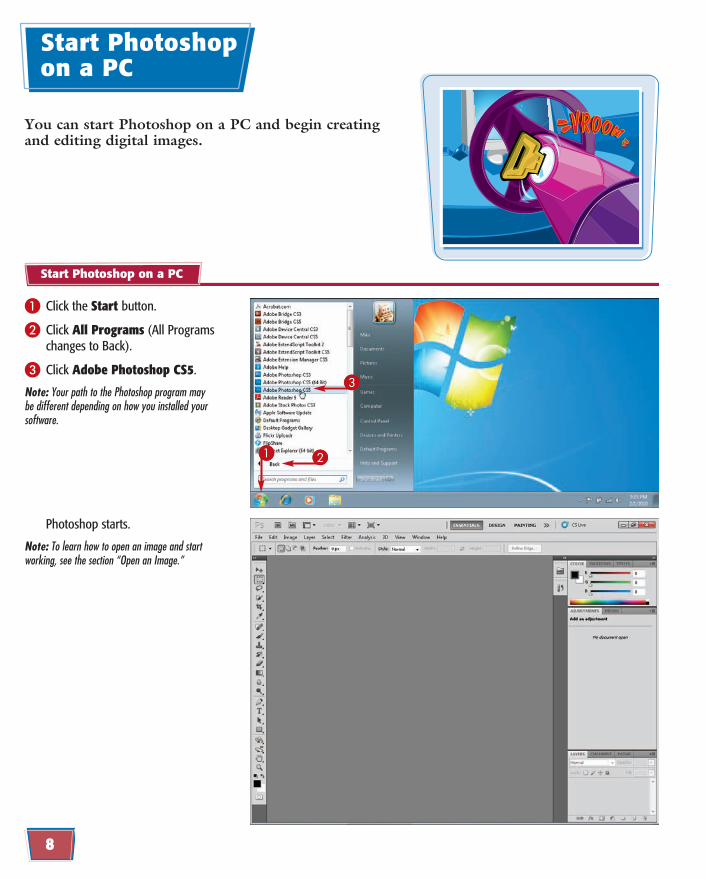
Photoshop starts.
Note: To learn how to open an image and start working, see the section “Open an Image.”
1 Click the Start button.
2 Click All Programs (All Programs changes to Back).
3 Click Adobe Photoshop CS5.
Note: Your path to the Photoshop program may be different depending on how you installed your software.
Start Photoshop on a PC
You can start Photoshop on a PC and begin creating and editing digital images.
Start Photoshop on a PC
03_612637-ch01.indd 803_612637-ch01.indd 8 4/13/10 1:03 PM4/13/10 1:03 PM
9
Getting Started chapter1
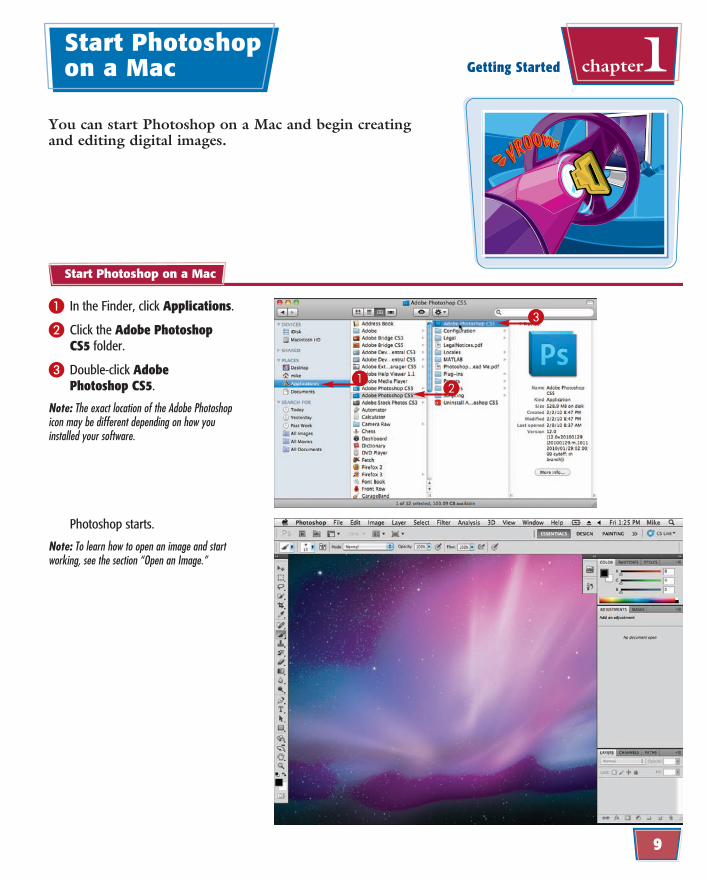
Photoshop starts.
Note: To learn how to open an image and start working, see the section “Open an Image.”
1122
331 In the Finder, click Applications.
2 Click the Adobe Photoshop CS5 folder.
3 Double-click Adobe Photoshop CS5.
Note: The exact location of the Adobe Photoshop icon may be different depending on how you installed your software.
Start Photoshop on a Mac
You can start Photoshop on a Mac and begin creating and editing digital images.
Start Photoshop on a Mac
03_612637-ch01.indd 903_612637-ch01.indd 9 4/13/10 1:03 PM4/13/10 1:03 PM
10
In Photoshop, you open your digital images in a main image window and then use a combination of tools, menu commands, and panel-based features to edit the images.
The Photoshop Workspace
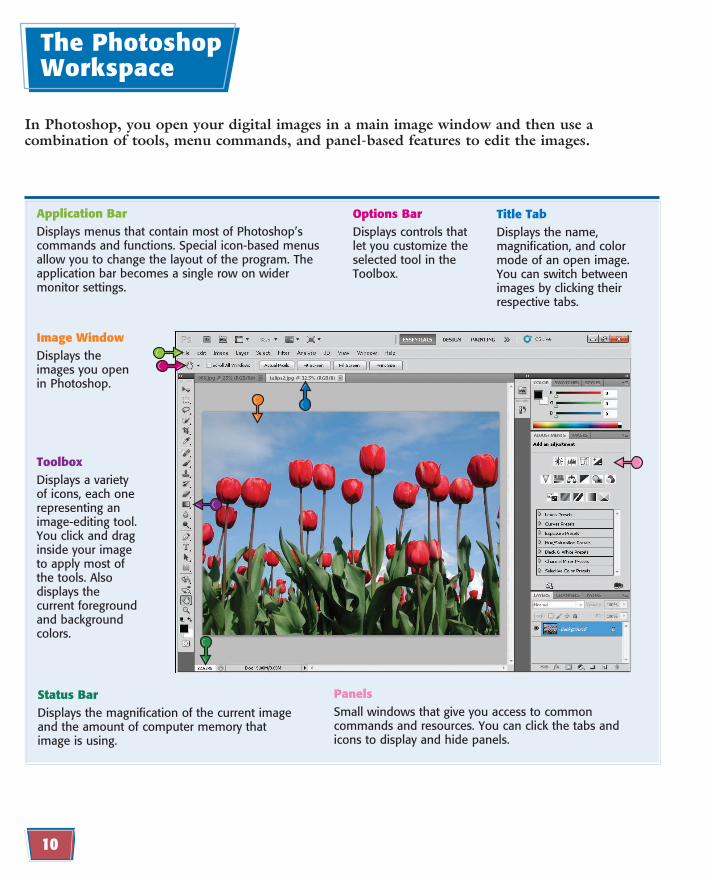
Application BarDisplays menus that contain most of Photoshop’s commands and functions. Special icon-based menus allow you to change the layout of the program. The application bar becomes a single row on wider monitor settings.
Options BarDisplays controls that let you customize the selected tool in the Toolbox.
Title TabDisplays the name, magnification, and color mode of an open image. You can switch between images by clicking their respective tabs.
Image WindowDisplays the images you open in Photoshop.
ToolboxDisplays a variety of icons, each one representing an image-editing tool. You click and drag inside your image to apply most of the tools. Also displays the current foreground and background colors.
Status BarDisplays the magnification of the current image and the amount of computer memory that image is using.
PanelsSmall windows that give you access to common commands and resources. You can click the tabs and icons to display and hide panels.
03_612637-ch01.indd 1003_612637-ch01.indd 10 4/13/10 1:03 PM4/13/10 1:03 PM
11
Getting Started chapter1Find Images for Your Projects
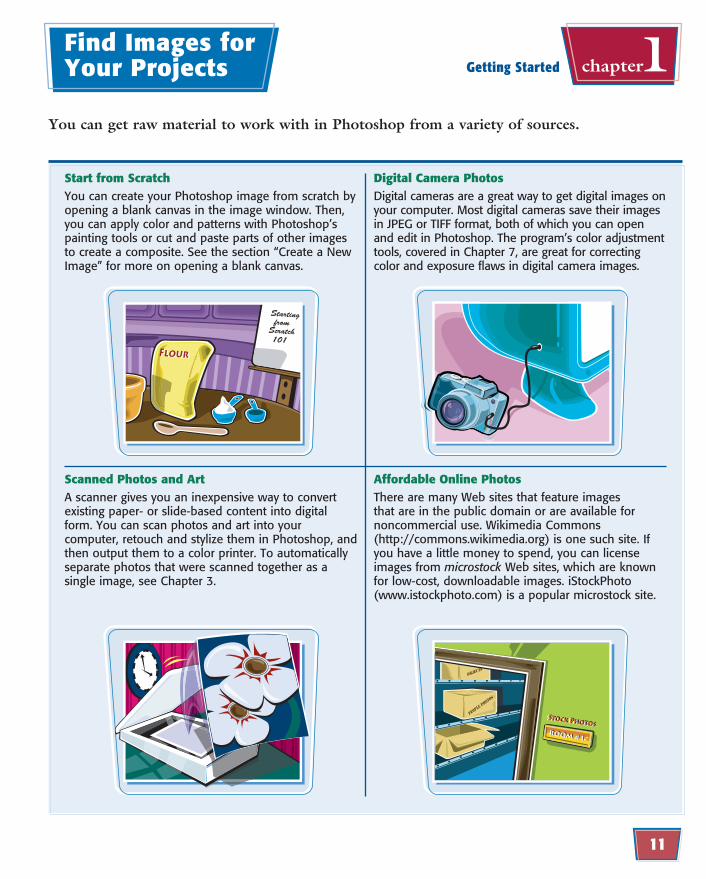
You can get raw material to work with in Photoshop from a variety of sources.
FlourFlour
Starting from
Scratch101
Digital Camera PhotosDigital cameras are a great way to get digital images on your computer. Most digital cameras save their images in JPEG or TIFF format, both of which you can open and edit in Photoshop. The program’s color adjustment tools, covered in Chapter 7, are great for correcting color and exposure flaws in digital camera images.
Start from ScratchYou can create your Photoshop image from scratch by opening a blank canvas in the image window. Then, you can apply color and patterns with Photoshop’s painting tools or cut and paste parts of other images to create a composite. See the section “Create a New Image” for more on opening a blank canvas.
Objects
ROOM #1ROOM #1
People Photos
Stock PhotosStock PhotosStock Photos
Affordable Online PhotosThere are many Web sites that feature images that are in the public domain or are available for noncommercial use. Wikimedia Commons (http://commons.wikimedia.org) is one such site. If you have a little money to spend, you can license images from microstock Web sites, which are known for low-cost, downloadable images. iStockPhoto (www.istockphoto.com) is a popular microstock site.
Scanned Photos and ArtA scanner gives you an inexpensive way to convert existing paper- or slide-based content into digital form. You can scan photos and art into your computer, retouch and stylize them in Photoshop, and then output them to a color printer. To automatically separate photos that were scanned together as a single image, see Chapter 3.
03_612637-ch01.indd 1103_612637-ch01.indd 11 4/13/10 1:03 PM4/13/10 1:03 PM
12
33
55
44
66
22
11
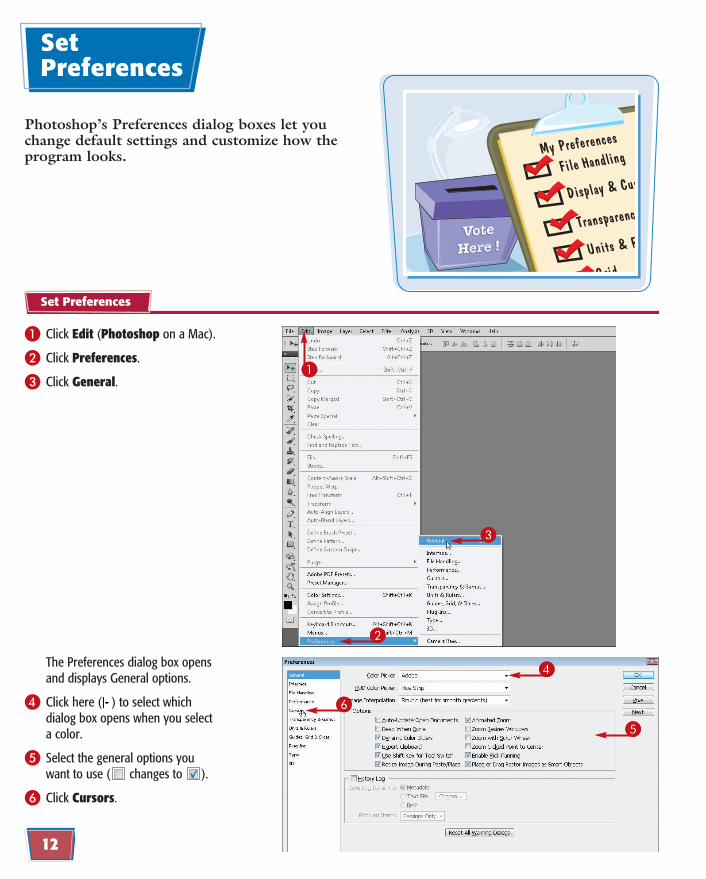
The Preferences dialog box opens and displays General options.
4 Click here ( ) to select which dialog box opens when you select a color.
5 Select the general options you want to use ( changes to ).
6 Click Cursors.
1 Click Edit (Photoshop on a Mac).
2 Click Preferences.
3 Click General.
Set Preferences
Photoshop’s Preferences dialog boxes let you change default settings and customize how the program looks.
Set Preferences
03_612637-ch01.indd 1203_612637-ch01.indd 12 4/13/10 1:04 PM4/13/10 1:04 PM
13
Getting Started chapter188
77
00!!
@@
99
How can I change the number of operations saved in the History panel?You can backtrack through your work by using the History panel. To change the number of operations Photoshop remembers, click Performance in the Preferences window and then change the History States value. Photoshop can remember as many as 1,000 operations. The default is 20.
What type of measurement units should I use in Photoshop?You should use the units most applicable to the type of output you intend to produce. Pixel units are useful for Web imaging because monitor dimensions are measured in pixels. Inches, centimeters, and picas are useful for print because those are standards for working on paper. You can set this under the Units & Rulers preferences.
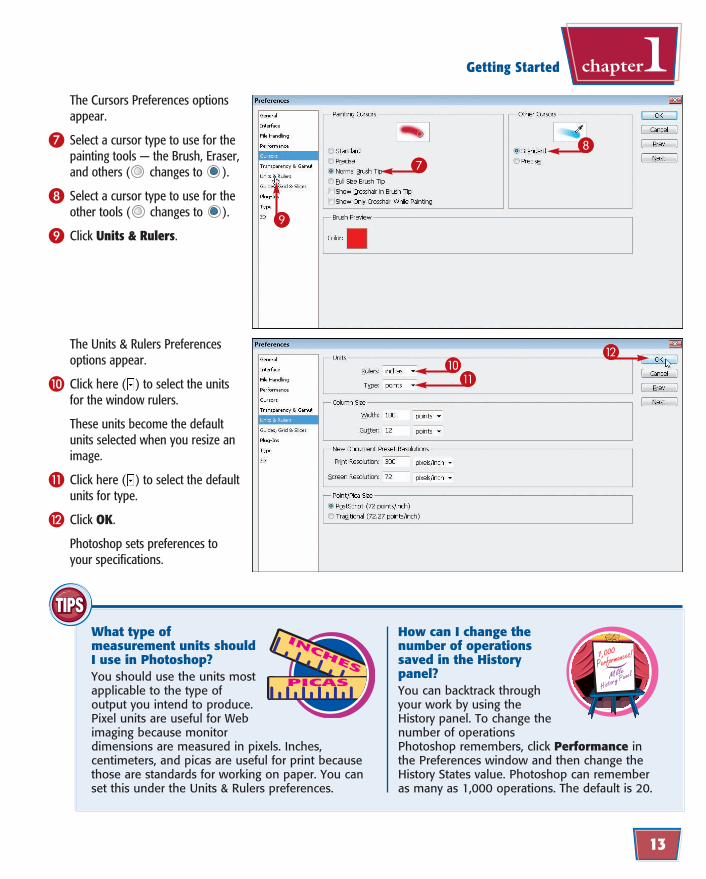
The Units & Rulers Preferences options appear.
0 Click here ( ) to select the units for the window rulers.
These units become the default units selected when you resize an image.
! Click here ( ) to select the default units for type.
@ Click OK.
Photoshop sets preferences to your specifications.
The Cursors Preferences options appear.
7 Select a cursor type to use for the painting tools — the Brush, Eraser, and others ( changes to ).
8 Select a cursor type to use for the other tools ( changes to ).
9 Click Units & Rulers.
1,000
Performances!
Mlle
History Panel
INCHES
PICAS
03_612637-ch01.indd 1303_612637-ch01.indd 13 4/13/10 1:04 PM4/13/10 1:04 PM
14
Workspaces
33
44
22
11
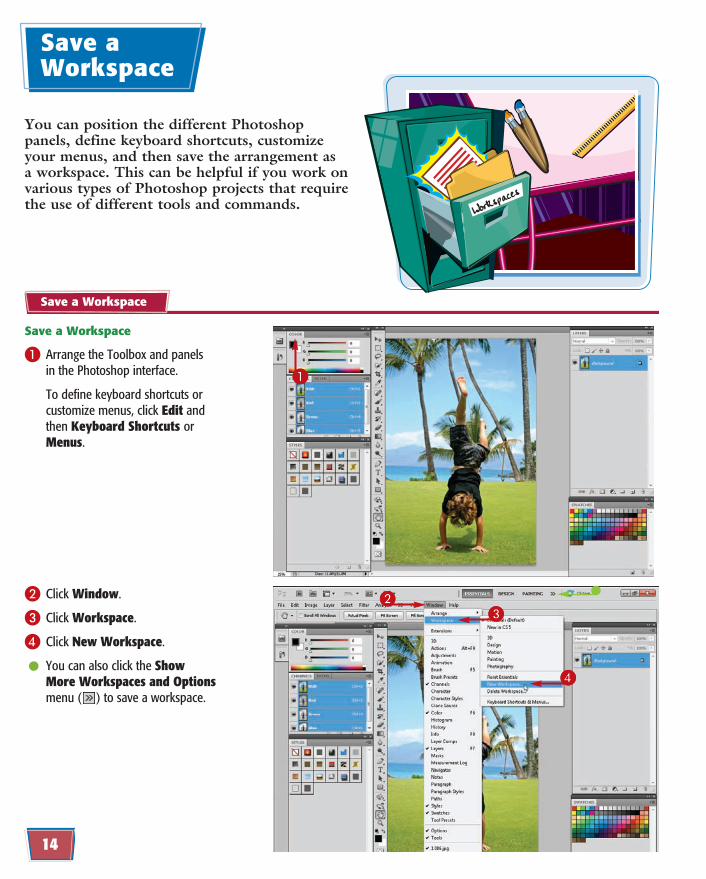
2 Click Window.
3 Click Workspace.
4 Click New Workspace.
● You can also click the Show More Workspaces and Options menu ( ) to save a workspace.
Save a Workspace
1 Arrange the Toolbox and panels in the Photoshop interface.
To define keyboard shortcuts or customize menus, click Edit and then Keyboard Shortcuts or Menus.
Save a Workspace
You can position the different Photoshop panels, define keyboard shortcuts, customize your menus, and then save the arrangement as a workspace. This can be helpful if you work on various types of Photoshop projects that require the use of different tools and commands.
Save a Workspace
03_612637-ch01.indd 1403_612637-ch01.indd 14 4/13/10 1:04 PM4/13/10 1:04 PM
15
Getting Started chapter1
2233
11
66
22
33
55 77
11
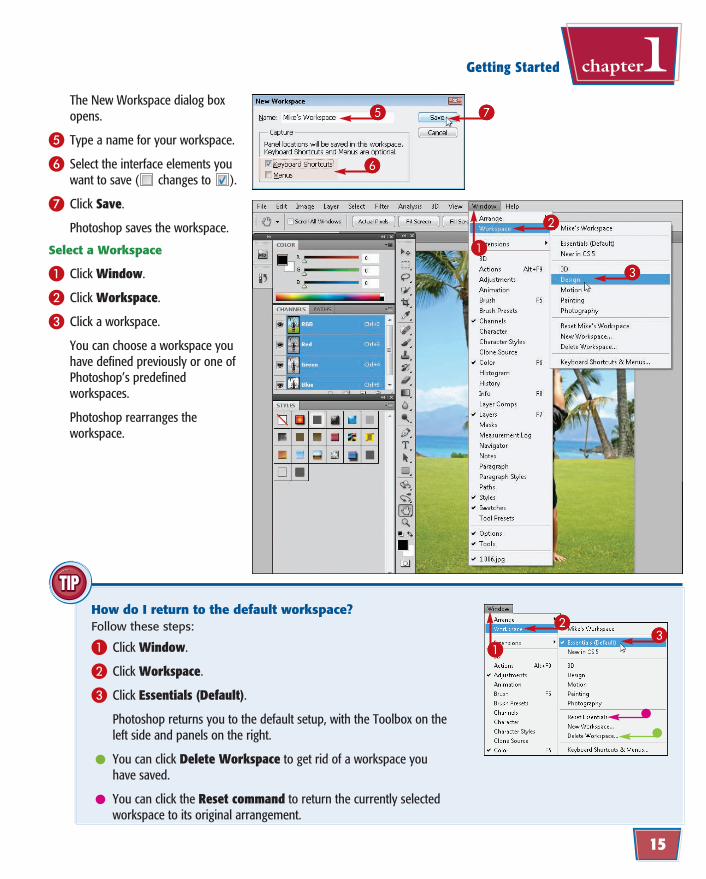
How do I return to the default workspace?Follow these steps:
1 Click Window.
2 Click Workspace.
3 Click Essentials (Default).
Photoshop returns you to the default setup, with the Toolbox on the left side and panels on the right.
● You can click Delete Workspace to get rid of a workspace you have saved.
● You can click the Reset command to return the currently selected workspace to its original arrangement.
The New Workspace dialog box opens.
5 Type a name for your workspace.
6 Select the interface elements you want to save ( changes to ).
7 Click Save.
Photoshop saves the workspace.
Select a Workspace
1 Click Window.
2 Click Workspace.
3 Click a workspace.
You can choose a workspace you have defined previously or one of Photoshop’s predefined workspaces.
Photoshop rearranges the workspace.
03_612637-ch01.indd 1503_612637-ch01.indd 15 4/13/10 1:04 PM4/13/10 1:04 PM
16
22
33
11
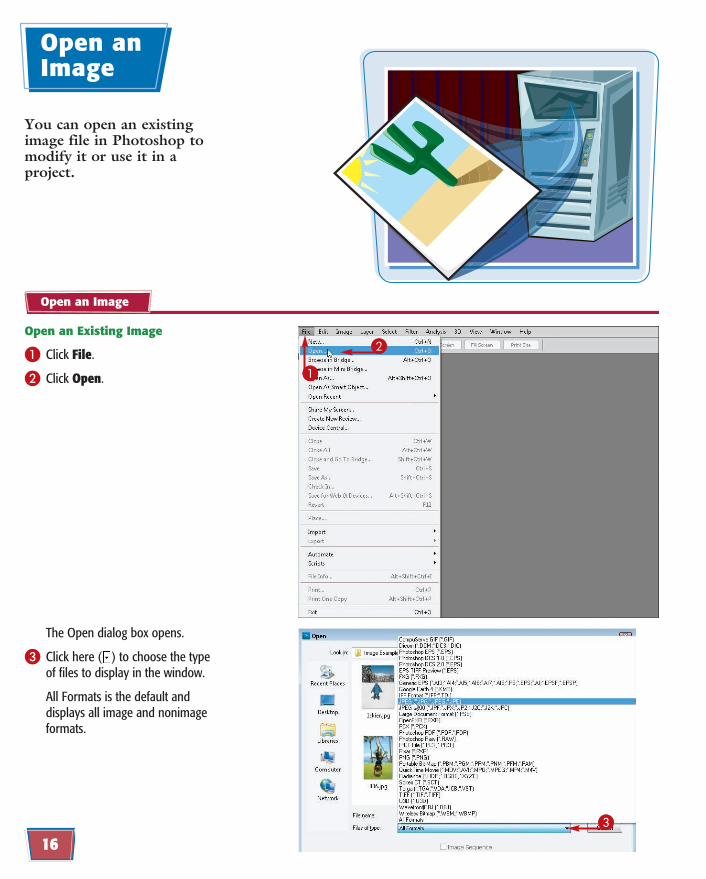
The Open dialog box opens.
3 Click here ( ) to choose the type of files to display in the window.
All Formats is the default and displays all image and nonimage formats.
Open an Existing Image
1 Click File.
2 Click Open.
Open an Image
You can open an existing image file in Photoshop to modify it or use it in a project.
Open an Image
03_612637-ch01.indd 1603_612637-ch01.indd 16 4/13/10 1:04 PM4/13/10 1:04 PM