Embed Size (px)
DESCRIPTION
planning successfull lesson
Citation preview
�©Pentronics Publishing 2006
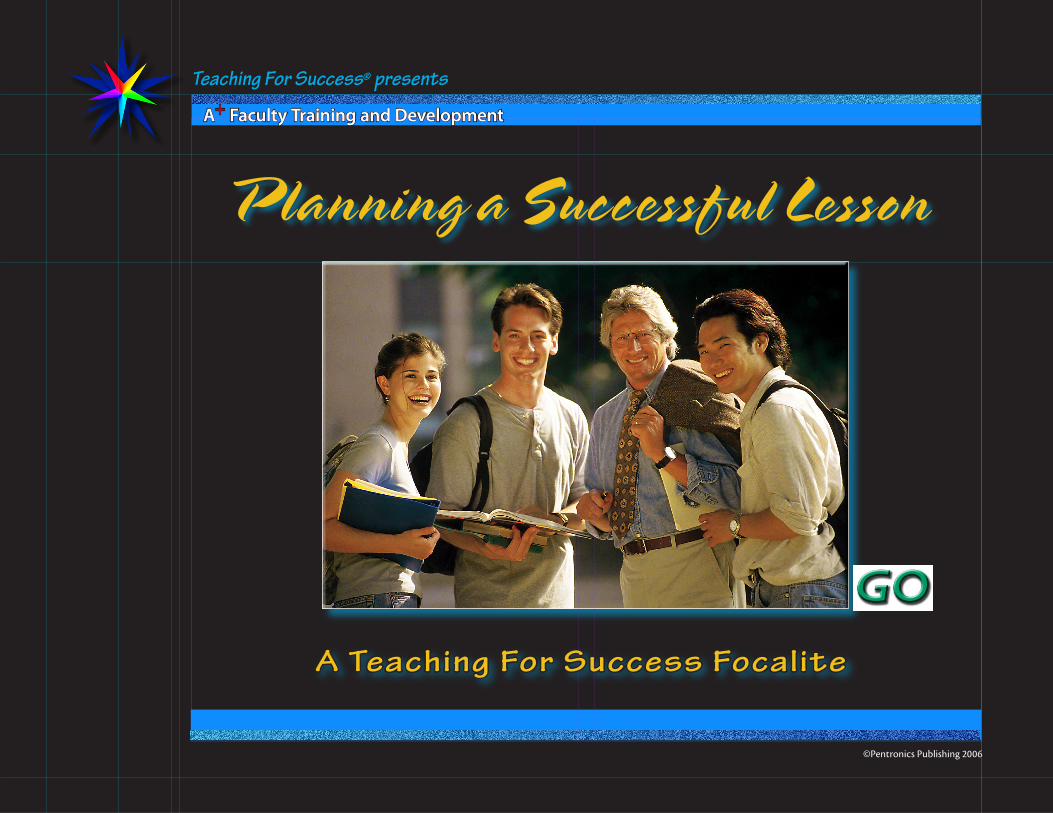
A+ Faculty Training and Development
A Teaching For Success Focalite
Teaching For Success® presents
Planning a Successful Lesson
� ©Pentronics Publishing 2006: teachingforsuccess.com
A TFS Focalite
Written by: Jack H. Shrawder, Publisher/Editor, Teaching For Success South Lake Tahoe, CA <[email protected]>
David WarnerRoane State Community CollegeHarriman, TN, [email protected]
Edited by: Jack H. Shrawder, Publisher/editor, Teaching For Success, South Lake Tahoe, CA <[email protected]>.
1What’sinItforMe?
If you value good teaching and achieving optimum learning results for your students,
then this Teaching For Success Focalite is for you. It will help you develop and refine a critical teaching skill—creating effective learning objectives and formulating lesson plans that will achieve the outcomes you desire. Building successful lessons is where the rubber meets the road in education. This is the key to developing effective teaching and learning sessions. This Focalite is especially for those who believe, as we do, that “just talking isn’t teaching.”
If you are new to teaching, you’ll first want to know: “What are lesson plans, and why should I know how to generate them?” If you are an experienced instructor and can list and define Bloom’s six levels of thinking and know how to write a learning objective, you may wish to move ahead to Chapter 5, “An Engag-ing Format.”
TFS Focalites are self-paced, self-study learning resources for fac-ulty who want to improve their skills. A knowledge test is provided at the end of this course s you can see if you understood the basics of each section. In addition, you will find a Learning Objective form and a Lesson Plan Activity template to help you more quickly and easily plan your next lesson or course using the information pre-sented here.
The goal of this Focalite is to give you the tools to plan a series of effective lessons that can be combined into a course that will help your students master the learning outcomes you desire.
The fact that you are reading this means you are already in the top 10 percent of instructors—those who care enough to improve their knowledge and skills. The knowledge and tips in this Focalite will boost your career effectiveness and make teaching a rewarding experience for you and learning more efficacious and satisfying for your students.
Planning a Successful Lesson
Chapters (Click to Go)
1. What’s in It for Me?
2. Plans?—Why Bother?
3. Being Objective
4. Thinking Like Bloom?
5. An Engaging Format.
6. Boxed in.
7. Reality Check
8. Preparation and Input
9. Effective Explorations
10. Pedal to The Metal
11. Clinging to The Cliff.
12. End in Sight
Appendix
A. Objectives Template
B. Lesson Plan Template
C. References
D. Knowledge Test
E. Afterword
How to Create A+ Lessons
Without lesson plans, effec-tive course presentation is
at best suspect and at worst a gamble. If you refuse to gamble with your students’ learning out-comes, apply the advice and prin-ciples explained in this Focalite to your course.
� ©Pentronics Publishing 2006: teachingforsuccess.com
A TFS Focalite
2Plans?WhyBother?
Agood lesson plan helps you carry out the all-important task of setting goals and describ-
ing how you will reach them. A lesson plan is the road map or framework used to plan and conduct every class from first meet-ing to final exam. In addition, lesson plans ensure you have created a logical, systematic learning process essential to making sure your students achieve the most learning in the least time.
Sure, you can walk into class without any forethought or lesson plans and talk your way through a class session or two, but fairly soon the lack of organization will become apparent to your stu-dents. Winging it will soon reduce your students’ interest and moti-vation to study and participate in your class. After all, they reason if you aren’t going to put much effort into creating a first-class learning experience, why should they put much effort into learning?
It’s your timeWhen you make an effort to become comfortable creating lesson
plans, you save yourself a great deal of time and reduce the stress of dealing with confused and sometimes angry students whose poor performance is a direct result of poorly designed lessons.
You owe it to yourself and to your students to learn the fun-damentals of lesson planning and put them to use each time you prepare for a class meeting or construct an entire course.
Richard Pregent (1994) observes that “professors who have carefully prepared lesson plans save an enormous amount of time when you teach a course again; you have a written record of everything you have done” (p. 97). Without plans, effective
course presentation is at best suspect and at worst a learning gamble.
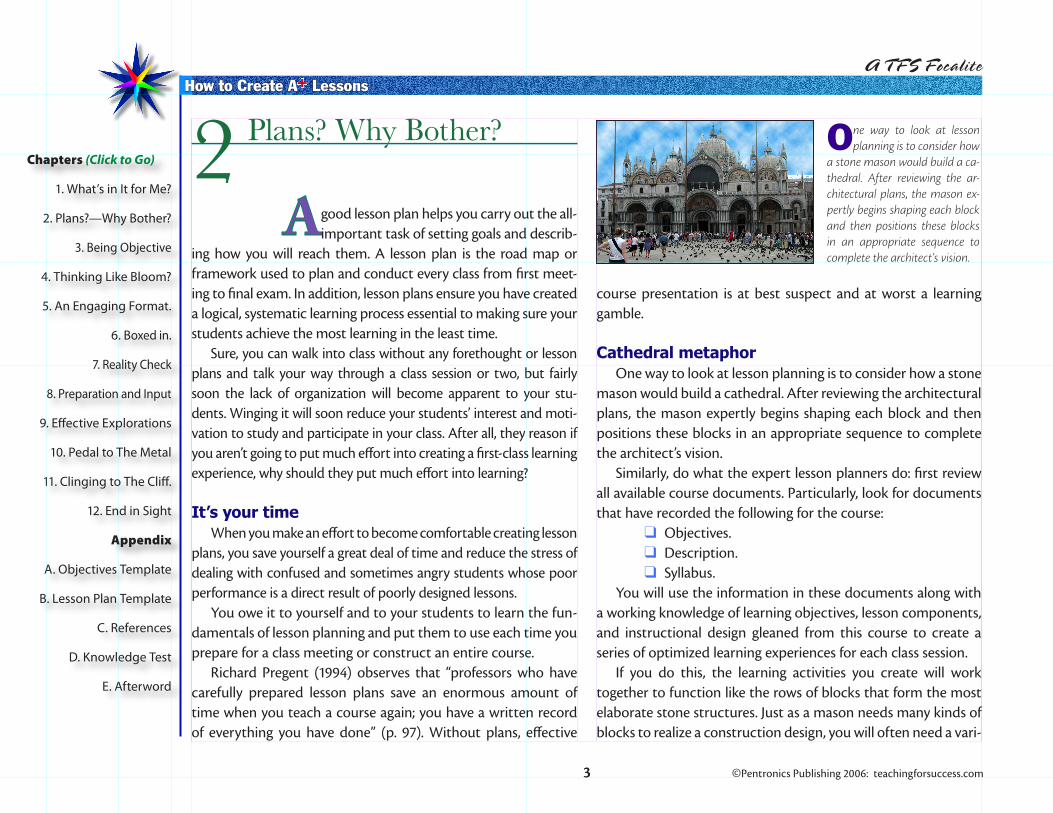
Cathedral metaphorOne way to look at lesson planning is to consider how a stone
mason would build a cathedral. After reviewing the architectural plans, the mason expertly begins shaping each block and then positions these blocks in an appropriate sequence to complete the architect’s vision.
Similarly, do what the expert lesson planners do: first review all available course documents. Particularly, look for documents that have recorded the following for the course:
q Objectives. q Description. q Syllabus.
You will use the information in these documents along with a working knowledge of learning objectives, lesson components, and instructional design gleaned from this course to create a series of optimized learning experiences for each class session.
If you do this, the learning activities you create will work together to function like the rows of blocks that form the most elaborate stone structures. Just as a mason needs many kinds of blocks to realize a construction design, you will often need a vari-
One way to look at lesson planning is to consider how
a stone mason would build a ca-thedral. After reviewing the ar-chitectural plans, the mason ex-pertly begins shaping each block and then positions these blocks in an appropriate sequence to complete the architect’s vision.
Chapters (Click to Go)
1. What’s in It for Me?
2. Plans?—Why Bother?
3. Being Objective
4. Thinking Like Bloom?
5. An Engaging Format.
6. Boxed in.
7. Reality Check
8. Preparation and Input
9. Effective Explorations
10. Pedal to The Metal
11. Clinging to The Cliff.
12. End in Sight
Appendix
A. Objectives Template
B. Lesson Plan Template
C. References
D. Knowledge Test
E. Afterword
How to Create A+ Lessons
� ©Pentronics Publishing 2006: teachingforsuccess.com
A TFS Focalite
In addition, ask if a course specification sheet is available that includes information on course objectives and expected student performance outcomes and/or competencies.
Also, read the official course catalog or bulletin to understand the official description of your course. This is important, because this statement is the one your students use to make course selections.
In summary, at the very least, you need the course topics outline and list of instructional objectives (also called outcomes or competencies) and information on textbooks that may have already been chosen for you or from a text that you have chosen.
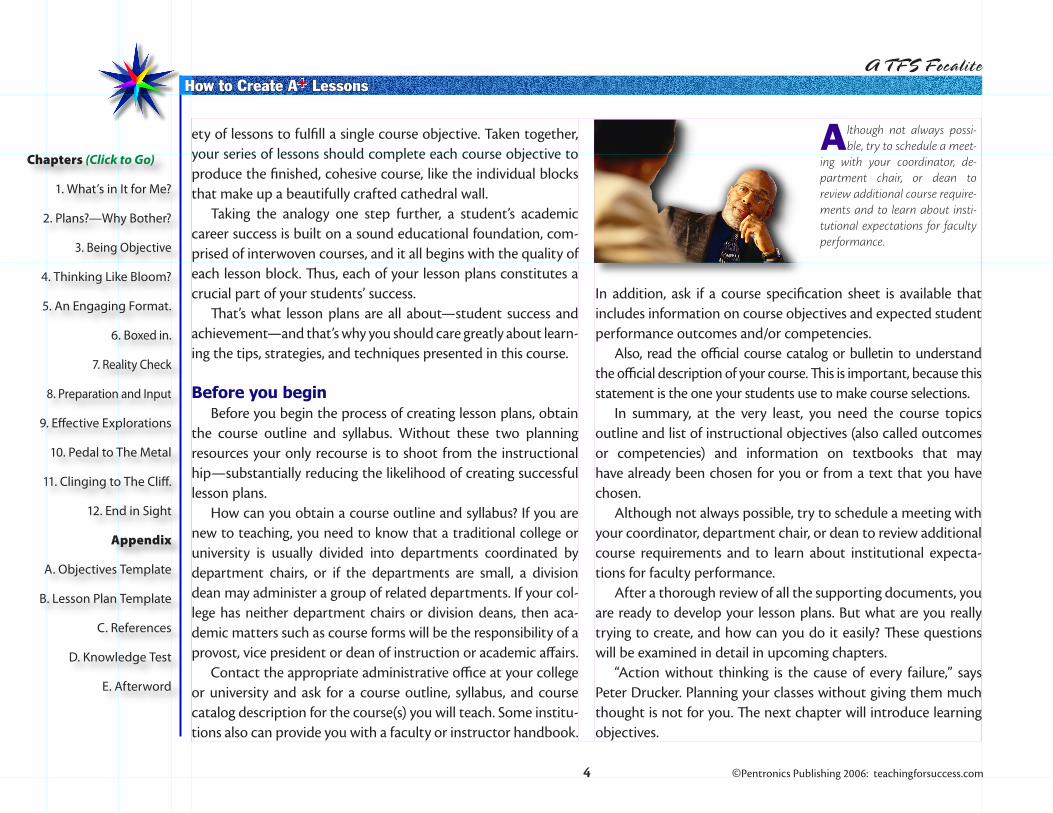
Although not always possible, try to schedule a meeting with your coordinator, department chair, or dean to review additional course requirements and to learn about institutional expecta-tions for faculty performance.
After a thorough review of all the supporting documents, you are ready to develop your lesson plans. But what are you really trying to create, and how can you do it easily? These questions will be examined in detail in upcoming chapters.
“Action without thinking is the cause of every failure,” says Peter Drucker. Planning your classes without giving them much thought is not for you. The next chapter will introduce learning objectives.
ety of lessons to fulfill a single course objective. Taken together, your series of lessons should complete each course objective to produce the finished, cohesive course, like the individual blocks that make up a beautifully crafted cathedral wall.
Taking the analogy one step further, a student’s academic career success is built on a sound educational foundation, com-prised of interwoven courses, and it all begins with the quality of each lesson block. Thus, each of your lesson plans constitutes a crucial part of your students’ success.
That’s what lesson plans are all about—student success and achievement—and that’s why you should care greatly about learn-ing the tips, strategies, and techniques presented in this course.
Before you beginBefore you begin the process of creating lesson plans, obtain
the course outline and syllabus. Without these two planning resources your only recourse is to shoot from the instructional hip—substantially reducing the likelihood of creating successful lesson plans.
How can you obtain a course outline and syllabus? If you are new to teaching, you need to know that a traditional college or university is usually divided into departments coordinated by department chairs, or if the departments are small, a division dean may administer a group of related departments. If your col-lege has neither department chairs or division deans, then aca-demic matters such as course forms will be the responsibility of a provost, vice president or dean of instruction or academic affairs.
Contact the appropriate administrative office at your college or university and ask for a course outline, syllabus, and course catalog description for the course(s) you will teach. Some institu-tions also can provide you with a faculty or instructor handbook.
Chapters (Click to Go)
1. What’s in It for Me?
2. Plans?—Why Bother?
3. Being Objective
4. Thinking Like Bloom?
5. An Engaging Format.
6. Boxed in.
7. Reality Check
8. Preparation and Input
9. Effective Explorations
10. Pedal to The Metal
11. Clinging to The Cliff.
12. End in Sight
Appendix
A. Objectives Template
B. Lesson Plan Template
C. References
D. Knowledge Test
E. Afterword
Although not always possi-ble, try to schedule a meet-
ing with your coordinator, de-partment chair, or dean to review additional course require-ments and to learn about insti-tutional expectations for faculty performance.
How to Create A+ Lessons
� ©Pentronics Publishing 2006: teachingforsuccess.com
A TFS Focalite
3BeingObjective
T here is one foundational concept you must understand in order to create suc-
cessful lesson plans: learning objectives and their variant, learning outcomes. These two terms refer to concepts used at all levels of education. If you want to discuss instruction and lesson planning intelligently with your colleagues and administrators, it’s neces-sary to develop a working knowledge of these common terms.
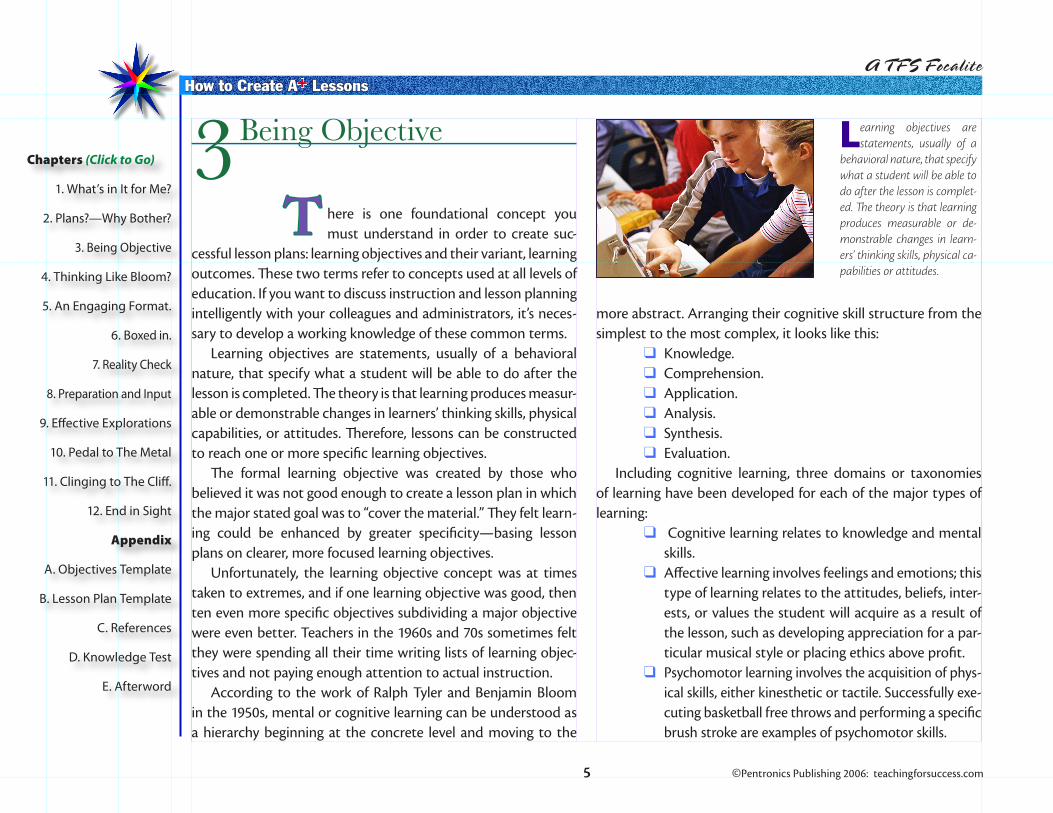
Learning objectives are statements, usually of a behavioral nature, that specify what a student will be able to do after the lesson is completed. The theory is that learning produces measur-able or demonstrable changes in learners’ thinking skills, physical capabilities, or attitudes. Therefore, lessons can be constructed to reach one or more specific learning objectives.
The formal learning objective was created by those who believed it was not good enough to create a lesson plan in which the major stated goal was to “cover the material.” They felt learn-ing could be enhanced by greater specificity—basing lesson plans on clearer, more focused learning objectives.
Unfortunately, the learning objective concept was at times taken to extremes, and if one learning objective was good, then ten even more specific objectives subdividing a major objective were even better. Teachers in the 1960s and 70s sometimes felt they were spending all their time writing lists of learning objec-tives and not paying enough attention to actual instruction.
According to the work of Ralph Tyler and Benjamin Bloom in the 1950s, mental or cognitive learning can be understood as a hierarchy beginning at the concrete level and moving to the
more abstract. Arranging their cognitive skill structure from the simplest to the most complex, it looks like this:
q Knowledge.q Comprehension.q Application.q Analysis.q Synthesis.q Evaluation.
Including cognitive learning, three domains or taxonomies of learning have been developed for each of the major types of learning:
q Cognitive learning relates to knowledge and mental skills.
q Affective learning involves feelings and emotions; this type of learning relates to the attitudes, beliefs, inter-ests, or values the student will acquire as a result of the lesson, such as developing appreciation for a par-ticular musical style or placing ethics above profit.
q Psychomotor learning involves the acquisition of phys-ical skills, either kinesthetic or tactile. Successfully exe-cuting basketball free throws and performing a specific brush stroke are examples of psychomotor skills.
Learning objectives are statements, usually of a
behavioral nature, that specify what a student will be able to do after the lesson is complet-ed. The theory is that learning produces measurable or de-monstrable changes in learn-ers’ thinking skills, physical ca-pabilities or attitudes.
Chapters (Click to Go)
1. What’s in It for Me?
2. Plans?—Why Bother?
3. Being Objective
4. Thinking Like Bloom?
5. An Engaging Format.
6. Boxed in.
7. Reality Check
8. Preparation and Input
9. Effective Explorations
10. Pedal to The Metal
11. Clinging to The Cliff.
12. End in Sight
Appendix
A. Objectives Template
B. Lesson Plan Template
C. References
D. Knowledge Test
E. Afterword
How to Create A+ Lessons
� ©Pentronics Publishing 2006: teachingforsuccess.com
A TFS Focalite
To keep this course at a reasonable length, we’ll limit this dis-cussion to a brief explanation of the categories that describe the cognitive domain of learning. You may wish to expand your knowledge to the other two domains by doing an Internet search. One site with information on all three domains can be found at: <http://www.olemiss.edu/depts/educ_school2/docs/stai_manual/manual10.htm>.
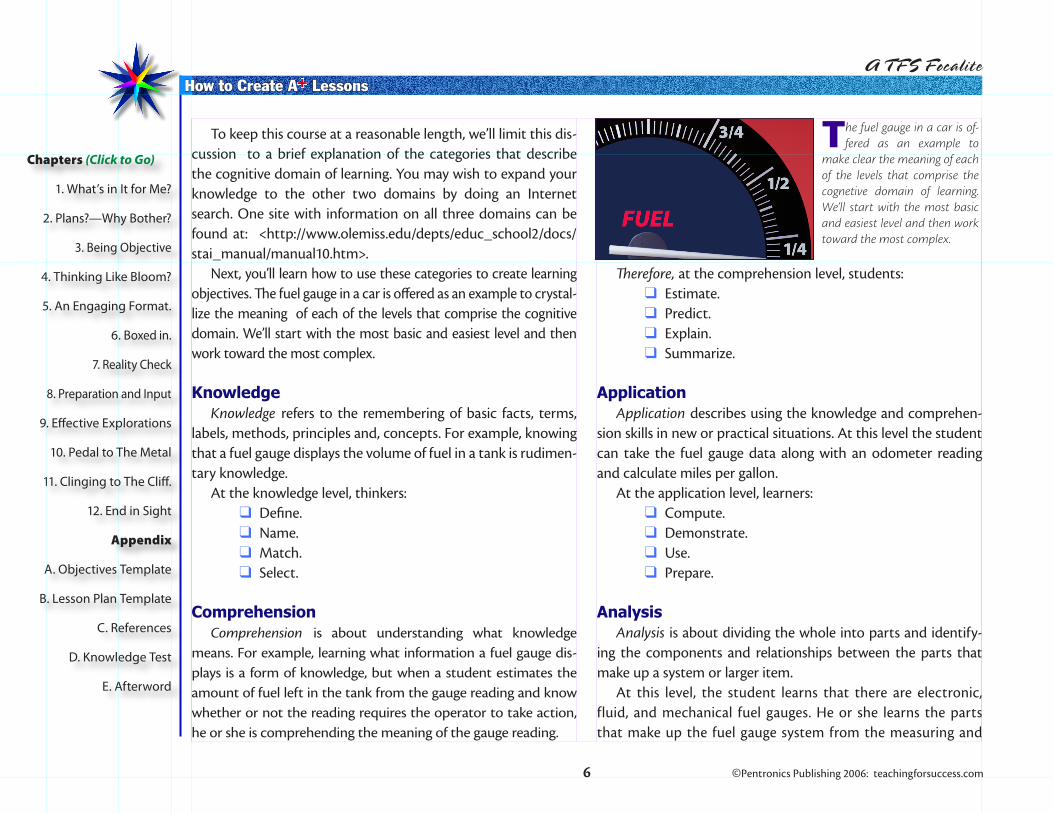
Next, you’ll learn how to use these categories to create learning objectives. The fuel gauge in a car is offered as an example to crystal-lize the meaning of each of the levels that comprise the cognitive domain. We’ll start with the most basic and easiest level and then work toward the most complex.
KnowledgeKnowledge refers to the remembering of basic facts, terms,
labels, methods, principles and, concepts. For example, knowing that a fuel gauge displays the volume of fuel in a tank is rudimen-tary knowledge.
At the knowledge level, thinkers: q Define.q Name.q Match.q Select.
ComprehensionComprehension is about understanding what knowledge
means. For example, learning what information a fuel gauge dis-plays is a form of knowledge, but when a student estimates the amount of fuel left in the tank from the gauge reading and know whether or not the reading requires the operator to take action, he or she is comprehending the meaning of the gauge reading.
Therefore, at the comprehension level, students: q Estimate.q Predict.q Explain.q Summarize.
ApplicationApplication describes using the knowledge and comprehen-
sion skills in new or practical situations. At this level the student can take the fuel gauge data along with an odometer reading and calculate miles per gallon.
At the application level, learners: q Compute.q Demonstrate.q Use.q Prepare.
AnalysisAnalysis is about dividing the whole into parts and identify-
ing the components and relationships between the parts that make up a system or larger item.
At this level, the student learns that there are electronic, fluid, and mechanical fuel gauges. He or she learns the parts that make up the fuel gauge system from the measuring and
Chapters (Click to Go)
1. What’s in It for Me?
2. Plans?—Why Bother?
3. Being Objective
4. Thinking Like Bloom?
5. An Engaging Format.
6. Boxed in.
7. Reality Check
8. Preparation and Input
9. Effective Explorations
10. Pedal to The Metal
11. Clinging to The Cliff.
12. End in Sight
Appendix
A. Objectives Template
B. Lesson Plan Template
C. References
D. Knowledge Test
E. Afterword
How to Create A+ Lessons
The fuel gauge in a car is of-fered as an example to
make clear the meaning of each of the levels that comprise the cognetive domain of learning. We’ll start with the most basic and easiest level and then work toward the most complex.
� ©Pentronics Publishing 2006: teachingforsuccess.com
A TFS Focalite
sending unit in the tank to the display unit on the dashboard or instrument panel.
At the analysis level, students: q Diagram.q Outline.q Subdivide.q Discriminate.
SynthesisSynthesis is the inverse of analysis: combining the parts into
a new whole. At this level the student has learned sufficient knowledge and
gained adequate comprehension, application, and analysis skills to learn how to put together a fuel measuring system from com-ponents. The student is thinking at the system level, and could well design and build a different type of structure from what currently exists.
At the synthesis, level the student: q Categorizes.q Rearranges.q Combines.q Composes.
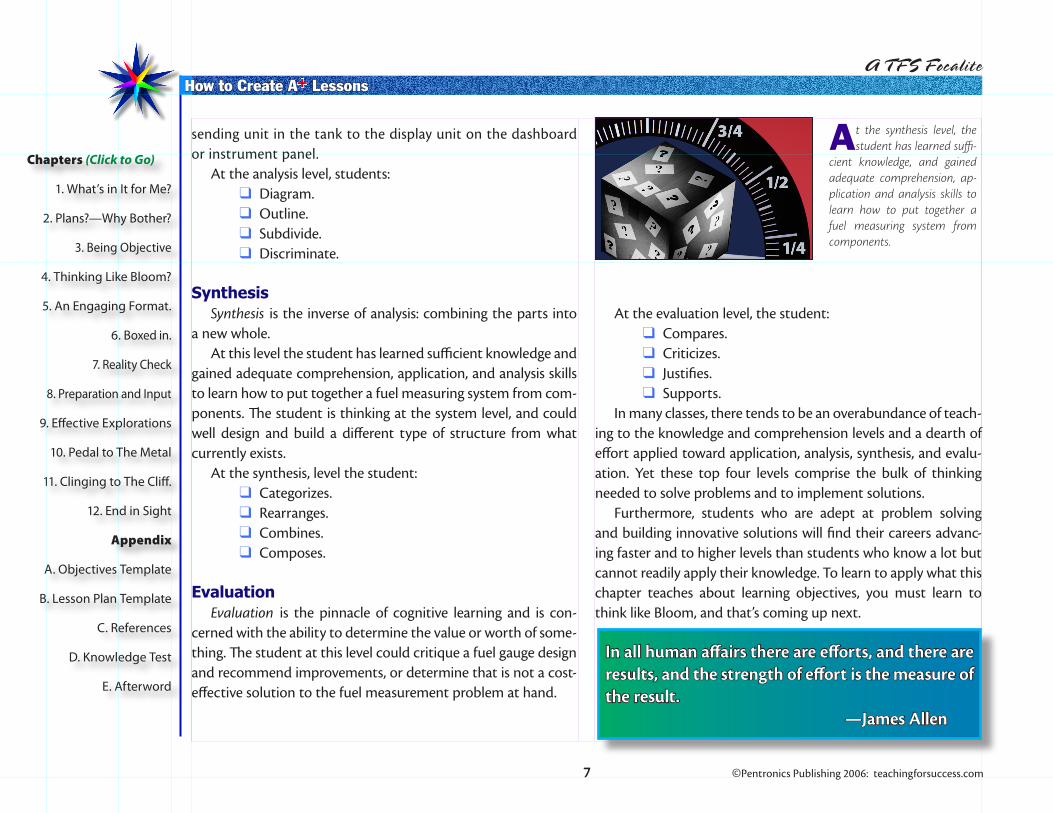
EvaluationEvaluation is the pinnacle of cognitive learning and is con-
cerned with the ability to determine the value or worth of some-thing. The student at this level could critique a fuel gauge design and recommend improvements, or determine that is not a cost-effective solution to the fuel measurement problem at hand.
At the evaluation level, the student: q Compares.q Criticizes.q Justifies.q Supports.
In many classes, there tends to be an overabundance of teach-ing to the knowledge and comprehension levels and a dearth of effort applied toward application, analysis, synthesis, and evalu-ation. Yet these top four levels comprise the bulk of thinking needed to solve problems and to implement solutions.
Furthermore, students who are adept at problem solving and building innovative solutions will find their careers advanc-ing faster and to higher levels than students who know a lot but cannot readily apply their knowledge. To learn to apply what this chapter teaches about learning objectives, you must learn to think like Bloom, and that’s coming up next.
Chapters (Click to Go)
1. What’s in It for Me?
2. Plans?—Why Bother?
3. Being Objective
4. Thinking Like Bloom?
5. An Engaging Format.
6. Boxed in.
7. Reality Check
8. Preparation and Input
9. Effective Explorations
10. Pedal to The Metal
11. Clinging to The Cliff.
12. End in Sight
Appendix
A. Objectives Template
B. Lesson Plan Template
C. References
D. Knowledge Test
E. Afterword
In all human affairs there are efforts, and there are results, and the strength of effort is the measure of the result. —James Allen
How to Create A+ Lessons
At the synthesis level, the student has learned suffi-
cient knowledge, and gained adequate comprehension, ap-plication and analysis skills to learn how to put together a fuel measuring system from components.
� ©Pentronics Publishing 2006: teachingforsuccess.com
A TFS Focalite
4ThinkingLikeBloom
The easiest way to become further acquainted with Bloom’s taxonomy of
cognitive skills is to work a practical example through all the levels, from comprehension to evaluation. In this chapter, we’ll create a set of learning objectives for teaching a module on fuel gauge systems to automotive technicians at each of the six levels of cognitive learning. Now, admittedly, the human brain does not precisely support such a breakdown of thinking skills into these compartments, but the system will help you plan lessons that contain more complex learning.
Knowledge—given an instrument panel comprising several gauges and indicators, the student correctly locates and labels the fuel gauge.
Comprehension—given a fuel gauge reading three-quarters full, the student predicts whether the vehicle’s engine will start and run.
Application—given the miles a vehicle is driven and the fuel gauge reading at the start and end of the trip, the student will calculate the fuel efficiency of the vehicle in miles per gallon.
Analysis—given the vehicle’s repair manual, the student can identify the wiring and parts of the fuel gauge system.
Synthesis—given the voltage readings at various points of the fuel gauge system, the student identifies the defective part.
Evaluation—given the design specification for a new vehicle, the student describes the most cost-effective fuel gauge system design and the design trade-offs among accuracy, reliability, maintainability, and installation cost.
Learning OutcomesLesson plans, then, are created from an organized set of
specific learning objectives. If you find that Bloom’s taxonomy doesn’t fit how you think about your subject, you may prefer to create a set of learning outcomes.
What is a learning outcome? A more modern term, “learning outcome” refers to a statement in your own words of how your students will demonstrate that they have mastered the mate-rial.
A learning outcome for a class on automotive fuel gauges might read like this: After completing the chapter on fuel sys-tems, the successful student will work with a project group whose task it will be to prepare a five-minute class presentation on the various types of fuel gauges, how they function, and the strengths and weaknesses of each design.
A learning outcome can be phrased in any way that makes sense to you and communicates the learning intentions to you, your students and your administrator.
Now it’s your turn: On page 10 you will find the first planning form, designed to help you sit down with your textbook and syl-labus and create a set of learning objectives based on Bloom’s taxonomy of thinking skill levels.
The goal here is to ensure that you create learning objectives at the higher levels of thinking skills. Without this planning sheet,
Chapters (Click to Go)
1. What’s in It for Me?
2. Plans?—Why Bother?
3. Being Objective
4. Thinking Like Bloom?
5. An Engaging Format.
6. Boxed in.
7. Reality Check
8. Preparation and Input
9. Effective Explorations
10. Pedal to The Metal
11. Clinging to The Cliff.
12. End in Sight
Appendix
A. Objectives Template
B. Lesson Plan Template
C. References
D. Knowledge Test
E. Afterword
How to Create A+ Lessons
Learning objectives help you walk through any complex
subject in a clear and balanced fashion. They should be phrased in any way that makes sense to you and is easily communicated to your students your supervisor.
� ©Pentronics Publishing 2006: teachingforsuccess.com
A TFS Focalite
and referring to Bloom’s levels, you will have a tendency to create learning goals at the lowest levels, such as knowledge and com-prehension, thus depriving your students of development at the higher thinking levels of learning.
The chart you’ll find on the next page illustrates how to use Bloom’s taxonomy of thinking skills to create learning objectives for a typical concept-centered class—and what better class to use as an example than a class covering Teaching For Success concepts?
First, browse through the examples (in red type) at each level and note how simple and concise learning objectives can be. Space is provided at the top of the form to write a general learn-ing or, if you like, performance objective for a single class session or unit of instruction.
Then, subordinate objectives can be created at as many spe-cific thinking skill levels as is appropriate to the content, as dem-onstrated in this example. A blank copy of this form is provided for you to print according to your needs in the Lesson Plan Tem-plate section at the end of this course.
If this form is not to your liking, take a few minutes and create a form that better supports the way you think and work. The important point here is to stress the advantages of working with learning objectives and guard against any tendency to go over-board with too much complexity.
The bottom line is, use Bloom’s taxonomy to create learning objectives that ensure students learn and practice at the highest levels of thinking skills in each topic.
Chapters (Click to Go)
1. What’s in It for Me?
2. Plans?—Why Bother?
3. Being Objective
4. Thinking Like Bloom?
5. An Engaging Format.
6. Boxed in.
7. Reality Check
8. Preparation and Input
9. Effective Explorations
10. Pedal to The Metal
11. Clinging to The Cliff.
12. End in Sight
Appendix
A. Objectives Template
B. Lesson Plan Template
C. References
D. Knowledge Test
E. Afterword
How to Create A+ Lessons
Things should be made as simple as possible but no simpler.
— Albert Einstein.
�0 ©Pentronics Publishing 2006: teachingforsuccess.com
A TFS Focalite
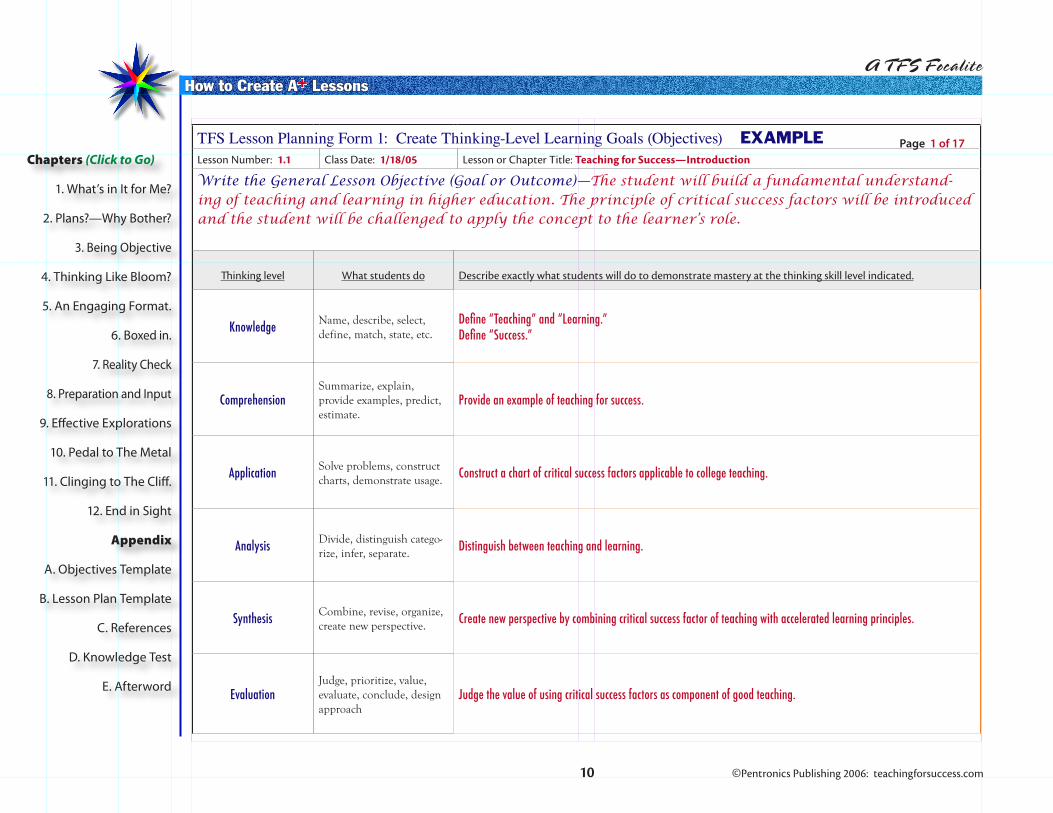
TFS Lesson Planning Form 1: Create Thinking-Level Learning Goals (Objectives) EXAMPLELesson Number: 1.1 Class Date: 1/18/05 Lesson or Chapter Title: Teaching for Success—Introduction
Write the General Lesson Objective (Goal or Outcome)—The student will build a fundamental understand-ing of teaching and learning in higher education. The principle of critical success factors will be introduced and the student will be challenged to apply the concept to the learner’s role.
Thinking level What students do Describe exactly what students will do to demonstrate mastery at the thinking skill level indicated.
Knowledge Name, describe, select, define, match, state, etc.
Define “Teaching” and “Learning.”Define “Success.”
ComprehensionSummarize, explain, provide examples, predict, estimate.
Provide an example of teaching for success.
Application Solve problems, construct charts, demonstrate usage. Construct a chart of critical success factors applicable to college teaching.
Analysis Divide, distinguish catego-rize, infer, separate. Distinguish between teaching and learning.
Synthesis Combine, revise, organize, create new perspective. Create new perspective by combining critical success factor of teaching with accelerated learning principles.
EvaluationJudge, prioritize, value, evaluate, conclude, design approach
Judge the value of using critical success factors as component of good teaching.
Page 1 of 17Chapters (Click to Go)
1. What’s in It for Me?
2. Plans?—Why Bother?
3. Being Objective
4. Thinking Like Bloom?
5. An Engaging Format.
6. Boxed in.
7. Reality Check
8. Preparation and Input
9. Effective Explorations
10. Pedal to The Metal
11. Clinging to The Cliff.
12. End in Sight
Appendix
A. Objectives Template
B. Lesson Plan Template
C. References
D. Knowledge Test
E. Afterword
How to Create A+ Lessons
�� ©Pentronics Publishing 2006: teachingforsuccess.com
A TFS Focalite
5AnEngagingFormat
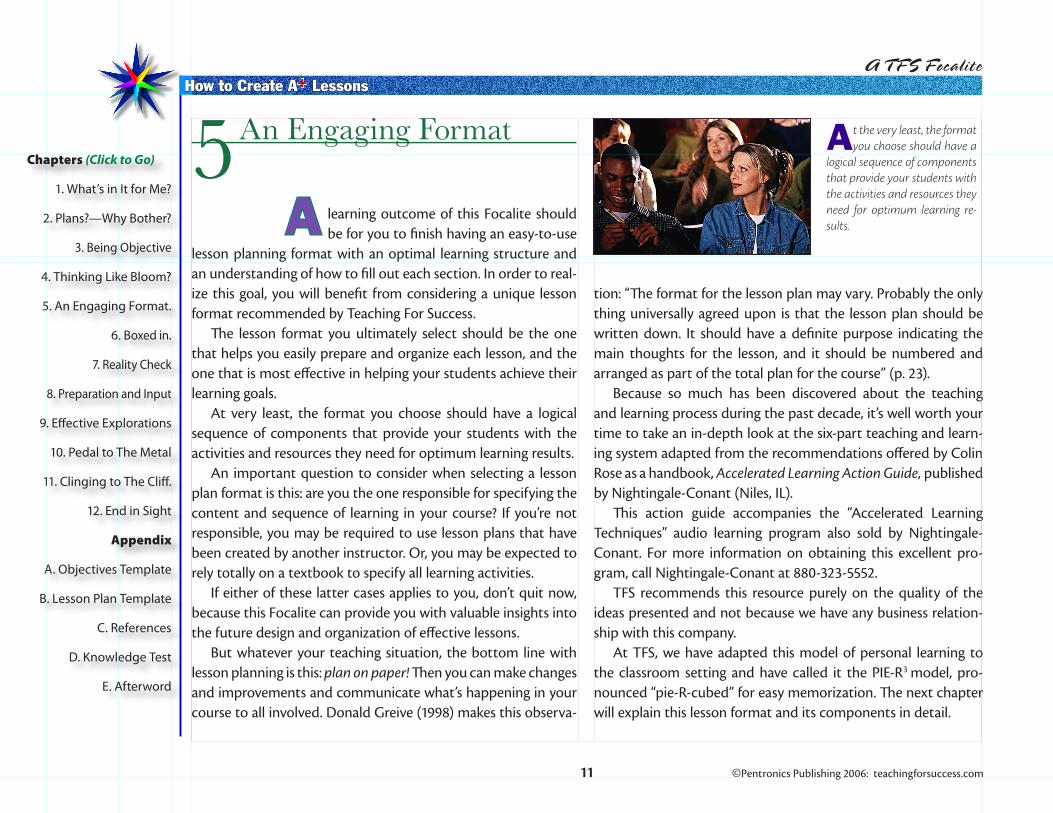
A learning outcome of this Focalite should be for you to finish having an easy-to-use
lesson planning format with an optimal learning structure and an understanding of how to fill out each section. In order to real-ize this goal, you will benefit from considering a unique lesson format recommended by Teaching For Success.
The lesson format you ultimately select should be the one that helps you easily prepare and organize each lesson, and the one that is most effective in helping your students achieve their learning goals.
At very least, the format you choose should have a logical sequence of components that provide your students with the activities and resources they need for optimum learning results.
An important question to consider when selecting a lesson plan format is this: are you the one responsible for specifying the content and sequence of learning in your course? If you’re not responsible, you may be required to use lesson plans that have been created by another instructor. Or, you may be expected to rely totally on a textbook to specify all learning activities.
If either of these latter cases applies to you, don’t quit now, because this Focalite can provide you with valuable insights into the future design and organization of effective lessons.
But whatever your teaching situation, the bottom line with lesson planning is this: plan on paper! Then you can make changes and improvements and communicate what’s happening in your course to all involved. Donald Greive (1998) makes this observa-
Chapters (Click to Go)
1. What’s in It for Me?
2. Plans?—Why Bother?
3. Being Objective
4. Thinking Like Bloom?
5. An Engaging Format.
6. Boxed in.
7. Reality Check
8. Preparation and Input
9. Effective Explorations
10. Pedal to The Metal
11. Clinging to The Cliff.
12. End in Sight
Appendix
A. Objectives Template
B. Lesson Plan Template
C. References
D. Knowledge Test
E. Afterword
How to Create A+ Lessons
tion: “The format for the lesson plan may vary. Probably the only thing universally agreed upon is that the lesson plan should be written down. It should have a definite purpose indicating the main thoughts for the lesson, and it should be numbered and arranged as part of the total plan for the course” (p. 23).
Because so much has been discovered about the teaching and learning process during the past decade, it’s well worth your time to take an in-depth look at the six-part teaching and learn-ing system adapted from the recommendations offered by Colin Rose as a handbook, Accelerated Learning Action Guide, published by Nightingale-Conant (Niles, IL).
This action guide accompanies the “Accelerated Learning Techniques” audio learning program also sold by Nightingale-Conant. For more information on obtaining this excellent pro-gram, call Nightingale-Conant at 880-323-5552.
TFS recommends this resource purely on the quality of the ideas presented and not because we have any business relation-ship with this company.
At TFS, we have adapted this model of personal learning to the classroom setting and have called it the PIE-R3 model, pro-nounced “pie-R-cubed” for easy memorization. The next chapter will explain this lesson format and its components in detail.
At the very least, the format you choose should have a
logical sequence of components that provide your students with the activities and resources they need for optimum learning re-sults.
�� ©Pentronics Publishing 2006: teachingforsuccess.com
A TFS Focalite
6Boxedin
Sometimes thinking within the box is helpful when you are learning the basics of a new con-
cept. That said, it’s time to explain each of the steps in this accelerated lesson format in detail. Again, these lesson steps are discussed in the sequence that they would be presented to students.
Two good questions are: Can these steps be accomplished in any order? And, can a step be deleted or skipped? Ideally you should go through each step in the lesson sequence in order. However, there are always special teaching circumstances that call for innovation and change. But unless there is a good reason for deviation, you should strive to present each of the following steps:
q Prepare—Begin lesson planning with the end in mind, and devote time to learning warm-ups—this will save you and your students time.
q Input—Present the content in visual, auditory, and hands-on learning experiences; teaching genius means knowing how to reduce the complex to a simple yet accurate expression of the same knowl-edge—for example, E=mc2. Be sure students formu-late questions they are interested in answering.
q Explore—Your students learn the most in the least time when they are encouraged to explore the mate-rial using their preferred learning styles, intelligence sets, and modes of expression.
q Recall—Learning retention is significantly increased when students personalize and emotionalize the material.
q Retain—Teach self-testing—the best students know the value of reviewing early and often and self-testing their knowledge and skill acquisitions.
q Reflect—Both instructor and learner must con-stantly gather performance observations, and then reflect on improvement action steps.
An easy way to remember the steps in this lesson model is to remember the formula for the area of a circle, A=∏r2. Changing that common formula slightly to the mnemonic PIE-R3 will help you remember the sequence of instructional events. This system is built on the learners’ needs. It endeavors to provide in sequence the learn-ing activities that make the most instructional sense:
q Prepare. q Input. q Explore.q Retain.q Reconfirm.q Reflect.
Lets look now at the details of each of the PIE-R3 lesson-plan steps. A good rule of thumb in lesson planning is to use Albert Einstein’s planning principal, “Everything should be made as simple as possible, but not simpler.”
Chapters (Click to Go)
1. What’s in It for Me?
2. Plans?—Why Bother?
3. Being Objective
4. Thinking Like Bloom?
5. An Engaging Format.
6. Boxed in.
7. Reality Check
8. Preparation and Input
9. Effective Explorations
10. Pedal to The Metal
11. Clinging to The Cliff.
12. End in Sight
Appendix
A. Objectives Template
B. Lesson Plan Template
C. References
D. Knowledge Test
E. Afterword
How to Create A+ Lessons
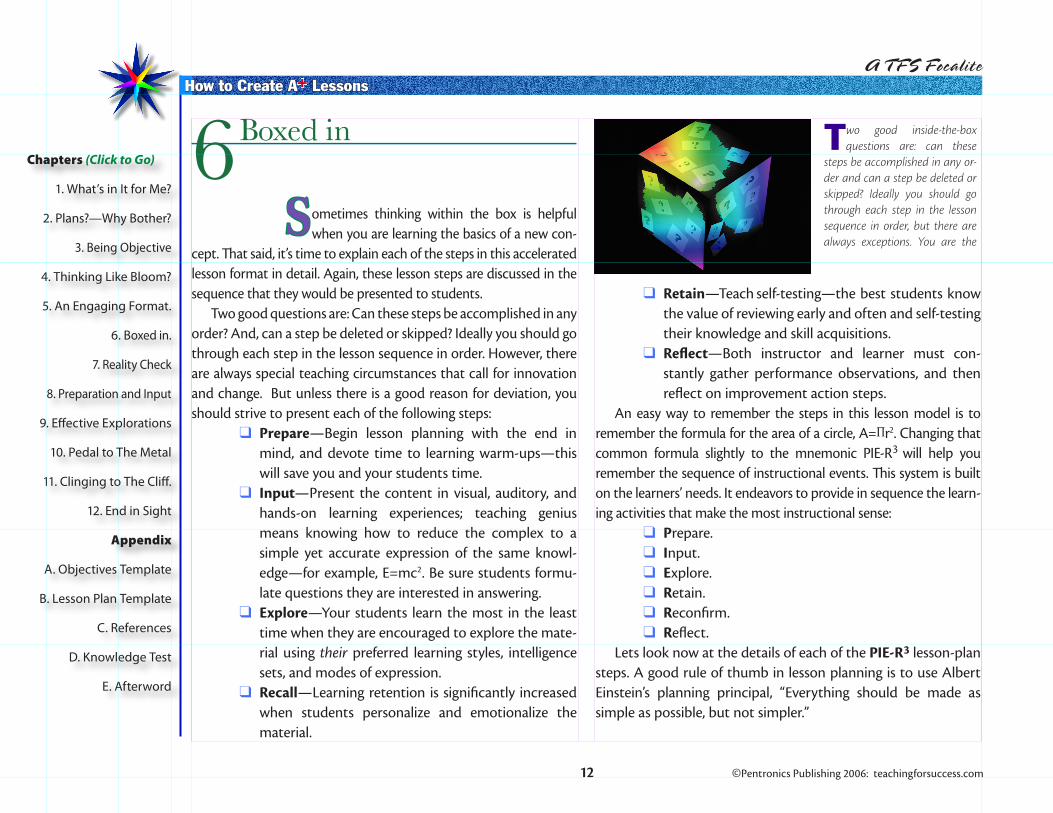
Two good inside-the-box questions are: can these
steps be accomplished in any or-der and can a step be deleted or skipped? Ideally you should go through each step in the lesson sequence in order, but there are always exceptions. You are the
�� ©Pentronics Publishing 2006: teachingforsuccess.com
A TFS Focalite
Prepare: PIE-RRRPreparing to learn is the natural, common-sense starting point
of learning, and therefore should be the first teaching activity. But it’s a step too often ignored in the hurry to cover as much mate-rial as possible in each class meeting. The PIE-R3 learning model begins with the preparation phase because it’s crucial for good teaching and optimized learning.
Accelerated learning experts contend that taking time to pre-pare to learn increases the rate of learning by two to three times. Skipping this vital step only slows and hampers learning in the long run and is very expensive in terms of increased time to learn and lowering “Learning Return On Energy” (LROE).
This is the point in your class planning to think about how you can encourage your students to arrive on time. If the first order of business in your class is to take attendance, return assignments, hand out new study sheets, announce the date of the next unit test, and remind students there will be no class meeting next Monday because of a holiday, you have failed to provide any activities designed to prepare students to learn the lesson.
Preparation activitiesSome possible activities that creatively prepare students for
new learning include:q Creating a positive, expectant attitude of successful
learning and learning outcomes.q Forming and maintaining a creative, relaxed, resource-
ful mindset with brief meditation, imaging, or breath-ing exercise breaks.
q Writing learning goals and reviewing these before each study session.
q Repeating confidence-building assertions before start-ing a study session, such as, “I’m a terrific learner.” It works wonders in keeping energy high.
q Adopting strict time-management practices—such as working on the most difficult learning task first.
q Maintaining peak levels of self-motivation by sug-gesting students set some post-class rewards such as enjoying a coffee break, instant messaging a friend or shopping for the latest music releases on-line.
Input: PIE-RRRAfter you’ve helped your students prepare to learn, move up
to the second rung in the lesson ladder, input.Accelerated learning gurus such as Colin Rose suggest that
multisensory input is a crucial component of good instruction. A fundamental precept of accelerated learning is this: The more senses that are involved in the learning, the more rapid and memorable the learning will be, and the more quickly the speci-fied learning outcome can be achieved.
Chapters (Click to Go)
1. What’s in It for Me?
2. Plans?—Why Bother?
3. Being Objective
4. Thinking Like Bloom?
5. An Engaging Format.
6. Boxed in.
7. Reality Check
8. Preparation and Input
9. Effective Explorations
10. Pedal to The Metal
11. Clinging to The Cliff.
12. End in Sight
Appendix
A. Objectives Template
B. Lesson Plan Template
C. References
D. Knowledge Test
E. Afterword
How to Create A+ Lessons
�� ©Pentronics Publishing 2006: teachingforsuccess.com
A TFS Focalite
Let’s consider a student who completes several of the recom-mended Preparation steps. This student is now more relaxed, focused, motivated, and ready to learn.
But, now what? Sure, it might be easiest from your point of view to plan a traditional lecture for the entire class period, but how many senses will be engaged? How will the students participate?
Activating the input stageTo achieve multisensory input, a good lesson design should
be more than a traditional lecture, and it should encompass some or all of the following concepts:
q Connect the subject to the learner in terms of stu-dents’ prior experience, current academic skills, and learning goals.
q Pose tough questions and point up debates, dilem-mas, and dichotomies inherent in your subject area.
q Provide applications, applications, applications—overcome the “I’ll-never-use-that” syndrome; make learning concrete, practical, useful.
q Picture the problem or concept; challenge students to portray the idea visually—use metaphors; ask, “If this concept were a famous painting, which one would it be and why?”
q Convert the concept or problem you are studying to one of the other senses: ask students, “What would this feel, taste, or sound like?
q Take a kinesthetic learning break—ask a multiple-choice survey question—one about which you know students will have a range of opinions; then ask stu-dents to quickly get up from their seats and stand in a line by the choice they prefer; a human chart results.
q Web sites and commercial media outlets provide a wealth of audio and video material, and today you can burn your own audio CD-ROM and even produce excellent amateur video presentations—Apple’s iDVD program makes producing videos an enjoyable task.
How to organize knowledgeStudents need structure, variety, challenge, application, and
activity. There are five common ways to structure knowledge for presentation during the input stage of the lesson. It would be a good idea to memorize these so you have them instantly recallable:
q Complexity—simple to intricate.q Age—forward or reverse chronological order.q Distance—near to far.q Solidity—concrete to abstract.q View—big picture to details.
Use one or more of these structures to make multisensory input follow a meaningful pattern. Too many instructors fail to choose a logical approach. This lack results in their students com-plaining about the difficulty of learning the material. To help all your students learn more quickly and retain more course con-tent, shape your teaching so that students have the opportunity to see, hear, and use the core facts, principles, and concepts cen-tral to your course.
Chapters (Click to Go)
1. What’s in It for Me?
2. Plans?—Why Bother?
3. Being Objective
4. Thinking Like Bloom?
5. An Engaging Format.
6. Boxed in.
7. Reality Check
8. Preparation and Input
9. Effective Explorations
10. Pedal to The Metal
11. Clinging to The Cliff.
12. End in Sight
Appendix
A. Objectives Template
B. Lesson Plan Template
C. References
D. Knowledge Test
E. Afterword
How to Create A+ Lessons
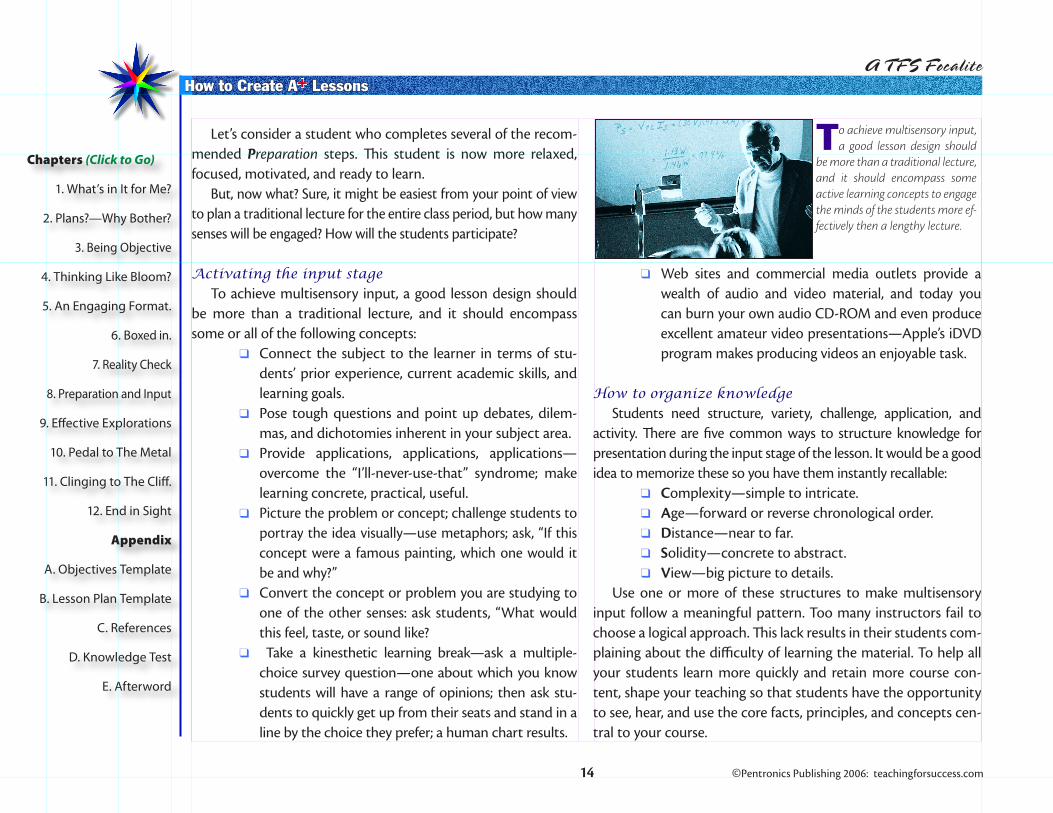
To achieve multisensory input, a good lesson design should
be more than a traditional lecture, and it should encompass some active learning concepts to engage the minds of the students more ef-fectively then a lengthy lecture.
�� ©Pentronics Publishing 2006: teachingforsuccess.com
A TFS Focalite
Exploration: PIE-RRRExploration is the term used to describe the custom-tailor-
ing and personalization necessary for effective learning. When exploration is planned into a lesson, learning becomes acceler-ated, fun, authentic, and effective.
Learning outcomes are more readily reached when you help your students personally explore the landscape of new material through their various intelligence sets, rather than in lock-step, mono-mode, learning activities.
Explorers of all types usually have a say in how they plan to reach their destination, and so should your learners in the explo-ration stage. Your students need coaching and an opportunity to have their learning problems diagnosed, rather than having a con-tent expert tell them everything they need to know. They thrive on learning choices; not everyone needs to take the same explor-atory learning path.
Your students will feel put off and alienated if you only pres-ent material in one intelligence mode, such as linguistic, or one sensory mode, such as audio. Traditional teaching assumes every-one learns the same way and pure lecture is good enough for everyone.
Multiple intelligences?According to the theory championed by Dr. Howard Gardner
of Harvard University in his Frames of Mind: The Theory of Mul-tiple Intelligences, (1985) students learn better when they explore a subject using multiple intelligences.
For example, when working on one’s physical development, a person cannot rapidly develop without employing the best
exercises needed to build specific physical skill. A skilled physical trainer or coach can analyze one’s current physical skill level and create a program to move her or him to a new level of adroitness and competence.
The same process works in cognitive learning. The teacher as coach assesses the current level of each student’s academic skill and then creates an activity program to optimize learning.
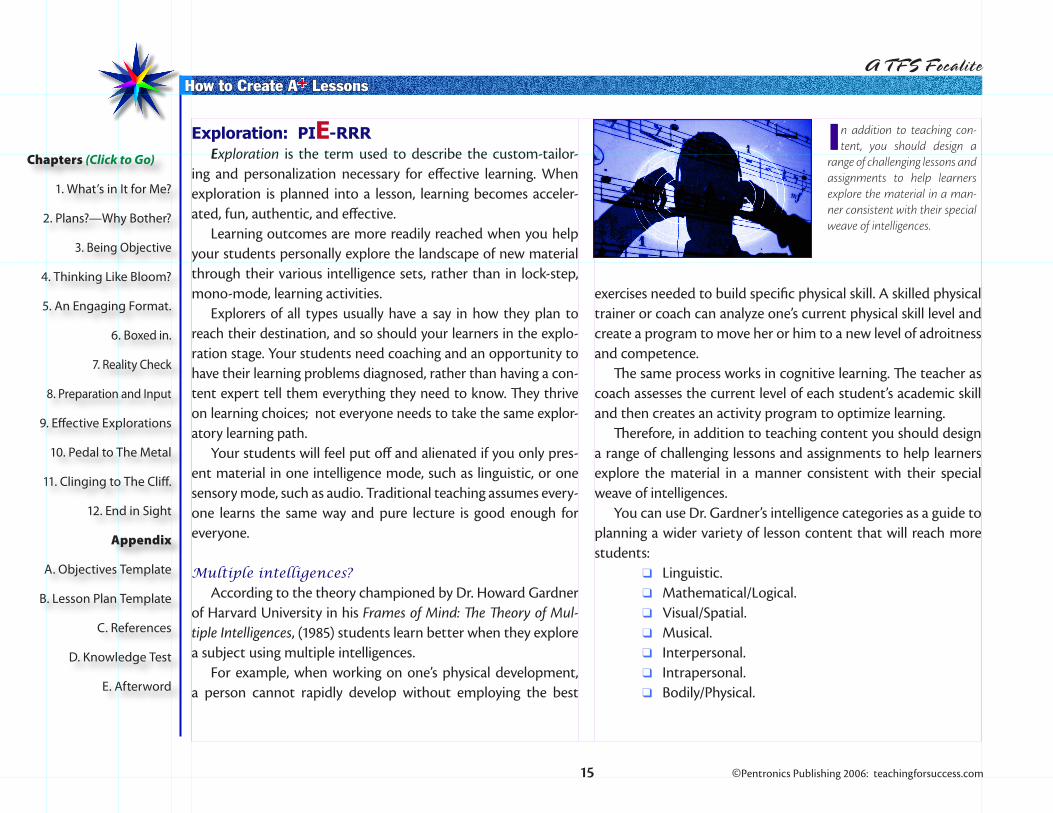
Therefore, in addition to teaching content you should design a range of challenging lessons and assignments to help learners explore the material in a manner consistent with their special weave of intelligences.
You can use Dr. Gardner’s intelligence categories as a guide to planning a wider variety of lesson content that will reach more students:
q Linguistic.q Mathematical/Logical.q Visual/Spatial.q Musical.q Interpersonal.q Intrapersonal.q Bodily/Physical.
Chapters (Click to Go)
1. What’s in It for Me?
2. Plans?—Why Bother?
3. Being Objective
4. Thinking Like Bloom?
5. An Engaging Format.
6. Boxed in.
7. Reality Check
8. Preparation and Input
9. Effective Explorations
10. Pedal to The Metal
11. Clinging to The Cliff.
12. End in Sight
Appendix
A. Objectives Template
B. Lesson Plan Template
C. References
D. Knowledge Test
E. Afterword
How to Create A+ Lessons
In addition to teaching con-tent, you should design a
range of challenging lessons and assignments to help learners explore the material in a man-ner consistent with their special weave of intelligences.

�� ©Pentronics Publishing 2006: teachingforsuccess.com
A TFS Focalite
Besides recognizing multiple intelligences, you can improve the Exploration phase of learning by asking your students to:
q Identify assumptions.q Discern the evidence of credibility.q Create metaphorical visuals and examples.q Focus on what’s important.q Select and solve key problems.
Retain: PIE-RRRModern brain research confirms what outstanding teachers
have known all along: learning retention takes place when the material is relevant and meaningful, processed by many senses, and emotionally stirring. A good lesson plan answers the ques-tion: How can I ensure that students will retain the material long after the class is over?
Effective study—that which is meaningful, concise, an success-oriented—is the key to establishing excellent recall. To maximize recall, students need to have the following components incorpo-rated into each lesson:
q Adequate practice with improvement feedback from the instructor; for example, homework assignments evaluated and returned with improvement sugges-tions listed.
q Personalization of the content—an opportunity to take knowledge apart, reassemble it, and then express it in one’s own thoughts and terms.
q Time and encouragement to express doubt and direct questions to learning peers, the instructor, and real-world practitioners.
re t e n t i o n t i p
Though eschewed by many educators, there is still a great need for learning how to rapidly and accurately memorize definitions, facts, formulas, and procedures. For some tips in this area we recommend The Memory Bible by Gary Small, M.D.Dr. Small recommends using the look, snap, and connect memorization system. Briefly, “Look” means to carefully observe the thing to be remembered. Note the details: color, shape texture, smell, weight, etc.
Next, “Snap” is a series of mental pictures of the object or data to be remembered. Snapping a colorful, detailed, and vivid mental image will improve the likelihood of recalling it later. Keep in mind that the more wild and fanciful the snap-shot image, the easier it is to remember.Lastly, “Connect” the images with a story that correctly sequences the snapshots and makes them easily recallable. Optionally, you can create a single visual that contains all the snapshots in a meaningful pattern, or create an acronym to remember the first letter of the title of each snap. Why not teach your students to look, snap and connect?
Chapters (Click to Go)
1. What’s in It for Me?
2. Plans?—Why Bother?
3. Being Objective
4. Thinking Like Bloom?
5. An Engaging Format.
6. Boxed in.
7. Reality Check
8. Preparation and Input
9. Effective Explorations
10. Pedal to The Metal
11. Clinging to The Cliff.
12. End in Sight
Appendix
A. Objectives Template
B. Lesson Plan Template
C. References
D. Knowledge Test
E. Afterword
How to Create A+ Lessons

�� ©Pentronics Publishing 2006: teachingforsuccess.com
A TFS Focalite
q Visualization of the content by creating charts, graphs, and symbols.
q Emotionalizing the content by acting out learning concepts using the elements of basic theater.
q The experience of accomplishment by comparing learning goals to learning achievement.
Homework length and complexity issuesHomework is essential to learning, and should be a part of your
lesson plan. You may feel the expectation from yourself, other instructors, and your students to assign a hefty amount. But how much homework is optimal? Here are some points about hom-work to consider when developing a lesson plan:
q Length—the time an average student is expected to spend to complete the assignment; don’t give more practice problems than needed.
q Difficulty—each practice assignment should include easy, medium, difficult, and challenging problems.
q Context—are the practice activities meaningful? Are they in terms that connect with the students’ reality in some way?
q Feedback—how will student responses and answers be critiqued and improvement suggestions be trans-mitted to them?
q Variety—does the assignment give the student a thorough workout of all mental muscles?
Gagné, Briggs and Wagner, in their Principles of Instructional Design, stress adding variety to homework and in-class practice ses-sions to help students apply knowledge to new situations or retain and transfer learning from the classroom to the real world.
Chapters (Click to Go)
1. What’s in It for Me?
2. Plans?—Why Bother?
3. Being Objective
4. Thinking Like Bloom?
5. An Engaging Format.
6. Boxed in.
7. Reality Check
8. Preparation and Input
9. Effective Explorations
10. Pedal to The Metal
11. Clinging to The Cliff.
12. End in Sight
Appendix
A. Objectives Template
B. Lesson Plan Template
C. References
D. Knowledge Test
E. Afterword Homework is essential to learning, and should be a part of your lesson plan. You may feel the expectation from yourself, other instructors, and your students to
assign a hefty amount. But how much homework is optimal? Simulations and real-world case problems often provide needed practice in critical thinking.
How to Create A+ Lessons
�� ©Pentronics Publishing 2006: teachingforsuccess.com
A TFS Focalite
Reconfirm: PIE-RRRAll students must periodically reconfirm what they have
learned in order to transfer the new knowledge and skills into long-term cognitive and muscle memory, depending of the type of learning involved. Here are some specific, active reconfirma-tion strategies that you can build into your lesson plan to help your “A” students learn faster, your “B” students become “A” stu-dents, and your “C,” “D,” and “F” students improve.
Reconfirmation activities require discipline and effective study skills that some students master early in their academic career while others struggle into their college years before it all comes together for them. The misguided study goal for many students is to complete the assigned work as soon as possible.
However, just completing the work does not necessarily lead to retention. The most important retention technique for under-achieving students to learn is adopting a regular review sched-ule both in and out of class. Adequate review time and activities must comprise part of your lesson plan.
Most poor students fail to review often enough. Here’s a very effective pattern that will produce terrific results. For maximum retention, students should review after:
q One hour.q One day.q One week.q One month.q End of course.
Teaching your underperforming students how to review is as important as providing them with time to review. One of the simplest yet most powerful strategies is to ensure students ver-balize learning in their own words.
At home, they can even record these explanations on audio tape or digitally as a computer sound file. Then, they can add music (classical works best but this musical style may not be the favorite of your students) to another track. Finally, if they play this voice-music recording when relaxed before sleeping or upon rising, they will tap both sides of the brain and review is accelerated.
In addition, have your students list comparisons—another dynamic active review. They first make a list of the main points, writing them in their own words. Then, they study them for a short time, put the list away and attempt to recreate this list from memory. A comparison of the two lists will quickly reveal what they’ve missed. This list comparison process continues until the original and final lists match perfectly.
The ultimate purpose of this Reconfirmation stage in your lesson is for students to “show they know,” validating mastery of skills, knowledge, and attitudes. To this end, you should also pro-vide in your lesson plan test reviews and practice tests to prepare students for a graded exam.
Here are three more instructional principles that go to work in the well-designed Reconfirmation step in an A+ Lesson Plan:
q Outstanding students achieve more because they continually reconfirm their subject mastery.
Chapters (Click to Go)
1. What’s in It for Me?
2. Plans?—Why Bother?
3. Being Objective
4. Thinking Like Bloom?
5. An Engaging Format.
6. Boxed in.
7. Reality Check
8. Preparation and Input
9. Effective Explorations
10. Pedal to The Metal
11. Clinging to The Cliff.
12. End in Sight
Appendix
A. Objectives Template
B. Lesson Plan Template
C. References
D. Knowledge Test
E. Afterword
How to Create A+ Lessons
Reconfirmation activities require discipline and ef-
fective study skills that some students master early in their academic career and some struggle into their college years before it all comes together for them.
�� ©Pentronics Publishing 2006: teachingforsuccess.com
A TFS Focalite
q Struggling students, on the other hand, may fail because they haven’t developed good self-test skills.
q To assist your students, help them make self-testing a priority, unbreakable habit during learning .
At the bottom line, your lesson plan must have a stage where proof of learning is confirmed by a written test, oral exam, evalu-ation of a practical demonstration, log, journal, paper, project, or learning summary. Give students an chance to show they know.
Reflect: PIE-RRRAt TFS, we modify the adage, “If you can’t measure it, you
can’t manage it,” to read, “If you don’t reflect on it, you won’t improve it.” Reflection is the sixth, last, and most crucial phase of the PIE-R3 model. Unfortunately, the Reflect step in teaching and learning is often just as neglected in the rush to cover the material and call it a day. In the face of demanding schedules some instructors decide that this is a step can be easily left for the odd moment.
However, for you to improve your teaching via an A+ Lesson Plan and for your students to improve their learning skills, it’s imperative that you and they reflect on what has or has not been accomplished in the last unit, chapter, class meeting, or learning activity before proceeding to the next topic.
Be sure to add the following two-question thought exer-cise—step one of an effective Reflection learning event—at the conclusion of each lesson you plan. Using a computer or pad of paper, prepare a two-column sheet. Head the columns with the following questions:
q What went well? (Reflect)q What could I have done better? (Correct)
A second Reflection step is completed when you create an ongoing self-reflection Success Contract. Such a contract results from answering the following questions:
q The most important thing I learned about teaching or learning is .
q I will apply what I have discovered to my next learn-ing activity, class meeting, unit, or course by .
q When I encounter obstacles, I will overcome them by .
q I will track my results by .q If I need assistance to reach my goals, I will seek
assistance from (person) or consult this reference or resource .
q I will reward myself by when I reach my goal!As Arturo Toscanini, the noted Italian symphonic and oper-
atic conductor, once wrote, “Nobody knows what is the best he can do.” When you regularly stop to reflect and generate a modified lesson plan from the old one, you teach for success, and great improvement is possible.
Now you have at least two lesson formats to pick from, or you may choose a format that blends well with your own training and experience. But do pick a format you will use routinely.
Chapters (Click to Go)
1. What’s in It for Me?
2. Plans?—Why Bother?
3. Being Objective
4. Thinking Like Bloom?
5. An Engaging Format.
6. Boxed in.
7. Reality Check
8. Preparation and Input
9. Effective Explorations
10. Pedal to The Metal
11. Clinging to The Cliff.
12. End in Sight
Appendix
A. Objectives Template
B. Lesson Plan Template
C. References
D. Knowledge Test
E. Afterword
How to Create A+ Lessons
Unfortunately, the Reflect step in teaching and learn-
ing is often just as neglected in the rush to cover the material and call it a day. Reflection is the sixth, last and most crucial phase of the PIE-R3 model.
�0 ©Pentronics Publishing 2006: teachingforsuccess.com
A TFS Focalite
7RealityCheck
B efore going on, let’s look at reality. The perfect A+ Lesson Plan is not one that cre-
ates the perfect lesson. Teaching and learning is part art and part science, and when the variables are factored in for a group of students from one class to the next, you will find that a lesson that works beautifully one term may cause confusion and exas-peration among a new group of students the very next time the lesson is taught.
The steps of the PIE-R3 lesson format we have discussed are available in a table format you can print and refer to during the rest of this course, and to use for actual lesson planning at the end of this course. Click here to see these tables now.
The A+ Lesson Plan is one that communicates very clearly to you and to your students the intended specific learning objective(s) or outcome(s), and the strategy and resources you will employ to help learners reach the stated goal(s). Also, the A+ plan is one that meshes well with the preceding and succeeding lessons to form an organized set of lessons that will form the successful course. An A+ Lesson Plan retains flexibility and states some back-ups or alternatives and some instant feedback processes that can be used to receive immediate feedback from students on the les-sons’ actual effectiveness. (See Classroom Assessment Techniques by Thomas Angelo and K. Patricia Cross.)
More about topicsA standardized departmental course outline may include lists
of objectives or a general topic list, often in chronological order.
If there is no standard course outline or topic list, review course objectives. Develop a chronological list of general topics to be addressed in order to achieve each objective.
For example, a speech or composition departmental topic of “Purpose” precedes “Organizational Principles” and follows “Topic Selection.” Without a topic, a purpose cannot be consid-ered. Until students formulate purposes, decisions about organi-zational presentation cannot be made.
List specific topics necessary to an understanding of each general topic. One or more specific topics comprise a lesson, and more than one lesson may be required to explain a general topic.
Lesson plan topics are what will be presented during a class meeting in a single planning block of time. one-hour or 50-minute planning blocks are convenient beginnings, since the shortest classes generally fit this time frame.
Another way to look at a topic is knowledge-based rather than time-based. For example, a topic could be the smallest coherent piece of knowledge that answers a question, provides a procedure to solve a problem, or allows two or more previous topics to be synthesized into a larger whole.
Chapters (Click to Go)
1. What’s in It for Me?
2. Plans?—Why Bother?
3. Being Objective
4. Thinking Like Bloom?
5. An Engaging Format.
6. Boxed in.
7. Reality Check
8. Preparation and Input
9. Effective Explorations
10. Pedal to The Metal
11. Clinging to The Cliff.
12. End in Sight
Appendix
A. Objectives Template
B. Lesson Plan Template
C. References
D. Knowledge Test
E. Afterword
How to Create A+ Lessons
The A+ Lesson Plan is one that communicates very clearly
to you and to your students the intended specific learning objective(s) or outcome(s), and the strategy and resources you will employ to help learners reach the stated goal(s).
�� ©Pentronics Publishing 2006: teachingforsuccess.com
A TFS Focalite
Time is of the essenceIn traditional models of instruction, time is of the essence and is
held fixed. Achievement standards are variable—a student may pass with any grade from a D to an A. If you teach in a mastery learning institution, time is made flexible and mastery standards are fixed.
When lesson planning to fit the classic model of instruction, consider carefully the time actually required for presenting and learning. In one case a topic may require an average of 30 min-utes, yet another requires only 10 minutes. A single topic, or a series of topics, may be considered during one class meeting.
Chronologically, list the topics that are necessary for develop-ing an understanding of the general topic. To do this, figure out which topic is prerequisite to another.
For example, an understanding of specific purposes must be established before thesis statements are discussed. Thesis state-ments identify what an audience must understand in order to achieve a purpose. Thus, student understanding of specific pur-pose is prerequisite to thesis statements.
Assign each lesson plan a sequence number. Use text chap-ters, course objectives, or competencies. Numerically, identify the general topics with a number and assign each lesson a sequence number, i.e., 4:1, 4:2, and 4:3, where 4 is the general topic and the following numbers are individual lesson blocks. Textbook chapters or competency numbers are advisable when instruct-ing multiple sections of varying lengths.
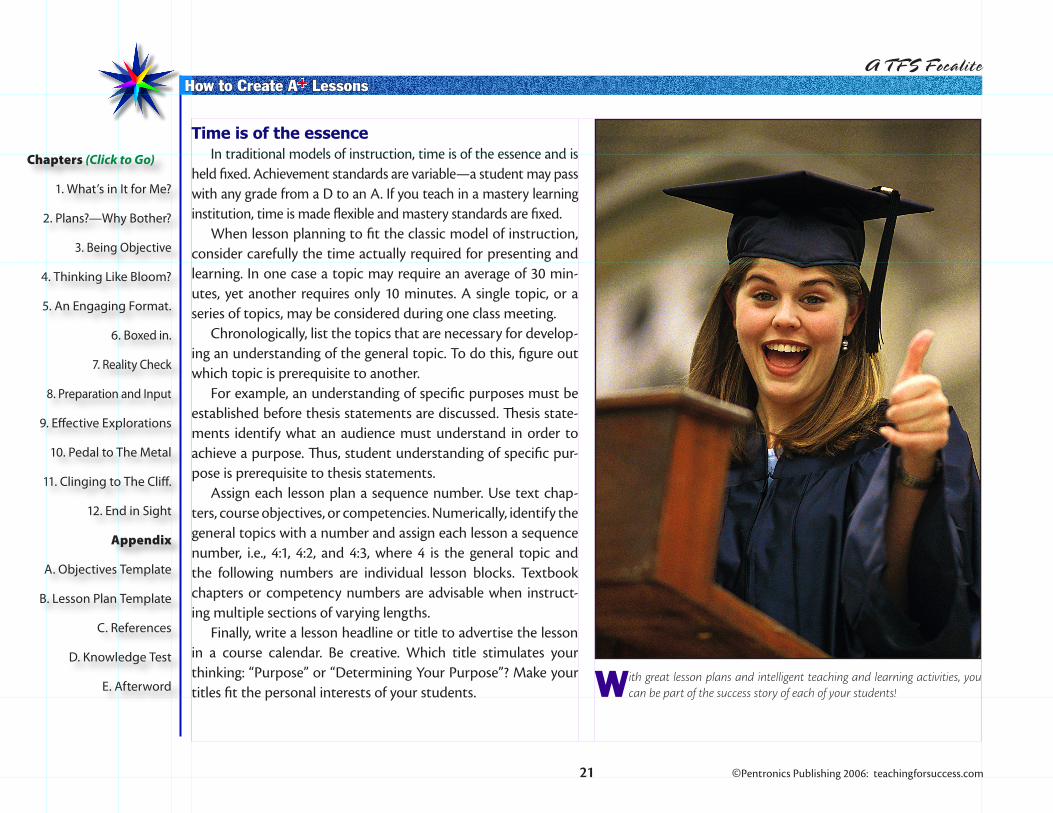
Finally, write a lesson headline or title to advertise the lesson in a course calendar. Be creative. Which title stimulates your thinking: “Purpose” or “Determining Your Purpose”? Make your titles fit the personal interests of your students. With great lesson plans and intelligent teaching and learning activities, you
can be part of the success story of each of your students!
Chapters (Click to Go)
1. What’s in It for Me?
2. Plans?—Why Bother?
3. Being Objective
4. Thinking Like Bloom?
5. An Engaging Format.
6. Boxed in.
7. Reality Check
8. Preparation and Input
9. Effective Explorations
10. Pedal to The Metal
11. Clinging to The Cliff.
12. End in Sight
Appendix
A. Objectives Template
B. Lesson Plan Template
C. References
D. Knowledge Test
E. Afterword
How to Create A+ Lessons
�� ©Pentronics Publishing 2006: teachingforsuccess.com
A TFS Focalite
8PreparationandInput
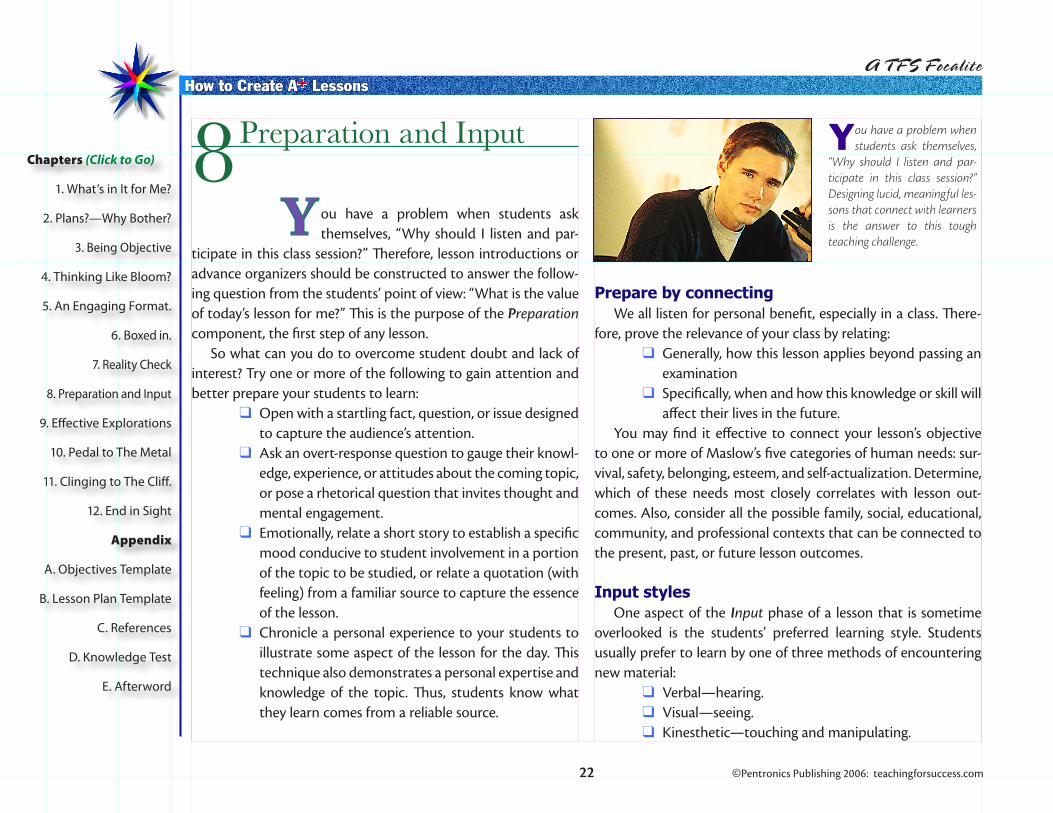
Y ou have a problem when students ask themselves, “Why should I listen and par-
ticipate in this class session?” Therefore, lesson introductions or advance organizers should be constructed to answer the follow-ing question from the students’ point of view: “What is the value of today’s lesson for me?” This is the purpose of the Preparation component, the first step of any lesson.
So what can you do to overcome student doubt and lack of interest? Try one or more of the following to gain attention and better prepare your students to learn:
q Open with a startling fact, question, or issue designed to capture the audience’s attention.
q Ask an overt-response question to gauge their knowl-edge, experience, or attitudes about the coming topic, or pose a rhetorical question that invites thought and mental engagement.
q Emotionally, relate a short story to establish a specific mood conducive to student involvement in a portion of the topic to be studied, or relate a quotation (with feeling) from a familiar source to capture the essence of the lesson.
q Chronicle a personal experience to your students to illustrate some aspect of the lesson for the day. This technique also demonstrates a personal expertise and knowledge of the topic. Thus, students know what they learn comes from a reliable source.
Prepare by connectingWe all listen for personal benefit, especially in a class. There-
fore, prove the relevance of your class by relating:q Generally, how this lesson applies beyond passing an
examinationq Specifically, when and how this knowledge or skill will
affect their lives in the future.You may find it effective to connect your lesson’s objective
to one or more of Maslow’s five categories of human needs: sur-vival, safety, belonging, esteem, and self-actualization. Determine, which of these needs most closely correlates with lesson out-comes. Also, consider all the possible family, social, educational, community, and professional contexts that can be connected to the present, past, or future lesson outcomes.
Input stylesOne aspect of the Input phase of a lesson that is sometime
overlooked is the students’ preferred learning style. Students usually prefer to learn by one of three methods of encountering new material:
q Verbal—hearing.q Visual—seeing.q Kinesthetic—touching and manipulating.
Chapters (Click to Go)
1. What’s in It for Me?
2. Plans?—Why Bother?
3. Being Objective
4. Thinking Like Bloom?
5. An Engaging Format.
6. Boxed in.
7. Reality Check
8. Preparation and Input
9. Effective Explorations
10. Pedal to The Metal
11. Clinging to The Cliff.
12. End in Sight
Appendix
A. Objectives Template
B. Lesson Plan Template
C. References
D. Knowledge Test
E. Afterword
How to Create A+ Lessons
You have a problem when students ask themselves,
“Why should I listen and par-ticipate in this class session?” Designing lucid, meaningful les-sons that connect with learners is the answer to this tough teaching challenge.

�� ©Pentronics Publishing 2006: teachingforsuccess.com
A TFS Focalite
There are tests that can be given to help determine the learn-ing style of each student, but this is often impractical for you to accomplish in the already jam-packed college course. The best solution is to plan to teach using all three modes of learning.
Analyze the content of your course to determine how you can introduce new knowledge visually, auditorily, and by a hands-on approach. By carefully mixing all three learning modes in your classes, you will be offering something in the preferred style of all your students. Ensuring that you offer many kinds of learning activities will greatly enhance and speed learning.
LectureProbably the first method that comes to mind when you
think about how to introduce new knowledge during a lesson is to lecture. Today, lectures range from the traditional, formal lecture (instructor talks and the students take notes) to the more modern and interactive style lecture that makes use of small group discussions and other processes. For more details on new lecture techniques and strategies, see the TFS Focalite, “How to Activate Your Lectures.”
More involvement and action Case Study Presentations include presentation of a case by
the instructor with questions and answers; this is often followed by small group analysis and discussions. This approach provides opportunities to examine theory in relation to an actual event, while combining lecture and discussion features. Groups of stu-dents may examine a case report and discuss the group’s obser-vations in a classroom discussion.
Demonstrations are variations of the more informal, ques-tion-and-answer-based lecture. Demonstrations draw students‘
interests and attention to the subject under study. Demonstra-tions require preparation to ensure they proceed without glitches and interruptions from equipment problems. Demonstration can also be virtual using multimedia equipment.
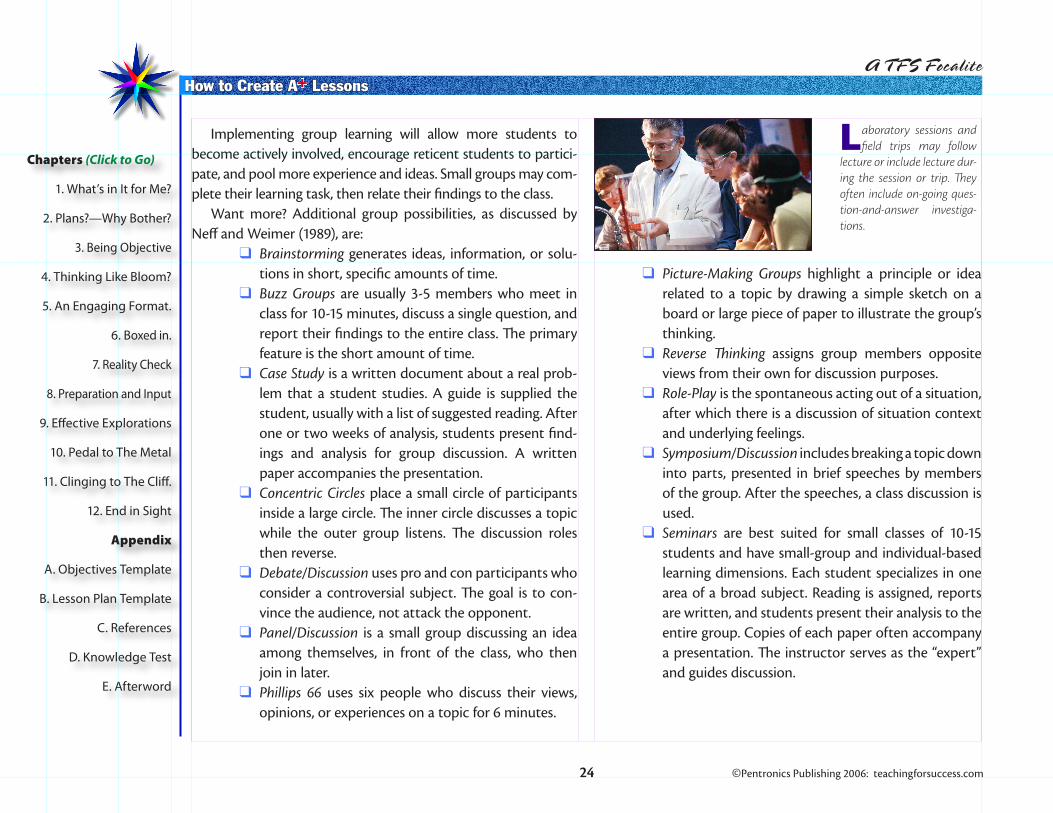
Laboratory Sessions and Field Trips may follow lecture or include lecture during the session or trip. They often include on-going question-and-answer investigations. This method bridges lecture and group-learning techniques. Students may work together in pairs or small teams to gain hands-on experience in a laboratory or shop. Field trips bring the energy of new learning environment and the chance to see, feel, smell, and touch the subject as it applies to real-world situations.
Groups Class Discussion, the most basic form of group discussion,
requires careful planning to be a success. Initiating classroom discussion requires careful formulation of thought-provoking, objective questions, an understanding of questioning techniques, and the communication of the purpose and benefits of the dis-cussion to the students. Group learning can be accomplished by breaking your class down into active learning units. For great ideas on managing small groups, see the TFS Focalite, “Making Small Group Learning Work.”
Chapters (Click to Go)
1. What’s in It for Me?
2. Plans?—Why Bother?
3. Being Objective
4. Thinking Like Bloom?
5. An Engaging Format.
6. Boxed in.
7. Reality Check
8. Preparation and Input
9. Effective Explorations
10. Pedal to The Metal
11. Clinging to The Cliff.
12. End in Sight
Appendix
A. Objectives Template
B. Lesson Plan Template
C. References
D. Knowledge Test
E. Afterword
How to Create A+ Lessons
Case Study Presentations in-clude an introduction of a
case by the instructor with ques-tions-and-answers. This is often followed by a in-depth discus-sion.
�� ©Pentronics Publishing 2006: teachingforsuccess.com
A TFS Focalite
Implementing group learning will allow more students to become actively involved, encourage reticent students to partici-pate, and pool more experience and ideas. Small groups may com-plete their learning task, then relate their findings to the class.
Want more? Additional group possibilities, as discussed by Neff and Weimer (1989), are:
q Brainstorming generates ideas, information, or solu-tions in short, specific amounts of time.
q Buzz Groups are usually 3-5 members who meet in class for 10-15 minutes, discuss a single question, and report their findings to the entire class. The primary feature is the short amount of time.
q Case Study is a written document about a real prob-lem that a student studies. A guide is supplied the student, usually with a list of suggested reading. After one or two weeks of analysis, students present find-ings and analysis for group discussion. A written paper accompanies the presentation.
q Concentric Circles place a small circle of participants inside a large circle. The inner circle discusses a topic while the outer group listens. The discussion roles then reverse.
q Debate/Discussion uses pro and con participants who consider a controversial subject. The goal is to con-vince the audience, not attack the opponent.
q Panel/Discussion is a small group discussing an idea among themselves, in front of the class, who then join in later.
q Phillips 66 uses six people who discuss their views, opinions, or experiences on a topic for 6 minutes.
q Picture-Making Groups highlight a principle or idea related to a topic by drawing a simple sketch on a board or large piece of paper to illustrate the group’s thinking.
q Reverse Thinking assigns group members opposite views from their own for discussion purposes.
q Role-Play is the spontaneous acting out of a situation, after which there is a discussion of situation context and underlying feelings.
q Symposium/Discussion includes breaking a topic down into parts, presented in brief speeches by members of the group. After the speeches, a class discussion is used.
q Seminars are best suited for small classes of 10-15 students and have small-group and individual-based learning dimensions. Each student specializes in one area of a broad subject. Reading is assigned, reports are written, and students present their analysis to the entire group. Copies of each paper often accompany a presentation. The instructor serves as the “expert” and guides discussion.
Chapters (Click to Go)
1. What’s in It for Me?
2. Plans?—Why Bother?
3. Being Objective
4. Thinking Like Bloom?
5. An Engaging Format.
6. Boxed in.
7. Reality Check
8. Preparation and Input
9. Effective Explorations
10. Pedal to The Metal
11. Clinging to The Cliff.
12. End in Sight
Appendix
A. Objectives Template
B. Lesson Plan Template
C. References
D. Knowledge Test
E. Afterword
How to Create A+ Lessons
Laboratory sessions and field trips may follow
lecture or include lecture dur-ing the session or trip. They often include on-going ques-tion-and-answer investiga-tions.
�� ©Pentronics Publishing 2006: teachingforsuccess.com
A TFS Focalite
9EffectiveExplorations
L earning explorations should be personal-ized, exciting, and diverse so that students
can apply their learning skills most effectively to the subject at hand. Therefore, the heart of any lesson is an intelligent, creative offering of learning activities best suited to producing the learn-ing objectives you specify and making the learning personal to each student. In short, you need a variety of ways to help learn-ers explore each topic for themselves.
In addition, planning for a variety of exploration activities is beneficial because each requires the use of different cognitive or thinking abilities, often referred to as “ways of knowing” (Lazear, 1991). Exploration activities usually concentrate or accentuate one or more ways of knowing.
The seven ways of knowing are :q Verbal/linguistic, encompassing written and spoken
words, memory, and recall.q Logical/mathematical, knowing includes reasoning,
abstractions, and relationships.q Visual/spatial, including acute visualization, mental
imagining, graphics, and manipulation of space.q Body/kinesthetic, relating to bodily movement and
mime activities.q Musical/rhythmic, entailing sensitivity to sounds,
tones, and rhythms.q Interpersonal, encompassing effectiveness in inter-
personal and group verbal and nonverbal communi-cation.
q Intrapersonal, involving a sense of self, awareness of feelings, and the ability to concentrate.
Here are some quick ideas to jog your learning exploration creativity:
q Read a speech and analyze its reasoning in a mini-paper or small-group discussion.
q View a video of the speech and analyze its influence on your thinking and attitude; then identify the key images, messages, and sounds that made the most lasting impression and explain why.
q Discuss in small groups the relationship between the structural elements of a movie clip; listen for the actors’ vocal rhythm patterns; mark sections that con-tained key body movements supporting or detracting from the character’s message; explore congruency of verbal and nonverbal messages in different passages.
q Have students evaluate the effectiveness of a media clip.
q Ask each small group to quickly create an ad in 10 min-utes that attempts to sell a specific point of view of a controversial issue just presented in a lecture; then have each group act out the ad while the other groups analyze the message and identify its point of view. Compare original intent with actual perception.
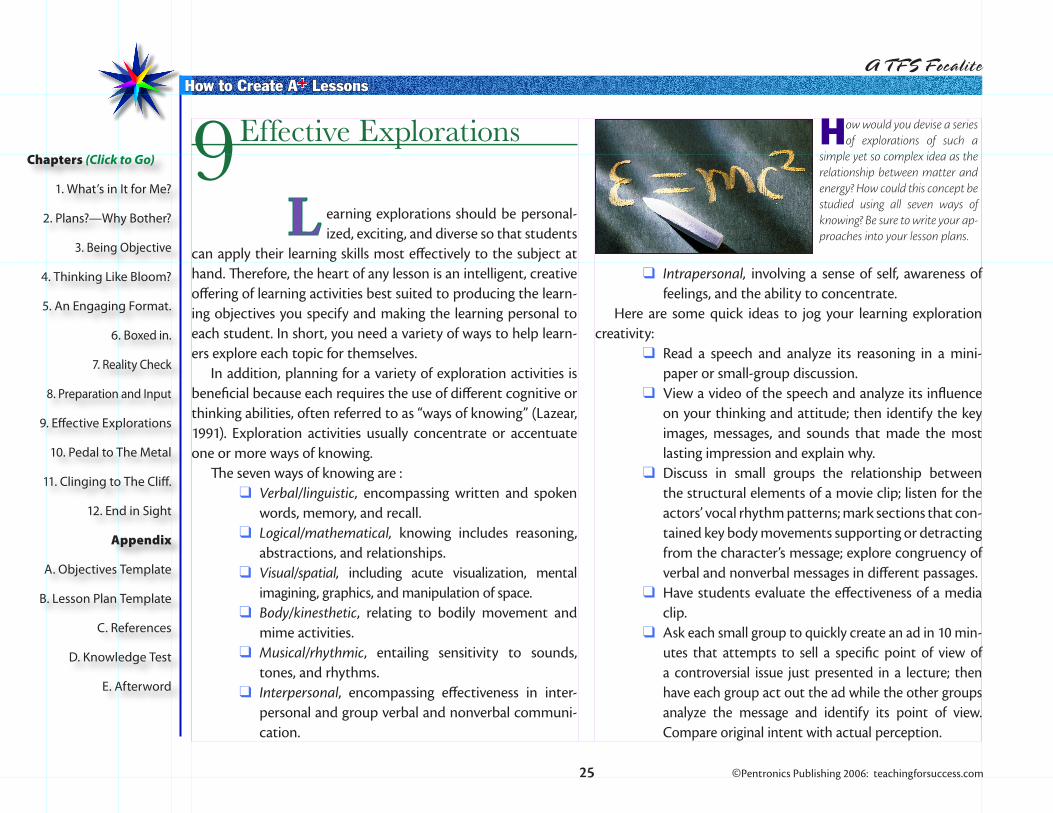
How would you devise a series of explorations of such a
simple yet so complex idea as the relationship between matter and energy? How could this concept be studied using all seven ways of knowing? Be sure to write your ap-proaches into your lesson plans.
Chapters (Click to Go)
1. What’s in It for Me?
2. Plans?—Why Bother?
3. Being Objective
4. Thinking Like Bloom?
5. An Engaging Format.
6. Boxed in.
7. Reality Check
8. Preparation and Input
9. Effective Explorations
10. Pedal to The Metal
11. Clinging to The Cliff.
12. End in Sight
Appendix
A. Objectives Template
B. Lesson Plan Template
C. References
D. Knowledge Test
E. Afterword
How to Create A+ Lessons
�� ©Pentronics Publishing 2006: teachingforsuccess.com
A TFS Focalite
10 PedaltotheMetal
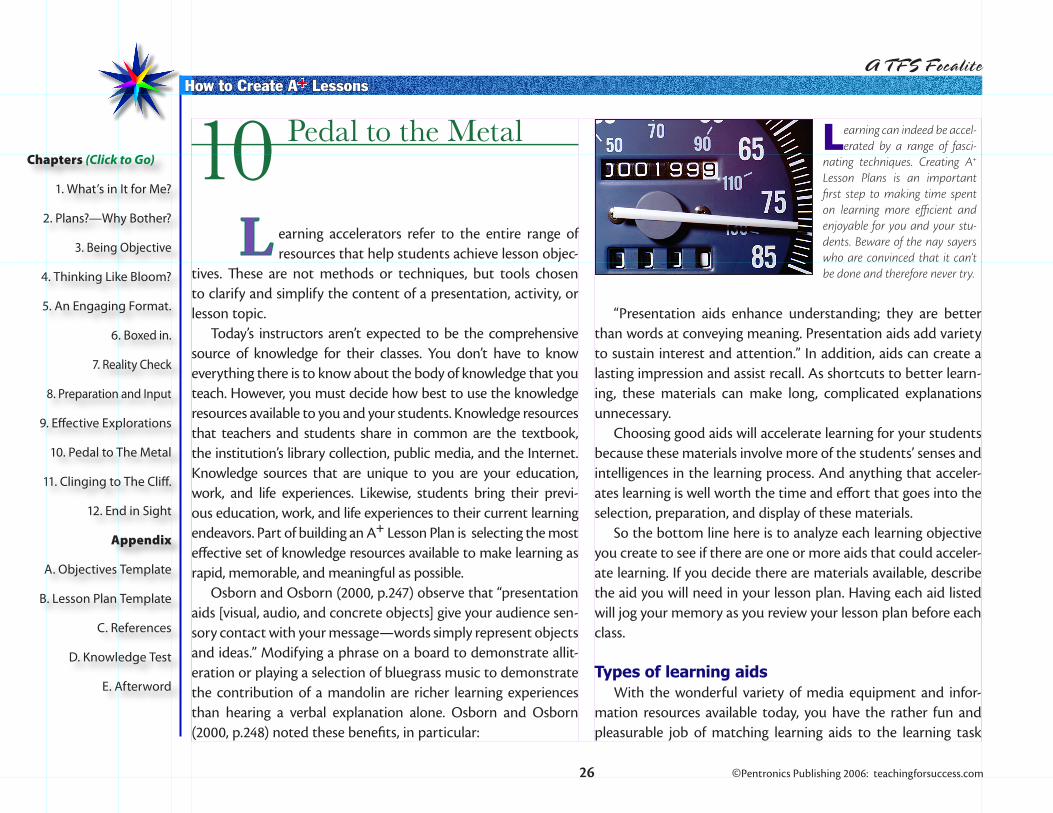
L earning accelerators refer to the entire range of resources that help students achieve lesson objec-
tives. These are not methods or techniques, but tools chosen to clarify and simplify the content of a presentation, activity, or lesson topic.
Today’s instructors aren’t expected to be the comprehensive source of knowledge for their classes. You don’t have to know everything there is to know about the body of knowledge that you teach. However, you must decide how best to use the knowledge resources available to you and your students. Knowledge resources that teachers and students share in common are the textbook, the institution’s library collection, public media, and the Internet. Knowledge sources that are unique to you are your education, work, and life experiences. Likewise, students bring their previ-ous education, work, and life experiences to their current learning endeavors. Part of building an A+ Lesson Plan is selecting the most effective set of knowledge resources available to make learning as rapid, memorable, and meaningful as possible.
Osborn and Osborn (2000, p.247) observe that “presentation aids [visual, audio, and concrete objects] give your audience sen-sory contact with your message—words simply represent objects and ideas.” Modifying a phrase on a board to demonstrate allit-eration or playing a selection of bluegrass music to demonstrate the contribution of a mandolin are richer learning experiences than hearing a verbal explanation alone. Osborn and Osborn (2000, p.248) noted these benefits, in particular:
“Presentation aids enhance understanding; they are better than words at conveying meaning. Presentation aids add variety to sustain interest and attention.” In addition, aids can create a lasting impression and assist recall. As shortcuts to better learn-ing, these materials can make long, complicated explanations unnecessary.
Choosing good aids will accelerate learning for your students because these materials involve more of the students’ senses and intelligences in the learning process. And anything that acceler-ates learning is well worth the time and effort that goes into the selection, preparation, and display of these materials.
So the bottom line here is to analyze each learning objective you create to see if there are one or more aids that could acceler-ate learning. If you decide there are materials available, describe the aid you will need in your lesson plan. Having each aid listed will jog your memory as you review your lesson plan before each class.
Types of learning aidsWith the wonderful variety of media equipment and infor-
mation resources available today, you have the rather fun and pleasurable job of matching learning aids to the learning task
Chapters (Click to Go)
1. What’s in It for Me?
2. Plans?—Why Bother?
3. Being Objective
4. Thinking Like Bloom?
5. An Engaging Format.
6. Boxed in.
7. Reality Check
8. Preparation and Input
9. Effective Explorations
10. Pedal to The Metal
11. Clinging to The Cliff.
12. End in Sight
Appendix
A. Objectives Template
B. Lesson Plan Template
C. References
D. Knowledge Test
E. Afterword
How to Create A+ Lessons
Learning can indeed be accel-erated by a range of fasci-
nating techniques. Creating A+ Lesson Plans is an important first step to making time spent on learning more efficient and enjoyable for you and your stu-dents. Beware of the nay sayers who are convinced that it can’t be done and therefore never try.

�� ©Pentronics Publishing 2006: teachingforsuccess.com
A TFS Focalite
at hand. Being able to see, hear, smell, feel, and manipulate an object speeds learning. Let’s look at a brief list of the common learning aids used to enhance the Input and Exploration phases of a lesson.
Show the object, and whenever feasible, use the object itself instead of a substitute. Objects stimulate the senses.
Models work well as presentation aids when the object is too large, rare, dangerous, valuable, or fragile to have in the class-room. Or a live model may be appropriate when the subject is a study of movement, as in sports, dance and acting.
Graphic presentation aids include maps, charts, sketches, and graphs. Maps illustrate movements, boundaries, and relation-ships. Charts illustrate organizational hierarchy, steps in a pro-cess, periods, or visual representations of a projection. Sketches are useful when simplified representations are sufficient. Finally, graphs illustrate proportions or relationships.
Chalk or marker boards—are best suited for brief writing and sketches. Information requiring more time is best presented using another medium. Spend time talking with the students, not the board.
Handouts are useful if a topic is complex, detailed, or full of many new terms or numerical data, that would require excessive writing. Handouts can provide information to reinforce and aid recall.
Transparencies or slides in digital for film format can convey structure through outlines or flowcharts to aid understanding of relationships and promote retention. Slides are useful if photo-graphs are too small or when color or detail is important.
Flip charts are easy to prepare, use, and modify on the fly while teaching. Complex concepts can also be presented using a series of flip-chart pages. In combination with an easel, flip charts are
particularly useful when a class meets in a remote location that does not have Internet access or media equipment available.
Posters have fallen into disfavor since the arrival of overhead projections and computer-assisted presentations, but they are still useful when other media are unavailable. Flip charts and posters work well as products of learning when using small group processing techniques.
Audiotapes provide the means to examine sounds or patterns, while videotapes allow students to view scenes that would, other-wise, be unavailable because of distance, time, expense, or danger.
Computer-assisted presentations require a range of skills to produce and may require extensive time and resources to com-plete. They do, however, offer great flexibility and power. How else could you effectively study two galaxies colliding but by incorporating the powerful media elements, including graphics, text, sound, and video into a meaningful simulation?
Sometimes the most overlooked learning opportunity comes at the end of each class session. Research shows recall peaks at this time. What can you do to take advantage of this fact? The next chapter will give you a unique idea worth remembering.
Chapters (Click to Go)
1. What’s in It for Me?
2. Plans?—Why Bother?
3. Being Objective
4. Thinking Like Bloom?
5. An Engaging Format.
6. Boxed in.
7. Reality Check
8. Preparation and Input
9. Effective Explorations
10. Pedal to The Metal
11. Clinging to The Cliff.
12. End in Sight
Appendix
A. Objectives Template
B. Lesson Plan Template
C. References
D. Knowledge Test
E. Afterword
How to Create A+ Lessons
Is a lesson more than the sum of it’s parts? And what learn-
ing aids will be most beneficial? Both are tough questions, but one to be wrestled with when de-signing each class meeting. Through the process of trial end evaluation, you will ultimately learn what works best in your unique teaching situation.
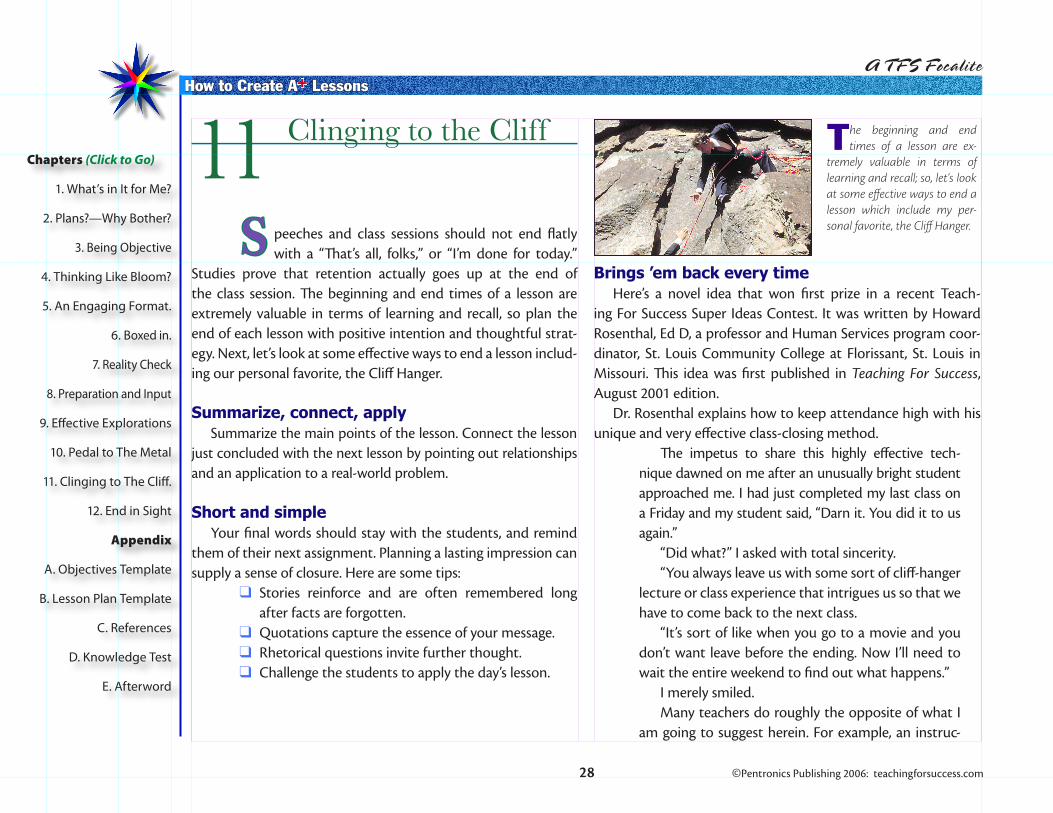
�� ©Pentronics Publishing 2006: teachingforsuccess.com
A TFS Focalite
11 ClingingtotheCliff
S peeches and class sessions should not end flatly with a “That’s all, folks,” or “I’m done for today.”
Studies prove that retention actually goes up at the end of the class session. The beginning and end times of a lesson are extremely valuable in terms of learning and recall, so plan the end of each lesson with positive intention and thoughtful strat-egy. Next, let’s look at some effective ways to end a lesson includ-ing our personal favorite, the Cliff Hanger.
Summarize, connect, applySummarize the main points of the lesson. Connect the lesson
just concluded with the next lesson by pointing out relationships and an application to a real-world problem.
Short and simpleYour final words should stay with the students, and remind
them of their next assignment. Planning a lasting impression can supply a sense of closure. Here are some tips:
q Stories reinforce and are often remembered long after facts are forgotten.
q Quotations capture the essence of your message. q Rhetorical questions invite further thought. q Challenge the students to apply the day’s lesson.
Brings ’em back every timeHere’s a novel idea that won first prize in a recent Teach-
ing For Success Super Ideas Contest. It was written by Howard Rosenthal, Ed D, a professor and Human Services program coor-dinator, St. Louis Community College at Florissant, St. Louis in Missouri. This idea was first published in Teaching For Success, August 2001 edition.
Dr. Rosenthal explains how to keep attendance high with his unique and very effective class-closing method.
The impetus to share this highly effective tech-nique dawned on me after an unusually bright student approached me. I had just completed my last class on a Friday and my student said, “Darn it. You did it to us again.” “Did what?” I asked with total sincerity. “You always leave us with some sort of cliff-hanger lecture or class experience that intrigues us so that we have to come back to the next class. “It’s sort of like when you go to a movie and you don’t want leave before the ending. Now I’ll need to wait the entire weekend to find out what happens.” I merely smiled. Many teachers do roughly the opposite of what I am going to suggest herein. For example, an instruc-
Chapters (Click to Go)
1. What’s in It for Me?
2. Plans?—Why Bother?
3. Being Objective
4. Thinking Like Bloom?
5. An Engaging Format.
6. Boxed in.
7. Reality Check
8. Preparation and Input
9. Effective Explorations
10. Pedal to The Metal
11. Clinging to The Cliff.
12. End in Sight
Appendix
A. Objectives Template
B. Lesson Plan Template
C. References
D. Knowledge Test
E. Afterword
How to Create A+ Lessons
The beginning and end times of a lesson are ex-
tremely valuable in terms of learning and recall; so, let’s look at some effective ways to end a lesson which include my per-sonal favorite, the Cliff Hanger.
�� ©Pentronics Publishing 2006: teachingforsuccess.com
A TFS Focalite
tor might end a typical lecture with, “Okay, now that I’ve covered the material related to World War I, I’ll begin talking about World War II in our next class.” While this strategy is certainly acceptable, I believe that you can often generate massive motivation by not giving your students the punch line until the next class period. This is no small feat in terms of today’s problems with class retention and attendance. Newscasters routinely use this strategy. Here are some of the cliff-hanger statements that I heard as I watched my local news last evening: “If you think that eating fruits and vegetables is healthy just wait until you hear the results of an amazing new study.” Of course, a commercial break follows that state-ment. (Yes, I’m not immune to the powers of this strat-egy, hence, I stayed tuned like I’m certain thousands of other viewers—many of whom are students—did!) The final words I encountered prior to the next commercial were, “Don’t even think about head-ing out to the ballpark until you hear what Sam the weatherman says is in store for us tonight.” Here are just a few actual examples of cliff-hangers that I’ve used recently: q When you return on Monday, I’m going to tell
you precisely how one of our students was able to snare a salary that was over $6,000 a year higher than what was advertised in the paper.
q Next time we meet I’m going to tell you about an extraordinary discovery that suggests that Freud changed his entire theory so he would be accepted by his colleagues.
Learning should be and, yes, must be exciting, like discovering the sights, sounds, and smells of a new city. The landscape of any subject holds fascination for the
learner, and it’s up to the innovative instructor to unlock the doors to the enjoy-ment of new learning for as many students as possible.
The most powerful cliff-hangers are those that per-sonally affect the student (e.g., the salary or the test-ing), though to be sure, this is not always possible. End your class with a cliff-hanger and watch your attendance soar.
Chapters (Click to Go)
1. What’s in It for Me?
2. Plans?—Why Bother?
3. Being Objective
4. Thinking Like Bloom?
5. An Engaging Format.
6. Boxed in.
7. Reality Check
8. Preparation and Input
9. Effective Explorations
10. Pedal to The Metal
11. Clinging to The Cliff.
12. End in Sight
Appendix
A. Objectives Template
B. Lesson Plan Template
C. References
D. Knowledge Test
E. Afterword
How to Create A+ Lessons
�0 ©Pentronics Publishing 2006: teachingforsuccess.com
A TFS Focalite
12EndinSight
E valuation is a major part of each lesson plan. Be sure to identify
assessment measures you can use to gauge student achievement of the lesson objective(s). Assessment measures may be tests, papers, projects, performances, class participation, etc. Choice of an assessment measure is best accomplished by linking each measure to a lesson objective.
Remember, a lesson objective points to a thinking skill level the student should attain. Bloom observed that objectives relat-ing to content mastery are not all on the same level.
As you recall from Chapter Three, objectives based on knowl-edge range from an elementary level (recall words, facts, dates, etc.) to the most complex level, evaluation (making critical judge-ments based on internal and external criteria). The words chosen to identify the behavior in each objective suggest the level of knowledge required and the appropriate assessment measure.
The ability to list, identify, or define relates to the most ele-mentary and concrete thinking levels. Be sure to go beyond these levels. Tests or performance challenges that ask the students to discriminate among causes or specific results or to combine, jus-tify, or criticize a concept, process, or principle should be included and are the most appropriate assessment measures to check for critical thinking.
As an instructor, you are accountable for achieving the teaching and learning outcomes you accept as reasonable goals. To achieve this you will need to evaluate your progress continually, as well as that of your students. Be sure to build this strategy into your plans.
LessonPlanTemplates
T he more time you spend on lesson prep-aration the first time you design and
teach a course, the less preparation time you will need to teach the same course in the future. With the basic lessons, in place your preparation time can be devoted to lesson improvement.
Depending on the number of course hours, complete plans can range from 12 to 24 pages for a one-hour-per-week course and 30 to 60 pages for a three- to four-hour-per-week course.
Store your plans either in a three-ring binder or in a common and easy-to-read computer document format, such as MS Word or Adobe Acrobat, in a public access folder on your computer. Your plans should be easy to locate so that in the event you cannot continue teaching the course, you can provide the new instructor with a set of your plans to make the process of taking over for you easier.
Chapters (Click to Go)
1. What’s in It for Me?
2. Plans?—Why Bother?
3. Being Objective
4. Thinking Like Bloom?
5. An Engaging Format.
6. Boxed in.
7. Reality Check
8. Preparation and Input
9. Effective Explorations
10. Pedal to The Metal
11. Clinging to The Cliff.
12. End in Sight
Appendix
A. Objectives Template
B. Lesson Plan Template
C. References
D. Knowledge Test
E. Afterword
How to Create A+ Lessons
The end is insight. But don’t stop now. Take a look at the
Lesson Plan Template, this tem-plate is designed to save you time while making the job of organiz-ing a lesson as painless as possi-ble. Feel free to print copies of these templates as needed for your use or design your own.
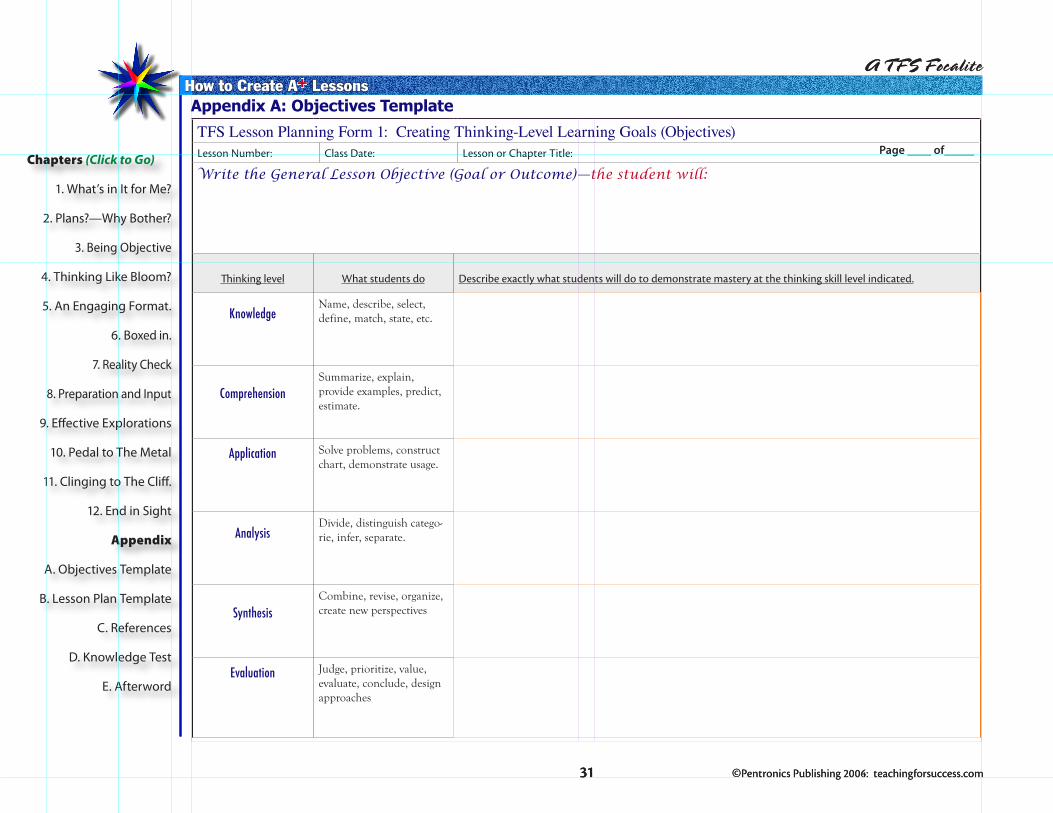
�� ©Pentronics Publishing 2006: teachingforsuccess.com
A TFS Focalite
�� ©Pentronics Publishing 2004: teachingforsuccess.com
A TFS Focalite
TFS Lesson Planning Form 1: Creating Thinking-Level Learning Goals (Objectives) Lesson Number: Class Date: Lesson or Chapter Title:
Write the General Lesson Objective (Goal or Outcome)—the student will:
Thinking level What students do Describe exactly what students will do to demonstrate mastery at the thinking skill level indicated.
KnowledgeName, describe, select, define, match, state, etc.
ComprehensionSummarize, explain, provide examples, predict, estimate.
Application Solve problems, construct chart, demonstrate usage.
AnalysisDivide, distinguish catego-rie, infer, separate.
SynthesisCombine, revise, organize, create new perspectives
Evaluation Judge, prioritize, value, evaluate, conclude, design approaches
Page ____ of_____
Appendix A: Objectives Template
Chapters (Click to Go)
1. What’s in It for Me?
2. Plans?—Why Bother?
3. Being Objective
4. Thinking Like Bloom?
5. An Engaging Format.
6. Boxed in.
7. Reality Check
8. Preparation and Input
9. Effective Explorations
10. Pedal to The Metal
11. Clinging to The Cliff.
12. End in Sight
Appendix
A. Objectives Template
B. Lesson Plan Template
C. References
D. Knowledge Test
E. Afterword
How to Create A+ Lessons
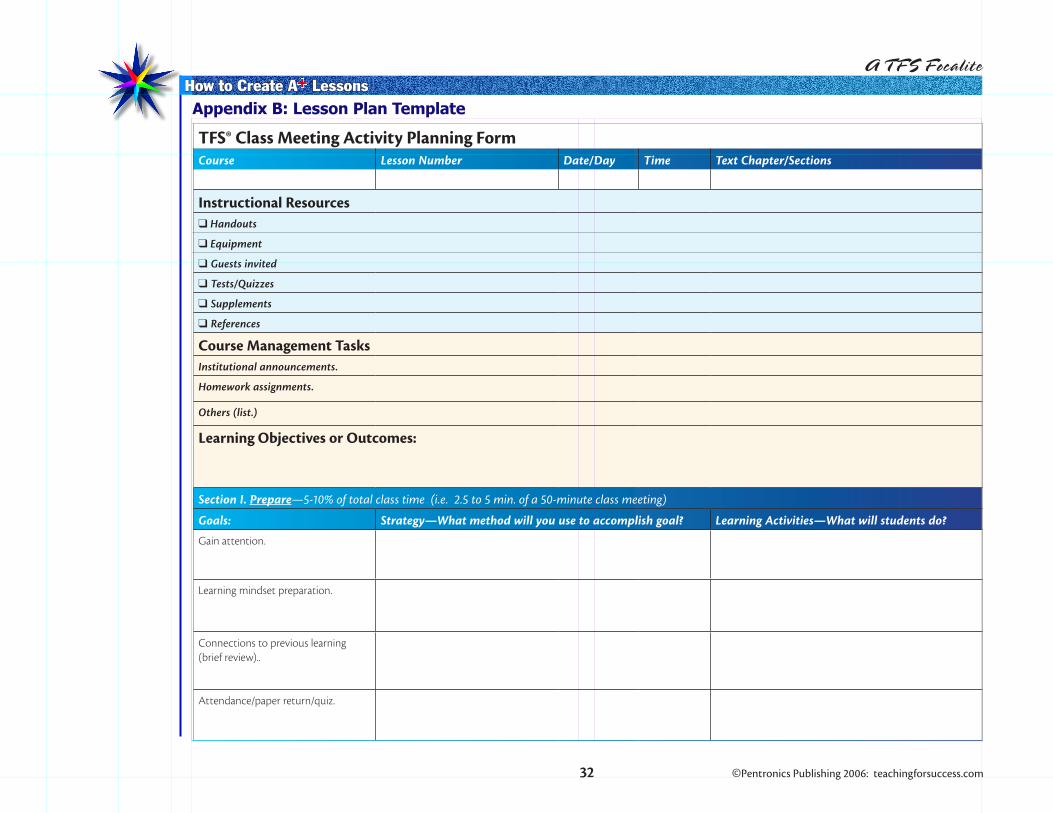
�� ©Pentronics Publishing 2006: teachingforsuccess.com
A TFS Focalite
TFS® Class Meeting Activity Planning FormCourse Lesson Number Date/Day Time Text Chapter/Sections
Instructional Resourcesq Handouts
q Equipment
q Guests invited
q Tests/Quizzes
q Supplements
q References
Course Management TasksInstitutional announcements.
Homework assignments.
Others (list.)
Learning Objectives or Outcomes:
Section I. Prepare—5-10% of total class time (i.e. 2.5 to 5 min. of a 50-minute class meeting)
Goals: Strategy—What method will you use to accomplish goal? Learning Activities—What will students do?
Gain attention.
Learning mindset preparation.
Connections to previous learning (brief review)..
Attendance/paper return/quiz.
Appendix B: Lesson Plan TemplateHow to Create A+ Lessons
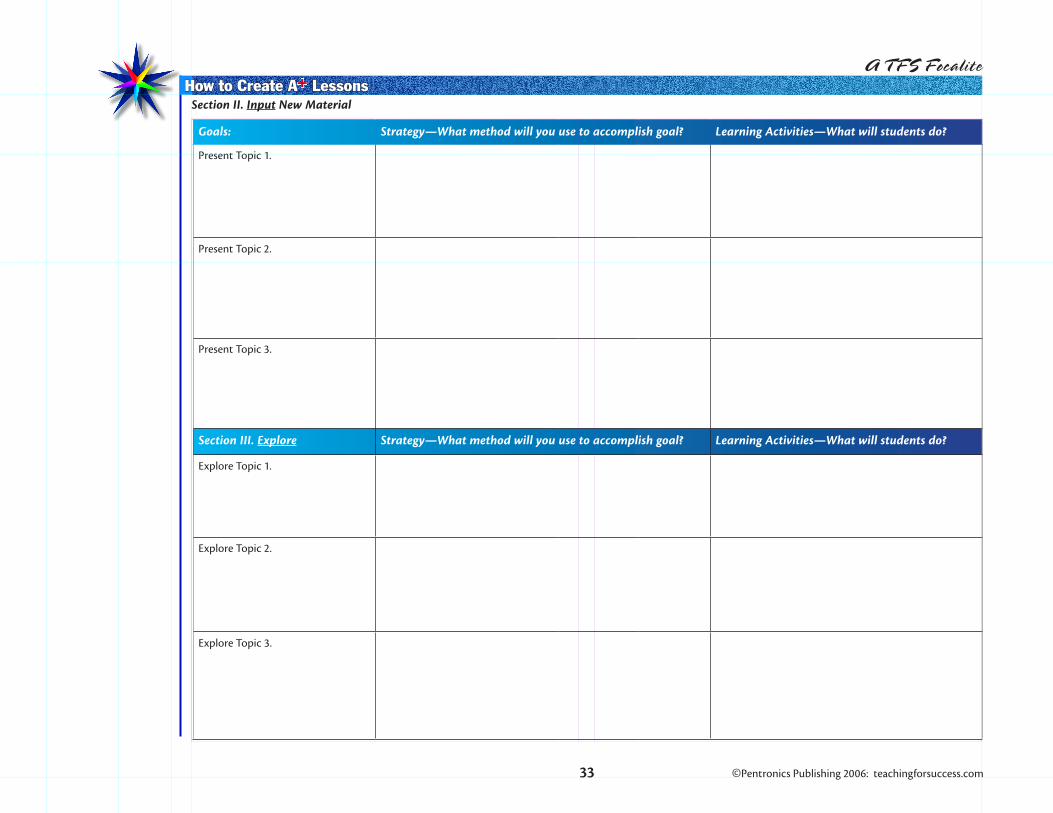
�� ©Pentronics Publishing 2006: teachingforsuccess.com
A TFS Focalite
Goals: Strategy—What method will you use to accomplish goal? Learning Activities—What will students do?
Present Topic 1.
Present Topic 2.
Present Topic 3.
Section III. Explore Strategy—What method will you use to accomplish goal? Learning Activities—What will students do?
Explore Topic 1.
Explore Topic 2.
Explore Topic 3.
Section II. Input New MaterialHow to Create A+ Lessons

�� ©Pentronics Publishing 2006: teachingforsuccess.com
A TFS Focalite
�� ©Pentronics Publishing 2004: teachingforsuccess.com
A TFS Focalite
Section VI. Retain Strategy—What method will you use to accomplish goal? Learning Activities—What will students do?
Retain Topic 1.
Retain Topic 2.
Retain Topic 3.
Section V. Recall Strategy—What method will you use to accomplish goal? Learning Activities—What will students do?
Recall of Topic 1.
Recall of Topic 2.
Recall of Topic 3.
Section VI. Reflect Strategy—What method will you use to accomplish goal? Learning Activities—What will students do?
Reflect on learning session (all topics).
Section VI. The Cliff Hanger Exit Strategy—What will you use to inspire and motivate students to return to the next class meeting prepared to learn?
Teaser topic to boost attendance and interest in next session.
How to Create A+ Lessons
�� ©Pentronics Publishing 2006: teachingforsuccess.com
A TFS Focalite
ShowYouKnow
1. The goal of this course is to provide you with: A. Course and lesson planning tools.B. Tools to make better tests.C. A set of teaching goals and objectives.D. A four-step, traditional lesson sequence.
2. Why bother with lesson plans?A. Lesson plans require goal setting.B. Lesson plans maximize your return on energy.C. Lesson plans help your students achieve their learning goals.D. All of the above.
3. What documents do you need to have before you begin lesson planning?A. Course catalog and class schedule.B. Course outline and syllabus.C. Campus directory and Web site index.D. Student disciplinary policy and state instructional codes.
4. According to Bloom’s taxonomy, which of the cognitive skill groups below is arranged in the correct order from least complex to most complex?
A. Knowledge, Comprehension, Application, Analysis, Synthesis, Evaluation.B. Knowledge, Application, Comprehension, Analysis, Synthesis, Evaluation.C. Comprehension, Knowledge, Application, Analysis, Synthesis, Evaluation.D. Analysis, Synthesis, Evaluation, Comprehension, Application Knowledge.
5. At the Comprehension level of cognition, which mental task might a student be expected to do?
A. Define.B. Demonstrate.C. Estimate.D. Subdivide.
Chapters (Click to Go)
1. What’s in It for Me?
2. Plans?—Why Bother?
3. Being Objective
4. Thinking Like Bloom?
5. An Engaging Format.
6. Boxed in.
7. Reality Check
8. Preparation and Input
9. Effective Explorations
10. Pedal to The Metal
11. Clinging to The Cliff.
12. End in Sight
Appendix
A. Objectives Template
B. Lesson Plan Template
C. References
D. Knowledge Test
E. Afterword
6. True or False Learning objectives are created after learning activities are chosen.
7. Complete the quote from Albert Einstein that provides an excellent rule of thumb for good lesson planning. “Things should be…
8. Match the type of learning to its correct definition.A. Cognitive—Feelings; Affective—Thinking; Psychomotor—PhysicalB. Affective—Feelings; Cognitive—Physical; Psychomotor—ThinkingC. Psychomotor—Feelings; Cognitive—Physical; Affective—PhysicalD. Psychomotor—Physical; Affective—Feelings; Cognitive—Thinking
9. If you asked your students to revise, organize, and create a new perspective, they would be working at the ________ level of thinking.
A. ComprehensionB. SynthesisC. EvaluationD. Knowledge
10. The first letter in the PIE-R3 lesson format stands for .A. ProposeB. PromptC. PostulateD. Prepare
11. The second “R” component of the PIE-R3 lesson format stands for .A. RetainB. ReconfirmC. ReflectD. Reorganize
Appendix D: Knowledge TestHow to Create A+ Lessons
�� ©Pentronics Publishing 2006: teachingforsuccess.com
A TFS Focalite
Chapters (Click to Go)
1. What’s in It for Me?
2. Plans?—Why Bother?
3. Being Objective
4. Thinking Like Bloom?
5. An Engaging Format.
6. Boxed in.
7. Reality Check
8. Preparation and Input
9. Effective Explorations
10. Pedal to The Metal
11. Clinging to The Cliff.
12. End in Sight
Appendix
A. Objectives Template
B. Lesson Plan Template
C. References
D. Knowledge Test
E. Afterword
12. During the Input phase of a PIE-R3 lesson, you would do which of the following?A. Relax and reorient your students to the new learning task at hand.B. Provide practice sessions where students can apply new knowledge.C. Review and test recall of new content.D. Involve students using as many of their senses as possible as
they are introduced to new knowledge.
13. When you personalize the content and present students with an opportunity to take knowledge apart, reassemble it, and then express it in their own thoughts and terms, you are most likely in what phase of a PIE-R3 lesson sequence.
A. Exploration.B. Retain.C. Reconfirm.D. Reflect.
14. When is a “Cliff Hanger” employed during a lesson?A. Any time during the Preparation component.B. At the end of the Input section.C. At the beginning of the Recall phase.D. At the end of class session.
15. What is your ultimate responsibility as an instructor?A. Reaching the teaching and learning outcomes you specified in
your lesson plans.B. Taking attendance at each class meeting.C. Keeping regular office hours.D. Creating Web pages that supplement the textbook for each of
your courses.
How did you do?My raw score is: :Number of correct answers out of 15 possible .My percentage is: (number correct divided by 15.)
How to Create A+ Lessons
�� ©Pentronics Publishing 2006: teachingforsuccess.com
A TFS Focalite
References
Angelo, Thomas A. and Cross, K. Patricia. Classroom Assessment Techniques. San Francisco: Jossey-Bass Inc., 1993.Bloom, Benjamin S., Max D. Engelhart, Edward J. Furst, W. H. Hill, and David R. Krathwohl, eds. Taxonomy of Educational
Objectives: The Classification of Educational Goals. Handbook I, Cognitive Domain (1st ed.). New York: David McKay, 1956.
Frye, Bill J. “Instructional Resources for College Courses.” Teaching In College: A Resource for College Teachers. Ed. Bill J. Frye. Elyria, OH: Info-Tec, 1994.
Gardner, Howard. Frames of Mind: The theory of multiple intelligences, New York: Basic Books, 1983; 1993.Gagne, Robert M., Briggs, Leslie J., Wager, Walter W. Principles of Instructional Design. Orlando, Harcourt Brace Jovanovich
College Publishers: 1992.Greive, Donald. A Handbook for Adjunct/Part-Time Faculty and Teachers of Adults. Elyria, OH: Info-Tec, 1995.Greive, Donald. Teaching Strategies & Techniques for Adjunct Faculty. Elyria, OH: Info-Tec, 1998.Lazear, David. Seven Ways of Knowing: Understanding Multiple Intelligences (2nd ed.). Palatine, IL: Skylight Publishing, 1991.Maslow, Abraham H. Motivation and Personality. New York: Harper and Row, 1970.Neff, Rose Ann, and Maryellen Weimer. Classroom Communication: Collected Readings for Effective Discussion and Ques-
tioning. Madison: Magna Publications, 1989.Nichols, James O. The Departmental Guide to Implementation of Student Outcomes Assessment and Institutional Effective-
ness. New York: Agathon Press, 1991.Osborn, Michael, and Suzanne Osborn. Public Speaking (5th ed.). Boston: Houghton Mifflin, 2000.Pregent, Richard. Charting Your Course: How to Prepare to Teach More Effectively. Madison, WI: Magna Publications, 1994.Rose, Collin. Accelerated Learning Action Guide. Niles, IL: Nightingale-Conant, 1995.Weimer, Maryellen, Joan L. Parrett, and Mary-Margaret Kerns. How Am I Teaching: Forms and Activities for Acquiring
Instructional Input. Madison, WI: Magna Publications, 1988.
Appendix D: References
Chapters (Click to Go)
1. What’s in It for Me?
2. Plans?—Why Bother?
3. Being Objective
4. Thinking Like Bloom?
5. An Engaging Format.
6. Boxed in.
7. Reality Check
8. Preparation and Input
9. Effective Explorations
10. Pedal to The Metal
11. Clinging to The Cliff.
12. End in Sight
Appendix
A. Objectives Template
B. Lesson Plan Template
C. References
D. Knowledge Test
E. Afterword
How to Create A+ Lessons
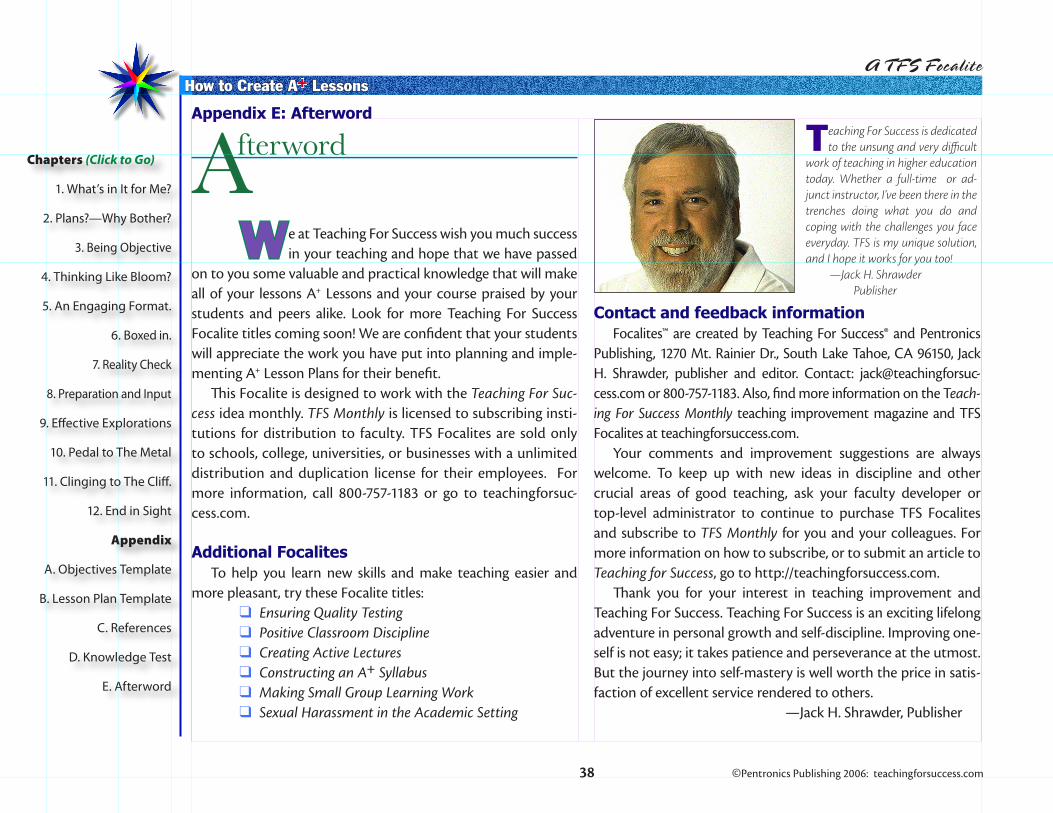
�� ©Pentronics Publishing 2006: teachingforsuccess.com
A TFS Focalite
Afterword
We at Teaching For Success wish you much success in your teaching and hope that we have passed
on to you some valuable and practical knowledge that will make all of your lessons A+ Lessons and your course praised by your students and peers alike. Look for more Teaching For Success Focalite titles coming soon! We are confident that your students will appreciate the work you have put into planning and imple-menting A+ Lesson Plans for their benefit.
This Focalite is designed to work with the Teaching For Suc-cess idea monthly. TFS Monthly is licensed to subscribing insti-tutions for distribution to faculty. TFS Focalites are sold only to schools, college, universities, or businesses with a unlimited distribution and duplication license for their employees. For more information, call 800-757-1183 or go to teachingforsuc-cess.com.
Additional FocalitesTo help you learn new skills and make teaching easier and
more pleasant, try these Focalite titles:q Ensuring Quality Testingq Positive Classroom Disciplineq Creating Active Lecturesq Constructing an A+ Syllabusq Making Small Group Learning Workq Sexual Harassment in the Academic Setting
Contact and feedback informationFocalites™ are created by Teaching For Success® and Pentronics
Publishing, 1270 Mt. Rainier Dr., South Lake Tahoe, CA 96150, Jack H. Shrawder, publisher and editor. Contact: [email protected] or 800-757-1183. Also, find more information on the Teach-ing For Success Monthly teaching improvement magazine and TFS Focalites at teachingforsuccess.com.
Your comments and improvement suggestions are always welcome. To keep up with new ideas in discipline and other crucial areas of good teaching, ask your faculty developer or top-level administrator to continue to purchase TFS Focalites and subscribe to TFS Monthly for you and your colleagues. For more information on how to subscribe, or to submit an article to Teaching for Success, go to http://teachingforsuccess.com.
Thank you for your interest in teaching improvement and Teaching For Success. Teaching For Success is an exciting lifelong adventure in personal growth and self-discipline. Improving one-self is not easy; it takes patience and perseverance at the utmost. But the journey into self-mastery is well worth the price in satis-faction of excellent service rendered to others.
—Jack H. Shrawder, Publisher
Appendix E: Afterword
Chapters (Click to Go)
1. What’s in It for Me?
2. Plans?—Why Bother?
3. Being Objective
4. Thinking Like Bloom?
5. An Engaging Format.
6. Boxed in.
7. Reality Check
8. Preparation and Input
9. Effective Explorations
10. Pedal to The Metal
11. Clinging to The Cliff.
12. End in Sight
Appendix
A. Objectives Template
B. Lesson Plan Template
C. References
D. Knowledge Test
E. Afterword
How to Create A+ Lessons
Teaching For Success is dedicated to the unsung and very difficult
work of teaching in higher education today. Whether a full-time or ad-junct instructor, I’ve been there in the trenches doing what you do and coping with the challenges you face everyday. TFS is my unique solution, and I hope it works for you too!
—Jack H. Shrawder Publisher