Embed Size (px)
Citation preview
PowerTeacher Pro User Guide
PowerSchool Student Information System
Released June 2016 Document Owner: Documentation Services This edition applies to Release 9.2.9 of the PowerSchool software and to all subsequent releases and modifications until otherwise indicated in new editions or updates. The data and names used to illustrate the reports and screen images may include names of individuals, companies, brands, and products. All of the data and names are fictitious; any similarities to actual names are entirely coincidental. PowerSchool is a trademark, in the U.S. and/or other countries, of Pearson Education, Inc. or its affiliate(s). Copyright © 2005-2016 PowerSchool Group LLC and/or its affiliate(s). All rights reserved. All trademarks are either owned or licensed by PowerSchool Group LLC and/or its affiliates.
PowerTeacher Pro User Guide
Contents iii
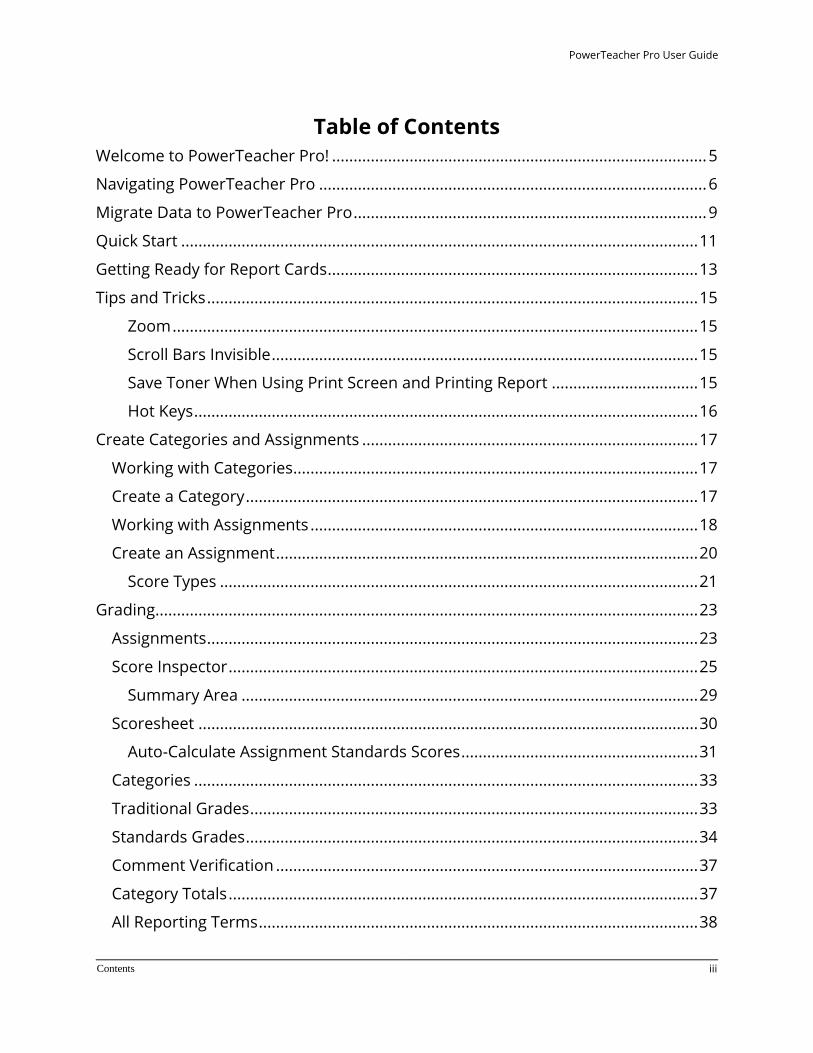
Table of Contents Welcome to PowerTeacher Pro! ....................................................................................... 5
Navigating PowerTeacher Pro .......................................................................................... 6
Migrate Data to PowerTeacher Pro .................................................................................. 9
Quick Start ........................................................................................................................ 11
Getting Ready for Report Cards ...................................................................................... 13
Tips and Tricks .................................................................................................................. 15
Zoom .......................................................................................................................... 15
Scroll Bars Invisible ................................................................................................... 15
Save Toner When Using Print Screen and Printing Report .................................. 15
Hot Keys ..................................................................................................................... 16
Create Categories and Assignments .............................................................................. 17
Working with Categories .............................................................................................. 17
Create a Category ......................................................................................................... 17
Working with Assignments .......................................................................................... 18
Create an Assignment .................................................................................................. 20
Score Types ............................................................................................................... 21
Grading.............................................................................................................................. 23
Assignments .................................................................................................................. 23
Score Inspector ............................................................................................................. 25
Summary Area .......................................................................................................... 29
Scoresheet .................................................................................................................... 30
Auto-Calculate Assignment Standards Scores ....................................................... 31
Categories ..................................................................................................................... 33
Traditional Grades ........................................................................................................ 33
Standards Grades ......................................................................................................... 34
Comment Verification .................................................................................................. 37
Category Totals ............................................................................................................. 37
All Reporting Terms ...................................................................................................... 38
PowerTeacher Pro User Guide
Contents iv
Students ............................................................................................................................ 39
Student Assignments ................................................................................................... 39
Student Standards Progress ....................................................................................... 40
Student Standards Progress Graph ........................................................................ 41
Comment Log ............................................................................................................... 43
Demographics............................................................................................................... 43
Quick Lookup - Traditional .......................................................................................... 44
Quick Lookup - Standards ........................................................................................... 44
Progress ............................................................................................................................ 45
Standards Grades Progress ......................................................................................... 45
Traditional Grades Progress ........................................................................................ 46
Traditional Grades Progress Details ........................................................................... 47
Professional Judgment Indicator ................................................................................ 48
Assessment ....................................................................................................................... 49
Reports .............................................................................................................................. 50
Working with Reports .................................................................................................. 50
Individual Student Report ............................................................................................ 50
Multi-Function Assignment Report ............................................................................. 51
Student Roster Report ................................................................................................. 52
Settings .............................................................................................................................. 54
Class Descriptions ........................................................................................................ 54
Display Settings ............................................................................................................ 54
Grade Calculation Types .............................................................................................. 55
Traditional Grade Calculations .................................................................................... 57
Standards Grades Calculations ................................................................................... 58
Standards Calculation Examples ............................................................................. 58
Recalculate Final Grades .............................................................................................. 63
PowerTeacher Pro User Guide
Welcome to PowerTeacher Pro! 5J
Welcome to PowerTeacher Pro! PowerTeacher Pro includes robust functionality for managing the classroom, including advanced features for both standards-based and traditional grading. Teachers use this mobile-friendly gradebook to get their work done quickly and to analyze student performance. Administrators set up district-level grading preferences and apply them to selections of schools to provide grading consistency and to save teachers time. Use PowerTeacher Pro to:
• Create assignment categories • Create assignments • Score assignments and work with grades • Assess student and class performance • Refine district-level grading preferences
Getting Started
The gradebook is ready to go the first day of school. You don’t have a lengthy setup because its default settings work for most teachers, at least to start. You may want to format certain items, but the default settings make the gradebook fully functional out of the box. Additionally, your district leaders may set up grading preferences for you to provide grading consistency between teachers and schools throughout the district. Navigate to the HTML-based gradebook directly through the PowerTeacher portal. There’s no need to launch a separate application to access PowerTeacher Pro. The first time you navigate to the gradebook, you’ll see a welcome message that introduces some of the features.
PowerTeacher Pro User Guide
Navigating PowerTeacher Pro 6J
Navigating PowerTeacher Pro Sign In to PowerTeacher Pro
Sign in to PowerTeacher Portal, and then select the PowerTeacher Pro link on the main menu or on the Current Classes page.
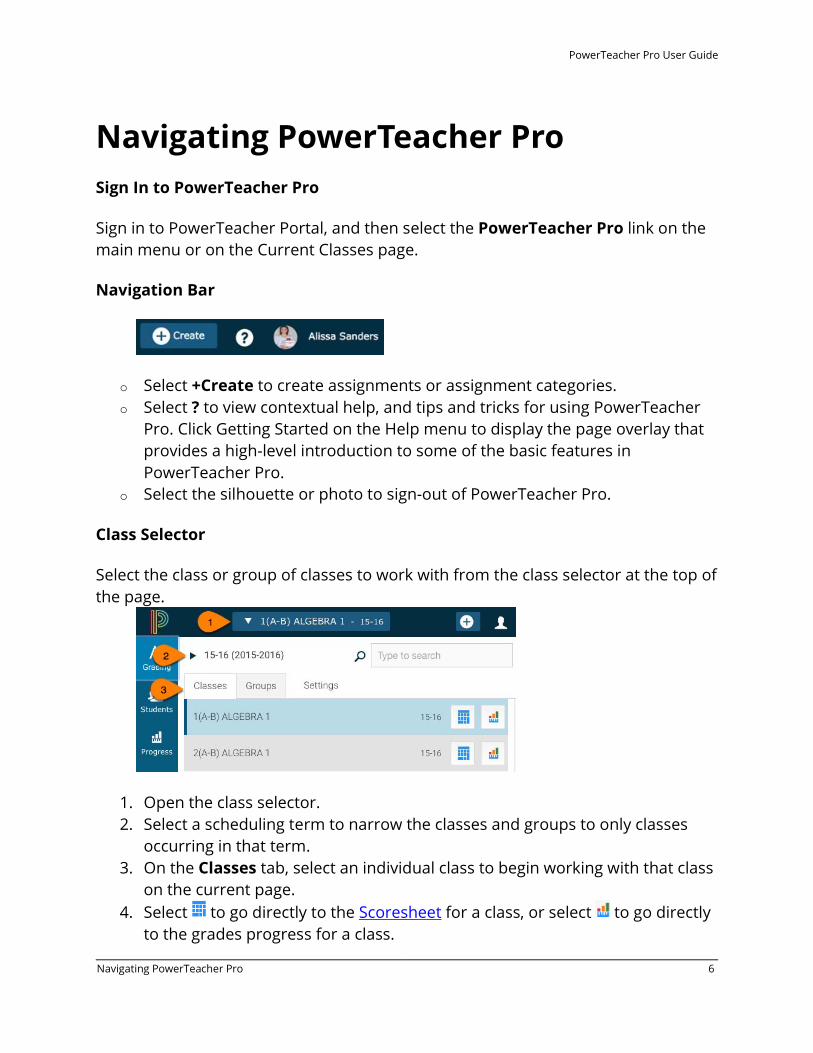
Navigation Bar
o Select +Create to create assignments or assignment categories. o Select ? to view contextual help, and tips and tricks for using PowerTeacher
Pro. Click Getting Started on the Help menu to display the page overlay that provides a high-level introduction to some of the basic features in PowerTeacher Pro.
o Select the silhouette or photo to sign-out of PowerTeacher Pro.
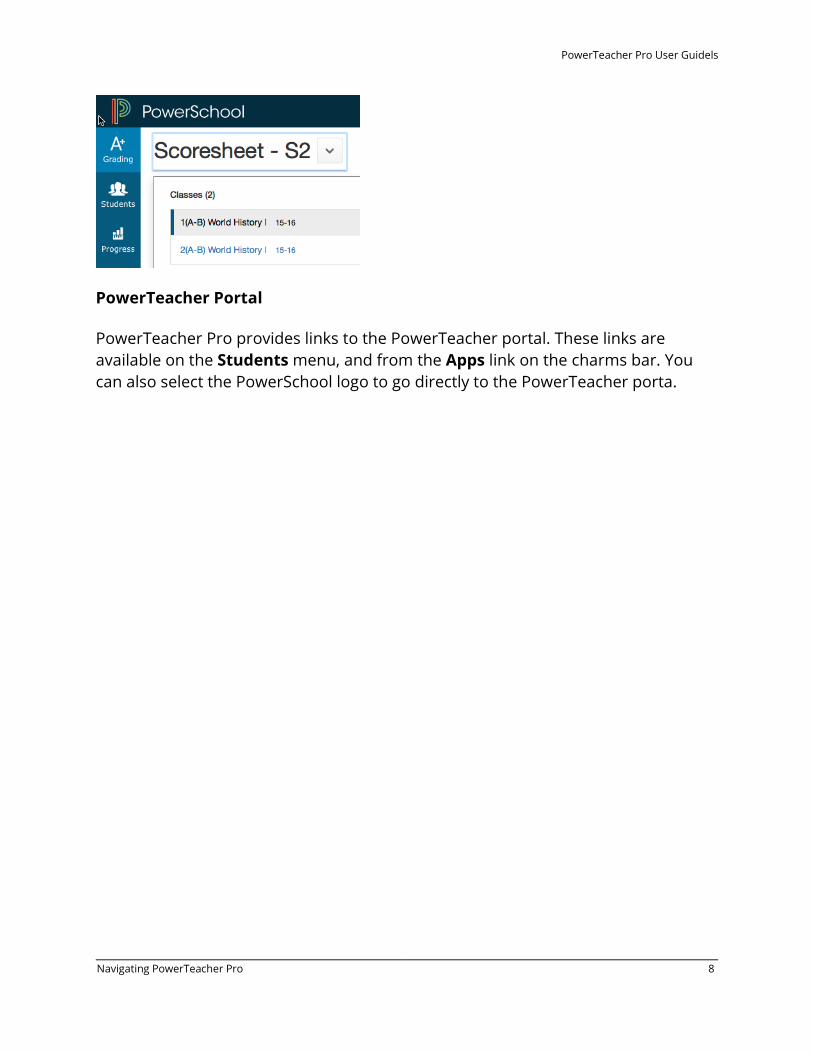
Class Selector
Select the class or group of classes to work with from the class selector at the top of the page.
1. Open the class selector. 2. Select a scheduling term to narrow the classes and groups to only classes
occurring in that term. 3. On the Classes tab, select an individual class to begin working with that class
on the current page. 4. Select to go directly to the Scoresheet for a class, or select to go directly
to the grades progress for a class.
PowerTeacher Pro User Guidels
Navigating PowerTeacher Pro 7J
5. On the Groups tab, select all classes in the selected term or a class group to begin working with those classes on the current page. The groups are automatically created for classes occurring in the selected term that have the same expression, course, or school (if there are classes at multiple schools). Select to go directly to the Scoresheet for a group, or select to go directly to the grades progress page you have selected on the Display Settings page for a group.
Charms Bar
Select an item on the charms bar along the left side of the app to open the corresponding section. The image above displays the default menu items for PowerTeacher Pro. Other items that are enabled by your district may appear on the charms bar or on various section menus in PowerTeacher Pro.
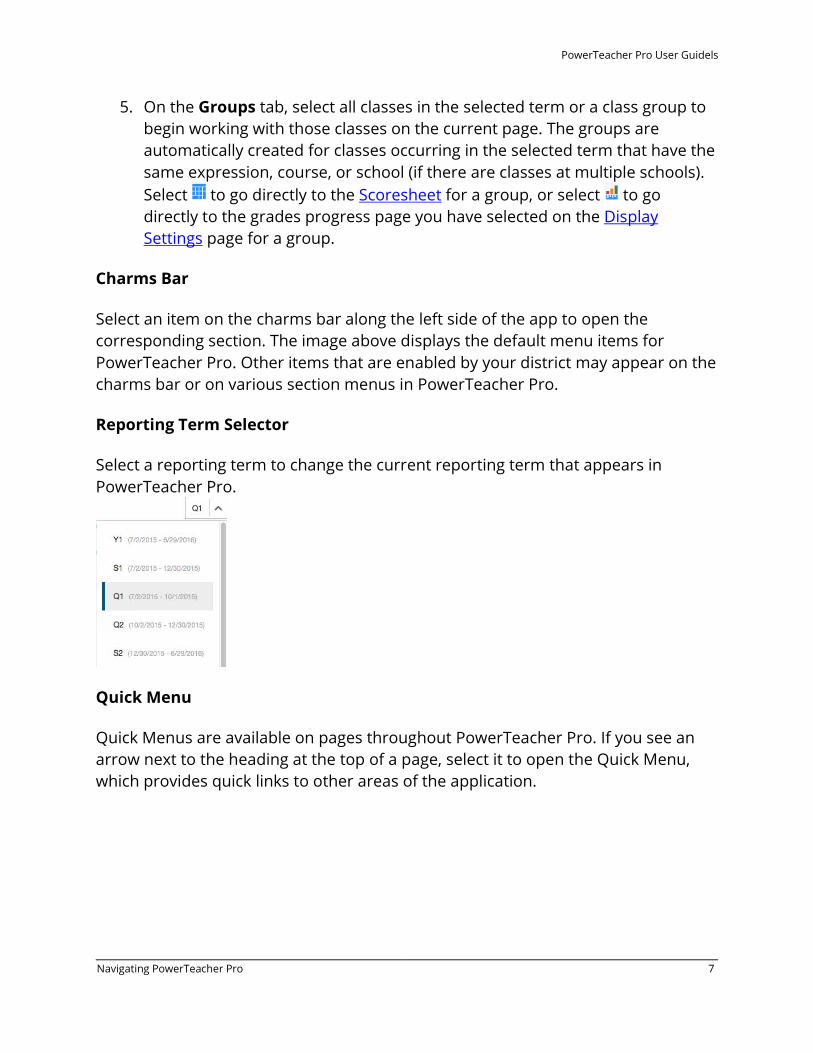
Reporting Term Selector
Select a reporting term to change the current reporting term that appears in PowerTeacher Pro.
Quick Menu
Quick Menus are available on pages throughout PowerTeacher Pro. If you see an arrow next to the heading at the top of a page, select it to open the Quick Menu, which provides quick links to other areas of the application.
PowerTeacher Pro User Guidels
Navigating PowerTeacher Pro 8J
PowerTeacher Portal
PowerTeacher Pro provides links to the PowerTeacher portal. These links are available on the Students menu, and from the Apps link on the charms bar. You can also select the PowerSchool logo to go directly to the PowerTeacher porta.
PowerTeacher Pro User Guide
Migrate Data to PowerTeacher Pro 9J
Migrate Data to PowerTeacher Pro PowerTeacher Pro provides a method for you to migrate existing assignments created in PowerTeacher Gradebook (PTG) for the current year. The following conditions must be met in order to successfully migrate assignment data:
• Your PowerSchool administrator has set the Gradebook Type to PowerTeacher Pro for the section for the current year.
• No assignments exist in PowerTeacher Pro. • Assignments exist in PTG for the current year.
If these conditions are met, the first time you launch PowerTeacher Pro, a Migrate Data to PowerTeacher Pro screen appears. Click Migrate.
• A checkmark appears next to the class when the migration is successfully completed.
• A yellow exclamation marks appears next to the class if data was migrated but changed in some manner from the records in PowerTeacher Gradebook. Look at the Summary tab for more information regarding the failure.
• An red exclamation mark appears next to the class if errors were encountered during the migration.
Click Summary to view a log of any migration errors. Click Print to either print the log, or save it as a PDF to send to your PowerSchool administrator. The following items will NOT migrate from PTG:
• Custom teacher-created versions of the grade scale. • Custom teacher-created score codes (if there is no corresponding grade scale
item or special code item in the grade scale). For example, a teacher enters in score code of “x” = 80%. If there is no “x” in a grade scale or special code, then “x” cannot migrate to PowerTeacher Pro, but the value of 80% is migrated correctly.
• Calculation settings. Since calculation settings do not migrate, be sure that your PowerSchool administrator has created any new grade calculation formulas in PowerSchool, or you can create grade calculation formulas in PowerTeacher Pro.
• Content links • Teacher-defined custom student fields.
PowerTeacher Pro User Guidels
Migrate Data to PowerTeacher Pro 10J
• Classes that are designated as read-only. For standards, PowerTeacher Pro uses grade scales instead of conversion scales. As part of the PowerSchool 10 upgrade, copies of conversion scales have been created as grade scales and attached to the appropriate standards. If assignments do not migrate: Assignments that do not migrate will need to be recreated in PowerTeacher Pro. 1. View the assignment details in the Summary tab. 2. Find the failed assignments in PowerTeacher Gradebook. 3. Copy the values from PowerTeacher Gradebook into a new assignment in PowerTeacher Pro. If no assignments migrate successfully for a section, you must create at least one assignment in PowerTeacher Pro to prevent the migration prompt from reappearing. Contact your PowerSchool administrator if you have additional questions.
PowerTeacher Pro User Guide
Quick Start 11J
Quick Start To get started immediately and begin taking advantage of PowerTeacher Pro, perform the following tasks. For navigation help, see Navigating PowerTeacher Pro.
Class Descriptions
You can add descriptions or other information about the class that will be visible in the PowerSchool Student and Parent Portals, and in PowerSchool Mobile.
1. Use the class selector to select a class. 2. If needed, select the term in which the class meets, if different from the
current term. 3. On the charms bar, select Settings. 4. Select Class Descriptions.
Display Preferences
Customize display settings such as class names, how students are sorted, as well as how grades are displayed (traditional vs. standards).
• From the class selector screen, select the Settings link.
Or
• On the charms bar, select Settings, and then choose Display Settings.
Grading Preferences
Define the grade calculations for your classes.
• On the charms bar, select Settings, and then choose Traditional Grade Calculations or Standards Grade Calculations.
Create Categories
Create categories in which you can group similar types of assignments.
PowerTeacher Pro User Guidels
Quick Start 12J
• Select and then choose Category.
Create Assignments
Create assignments at the beginning of a school term or at any time during the term.
• Select and then choose Assignment.
Grades
• Enter scores on the Assignment, Scoresheet, or Student pages. • Use the Score Inspector to provide more details about the student's
performance. • Review all areas of overall class grades on the Traditional Grades, Standards
Grades, Comment Verification, Category Totals, and All Reporting Terms pages.
Class Progress
Analyze class performance at any time during the school year.
• On the charms bar, select Progress, and then choose Traditional or Standards.
Reports
You can personalize each report by entering a custom title or by including a top note, bottom note, or signature line.
• On the charms bar, select Reports.
PowerTeacher Pro User Guide
Getting Ready for Report Cards 13J
Getting Ready for Report Cards PowerTeacher Pro provides five powerful features to help you get ready for report cards. Final grades are updated automatically throughout the term as you enter assignment scores. When the term comes to a close, however, you may have additional tasks to perform before submitting grades for report cards to make sure your final grades are accurate. For example, you may have to enter standards grades and modify individual scores. Occasionally, you may also need to modify a student’s final grade in a course based on effort, participation, or other performance factors.
Traditional Grades
When preparing for report cards, the Traditional Grades page provides an overall view of traditional grades for an entire class, along with a summary of how many absences, tardies, missing, late, and incomplete assignments each student has. Use this page to analyze any correlation between absences and how they may correlate to assignment scores. Use your professional judgement to determine if there is a need to manually override a grade.
• Select Grading from the charms bar, or select the Quick Menu, and then choose Traditional.
Standards Grades
When preparing for report cards, the Standards Grades page provides an overall view of standards grades for an entire class. Use your professional judgement to determine if there is a need to manually override a grade.
• Select Grading from the charms bar, or select the Quick Menu, and then choose Standards.
Comment Verification
The Comment Verification page provides you with a view of all comments for a selected class and term. Use this page to review previous comments to aide in your analysis of the final grade.
PowerTeacher Pro User Guidels
Getting Ready for Report Cards 14J
• Select Grading from the charms bar, or select the Quick Menu, and then choose Comment Verification.
Category Totals
The Category Totals page provides an overall view of the category scores for a class. You can analyze student comprehension across all categories for a class. Use this page to review student progress on class work, projects, and tests.
• Select Grading from the charms bar, or select the Quick Menu, and then choose Category Totals. The categories for the selected class appear.
All Reporting Terms
The All Reporting Terms page provides a comprehensive view of the traditional grades across all reporting terms for the selected class. This is especially helpful if you use term-based weighting for your final grades.
• Select Grading from the charms bar, or select the Quick Menu, and then choose All Reporting Terms.
Reports
• Use the Individual Student Report to view details for an individual student. Run the report to display missing and late assignments, assignment due dates, high and low course grades during a specific period, as well as course grade and assignment comments.
• Use the Multi-Function Assignment Report to view assignment details by student. You can sort the report to display only missing and late assignments, or filter it to display specific assignment categories. You can also set a specific date range to view only assignments due within a specific period.
• Use the Student Roster Report to generate a report based on student demographic data. You can use this report output for a field trip list, a class contact list, a class checklist, and much more.
PowerTeacher Pro User Guide
Tips and Tricks 15J
Tips and Tricks Zoom
To magnify or reduce the PowerTeacher Pro pages, you can use keyboard shortcuts or use the browser View menu. Remember that changing the view will affect all other websites you view with the browser.
Windows
Press Ctrl and + to magnify. Press Ctrl and - to reduce. Press Ctrl and 0 to restore the default view.
Mac
Press Command and + to magnify. Press Command and - to reduce. Press Command and 0 to restore the default view.
Scroll Bars Invisible
If you are using a Mac, you may not be able to see scrollbars on certain pages of PowerTeacher Pro. This is a feature of the operating system that is easily adjusted. Change the system preferences on your Mac to always display scrollbars. Go to Apple Menu > System Preferences > General, and then set the Show scroll bars setting to Always.
Save Toner When Using Print Screen and Printing Report
When printing certain pages in PowerTeacher Pro, you can specify in your browser if you want to print background graphics. Printing the background graphics will print detailed information available on these pages. However, you can also avoid printing background graphics on pages to conserve toner. Consult your browser application online help for instructions on printing background graphics. On reports, select the Exclude Row Shading option to save toner when printing reports.
PowerTeacher Pro User Guidels
Tips and Tricks 16J
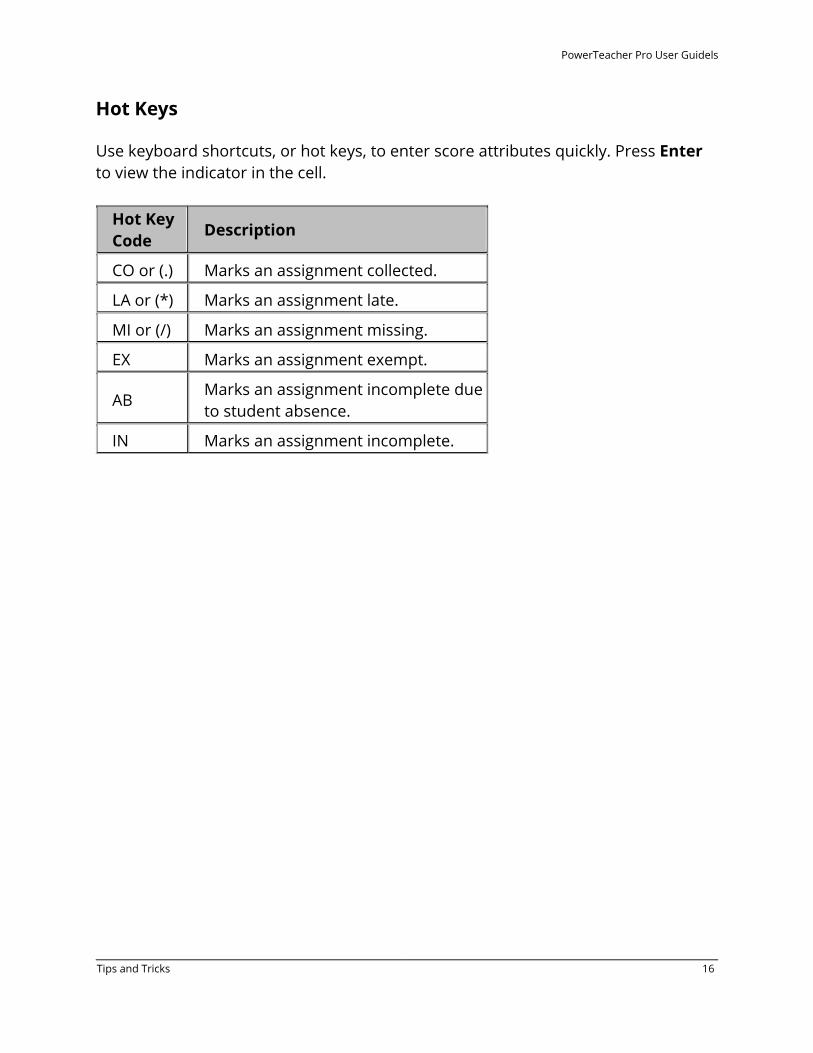
Hot Keys
Use keyboard shortcuts, or hot keys, to enter score attributes quickly. Press Enter to view the indicator in the cell.
Hot Key Code Description
CO or (.) Marks an assignment collected.
LA or (*) Marks an assignment late.
MI or (/) Marks an assignment missing.
EX Marks an assignment exempt.
AB Marks an assignment incomplete due to student absence.
IN Marks an assignment incomplete.
PowerTeacher Pro User Guide
Create Categories and Assignments 17J
Create Categories and Assignments Working with Categories
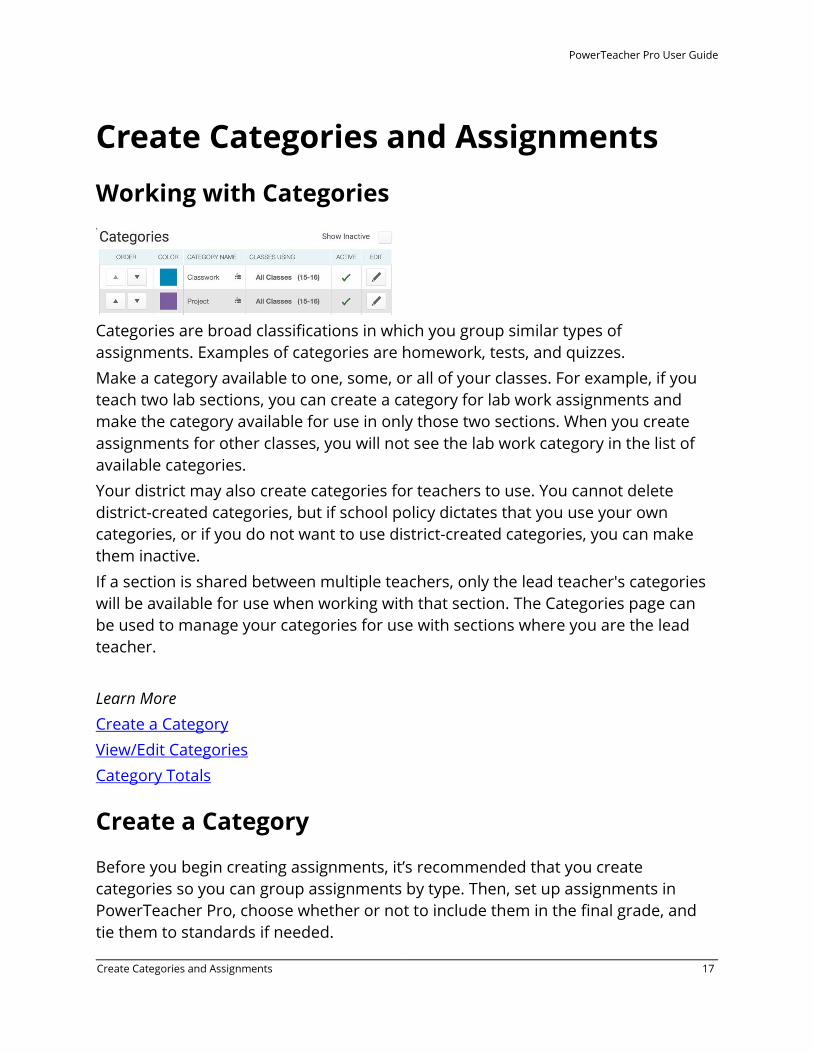
Categories are broad classifications in which you group similar types of assignments. Examples of categories are homework, tests, and quizzes. Make a category available to one, some, or all of your classes. For example, if you teach two lab sections, you can create a category for lab work assignments and make the category available for use in only those two sections. When you create assignments for other classes, you will not see the lab work category in the list of available categories. Your district may also create categories for teachers to use. You cannot delete district-created categories, but if school policy dictates that you use your own categories, or if you do not want to use district-created categories, you can make them inactive. If a section is shared between multiple teachers, only the lead teacher's categories will be available for use when working with that section. The Categories page can be used to manage your categories for use with sections where you are the lead teacher. Learn More Create a Category View/Edit Categories Category Totals
Create a Category
Before you begin creating assignments, it’s recommended that you create categories so you can group assignments by type. Then, set up assignments in PowerTeacher Pro, choose whether or not to include them in the final grade, and tie them to standards if needed.
PowerTeacher Pro User Guidels
Create Categories and Assignments 18J
Your district may also set up assignment categories for you and other teachers to use.
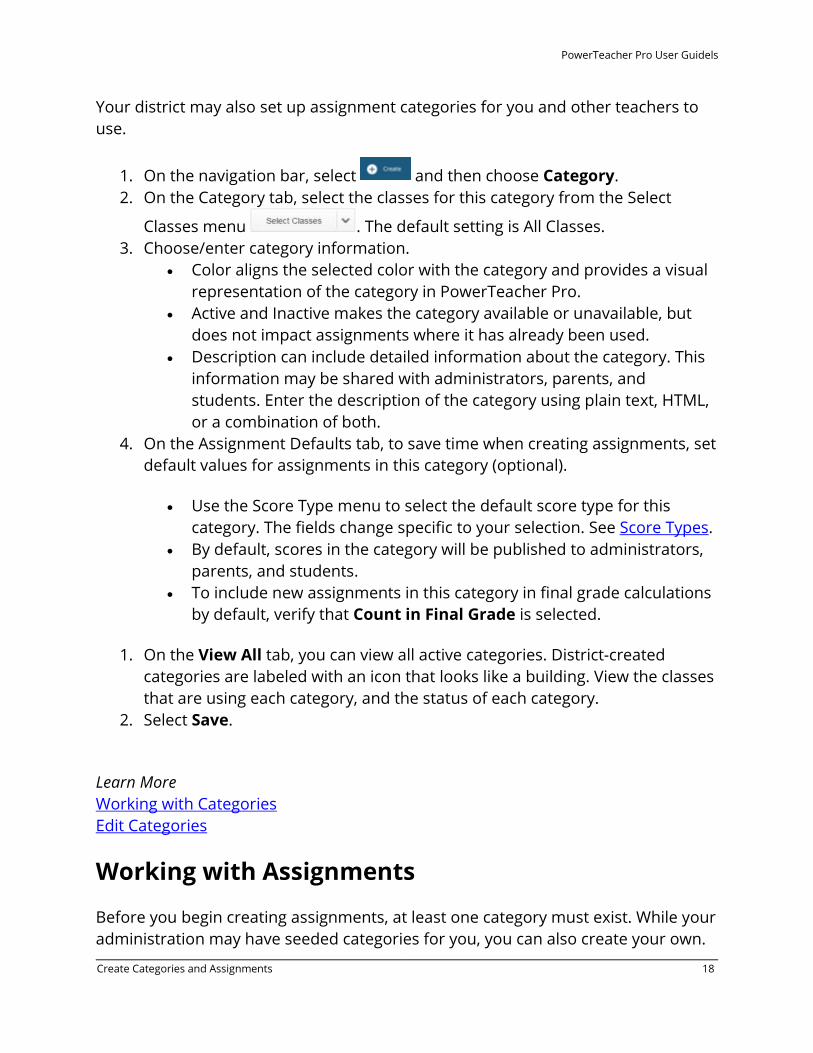
1. On the navigation bar, select and then choose Category. 2. On the Category tab, select the classes for this category from the Select
Classes menu . The default setting is All Classes. 3. Choose/enter category information.
• Color aligns the selected color with the category and provides a visual representation of the category in PowerTeacher Pro.
• Active and Inactive makes the category available or unavailable, but does not impact assignments where it has already been used.
• Description can include detailed information about the category. This information may be shared with administrators, parents, and students. Enter the description of the category using plain text, HTML, or a combination of both.
4. On the Assignment Defaults tab, to save time when creating assignments, set default values for assignments in this category (optional).
• Use the Score Type menu to select the default score type for this category. The fields change specific to your selection. See Score Types.
• By default, scores in the category will be published to administrators, parents, and students.
• To include new assignments in this category in final grade calculations by default, verify that Count in Final Grade is selected.
1. On the View All tab, you can view all active categories. District-created categories are labeled with an icon that looks like a building. View the classes that are using each category, and the status of each category.
2. Select Save.
Learn More Working with Categories Edit Categories
Working with Assignments
Before you begin creating assignments, at least one category must exist. While your administration may have seeded categories for you, you can also create your own.
PowerTeacher Pro User Guidels
Create Categories and Assignments 19J
Set up assignments in PowerTeacher Pro, choose whether or not to include them in the final grade, and tie them to standards. Your district may also set up assignment categories at the district level for you and other teachers to use. See Create a Category. Before setting up an assignment, consider how you will score the assignment:
o Do you want to record the score as points, a percentage, or letter grade? o How many points is the assignment worth? o How do you want to weight the assignment? o Do you want to include the assignment in final grade calculation?
Count in Final Grade
When setting up assignments, you can use the Count in Final Grade checkbox to indicate whether an assignment should be included in calculating final grades. The value set for a category is used as a default for all assignments within that category, but may be overridden on an assignment-by-assignment basis.
Weighting
Assignment setup may involve weighting; however, weighting is not required. Weighting gives particular assignments, whether points, percentage, or letter grades, more value than others when determining final grades. The weight value is used to multiply the points earned and the points possible.
Extra Points
You can determine the extra points. PowerTeacher Pro takes the total sum of Points Possible and Extra Points to determine the maximum points available on the assignment. When entering the score on the Scoresheet, you cannot enter a value greater than the maximum score that appears on the Assignments window in the Max Entry field. Note: The maximum point value ((Points * Weighting) + Extra Points) for any assignment is 9,999 within PowerTeacher Pro.
Standards Based Grades
You can assign any number of standards to an assignment, which can be scored separately or auto-calculated from assignment scores.
PowerTeacher Pro User Guidels
Create Categories and Assignments 20J
Learn More Assignment List Create an Assignment
Create an Assignment
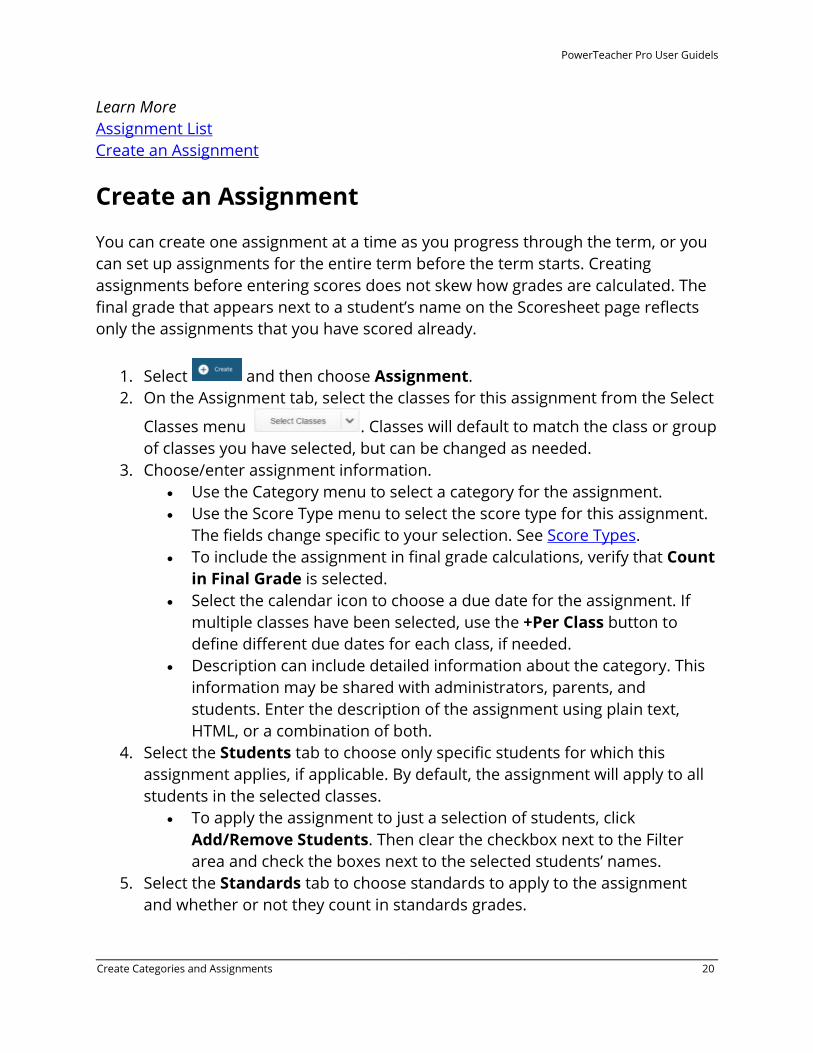
You can create one assignment at a time as you progress through the term, or you can set up assignments for the entire term before the term starts. Creating assignments before entering scores does not skew how grades are calculated. The final grade that appears next to a student’s name on the Scoresheet page reflects only the assignments that you have scored already.
1. Select and then choose Assignment. 2. On the Assignment tab, select the classes for this assignment from the Select
Classes menu . Classes will default to match the class or group of classes you have selected, but can be changed as needed.
3. Choose/enter assignment information. • Use the Category menu to select a category for the assignment. • Use the Score Type menu to select the score type for this assignment.
The fields change specific to your selection. See Score Types. • To include the assignment in final grade calculations, verify that Count
in Final Grade is selected. • Select the calendar icon to choose a due date for the assignment. If
multiple classes have been selected, use the +Per Class button to define different due dates for each class, if needed.
• Description can include detailed information about the category. This information may be shared with administrators, parents, and students. Enter the description of the assignment using plain text, HTML, or a combination of both.
4. Select the Students tab to choose only specific students for which this assignment applies, if applicable. By default, the assignment will apply to all students in the selected classes.
• To apply the assignment to just a selection of students, click Add/Remove Students. Then clear the checkbox next to the Filter area and check the boxes next to the selected students’ names.
5. Select the Standards tab to choose standards to apply to the assignment and whether or not they count in standards grades.
PowerTeacher Pro User Guidels
Create Categories and Assignments 21J
• Select Show Selected Standards, and then check Auto-Calculate Assignment Standards Scores to automatically calculate standards scores from assignment scores. For more information, see Auto-Calculate Assignment Standards Scores.
• Select Add/Edit Standards, and check the boxes next to the standards you want to associated to this assignment. Use the Filter field to limit the number of standards that appear. Once the standards are filtered, you can use the checkbox next to the Filter field to select those filtered standards.
6. Select the Publish tab to set when the assignment will be shared with parents and students on the PowerSchool Student and Parent portal.
• Use the Publish Assignments menu to choose when the assignments will be published.
• Select the Publish Scores checkbox to share the assignment score.
7. Select Save when finished.
When you save an assignment, Duplicate and Delete buttons appear on the Edit window. You can copy the assignment you just created, or delete it.
Create a Duplicate Assignment
To save time, copy existing assignments.
1. On the charms bar, select Grading, then select Assignment List. 2. Select the Edit icon next to the assignment name on the Assignments page. 3. Select Duplicate. 4. Edit the assignments details and click Save.
Learn More
Assignment Details
Assignment List
Create a Category
Score Types
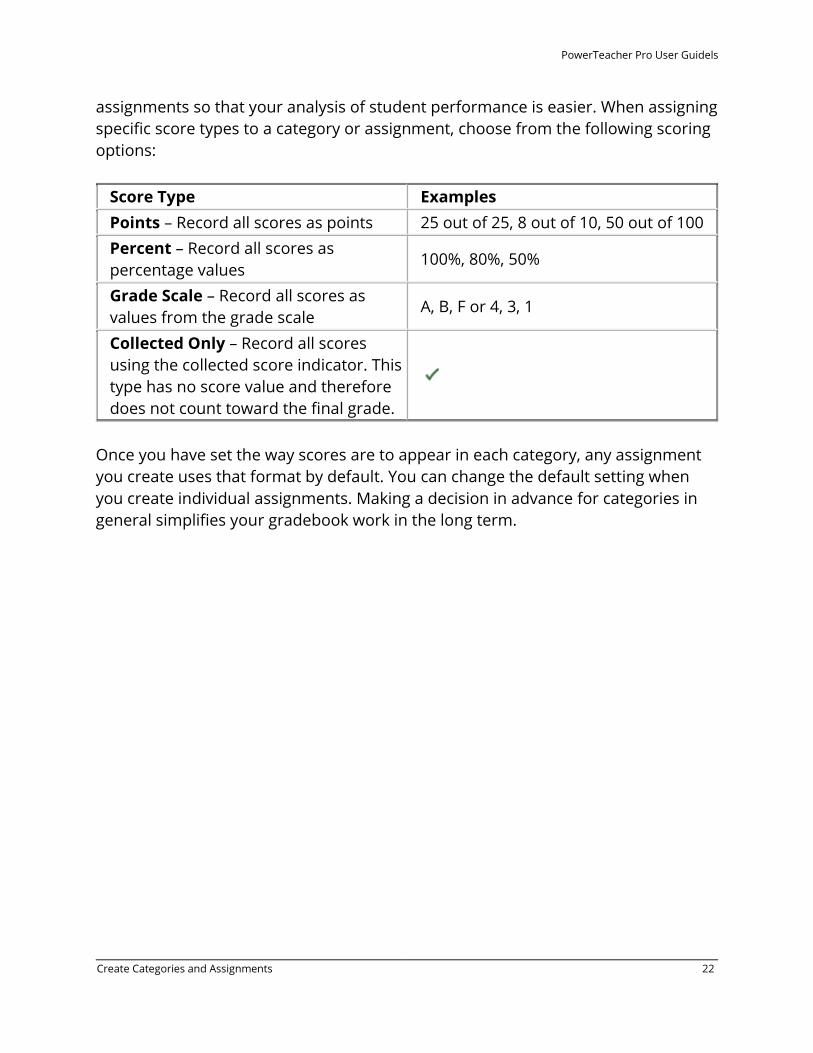
Choose from four different score types —points, percent, grade scale, or collected only. It's possible to use one score type for one category and a different type for another, but it’s best to choose one method and use it consistently when scoring
PowerTeacher Pro User Guidels
Create Categories and Assignments 22J
assignments so that your analysis of student performance is easier. When assigning specific score types to a category or assignment, choose from the following scoring options:
Score Type Examples Points – Record all scores as points 25 out of 25, 8 out of 10, 50 out of 100 Percent – Record all scores as percentage values
100%, 80%, 50%
Grade Scale – Record all scores as values from the grade scale
A, B, F or 4, 3, 1
Collected Only – Record all scores using the collected score indicator. This type has no score value and therefore does not count toward the final grade.
Once you have set the way scores are to appear in each category, any assignment you create uses that format by default. You can change the default setting when you create individual assignments. Making a decision in advance for categories in general simplifies your gradebook work in the long term.
PowerTeacher Pro User Guide
Grading 23J
Grading Assignments
The Assignments page displays all assignments for the currently selected class. View assignments on both the Assignments and Scoresheet pages. Set up assignments at the beginning of a school term or at any time during the term. When you access PowerTeacher Pro, you see the Assignments page by default. The assignments are listed by the most recent due date by default. Use one of two methods to score an assignment—score a single assignment from the Assignments page or score multiple assignments on the Scoresheet.
View Assignments
1. On the charms bar, select Grading, and then select Assignment List. 2. Select Filter to access the filtering options.
o Select to add filter settings for the assignment list. Use the pop-up menus to choose the filter options and search operators.
o Select Needs Scoring to display assignments that are not yet scored. Select Due to display assignments closest to the due date.
3. Select Apply to execute the filter settings. 4. Select a column heading to change the sort order of assignments.
Work with Assignments
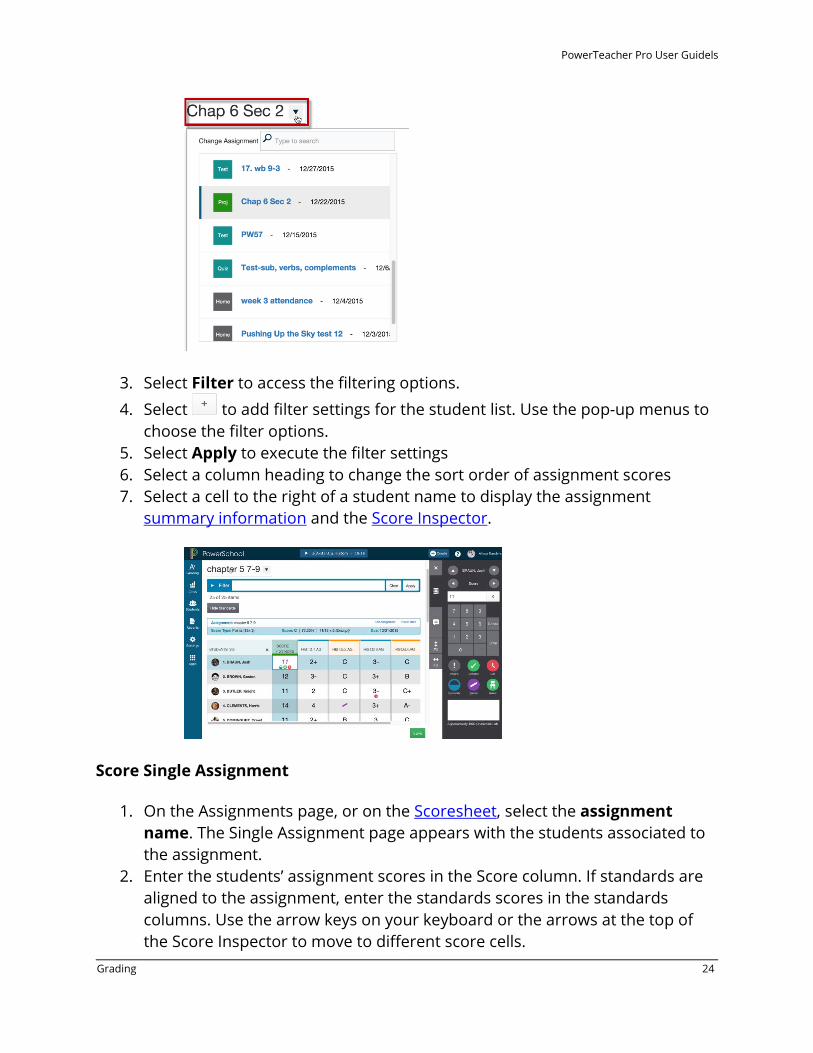
1. On the Assignments page, select the assignment name. The Single Assignment page appears with the students associated to the assignment.
2. Change to a different assignment by selecting the assignment name and choosing an assignment from the Quick Menu.
PowerTeacher Pro User Guidels
Grading 24J
3. Select Filter to access the filtering options.
4. Select to add filter settings for the student list. Use the pop-up menus to choose the filter options.
5. Select Apply to execute the filter settings 6. Select a column heading to change the sort order of assignment scores 7. Select a cell to the right of a student name to display the assignment
summary information and the Score Inspector.
Score Single Assignment
1. On the Assignments page, or on the Scoresheet, select the assignment name. The Single Assignment page appears with the students associated to the assignment.
2. Enter the students’ assignment scores in the Score column. If standards are aligned to the assignment, enter the standards scores in the standards columns. Use the arrow keys on your keyboard or the arrows at the top of the Score Inspector to move to different score cells.
PowerTeacher Pro User Guidels
Grading 25J
3. Select Save.
Note: If you navigate away from the page before saving scores that you’ve entered, a prompt will appear asking if you want to discard the changes or save them and continue.
Edit Assignment
1. On the Assignments page, or any page with score cells, select the assignment name, and then in the summary area, select Edit Assignment.
OR On the Assignments page, or any page with score cells, select next to the applicable assignment.
2. Make any changes needed to the assignment. For more information, see Create an Assignment.
3. Select Save.
Associate Standards to an Assignment
Associate standards to an assignment to allow the entry of standards scores on that assignment. When editing an assignment, select the Standards tab and select the standards. Learn More Auto-Calculate Assignment Standards Scores Recalculate Final Grades
Score Inspector
While you can enter scores directly, use the Score Inspector to provide more details about the student’s performance. Identify if an assignment is missing, if it was received late, if it was collected but hasn't been scored yet, if a student is exempt from completing it, if the student didn’t complete it because he was absent, or if it is incomplete for other reasons. Also use the Score Inspector to enter a comment about a student’s score.

PowerTeacher Pro User Guidels
Grading 26J
1. Navigation
Use the arrow buttons to navigate to a different student, or to a different score column.
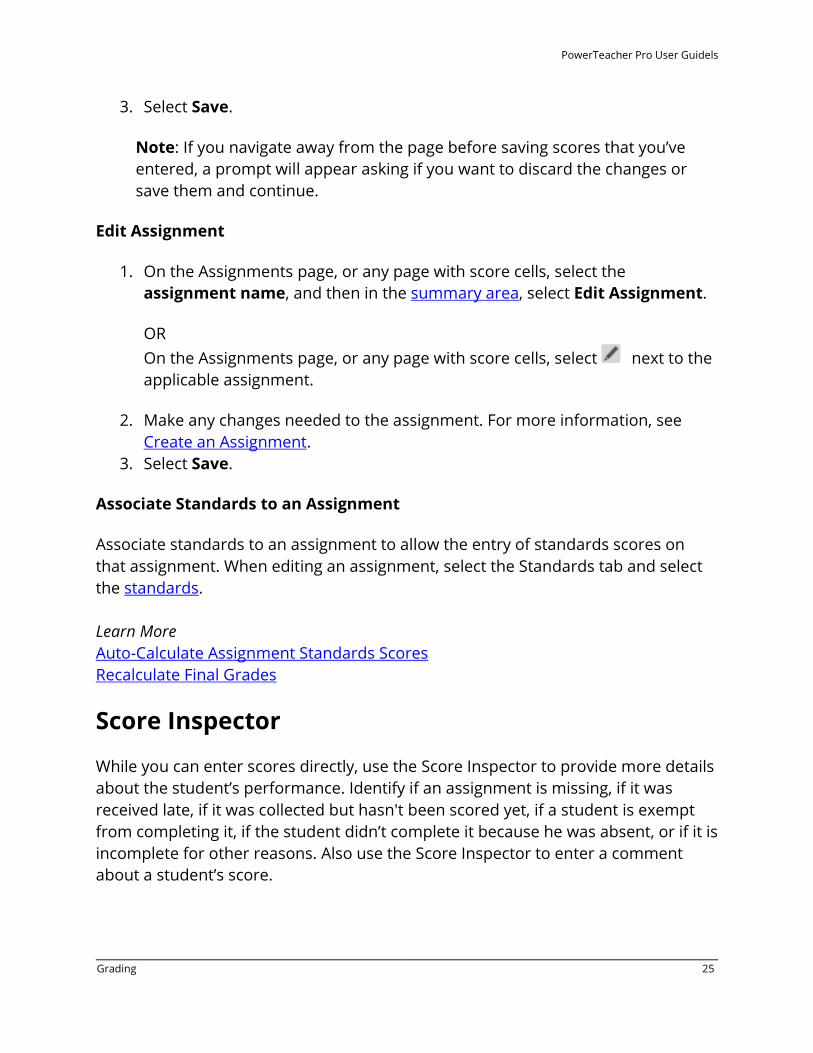
2. Score
Enter the score in the score field, or select the score using the keypad. Select the < or x button to the right of the score to remove it.
When you modify a final grade, the original calculated grade appears on the Score Inspector directly under the grade input field. Select the Undo button to revert to the original calculated grade.
PowerTeacher Pro User Guidels
Grading 27J
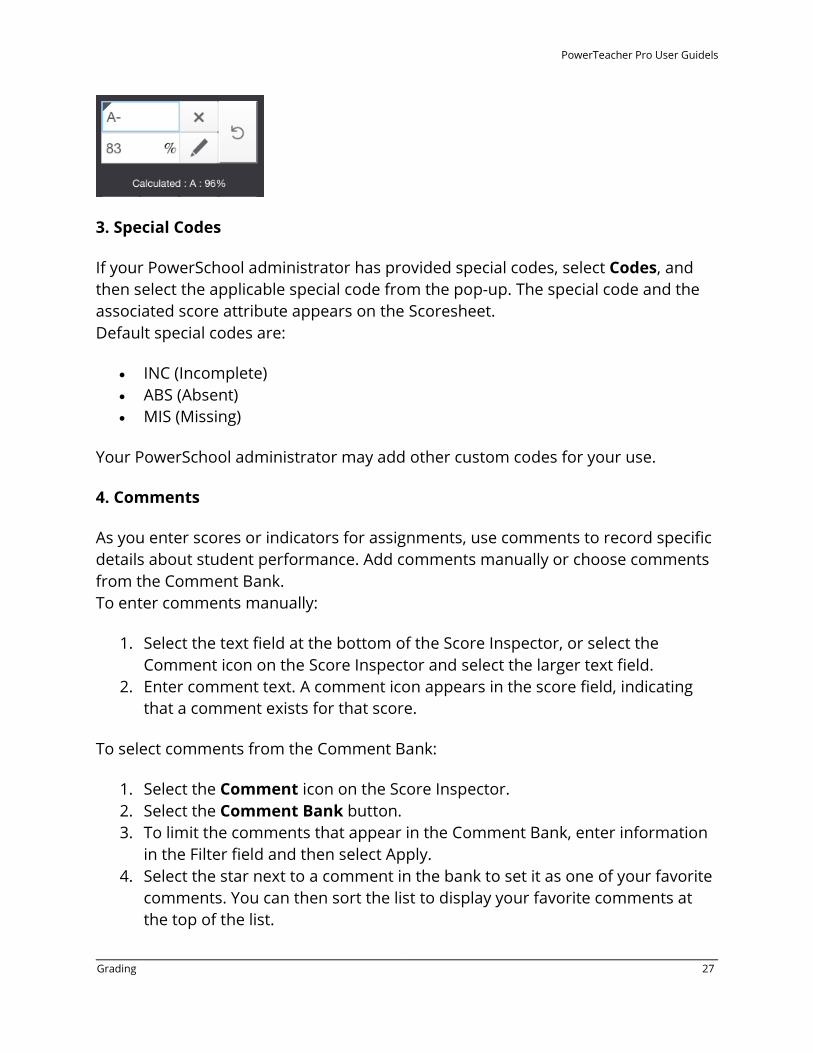
3. Special Codes
If your PowerSchool administrator has provided special codes, select Codes, and then select the applicable special code from the pop-up. The special code and the associated score attribute appears on the Scoresheet. Default special codes are:
• INC (Incomplete) • ABS (Absent) • MIS (Missing)
Your PowerSchool administrator may add other custom codes for your use.
4. Comments
As you enter scores or indicators for assignments, use comments to record specific details about student performance. Add comments manually or choose comments from the Comment Bank. To enter comments manually:
1. Select the text field at the bottom of the Score Inspector, or select the Comment icon on the Score Inspector and select the larger text field.
2. Enter comment text. A comment icon appears in the score field, indicating that a comment exists for that score.
To select comments from the Comment Bank:
1. Select the Comment icon on the Score Inspector. 2. Select the Comment Bank button. 3. To limit the comments that appear in the Comment Bank, enter information
in the Filter field and then select Apply. 4. Select the star next to a comment in the bank to set it as one of your favorite
comments. You can then sort the list to display your favorite comments at the top of the list.
PowerTeacher Pro User Guidels
Grading 28J
5. Select the checkbox next to one or more comments you want to add to the score.
6. Choose if you want comments separated by a line break or a space. 7. Select Insert Comments. A blue Comment icon appears in the student’s
score cell. Click the icon to read the comment.
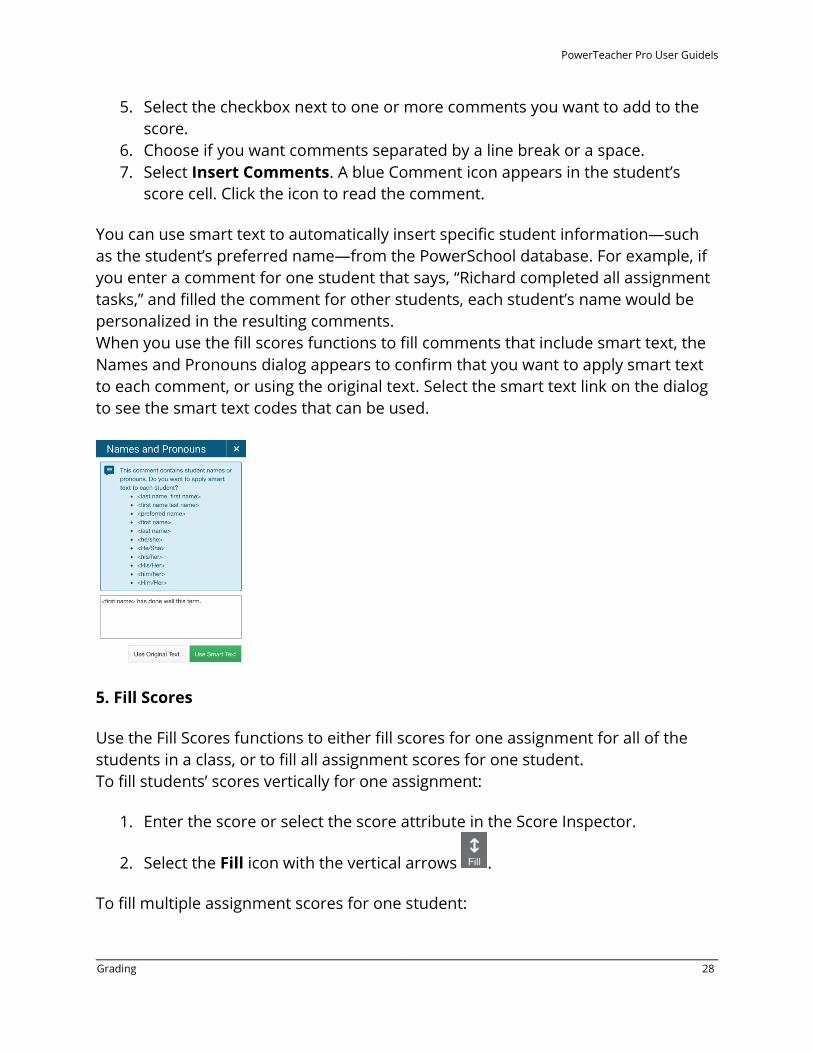
You can use smart text to automatically insert specific student information—such as the student’s preferred name—from the PowerSchool database. For example, if you enter a comment for one student that says, “Richard completed all assignment tasks,” and filled the comment for other students, each student’s name would be personalized in the resulting comments. When you use the fill scores functions to fill comments that include smart text, the Names and Pronouns dialog appears to confirm that you want to apply smart text to each comment, or using the original text. Select the smart text link on the dialog to see the smart text codes that can be used.
5. Fill Scores
Use the Fill Scores functions to either fill scores for one assignment for all of the students in a class, or to fill all assignment scores for one student. To fill students’ scores vertically for one assignment:
1. Enter the score or select the score attribute in the Score Inspector.
2. Select the Fill icon with the vertical arrows .
To fill multiple assignment scores for one student:
PowerTeacher Pro User Guidels
Grading 29J
1. Enter the score or select the score attribute in the Score Inspector.
2. Select the Fill icon with the horizontal arrows .
Scores will be filled in cells that do not already have scores. Additionally, use the fill scores functions to fill comments. Note: Fill will modify fields that will accept the filled value. For example, if you have a 10 point POINTS assignment and a 10 point PERCENT assignment, filling 10 would score both assignments with 10, so the student would receive a 10/10 for the POINTS assignment and a 1/10 for the PERCENT assignment as it is 10% of the assignment value.
6. Score Attributes
Select an attribute on the Score Inspector to add it to a score. You can also use hot keys to add the attributes from your keyboard. Note: If you have special codes that coincide with the hot keys (for example, ABS for absent), you must enter the full special code in order for it to appear in the score field.
Summary Area
The summary area appears on several pages in PowerTeacher Pro, and displays different information based on the page and your selection. It provides at-a-glance information on an assignment, and quick links to view more details, or edit functionality.
Assignments Summary
• Assignment: Displays the assignment name, and if applicable, the application that created the assignment in parentheses. This indicator allows you to track which integrated application created this assignment.
• Score Type: Displays the score type associated to the assignment. • Score: Displays the score, total points and weight, and if it is Exempt from
the final grade. • Due: Displays the due date for the assignment. • Edit Assignment: Opens the Edit Assignment dialog. • Show More: Displays the Grade Scale and Special Codes for the assignment.
Traditional Final Grades Summary
PowerTeacher Pro User Guidels
Grading 30J
• Class Grade: Displays the reporting term of the final grade. • Grade Scale Type: Displays the grade scale type (Alpha or Numeric) followed
by the range of grades in the scale associated to the selected class. • Calculation: Displays the calculation formula type for the selected class. • Grade: Displays the grade, percent, and/or the points/points possible. • Show More: Displays the Grade Scale, Special Codes and Formula used to
calculate the final grade.
Standards Summary
• Class Grade: Displays the name of the standard associated to the selected standards score or standards final grade.
• Grade Scale Type: Displays the grade scale associated to the selected standard.
• Show More: Select the link to display the standard description, the standard hierarchy, the associated grade scale, and Special Codes associated to the selected standard.
Scoresheet
Using the Scoresheet page, you can score assignments, and view and edit final grades for students enrolled in a class. When you select a course grade or score field on the scoresheet, the Score Inspector appears, and summary information for the assignment or grade appears above the scoresheet.
1. On the charms bar, select Grading, and then select Scoresheet. 2. Select Show Assignments from Most Recent to sort assignments by date.
• To view the scoresheet for a group of classes, choose the group from the Class Selector, then use the Scoresheet Quick Menu to easily switch between the classes within the group.
3. Locate the assignment you want to score, and enter the students’ assignment scores in the Score column.
4. If standards are aligned to the assignment, enter the standards scores in the standards columns. Use the arrow keys on your keyboard or the arrows at the top of the Score Inspector to move to different score cells.
5. To change the term, make a selection from the Reporting Term menu in the upper right portion of the page.
6. Use the summary area to view details or make changes to an assignment.
PowerTeacher Pro User Guidels
Grading 31J
7. Select the assignment name in the column heading to view a single assignment on the Scoresheet.
8. Select Save when you are done entering scores.
Learn More Score Inspector Recalculate Final Grades
Auto-Calculate Assignment Standards Scores
You can select if you want the assignment score to auto-calculate the standards scores.
1. Select an assignment name on the Assignments page or the Scoresheet. 2. On the Standards tab of the Edit Assignment dialog, select the checkbox if
you want the assignment score to auto-calculate to standards scores.
Auto-Calculation Scenarios
If no calculation preferences are set:
Standards Scenario
Alphanumeric Scale Numeric Scale
Using assignment standard scores to calculate the final standards grade
Uses values and cutoffs to calculate the final standards grade. Every letter has a grade value. The scores are calculated to a grade value, then the cut-off is used to determine the final grade.
Numeric scales with no decimals or with extra decimals use numeric value and numeric cutoffs to calculate the standards grade. Or, the scale uses ratios if the PowerSchool administrator has set the grade scale conversion into the numeric scale to use ratios. For example, 9/10 -> 3 cut-off, 9/10 -> 3.3 ratio). For credit in between whole numbers,the cut-off is the discrete value. Numeric scales with decimals use basic numbers with no special values.

PowerTeacher Pro User Guidels
Grading 32J
If preference is set to calculate the higher level standards grades from lowest level standards grades:
Standards Scenario
Alphanumeric Scale Numeric Scale
Auto-calculate higher level standards grades from lower level standards grades that all have the same grade scale.
Uses values and cut-offs to calculate the final standards grade. Every letter has a grade value. The score values are calculated to a higher level standard grade value, then the cut-off is used to determine the final grade.
Numeric scales with no decimals or with extra decimals use numeric value and numeric cutoffs to calculate the standards grade. Numeric scales with decimals use basic numbers with no special values.
Auto-calculate higher level standards grades from lower level standards grades when some have different grade scales scale.
Uses values and cutoffs to calculate the final standards grade. Every letter has a grade value. The score values are calculated to a higher level standard grade value, then the cut-off is used to determine the final grade.
Uses the grade value and cut-off to use the values and cutoffs grading method.
If the preference is set to allow assignment scores to auto-calculate the assignment standards scores:
Standards Scenario
Alphanumeric Scale Numeric Scale
Auto-calculate standard scores from assignment scores.
Uses values and cutoffs to calculate the standards score. Every letter has a grade value. The cut-off is used to determine the assignment standards score.
Uses values and cutoffs to calculate the standards score. Every numeric grade has a percent value. The cut-off is used to determine the assignment standards score.
PowerTeacher Pro User Guidels
Grading 33J
Categories
View and work with your categories on the Categories page. District-created categories are labeled with an icon that looks like a building. If a section is shared between multiple teachers, only the lead teacher’s categories will be applicable when working with that section.
1. If a section is shared between multiple teachers, only the lead teacher’s categories will be applicable when working with that section. Select Grading from the charms bar, and then choose Categories. All of your active categories appear.
2. Select Show Inactive to display categories that are not currently active. 3. Select the arrows to move categories higher or lower on the list to sort the
categories. 4. Select next to the category name to edit. Select Save when your changes
are complete. 5. To delete a category, select next to the category name. Select Delete, and
then select Confirm Delete. Note: You will not be able to delete categories that are linked to any assignment (current or past years). You can mark these categories as Inactive instead. Learn More Working with Categories Category Totals Create a Category
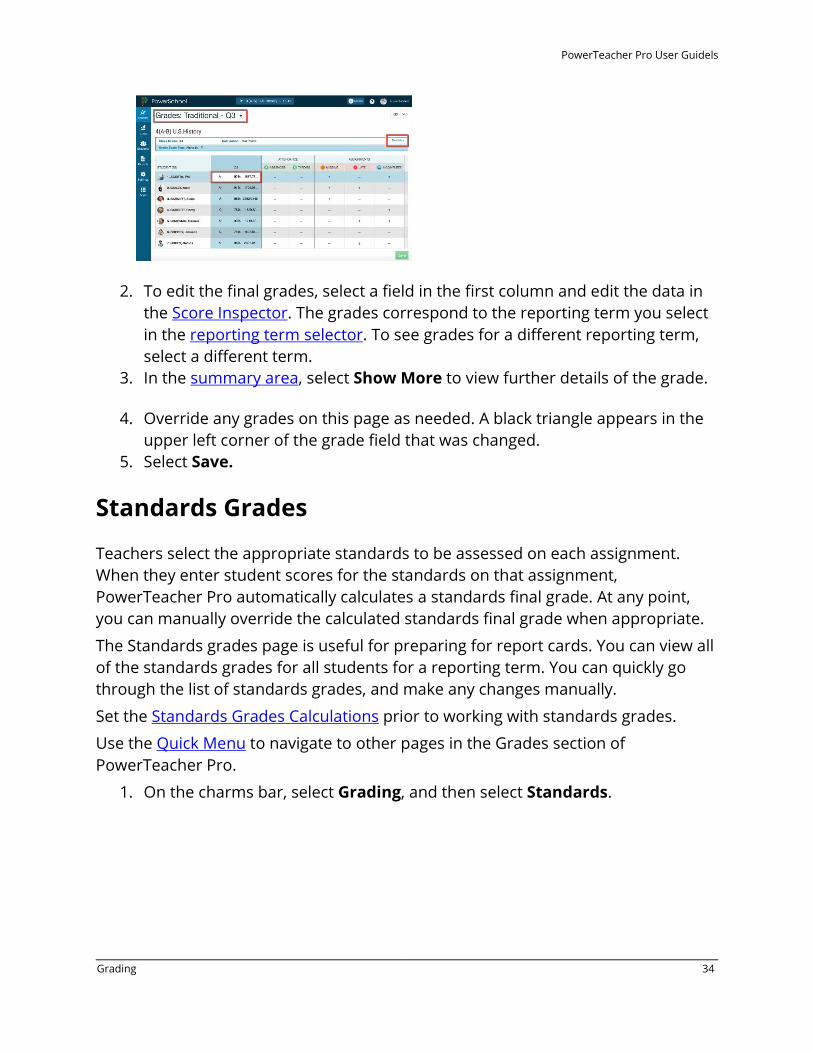
Traditional Grades
View the traditional grades for an entire class, along with a summary of how many absences, tardies, missing assignments, late assignments, and incomplete assignments each student has. Use the Quick Menu to navigate to other pages in the Grades section of PowerTeacher Pro.
1. On the charms bar, select Grading, and then select Traditional.
PowerTeacher Pro User Guidels
Grading 34J
2. To edit the final grades, select a field in the first column and edit the data in the Score Inspector. The grades correspond to the reporting term you select in the reporting term selector. To see grades for a different reporting term, select a different term.
3. In the summary area, select Show More to view further details of the grade.
4. Override any grades on this page as needed. A black triangle appears in the upper left corner of the grade field that was changed.
5. Select Save.
Standards Grades
Teachers select the appropriate standards to be assessed on each assignment. When they enter student scores for the standards on that assignment, PowerTeacher Pro automatically calculates a standards final grade. At any point, you can manually override the calculated standards final grade when appropriate.
The Standards grades page is useful for preparing for report cards. You can view all of the standards grades for all students for a reporting term. You can quickly go through the list of standards grades, and make any changes manually.
Set the Standards Grades Calculations prior to working with standards grades.
Use the Quick Menu to navigate to other pages in the Grades section of PowerTeacher Pro.
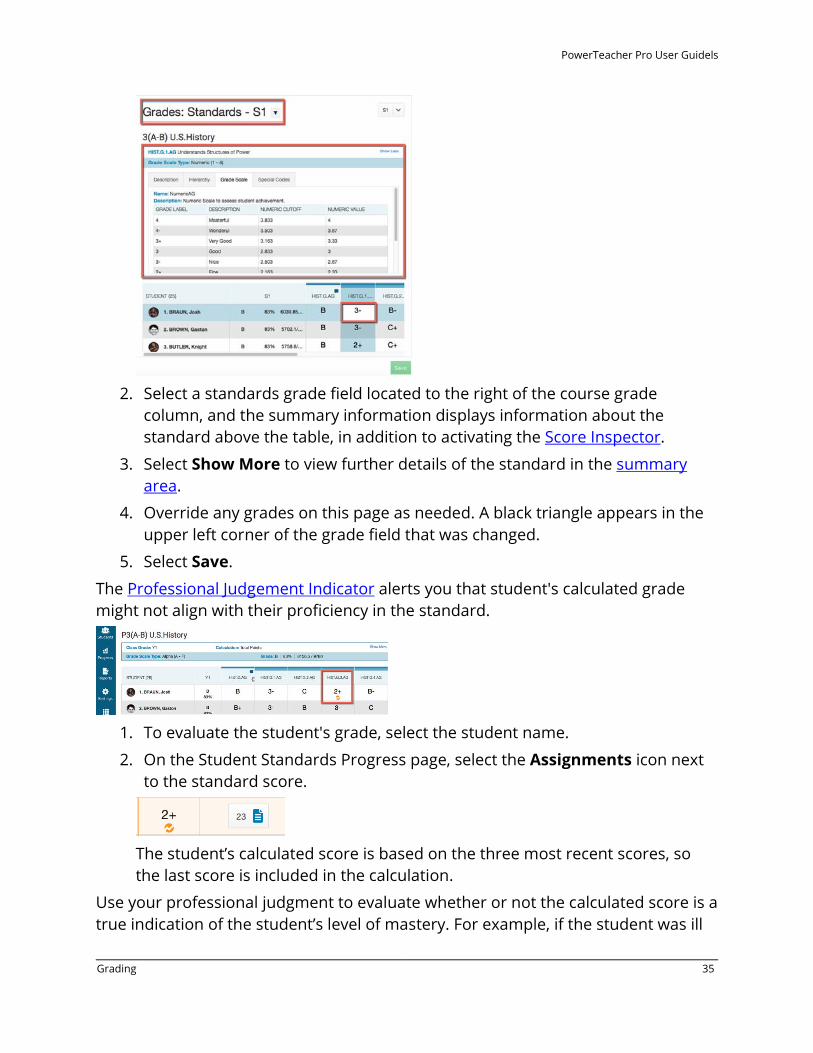
1. On the charms bar, select Grading, and then select Standards.
PowerTeacher Pro User Guidels
Grading 35J
2. Select a standards grade field located to the right of the course grade
column, and the summary information displays information about the standard above the table, in addition to activating the Score Inspector.
3. Select Show More to view further details of the standard in the summary area.
4. Override any grades on this page as needed. A black triangle appears in the upper left corner of the grade field that was changed.
5. Select Save.
The Professional Judgement Indicator alerts you that student's calculated grade might not align with their proficiency in the standard.
1. To evaluate the student's grade, select the student name.
2. On the Student Standards Progress page, select the Assignments icon next to the standard score.
The student’s calculated score is based on the three most recent scores, so the last score is included in the calculation.
Use your professional judgment to evaluate whether or not the calculated score is a true indication of the student’s level of mastery. For example, if the student was ill
PowerTeacher Pro User Guidels
Grading 36J
or had a bad test day, the last score may not be a true indicator of his skill level, so you could choose to ignore that score and change the calculated score.
How do I determine the standards final grade for the marking period?
The default calculation method is used as a starting point. However, as described above, sometimes these measures work very well, and other times there are reasons to prefer a different calculation. The default calculation is a good starting point. However, the teacher should review the standards grades above, and review the calculations in the summary area below. Then the teacher can determine if the calculated grade is correct for the report card for this student, or if they want to choose a different grade on that standard for that student. Here are two examples, both of which start with a calculation of the highest score for the final standards grade. Student 1
• Scores: 3,3,3,4,4,4,4,4,4,4. • Highest = 4. • Final Grade Decision on this standard: For this student, 4 is probably a good
choice for the final grade on this standard. No change or further work needed.
Student 2
• Scores: 2,2,4,2,1,2,2,2,2,2,2,2,2,2 • Highest = 4.
Final Grade Decision on this standard: For this student, it would be good to know more about the time they got a 4. Likely, the teacher will want to change the standard final score on the report card from 4 to 2. Two is the median, mode, approximate average, and the most recent score. With this data, 2 appears to be a more accurate representation of the student’s actual proficiency level on this standard than 4. Learn More
Calculation Methods
Standards Calculation Examples
PowerTeacher Pro User Guidels
Grading 37J
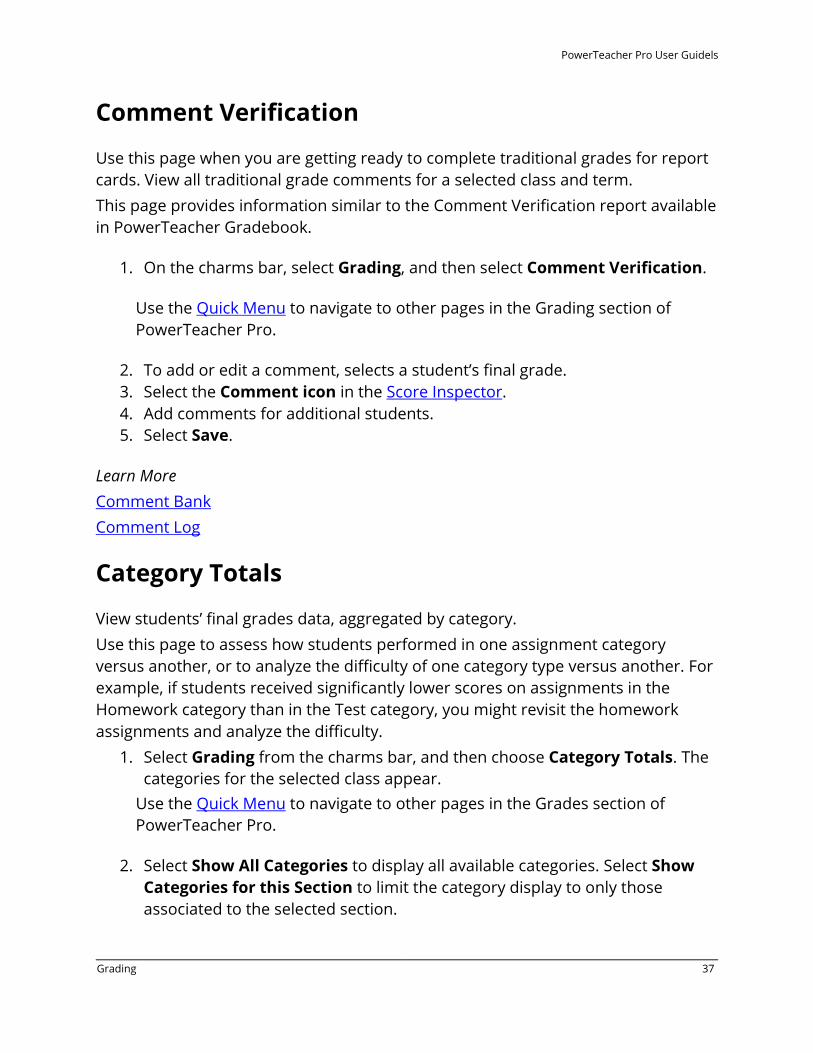
Comment Verification
Use this page when you are getting ready to complete traditional grades for report cards. View all traditional grade comments for a selected class and term. This page provides information similar to the Comment Verification report available in PowerTeacher Gradebook.
1. On the charms bar, select Grading, and then select Comment Verification.
Use the Quick Menu to navigate to other pages in the Grading section of PowerTeacher Pro.
2. To add or edit a comment, selects a student’s final grade. 3. Select the Comment icon in the Score Inspector. 4. Add comments for additional students. 5. Select Save.
Learn More Comment Bank Comment Log
Category Totals
View students’ final grades data, aggregated by category. Use this page to assess how students performed in one assignment category versus another, or to analyze the difficulty of one category type versus another. For example, if students received significantly lower scores on assignments in the Homework category than in the Test category, you might revisit the homework assignments and analyze the difficulty.
1. Select Grading from the charms bar, and then choose Category Totals. The categories for the selected class appear.
Use the Quick Menu to navigate to other pages in the Grades section of PowerTeacher Pro.
2. Select Show All Categories to display all available categories. Select Show Categories for this Section to limit the category display to only those associated to the selected section.
PowerTeacher Pro User Guidels
Grading 38J
3. Select a grade to change the value using the score inspector. A black triangle appears in the upper left corner of the grade field that was changed. Select Save.
All Reporting Terms
Use this page to work with the final grades for all reporting terms. Each column represents a reporting term. The column that corresponds to the current term is highlighted.
1. Select Grading from the charms bar, and then choose All Reporting Terms. Use the Quick Menu to navigate to other pages in the Grades section of PowerTeacher Pro.
2. To edit the final grades, select a grade and edit the data in the Score Inspector.
3. Select Show More to view further details of the traditional grade in the summary area.
4. Override any grades on this page as needed. A black triangle appears in the upper left corner of the grade field that was changed.
5. Select Save.

PowerTeacher Pro User Guide
Students 39J
Students View student progress, manage communication, and work with assignments. Analyze performance throughout the term to ensure that students are mastering the skills and standards you are teaching. Review students’ performance as you prepare to complete final grades for report cards, and then use the gradebook to prepare for and conduct parent-teacher conferences. Other pages in PowerTeacher Pro are optimized to display how an entire class is performing using the Progress pages. The individual student pages, however, provide more detailed information on an individual student. This is particularly useful for entering multiple of scores for a single student, and during parent-teacher conferences to explain why a student earned a particular grade.
1. On the charms bar, select Students. 2. Search for a student using the search field. Use the selection buttons to limit
the search to a class or all classes for the teacher. 3. Select a Student View from the menu. The details for the student highlighted
in the Students list appears.
Use the Quick Menu to navigate to other pages in the Students section of PowerTeacher Pro.
4. To view only dropped students, select Show Dropped. 5. Select a student name to view details for that student.
Learn More Student Assignments Student Standards Progress Quick Lookup
Student Assignments
View a summary of the student’s grades and assignments for the selected reporting term.
PowerTeacher Pro User Guidels
Students 40J
1. On the charms bar, select Students. Locate the specific student and then select Assignments. View a summary of the student’s course grades at the top of the page.
2. Select Filter to access the filtering options.
o Select to add filter settings for the assignment list. Use the pop-up menus to choose the filter options and search operators.
3. Select Apply to execute the filter settings. 4. Select a column heading to change the sort order of assignments. 5. Select an assignment name to view assignment scores for the class. 6. Select a cell to display the assignment summary information and the Score
Inspector. When you change a score, it is highlighted to indicate that it has changed.
7. Select Save. 8. If there are Standards associated to the assignment, select the Standards
icon to view the Assignment Standards Detail. 9. Use the Quick Menu links (the arrow next to the page heading) to navigate to
other pages in the Students section of PowerTeacher Pro.
Student Standards Progress
The Standards Progress page shows the student’s standards grades for each standard that was assessed by reporting term. The column that corresponds to the selected reporting term is highlighted. Compare the grades the student received in each term to assess his or her progress.
1. On the charms bar, select Students. Locate the specific student and then select Standards Progress.
3. Select a cell to display the standards summary information and the Score Inspector. When you change a grade, it is highlighted to indicate that it has changed.
The Professional Judgement Indicator alerts you that student's calculated grade might not align with their proficiency in the standard.
4. Select Save.
PowerTeacher Pro User Guidels
Students 41J
5. To view the assignments that you used to assess the standard, click the icon in the Assignments column. Use the graph at the top of the page to see how the student performed over time on the standard. Learn more about the Standards Progress graph.
6. To view the student’s performance on additional standards, open the Quick Menu and select a standard.
Student Standards Progress Graph
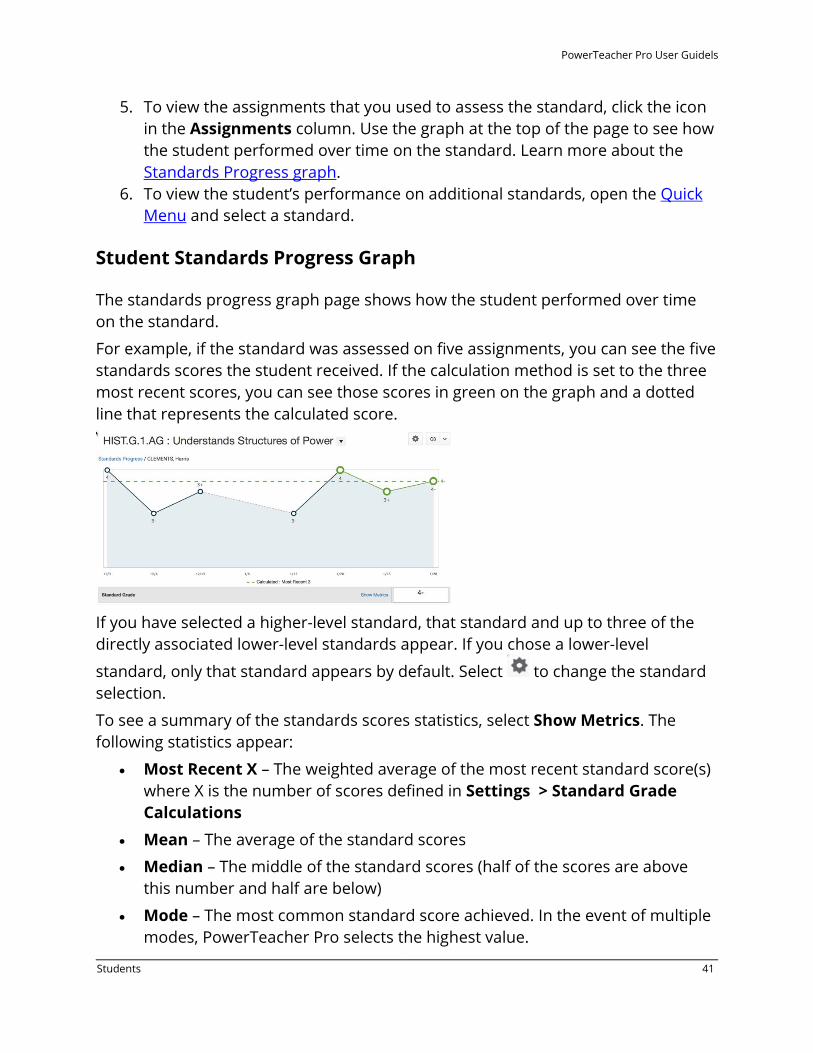
The standards progress graph page shows how the student performed over time on the standard.
For example, if the standard was assessed on five assignments, you can see the five standards scores the student received. If the calculation method is set to the three most recent scores, you can see those scores in green on the graph and a dotted line that represents the calculated score.
If you have selected a higher-level standard, that standard and up to three of the directly associated lower-level standards appear. If you chose a lower-level
standard, only that standard appears by default. Select to change the standard selection.
To see a summary of the standards scores statistics, select Show Metrics. The following statistics appear:
• Most Recent X – The weighted average of the most recent standard score(s) where X is the number of scores defined in Settings > Standard Grade Calculations
• Mean – The average of the standard scores
• Median – The middle of the standard scores (half of the scores are above this number and half are below)
• Mode – The most common standard score achieved. In the event of multiple modes, PowerTeacher Pro selects the highest value.

PowerTeacher Pro User Guidels
Students 42J
• Wt. Mean – The average of the standard scores based weighted by assignment total value (points possible x weight).
• Highest – The highest standard score
These statistical values are indicators of how well the student did on a specific standard. If any of the values are low, it may mean that the student needs additional practice on the skill or concept you’re assessing, or you may need to revise the assignment.
In the summary area, select Show More to view further details of the assignment or standard.
Change the Standard View
Use the Quick Menu to change to a different standard.
Graph Additional Metrics or Standards
1. Select to set additional progress options. 2. Use the Additional Metric to Graph menu to select a metric to graph in order
to compare an additional metric against the set metric in the calculation for the standard. A dotted line appears on the graph to represent the additional metric.
3. Check the boxes for the standards you want to graph to compare multiple standards. You can select a maximum of three standards to graph in addition to the currently selected standard.
4. Select OK to close the screen. 5. On the graph page, select the standard grade field directly below the graph
to focus on that standard.
6. If multiple graphs appear on the page, select to show or hide the additional standard graphs.
Change a Score
Select a score on the graph, or a Standard Score field, and the Score Inspector appears. Change the score as needed, and then select Save. If you change the Standard Grade, a black triangle appears in the upper left corner of the grade field to indicate that the grade has been manually changed.
PowerTeacher Pro User Guidels
Students 43J
Learn More
Professional Judgment Indicator
Comment Log
Use this page to review all comments entered for a student. Depending on the types of comments you’ve entered for the student, the comment log may show course grade comments, standards grades comments, and assignment score comments.
1. On the charms bar, select Students. Locate the specific student and then select Comment Log.
2. Select Filter to access the filtering options.
o Select to add filter settings for the assignment list. Use the pop-up menus to choose the filter options and search operators.
3. Select Apply to execute the filter settings. 4. Select a column heading to change the sort order of comments. 5. Select a Grade/Score field to display the assignment summary information
and the Score Inspector. Select the Comment icon on the Score Inspector to change the comment.
6. Select Save.
Learn More Comment Bank Comment Verification
Demographics
This page shows the student demographic information as entered in PowerSchool. On the charms bar, select Students, and then select Demographics. Use the Quick Menu links (the arrow next to the page heading) to navigate to other pages in the Students section of PowerTeacher Pro.
PowerTeacher Pro User Guidels
Students 44J
Quick Lookup - Traditional
This page is the same page that parents, students, and administrators see in PowerSchool and, if configured to do so by an administrator, shows the student’s attendance for the last two weeks, the current schedule, current grades, a summary of total absences and tardies, and current GPA.
1. On the charms bar, select Students, and then select Quick Lookup - Traditional.
Use the Quick Menu to navigate to other pages in the Students section of PowerTeacher Pro.
2. Select a grade to view additional details.
Quick Lookup - Standards
This page is the same page that parents, students, and administrators see in PowerSchool and shows the student’s standards grades for all classes in the selected year.
1. On the charms bar, select Students, and then select Quick Lookup - Standards.
Use the Quick Menu to navigate to other pages in the Students section of PowerTeacher Pro.
2. Select a grade to view additional details, including the standards grade rollup. In cases where the same student is being assessed on the same standard (for example, Scientific Principles) in different classes at the same time (for example, Q1), the standards grades for each individual section are retained. In addition, they are averaged together to produce a rollup score. The high score is also stored.
PowerTeacher Pro User Guide
Progress 45J
Progress Standards Grades Progress
The graph on the Standards Progress page shows the distribution of grades for each standard aligned to the course, for the selected class and reporting term. If you are working with standards, this is the primary page you can use to manage standards and student progress for your class. The page provides an overall view of the standards for the class. From the Standards Progress page, you can assess which standards you may need to focus on to assure proficiency for the students in your class.
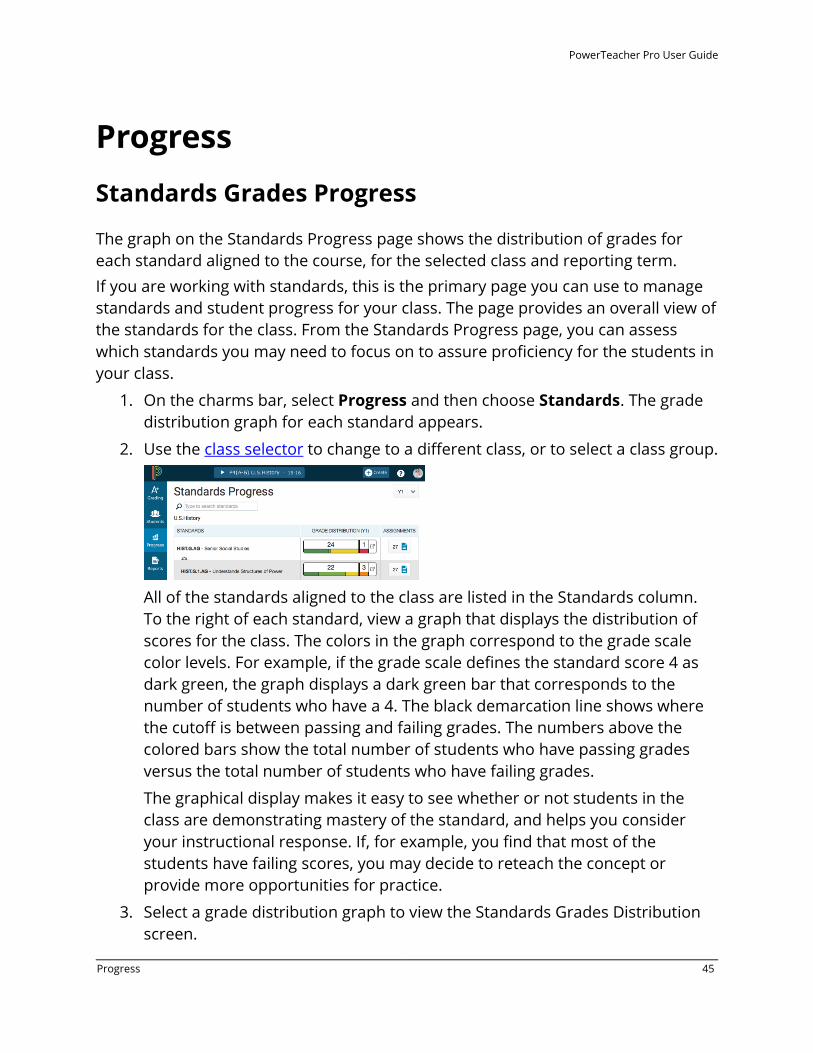
1. On the charms bar, select Progress and then choose Standards. The grade distribution graph for each standard appears.
2. Use the class selector to change to a different class, or to select a class group.
All of the standards aligned to the class are listed in the Standards column. To the right of each standard, view a graph that displays the distribution of scores for the class. The colors in the graph correspond to the grade scale color levels. For example, if the grade scale defines the standard score 4 as dark green, the graph displays a dark green bar that corresponds to the number of students who have a 4. The black demarcation line shows where the cutoff is between passing and failing grades. The numbers above the colored bars show the total number of students who have passing grades versus the total number of students who have failing grades.
The graphical display makes it easy to see whether or not students in the class are demonstrating mastery of the standard, and helps you consider your instructional response. If, for example, you find that most of the students have failing scores, you may decide to reteach the concept or provide more opportunities for practice.
3. Select a grade distribution graph to view the Standards Grades Distribution screen.
PowerTeacher Pro User Guidels
Progress 46J
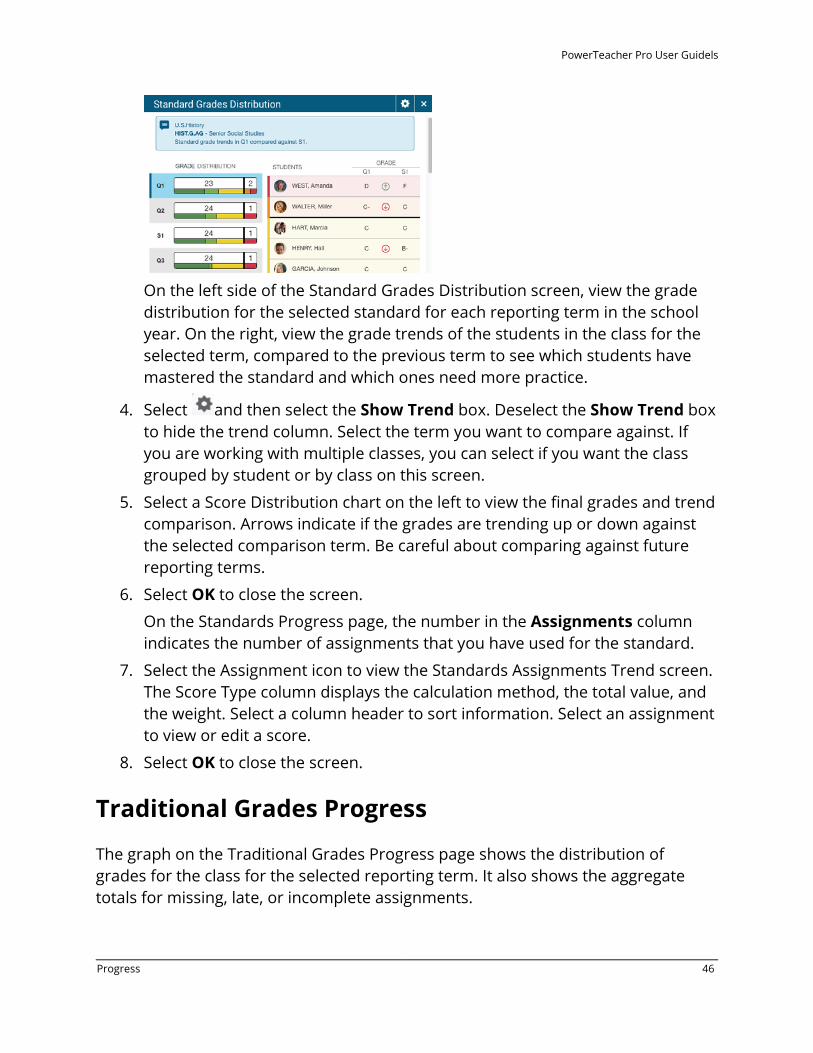
On the left side of the Standard Grades Distribution screen, view the grade distribution for the selected standard for each reporting term in the school year. On the right, view the grade trends of the students in the class for the selected term, compared to the previous term to see which students have mastered the standard and which ones need more practice.
4. Select and then select the Show Trend box. Deselect the Show Trend box to hide the trend column. Select the term you want to compare against. If you are working with multiple classes, you can select if you want the class grouped by student or by class on this screen.
5. Select a Score Distribution chart on the left to view the final grades and trend comparison. Arrows indicate if the grades are trending up or down against the selected comparison term. Be careful about comparing against future reporting terms.
6. Select OK to close the screen.
On the Standards Progress page, the number in the Assignments column indicates the number of assignments that you have used for the standard.
7. Select the Assignment icon to view the Standards Assignments Trend screen. The Score Type column displays the calculation method, the total value, and the weight. Select a column header to sort information. Select an assignment to view or edit a score.
8. Select OK to close the screen.
Traditional Grades Progress
The graph on the Traditional Grades Progress page shows the distribution of grades for the class for the selected reporting term. It also shows the aggregate totals for missing, late, or incomplete assignments.
PowerTeacher Pro User Guidels
Progress 47J
1. On the charms bar, select Progress and then choose Traditional. The class grades progress appears in a graph.
2. Use the class selector to change to a different class, or to select a class group. 3. Select Missing, Late, or Incomplete to view the Traditional Grades page with
summary information on each category.
3. Select the progress graph to view the Traditional Grades Distribution screen.
4. Select and then select the Show Trend box. Deselect the Show Trend box to hide the trend column. Select the term you want to compare against. If you are working with multiple classes, you can select if you want the class grouped by student or by class on this screen.
5. Select a Score Distribution chart to view the final grades and trend comparison. Arrows indicate if the grades are trending up or down against the selected comparison term.
6. Select OK to close the screen.
Learn More Traditional Grades Progress Details
Traditional Grades Progress Details
The Traditional Grades Progress screen provides a graphical view of the grade distribution across the selected class. The column on the left lists the number of students who have earned each traditional grade in the grade scale. The colors in the graph correspond to the grade scale color levels. For example, if the grade scale defines the grades A and A- as dark green, the graph displays a dark green bar that corresponds to the number of students who have an A or A-. The black demarcation line shows where the cutoff is between passing and failing grades. The numbers in the column on the right show the total number of students who have passing grades versus the total number of students who have failing grades. To the right of the graph, view a summary of the total number of students who have missing, late, or incomplete assignments.

PowerTeacher Pro User Guidels
Progress 48J
Professional Judgment Indicator
If you work with standards grades, the Professional Judgment Indicator is designed to assist you in assessing standards grades.
The indicator helps you understand which grades to focus on to determine if the final grade accurately reflects the student’s level of understanding.
Here’s an example of when the indicator appears:
The most recent scores for a standard are 1, 1, 1, 4, and 4, respectively, and all have different metrics. The Professional Judgment Indicator appears on the calculated final grade field to bring to your attention to the fact that one of the three most recent scores is actually higher than the final grade.
Using your professional judgment, you can decide how you want to impact the final grade. You may override the final grade, or you can make the score anomaly exempt.
PowerTeacher Pro User Guide
Assessment 49J
Assessment The Assessment charm is available if your district has purchased and enabled PowerSchool Assessment and/or PowerSchool Analytics. PowerSchool Assessment and PowerSchool Analytics provides standards-based instructional assessment solutions for school districts that allow administrators and teachers to deliver measurable improvements in student performance. The links described below provide direct access to functions within PowerSchool Assessment. PowerSchool Assessment and PowerSchool Analytics launches in a separate window or tab, depending on your browser settings. Be sure to sign-out of PowerSchool Assessment or PowerSchool Analytics when you are finished.
• Manage Tests - Access the Assessment Library. • Administer Test - Access the Testing Center. • View Results - Access Assessment Reporting. • Assessment Home - Access the Assessment Home Page. • Manage - Access Interventions.
Additionally, the following links may appear on the Reports charm. • View Results – Access Assessment Reporting. • Achievement Records – Access Student Achievement Records. • Longitudinal Data – Access Longitudinal Data System Reporting (appears if
PowerSchool Analytics is enabled). For more information on using these areas within PowerSchool Assessment and PowerSchool Analytics, consult the PowerSchool Assessment and PowerSchool Analytics online help.
PowerTeacher Pro User Guide
Reports 50J
Reports Working with Reports
PowerTeacher Pro offers a selection of reports to assist you in daily classroom activities, as well as with assessing student performance. You can generate reports for all students who are enrolled in a class, for all students who are enrolled in all your classes, or for specific students. Learn More Individual Student Report Multi-Function Assignment Report Student Roster Report
Individual Student Report
This is a multi-function report you can generate per student. You can generate this report to compile the following information:
• Progress reports • Missing and late assignments • Grades • Category totals • Assignment scores • Comments • Summary of student work to present a to parents at conferences or to a
principal during a review • Midterm update for students and parent
This report displays all sections accessible by you. However, the name of the Lead teacher for each class displays on the report.
1. Select Reports from the charms bar, and then choose Individual Student Report.
2. On the Criteria tab, enter a report title in the field provided. 3. Open the Select Classes menu and choose the classes to include on the
report.
PowerTeacher Pro User Guidels
Reports 51J
4. In the Sort Options section, open the Layout menu and choose how you want to sort information on the report.
• Select By Section, By Student to sort by section and then by student for each section.
• Select By Student to sort by student across all sections. 5. Open the Students menu and choose how you want the students sorted on
the report. The Gradebook Preference option defaults to the selection you made on the Display Settings page.
6. Open the Assignments menu and choose how you want assignments sorted on the report.
7. In the Data section, open the Select Data menu and choose the data to include on the report. Additional menus appear on the page depending on the selections you make to allow you to further refine the report. The current default settings are listed on the menus or next to them.
8. Select the Students tab. If you want to run the report for a subset of students, select Add/Remove Students and use the Filter field to search for specific students. Uncheck the boxes next to the students you want excluded from the report.
9. Select the Format tab to specify how you want the report to look. 10. Select Run Report.
Note: When you select Run Report when using most browsers, the PDF file automatically downloads to your computer. When using Safari browser, the report output appears in a window. Choose File > Export as PDF to download the report to your computer.
Multi-Function Assignment Report
This report provides a list of students and scores per assignment. You can generate this report to compile the following information:
• Missing, late, or incomplete assignments • Grades • List of all assignment and the associated scores, attributes, and grade for
each reporting term, by student.
Use this report to help students and parents keep up with class work, to target students who need extra help, or to gauge which assignments present the most challenges to students.
PowerTeacher Pro User Guidels
Reports 52J
1. Select Reports from the charms bar, and then choose Multi-Function Assignment Report.
2. On the Criteria tab, enter a report title in the field provided. 3. Open the Select Classes menu and choose the classes to include on the
report. 4. In the Sort Options section, open the Students menu and choose how you
want the students sorted on the report. The Gradebook Preference option defaults to the selection you made on the Display Settings page.
5. Open the Assignments menu and choose how you want assignments sorted on the report.
6. In the Data section, select the data to include on the report. 7. In the Date Range and Data Filters sections, use the menus to further refine
the report. Select the Manual date range to set a specific date range for the assignment.
8. Select the Students tab. If you want to run the report for a subset of students, select Add/Remove Students and use the Filter field to search for specific students. Uncheck the boxes next to the students you want excluded from the report.
9. Select the Format tab to specify how you want the report to look. 10. Select Run Report.
Note: When you select Run Report when using most browsers, the PDF file automatically downloads to your computer. When using Safari browser, the report output appears in a window. Choose File > Export as PDF to download the report to your computer.
Student Roster Report
This report displays student demographic information and blank columns, listed one row per student. the Student Roster report can generate a list of demographic information by class. You can use the report, for example, to keep track of money collected for classroom field trips, or as an emergency contact list.
1. Select Reports from the charms bar, and then choose Student Roster Report.
2. On the Criteria tab, enter a report title in the field provided. 3. Open the Select Classes menu and choose the classes to include on the
report.
PowerTeacher Pro User Guidels
Reports 53J
4. In the Sort Options section, open the Students menu and choose how you want the students sorted on the report. The Gradebook Preference option defaults to the selection you made on the Display Settings page.
5. Open the Columns menu to select the columns you would like added to the report output. Select Blank to add custom columns you can use on the printed report to record attendance or participation. Enter the column names you want to appear on the report output in the fields provided. Use the arrows to move the columns to the order you want them to appear on the report output. Select the Remove button to discard the column.
6. Select the Students tab. If you want to run the report for a subset of students, select Add/Remove Students and use the Filter field to search for specific students. Uncheck the boxes next to the students you want excluded from the report.
7. Select the Format tab to specify how you want the report to look. 8. Select Run Report.
Note: When you select Run Report when using most browsers, the PDF file automatically downloads to your computer. When using Safari browser, the report output appears in a window. Choose File > Export as PDF to download the report to your computer.
PowerTeacher Pro User Guide
Settings 54J
Settings Class Descriptions
You can add descriptions or other information about the class that will be visible in the PowerSchool Student and Parent Portals, and in PowerSchool Mobile. Examples include grading policy, class syllabus, links to class resources, and more.
1. From the Class Selector select the scheduling term and class or group for which you would like to edit descriptions.
2. Select the term in which the class meets, if different from the current term. 3. On the charms bar, select Settings. 4. Select Class Descriptions. 5. Enter the class description, syllabus, or other details in the Description field. 6. Select the arrow to the left of another class name to open the details pane
and add a description. 7. Select Save.
Display Settings
Choose how you want information to appear in PowerTeacher Pro.
1. On the charms bar, select Settings, and then select Display Settings.
• Open pop-up menus by selecting .
• Select a box to add a checkmark and activate the setting .
2. Use the Display and Sorting menu to sort the class names. 3. Check Show Standards Pages and Links to use the standards grading
features. 4. Check Show Standards on Assignments to show standards aligned to
assignments. 5. Use the Auto-Calculate Assignment Standards Scores menu to determine the
default setting for new assignments. Select New Assignments Start Checked to have the setting checked by default for all newly created assignments.
PowerTeacher Pro User Guidels
Settings 55J
6. Use the Navigation Links Sort Order menu to change the sort order of the Traditional and Standards navigation links in the Grading menu and Quick Menu. The default setting is Traditional, Standards.
7. Check the pages on which you want the Professional Judgement Indicator to appear.
8. Check Show Traditional Grade on Pages to display traditional grades in the gradebook.
9. Use the Values to Show in the Traditional Grades Column menu to select the grade values you want to appear.
10. Under Student Names, use the Display menu to define how students’ names will appear, such as by first, then last name.
11. Use the Sort Students by menu to choose how to sort the lists of students, such as by first name.
12. To view new students’ names at the bottom of class lists, check Add newly enrolled students to the bottom.
13. To conceal the names of pre-registered students from class lists, check Hide pre-registered students.
14. Select Save.
Grade Calculation Types
Use calculation formula sets to define the final grade calculation methods—how you want students’ assignment scores to count towards their final grades. Choose whether you’ll calculate the students’ final grades using total points, term weighting, standards weighting, or category weighting. You can combine calculation methods by using different methods for different reporting terms, such as total points for Q1 and Q2 and term weighting for S1.
Total Points
Use the total points method to calculate a student’s final grade by dividing the points the student earned for the class by the number of points possible for the class. Using this option, a student might earn 1250 points out of a total 1600 points possible which would be converted to a percentage of 78% and a grade would be determined from the cutoff percentage defined in the grade scale.
PowerTeacher Pro User Guidels
Settings 56J
Term Weighting
Use the term weighting method to calculate a student’s final grade based on grades from shorter reporting terms. For example, you might calculate the Semester 1 grade based on the final grades for Quarter 1 and Quarter 2. In this scenario, you might enter 40% for Quarter 1 and 60% for Quarter 2. Each percentage is a weight used to determine how the smaller term contributes to the final grade. Note: Only reporting terms that are fully encompassed by the selected reporting term will appear in the list. This option will not appear if the reporting term does not encompass other reporting terms. For example, quarters can usually be used to calculate semester grades.
Standards Weighting
To have a standards final grade count in the course final grade for a reporting term (whether Q1, Q2, or S1), you must use standards weighting. Use the standards weighting method to calculate a student’s course final grade based on final grades from the standards aligned to the course. Set up standards weighting similar to how you set up term weighting by defining the percentage that is the weight used to determine how the standards grades contribute to the final grade. For example, you might calculate the Semester 1 final grade based on 40% of the standards grades from Q1 and 60% of the standards grades from Q2. Using Standards Weighting with attributes of Specific Weights and Specific Sum require that PowerSchool administrators configure weights for specific standards for each course on the Course Settings page. Note: Certain weight settings are determined by the PowerSchool administrator, such as Specific Weights and Specific Sum.
Category Weighting
Categories are broad classifications for assignments, such as homework and tests. Use the category weighting method to calculate a student’s final grade using assignment categories. Assign a weight to each category to determine how it contributes to the final grade. The rounded percentage the student earns for each category is multiplied by the weight. The weighted percentage values are added together to calculate the final grade. For example, you might use the categories Homework, Tests, and Final Project, and assign each the respective weights 20, 40, and 40.
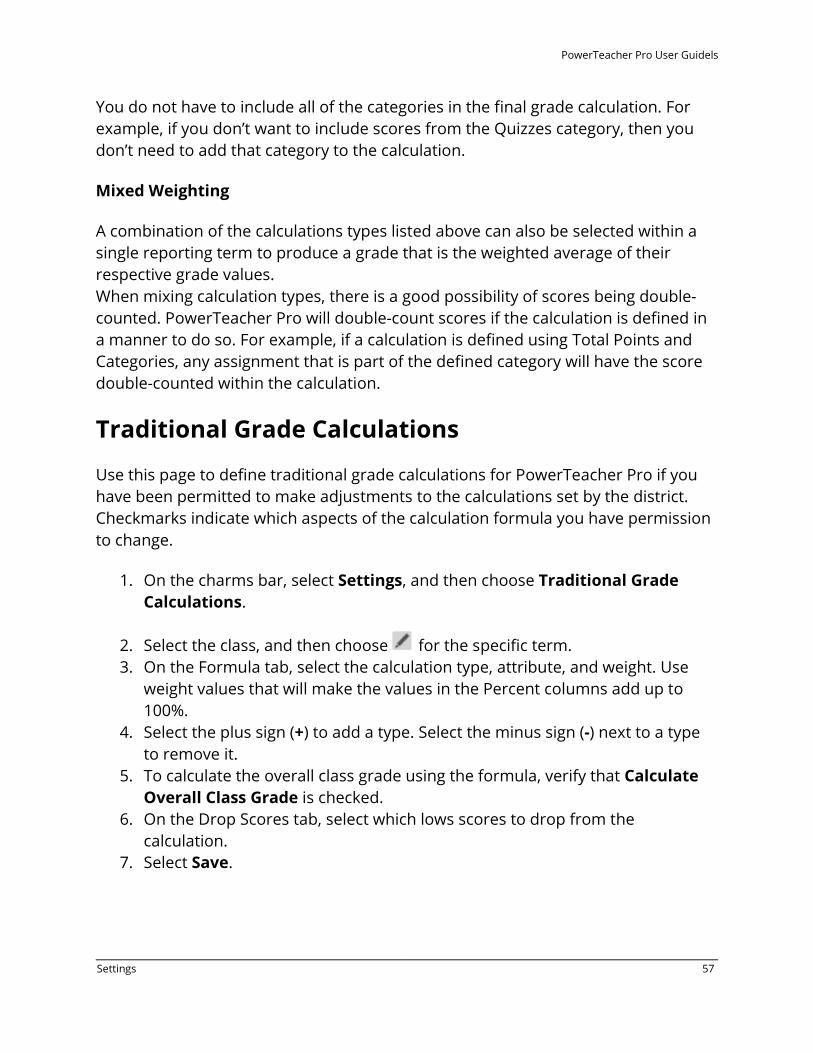
PowerTeacher Pro User Guidels
Settings 57J
You do not have to include all of the categories in the final grade calculation. For example, if you don’t want to include scores from the Quizzes category, then you don’t need to add that category to the calculation.
Mixed Weighting
A combination of the calculations types listed above can also be selected within a single reporting term to produce a grade that is the weighted average of their respective grade values. When mixing calculation types, there is a good possibility of scores being double-counted. PowerTeacher Pro will double-count scores if the calculation is defined in a manner to do so. For example, if a calculation is defined using Total Points and Categories, any assignment that is part of the defined category will have the score double-counted within the calculation.
Traditional Grade Calculations
Use this page to define traditional grade calculations for PowerTeacher Pro if you have been permitted to make adjustments to the calculations set by the district. Checkmarks indicate which aspects of the calculation formula you have permission to change.
1. On the charms bar, select Settings, and then choose Traditional Grade Calculations.
2. Select the class, and then choose for the specific term. 3. On the Formula tab, select the calculation type, attribute, and weight. Use
weight values that will make the values in the Percent columns add up to 100%.
4. Select the plus sign (+) to add a type. Select the minus sign (-) next to a type to remove it.
5. To calculate the overall class grade using the formula, verify that Calculate Overall Class Grade is checked.
6. On the Drop Scores tab, select which lows scores to drop from the calculation.
7. Select Save.
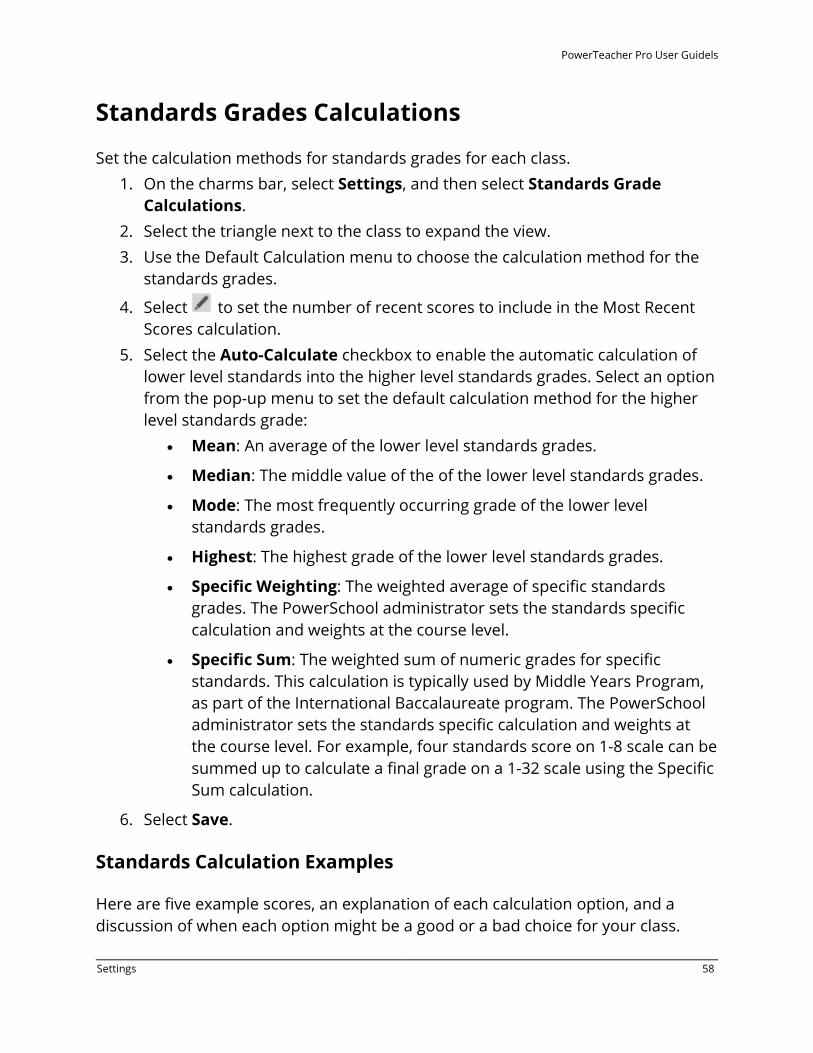
PowerTeacher Pro User Guidels
Settings 58J
Standards Grades Calculations
Set the calculation methods for standards grades for each class. 1. On the charms bar, select Settings, and then select Standards Grade
Calculations. 2. Select the triangle next to the class to expand the view. 3. Use the Default Calculation menu to choose the calculation method for the
standards grades.
4. Select to set the number of recent scores to include in the Most Recent Scores calculation.
5. Select the Auto-Calculate checkbox to enable the automatic calculation of lower level standards into the higher level standards grades. Select an option from the pop-up menu to set the default calculation method for the higher level standards grade:
• Mean: An average of the lower level standards grades.
• Median: The middle value of the of the lower level standards grades.
• Mode: The most frequently occurring grade of the lower level standards grades.
• Highest: The highest grade of the lower level standards grades.
• Specific Weighting: The weighted average of specific standards grades. The PowerSchool administrator sets the standards specific calculation and weights at the course level.
• Specific Sum: The weighted sum of numeric grades for specific standards. This calculation is typically used by Middle Years Program, as part of the International Baccalaureate program. The PowerSchool administrator sets the standards specific calculation and weights at the course level. For example, four standards score on 1-8 scale can be summed up to calculate a final grade on a 1-32 scale using the Specific Sum calculation.
6. Select Save.
Standards Calculation Examples
Here are five example scores, an explanation of each calculation option, and a discussion of when each option might be a good or a bad choice for your class.
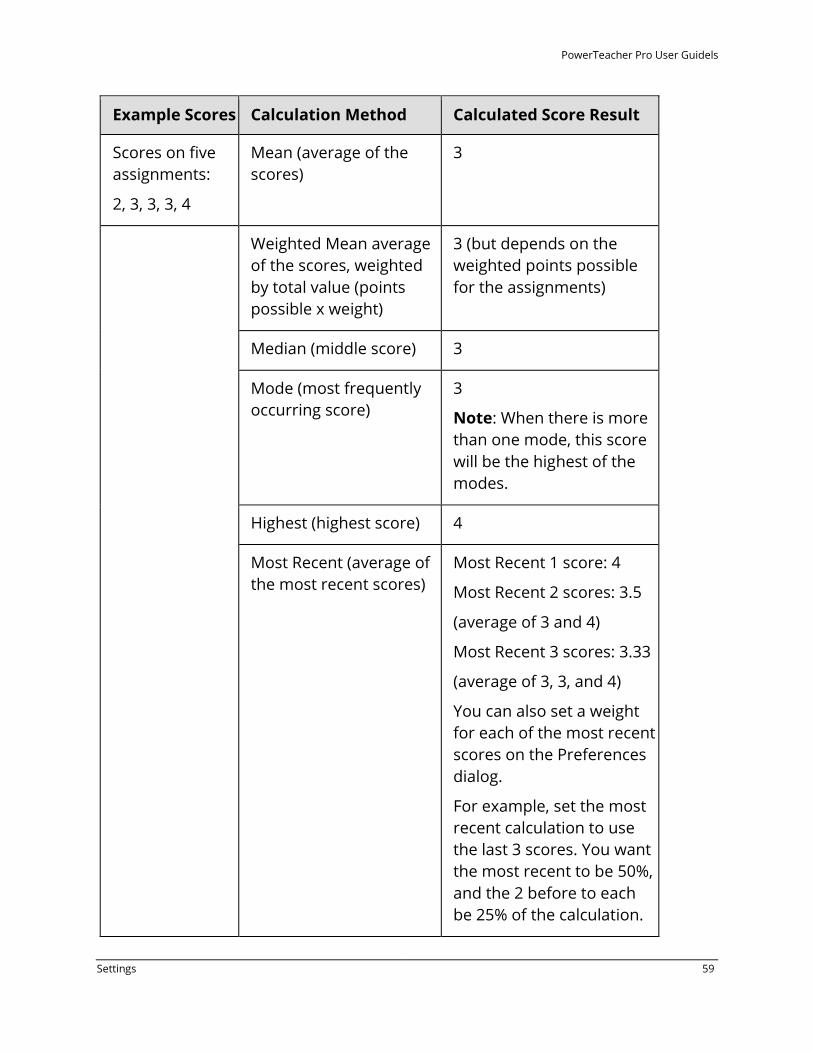
PowerTeacher Pro User Guidels
Settings 59J
Example Scores Calculation Method Calculated Score Result
Scores on five assignments:
2, 3, 3, 3, 4
Mean (average of the scores)
3
Weighted Mean average of the scores, weighted by total value (points possible x weight)
3 (but depends on the weighted points possible for the assignments)
Median (middle score) 3
Mode (most frequently occurring score)
3
Note: When there is more than one mode, this score will be the highest of the modes.
Highest (highest score) 4
Most Recent (average of the most recent scores)
Most Recent 1 score: 4
Most Recent 2 scores: 3.5
(average of 3 and 4)
Most Recent 3 scores: 3.33
(average of 3, 3, and 4)
You can also set a weight for each of the most recent scores on the Preferences dialog.
For example, set the most recent calculation to use the last 3 scores. You want the most recent to be 50%, and the 2 before to each be 25% of the calculation.
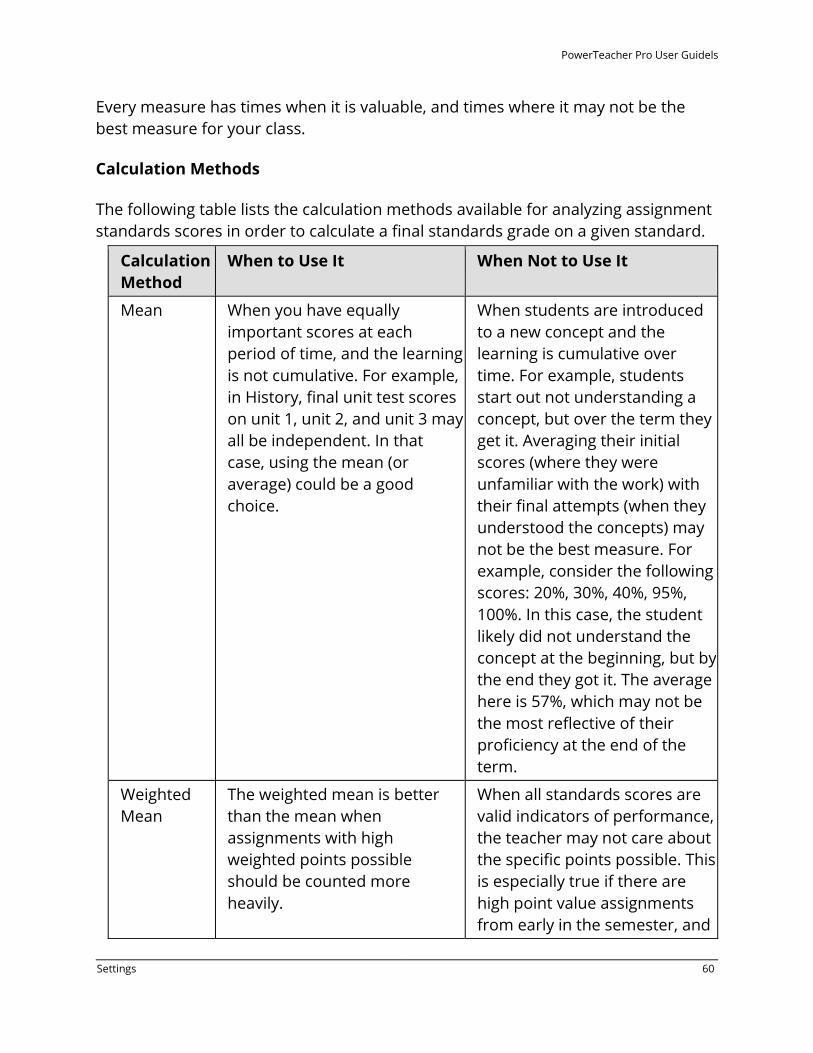
PowerTeacher Pro User Guidels
Settings 60J
Every measure has times when it is valuable, and times where it may not be the best measure for your class.
Calculation Methods
The following table lists the calculation methods available for analyzing assignment standards scores in order to calculate a final standards grade on a given standard.
Calculation Method
When to Use It When Not to Use It
Mean When you have equally important scores at each period of time, and the learning is not cumulative. For example, in History, final unit test scores on unit 1, unit 2, and unit 3 may all be independent. In that case, using the mean (or average) could be a good choice.
When students are introduced to a new concept and the learning is cumulative over time. For example, students start out not understanding a concept, but over the term they get it. Averaging their initial scores (where they were unfamiliar with the work) with their final attempts (when they understood the concepts) may not be the best measure. For example, consider the following scores: 20%, 30%, 40%, 95%, 100%. In this case, the student likely did not understand the concept at the beginning, but by the end they got it. The average here is 57%, which may not be the most reflective of their proficiency at the end of the term.
Weighted Mean
The weighted mean is better than the mean when assignments with high weighted points possible should be counted more heavily.
When all standards scores are valid indicators of performance, the teacher may not care about the specific points possible. This is especially true if there are high point value assignments from early in the semester, and
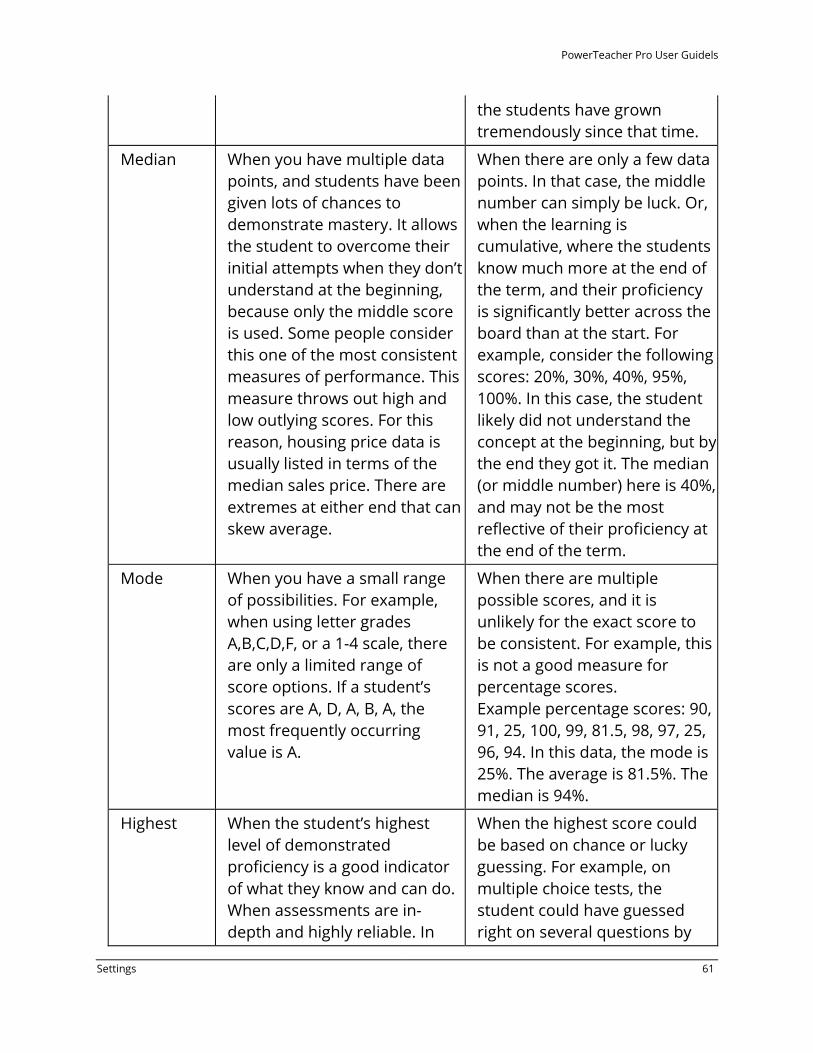
PowerTeacher Pro User Guidels
Settings 61J
the students have grown tremendously since that time.
Median When you have multiple data points, and students have been given lots of chances to demonstrate mastery. It allows the student to overcome their initial attempts when they don’t understand at the beginning, because only the middle score is used. Some people consider this one of the most consistent measures of performance. This measure throws out high and low outlying scores. For this reason, housing price data is usually listed in terms of the median sales price. There are extremes at either end that can skew average.
When there are only a few data points. In that case, the middle number can simply be luck. Or, when the learning is cumulative, where the students know much more at the end of the term, and their proficiency is significantly better across the board than at the start. For example, consider the following scores: 20%, 30%, 40%, 95%, 100%. In this case, the student likely did not understand the concept at the beginning, but by the end they got it. The median (or middle number) here is 40%, and may not be the most reflective of their proficiency at the end of the term.
Mode When you have a small range of possibilities. For example, when using letter grades A,B,C,D,F, or a 1-4 scale, there are only a limited range of score options. If a student’s scores are A, D, A, B, A, the most frequently occurring value is A.
When there are multiple possible scores, and it is unlikely for the exact score to be consistent. For example, this is not a good measure for percentage scores. Example percentage scores: 90, 91, 25, 100, 99, 81.5, 98, 97, 25, 96, 94. In this data, the mode is 25%. The average is 81.5%. The median is 94%.
Highest When the student’s highest level of demonstrated proficiency is a good indicator of what they know and can do. When assessments are in-depth and highly reliable. In
When the highest score could be based on chance or lucky guessing. For example, on multiple choice tests, the student could have guessed right on several questions by
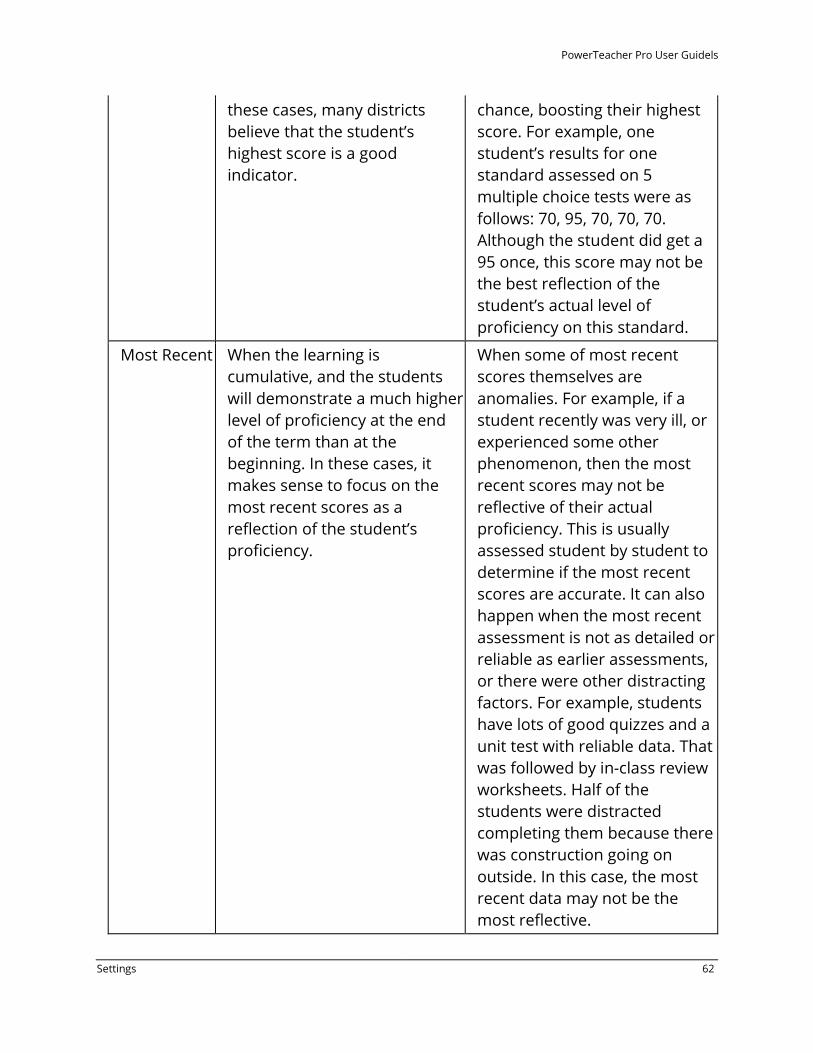
PowerTeacher Pro User Guidels
Settings 62J
these cases, many districts believe that the student’s highest score is a good indicator.
chance, boosting their highest score. For example, one student’s results for one standard assessed on 5 multiple choice tests were as follows: 70, 95, 70, 70, 70. Although the student did get a 95 once, this score may not be the best reflection of the student’s actual level of proficiency on this standard.
Most Recent When the learning is cumulative, and the students will demonstrate a much higher level of proficiency at the end of the term than at the beginning. In these cases, it makes sense to focus on the most recent scores as a reflection of the student’s proficiency.
When some of most recent scores themselves are anomalies. For example, if a student recently was very ill, or experienced some other phenomenon, then the most recent scores may not be reflective of their actual proficiency. This is usually assessed student by student to determine if the most recent scores are accurate. It can also happen when the most recent assessment is not as detailed or reliable as earlier assessments, or there were other distracting factors. For example, students have lots of good quizzes and a unit test with reliable data. That was followed by in-class review worksheets. Half of the students were distracted completing them because there was construction going on outside. In this case, the most recent data may not be the most reflective.
PowerTeacher Pro User Guidels
Settings 63J
Important Usage Note: In PowerTeacher Pro, you can mark any standards score as Exempt. For example, if a student was ill during the last quiz, you can choose exempt this score. The calculations will then ignore that score and use the other scores. For example, if you have set the most recent three calculation, and you mark the most recent score as Exempt, the calculation will take the previous three scores. In this manner, you can use the most recent scores, or any other calculation, while still exempting any scores that are not a accurate reflection of the student’s learning.
Recalculate Final Grades
Use this page to recalculate final grades for one or more classes. Although final grades in PowerTeacher Pro are calculated automatically, you can force a recalculation, if necessary. Use the recalculate tool after making significant changes, such as adding multiple assignment scores for students who transferred from another class. Also, recalculate grades when your PowerSchool administrator changes a setting that affects PowerTeacher Pro, such as the grade calculation formula.
1. On the charms bar, select Settings, and then choose Recalculate Final Grades.
2. Use the Select Classes menu to select one or more classes. 3. Check the type of grades you want recalculated. 4. Select Recalculate.
Learn More Grade Calculation Types