Embed Size (px)
Citation preview
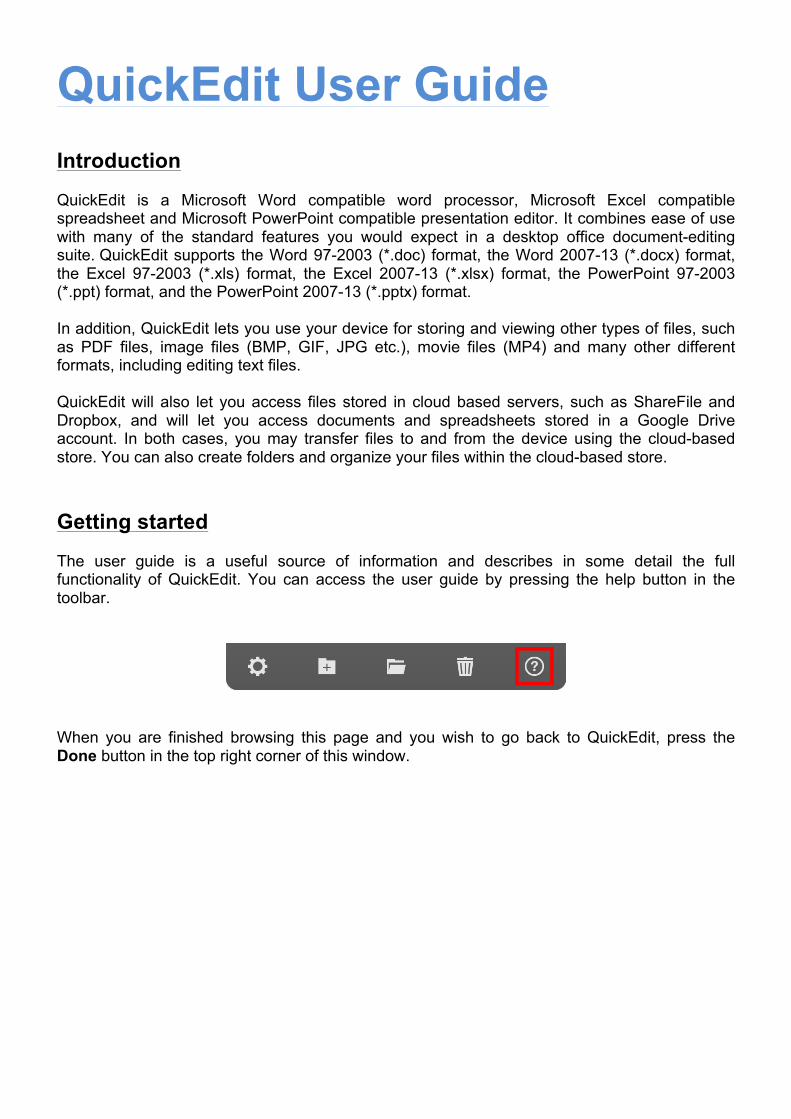
QuickEdit User Guide Introduction QuickEdit is a Microsoft Word compatible word processor, Microsoft Excel compatible spreadsheet and Microsoft PowerPoint compatible presentation editor. It combines ease of use with many of the standard features you would expect in a desktop office document-editing suite. QuickEdit supports the Word 97-2003 (*.doc) format, the Word 2007-13 (*.docx) format, the Excel 97-2003 (*.xls) format, the Excel 2007-13 (*.xlsx) format, the PowerPoint 97-2003 (*.ppt) format, and the PowerPoint 2007-13 (*.pptx) format. In addition, QuickEdit lets you use your device for storing and viewing other types of files, such as PDF files, image files (BMP, GIF, JPG etc.), movie files (MP4) and many other different formats, including editing text files. QuickEdit will also let you access files stored in cloud based servers, such as ShareFile and Dropbox, and will let you access documents and spreadsheets stored in a Google Drive account. In both cases, you may transfer files to and from the device using the cloud-based store. You can also create folders and organize your files within the cloud-based store. Getting started The user guide is a useful source of information and describes in some detail the full functionality of QuickEdit. You can access the user guide by pressing the help button in the toolbar.
When you are finished browsing this page and you wish to go back to QuickEdit, press the Done button in the top right corner of this window.
ShareFile QuickEdit FAQ What is Citrix ShareFile? Citrix ShareFile is the secure and easy-to-use file-sharing and cloud-storage tool used by more than 15 million people around the world. We suggest adding the free ShareFile account, so you can access files anywhere and protect files from lost or stolen devices. With ShareFile, you can store your documents, photos and other files, so you can access and share them anytime, from any computer or mobile device. Why does ShareFile cloud storage ask for an email address? Now, all users of ShareFile QuickEdit can receive 1GB of cloud storage from ShareFile – for free. Once you enter your name and email address on the registration screen, we’ll send you an email to confirm your ShareFile account. Your email address will only be used to sign up for ShareFile, and will not be used for any other purposes. If you do not confirm your registered ShareFile account with 30 days, you will not be able to continue using the ShareFile service, but the rest of the app will still be operational as normal. If you already have a ShareFile account, you can skip the registration process and enter your existing login information. Can I still store documents locally or in my personal cloud-storage? Of course! Once you’ve set up your new or existing ShareFile account, you can still save files locally or connect ShareFile QuickEdit to any of your other cloud-storage services, so you can upload or save files to and from those services. I’m an old Office2 / Office2 HD user. Is there anything I should know? Your Office2 / Office2 HD app is now ShareFile QuickEdit. We changed the name and added additional value to the features you know and love. ShareFile QuickEdit is still the simplest document-editing tool available for your iOS device, it just has a new name. With previous versions of the app, the file navigator pane by default brought you into the Local Files area. With QuickEdit, the default file navigator pane is one level higher than before. The user can now select between Local Files or ShareFile. After an upgrade, all the previous files stored locally will still be there, but they are not shown by default in the file navigator pane.
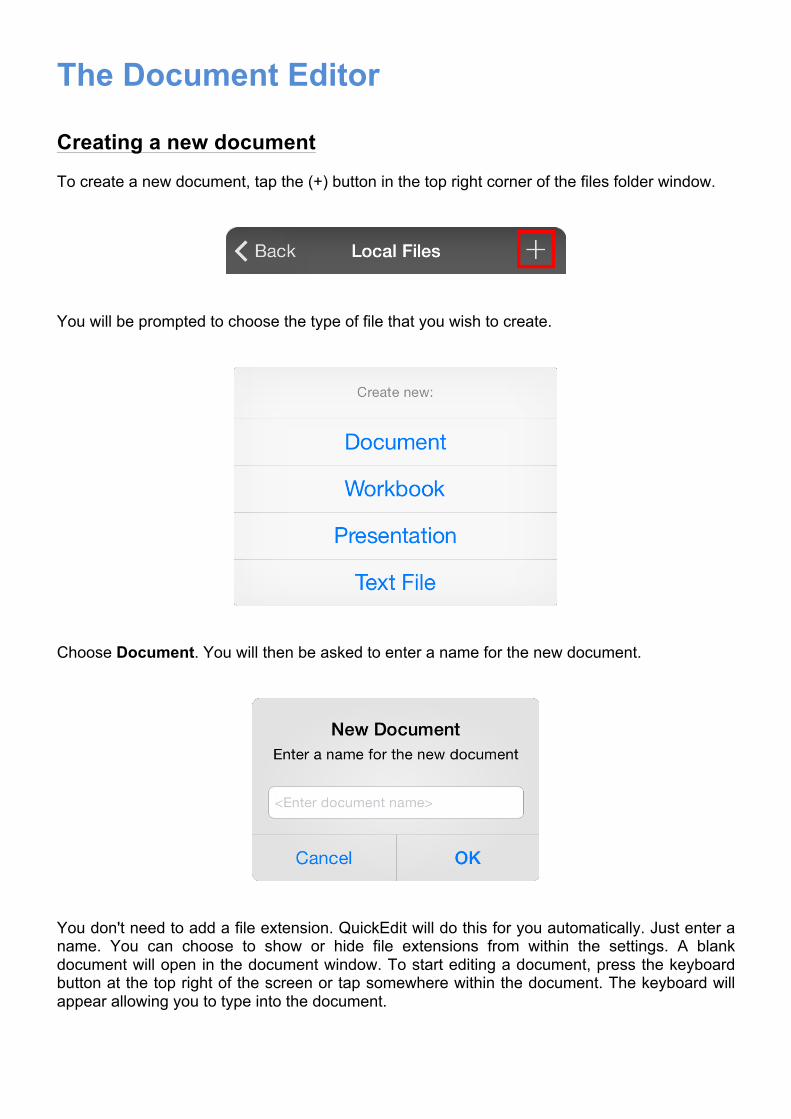
The Document Editor Creating a new document To create a new document, tap the (+) button in the top right corner of the files folder window.
You will be prompted to choose the type of file that you wish to create.
Choose Document. You will then be asked to enter a name for the new document.
You don't need to add a file extension. QuickEdit will do this for you automatically. Just enter a name. You can choose to show or hide file extensions from within the settings. A blank document will open in the document window. To start editing a document, press the keyboard button at the top right of the screen or tap somewhere within the document. The keyboard will appear allowing you to type into the document.
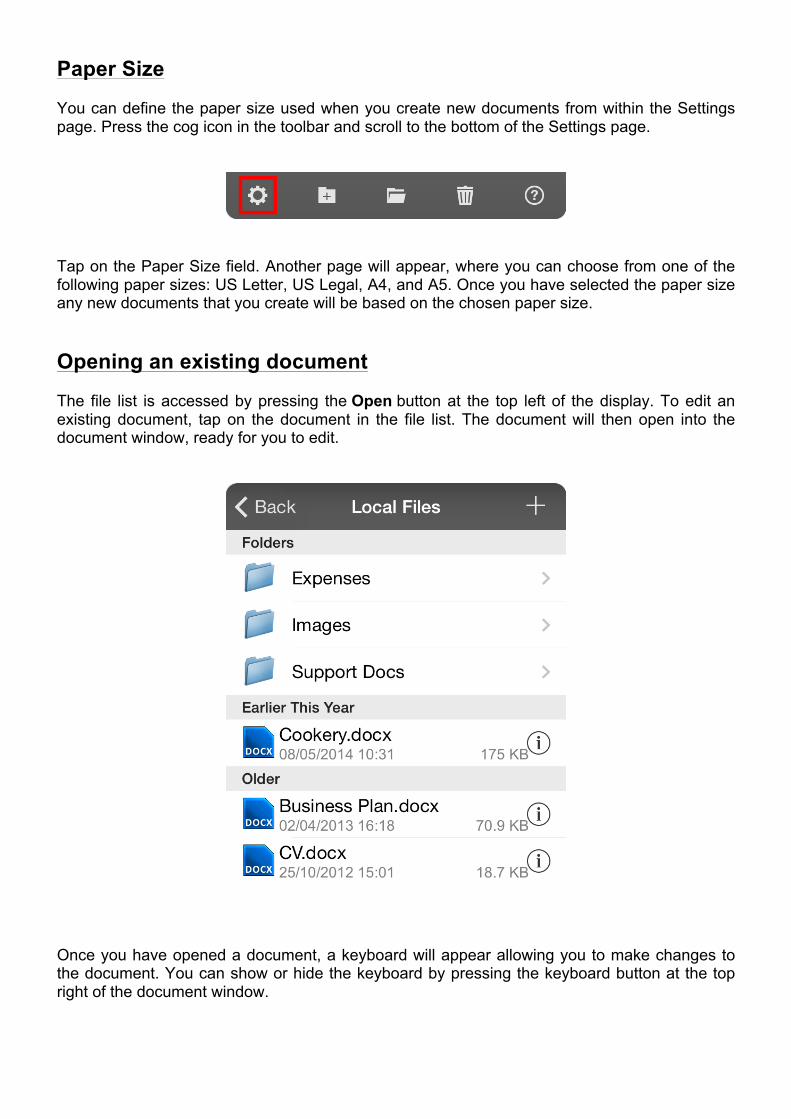
Paper Size You can define the paper size used when you create new documents from within the Settings page. Press the cog icon in the toolbar and scroll to the bottom of the Settings page.
Tap on the Paper Size field. Another page will appear, where you can choose from one of the following paper sizes: US Letter, US Legal, A4, and A5. Once you have selected the paper size any new documents that you create will be based on the chosen paper size. Opening an existing document The file list is accessed by pressing the Open button at the top left of the display. To edit an existing document, tap on the document in the file list. The document will then open into the document window, ready for you to edit.
Once you have opened a document, a keyboard will appear allowing you to make changes to the document. You can show or hide the keyboard by pressing the keyboard button at the top right of the document window.
Opening a document email attachment If you have received an email containing a document, you may open the file in QuickEdit in the following way:
• From the Mail app, open the relevant email message. • Tap on attachment. A preview window will appear, showing the document file. • Press the Open In... button at the far right of the navigation bar. • Select QuickEdit from the list of applications.
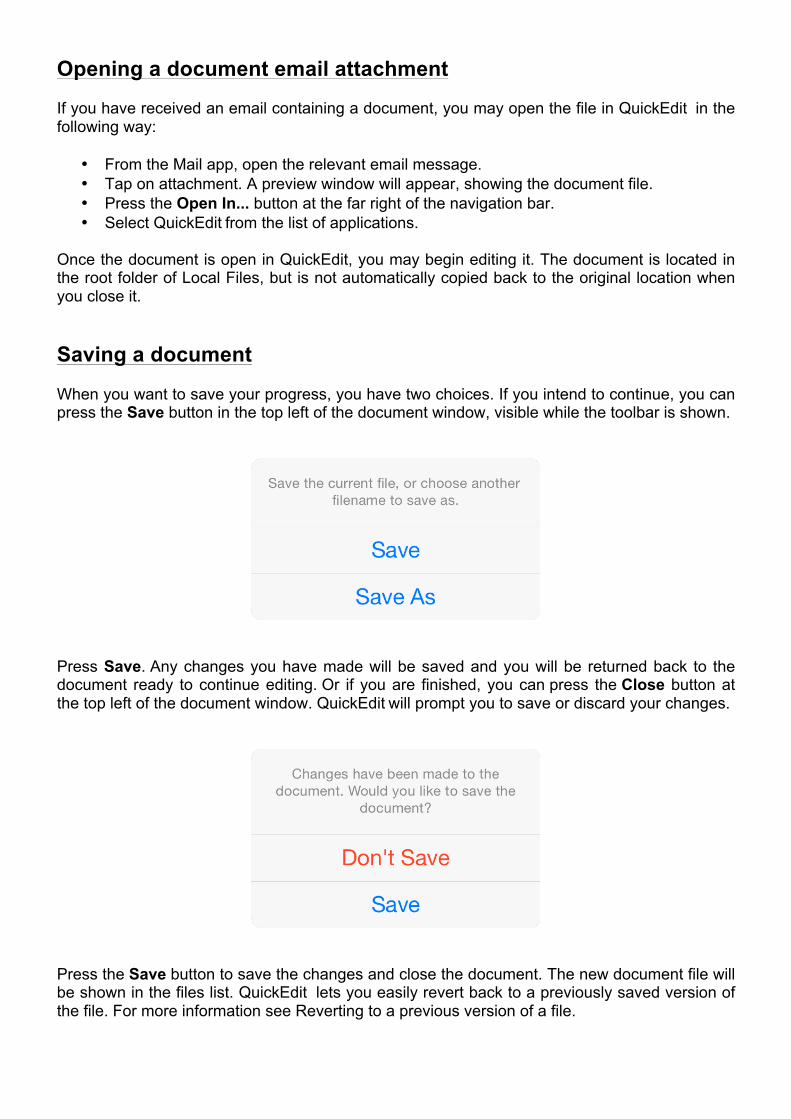
Once the document is open in QuickEdit, you may begin editing it. The document is located in the root folder of Local Files, but is not automatically copied back to the original location when you close it. Saving a document When you want to save your progress, you have two choices. If you intend to continue, you can press the Save button in the top left of the document window, visible while the toolbar is shown.
Press Save. Any changes you have made will be saved and you will be returned back to the document ready to continue editing. Or if you are finished, you can press the Close button at the top left of the document window. QuickEdit will prompt you to save or discard your changes.
Press the Save button to save the changes and close the document. The new document file will be shown in the files list. QuickEdit lets you easily revert back to a previously saved version of the file. For more information see Reverting to a previous version of a file.

Saving a document to a different location When you press the Save button, located at the far left of the toolbar, you are given the choice of either saving the current document by pressing the Save button, or saving the document to a different location. You can perform the latter by pressing the Save As button.
On pressing the Save As button, a new window will appear letting you save the file with a new name and/or to a new location. To save the file with a new name, tap in the Filename field and change the filename to the appropriate name. Note that you do not need to include a file extension. To save the file to a new location, tap the location field. Another window will appear allowing you to choose a folder for the new file. You may choose any folder or sub folder under the Local files folder. Press the highlighted Choose folder at the bottom of the window once you have navigated to the appropriate folder.
You can also change the format of the current file by choosing the appropriate format from the Export Format field. To create the new file with the filename and location that you have chosen, press the Save button.
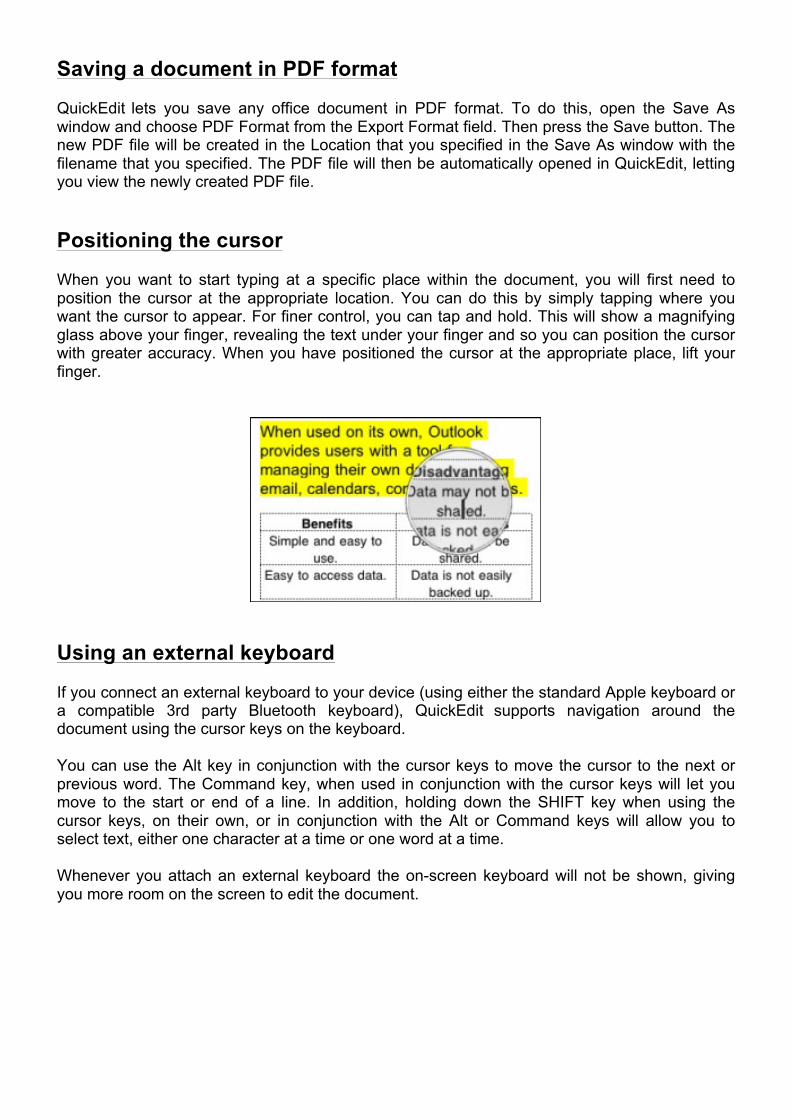
Saving a document in PDF format QuickEdit lets you save any office document in PDF format. To do this, open the Save As window and choose PDF Format from the Export Format field. Then press the Save button. The new PDF file will be created in the Location that you specified in the Save As window with the filename that you specified. The PDF file will then be automatically opened in QuickEdit, letting you view the newly created PDF file. Positioning the cursor When you want to start typing at a specific place within the document, you will first need to position the cursor at the appropriate location. You can do this by simply tapping where you want the cursor to appear. For finer control, you can tap and hold. This will show a magnifying glass above your finger, revealing the text under your finger and so you can position the cursor with greater accuracy. When you have positioned the cursor at the appropriate place, lift your finger.
Using an external keyboard If you connect an external keyboard to your device (using either the standard Apple keyboard or a compatible 3rd party Bluetooth keyboard), QuickEdit supports navigation around the document using the cursor keys on the keyboard. You can use the Alt key in conjunction with the cursor keys to move the cursor to the next or previous word. The Command key, when used in conjunction with the cursor keys will let you move to the start or end of a line. In addition, holding down the SHIFT key when using the cursor keys, on their own, or in conjunction with the Alt or Command keys will allow you to select text, either one character at a time or one word at a time. Whenever you attach an external keyboard the on-screen keyboard will not be shown, giving you more room on the screen to edit the document.
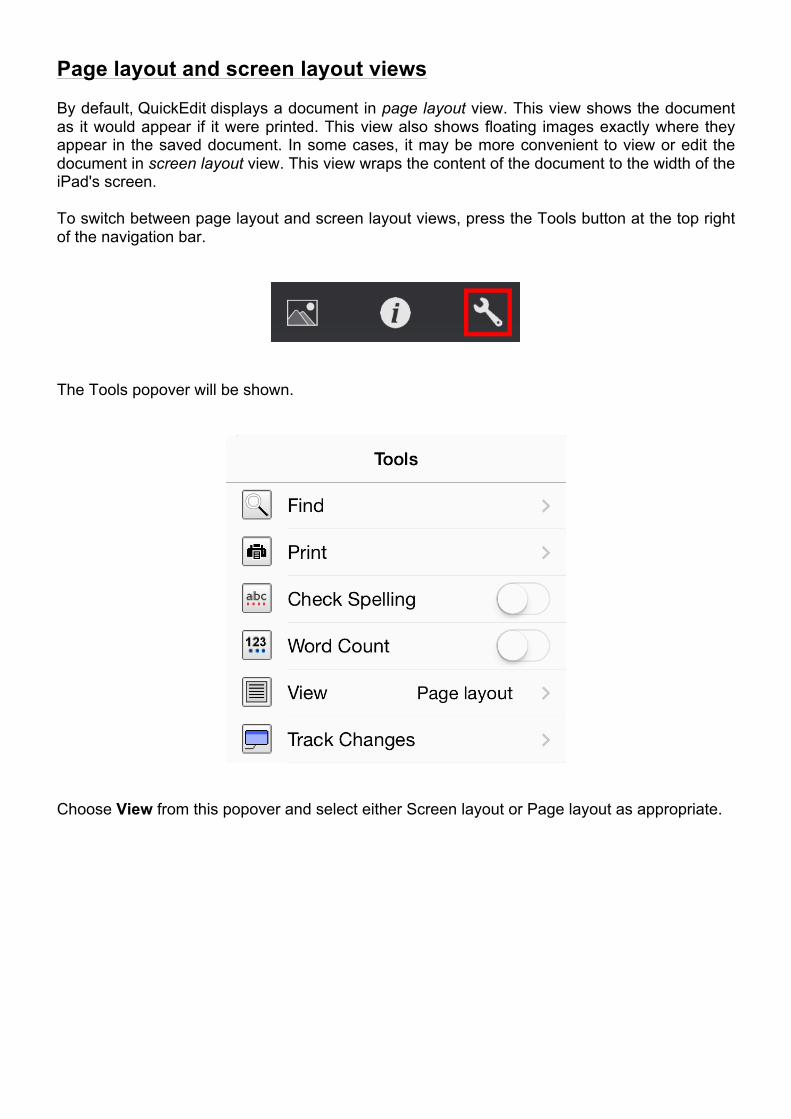
Page layout and screen layout views By default, QuickEdit displays a document in page layout view. This view shows the document as it would appear if it were printed. This view also shows floating images exactly where they appear in the saved document. In some cases, it may be more convenient to view or edit the document in screen layout view. This view wraps the content of the document to the width of the iPad's screen. To switch between page layout and screen layout views, press the Tools button at the top right of the navigation bar.
The Tools popover will be shown.
Choose View from this popover and select either Screen layout or Page layout as appropriate.
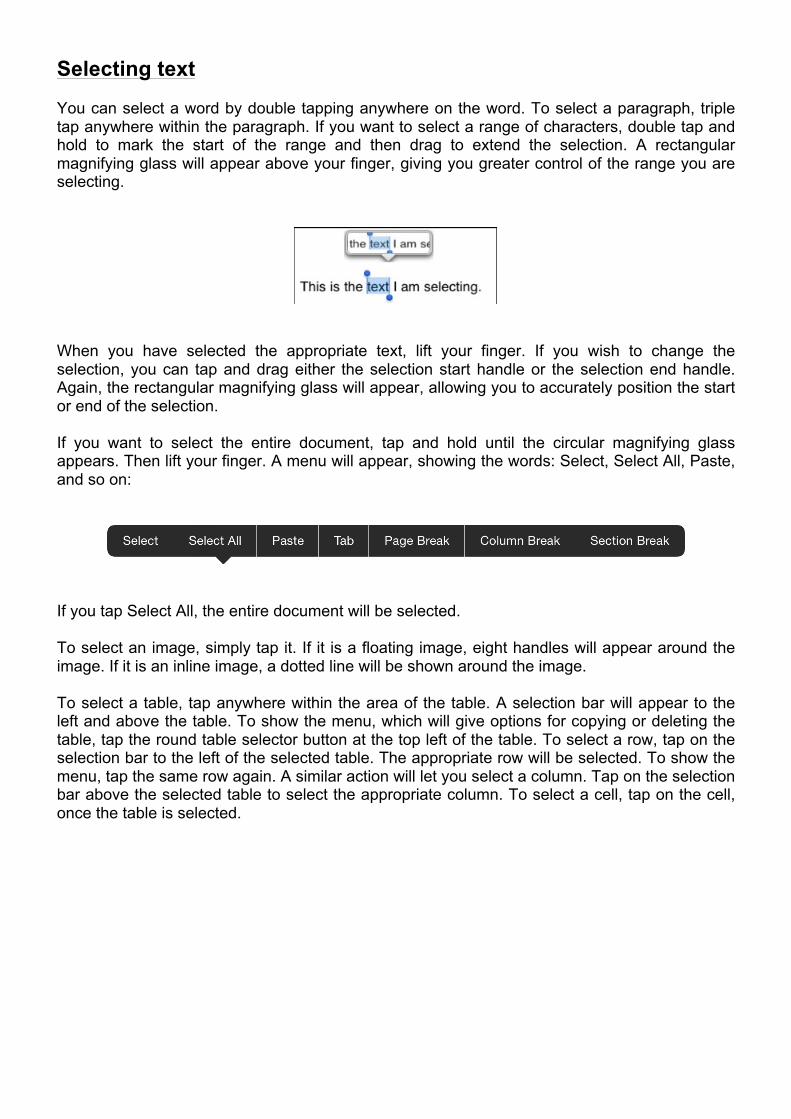
Selecting text You can select a word by double tapping anywhere on the word. To select a paragraph, triple tap anywhere within the paragraph. If you want to select a range of characters, double tap and hold to mark the start of the range and then drag to extend the selection. A rectangular magnifying glass will appear above your finger, giving you greater control of the range you are selecting.
When you have selected the appropriate text, lift your finger. If you wish to change the selection, you can tap and drag either the selection start handle or the selection end handle. Again, the rectangular magnifying glass will appear, allowing you to accurately position the start or end of the selection. If you want to select the entire document, tap and hold until the circular magnifying glass appears. Then lift your finger. A menu will appear, showing the words: Select, Select All, Paste, and so on:
If you tap Select All, the entire document will be selected. To select an image, simply tap it. If it is a floating image, eight handles will appear around the image. If it is an inline image, a dotted line will be shown around the image. To select a table, tap anywhere within the area of the table. A selection bar will appear to the left and above the table. To show the menu, which will give options for copying or deleting the table, tap the round table selector button at the top left of the table. To select a row, tap on the selection bar to the left of the selected table. The appropriate row will be selected. To show the menu, tap the same row again. A similar action will let you select a column. Tap on the selection bar above the selected table to select the appropriate column. To select a cell, tap on the cell, once the table is selected.
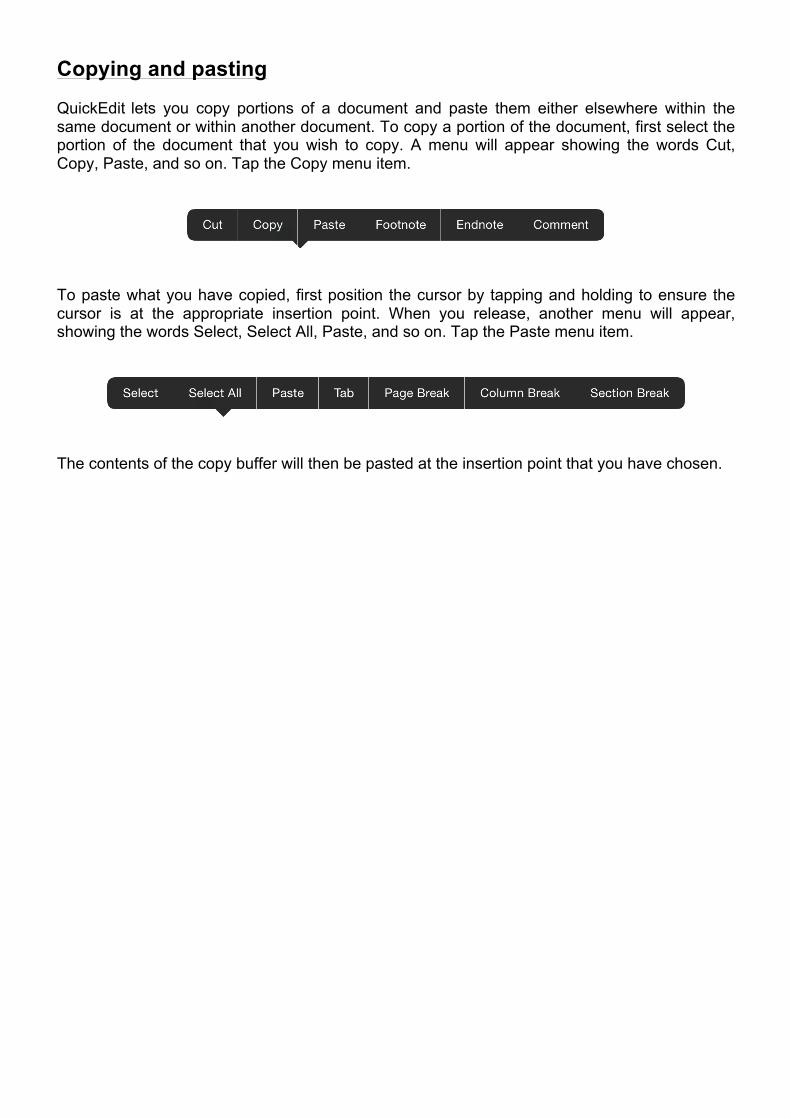
Copying and pasting QuickEdit lets you copy portions of a document and paste them either elsewhere within the same document or within another document. To copy a portion of the document, first select the portion of the document that you wish to copy. A menu will appear showing the words Cut, Copy, Paste, and so on. Tap the Copy menu item.
To paste what you have copied, first position the cursor by tapping and holding to ensure the cursor is at the appropriate insertion point. When you release, another menu will appear, showing the words Select, Select All, Paste, and so on. Tap the Paste menu item.
The contents of the copy buffer will then be pasted at the insertion point that you have chosen.
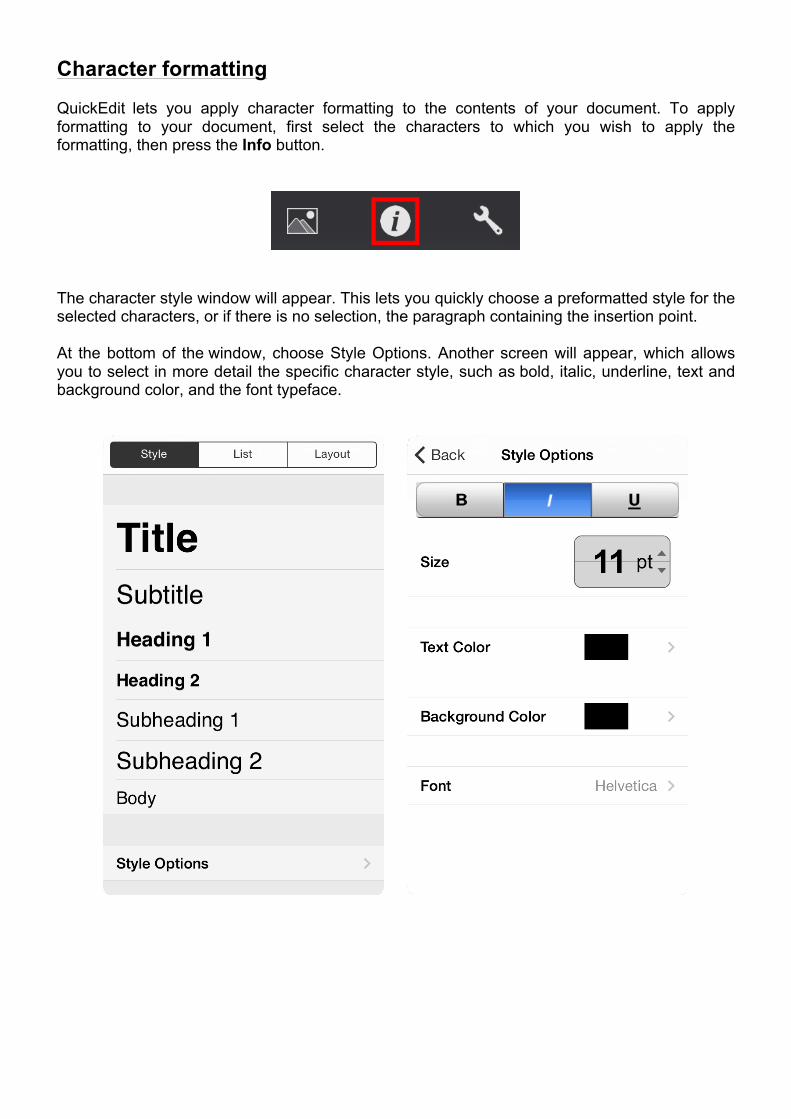
Character formatting QuickEdit lets you apply character formatting to the contents of your document. To apply formatting to your document, first select the characters to which you wish to apply the formatting, then press the Info button.
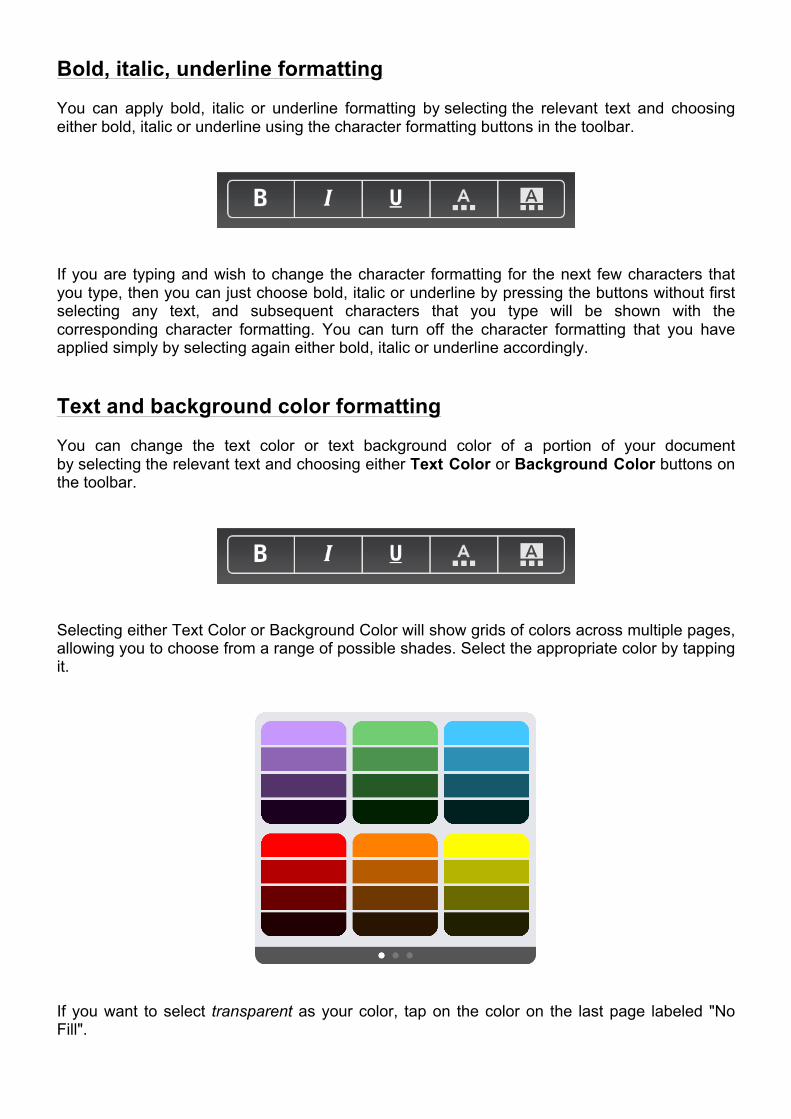
The character style window will appear. This lets you quickly choose a preformatted style for the selected characters, or if there is no selection, the paragraph containing the insertion point. At the bottom of the window, choose Style Options. Another screen will appear, which allows you to select in more detail the specific character style, such as bold, italic, underline, text and background color, and the font typeface.
Bold, italic, underline formatting You can apply bold, italic or underline formatting by selecting the relevant text and choosing either bold, italic or underline using the character formatting buttons in the toolbar.
If you are typing and wish to change the character formatting for the next few characters that you type, then you can just choose bold, italic or underline by pressing the buttons without first selecting any text, and subsequent characters that you type will be shown with the corresponding character formatting. You can turn off the character formatting that you have applied simply by selecting again either bold, italic or underline accordingly. Text and background color formatting You can change the text color or text background color of a portion of your document by selecting the relevant text and choosing either Text Color or Background Color buttons on the toolbar.
Selecting either Text Color or Background Color will show grids of colors across multiple pages, allowing you to choose from a range of possible shades. Select the appropriate color by tapping it.
If you want to select transparent as your color, tap on the color on the last page labeled "No Fill".
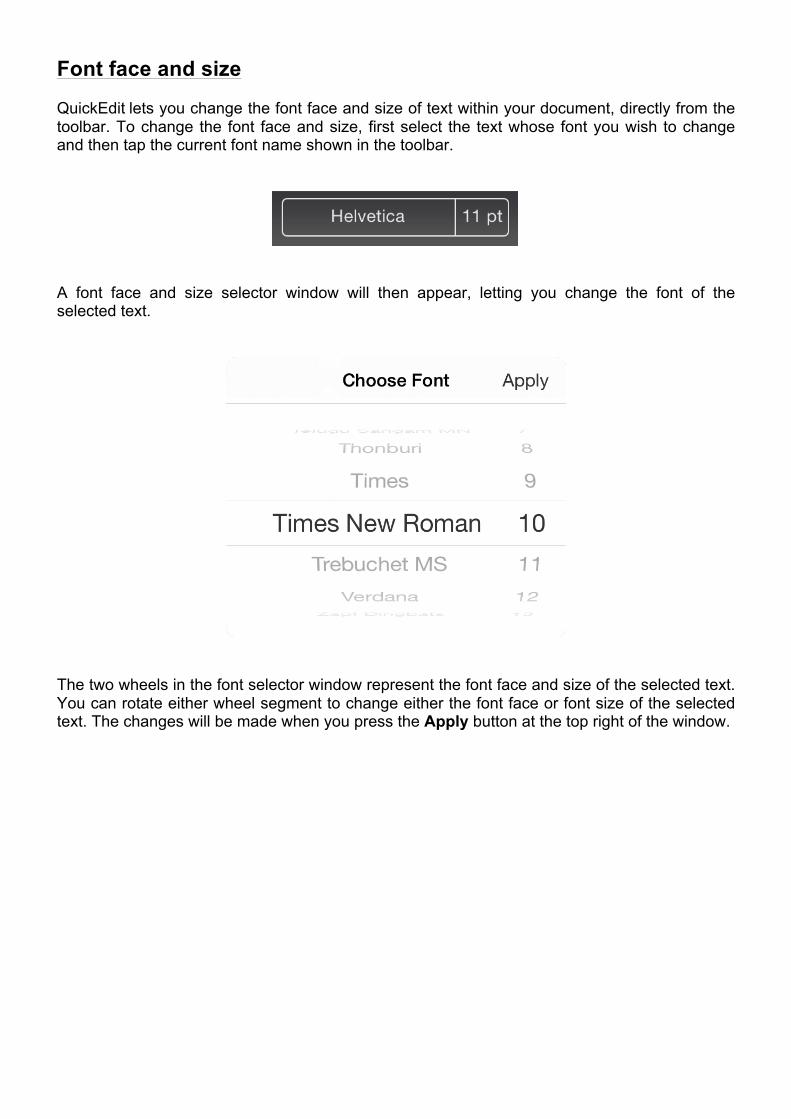
Font face and size QuickEdit lets you change the font face and size of text within your document, directly from the toolbar. To change the font face and size, first select the text whose font you wish to change and then tap the current font name shown in the toolbar.
A font face and size selector window will then appear, letting you change the font of the selected text.
The two wheels in the font selector window represent the font face and size of the selected text. You can rotate either wheel segment to change either the font face or font size of the selected text. The changes will be made when you press the Apply button at the top right of the window.

Paragraph formatting QuickEdit provides comprehensive functionality for formatting the paragraphs within your document. You can change the following paragraph attributes: Paragraph alignment, Paragraph indentation, Bullets and numbering, Number of columns, Line spacing, and Space above and below the paragraph. To apply paragraph formatting to a paragraph, first position the cursor anywhere within the paragraph and press the Info button.
The character and paragraph style window is shown. To change the paragraph indentation and bullets and numbering, press the List tab at the top of the window.
This window lets you choose whether a paragraph is numbered, bulleted, or neither. Simply choose from the appropriate item in the list. You can increase or decrease the indentation of the paragraph too. Do this simply by pressing the left or right arrow buttons at the top of the window.
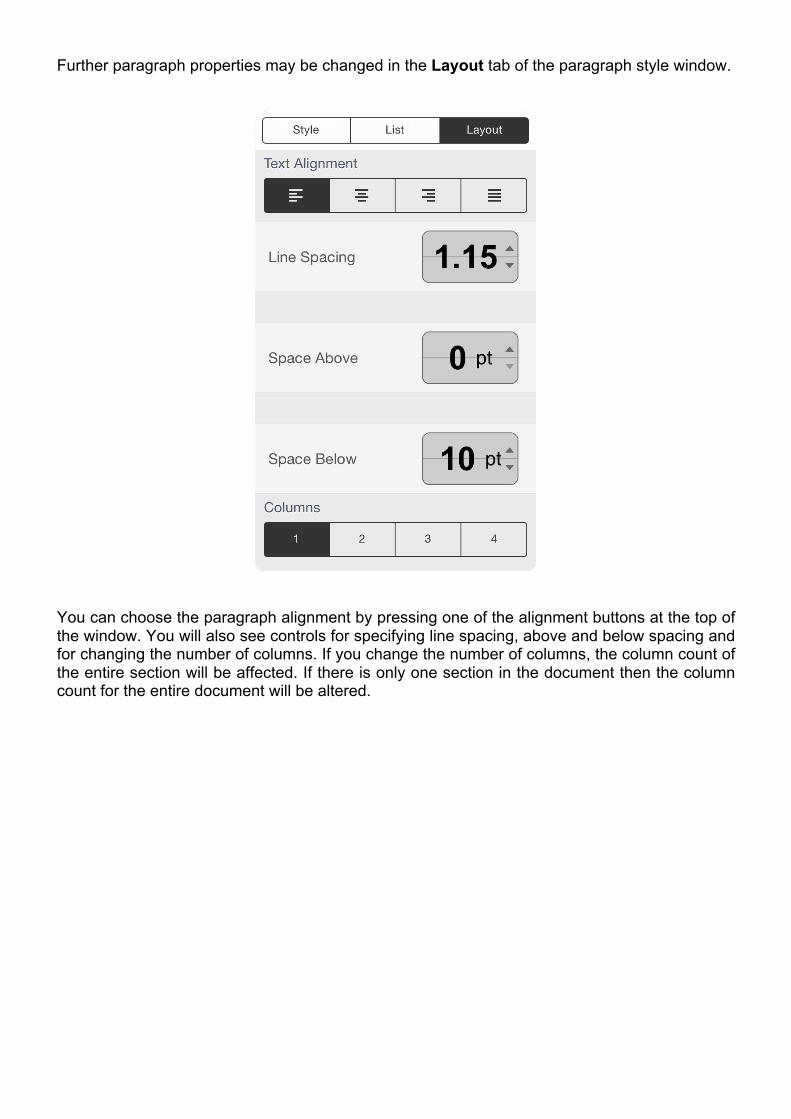
Further paragraph properties may be changed in the Layout tab of the paragraph style window.
You can choose the paragraph alignment by pressing one of the alignment buttons at the top of the window. You will also see controls for specifying line spacing, above and below spacing and for changing the number of columns. If you change the number of columns, the column count of the entire section will be affected. If there is only one section in the document then the column count for the entire document will be altered.
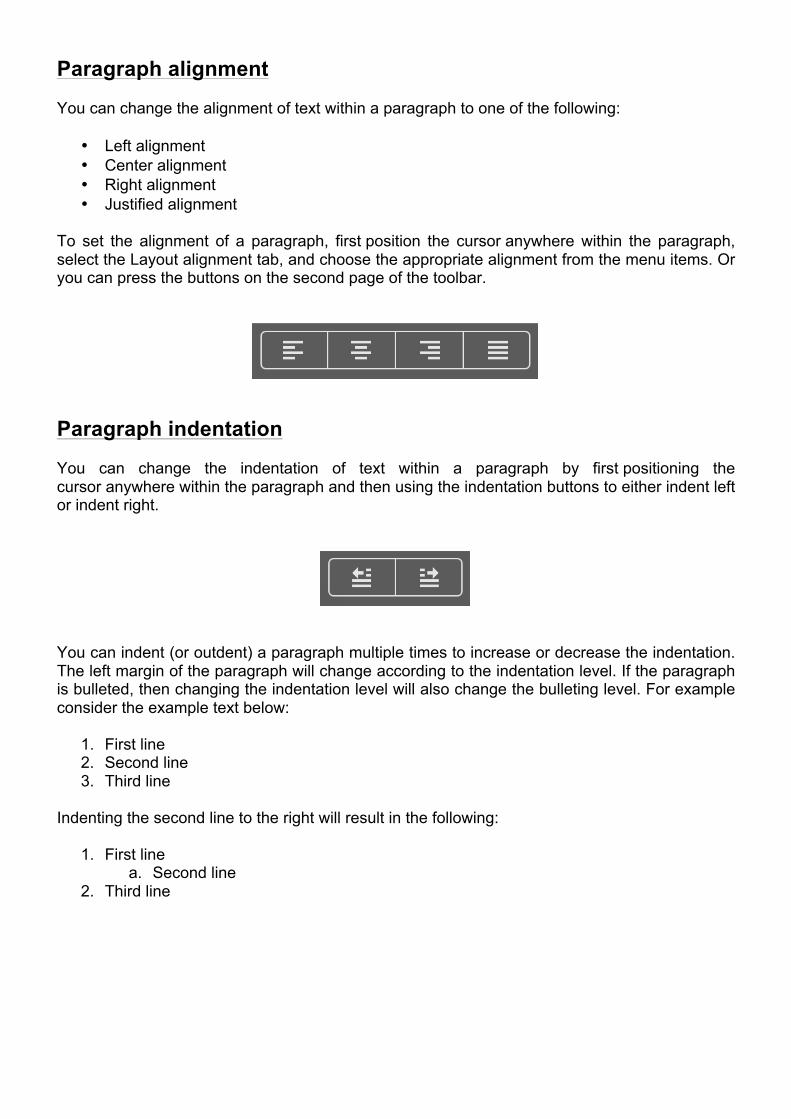
Paragraph alignment You can change the alignment of text within a paragraph to one of the following:
• Left alignment • Center alignment • Right alignment • Justified alignment
To set the alignment of a paragraph, first position the cursor anywhere within the paragraph, select the Layout alignment tab, and choose the appropriate alignment from the menu items. Or you can press the buttons on the second page of the toolbar.
Paragraph indentation You can change the indentation of text within a paragraph by first positioning the cursor anywhere within the paragraph and then using the indentation buttons to either indent left or indent right.
You can indent (or outdent) a paragraph multiple times to increase or decrease the indentation. The left margin of the paragraph will change according to the indentation level. If the paragraph is bulleted, then changing the indentation level will also change the bulleting level. For example consider the example text below:
1. First line 2. Second line 3. Third line
Indenting the second line to the right will result in the following:
1. First line a. Second line
2. Third line
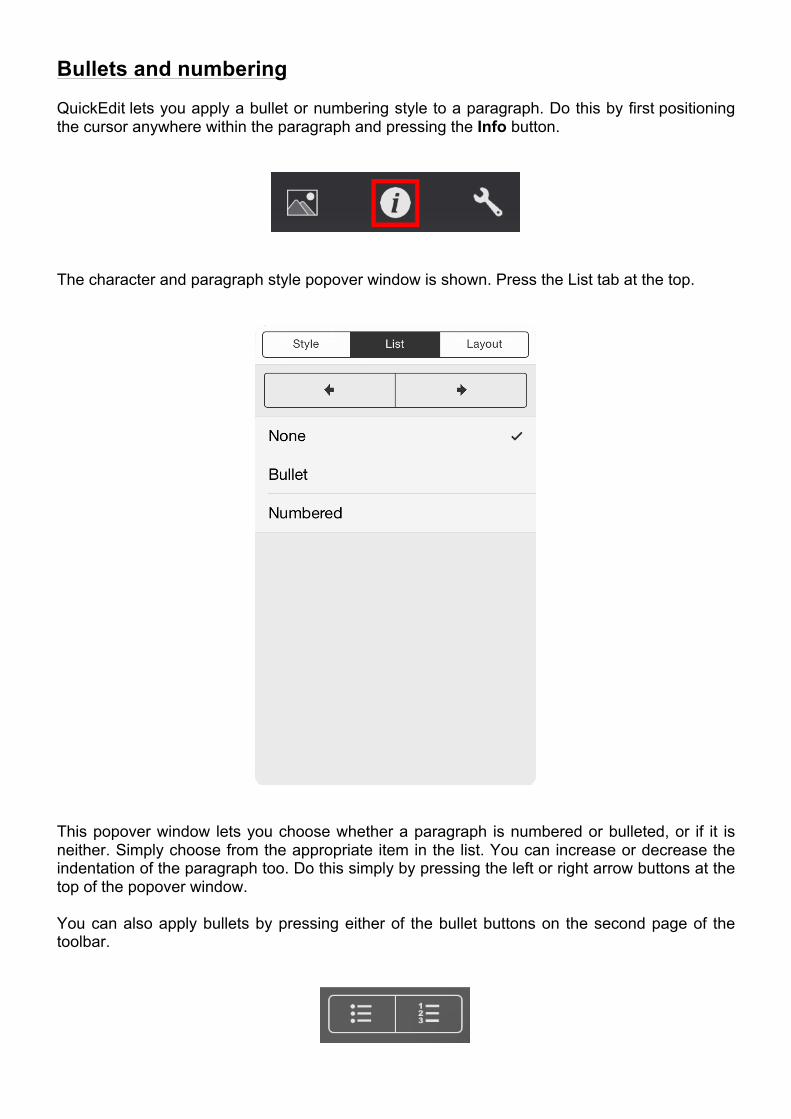
Bullets and numbering QuickEdit lets you apply a bullet or numbering style to a paragraph. Do this by first positioning the cursor anywhere within the paragraph and pressing the Info button.
The character and paragraph style popover window is shown. Press the List tab at the top.
This popover window lets you choose whether a paragraph is numbered or bulleted, or if it is neither. Simply choose from the appropriate item in the list. You can increase or decrease the indentation of the paragraph too. Do this simply by pressing the left or right arrow buttons at the top of the popover window. You can also apply bullets by pressing either of the bullet buttons on the second page of the toolbar.
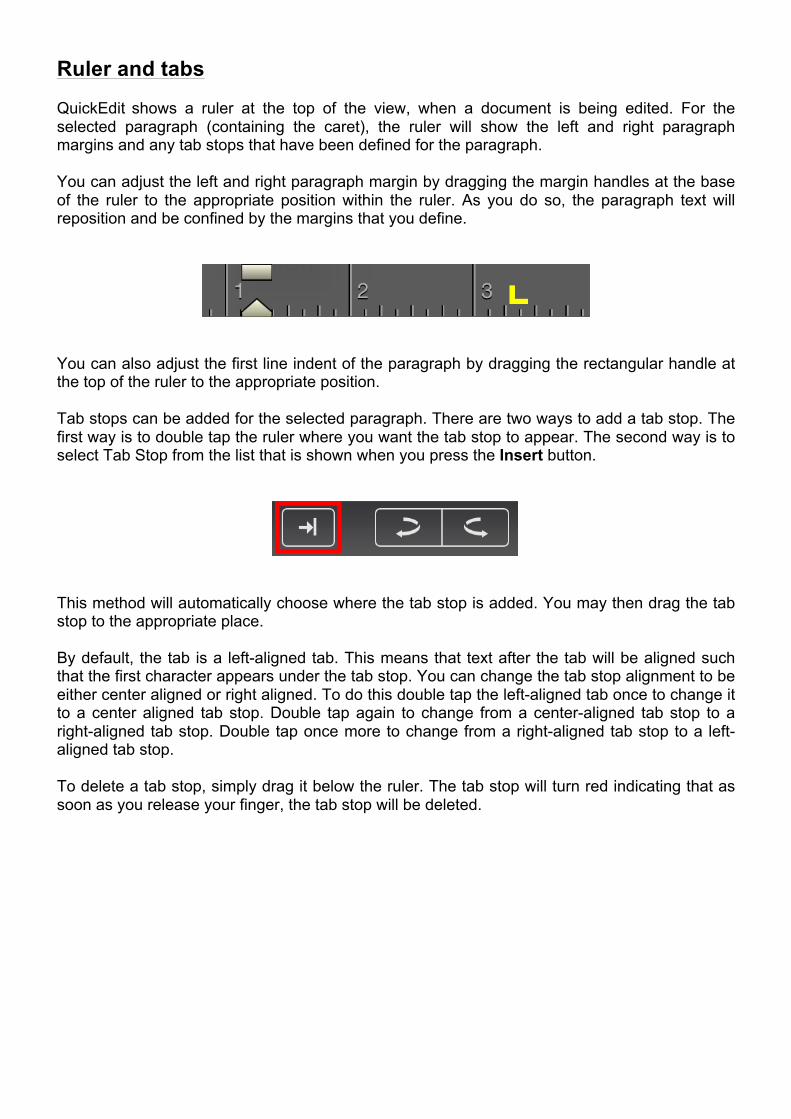
Ruler and tabs QuickEdit shows a ruler at the top of the view, when a document is being edited. For the selected paragraph (containing the caret), the ruler will show the left and right paragraph margins and any tab stops that have been defined for the paragraph. You can adjust the left and right paragraph margin by dragging the margin handles at the base of the ruler to the appropriate position within the ruler. As you do so, the paragraph text will reposition and be confined by the margins that you define.
You can also adjust the first line indent of the paragraph by dragging the rectangular handle at the top of the ruler to the appropriate position. Tab stops can be added for the selected paragraph. There are two ways to add a tab stop. The first way is to double tap the ruler where you want the tab stop to appear. The second way is to select Tab Stop from the list that is shown when you press the Insert button.
This method will automatically choose where the tab stop is added. You may then drag the tab stop to the appropriate place. By default, the tab is a left-aligned tab. This means that text after the tab will be aligned such that the first character appears under the tab stop. You can change the tab stop alignment to be either center aligned or right aligned. To do this double tap the left-aligned tab once to change it to a center aligned tab stop. Double tap again to change from a center-aligned tab stop to a right-aligned tab stop. Double tap once more to change from a right-aligned tab stop to a left-aligned tab stop. To delete a tab stop, simply drag it below the ruler. The tab stop will turn red indicating that as soon as you release your finger, the tab stop will be deleted.
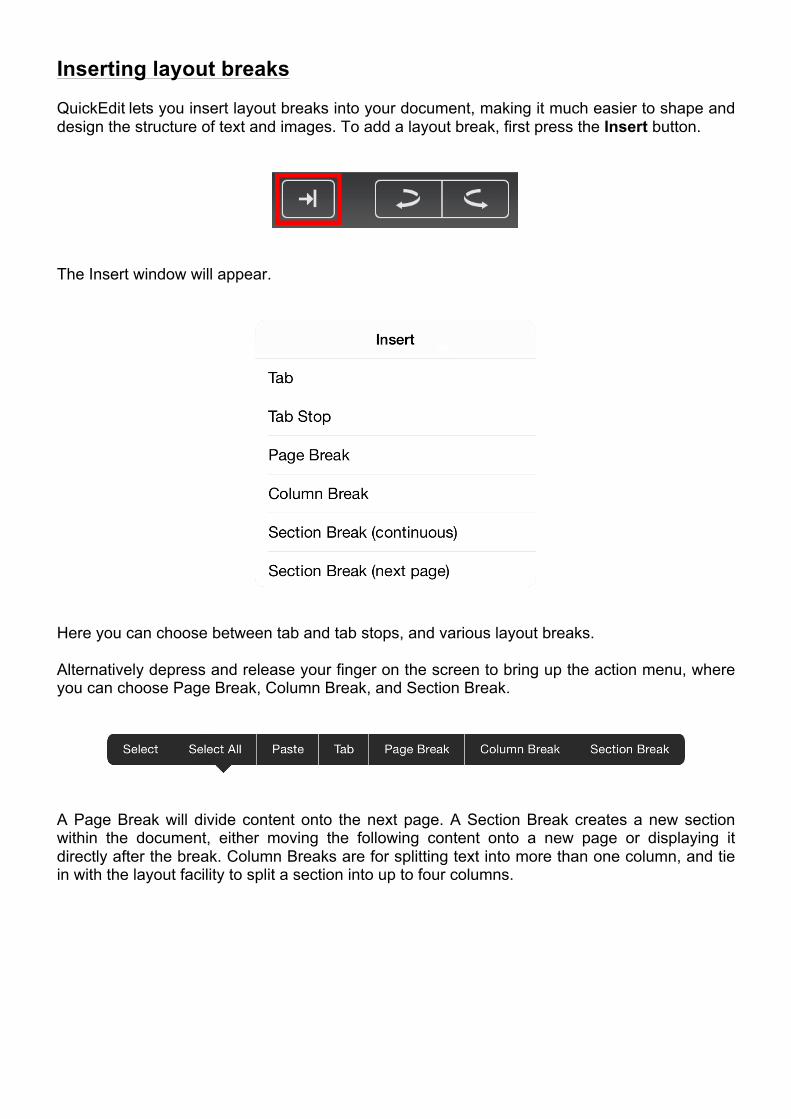
Inserting layout breaks QuickEdit lets you insert layout breaks into your document, making it much easier to shape and design the structure of text and images. To add a layout break, first press the Insert button.
The Insert window will appear.
Here you can choose between tab and tab stops, and various layout breaks. Alternatively depress and release your finger on the screen to bring up the action menu, where you can choose Page Break, Column Break, and Section Break.
A Page Break will divide content onto the next page. A Section Break creates a new section within the document, either moving the following content onto a new page or displaying it directly after the break. Column Breaks are for splitting text into more than one column, and tie in with the layout facility to split a section into up to four columns.
Text layout in multiple columns QuickEdit allows you to define the text column structure of a document on a section by section basis. If there are no section breaks present, then the entirety of the document will be altered. To change the number of columns, position the cursor anywhere within the section in question, and press the Info button.
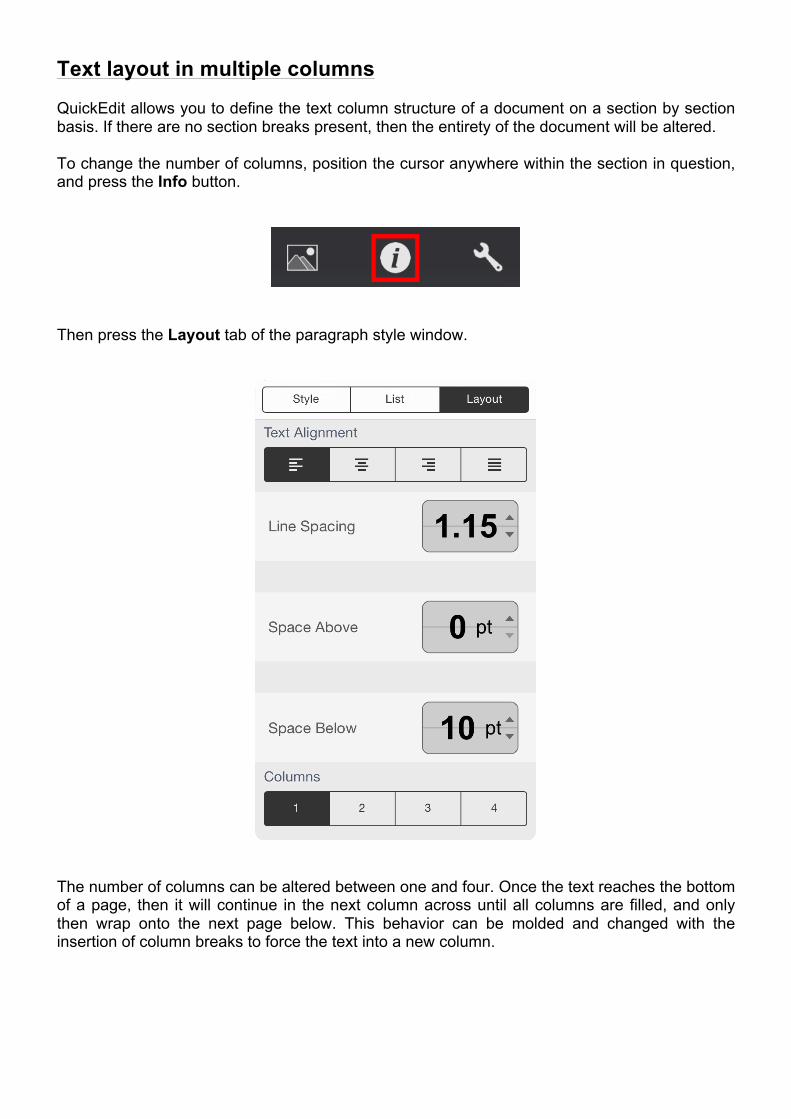
Then press the Layout tab of the paragraph style window.
The number of columns can be altered between one and four. Once the text reaches the bottom of a page, then it will continue in the next column across until all columns are filled, and only then wrap onto the next page below. This behavior can be molded and changed with the insertion of column breaks to force the text into a new column.

To insert a column break, press the Insert button.
The insert window will appear.
Select Column Break to insert a column break at the current cursor position. Alternatively, depress and release your finger on the screen to bring up the action menu, where you can choose Column Break.
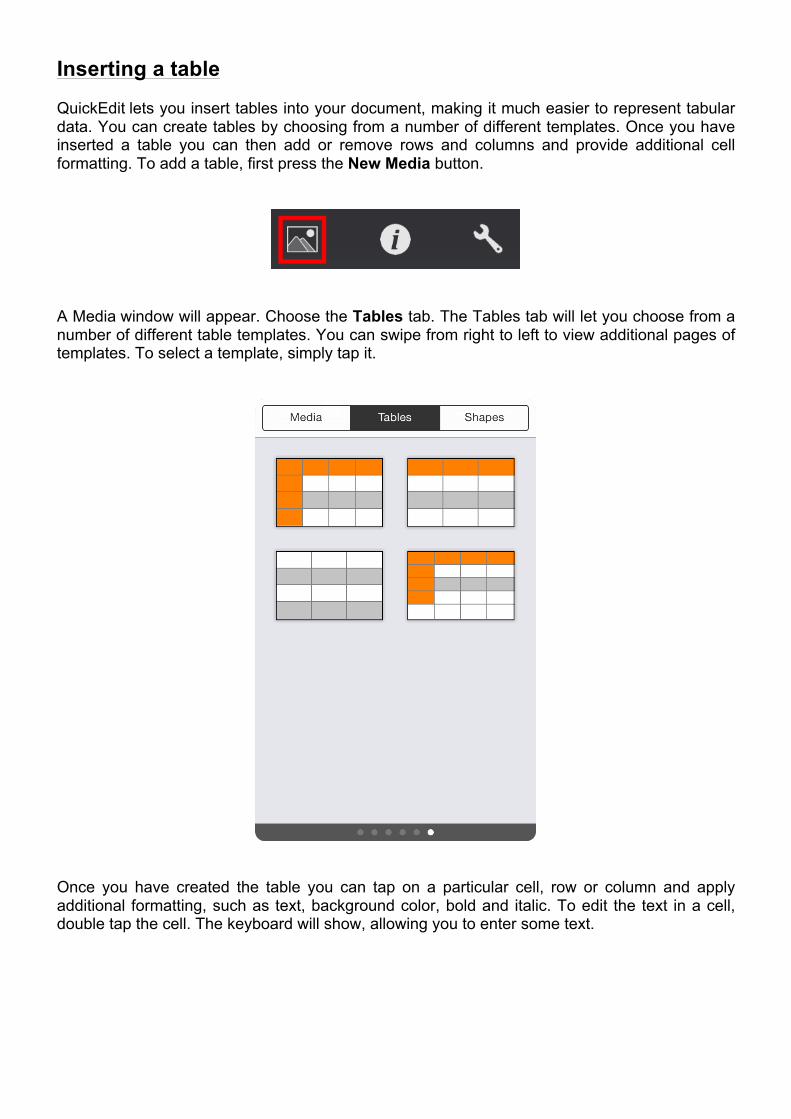
Inserting a table QuickEdit lets you insert tables into your document, making it much easier to represent tabular data. You can create tables by choosing from a number of different templates. Once you have inserted a table you can then add or remove rows and columns and provide additional cell formatting. To add a table, first press the New Media button.
A Media window will appear. Choose the Tables tab. The Tables tab will let you choose from a number of different table templates. You can swipe from right to left to view additional pages of templates. To select a template, simply tap it.
Once you have created the table you can tap on a particular cell, row or column and apply additional formatting, such as text, background color, bold and italic. To edit the text in a cell, double tap the cell. The keyboard will show, allowing you to enter some text.
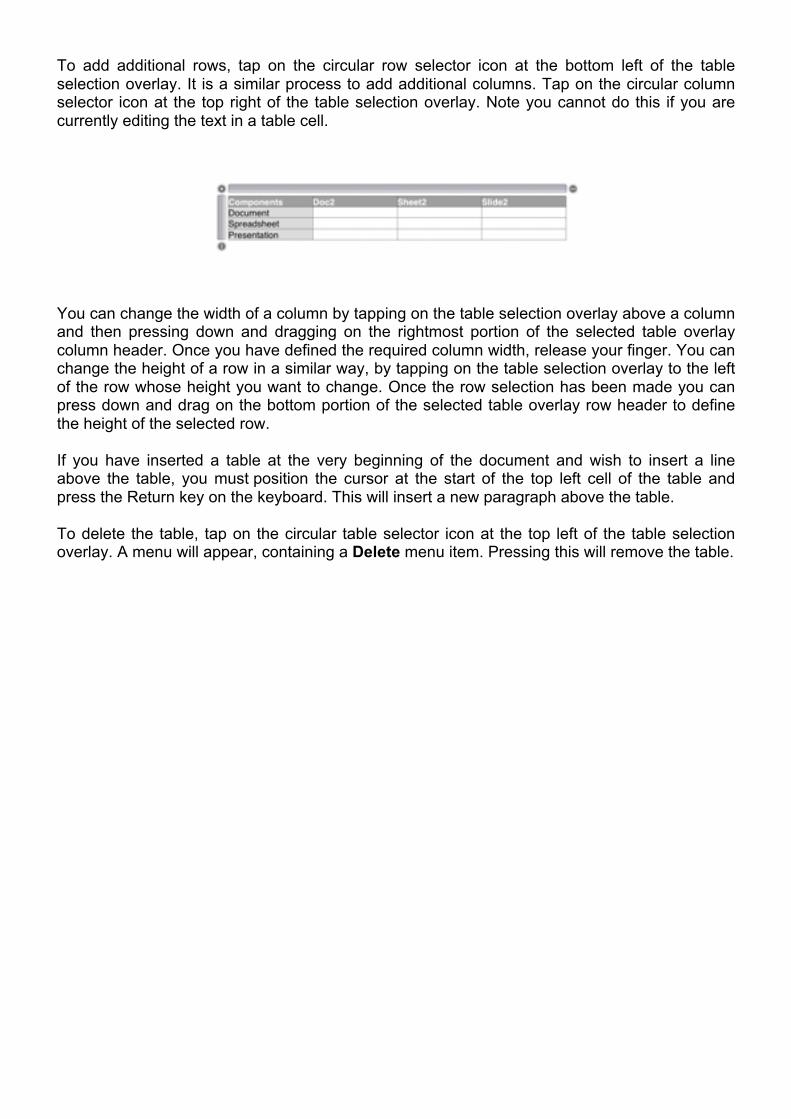
To add additional rows, tap on the circular row selector icon at the bottom left of the table selection overlay. It is a similar process to add additional columns. Tap on the circular column selector icon at the top right of the table selection overlay. Note you cannot do this if you are currently editing the text in a table cell.
You can change the width of a column by tapping on the table selection overlay above a column and then pressing down and dragging on the rightmost portion of the selected table overlay column header. Once you have defined the required column width, release your finger. You can change the height of a row in a similar way, by tapping on the table selection overlay to the left of the row whose height you want to change. Once the row selection has been made you can press down and drag on the bottom portion of the selected table overlay row header to define the height of the selected row. If you have inserted a table at the very beginning of the document and wish to insert a line above the table, you must position the cursor at the start of the top left cell of the table and press the Return key on the keyboard. This will insert a new paragraph above the table. To delete the table, tap on the circular table selector icon at the top left of the table selection overlay. A menu will appear, containing a Delete menu item. Pressing this will remove the table.
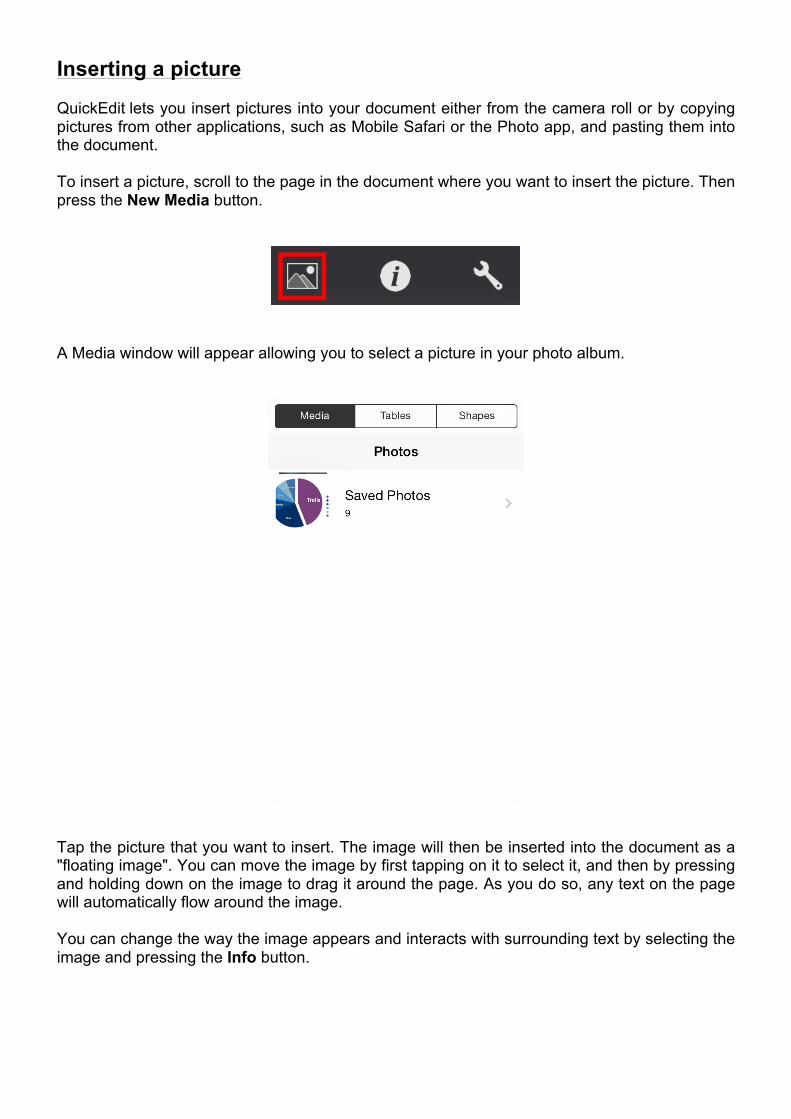
Inserting a picture QuickEdit lets you insert pictures into your document either from the camera roll or by copying pictures from other applications, such as Mobile Safari or the Photo app, and pasting them into the document. To insert a picture, scroll to the page in the document where you want to insert the picture. Then press the New Media button.
A Media window will appear allowing you to select a picture in your photo album.
Tap the picture that you want to insert. The image will then be inserted into the document as a "floating image". You can move the image by first tapping on it to select it, and then by pressing and holding down on the image to drag it around the page. As you do so, any text on the page will automatically flow around the image. You can change the way the image appears and interacts with surrounding text by selecting the image and pressing the Info button.
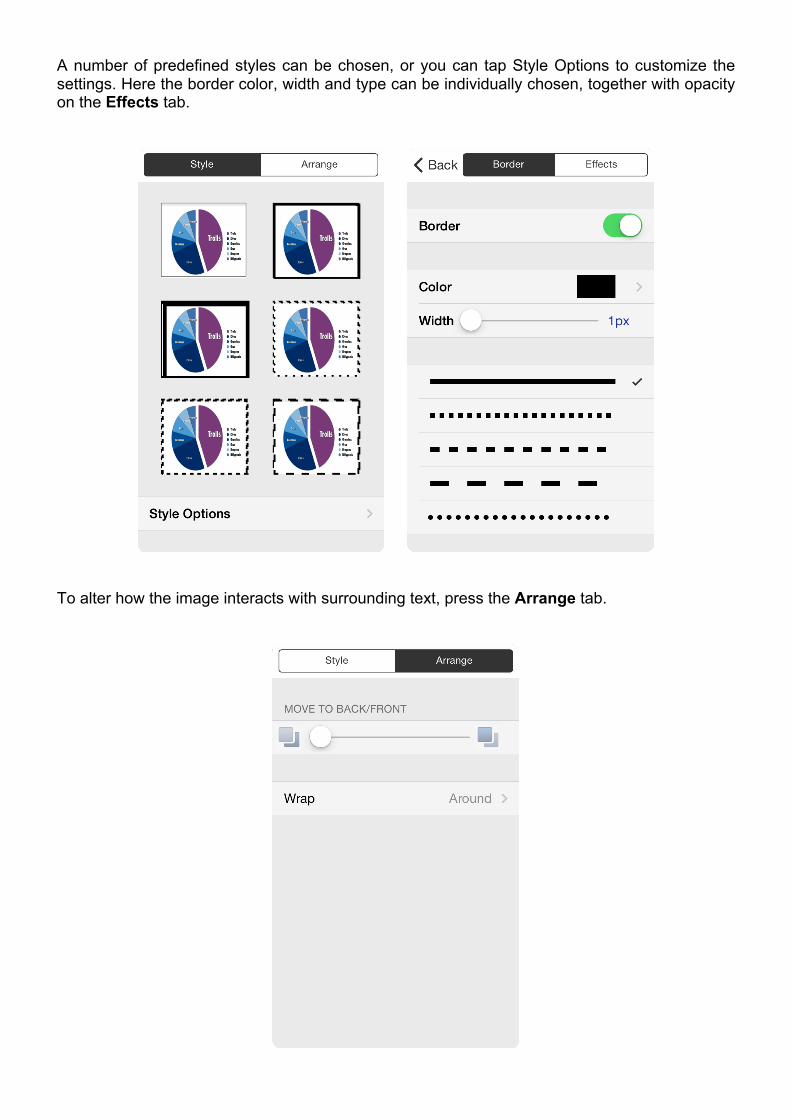
A number of predefined styles can be chosen, or you can tap Style Options to customize the settings. Here the border color, width and type can be individually chosen, together with opacity on the Effects tab.
To alter how the image interacts with surrounding text, press the Arrange tab.
You will see a field at the bottom of the window called "Wrap". Select this field and choose from one of several wrap types. You can choose from the following: Around The default wrap type. Text will render around the image. Above and below Text will render above and below the image.
None Text will render underneath the image and will not be displaced by the image.
Inline with text The image will behave like a text character and will flow along with the text.
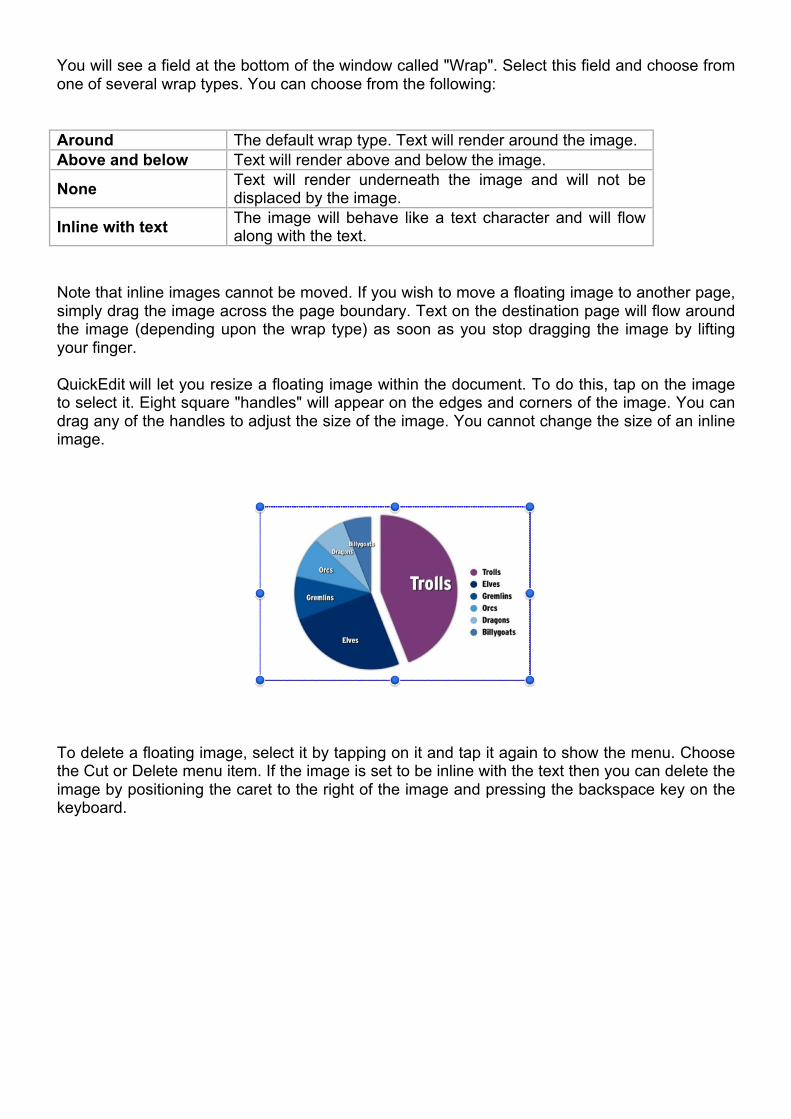
Note that inline images cannot be moved. If you wish to move a floating image to another page, simply drag the image across the page boundary. Text on the destination page will flow around the image (depending upon the wrap type) as soon as you stop dragging the image by lifting your finger. QuickEdit will let you resize a floating image within the document. To do this, tap on the image to select it. Eight square "handles" will appear on the edges and corners of the image. You can drag any of the handles to adjust the size of the image. You cannot change the size of an inline image.
To delete a floating image, select it by tapping on it and tap it again to show the menu. Choose the Cut or Delete menu item. If the image is set to be inline with the text then you can delete the image by positioning the caret to the right of the image and pressing the backspace key on the keyboard.
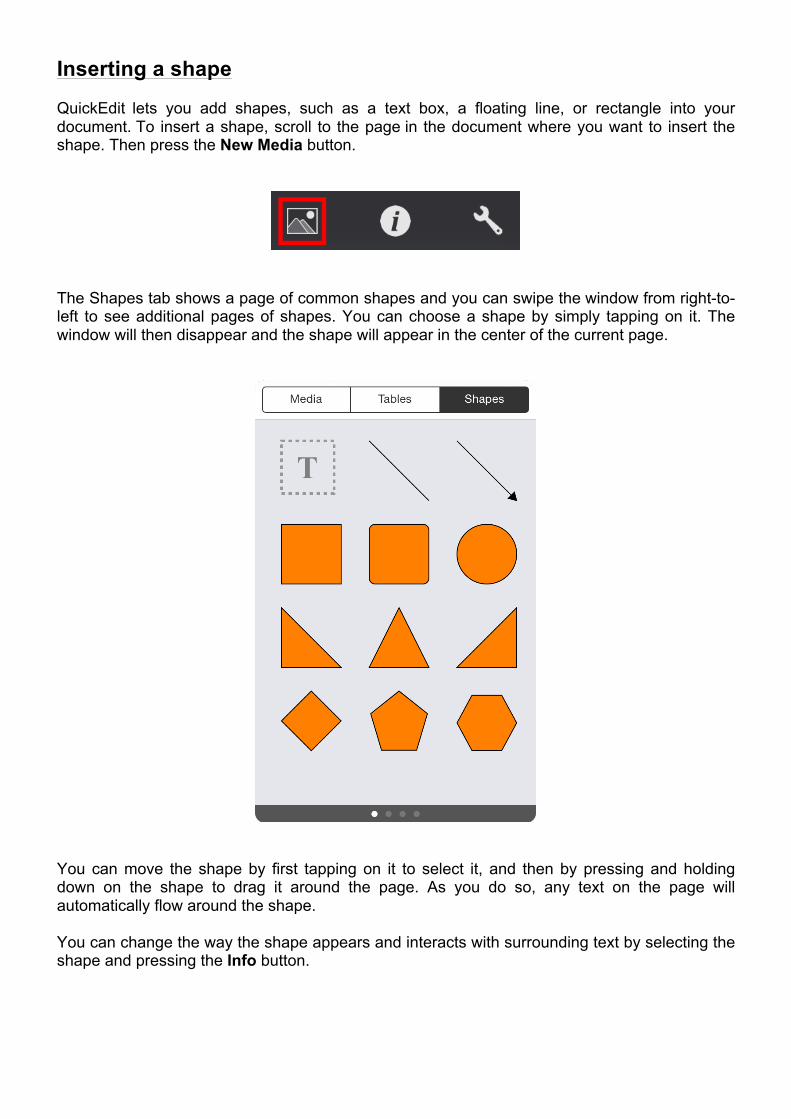
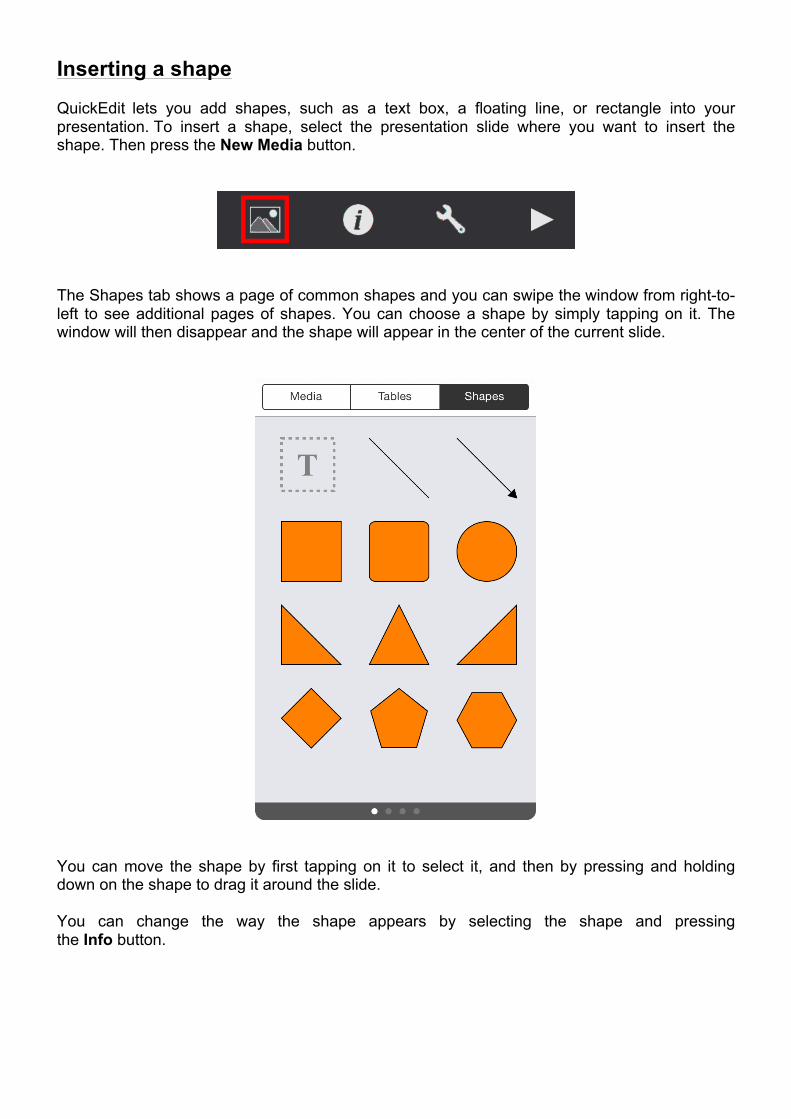
Inserting a shape QuickEdit lets you add shapes, such as a text box, a floating line, or rectangle into your document. To insert a shape, scroll to the page in the document where you want to insert the shape. Then press the New Media button.
The Shapes tab shows a page of common shapes and you can swipe the window from right-to-left to see additional pages of shapes. You can choose a shape by simply tapping on it. The window will then disappear and the shape will appear in the center of the current page.
You can move the shape by first tapping on it to select it, and then by pressing and holding down on the shape to drag it around the page. As you do so, any text on the page will automatically flow around the shape. You can change the way the shape appears and interacts with surrounding text by selecting the shape and pressing the Info button.
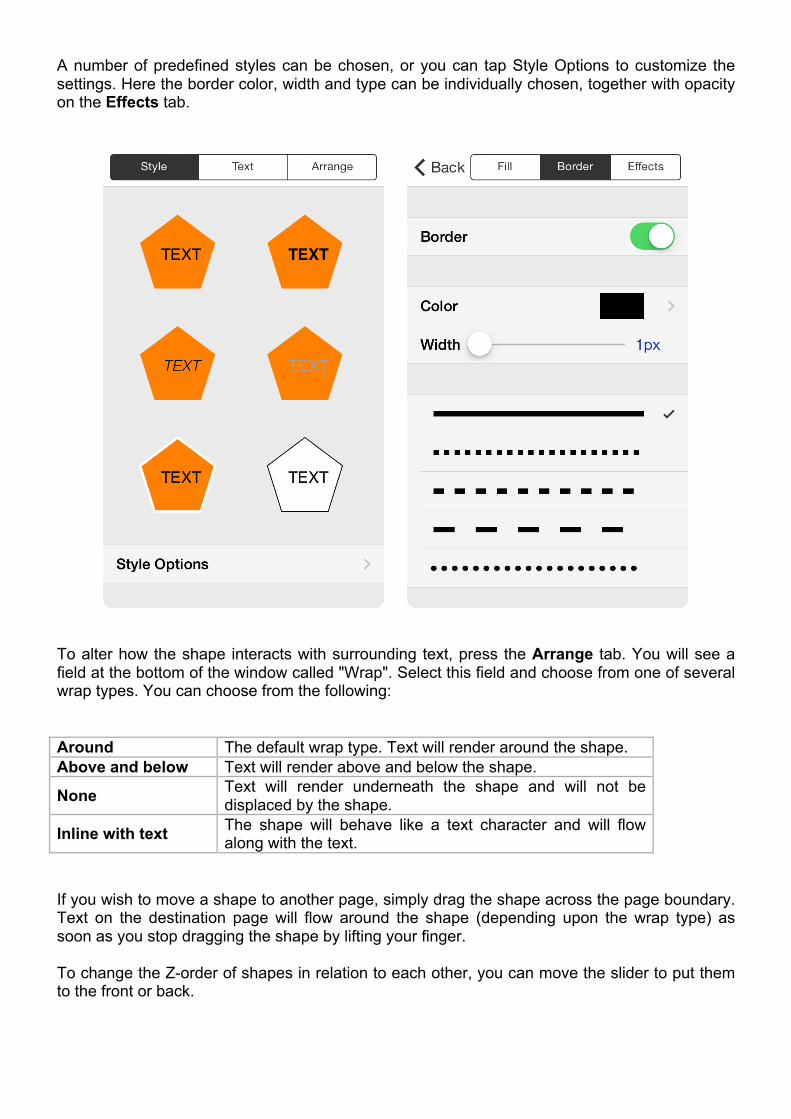
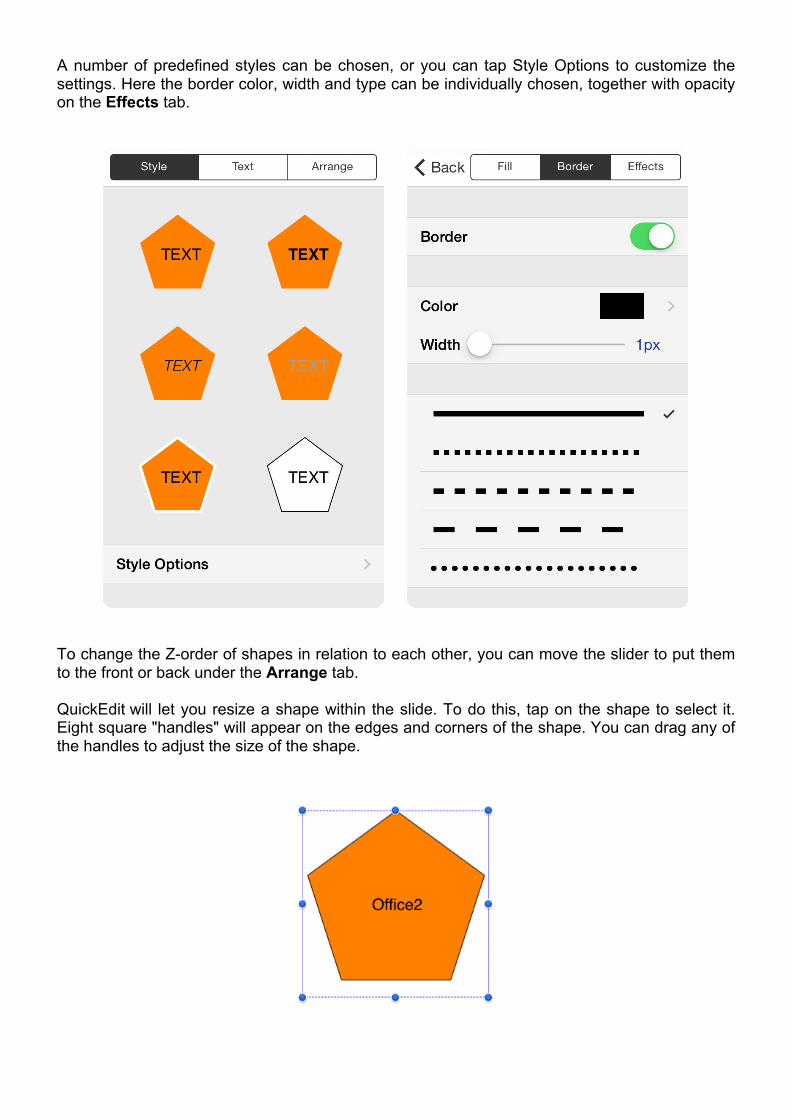
A number of predefined styles can be chosen, or you can tap Style Options to customize the settings. Here the border color, width and type can be individually chosen, together with opacity on the Effects tab.
To alter how the shape interacts with surrounding text, press the Arrange tab. You will see a field at the bottom of the window called "Wrap". Select this field and choose from one of several wrap types. You can choose from the following: Around The default wrap type. Text will render around the shape. Above and below Text will render above and below the shape.
None Text will render underneath the shape and will not be displaced by the shape.
Inline with text The shape will behave like a text character and will flow along with the text.
If you wish to move a shape to another page, simply drag the shape across the page boundary. Text on the destination page will flow around the shape (depending upon the wrap type) as soon as you stop dragging the shape by lifting your finger. To change the Z-order of shapes in relation to each other, you can move the slider to put them to the front or back.
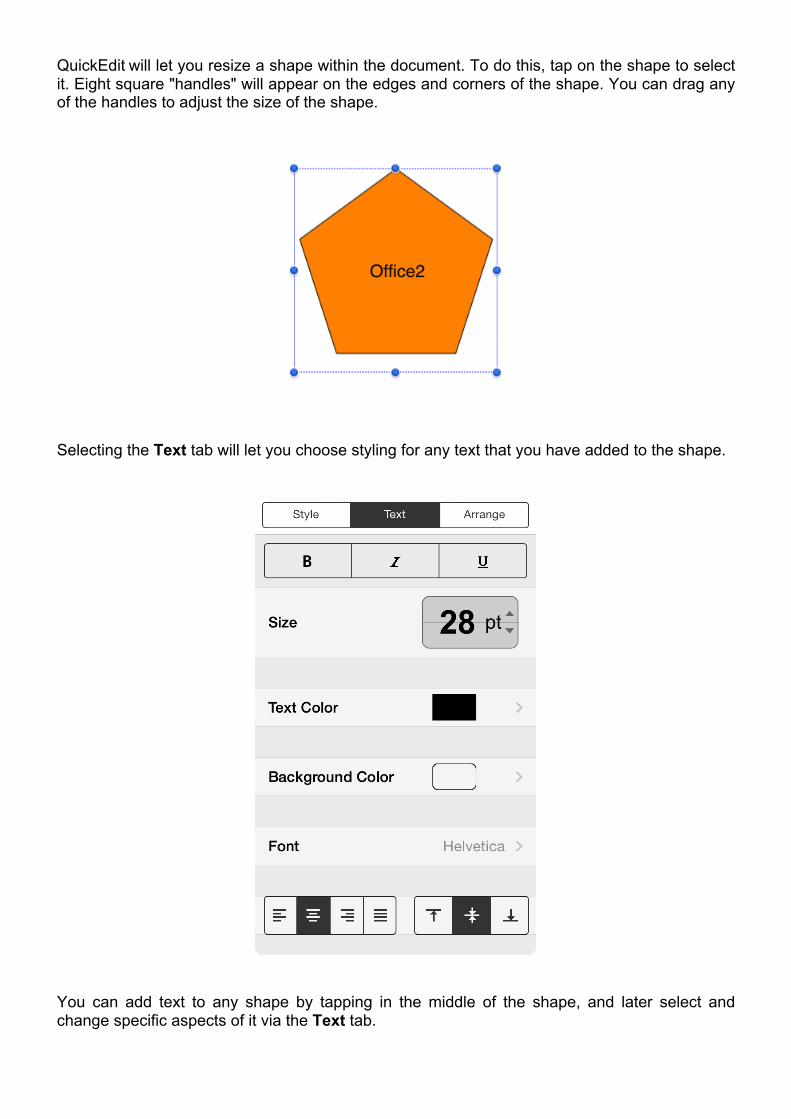
QuickEdit will let you resize a shape within the document. To do this, tap on the shape to select it. Eight square "handles" will appear on the edges and corners of the shape. You can drag any of the handles to adjust the size of the shape.
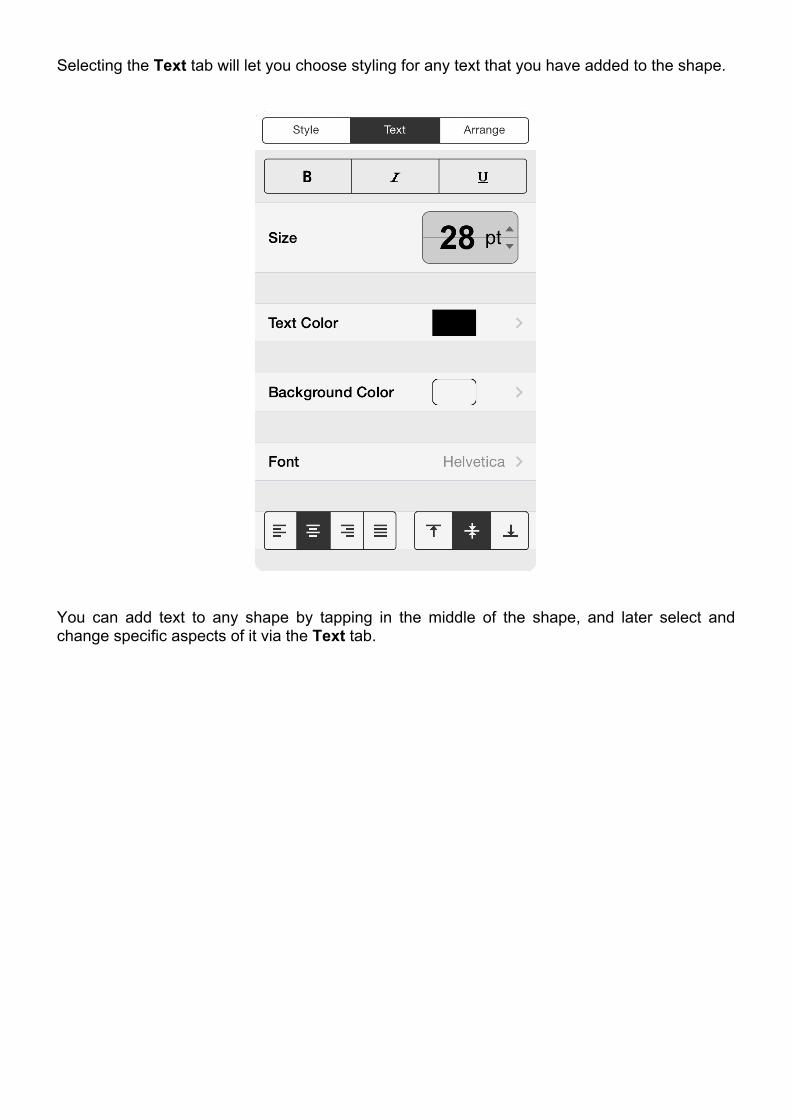
Selecting the Text tab will let you choose styling for any text that you have added to the shape.
You can add text to any shape by tapping in the middle of the shape, and later select and change specific aspects of it via the Text tab.
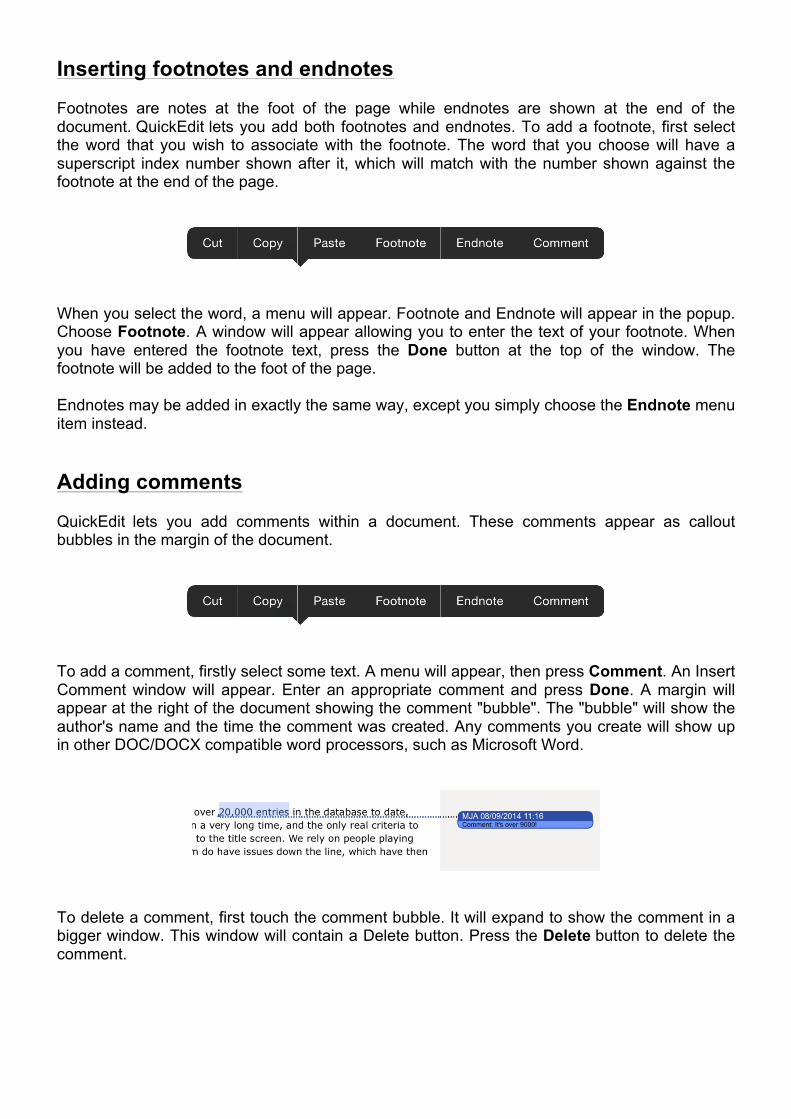
Inserting footnotes and endnotes Footnotes are notes at the foot of the page while endnotes are shown at the end of the document. QuickEdit lets you add both footnotes and endnotes. To add a footnote, first select the word that you wish to associate with the footnote. The word that you choose will have a superscript index number shown after it, which will match with the number shown against the footnote at the end of the page.
When you select the word, a menu will appear. Footnote and Endnote will appear in the popup. Choose Footnote. A window will appear allowing you to enter the text of your footnote. When you have entered the footnote text, press the Done button at the top of the window. The footnote will be added to the foot of the page. Endnotes may be added in exactly the same way, except you simply choose the Endnote menu item instead. Adding comments QuickEdit lets you add comments within a document. These comments appear as callout bubbles in the margin of the document.
To add a comment, firstly select some text. A menu will appear, then press Comment. An Insert Comment window will appear. Enter an appropriate comment and press Done. A margin will appear at the right of the document showing the comment "bubble". The "bubble" will show the author's name and the time the comment was created. Any comments you create will show up in other DOC/DOCX compatible word processors, such as Microsoft Word.
To delete a comment, first touch the comment bubble. It will expand to show the comment in a bigger window. This window will contain a Delete button. Press the Delete button to delete the comment.
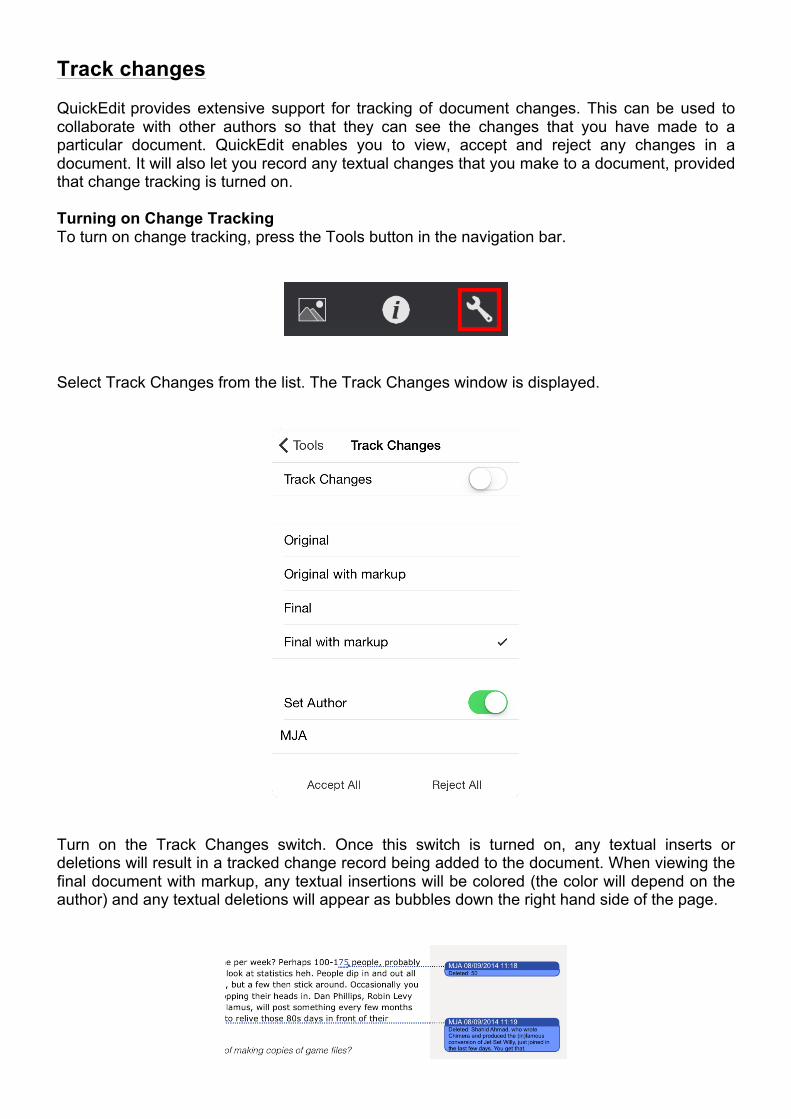
Track changes QuickEdit provides extensive support for tracking of document changes. This can be used to collaborate with other authors so that they can see the changes that you have made to a particular document. QuickEdit enables you to view, accept and reject any changes in a document. It will also let you record any textual changes that you make to a document, provided that change tracking is turned on. Turning on Change Tracking To turn on change tracking, press the Tools button in the navigation bar.
Select Track Changes from the list. The Track Changes window is displayed.
Turn on the Track Changes switch. Once this switch is turned on, any textual inserts or deletions will result in a tracked change record being added to the document. When viewing the final document with markup, any textual insertions will be colored (the color will depend on the author) and any textual deletions will appear as bubbles down the right hand side of the page.
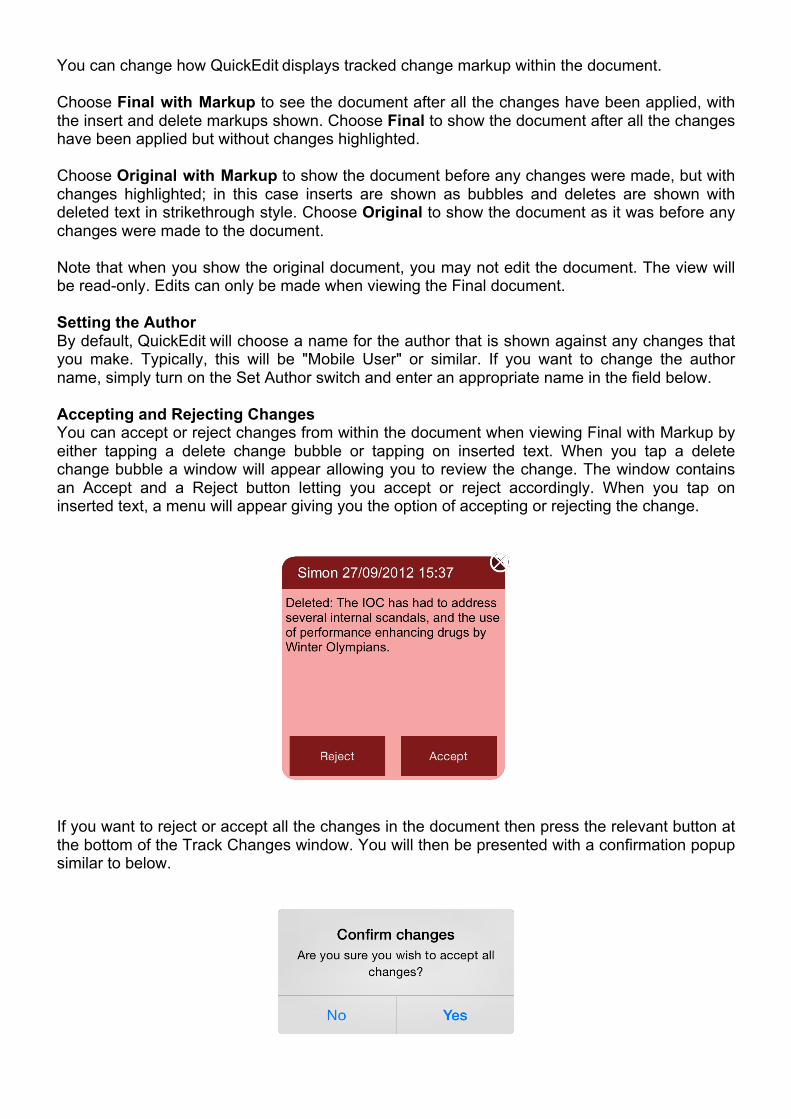
You can change how QuickEdit displays tracked change markup within the document. Choose Final with Markup to see the document after all the changes have been applied, with the insert and delete markups shown. Choose Final to show the document after all the changes have been applied but without changes highlighted. Choose Original with Markup to show the document before any changes were made, but with changes highlighted; in this case inserts are shown as bubbles and deletes are shown with deleted text in strikethrough style. Choose Original to show the document as it was before any changes were made to the document. Note that when you show the original document, you may not edit the document. The view will be read-only. Edits can only be made when viewing the Final document. Setting the Author By default, QuickEdit will choose a name for the author that is shown against any changes that you make. Typically, this will be "Mobile User" or similar. If you want to change the author name, simply turn on the Set Author switch and enter an appropriate name in the field below. Accepting and Rejecting Changes You can accept or reject changes from within the document when viewing Final with Markup by either tapping a delete change bubble or tapping on inserted text. When you tap a delete change bubble a window will appear allowing you to review the change. The window contains an Accept and a Reject button letting you accept or reject accordingly. When you tap on inserted text, a menu will appear giving you the option of accepting or rejecting the change.
If you want to reject or accept all the changes in the document then press the relevant button at the bottom of the Track Changes window. You will then be presented with a confirmation popup similar to below.
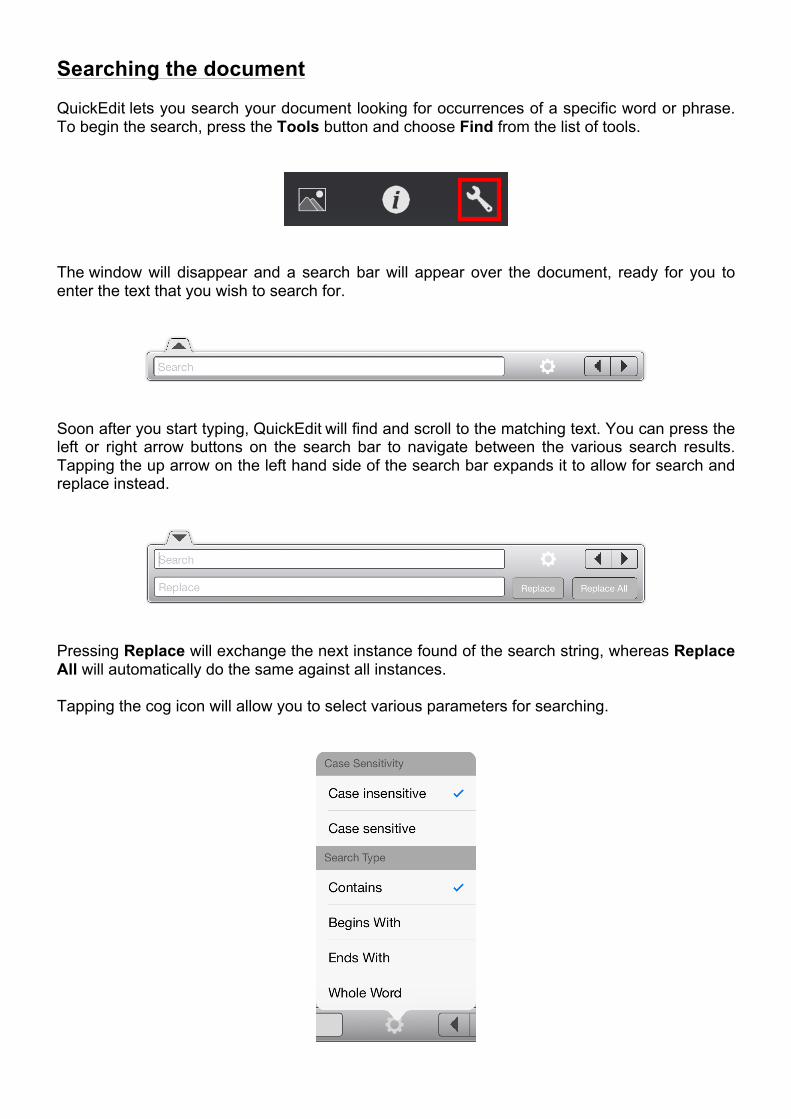
Searching the document QuickEdit lets you search your document looking for occurrences of a specific word or phrase. To begin the search, press the Tools button and choose Find from the list of tools.
The window will disappear and a search bar will appear over the document, ready for you to enter the text that you wish to search for.
Soon after you start typing, QuickEdit will find and scroll to the matching text. You can press the left or right arrow buttons on the search bar to navigate between the various search results. Tapping the up arrow on the left hand side of the search bar expands it to allow for search and replace instead.
Pressing Replace will exchange the next instance found of the search string, whereas Replace All will automatically do the same against all instances. Tapping the cog icon will allow you to select various parameters for searching.
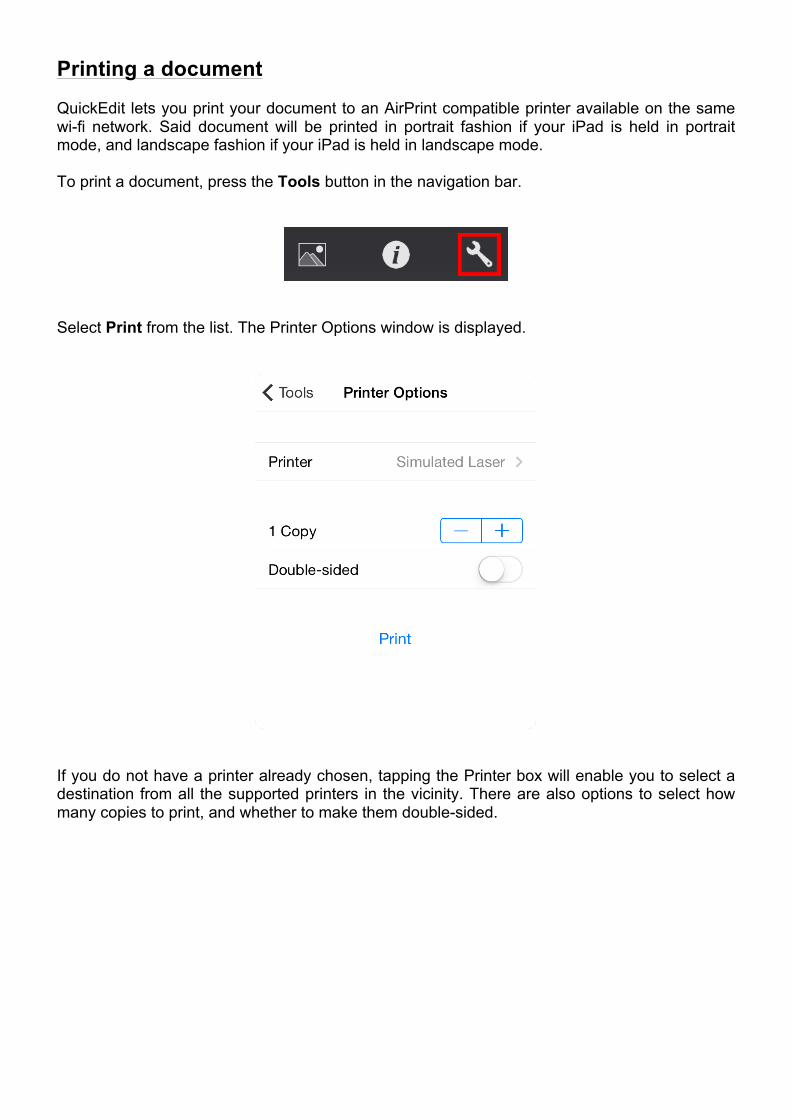
Printing a document QuickEdit lets you print your document to an AirPrint compatible printer available on the same wi-fi network. Said document will be printed in portrait fashion if your iPad is held in portrait mode, and landscape fashion if your iPad is held in landscape mode. To print a document, press the Tools button in the navigation bar.
Select Print from the list. The Printer Options window is displayed.
If you do not have a printer already chosen, tapping the Printer box will enable you to select a destination from all the supported printers in the vicinity. There are also options to select how many copies to print, and whether to make them double-sided.
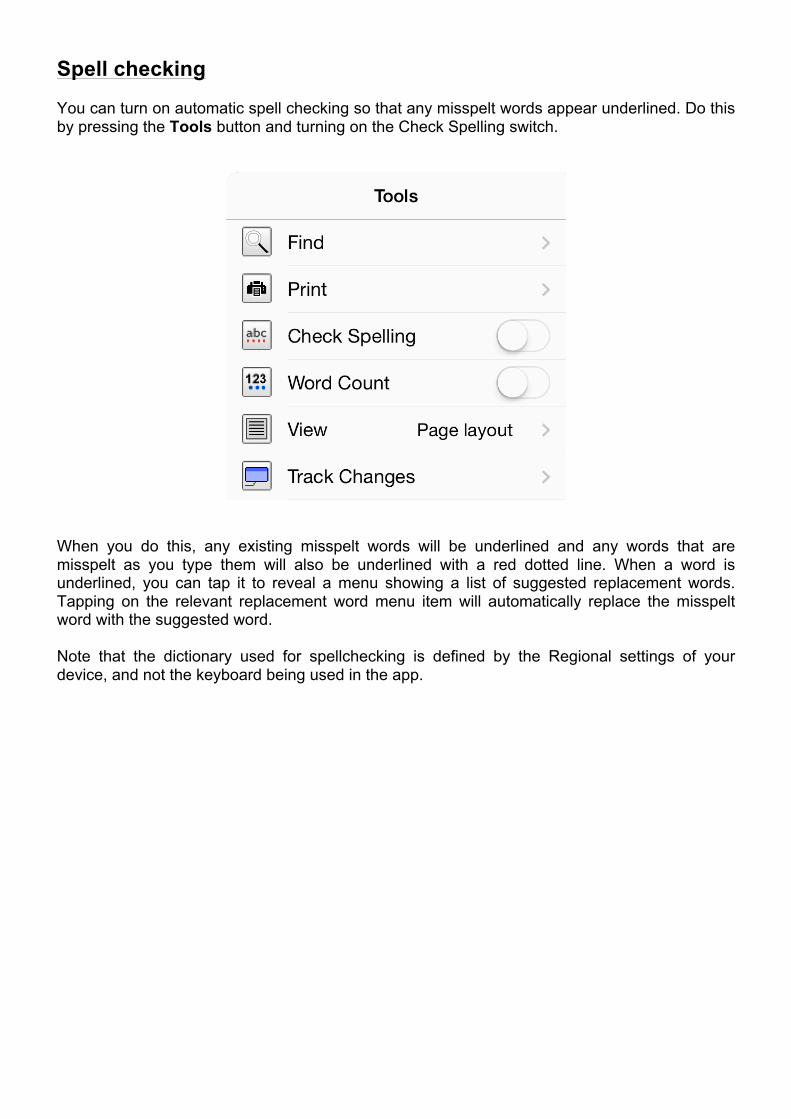
Spell checking You can turn on automatic spell checking so that any misspelt words appear underlined. Do this by pressing the Tools button and turning on the Check Spelling switch.
When you do this, any existing misspelt words will be underlined and any words that are misspelt as you type them will also be underlined with a red dotted line. When a word is underlined, you can tap it to reveal a menu showing a list of suggested replacement words. Tapping on the relevant replacement word menu item will automatically replace the misspelt word with the suggested word. Note that the dictionary used for spellchecking is defined by the Regional settings of your device, and not the keyboard being used in the app.
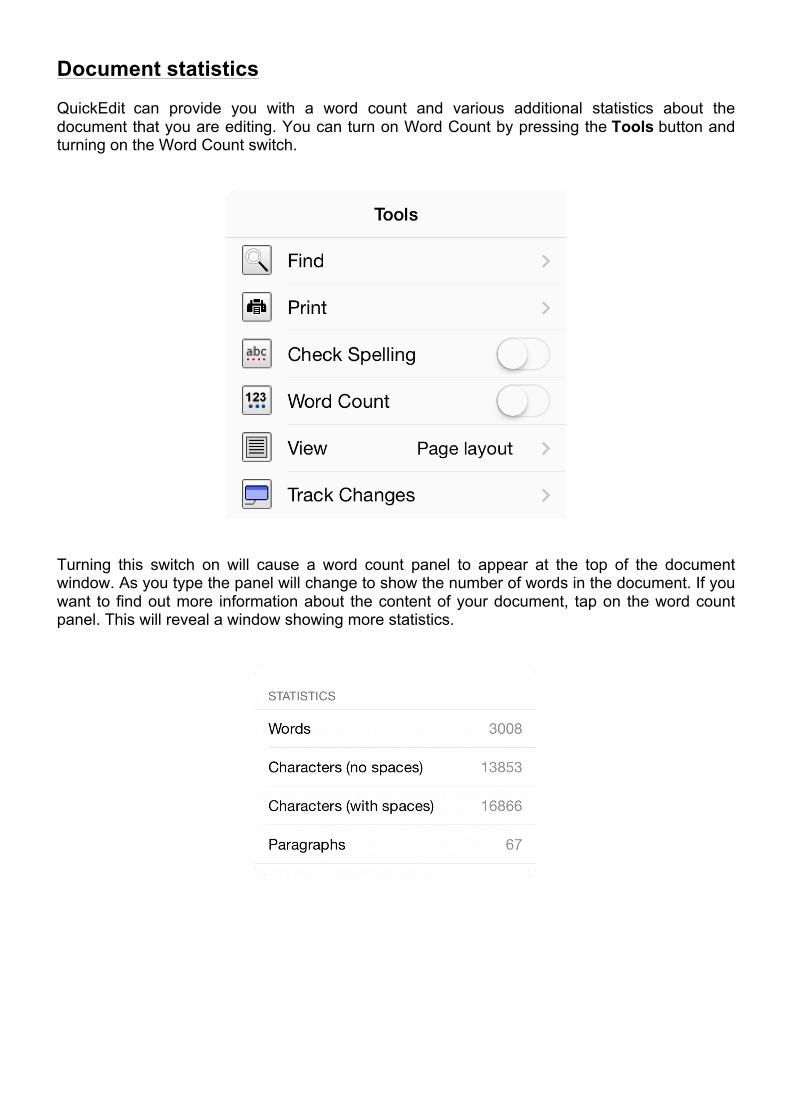
Document statistics QuickEdit can provide you with a word count and various additional statistics about the document that you are editing. You can turn on Word Count by pressing the Tools button and turning on the Word Count switch.
Turning this switch on will cause a word count panel to appear at the top of the document window. As you type the panel will change to show the number of words in the document. If you want to find out more information about the content of your document, tap on the word count panel. This will reveal a window showing more statistics.
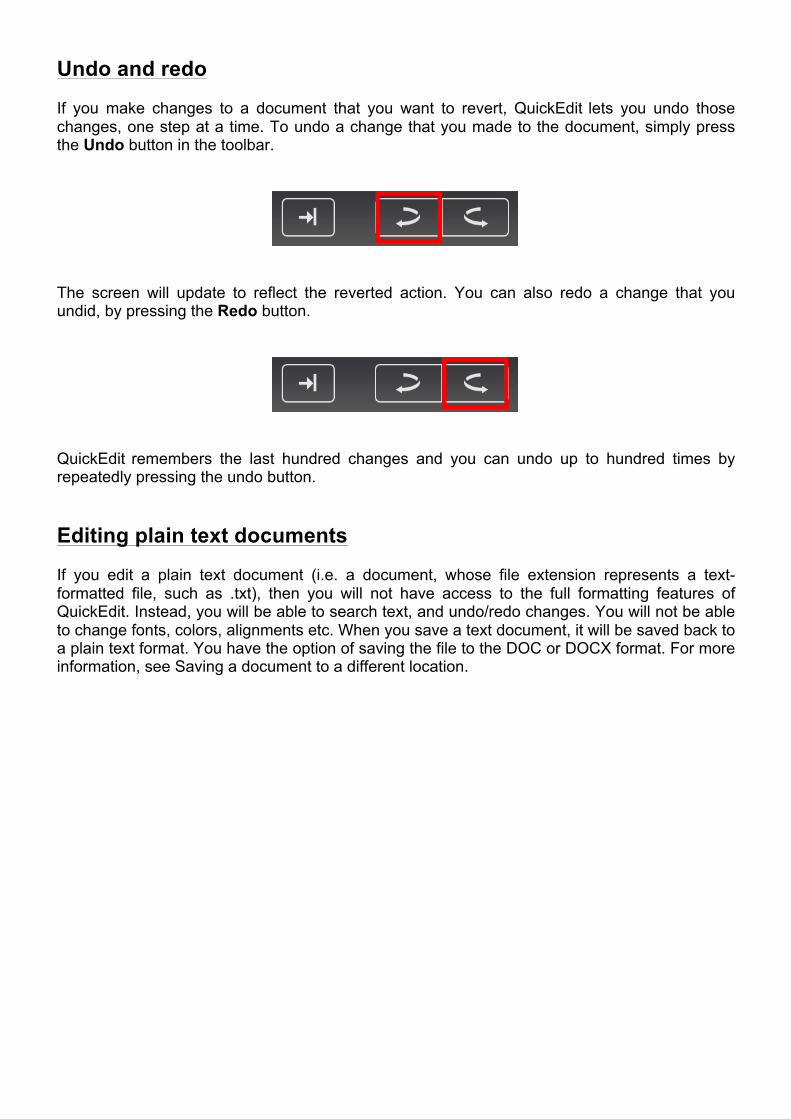
Undo and redo If you make changes to a document that you want to revert, QuickEdit lets you undo those changes, one step at a time. To undo a change that you made to the document, simply press the Undo button in the toolbar.
The screen will update to reflect the reverted action. You can also redo a change that you undid, by pressing the Redo button.
QuickEdit remembers the last hundred changes and you can undo up to hundred times by repeatedly pressing the undo button. Editing plain text documents If you edit a plain text document (i.e. a document, whose file extension represents a text-formatted file, such as .txt), then you will not have access to the full formatting features of QuickEdit. Instead, you will be able to search text, and undo/redo changes. You will not be able to change fonts, colors, alignments etc. When you save a text document, it will be saved back to a plain text format. You have the option of saving the file to the DOC or DOCX format. For more information, see Saving a document to a different location.
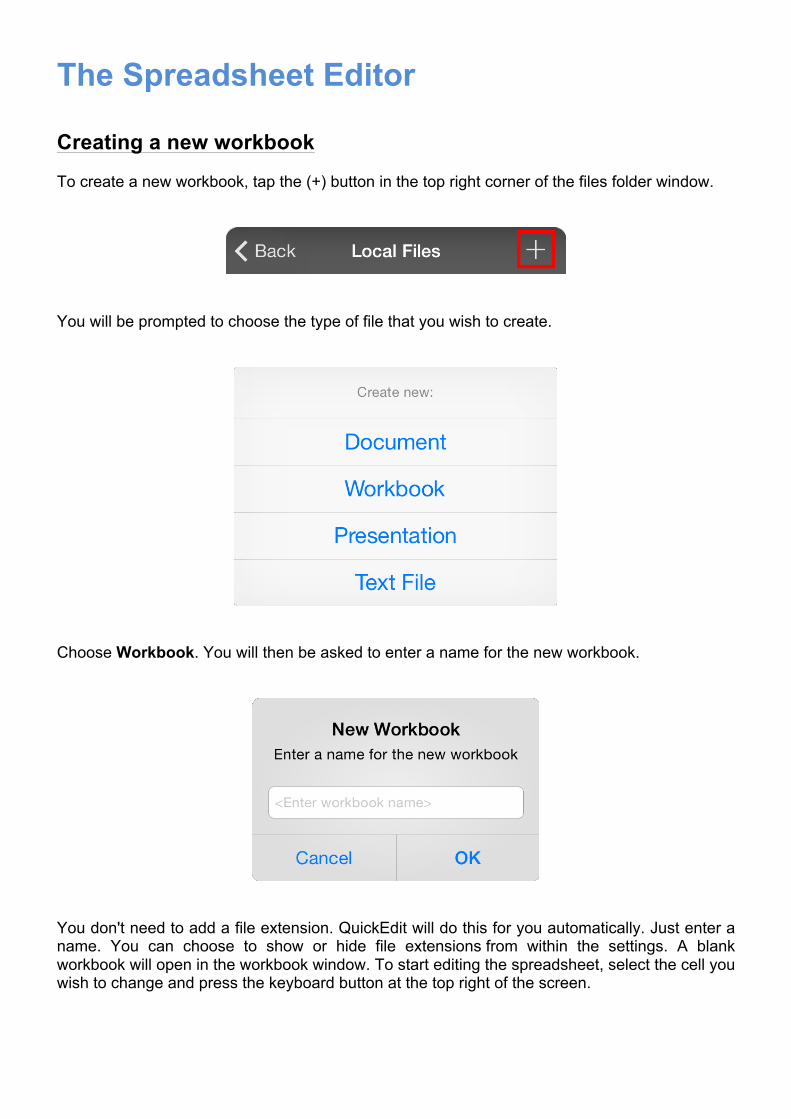
The Spreadsheet Editor Creating a new workbook To create a new workbook, tap the (+) button in the top right corner of the files folder window.
You will be prompted to choose the type of file that you wish to create.
Choose Workbook. You will then be asked to enter a name for the new workbook.
You don't need to add a file extension. QuickEdit will do this for you automatically. Just enter a name. You can choose to show or hide file extensions from within the settings. A blank workbook will open in the workbook window. To start editing the spreadsheet, select the cell you wish to change and press the keyboard button at the top right of the screen.
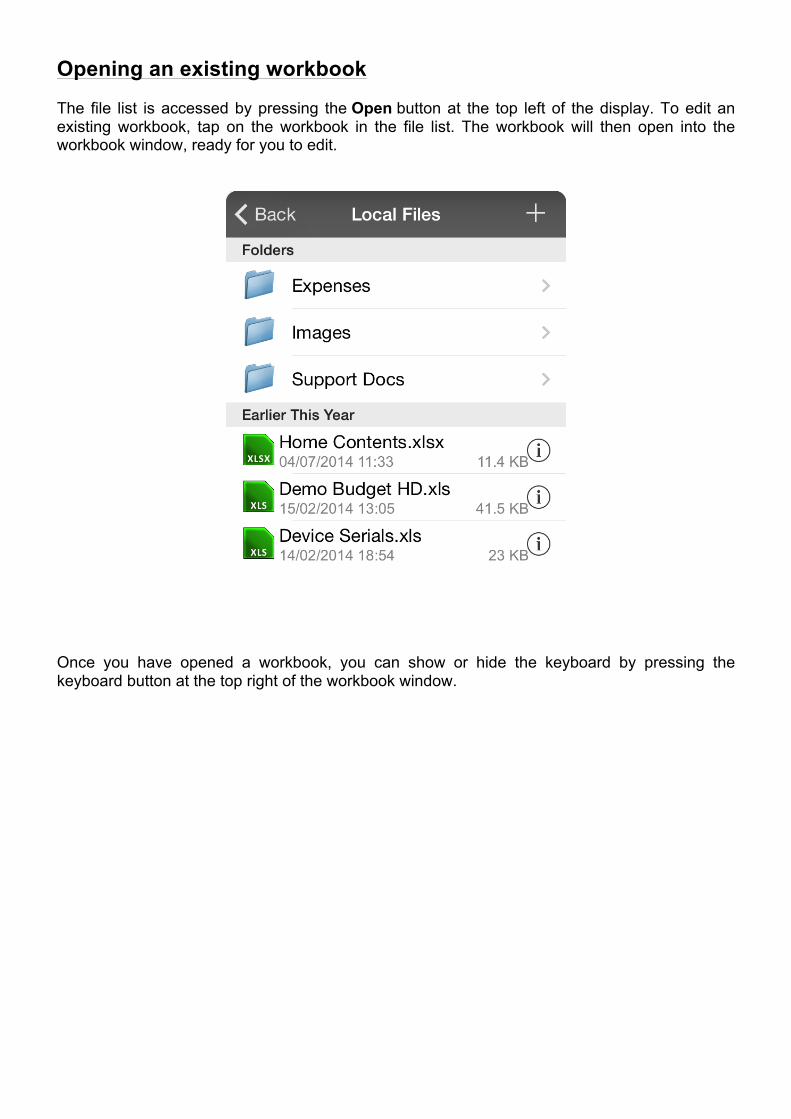
Opening an existing workbook The file list is accessed by pressing the Open button at the top left of the display. To edit an existing workbook, tap on the workbook in the file list. The workbook will then open into the workbook window, ready for you to edit.
Once you have opened a workbook, you can show or hide the keyboard by pressing the keyboard button at the top right of the workbook window.
Opening a workbook email attachment If you have received an email containing a workbook, you may open the file in QuickEdit in the following way:
• From the Mail app, open the relevant email message. • Tap on the attachment. A preview window will appear, showing the workbook file • Press the Open In... button at the far right of the navigation bar. • Select QuickEdit from the list of applications.
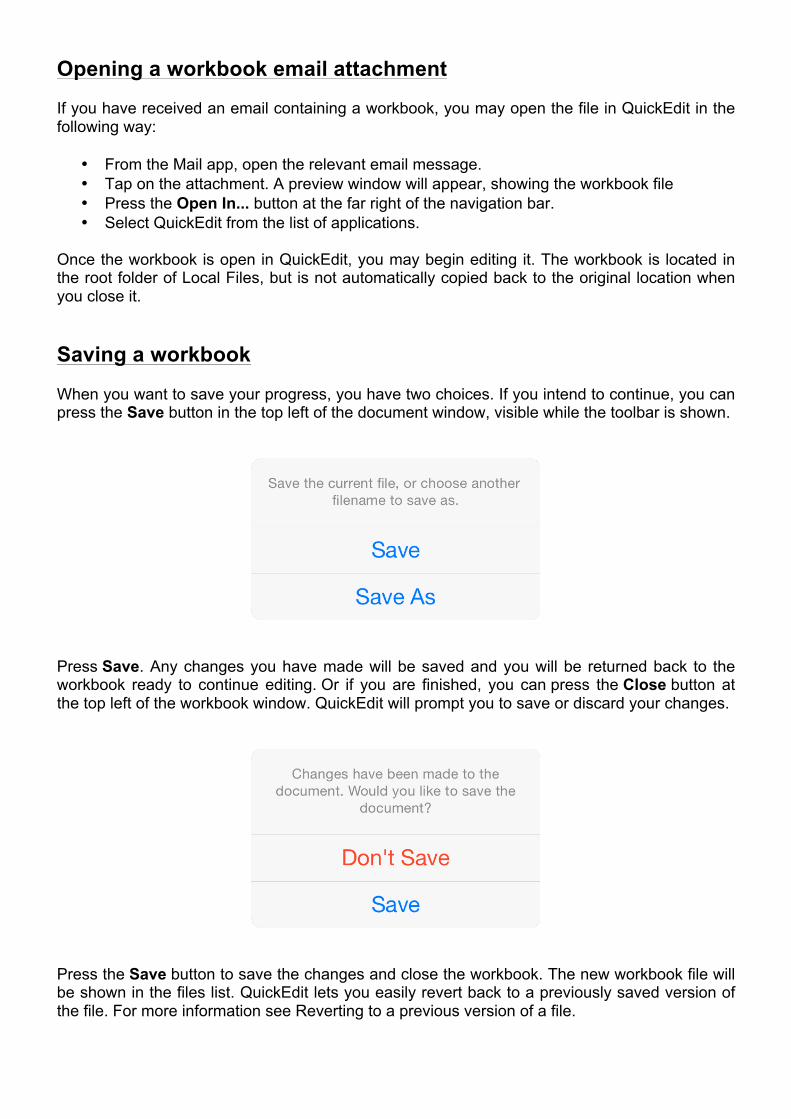
Once the workbook is open in QuickEdit, you may begin editing it. The workbook is located in the root folder of Local Files, but is not automatically copied back to the original location when you close it. Saving a workbook When you want to save your progress, you have two choices. If you intend to continue, you can press the Save button in the top left of the document window, visible while the toolbar is shown.
Press Save. Any changes you have made will be saved and you will be returned back to the workbook ready to continue editing. Or if you are finished, you can press the Close button at the top left of the workbook window. QuickEdit will prompt you to save or discard your changes.
Press the Save button to save the changes and close the workbook. The new workbook file will be shown in the files list. QuickEdit lets you easily revert back to a previously saved version of the file. For more information see Reverting to a previous version of a file.
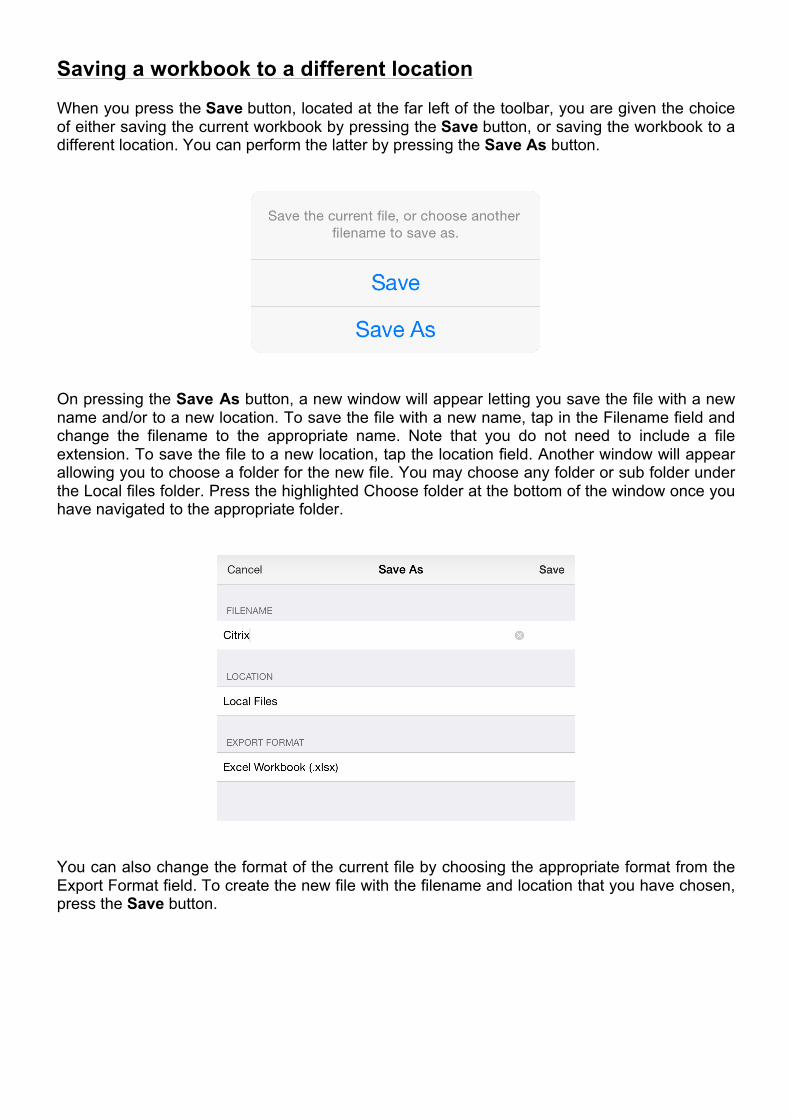
Saving a workbook to a different location When you press the Save button, located at the far left of the toolbar, you are given the choice of either saving the current workbook by pressing the Save button, or saving the workbook to a different location. You can perform the latter by pressing the Save As button.
On pressing the Save As button, a new window will appear letting you save the file with a new name and/or to a new location. To save the file with a new name, tap in the Filename field and change the filename to the appropriate name. Note that you do not need to include a file extension. To save the file to a new location, tap the location field. Another window will appear allowing you to choose a folder for the new file. You may choose any folder or sub folder under the Local files folder. Press the highlighted Choose folder at the bottom of the window once you have navigated to the appropriate folder.
You can also change the format of the current file by choosing the appropriate format from the Export Format field. To create the new file with the filename and location that you have chosen, press the Save button.
Saving a workbook in PDF format QuickEdit lets you save any office document in PDF format. To do this, open the Save As window and choose PDF Format from the Export Format field. Then press the Save button. The new PDF file will be created in the Location that you specified in the Save As window with the filename that you specified. The PDF file will then be automatically opened in QuickEdit, letting you view the newly created PDF file. Compatibility with other programs QuickEdit supports importing XLS (BIFF5 through BIFF8), XLSX, XML and CSV formats. When saving a file XLS and XLSX file formats will be maintained, although XML and CSV files must be saved in XLS or XLSX format. As a result, QuickEdit is compatible with XLS and XLSX files created using the following programs: Excel 97 onwards for Windows, Excel 10 onwards for MAC, NeoOffice v2 onwards, Numbers 1.0 onwards, OpenOffice Calc 1.0 onwards. Panning and zooming You can pan (or scroll) around the worksheet by holding down a finger and dragging the screen, in just the same way that you scroll through your email, except the panning works in two directions. To zoom into an area, pinch your thumb and forefinger together on the area of the screen that you wish to zoom into, and then expand your pinch to change the zoom level. Do exactly the reverse to zoom out. This is exactly the same process that you use for zooming in and out using Safari. Using an external keyboard If you connect an external keyboard to your device (using either the standard Apple keyboard or a compatible 3rd party Bluetooth keyboard), QuickEdit supports navigation around the spreadsheet using the cursor keys on the keyboard. Additionally, you can select a range of cells by holding down the Shift key while using the cursor keys to define the selection range. To enter data into a cell, first navigate to the relevant cell using the cursor keys and then press the Enter key, which gives focus to the formula field. This allows you to enter the relevant data for the cell. To commit the data to the cell, press the Enter key once again. The data will be committed, the cell below will be selected, and the formula field will maintain focus, ready for you to enter data for the newly selected cell. If you wish to give focus back to the grid so that you can once again use the cursor keys to navigate the grid, press the Tab key. Whenever you attach an external keyboard the on-screen keyboard will not be shown, giving you more room on the screen to edit the spreadsheet.
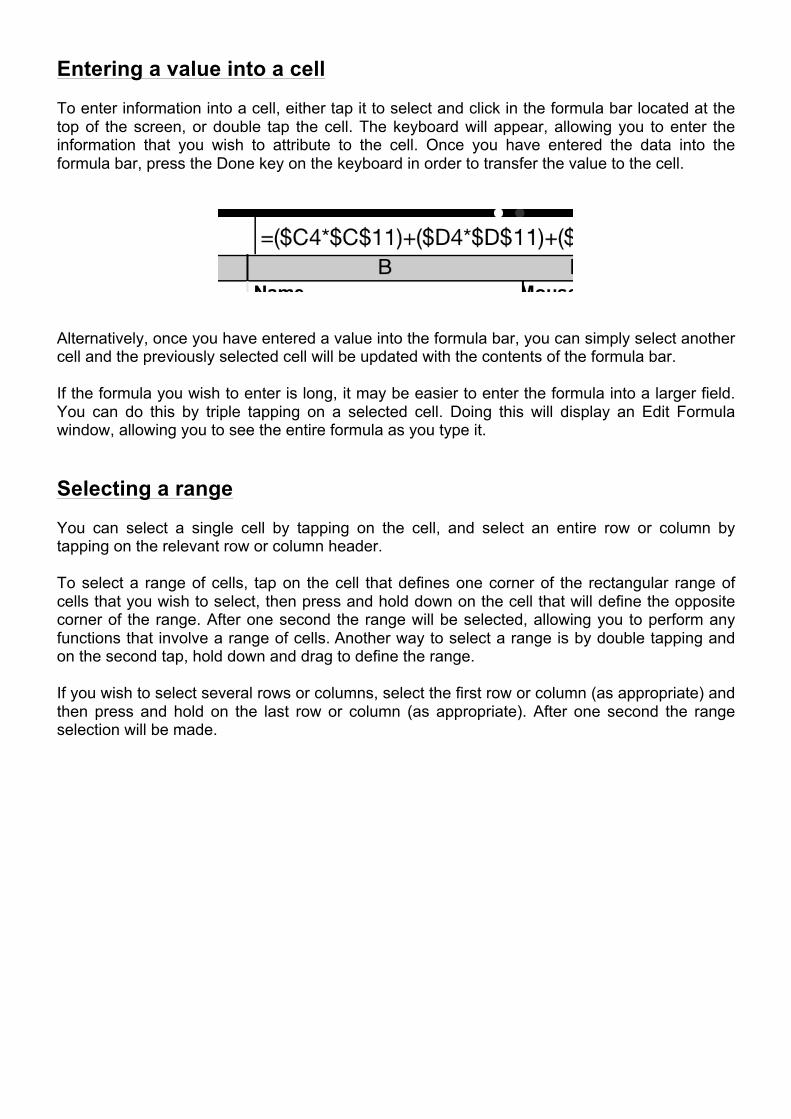
Entering a value into a cell To enter information into a cell, either tap it to select and click in the formula bar located at the top of the screen, or double tap the cell. The keyboard will appear, allowing you to enter the information that you wish to attribute to the cell. Once you have entered the data into the formula bar, press the Done key on the keyboard in order to transfer the value to the cell.
Alternatively, once you have entered a value into the formula bar, you can simply select another cell and the previously selected cell will be updated with the contents of the formula bar. If the formula you wish to enter is long, it may be easier to enter the formula into a larger field. You can do this by triple tapping on a selected cell. Doing this will display an Edit Formula window, allowing you to see the entire formula as you type it. Selecting a range You can select a single cell by tapping on the cell, and select an entire row or column by tapping on the relevant row or column header. To select a range of cells, tap on the cell that defines one corner of the rectangular range of cells that you wish to select, then press and hold down on the cell that will define the opposite corner of the range. After one second the range will be selected, allowing you to perform any functions that involve a range of cells. Another way to select a range is by double tapping and on the second tap, hold down and drag to define the range. If you wish to select several rows or columns, select the first row or column (as appropriate) and then press and hold on the last row or column (as appropriate). After one second the range selection will be made.
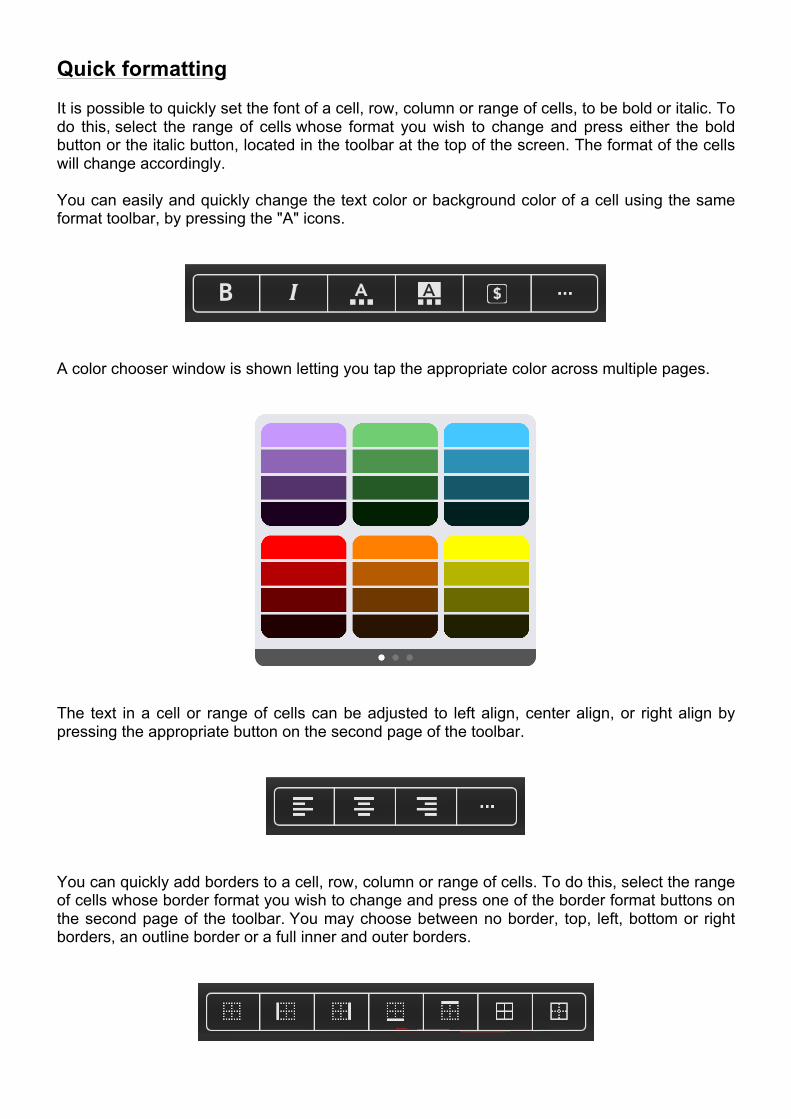
Quick formatting It is possible to quickly set the font of a cell, row, column or range of cells, to be bold or italic. To do this, select the range of cells whose format you wish to change and press either the bold button or the italic button, located in the toolbar at the top of the screen. The format of the cells will change accordingly. You can easily and quickly change the text color or background color of a cell using the same format toolbar, by pressing the "A" icons.
A color chooser window is shown letting you tap the appropriate color across multiple pages.
The text in a cell or range of cells can be adjusted to left align, center align, or right align by pressing the appropriate button on the second page of the toolbar.
You can quickly add borders to a cell, row, column or range of cells. To do this, select the range of cells whose border format you wish to change and press one of the border format buttons on the second page of the toolbar. You may choose between no border, top, left, bottom or right borders, an outline border or a full inner and outer borders.
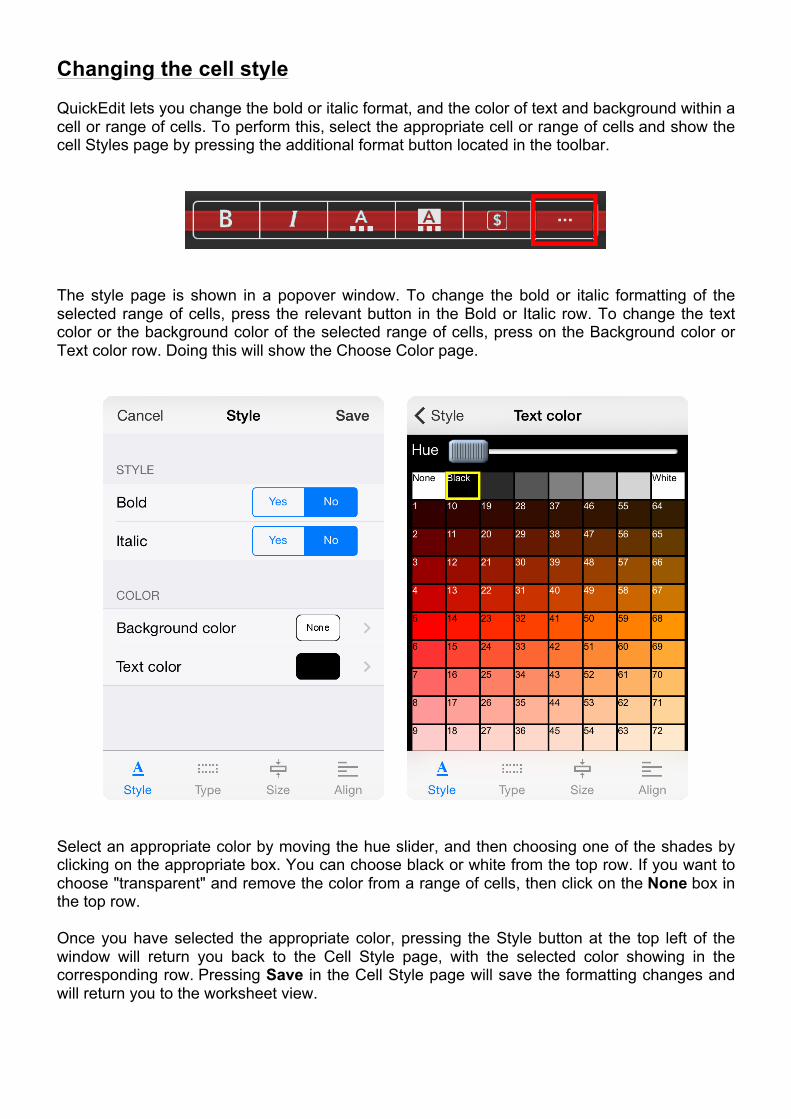
Changing the cell style QuickEdit lets you change the bold or italic format, and the color of text and background within a cell or range of cells. To perform this, select the appropriate cell or range of cells and show the cell Styles page by pressing the additional format button located in the toolbar.
The style page is shown in a popover window. To change the bold or italic formatting of the selected range of cells, press the relevant button in the Bold or Italic row. To change the text color or the background color of the selected range of cells, press on the Background color or Text color row. Doing this will show the Choose Color page.
Select an appropriate color by moving the hue slider, and then choosing one of the shades by clicking on the appropriate box. You can choose black or white from the top row. If you want to choose "transparent" and remove the color from a range of cells, then click on the None box in the top row. Once you have selected the appropriate color, pressing the Style button at the top left of the window will return you back to the Cell Style page, with the selected color showing in the corresponding row. Pressing Save in the Cell Style page will save the formatting changes and will return you to the worksheet view.
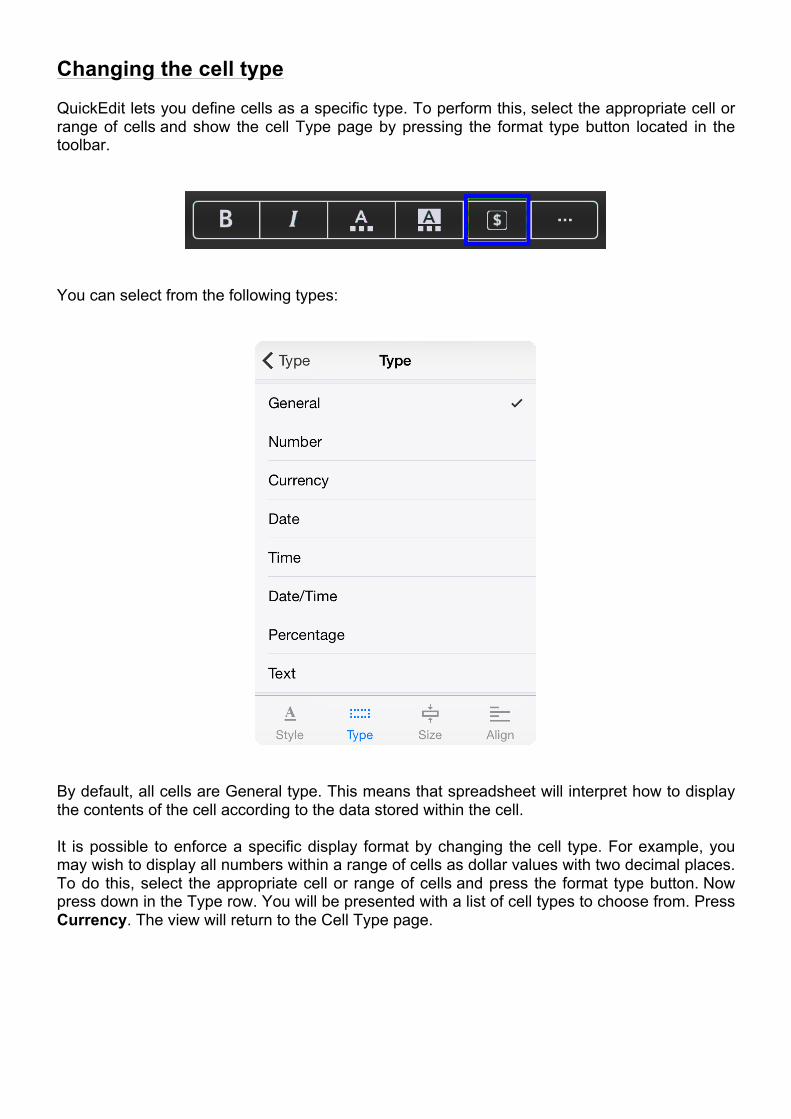
Changing the cell type QuickEdit lets you define cells as a specific type. To perform this, select the appropriate cell or range of cells and show the cell Type page by pressing the format type button located in the toolbar.
You can select from the following types:
By default, all cells are General type. This means that spreadsheet will interpret how to display the contents of the cell according to the data stored within the cell. It is possible to enforce a specific display format by changing the cell type. For example, you may wish to display all numbers within a range of cells as dollar values with two decimal places. To do this, select the appropriate cell or range of cells and press the format type button. Now press down in the Type row. You will be presented with a list of cell types to choose from. Press Currency. The view will return to the Cell Type page.
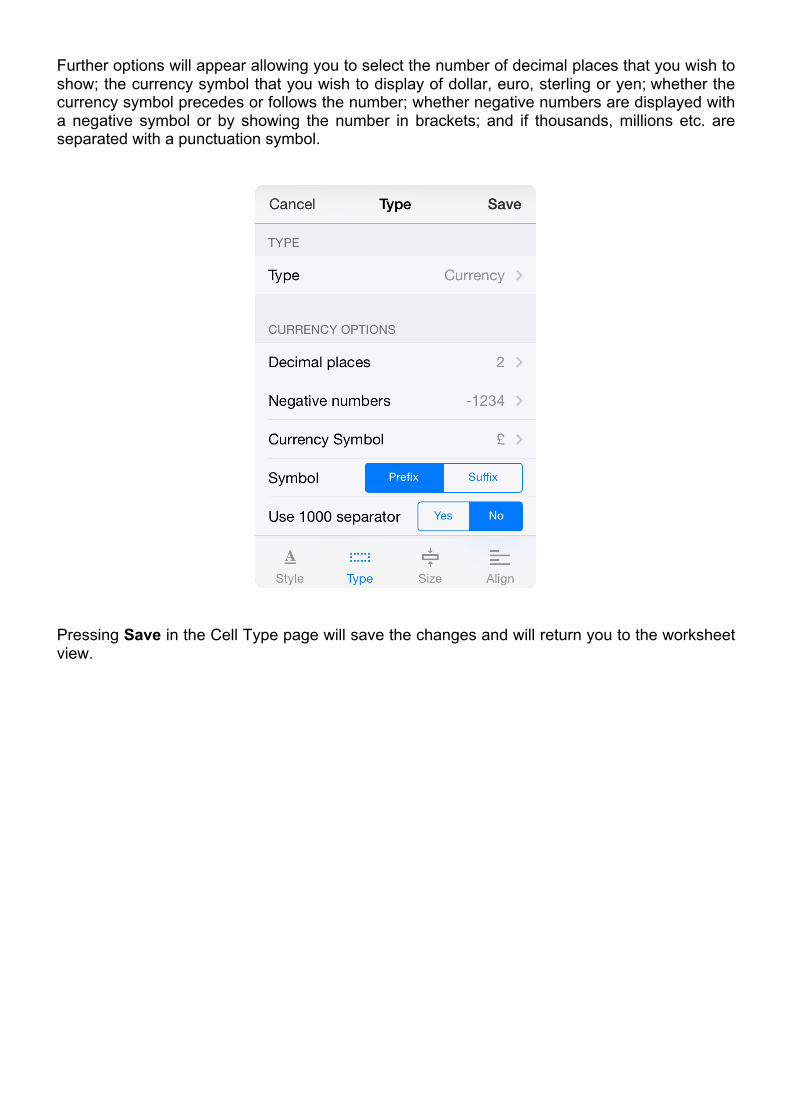
Further options will appear allowing you to select the number of decimal places that you wish to show; the currency symbol that you wish to display of dollar, euro, sterling or yen; whether the currency symbol precedes or follows the number; whether negative numbers are displayed with a negative symbol or by showing the number in brackets; and if thousands, millions etc. are separated with a punctuation symbol.
Pressing Save in the Cell Type page will save the changes and will return you to the worksheet view.
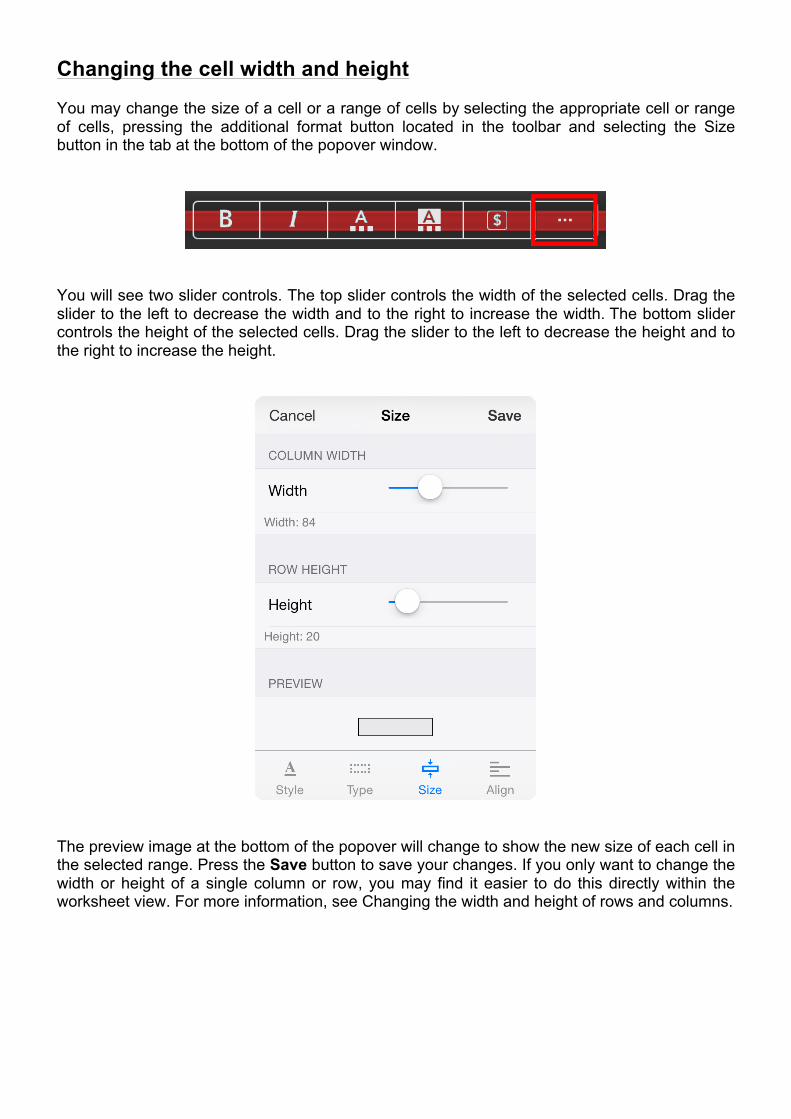
Changing the cell width and height You may change the size of a cell or a range of cells by selecting the appropriate cell or range of cells, pressing the additional format button located in the toolbar and selecting the Size button in the tab at the bottom of the popover window.
You will see two slider controls. The top slider controls the width of the selected cells. Drag the slider to the left to decrease the width and to the right to increase the width. The bottom slider controls the height of the selected cells. Drag the slider to the left to decrease the height and to the right to increase the height.
The preview image at the bottom of the popover will change to show the new size of each cell in the selected range. Press the Save button to save your changes. If you only want to change the width or height of a single column or row, you may find it easier to do this directly within the worksheet view. For more information, see Changing the width and height of rows and columns.
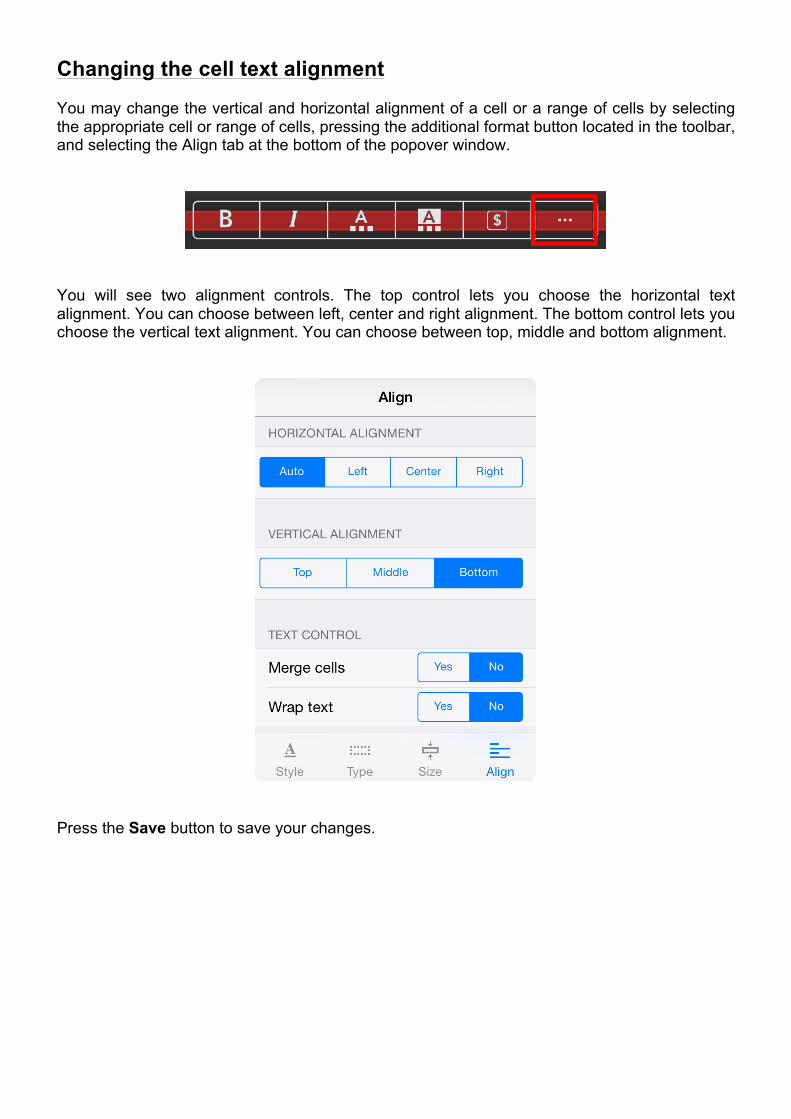
Changing the cell text alignment You may change the vertical and horizontal alignment of a cell or a range of cells by selecting the appropriate cell or range of cells, pressing the additional format button located in the toolbar, and selecting the Align tab at the bottom of the popover window.
You will see two alignment controls. The top control lets you choose the horizontal text alignment. You can choose between left, center and right alignment. The bottom control lets you choose the vertical text alignment. You can choose between top, middle and bottom alignment.
Press the Save button to save your changes.

Creating merged cells QuickEdit lets you select a range of cells and merge them into a single cell. When you do this, the contents of all but the top left cell will be cleared. The value of the top left cell will be used as the merged cell's value. To merge a range of cells, select the appropriate range, press the additional format button located in the toolbar, and select the Align tab at the bottom of the popover window.
Turn on the Merge cells switch and press the Save button. To unmerge a group of merged cells, select it, open the Align settings, turn off the Merge cells switch, and press the Save button.
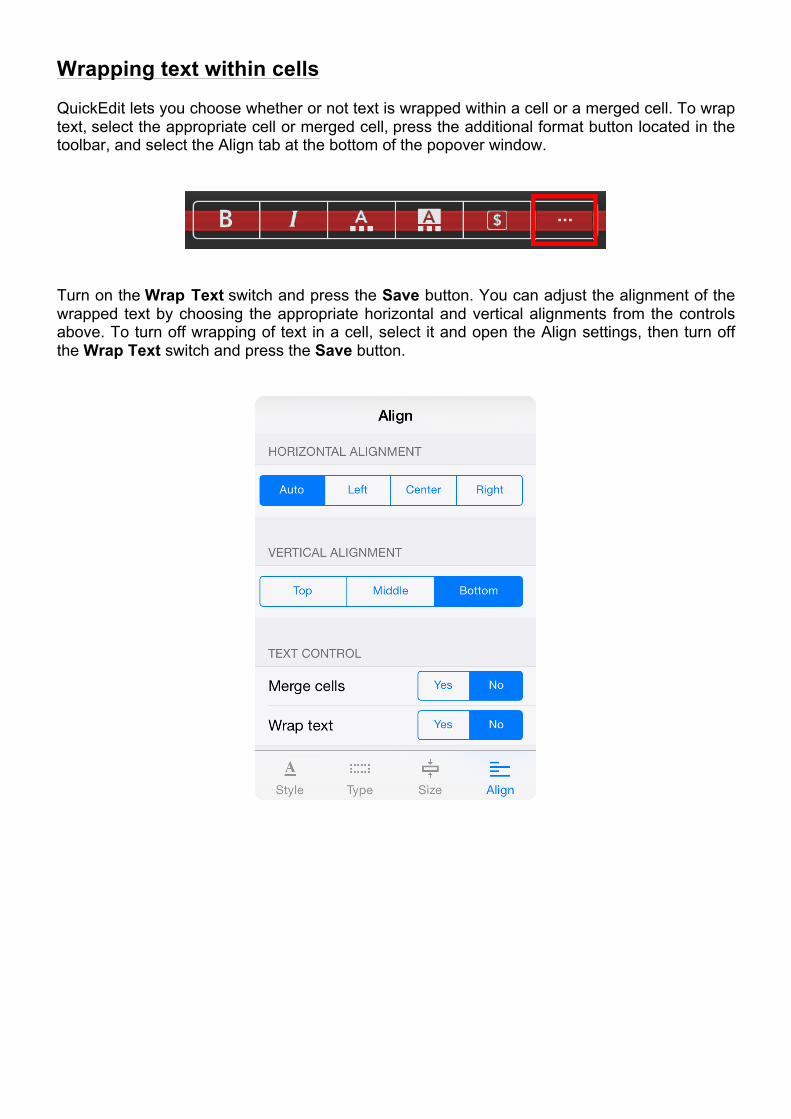
Wrapping text within cells QuickEdit lets you choose whether or not text is wrapped within a cell or a merged cell. To wrap text, select the appropriate cell or merged cell, press the additional format button located in the toolbar, and select the Align tab at the bottom of the popover window.
Turn on the Wrap Text switch and press the Save button. You can adjust the alignment of the wrapped text by choosing the appropriate horizontal and vertical alignments from the controls above. To turn off wrapping of text in a cell, select it and open the Align settings, then turn off the Wrap Text switch and press the Save button.
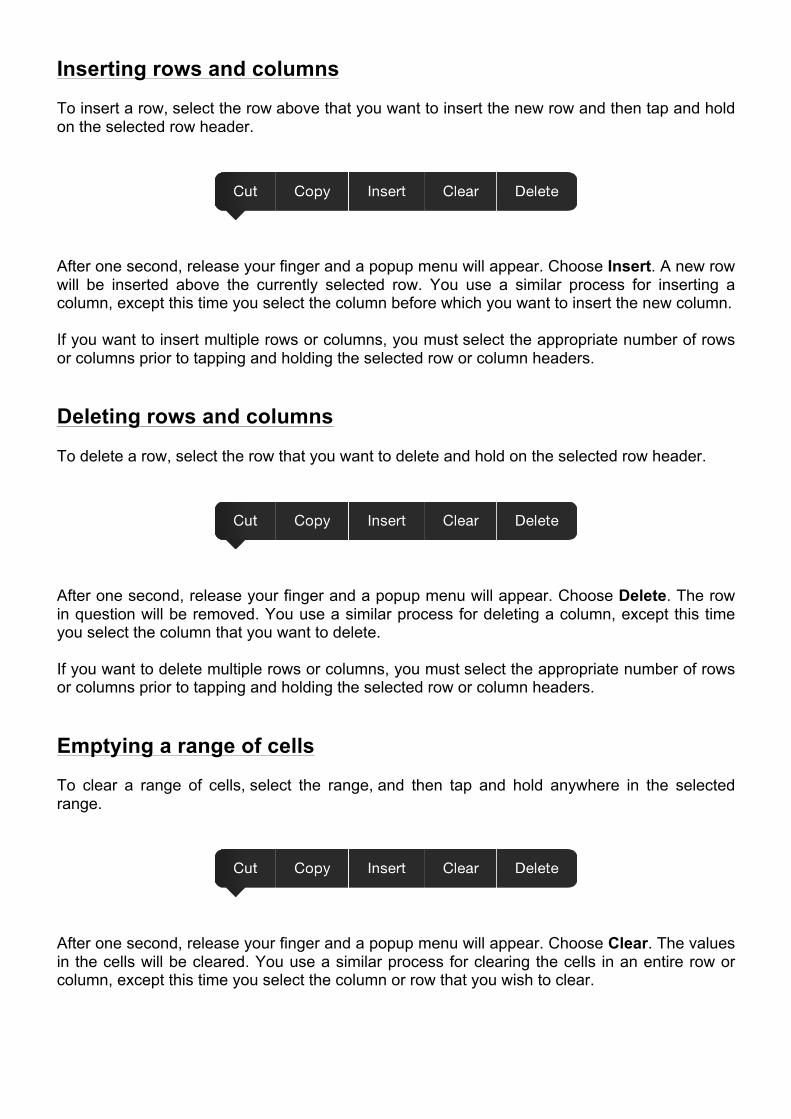
Inserting rows and columns To insert a row, select the row above that you want to insert the new row and then tap and hold on the selected row header.
After one second, release your finger and a popup menu will appear. Choose Insert. A new row will be inserted above the currently selected row. You use a similar process for inserting a column, except this time you select the column before which you want to insert the new column. If you want to insert multiple rows or columns, you must select the appropriate number of rows or columns prior to tapping and holding the selected row or column headers. Deleting rows and columns To delete a row, select the row that you want to delete and hold on the selected row header.
After one second, release your finger and a popup menu will appear. Choose Delete. The row in question will be removed. You use a similar process for deleting a column, except this time you select the column that you want to delete. If you want to delete multiple rows or columns, you must select the appropriate number of rows or columns prior to tapping and holding the selected row or column headers. Emptying a range of cells To clear a range of cells, select the range, and then tap and hold anywhere in the selected range.
After one second, release your finger and a popup menu will appear. Choose Clear. The values in the cells will be cleared. You use a similar process for clearing the cells in an entire row or column, except this time you select the column or row that you wish to clear.
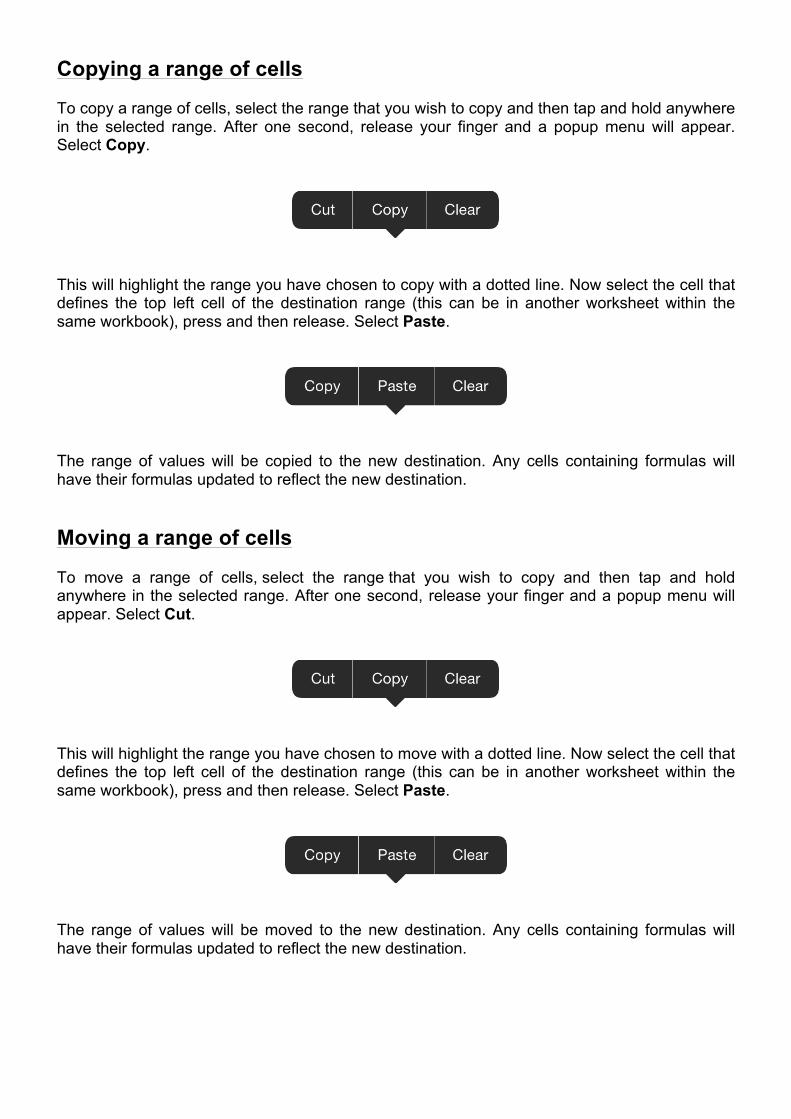
Copying a range of cells To copy a range of cells, select the range that you wish to copy and then tap and hold anywhere in the selected range. After one second, release your finger and a popup menu will appear. Select Copy.
This will highlight the range you have chosen to copy with a dotted line. Now select the cell that defines the top left cell of the destination range (this can be in another worksheet within the same workbook), press and then release. Select Paste.
The range of values will be copied to the new destination. Any cells containing formulas will have their formulas updated to reflect the new destination. Moving a range of cells To move a range of cells, select the range that you wish to copy and then tap and hold anywhere in the selected range. After one second, release your finger and a popup menu will appear. Select Cut.
This will highlight the range you have chosen to move with a dotted line. Now select the cell that defines the top left cell of the destination range (this can be in another worksheet within the same workbook), press and then release. Select Paste.
The range of values will be moved to the new destination. Any cells containing formulas will have their formulas updated to reflect the new destination.
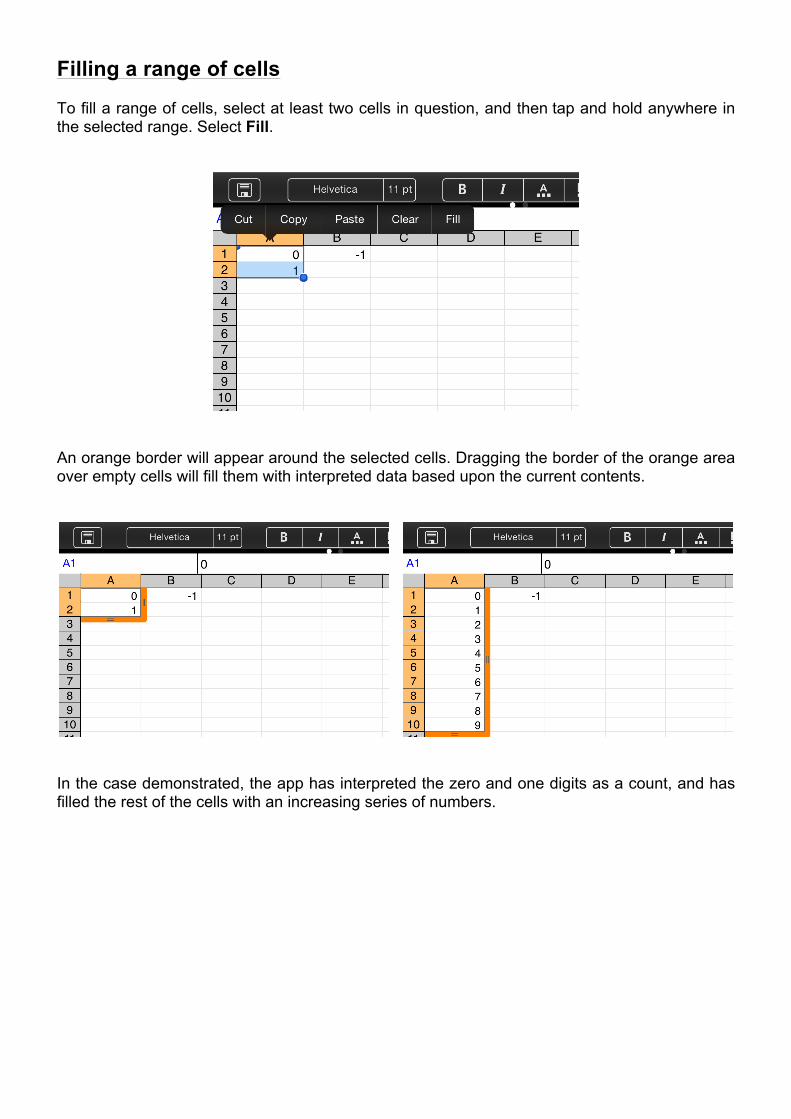
Filling a range of cells To fill a range of cells, select at least two cells in question, and then tap and hold anywhere in the selected range. Select Fill.
An orange border will appear around the selected cells. Dragging the border of the orange area over empty cells will fill them with interpreted data based upon the current contents.
In the case demonstrated, the app has interpreted the zero and one digits as a count, and has filled the rest of the cells with an increasing series of numbers.
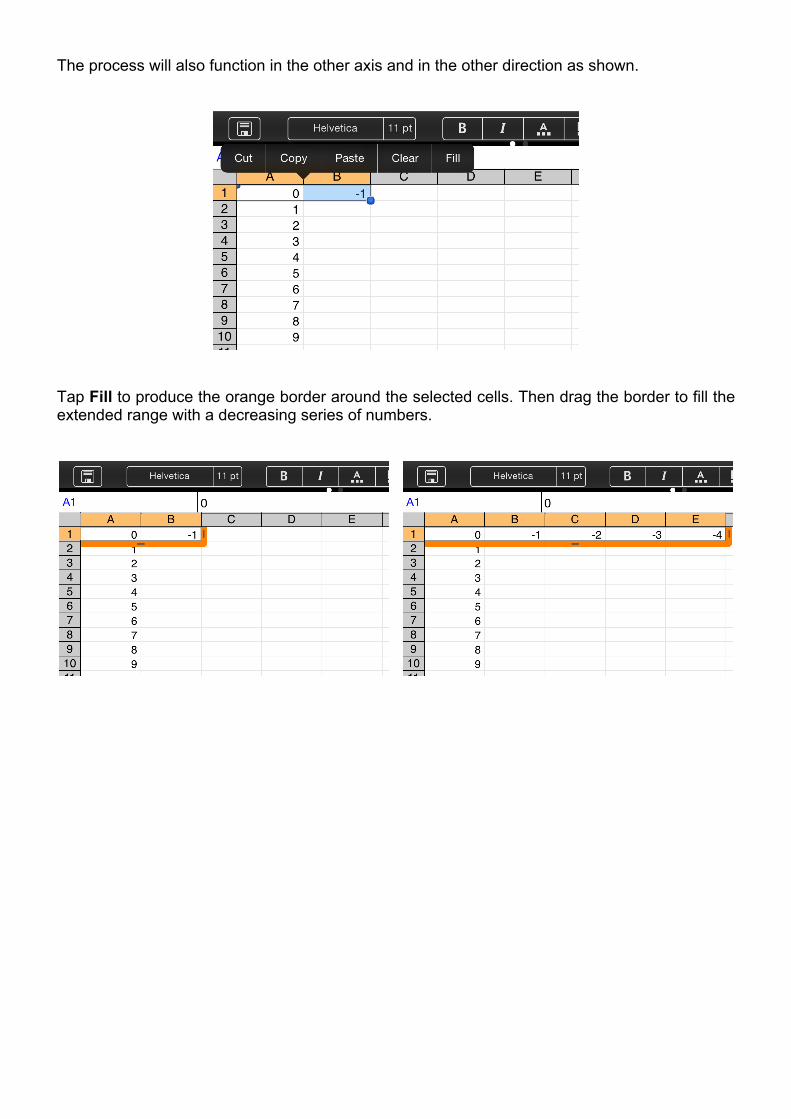
The process will also function in the other axis and in the other direction as shown.
Tap Fill to produce the orange border around the selected cells. Then drag the border to fill the extended range with a decreasing series of numbers.
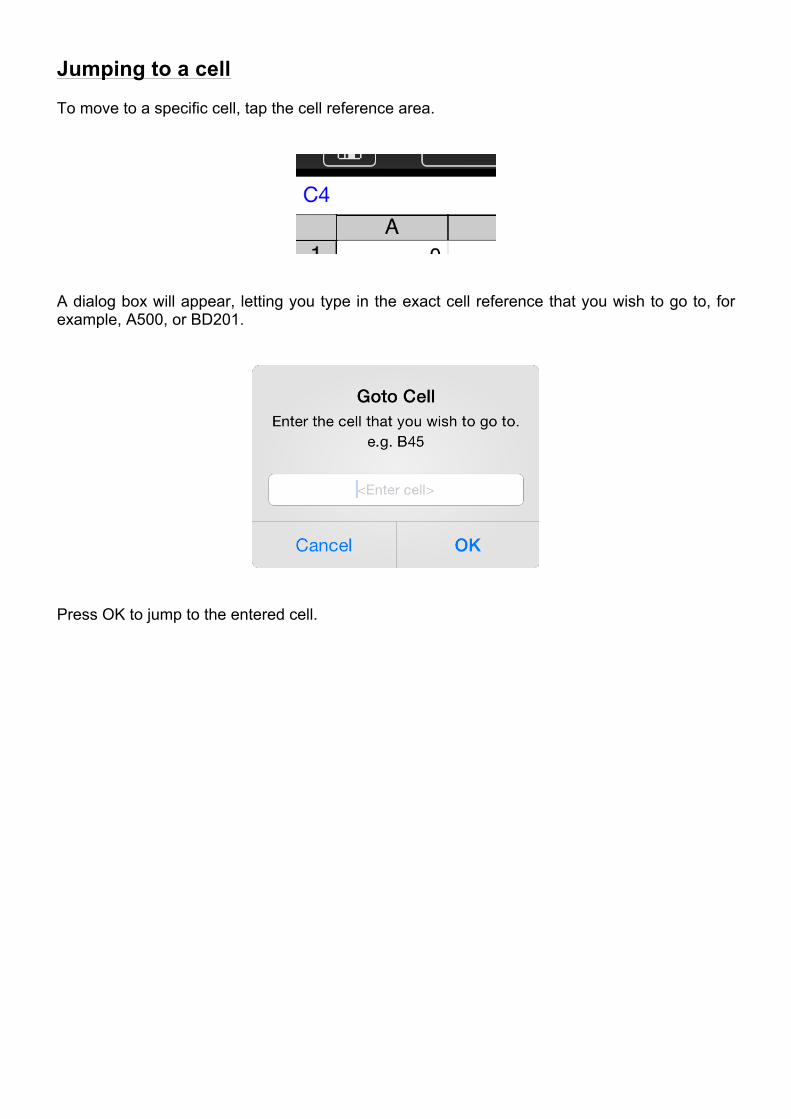
Jumping to a cell To move to a specific cell, tap the cell reference area.
A dialog box will appear, letting you type in the exact cell reference that you wish to go to, for example, A500, or BD201.
Press OK to jump to the entered cell.
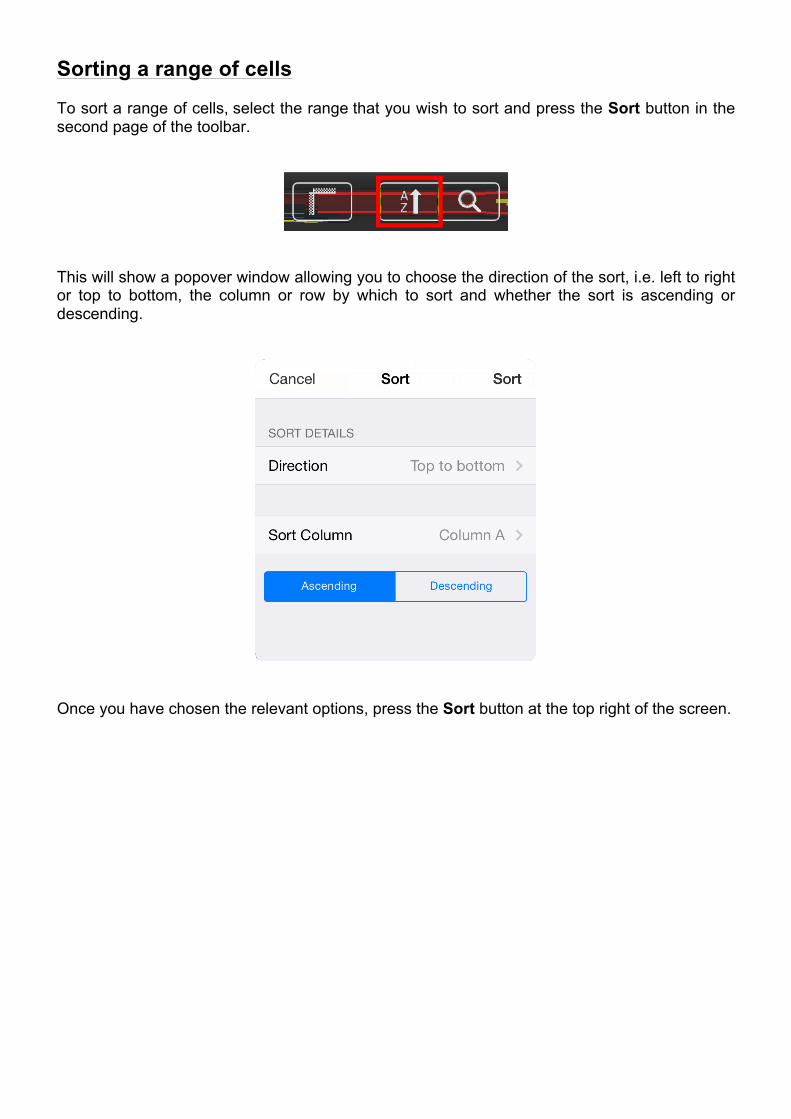
Sorting a range of cells To sort a range of cells, select the range that you wish to sort and press the Sort button in the second page of the toolbar.
This will show a popover window allowing you to choose the direction of the sort, i.e. left to right or top to bottom, the column or row by which to sort and whether the sort is ascending or descending.
Once you have chosen the relevant options, press the Sort button at the top right of the screen.
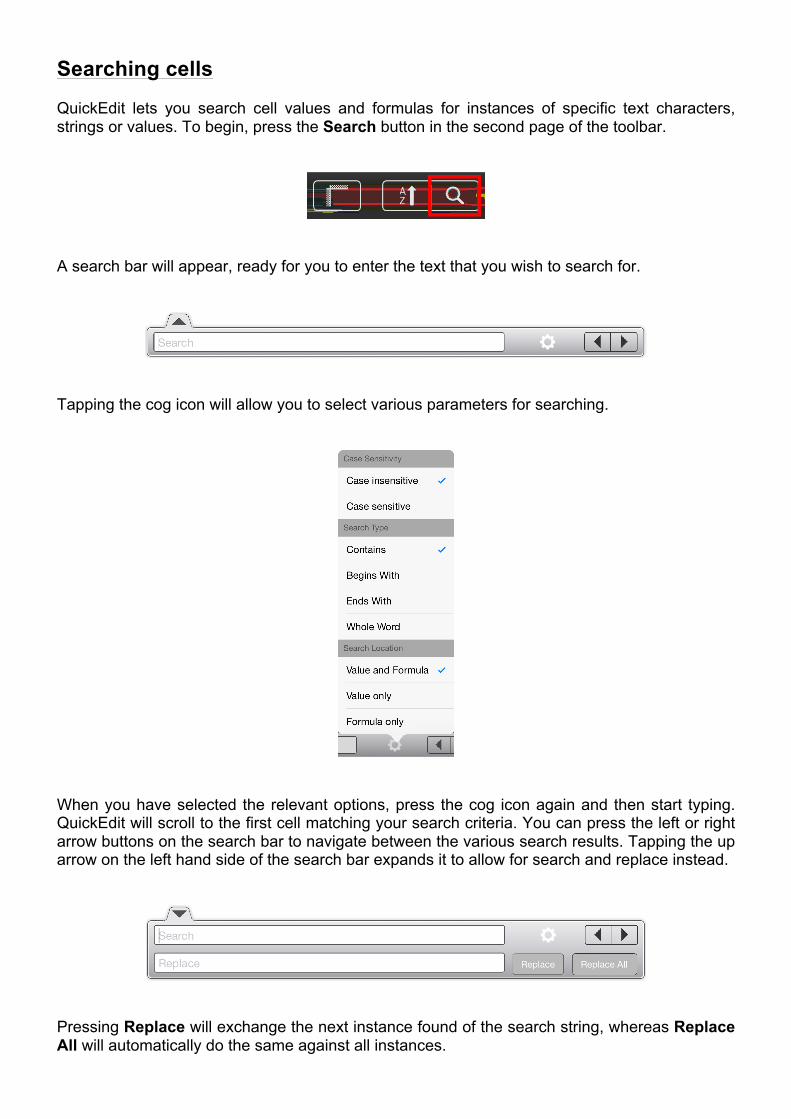
Searching cells QuickEdit lets you search cell values and formulas for instances of specific text characters, strings or values. To begin, press the Search button in the second page of the toolbar.
A search bar will appear, ready for you to enter the text that you wish to search for.
Tapping the cog icon will allow you to select various parameters for searching.
When you have selected the relevant options, press the cog icon again and then start typing. QuickEdit will scroll to the first cell matching your search criteria. You can press the left or right arrow buttons on the search bar to navigate between the various search results. Tapping the up arrow on the left hand side of the search bar expands it to allow for search and replace instead.
Pressing Replace will exchange the next instance found of the search string, whereas Replace All will automatically do the same against all instances.
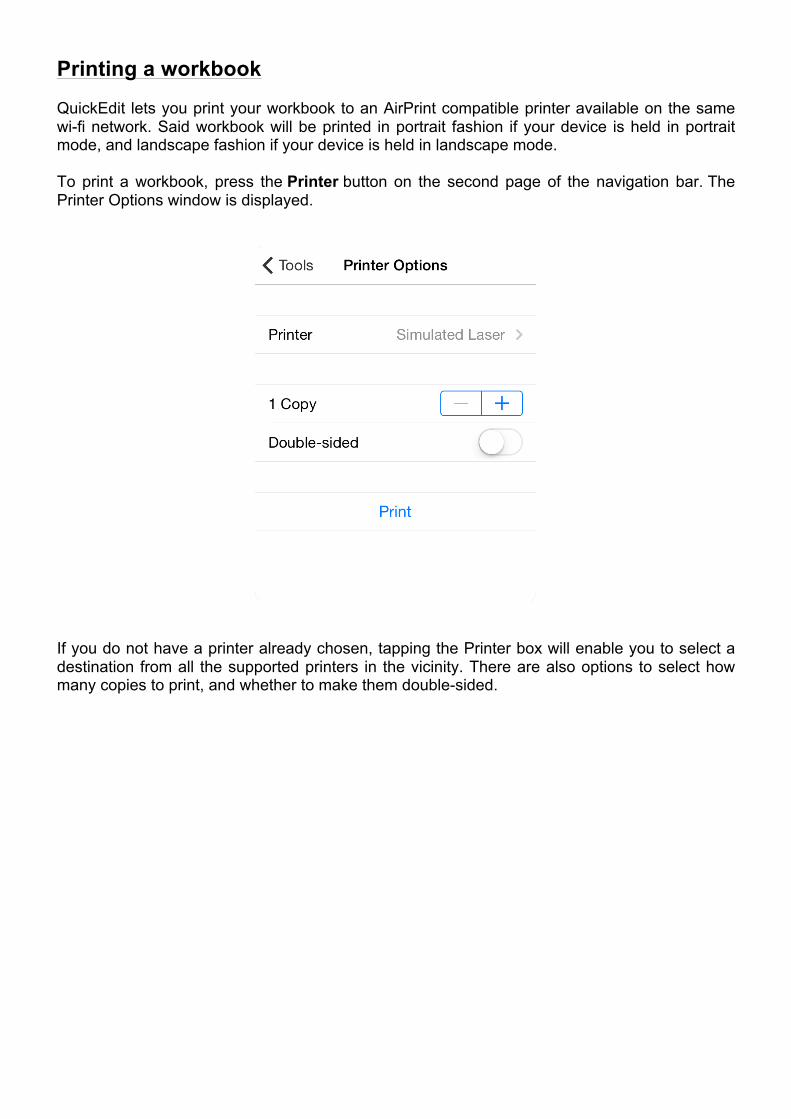
Printing a workbook QuickEdit lets you print your workbook to an AirPrint compatible printer available on the same wi-fi network. Said workbook will be printed in portrait fashion if your device is held in portrait mode, and landscape fashion if your device is held in landscape mode. To print a workbook, press the Printer button on the second page of the navigation bar. The Printer Options window is displayed.
If you do not have a printer already chosen, tapping the Printer box will enable you to select a destination from all the supported printers in the vicinity. There are also options to select how many copies to print, and whether to make them double-sided.
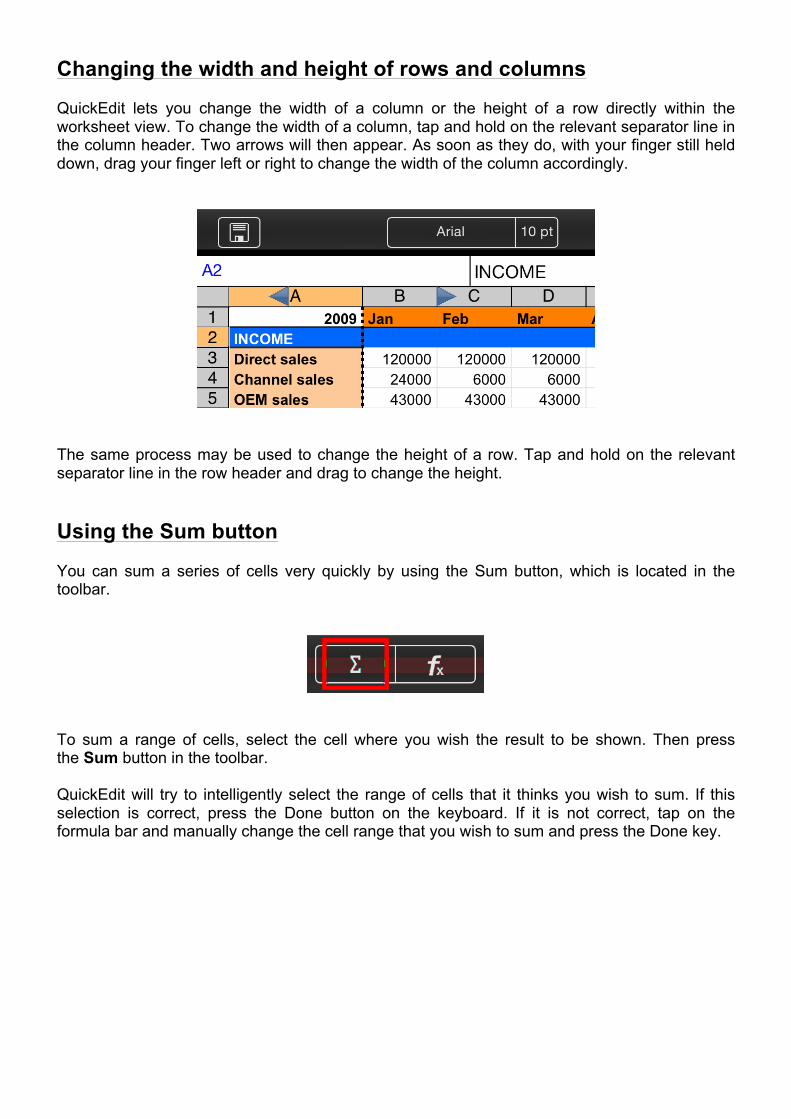
Changing the width and height of rows and columns QuickEdit lets you change the width of a column or the height of a row directly within the worksheet view. To change the width of a column, tap and hold on the relevant separator line in the column header. Two arrows will then appear. As soon as they do, with your finger still held down, drag your finger left or right to change the width of the column accordingly.
The same process may be used to change the height of a row. Tap and hold on the relevant separator line in the row header and drag to change the height. Using the Sum button You can sum a series of cells very quickly by using the Sum button, which is located in the toolbar.
To sum a range of cells, select the cell where you wish the result to be shown. Then press the Sum button in the toolbar. QuickEdit will try to intelligently select the range of cells that it thinks you wish to sum. If this selection is correct, press the Done button on the keyboard. If it is not correct, tap on the formula bar and manually change the cell range that you wish to sum and press the Done key.
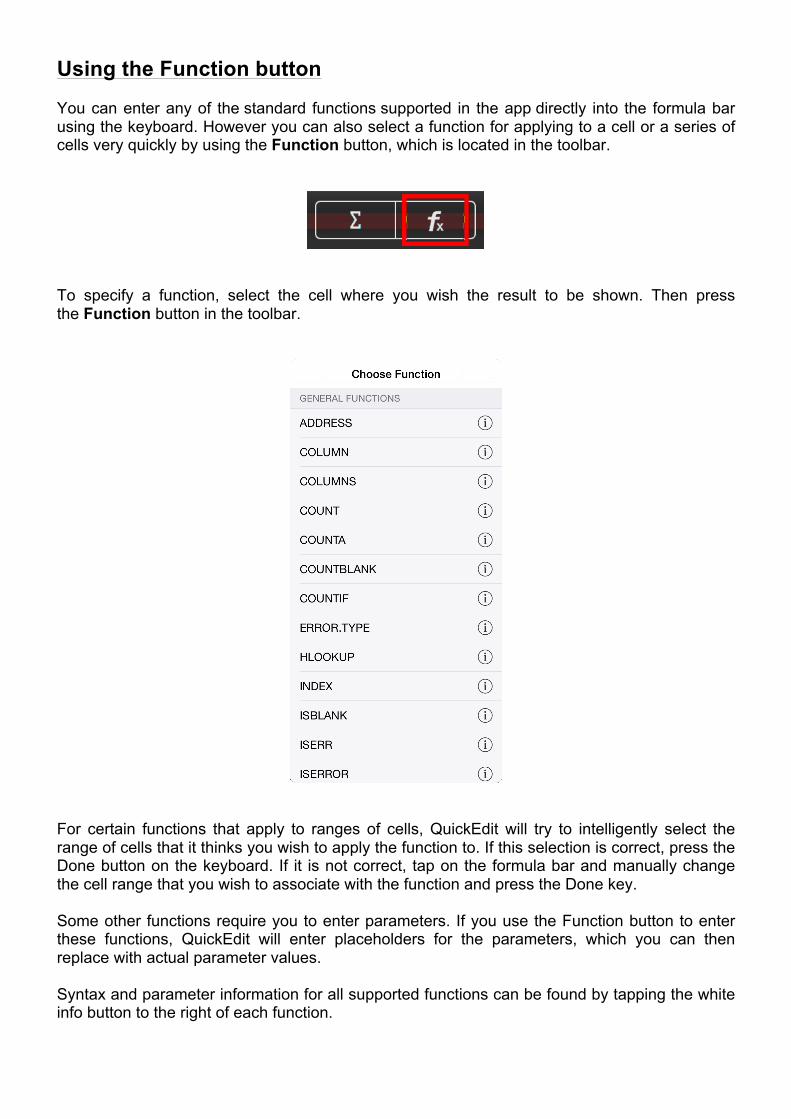
Using the Function button You can enter any of the standard functions supported in the app directly into the formula bar using the keyboard. However you can also select a function for applying to a cell or a series of cells very quickly by using the Function button, which is located in the toolbar.
To specify a function, select the cell where you wish the result to be shown. Then press the Function button in the toolbar.
For certain functions that apply to ranges of cells, QuickEdit will try to intelligently select the range of cells that it thinks you wish to apply the function to. If this selection is correct, press the Done button on the keyboard. If it is not correct, tap on the formula bar and manually change the cell range that you wish to associate with the function and press the Done key. Some other functions require you to enter parameters. If you use the Function button to enter these functions, QuickEdit will enter placeholders for the parameters, which you can then replace with actual parameter values. Syntax and parameter information for all supported functions can be found by tapping the white info button to the right of each function.
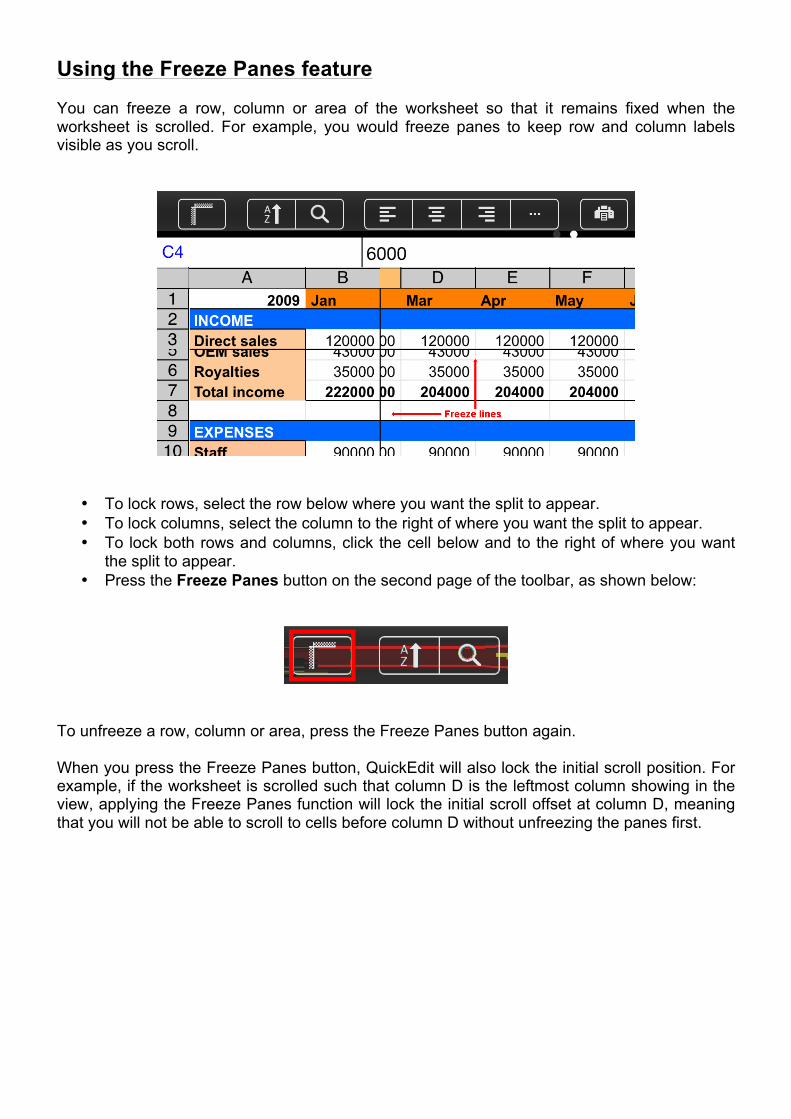
Using the Freeze Panes feature You can freeze a row, column or area of the worksheet so that it remains fixed when the worksheet is scrolled. For example, you would freeze panes to keep row and column labels visible as you scroll.
• To lock rows, select the row below where you want the split to appear. • To lock columns, select the column to the right of where you want the split to appear. • To lock both rows and columns, click the cell below and to the right of where you want
the split to appear. • Press the Freeze Panes button on the second page of the toolbar, as shown below:
To unfreeze a row, column or area, press the Freeze Panes button again. When you press the Freeze Panes button, QuickEdit will also lock the initial scroll position. For example, if the worksheet is scrolled such that column D is the leftmost column showing in the view, applying the Freeze Panes function will lock the initial scroll offset at column D, meaning that you will not be able to scroll to cells before column D without unfreezing the panes first.
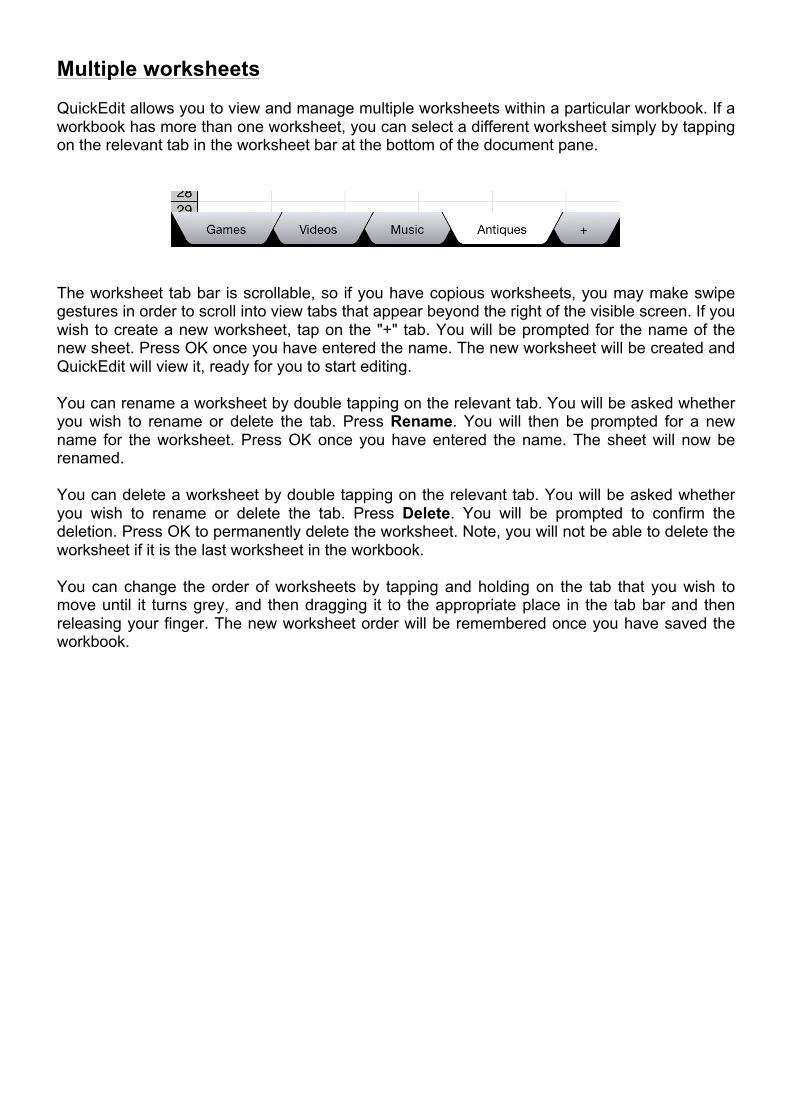
Multiple worksheets QuickEdit allows you to view and manage multiple worksheets within a particular workbook. If a workbook has more than one worksheet, you can select a different worksheet simply by tapping on the relevant tab in the worksheet bar at the bottom of the document pane.
The worksheet tab bar is scrollable, so if you have copious worksheets, you may make swipe gestures in order to scroll into view tabs that appear beyond the right of the visible screen. If you wish to create a new worksheet, tap on the "+" tab. You will be prompted for the name of the new sheet. Press OK once you have entered the name. The new worksheet will be created and QuickEdit will view it, ready for you to start editing. You can rename a worksheet by double tapping on the relevant tab. You will be asked whether you wish to rename or delete the tab. Press Rename. You will then be prompted for a new name for the worksheet. Press OK once you have entered the name. The sheet will now be renamed. You can delete a worksheet by double tapping on the relevant tab. You will be asked whether you wish to rename or delete the tab. Press Delete. You will be prompted to confirm the deletion. Press OK to permanently delete the worksheet. Note, you will not be able to delete the worksheet if it is the last worksheet in the workbook. You can change the order of worksheets by tapping and holding on the tab that you wish to move until it turns grey, and then dragging it to the appropriate place in the tab bar and then releasing your finger. The new worksheet order will be remembered once you have saved the workbook.
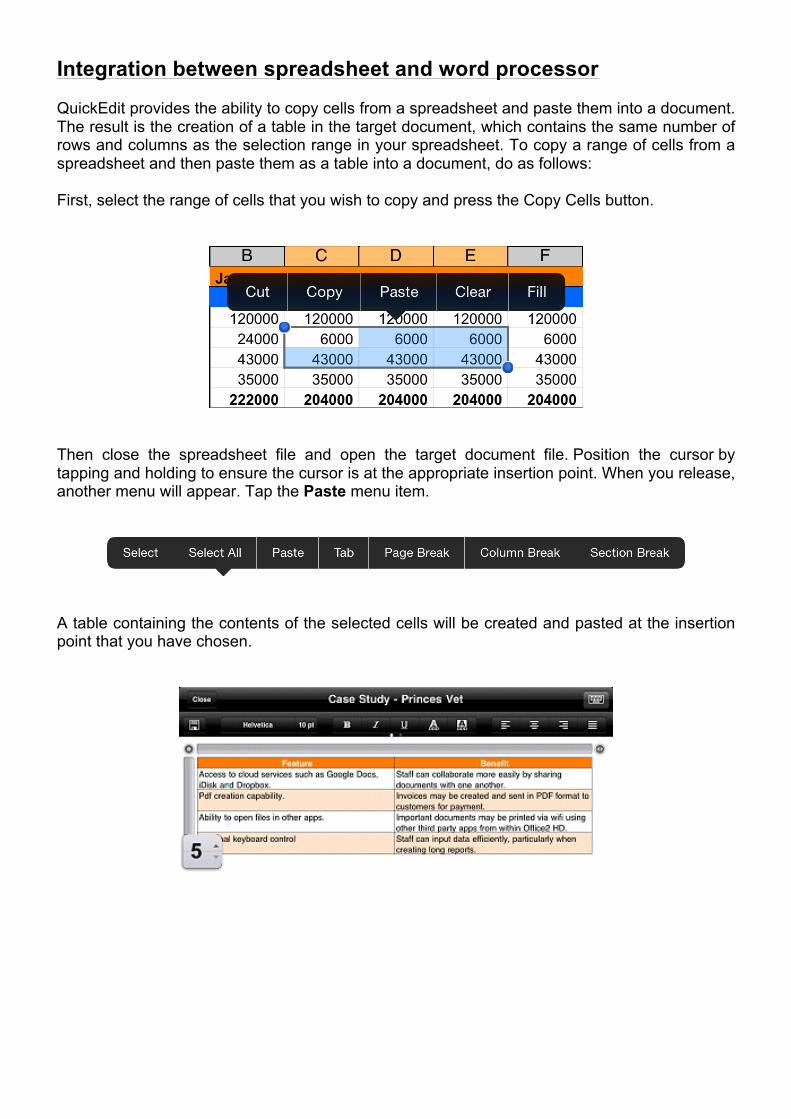
Integration between spreadsheet and word processor QuickEdit provides the ability to copy cells from a spreadsheet and paste them into a document. The result is the creation of a table in the target document, which contains the same number of rows and columns as the selection range in your spreadsheet. To copy a range of cells from a spreadsheet and then paste them as a table into a document, do as follows: First, select the range of cells that you wish to copy and press the Copy Cells button.
Then close the spreadsheet file and open the target document file. Position the cursor by tapping and holding to ensure the cursor is at the appropriate insertion point. When you release, another menu will appear. Tap the Paste menu item.
A table containing the contents of the selected cells will be created and pasted at the insertion point that you have chosen.
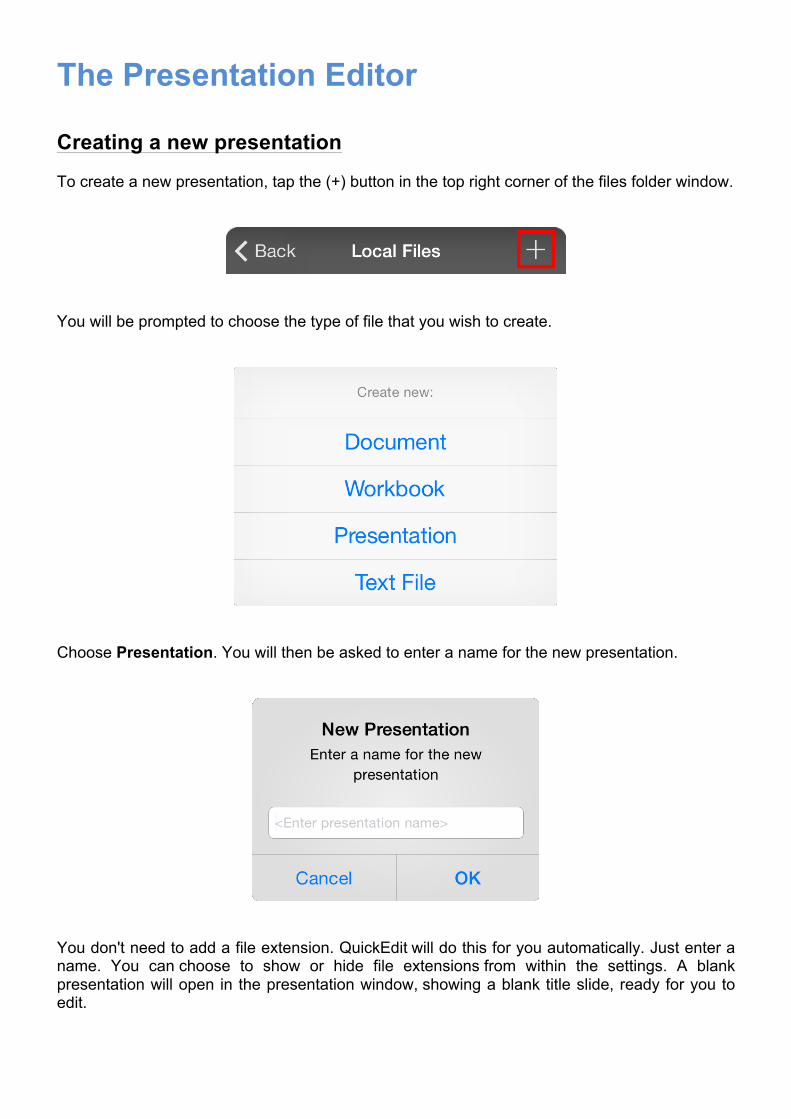
The Presentation Editor Creating a new presentation To create a new presentation, tap the (+) button in the top right corner of the files folder window.
You will be prompted to choose the type of file that you wish to create.
Choose Presentation. You will then be asked to enter a name for the new presentation.
You don't need to add a file extension. QuickEdit will do this for you automatically. Just enter a name. You can choose to show or hide file extensions from within the settings. A blank presentation will open in the presentation window, showing a blank title slide, ready for you to edit.
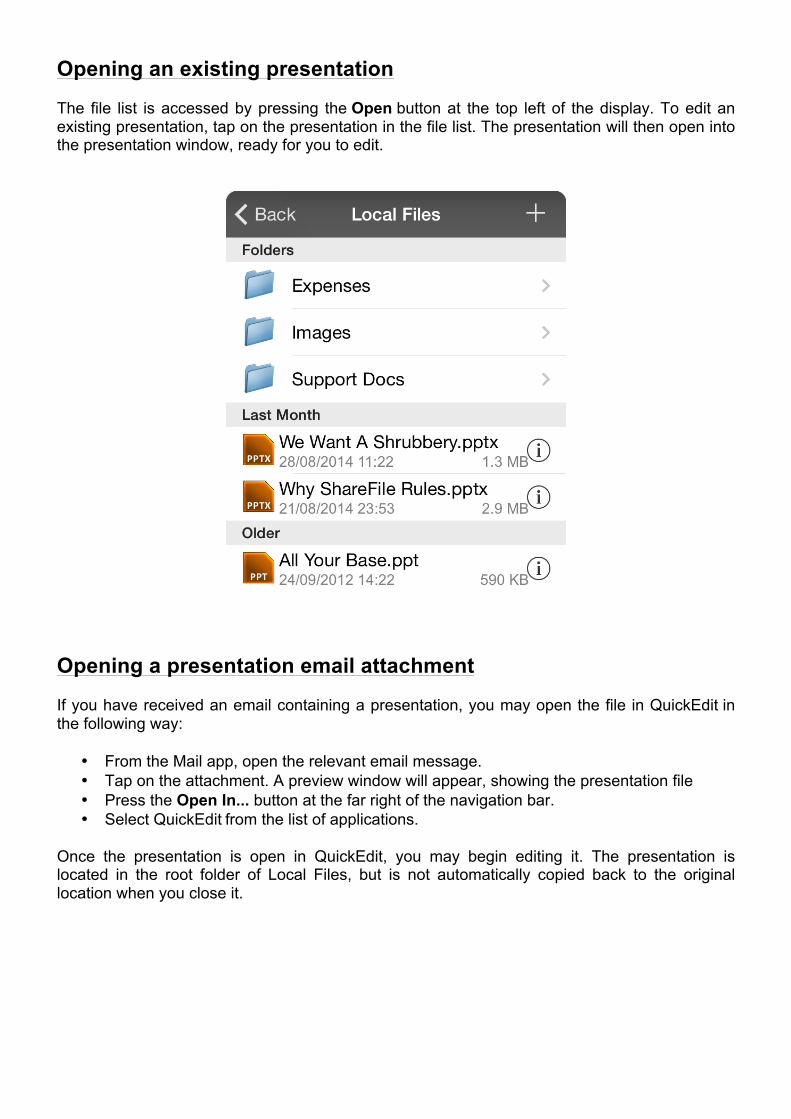
Opening an existing presentation The file list is accessed by pressing the Open button at the top left of the display. To edit an existing presentation, tap on the presentation in the file list. The presentation will then open into the presentation window, ready for you to edit.
Opening a presentation email attachment If you have received an email containing a presentation, you may open the file in QuickEdit in the following way:
• From the Mail app, open the relevant email message. • Tap on the attachment. A preview window will appear, showing the presentation file • Press the Open In... button at the far right of the navigation bar. • Select QuickEdit from the list of applications.
Once the presentation is open in QuickEdit, you may begin editing it. The presentation is located in the root folder of Local Files, but is not automatically copied back to the original location when you close it.
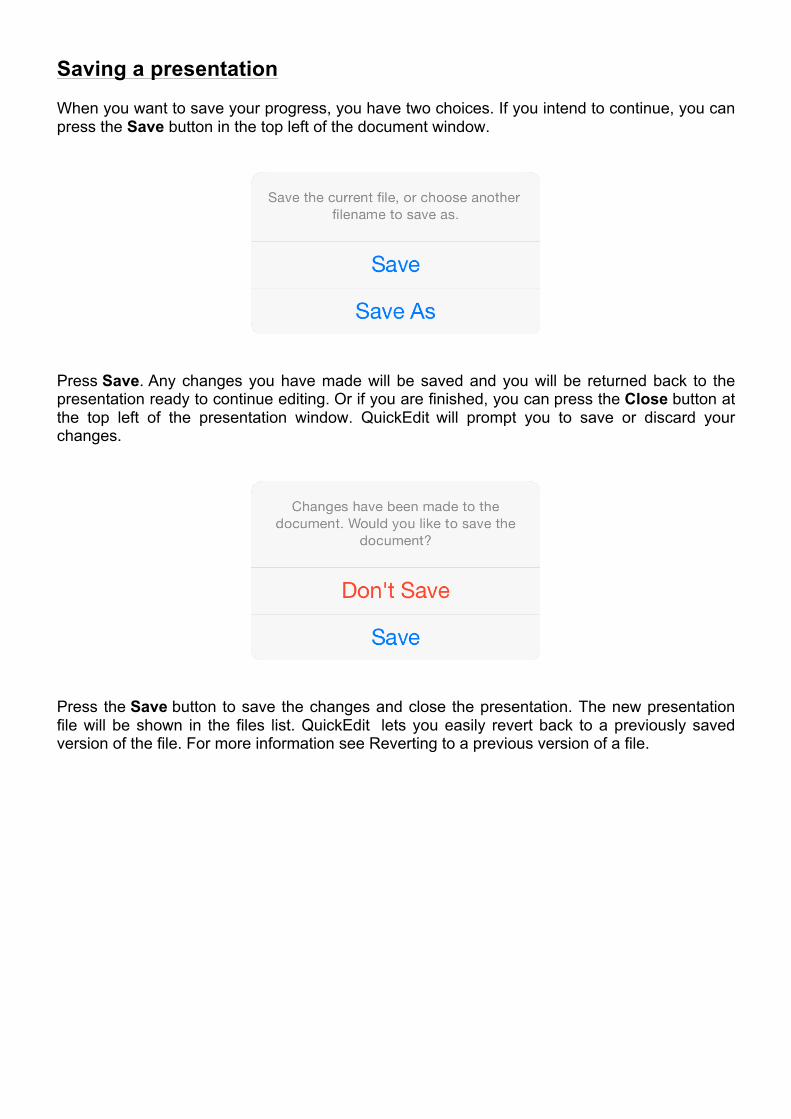
Saving a presentation When you want to save your progress, you have two choices. If you intend to continue, you can press the Save button in the top left of the document window.
Press Save. Any changes you have made will be saved and you will be returned back to the presentation ready to continue editing. Or if you are finished, you can press the Close button at the top left of the presentation window. QuickEdit will prompt you to save or discard your changes.
Press the Save button to save the changes and close the presentation. The new presentation file will be shown in the files list. QuickEdit lets you easily revert back to a previously saved version of the file. For more information see Reverting to a previous version of a file.
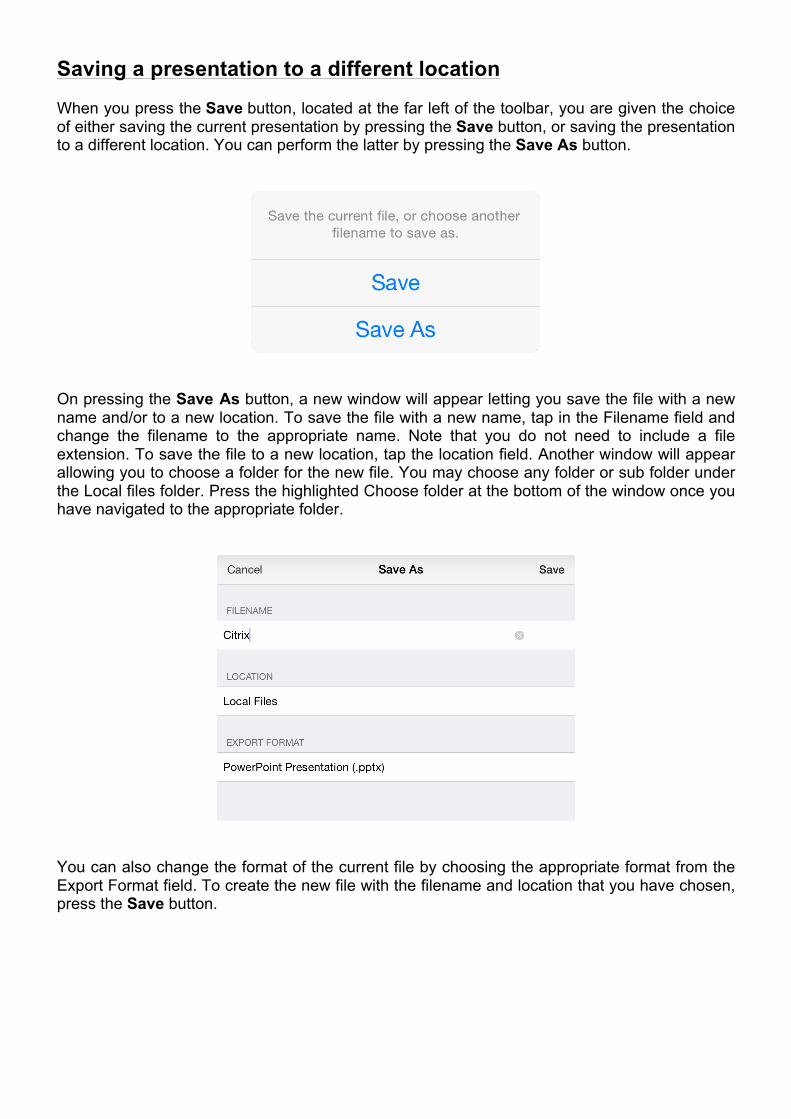
Saving a presentation to a different location When you press the Save button, located at the far left of the toolbar, you are given the choice of either saving the current presentation by pressing the Save button, or saving the presentation to a different location. You can perform the latter by pressing the Save As button.
On pressing the Save As button, a new window will appear letting you save the file with a new name and/or to a new location. To save the file with a new name, tap in the Filename field and change the filename to the appropriate name. Note that you do not need to include a file extension. To save the file to a new location, tap the location field. Another window will appear allowing you to choose a folder for the new file. You may choose any folder or sub folder under the Local files folder. Press the highlighted Choose folder at the bottom of the window once you have navigated to the appropriate folder.
You can also change the format of the current file by choosing the appropriate format from the Export Format field. To create the new file with the filename and location that you have chosen, press the Save button.
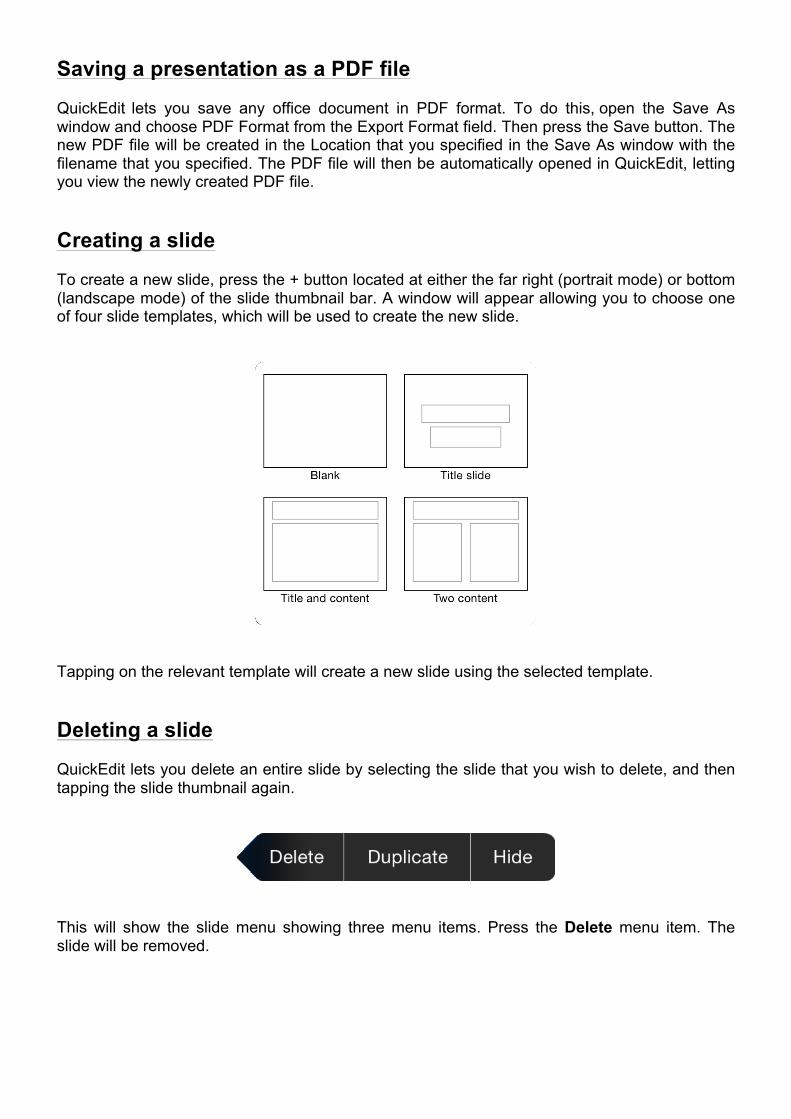
Saving a presentation as a PDF file QuickEdit lets you save any office document in PDF format. To do this, open the Save As window and choose PDF Format from the Export Format field. Then press the Save button. The new PDF file will be created in the Location that you specified in the Save As window with the filename that you specified. The PDF file will then be automatically opened in QuickEdit, letting you view the newly created PDF file. Creating a slide To create a new slide, press the + button located at either the far right (portrait mode) or bottom (landscape mode) of the slide thumbnail bar. A window will appear allowing you to choose one of four slide templates, which will be used to create the new slide.
Tapping on the relevant template will create a new slide using the selected template. Deleting a slide QuickEdit lets you delete an entire slide by selecting the slide that you wish to delete, and then tapping the slide thumbnail again.
This will show the slide menu showing three menu items. Press the Delete menu item. The slide will be removed.
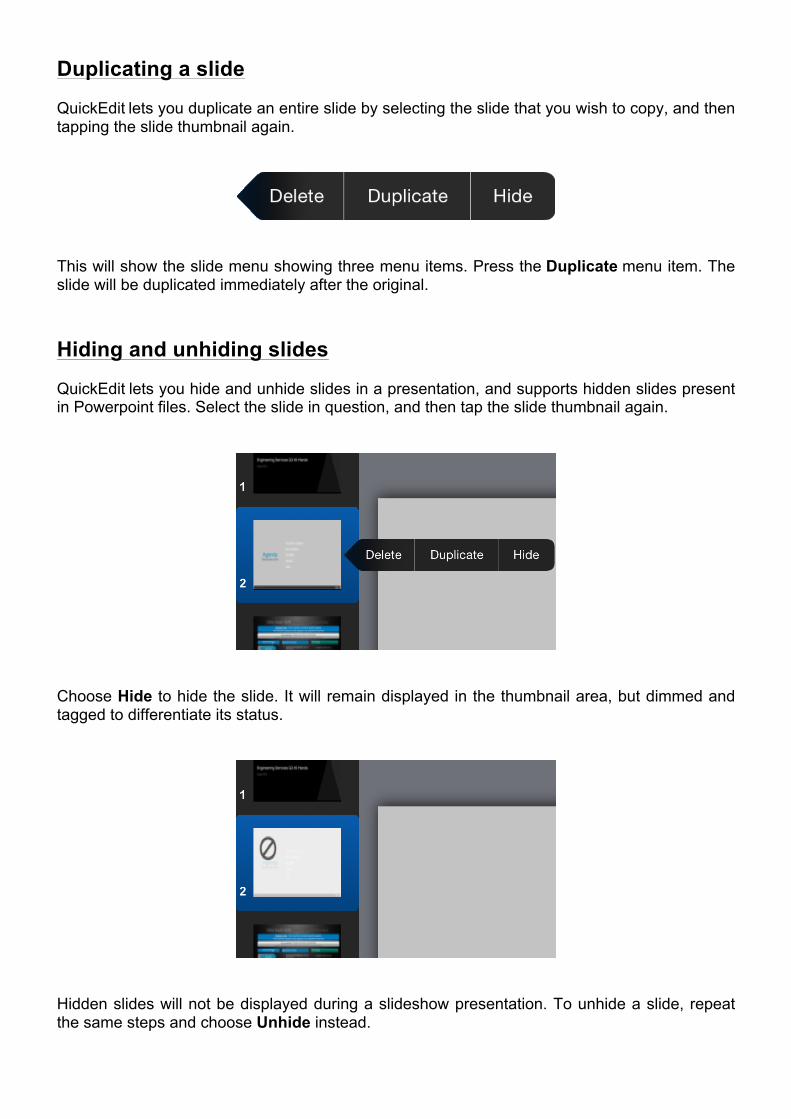
Duplicating a slide QuickEdit lets you duplicate an entire slide by selecting the slide that you wish to copy, and then tapping the slide thumbnail again.
This will show the slide menu showing three menu items. Press the Duplicate menu item. The slide will be duplicated immediately after the original. Hiding and unhiding slides QuickEdit lets you hide and unhide slides in a presentation, and supports hidden slides present in Powerpoint files. Select the slide in question, and then tap the slide thumbnail again.
Choose Hide to hide the slide. It will remain displayed in the thumbnail area, but dimmed and tagged to differentiate its status.
Hidden slides will not be displayed during a slideshow presentation. To unhide a slide, repeat the same steps and choose Unhide instead.
Reordering slides To change the order of a slide within the slide thumbnail bar, tap and hold on the slide that you wish to move. The slide will darken to indicate that it has been selected. While keeping your finger held down, move the slide to the appropriate position within the slide thumbnail bar. Other slides will move out of the way as you drag the slide over them. When you have positioned the slide in the appropriate position, lift your finger. The slide will then fix its position. Changing a slide’s background QuickEdit lets you change a slide's background color or background image. You can do this by tapping once on the slide background to make it "active" and then again to call up the action command. A menu will appear showing a Set Background action. When you select the menu item, a popover will appear, which will let you choose between adding a background image and selecting a background color. Moving, resizing and rotating objects Any object in a slide may be moved after first selecting the object by tapping it. Then press on the selected object and while keeping your finger held down, drag your finger until the object is positioned in the appropriate place on the slide. Release your finger to fix the object's new position. You can move multiple objects at the same time by first selecting several objects before dragging them to the appropriate position. To select several objects, first tap on the first object to select it, then press and hold your finger on the second object until it selects. Then release your finger and press and hold your finger on the third object until it selects. Continue until you have selected all the objects that you wish to move. Then press and hold on any of the selected objects and drag your finger. All of the objects will move together. Release your finger to fix the new position of the objects. You can resize an object by pressing and holding and subsequently dragging on any of the blue handles that surround a shape. As you drag any of the handles, the shape will stretch in the relevant direction. To fix the shape's new dimensions, lift your finger. Some shapes will have a green handle. By dragging a green handle you can change various attributes of the shape. For example, a rounded rectangle has a green handle, which will let you change the corner radius of the rectangle. Dragging the green handle on a triangle object will allow you to change the apex of the triangle, letting you transform the triangle from a right angled triangle to an equilateral triangle. You can rotate any text box or shape (except for Line shapes) by touching the object with two fingers (or a finger and a thumb) and rotating your finger and thumb. To fix the rotation, release both finger and thumb.
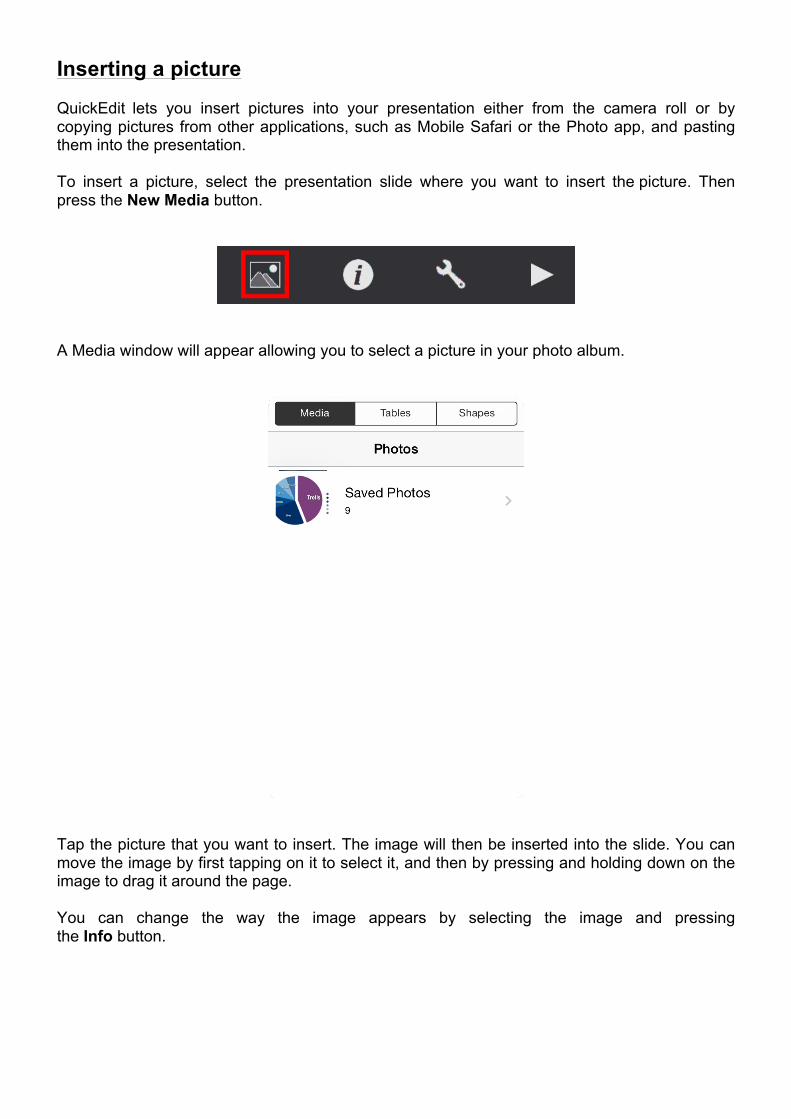
Inserting a picture QuickEdit lets you insert pictures into your presentation either from the camera roll or by copying pictures from other applications, such as Mobile Safari or the Photo app, and pasting them into the presentation. To insert a picture, select the presentation slide where you want to insert the picture. Then press the New Media button.
A Media window will appear allowing you to select a picture in your photo album.
Tap the picture that you want to insert. The image will then be inserted into the slide. You can move the image by first tapping on it to select it, and then by pressing and holding down on the image to drag it around the page. You can change the way the image appears by selecting the image and pressing the Info button.
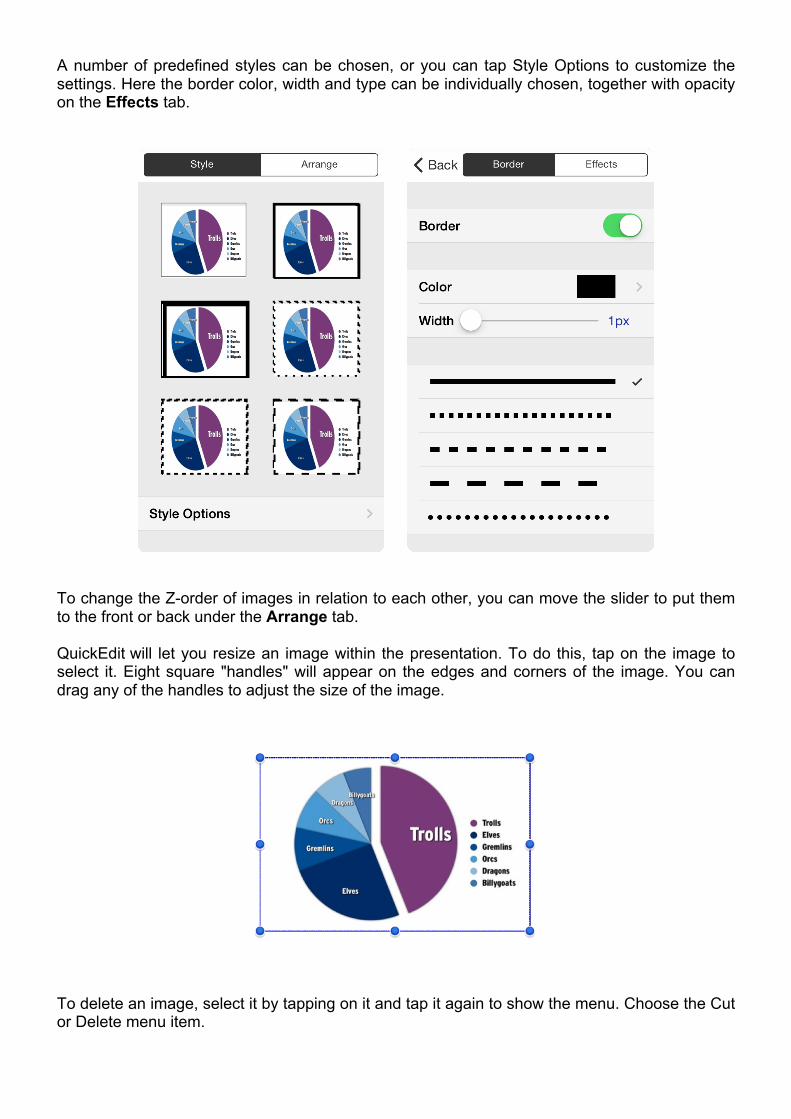
A number of predefined styles can be chosen, or you can tap Style Options to customize the settings. Here the border color, width and type can be individually chosen, together with opacity on the Effects tab.
To change the Z-order of images in relation to each other, you can move the slider to put them to the front or back under the Arrange tab. QuickEdit will let you resize an image within the presentation. To do this, tap on the image to select it. Eight square "handles" will appear on the edges and corners of the image. You can drag any of the handles to adjust the size of the image.
To delete an image, select it by tapping on it and tap it again to show the menu. Choose the Cut or Delete menu item.
Inserting a shape QuickEdit lets you add shapes, such as a text box, a floating line, or rectangle into your presentation. To insert a shape, select the presentation slide where you want to insert the shape. Then press the New Media button.
The Shapes tab shows a page of common shapes and you can swipe the window from right-to-left to see additional pages of shapes. You can choose a shape by simply tapping on it. The window will then disappear and the shape will appear in the center of the current slide.
You can move the shape by first tapping on it to select it, and then by pressing and holding down on the shape to drag it around the slide. You can change the way the shape appears by selecting the shape and pressing the Info button.
A number of predefined styles can be chosen, or you can tap Style Options to customize the settings. Here the border color, width and type can be individually chosen, together with opacity on the Effects tab.
To change the Z-order of shapes in relation to each other, you can move the slider to put them to the front or back under the Arrange tab. QuickEdit will let you resize a shape within the slide. To do this, tap on the shape to select it. Eight square "handles" will appear on the edges and corners of the shape. You can drag any of the handles to adjust the size of the shape.
Selecting the Text tab will let you choose styling for any text that you have added to the shape.
You can add text to any shape by tapping in the middle of the shape, and later select and change specific aspects of it via the Text tab.
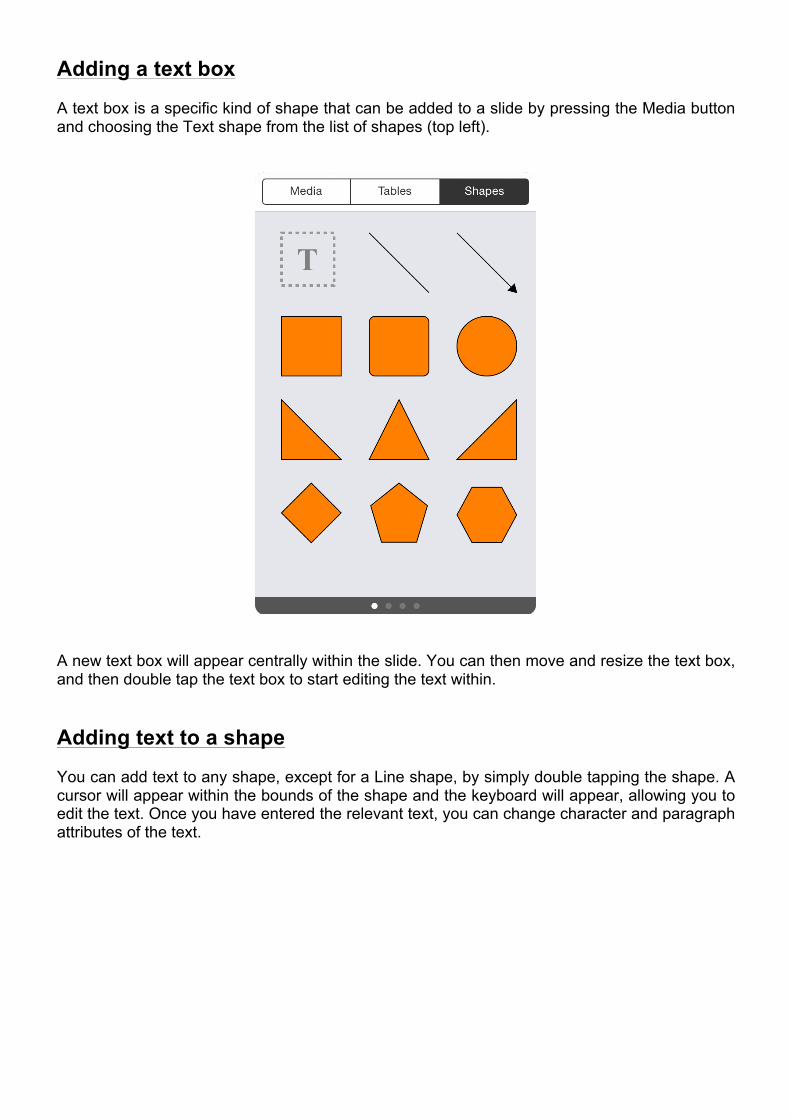
Adding a text box A text box is a specific kind of shape that can be added to a slide by pressing the Media button and choosing the Text shape from the list of shapes (top left).
A new text box will appear centrally within the slide. You can then move and resize the text box, and then double tap the text box to start editing the text within. Adding text to a shape You can add text to any shape, except for a Line shape, by simply double tapping the shape. A cursor will appear within the bounds of the shape and the keyboard will appear, allowing you to edit the text. Once you have entered the relevant text, you can change character and paragraph attributes of the text.
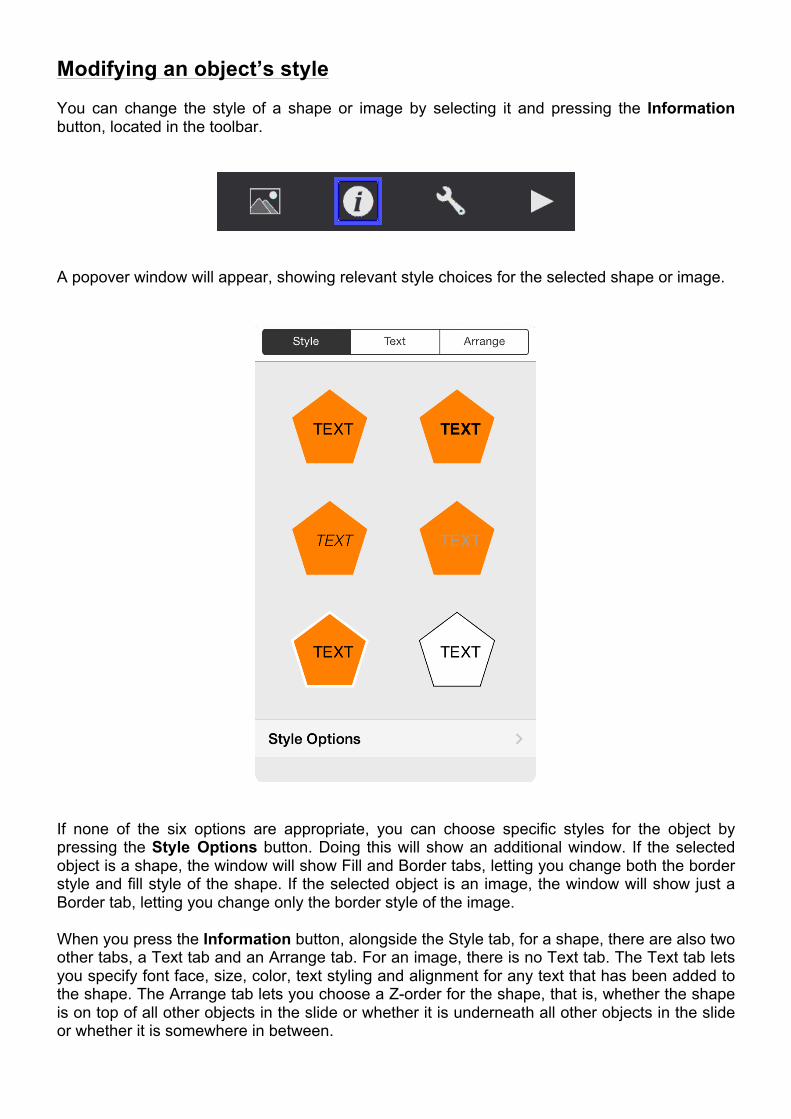
Modifying an object’s style You can change the style of a shape or image by selecting it and pressing the Information button, located in the toolbar.
A popover window will appear, showing relevant style choices for the selected shape or image.
If none of the six options are appropriate, you can choose specific styles for the object by pressing the Style Options button. Doing this will show an additional window. If the selected object is a shape, the window will show Fill and Border tabs, letting you change both the border style and fill style of the shape. If the selected object is an image, the window will show just a Border tab, letting you change only the border style of the image. When you press the Information button, alongside the Style tab, for a shape, there are also two other tabs, a Text tab and an Arrange tab. For an image, there is no Text tab. The Text tab lets you specify font face, size, color, text styling and alignment for any text that has been added to the shape. The Arrange tab lets you choose a Z-order for the shape, that is, whether the shape is on top of all other objects in the slide or whether it is underneath all other objects in the slide or whether it is somewhere in between.
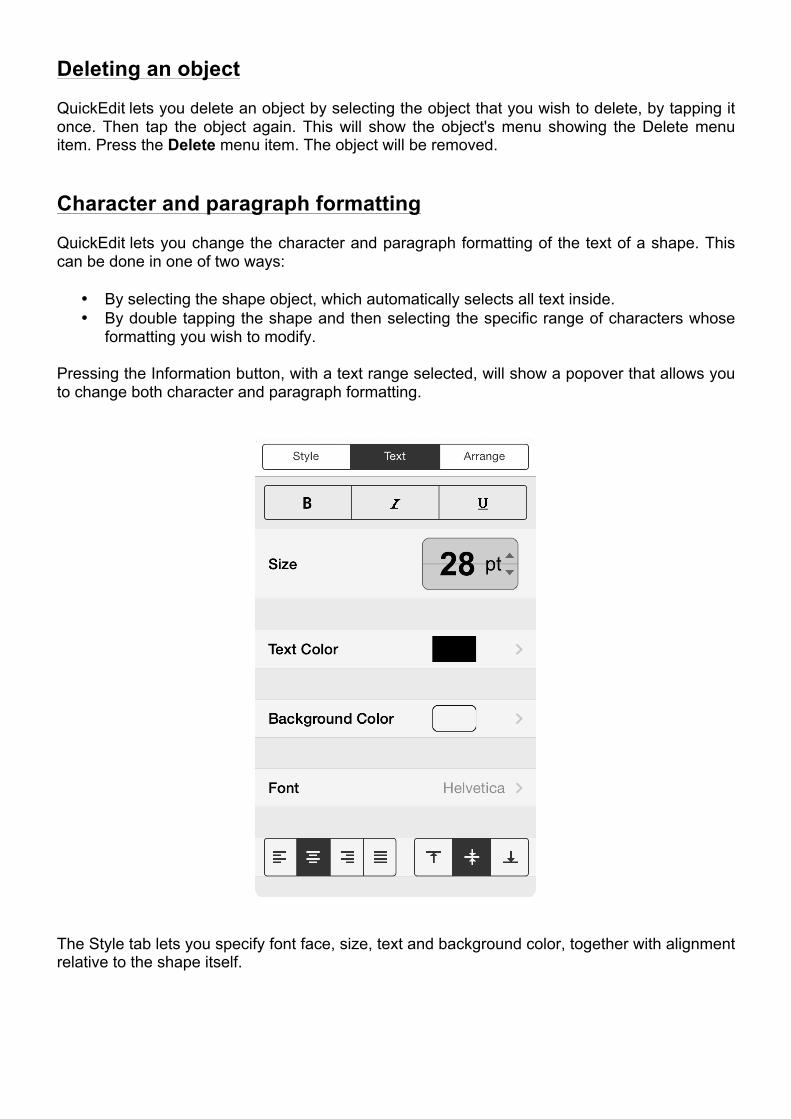
Deleting an object QuickEdit lets you delete an object by selecting the object that you wish to delete, by tapping it once. Then tap the object again. This will show the object's menu showing the Delete menu item. Press the Delete menu item. The object will be removed. Character and paragraph formatting QuickEdit lets you change the character and paragraph formatting of the text of a shape. This can be done in one of two ways:
• By selecting the shape object, which automatically selects all text inside. • By double tapping the shape and then selecting the specific range of characters whose
formatting you wish to modify. Pressing the Information button, with a text range selected, will show a popover that allows you to change both character and paragraph formatting.
The Style tab lets you specify font face, size, text and background color, together with alignment relative to the shape itself.
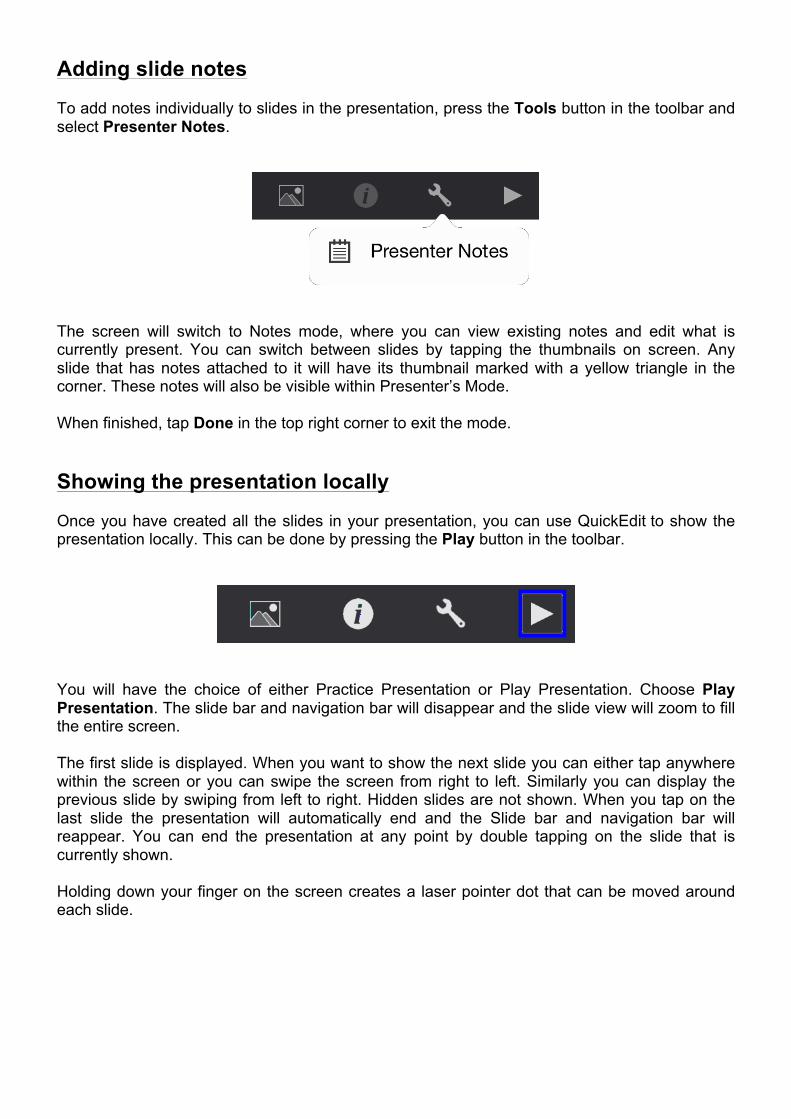
Adding slide notes To add notes individually to slides in the presentation, press the Tools button in the toolbar and select Presenter Notes.
The screen will switch to Notes mode, where you can view existing notes and edit what is currently present. You can switch between slides by tapping the thumbnails on screen. Any slide that has notes attached to it will have its thumbnail marked with a yellow triangle in the corner. These notes will also be visible within Presenter’s Mode. When finished, tap Done in the top right corner to exit the mode. Showing the presentation locally Once you have created all the slides in your presentation, you can use QuickEdit to show the presentation locally. This can be done by pressing the Play button in the toolbar.
You will have the choice of either Practice Presentation or Play Presentation. Choose Play Presentation. The slide bar and navigation bar will disappear and the slide view will zoom to fill the entire screen. The first slide is displayed. When you want to show the next slide you can either tap anywhere within the screen or you can swipe the screen from right to left. Similarly you can display the previous slide by swiping from left to right. Hidden slides are not shown. When you tap on the last slide the presentation will automatically end and the Slide bar and navigation bar will reappear. You can end the presentation at any point by double tapping on the slide that is currently shown. Holding down your finger on the screen creates a laser pointer dot that can be moved around each slide.
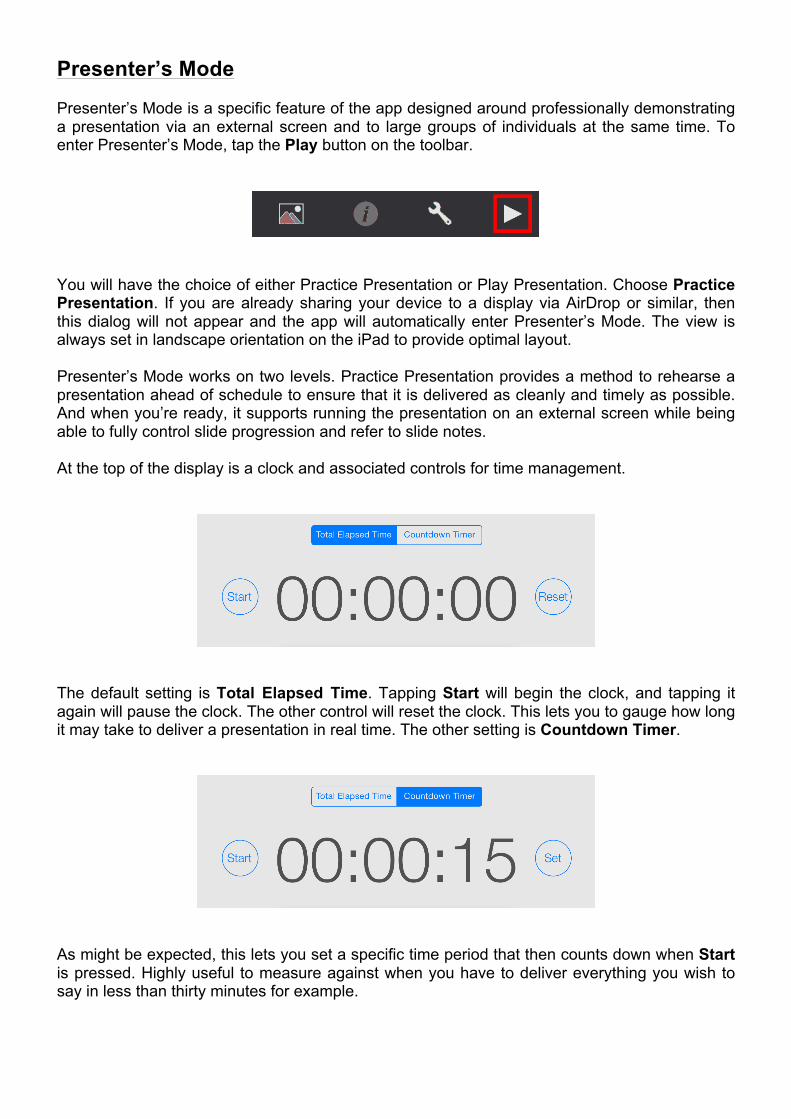
Presenter’s Mode Presenter’s Mode is a specific feature of the app designed around professionally demonstrating a presentation via an external screen and to large groups of individuals at the same time. To enter Presenter’s Mode, tap the Play button on the toolbar.
You will have the choice of either Practice Presentation or Play Presentation. Choose Practice Presentation. If you are already sharing your device to a display via AirDrop or similar, then this dialog will not appear and the app will automatically enter Presenter’s Mode. The view is always set in landscape orientation on the iPad to provide optimal layout. Presenter’s Mode works on two levels. Practice Presentation provides a method to rehearse a presentation ahead of schedule to ensure that it is delivered as cleanly and timely as possible. And when you’re ready, it supports running the presentation on an external screen while being able to fully control slide progression and refer to slide notes. At the top of the display is a clock and associated controls for time management.
The default setting is Total Elapsed Time. Tapping Start will begin the clock, and tapping it again will pause the clock. The other control will reset the clock. This lets you to gauge how long it may take to deliver a presentation in real time. The other setting is Countdown Timer.
As might be expected, this lets you set a specific time period that then counts down when Start is pressed. Highly useful to measure against when you have to deliver everything you wish to say in less than thirty minutes for example.
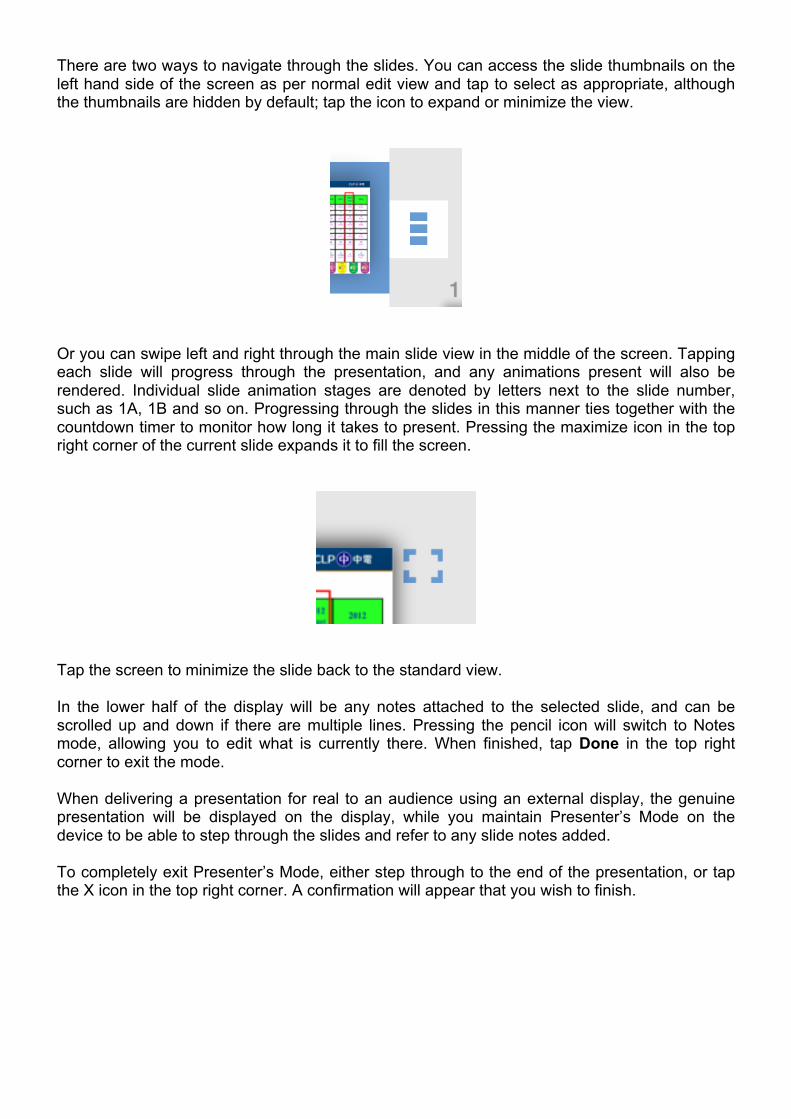
There are two ways to navigate through the slides. You can access the slide thumbnails on the left hand side of the screen as per normal edit view and tap to select as appropriate, although the thumbnails are hidden by default; tap the icon to expand or minimize the view.
Or you can swipe left and right through the main slide view in the middle of the screen. Tapping each slide will progress through the presentation, and any animations present will also be rendered. Individual slide animation stages are denoted by letters next to the slide number, such as 1A, 1B and so on. Progressing through the slides in this manner ties together with the countdown timer to monitor how long it takes to present. Pressing the maximize icon in the top right corner of the current slide expands it to fill the screen.
Tap the screen to minimize the slide back to the standard view. In the lower half of the display will be any notes attached to the selected slide, and can be scrolled up and down if there are multiple lines. Pressing the pencil icon will switch to Notes mode, allowing you to edit what is currently there. When finished, tap Done in the top right corner to exit the mode. When delivering a presentation for real to an audience using an external display, the genuine presentation will be displayed on the display, while you maintain Presenter’s Mode on the device to be able to step through the slides and refer to any slide notes added. To completely exit Presenter’s Mode, either step through to the end of the presentation, or tap the X icon in the top right corner. A confirmation will appear that you wish to finish.
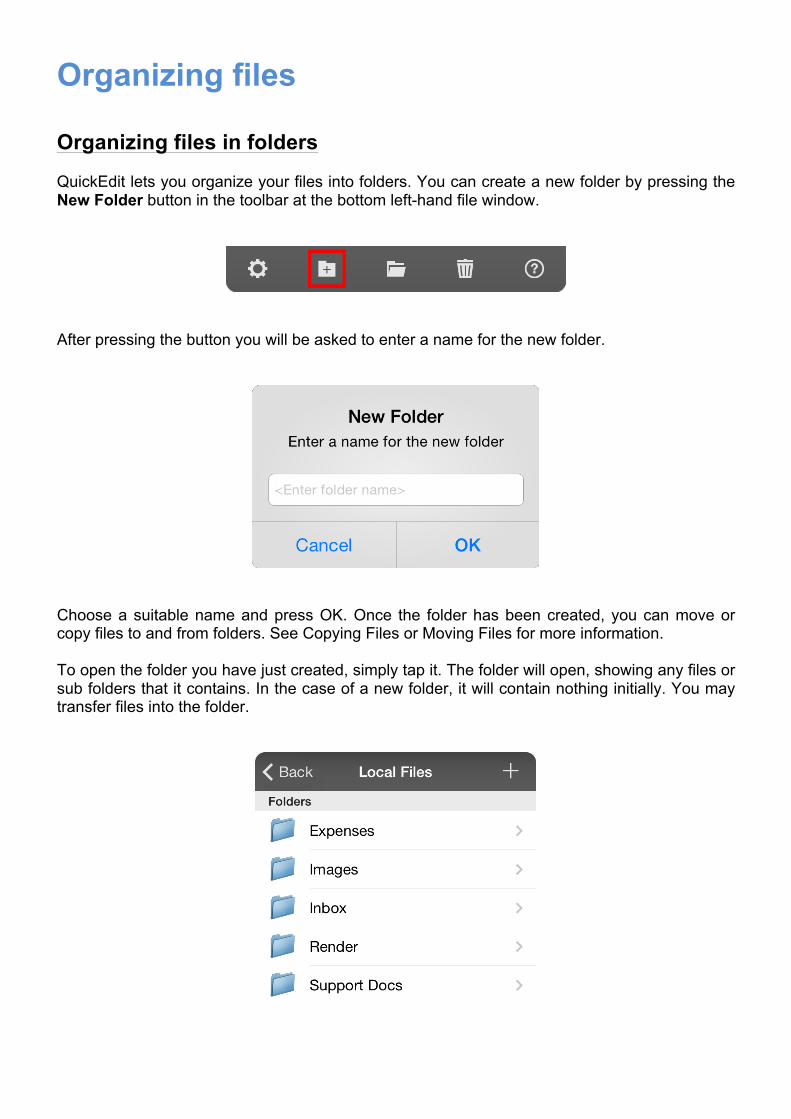
Organizing files Organizing files in folders QuickEdit lets you organize your files into folders. You can create a new folder by pressing the New Folder button in the toolbar at the bottom left-hand file window.
After pressing the button you will be asked to enter a name for the new folder.
Choose a suitable name and press OK. Once the folder has been created, you can move or copy files to and from folders. See Copying Files or Moving Files for more information. To open the folder you have just created, simply tap it. The folder will open, showing any files or sub folders that it contains. In the case of a new folder, it will contain nothing initially. You may transfer files into the folder.

Copying files QuickEdit lets you copy files from one folder to another, or duplicate within the same folder. To copy a file, start by tapping on the Organize button in the files toolbar.
The toolbar will change to show a Move button, a Copy button and a Cancel button. Select the file or files that you wish to copy, by tapping on each file in turn.
A check will be shown against each selected file. Then press the Copy button. You will be asked to choose a destination folder. The top-most level folder is shown initially, giving you the opportunity to choose either a local folder, or a remote folder located on services such as Dropbox or OneDrive. To copy the files locally, select Local Files and tap on the relevant sub folders until you have located the desired destination folder.
To copy the files to the chosen folder, press the Choose button in the window. To stop the operation at any time, press the Cancel button in the top right of the window. If you select a destination folder that already contains a file of the same name and type, it will be copied as originalname-1.
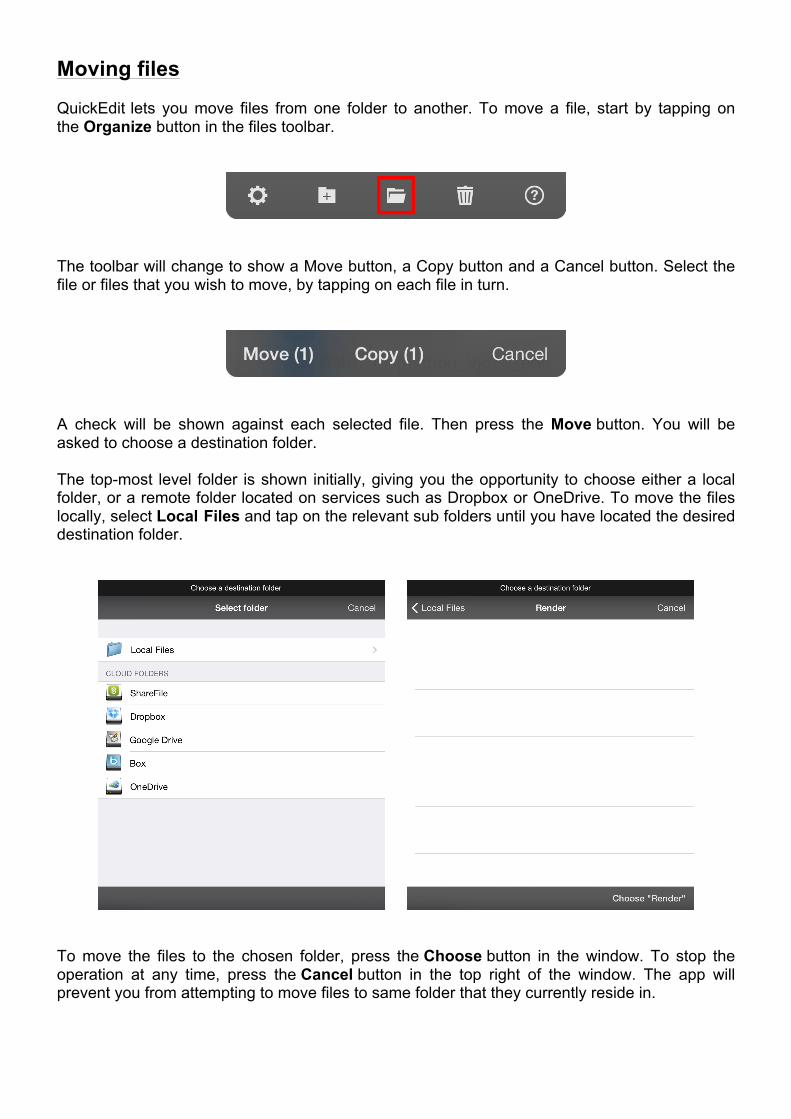
Moving files QuickEdit lets you move files from one folder to another. To move a file, start by tapping on the Organize button in the files toolbar.
The toolbar will change to show a Move button, a Copy button and a Cancel button. Select the file or files that you wish to move, by tapping on each file in turn.
A check will be shown against each selected file. Then press the Move button. You will be asked to choose a destination folder. The top-most level folder is shown initially, giving you the opportunity to choose either a local folder, or a remote folder located on services such as Dropbox or OneDrive. To move the files locally, select Local Files and tap on the relevant sub folders until you have located the desired destination folder.
To move the files to the chosen folder, press the Choose button in the window. To stop the operation at any time, press the Cancel button in the top right of the window. The app will prevent you from attempting to move files to same folder that they currently reside in.
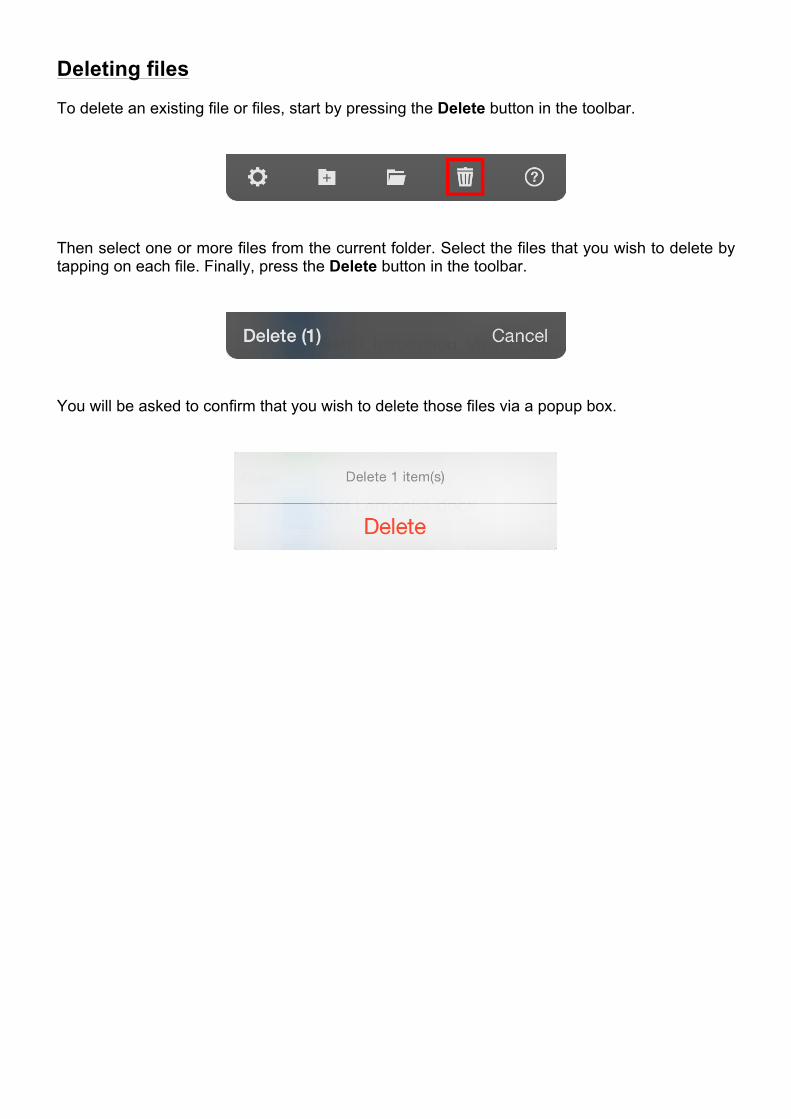
Deleting files To delete an existing file or files, start by pressing the Delete button in the toolbar.
Then select one or more files from the current folder. Select the files that you wish to delete by tapping on each file. Finally, press the Delete button in the toolbar.
You will be asked to confirm that you wish to delete those files via a popup box.
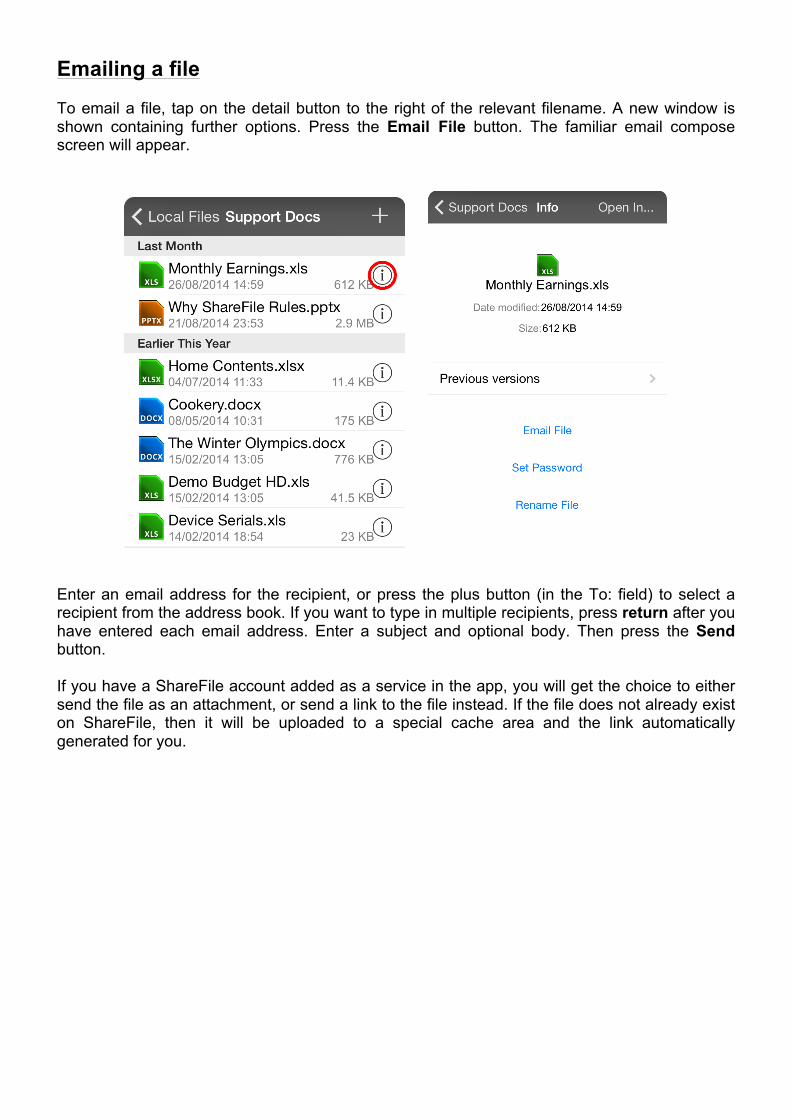
Emailing a file To email a file, tap on the detail button to the right of the relevant filename. A new window is shown containing further options. Press the Email File button. The familiar email compose screen will appear.
Enter an email address for the recipient, or press the plus button (in the To: field) to select a recipient from the address book. If you want to type in multiple recipients, press return after you have entered each email address. Enter a subject and optional body. Then press the Send button. If you have a ShareFile account added as a service in the app, you will get the choice to either send the file as an attachment, or send a link to the file instead. If the file does not already exist on ShareFile, then it will be uploaded to a special cache area and the link automatically generated for you.
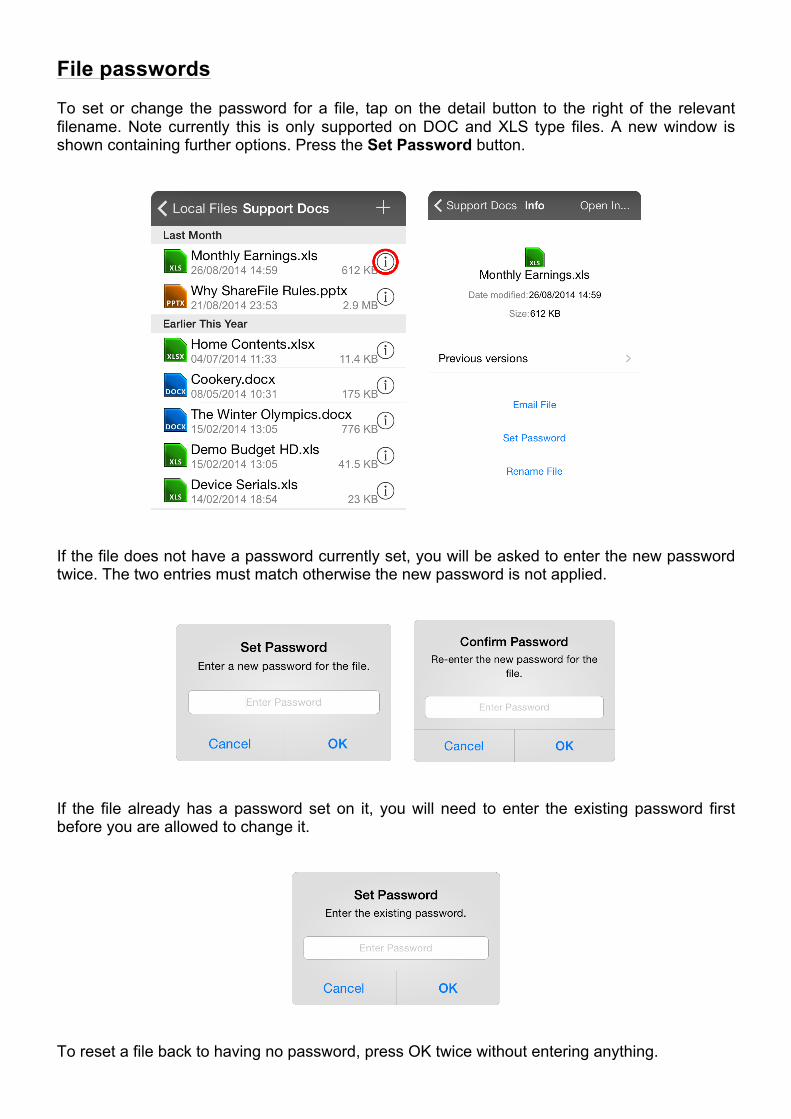
File passwords To set or change the password for a file, tap on the detail button to the right of the relevant filename. Note currently this is only supported on DOC and XLS type files. A new window is shown containing further options. Press the Set Password button.
If the file does not have a password currently set, you will be asked to enter the new password twice. The two entries must match otherwise the new password is not applied.
If the file already has a password set on it, you will need to enter the existing password first before you are allowed to change it.
To reset a file back to having no password, press OK twice without entering anything.
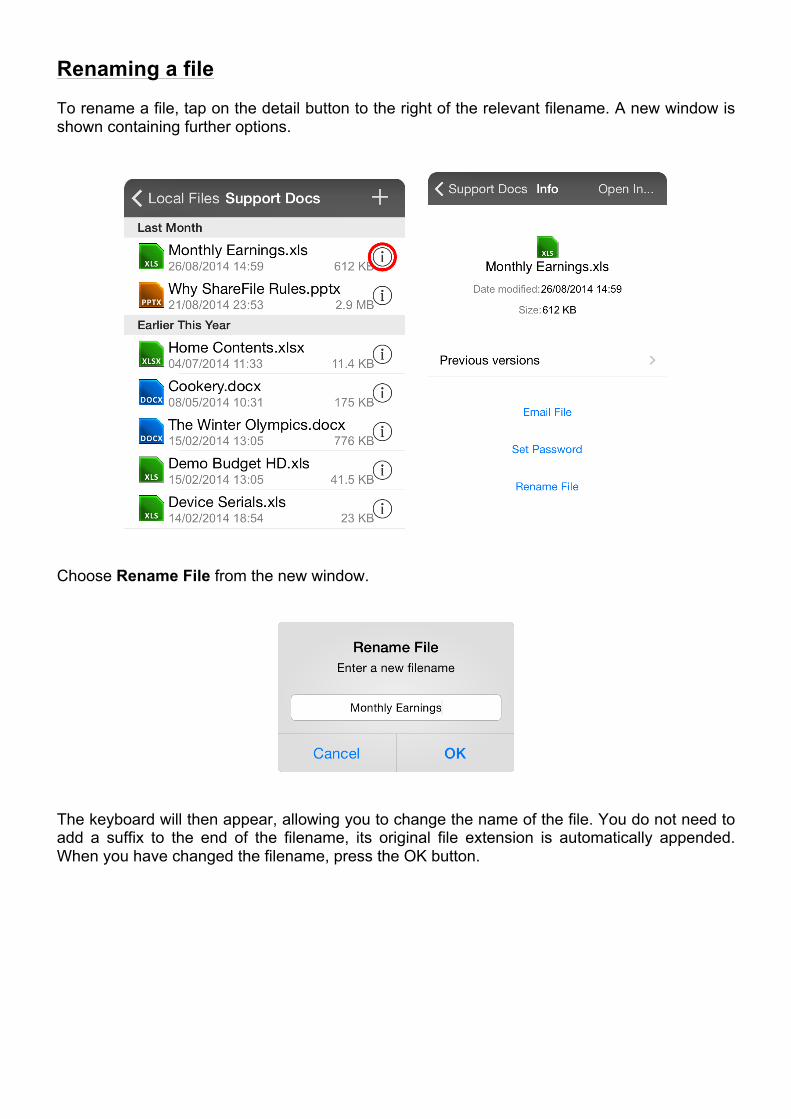
Renaming a file To rename a file, tap on the detail button to the right of the relevant filename. A new window is shown containing further options.
Choose Rename File from the new window.
The keyboard will then appear, allowing you to change the name of the file. You do not need to add a suffix to the end of the filename, its original file extension is automatically appended. When you have changed the filename, press the OK button.
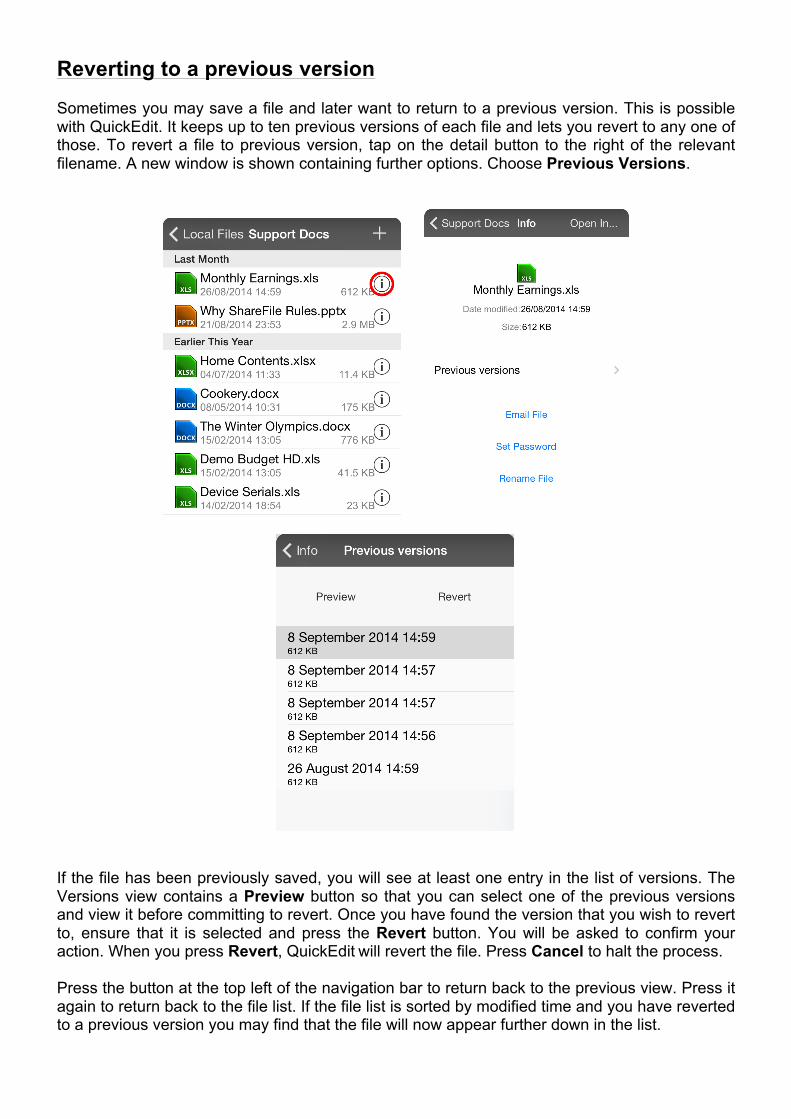
Reverting to a previous version Sometimes you may save a file and later want to return to a previous version. This is possible with QuickEdit. It keeps up to ten previous versions of each file and lets you revert to any one of those. To revert a file to previous version, tap on the detail button to the right of the relevant filename. A new window is shown containing further options. Choose Previous Versions.
If the file has been previously saved, you will see at least one entry in the list of versions. The Versions view contains a Preview button so that you can select one of the previous versions and view it before committing to revert. Once you have found the version that you wish to revert to, ensure that it is selected and press the Revert button. You will be asked to confirm your action. When you press Revert, QuickEdit will revert the file. Press Cancel to halt the process. Press the button at the top left of the navigation bar to return back to the previous view. Press it again to return back to the file list. If the file list is sorted by modified time and you have reverted to a previous version you may find that the file will now appear further down in the list.
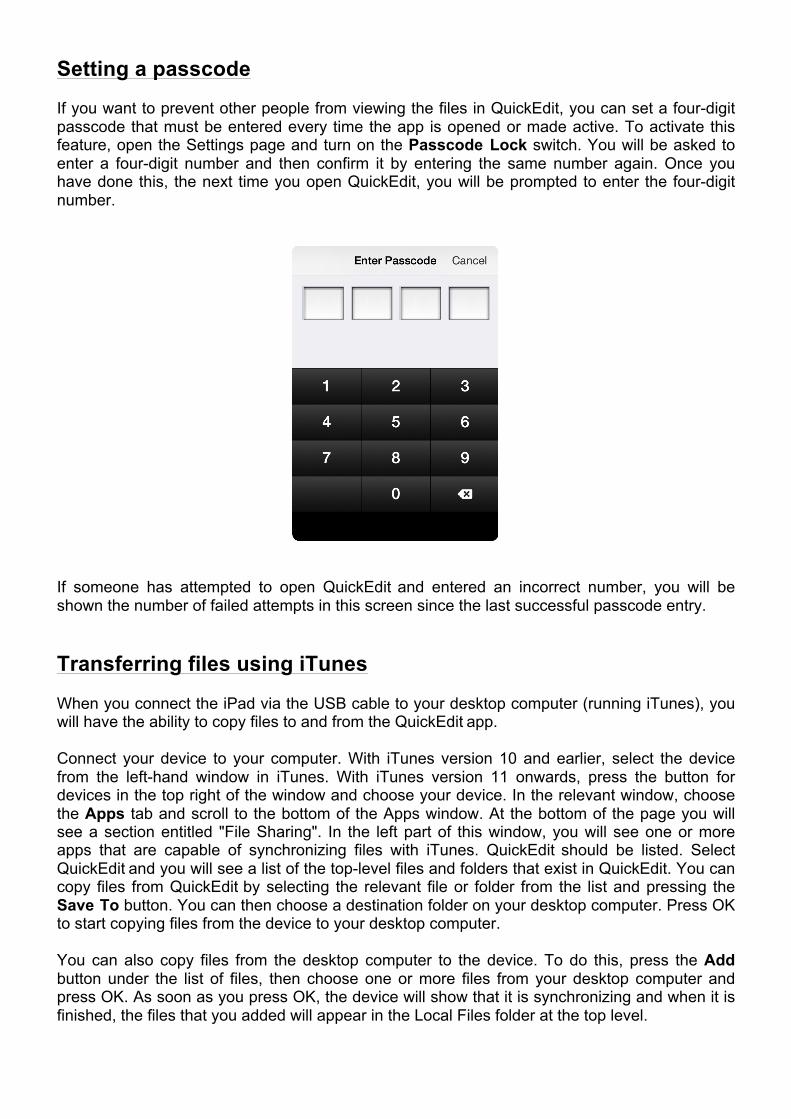
Setting a passcode If you want to prevent other people from viewing the files in QuickEdit, you can set a four-digit passcode that must be entered every time the app is opened or made active. To activate this feature, open the Settings page and turn on the Passcode Lock switch. You will be asked to enter a four-digit number and then confirm it by entering the same number again. Once you have done this, the next time you open QuickEdit, you will be prompted to enter the four-digit number.
If someone has attempted to open QuickEdit and entered an incorrect number, you will be shown the number of failed attempts in this screen since the last successful passcode entry. Transferring files using iTunes When you connect the iPad via the USB cable to your desktop computer (running iTunes), you will have the ability to copy files to and from the QuickEdit app. Connect your device to your computer. With iTunes version 10 and earlier, select the device from the left-hand window in iTunes. With iTunes version 11 onwards, press the button for devices in the top right of the window and choose your device. In the relevant window, choose the Apps tab and scroll to the bottom of the Apps window. At the bottom of the page you will see a section entitled "File Sharing". In the left part of this window, you will see one or more apps that are capable of synchronizing files with iTunes. QuickEdit should be listed. Select QuickEdit and you will see a list of the top-level files and folders that exist in QuickEdit. You can copy files from QuickEdit by selecting the relevant file or folder from the list and pressing the Save To button. You can then choose a destination folder on your desktop computer. Press OK to start copying files from the device to your desktop computer. You can also copy files from the desktop computer to the device. To do this, press the Add button under the list of files, then choose one or more files from your desktop computer and press OK. As soon as you press OK, the device will show that it is synchronizing and when it is finished, the files that you added will appear in the Local Files folder at the top level.
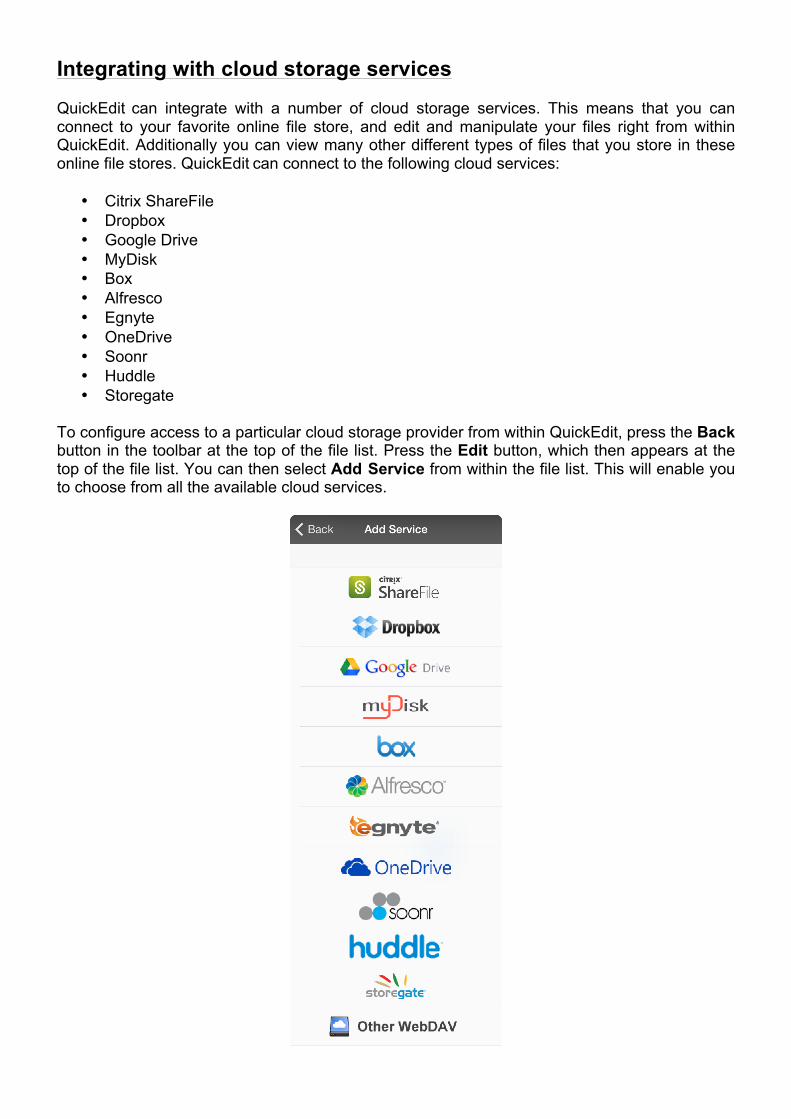
Integrating with cloud storage services QuickEdit can integrate with a number of cloud storage services. This means that you can connect to your favorite online file store, and edit and manipulate your files right from within QuickEdit. Additionally you can view many other different types of files that you store in these online file stores. QuickEdit can connect to the following cloud services:
• Citrix ShareFile • Dropbox • Google Drive • MyDisk • Box • Alfresco • Egnyte • OneDrive • Soonr • Huddle • Storegate
To configure access to a particular cloud storage provider from within QuickEdit, press the Back button in the toolbar at the top of the file list. Press the Edit button, which then appears at the top of the file list. You can then select Add Service from within the file list. This will enable you to choose from all the available cloud services.
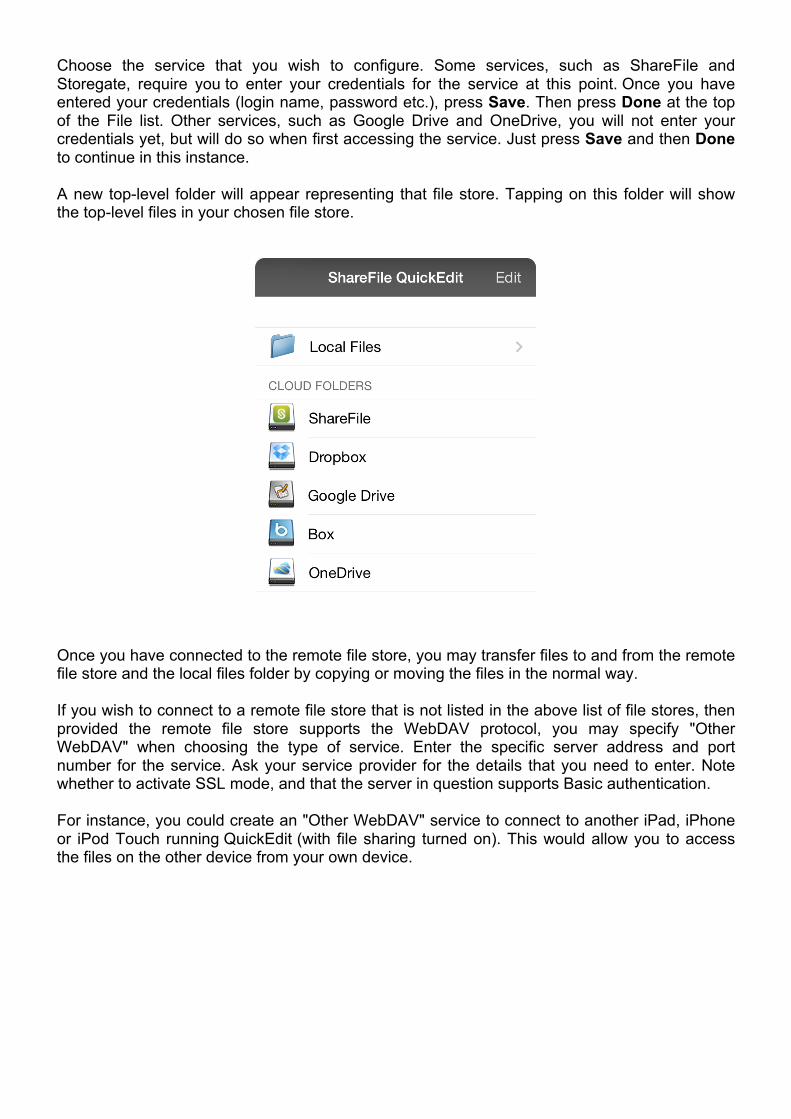
Choose the service that you wish to configure. Some services, such as ShareFile and Storegate, require you to enter your credentials for the service at this point. Once you have entered your credentials (login name, password etc.), press Save. Then press Done at the top of the File list. Other services, such as Google Drive and OneDrive, you will not enter your credentials yet, but will do so when first accessing the service. Just press Save and then Done to continue in this instance. A new top-level folder will appear representing that file store. Tapping on this folder will show the top-level files in your chosen file store.
Once you have connected to the remote file store, you may transfer files to and from the remote file store and the local files folder by copying or moving the files in the normal way. If you wish to connect to a remote file store that is not listed in the above list of file stores, then provided the remote file store supports the WebDAV protocol, you may specify "Other WebDAV" when choosing the type of service. Enter the specific server address and port number for the service. Ask your service provider for the details that you need to enter. Note whether to activate SSL mode, and that the server in question supports Basic authentication. For instance, you could create an "Other WebDAV" service to connect to another iPad, iPhone or iPod Touch running QuickEdit (with file sharing turned on). This would allow you to access the files on the other device from your own device.
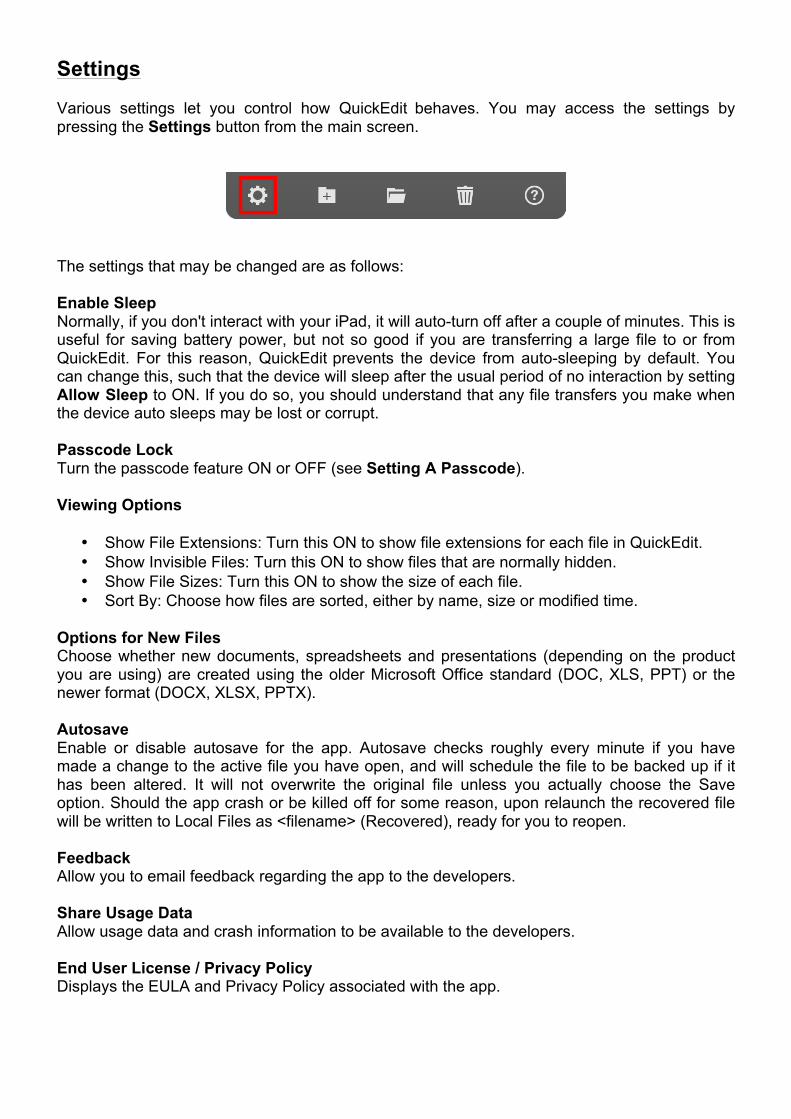
Settings Various settings let you control how QuickEdit behaves. You may access the settings by pressing the Settings button from the main screen.
The settings that may be changed are as follows: Enable Sleep Normally, if you don't interact with your iPad, it will auto-turn off after a couple of minutes. This is useful for saving battery power, but not so good if you are transferring a large file to or from QuickEdit. For this reason, QuickEdit prevents the device from auto-sleeping by default. You can change this, such that the device will sleep after the usual period of no interaction by setting Allow Sleep to ON. If you do so, you should understand that any file transfers you make when the device auto sleeps may be lost or corrupt. Passcode Lock Turn the passcode feature ON or OFF (see Setting A Passcode). Viewing Options
• Show File Extensions: Turn this ON to show file extensions for each file in QuickEdit. • Show Invisible Files: Turn this ON to show files that are normally hidden. • Show File Sizes: Turn this ON to show the size of each file. • Sort By: Choose how files are sorted, either by name, size or modified time.
Options for New Files Choose whether new documents, spreadsheets and presentations (depending on the product you are using) are created using the older Microsoft Office standard (DOC, XLS, PPT) or the newer format (DOCX, XLSX, PPTX). Autosave Enable or disable autosave for the app. Autosave checks roughly every minute if you have made a change to the active file you have open, and will schedule the file to be backed up if it has been altered. It will not overwrite the original file unless you actually choose the Save option. Should the app crash or be killed off for some reason, upon relaunch the recovered file will be written to Local Files as <filename> (Recovered), ready for you to reopen. Feedback Allow you to email feedback regarding the app to the developers. Share Usage Data Allow usage data and crash information to be available to the developers. End User License / Privacy Policy Displays the EULA and Privacy Policy associated with the app.