Embed Size (px)
Citation preview
Raising Honey Bee Queens
Written by Khalil Hamdan
Apeldoorn, The Netherlands
Carniolan Queen Bee (Photo by P-O Gustafsson)
Queen raising is the production of mated queens for use in the apiary or sale and involves breeding
and selection of suitable queen mothers and drones to produce bees that possess desirable
characteristics. Queen rearing is a highly specialized process and is an essential part of beekeeping.
There are numerous practices and variations of queen raising practiced by beekeepers, all are based
on one fact of bee biology, that the nurse bees in a queenless hive can produce some queens from
young female larvae. To undertake the production of queens, this requires an understanding of the
biological and fundamental of raising queens.
This publication provides basic information on queen raising and explains simple methods of how to
raise queen bees on a small scale for the use in the apiary. The beekeeper will find that there is more
than one way to raise his own queens.
Developmental stages of queen bee
The number of days required for the developmental stages of the queen is shown in the chart below:
Stage Day
Egg 1
2
3
Unsealed larva 4 Egg hatches into tiny larva.
5 Larva is fed lavishly on royal jelly during
6 the larval stage.
7
8
Operculated larva 9
Prepupa 10
11
12
Pupa 13 The queen pupa is fully formed and in its toughest. This is the
14 best times that the cell can be removed when raising queens.
15
Queen birth 16
Mating flight 20
Start egg laying 23 - 30
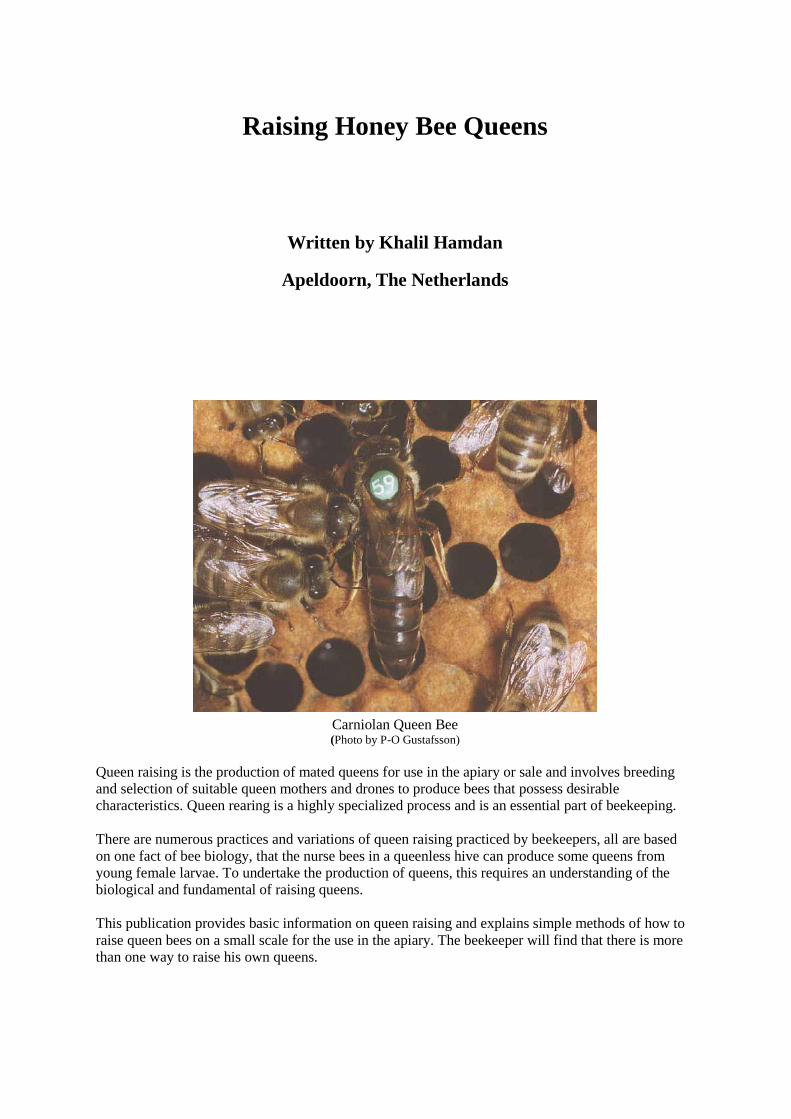
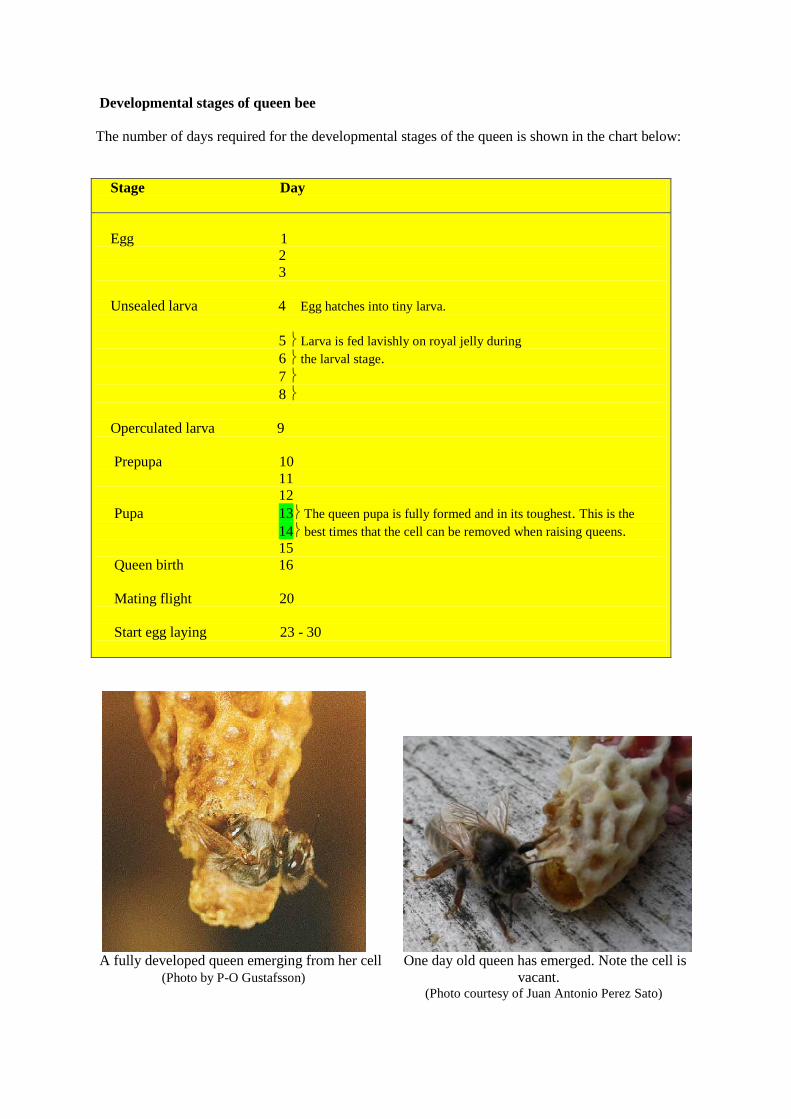
A fully developed queen emerging from her cell One day old queen has emerged. Note the cell is
(Photo by P-O Gustafsson) vacant. (Photo courtesy of Juan Antonio Perez Sato)
Type of queens raised by bees and how to distinguish them
In nature, worker bees raise new queens under three different circumstances:
1 The swarm queen
Swarming is a natural phenomenon and is the bee colony’s method of reproduction and ensures the
survival of their species.
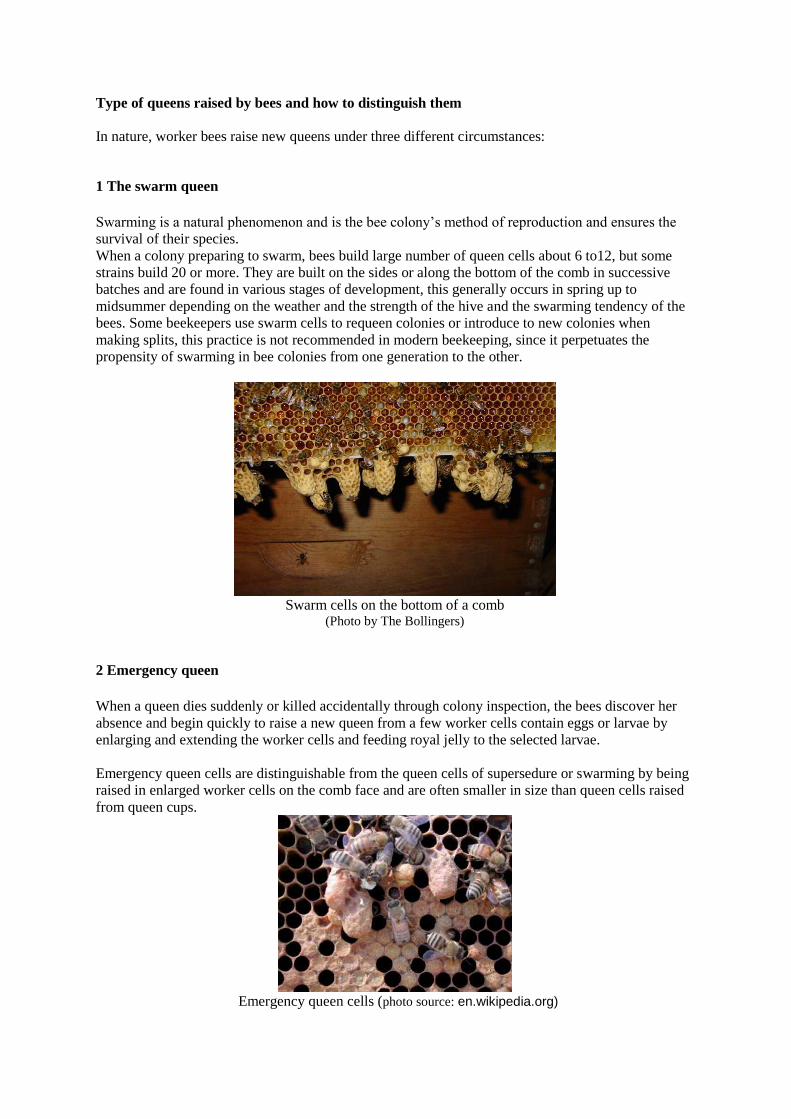
When a colony preparing to swarm, bees build large number of queen cells about 6 to12, but some
strains build 20 or more. They are built on the sides or along the bottom of the comb in successive
batches and are found in various stages of development, this generally occurs in spring up to
midsummer depending on the weather and the strength of the hive and the swarming tendency of the
bees. Some beekeepers use swarm cells to requeen colonies or introduce to new colonies when
making splits, this practice is not recommended in modern beekeeping, since it perpetuates the
propensity of swarming in bee colonies from one generation to the other.
Swarm cells on the bottom of a comb
(Photo by The Bollingers)
2 Emergency queen
When a queen dies suddenly or killed accidentally through colony inspection, the bees discover her
absence and begin quickly to raise a new queen from a few worker cells contain eggs or larvae by
enlarging and extending the worker cells and feeding royal jelly to the selected larvae.
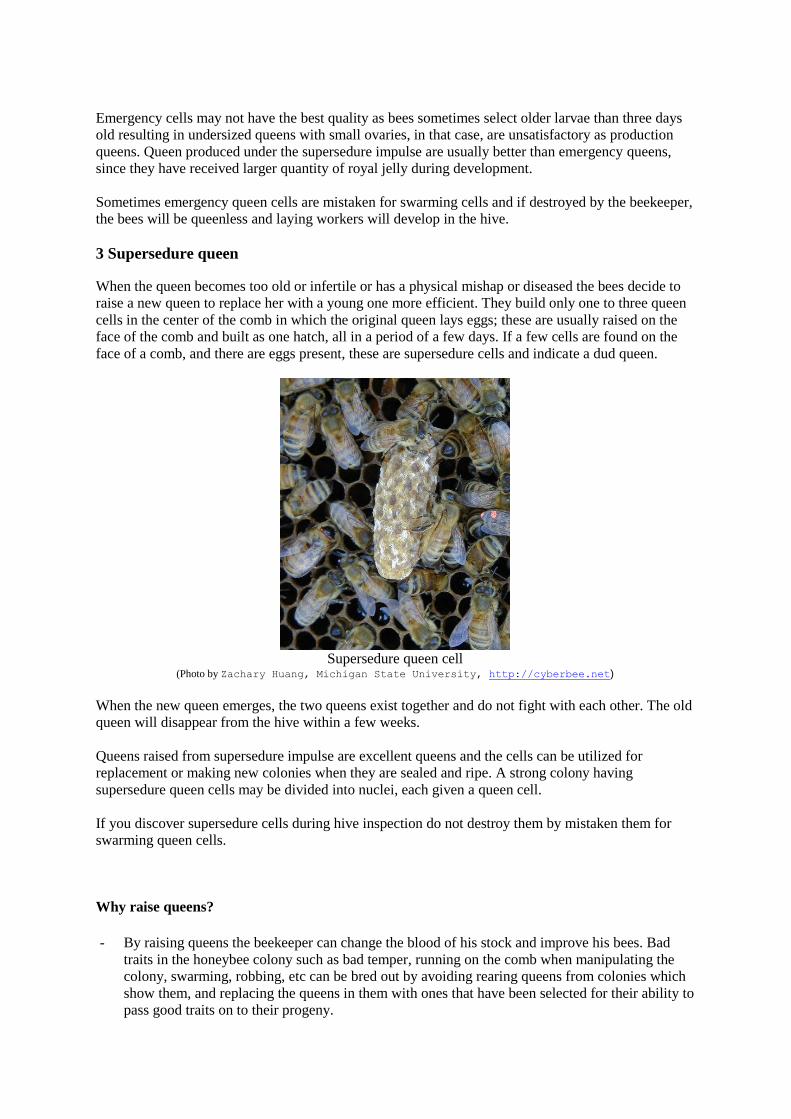
Emergency queen cells are distinguishable from the queen cells of supersedure or swarming by being
raised in enlarged worker cells on the comb face and are often smaller in size than queen cells raised
from queen cups.
Emergency queen cells (photo source: en.wikipedia.org)
Emergency cells may not have the best quality as bees sometimes select older larvae than three days
old resulting in undersized queens with small ovaries, in that case, are unsatisfactory as production
queens. Queen produced under the supersedure impulse are usually better than emergency queens,
since they have received larger quantity of royal jelly during development.
Sometimes emergency queen cells are mistaken for swarming cells and if destroyed by the beekeeper,
the bees will be queenless and laying workers will develop in the hive.
3 Supersedure queen
When the queen becomes too old or infertile or has a physical mishap or diseased the bees decide to
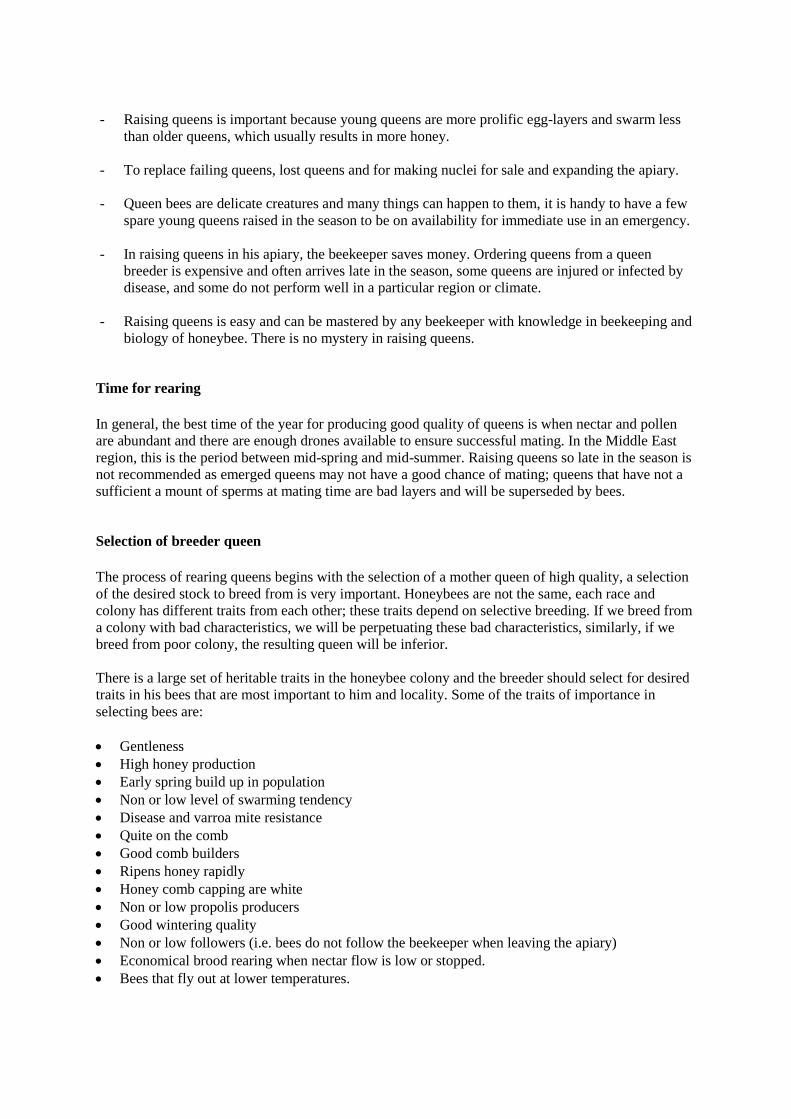
raise a new queen to replace her with a young one more efficient. They build only one to three queen
cells in the center of the comb in which the original queen lays eggs; these are usually raised on the
face of the comb and built as one hatch, all in a period of a few days. If a few cells are found on the
face of a comb, and there are eggs present, these are supersedure cells and indicate a dud queen.
Supersedure queen cell
(Photo by Zachary Huang, Michigan State University, http://cyberbee.net)
When the new queen emerges, the two queens exist together and do not fight with each other. The old
queen will disappear from the hive within a few weeks.
Queens raised from supersedure impulse are excellent queens and the cells can be utilized for
replacement or making new colonies when they are sealed and ripe. A strong colony having
supersedure queen cells may be divided into nuclei, each given a queen cell.
If you discover supersedure cells during hive inspection do not destroy them by mistaken them for
swarming queen cells.
Why raise queens?
- By raising queens the beekeeper can change the blood of his stock and improve his bees. Bad
traits in the honeybee colony such as bad temper, running on the comb when manipulating the
colony, swarming, robbing, etc can be bred out by avoiding rearing queens from colonies which
show them, and replacing the queens in them with ones that have been selected for their ability to
pass good traits on to their progeny.
- Raising queens is important because young queens are more prolific egg-layers and swarm less
than older queens, which usually results in more honey.
- To replace failing queens, lost queens and for making nuclei for sale and expanding the apiary.
- Queen bees are delicate creatures and many things can happen to them, it is handy to have a few
spare young queens raised in the season to be on availability for immediate use in an emergency.
- In raising queens in his apiary, the beekeeper saves money. Ordering queens from a queen
breeder is expensive and often arrives late in the season, some queens are injured or infected by
disease, and some do not perform well in a particular region or climate.
- Raising queens is easy and can be mastered by any beekeeper with knowledge in beekeeping and
biology of honeybee. There is no mystery in raising queens.
Time for rearing
In general, the best time of the year for producing good quality of queens is when nectar and pollen
are abundant and there are enough drones available to ensure successful mating. In the Middle East
region, this is the period between mid-spring and mid-summer. Raising queens so late in the season is
not recommended as emerged queens may not have a good chance of mating; queens that have not a
sufficient a mount of sperms at mating time are bad layers and will be superseded by bees.
Selection of breeder queen
The process of rearing queens begins with the selection of a mother queen of high quality, a selection
of the desired stock to breed from is very important. Honeybees are not the same, each race and
colony has different traits from each other; these traits depend on selective breeding. If we breed from
a colony with bad characteristics, we will be perpetuating these bad characteristics, similarly, if we
breed from poor colony, the resulting queen will be inferior.
There is a large set of heritable traits in the honeybee colony and the breeder should select for desired
traits in his bees that are most important to him and locality. Some of the traits of importance in
selecting bees are:
Gentleness
High honey production
Early spring build up in population
Non or low level of swarming tendency
Disease and varroa mite resistance
Quite on the comb
Good comb builders
Ripens honey rapidly
Honey comb capping are white
Non or low propolis producers
Good wintering quality
Non or low followers (i.e. bees do not follow the beekeeper when leaving the apiary)
Economical brood rearing when nectar flow is low or stopped.
Bees that fly out at lower temperatures.
It is impossible in queen rearing to get all these characteristics at the same time, however, 3 or 4 items
on this list will be achieved.
Requirements for rearing good queens
In order to produce good queens the following is required:
A breeder queen to breed from. It is very important that the beekeeper should choose a queen
mother from the best hive in his apiary that is one that lays well and produces a lot of brood,
whose bees are gentle, easy to handle, disease resistant, greater honey producer, and do not have
swarm or have low swarming tendency.
To breed high quality queens the beekeeper is advised to avoid excessive inbreeding and should
Purchase every 2-3 years a pure queen of the same bee race he keeps from a breeder to use for
Propagating.
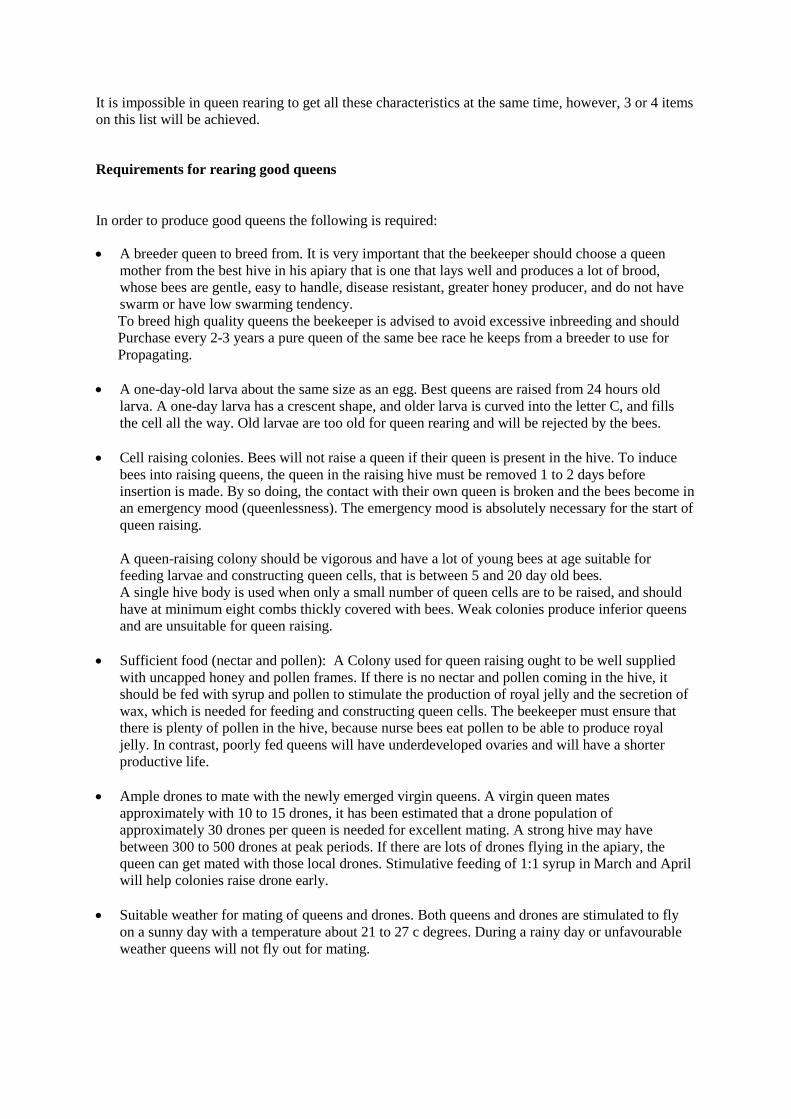
A one-day-old larva about the same size as an egg. Best queens are raised from 24 hours old
larva. A one-day larva has a crescent shape, and older larva is curved into the letter C, and fills
the cell all the way. Old larvae are too old for queen rearing and will be rejected by the bees.
Cell raising colonies. Bees will not raise a queen if their queen is present in the hive. To induce
bees into raising queens, the queen in the raising hive must be removed 1 to 2 days before
insertion is made. By so doing, the contact with their own queen is broken and the bees become in
an emergency mood (queenlessness). The emergency mood is absolutely necessary for the start of
queen raising.
A queen-raising colony should be vigorous and have a lot of young bees at age suitable for
feeding larvae and constructing queen cells, that is between 5 and 20 day old bees.
A single hive body is used when only a small number of queen cells are to be raised, and should
have at minimum eight combs thickly covered with bees. Weak colonies produce inferior queens
and are unsuitable for queen raising.
Sufficient food (nectar and pollen): A Colony used for queen raising ought to be well supplied
with uncapped honey and pollen frames. If there is no nectar and pollen coming in the hive, it
should be fed with syrup and pollen to stimulate the production of royal jelly and the secretion of
wax, which is needed for feeding and constructing queen cells. The beekeeper must ensure that
there is plenty of pollen in the hive, because nurse bees eat pollen to be able to produce royal
jelly. In contrast, poorly fed queens will have underdeveloped ovaries and will have a shorter
productive life.
Ample drones to mate with the newly emerged virgin queens. A virgin queen mates
approximately with 10 to 15 drones, it has been estimated that a drone population of
approximately 30 drones per queen is needed for excellent mating. A strong hive may have
between 300 to 500 drones at peak periods. If there are lots of drones flying in the apiary, the
queen can get mated with those local drones. Stimulative feeding of 1:1 syrup in March and April
will help colonies raise drone early.
Suitable weather for mating of queens and drones. Both queens and drones are stimulated to fly
on a sunny day with a temperature about 21 to 27 c degrees. During a rainy day or unfavourable
weather queens will not fly out for mating.
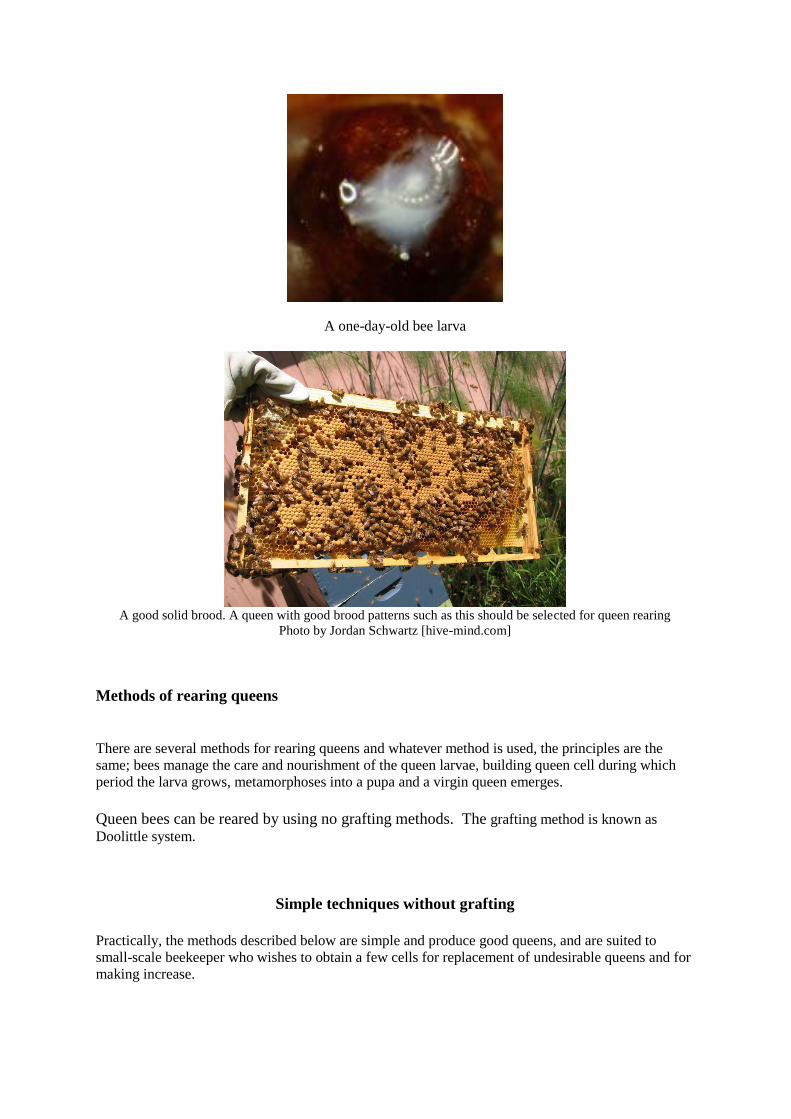
A one-day-old bee larva
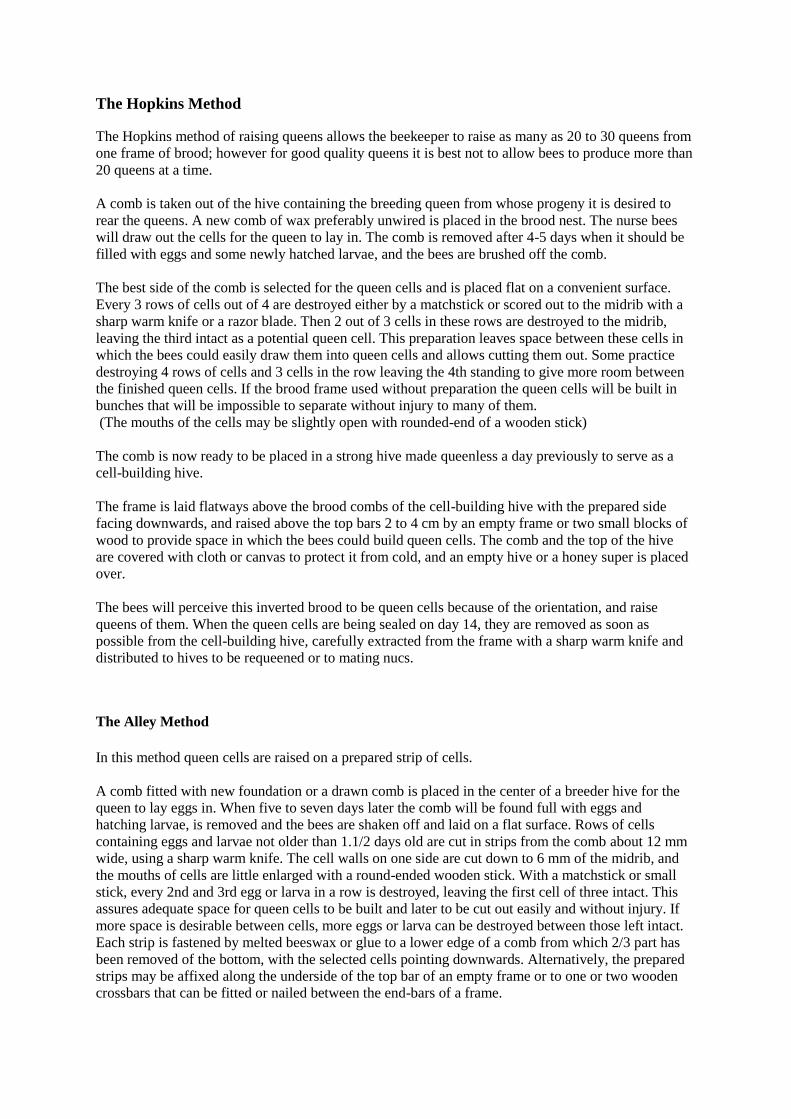
A good solid brood. A queen with good brood patterns such as this should be selected for queen rearing
Photo by Jordan Schwartz [hive-mind.com]
Methods of rearing queens
There are several methods for rearing queens and whatever method is used, the principles are the
same; bees manage the care and nourishment of the queen larvae, building queen cell during which
period the larva grows, metamorphoses into a pupa and a virgin queen emerges.
Queen bees can be reared by using no grafting methods. The grafting method is known as
Doolittle system.
Simple techniques without grafting
Practically, the methods described below are simple and produce good queens, and are suited to
small-scale beekeeper who wishes to obtain a few cells for replacement of undesirable queens and for
making increase.
The Hopkins Method
The Hopkins method of raising queens allows the beekeeper to raise as many as 20 to 30 queens from
one frame of brood; however for good quality queens it is best not to allow bees to produce more than
20 queens at a time.
A comb is taken out of the hive containing the breeding queen from whose progeny it is desired to
rear the queens. A new comb of wax preferably unwired is placed in the brood nest. The nurse bees
will draw out the cells for the queen to lay in. The comb is removed after 4-5 days when it should be
filled with eggs and some newly hatched larvae, and the bees are brushed off the comb.
The best side of the comb is selected for the queen cells and is placed flat on a convenient surface.
Every 3 rows of cells out of 4 are destroyed either by a matchstick or scored out to the midrib with a
sharp warm knife or a razor blade. Then 2 out of 3 cells in these rows are destroyed to the midrib,
leaving the third intact as a potential queen cell. This preparation leaves space between these cells in
which the bees could easily draw them into queen cells and allows cutting them out. Some practice
destroying 4 rows of cells and 3 cells in the row leaving the 4th standing to give more room between
the finished queen cells. If the brood frame used without preparation the queen cells will be built in
bunches that will be impossible to separate without injury to many of them.
(The mouths of the cells may be slightly open with rounded-end of a wooden stick)
The comb is now ready to be placed in a strong hive made queenless a day previously to serve as a
cell-building hive.
The frame is laid flatways above the brood combs of the cell-building hive with the prepared side
facing downwards, and raised above the top bars 2 to 4 cm by an empty frame or two small blocks of
wood to provide space in which the bees could build queen cells. The comb and the top of the hive
are covered with cloth or canvas to protect it from cold, and an empty hive or a honey super is placed
over.
The bees will perceive this inverted brood to be queen cells because of the orientation, and raise
queens of them. When the queen cells are being sealed on day 14, they are removed as soon as
possible from the cell-building hive, carefully extracted from the frame with a sharp warm knife and
distributed to hives to be requeened or to mating nucs.
The Alley Method
In this method queen cells are raised on a prepared strip of cells.
A comb fitted with new foundation or a drawn comb is placed in the center of a breeder hive for the
queen to lay eggs in. When five to seven days later the comb will be found full with eggs and
hatching larvae, is removed and the bees are shaken off and laid on a flat surface. Rows of cells
containing eggs and larvae not older than 1.1/2 days old are cut in strips from the comb about 12 mm
wide, using a sharp warm knife. The cell walls on one side are cut down to 6 mm of the midrib, and
the mouths of cells are little enlarged with a round-ended wooden stick. With a matchstick or small
stick, every 2nd and 3rd egg or larva in a row is destroyed, leaving the first cell of three intact. This
assures adequate space for queen cells to be built and later to be cut out easily and without injury. If
more space is desirable between cells, more eggs or larva can be destroyed between those left intact.
Each strip is fastened by melted beeswax or glue to a lower edge of a comb from which 2/3 part has
been removed of the bottom, with the selected cells pointing downwards. Alternatively, the prepared
strips may be affixed along the underside of the top bar of an empty frame or to one or two wooden
crossbars that can be fitted or nailed between the end-bars of a frame.

The frame with prepared cells is given to queenless colony from which the queen is removed. In a day
or two, the bees will proceed to fashion the cells that contain young larvae into queen cells.
Ten days later the comb can be taken out and the queen cells can be cut off and given to nuclei
prepared for their reception.
One cell can be left in the queenless colony.
The Miller Method
Miller method is the simplest of all queen-raising methods and is suited for a beekeeper wanting to
raise a small number of queens, about eight or nine queens. The queen cells are raised on a new comb
in the following way:
Two or four triangular shaped pieces of foundation are fastened to the top bar of an empty frame,
leaving a space of 5cm at each end. These pieces are 10 cm wide and tapered to a point at the end and
extend half the depth the frame.
The prepared frame is then placed in the middle of the brood nest of a colony selected for queen
raising after lifting a comb from the side first to make room. After five to seven days, the foundation
should be drawn out and contains brood with the youngest larvae and eggs toward the margins. The
hive should be fed if there is no honey flow at the time. The frame is now removed from the breeder
queen colony and the bees are brushed off gently while it is held vertically, the comb is not supported
by wire and in this case is fragile to shake. The frame is placed on a board or table and with a warm
sharp knife the bottom margins of the comb are trimmed so that the cells at the margins contain the
youngest larvae (one to one and half day old). This should be done in a warm, shady place to protect
larvae from winds and direct sunshine; the frame should not be out of the hive longer than 10
minutes.
If every second and third larva or egg on the margin of the cut comb is destroyed, the queen cells will
be built farther apart; this will facilitate their easy removal in a later stage.
The prepared comb of larvae is then inserted in the middle of a strong cell-building colony from
which the queen is removed 1 to 2 days beforehand. The bees will build a number of queen cells
along the bottom margins of the comb and the larvae within will be nursed into queen papuae.
After ten days of comb insertion in the cell-building colony, the sealed cells are ready to be cut out
and used for requeening or are introduced to nuclei.
After this the bees should be left one or two good queen cells from which to raise their own queen.
NOTE: In hot weather, it is difficult for the bees to draw out a new foundation and induce the
queen to lay eggs on it. Alternatively, a drawn comb, preferably unwired may be used. The
drawn comb is inserted between two brood combs in the selected colony for queen raising. In
order to induce the queen to lay eggs on this frame, there should be no other empty comb where
the queen can lay eggs. After 4 days, the comb will be found filled with newly hatched larvae
and eggs. It is removed and the bees brushed off. With a sharp knife the bottom portion of the
comb is cut into “V” shapes leaving eggs about to hatch and young larvae. It is important to
expose the youngest of the brood or eggs at the edge of the comb (where cuts are made) as the
bees prefer to build cells on the edges. Two out of three eggs or larvae are destroyed so there
will be space between the queen cells.
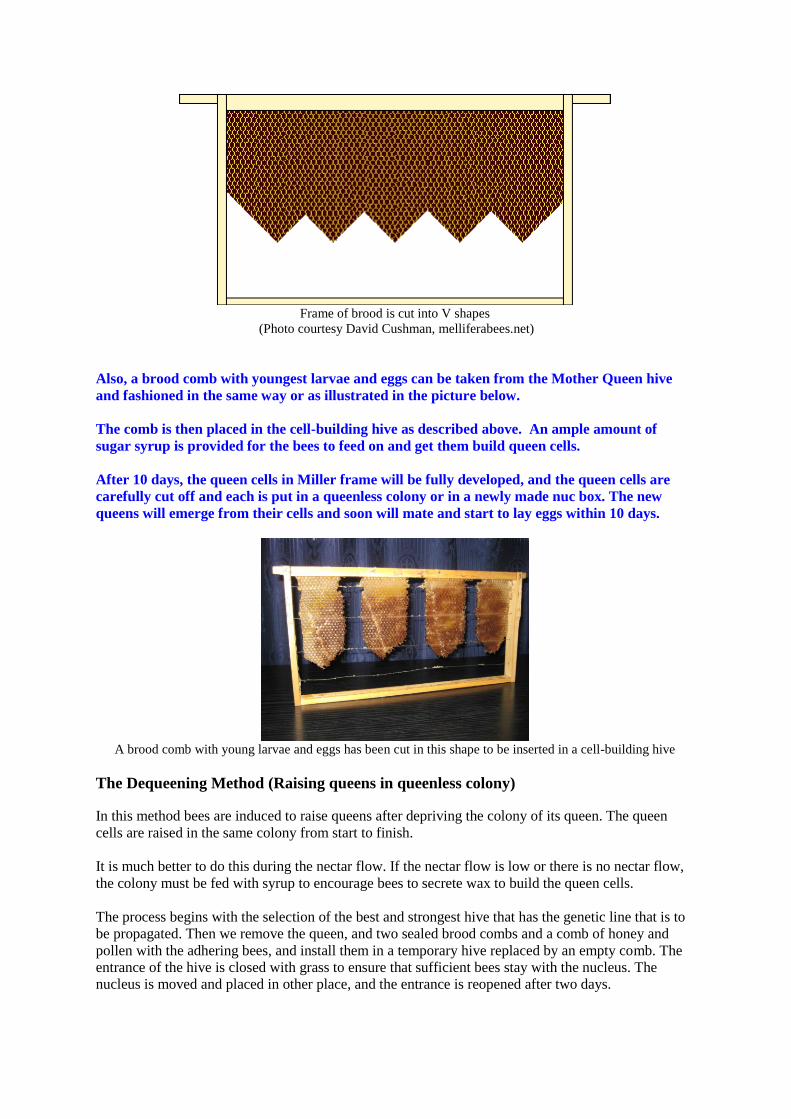
Frame of brood is cut into V shapes
(Photo courtesy David Cushman, melliferabees.net)
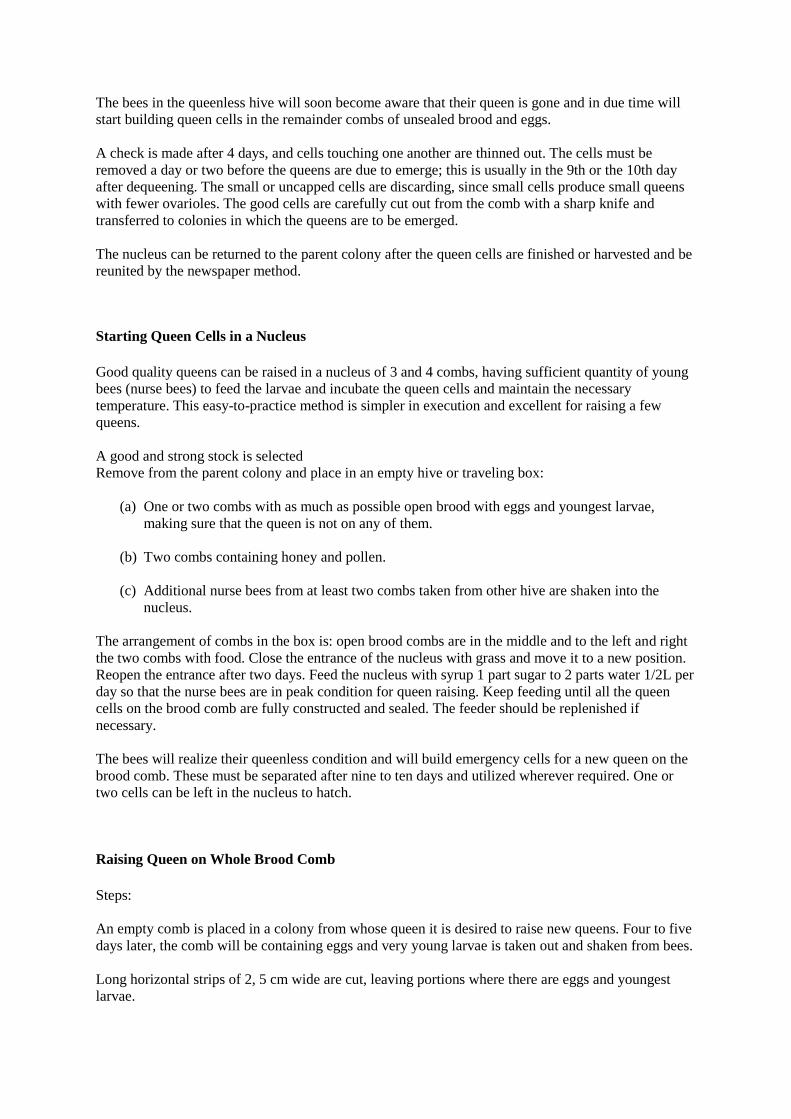
Also, a brood comb with youngest larvae and eggs can be taken from the Mother Queen hive
and fashioned in the same way or as illustrated in the picture below.
The comb is then placed in the cell-building hive as described above. An ample amount of
sugar syrup is provided for the bees to feed on and get them build queen cells.
After 10 days, the queen cells in Miller frame will be fully developed, and the queen cells are
carefully cut off and each is put in a queenless colony or in a newly made nuc box. The new
queens will emerge from their cells and soon will mate and start to lay eggs within 10 days.
A brood comb with young larvae and eggs has been cut in this shape to be inserted in a cell-building hive
The Dequeening Method (Raising queens in queenless colony)
In this method bees are induced to raise queens after depriving the colony of its queen. The queen
cells are raised in the same colony from start to finish.
It is much better to do this during the nectar flow. If the nectar flow is low or there is no nectar flow,
the colony must be fed with syrup to encourage bees to secrete wax to build the queen cells.
The process begins with the selection of the best and strongest hive that has the genetic line that is to
be propagated. Then we remove the queen, and two sealed brood combs and a comb of honey and
pollen with the adhering bees, and install them in a temporary hive replaced by an empty comb. The
entrance of the hive is closed with grass to ensure that sufficient bees stay with the nucleus. The
nucleus is moved and placed in other place, and the entrance is reopened after two days.
The bees in the queenless hive will soon become aware that their queen is gone and in due time will
start building queen cells in the remainder combs of unsealed brood and eggs.
A check is made after 4 days, and cells touching one another are thinned out. The cells must be
removed a day or two before the queens are due to emerge; this is usually in the 9th or the 10th day
after dequeening. The small or uncapped cells are discarding, since small cells produce small queens
with fewer ovarioles. The good cells are carefully cut out from the comb with a sharp knife and
transferred to colonies in which the queens are to be emerged.
The nucleus can be returned to the parent colony after the queen cells are finished or harvested and be
reunited by the newspaper method.
Starting Queen Cells in a Nucleus
Good quality queens can be raised in a nucleus of 3 and 4 combs, having sufficient quantity of young
bees (nurse bees) to feed the larvae and incubate the queen cells and maintain the necessary
temperature. This easy-to-practice method is simpler in execution and excellent for raising a few
queens.
A good and strong stock is selected
Remove from the parent colony and place in an empty hive or traveling box:
(a) One or two combs with as much as possible open brood with eggs and youngest larvae,
making sure that the queen is not on any of them.
(b) Two combs containing honey and pollen.
(c) Additional nurse bees from at least two combs taken from other hive are shaken into the
nucleus.
The arrangement of combs in the box is: open brood combs are in the middle and to the left and right
the two combs with food. Close the entrance of the nucleus with grass and move it to a new position.
Reopen the entrance after two days. Feed the nucleus with syrup 1 part sugar to 2 parts water 1/2L per
day so that the nurse bees are in peak condition for queen raising. Keep feeding until all the queen
cells on the brood comb are fully constructed and sealed. The feeder should be replenished if
necessary.
The bees will realize their queenless condition and will build emergency cells for a new queen on the
brood comb. These must be separated after nine to ten days and utilized wherever required. One or
two cells can be left in the nucleus to hatch.
Raising Queen on Whole Brood Comb
Steps:
An empty comb is placed in a colony from whose queen it is desired to raise new queens. Four to five
days later, the comb will be containing eggs and very young larvae is taken out and shaken from bees.
Long horizontal strips of 2, 5 cm wide are cut, leaving portions where there are eggs and youngest
larvae.

The comb is then put into the center of a queenless colony to build queen cells along the upper
margins of the opening in the comb.
As soon as the queen cells are ripe in about 9 – 10 days after inserting the prepared comb, the queen
cells are cut out for requeening colonies or for transferring to mating nuclei.
Raising Queens in Double Brood Hive
A small number of queens can be raised in a queenless brood chamber established on top of a strong
colony, arranged in this order:
1. A lower brood chamber
2. Queen excluder
3. Super
4. Queen excluder
5. Upper brood chamber
In this arrangement, the upper brood chamber is used for raising queen cells and the lower brood
chamber for the production; and the laying queen maintains the strength of the colony.
1) All the unsealed brood with the adhering nurse bees is removed from the original hive and
placed into an empty hive body. Empty combs are given to replace the open brood taken from
the hive for the queen to lay eggs.
2) The queen is confined in the original hive (the lower brood chamber) by a queen excluder.
3) A honey super or a box with drawn combs is placed above the queen excluder.
4) Another queen excluder is placed above the super.
5) The second queenless brood chamber containing the open brood, with two combs of honey
and pollen and a feeder is placed on top, and the hive is closed with inner and outer covers.
6) After 5 – 12 hours of preparing the hive, a comb of eggs and youngest larvae taken from the
breeder queen colony is inserted in the middle of the upper brood chamber. A number of
queen cells will be built on this frame and will be ripe for transfer in about 9 to 10 days later.
Tips:
Feed with ½ lb. Syrup every day
Examine all combs in the upper chamber after three days and destroy any queen cells raised in
other brood combs.
The Grafting Method of Rearing Queens
The Doolittle or grafting method involves the transferring or grafting of small larvae (24 hours old)
into artificial queen cell cups and is generally employed by commercial queen breeders. The age of
larvae is timed giving the breeder queen an empty comb to lay eggs in 4 days before grafting. The
grafting method allows a large number of queens to be reared throughout most of the season. A
beekeeper with a few hives can raise a few queen cells (10–12) by using this method.
Equipement required
Artificial plastic queen cups
Modified frame and cell bar. This can be made or purchased
Grafting tool. This may be fashioned by the beekeeper from a toothpick or a matchstick with the
end is flattened and bent.
Royal jelly. Royal jelly is collected beforehand from uncapped queen cells and is diluted 1:1 with
warm water.
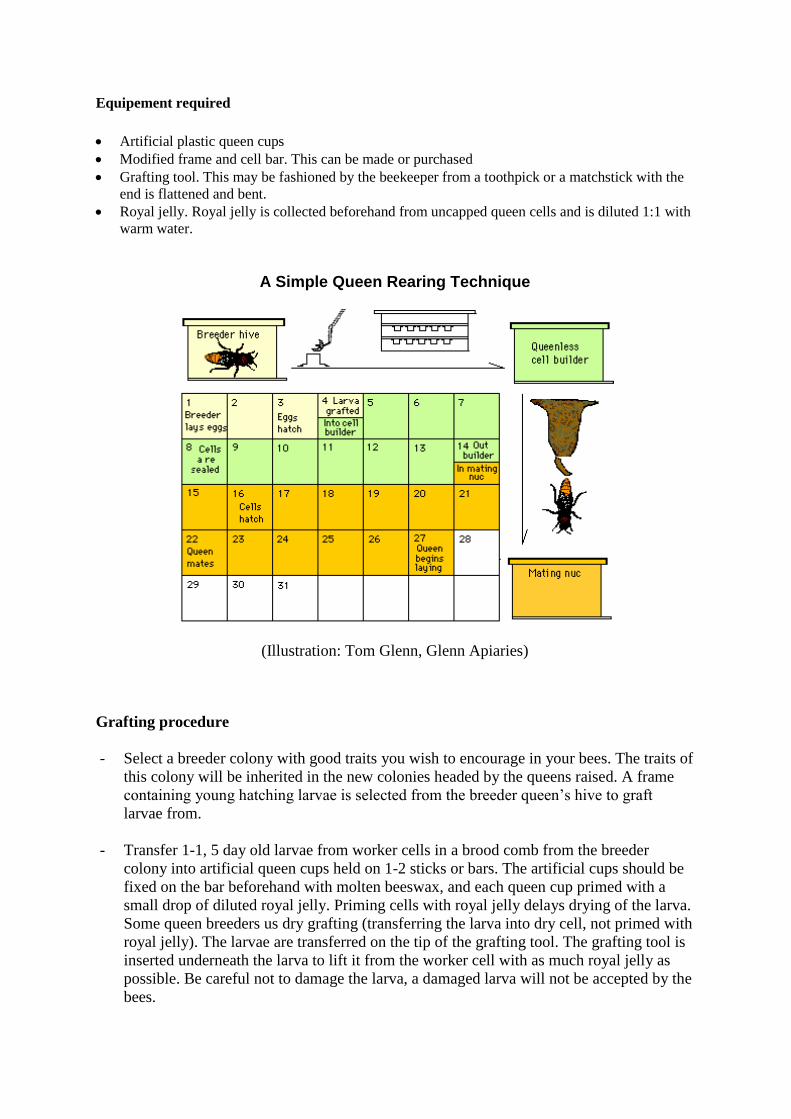
A Simple Queen Rearing Technique
(Illustration: Tom Glenn, Glenn Apiaries)
Grafting procedure
- Select a breeder colony with good traits you wish to encourage in your bees. The traits of
this colony will be inherited in the new colonies headed by the queens raised. A frame
containing young hatching larvae is selected from the breeder queen’s hive to graft
larvae from.
- Transfer 1-1, 5 day old larvae from worker cells in a brood comb from the breeder
colony into artificial queen cups held on 1-2 sticks or bars. The artificial cups should be
fixed on the bar beforehand with molten beeswax, and each queen cup primed with a
small drop of diluted royal jelly. Priming cells with royal jelly delays drying of the larva.
Some queen breeders us dry grafting (transferring the larva into dry cell, not primed with
royal jelly). The larvae are transferred on the tip of the grafting tool. The grafting tool is
inserted underneath the larva to lift it from the worker cell with as much royal jelly as
possible. Be careful not to damage the larva, a damaged larva will not be accepted by the
bees.
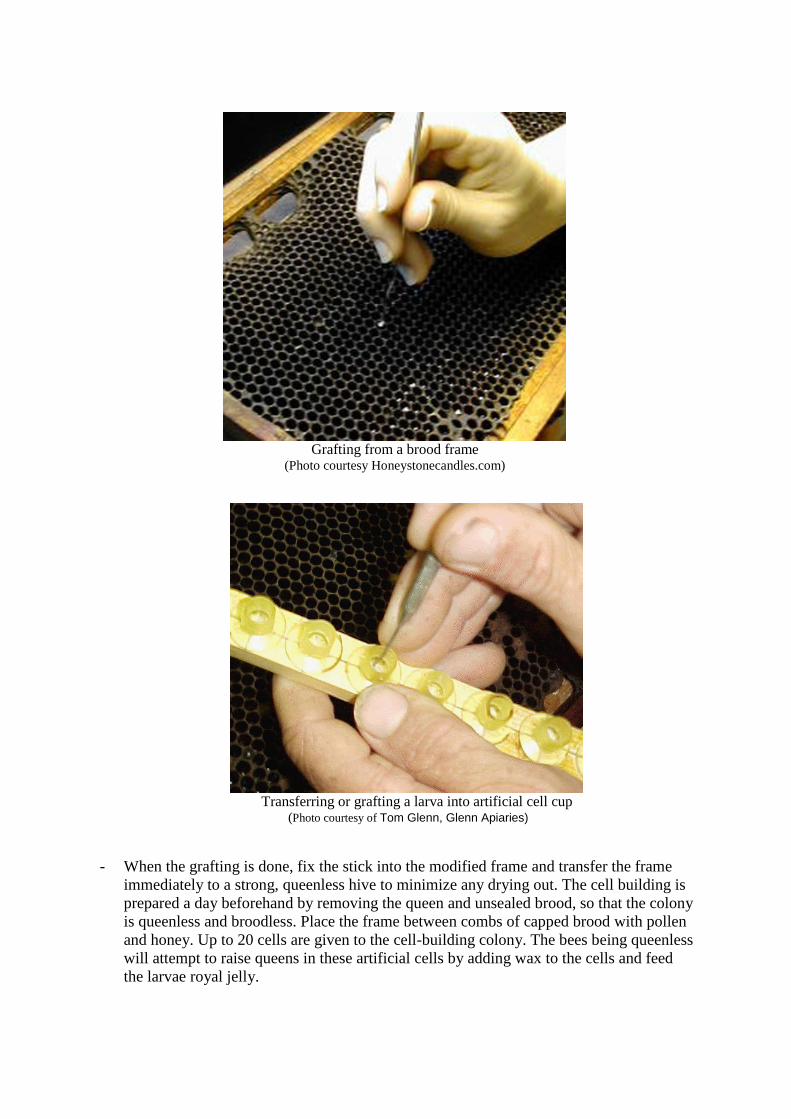
Grafting from a brood frame
(Photo courtesy Honeystonecandles.com)
Transferring or grafting a larva into artificial cell cup
(Photo courtesy of Tom Glenn, Glenn Apiaries)
- When the grafting is done, fix the stick into the modified frame and transfer the frame
immediately to a strong, queenless hive to minimize any drying out. The cell building is
prepared a day beforehand by removing the queen and unsealed brood, so that the colony
is queenless and broodless. Place the frame between combs of capped brood with pollen
and honey. Up to 20 cells are given to the cell-building colony. The bees being queenless
will attempt to raise queens in these artificial cells by adding wax to the cells and feed
the larvae royal jelly.
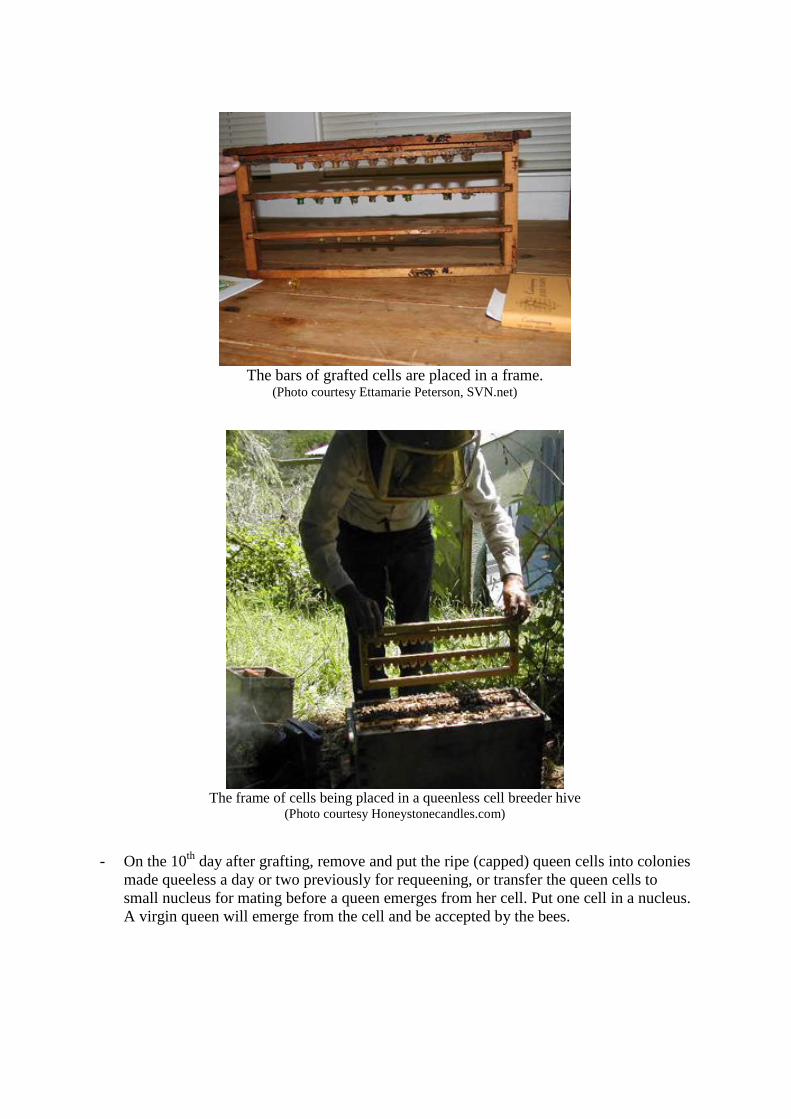
The bars of grafted cells are placed in a frame.
(Photo courtesy Ettamarie Peterson, SVN.net)
The frame of cells being placed in a queenless cell breeder hive
(Photo courtesy Honeystonecandles.com)
- On the 10th
day after grafting, remove and put the ripe (capped) queen cells into colonies
made queeless a day or two previously for requeening, or transfer the queen cells to
small nucleus for mating before a queen emerges from her cell. Put one cell in a nucleus.
A virgin queen will emerge from the cell and be accepted by the bees.
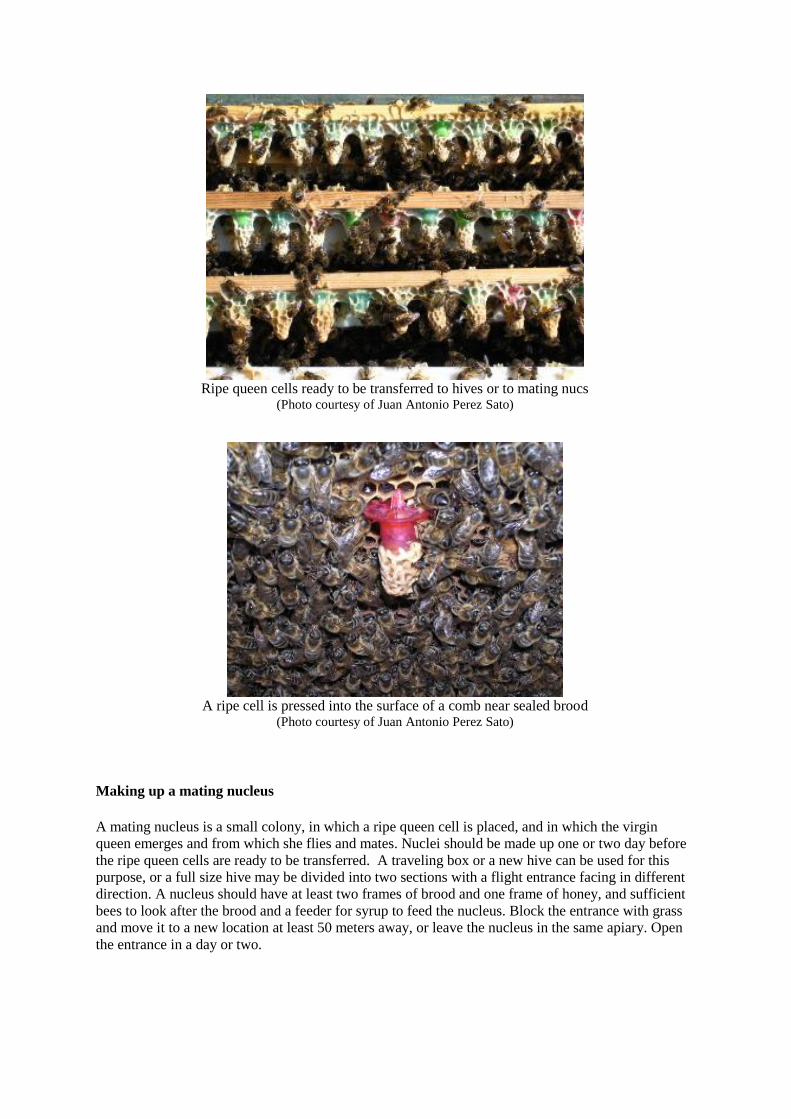
Ripe queen cells ready to be transferred to hives or to mating nucs
(Photo courtesy of Juan Antonio Perez Sato)
A ripe cell is pressed into the surface of a comb near sealed brood
(Photo courtesy of Juan Antonio Perez Sato)
Making up a mating nucleus
A mating nucleus is a small colony, in which a ripe queen cell is placed, and in which the virgin
queen emerges and from which she flies and mates. Nuclei should be made up one or two day before
the ripe queen cells are ready to be transferred. A traveling box or a new hive can be used for this
purpose, or a full size hive may be divided into two sections with a flight entrance facing in different
direction. A nucleus should have at least two frames of brood and one frame of honey, and sufficient
bees to look after the brood and a feeder for syrup to feed the nucleus. Block the entrance with grass
and move it to a new location at least 50 meters away, or leave the nucleus in the same apiary. Open
the entrance in a day or two.
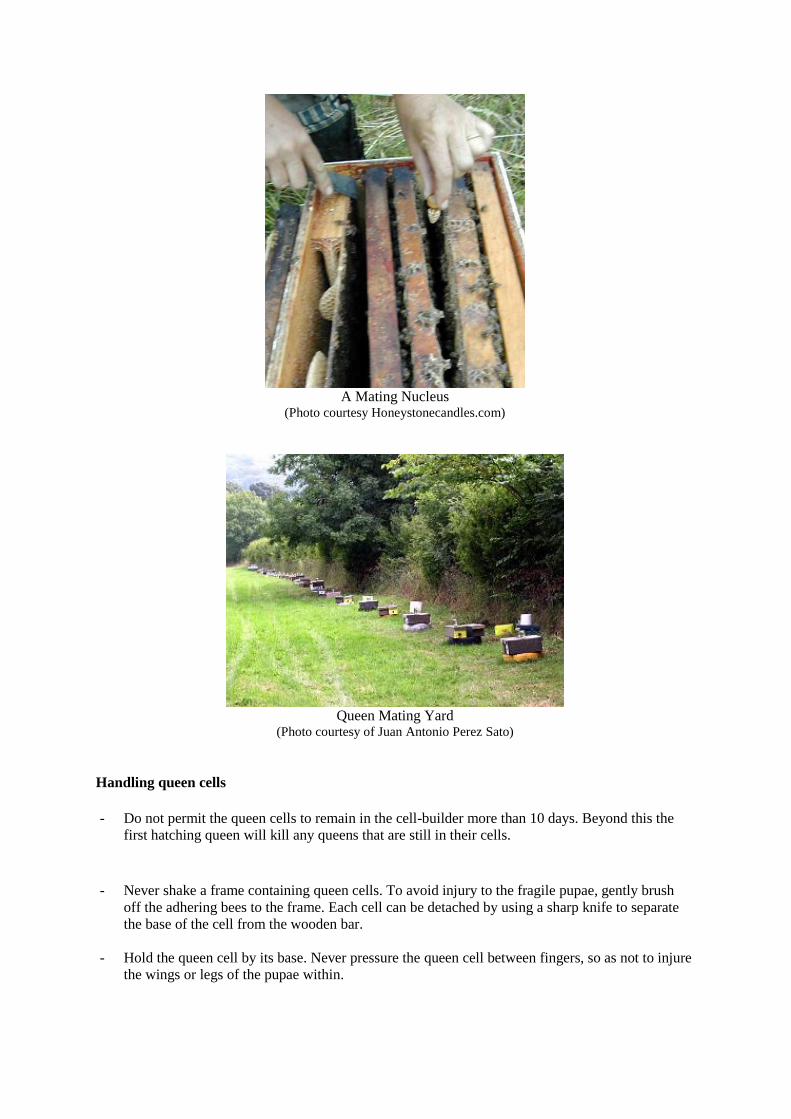
A Mating Nucleus
(Photo courtesy Honeystonecandles.com)
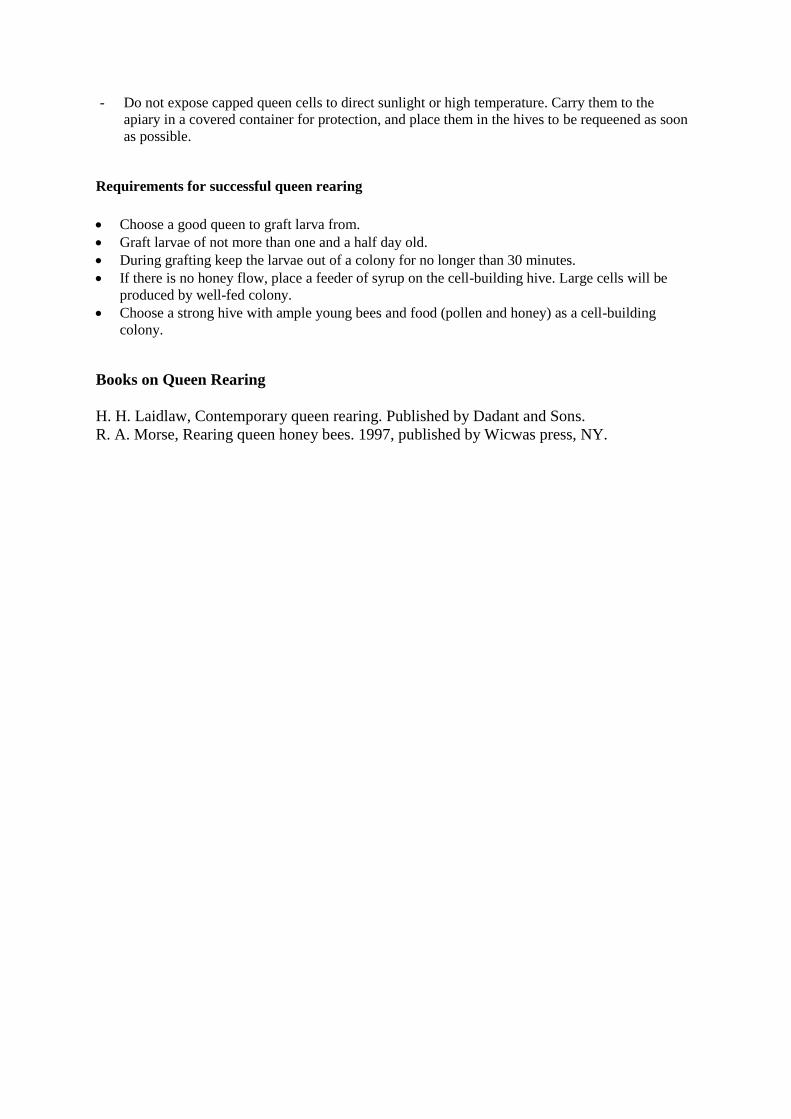
Queen Mating Yard
(Photo courtesy of Juan Antonio Perez Sato)
Handling queen cells
- Do not permit the queen cells to remain in the cell-builder more than 10 days. Beyond this the
first hatching queen will kill any queens that are still in their cells.
- Never shake a frame containing queen cells. To avoid injury to the fragile pupae, gently brush
off the adhering bees to the frame. Each cell can be detached by using a sharp knife to separate
the base of the cell from the wooden bar.
- Hold the queen cell by its base. Never pressure the queen cell between fingers, so as not to injure
the wings or legs of the pupae within.
- Do not expose capped queen cells to direct sunlight or high temperature. Carry them to the
apiary in a covered container for protection, and place them in the hives to be requeened as soon
as possible.
Requirements for successful queen rearing
Choose a good queen to graft larva from.
Graft larvae of not more than one and a half day old.
During grafting keep the larvae out of a colony for no longer than 30 minutes.
If there is no honey flow, place a feeder of syrup on the cell-building hive. Large cells will be
produced by well-fed colony.
Choose a strong hive with ample young bees and food (pollen and honey) as a cell-building
colony.
Books on Queen Rearing
H. H. Laidlaw, Contemporary queen rearing. Published by Dadant and Sons.
R. A. Morse, Rearing queen honey bees. 1997, published by Wicwas press, NY.