Embed Size (px)
Citation preview
Red Hat Enterprise Linux 6
Resource Management Guide
Managing system resources on Red Hat Enterprise Linux 6
Edition 6
Last Updated: 2017-10-20

Red Hat Enterprise Linux 6 Resource Management Guide
Managing system resources on Red Hat Enterprise Linux 6Edition 6
Milan NavrátilRed Hat Customer Content [email protected]
Marie DoleželováRed Hat Customer Content [email protected]
Peter OndrejkaRed Hat Customer Content Services
Eva MajoršinováRed Hat Customer Content Services
Martin PrpičRed Hat Product Security
Rüdiger LandmannRed Hat Customer Content Services
Douglas SilasRed Hat Customer Content Services
Legal Notice
Copyright © 2016 Red Hat, Inc.
This document is licensed by Red Hat under the Creative Commons Attribution-ShareAlike 3.0Unported License. If you distribute this document, or a modified version of it, you must provideattribution to Red Hat, Inc. and provide a link to the original. If the document is modified, all RedHat trademarks must be removed.
Red Hat, as the licensor of this document, waives the right to enforce, and agrees not to assert,Section 4d of CC-BY-SA to the fullest extent permitted by applicable law.
Red Hat, Red Hat Enterprise Linux, the Shadowman logo, JBoss, OpenShift, Fedora, the Infinitylogo, and RHCE are trademarks of Red Hat, Inc., registered in the United States and othercountries.
Linux ® is the registered trademark of Linus Torvalds in the United States and other countries.
Java ® is a registered trademark of Oracle and/or its affiliates.
XFS ® is a trademark of Silicon Graphics International Corp. or its subsidiaries in the UnitedStates and/or other countries.
MySQL ® is a registered trademark of MySQL AB in the United States, the European Union andother countries.
Node.js ® is an official trademark of Joyent. Red Hat Software Collections is not formally relatedto or endorsed by the official Joyent Node.js open source or commercial project.
The OpenStack ® Word Mark and OpenStack logo are either registered trademarks/service marksor trademarks/service marks of the OpenStack Foundation, in the United States and othercountries and are used with the OpenStack Foundation's permission. We are not affiliated with,endorsed or sponsored by the OpenStack Foundation, or the OpenStack community.
All other trademarks are the property of their respective owners.
Abstract
Managing system resources on Red Hat Enterprise Linux 6.
. . . . . . . . . . . . . . . . . . . . . . . . . . . . . . . . . . . . . . . . . . . . . . . . . . . . . . . . . . . . . . . . . . . . . . . . . . . . . . . . . . . . . . . . . . . . . . . . . . . . . . . . . . . . . . . . . . . . . . . . . . . . . . . . . . . . . . . . . . . . . . . . . . . . . . . . . . . . . . . . . . . . . . . . . . . . . . . . . . . . . . . . . . . . . . . . . . . . . . . . . . . . . . . . . . . . . . . . . . . . . . . . . . . . . . . . . . . . . . . . . . . . . . . . . . . . . . . . . . . . . . . . . . . . . . . . . . . . . . . .
. . . . . . . . . . . . . . . . . . . . . . . . . . . . . . . . . . . . . . . . . . . . . . . . . . . . . . . . . . . . . . . . . . . . . . . . . . . . . . . . . . . . . . . . . . . . . . . . . . . . . . . . . . . . . . . . . . . . . . . . . . . . . . . . . . . . . . . . . . . . . . . . . . . . . . . . . . . . . . . . . . . . . . . . . . . . . . . . . . . . . . . . . . . . . . . . . . . . . . . . . . . . . . . . . . . . . . . . . . . . . . . . . . . . . . . . . . . . . . . . . . . . . . . . . . . . . . . . . . . . . . . . . . . . . . . . . . . . . . . .
. . . . . . . . . . . . . . . . . . . . . . . . . . . . . . . . . . . . . . . . . . . . . . . . . . . . . . . . . . . . . . . . . . . . . . . . . . . . . . . . . . . . . . . . . . . . . . . . . . . . . . . . . . . . . . . . . . . . . . . . . . . . . . . . . . . . . . . . . . . . . . . . . . . . . . . . . . . . . . . . . . . . . . . . . . . . . . . . . . . . . . . . . . . . . . . . . . . . . . . . . . . . . . . . . . . . . . . . . . . . . . . . . . . . . . . . . . . . . . . . . . . . . . . . . . . . . . . . . . . . . . . . . . . . . . . . . . . . . . . .
Table of Contents
CHAPTER 1. INTRODUCTION TO CONTROL GROUPS (CGROUPS)1.1. HOW CONTROL GROUPS ARE ORGANIZED
The Linux Process ModelThe Cgroup Model
1.2. RELATIONSHIPS BETWEEN SUBSYSTEMS, HIERARCHIES, CONTROL GROUPS AND TASKSRule 1Rule 2Rule 3Rule 4
1.3. IMPLICATIONS FOR RESOURCE MANAGEMENT
CHAPTER 2. USING CONTROL GROUPS2.1. THE CGCONFIG SERVICE
2.1.1. The /etc/cgconfig.conf File2.1.2. The /etc/cgconfig.d/ Directory
2.2. CREATING A HIERARCHY AND ATTACHING SUBSYSTEMSAlternative method
2.3. ATTACHING SUBSYSTEMS TO, AND DETACHING THEM FROM, AN EXISTING HIERARCHYAlternative method
2.4. UNMOUNTING A HIERARCHY2.5. CREATING CONTROL GROUPS
Alternative method2.6. REMOVING CONTROL GROUPS2.7. SETTING PARAMETERS
Alternative method2.8. MOVING A PROCESS TO A CONTROL GROUP
Alternative method2.8.1. The cgred Service
2.9. STARTING A PROCESS IN A CONTROL GROUPAlternative method2.9.1. Starting a Service in a Control Group2.9.2. Process Behavior in the Root Control Group
2.10. GENERATING THE /ETC/CGCONFIG.CONF FILE2.10.1. Blacklisting Parameters2.10.2. Whitelisting Parameters
2.11. OBTAINING INFORMATION ABOUT CONTROL GROUPS2.11.1. Finding a Process2.11.2. Finding a Subsystem2.11.3. Finding Hierarchies2.11.4. Finding Control Groups2.11.5. Displaying Parameters of Control Groups
2.12. UNLOADING CONTROL GROUPS2.13. USING THE NOTIFICATION API2.14. ADDITIONAL RESOURCES
CHAPTER 3. SUBSYSTEMS AND TUNABLE PARAMETERS3.1. BLKIO
3.1.1. Proportional Weight Division Tunable Parameters3.1.2. I/O Throttling Tunable Parameters3.1.3. blkio Common Tunable Parameters3.1.4. Example Usage
3.2. CPU
4444556678
999
121213141415151616171818191921222222232525252525262626272728
30303031323435
Table of Contents
1
. . . . . . . . . . . . . . . . . . . . . . . . . . . . . . . . . . . . . . . . . . . . . . . . . . . . . . . . . . . . . . . . . . . . . . . . . . . . . . . . . . . . . . . . . . . . . . . . . . . . . . . . . . . . . . . . . . . . . . . . . . . . . . . . . . . . . . . . . . . . . . . . . . . . . . . . . . . . . . . . . . . . . . . . . . . . . . . . . . . . . . . . . . . . . . . . . . . . . . . . . . . . . . . . . . . . . . . . . . . . . . . . . . . . . . . . . . . . . . . . . . . . . . . . . . . . . . . . . . . . . . . . . . . . . . . . . . . . . . . .
. . . . . . . . . . . . . . . . . . . . . . . . . . . . . . . . . . . . . . . . . . . . . . . . . . . . . . . . . . . . . . . . . . . . . . . . . . . . . . . . . . . . . . . . . . . . . . . . . . . . . . . . . . . . . . . . . . . . . . . . . . . . . . . . . . . . . . . . . . . . . . . . . . . . . . . . . . . . . . . . . . . . . . . . . . . . . . . . . . . . . . . . . . . . . . . . . . . . . . . . . . . . . . . . . . . . . . . . . . . . . . . . . . . . . . . . . . . . . . . . . . . . . . . . . . . . . . . . . . . . . . . . . . . . . . . . . . . . . . . .
3.2.1. CFS Tunable Parameters3.2.2. RT Tunable Parameters3.2.3. Example Usage
3.3. CPUACCT3.4. CPUSET3.5. DEVICES3.6. FREEZER3.7. MEMORY
3.7.1. Example Usage3.8. NET_CLS3.9. NET_PRIO3.10. NS3.11. PERF_EVENT3.12. COMMON TUNABLE PARAMETERS3.13. ADDITIONAL RESOURCES
CHAPTER 4. CONTROL GROUP APPLICATION EXAMPLES4.1. PRIORITIZING DATABASE I/O4.2. PRIORITIZING NETWORK TRAFFIC4.3. PER-GROUP DIVISION OF CPU AND MEMORY RESOURCES
Alternative method
APPENDIX A. REVISION HISTORY
353738383942434349525253545456
5757586063
65
Resource Management Guide
2
Table of Contents
3
CHAPTER 1. INTRODUCTION TO CONTROL GROUPS(CGROUPS)Red Hat Enterprise Linux 6 provides a new kernel feature: control groups, which are called by theirshorter name cgroups in this guide. Cgroups allow you to allocate resources — such as CPU time,system memory, network bandwidth, or combinations of these resources — among user-defined groupsof tasks (processes) running on a system. You can monitor the cgroups you configure, deny cgroupsaccess to certain resources, and even reconfigure your cgroups dynamically on a running system. The cgconfig (control group config) service can be configured to start up at boot time and reestablish yourpredefined cgroups, thus making them persistent across reboots.
By using cgroups, system administrators gain fine-grained control over allocating, prioritizing, denying,managing, and monitoring system resources. Hardware resources can be appropriately divided upamong tasks and users, increasing overall efficiency.
1.1. HOW CONTROL GROUPS ARE ORGANIZED
Cgroups are organized hierarchically, like processes, and child cgroups inherit some of the attributesof their parents. However, there are differences between the two models.
The Linux Process ModelAll processes on a Linux system are child processes of a common parent: the init process, which isexecuted by the kernel at boot time and starts other processes (which may in turn start childprocesses of their own). Because all processes descend from a single parent, the Linux process modelis a single hierarchy, or tree.
Additionally, every Linux process except init inherits the environment (such as the PATH variable) [1]
and certain other attributes (such as open file descriptors) of its parent process.
The Cgroup ModelCgroups are similar to processes in that:
they are hierarchical, and
child cgroups inherit certain attributes from their parent cgroup.
The fundamental difference is that many different hierarchies of cgroups can exist simultaneously on asystem. If the Linux process model is a single tree of processes, then the cgroup model is one or moreseparate, unconnected trees of tasks (i.e. processes).
Multiple separate hierarchies of cgroups are necessary because each hierarchy is attached to one ormore subsystems. A subsystem[2] represents a single resource, such as CPU time or memory. Red HatEnterprise Linux 6 provides ten cgroup subsystems, listed below by name and function.
Available Subsystems in Red Hat Enterprise Linux
blkio — this subsystem sets limits on input/output access to and from block devices such asphysical drives (disk, solid state, or USB).
cpu — this subsystem uses the scheduler to provide cgroup tasks access to the CPU.
cpuacct — this subsystem generates automatic reports on CPU resources used by tasks in acgroup.
Resource Management Guide
4
cpuset — this subsystem assigns individual CPUs (on a multicore system) and memory nodesto tasks in a cgroup.
devices — this subsystem allows or denies access to devices by tasks in a cgroup.
freezer — this subsystem suspends or resumes tasks in a cgroup.
memory — this subsystem sets limits on memory use by tasks in a cgroup and generatesautomatic reports on memory resources used by those tasks.
net_cls — this subsystem tags network packets with a class identifier (classid) that allows theLinux traffic controller (tc) to identify packets originating from a particular cgroup task.
net_prio — this subsystem provides a way to dynamically set the priority of network trafficper network interface.
ns — the namespace subsystem.
perf_event — this subsystem identifies cgroup membership of tasks and can be used forperformance analysis.
NOTE
You may come across the term resource controller or simply controller in cgroupliterature such as the man pages or kernel documentation. Both of these terms aresynonymous with “subsystem” and arise from the fact that a subsystem typicallyschedules a resource or applies a limit to the cgroups in the hierarchy it is attached to.
The definition of a subsystem (resource controller) is quite general: it is something thatacts upon a group of tasks, i.e. processes.
1.2. RELATIONSHIPS BETWEEN SUBSYSTEMS, HIERARCHIES,CONTROL GROUPS AND TASKS
Remember that system processes are called tasks in cgroup terminology.
Here are a few simple rules governing the relationships between subsystems, hierarchies of cgroups,and tasks, along with explanations of the consequences of those rules.
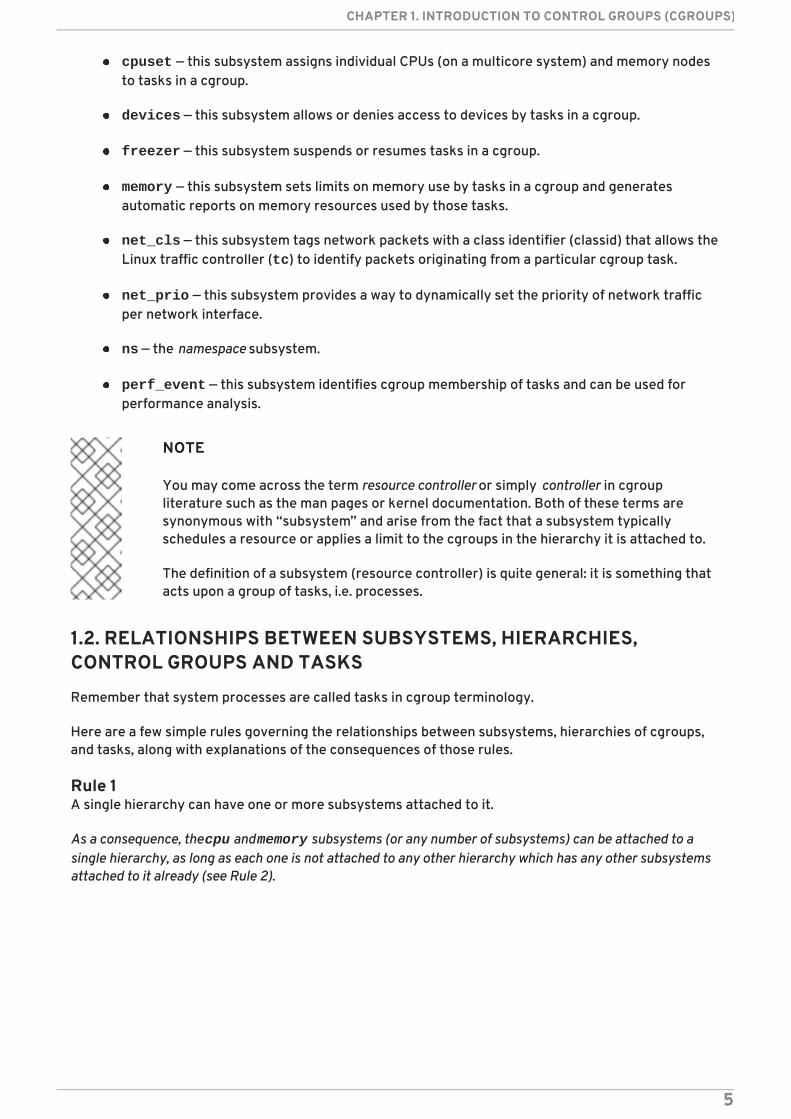
Rule 1A single hierarchy can have one or more subsystems attached to it.
As a consequence, the cpu and memory subsystems (or any number of subsystems) can be attached to asingle hierarchy, as long as each one is not attached to any other hierarchy which has any other subsystemsattached to it already (see Rule 2).
CHAPTER 1. INTRODUCTION TO CONTROL GROUPS (CGROUPS)
5
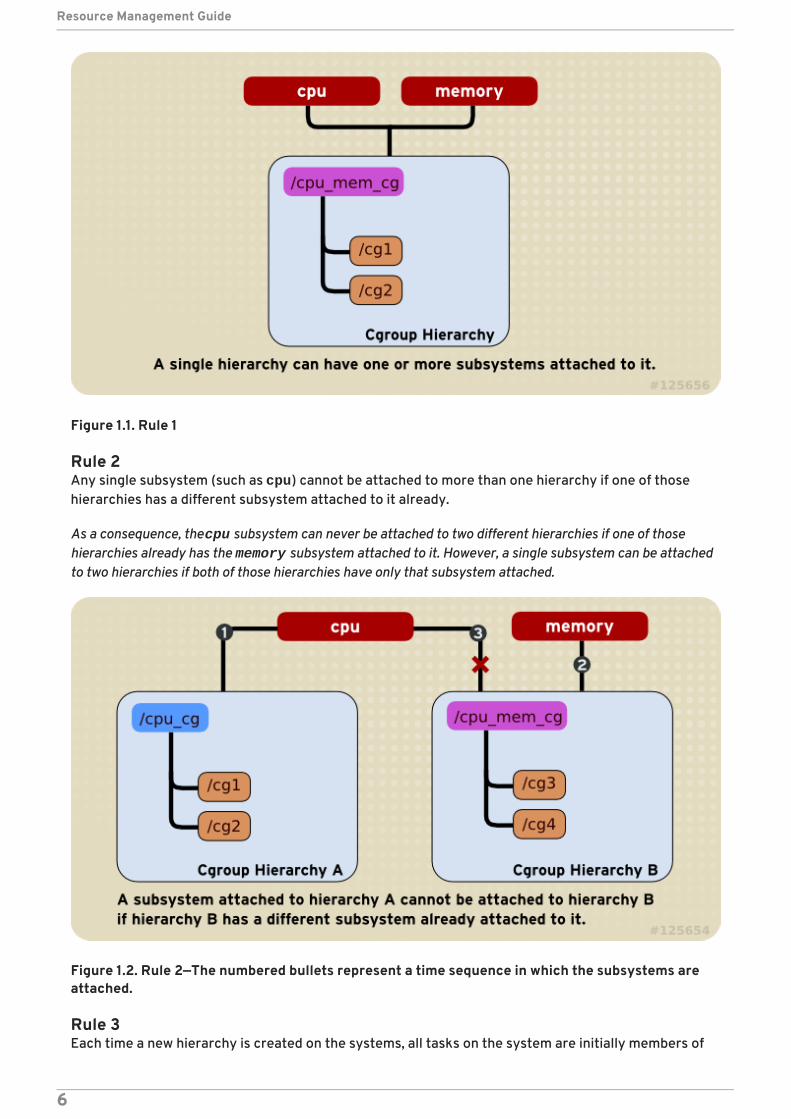
Figure 1.1. Rule 1
Rule 2Any single subsystem (such as cpu) cannot be attached to more than one hierarchy if one of thosehierarchies has a different subsystem attached to it already.
As a consequence, the cpu subsystem can never be attached to two different hierarchies if one of thosehierarchies already has the memory subsystem attached to it. However, a single subsystem can be attachedto two hierarchies if both of those hierarchies have only that subsystem attached.
Figure 1.2. Rule 2—The numbered bullets represent a time sequence in which the subsystems areattached.
Rule 3Each time a new hierarchy is created on the systems, all tasks on the system are initially members of
Resource Management Guide
6
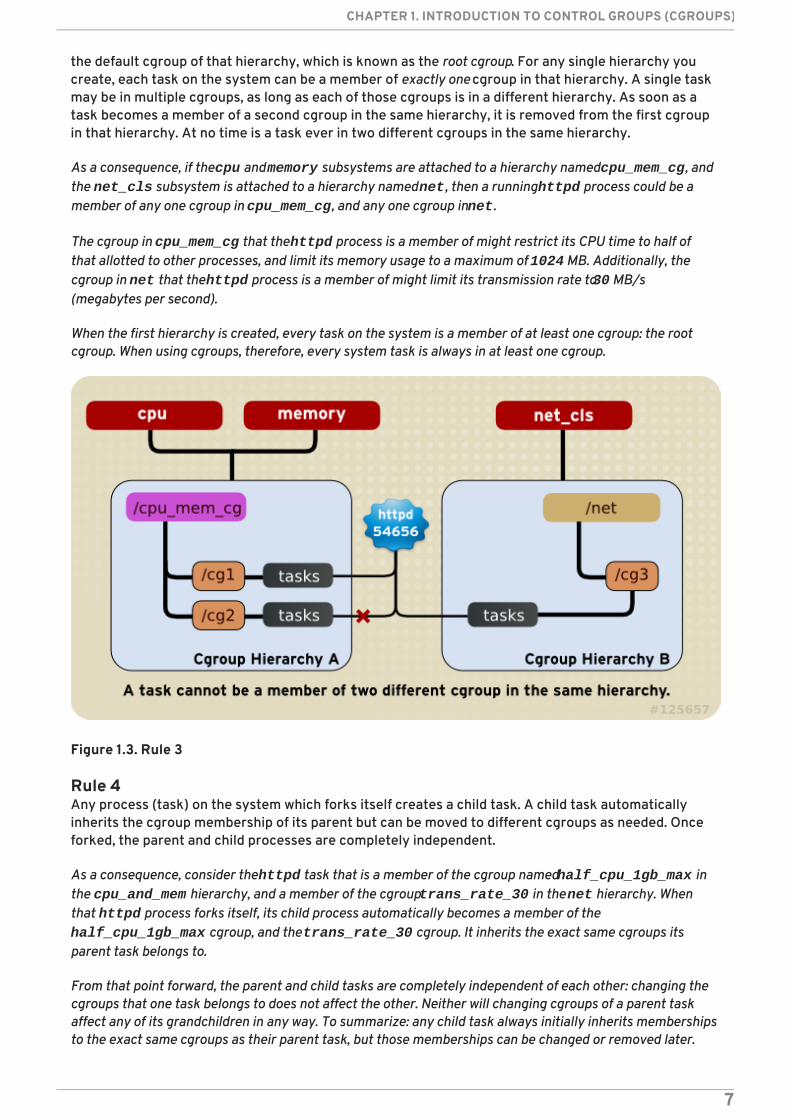
the default cgroup of that hierarchy, which is known as the root cgroup. For any single hierarchy youcreate, each task on the system can be a member of exactly one cgroup in that hierarchy. A single taskmay be in multiple cgroups, as long as each of those cgroups is in a different hierarchy. As soon as atask becomes a member of a second cgroup in the same hierarchy, it is removed from the first cgroupin that hierarchy. At no time is a task ever in two different cgroups in the same hierarchy.
As a consequence, if the cpu and memory subsystems are attached to a hierarchy named cpu_mem_cg, andthe net_cls subsystem is attached to a hierarchy named net, then a running httpd process could be amember of any one cgroup in cpu_mem_cg, and any one cgroup in net.
The cgroup in cpu_mem_cg that the httpd process is a member of might restrict its CPU time to half ofthat allotted to other processes, and limit its memory usage to a maximum of 1024 MB. Additionally, thecgroup in net that the httpd process is a member of might limit its transmission rate to 30 MB/s(megabytes per second).
When the first hierarchy is created, every task on the system is a member of at least one cgroup: the rootcgroup. When using cgroups, therefore, every system task is always in at least one cgroup.
Figure 1.3. Rule 3
Rule 4Any process (task) on the system which forks itself creates a child task. A child task automaticallyinherits the cgroup membership of its parent but can be moved to different cgroups as needed. Onceforked, the parent and child processes are completely independent.
As a consequence, consider the httpd task that is a member of the cgroup named half_cpu_1gb_max inthe cpu_and_mem hierarchy, and a member of the cgroup trans_rate_30 in the net hierarchy. Whenthat httpd process forks itself, its child process automatically becomes a member of the half_cpu_1gb_max cgroup, and the trans_rate_30 cgroup. It inherits the exact same cgroups itsparent task belongs to.
From that point forward, the parent and child tasks are completely independent of each other: changing thecgroups that one task belongs to does not affect the other. Neither will changing cgroups of a parent taskaffect any of its grandchildren in any way. To summarize: any child task always initially inherits membershipsto the exact same cgroups as their parent task, but those memberships can be changed or removed later.
CHAPTER 1. INTRODUCTION TO CONTROL GROUPS (CGROUPS)
7
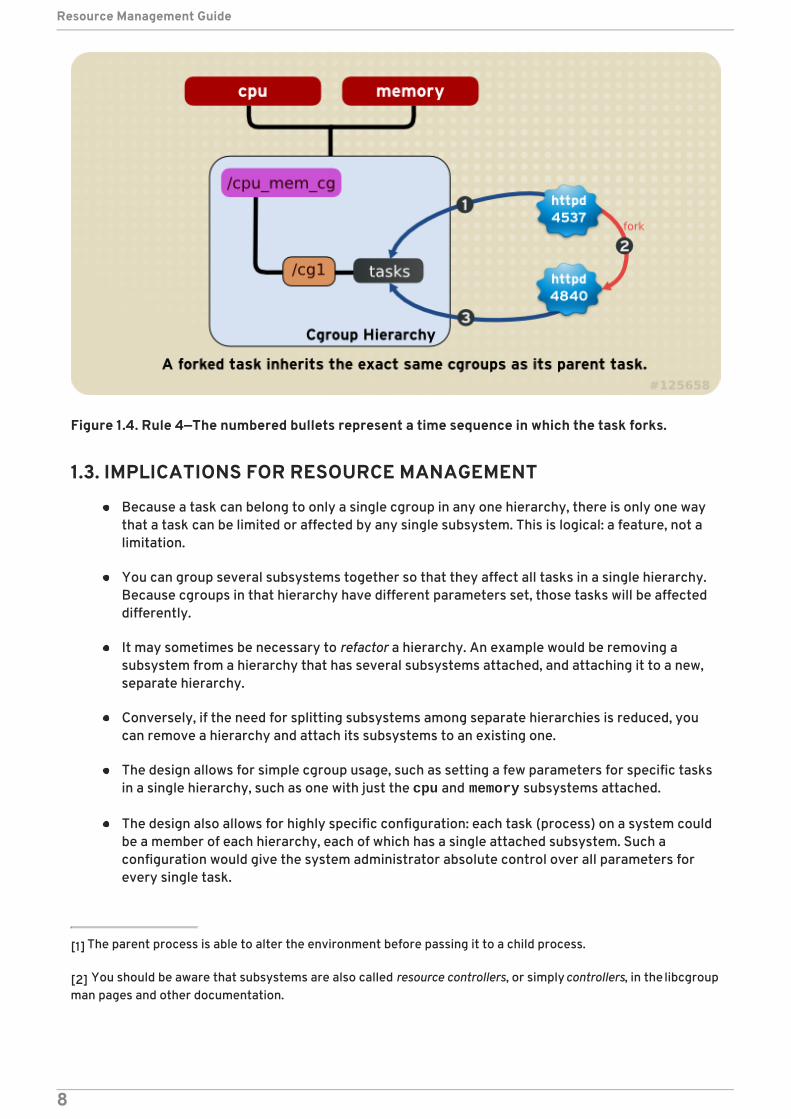
Figure 1.4. Rule 4—The numbered bullets represent a time sequence in which the task forks.
1.3. IMPLICATIONS FOR RESOURCE MANAGEMENT
Because a task can belong to only a single cgroup in any one hierarchy, there is only one waythat a task can be limited or affected by any single subsystem. This is logical: a feature, not alimitation.
You can group several subsystems together so that they affect all tasks in a single hierarchy.Because cgroups in that hierarchy have different parameters set, those tasks will be affecteddifferently.
It may sometimes be necessary to refactor a hierarchy. An example would be removing asubsystem from a hierarchy that has several subsystems attached, and attaching it to a new,separate hierarchy.
Conversely, if the need for splitting subsystems among separate hierarchies is reduced, youcan remove a hierarchy and attach its subsystems to an existing one.
The design allows for simple cgroup usage, such as setting a few parameters for specific tasksin a single hierarchy, such as one with just the cpu and memory subsystems attached.
The design also allows for highly specific configuration: each task (process) on a system couldbe a member of each hierarchy, each of which has a single attached subsystem. Such aconfiguration would give the system administrator absolute control over all parameters forevery single task.
[1] The parent process is able to alter the environment before passing it to a child process.
[2] You should be aware that subsystems are also called resource controllers, or simply controllers, in the libcgroupman pages and other documentation.
Resource Management Guide
8
CHAPTER 2. USING CONTROL GROUPSAs explained in Chapter 3, Subsystems and Tunable Parameters, control groups and the subsystems towhich they relate can be manipulated using shell commands and utilities. However, the easiest way towork with cgroups is to install the libcgroup package, which contains a number of cgroup-relatedcommand line utilities and their associated man pages. It is possible to mount hierarchies and setcgroup parameters (non-persistently) using shell commands and utilities available on any system.However, using the libcgroup-provided utilities simplifies the process and extends your capabilities.Therefore, this guide focuses on libcgroup commands throughout. In most cases, we have includedthe equivalent shell commands to help describe the underlying mechanism. However, we recommendthat you use the libcgroup commands wherever practical.
NOTE
In order to use cgroups, first ensure the libcgroup package is installed on your systemby running, as root:
~]# yum install libcgroup
2.1. THE CGCONFIG SERVICE
The cgconfig service installed with the libcgroup package provides a convenient way to createhierarchies, attach subsystems to hierarchies, and manage cgroups within those hierarchies. It isrecommended that you use cgconfig to manage hierarchies and cgroups on your system.
The cgconfig service is not started by default on Red Hat Enterprise Linux 6. When you start theservice with chkconfig, it reads the cgroup configuration file — /etc/cgconfig.conf. Cgroups aretherefore recreated from session to session and remain persistent. Depending on the contents of theconfiguration file, cgconfig can create hierarchies, mount necessary file systems, create cgroups, andset subsystem parameters for each group.
The default /etc/cgconfig.conf file installed with the libcgroup package creates and mounts anindividual hierarchy for each subsystem, and attaches the subsystems to these hierarchies. The cgconfig service also allows to create configuration files in the /etc/cgconfig.d/ directory andto invoke them from /etc/cgconfig.conf.
If you stop the cgconfig service (with the service cgconfig stop command), it unmounts all thehierarchies that it mounted.
2.1.1. The /etc/cgconfig.conf File
The /etc/cgconfig.conf file contains two major types of entries — mount and group. Mount entriescreate and mount hierarchies as virtual file systems, and attach subsystems to those hierarchies.Mount entries are defined using the following syntax:
The libcgroup package automatically creates a default /etc/cgconfig.conf file when it is installed.The default configuration file looks as follows:
mount { subsystem = /cgroup/hierarchy; …}
CHAPTER 2. USING CONTROL GROUPS
9
mount { cpuset = /cgroup/cpuset; cpu = /cgroup/cpu; cpuacct = /cgroup/cpuacct; memory = /cgroup/memory; devices = /cgroup/devices; freezer = /cgroup/freezer; net_cls = /cgroup/net_cls; blkio = /cgroup/blkio;}
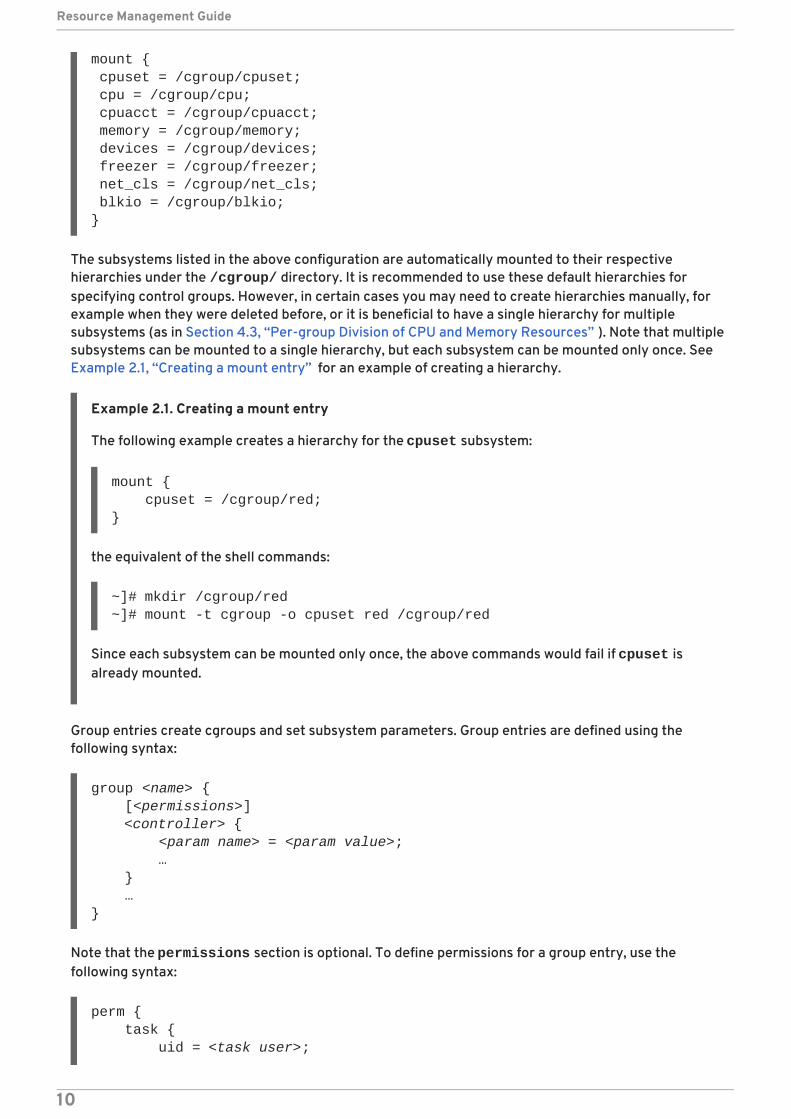
The subsystems listed in the above configuration are automatically mounted to their respectivehierarchies under the /cgroup/ directory. It is recommended to use these default hierarchies forspecifying control groups. However, in certain cases you may need to create hierarchies manually, forexample when they were deleted before, or it is beneficial to have a single hierarchy for multiplesubsystems (as in Section 4.3, “Per-group Division of CPU and Memory Resources” ). Note that multiplesubsystems can be mounted to a single hierarchy, but each subsystem can be mounted only once. SeeExample 2.1, “Creating a mount entry” for an example of creating a hierarchy.
Example 2.1. Creating a mount entry
The following example creates a hierarchy for the cpuset subsystem:
the equivalent of the shell commands:
~]# mkdir /cgroup/red~]# mount -t cgroup -o cpuset red /cgroup/red
Since each subsystem can be mounted only once, the above commands would fail if cpuset isalready mounted.
Group entries create cgroups and set subsystem parameters. Group entries are defined using thefollowing syntax:
Note that the permissions section is optional. To define permissions for a group entry, use thefollowing syntax:
mount { cpuset = /cgroup/red;}
group <name> { [<permissions>] <controller> { <param name> = <param value>; … } …}
perm { task { uid = <task user>;
Resource Management Guide
10
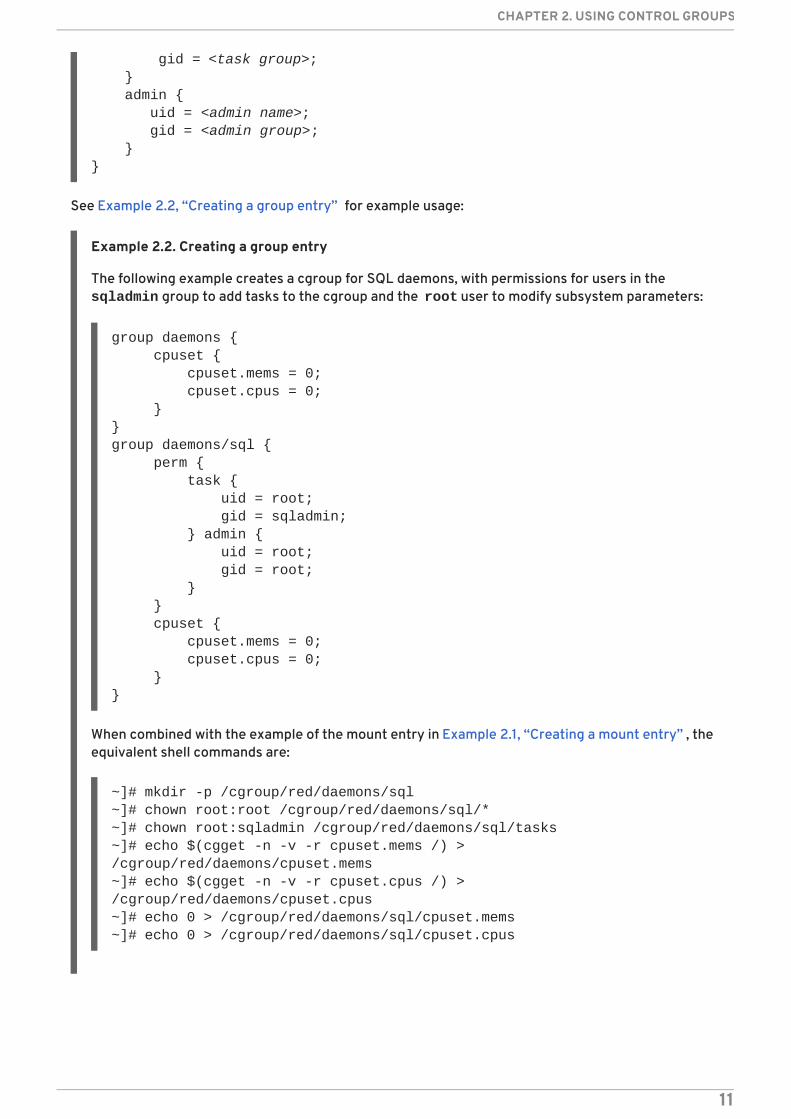
See Example 2.2, “Creating a group entry” for example usage:
Example 2.2. Creating a group entry
The following example creates a cgroup for SQL daemons, with permissions for users in the sqladmin group to add tasks to the cgroup and the root user to modify subsystem parameters:
When combined with the example of the mount entry in Example 2.1, “Creating a mount entry” , theequivalent shell commands are:
~]# mkdir -p /cgroup/red/daemons/sql~]# chown root:root /cgroup/red/daemons/sql/*~]# chown root:sqladmin /cgroup/red/daemons/sql/tasks~]# echo $(cgget -n -v -r cpuset.mems /) > /cgroup/red/daemons/cpuset.mems~]# echo $(cgget -n -v -r cpuset.cpus /) > /cgroup/red/daemons/cpuset.cpus~]# echo 0 > /cgroup/red/daemons/sql/cpuset.mems~]# echo 0 > /cgroup/red/daemons/sql/cpuset.cpus
gid = <task group>; } admin { uid = <admin name>; gid = <admin group>; }}
group daemons { cpuset { cpuset.mems = 0; cpuset.cpus = 0; }}group daemons/sql { perm { task { uid = root; gid = sqladmin; } admin { uid = root; gid = root; } } cpuset { cpuset.mems = 0; cpuset.cpus = 0; }}
CHAPTER 2. USING CONTROL GROUPS
11
NOTE
You must restart the cgconfig service for the changes in the /etc/cgconfig.conffile to take effect. However, note that restarting this service causes the entire cgrouphierarchy to be rebuilt, which removes any previously existing cgroups (for example, anyexisting cgroups used by libvirtd). To restart the cgconfig service, usethe following command:
~]# service cgconfig restart
When you install the libcgroup package, a sample configuration file is written to /etc/cgconfig.conf. The hash symbols ('#') at the start of each line comment that line out andmake it invisible to the cgconfig service.
2.1.2. The /etc/cgconfig.d/ Directory
The /etc/cgconfig.d/ directory is reserved for storing configuration files for specific applicationsand use cases. These files should be created with the .conf suffix and adhere to the same syntax rulesas /etc/cgconfig.conf.
The cgconfig service first parses the /etc/cgconfig.conf file and then continues with files in the /etc/cgconfig.d/ directory. Note that the order of file parsing is not defined, because it does notmake a difference provided that each configuration file is unique. Therefore, do not define the samegroup or template in multiple configuration files, otherwise they would interfere with each other.
Storing specific configuration files in a separate directory makes them easily reusable. If an applicationis shipped with a dedicated configuration file, you can easily set up cgroups for the application just bycopying its configuration file to /etc/cgconfig.d/.
2.2. CREATING A HIERARCHY AND ATTACHING SUBSYSTEMS
WARNING
The following instructions, which cover creating a new hierarchy and attachingsubsystems to it, assume that cgroups are not already configured on your system.In this case, these instructions will not affect the operation of the system.Changing the tunable parameters in a cgroup with tasks, however, can immediatelyaffect those tasks. This guide alerts you the first time it illustrates changing atunable cgroup parameter that can affect one or more tasks.
On a system on which cgroups are already configured (either manually, or by the cgconfig service) these commands fail unless you first unmount existinghierarchies, which affects the operation of the system. Do not experiment withthese instructions on production systems.
To create a hierarchy and attach subsystems to it, edit the mount section of the /etc/cgconfig.conf file as root. Entries in the mount section have the following format:
Resource Management Guide
12
When cgconfig next starts, it will create the hierarchy and attach the subsystems to it.
The following example creates a hierarchy called cpu_and_mem and attaches the cpu, cpuset, cpuacct, and memory subsystems to it.
Alternative methodYou can also use shell commands and utilities to create hierarchies and attach subsystems to them.
Create a mount point for the hierarchy as root. Include the name of the cgroup in the mount point:
~]# mkdir /cgroup/name
For example:
~]# mkdir /cgroup/cpu_and_mem
Next, use the mount command to mount the hierarchy and simultaneously attach one or moresubsystems. For example:
~]# mount -t cgroup -o subsystems name /cgroup/name
Where subsystems is a comma‑separated list of subsystems and name is the name of the hierarchy.Brief descriptions of all available subsystems are listed in Available Subsystems in Red HatEnterprise Linux, and Chapter 3, Subsystems and Tunable Parameters provides a detailed reference.
Example 2.3. Using the mount command to attach subsystems
In this example, a directory named /cgroup/cpu_and_mem already exists and will serve as themount point for the hierarchy that you create. Attach the cpu, cpuset, and memory subsystems toa hierarchy named cpu_and_mem, and mount the cpu_and_mem hierarchy on /cgroup/cpu_and_mem:
~]# mount -t cgroup -o cpu,cpuset,memory cpu_and_mem /cgroup/cpu_and_mem
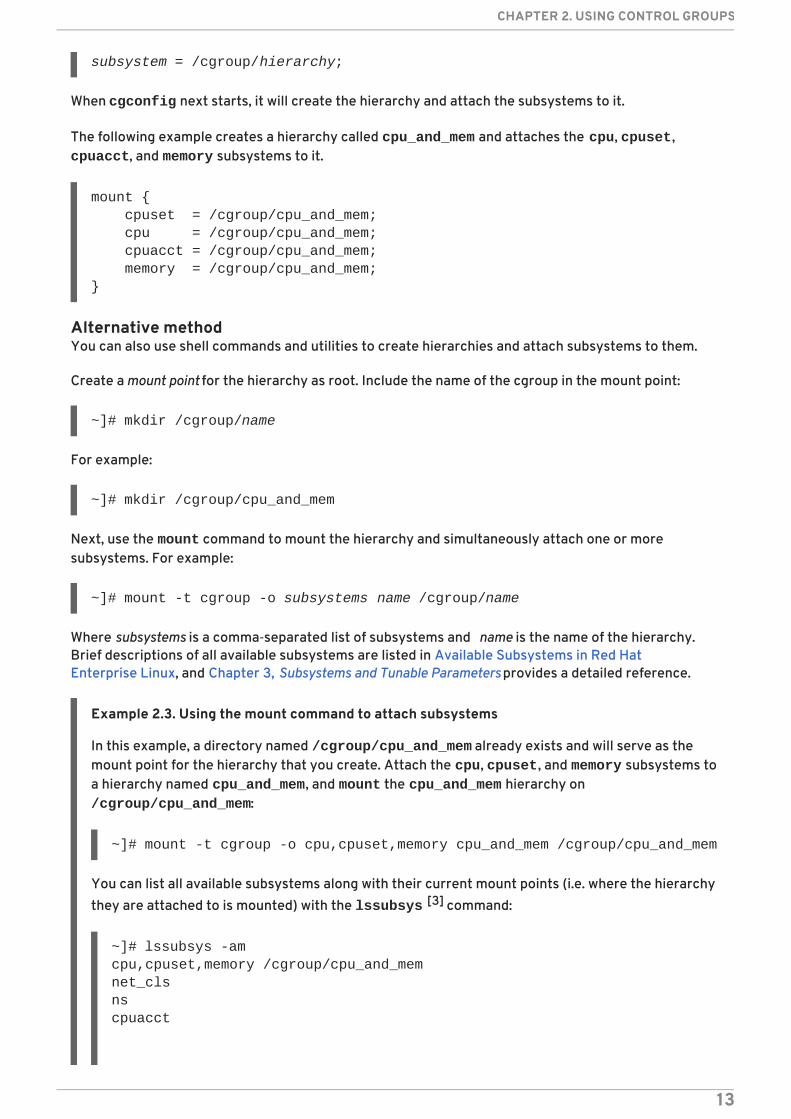
You can list all available subsystems along with their current mount points (i.e. where the hierarchythey are attached to is mounted) with the lssubsys [3] command:
~]# lssubsys -amcpu,cpuset,memory /cgroup/cpu_and_memnet_clsnscpuacct
subsystem = /cgroup/hierarchy;
mount { cpuset = /cgroup/cpu_and_mem; cpu = /cgroup/cpu_and_mem; cpuacct = /cgroup/cpu_and_mem; memory = /cgroup/cpu_and_mem;}
CHAPTER 2. USING CONTROL GROUPS
13
devicesfreezerblkio
This output indicates that:
the cpu, cpuset, and memory subsystems are attached to a hierarchy mounted on /cgroup/cpu_and_mem, and
the net_cls, ns, cpuacct, devices, freezer, and blkio subsystems are as yetunattached to any hierarchy, as illustrated by the lack of a corresponding mount point.
2.3. ATTACHING SUBSYSTEMS TO, AND DETACHING THEM FROM, ANEXISTING HIERARCHY
To add a subsystem to an existing hierarchy, detach it from an existing hierarchy, or move it to adifferent hierarchy, edit the mount section of the /etc/cgconfig.conf file as root, using the samesyntax described in Section 2.2, “Creating a Hierarchy and Attaching Subsystems” . When cgconfignext starts, it will reorganize the subsystems according to the hierarchies that you specify.
Alternative methodTo add an unattached subsystem to an existing hierarchy, remount the hierarchy. Include the extrasubsystem in the mount command, together with the remount option.
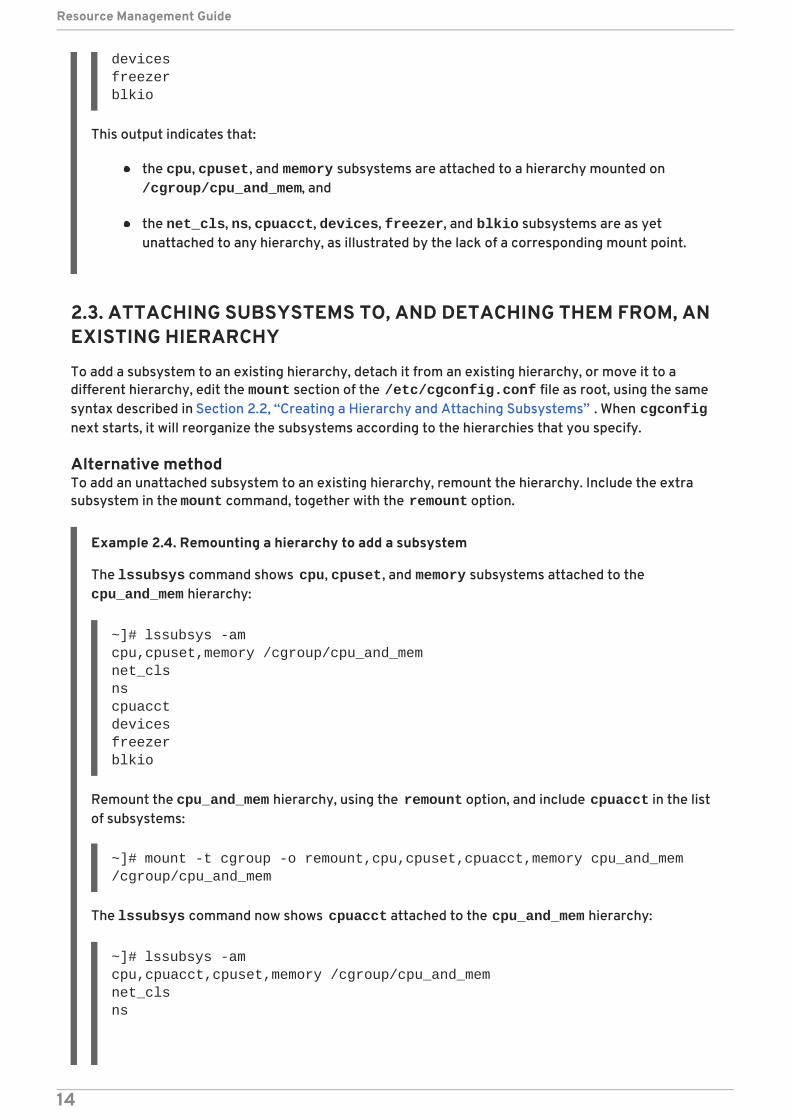
Example 2.4. Remounting a hierarchy to add a subsystem
The lssubsys command shows cpu, cpuset, and memory subsystems attached to the cpu_and_mem hierarchy:
~]# lssubsys -amcpu,cpuset,memory /cgroup/cpu_and_memnet_clsnscpuacctdevicesfreezerblkio
Remount the cpu_and_mem hierarchy, using the remount option, and include cpuacct in the listof subsystems:
~]# mount -t cgroup -o remount,cpu,cpuset,cpuacct,memory cpu_and_mem /cgroup/cpu_and_mem
The lssubsys command now shows cpuacct attached to the cpu_and_mem hierarchy:
~]# lssubsys -amcpu,cpuacct,cpuset,memory /cgroup/cpu_and_memnet_clsns
Resource Management Guide
14
devicesfreezerblkio
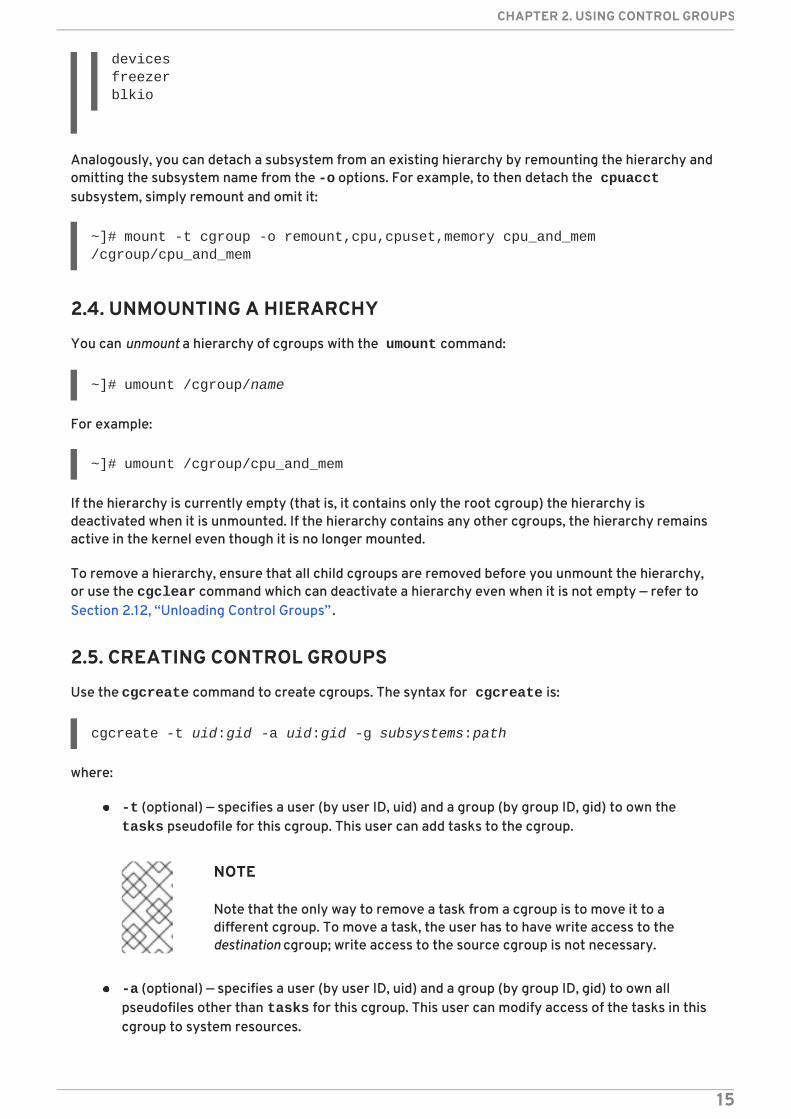
Analogously, you can detach a subsystem from an existing hierarchy by remounting the hierarchy andomitting the subsystem name from the -o options. For example, to then detach the cpuacctsubsystem, simply remount and omit it:
~]# mount -t cgroup -o remount,cpu,cpuset,memory cpu_and_mem /cgroup/cpu_and_mem
2.4. UNMOUNTING A HIERARCHY
You can unmount a hierarchy of cgroups with the umount command:
~]# umount /cgroup/name
For example:
~]# umount /cgroup/cpu_and_mem
If the hierarchy is currently empty (that is, it contains only the root cgroup) the hierarchy isdeactivated when it is unmounted. If the hierarchy contains any other cgroups, the hierarchy remainsactive in the kernel even though it is no longer mounted.
To remove a hierarchy, ensure that all child cgroups are removed before you unmount the hierarchy,or use the cgclear command which can deactivate a hierarchy even when it is not empty — refer toSection 2.12, “Unloading Control Groups” .
2.5. CREATING CONTROL GROUPS
Use the cgcreate command to create cgroups. The syntax for cgcreate is:
cgcreate -t uid:gid -a uid:gid -g subsystems:path
where:
-t (optional) — specifies a user (by user ID, uid) and a group (by group ID, gid) to own the tasks pseudofile for this cgroup. This user can add tasks to the cgroup.
NOTE
Note that the only way to remove a task from a cgroup is to move it to adifferent cgroup. To move a task, the user has to have write access to thedestination cgroup; write access to the source cgroup is not necessary.
-a (optional) — specifies a user (by user ID, uid) and a group (by group ID, gid) to own allpseudofiles other than tasks for this cgroup. This user can modify access of the tasks in thiscgroup to system resources.
CHAPTER 2. USING CONTROL GROUPS
15
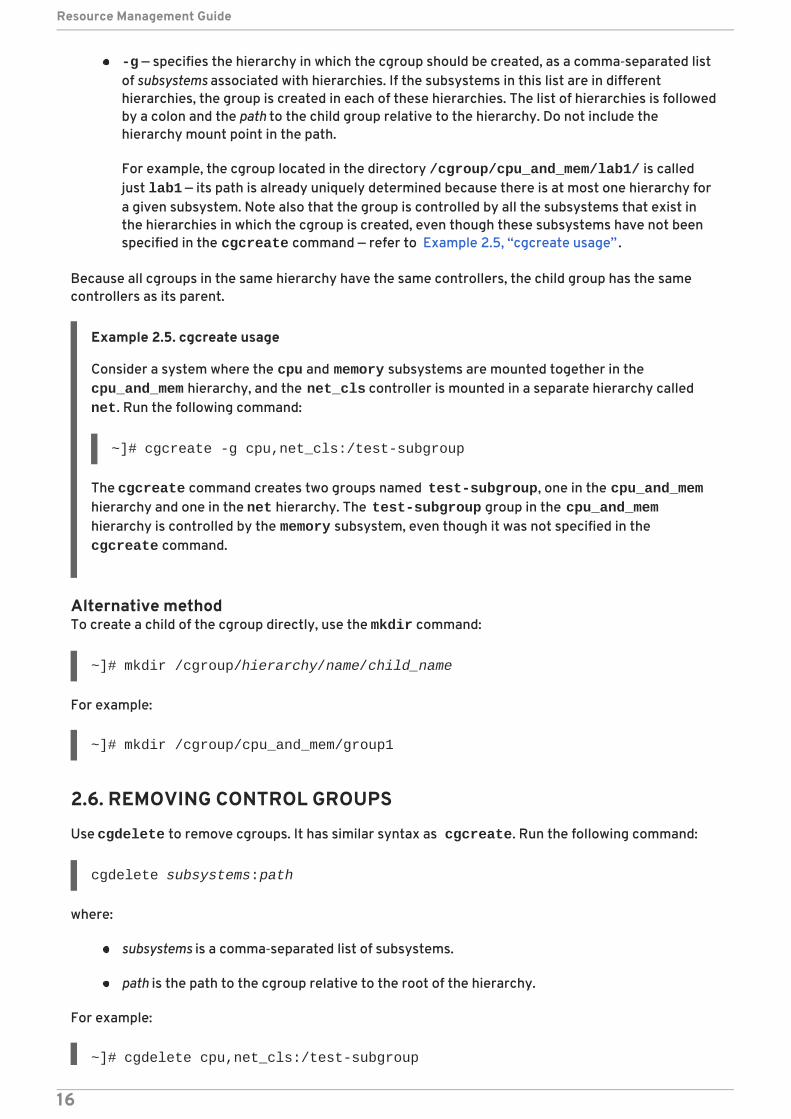
-g — specifies the hierarchy in which the cgroup should be created, as a comma‑separated listof subsystems associated with hierarchies. If the subsystems in this list are in differenthierarchies, the group is created in each of these hierarchies. The list of hierarchies is followedby a colon and the path to the child group relative to the hierarchy. Do not include thehierarchy mount point in the path.
For example, the cgroup located in the directory /cgroup/cpu_and_mem/lab1/ is calledjust lab1 — its path is already uniquely determined because there is at most one hierarchy fora given subsystem. Note also that the group is controlled by all the subsystems that exist inthe hierarchies in which the cgroup is created, even though these subsystems have not beenspecified in the cgcreate command — refer to Example 2.5, “cgcreate usage” .
Because all cgroups in the same hierarchy have the same controllers, the child group has the samecontrollers as its parent.
Example 2.5. cgcreate usage
Consider a system where the cpu and memory subsystems are mounted together in the cpu_and_mem hierarchy, and the net_cls controller is mounted in a separate hierarchy called net. Run the following command:
~]# cgcreate -g cpu,net_cls:/test-subgroup
The cgcreate command creates two groups named test-subgroup, one in the cpu_and_memhierarchy and one in the net hierarchy. The test-subgroup group in the cpu_and_memhierarchy is controlled by the memory subsystem, even though it was not specified in the cgcreate command.
Alternative methodTo create a child of the cgroup directly, use the mkdir command:
~]# mkdir /cgroup/hierarchy/name/child_name
For example:
~]# mkdir /cgroup/cpu_and_mem/group1
2.6. REMOVING CONTROL GROUPS
Use cgdelete to remove cgroups. It has similar syntax as cgcreate. Run the following command:
cgdelete subsystems:path
where:
subsystems is a comma‑separated list of subsystems.
path is the path to the cgroup relative to the root of the hierarchy.
For example:
~]# cgdelete cpu,net_cls:/test-subgroup
Resource Management Guide
16
cgdelete can also recursively remove all subgroups with the option -r.
When you delete a cgroup, all its tasks move to its parent group.
2.7. SETTING PARAMETERS
Set subsystem parameters by running the cgset command from a user account with permission tomodify the relevant cgroup. For example, if cpuset is mounted to /cgroup/cpu_and_mem/ and the /cgroup/cpu_and_mem/group1 subdirectory exists, specify the CPUs to which this group hasaccess with the following command:
cpu_and_mem]# cgset -r cpuset.cpus=0-1 group1
The syntax for cgset is:
cgset -r parameter=value path_to_cgroup
where:
parameter is the parameter to be set, which corresponds to the file in the directory of the givencgroup.
value is the value for the parameter.
path_to_cgroup is the path to the cgroup relative to the root of the hierarchy. For example, to setthe parameter of the root group (if the cpuacct subsystem is mounted to /cgroup/cpu_and_mem/), change to the /cgroup/cpu_and_mem/ directory, and run:
cpu_and_mem]# cgset -r cpuacct.usage=0 /
Alternatively, because . is relative to the root group (that is, the root group itself) you couldalso run:
cpu_and_mem]# cgset -r cpuacct.usage=0 .
Note, however, that / is the preferred syntax.
NOTE
Only a small number of parameters can be set for the root group (such as the cpuacct.usage parameter shown in the examples above). This is because aroot group owns all of the existing resources, therefore, it would make no senseto limit all existing processes by defining certain parameters, for example the cpuset.cpu parameter.
To set the parameter of group1, which is a subgroup of the root group, run:
cpu_and_mem]# cgset -r cpuacct.usage=0 group1
A trailing slash after the name of the group (for example, cpuacct.usage=0 group1/) isoptional.
CHAPTER 2. USING CONTROL GROUPS
17
The values that you can set with cgset might depend on values set higher in a particular hierarchy. Forexample, if group1 is limited to use only CPU 0 on a system, you cannot set group1/subgroup1 touse CPUs 0 and 1, or to use only CPU 1.
You can also use cgset to copy the parameters of one cgroup into another existing cgroup. Forexample:
cpu_and_mem]# cgset --copy-from group1/ group2/
The syntax to copy parameters with cgset is:
cgset --copy-from path_to_source_cgroup path_to_target_cgroup
where:
path_to_source_cgroup is the path to the cgroup whose parameters are to be copied, relative tothe root group of the hierarchy.
path_to_target_cgroup is the path to the destination cgroup, relative to the root group ofthe hierarchy.
Ensure that any mandatory parameters for the various subsystems are set before you copyparameters from one group to another, or the command will fail. For more information on mandatoryparameters, refer to Important.
Alternative methodTo set parameters in a cgroup directly, insert values into the relevant subsystem pseudofile using the echo command. In the following example, the echo command inserts the value of 0-1 into the cpuset.cpus pseudofile of the cgroup group1:
~]# echo 0-1 > /cgroup/cpu_and_mem/group1/cpuset.cpus
With this value in place, the tasks in this cgroup are restricted to CPUs 0 and 1 on the system.
2.8. MOVING A PROCESS TO A CONTROL GROUP
Move a process into a cgroup by running the cgclassify command, for example:
~]# cgclassify -g cpu,memory:group1 1701
The syntax for cgclassify is:
cgclassify -g subsystems:path_to_cgroup pidlist
where:
subsystems is a comma‑separated list of subsystems, or * to launch the process in thehierarchies associated with all available subsystems. Note that if cgroups of the same nameexist in multiple hierarchies, the -g option moves the processes in each of those groups.Ensure that the cgroup exists within each of the hierarchies whose subsystems you specifyhere.
path_to_cgroup is the path to the cgroup within its hierarchies.
Resource Management Guide
18
pidlist is a space-separated list of process identifier (PIDs).
If the -g option is not specified, cgclassify automatically searches the /etc/cgrules.conf file(see Section 2.8.1, “The cgred Service” ) and uses the first applicable configuration line. According tothis line, cgclassify determines the hierarchies and cgroups to move the process under. Note thatfor the move to be successful, the destination hierarchies must exist. The subsystems specified in /etc/cgrules.conf also have to be properly configured for the corresponding hierarchy in /etc/cgconfig.conf.
You can also add the --sticky option before the pid to keep any child processes in the same cgroup.If you do not set this option and the cgred service is running, child processes are allocated to cgroupsbased on the settings found in /etc/cgrules.conf. However, the parent process remains in thecgroup in which it was first started.
Using cgclassify, you can move several processes simultaneously. For example, this commandmoves the processes with PIDs 1701 and 1138 into cgroup group1/:
~]# cgclassify -g cpu,memory:group1 1701 1138
Note that the PIDs to be moved are separated by spaces and that the specified groups should be indifferent hierarchies.
Alternative methodTo move a process into a cgroup directly, write its PID to the tasks file of the cgroup. For example, tomove a process with the PID 1701 into a cgroup at /cgroup/cpu_and_mem/group1/:
~]# echo 1701 > /cgroup/cpu_and_mem/group1/tasks
2.8.1. The cgred Service
Cgred is a service (which starts the cgrulesengd service) that moves tasks into cgroups according toparameters set in the /etc/cgrules.conf file. Entries in the /etc/cgrules.conf file can take oneof these two forms:
user subsystems control_group
user:command subsystems control_group
Replace user with a user name or a group name prefixed with the "@" character. Replace subsystemswith a comma‑separated list of subsystem names, control_group represents a path to the cgroup, andcommand stands for a process name or a full command path of a process.
For example:
This entry specifies that any processes that belong to the user named maria access the devicessubsystem according to the parameters specified in the /usergroup/staff cgroup. To associateparticular commands with particular cgroups, add the command parameter, as follows:
maria devices /usergroup/staff
maria:ftp devices /usergroup/staff/ftp
CHAPTER 2. USING CONTROL GROUPS
19
The entry now specifies that when the user named maria uses the ftp command, the process isautomatically moved to the /usergroup/staff/ftp cgroup in the hierarchy that contains the devices subsystem. Note, however, that the daemon moves the process to the cgroup only after theappropriate condition is fulfilled. Therefore, the ftp process might run for a short time in the wronggroup. Furthermore, if the process quickly spawns children while in the wrong group, these childrenmight not be moved.
Entries in the /etc/cgrules.conf file can include the following extra notation:
@ — indicates a group instead of an individual user. For example, @admins are all users in the admins group.
* — represents "all". For example, * in the subsystem field represents all mountedsubsystems.
% — represents an item that is the same as the item on the line above.
For example, the entries specified in the /etc/cgrules.conf file can have the following form:
The above configuration ensures that processes owned by the adminstaff and labstaff access thedevices subsystem according to the limits set in the admingroup cgroup.
Rules specified in /etc/cgrules.conf can be linked to templates configured either in the /etc/cgconfig.conf file or in configuration files stored in the /etc/cgconfig.d/ directory,allowing for flexible cgroup assignment and creation.
For example, specify the following template in /etc/cgconfig.conf:
template users/%g/%u { cpuacct{ } cpu { cpu.shares = "1000"; } }
Then use the users/%g/%u template in the third row of a /etc/cgrules.conf entry, which can lookas follows:
The %g and %u variables used above are automatically replaced with group and user name dependingon the owner of the ftp process. If the process belongs to peter from the adminstaff group, theabove path is translated to users/adminstaff/peter. The cgred service then searches for thisdirectory, and if it does not exist, cgred creates it and assigns the process to users/adminstaff/peter/tasks. Note that template rules apply only to definitions of templates inconfiguration files, so even if "group users/adminstaff/peter" was defined in /etc/cgconfig.conf, itwould be ignored in favor of "template users/%g/%u".
There are several other variables that can be used for specifying cgroup paths in templates:
@adminstaff devices /admingroup@labstaff % %
peter:ftp cpu users/%g/%u
Resource Management Guide
20
%u — is replaced with the name of the user who owns the current process. If name resolutionfails, UID is used instead.
%U — is replaced with the UID of the specified user who owns the current process.
%g — is replaced with the name of the user group that owns the current process, or with theGID if name resolution fails.
%G — is replaced with the GID of the cgroup that owns the current process.
%p — is replaced with the name of the current process. PID is used in case of name resolutionfailure.
%P — is replaced with the PID of the current processes.
2.9. STARTING A PROCESS IN A CONTROL GROUP
IMPORTANT
Some subsystems have mandatory parameters that must be set before you can move atask into a cgroup which uses any of those subsystems. For example, before you move atask into a cgroup which uses the cpuset subsystem, the cpuset.cpus and cpuset.mems parameters must be defined for that cgroup.
The examples in this section illustrate the correct syntax for the command, but onlywork on systems on which the relevant mandatory parameters have been set for anycontrollers used in the examples. If you have not already configured the relevantcontrollers, you cannot copy example commands directly from this section and expectthem to work on your system.
Refer to Chapter 3, Subsystems and Tunable Parameters for a description of whichparameters are mandatory for given subsystems.
Launch processes in a cgroup by running the cgexec command. For example, this command launchesthe firefox web browser within the group1 cgroup, subject to the limitations imposed on that groupby the cpu subsystem:
~]# cgexec -g cpu:group1 firefox http://www.redhat.com
The syntax for cgexec is:
cgexec -g subsystems:path_to_cgroup command arguments
where:
subsystems is a comma‑separated list of subsystems, or * to launch the process in thehierarchies associated with all available subsystems. Note that, as with cgset described inSection 2.7, “Setting Parameters”, if cgroups of the same name exist in multiple hierarchies,the -g option creates processes in each of those groups. Ensure that the cgroup exists withineach of the hierarchies whose subsystems you specify here.
path_to_cgroup is the path to the cgroup relative to the hierarchy.
CHAPTER 2. USING CONTROL GROUPS
21
command is the command to run.
arguments are any arguments for the command.
You can also add the --sticky option before the command to keep any child processes in the samecgroup. If you do not set this option and the cgred service is running, child processes will be allocatedto cgroups based on the settings found in /etc/cgrules.conf. The process itself, however, willremain in the cgroup in which you started it.
Alternative methodWhen you start a new process, it inherits the group of its parent process. Therefore, an alternativemethod for starting a process in a particular cgroup is to move your shell process to that group (referto Section 2.8, “Moving a Process to a Control Group” ), and then launch the process from that shell. Forexample:
~]# echo $$ > /cgroup/cpu_and_mem/group1/tasks~]# firefox
Note that after exiting firefox, your existing shell is still in the group1 cgroup. Therefore, an evenbetter way would be:
~]# sh -c "echo \$$ > /cgroup/cpu_and_mem/group1/tasks && firefox"
2.9.1. Starting a Service in a Control Group
You can start certain services in a cgroup. Services that can be started in cgroups must:
use a /etc/sysconfig/servicename file
use the daemon() function from /etc/init.d/functions to start the service
To make an eligible service start in a cgroup, edit its file in the /etc/sysconfig directory to includean entry in the form CGROUP_DAEMON="subsystem:control_group" where subsystem is asubsystem associated with a particular hierarchy, and control_group is a cgroup in that hierarchy. Forexample:
If cpuset is mounted to /cgroup/cpu_and_mem/, the above configuration translates to /cgroup/cpu_and_mem/group1.
2.9.2. Process Behavior in the Root Control Group
Certain blkio and cpu configuration options affect processes (tasks) running in the root cgroup in adifferent way than those in a subgroup. Consider the following example:
1. Create two subgroups under one root group: /rootgroup/red/ and /rootgroup/blue/
2. In each subgroup and in the root group, define the cpu.shares configuration option and set itto 1.
In the scenario configured above, one process placed in each group (that is, one task in /rootgroup/tasks, /rootgroup/red/tasks and /rootgroup/blue/tasks) consumes 33.33%of the CPU:
CGROUP_DAEMON="cpuset:group1"
Resource Management Guide
22
/rootgroup/ process: 33.33%/rootgroup/blue/ process: 33.33%/rootgroup/red/ process: 33.33%
Any other processes placed in subgroups blue and red result in the 33.33% percent of the CPUassigned to that specific subgroup to be split among the multiple processes in that subgroup.
However, multiple processes placed in the root group cause the CPU resource to be split per process,rather than per group. For example, if /rootgroup/ contains three processes, /rootgroup/red/contains one process and /rootgroup/blue/ contains one process, and the cpu.shares option isset to 1 in all groups, the CPU resource is divided as follows:
/rootgroup/ processes: 20% + 20% + 20%/rootgroup/blue/ process: 20%/rootgroup/red/ process: 20%
Therefore, it is recommended to move all processes from the root group to a specific subgroup whenusing the blkio and cpu configuration options which divide an available resource based on a weightor a share (for example, cpu.shares or blkio.weight). To move all tasks from the root group into aspecific subgroup, you can use the following commands:
rootgroup]# cat tasks >> red/tasksrootgroup]# echo > tasks
2.10. GENERATING THE /ETC/CGCONFIG.CONF FILE
Configuration for the /etc/cgconfig.conf file can be generated from the current cgroupconfiguration using the cgsnapshot utility. This utility takes a snapshot of the current state of allsubsystems and their cgroups and returns their configuration as it would appear in the /etc/cgconfig.conf file. Example 2.6, “Using the cgsnapshot utility” shows an example usage ofthe cgsnapshot utility.
Example 2.6. Using the cgsnapshot utility
Configure cgroups on the system using the following commands:
~]# mkdir /cgroup/cpu~]# mount -t cgroup -o cpu cpu /cgroup/cpu~]# mkdir /cgroup/cpu/lab1~]# mkdir /cgroup/cpu/lab2~]# echo 2 > /cgroup/cpu/lab1/cpu.shares~]# echo 3 > /cgroup/cpu/lab2/cpu.shares~]# echo 5000000 > /cgroup/cpu/lab1/cpu.rt_period_us~]# echo 4000000 > /cgroup/cpu/lab1/cpu.rt_runtime_us~]# mkdir /cgroup/cpuacct~]# mount -t cgroup -o cpuacct cpuacct /cgroup/cpuacct
The above commands mounted two subsystems and created two cgroups, for the cpu subsystem,with specific values for some of their parameters. Executing the cgsnapshot command (with the -
s option and an empty /etc/cgsnapshot_blacklist.conf file[4]) then produces the followingoutput:
CHAPTER 2. USING CONTROL GROUPS
23

~]$ cgsnapshot -s# Configuration file generated by cgsnapshotmount { cpu = /cgroup/cpu; cpuacct = /cgroup/cpuacct;}
group lab2 { cpu { cpu.rt_period_us="1000000"; cpu.rt_runtime_us="0"; cpu.shares="3"; }}
group lab1 { cpu { cpu.rt_period_us="5000000"; cpu.rt_runtime_us="4000000"; cpu.shares="2"; }}
The -s option used in the example above tells cgsnapshot to ignore all warnings in the output filecaused by parameters not being defined in the blacklist or whitelist of the cgsnapshot utility. Formore information on parameter blacklisting, refer to Section 2.10.1, “Blacklisting Parameters”. Formore information on parameter whitelisting, refer to Section 2.10.2, “Whitelisting Parameters” .
By default, the output generated by cgsnapshot is returned on the standard output. Use the -f optionto specify a file to which the output should be redirected. For example:
~]$ cgsnapshot -f ~/test/cgconfig_test.conf
WARNING
When using the -f option, note that it overwrites any content in the file youspecify. Therefore, it is recommended not to direct the output straight to the /etc/cgconfig.conf file.
The cgsnapshot utility can also create configuration files per subsystem. By specifying the name of asubsystem, the output will consist of the corresponding configuration for that subsystem:
~]$ cgsnapshot cpuacct# Configuration file generated by cgsnapshotmount { cpuacct = /cgroup/cpuacct;}
Resource Management Guide
24
2.10.1. Blacklisting Parameters
The cgsnapshot utility allows parameter blacklisting. If a parameter is blacklisted, it does not appear inthe output generated by cgsnapshot. By default, the /etc/cgsnapshot_blacklist.conf file ischecked for blacklisted parameters. If a parameter is not present in the blacklist, the whitelist ischecked. To specify a different blacklist, use the -b option. For example:
~]$ cgsnapshot -b ~/test/my_blacklist.conf
2.10.2. Whitelisting Parameters
The cgsnapshot utility also allows parameter whitelisting. If a parameter is whitelisted, it appears inthe output generated by cgsnapshot. If a parameter is neither blacklisted or whitelisted, a warningappears informing of this:
~]$ cgsnapshot -f ~/test/cgconfig_test.confWARNING: variable cpu.rt_period_us is neither blacklisted nor whitelistedWARNING: variable cpu.rt_runtime_us is neither blacklisted nor whitelisted
By default, there is no whitelist configuration file. To specify which file to use as a whitelist, use the -woption. For example:
~]$ cgsnapshot -w ~/test/my_whitelist.conf
Specifying the -t option tells cgsnapshot to generate a configuration with parameters from thewhitelist only.
2.11. OBTAINING INFORMATION ABOUT CONTROL GROUPS
There are several ways to find and monitor control groups, subsystems, and hierarchies configured onyour system.
2.11.1. Finding a Process
To find the cgroup to which a process belongs, run:
~]$ ps -O cgroup
Or, if you know the PID for the process, run:
~]$ cat /proc/PID/cgroup
where PID stands for a PID of the inspected process.
2.11.2. Finding a Subsystem
To find out what subsystems are available in your kernel and how they are mounted together intohierarchies, run:
~]$ cat /proc/cgroups#subsys_name hierarchy num_cgroups enabledcpuset 2 1 1
CHAPTER 2. USING CONTROL GROUPS
25
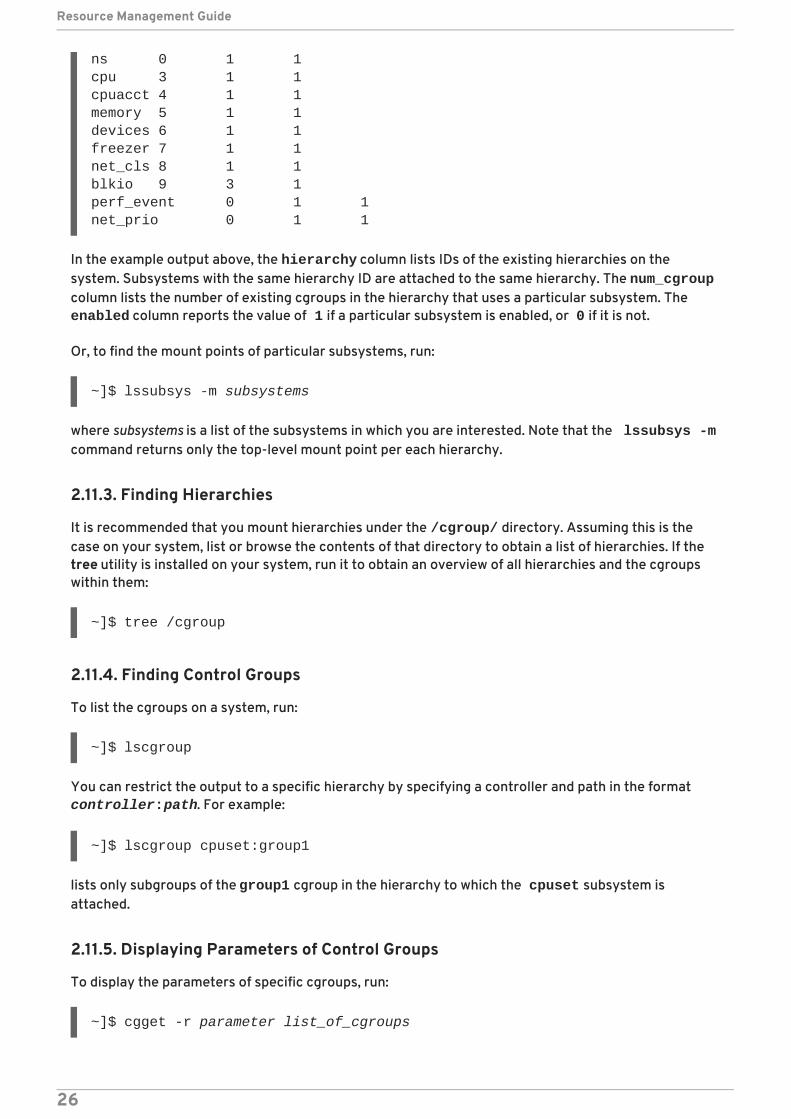
ns 0 1 1cpu 3 1 1cpuacct 4 1 1memory 5 1 1devices 6 1 1freezer 7 1 1net_cls 8 1 1blkio 9 3 1perf_event 0 1 1net_prio 0 1 1
In the example output above, the hierarchy column lists IDs of the existing hierarchies on thesystem. Subsystems with the same hierarchy ID are attached to the same hierarchy. The num_cgroupcolumn lists the number of existing cgroups in the hierarchy that uses a particular subsystem. The enabled column reports the value of 1 if a particular subsystem is enabled, or 0 if it is not.
Or, to find the mount points of particular subsystems, run:
~]$ lssubsys -m subsystems
where subsystems is a list of the subsystems in which you are interested. Note that the lssubsys -mcommand returns only the top-level mount point per each hierarchy.
2.11.3. Finding Hierarchies
It is recommended that you mount hierarchies under the /cgroup/ directory. Assuming this is thecase on your system, list or browse the contents of that directory to obtain a list of hierarchies. If thetree utility is installed on your system, run it to obtain an overview of all hierarchies and the cgroupswithin them:
~]$ tree /cgroup
2.11.4. Finding Control Groups
To list the cgroups on a system, run:
~]$ lscgroup
You can restrict the output to a specific hierarchy by specifying a controller and path in the format controller:path. For example:
~]$ lscgroup cpuset:group1
lists only subgroups of the group1 cgroup in the hierarchy to which the cpuset subsystem isattached.
2.11.5. Displaying Parameters of Control Groups
To display the parameters of specific cgroups, run:
~]$ cgget -r parameter list_of_cgroups
Resource Management Guide
26
where parameter is a pseudofile that contains values for a subsystem, and list_of_cgroups is a list ofcgroups separated with spaces. For example:
~]$ cgget -r cpuset.cpus -r memory.limit_in_bytes group1 group2
displays the values of cpuset.cpus and memory.limit_in_bytes for cgroups group1 and group2.
If you do not know the names of the parameters themselves, use a command like:
~]$ cgget -g cpuset /
2.12. UNLOADING CONTROL GROUPS
WARNING
The cgclear command destroys all cgroups in all hierarchies. If you do not havethese hierarchies stored in a configuration file, you will not be able to readilyreconstruct them.
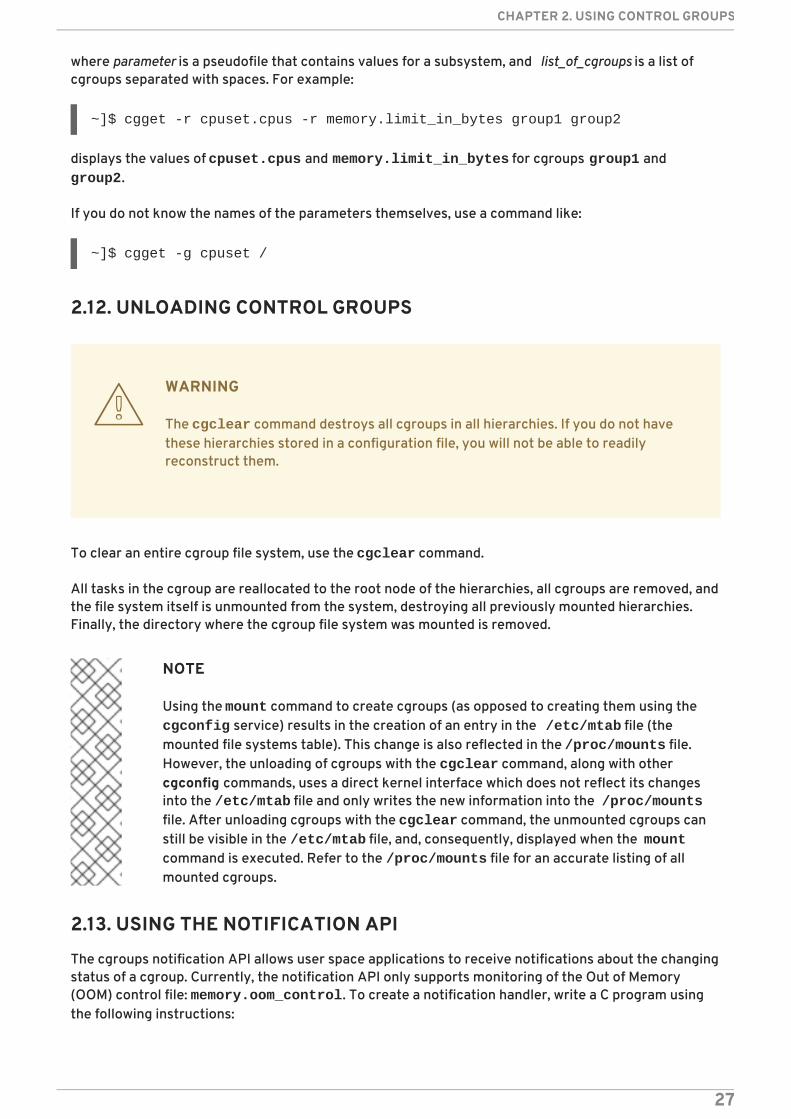
To clear an entire cgroup file system, use the cgclear command.
All tasks in the cgroup are reallocated to the root node of the hierarchies, all cgroups are removed, andthe file system itself is unmounted from the system, destroying all previously mounted hierarchies.Finally, the directory where the cgroup file system was mounted is removed.
NOTE
Using the mount command to create cgroups (as opposed to creating them using the cgconfig service) results in the creation of an entry in the /etc/mtab file (themounted file systems table). This change is also reflected in the /proc/mounts file.However, the unloading of cgroups with the cgclear command, along with othercgconfig commands, uses a direct kernel interface which does not reflect its changesinto the /etc/mtab file and only writes the new information into the /proc/mountsfile. After unloading cgroups with the cgclear command, the unmounted cgroups canstill be visible in the /etc/mtab file, and, consequently, displayed when the mountcommand is executed. Refer to the /proc/mounts file for an accurate listing of allmounted cgroups.
2.13. USING THE NOTIFICATION API
The cgroups notification API allows user space applications to receive notifications about the changingstatus of a cgroup. Currently, the notification API only supports monitoring of the Out of Memory(OOM) control file: memory.oom_control. To create a notification handler, write a C program usingthe following instructions:
CHAPTER 2. USING CONTROL GROUPS
27
1. Using the eventfd() function, create a file descriptor for event notifications. For moreinformation, refer to the eventfd(2) man page.
2. To monitor the memory.oom_control file, open it using the open() function. For moreinformation, refer to the open(2) man page.
3. Use the write() function to write the following arguments to the cgroup.event_controlfile of the cgroup whose memory.oom_control file you are monitoring:
<event_file_descriptor> <OOM_control_file_descriptor>
where:
event_file_descriptor is used to open the cgroup.event_control file,
and OOM_control_file_descriptor is used to open the respective memory.oom_control file.
For more information on writing to a file, refer to the write(1) man page.
When the above program is started, it will be notified of any OOM situation in the cgroup it ismonitoring. Note that OOM notifications only work in non-root cgroups.
For more information on the memory.oom_control tunable parameter, refer to Section 3.7,“memory”. For more information on configuring notifications for OOM control, refer to Example 3.3,“OOM Control and Notifications”.
2.14. ADDITIONAL RESOURCES
The ultimate documentation for cgroup commands is available on the manual pages provided with thelibcgroup package. The section numbers are specified in the list of man pages below.
The libcgroup Man Pages
man 1 cgclassify — the cgclassify command is used to move running tasks to one ormore cgroups.
man 1 cgclear — the cgclear command is used to delete all cgroups in a hierarchy.
man 5 cgconfig.conf — cgroups are defined in the cgconfig.conf file.
man 8 cgconfigparser — the cgconfigparser command parses the cgconfig.conf fileand mounts hierarchies.
man 1 cgcreate — the cgcreate command creates new cgroups in hierarchies.
man 1 cgdelete — the cgdelete command removes specified cgroups.
man 1 cgexec — the cgexec command runs tasks in specified cgroups.
man 1 cgget — the cgget command displays cgroup parameters.
man 1 cgsnapshot — the cgsnapshot command generates a configuration file fromexisting subsystems.
man 5 cgred.conf — cgred.conf is the configuration file for the cgred service.
Resource Management Guide
28
man 5 cgrules.conf — cgrules.conf contains the rules used for determining when tasksbelong to certain cgroups.
man 8 cgrulesengd — the cgrulesengd service distributes tasks to cgroups.
man 1 cgset — the cgset command sets parameters for a cgroup.
man 1 lscgroup — the lscgroup command lists the cgroups in a hierarchy.
man 1 lssubsys — the lssubsys command lists the hierarchies containing the specifiedsubsystems.
[3] The lssubsys command is one of the utilities provided by the libcgroup package. You have to installlibcgroup to use it: refer to Chapter 2, Using Control Groups if you are unable to run lssubsys.
[4] The cpu.shares parameter is specified in the /etc/cgsnapshot_blacklist.conf file by default,which would cause it to be omitted in the generated output in Example 2.6, “Using the cgsnapshot utility”. Thus,for the purposes of the example, an empty /etc/cgsnapshot_blacklist.conf file is used.
CHAPTER 2. USING CONTROL GROUPS
29
CHAPTER 3. SUBSYSTEMS AND TUNABLE PARAMETERSSubsystems are kernel modules that are aware of cgroups. Typically, they are resource controllers thatallocate varying levels of system resources to different cgroups. However, subsystems could beprogrammed for any other interaction with the kernel where the need exists to treat different groupsof processes differently. The application programming interface (API) to develop new subsystems isdocumented in cgroups.txt in the kernel documentation, installed on your system at /usr/share/doc/kernel-doc-kernel-version/Documentation/cgroups/ (provided by thekernel-doc package). The latest version of the cgroups documentation is also available online athttp://www.kernel.org/doc/Documentation/cgroup-v1/cgroups.txt. Note, however, that the featuresin the latest documentation might not match those available in the kernel installed on your system.
State objects that contain the subsystem parameters for a cgroup are represented as pseudofiles withinthe cgroup virtual file system. These pseudofiles can be manipulated by shell commands or theirequivalent system calls. For example, cpuset.cpus is a pseudofile that specifies which CPUs a cgroupis permitted to access. If /cgroup/cpuset/webserver is a cgroup for the web server that runs on asystem, and the following command is executed,
~]# echo 0,2 > /cgroup/cpuset/webserver/cpuset.cpus
the value 0,2 is written to the cpuset.cpus pseudofile and therefore limits any tasks whose PIDs arelisted in /cgroup/cpuset/webserver/tasks to use only CPU 0 and CPU 2 on the system.
3.1. BLKIO
The Block I/O (blkio) subsystem controls and monitors access to I/O on block devices by tasks incgroups. Writing values to some of these pseudofiles limits access or bandwidth, and reading valuesfrom some of these pseudofiles provides information on I/O operations.
The blkio subsystem offers two policies for controlling access to I/O:
Proportional weight division — implemented in the Completely Fair Queuing (CFQ) I/O scheduler,this policy allows you to set weights to specific cgroups. This means that each cgroup has a setpercentage (depending on the weight of the cgroup) of all I/O operations reserved. For moreinformation, refer to Section 3.1.1, “Proportional Weight Division Tunable Parameters”
I/O throttling (Upper limit) — this policy is used to set an upper limit for the number of I/Ooperations performed by a specific device. This means that a device can have a limited rate ofread or write operations. For more information, refer to Section 3.1.2, “I/O Throttling TunableParameters”
IMPORTANT
Currently, the Block I/O subsystem does not work for buffered write operations. It isprimarily targeted at direct I/O, although it works for buffered read operations.
3.1.1. Proportional Weight Division Tunable Parameters
blkio.weight
specifies the relative proportion (weight) of block I/O access available by default to a cgroup, in therange from 100 to 1000. This value is overridden for specific devices by the blkio.weight_device parameter. For example, to assign a default weight of 500 to a cgroup foraccess to block devices, run:
Resource Management Guide
30
~]# echo 500 > blkio.weight
blkio.weight_device
specifies the relative proportion (weight) of I/O access on specific devices available to a cgroup, inthe range from 100 to 1000. The value of this parameter overrides the value of the blkio.weightparameter for the devices specified. Values take the format of major:minor weight, where major andminor are device types and node numbers specified in Linux Allocated Devices, otherwise known asthe Linux Devices List and available from http://www.kernel.org/doc/Documentation/devices.txt.For example, to assign a weight of 500 to a cgroup for access to /dev/sda, run:
~]# echo 8:0 500 > blkio.weight_device
In the Linux Allocated Devices notation, 8:0 represents /dev/sda.
3.1.2. I/O Throttling Tunable Parameters
blkio.throttle.read_bps_device
specifies the upper limit on the number of read operations a device can perform. The rate of theread operations is specified in bytes per second. Entries have three fields: major, minor, andbytes_per_second. Major and minor are device types and node numbers specified in Linux AllocatedDevices, and bytes_per_second is the upper limit rate at which read operations can be performed. Forexample, to allow the /dev/sda device to perform read operations at a maximum of 10 MBps, run:
~]# echo "8:0 10485760" > /cgroup/blkio/test/blkio.throttle.read_bps_device
blkio.throttle.read_iops_device
specifies the upper limit on the number of read operations a device can perform. The rate of theread operations is specified in operations per second. Entries have three fields: major, minor, andoperations_per_second. Major and minor are device types and node numbers specified in LinuxAllocated Devices, and operations_per_second is the upper limit rate at which read operations can beperformed. For example, to allow the /dev/sda device to perform a maximum of 10 read operationsper second, run:
~]# echo "8:0 10" > /cgroup/blkio/test/blkio.throttle.read_iops_device
blkio.throttle.write_bps_device
specifies the upper limit on the number of write operations a device can perform. The rate of thewrite operations is specified in bytes per second. Entries have three fields: major, minor, andbytes_per_second. Major and minor are device types and node numbers specified in Linux AllocatedDevices, and bytes_per_second is the upper limit rate at which write operations can be performed.For example, to allow the /dev/sda device to perform write operations at a maximum of 10 MBps,run:
~]# echo "8:0 10485760" > /cgroup/blkio/test/blkio.throttle.write_bps_device
blkio.throttle.write_iops_device
specifies the upper limit on the number of write operations a device can perform. The rate of the
CHAPTER 3. SUBSYSTEMS AND TUNABLE PARAMETERS
31
write operations is specified in operations per second. Entries have three fields: major, minor, andoperations_per_second. Major and minor are device types and node numbers specified in LinuxAllocated Devices, and operations_per_second is the upper limit rate at which write operations can beperformed. For example, to allow the /dev/sda device to perform a maximum of 10 writeoperations per second, run:
~]# echo "8:0 10" > /cgroup/blkio/test/blkio.throttle.write_iops_device
blkio.throttle.io_serviced
reports the number of I/O operations performed on specific devices by a cgroup as seen by thethrottling policy. Entries have four fields: major, minor, operation, and number. Major and minor aredevice types and node numbers specified in Linux Allocated Devices, operation represents the type ofoperation (read, write, sync, or async) and number represents the number of operations.
blkio.throttle.io_service_bytes
reports the number of bytes transferred to or from specific devices by a cgroup. The only differencebetween blkio.io_service_bytes and blkio.throttle.io_service_bytes is that theformer is not updated when the CFQ scheduler is operating on a request queue. Entries have fourfields: major, minor, operation, and bytes. Major and minor are device types and node numbersspecified in Linux Allocated Devices, operation represents the type of operation ( read, write, sync,or async) and bytes is the number of transferred bytes.
3.1.3. blkio Common Tunable Parameters
The following parameters may be used for either of the policies listed in Section 3.1, “blkio”.
blkio.reset_stats
resets the statistics recorded in the other pseudofiles. Write an integer to this file to reset thestatistics for this cgroup.
blkio.time
reports the time that a cgroup had I/O access to specific devices. Entries have three fields: major,minor, and time. Major and minor are device types and node numbers specified in Linux AllocatedDevices, and time is the length of time in milliseconds (ms).
blkio.sectors
reports the number of sectors transferred to or from specific devices by a cgroup. Entries havethree fields: major, minor, and sectors. Major and minor are device types and node numbers specifiedin Linux Allocated Devices, and sectors is the number of disk sectors.
blkio.avg_queue_size
reports the average queue size for I/O operations by a cgroup, over the entire length of time of thegroup's existence. The queue size is sampled every time a queue for this cgroup receives atimeslice. Note that this report is available only if CONFIG_DEBUG_BLK_CGROUP=y is set on thesystem.
blkio.group_wait_time
reports the total time (in nanoseconds — ns) a cgroup spent waiting for a timeslice for one of itsqueues. The report is updated every time a queue for this cgroup gets a timeslice, so if you read thispseudofile while the cgroup is waiting for a timeslice, the report will not contain time spent waiting
Resource Management Guide
32
for the operation currently queued. Note that this report is available only if CONFIG_DEBUG_BLK_CGROUP=y is set on the system.
blkio.empty_time
reports the total time (in nanoseconds — ns) a cgroup spent without any pending requests. Thereport is updated every time a queue for this cgroup has a pending request, so if you read thispseudofile while the cgroup has no pending requests, the report will not contain time spent in thecurrent empty state. Note that this report is available only if CONFIG_DEBUG_BLK_CGROUP=y isset on the system.
blkio.idle_time
reports the total time (in nanoseconds — ns) the scheduler spent idling for a cgroup in anticipationof a better request than the requests already in other queues or from other groups. The report isupdated every time the group is no longer idling, so if you read this pseudofile while the cgroup isidling, the report will not contain time spent in the current idling state. Note that this report isavailable only if CONFIG_DEBUG_BLK_CGROUP=y is set on the system.
blkio.dequeue
reports the number of times requests for I/O operations by a cgroup were dequeued by specificdevices. Entries have three fields: major, minor, and number. Major and minor are device types andnode numbers specified in Linux Allocated Devices, and number is the number of times requests bythe group were dequeued. Note that this report is available only if CONFIG_DEBUG_BLK_CGROUP=yis set on the system.
blkio.io_serviced
reports the number of I/O operations performed on specific devices by a cgroup as seen by the CFQscheduler. Entries have four fields: major, minor, operation, and number. Major and minor are devicetypes and node numbers specified in Linux Allocated Devices, operation represents the type ofoperation (read, write, sync, or async) and number represents the number of operations.
blkio.io_service_bytes
reports the number of bytes transferred to or from specific devices by a cgroup as seen by the CFQscheduler. Entries have four fields: major, minor, operation, and bytes. Major and minor are devicetypes and node numbers specified in Linux Allocated Devices, operation represents the type ofoperation (read, write, sync, or async) and bytes is the number of transferred bytes.
blkio.io_service_time
reports the total time between request dispatch and request completion for I/O operations onspecific devices by a cgroup as seen by the CFQ scheduler. Entries have four fields: major, minor,operation, and time. Major and minor are device types and node numbers specified in Linux AllocatedDevices, operation represents the type of operation ( read, write, sync, or async) and time is thelength of time in nanoseconds (ns). The time is reported in nanoseconds rather than a larger unit sothat this report is meaningful even for solid-state devices.
blkio.io_wait_time
reports the total time I/O operations on specific devices by a cgroup spent waiting for service in thescheduler queues. When you interpret this report, note:
the time reported can be greater than the total time elapsed, because the time reported isthe cumulative total of all I/O operations for the cgroup rather than the time that thecgroup itself spent waiting for I/O operations. To find the time that the group as a whole has
CHAPTER 3. SUBSYSTEMS AND TUNABLE PARAMETERS
33
spent waiting, use the blkio.group_wait_time parameter.
if the device has a queue_depth > 1, the time reported only includes the time until therequest is dispatched to the device, not any time spent waiting for service while the devicereorders requests.
Entries have four fields: major, minor, operation, and time. Major and minor are device types and nodenumbers specified in Linux Allocated Devices, operation represents the type of operation ( read, write, sync, or async) and time is the length of time in nanoseconds (ns). The time is reported innanoseconds rather than a larger unit so that this report is meaningful even for solid-state devices.
blkio.io_merged
reports the number of BIOS requests merged into requests for I/O operations by a cgroup. Entrieshave two fields: number and operation. Number is the number of requests, and operation representsthe type of operation (read, write, sync, or async).
blkio.io_queued
reports the number of requests queued for I/O operations by a cgroup. Entries have two fields:number and operation. Number is the number of requests, and operation represents the type ofoperation (read, write, sync, or async).
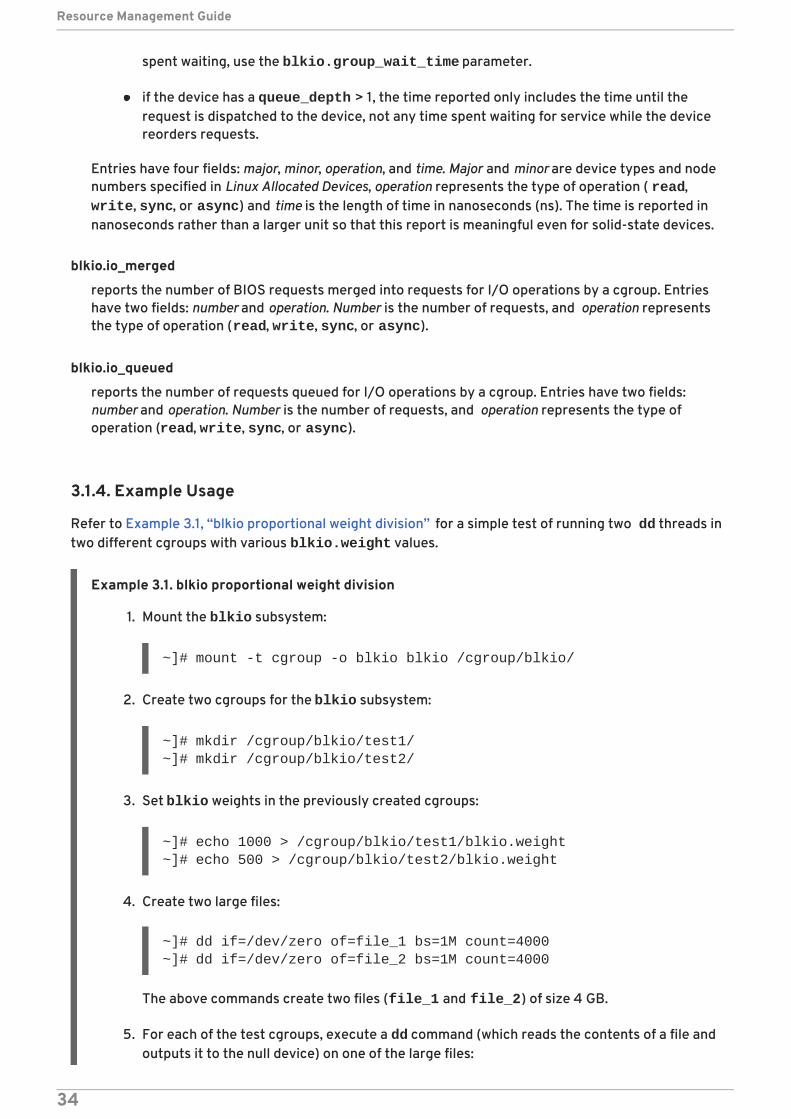
3.1.4. Example Usage
Refer to Example 3.1, “blkio proportional weight division” for a simple test of running two dd threads intwo different cgroups with various blkio.weight values.
Example 3.1. blkio proportional weight division
1. Mount the blkio subsystem:
~]# mount -t cgroup -o blkio blkio /cgroup/blkio/
2. Create two cgroups for the blkio subsystem:
~]# mkdir /cgroup/blkio/test1/~]# mkdir /cgroup/blkio/test2/
3. Set blkio weights in the previously created cgroups:
~]# echo 1000 > /cgroup/blkio/test1/blkio.weight~]# echo 500 > /cgroup/blkio/test2/blkio.weight
4. Create two large files:
~]# dd if=/dev/zero of=file_1 bs=1M count=4000~]# dd if=/dev/zero of=file_2 bs=1M count=4000
The above commands create two files (file_1 and file_2) of size 4 GB.
5. For each of the test cgroups, execute a dd command (which reads the contents of a file andoutputs it to the null device) on one of the large files:
Resource Management Guide
34

~]# cgexec -g blkio:test1 time dd if=file_1 of=/dev/null~]# cgexec -g blkio:test2 time dd if=file_2 of=/dev/null
Both commands will output their completion time once they have finished.
6. Simultaneously with the two running dd threads, you can monitor the performance in realtime by using the iotop utility. To install the iotop utility, execute, as root, the yum install iotop command. The following is an example of the output as seen in the iotoputility while running the previously started dd threads:
Total DISK READ: 83.16 M/s | Total DISK WRITE: 0.00 B/s TIME TID PRIO USER DISK READ DISK WRITE SWAPIN IO COMMAND15:18:04 15071 be/4 root 27.64 M/s 0.00 B/s 0.00 % 92.30 % dd if=file_2 of=/dev/null15:18:04 15069 be/4 root 55.52 M/s 0.00 B/s 0.00 % 88.48 % dd if=file_1 of=/dev/null
In order to get the most accurate result in Example 3.1, “blkio proportional weight division” , prior to theexecution of the dd commands, flush all file system buffers and free pagecache, dentries and inodesusing the following commands:
~]# sync~]# echo 3 > /proc/sys/vm/drop_caches
Additionally, you can enable group isolation which provides stronger isolation between groups at theexpense of throughput. When group isolation is disabled, fairness can be expected only for a sequentialworkload. By default, group isolation is enabled and fairness can be expected for random I/Oworkloads as well. To enable group isolation, use the following command:
~]# echo 1 > /sys/block/<disk_device>/queue/iosched/group_isolation
where <disk_device> stands for the name of the desired device, for example sda.
3.2. CPU
The cpu subsystem schedules CPU access to cgroups. Access to CPU resources can be scheduledusing two schedulers:
Completely Fair Scheduler (CFS) — a proportional share scheduler which divides the CPU time(CPU bandwidth) proportionately between groups of tasks (cgroups) depending on thepriority/weight of the task or shares assigned to cgroups. For more information about resourcelimiting using CFS, refer to Section 3.2.1, “CFS Tunable Parameters” .
Real-Time scheduler (RT) — a task scheduler that provides a way to specify the amount of CPUtime that real-time tasks can use. For more information about resource limiting of real-timetasks, refer to Section 3.2.2, “RT Tunable Parameters” .
3.2.1. CFS Tunable Parameters
In CFS, a cgroup can get more than its share of CPU if there are enough idle CPU cycles available in thesystem, due to the work conserving nature of the scheduler. This is usually the case for cgroups that
CHAPTER 3. SUBSYSTEMS AND TUNABLE PARAMETERS
35
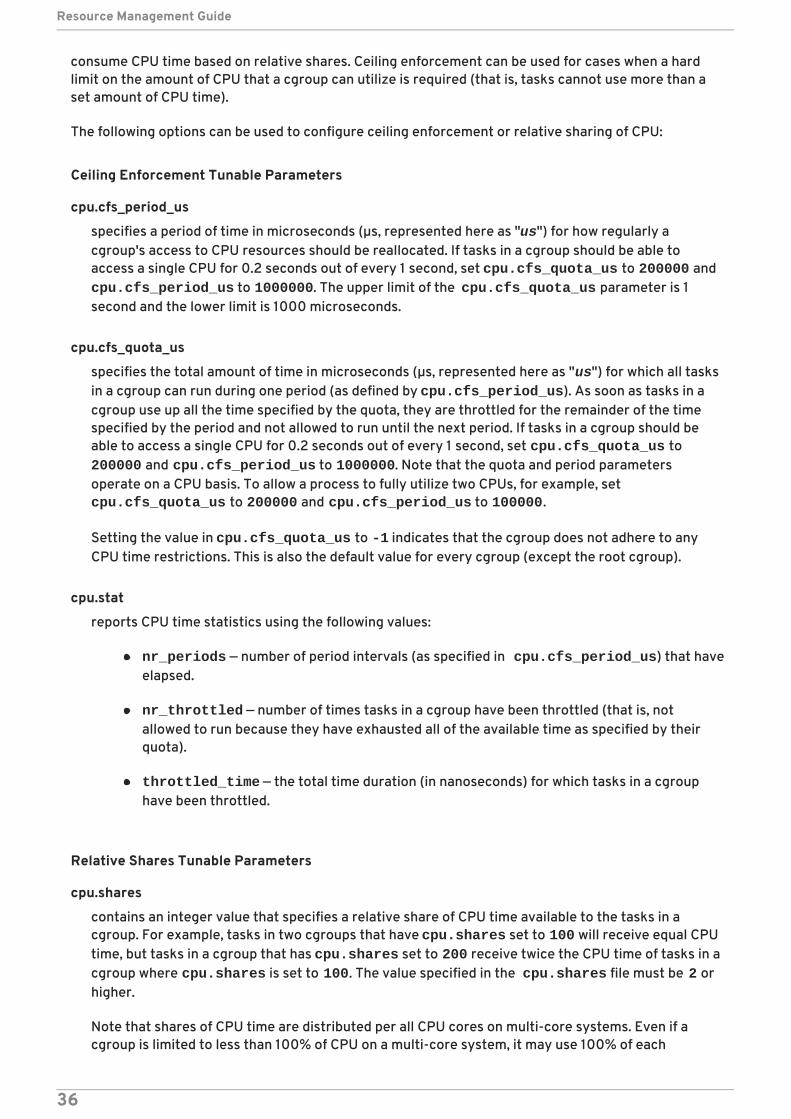
consume CPU time based on relative shares. Ceiling enforcement can be used for cases when a hardlimit on the amount of CPU that a cgroup can utilize is required (that is, tasks cannot use more than aset amount of CPU time).
The following options can be used to configure ceiling enforcement or relative sharing of CPU:
Ceiling Enforcement Tunable Parameters
cpu.cfs_period_us
specifies a period of time in microseconds (µs, represented here as "us") for how regularly acgroup's access to CPU resources should be reallocated. If tasks in a cgroup should be able toaccess a single CPU for 0.2 seconds out of every 1 second, set cpu.cfs_quota_us to 200000 andcpu.cfs_period_us to 1000000. The upper limit of the cpu.cfs_quota_us parameter is 1second and the lower limit is 1000 microseconds.
cpu.cfs_quota_us
specifies the total amount of time in microseconds (µs, represented here as "us") for which all tasksin a cgroup can run during one period (as defined by cpu.cfs_period_us). As soon as tasks in acgroup use up all the time specified by the quota, they are throttled for the remainder of the timespecified by the period and not allowed to run until the next period. If tasks in a cgroup should beable to access a single CPU for 0.2 seconds out of every 1 second, set cpu.cfs_quota_us to 200000 and cpu.cfs_period_us to 1000000. Note that the quota and period parametersoperate on a CPU basis. To allow a process to fully utilize two CPUs, for example, set cpu.cfs_quota_us to 200000 and cpu.cfs_period_us to 100000.
Setting the value in cpu.cfs_quota_us to -1 indicates that the cgroup does not adhere to anyCPU time restrictions. This is also the default value for every cgroup (except the root cgroup).
cpu.stat
reports CPU time statistics using the following values:
nr_periods — number of period intervals (as specified in cpu.cfs_period_us) that haveelapsed.
nr_throttled — number of times tasks in a cgroup have been throttled (that is, notallowed to run because they have exhausted all of the available time as specified by theirquota).
throttled_time — the total time duration (in nanoseconds) for which tasks in a cgrouphave been throttled.
Relative Shares Tunable Parameters
cpu.shares
contains an integer value that specifies a relative share of CPU time available to the tasks in acgroup. For example, tasks in two cgroups that have cpu.shares set to 100 will receive equal CPUtime, but tasks in a cgroup that has cpu.shares set to 200 receive twice the CPU time of tasks in acgroup where cpu.shares is set to 100. The value specified in the cpu.shares file must be 2 orhigher.
Note that shares of CPU time are distributed per all CPU cores on multi-core systems. Even if acgroup is limited to less than 100% of CPU on a multi-core system, it may use 100% of each
Resource Management Guide
36
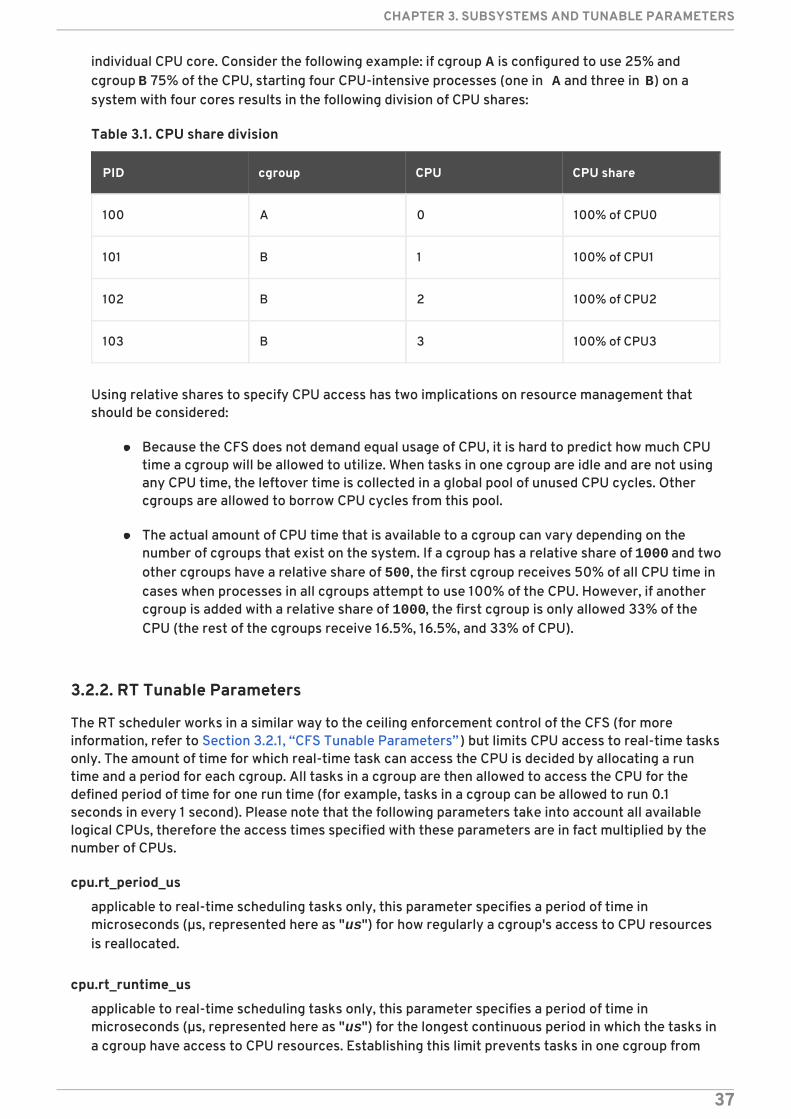
individual CPU core. Consider the following example: if cgroup A is configured to use 25% andcgroup B 75% of the CPU, starting four CPU-intensive processes (one in A and three in B) on asystem with four cores results in the following division of CPU shares:
Table 3.1. CPU share division
PID cgroup CPU CPU share
100 A 0 100% of CPU0
101 B 1 100% of CPU1
102 B 2 100% of CPU2
103 B 3 100% of CPU3
Using relative shares to specify CPU access has two implications on resource management thatshould be considered:
Because the CFS does not demand equal usage of CPU, it is hard to predict how much CPUtime a cgroup will be allowed to utilize. When tasks in one cgroup are idle and are not usingany CPU time, the leftover time is collected in a global pool of unused CPU cycles. Othercgroups are allowed to borrow CPU cycles from this pool.
The actual amount of CPU time that is available to a cgroup can vary depending on thenumber of cgroups that exist on the system. If a cgroup has a relative share of 1000 and twoother cgroups have a relative share of 500, the first cgroup receives 50% of all CPU time incases when processes in all cgroups attempt to use 100% of the CPU. However, if anothercgroup is added with a relative share of 1000, the first cgroup is only allowed 33% of theCPU (the rest of the cgroups receive 16.5%, 16.5%, and 33% of CPU).
3.2.2. RT Tunable Parameters
The RT scheduler works in a similar way to the ceiling enforcement control of the CFS (for moreinformation, refer to Section 3.2.1, “CFS Tunable Parameters”) but limits CPU access to real-time tasksonly. The amount of time for which real-time task can access the CPU is decided by allocating a runtime and a period for each cgroup. All tasks in a cgroup are then allowed to access the CPU for thedefined period of time for one run time (for example, tasks in a cgroup can be allowed to run 0.1seconds in every 1 second). Please note that the following parameters take into account all availablelogical CPUs, therefore the access times specified with these parameters are in fact multiplied by thenumber of CPUs.
cpu.rt_period_us
applicable to real-time scheduling tasks only, this parameter specifies a period of time inmicroseconds (µs, represented here as "us") for how regularly a cgroup's access to CPU resourcesis reallocated.
cpu.rt_runtime_us
applicable to real-time scheduling tasks only, this parameter specifies a period of time inmicroseconds (µs, represented here as "us") for the longest continuous period in which the tasks ina cgroup have access to CPU resources. Establishing this limit prevents tasks in one cgroup from
CHAPTER 3. SUBSYSTEMS AND TUNABLE PARAMETERS
37
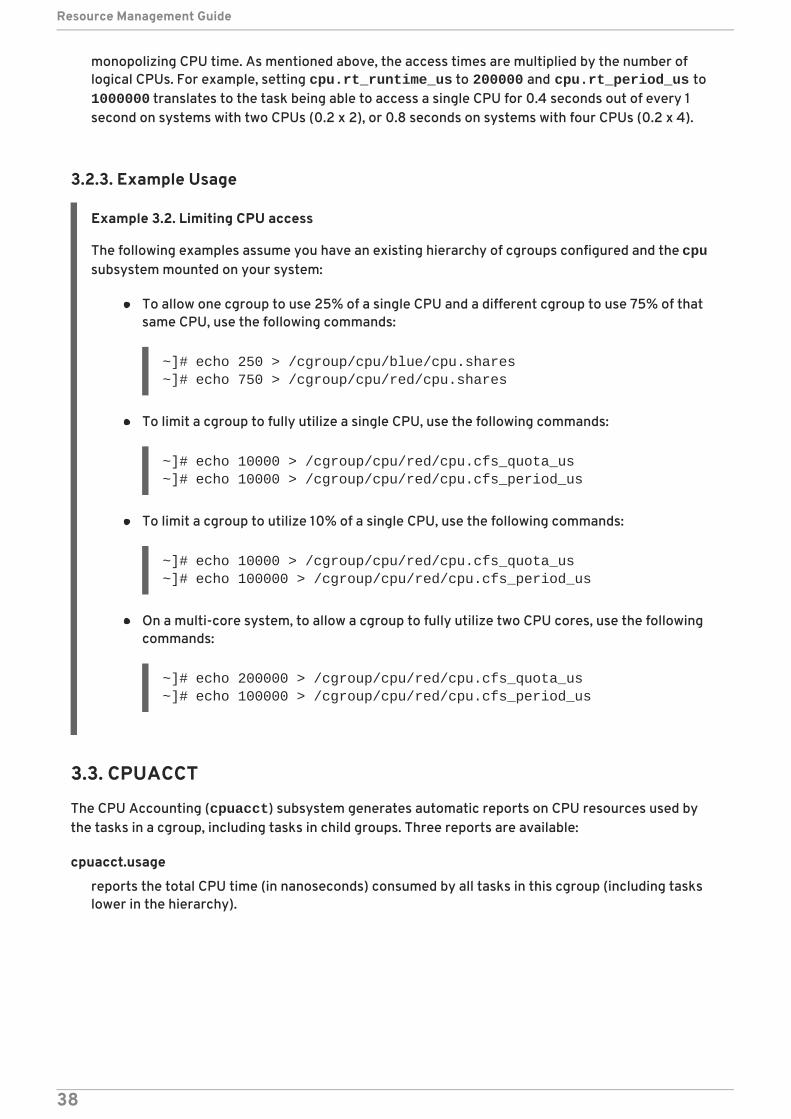
monopolizing CPU time. As mentioned above, the access times are multiplied by the number oflogical CPUs. For example, setting cpu.rt_runtime_us to 200000 and cpu.rt_period_us to 1000000 translates to the task being able to access a single CPU for 0.4 seconds out of every 1second on systems with two CPUs (0.2 x 2), or 0.8 seconds on systems with four CPUs (0.2 x 4).
3.2.3. Example Usage
Example 3.2. Limiting CPU access
The following examples assume you have an existing hierarchy of cgroups configured and the cpusubsystem mounted on your system:
To allow one cgroup to use 25% of a single CPU and a different cgroup to use 75% of thatsame CPU, use the following commands:
~]# echo 250 > /cgroup/cpu/blue/cpu.shares~]# echo 750 > /cgroup/cpu/red/cpu.shares
To limit a cgroup to fully utilize a single CPU, use the following commands:
~]# echo 10000 > /cgroup/cpu/red/cpu.cfs_quota_us~]# echo 10000 > /cgroup/cpu/red/cpu.cfs_period_us
To limit a cgroup to utilize 10% of a single CPU, use the following commands:
~]# echo 10000 > /cgroup/cpu/red/cpu.cfs_quota_us~]# echo 100000 > /cgroup/cpu/red/cpu.cfs_period_us
On a multi-core system, to allow a cgroup to fully utilize two CPU cores, use the followingcommands:
~]# echo 200000 > /cgroup/cpu/red/cpu.cfs_quota_us~]# echo 100000 > /cgroup/cpu/red/cpu.cfs_period_us
3.3. CPUACCT
The CPU Accounting (cpuacct) subsystem generates automatic reports on CPU resources used bythe tasks in a cgroup, including tasks in child groups. Three reports are available:
cpuacct.usage
reports the total CPU time (in nanoseconds) consumed by all tasks in this cgroup (including taskslower in the hierarchy).
Resource Management Guide
38
NOTE
To reset the value in cpuacct.usage, execute the following command:
~]# echo 0 > /cgroup/cpuacct/cpuacct.usage
The above command also resets values in cpuacct.usage_percpu.
cpuacct.stat
reports the user and system CPU time consumed by all tasks in this cgroup (including tasks lower inthe hierarchy) in the following way:
user — CPU time consumed by tasks in user mode.
system — CPU time consumed by tasks in system (kernel) mode.
CPU time is reported in the units defined by the USER_HZ variable.
cpuacct.usage_percpu
reports the CPU time (in nanoseconds) consumed on each CPU by all tasks in this cgroup (includingtasks lower in the hierarchy).
3.4. CPUSET
The cpuset subsystem assigns individual CPUs and memory nodes to cgroups. Each cpuset can bespecified according to the following parameters, each one in a separate pseudofile within the cgroupvirtual file system:
IMPORTANT
Some subsystems have mandatory parameters that must be set before you can move atask into a cgroup which uses any of those subsystems. For example, before you move atask into a cgroup which uses the cpuset subsystem, the cpuset.cpus and cpuset.mems parameters must be defined for that cgroup.
cpuset.cpus (mandatory)
specifies the CPUs that tasks in this cgroup are permitted to access. This is a comma-separated list,with dashes ("-") to represent ranges. For example,
represents CPUs 0, 1, 2, and 16.
cpuset.mems (mandatory)
specifies the memory nodes that tasks in this cgroup are permitted to access. This is a comma-separated list in the ASCII format, with dashes ("-") to represent ranges. For example,
0-2,16
0-2,16
CHAPTER 3. SUBSYSTEMS AND TUNABLE PARAMETERS
39
represents memory nodes 0, 1, 2, and 16.
cpuset.memory_migrate
contains a flag (0 or 1) that specifies whether a page in memory should migrate to a new node if thevalues in cpuset.mems change. By default, memory migration is disabled ( 0) and pages stay onthe node to which they were originally allocated, even if the node is no longer among the nodesspecified in cpuset.mems. If enabled (1), the system migrates pages to memory nodes within thenew parameters specified by cpuset.mems, maintaining their relative placement if possible — forexample, pages on the second node on the list originally specified by cpuset.mems are allocatedto the second node on the new list specified by cpuset.mems, if the place is available.
cpuset.cpu_exclusive
contains a flag (0 or 1) that specifies whether cpusets other than this one and its parents andchildren can share the CPUs specified for this cpuset. By default (0), CPUs are not allocatedexclusively to one cpuset.
cpuset.mem_exclusive
contains a flag (0 or 1) that specifies whether other cpusets can share the memory nodes specifiedfor the cpuset. By default (0), memory nodes are not allocated exclusively to one cpuset. Reservingmemory nodes for the exclusive use of a cpuset (1) is functionally the same as enabling a memoryhardwall with the cpuset.mem_hardwall parameter.
cpuset.mem_hardwall
contains a flag (0 or 1) that specifies whether kernel allocations of memory page and buffer datashould be restricted to the memory nodes specified for the cpuset. By default (0), page and bufferdata is shared across processes belonging to multiple users. With a hardwall enabled (1), each tasks'user allocation can be kept separate.
cpuset.memory_pressure
a read-only file that contains a running average of the memory pressure created by the processes inthe cpuset. The value in this pseudofile is automatically updated when cpuset.memory_pressure_enabled is enabled, otherwise, the pseudofile contains the value 0.
cpuset.memory_pressure_enabled
contains a flag (0 or 1) that specifies whether the system should compute the memory pressurecreated by the processes in the cgroup. Computed values are output to cpuset.memory_pressure and represent the rate at which processes attempt to free in-usememory, reported as an integer value of attempts to reclaim memory per second, multiplied by1000.
cpuset.memory_spread_page
contains a flag (0 or 1) that specifies whether file system buffers should be spread evenly across thememory nodes allocated to the cpuset. By default (0), no attempt is made to spread memory pagesfor these buffers evenly, and buffers are placed on the same node on which the process thatcreated them is running.
cpuset.memory_spread_slab
contains a flag (0 or 1) that specifies whether kernel slab caches for file input/output operationsshould be spread evenly across the cpuset. By default (0), no attempt is made to spread kernel slabcaches evenly, and slab caches are placed on the same node on which the process that created
Resource Management Guide
40
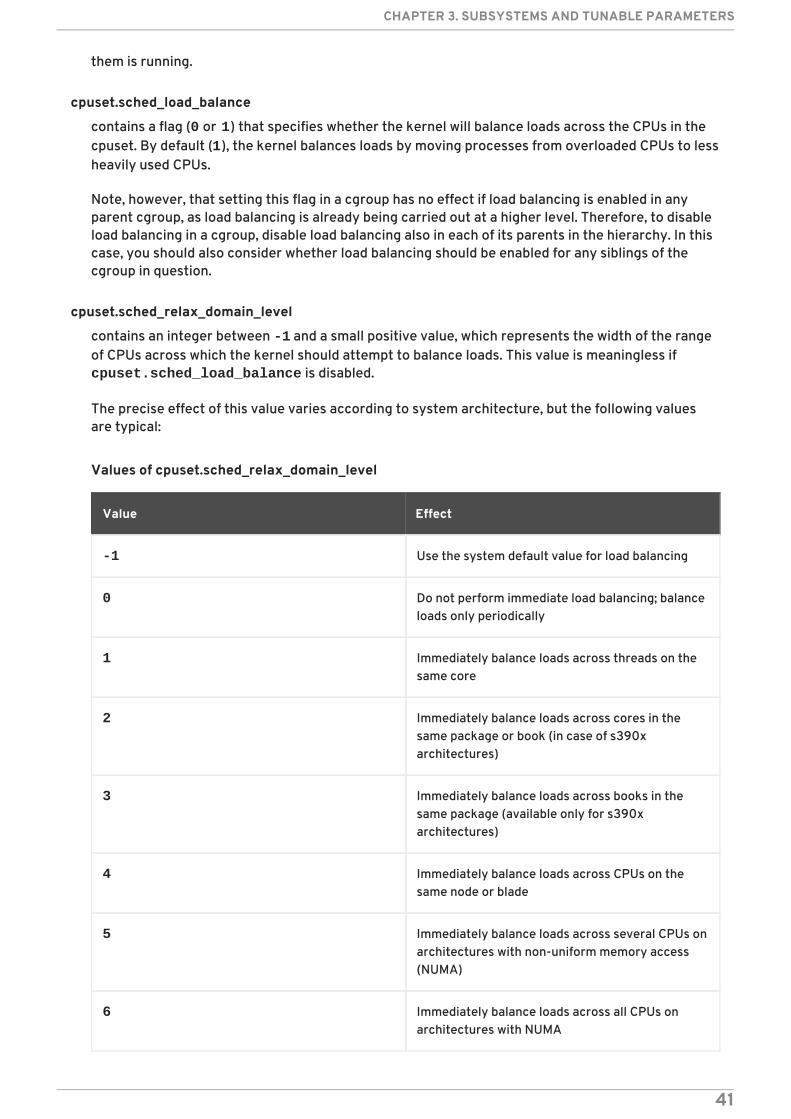
them is running.
cpuset.sched_load_balance
contains a flag (0 or 1) that specifies whether the kernel will balance loads across the CPUs in thecpuset. By default (1), the kernel balances loads by moving processes from overloaded CPUs to lessheavily used CPUs.
Note, however, that setting this flag in a cgroup has no effect if load balancing is enabled in anyparent cgroup, as load balancing is already being carried out at a higher level. Therefore, to disableload balancing in a cgroup, disable load balancing also in each of its parents in the hierarchy. In thiscase, you should also consider whether load balancing should be enabled for any siblings of thecgroup in question.
cpuset.sched_relax_domain_level
contains an integer between -1 and a small positive value, which represents the width of the rangeof CPUs across which the kernel should attempt to balance loads. This value is meaningless if cpuset.sched_load_balance is disabled.
The precise effect of this value varies according to system architecture, but the following valuesare typical:
Values of cpuset.sched_relax_domain_level
Value Effect
-1 Use the system default value for load balancing
0 Do not perform immediate load balancing; balanceloads only periodically
1 Immediately balance loads across threads on thesame core
2 Immediately balance loads across cores in thesame package or book (in case of s390xarchitectures)
3 Immediately balance loads across books in thesame package (available only for s390xarchitectures)
4 Immediately balance loads across CPUs on thesame node or blade
5 Immediately balance loads across several CPUs onarchitectures with non-uniform memory access(NUMA)
6 Immediately balance loads across all CPUs onarchitectures with NUMA
CHAPTER 3. SUBSYSTEMS AND TUNABLE PARAMETERS
41
NOTE
With the release of Red Hat Enterprise Linux 6.1 the BOOK scheduling domain hasbeen added to the list of supported domain levels. This change affected the meaningof cpuset.sched_relax_domain_level values. Please note that the effect ofvalues from 3 to 5 changed. For example, to get the old effect of value 3, which was"Immediately balance loads across CPUs on the same node or blade" the value 4needs to be selected. Similarly, the old 4 is now 5, and the old 5 is now 6.
3.5. DEVICES
The devices subsystem allows or denies access to devices by tasks in a cgroup.
IMPORTANT
The Device Whitelist (devices) subsystem is considered to be a Technology Preview inRed Hat Enterprise Linux 6.
Technology Preview features are currently not supported under Red HatEnterprise Linux 6 subscription services, might not be functionally complete and aregenerally not suitable for production use. However, Red Hat includes these features inthe operating system as a customer convenience and to increase the features'exposure. You might find these features useful in a non-production environment and arealso welcome to provide feedback and functionality suggestions for a TechnologyPreview feature before it becomes fully supported.
devices.allow
specifies devices to which tasks in a cgroup have access. Each entry has four fields: type, major,minor, and access. The values used in the type, major, and minor fields correspond to device typesand node numbers specified in Linux Allocated Devices, otherwise known as the Linux Devices Listand available from http://www.kernel.org/doc/Documentation/devices.txt.
type
type can have one of the following three values:
a — applies to all devices, both character devices and block devices
b — specifies a block device
c — specifies a character device
major, minor
major and minor are device node numbers specified by Linux Allocated Devices. The major andminor numbers are separated by a colon. For example, 8 is the major number that specifiesSmall Computer System Interface (SCSI) disk drives, and the minor number 1 specifies the firstpartition on the first SCSI disk drive; therefore 8:1 fully specifies this partition, correspondingto a file system location of /dev/sda1.
* can stand for all major or all minor device nodes, for example 9:* (all RAID devices) or *:* (alldevices).
Resource Management Guide
42
access
access is a sequence of one or more of the following letters:
r — allows tasks to read from the specified device
w — allows tasks to write to the specified device
m — allows tasks to create device files that do not yet exist
For example, when access is specified as r, tasks can only read from the specified device, butwhen access is specified as rw, tasks can read from and write to the device.
devices.deny
specifies devices that tasks in a cgroup cannot access. The syntax of entries is identical with devices.allow.
devices.list
reports the devices for which access controls have been set for tasks in this cgroup.
3.6. FREEZER
The freezer subsystem suspends or resumes tasks in a cgroup.
freezer.state
freezer.state is only available in non-root cgroups and has three possible values:
FROZEN — tasks in the cgroup are suspended.
FREEZING — the system is in the process of suspending tasks in the cgroup.
THAWED — tasks in the cgroup have resumed.
To suspend a specific process:
1. Move that process to a cgroup in a hierarchy which has the freezer subsystem attached to it.
2. Freeze that particular cgroup to suspend the process contained in it.
It is not possible to move a process into a suspended (frozen) cgroup.
Note that while the FROZEN and THAWED values can be written to freezer.state, FREEZING cannotbe written, only read.
3.7. MEMORY
The memory subsystem generates automatic reports on memory resources used by the tasks in acgroup, and sets limits on memory use of those tasks:
CHAPTER 3. SUBSYSTEMS AND TUNABLE PARAMETERS
43
NOTE
By default, the memory subsystem uses 40 bytes of memory per physical page onx86_64 systems. These resources are consumed even if memory is not used in anyhierarchy. If you do not plan to use the memory subsystem, you can disable it to reducethe resource consumption of the kernel.
To permanently disable the memory subsystem, open the /boot/grub/grub.confconfiguration file as root and append the following text to the line that starts with thekernel keyword:
cgroup_disable=memory
For more information on working with /boot/grub/grub.conf, see the Configuringthe GRUB Boot Loader chapter in the Red Hat Enterprise Linux 6 Deployment Guide .
To temporarily disable the memory subsystem for a single session, perform thefollowing steps when starting the system:
1. At the GRUB boot screen, press any key to enter the GRUB interactive menu.
2. Select Red Hat Enterprise Linux with the version of the kernel that you want toboot and press the a key to modify the kernel parameters.
3. Type cgroup_disable=memory at the end of the line and press Enter to exitGRUB edit mode.
With cgroup_disable=memory enabled, memory is not visible as an individuallymountable subsystem and it is not automatically mounted when mounting all cgroups ina single hierarchy. Please note that memory is currently the only subsystem that can beeffectively disabled with cgroup_disable to save resources. Using this option withother subsystems only disables their usage, but does not cut their resourceconsumption. However, other subsystems do not consume as much resources as the memory subsystem.
The following tunable parameters are available for the memory subsystem:
memory.stat
reports a wide range of memory statistics, as described in the following table:
Table 3.2. Values reported by memory.stat
Statistic Description
cache page cache, including tmpfs (shmem), in bytes
rss anonymous and swap cache, not including tmpfs (shmem), in bytes
mapped_file size of memory-mapped mapped files, including tmpfs (shmem), inbytes
pgpgin number of pages paged into memory
Resource Management Guide
44
pgpgout number of pages paged out of memory
swap swap usage, in bytes
active_anon anonymous and swap cache on active least-recently-used (LRU) list,including tmpfs (shmem), in bytes
inactive_anon anonymous and swap cache on inactive LRU list, including tmpfs(shmem), in bytes
active_file file-backed memory on active LRU list, in bytes
inactive_file file-backed memory on inactive LRU list, in bytes
unevictable memory that cannot be reclaimed, in bytes
hierarchical_memory_limit
memory limit for the hierarchy that contains the memory cgroup, inbytes
hierarchical_memsw_limit
memory plus swap limit for the hierarchy that contains the memorycgroup, in bytes
Statistic Description
Additionally, each of these files other than hierarchical_memory_limit and hierarchical_memsw_limit has a counterpart prefixed total_ that reports not only on thecgroup, but on all its children as well. For example, swap reports the swap usage by a cgroup and total_swap reports the total swap usage by the cgroup and all its child groups.
When you interpret the values reported by memory.stat, note how the various statistics inter-relate:
active_anon + inactive_anon = anonymous memory + file cache for tmpfs + swapcache
Therefore, active_anon + inactive_anon ≠ rss, because rss does not include tmpfs.
active_file + inactive_file = cache - size of tmpfs
memory.usage_in_bytes
reports the total current memory usage by processes in the cgroup (in bytes).
memory.memsw.usage_in_bytes
reports the sum of current memory usage plus swap space used by processes in the cgroup (inbytes).
memory.max_usage_in_bytes
reports the maximum memory used by processes in the cgroup (in bytes).
CHAPTER 3. SUBSYSTEMS AND TUNABLE PARAMETERS
45
memory.memsw.max_usage_in_bytes
reports the maximum amount of memory and swap space used by processes in the cgroup (inbytes).
memory.limit_in_bytes
sets the maximum amount of user memory (including file cache). If no units are specified, the valueis interpreted as bytes. However, it is possible to use suffixes to represent larger units — k or K forkilobytes, m or M for megabytes, and g or G for gigabytes. For example, to set the limit to 1 gigabyte,execute:
~]# echo 1G > /cgroup/memory/lab1/memory.limit_in_bytes
You cannot use memory.limit_in_bytes to limit the root cgroup; you can only apply values togroups lower in the hierarchy.
Write -1 to memory.limit_in_bytes to remove any existing limits.
memory.memsw.limit_in_bytes
sets the maximum amount for the sum of memory and swap usage. If no units are specified, thevalue is interpreted as bytes. However, it is possible to use suffixes to represent larger units — k or K for kilobytes, m or M for megabytes, and g or G for gigabytes.
You cannot use memory.memsw.limit_in_bytes to limit the root cgroup; you can only applyvalues to groups lower in the hierarchy.
Write -1 to memory.memsw.limit_in_bytes to remove any existing limits.
Resource Management Guide
46
IMPORTANT
It is important to set the memory.limit_in_bytes parameter before setting the memory.memsw.limit_in_bytes parameter: attempting to do so in the reverseorder results in an error. This is because memory.memsw.limit_in_bytesbecomes available only after all memory limitations (previously set in memory.limit_in_bytes) are exhausted.
Consider the following example: setting memory.limit_in_bytes = 2G and memory.memsw.limit_in_bytes = 4G for a certain cgroup will allow processesin that cgroup to allocate 2 GB of memory and, once exhausted, allocate another2 GB of swap only. The memory.memsw.limit_in_bytes parameter representsthe sum of memory and swap. Processes in a cgroup that does not have the memory.memsw.limit_in_bytes parameter set can potentially use up all theavailable swap (after exhausting the set memory limitation) and trigger an Out OfMemory situation caused by the lack of available swap.
The order in which the memory.limit_in_bytes and memory.memsw.limit_in_bytes parameters are set in the /etc/cgconfig.conf file is important as well. The following is a correct exampleof such a configuration:
memory { memory.limit_in_bytes = 1G; memory.memsw.limit_in_bytes = 1G;}
memory.failcnt
reports the number of times that the memory limit has reached the value set in memory.limit_in_bytes.
memory.memsw.failcnt
reports the number of times that the memory plus swap space limit has reached the value set in memory.memsw.limit_in_bytes.
memory.soft_limit_in_bytes
enables flexible sharing of memory. Under normal circumstances, control groups are allowed to useas much of the memory as needed, constrained only by their hard limits set with the memory.limit_in_bytes parameter. However, when the system detects memory contention orlow memory, control groups are forced to restrict their consumption to their soft limits. To set thesoft limit for example to 256 MB, execute:
~]# echo 256M > /cgroup/memory/lab1/memory.soft_limit_in_bytes
This parameter accepts the same suffixes as memory.limit_in_bytes to represent units. Tohave any effect, the soft limit must be set below the hard limit. If lowering the memory usage to thesoft limit does not solve the contention, cgroups are pushed back as much as possible to make surethat one control group does not starve the others of memory. Note that soft limits take effect overa long period of time, since they involve reclaiming memory for balancing between memorycgroups.
CHAPTER 3. SUBSYSTEMS AND TUNABLE PARAMETERS
47
memory.force_empty
when set to 0, empties memory of all pages used by tasks in the cgroup. This interface can only beused when the cgroup has no tasks. If memory cannot be freed, it is moved to a parent cgroup ifpossible. Use the memory.force_empty parameter before removing a cgroup to avoid moving out-of-use page caches to its parent cgroup.
memory.swappiness
sets the tendency of the kernel to swap out process memory used by tasks in this cgroup instead ofreclaiming pages from the page cache. This is the same tendency, calculated the same way, as setin /proc/sys/vm/swappiness for the system as a whole. The default value is 60. Values lowerthan 60 decrease the kernel's tendency to swap out process memory, values greater than 60increase the kernel's tendency to swap out process memory, and values greater than 100 permitthe kernel to swap out pages that are part of the address space of the processes in this cgroup.
Note that a value of 0 does not prevent process memory being swapped out; swap out might stillhappen when there is a shortage of system memory because the global virtual memorymanagement logic does not read the cgroup value. To lock pages completely, use mlock() insteadof cgroups.
You cannot change the swappiness of the following groups:
the root cgroup, which uses the swappiness set in /proc/sys/vm/swappiness.
a cgroup that has child groups below it.
memory.move_charge_at_immigrate
allows moving charges associated with a task along with task migration. Charging is a way of givinga penalty to cgroups which access shared pages too often. These penalties, also called charges, areby default not moved when a task migrates from one cgroup to another. The pages allocated fromthe original cgroup still remain charged to it; the charge is dropped when the page is freed orreclaimed.
With memory.move_charge_at_immigrate enabled, the pages associated with a task are takenfrom the old cgroup and charged to the new cgroup. The following example shows how to enable memory.move_charge_at_immigrate:
~]# echo 1 > /cgroup/memory/lab1/memory.move_charge_at_immigrate
Charges are moved only when the moved task is a leader of a thread group. If there is not enoughmemory for the task in the destination cgroup, an attempt to reclaim memory is performed. If thereclaim is not successful, the task migration is aborted.
To disable memory.move_charge_at_immigrate, execute:
~]# echo 0 > /cgroup/memory/lab1/memory.move_charge_at_immigrate
memory.use_hierarchy
contains a flag (0 or 1) that specifies whether memory usage should be accounted for throughout ahierarchy of cgroups. If enabled (1), the memory subsystem reclaims memory from the children ofand process that exceeds its memory limit. By default (0), the subsystem does not reclaim memoryfrom a task's children.
Resource Management Guide
48
memory.oom_control
contains a flag (0 or 1) that enables or disables the Out of Memory killer for a cgroup. If enabled ( 0),tasks that attempt to consume more memory than they are allowed are immediately killed by theOOM killer. The OOM killer is enabled by default in every cgroup using the memory subsystem; todisable it, write 1 to the memory.oom_control file:
~]# echo 1 > /cgroup/memory/lab1/memory.oom_control
When the OOM killer is disabled, tasks that attempt to use more memory than they are allowed arepaused until additional memory is freed.
The memory.oom_control file also reports the OOM status of the current cgroup under the under_oom entry. If the cgroup is out of memory and tasks in it are paused, the under_oom entryreports the value 1.
The memory.oom_control file is capable of reporting an occurrence of an OOM situation usingthe notification API. For more information, refer to Section 2.13, “Using the Notification API” andExample 3.3, “OOM Control and Notifications” .
3.7.1. Example Usage
Example 3.3. OOM Control and Notifications
The following example demonstrates how the OOM killer takes action when a task in a cgroupattempts to use more memory than allowed, and how a notification handler can report OOMsituations:
1. Attach the memory subsystem to a hierarchy and create a cgroup:
~]# mount -t memory -o memory memory /cgroup/memory~]# mkdir /cgroup/memory/blue
2. Set the amount of memory which tasks in the blue cgroup can use to 100 MB:
~]# echo 104857600 > memory.limit_in_bytes
3. Change into the blue directory and make sure the OOM killer is enabled:
~]# cd /cgroup/memory/blueblue]# cat memory.oom_controloom_kill_disable 0under_oom 0
4. Move the current shell process into the tasks file of the blue cgroup so that all otherprocesses started in this shell are automatically moved to the blue cgroup:
blue]# echo $$ > tasks
5. Start a test program that attempts to allocate a large amount of memory exceeding thelimit you set in step 2. As soon as the blue cgroup runs out of free memory, the OOM killerkills the test program and reports Killed to the standard output:
CHAPTER 3. SUBSYSTEMS AND TUNABLE PARAMETERS
49
blue]# ~/mem-hogKilled
The following is an example of such a test program[5]:
6. Disable the OOM killer and rerun the test program. This time, the test program remainspaused waiting for additional memory to be freed:
blue]# echo 1 > memory.oom_controlblue]# ~/mem-hog
7. While the test program is paused, note that the under_oom state of the cgroup haschanged to indicate that the cgroup is out of available memory:
~]# cat /cgroup/memory/blue/memory.oom_controloom_kill_disable 1under_oom 1
Reenabling the OOM killer immediately kills the test program.
8. To receive notifications about every OOM situation, create a program as specified inSection 2.13, “Using the Notification API” . For example[6]:
#include <stdio.h>#include <stdlib.h>#include <string.h>#include <unistd.h>
#define KB (1024)#define MB (1024 * KB)#define GB (1024 * MB)
int main(int argc, char *argv[]){ char *p;
again: while ((p = (char *)malloc(GB))) memset(p, 0, GB);
while ((p = (char *)malloc(MB))) memset(p, 0, MB);
while ((p = (char *)malloc(KB))) memset(p, 0, KB);
sleep(1);
goto again;
return 0;}
Resource Management Guide
50
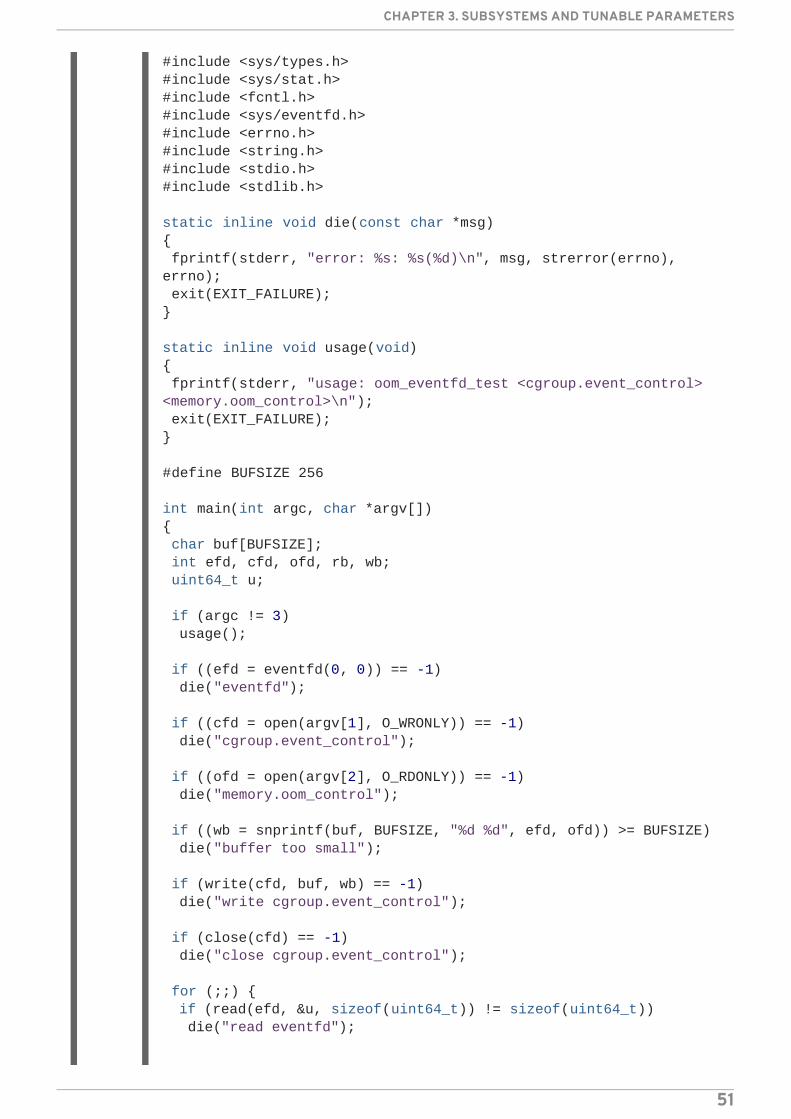
#include <sys/types.h>#include <sys/stat.h>#include <fcntl.h>#include <sys/eventfd.h>#include <errno.h>#include <string.h>#include <stdio.h>#include <stdlib.h>
static inline void die(const char *msg){ fprintf(stderr, "error: %s: %s(%d)\n", msg, strerror(errno), errno); exit(EXIT_FAILURE);}
static inline void usage(void){ fprintf(stderr, "usage: oom_eventfd_test <cgroup.event_control> <memory.oom_control>\n"); exit(EXIT_FAILURE);}
#define BUFSIZE 256
int main(int argc, char *argv[]){ char buf[BUFSIZE]; int efd, cfd, ofd, rb, wb; uint64_t u;
if (argc != 3) usage();
if ((efd = eventfd(0, 0)) == -1) die("eventfd");
if ((cfd = open(argv[1], O_WRONLY)) == -1) die("cgroup.event_control");
if ((ofd = open(argv[2], O_RDONLY)) == -1) die("memory.oom_control");
if ((wb = snprintf(buf, BUFSIZE, "%d %d", efd, ofd)) >= BUFSIZE) die("buffer too small");
if (write(cfd, buf, wb) == -1) die("write cgroup.event_control");
if (close(cfd) == -1) die("close cgroup.event_control");
for (;;) { if (read(efd, &u, sizeof(uint64_t)) != sizeof(uint64_t)) die("read eventfd");
CHAPTER 3. SUBSYSTEMS AND TUNABLE PARAMETERS
51
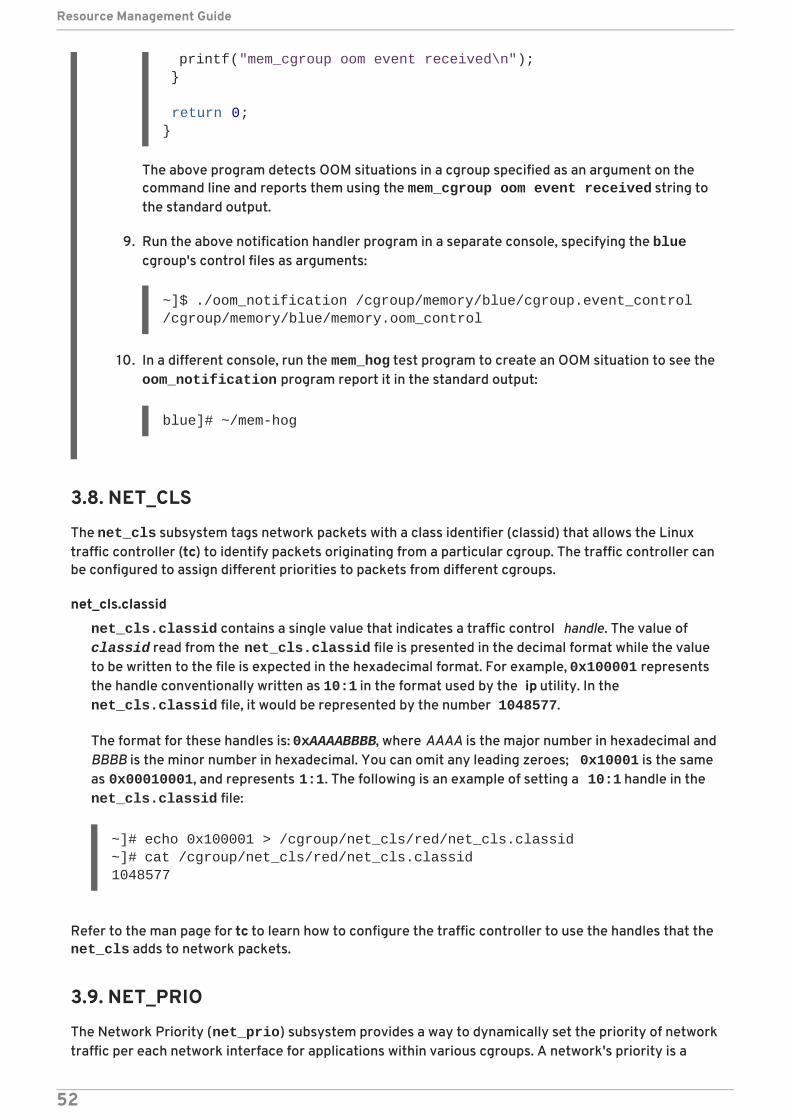
The above program detects OOM situations in a cgroup specified as an argument on thecommand line and reports them using the mem_cgroup oom event received string tothe standard output.
9. Run the above notification handler program in a separate console, specifying the bluecgroup's control files as arguments:
~]$ ./oom_notification /cgroup/memory/blue/cgroup.event_control /cgroup/memory/blue/memory.oom_control
10. In a different console, run the mem_hog test program to create an OOM situation to see the oom_notification program report it in the standard output:
blue]# ~/mem-hog
3.8. NET_CLS
The net_cls subsystem tags network packets with a class identifier (classid) that allows the Linuxtraffic controller (tc) to identify packets originating from a particular cgroup. The traffic controller canbe configured to assign different priorities to packets from different cgroups.
net_cls.classid
net_cls.classid contains a single value that indicates a traffic control handle. The value of classid read from the net_cls.classid file is presented in the decimal format while the valueto be written to the file is expected in the hexadecimal format. For example, 0x100001 representsthe handle conventionally written as 10:1 in the format used by the ip utility. In the net_cls.classid file, it would be represented by the number 1048577.
The format for these handles is: 0xAAAABBBB, where AAAA is the major number in hexadecimal andBBBB is the minor number in hexadecimal. You can omit any leading zeroes; 0x10001 is the sameas 0x00010001, and represents 1:1. The following is an example of setting a 10:1 handle in the net_cls.classid file:
~]# echo 0x100001 > /cgroup/net_cls/red/net_cls.classid~]# cat /cgroup/net_cls/red/net_cls.classid1048577
Refer to the man page for tc to learn how to configure the traffic controller to use the handles that thenet_cls adds to network packets.
3.9. NET_PRIO
The Network Priority (net_prio) subsystem provides a way to dynamically set the priority of networktraffic per each network interface for applications within various cgroups. A network's priority is a
printf("mem_cgroup oom event received\n"); }
return 0;}
Resource Management Guide
52
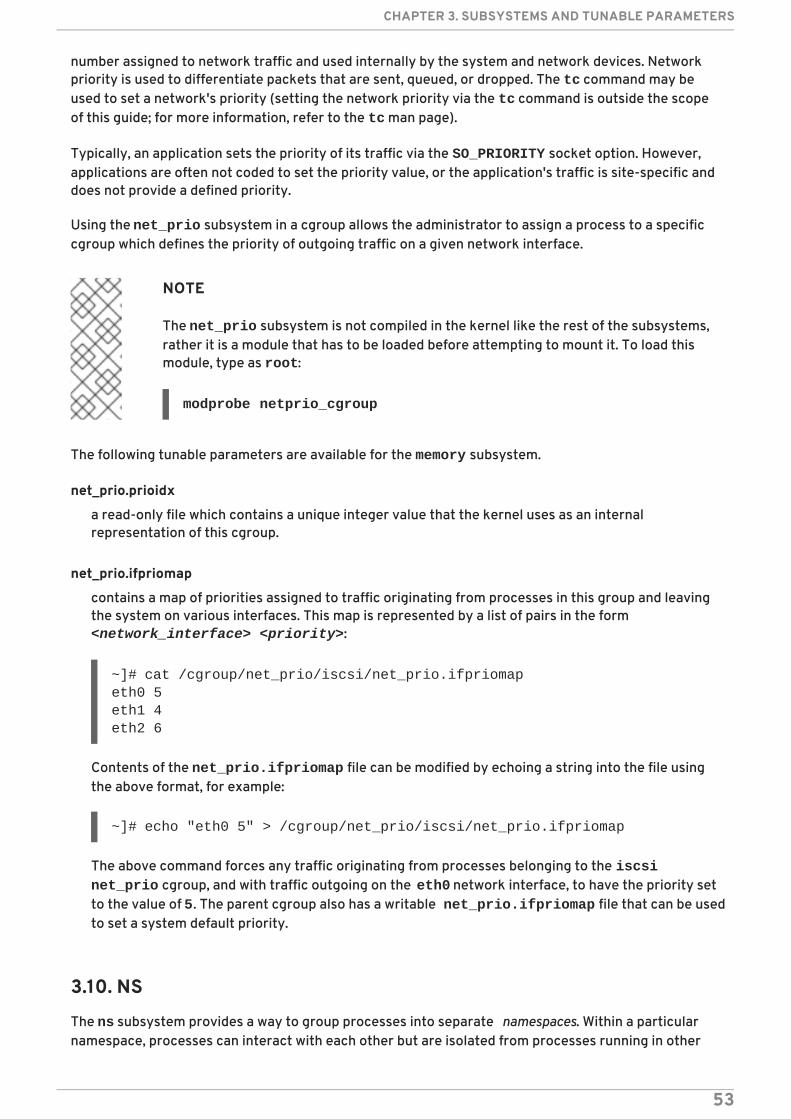
number assigned to network traffic and used internally by the system and network devices. Networkpriority is used to differentiate packets that are sent, queued, or dropped. The tc command may beused to set a network's priority (setting the network priority via the tc command is outside the scopeof this guide; for more information, refer to the tc man page).
Typically, an application sets the priority of its traffic via the SO_PRIORITY socket option. However,applications are often not coded to set the priority value, or the application's traffic is site-specific anddoes not provide a defined priority.
Using the net_prio subsystem in a cgroup allows the administrator to assign a process to a specificcgroup which defines the priority of outgoing traffic on a given network interface.
NOTE
The net_prio subsystem is not compiled in the kernel like the rest of the subsystems,rather it is a module that has to be loaded before attempting to mount it. To load thismodule, type as root:
modprobe netprio_cgroup
The following tunable parameters are available for the memory subsystem.
net_prio.prioidx
a read-only file which contains a unique integer value that the kernel uses as an internalrepresentation of this cgroup.
net_prio.ifpriomap
contains a map of priorities assigned to traffic originating from processes in this group and leavingthe system on various interfaces. This map is represented by a list of pairs in the form <network_interface> <priority>:
~]# cat /cgroup/net_prio/iscsi/net_prio.ifpriomapeth0 5eth1 4eth2 6
Contents of the net_prio.ifpriomap file can be modified by echoing a string into the file usingthe above format, for example:
~]# echo "eth0 5" > /cgroup/net_prio/iscsi/net_prio.ifpriomap
The above command forces any traffic originating from processes belonging to the iscsi net_prio cgroup, and with traffic outgoing on the eth0 network interface, to have the priority setto the value of 5. The parent cgroup also has a writable net_prio.ifpriomap file that can be usedto set a system default priority.
3.10. NS
The ns subsystem provides a way to group processes into separate namespaces. Within a particularnamespace, processes can interact with each other but are isolated from processes running in other
CHAPTER 3. SUBSYSTEMS AND TUNABLE PARAMETERS
53

namespaces. These separate namespaces are sometimes referred to as containers when used foroperating-system-level virtualization.
3.11. PERF_EVENT
When the perf_event subsystem is attached to a hierarchy, all cgroups in that hierarchy can be usedto group processes and threads which can then be monitored with the perf tool, as opposed tomonitoring each process or thread separately or per-CPU. Cgroups which use the perf_eventsubsystem do not contain any special tunable parameters other than the common parameters listed inSection 3.12, “Common Tunable Parameters”.
For additional information on how tasks in a cgroup can be monitored using the perf tool, refer to theRed Hat Enterprise Linux Developer Guide, available fromhttp://access.redhat.com/site/documentation/Red_Hat_Enterprise_Linux/.
3.12. COMMON TUNABLE PARAMETERS
The following parameters are present in every created cgroup, regardless of the subsystem that thecgroup is using:
tasks
contains a list of processes, represented by their PIDs, that are running in a cgroup. The list of PIDsis not guaranteed to be ordered or unique (that is, it may contain duplicate entries). Writing a PIDinto the tasks file of a cgroup moves that process into that cgroup.
cgroup.procs
contains a list of thread groups, represented by their TGIDs, that are running in a cgroup. The list ofTGIDs is not guaranteed to be ordered or unique (that is, it may contain duplicate entries). Writing aTGID into the cgroup.procs file of a cgroup moves that thread group into that cgroup.
cgroup.event_control
along with the cgroup notification API, allows notifications to be sent about a changing status of acgroup.
notify_on_release
contains a Boolean value, 1 or 0, that either enables or disables the execution of the release agent.If the notify_on_release parameter is enabled, the kernel executes the contents of the release_agent file when a cgroup no longer contains any tasks (that is, the cgroup's tasks filecontained some PIDs and those PIDs were removed, leaving the file empty). A path to the emptycgroup is provided as an argument to the release agent.
The default value of the notify_on_release parameter in the root cgroup is 0. All non-rootcgroups inherit the value in notify_on_release from their parent cgroup.
release_agent (present in the root cgroup only)
contains a command to be executed when a “notify on release” is triggered. Once a cgroup isemptied of all processes, and the notify_on_release flag is enabled, the kernel runs thecommand in the release_agent file and supplies it with a relative path (relative to the rootcgroup) to the emptied cgroup as an argument. The release agent can be used, for example, toautomatically remove empty cgroups; for more information, see Example 3.4, “Automaticallyremoving empty cgroups”.
Resource Management Guide
54

Example 3.4. Automatically removing empty cgroups
Follow these steps to configure automatic removal of any emptied cgroup from the cpu cgroup:
1. Create a shell script that removes empty cpu cgroups, place it in, for example, /usr/local/bin, and make it executable.
~]# cat /usr/local/bin/remove-empty-cpu-cgroup.sh#!/bin/shrmdir /cgroup/cpu/$1~]# chmod +x /usr/local/bin/remove-empty-cpu-cgroup.sh
The $1 variable contains a relative path to the emptied cgroup.
2. In the cpu cgroup, enable the notify_on_release flag:
~]# echo 1 > /cgroup/cpu/notify_on_release
3. In the cpu cgroup, specify a release agent to be used:
~]# echo "/usr/local/bin/remove-empty-cpu-cgroup.sh" > /cgroup/cpu/release_agent
4. Test your configuration to make sure emptied cgroups are properly removed:
cpu]# pwd; ls/cgroup/cpucgroup.event_control cgroup.procs cpu.cfs_period_us cpu.cfs_quota_us cpu.rt_period_us cpu.rt_runtime_us cpu.shares cpu.stat libvirt notify_on_release release_agent taskscpu]# cat notify_on_release 1cpu]# cat release_agent /usr/local/bin/remove-empty-cpu-cgroup.shcpu]# mkdir blue; lsblue cgroup.event_control cgroup.procs cpu.cfs_period_us cpu.cfs_quota_us cpu.rt_period_us cpu.rt_runtime_us cpu.shares cpu.stat libvirt notify_on_release release_agent taskscpu]# cat blue/notify_on_release 1cpu]# cgexec -g cpu:blue dd if=/dev/zero of=/dev/null bs=1024k &[1] 8623cpu]# cat blue/tasks 8623cpu]# kill -9 8623cpu]# lscgroup.event_control cgroup.procs cpu.cfs_period_us cpu.cfs_quota_us cpu.rt_period_us cpu.rt_runtime_us cpu.shares cpu.stat libvirt notify_on_release release_agent tasks
CHAPTER 3. SUBSYSTEMS AND TUNABLE PARAMETERS
55
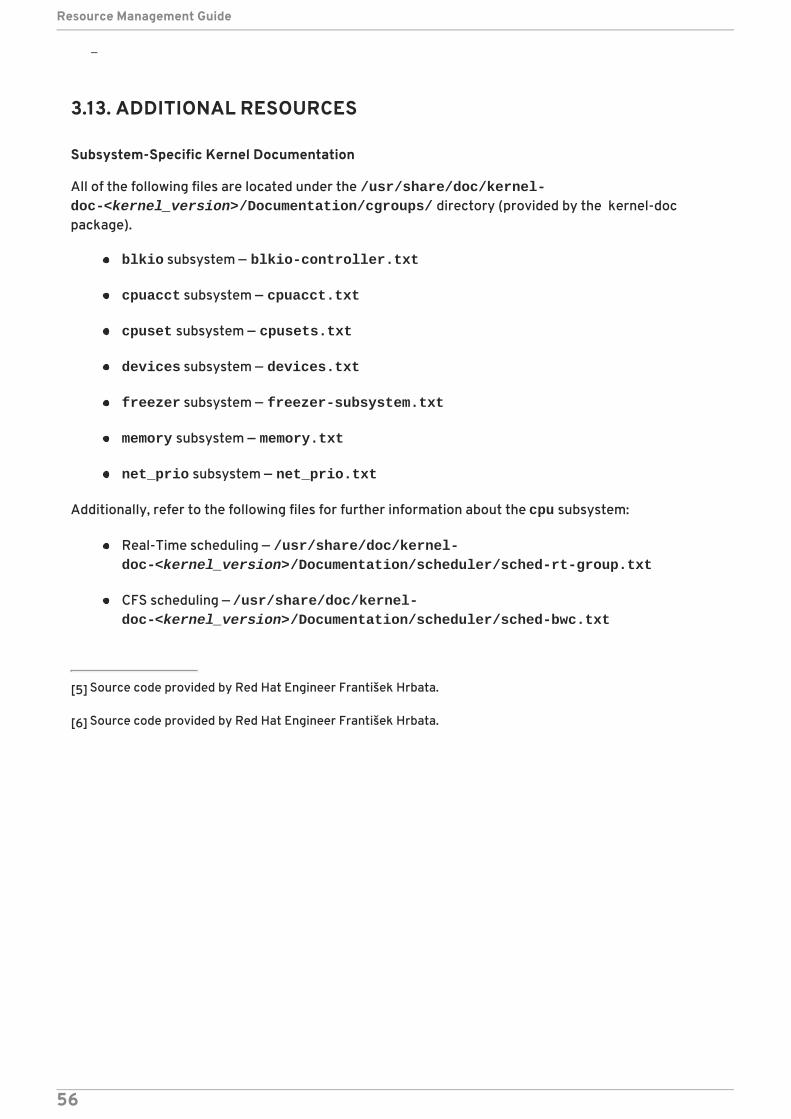
3.13. ADDITIONAL RESOURCES
Subsystem-Specific Kernel Documentation
All of the following files are located under the /usr/share/doc/kernel-doc-<kernel_version>/Documentation/cgroups/ directory (provided by the kernel-docpackage).
blkio subsystem — blkio-controller.txt
cpuacct subsystem — cpuacct.txt
cpuset subsystem — cpusets.txt
devices subsystem — devices.txt
freezer subsystem — freezer-subsystem.txt
memory subsystem — memory.txt
net_prio subsystem — net_prio.txt
Additionally, refer to the following files for further information about the cpu subsystem:
Real-Time scheduling — /usr/share/doc/kernel-doc-<kernel_version>/Documentation/scheduler/sched-rt-group.txt
CFS scheduling — /usr/share/doc/kernel-doc-<kernel_version>/Documentation/scheduler/sched-bwc.txt
[5] Source code provided by Red Hat Engineer František Hrbata.
[6] Source code provided by Red Hat Engineer František Hrbata.
Resource Management Guide
56
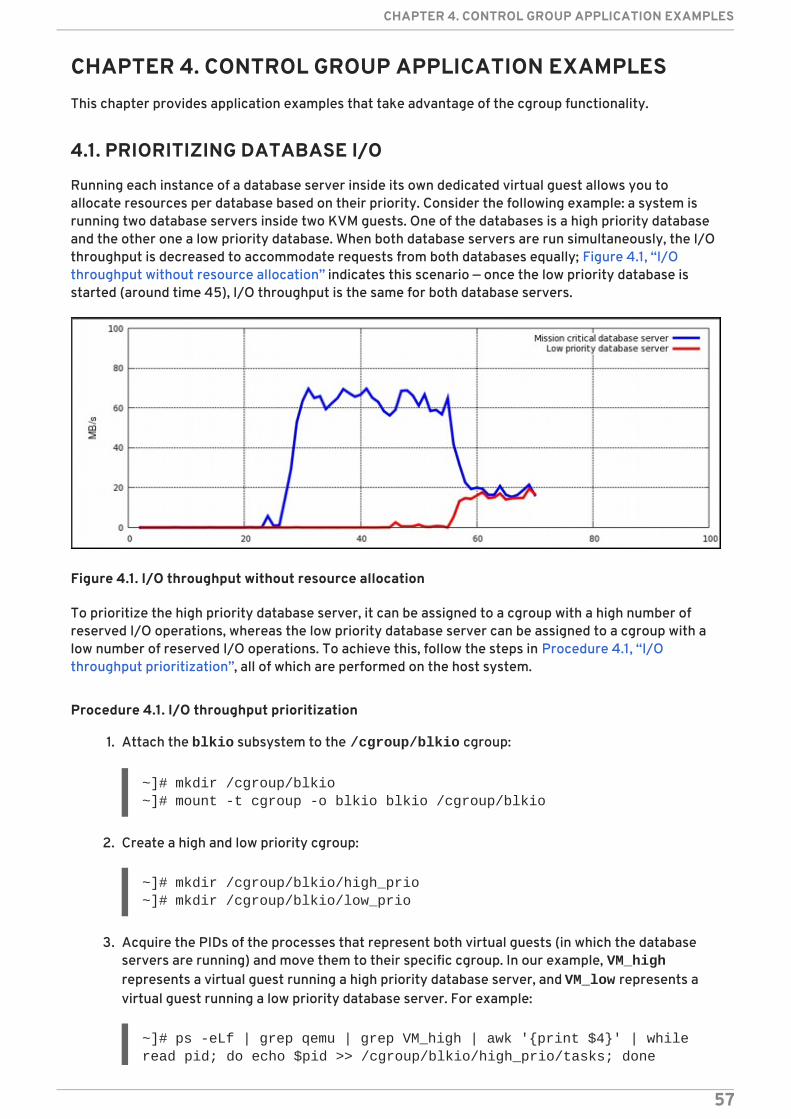
CHAPTER 4. CONTROL GROUP APPLICATION EXAMPLESThis chapter provides application examples that take advantage of the cgroup functionality.
4.1. PRIORITIZING DATABASE I/O
Running each instance of a database server inside its own dedicated virtual guest allows you toallocate resources per database based on their priority. Consider the following example: a system isrunning two database servers inside two KVM guests. One of the databases is a high priority databaseand the other one a low priority database. When both database servers are run simultaneously, the I/Othroughput is decreased to accommodate requests from both databases equally; Figure 4.1, “I/Othroughput without resource allocation” indicates this scenario — once the low priority database isstarted (around time 45), I/O throughput is the same for both database servers.
Figure 4.1. I/O throughput without resource allocation
To prioritize the high priority database server, it can be assigned to a cgroup with a high number ofreserved I/O operations, whereas the low priority database server can be assigned to a cgroup with alow number of reserved I/O operations. To achieve this, follow the steps in Procedure 4.1, “I/Othroughput prioritization”, all of which are performed on the host system.
Procedure 4.1. I/O throughput prioritization
1. Attach the blkio subsystem to the /cgroup/blkio cgroup:
~]# mkdir /cgroup/blkio~]# mount -t cgroup -o blkio blkio /cgroup/blkio
2. Create a high and low priority cgroup:
~]# mkdir /cgroup/blkio/high_prio~]# mkdir /cgroup/blkio/low_prio
3. Acquire the PIDs of the processes that represent both virtual guests (in which the databaseservers are running) and move them to their specific cgroup. In our example, VM_highrepresents a virtual guest running a high priority database server, and VM_low represents avirtual guest running a low priority database server. For example:
~]# ps -eLf | grep qemu | grep VM_high | awk '{print $4}' | while read pid; do echo $pid >> /cgroup/blkio/high_prio/tasks; done
CHAPTER 4. CONTROL GROUP APPLICATION EXAMPLES
57
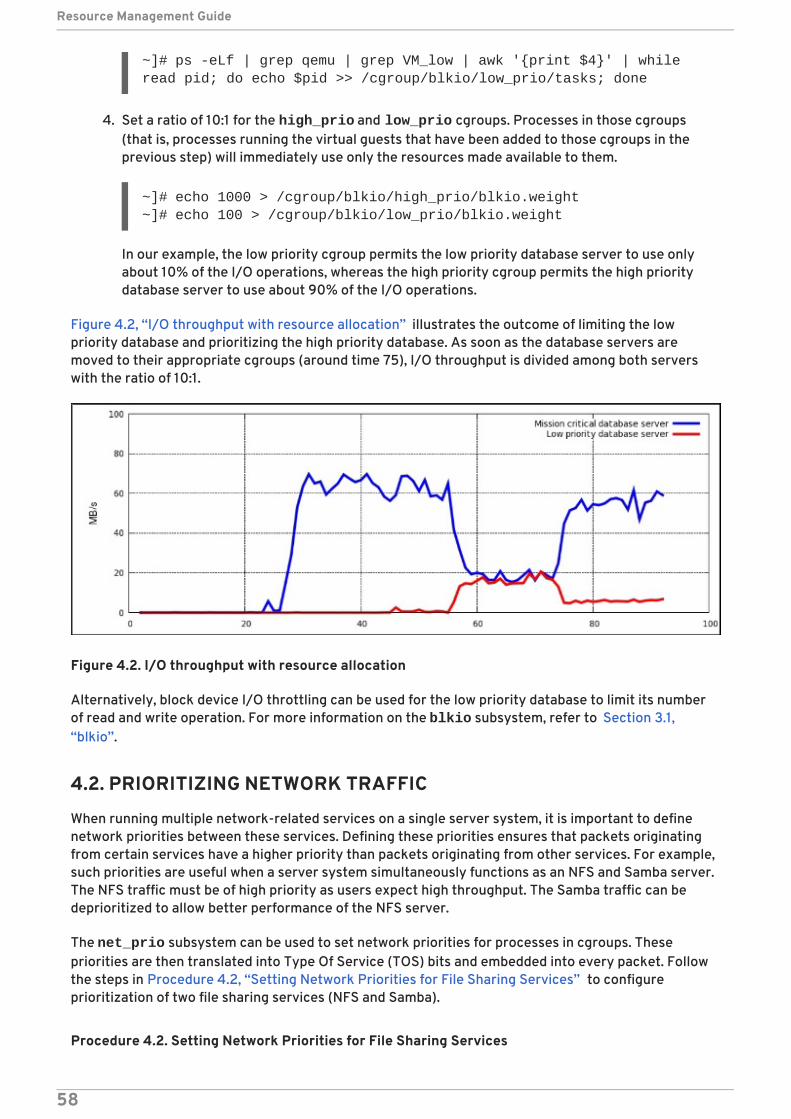
~]# ps -eLf | grep qemu | grep VM_low | awk '{print $4}' | while read pid; do echo $pid >> /cgroup/blkio/low_prio/tasks; done
4. Set a ratio of 10:1 for the high_prio and low_prio cgroups. Processes in those cgroups(that is, processes running the virtual guests that have been added to those cgroups in theprevious step) will immediately use only the resources made available to them.
~]# echo 1000 > /cgroup/blkio/high_prio/blkio.weight~]# echo 100 > /cgroup/blkio/low_prio/blkio.weight
In our example, the low priority cgroup permits the low priority database server to use onlyabout 10% of the I/O operations, whereas the high priority cgroup permits the high prioritydatabase server to use about 90% of the I/O operations.
Figure 4.2, “I/O throughput with resource allocation” illustrates the outcome of limiting the lowpriority database and prioritizing the high priority database. As soon as the database servers aremoved to their appropriate cgroups (around time 75), I/O throughput is divided among both serverswith the ratio of 10:1.
Figure 4.2. I/O throughput with resource allocation
Alternatively, block device I/O throttling can be used for the low priority database to limit its numberof read and write operation. For more information on the blkio subsystem, refer to Section 3.1,“blkio”.
4.2. PRIORITIZING NETWORK TRAFFIC
When running multiple network-related services on a single server system, it is important to definenetwork priorities between these services. Defining these priorities ensures that packets originatingfrom certain services have a higher priority than packets originating from other services. For example,such priorities are useful when a server system simultaneously functions as an NFS and Samba server.The NFS traffic must be of high priority as users expect high throughput. The Samba traffic can bedeprioritized to allow better performance of the NFS server.
The net_prio subsystem can be used to set network priorities for processes in cgroups. Thesepriorities are then translated into Type Of Service (TOS) bits and embedded into every packet. Followthe steps in Procedure 4.2, “Setting Network Priorities for File Sharing Services” to configureprioritization of two file sharing services (NFS and Samba).
Procedure 4.2. Setting Network Priorities for File Sharing Services
Resource Management Guide
58
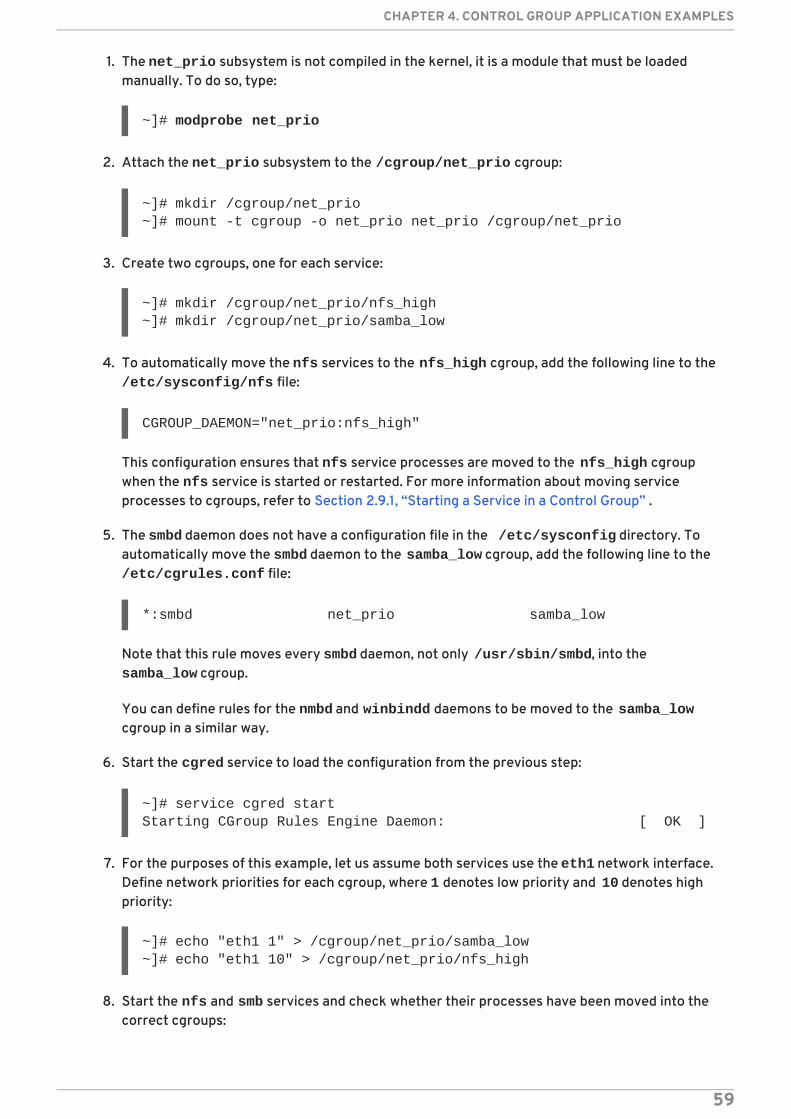
1. The net_prio subsystem is not compiled in the kernel, it is a module that must be loadedmanually. To do so, type:
~]# modprobe net_prio
2. Attach the net_prio subsystem to the /cgroup/net_prio cgroup:
~]# mkdir /cgroup/net_prio~]# mount -t cgroup -o net_prio net_prio /cgroup/net_prio
3. Create two cgroups, one for each service:
~]# mkdir /cgroup/net_prio/nfs_high~]# mkdir /cgroup/net_prio/samba_low
4. To automatically move the nfs services to the nfs_high cgroup, add the following line to the/etc/sysconfig/nfs file:
CGROUP_DAEMON="net_prio:nfs_high"
This configuration ensures that nfs service processes are moved to the nfs_high cgroupwhen the nfs service is started or restarted. For more information about moving serviceprocesses to cgroups, refer to Section 2.9.1, “Starting a Service in a Control Group” .
5. The smbd daemon does not have a configuration file in the /etc/sysconfig directory. Toautomatically move the smbd daemon to the samba_low cgroup, add the following line to the /etc/cgrules.conf file:
*:smbd net_prio samba_low
Note that this rule moves every smbd daemon, not only /usr/sbin/smbd, into the samba_low cgroup.
You can define rules for the nmbd and winbindd daemons to be moved to the samba_lowcgroup in a similar way.
6. Start the cgred service to load the configuration from the previous step:
~]# service cgred startStarting CGroup Rules Engine Daemon: [ OK ]
7. For the purposes of this example, let us assume both services use the eth1 network interface.Define network priorities for each cgroup, where 1 denotes low priority and 10 denotes highpriority:
~]# echo "eth1 1" > /cgroup/net_prio/samba_low~]# echo "eth1 10" > /cgroup/net_prio/nfs_high
8. Start the nfs and smb services and check whether their processes have been moved into thecorrect cgroups:
CHAPTER 4. CONTROL GROUP APPLICATION EXAMPLES
59
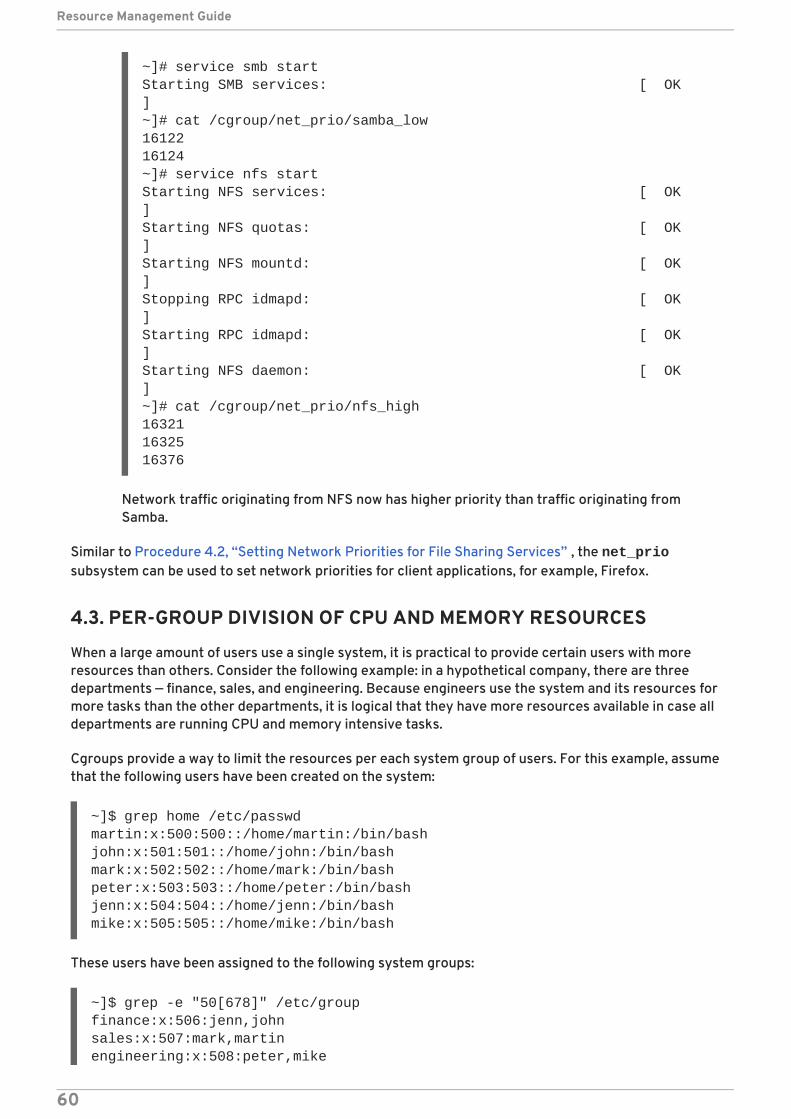
~]# service smb startStarting SMB services: [ OK ]~]# cat /cgroup/net_prio/samba_low1612216124~]# service nfs startStarting NFS services: [ OK ]Starting NFS quotas: [ OK ]Starting NFS mountd: [ OK ]Stopping RPC idmapd: [ OK ]Starting RPC idmapd: [ OK ]Starting NFS daemon: [ OK ]~]# cat /cgroup/net_prio/nfs_high163211632516376
Network traffic originating from NFS now has higher priority than traffic originating fromSamba.
Similar to Procedure 4.2, “Setting Network Priorities for File Sharing Services” , the net_priosubsystem can be used to set network priorities for client applications, for example, Firefox.
4.3. PER-GROUP DIVISION OF CPU AND MEMORY RESOURCES
When a large amount of users use a single system, it is practical to provide certain users with moreresources than others. Consider the following example: in a hypothetical company, there are threedepartments — finance, sales, and engineering. Because engineers use the system and its resources formore tasks than the other departments, it is logical that they have more resources available in case alldepartments are running CPU and memory intensive tasks.
Cgroups provide a way to limit the resources per each system group of users. For this example, assumethat the following users have been created on the system:
~]$ grep home /etc/passwdmartin:x:500:500::/home/martin:/bin/bashjohn:x:501:501::/home/john:/bin/bashmark:x:502:502::/home/mark:/bin/bashpeter:x:503:503::/home/peter:/bin/bashjenn:x:504:504::/home/jenn:/bin/bashmike:x:505:505::/home/mike:/bin/bash
These users have been assigned to the following system groups:
~]$ grep -e "50[678]" /etc/groupfinance:x:506:jenn,johnsales:x:507:mark,martinengineering:x:508:peter,mike
Resource Management Guide
60
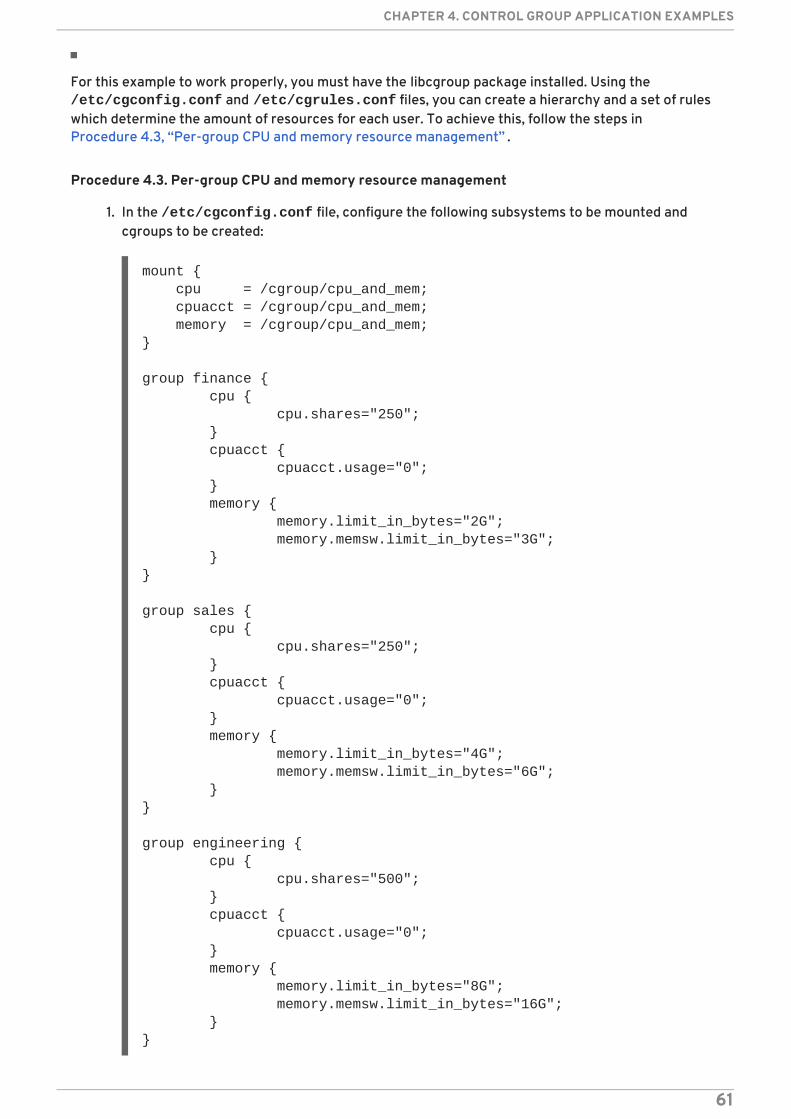
For this example to work properly, you must have the libcgroup package installed. Using the /etc/cgconfig.conf and /etc/cgrules.conf files, you can create a hierarchy and a set of ruleswhich determine the amount of resources for each user. To achieve this, follow the steps inProcedure 4.3, “Per-group CPU and memory resource management” .
Procedure 4.3. Per-group CPU and memory resource management
1. In the /etc/cgconfig.conf file, configure the following subsystems to be mounted andcgroups to be created:
mount { cpu = /cgroup/cpu_and_mem; cpuacct = /cgroup/cpu_and_mem; memory = /cgroup/cpu_and_mem;}
group finance { cpu { cpu.shares="250"; } cpuacct { cpuacct.usage="0"; } memory { memory.limit_in_bytes="2G"; memory.memsw.limit_in_bytes="3G"; }}
group sales { cpu { cpu.shares="250"; } cpuacct { cpuacct.usage="0"; } memory { memory.limit_in_bytes="4G"; memory.memsw.limit_in_bytes="6G"; }}
group engineering { cpu { cpu.shares="500"; } cpuacct { cpuacct.usage="0"; } memory { memory.limit_in_bytes="8G"; memory.memsw.limit_in_bytes="16G"; }}
CHAPTER 4. CONTROL GROUP APPLICATION EXAMPLES
61
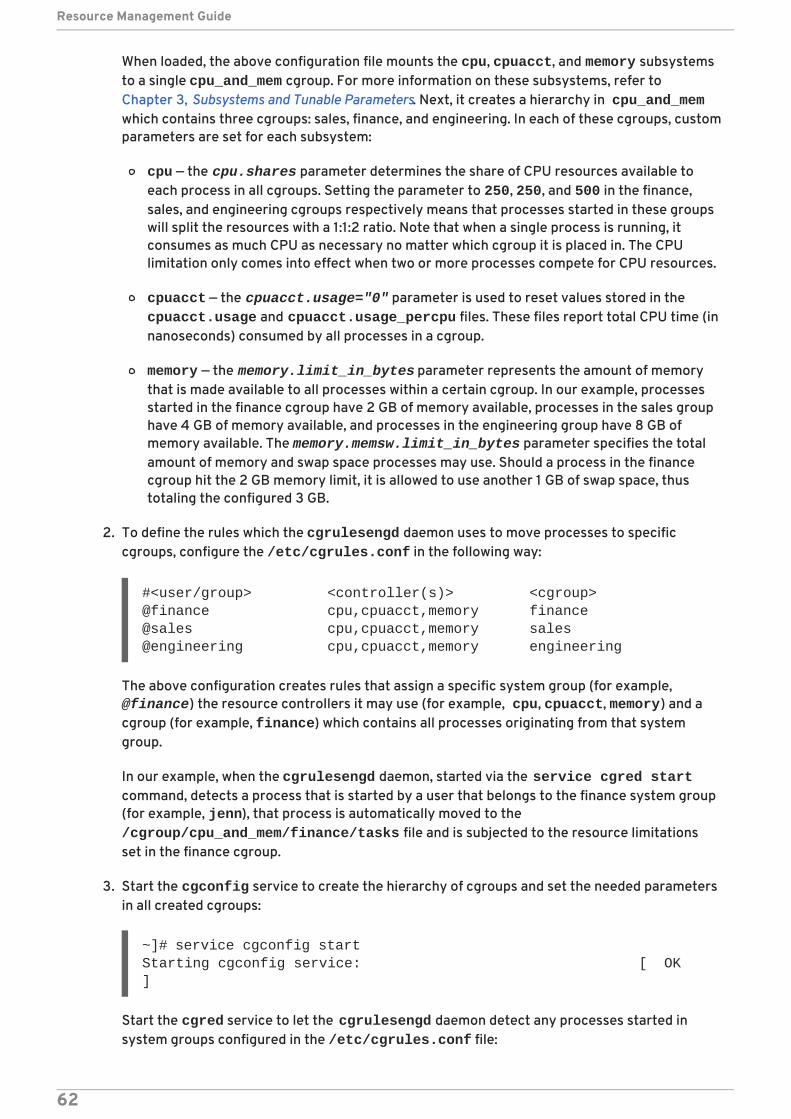
When loaded, the above configuration file mounts the cpu, cpuacct, and memory subsystemsto a single cpu_and_mem cgroup. For more information on these subsystems, refer toChapter 3, Subsystems and Tunable Parameters. Next, it creates a hierarchy in cpu_and_memwhich contains three cgroups: sales, finance, and engineering. In each of these cgroups, customparameters are set for each subsystem:
cpu — the cpu.shares parameter determines the share of CPU resources available toeach process in all cgroups. Setting the parameter to 250, 250, and 500 in the finance,sales, and engineering cgroups respectively means that processes started in these groupswill split the resources with a 1:1:2 ratio. Note that when a single process is running, itconsumes as much CPU as necessary no matter which cgroup it is placed in. The CPUlimitation only comes into effect when two or more processes compete for CPU resources.
cpuacct — the cpuacct.usage="0" parameter is used to reset values stored in the cpuacct.usage and cpuacct.usage_percpu files. These files report total CPU time (innanoseconds) consumed by all processes in a cgroup.
memory — the memory.limit_in_bytes parameter represents the amount of memorythat is made available to all processes within a certain cgroup. In our example, processesstarted in the finance cgroup have 2 GB of memory available, processes in the sales grouphave 4 GB of memory available, and processes in the engineering group have 8 GB ofmemory available. The memory.memsw.limit_in_bytes parameter specifies the totalamount of memory and swap space processes may use. Should a process in the financecgroup hit the 2 GB memory limit, it is allowed to use another 1 GB of swap space, thustotaling the configured 3 GB.
2. To define the rules which the cgrulesengd daemon uses to move processes to specificcgroups, configure the /etc/cgrules.conf in the following way:
#<user/group> <controller(s)> <cgroup>@finance cpu,cpuacct,memory finance@sales cpu,cpuacct,memory sales@engineering cpu,cpuacct,memory engineering
The above configuration creates rules that assign a specific system group (for example, @finance) the resource controllers it may use (for example, cpu, cpuacct, memory) and acgroup (for example, finance) which contains all processes originating from that systemgroup.
In our example, when the cgrulesengd daemon, started via the service cgred startcommand, detects a process that is started by a user that belongs to the finance system group(for example, jenn), that process is automatically moved to the /cgroup/cpu_and_mem/finance/tasks file and is subjected to the resource limitationsset in the finance cgroup.
3. Start the cgconfig service to create the hierarchy of cgroups and set the needed parametersin all created cgroups:
~]# service cgconfig startStarting cgconfig service: [ OK ]
Start the cgred service to let the cgrulesengd daemon detect any processes started insystem groups configured in the /etc/cgrules.conf file:
Resource Management Guide
62
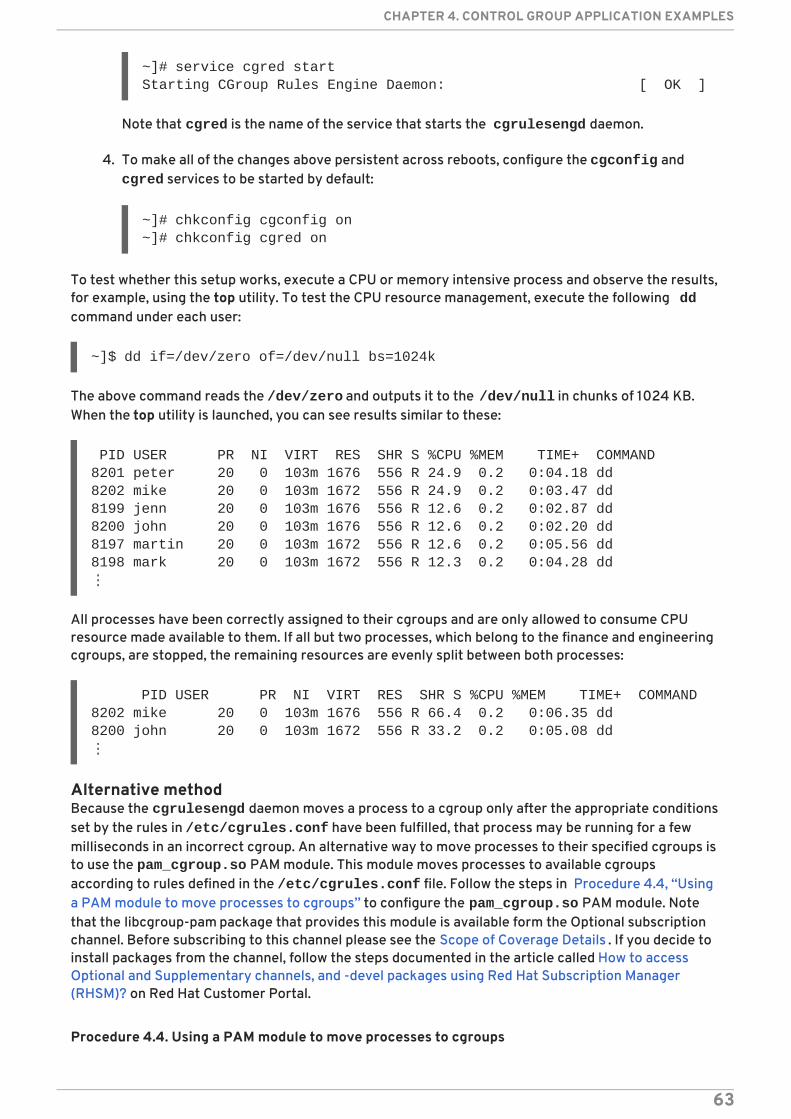
~]# service cgred startStarting CGroup Rules Engine Daemon: [ OK ]
Note that cgred is the name of the service that starts the cgrulesengd daemon.
4. To make all of the changes above persistent across reboots, configure the cgconfig and cgred services to be started by default:
~]# chkconfig cgconfig on~]# chkconfig cgred on
To test whether this setup works, execute a CPU or memory intensive process and observe the results,for example, using the top utility. To test the CPU resource management, execute the following ddcommand under each user:
~]$ dd if=/dev/zero of=/dev/null bs=1024k
The above command reads the /dev/zero and outputs it to the /dev/null in chunks of 1024 KB.When the top utility is launched, you can see results similar to these:
PID USER PR NI VIRT RES SHR S %CPU %MEM TIME+ COMMAND8201 peter 20 0 103m 1676 556 R 24.9 0.2 0:04.18 dd8202 mike 20 0 103m 1672 556 R 24.9 0.2 0:03.47 dd8199 jenn 20 0 103m 1676 556 R 12.6 0.2 0:02.87 dd8200 john 20 0 103m 1676 556 R 12.6 0.2 0:02.20 dd8197 martin 20 0 103m 1672 556 R 12.6 0.2 0:05.56 dd8198 mark 20 0 103m 1672 556 R 12.3 0.2 0:04.28 dd⋮
All processes have been correctly assigned to their cgroups and are only allowed to consume CPUresource made available to them. If all but two processes, which belong to the finance and engineeringcgroups, are stopped, the remaining resources are evenly split between both processes:
PID USER PR NI VIRT RES SHR S %CPU %MEM TIME+ COMMAND8202 mike 20 0 103m 1676 556 R 66.4 0.2 0:06.35 dd8200 john 20 0 103m 1672 556 R 33.2 0.2 0:05.08 dd⋮
Alternative methodBecause the cgrulesengd daemon moves a process to a cgroup only after the appropriate conditionsset by the rules in /etc/cgrules.conf have been fulfilled, that process may be running for a fewmilliseconds in an incorrect cgroup. An alternative way to move processes to their specified cgroups isto use the pam_cgroup.so PAM module. This module moves processes to available cgroupsaccording to rules defined in the /etc/cgrules.conf file. Follow the steps in Procedure 4.4, “Usinga PAM module to move processes to cgroups” to configure the pam_cgroup.so PAM module. Notethat the libcgroup-pam package that provides this module is available form the Optional subscriptionchannel. Before subscribing to this channel please see the Scope of Coverage Details . If you decide toinstall packages from the channel, follow the steps documented in the article called How to accessOptional and Supplementary channels, and -devel packages using Red Hat Subscription Manager(RHSM)? on Red Hat Customer Portal.
Procedure 4.4. Using a PAM module to move processes to cgroups
CHAPTER 4. CONTROL GROUP APPLICATION EXAMPLES
63
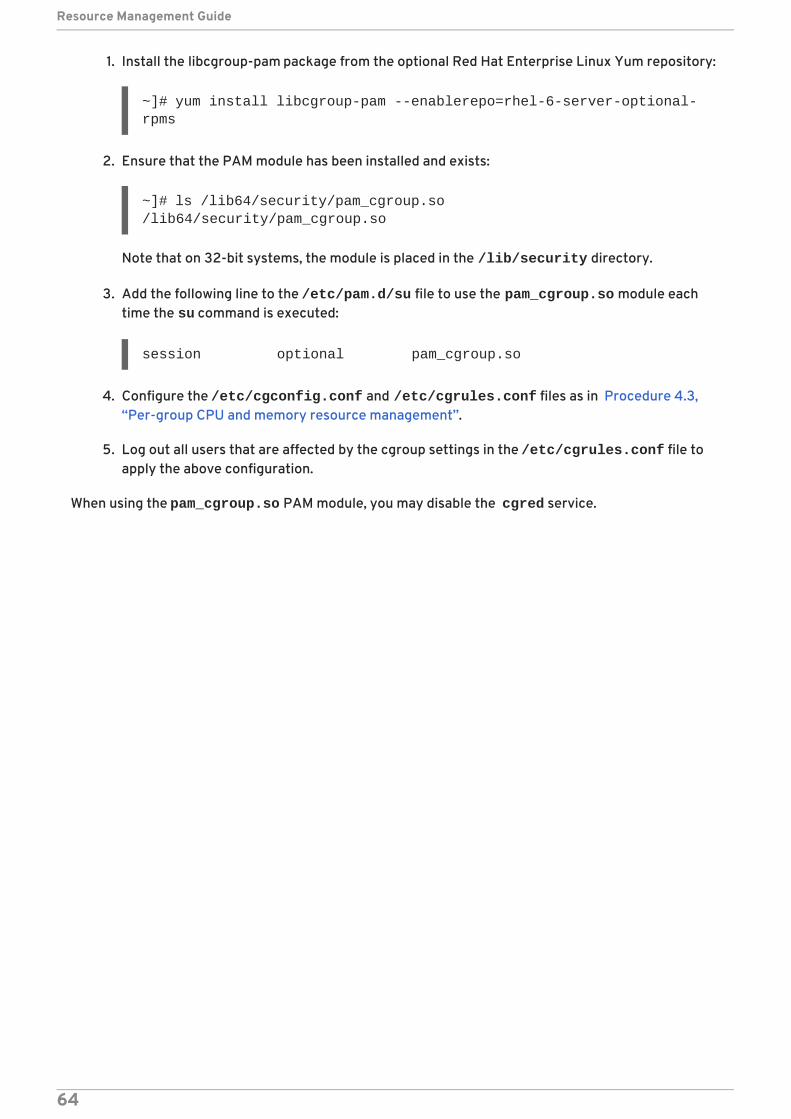
1. Install the libcgroup-pam package from the optional Red Hat Enterprise Linux Yum repository:
~]# yum install libcgroup-pam --enablerepo=rhel-6-server-optional-rpms
2. Ensure that the PAM module has been installed and exists:
~]# ls /lib64/security/pam_cgroup.so/lib64/security/pam_cgroup.so
Note that on 32-bit systems, the module is placed in the /lib/security directory.
3. Add the following line to the /etc/pam.d/su file to use the pam_cgroup.so module eachtime the su command is executed:
session optional pam_cgroup.so
4. Configure the /etc/cgconfig.conf and /etc/cgrules.conf files as in Procedure 4.3,“Per-group CPU and memory resource management”.
5. Log out all users that are affected by the cgroup settings in the /etc/cgrules.conf file toapply the above configuration.
When using the pam_cgroup.so PAM module, you may disable the cgred service.
Resource Management Guide
64
APPENDIX A. REVISION HISTORY
Revision 1.0-32 Wed Mar 15 2017 Marie DoleželováVersion for 6.9 GA publication.
Revision 1.0-31 Thu Apr 28 2016 Jana HevesRed Hat Enterprise Linux 6.8 GA release of the Resource Management Guide
Revision 1.0-29 Tue May 12 2015 Radek BíbaAsynchronous update.
Revision 1.0-26 Thu Oct 10 2014 Peter OndrejkaRed Hat Enterprise Linux 6.6 GA release of the Resource Management Guide
Revision 1.0-16 Thu Feb 21 2013 Martin PrpičRed Hat Enterprise Linux 6.4 GA release of the Resource Management Guide
Revision 1.0-7 Wed Jun 20 2012 Martin PrpičRed Hat Enterprise Linux 6.3 GA release of the Resource Management Guide.
Revision 1.0-6 Tue Dec 6 2011 Martin PrpičRed Hat Enterprise Linux 6.2 GA release of the Resource Management Guide
Revision 1.0-5 Thu May 19 2011 Martin PrpičRed Hat Enterprise Linux 6.1 GA release of the Resource Management Guide
Revision 1.0-0 Tue Nov 9 2010 Rüdiger LandmannFeature-complete version for GA
APPENDIX A. REVISION HISTORY
65