Embed Size (px)
Citation preview
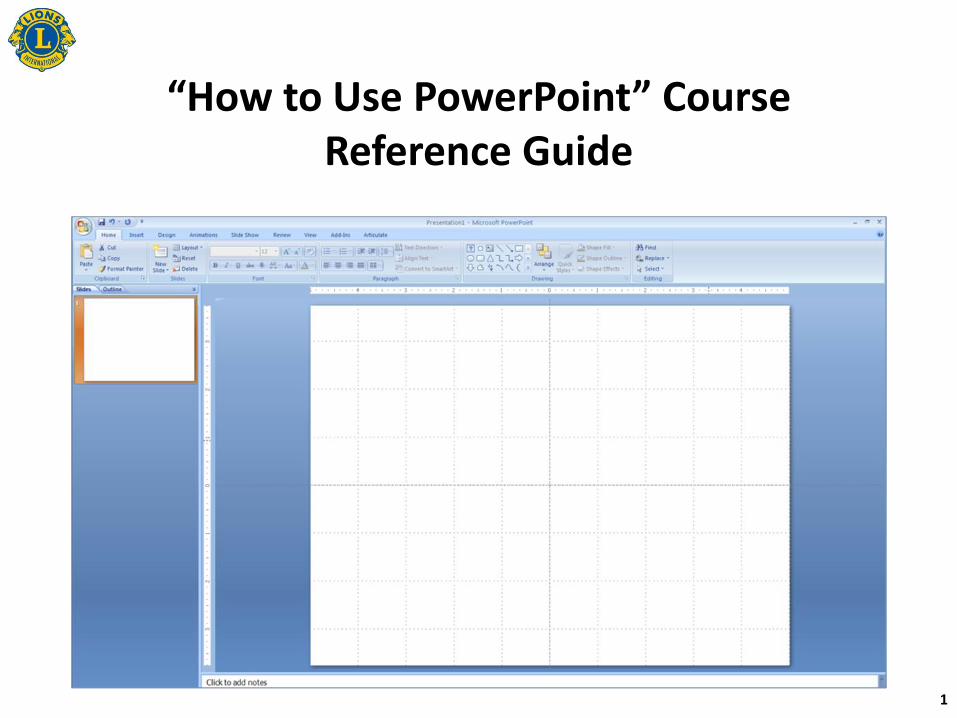
“How to Use PowerPoint” Course Reference Guide
1
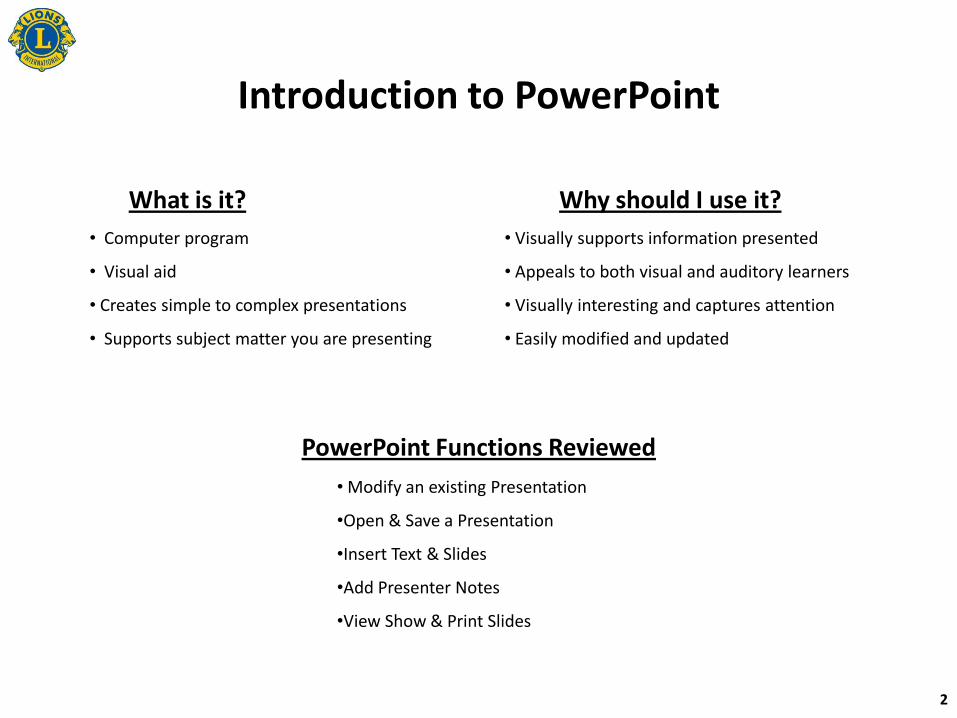
Introduction to PowerPoint
• Computer program
• Visual aid
• Creates simple to complex presentations
• Supports subject matter you are presenting
What is it?
• Visually supports information presented
• Appeals to both visual and auditory learners
• Visually interesting and captures attention
• Easily modified and updated
Why should I use it?
• Modify an existing Presentation
•Open & Save a Presentation
•Insert Text & Slides
•Add Presenter Notes
•View Show & Print Slides
PowerPoint Functions Reviewed
2
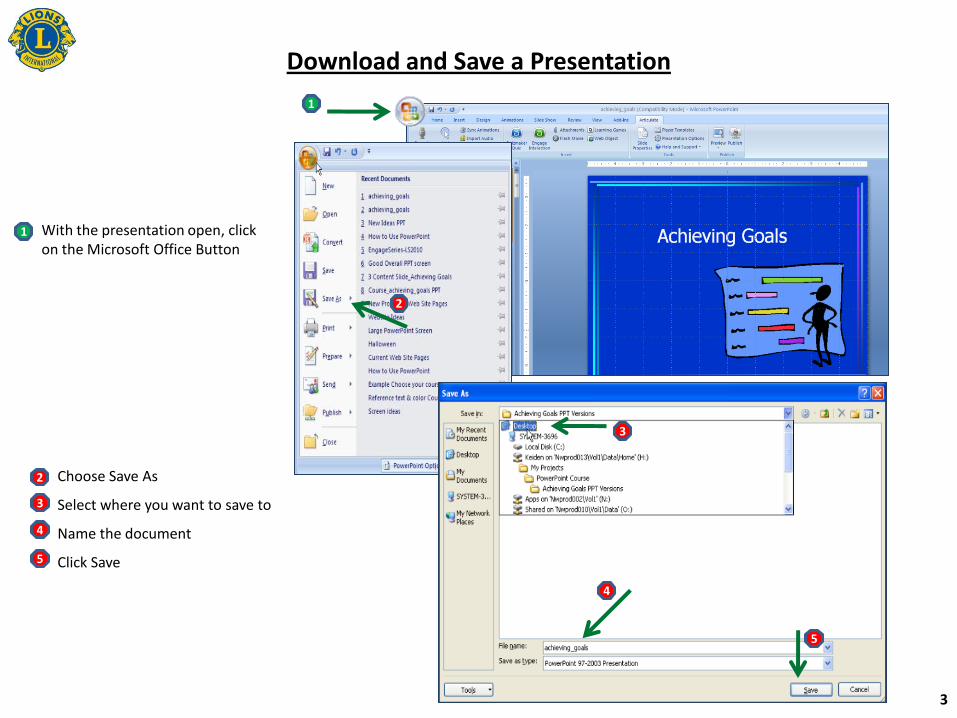
Download and Save a Presentation
1
2
3
4
5
3
Choose Save As
Select where you want to save to
Name the document
Click Save
2
3
4
5
With the presentation open, click on the Microsoft Office Button
1
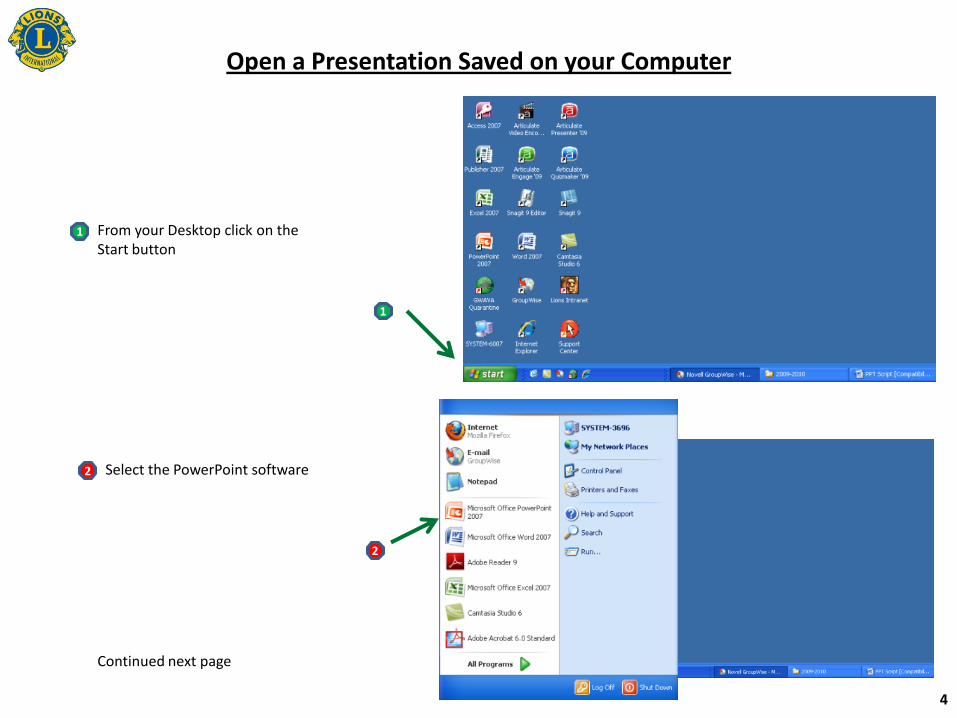
From your Desktop click on the Start button
1
Select the PowerPoint software2
2
1
Continued next page
4
Open a Presentation Saved on your Computer
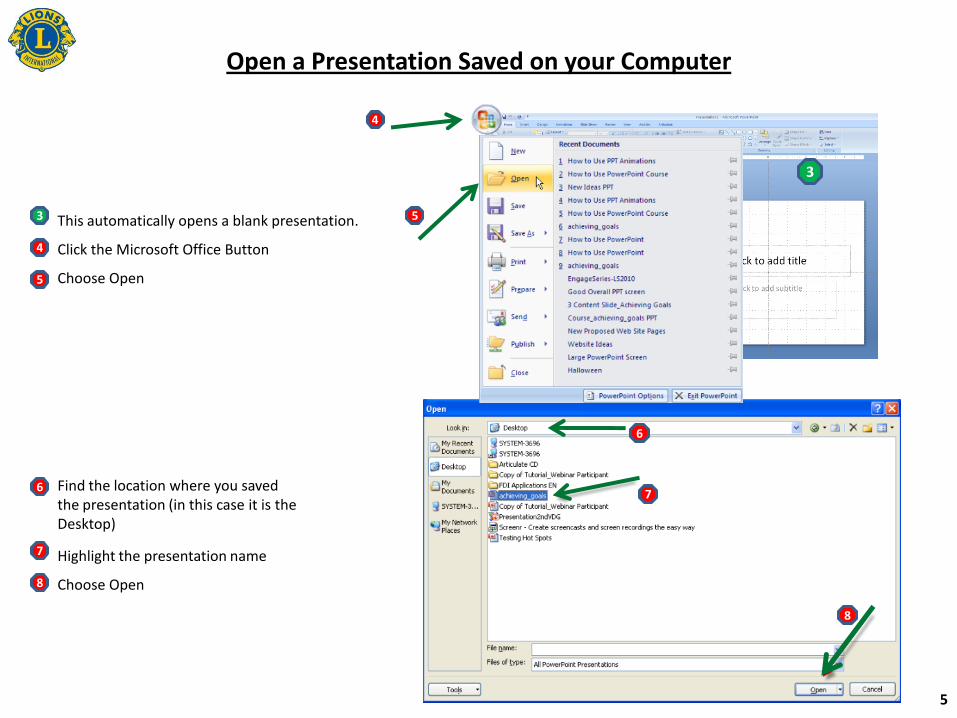
Open a Presentation Saved on your Computer
3
4
5
This automatically opens a blank presentation.
Click the Microsoft Office Button
Choose Open
6
7
Find the location where you saved the presentation (in this case it is the Desktop)
Highlight the presentation name
Choose Open8
6
7
8
3
4
5
5
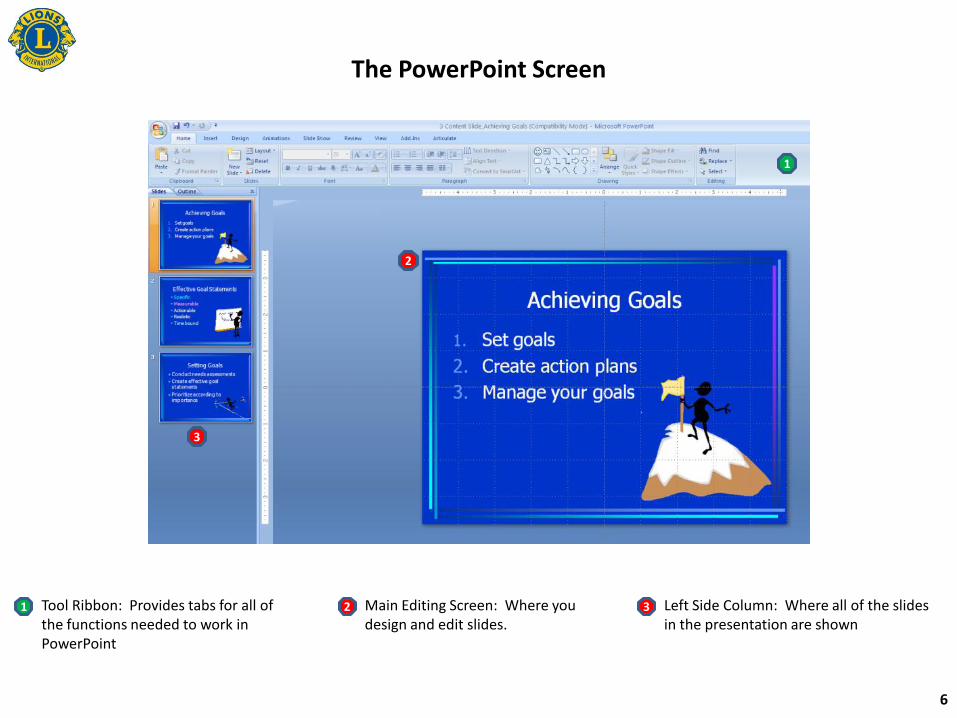
The PowerPoint Screen
1
2
3
Tool Ribbon: Provides tabs for all of the functions needed to work in PowerPoint
1 Main Editing Screen: Where you design and edit slides.
2 Left Side Column: Where all of the slides in the presentation are shown
3
6
1 2 3 4
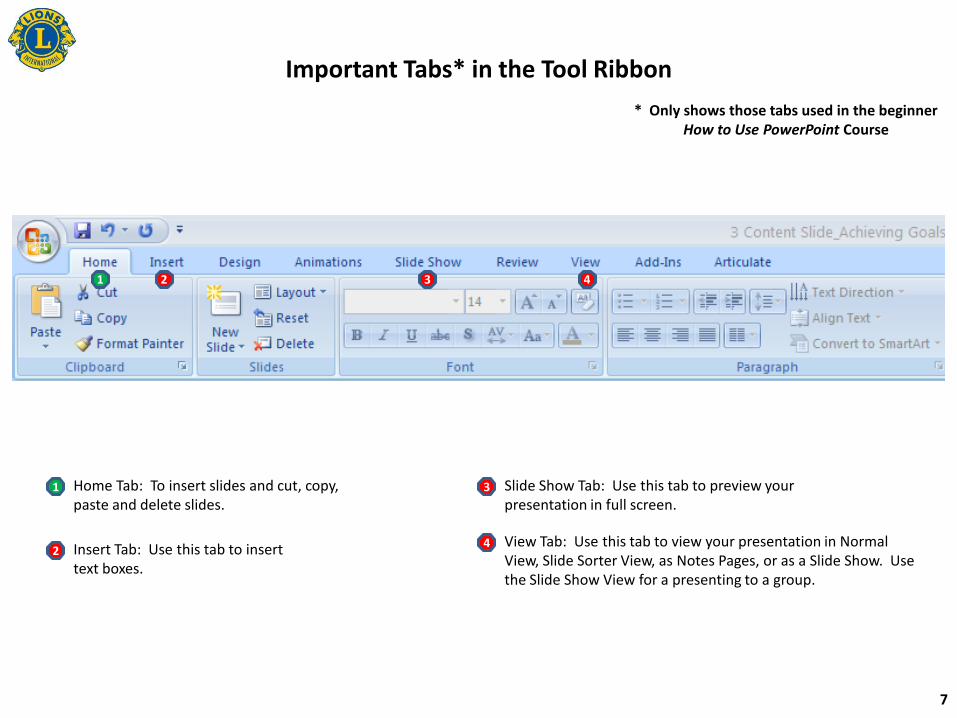
Important Tabs* in the Tool Ribbon
* Only shows those tabs used in the beginner How to Use PowerPoint Course
Home Tab: To insert slides and cut, copy, paste and delete slides.
1
Insert Tab: Use this tab to insert text boxes.
24 View Tab: Use this tab to view your presentation in Normal
View, Slide Sorter View, as Notes Pages, or as a Slide Show. Use the Slide Show View for a presenting to a group.
Slide Show Tab: Use this tab to preview your presentation in full screen.
3
7
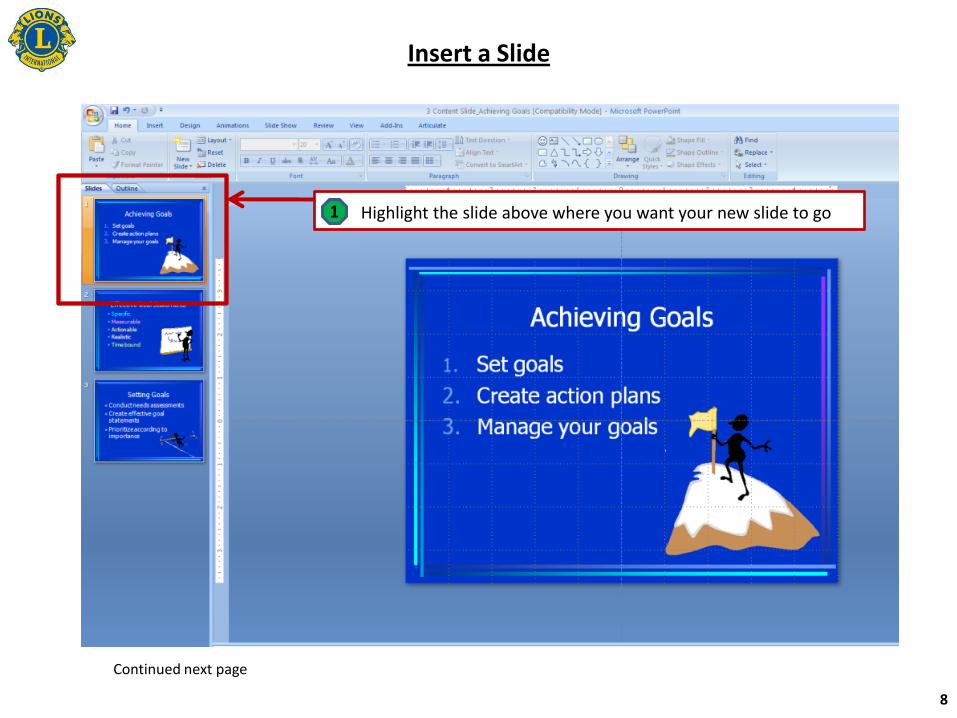
Insert a Slide
Highlight the slide above where you want your new slide to go1
Continued next page
8
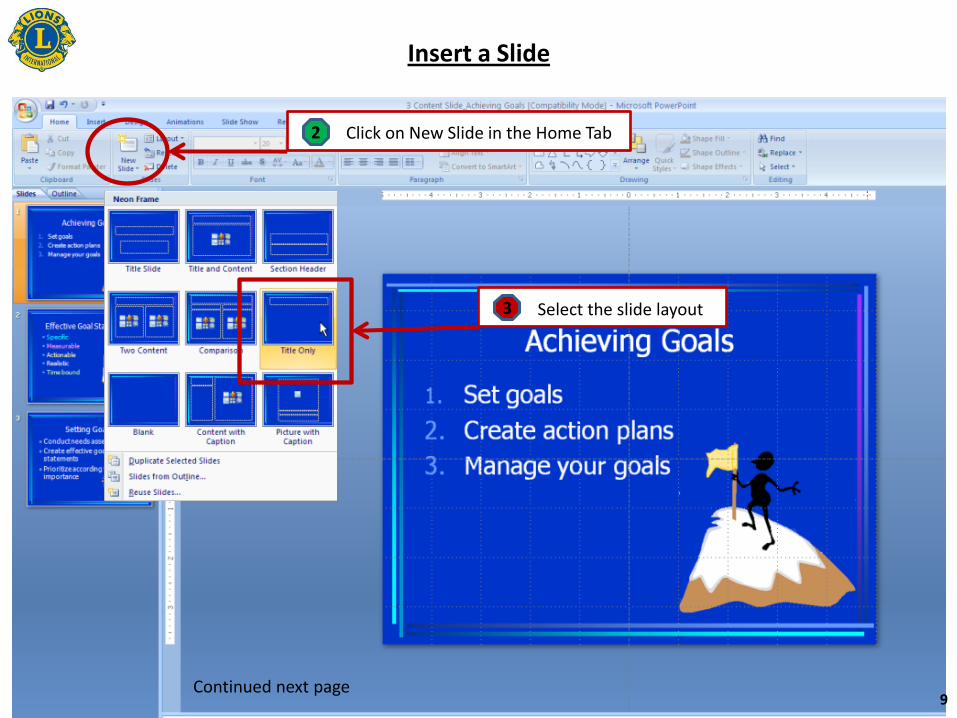
Select the slide layout3
Click on New Slide in the Home Tab2
Insert a Slide
Continued next page9
Insert a Slide
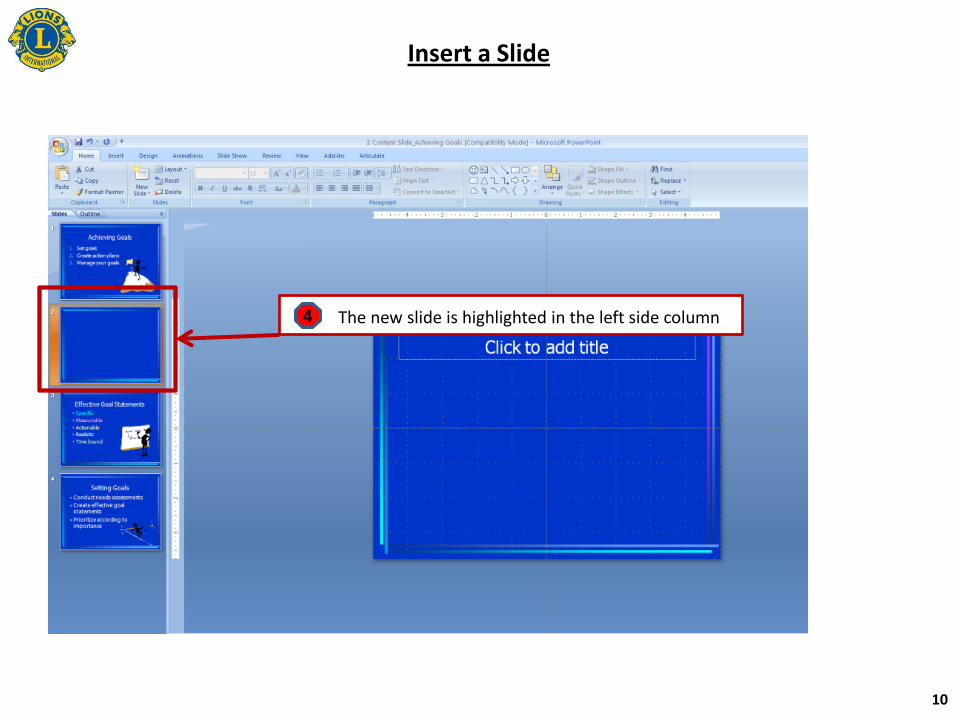
The new slide is highlighted in the left side column4
10
Copy a Slide
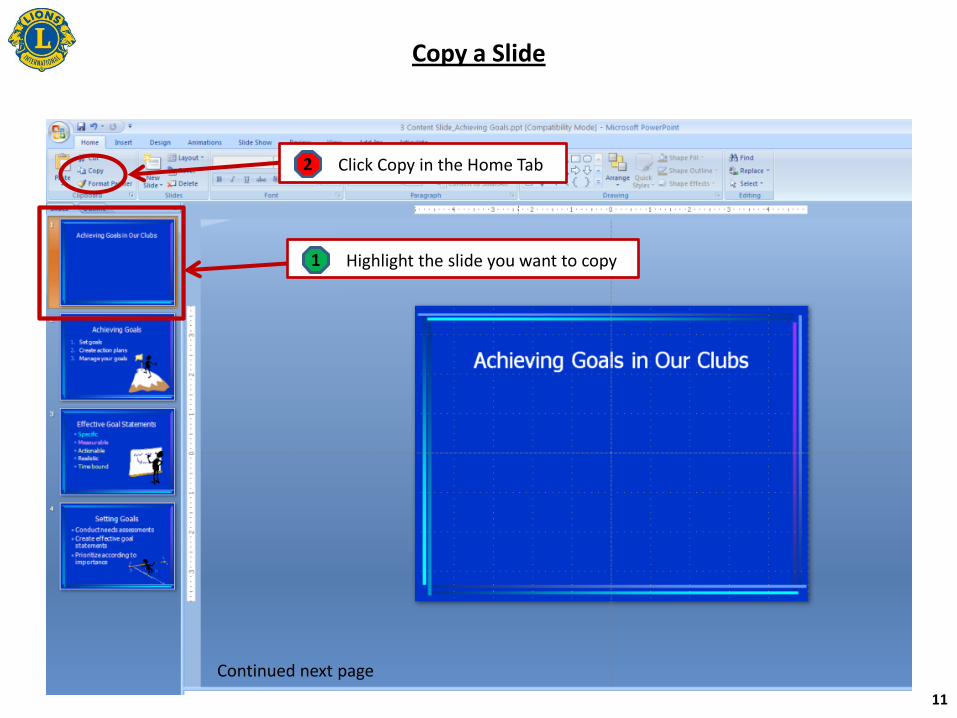
Highlight the slide you want to copy1
Click Copy in the Home Tab2
Continued next page
11
Copy a Slide
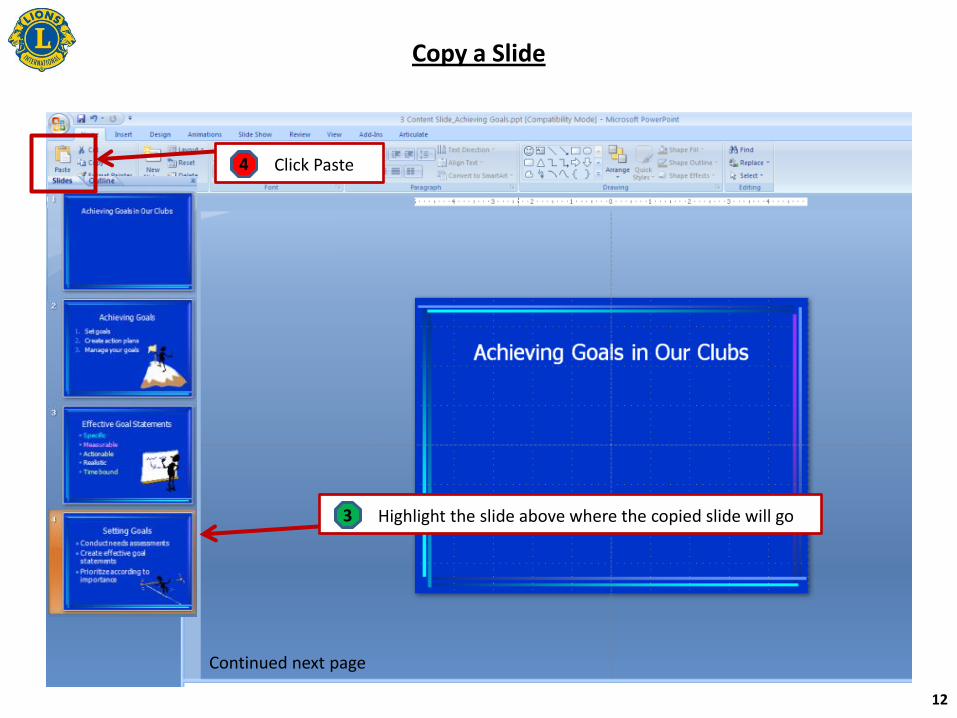
Click Paste4
Highlight the slide above where the copied slide will go3
Continued next page
12
Copy a Slide
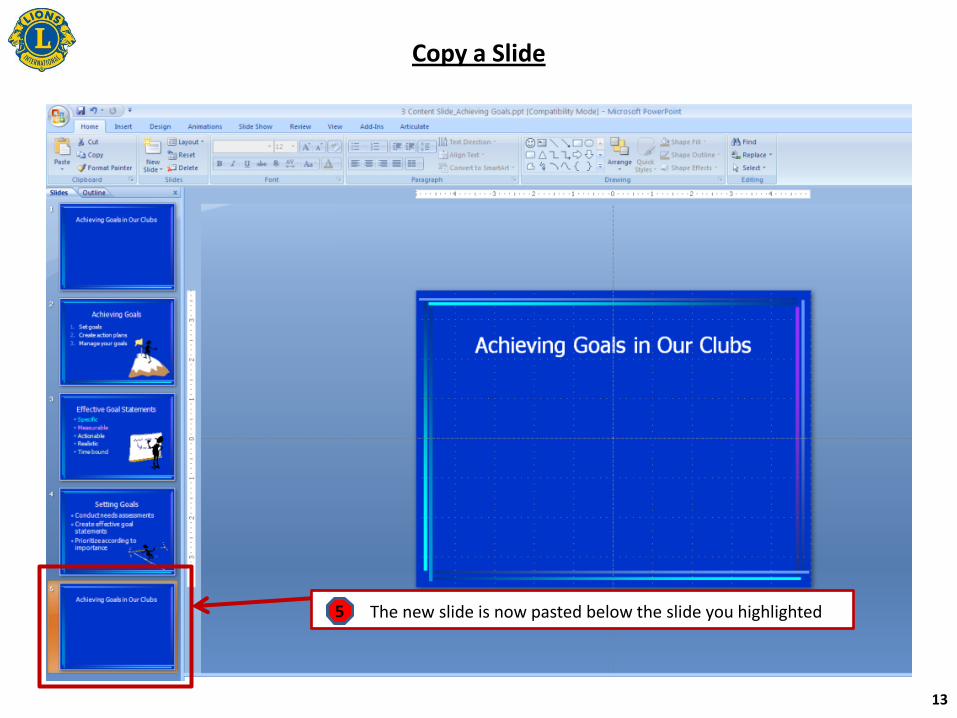
The new slide is now pasted below the slide you highlighted5
13
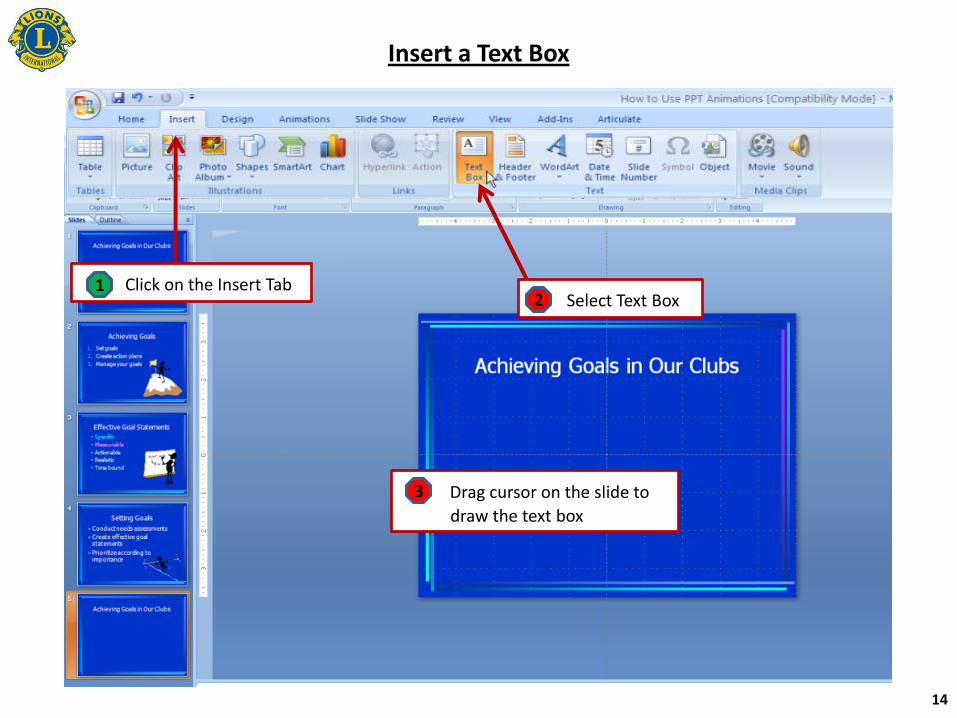
Insert a Text Box
Click on the Insert Tab1Select Text Box2
Drag cursor on the slide to
draw the text box
3
14
1 Click on the Microsoft Office Button
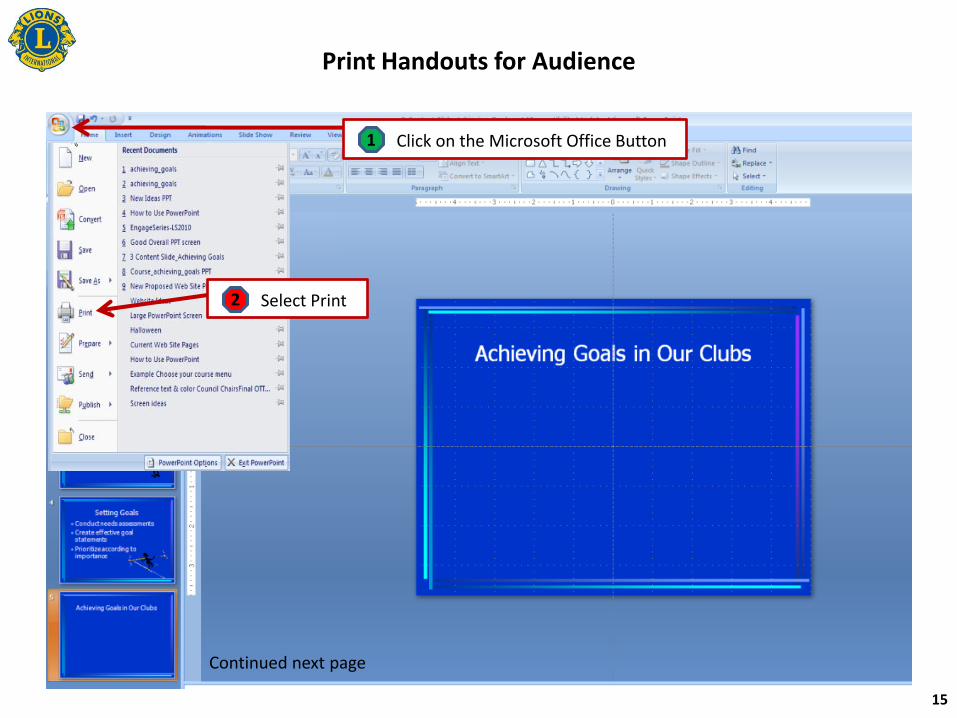
Print Handouts for Audience
2 Select Print
1
2
15
Continued next page
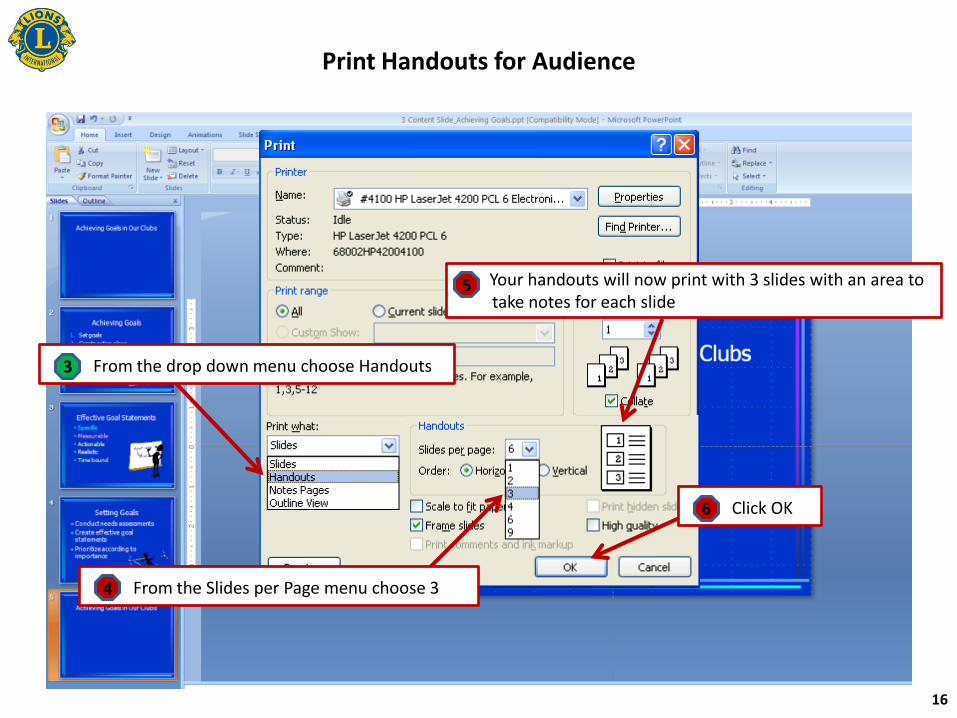
Print Handouts for Audience
From the drop down menu choose Handouts 3
From the Slides per Page menu choose 34
Your handouts will now print with 3 slides with an area to take notes for each slide
5
Click OK6
16


![Fast Oracle Financials Rollouts with Reference Models · PDF file(Microsoft PowerPoint - 37-PPT-2011-Apps-EBS-Mohl-Financials-Rollouts-Reference- [Kompatibilit tsmodus]) Author (Sabine](https://img.pdfslide.net/doc/110x75/5aad42207f8b9a8f498e02f4/fast-oracle-financials-rollouts-with-reference-models-microsoft-powerpoint-37-ppt-2011-apps-ebs-mohl-financials-rollouts-reference-.jpg)