Embed Size (px)
Citation preview
Document issue 2.0
Continuent.org Sequoia 3.0 Installation and Configuration Guide
Con
tinue
nt.o
rg S
equo
ia 3
.0
Contents
Contents
1 About this document .................................................................................. 1
1.1 Related documents .............................................................................................................. 1
1.2 Typographic conventions ..................................................................................................... 1
2 Overview of Continuent.org Sequoia 3.0 installation.............................. 2
2.1 Sequoia directory structure .................................................................................................. 2
3 Sequoia installation prerequisites ............................................................ 4
3.1 System requirements ........................................................................................................... 4 3.1.1 Software requirements ..............................................................................................................4 3.1.2 Network requirements ...............................................................................................................5
3.2 Configure the JAVA_HOME environment variable ................................................................ 6
3.3 Synchronize node clocks using Network Time Protocol (NTP) ........................................... 6
4 Installing Sequoia ....................................................................................... 9
4.1 Download the distribution archive ........................................................................................ 9
4.2 Install Sequoia on the controller nodes ................................................................................ 9 4.2.1 Install Sequoia using the graphical installation wizard ..............................................................9 4.2.2 Install Sequoia using a binary distribution ...............................................................................14
5 Configuring Sequoia after installation.................................................... 16
5.1 Sequoia configuration files ................................................................................................. 16 5.1.1 Controller configuration file .....................................................................................................16 5.1.2 Controller Group Communication configuration files ...............................................................17 5.1.3 Virtual database configuration file ...........................................................................................17 5.1.4 Sequoia virtual database demos and example configuration files ..........................................18
5.2 Configure the controller(s) after Sequoia installation ......................................................... 20
5.3 Configure the virtual database(s) after Sequoia installation .............................................. 22 5.3.1 Write the VirtualDatabase element definition ...................................................................23 5.3.2 Write the Distribution element definition ..........................................................................23 5.3.3 Write the Backup element definition .......................................................................................24 5.3.4 Write the AuthenticationManager element definition ......................................................25 5.3.5 Write the DatabaseBackend element definition(s) ...............................................................25 5.3.6 Write the DatabaseSchema element definition .....................................................................27 5.3.7 Write the RequestManager element definition .....................................................................28
Continuent.org Sequoia 3.0 Installation and Configuration Guide iDocument issue 2.0
Contents
6 Configuring the client application........................................................... 34
6.1 Defining the Sequoia URL ................................................................................................. 34 6.1.1 Sequoia URL options ..............................................................................................................34
6.2 Configuring Java applications to access Sequoia ............................................................. 37 6.2.1 Configuring Jakarta Tomcat ....................................................................................................37 6.2.2 Java Open Application Server (JOnAS) configuration example ..............................................38 6.2.3 JBoss configuration example ..................................................................................................39 6.2.4 BEA Weblogic Server 7.x/8.x configuration example ..............................................................40 6.2.5 Hibernate configuration example ............................................................................................41
6.3 Configuring Perl clients to access Sequoia using the Perl DBD:JDBC module ................. 41 6.3.1 Installing the DBD::JDBC Perl module ....................................................................................41 6.3.2 Configuring the data source for Perl applications ...................................................................43
7 Activating the cluster ............................................................................... 45
7.1 Start the Controllers ........................................................................................................... 45 7.1.1 Controller start-up options .......................................................................................................46
7.2 Load the virtual database configuration files to the controllers .......................................... 47
7.3 Activate the database backend(s) of the first controller ..................................................... 48
7.4 Activate the database backend(s) of the second controller ............................................... 50
7.5 Test the operation of the cluster ........................................................................................ 52
8 Uninstalling Sequoia ................................................................................ 54
9 Sequoia configuration guidelines and examples .................................. 55
9.1 Configuring Sequoia usernames and passwords .............................................................. 55
9.2 Configuring controller group communication ..................................................................... 56 9.2.1 Configuring Appia ....................................................................................................................57 9.2.2 Appia configuration examples .................................................................................................60
9.3 Configuring backupers ....................................................................................................... 61 9.3.1 Available backuper implementations .......................................................................................62 9.3.2 Configuring backuper options .................................................................................................63
9.4 Configuring load balancing methods ................................................................................. 66 9.4.1 Balancing client connections to controllers .............................................................................66 9.4.2 Balancing read queries between backends ............................................................................68
9.5 Configuring the maximum number of allowed client connections ...................................... 69
Continuent.org Sequoia 3.0 Installation and Configuration Guide iiDocument issue 2.0
Contents
9.6 Configuring Sequoia security settings ............................................................................... 70 9.6.1 Securing the connection between the Sequoia driver and controller using SSL .....................71 9.6.2 Securing the connection between the CLC and the Sequoia controller using SSL ................73 9.6.3 Disabling dynamic addition of drivers ......................................................................................74 9.6.4 Configuring an access control policy based on user and host ................................................75
Continuent.org Sequoia 3.0 Installation and Configuration Guide iiiDocument issue 2.0
About this document
Continuent.org Sequoia 3.0 Installation and Configuration Guide 1Document issue 2.0
1 About this documentThis document provides a detailed description of the tasks involved in installing Continuent.org Sequoia 3.0.
1.1 Related documents
Refer to Continuent.org Sequoia 3.0 Basic Concepts for a description of the central concepts related to Sequoia, including its architecture, features and deployment models.
Refer to Continuent.org Sequoia 3.0 Management Guide for:
• detailed instructions on the tasks and procedures involved in managing Sequoia• command line syntax and parameter descriptions.
1.2 Typographic conventions
This document uses the following formatting conventions:
Notation Explanation
Italics Indicates a reference to another document.
Hyperlink Indicates a hyperlink to a web page.
Blue italics Indicates a linked cross-reference to another section in the document.
Bold Indicates elements in a graphical user interface.
Courier Indicates code, including command line input and/or output.
Overview of Continuent.org Sequoia 3.0 installation
2 Overview of Continuent.org Sequoia 3.0 installationThe main steps of the Sequoia installation process are:
1. Fulfill the Sequoia system requirements. See 3 Sequoia installation prerequisites on page 4.
2. Download the Sequoia distribution archive. See 4.1 Download the distribution archive on page 9.
3. Install the Sequoia software on the controller node(s). See 4.2 Install Sequoia on the controller nodes on page 9.
4. Configure the controller(s) and virtual database(s). See 5 Configuring Sequoia after installation on page 16.
5. Configure the client application. See 6 Configuring the client application on page 34.
6. Activate the cluster. See 7 Activating the cluster on page 45.
The configuration of a Sequoia demo called Distributed RAIDb-1 is used in all the examples included in chapters 5 Configuring Sequoia after installation on page 16 and 7 Activating the cluster on page 45. See also 5.1.4 Sequoia virtual database demos and example configuration files on page 18.
Warning
To ensure database consistency, all database backends must be accessed through Sequoia. The database nodes must not be accessed directly using the database native console.
2.1 Sequoia directory structureWhen you run the Sequoia graphical installation wizard, it automatically unpacks the distribution archive and creates the Sequoia directory structure.
Continuent.org Sequoia 3.0 Installation and Configuration Guide 2Document issue 2.0
Overview of Continuent.org Sequoia 3.0 installation
The installation program automatically creates the following directories:
• bin - includes the Sequoia start/stop scripts• demo - includes scripts that can be used to start Sequioa demos, that is, example
virtual database configurations• lib - includes the java libraries used by Sequoia• driver - includes the Sequoia driver• config - includes the Sequoia configuration files• log - includes the logs generated by the logging system• xml - includes the DTD and XSL files used by Sequoia. You can use the DTD files
to validate Sequoia configuration files after editing• uninstaller - includes an uninstall script that you can use to uninstall Sequoia• 3rdparty - includes the iSQL graphical SQL console libraries and
HypersonicSQL libraries• doc - includes all Sequoia documentation, including example configuration files
and the user manuals.
Continuent.org Sequoia 3.0 Installation and Configuration Guide 3Document issue 2.0
Sequoia installation prerequisites
3 Sequoia installation prerequisitesThe following sections list requirements that must be fulfilled for the Sequoia installation to be successful.
3.1 System requirements
3.1.1 Software requirements
Client applications
You can use Sequoia with any Java client application, for example a standalone application, servlet, or EJBTM container, which accesses a database cluster through JDBC.
Sequoia supports the use of:
• a JDBC driver of type 1, 2, 3, or 4• an ODBC driver used with the JDBC-ODBC bridge.
Note
If you want to use Sequoia with a non-Java client application, which does not use JDBC, refer to the Carob project (http://carob.continuent.org/HomePage), which provides a C++ API that can be used to access Sequoia. There is an ODBC driver available, built on top of the Carob C++ interface.
Relational DataBase Management Systems (RDBMS)
Sequoia can be used with any RDBMS providing a JDBC driver, that is to say almost all existing open source and commercial databases.
Users have reported successful usage of Sequoia with the following RDBMS: Oracle®, PostgreSQL, MySQL, Apache Derby, IBM DB2®, Sybase®, SAP DB (MySQL MaxDB), Hypersonic SQL, Firebird, MS SQL Server and Instant DB.
Sequoia also allows you to mix different database engines from different vendors in your cluster configuration. See section Sequoia deployment models in Continuent.org Sequoia 3.0 Basic Concepts for more information on the possible cluster setups.
Operating systems
Sequoia can be used on all operating systems supporting Java (Unix, Linux, Windows, Solaris, HP-UX, etc.).
Continuent.org Sequoia 3.0 Installation and Configuration Guide 4Document issue 2.0
Sequoia installation prerequisites
Additional required software
Sequoia requires that the following additional software be installed on controller nodes:
• Java Software Development Kit (Sun 1.4.2)• NTP or some other reliable clock synchronization mechanism.
3.1.2 Network requirements
Sequoia requires a network supporting TCP/IP for communication between cluster nodes. Use a switched Ethernet network: the recommendation is to use a full-duplex 1Gb/s interconnection between controllers and backends.
In addition, the following proper network settings are required for the controller group communication to work.
Network configuration of controller hosts
If your controller host uses multiple IP addresses, make sure that your hostname translates to the real IP address of the controller node, and not the localhost address (127.0.0.1). To verify this, use the command ping <hostname> to output the real IP address of the host.
Warning
The host name may not resolve to 127.0.0.1 or the controller will not function properly. If you change a host name that resolves to 127.0.0.1, you should reboot because these values tend to be cached and can cause errors in other applications.
Example
The following /etc/hosts file configuration for host controller1 is correct.
# Do not remove the following line, or various programs # that require network functionality will fail. 127.0.0.1 localhost.localdomain localhost 172.16.10.25 controller1 controller1.mycompany.com
Continuent.org Sequoia 3.0 Installation and Configuration Guide 5Document issue 2.0
Sequoia installation prerequisites
Route configuration
Define a default route for the network adapter bound by Appia (usually eth0). If such a route does not exist, either the controller group communication initialization will fail or the controllers will be unable to see each other.
• To check for the default entries in your routing table under Linux, you can use the /sbin/route command.
• To add the default route, use a command such as /sbin/route add default eth0.
3.2 Configure the JAVA_HOME environment variableFor the Sequoia installation be successful, the JAVA_HOME environment variable must be set on both controller nodes to point to the Sun Microsystems® Java root installation.
To check that the value assigned to the JAVA_HOME environment is the Java root directory, execute the following command, which shows the directory where Java is installed:> env | grep JAVA_HOME
To set the JAVA_HOME environment variable value correctly, execute the following command:> JAVA_HOME=<java root dir>; export JAVA_HOME
3.3 Synchronize node clocks using Network Time Protocol (NTP)Configure the controller nodes to use Network Time Protocol (NTP) or some other reliable clock synchronization mechanism.
NTP is required to ensure that sql requests that use time functions such as NOW() or current_timestamp receive consistent time values on both controller nodes of the cluster. Such requests are parsed by the controller(s) and macros are replaced with the time value before sending the requests to the group communication protocol.
Note
When configuring NTP, use at least two individual NTP servers to ensure failure tolerance.
Continuent.org Sequoia 3.0 Installation and Configuration Guide 6Document issue 2.0
Sequoia installation prerequisites
Install NTP
To check if your Linux distribution already includes an NTP software package, execute the following command:> rpm -qa | grep -i ntp
If your distribution includes NTP, you can continue as instructed in section Check that NTP is synchronized on page 7. If not, you must first install NTP.
Check that NTP is synchronized
NTP is pre-configured in some Linux distributions. If there is no firewall filtering your NTP traffic, then the NTP daemon may work out of the box, and no modifications to the configuration are needed.
To check that the NTP daemon is running, execute the following command:> ntpq -c 'readvar 0'
Check the command line output for sync_ntp, which indicates that NTP is synchronized.
Configure NTP
If NTP is not configured by default on the controller machine, edit the NTP configuration file etc/ntp.conf as instructed below to ensure that the node clocks have the same time value.
Note that there are many different ways to configure NTP: these instructions represent only the simplest possible solution. Refer, for example, to http://ntp.isc.org/bin/view/Main/DocumentationIndex and the official NTP documentation at http://www.eecis.udel.edu/~mills/ntp/html/index.html for more details on the advanced configuration options.
To configure ntp.conf on the controller nodes
1. Locate at least two NTP servers on your network.
2. Save a copy of the original etc/ntp.conf configuration file.> cd /etc > cp ntp.conf ntp.conf.orig
3. Open the etc/ntp.conf configuration file for editing.
4. Comment out all the following lines: server, peer, broadcast, and manycastclient.
Continuent.org Sequoia 3.0 Installation and Configuration Guide 7Document issue 2.0

Sequoia installation prerequisites
5. Add a server line for each NTP server you are using. server first.ntp.server server second.ntp.server
6. Save the configuration.
7. The ntp.conf file is read when the NTP daemon is started: thus, you must restart NTP every time the configuration file is modified.> /etc/init.d/ntpd restart
8. Wait until NTP is synchronized before installing Sequoia. The synchronization process normally takes a couple of minutes. You can check the current state using the ntpq command.
Continuent.org Sequoia 3.0 Installation and Configuration Guide 8Document issue 2.0
Installing Sequoia
4 Installing Sequoia
Note
Make sure you have fulfilled the Sequoia installation prerequisites discussed in the previous chapter. Failure to meet these requirements may result in failures during installation, or in an inability of the Sequoia service to function properly.
4.1 Download the distribution archiveDownload the binary distribution of Sequoia from the Continuent.org web site (http://sequoia.continuent.org). The Sequoia distribution is available in the following formats (where x.y is the Sequoia release):
• sequoia-x.y-bin-installer.jar - graphical installation wizard, powered by IzPack (http://www.izforge.com/izpack/)
• sequoia-x.y-bin.tar.gz - binary distribution for Unix platform• sequoia-x.y-bin.zip - binary distribution for Windows platform.
There are also nightly builds and a source repository available.
4.2 Install Sequoia on the controller nodesSequoia includes both a text-based installation program and a graphical installation wizard, which you can use to install the Sequoia software.
Note
It is recommended to install Sequoia using the Java graphical installation wizard: it automatically configures the SEQUOIA_HOME environment variable according to your system configuration.
4.2.1 Install Sequoia using the graphical installation wizard
Before running the Sequoia graphical installer, make sure that JRE (1.4.2 or later) is installed on your platform and the Java executable is in your PATH.
Continuent.org Sequoia 3.0 Installation and Configuration Guide 9Document issue 2.0
Installing Sequoia
To install Sequoia using the graphical installation wizard
1. Copy the Sequoia distribution to a controller node.
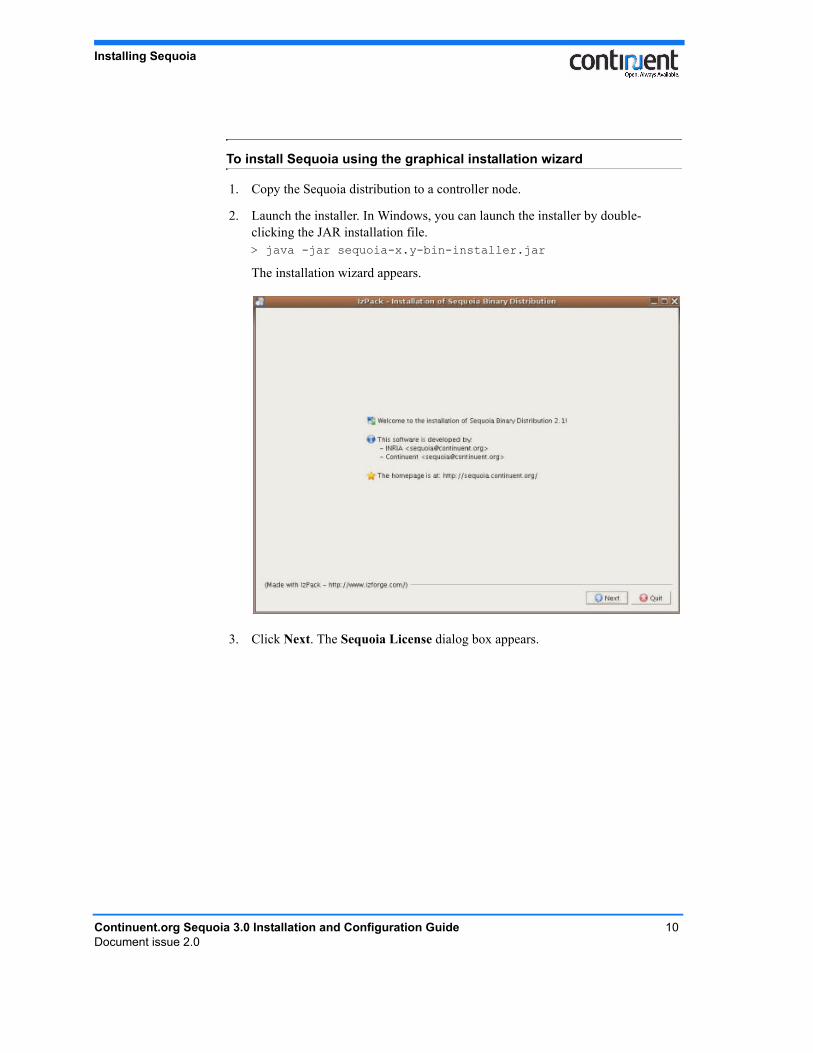
2. Launch the installer. In Windows, you can launch the installer by double-clicking the JAR installation file.> java -jar sequoia-x.y-bin-installer.jar
The installation wizard appears.
3. Click Next. The Sequoia License dialog box appears.
Continuent.org Sequoia 3.0 Installation and Configuration Guide 10Document issue 2.0
Installing Sequoia
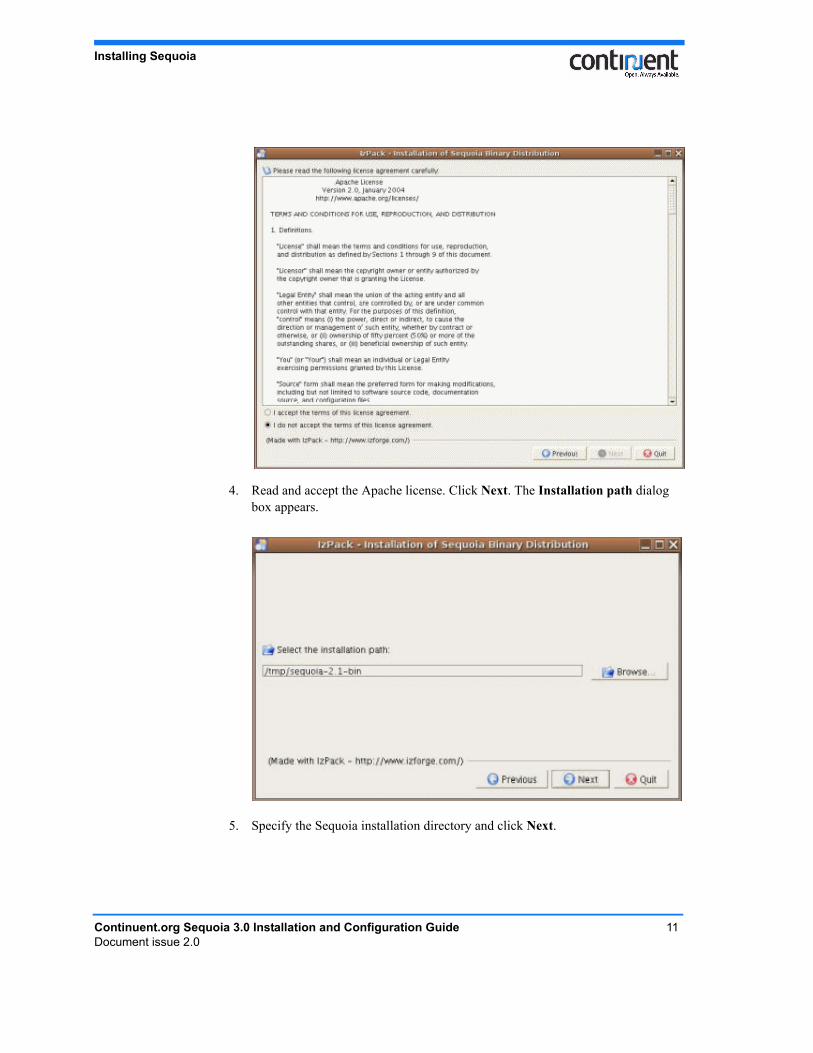
4. Read and accept the Apache license. Click Next. The Installation path dialog box appears.
5. Specify the Sequoia installation directory and click Next.
Continuent.org Sequoia 3.0 Installation and Configuration Guide 11Document issue 2.0
Installing Sequoia
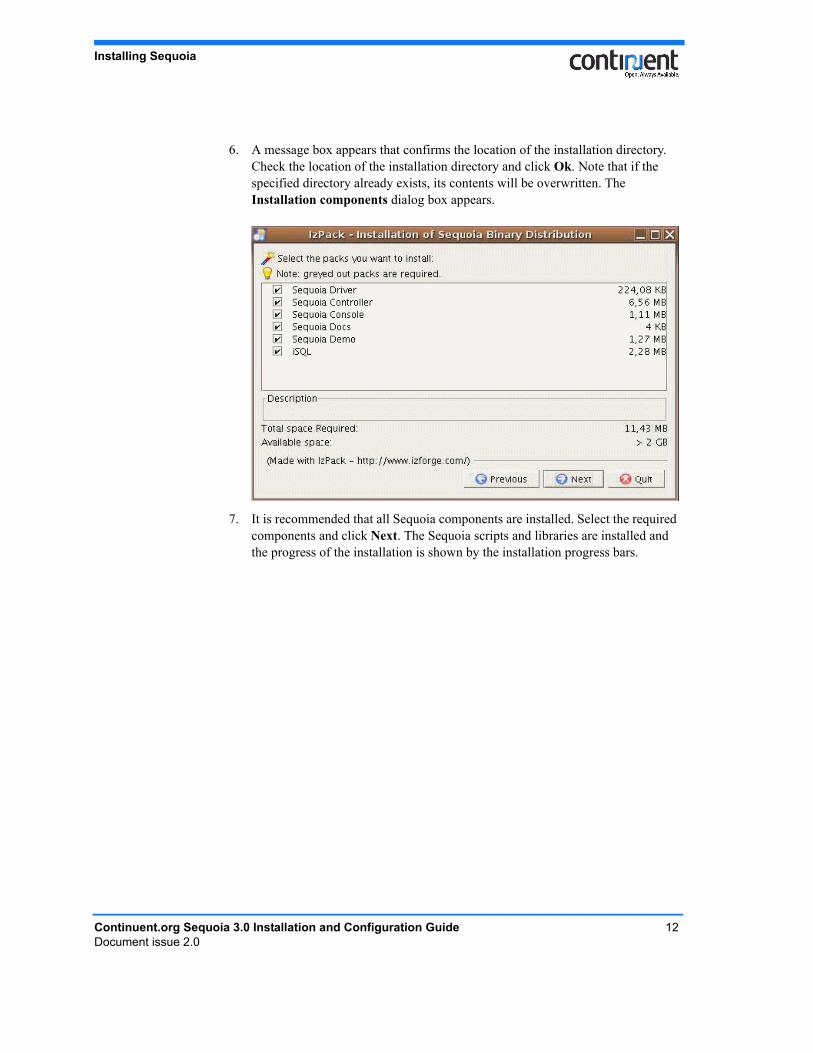
6. A message box appears that confirms the location of the installation directory. Check the location of the installation directory and click Ok. Note that if the specified directory already exists, its contents will be overwritten. The Installation components dialog box appears.
7. It is recommended that all Sequoia components are installed. Select the required components and click Next. The Sequoia scripts and libraries are installed and the progress of the installation is shown by the installation progress bars.
Continuent.org Sequoia 3.0 Installation and Configuration Guide 12Document issue 2.0
Installing Sequoia
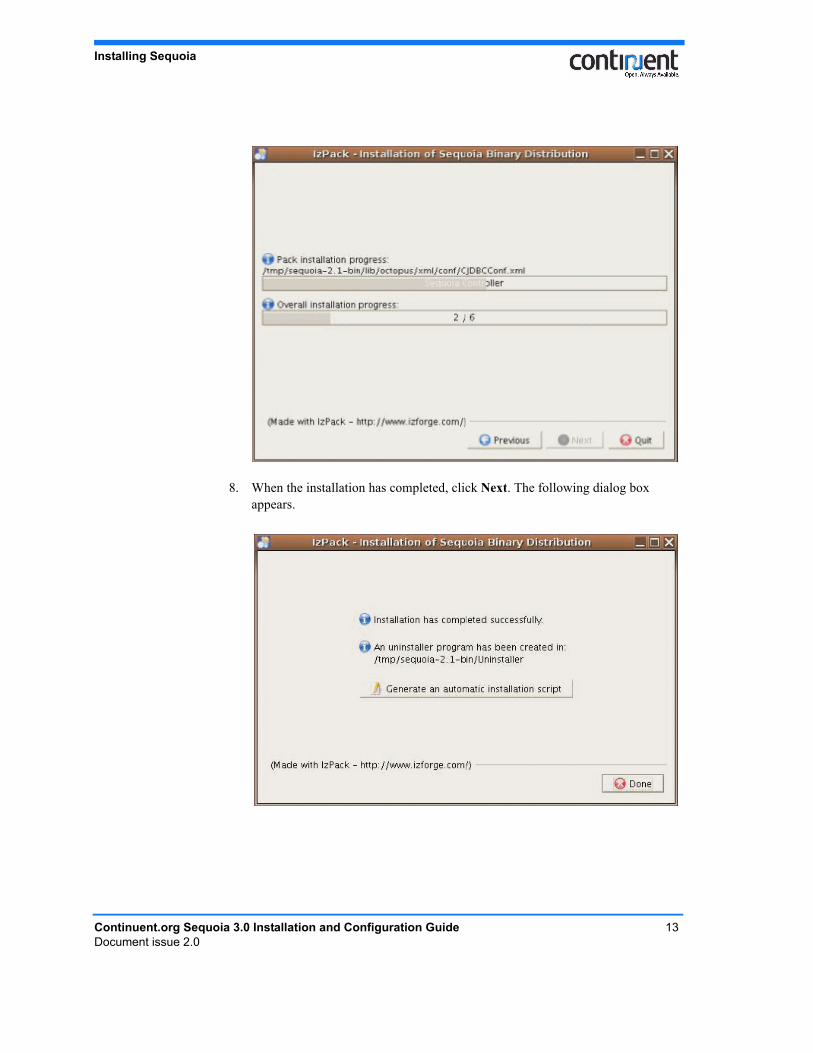
8. When the installation has completed, click Next. The following dialog box appears.
Continuent.org Sequoia 3.0 Installation and Configuration Guide 13Document issue 2.0
Installing Sequoia
4.2.2 Install Sequoia using a binary distribution
To install Sequoia using a binary distribution
Note
When configuring the SEQUOIA_HOME environment variable on Windows, remember to include the quotes in the SEQUOIA_HOME environment variable definition: the start-up scripts will fail if the path includes spaces.
Tip
To set the environment variable permanently, modify your shell configuration file (.bashrc, .cshrc, ...).
9. You can save the installation settings to an XML configuration file install.xml for further use and customization. To save the configuration, click the Generate an automatic installation script button. In the dialog box that appears, select the directory where you want the install.xml file to be stored. Click Save.
10. To exit the installation wizard, click Done.
11. Repeat steps 1-10 on the other controller node(s) that you wish to install.
1. Download the Sequoia distribution archive.
2. On the controller node, create the directory where you want to install Sequoia.
3. Uncompress the distribution archive in the Sequoia installation directory on the controller node.
4. Set the SEQUOIA_HOME environment variable.
5. Repeat steps 1-4 on the other controller node(s) that you wish to install.
Continuent.org Sequoia 3.0 Installation and Configuration Guide 14Document issue 2.0
Installing Sequoia
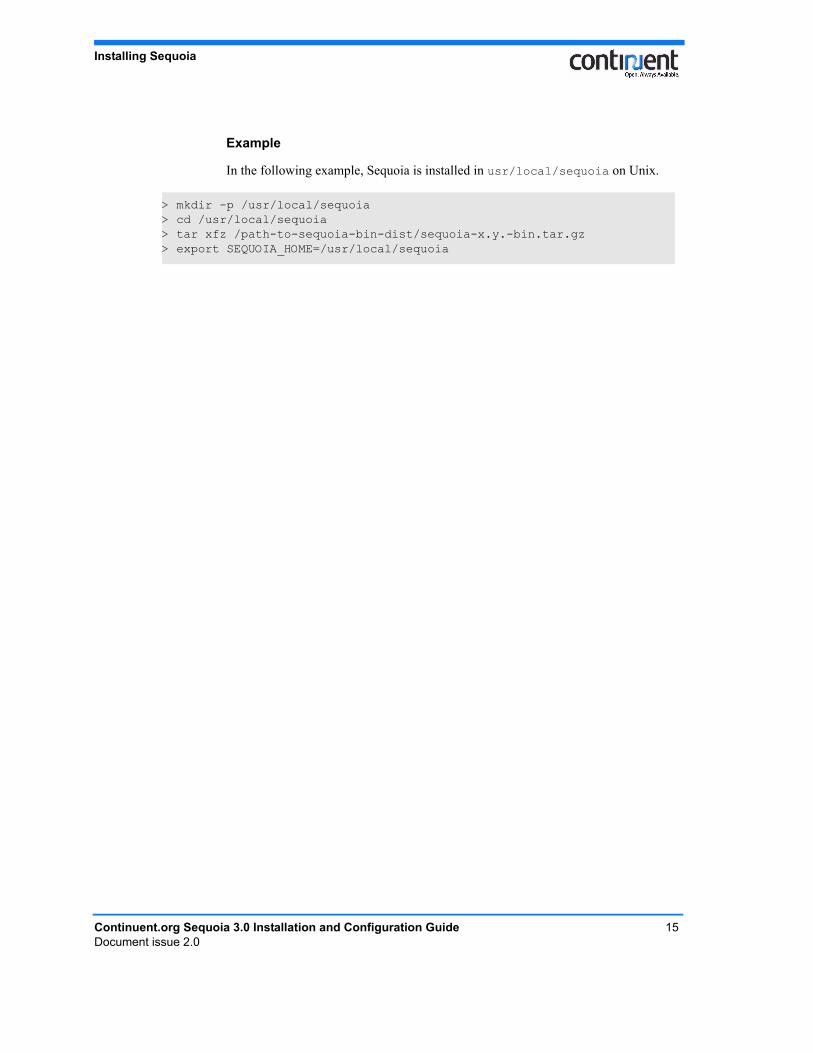
Example
In the following example, Sequoia is installed in usr/local/sequoia on Unix.
> mkdir -p /usr/local/sequoia> cd /usr/local/sequoia> tar xfz /path-to-sequoia-bin-dist/sequoia-x.y.-bin.tar.gz> export SEQUOIA_HOME=/usr/local/sequoia
Continuent.org Sequoia 3.0 Installation and Configuration Guide 15Document issue 2.0
Configuring Sequoia after installation
5 Configuring Sequoia after installationThe Sequoia configuration process to be done after the installation consists of the following:
• controller configuration (see 5.2 Configure the controller(s) after Sequoia installation on page 20)
• virtual database configuration (see 5.3 Configure the virtual database(s) after Sequoia installation on page 22)
• client configuration (see 6 Configuring the client application on page 34).
See also 5.1 Sequoia configuration files on page 16.
The configuration instructions in the following sections describe what a basic, very minimal installation of Sequoia must include. This is explained using the Distributed RAIDb-1 demo as an example. See also 5.1.4 Sequoia virtual database demos and example configuration files on page 18 and 9 Sequoia configuration guidelines and examples on page 55.
For more information on the advanced configuration options, please refer to the following Sequoia DTDs, which you can find in the xml directory:
• sequoia.dtd - DTD for the virtual database configuration• sequoia-controller.dtd - DTD for the controller configuration.
You can also use the DTDs to validate your XML configuration files.
5.1 Sequoia configuration filesSequoia requires the following configuration files to operate correctly:
• a virtual database configuration file per controller for each virtual database• a controller configuration file per controller• a controller group communication configuration file for each virtual database.
5.1.1 Controller configuration file
The Sequoia controllers are configured using XML configuration files: each controller must have its own configuration file. The controller configuration file is named controller.xml and it is used during start-up to tune the controller. The settings in the controller configuration file apply to all virtual databases hosted by the controller in question.
Sequoia comes with a generic controller configuration file, which you can find in the config/controller directory of the Sequoia installation directory. You must edit
Continuent.org Sequoia 3.0 Installation and Configuration Guide 16Document issue 2.0
Configuring Sequoia after installation
this configuration file to configure your controller. See 5.2 Configure the controller(s) after Sequoia installation on page 20 for detailed instructions.
Tip
The Sequoia installation also includes several example configuration files, which you can use as a template when configuring your cluster. See 5.1.4 Sequoia virtual database demos and example configuration files on page 18.
5.1.2 Controller Group Communication configuration files
The controllers use a group communication protocol to exchange information and maintain consistent state information between each other. This controller replication, in other words horizontal scalability, prevents controllers from representing a possible single point of failure.
Sequoia group communications is based on Hedera, a group communications neutral wrapper, which by default is configured to use the Appia group communication library. Refer to the Appia website for more information.
When you install Sequoia, a controller group communication configuration file hedera_appia.properties is stored in the config directory of the Sequoia installation directory. The hedera_appia.properties file points by default to the Appia configuration file config/appia.xml.
The controller group communication settings are configured per virtual database: consequently, you must create new controller group communication files with distinctive names if you are using several virtual databases.
Related topics• See sections 5.3.2 Write the Distribution element definition on page 23 and
9.2 Configuring controller group communication on page 56 for instructions on how to configure the controller group communication.
• See also section 3.1.2 Network requirements on page 5 for information on the requirements that must be fulfilled for the controller group communication (Appia) to work properly.
5.1.3 Virtual database configuration file
The virtual database, including its components, is configured using an XML configuration file. You must create a separate configuration file for each controller. See 5.3 Configure the virtual database(s) after Sequoia installation on page 22.
Continuent.org Sequoia 3.0 Installation and Configuration Guide 17Document issue 2.0
Configuring Sequoia after installation
Tip
The Sequoia installation also includes several example configuration files, which you can use as a template when configuring your cluster. See 5.1.4 Sequoia virtual database demos and example configuration files on page 18.
5.1.4 Sequoia virtual database demos and example configuration files
The Sequoia installation includes the following two demos, in other words two example virtual database configurations:
• Distributed RAIDb-1 demo • RAIDb-1 demo.
In addition, the following directories, located under sequioa/doc/examples, include several example virtual database configuration files:
• The Cache directory contains various configuration examples on how to use the cache.
• The Derby directory contains examples for the Apache Derby database.• The HorizontalScalability directory contains configuration files that can be
used to create a distributed virtual database on two controllers. One file should be loaded on each of the two controllers.
• The LinuxService and SuSE directories contain examples where the Sequoia controller is run as a Linux service.
• The SingleDB directory contains a Sequoia configuration with a unique MySQL database backend.
• The RAIDb-0 directory contains Sequoia configuration examples for RAIDb-0• RAIDb-0.xml - a simple two node RAIDb-0 configuration• RAIDb-0-schema.xml - a two node RAIDb-0 configuration using a static
database schema definition matching the RUBiS benchmark database schema.• The RAIDb-1 directory contains various RAIDb-1 configuration examples.• The RAIDb-2 directory contains various RAIDb-2 configuration examples.• The RecoveryLog directory contains an example of virtual database with a fault
tolerant recovery log.
Distributed RAIDb-1 demo
The distributed RAIDb-1 demo is a Sequoia configuration that uses full replication, with two controllers located on dedicated machines. Each controller hosts two database backends. This Sequoia installation also includes a recovery log.
Continuent.org Sequoia 3.0 Installation and Configuration Guide 18Document issue 2.0
Configuring Sequoia after installation
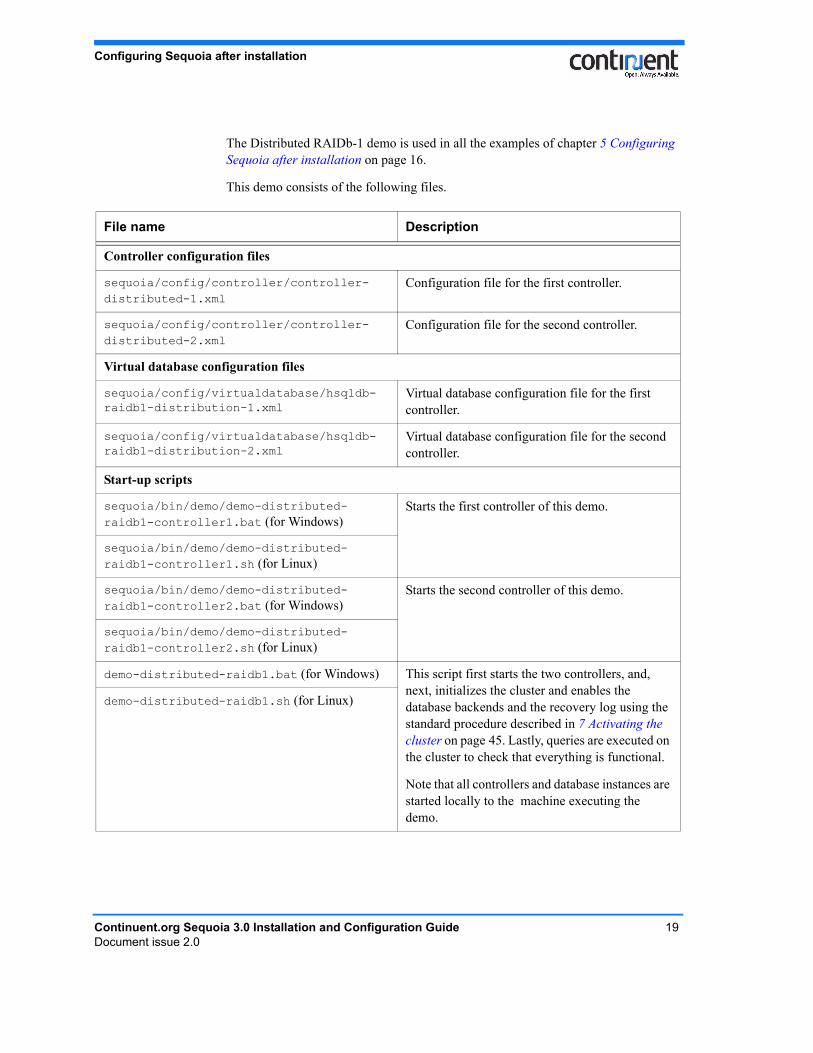
The Distributed RAIDb-1 demo is used in all the examples of chapter 5 Configuring Sequoia after installation on page 16.
This demo consists of the following files.
File name Description
Controller configuration files
sequoia/config/controller/controller-distributed-1.xml
Configuration file for the first controller.
sequoia/config/controller/controller-distributed-2.xml
Configuration file for the second controller.
Virtual database configuration files
sequoia/config/virtualdatabase/hsqldb-raidb1-distribution-1.xml
Virtual database configuration file for the first controller.
sequoia/config/virtualdatabase/hsqldb-raidb1-distribution-2.xml
Virtual database configuration file for the second controller.
Start-up scripts
sequoia/bin/demo/demo-distributed-raidb1-controller1.bat (for Windows)
Starts the first controller of this demo.
sequoia/bin/demo/demo-distributed-raidb1-controller1.sh (for Linux)
sequoia/bin/demo/demo-distributed-raidb1-controller2.bat (for Windows)
Starts the second controller of this demo.
sequoia/bin/demo/demo-distributed-raidb1-controller2.sh (for Linux)
demo-distributed-raidb1.bat (for Windows) This script first starts the two controllers, and, next, initializes the cluster and enables the database backends and the recovery log using the standard procedure described in 7 Activating the cluster on page 45. Lastly, queries are executed on the cluster to check that everything is functional.
Note that all controllers and database instances are started locally to the machine executing the demo.
demo-distributed-raidb1.sh (for Linux)
Continuent.org Sequoia 3.0 Installation and Configuration Guide 19Document issue 2.0
Configuring Sequoia after installation
5.2 Configure the controller(s) after Sequoia installationThe controller configuration file is controller-specific: the settings included in it apply to all virtual databases hosted by the controller in question.
To configure your Sequoia controller(s), you must include at least the following elements and attributes in your controller configuration file.
To configure a controller
1. Create a new XML configuration file or create a copy of an existing configuration file example included in the Sequoia installation.
2. Name the controller config file controller.xml and save it under sequoia/config/controller for the controller to be able to load it automatically during startup. (You can also load a specific controller configuration file with the -f option of the controller startup script.)
3. Include the public identifier in the beginning of the controller configuration file.
4. Insert the Controller element.
5. If your controller host uses multiple IP addresses, include the ipAddress attribute of the Controller element to bind the controller to a specific IP address. If you leave out the jdbcIpAddress attribute, the default value 127.0.0.1 (localhost) is used.<SEQUOIA-CONTROLLER> <Controller name="c1" jdbcIpAddress="127.0.0.1"> </Controller></SEQUOIA-CONTROLLER>
6. Define the jdbcPort attribute for the Controller element. This is the port number to which the clients will connect through the Sequoia driver. The default port number is 25322. If you use the value 0, the port number is chosen automatically by the system.<SEQUOIA-CONTROLLER> <Controller name="c1" jdbcIpAddress="127.0.0.1" jdbcPort="25322"> </Controller></SEQUOIA-CONTROLLER>
7. Include a JmxSettings element. This allows the controller to be administered remotely using the Sequoia Command Line Console (CLC), a JMX client based on the standard RMI connector for JMX. The JMX/RMI IP address/port number is 0.0.0.0:1090 by default.<JmxSettings jmxIpAddress="0.0.0.0" jmxPort="1090"/>
Continuent.org Sequoia 3.0 Installation and Configuration Guide 20Document issue 2.0
Configuring Sequoia after installation
Warning
Identifying the controller with the optional name attribute has not been fully implemented yet. When managing the cluster with the CLC (for example when executing the transfer dump command), you should identify the controller using the controller IP address and JMX port number.
Note
If you use a Controller port number lower than 1024, this requires that the controller is run with root privileges.
Example
The following example shows the configuration for controller 1 (controller-distributed-1.xml) in the Distributed RAIDb-1 demo.
The controller binds to the localhost address (127.0.0.1) and listens to the default port 25322 for new connections.
Because the backlogSize attribute of the Controller element is not defined, the default value 10 is used, which means that if the number of connections in the accept queue exceeds 10, the message connection refused is returned to the client application.
This controller configuration also includes the optional configuration element VirtualDatabaseAutoLoad, which specifies that the virtual database configuration file (hsqldb-raidb1-distribution-1.xml) for this controller is to be loaded automatically during startup.The name of the enabled virtual database is myDB. The value true of the autoEnableBackends attribute specifies that the hosted database backends are also enabled automatically during controller startup.
<?xml version="1.0" encoding="UTF-8" ?><!DOCTYPE SEQUOIA-CONTROLLER PUBLIC "-//Continuent//DTD SEQUOIA-CONTROLLER @VERSION@//EN" "http://sequoia.continuent.org/dtds/sequoia-controller-@[email protected]"><SEQUOIA-CONTROLLER> <Controller name="c1" jdbcIpAddress="127.0.0.1" jdbcPort="25322"> <JmxSettings jmxIpAddress="0.0.0.0" jmxPort="1090"/> <VirtualDatabaseAutoLoad configFile="hsqldb-raidb1-distribution-1.xml" virtualDatabaseName="myDB" autoEnableBackends="true"/> </Controller></SEQUOIA-CONTROLLER>
Continuent.org Sequoia 3.0 Installation and Configuration Guide 21Document issue 2.0
Configuring Sequoia after installation
Note
If you configure the virtual database to be enabled automatically during startup, the default value true means that the database backends will be enabled only if there is a valid checkpoint available that can be used to synchronize the cluster based on the entries in the recovery log.
When activating the new cluster after Sequoia installation, you should follow the instructions in section 7 Activating the cluster on page 45.
5.3 Configure the virtual database(s) after Sequoia installationTo configure your virtual database, you must include at least the following elements and attributes in your virtual database configuration file. You must create one virtual database configuration file for each controller that hosts the virtual database.
The main steps of creating a virtual database configuration are, as follows:
1. Create a new XML configuration file or create a copy of an existing configuration file example included in the Sequoia installation.
2. Name the configuration file so that it includes the name of the virtual database, for example, myDB.xml. Open the configuration file in a text editor for editing.
3. Include the SEQUOIA element after the public identifier. This is the highest-level element in the virtual database configuration file.
4. Include a VirtualDatabase element after the SEQUOIA element.5. Write the Distribution element definition to configure the controller group
communication.6. Write the Backup element definition to configure the backuper.7. Write the AuthenticationManager element definition to configure the Sequoia
usernames and passwords.8. Include a DatabaseBackend element definition for each database backend
hosted by the current controller for this virtual database.9. Include a DatabaseSchema element definition to define a schema that will be
used for load balancing and caching.10. Write a RequestManager element definition to configure the components of the
Sequoia request manager: the request scheduler, load balancer and recovery log.
See the following sections for more details on how to write the virtual database configuration file.
Continuent.org Sequoia 3.0 Installation and Configuration Guide 22Document issue 2.0
Configuring Sequoia after installation
5.3.1 Write the VirtualDatabase element definition
To write the VirtualDatabase element definition
5.3.2 Write the Distribution element definition
The Distribution element configuration allows the controllers to share the virtual database and communicate with each other using the Hedera controller group communication protocol.
See also 5.1.2 Controller Group Communication configuration files on page 17 and 9.2 Configuring controller group communication on page 56.
To write the Distribution element definition
1. Insert a VirtualDatabase element as a child element of the SEQUOIA element.
2. Specify the name of the virtual database with the name attribute.<SEQUOIA> <VirtualDatabase name="myDB"> </VirtualDatabase></SEQUOIA>
1. To use horizontal scalability and make sure that a controller does not represent a single point of failure, insert a Distribution element to specify the virtual database distribution rules. By default, the Distribution element points to the hedera_appia.properties file.<VirtualDatabase name="myDB"> <Distribution> </Distribution></VirtualDatabase>
2. If your controller hosts multiple virtual databases, you must use a separate controller group communication file for each virtual database and specify the name of the file with the hederaPropertiesFile attribute.<Distribution hederaPropertiesFile=”vdb1_appia.properties”/>
3. Insert a MessageTimeouts element to specify that the sending of controller group communication messages are controlled with timeouts (the timeouts are tuned by default and normally need no adjustment.) <Distribution> <MessageTimeouts/> </Distribution>
Continuent.org Sequoia 3.0 Installation and Configuration Guide 23Document issue 2.0
Configuring Sequoia after installation
Note
By default, the group name to be used by the Appia communication layer is the virtual database name. If you specify a different group name with the groupName attribute of the Distribution element, make sure that you use the same value in all configuration files for the virtual database in question.
5.3.3 Write the Backup element definition
The Backup element defines which backuper is used to perform database backup/restore operations on the database backends. The Sequoia installation includes several backuper implementations (see 9.3 Configuring backupers on page 61), but you can also use your own database-specific backuper code.
If you want to define several backupers, you must create a separate Backuper element definition for each one of them in the virtual database configuration file.
To write the Backup element definition
1. Insert a Backup child element of the VirtualDatabase element
2. Insert a Backuper element. Define a value for the backuperName attibute of the Backuper element to specify a name for the backuper to be used. The value of the backuperName attribute will be used as a command argument of the backup CLC command when backing up a database (see backup command in Continuent.org Sequoia 3.0 Management Guide.)<Backup> <Backuper backuperName=”Octopus”/></Backup>
3. Insert the className attribute of the Backuper element to specify the backuper implementation to be used.<Backup> <Backuper backuperName=”Octopus” className= ”org.continuent.sequoia.controller.backup.backupers. OctopusBackuper”/></Backup>
4. You can also define backuper-specific options with the options attribute. For example, Octopus database dumps are stored by default in .zip format.<Backup> <Backuper backuperName=”Octopus” className= ”org.continuent.sequoia.controller.backup.backupers. OctopusBackuper” options=”zip=true”/></Backup>
Continuent.org Sequoia 3.0 Installation and Configuration Guide 24Document issue 2.0
Configuring Sequoia after installation
5.3.4 Write the AuthenticationManager element definition
The AuthenticationManager element is used to define the Sequoia user privileges. See also 9.1 Configuring Sequoia usernames and passwords on page 55.
To write the AuthenticationManager element definition
5.3.5 Write the DatabaseBackend element definition(s)
Warning
Each <DatabaseBackend/> definition in a virtual database configuration must be unique. In other words, two database backends must not have the same name even if they belong to a different controller.
1. Insert the AuthenticationManager child element of the VirtualDatabase element.
2. Insert an AdminUser element to specify the administrator login(s) required by the Command Line Console (CLC). Specify the username and password combinations with the username and password attributes. If you define several admin users, each one of them must have its own separate AdminUser element definition.<AuthenticationManager> <AdminUser username="admin" password=""/></AuthenticationManager>
3. Insert a VirtualUser element to specify the username and password combination(s) that the client application uses to access the virtual database. For each virtual database username and password combination, include a VirtualUser element containing the vLogin and vPassword attributes.<AuthenticationManager> <AdminUser username="admin" password=""/> <VirtualUser vLogin="user" vPassword=""/></AuthenticationManager>
Continuent.org Sequoia 3.0 Installation and Configuration Guide 25Document issue 2.0
Configuring Sequoia after installation
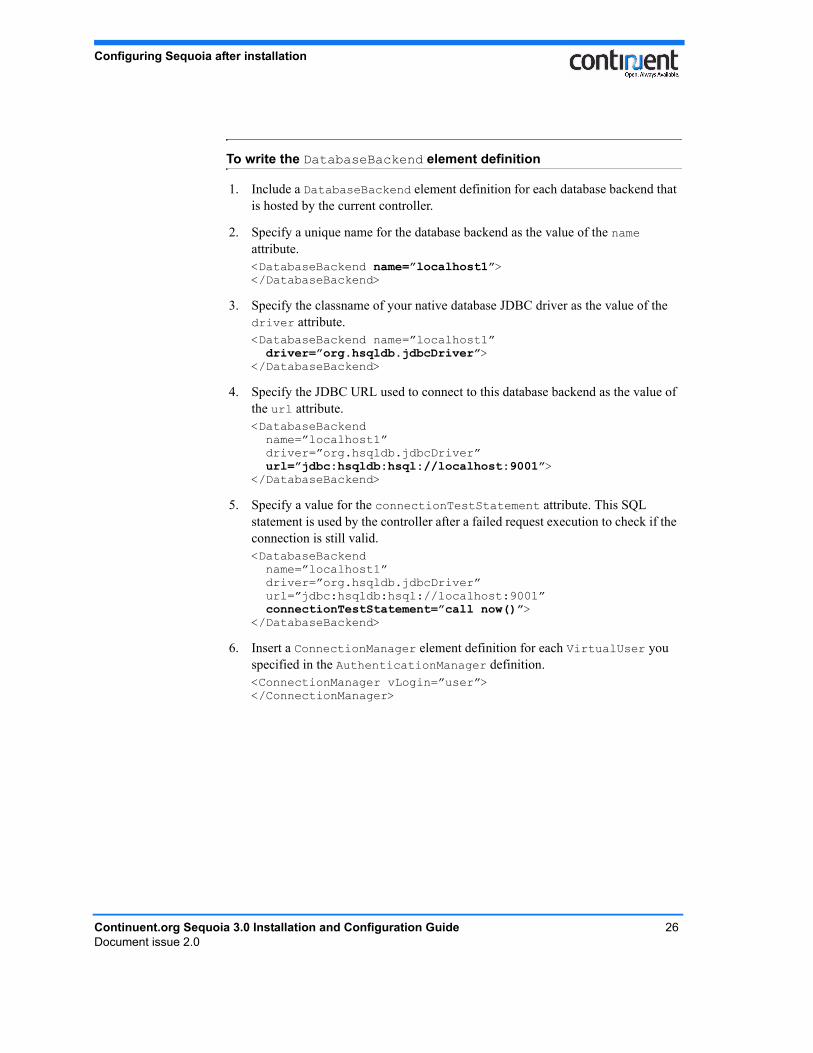
To write the DatabaseBackend element definition
1. Include a DatabaseBackend element definition for each database backend that is hosted by the current controller.
2. Specify a unique name for the database backend as the value of the name attribute. <DatabaseBackend name=”localhost1”> </DatabaseBackend>
3. Specify the classname of your native database JDBC driver as the value of the driver attribute.<DatabaseBackend name=”localhost1” driver=”org.hsqldb.jdbcDriver”></DatabaseBackend>
4. Specify the JDBC URL used to connect to this database backend as the value of the url attribute.<DatabaseBackend name=”localhost1” driver=”org.hsqldb.jdbcDriver” url=”jdbc:hsqldb:hsql://localhost:9001”></DatabaseBackend>
5. Specify a value for the connectionTestStatement attribute. This SQL statement is used by the controller after a failed request execution to check if the connection is still valid.<DatabaseBackend name=”localhost1” driver=”org.hsqldb.jdbcDriver” url=”jdbc:hsqldb:hsql://localhost:9001” connectionTestStatement=”call now()”></DatabaseBackend>
6. Insert a ConnectionManager element definition for each VirtualUser you specified in the AuthenticationManager definition. <ConnectionManager vLogin=”user”></ConnectionManager>
Continuent.org Sequoia 3.0 Installation and Configuration Guide 26Document issue 2.0
Configuring Sequoia after installation
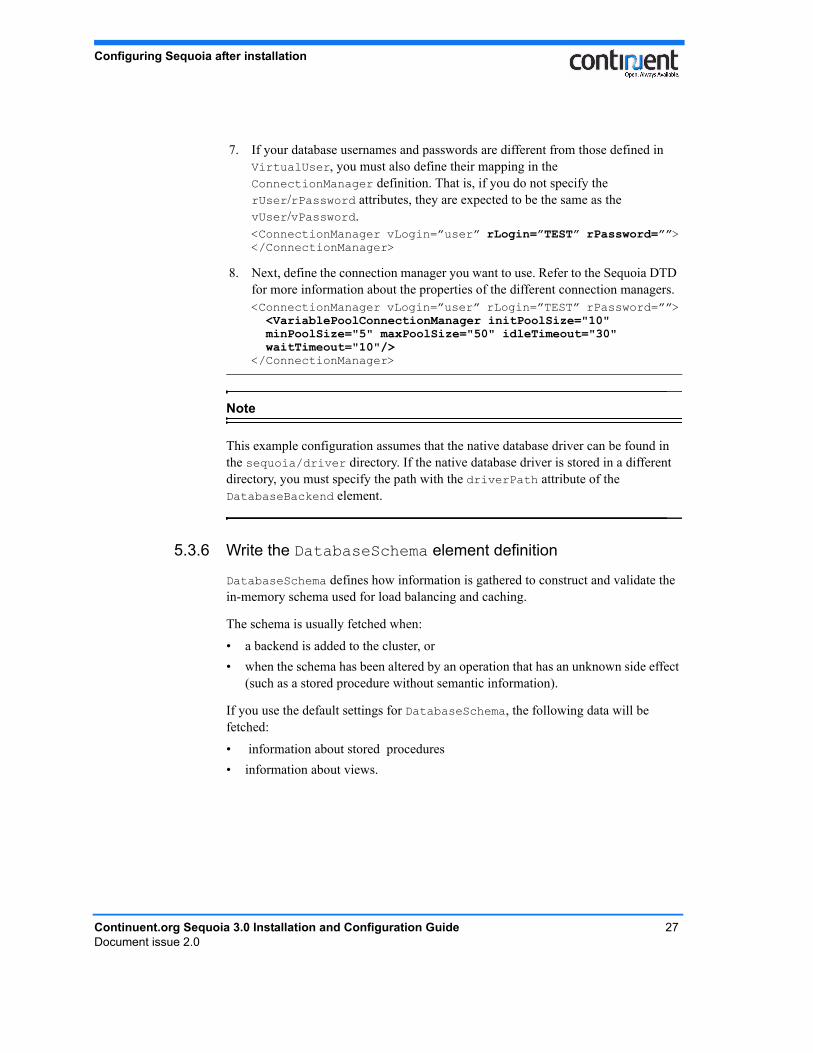
Note
This example configuration assumes that the native database driver can be found in the sequoia/driver directory. If the native database driver is stored in a different directory, you must specify the path with the driverPath attribute of the DatabaseBackend element.
5.3.6 Write the DatabaseSchema element definition
DatabaseSchema defines how information is gathered to construct and validate the in-memory schema used for load balancing and caching.
The schema is usually fetched when:
• a backend is added to the cluster, or • when the schema has been altered by an operation that has an unknown side effect
(such as a stored procedure without semantic information).
If you use the default settings for DatabaseSchema, the following data will be fetched:
• information about stored procedures• information about views.
7. If your database usernames and passwords are different from those defined in VirtualUser, you must also define their mapping in the ConnectionManager definition. That is, if you do not specify the rUser/rPassword attributes, they are expected to be the same as the vUser/vPassword.<ConnectionManager vLogin=”user” rLogin=”TEST” rPassword=””></ConnectionManager>
8. Next, define the connection manager you want to use. Refer to the Sequoia DTD for more information about the properties of the different connection managers.<ConnectionManager vLogin=”user” rLogin=”TEST” rPassword=””> <VariablePoolConnectionManager initPoolSize="10" minPoolSize="5" maxPoolSize="50" idleTimeout="30" waitTimeout="10"/></ConnectionManager>
Continuent.org Sequoia 3.0 Installation and Configuration Guide 27Document issue 2.0
Configuring Sequoia after installation
To write the DatabaseSchema element definition
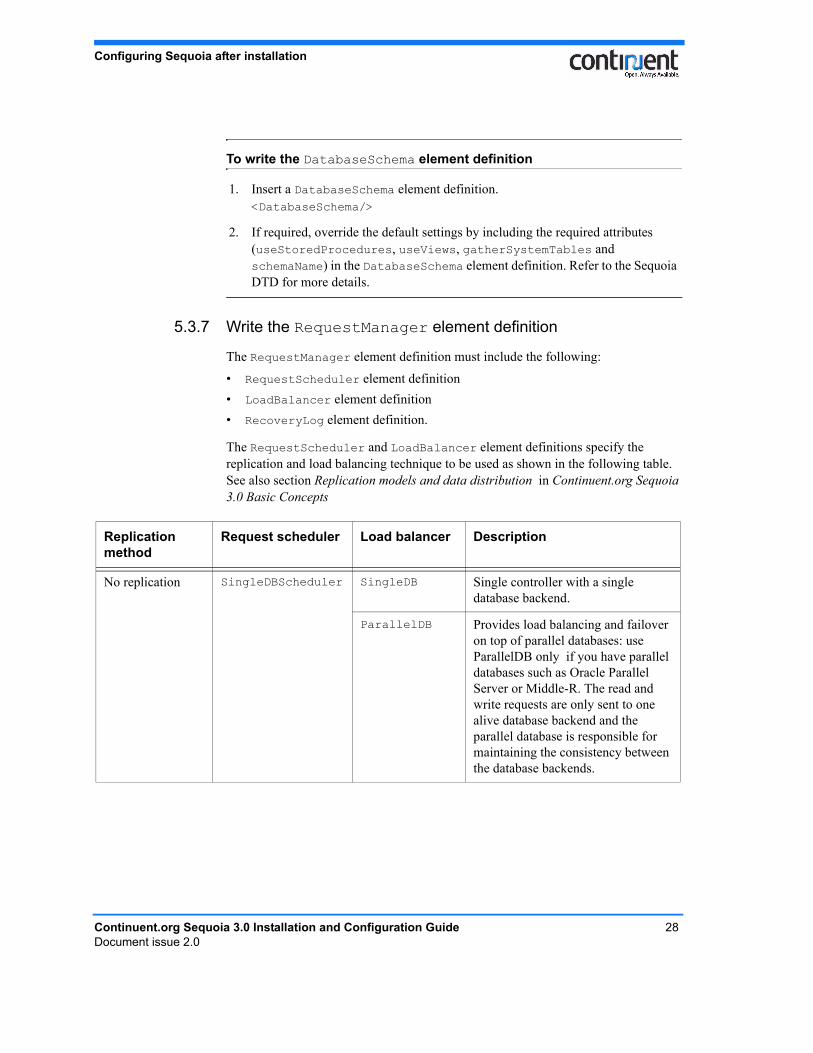
5.3.7 Write the RequestManager element definition
The RequestManager element definition must include the following:
• RequestScheduler element definition• LoadBalancer element definition• RecoveryLog element definition.
The RequestScheduler and LoadBalancer element definitions specify the replication and load balancing technique to be used as shown in the following table. See also section Replication models and data distribution in Continuent.org Sequoia 3.0 Basic Concepts
1. Insert a DatabaseSchema element definition.<DatabaseSchema/>
2. If required, override the default settings by including the required attributes (useStoredProcedures, useViews, gatherSystemTables and schemaName) in the DatabaseSchema element definition. Refer to the Sequoia DTD for more details.
Replication method
Request scheduler Load balancer Description
No replication SingleDBScheduler SingleDB Single controller with a single database backend.
ParallelDB Provides load balancing and failover on top of parallel databases: use ParallelDB only if you have parallel databases such as Oracle Parallel Server or Middle-R. The read and write requests are only sent to one alive database backend and the parallel database is responsible for maintaining the consistency between the database backends.
Continuent.org Sequoia 3.0 Installation and Configuration Guide 28Document issue 2.0

Configuring Sequoia after installation
The RecoveryLog element definition is used to create a recovery log database, which stores information about all requests and transactions that update the virtual database for database recovery and synchronization purposes.
Note
When configuring the virtual database, note that the recovery log is defined per virtual database and per controller.
The recovery log cannot be shared between controllers: each controller must have its own recovery log.
Make sure you specify different recovery log file names for different virtual databases on the same controller. For example, use the virtual database name as the recovery log file name.
RAIDb-0 RAIDb-0Scheduler RAIDb-0 Full partitioning of database tables: the different tables belonging to a database are distributed on different database backends. Provides moderate performance scalability but no fault tolerance. Requires at least two database backend nodes.
RAIDb-1 RAIDb-1Scheduler RAIDb-1 Full replication: all tables are replicated on all database backends. Best fault tolerance scheme but no scalability for write requests. Requires at least two database backend nodes.
RAIDb-2 RAIDb-2Scheduler RAIDb-2 Partial replication that allows you to tune the degree of replication for each database table and optimize the read/write throughput. If you only want to replicate some of the tables on different remote nodes, then use RAIDb-2. Each database table must exist on at least two database backends.
Replication method
Request scheduler Load balancer Description
Continuent.org Sequoia 3.0 Installation and Configuration Guide 29Document issue 2.0
Configuring Sequoia after installation
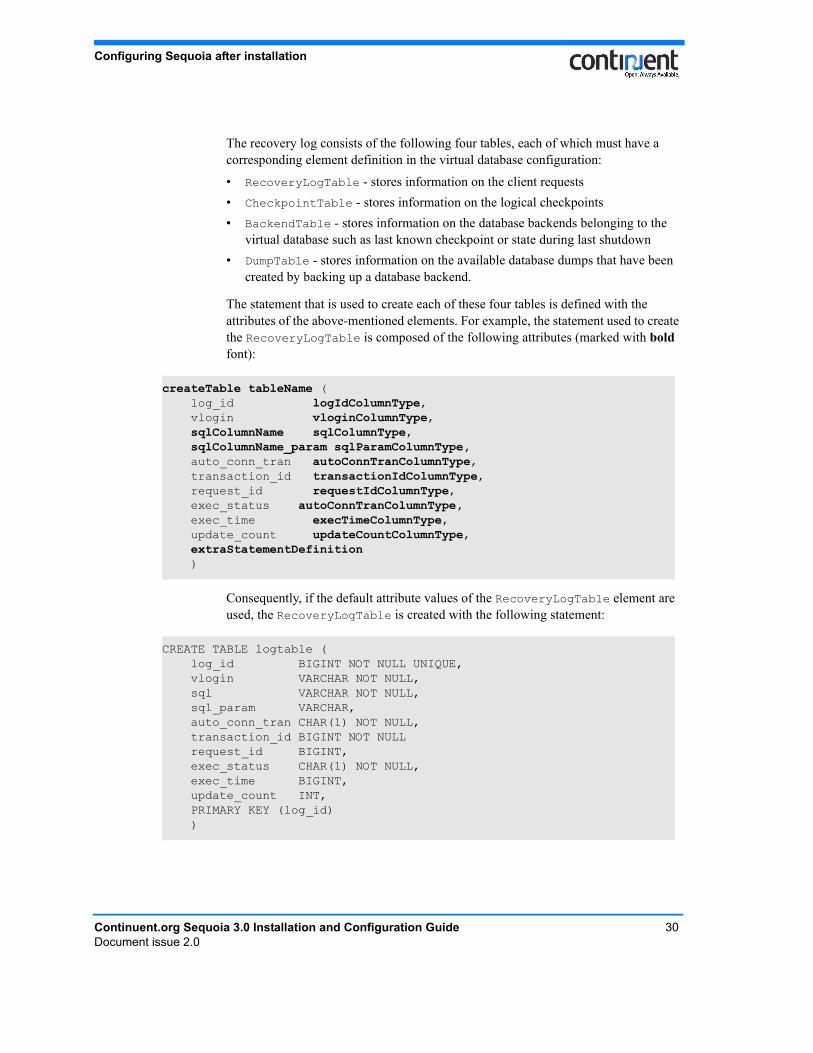
The recovery log consists of the following four tables, each of which must have a corresponding element definition in the virtual database configuration:
• RecoveryLogTable - stores information on the client requests• CheckpointTable - stores information on the logical checkpoints• BackendTable - stores information on the database backends belonging to the
virtual database such as last known checkpoint or state during last shutdown• DumpTable - stores information on the available database dumps that have been
created by backing up a database backend.
The statement that is used to create each of these four tables is defined with the attributes of the above-mentioned elements. For example, the statement used to create the RecoveryLogTable is composed of the following attributes (marked with bold font):
Consequently, if the default attribute values of the RecoveryLogTable element are used, the RecoveryLogTable is created with the following statement:
createTable tableName ( log_id logIdColumnType, vlogin vloginColumnType, sqlColumnName sqlColumnType, sqlColumnName_param sqlParamColumnType, auto_conn_tran autoConnTranColumnType, transaction_id transactionIdColumnType, request_id requestIdColumnType, exec_status autoConnTranColumnType, exec_time execTimeColumnType, update_count updateCountColumnType, extraStatementDefinition )
CREATE TABLE logtable ( log_id BIGINT NOT NULL UNIQUE, vlogin VARCHAR NOT NULL, sql VARCHAR NOT NULL, sql_param VARCHAR, auto_conn_tran CHAR(1) NOT NULL, transaction_id BIGINT NOT NULL request_id BIGINT, exec_status CHAR(1) NOT NULL, exec_time BIGINT, update_count INT, PRIMARY KEY (log_id) )
Continuent.org Sequoia 3.0 Installation and Configuration Guide 30Document issue 2.0
Configuring Sequoia after installation
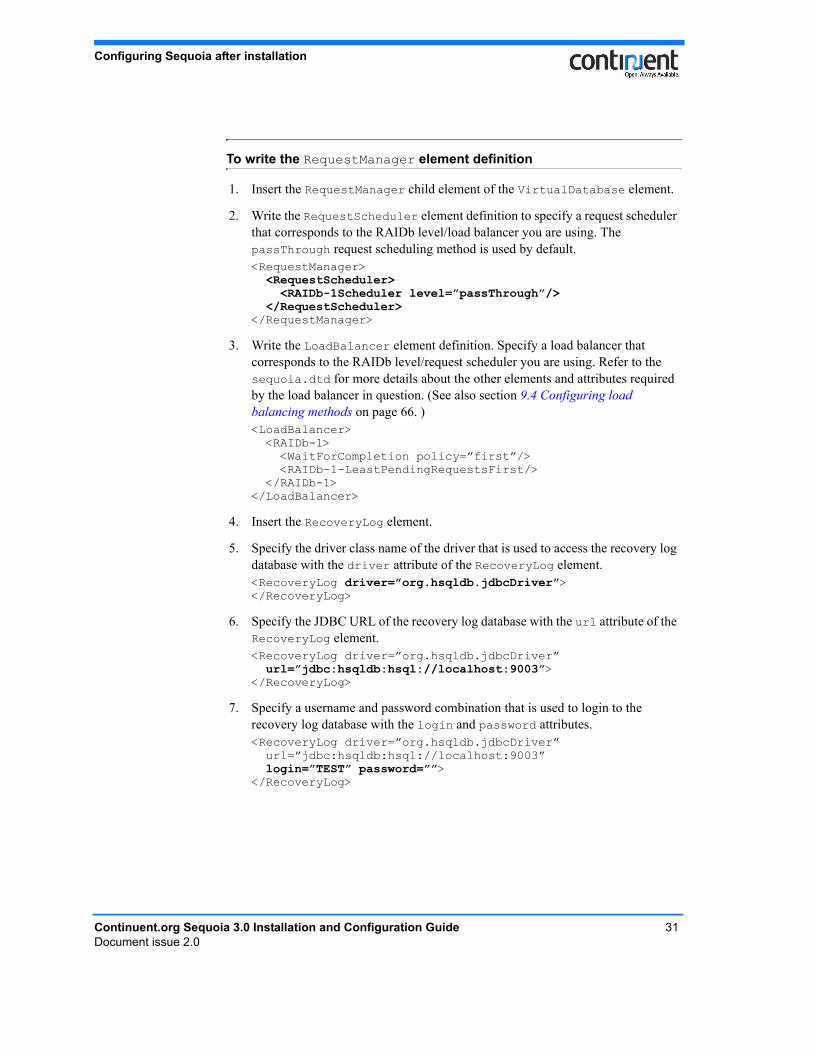
To write the RequestManager element definition
1. Insert the RequestManager child element of the VirtualDatabase element.
2. Write the RequestScheduler element definition to specify a request scheduler that corresponds to the RAIDb level/load balancer you are using. The passThrough request scheduling method is used by default. <RequestManager> <RequestScheduler> <RAIDb-1Scheduler level=”passThrough”/> </RequestScheduler></RequestManager>
3. Write the LoadBalancer element definition. Specify a load balancer that corresponds to the RAIDb level/request scheduler you are using. Refer to the sequoia.dtd for more details about the other elements and attributes required by the load balancer in question. (See also section 9.4 Configuring load balancing methods on page 66. )<LoadBalancer> <RAIDb-1> <WaitForCompletion policy=”first”/> <RAIDb-1-LeastPendingRequestsFirst/> </RAIDb-1></LoadBalancer>
4. Insert the RecoveryLog element.
5. Specify the driver class name of the driver that is used to access the recovery log database with the driver attribute of the RecoveryLog element.<RecoveryLog driver=”org.hsqldb.jdbcDriver”></RecoveryLog>
6. Specify the JDBC URL of the recovery log database with the url attribute of the RecoveryLog element.<RecoveryLog driver=”org.hsqldb.jdbcDriver” url=”jdbc:hsqldb:hsql://localhost:9003”></RecoveryLog>
7. Specify a username and password combination that is used to login to the recovery log database with the login and password attributes.<RecoveryLog driver=”org.hsqldb.jdbcDriver” url=”jdbc:hsqldb:hsql://localhost:9003” login=”TEST” password=””></RecoveryLog>
Continuent.org Sequoia 3.0 Installation and Configuration Guide 31Document issue 2.0
Configuring Sequoia after installation
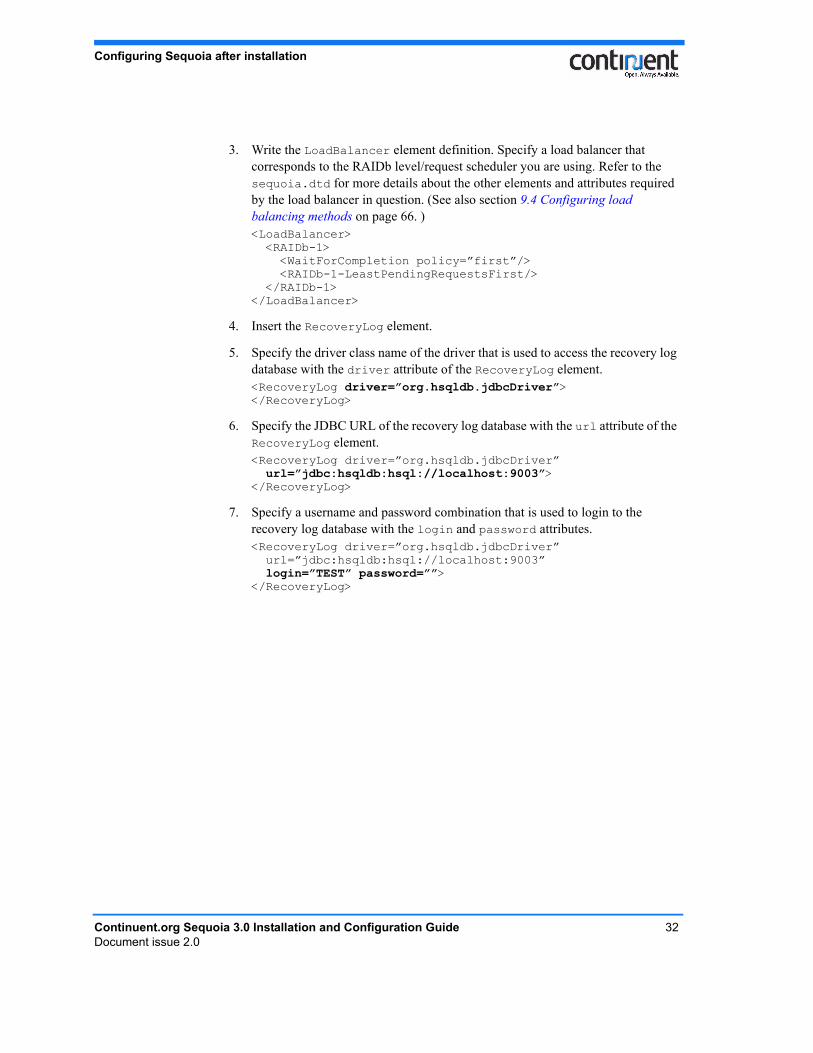
3. Write the LoadBalancer element definition. Specify a load balancer that corresponds to the RAIDb level/request scheduler you are using. Refer to the sequoia.dtd for more details about the other elements and attributes required by the load balancer in question. (See also section 9.4 Configuring load balancing methods on page 66. )<LoadBalancer> <RAIDb-1> <WaitForCompletion policy=”first”/> <RAIDb-1-LeastPendingRequestsFirst/> </RAIDb-1></LoadBalancer>
4. Insert the RecoveryLog element.
5. Specify the driver class name of the driver that is used to access the recovery log database with the driver attribute of the RecoveryLog element.<RecoveryLog driver=”org.hsqldb.jdbcDriver”></RecoveryLog>
6. Specify the JDBC URL of the recovery log database with the url attribute of the RecoveryLog element.<RecoveryLog driver=”org.hsqldb.jdbcDriver” url=”jdbc:hsqldb:hsql://localhost:9003”></RecoveryLog>
7. Specify a username and password combination that is used to login to the recovery log database with the login and password attributes.<RecoveryLog driver=”org.hsqldb.jdbcDriver” url=”jdbc:hsqldb:hsql://localhost:9003” login=”TEST” password=””></RecoveryLog>
Continuent.org Sequoia 3.0 Installation and Configuration Guide 32Document issue 2.0
Configuring Sequoia after installation
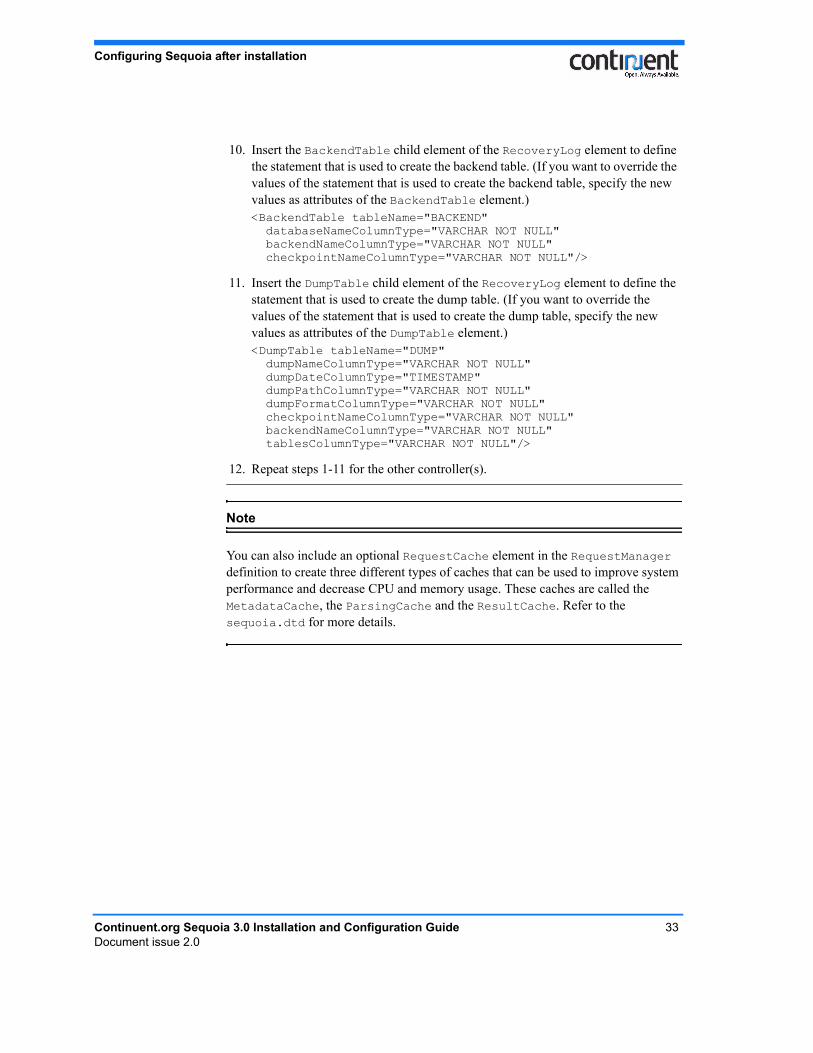
Note
You can also include an optional RequestCache element in the RequestManager definition to create three different types of caches that can be used to improve system performance and decrease CPU and memory usage. These caches are called the MetadataCache, the ParsingCache and the ResultCache. Refer to the sequoia.dtd for more details.
10. Insert the BackendTable child element of the RecoveryLog element to define the statement that is used to create the backend table. (If you want to override the values of the statement that is used to create the backend table, specify the new values as attributes of the BackendTable element.)<BackendTable tableName="BACKEND" databaseNameColumnType="VARCHAR NOT NULL" backendNameColumnType="VARCHAR NOT NULL" checkpointNameColumnType="VARCHAR NOT NULL"/>
11. Insert the DumpTable child element of the RecoveryLog element to define the statement that is used to create the dump table. (If you want to override the values of the statement that is used to create the dump table, specify the new values as attributes of the DumpTable element.)<DumpTable tableName="DUMP" dumpNameColumnType="VARCHAR NOT NULL" dumpDateColumnType="TIMESTAMP" dumpPathColumnType="VARCHAR NOT NULL" dumpFormatColumnType="VARCHAR NOT NULL" checkpointNameColumnType="VARCHAR NOT NULL" backendNameColumnType="VARCHAR NOT NULL" tablesColumnType="VARCHAR NOT NULL"/>
12. Repeat steps 1-11 for the other controller(s).
Continuent.org Sequoia 3.0 Installation and Configuration Guide 33Document issue 2.0
Configuring the client application
6 Configuring the client applicationYou can use Sequoia with Java and Perl client applications:
• Java clients are configured to directly connect to the Sequoia driver (see 6.2 Configuring Java applications to access Sequoia on page 37 for detailed instructions and examples)
• Perl clients can access Sequoia through the DBD::JDBC Perl module (see 6.3 Configuring Perl clients to access Sequoia using the Perl DBD:JDBC module on page 41)
Tip
The Carob project provides an interface that allows you to use Sequoia with non-Java client applications. See http://carob.continuent.org for more details.
The basic information that you must provide to configure your client application to connect to Sequoia is, however, the same for all client applications:
1. Replace the native database connector with a Sequoia-specific one that corresponds to your client application.
2. Define the Sequoia URL, which defines the IP addresses of the controller nodes and the name of the virtual database hosted by the controllers (see 6.1 Defining the Sequoia URL on page 34)
3. Define a username and password to be used for the connection. Make sure to use the same username and password combination that you configured as a virtual user definition in the virtual database configuration file.
6.1 Defining the Sequoia URLThe Sequoia URL contains the information that the client application requires to connect to Sequoia:
• the IP addresses of the controller nodes (followed by the controller port numbers if you want to override the default port number 25322)
• the name of the virtual database hosted by the controllers.
6.1.1 Sequoia URL options
When specifying the Sequoia URL, you can use the options listed in the following table to override the default settings that are used when establishing a connection with Sequoia.
Continuent.org Sequoia 3.0 Installation and Configuration Guide 34Document issue 2.0
Configuring the client application
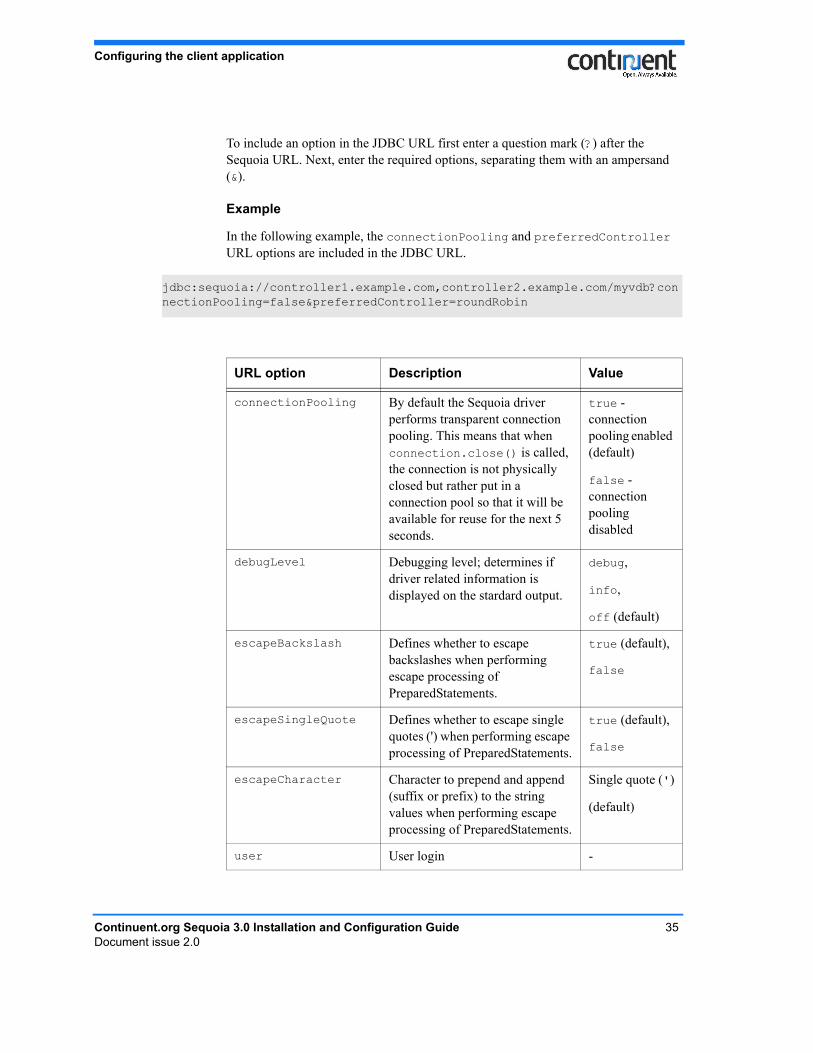
To include an option in the JDBC URL first enter a question mark (?) after the Sequoia URL. Next, enter the required options, separating them with an ampersand (&).
Example
In the following example, the connectionPooling and preferredController URL options are included in the JDBC URL.
jdbc:sequoia://controller1.example.com,controller2.example.com/myvdb?connectionPooling=false&preferredController=roundRobin
URL option Description Value
connectionPooling By default the Sequoia driver performs transparent connection pooling. This means that when connection.close() is called, the connection is not physically closed but rather put in a connection pool so that it will be available for reuse for the next 5 seconds.
true - connection pooling enabled (default)
false - connection pooling disabled
debugLevel Debugging level; determines if driver related information is displayed on the stardard output.
debug,
info,
off (default)
escapeBackslash Defines whether to escape backslashes when performing escape processing of PreparedStatements.
true (default),
false
escapeSingleQuote Defines whether to escape single quotes (') when performing escape processing of PreparedStatements.
true (default),
false
escapeCharacter Character to prepend and append (suffix or prefix) to the string values when performing escape processing of PreparedStatements.
Single quote (')
(default)
user User login -
Continuent.org Sequoia 3.0 Installation and Configuration Guide 35Document issue 2.0
Configuring the client application
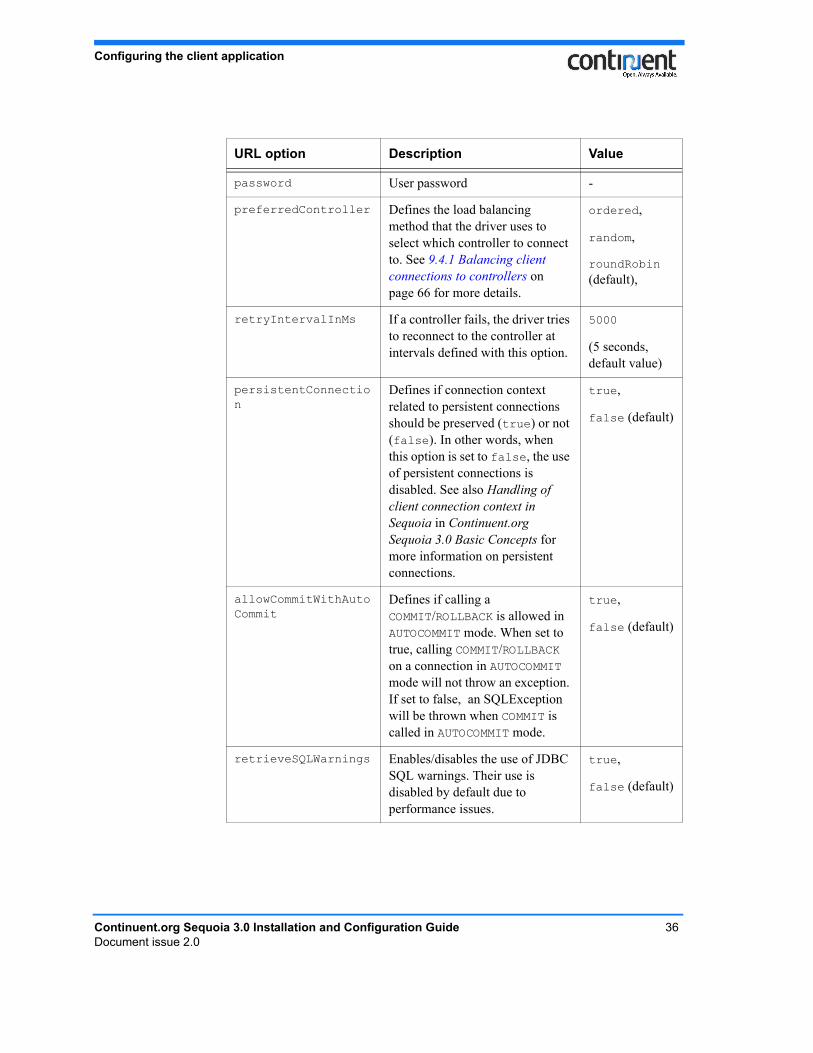
password User password -
preferredController Defines the load balancing method that the driver uses to select which controller to connect to. See 9.4.1 Balancing client connections to controllers on page 66 for more details.
ordered,
random,
roundRobin (default),
retryIntervalInMs If a controller fails, the driver tries to reconnect to the controller at intervals defined with this option.
5000
(5 seconds, default value)
persistentConnection
Defines if connection context related to persistent connections should be preserved (true) or not (false). In other words, when this option is set to false, the use of persistent connections is disabled. See also Handling of client connection context in Sequoia in Continuent.org Sequoia 3.0 Basic Concepts for more information on persistent connections.
true,
false (default)
allowCommitWithAutoCommit
Defines if calling a COMMIT/ROLLBACK is allowed in AUTOCOMMIT mode. When set to true, calling COMMIT/ROLLBACK on a connection in AUTOCOMMIT mode will not throw an exception. If set to false, an SQLException will be thrown when COMMIT is called in AUTOCOMMIT mode.
true,
false (default)
retrieveSQLWarnings Enables/disables the use of JDBC SQL warnings. Their use is disabled by default due to performance issues.
true,
false (default)
URL option Description Value
Continuent.org Sequoia 3.0 Installation and Configuration Guide 36Document issue 2.0

Configuring the client application
6.2 Configuring Java applications to access SequoiaTo configure a Java client to access Sequoia:
1. Add the Sequoia JDBC driver jar file to the application classpath. This replaces the native database driver with the Sequoia driver and allows the client application to load it. To load the driver, use the class org.continuent.sequoia.driver.Driver.
2. Define the Sequoia JDBC URL jdbc:sequoia://host1,host2/vdbname, which the driver uses to establish a connection with the controllers. Separate the controller host names with a comma (,) in the URL. The port value is optional: if it is omitted, Sequoia uses the default port number 25322. If you want to start the Sequoia controller on a port other than the default port, give the port number after the controller host name in the URL. See the example below. See also section 6.1.1 Sequoia URL options on page 34 for the available URL options.
3. Define a username and password to be used for the connection. Make sure to use the same username and password combination that you configured as a virtual user definition in the virtual database configuration file.
The following sections provide examples of how to configure the data source for some 3rd party Java applications. Refer to your application server documentation for detailed instructions on how to configure a data source.
Note
Sequoia can be used with any Java application that allows replacing the JDBC driver with the Sequoia JDBC driver.
If the application you are using Sequoia with requires a mapper, configure the mapping so that it corresponds to the underlying database .
Example
In this example of the Sequoia URL, controller1 listens to port 1234 and controller2 listens to port 3456. The name of the virtual database is myvdb.
6.2.1 Configuring Jakarta Tomcat
There are many ways to obtain connections from a Jakarta Tomcat application. Refer to the Jakarta Tomcat documentation for details.
jdbc:sequoia://controller1:1234,controller2:3456/myvdb
Continuent.org Sequoia 3.0 Installation and Configuration Guide 37Document issue 2.0
Configuring the client application
Copy the Sequoia driver jar file to the lib directory of your web application (for example: $TOMCAT_HOME/webapps/mywebapp/WEB-INF/lib).
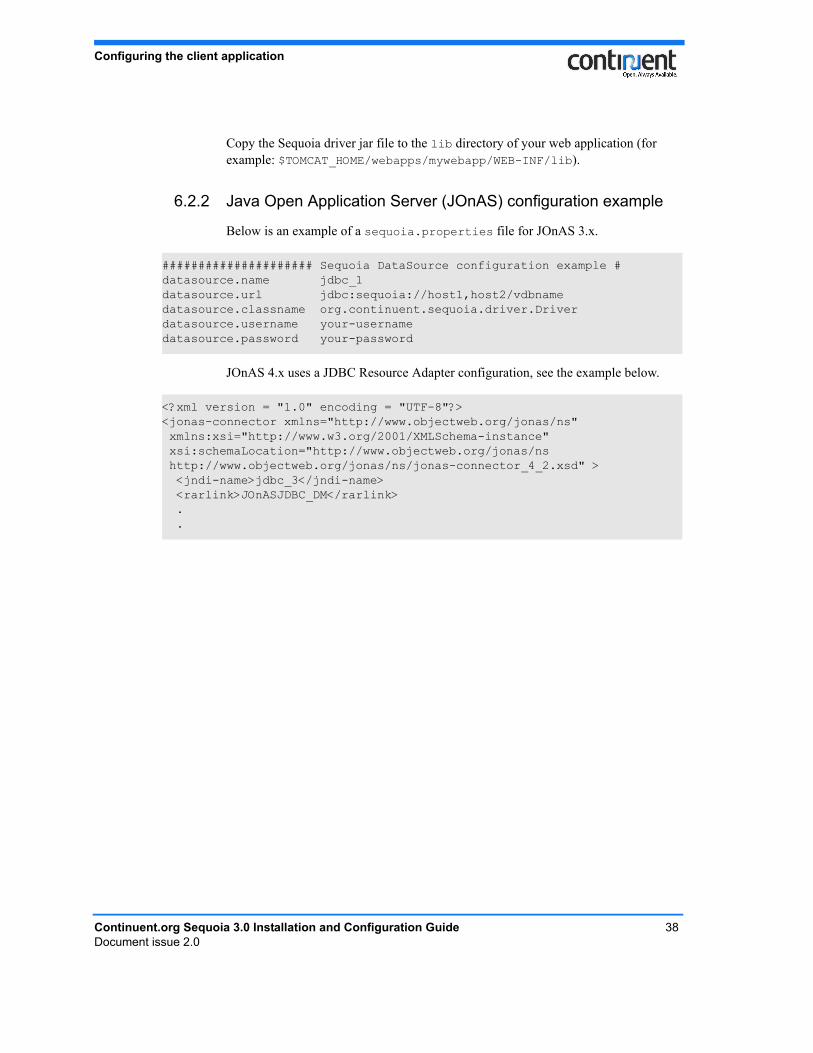
6.2.2 Java Open Application Server (JOnAS) configuration example
Below is an example of a sequoia.properties file for JOnAS 3.x.
JOnAS 4.x uses a JDBC Resource Adapter configuration, see the example below.
##################### Sequoia DataSource configuration example #datasource.name jdbc_1 datasource.url jdbc:sequoia://host1,host2/vdbnamedatasource.classname org.continuent.sequoia.driver.Driverdatasource.username your-username datasource.password your-password
<?xml version = "1.0" encoding = "UTF-8"?><jonas-connector xmlns="http://www.objectweb.org/jonas/ns" xmlns:xsi="http://www.w3.org/2001/XMLSchema-instance" xsi:schemaLocation="http://www.objectweb.org/jonas/ns http://www.objectweb.org/jonas/ns/jonas-connector_4_2.xsd" > <jndi-name>jdbc_3</jndi-name> <rarlink>JOnASJDBC_DM</rarlink> . .
Continuent.org Sequoia 3.0 Installation and Configuration Guide 38Document issue 2.0
Configuring the client application
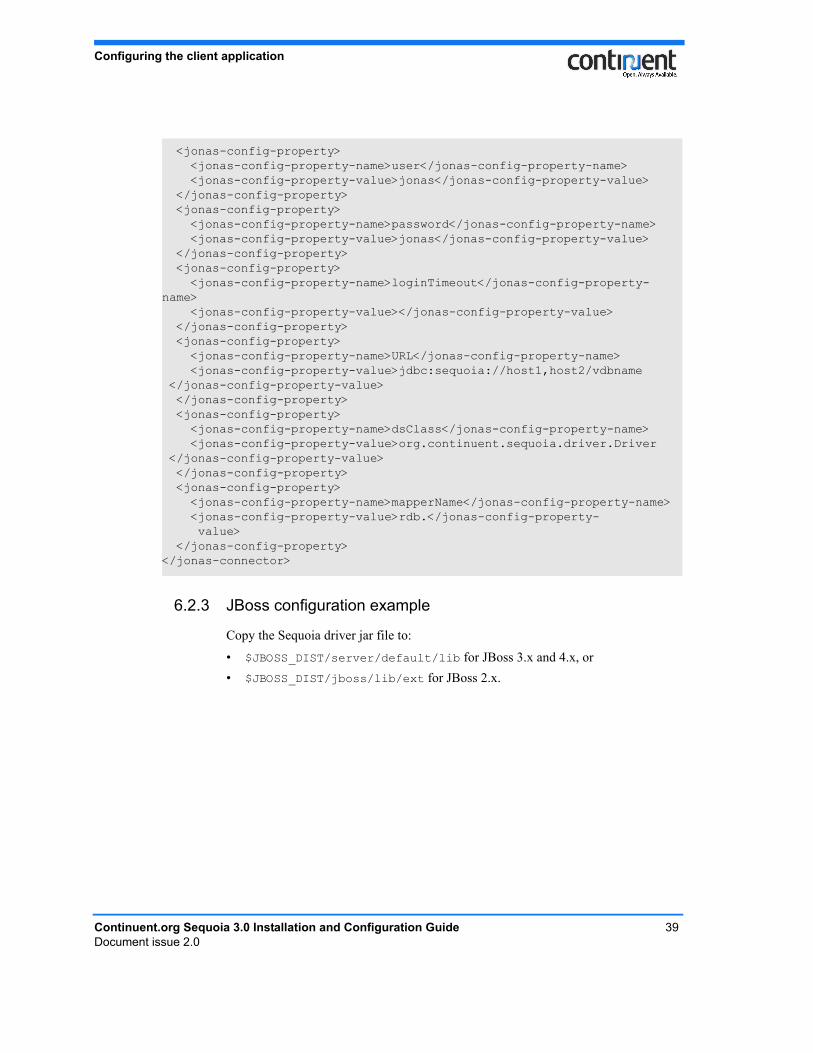
6.2.3 JBoss configuration example
Copy the Sequoia driver jar file to:
• $JBOSS_DIST/server/default/lib for JBoss 3.x and 4.x, or • $JBOSS_DIST/jboss/lib/ext for JBoss 2.x.
<jonas-config-property> <jonas-config-property-name>user</jonas-config-property-name> <jonas-config-property-value>jonas</jonas-config-property-value> </jonas-config-property> <jonas-config-property> <jonas-config-property-name>password</jonas-config-property-name> <jonas-config-property-value>jonas</jonas-config-property-value> </jonas-config-property> <jonas-config-property> <jonas-config-property-name>loginTimeout</jonas-config-property-name> <jonas-config-property-value></jonas-config-property-value> </jonas-config-property> <jonas-config-property> <jonas-config-property-name>URL</jonas-config-property-name> <jonas-config-property-value>jdbc:sequoia://host1,host2/vdbname </jonas-config-property-value> </jonas-config-property> <jonas-config-property> <jonas-config-property-name>dsClass</jonas-config-property-name> <jonas-config-property-value>org.continuent.sequoia.driver.Driver </jonas-config-property-value> </jonas-config-property> <jonas-config-property> <jonas-config-property-name>mapperName</jonas-config-property-name> <jonas-config-property-value>rdb.</jonas-config-property- value> </jonas-config-property></jonas-connector>
Continuent.org Sequoia 3.0 Installation and Configuration Guide 39Document issue 2.0
Configuring the client application
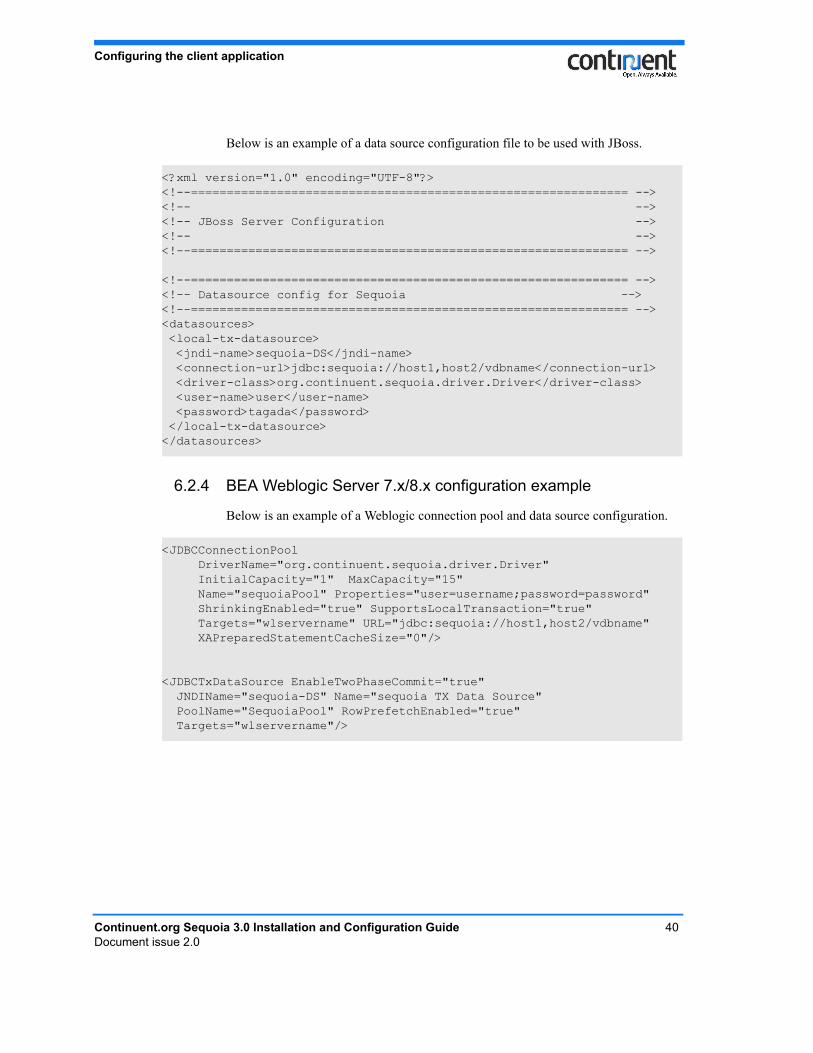
Below is an example of a data source configuration file to be used with JBoss.
6.2.4 BEA Weblogic Server 7.x/8.x configuration example
Below is an example of a Weblogic connection pool and data source configuration.
<?xml version="1.0" encoding="UTF-8"?> <!--============================================================= --><!-- --><!-- JBoss Server Configuration --><!-- --><!--============================================================= -->
<!--============================================================= --><!-- Datasource config for Sequoia --><!--============================================================= --><datasources> <local-tx-datasource> <jndi-name>sequoia-DS</jndi-name> <connection-url>jdbc:sequoia://host1,host2/vdbname</connection-url> <driver-class>org.continuent.sequoia.driver.Driver</driver-class> <user-name>user</user-name> <password>tagada</password> </local-tx-datasource> </datasources>
<JDBCConnectionPool DriverName="org.continuent.sequoia.driver.Driver" InitialCapacity="1" MaxCapacity="15" Name="sequoiaPool" Properties="user=username;password=password" ShrinkingEnabled="true" SupportsLocalTransaction="true" Targets="wlservername" URL="jdbc:sequoia://host1,host2/vdbname" XAPreparedStatementCacheSize="0"/>
<JDBCTxDataSource EnableTwoPhaseCommit="true" JNDIName="sequoia-DS" Name="sequoia TX Data Source" PoolName="SequoiaPool" RowPrefetchEnabled="true" Targets="wlservername"/>
Continuent.org Sequoia 3.0 Installation and Configuration Guide 40Document issue 2.0
Configuring the client application
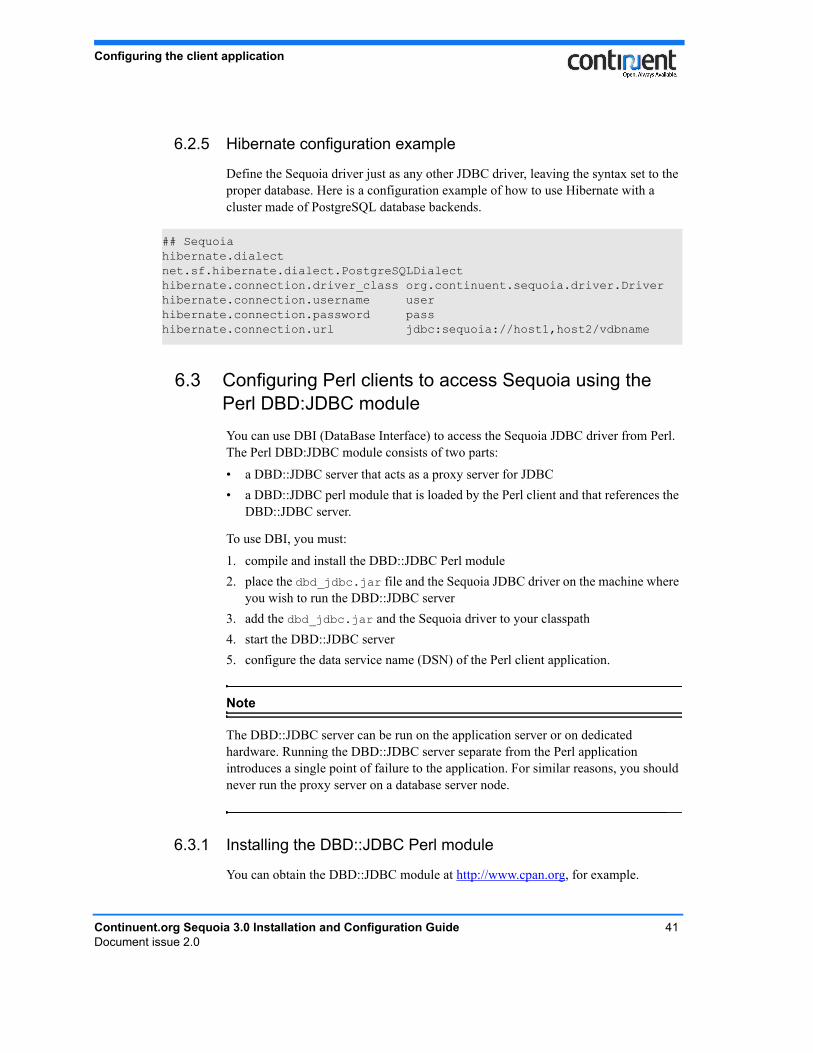
6.2.5 Hibernate configuration example
Define the Sequoia driver just as any other JDBC driver, leaving the syntax set to the proper database. Here is a configuration example of how to use Hibernate with a cluster made of PostgreSQL database backends.
6.3 Configuring Perl clients to access Sequoia using the Perl DBD:JDBC moduleYou can use DBI (DataBase Interface) to access the Sequoia JDBC driver from Perl. The Perl DBD:JDBC module consists of two parts:
• a DBD::JDBC server that acts as a proxy server for JDBC• a DBD::JDBC perl module that is loaded by the Perl client and that references the
DBD::JDBC server.
To use DBI, you must:
1. compile and install the DBD::JDBC Perl module2. place the dbd_jdbc.jar file and the Sequoia JDBC driver on the machine where
you wish to run the DBD::JDBC server3. add the dbd_jdbc.jar and the Sequoia driver to your classpath4. start the DBD::JDBC server5. configure the data service name (DSN) of the Perl client application.
Note
The DBD::JDBC server can be run on the application server or on dedicated hardware. Running the DBD::JDBC server separate from the Perl application introduces a single point of failure to the application. For similar reasons, you should never run the proxy server on a database server node.
6.3.1 Installing the DBD::JDBC Perl module
You can obtain the DBD::JDBC module at http://www.cpan.org, for example.
## Sequoiahibernate.dialect net.sf.hibernate.dialect.PostgreSQLDialecthibernate.connection.driver_class org.continuent.sequoia.driver.Driverhibernate.connection.username userhibernate.connection.password passhibernate.connection.url jdbc:sequoia://host1,host2/vdbname
Continuent.org Sequoia 3.0 Installation and Configuration Guide 41Document issue 2.0
Configuring the client application
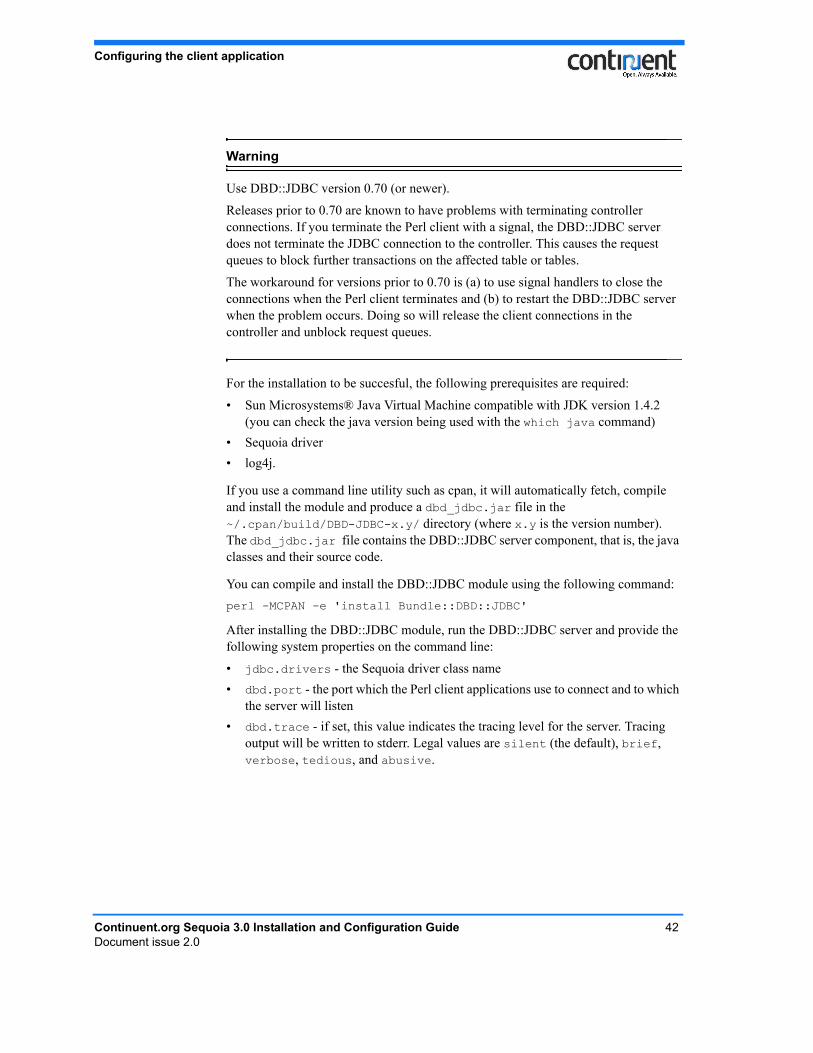
Warning
Use DBD::JDBC version 0.70 (or newer).
Releases prior to 0.70 are known to have problems with terminating controller connections. If you terminate the Perl client with a signal, the DBD::JDBC server does not terminate the JDBC connection to the controller. This causes the request queues to block further transactions on the affected table or tables.
The workaround for versions prior to 0.70 is (a) to use signal handlers to close the connections when the Perl client terminates and (b) to restart the DBD::JDBC server when the problem occurs. Doing so will release the client connections in the controller and unblock request queues.
For the installation to be succesful, the following prerequisites are required:
• Sun Microsystems® Java Virtual Machine compatible with JDK version 1.4.2 (you can check the java version being used with the which java command)
• Sequoia driver• log4j.
If you use a command line utility such as cpan, it will automatically fetch, compile and install the module and produce a dbd_jdbc.jar file in the ~/.cpan/build/DBD-JDBC-x.y/ directory (where x.y is the version number). The dbd_jdbc.jar file contains the DBD::JDBC server component, that is, the java classes and their source code.
You can compile and install the DBD::JDBC module using the following command:perl -MCPAN -e 'install Bundle::DBD::JDBC'
After installing the DBD::JDBC module, run the DBD::JDBC server and provide the following system properties on the command line:
• jdbc.drivers - the Sequoia driver class name• dbd.port - the port which the Perl client applications use to connect and to which
the server will listen• dbd.trace - if set, this value indicates the tracing level for the server. Tracing
output will be written to stderr. Legal values are silent (the default), brief, verbose, tedious, and abusive.
Continuent.org Sequoia 3.0 Installation and Configuration Guide 42Document issue 2.0
Configuring the client application
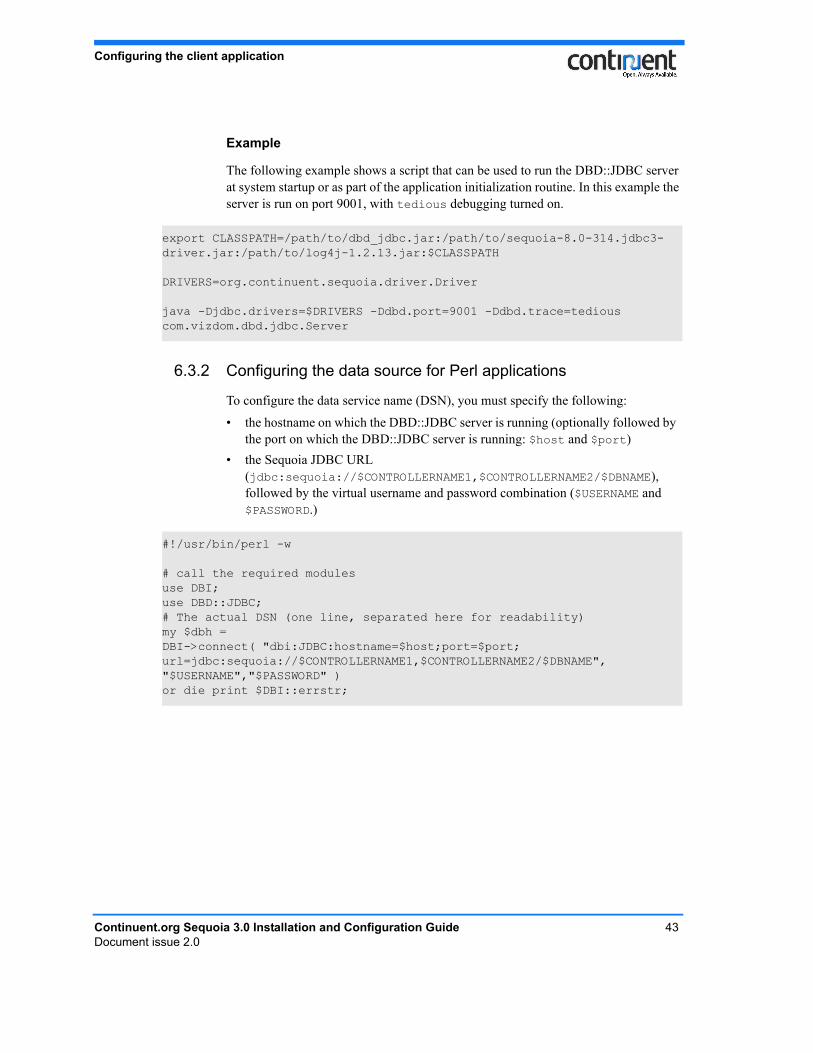
Example
The following example shows a script that can be used to run the DBD::JDBC server at system startup or as part of the application initialization routine. In this example the server is run on port 9001, with tedious debugging turned on.
6.3.2 Configuring the data source for Perl applications
To configure the data service name (DSN), you must specify the following:
• the hostname on which the DBD::JDBC server is running (optionally followed by the port on which the DBD::JDBC server is running: $host and $port)
• the Sequoia JDBC URL (jdbc:sequoia://$CONTROLLERNAME1,$CONTROLLERNAME2/$DBNAME), followed by the virtual username and password combination ($USERNAME and $PASSWORD.)
export CLASSPATH=/path/to/dbd_jdbc.jar:/path/to/sequoia-8.0-314.jdbc3-driver.jar:/path/to/log4j-1.2.13.jar:$CLASSPATH
DRIVERS=org.continuent.sequoia.driver.Driver
java -Djdbc.drivers=$DRIVERS -Ddbd.port=9001 -Ddbd.trace=tedious com.vizdom.dbd.jdbc.Server
#!/usr/bin/perl -w
# call the required modulesuse DBI;use DBD::JDBC;# The actual DSN (one line, separated here for readability)my $dbh = DBI->connect( "dbi:JDBC:hostname=$host;port=$port;url=jdbc:sequoia://$CONTROLLERNAME1,$CONTROLLERNAME2/$DBNAME","$USERNAME","$PASSWORD" ) or die print $DBI::errstr;
Continuent.org Sequoia 3.0 Installation and Configuration Guide 43Document issue 2.0
Configuring the client application
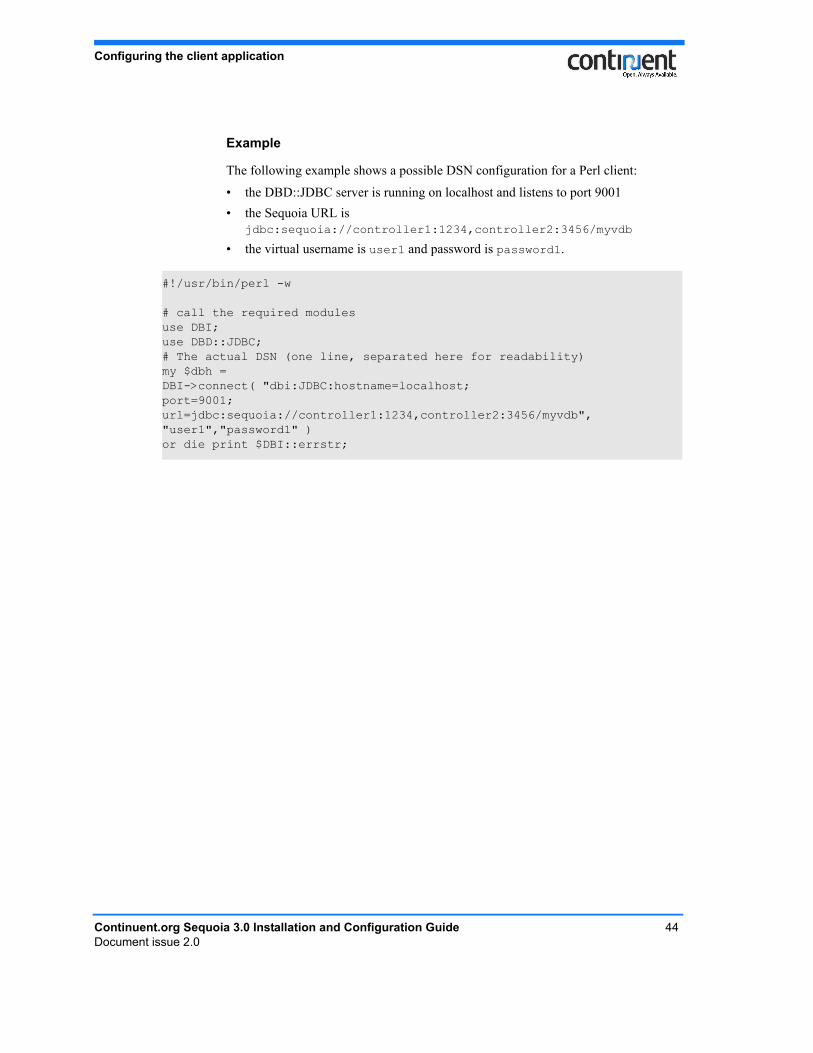
Example
The following example shows a possible DSN configuration for a Perl client:
• the DBD::JDBC server is running on localhost and listens to port 9001• the Sequoia URL is
jdbc:sequoia://controller1:1234,controller2:3456/myvdb
• the virtual username is user1 and password is password1.
#!/usr/bin/perl -w
# call the required modulesuse DBI;use DBD::JDBC;# The actual DSN (one line, separated here for readability)my $dbh = DBI->connect( "dbi:JDBC:hostname=localhost;port=9001;url=jdbc:sequoia://controller1:1234,controller2:3456/myvdb","user1","password1" ) or die print $DBI::errstr;
Continuent.org Sequoia 3.0 Installation and Configuration Guide 44Document issue 2.0
Activating the cluster
7 Activating the clusterAfter installing and configuring Sequoia, you must first start the controllers. See 7.1 Start the Controllers on page 45.
After starting the controllers, activate the cluster to enable access to the database through Sequoia:
1. Load the virtual database configuration files to the controllers. See 7.2 Load the virtual database configuration files to the controllers on page 47.
2. Activate the database backend(s) of the first controller. See 7.3 Activate the database backend(s) of the first controller on page 48.
3. Activate the database backend(s) of possible other controllers. See 7.4 Activate the database backend(s) of the second controller on page 50.
For more details on how to manage Sequoia using CLC, including the complete command syntax, refer to Continuent.org Sequoia 3.0 Management Guide.
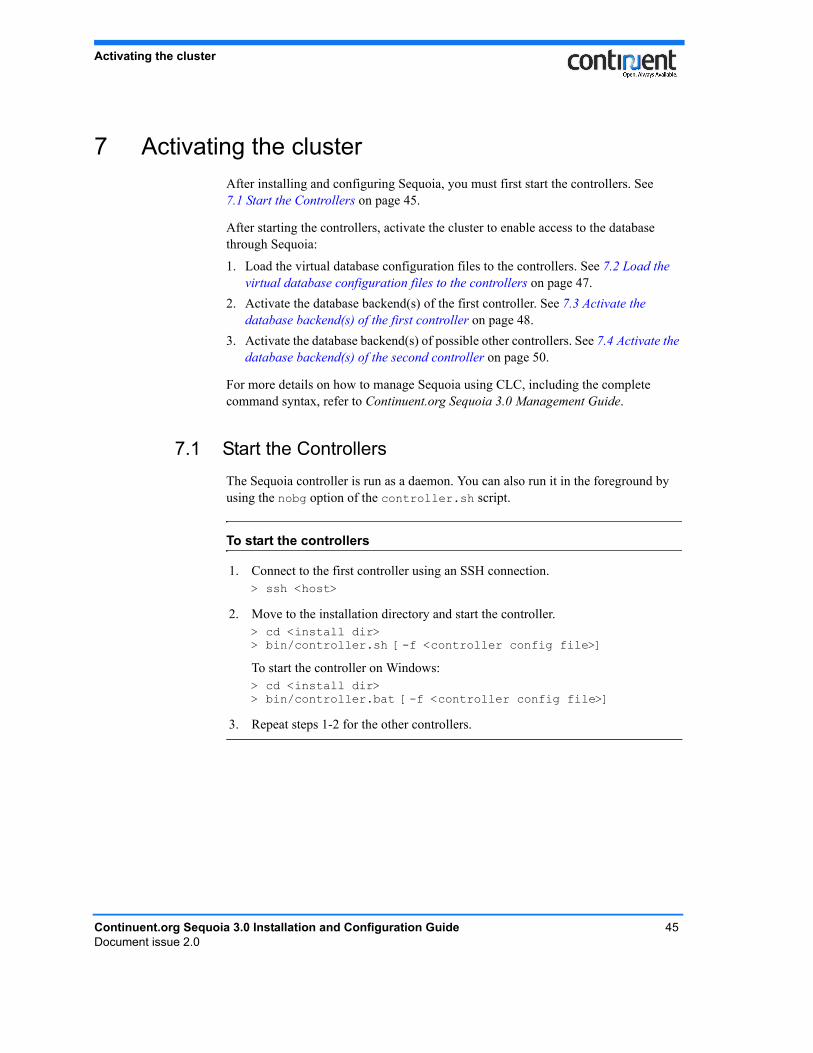
7.1 Start the ControllersThe Sequoia controller is run as a daemon. You can also run it in the foreground by using the nobg option of the controller.sh script.
To start the controllers
1. Connect to the first controller using an SSH connection.> ssh <host>
2. Move to the installation directory and start the controller.> cd <install dir>> bin/controller.sh [-f <controller config file>]
To start the controller on Windows:> cd <install dir>> bin/controller.bat [-f <controller config file>]
3. Repeat steps 1-2 for the other controllers.
Continuent.org Sequoia 3.0 Installation and Configuration Guide 45Document issue 2.0
Activating the cluster
Note
When you start the controller with the script bin/controller.sh, it will claim 512MB of RAM by default. To augment the default memory settings of the configuration to 1GB, for example, execute the following command before launching the controller with the controller.sh script.JVM_OPTIONS="-Xms1024m -Xmx=1024m"; export JVM_OPTIONS
If you set JVM_OPTIONS, make sure to take care of memory settings.
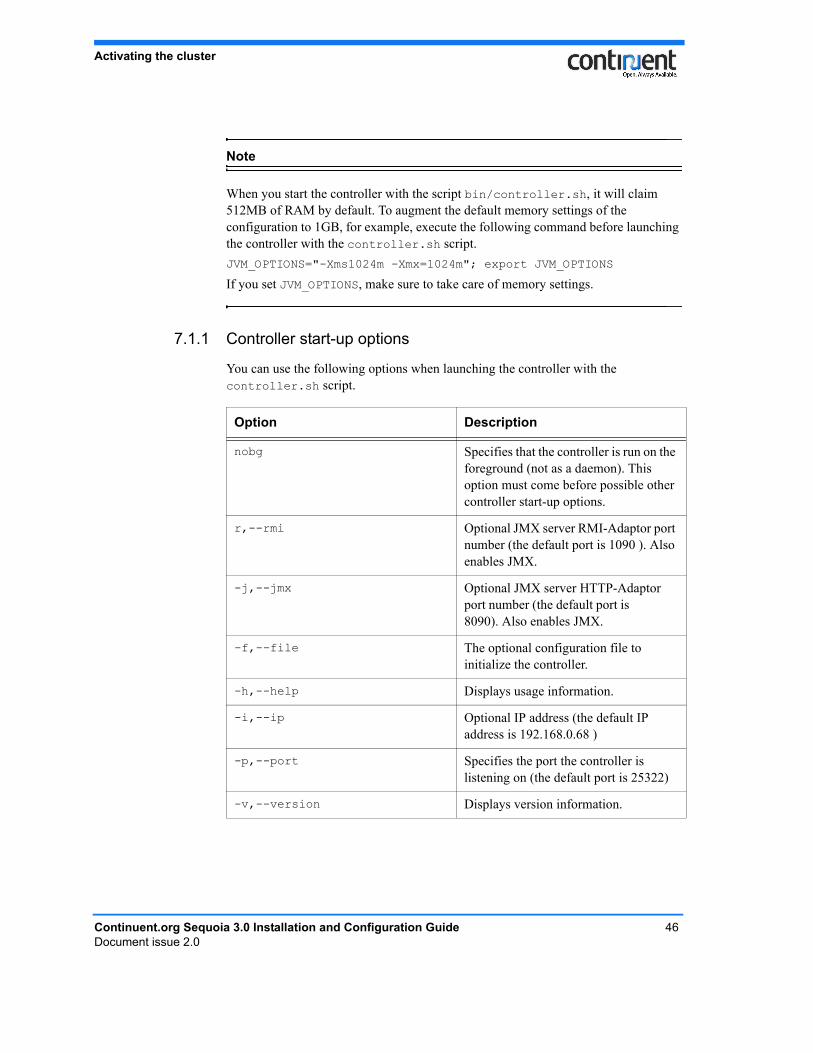
7.1.1 Controller start-up options
You can use the following options when launching the controller with the controller.sh script.
Option Description
nobg Specifies that the controller is run on the foreground (not as a daemon). This option must come before possible other controller start-up options.
r,--rmi Optional JMX server RMI-Adaptor port number (the default port is 1090 ). Also enables JMX.
-j,--jmx Optional JMX server HTTP-Adaptor port number (the default port is 8090). Also enables JMX.
-f,--file The optional configuration file to initialize the controller.
-h,--help Displays usage information.
-i,--ip Optional IP address (the default IP address is 192.168.0.68 )
-p,--port Specifies the port the controller is listening on (the default port is 25322)
-v,--version Displays version information.
Continuent.org Sequoia 3.0 Installation and Configuration Guide 46Document issue 2.0
Activating the cluster
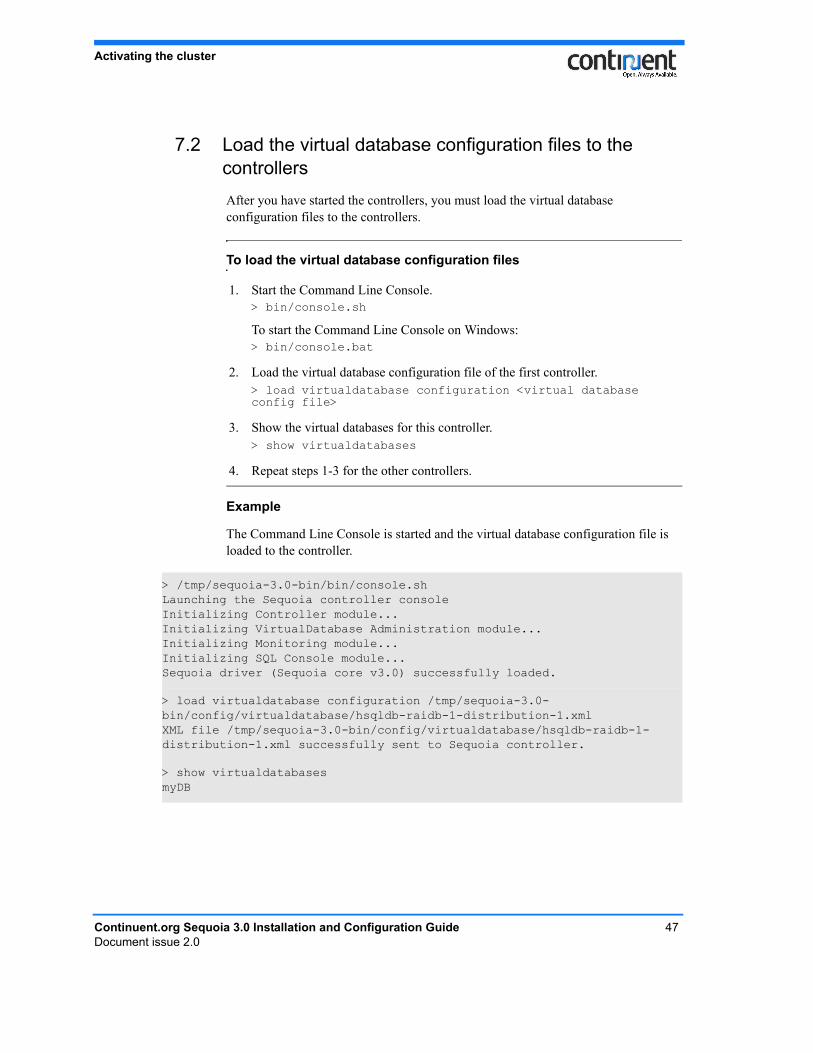
7.2 Load the virtual database configuration files to the controllersAfter you have started the controllers, you must load the virtual database configuration files to the controllers.
To load the virtual database configuration files
Example
The Command Line Console is started and the virtual database configuration file is loaded to the controller.
1. Start the Command Line Console.> bin/console.sh
To start the Command Line Console on Windows:> bin/console.bat
2. Load the virtual database configuration file of the first controller.> load virtualdatabase configuration <virtual database config file>
3. Show the virtual databases for this controller.> show virtualdatabases
4. Repeat steps 1-3 for the other controllers.
> /tmp/sequoia-3.0-bin/bin/console.shLaunching the Sequoia controller consoleInitializing Controller module...Initializing VirtualDatabase Administration module...Initializing Monitoring module...Initializing SQL Console module...Sequoia driver (Sequoia core v3.0) successfully loaded.
> load virtualdatabase configuration /tmp/sequoia-3.0-bin/config/virtualdatabase/hsqldb-raidb-1-distribution-1.xmlXML file /tmp/sequoia-3.0-bin/config/virtualdatabase/hsqldb-raidb-1-distribution-1.xml successfully sent to Sequoia controller.
> show virtualdatabasesmyDB
Continuent.org Sequoia 3.0 Installation and Configuration Guide 47Document issue 2.0
Activating the cluster
7.3 Activate the database backend(s) of the first controllerLoading the configuration file to the controller does not activate the database backend(s). The backend(s) are in disabled state and must be activated as instructed below.
To activate the backend(s) of the first controller
1. Connect to the first controller using SSH.> ssh <host>
2. Start the Command Line Console.> bin/console.sh
To start the Command Line Console on Windows:> bin/console.bat
3. Go to admin mode.> admin <virtual database name>
4. Enter the administrator username and password for the virtual database.> <admin username>> <admin password>
5. Initialize the first backend of the managed virtual database.> initialize <backend name>
6. Create a database backup file from the initialized backend. The CLC prompts you for the database username.> backup <backend name> <dump name> <backuper> <path>> <database username>> <database password>
7. Enable the backend.> enable <backend name>
8. Check the state of the enabled backend.> show backend <backend name>
9. Check the state of the controllers.> show controllers
Continuent.org Sequoia 3.0 Installation and Configuration Guide 48Document issue 2.0
Activating the cluster
Example
10. If you are using a configuration with more than one backend per controller, add the second backend to the cluster on this controller. Restore first the database backup of the first enabled backend to the one to be added and, next, enable the new backend.> restore backend <backend name> <dump name>> <database username>> <database password>> enable <backend name>
Repeat this step for possible other backends.
11. Copy the database dump to the second controller.> transfer dump <dump name> <controller ip>:<jmx port> [nocopy]
12. Go to expert admin mode and copy the recovery log to the second controller.> expert on> restore log <dump name> <controller ip>:<jmx port>
> /tmp/sequoia-3.0-bin/bin/console.shLaunching the Sequoia controller consoleInitializing Controller module...Initializing VirtualDatabase Administration module...Initializing Monitoring module...Initializing SQL Console module...Sequoia driver (Sequoia core v3.0) successfully loaded.
> admin myDB> admin> Ready to administrate virtual database myDB
> initialize localhost1admin.command.initialize.success
> backup localhost1 initial_dump Octopus /tmp> realuser> Backup backend localhost1 in dump file initial_dump
> enable localhost1Enabling backend localhost1 from its last known checkpoint
Continuent.org Sequoia 3.0 Installation and Configuration Guide 49Document issue 2.0
Activating the cluster
7.4 Activate the database backend(s) of the second controllerTo activate the backend(s) of the second controller, you must first restore the database using the backup file that you transferred from the first controller. Next, enable the backend(s) to synchronize the cluster. When you execute the enable command, the missing client update requests are replayed from the recovery log.
> show backend localhost1+-------------------------+-------------------------------------------+| Backend Name | localhost1 || Driver | org.hsqldb.jdbcDriver || URL | jdbc:hsqldb:hsql://localhost:9001 || Active transactions | 0 || Pending Requests | 0 || Read Enabled | true || Write Enabled | true || Is Initialized | true || Static Schema | false || Connection Managers | 1 || Total Active Connections| 0 || Total Requests | 1 || Total Transactions | 0 || Last known checkpoint | <unknown> |+-------------------------+-------------------------------------------+
> restore backend localhost2 initial_dump > TEST > Restoring backend localhost2 with dump initial_dump> enable localhost2Enabling backend localhost2 from its last known checkpoint
> show controllersmyDB is hosted by 2 controller(s): 127.0.0.1:25322 127.0.0.1:25323
> transfer dump initial_dump 127.0.0.1:25323Transferring dump initial_dump to controller 127.0.0.1:25323...Done
> expert onExpert mode on
> restore log initial_dump 127.0.0.1:25323
Continuent.org Sequoia 3.0 Installation and Configuration Guide 50Document issue 2.0
Activating the cluster
To enable the backend(s) of the second controller
1. Connect to the second controller using SSH.$ ssh <host>
2. Start the Command Line Console.> bin/console.sh
To start the Command Line Console on Windows:> bin/console.bat
3. Connect to the virtual database of the second controller and open admin mode.> admin <virtual database name>
4. Enter the administrator username and password for the virtual database.> <admin username>> <admin password>
5. Show the available database backup files.> show dumps
6. Restore the database backup on the backend that you want to activate. The CLC prompts you for the database username.> restore backend <backend name> <dump name>> <database username>> <database password>
7. Enable the backend.> enable <backend name>
8. If you are using a controller configuration with more than one backend, repeat steps 6-8 to enable the other backend(s).
Continuent.org Sequoia 3.0 Installation and Configuration Guide 51Document issue 2.0
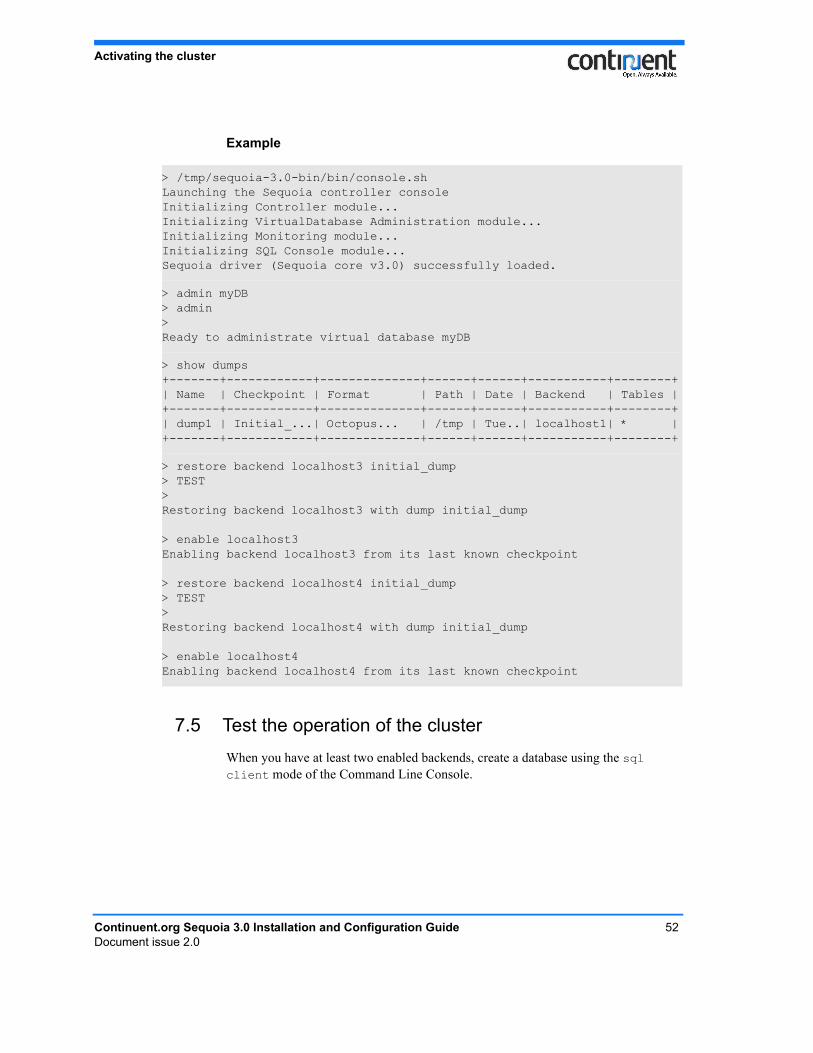
Activating the cluster
Example
7.5 Test the operation of the clusterWhen you have at least two enabled backends, create a database using the sql client mode of the Command Line Console.
> /tmp/sequoia-3.0-bin/bin/console.shLaunching the Sequoia controller consoleInitializing Controller module...Initializing VirtualDatabase Administration module...Initializing Monitoring module...Initializing SQL Console module...Sequoia driver (Sequoia core v3.0) successfully loaded.
> admin myDB> admin> Ready to administrate virtual database myDB
> show dumps+-------+------------+--------------+------+------+-----------+--------+| Name | Checkpoint | Format | Path | Date | Backend | Tables |+-------+------------+--------------+------+------+-----------+--------+| dump1 | Initial_...| Octopus... | /tmp | Tue..| localhost1| * |+-------+------------+--------------+------+------+-----------+--------+
> restore backend localhost3 initial_dump> TEST> Restoring backend localhost3 with dump initial_dump
> enable localhost3Enabling backend localhost3 from its last known checkpoint
> restore backend localhost4 initial_dump> TEST> Restoring backend localhost4 with dump initial_dump
> enable localhost4Enabling backend localhost4 from its last known checkpoint
Continuent.org Sequoia 3.0 Installation and Configuration Guide 52Document issue 2.0
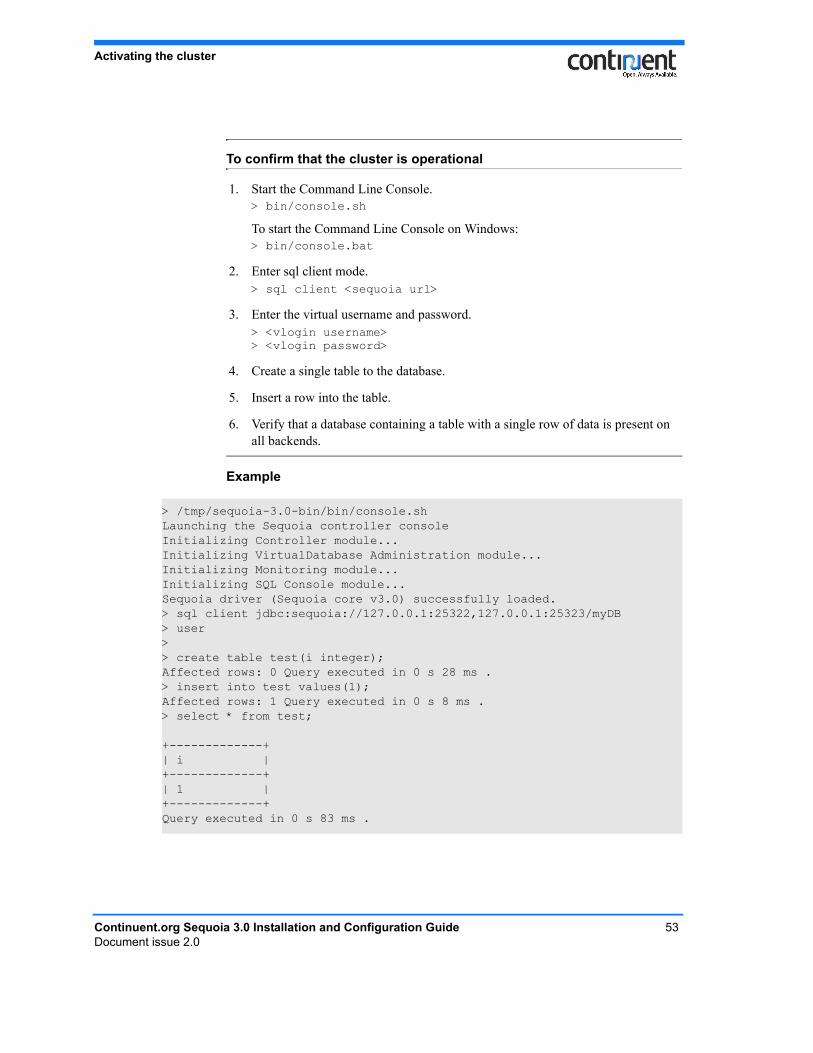
Activating the cluster
To confirm that the cluster is operational
Example
1. Start the Command Line Console.> bin/console.sh
To start the Command Line Console on Windows:> bin/console.bat
2. Enter sql client mode.> sql client <sequoia url>
3. Enter the virtual username and password.> <vlogin username> > <vlogin password>
4. Create a single table to the database.
5. Insert a row into the table.
6. Verify that a database containing a table with a single row of data is present on all backends.
> /tmp/sequoia-3.0-bin/bin/console.shLaunching the Sequoia controller consoleInitializing Controller module...Initializing VirtualDatabase Administration module...Initializing Monitoring module...Initializing SQL Console module...Sequoia driver (Sequoia core v3.0) successfully loaded.> sql client jdbc:sequoia://127.0.0.1:25322,127.0.0.1:25323/myDB> user > > create table test(i integer); Affected rows: 0 Query executed in 0 s 28 ms .> insert into test values(1); Affected rows: 1 Query executed in 0 s 8 ms .> select * from test;
+-------------+| i |+-------------+| 1 |+-------------+Query executed in 0 s 83 ms .
Continuent.org Sequoia 3.0 Installation and Configuration Guide 53Document issue 2.0
Uninstalling Sequoia
Continuent.org Sequoia 3.0 Installation and Configuration Guide 54Document issue 2.0
8 Uninstalling SequoiaThe uninstallation program is stored automatically to the uninstaller directory during Sequoia installation.
To uninstall Sequoia
1. Connect to the first controller and enable X11 Forwarding. It is required by the graphical uninstallation program.$ ssh -X <host>
2. Run the uninstall script. java -jar <install-dir>/uninstaller/uninstaller.jar
The uninstallation wizard appears.
3. Repeat steps 1-2 on the other controllers.
Sequoia configuration guidelines and examples
9 Sequoia configuration guidelines and examplesThe following sections provide some guidelines and examples on how to configure the Sequoia virtual database configuration files.
• section 9.1 Configuring Sequoia usernames and passwords on page 55 explains the Sequoia user privileges
• section 9.2 Configuring controller group communication on page 56 explains the group communication settings used by the Appia group communication protocol and how to modify the default settings
• section 9.3 Configuring backupers on page 61 describes the backuper implementations included in the Sequoia installation and their configuration options
• section 9.4 Configuring load balancing methods on page 66 provides information on optional load balancing settings
• section 9.5 Configuring the maximum number of allowed client connections on page 69 provides guidelines that can be used to optimize the performance of the cluster
• section 9.6 Configuring Sequoia security settings on page 70 describes how you can secure the connections to Sequoia
9.1 Configuring Sequoia usernames and passwordsSequoia uses the following user privileges:
• administrator user - specifies a username and password combination that is required to access the Sequoia Command Line Console (CLC)
• virtual user - specifies a username and password combination, which the client applications use to access the virtual database
• real user - the real database username and password combination.
The user privileges and authentication are configured in the virtual database configuration file during the Sequoia installation process.
• The administrator and virtual users are defined with the AuthenticationManager element in the virtual database configuration file.
• In addition, you must define a connection manager (ConnectionManager element in the virtual database configuration file) for the virtual users that the virtual database is associated with.
The authentication manager uses the connection manager definition to match the virtual user(s) with the real user(s) of each database server.
Continuent.org Sequoia 3.0 Installation and Configuration Guide 55Document issue 2.0
Sequoia configuration guidelines and examples
Note
By default, the database username and password combination (real login) is expected to be the same as the virtual username and password. If they are not, the real and virtual users must be mapped with the ConnectionManager element definition (see section 5.3.5 Write the DatabaseBackend element definition(s) on page 25).
9.2 Configuring controller group communicationSince the 3.0 release, Sequoia uses Appia as the default controller group communication library. Appia is an open source layered communication toolkit implemented in Java.
Tip
Refer also to the Appia website for developer documentation such as Appia protocol specifications. See http://appia.di.fc.ul.pt/wiki/index.php?title=Documentation.
When using Appia, you can choose from the following two implementations. Both of them ensure Total Order (TO) reliable multicast, which is required for proper synchronization of the Sequoia controllers.
• a sequencer-based TO protocol (used by default)• a token-based TO protocol.
Both TO protocols support the use of TCP, UDP, and UDP multicast transport protocols.
Sequencer-based total order protocol
In the sequencer-based protocol there is one node responsible for sequencing the messages:
• For each message sent by a member to the group, the sequencer sends another message with the sequence number. This means two communication steps for each message that is sent to the network.
• All group members can send messages at the same time.
Continuent.org Sequoia 3.0 Installation and Configuration Guide 56Document issue 2.0
Sequoia configuration guidelines and examples
Token-based total order protocol
This protocol is based on exchanging a rotating token message:
• Only the member that has the token can send messages to the group: after sending its messages, the member passes the token to the next member, and so on (the token can be piggybacked onto the last message that was sent).
• There is only one communication step for each message.• If the member that receives the token has nothing to send, it just forwards the
token, because the protocol cannot know when a peer member needs to send a message.
• If none of the group members has nothing to send, the token is continuously rotating.
The token-based protocol still needs to be optimized for situations where there is very little group communication traffic:
• a read request is not distributed, only load balanced, so it does not use group communication (and total order)
• in a system where there are a lot of read requests but very few write requests, there is also very little group communication traffic
• thus, the rotating token can cause unnecessary network traffic and CPU usage.
This optimization must be done without decreasing performance when the throughput increases. We expect to have this improved in the Appia 3.3 release.
Choosing the best Appia TO protocol for your system
Use the following guidelines when configuring the TO protocol in Appia:
• use the token-based protocol when there is heavy load on the group communication (due to a large amount of write requests to the controllers).
• correspondingly, use the sequencer-based protocol when the group communication is not as heavily loaded (a small number of write requests) as it reduces the controller CPU usage and the network is able to handle the extra sequencer messages.
Choosing the best alternative depends a lot on the configuration of your system. If the network is your bottleneck and a lot of messages are being sent, the token-based protocol is better.
9.2.1 Configuring Appia
To modify the default Appia configuration, follow the instructions below. See also 9.2.2 Appia configuration examples on page 60.
Continuent.org Sequoia 3.0 Installation and Configuration Guide 57Document issue 2.0
Sequoia configuration guidelines and examples
Configure the group communication channel
The Appia stack configurations are found in config/appia.xml. The appia.xml configuration file is divided into two parts:
• the first part includes six configuration templates that are used to define the protocol stacks that make up a channel
• the second part, which contains the respective channel instantiations, is used to activate a channel and define parameter values that should be passed on to that channel.
Note
Note that the current Appia implementation of Hedera does not support the simultaneous use of several active channels: make sure that just one channel definition uses the setting initialized="yes".
The six configurations (shown below) are formed as a combination of the two total order implementations (sequencer-based and token-based total order) using different transport protocols: TCP, UDP and UDP multicast:
• tcp_sequencer - sequencer-based total order using TCP (used by default)• udp_p2p_sequencer - sequencer-based total order using UDP• udp_multicast_sequencer - sequencer-based total order using UDP multicast• tcp_token - token-based total order using TCP• udp_p2p_token - token-based total order using UDP• udp_multicast_token - token-based total order using UDP multicast.
Configure the Appia network interface
If the machine where Appia is running has several network interfaces, Appia binds to eth0 by default. To bind to another interface, define the address that corresponds to that interface as the value of the local_address parameter in the channel definition in appia.xml.
Configure the Appia gossip service
Appia uses a gossip service to discover new members and join them to the group communication. The gossip service is a light protocol, which uses IP multicast (224.1.1.5:10000) by default.
Continuent.org Sequoia 3.0 Installation and Configuration Guide 58Document issue 2.0
Sequoia configuration guidelines and examples
Note
You cannot bind Appia to use a multicast address that is configured for the gossip service.
To set up the gossip service you can either:
• use a multicast address (if your network supports multicast), or• configure and start a gossip server, which is used to help the dynamic discovery of
new nodes. The gossip server can also be replicated.
If you don't have IP Multicast, set up an Appia gossip server, as follows:
1. edit the appia.xml configuration file by changing the multicast address (defined with gossip_address in appia.xml) to the gossip address, that is, the IP:port where your gossip server will be running.
2. start the Appia gossip server with the shell script (appia/bin/gossipServer.sh or appia\bin\gossipServer.bat).
The syntax of the gossip server start-up script is:gossipServer.sh [-help] [-port <port>] [-debug] [-solo] [-gossips <ip>[:<port>][,...]]
The options are:
• [-help] - prints a help• [-port <port>] - overrides the default port (10000)• [-debug] - enables debugging• [-solo] - use this option to run just one instance of the gossip server, that is,
when you do not want to set up a group of gossip servers• [-gossips <ip>[:<port>][,...]] - other known gossip servers.
Tip
You can replicate the gossip service to achieve fault tolerance just by running several instances of the gossip server on several machines. To replicate the gossip server, run the gossipServer script without the -solo option.
gossipServer.xml configuration file
The gossipServer.xml file defines the settings used for the gossip server: the default values are usually enough for the server to work well.
Continuent.org Sequoia 3.0 Installation and Configuration Guide 59Document issue 2.0
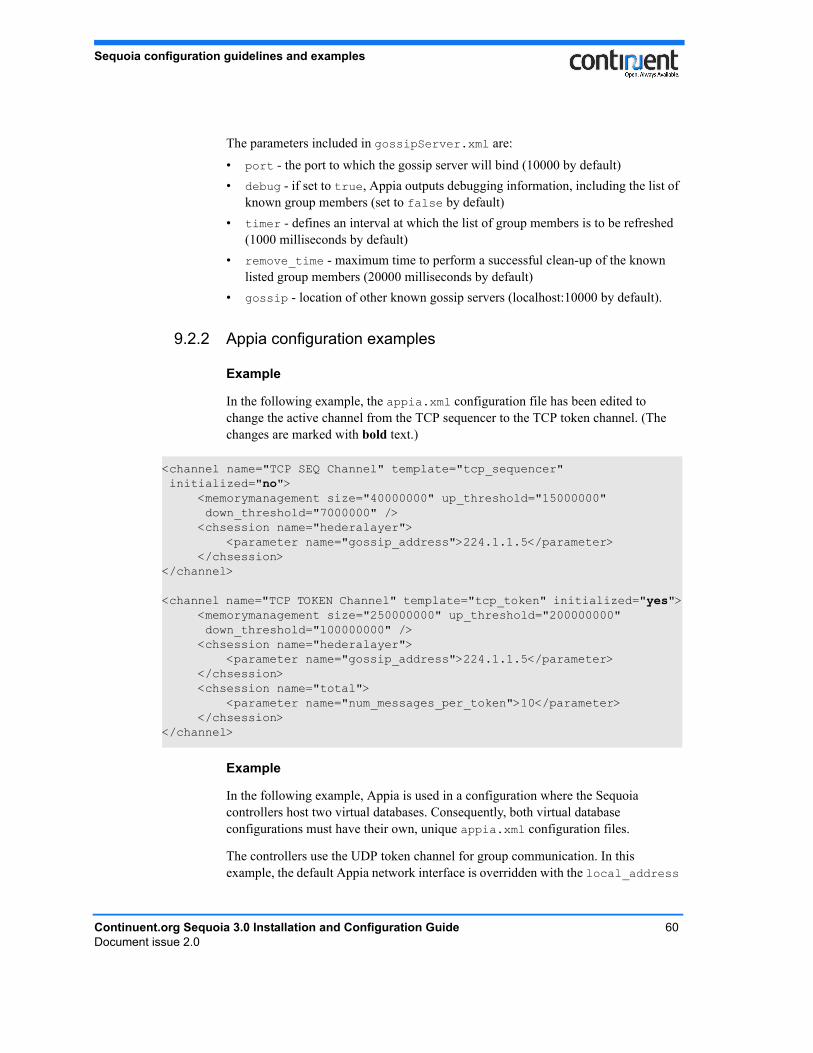
Sequoia configuration guidelines and examples
The parameters included in gossipServer.xml are:
• port - the port to which the gossip server will bind (10000 by default)• debug - if set to true, Appia outputs debugging information, including the list of
known group members (set to false by default)• timer - defines an interval at which the list of group members is to be refreshed
(1000 milliseconds by default)• remove_time - maximum time to perform a successful clean-up of the known
listed group members (20000 milliseconds by default)• gossip - location of other known gossip servers (localhost:10000 by default).
9.2.2 Appia configuration examples
Example
In the following example, the appia.xml configuration file has been edited to change the active channel from the TCP sequencer to the TCP token channel. (The changes are marked with bold text.)
Example
In the following example, Appia is used in a configuration where the Sequoia controllers host two virtual databases. Consequently, both virtual database configurations must have their own, unique appia.xml configuration files.
The controllers use the UDP token channel for group communication. In this example, the default Appia network interface is overridden with the local_address
<channel name="TCP SEQ Channel" template="tcp_sequencer" initialized="no"> <memorymanagement size="40000000" up_threshold="15000000" down_threshold="7000000" /> <chsession name="hederalayer"> <parameter name="gossip_address">224.1.1.5</parameter> </chsession></channel>
<channel name="TCP TOKEN Channel" template="tcp_token" initialized="yes"> <memorymanagement size="250000000" up_threshold="200000000" down_threshold="100000000" /> <chsession name="hederalayer"> <parameter name="gossip_address">224.1.1.5</parameter> </chsession> <chsession name="total"> <parameter name="num_messages_per_token">10</parameter> </chsession></channel>
Continuent.org Sequoia 3.0 Installation and Configuration Guide 60Document issue 2.0
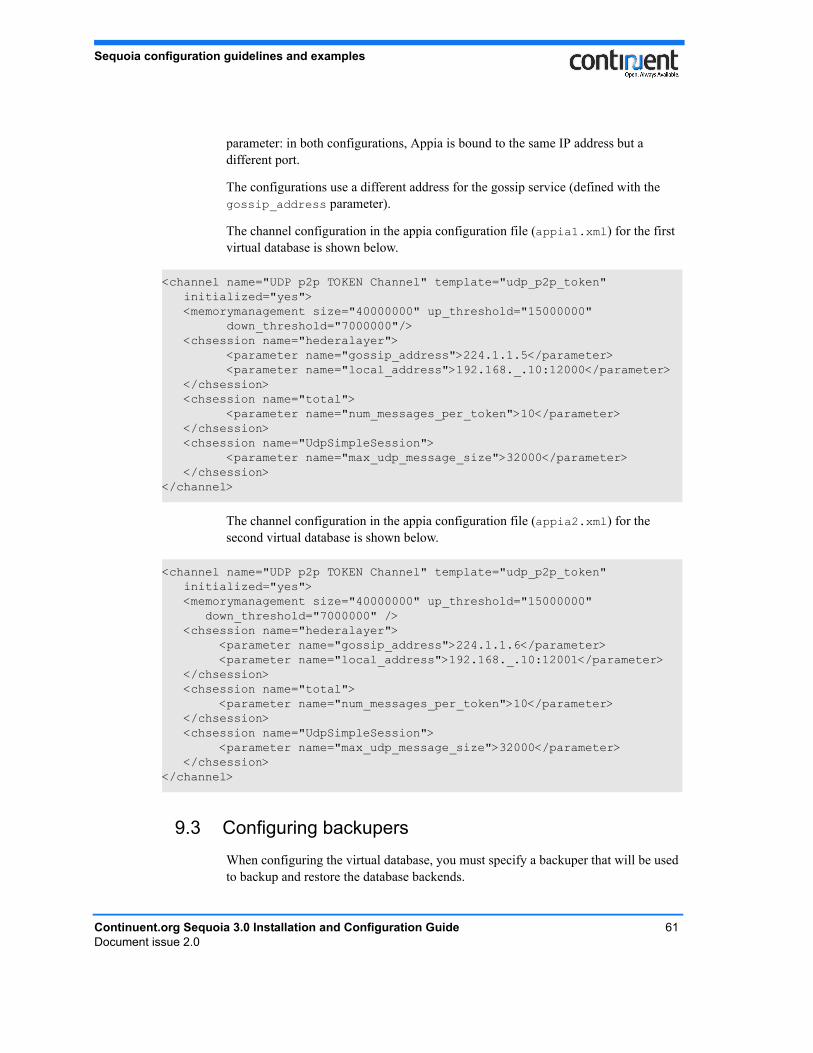
Sequoia configuration guidelines and examples
parameter: in both configurations, Appia is bound to the same IP address but a different port.
The configurations use a different address for the gossip service (defined with the gossip_address parameter).
The channel configuration in the appia configuration file (appia1.xml) for the first virtual database is shown below.
The channel configuration in the appia configuration file (appia2.xml) for the second virtual database is shown below.
9.3 Configuring backupersWhen configuring the virtual database, you must specify a backuper that will be used to backup and restore the database backends.
<channel name="UDP p2p TOKEN Channel" template="udp_p2p_token" initialized="yes"> <memorymanagement size="40000000" up_threshold="15000000" down_threshold="7000000"/> <chsession name="hederalayer"> <parameter name="gossip_address">224.1.1.5</parameter> <parameter name="local_address">192.168._.10:12000</parameter> </chsession> <chsession name="total"> <parameter name="num_messages_per_token">10</parameter> </chsession> <chsession name="UdpSimpleSession"> <parameter name="max_udp_message_size">32000</parameter> </chsession></channel>
<channel name="UDP p2p TOKEN Channel" template="udp_p2p_token" initialized="yes"> <memorymanagement size="40000000" up_threshold="15000000" down_threshold="7000000" /> <chsession name="hederalayer"> <parameter name="gossip_address">224.1.1.6</parameter> <parameter name="local_address">192.168._.10:12001</parameter> </chsession> <chsession name="total"> <parameter name="num_messages_per_token">10</parameter> </chsession> <chsession name="UdpSimpleSession"> <parameter name="max_udp_message_size">32000</parameter> </chsession></channel>
Continuent.org Sequoia 3.0 Installation and Configuration Guide 61Document issue 2.0
Sequoia configuration guidelines and examples
You can also define several backupers in the same virtual database configuration. Each backuper must have its own Backuper element definition.
The backuper configurations are included in the Backup element definition in the virtual database configuration file. A backuper configuration consists of the following:
• a backuperName that will be used as a command argument of the backup CLC command when backing up a database (see backup command in Continuent.org Sequoia 3.0 Management Guide
• a className that specifies the backuper implementation to be used. The className is org.continuent.sequoia.controller.backup.backupers.backuper, where backuper is replaced with the backuper file name (see 9.3.1 Available backuper implementations on page 62).
• possible backuper options (see 9.3.2 Configuring backuper options on page 63).
See also 5.3.3 Write the Backup element definition on page 24.
9.3.1 Available backuper implementations
The Sequoia installation includes the following backupers:
• OctopusBackuper: A generic JDBC backuper that dumps/restores databases through JDBC. Note that this backuper does not support most database-specific types or extensions.
• PostgreSQL backupers:• PostgreSQLBinaryBackuper: Uses pg_dump to generate a binary dump of
the database• PostgreSQLPlainTextBackuper: Uses pg_dump to generate an ASCII
dump of the database• PostgreSQLSplitPlainTextBackuper: Uses pg_dump to generate an
ASCII dump of the database and split the dump into multiple files• PostgreSQLTarBackuper: Uses pg_dump to generate a tar dump of the
database• MySQLBackuper: Uses mysqldump to generate a MySQL native dump• MSSQLBackuper: uses MS SQL Server BACKUP DATABASE facility for a
dump. Note that to work properly, this backuper requires a shared directory between the backend nodes.
• DerbyEmbeddedBackuper: can be used to dump a Derby database embedded in a controller. Note that this backuper does not work with a remote Derby database.
Continuent.org Sequoia 3.0 Installation and Configuration Guide 62Document issue 2.0
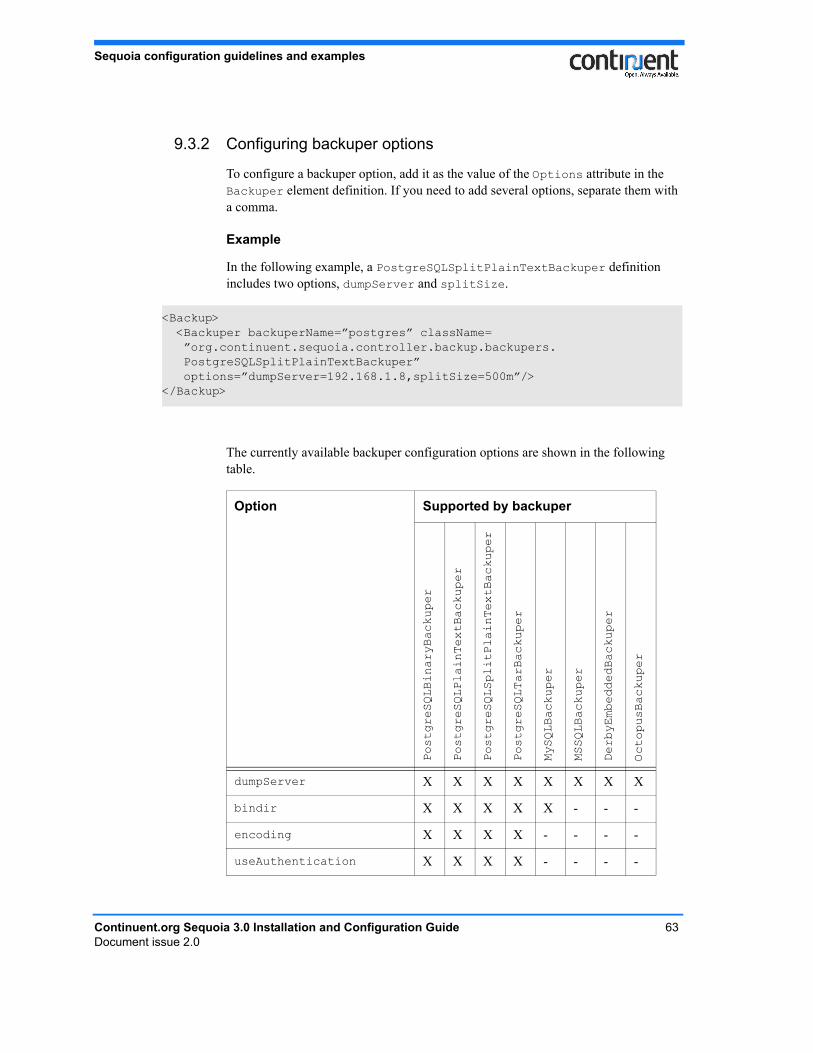
Sequoia configuration guidelines and examples
9.3.2 Configuring backuper options
To configure a backuper option, add it as the value of the Options attribute in the Backuper element definition. If you need to add several options, separate them with a comma.
Example
In the following example, a PostgreSQLSplitPlainTextBackuper definition includes two options, dumpServer and splitSize.
The currently available backuper configuration options are shown in the following table.
<Backup> <Backuper backuperName=”postgres” className= ”org.continuent.sequoia.controller.backup.backupers. PostgreSQLSplitPlainTextBackuper” options=”dumpServer=192.168.1.8,splitSize=500m”/></Backup>
Option Supported by backuper
PostgreSQLBinaryBackuper
PostgreSQLPlainTextBackuper
PostgreSQLSplitPlainTextBackuper
PostgreSQLTarBackuper
MySQLBackuper
MSSQLBackuper
DerbyEmbeddedBackuper
OctopusBackuper
dumpServer X X X X X X X X
bindir X X X X X - - -
encoding X X X X - - - -
useAuthentication X X X X - - - -
Continuent.org Sequoia 3.0 Installation and Configuration Guide 63Document issue 2.0
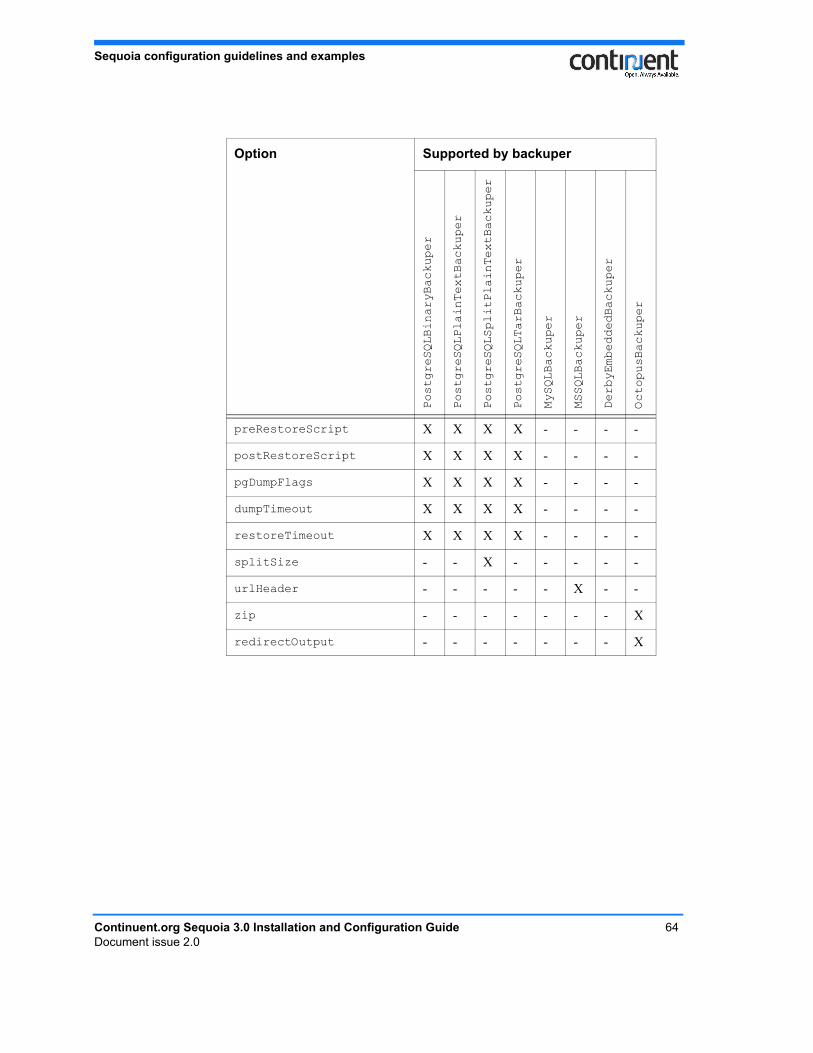
Sequoia configuration guidelines and examples
preRestoreScript X X X X - - - -
postRestoreScript X X X X - - - -
pgDumpFlags X X X X - - - -
dumpTimeout X X X X - - - -
restoreTimeout X X X X - - - -
splitSize - - X - - - - -
urlHeader - - - - - X - -
zip - - - - - - - X
redirectOutput - - - - - - - X
Option Supported by backuper
PostgreSQLBinaryBackuper
PostgreSQLPlainTextBackuper
PostgreSQLSplitPlainTextBackuper
PostgreSQLTarBackuper
MySQLBackuper
MSSQLBackuper
DerbyEmbeddedBackuper
OctopusBackuper
Continuent.org Sequoia 3.0 Installation and Configuration Guide 64Document issue 2.0
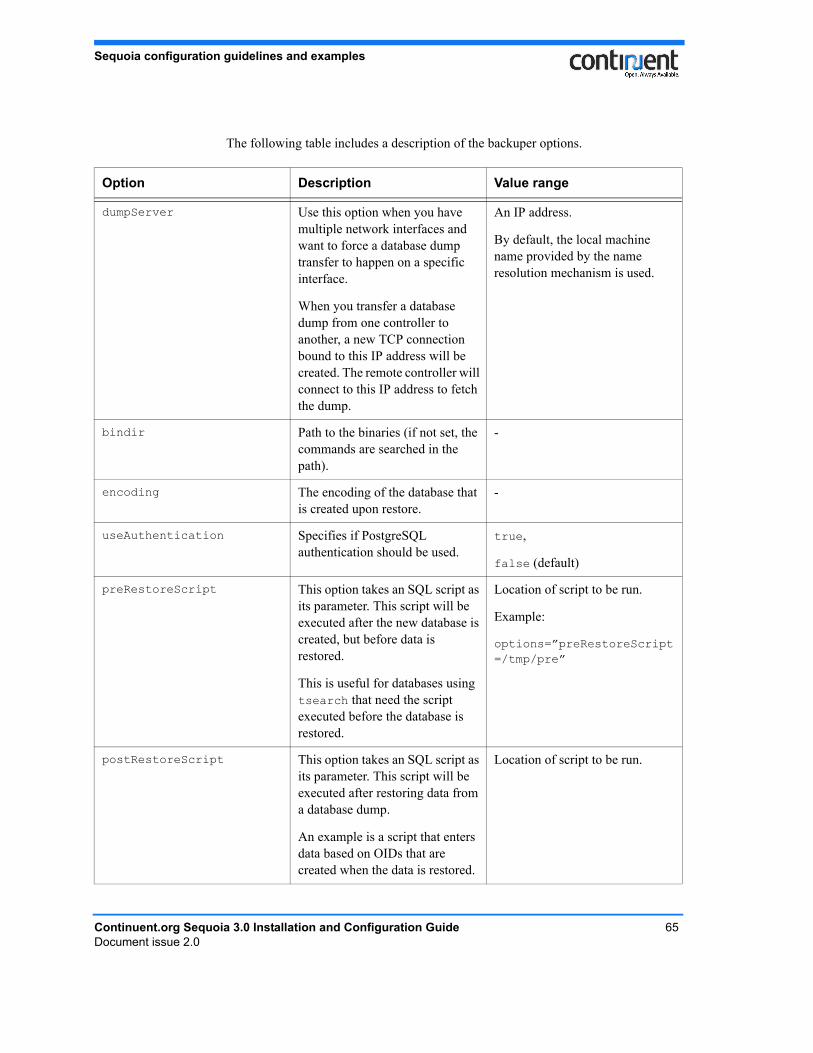
Sequoia configuration guidelines and examples
The following table includes a description of the backuper options.
Option Description Value range
dumpServer Use this option when you have multiple network interfaces and want to force a database dump transfer to happen on a specific interface.
When you transfer a database dump from one controller to another, a new TCP connection bound to this IP address will be created. The remote controller will connect to this IP address to fetch the dump.
An IP address.
By default, the local machine name provided by the name resolution mechanism is used.
bindir Path to the binaries (if not set, the commands are searched in the path).
-
encoding The encoding of the database that is created upon restore.
-
useAuthentication Specifies if PostgreSQL authentication should be used.
true,
false (default)
preRestoreScript This option takes an SQL script as its parameter. This script will be executed after the new database is created, but before data is restored.
This is useful for databases using tsearch that need the script executed before the database is restored.
Location of script to be run.
Example:
options=”preRestoreScript=/tmp/pre”
postRestoreScript This option takes an SQL script as its parameter. This script will be executed after restoring data from a database dump.
An example is a script that enters data based on OIDs that are created when the data is restored.
Location of script to be run.
Continuent.org Sequoia 3.0 Installation and Configuration Guide 65Document issue 2.0
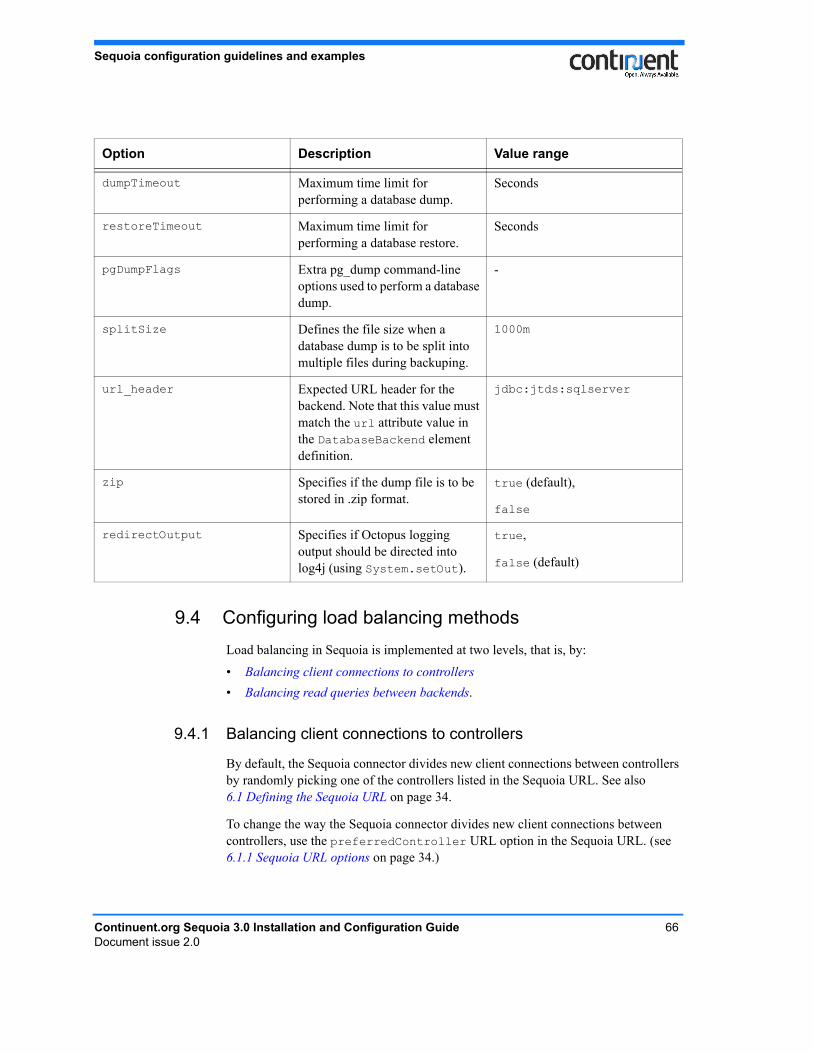
Sequoia configuration guidelines and examples
9.4 Configuring load balancing methodsLoad balancing in Sequoia is implemented at two levels, that is, by:
• Balancing client connections to controllers• Balancing read queries between backends.
9.4.1 Balancing client connections to controllers
By default, the Sequoia connector divides new client connections between controllers by randomly picking one of the controllers listed in the Sequoia URL. See also 6.1 Defining the Sequoia URL on page 34.
To change the way the Sequoia connector divides new client connections between controllers, use the preferredController URL option in the Sequoia URL. (see 6.1.1 Sequoia URL options on page 34.)
dumpTimeout Maximum time limit for performing a database dump.
Seconds
restoreTimeout Maximum time limit for performing a database restore.
Seconds
pgDumpFlags Extra pg_dump command-line options used to perform a database dump.
-
splitSize Defines the file size when a database dump is to be split into multiple files during backuping.
1000m
url_header Expected URL header for the backend. Note that this value must match the url attribute value in the DatabaseBackend element definition.
jdbc:jtds:sqlserver
zip Specifies if the dump file is to be stored in .zip format.
true (default),
false
redirectOutput Specifies if Octopus logging output should be directed into log4j (using System.setOut).
true,
false (default)
Option Description Value range
Continuent.org Sequoia 3.0 Installation and Configuration Guide 66Document issue 2.0
Sequoia configuration guidelines and examples
The possible methods are:
• ordered - the Sequoia connector connects to the controllers in the same order as they are listed in the Sequoia URL: it always first tries to connect to the first controller, but if the connection establishment fails, it then tries to connect to the second controller
• random - the Sequoia connector randomly selects a controller• round robin - simple round robin method: the first connection is established to
the first controller, the second connection to the second controller, and so on (used by default).
Random and round robin are the recommended methods because they ensure that connections are always distributed on the controllers, which reduces the impact of a possible controller failure.
Example
In the following example, the Sequoia connector always tries to connect first to controller controller1. If controller1 is not available, the connector then tries to connect to controller controller2 and, finally, if neither controller1 or controller2 are available, controller3.
Example
In the following example, the Sequoia connector selects randomly between controller nodes controller1, controller2, and controller3.
Example
In the following example the Sequoia connector uses the round robin method between controllers controller2 and controller3. If neither of controller2 and controller3 are available, the driver tries to connect to controller1.
jdbc:sequoia://controller1,controller2,controller3/myDB?preferredController=ordered
jdbc:sequoia://controller1,controller2,controller3/myDB?preferredController=random
jdbc:sequoia://controller1,controller2:25343,controller3/myDB?preferredController=node2:25343,node3
Continuent.org Sequoia 3.0 Installation and Configuration Guide 67Document issue 2.0

Sequoia configuration guidelines and examples
Example
In the following example the Sequoia connector connects to the controllers using the round robin method in the order that the controllers are listed in the Sequoia URL.
9.4.2 Balancing read queries between backends
You can use the following methods to balance read queries between backends:
• least pending requests first - The request is sent to the backend that has the shortest queue of pending requests, that is, the smallest number of pending requests to be executed. The pending request queue is a good approximation of the backend load and thus provides efficient dynamic load balancing.
• round robin - Simple round robin load balancing: the first request is sent to the first backend, the second request to the second backend, and so on. This is a continuous loop: after all backends have received a request, the same process starts again from the first backend.
• weighted round robin - The round robin method is improved by assigning a weight to each backend. This value determines what proportion of the load a particular backend will receive relative to other servers. For example, a backend that has the weight 2 gets twice as many requests as a backend with the weight 1.
Note
The availability of the different load balancing methods depends on the load balancer you are using. Refer to the sequoia.dtd for more details.
To change the load balancing method for the read queries, edit the definition of the load balancer, for example the RAIDb-1 element in the virtual database configuration files:
• to use the least pending requests first method, include the RAIDb-1-LeastPendingRequestsFirst element in the RAIDb-1 element definition
• to use the round robin method, replace the RAIDb-1-LeastPendingRequestsFirst element with the RAIDb-1-RoundRobin element
• to use the weighted round robin method, replace the RAIDb-1-LeastPendingRequestsFirst element with the RAIDb-1-WeightedRoundRobin element. Assign weights to the backends by using the name and weight attributes of the BackendWeight element.
jdbc:sequoia://node1,node2,node3/myDB?preferredController=roundRobin
Continuent.org Sequoia 3.0 Installation and Configuration Guide 68Document issue 2.0
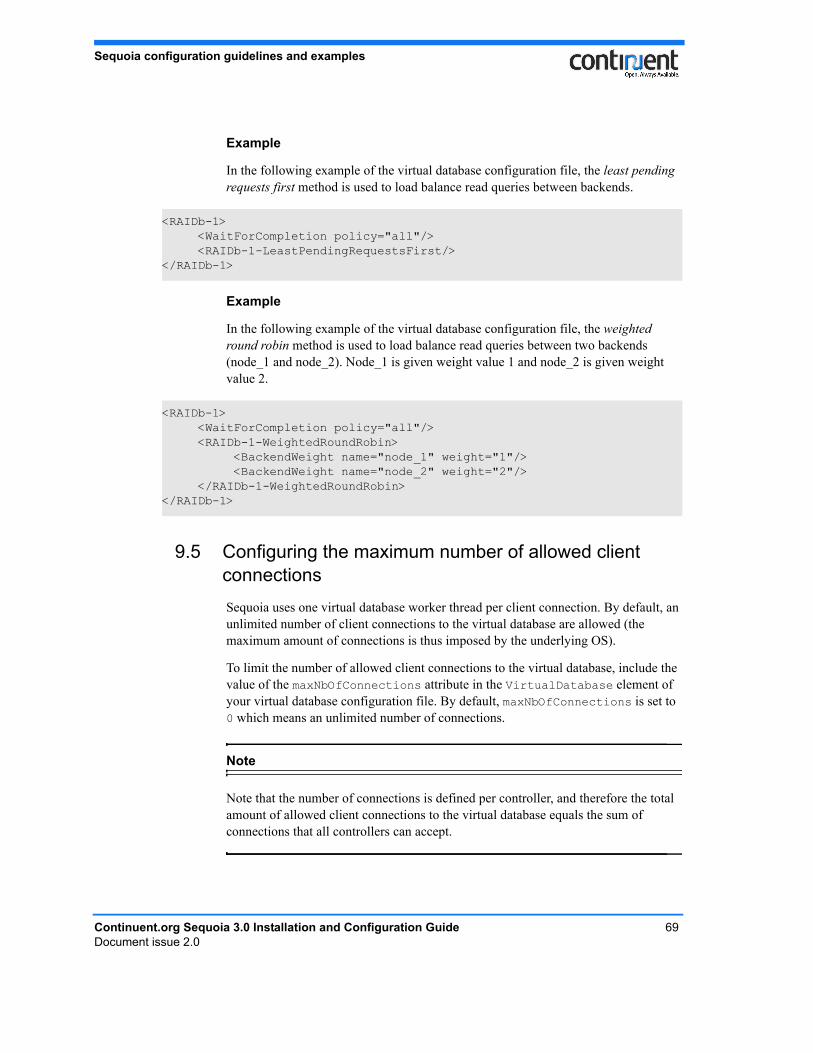
Sequoia configuration guidelines and examples
Example
In the following example of the virtual database configuration file, the least pending requests first method is used to load balance read queries between backends.
Example
In the following example of the virtual database configuration file, the weighted round robin method is used to load balance read queries between two backends (node_1 and node_2). Node_1 is given weight value 1 and node_2 is given weight value 2.
9.5 Configuring the maximum number of allowed client connectionsSequoia uses one virtual database worker thread per client connection. By default, an unlimited number of client connections to the virtual database are allowed (the maximum amount of connections is thus imposed by the underlying OS).
To limit the number of allowed client connections to the virtual database, include the value of the maxNbOfConnections attribute in the VirtualDatabase element of your virtual database configuration file. By default, maxNbOfConnections is set to 0 which means an unlimited number of connections.
Note
Note that the number of connections is defined per controller, and therefore the total amount of allowed client connections to the virtual database equals the sum of connections that all controllers can accept.
<RAIDb-1> <WaitForCompletion policy="all"/> <RAIDb-1-LeastPendingRequestsFirst/></RAIDb-1>
<RAIDb-1> <WaitForCompletion policy="all"/> <RAIDb-1-WeightedRoundRobin> <BackendWeight name="node_1" weight="1"/> <BackendWeight name="node_2" weight="2"/> </RAIDb-1-WeightedRoundRobin></RAIDb-1>
Continuent.org Sequoia 3.0 Installation and Configuration Guide 69Document issue 2.0
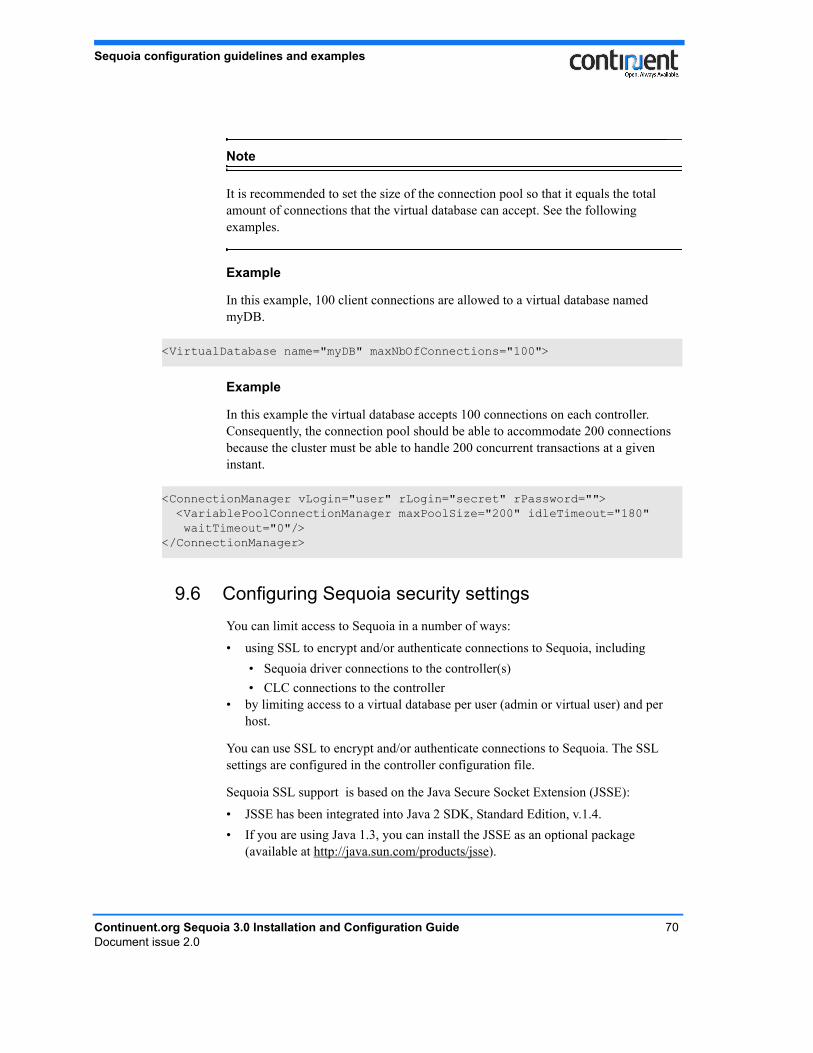
Sequoia configuration guidelines and examples
Note
It is recommended to set the size of the connection pool so that it equals the total amount of connections that the virtual database can accept. See the following examples.
Example
In this example, 100 client connections are allowed to a virtual database named myDB.
Example
In this example the virtual database accepts 100 connections on each controller. Consequently, the connection pool should be able to accommodate 200 connections because the cluster must be able to handle 200 concurrent transactions at a given instant.
9.6 Configuring Sequoia security settingsYou can limit access to Sequoia in a number of ways:
• using SSL to encrypt and/or authenticate connections to Sequoia, including• Sequoia driver connections to the controller(s) • CLC connections to the controller
• by limiting access to a virtual database per user (admin or virtual user) and per host.
You can use SSL to encrypt and/or authenticate connections to Sequoia. The SSL settings are configured in the controller configuration file.
Sequoia SSL support is based on the Java Secure Socket Extension (JSSE):
• JSSE has been integrated into Java 2 SDK, Standard Edition, v.1.4. • If you are using Java 1.3, you can install the JSSE as an optional package
(available at http://java.sun.com/products/jsse).
<VirtualDatabase name="myDB" maxNbOfConnections="100">
<ConnectionManager vLogin="user" rLogin="secret" rPassword=""> <VariablePoolConnectionManager maxPoolSize="200" idleTimeout="180" waitTimeout="0"/></ConnectionManager>
Continuent.org Sequoia 3.0 Installation and Configuration Guide 70Document issue 2.0
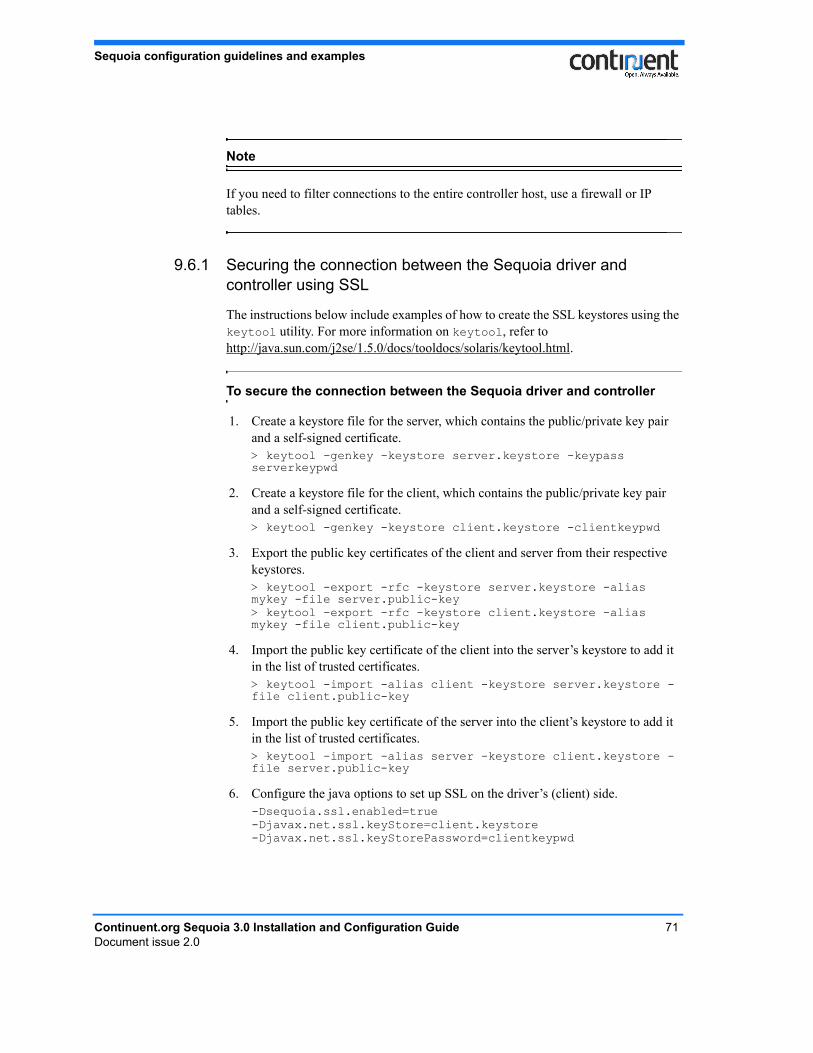
Sequoia configuration guidelines and examples
Note
If you need to filter connections to the entire controller host, use a firewall or IP tables.
9.6.1 Securing the connection between the Sequoia driver and controller using SSL
The instructions below include examples of how to create the SSL keystores using the keytool utility. For more information on keytool, refer to http://java.sun.com/j2se/1.5.0/docs/tooldocs/solaris/keytool.html.
To secure the connection between the Sequoia driver and controller
1. Create a keystore file for the server, which contains the public/private key pair and a self-signed certificate.> keytool -genkey -keystore server.keystore -keypass serverkeypwd
2. Create a keystore file for the client, which contains the public/private key pair and a self-signed certificate.> keytool -genkey -keystore client.keystore -clientkeypwd
3. Export the public key certificates of the client and server from their respective keystores.> keytool -export -rfc -keystore server.keystore -alias mykey -file server.public-key> keytool -export -rfc -keystore client.keystore -alias mykey -file client.public-key
4. Import the public key certificate of the client into the server’s keystore to add it in the list of trusted certificates.> keytool -import -alias client -keystore server.keystore -file client.public-key
5. Import the public key certificate of the server into the client’s keystore to add it in the list of trusted certificates.> keytool -import -alias server -keystore client.keystore -file server.public-key
6. Configure the java options to set up SSL on the driver’s (client) side.-Dsequoia.ssl.enabled=true-Djavax.net.ssl.keyStore=client.keystore-Djavax.net.ssl.keyStorePassword=clientkeypwd
Continuent.org Sequoia 3.0 Installation and Configuration Guide 71Document issue 2.0
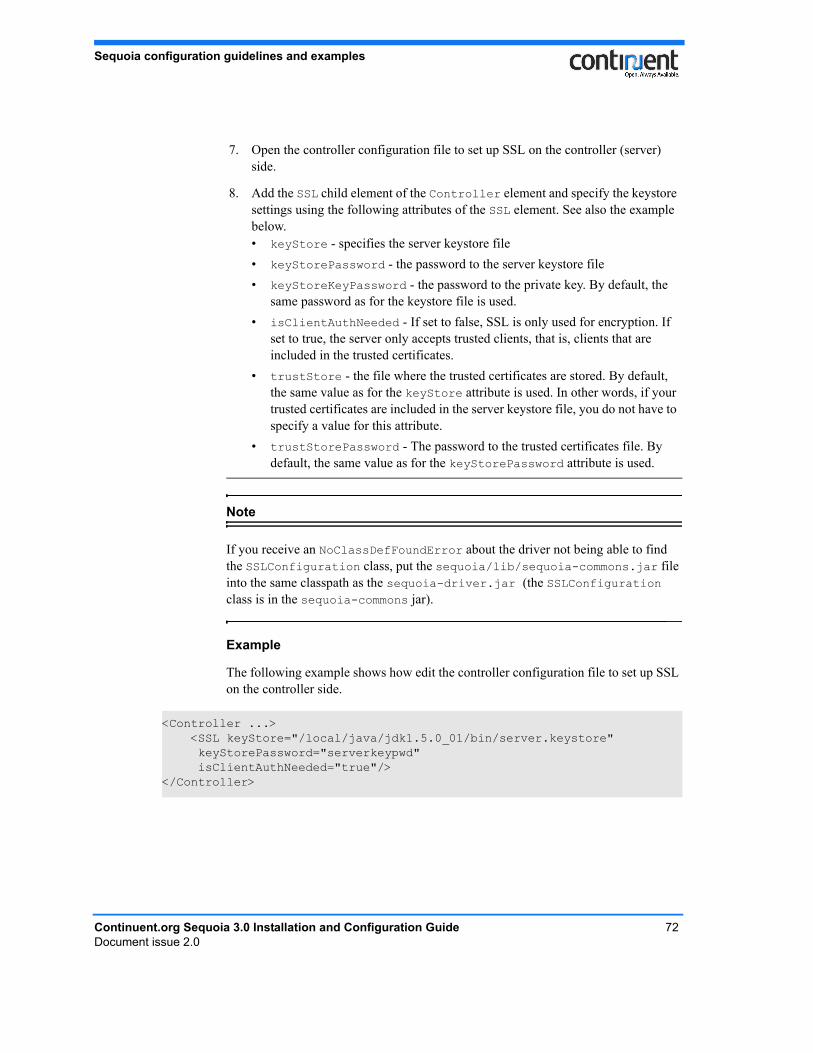
Sequoia configuration guidelines and examples
Note
If you receive an NoClassDefFoundError about the driver not being able to find the SSLConfiguration class, put the sequoia/lib/sequoia-commons.jar file into the same classpath as the sequoia-driver.jar (the SSLConfiguration class is in the sequoia-commons jar).
Example
The following example shows how edit the controller configuration file to set up SSL on the controller side.
7. Open the controller configuration file to set up SSL on the controller (server) side.
8. Add the SSL child element of the Controller element and specify the keystore settings using the following attributes of the SSL element. See also the example below.• keyStore - specifies the server keystore file• keyStorePassword - the password to the server keystore file• keyStoreKeyPassword - the password to the private key. By default, the
same password as for the keystore file is used.• isClientAuthNeeded - If set to false, SSL is only used for encryption. If
set to true, the server only accepts trusted clients, that is, clients that are included in the trusted certificates.
• trustStore - the file where the trusted certificates are stored. By default, the same value as for the keyStore attribute is used. In other words, if your trusted certificates are included in the server keystore file, you do not have to specify a value for this attribute.
• trustStorePassword - The password to the trusted certificates file. By default, the same value as for the keyStorePassword attribute is used.
<Controller ...> <SSL keyStore="/local/java/jdk1.5.0_01/bin/server.keystore" keyStorePassword="serverkeypwd" isClientAuthNeeded="true"/></Controller>
Continuent.org Sequoia 3.0 Installation and Configuration Guide 72Document issue 2.0
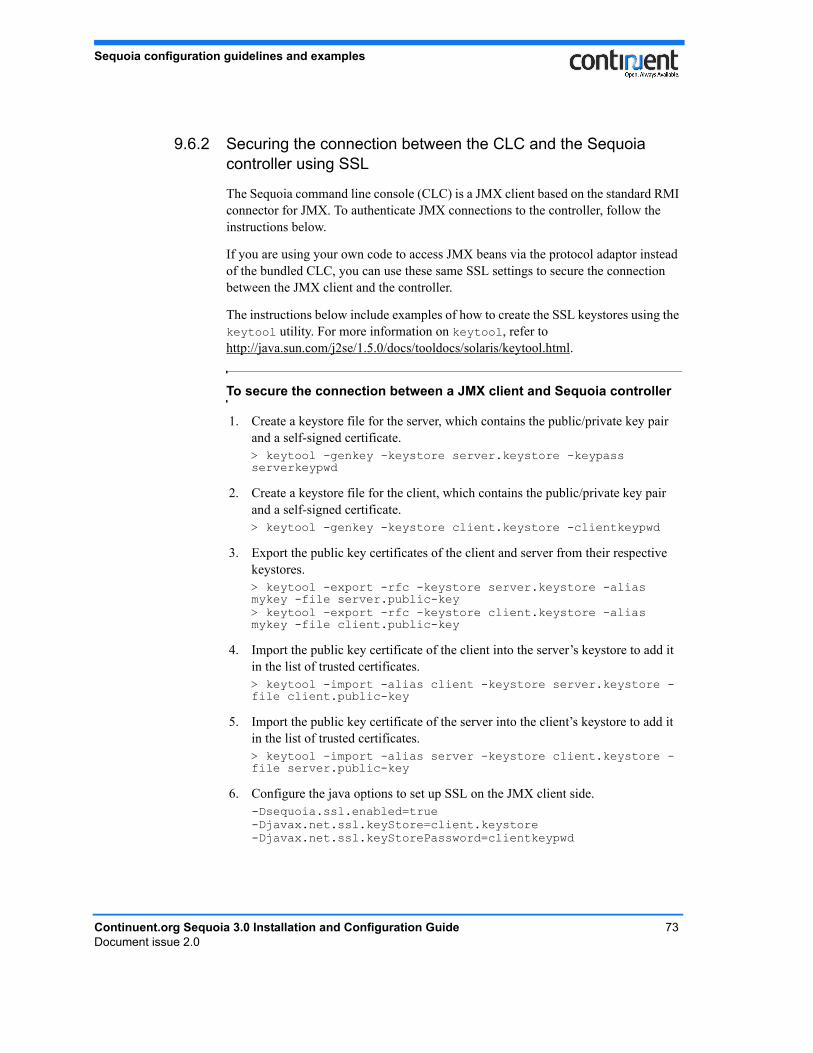
Sequoia configuration guidelines and examples
9.6.2 Securing the connection between the CLC and the Sequoia controller using SSL
The Sequoia command line console (CLC) is a JMX client based on the standard RMI connector for JMX. To authenticate JMX connections to the controller, follow the instructions below.
If you are using your own code to access JMX beans via the protocol adaptor instead of the bundled CLC, you can use these same SSL settings to secure the connection between the JMX client and the controller.
The instructions below include examples of how to create the SSL keystores using the keytool utility. For more information on keytool, refer to http://java.sun.com/j2se/1.5.0/docs/tooldocs/solaris/keytool.html.
To secure the connection between a JMX client and Sequoia controller
1. Create a keystore file for the server, which contains the public/private key pair and a self-signed certificate.> keytool -genkey -keystore server.keystore -keypass serverkeypwd
2. Create a keystore file for the client, which contains the public/private key pair and a self-signed certificate.> keytool -genkey -keystore client.keystore -clientkeypwd
3. Export the public key certificates of the client and server from their respective keystores.> keytool -export -rfc -keystore server.keystore -alias mykey -file server.public-key> keytool -export -rfc -keystore client.keystore -alias mykey -file client.public-key
4. Import the public key certificate of the client into the server’s keystore to add it in the list of trusted certificates.> keytool -import -alias client -keystore server.keystore -file client.public-key
5. Import the public key certificate of the server into the client’s keystore to add it in the list of trusted certificates.> keytool -import -alias server -keystore client.keystore -file server.public-key
6. Configure the java options to set up SSL on the JMX client side.-Dsequoia.ssl.enabled=true-Djavax.net.ssl.keyStore=client.keystore-Djavax.net.ssl.keyStorePassword=clientkeypwd
Continuent.org Sequoia 3.0 Installation and Configuration Guide 73Document issue 2.0

Sequoia configuration guidelines and examples
Example
The following example shows how edit the controller configuration file to set up SSL on the controller side
9.6.3 Disabling dynamic addition of drivers
By default, Sequoia allows additional drivers to be added dynamically to the controller. However, this feature also allows the loading of malicious code to the controller.
7. Open the controller configuration file to set up SSL on the controller (server) side.
8. Add the JmxSettings child element of the Controller element.
9. Add the SSL child element of the JmxSettings element and specify the keystore settings using the following attributes of the SSL element. See also the example below.• keyStore - specifies the server keystore file• keyStorePassword - the password to the server keystore file• keyStoreKeyPassword - the password to the private key. By default, the
same password as for the keystore file is used.• isClientAuthNeeded - If set to false, SSL is only used for encryption. If
set to true, the server only accepts trusted clients, that is, clients that are included in the trusted certificates.
• trustStore - the file where the trusted certificates are stored. By default, the same value as for the keyStore attribute is used. In other words, if your trusted certificates are included in the server keystore file, you do not have to specify a value for this attribute.
• trustStorePassword - The password to the trusted certificates file. By default, the same value as for the keyStorePassword attribute is used
<Controller ...> <JmxSettings> <SSL keyStore="/local/java/jdk1.5.0_01/bin/server.keystore" keyStorePassword="serverkeypwd" isClientAuthNeeded="false"/> </JmxSettings></Controller>
Continuent.org Sequoia 3.0 Installation and Configuration Guide 74Document issue 2.0
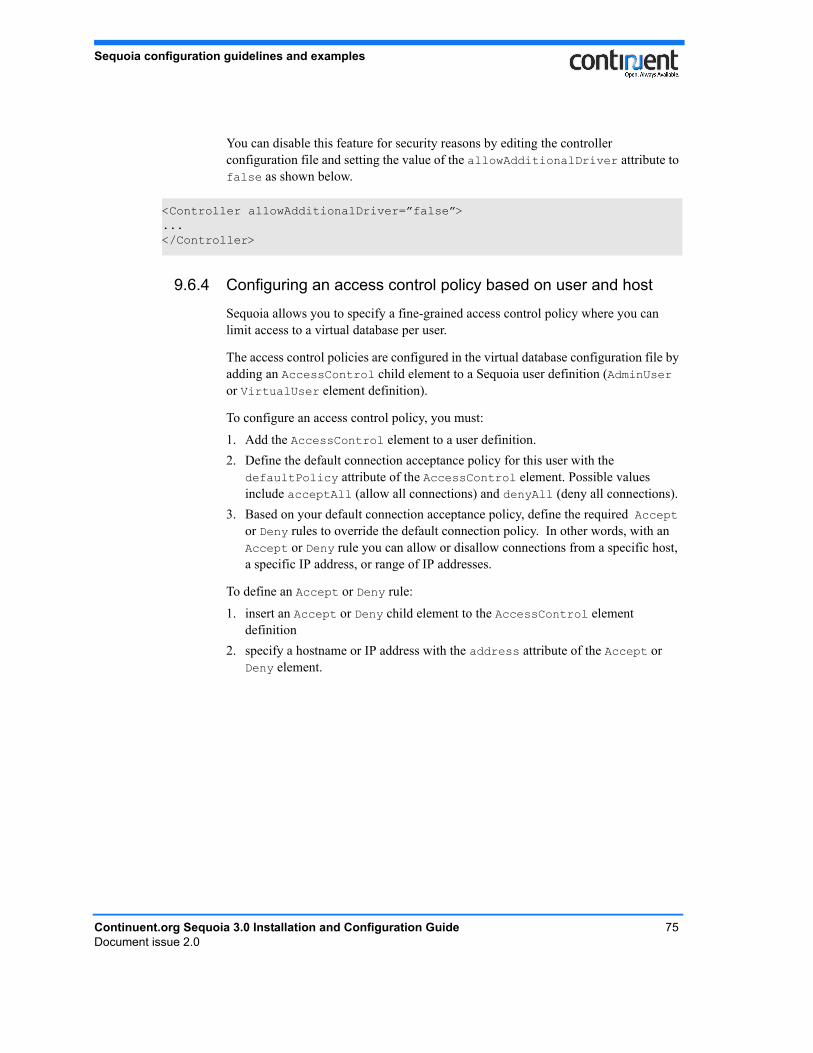
Sequoia configuration guidelines and examples
You can disable this feature for security reasons by editing the controller configuration file and setting the value of the allowAdditionalDriver attribute to false as shown below.
9.6.4 Configuring an access control policy based on user and host
Sequoia allows you to specify a fine-grained access control policy where you can limit access to a virtual database per user.
The access control policies are configured in the virtual database configuration file by adding an AccessControl child element to a Sequoia user definition (AdminUser or VirtualUser element definition).
To configure an access control policy, you must:
1. Add the AccessControl element to a user definition.2. Define the default connection acceptance policy for this user with the
defaultPolicy attribute of the AccessControl element. Possible values include acceptAll (allow all connections) and denyAll (deny all connections).
3. Based on your default connection acceptance policy, define the required Accept or Deny rules to override the default connection policy. In other words, with an Accept or Deny rule you can allow or disallow connections from a specific host, a specific IP address, or range of IP addresses.
To define an Accept or Deny rule:
1. insert an Accept or Deny child element to the AccessControl element definition
2. specify a hostname or IP address with the address attribute of the Accept or Deny element.
<Controller allowAdditionalDriver=”false”>...</Controller>
Continuent.org Sequoia 3.0 Installation and Configuration Guide 75Document issue 2.0
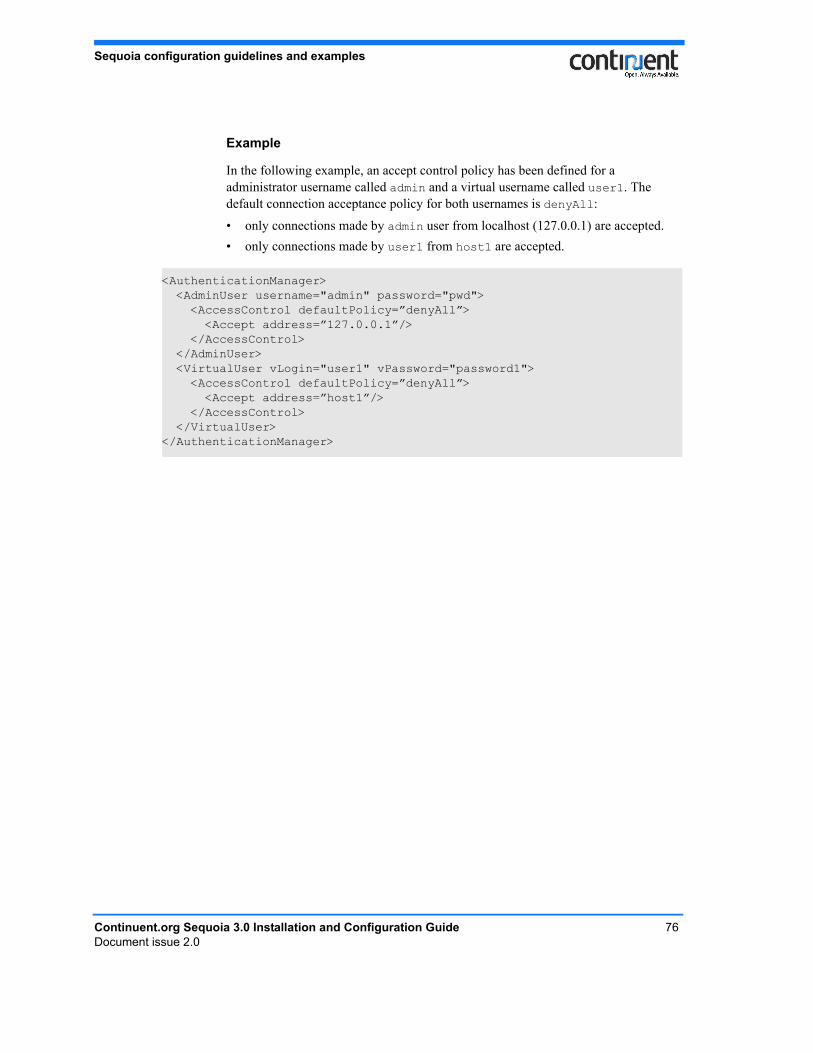
Sequoia configuration guidelines and examples
Example
In the following example, an accept control policy has been defined for a administrator username called admin and a virtual username called user1. The default connection acceptance policy for both usernames is denyAll:
• only connections made by admin user from localhost (127.0.0.1) are accepted. • only connections made by user1 from host1 are accepted.
<AuthenticationManager> <AdminUser username="admin" password="pwd"> <AccessControl defaultPolicy=”denyAll”> <Accept address=”127.0.0.1”/> </AccessControl> </AdminUser> <VirtualUser vLogin="user1" vPassword="password1"> <AccessControl defaultPolicy=”denyAll”> <Accept address=”host1”/> </AccessControl> </VirtualUser></AuthenticationManager>
Continuent.org Sequoia 3.0 Installation and Configuration Guide 76Document issue 2.0