Embed Size (px)
Citation preview
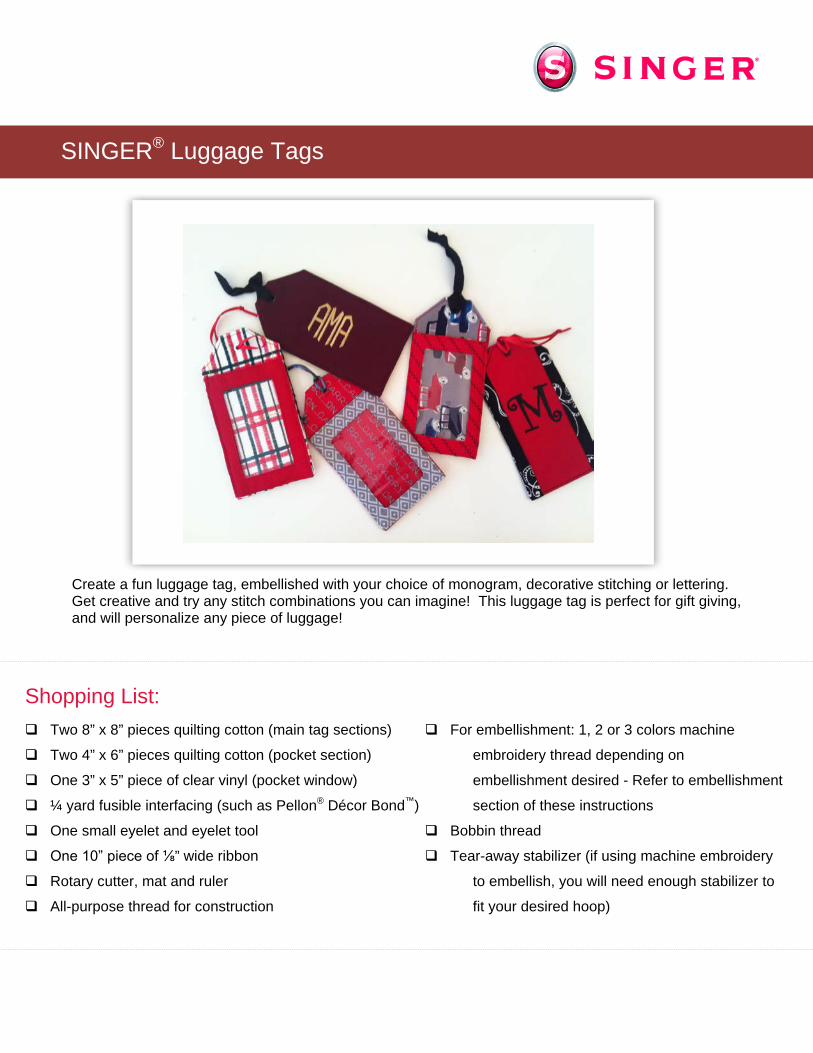
Create a fun luggage tag, embellished with your choice of monogram, decorative stitching or lettering. Get creative and try any stitch combinations you can imagine! This luggage tag is perfect for gift giving, and will personalize any piece of luggage!
SINGER® Luggage Tags
Two 8” x 8” pieces quilting cotton (main tag sections)
Two 4” x 6” pieces quilting cotton (pocket section)
One 3” x 5” piece of clear vinyl (pocket window)
¼ yard fusible interfacing (such as Pellon® Décor Bond™)
One small eyelet and eyelet tool
One 10” piece of ⅛” wide ribbon
Rotary cutter, mat and ruler
All-purpose thread for construction
For embellishment: 1, 2 or 3 colors machine
embroidery thread depending on
embellishment desired - Refer to embellishment
section of these instructions
Bobbin thread
Tear-away stabilizer (if using machine embroidery
to embellish, you will need enough stabilizer to
fit your desired hoop)
Shopping List:
2
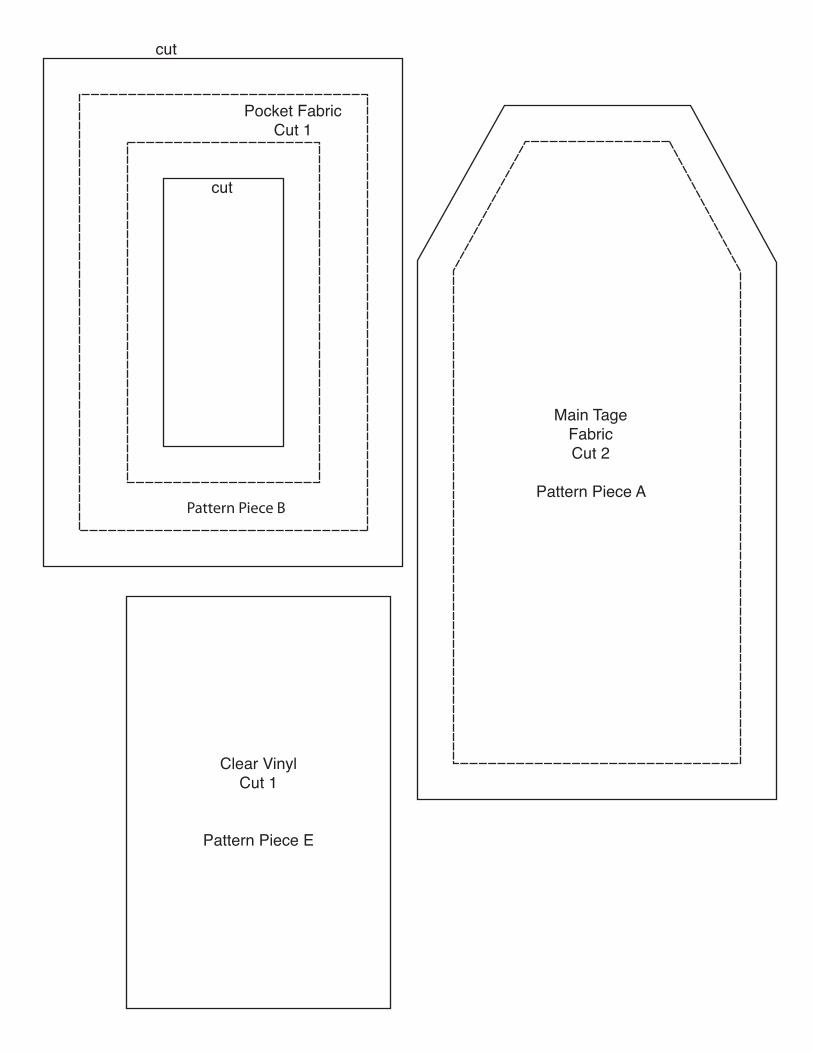
1. Cut 2 of main tag fabric from pattern piece A.
2. Cut 1 of pocket fabric from pattern piece B.
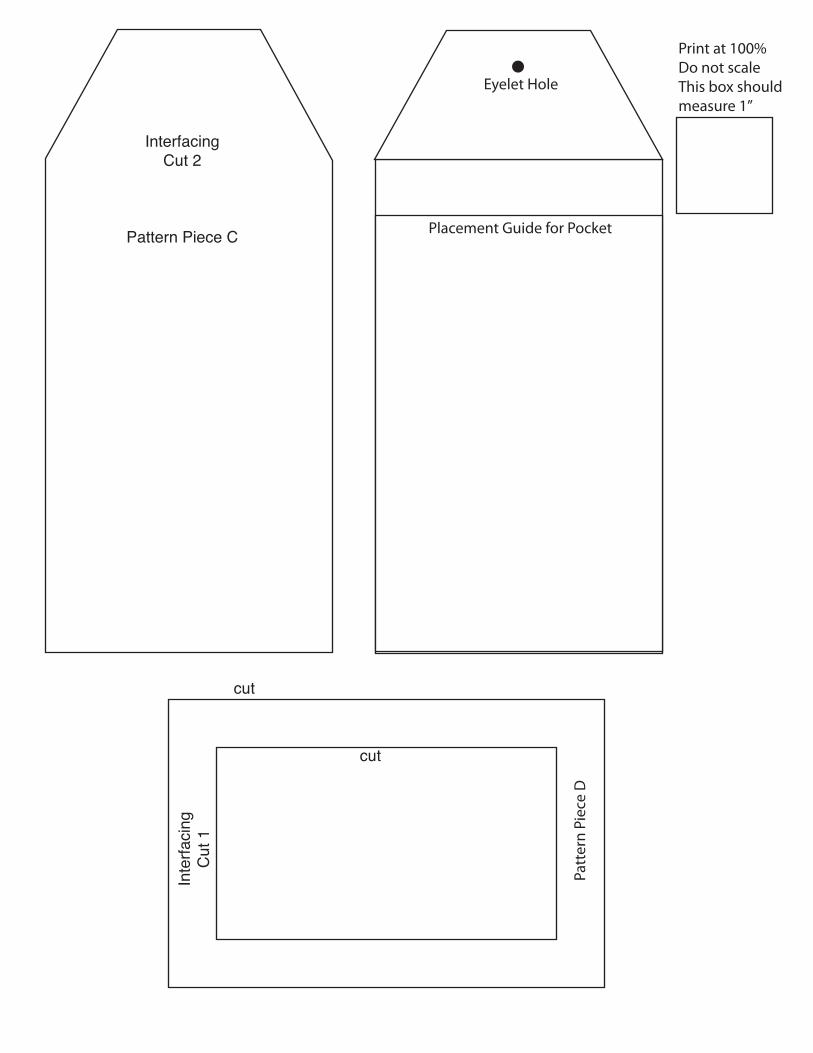
3. Cut 2 of interfacing from pattern piece C.
4. Cut 1 of interfacing from pattern piece D.
5. Cut 1 of clear vinyl from pattern piece E.
6. Fuse the corresponding interfacing to each cut fabric piece. (C to A, and D to B)
7. After embellishing the fabric pieces in the desired fashion (see “Embellishment Options and Ideas” section) proceed with Step 8.
8. Press seam allowances of main tag fabric to wrong/interfaced side using the dashed fold line on the pattern piece as a guide. Repeat with remaining main tag fabric piece.
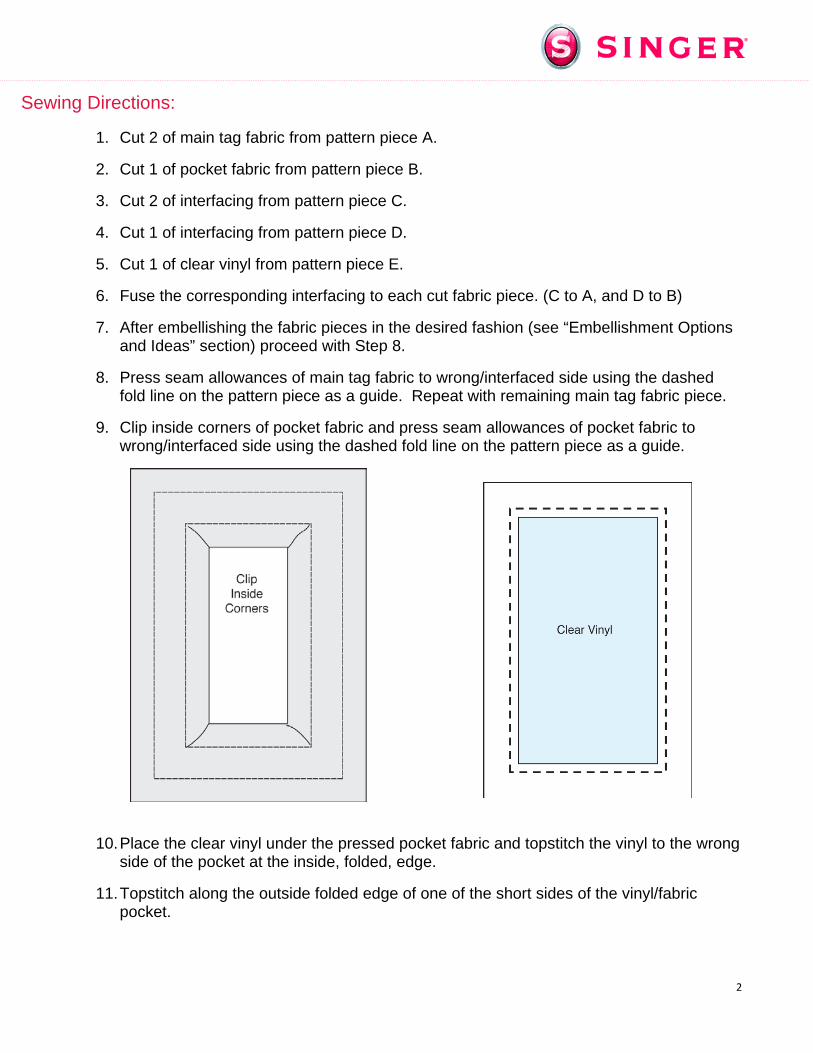
9. Clip inside corners of pocket fabric and press seam allowances of pocket fabric to wrong/interfaced side using the dashed fold line on the pattern piece as a guide.
10. Place the clear vinyl under the pressed pocket fabric and topstitch the vinyl to the wrong side of the pocket at the inside, folded, edge.
11. Topstitch along the outside folded edge of one of the short sides of the vinyl/fabric pocket.
Sewing Directions:
3
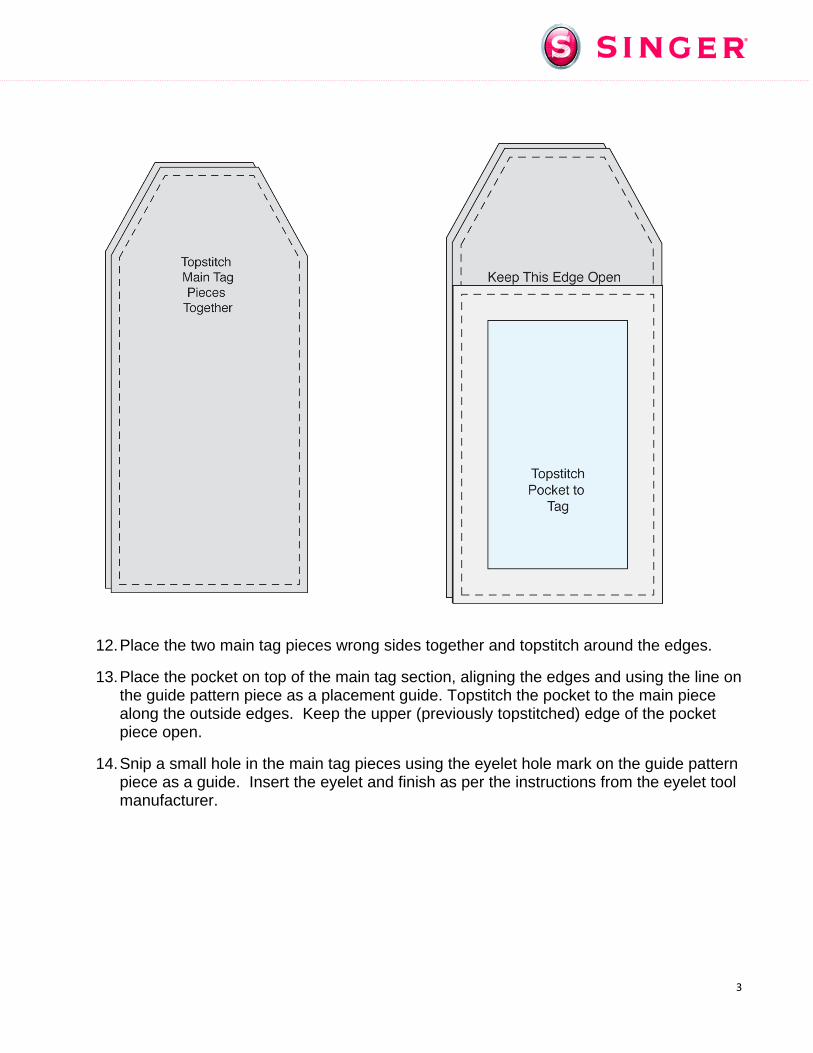
12. Place the two main tag pieces wrong sides together and topstitch around the edges.
13. Place the pocket on top of the main tag section, aligning the edges and using the line on the guide pattern piece as a placement guide. Topstitch the pocket to the main piece along the outside edges. Keep the upper (previously topstitched) edge of the pocket piece open.
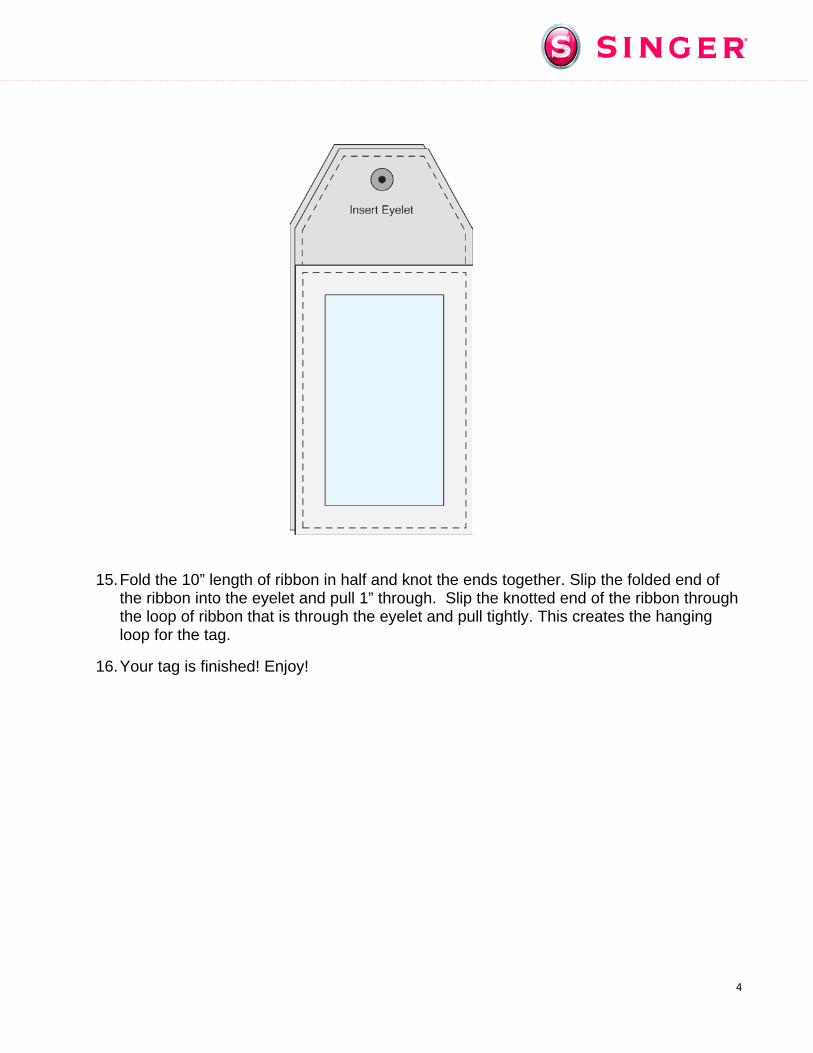
14. Snip a small hole in the main tag pieces using the eyelet hole mark on the guide pattern piece as a guide. Insert the eyelet and finish as per the instructions from the eyelet tool manufacturer.
4
15. Fold the 10” length of ribbon in half and knot the ends together. Slip the folded end of the ribbon into the eyelet and pull 1” through. Slip the knotted end of the ribbon through the loop of ribbon that is through the eyelet and pull tightly. This creates the hanging loop for the tag.
16. Your tag is finished! Enjoy!
5
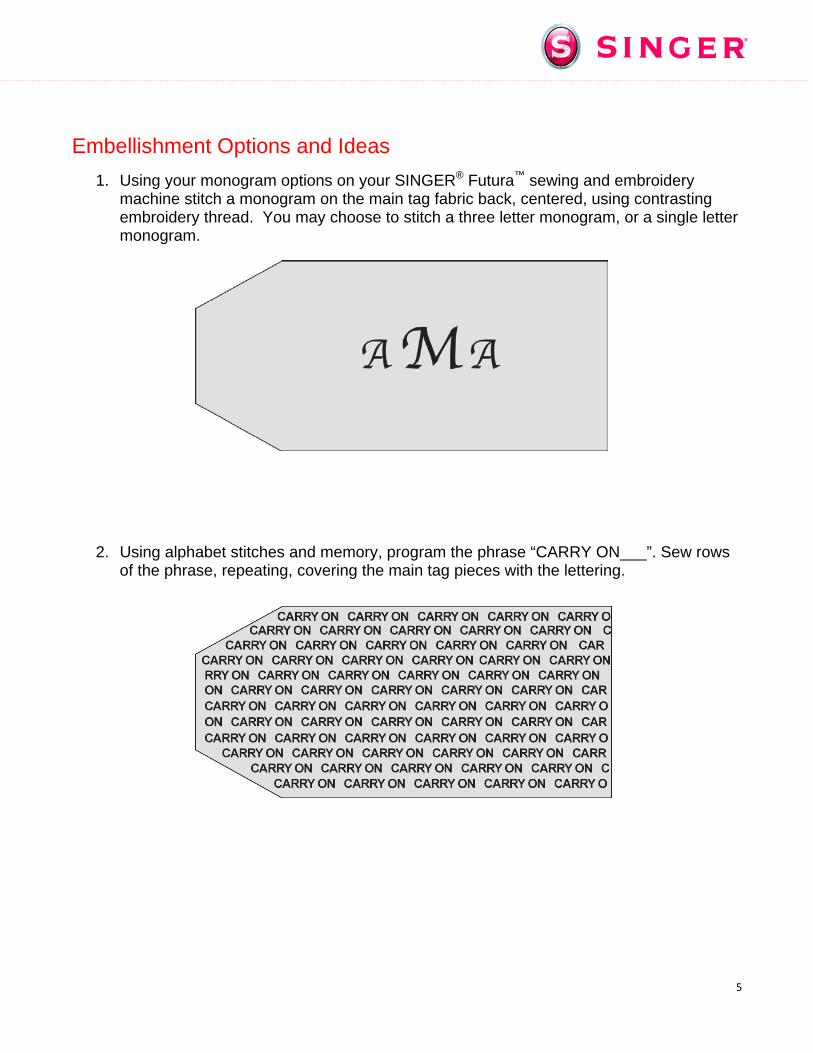
Embellishment Options and Ideas 1. Using your monogram options on your SINGER® Futura™ sewing and embroidery
machine stitch a monogram on the main tag fabric back, centered, using contrasting embroidery thread. You may choose to stitch a three letter monogram, or a single letter monogram.
2. Using alphabet stitches and memory, program the phrase “CARRY ON___”. Sew rows of the phrase, repeating, covering the main tag pieces with the lettering.
6
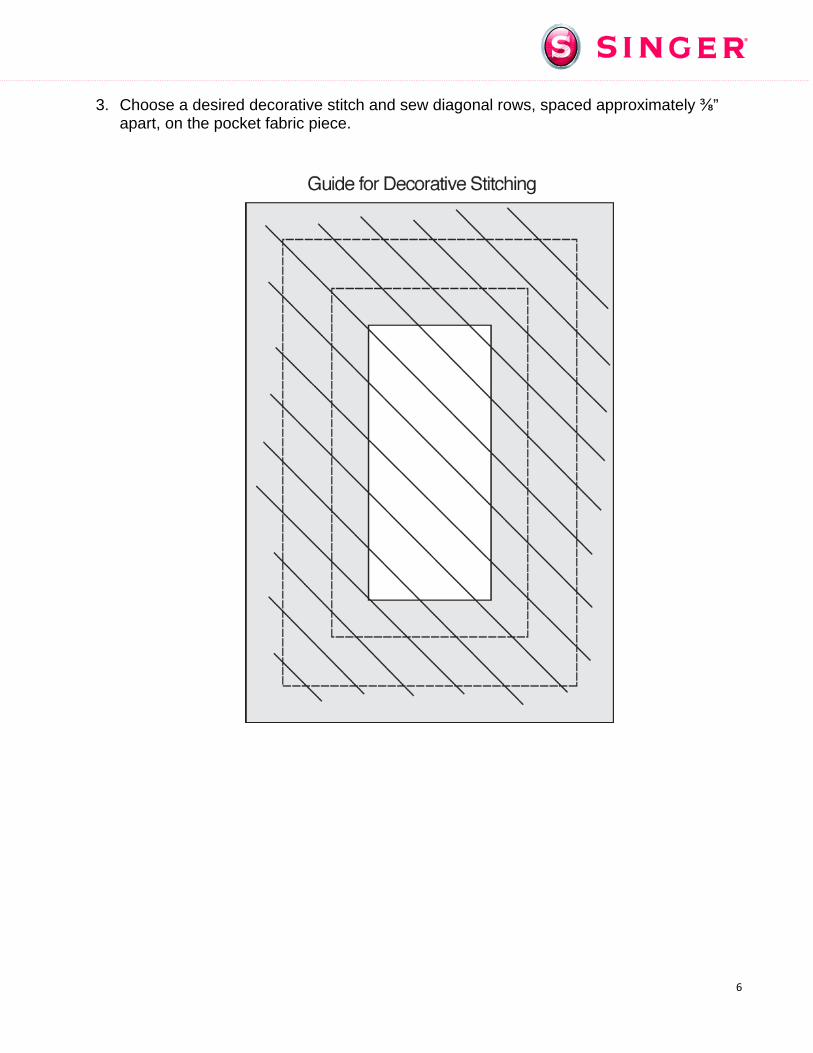
3. Choose a desired decorative stitch and sew diagonal rows, spaced approximately ⅜” apart, on the pocket fabric piece.

7
4. Create a “plaid” using three colors of embroidery thread; red, green and yellow-gold. Use the guide below and first sew the red with a 5mm wide satin stitch, sew the green with a 3mm wide satin stitch and the yellow-gold with a triple straight stitch.
8
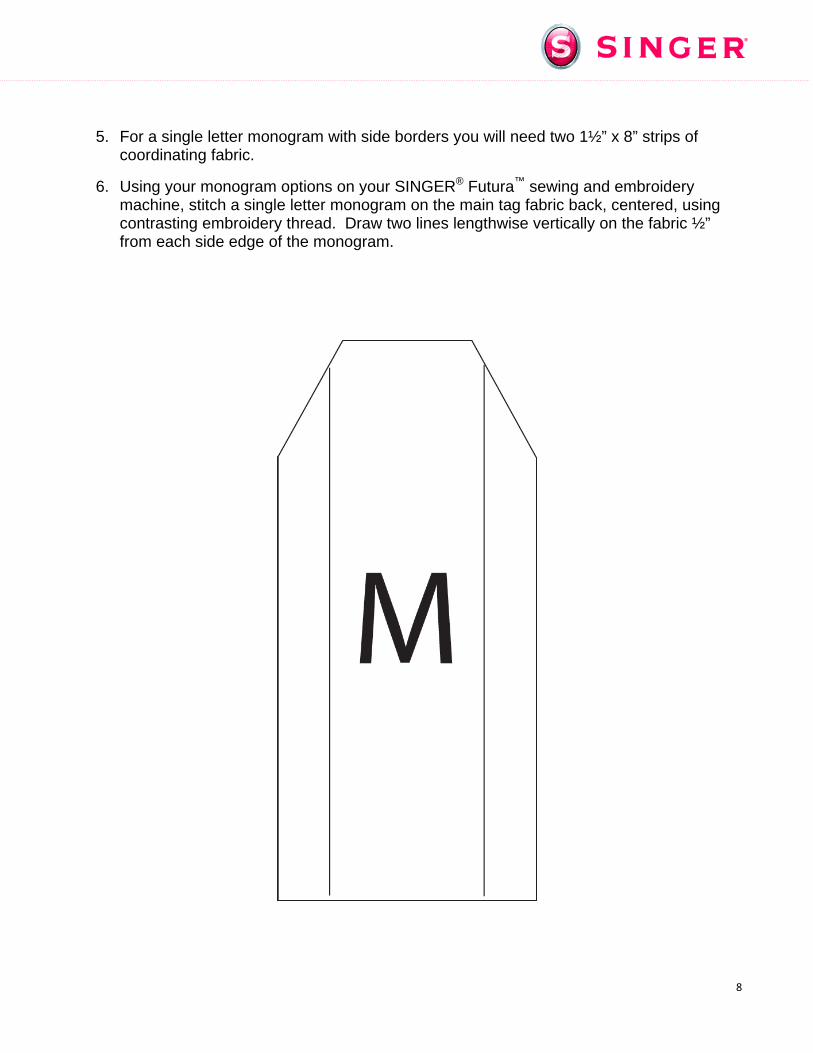
5. For a single letter monogram with side borders you will need two 1½” x 8” strips of coordinating fabric.
6. Using your monogram options on your SINGER® Futura™ sewing and embroidery machine, stitch a single letter monogram on the main tag fabric back, centered, using contrasting embroidery thread. Draw two lines lengthwise vertically on the fabric ½” from each side edge of the monogram.
9
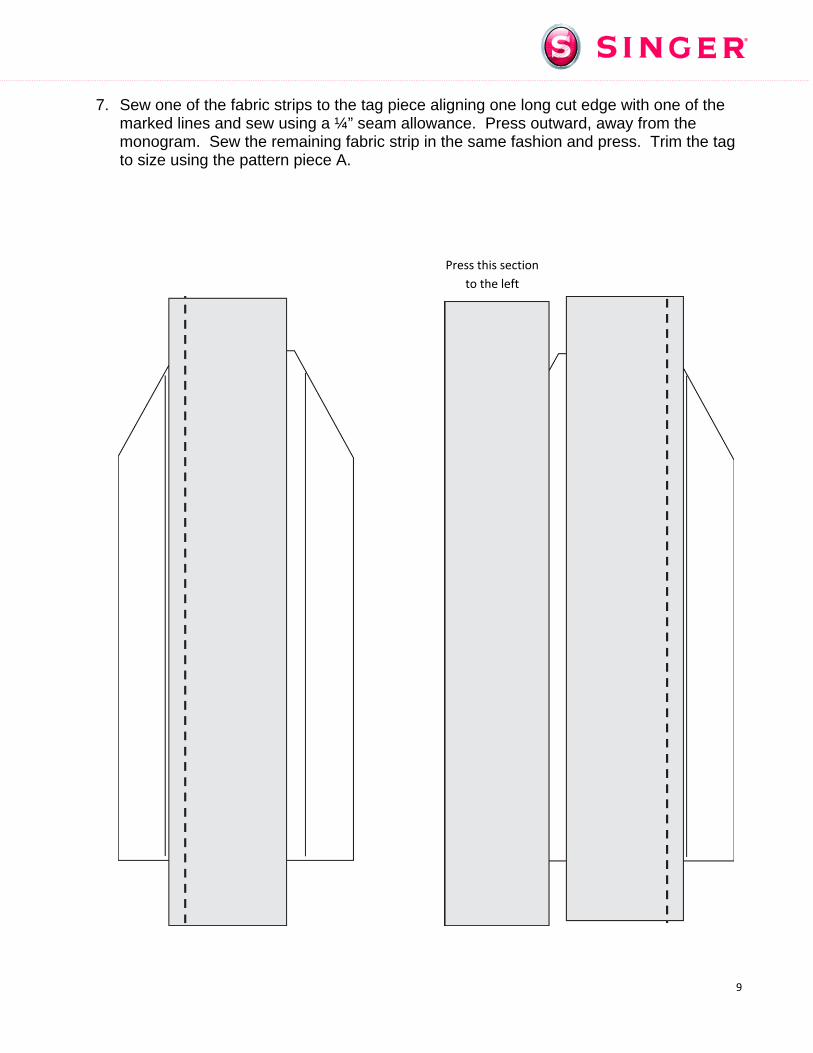
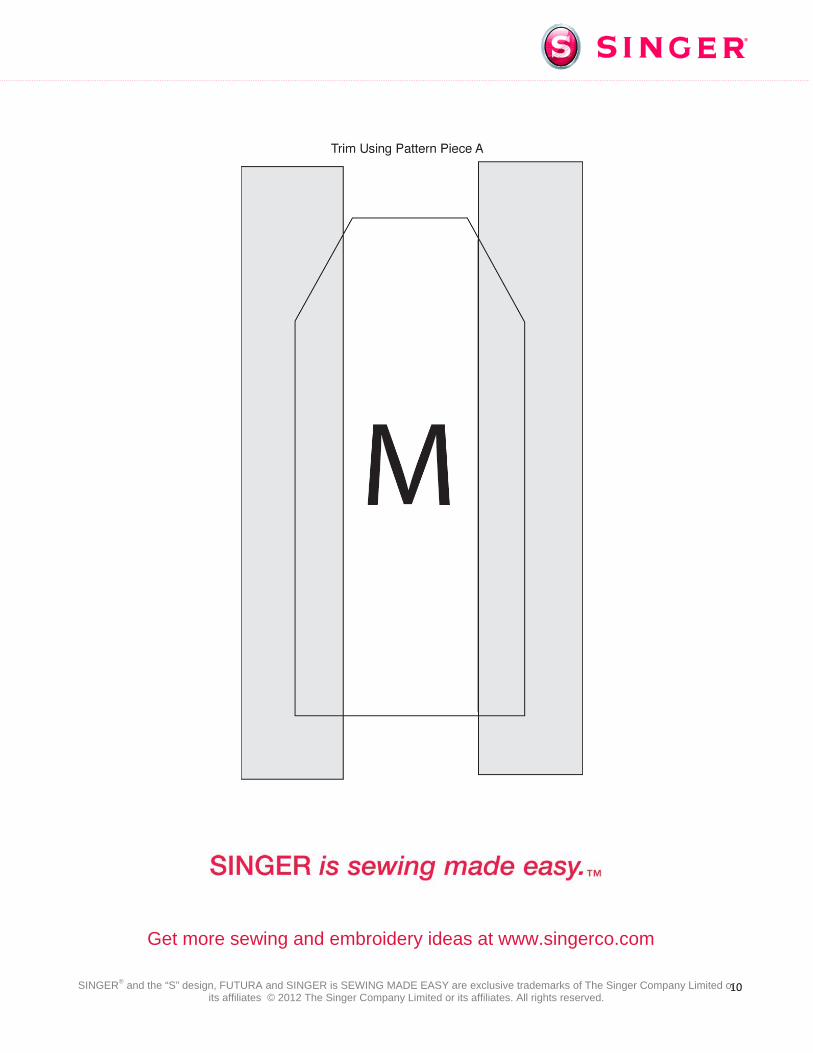
7. Sew one of the fabric strips to the tag piece aligning one long cut edge with one of the marked lines and sew using a ¼” seam allowance. Press outward, away from the monogram. Sew the remaining fabric strip in the same fashion and press. Trim the tag to size using the pattern piece A.
Press this section to the left
10
SINGER® and the “S” design, FUTURA and SINGER is SEWING MADE EASY are exclusive trademarks of The Singer Company Limited or its affiliates © 2012 The Singer Company Limited or its affiliates. All rights reserved.
Get more sewing and embroidery ideas at www.singerco.com
InterfacingCut 2
Pattern Piece C
Inte
rfaci
ngC
ut 1
Placement Guide for Pocket
Eyelet Hole
Patt
ern
Piec
e D
cut
cut
Print at 100%Do not scaleThis box should measure 1”
Clear VinylCut 1
Pattern Piece E
Main TageFabricCut 2
Pattern Piece A
Pocket FabricCut 1
cut
cut
Pattern Piece B