Embed Size (px)
Citation preview

Foreword
ContentsPages
Sewing tochine PrinciPler l-12Sewing Nlachine Facts l-3Preparation for Stitching 3-5Stitch Length, Pressure and
l
{ n FAMTLY rl'nu-crorneo and a home well-appointed are
{ /1 responsibilities of every homemaker. To know and toi recognize good construction in clothing and fabric furnishings1 targely determine how much value is bought with every dollar
i rpent. Savings are greatest when sewing is done at home, if done
I well. The SINGER* Sewing Skills Course is designed to create
3 ,n awareness of good quality workmanship and to teach the:l;j simple procedures for attaining better results in sewing.
I e thorough understanding of sewing together with skill inI performance create a well-made product whether it be a dress,
fl .oat, suit or one of the many fabric furnishings for the home.
H fhere is no component of sewing rnore important than theg rtitch itself. When the stitching is flexible and strong, the gar-
# ment has greater durability. When surface stitching is perfectly
! Ulended to the fiber and texture of the fabric it has beauty.;.i Oependable equipment influences the success and quality of
il .very sewing venture.ii Owners of new SINGER* Sewing Machines, sewing with the
H nnest equipment, experience many advantages. The smooth
fl operation of the machine and the absolute control of stitching
H rpeed enable them to produce better-guided stitching, straighter
ffi reams, greater exactness in assembling sections of the garment,
H and more beautiful buttonhoies, pockets and decorative details.
$ The wide selection of needles enables the Singer owner to
H quickly adapt the sewing machine from stitching the most filmyH weights of fabric to stitching tough, heavy, rugged fabrics''fl
Tension, pressure, and length of stitch are regulated simply and
lJ easily to compensate for changes in weights and textures ofFj fabrics. Perhaps no other single sewing machine is called upon
:tl to stitch a greater variety of fabrics than one used in the home..l Its simple flexibility is the secret of its usefulness and performance.
# Skillful, high quality sewing is within the scope of every
ffi woman. Once a few simple, basic principles are learned, it is
ffi only a matter of practice until the skill is developed that makes
ffi sewing a pleasure. Good sewing habits are reflected in everything
ryi that one makes and are easily developed when attention is
;.i deliberately directed toward them':alF'j The SINGER Sewing Skills Course provides time for bothili instruction and practice so that good sewing habits are cor-i;,1
tt rectly implanted.il The scope of sewing is broad and its rewards are great, both
.1] in savings and in the pleasuie of achievement. No one knows
ij everything about sewing, nor does one ever learn enough' for=:l there are always new ideas, applications and methods thatAli Llrtrc .rt .rwoJr al-Hr^v*-'"-"
,*-- , ---.- -: -.
-f{ present a challenge because of the constantly changing fashion
H picture, tho new discoveries and developments in the textile
ffi industry, and the advancements in equipment design' The
=ti SINGER Sewing Skills Course has as much to offer women who
1j already sew as it ofiers those who are eager to learn to sew.
ri.*-: NA343o. Copyright U S.A., 1955, bv Tm SINGER MANUFACTUnING CO'
=,_, : . All rights reserved for all countrie!, J,itho. in U. S. A,iiiri;:-'"%
5-/8-l I
t2
t3-21
TensionStitching for Line 'OuruNr ron LnssoN I
Sritrhing ilertods ood Foshion
DctoilsStitching for Contour 13-15Fashion Details 16-20OurrrNr ron LnssoN II 2l
Sewirq lllochine Attothments 22-30OuruNn ron LBssoN III 30
Fochion Stirther 31-36OurrrNB ron LessoN IV 36
Zipper Closures 37-47Oururxr ron LrssoN V . 47
Hems ond Hem Finishes 48-55Ourr-rNe ron LrssoN VI 55
'*": ;",".,,,: ", ;,, ",",;,^.".^".,",""t":.
Sewing Milehine PrineiplesSewing Maehine Care General Bule* tor Oiling
rrE KNowLEDGE AND cenu with which the sewing machine ishandled determines to some extent the pleasure and satis-
faction in its use as well as the service that it renders. Many fab-rics, when sewed, drop lint and particles of filler. These, withdust and moisture from the air, all work together on the sewingmachine to create a film that is best removed from time to time.A good craftsman is meticulous in the care of his tools.
When the sewing machine is used all day and every day, itshould be oi.led eoery day. When used less continuously, a weeklyoiling is usually adequate. Oil is never placed on the machinebefore the dust and iint are removed. The sewing machine in-struction book carries diagrams and procedures for oiling themachine being used. It is best to devote some study to thesediagrams while the machine is new to avoid overlooking any ofthe points indicated. Oil keeps the sewing machine running freely,preventing friction and wear.
%Bemooal of lDast and Lint
ilNsl!1
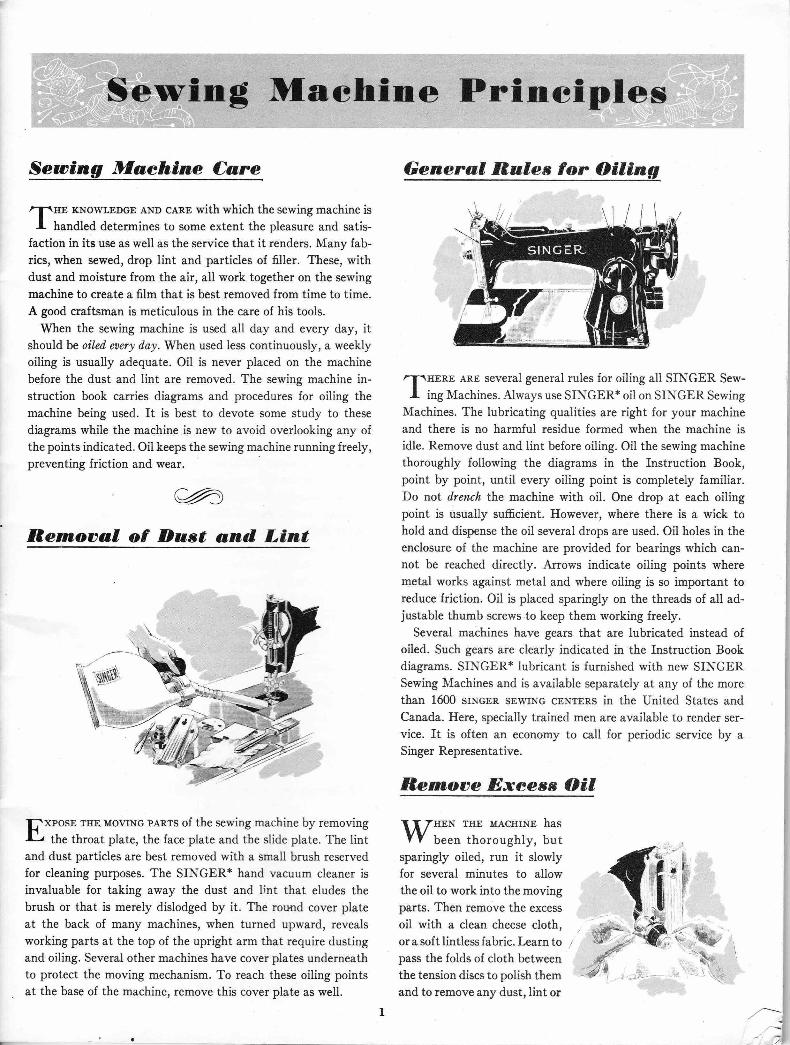
f,xrosa rHE MovrNG panrs of the sewing machine by removingr--i the throat plate, the face plate and the slide plate. The lintand dust particles are best removed with a small brush reservedfor cleaning purposes. The SINGER* hand vacuum cleaner isinvaluable for taking away the dust and lint that eludes thebrush or that is merely dislodged by it. The rotmd cover plateat the back of many machines, when turned upward, revealsworking parts at the top of the upright arm that require dustingand oiling. Several other machines have cover plates underneathto protect the moving mechanism. To reach these oiling pointsat the base of the machine, remove this cover plate as well.
r r THEN rsn lracnrNn, hasW 1..r, thoroughly, but
sparingly oiled, run it slowlyfor several minutes to allowthe oil to work into the movingparts. Then remove the excessoil with a clean cheese cloth,or a soft Iintless fabric. Learn topass the folds of cloth betweenthe tension discs to polish themand to remove any dust, lint or
/T\HERE anr several general rules for oiling all SINGER Sew-I ing Machines. Always use SINGER* oil on SINGER Sewing
Machines. The lubricating qualities are right for your machineand there is no harmful residue formed when the machine isidle. Remove dust and lint before oiling. Oil the sewing machinethoroughly following the diagrams in the Instruction Book,point by point, until every oiling point is completely familiar.Do not d.rench the machine with oil. One drop at each oiiingpoint is usually sufficient. However, where there is a wick tohold and dispense the oii several drops are used. Oil holes in theenclosure of the machine are provided for bearings which can-not be reached directly. Arrows indicate oiling points wheremetal works against metal and where oiling is so important toreduce friction. Oil is placed sparingiy on the threads of all ad-justable thumb screws to keep them working freely.
Several machines have gears that are lubricated instead ofoiled. Such gears are clearly indicated in the Instruction Bookdiagrams. SINGER* lubricant is furnished with new SINGERSewing Machines and is available separately at any of the morethan 1600 sTNGER sEwrNG cENTERS in the United States andCanada. Here, specially trained men are available to render ser-vice. It is often an economy to call for periodic service by aSinger Representative.
Bernooe Dxeess Oil
Retnoo al and Beplaeernenlol Balb in SfNGDtr. LIGET
.f"" slNGBn* light will focus ar soft clear light on the needle
point and presser foot, prevent-ing eyestrain and making skillful,careful work easier to produce.While the bulb is of long burningfilament, occasionally it must bereplaced. The bulb is of a bayonetand socket type and does not un-
screw. To remove lamp, press the bulb into the SINGER.lightsocket and, at the same time, turn it a quarter turn away as you
sit in sewing position. Several models are equipped with aSINGER light on which the lens encloses the bulb. The separateinstruction book for each model machine clearly indicates theremoval of the lens prior to removing the bulb. The new bulb isreplaced by pressing it into the socket and then turning it aquarter turn toward the operator,
Speed, Control and, PostareouR PosruRE, when seated at themachine, has a direct influence
on your comfort as well as on the re-sults in sewing. Sit squarely in frontof the machine with both feet flat onthe floor.
When controlling the machine withthe knee lever, sit so the knee com-fortably engages the lever. Mostcabinet model sewing machines areequipped with an adjustment thatpermits moving the lever to the rightor left to suit the operator. Someprefer to use the foot control and allcurrent machines having a knee lever also permit the alternativeof a foot control, as well. The speed control is built to producesteady even stitching that is accelerated or retarded as the pres-sure on the controller is increased or decreased. In using thefoot control, steadiness and evenness of speed is gained throughbalancing the right side of the shoe on the foot rest and gentlytilting the foot inwardly to depress the controller.
A full range of gradual speeds is at the operator's command.The skill of the operator in home sewing is more often judgedby her ability to control the machine at even rhythmic slozospeed than by her ability to stitch rapidly. High speeds are at-tained by merely depressing the controller and are importautonly for stitching long straight seams. The fine careful detail ofbeautiful clothes is most often done at slow rhythmic speeds.
-l i
oil that might have found its way there. Learn to avoid catchingthe fine wire take-up spring in the cloth when polishing the ten-sion discs. Each thread guide and the face plate must be polishedwith clean cheese cloth to remove any accumulated dust, Iint oroil. The area around the presser foot and needle where both thepresser bar and needle bar leave the heavy enclosure of the armof the machine are often flowing with excess oil unless care wasexercised when oiling. Remove both presser foot and needle andwith a clean cheese cloth wipe all the excess oil from this area.Polish the presser foot and needle before replacing. Thread themachine and stitch until the thread is clear of oil.
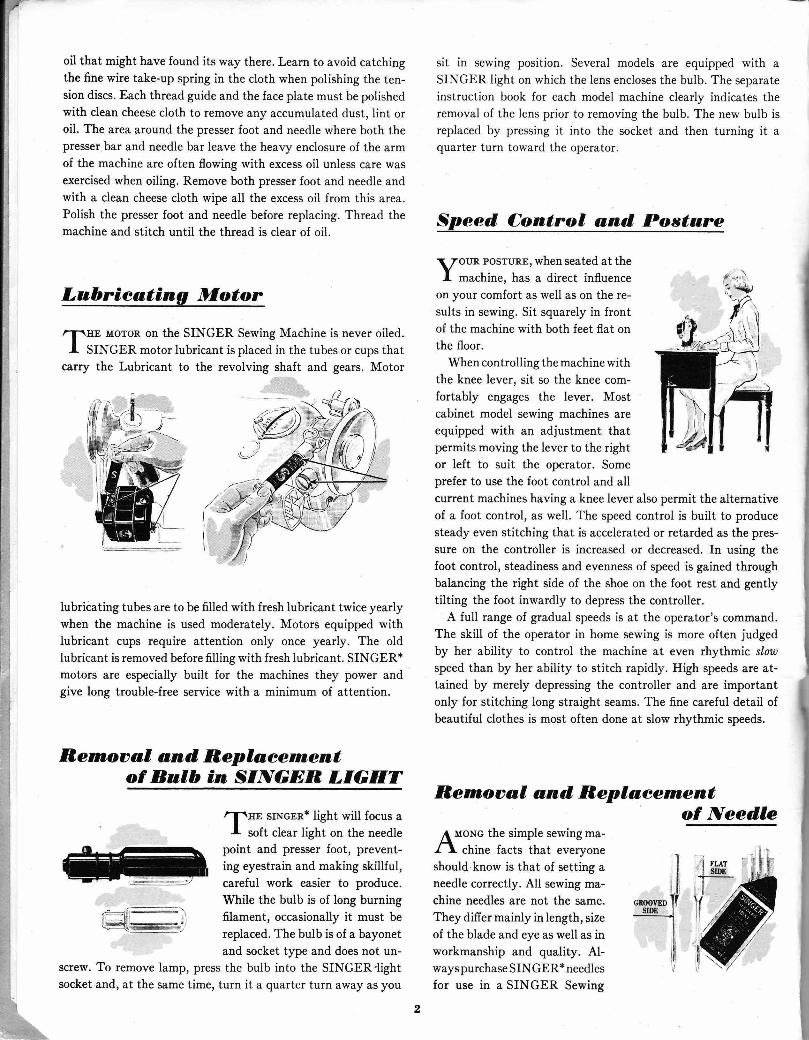
Lahrieating DlotorIrE MoroR on the SINGER Sewing Machine is never oiled.SINGER motor lubricant is placed in the tubes or cups that
carry the Lubricant to the revolving shaft and gears. Motor
lubriiating tubes are to be filled with fresh lubricant twice yearlywhen the machine is used moderately. Motors equipped withIubricant cups require attention only once yearly. The oldlubricant is removed before filling with fresh lubricant. SINGER*motors are especially built for the machines they power andgive long trouble-free service with a minimum of attention.
fr,emooal and, B,eplaeetnentof Need,le
A MoNG the simple sewing ma-I \ chine facts that everyoneshould.know is that of setting aneedle correctly. AIl sewing ma-chine needles are not the same.They difier mainly in length, sizeof the blade and eye as well as inworkmanship and quality. Al-ways purchase SINGER* needlesfor use in a SINGER Sewing
Machine. SINGER needles are manufactured with the greatestcare under strictest manufacturing limits and are superior inquality, durability and performance.
Sewing machine needles characteristically have a shank oneside of which is rounded, the other, flat. The blade of the needlecarries a long groove on one side and is rounded on the other.The long groove down the blade of the needle, on the oppositeside from the flat shank, protects the thread as the needle car-ries it downward. Therefore, the long groove always faces theside from which the needle is threaded.
If, when setting the needle, the groove is not placed in thisposition, the machine will not form the stitch. When threadingan unfamiliar machine, the direction for threading can bequickly determined by locating the long groove with the fingernail and threading from that direction, and in addition a threadguide is always located above the needle on the side from whichthe machine is threaded.
Some machines thread from front to back, others from left toright and still others from right to left.
The needle clamp is so designed to hold the needle securelyand to control the height to which the needle can be set. It isimportant to set the needle into the clamp as high as possibleand then tighten the thumb screw securely. If set to improperheight the machine will skip stitches. A bent needle will causethe fabric to draw to one side feeding in a curve rather than astraight line. A needle too fine for the thread will cause thethread to fray. A blunt needle will cause pulls in the fabric. It isa good practice, when a stitching problem occurs, to check thethreading, and then replace the needle, if necessary. It is mostconvenient, therefore, to have a full supply of all sizes of needleson hand to meet all needs.
Preparation for Stitehtn$Soleetion of lVeed,le and, Thread,t-nrrE sELECrroN of both needle and thread is based on theI t"b.i. to be stitched. The Fabric, Thread, and Needle Chart
given below will be a helpful guide for this selection. The threadmust blend with the fabric in color, fiber, and size. Silk is stitchedwith silk. Wool, an animal fiber, is also stitched with silk, ananimal fiber. Cottons are stitched with cotton or mercerizedthread. Rayon fabrics with a sheen are most often stitched withsilk, while those with a dull surface, or of the spun yarn type areoften stitched with mercerized thread.
The synthetic threads now appearing for use in home sewingvary somewhat in properties. Their greatest advantages arefound in their fine sizes yet great strength and in their uniformityof diameter. While selections are somewhat limited, colors arebecoming more numerous and uses broader.
The size of the thread must blend with the fabric whenstitched. A "too-heavy" thread will remain on the surface of thefabric and will give shorter service and less strength than afiner thread that imbeds itself into the texture of the fabric. Thethread that is "too-heavy" and remains on the surface, is weak-ened by the friction and abrasion to which it is subjected whenworn.
The needle is selected with consideration for both the threadand the fabric. The eye of the needle must be large enoughfor the thread to pass through it freely. The blade of the needlemust be fine enough not to mar the fabric with a large puncture,
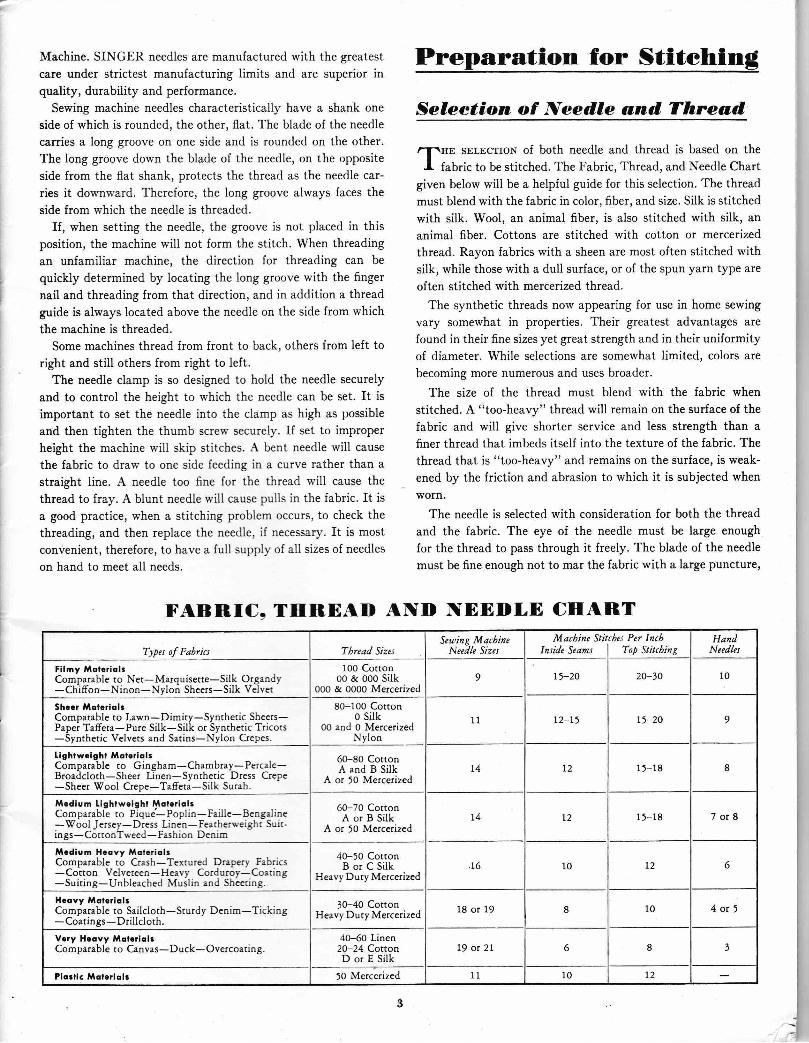
FABNIC9 THBEAI} ANID NDRIDLE CIIABTTypu of Fabrks Tbread Sizes
Seuing MaebineNeedle Sizes
Nachine Stitchu Per InchIntide Seams I Top Stitchhg
HandNcedlet
Filmy ,ilol.riol3Comparable to Net-Marquisette-Silk Organdy-Chiffon-Ninon-Nylon Sheets-Silk Velvet
100 Cottonoo & 000 silk
OOO & OO0O Mercerized9 t5-20 20-)o 10
Shrrr MolcriqlrComparable to Lawn-Dimiry-Synthetic Sheers-Paper Taffeta-Pure Silk-Silk or Synthetic Tricots-Synthetic Velvets and Satins-Nylon Crepes.
8G-lO0 Cotron0 silk
fl) and 0 MercerizedNylon
ll t2-r5 tt-20 9
Lightwcight MotcriclrComparable to Gingham-Chambray-Percale-Broadcloth-Sheer Linen-Synthetic Dress Crepc-Sheer
\D7ool Crepe-Taffeta-Silk Surah.
60-80 CottonA and B Silk
A or 50 Mercerizedr4 t2 1 r-18 I
Modium !,ightwcight llctrriolrComparable to Pique--Poplin-Faille-Bengeline-Wool Jersey-Dress Linen-Featherweight Suit-ings-CottonTweed-Fashion Denim
6O-70 CottonA or B Silk
A or J0 Mercerizedt4 L2 1r-18 7or8
tlodium Hoovy trlclcriclrComparable to Gash-Tertured Drapcry Frbrics-Cotton Velveteeo-Heavy Cordutoy-Coeting-Suiting-Unbleached Muslin and Sheedng.
4o-ro CortonB or C Silk
HeavyDuty Mercerized,16 t0 72 6
H.ovy Motcriol3Comparable to Sailcloth-Sturdy Denim-Ticking-Coatings- Drillcloth.
3O-40 CottonHeavy Duty Mercerized 18 or 19 8 t0 4orj
Ve:y Hcovy MotcricltComparable to Canvas-Duck-Overcoating.
4O-60 Linen20-24 CottonD or E Silk
19 or 2l 6 8 )
?lorlic Malcrioh 50 Mercerized 11 t0 12
t'
Seleetion of lland, Sewing Need,les Wind,ing the Bobhin
yet heavy enough to pierce the fabric without being bent ordeflected. The Fabric, Thread and Needle Chart is a practicalguide to needle selection.
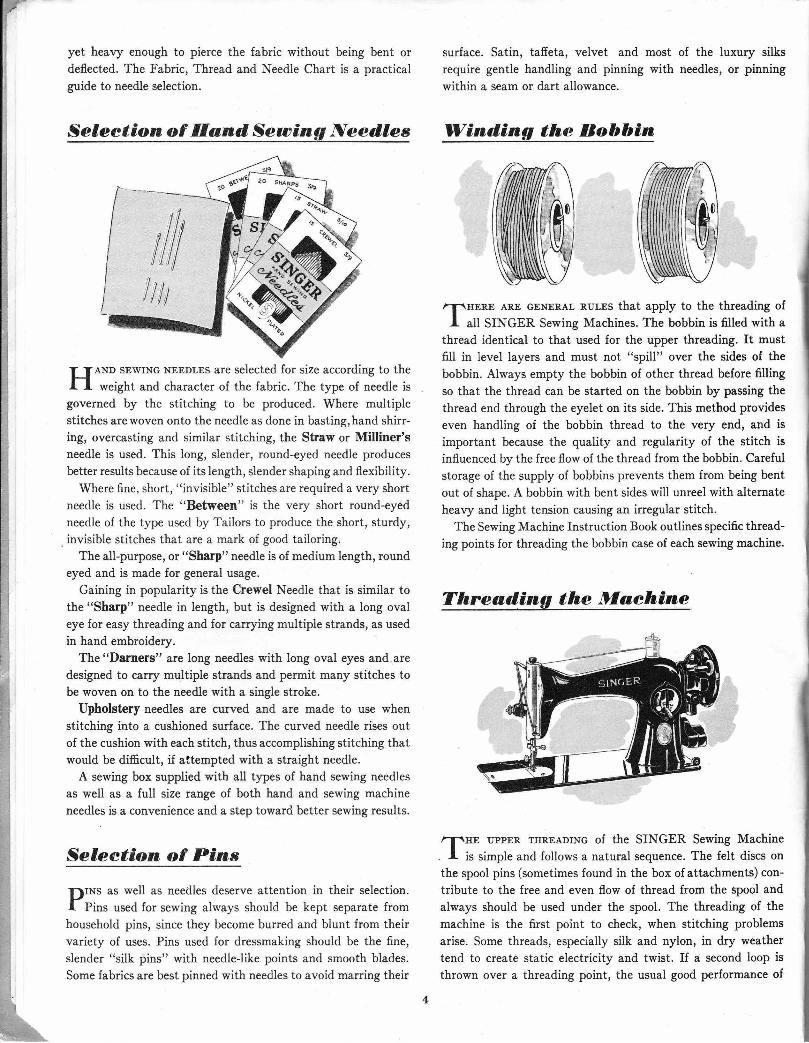
AND sEwrNG NEEDLES are selected for size according to theweight and character of the iabric. The type of needle is
governed by the stitching to be produced. Where multiplestitches arewoven onto the needle as done in basting,hand shirr-ing, overcasting and similar stitching, the Straw or Milliner'sneedle is used. This long, slender, round-eyed needle producesbetter results because of its length, slender shaping and flexibility.
Where fine, short, "invisibie" stitches are required a very shortneedle is used. The "Between" is the very short round-eyedneedle of the type used by Tailors to produce the short, sturdy,invisible stitches that are a mark of good tailoring.
The all-purpose, or "Sharp" needle is of medium length, roundeyed and is made for general usage.
Gaining in popularity is the Crewel Needle that is similar tothe "Sharp" needle in length, but is designed with a long ovaleye for easy threading and for carrying multiple strands, as usedin hand embroidery.
The "Darners" are long needles with long oval eyes and.aredesigned to carry multiple strands and permit many stitches tobe woven on to the needle with a single stroke.
Upholstery needles are curved and are made to use whenstitching into a cushioned surface. The curved needle rises outof the cushion with each stitch, thus accomplishing stitching thatwould be diftcult, if attempted with a straight needle.
A sewing box supplied with all types of hand sewing needlesas well as a full size range of both hand and sewing machineneedles is a convenience and a step toward better sewing results.
Seleetion of PinsDINS as well as needles deserve attention in their selection.I Pins used for sewing always should be kept separate fromhousehold pins, since they become burred and blunt from theirvariety of uses. Pins used for dressmaking should be the fine,slender "silk pins" with needleJike points and smooth blades.Some fabrics are best pinned with needles to avoid marring their
surface. Satin, tafieta, velvet and most of the luxury silksrequire gentle handling and pinning with needles, or pinningwithin a seam or dart allowance.
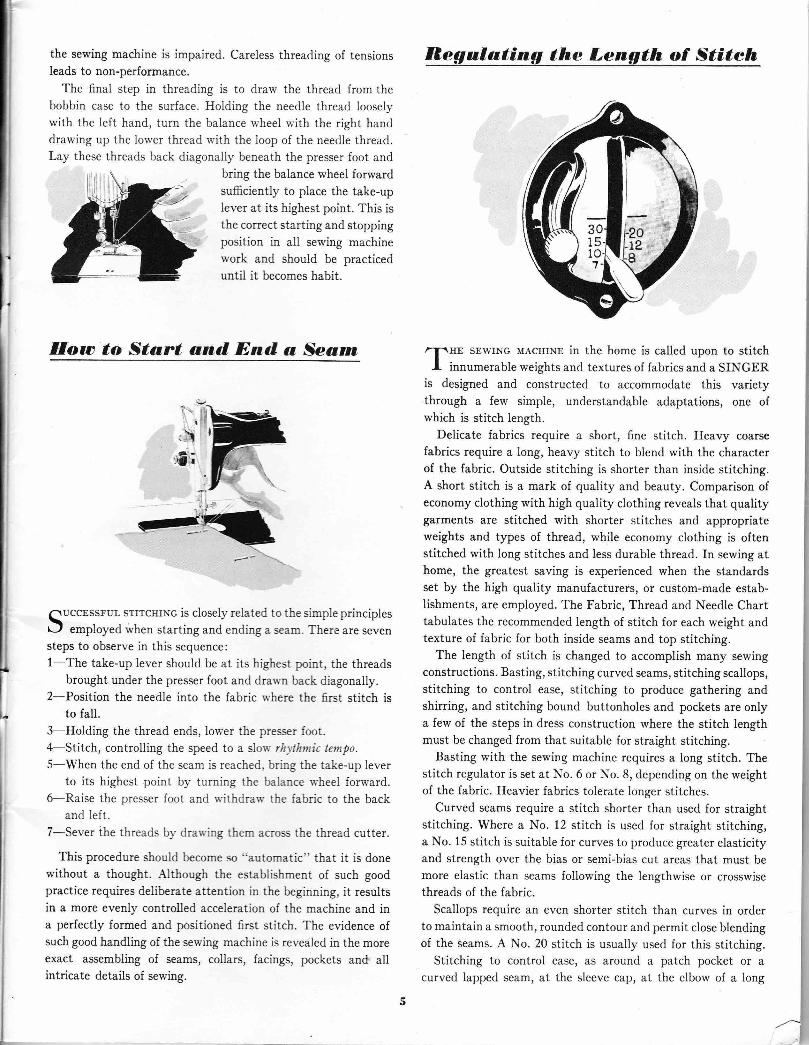
/-I-\HERE ARE GENERAL RULES that apply to the threading ofI a[ SINGER Sewing Machines. The bobbin is filled with a
thread identical to that used for the upper threading. It mustfill in level layers and must not "spill" over the sides of thebobbin. Always empty the bobbin of other thread before fillingso that the thread can be started on the bobbin by passing thethread end through the eyelet on its side. This method provideseven handling of the bobbin thread to the very end, and isimportant because the quality and regularity of the stitch isinfluenced by the free flow of the thread from the bobbin. Carefulstorage of the supply of bobbins prevents them from being bentout of shape. A bobbin with bent sides will unreel with alternateheavy and light tension causing an irregular stitch.
The Sewing Machine Instruction Book outlines specific thread-ing points for threading the bobbin case of each sewing machine.
Threud,ing the Dlaehine
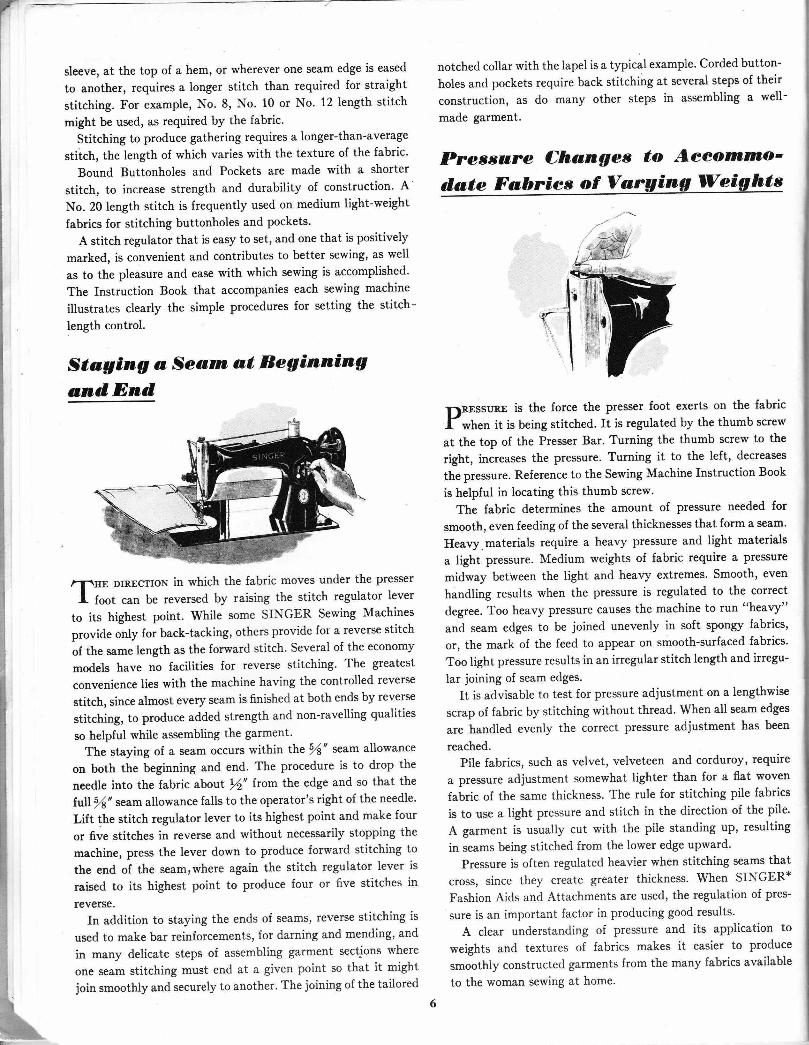
HE rrppER THREADTNG of the SINGER Sewing Machineis simple and follows a natural sequence. The felt discs on
the spool pins (sometimes found in the box of attachments) con-tribute to the free and even flow of thread from the spool andalways should be used under the spool. The threading of themachine is the first point to check, when stitching problemsarise. Some threads, especially silk and nylon, in dry weathertend to create static electricity and twist. If a second loop isthrown over a threading point, the usual good performance of
the sewing machine is impaired. Careless threading of tensionsleads to non-performance.
The final step in threading is to draw the thread from thebobbin case to the surface. Holding the needle threacl looselywith the left hand, turn the balance rvheel with the right handdrawing up the lorver thread ri'ith the loop of the needle thread.Lay these threads back diagonalll'beneath the presser foot and
bring the balance wheel forwardsufficiently to place the take-uplever at its highest point. This isthe correct starting and stoppingposition in all sewing machinervork and should be practiceduntil it becomes habit.
Ilotc to Start and Bnd a Searn
quccESSruL srrrcHrNG is closely related to the simple principlest-J employed rvhen starting and ending a seam. There are sevensteps to observe in this sequence:1-The take-up lever should be at its highest point, the threads
brought under the presser foot and drari-n back diagonally.2-Position the needle into the fabric rvhere the first stitch is
to fall.3-Holding the thread ends, lower the presser foot.4-Stitch, controlling the speed to a slon' rhtthniic tempo.S-When the end of the seam is reached. br:ng the take-up lever
to its highest point b1' turning the balance rvheel forrvard.6-Raise the presser foot and rvithdrari' the fabric to the back
and left.7-Sever ihe threads b1- drat'ing them across the thread cutter.
This procedure should become so "automatic" that it is donewithout a thought. Although the establishment of such goodpractice requires deiiberate attention in the beginning, it resultsin a more evenly controlled acceleration of the machine and ina perfectiy formed and positioned first stitch. The evidence ofsuch good handling of ihe sewing machine is revealed in the moreexact assembling of seams, coliars, facings, pockets and allintricate details of sewing.
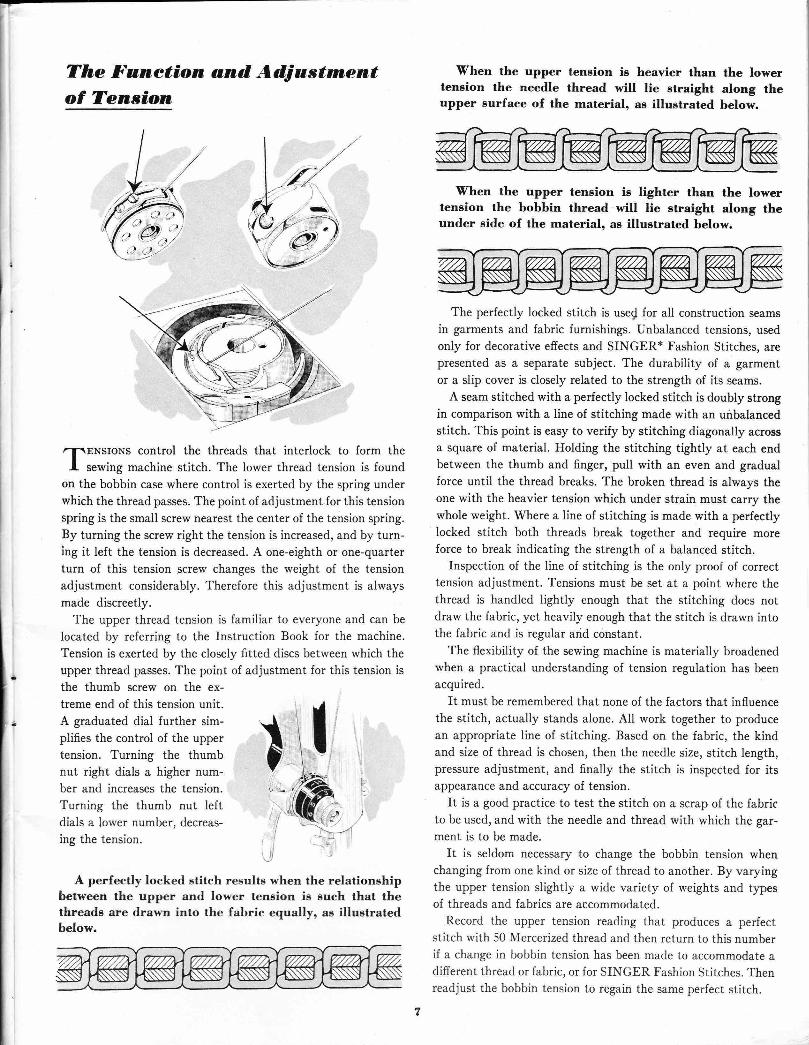
ISegalating the Length of Stiteh
,T,r" sEwrNG MACHTNE in the home is called upon to stitchI innumerable weights and textures of fabrics and a SINGER
is designed and constructed to accommodate this varietythrough a few simpie, understandable adaptations, one ofwhich is stitch length.
Delicate fabrics require a short, fine stitch. Heavy coarsefabrics require a long, heavy stitch to blend with the characterof the fabric. Outside stitching is shorter than inside stitching.A short stitch is a mark of quality and beauty. Comparison ofeconomy clothing with high quality clothing reveals that qualitygarments are stitched with shorter stitches and appropriateweights and types of thread, while economy clothing is oftenstitched with long stitches and less durable thread. In sewing athome, the greatest saving is experienced when the standardsset by the high quality manufacturers, or custom-made estab-Iishments, are employed. The Fabric, Thread and Needle Charttabulates the recommended length of stitch for each weight andtexture of fabric for both inside seams and top stitching.
The length of stitch is changed to accomplish many sewingconstructions. Basting, stitching curved seams, stitching scallops,stitching to control ease, stitching to produce gathering andshirring, and stitching bound buttonholes and pockets are onlya few of the steps in dress construction where the stitch lengthmust be changed from that suitable for straight stitching.
Basting with the sewing machine requires a long stitch. Thestitch regulator is set at No. 6 or No. 8, depending on the weightof the fabric. Heavier fabrics tolerate longer stitches.
Curved seams require a stitch shorter than used for straightstitching. Where a No. 12 stitch is used for straight stitching,a No. 15 stitch is suitable for curves to produce greater elasticityand strength over the bias or semi-bias cut areas that must bemore elastic than seams following the lengthwise or crosswisethreads of the fabric.
Scallops require an even shorter stitch than curves in orderto maintain a smooth, rounded contour and permit close blendingof the seams. A No. 20 stitch is usually used for this stitching.
Stitching to control ease, as around a patch pocket or acurved lapped seam, at the sleeve cap, at the elbow of a long
sleeve, at the top of a hem, or wherever one seam edge is eased
to another, requires a longer stitch than required for straightstitching. For example, No. 8, No. 10 or No. 12 length stitchmight be used, as required by the fabric.
Stitching to produce gathering requires a longer-than-averagestilch, the length of which varies with the texture of the fabric'
Bound Buttonholes and Pockets are made with a shorterstitch, to increase strength and durability of construction' ANo. 20 length stitch is frequently used on medium light-weightfabrics for stitching buttonholes and pockets'
A stitch regulator that is easy to set, and one that is positivelymarked, is convenient and contributes to better sewing, as well
as to the pleasure and ease with which sewing is accomplished'
The Instruction Book that accompanies each sewing machine
illustrates clearly the simple procedures for setting the stitch-length control.
Staging a Sea,lnr at Beginningand Dnd
f.r\rEDlRECrloNinwhichthefabricmovesunderthepresserI foot can be reversed by raising the stitch regulator lever
to its highest point. While some SINGER Sewing Machines
provide only for back-tacking, others provide for a reverse stitch
of the same length as the forward stitch' Several of the economy
models have no facilities for reverse stitching' The greatest
convenience lies with the machine having the controlled reverse
stitch, since almost every seam is finished at both ends by reverse
stitching, to produce added strength and non-ravelling qualities
so helpful while assembling the garment'The staying of a seam occurs within the 5f' seam allowance
on both the beginning and end. The procedure is to drop the
needle into the fabric about rf" from the edge and so that the
fitll'ft'seam allowance falls to the operator's right of the needle'
Lift the stitch regulator lever to its highest point and make four
or five stitches in reverse and without necessarily stopping the
machine, press the lever down to produce forward stitching to
the end of the seamrwhere again the stitch regulator lever is
raised to its highest point to produce four or five stitches inreverse.
In addition to staying the ends of seams, reverse stitching is
used to make bar reinforcements, for darning and mending, and
in many delicate steps of assembling garment sectjons where
one seam stitching must end at a given point so that it mightjoin smoothly and securely to another' The joining of the tailored
notched collar with the lapel is a typical example' Corded button-holes and pockets require back stitching at several steps of theirconstruction, as do many other steps in assembling a well-made garment.
Pre*sure Changes to Aeeottottlo-
TIRESsTIRE is the force the presser foot exerts on the fabric
-t'*n"n it is being stitched. It is regulated by the thumb screw
at the top of the Presser Bar. Turning the thumb screw to theright, increases the pressure. Turning it to the left, decreases
the pressure. Reference to the Sewing Machine fnstruction Bookis helpful in locating this thumb screw.
The {abric determines the amount of pressure needed forsmooth, even feeding of the several thicknesses that form a seam'
Heavy.materials require a heavy pressure and light materialsa light pressure. Medium weights of fabric require a pressure
midway betWeen the light and heavy extremes' Smooth, even
handling results when the pressure is regulated to the correctdegree. Too heavy pressure causes the machine to run "heavy"and seam edges to be joined unevenly in soft spongy fabrics,
or, the mark of the feed to appear on smooth-surfaced fabrics'Too light pressure results in an irregular stitch length and irregu-lar joining of seam edges'
It is advisable to test for pressure adjustment on a lengthwise
scrap of fabric by stitching without thread. When all seam edges
are handled evenly the correct pressure adjustment has been
reached.Pile fabrics, such as velvet, velveteen and corduroy, require
a pressure adjustment somewhat lighter than for a flat woven
fabric of the same thickness. The rule for stitching pile fabricsis to use a light pressure and stitch in the direction of the pile'
A garment is usually cut with the pile standing up, resultingin seams being stitched from the lower edge upward'
Pressure is often regulated heavier when stitching seams thatcross, since they create Sreater thickness' When SINGER*Fashion Aids and Attachments are used, the regulation of pres-
sure is an important factor in producing good results'
A clear understanding of pressure and its application to
weights and textures of fabrics makes it easier to produce
smoothly constructed Sarments from the many fabrics availableto the woman sewing at home.
The Funetion and, Ad,jastrnentof Tension
-IIENSToNS control the threads that interlock to form theI sewing machine stitch. The lower thread tension is found
on the bobbin case where control is exerted by the spring underwhich the thread passes. The point of adjustment for this tensionspring is the small screw nearest the center of the tension spring.By turning the screw right the tension is increased, and by turn-ing it left the tension is decreased. A one-eighth or one-quarterturn of this tension screw changes the weight of the tensionadjustment considerably. Therefore this adjustment is alwaysmade discreetly.
The upper thread tension is familiar to everyone and can belocated by referring to the Instruction Book for the machine.Tension is exerted by the closely fitted discs between which theupper thread passes. The point of adjustment for this tension isthe thumb screw on the ex-treme end of this tension unit.A graduated dial further sim-plifies the control of the uppertension. Turning the thumbnut right dials a higher num-ber and increases the tension.Turning the thumb nut leftdials a lower number, decreas-ing the tension.
A perfectly locked stitch results when the relationshipbetween the upper and lower tension ie euch that thethreads are drawn into the fabric equally, ae illuetratedbelow.
T
When the upper teneion ia heavier than the lowerteneion the needle thread will Iie straight along theupper surface of the material, ae illustrated below.
When the upper teneion ia lighter than the lowerteneion the bobbin tlread will lie straight along theunder eide of the material, aa illuetrated below.
The perfectly locked stitch is usef, for all construction seamsin garments and fabric furnishings. Unbalanced tensions, usedonly for decorative effects and SINGER* Fashion Stitches, arepresented as a separate subject. The durability of a garmentor a slip cover is closely related to the strength of its seams.
A seam stitched with a perfectly locked stitch is doubly strongin comparison with a line of stitching made with an unbalancedstitch. This point is easy to verify by stitching diagonally acrossa square of material. Holding the stitching tightly at each endbetween the thumb and finger, pull with an even and gradualforce until the thread breaks. The broken thread is always theone with the heavier tension which under strain must carry thewhole weight. Where a line of stitching is made with a perfectlylocked stitch both threads break together and require moreforce to break indicating the strength of a balanced stitch.
Inspection of the line of stitching is the only proof of correcttension adjustment. Tensions must be set at a point where thethread is handled lightly enough that the stitching does notdraw the fabric, yet heavily enough that the stitch is drawn intothe fabric and is regular arid constant.
The flexibility of the sewing machine is materially broadenedwhen a practical understanding of tension regulation has beenacquired.
It must be remembered that none of the factors that influencethe stitch, actually stands alone. All work together to producean appropriate line of stitching. Based on the fabric, the kindand size of thread is chosen, then the needle size, stitch length,pressure adjustment, and finally the stitch is inspected for itsappearance and accuracy of tension.
It is a good practice to test the stitch on a scrap of the fabricto be used, and with the needle and thread with which the gar-ment is to be made.
It is seldom necessary to change the bobbin tension whenchanging from one kind or size of thread to another. By varyingthe upper tension slightly a wide variety of weights and typesof threads and fabrics are accommodated.
Record the upper tension reading that produces a perfectstitch with 50 Mercerized thread and then return to this numberif a change in bobbin tension has been made to accommodate adifferent thread or fabric, or for SINGER Fashion Stitches. Thenreadjust the bobbin tension to regain the same perfect stitch.
Stitchins for LineThe Struight SeamI INE IN DRESS CoNSTRUCTION is expressed through seams,I-r some of which must be emphasized by special treatment,while others are meant to be almost invisible.
The established steps for forming seams are to first pin seamedges at each end, at notches and at center,. finally workingtoward the edges. The second step is to hand baste, the third,to stitch, the fourth, to pink and the fifth to press. Handbasting is often eliminated on easy-to-handle fabrics and whensufficient skill in stitching has been developed. The Seam Guideaids in guiding the seam stitching straight and parallel to theedge. The Hinged Presser Foot rides freely over the pin points.Pins are placed with the points toward the seam edge and nipinto the fabric at the stitching line.
Many cottons, woolens, and spun rayons lend themselves tothis handling. However, smooth textured fabrics, pile fabrics,delicate fabrics and fabrics with a surface finish like satin re-quire more careful handling and do not lend themselves to pin-ning and stitching without hand basting. Neither should theybe machine-basted.
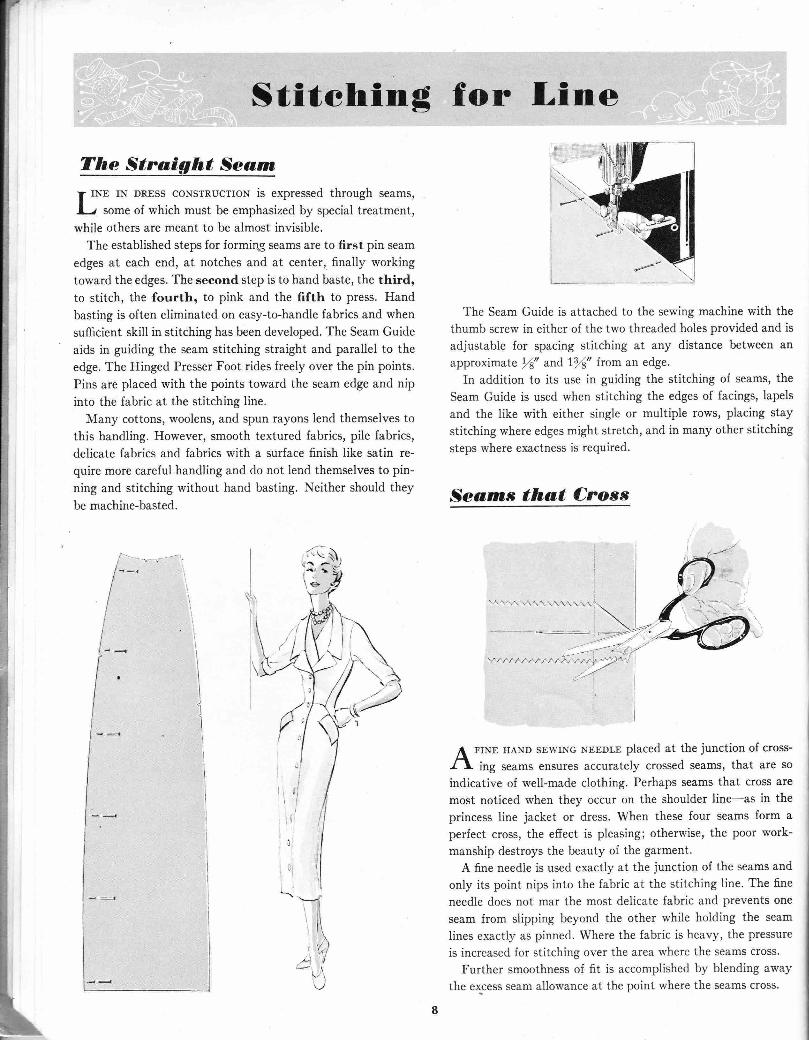
The Seam Guide is attached to the sewing machine with thethumb screw in either of the two threaded holes provided and isadjustable for spacing stitching at any distance between anapproximate |f" and l)\" fuom an edge.
In addition to its use in guiding the stitching of seams, theSeam Guide is used when stitching the edges of facings, lapelsand the like with either single or multiple rows, placing staystitching where edges might stretch, and in many other stitchingsteps where exactness is required.
Sea,tn* that Cro*s
j-r
II
il
ilt,
tIlI!!!
"*:I
rl
i\
,.,
ll
il
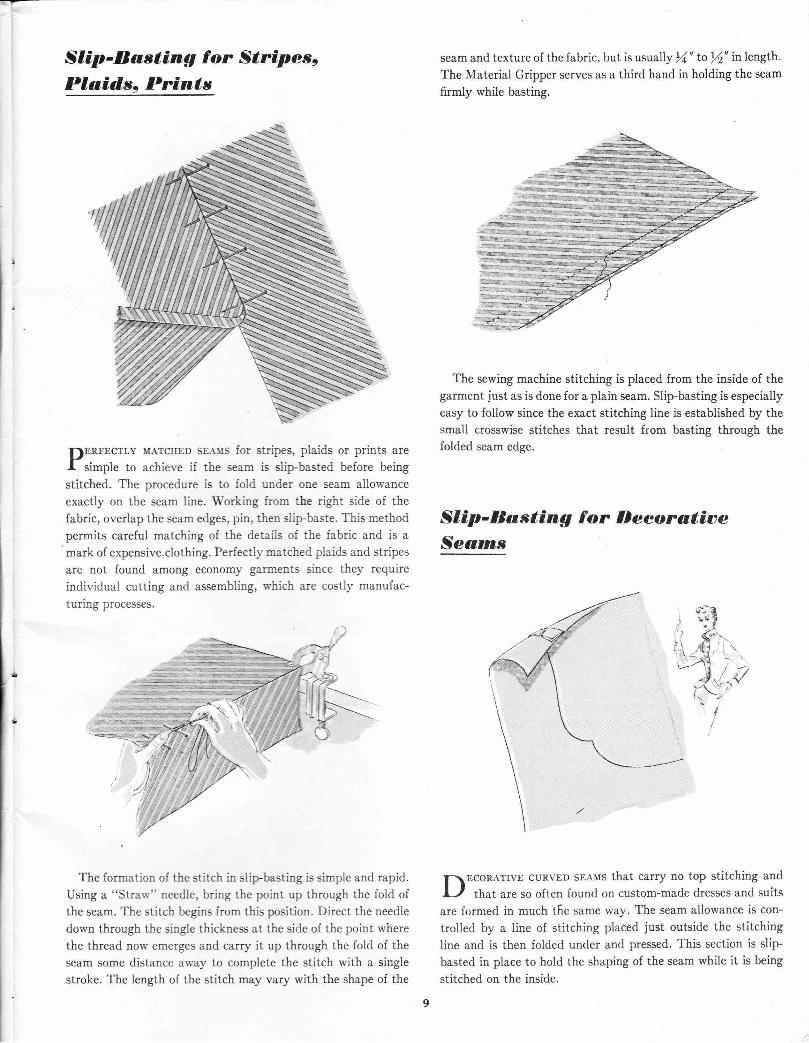
A FINE HAND sEwrNG NEEDLE placed at the junction of cross-I \ ing seams ensures accurately crossed seams, that are so
indicative of well-made clothing. Perhaps seams that cross aremost noticed when they occur on the shoulder line-as in theprincess line jacket or dress. When these four seams form a
perfect cross, the effect is pleasing; otherwise, the poor work-manship destroys the beauty of the garment.
A fine needie is used exactly at the junction of the seams andonly its point nips into the fabric at the stitching line. The fineneedle does not mar the most delicate fabric and prevents oneseam from stipping beyond the other while hoiding the seamlines exactly as pinned. Where the fabric is heavy, the pressureis increased for stitching over the area where the seams cross.
Further smoothness of fit is accomplished by blending awaythe excess seam allowance at the point where the seams cross.
Slip-Bosting for Stripes'Plaid,s, Prints
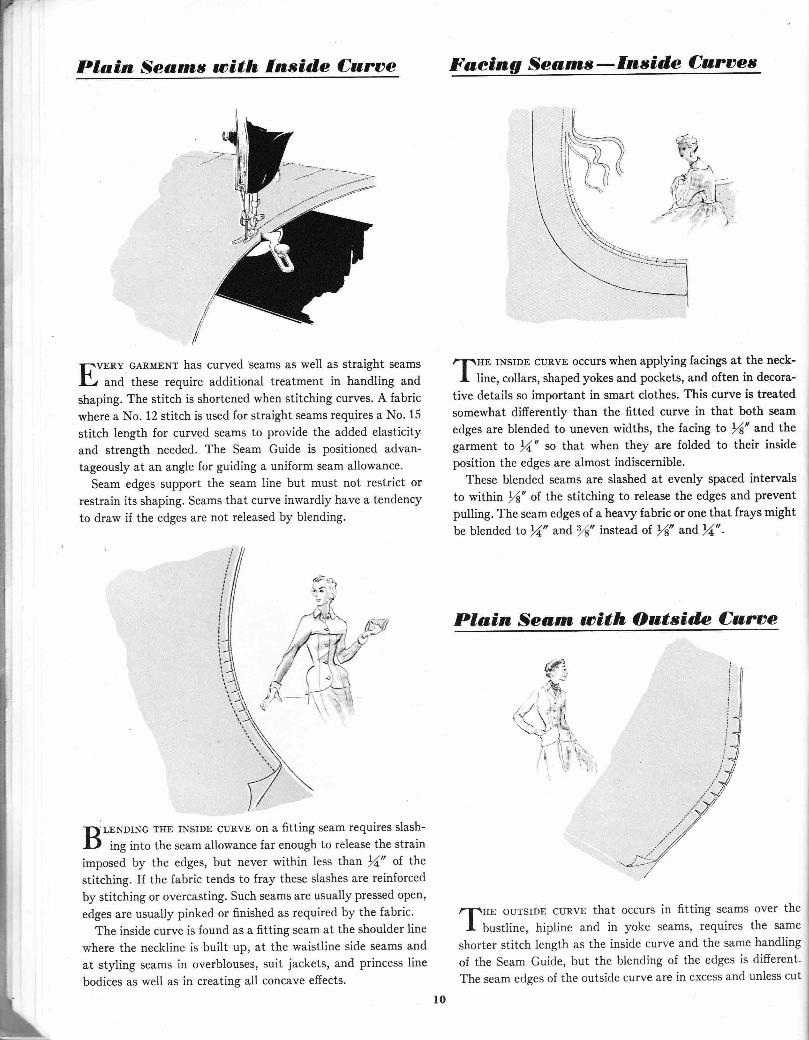
1)ERFECTLv MATcHED sr.srs for stripes, plaids or prints areI simple to achieve if the seam is slipbasted before beingstitched. The procedure is to fold under one seam allowanceexactly on the seam line. Working from the right side of thefabric, overlap the seam edges, pin, then slip-baste. This methodpermits careful matching of the details of the fabric and is amark of expensive.clothing. Perfectll'matched piaids and stripesare not found among economy garments since they requireindividual cutting and assembling, which are costly manufac-turing processes.
The formation of the stitch in slip-basting is simpie and rapid.Using a "Strarv" needle, bring the point up through the fold ofthe seam. The stitch begins from this position. Direct the needledown through the single thickness at the side of the point wherethe thread nolv emerges and carry it up through the fold of theseam some distance alray to complete the stitch with a singlestroke. The length of the stitch may vary with the shape of the
seam and texture of the fabric, but is usually t4" to rl" in length.The Material Gripper serves as a third hand in holding the seamfirmly while basting.
The sewing machine stitching is placed from the inside of thegarment just as is done for a plain seam. Slip-basting is especiallyeasy to follow since the exact stitching line is established by thesmall crosswise stitches that result from basting through thefolded seam edge.
Slip-BastingSeanns
for lDeeoratiae
ECoRATIVE cuRvED sraus that carry no top stitching andthat are so often found on custom-made dresses and suits
are formed in much tEe same way. The seam allowance is con-trolied by a line of stitching placed just outside the stitchingline and is then folded under and pressed. This section is slip-basted in place to hold the shaping of the seam while it is beingstitched on the inside.
,l
Plain Sea,rns with In*id,e Caroe Faeing Seam,s - In*id,e Curoes
T)vERy cARMENT has curved seams as well as straight seamsF' and these require additional treatment in handling andshaping. The stitch is shortened when stitching curves. A fabricwhere a No. 12 stitch is used for straight seams requires a No' 15
stitch length for curved seams to provide the added elasticityand strength needed. The Seam Guide is positioned advan-tageously at an angle for guiding a uniform seam allowance'
Seam edges support the seam line but must not restrict orrestrain its shaping. Seams that curve inwardly have a tendencyto draw if the edges are not released by blending.
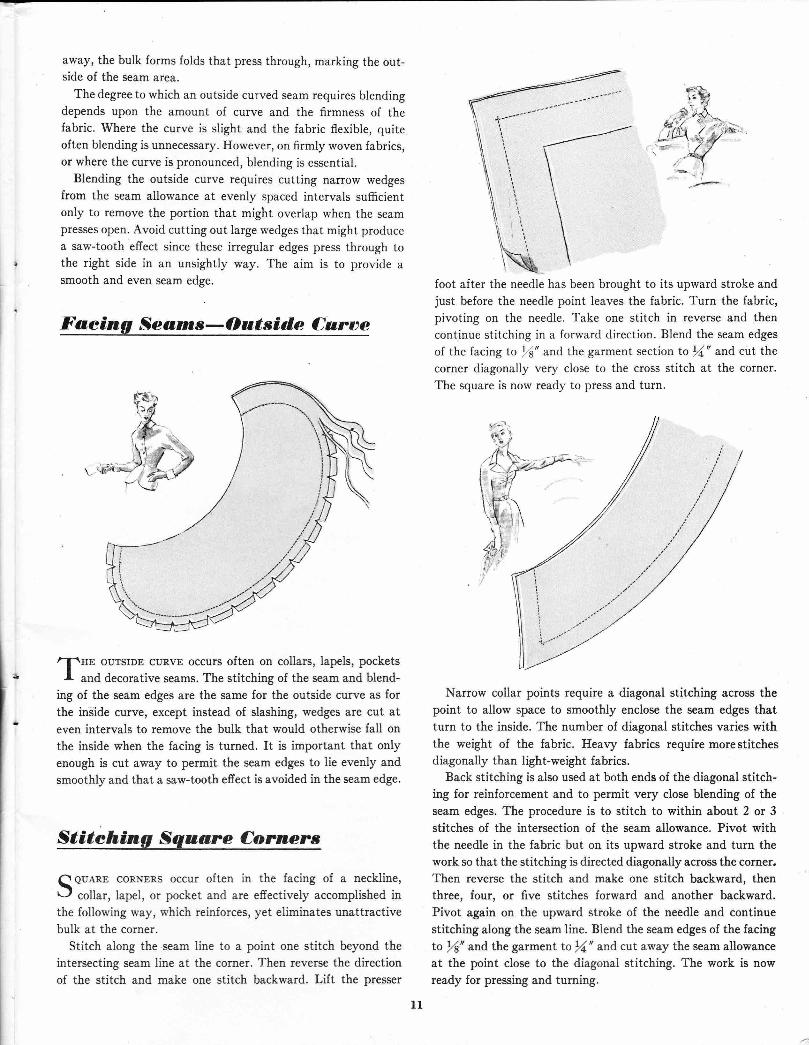
r )-. LENDTNG THE TNSIDE cuRvE on a fitting seam requires slash-lJ lrg into the seam allowance far enough to release the strainimposed by the edges, but never within less than fu" of' thestitching. If the fabric tends to fray these slashes are reinforcedby stitching or overcasting. Such seams are usually pressed open,edges are usually pinked or finished as required by the fabric.
The inside curve is found as a fitting seam at the shoulder linewhere the neckline is built up, at the waistline side seams andat styling seams in overblouses, suit jackets, and princess linebodices as well as in creating all concave effects'
/-f\rrE TNSTDE crrRvE occurs when applying facings at the neck-I lirre, collars, shaped yokes and pockets, and often in decora-
tive details so important in smart clothes. This curve is treatedsomewhat differently than the fitted curve in that both seamedges are blended to uneven widths, the facing to rA" and thegarment to rl" so that when they are folded to their insideposition the edges are almost indiscernible.
These blended seams are slashed at evenly spaced intervalsto within rf" of. the stitching to release the edges and preventpulling. The seam edges of a heavy fabric or one that frays mightbe blended to r7(" and fi" instead ol rf" and rf" .
Plain Scatn with Out*ide Curoe
il
/T,*E ourstDE cunvp that occurs in fitting seams over theI bustline, hipline and in yoke seams, requires the same
shorter stitch length as the inside curve and the same handlingof the Seam Guide, but the blending of the edges is different'The seam edges of the outside curve are in excess and unless cut
&ffi\-:e. ,/ ,l*t.'. \ 't1'li )''r.
,-,"*i
5,:,
10
away, the bulk forms folds that press through, marking the out-side of the seam area.
The degree to which an outside curved seam requires blendingdepends upon the amount of curve and the firmness of thefabric. Where the curve is slight and the fabric flexible, quiteoften blending is unnecessary. However, on frrmly woven fabrics,or where the curve is pronounced, blending is essential.
Blending the outside curve requires cutting narrow wedgesfrom the seam allowance at evenly spaced intervals sufficientonly to remove the portion that might overlap when the seampresses open. Avoid cutting out large wedges that might producea saw-tooth effect since these irregular edges press through tothe right side in an unsightly way. The aim is to provide asmooth and even seam edge.
Faeing Searns-Oat*idc Carae
,T,"t oursrDE cr.rRvE occurs often on collars, lapels, pocketsI and decorative seams. The stitching of the seam and blend-
ing of tlle seam edges are the same for the outside curve as forthe inside curve, except instead of slashing, wedges are cut ateven intervals to remove the bulk that would otherwise fall onthe inside when the facing is turned. It is important that onlyenough is cut away to permit the seam edges to lie evenly andsmoothly and that a saw-tooth effect is avoided in the seam edge.
Stitehing Square Corners
Qouenr coRNERS occur often in the facing of a neckline,U collar, lapel, or pocket and are effectively accomplished inthe following way, which reinforces, yet eliminates unattractivebulk at the corner.
Stitch along the seam line to a point one stitch beyond theintersecting seam line at the corner. Then reverse the directionof the stitch and make one stitch backward. Lift the presser
foot after the needle has been brought to its upward stroke andjust before the needle point leaves the fabric. Turn the fabric,pivoting on the needle. Take one stitch in reverse and thencontinue stitching in a forward direction. Blend the seam edgesof the facing to \" and the garment section to rr1" and cut thecorner diagonally very close to the cross stitch at the corner.The square is now ready to press and turn.
Narrow collar points require a diagonal stitching across thepoint to allow space to smoothly enclose the seam edges thatturn to the inside. The number of diagonal stitches varies withthe weight of the fabric. Heavy fabrics require morestitchesdiagonally than light-weight fabrics.
Back stitching is also used at both ends of the diagonal stitch-ing for reinforcement and to permit very close blending of theseam edges. The procedure is to stitch to within about 2 or 3stitches of the intersection of the seam allowance. Pivot withthe needle in the fabric but on its upward stroke and turn thework so that the stitching is directed diagonally across the corner.Then reverse the stitch and make one stitch backward, thenthree, four, or five stitches forward and another backward.Pivot again on the upward stroke of the needle and continuestitching along the seam line. Blend the seam edges of the facingto Lf' and the garment tof" and cut away the seam allowanceat the point close to the diagonal stitching. The work is nowready for pressing and turning.
Si,Lit.?.,fi1,1
l1
SINGEN SElvING Str(ILLSLess,on I - Sewing Dluehine Prineiples
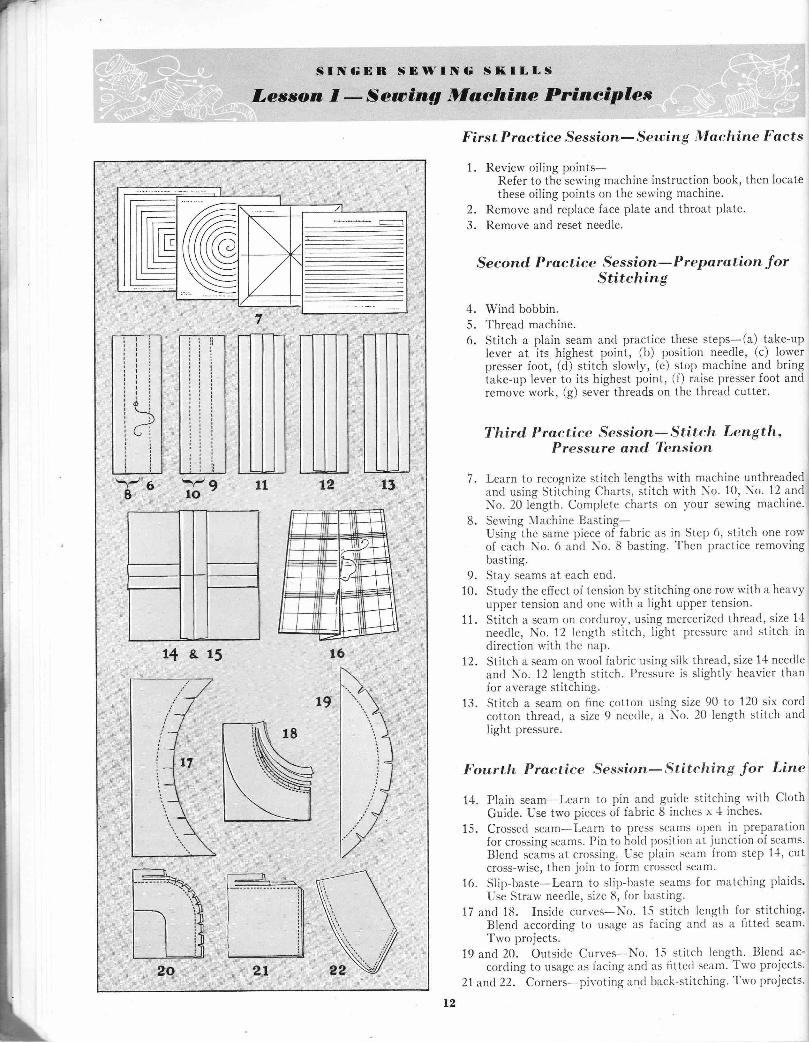
FirstPractice Session- Seuoing lluchine Facts
1. Review oiling pt,ints-Refer to the serving n.rachine instruction book, then locatethese oiling points on the serving machine.
Remove and replace face plate ancl throat plate.I{emove ancl reset needle.
Second Practice Se.s.sion- Preparation JorStitching
Wind bobbin.Thread machine.Stitch a plain seam and practice these steps-(a) take-uplever at its highest point, (b) position neeclie, (c) lowerpresser foot, (cl) stitch slorvl1,, (e) stoi-r machine anrl bringtake-up lever to its highest point, (i) raise presser foot anclremove work, (g) sever threads on the threacl cutter.
Third Practice Se.ssion- Stitch Length,Pressure ancl Tension
7. Learn to recognize stitch lengths rvith machine unthreadedand using Stitching Charts, stitch rvith \o. 10, No' 12 ancl,\o. 20 iength. Compiete chiirts on vr.rur serving machine'
8. Serving llachine Basting-Using the same piece of fabric as in Step 6, stitch one ro\\'of each No. 6 anri No. [i basting. 'l'hen practice removingbasting.
9. Stay seams at each encl.10. Stucly the effect of tension b1'stitching one rolv rvith a heavl'
upper tension :rncl one with a light upper tension.11. Stitch a seam on corcluror', using mcrcerizerl threatl, size 1'1
neeclle, No. 12 length stitch, light pressure anrl stitch inciircction rvith the nap.
12. Stitch a seam on rvool fabric using silk thread, size 1{ needleanrl No. 12 length stitch. Pressure is slightlv heavier thanfor average stitching.
13. Stitch a seam on frne cotton u-sing size 90 to 120 six cortlcotton threarl, a size 9 neeclle, a No. 20 length stitch ancllight pressure.
Fourth Practice Se.s.sion-Stitr:ft ing Jor Line
14. Plain seam Learn tr.r pin ancl guicle stitching rvith ClothGuide. Use two pieces oi labric ii inches x -l inches.
15. Crossetl seam-Lelirn to J)rcss seams ol)tln in preparationfor crossing seams. Pin to holcl positiotl at junction of seams.Rlend seams at crossing. Lrse iriain senm irttm step 1{, cutcross-wise, then join tr> lorm crossetl scanl.
16. Slip-baste-Learn to slip-ixste seam,. ior matching irlairls.Use Strarv needle, size 8, for l;asting'
17 anrl 18. Insicle curves-No. 1.i stitch iength for stiiching.Blend according to usage as iacing rtnrl as a fitte<i seam'Two projects.
19 and 20. Outside Curvcs-No. 1.5 stitch lcngth lllend ac-cortling to usage as facing itnrl as htterl scam"lu'o projects'
2l ancl 22. Corners-pivoting aml blck-stitching.'livo projects'
)3.
1.
6.rrmtlttillltlllllltttttIllillttttltttltttttttI L_lJ t
12
[|]]l
Mt3
Hffifa ['e
14
l----i7lilI i1I i-l,,l\1li1l'\t-:-
l-. hlL_i+
2a
& 15
t2
Stitchins for Oontour
r \--r':I
\, ,
./ | \,.
'' ',, ), ,ll1 l,l-.
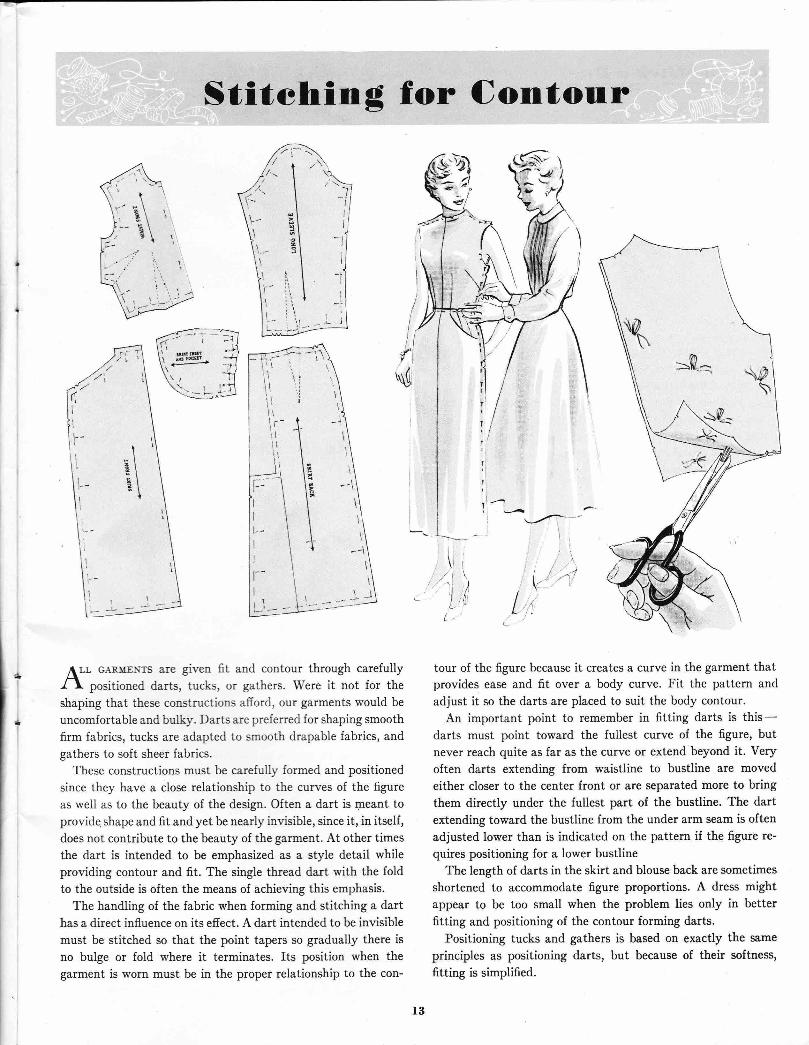
ALL G-{R}rENrs are given fit and contour through carefullyI \ positioned darts, tucks, or gathers. Were it not for theshaping that these constructions afford, our garments would beuncomfortable and bulky. Darts are preferred for shaping smoothfirm fabrics, tucks are adapted to smooth drapable fabrics, andgathers to soft sheer fabrics.
These constructions must be carefully formed and positionedsince they have a close relationship to the curves of the figureas well as to the beauty of the design. Often a dart is meant toprovidq shape and fit and yet be nearly invisible, since it, in itself,does not contribute to the beauty of the garment. At other timesthe dart is intended to be emphasized as a style detail whileproviding contour and fit. The single thread dart with the foldto the outside is often the means of achieving this emphasis.
The handling of the fabric when forming and stitching a darthas a direct influence on its efiect. A dart intended to be invisiblemust be stitched so that the point tapers so gradually there isno bulge or fold where it terminates. Its position when thegarment is worn must be in the proper relationship to the con-
tour of the figure because it creates a curve in the garment thatprovides ease and fit over a body curve. Fit the pattern andadjust it so the darts are placed to suit the body contour.
An important point to remember in fitting darts is this -darts must point toward the fullest curve of the figure, butnever reach quite as far as the curve or extend beyond it. Veryoften darts extending from waistline to bustline are movedeither closer to the center front or are separated more to bringthem directly under the fullest part of the bustline. The dartextending toward the bustline from the under arm seam is oftenadjusted lower than is indicated on the pattern if the figure re-quires positioning for a lower bustline
The length of darts in the skirt and blouse back are sometimesshortened to accommodate figure proportions. A dress mightappear to be too small when the problem lies only in betterfitting and positioning of the contour forming darts.
Positioning tucks and gathers is based on exactly the sameprinciples as positioning darts, but because of their softness,fitting is simplified.
{sf -.d
\ ^'
l3
IHow to Stiteh a lDart
A DARr is usually stitched from the seam edge to the point,I \ and is reinforced with back stitching at the seam edge.The point of the dart is skillfully handled when it tapers gradu-ally and when the final three or four stitches parallel the foldof the dartiust a thread's w'ilth from the fold and, then, con-tinues off the fabric to form a thread chain lto }{ inches inlength. This thread chain is tied into a simple single knot thatis set close to the end of the dart.
Single Thread, I)art
,T,m sTNGLE THREAD oanr is always used where the fold ofI the dart is on the outside of the garment and for inside
darts where the fabric is sheer, since there are no thread ends totie. The stitching begins at the point rather than at the seamedge as in the conventional dart, and the sewing machine isrethreaded for each dart. The thread from the bobbin is threadedthrough the needle, in the opposite direction from usualthreading.
Tie the bobbin and upper threads together and rewind thespool until the knot has passed the last thread guide nearestthe spool a sufficient distance to afford thread for stitching thefull length of the dart. Position the tip of the needle into the
very edge of the fold at the point of the dart. Take the slack outof the upper threading of the machine by turning the spool, butdo not draw the thread so taut as to raise the take-up spri.ng.
Then, drop the presser foot and stitch carefully shaping thetapered point of the dart. Back stitch the dart at the seam edgefor reinforcement.
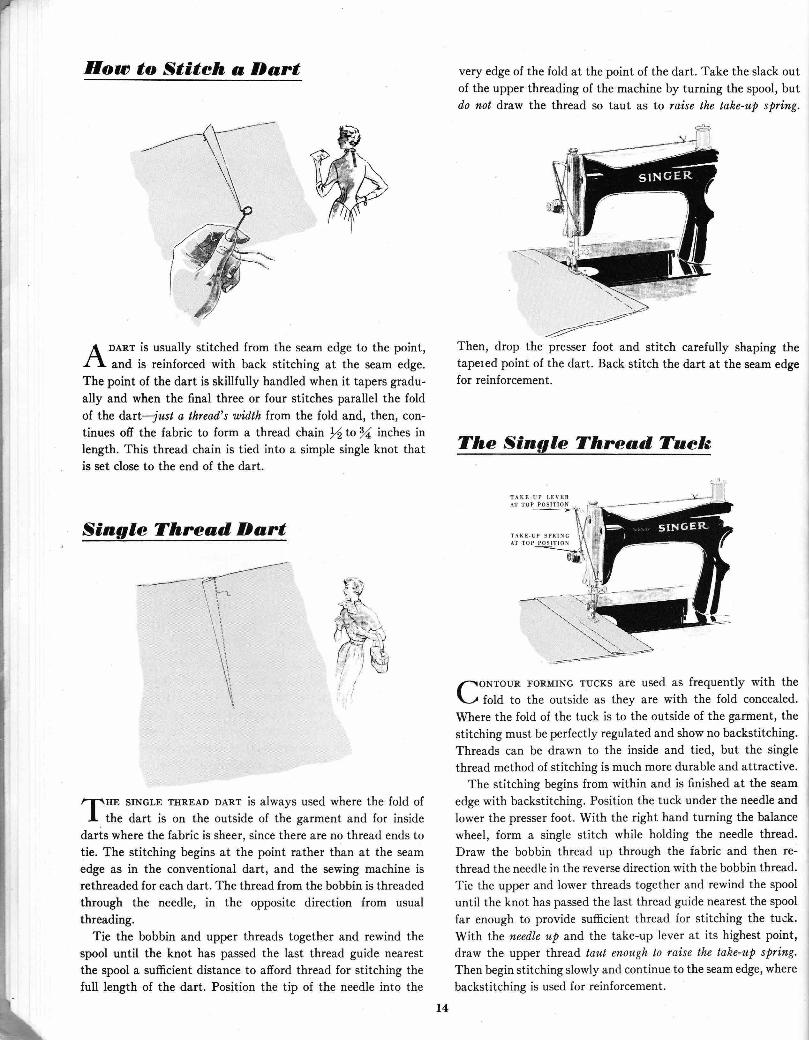
The Single Thread, Taels
TA(E.UP LEYERAT TOP POSITION
TAKE.UP SPRINC
l^oNrouR FoRMING ruCKS are used as frequently with the\-,t fold to the outside as they are with the fold concealed.Where the fold of the tuck is to the outside of the garment, thestitching must be perfectly regulated and show no backstitching.Threads can be drawn to the inside and tied, but the singlethread method of stitching is much more durable and attractive.
The stitching begins from within and is finished at the seamedge with backstitching. Position the tuck under the needle andlower the presser foot. With the right hand turning the balancewheel, form a single stitch while holding the needle thread.Draw the bobbin thread up through the fabric and then re-thread the needle in the reverse direction with the bobbin thread.Tie the upper and lower threads together and rewind the spooluntil the knot has passed the last thread guide nearest the spoolfar enough to provide sufficient thread for stitching the tuck.With the needl,e up and the take-up lever at its highest point,draw the upper thread taul enough to raise the take-up spring.Then begin stitching slowly and continue to the seam edge, wherebackstitching is used for reinforcement.
l4
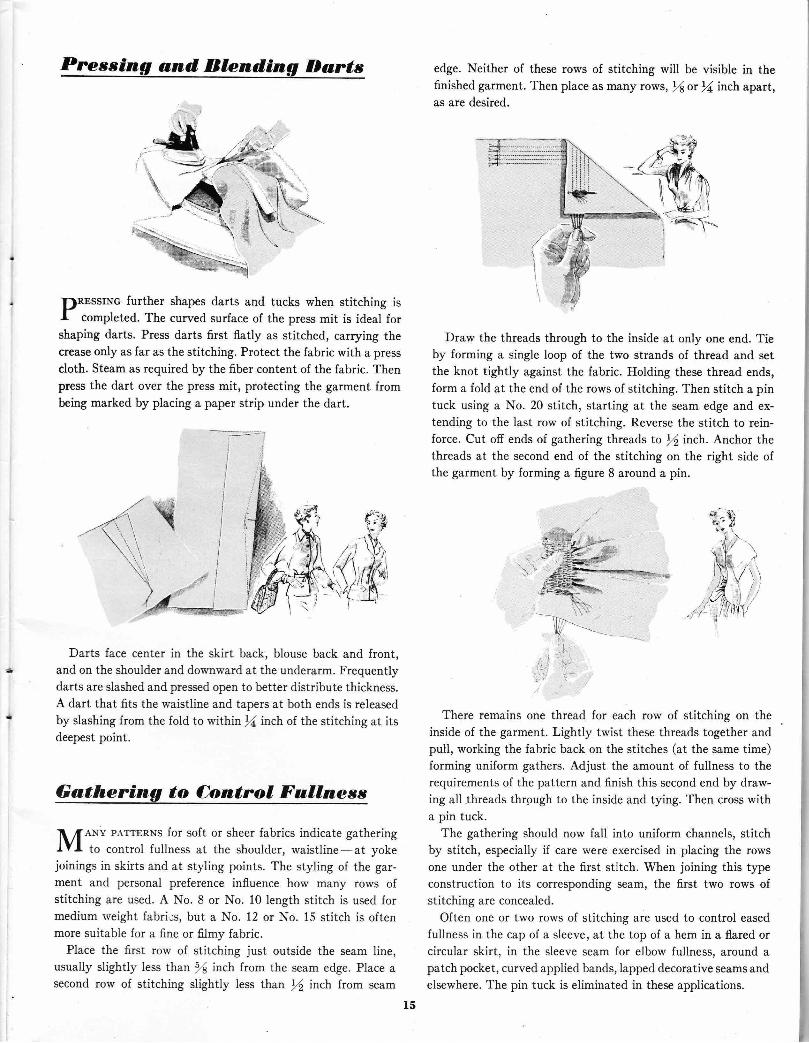
Prossing and, Blending lrart*
DRESSTNG further shapes darts and tucks when stitching isI completed. The curved surface of the press mit is ideal forshaping darts. Press darts first flatly as stitched, carrying thecrease only as far as the stitching. Protect the fabric with a presscloth. Steam as required by the fiber content of the fabric. Thenpress the dart over the press mit, protecting the garment frombeing marked by placing a paper strip under the dart.
Darts face center in the skirt back, blouse back and front,and on the shoulder and downward at the underarm. Frequentlydarts are slashed and pressed open to better distribute thickness.A dart that fits the waistline and tapers at both ends is releasedby slashing from the fold to within r,1 inch of the stitching at itsdeepest point.
Gathering to Control Fallnes*ANy pArrERNs for soft or sheer fabrics indicate gatheringto control fullness at the shoulder, waistline-at yoke
joinings in skirts and at styling points. The styling of the gar-ment and personal preference influence how many rows ofstitching are used. A No. 8 or No. 10 length stitch is used formedium rveight fabrics, but a No. 12 or No. 15 stitch is oftenmore suitable for a fine or filmy fabric.
Place the first row of stitching just outside the seam line,usually slightly less than fu irch from the seam edge. Place asecond row of stitching slightly less than /2 inch from seam
edge. Neither of these rows of stitching will be visible in thefinished garment. Then place as many rows, rf or /4 inch apart,as are desired.
Draw the threads through to the inside at only one end. Tieby forming a single loop of the two strands of thread and setthe knot tightly against the fabric. Holding these thread ends,form a fold at the end of the rows of stitching. Then stitch a pintuck using a No. 20 stitch, starting at the seam edge and ex-tending to the last row of stitching. Reverse the stitch to rein-force. Cut off ends of gathering threads to )linch. Anchor thethreads at the second end of the stitching on the right side ofthe garment by forming a figure 8 around a pin.
., :-
There remains one thread for each row of stitching on theinside of the garment. Lightly twist these threads together andpull, working the fabric back on the stitches (at the same time)forming uniform gathers. Adjust the amount of fullness to therequirements of the pattern and finish this second end by draw-ing all .threads thrgugh to the inside and tying. Then cross witha pin tuck.
The gathering should now fall into uniform channels, stitchby stitch, especially if care were exercised in placing the rowsone under the other at the first stitch. When joining this typeconstruction to its corresponding seam, the first two rows ofstitching are concealed.
Often one or two rows of stitching are used to control easedfullness in the cap of a sleeve, at the top of a hem in a flared orcircular skirt, in the sleeve seam for elbow fullness, around apatch pocket, curved applied bands, lapped decorative seams andelsewhere. The pin tuck is eliminated in these applications.
q:?x
l5
Fashion l)etailsIDeeoratioe Tueking
NTo orHER EASHToN DETATL has better sustained fashionI \ interest than tucking. Whiie interest in tucking for dressdetail fluctuates, tucks are always fashion right and lovely forblouses, lingerie and children's clothes.
The opportunity for self-expression is unlimited since tucksmay be made as narrow as the stitching itself or bold and heavy.Spacing between tucks allows for a variety of effects. Tucks lendthemselves to cross tucking, to smocked effects, pineapple tuck-ing, shirred tucking and many other interesting and originalapplications in combination with insertions.
There are two aids for tucking, one the SINGER Tucker, andthe other, the SINGER Edgestitcher. The Tucker guides boththe spacing and width for tucks up to 1 inch, while the Edge-stitcher guides only the width for tucks up to I inch.
When stitching tucks perfect tension adjustment is essential,as well as a short stitch as designated for top stitching. Refer tothe Fabric, Thread and Needle Chart on page 3. The threadshould blend perfectly with the fabric in color and texture, orshould be in decided contrast.
Tucks are usually made along the lengthwise thread of thefabric, but occasionally a design calls for crosswise tucking toemphasize style lines. The lengthwise grain of the fabric isalways more firm and for that reason lends itself to tucking.
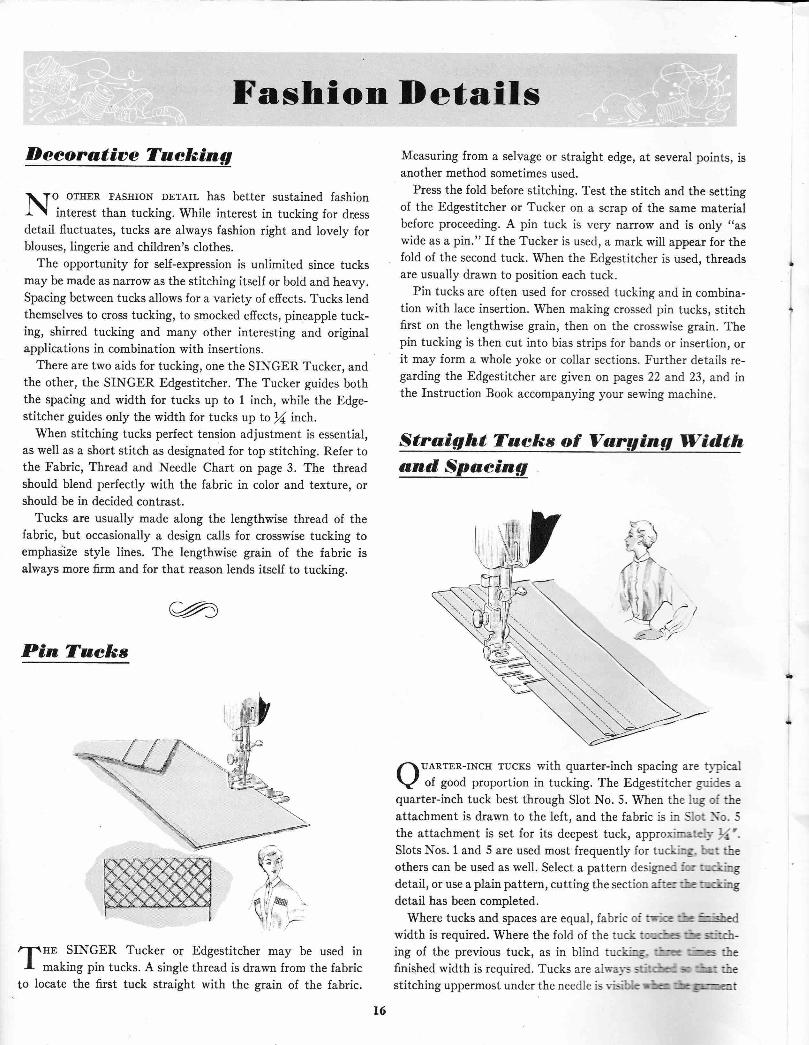
%Pin Tueks
r\l
Measuring from a selvage or straight edge, at several points, isanother method sometimes used.
Press the fold before stitching. Test the stitch and the settingof the Edgestitcher or Tucker on a scrap of the same materialbefore proceeding. A pin tuck is very narrow and is only "aswide as a pin." If the Tucker is used, a mark will appear for thefold of the second tuck. When the Edgestitcher is used, threadsare usually drawn to position each tuck.
Pin tucks are often used for crossed tucking and in combina-tion with lace insertion. When making crossed pin tucks, stitchfirst on the lengthwise grain, then on the crosswise grain. Thepin tucking is then cut into bias strips for bands or insertion, orit may form a whole yoke or collar sections. Further details re-garding the Edgestitcher are given on pages 22 and 23, and inthe Instruction Book accompanying your sewing machine.
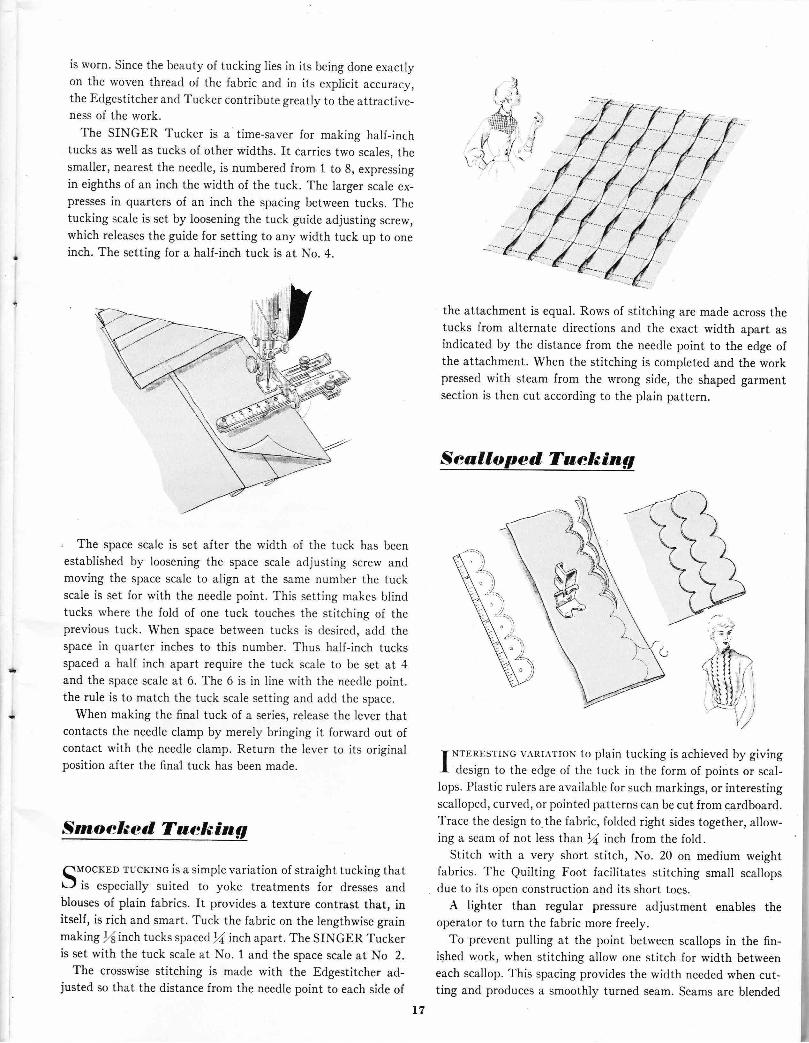
Straight Tueks of Varving Widthand, Spaeing
n UARTER-rNCH rucKs with quarter-inch spacing are tlpicalV of good proportion in tucking. The Edgestitcher guides aquarter-inch tuck best through Slot No. 5. When the iug of theattachment is drawn to the left, and the fabric is in S-er \o. 5the attachment is set for its deepest tuck, approrimtel-r ri'-Slots Nos. 1 and 5 are used most frequently for tu&=g:. t:: -:he
others can be used as well. Select a pattern desigaec 11;':;rringdetail, or use a plain pattern, cutting the section afte: =e 1,-i:ngdetail has been completed.
Where tucks and spaces are equal, fabric oi !E:G ---= -=5edwidth is required. Where the fold of the tuck:.:,'jir- -: =rch-ing of the previous tuck, as in blind tucl,-S. --:-: -_* '.-he
finished width is required. Tucks are alrrar-= =-:,-: s: -:,:: iestitching uppermost under the needle is ri.ible r-. -5e gert
,T,rru SINGER Tucker or Edgestitcher may be used inI making pin tucks. A single thread is drawn from the fabric
to locate the first tuck straight with the grain of the fabric.
=,\Y-\i\
*l
l6
is worn. Since the beauty of tucking lies in its being done exactlyon the woven thread of the fabric and in its explicit accuracy,the Edgestitcher and Tucker contribute greatly to the attractive-ness of the work.
The SINGER Tucker is a'time-saver for making half-inchtucks as well as tucks of other widths. It carries two scales, thesmaller, nearest the needle, is numbered from 1 to 8, expressingin eighths of an inch the width of the tuck. The larger scale ex-presses in quarters of an inch the spacing between tucks. Thetucking scale is set by loosening the tuck guide adjusting screw,which releases the guide for setting to any width tuck up to oneinch. The setting for a half-inch tuck is at No. 4.
. The space scale is set after the width of the tuck has beenestablished by loosening the space scale adjusting screw andmoving the space scale to align at the same number the tuckscale is set for with the needle point. This setting makes blindtucks where the fold of one tuck touches the stitching of theprevious tuck. When space between tucks is desired, add thespace in quarter inches to this number. Thus half-inch tucksspaced a half inch apart require the tuck scale to be set at 4and the space scale at 6. The 6 is in line with the needle point.the rule is to match the tuck scale setting and add the space.
When making the final tuck of a series, release the lever thatcontacts the needle clamp by merely bringing it forward out ofcontact with the needle clamp. Return the lever to its originalposition after the final tuck has been made.
Srnoeked TuekingqMocKED rucKrNG is a simple variation of straight tucking thatLJ is especially suited to yoke treatments for dresses andblouses of plain fabrics. It provides a texture contrast that, initself, is rich and smart. Tuck the fabric on the lengthwise grainmaking !(inch tucks spaced 171 inch apart. The SINGER Tuckeris set with the tuck scale at No. 1 and the space scale at No 2.
The crosswise stitching is made with the Edgestitcher ad-justed so that the distance from the needle point to each side of
the attachment is equal. Rows of stitching are made across thetucks from alternate directions and the exact width apart asindicated by the distance from the needle point to the edge ofthe attachment. When the stitching is completed and the workpressed with steam from the wrong side, the shaped garmentsection is then cut according to the plain pattern.
Sealloped, Taeking
I. NTERESTTNG \,,\RrArroN to plain tucking is achieved by givingI design to the erlge of the tuck in the form of points or scal-lops. Plastic rulers are available for such markings, or interestingscall<-rped, curve<l, or pointed patterns can be cut from cardboard.Trace the clesign to.the fabric, folded right sides together, allow-ing a seam of not less thanr,l inch from the fold.
Stitch with a very short stitch, No. 20 on medium weightfabrics. The Quilting Foot facilitates stitching small scallopsdue to its open construction and its short toes.
A lighter than regular pressure adjustment enables theoperator to turn the fabric more freely.
To prevent pulling at the point between scallops in the fin-ished work, when stitching allow one stitch for width betweeneach scallop. This spacing provides the width needed when cut-ting and produces a smoothly turned seam. Seams are blended
t7
to a scant 1l ir,ch on small scallops and a generous ){ inch onlarger scailops. One edge is blended shorter tha.n the other onall scallops except the very small. Wedges are cut from theseam edges at evenly spaced intervals when blending. Then thescallops are turned and the seam edges are worked between thethumb and the finger to bring the stitching to the very edge.
A silk thread basting is often used to retain the shaping untilafter pressing. If the finished scallop is not smoothly shaped,inspect the stitching for exactness, and review the blending ofseam edges and the cutting of wedges. Smooth, even scallopsare lovely and expensive looking when used with tucking or asan edge finish.
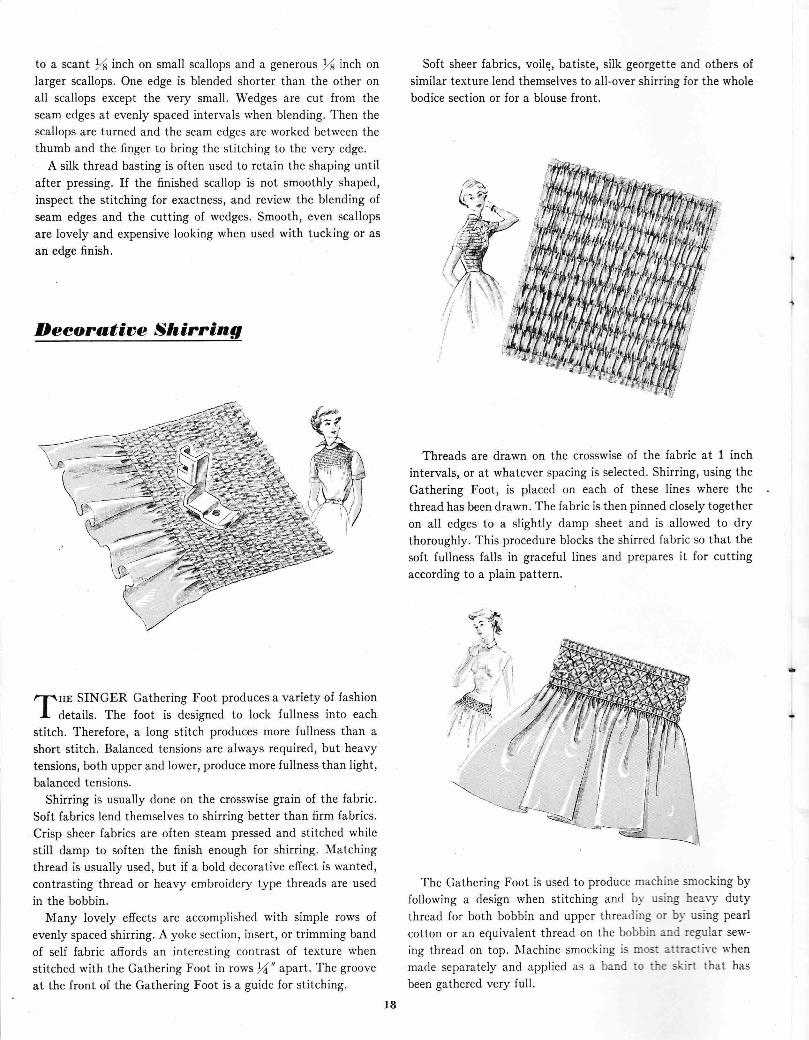
I)eeoratioe Shiming
,T,rru SINGER Gathering Foot produces a variety of fashionI details. The foot is designed to lock fullness into each
stitch. Therefore, a long stitch produces more fullness than ashort stitch. Balanced tensions are always required, but heavytensions, both upper and lower, produce more fullness than light,balanced tensions.
Shirring is usually done on the crosswise grain of the fabric.Soft fabrics lend themselves to shirring better than firm fabrics.Crisp sheer fabrics are often steam pressed and stitched whilestill damp to soften the finish enough for shirring. Matchingthread is usually used, but if a bold decorative effect is wanted,contrasting thread or heavy embroidery type threads are usedin the bobbin.
Many lovely effects are accomplished with simple rows ofevenly spaced shirring. A yoke section, insert, or trimming bandof self fabric affords an interesting contrast of texture whenstitched with the Gathering Foot in rows \,y'" apart. The grooveat the front of the Gathering Foot is a guide for stitching.
Soft sheer fabrics, voile, batiste, silk georgette and others ofsimilar texture lend themselves to all-over shirring for the wholebodice section or for a blouse front.
Threads are drawn on the crosswise of the fabric at 1 inchintervals, or at whatever spacing is selected. Shirring, using theGathering Foot, is placed on each of these lines where thethread has been drawn. The fabric is then pinned closely togetheron all edges to a slightly damp sheet and is allowed to drythoroughly. This procedure blocks the shirred fabric so that thesoft fullness falls in graceful lines and prepares it for cuttingaccording to a plain pattern.
The Gathering Foot is used to produce machine smocking byfollowing a design when stitching and b1- using hearv dutythread for both bobbin and upper threading or bv using pearlcotton or an equivalent thread on the bobbin and regular sew-ing thread on top. Ilachine smocking is most a:tracti\-e whenmade separately and applied as a band to the skirt that hasbeen gathered very full.
q- *F"... -l*..:r l
{*',** '
/!
(" ,' ' !: {I ,, I,l l;{tt*l\,',t!\. ,/ I l*<=. =ss\L *
l8
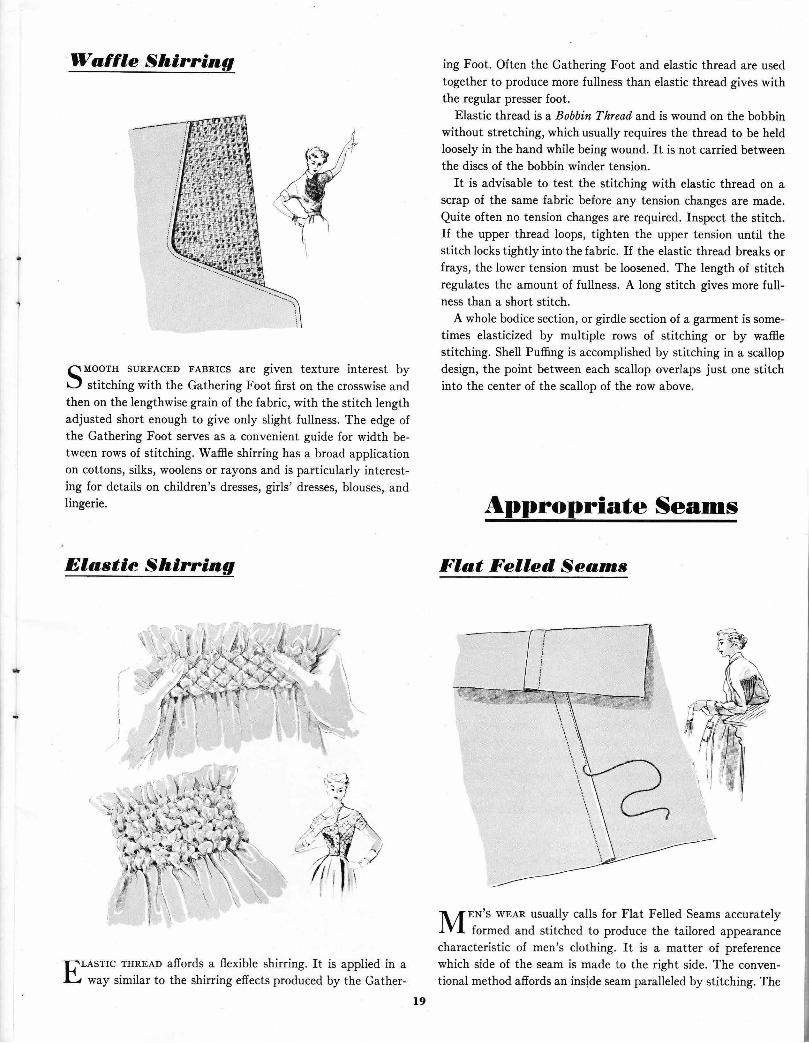
Waffle Shiming
qMoorH sURTACED FABRrcs are given texture interest byL-, stitching with the Gathering Foot first on the crosswise andthen on the lengthwise grain of the fabric, with the stitch lengthadjusted short enough to give only slight fullness. The edge ofthe Gathering Foot serves as a convenient guide for width be-tween rows of stitching. Waffie shirring has a broad applicationon cottons, silks, woolens or rayons and is particularly interest-ing for details on children's dresses, girls' dresses, blouses, andlingerie.
Dlastie Shiming
ing Foot. Often *,he Gathering Foot and elastic thread are usedtogether to produce more fullness than elastic thread gives withthe regular presser foot.
Elastic thread is a Bobbin Thread and is wound on the bobbinwithout stretching, which usually requires the thread to be heldloosely in the hand while being wound. It is not carried betweenthe discs of the bobbin winder tension.
It is advisable to test the stitching with elastic thread on ascrap of the same fabric before any tension changes are made.Quite often no tensiort changes are required. Inspect the stitch.If the upper thread loops, tighten the upper tension until thestitch locks tightly into the fabric. If the elastic thread breaks orfrays, the lower tension must be loosened. The length of stitchregulates the amount of fullness. A long stitch gives more full-ness than a short stitch.
A whole bodice section, or girdle section of a garment is some-times elasticized by multiple rows of stitching or by waffiestitching. Shell Puffing is accomplished by stitching in a scallopdesign, the point between each scallop overlaps just one stitchinto the center of the scallop of the row above.
Appropriate Seams
Flat Felled, Sea,rns
EN's wEen usually calls for Flat Felled Seams accuratelyformed and stitched to produce the tailored appearance
characteristic of men's clothing. It is a matter of preferencewhich side of the seam is made to the right side. The conven-tional method afiords an inside seam paralleled by stitching. The
6&ft'.'
$-"
t
I
-'> l-1 iy^ -.i-.
,r , "}ff')fi 1,,'
LASrrc THREAD affords a flexible shirring. It is applied in away similar to the shirring effects produced by the Gather-
t9
reverse side reveals a top-stitched seam edge, paralleled by arow of stitching.
The full seam allowance is taken with the first stitching. Theseam is pressed flatly as stitched, pressed open and then pressedwith both seam edges together.
The inside seam edge is blended to slightly less than thewidth of the finished seam, the upper seam edge is turned evenlyand is top stitched.
Manufacturers differ in their handling of Flat Felled Seams,but usually the seam edges that are blended are the back seamedge on side seams, the back seam edge on sleeve seams, thesleeve seam edge on armhole seams, the garment section on yokeseams and the front seam edge on shoulder seams.
The Slotted, Seam
Jtat.!
s?(1tl-l/1.\D"
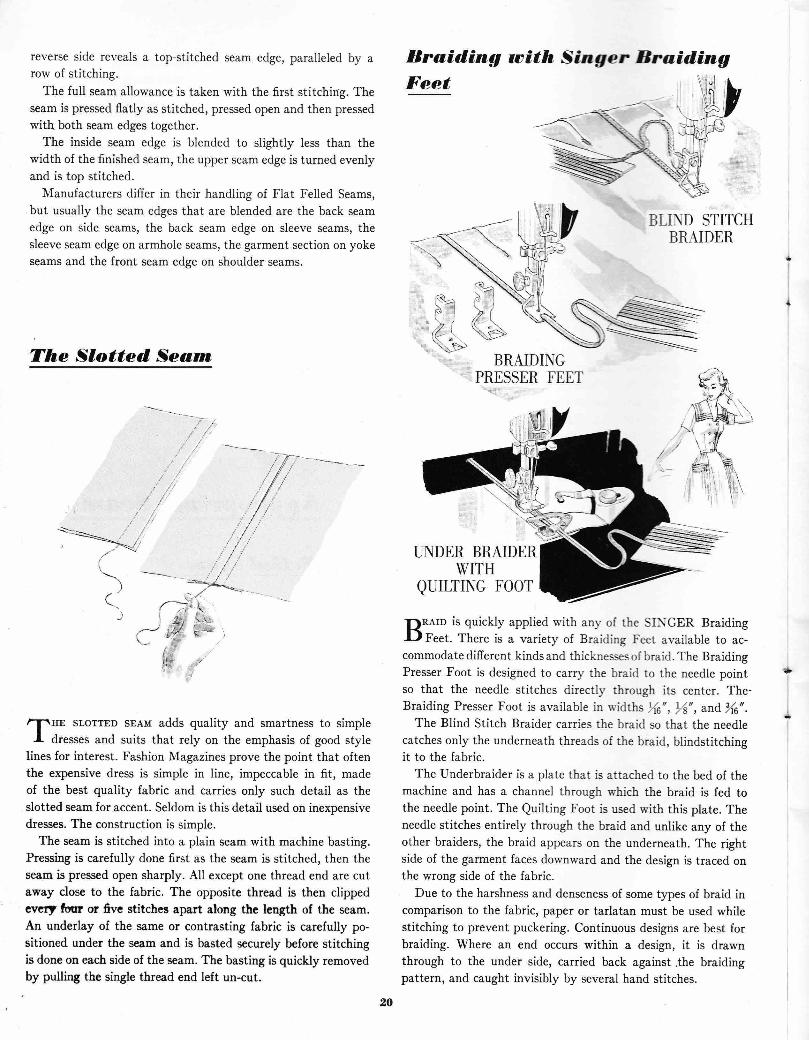
,T,"t sLorrED sreu adds quality and smartness to simpleI dresses and suits that rely on the emphasis of good style
lines for interest. Fashion Magazines prove the point that oftenthe expensive dress is simple in line, impeccable in fit, madeof the best quality fabric and carries only such detail as theslotted seam for accent. Seldom is this detail used on inexpensivedresses. The construction is simple.
The seam is stitched into a plain seam with machine basting.Pressing is carefully done first as the seam is stitched, then theseam is pressed open sharply. All except one thread end are cutaway close to the fabric. The opposite thread is then clippedevet f!ilrr or five stitches apart along the length of the seam.An underlay of the same or contrasting fabric is carefully po-sitioned under the seam and is basted securely before stitchingis done on each side of the seam. The basting is quickly removedby pulling the single thread end left un-cut.
Braid,ing with Singer Braid,ingFeet
BLI\D STITCHBRAIDER
BRAIDINCPRESSER FEET
UNDER BRAIDERWITH
QUILTINC FOOT
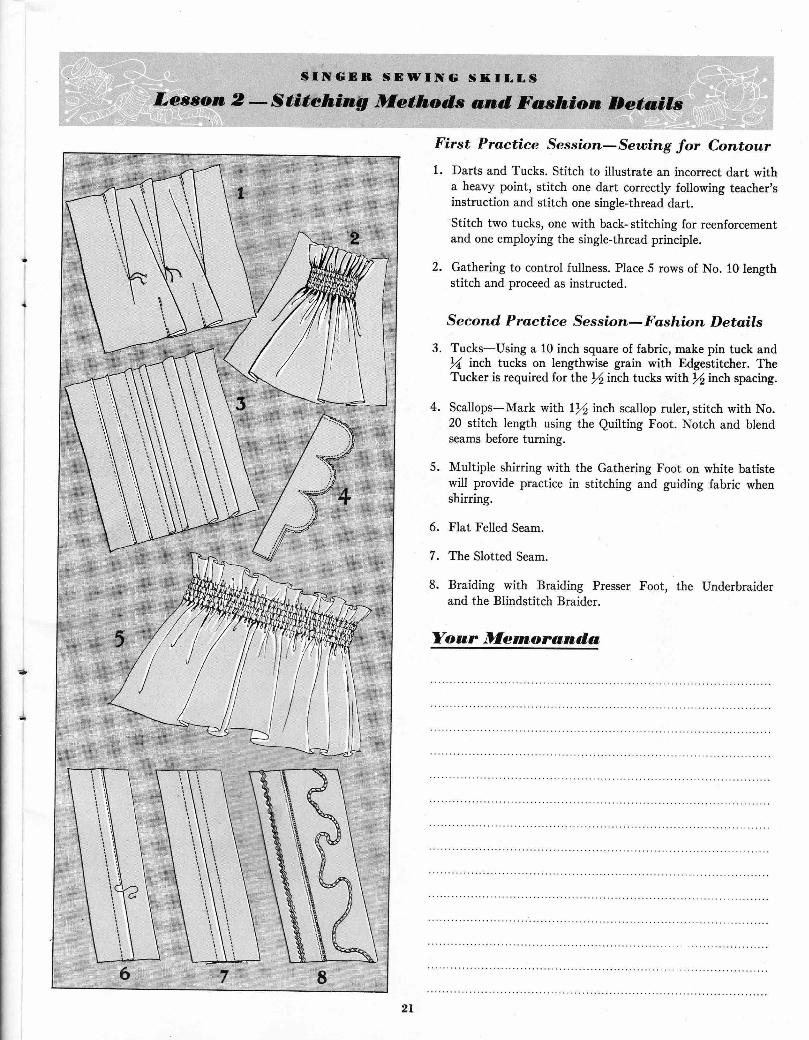
DRAID is quickly applied with any of the SI\GER BraidingI-Dpss1. There is a variety of Braiding Feet available to ac-commodate different kinds and thicknesses of braid. The BraidingPresser Foot is designed to carry the braid to the needle pointso that the needle stitches directll' through its center. The'Braiding Presser Foot is available in rvidths Yr6" , rr4", and /16".
The Blind Stitch Braider carries the braid so that the needlecatches only the underneath threads of the braid, blindstitchingit to the fabric.
The LInderbraider is a plate that is attached to the bed of themachine and has a channel through which the braid is fed tothe needle point. The Quilting Foot is used with this plate. Theneedle stitches entirely through the braid and unlike any of theother braiders, the braid appears on the underneath. The rightside of the garment faces downward and the design is traced onthe wrong side of the fabric.
Due to the harshness and denseness of some types of braid incomparison to the fabric, paper or tarlatan must be used whilestitching to prevent puckering. Continuous designs are best forbraiding. Where an end occurs within a design, it is drawnthrough to the under side, carried back against.the braidingpattern, and caught invisibly by several hand stitches.
20
SINGEN SEWTNG Sf,II,ISLe*son 2 - stitehinfr Method,* and Fushion Details
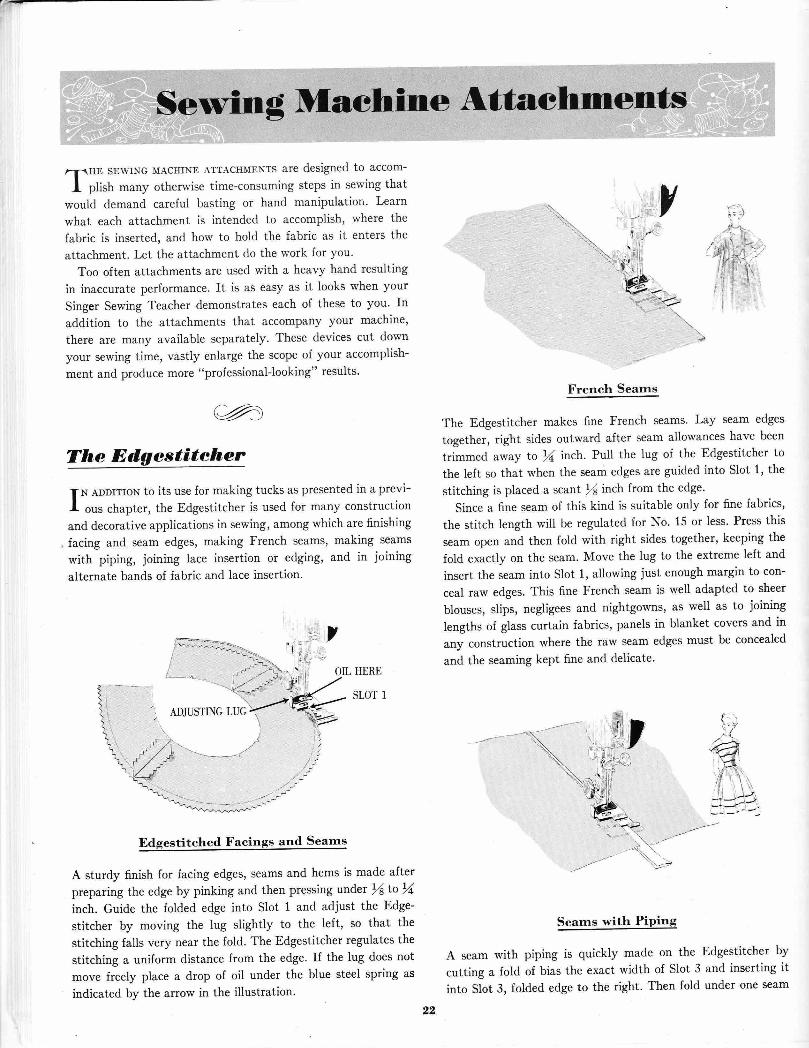
First Practice Session- Seuing Jor Contour1. Darts and Tucks. Stitch to illustrate an incorrect dart with
a heavy point, stitch one dart correctly following teacher,sinstruction and stitch one single-thread dart.Stitch two tucks, one with back- stitching for reenforcementand one employing the single-thread principle.
2. Gathering to control fullness. Place 5 rows of No. 10 lengthstitch and proceed as instructed.
Second. Practice Session- Fashion Details3. Tucks-Using a 10 inch square of fabric, make pin tuck and
rz{, inch tucks on Iengthwise grain with Edgestitcher. TheTucker is required for the rlinch tucks with rlinch spacing.
4. Scallops-Mark with ll inch scallop ruler, stitch with No.20 stitch length using the Quilting Foot. Notch and blendseams before turning.
5. Multiple shirring with the Gathering Foot on white batistewill provide practice in stitching and guiding fabric whenshirring.
6. Flat Felled Seam.
7. The Slotted Seam.
8. Braiding with Braiding Presser Foot, the Underbraiderand the Blindstitch Braider.
Yoar Dfetnoranda,
Sewing Maehine Attaehments,-nHE sEwrNG MACHINE ATTACHNIENTs are designed to accom-
I piish many otherwise time-consuming steps in sewing thatwouid demand careful basting or hand manipulation' Learnwhat each attachment is intended to accompiish, where the
fabric is inserted, and how to hold the fabric as it enters the
attachment. Let the attachment do the work for you'Too often attachments are used with a hear'y hand resulting
in inaccurate performance. It is as easy as it looks when yourSinger Sewing Teacher demonstrates each of these to you' Inaddition to the attachments that accompany your machine,
there are many availabie separately. These devices cut downyour sewing time, vastly enlarge the scope of your accomplish-ment and produce more "professional-Iooking" results'
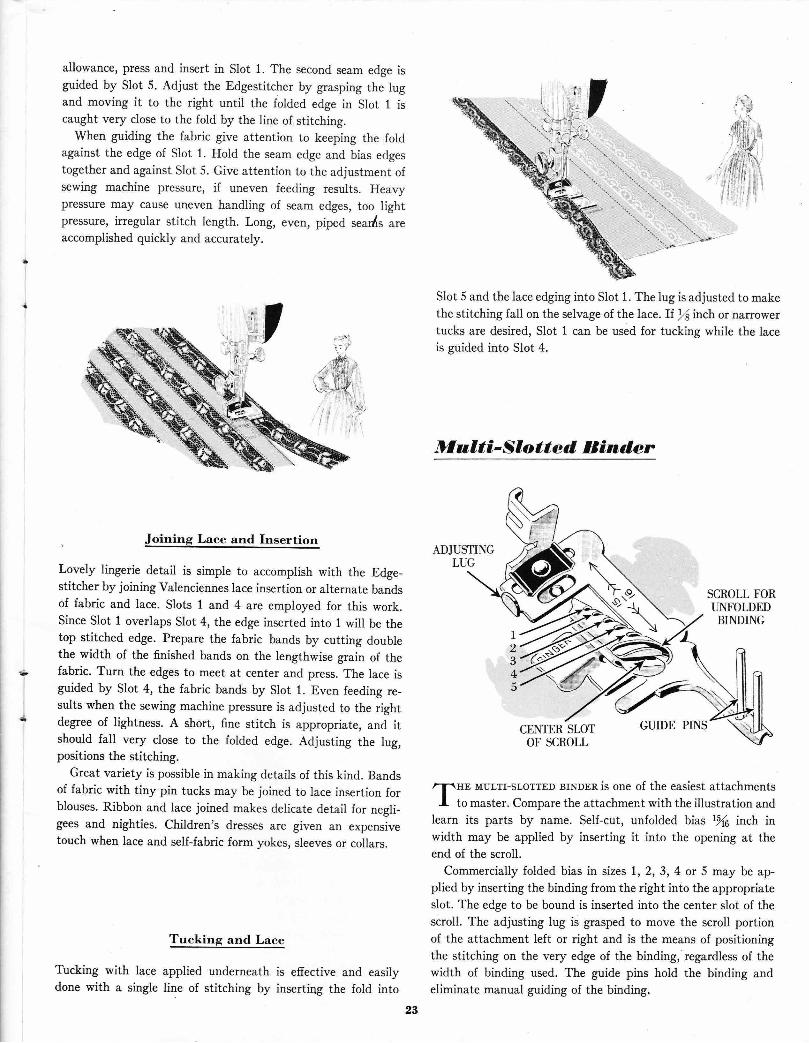
c4)The EdgestiteherI'N ADDrrroN to its use for making tucks as presented in a previ-I ous chapter, the Edgestitcher is used for many constructionand decorative applications in sewing, among which are flnishing
. facing and seam edges, making French seams, making seams
with piping, joining lace insertion or edging, and in joiningalternate bands of fabric and lace insertion'
, euusrnc Lud'<
Edgestitched Facings and Searns
A sturdy finish for facing edges, seams and hems is made afterpreparing the edge by pinking and then pressing under lf to r/,
inch. Guide the folded edge into Slot 1 and adjust the Edge-
stitcher by moving the lug slightly to the left, so that the
stitching falls very near the fold. The Edgestitcher regulates the
stitching a uniform distance from the edge. If the lug does notmove freely place a drop of oil under the blue steel spring as
indicated by the arrow in the illustration.
\. \.\:- -\
-.{,\..rt --; :,l/1 t-la!':r'li:i:t ll
"\
French Searns
The Edgestitcher makes fine French seams' Lay seam edges
together, right sides outward after seam allowances have been
trimmed away to 1l inch. Pull the lug of the Edgestitcher to
the left so that when the seam edges are guided into Slot 1, the
stitching is placed a scant )rtinch from the edge'
Since a fine seam of this kind is suitable only for fine fabrics,
the stitch length wili be regulated for No' 15 or less' Press this
seam open and then fold with right sides together, keeping the
fold exactly on the seam. Move the lug to the extreme left and
insert the seam into Slot 1, allowing just enough margin to con-
ceal raw edges. This fine French seam is well adapted to sheer
blouses, slips, negligees and nightgowns, as well as to joining
lengths of glass curtain fabrics, panels in blanket covers and in
any construction where the raw seam edges must be concealed
and the seaming kept fine and delicate.
Seams with Piping
A seam with piping is quickly made on the Edgestitcher by
cutting a fold of bias the exact width of Slot 3 and inserting itinto SIot 3, folded edge to the right' Then fold under one seam
.t,
allowance, press and insert in Slot 1. The second seam edge isguided by Slot 5. Adjust the Edgestitcher by grasping the lugand moving it to the right until the folded edge in Slot 1 iscaught very close to the fold by the line of stitching.
When guiding the fabric give attention to keeping the foldagainst the edge of Slot 1. Hold the seam edge and bias edgestogether and against Slot 5. Give attention to the adjustment ofsewing machine pressure, if uneven feeding results. Healypressure may cause uneven handling of seam edges, too lightpressure, irregular stitch length. Long, even, piped .ead{s ureaccomplished quickly and accurately.
. Joining Lace and Insertion
Lovely lingerie detail is simple to accomplish with the Edge-stitcher by joining Valenciennes lace insertion or alternate bandsof fabric and lace. Slots 1 and 4 are employed for this work.Since Slot 1 overlaps Slot 4, the edge inserted into 1 will be thetop stitched edge. Prepare the fabric bands by cutting doublethe width of the finished bands on the lengthwise grain of thefabric. Turn the edges to meet at center and press. The lace isguided by Slot 4, the fabric bands by Slot 1. Even feeding re-sults when the sewing machine pressure is adjusted to the rightdegree of lightness. A short, fine stitch is appropriate, and itshould fall very close to the folded edge. Adjusting the lug,positions the stitching.
Great variety is possible in making details of this kind. Bandsof fabric with tiny pin tucks may be joined to lace insertion forblouses. Ribbon and lace joined makes delicate detail for negli-gees and nighties. Children's dresses are given an expensivetouch when lace and self-fabric form yokes, sleeves or collars.
Tucking and Lace
Tucking with lace applied underneath is effective and easilydone with a single line of stitching by insertiqg the fold into
Slot 5 and the lace edging into Slot 1. The lug is adjusted to makethe stitching fall on the selvage of the lace. If rlinch or narrowertucks are desired, SIot 1 can be used for tucking while the laceis guided into Slot 4.
Df alti - S lo tt e d, B ind,er
ADJUSTINGLUG
SCROI-L FORIINFOI,DED
BINDING
CENTER SLOTOF SCROLL
GUIDE PINS
,T.r" MULTr-sLorrED BTNDER is one of the easiest attachmentsI to master. Compare the attachment with the illustration and
learn its parts by name. Self-cut, unfolded bias r/16 inch inwidth may be applied by inserting it into the opening at theend of the scroll.
Commercially folded bias in sizes 1,2,3,4 or 5 may be ap-plied by inserting the binding from the right into the appropriateslot. The eCge to be bound is inserted into the center slot of thescroll. The adjusting lug is grasped to move the scroll portionof the attachment left or right and is the means of positioningthe stitching on the very edge of the binding,'regardless of thewidth of binding used. The guide pins hold the binding andeliminate manual guiding of the binding.
I2345
23
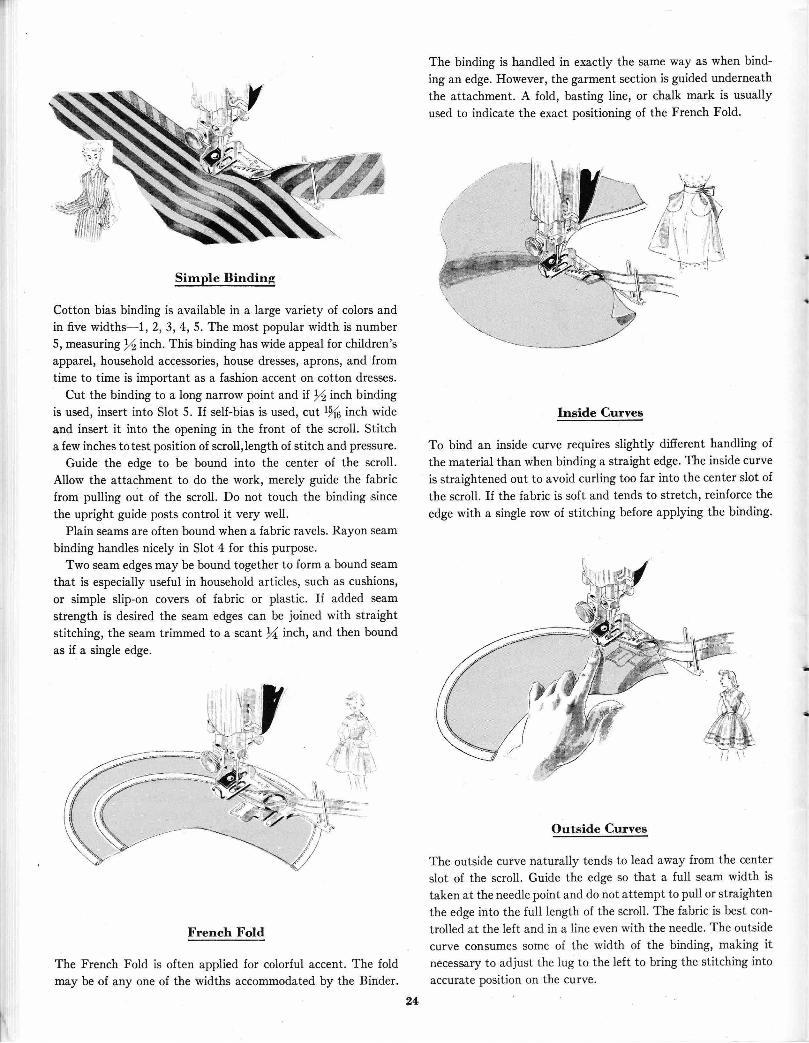
Sirnple Binding
Cotton bias binding is available in a large variety of colors andin five widths-t,2,3, 4, 5. The most popular width is number5, measuring tlinch. This binding has wide appeal for children'sapparel, household accessories, house dresses, aprons, and fromtime to time is important as a fashion accent on cotton dresses.
Cut the binding to a long narrow point and iI rlinch bindingis used, insert into SIot 5. If self-bias is used, cutr/16 inch wideand insert it into the opening in the front of the scroll. Stitcha few inches totest position of scroll,length of stitch and pressure.
Guide the edge to be bound into the center of the scroll.Allow the attachment to do the work, merely guide the fabricfrom pulling out of the scroll. Do not touch the binding sincethe upright guide posts control it very well.
Plain seams are often bound when a fabric ravels. Rayon seambinding handles nicely in Slot 4 for this purpose.
Two seam edges may be bound together to form a bound seamthat is especially useful in household articles, such as cushions,or simple slip-on covers of fabric or plastic. If added seamstrength is desired the seam edges can be joined with straightstitching, the seam trimmed to a scant f itch, and then boundas if a single edge.
French Fold
The French Fold is often applied for colorful accent. The foldmay be of any one of the widths accommodated by the Binder.
The binding is handled in exactly the same way as when bind-ing an edge. However, the garment section is guided underneaththe attachment. A fold, basting line, or chalk mark is usuallyused to indicate the exact positioning of the French Fold.
Inside Curves
To bind an inside curve requires slightly difierent handling ofthe material than when binding a straight edge. The inside curveis straightened out to avoid curling too far into the center slot ofthe scroll. If the fabric is soft and tends to stretch, reinforce theedge with a single row of stitching before applying the binding.
Outside Curves
The outside curve naturally tends to lead away from the centerslot of the scroll. Guide the edge so that a full seam width is
taken at the needle point and do not attempt to pull or straightenthe edge into the full length of the scroll. The fabric is best con-trolled at the left and in a line even with the needle. The outsidecurve consumes some of the width of the binding, making itnecessary to adjust the lug to the left to bring the stitching intoaccurate position on the curve.
i'$1{Aft
24
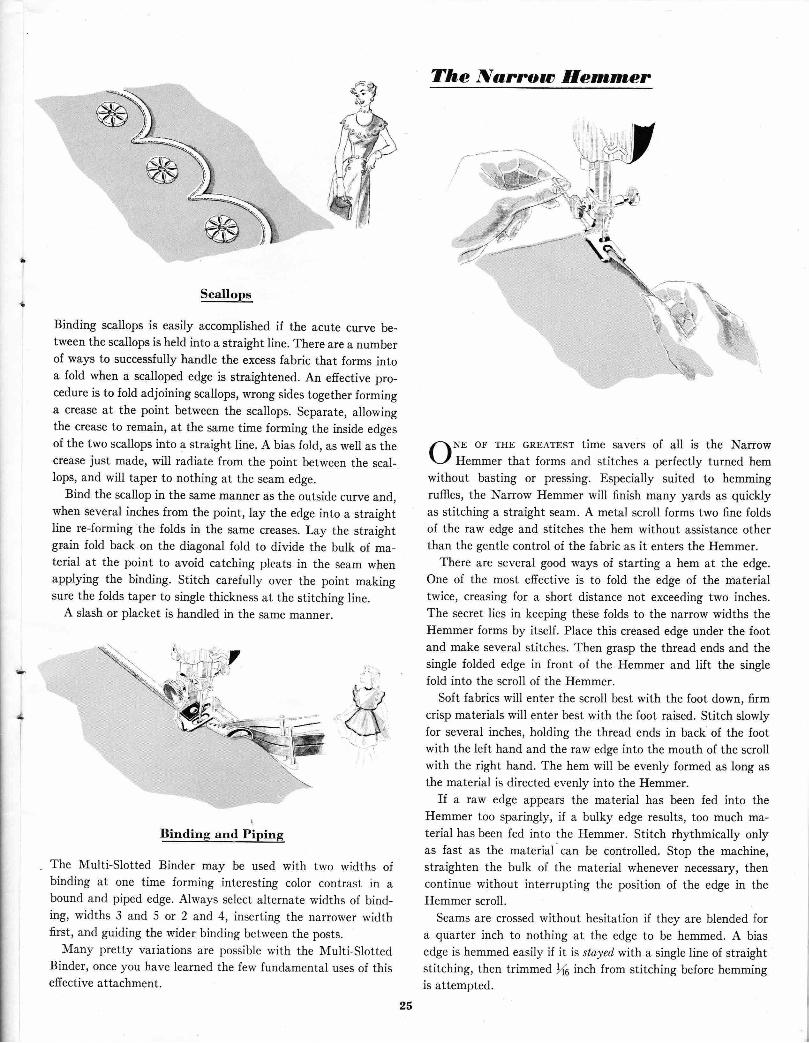
Scallops
Binding scallops is easily accomplished if the acute curve be-tween the scallops is held into a straight line. There are a numberof ways to successfully handle the excess fabric that forms intoa fold when a scalloped edge is straightened. An efiective pro-cedure is to fold adjoining scallops, wrong sides together forminga crease at the point between the scallops. Separate, allowingthe crease to remain, at the same time forming the inside edgesof the two scallops into a straight line. A bias fold, as well as thecrease just made, will radiate from the point between the scal-lops, and will taper to nothing at the seam edge.
Bind the scallop in the same manner as the outside curve and,when several inches from the point, lay the edge into a straightline re-Iorming the folds in the same creases. Lay the straightgrain fold back on the diagonal fold to divide the bulk of ma-terial at the point to avoid catching pleats in the seam whenapplying the binding. Stitch carefuliy over the point makingsure the folds taper to single thickness at the stitching line.
A slash or placket is handled in the same manner.
sEqi"s *g Jtprss
The Multi-Slotted Binder may be used with two widths ofbinding at one time forming interesting color contrast in abound and piped edge. Always select alternate widths of bind-ing, widths 3 and 5 or 2 and 4, inserting the narrower widthfirst, and guiding the wider binding between the posts.
Many pretty variations are possible with the MultislottedBinder, once you have learned the few fundamental uses of thiseffective attachment.
The Namow lfontrner
\1.;
/-\ NE oF rrrE GREATEST time savers of all is the Narrowl..-l H"--.r that forms and stitches a perfectly turned hemwithout basting or pressing. Especially suited to hemmingruffies, the Narrow Hemmer will finish many yards as quicklyas stitching a straight seam. A metal scroll forms two fine foldsof the raw edge and stitches the hem without assistance otherthan the gentle control of the fabric as it enters the Hemmer.
There are several good ways of starting a hem at the edge.One of the most effective is to fold the edge of the materialtwice, creasing for a short distance not exceeding two inches.The secret lies in keeping these folds to the narrow widths theHemmer forms by itself. Place this creased edge under the footand make several stitches. Then grasp the thread ends and thesingle folded edge in front of the Hemmer and lift the singlefold into the scroll of the Hemmer.
Soft fabrics will enter the scroll best with the foot down, firmcrisp materials will enter best with the foot raised. Stitch slowlyfor several inches, holding the thread ends in back of the footwith the left hand and the raw edge into the mouth of the scrollwith the right hand. The hem will be evenly formed as long asthe material is directed evenly into the Hemmer.
If a raw edge appears the material has been fed into theHemmer too sparingly, if a bulky edge results, too much ma-terial has been fed into the Hemmer. Stitch rhythmically onlyas fast as the material can be controlled. Stop the machine,straighten the bulk of the material whenever necessary, thencontinue without interrupting the position of the edge in theHemmer scroll.
Seams are crossed without hesitation if they are blended fora quarter inch to nothing at the edge to be hemmed. A biasedge is hemmed easily if it is stayed with a single line of straightstitching, then trimmed Yre inch from stitching before hemmingis attempted.
.(-t/,\..d/:\.\ ,..1,
25
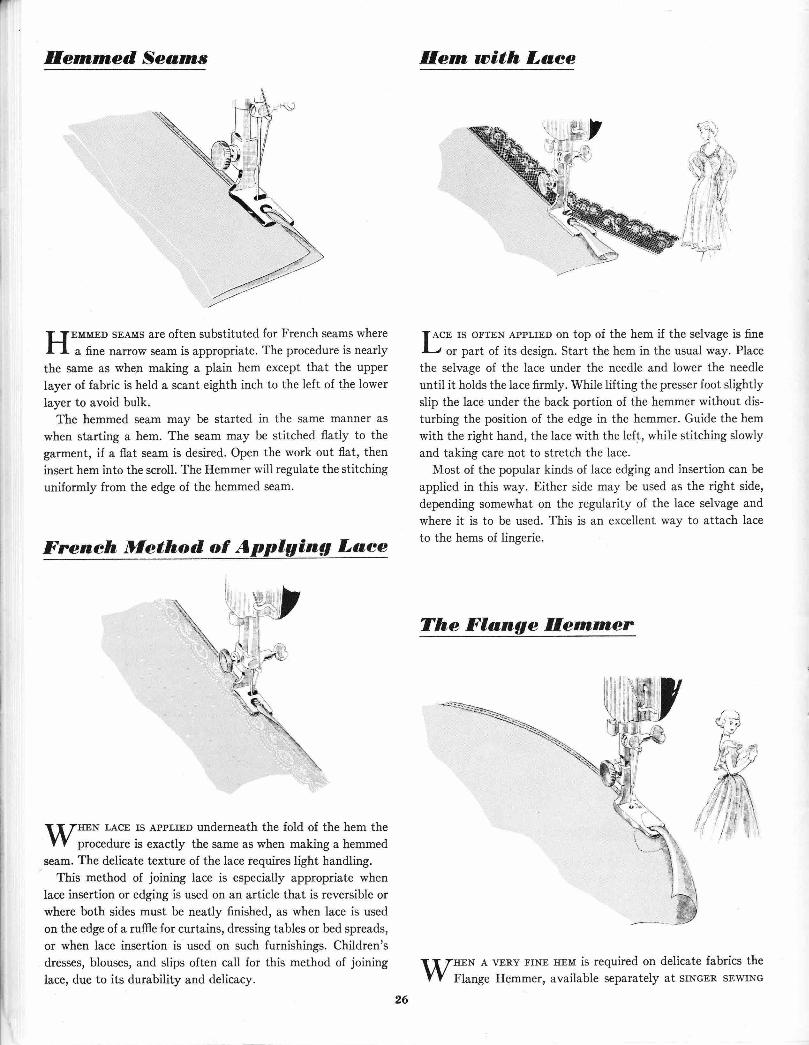
tr
flerntned Sea,rn*
I_IEMMED sEAMS are often substituted for French seams whereI I a fine narrow seam is appropriate. The procedure is nearlythe same as when making a plain hem except that the upperlayer of fabric is held a scant eighth inch to the left of the lowerlayer to avoid bulk.
The hemmed seam may be started in the same manner as
when starting a hem. The seam may be stitched flatly to thegarment, if a flat seam is desired. Open the work out flat, theninsert hem into the scroll. The Hemmer will regulate the stitchinguniformly from the edge of the hemmed seam.
Freneh Dfethod of Applqing Laee
II frrEN LAcE rs AppLrED underneath the fold of the hem theY Y procedure is exactly the same as when making a hemmed
seam. The delicate texture of the lace requires light handling.This method of joining lace is especially appropriate when
lace insertion or edging is used on an article that is reversible orwhere both sides must be neatly finished, as when lace is usedon the edge of a ruffie for curtains, dressing tables or bed spreads,or when lace insertion is used on such furnishings. Children'sdresses, blouses, and slips often call for this method of joininglace, due to its durability and delicacy.
Hern with Laee
fACE rs oFrEN AppLrEo on top of the hem if the selvage is fineLr 61 part of its design. Start the hem in the usual way. Placethe selvage of the lace under the needle and lower the needleuntil it holds the lace firmly. While lifting the presser foot slightlyslip the lace under the back portion of the hemmer without dis-turbing the position of the edge in the hemmer. Guide the hemwith the right hand, the lace with the left, while stitching slowlyand taking care not to stretch the lace.
Most of the popular kinds of lace edging and insertion can beapplied in this way. Either side may be used as the right side,depending somewhat on the regularity of the lace selvage andwhere it is to be used. This is an excellent way to attach laceto the hems of lingerie.
The Flange llemrner
{,ll
26
r r rHEN A vERy FrNE HEM is required on delicate fabrics theW fUng. Hemmer, available separately at sINGER sEwrNG
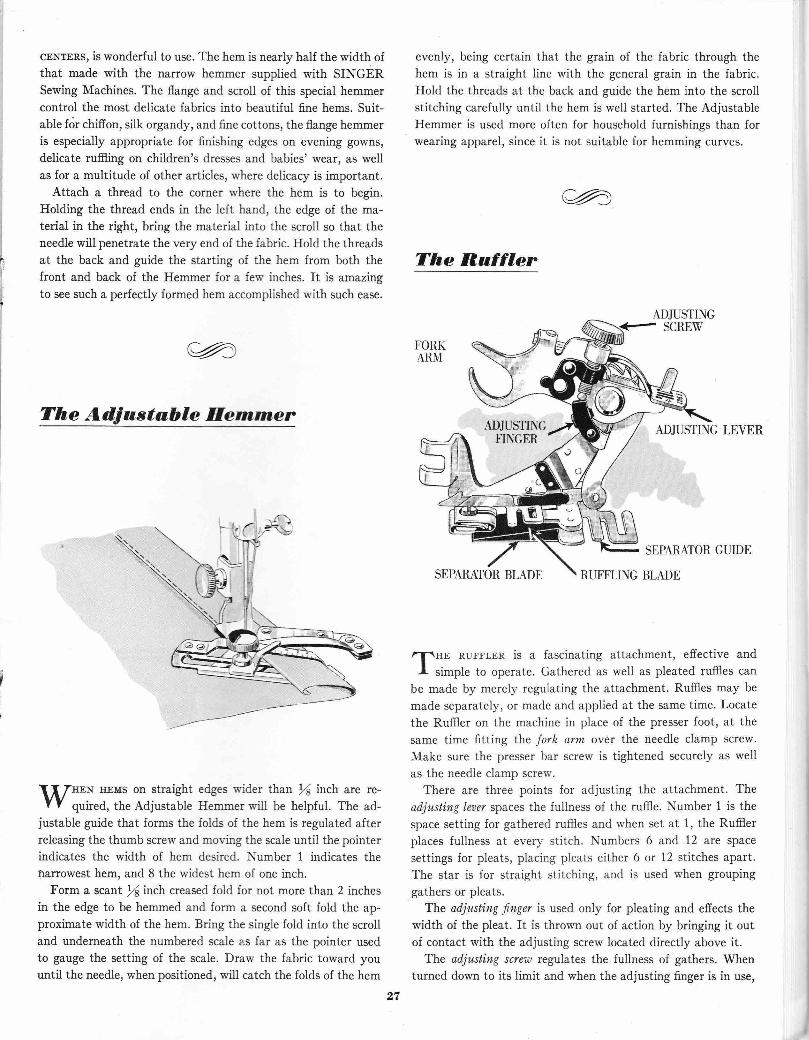
cENTERS, is wonderful to use. The hem is nearly half the width ofthat made with the narrow hemmer supplied with SINGERSewing Machines. The flange and scroll of this special hemmercontrol the most delicate fabrics into beautiful fine hems. Suit-able f<ir chifion, silk organdy, and fine cottons, the flange hemmeris especially appropriate for finishing edges on evening gowns,delicate ruffiing on children's dresses and babies' wear, as wellas for a multitude of other articles, where delicacy is important.
Attach a thread to the corner where the hem is to begin.Holding the thread ends in the left hand, the edge of the ma-terial in the right, bring the material into the scroll so that theneedle will penetrate the very end of the fabric. Hold the threadsat the back and guide the starting of the hem from both thefront and back of the Hemmer for a few inches. It is amazingto see such a perfectly formed hem accomplished with such ease.
%
The Ad,iastahle Eemmer
r{EN rrEMS on straight edges wider that l( inch are re-quired, the Adjustable Hemmer will be helpful. The ad-
justable guide that forms the folds of the hem is regulated afterreleasing the thumb screw and moving the scale until the pointerindicates the width of hem desired. Number 1 indicates thenarrowest hem, and 8 the widest hem of one inch.
Form a scant Lf inch creased fold for not more than 2 inchesin the edge to be hemmed and form a second soft fold the ap-proximate width of the hem. Bring the single fold into the scrolland underneath the numbered scale as far as the pointer usedto gauge the setting of the scale. Drarv the fabric toward youuntil the needle, when positioned, will catch the folds of the hem
evenly, being certain that the grain of the fabric through thehem is in a straight line with the general grain in the fabric.Hold the threads at the back and guide the hem into the scrollstitching carefully until the hem is well started. The AdjustableHemmer is used more often for household furnishings than forwearing apparel, since it is not suitable for hemming curves.
%
The lSufflor
ADJUSTINGSCREW
FORKARM
ADJUSTINGFINGER
ADJUSTINC LEVER
SEPARATOR GUIDE
SEPARATOR BLADE RUFFLING BLADE
/-f-\HE RUI.ILER is a fascinating attachment, effective andI si.ple to operate. Gathered as well as pleated ruffies can
be made by merely regulating the attachment. Ruffies may be
made separately, or made and applied at the same time. Locatethe Ruffier on the machine in place of the presser foot, at thesame time fitting the fork arm over the needle clamp screw.Make sure the presser bar screw is tightened securely as wellas the needle clamp screw.
There are three points for adjusting the attachment. Theadjusting leoer spaces the fullness of the ruffIe. Number 1 is thespace setting for gathered ruffies and when set at l, the Ruffierplaces fullness at every stitch. Numbers 6 and 12 are spacesettings for pleats, placing pleats either 6 or 12 stitches apart.The star is for straight stitching, and is used when groupinggathers or pleats.
"lhe adjusting fnger is used only for pleating and effects thewidth of the pleat. ft is thrown out of action by bringing it outof contact with the adjusting screw located directly above it.
The adjusting screla regulates the fullness of gathers. Whenturned down to its limit and when the adjusting finger is in use,
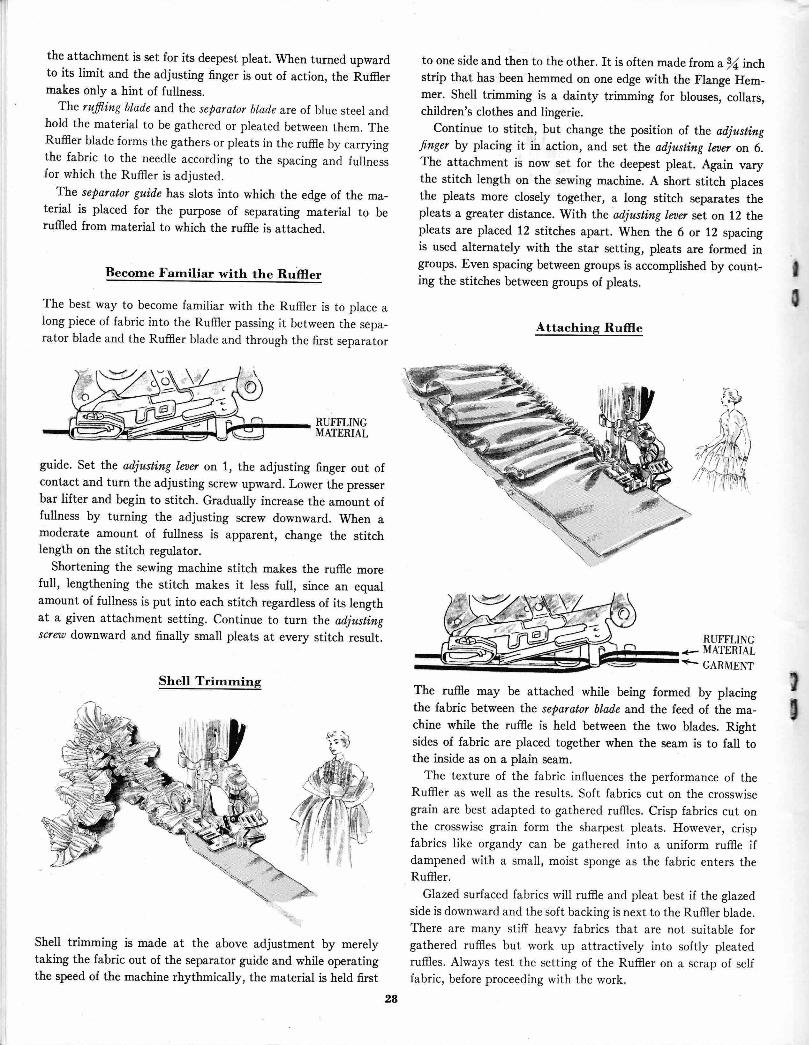
the attachment is set for its deepest pleat. When turned upwardto its limit and the adjusting finger is out of action, the Ruffiermakes only a hint of fullness.
The rufling blade and the separator blade are of blue steel andhold the material to be gathered or pleated between them. TheRuffier blade forms the gathers or pleats in the ruffie by carryingthe fabric to the needle according to the spacing and fullnessfor which the Ruffier is adjusted.
The separator guide has slots into which the edge of the ma-terial is placed for the pulpose of separating material to beruffied from material to which the ruffie is attached.
Beeome Farniliar with the Ruffier
The best way to become familiar with the Ruffier is to place along piece of fabric into the Ruffier passing it between the sepa-rator blade and the Ruffler blade and through the first separator
RUTFLINGMATERIAL
guide. Set the adjusting laner on 1, the adjusting finger out ofcontact and turn the adjusting screw upward. Lower the presserbar lifter and begin to stitch. Gradually increase the amount offullness by turning the adjusting screw downward. When amoderate amount of fullness is apparent, change the stitchlength on the stitch regulator.
Shortening the sewing machine stitch makes the ruffie morefull, lengthening the stitch makes it less full, since an equalamount of fullness is put into each stitch regardless of its lengthat a given attachment setting. Continue to turn the adjustingscrew downward and finally small pleats at every stitch result.
Shell Trirnrning
Shell trimming is made at the above adjustment by merelytaking the fabric out of the separator guide and while operatingthe speed of the machine rhythmically, the material is held first
to one side and then to the other. It is often made from afu irrchstrip that has been hemmed on one edge with the Flange Hem-mer. Shell trimming is a dainty trimming for blouses, collars,children's clothes and lingerie.
Continue to stitch, but change the position of. the adjuslingf.nger by placing it in action, and set the adjusting larcr on 6.The attachment is now set for the deepest pleat. Again varythe stitch length on the sewing machine. A short stitch placesthe pleats more closely together, a long stitch separates thepleats a greater distance. With the adjusting l,anr wt on 12 thepleats are placed 12 stitches apart. When the 6 or 12 spacingis used alternately with the star setting, pleats are formed ingroups. Even spacing between groups is accomplished by count-ing the stitches between groups of pleats.
Attaching Ruffie
RUTFLING<- MATERIAL
- GARMENT
The ruffie may be attached while being formed by placingthe fabric between the separator blad.e and. the feed of the ma-chine while the ruffe is held between the two blades. Rightsides of fabric are placed together when the seam is to fall tothe inside as on a plain seam.
The texture of the fabric influences the performance of theRuffier as well as the results. Soft fabrics cut on the crosswisegrain are best adapted to gathered ruffies. Crisp fabrics cut onthe crosswise grain form the sharpest pleats. However, crispfabrics like organdy can be gathered into a uniform ruffie ifdampened with a small, moist sponge as the fabric enters theRuffier.
Glazed surfaced fabrics will ruffie and pleat best if the glazedside is downward and the soft backing is next to the Ruffier blade.There are many stiff heavy fabrics that are not suitable forgathered ruffies but work up attractively into softly pleatedruffies. Always test the setting of the Ruffier on a scrap of selffabric, before proceeding with the work.
t0
tt
2A
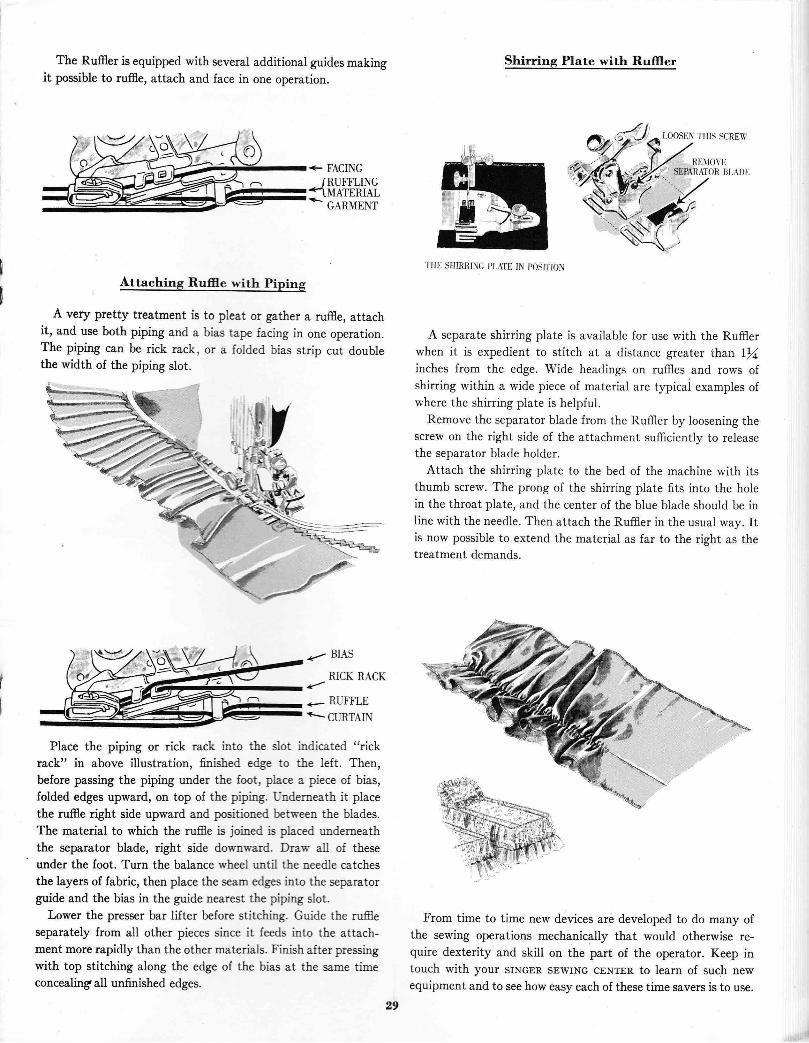
The Ruffier is equipped with several additional guides makingit possible to ruffie, attach and face in one operation.
Shirring Plate with Ruffier
I,OOSIN TIIIS SCREW
REImVESEPARATOR BI,ADII,
I'HE SHIRITING PLAIE IN POSITION
A separate shirring plate is available for use with the Rufflerwhen it is expedient to stitch at a distance greater .r"han l)1inches from the edge. Wide headings on ruffies and rows ofshirring within a wide piece of material are typicai examples ofwhere the shirring plate is helpful.
Remove the separator blade from the Ruffier by loosening thescrew on the right side of the attachment sufficiently to releasethe separator blade holder.
Attach the shirring plate to the bed of the machine with itsthumb screw. The prong of the shirring plate fits into the holein the throat plate, and the center of the blue blade should be inline with the needie. Then attach the Ruffier in the usual way. Itis now possible to extend the material as far to the right as thetreatment demands.
From time to time new devices are developed to do many ofthe sewing operations mechanically that would otherwise re-quire dexterity and skill on the part of the operator. Keep intouch with your sTNGER sEwrNG cENTER to learn of such newequipment and to see how easy each of these time savers is to use.
<_ FACINGiRUFFLING
'nlterrzuel- GARMENT
Attaching Ruffie with Piping
A very pretty treatment is to pleat or gather a ruffie, attachit, and use both piping and a bias tape facing in one operation.The piping can be rick rack, or a folded bias strip cut doublethe width of tle piping slot.
*-- BIAS
RICK RACKr'_ RLiFFLE<CLRTAIN
Place the piping or rick rack into the slot indicated "rickrack" in above illustration, finished edge to the left. Then,before passing the piping under the foot, place a piece of bias,folded edges upward, on top of the piping. Underneath it placethe ruffie right side upward and positioned between the blades.The material to which the ruffie is joined is placed underneaththe separator blade, right side downward. Draw all of theseunder the foot. Turn the balance wheel until the needle catchesthe layers of fabric, then place the seam edges into the separatorguide and the bias in the guide nearest the piping slot.
Lower the presser bar lifter before stitching. Guide the ruffieseparately from all other pieces since it feeds into the attach-ment more rapidly than the other materials. Finish after pressingwith top stitching along the edge of the bias at the same timeconcealing all unfinished edges.
29
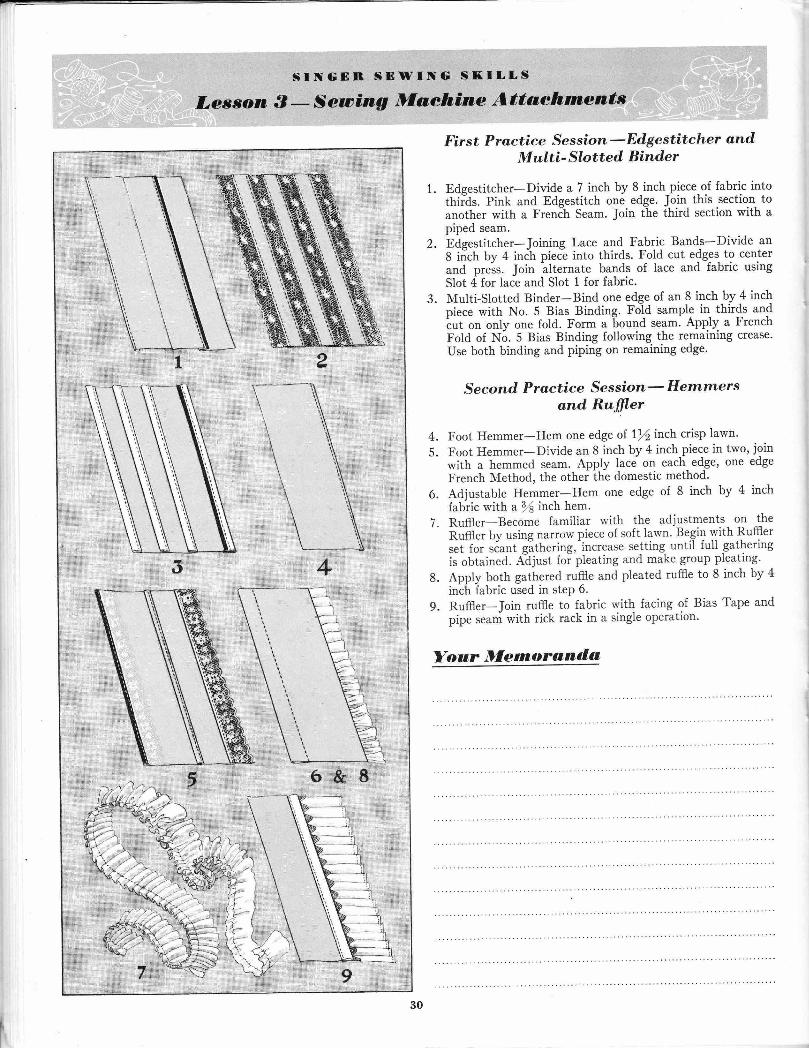
SINGEB SEWING SKILLS
6 & I
---lril
- rltt
.-,--- ii.
)1i;,::-ii
trir st P ractice Session - Edgestitcher andMulti-Slotted Binder
1. Edgestitcher-Divide a 7 inch by 8 inch-piece of fabric intothifos. Pink and Edgestitch one edge. Join this section toanother with a French Seam. Join the third section with apiped seam.
2. Edgestitcher-Joining Lace and fqb!: Bands-Divide anS iich by 4 inih piecl into thirds. Fold cut edges. to centerand press. Join ilternate bands of lace and fabric usingSlot 4 for lace and Slot 1 for fabric.
3. Multi-slotted Binder-Bind one edge of an 8 inch by 4 inchpiece with No. 5 Bias Binding. Fold sample in thirds and'cut on only one foid. Form a 6ound seam. Apply a FrenchFold of No. 5 gias Binding following the remaining crease'Use both binding and piping on remaining edge'
Second P ractice Session - Hernrn'er sand Rufiler
Foot Hemmer-Hem one edge of- l/2inch crisp lawn'Foot Hemmer-Divide an 8 inch by 4 inch piece in two, joinwith a hemmed seam. Apply lace on each edge, one edgeFrench \{ethod, the other the domestic method'Adjustable Hemmer-Hem one edge of 8 inch by 4 inchfabric with a ? s inch hem.Ruffler-Become familiar with the adjustments on thenum.. by using narrow piece of soft lawn' Be.gin with Ruffierr.i to. scant githering, increase setting. until full gatheringis obtained. A'djust foi pleating and make group pleating'Apply both gathered ruffie and pleated ruffie to 8 inch by 4inch fabric used in step 6.Ruffler-Join ruffie to fabric with facing of Bias Tape andpipe seani with rick rack in a single operation'
Les*on I - Sewing Dlaehine Attaehrnents
4.5.
6.
o
Your Dfernoranda
30
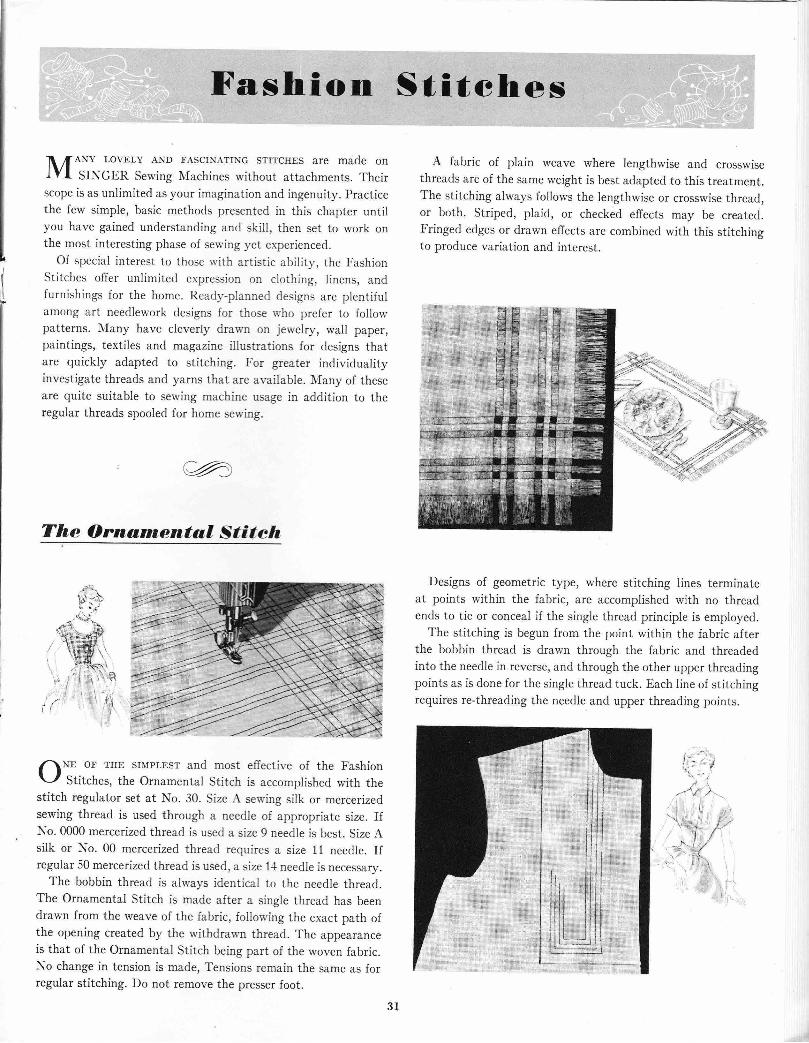
Fashion StitehesANy LovELy AND FASCINATING srrrcHEs are made onSINGER Sewing Machines without attachments. Their
scope is as unlimited as your imagination and ingenuity. Practicethe few simple, basic methods presented in this chapter untilyou have gained understanding and skill, then set to work onthe most interesting phase of sewing yet experienced.
Of special interest to those n'ith artistic ability, the FashionStitches offer unlimited expression on clothing, linens, andfurnishings for the home. I{ead1-planned designs are plentifulamong art needlework designs for those rvho prefer to followpatterns. NIany have cleverly dras.n on jerveiry, wall paper,paintings, textiles and magazine illustrations for designs thatare quickly adapted to stitching. For greater individualityinvestigate threads and yarns that are available. I,Iany of theseare quite suitable to sewing machine usage in addition to theregular threads spooled for home sewing.
aThe Ornarnental Stiteh
r-! --\!ir
11*. or rHE srrrpLEST and most effective of the Fashion\-/ Stitches, the Ornamental Stitch is accomplished with thestitch regulator set at No. 30. Size A serving silk or mercerizedsewing thread is used through a needle of appropriate size. IfNo. 0000 mercerized thread is used a size 9 needle is best. Size Asilk or No. 00 mercerized thread requires a size ll needle. Ifregular 50 mercerized thread is used, a size 1-l needle is necessary.
The bobbin thread is always identical to the needle thread.The Ornamental Stitch is made after a single threacl has beendrawn from the weave of the fabric, follorving the exact path ofthe opening created by the withdrawn threaii. The appearanceis that of the Ornamental Stitch being part of the woven fabric.No change in tension is made, Tensions remain the same as forregular stitching. Do not remove the presser foot.
A fabric of plain weave where lengthwise and crosswisethreads are of the same weight is best adapted to this treatment.The stitching always follows the lengthwise or crosswise thread,or both. Striped, plaid, or checked effects may be created.Fringed edges or drawn effects are combined with this stitchingto produce variation and interest.
Designs of geometric type, where stitching lines terminateat points within the fabric, are accomplished with no threadends to tie or conceal if the single thread principle is employed.
The stitching is begun from the point within the fabric afterthe bobbin thread is drawn through the fabric and threadedinto the needle in reverse, and through the other upper threadingpoints as is done for the single thread tuck. Each line of stitchingrequires re-threading the needle and upper threading points.
'si;:,:-r..,. ,
3t
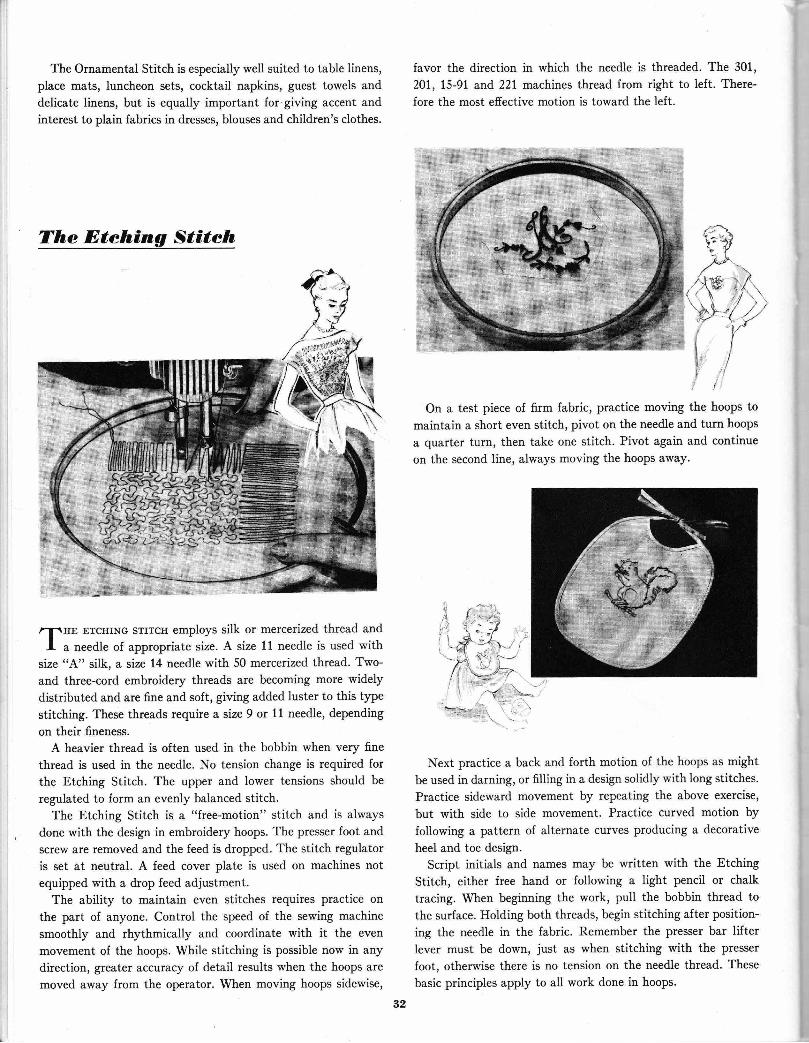
The Ornamental Stitch is especially well suited to table linens,place mats, luncheon sets, cocktail napkins, guest towels anddelicate linens, but is equally important for'giving accent andinterest to plain fabrics in dresses, blouses and children's clothes.
The Dtehing Stiteh
/T.HE ETcI{ING srrrcH employs silk or mercerized thread andI a needle of appropriate size. A size 17 needle is used with
size "A" silk, a size 14 needle with 50 mercerized thread. Two-and three-cord embroidery threads are becoming more widelydistributed and are fine and soft, giving added luster to this typestitching. These threads require a size 9 or 11 needle, dependingon their fineness.
A heavier thread is often used in the bobbin when very finethread is used in the needle. No tension change is required forthe Etching Stitch. The upper and lower tensions should beregulated to form an evenly balanced stitch.
The Etching Stitch is a "Iree-motion" stitch and is alwaysdone with the design in embroidery hoops. The presser foot andscrew are removed and the feed is dropped. The stitch regulatoris set at neutral. A feed cover plate is used on machines notequipped with a drop feed adjustment.
The ability to maintain even stitches requires practice onthe part of anyone. Control the speed of the sewing machinesmoothly and rhythmically and coordinate with it the evenmovement of the hoops. While stitching is possible now in anydirection, greater accuracy of detail results when the hoops aremoved away from the operator. When moving hoops sidewise,
favor the direction in which the needle is threaded. The 301,201, 15-91 and 221 machines thread from right to left. There-fore the most efiective motion is toward the left.
On a test piece of firm fabric, practice moving the hoops tomaintain a short even stitch, pivot on the needle and turn hoopsa quarter turn, then take one stitch. Pivot again and continueon the second line, always moving the hoops away.
Next practice a back and forth motion of the hoops as mightbe used in darning, or filling in a design solidly with Iong stitches.Practice sideward movement by repeating the above exercise,
but with side to side movement. Practice curved motion byfollowing a pattern of alternate curves producing a decorativeheel and toe design.
Script initials and names may be written with the EtchingStitch, either free hand or following a light pencil or chalktracing. When beginning the work, pull the bobbin thread tothe surface. Holding both threads, begin stitching after position-ing the needle in the fabric. Remember the presser bar lifterlever must be down, just as when stitching with the presserfoot, otherwise there is no tension on the needle thread. Thesebasic principles apply to all work done in hoops'
,^P-q!. ir.,. (/\lJ,t&r -: f/. \ 'i .\'\rr\ / ')-f;''( '-/. t,
vt1ttI
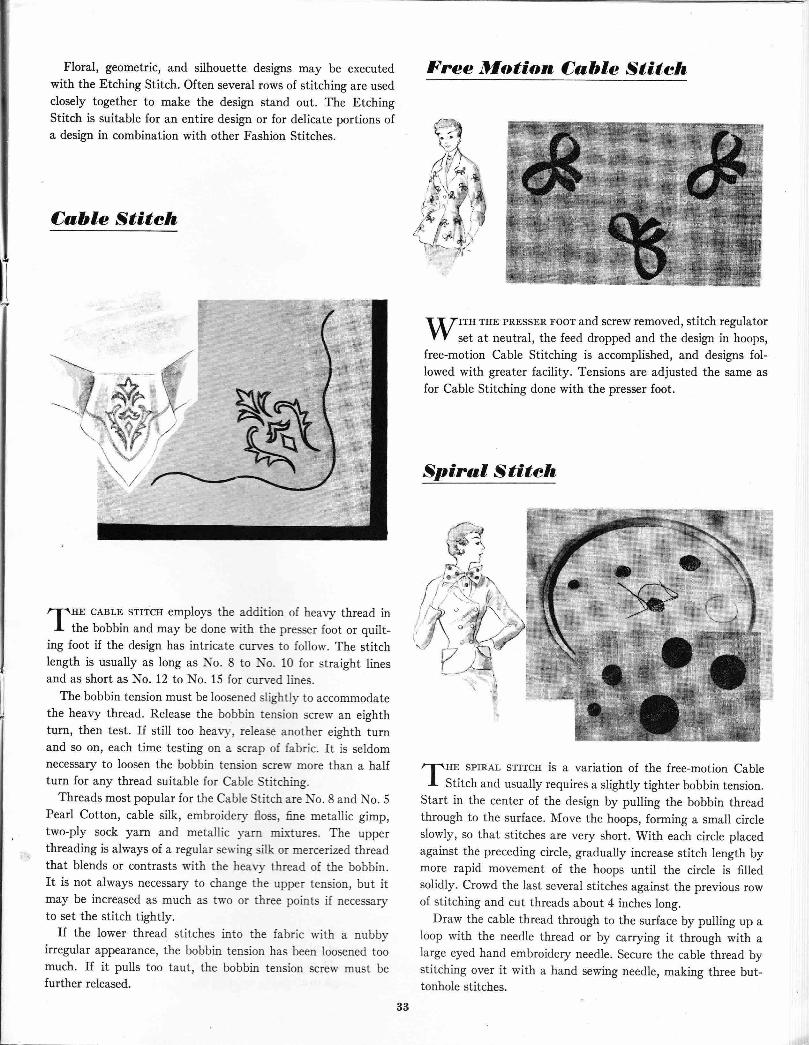
Floral, geometric, and silhouette designs may be executedwith the Etching Stitch. Often several rows of stitching are usedclosely together to make the design stand out. The EtchingStitch is suitable for an entire design or for delicate portions ofa design in combination with other Fashion Stitches.
Cable Stiteh
,:$ig-,,*'\
Free Dlotion Cable Stiteh
rru THE rRESSER noor and screw removed, stitch regulatorset at neutral, the feed dropped and the design in hoops,
free-motion Cable Stitching is accomplished, and designs fol-lowed with greater facility. Tensions are adjusted the same asfor Cable Stitching done with the presser foot.
Spiral Stiteh
,*f,HE sprRAL srrrcu is a variation of the free-motion CableI Stitch and usually requires a slightly tighter bobbin tension.
Start in the center of the design by pulling the bobbin threadthrough to the surface. Move the hoops, forming a small circleslowly, so that stitches are very short. With each circle placedagainst the preceding circle, gradually increase stitch Iength bymore rapid movement of the hoops until the circle is filledsolidly. Crowd the last several stitches against the previous rowof stitching and cut threads about 4 inches long.
Draw the cable thread through to the surface by pulling up aloop with the needie thread or by carrying it through with alarge eyed hand embroidery needle. Secure the cable thread bystitching over it with a hand sewing needle, making three but-tonhole stitches.
(-.?i- .t
)r,h-,i', c *
.,Yi*? i,:,'' r !-lfy+* t\-r' -'r *,'
l,,t -
,T,rru cABLE srrrcH employs the addition of hear,y thread inI the bobbin and may be done with the presser foot or quilt-
ing foot if the design has intricate cun es to follow. The stitchlength is usually as long as No. 8 to No. 10 for straight linesand as short as No. 12 to No. 15 for cun-ed lines.
The bobbin tension must be loosened slightll'to accommodatethe healy thread. Release the bobbin tension screrv an eighthturn, then test. If still too heavl', release another eighth turnand so on, each time testing on a scrap of fabric. It is seldomnecessary to loosen the bobbin tension scren- more than a halfturn for any thread suitable for Cable Stitching.
Threads most popular for the Cable Stitch are \o. 8 and No. 5Pearl Cotton, cable silk, embroiden- floss, fine metallic gimp,two-ply sock yarn and metallic varn mlrtures. The upperthreading is always of a regular sen'ing silk or mercerized threadthat blends or contrasts with the heary thread of the bobbin.It is not always necessary to change the upper tension, but itmay be increased as much as two or three points if necessaryto set the stitch tightly.
If the lower thread stitches into the fabric with a nubbyirregular appearance, the bobbin tension has been loosened toomuch. If it pulls too taut, the bobbin tension screw must befurther released.
33
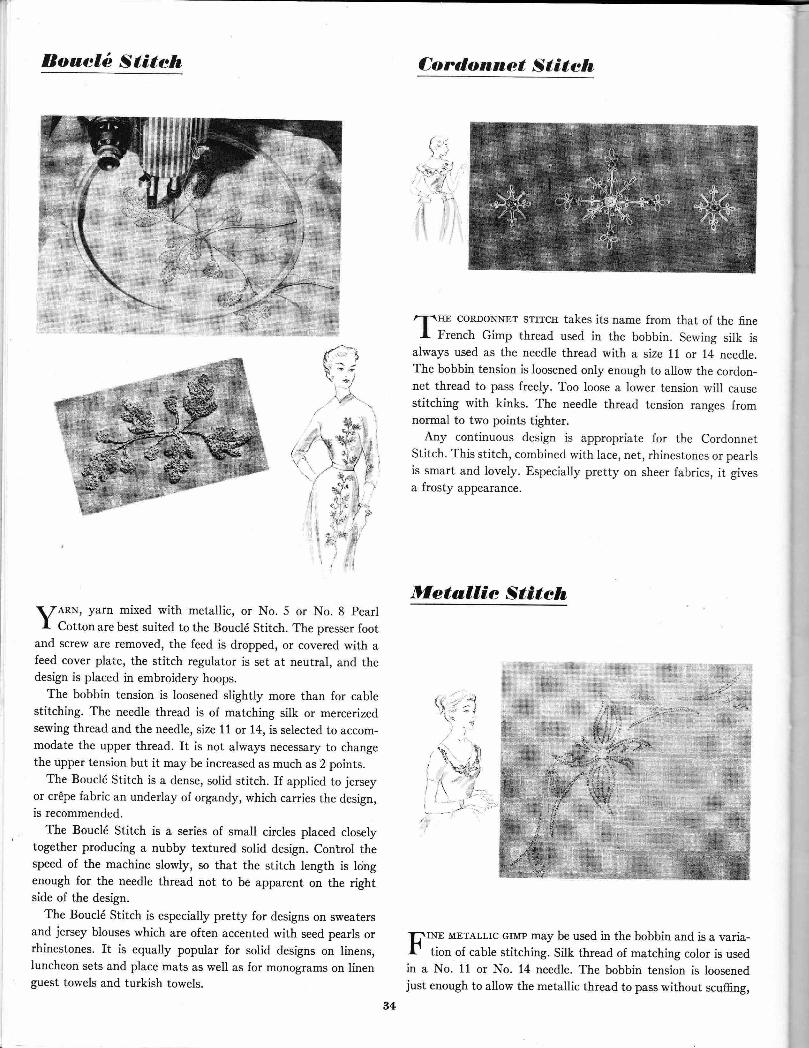
Boaelb Stiteh Cordonnet Stiteh
.J
,T,o, coRDoNNEr srrrcu takes its name from that of the fineI French Gimp thread used in the bobbin. Sewing siik is
always used as the needle thread with a size 1l or 14 needle.The bobbin tension is loosened only enough to allow the cordon-net thread to pass freely. Too loose a lower tension will causestitching with kinks. The needle thread tension ranges fromnormal to two points tighter.
Any continuous design is appropriate for the CordonnetStitch. This stitch, combined with lace, net, rhinestones or pearlsis smart and lovely. Especially pretty on sheer fabrics, it givesa frosty appearance.
Dfetallie Stiteh
d,:
.!,q+.,:jJ...a.i .r:7''{t,'r,..'.,
,1";:
t')\;;tt,.'-*li .i.
lfea
, '\$:n:\" ):y','*'-i$ :i' #l'''tl e-\'i l:*:;
',1, l?,f i,P''. 2tie;Y
: a,
ARN, yarn mixed with metallic, or No. 5 or No. 8 pearlCotton are best suited to the Boucl6 Stitch. The presser foot
and screw are removed, the feed is dropped, or covered with afeed cover plate, the stitch regulator is set at neutral, and thedesign is placed in embroidery hoops.
The bobbin tension is loosened slightly more than lor cablestitching. The needle thread is of matching silk or mercerizedsewing thread and the needle, size 11 or 14, is selected to accom-modate the upper thread. It is not always necessary to changethe upper tension but it may be increased as much as 2 points.
The Boucl6 Stitch is a dense, solid stitch. If applied to jerseyor crdpe fabric an underlay of organdy, which carries the design,is recommended.
The Boucl6 Stitch is a series of small circles placed closelytogether producing a nubby textured solid design. Con'trol thespeed of the machine slowly, so that the stitch length is longenough for the needle thread not to be apparent on the rightside of tJre design.
The Boucl6 Stitch is especially pretty for designs on sweatersand jersey blouses which are often accented with seed pearls orrhinestones. It is equally popular for solid designs on linens,luncheon sets and place mats as well as for monograms on linenguest towels and turkish towels.
q+, ?1, r.r ti
\3i''r, \ t-i, '...,," "...I J'-:l
[rNr METALLTc crMp may be used in the bobbin and is a varia-I' tion of cable stitching. Silk thread of matching color is usedin a No. 11 or No. 14 needle. The bobbin tension is loosenedjust enough to allow the metallic thread to pass without scuffing,
. ",]\\ t-)\r .a
34
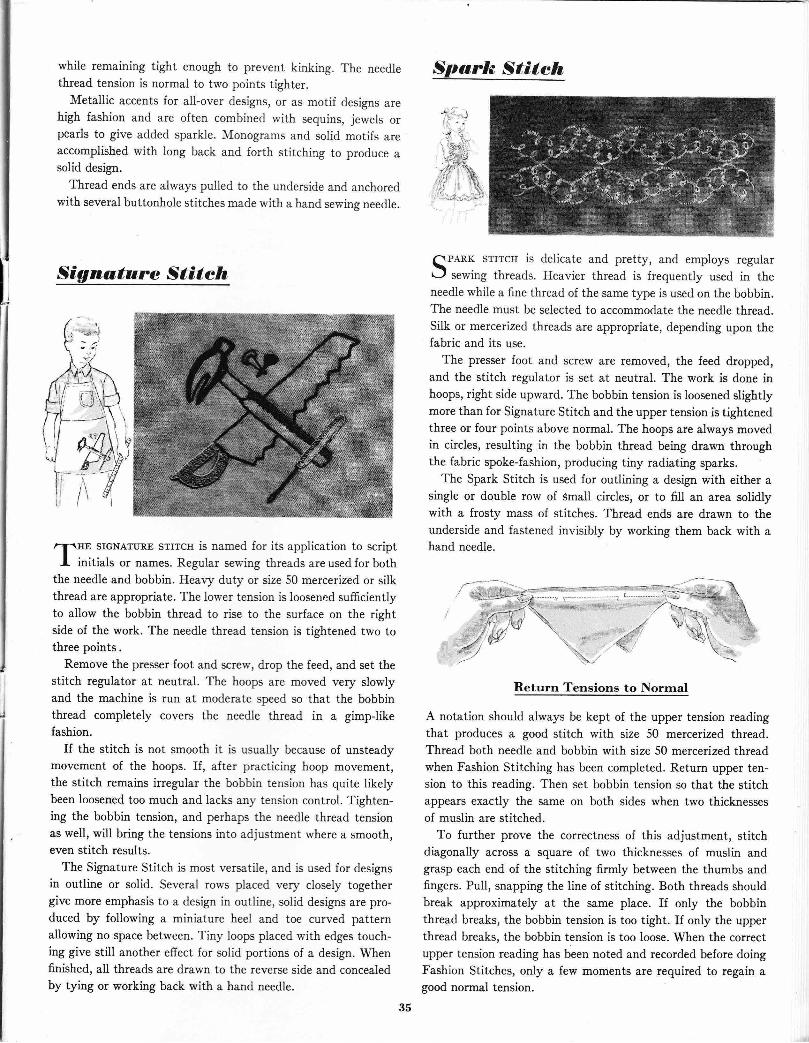
while remaining tight enough to prevent kinking. The needlethread tension is normal to two points tighter.
Metallic accents for all-over designs, or as motif designs arehigh fashion and are often combined with sequins, jewels orpearls to give added sparkle. Monograms and solid motifs areaccomplished with long back and forth stitching to produce asolid design.
Thread ends are always pulled to the underside and anchoredwith several buttonhole stitches made with a hand sewing needle.
Signature Stiteh
-frt srcNArtrRE srrrcH is named for its application to scriptI initials or names. Regular sewing threads are used for both
the needle and bobbin. Heavy duty or size 50 mercerized or silkthread are appropriate. The lower tension is loosened sufficientlyto allow the bobbin thread to rise to the surface on the rightside of the work. The needle thread tension is tightened two tothree points.
Remove the presser foot and screw, drop the feed, and set thestitch regulator at neutral. The hoops are moved very slowlyand the machine is run at moderate speed so that the bobbinthread completely covers the needle thread in a gimpJikefashion.
If the stitch is not smooth it is usually because of unsteadymovement of the hoops. ff, after practicing hoop movement,the stitch remains irregular the bobbin tension has quite likelybeen loosened too much and lacks any tension control. Tighten-ing the bobbin tension, and perhaps the needle thread tensionas well, will bring the tensions into adjustment where a smooth,even stitch results.
The Signature Stitch is most versatile, and is used for designsin outline or solid. Several rows placed very closely togethergive more emphasis to a design in outline, solid designs are pro-duced by following a miniature heel and toe curved patternallowing no space between. Tiny loops placed with edges touch-ing give still another effect for solid portions of a design. Whenfinished, all threads are drawn to the reverse side and concealedby tying or working back with a hand needle.
qpARK srrrcH is delicate and pretty, and employs regulart J 5s\rying threads. Heavier thread is frequently used in theneedle while a fine thread of the same type is used on the bobbin.The needle must be selected to accommodate the needle thread.Silk or mercerized threads are appropriate, depending upon thefabric and its use.
The presser foot and screw are removed, the feed dropped,and the stitch regulator is set at neutral. The work is done inhoops, right side upward. The bobbin tension is loosened slightlymore than for Signature Stitch and the upper tension is tightenedthree or four points above normal. The hoops are always movedin circles, resulting in the bobbin thread being drawn throughthe fabric spoke-fashion, producing tiny radiating sparks.
The Spark Stitch is used for outlining a design with either asingle or double row of Small circles, or to fill an area solidlywith a frosty mass of stitches. Thread ends are drawn to theunderside and fastened invisibly by working them back with ahand needle.
. -.-;l::ril
\b^//
Return Tensions to Norrnal
A notation should always be kept of the upper tension readingthat produces a good stitch with size 50 mercerized thread.Thread both needle and bobbin with size 50 mercerized threadwhen Fashion Stit-ching has been completed. Return upper ten-sion to this reading. Then set bobbin tension so that the stitchappears exactly the same on both sides when two thicknessesof muslin are stitched.
To further prove the correctness of this adjustment, stitchdiagonally across a square of two thicknesses of muslin andgrasp each end of the stitching firmly between the thumbs andfingers. Pull, snapping the line of stitching. Both threads shouldbreak approximately at the same place. If only the bobbinthread breaks, the bobbin tension is too tight. If only the upperthread breaks, the bobbin tension is too loose. When the correctupper tension reading has been noted and recorded before doingFashion Stitches, only a few moments are required to regain agood normal tension.
35
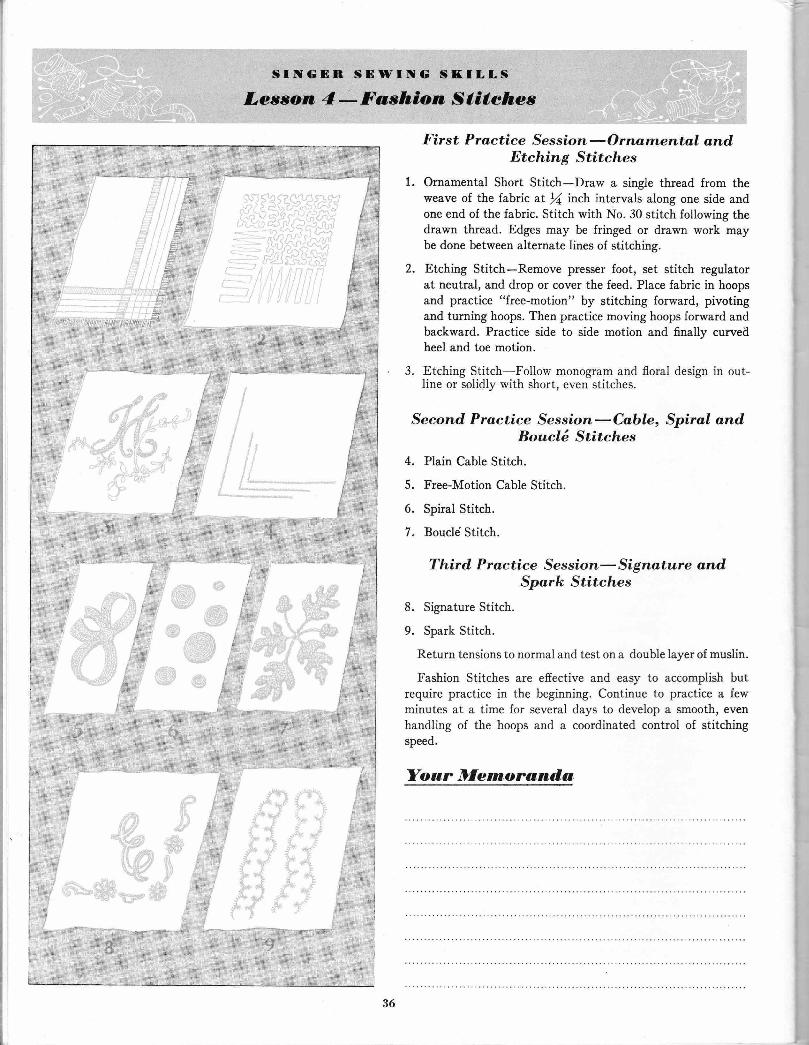
P-&
fl ,Jff #\I J"h* i*"f{€ "..+ #$ # ,*,rt'*# ?*+€1-d 1* c&"{ s -ls\. *r+ ,!S"d J" Y{.r
dP,*. [\.lint Jr-{w_ "v*\\@* ffi"utr$ *tuw *#
2-
t.
First P roctice Session - Orna.rnen tal andEtching Stitches
Ornamental Short Stitch-Draw a single tlread from theweave of the fabric at 17( nch intervals along one side andone end of ttre fabric. Stitch with No. 30 stitch following ttredrawn thread. Edges may be fringed or drawn work maybe done between alterrtate lines of stitching.
Etching Stitch-Remove presser foot, set stitch regulatorat neutral, and drop or cover the feed. Place fabric in hoopsand practice "free-motion" by stitching forward, pivotingand turning hoops. Then practice moving hoops forward andbackward. Practice side to side motion o16 finally curvedheel and toe motion.
Etching Stitch-Follow monogram and floral design in out-Iine or solidly with short, even stitches.
Second, Practice Session.-Cable, Spirol ond.Boucli Stitches
4. Plain Cable Stitch.
5. Free-Motion Cable Stitch.
6. Spiral Stitch.
7. Boucld Stitch.
Third, Proctice Session- Signoture and,Spark Stitches
8. Sigaature Stitch.
9. Spark Stitch.
Return tensions to normal and test on a double layer of muslin.
Fashion Stitches are effective and easy to accomplish butrequire practice in the beginning. Continue to practice a fewminutes at a time for several days to develop a smooth, evenhandling of the hoops and a coordinated control of stitchingspeed.
Yoar Dfernorandu
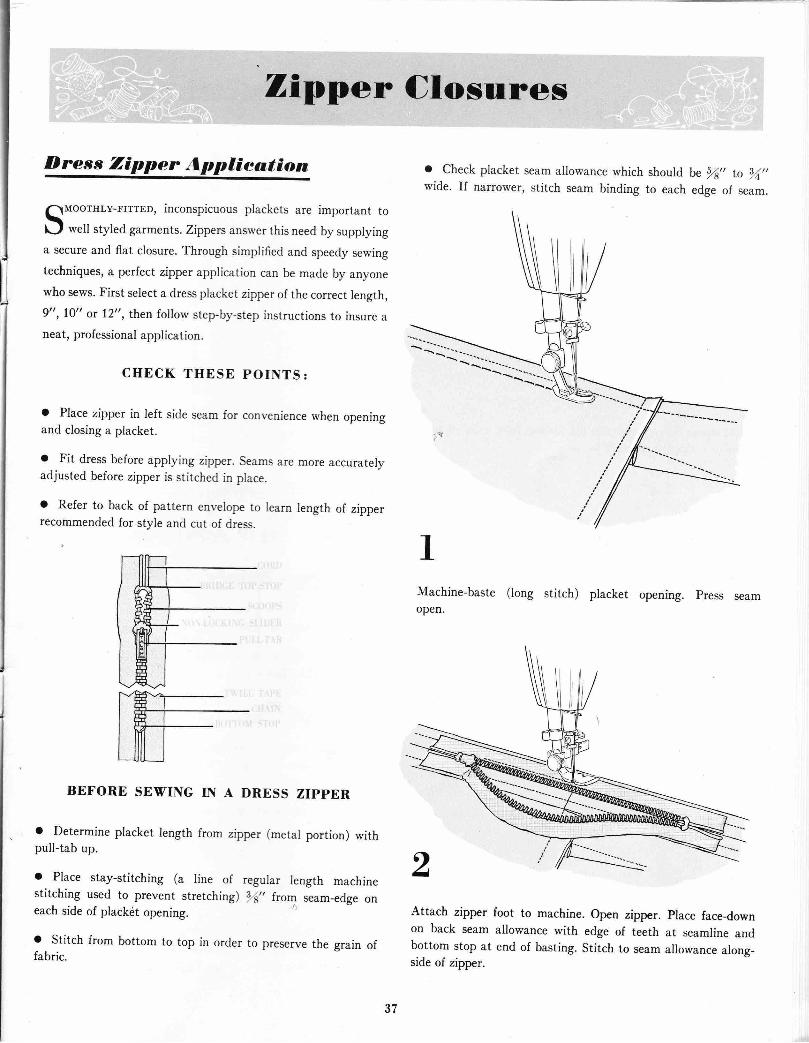
7lipper OlosnresID ress Zlpper Applieation
Qroot"tu-r'ITTED, inconspicuous plackets are important to
LI well styled garments. Zippers answer this need by supplyinga secure and flat closure. Through simplified and speedy sewingtechniques, a perfect zipper application can be made by anyonewho sews. First select a dress placket zipper of the correct length,9", 10" or 12", then follow step-by-step instructions to insure aneat, professional application.
CHECK THESE POINTS:
o Place zipper in left side seam for convenience when openingand closing a placket.
o Fit dress before applying zipper. Seams are more accuratelyadjusted before zipper is stitched in place.
O Refer to back of pattern envelope to learn length of zipperrecommended for style and cut of dress.
BEFORE SEWING IN A DRESS ZIPPER
o I)etermine placket length from zipper (metal portion) withpull-tab up.
o Place stay-stitching (a line of regular length machinestitching used to prevent stretching) )(,, ftom seam_edge oneach side of plackit opening.
o Stitch from bottom to top in order to preserve the grain offabric.
t
a Check placket seam allowance which should b" 94,, to 8,4,,wide. If narrower, stitch seam binding to each edge of seam.
Machine-baste (long stitch) placket opening. press seamopen.
Attach zipper foot to machine. Open zipper. place facedownon back seam allowance with edge of teeth at seamline andbottom stop at end of basting. Stitch to seam allowance along_side of zipper.
37
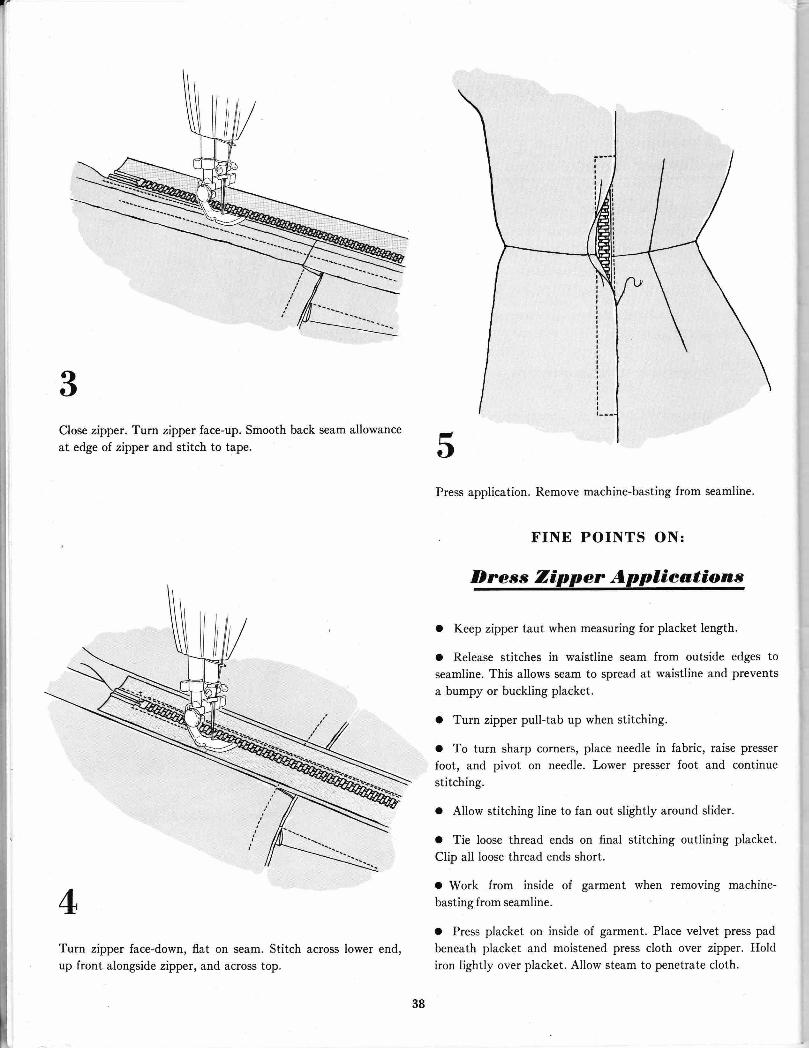
j
il
ti1lililil
Close zipper. Turn zipper face-up. Smooth back seam allowanceat edge of zipper and stitch to tape.
Turn zipper face-down, flat on seam. Stitch across lower end,up front alongside zipper, and across top.
Press application. Remove machine-basting from seamline.
FINE POINTS ON:
n""** Zipp"" epfii*r Keep zipper taut when measuring for placket length.
o Release stitches in waistline seam from outside edges toseamline. This allows seam to spread at waistline and preventsa bumpy or buckling placket.
o Turn zipper pull-tab up when stitching.
o To turn sharp corners, place needle in fabric, raise presserfoot, and pivot on needle. Lower presser foot and continuestitching.
a Allow stitching line to fan out slightly around slider.
o Tie loose thread ends on final stitching outlining placket.CIip all loose thread ends short.
a Work from inside of garment when removing machine-basting from seamline
o Press placket on inside of garment. Place velvet press padbeneath placket and moistened press cloth over zipper. Holdiron lightly over placket. Allow steam to penetrate cloth.
38

S kirt Zipper Applieation
ELL sryLED "sErARATES" demand snugly fitted, smoothlyclosed waistlines. The use of the correct zipper assures a
neat, securely fitted waist and hipline. A correctly placed andapplied skirt zipper results in a reliable, flat, inconspicuousplacket. The method of zipper application usecl in skirts alsoapplies to zipper plackets for shorts and slacks. Use a regulation7" length skirt zipper.
CHECK THESE POINTS:
o Place zipper in left side seam or center back seam.
o Fit skirt before applying zipper. Seams are more accuratelyadjusted before zipper is stitched in place.
o Leave enough seam allowance above top of zipper to attachskirt waistband.
BEFORE SEWING IN A SKIRT ZIPPER
o Determine length of the placket from zipper (metal portion)plus waistline seam allowance.
o Place stay-stitching (a line of regular length machine stitchingused to prevent stretching) )(" from seam-edge on each sideof placket opening.
a Stitch from bottom to top in order to preserve the grain offabric.
Il\Iachine-baste (long stitch) placket opening. Press seam open.
a Check placket seamwide. If narrower, stitch
allowance which should be 74" to 3,4"seam binding to each edge of seam.
Attach zipper foot to machine. Open zipper. place face-downon seam allowance with edge of teeth at seamline, and bottomstop at end of basting. Stitch to seam allowance alongside zipper.
39
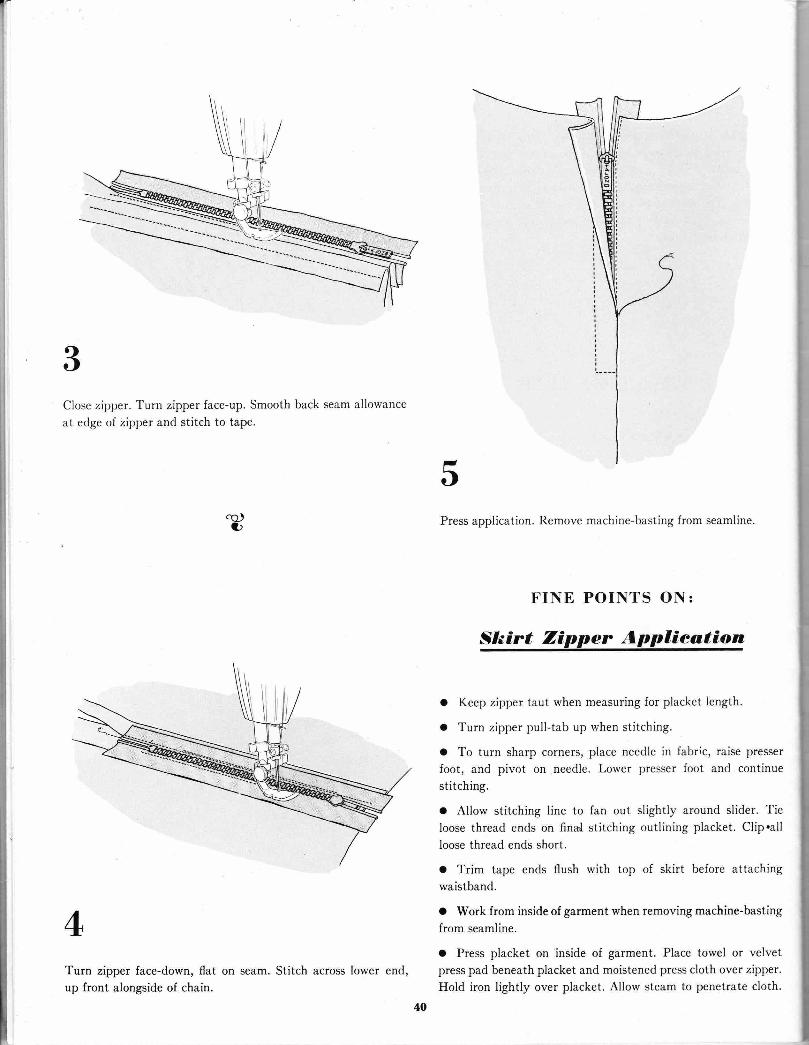
Close zipper. Turn zipper face-up. Smoothat edge of 2ipper and stitch to tape.
back seam allowance
Press application. Remove machine-basting from seamline.
FINE POINTS ON:
Skirt Zipper Applieation
o Keep zipper taut when measuring for placket length.
o Turn zipper pull-tab up when stitching.
o To turn sharp corners, place needle in fabric, raise presserfoot, and pivot on needle. Lower presser foot and continuestitching.
o Allow stitching line to fan out slightly around slider. Tieloose thread ends on final stitching outlining placket. Clip.a11loose thread ends short.
o Trim tape ends flush with top of skirt before attachingwaistband.
a Work from inside of garment when removing machine-bastingfrom seamline.
o Press placket on inside of garment. Place towel or velvetpress pad beneath placket and moistened press cloth over zipper.Hold iron lightly over placket. Allow steam to penetrate cloth.
Turn zipper face-down, flatup front alongside of chain.
on seam. Stitch across lower end,
40
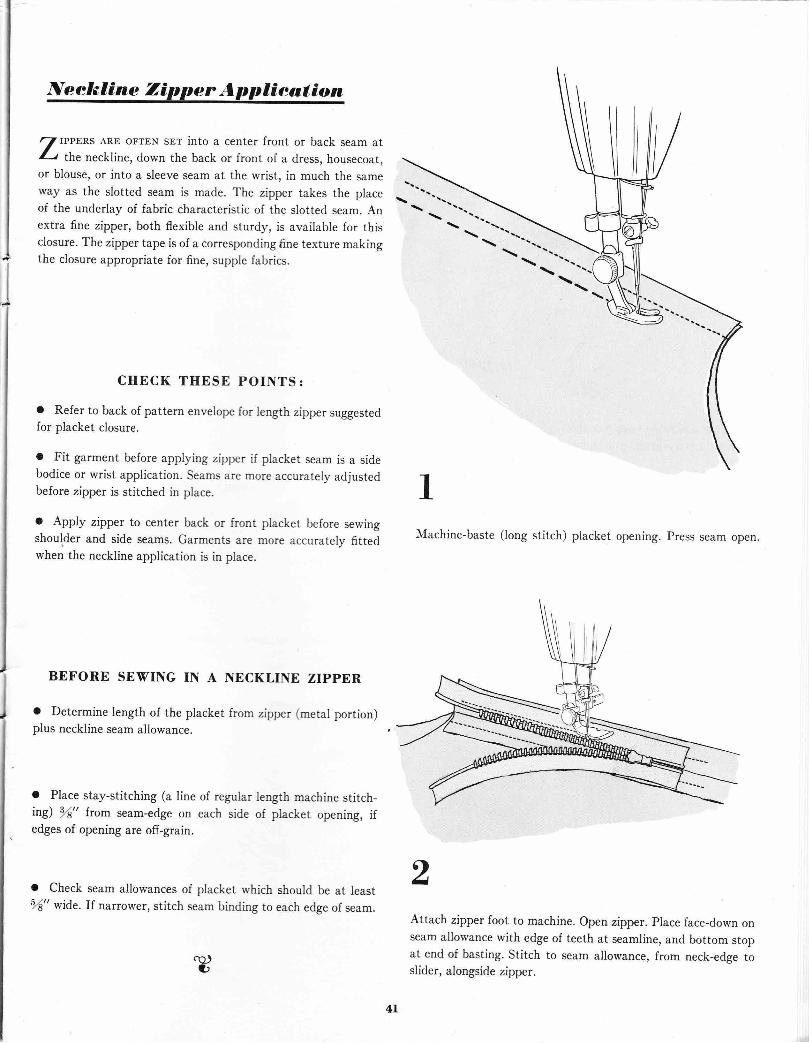
Neekline Zipper Applieation
Z tlrERs ARE orrEN srr into a center front or back seam atIt 1l1s neckline, down the back or front of a dress, housecoat,or blouse, or into a sleeve seam at the wrist, in much the sameway as the slotted seam is made. The zipper takes the placeof the underlay of fabric characteristic of the slotted seam. Anextra fine zipper, both flexible and sturdy, is available for thisclosure. The zipper tape is of a corresponding fine texture makingthe closure appropriate for fine, supple fabrics.
CHECK THESE POINTS:o Refer to back of pattern envelope for length zipper suggestedfor placket closure.
o Fit garment before applying zipper if placket seam is a sidebodice or wrist application. Seams are more accurately adjustedbefore zipper is stitched in place.
o Apply zipper to center back or front placket before sewingshoulder and side seams. Garments are more accurately fittedwhen the neckline application is in place.
BEFORE SEWING IN A NECKLINE ZIPPER
from zipper (metal portion)o Determine length of the placketplus neckline seam allowance.
IMachine-baste (long stitch) placket opening. Press seam open.
Attach zipper foot to machine. Open zipper. place face-down onseam allowance with edge of teeth at seamline, anrl bottom stopat end of basting. Stitch to seam allowance, from neck-edge toslider, alongside zipper.
--"..-...-\-\ - - '-'-
I
a Place stay-stitching (a line of regularing) 94" from seam-edge on each sideedges of opening are off-grain.
length machine stitch-of placket opening, if
a Check seam allowances of placket which should be at leastl(" wide. If narrower, stitch seam binding to each edge of seam.
4l
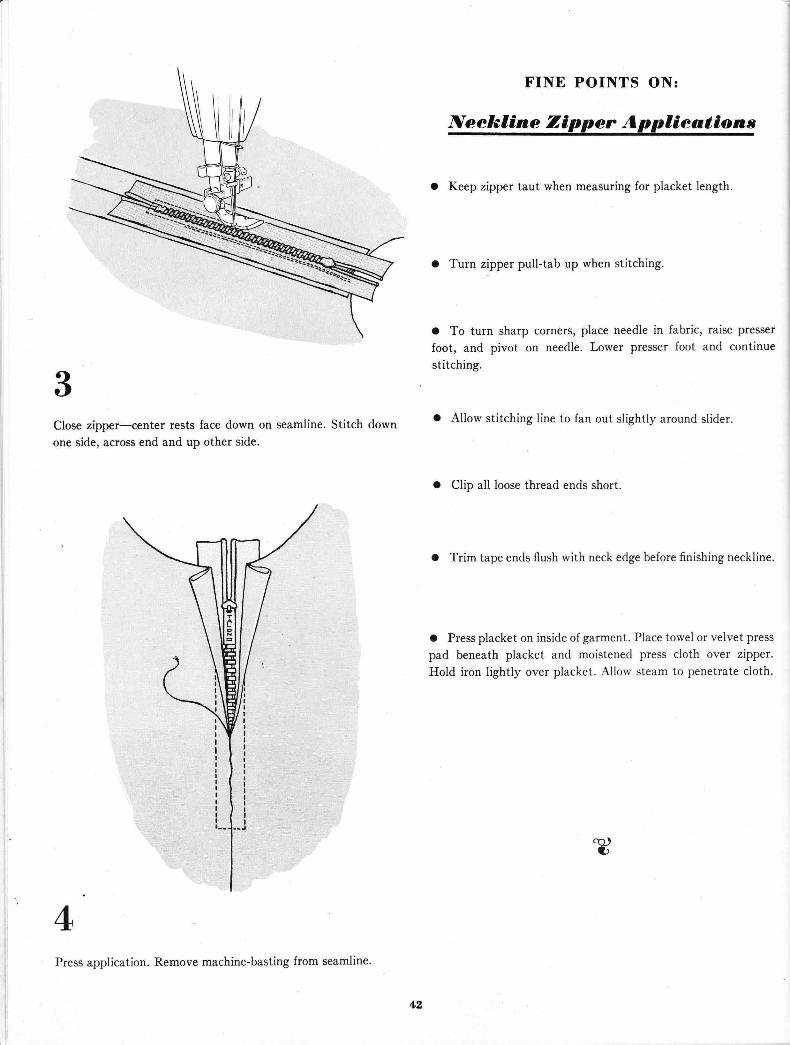
FI.NE POINTS ON:
Neelsline Zlppcr Aoplieatlons
o Keep zipper taut when measuring for placket length.
a Turn zipper pull-tab up when stitching.
o To turn sharp corners, place needle in fabric, raise presserfoot, and pivot on needle. Lower presser foot and continuestitching.
Close zipper.-center rests face down on seamline.one side, across end and up other side.
Stitch down o Allow stitching line to fan out slightly around slider.
o Clip all loose thread ends short.
o Trim tape ends flush with neck edge before finishing neckline.
o Press placket on inside of garment. Place towel or velvet presspad beneath placket and moistened press cloth over zipper.Hold iron lightly over placket. Allow steam to penetrate cloth.
Press application. Remove machine-basting from seamline.
12
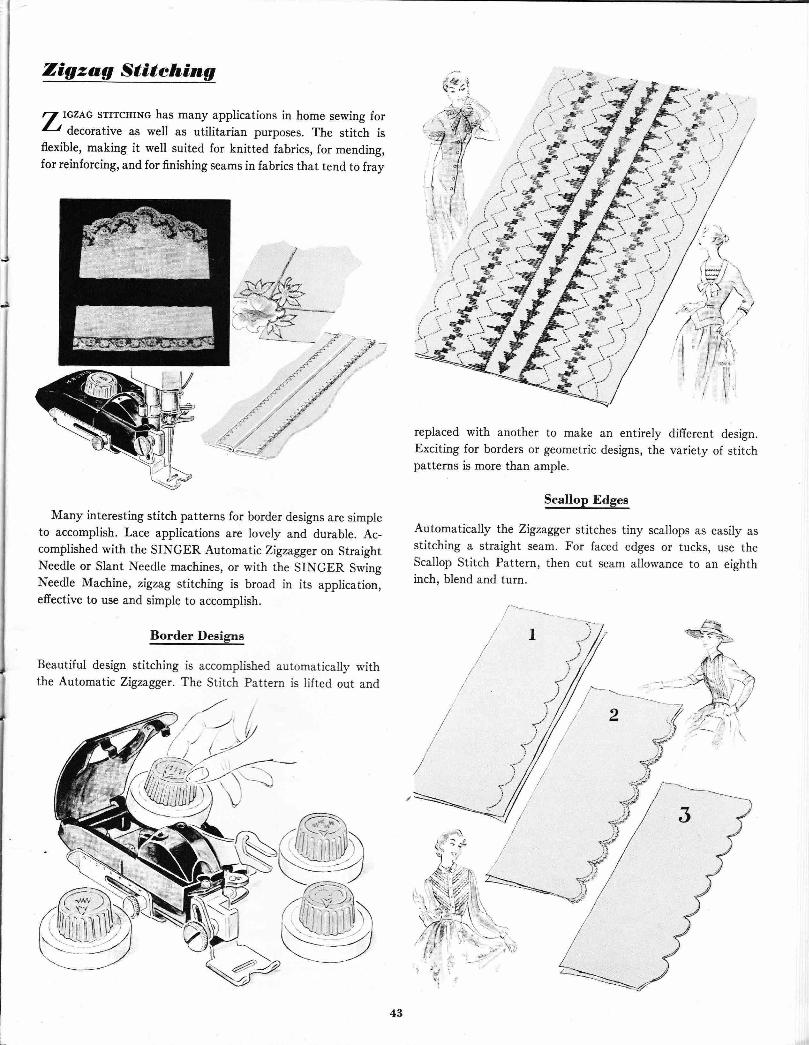
Zigzag Stitehing
Z IGZ^G srrrcHrNc has many applications in home sewing foru decorative as well as utilitarian purposes. The stitch isflexible, making it well suited for knitted fabrics, for mending,for reinforcing, and for finishing seams in fabrics that tend to fray
Many interesting stitch patterns for border designs are simpleto accomplish. Lace applications are lovely and durable. Ac-complished with the SINGER Automatic Zigzagger on StraightNeedle or Slant Needle machines, or with the SINGER SwingNeedle Machine, zigzag stitching is broad in its applica.rion,effective to use and simple to accomplish.
Border Deeigne
Beautiful design stitching is accomplished automatically withthe Automatic Zigzagger. The Stitch Pattern is lifted out ancl
replaced with another to make an entirely difierent design.Exciting for borders or geometric designs, the variety of stitchpatterns is more than ample.
Scallop Edgee
Automaticaily the Zigzagger stitches tiny scallops as easily asstitching a straight seam. For faced edges or tucks, use theScallop Stitch Pattern, then cut seam allowance to an eighthinch, blend and turn.
f"' 1t
-.i'i"'t\i..")*l
lt
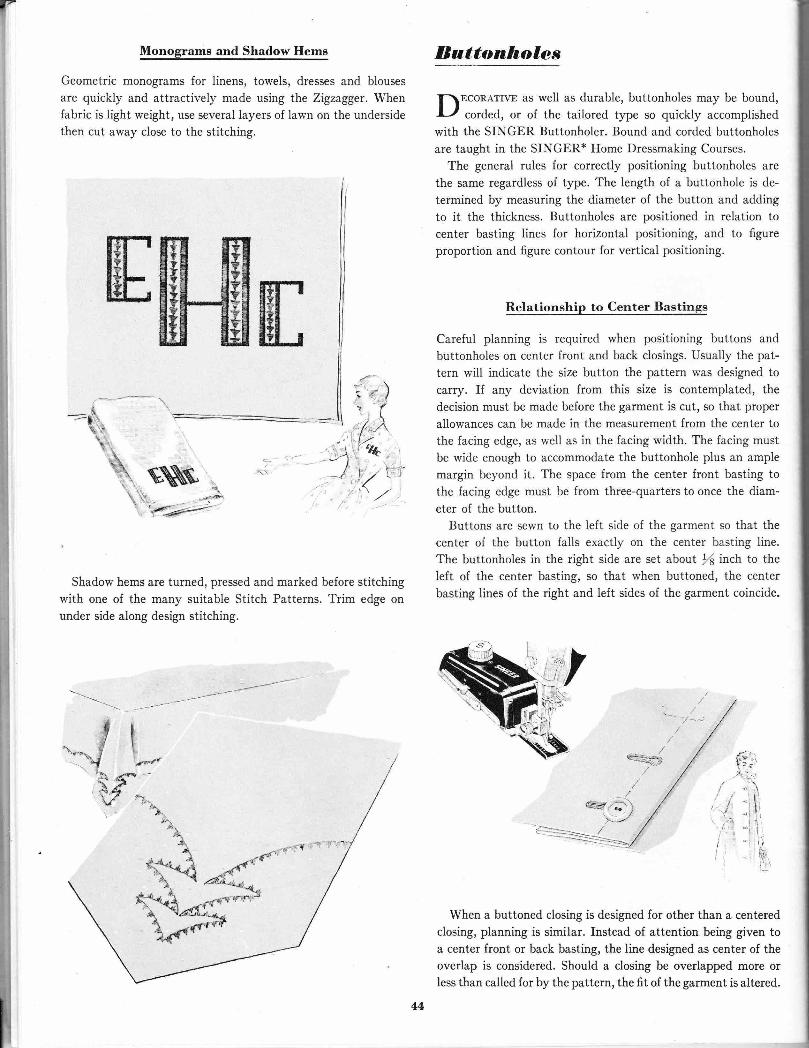
Monograme and Shadow Heme
Geometric monograms for linens, towels, dresses and blousesare quickly and attractively made using the Zigzagger. Whenfabric is light weight, use several layers of lawn on the undersidethen cut away close to the stitching.
Ii
ll
lr
{t
Battonholes
nECoRATrve as well as durable, buttonholes may be bound,IJ .o16"4, or of the tailored type so quickly accomplishedwith the SINGER Buttonholer. Bound and corded buttonholesare taught in the SINGER* Home Dressmaking Courses.
The general rules for correctly positioning buttonholes arethe same regardless of type. The length of a buttonhole is de-termined by measuring the diameter of the button and addingto it the thickness. Buttonholes are positioned in relation tocenter basting lines for horizontal positioning, and to figureproportion and figure contour for vertical positioning.
Relationship to Center Bastings
Careful planning is required when positiorring buttons andbuttonholes on center front and back closings. Usually the pat-tern will indicate the size button the pattern was designed tocarry. If any deviation from this size is contemplated, thedecision must be made before the garment is cut, so that properallowances can be made in the measurement from the center tothe facing edge, as well as in the facing width. The facing mustbe wide enough to accommodate the buttonhole plus an amplemargin beyond it. The space from the center front basting tothe facing edge must be from three-quarters to once the diam-eter of the button.
Buttons are sewn to the left side of the garment so that thecenter of the button falls exactly on the center basting line.The buttonholes in the right side are set about tf inch to theleft of the center basting, so that when buttoned, the centerbasting lines of the right and left sides of the garment coincide.
When a buttoned closing is designed for other than a centeredclosing, planning is similar. Instead of attention being given toa center front or back basting, the line designed as center of theoverlap is considered. Should a closing be overlapped more orless than called for by the pattern, the fit of the garment is altered.
Shadow hems are turned, pressed and marked before stitchingwith one of the many suitable Stitch Patterns. Trim edge onunder side along design stitching.
... \at It(
/-^'t,/"'*b' ,
i t..'1 ''
44
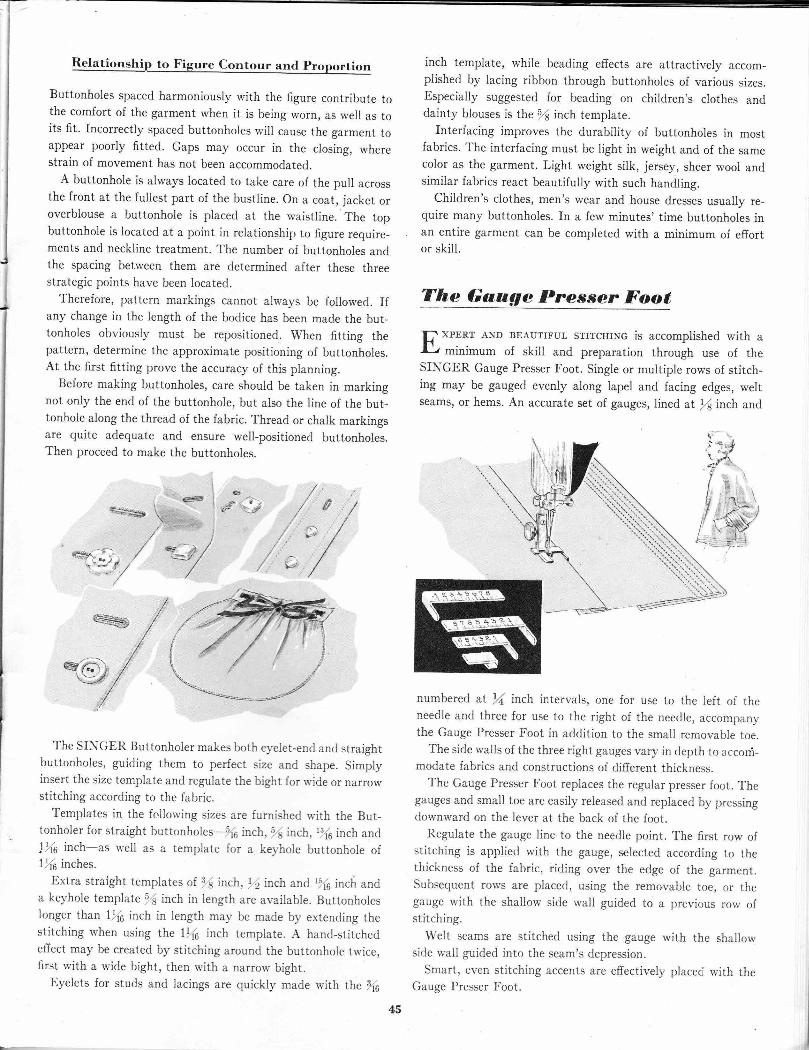
Relationship to Figure Contour and proportion
Buttonholes spaced harmoniously with the figure contribute tothe comfort of the garment when it is being worn, as well as toits fit. Incorrectly spaced buttonholes will cause the garment toappear poorly fitted. Gaps may occur in the closing, wherestrain of movement has not been accommodated.
A buttonhole is always located to take care of the pull acrossthe front at the fullest part of the bustline. On a coat, jacket oroverblouse a buttonhole is placed at the waistline. The topbuttonhole is iocated at a point in relationship to figure require-ments and neckline treatment. The number of buttonholes andthe spacing between them are determined after these threestrategic points have been located.
Therefore, pattern markings cannot always be followed. Ifany change in the length of the bodice has been made the but-tonholes obviously must be repositioned. When fitting thepattern, determine the approximate positioning of buttonholes.At the first fitting prove the accuracy of this planning.
Before making buttonholes, care should be taken in markingnot only the end of the buttonhole, but also the line of the but-tonhole along the thread of the fabric. Thread or chalk markingsare quite adequate and ensure well-positioned buttonholes.Then proceed to make the buttonholes.
Gr- /dt) ,/ o //'e//' //r/%
The SINGER Buttonholer makes both eyelet-end and straightbuttonholes, guiding them to perfect size and shape. Simplyinsert the size template and regulate the bight for rvide or narrowstitching according to the fabric.
Templates in the following sizes are furnished with the But-tonholer for straight buttonholes-,5/6 inch, 7! inch, 11.16 inch and!.1/6 inch-as weli as a template for a kel-hole buttonhole ofllio inches'
Extra straight templates of 3,.( inch, l,j inch and rlro inch anda keyhole tempiate 2ls inch in length are available. ButtonholesIonger than 1t'6 inch in length may be made by extending thestitching when using the 1t(6 inch template. A hand-stitchedeffect may be created by stitching around the buttonhole trvice,first with a wide bight, then with a narrow bight.
Eyelets for studs and lacings are quickly made with the ,s4
inch template, while beading effects are attractively accom-plished by lacing ribbon through buttonhoies of various sizes.Especially suggested for beading on children,s clothes anddainty blouses is the 7{ inch template.
Interfacing improves the durability of buttonholes in mostfabrics. The interfacing must be light in weight and of the samecolor as the garment. Light weight silk, jersey, sheer wool andsimiiar fabrics react beautifully with such handling.
Chiidren's clothes, men's wear and house dresses usually re-quire many buttonholes. In a few minutes, time buttonholes inan entire garment can be completed with a minimum of effortor skill.
The Gauge Pre*ser Foot
ff xernt AND BEAUTTFUL srrrcHtNc is accomplished with al-l minimurn of skill and preparation through use of theSINGER Gauge Presser Foot. Single or multiple rows of stitch-ing may be gauged evenly along lapel and facing edges, weltseams, or hems. An accurate set of gauges, Iined at tf inch and
numbered at rr1 inch intervals, one for use to the left of theneedle and three for use to the right of the needle, accompanythe Gauge Presser Foot in addition to the small removable toe.
The side walls of the three right gauges vary in depth to acconi_modate fabrics and constructions of different thickness.
The Gauge Presser Foot replaces the regular presser foot. Thegauges and small toe are easily released and replaced by pressingdownward on the lever at the back of the foot.
Regulate the gauge line to the needle point. The first row ofstitching is applied with the gauge, selected according to thethickness of the fabric, riding over the edge of the garment.Subsequent ro\,vs are piaced, using the removable toe, or thegauge with the shallow side wall guided to a previous row ofstitching.
Welt seams are stitched using the gauge with the shallowside wall guided into the seam's depression.
Smart, even stitching accents are effectively placeci with theGauge Presser Foot.
5
45
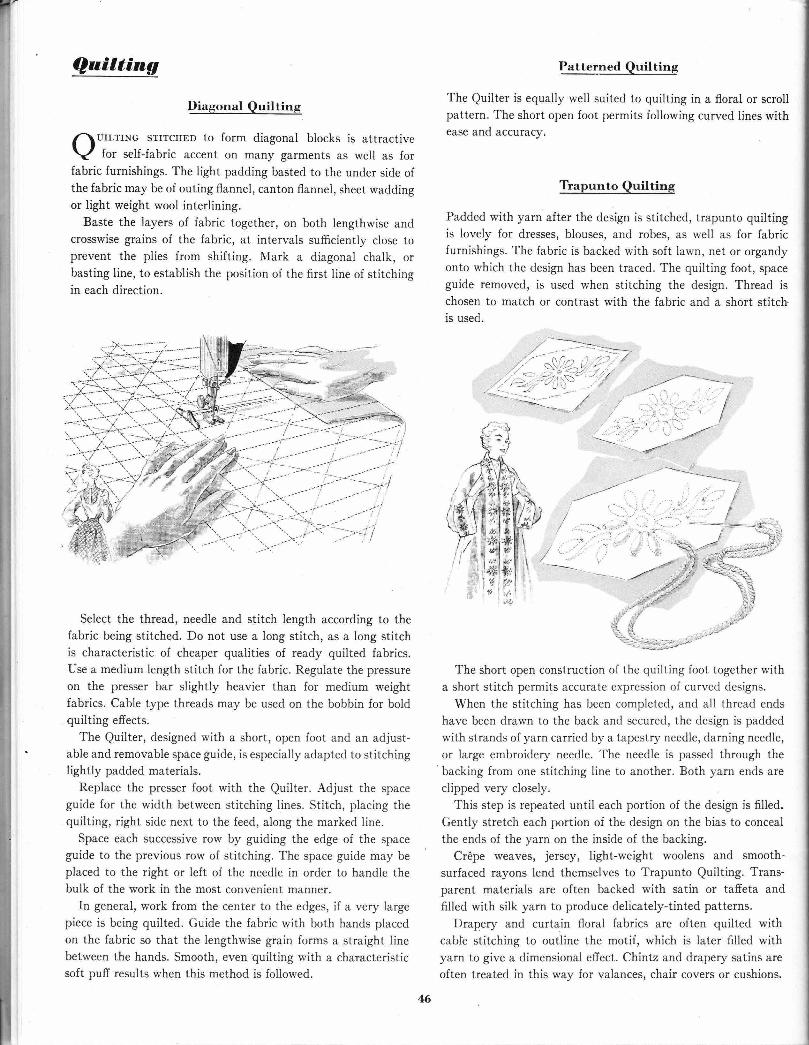
QuiltingDiagonal Quilting
nuILrrNG srrrcHED to form diagonal blocks is attractive{ for self-fabric accent on many garments as well as forfabric furnishings. The light padding basted to the under side ofthe fabric may be of outing flannel, canton flannel, sheet waddingor light weight wool interlining.
Baste the layers of fabric together, on both lengthwise andcrosswise grains of the fabric, at intervals sufficiently close toprevent the plies from shifting. Mark a diagonal chalk, orbasting line, to establish the position of the first line of stitchingin each direction.
Select the thread, needle and stitch length according to thefabric being stitched. Do not use a long stitch, as a long stitchis characteristic of cheaper qualities of ready quilted fabrics.Use a medium length stitch for the fabric. Regulate the pressureon the presser bar slightly heavier than for medium weightfabrics. Cable type threads may be used on the bobbin for boldquilting effects.
The Quilter, designed with a short, open foot and an adjust-able and removable space guide, is especially adapted to stitchinglightly padded materials.
Replace the presser foot with the Quilter. Adjust the spaceguide for the width between stitching lines. Stitch, placing thequilting, right side next to the feed, along the marked line.
Space each successive row by guiding the edge of the spaceguide to the previous row of stitching. The space guide may beplaced to the right or left of the needle in order to handle thebulk of the work in the most convenient manner.
In general, work from the center to the edges, if a very largepiece is being quilted. Guide the fabric with both hands placedon the fabric so that the lengthwise grain forms a straight linebetween the hands. Smooth, even quilting with a characteristicsoft puff results when this method is followed.
Patterned Quilting
The Quilter is equally well suited to quilting in a floral or scrollpattern. The short open foot permits following curved lines withease and accuracy.
Trapunto Quilting
Padded with yarn after the design is stitched, trapunto quiltingis lovely for dresses, blouses, and robes, as well as for fabricfurnishings. The fabric is backed with soft lawn, net or organdyonto which the design has been traced. The quilting foot, spaceguide removed, is used when stitching the design. Thread ischosen to match or contrast with the fabric and a short stitch'is used.
'. .,:.--'r
,..-'i I--.-..-- :-j / ...:.^--'.";t\,,
.. . .'.a ,." .-.-:.''
The short open construction of the quilting foot together witha short stitch permits accurate expression of curved designs.
When the stitching has been completed, and all thread endshave been drawn to the back and secured, the design is paddedwith strands of yarn carried by a tapestry needle, darning needle,or large embroidery needle. The needle is passed through thebacking from one stitching Iine to another. Both yarn ends areclipped very closely.
This step is repeated until each portion of the design is filled.Gently stretch each portion of the design on the bias to concealthe ends of the yarn on the inside of the backing.
Cr6pe weaves, jersey, light-weight woolens and smooth-surfaced rayons lend themselves to Trapunto Quilting. Trans-parent materials are often backed with satin or taffeta andfilled with silk yarn to produce delicately-tinted patterns.
Drapery and curtain floral fabrics are often quilted withcable stitching to outline the motif, which is later f,lled withyarn to give a dimensional effect. Chintz and drapery satins areoften treated in this way for valances, chair covers or cushions.
,d/&ks:
it,
46
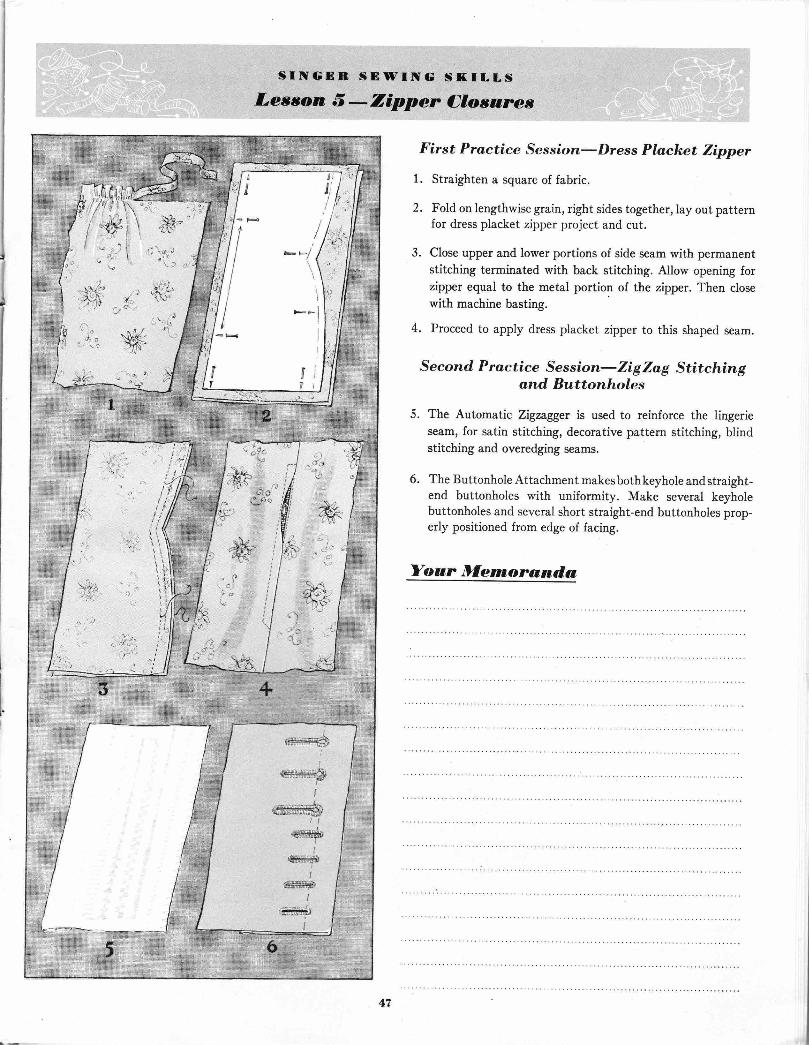
SINGEN SDlvING SKTLLSLesson 5 - Zipper Closures
First Practice Session-Dress Placket Zipper1. Straighten a square of fabric.
2. Fold on lengthwise grain, right sides together, lay out patternfor dress placket zipper project and cut.
3. Close upper and lower portions of side seam with permanentstitching terminated with back stitching. Allow opening forzipper equal to the metal portion of the zipper. Then closewith machine basting.
4. Proceed to apply dress placket zipper to this shaped seam.
Second Practice Session- Zig Zag Stitchingand Buttonholes
5. The Automatic Zigzagger is used to reinforce the lingerieseam, for satin stitching, decorative pattern stitching, blindstitching and overedging seams.
6. The Buttonhole Attachment makesbothkeyhole andstraight-end buttonholes with uniformity. Make several keyholebuttonholes and several short straight-end buttonholes prop-erly positioned from edge of facing.
Your Dfenoorand,a
I
4?
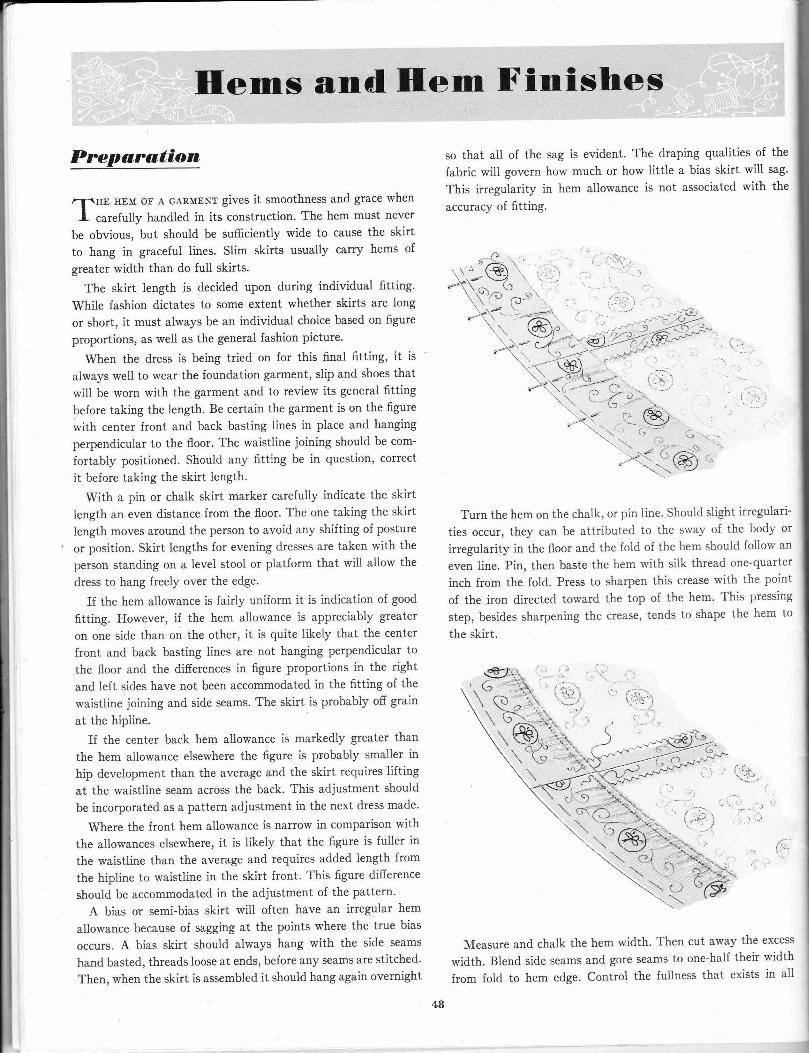
lilJ:ffi,':?r1.r:xlir=--l
ffiar
ailowance is ro :ssociated with t"
I*y-_,"1f-*%i;- I"<l'-'S '' I'-iita I
Turn the hem on the chalk, or pin line. Should 'tigt't i"tg'tu'i- |ties occur, they can be attributed to the sway of the body or Iirregularity in the floor and the fold of the hem should foliow an Ieven line. Pin, then baste the hem with silk thread one-quarter Iinch from the fold. Press to sharpen this crease with the Wint Iof the iron directed toward the top of the hem' This pressing Istep, besides sharpening the crease, tends to shape the hem to
I'n"*'L,.. I
\lq"\f.,'ll*i i:'':,', I\..qi\,j*',--,g? l^f '..i I\lrd\.- '''; '' : I\.:@-\s : I
\s b6r I
I
Measure and chalk the hem width' Then cut away the excess
width.Blendsideseamsandgoreseamstoone.halftheirwidthfrom fold. to hem edge. Control the fullness that exists in all
Herns and HPreparation,-I-\HE HEM ol A GARMENT gives it smoothness and grace whenI carefully handled in its construction. The hem must never
be obvious, but should be sufficiently wide to cause the skirtto hang in graceful lines. Slim skirts usually carry hems ofgreater width than do full skirts.
The skirt length is decided upon during individual fitting'While fashion dictates to some extent whether skirts are longor short, it must always be an individual choice based on figureproportions, as well as the general fashion picture'
When the dress is being tried on for this final fitting, it is
always well to wear the foundation garment, slip and shoes thatwill be worn with the garment and to review its general fittingbefore taking the length. Be certain the garment is on the figurewith center front and back basting lines in place and hangingperpendicular to the floor. The waistline joining should be com-fortably positioned. Should any fitting be in question, correctit before taking the skirt length.
With a pin or chalk skirt marker carefully indicate the skirtIength an even distance from the floor. The one taking the skirtlength moves around the person to avoid any shifting of postureor position. Skirt lengths for evening dresses are taken with theperson standing on a level stool or platform that will allow thedress to hang freely over the edge.
If the hem allowance is fairly uniform it is indication of good
fitting. However, if the hem allowance is appreciably greateron one side than on the other, it is quite likely that the centerfront and back basting lines are not hanging perpendicular tothe floor and the differences in figure proportions in the rightand left sides have not been accommodated in the fitting of thewaistline joining and side seams. The skirt is probably off grainat the hipline.
If the center back hem allowance is markedly greater thanthe hem allowance elsewhere the figure is probably smaller inhip development than the average and the skirt requires liftingat the waistline seam across the back. This adjustment shouldbe incorporated as a pattern adjustment in the next dress made'
Where the front hem allowance is narrow in comparison withthe allowances elsewhere, it is likely that the figure is fuller inthe waistline than the average and requires added length fromthe hipline to waistline in the skirt front. This figure difference
should be accommodated in the adjustment of the pattern'A bias or semi-bias skirt will often have an irregular hem
allowance because of sagging at the points where the true bias
occurs. A bias skirt should always hang with the side seams
hand basted, threads loose at ends, before any seams are stitched'Then, when the skirt is assembled it should hang again overnight
{
4B
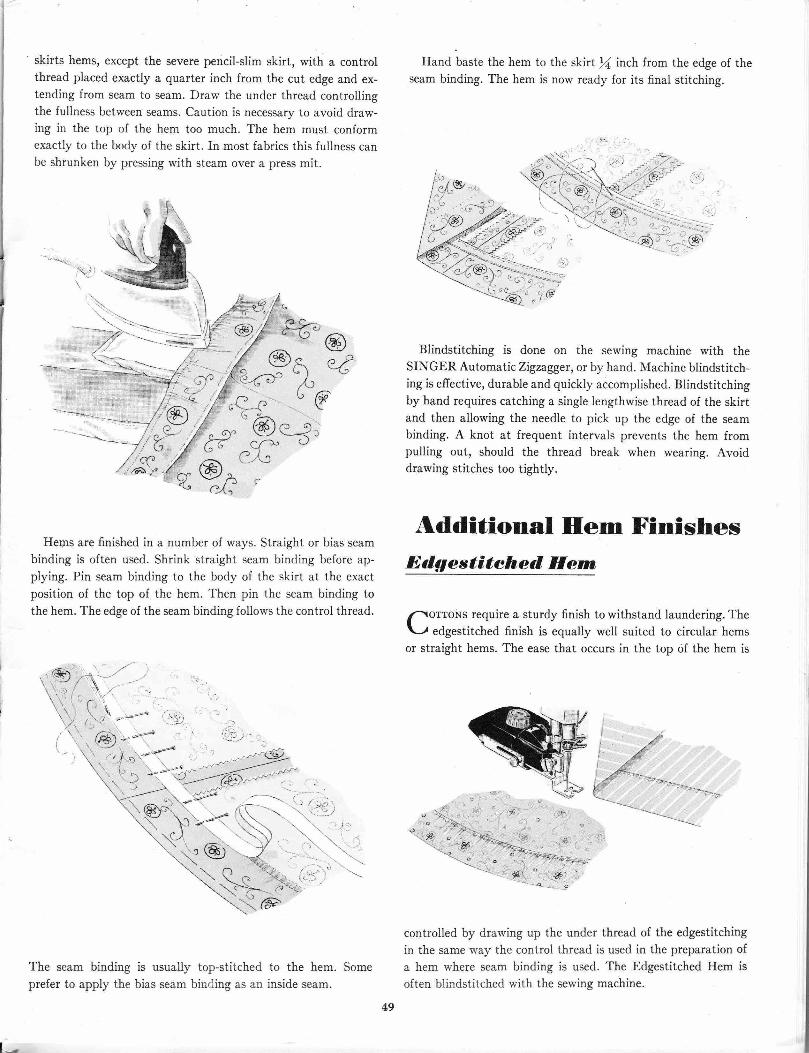
skirts hems, except the severe pencil-slim skirt, with a controlthread placed exactly a quarter inch from the cut edge and ex-tending from seam to seam. Draw the under thread controllingthe fullness between seams. Caution is necessary to avoid draw-ing in the top of the hem too much. The hem must conformexactly to the body of the skirt. In most fabrics this fullness canbe shrunken by pressing with steam over a press mit.
\,, '''""" ', \ .d.n\ -i:a.**-j-:-. -----2- -'-- _-.1
,/ .- ----='-\-:- - /:..-"--* /:. , ,#' @ @etfiiryo|/,i,
Hems are finished in a number of ways. Straight or bias seambinding is often used. Shrink straight seam binding before ap-plying. Pin seam binding to the body of the skirt at the exactposition of the top of the hem. Then pin the seam binding tothe hem. The edge of the seam binding follows the control thread.
The seam binding is usually top-stitched to the hem. Someprefer to apply the bias seam binding as an inside seam.
Hand baste the hem to the skirt rr1 inch from the edge of theseam binding. The hem is now ready for its final stitching.
Blindstitching is done on the sewing machine with theSINGER Automatic Zigzagger, or by hand. Machine blindstitch-ing is effective, durable and quickly accomplished. Blindstitchingby hand requires catching a single lengthwise thread of the skirtand then allowing the needle to pick up the edge of the seambinding. A knot at frequent intervals prevents the hem frompulling out, should the thread break when wearing. Avoiddrawing stitches too tightly.
Additional Hem FinishesDdgestitehed, Ifem
l-\orroNs require a sturdy finish to withstand laundering. The\-r sdgsstit6hed finish is equally well suited to circular hemsor straight hems. The ease that occurs in the top of the hem is
- -,*J::*.,3iilL
*-_*--\-
controlied by drawing up the under thread of the edgestitchingin the same way the control thread is used in the preparation ofa hem where seam binding is used. The Edgestitched Hem isoften blindstitched with the sewing machine.
*,/,'6 6 Ce ^G/x=f"@"7'Le D Ir /tf
)t,..ll
l-
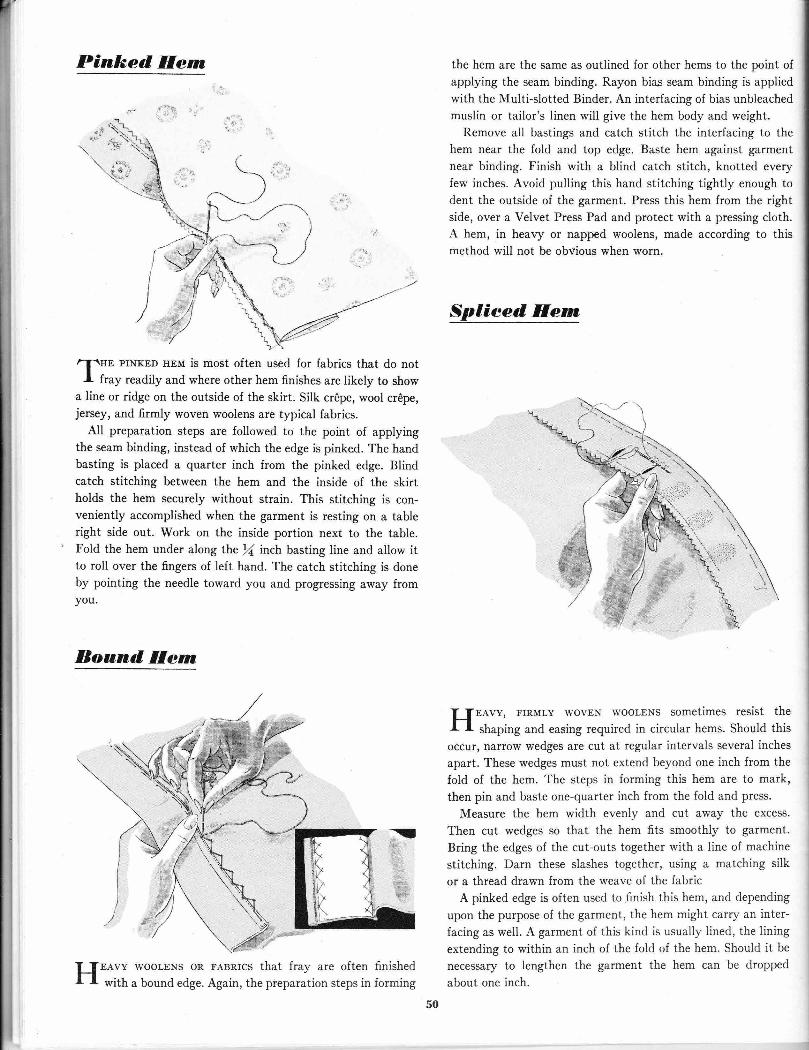
Pinked flem
/-f\HE pTNKED neu is most often used for fabrics that do notI fray readily and where other hem finishes are likely to show
a line or ridge on the outside of the skirt. Silk cr6pe, wool cr6pe,jersey, and firmly woven woolens are typical fabrics.
AII preparation steps are followed to the point of applyingthe seam binding, instead of which the edge is pinked. The handbasting is placed a quarter inch from the pinked edge. Blindcatch stitching between the hem and the inside of the skirtholds the hem securely without strain. This stitching is con-veniently accomplished when the garment is resting on a tableright side out. Work on the inside portion next to the table.Fold the hem under along the rrl inch basting line and allow itto roll over the fingers of left hand. The catch stitching is doneby pointing the needle toward you and progressing away fromyou.
Bound lfern
EAvy wooLENS oR FABRIcs that fray are often finishedwith a bound edge. Again, the preparation steps in forming
the hem are the same as outlined for other hems to the point olapplying the seam binding. Rayon bias seam binding is appliedwith the Multi-slotted Binder. An interfacing of bias unbleachedmuslin or tailor's linen will give the hem body and weight.
Remove all bastings and catch stitch the interfacing to thehem niar the fold and top edge. Baste hem against garmentnear binding. Finish with a blind catch stitch, knotted everyfew inches. Avoid pulling this hand stitching tightly enough todent the outside of the garment. Press this hem from the rightside, over a Velvet Press Pad and protect with a pressing cloth.A hem, in heavy or napped woolens, made according to thismethod will not be obvious when worn.
Splieed llern
f_f nevv, FTRMLv wovEN wooLDNS sometimes resist theI I shaping and easing required in circular hems. Should thisoccur, narrow wedges are cut at regular intervals several inchesapart. These wedges must not extend beyond one inch from thefold of the hem. The steps in forming this hem are to mark,then pin and baste one-quarter inch from the fold and press.
Measure the hem width evenly and cut away the exces6.Then cut wedges so that the hem fits smoothly to garment.Bring the edges of the cut-outs together with a line of machinestitching. Darn these slashes together, using a matching silkor a thread drawn from the weave of the fabric
A pinked edge is often used to,finish this hem, and dependingupon the purpose of the garment, the hem might carry an inter-facing as well. A garment of this kind is usually lined, the liningextending to within an inch of the fold of the hem. Should it be
necessary to lengthen the garment the hem can be droppedabout one inch.
{!
III
).t
-.-\\\r\
t|i_\ :!l_\"}-'
.3
50
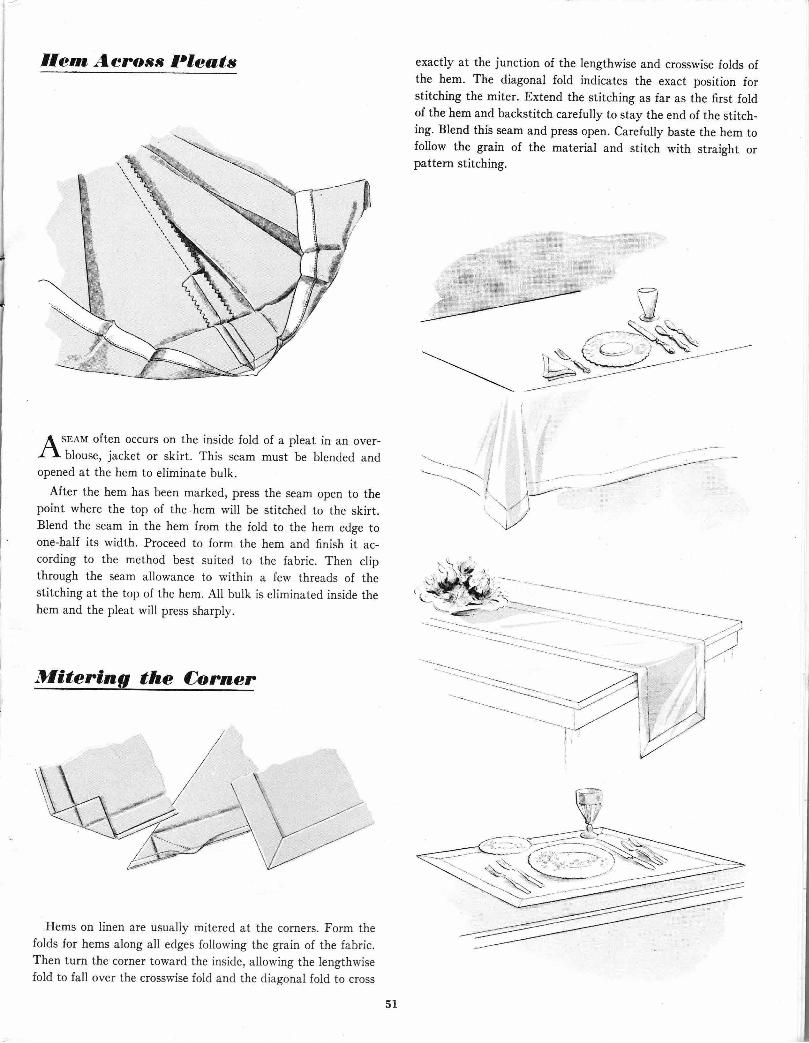
Ifern Aeross Pleats
sBelr often occurs on the inside fold of a pleat in an over-blouse, jacket or skirt. This seam must be blended and
opened at the hem to eiiminate bulk.After the hem has been marked, press the seam open to the
point where the top of the hem will be stitched to the skirt.Blend the seam in the hem from the fold to the hem edge toone-half its width. Proceed to form the hem and finish it ac-cording to the method best suited to the fabric. Then clipthrough the seam allowance to within a few threads of thestitching at the top of the hem. All bulk is eliminated inside thehem and the pleat will press sharply.
Dfitering the Corner
Hems on linen are usually mitered at the corners. Form thefolds for hems along all edges following the grain of the fabric.Then turn the corner toward the inside, allowing the lengthwisefold to fall over the crosswise fold and the diagonal fold to cross
exactly at the junction of the lengthwise and crosswise folds ofthe hem. The diagonal fold indicates the exact position forstitching the miter. Extend the stitching as far as the first foldof the hem and backstitch carefully to stay the end of the stitch-ing. Blend this seam and press open. Carefully baste the hem tofollow the grain of the material and stitch with straight orpattern stitching.
'--"---"
\: \,
l,l
t--\ _z/
\-' I
]----,
.).ro ,
.-.=#hq{r-@:
.'....'-.''.''".'-.."'.'.-*'.......''"'
'..'....-.*.'..'.-.-'' . .,:----
s--r-
5l
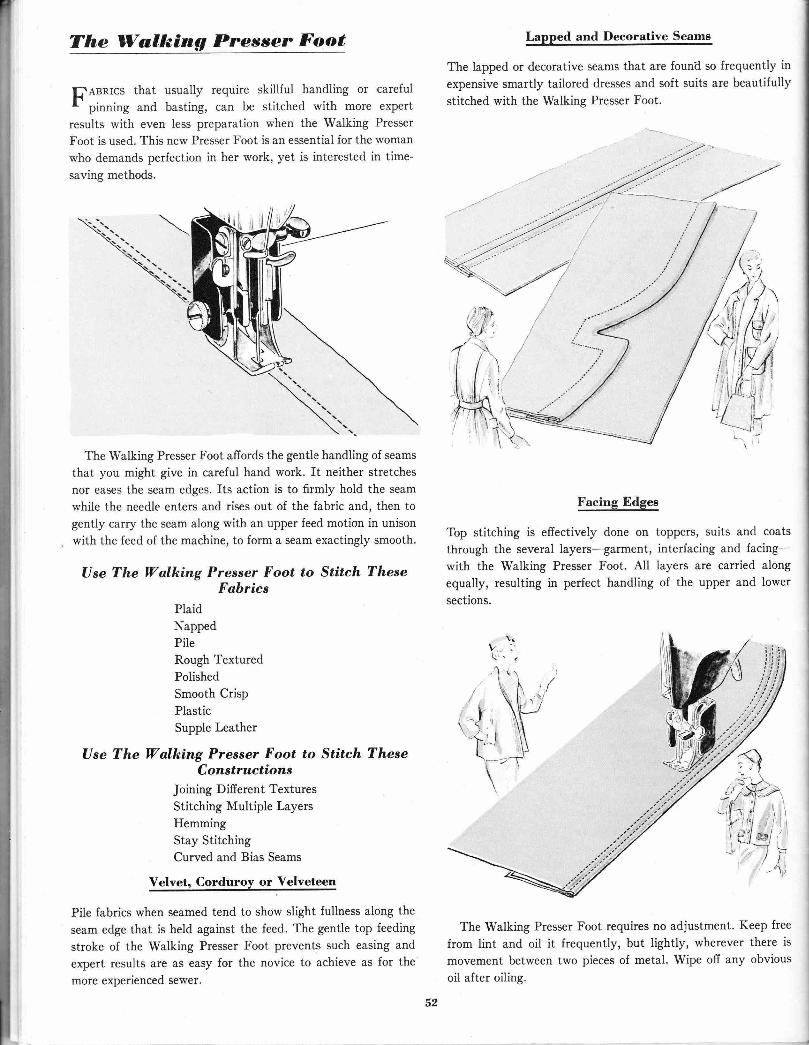
The Walking Presser Foot
['aanrcs that usually require skillful handling or carefulr pinning and basting, can be stitched with more expertresults with even less preparation when the Walking PresserFoot is used. This new Presser Foot is an essential for the womanwho demands perfection in her work, yet is interested in time-saving methods.
The Walking Presser Foot affords the gentle handling of seamsthat you might give in careful hand work. It neither stretchesnor eases the seam edges. Its action is to firmly hold the seamwhile the needle enters and rises out of the fabric and, then togently carry the seam along with an upper feed motion in unisonwith the feed of the machine, to form a seam exactingly smooth.
Use The Walking Presser Foot to Stitch TheseFabrics
PlaidNappedPiteRough TexturedPolishedSmooth CrisPPlasticSupple Leather
Use The Walking Presser Foot to Stitch TheseConstructions
Joining Difierent TexturesStitching Multiple LayersHemmingStay StitchingCurved and Bias Seams
Velvet, Corduroy or.Yelveteen
Pile fabrics when seamed tend to show slight fullness along theseam edge that is held against the feed. The gentle top feedingstroke of the Walking Presser Foot prevents such easing andexpert results are as easy for the novice to achieve as for themore experienced sewer.
Lapped and Decorative Seame
The lapped or decorative seams that are founil so frequently inexpensive smartly tailored dresses and soft suits are beautifullystitched with the Walking Presser Foot.
Faeing Edges
Top stitching is effectively done on toppers, suits and coatsthrough the several layers-garment, interfacing and facing-with the Walking Presser Foot. All layers are carried alongequally, resulting in perfect handling of the upper and lowersections.
/\*'i
The Walking Presser Foot requires no adjustment. Keep free
from lint and oil it frequently, but lightly, wherever there is
movement between two pieces of metal. Wipe off any obviousoil after oiling.
\/f:\
.i"-,''|j'rW*['. 'lv'"i\tJeJ
i.,t@-i.,..',,/
JZ
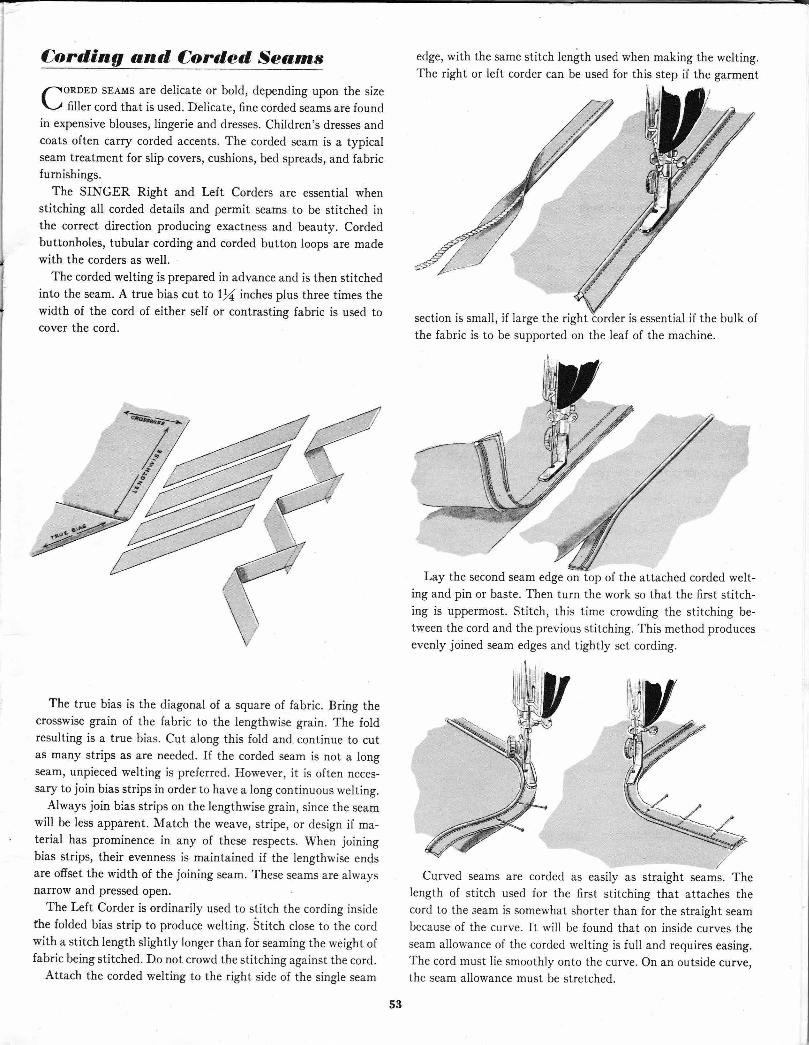
Cording and, Corded, Sea,rns
la\ORDED SEAMS are delicate or bold, depending upon the size\-,r filler cord that is used. Delicate, fine corded seams are foundin expensive blouses, Iingerie and dresses. Children's dresses andcoats often carry corded accents. The corded seam is a typicalseam treatment for slip covers, cushions, bed spreads, and fabricfurnishings.
The SINGER Right and Left Corders are essential whenstitching all corded details and permit seams to be stitched inthe correct direction producing exactness and beauty. Cordedbuttonholes, tubular cording and corded button loops are madewith the corders as well.
The corded welting is prepared in advance and is then stitchedinto the seam. A true bias cut to lll inches plus three times thewidth of the cord of either self or contrasting fabric is used tocover the cord.
The true bias is the diagonal of a square of fabric. Bring thecrosswise grain of the fabric to the lengthwise grain. The foldresulting is a true bias. Cut along this fold and continue to cutas many strips as are needed. If the corded seam is not a longseam, unpieced rvelting is preferred. However, it is often neces-sary to join bias strips in order to have a long continuous welting.
Always join bias strips on the lengthwise grain, since the seamwill be less apparent. Match the weave, stripe, or design if ma-terial has prominence in any of these respects. When joiningbias strips, their evenness is maintained if the lengthwise endsare offset the width of the joining seam. These seams are alwaysnarrow and pressed open.
The Left Corder is ordinarily used to stitch the cording insidethe folded bias strip to produce welting. Stitch close to the cordwith a stitch length slightly longer than for seaming the weight offabric being stitched. Do not crowd the stitching against the cord.
Attach the corded welting to the right side of the single seam
edge, with the same stitch length used when making the welting.The right or left corder can be used for this step if the garment
the fabric is to be supported on the leaf of the machine.
Lay the second seam edge on top of the attached corded welt-ing and pin or baste. Then turn the work so that the first stitch-ing is uppermost. Stitch, this time crowding the stitching be-tween the cord and the previous stitching. This method producesevenly joined seam edges and tightly set cording.
Curved seams are corded as easily as straight seams. Thelength of stitch used for the first stitching that attaches thecord to the seam is somewhat shorter than for the straight seambecause of the curve. It will be found that on inside curves theseam allowance of the corded welting is full and requires easing.The cord must lie smoothly onto the curve. On an outside curve,the seam allowance must be stretched.
53
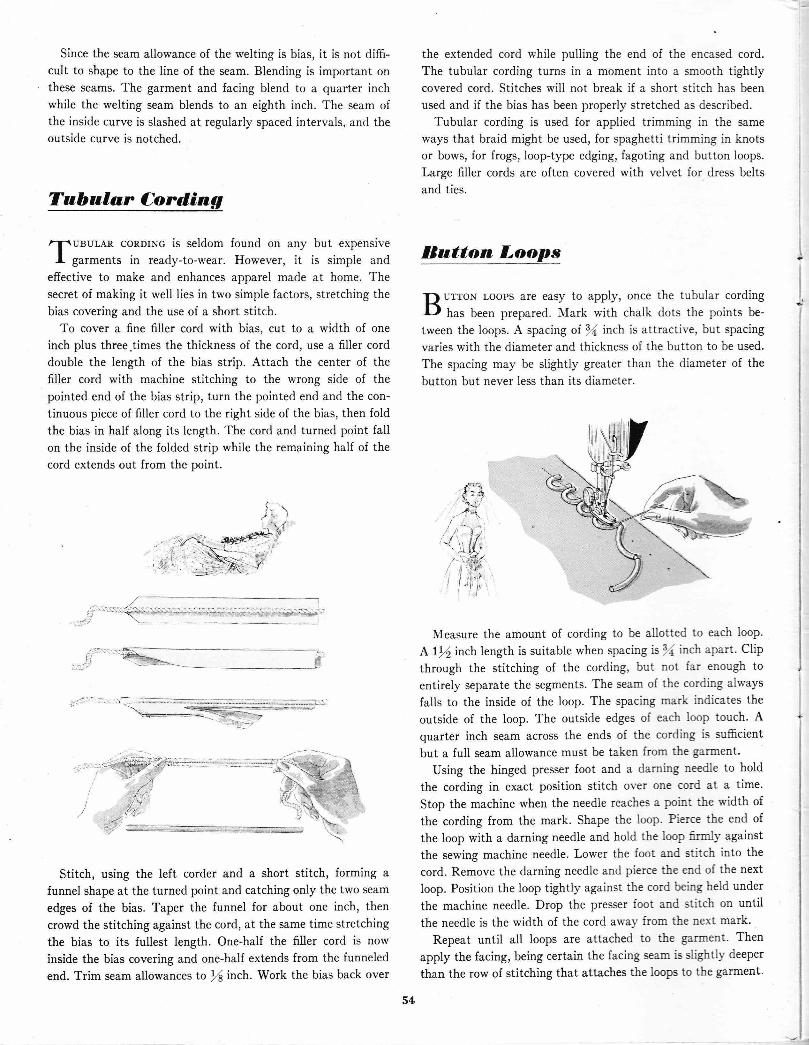
Since the seam allowance of the welting is bias, it is not diffi-cult to shape to the line of the seam. Blending is important onthese seams. The garment and facing blend to a quarter inchwhile the welting seam blends to an eighth inch. The seam ofthe inside curve is slashed at regularly spaced intervals, and theoutside curve is notched.
Tabalar Cord,ing
/-I-\UBULAR CoRDING is seldom found on any but expensiveI garments in ready-to-wear. However, it is simple and
effective to make and enhances apparel made at home. Thesecret of making it well lies in two simple factors, stretching thebias covering and the use of a short stitch.
To cover a fine filler cord with bias, cut to a width of oneinch plus three.times the thickness of the cord, use a filler corddouble the length of the bias strip. Attach the center of thefiller cord with machine stitching to the wrong side of thepointed end of the bias strip, turn the pointed end and the con-tinuous piece of filler cord to the right side of the bias, then foldthe bias in half along its length. The cord and turned point fallon the inside of the folded strip while the remaining half of thecord extends out from the point.
*<$,'-.il;.j::'::':,
, u'I
the extended cord while pulling the end of the encased cord.The tubular cording turns in a moment into a smooth tightlycovered cord. Stitches will not break if a short stitch has beenused and if the bias has been properly stretched as described.
Tubular cording is used for applied trimming in the sameways that braid might be used, for spaghetti trimming in knotsor bows, for frogs, loop-type edging, fagoting and button ioops.Large filler cords are often covered with velvet for dress beltsand ties.
Batton Loop*
D) urroN Loops are easy to apply, once the tubular cordingI-D has been preparerl. N[ark with chaik dots the points be-tween the loops. A spacing ol \ inch is attractive, but spacingvaries with the diameter and thickness of the button to be used.The spacing may be slightly greater than the diameter of thebutton but never less than its diameter.
Nleasure the amount of cording to be allotted to each loop.A ltl inch length is suitable when spacing is li inch apart. Clipthrough the stitching of the cording, but not far enough toentirely separate the segments. The seam of the cording alwaysfalls to the inside of the loop. The spacing mark indicates theoutside of the loop. The outside edges of each loop touch. Aquarter inch seam across the ends of the cording is sufficientbut a full seam allowance must be taken from the garment.
Using the hinged presser foot and a darning needle to holdthe cording in exact position stitch over one cord at a time.Stop the machine when the needle reaches a point the width ofthe cording from the mark. Shape the loop. Pierce the end ofthe loop with a darning needle and hold the loop firmly againstthe sewing machine needle. Lower the foot and stitch into thecord. Remove the darning needle and pierce the end of the nextloop. Position the loop tightly against the cord being held underthe machine needle. Drop the presser foot and stitch on untilthe needle is the width of the cord away from the next mark.
Repeat until all loops are attached to the garment. Thenapply the facing, being certain the facing seam is slightly deeper
than the row of stitching that attaches the loops to the garment
t{j)'
l" i- -,
!i "'.
i i /',* i#.,','":*!:f.,' ,i .i*$'
,'"! t
t ,l'i
Stitch, using the left corder and a short stitch, forming a
funnel shape at the turned point and catching only the two seamedges of the bias. Taper the funnel for about one inch, thencrowd the stitching against the cord, at the same time stretchingthe bias to its fullest length. One-half the filler cord is nowinside the bias covering and one-half extends from the funneledend. Trim seam allowances to /s inch. Work the bias back over
54
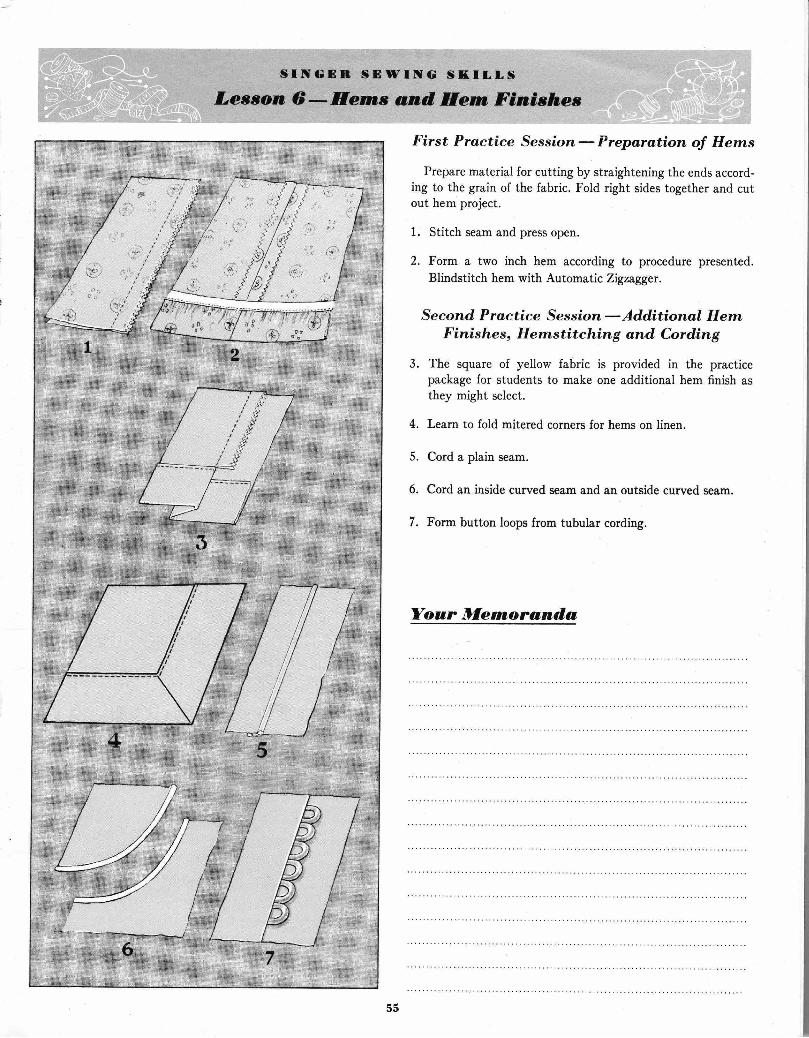
SINGSN SEWING Sf,,ILLSLexson 6-Hem,,s and, Eern Flntshes
First Practice Session - Preparation oJ HetnsPrepare material for cutting by straightening the ends accord-
ing to the grain of the fabric. Fold right sides together and cutout hem project.
1. Stitch seam and press open.
2. Form a two inch hem according to procedure presented.Blindstitch hem with Automatic Zigzagger.
Second. Practice Session -Ad.ditional HernFinishes, Hernstitchin g and, Cord,ing
3. The square of yellow fabric is provided in the practicepackage for students to make one additional hem finish asthey might select.
4. Learn to fold mitered corners for hems on linen.
5. Cord a plain seam.
6. Cord an inside curved seam and an outside curved seam.
7. Form button loops from tubular cording.
Yoar Dfernorand,a
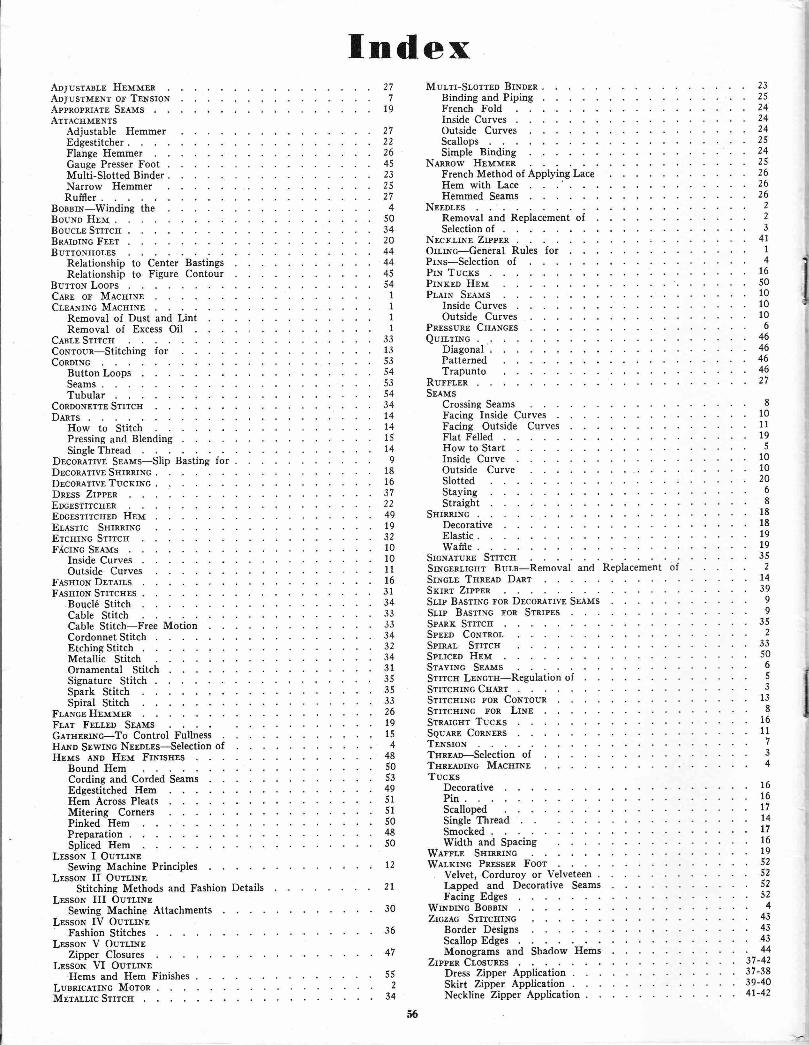
Index27
19
Aoyustlnr,r HrrrrrvtrnAoyusrrvrrNr or TrNstolvAppnopnr.qrr SrelrsArrncultrNts
Adjustable HemmerEdgestitcher .
Mur,rr-Sr,ormo Brrorn .
Binding and PipingFrench FoldInside CurvesOutside CurvesScallopsSimple Binding
23252424242524'r<Flange Hemmer
Gauge Presser FootMulti-Slotted BinderNarrow HemmerRuffier .
BogsrN-Winding theBouNn HnM -
Boucrr SrrrcrrBnerorxc FrrrBurrourror,rs
Relationship to Center BastingsRelationship to Figure Contour
Burrox LoopsClnr or MlcurNrCr-rewrNc Mecurm
Removal of Dust and UniRemoval of Excess OiI
Clsr-r SrrrcgCoNroun-StitchingConotNc
Button LoopsSeamsTubular
ConooNrrru Srrrcrr
262626
223
4t
))2645232S27
450342044444554
4627
81011l9
510l020
68
1818
Nrrxr,rlm ZtpptnOrr.rwc-General Rules for IPrNs-Selection of 4Prr Tucxs 16PrNrro Hrlr 50Pr,lrx Sr.lus 10
Inside Curves 10Outside Curves 10
TrapuntoRurrrrnSBlus
Crossing SeamsFacing Inside CurvesFacing Outside CurvesFlat FelledHow to StartInside CurveOutside CurveSlotted
Nlnnow HnMrvrnrFrench Method of Applying LaceHem with LaceHemmed Seams
Nrror,rsRemoval and Replacement oiSelection of
StayingStraight
SurnnrNcDecorative
WaftleSrcNlrunr SrrrcuSrNcrutcrlr Bur,s-Removal and Replacement ofSrxcr.r Trrnuo DlnrSxrnr ZrpprnSr,rp B,lsuxc ron DrconlrrvE SEAMSSr,rp Blsrrmc ron SrmprsSpenx SurcuSpnno Cor.ltnor.Sprner, SrrrcrlSprrcro HruSrevrrcc Srelrsirrrcn Lnlccrr-Regutation oiSrrrcnrNc CrrmrSrrrcrrrNo ror CoNrounSTrrcErNG ron LrNrSrnercnr TucrsSeulnr ConNrnsTrr.rsrorTrrnBlo-Selection ofTrrnrlottrc MlcxrNrTucrs
DecorativePin .
ScallopedSingle ThreadSmockedWidth and SpacingWerrrr SrrrnnrNc
Wer,xrNc Pnrssrn Foor
in.33135354-\.1
Pnrssunr Cruxcrs 6 rQurr,rrr.rc . 46
Diagonal . 46Patterned 46
DenrsHow to StitchPressing and BlendingSingle Thread
DrconerrvE Srervrs-Slip Basting forDrcon.trtvn SgrnnrNc .
Drcourrvr TucKrNc .
Dnnss ZrpprnEocrsrrrcrrrnEocBsrtrcuro HrrlrEusrrc SrrrnnrxcErcnrNc SrrrcnF;icrNc Srlrvrs
Inside CurvesOutside Curves
FAsHroN DnterlsF,lsrrror.r Strrcrrrs
Boucl6 StitchCable StitchCable Stitch-Free MotionCordonnet StitchEtching StitchMetallic StitchOrnamental StitchSignature StitchSpark Stitch
54i4l414l5t4
1935
)7439
9I35)
3350
65J
138
16ll734
1616t7t4t1t619s2
918165l224919a)l0l0ll16313433J3341)343l3535332619r5
Elastic . 19
Spiral StitchFr..lxcr HrlrlrrnFLAT FELLED SEAMSGlrrmnrr.rc-To Control fuilnessHnro Spwrxc Nrror,rs-Selection ofHrrws .qro Hru Frr.rrsrres
Bound HemCording and Corded SeamsEdgestitched HemHem Across PleatsMitering CornersPinked HemPreparationSpliced Hem
LEssoN I OutrNrSewing Machine Principles
Lrssow II Ourr.rNr,Stitchine Methods and Fashion Details
LEssoN III Ourr,rNrSewing Machine Attachments
LrssoN IV OurrrNrFashion Stitches
LEssoN V Outr,rwpZipper Closures
LrssoN VI Outr.rrtHems and Hem Finishes
LuBRrcArrNG MoronMrrlrr,rc Srrrcs
WrNorwc BosnrN 4Zrczec Srrrcntwc 43
Border Designs 43Scallop Edges 43Monograms and Shadow Hems 44
ZrppEn CiosunBs 37-42
Velvet, Corduroy or Velveteen 52Lapped and Decorative Seams 52Facing Edges 52
Dress Zipper Application 37-38Skirt Zipper Application 39-40Neckline Zipper Application . 4l-42
448505349515r504850
12
21
30
36
47
55)
34
56
fo, your sewing sati"sfaction, . ..
HE CONTENTS OT TIIIS BOOK,
as represented by the Index on the facing page, were carefully
prepared to serve your reference purposes and thus extend your
sewing satisfaction. The various procedures covered coincide with
those taught in the SINGER Sewing Skills Course, which is
given, without charge, to all new Singer owners.
This is but one of the many services ofiered by your local
sTNGER sEwrNc cENTER to assist and accommodate women who
sew. In addition to a wide variety of the world's finest sewing
machines and vacuum cleaners, you will find there a generous
store of parts, accessories, sewing notions and other sewing sup-
plies. Best of all whenever you have a need or problem, whether
it be repairs or just a little advice, or friendly suggestion, you
will find your sTNGER sEwrNG cENTER ready to serve you in a
manner that has made SINGER Service world-famous.
SINGER SEWING MACHINE COMPANY


![[Mark Baxter] the Rock-N-Roll Singer's Survival Ma(BookZZ.org)](https://img.pdfslide.net/doc/110x75/55cf940e550346f57b9f5236/mark-baxter-the-rock-n-roll-singers-survival-mabookzzorg.jpg)