Embed Size (px)
Citation preview
1
SSScccaaannnnnniiinnnggg RRRRRRSSS ooorrr IIILLLSSS iiinnn AAArrriiieeelll wwwiiittthhh ttthhheeeMMMiiinnnooollltttaaa PPPSSS333000000000 ssscccaaannnnnneeerrr...
Ariel.lnk? For your convenience, these instructions may be found in the
Alex Server:“T:\COMMON\Scanning_RDS_ILS_WebDocDel\scanning_Ariel (Minolta PS3000).
? Turn on your scanner before turning on your computer.The Ariel software will not be able to detect a scanningdevice if it is not turned on before the computer. Turn on thescanner and reboot the computer if the scanner is notrecognized.
? Go to the Ariel icon as seen above and double click to openthe program.
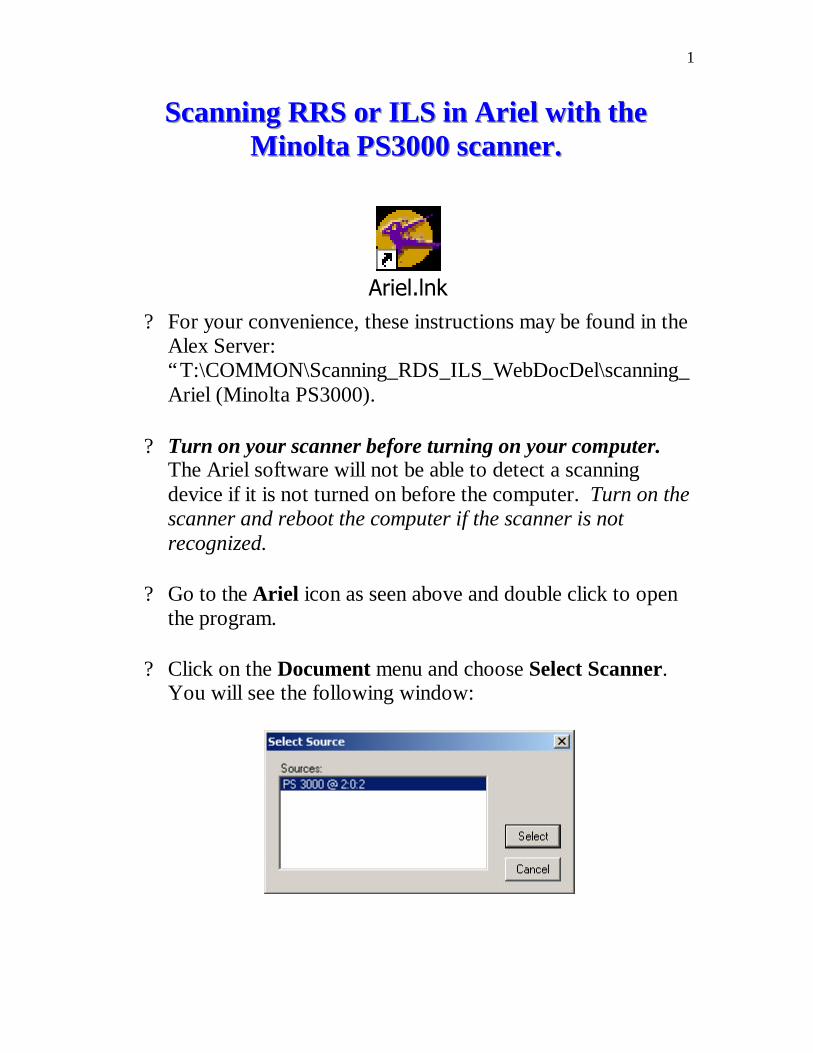
? Click on the Document menu and choose Select Scanner.You will see the following window:
2
? Highlight the PS 3000 in the Select Source window and clickon the Select button. Once the device is selected it shouldnot be changed. If there are any problems scanning you maywant to check if the proper device has been selected.
? Click on the Document menu and choose Open Archive.This will enable the archive window for future use.
? Follow the instructions provided in Ariel 3.01 Set-up toensure that the software is set to the proper functions. Theseinstructions are also located in the Alex Server:“T:\COMMON\ Scanning_RDS_ILS_WebDocDel \Ariel3.01 Set-up”.
? Once the drivers have been configured DO NOT tamper withthe Select Scanner option in the Document menu. Thescanner will already be selected.
3
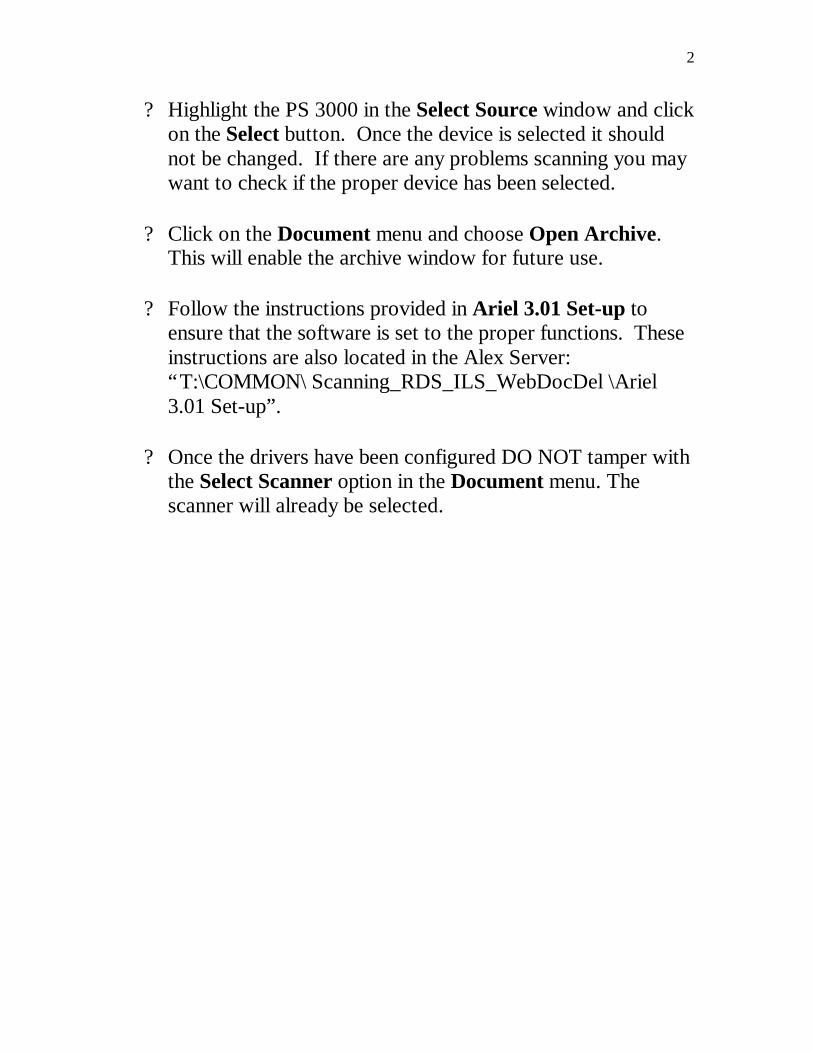
? To start scanning documents and change the settings fordifferent modes of scanning, click on the Document menuchoose Scan. You will see the following window:
Please note: The Scanner Settings must be arranged on thecomputer workstation and not with the front panel of thePS3000.
? Make sure the Auto Scan Mode is CHECKED. The AutoScan Preview should be CHECKED as well.
? Set the Resolution to 300.
? The Brightness bar should be set towards Light.
? Disposition should be one of the below:o Scan and Send (if you want to send immediately)o Scan and Save (if you want to preview the document
before sending)
4
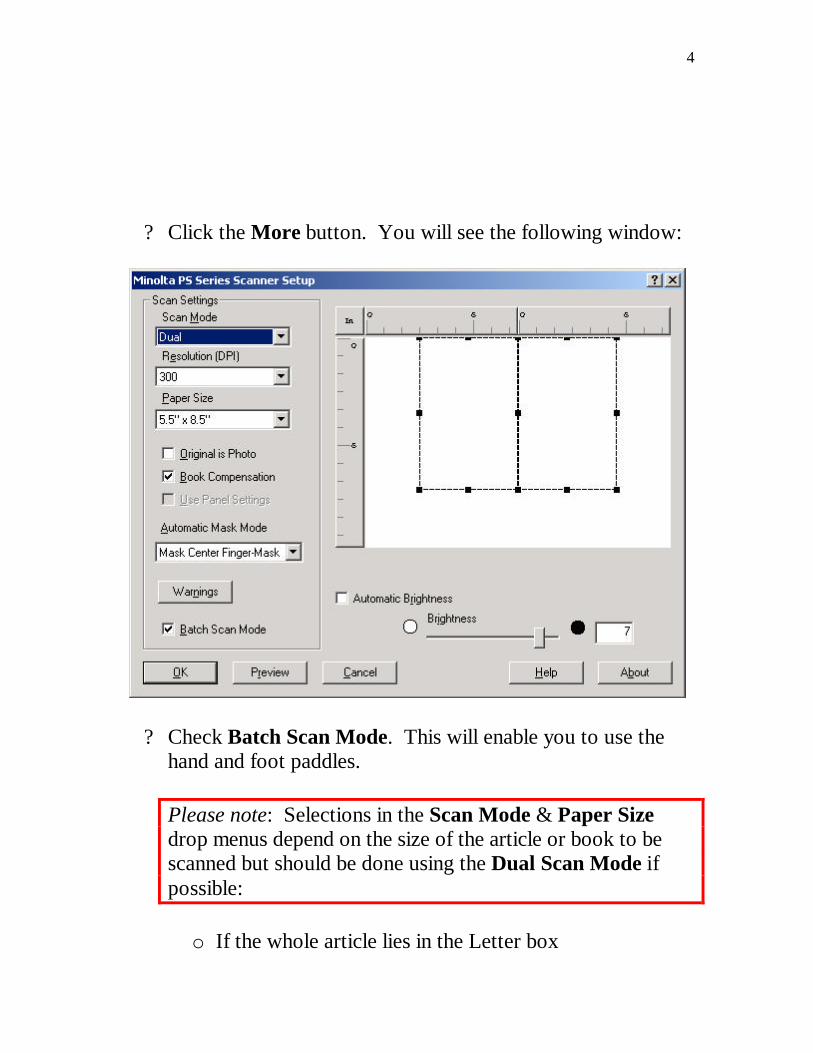
? Click the More button. You will see the following window:
? Check Batch Scan Mode. This will enable you to use thehand and foot paddles.
Please note: Selections in the Scan Mode & Paper Sizedrop menus depend on the size of the article or book to bescanned but should be done using the Dual Scan Mode ifpossible:
o If the whole article lies in the Letter box
5
Scan Mode – SinglePaper Size – 8.5 X 11 (L) “L meaning Landscape”
o If the whole article lies in the Legal boxScan Mode – DualPaper Size – 8.5 X 11 (P) “P meaning Portrait”
o If the whole article lies in the 11X17 box, choose theLegal box setting.
? The Brightness bar should be oriented towards the right (atabout 7 or 8).
? The Automatic Mask Mode should be set to Mask CenterFinger-Mask.
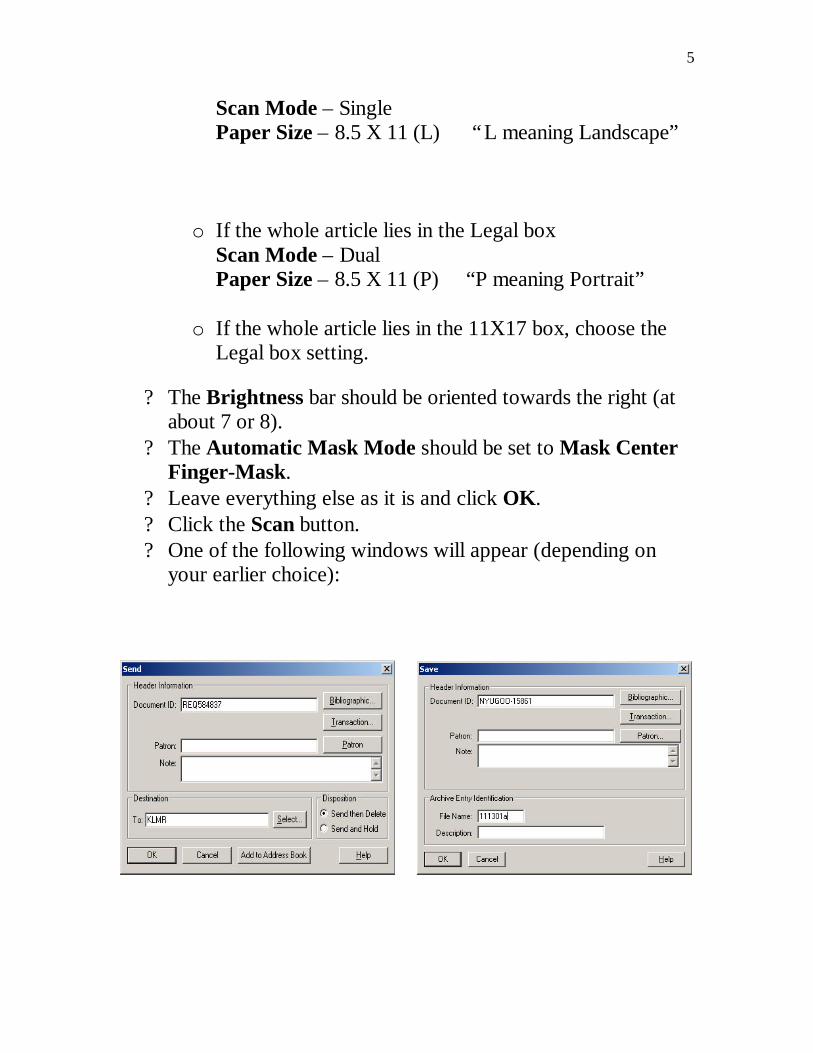
? Leave everything else as it is and click OK.? Click the Scan button.? One of the following windows will appear (depending on
your earlier choice):
6
For Enter the Document ID and the
Destination. Use Note only if there is something special the
recipient needs to know. For example: “resending page 25”
? The Document ID will be the request number from the
original request sheet (all capitals and no hyphens as seen
above). If no request number is given you may use the
Patron’s name as it appears on the form.
? In Destination choose the library from your address book
that file will be sent to. Do this by clicking the Select button
and choosing the correct location. This is the IP address as
listed on the on the request form.
? If you are sending an ILS document and you are not located
at Alexander or LSM you should fax a copy of the request
with notation “Ariel” as well as the number of pages and date
sent.
o ILS/ALEX fax# 932-7579
o ILS/LSM fax# 445-4790
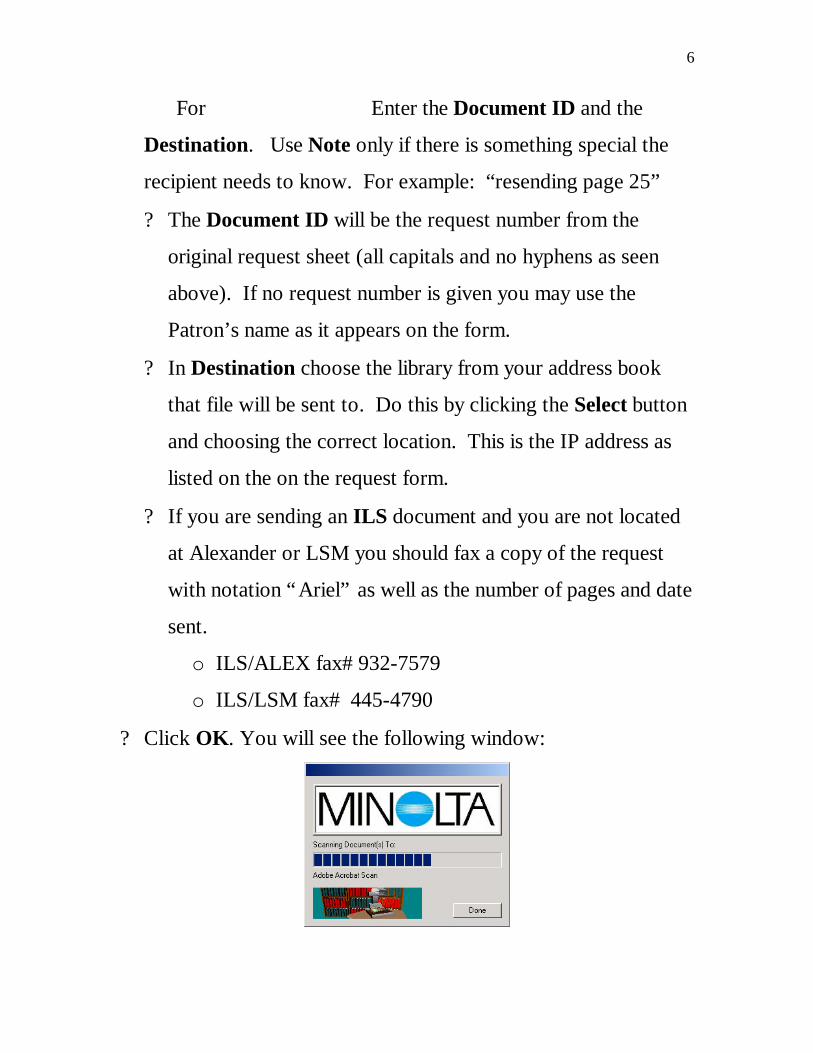
? Click OK. You will see the following window:
7
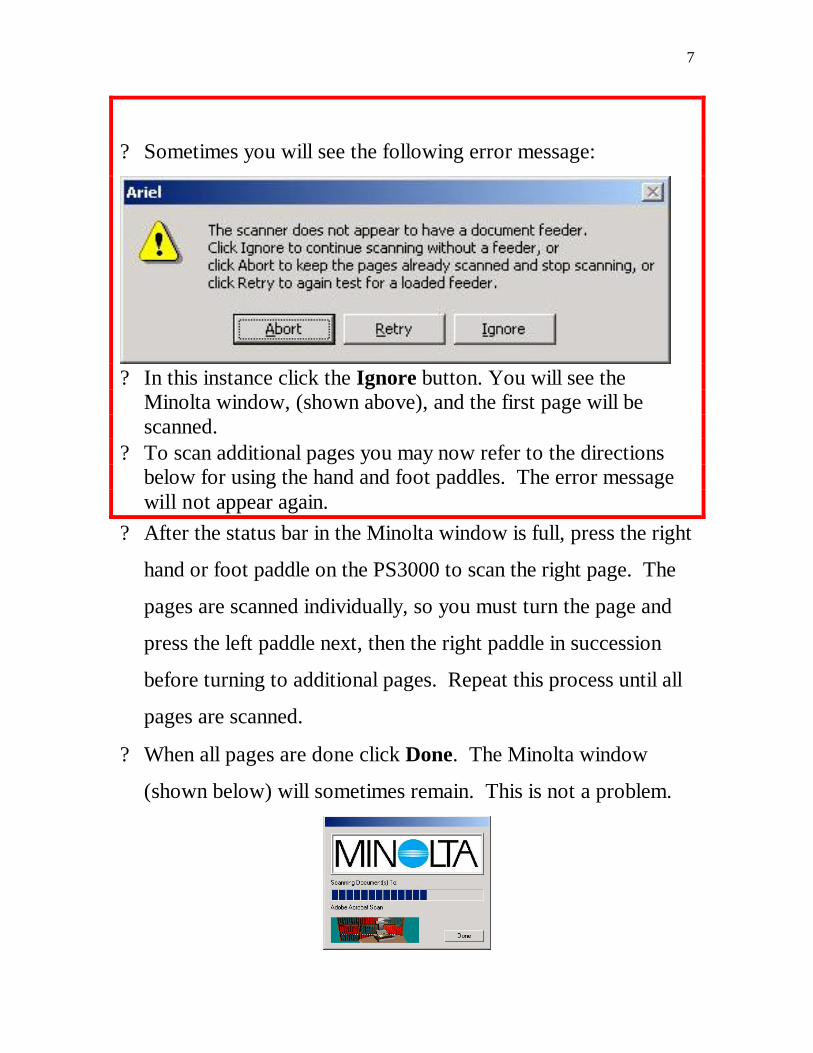
? Sometimes you will see the following error message:
? In this instance click the Ignore button. You will see theMinolta window, (shown above), and the first page will bescanned.
? To scan additional pages you may now refer to the directionsbelow for using the hand and foot paddles. The error messagewill not appear again.
? After the status bar in the Minolta window is full, press the right
hand or foot paddle on the PS3000 to scan the right page. The
pages are scanned individually, so you must turn the page and
press the left paddle next, then the right paddle in succession
before turning to additional pages. Repeat this process until all
pages are scanned.
? When all pages are done click Done. The Minolta window
(shown below) will sometimes remain. This is not a problem.
8
The article will now be in the Send window and will betransmitted to the specified destination.
For Enter the Document ID and the FileName.
? The Document ID will be the same as the one on the originalform.
? The File Name should be the date followed by a successionof letters for each working day. (ex. 1129a, 1129b,1129c,… ect.)
? Click OK. You will see the following window:

9
? Sometimes you will see the following error message:
? In this instance click the Ignore button. You will see theMinolta window and the first page will be scanned.
? To scan additional pages you may now refer to the directionsbelow for using the hand and foot paddles. The error messagewill not appear again.
? After the status bar in the above window is full press the hand or
foot paddles on the PS3000 to scan the right page. The pages
are scanned individually so you must turn the page and press the
left paddle next, then the right paddle in succession before
turning to additional pages. Repeat this process until all pages
are scanned.
? When all pages are done click Done. The Minolta window
(shown below) will sometimes stay. This is not a problem.
10
The article will now be in the Archive window.? Open the Archive Window. You will see the document listed
and sorted by file name.? Before sending you should preview the document and make
any necessary changes. See following sections Editing inAriel and Sending Documents in the Archive Window fordetails.
? As a general guideline documents in the Archive windowshould remain there for about two weeks in case anyproblems arise. After that time they should be deleted.o To delete a file single click on it to highlight the file
and press delete.o You will see a window that reads, “Do you want to
delete the selected Documents?” Click Yes.
11
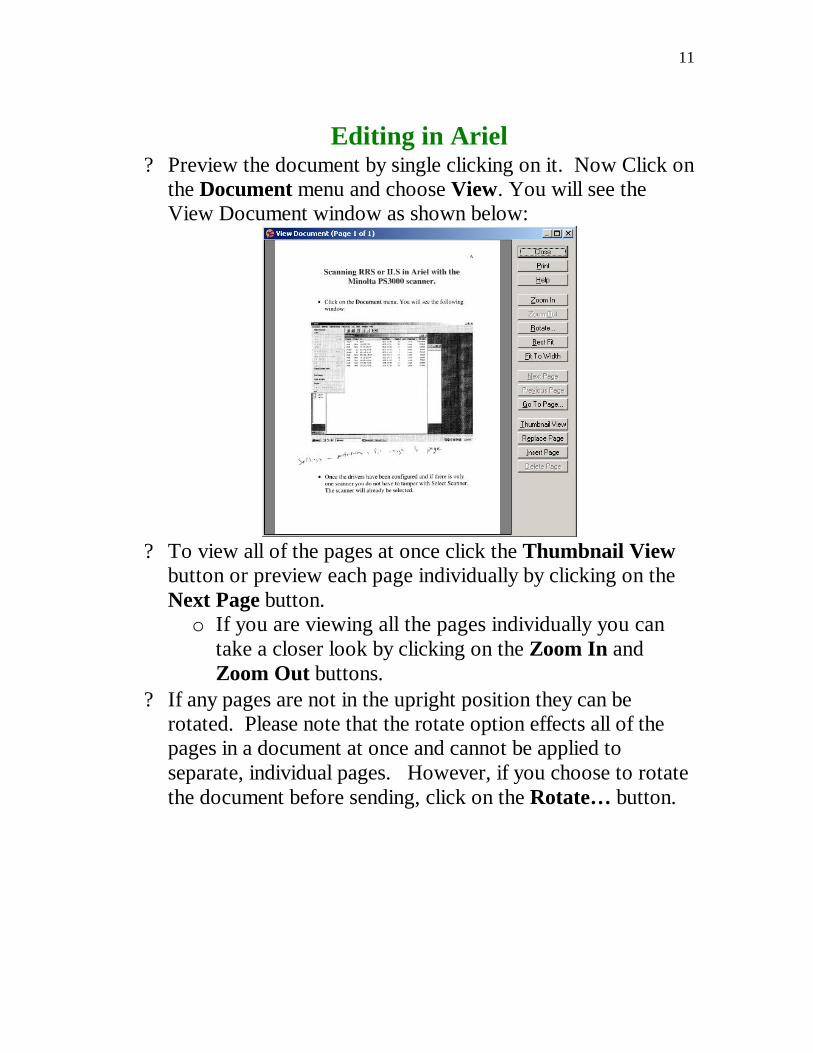
Editing in Ariel? Preview the document by single clicking on it. Now Click on
the Document menu and choose View. You will see theView Document window as shown below:
? To view all of the pages at once click the Thumbnail Viewbutton or preview each page individually by clicking on theNext Page button.o If you are viewing all the pages individually you can
take a closer look by clicking on the Zoom In andZoom Out buttons.
? If any pages are not in the upright position they can berotated. Please note that the rotate option effects all of thepages in a document at once and cannot be applied toseparate, individual pages. However, if you choose to rotatethe document before sending, click on the Rotate… button.
12
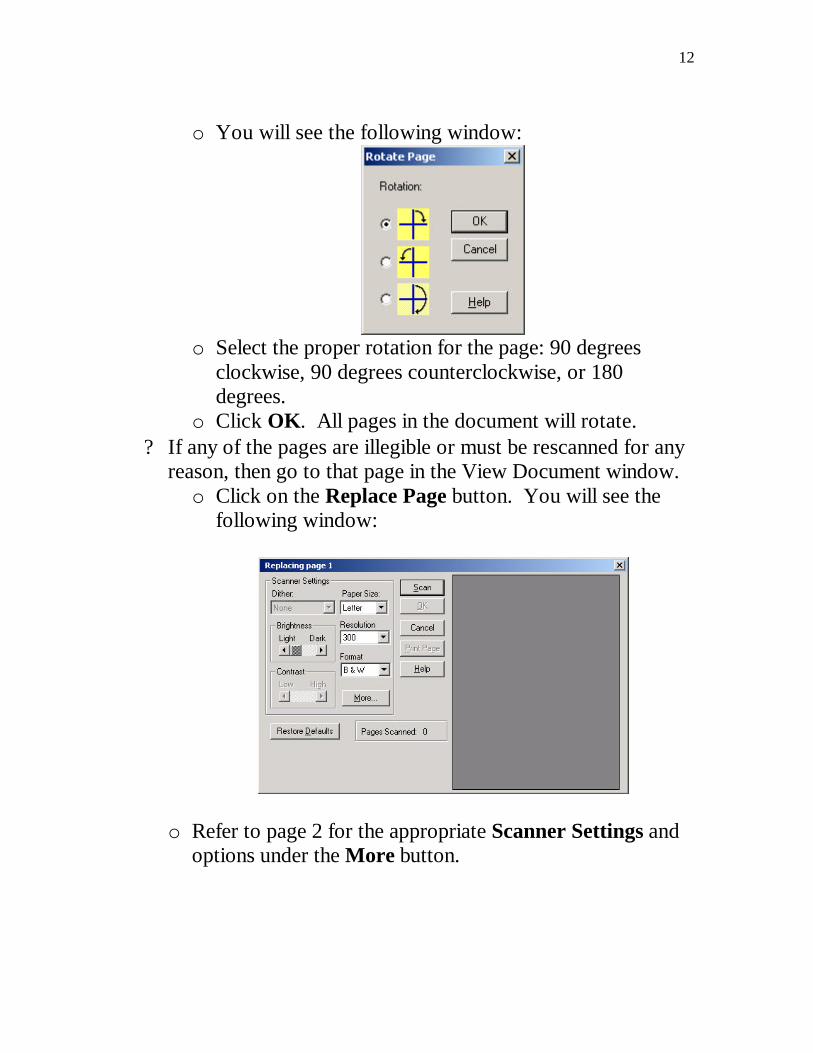
o You will see the following window:
o Select the proper rotation for the page: 90 degreesclockwise, 90 degrees counterclockwise, or 180degrees.
o Click OK. All pages in the document will rotate.? If any of the pages are illegible or must be rescanned for any
reason, then go to that page in the View Document window.o Click on the Replace Page button. You will see the
following window:
o Refer to page 2 for the appropriate Scanner Settings andoptions under the More button.
13
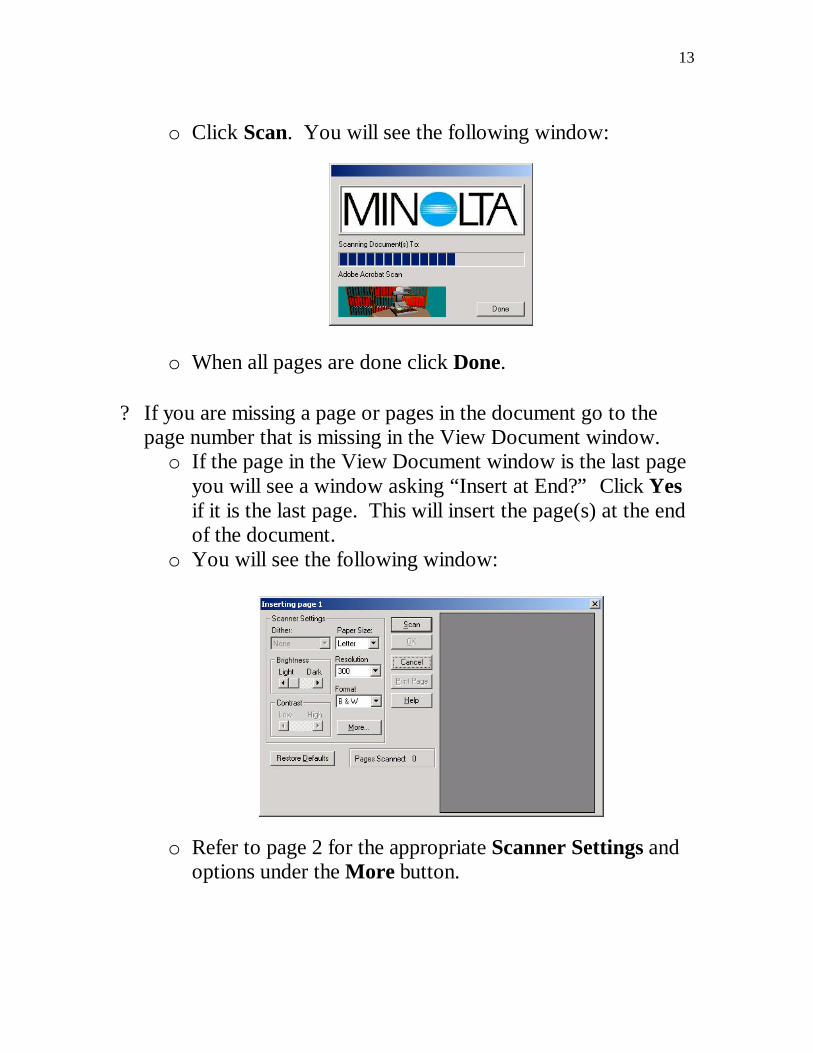
o Click Scan. You will see the following window:
o When all pages are done click Done.
? If you are missing a page or pages in the document go to thepage number that is missing in the View Document window.o If the page in the View Document window is the last page
you will see a window asking “Insert at End?” Click Yesif it is the last page. This will insert the page(s) at the endof the document.
o You will see the following window:
o Refer to page 2 for the appropriate Scanner Settings andoptions under the More button.
14
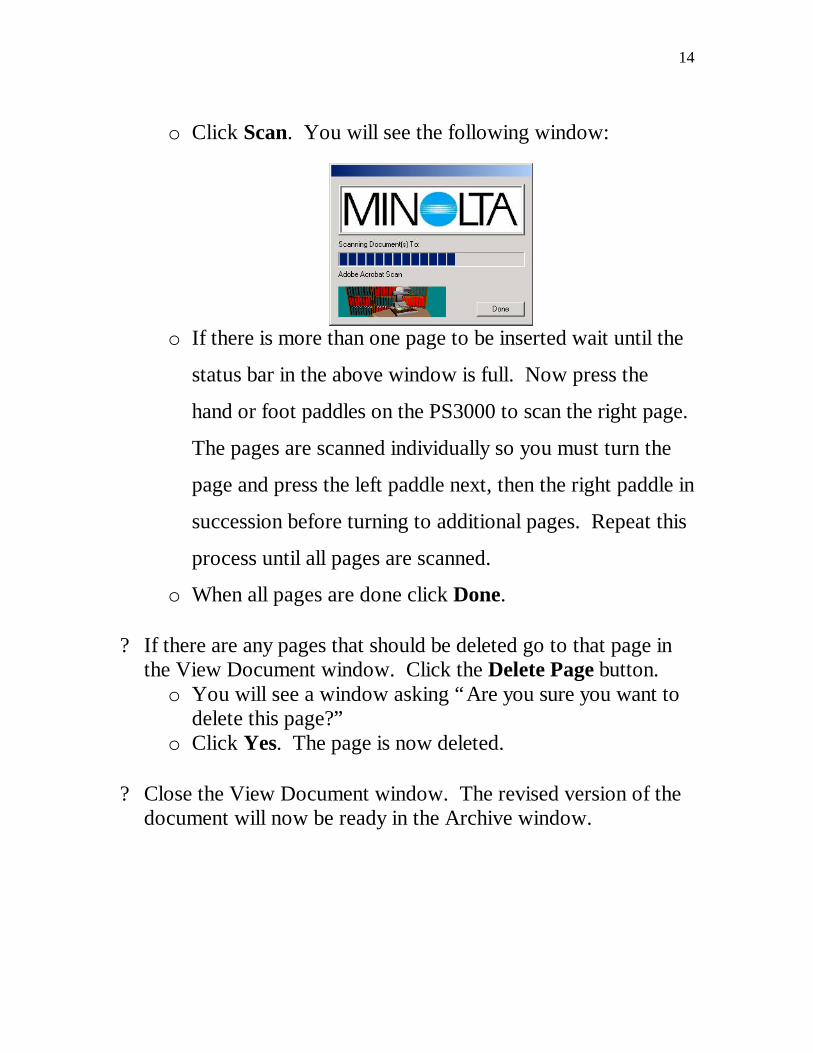
o Click Scan. You will see the following window:
o If there is more than one page to be inserted wait until the
status bar in the above window is full. Now press the
hand or foot paddles on the PS3000 to scan the right page.
The pages are scanned individually so you must turn the
page and press the left paddle next, then the right paddle in
succession before turning to additional pages. Repeat this
process until all pages are scanned.
o When all pages are done click Done.
? If there are any pages that should be deleted go to that page inthe View Document window. Click the Delete Page button.o You will see a window asking “Are you sure you want to
delete this page?”o Click Yes. The page is now deleted.
? Close the View Document window. The revised version of thedocument will now be ready in the Archive window.
15
Sending Documents in the Archive Window
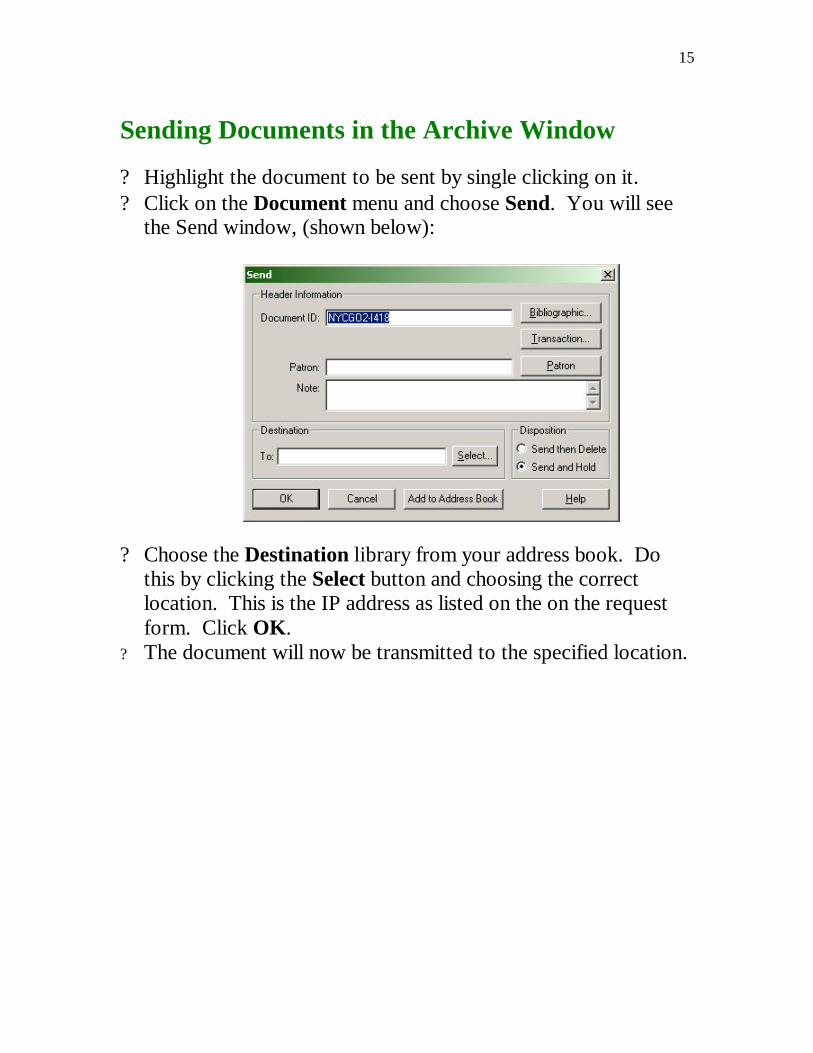
? Highlight the document to be sent by single clicking on it.? Click on the Document menu and choose Send. You will see
the Send window, (shown below):
? Choose the Destination library from your address book. Dothis by clicking the Select button and choosing the correctlocation. This is the IP address as listed on the on the requestform. Click OK.
? The document will now be transmitted to the specified location.
16
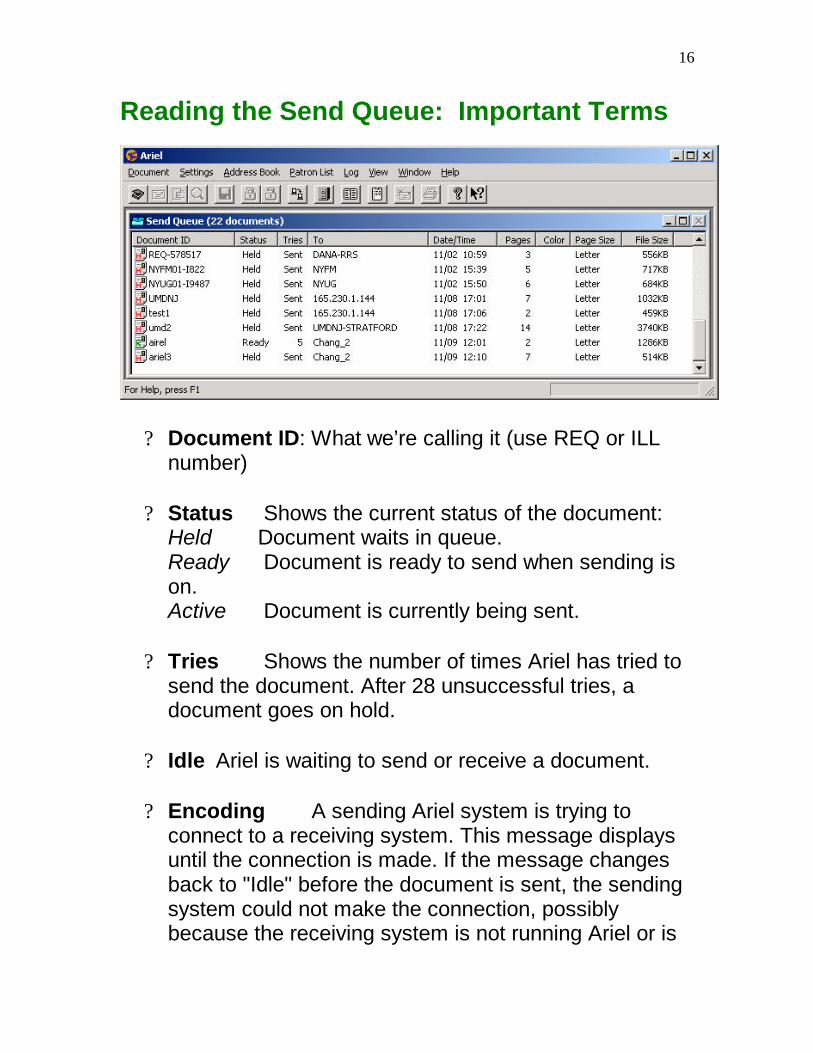
Reading the Send Queue: Important Terms
? Document ID: What we’re calling it (use REQ or ILLnumber)
? Status Shows the current status of the document: Held Document waits in queue. Ready Document is ready to send when sending is
on. Active Document is currently being sent.
? Tries Shows the number of times Ariel has tried tosend the document. After 28 unsuccessful tries, adocument goes on hold.
? Idle Ariel is waiting to send or receive a document.
? Encoding A sending Ariel system is trying toconnect to a receiving system. This message displaysuntil the connection is made. If the message changesback to "Idle" before the document is sent, the sendingsystem could not make the connection, possiblybecause the receiving system is not running Ariel or is
17
already receiving another file. Messages in the LogViewer give more detailed information for eachtransaction.
? Connected Your Ariel system has connected toanother Ariel system and is ready to start sending orreceiving a document.
? [Address] Ariel is sending a file to or receiving afile from the machine with the specified address. Whenthe transmission is finished, the address disappearsand you again see the message "Idle."
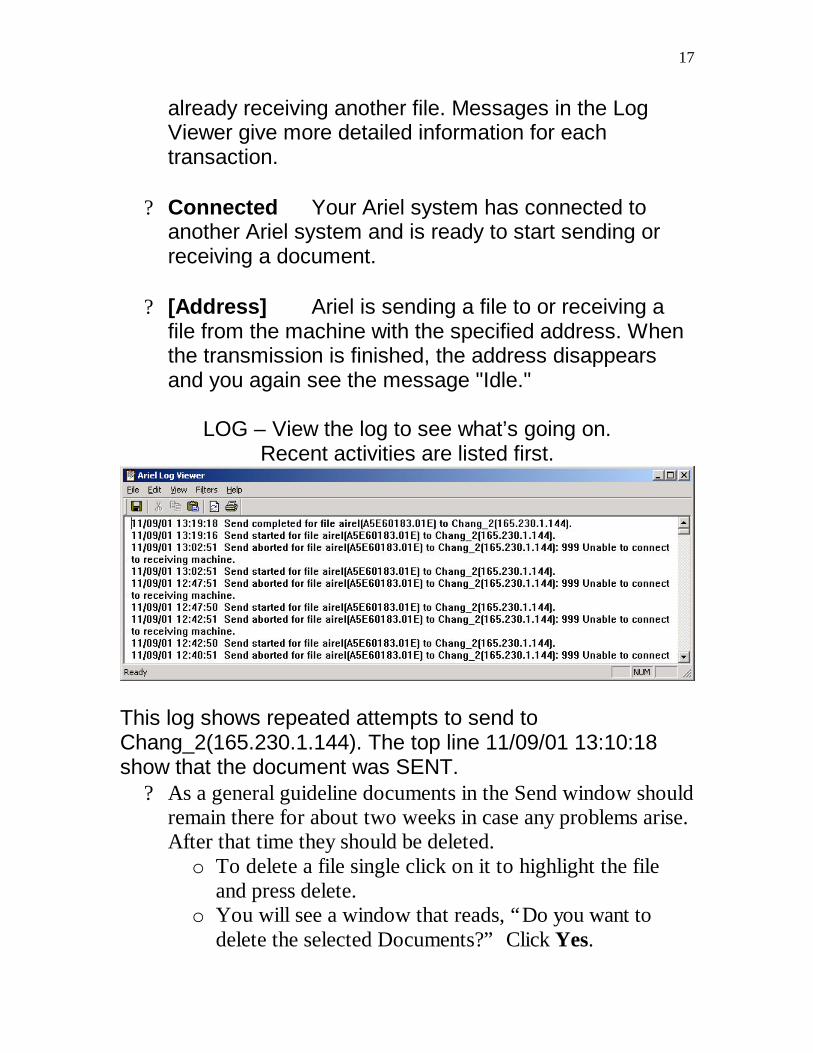
LOG – View the log to see what’s going on.Recent activities are listed first.
This log shows repeated attempts to send toChang_2(165.230.1.144). The top line 11/09/01 13:10:18show that the document was SENT.
? As a general guideline documents in the Send window shouldremain there for about two weeks in case any problems arise.After that time they should be deleted.o To delete a file single click on it to highlight the file
and press delete.o You will see a window that reads, “Do you want to
delete the selected Documents?” Click Yes.
18
Receiving Documents
? For details on setting up your workstation for receivingdocuments using Ariel 3.01 see the Ariel set up instructions.
? All files that are successfully sent to a location will be in thatlocation’s Received Queue. If you are at the receiving locationyou are responsible for printing out these files. Checkperiodically for received files.
? These items must be printed one at a time. Select the file bysingle clicking on it. The file will now be highlighted.
? Click on the Document menu and select Print.? The item may now be deleted from the Received Queue.
? Verify that the correct number of pages was printed and thatthere are no other problems with the printed document. Ifthere are no problems the document should now be deletedfrom the Received Queue.o To delete a file single click on it to highlight the file
and press delete.o You will see a window that reads, “Do you want to
delete the selected Documents?” Click Yes.
19
What to do when it won’t send:
? Verify the IP address/Address Book. Select the documentfrom the SEND QUEUE and use DOCUMENT- VIEW –INFO EDIT. Make adjustments as needed. Highlight it againin the SEND QUEUE and use DOCUMENT- RELEASE.This will send it to the corrected address.
? Wait a while. Ariel will try 28 times before it gives up.
? Call or Fax the Receiving Library and ask them to check theirARIEL PC.o The PC must be turned ono Ariel must be openo RECEIVING must be selected in SETTINGS.
? DOCUMENT DISAPPEARED? Use the Document menuand click on Open Archive. The document should appear inthe Archive window.
? To resend a document that has already been Sent:o THIS WILL HAPPEN WHEN YOU RECEIVE A
MESSAGE TO RESEND [fax,voice,email])o First: Check the Address Book. Verify the ARIEL
IP Address for the Alias you are using. Adjust asneeded from the information on the ILS-Requestform.
20
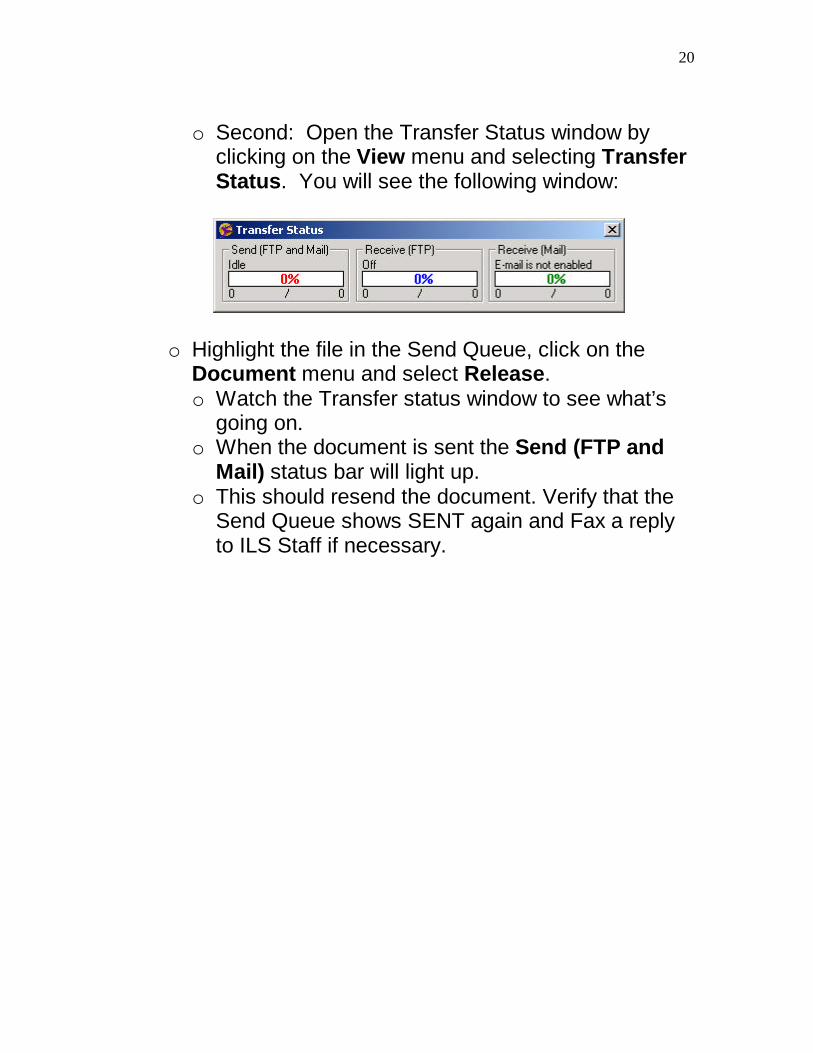
o Second: Open the Transfer Status window byclicking on the View menu and selecting TransferStatus. You will see the following window:
o Highlight the file in the Send Queue, click on theDocument menu and select Release.o Watch the Transfer status window to see what’s
going on.o When the document is sent the Send (FTP and
Mail) status bar will light up.o This should resend the document. Verify that the
Send Queue shows SENT again and Fax a replyto ILS Staff if necessary.