Embed Size (px)
Citation preview
Tablesaw Dado Jig
The following photograph with description detail and explain the function of a jig for cutting dadoes with a tablesaw. An existing base sled was used, the carrier assembly was built to fit it. This jig allows for close fitting dado joints to be cut in volume once the kerf adjustment is made. The range of dado widths possible is minimum 1/8" up to approximately 4".
Tablesaw Dado Jig components: Left- Carrier assembly Center- Hardware Right- Base sled
Base Sled- guides fit your saw's miter grooves. Width and length per your needs.
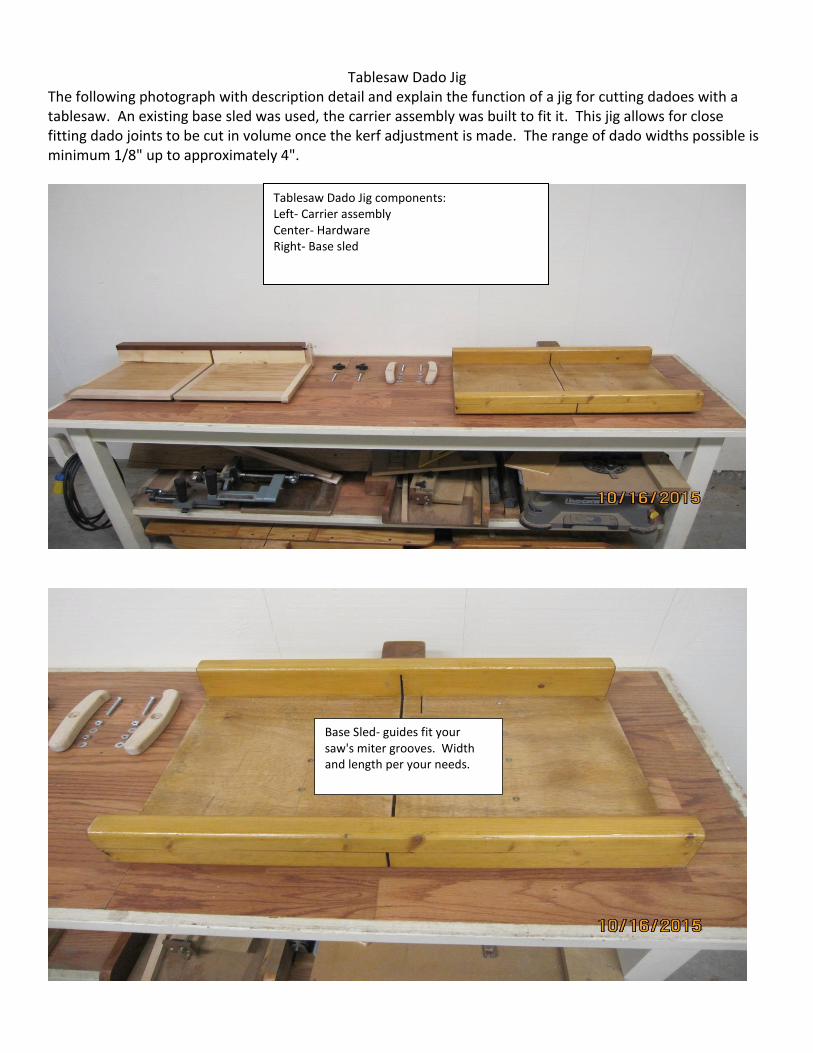
Carrier Assembly- this assembly fits inside between the fences on the base sled. Its edges extend past the bottom of the sides on the base sled to act as stops. Note the adjustment screw on the upper right. This is to allow for the sawblade/dado blade kerf. It is critical to the accuracy of the finished dado
Left- knobs, washers and bolts for tee trak on kerf adjustment screw side. Right- hold down clamps and fasteners for carrier assembly. All fasteners are 1/4-20 size. The bolts are 2" long.
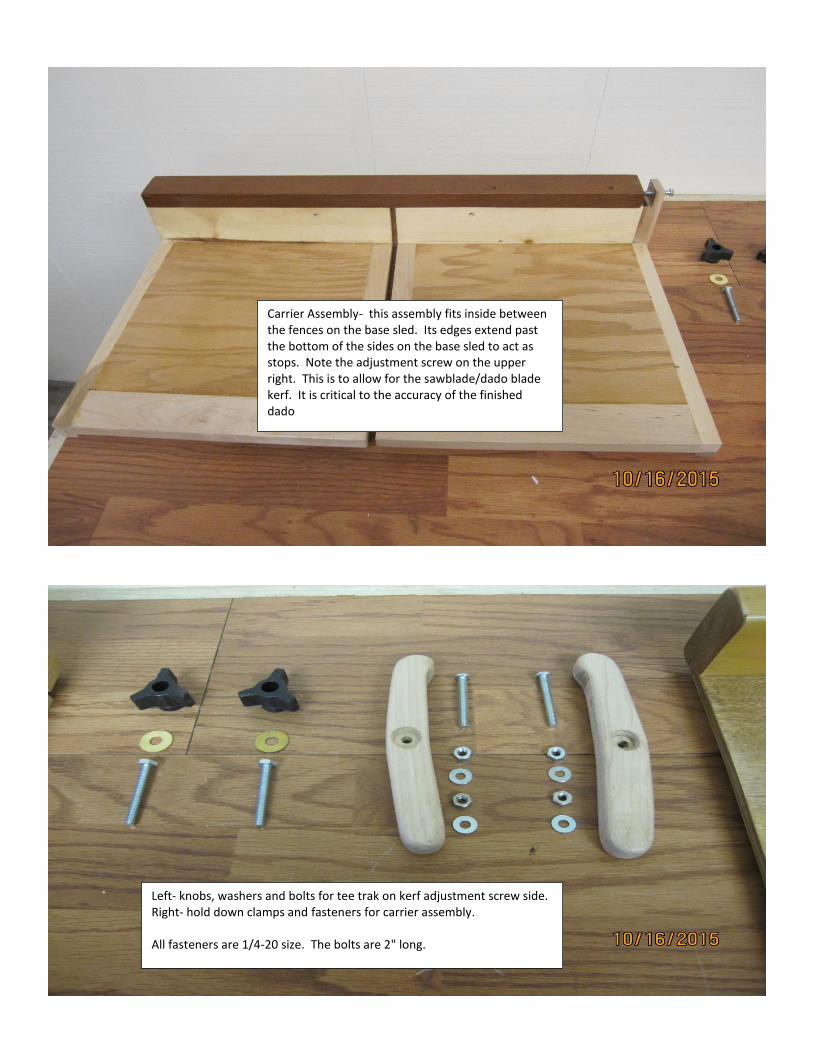
Hardware from previous view installed on carrier assembly.
Hardware installed on Kerf adjustment side of carrier assembly. There is a tee trak installed in the top of the fence.
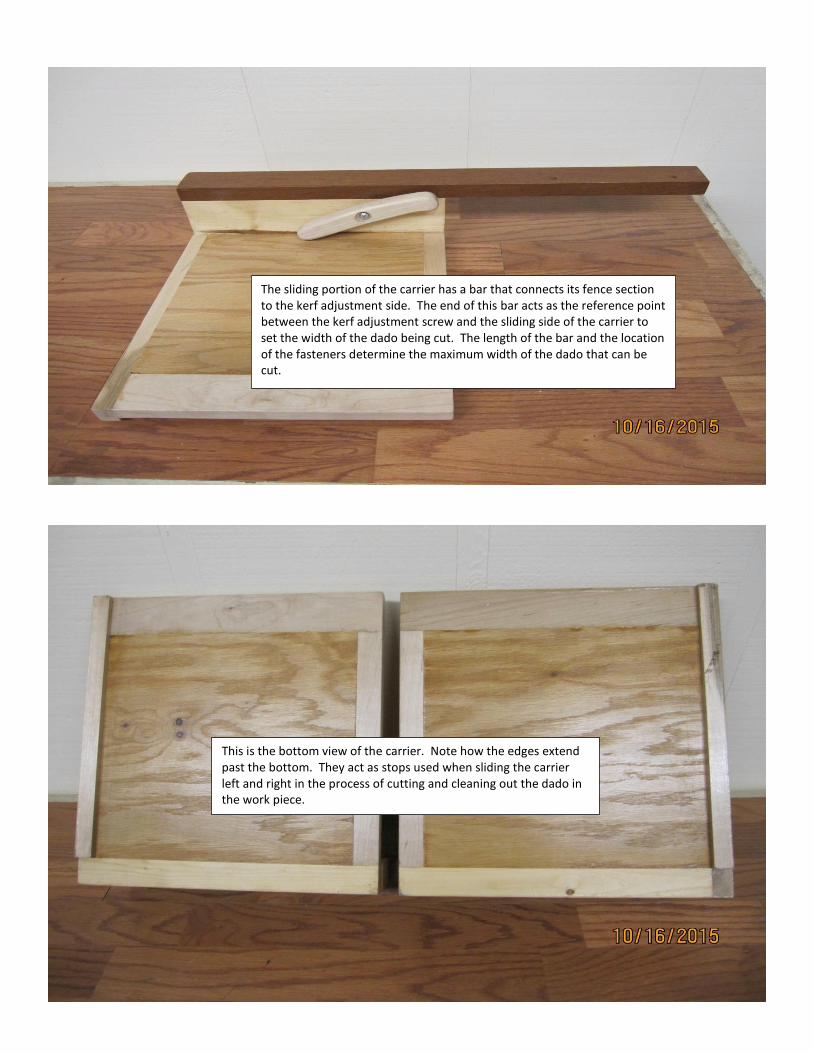
The sliding portion of the carrier has a bar that connects its fence section to the kerf adjustment side. The end of this bar acts as the reference point between the kerf adjustment screw and the sliding side of the carrier to set the width of the dado being cut. The length of the bar and the location of the fasteners determine the maximum width of the dado that can be cut.
This is the bottom view of the carrier. Note how the edges extend past the bottom. They act as stops used when sliding the carrier left and right in the process of cutting and cleaning out the dado in the work piece.
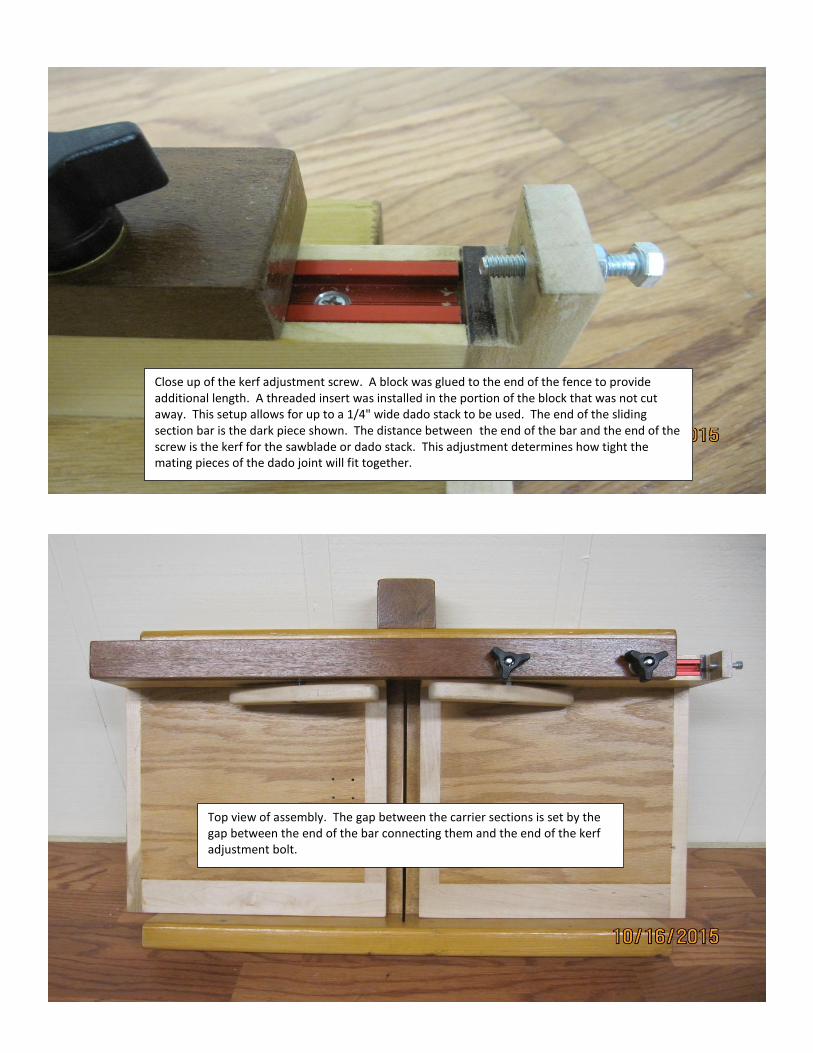
Close up of the kerf adjustment screw. A block was glued to the end of the fence to provide additional length. A threaded insert was installed in the portion of the block that was not cut away. This setup allows for up to a 1/4" wide dado stack to be used. The end of the sliding section bar is the dark piece shown. The distance between the end of the bar and the end of the screw is the kerf for the sawblade or dado stack. This adjustment determines how tight the mating pieces of the dado joint will fit together.
Top view of assembly. The gap between the carrier sections is set by the gap between the end of the bar connecting them and the end of the kerf adjustment bolt.
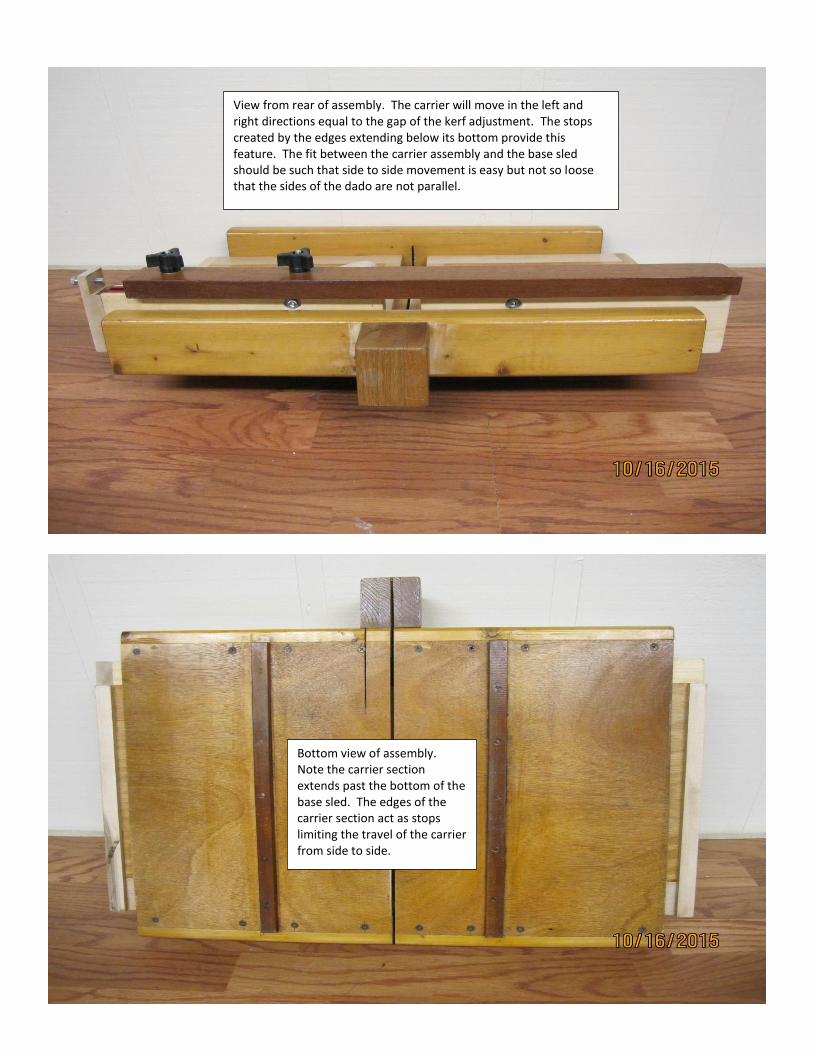
View from rear of assembly. The carrier will move in the left and right directions equal to the gap of the kerf adjustment. The stops created by the edges extending below its bottom provide this feature. The fit between the carrier assembly and the base sled should be such that side to side movement is easy but not so loose that the sides of the dado are not parallel.
Bottom view of assembly. Note the carrier section extends past the bottom of the base sled. The edges of the carrier section act as stops limiting the travel of the carrier from side to side.