Embed Size (px)
Citation preview
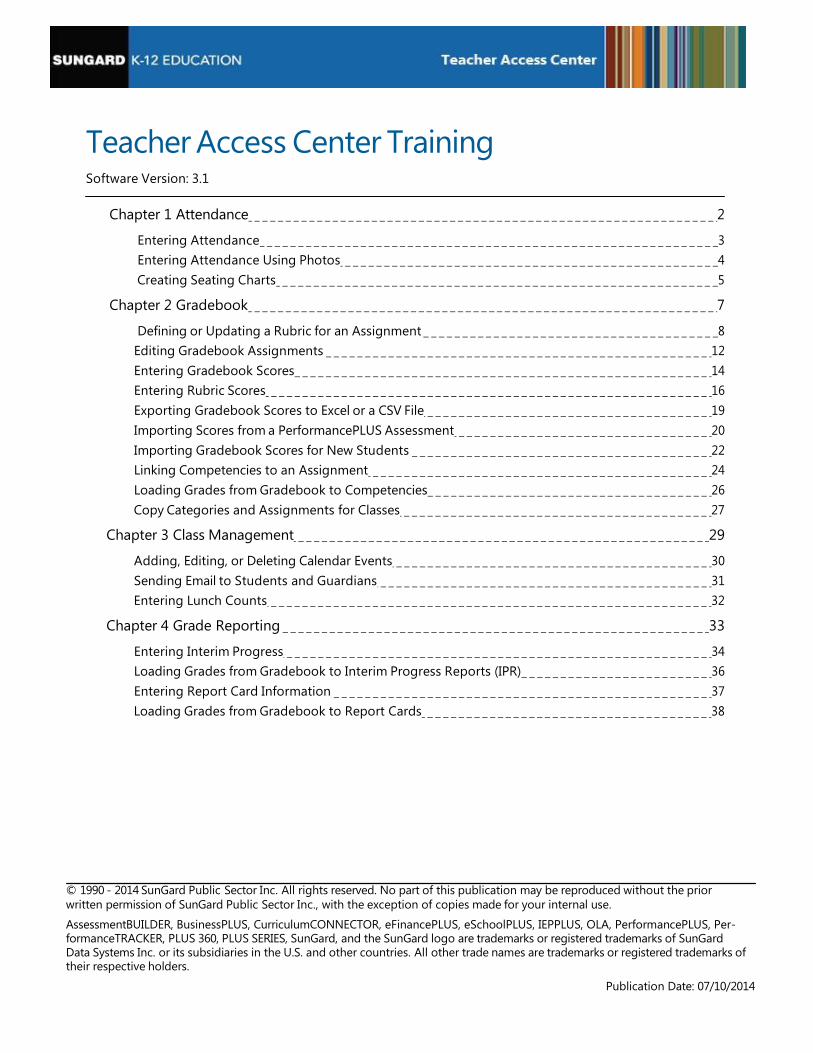
Teacher Access Center Training Software Version: 3.1
Chapter 1 Attendance 2
Entering Attendance 3
Entering Attendance Using Photos 4
Creating Seating Charts 5
Chapter 2 Gradebook 7
Defining or Updating a Rubric for an Assignment 8
Editing Gradebook Assignments 12
Entering Gradebook Scores 14
Entering Rubric Scores 16
Exporting Gradebook Scores to Excel or a CSV File 19
Importing Scores from a PerformancePLUS Assessment 20
Importing Gradebook Scores for New Students 22
Linking Competencies to an Assignment 24
Loading Grades from Gradebook to Competencies 26
Copy Categories and Assignments for Classes 27
Chapter 3 Class Management 29
Adding, Editing, or Deleting Calendar Events 30
Sending Email to Students and Guardians 31
Entering Lunch Counts 32
Chapter 4 Grade Reporting 33
Entering Interim Progress 34
Loading Grades from Gradebook to Interim Progress Reports (IPR) 36
Entering Report Card Information 37
Loading Grades from Gradebook to Report Cards 38
© 1990 - 2014 SunGard Public Sector Inc. All rights reserved. No part of this publication may be reproduced without the prior
written permission of SunGard Public Sector Inc., with the exception of copies made for your internal use.
AssessmentBUILDER, BusinessPLUS, CurriculumCONNECTOR, eFinancePLUS, eSchoolPLUS, IEPPLUS, OLA, PerformancePLUS, Per- formanceTRACKER, PLUS 360, PLUS SERIES, SunGard, and the SunGard logo are trademarks or registered trademarks of SunGard
Data Systems Inc. or its subsidiaries in the U.S. and other countries. All other trade names are trademarks or registered trademarks of their respective holders.
Publication Date: 07/10/2014
Teacher Access Center Training 2 of 44
© 1990 - 2014 SunGard Public Sector Inc. All Rights Reserved. Publication Date: 07/10/2014
Chapter 1 Attendance
Entering Attendance 3
Entering Attendance Using Photos 4
Creating Seating Charts 5
Teacher Access Center Training 3 of 44
© 1990 - 2014 SunGard Public Sector Inc. All Rights Reserved. Publication Date: 07/10/2014
Entering Attendance
Use this procedure to enter attendance for your classes using the Entry by List page.
To enter attendance for students:
1. From Attendance, select List to display the Entry by List page.
2. If you need to change the class or attendance date selected, click Change to display the Class List pop-up, and make your selections.
3. Enter attendance information as needed.
l To mark a student absent, enter a check in the A box.
l To mark a student tardy, enter a check in the click the T box.
l To mark a student present, enter a check in the P box. Typically, you only need to mark a stu- dent present to remove an incorrect absence. But, some building attendance policies may require that you mark all students who are present.
l To mark all students absent, tardy, or present, enter a check in the checkbox in the appro- priate column heading.
l To enter a specific attendance code, use the drop-down field. Your building administrator chooses whether this option is available for you.
Note: To remove a checkmark from the A or T box, you must enter a check in the P box which removes the absence and marks the student present.
4. If the attendance code for a student requires an arrival and/or dismissal time, enter the appropriate time information. You may need to scroll to the right to display the Dismiss Time and Arrive Time col- umns.
5. To add another attendance line for a student, click in the Add Entry column. If you add a line, you must enter arrival or dismissal times. For example, you would enter the time that the student arrived for a tardy code and the time that the student was dismissed for an early dismissal. You may need to scroll to the right to display the Add Entry and Clear Entry columns.
6. To remove an attendance line for a student, click .
7. Click .
Note: If there is an office entry that is incorrect, contact the attendance clerk so the clerk can correct
absence information.
Related Topics
For more information, refer to the following content in the Teacher Access Center Online Help system: Morning Bulletin Page Printing the Audit Report
Teacher Access Center Training 4 of 44
© 1990 - 2014 SunGard Public Sector Inc. All Rights Reserved. Publication Date: 07/10/2014
Entering Attendance Using Photos
Use this procedure to enter attendance for individual students using the Attendance by Photo page. If you
need to mark groups of students absent, tardy, or present, you can assign the same code to large groups of
students (or to the entire class) more quickly on the Entry by List attendance page.
To enter attendance for students:
1. From Attendance, select Photo to display the Attendance by Photo page.
2. If you need to update the class or attendance date, click Change to display the Class List pop-up, and make your selections.
3. Enter attendance information as needed on the student's photo. If a student has not been placed in the seating chart, you can record their attendance in the Unplaced Students drawer.
l To take attendance with all students marked present, click on the toolbar.
l To mark a student absent, click A.
l To mark a student tardy, click T.
l If you click A or T, the fields displayed on the student's photograph may change to let you enter Arrive or Dismiss times (depending on your building's configuration).
l To mark a student present, click P on the student's photo. Typically, you only need to mark a student present to remove an incorrect absence, but some building attendance policies may require that you mark all students who are present.
4. Your building administrator may allow you to select attendance codes. To enter an attendance code for a student:
l Click on the student's name.
l Click to open the student's Attendance Codes pop-up.
l Click the desired code.
l Click Select to apply the code and close the pop-up.
5. Click .
Note: If there is an office attendance entry that is incorrect, contact the attendance clerk so the clerk can cor-
rect absence information.
Related Topics
For more information, refer to the following content in the Teacher Access Center Online Help system: Attendance Bulletin Page Printing the Audit Report Entering Attendance

Teacher Access Center Training 5 of 44
© 1990 - 2014 SunGard Public Sector Inc. All Rights Reserved. Publication Date: 07/10/2014
Creating Seating Charts
Use these procedures to create seating charts using the Seating Chart page. If you arrange your class in grid
blocks, you can configure the number of rows and columns. You can also choose a free-form option to place
seats in any arrangement you would like.
To create a grid layout seating chart:
1. From Class Management, select Seating Chart to display the Seating Chart page.
2. If you need to update the class, click Change to display the Class List pop-up, and make your selec- tions.
3. Click to display the Seating Chart Options pop-up.
l Click Grid Blocks from the Layout field.
l Enter the number of rows for your class.
l Enter the number of columns for your class.
Refer to the number of unplaced student as show on the drawer to determine the number of rows and columns necessary to accommodate all students you wish to place in the seating chart.
l Click Close on the Seating Chart Options pop-up.
4. Add students to the seating chart:
l If the Unplaced Students drawer is not displayed, click .
l To move all students from the Unplaced Students drawer, click Add All Students in the Unplaced Students drawer to move all students from the drawer to the seating chart. Note that this will only move as many students as there are available seats in the seating chart.
l To move individual students, drag and drop students from the Unplaced Students drawer to the seating chart. You may chose to leave some students in the Unplaced Students drawer.
5. Click .
To rearrange students on a grid layout seating chart, refer to Managing Grid Layout Seating Charts.
To create a free-form seating chart:
1. From Class Management, select Seating Chart to display the Seating Chart page.
2. If you need to update the class, click Change to display the Class List pop-up, and make your selec- tions.
3. Click to display the Seating Chart Options pop-up.
4. Click Free Movement from the Layout field.
5. Click Close on the Seating Chart Options pop-up.
6. Add students to the seating chart:
l If the Unplaced Students drawer is not displayed, click .
l You can drag the right and lower boundaries of the seating chart to make it larger or smaller.
l Click Add All Students to move students from the Students section to the seating chart. You can also drag and drop students to the seating chart. You may chose to leave some students in the Unplaced Students drawer.
7. Drag and drop students to arrange the seating chart.
l Student images cannot overlap in the seating chart.
Teacher Access Center Training 6 of 44
© 1990 - 2014 SunGard Public Sector Inc. All Rights Reserved. Publication Date: 07/10/2014
8. To remove a student from the seating chart, drag and drop the student into the Unplaced Students drawer.
l Students in the Unplaced Students drawer are members of the class but not placed in the seat- ing arrangement.
9. Click .
Related Topics
For more information, refer to the following content in the Teacher Access Center Online Help system: Managing Grid Layout Seating Charts Seating Chart / Attendance By Photo Page Seating Chart Options Pop-Up
Teacher Access Center Training 7 of 44
© 1990 - 2014 SunGard Public Sector Inc. All Rights Reserved. Publication Date: 07/10/2014
Chapter 2 Gradebook
Defining or Updating a Rubric for an Assignment 8
Editing Gradebook Assignments 12
Entering Gradebook Scores 14
Entering Rubric Scores 16
Exporting Gradebook Scores to Excel or a CSV File 19
Importing Scores from a PerformancePLUS Assessment 20
Importing Gradebook Scores for New Students 22
Linking Competencies to an Assignment 24
Loading Grades from Gradebook to Competencies 26
Copy Categories and Assignments for Classes 27
Teacher Access Center Training 8 of 44
© 1990 - 2014 SunGard Public Sector Inc. All Rights Reserved. Publication Date: 07/10/2014
Defining or Updating a Rubric for an Assignment
Use these procedures to define, update, or select a rubric for an assignment for which you want to score mul-
tiple objectives. A rubric can only be defined or changed for an assignment that does not have any scores
entered. Rubrics can be defined from either the Gradebook Entry or Gradebook Setup pages.
Before you can create or make changes to a Rubric, you must open the Competencies and Rubrics pop-up
window using one of the first two procedures below.
To open the Competencies and Rubrics pop-up window from Gradebook Setup:
1. From Gradebook, select Setup to display the Gradebook Setup page.
2. If you need to update the class or marking period, click Change to display the Class List pop-up, and make your selections.
3. Click the Assignments tab.
4. Either click in the Actions column for the assignment's row, or click to add a new assignment.
5. Click the rubric indicator in the R&C column of the assignment's row to display the Competencies and Rubrics pop-up window. The rubric indicator icon can display in one of four ways:
No rubric or competency is associated with this assignment.
A rubric (but no competencies) is associated with this assignment.
One or more competencies (but no rubric) is associated with this assignment.
A rubric with competencies is associated with this assignment.
To open the Competencies and Rubrics pop-up window from Gradebook Entry:
1. From Gradebook, select Entry to display the Gradebook Entry page.
2. If you need to update the class or marking period, click Change to display the Class List pop-up, and make your selections.
3. Either click to create a new assignment, or click the header of an existing assignment to open the Assignment Details drawer.
4. Click the rubric indicator next to Rubrics/Competencies in the Assignment Details drawer to display the Competencies and Rubrics pop-up window. The rubric indicator icon can display in one of four ways:
No rubric or competency is associated with this assignment.
A rubric (but no competencies) is associated with this assignment.
One or more competencies (but no rubric) is associated with this assignment.
A rubric with competencies is associated with this assignment.
To define a Simple Rubric:
A Simple Rubric allows you to score an assignment based on one or more competency scores.
1. Open the Competencies and Rubrics pop-up using one of the procedures above.
2. In the Use field, select Simple Rubric.
The Use field cannot be changed if any scores have been entered for this assignment.
3. Click to select competencies.
Teacher Access Center Training 9 of 44
© 1990 - 2014 SunGard Public Sector Inc. All Rights Reserved. Publication Date: 07/10/2014
4. From the Competency Selection pop-up window, select the competencies to score the assignment. To select multiple competencies, you can use SHIFT + click or CTRL + click. You can sort and search competencies in the Competency Selection pop-up window.
To sort by a column header: Click on a column header (Group, Description, or State Standard) to select and sort by the header's column. Subsequent clicks of the selected column header reverses the sort direction.
To search by a column: Under each column header (Group, Description, or State Standard) a blank field lets you enter text to search for matching entries in that column. As you enter text, a drop down displays with matches from the column to let you select an expanded search string. You can either press ENTER to search based on the text you've entered so far, or click on one of the drop-down suggestions and then press ENTER to search based on the sug- gested matching text from the drop-down. Any content matching the search text is displayed. You can search multiple columns to further narrow your search.
5. Click OK.
6. Choose Average or Sum for the Assignment Points option. Select:
Average - Select to assign the same possible point value to each competency. The student's assign- ment score will be the average of all selected competency scores. Enter the a value in the Assignment Points field at the bottom of the grid; this becomes the maximum point value for the assignment and the Points value for each competency.
Sum - Select to assign a unique point value for each competency in the Points column. The student's assignment score will be the sum of all selected competency scores. The Assignment Points field at the bottom of the grid displays the sum of the values you entered for each competency in the Points column.
7. When you have finished defining the simple rubric, click Save.
To define a new Full Rubric
1. Open the Competencies and Rubrics pop-up Window using one of the two procedures at the begin- ning of this topic.
2. Select Full Rubric in the Use field. The Use field cannot be changed if any scores are entered for this assignment. You can select a saved rubric or create a new one. If your are editing an existing rubric, refer to To update an existing Full Rubric below for more information.
3. Make your Rubric Type Selection:
Saved For This Assignment Only - Rubric applies only to the current assignment.
Available For All My Assignments - Rubric will be available to any of your assignments.
Public For All Teachers - Rubric will be available for all teachers in your district who work in buildings that grant access to public rubrics. Your building's TAC configuration determines whether you can create a public rubric.
4. Choose Average or Sum for the Assignment Points option. Select:
Average - To average the scores for each criterion to determine the assignment's Points value. The stu- dent's assignment score will be the average of the rubric criteria scores. When Average is selected, you enter the assignment's desired Points value in the Assignment Points field at the bottom of the grid. The Competencies and Rubrics pop-up window then populates the grid; each criterions's high- est performance level will be equal to the value entered in the Assignment Points field. The highest performance level of each criterion cannot be changed, but you can adjust the levels in the lower per- formance levels.
Sum - To enter distinct values for each criterion's Performance Levels Score cell and have the Com- petencies and Rubrics pop-up window compute the Assignments Points field at the bottom of the grid. The assignment's Points value is the sum of each criterion's maximum performance level Score. The student's assignment score will be the sum of the rubric's criterion scores.
5. Enter a value in Rubric Code (the rubric's name - up to 20 characters).
6. If desired, enter text to describe the rubric in the Description field (up to 255 characters).
7. Enter values for the Number of Performance Levels and Number of Criteria fields.
8. Populate the titles for the Criteria rows and Performance Levels columns.
Teacher Access Center Training 10 of 44
© 1990 - 2014 SunGard Public Sector Inc. All Rights Reserved. Publication Date: 07/10/2014
9. Enter the Score values:
l If Average is the Assignment Points selection, enter the desired score value for the assignment in the Assignment Points field at the bottom of the grid.
l If Sum is the Assignment Points selection, enter the desired score values for each cell.
10. To associate a competency with a criterion, click in the criterion's row to display the Competency Selection pop-up window. You can sort and search competencies in the Competency Selection pop-up window.
To sort by a column header: Click on a column header (Group, Description, or State Standard) to select and sort by the header's column. Subsequent clicks of the selected column header reverses the sort direction.
To search by a column: Under each column header (Group, Description, or State Standard) a blank field lets you enter text to search for matching entries in that column. As you enter text, a drop down displays with matches from the column to let you select an expanded search string. You can either press ENTER to search based on the text you've entered so far, or click on one of the drop-down suggestions and then press ENTER to search based on the sug- gested matching text from the drop-down. Any content matching the search text is displayed. You can search multiple columns to further narrow your search.
11. If you are associating a competency with a criterion, click the row of the competency in the Com- petency Selection pop-up window to select it.
To select multiple competencies, you can use SHIFT + click or CTRL + click.
12. If you are associating a competency with a criterion, click OK.
13. When you have finished defining the rubric, click Save.
l The rubric is saved to your repository of available rubrics or is made available as a public rubric at this point, depending on your Rubric Type selection.
l The rubric is also linked to the assignment at this point.
l To save changes, click in the Actions column of the Gradebook Setup page or Save in the Gradebook Assignment Details drawer.
To copy information from a saved Full Rubric:
1. Open the Competencies and Rubrics pop-up Window using one of the two procedures at the begin- ning of this topic.
2. Click the Select Saved Rubric link above the Rubric Code label to display the Rubric Search pop-up win- dow.
3. In the Rubrics Search window, use the Create a Copy box to determine how you want to use the rubric you are selecting.
l If you want to be able to edit the rubric, check this box to create a new rubric based on the saved rubric you select.
l If you want to use the saved rubric without making changes, uncheck this box.
Important: If you need to associate competencies with the rubric criteria, make sure you check the Create a Copy box. Competencies do not copy from saved rubrics, so you need to add them after you select the rubric.
4. Click on a row to select a saved rubric.
l By default, the Rubric Search pop-up window shows all of your saved rubrics and, if your build- ing allows access, all rubrics saved as Public by teachers in your district.
l Use the search fields under each column header to retrieve records containing the character strings you enter. For instance, suppose you are looking for an Algebra rubric defined by your colleague Harold Hastings. In this case, you would enter algebra in the Description field and press ENTER. Next enter Hastings in the Author field and press ENTER.
5. Click OK to close the Rubric Search pop-up window and chose the selected rubric. It now populates the Competencies and Rubrics pop-up window.
Teacher Access Center Training 11 of 44
© 1990 - 2014 SunGard Public Sector Inc. All Rights Reserved. Publication Date: 07/10/2014
l If you created a copy of a saved rubric, remember to link competencies as needed to the rubric criteria.
l If you created a copy of a saved rubric, make sure to change the Rubric Code so it is unique from codes you already used.
l When you save the rubric, the system compares the rubric point total to the assignment point total. If the values do not match, the system asks whether you want to change the assignment point total.
To update an existing Full Rubric:
If the rubric is linked only to one assignment and no scores have been entered, you can change any part of
the rubric. Otherwise, the following restrictions apply:
l If a rubric is attached to more than one assignment, you cannot make changes to it.
l If a rubric is linked to a single assignment and scores have been entered, you may only change the descriptive text associated with a particular rubric criterion and performance level.
l You can change the Rubric Type to Public For All Teachers selection even if scores exist for assign- ments linked to the rubric. However, you cannot change the Rubric Type for a public rubric once it is linked to assignments for other teachers in your district.
Related Topics
For more information, refer to the following content in the Teacher Access Center Online Help system: What is a rubric? Gradebook Setup page Gradebook Entry page
Teacher Access Center Training 12 of 44
© 1990 - 2014 SunGard Public Sector Inc. All Rights Reserved. Publication Date: 07/10/2014
Editing Gradebook Assignments
Use this procedure to edit gradebook assignments. You can edit assignments from either the Assignment
Details drawer of the Gradebook page or from the Assignments tab of the Gradebook Setup page.
To edit an assignment from the Gradebook Entry page (Assignment Details Drawer):
1. From Gradebook, select Entry to display the Gradebook Entry page.
2. If you need to update the class or marking period, click Change to display the Class List pop-up, and make your selections.
3. If you are in SBGB Summary Mode, click for GB Entry mode or for SBGB Detail mode on the
mode selector .
4. If the assignment is not displayed on the assignment header, select the appropriate category or mark type in the Competencies and Marks filters or the Categories and Marks filter drop-down fields.
5. Click the assignment header of the desired assignment to open the Assignment Details drawer.
6. Make your changes to the fields in the drawer.
7. If you need to change rubric or competency information, click the icon next to Rubrics/Competencies. This allows you to add new or edit existing rubrics and/or competencies to the assignment. If a non- rubric-scored assignment has student scores entered, you will not be able to add a rubric. Refer to the Associating Competencies with Assignments and the Defining a Rubric topics for additional infor- mation.
8. Click Save to save changes to the assignment.
9. Click Close to close the Assignment Details drawer. A Save dialog box will warn you if changes to the assignment have not been saved.
To edit a single assignment on the Gradebook Setup page:
1. From Gradebook, select Setup to display the Gradebook Setup page.
2. If you need to update the class or marking period, click Change to display the Class List pop-up, and make your selections.
3. Click the Assignments tab to open the Assignments grid.
4. Click in the Actions column for the assignment that you want to edit.
5. Make the changes in the appropriate cells.
6. If you need to change rubric or competency information, click the icon in the R&C column. This allows you to add new or edit existing rubrics and/or competencies to the assignment. If a non-rubric- scored assignment has student scores entered, you will not be able to add a rubric. Refer to the Asso- ciating Competencies with Assignments and the Defining a Rubric topics for additional information.
7. Click in the Actions column to save your changes. You can also click to discard any changes made to the assignment.
To edit multiple assignments on the Gradebook Setup page:
1. From Gradebook, select Setup to display the Gradebook Setup page.
2. If you need to update the class or marking period, click Change to display the Class List pop-up, and make your selections.
3. Click the Assignments tab to open the Assignments grid.
4. Click on the Gradebook Setup toolbar to edit all assignments.
5. Make the changes in the appropriate cells of the assignments you wish to edit.
Teacher Access Center Training 13 of 44
© 1990 - 2014 SunGard Public Sector Inc. All Rights Reserved. Publication Date: 07/10/2014
6. If you need to change rubric or competency information, click the icon in the R&C column. This allows you to add new or edit existing rubrics and/or competencies to the assignment. If a non-rubric- scored assignment has student scores entered, you will not be able to add a rubric. Refer to the Asso- ciating Competencies with Assignments and the Defining a Rubric topics for additional information.
7. Click in on the toolbar to save your changes. You can also click to discard any changes made to the assignment.
Related Topics
For more information, refer to the following content in the Teacher Access Center Online Help system: Creating New Gradebook Assignments Gradebook Setup Page Gradebook Entry Page Overview
Teacher Access Center Training 14 of 44
© 1990 - 2014 SunGard Public Sector Inc. All Rights Reserved. Publication Date: 07/10/2014
Entering Gradebook Scores
Use this procedure to enter gradebook scores for individual students. Other procedures enable you to
quickly assign scores to multiple students. Refer to the Related Topics section below for more information.
To enter scores for an assignment:
1. From Gradebook, select Entry to display the Gradebook Entry page.
2. If you are in SBGB Summary Mode, click for GB Entry mode or for SBGB Detail mode on the
mode selector .
3. If you need to update the class or marking period, click Change to display the Class List pop-up, and make your selections.
4. If the assignment is not displayed on the assignment header, select the appropriate category or mark type in the Competencies and Marks filters or the Categories and Marks filter drop-down fields.
l If the assignment header displays , the assignment is graded by rubric, and scores cannot be updated directly from the gradebook. Refer to Rubric Score Entry for more information.
5. Click in a cell and type a valid numerical or alpha score.
l A score can be up to a three-digit number or an alpha score that your district has defined. You can double-click a cell to view valid alpha scores. Alpha scores can be used to exclude an assign- ment from a student's average or to give the student a percentage score.
l If displays in a cell or group of cells, scores cannot be entered in these cells because the assignment is associated with a rubric, the student was not enrolled in the class on the assignment's due date, or multiple classes are being displayed and the assignment did not apply to this student.
l A black triangle in the top-left corner of the score field indicates that the score is not saved (this will only display if Auto Saving is not enabled). A red triangle in the top-left corner of a score cell indicates that the current entry is an invalid mark; all invalid marks must be resolved before the gradebook will save scores.
6. Navigate to the next cell you want to score by using one of the following options:
l ENTER key to move to the next student's score in the column.
l UP/DOWN/RIGHT/LEFT keys to select any adjacent cell.
l TAB key to select this student's next assignment score.
l The pointer to click to select another cell.
7. When finished:
l If you’ve enabled Auto Saving, you’re done. For more information about Auto Saving, refer to the Settings topic in the online help system.
l Otherwise, click .
Related Topics
For more information, refer to the following content in the Teacher Access Center Online Help system: Assign a Default Score to an Assignment Deleting an Average Override Clear all Scores for an Assignment Entering Gradebook Comments for Scores Excusing Students from an Assignment Gradebook Entry Page Import Gradebook Scores for New Students Import Scores from Files

Teacher Access Center Training 15 of 44
© 1990 - 2014 SunGard Public Sector Inc. All Rights Reserved. Publication Date: 07/10/2014
Import scores from Performance PLUS
Mass Entering a Gradebook Assignment Score Overriding Average for a Mark or Category
Teacher Access Center Training 16 of 44
© 1990 - 2014 SunGard Public Sector Inc. All Rights Reserved. Publication Date: 07/10/2014
Entering Rubric Scores
Use these procedures to enter scores for an assignment graded by a rubric. The Full Rubric Score Entry and
Simple Rubric Score Entry pages are opened from the Gradebook Entry page by clicking the Rubric Score
Entry icon in an assignment header. Each score page has two sections:
l The Rubric Display table displays at the top of the page and shows the rubric that you defined for the assignment. If there are competencies associated with a full rubric's criteria, they are displayed under a Competency Description heading. Simple rubrics list each competency under a Competency head- ing.
l The Student Scores Entry grid is below the Rubric Display table, and it displays columns of score fields. Students are listed down the left of the page, and identifiers for each score column are listed across the page. The Class Average for each score is displayed at the bottom of its column.
Refer to What is a Rubric? for more information about rubrics.
To manually enter scores for students:
1. From Gradebook, select Entry to display the Gradebook Entry page.
2. If you are in SBGB Summary Mode, click for GB Entry mode or for SBGB Detail mode on the
mode selector .
3. If you need to update the class or marking period, click Change to display the Class List pop-up, and make your selections.
4. If the assignment is not displayed on the assignment header, select the appropriate category or mark type in the Competencies and Marks filters or the Categories and Marks filter drop-down fields.
5. Click on the header of the desired assignment to score the assignment. The Full Rubric Score Entry or Simple Rubric Score Entry page displays.
6. On the Student Scores Entry grid, click a cell to select it, and then type in a score value.
l Refer to the rubric displayed in the Rubric Display table for the valid score range. The Total field is updated based on the individual scores for the student. This value will be the student's score on the Gradebook Entry page.
l If the value entered exceeds its allowable range, the cell is outlined in red to indicate the error.
You must correct the score.
l To enter default grades or to import scores from a file for a column, refer to To mass update a score column below.
7. Move the cursor to another field by using the TAB key or clicking on another score field.
8. Repeat steps 6-7 to enter additional scores.
9. When finished:
l If you’ve enabled Auto Saving, you’re done. For more information about Auto Saving, refer to the Settings topic in the online help system.
l Otherwise, click .
10. When you have finished entering scores for the rubric, click to return to the Gradebook page.
To enter scores for students by clicking on Rubric Display table entries:
This option is not available for the Simple Rubric Score Entry page.
1. From Gradebook, select Entry to display the Gradebook Entry page.
2. If you are in SBGB Summary Mode, click for GB Entry mode or for SBGB Detail mode on the
mode selector .
Teacher Access Center Training 17 of 44
© 1990 - 2014 SunGard Public Sector Inc. All Rights Reserved. Publication Date: 07/10/2014
3. If you need to update the class or marking period, click Change to display the Class List pop-up, and make your selections.
4. If the assignment is not displayed on the assignment header, select the appropriate category or mark type in the Competencies and Marks filters or the Categories and Marks filter drop-down fields.
5. Click on the header of the desired assignment to open the Full Rubric Score Entry page.
6. Click on a score cell to select the student in that row.
7. Click the desired scores in the rubric displayed on the Rubric Display table at the top of the page to enter the selected student's scores for the rubric.
8. Press the UP ARROW or DOWN ARROW key to access another student, and repeat step 6.
9. When finished:
l If you’ve enabled Auto Saving, you’re done. For more information about Auto Saving, refer to the Settings topic in the online help system.
l Otherwise, click .
10. When you have finished entering scores for the rubric, click to return to the Gradebook page.
To mass update a score column:
1. From Gradebook, select Entry to display the Gradebook Entry page.
2. If you are in SBGB Summary Mode, click for GB Entry mode or for SBGB Detail mode on the
mode selector .
3. If you need to update the class or marking period, click Change to display the Class List pop-up, and make your selections.
4. If the assignment is not displayed on the assignment header, select the appropriate category or mark type in the Competencies and Marks filters or the Categories and Marks filter drop-down fields.
5. Click on the header of the desired assignment to open the Full Rubric Score Entry page or the Sim- ple Rubric Score Entry page.
6. Click on the header of the desired column to display mass update options. From these options, select:
l Update Scores - to update all scores in the column with a value you enter. Check Override Exist- ing Scores if you wish to overwrite previously-entered scores.
l Clear All Scores - to clear all scores in the column.
l Import Scores From File - to import scores to the selected column from a text or CSV file. Refer to Importing Scores from a File for more details.
7. Repeat step 6 for any other columns you wish to update.
8. When finished:
l If you’ve enabled Auto Saving, you’re done. For more information about Auto Saving, refer to the Settings topic in the online help system.
l Otherwise, click .
9. When you have finished entering scores for the rubric, click to return to the Gradebook Entry page.
Related Topics
For more information, refer to the following content in the Teacher Access Center Online Help system: Gradebook Setup Page Defining a Rubric

Teacher Access Center Training 18 of 44
© 1990 - 2014 SunGard Public Sector Inc. All Rights Reserved. Publication Date: 07/10/2014
What is a Rubric?
Teacher Access Center Training 19 of 44
© 1990 - 2014 SunGard Public Sector Inc. All Rights Reserved. Publication Date: 07/10/2014
Exporting Gradebook Scores to Excel or a CSV File
Use this procedure to display a printable view of the Gradebook for a class and select what information you
would like to include on the exported Gradebook.
To export gradebook information:
1. From Gradebook, select Entry to display the Gradebook Entry page.
2. If you are in SBGB Summary Mode, click for GB Entry mode or for SBGB Detail mode on the
mode selector .
3. If you need to update the class or marking period, click Change to display the Class List pop-up, and make your selections.
4. On the Gradebook page, use the Filter field to select the category or mark you want to print.
5. From the Gradebook toolbar's Actions/Reports field, select View Printable.
6. On the Prompts tab of the Printable window, select the options to include. For more information on the prompts, refer to Printing Gradebook Scores.
7. Click Run. The report will open on the Report tab. You can then view, print, or save to your computer. Additionally, the PDF file is saved automatically to your report directory and can be accessed from the Home page.
8. On the top of the Printable window, click to save the file for Excel.
9. A dialog displays when the export is completed. Click OK to close it.
10. To close the Printable window, click Close.
11. Click Home to display your reports. The exported file is named Student Scores Printable(xls).
Related Topics
For more information, refer to the following content in the Teacher Access Center Online Help system: Printing Gradebook Scores
© 1990 - 2014 SunGard Public Sector Inc. All Rights Reserved. Publication Date: 07/10/2014
Teacher Access Center Training 20 of 44
Importing Scores from a PerformancePLUS Assessment -NISD DOES NOT HAVE THIS CURRENTLY
Use this procedure to import scores from an assessment that is stored in PerformancePLUS. You can select
the assessment and section from a list of assessments for which students in your class have scores. This
option is available only for districts that have a license for PerformancePLUS Integration for eSchoolPLUS.
If you import from an assessment section where the maximum points is greater than the points possible for
the assignment, then the software allows you to select to load scores based on the student's percentage or
raw value.
To import assignment scores from PerformancePLUS:
1. From Gradebook, select Entry to display the Gradebook Entry page.
2. If you are in SBGB Summary Mode, click for GB Entry mode or for SBGB Detail mode on the
mode selector .
3. If you need to update the class or marking period, click Change to display the Class List pop-up, and make your selections.
4. If the assignment is not displayed on the assignment header, select the appropriate category or mark type in the Competencies and Marks filters or the Categories and Marks filter drop-down fields.
l If the assignment header displays , the assignment is graded by rubric, and scores cannot be imported from PerformancePLUS. Refer to Rubric Score Entry for more information.
5. Click on the header of the desired assignment to display mass update options.
Note: If displays in a cell or group of cells, scores cannot be entered in these cells because the assignment is associated with a rubric, the student was not enrolled in the class on the assign- ment's due date, or multiple classes are being displayed and the assignment did not apply to this stu- dent.
6. Select Import Assessment from Performance Plus.
7. To override existing scores, check Override Existing Scores; leave unchecked to only update blank scores.
8. Click Apply to open the Import Scores from PerfomancePLUS Assessment pop-up.
9. If you checked Override Existing Scores, a confirmation prompt displays to verify that you want to overwrite scores. Click Yes if you want to continue.
10. On the Import Scores from PerformancePLUS Assessment pop-up, select the assessment item you want to import as the score by clicking on its row, and then clicking Import.
If you want to see a list of assessments available without the item detail, click Expand/Collapse All.
Then, you can expand the detail for the appropriate assessment by clicking on its header.
11. If the max score for the assessment item you selected is greater than the possible points for the assignment, a dialog displays so you can select whether to load a score based on the student's per- centage or to load the raw score.
l To import scores based on student percentages, click Percentage Score.
l To import the raw scores even though a student's score may exceed possible points, click Raw Score.
12. When the import is complete, a dialog displays indicating the number of students for whom scores were loaded. If the number is not equal to the number of students in the class, then some students may not have scores for the assessment section in PerformancePLUS. Click Close after reviewing the count.
13. When finished:
© 1990 - 2014 SunGard Public Sector Inc. All Rights Reserved. Publication Date: 07/10/2014
Teacher Access Center Training 21 of 44
l If you’ve enabled Auto Saving, you’re done. For more information about Auto Saving, refer to the Settings topic in the online help system.
l Otherwise, click .
Related Topics
For more information, refer to the following content in the Teacher Access Center Online Help system: Deleting an Average Override Entering Gradebook Comments for Scores Excusing Students from an Assignment Gradebook Entry Page Overriding Average for a Mark or Category
© 1990 - 2014 SunGard Public Sector Inc. All Rights Reserved. Publication Date: 07/10/2014
Teacher Access Center Training 22 of 44
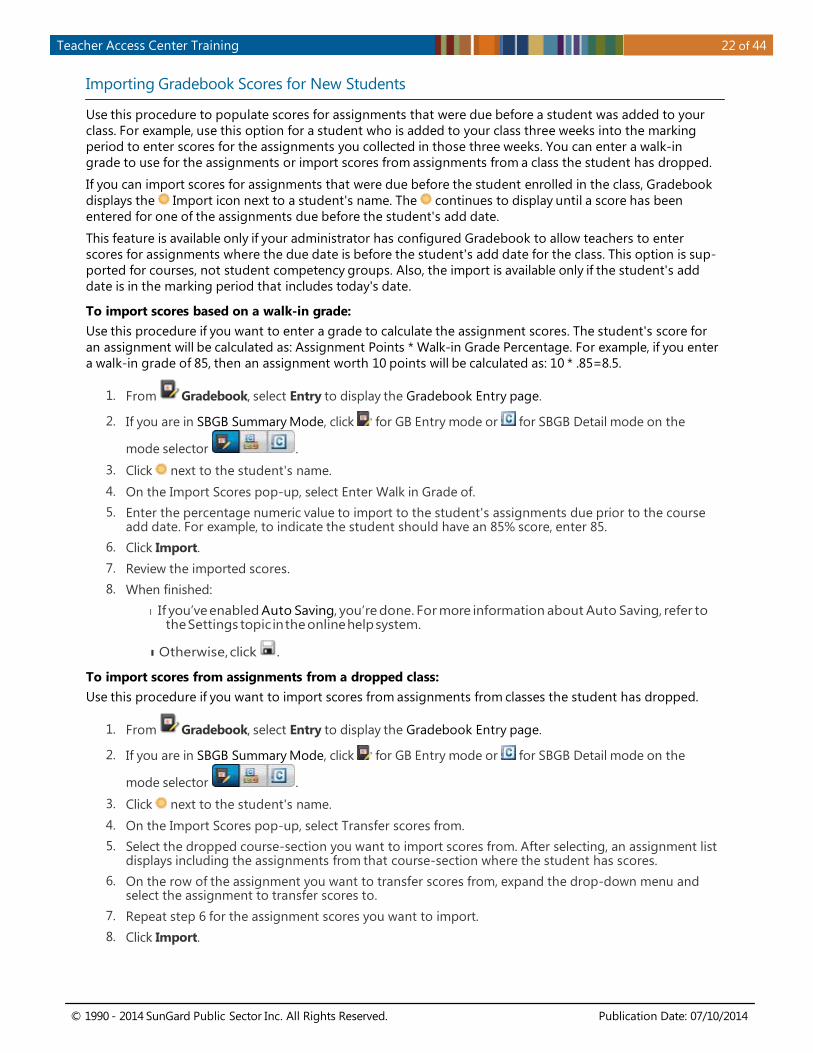
Importing Gradebook Scores for New Students
Use this procedure to populate scores for assignments that were due before a student was added to your
class. For example, use this option for a student who is added to your class three weeks into the marking
period to enter scores for the assignments you collected in those three weeks. You can enter a walk-in
grade to use for the assignments or import scores from assignments from a class the student has dropped.
If you can import scores for assignments that were due before the student enrolled in the class, Gradebook
displays the Import icon next to a student's name. The continues to display until a score has been
entered for one of the assignments due before the student's add date.
This feature is available only if your administrator has configured Gradebook to allow teachers to enter
scores for assignments where the due date is before the student's add date for the class. This option is sup-
ported for courses, not student competency groups. Also, the import is available only if the student's add
date is in the marking period that includes today's date.
To import scores based on a walk-in grade:
Use this procedure if you want to enter a grade to calculate the assignment scores. The student's score for
an assignment will be calculated as: Assignment Points * Walk-in Grade Percentage. For example, if you enter
a walk-in grade of 85, then an assignment worth 10 points will be calculated as: 10 * .85=8.5.
1. From Gradebook, select Entry to display the Gradebook Entry page.
2. If you are in SBGB Summary Mode, click for GB Entry mode or for SBGB Detail mode on the
mode selector .
3. Click next to the student's name.
4. On the Import Scores pop-up, select Enter Walk in Grade of.
5. Enter the percentage numeric value to import to the student's assignments due prior to the course add date. For example, to indicate the student should have an 85% score, enter 85.
6. Click Import.
7. Review the imported scores.
8. When finished:
l If you’ve enabled Auto Saving, you’re done. For more information about Auto Saving, refer to the Settings topic in the online help system.
l Otherwise, click .
To import scores from assignments from a dropped class:
Use this procedure if you want to import scores from assignments from classes the student has dropped.
1. From Gradebook, select Entry to display the Gradebook Entry page.
2. If you are in SBGB Summary Mode, click for GB Entry mode or for SBGB Detail mode on the
mode selector .
3. Click next to the student's name.
4. On the Import Scores pop-up, select Transfer scores from.
5. Select the dropped course-section you want to import scores from. After selecting, an assignment list displays including the assignments from that course-section where the student has scores.
6. On the row of the assignment you want to transfer scores from, expand the drop-down menu and select the assignment to transfer scores to.
7. Repeat step 6 for the assignment scores you want to import.
8. Click Import.
© 1990 - 2014 SunGard Public Sector Inc. All Rights Reserved. Publication Date: 07/10/2014
Teacher Access Center Training 23 of 44
9. Review the imported scores.
10. When finished:
l If you’ve enabled Auto Saving, you’re done. For more information about Auto Saving, refer to the Settings topic in the online help system.
l Otherwise, click .
Related Topics
For more information, refer to the following content in the Teacher Access Center Online Help system: Deleting an Average Override Entering Gradebook Comments for Scores Excusing Students from an Assignment Gradebook Entry Page Overriding Average for a Mark or Category
© 1990 - 2014 SunGard Public Sector Inc. All Rights Reserved. Publication Date: 07/10/2014
Teacher Access Center Training 24 of 44
Linking Competencies to an Assignment
Use this procedure to link competencies to an Assignment. To associate a competency with a rubric's crite-
rion, refer to the Defining or Updating a Rubric for an Assignment procedure.
To Link competencies to an assignment:
1. From Gradebook, select Setup to display the Gradebook Setup page or select Entry to display the Gradebook Entry page.
2. If you are in SBGB Summary Mode, click for GB Entry mode or for SBGB Detail mode on the
mode selector .
3. If you need to update the class or marking period, click Change to display the Class List pop-up, and make your selections.
4. Open an assignment from either the Gradebook Setup page of the Gradebook Entry page: Gradebook Setup page
Click the Assignments tab.
Then, either click in the Actions column for the assignment you want to add competencies
to, or click on the toolbar to add a new assignment.
Gradebook Entry page
Click the header of an existing assignment, or click to create a new assignment. This opens the Assignment Details drawer.
5. Click the rubric indicator to display the Competencies and Rubrics pop-up window. On the Grade- book Setup page, the indicator is in the R&C column; on the Gradebook Entry page, it is next to Rubrics/Competencies in the Assignment Details drawer. The rubric indicator icon can display in one of four ways:
No rubric or competency is associated with this assignment.
A rubric (but no competencies) is associated with this assignment.
One or more competencies (but no rubric) is associated with this assignment.
A rubric with competencies is associated with this assignment.
6. Click to open the Competency Selection pop-up dialog box.
You can sort and search competencies in the Competency Selection pop-up window.
To sort by a column header: Click on a column header (Group, Description, or State Standard) to select and sort by the header's column. Subsequent clicks of the selected column header reverses the sort direction.
To search by a column: Under each column header (Group, Description, or State Standard) a blank field lets you enter text to search for matching entries in that column. As you enter text, a drop down displays with matches from the column to let you select an expanded search string. You can either press ENTER to search based on the text you've entered so far, or click on one of the drop-down suggestions and then press ENTER to search based on the sug- gested matching text from the drop-down. Any content matching the search text is displayed. You can search multiple columns to further narrow your search.
7. Select one or more competencies (use CTRL + click or SHIFT+click to select multiple competencies).
8. Click OK to select the competencies and close the Competency Selection pop-up.
9. To delete any competencies in the Competencies and Rubrics pop-up window, check the appropriate boxes in the Delete column and then click Delete.
10. Click Save in the Competencies and Rubrics pop-up window.
© 1990 - 2014 SunGard Public Sector Inc. All Rights Reserved. Publication Date: 07/10/2014
Teacher Access Center Training 25 of 44
11. To save competencies, click in the Actions column of the Gradebook Setup page or Save on the Gradebook Assignment Details drawer.
Related Topics
For more information, refer to the following content in the Teacher Access Center Online Help system: Gradebook Entry Page Gradebook Setup Page
© 1990 - 2014 SunGard Public Sector Inc. All Rights Reserved. Publication Date: 07/10/2014
Teacher Access Center Training 26 of 44
Loading Grades from Gradebook to Competencies
Use this procedure to load marks from Gradebook to competency records. Load from Gradebook uses the
competency definition to determine whether the mark is based on the student's maximum score, most
recent score, average score, power law, or a manual entry made in Gradebook.
If you are loading marks for course competencies, then the report card marks will also be loaded.
To prepare to load marks:
1. Enter all scores for assignments that will be included when calculating marks.
2. Run the Missing Scores report for the class to verify that there are no scores missing for students that should be entered.
3. If necessary, enter scores for any missing assignments which you want to count as a 0 (zero). Missing scores are never factored when calculating a mark for competencies.
4. To review assignments for a competency, click from the Gradebook mode selector to enter SBGB Detail mode. Then, use the Filter fields to display the competency.
5. If you ask students to confirm the scores entered in your gradebook, run the Student Detail Report for the class. This report includes a signature line for students/guardians to sign indicating that the information is correct.
To load grades on Competency Entry page:
1. From Grade Reporting, select Competencies to display the Competency Entry Page in Grid or List mode.
2. To change to a different marking period or class, click Change and then select the appropriate mark- ing period and course or student competency group.
3. Review the list of student marks for overrides on any existing marks. If you want Load from Grade- book to calculate the mark, you must remove the override and save your changes.
4. Click .
5. Review the marks that posted.
To change grade for a student:
1. Display the Gradebook Entry page for the course or student competency group.
2. To change to a different marking period or class, click Change and then select the appropriate mark- ing period and course or student competency group.
3. Click from the Gradebook mode selector to enter SBGB Detail mode.
4. Use the Filter to display the average for the appropriate competency.
5. Change the student's Grade value and save changes if Auto Saving is not enabled.
6. Repeat the "To load grades on Competency Entry page" procedure above.
Related Topics
For more information, refer to the following content in the Teacher Access Center Online Help system: Calculating Marks Competency Entry Page - Grid Mode Competency Entry Page - List Mode Removing Mark Overrides for Competencies Report Card Page Running the Missing Scores Report
Running the Gradebook Student Detail Report
© 1990 - 2014 SunGard Public Sector Inc. All Rights Reserved. Publication Date: 07/10/2014
Teacher Access Center Training 27 of 44
Copy Categories and Assignments for Classes
Use these procedures to copy categories, assignments, and attachments from one class to another. The fol-
lowing procedures explain how to copy gradebook information for courses and not for student com-
petencies. Refer to Copy Categories and Assignments for Student Competencies for details on copying
gradebook information for student competencies.
To Copy Gradebook Information From a Class
1. Select Gradebook > Copy Assignments from the TAC toolbar to display the Copy Assignments page.
2. To change the class or to select a prior year class, click in the Copy From section to open the Class List chooser, and make your selections
3. To copy from specific marking period, select the marking period from the Marking Periods drop- down list.
4. In the Assignments and Categories field, select to copy all or selected categories and assignments.
l To copy all categories and assignments, select All. Skip to Step 6.
l To copy specific categories or assignments, select Selected. Continue to the next step.
5. Use the Grid to select the categories and assignments to copy.
l To copy all categories without copying assignments, check the box on the header row of the grid of categories and assignments.
l To display a category's assignments, click the category's row.
l To copy all assignments for a category, check the box next to the Assignment Date column header.
l To copy specific assignments, check the boxes for the assignments. When you select an assign- ment, the category is also selected.
6. Make your selections in the Additional Options section.
7. In the Copy To section, click to open the Course Chooser.
8. Click the row of the desired destination course to select it.
If you selected All in the Marking Periods selection in the Copy From section, only competency groups whose marking periods exactly match the selected Copy From course will be displayed. Select a single marking period in the Copy From section to potentially display more courses.
9. Click Add to add the course to the Copy To list.
10. To add more courses, repeat steps 7-9.
11. If you selected a single marking period in the Copy From section, you can select a different des- tination marking period on the selector in the Copy To section's Marking Period field.
12. Click .
13. When the copy is complete, a pop-up window displays. Click Close to close the window.
14. If you copied assignments from one marking period to another or from a previous year, you must edit the date due for the assignments. The Copy Assignments page sets the due date for these assign- ments to the first day of the marking period you copied to.
Related Topics
For more information, refer to the following content in the Teacher Access Center Online Help system: Gradebook Copy Assignments Page Editing Gradebook Assignments Gradebook Setup Page

© 1990 - 2014 SunGard Public Sector Inc. All Rights Reserved. Publication Date: 07/10/2014
Teacher Access Center Training 28 of 44
Gradebook Setup Assignment Tab Field Descriptions
© 1990 - 2014 SunGard Public Sector Inc. All Rights Reserved. Publication Date: 07/10/2014
Teacher Access Center Training 29 of 44
Chapter 3 Class Management
Adding, Editing, or Deleting Calendar Events 30
Sending Email to Students and Guardians 31
Entering Lunch Counts 32
© 1990 - 2014 SunGard Public Sector Inc. All Rights Reserved. Publication Date: 07/10/2014
Teacher Access Center Training 30 of 44
Adding, Editing, or Deleting Calendar Events
Use these procedures to add, edit, or delete calendar events.
To add a new event to the calendar:
1. From Class Management, select Calendar to display the Calendar page.
2. Click to open the Event Detail pop-up.
3. Enter the event information.
4. Click the Publish Flag if you want the event to display in Home Access Center.
5. Check the courses you want to attach the event to.
6. Click Save.
To edit an event on the calendar:
1. From Class Management, select Calendar to display the Calendar page.
2. If the event does not display, use the buttons to display the date that holds the event.
3. Click the event you want to edit. The Event Detail pop-up displays.
Note: You cannot edit assignments from the calendar; you can only edit calendar events.
4. Update the event information.
5. If desired, change which classes the event is scheduled for.
6. Click Save.
To delete an event on the calendar:
Use this procedure if you want to delete an event from all courses attached to it. To change or remove only
certain classes from an event, use the preceding procedure, To edit an event on the calendar.
1. From Class Management, select Calendar to display the Calendar page.
2. If the event does not display, use the buttons to display the date when the event is sched- uled.
3. Click the event you want to delete. The Event Detail pop-up displays.
4. Click Delete to delete the event from all courses attached to it.
Related Topics
For more information, refer to the following content in the Teacher Access Center Online Help system: Calendar Page Event Detail Pop-up
© 1990 - 2014 SunGard Public Sector Inc. All Rights Reserved. Publication Date: 07/10/2014
Teacher Access Center Training 31 of 44
Sending Email to Students and Guardians
This page describes how to send email to students you teach and/or their guardians. You can send email to
an individual, a set of individuals, an entire class, or all of your classes. You can also enter email addresses
directly and attach files to the email. Each recipient will receive a separate email which lists only his or her
email address and the sender's email address.
Your district can configure Teacher Access Center to send email from a generic account. If the email is sent
from a generic email address, your district may append a statement to your email to indicate that parents
and students cannot reply to the email.
Note: Your district's Teacher Access Center setup may require that your staff record has a email address
entered before you can access or use this page.
To send email:
1. From Class Management select Email to open the Email page.
2. Click To; this opens the Select Recipients pop-up which lists your classes.
3. Select the type of recipients by using the Send To drop-down (located in the upper right of the Select Recipients pop-up) to select Students, Guardians, or Both. This selection determines which individ- uals can be selected in next step.
4. Select the recipients by checking the appropriate boxes. For details on selecting recipients, refer to the Select Recipients Pop-up topic.
Note: You cannot select a student or guardian that does not have an email address stored in the eSchoolPLUS System. Their names will display, but you will not be able to enter a check next to their name.
5. After selecting recipients, click Close to close the Select Recipients pop-up. The selected recipients will appear in the field adjacent to the To button.
6. Add any additional recipients by typing email addresses in the Also field. You may use either sem- icolons or commas (but not both) to separate email addresses.
7. Enter the subject for the email in the Subject field.
8. Enter the email text in the email body field.
9. If you want to add attachments, refer to To add attachments below.
10. Click Send to send the email to the selected individuals. An individual email will be sent to each recip- ient (NOT an email with multiple addresses in the To field).
To add attachments:
1. Click Browse or Choose File (depending on your browser), to display the browser’s file selection pop- up.
2. Select the file, and close the browser’s file selection pop-up.
Check with your system administrator to determine what file type and size limits are enforced in your district/building.
3. Click Attach File to attach the selected file.
4. Repeat this process to attach additional files.
Related Topics
For more information, refer to the following content in the Teacher Access Center Online Help system: Select Recipients Pop-up Email page
© 1990 - 2014 SunGard Public Sector Inc. All Rights Reserved. Publication Date: 07/10/2014
Teacher Access Center Training 32 of 44
Entering Lunch Counts
The Lunch Counts pop-up on the Home page allows you to submit the total number of students who are
buying a lunch option. This pane may not display if your building does not submit lunch counts in TAC, or if
your administrator has indicated that you do not need to report lunch counts.
To report lunch counts for your class:
1. Click Hometo display the Home page.
2. Click on the upper right of the My Classes pane to display the Lunch Counts pop-up.
3. Enter the total number of students who are buying each lunch option.
4. Click Save.
To update a lunch count you submitted:
1. On the Home page, click to display the Lunch Counts pop-up.
2. Enter the new total number of students for each lunch option, as necessary.
For example, if the previous lunch count for Hot Option B was 12 and you needed to add another stu- dent, you would enter 13.
3. Click Save.
Related Topics
For more information, refer to the following content in the Teacher Access Center Online Help system: TAC Home Page
© 1990 - 2014 SunGard Public Sector Inc. All Rights Reserved. Publication Date: 07/10/2014
Teacher Access Center Training 33 of 44
Chapter 4 Grade Reporting
Entering Interim Progress 34
Loading Grades from Gradebook to Interim Progress Reports (IPR) 36
Entering Report Card Information 37
Loading Grades from Gradebook to Report Cards 38

© 1990 - 2014 SunGard Public Sector Inc. All Rights Reserved. Publication Date: 07/10/2014
Teacher Access Center Training 34 of 44
Entering Interim Progress
Use this procedure to step through selecting a course, entering grades, adding comments, recording attend-
ance information, and saving your records.
To enter IPR information for a report date pre-defined by your building:
1. From Grade Reporting, select Interim Progress to display the Interim Progress page.
2. If you need to update the course or IPR Date, click Change to display the Class List pop-up, and make your selections.
3. If you want to load grades from Gradebook and then change information as needed, click Load from Gradebook icon. For more information, refer to Load from Gradebook to IPR.
4. Enter IPR information for selected students.
Depending on your building's mark reporting configuration, you may be required to enter a value in a field if you enter a value in any other field for the student. The configuration also determines which of the following columns display:
Marks - Enter the desired grade. Type the desired grade or click the down arrow to select the grade
from a list of valid grades. You can also click to display mass update options. These let you clear all
marks or update either all or only blank marks with an entered value.
Comments - Enter the comment to assign to the student for the type of comment specified for the column. Type the comment code or click the down arrow to select the comment. You can also click
to display mass update options. These let you clear all comments or update either all or only blank comments with an entered comment code value.
Absences - Enter the total number of days the student missed your class for the type of absence spec- ified for the column.
5. To view or enter IPR notes for students, click , and select Show/Hide Notes. Then enter any detailed comments or notes.
6. To spell check the text you entered, click . Use the UltimateSpell options to make changes as needed. When you have completed the spell check, click OK to keep the changes.
7. Click .
To enter IPR information for an individual IPR date:
1. From Grade Reporting, select Interim Progress to display the Interim Progress page.
2. Click Individual.
3. On the Class List chooser, select the course and the date to use for the individual IPR date. Then, click
OK.
4. To enter information for a student, click the Individual box to enter a checkmark.
5. Enter IPR information for the appropriate students.
Depending on your building's mark reporting configuration, you may be required to enter a value in a field if you enter a value in any other field for the student. The configuration also determines which of the following columns display:
Marks - Enter the desired grade. Type the desired grade or click the down arrow to select the grade
from a list of valid grades. If you have multiple students selected, you can click to display mass update options. These let you clear all marks or update either all or only blank marks with an entered value for checked students.
Comments - Enter the comment to assign to the student for the type of comment specified for the column. Type the comment code or click the down arrow to select the comment. If you have multiple students selected, you can also click
© 1990 - 2014 SunGard Public Sector Inc. All Rights Reserved. Publication Date: 07/10/2014
Teacher Access Center Training 35 of 44
to display mass update options. These let you clear all comments or update either all or only blank comments with an entered comment code value for checked students.
Absences - Enter the total number of days the student missed your class for the type of absence spec- ified for the column.
6. To view or enter IPR notes for students, click , and select Show/Hide Notes. Then enter any detailed comments or notes.
7. To spell check the text you entered, click . Use the UltimateSpell options to make changes as needed. When you have completed the spell check, click OK to keep the changes.
8. Click .
Related Topics
For more information, refer to the following content in the Teacher Access Center Online Help system: Interim Progress Page Loading Grades from Gradebook
© 1990 - 2014 SunGard Public Sector Inc. All Rights Reserved. Publication Date: 07/10/2014
Teacher Access Center Training 36 of 44
Loading Grades from Gradebook to Interim Progress Reports (IPR)
Use this procedure to load marks from Gradebook to interim progress reports. The marks that get loaded
for a student are based on the calculated average for each of the marks that your building has configured
for you to post.
To prepare to load marks:
1. Enter all scores for assignments that will be included when calculating marks.
2. Run the Missing Scores report for the class to verify that there are no scores missing for students that should be entered.
3. If necessary, enter scores for any missing assignments where you want to control how the assign- ments should affect the student's average.
l If your building has defined alpha scores to exclude an assignment or to specify that a student has earned 0% of the possible points, enter the appropriate alpha score to control how the assignment affects the average.
l If you selected to exclude missing scores from a category average, the missing scores in that category will not affect a student's course averages.
4. If you ask students to confirm the scores entered in your gradebook, run the Student Detail Report for the class. This report includes a signature line for students/guardians to sign indicating that the information is correct.
To load grades on Interim Progress page:
1. From Grade Reporting, select Interim Progress to display the Interim Progress page.
2. Make sure the correct IPR date is selected.
l To load for an indidual IPR date, click Individual and select the appropriate course and date.
l To change to a different pre-defined IPR date, click Change and then select the appropriate course and date.
3. Click to load from the gradebook.
4. Review the marks that posted to IPR.
Note: If a student's average is below the minimum mark or over the maximum mark in your building's marks, then the closest possible mark is used. For example, if your building issues marks 50 - 100 and a student has an average of 101.67%, the student will receive a 100.
To change grade for a student for a pre-defined IPR Date:
1. Display the Gradebook Entry page for the course.
2. Use the Filter to display the average for the IPR date.
3. Change the student's average.
4. Repeat the "To load grades on Interim Progress page" procedure above.
Related Topics
For more information, refer to the following content in the Teacher Access Center Online Help system: Calculating Marks Entering Interim Progress Interim Progress Page Running the Missing Scores Report
Running the Gradebook Student Detail Report
© 1990 - 2014 SunGard Public Sector Inc. All Rights Reserved. Publication Date: 07/10/2014
Teacher Access Center Training 37 of 44
Entering Report Card Information
Use this procedure to step through processes for entering report card. This includes selecting a course,
entering grades, adding comments, recording attendance information, and saving your records.
You can add or update report card information for the current marking period only, as determined by your
building.
If you teach courses for which your school reports student marks for course competencies, you will also
need to enter marks for the competencies. For more information, refer to Entering Course Competency
Marks and Comments.
To enter report card information:
1. From Grade Reporting, select Report Card to display the Report Card page.
2. If you need to update the class or marking period, click Change to display the Class List pop-up, and make your selections.
3. If you want to load grades from Gradebook and then change information as needed, click Load from
Gradebook . For more information, refer to Load from Gradebook to Report Cards.
4. Enter report card information for each student as appropriate.
Credit - Typically, you would not enter earned credit in Teacher Access Center. The eSchoolPLUS Sys- tem includes an Assign Credit option that calculates earned credit based on the marks you issue stu- dents. In some districts, teachers need to enter prorated credit for courses for which the district policy is to assign credit based on student effort. Note that this column may not display.
Marks - Enter the grade for the mark type. Type the desired grade, or click the down arrow to select
the grade from a list of valid grades. You can also click to display mass update options. These let
you clear all marks or update either all or only blank marks with an entered value.
Comments - Enter the comment to assign to the student for the type of comment specified for the column. Type the comment code, or click on the down arrow to select the comment. You can also click
to display mass update options. These let you clear all comments or update either all or only blank comments with an entered comment code value.
Absences - Enter the total number of days the student missed your class for the type of absence spec- ified for the column.
5. If free text comments are enabled for your building, you can click on the toolbar to open a free
text comment field under each student's marks. You can also click to spell check comments.
6. Click .
Related Topics
For more information, refer to the following content in the Teacher Access Center Online Help system: Adding Mark Override Reasons for Report Cards Entering Competency Marks
Loading Grades from Gradebook to Report Cards Printing Report Cards Viewing a Summary of Student Marks and Absences
© 1990 - 2014 SunGard Public Sector Inc. All Rights Reserved. Publication Date: 07/10/2014
Teacher Access Center Training 38 of 44
Loading Grades from Gradebook to Report Cards
Use this procedure to load marks from Gradebook to report cards records. The marks that get loaded for a
student are based on the calculated average for each of the marks that your building has configured for you
to post.
If the course also has course competencies, then competency marks will also be loaded.
To prepare to load marks:
1. Enter all scores for assignments that will be included when calculating marks.
2. Run the Missing Scores report for the class to verify that there are no scores missing for students that should be entered.
3. If necessary, enter scores for any missing assignments where you want to control how the assign- ments should affect the student's average.
l If your building has defined alpha scores to exclude an assignment or to specify that a student has earned 0% of the possible points, enter the appropriate alpha score to control how the assignment affects the average.
l If you selected to exclude missing scores from a category on the Report Card Averages tab in Gradebook Setup, the missing scores in that category will not affect a student's course aver- ages.
l Missing scores are never factored into report card grades for course competencies.
4. If you ask students to confirm the scores entered in your gradebook, run the Student Detail Report for the class. This report includes a signature line for students/guardians to sign indicating that the information is correct.
To load grades on Report Card page:
1. From Grade Reporting, select Report Card to display the Report Card page.
2. If you need to update the class or marking period, click Change to display the Class List pop-up, and make your selections.
3. Review the list of student marks for overrides on any existing marks. If you want the Load from Grade- book option to calculate the mark, you must uncheck the Override box next to the mark and save your changes.
4. Click to load gradebook scores.
5. Review marks posted to the Report Card page. Hover your mouse pointer over a mark value to display the student's Gradebook average in a tooltip, or display the Report Card Summary page to check numeric averages.
Note that if a student's average is below the minimum mark or over the maximum mark in your build- ing's marks, the closest possible mark is used. For example, if your building issues marks 50 - 100 and a student has an average of 101.67%, the student will receive a 100.
6. Click .
To change grades for a student:
1. From Gradebook, select Entry to display the Gradebook Entry page.
2. If you need to update the class or marking period, click Change to display the Class List pop-up, and make your selections.
3. Use the Filter to display the average for the appropriate mark type.
4. Change the student's average.
5. If necessary, repeat the "To load grades on Report Cards page" procedure above.
6. .
© 1990 - 2014 SunGard Public Sector Inc. All Rights Reserved. Publication Date: 07/10/2014
Teacher Access Center Training 39 of 44
Related Topics
For more information, refer to the following content in the Teacher Access Center Online Help system: Calculating Marks Competency Entry Page
Entering Report Card Information Report Card Page Running the Missing Scores Report
Running the Gradebook Student Detail Report

© 1990 - 2014 SunGard Public Sector Inc. All Rights Reserved. Publication Date: 07/10/2014
Teacher Access Center Training 40 of 44