Embed Size (px)
Citation preview
Teacher: Kenji TachibanaDigital Photography IDigital Photography I..
My Old Stuff… 1 of 3My Old Stuff… 1 of 3
Chronological but RandomChronological but Random
Teacher: Kenji TachibanaDigital Photography IDigital Photography IMy Old Stuff 1 of 3/ Chronological but RandomMy Old Stuff 1 of 3/ Chronological but Random 2002 - 2002 - 20032003
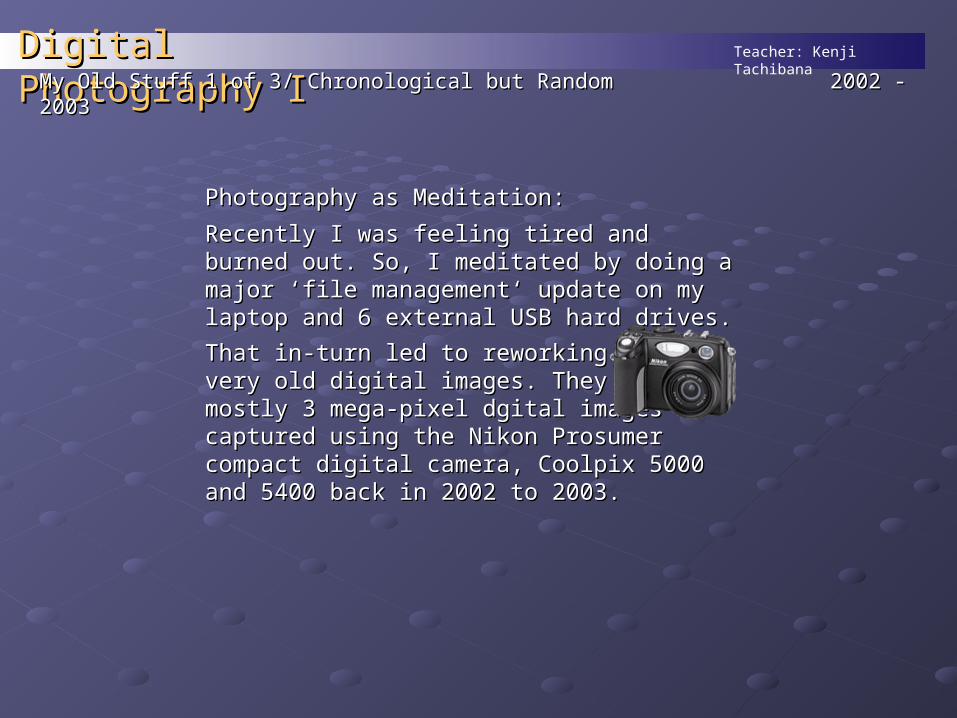
Photography as Meditation:Photography as Meditation:
Recently I was feeling tired and burned out. So, I Recently I was feeling tired and burned out. So, I meditated by doing a major ‘file management‘ meditated by doing a major ‘file management‘ update on my laptop and 6 external USB hard update on my laptop and 6 external USB hard drives.drives.
That in-turn led to reworking someThat in-turn led to reworking somevery old digital images. They werevery old digital images. They weremostly 3 mega-pixel dgital imagesmostly 3 mega-pixel dgital imagescaptured using the Nikon Prosumer compact captured using the Nikon Prosumer compact digital camera, Coolpix 5000 and 5400 back in digital camera, Coolpix 5000 and 5400 back in 2002 to 2003. 2002 to 2003.
Teacher: Kenji TachibanaDigital Photography IDigital Photography ICompact Digital Prosumer Coolpix: 3 MPCompact Digital Prosumer Coolpix: 3 MP 2002 - 2002 - 20032003
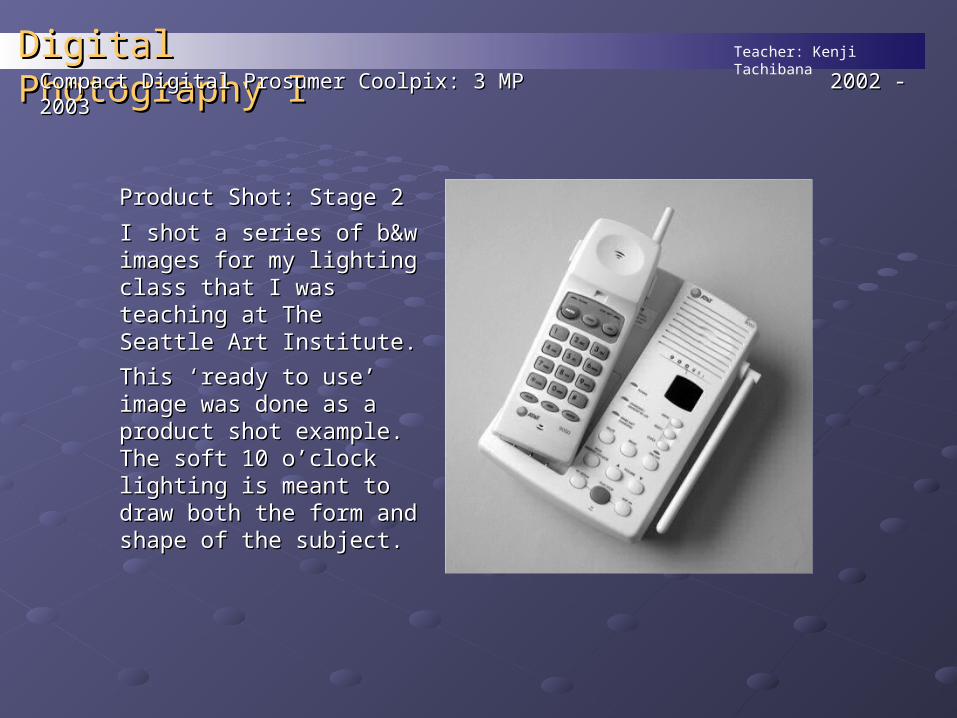
Product Shot: Stage 2Product Shot: Stage 2
I shot a series of b&w I shot a series of b&w images for my lighting class images for my lighting class that I was teaching at The that I was teaching at The Seattle Art Institute.Seattle Art Institute.
This ‘ready to use’ image This ‘ready to use’ image was done as a product shot was done as a product shot example. The soft 10 example. The soft 10 o’clock lighting is meant to o’clock lighting is meant to draw both the form and draw both the form and shape of the subject.shape of the subject.
Teacher: Kenji TachibanaDigital Photography IDigital Photography ICompact Digital Prosumer Coolpix: 3 MPCompact Digital Prosumer Coolpix: 3 MP 2002 - 2002 - 20032003
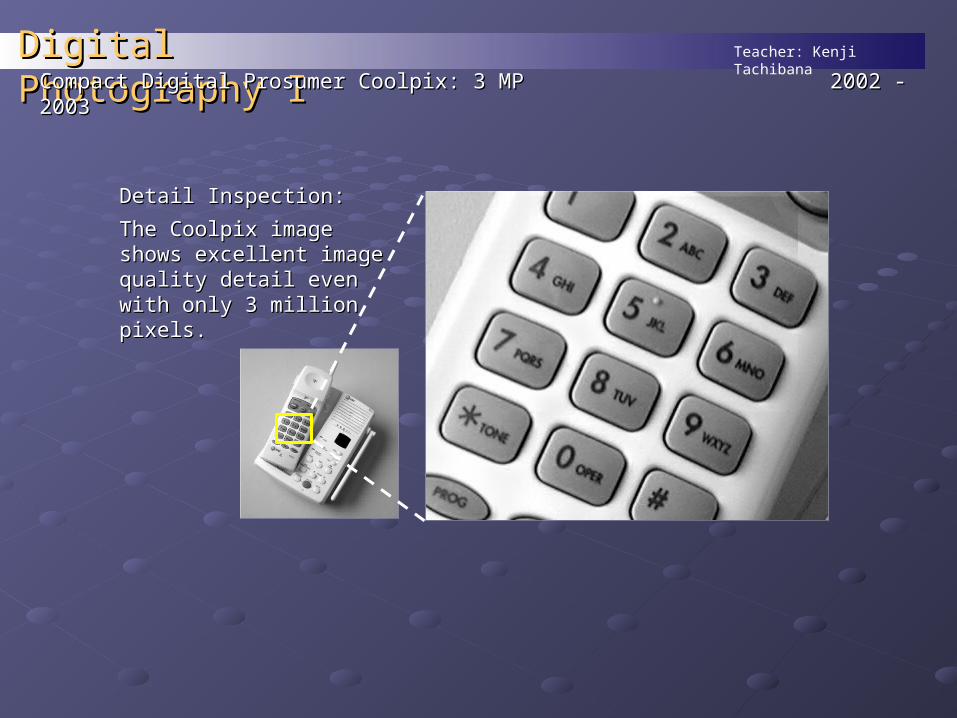
Detail Inspection:Detail Inspection:
The Coolpix image shows The Coolpix image shows excellent image quality excellent image quality detail evendetail evenwith only 3 million pixels.with only 3 million pixels.
Teacher: Kenji TachibanaDigital Photography IDigital Photography ICompact Digital Prosumer Coolpix: 3 MPCompact Digital Prosumer Coolpix: 3 MP 2002 - 2002 - 20032003
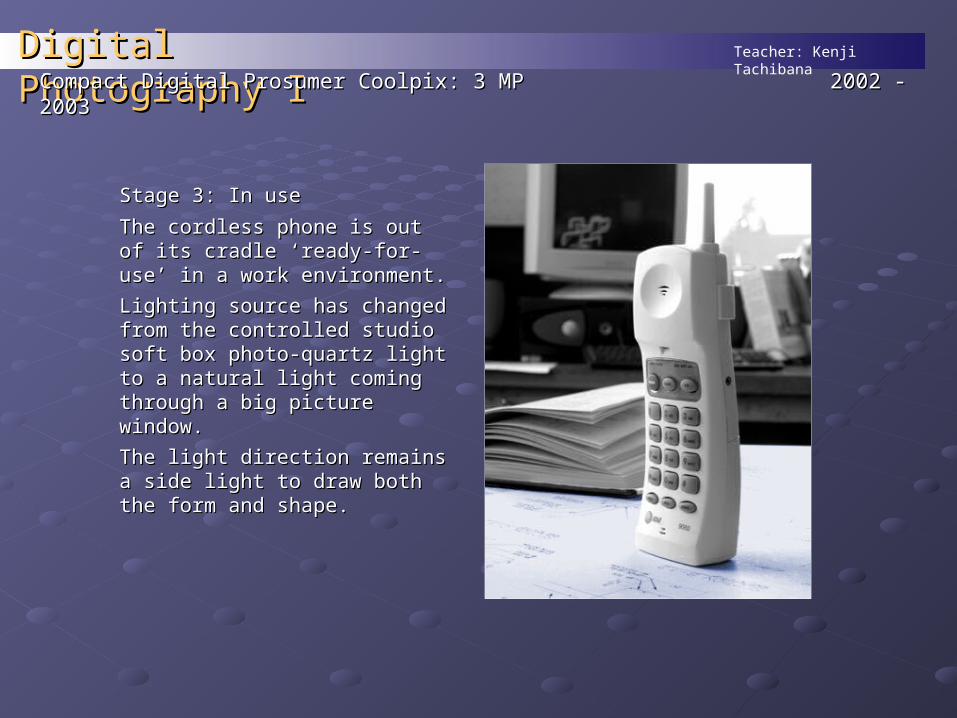
Stage 3: In useStage 3: In use
The cordless phone is out of its The cordless phone is out of its cradle ‘ready-for-use’ in a work cradle ‘ready-for-use’ in a work environment. environment.
Lighting source has changed Lighting source has changed from the controlled studio soft from the controlled studio soft box photo-quartz light to a box photo-quartz light to a natural light coming through a natural light coming through a big picture window.big picture window.
The light direction remains a The light direction remains a side light to draw both the form side light to draw both the form and shape.and shape.
Teacher: Kenji TachibanaDigital Photography IDigital Photography ICompact Digital Prosumer Coolpix: 3 MPCompact Digital Prosumer Coolpix: 3 MP 2002 - 2002 - 20032003
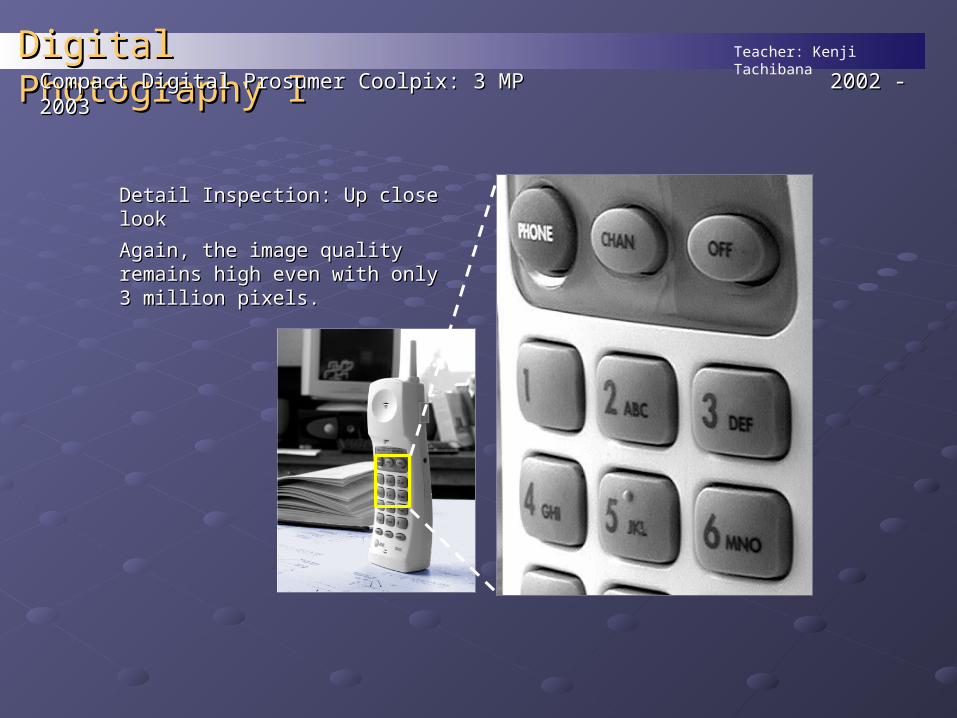
Detail Inspection: Up close lookDetail Inspection: Up close look
Again, the image quality Again, the image quality remains high even with only 3 remains high even with only 3 million pixels.million pixels.
Teacher: Kenji TachibanaDigital Photography IDigital Photography ICompact Digital Prosumer Coolpix: 3 MPCompact Digital Prosumer Coolpix: 3 MP
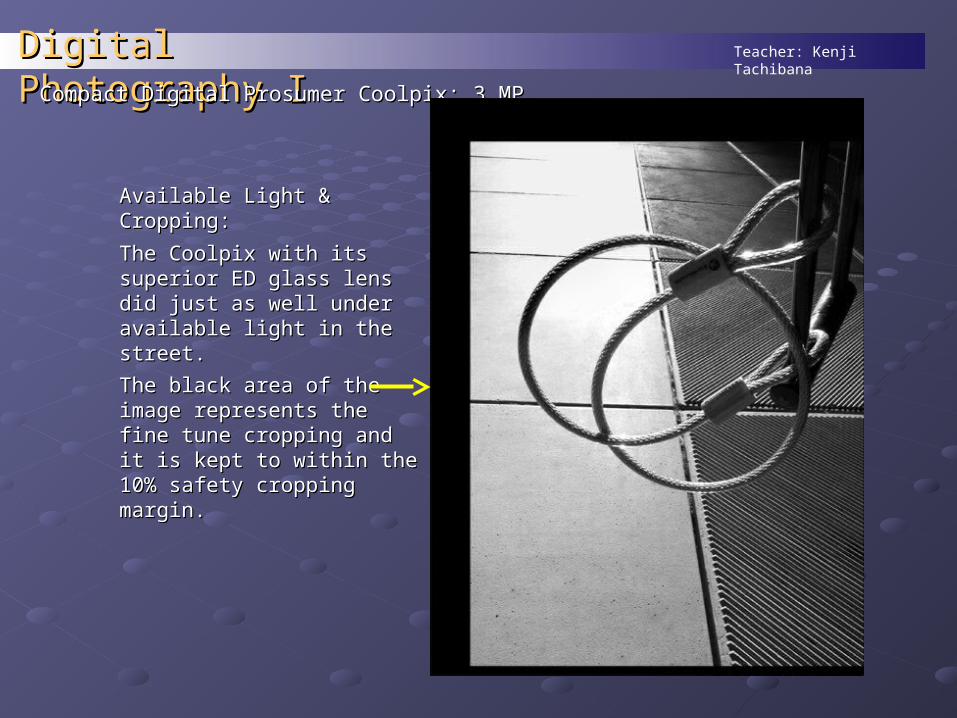
Available Light & Cropping:Available Light & Cropping:
The Coolpix with its The Coolpix with its superior ED glass lens did superior ED glass lens did just as well under available just as well under available light in the street.light in the street.
The black area of the image The black area of the image represents the fine tune represents the fine tune cropping and it is kept to cropping and it is kept to within the 10% safety within the 10% safety cropping margin.cropping margin.
Teacher: Kenji TachibanaDigital Photography IDigital Photography ICompact Digital Prosumer Coolpix: 3 MPCompact Digital Prosumer Coolpix: 3 MP 2002 - 2002 - 20032003
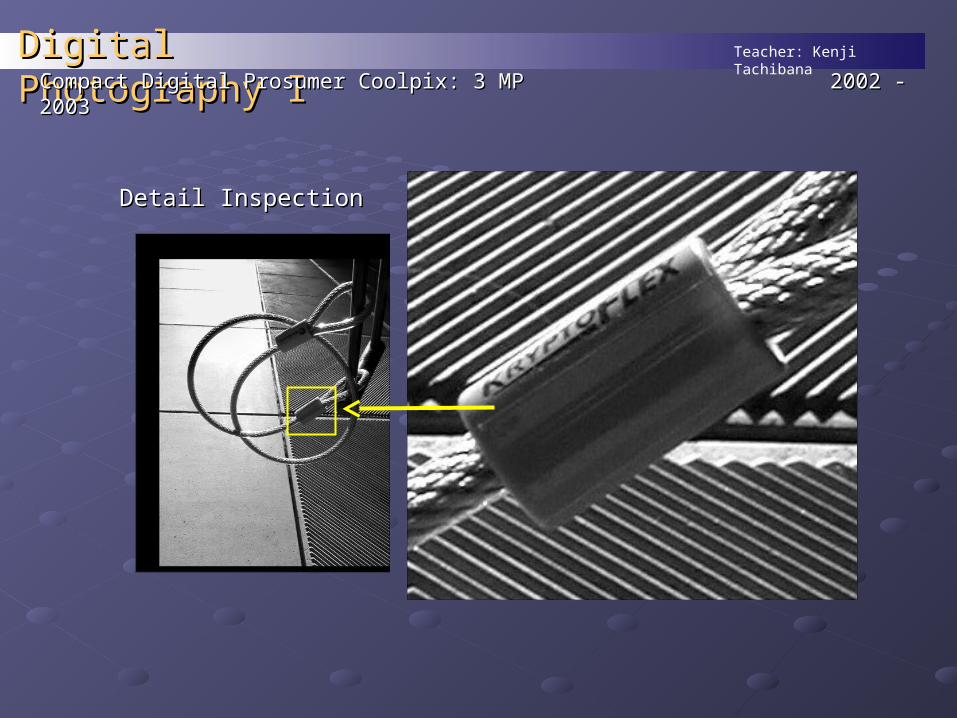
Detail InspectionDetail Inspection
Teacher: Kenji TachibanaDigital Photography IDigital Photography Iosumer Coolpix:osumer Coolpix:
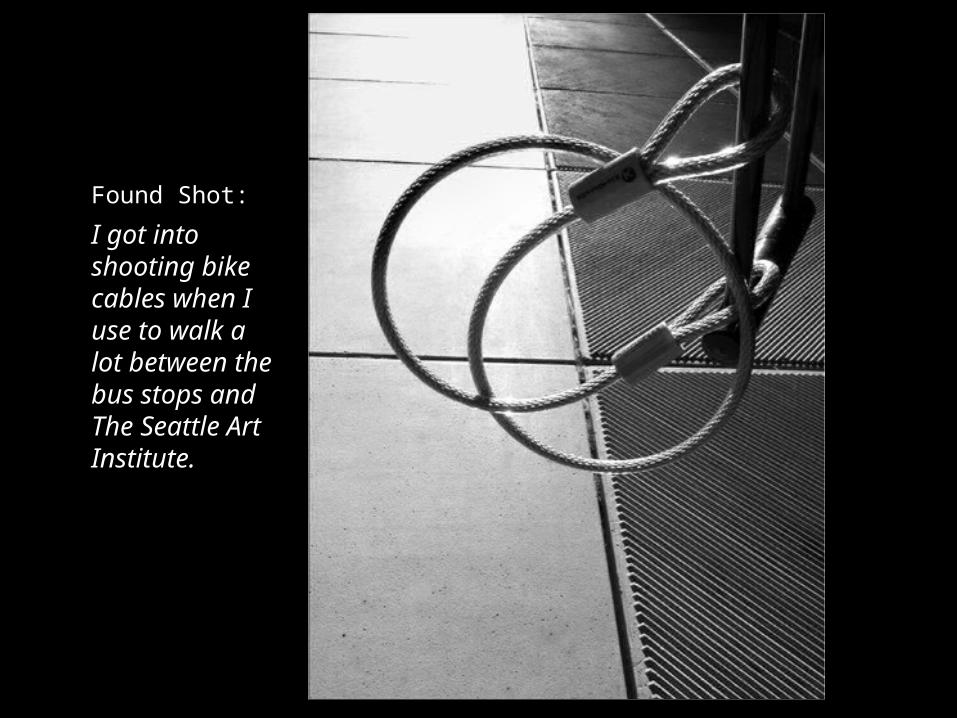
Found Shot:Found Shot:
I got into I got into shooting bike shooting bike cables when I cables when I use to walk a lot use to walk a lot between the bus between the bus stops and The stops and The Seattle Art Seattle Art Institute.Institute.
Teacher: Kenji TachibanaDigital Photography IDigital Photography ICompact Digital Prosumer Coolpix: 3 MPCompact Digital Prosumer Coolpix: 3 MP 2002 - 2002 - 20032003
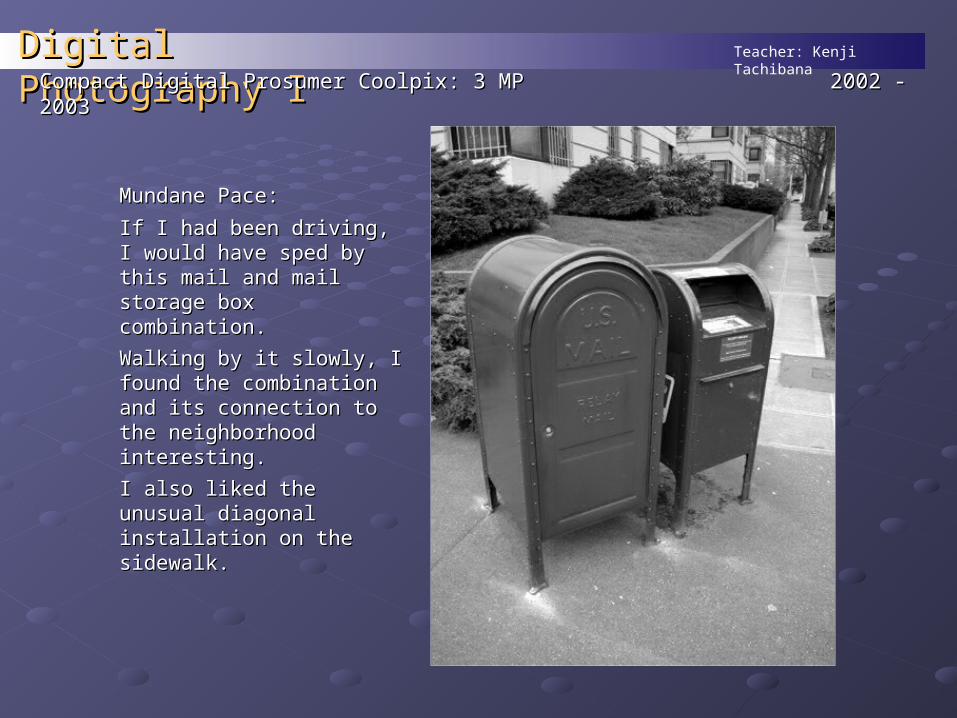
Mundane Pace:Mundane Pace:
If I had been driving, I If I had been driving, I would have sped by this would have sped by this mail and mail storage box mail and mail storage box combination.combination.
Walking by it slowly, I Walking by it slowly, I found the combination and found the combination and its connection to the its connection to the neighborhood interesting.neighborhood interesting.
I also liked the unusual I also liked the unusual diagonal installation on the diagonal installation on the sidewalk.sidewalk.
Teacher: Kenji TachibanaDigital Photography IDigital Photography ICompact Digital Prosumer Coolpix: 3 MPCompact Digital Prosumer Coolpix: 3 MP 2002 - 2002 - 20032003
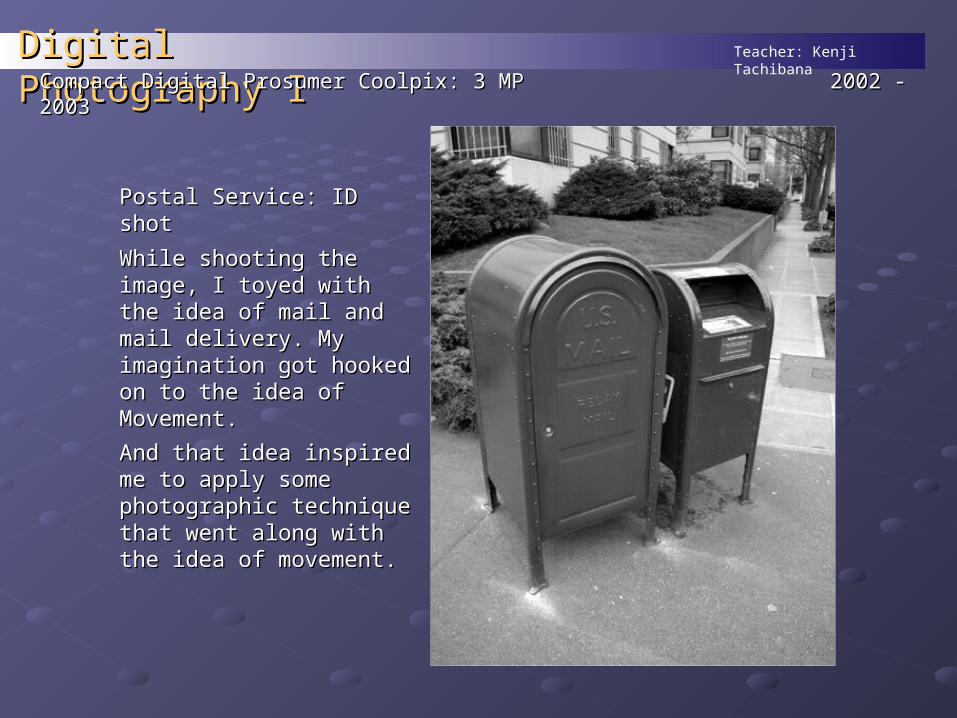
Postal Service: ID shotPostal Service: ID shot
While shooting the image, I While shooting the image, I toyed with the idea of mail toyed with the idea of mail and mail delivery. My and mail delivery. My imagination got hooked on imagination got hooked on to the idea of Movement.to the idea of Movement.
And that idea inspired me And that idea inspired me to apply some to apply some photographic technique photographic technique that went along with the that went along with the idea of movement.idea of movement.
Teacher: Kenji TachibanaDigital Photography IDigital Photography ICompact Digital Prosumer Coolpix: 3 MPCompact Digital Prosumer Coolpix: 3 MP 2002 - 2002 - 20032003
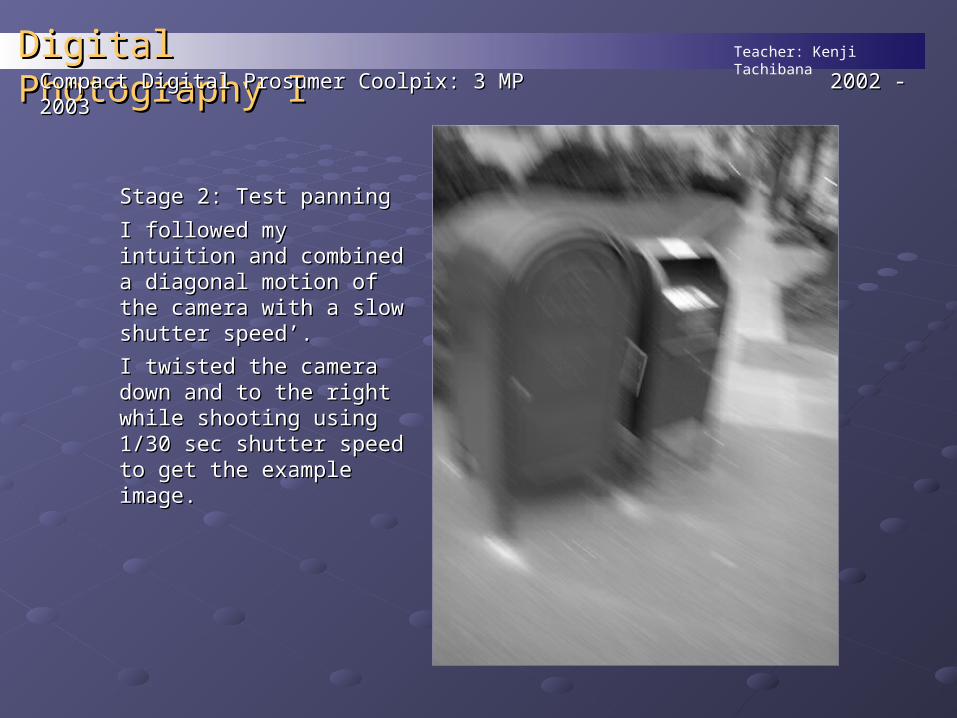
Stage 2: Test panning Stage 2: Test panning
I followed my intuition and I followed my intuition and combined a diagonal combined a diagonal motion of the camera with motion of the camera with a slow shutter speed’. a slow shutter speed’.
I twisted the camera down I twisted the camera down and to the right while and to the right while shooting using 1/30 sec shooting using 1/30 sec shutter speed to get the shutter speed to get the example image.example image.
Teacher: Kenji TachibanaDigital Photography IDigital Photography ICompact Digital Prosumer Coolpix: 3 MPCompact Digital Prosumer Coolpix: 3 MP 2002 - 2002 - 20032003
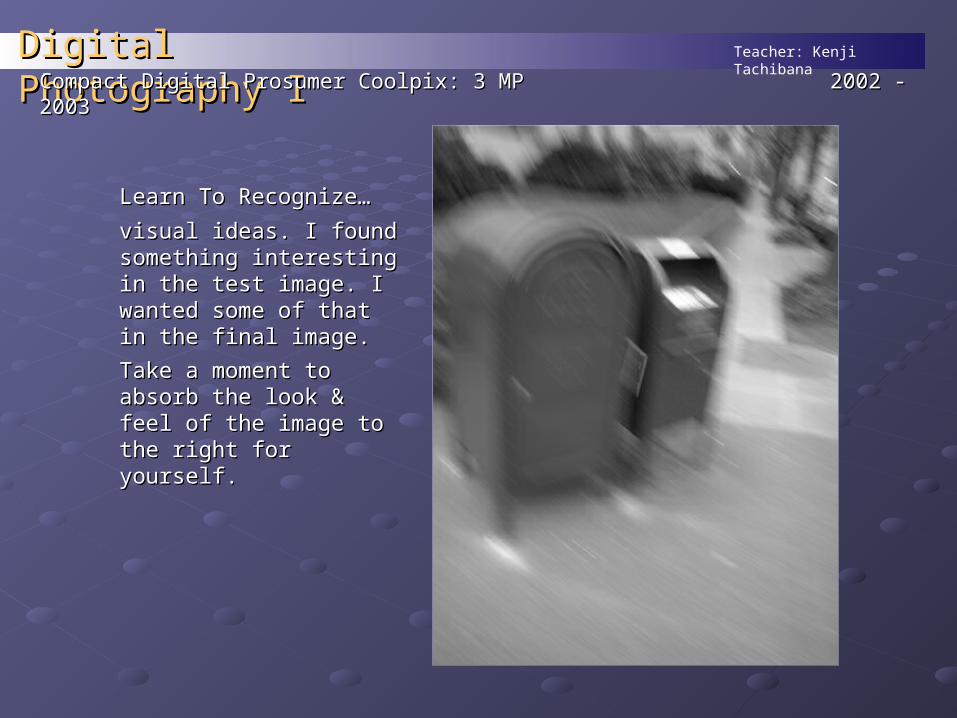
Learn To Recognize…Learn To Recognize…
visual ideas. I found visual ideas. I found something interesting in something interesting in the test image. I wanted the test image. I wanted some of that in the final some of that in the final image.image.
Take a moment to absorb Take a moment to absorb the look & feel of the the look & feel of the image to the right for image to the right for yourself.yourself.
Teacher: Kenji TachibanaDigital Photography IDigital Photography ICompact Digital Prosumer Coolpix: 3 MPCompact Digital Prosumer Coolpix: 3 MP 2002 - 2002 - 20032003
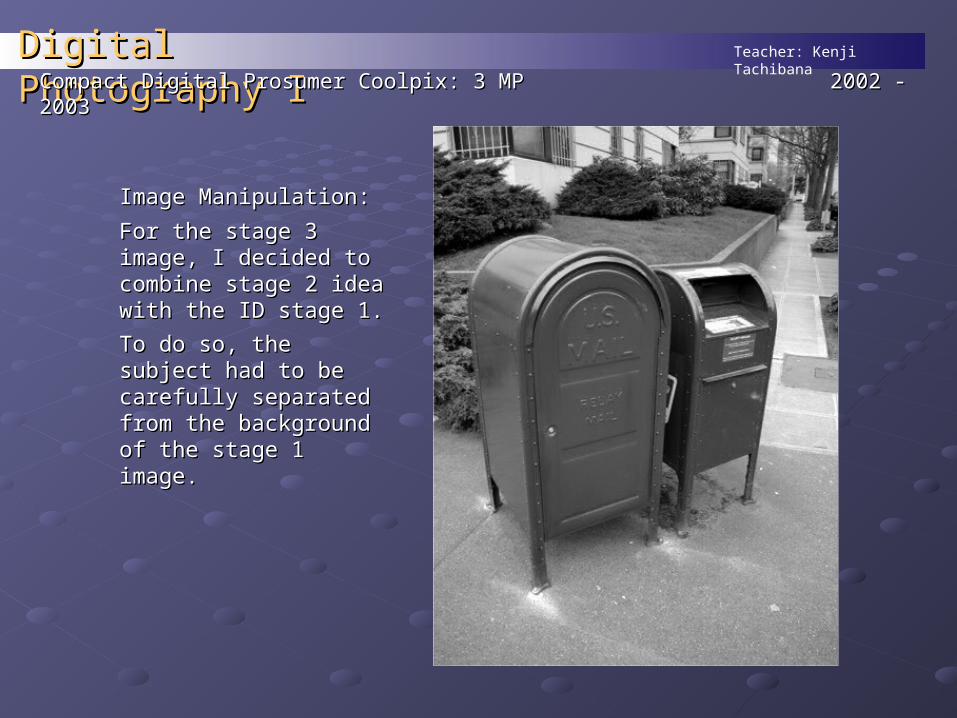
Image Manipulation:Image Manipulation:
For the stage 3 image, I For the stage 3 image, I decided to combine decided to combine stage 2 idea with the ID stage 2 idea with the ID stage 1.stage 1.
To do so, the subject had To do so, the subject had to be carefully separated to be carefully separated from the background of from the background of the stage 1 image.the stage 1 image.
Teacher: Kenji TachibanaDigital Photography IDigital Photography ICompact Digital Prosumer Coolpix: 3 MPCompact Digital Prosumer Coolpix: 3 MP 2002 - 2002 - 20032003
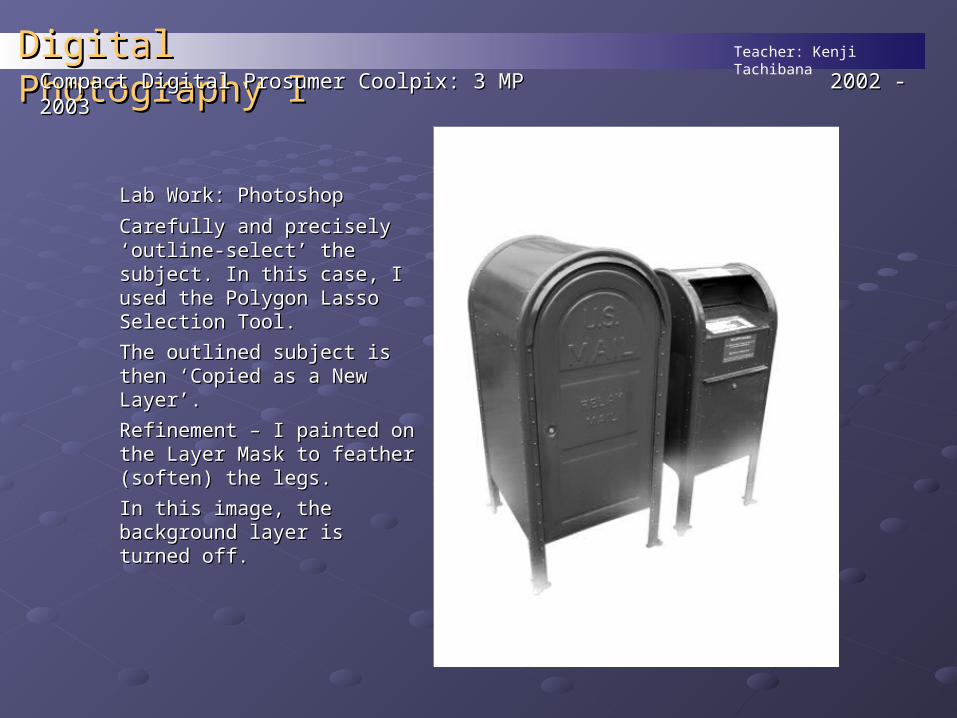
Lab Work: PhotoshopLab Work: Photoshop
Carefully and precisely Carefully and precisely ‘outline-select’ the subject. In ‘outline-select’ the subject. In this case, I used the Polygon this case, I used the Polygon Lasso Selection Tool. Lasso Selection Tool.
The outlined subject is then The outlined subject is then ‘Copied as a New Layer’. ‘Copied as a New Layer’.
Refinement – I painted on the Refinement – I painted on the Layer Mask to feather Layer Mask to feather (soften) the legs.(soften) the legs.
In this image, the background In this image, the background layer is turned off.layer is turned off.
Teacher: Kenji TachibanaDigital Photography IDigital Photography ICompact Digital Prosumer Coolpix: 3 MPCompact Digital Prosumer Coolpix: 3 MP 2002 - 2002 - 20032003
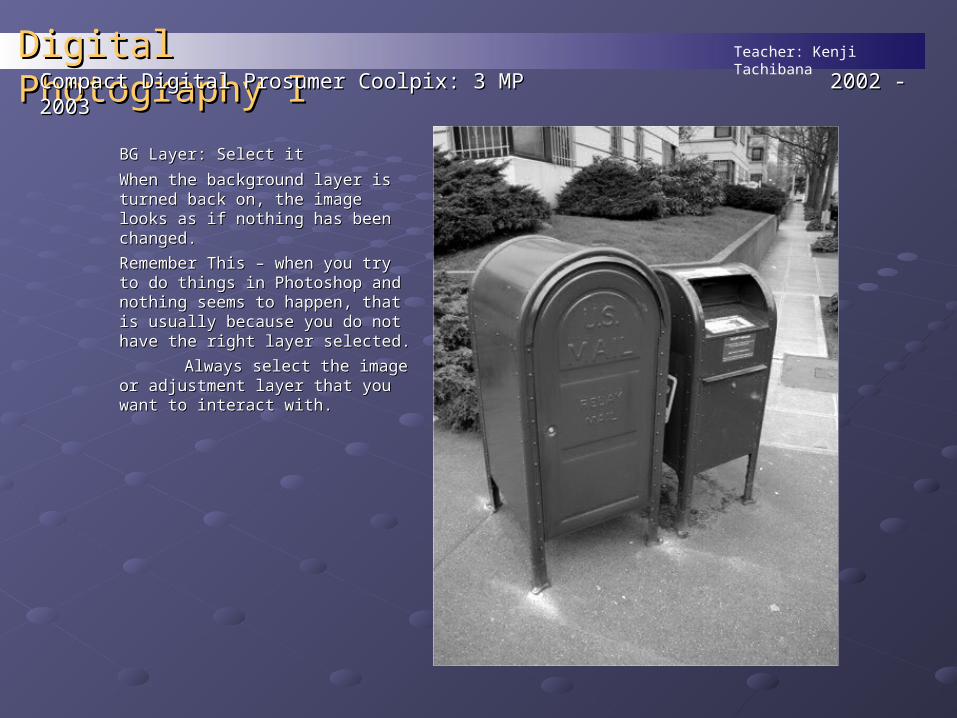
BG Layer: Select itBG Layer: Select it
When the background layer is When the background layer is turned back on, the image looks turned back on, the image looks as if nothing has been changed.as if nothing has been changed.
Remember This – when you try Remember This – when you try to do things in Photoshop and to do things in Photoshop and nothing seems to happen, that is nothing seems to happen, that is usually because you do not have usually because you do not have the right layer selected.the right layer selected.
Always select the Always select the image or adjustment layer that image or adjustment layer that you want to interact with.you want to interact with.
Teacher: Kenji TachibanaDigital Photography IDigital Photography IMy Old Stuff 1 of 3/ Chronological but RandomMy Old Stuff 1 of 3/ Chronological but Random
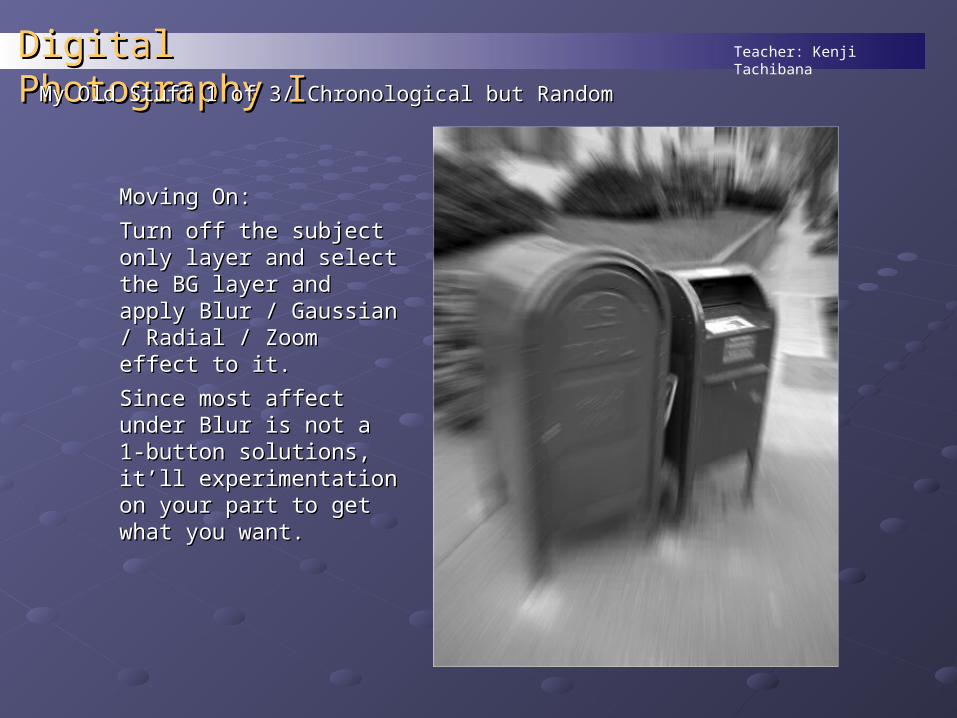
Moving On:Moving On:
Turn off the subject only Turn off the subject only layer and select the BG layer and select the BG layer and apply Blur / layer and apply Blur / Gaussian / Radial / Zoom Gaussian / Radial / Zoom effect to it.effect to it.
Since most affect under Since most affect under Blur is not a 1-button Blur is not a 1-button solutions, it’ll solutions, it’ll experimentation on your experimentation on your part to get what you want.part to get what you want.

Teacher: Kenji TachibanaDigital Photography IDigital Photography IMy Old Stuff 1 of 3/ Chronological but RandomMy Old Stuff 1 of 3/ Chronological but Random
Combine Layers:Combine Layers:
Turn on the subject only Turn on the subject only layer to make the final layer to make the final image look like the image look like the example to the right.example to the right.
The partially transparent The partially transparent mail box legs help the two mail box legs help the two images to merge together images to merge together believably.believably.
Use the keyboard Up & Use the keyboard Up & Down arrow keys to Down arrow keys to compare this with the compare this with the previous image.previous image.
Teacher: Kenji TachibanaDigital Photography IDigital Photography IMy Old Stuff 1 of 3/ Chronological but RandomMy Old Stuff 1 of 3/ Chronological but Random
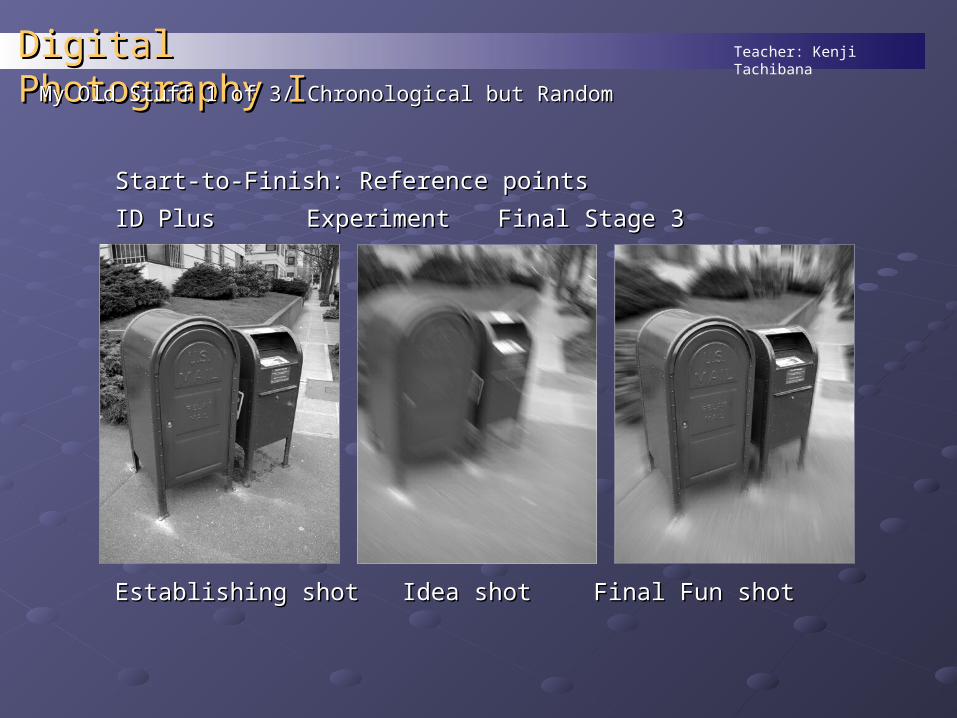
Start-to-Finish: Reference pointsStart-to-Finish: Reference points
ID Plus ID Plus ExperimentExperiment Final Stage 3Final Stage 3
Establishing shotEstablishing shot Idea shotIdea shot Final Fun shotFinal Fun shot
Teacher: Kenji TachibanaDigital Photography IDigital Photography IMy Old Stuff 1 of 3/ Chronological but RandomMy Old Stuff 1 of 3/ Chronological but Random
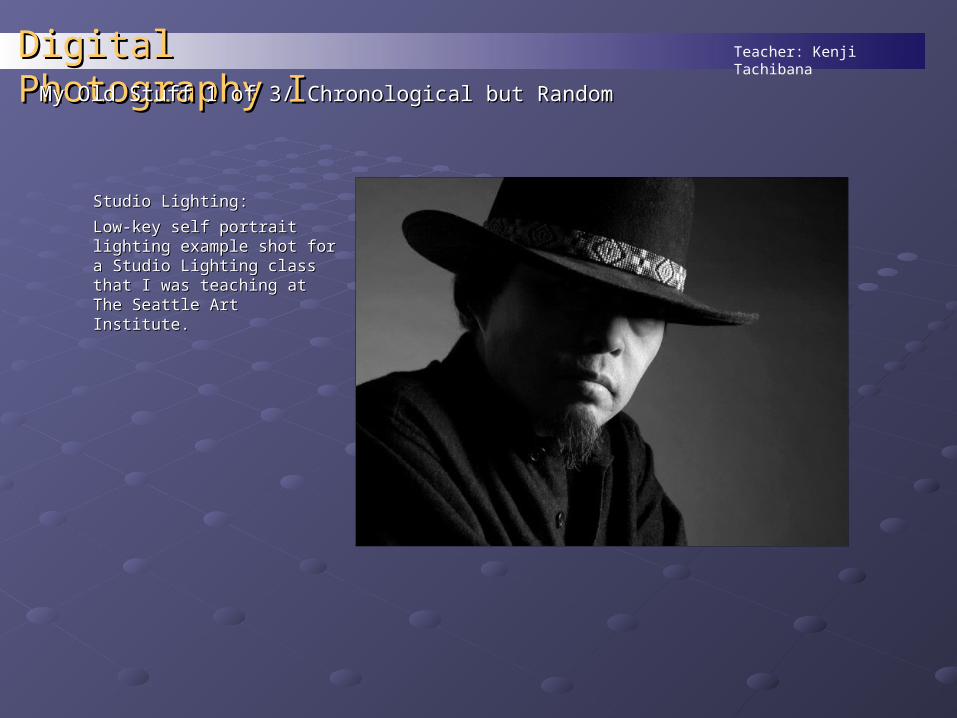
Studio Lighting:Studio Lighting:
Low-key self portrait lighting Low-key self portrait lighting example shot for a Studio example shot for a Studio Lighting class that I was Lighting class that I was teaching at The Seattle Art teaching at The Seattle Art Institute.Institute.
Teacher: Kenji TachibanaDigital Photography IDigital Photography IMy Old Stuff 1 of 3/ Chronological but RandomMy Old Stuff 1 of 3/ Chronological but Random
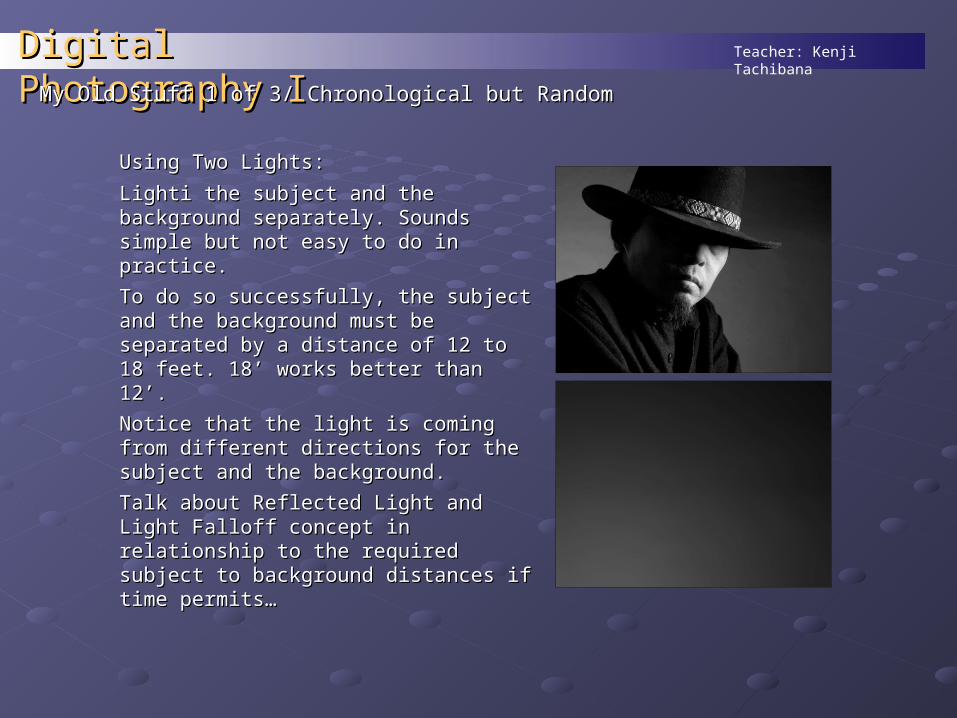
Using Two Lights:Using Two Lights:
Lighti the subject and the background Lighti the subject and the background separately. Sounds simple but not easy separately. Sounds simple but not easy to do in practice.to do in practice.
To do so successfully, the subject and To do so successfully, the subject and the background must be separated by a the background must be separated by a distance of 12 to 18 feet. 18’ works distance of 12 to 18 feet. 18’ works better than 12’.better than 12’.
Notice that the light is coming from Notice that the light is coming from different directions for the subject and different directions for the subject and the background.the background.
Talk about Reflected Light and Light Talk about Reflected Light and Light Falloff concept in relationship to the Falloff concept in relationship to the required subject to background required subject to background distances if time permits…distances if time permits…
Teacher: Kenji TachibanaDigital Photography IDigital Photography IMy Old Stuff 1 of 3/ Chronological but RandomMy Old Stuff 1 of 3/ Chronological but Random
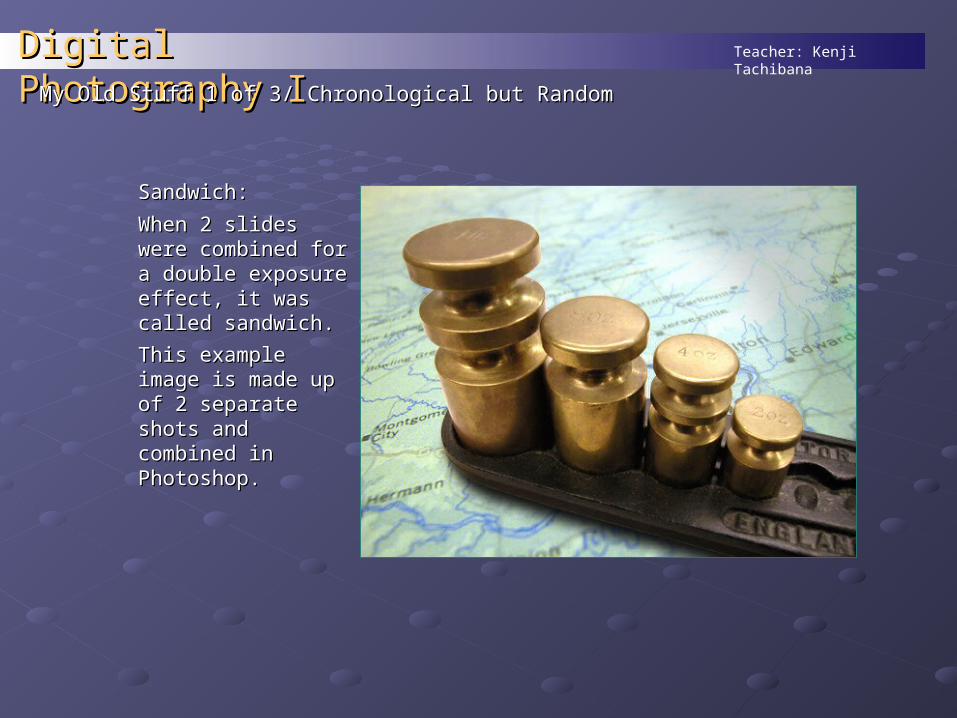
Sandwich:Sandwich:
When 2 slides were When 2 slides were combined for a combined for a double exposure double exposure effect, it was called effect, it was called sandwich.sandwich.
This example This example image is made up image is made up of 2 separate shots of 2 separate shots and combined in and combined in Photoshop. Photoshop.
Teacher: Kenji TachibanaDigital Photography IDigital Photography IMy Old Stuff 1 of 3/ Chronological but RandomMy Old Stuff 1 of 3/ Chronological but Random
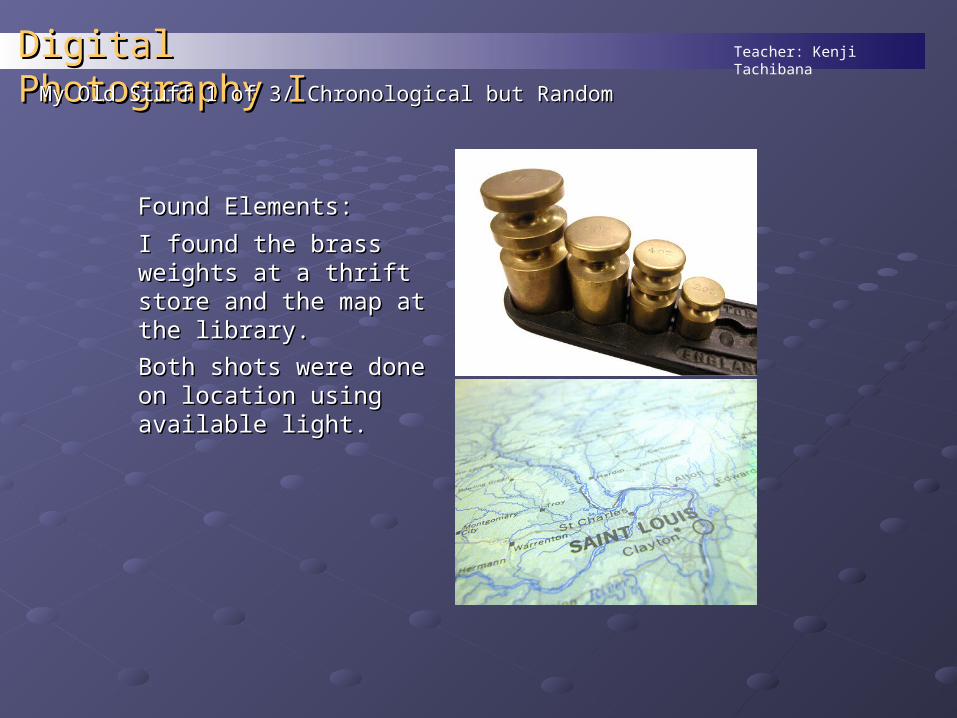
Found Elements:Found Elements:
I found the brass weights I found the brass weights at a thrift store and the at a thrift store and the map at the library.map at the library.
Both shots were done on Both shots were done on location using available location using available light.light.
Teacher: Kenji TachibanaDigital Photography IDigital Photography IMy Old Stuff 1 of 3/ Chronological but RandomMy Old Stuff 1 of 3/ Chronological but Random
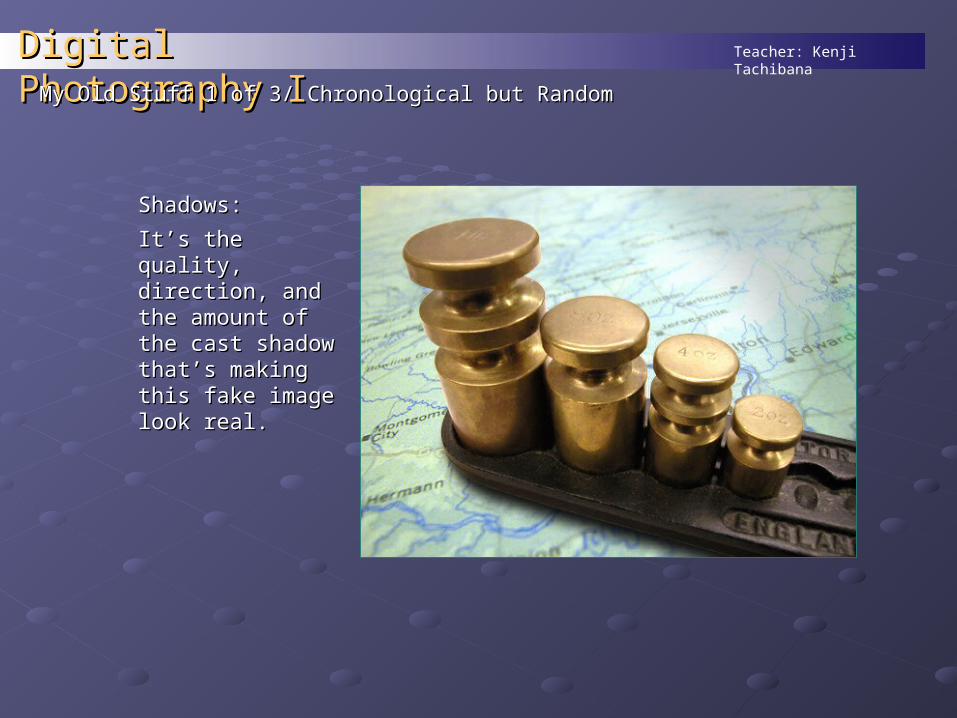
Shadows:Shadows:
It’s the quality, It’s the quality, direction, and the direction, and the amount of the cast amount of the cast shadow that’s shadow that’s making this fake making this fake image look real.image look real.
Teacher: Kenji TachibanaDigital Photography IDigital Photography IMy Old Stuff 1 of 3/ Chronological but RandomMy Old Stuff 1 of 3/ Chronological but Random
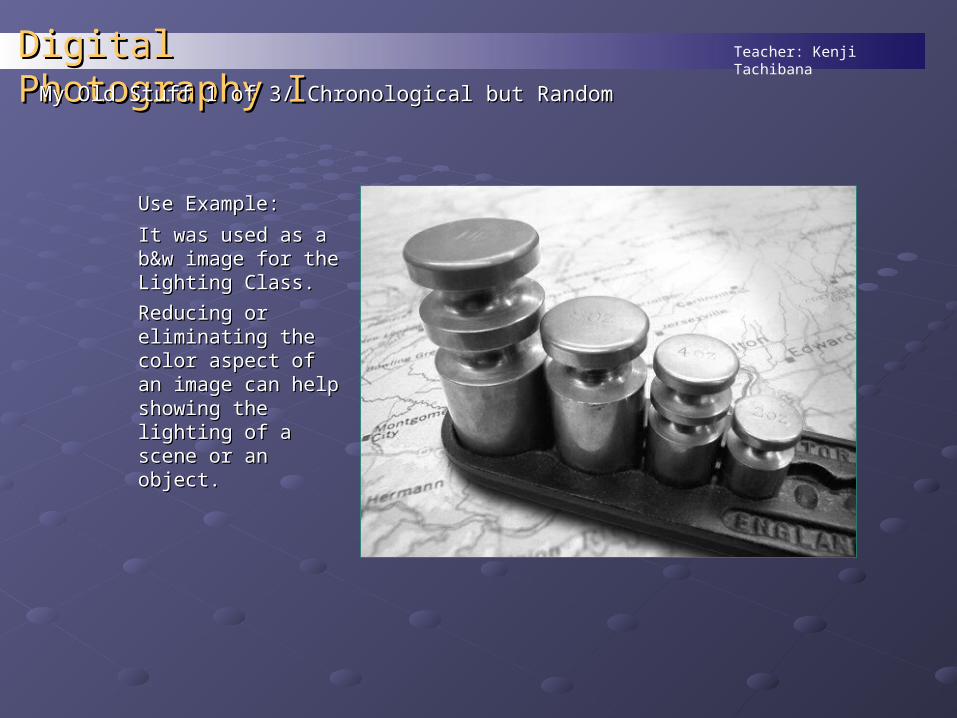
Use Example:Use Example:
It was used as a It was used as a b&w image for the b&w image for the Lighting Class.Lighting Class.
Reducing or Reducing or eliminating the eliminating the color aspect of an color aspect of an image can help image can help showing the lighting showing the lighting of a scene or an of a scene or an object.object.
Teacher: Kenji TachibanaDigital Photography IDigital Photography IMy Old Stuff 1 of 3/ Chronological but RandomMy Old Stuff 1 of 3/ Chronological but Random
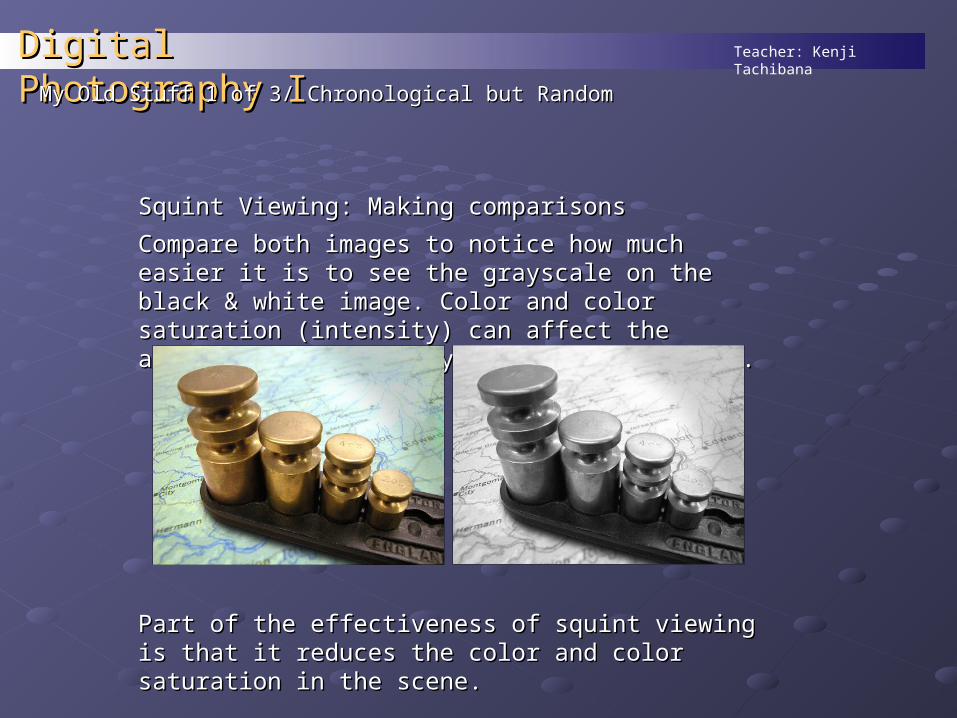
Squint Viewing: Making comparisonsSquint Viewing: Making comparisons
Compare both images to notice how much easier it is to Compare both images to notice how much easier it is to see the grayscale on the black & white image. Color and see the grayscale on the black & white image. Color and color saturation (intensity) can affect the appearance of the color saturation (intensity) can affect the appearance of the grayscale interpretation. grayscale interpretation.
Part of the effectiveness of squint viewing is that it reduces Part of the effectiveness of squint viewing is that it reduces the color and color saturation in the scene.the color and color saturation in the scene.
Teacher: Kenji TachibanaDigital Photography IDigital Photography I..
End of 1End of 1