Embed Size (px)
Citation preview
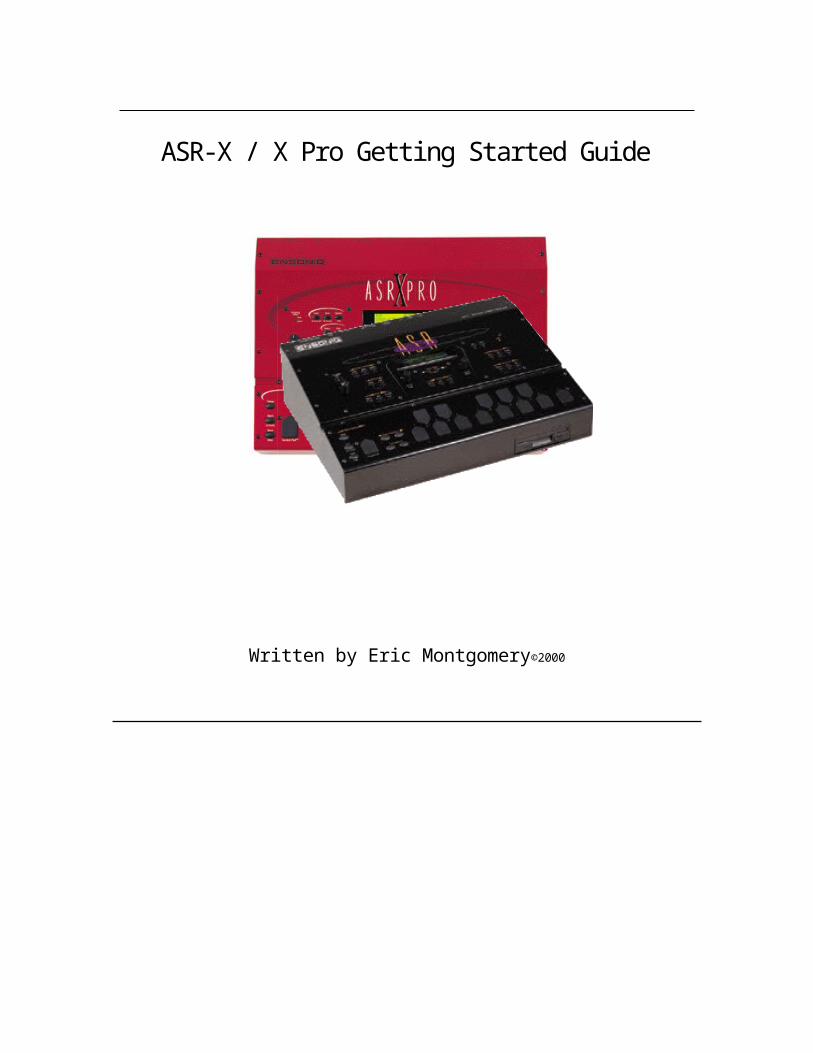
ASR-X / X Pro Getting Started Guide
Written by Eric Montgomery©2000
Getting StartedThe first thing most people want to do when they get a new piece of gear is to "do it all". They want to start writing songs, sampling and doing performances. My advice is to take your time and get to know the new product first. By the time you finish this manual you will have the basic idea of how to sequence, sample, load and save data to disk. Take it a little at a time and you will be moving around on the X like you never thought you could!
For A/C connections, refer to the owner’s manual that came with your ASR-X. If you do not have a manual, you can place an order for one through a local Ensoniq dealer or from the company listed below.
Syntaur Productions 1418 N. Walnut Ave., New Braunfels, TX 78130 830-627-1530 Fax: 830-627-1531 www.syntaur.com
As a tip, try to avoid lifting the ground. Don’t use adapters that convert the 3-prong A/C cable to a 2 prong. If there is ever a power surge there is the possibility that you can hurt yourself or your equipment can sustain damage. It is safer for the both of you!
Audio Connections:
You can listen to the ASR-X in a few different ways. There is a ¼” headphone jack located on the rear of the unit. You can also try connecting the Main Outputs to a mixer, pair of powered monitors, or even to your home stereo or portable radio. If the connection is going to be to a home stereo or portable radio, those products must have either a Line input, Aux. input or CD/Tape input. Under normal conditions the type of cable needed is a stereo RCA to ¼” cable. Any length is okay, but try to stay less than 18 feet to avoid signal loss. If you are going to use a mixing console, refer to the owner’s manual of that mixer for connections and input control settings. Normally, on a mixer, the type of cables needed for connection are two ¼” to ¼” audio cables. Again, try to stay less than 18 feet to avoid signal loss.
The ASR-X has Audio inputs too. It is a sampler. In case you don’t know, a sample is nothing more than a recording. Similar to when you make a cassette recording of one of your favorite songs from the radio. The only difference is that the tape is replaced by RAM computer memory and the recordings are much shorter than the length of a song. The recordings or “samples” are of single notes of a musical instrument, vocal uttering, noises etc.
When connecting to the audio inputs of the ASR-X:DO NOT USE THE AMP OUTPUTS OF AN AMPLIFIER OR STEREO RECEIVER!!!! If you do, pack up the unit and take it to your nearest service center. The amp or speaker outputs of a stereo receiver, portable radio or any amp have an extremely high output and will certainly damage your ASR-X/X Pro.
1
ASR-X/X PRO JUMP START MANUAL
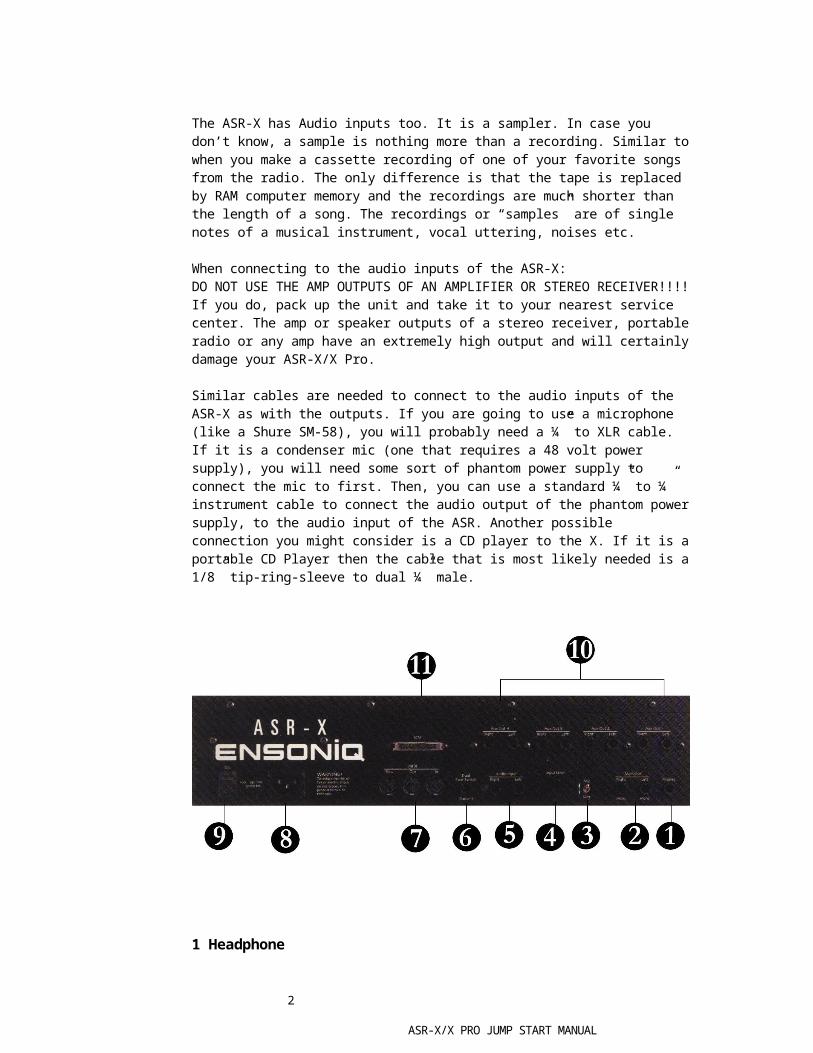
Similar cables are needed to connect to the audio inputs of the ASR-X as with the outputs. If you are going to use a microphone (like a Shure SM-58), you will probably need a ¼” to XLR cable. If it is a condenser mic (one that requires a 48 volt power supply), you will need some sort of phantom power supply to connect the mic to first. Then, you can use a standard ¼” to ¼” instrument cable to connect the audio output of the phantom power supply, to the audio input of the ASR. Another possible connection you might consider is a CD player to the X. If it is a portable CD Player then the cable that is most likely needed is a 1/8” tip-ring-sleeve to dual ¼” male.
1 Headphone2 Left and Right Main Outputs3 Mic/Line Gain switch4 Input Attenuator knob5 Left and Right Audio Inputs for sampling6 Sustain pedal input (SW-6 or SW-10)7 MIDI In, Out and Thru8 A/C Cable connection9 Power Switch10 Auxiliary Outputs (Optional X-8)11 SCSI Interface for storage and interface with computers
Assuming we have gotten through the A/C power connections and the connections of outputs and inputs, let’s move on to the fun part, making music!
2
ASR-X/X PRO JUMP START MANUAL
Sounds
*A quick way to get to the sound groups in an ASR-X Pro (not ASR-X Black box) is to use the ESSENTIALS buttons.
Buttons 0-3 select drums kits Gizmo, Dance, Heavy Drum kit and Ol’school Button 4 selects the GM Drum kitButtons 5-9 select Vintg Bass 1, Sweep Bass, Snot T Bass, MONO Boy and Tight T Bass.Press and hold button 0, then press button 5 to get to the Synother bank.Press and hold button 1, then press button 6 to get to the Syn Lead bankPress and hold button 2, then press button 7 to get to the Syn-Vint bankPress and hold button 3, then press button 8 to get to the PNO Layer-E bankPress and hold button 4, then press button 9 to get to the Techno Sync bank
It is easy to go through the sounds of an ASR-X/X Pro. There are 2 knobs on the front of the X. They are labeled Parameter (on the left) and Value (on the right). The Parameter knob is the SOUND TYPE or SOUND GROUP. The Value knob CHOOSES the SOUND IN THAT GROUP. As an example, if you turn the parameter knob you will see a group name on the left of the screen like DRUM-KIT. If you want to then demo the entire set of drum kits in the X simply turn the value knob. Take some time and become familiar with the sounds. Don’t forget to use the OCTAVE buttons to play the sound higher or lower. The Octave buttons are especially important when exploring drum kits. All of the kick drums are in their own octave, as are the snare drums, percussion and other kit elements.
There are many banks to become familiar with. The ASR-X/X Pro users guide has a complete list of the possible banks. Here are just a few of the banks to choose from. Drum Kit, Guitar-E, Percsolo, Keys, Organ-E, Sound efx and Syn Comp. Your banks and sounds will expand if you install an EXP-3 Urban Dance expansion board into your X or X Pro. You’ll be adding such banks as the EXP bank and Loop groove bank. Loop groove will contain exactly what it says, R&B and Dance sampled drum grooves! Other banks that will show up while using the X are User, Custom and RAM. Those banks will show up if you create a sample, load samples or if you create your own drum kits and patches.
Selecting Sounds
Press the Track Sound buttonTurn the Parameter knob to select a sound groupTurn the Value knob to select a sound within that group
3
ASR-X/X PRO JUMP START MANUAL
Sequencing and Scoop editing
Your next thought might be, “wow I got so many great sounds. How do I begin sequencing?" Just in case you don’t know, sequencing, simply put, is a recording of your performance on the instrument. The recorder in the X records the notes you play, and plays the notes back for you. The cool part is that if you want to edit or change anything you played, it can be done. There are features to do this such as Scoop editing and quantizing. We will talk about quantizing in a moment. First, let’s sequence!
Sequencing
Select a SoundPress and hold the Record button Press Play and release both buttonsThere will be a 1 measure (4 counts if you are in 4/4 time) introStart Playing, Press Stop when finished recording
To record yourself playing along with the first track:Press the Track button and select the next available track(The screen will display the Selected track number in the upper left of the screen, TK01, TK02 etc.)Repeat the above steps
“What if I played a note that I do not like? Can I erase it?”Yes! There are TWO ways to get rid of a single note after it has been recorded. You can Scoop the note out of the recording.
Scoop Editing
1>Press and hold RecordPlay the Pad that you want to eraseRelease record and press Enter*This method erases the note from the entire sequence.
2>Press and hold RecordPress Play, then release both buttons (the unit is now in normal record mode)Press and hold RecordPlay the pad of the sound you want to delete*Play the pad and hold it. As long as you hold the pad down, it is erasing the note from the sequence.
Erase a Track
Select the track you want to erase with the Select Track buttonsPress the Sequence Process buttonTurn the Parameter knob to select Erase Track #?Press Enter
4
ASR-X/X PRO JUMP START MANUAL
Quantizing
Another very useful tool that will allow you to create professional sequences is the use of Quantizing.What quantizing does is to shift the notes you have played to get them to be “in time” with specific predetermined times of the sequence.
Quantize
Press the Sequence Process buttonTurn the parameter knob to select Quantize Track #Press EnterTurn the Parameter knob to select QUANTIZE TO=Turn the Value knob to select a quantize resolutionPress Enter*Use 1/16 for a Dance music feel. It is very “straight”.*If you want it to “swing” like in Jazz or Hip Hop/R&B use 1/16T (Triplet). *Remember that Michael Jackson tune, “The way you make me feel”? Remember Sting's "Brand New Day"? They were both quantized at a rate of 1/8T!
A Groovy tip (pun intended)
Press Sequence EditTurn the Parameter knob till you see RECORD QUANTIZE on the screenSelect the quantize rate you want to useNow, the X/ X Pro will automatically quantize upon recording.
*Another thing about grooves and feel to keep in mind is this. Lately, a popular groove or feel has been to use very fast tempos. It is impossible to play at the tempo of some of today's Hip-Hop, or Techno songs. But, it is possible to get that style by playing at half that speed and then raising the tempo to the desired speed. Simply record your beats at HALF the tempo you intend on using. If you really want the song to be at 140bpm, record all the data at 70bpm. Speed up the tempo to see if it sounds the way you want. If you need to make changes, slow it down and make the changes.
5
ASR-X/X PRO JUMP START MANUAL
Sampling
Most times, the simple word “Sampling” throws people into a tizzy and makes them believe it is the most complex function in the entire unit. It isn’t. Everything is hard to do when it is new to you. Once you understand it, the ASR takes on a new persona. It is no longer difficult. Before long, you will realize that you are doing the “impossible”. First, let me mention what sampling is.
Have you ever taped a song from the radio with a cassette or taped a television show with your VCR? Guess what, you sampled it! A sample is nothing more than a recording. Replace the VCR or cassette tape with computer memory called RAM (Random Access Memory) and instead of recording entire programs of data, record short pieces of data. Normally, a sample is very short. Some examples of things to sample on an ASR-X/X Pro are drums (kick, snare, hi-hat etc.), maybe a guitar chord or a vocal riff. Now, here is how to sample. I will assume you already have a source to sample from, like your CD Player or a microphone.
Sampling
Press the Setup buttonTurn the Parameter knob to get to Source =Choose the source you will be sampling from with the Value knob(If it is your CD player or a Mic, choose the Input Dry setting)Press the Start/Stop buttonBegin samplingWhen finished, press the Start/Stop buttonPlay the Scratch pad to see if you want to keep the sample, if so press the Send to Pad buttonTap the pad you want to send it to and press Enter
* When choosing a sample source, choose Input+Insert to sample a sound with the Insert effect on the sample.* Before sending the sample to the Pads, choose the Utility Silence Instrument (last sound Bank). Now you have a blank “palette” to work in while sampling. It is easier to build custom drum kits from the Silence instrument also.
6
ASR-X/X PRO JUMP START MANUAL

Resampling
Resampling is the same as sampling except that you might have a sample that is already inside the X/ X Pro. Maybe the sample will sound more unique with an Insert effect on it. You could resample a snare drum with a room reverb on it. Then, resample it again with an EQ effect and so on. Here’s how to do it.
Select the Instrument you want to resampleChoose the Insert effect you want to usePress the Setup buttonTurn the Parameter knob to get to Source =Choose the source you will be sampling from with the Value knob(In this case, choose the Main Out setting)Press the Start/Stop buttonTrigger your sampleWhen finished, press the Start/Stop buttonPlay the Scratch pad to see if you want to keep the sample, if so press the Send to Pad buttonTap the pad you want to send it to and press Enter
Resample Idea
When resampling, keep in mind that you can do more than making an instrument like a drum sound with reverb. Do something like creating your own rhythm loops! As an example, create a drum pattern. Resample the drum pattern you just created. No you are making your own drum loops. Resample the same drum pattern but with new Insert effects added to make variations of the same drum pattern. To me, that is a big reason why resampling is such a needed feature. If you use it wisely, you will create a very unique sound of your own.
7
ASR-X/X PRO JUMP START MANUAL
Truncate a sample
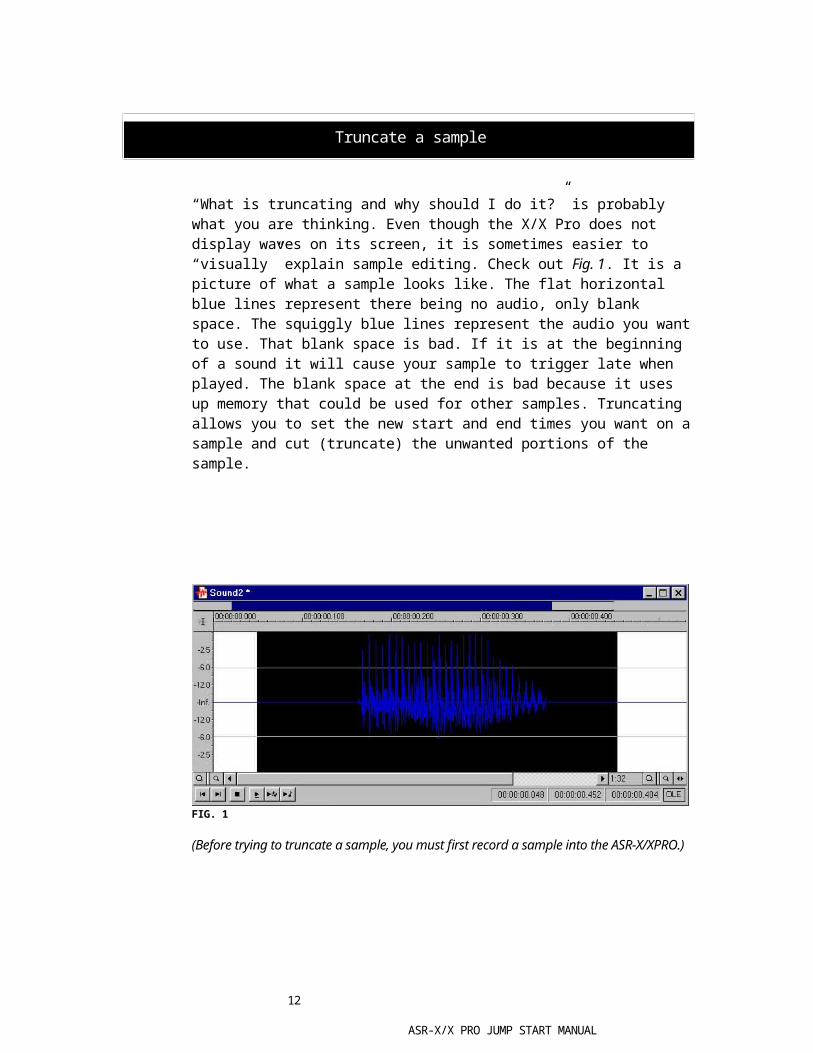
“What is truncating and why should I do it?” is probably what you are thinking. Even though the X/X Pro does not display waves on its screen, it is sometimes easier to “visually” explain sample editing. Check out Fig. 1. It is a picture of what a sample looks like. The flat horizontal blue lines represent there being no audio, only blank space. The squiggly blue lines represent the audio you want to use. That blank space is bad. If it is at the beginning of a sound it will cause your sample to trigger late when played. The blank space at the end is bad because it uses up memory that could be used for other samples. Truncating allows you to set the new start and end times you want on a sample and cut (truncate) the unwanted portions of the sample.
FIG. 1
(Before trying to truncate a sample, you must first record a sample into the ASR-X/XPRO.)
8
ASR-X/X PRO JUMP START MANUAL
Truncate
Select the sample you want to edit (pad sound area)Press Pad EditTurn the Parameter knob to get to Start/Stop= 00 00 99%
The first double digit # adjusts the sample start timeThe percentage # adjusts the sample end timeWhile adjusting the sample start and end times, tap the pad and play the sample. That way, you get an idea of what you are going to be editing (or cutting) off of the sample.When you are comfortable with the start/end times, press the Pad Proccess button.Turn the Parameter knob till the screen displays Truncate length?Press EnterPlay the Scratch Pad [*If you do not like the truncated version of the sample, simply redo your sample start/end times and truncate the sample again. Once you are comfortable with the truncated result, press Track Sound and select the original sound.
Press and hold Track SoundPress NO and release both buttons.If you did it right you should receive a message that says “Delete NAME OF SOUND and all references?”Press Enter]Press the Send to Track ButtonTap the pad you want the sample to play on. Press Enter
The bracketed [ ] area is not a part of the original sample instructions found in the Ensoniq Users Manual. That area was added to help you have more control over the memory and samples. The ASR-X/X Pro creates copies of every sample. The auto-copying was tossed in as a “just in case I hate the new edits” measure. You may want to go back to the original sample. If that is something you might want to consider doing, simply ignore the bracketed areas of the truncating instructions. Otherwise, adding what is in the bracketed areas will help you to conserve memory and keep the additional copies to a minimum.
9
ASR-X/X PRO JUMP START MANUAL
Filters, MIDI and the X
This section is going to talk about a specific filter technique and your ASR-X/X Pro. In certain genre's of music, there is a high demand for having control over filter frequency via MIDI. This can be achieved in the X via the Insert effect. You might be wondering, "Why would I want to do this?" or "It seems like it is too hard to do?" It really is very easy. If you can use a software sequencer, you can do this. Some good sequencers are Cakewalk, Logic (Emagic), Cubase (Steinberg), Digital Performer (Mark of the Unicorn) and Vision (Opcode). First, lets set up the X to use an external sequencer. You may want to consult your Software sequencer's manual for installation issues and setup with your MIDI Interface.
MIDI Connections & Setup
MIDI connections with a MIDI Keyboard as a controller:MIDI Out of the keyboard to MIDI In of the computerMIDI Out of the computer to MIDI In of the ASR-X/X ProMIDI Thru of the ASR-X/X Pro to MIDI In on the keyboard (If it has sounds you want to use)
In your software sequencer, be sure that each track has its own MIDI Channel (Track 1= MIDI ch 1. Track 2 = MIDI Ch 2, etc.) and a sound selected. Be sure that each track is going to use the MIDI IN and MIDI Out of your MIDI Interface.
In the ASR-X/X Pro, If you have a keyboard you are going to use as a controller, then there is no set up necessary on the X. It is already set to go, by simply turning it on.
MIDI connections without a MIDI Keyboard as a controller:MIDI Out of the ASR-X/X Pro to MIDI In of the computerMIDI Out of the computer to MIDI In of the ASR-X/X Pro
In the ASR-X/X Pro:Press the Track Edit buttonTurn the parameter knob till you see TRACK MIDI OUT=Set each track to = ENABLED
MIDI control over Insert effect parameters
Select a sound on track 1 Press Track EditTurn the parameter knob and make sure that FX Bus = InsertPress the Effects Select buttonSelect effect #29 ResVCF-DDLPress the Effects Edit ButtonTurn your Parameter knob and select "Edit insert effect?", press EnterTurn the Parameter knob to select "Mod Src=", choose SysCTRL4Turn the Paramter knob to select Dest Min=, select 80HzPlay your recorded sequencer track to the ASR on channel 1
10
ASR-X/X PRO JUMP START MANUAL
Send controller 71 to track 1
Disk functions
This is obviously an important area to know about the X/X Pro. Reviewing this section will show you how to save your creations to a floppy disk or to a SCSI hard drive. You will also be shown how to retrieve your files to play them back. Just a few things I want to make sure you know, file types and a quick lesson on SCSI.
There has been a means of organization that was put into the X to help you stay on top of what you are saving. When you save data to a floppy disk or to a hard drive, there are file types. If you are saving one sequence, that is known as a MIDI File. If you save a collection of sequences, that is known as an All Seqs file type. If you save a set of sounds, that is known as an All Sounds file type. There are several types. Take time to become familiar with the possible file types.
I also want to answer the question, "Why would I want to use a SCSI Hard drive?"First, what is a SCSI Hard drive? SCSI is an acronym for Small Computer Systems Interface. Yep, your ASR-X/X Pro is a small hardware based computer. Similar, to a Mac or a Windows computer, it uses RAM memory and has similar components. Your computer runs on the OS (MacOS or Windows) it has installed. Your ASR has its own OS installed into ROM (Read ONLY Memory) chips. Computers have hard drives built into the case. You ASR has to use an external hard drive. SCSI is the protocol that the X uses to communicate with the hard drive. A hard drive is nothing more (in theory), than a huge floppy disk. Instead of storing 1.44 Megs of data, you can store 100 Megs of data, or larger depending on the storage capacity of the drive. There are two types of SCSI Hard drives, removable and fixed. The most popular removable is the Iomega Zip 100. There are literally hundreds of fixed hard drives. If you want to use a removable drive, consider the Iomega SCSI Zip 250. If you want a fixed hard drive, consider calling Glyph Technologies. They test and guarantee every drive they sell. Their contact info is at the back of this manual in the ASR-X Partners area.
Format a floppy disk
Formatting a disk means that the ASR-X/X Pro will now make the disk usable or "mark" the disk with its own identification information. Disks
11
ASR-X/X PRO JUMP START MANUAL
formatted by one ASR-X/X Pro are compatible with other ASR-X /X Pro's.
Insert a DS/HD (Double Sided / High Density) 3.5" floppy disk into the drivePress the System/MIDI buttonTurn the Parameter knob till the screen displays "Access Disk Utils"Press EnterScreen= Floppy DiskPress EnterSystem will read the disk and display a message that says "Format disk?"Press EnterScreen = Erase and Format this disk?Press Enter
*Floppy disks that were preformatted for DOS, Windows or disks that were formatted by a Windows computer are ready to use, and do not need to be formatted by the ASR.
Save to a floppy disk
Press the Save buttonScreen = Floppy DiskPress EnterTurn the Parameter knob to select the file type you want to savePress Enter
Load from a floppy disk
Press the Load buttonScreen = Floppy DiskPress EnterTurn the Parameter knob to select the file type you want to loadTurn the Value knob to select the specific file to load(There may be several files that have the same file type, you can go through them with the Value knob)Once you have found the file you want to load, press Enter
Format a SCSI Hard drive
Formatting a SCSI drive means that the ASR-X/X Pro will now mark the drive with its own identification information. Hard drives formatted by one ASR-X/X Pro are compatible with other ASR-X/X Pro's.
12
ASR-X/X PRO JUMP START MANUAL
Turn on your Hard driveIf the drive is a removable drive, insert the cartridgeTurn on the ASRPress the System/MIDI buttonTurn the Parameter knob till the screen displays "Access Disk Utils"Press EnterThe ASR will scan for a connected SCSI device, it will ask you if you want to select that device, press Enter.If it is not formatted the X will ask if you want to format the drive, press Enter. It will then ask you if you are sure, press Enter.The X will count up from 0.1 to 99.9 to let you know how far it is into completing the formatting task.When it is complete, it will setup a default directory structure
Save to a SCSI Hard drive
Press Save, the X will ask what storage device you want to use, choose "SCSI# hard drive name". Press Enter. Now, you will have the name of a folder on your screen and an arrow on the right side of the screen. The arrow means that you have not entered into that folder. Press Enter to go into that folder, you can then store sounds into that folder. Press Enter
Load from a SCSI Hard drive
Press Load, Screen = Floppy disk Turn the Value knobThe ASR will scan for a SCSI deviceDisplay = "name of hard drive", press Enter Now, you will have the name of a folder on your screen and an arrow on the right side of the screen. The arrow means that you have not entered into that folder. Press Enter to go into that folderYou may get a screen that says, No FoldersSimply turn the Parameter knob to see the available foldersWhen you locate the file you want to load, press Enter
13
ASR-X/X PRO JUMP START MANUAL
Q&A
Q: How do I assign an instrument to the AUX outs?
A: (You need the optional X-8 output expander to do this)Use the track select buttons to select the track that will use the AUX outsPress the Track Edit buttonTurn the Parameter knob to select FX Bus =Turn the Value knob to select the appropriate aux out i.e. AUX1, AUX 2 etc.Turn the Parameter knob to select Track Pan =Turn the value knb to select the output you want
Q: Is there a way to expand the Sequencer memory?
A: Yes there is on the ASR-X Pro. Simply add a 32 meg SIMM to the unit. The X Pro's sequencer memory will automatically expand from 30,000 events to around 100,000 events. That means you will be able to do longer songs. There is not a sequencer expansion for the original ASR-X.
Q: There is a "hiccup" or slight pause in between sequences. Is there a fix for that?
A: Use the Append Sequence function in the Sequence Process area. It will allow you to assemble all of your sequences into one large sequence or song. No hiccups will exist because only one sequence is playing. You will have better overall results if you use an external hardware or software sequencer.
Q: When I save a song as a MIDI file, only the first sequence of the song shows up?
A: The ASR-X/X Pro cannot save a Song Playlist as a MIDI file. You will need to assign the MIDI Out instrument to each track of the song. Then play the X/ X Pro sequence into the external sequencer as it records the data. The other option is to use the Append Sequence function to
14
ASR-X/X PRO JUMP START MANUAL
assemble all sections of the song into ONE SEQUENCE. Then save that sequence as a MIDI file.
Q: How can I get the ASR-X/X Pro to work with an external sequencer?
A: If the X is the only unit in use with an external sequencer, there are only a few necessary settings. Press System, then go to Edit MIDI Settings and set Pads Play Local to the OFF setting. The other is to go to TrackEdit and set Track MIDI Out = to Enable on each track. I would alsoSuggest saving that sequence to a disk or hard drive as a template setup for future use.
If the X is in a setup with an external sequencer and a keyboard as a controller, there is nothing to do except turn the X on. The ASR-X/X Pro is ALWAYS in multimode and ready to work as a tone module.
All selection of sounds should be done by the external sequencer's Bankand Program change features.The MSB and LSB messages for ALL Ensoniq products is MSB 000 and LSB of 032.
Q: Can I change the volume and panning of each drum in a kit? A: Yes you can. Select the track that contains the drum kitPress the Pad Edit buttonScreen = Make a RAM kit from TK xx: Name of KitPress EnterTurn the Parameter knob to select volume, pan or the edit you wantTap the pad you want to editTurn the Value knob to make your edit
Q: Can I use a keyboard with the ASR-X sequencer?
A: Yes you can. Connect the MIDI Out of the keyboard to MIDI IN of the X.Connect MIDI Out of the X to MIDI in of the keyboard.Change the MIDI channel of the keyboard to match the track you want to record to i.e. Channel 1 to track 1, channel 2 to track 2 etc.Any ASR sequencer track that is going to trigger sounds in the keyboard, assign the MIDI Out instrument to that track.
15
ASR-X/X PRO JUMP START MANUAL
ASR-X/X-Pro SCSI/SIMM Tips
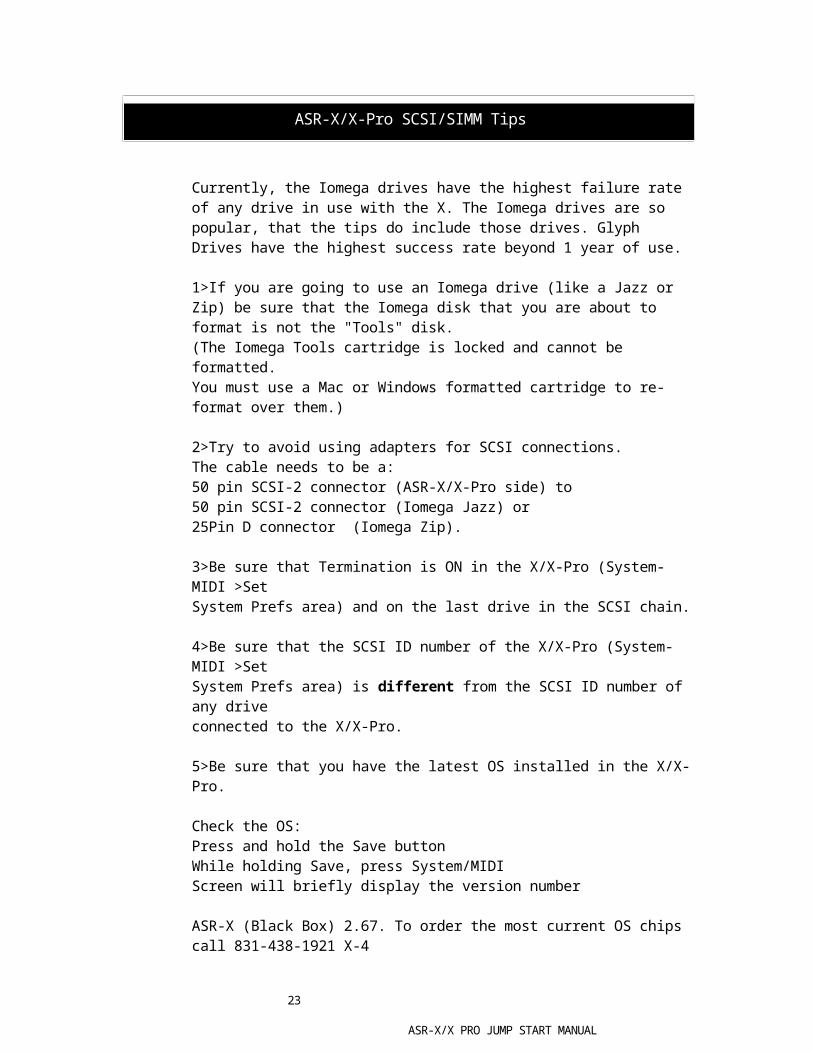
Currently, the Iomega drives have the highest failure rate of any drive in use with the X. The Iomega drives are so popular, that the tips do include those drives. Glyph Drives have the highest success rate beyond 1 year of use.
1>If you are going to use an Iomega drive (like a Jazz or Zip) be sure that the Iomega disk that you are about to format is not the "Tools" disk. (The Iomega Tools cartridge is locked and cannot be formatted. You must use a Mac or Windows formatted cartridge to re-format over them.)
2>Try to avoid using adapters for SCSI connections. The cable needs to be a:50 pin SCSI-2 connector (ASR-X/X-Pro side) to 50 pin SCSI-2 connector (Iomega Jazz) or 25Pin D connector (Iomega Zip).
3>Be sure that Termination is ON in the X/X-Pro (System-MIDI >SetSystem Prefs area) and on the last drive in the SCSI chain.
4>Be sure that the SCSI ID number of the X/X-Pro (System-MIDI >SetSystem Prefs area) is different from the SCSI ID number of any drive connected to the X/X-Pro.
5>Be sure that you have the latest OS installed in the X/X-Pro.
Check the OS:Press and hold the Save buttonWhile holding Save, press System/MIDIScreen will briefly display the version number
ASR-X (Black Box) 2.67. To order the most current OS chips call 831-438-1921 X-4
ASR-X Pro (Red Box) 3.04. To download the current OS:
http://www.emu.com/support/asrx_pro/asrxproosupdate.htm
You cannot download this OS for the ASR-X (Black Box). This OS will work for the ASR-X Pro (Red Box) ONLY.
6>Check for bent pins on both ends of the SCSI cable.
7>Never save files to your hard drive with the same or default name.
16
ASR-X/X PRO JUMP START MANUAL
8>BACKUP YOUR DATA: Always save an extra copy to a different cartridgeor floppy.
9>Do NOT edit samples, sounds, or sequences that are saved as a partof an ALL SESSION file. Once that has been done, there will be"invalid sample size" errors and the data cannot be retrieved.
* A simm brand and description that works in the X/X Pro is: 8x32FPM memory, 72pin, 60ns (non-EDO) made by Ak-byte.
A company that sells SIMM's:
The Chip MerchantTel: 619-268-4774Fax: 619-268-0874e-mail: [email protected]
A company that sells hard drives:
Glyph Technologies(607) 275-0345
* If there is a problem formatting, remove all other devices from the SCSI chain. The ASR-X/X-Pro and the drive to be formatted should be the only devices connected.
* The ASR-X/X-Pro can use an Iomega DOS formatted cartridge without having to format it!
* If you notice inconsistent performance with a Zip drive, change the ID of the Zip drive to 6. That has helped some people.
17
ASR-X/X PRO JUMP START MANUAL
SMIDI and the ASR-X/X Pro
SMIDI is a new protocol that allows a computer to get samples from and send samples to any SMIDI compatible device. The ASR's support this protocol. The instructions below are for setting up a Windows computer to use the SMIDI protocol. "Why?" may be your next question, that is easily answered. You might want to do some sample editing in your computer! Instead of having to use the numbers in the screen of the X, you can use the visual interface on your computer. Most sample editors (or sometimes called wave editors) have more features for altering a sample than samplers do. As an example, most samplers can Normalize (play at max volume without distortion), truncate and loop. The sample editor in a computer will do more like adding EQ, splicing several samples together, using effect plug-ins and it is visual so it is easier and more accurate to edit start and end times of samples. You must connect the SCSI port of the ASR to the SCSI port on your computer. You should also connect the MIDI In and MIDI out of the ASR to the MIDI In and Out of your computer's MIDI Interface.
1. Turn off all ASR-X and SCSI Devices on the chain
2. Boot up computer
3. Turn on ASR-X
4. Set "SCSI Termination" to "on" ( Press System/MIDI, go to "SetSystem Prefs", press Enter, turn the Parameter knob till the screendisplays "SCSI Termination = ").
5. (In Windows) Press Start, Go to Control Panel-Double click System 6. Select " SCSI Controller", click "REFRESH"
7. Windows will ask you if it should search for the best driver or ifyou would select a driver from a list. Select, DRIVER FROM LIST
By default, Windows will present a driver, called "unsupported device",choose it, even if Windows tells you that the driver isn't written for the device
Do this as often as necessary. Windows detects the X up to 7 times
It is possible that Windows will let you choose the driver only once, then display the other six ASR-X "devices" without a driver and asnon-functional. In this case manually change the driver for each deviceto "unsupported device".
You have to do this procedure only one time. After that, Windows willAutomatically detect the X, without asking for a driver. Be sure thatyou have the ASR-X turned off when Windows boots and hit refresh in the
18
ASR-X/X PRO JUMP START MANUAL
Device Manager.* Do this procedure AT YOUR OWN RISK. EMU-ENSONIQ and Eric Montgomery will not be held liable for any damage or mishaps with your computer.
19
ASR-X/X PRO JUMP START MANUAL
Expanding the RAM
Okay, this is the part where you get to feel like Mcguiver or James Bond. (Anybody remember the McGuiver show? He made all these crazy gadgets out of anything he saw!) You get to take apart your ASR and take a look inside. DISCLAIMER time. If you do not feel comfortable or do not feel that you have the aptitude in doing this (or even if you do feel comfortable or think you have the aptitude) you do this AT YOUR OWN RISK! I hope that you understand that YOU ARE ON YOUR OWN AND I AM NOT LIABLE FOR ANY DAMAGES TO THE ASR OR TO YOURSELF!!!!!! If you feel that help is needed to install the RAM, contact your nearest Authorized Ensoniq Service Center for assistance. To find your nearest service center please contact Ensoniq Technical Support at 610-948-8060 East Coast/831-438-1921 X-4 West Coast or via the Internet at www.emu.com. Now that the DISCLAIMER part is over, lets talk about RAM!
RAM is an acronym for Random Access Memory. RAM is also known as a SIMM chip. SIMM is an acronym for Single Inline Memory Module. When you sequence songs, make your own sounds or load sounds and samples, that is where your data goes. The more RAM you have, the more you can load and create. The ASR’s both come with 2 Meg of RAM standard. The ASR-X is expandable to 32 Meg of RAM. The ASR-X Pro is expandable to 64 Meg of RAM (via two 32 meg simm's). In an ASR-X Pro, the fully expanded RAM also expands the sequencer memory. Without expanded RAM it has around 31,000 events. With the RAM expanded to 64 Meg, the sequencer has around 90,000 events.
The correct SIMM description for the ASR-X/X Pro is:Standard SIMMs that are 32 bit non-parity, or 36-bit parity, 72-pin only, 70ns (nanoseconds) or faster, Non-EDO.The SIMM is a 5-volt chip (3-volt SIMMs will not properly fit the ASR-X SIMM socket).
A mail order company that sells SIMMs for Ensoniq Products is: The Chip Merchant
Tel: 619-268-4774Fax: 619-268-0874E-mail: [email protected]
You can also go to any Circuit City or Best buy to purchase SIMMs. They are the same types that are used inside of computers.
Remove the 10 hex (Allen) screws from the upper top (outer edges) of the unitRemove the 4 Phillips screws from the rear top lid of the X/X ProSlowly remove the top lid (there are plastic ribbon cables connected that you DO NOT want to remove or loosen)If the back of the X is facing away from you - The SIMM socket(s) are located near the left rear of the boxTo install the SIMM you should arrange the SIMM so that the shinny teeth are pointing down. Place the SIMM in the slot at an angle, in the middle of the slot. The SIMM should tilt forward and back in the slot. If the SIMM will not click into place when pushed into its vertical position in the slot, it is backwards. The notched end of the SIMM should be facing away from
20
ASR-X/X PRO JUMP START MANUAL
the power supply (Large silver box inside the unit). The SIMM should click into place. Replace the top lidReplace the 14 screwsNow your X is ready to go! For a more detailed explanation of the SIMM installation, check out pages (104-106 ASR-X Pro) in the Reference Manual.
21
ASR-X/X PRO JUMP START MANUAL
ASR-X Pro Partners
Glyph Technologies, Inc.735 West Clinton Street, IthacaNY 14850 USA Sales 800-335-0345 607-275-0345 FAX 607-275-9464 Tech Support 607-275-0154 General Information:[email protected] Sales: [email protected] Customer Support:[email protected]://www.GlyphTech.com
Glyph offers a variety of storage and CD ROM solutions.
BIASP.O. Box 2481 Sausalito, CA94966 USAUSA 1.800.775.BIAS (2427) International +1.415.467.8446 FAX +1.415.467.8446 [email protected] Headquarters voice/fax+1.415.331.2446 Technical Support [email protected]://www.bias-inc.com
Bias Peak Software for the Macintosh provides computer based sample editing.
Mark of the Unicorn1280 Massachusetts AveCambridge, MA 02138http://www.motu.com
Digital Performer provides a computer based sequencing solution as well as drag &drop sample support. Unisyn is a cross platform synth editing solution.
22
ASR-X/X PRO JUMP START MANUAL
Sonic Foundry®754 Williamson St. Madison,WI 53703 WI 1 800 57 SONIChttp://www.sfoundry.com/
Sound Forge Software for the PC provides computer based sample editing.
Steinberg North America21354 Nordhoff St., Suite 110Chatsworth, CA 91311Email [email protected]://www.steinberg.de
Wavelab Software for the PC provides computer based sample editing. Cubase provides a computer (Mac or PC) based sequencing solution.
Sound EngineeringP.O. Box 2226 Southeastern,PA 19399 USA Voice: 610-519-WAVEFAX: 610-519-0253 Email:[email protected]://www.soundengine.com
Sound Engineering provides samples and beat libraries in native ASR-X format.
Syntaur Productions 1418 N. Walnut Ave., New Braunfels, TX 78130 830-627-1530 Fax: 830-627-1531 www.syntaur.com
Syntaur provides sample libraries and Ensoniq accessories for the ASR series.
23
ASR-X/X PRO JUMP START MANUAL