Embed Size (px)
Citation preview
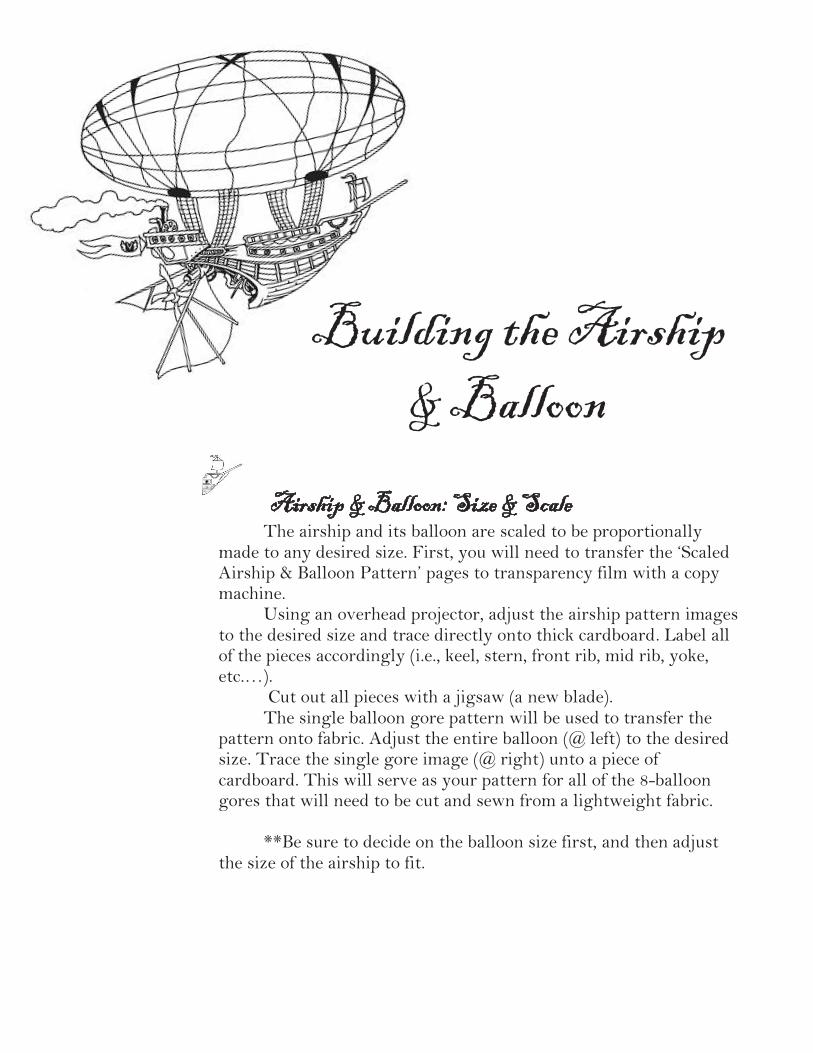
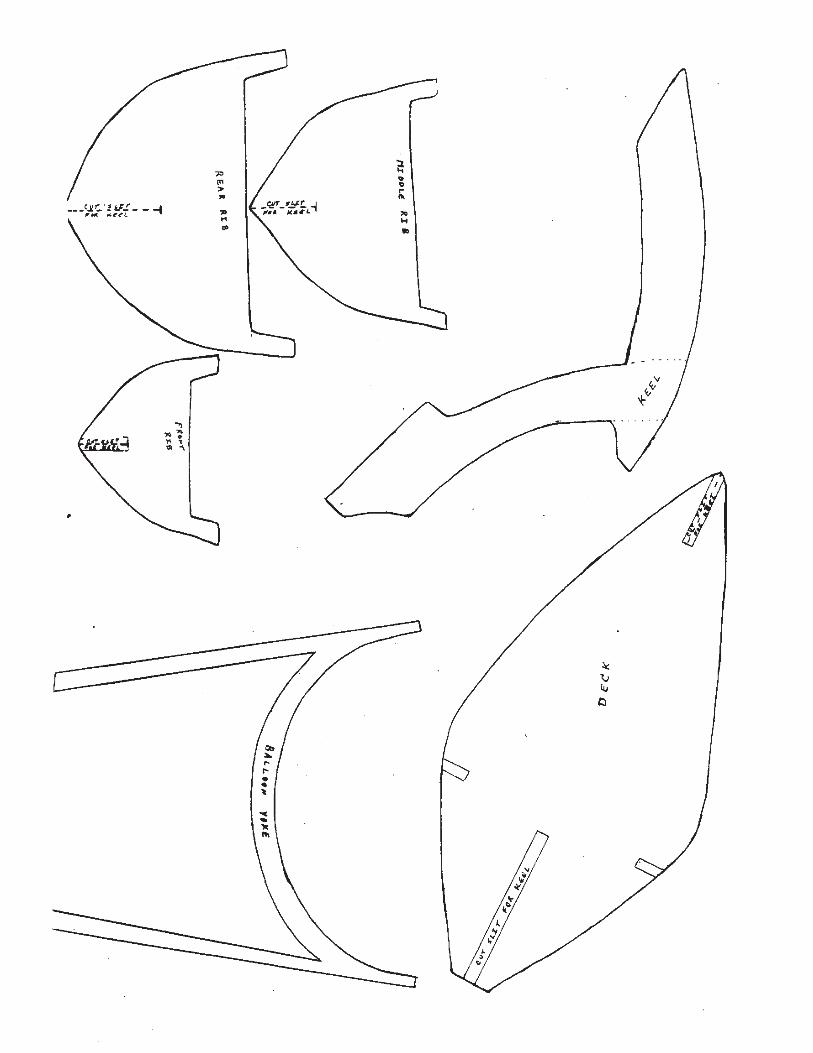
Building the Airship
& Balloon
Airship & Balloon: Size & Scale The airship and its balloon are scaled to be proportionally
made to any desired size. First, you will need to transfer the ‘Scaled Airship & Balloon Pattern’ pages to transparency film with a copy machine.
Using an overhead projector, adjust the airship pattern images to the desired size and trace directly onto thick cardboard. Label all of the pieces accordingly (i.e., keel, stern, front rib, mid rib, yoke, etc.…).
Cut out all pieces with a jigsaw (a new blade). The single balloon gore pattern will be used to transfer the
pattern onto fabric. Adjust the entire balloon (@ left) to the desired size. Trace the single gore image (@ right) unto a piece of cardboard. This will serve as your pattern for all of the 8-balloon gores that will need to be cut and sewn from a lightweight fabric.
**Be sure to decide on the balloon size first, and then adjust
the size of the airship to fit.
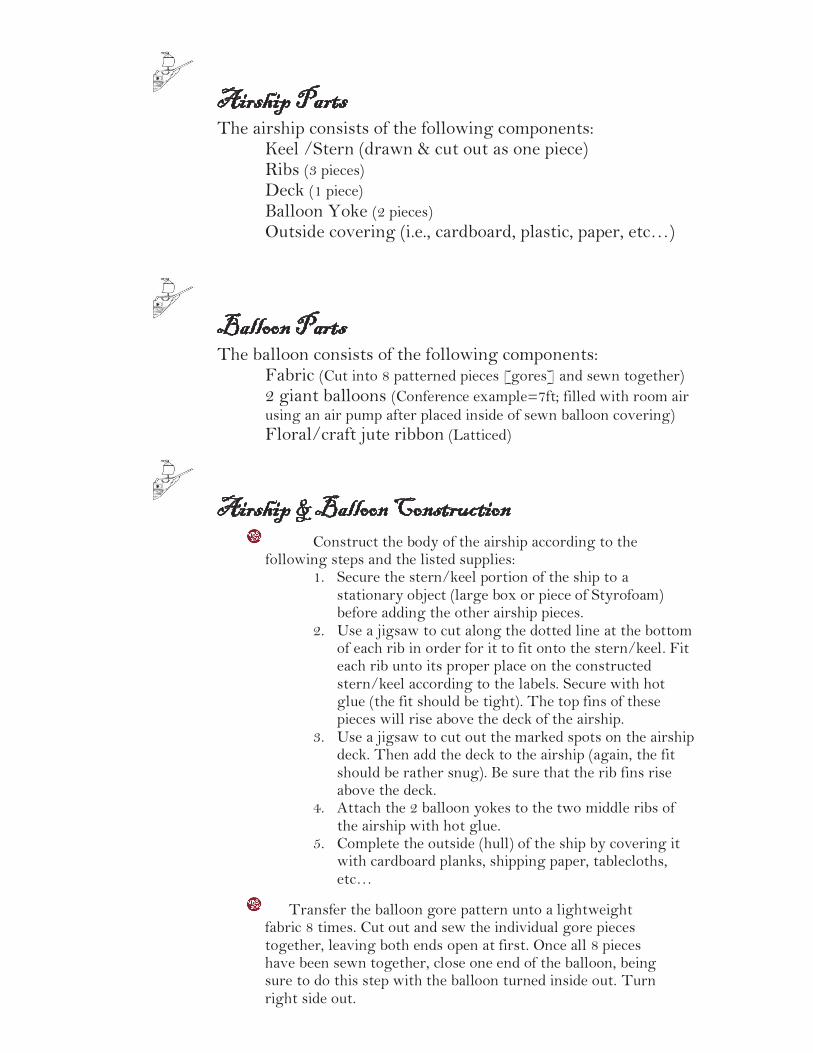
Airship Parts The airship consists of the following components: Keel /Stern (drawn & cut out as one piece) Ribs (3 pieces) Deck (1 piece) Balloon Yoke (2 pieces)
Outside covering (i.e., cardboard, plastic, paper, etc…)
Balloon Parts The balloon consists of the following components:
Fabric (Cut into 8 patterned pieces [gores] and sewn together) 2 giant balloons (Conference example=7ft; filled with room air using an air pump after placed inside of sewn balloon covering) Floral/craft jute ribbon (Latticed)
Airship & Balloon Construction
Construct the body of the airship according to the following steps and the listed supplies:
1. Secure the stern/keel portion of the ship to a stationary object (large box or piece of Styrofoam) before adding the other airship pieces.
2. Use a jigsaw to cut along the dotted line at the bottom of each rib in order for it to fit onto the stern/keel. Fit each rib unto its proper place on the constructed stern/keel according to the labels. Secure with hot glue (the fit should be tight). The top fins of these pieces will rise above the deck of the airship.
3. Use a jigsaw to cut out the marked spots on the airship deck. Then add the deck to the airship (again, the fit should be rather snug). Be sure that the rib fins rise above the deck.
4. Attach the 2 balloon yokes to the two middle ribs of the airship with hot glue.
5. Complete the outside (hull) of the ship by covering it with cardboard planks, shipping paper, tablecloths, etc…
Transfer the balloon gore pattern unto a lightweight fabric 8 times. Cut out and sew the individual gore pieces together, leaving both ends open at first. Once all 8 pieces have been sewn together, close one end of the balloon, being sure to do this step with the balloon turned inside out. Turn right side out. Cut a piece of fabric into the shape of a circle that is large enough to cover the open end of the balloon fabric once the giant balloons have been added and inflated. Insert one giant balloon (Conference example=7ft balloon filled with room air) into the sewn balloon fabric and inflate using a small air pump/vacuum. Do not fill the balloon to max capacity. Use a few rubber bands to seal the balloon shut. Add the other balloon and inflate. Finish the airship balloon by attaching the large fabric circle using either, a craft glue (not hot glue) or self-adhesive Velcro strips.
Place the finished balloon onto the balloon yokes of the airship. Stretch latticed floral/craft jute ribbon across the airship balloon and attached to the airship where the struts of the yoke meet the body of the ship.
Airship Details Add a few portholes along the side of the airship’s hull. Construct at least one that can be opened or looked into by your students. Add woodgrain detail to the hull and deck of the airship using a black permanent marker. Make the airship ‘fly’ by fitting a large piece of cardboard around the entire airship and covering the top of it with batting to create the look of clouds. The airship can be made mobile by adding a frame of PVC pipes and casters to the underside of the airship.
Add a steam trail by stringing cotton beauty coil unto a piece of heavy gauge wire. A stiff pennant flag or a starched piece of fabric can be added to the back of the ship. Place theme character figures on the deck of the ship.
Porthole Scenes Draw and paint the different location scenes from inside the
airship. These scenes are located in the VBS 2016 The Conquerors Room Decorations Transparency Book. Hot glue the scenes to separate pieces of cardboard. Attach two strips to the top of the finished scene (one on each side). This will keep the scene from falling into the slit in the airship’s deck. Cut a slit into the airship’s deck large enough to accommodate the scene and aligned with one of the open portholes in the side of the airship.
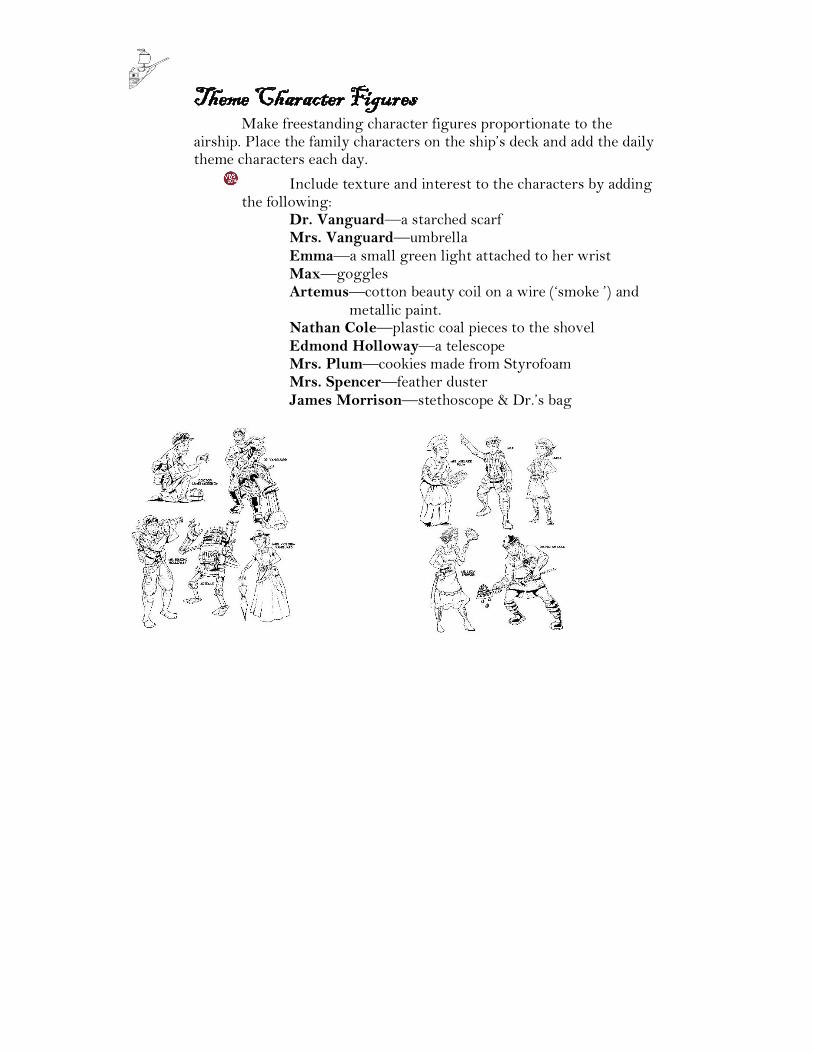
Theme Character Figures
Make freestanding character figures proportionate to the airship. Place the family characters on the ship’s deck and add the daily theme characters each day. Include texture and interest to the characters by adding
the following: Dr. Vanguard—a starched scarf Mrs. Vanguard—umbrella Emma—a small green light attached to her wrist Max—goggles Artemus—cotton beauty coil on a wire (‘smoke ’) and
metallic paint. Nathan Cole—plastic coal pieces to the shovel Edmond Holloway—a telescope Mrs. Plum—cookies made from Styrofoam Mrs. Spencer—feather duster James Morrison—stethoscope & Dr.’s bag
Porthole Scenes Draw and paint the different location scenes from inside the
airship. These scenes are located in the VBS 2016 The Conquerors Room Decorations Transparency Book. Hot glue the scenes to separate pieces of cardboard. Attach two strips to the top of the finished scene (one on each side). This will keep the scene from falling into the slit in the airship’s deck. Cut a slit into the airship’s deck large enough to accommodate the scene and aligned with one of the open portholes in the side of the airship.
Theme Character Figures
Make freestanding character figures proportionate to the airship. Place the family characters on the ship’s deck and add the daily theme characters each day. Include texture and interest to the characters by adding
the following: Dr. Vanguard—a starched scarf Mrs. Vanguard—umbrella Emma—a small green light attached to her wrist Max—goggles Artemus—cotton beauty coil on a wire (‘smoke ’) and
metallic paint. Nathan Cole—plastic coal pieces to the shovel Edmond Holloway—a telescope Mrs. Plum—cookies made from Styrofoam Mrs. Spencer—feather duster James Morrison—stethoscope & Dr.’s bag
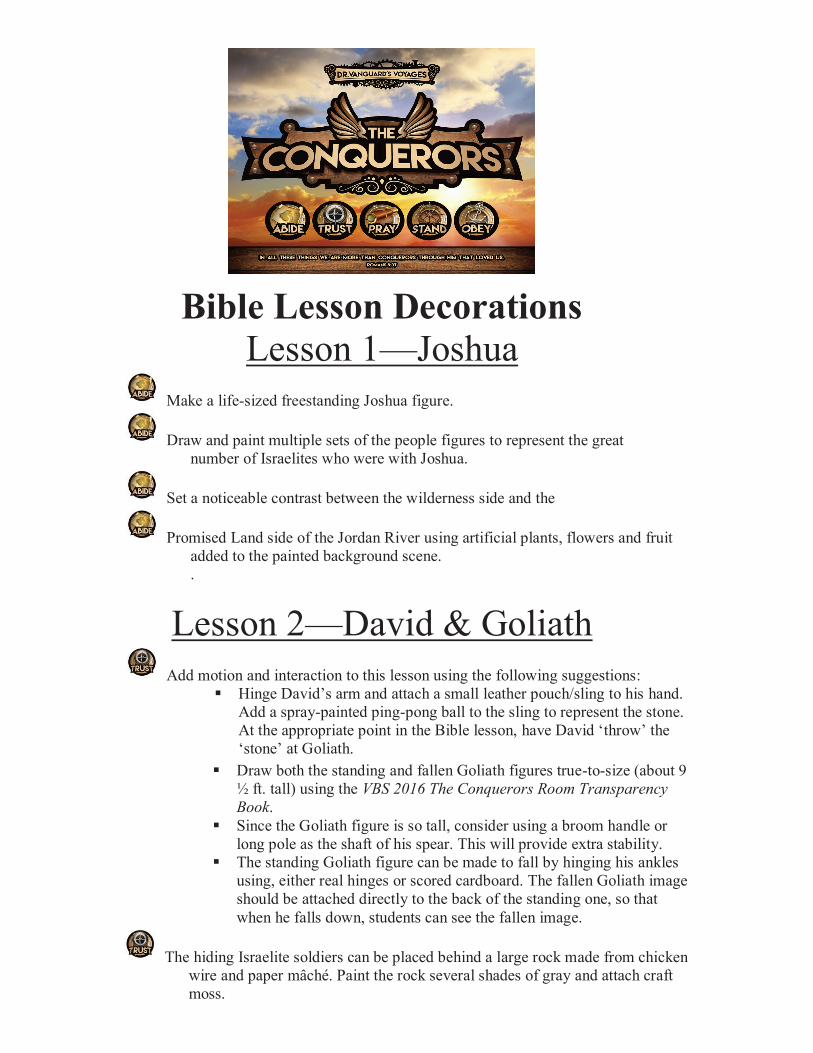
Bible Lesson Decorations
Lesson 1—Joshua Make a life-sized freestanding Joshua figure. Draw and paint multiple sets of the people figures to represent the great
number of Israelites who were with Joshua. Set a noticeable contrast between the wilderness side and the Promised Land side of the Jordan River using artificial plants, flowers and fruit added to the painted background scene. .
Lesson 2—David & Goliath Add motion and interaction to this lesson using the following suggestions:
Hinge David’s arm and attach a small leather pouch/sling to his hand. Add a spray-painted ping-pong ball to the sling to represent the stone. At the appropriate point in the Bible lesson, have David ‘throw’ the ‘stone’ at Goliath.
Draw both the standing and fallen Goliath figures true-to-size (about 9 ½ ft. tall) using the VBS 2016 The Conquerors Room Transparency Book.
Since the Goliath figure is so tall, consider using a broom handle or long pole as the shaft of his spear. This will provide extra stability.
The standing Goliath figure can be made to fall by hinging his ankles using, either real hinges or scored cardboard. The fallen Goliath image should be attached directly to the back of the standing one, so that when he falls down, students can see the fallen image. The hiding Israelite soldiers can be placed behind a large rock made from chicken
wire and paper mâché. Paint the rock several shades of gray and attach craft moss.
Lesson 3—King Hezekiah Add a life-sized figure of King Hezekiah kneeling on top of a piece of cardboard painted to look like a continuation of the tile floor located on the background image. Place a scroll made from brown shipping paper on the floor in front of the praying king. Add a large flowerpot with artificial flowers. Depth and texture can be added to the background scene by attaching a large box
lid to the ‘table’ area of the image and propping it up with cardboard ‘table legs’. A lightweight vase or decorative container can be placed on top of the table, too.
Lesson 4—Shadrach
Draw and paint King Nebuchadnezzar in a life-sized scale. The use of metallic paint will enhance his royal appearance. Draw and paint freestanding figures of Shadrach, Meshach and Abednego At the appropriate point in the presentation of the Bible account, move these figures from the statue scene to inside the fiery furnace. Draw and paint a freestanding figure of Jesus. Create the look of fire inside the furnace using colored cellophane and a strand of blinking Christmas lights. Layer the cellophane to create depth and interest. Attach batting (spray-painted gray) to the furnace vent to represent smoke.
Draw both the standing and fallen Goliath figures true-to-size (about 9 ½ ft. tall) using the VBS 2016 The Conquerors Room TransparencyBook.
Since the Goliath figure is so tall, consider using a broom handle orlong pole as the shaft of his spear. This will provide extra stability.
The standing Goliath figure can be made to fall by hinging his anklesusing, either real hinges or scored cardboard. The fallen Goliath image should be attached directly to the back of the standing one, so that when he falls down, students can see the fallen image.
The hiding Israelite soldiers can be placed behind a large rock made from chicken wire and paper mâché. Paint the rock several shades of gray and attach craft moss.
Lesson 3—King Hezekiah Add a life-sized figure of King Hezekiah kneeling on top of a piece of cardboard painted to look like a continuation of the tile floor located on the background image. Place a scroll made from brown shipping paper on the floor in front of the praying king.
Add a large flowerpot with artificial flowers.
Depth and texture can be added to the background scene by attaching a large box lid to the ‘table’ area of the image and propping it up with cardboard ‘table legs.’ A lightweight vase or decorative container can be placed on top of the table, too.
Lesson 4—Shadrach Draw and paint King Nebuchadnezzar in a life-sized scale. The use of metallic
paint will enhance his royal appearance.
Draw and paint freestanding figures of Shadrach, Meshach and Abed-nego. At the appropriate point in the presentation of the Bible account, move these figures from the statue scene to inside the fiery furnace. Draw and paint a freestanding figure of Jesus.
Create the look of fire inside the furnace using colored cellophane and a strand of blinking Christmas lights. Layer the cellophane to create depth and interest. Attach batting (spray-painted gray) to the furnace vent to represent smoke.
Add fallen soldiers to the stairs of the furnace. Draw the ‘running’ men of Gideon’s army (Lesson 5--VBS 2016 The Conquerors Room Decorations Transparency Book) minus the torches and horns.
The golden image should be much larger than the other character figures. Place the freestanding statue on top of a box to add height.
Place a black flowerpot in front of the golden image. Add ‘smoke’ by stringing a cotton coil (available at most beauty/salon supply stores) onto a heavy gauge wire. Twist the wire so that it loops around the golden image.
Attach a wooden recorder or a harp made from a cereal box and rubber bands to the musicians.
Lesson 5—GideonBefore presenting the lesson, gather and break a few clay flowerpots. Rub the
broken edges on a piece of concrete to make them smooth and safe for little hands.
Construct the mountains and valley using 4 or 6 ladders (6ft), 3 wooden planksand brown shipping paper/felt/flannel. Place a tent in the ‘valley’.
Add soldier silhouettes to the planks. Add a freestanding Gideon with a torch(paper towel roll, colored cellophane & flashlight) and horn (center roll fromfoil/plastic wrap, different sized plastic lids & brown shipping paper).
All character figures and backgrounds are located in the VBS 2016 TheConquerors Room Decorations Transparency Book.
The 3D airship and balloon patterns are included in this handout packet.
Add fallen soldiers to the stairs of the furnace. Draw the ‘running’ men ofGideon’s army (Lesson 5--VBS 2016 The Conquerors Room DecorationsTransparency Book) minus the torches and horns.
The golden image should be much larger than the other character figures. Place the freestanding statue on top of a box to add height.
Place a black flowerpot in front of the golden image. Add ‘smoke’ by stringing a cotton coil (available at most beauty/salon supply stores) onto a heavy gauge wire. Twist the wire so that it loops around the golden image.
Attach a wooden recorder or a harp made from a cereal box and rubber bands tothe musicians.
Lesson 5—Gideon Before presenting the lesson, gather and break a few clay flowerpots. Rub the
broken edges on a piece of concrete to make them smooth and safe for little hands.
Construct the mountains and valley using 4 or 6 ladders (6ft), 3 wooden planks and brown shipping paper/felt/flannel. Place a tent in the ‘valley.’
Add soldier silhouettes to the planks. Add a freestanding Gideon with a torch (paper towel roll, colored cellophane & flashlight) and horn (center roll from foil/plastic wrap, different sized plastic lids & brown shipping paper).
All character figures and backgrounds are located in the VBS 2016 The Conquerors Room Decorations Transparency Book.
The 3D airship and balloon patterns are included in this handout packet.
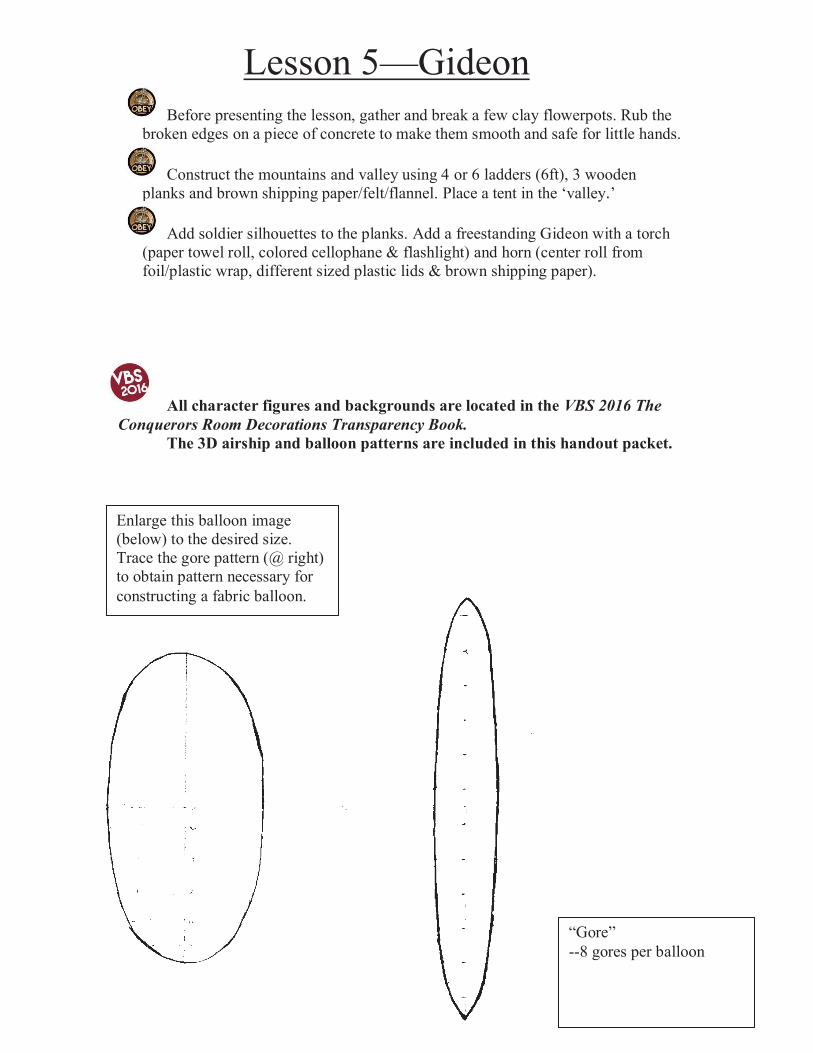
Enlarge this balloon image (below) to the desired size. Trace the gore pattern (@ right) to obtain pattern necessary for constructing a fabric balloon.
“Gore”--8 gores per balloon
Enlarge this balloon image(below) to the desired size. Trace the gore pattern (@ right)to obtain pattern necessary forconstructing a fabric balloon.
“Gore” --8 gores per balloon