Embed Size (px)
Citation preview
TRIAL OF THE BATTLE GOD BY BREWIN'
*********************************************************************************
TRIAL OF THE
BATTLE GOD*********************************************************************************
By Brewin’
An entry in the 2012 Windhammer Prize for
Short Gamebook Fiction
AN ENTRY IN THE 2012 WINDHAMMER PRIZE 1
TRIAL OF THE BATTLE GOD BY BREWIN'
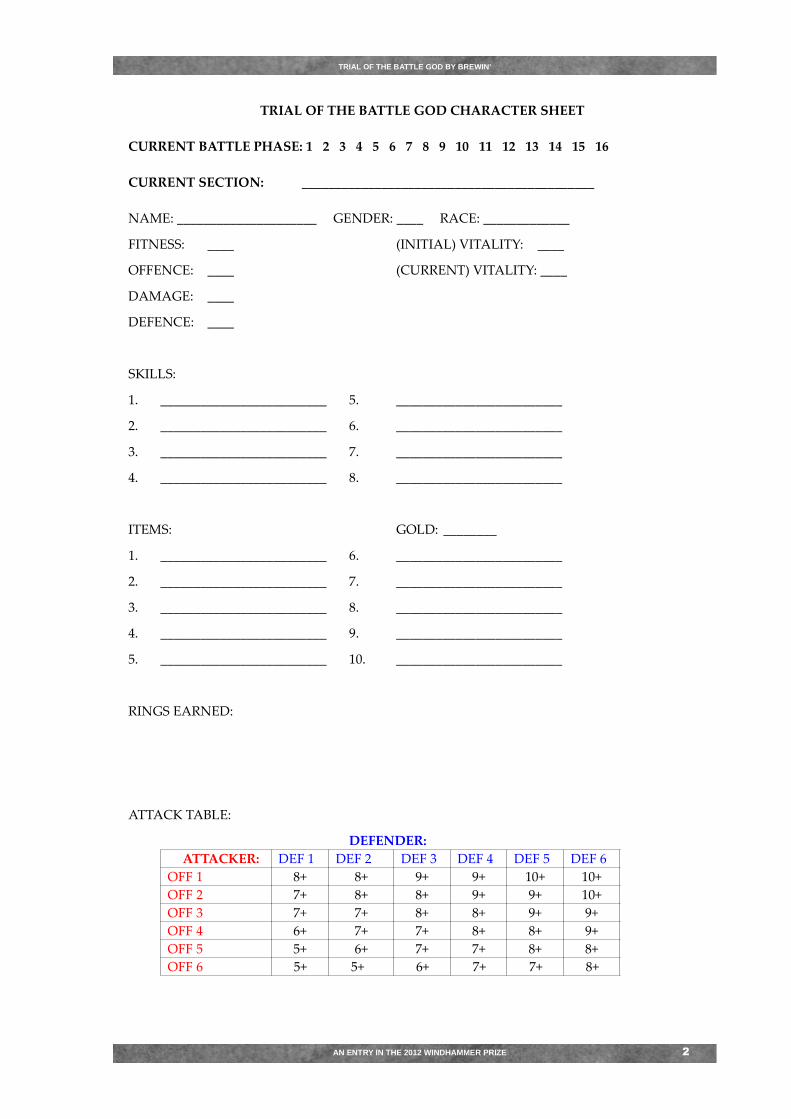
TRIAL OF THE BATTLE GOD CHARACTER SHEET
CURRENT BATTLE PHASE: 1 2 3 4 5 6 7 8 9 10 11 12 13 14 15 16
CURRENT SECTION: ____________________________________________
NAME: _____________________ GENDER: ____ RACE: _____________
FITNESS: ____ (INITIAL) VITALITY: ____
OFFENCE: ____ (CURRENT) VITALITY: ____
DAMAGE: ____
DEFENCE: ____
SKILLS:
1. _________________________ 5. _________________________
2. _________________________ 6. _________________________
3. _________________________ 7. _________________________
4. _________________________ 8. _________________________
ITEMS: GOLD: ________
1. _________________________ 6. _________________________
2. _________________________ 7. _________________________
3. _________________________ 8. _________________________
4. _________________________ 9. _________________________
5. _________________________ 10. _________________________
RINGS EARNED:
ATTACK TABLE:
DEFENDER:
ATTACKER: DEF 1 DEF 2 DEF 3 DEF 4 DEF 5 DEF 6
OFF 1 8+ 8+ 9+ 9+ 10+ 10+
OFF 2 7+ 8+ 8+ 9+ 9+ 10+
OFF 3 7+ 7+ 8+ 8+ 9+ 9+
OFF 4 6+ 7+ 7+ 8+ 8+ 9+
OFF 5 5+ 6+ 7+ 7+ 8+ 8+
OFF 6 5+ 5+ 6+ 7+ 7+ 8+
AN ENTRY IN THE 2012 WINDHAMMER PRIZE 2
TRIAL OF THE BATTLE GOD BY BREWIN'
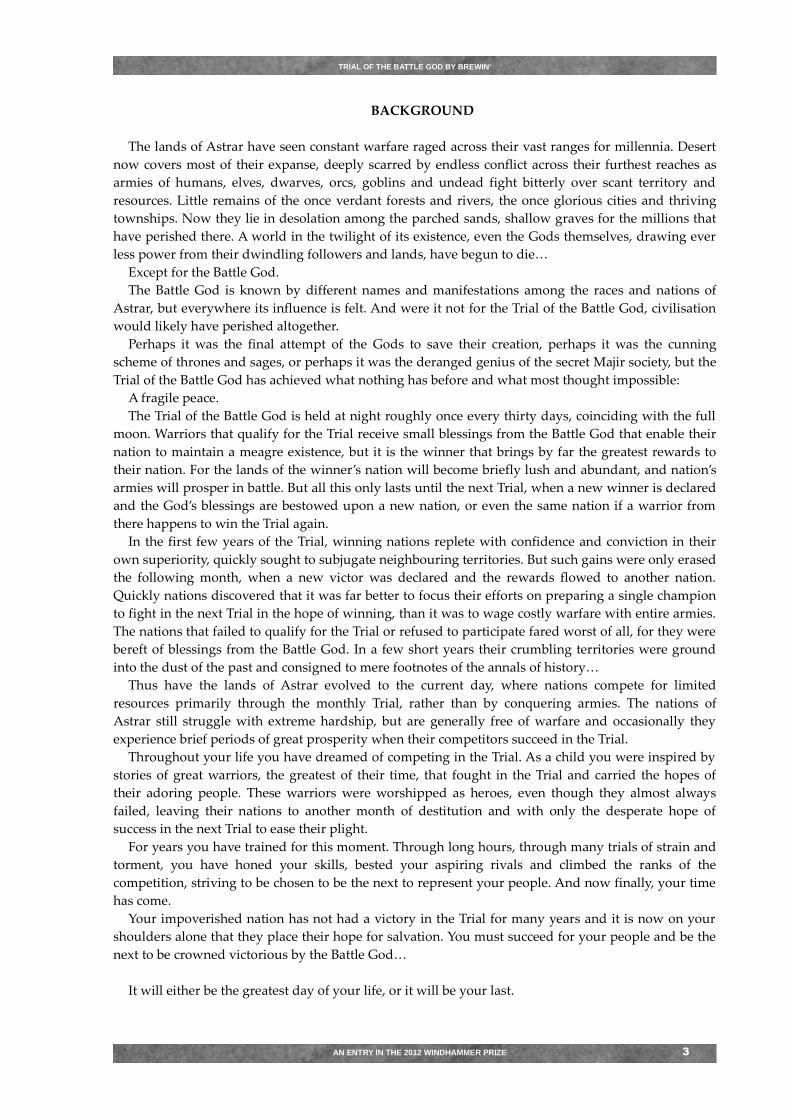
BACKGROUND
The lands of Astrar have seen constant warfare raged across their vast ranges for millennia. Desert
now covers most of their expanse, deeply scarred by endless conflict across their furthest reaches as
armies of humans, elves, dwarves, orcs, goblins and undead fight bitterly over scant territory and
resources. Little remains of the once verdant forests and rivers, the once glorious cities and thriving
townships. Now they lie in desolation among the parched sands, shallow graves for the millions that
have perished there. A world in the twilight of its existence, even the Gods themselves, drawing ever
less power from their dwindling followers and lands, have begun to die…
Except for the Battle God.
The Battle God is known by different names and manifestations among the races and nations of
Astrar, but everywhere its influence is felt. And were it not for the Trial of the Battle God, civilisation
would likely have perished altogether.
Perhaps it was the final attempt of the Gods to save their creation, perhaps it was the cunning
scheme of thrones and sages, or perhaps it was the deranged genius of the secret Majir society, but the
Trial of the Battle God has achieved what nothing has before and what most thought impossible:
A fragile peace.
The Trial of the Battle God is held at night roughly once every thirty days, coinciding with the full
moon. Warriors that qualify for the Trial receive small blessings from the Battle God that enable their
nation to maintain a meagre existence, but it is the winner that brings by far the greatest rewards to
their nation. For the lands of the winner’s nation will become briefly lush and abundant, and nation’s
armies will prosper in battle. But all this only lasts until the next Trial, when a new winner is declared
and the God’s blessings are bestowed upon a new nation, or even the same nation if a warrior from
there happens to win the Trial again.
In the first few years of the Trial, winning nations replete with confidence and conviction in their
own superiority, quickly sought to subjugate neighbouring territories. But such gains were only erased
the following month, when a new victor was declared and the rewards flowed to another nation.
Quickly nations discovered that it was far better to focus their efforts on preparing a single champion
to fight in the next Trial in the hope of winning, than it was to wage costly warfare with entire armies.
The nations that failed to qualify for the Trial or refused to participate fared worst of all, for they were
bereft of blessings from the Battle God. In a few short years their crumbling territories were ground
into the dust of the past and consigned to mere footnotes of the annals of history…
Thus have the lands of Astrar evolved to the current day, where nations compete for limited
resources primarily through the monthly Trial, rather than by conquering armies. The nations of
Astrar still struggle with extreme hardship, but are generally free of warfare and occasionally they
experience brief periods of great prosperity when their competitors succeed in the Trial.
Throughout your life you have dreamed of competing in the Trial. As a child you were inspired by
stories of great warriors, the greatest of their time, that fought in the Trial and carried the hopes of
their adoring people. These warriors were worshipped as heroes, even though they almost always
failed, leaving their nations to another month of destitution and with only the desperate hope of
success in the next Trial to ease their plight.
For years you have trained for this moment. Through long hours, through many trials of strain and
torment, you have honed your skills, bested your aspiring rivals and climbed the ranks of the
competition, striving to be chosen to be the next to represent your people. And now finally, your time
has come.
Your impoverished nation has not had a victory in the Trial for many years and it is now on your
shoulders alone that they place their hope for salvation. You must succeed for your people and be the
next to be crowned victorious by the Battle God…
It will either be the greatest day of your life, or it will be your last.
AN ENTRY IN THE 2012 WINDHAMMER PRIZE 3
TRIAL OF THE BATTLE GOD BY BREWIN'
CREATING YOUR CHARACTER
You will need all of your skill, cunning and luck to succeed over all others in the Trial. But first
you’ll need to print off a copy of the character sheet and create your warrior:
Your character’s NAME and GENDER can be whatever you wish. Your character’s RACE can be
any of those that make up the nations of Astrar: humans, elves, dwarves, orcs, goblins or undead.
Unless you choose to play a human, you will have modifers to your vital stats depending on what
RACE you choose.
The vital stat modifers for RACE are as follows:
Humans: None.
Elves: +1 FITNESS bonus, -3 VITALITY penalty.
Dwarves: +3 VITALITY bonus, -1 FITNESS penalty.
Orcs: +1 DAMAGE bonus, -1 FITNESS penalty.
Goblins: +1 DEFENCE bonus, -1 DAMAGE penalty.
Undead: +1 DAMAGE bonus, -3 VITALITY penalty.
Your character has five vital stats:
FITNESS, VITALITY, OFFENCE, DEFENCE and DAMAGE.
FITNESS (abbreviated FIT) typically varies from 6 to 12 and determines how quickly your
character acts in combat and is used to perform physical feats by making a FIT check. (A FIT check is
made by rolling two dice under your current FITNESS).
• Unless specified, FITNESS can never be increased above the starting amount.
VITALITY (abbreviated VIT) typically varies from 10 and 24 and determines how much damage
your character can sustain. Damage causes loss of VITALITY and death results on reaching 0
VITALITY.
• Unless specified, VITALITY can never be increased above the starting amount.
OFFENCE (abbreviated OFF) and DEFENCE (abbreviated DEF) vary from 1 to 6 and are
determined by the weapon and armour equipped. (An unarmed warrior without special skills or
racial modifiers has OFF 1 and DEF 1). OFFENCE determines the roll required for you to hit and
DEFENCE determines the roll required for you to be hit.
• OFFENCE and DEFENCE can never be lower than 1, or higher than 6, regardless of modifiers.
• OFF and DEF values do not stack. For instance, if you have armour with DEF 2 and pick up armour
that has DEF 4, your new DEF value is 4, not 2+4 = 6.
DAMAGE (abbreviated DAM) is the Vitality loss you inflict when you hit in combat and is
determined by the weapon equipped. (An unarmed warrior without racial modifiers has DAM 2).
• DAMAGE can never be lower than 1, regardless of modifiers.
AN ENTRY IN THE 2012 WINDHAMMER PRIZE 4
TRIAL OF THE BATTLE GOD BY BREWIN'
Your character starts with the base values FITNESS 6, VITALITY 10, OFFENCE 1 and DEFENCE 1
(these values represent the base level of an unarmed warrior). You then have 25 points to spend on the
stats and skills of your character:
• FITNESS can be increased at a cost of 3 points / FIT point, to a maximum of 12 before racial
modifiers are applied. Thus elves can have up to FITNESS 13, and dwarves and orcs can have
no higher than FITNESS 11.
• VITALITY can be increased at a cost of 1 points / VIT point, to a maximum of 24 before racial
modifiers are applied. Thus dwarves can have up to VITALITY 27, and elves and undead can
have no higher than VITALITY 21.
SKILLS cost 2 or 3 points each and cannot be taken multiple times. Below is the list:
• PROWESS (3 points) Adds one to your OFFENCE.
• DODGE (3 points) Adds one to your DEFENCE.
_____________________________________________________________________
• AGILITY (2 points) Skill in jumping, climbing and balancing.
• FIRST AID (2 points) Restore 2 VIT after each combat and
restore 1 VIT after each event that causes a loss of VIT.
• PARRY (2 points) Allows you to force opponent to re-roll one attack per
combat, providing you have a melee weapon to parry
with.
You must accept the second roll.
• SPOT (2 points) Skill in detecting things that are hidden.
• SPRINT (2 points) Skill in running and swimming fast over
short distances.
• STEALTH (2 points) Skill in hiding and ambushing others. A
character with STEALTH gets a free attack at the start
of melee combat, unless:
- The target has SPOT skill.
- Or the target has STEALTH skill and you
don’t have SPOT skill.
• TRUE STRIKE (2 points) Allows you to re-roll one attack you
make per combat.
You must accept the second roll.
• UNARMED COMBAT (2 points) OFF 2, DEF 2, DAM 4 when unarmed.
AN ENTRY IN THE 2012 WINDHAMMER PRIZE 5
TRIAL OF THE BATTLE GOD BY BREWIN'
Trial participants are each given 25 gold pieces with which to purchase their items. Unless one of
your items is a Backpack, you cannot carry more than six items at once: including weapons and
armour. If you have a Backpack, then you can carry up to ten items: including the Backpack.
The list of items available is as follows:
WEAPONS:
Dagger (3 gold) .……………......OFF 2, DAM 4.
Quarterstaff* (5 gold).…………OFF 3, DAM 5.
Hand Axe (6 gold)……………...OFF 3, DAM 6.
War Hammer (7 gold)………....OFF 3, DAM 7.
Short Sword (10 gold)…………OFF 4, DAM 8.
Javelin** (4 gold)……..………...Free attack before melee combat: OFF 3, DAM 5.
* Because a quarterstaff is two-handed, it cannot be used if you are also using a shield.
** You cannot throw a javelin at a target with STEALTH skill unless you have SPOT skill. A thrown javelin
is automatically recovered at the end of combat, unless otherwise specified.
ARMOUR:
Leather Armour (9 gold)……………...DEF 2.
Studded Leather Armour (15 gold)….DEF 3.
Shield (10 gold)…………………….......Adds 1 to your DEF.
MISCELLANEOUS ITEMS:
Healing Balm (2 gold) ……………..…Single use: restores 1 FIT.
Healing Salve (3 gold)………………...Single use: restores 5 VIT.
Healing Potion (6 gold).……………....Single use: restores 10 VIT.
Potion of Speed (5 gold)……………....Single use: adds 3 to your FIT (exceeding your
starting value) for a single FIT check
or until the end of combat.
Backpack (4 gold)……………………..Allows user to carry up to ten items
(including the backpack).
Lucky Charm (1 gold).
AN ENTRY IN THE 2012 WINDHAMMER PRIZE 6
TRIAL OF THE BATTLE GOD BY BREWIN'
HOW TO PLAY TRIAL OF THE BATTLE GOD
The Trial of the Battle God is set in a dungeon where not only your location in space is important,
but your location in time is as well. This is because your opponents, and there are at least seven of
them, are moving around the dungeon just as you are.
The way in which this gamebook handles time is by what are called Battle Phases and you keep
track of your current Battle Phase by using the record track at the top of your character sheet. All
combatants begin on Battle Phase 1 and as time passes, they go to Battle Phase 2, then 3 and so on
until the Trial concludes.
When you see the instruction * Next Battle Phase * at the beginning of a section, it means that you
are now on the next Battle Phase and should update this on your character sheet. Typically a new
Battle Phase occurs whenever you have moved to a new area or spend time in an area.
Your current location will then be described and may be followed by a list of sections to turn to if it
is a given Battle Phase. When this occurs, you turn to the new section instead of continuing to read the
current section. Note that where you see the words “turn first”, you need to record your current section on
your character sheet before turning to the directed section, as you will need to return to the section you are
currently on or about to turn to (and the gamebook won’t know where that was). Also note that when you
return to the section you were on in this way, you do not increase your Battle Phase a second time (but you do of
course if you go somewhere else and then come back to this location).
Otherwise, if you are on none of the specified Battle Phases, you continue to read the rest of the
current section as normal. In Italics below is an example section:
(99)
* Next Battle Phase *
Here lies an empty corridor, leading north and south.
If it is Battle Phase 5, turn first to (16).
If it is Battle Phase 11 or 12, turn to (49).
Otherwise, your exits are:
• North, by turning to (31).
• Or south, by turning to (84): unless you are going this way on Battle Phase 4, in which case turn first
to (16).
So let’s say you reach this section on Battle Phase 3. At the start of this section, you go to the next
Battle Phase, i.e. Battle Phase 4. Because it is not any of the Battle Phases 5, 11 or 12 that are specified
at the start of this section, you read the whole section (an empty corridor) and make your choices on
where to go from there at the end of the section. Because it is Battle Phase 4 though, if you are going
south from here you will need to turn to section 16 first, before then turning to section 84… Someone
is coming the other way: perhaps you can even hear their footsteps.
AN ENTRY IN THE 2012 WINDHAMMER PRIZE 7
TRIAL OF THE BATTLE GOD BY BREWIN'
DICE
Only the standard six-sided dice are used and dice rolls are usually abbreviated to #D +# format.
For instance, rolling 1D+1 means rolling one dice and adding one to the total, and rolling 3D+2 means
rolling three dice and adding two to the total.
FIT CHECKS
A FIT check is made by rolling 2D (two dice) under your current FITNESS.
ITEMS
You will find different items in the dungeon, which you record on your character sheet if you wish
to take them and can carry them. Some items, such as potions and salves, can only be used once but at
any time (including combat). All items except RINGS count against your limit of six items or ten items
if you have a Backpack. You can discard all items except RINGS at any time, but once discarded they
are considered permanently gone (for you and anyone else).
RINGS
Rings you obtain are recorded in their own area on your character sheet and do not count against
your item limit. Each participant in the Trial wears a jewelled RING: yours being an OPAL RING.
Whenever you defeat another participant, you take their RING and record it on your character sheet.
Some sections begin with instructions to ignore the section if you have a certain RING and return to
the section you were on, instead of reading on. This is because you have already slain that opponent in
the current Trial. But remember you’re not the only one doing the slaying: other opponents will be
meeting and defeating each other in the dungeon too.
RULES OF THE TRIAL
As decreed by the Battle God, these are the rules of the Trial:
• You must always seek to attack and defeat your opponents. There will be no surrender and
no retreat.
• You must keep moving. There will be no rest and no delay.
• You must endure until all opponents have fallen. You alone must stand victorious in battle.
Every warrior in the Trial lives and dies by these rules. It is said that even the Battle God itself can
enforce its will on the Trial to ensure that these rules are adhered to.
AN ENTRY IN THE 2012 WINDHAMMER PRIZE 8
TRIAL OF THE BATTLE GOD BY BREWIN'
RULES OF COMBAT
If you are going to win the Trial of the Battle God, you’ll need to win combat. The rules for this are
as follows:
1. Resolve javelin attacks that might occur before melee combat commences. (If multiple players
are throwing javelins, attacks are resolved simultaneously).
2. Resolve STEALTH attacks that might occur at the start of melee combat.
3. Combatants take it in turns to attack each round, with the combatant with the highest FIT
going first. If both combatants have the same FIT, then attacks are simultaneous, meaning it is
possible for both to be killed at the same time.
4. Before making an attack, a combatant can elect to make a FIT check to add one to their next
attack roll. A failed FIT check means that instead they deduct one from their next attack roll.
Regardless of success or failure, this FIT check temporarily costs the combatant one FITNESS
point until the end of battle, when all FITNESS points lost in this way are automatically
recovered. This means that subsequent FIT checks in the same battle are harder, and also that
the combatant will lose first attack in a round if they no longer have the highest FITNESS.
-Note that non-player-controlled combatants will not use FIT checks in combat.
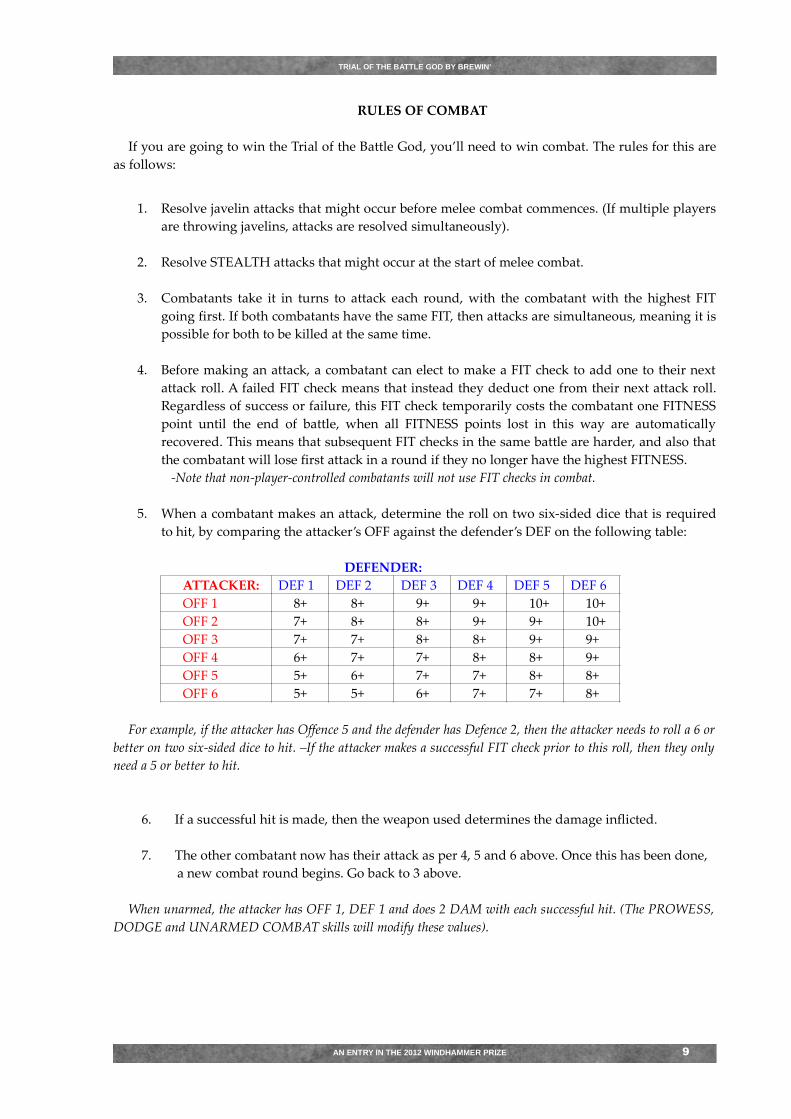
5. When a combatant makes an attack, determine the roll on two six-sided dice that is required
to hit, by comparing the attacker’s OFF against the defender’s DEF on the following table:
DEFENDER:
ATTACKER: DEF 1 DEF 2 DEF 3 DEF 4 DEF 5 DEF 6
OFF 1 8+ 8+ 9+ 9+ 10+ 10+
OFF 2 7+ 8+ 8+ 9+ 9+ 10+
OFF 3 7+ 7+ 8+ 8+ 9+ 9+
OFF 4 6+ 7+ 7+ 8+ 8+ 9+
OFF 5 5+ 6+ 7+ 7+ 8+ 8+
OFF 6 5+ 5+ 6+ 7+ 7+ 8+
For example, if the attacker has Offence 5 and the defender has Defence 2, then the attacker needs to roll a 6 or
better on two six-sided dice to hit. –If the attacker makes a successful FIT check prior to this roll, then they only
need a 5 or better to hit.
6. If a successful hit is made, then the weapon used determines the damage inflicted.
7. The other combatant now has their attack as per 4, 5 and 6 above. Once this has been done,
a new combat round begins. Go back to 3 above.
When unarmed, the attacker has OFF 1, DEF 1 and does 2 DAM with each successful hit. (The PROWESS,
DODGE and UNARMED COMBAT skills will modify these values).
AN ENTRY IN THE 2012 WINDHAMMER PRIZE 9
TRIAL OF THE BATTLE GOD BY BREWIN'
MULTIPLAYER OPTION
It is possible to play Trial of the Battle God with up to six human players. Regardless of how many
human players there are, there will always be another seven non-player-controlled opponents.
In order to play with between two and six human players, each player will need to create a warrior
(as per the prior rules) and have a copy of this document. Then when reading, all players need to
observe the following additional rules:
• To determine starting locations, players should draw the numbers one to six from a hat in an
agreed order, instead of each rolling a dice. Thus all players will start at different locations.
Players with a lucky charm can draw again if they wish (replacing their first draw) but must accept the
second draw.
• The numbers drawn for starting locations also determine what jewelled RING each player
starts with: 1 – AMBER, 2 – ROSE QUARTZ, 3 – TURQUIOSE, 4 – CITRINE, 5 – PEARL, 6 –
OPAL.
• When a player reaches the instruction * Next Battle Phase * they need to wait until all other
players have also reached a * Next Battle Phase * instruction before proceeding. Thus all
players will always be on the same Battle Phase.
• Once all players have reached a * Next Battle Phase * instruction, they need to call out what
section number they are on. If two players call out the same number, then this means that they
are at the same location and must immediately resolve combat between them. Once combat
has been resolved, then the winner can keep reading. In the event that there are more than
two players at the same location, combatants can direct attacks against an opponent of their
choice (and otherwise combat is conducted in the same way).
• Occasionally players will be instructed to call out a different section number from the one in
which they are on. Where this occurs, you will see the instruction (Multiplayer section #)
immediately below the * Next Battle Phase * instruction. This typically occurs when a player
spends time in a given area.
• Lastly, whenever a player acquires another jewelled RING from an opponent, they must
inform the other players so that they too can record this RING on their character sheets. These
other players haven’t earned the RING themselves, but for the purposes of keeping track of
which opponents are still alive, they need to record it and read subsequent sections as if they did
have it.
THAT CONCLUDES THE RULES OF PLAY. WHEN YOU ARE READY TO BEGIN THE TRIAL,
TURN OVER TO (1).
AN ENTRY IN THE 2012 WINDHAMMER PRIZE 10

TRIAL OF THE BATTLE GOD BY BREWIN'
(1)
As is tradition, on the day before you set off for the Trial your people hold a lavish festival in your
honour and for those before you that have fought and died for the glory of the Battle God. The
celebrations last into the early hours of the morning and you enjoy the company and adulation of your
people while you can, knowing that tomorrow you leave your lands and will not return unless you
succeed. Some of your most ardent followers even pledge you gifts, gold and land if you win, their
offers growing more extravagant as the night grows long and you dare to believe that you will return
victorious to claim them... But how many others before you had the same thought, only to perish?
With the first rays of the new day, you say your final goodbyes to your home and set out with your
entourage of soldiers, priests and dedicated followers for the fateful waters of Lake Judgement, where
the next Trial is to be held. After many days of travel across a barren, parched wilderness, you finally
reach the lake’s fabled waters. Shrouded in fog, the lake lies surrounded by a dense mangrove forest
and the colourful flagged camps of other competitors that have already arrived. A glistening rocky
hillock emerges from the centre of the misty lake, like a scaly beast rising from the depths and atop it
you can discern a sparkling silvery haze. It is here you have been told, that you must go when called
to begin the Trial.
You establish your camp at a respectful distance from the other camps and over the next couple of
days, you manage to catch a glimpse of your rivals. Taking part in the Trial are a human warrior-monk
from the mountainous and snow-clad kingdom of Lashtar, a human storm-knight from the mighty
Baaldavan empire, an elven ranger from the forested lands of Estare where last month’s winner came
from, a member of the elite dwarven stone-guard from the independent city of Ravok’s Pass, an orcish
barbarian from the lawless Vakak wilds, a goblin acrobat from the Borog marshes, and another
competitor in a hooded black cloak that keeps the company of skeletal soldiers.
At midnight when the moon is full, a great gong rings throughout the camps, signalling the
beginning of the Trial. Quickly you and the other competitors move to the lake’s edge, accompanied
only by your highest priest and most-trusted aide. The lake’s meandering shoreline prevents close
contact between the rival parties and you can barely make out their silhouettes against the moonlight.
Waiting for you at the pebbled shore is a one-man canoe.
“I can go no further. You must enter and leave the Trial alone,” says your priest in a solemn voice.
“May the glory of the Battle God be yours.”
Focusing on the task ahead, you make a final check of your inventory and climb into the canoe to
paddle towards the rocky hillock. As you approach, the reflection of the sparkling haze ahead dances
across the lake’s ripples around you and seems to envelop your canoe. Your mind begins to slip into a
dream-like state, but determined to resist, you grit your teeth and push onwards, even as you fall into
a deep sleep…
And the Trial of the Battle God has begun.
Set your Battle Phase to 1 on your character sheet and roll one die*:
If you roll 1, turn to (90).
If you roll 2, turn to (32).
If you roll 3, turn to (5).
If you roll 4, turn to (21).
If you roll 5, turn to (60).
And if you roll 6, turn to (84).
* You can choose to re-roll this result if you have a lucky charm, but if so, you must accept the second roll.
AN ENTRY IN THE 2012 WINDHAMMER PRIZE 11

TRIAL OF THE BATTLE GOD BY BREWIN'
(2)
* Next Battle Phase *
You have entered a domed chamber of wooden walls carved with intricate grooves that circle the
room. Suspended from the middle of the ceiling on a thick rope as wide as your torso is a gigantic iron
bell covered in glowing runes that morph through the colours of the rainbow.
A hefty wooden mallet leans against the bell that hangs a few centimetres off the floor. You can take
this Mallet as a weapon if you wish (OFF 2, DAM 4 and –1 to your FIT in combat) but its real purpose
is obvious…
If you wish to ring the bell, turn to (67).
Otherwise, the only exit from here is east back through the door, by turning to (17).
(3)
The steel door leading north from this room no longer opens, leaving you no choice but to go
through the west door. Turn to (53).
(4)
If you have a TOPAZ RING, ignore this section and return to the section you were on.
Otherwise, read on:
You come face to face with a burly human male and instantly recognise his chiselled Baaldavan
features. Standing a few metres away, short sword in hand and wearing studded leather painted in the
bright blue and gold colours of his national flag, he is a storm-knight. Famous for their skill in battle
and cunning tactics, storm-knights are often fancied by onlookers to win the Trial.
The knight's alert senses prevent you from making a STEALTH attack prior to the commencement
of melee combat:
FIT VIT OFF DAM DEF
HUMAN KNIGHT 9 21 5 8 3
Skills: Prowess, Spot.
Weapons: Short Sword (OFF 4, DAM 8).
Armour: Studded Leather (DEF 3).
Miscellaneous Items: None.
If you win this battle, you acquire the knight’s TOPAZ RING (be sure to inform the other players if
there are any) and can take any of his other items if you wish. Then return to section you were on.
AN ENTRY IN THE 2012 WINDHAMMER PRIZE 12
TRIAL OF THE BATTLE GOD BY BREWIN'
(5)
You recover consciousness to discover that you are no longer on the lake, but standing in a square
chamber of stone walls that is cluttered with the whirring cogs, pumping pistons and steaming pipes
of a vast mechanical contraption that dominates the room and deafens your ears. A large hissing pipe
follows the north side of the chamber and continues through the wall to the west, where a steel door is
also set. Noticing that the room is lit from no discernible source, you see that there is also a painted
blue door in the middle of the east wall… You are now in the dungeon of the Battle God.
Amongst the machinery here is an iron Hammer (OFF 2, DAM 4) that you can take if you wish,
before deciding where you will go from here:
• If you go through the steel door to the west, turn to (46).
• Or you go through the blue door to the east, turn to (43).
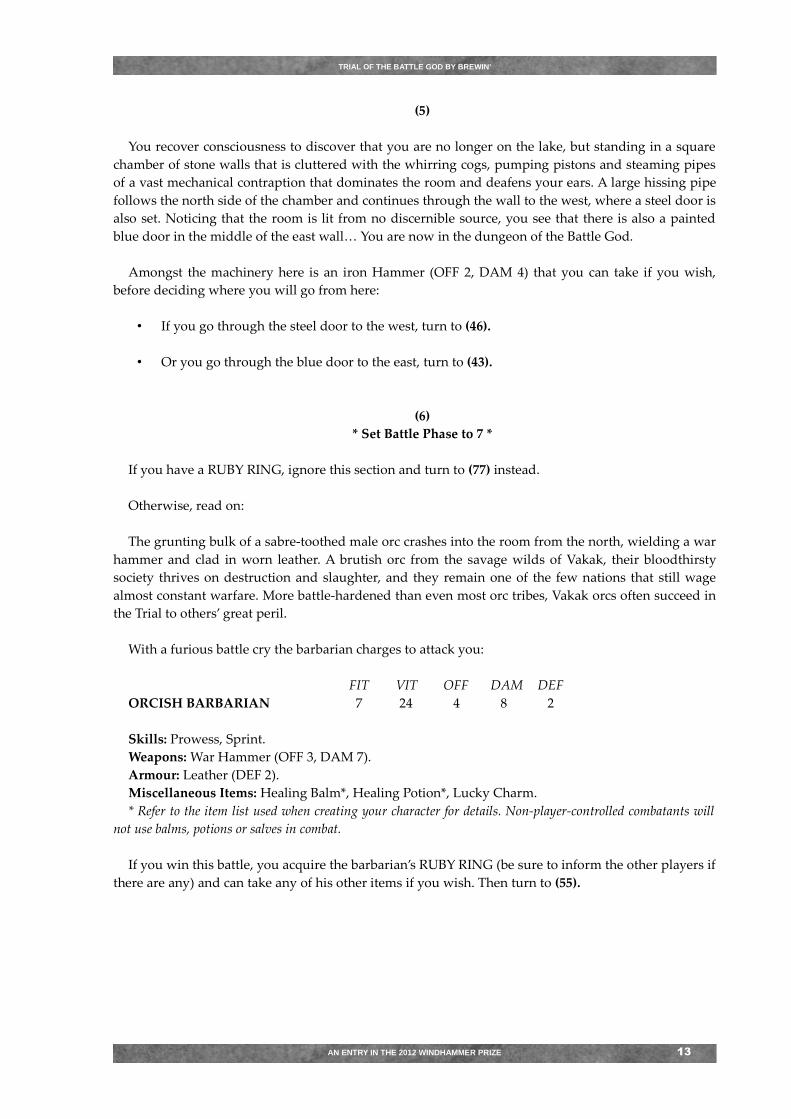
(6)
* Set Battle Phase to 7 *
If you have a RUBY RING, ignore this section and turn to (77) instead.
Otherwise, read on:
The grunting bulk of a sabre-toothed male orc crashes into the room from the north, wielding a war
hammer and clad in worn leather. A brutish orc from the savage wilds of Vakak, their bloodthirsty
society thrives on destruction and slaughter, and they remain one of the few nations that still wage
almost constant warfare. More battle-hardened than even most orc tribes, Vakak orcs often succeed in
the Trial to others’ great peril.
With a furious battle cry the barbarian charges to attack you:
FIT VIT OFF DAM DEF
ORCISH BARBARIAN 7 24 4 8 2
Skills: Prowess, Sprint.
Weapons: War Hammer (OFF 3, DAM 7).
Armour: Leather (DEF 2).
Miscellaneous Items: Healing Balm*, Healing Potion*, Lucky Charm.
* Refer to the item list used when creating your character for details. Non-player-controlled combatants will
not use balms, potions or salves in combat.
If you win this battle, you acquire the barbarian’s RUBY RING (be sure to inform the other players if
there are any) and can take any of his other items if you wish. Then turn to (55).
AN ENTRY IN THE 2012 WINDHAMMER PRIZE 13
TRIAL OF THE BATTLE GOD BY BREWIN'
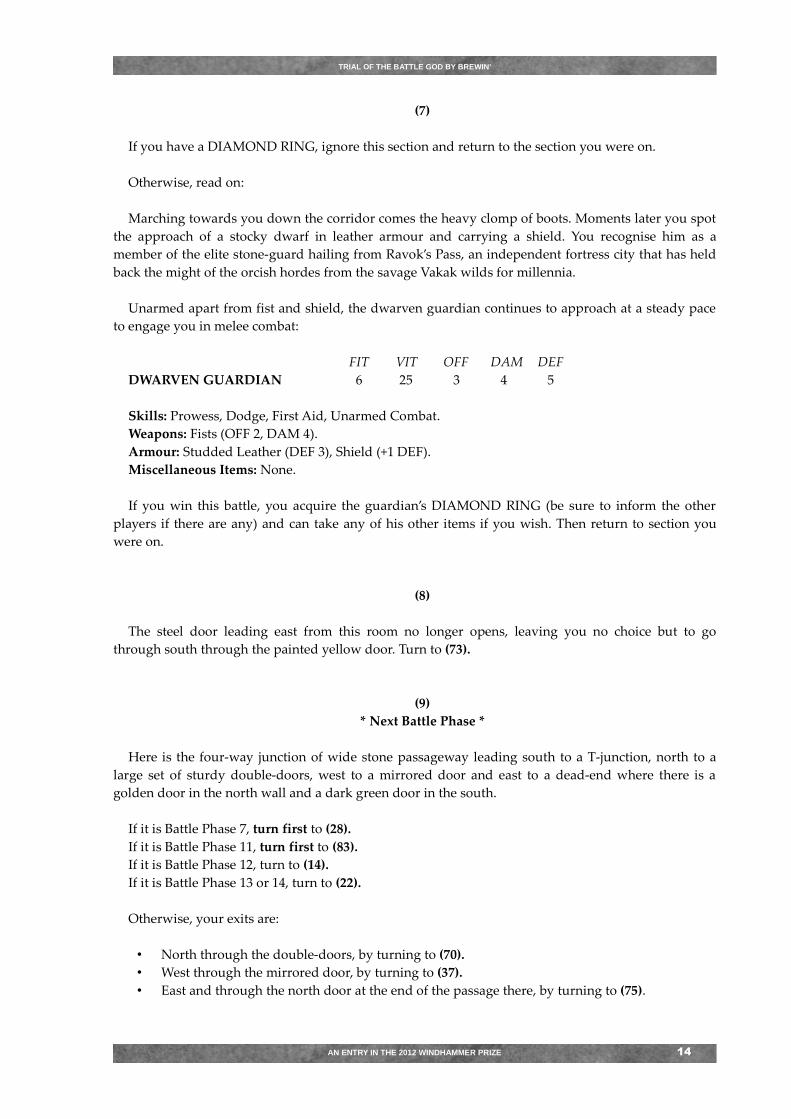
(7)
If you have a DIAMOND RING, ignore this section and return to the section you were on.
Otherwise, read on:
Marching towards you down the corridor comes the heavy clomp of boots. Moments later you spot
the approach of a stocky dwarf in leather armour and carrying a shield. You recognise him as a
member of the elite stone-guard hailing from Ravok’s Pass, an independent fortress city that has held
back the might of the orcish hordes from the savage Vakak wilds for millennia.
Unarmed apart from fist and shield, the dwarven guardian continues to approach at a steady pace
to engage you in melee combat:
FIT VIT OFF DAM DEF
DWARVEN GUARDIAN 6 25 3 4 5
Skills: Prowess, Dodge, First Aid, Unarmed Combat.
Weapons: Fists (OFF 2, DAM 4).
Armour: Studded Leather (DEF 3), Shield (+1 DEF).
Miscellaneous Items: None.
If you win this battle, you acquire the guardian’s DIAMOND RING (be sure to inform the other
players if there are any) and can take any of his other items if you wish. Then return to section you
were on.
(8)
The steel door leading east from this room no longer opens, leaving you no choice but to go
through south through the painted yellow door. Turn to (73).
(9)
* Next Battle Phase *
Here is the four-way junction of wide stone passageway leading south to a T-junction, north to a
large set of sturdy double-doors, west to a mirrored door and east to a dead-end where there is a
golden door in the north wall and a dark green door in the south.
If it is Battle Phase 7, turn first to (28).
If it is Battle Phase 11, turn first to (83).
If it is Battle Phase 12, turn to (14).
If it is Battle Phase 13 or 14, turn to (22).
Otherwise, your exits are:
• North through the double-doors, by turning to (70).
• West through the mirrored door, by turning to (37).
• East and through the north door at the end of the passage there, by turning to (75).
AN ENTRY IN THE 2012 WINDHAMMER PRIZE 14
TRIAL OF THE BATTLE GOD BY BREWIN'
• East and through the south door at the end of the passage there, by turning to (94): unless you
are going this way on Battle Phase 11, in which case turn first to (88).
• Or south along the T-junction, by turning to (49): unless you are going this way on Battle
Phase 6, in which case turn first to (28); or on Battle Phase 10, in which case turn first to (83).
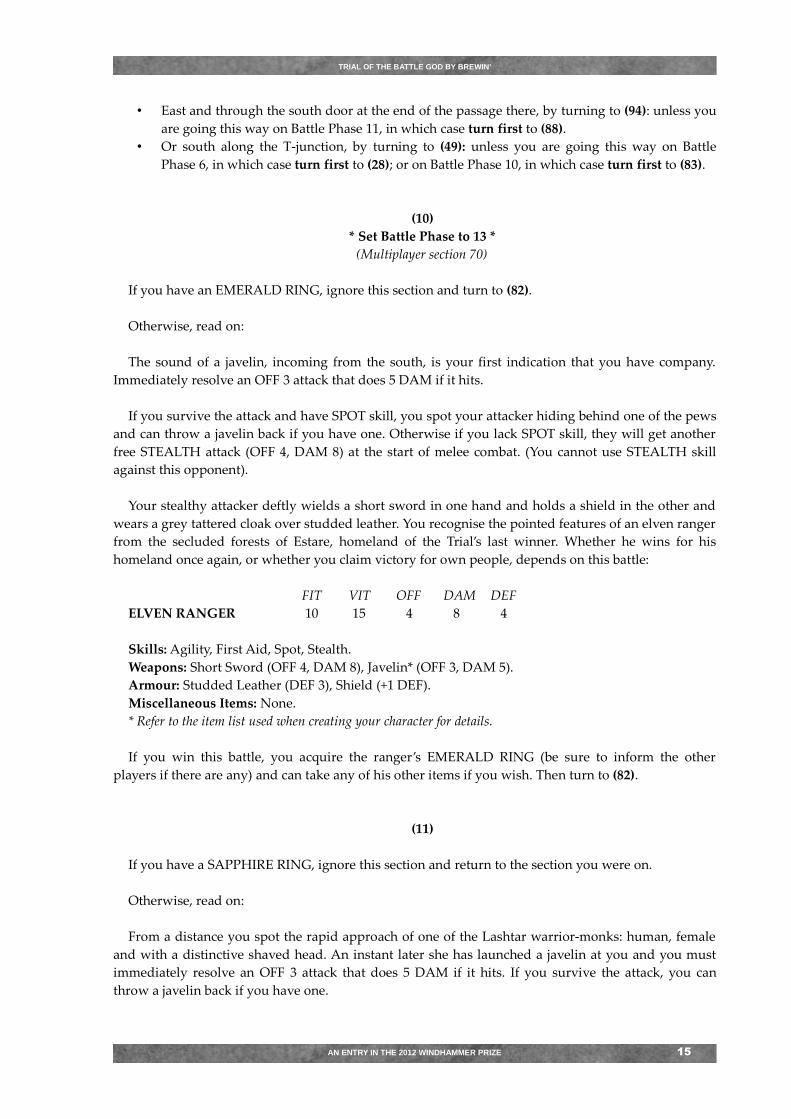
(10)
* Set Battle Phase to 13 *
(Multiplayer section 70)
If you have an EMERALD RING, ignore this section and turn to (82).
Otherwise, read on:
The sound of a javelin, incoming from the south, is your first indication that you have company.
Immediately resolve an OFF 3 attack that does 5 DAM if it hits.
If you survive the attack and have SPOT skill, you spot your attacker hiding behind one of the pews
and can throw a javelin back if you have one. Otherwise if you lack SPOT skill, they will get another
free STEALTH attack (OFF 4, DAM 8) at the start of melee combat. (You cannot use STEALTH skill
against this opponent).
Your stealthy attacker deftly wields a short sword in one hand and holds a shield in the other and
wears a grey tattered cloak over studded leather. You recognise the pointed features of an elven ranger
from the secluded forests of Estare, homeland of the Trial’s last winner. Whether he wins for his
homeland once again, or whether you claim victory for own people, depends on this battle:
FIT VIT OFF DAM DEF
ELVEN RANGER 10 15 4 8 4
Skills: Agility, First Aid, Spot, Stealth.
Weapons: Short Sword (OFF 4, DAM 8), Javelin* (OFF 3, DAM 5).
Armour: Studded Leather (DEF 3), Shield (+1 DEF).
Miscellaneous Items: None.
* Refer to the item list used when creating your character for details.
If you win this battle, you acquire the ranger’s EMERALD RING (be sure to inform the other
players if there are any) and can take any of his other items if you wish. Then turn to (82).
(11)
If you have a SAPPHIRE RING, ignore this section and return to the section you were on.
Otherwise, read on:
From a distance you spot the rapid approach of one of the Lashtar warrior-monks: human, female
and with a distinctive shaved head. An instant later she has launched a javelin at you and you must
immediately resolve an OFF 3 attack that does 5 DAM if it hits. If you survive the attack, you can
throw a javelin back if you have one.
AN ENTRY IN THE 2012 WINDHAMMER PRIZE 15

TRIAL OF THE BATTLE GOD BY BREWIN'
Wearing only a simple grey tunic, the monk dashes towards you and unleashes a flurry of kicks and
punches. Knowing that underestimating this unarmed expert could be a deadly mistake, you focus all
your wits and skill on prevailing in combat (you cannot use STEALTH skill against this opponent):
FIT VIT OFF DAM DEF
HUMAN MONK 10 14 2 4 3
Skills: Dodge, Agility, Spot, Unarmed Combat.
Weapons: Unarmed Combat (OFF 2, DAM 4), Javelin* (OFF 3, DAM 5).
Armour: Unarmed Combat (DEF 2).
Miscellaneous Items: Healing Balm*, Healing Potion*, Healing Salve*, Potion of Speed*, Backpack*,
Lucky Charm.
* Refer to the item list used when creating your character for details. Non-player-controlled combatants will
not use balms, potions or salves in combat.
If you win this battle, you acquire the monk’s SAPPHIRE RING (be sure to inform the other players
if there are any) and can take any of her other items if you wish. Then return to section you were on.
(12)
* Next Battle Phase *
You have entered a small office with a dust-covered wooden desk and chair. The stiffened corpse of
a man in a grey officer’s uniform lies face-down here, his gruesome blade wounds now being
engorged on by a pack of filthy rats the size of rabbits. There are no other exits from the room.
The rats seem little disturbed by your sudden appearance, so you cast your attention briefly
elsewhere. There is a bulky set of Rusted Keys hanging on a nail next to the door that you can take if
you wish (it counts as a one item) and checking the desk’s single drawer, you only find a couple of
dead cockroaches.
You head back through the door north. Turn to (15).
(13)
If you have a TOPAZ RING, ignore this section and turn to (97) instead.
Waiting for you here is a burly human male wielding a magnificent broadsword and clad in battle-
hardened plate armour. You recognise the chiselled Baaldavan features of a storm-knight: warriors
famous for their skill and fearlessness in battle, and often fancied by onlookers to win the Trial. This
storm-knight is well armed and defended, and may well be your greatest rival.
He welcomes your arrival by hurling a javelin and you must immediately resolve an OFF 4 attack
that does 5 DAM if it hits. If you survive the attack, you can throw a javelin back if you have one,
before meeting the knight in melee combat (you cannot use STEALTH skill against this opponent):
AN ENTRY IN THE 2012 WINDHAMMER PRIZE 16
TRIAL OF THE BATTLE GOD BY BREWIN'
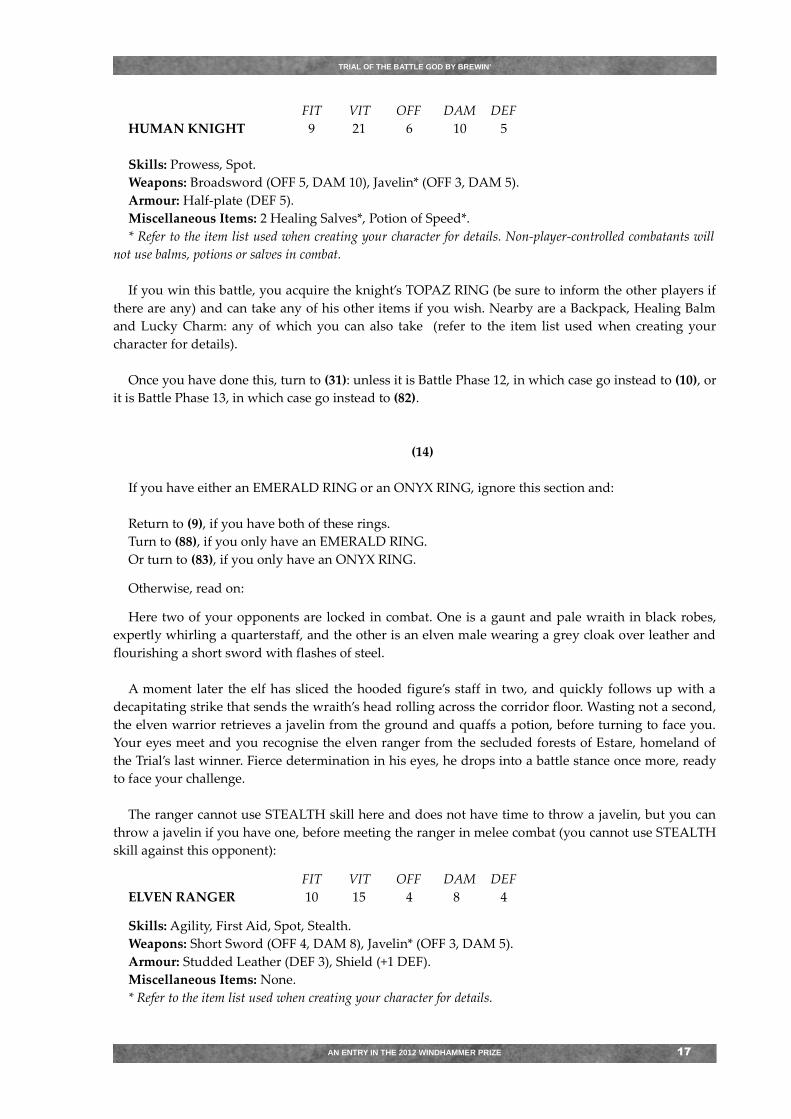
FIT VIT OFF DAM DEF
HUMAN KNIGHT 9 21 6 10 5
Skills: Prowess, Spot.
Weapons: Broadsword (OFF 5, DAM 10), Javelin* (OFF 3, DAM 5).
Armour: Half-plate (DEF 5).
Miscellaneous Items: 2 Healing Salves*, Potion of Speed*.
* Refer to the item list used when creating your character for details. Non-player-controlled combatants will
not use balms, potions or salves in combat.
If you win this battle, you acquire the knight’s TOPAZ RING (be sure to inform the other players if
there are any) and can take any of his other items if you wish. Nearby are a Backpack, Healing Balm
and Lucky Charm: any of which you can also take (refer to the item list used when creating your
character for details).
Once you have done this, turn to (31): unless it is Battle Phase 12, in which case go instead to (10), or
it is Battle Phase 13, in which case go instead to (82).
(14)
If you have either an EMERALD RING or an ONYX RING, ignore this section and:
Return to (9), if you have both of these rings.
Turn to (88), if you only have an EMERALD RING.
Or turn to (83), if you only have an ONYX RING.
Otherwise, read on:
Here two of your opponents are locked in combat. One is a gaunt and pale wraith in black robes,
expertly whirling a quarterstaff, and the other is an elven male wearing a grey cloak over leather and
flourishing a short sword with flashes of steel.
A moment later the elf has sliced the hooded figure’s staff in two, and quickly follows up with a
decapitating strike that sends the wraith’s head rolling across the corridor floor. Wasting not a second,
the elven warrior retrieves a javelin from the ground and quaffs a potion, before turning to face you.
Your eyes meet and you recognise the elven ranger from the secluded forests of Estare, homeland of
the Trial’s last winner. Fierce determination in his eyes, he drops into a battle stance once more, ready
to face your challenge.
The ranger cannot use STEALTH skill here and does not have time to throw a javelin, but you can
throw a javelin if you have one, before meeting the ranger in melee combat (you cannot use STEALTH
skill against this opponent):
FIT VIT OFF DAM DEF
ELVEN RANGER 10 15 4 8 4
Skills: Agility, First Aid, Spot, Stealth.
Weapons: Short Sword (OFF 4, DAM 8), Javelin* (OFF 3, DAM 5).
Armour: Studded Leather (DEF 3), Shield (+1 DEF).
Miscellaneous Items: None.
* Refer to the item list used when creating your character for details.
AN ENTRY IN THE 2012 WINDHAMMER PRIZE 17
TRIAL OF THE BATTLE GOD BY BREWIN'
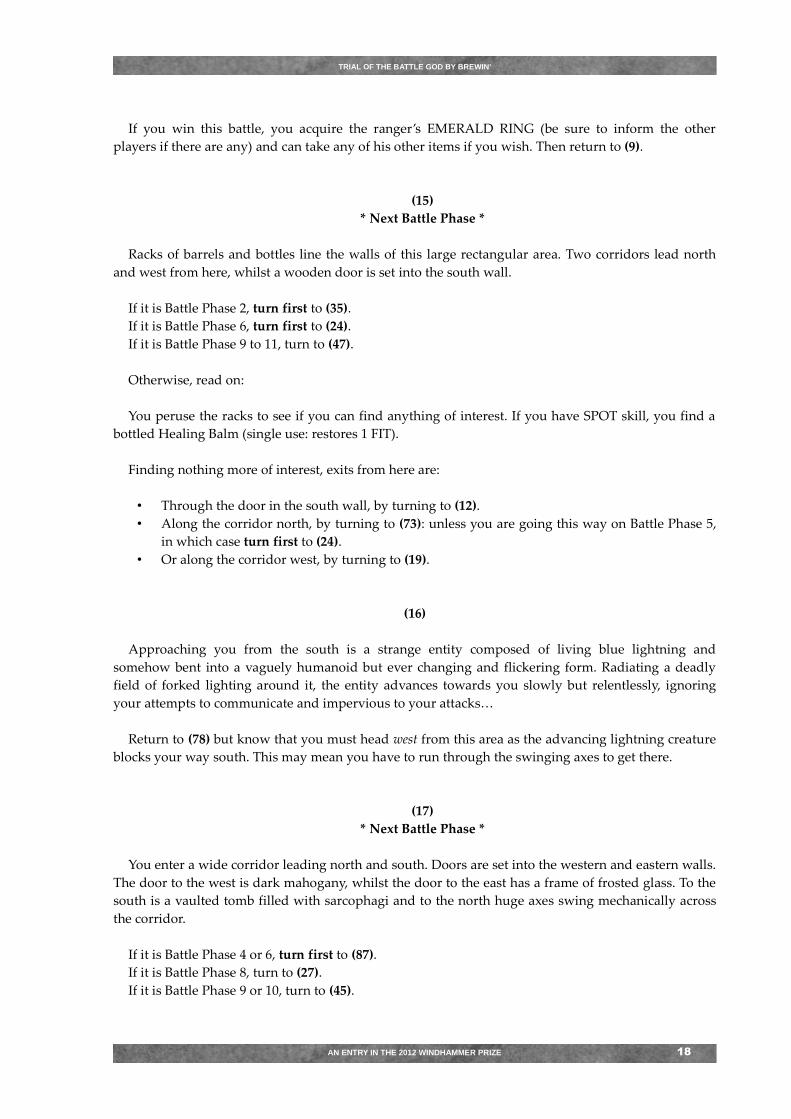
If you win this battle, you acquire the ranger’s EMERALD RING (be sure to inform the other
players if there are any) and can take any of his other items if you wish. Then return to (9).
(15)
* Next Battle Phase *
Racks of barrels and bottles line the walls of this large rectangular area. Two corridors lead north
and west from here, whilst a wooden door is set into the south wall.
If it is Battle Phase 2, turn first to (35).
If it is Battle Phase 6, turn first to (24).
If it is Battle Phase 9 to 11, turn to (47).
Otherwise, read on:
You peruse the racks to see if you can find anything of interest. If you have SPOT skill, you find a
bottled Healing Balm (single use: restores 1 FIT).
Finding nothing more of interest, exits from here are:
• Through the door in the south wall, by turning to (12).
• Along the corridor north, by turning to (73): unless you are going this way on Battle Phase 5,
in which case turn first to (24).
• Or along the corridor west, by turning to (19).
(16)
Approaching you from the south is a strange entity composed of living blue lightning and
somehow bent into a vaguely humanoid but ever changing and flickering form. Radiating a deadly
field of forked lighting around it, the entity advances towards you slowly but relentlessly, ignoring
your attempts to communicate and impervious to your attacks…
Return to (78) but know that you must head west from this area as the advancing lightning creature
blocks your way south. This may mean you have to run through the swinging axes to get there.
(17)
* Next Battle Phase *
You enter a wide corridor leading north and south. Doors are set into the western and eastern walls.
The door to the west is dark mahogany, whilst the door to the east has a frame of frosted glass. To the
south is a vaulted tomb filled with sarcophagi and to the north huge axes swing mechanically across
the corridor.
If it is Battle Phase 4 or 6, turn first to (87).
If it is Battle Phase 8, turn to (27).
If it is Battle Phase 9 or 10, turn to (45).
AN ENTRY IN THE 2012 WINDHAMMER PRIZE 18
TRIAL OF THE BATTLE GOD BY BREWIN'
Otherwise, your exits are:
• Through the mahogany door on the western side of the corridor, by turning to (2).
• Through the glass-framed door on the eastern side of the corridor, by turning to (57): unless
you are going this way on Battle Phase 7, in which case turn first to (35).
• North up the corridor, by turning to (78).
• Or south into the vaulted chamber, by turning to (23): unless you are going this way on either
Battle Phase 5 or Battle Phase 7, in which case turn first to (87).
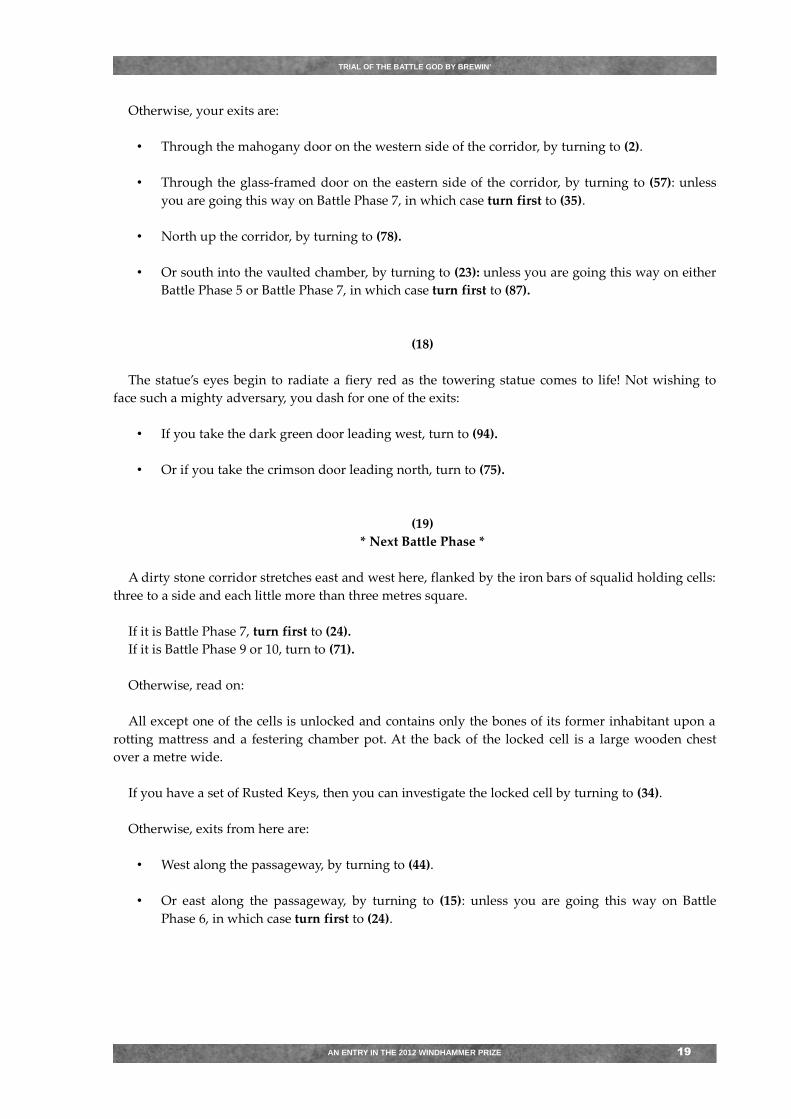
(18)
The statue’s eyes begin to radiate a fiery red as the towering statue comes to life! Not wishing to
face such a mighty adversary, you dash for one of the exits:
• If you take the dark green door leading west, turn to (94).
• Or if you take the crimson door leading north, turn to (75).
(19)
* Next Battle Phase *
A dirty stone corridor stretches east and west here, flanked by the iron bars of squalid holding cells:
three to a side and each little more than three metres square.
If it is Battle Phase 7, turn first to (24).
If it is Battle Phase 9 or 10, turn to (71).
Otherwise, read on:
All except one of the cells is unlocked and contains only the bones of its former inhabitant upon a
rotting mattress and a festering chamber pot. At the back of the locked cell is a large wooden chest
over a metre wide.
If you have a set of Rusted Keys, then you can investigate the locked cell by turning to (34).
Otherwise, exits from here are:
• West along the passageway, by turning to (44).
• Or east along the passageway, by turning to (15): unless you are going this way on Battle
Phase 6, in which case turn first to (24).
AN ENTRY IN THE 2012 WINDHAMMER PRIZE 19

TRIAL OF THE BATTLE GOD BY BREWIN'
(20)
* Next Battle Phase *
You enter a fantastic domed chamber of multicoloured glowing crystal pillars. Light blends in a
myriad of hues creating spectacular visual displays that momentarily fill you with awe.
If it is Battle Phase 2, turn first to (4).
Otherwise, read on:
Focusing on the task at hand, you begin to explore the area until moments later there is an
unnerving hiss from close behind and you spin around…
Only a few metres distant is a creature of glistening green scales, with an ophidian head set with
fiery beady eyes, a humanoid torso wielding a shining scimitar and the thick coiled body of a five
metre long serpent. Blocking your exit, it tastes the air with flicks of its long red forked tongue and
advances towards you.
If you have SPRINT skill, STEALTH skill or your FIT is 9 or more, you can choose to escape this
chamber south back into the mirrored corridor, by turning to (37).
Otherwise, you must fight:
FIT VIT OFF DAM DEF
OPHIDIAN WARRIOR 8 9 5 9 3
Skills: None.
Weapons: Shining Scimitar (OFF 5, DAM 9, +1 FIT in combat*).
Armour: Scaled body (DEF 3).
Miscellaneous Items: Healing Potion**.
* This FIT bonus exceeds your starting value.
** Refer to the item list used when creating your character for details. Non-player-controlled combatants will
not use balms, potions or salves in combat.
If you defeat the ophidian warrior, you can take the Shining Scimitar and Healing Potion if you
wish. Disorientated by the kaleidoscope of lights here, you decide against further searching lest more
creatures appear and hurry back south into the mirrored corridor. Turn to (37).
(21)
You stir awake to find yourself in a small shadowy cavern, dimly lit from no discernible source. The
only exit is a narrow tunnel that slopes up to the south-west and in the far distance you can hear the
ring of a brassy gong as it fades away… You are now in the dungeon of the Battle God.
A low moan and the clink of armour from the opposite corner of the cavern suddenly grabs your
attention as shuffling into view comes a pale, rotted man clad in chainmail. Its decomposing state in
defiance of a natural death, it lumbers moaning towards you, intent on your demise. You can choose
to avoid this combat by running for the exit, and turning to (42). Otherwise, you engage the zombie in
battle:
AN ENTRY IN THE 2012 WINDHAMMER PRIZE 20
TRIAL OF THE BATTLE GOD BY BREWIN'
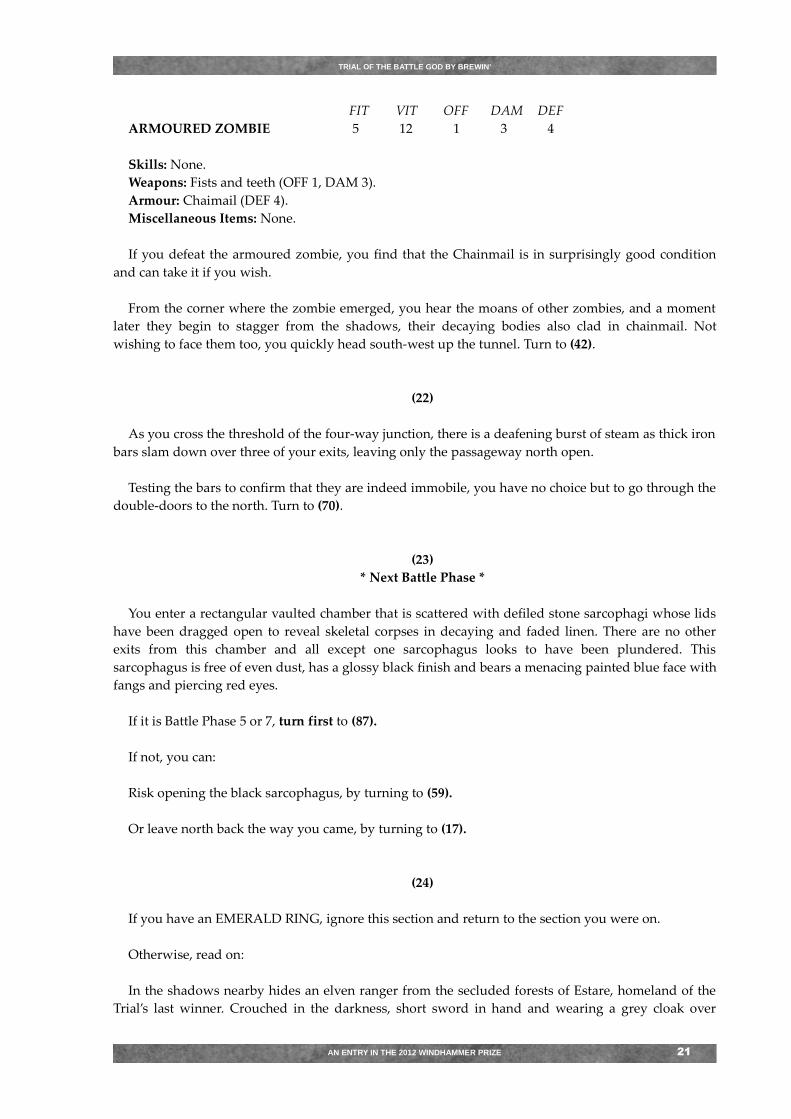
FIT VIT OFF DAM DEF
ARMOURED ZOMBIE 5 12 1 3 4
Skills: None.
Weapons: Fists and teeth (OFF 1, DAM 3).
Armour: Chaimail (DEF 4).
Miscellaneous Items: None.
If you defeat the armoured zombie, you find that the Chainmail is in surprisingly good condition
and can take it if you wish.
From the corner where the zombie emerged, you hear the moans of other zombies, and a moment
later they begin to stagger from the shadows, their decaying bodies also clad in chainmail. Not
wishing to face them too, you quickly head south-west up the tunnel. Turn to (42).
(22)
As you cross the threshold of the four-way junction, there is a deafening burst of steam as thick iron
bars slam down over three of your exits, leaving only the passageway north open.
Testing the bars to confirm that they are indeed immobile, you have no choice but to go through the
double-doors to the north. Turn to (70).
(23)
* Next Battle Phase *
You enter a rectangular vaulted chamber that is scattered with defiled stone sarcophagi whose lids
have been dragged open to reveal skeletal corpses in decaying and faded linen. There are no other
exits from this chamber and all except one sarcophagus looks to have been plundered. This
sarcophagus is free of even dust, has a glossy black finish and bears a menacing painted blue face with
fangs and piercing red eyes.
If it is Battle Phase 5 or 7, turn first to (87).
If not, you can:
Risk opening the black sarcophagus, by turning to (59).
Or leave north back the way you came, by turning to (17).
(24)
If you have an EMERALD RING, ignore this section and return to the section you were on.
Otherwise, read on:
In the shadows nearby hides an elven ranger from the secluded forests of Estare, homeland of the
Trial’s last winner. Crouched in the darkness, short sword in hand and wearing a grey cloak over
AN ENTRY IN THE 2012 WINDHAMMER PRIZE 21

TRIAL OF THE BATTLE GOD BY BREWIN'
leather, he waits for your approach…
Unless you have SPOT skill, you are unaware of the ranger until he suddenly launches himself at
you in a deadly flash of steel. Resolve an OFF 4 attack that does 8 DAM if it hits, before you engage the
ranger in melee combat (you cannot throw a javelin or use STEALTH skill against this opponent).
If you have SPOT skill, you see the ranger watching you from the shadows nearby and can throw a
javelin if you have one (but you still cannot use STEALTH skill against this opponent). Your eyes meet
and acknowledging that his cover is gone, he charges towards you:
FIT VIT OFF DAM DEF
ELVEN RANGER 10 15 4 8 2
Skills: Agility, First Aid, Spot, Stealth.
Weapons: Short Sword (OFF 4, DAM 8).
Armour: Leather (DEF 2).
Miscellaneous Items: Healing Potion*.
* Refer to the item list used when creating your character for details. Non-player-controlled combatants will
not use balms, potions or salves in combat.
If you win this battle, you acquire the ranger’s EMERALD RING (be sure to inform the other
players if there are any) and can take any of his other items if you wish. Then return to section you
were on.
(25)
As you cross the threshold of the three-way junction, there is a deafening burst of steam as thick
iron bars slam down over two of your exits, leaving only the passageway north open.
Testing the bars to confirm that they are indeed immobile, you have no choice but to follow the
corridor north. Turn to (9).
(26)
* Next Battle Phase *
Here is a square chamber of stone walls that is cluttered with the whirring cogs, pumping pistons
and steaming pipes of a vast mechanical contraption that fills the room and deafens your ears. A large
hissing pipe follows the north side of the chamber and continues through the wall to the west, where a
steel door is also set. There is another door opposite in the middle of the east wall, painted blue.
Amongst the machinery lies an iron Hammer (OFF 2, DAM 4) that you can take if you wish.
If it is Battle Phase 5, turn first to (35).
If it is Battle Phases 8 to 10, turn to (52).
Otherwise, your exits are:
• Through the steel door to the west, by turning to (46).
• Or through the blue door to the east, by turning to (43).
AN ENTRY IN THE 2012 WINDHAMMER PRIZE 22
TRIAL OF THE BATTLE GOD BY BREWIN'
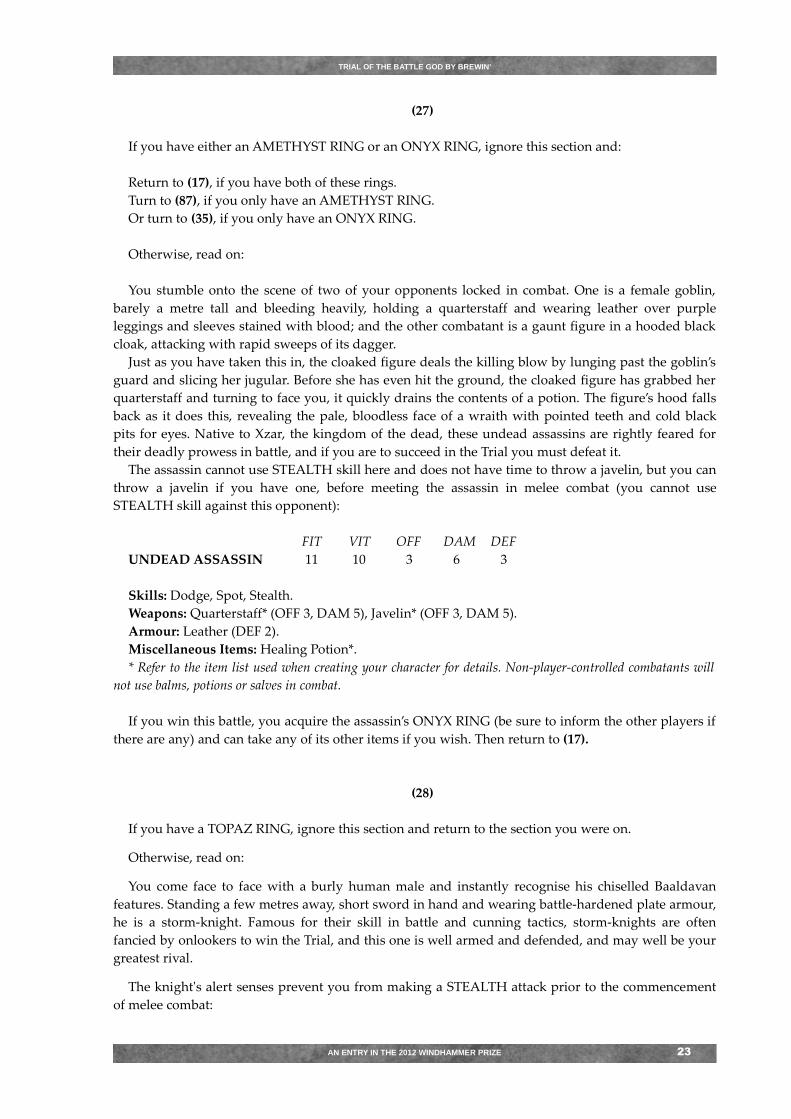
(27)
If you have either an AMETHYST RING or an ONYX RING, ignore this section and:
Return to (17), if you have both of these rings.
Turn to (87), if you only have an AMETHYST RING.
Or turn to (35), if you only have an ONYX RING.
Otherwise, read on:
You stumble onto the scene of two of your opponents locked in combat. One is a female goblin,
barely a metre tall and bleeding heavily, holding a quarterstaff and wearing leather over purple
leggings and sleeves stained with blood; and the other combatant is a gaunt figure in a hooded black
cloak, attacking with rapid sweeps of its dagger.
Just as you have taken this in, the cloaked figure deals the killing blow by lunging past the goblin’s
guard and slicing her jugular. Before she has even hit the ground, the cloaked figure has grabbed her
quarterstaff and turning to face you, it quickly drains the contents of a potion. The figure’s hood falls
back as it does this, revealing the pale, bloodless face of a wraith with pointed teeth and cold black
pits for eyes. Native to Xzar, the kingdom of the dead, these undead assassins are rightly feared for
their deadly prowess in battle, and if you are to succeed in the Trial you must defeat it.
The assassin cannot use STEALTH skill here and does not have time to throw a javelin, but you can
throw a javelin if you have one, before meeting the assassin in melee combat (you cannot use
STEALTH skill against this opponent):
FIT VIT OFF DAM DEF
UNDEAD ASSASSIN 11 10 3 6 3
Skills: Dodge, Spot, Stealth.
Weapons: Quarterstaff* (OFF 3, DAM 5), Javelin* (OFF 3, DAM 5).
Armour: Leather (DEF 2).
Miscellaneous Items: Healing Potion*.
* Refer to the item list used when creating your character for details. Non-player-controlled combatants will
not use balms, potions or salves in combat.
If you win this battle, you acquire the assassin’s ONYX RING (be sure to inform the other players if
there are any) and can take any of its other items if you wish. Then return to (17).
(28)
If you have a TOPAZ RING, ignore this section and return to the section you were on.
Otherwise, read on:
You come face to face with a burly human male and instantly recognise his chiselled Baaldavan
features. Standing a few metres away, short sword in hand and wearing battle-hardened plate armour,
he is a storm-knight. Famous for their skill in battle and cunning tactics, storm-knights are often
fancied by onlookers to win the Trial, and this one is well armed and defended, and may well be your
greatest rival.
The knight's alert senses prevent you from making a STEALTH attack prior to the commencement
of melee combat:
AN ENTRY IN THE 2012 WINDHAMMER PRIZE 23
TRIAL OF THE BATTLE GOD BY BREWIN'
FIT VIT OFF DAM DEF
HUMAN KNIGHT 9 21 5 8 5
Skills: Prowess, Spot.
Weapons: Short Sword (OFF 4, DAM 8).
Armour: Half-plate (DEF 5).
Miscellaneous Items: None.
If you win this battle, you acquire the knight’s TOPAZ RING (be sure to inform the other players if
there are any) and can take any of his other items if you wish. Then return to section you were on.
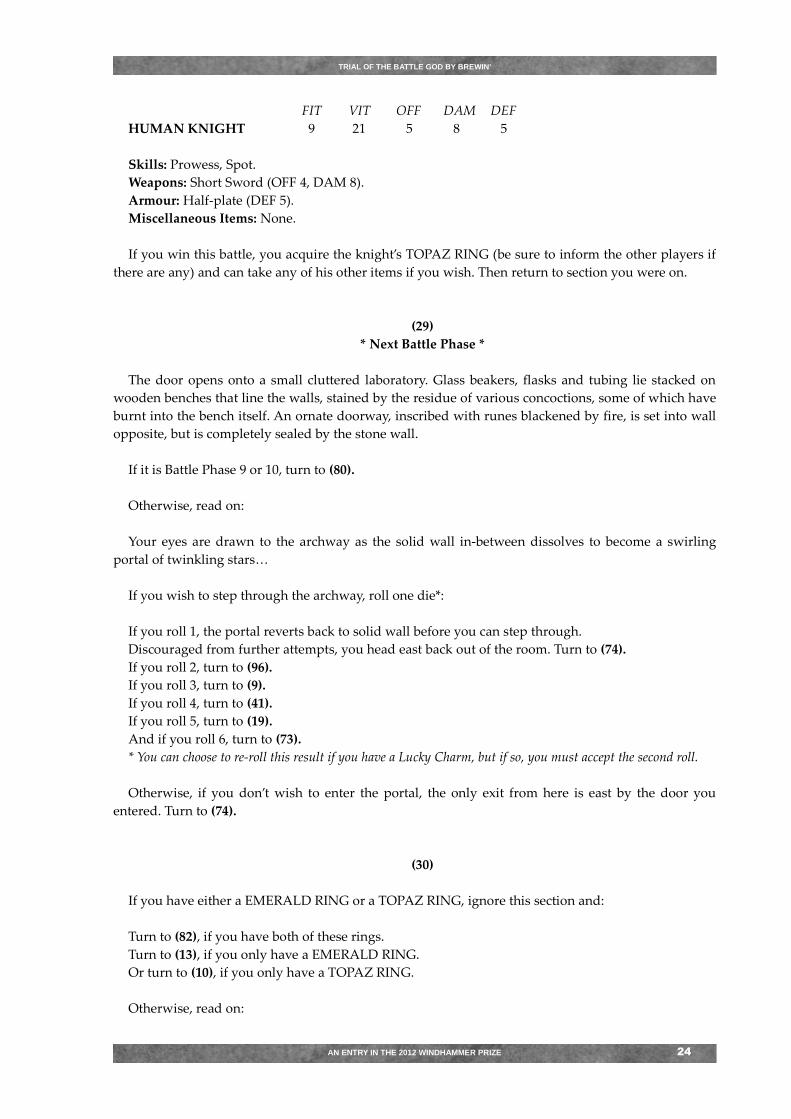
(29)
* Next Battle Phase *
The door opens onto a small cluttered laboratory. Glass beakers, flasks and tubing lie stacked on
wooden benches that line the walls, stained by the residue of various concoctions, some of which have
burnt into the bench itself. An ornate doorway, inscribed with runes blackened by fire, is set into wall
opposite, but is completely sealed by the stone wall.
If it is Battle Phase 9 or 10, turn to (80).
Otherwise, read on:
Your eyes are drawn to the archway as the solid wall in-between dissolves to become a swirling
portal of twinkling stars…
If you wish to step through the archway, roll one die*:
If you roll 1, the portal reverts back to solid wall before you can step through.
Discouraged from further attempts, you head east back out of the room. Turn to (74).
If you roll 2, turn to (96).
If you roll 3, turn to (9).
If you roll 4, turn to (41).
If you roll 5, turn to (19).
And if you roll 6, turn to (73).
* You can choose to re-roll this result if you have a Lucky Charm, but if so, you must accept the second roll.
Otherwise, if you don’t wish to enter the portal, the only exit from here is east by the door you
entered. Turn to (74).
(30)
If you have either a EMERALD RING or a TOPAZ RING, ignore this section and:
Turn to (82), if you have both of these rings.
Turn to (13), if you only have a EMERALD RING.
Or turn to (10), if you only have a TOPAZ RING.
Otherwise, read on:
AN ENTRY IN THE 2012 WINDHAMMER PRIZE 24
TRIAL OF THE BATTLE GOD BY BREWIN'
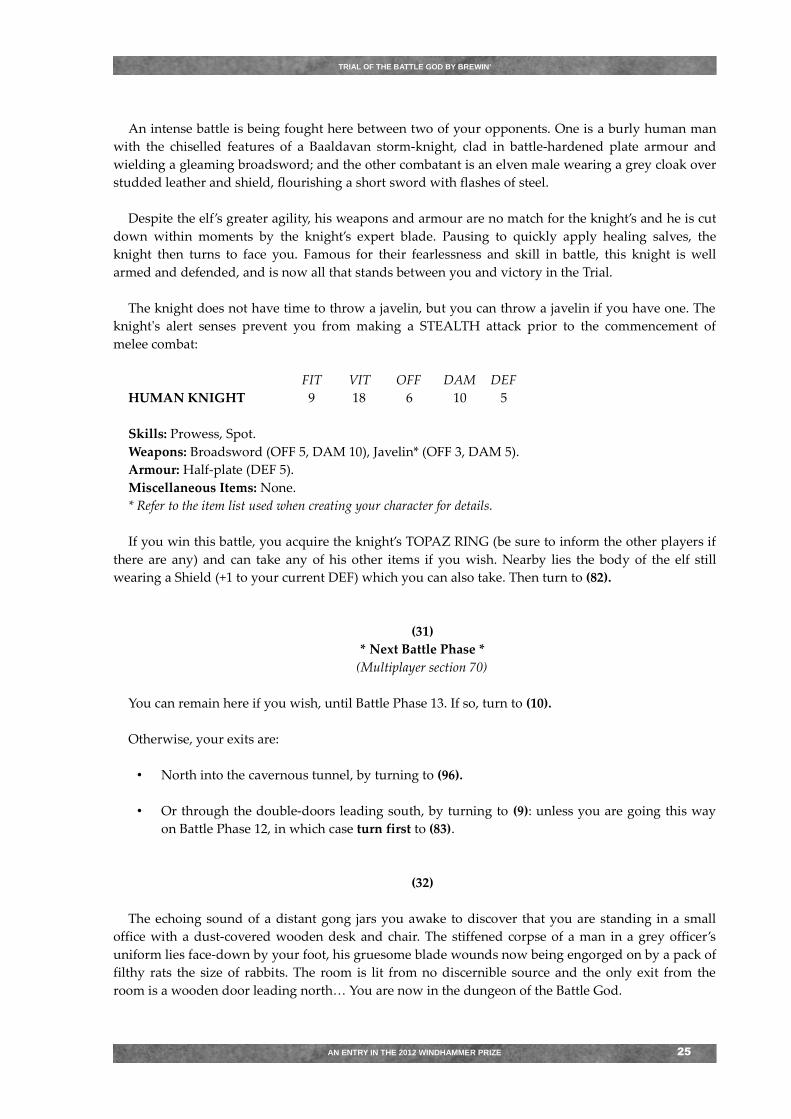
An intense battle is being fought here between two of your opponents. One is a burly human man
with the chiselled features of a Baaldavan storm-knight, clad in battle-hardened plate armour and
wielding a gleaming broadsword; and the other combatant is an elven male wearing a grey cloak over
studded leather and shield, flourishing a short sword with flashes of steel.
Despite the elf’s greater agility, his weapons and armour are no match for the knight’s and he is cut
down within moments by the knight’s expert blade. Pausing to quickly apply healing salves, the
knight then turns to face you. Famous for their fearlessness and skill in battle, this knight is well
armed and defended, and is now all that stands between you and victory in the Trial.
The knight does not have time to throw a javelin, but you can throw a javelin if you have one. The
knight's alert senses prevent you from making a STEALTH attack prior to the commencement of
melee combat:
FIT VIT OFF DAM DEF
HUMAN KNIGHT 9 18 6 10 5
Skills: Prowess, Spot.
Weapons: Broadsword (OFF 5, DAM 10), Javelin* (OFF 3, DAM 5).
Armour: Half-plate (DEF 5).
Miscellaneous Items: None.
* Refer to the item list used when creating your character for details.
If you win this battle, you acquire the knight’s TOPAZ RING (be sure to inform the other players if
there are any) and can take any of his other items if you wish. Nearby lies the body of the elf still
wearing a Shield (+1 to your current DEF) which you can also take. Then turn to (82).
(31)
* Next Battle Phase *
(Multiplayer section 70)
You can remain here if you wish, until Battle Phase 13. If so, turn to (10).
Otherwise, your exits are:
• North into the cavernous tunnel, by turning to (96).
• Or through the double-doors leading south, by turning to (9): unless you are going this way
on Battle Phase 12, in which case turn first to (83).
(32)
The echoing sound of a distant gong jars you awake to discover that you are standing in a small
office with a dust-covered wooden desk and chair. The stiffened corpse of a man in a grey officer’s
uniform lies face-down by your foot, his gruesome blade wounds now being engorged on by a pack of
filthy rats the size of rabbits. The room is lit from no discernible source and the only exit from the
room is a wooden door leading north… You are now in the dungeon of the Battle God.
AN ENTRY IN THE 2012 WINDHAMMER PRIZE 25
TRIAL OF THE BATTLE GOD BY BREWIN'
The rats seem little disturbed by your sudden appearance, so you cast your attention briefly
elsewhere. There is a bulky set of Rusted Keys hanging on a nail next to the door that you can take if
you wish (it counts as a one item) and checking the desk’s single drawer, you only find a couple of
dead cockroaches.
As you turn the door handle to leave, you hear running footsteps approaching from somewhere
beyond and to the west. Turn to (15).
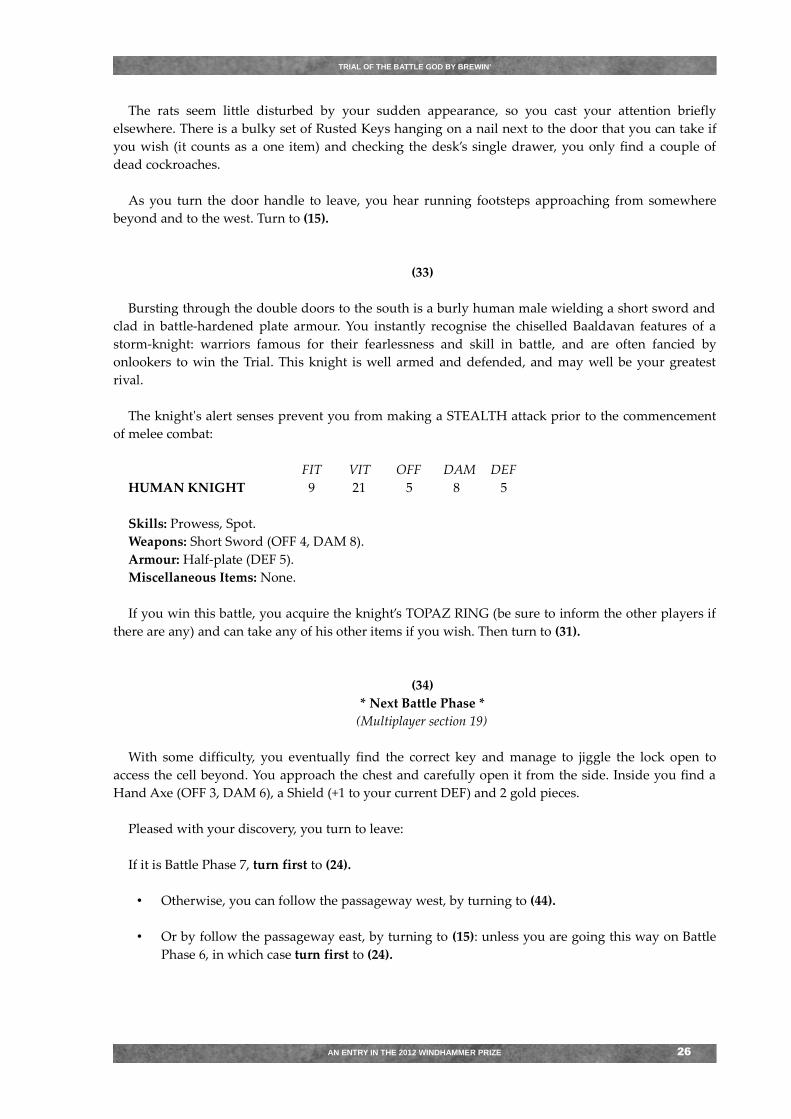
(33)
Bursting through the double doors to the south is a burly human male wielding a short sword and
clad in battle-hardened plate armour. You instantly recognise the chiselled Baaldavan features of a
storm-knight: warriors famous for their fearlessness and skill in battle, and are often fancied by
onlookers to win the Trial. This knight is well armed and defended, and may well be your greatest
rival.
The knight's alert senses prevent you from making a STEALTH attack prior to the commencement
of melee combat:
FIT VIT OFF DAM DEF
HUMAN KNIGHT 9 21 5 8 5
Skills: Prowess, Spot.
Weapons: Short Sword (OFF 4, DAM 8).
Armour: Half-plate (DEF 5).
Miscellaneous Items: None.
If you win this battle, you acquire the knight’s TOPAZ RING (be sure to inform the other players if
there are any) and can take any of his other items if you wish. Then turn to (31).
(34)
* Next Battle Phase *
(Multiplayer section 19)
With some difficulty, you eventually find the correct key and manage to jiggle the lock open to
access the cell beyond. You approach the chest and carefully open it from the side. Inside you find a
Hand Axe (OFF 3, DAM 6), a Shield (+1 to your current DEF) and 2 gold pieces.
Pleased with your discovery, you turn to leave:
If it is Battle Phase 7, turn first to (24).
• Otherwise, you can follow the passageway west, by turning to (44).
• Or by follow the passageway east, by turning to (15): unless you are going this way on Battle
Phase 6, in which case turn first to (24).
AN ENTRY IN THE 2012 WINDHAMMER PRIZE 26
TRIAL OF THE BATTLE GOD BY BREWIN'
(35)
If you have an AMETHYST RING, ignore this section and return to the section you were on.
Otherwise, read on:
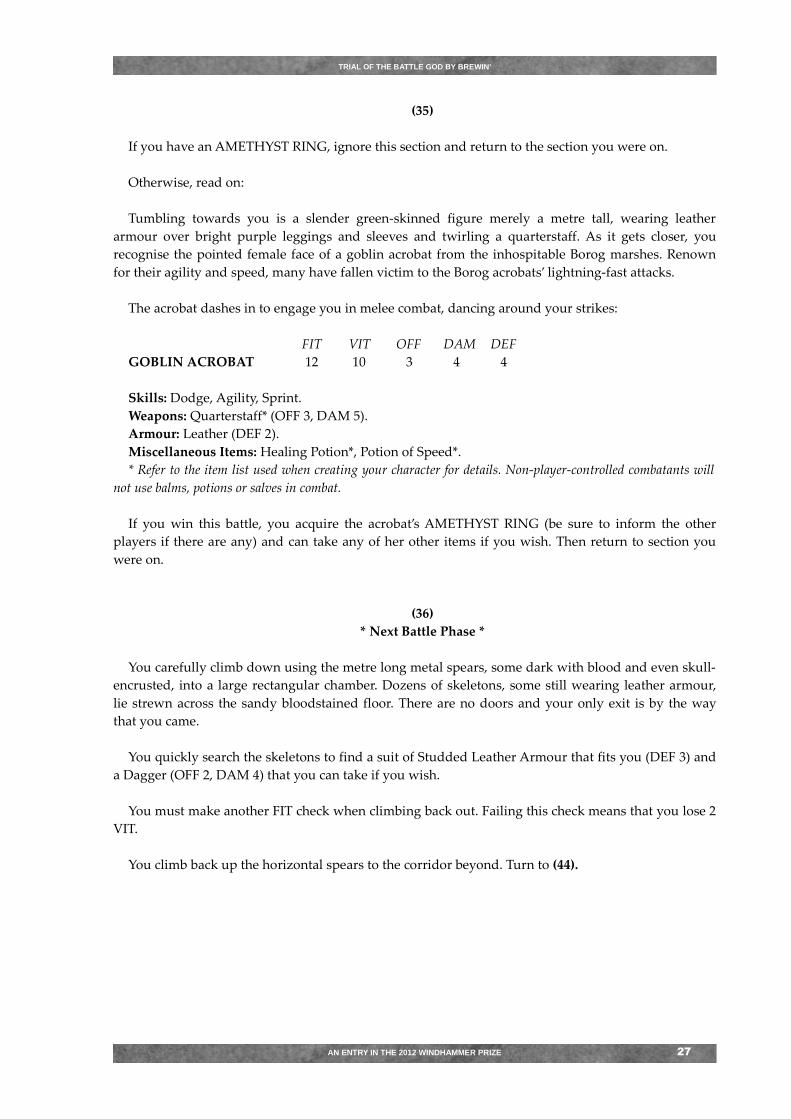
Tumbling towards you is a slender green-skinned figure merely a metre tall, wearing leather
armour over bright purple leggings and sleeves and twirling a quarterstaff. As it gets closer, you
recognise the pointed female face of a goblin acrobat from the inhospitable Borog marshes. Renown
for their agility and speed, many have fallen victim to the Borog acrobats’ lightning-fast attacks.
The acrobat dashes in to engage you in melee combat, dancing around your strikes:
FIT VIT OFF DAM DEF
GOBLIN ACROBAT 12 10 3 4 4
Skills: Dodge, Agility, Sprint.
Weapons: Quarterstaff* (OFF 3, DAM 5).
Armour: Leather (DEF 2).
Miscellaneous Items: Healing Potion*, Potion of Speed*.
* Refer to the item list used when creating your character for details. Non-player-controlled combatants will
not use balms, potions or salves in combat.
If you win this battle, you acquire the acrobat’s AMETHYST RING (be sure to inform the other
players if there are any) and can take any of her other items if you wish. Then return to section you
were on.
(36)
* Next Battle Phase *
You carefully climb down using the metre long metal spears, some dark with blood and even skull-
encrusted, into a large rectangular chamber. Dozens of skeletons, some still wearing leather armour,
lie strewn across the sandy bloodstained floor. There are no doors and your only exit is by the way
that you came.
You quickly search the skeletons to find a suit of Studded Leather Armour that fits you (DEF 3) and
a Dagger (OFF 2, DAM 4) that you can take if you wish.
You must make another FIT check when climbing back out. Failing this check means that you lose 2
VIT.
You climb back up the horizontal spears to the corridor beyond. Turn to (44).
AN ENTRY IN THE 2012 WINDHAMMER PRIZE 27
TRIAL OF THE BATTLE GOD BY BREWIN'
(37)
* Next Battle Phase *
You are in a complex of mirrors that cover every surface, reflecting a hundred different images of
you and the surrounding labyrinthine corridors. Struggling to find your way, you feel around this
confusing maze of mirrors with hands outstretched…
If it is Battle Phase 2, turn first to (4).
If it is Battle Phase 12 or 13, turn to (51).
Otherwise, read on:
Roll one die and add one to the result if you are a Human, Dwarf or Elf:
If you roll a total of 2 or less, you are still trying to find your way through here. Increase your Battle
Phase by 1 and roll again (waiting for others first if there are multiple players), unless it is now Battle
Phase 12, in which case turn to (51).
And if you roll a total of 3 or more, then you can choose which exit to take:
• You can either go into a crystal domed chamber to the north by turning to (20).
• Or take the mirrored door into the wide stone passage leading east by turning to (9).
(38)
* Next Battle Phase *
You are correct! The hairline crack of a door appears around the inscription and widens as a thick
steel door grates open to reveal a small square room with steel doors leading north and west. The steel
doors have handles on the inside that allows them to be easily opened from within the room. In the
centre of the floor is a plush red cushion, upon which sits a golden ring that is inlaid with a lightning
bolt motif.
Beaming at your find, you take the Firebolt Ring. This ring can be used once per combat to
automatically inflict 1D+1 DAM on an opponent. You can use this ring in addition to your normal
attack but no more than once per combat and only once javelin and STEALTH attacks have been
resolved. Also note that if you are playing with human opponents, you do not inform them that you have
obtained this ring.
If it is Battle Phase 9 to 11, turn to (3).
Otherwise, your exits are:
• Through the steel door leading west, by turning to (53).
• Or through the steel door leading north, by turning to (74).
AN ENTRY IN THE 2012 WINDHAMMER PRIZE 28
TRIAL OF THE BATTLE GOD BY BREWIN'
(39)
* Next Battle Phase *
You have entered a small sauna with soft cushions laid out over wooden recliners. There are no
other exits from this area, but this looks like a nice place to relax. However you know that you can
afford no such liberty.
Looking around, you find a Healing Salve (single use: restores 5 VIT) that has slipped down the
side of the cushions, before heading back into the corridor. Turn to (41).
(40)
If you have a TOPAZ RING and have not yet been to this room, ignore this section and return to
(98).
Otherwise, read on:
At the far end of the room lies the curled carcass of a monstrous jet-black spider that would be half
your height if it was upright, now hacked to pieces. Next to its leaking body lies the desiccated corpse
of a man still partially wrapped in a cocoon: already stripped of valuables.
It would seem that someone has been here before you. With no other options, you leave this area
and return to the corridor outside. Turn to (49).
(41)
* Next Battle Phase *
Thick swirling mists fill the corridor here, restricting your vision. The corridor winds and dips, and
eventually joins a corridor to the south and another to the east. Halfway along the length of this
stretch of corridor is a wooden door. The mists that fill this area prevent you from throwing a javelin here,
should you have one.
If it is any of Battle Phases 4, 6 or 8, turn first to (7).
If it is Battle Phase 9, turn to (66).
If it is Battle Phase 11 or 12, turn to (95).
Otherwise, your exits from here are:
• Through the door off this section of corridor, by turning to (39).
• Around the corridor to the east, by turning to (49): unless you are going this way on either
Battle Phase 3 or Battle Phase 7, in which case turn first to (7).
• Or around the corridor to the south, by turning to (44): unless you are going this way on Battle
Phase 5, in which case turn first to (7); or on Battle Phase 8, in which case turn first to (24).
AN ENTRY IN THE 2012 WINDHAMMER PRIZE 29
TRIAL OF THE BATTLE GOD BY BREWIN'
(42)
* Next Battle Phase *
You enter a large cavern whose shadowy crevices and walls are covered in a thick green moss. Here
and there are clusters of pinkish H’yare mushrooms that you recognise for their healing properties.
Four rocky tunnels lead from this area.
If it is Battle Phase 4, turn first to (11).
If it is Battle Phase 5, turn first to (79).
If it is Battle Phase 12 or 13, turn to (54).
Otherwise, read on:
If you wish you can pick some of the mushrooms, but note that they will lose their healing effects if
not eaten immediately, meaning that you cannot take any with you to use later. Roll one die each time
you eat some mushrooms here:
If you roll 1, you have a bad reaction and immediately lose 1D VIT.
If you roll 2 or 3, nothing happens.
And if you roll 4 or more, the mushroom has its desired effect and immediately restores 1D VIT
(not exceeding your starting amount).
Once you have finished munching mushrooms, exits from here are:
• Into the wide tunnel leading west, by turning to (96).
• Into the downhill tunnel to the north-east, by turning to (50).
• Into the tunnel going east and bending south, by turning to (68): unless you are heading this
way on Battle Phase 3, in which case turn first to (11).
• Or south into another cavern, by turning to (75): unless you are heading this way on Battle
Phase 4, in which case turn first to (79).
(43)
* Next Battle Phase *
The door opens onto a small stone balcony that is perched a metre above a vast underground lake
that stretches into misty darkness. A frayed rope bridge with wooden planks extends from the balcony
and over the rippling lake for a distance of about thirty metres before reaching another balcony like
this one with a blue painted door.
If it is Battle Phase 6, turn first to (35).
Otherwise, read on:
With trepidation you start across the bridge, but do not travel far before scores of fish with razor
sharp teeth leap out of the water to attack you!
AN ENTRY IN THE 2012 WINDHAMMER PRIZE 30
TRIAL OF THE BATTLE GOD BY BREWIN'
Thankful that at least the bridge holds up, you run as quickly as you can to avoid the flying piranha
onslaught:
Roll 3D and deduct your FIT from the total to determine how many fish bite you. If you have
SPRINT skill then deduct 3 more from the total. For each fish that bites you, you lose 1 VIT. If you
have the FIRST AID skill, then afterwards you can restore up to 2 VIT from this crossing.
If you still live, you eventually reach the safety of one of balconies at either end of the rope bridge
and enter the door there:
• If you were heading for the western balcony, turn to (26).
• Or if you were heading for the southern balcony, turn to (57).
(44)
* Next Battle Phase *
A junction here has one corridor leading north into opaque churning white mists and one corridor
leading east past a series of cells sealed by iron bars. At the junction of these two corridors, there is a
metre high gap in the wall at floor-level that you can see drops five metres down a wall lined with
horizontal steel spears into a sandy pit.
If it is Battle Phase 5, turn first to (7).
If it is Battle Phase 8, turn first to (24).
If it is Battle Phase 10 or 11, turn to (64).
Otherwise, if you have AGILITY skill, then you can climb down the spears into the sandy pit if you
wish, by turning to (36).
If not, exits from here are:
• North into the misty corridor, by turning to (41): unless you are going this way on Battle Phase
4, in which case turn first to (7).
• Or along the passageway east, by turning to (19): unless you are going this way on Battle
Phase 7, in which case turn first to (24).
(45)
There is a sudden bright explosion from the tomb to the south, followed moments later by the
emergence of a strange entity composed of living blue lightning and somehow bent into a vaguely
humanoid but ever changing and flickering form. Radiating a deadly field of forked lighting around
it, the entity turns to face you and begins to slowly and relentlessly advance, ignoring your attempts to
communicate and impervious to your attacks…
Discovering that the doors on either side of the corridor are now locked, you are forced north up
the corridor towards the swinging axes. Turn to (78).
AN ENTRY IN THE 2012 WINDHAMMER PRIZE 31
TRIAL OF THE BATTLE GOD BY BREWIN'
(46)
* Next Battle Phase *
You have entered a square stone room that is bare aside from a shiny rectangular metal booth with
five golden levers and a tray below its base that stands against the northern wall. A large silvery pipe
protrudes from the top of the booth, leaking steam, and runs along the northern wall and through the
eastern wall to where you can hear the chugging sound of heavy machinery. A steel door is set into
this wall and there is also a painted yellow door to the south.
If it is Battle Phase 4, turn first to (35).
Otherwise, read on:
The words “MAGIC RING DISPENSER: INSERT COINS” are written in bold red capitals on the
metal booth, drawing your closer attention to the words written below:
• 1 gold and Lever 1: Ring of Seeing.
• 1 gold and Lever 2: Ring of Swiftness.
• 1 gold and Lever 3: Ring of Stealth.
• 2 gold and Lever 4: Ring of Vitality.
• 3 gold and Lever 5: Ring of Agility.
By inserting the specified number of gold coins, you can purchase one, and only one, ring of your
choice from this booth. The machine shudders for a moment as a rumbling sound passes down the
pipe, before the booth spits out the selected ring into the tray below. Through experimentation you
quickly establish that the machine will not issue you a second ring, but at least it will refund any
additional coins you insert. See the list below for what each ring does:
• Ring of Seeing: Grants you SPOT skill.
• Ring of Swiftness: Grants you SPRINT skill.
• Ring of Stealth: Grants you STEALTH skill.
• Ring of Vitality: +4 VIT (exceeding your starting value).
• Ring of Agility: +1 FIT (exceeding your starting value) and AGILITY skill.
If you are playing with human opponents, do not inform them that you have obtained one of these rings.
Once you have finished with the machine, if it is Battle Phase 10 or 11, turn to (8).
Otherwise, your exits are:
• East through the steel door, by turning to (26).
• Or south through the yellow door, by turning to (73).
(47)
A stone wall slams down through a crack that suddenly appears in the ceiling at the entrance to the
corridor going west, sealing off that exit. At the same time, thick green smoke pours into the room
from behind the racks and quickly begins to fill the room.
AN ENTRY IN THE 2012 WINDHAMMER PRIZE 32
TRIAL OF THE BATTLE GOD BY BREWIN'
The smoke is highly poisonous and you must make a FIT check as you seek refuge by running
north. If you have SPRINT skill, you automatically succeed, otherwise if you fail the FIT check, you
lose 1D VIT from the toxic gas.
If you make it north into the corridor, turn to (73).
(48)
The cavern shakes violently, dislodging huge stalactites and boulders from the ceiling. You are
knocked to the ground and lose 1 VIT from bruising, but miraculously the falling rock does not strike
you. The tremors subside a few moments later, leaving most of the cavern buried under rock and the
gold door in the south-west corner as the only exit you can access.
Fearful of further tremors, you quickly clamber over the rocks to reach the gold door and escape
into the stone corridor beyond. Turn to (9).
(49)
* Next Battle Phase *
Here a wide stone passageway forms a three-way junction, with one way going west into a thick
white mist, one way leading east to a dead-end where a set of double doors is set into the south wall,
and the other way running north to another junction.
If it is Battle Phase 3 or 7, turn first to (7).
If it is Battle Phase 4, turn first to (4).
If it is Battle Phase 6, turn first to (28).
If it is Battle Phase 10, turn first to (83).
If it is Battle Phase 12 or 13, turn to (25).
Otherwise, your exits are:
• Through the double-doors at the end of the east passage, by turning to (98): unless you are
going this way on Battle Phase 5, in which case turn first to (28).
• North up the corridor, by turning to (9): unless you are going this way on Battle Phase 3, in
which case turn first to (4).
• Or west along the corridor into the mists, by turning to (41): unless you are going this way on
Battle Phase 6, in which case turn first to (7); or on Battle Phase 9, in which case turn first to
(83).
(50)
* Next Battle Phase *
You follow the tunnel down to a small shadowy cavern with no other exits. As you try to discern
the details of this area through the gloom, a low moan and the clink of armour from the opposite
corner alerts you to the fact that you are not alone here…
AN ENTRY IN THE 2012 WINDHAMMER PRIZE 33
TRIAL OF THE BATTLE GOD BY BREWIN'
If it is Battle Phase 11 or 12, turn to (63).
Otherwise, read on:
Shuffling into view is a pale, rotted man clad in chainmail. Its decomposing state in defiance of a
natural death, it lumbers moaning towards you, intent on your demise.
You can choose to avoid this combat by retreating back the way you came, by turning to (42).
Otherwise, you engage the zombie in battle:
FIT VIT OFF DAM DEF
ARMOURED ZOMBIE 5 12 1 3 4
Skills: None.
Weapons: Fists and teeth (OFF 1, DAM 3).
Armour: Chainmail (DEF 4).
Miscellaneous Items: None.
If you defeat the armoured zombie, you find that the Chainmail is in surprisingly good condition
and can take it if you wish.
From the corner where the zombie emerged, you hear the moans of other zombies, and a moment
later they begin to stagger from the shadows, their decaying bodies also clad in chainmail. Not
wishing to face them too, you quickly return the way you came. Turn to (42).
(51)
You are suddenly racked by an eruption of high pitched sound from all directions. Stunned and
disorientated, you fall to the ground as the mirrors around you explode into thousands of pieces of
slicing glass. Immediately resolve a single OFF 4 attack that does 2D DAM if it hits and 1 DAM even if
it does not.
As the glittering dust settles, you recover your senses and see that the mirror maze has been
reduced to sandy rubble, leaving only the outer stone walls of a massive hall that the maze stood in.
The only exit from this hall is the mirrored door leading east back to the wide stone passageway you
entered by. Turn to (9).
(52)
The blue door leading east from this room no longer opens, leaving you no choice but to go through
the steel door to the west. Turn to (46).
(53)
* Next Battle Phase *
You have entered a small candle-lit chamber painted blood red, with cushions scattered before a
brightly painted statue of the Battle God as a mighty bestial warrior in blood-soaked plate mail and
wielding axes, swords and spears in its many arms. The towering statue stands in a pose of triumph, a
sculpted scream of victory on its lips. Exits from this chamber are a dark green door leading west and
a crimson door leading north.
AN ENTRY IN THE 2012 WINDHAMMER PRIZE 34
TRIAL OF THE BATTLE GOD BY BREWIN'
If it is Battle Phase 11 or 12, turn to (18).
Otherwise, if you wish to kneel before the statue and pray to the Battle God, turn to (65).
If not, your exits are:
• Through the dark green door leading west, by turning to (94).
• Or through the crimson door leading north, by turning to (75).
(54)
The cavern shakes violently, dislodging huge chunks of rock from the walls that crash down around
you. You are knocked to the ground, losing 1 VIT from bruising, but miraculously you are not struck
by the falling ceiling. The tremors subside a few moments later, leaving most of the cavern buried
beneath boulders and the tunnel west as the only exit you can access.
Fearful of further tremors, you quickly clamber over the rocks in your path to escape the buried
cavern. Turn to (96).
(55)
* Next Battle Phase *
(Multiplayer section 70)
If you have either a SAPPHIRE RING or a TOPAZ RING, ignore this section and:
Turn to (31), if you have both of these rings.
Turn to (33), if you only have a SAPPHIRE RING.
Or turn to (76), if you only have a TOPAZ RING.
Otherwise, read on:
Moments later two other combatants enter from opposite ends of the temple. From the north comes
a female human Lashtar warrior-monk with a distinctive shaved head, wielding a javelin and wearing
only a simple grey tunic; and from the south comes a burly human male with the chiselled Baaldavan
features of a storm-knight, wielding a short sword and wearing battle-hardened plate armour.
Before you have time to react, the monk has launched her javelin at the knight, which strikes his
side before they meet in melee combat. The monk manages to land a flying kick, but then is quickly
slain by the knight’s expert blade. Draining the contents of a potion on the monk’s belt, the knight then
turns to face you. Famous for their fearlessness and skill in battle, storm-knights are often fancied by
onlookers to win the Trial. This knight is well armed and defended, and may well be your greatest
rival.
The knight's alert senses prevent you from making a STEALTH attack prior to the commencement
of melee combat:
AN ENTRY IN THE 2012 WINDHAMMER PRIZE 35
TRIAL OF THE BATTLE GOD BY BREWIN'
FIT VIT OFF DAM DEF
HUMAN KNIGHT 9 21 5 8 5
Skills: Prowess, Spot.
Weapons: Short Sword (OFF 4, DAM 8).
Armour: Half-plate (DEF 5).
Miscellaneous Items: Healing Salve*.
* Refer to the item list used when creating your character for details. Non-player-controlled combatants will
not use balms, potions or salves in combat.
If you win this battle, you acquire the knight’s TOPAZ RING (be sure to inform the other players if
there are any) and can take any of his other items if you wish. Nearby are a Javelin, Backpack, Healing
Balm, Potion of Speed and Lucky Charm: any of which you can also take (refer to the item list used
when creating your character for details). Then turn to (31).
(56)
There is a deafening burst of steam as thick iron bars slam down to block the corridor south. Frantic
to escape this area, you rush for the other doors and discover that all are locked except the western-
most door. Without further delay, you wrench it open and hurry into the stone corridor beyond. Turn
to (9).
(57)
* Next Battle Phase *
You entered a domed room whose walls are of frosted glass. One door, painted blue, is set into the
north side of the dome and another door with a frame of frosted glass is set into the west side.
If it is Battle Phase 7, turn first to (35).
Otherwise, read on:
You are suddenly alerted to the fact that you are not alone here. Stepping from the camouflage of
the walls is a figure made of the same frosted glass, wielding a shiny steel battleaxe that you fancy
could be quite handy in your hands. The axe-wielding golem marches towards you, its intent clear…
If you have SPRINT skill or your FIT is 7 or more, you can choose to escape through one of the
doors before the golem engages you. If so, ignore this combat and refer to the exits at the end of this
section.
Otherwise, you must fight (you cannot use STEALTH skill against the golem):
FIT VIT OFF DAM DEF
GLASS GOLEM 6 5 5 9 2
Skills: Spot.
Weapons: Battleaxe (OFF 5, DAM 9).
Armour: Glass body (DEF 2).
Miscellaneous Items: None.
AN ENTRY IN THE 2012 WINDHAMMER PRIZE 36
TRIAL OF THE BATTLE GOD BY BREWIN'
If you defeat the glass golem, you can take the Battleaxe if wish. Then if it is Battle Phase 8 or 9, turn
to (62).
Otherwise, your exits are:
• North through the painted blue door, by turning to (43): unless you are going this way on
Battle Phase 6, in which case turn first to (35).
• Or west through the glass-framed door, by turning to (17).
(58)
Intense vibrations suddenly grip the tunnel as the rocky walls and floor split open, dislodging
boulders that crash around you.
You turn to flee back the way you came, only to discover that you are now cut off by a three metre
wide chasm that grows wider by the second as the tremors continue…
With no time to waste, you launch yourself across the widening gap. If you have AGILITY skill,
then you automatically succeed. Otherwise, you must make a FIT check to successfully jump across.
Failing this check means that you land short, hanging perilously from the precipice of the far side of
the chasm. If you now make a second FIT check, you manage to pull yourself up. Otherwise, you
plunge to your death, crushed between two walls of rock.
If you make it across the chasm, you return to the main tunnel. Turn to (96).
(59)
You are stunned by the sudden appearance of a living entity of sizzling blue lightning that
materialises behind you. Vaguely humanoid in form, it flickers with energy as it lashes out at you
before you have time to react or avoid its strike, inflicting 9 DAM. It emits a crackling laugh before
disappearing again as suddenly as it had appeared.
If you are still alive, you can now return to the section you were on and proceed as normal.
(60)
You awaken underground to the sound of rushing water. Looking around, you see that you are
standing in a dim cavern that is lit from no discernible source and through which runs a dark fast-
flowing river that has no shore on the other side. Behind you is a narrow tunnel cut through jagged
rock that leads uphill to the west and turns south. In the far distance you can hear the ring of a brassy
gong as it fades away… You are now in the dungeon of the Battle God.
If you have SPOT skill, you notice a Javelin in the murky waters near the edge, wedged between
two submerged boulders. If you wish to retrieve it, you must roll 4D under your current VIT. If you
succeed, you can take the javelin, but if you fail, you cannot prise it free. -Refer to the item list used
when creating your character for details on the javelin.
You follow the narrow tunnel west and around to the south where it meets a larger tunnel. Turn to
(96).
AN ENTRY IN THE 2012 WINDHAMMER PRIZE 37
TRIAL OF THE BATTLE GOD BY BREWIN'
(61)
As you reach the door, the engraving begins to glow. Realising that it is an inscription in the
universal language of Onespeak, you read what it says:
I must feed and breathe to live, but give me water and I will die. So then, what am I?
A B C D E F G H I J K L M
1 2 3 4 5 6 7 8 9 10 11 12 13
N O P Q R S T U V W X Y Z
14 15 16 17 18 19 20 21 22 23 24 25 26
Convert each letter in your answer to a number according to the series above, and add these
numbers together to get a single total. This total is the section you turn to, where you will be informed
if you are correct. If you are wrong, the inscription fades and you cannot make any further attempts:
you must return the way you came and brave the tentacle horror once more. Turn to (74).
(62)
The blue door leading north from this room no longer opens, leaving you with west through the
glass-framed door as your only option. Turn to (17).
(63)
Intense vibrations suddenly grip the tunnel as the rocky walls and floor split open, dislodging
boulders that crash around you.
You turn to flee, only to discover that you are now cut off by a three metre wide chasm that grows
wider by the second as the tremors continue…
With no time to waste, you launch yourself across the widening gap. If you have AGILITY skill,
then you automatically succeed. Otherwise, you must make a FIT check to successfully jump across.
Failing this check means that you land short, hanging perilously from the precipice of the far side of
the chasm. If you now make a second FIT check, you manage to pull yourself up. Otherwise, you
plunge to your death, crushed between two walls of rock.
If you make it across the chasm, you escape to the mossy cavern. Turn to (42).
(64)
A growing rumble from the corridor to the east alerts you to the approach of something massive.
Moments later a smooth steel ball with edges touching the floor, ceiling and walls comes into view,
rolling west towards you down the corridor with increasing speed.
With no time to climb down into the pit at the junction corner, you dash into the north branch of the
corridor towards the white mists and look back with terror to see that the steel ball turns at the
junction to continue following you. Desperate to avoid being crushed to death by the rolling ball, you
sprint onward into the mists. Turn to (41).
AN ENTRY IN THE 2012 WINDHAMMER PRIZE 38
TRIAL OF THE BATTLE GOD BY BREWIN'
(65)
* Next Battle Phase *
(Multiplayer section 53)
If it is Battle Phase 11, turn to (18).
Otherwise, read on:
You kneel and bow your head as you dedicate a prayer to the great Battle God. You give thanks for
glory, for every moment you remain alive in battle, and pray for victory in the battle ahead…
For a few moments, nothing happens. Then as you rise to leave, you are bathed in warm light as an
invigorating energy rushes through your body. Looking up, you see the statue’s eyes glowing a fiery
red as a voice booms: “Great brave warrior! The Battle God answers your prayer! I grant you one
blessing of healing, vitality, fitness or luck. Make your choice!”
Choose your blessing and consult the list below for its effects:
• Healing blessing restores all VIT and FIT lost.
• Vitality blessing gives you +3 VIT permanently (exceeding your starting value).
• Fitness blessing gives you +1 FIT permanently (exceeding your starting value).
• Luck blessing grants you three occasions when you can re-roll any dice roll. You must always
accept the second roll (you cannot use this blessing to re-roll again).
As the light fades and the statue’s eyes revert to inert stone, you notice a glowing inscription has
been revealed on the eastern wall of the chamber. Seeing that it is written in the universal language of
Onespeak, you move closer to read it:
I can build castles and tear them down easily. I can blind a man and help another to see. So then tell me, what
is the name of me?
A B C D E F G H I J K L M
1 2 3 4 5 6 7 8 9 10 11 12 13
N O P Q R S T U V W X Y Z
14 15 16 17 18 19 20 21 22 23 24 25 26
Convert each letter in your answer to a number according to the series above, and add these
numbers together to get a single total. This total is the section you turn to, where you will be informed
if you are correct. If you are wrong, the inscription fades and you cannot make any further attempts:
you must return to this section and choose one of the exits below:
• If you leave west via the dark green door, turn to (94).
• Or if you leave north via the crimson door, turn to (75).
(66)
If you have either a DIAMOND RING or an EMERALD RING, ignore this section and:
Return to (41), if you have both of these rings.
Turn to (24), if you only have a DIAMOND RING.
Or turn to (7), if you only have an EMERALD RING.
AN ENTRY IN THE 2012 WINDHAMMER PRIZE 39
TRIAL OF THE BATTLE GOD BY BREWIN'
Otherwise, read on:
Through the mists ahead comes the clang of battle. As you draw closer you discern two of your
opponents locked in combat. One is stocky male dwarf in studded leather, bleeding from many places
and trying to fend off his attacker with a shield; and the other combatant is an elven male wearing a
grey cloak over leather who is cutting the hapless dwarf with rapid flashes of his short sword.
Just as you have taken this in, the dwarf stumbles to avoid a strike and is unable to recover in time
before the elf swipes his blade across the dwarf’s face. The dwarf’s roar of pain is quickly silenced as
the elf follows up to deal the killing blow, plunging his sword into the dwarf’s exposed belly.
A couple of moments later the elven warrior has relieved the dwarf of his shield and downed a
potion. Turning to face you, you recognise the elven ranger from the secluded forests of Estare,
homeland of the Trial’s last winner. He cannot use STEALTH skill against you, but as your eyes meet
you see the steely determination in his eyes and he drops into a battle stance once more, ready to meet
your challenge (you cannot use STEALTH skill against this opponent):
FIT VIT OFF DAM DEF
ELVEN RANGER 10 15 4 8 3
Skills: Agility, First Aid, Spot, Stealth.
Weapons: Short Sword (OFF 4, DAM 8).
Armour: Leather (DEF 2), Shield (+1 DEF).
Miscellaneous Items: None.
If you win this battle, you acquire the ranger’s EMERALD RING (be sure to inform the other
players if there are any) and can take any of his other items if you wish. Nearby lies the body of the
dwarf still wearing Studded Leather Armour (DEF 3) which you can also take. Then return to (41).
(67)
You raise the mallet and strike the bell, unleashing an ominous boom that fills your senses and
shakes your whole body with its power… Roll one die and add one to the result if you are Orc, Goblin
or Undead:
On a roll of 1 or 2, the clamour intensifies, becoming an unbearable onslaught of sound that numbs
your bones and threatens to burst your eardrums. Lose 3 VIT and 1 FIT. If you live, you stagger back
east through the door. Turn to (17).
On a roll of 3 or 4, nothing happens. Disappointed, you return east back through the door. Turn to
(17).
On a roll of 5 or more, you are stunned by the sudden appearance of a living entity of sizzling blue
lightning that materialises behind you. Vaguely humanoid in form, it stands flickering with energy as
you hear a voice crackle in your head, “You have dared to summon me! For such bravery you shall be
rewarded! Choose a victim for my wrath!”
You take a step back, trying to comprehend its message... You consider for a moment who your
chosen victim might be and then suddenly the being has disappeared in a flash of blue light, leaving
you wondering just what happened and is going to happen.
AN ENTRY IN THE 2012 WINDHAMMER PRIZE 40

TRIAL OF THE BATTLE GOD BY BREWIN'
The creature you summoned has now been dispatched to attack your chosen opponent. Choose one
of the following opponents: acrobat, assassin, barbarian, guardian, knight, monk, ranger OR one of
your human opponents if there are other players.
If you have chosen one of the non-player-controlled opponents, then the creature you summoned
will only appear if and when you encounter that opponent. If this occurs, before combat commences
(including javelin and STEALTH attacks) the creature will automatically appear and inflict 9 DAM on
your opponent before disappearing, never to return.
If you have chosen another human opponent, then at the start of the next Battle Phase, tell them to
turn to section 59 to read the results, before returning to the section that they were on. Note that if they
die from this attack, you will not earn their RING.
Once the bell has been successfully used to summon the creature, it will not work for you again in this Trial.
The only exit from here is east back through the door. Turn to (17).
(68)
* Next Battle Phase *
Here a rocky three-metre wide tunnel bends around from a large mossy cavern to the west and runs
south to a crystal-studded stone archway. Beyond the archway, a large hall floored with chequered
black and grey flagstones stretches south.
If it is Battle Phase 3, turn first to (11).
If it is Battle Phase 11 or 12, turn to (63).
Otherwise, your exits are:
• West into the mossy cavern, by turning to (42).
• Or south into the flagstone hall, by turning to (74).
(69)
If you have a SAPPHIRE RING, ignore this section and:
Turn to (97), if you also have a RUBY RING and a TOPAZ RING.
Turn to (92), if you also have a TOPAZ RING.
Turn to (13), if you also have a RUBY RING.
Or turn to (72), if you only have a SAPPHIRE RING.
Otherwise, read on:
Your thoughts are interrupted by the sound of an incoming javelin and you must immediately
resolve an OFF 3 attack that does 5 DAM if it hits. Following up this attack is an unarmed human
female wearing only a simple grey tunic and with a distinctive shaved head: a Lashtar warrior-monk.
You have time to throw a javelin back if you have one, before the monk engages you in melee combat
with a flurry of kicks and punches. Knowing that underestimating this unarmed expert could be a
deadly mistake, you focus all your wits and skill on prevailing in combat (you cannot use STEALTH
AN ENTRY IN THE 2012 WINDHAMMER PRIZE 41
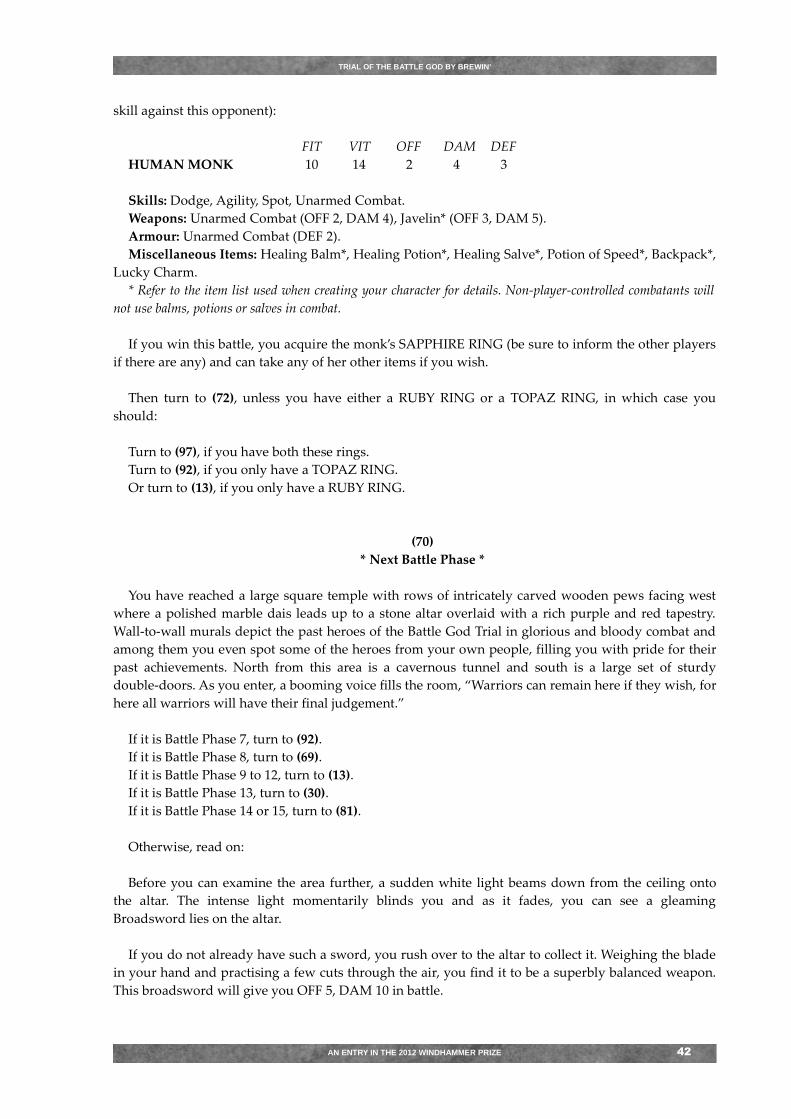
TRIAL OF THE BATTLE GOD BY BREWIN'
skill against this opponent):
FIT VIT OFF DAM DEF
HUMAN MONK 10 14 2 4 3
Skills: Dodge, Agility, Spot, Unarmed Combat.
Weapons: Unarmed Combat (OFF 2, DAM 4), Javelin* (OFF 3, DAM 5).
Armour: Unarmed Combat (DEF 2).
Miscellaneous Items: Healing Balm*, Healing Potion*, Healing Salve*, Potion of Speed*, Backpack*,
Lucky Charm.
* Refer to the item list used when creating your character for details. Non-player-controlled combatants will
not use balms, potions or salves in combat.
If you win this battle, you acquire the monk’s SAPPHIRE RING (be sure to inform the other players
if there are any) and can take any of her other items if you wish.
Then turn to (72), unless you have either a RUBY RING or a TOPAZ RING, in which case you
should:
Turn to (97), if you have both these rings.
Turn to (92), if you only have a TOPAZ RING.
Or turn to (13), if you only have a RUBY RING.
(70)
* Next Battle Phase *
You have reached a large square temple with rows of intricately carved wooden pews facing west
where a polished marble dais leads up to a stone altar overlaid with a rich purple and red tapestry.
Wall-to-wall murals depict the past heroes of the Battle God Trial in glorious and bloody combat and
among them you even spot some of the heroes from your own people, filling you with pride for their
past achievements. North from this area is a cavernous tunnel and south is a large set of sturdy
double-doors. As you enter, a booming voice fills the room, “Warriors can remain here if they wish, for
here all warriors will have their final judgement.”
If it is Battle Phase 7, turn to (92).
If it is Battle Phase 8, turn to (69).
If it is Battle Phase 9 to 12, turn to (13).
If it is Battle Phase 13, turn to (30).
If it is Battle Phase 14 or 15, turn to (81).
Otherwise, read on:
Before you can examine the area further, a sudden white light beams down from the ceiling onto
the altar. The intense light momentarily blinds you and as it fades, you can see a gleaming
Broadsword lies on the altar.
If you do not already have such a sword, you rush over to the altar to collect it. Weighing the blade
in your hand and practising a few cuts through the air, you find it to be a superbly balanced weapon.
This broadsword will give you OFF 5, DAM 10 in battle.
AN ENTRY IN THE 2012 WINDHAMMER PRIZE 42
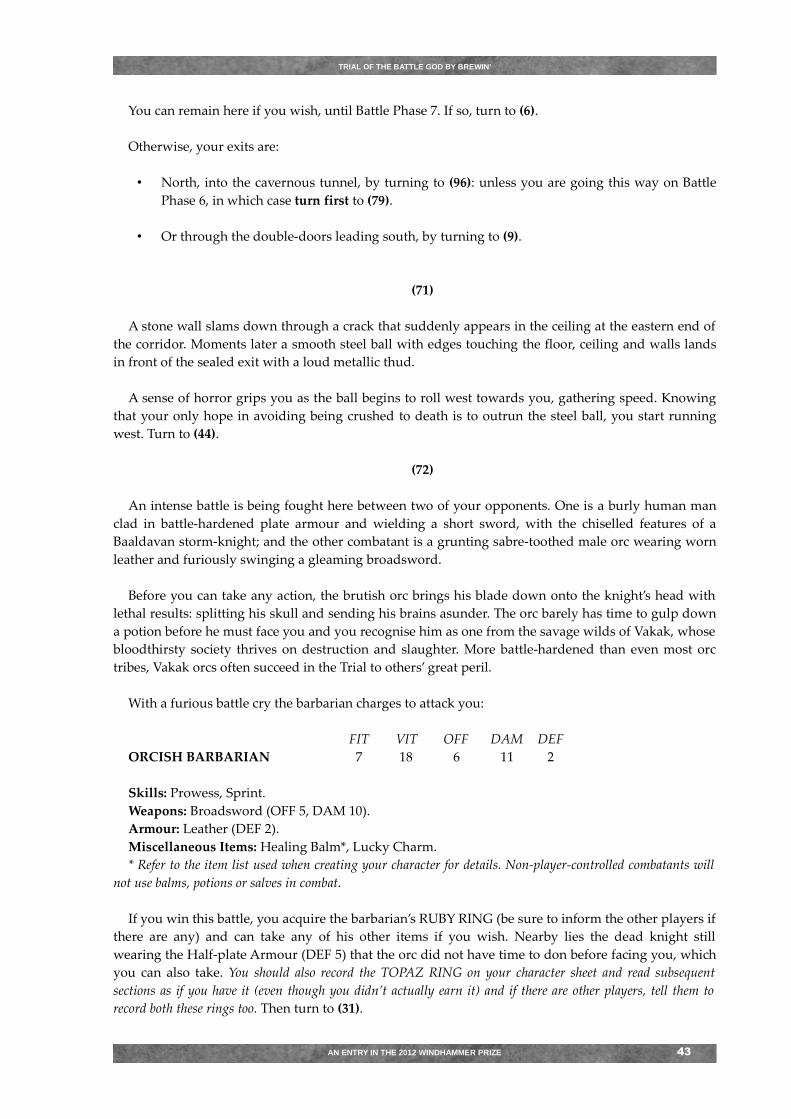
TRIAL OF THE BATTLE GOD BY BREWIN'
You can remain here if you wish, until Battle Phase 7. If so, turn to (6).
Otherwise, your exits are:
• North, into the cavernous tunnel, by turning to (96): unless you are going this way on Battle
Phase 6, in which case turn first to (79).
• Or through the double-doors leading south, by turning to (9).
(71)
A stone wall slams down through a crack that suddenly appears in the ceiling at the eastern end of
the corridor. Moments later a smooth steel ball with edges touching the floor, ceiling and walls lands
in front of the sealed exit with a loud metallic thud.
A sense of horror grips you as the ball begins to roll west towards you, gathering speed. Knowing
that your only hope in avoiding being crushed to death is to outrun the steel ball, you start running
west. Turn to (44).
(72)
An intense battle is being fought here between two of your opponents. One is a burly human man
clad in battle-hardened plate armour and wielding a short sword, with the chiselled features of a
Baaldavan storm-knight; and the other combatant is a grunting sabre-toothed male orc wearing worn
leather and furiously swinging a gleaming broadsword.
Before you can take any action, the brutish orc brings his blade down onto the knight’s head with
lethal results: splitting his skull and sending his brains asunder. The orc barely has time to gulp down
a potion before he must face you and you recognise him as one from the savage wilds of Vakak, whose
bloodthirsty society thrives on destruction and slaughter. More battle-hardened than even most orc
tribes, Vakak orcs often succeed in the Trial to others’ great peril.
With a furious battle cry the barbarian charges to attack you:
FIT VIT OFF DAM DEF
ORCISH BARBARIAN 7 18 6 11 2
Skills: Prowess, Sprint.
Weapons: Broadsword (OFF 5, DAM 10).
Armour: Leather (DEF 2).
Miscellaneous Items: Healing Balm*, Lucky Charm.
* Refer to the item list used when creating your character for details. Non-player-controlled combatants will
not use balms, potions or salves in combat.
If you win this battle, you acquire the barbarian’s RUBY RING (be sure to inform the other players if
there are any) and can take any of his other items if you wish. Nearby lies the dead knight still
wearing the Half-plate Armour (DEF 5) that the orc did not have time to don before facing you, which
you can also take. You should also record the TOPAZ RING on your character sheet and read subsequent
sections as if you have it (even though you didn’t actually earn it) and if there are other players, tell them to
record both these rings too. Then turn to (31).
AN ENTRY IN THE 2012 WINDHAMMER PRIZE 43
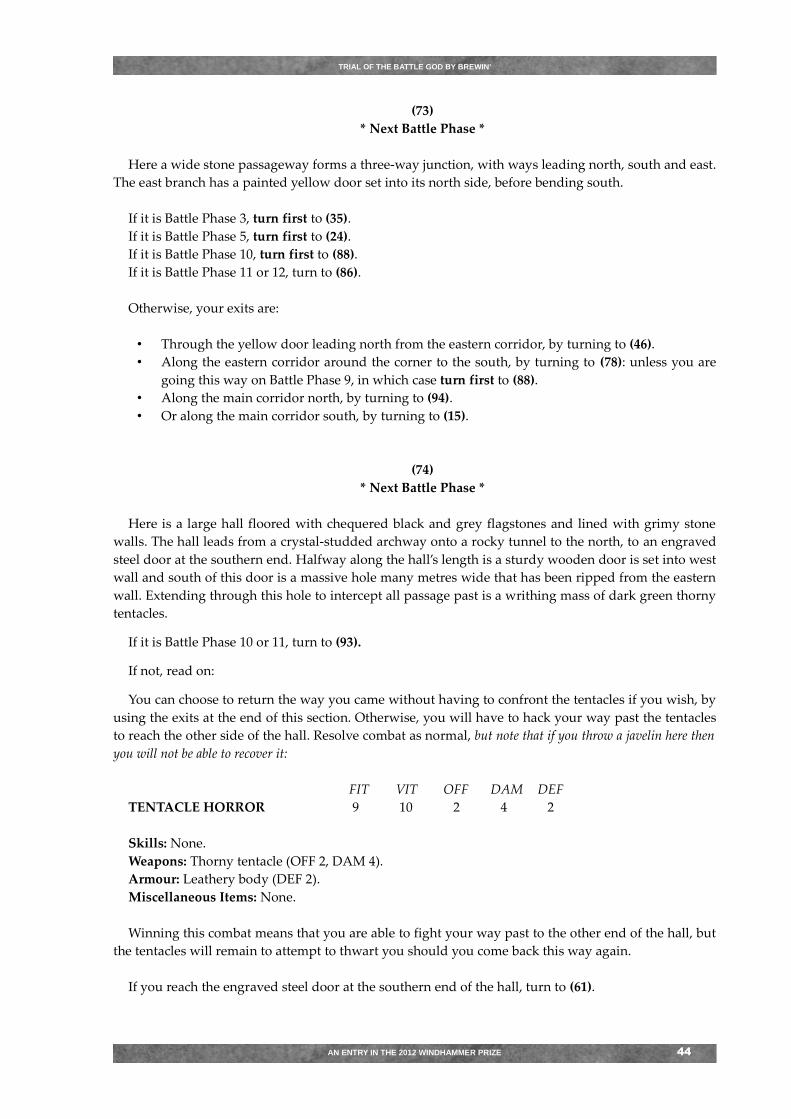
TRIAL OF THE BATTLE GOD BY BREWIN'
(73)
* Next Battle Phase *
Here a wide stone passageway forms a three-way junction, with ways leading north, south and east.
The east branch has a painted yellow door set into its north side, before bending south.
If it is Battle Phase 3, turn first to (35).
If it is Battle Phase 5, turn first to (24).
If it is Battle Phase 10, turn first to (88).
If it is Battle Phase 11 or 12, turn to (86).
Otherwise, your exits are:
• Through the yellow door leading north from the eastern corridor, by turning to (46).
• Along the eastern corridor around the corner to the south, by turning to (78): unless you are
going this way on Battle Phase 9, in which case turn first to (88).
• Along the main corridor north, by turning to (94).
• Or along the main corridor south, by turning to (15).
(74)
* Next Battle Phase *
Here is a large hall floored with chequered black and grey flagstones and lined with grimy stone
walls. The hall leads from a crystal-studded archway onto a rocky tunnel to the north, to an engraved
steel door at the southern end. Halfway along the hall’s length is a sturdy wooden door is set into west
wall and south of this door is a massive hole many metres wide that has been ripped from the eastern
wall. Extending through this hole to intercept all passage past is a writhing mass of dark green thorny
tentacles.
If it is Battle Phase 10 or 11, turn to (93).
If not, read on:
You can choose to return the way you came without having to confront the tentacles if you wish, by
using the exits at the end of this section. Otherwise, you will have to hack your way past the tentacles
to reach the other side of the hall. Resolve combat as normal, but note that if you throw a javelin here then
you will not be able to recover it:
FIT VIT OFF DAM DEF
TENTACLE HORROR 9 10 2 4 2
Skills: None.
Weapons: Thorny tentacle (OFF 2, DAM 4).
Armour: Leathery body (DEF 2).
Miscellaneous Items: None.
Winning this combat means that you are able to fight your way past to the other end of the hall, but
the tentacles will remain to attempt to thwart you should you come back this way again.
If you reach the engraved steel door at the southern end of the hall, turn to (61).
AN ENTRY IN THE 2012 WINDHAMMER PRIZE 44
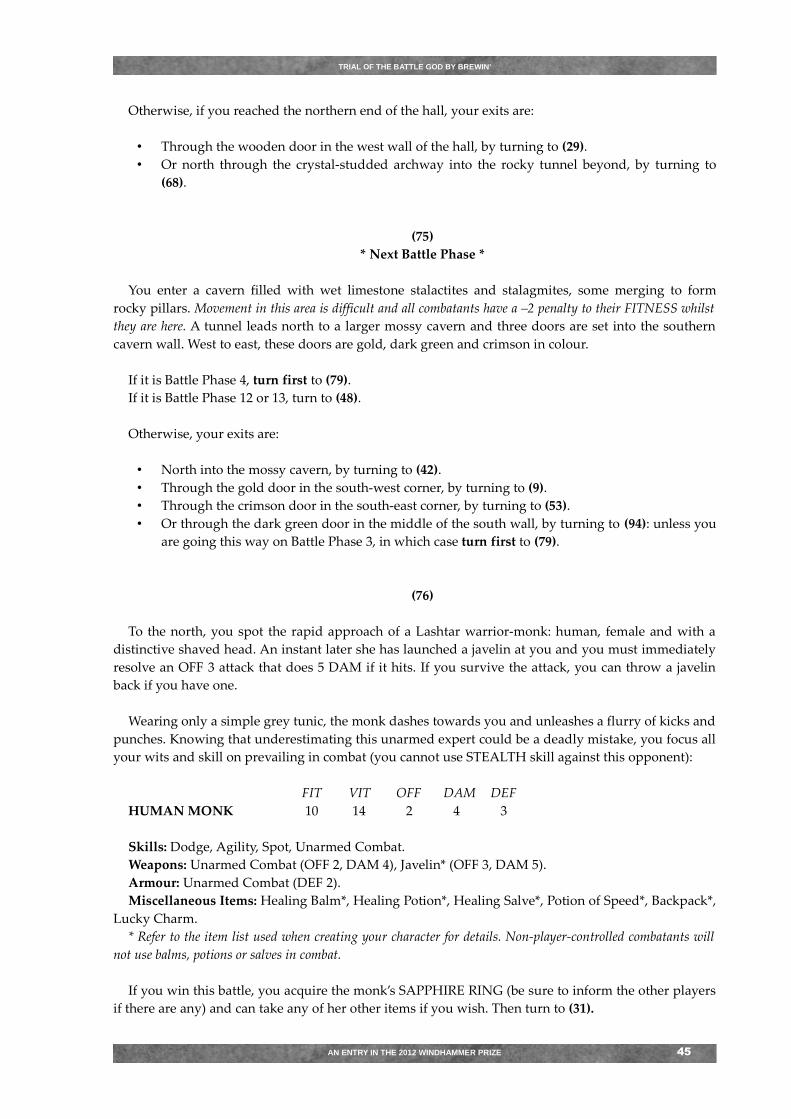
TRIAL OF THE BATTLE GOD BY BREWIN'
Otherwise, if you reached the northern end of the hall, your exits are:
• Through the wooden door in the west wall of the hall, by turning to (29).
• Or north through the crystal-studded archway into the rocky tunnel beyond, by turning to
(68).
(75)
* Next Battle Phase *
You enter a cavern filled with wet limestone stalactites and stalagmites, some merging to form
rocky pillars. Movement in this area is difficult and all combatants have a –2 penalty to their FITNESS whilst
they are here. A tunnel leads north to a larger mossy cavern and three doors are set into the southern
cavern wall. West to east, these doors are gold, dark green and crimson in colour.
If it is Battle Phase 4, turn first to (79).
If it is Battle Phase 12 or 13, turn to (48).
Otherwise, your exits are:
• North into the mossy cavern, by turning to (42).
• Through the gold door in the south-west corner, by turning to (9).
• Through the crimson door in the south-east corner, by turning to (53).
• Or through the dark green door in the middle of the south wall, by turning to (94): unless you
are going this way on Battle Phase 3, in which case turn first to (79).
(76)
To the north, you spot the rapid approach of a Lashtar warrior-monk: human, female and with a
distinctive shaved head. An instant later she has launched a javelin at you and you must immediately
resolve an OFF 3 attack that does 5 DAM if it hits. If you survive the attack, you can throw a javelin
back if you have one.
Wearing only a simple grey tunic, the monk dashes towards you and unleashes a flurry of kicks and
punches. Knowing that underestimating this unarmed expert could be a deadly mistake, you focus all
your wits and skill on prevailing in combat (you cannot use STEALTH skill against this opponent):
FIT VIT OFF DAM DEF
HUMAN MONK 10 14 2 4 3
Skills: Dodge, Agility, Spot, Unarmed Combat.
Weapons: Unarmed Combat (OFF 2, DAM 4), Javelin* (OFF 3, DAM 5).
Armour: Unarmed Combat (DEF 2).
Miscellaneous Items: Healing Balm*, Healing Potion*, Healing Salve*, Potion of Speed*, Backpack*,
Lucky Charm.
* Refer to the item list used when creating your character for details. Non-player-controlled combatants will
not use balms, potions or salves in combat.
If you win this battle, you acquire the monk’s SAPPHIRE RING (be sure to inform the other players
if there are any) and can take any of her other items if you wish. Then turn to (31).
AN ENTRY IN THE 2012 WINDHAMMER PRIZE 45
TRIAL OF THE BATTLE GOD BY BREWIN'
(77)
You can remain here if you wish, until the next Battle Phase. If so, turn to (55).
Otherwise, your exits are:
• North via the cavernous tunnel, by turning to (96): but turn first to (11).
• Or south via the double-doors, by turning to (9): but turn first to (28).
(78)
* Next Battle Phase *
The wide corridor here runs west and south. Along the southern stretch of the corridor are a series
of massive mechanical axes suspended from the ceiling, swinging back and forth across the corridor
methodically.
If it is Battle Phase 9, turn first to (88).
If it is Battle Phase 10 or 11, turn to (16).
Otherwise, read on:
The axes swing in a repeating sequence and you will have to carefully time your steps and jumps
past them to avoid being struck.
If you wish, you can return the way you came by using exits at the end of this section. Otherwise, to
reach the other end of the corridor, you must either make two FIT checks if you go carefully, or one
FIT check at a –2 penalty if you go quickly. If you have AGILITY skill, you can make a single FIT check
at no penalty to dodge past the swinging axes.
Each failed FIT check results in you being struck by one of the axes as it slices past, inflicting D6+1
DAM and –1 FIT if you lose 6 VIT or more on a single hit.
Exits from here are:
• Along the corridor south, by turning to (17): unless you are going this way on Battle Phase 8,
in which case turn first to (88).
• Or along the corridor west, by turning to (73).
(79)
If you have a RUBY RING, ignore this section and return to the section you were on.
Otherwise, read on:
The grunting bulk of a sabre-toothed male orc crashes into view a short distance ahead, wielding a
war hammer and clad in worn leather. A brutish orc from the savage wilds of Vakak, their bloodthirsty
society thrives on destruction and slaughter, and they remain one of the few nations that still wage
almost constant warfare. More battle-hardened than even most orc tribes, Vakak orcs often succeed in
the Trial to others’ great peril.
AN ENTRY IN THE 2012 WINDHAMMER PRIZE 46
TRIAL OF THE BATTLE GOD BY BREWIN'
The orcish barbarian sniffs the air, sensing your proximity and charges to attack you with a furious
battle cry:
FIT VIT OFF DAM DEF
ORCISH BARBARIAN 7 24 4 8 2
Skills: Prowess, Sprint.
Weapons: War Hammer (OFF 3, DAM 7).
Armour: Leather (DEF 2).
Miscellaneous Items: Healing Balm*, Healing Potion*, Lucky Charm.
* Refer to the item list used when creating your character for details. Non-player-controlled combatants will
not use balms, potions or salves in combat.
If you win this battle, you acquire the barbarian’s RUBY RING (be sure to inform the other players if
there are any) and can take any of his other items if you wish. Then return to section you were on.
(80)
Despite your efforts, the doorway opposite remains sealed. Discouraged, you head east back out of
the room. Turn to (74).
(81)
If you have a TOPAZ RING, ignore this section and turn to (82) instead.
Otherwise, read on:
Waiting for you here is a burly human male wielding a magnificent broadsword and clad in battle-
hardened plate armour and shield. You recognise the chiselled features of a Baaldavan storm-knight.
Famous for their fearlessness and skill in battle, this knight is well armed and defended, and is now all
that stands between you and victory in the Trial.
He greets your arrival with a javelin throw and you must immediately resolve an OFF 4 attack that
does 5 DAM if it hits. If you survive the attack, you can throw a javelin back if you have one, before
meeting the knight in melee combat (you cannot use STEALTH skill against this opponent):
FIT VIT OFF DAM DEF
HUMAN KNIGHT 9 18 6 10 6
Skills: Prowess, Spot.
Weapons: Broadsword (OFF 5, DAM 10), Javelin* (OFF 3, DAM 5).
Armour: Half-plate (DEF 5), Shield (+1 DEF).
Miscellaneous Items: None.
* Refer to the item list used when creating your character for details.
If you win this battle, you acquire the knight’s TOPAZ RING (be sure to inform the other players if
there are any) and can take any of his other items if you wish. Then turn to (82).
AN ENTRY IN THE 2012 WINDHAMMER PRIZE 47
TRIAL OF THE BATTLE GOD BY BREWIN'
(82)
* Next Battle Phase *
(Multiplayer section 70)
If there are other players that are still alive, you must wait here (calling Multiplayer section 70 on each Battle
Phase) until they arrive to face you in the final battle. The victor of this battle can then read on:
A mighty gong like thunder echoes through the temple, shaking the earth and cracking the walls.
Then from all directions a deafening rumble approaches, as the caverns and corridors around the
temple collapse. The air fills with choking and blinding dust from which there is no escape as
consciousness fades...
An indeterminate time later you recover to find yourself standing on the glistening rocky hillock in
the centre of Lake Judgement once more, under a sunny blue sky and observe for the first time that the
dark rock glistens with blood.
“The blood of fallen heroes,” says a gravelly voice behind you, “that have died for my honour and
glory.”
Spinning around, you come face to face with a mighty battle-scarred warrior of the same race as
you. The warrior stands in bloodstained plate mail, gripping a huge battleaxe scored with many years
of use in one hand and a large red banner in the other. “But you have succeeded where all others have
perished,” says the warrior. “You alone have achieved victory in my Trial for your nation.”
Sensing that these words are those of the Battle God itself, a feeling of overwhelming relief that
your ordeal is over and pride at your achievement washes over you.
“But there is one final challenge before you,” the warrior continues. “A challenge that none yet have
ever succeeded in, and possibly none ever will…”
The warrior, incarnation of the Battle God itself, fixes your eyes with a deadly stare and plants the
banner into the ground. “That challenge is to defeat me in combat.”
Your mind reels with the thought. How can you possibly defeat the supreme patron of battle? The
manifestation of combat perfection?
Perhaps sensing your trepidation, the warrior elaborates, “You have already won my Trial and this
cannot be taken away from you. Should you fall to me in battle, and you surely will, you will not die
and nor should you be ashamed that you failed to defeat the undefeatable. But should you somehow
succeed, then it will mean the dawning of a new era, for victory over me will mean that you shall
become the new Battle God.”
With nothing to lose it would seem but the chance for supreme glory, you prepare to do battle
against the ultimate opponent…
Neither of you can use STEALTH skill for this combat, nor may you use a javelin. You must fight
the Battle God in melee combat for the greatest honour there is:
FIT VIT OFF DAM DEF
BATTLE GOD 12 24 6 12 6
AN ENTRY IN THE 2012 WINDHAMMER PRIZE 48
TRIAL OF THE BATTLE GOD BY BREWIN'
Skills: Prowess, Dodge, Agility, First Aid, Spot, Sprint, Stealth, Unarmed Combat.
Weapons: Long Sword (OFF 6, DAM 12).
Armour: Plate Mail (DEF 6).
Miscellaneous Items: None.
If you achieve the incredible feat of defeating the Battle God, turn to (100).
Otherwise, read on:
The Battle God lands the last blow and you fall to your knees, beaten. Then a shining light envelops
you, instantly healing your wounds and reinvigorating your spirit.
You look up to see the Battle God smiling down at you. “Perhaps we shall meet again and once
more I shall have to defend my reign. But for now, this day is yours, for though you lost to me in
combat, as have all before you, you have won the Trial.”
The Battle God hauls you to your feet and hands you the blood-red banner before pointing to your
one-man canoe that rests on the rocks a few metres from you. “Take my banner of champions and
return to your people to rejoice in your victory! May your glorious deeds on this day live forever in
their memory!”
You return to the shore with the Battle God’s banner to be greeted by your loyal priest that has
waited through the night for your return. Heaping praise, he guides you back to your camp where
your entourage cheers your arrival and begins to pack up to take you on the long journey back home.
Great celebration and reward awaits you there, for you shall return as the newly crowned champion
of the Battle God.
And so ends another Trial… Consult the list at the end of this gamebook to determine your Battle
God score.
(83)
If you have an EMERALD RING, ignore this section and return to the section you were on.
Otherwise, read on:
In the shadows nearby hides an elven ranger from the secluded forests of Estare, homeland of the
Trial’s last winner. Crouched in the darkness, short sword in one hand, shield on the other and
wearing a grey cloak over studded leather, he waits for your approach…
Unless you have SPOT skill, you are unaware of the ranger until he suddenly launches himself at
you in a deadly flash of steel. Resolve an OFF 4 attack that does 8 DAM if it hits, before you engage the
ranger in melee combat (you cannot throw a javelin or use STEALTH skill against this opponent).
If you have SPOT skill, you see the ranger watching you from the shadows nearby and can throw a
javelin if you have one (but you still cannot use STEALTH skill against this opponent). Your eyes meet
and acknowledging that his cover is gone, he charges towards you:
AN ENTRY IN THE 2012 WINDHAMMER PRIZE 49
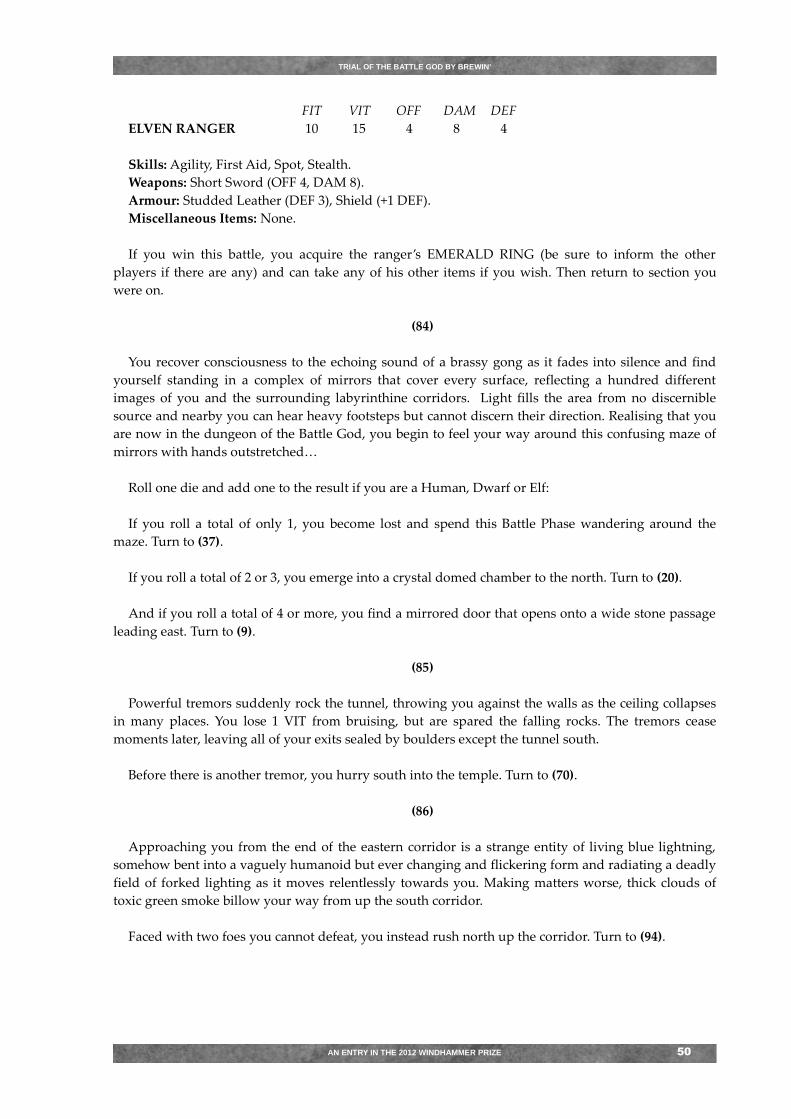
TRIAL OF THE BATTLE GOD BY BREWIN'
FIT VIT OFF DAM DEF
ELVEN RANGER 10 15 4 8 4
Skills: Agility, First Aid, Spot, Stealth.
Weapons: Short Sword (OFF 4, DAM 8).
Armour: Studded Leather (DEF 3), Shield (+1 DEF).
Miscellaneous Items: None.
If you win this battle, you acquire the ranger’s EMERALD RING (be sure to inform the other
players if there are any) and can take any of his other items if you wish. Then return to section you
were on.
(84)
You recover consciousness to the echoing sound of a brassy gong as it fades into silence and find
yourself standing in a complex of mirrors that cover every surface, reflecting a hundred different
images of you and the surrounding labyrinthine corridors. Light fills the area from no discernible
source and nearby you can hear heavy footsteps but cannot discern their direction. Realising that you
are now in the dungeon of the Battle God, you begin to feel your way around this confusing maze of
mirrors with hands outstretched…
Roll one die and add one to the result if you are a Human, Dwarf or Elf:
If you roll a total of only 1, you become lost and spend this Battle Phase wandering around the
maze. Turn to (37).
If you roll a total of 2 or 3, you emerge into a crystal domed chamber to the north. Turn to (20).
And if you roll a total of 4 or more, you find a mirrored door that opens onto a wide stone passage
leading east. Turn to (9).
(85)
Powerful tremors suddenly rock the tunnel, throwing you against the walls as the ceiling collapses
in many places. You lose 1 VIT from bruising, but are spared the falling rocks. The tremors cease
moments later, leaving all of your exits sealed by boulders except the tunnel south.
Before there is another tremor, you hurry south into the temple. Turn to (70).
(86)
Approaching you from the end of the eastern corridor is a strange entity of living blue lightning,
somehow bent into a vaguely humanoid but ever changing and flickering form and radiating a deadly
field of forked lighting as it moves relentlessly towards you. Making matters worse, thick clouds of
toxic green smoke billow your way from up the south corridor.
Faced with two foes you cannot defeat, you instead rush north up the corridor. Turn to (94).
AN ENTRY IN THE 2012 WINDHAMMER PRIZE 50
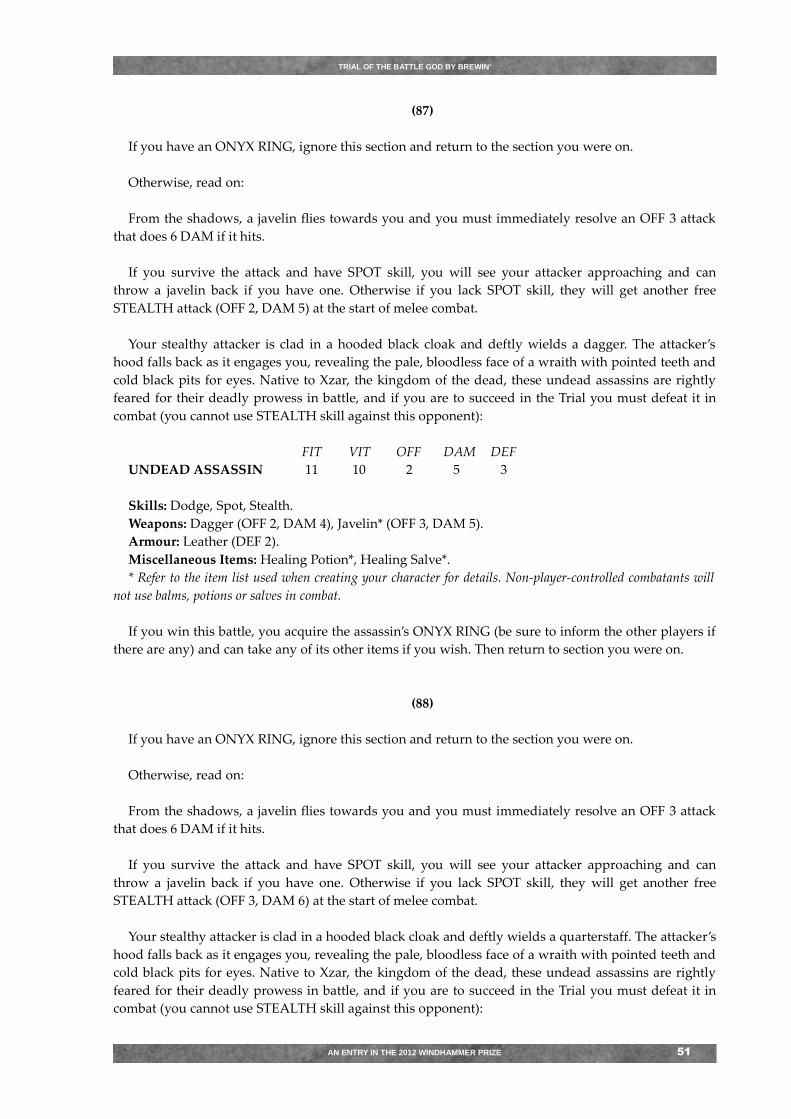
TRIAL OF THE BATTLE GOD BY BREWIN'
(87)
If you have an ONYX RING, ignore this section and return to the section you were on.
Otherwise, read on:
From the shadows, a javelin flies towards you and you must immediately resolve an OFF 3 attack
that does 6 DAM if it hits.
If you survive the attack and have SPOT skill, you will see your attacker approaching and can
throw a javelin back if you have one. Otherwise if you lack SPOT skill, they will get another free
STEALTH attack (OFF 2, DAM 5) at the start of melee combat.
Your stealthy attacker is clad in a hooded black cloak and deftly wields a dagger. The attacker’s
hood falls back as it engages you, revealing the pale, bloodless face of a wraith with pointed teeth and
cold black pits for eyes. Native to Xzar, the kingdom of the dead, these undead assassins are rightly
feared for their deadly prowess in battle, and if you are to succeed in the Trial you must defeat it in
combat (you cannot use STEALTH skill against this opponent):
FIT VIT OFF DAM DEF
UNDEAD ASSASSIN 11 10 2 5 3
Skills: Dodge, Spot, Stealth.
Weapons: Dagger (OFF 2, DAM 4), Javelin* (OFF 3, DAM 5).
Armour: Leather (DEF 2).
Miscellaneous Items: Healing Potion*, Healing Salve*.
* Refer to the item list used when creating your character for details. Non-player-controlled combatants will
not use balms, potions or salves in combat.
If you win this battle, you acquire the assassin’s ONYX RING (be sure to inform the other players if
there are any) and can take any of its other items if you wish. Then return to section you were on.
(88)
If you have an ONYX RING, ignore this section and return to the section you were on.
Otherwise, read on:
From the shadows, a javelin flies towards you and you must immediately resolve an OFF 3 attack
that does 6 DAM if it hits.
If you survive the attack and have SPOT skill, you will see your attacker approaching and can
throw a javelin back if you have one. Otherwise if you lack SPOT skill, they will get another free
STEALTH attack (OFF 3, DAM 6) at the start of melee combat.
Your stealthy attacker is clad in a hooded black cloak and deftly wields a quarterstaff. The attacker’s
hood falls back as it engages you, revealing the pale, bloodless face of a wraith with pointed teeth and
cold black pits for eyes. Native to Xzar, the kingdom of the dead, these undead assassins are rightly
feared for their deadly prowess in battle, and if you are to succeed in the Trial you must defeat it in
combat (you cannot use STEALTH skill against this opponent):
AN ENTRY IN THE 2012 WINDHAMMER PRIZE 51
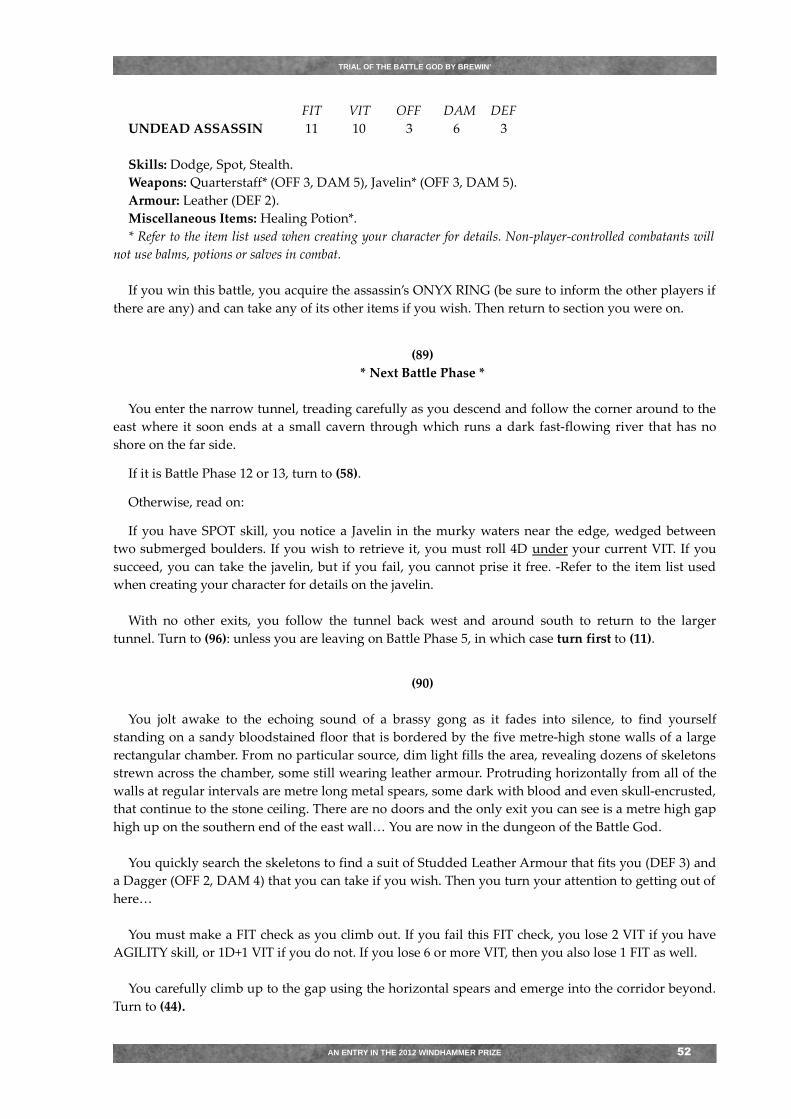
TRIAL OF THE BATTLE GOD BY BREWIN'
FIT VIT OFF DAM DEF
UNDEAD ASSASSIN 11 10 3 6 3
Skills: Dodge, Spot, Stealth.
Weapons: Quarterstaff* (OFF 3, DAM 5), Javelin* (OFF 3, DAM 5).
Armour: Leather (DEF 2).
Miscellaneous Items: Healing Potion*.
* Refer to the item list used when creating your character for details. Non-player-controlled combatants will
not use balms, potions or salves in combat.
If you win this battle, you acquire the assassin’s ONYX RING (be sure to inform the other players if
there are any) and can take any of its other items if you wish. Then return to section you were on.
(89)
* Next Battle Phase *
You enter the narrow tunnel, treading carefully as you descend and follow the corner around to the
east where it soon ends at a small cavern through which runs a dark fast-flowing river that has no
shore on the far side.
If it is Battle Phase 12 or 13, turn to (58).
Otherwise, read on:
If you have SPOT skill, you notice a Javelin in the murky waters near the edge, wedged between
two submerged boulders. If you wish to retrieve it, you must roll 4D under your current VIT. If you
succeed, you can take the javelin, but if you fail, you cannot prise it free. -Refer to the item list used
when creating your character for details on the javelin.
With no other exits, you follow the tunnel back west and around south to return to the larger
tunnel. Turn to (96): unless you are leaving on Battle Phase 5, in which case turn first to (11).
(90)
You jolt awake to the echoing sound of a brassy gong as it fades into silence, to find yourself
standing on a sandy bloodstained floor that is bordered by the five metre-high stone walls of a large
rectangular chamber. From no particular source, dim light fills the area, revealing dozens of skeletons
strewn across the chamber, some still wearing leather armour. Protruding horizontally from all of the
walls at regular intervals are metre long metal spears, some dark with blood and even skull-encrusted,
that continue to the stone ceiling. There are no doors and the only exit you can see is a metre high gap
high up on the southern end of the east wall… You are now in the dungeon of the Battle God.
You quickly search the skeletons to find a suit of Studded Leather Armour that fits you (DEF 3) and
a Dagger (OFF 2, DAM 4) that you can take if you wish. Then you turn your attention to getting out of
here…
You must make a FIT check as you climb out. If you fail this FIT check, you lose 2 VIT if you have
AGILITY skill, or 1D+1 VIT if you do not. If you lose 6 or more VIT, then you also lose 1 FIT as well.
You carefully climb up to the gap using the horizontal spears and emerge into the corridor beyond.
Turn to (44).
AN ENTRY IN THE 2012 WINDHAMMER PRIZE 52
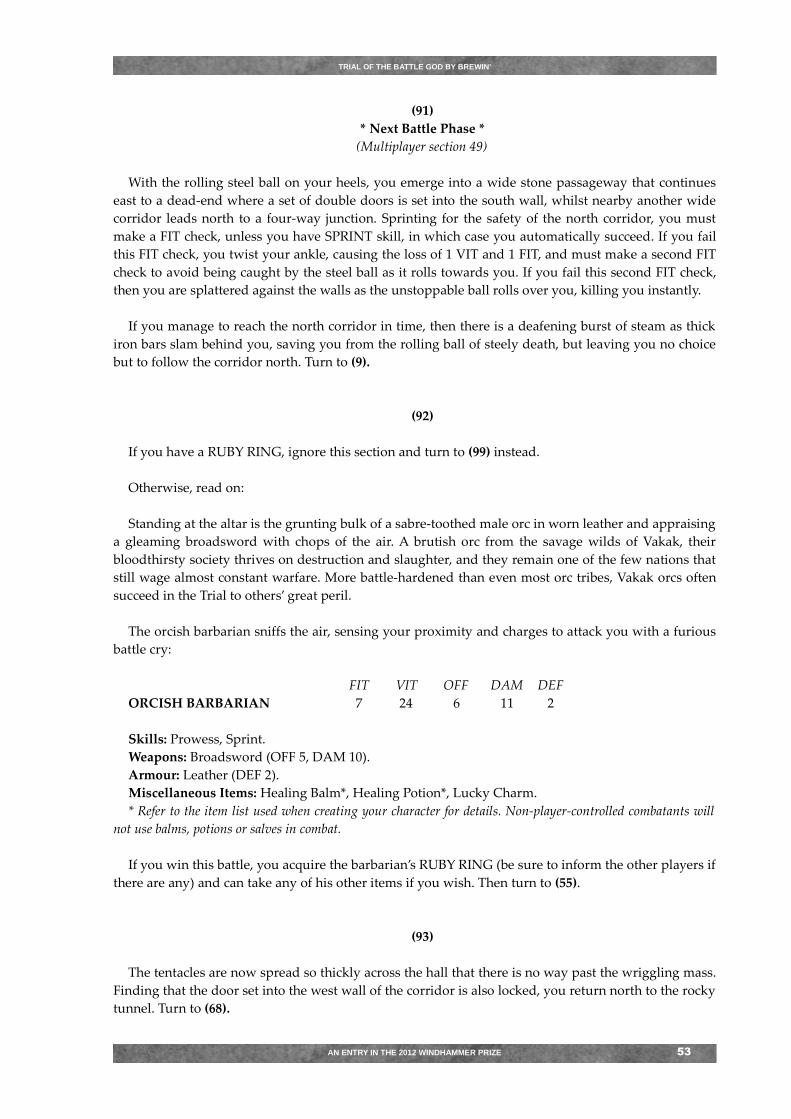
TRIAL OF THE BATTLE GOD BY BREWIN'
(91)
* Next Battle Phase *
(Multiplayer section 49)
With the rolling steel ball on your heels, you emerge into a wide stone passageway that continues
east to a dead-end where a set of double doors is set into the south wall, whilst nearby another wide
corridor leads north to a four-way junction. Sprinting for the safety of the north corridor, you must
make a FIT check, unless you have SPRINT skill, in which case you automatically succeed. If you fail
this FIT check, you twist your ankle, causing the loss of 1 VIT and 1 FIT, and must make a second FIT
check to avoid being caught by the steel ball as it rolls towards you. If you fail this second FIT check,
then you are splattered against the walls as the unstoppable ball rolls over you, killing you instantly.
If you manage to reach the north corridor in time, then there is a deafening burst of steam as thick
iron bars slam behind you, saving you from the rolling ball of steely death, but leaving you no choice
but to follow the corridor north. Turn to (9).
(92)
If you have a RUBY RING, ignore this section and turn to (99) instead.
Otherwise, read on:
Standing at the altar is the grunting bulk of a sabre-toothed male orc in worn leather and appraising
a gleaming broadsword with chops of the air. A brutish orc from the savage wilds of Vakak, their
bloodthirsty society thrives on destruction and slaughter, and they remain one of the few nations that
still wage almost constant warfare. More battle-hardened than even most orc tribes, Vakak orcs often
succeed in the Trial to others’ great peril.
The orcish barbarian sniffs the air, sensing your proximity and charges to attack you with a furious
battle cry:
FIT VIT OFF DAM DEF
ORCISH BARBARIAN 7 24 6 11 2
Skills: Prowess, Sprint.
Weapons: Broadsword (OFF 5, DAM 10).
Armour: Leather (DEF 2).
Miscellaneous Items: Healing Balm*, Healing Potion*, Lucky Charm.
* Refer to the item list used when creating your character for details. Non-player-controlled combatants will
not use balms, potions or salves in combat.
If you win this battle, you acquire the barbarian’s RUBY RING (be sure to inform the other players if
there are any) and can take any of his other items if you wish. Then turn to (55).
(93)
The tentacles are now spread so thickly across the hall that there is no way past the wriggling mass.
Finding that the door set into the west wall of the corridor is also locked, you return north to the rocky
tunnel. Turn to (68).
AN ENTRY IN THE 2012 WINDHAMMER PRIZE 53
TRIAL OF THE BATTLE GOD BY BREWIN'
(94)
* Next Battle Phase *
You have come to a room with dark green fleshy walls that are lined with black-tipped spikes.
There are three identical wooden doors on the northern side of the chamber and a wide stone corridor
leading south. As you enter, the organic walls ripple and unleash a hail of barbs across the room.
Immediately resolve a single OFF 2 attack that does 1D DAM if it hits. Each time you enter this area,
you will be subject to another barb attack.
If it is Battle Phase 4, turn first to (24).
If it is Battle Phase 11, turn first to (88).
The leathery walls look like they could easily resist your attacks whilst pelting you with yet more
barbs, so you decide to move quickly to another area.
If it is Battle Phase 12 or 13, turn to (56).
Otherwise, your exits are:
• Through the door in the north-west corner, by turning to (9).
• Through the door in the north-east corner, by turning to (75).
• Through the door in the eastern wall, by turning to (53).
• Or by following the corridor south. Turn to (73): unless you are going this way on Battle Phase
10, in which case turn first to (88).
(95)
A growing rumble from the corridor to the south alerts you to the incoming of something massive.
Moments later you glimpse a smooth steel ball rolling towards you down the corridor with increasing
speed, so large that its edges touch the floor, ceiling and walls.
In panic you run towards the eastern end of this winding corridor to escape a crushing death by the
rolling ball. As you sprint through the swirling white mists you must make a FIT check to maintain
your footing, unless you have AGILITY skill, in which case you automatically succeed. If you fail this
FIT check, you twist your ankle, causing the loss of 1 VIT and 1 FIT, and must make a second FIT
check to avoid being caught by the steel ball as it rolls towards you, unless you have SPRINT skill, in
which case you automatically succeed. If you fail this second FIT check, then you are splattered
against the walls as the unstoppable ball rolls over you, killing you instantly.
If you manage to escape east into the corridor beyond, turn to (91).
(96)
* Next Battle Phase *
You are standing in a rocky tunnel some five metres wide. A narrow side tunnel leads north,
sloping downhill and bends to the east where you can hear the sound of rushing water, whilst the
main tunnel goes east into a large mossy cavern and south into a temple area featuring colourful
murals and an altar to one side.
AN ENTRY IN THE 2012 WINDHAMMER PRIZE 54
TRIAL OF THE BATTLE GOD BY BREWIN'
If it is Battle Phase 5 or 7, turn first to (11).
If it is Battle Phase 6, turn first to (79).
If it is Battle Phase 13 or 14, turn to (85).
Otherwise, your exits are:
• North into the narrow downhill tunnel that bends to the east, by turning to (89).
• East into the mossy cavern, by turning to (42): unless you are going this way on Battle Phase 4,
in which case turn first to (11); or on Battle Phase 5, in which case turn first to (79).
• Or south into the temple, by turning to (70).
(97)
* Next Battle Phase *
(Multiplayer section 70)
Before you can examine the area further, a sudden white light beams down from the ceiling onto
the altar. The intense light momentarily blinds you and as it fades, you can see a gleaming
Broadsword lies on the altar.
If you do not already have such a sword, you rush over to the altar to collect it. Weighing the blade
in your hand and practising a few cuts through the air, you find it to be a superbly balanced weapon.
This broadsword will give you OFF 5, DAM 10 in battle.
You can remain here if you wish, until Battle Phase 13. If so, turn to (10).
Otherwise, your exits are:
• North, into the cavernous tunnel, by turning to (96).
• Or through the double-doors leading south, by turning to (9): unless you are going this way
on Battle Phase 12, in which case turn first to (83).
(98)
* Next Battle Phase *
The double doors open onto a chamber obscured by thick cobwebs that cover every surface and
slow your movement. Due to the webs, all combatants have a –2 penalty to their FITNESS whilst they are in
this area. There are no other exits from this room.
If it is Battle Phase 6 or more, turn to (40).
Otherwise, read on:
At the far end of the room hangs a still, cocooned figure clad in plate mail. Warily you approach to
investigate and as if to confirm your suspicions, a monstrous jet-black spider half your height emerges
from the web corrugations behind you.
The spider suffers no penalty to its Fitness due to the webs and unless you have either SPOT or
STEALTH skill, it will get a free STEALTH attack at the start of combat as well. As this beast now
AN ENTRY IN THE 2012 WINDHAMMER PRIZE 55
TRIAL OF THE BATTLE GOD BY BREWIN'
blocks your exit, you have no choice but to fight. You do not have time to throw a javelin before this
combat, but you can make a STEALTH attack if you have this skill as well as SPOT skill:
FIT VIT OFF DAM DEF
MONSTROUS SPIDER 8 8 2 8 2
Skills: Stealth.
Weapons: Spider bite (OFF 2, DAM 8).
Armour: Chitin (DEF 2).
Miscellaneous Items: None.
If you slay the spider, you will find that the hanging cocoon holds a man, now little more than a
desiccated husk, still wearing a suit of plate mail that is in good condition and mostly salvageable. The
armour failed to save his life but may yet save yours and you can wear the torso and arm sections as
Half-plate (DEF 5).
The only exit from here is back out into the corridor. Turn to (49): unless you are leaving on Battle
Phase 4, in which case turn first to (4).
(99)
Before you can examine the area further, a sudden white light beams down from the ceiling onto
the altar. The intense light momentarily blinds you and as it fades, you can see a gleaming
Broadsword lies on the altar.
If you do not already have such a sword, you rush over to the altar to collect it. Weighing the blade
in your hand and practising a few cuts through the air, you find it to be a superbly balanced weapon.
This broadsword will give you OFF 5, DAM 10 in battle.
You can remain here if you wish, until the next Battle Phase. If so, turn to (55).
Otherwise, your exits are:
• North via the cavernous tunnel, by turning to (96): but turn first to (11).
• Or south via the double-doors, by turning to (9): but turn first to (28).
AN ENTRY IN THE 2012 WINDHAMMER PRIZE 56
TRIAL OF THE BATTLE GOD BY BREWIN'
(100)
You land the final blow and the Battle God falls to your feet, beaten. Then a shining light envelops
you, instantly healing your wounds and reinvigorating your spirit.
The Battle God looks up at you, a smile cracking across its bloody lips. “Finally I have meet my
match. You have not only won the Trial for your nation, but you have won the privilege to take my
place as well.”
As your incredible achievement begins to sink in, the Battle God rises once more and places a
gauntlet-covered hand on your shoulder. “My era is now at an end. It has been a great honour, indeed
my last, to have fought you.”
A sparkling slivery haze descends over you, quickly forming a swirling vortex around you that
obscures all your senses, and within moments, your consciousness as well…
* * *
On the shore of Lake Judgement your loyal priest waits diligently for your return. Then a whirling
vortex begins to form over the hillock at the lake’s centre and your priest ponders its meaning.
Then a voice, your voice, is heard to echo from the skies overhead:
“ALL HAIL THE NEW BATTLE GOD!”
The priest struggles to believe it is possible, and yet they know within their soul that these words
are true.
You will never return to your homeland to reunite with your people, celebrate your victory with
them or enjoy your rewards. For now you are a deity, the sole deity, and you have an entire world to
support and nourish. Every corner of the globe will sing praises in your name, honour your glory and
strive for your favour from this day onward. You have truly achieved the impossible. Long may your
reign last…
Until another comes to take your place.
Congratulations on achieving the ultimate victory! Now turn the page to determine your Battle God
score.
AN ENTRY IN THE 2012 WINDHAMMER PRIZE 57
TRIAL OF THE BATTLE GOD BY BREWIN'
DETERMINING YOUR BATTLE GOD SCORE
Your Battle God score is determined by tallying points for the following:
• 50 points for winning the Trial.
• 7 points for each jewelled RING that you earned from your opponents (including other
players if there were any).
• 21 points if you also managed to defeat the Battle God.
A public hall of fame for the best Battle God scores can be found here:
http://www.thebrewin.com/blog/entry/trial-of-the-battle-god-hall-of-fame
-If you wish to have your score added to this record, simply send an email to
[email protected] with your player name or alias, the race you played and your best
score (honourable Battle God warriors do not cheat!)
Thanks to the many playtesters for their invaluable contributions to this work and thank YOU
for playing! May the glory of the Battle God be yours!
AN ENTRY IN THE 2012 WINDHAMMER PRIZE 58