Embed Size (px)
Citation preview
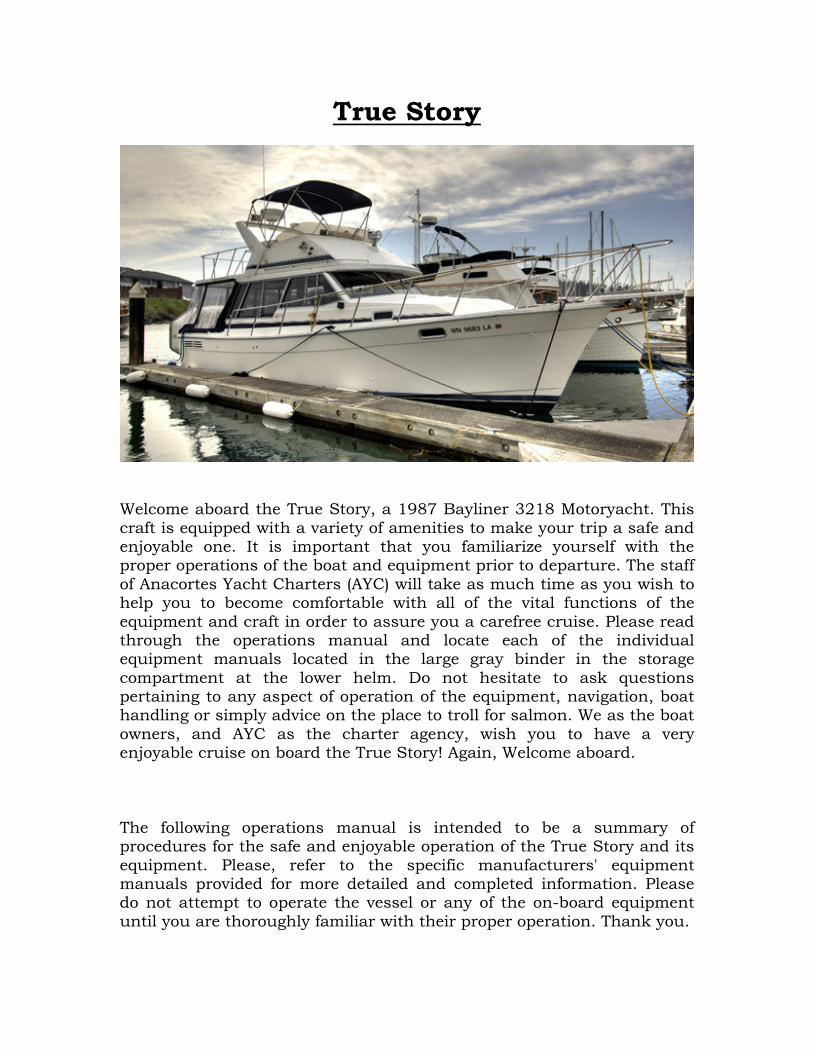
True Story
Welcome aboard the True Story, a 1987 Bayliner 3218 Motoryacht. This craft is equipped with a variety of amenities to make your trip a safe and enjoyable one. It is important that you familiarize yourself with the proper operations of the boat and equipment prior to departure. The staff of Anacortes Yacht Charters (AYC) will take as much time as you wish to help you to become comfortable with all of the vital functions of the equipment and craft in order to assure you a carefree cruise. Please read through the operations manual and locate each of the individual equipment manuals located in the large gray binder in the storage compartment at the lower helm. Do not hesitate to ask questions pertaining to any aspect of operation of the equipment, navigation, boat handling or simply advice on the place to troll for salmon. We as the boat owners, and AYC as the charter agency, wish you to have a very enjoyable cruise on board the True Story! Again, Welcome aboard. The following operations manual is intended to be a summary of procedures for the safe and enjoyable operation of the True Story and its equipment. Please, refer to the specific manufacturers' equipment manuals provided for more detailed and completed information. Please do not attempt to operate the vessel or any of the on-board equipment until you are thoroughly familiar with their proper operation. Thank you.
2
Table of contents
Boat Specifications 3 Pre-Cruise Preparation 4 Starting Engines and Cruising 5-8 Putting on Fuel and Water 8-9 Electronics VHF Radios 9 Depth Sounders / Fish Finder 10 GPS (Global Positioning System) 11 Radar 12 Anchoring 12-14 Electrical System 15-20 Galley Stove / Oven 20-24 Water System 24 Hot Water 24 Refrigerator 25 Microwave Oven 25 TV / VCR & Stereo System 25-26 Head/Shower (inc. marine sanitation system) 27-30 Heaters 31-32 Dingy & Outboard Motor 32-36 Docking Procedures 37-38 What to do if? 38-40 Emergency Procedures 40-41 General Clean-up 42
3
Boat Specifications
Boat Name: True Story Hin: BLBA322EKH687 Doc. Number: N/A Hailing Port: Anacortes, Washington Engines: Twin Hino 135 HP Turbo Diesels
Serial No: Port-TA10794 Serial No:Starboard- TA10795 Cruising: 15 knots @ 2700 RPM (maximum normal cruising) Fuel Capacity: 200 Gallons (full leaving / full returning) Water Capacity: 65 gallons (fill daily if possible / full returning) Holding Tank: 13 gallons (empty daily if possible / empty returning) LPG Tank: 5 gallons Length: 32' - 1" Beam: 11' – 6" Draft: 3' – 6" Bridge Clearance: 14' – 6" Navigation GPS: Laptop Computer with Nobeltec Admiral and Garmin III GPS Radar JRC 2000: 24 Miles Communication: 2 VHF radios Depth Sounder: Raytheon L365 (upper) Uniden QT206 (lower) Cabin Heat: Webasto Diesel Inverter: 2500 watt Freedom 25 Refrigerator: Norcold Stove: Seaward LPG Microwave Oven: Sanyo Stereo: Alpine CDA 7893 CD: Alpine CDA 7893 Dinghy: 10’ Zodiac RIB Outboard: 15 HP Honda Water Heater: Force 10 Windlass: Simpson Lawrence Sprint 600
4
PRE-CRUISE PREPARATIONS:
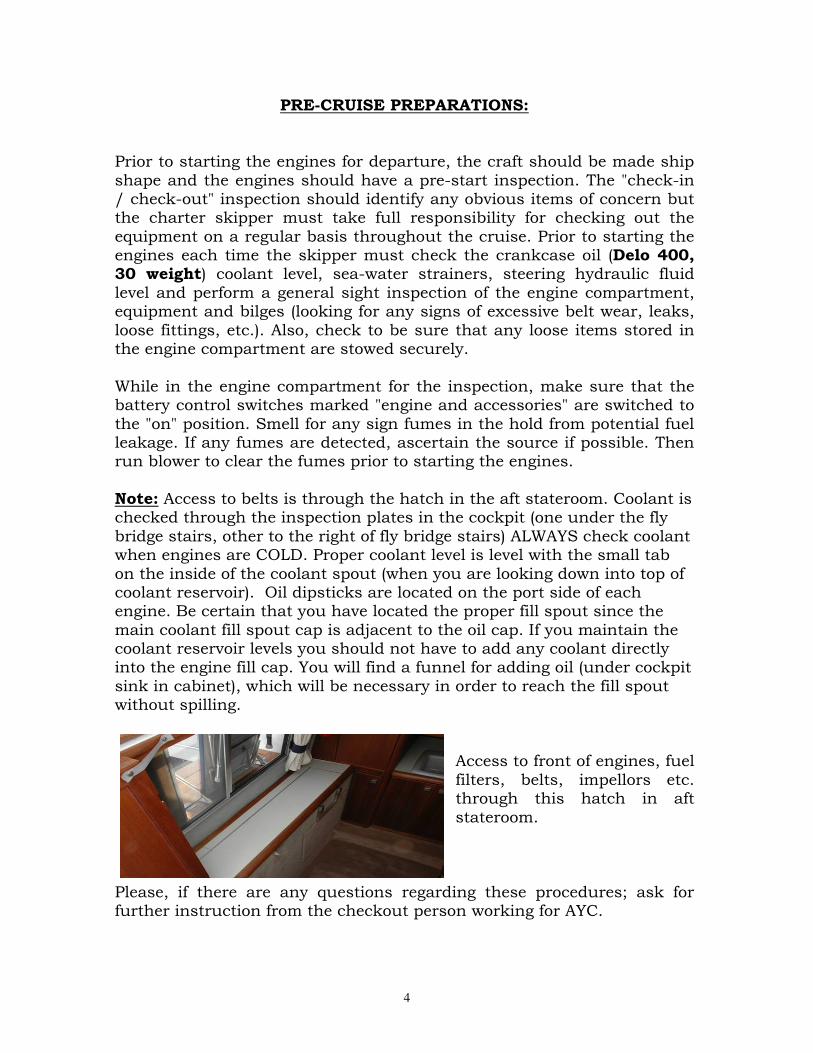
Prior to starting the engines for departure, the craft should be made ship shape and the engines should have a pre-start inspection. The "check-in / check-out" inspection should identify any obvious items of concern but the charter skipper must take full responsibility for checking out the equipment on a regular basis throughout the cruise. Prior to starting the engines each time the skipper must check the crankcase oil (Delo 400, 30 weight) coolant level, sea-water strainers, steering hydraulic fluid level and perform a general sight inspection of the engine compartment, equipment and bilges (looking for any signs of excessive belt wear, leaks, loose fittings, etc.). Also, check to be sure that any loose items stored in the engine compartment are stowed securely. While in the engine compartment for the inspection, make sure that the battery control switches marked "engine and accessories" are switched to the "on" position. Smell for any sign fumes in the hold from potential fuel leakage. If any fumes are detected, ascertain the source if possible. Then run blower to clear the fumes prior to starting the engines. Note: Access to belts is through the hatch in the aft stateroom. Coolant is checked through the inspection plates in the cockpit (one under the fly bridge stairs, other to the right of fly bridge stairs) ALWAYS check coolant when engines are COLD. Proper coolant level is level with the small tab on the inside of the coolant spout (when you are looking down into top of coolant reservoir). Oil dipsticks are located on the port side of each engine. Be certain that you have located the proper fill spout since the main coolant fill spout cap is adjacent to the oil cap. If you maintain the coolant reservoir levels you should not have to add any coolant directly into the engine fill cap. You will find a funnel for adding oil (under cockpit sink in cabinet), which will be necessary in order to reach the fill spout without spilling.
Access to front of engines, fuel filters, belts, impellors etc. through this hatch in aft stateroom.
Please, if there are any questions regarding these procedures; ask for further instruction from the checkout person working for AYC.
5
STARTING ENGINES AND CRUISING:
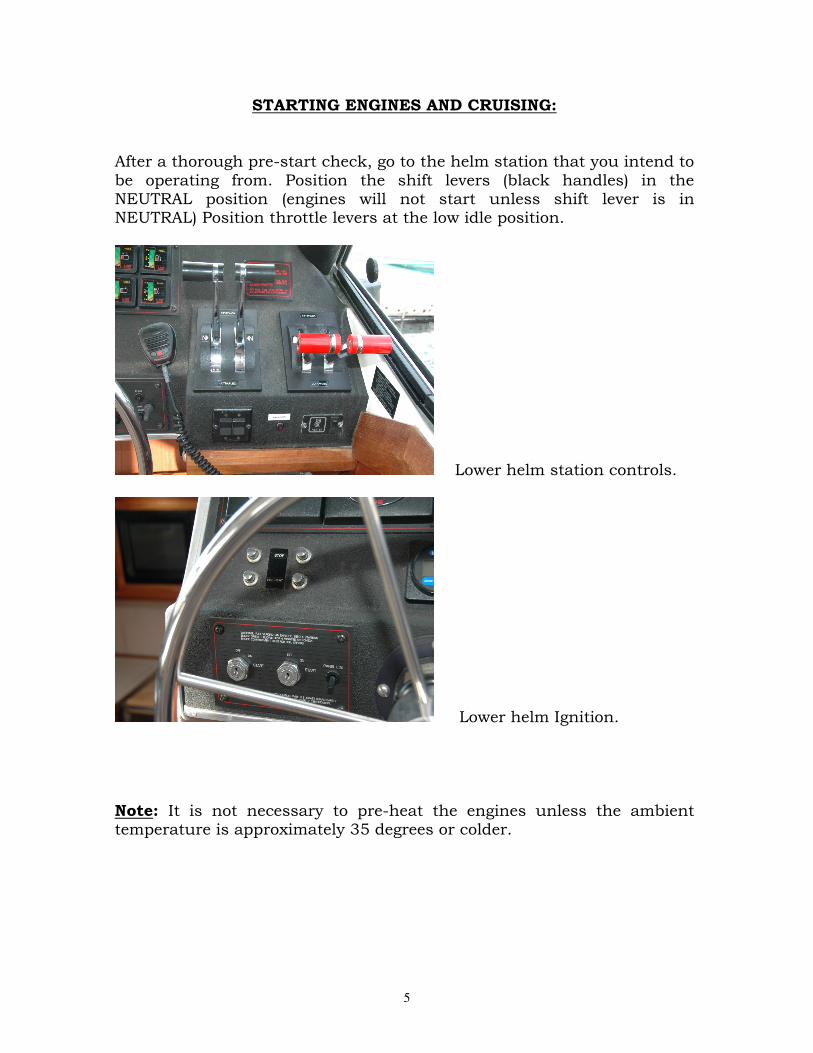
After a thorough pre-start check, go to the helm station that you intend to be operating from. Position the shift levers (black handles) in the NEUTRAL position (engines will not start unless shift lever is in NEUTRAL) Position throttle levers at the low idle position.
Lower helm station controls.
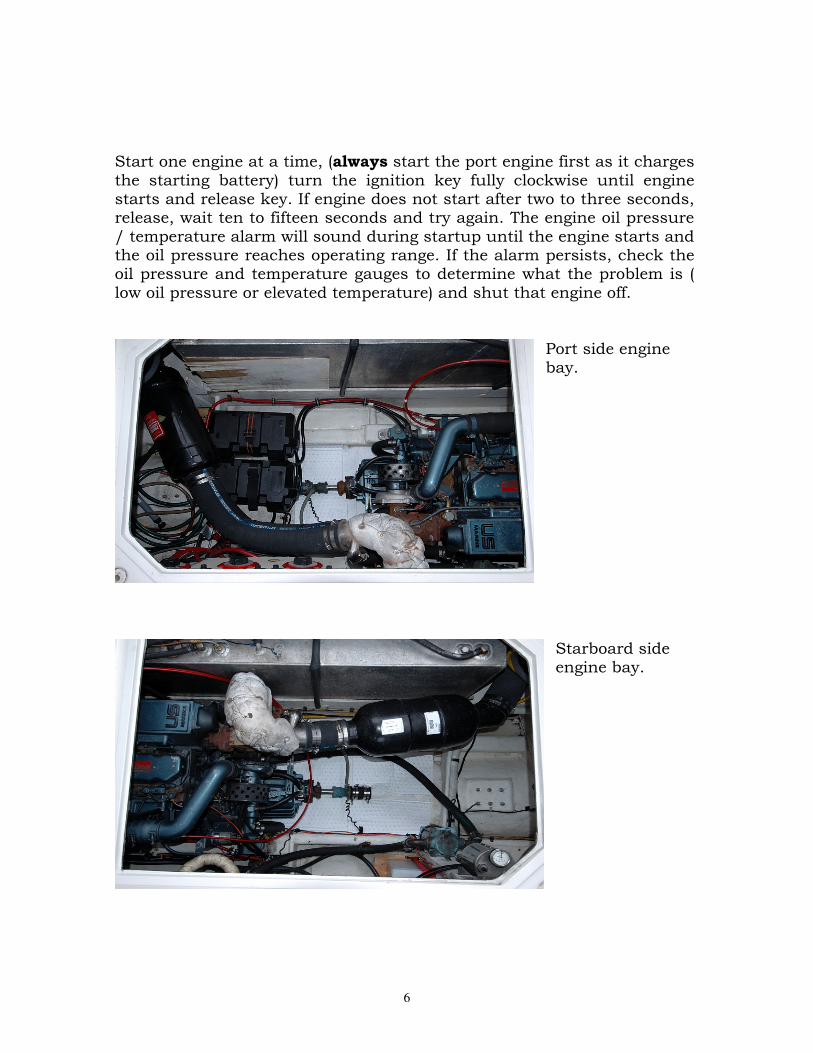
Lower helm Ignition. Note: It is not necessary to pre-heat the engines unless the ambient temperature is approximately 35 degrees or colder.
6
Start one engine at a time, (always start the port engine first as it charges the starting battery) turn the ignition key fully clockwise until engine starts and release key. If engine does not start after two to three seconds, release, wait ten to fifteen seconds and try again. The engine oil pressure / temperature alarm will sound during startup until the engine starts and the oil pressure reaches operating range. If the alarm persists, check the oil pressure and temperature gauges to determine what the problem is ( low oil pressure or elevated temperature) and shut that engine off.
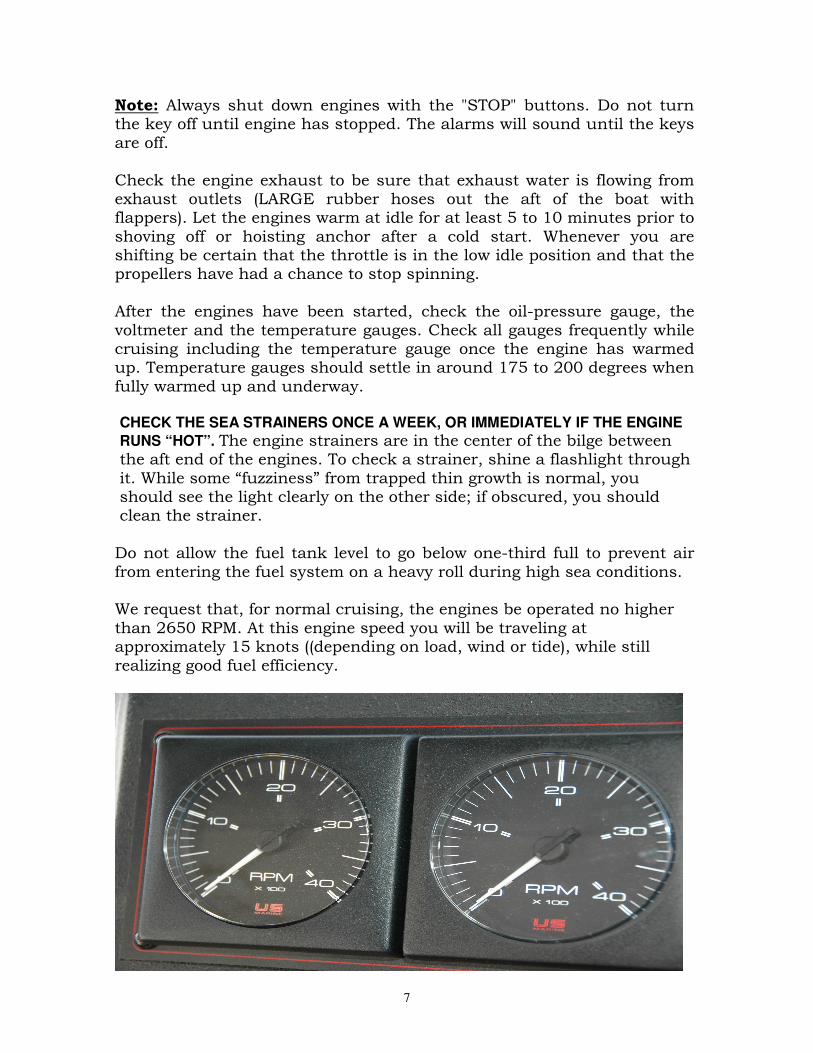
Port side engine bay.
Starboard side engine bay.
7
Note: Always shut down engines with the "STOP" buttons. Do not turn the key off until engine has stopped. The alarms will sound until the keys are off. Check the engine exhaust to be sure that exhaust water is flowing from exhaust outlets (LARGE rubber hoses out the aft of the boat with flappers). Let the engines warm at idle for at least 5 to 10 minutes prior to shoving off or hoisting anchor after a cold start. Whenever you are shifting be certain that the throttle is in the low idle position and that the propellers have had a chance to stop spinning. After the engines have been started, check the oil-pressure gauge, the voltmeter and the temperature gauges. Check all gauges frequently while cruising including the temperature gauge once the engine has warmed up. Temperature gauges should settle in around 175 to 200 degrees when fully warmed up and underway. CHECK THE SEA STRAINERS ONCE A WEEK, OR IMMEDIATELY IF THE ENGINE
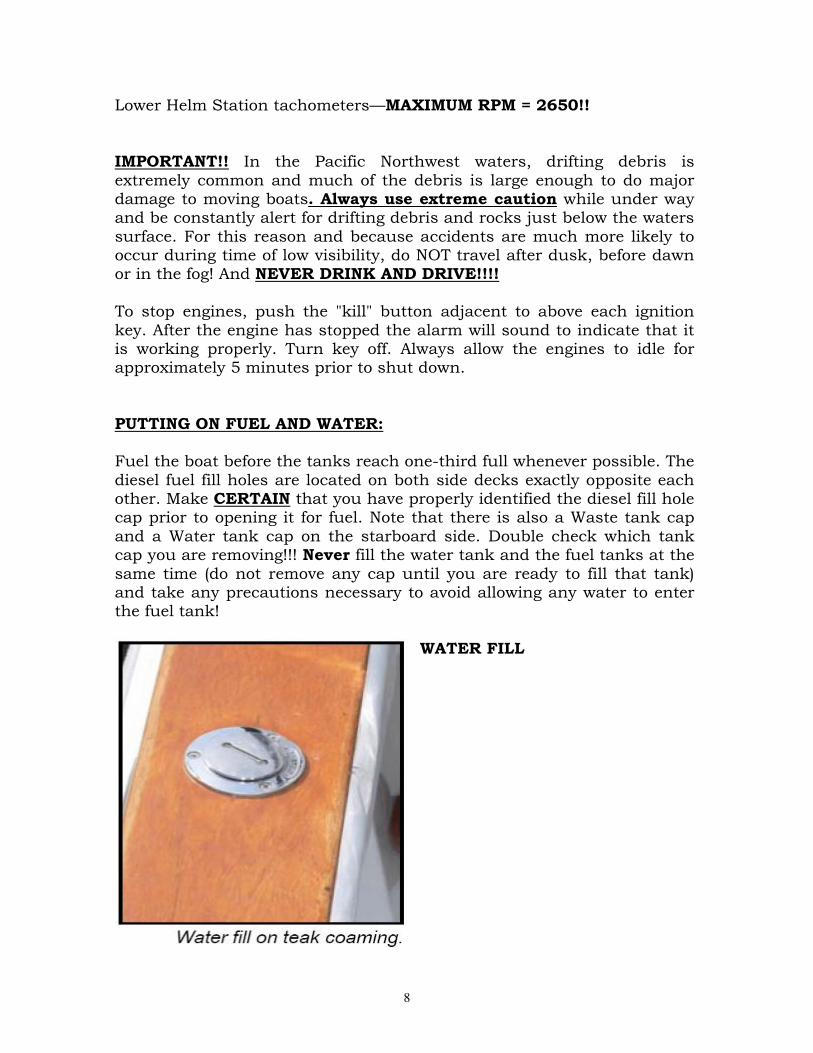
RUNS “HOT”. The engine strainers are in the center of the bilge between the aft end of the engines. To check a strainer, shine a flashlight through it. While some “fuzziness” from trapped thin growth is normal, you should see the light clearly on the other side; if obscured, you should clean the strainer. Do not allow the fuel tank level to go below one-third full to prevent air from entering the fuel system on a heavy roll during high sea conditions. We request that, for normal cruising, the engines be operated no higher than 2650 RPM. At this engine speed you will be traveling at approximately 15 knots ((depending on load, wind or tide), while still realizing good fuel efficiency.
8
Lower Helm Station tachometers—MAXIMUM RPM = 2650!!
IMPORTANT!! In the Pacific Northwest waters, drifting debris is extremely common and much of the debris is large enough to do major damage to moving boats. Always use extreme caution while under way and be constantly alert for drifting debris and rocks just below the waters surface. For this reason and because accidents are much more likely to occur during time of low visibility, do NOT travel after dusk, before dawn or in the fog! And NEVER DRINK AND DRIVE!!!! To stop engines, push the "kill" button adjacent to above each ignition key. After the engine has stopped the alarm will sound to indicate that it is working properly. Turn key off. Always allow the engines to idle for approximately 5 minutes prior to shut down. PUTTING ON FUEL AND WATER: Fuel the boat before the tanks reach one-third full whenever possible. The diesel fuel fill holes are located on both side decks exactly opposite each other. Make CERTAIN that you have properly identified the diesel fill hole cap prior to opening it for fuel. Note that there is also a Waste tank cap and a Water tank cap on the starboard side. Double check which tank cap you are removing!!! Never fill the water tank and the fuel tanks at the same time (do not remove any cap until you are ready to fill that tank) and take any precautions necessary to avoid allowing any water to enter the fuel tank!
WATER FILL
9
Note: Fill the fuel tanks only with clean #2 Diesel Fuel Oil. To avoid spills and/or overfilling of the fuel tanks, always be attentive to the fueling procedure. Listen carefully to the sound of the fuel entering the tank. There will be a subtle yet noticeable change in the pitch of the sound as the tank is nearing full. Fill the remainder of the tank cautiously – a drop or two of fuel out of the overflow vent should be all that is allowed. Always have some absorbent pads or paper towels handy while fueling to immediately and thoroughly clean up any inadvertent overflow. Clean any residual fuel off the deck and side of hull (from overflow vent) with soap and water (but only after replacing caps securely). The potable water tank holds 65 gallons, which is enough for a couple days use if used very sparingly. It is advised that you fill the main tank every day that water is available. On days that water is not available, monitor the water tank level on the gauge at the lower helm, and always be conscious of conserving. Fresh water is often the item in shortest supply on board. NOTE: do not DRINK this water, use only for cooking and cleaning.
ELECTRONICS: This will be just a brief overview of the proper use of the several pieces of electronic equipment on board the vessel. For further instruction on the use of a particular piece of equipment, please refer to the manufacturer's operating instructions located in one of the binders at the lower helm.
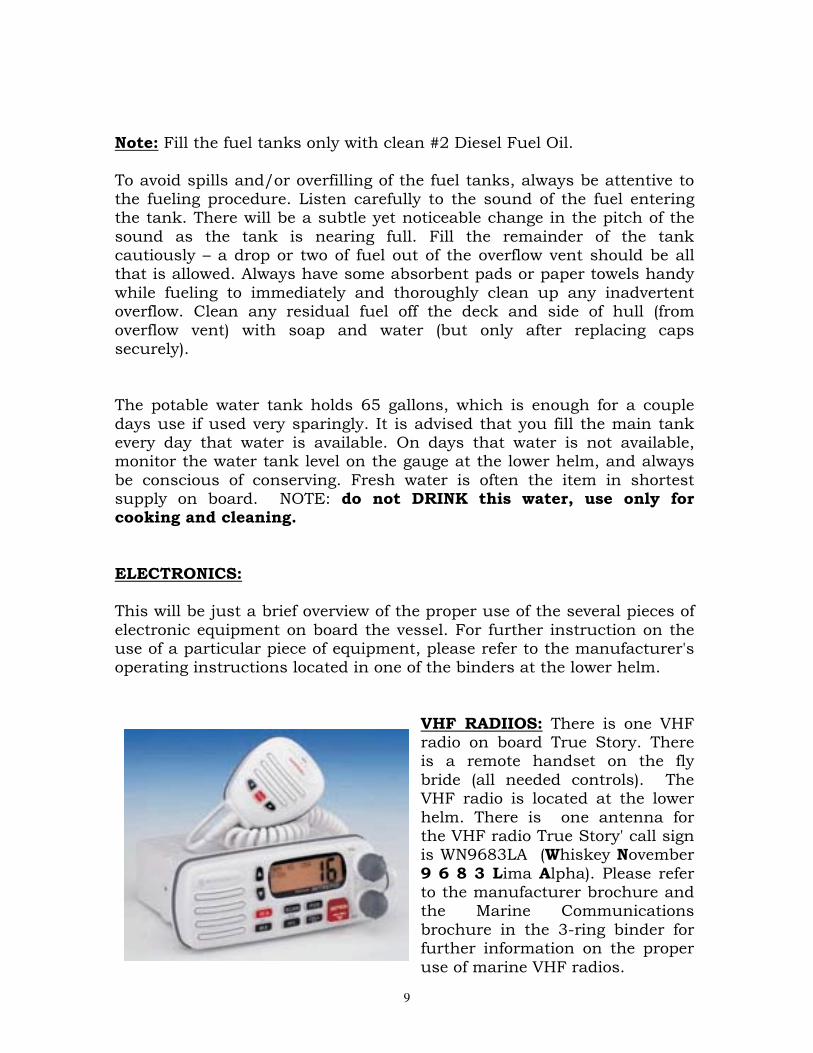
VHF RADIIOS: There is one VHF radio on board True Story. There is a remote handset on the fly bride (all needed controls). The VHF radio is located at the lower helm. There is one antenna for the VHF radio True Story' call sign is WN9683LA (Whiskey November 9 6 8 3 Lima Alpha). Please refer to the manufacturer brochure and the Marine Communications brochure in the 3-ring binder for further information on the proper use of marine VHF radios.
10
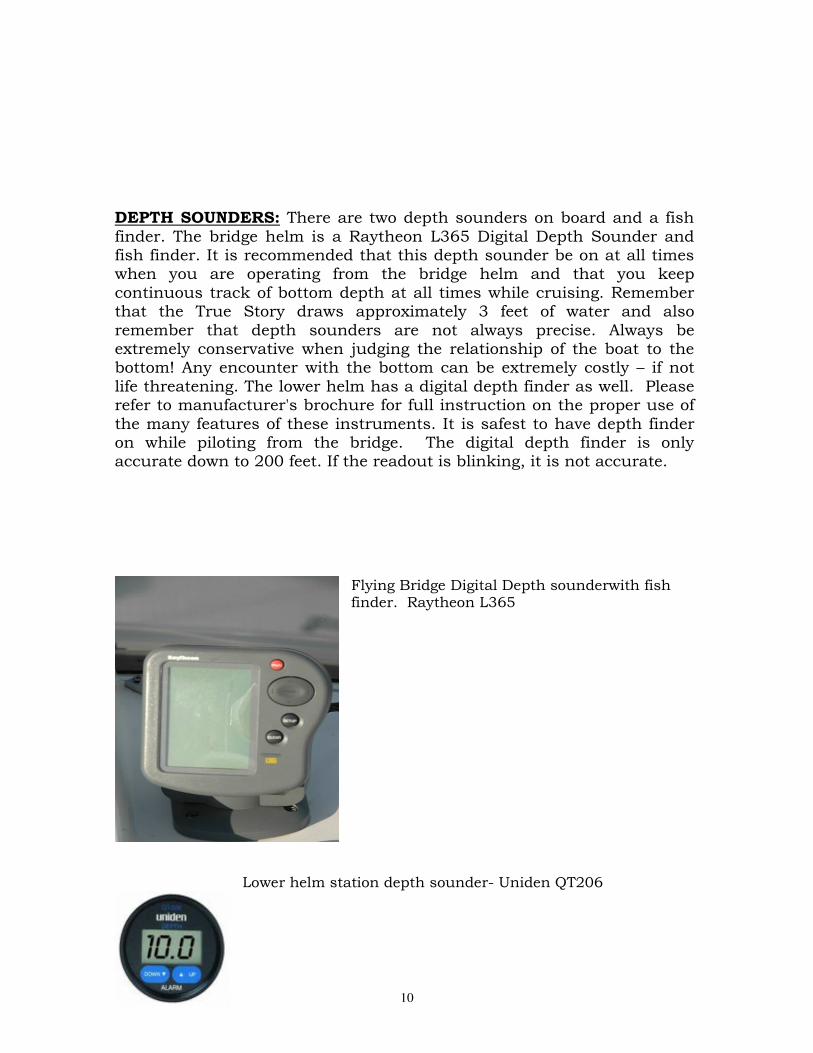
DEPTH SOUNDERS: There are two depth sounders on board and a fish finder. The bridge helm is a Raytheon L365 Digital Depth Sounder and fish finder. It is recommended that this depth sounder be on at all times when you are operating from the bridge helm and that you keep continuous track of bottom depth at all times while cruising. Remember that the True Story draws approximately 3 feet of water and also remember that depth sounders are not always precise. Always be extremely conservative when judging the relationship of the boat to the bottom! Any encounter with the bottom can be extremely costly – if not life threatening. The lower helm has a digital depth finder as well. Please refer to manufacturer's brochure for full instruction on the proper use of the many features of these instruments. It is safest to have depth finder on while piloting from the bridge. The digital depth finder is only accurate down to 200 feet. If the readout is blinking, it is not accurate.
Flying Bridge Digital Depth sounderwith fish finder. Raytheon L365
Lower helm station depth sounder- Uniden QT206
11
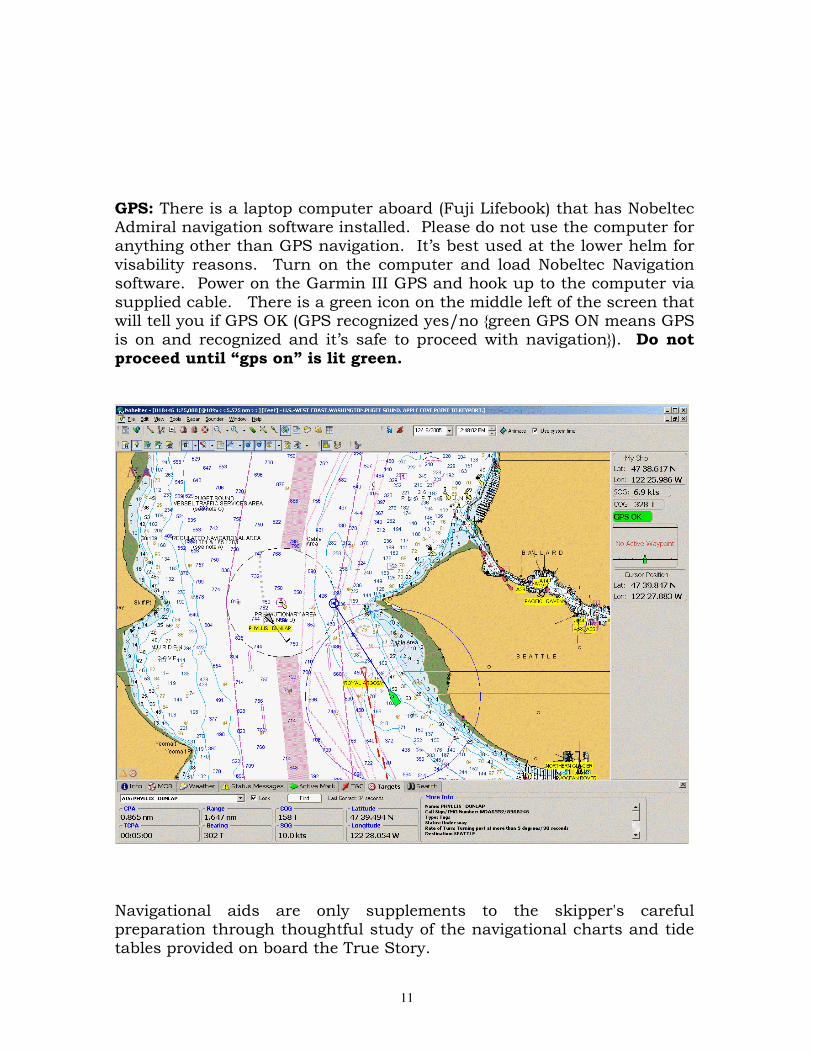
GPS: There is a laptop computer aboard (Fuji Lifebook) that has Nobeltec Admiral navigation software installed. Please do not use the computer for anything other than GPS navigation. It’s best used at the lower helm for visability reasons. Turn on the computer and load Nobeltec Navigation software. Power on the Garmin III GPS and hook up to the computer via supplied cable. There is a green icon on the middle left of the screen that will tell you if GPS OK (GPS recognized yes/no {green GPS ON means GPS is on and recognized and it’s safe to proceed with navigation}). Do not proceed until “gps on” is lit green.
Navigational aids are only supplements to the skipper's careful preparation through thoughtful study of the navigational charts and tide tables provided on board the True Story.
12
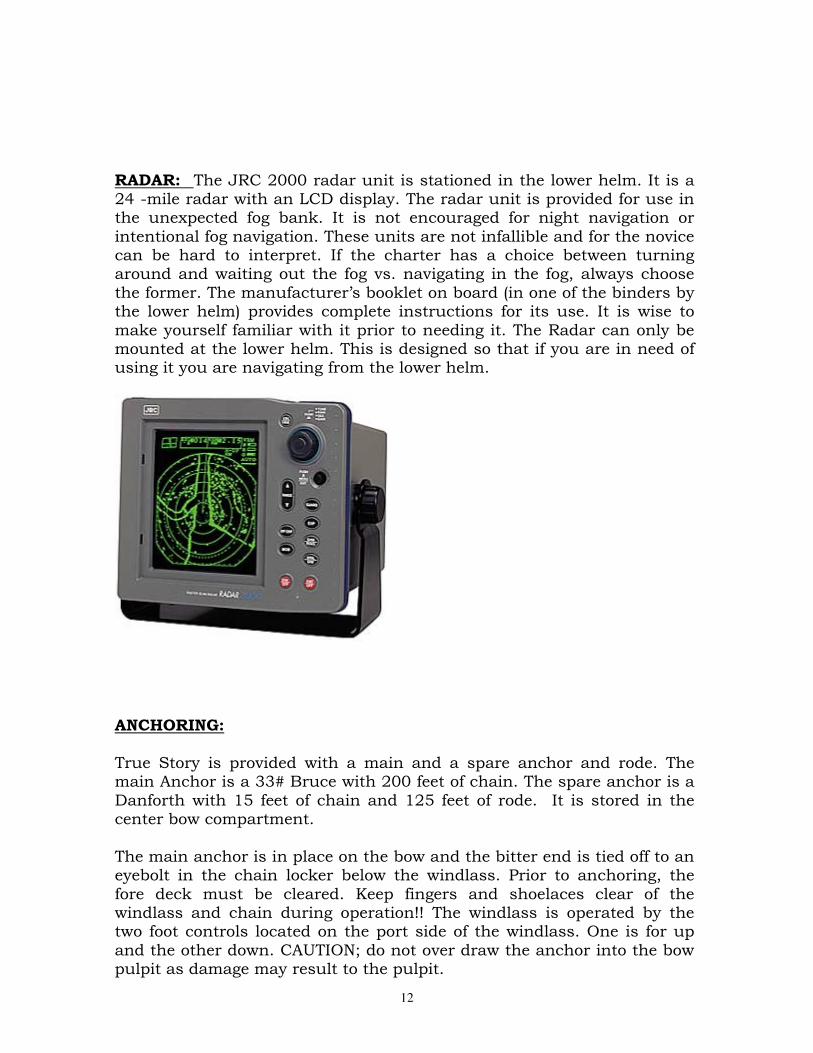
RADAR: The JRC 2000 radar unit is stationed in the lower helm. It is a 24 -mile radar with an LCD display. The radar unit is provided for use in the unexpected fog bank. It is not encouraged for night navigation or intentional fog navigation. These units are not infallible and for the novice can be hard to interpret. If the charter has a choice between turning around and waiting out the fog vs. navigating in the fog, always choose the former. The manufacturer’s booklet on board (in one of the binders by the lower helm) provides complete instructions for its use. It is wise to make yourself familiar with it prior to needing it. The Radar can only be mounted at the lower helm. This is designed so that if you are in need of using it you are navigating from the lower helm.
ANCHORING: True Story is provided with a main and a spare anchor and rode. The main Anchor is a 33# Bruce with 200 feet of chain. The spare anchor is a Danforth with 15 feet of chain and 125 feet of rode. It is stored in the center bow compartment. The main anchor is in place on the bow and the bitter end is tied off to an eyebolt in the chain locker below the windlass. Prior to anchoring, the fore deck must be cleared. Keep fingers and shoelaces clear of the windlass and chain during operation!! The windlass is operated by the two foot controls located on the port side of the windlass. One is for up and the other down. CAUTION; do not over draw the anchor into the bow pulpit as damage may result to the pulpit.
13
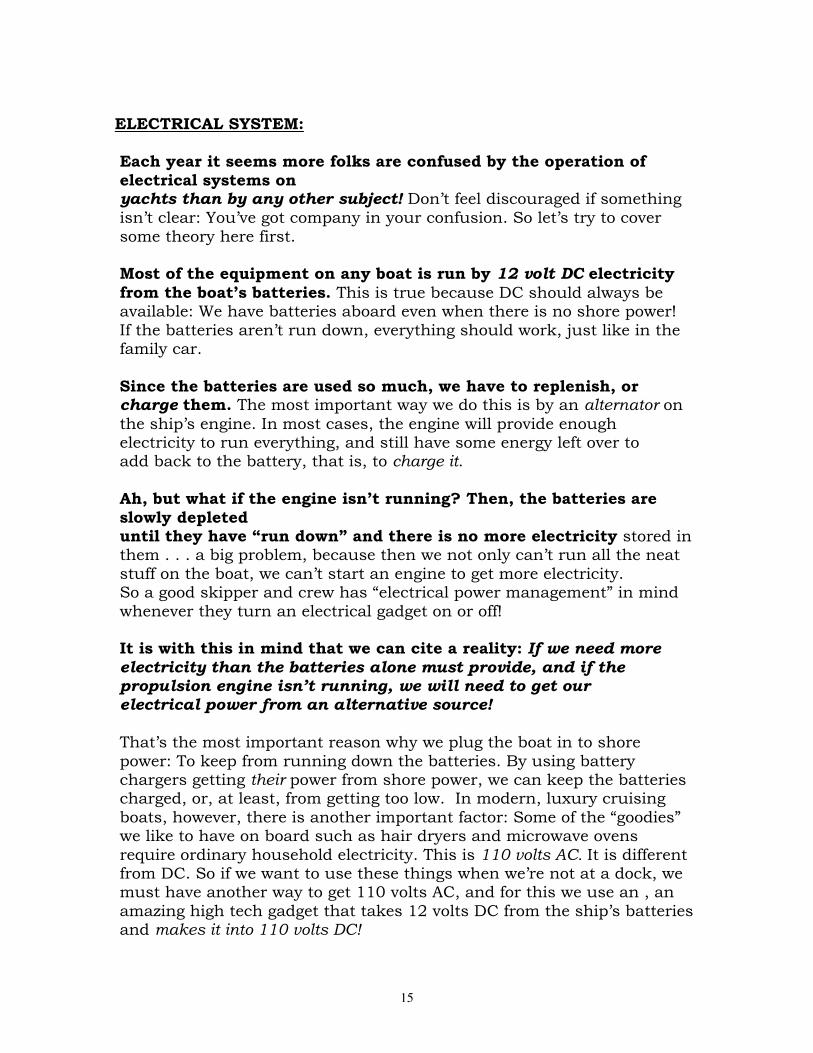
There are windlass controls in the upper helm station, but it’s best to use the foot controls located on the port bow. When the boat has been maneuvered into the desired position (be mindful of wind and tide changes and the swing of adjacent boats at anchor) and brought to a standstill. The skipper should signal the windlass operator to commence lowering the anchor. Care must be taken to assure that the rode is feeding properly at all times. Take additional care when setting and retrieving the anchor that the rode feeds through the sleeve in the deck smoothly. At all times take precautions to keep the anchor from swinging against the hull. Note: Bruce anchors recommend a minimum scope of 4 for all-chain rode.
Simpson Lawrence Windlass (Sprint 600)
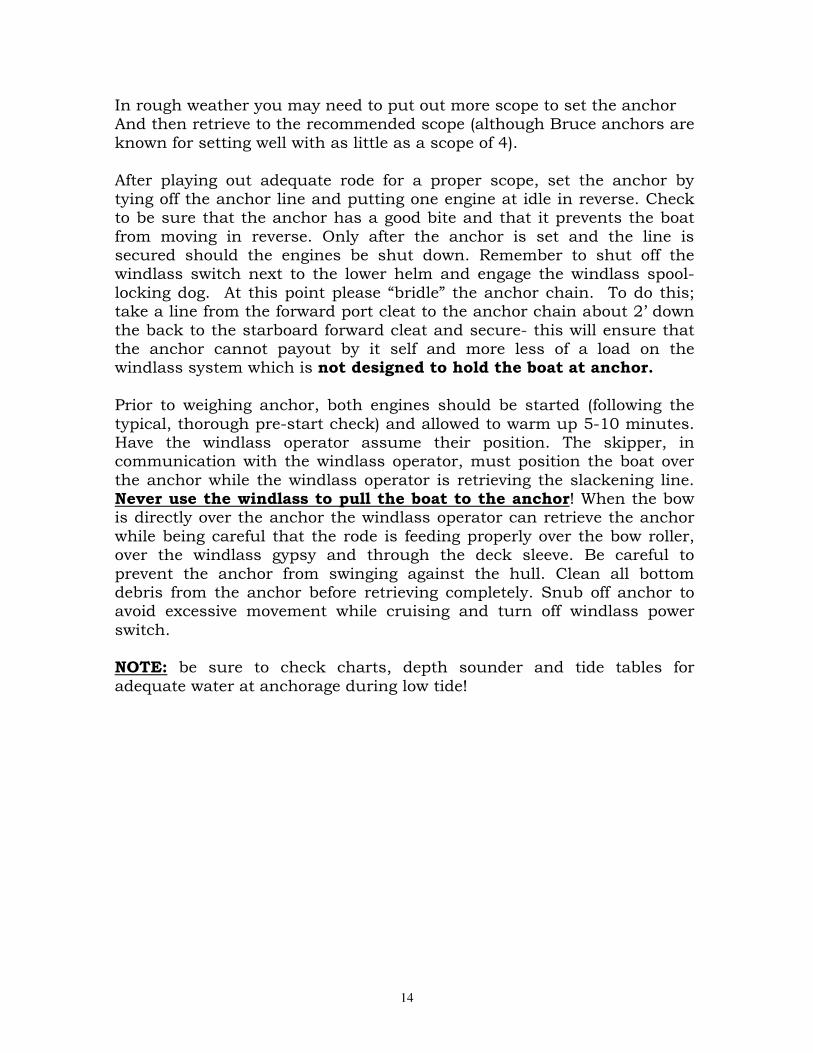
Foot controls for windlass located on Bow port side of windlass unit.
Picture showing proper scope for anchoring and stern tying.
14
In rough weather you may need to put out more scope to set the anchor And then retrieve to the recommended scope (although Bruce anchors are known for setting well with as little as a scope of 4). After playing out adequate rode for a proper scope, set the anchor by tying off the anchor line and putting one engine at idle in reverse. Check to be sure that the anchor has a good bite and that it prevents the boat from moving in reverse. Only after the anchor is set and the line is secured should the engines be shut down. Remember to shut off the windlass switch next to the lower helm and engage the windlass spool-locking dog. At this point please “bridle” the anchor chain. To do this; take a line from the forward port cleat to the anchor chain about 2’ down the back to the starboard forward cleat and secure- this will ensure that the anchor cannot payout by it self and more less of a load on the windlass system which is not designed to hold the boat at anchor. Prior to weighing anchor, both engines should be started (following the typical, thorough pre-start check) and allowed to warm up 5-10 minutes. Have the windlass operator assume their position. The skipper, in communication with the windlass operator, must position the boat over the anchor while the windlass operator is retrieving the slackening line. Never use the windlass to pull the boat to the anchor! When the bow is directly over the anchor the windlass operator can retrieve the anchor while being careful that the rode is feeding properly over the bow roller, over the windlass gypsy and through the deck sleeve. Be careful to prevent the anchor from swinging against the hull. Clean all bottom debris from the anchor before retrieving completely. Snub off anchor to avoid excessive movement while cruising and turn off windlass power switch. NOTE: be sure to check charts, depth sounder and tide tables for adequate water at anchorage during low tide!
15
ELECTRICAL SYSTEM: Each year it seems more folks are confused by the operation of electrical systems on yachts than by any other subject! Don’t feel discouraged if something isn’t clear: You’ve got company in your confusion. So let’s try to cover some theory here first. Most of the equipment on any boat is run by 12 volt DC electricity
from the boat’s batteries. This is true because DC should always be available: We have batteries aboard even when there is no shore power! If the batteries aren’t run down, everything should work, just like in the family car. Since the batteries are used so much, we have to replenish, or charge them. The most important way we do this is by an alternator on the ship’s engine. In most cases, the engine will provide enough electricity to run everything, and still have some energy left over to add back to the battery, that is, to charge it. Ah, but what if the engine isn’t running? Then, the batteries are slowly depleted until they have “run down” and there is no more electricity stored in them . . . a big problem, because then we not only can’t run all the neat stuff on the boat, we can’t start an engine to get more electricity. So a good skipper and crew has “electrical power management” in mind whenever they turn an electrical gadget on or off! It is with this in mind that we can cite a reality: If we need more electricity than the batteries alone must provide, and if the propulsion engine isn’t running, we will need to get our electrical power from an alternative source!
That’s the most important reason why we plug the boat in to shore power: To keep from running down the batteries. By using battery chargers getting their power from shore power, we can keep the batteries charged, or, at least, from getting too low. In modern, luxury cruising boats, however, there is another important factor: Some of the “goodies” we like to have on board such as hair dryers and microwave ovens require ordinary household electricity. This is 110 volts AC. It is different from DC. So if we want to use these things when we’re not at a dock, we must have another way to get 110 volts AC, and for this we use an , an amazing high tech gadget that takes 12 volts DC from the ship’s batteries and makes it into 110 volts DC!
16
So here’s what we’ve got: A lot of stuff running on 12 volts DC with that electricity from the batteries. To keep the batteries from running down, we have an alternator run by the engine, and battery chargers that get their power from shore power. For the stuff that runs on 110 volts AC, we have shore power, or, for making AC out of the batteries’ DC. The main switches for the boat’s batteries are located at the left edge of the port cockpit floor hatch just under the edge of the deck. One of these is the starting battery switch, the other is the house battery switch. They are normally both “On”; should the starting battery be low, the batteries should be paralleled by switching the starting battery switch to “Both” until the engines are started. Never turn a battery switch “Off” when an engine is running! An alternator could be seriously damaged if you do. The engine starter motors, windlass and the bilge pumps are powered by the "engine batteries" and all the accessories are powered by the Accessory batteries". When on shore power the battery charger will recharge all batteries. While running, the alternators will recharge all batteries. The port engine has a high out put alternator that can recharge the accessory and starting batteries in as little as 1.5 – 2.0 hours. If at anchor with out power you may recharge the batteries by running the port engine for that period of time. While stopped, without shore power, you can only draw from the "accessory batteries", which preserves the "engine battery" for starting the engines. Monitor the charge of the batteries at the battery monitor panel next to the lower helm. The main battery switches, located in the port engine compartment, should always remain "on" unless you need to work on the electrical system.
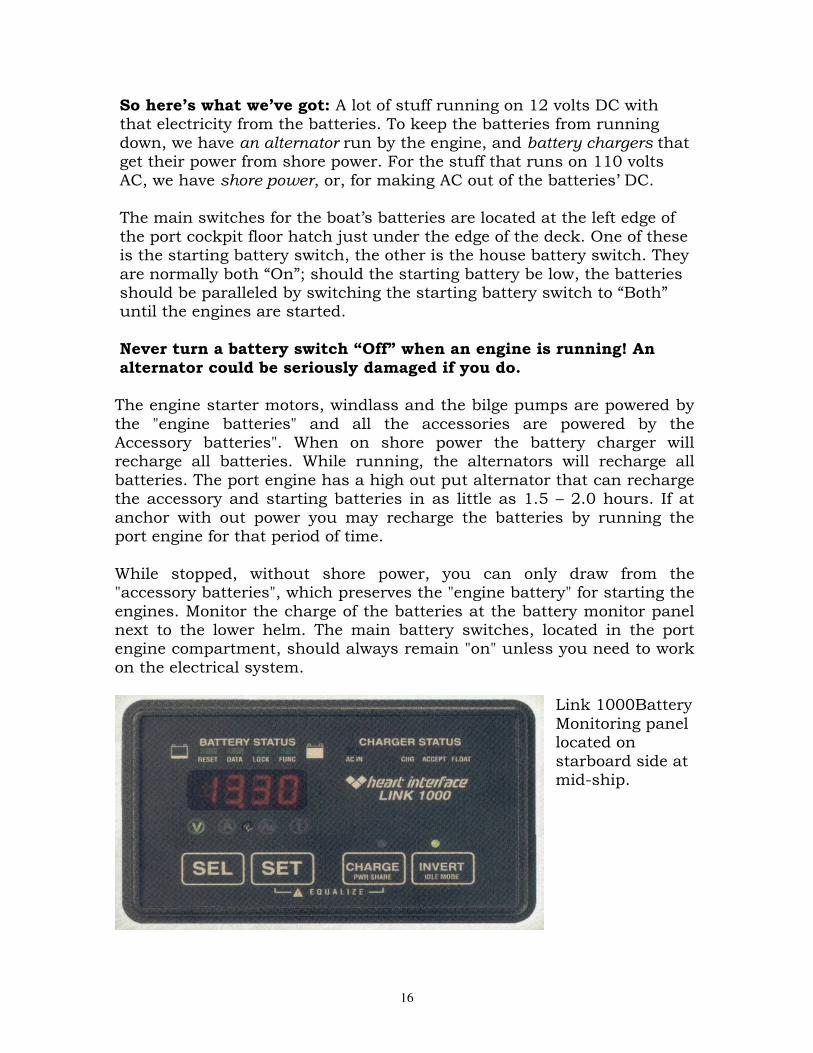
Link 1000Battery Monitoring panel located on starboard side at mid-ship.

17
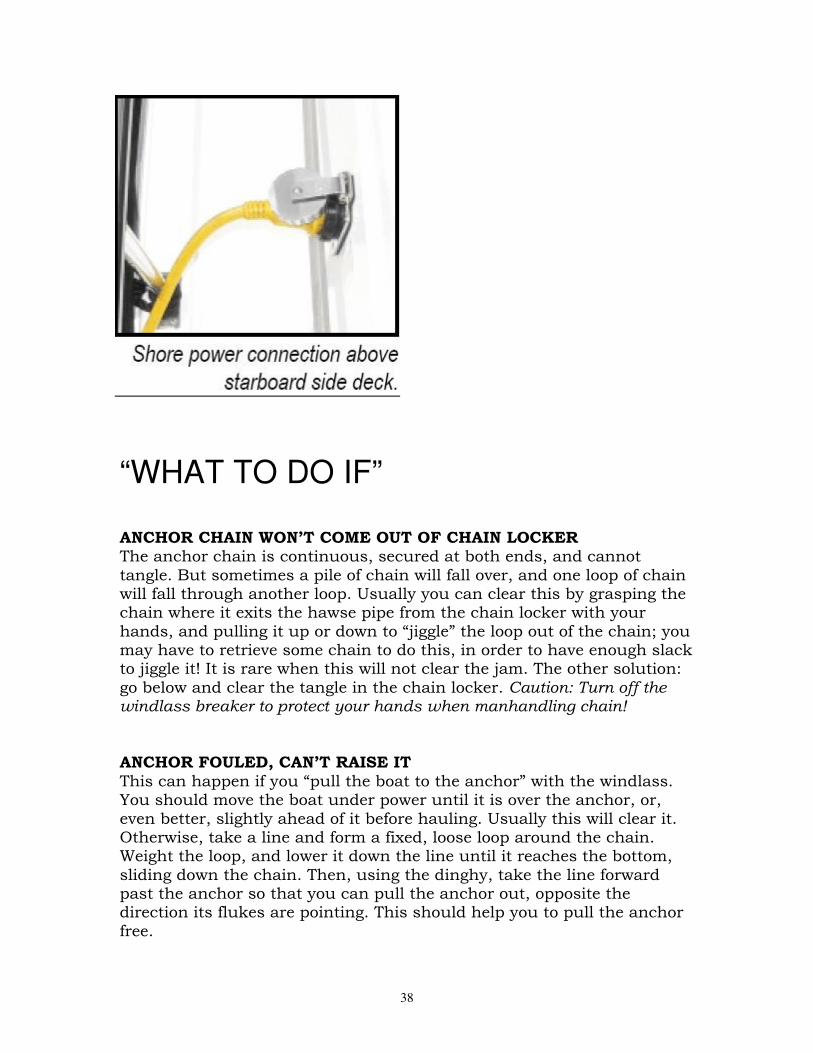
When on shore power, observe the electrical panel to be sure that all desired accessories are switched "on". Shore power adapter (15 Amp) is located in the starboard storage compartment nest to the lower helm (rear compartment).
30amp to 15 amp adaptor Breaker Panel on True Story
14.2 - 14.5 volts Battery is “bulk charging”,the alternator or shore power charger/ inverter are replenishing a battery which was not fully charged. 13.1 - 13.4 volts Battery is “float charging”, the engine alternator or shore power, charger/inverter are keeping it full since it is fully charged. 12.7 - 12.9 volts Battery is fully charged, no charger is on. 11.0 - 12.7 volts Useful range of battery voltage for vessel equipment.

18
Less than 11.0 volts Battery is considered discharged. Most equipment will not work. When running on battery, use only those accessories necessary. It is advisable to switch the refrigerator "off" at night to preserve battery power. Breaker is on the breaker panel marked refrigerator. LIGHTING: Lights are located throughout the boat. Some of the bulkhead lamps are switched at the fixture. Other lamps, such as most in the galley and salon are switched at the switch panel just inside the aft saloon door on the starboard side up by the headliner. This set of switches controls the main gallery lights, salon lights 1, salon lights 2 and the aft cockpit lights. Panel lights, anchor lights, navigation lights and engine compartment lights are controlled at the lower helm control panel. DC Switch Panel An important component of the DC electrical system is the DC switch panel by the helm. On this panel are the switches that control power to the boat’s various systems that do not have switches located elsewhere.
Nav Switch-- turns on Navigation lights. Blower Switch—turns on blower fan in engine compartment. Pump Switch—Turns on Bilgle pump in aft stateroom and engine room Horn- Toots the horn! Wiper Switch- turns on windshield wipers Engine Lights- Turns on Engine room lights Rubber Switch- Turns on Lower Helm Station Depth Sounder.

19
Connecting/Disconnecting Shore Power The large AC shore power selector switch on the AC circuit breaker panel is used to determine the source of AC power for the boat. This switch should be left “OFF” whenever you are connecting or disconnecting the boat to shore. This is true so that you do not draw an arc from the plug due to the load of the boat on the connector’s pins: Such an arc will burn the contacts and eventually cause them to overheat when in use, creating a fire hazard. Once connected to shore power, monitor the AC voltmeter to be sure you have not overloaded the circuit; the voltage will drop as you add load. Important Note: If the house batteries are low when you first hook up to shore power, and the inverter is turned on (as it should be), the inverter will begin charging the house batteries at a very high charging rate, drawing a lot of shore power current. Until this demand reduces (see “The Inverter System” below), you should turn “OFF” other high-current AC appliances such as the water heater. You can then turn on AC appliances as needed after the inverter’s load reduces. Watch the ammeter to be sure you don't exceed the dock's available supply, typically 30amps.
Here are some estimates of AC power consumption for typical appliances: Water Heater 15 amps Inverter up to 22 amps Hair Dryer 12 amps TV 1.5 amps Coffee maker 10 amps Cell phone .3 amps Microwave 10 amps
20
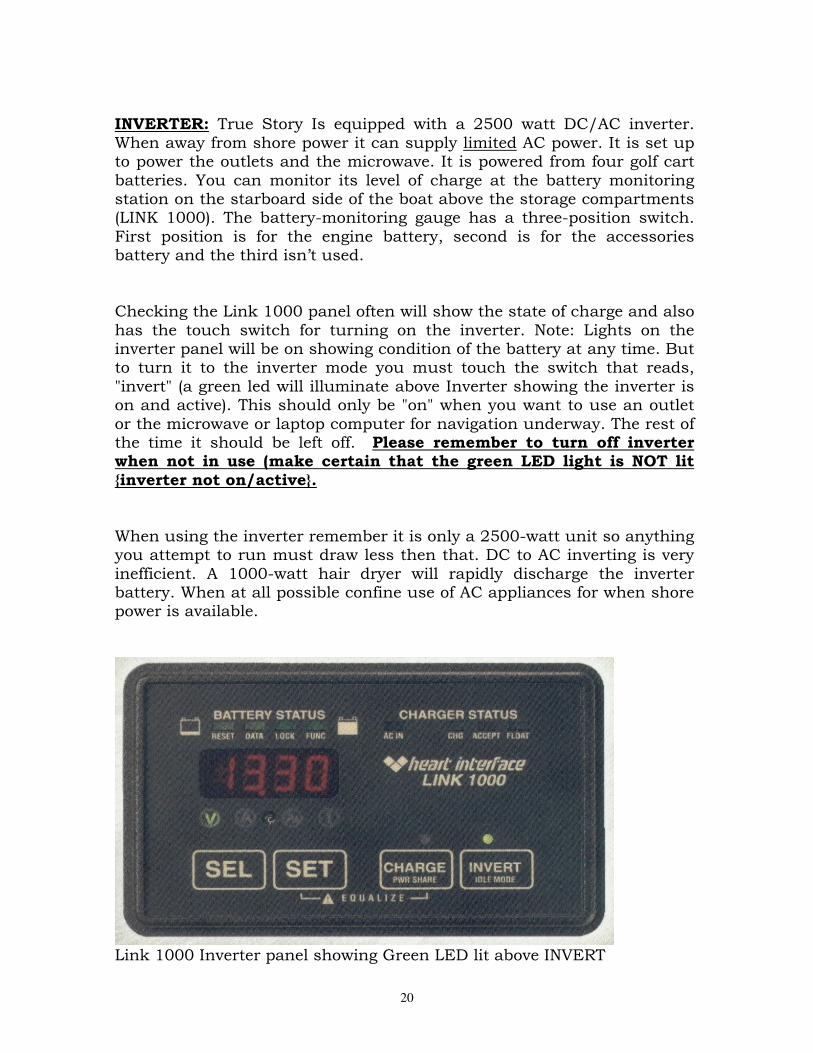
INVERTER: True Story Is equipped with a 2500 watt DC/AC inverter. When away from shore power it can supply limited AC power. It is set up to power the outlets and the microwave. It is powered from four golf cart batteries. You can monitor its level of charge at the battery monitoring station on the starboard side of the boat above the storage compartments (LINK 1000). The battery-monitoring gauge has a three-position switch. First position is for the engine battery, second is for the accessories battery and the third isn’t used. Checking the Link 1000 panel often will show the state of charge and also has the touch switch for turning on the inverter. Note: Lights on the inverter panel will be on showing condition of the battery at any time. But to turn it to the inverter mode you must touch the switch that reads, "invert" (a green led will illuminate above Inverter showing the inverter is on and active). This should only be "on" when you want to use an outlet or the microwave or laptop computer for navigation underway. The rest of the time it should be left off. Please remember to turn off inverter when not in use (make certain that the green LED light is NOT lit {inverter not on/active}. When using the inverter remember it is only a 2500-watt unit so anything you attempt to run must draw less then that. DC to AC inverting is very inefficient. A 1000-watt hair dryer will rapidly discharge the inverter battery. When at all possible confine use of AC appliances for when shore power is available.
Link 1000 Inverter panel showing Green LED lit above INVERT
21
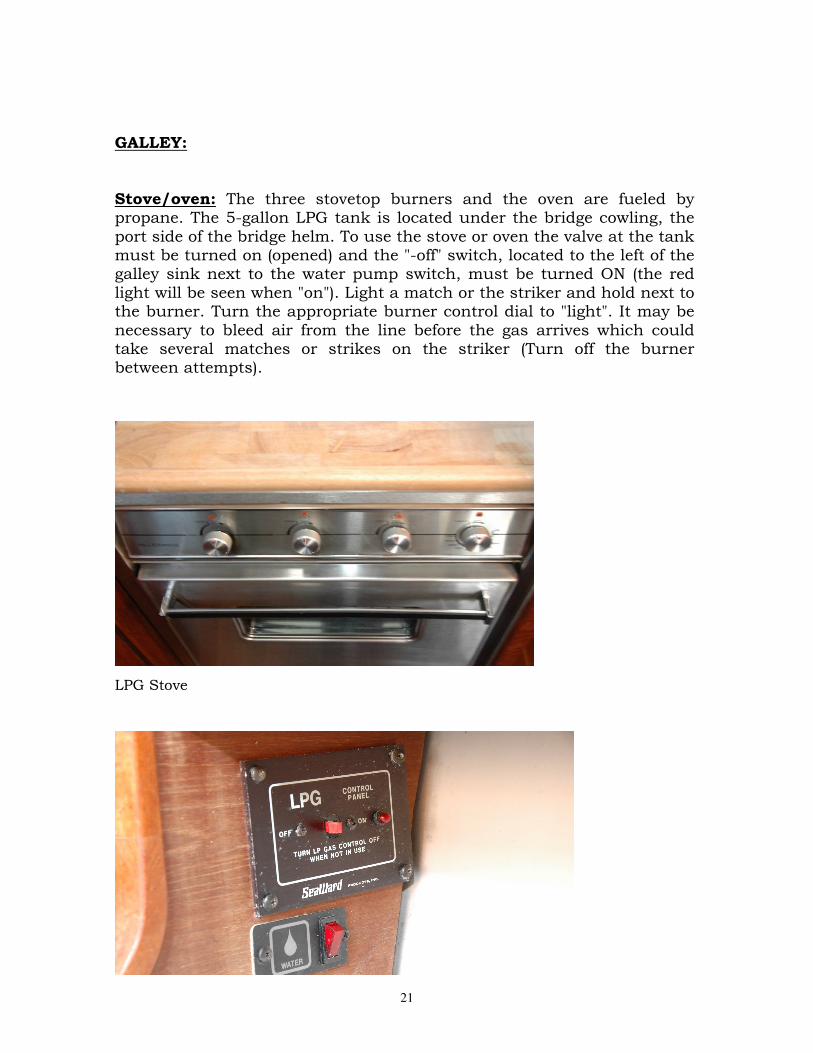
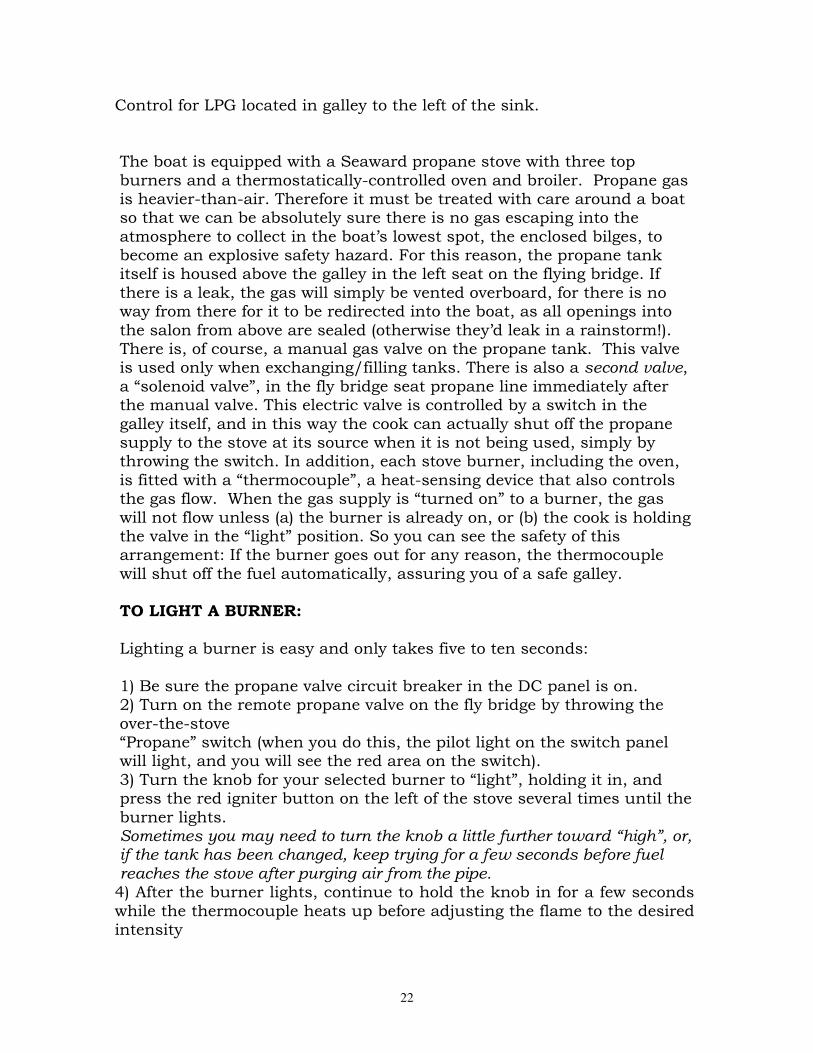
GALLEY: Stove/oven: The three stovetop burners and the oven are fueled by propane. The 5-gallon LPG tank is located under the bridge cowling, the port side of the bridge helm. To use the stove or oven the valve at the tank must be turned on (opened) and the "-off" switch, located to the left of the galley sink next to the water pump switch, must be turned ON (the red light will be seen when "on"). Light a match or the striker and hold next to the burner. Turn the appropriate burner control dial to "light". It may be necessary to bleed air from the line before the gas arrives which could take several matches or strikes on the striker (Turn off the burner between attempts).
LPG Stove
22
Control for LPG located in galley to the left of the sink. The boat is equipped with a Seaward propane stove with three top burners and a thermostatically-controlled oven and broiler. Propane gas is heavier-than-air. Therefore it must be treated with care around a boat so that we can be absolutely sure there is no gas escaping into the atmosphere to collect in the boat’s lowest spot, the enclosed bilges, to become an explosive safety hazard. For this reason, the propane tank itself is housed above the galley in the left seat on the flying bridge. If there is a leak, the gas will simply be vented overboard, for there is no way from there for it to be redirected into the boat, as all openings into the salon from above are sealed (otherwise they’d leak in a rainstorm!). There is, of course, a manual gas valve on the propane tank. This valve is used only when exchanging/filling tanks. There is also a second valve, a “solenoid valve”, in the fly bridge seat propane line immediately after the manual valve. This electric valve is controlled by a switch in the galley itself, and in this way the cook can actually shut off the propane supply to the stove at its source when it is not being used, simply by throwing the switch. In addition, each stove burner, including the oven, is fitted with a “thermocouple”, a heat-sensing device that also controls the gas flow. When the gas supply is “turned on” to a burner, the gas will not flow unless (a) the burner is already on, or (b) the cook is holding the valve in the “light” position. So you can see the safety of this arrangement: If the burner goes out for any reason, the thermocouple will shut off the fuel automatically, assuring you of a safe galley. TO LIGHT A BURNER: Lighting a burner is easy and only takes five to ten seconds: 1) Be sure the propane valve circuit breaker in the DC panel is on. 2) Turn on the remote propane valve on the fly bridge by throwing the over-the-stove “Propane” switch (when you do this, the pilot light on the switch panel will light, and you will see the red area on the switch). 3) Turn the knob for your selected burner to “light”, holding it in, and press the red igniter button on the left of the stove several times until the burner lights. Sometimes you may need to turn the knob a little further toward “high”, or, if the tank has been changed, keep trying for a few seconds before fuel reaches the stove after purging air from the pipe. 4) After the burner lights, continue to hold the knob in for a few seconds while the thermocouple heats up before adjusting the flame to the desired intensity
23
When you are finished cooking turn the "on-off" switch" off' (to left of sink) after turning all stove control dials to "off". The red light should go off. TO LIGHT THE OVEN: Since the oven burner is out of sight when the door is closed and it is on, and since while in use, the flame, controlled by the oven thermostat, goes on and off to control the temperature accurately, the oven has a pilot light that lights it when in use. Therefore the cook must “light the pilot” when the stove’s oven is to be used. Also, by not leaving the pilot light on all the time since the oven isn’t used at every meal, the boat’s propane is conserved. Just as with the burners, lighting the oven is easy, and will take about 20 seconds: 1) Follow steps (1) and (2) above turning on the circuit breaker and propane switch. 2) Locate the pilot light assembly in the opening under the oven divider, at the right front of the burner assembly. 3) Turn the oven control to “light”, and, while holding the red “oven light” button on the right side of the range, use a match or butane fire-lighter to light the pilot light, holding the red button in for another fifteen seconds after the pilot is lit for the thermocouple to heat up and allow the pilot to stay on. If the pilot will not stay lit, hold the button in longer! 4) Adjust the thermostat to the desired temperature. Note: The oven burner will not immediately light! For safety reasons, the control has a slight time delay, and the oven’s main burner will light after about 20 or 30 seconds following control-setting. In this way, the burner does not “puff” on and off as you adjust the control. 5) Until you are completely done with the oven for this cooking session, you may leave the control in the “light” position between cooking your dishes, so that to use it some more all you need to do is re-set it to a temperature --- the pilot is still lit. 6) When done with the oven for this meal, turn it completely “off”. The pilot light will go out. Propane Tank
24
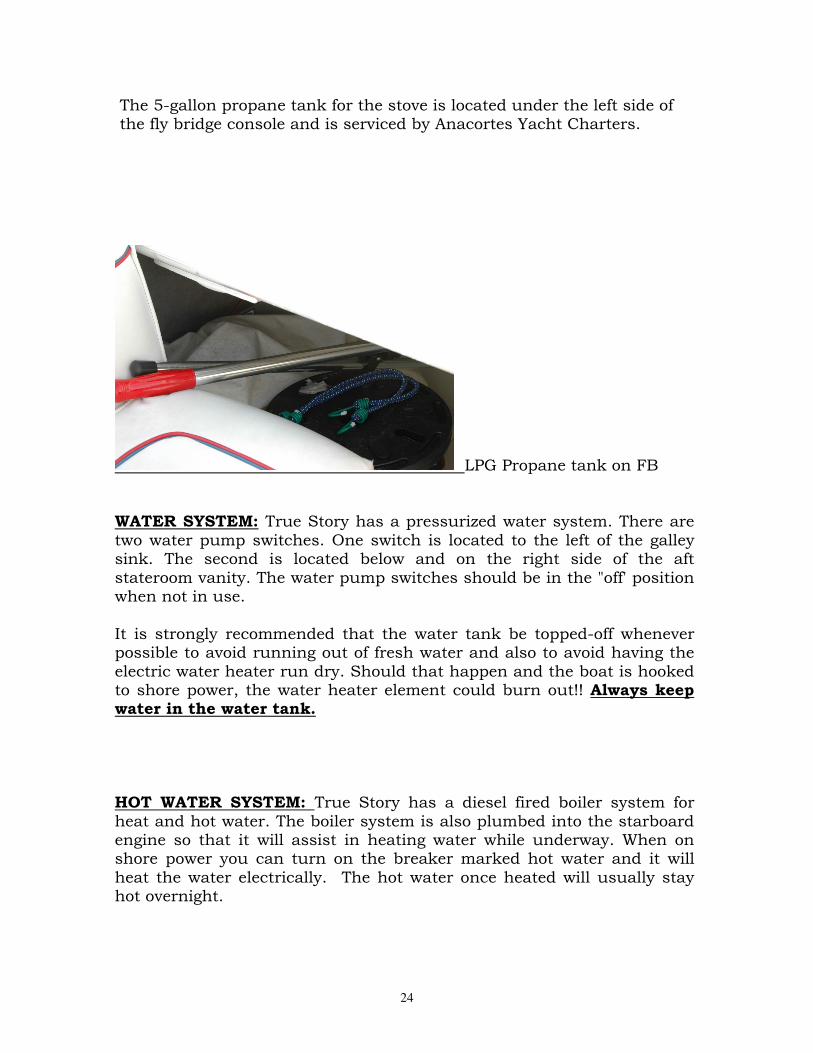
The 5-gallon propane tank for the stove is located under the left side of the fly bridge console and is serviced by Anacortes Yacht Charters.
LPG Propane tank on FB WATER SYSTEM: True Story has a pressurized water system. There are two water pump switches. One switch is located to the left of the galley sink. The second is located below and on the right side of the aft stateroom vanity. The water pump switches should be in the "off' position when not in use. It is strongly recommended that the water tank be topped-off whenever possible to avoid running out of fresh water and also to avoid having the electric water heater run dry. Should that happen and the boat is hooked to shore power, the water heater element could burn out!! Always keep water in the water tank. HOT WATER SYSTEM: True Story has a diesel fired boiler system for heat and hot water. The boiler system is also plumbed into the starboard engine so that it will assist in heating water while underway. When on shore power you can turn on the breaker marked hot water and it will heat the water electrically. The hot water once heated will usually stay hot overnight.
25
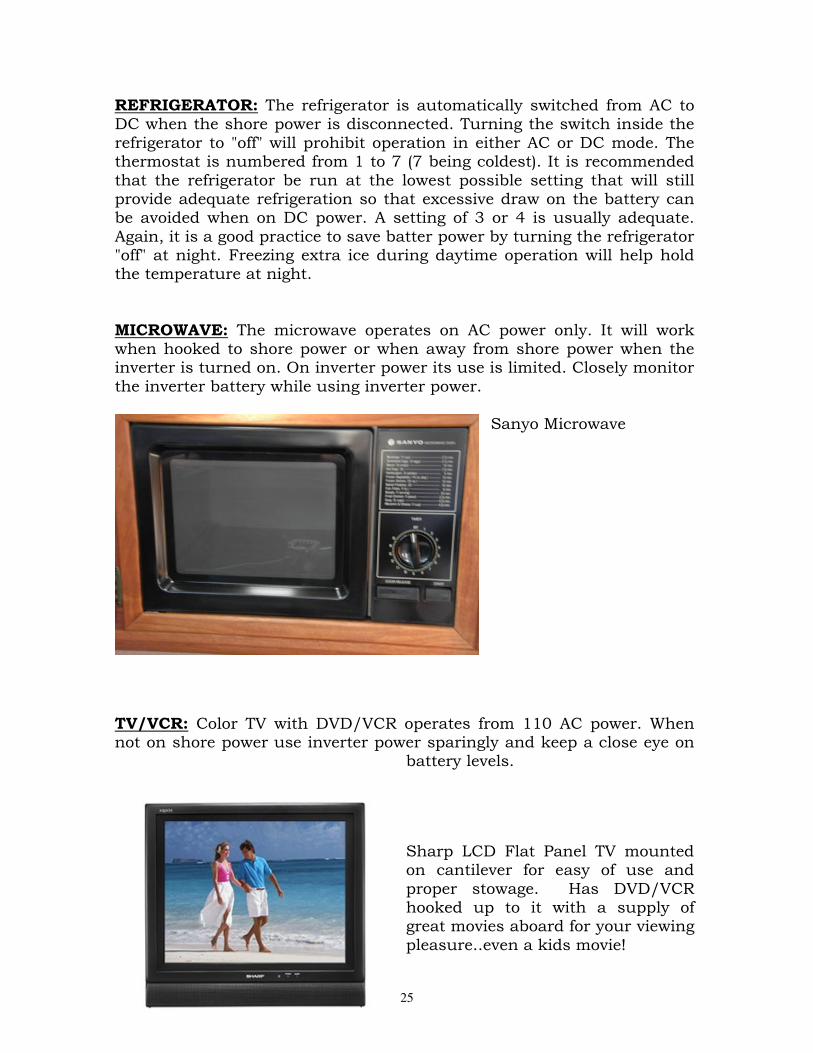
REFRIGERATOR: The refrigerator is automatically switched from AC to DC when the shore power is disconnected. Turning the switch inside the refrigerator to "off" will prohibit operation in either AC or DC mode. The thermostat is numbered from 1 to 7 (7 being coldest). It is recommended that the refrigerator be run at the lowest possible setting that will still provide adequate refrigeration so that excessive draw on the battery can be avoided when on DC power. A setting of 3 or 4 is usually adequate. Again, it is a good practice to save batter power by turning the refrigerator "off" at night. Freezing extra ice during daytime operation will help hold the temperature at night. MICROWAVE: The microwave operates on AC power only. It will work when hooked to shore power or when away from shore power when the inverter is turned on. On inverter power its use is limited. Closely monitor the inverter battery while using inverter power.
Sanyo Microwave
TV/VCR: Color TV with DVD/VCR operates from 110 AC power. When not on shore power use inverter power sparingly and keep a close eye on
battery levels.
Sharp LCD Flat Panel TV mounted on cantilever for easy of use and proper stowage. Has DVD/VCR hooked up to it with a supply of great movies aboard for your viewing pleasure..even a kids movie!
26
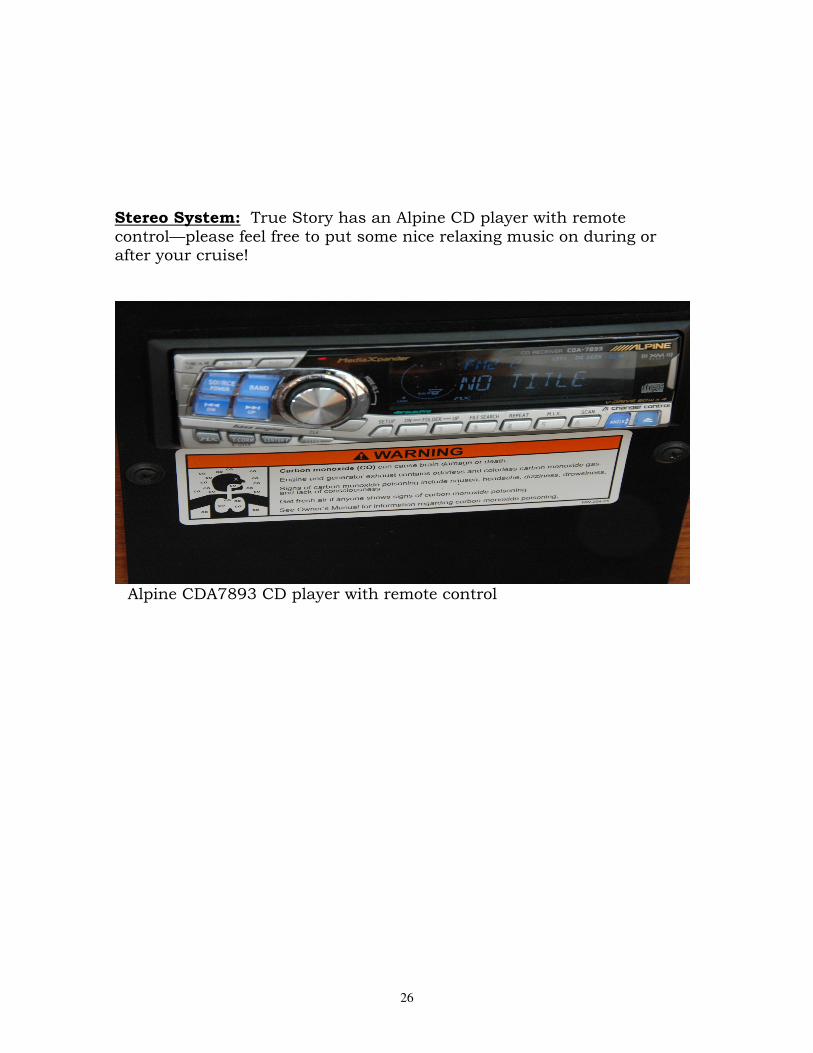
Stereo System: True Story has an Alpine CD player with remote control—please feel free to put some nice relaxing music on during or after your cruise!
Alpine CDA7893 CD player with remote control
27
Head System Overview The head system on this boat is reliable, straightforward, and easy-to-use.
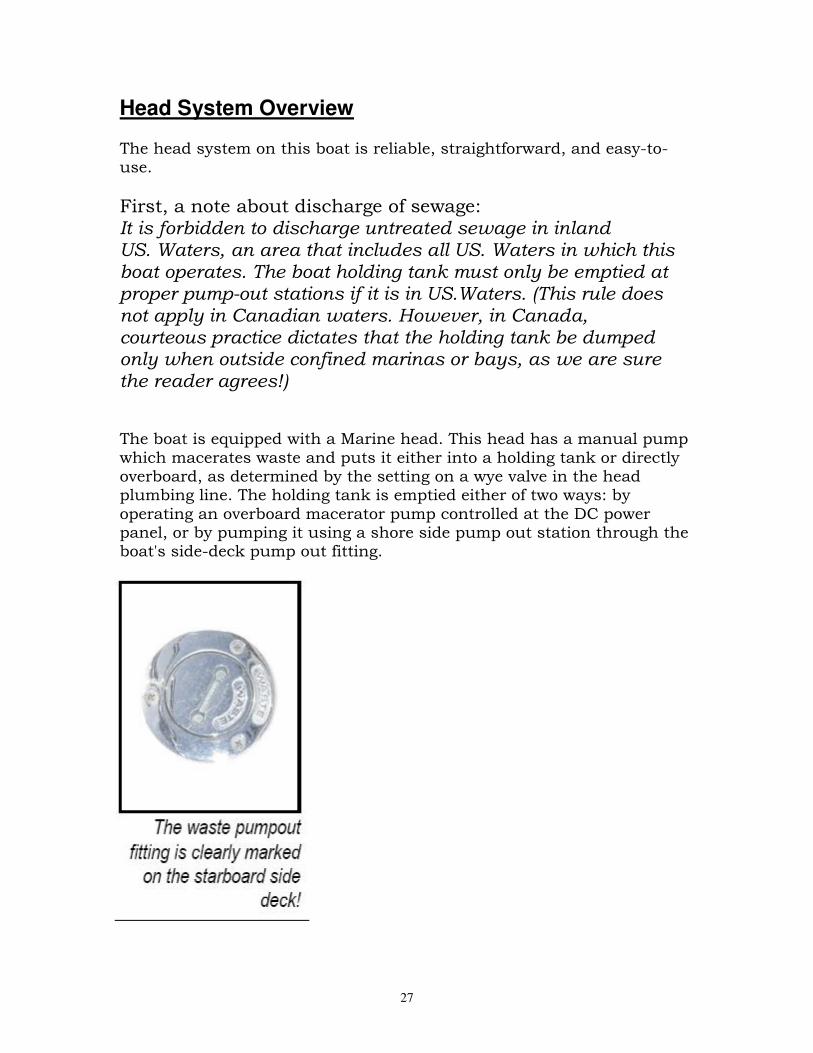
First, a note about discharge of sewage: It is forbidden to discharge untreated sewage in inland US. Waters, an area that includes all US. Waters in which this boat operates. The boat holding tank must only be emptied at proper pump-out stations if it is in US.Waters. (This rule does not apply in Canadian waters. However, in Canada, courteous practice dictates that the holding tank be dumped only when outside confined marinas or bays, as we are sure the reader agrees!) The boat is equipped with a Marine head. This head has a manual pump which macerates waste and puts it either into a holding tank or directly overboard, as determined by the setting on a wye valve in the head plumbing line. The holding tank is emptied either of two ways: by operating an overboard macerator pump controlled at the DC power panel, or by pumping it using a shore side pump out station through the boat's side-deck pump out fitting.
28
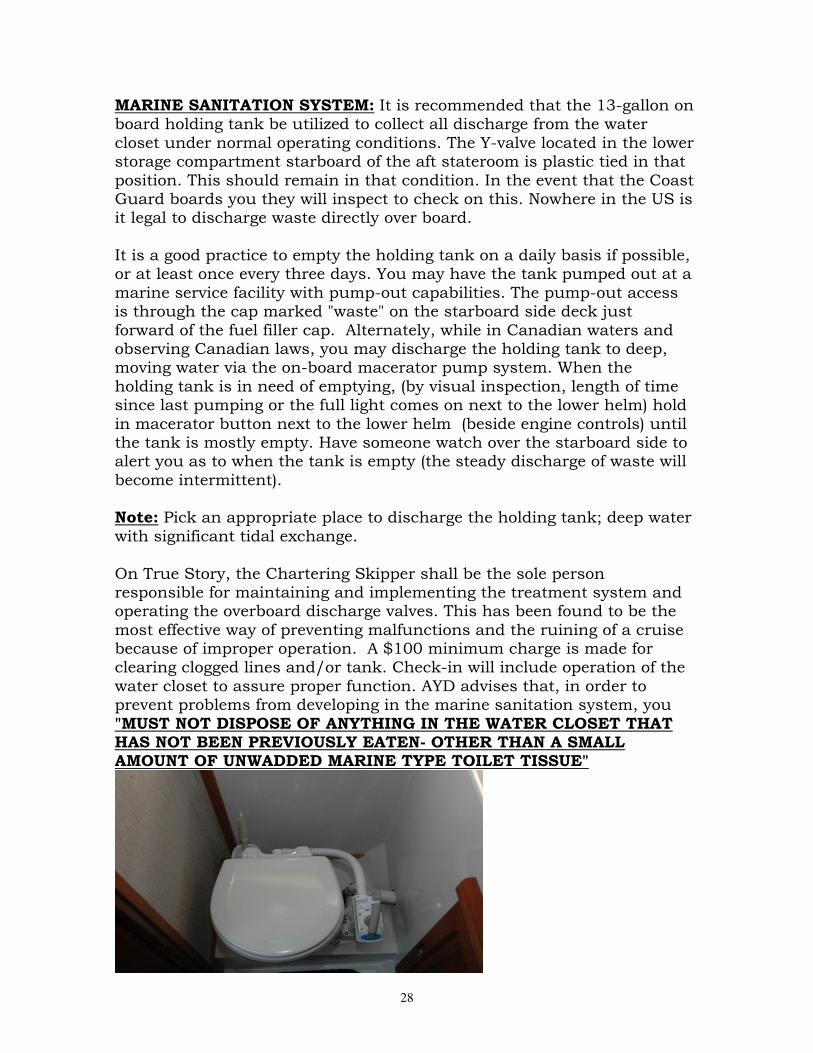
MARINE SANITATION SYSTEM: It is recommended that the 13-gallon on board holding tank be utilized to collect all discharge from the water closet under normal operating conditions. The Y-valve located in the lower storage compartment starboard of the aft stateroom is plastic tied in that position. This should remain in that condition. In the event that the Coast Guard boards you they will inspect to check on this. Nowhere in the US is it legal to discharge waste directly over board. It is a good practice to empty the holding tank on a daily basis if possible, or at least once every three days. You may have the tank pumped out at a marine service facility with pump-out capabilities. The pump-out access is through the cap marked "waste" on the starboard side deck just forward of the fuel filler cap. Alternately, while in Canadian waters and observing Canadian laws, you may discharge the holding tank to deep, moving water via the on-board macerator pump system. When the holding tank is in need of emptying, (by visual inspection, length of time since last pumping or the full light comes on next to the lower helm) hold in macerator button next to the lower helm (beside engine controls) until the tank is mostly empty. Have someone watch over the starboard side to alert you as to when the tank is empty (the steady discharge of waste will become intermittent). Note: Pick an appropriate place to discharge the holding tank; deep water with significant tidal exchange. On True Story, the Chartering Skipper shall be the sole person responsible for maintaining and implementing the treatment system and operating the overboard discharge valves. This has been found to be the most effective way of preventing malfunctions and the ruining of a cruise because of improper operation. A $100 minimum charge is made for clearing clogged lines and/or tank. Check-in will include operation of the water closet to assure proper function. AYD advises that, in order to prevent problems from developing in the marine sanitation system, you "MUST NOT DISPOSE OF ANYTHING IN THE WATER CLOSET THAT HAS NOT BEEN PREVIOUSLY EATEN- OTHER THAN A SMALL AMOUNT OF UNWADDED MARINE TYPE TOILET TISSUE"
29
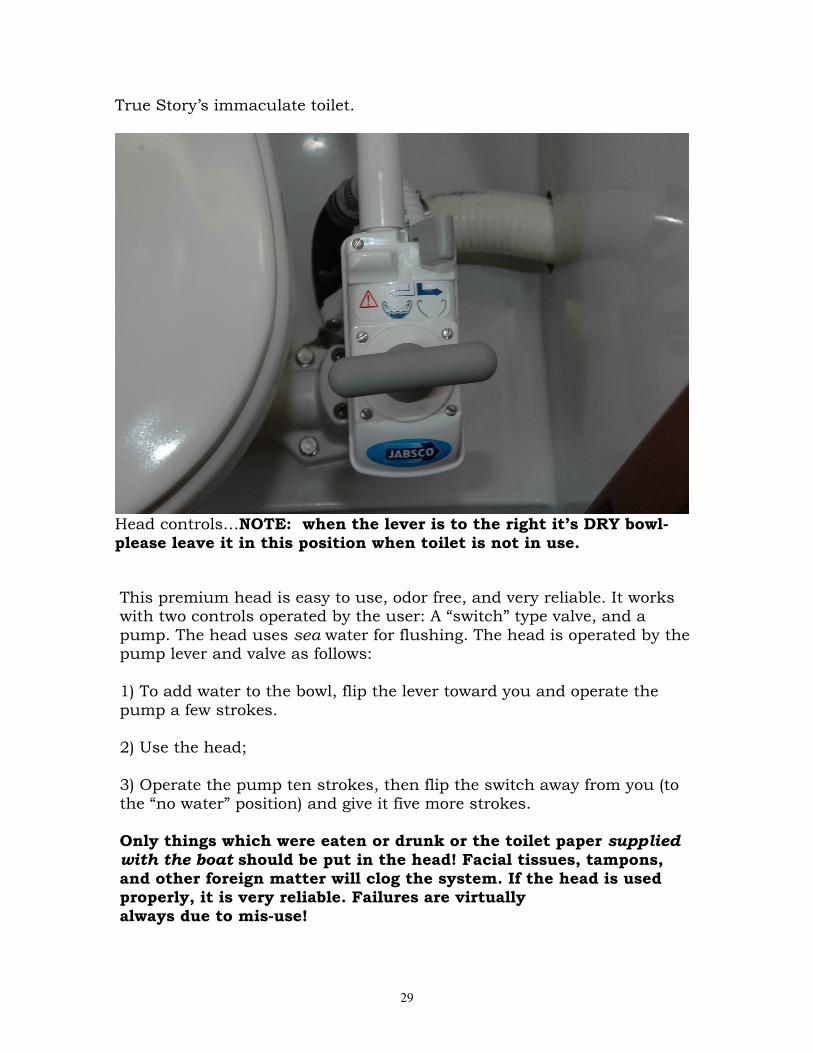
True Story’s immaculate toilet.
Head controls…NOTE: when the lever is to the right it’s DRY bowl-please leave it in this position when toilet is not in use. This premium head is easy to use, odor free, and very reliable. It works with two controls operated by the user: A “switch” type valve, and a pump. The head uses sea water for flushing. The head is operated by the pump lever and valve as follows: 1) To add water to the bowl, flip the lever toward you and operate the pump a few strokes. 2) Use the head; 3) Operate the pump ten strokes, then flip the switch away from you (to the “no water” position) and give it five more strokes. Only things which were eaten or drunk or the toilet paper supplied with the boat should be put in the head! Facial tissues, tampons, and other foreign matter will clog the system. If the head is used properly, it is very reliable. Failures are virtually always due to mis-use!
30
In regard to the supplied toilet tissue, “Four Sheets is Enough” for each flush! Nothing else should ever be put into the water closet, even normal toilet tissue or Kleenex type facial tissue can quickly foul the macerator pump and cause expensive repairs and inconvenience for you!! Use only MARINE type toilet tissue (not "Marina brand)!!! WYE-Valves: The wye-Valve on True Story is in the Equipment Room alongside the aft stateroom, and is secured in the “Holding Tank” position. It should remain tat way! All effluent goes to the holding tank. The only way to pump effluent overboard is with the macerator pump. Holding Tank Pump out & Macerator Pump there is a holding tank on the boat located in the equipment room. If dumped overboard from this tank using the macerator pump, the effluent passes through a through-hull valve (normally open). See if the tank needs pumping by the Tankwatch indicator’s lights on the AC power panel. When the light illuminates, the heads must not be used and the tank must be emptied!
To dump the tank, use a shore side pump out station connecting to the “Waste” deck fitting on the starboard side deck. If not in U.S. waters or a “no-discharge zone”, you can dump the tank overboard without a pump out station by turning “ON” the macerator pump at the DC panel: Press both buttons next to the lower helm simultaneously to run the pump; if a crew member looks on the starboard side while you pump, you’ll be able to tell when all the waste has been pumped from the tank.
SHOWER: The shower drains into a sump located under the shower enclosure. The sump switch, located on the side of the shower by the facet, must be turned on periodically to prevent the water from rising high enough to run over. No more than ¼" of water should accumulate before pumping. The pump will drain the water in the sump overboard. Do not run the shower drain pump unless there is water in the sump. Running without water may burn out the pump. Always be aware of where your discharge water is going. It's not polite to pump your shower discharge onto the float!!
31
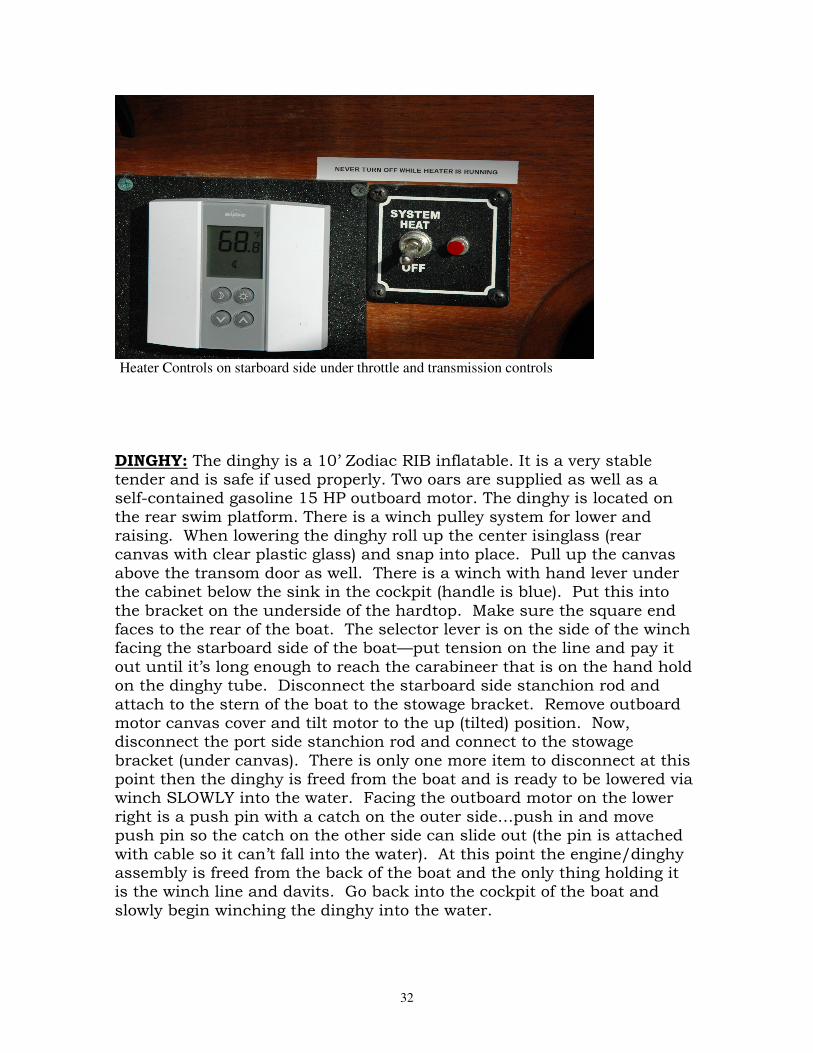
HEATERS: There are two heaters aboard True Story. One- Webasto Diesel heater with four outlets (aft master stateroom, salon, head and stairs going down into the galley)- this will provide you with plenty of nice warm dry air. The outlet vent in the aft stateroom is adjustable for your convenience should you find it getting too warm. The other heater aboard True Story is a Red Dot heater that is only used while engines are at operating temperature and you are underway. The rocker switch for this is directly below lower helm station throttle/transmission controls (hi/low switch). Usually the Webasto heater is preferred as it’s dry heat. Heat from Red Dot can sometimes fog up windows when using while raining outside. The on/off switch for the Webasto heater is located on the starboard side of the boat at knee level below throttle/engine controls next to the thermostat. IMPORTANT: do NOT ever turn the switch off while the heater is running. If you find the set temperature uncomfortable use the up/down buttons on the thermostat to adjust to your desired temperature then press and hold the MOON button on the thermostat for at LEAST 5 seconds. This will store your new desired temperature. If you find it too hot…adjust the temperature down and when the heater stops blowing…and only then the on/off (toggle switch) may be turned off. This is VERY important..if done incorrectly you might find yourself without heat for the remainder of your charter experience. IMPORTANT: Do not leave the heater “on” overnight when not on shore power! It
consumes a fair amount of DC battery power, and you will deplete your batteries. Low battery power causes the automatic heater igniter to become fouled and inoperative. If you run the batteries
down low, and the furnace igniters become fouled as a result, be warned: you will have no heat for the balance of the charter.
“Red” Dot Heaters---In addition to the Webasto furnace, there are two “Red Dot” heaters aboard True Story. These heaters can be used when the boat’s engines are in use. They operate like an automobile heater, converting the excess heat from engine coolant to warm air. They are controlled simply by turning their switches “on” or “off”, in turn operating their blowers. Since they will only be used when the engines are running, there is no concern.
32
Heater Controls on starboard side under throttle and transmission controls
DINGHY: The dinghy is a 10’ Zodiac RIB inflatable. It is a very stable tender and is safe if used properly. Two oars are supplied as well as a self-contained gasoline 15 HP outboard motor. The dinghy is located on the rear swim platform. There is a winch pulley system for lower and raising. When lowering the dinghy roll up the center isinglass (rear canvas with clear plastic glass) and snap into place. Pull up the canvas above the transom door as well. There is a winch with hand lever under the cabinet below the sink in the cockpit (handle is blue). Put this into the bracket on the underside of the hardtop. Make sure the square end faces to the rear of the boat. The selector lever is on the side of the winch facing the starboard side of the boat—put tension on the line and pay it out until it’s long enough to reach the carabineer that is on the hand hold on the dinghy tube. Disconnect the starboard side stanchion rod and attach to the stern of the boat to the stowage bracket. Remove outboard motor canvas cover and tilt motor to the up (tilted) position. Now, disconnect the port side stanchion rod and connect to the stowage bracket (under canvas). There is only one more item to disconnect at this point then the dinghy is freed from the boat and is ready to be lowered via winch SLOWLY into the water. Facing the outboard motor on the lower right is a push pin with a catch on the outer side…push in and move push pin so the catch on the other side can slide out (the pin is attached with cable so it can’t fall into the water). At this point the engine/dinghy assembly is freed from the back of the boat and the only thing holding it is the winch line and davits. Go back into the cockpit of the boat and slowly begin winching the dinghy into the water.

33
When the dinghy is in the water put hand tension on the line and continue to pay out until fully out (when you step in the dinghy to remove the winch line from the dinghy you’ll because it to go taught and you wont be able to disconnect). Coil the winch line and remove winch assembly from hardtop and stow back below sink in cockpit. Go back in the dinghy and now your ready to lower the motor onto the transom of the dinghy. It’s best to sit on the side of the dingy that is connected to True Story facing the outboard motor. At your shin level in front of you there is a pull out T-handle/knob..at the top part of that bracket assembly you will find a “handle” SLOWLY and VERY CAREFULLY grab the handle and pull out on the T-handle and lower the motor down onto the transom of the dinghy and secure with slide out pin. Be sure pin locks all the way through. Now, the motor must be tilted into the RUN position. To do this put the black handle to the run position and tilt up the outboard motor and SLOWLY lower the outboard engine into the water. Put the red outboard fuel can in the center of the dinghy and secure with strapping and connect fuel line to outboard engine. Please navigate slowly and carefully at all times and remember that you are responsible for your OWN WAKE…even in a tender. To raise tender reverse procedure and please remember to put canvas cover back on the outboard motor..keeps is pretty for the next charter user ☺
Dinghy sitting on the water with winch line hooked up and motor in correct position to begin hoisting up with Weaver Winch.
34
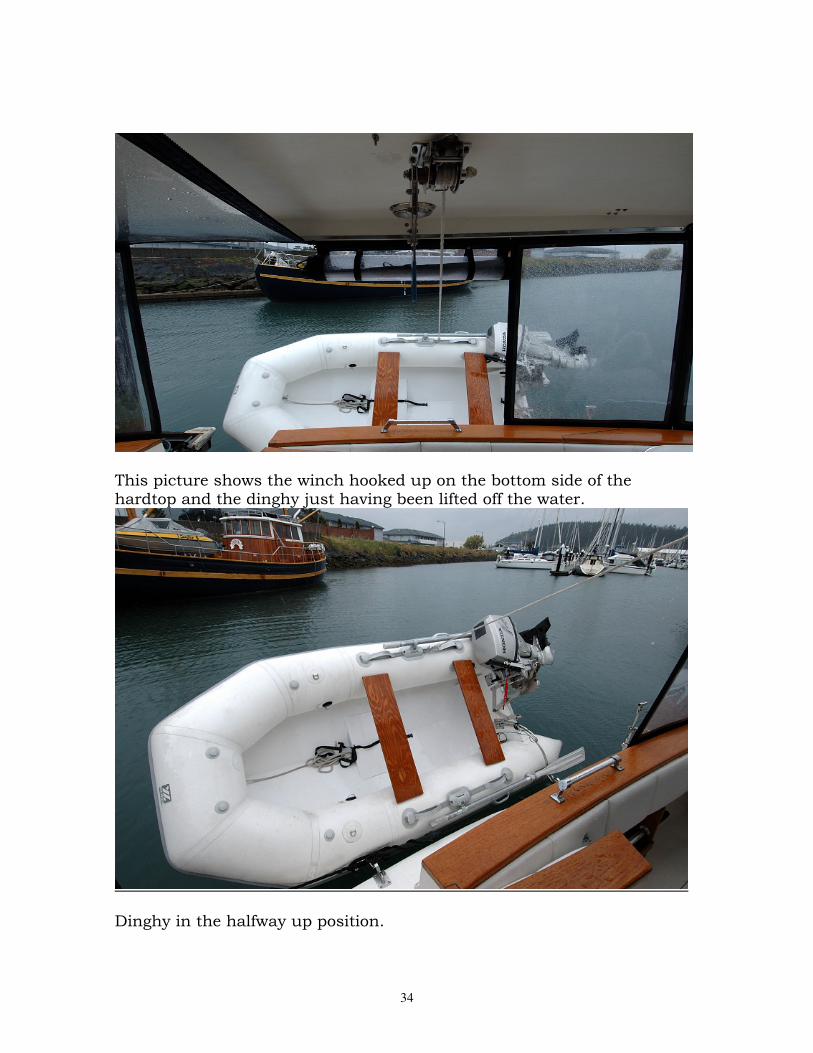
This picture shows the winch hooked up on the bottom side of the hardtop and the dinghy just having been lifted off the water.
Dinghy in the halfway up position.
35
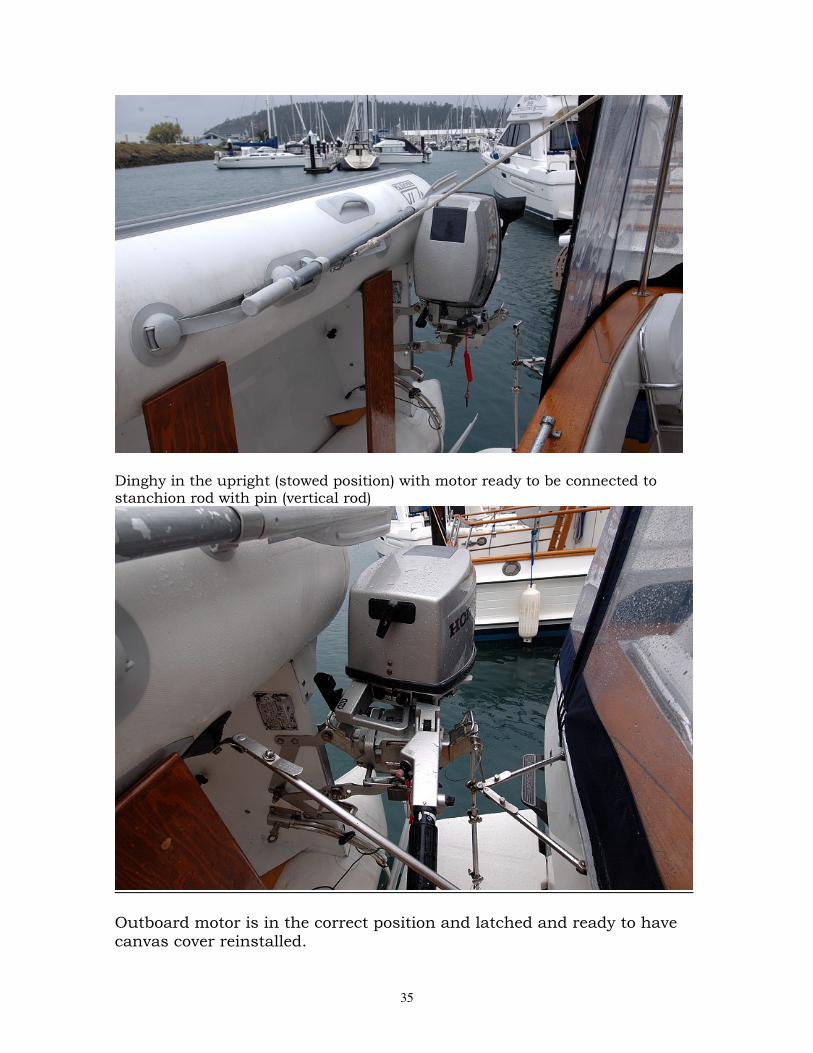
Dinghy in the upright (stowed position) with motor ready to be connected to stanchion rod with pin (vertical rod)
Outboard motor is in the correct position and latched and ready to have canvas cover reinstalled.
36
NOTE: The dinghy is provided for transportation to the dock when moored out and fishing. Please, DO NOT beach the dinghy since gravel and rocks will damage the bottom. If unloading on shore be very careful. OUTBOARD: The 15 HP Honda outboard motor is always in gear when running. Always attach the emergency stop cord to the operator prior to starting in the event you fall overboard. This will ensure the motor stops and no danger of propeller injury exists. It also means the boat won't leave you behind. You must open the air valve on top of the gas can. To motor in reverse; engage gear selector to reverse IDLE SPEED ONLY. Once backed up to your destination..disengage reverse to neutral, then forward if so desired. REMEMBER…Reverse is to be used at IDLE speed only. When engaged into forward use the throttle very slowly until the dinghy gets up on plane. You will find it is very stable to operate. The Coast Guard requires one life jacket per occupant on board while underway. Children 12 and under are required to wear them at all times.
Maneuvering Suggestions
Maneuvering in a Harbor With its twin screws, you’ll do best if you center the rudder and steer with the engines only! The props are big enough that the boat will usually respond well (except in high winds) just with use of the propellers in forward and/or reverse. Take your time, and keep the boat running “dead slow” so that you can plan each approach. You shouldn’t need to use the throttles too much; if you do, use them carefully so that you don’t get going too fast!
37
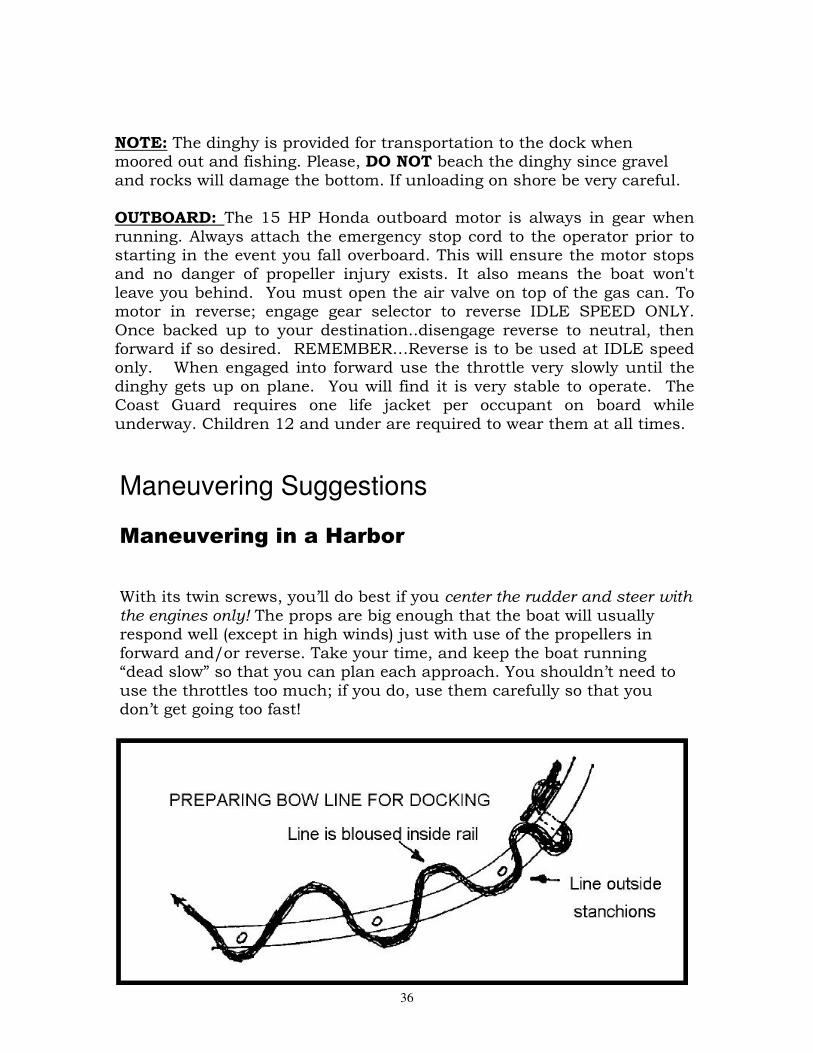
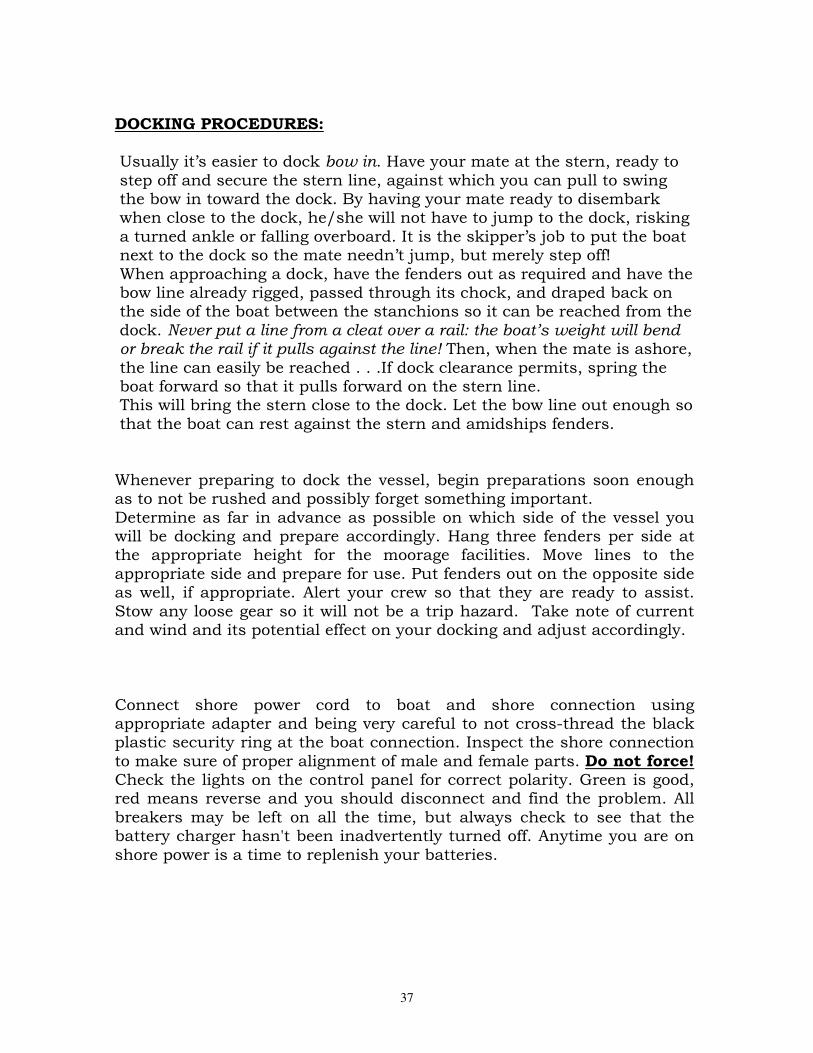
DOCKING PROCEDURES: Usually it’s easier to dock bow in. Have your mate at the stern, ready to step off and secure the stern line, against which you can pull to swing the bow in toward the dock. By having your mate ready to disembark when close to the dock, he/she will not have to jump to the dock, risking a turned ankle or falling overboard. It is the skipper’s job to put the boat next to the dock so the mate needn’t jump, but merely step off! When approaching a dock, have the fenders out as required and have the bow line already rigged, passed through its chock, and draped back on the side of the boat between the stanchions so it can be reached from the dock. Never put a line from a cleat over a rail: the boat’s weight will bend or break the rail if it pulls against the line! Then, when the mate is ashore, the line can easily be reached . . .If dock clearance permits, spring the boat forward so that it pulls forward on the stern line. This will bring the stern close to the dock. Let the bow line out enough so that the boat can rest against the stern and amidships fenders. Whenever preparing to dock the vessel, begin preparations soon enough as to not be rushed and possibly forget something important. Determine as far in advance as possible on which side of the vessel you will be docking and prepare accordingly. Hang three fenders per side at the appropriate height for the moorage facilities. Move lines to the appropriate side and prepare for use. Put fenders out on the opposite side as well, if appropriate. Alert your crew so that they are ready to assist. Stow any loose gear so it will not be a trip hazard. Take note of current and wind and its potential effect on your docking and adjust accordingly. Connect shore power cord to boat and shore connection using appropriate adapter and being very careful to not cross-thread the black plastic security ring at the boat connection. Inspect the shore connection to make sure of proper alignment of male and female parts. Do not force! Check the lights on the control panel for correct polarity. Green is good, red means reverse and you should disconnect and find the problem. All breakers may be left on all the time, but always check to see that the battery charger hasn't been inadvertently turned off. Anytime you are on shore power is a time to replenish your batteries.
38
“WHAT TO DO IF” ANCHOR CHAIN WON’T COME OUT OF CHAIN LOCKER The anchor chain is continuous, secured at both ends, and cannot tangle. But sometimes a pile of chain will fall over, and one loop of chain will fall through another loop. Usually you can clear this by grasping the chain where it exits the hawse pipe from the chain locker with your hands, and pulling it up or down to “jiggle” the loop out of the chain; you may have to retrieve some chain to do this, in order to have enough slack to jiggle it! It is rare when this will not clear the jam. The other solution: go below and clear the tangle in the chain locker. Caution: Turn off the windlass breaker to protect your hands when manhandling chain! ANCHOR FOULED, CAN’T RAISE IT This can happen if you “pull the boat to the anchor” with the windlass. You should move the boat under power until it is over the anchor, or, even better, slightly ahead of it before hauling. Usually this will clear it. Otherwise, take a line and form a fixed, loose loop around the chain. Weight the loop, and lower it down the line until it reaches the bottom, sliding down the chain. Then, using the dinghy, take the line forward past the anchor so that you can pull the anchor out, opposite the direction its flukes are pointing. This should help you to pull the anchor free.

39
ANCHOR WINDLASS WON’T TURN If the motor isn’t running, is the circuit breaker by the lower helm on? If the motor is running, is the clutch tight? Use the anchor windlass handle. Windlasses are equipped with a shear pin to protect them: if you sheared the pin, you will have to haul the anchor by hand using the emergency handle. BATTERIES (HOUSE) KEEP RUNNING DOWN
Have you run the engines enough? Is something left on (like the engine room or mast lights, too many electronics, etc.) that is too great a load for the time you were not charging? Are you using the inverter for big jobs? Use the stove or shore power. Have you had the inverter on whenever plugged in to shore power? You must, for the house batteries to charge! ENGINE OVERHEATS
Is the drive belt for the water pump intact? Spare belts are in the spares kit. Is the sea strainer clogged? See that section in this manual. Is the impeller shot? If sea strainer is clear and belt is good, this is likely. Change (spare in spares kit) or call a mechanic. Do not run engine if it overheats! ENGINE WON’T START
If starter does not turn, is transmission in neutral? Try jiggling shift lever while pushing start button. Check battery, battery switches. Try starting with battery switch set to “both”. If starter turns, assume fuel problem: did you bump a fuel valve on the manifold at back of engine room? Make sure all open, if one was closed, re-prime engine or call a mechanic if you can’t do this (see engine manual). FOG DELAYS RETURN
Call AYC by telephone or VHF marine operator and advise for instructions. What to Do If... HEAD WON’T FLUSH
Have you over-filled the holding tank? Pump it to allow more effluent to enter it. See the “Heads” section of this manual. HIT A FISH NET
Engines in Neutral: don’t try to back off, you may foul the net more. Try pulling the boat back with the dinghy & outboard. Get assistance from the fisherman. You are responsible for damage you cause to a net! HIT A LOG OR ROCK
See EMERGENCY PROCEDURES, next chapter.

40
PROPELLER FOULED OR DAMAGED
Best thing: Have the prop checked by a diver or dive it yourself if able. Check for vibration. Try turning shaft by hand in engine room, it should be turn-able with engine in neutral. Is shaft noisy, or does it load engine? Call Vessel Assist. See emergency procedures, next chapter. WATER (FRESH) WON’T FLOW
Is there water in the tank? Is F.W. Pump breaker on? If capable, check pressure switch on pump, run manually if necessary. Emergency Procedures
EMERGENCY PROCEDURES Protect your lives first! Put on life jackets Contact the Coast Guard with an emergency "MAYDAY" call. If adrift, prepare to anchor to keep the boat from drifting into danger. If the boat is really sinking, consider "beaching it" if necessary. Launch the dinghy and prepare to board if necessary. If an engine is available and you have time, mount the outboard engine and load its fuel tanks. Take a handheld VHF radio, if available. Be sure to wear life jackets!
Then, worry about the boat! In a true emergency, you certainly are authorized to call for immediate commercial assistance as minimally required to assure the safety of you and the boat. It is not an emergency, however, if neither you nor the boat is at risk. For all non-emergency assistance or mechanical repairs done by others, Anacortes Yacht Charters MUST give prior approval for you to be reimbursed!
41
If you think it may not be an emergency: If you have any concern about your long-term safety, contact the Coast Guard, either normally or using an urgent "PAN" call. Tell them that you are calling to advise them about your situation, so they can keep in touch. Be sure that the status and safety of the boat and crew is someone's responsibility while you sort out the boat's problem. For example, delegate your mate to keep a watch for hazards, or to operate the boat on course slowly while you deal with the difficulty. Here is a checklist for solving the problem: (A) Isolate it; (B) Get the manuals; (C) Get parts; (D) If necessary, call Anacortes Yacht Charters for help. Over the years, most problems with charter boats are caused by misuse! Holding tanks overflow because they aren't checked; heads clog because foreign matter (especially facial tissues and tampons) are put in them; engines fail because they run out of fuel, then must be "purged" to re-start. Use the boat carefully, and you'll avoid these problems. Almost all problems that are not operator-caused, i.e., that are boat deficiencies, are caused by pumps that fail, hoses and belts that break, and seawater strainers that get clogged. Generally, these problems are annoyances, and usually they are inconvenient, but they still can happen.
42
GENERAL CLEANUP:
House keeping supplies and equipment required for cleaning the boat are on board. Please use only those supplied. Daily attention and prompt cleanup of spills will make end-of-cruise cleanup much easier. Upon returning to port for Check-in be sure to refill the fuel and water tanks. Empty the holding tank. Enjoy a pleasant cruise. Rest assured that everything has been done to provide you with a vessel that is in excellent condition mechanically and otherwise. True Story has been equipped with the latest in electronic navigation and safety features. Our goal is to allow you to have a relaxing and trouble-free cruise. During your cruise if you think of something that might enhance the boating experience on board True Story, we would appreciate you passing along your recommendations. Thank you and have a safe and enjoyable trip. We hope to see you again next year aboard True Story.