Embed Size (px)
Citation preview

1USER GUIDE
MP4 Player
© Jazwares, Inc. 2011
2
Included in box: R2-D2 Preloaded MP4 Player C-3PO Earbuds USB Cable Video Cable Video Conversion Software CD User Guide and Warranty
CONTENTSFor safe and convenient operation of player, read all instructions before use.
WELCOME & Safety Tips 3Key Control & Interface 4-6Music : Loading Music 7-9Pictures 10Video 11Record 12Extras 13Video Conversion / Troubleshooting 14System Settings 15-16Firmware Upgrade 17Features & Specifications 18Warranty 19-20Notes 21
3

4
The buttons have different functions for press and press hold.
Key Control and Interface:
MENUMake your selection
BackScroll through songs, video & photos.Set volume down.
NEXTScroll through songs, video & photos.Set volume up.
Play/PausePlay & pause forsongs, video & photos
VolumePress and hold for volume
Earphone
USB
Lock/On/Off(On/Off is a slide
and hold function)
(Also functions as an on/off :
press and hold)
ONOFFLOCK
5
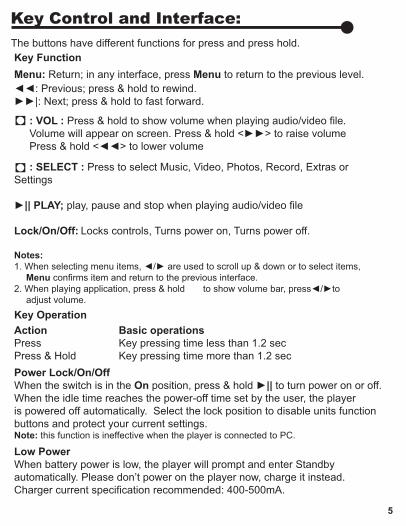
Key Function
Menu: Return; in any interface, press Menu to return to the previous level.◄◄: Previous; press & hold to rewind.►►|: Next; press & hold to fast forward.
: VOL : Press & hold to show volume when playing audio/video file. Volume will appear on screen. Press & hold <►►> to raise volume Press & hold <◄◄> to lower volume
: SELECT : Press to select Music, Video, Photos, Record, Extras or Settings
►|| PLAY; play, pause and stop when playing audio/video file
Lock/On/Off: Locks controls, Turns power on, Turns power off.
Notes: 1. When selecting menu items, ◄/► are used to scroll up & down or to select items, Menu confirms item and return to the previous interface.2. When playing application, press & hold to show volume bar, press◄/►to adjust volume. Key Operation
Action Basic operations
Press Key pressing time less than 1.2 secPress & Hold Key pressing time more than 1.2 secPower Lock/On/Off
When the switch is in the On position, press & hold ►|| to turn power on or off.When the idle time reaches the power-off time set by the user, the player is powered off automatically. Select the lock position to disable units function buttons and protect your current settings.Note: this function is ineffective when the player is connected to PC.
Low Power
When battery power is low, the player will prompt and enter Standby automatically. Please don’t power on the player now, charge it instead. Charger current specification recommended: 400-500mA.
The buttons have different functions for press and press hold.
Key Control and Interface:
6
File StorageAll files stored directly under memory, when you store the video/picture/song MP4 will automatically recognize the file. When you record, MP4 will automatically generate a “ RECORD” folder.
The MP4 player can be connected to your PC or a charging adaptor.
Connecting to PC and Charger
System ConfigurationOS: Windows XP/2K/ME/98 (driver installation needed) Linux9 and above /Mac OS 10CPU: Pentium-133MHz at leastMemory: 32MB at leastHard disk free space, 100MB at leastVideo card: above 640*480, enhanced color at least (16 bits)
Connecting to PCConnect the player to a PC with the USB cable in power-off/on status; Disconnect the USB cable or delete the hardware on the PC, the system enters player’s operation mode.If you do not disconnect the USB cable, the system will stay in charging mode during its operation interface.
Connecting to PCConnect the player to a PC with the USB cable in power-off/on status; Disconnect the USB cable or delete the hardware on the PC, the system enters player’s operation mode.If you do not disconnect the USB cable, the system will stay in charging mode during its operation interface.
Connecting to Charger/AdapterConnect the player with the USB cable to charge unit. If player is connected but power is in the OFF position, the system will go into to refresh mode.
Key Control and Interface Continued:
7
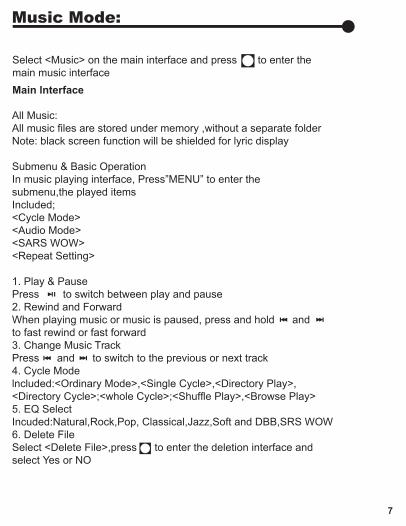
Music Mode:
Select <Music> on the main interface and press to enter themain music interfaceMain lnterface
All Music:All music files are stored under memory ,without a separate folderNote: black screen function will be shielded for lyric display
Submenu & Basic Operation In music playing interface, Press”MENU” to enter the submenu,the played itemsIncluded;<Cycle Mode><Audio Mode><SARS WOW><Repeat Setting>
1. Play & PausePress to switch between play and pause 2. Rewind and ForwardWhen playing music or music is paused, press and hold andto fast rewind or fast forward3. Change Music Track Press and to switch to the previous or next track4. Cycle Modelncluded:<Ordinary Mode>,<Single Cycle>,<Directory Play>,<Directory Cycle>;<whole Cycle>;<Shuffle Play>,<Browse Play>5. EQ Select Incuded:Natural,Rock,Pop, Classical,Jazz,Soft and DBB,SRS WOW6. Delete FileSelect <Delete File>,press to enter the deletion interface andselect Yes or NO
8
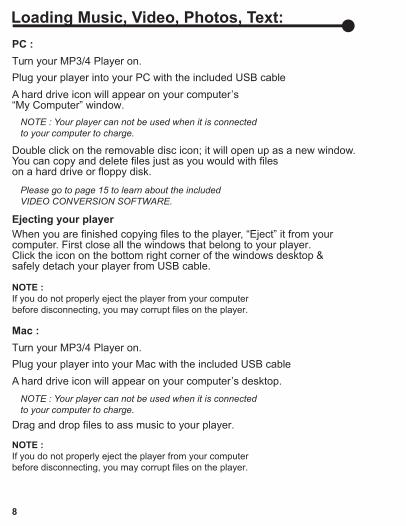
Loading Music, Video, Photos, Text:
Plug your player into your PC with the included USB cableTurn your MP3/4 Player on.PC :
A hard drive icon will appear on your computer’s“My Computer” window.
Double click on the removable disc icon; it will open up as a new window.You can copy and delete files just as you would with fileson a hard drive or floppy disk.
When you are finished copying files to the player, “Eject” it from your computer. First close all the windows that belong to your player. Click the icon on the bottom right corner of the windows desktop &safely detach your player from USB cable.
NOTE :If you do not properly eject the player from your computerbefore disconnecting, you may corrupt files on the player.
Please go to page 15 to learn about the included VIDEO CONVERSION SOFTWARE.
NOTE : Your player can not be used when it is connected to your computer to charge.
Ejecting your player
Plug your player into your Mac with the included USB cableTurn your MP3/4 Player on.Mac :
A hard drive icon will appear on your computer’s desktop.
Drag and drop files to ass music to your player.
NOTE :If you do not properly eject the player from your computerbefore disconnecting, you may corrupt files on the player.
NOTE : Your player can not be used when it is connected to your computer to charge.
9
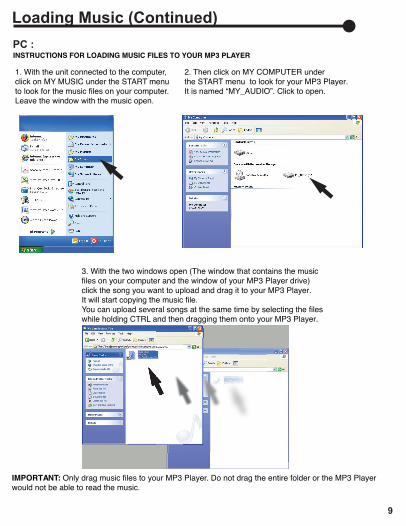
Loading Music (Continued)PC : INSTRUCTIONS FOR LOADING MUSIC FILES TO YOUR MP3 PLAYER
1. With the unit connected to the computer,click on MY MUSIC under the START menuto look for the music files on your computer.Leave the window with the music open.
3. With the two windows open (The window that contains the musicfiles on your computer and the window of your MP3 Player drive)click the song you want to upload and drag it to your MP3 Player.It will start copying the music file.You can upload several songs at the same time by selecting the fileswhile holding CTRL and then dragging them onto your MP3 Player.
2. Then click on MY COMPUTER underthe START menu to look for your MP3 Player.It is named “MY_AUDIO”. Click to open.
IMPORTANT: Only drag music files to your MP3 Player. Do not drag the entire folder or the MP3 Playerwould not be able to read the music.
10
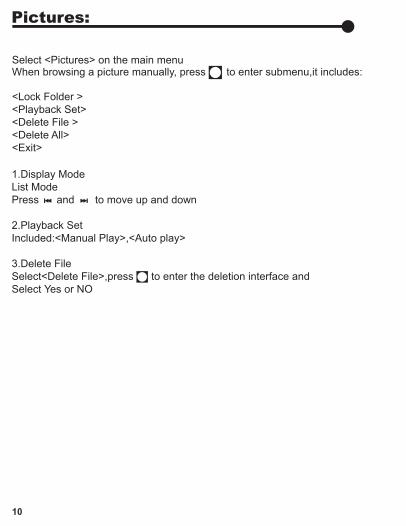
Pictures:
Select <Pictures> on the main menuWhen browsing a picture manually, press to enter submenu,it includes:
<Lock Folder ><Playback Set><Delete File ><Delete All><Exit>
1.Display ModeList ModePress and to move up and down
2.Playback SetIncluded:<Manual Play>,<Auto play>
3.Delete File Select<Delete File>,press to enter the deletion interface andSelect Yes or NO
11
Video:
Select <Video> on the main menu and press to enter its main menu.
1. Volume AdjustmentIn Video playing interface,pause video.Press and hold Volume control adjust bar appears,Press andto adjust the volume level.
2. Play & PausePress to switch between play and pauseNote: Black screen function is protected when playing video
3. Rewind and Fast ForwardWhen playing and pausing video files, press and hold and to rewind and fast forward
4. Change FileWhen playing or pausing video file, press andto switch to the previous or next file.
5. Playing ModeIncludes:<OrdinaryMode>,<Single Cycle>,<Directory Play>,<DirectoryCycle>,<Whole Cycle>,<Shuffle Play>,<Browse Play>.
Submenuu and Basic OperationPress to enter submenu,included<Main Disk Diretory><Delete Files><Delete All><Cycle Mode><Exit> At this time,video playing stops and will continue if the system exits from the submenu
12
Video Function Continued:
6.Delete FileSelect <Delete File>,press to enter the deletion interface and Select Yes or No
Record Function:
Select <Recordings> on the main menu to enter recording interface.
Submenu and Basic OperationIn recording interface player is in standby status, press”MENU” to enter submenu, it includes
<Local Folder><REC type><Exit>
1. Record GainIf player is in recording status, press and hold ”MENU”, the system will save the recording file and then return to standby status.
2. Start \ Pause \ Stop RecordingPress to pausePress to playPress and hold ”MENU” to save the recording files,After saving, directly return to main menu, and automatically generate “RECORDING” file.
3. ”Record Type” included<Long REC>,<Fine REC><Long VOR>,<Fine VOR>
13
Extras:
Select <Extras> in the main interface and press to enter the menu.
Submenu and Basic Operation
The <Extras> submenu includes <text>Press to enter “TEXT”, Press to play.
When player is in playback mode.
Press “MENU” to enter setting interfaceit includes:<Local Folder><Playback Set><Delete File><Playback Set><Delete File><Delete All><Exit>
2.PlaybackIncluded:<Manual Play>,<Auto Play>
3.Delete FileSelect<Delete File>,press to enter the deletion interface and select Yes or No
14
Troubleshooting:
1. Can not turn on the player. Check battery’s remaining capacity. Connect USB cable or charger and try to turn on the player again.2. Can not hear the voice via earphone Check whether volume is set to 0. Check whether earphone has been plugged in the earphone input jack.3. Serious noise Check whether earphone plug is clean. Dirty plug may lead to noise. Check whether the file is damaged. Try another file. Damaged file may lead to serious noise and voice jump.4. Key does not work. Check whether the player is set to the lock position.5.Can not download file. Check the connection between PC and the player is correct. Check if the memory space is full. Check for damaged USB cable. Need More Help?
Do Not Return Item to Store.Call 1-800-370-1827 and speak to a customer service representative.
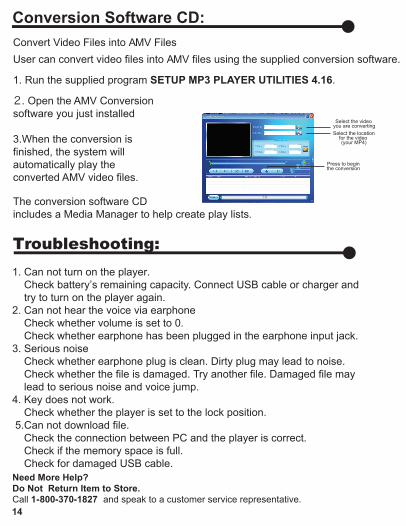
Convert Video Files into AMV Files
The conversion software CD includes a Media Manager to help create play lists.
Select the video you are converting
User can convert video files into AMV files using the supplied conversion software.
1. Run the supplied program SETUP MP3 PLAYER UTILITIES 4.16.
2. Open the AMV Conversionsoftware you just installed
3.When the conversion is finished, the system will automatically play the converted AMV video files.
Conversion Software CD:
Select the locationfor the video (your MP4)
Press to beginthe conversion
15
System Settings:
Select <setting> in the main interface and press to enter the menu.1. Adjust TimePress to enter the setting interfacePress to switch hours and minutesPress and to change the timePress to confirm and “Menu” to exit
2. LCD Set Dark Mode Options, time in seconds: 5s,10s,15s,20s,25s,30s,35s,40s,45s and 50s. Press to enter the Dark Mode interface If the backlight time is 0, there will be no black screen. If backlight time is on, the screen will turn black if no operation takes place during the set time duration.
3. Language Supports English,Spanish,French
4. Power Off Off time Options, time in seconds: 10s,20,30,40,50,60s,70s,80s,90s,100s,110s and 120s. If the power saving is off,the player will not shut down automatically. If it is on, the player will shut down in if no operation takes place during the set time duration. Sleep time Options, time in minutes: 10min,20min,30min,40min,50min,60min,70min, 80min,90min,100min,110min,120min. The player will shut down when the set time is reached.
16
System Settings (Continued):
Select <setting> in the main interface and press to enter the menu.5. Online mode Multiply drive Normal only Encrypted only
6. Memory info 7. Format Device Formatting the disk
8. Firmware version Can check the firmware version number
9. Firmware upgrade With the need for software and computer
10. Key tone Volume adjustable button
11. Exit
17
Firmware Upgrade:
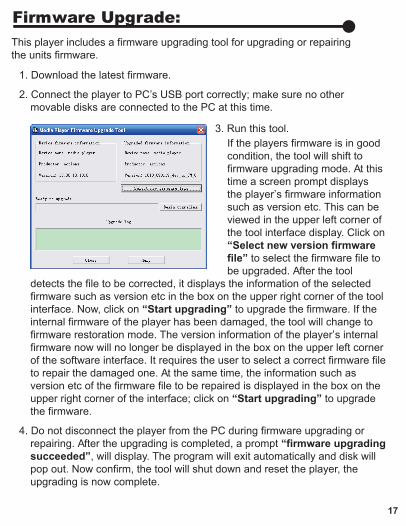
This player includes a firmware upgrading tool for upgrading or repairing the units firmware.
1. Download the latest firmware.
2. Connect the player to PC’s USB port correctly; make sure no other movable disks are connected to the PC at this time.
3. Run this tool.If the players firmware is in good condition, the tool will shift to firmware upgrading mode. At this time a screen prompt displays the player’s firmware information such as version etc. This can be viewed in the upper left corner of the tool interface display. Click on “Select new version firmware file” to select the firmware file to be upgraded. After the tool
detects the file to be corrected, it displays the information of the selected firmware such as version etc in the box on the upper right corner of the tool interface. Now, click on “Start upgrading” to upgrade the firmware. If the internal firmware of the player has been damaged, the tool will change to firmware restoration mode. The version information of the player’s internal firmware now will no longer be displayed in the box on the upper left corner of the software interface. It requires the user to select a correct firmware file to repair the damaged one. At the same time, the information such as version etc of the firmware file to be repaired is displayed in the box on the upper right corner of the interface; click on “Start upgrading” to upgrade the firmware.
4. Do not disconnect the player from the PC during firmware upgrading or repairing. After the upgrading is completed, a prompt “firmware upgrading succeeded”, will display. The program will exit automatically and disk will pop out. Now confirm, the tool will shut down and reset the player, the upgrading is now complete.
18
Features and Specifications:
FEATURES:
Music,Video,Photos & TextPlays up to 500 Songs*ID3 Support Lyrics & PlayUSB 2.0 Full Speed
SPECIFICATIONS:
Display: 1.5”Full Color TFT LCD Display,128*128Memory: 2GB FlashVideo Format: AVI,AMVVideo Conversion Software IncludedAudio Format:MP1,MP2,MP3,WMA,Sound to noise ratio:90dbPicture Fomat:JPG,BMPLCD 128*260,000colors TFT screenPreset Equalizer Modes: Rock,Pop,Classic and More!Voice Record FunctionMulti-languagesPlug & Play:Windows XP /windows MediaRechargeable Lithium BatteryOperating Voltage: 3.5-4.2v
*Song capacity is dependent upon thesize of each song file.500 songs isbased upon the assumption that eachson file will be 3.8 Mega Bytes
19
Limited Ninety (90) Day Warranty:
WARRANTY COVERAGEJazwares, Inc.’s warranty obligation is limited to the terms set forth below.
WHO IS COVEREDJazwares, Inc. warrants the product to the original purchaser or the person receivingthe product as a gift against defects in material & workmanship as based on the dateof the original purchase from an authorized dealer or retailer. The original sales receiptshowing the product name & the purchase date from an authorized retailer is consideredsuch proof.
Jazwares, Inc. warrants replacement products or parts provided under this warrantyagainst defects in materials & workmanship from the date of the replacement or repairfor ninety (90) days or for the remaining portion of the original product’s warranty, whichever provides longer coverage for you. When a product or part is exchanged, any replacement item becomes your property and the replaced item becomesJazwares, Inc. property.
Replacement can only be sent if all warranty requirements are met.Failure to follow all requirements can result in delay.
WHO IS COVEREDJazwares, Inc. warranty covers new products if a mechanical defect arises & a valid claim is received within the Ninety (90) Day Warranty Period. At its option, Jazwares, Inc. will either (1) repair the product at no charge,using new or refurbishedreplacement parts, or (2) exchange the product with a product that is new or which hasbeen manufactured from new, or serviceable used parts & is at least functionallyequivalent or most comparable to the original product in Jazwares, Inc.’s inventory, or (3) refund the original purchase price of the product.
WHAT IS NOT COVERED - EXCLUSIONS & LIMITATIONSThe limited warranty applies only to the products manufactured by or for Jazwares, Inc.that can be identified by the trademark, trade name, or logo affixed to it. This limitedwarranty does not apply to any non Jazwares, Inc. hardware product or any software, even if packaged or sold with the product. Non Jazwares, Inc. manufacturers, suppliers, or publishers may provide a separate warranty for their own products packaged with thebundled product. Jazwares, Inc. is not liable for any damage to or loss of any programs, data or other information stored on any media contained within the product, or any non - Jazwares, Inc. product or part not covered by this warranty.
20
WHAT IS NOT COVERED - EXCLUSIONS & LIMITATIONSThis warranty does not apply (a) to damage caused by accident, abuse, misuse, misapplication, or
non - Jaspers, Inc. product,(b) to damage caused by service performed by anyone other than Jaspers, Inc.(c) to a product or a part that has been modified without the written permission
of Jaspers, Inc.
LIMITED WARRANTY DOES NOT COVER• Shipping charges to return defective product to Jaspers, Inc. • Product repair and/or part replacement because of improper installation, connections
to improper voltage supply, abuse, neglect, accident, unauthorized repair or othercause not within the control of Jaspers, Inc.
• Damage or claims for products not being available for use, or for lost data orlost software.
• Damage occurring to product during shipping.• A product that requires modification or adaptation to enable it to operate in any country
other then the country for which it was designed, manufactured approved and/or authorized,or repair of products damaged by these modifications.
• Product lost in shipment and no signature verification receipt can be provided.• Failure to operate per Owner’s Manual.
BEFORE RETURNING ANY PRODUCT, CONTACT JAZWARES, INC. CUSTOMER SERVICE.Customer service is available 9-6 EST at 1-800-370-1877.REPAIR OR REPLACEMENT AS PROVIDED UNDER THIS WARRANTY IS THE EXCLUSIVEREMEDY FOR THE CONSUMER. JAZWARES, INC. SHALL NOT BE LIABLE FOR ANY INCIDENTALOR CONSEQUENTIAL DAMAGES FOR BREACH OF ANY EXPRESS OR IMPLIED WARRANTYON THIS PRODUCT. EXCEPT TO THE EXTENT PROHIBITED BY APPLICABLE LAW, ANY IMPLIEDWARRANTY OF MERCHANTABILITY OR FITNESS FOR A PARTICULAR PURPOSE ON THIS PRODUCTIS LIMITED IN DURATION TO THE DURATION OF THIS WARRANTY.
Some states do not allow exclusions or limitation of incidental or consequential damages, or allowlimitations on how long an implied warranty lasts, so the above limitations or exclusions may not apply to you
This warranty gives you specific legal rights. You may have other rights which vary from state to state.
© Jazwares, Inc.
Limited Ninety (90) Day Warranty:
21
Notes:
This equipment has been tested and found to comply with the limits fora Class B digital device,pursuant to Part 15 of the FCC rules.
These limits are designed to provide reasonable protection againstharmful interference in a frequency energy and,if not installed and usedin accordance with the instructions,may cause harmful interference to radio communications.
However,there is no guarantee that interference will not occur in aparticular installation. If this equipment does cause harmful interferenceto radio or television reception,which can be determined by switching theequipment off and on,the user is encouraged to try to correct theinterference by one or more of the following measures:Reorient or relocate the receiving antenna.
Increase the separation between the equipment and receiver.Connect the equipment into an outlet on a circuit different fromthat to which the receiver is connected.Consult the dealer or an experience radio/TV technician for help.

22USER GUIDE
MP4 Player
© Jazwares, Inc. 2011
Jazwares Inc.1067 Shotgun RoadSunrise, Fl. 33326


![USER MANUAL The MP4 player is a new generation …static.highspeedbackbone.net/pdf/pzx-32[1].pdf1 USER MANUAL The MP4 player is a new generation of digital portable device, supporting](https://img.pdfslide.net/doc/110x75/5e2fe67b662e7b5836475a95/user-manual-the-mp4-player-is-a-new-generation-1pdf-1-user-manual-the-mp4-player.jpg)


![MP4 User Manual [1]](https://img.pdfslide.net/doc/110x75/54367e99219acdda5f8b50c2/mp4-user-manual-1.jpg)