Embed Size (px)
Citation preview

1/29
www.embedinfo.com/en
WinCE User Manual
1. Build the Windows CE 6.0 development platform
1.1 Install Visual Studio 2005
1) Insert Visual Studio 2005 CD (We don’t provide Visual Studio 2005 CD, require the user to obtain their own), find setup.exe or vs_setup.msi, double it, then it will show the dialog as follows: Note: You can download Visual Studio 2005 and Windows CE 6.0 from the Microsoft’s website:
http://www.microsoft.com/windowsembedded/en-us/products/windowsce/getting-started.mspx
2) Click Install Visual Studio 2005, it will show:
2/29
www.embedinfo.com/en
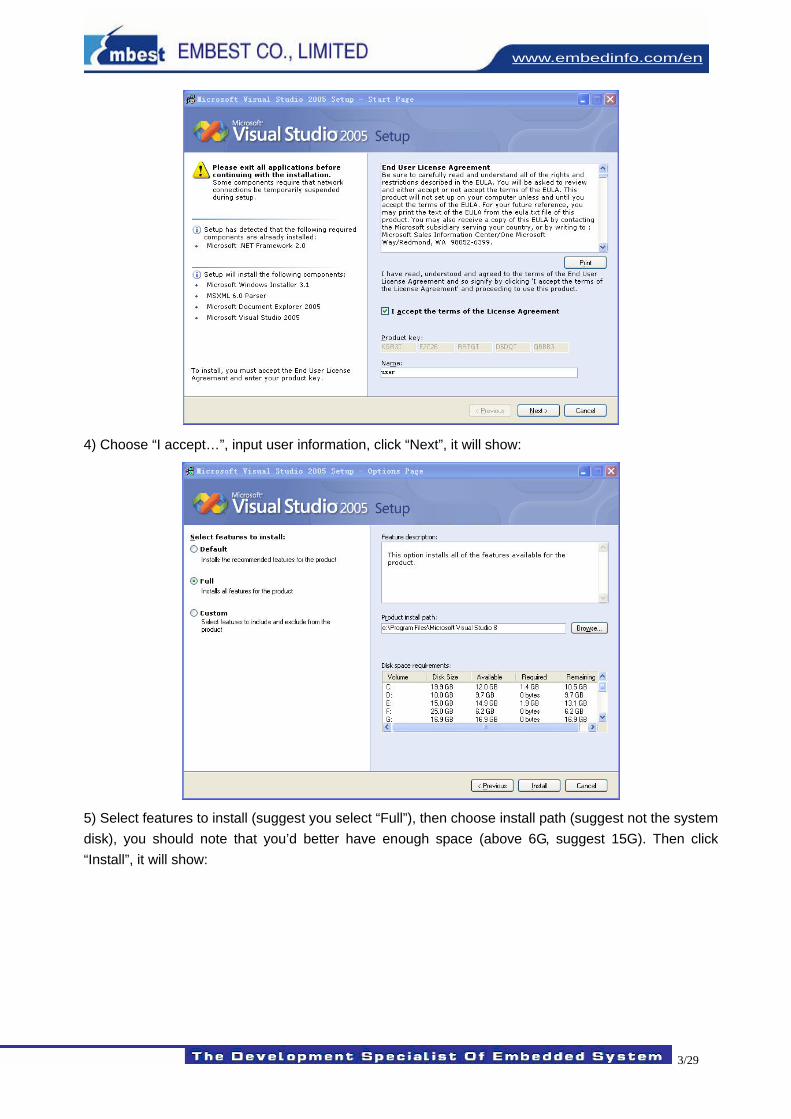
3) click “Next”, it will show:
3/29
www.embedinfo.com/en
4) Choose “I accept…”, input user information, click “Next”, it will show:
5) Select features to install (suggest you select “Full”), then choose install path (suggest not the system disk), you should note that you’d better have enough space (above 6G, suggest 15G). Then click “Install”, it will show:
4/29
www.embedinfo.com/en
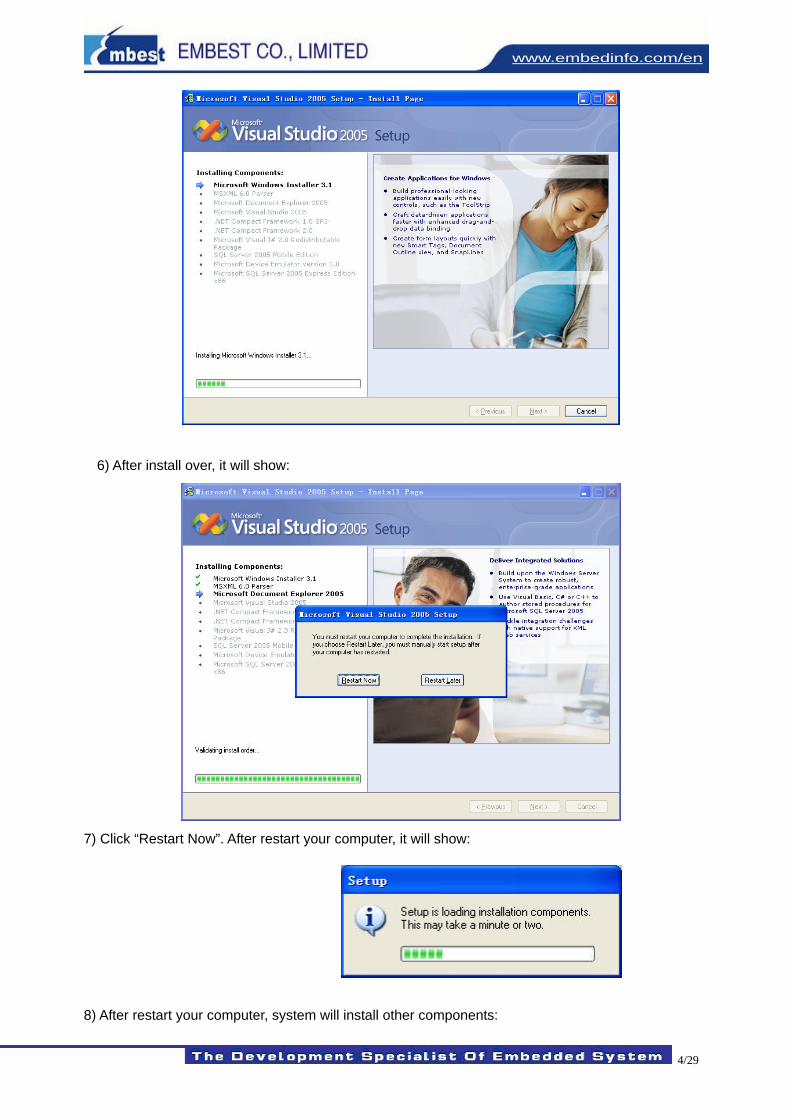
6) After install over, it will show:
7) Click “Restart Now”. After restart your computer, it will show:
8) After restart your computer, system will install other components:

5/29
www.embedinfo.com/en
9) It will last a long time, it will finish the install and show:
1.2 Install Windows CE 6.0
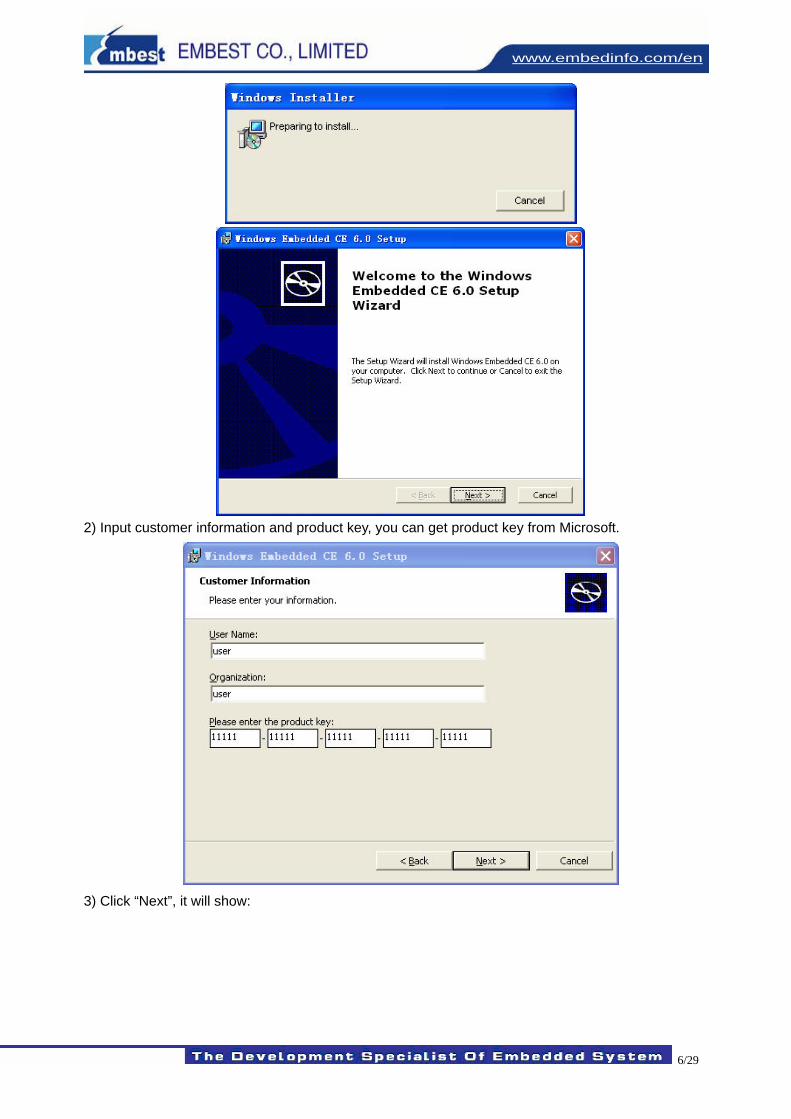
1) After install VS2005, you should install Windows CE 6.0 (We don’t provide Windows CE 6.0 CD, require the user to obtain their own), insert Windows CE 6.0 CD, find Windows Embedded CE 6.0.msi file, and double click it:
6/29
www.embedinfo.com/en
2) Input customer information and product key, you can get product key from Microsoft.
3) Click “Next”, it will show:
7/29
www.embedinfo.com/en
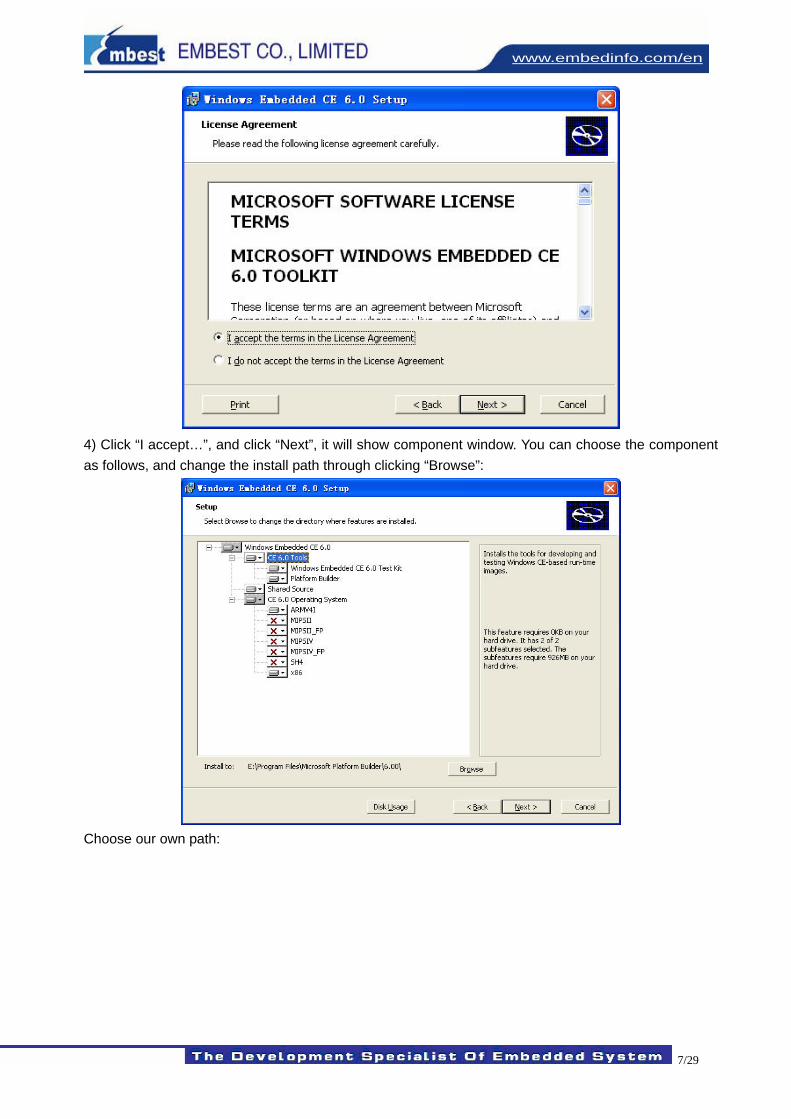
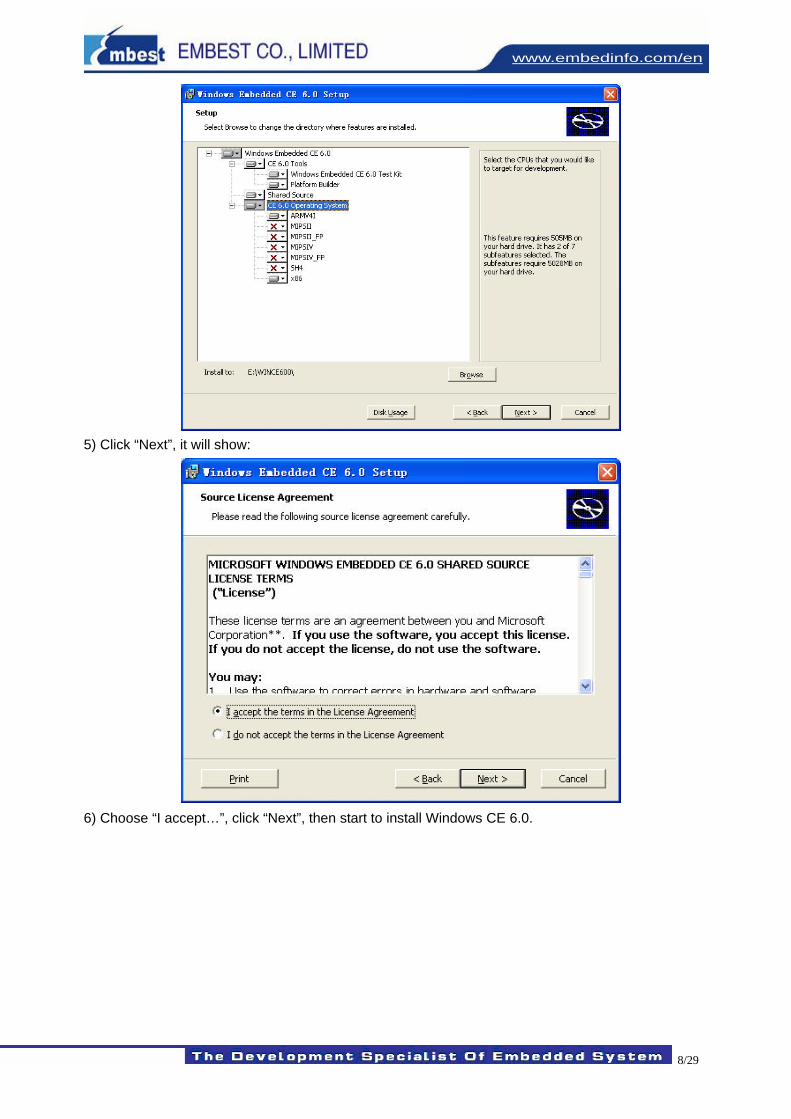
4) Click “I accept…”, and click “Next”, it will show component window. You can choose the component as follows, and change the install path through clicking “Browse”:
Choose our own path:
8/29
www.embedinfo.com/en
5) Click “Next”, it will show:
6) Choose “I accept…”, click “Next”, then start to install Windows CE 6.0.
9/29
www.embedinfo.com/en
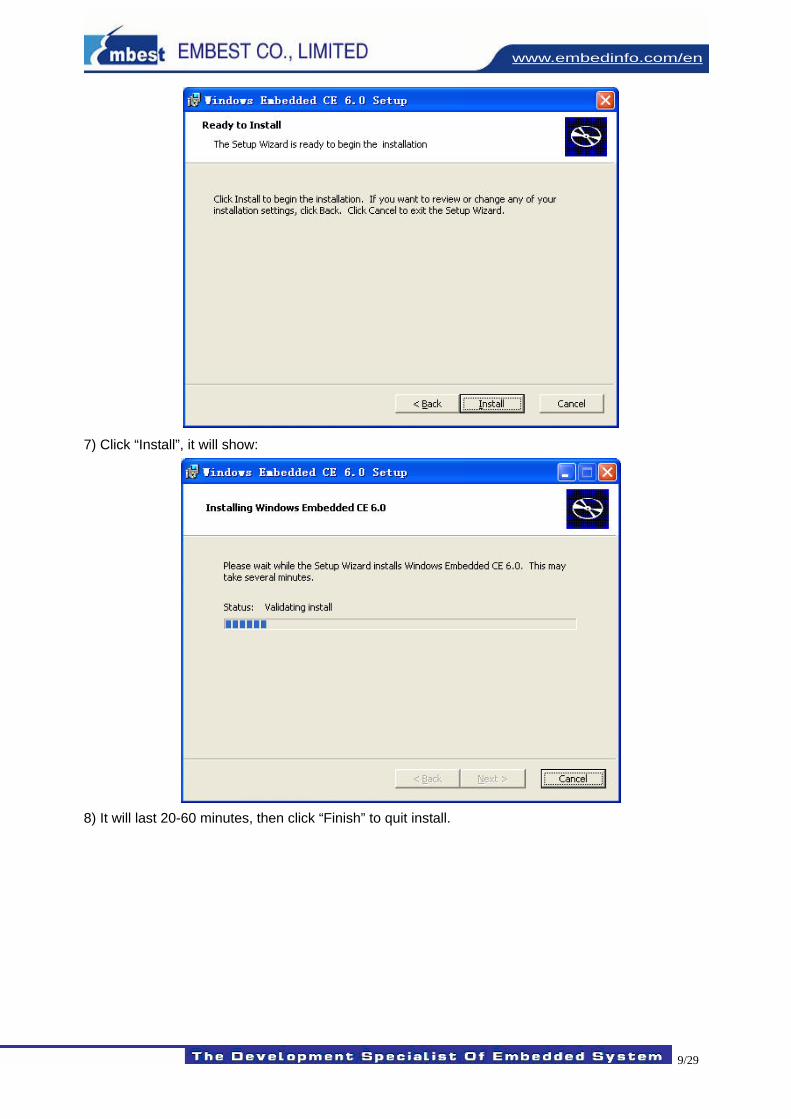
7) Click “Install”, it will show:
8) It will last 20-60 minutes, then click “Finish” to quit install.
10/29
www.embedinfo.com/en
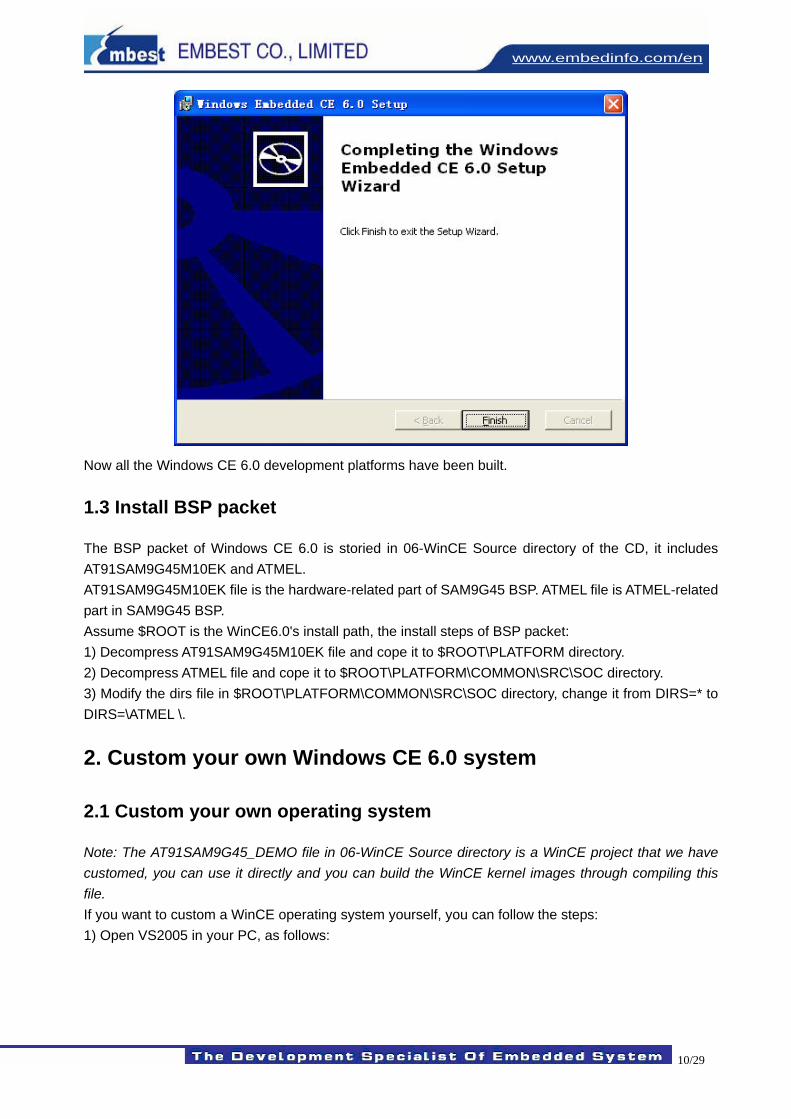
Now all the Windows CE 6.0 development platforms have been built.
1.3 Install BSP packet
The BSP packet of Windows CE 6.0 is storied in 06-WinCE Source directory of the CD, it includes AT91SAM9G45M10EK and ATMEL. AT91SAM9G45M10EK file is the hardware-related part of SAM9G45 BSP. ATMEL file is ATMEL-related part in SAM9G45 BSP. Assume $ROOT is the WinCE6.0's install path, the install steps of BSP packet: 1) Decompress AT91SAM9G45M10EK file and cope it to $ROOT\PLATFORM directory. 2) Decompress ATMEL file and cope it to $ROOT\PLATFORM\COMMON\SRC\SOC directory. 3) Modify the dirs file in $ROOT\PLATFORM\COMMON\SRC\SOC directory, change it from DIRS=* to DIRS=\ATMEL \.
2. Custom your own Windows CE 6.0 system
2.1 Custom your own operating system
Note: The AT91SAM9G45_DEMO file in 06-WinCE Source directory is a WinCE project that we have customed, you can use it directly and you can build the WinCE kernel images through compiling this file. If you want to custom a WinCE operating system yourself, you can follow the steps: 1) Open VS2005 in your PC, as follows:
11/29
www.embedinfo.com/en
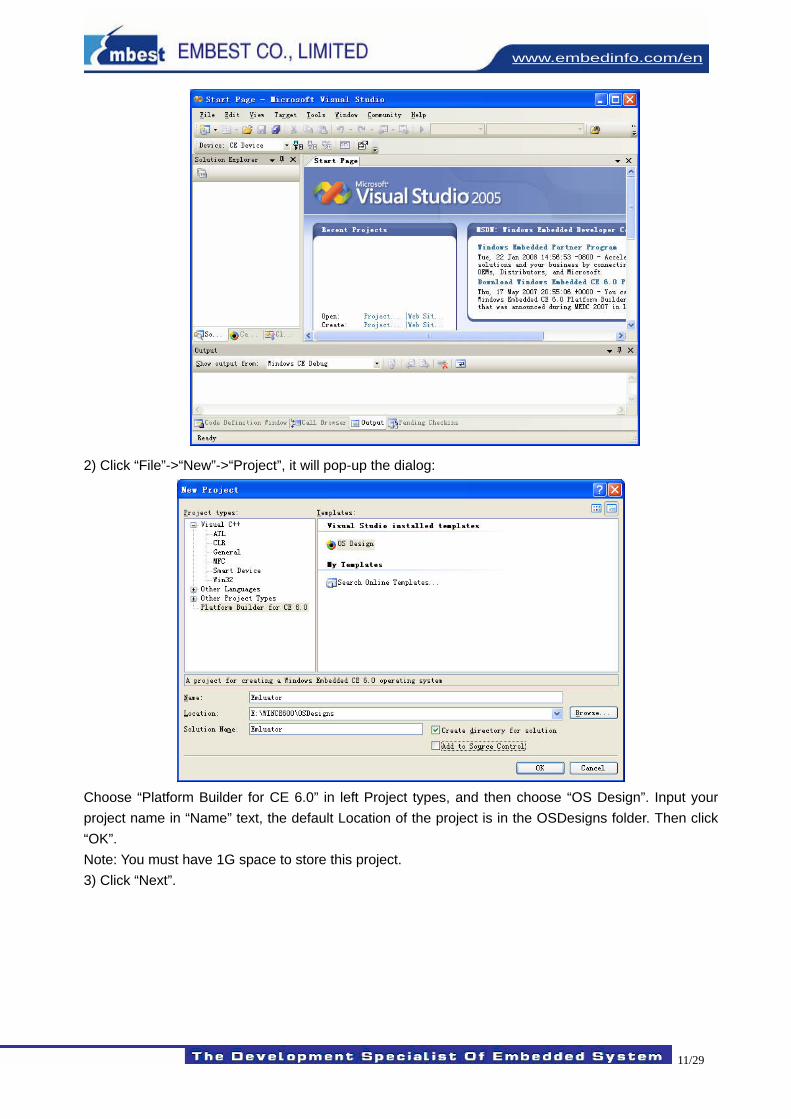
2) Click “File”->“New”->“Project”, it will pop-up the dialog:
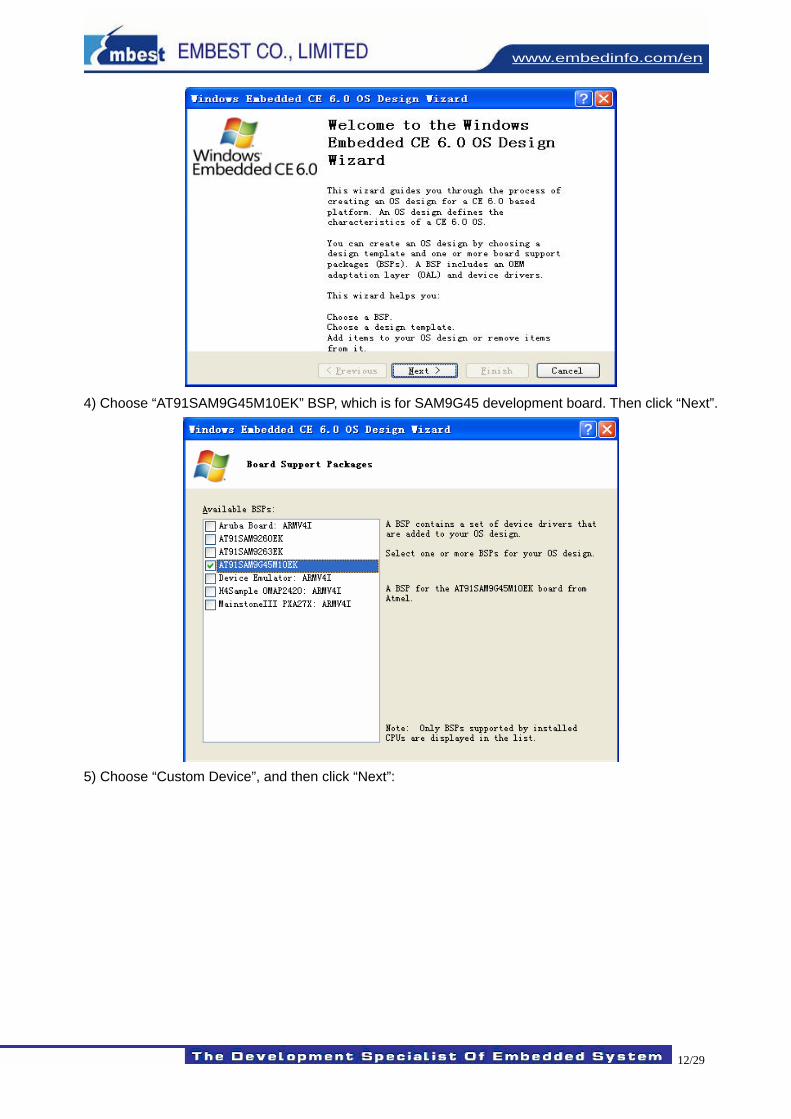
Choose “Platform Builder for CE 6.0” in left Project types, and then choose “OS Design”. Input your project name in “Name” text, the default Location of the project is in the OSDesigns folder. Then click “OK”. Note: You must have 1G space to store this project. 3) Click “Next”.
12/29
www.embedinfo.com/en
4) Choose “AT91SAM9G45M10EK” BSP, which is for SAM9G45 development board. Then click “Next”.
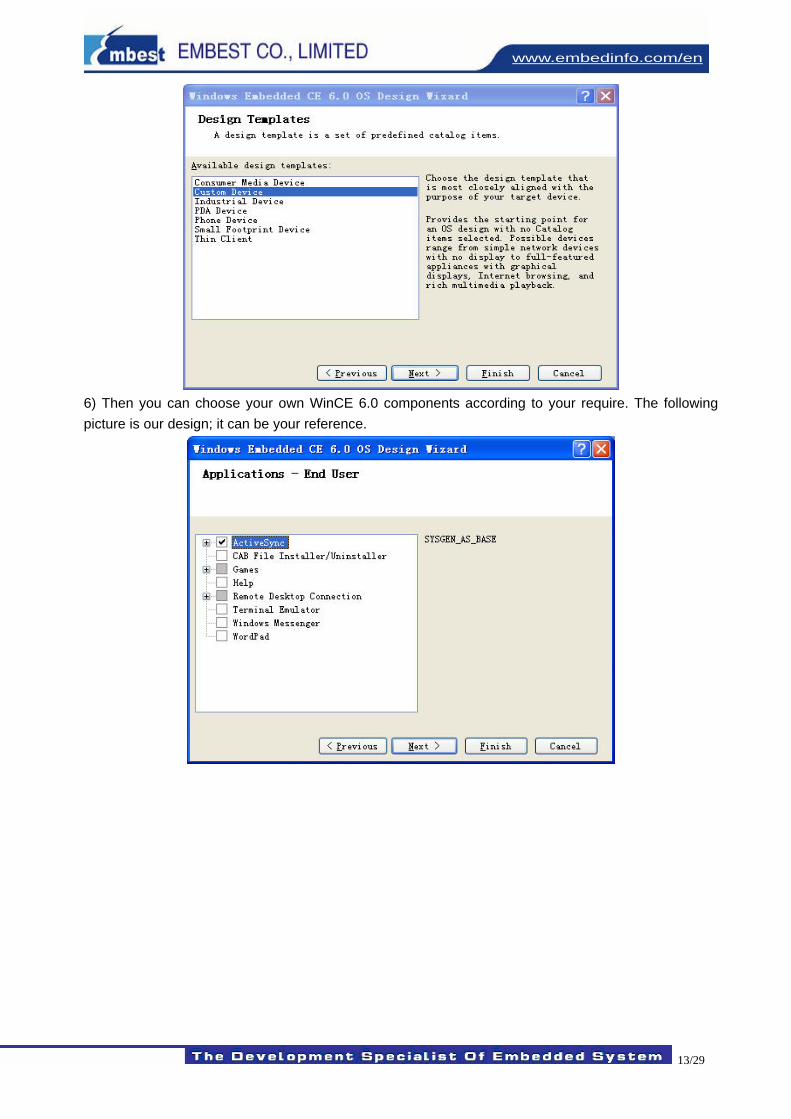
5) Choose “Custom Device”, and then click “Next”:
13/29
www.embedinfo.com/en
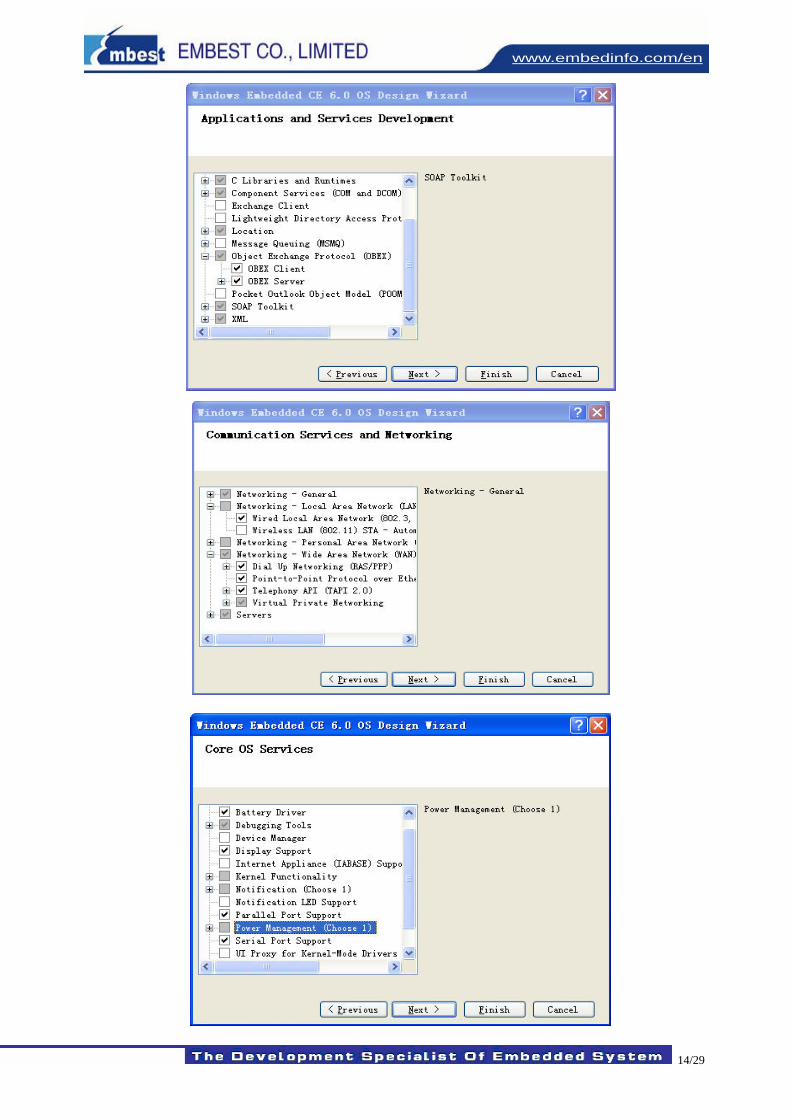
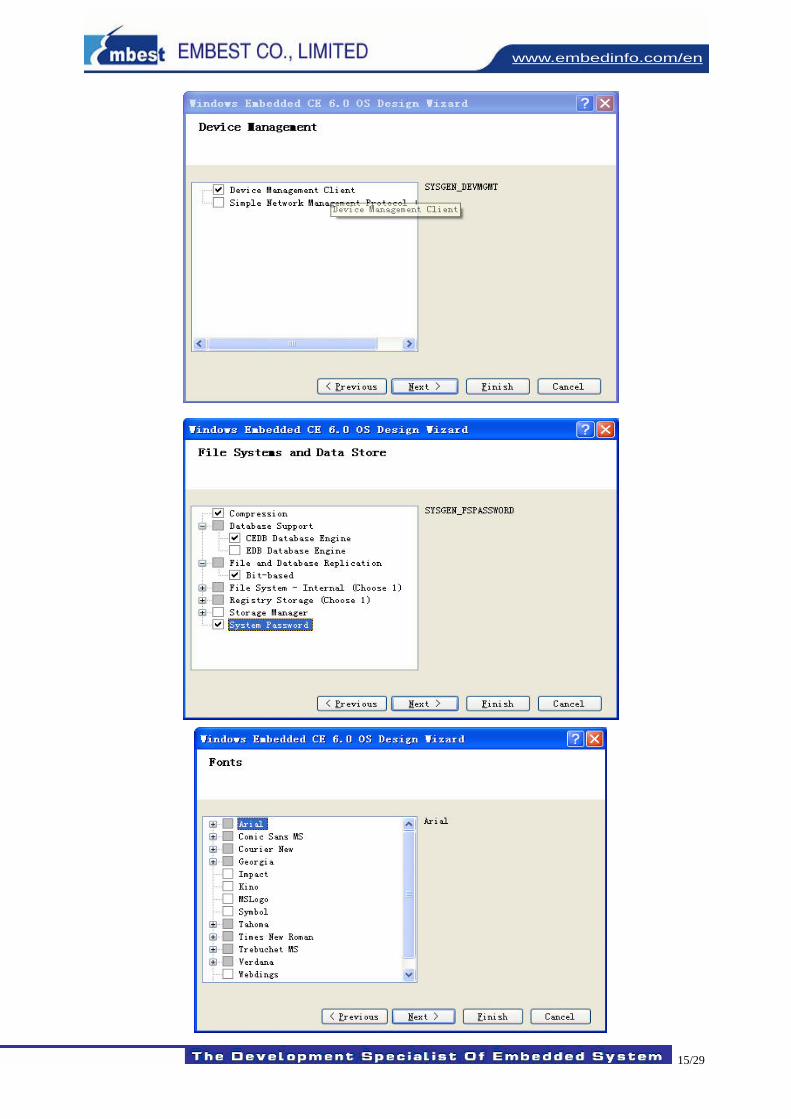
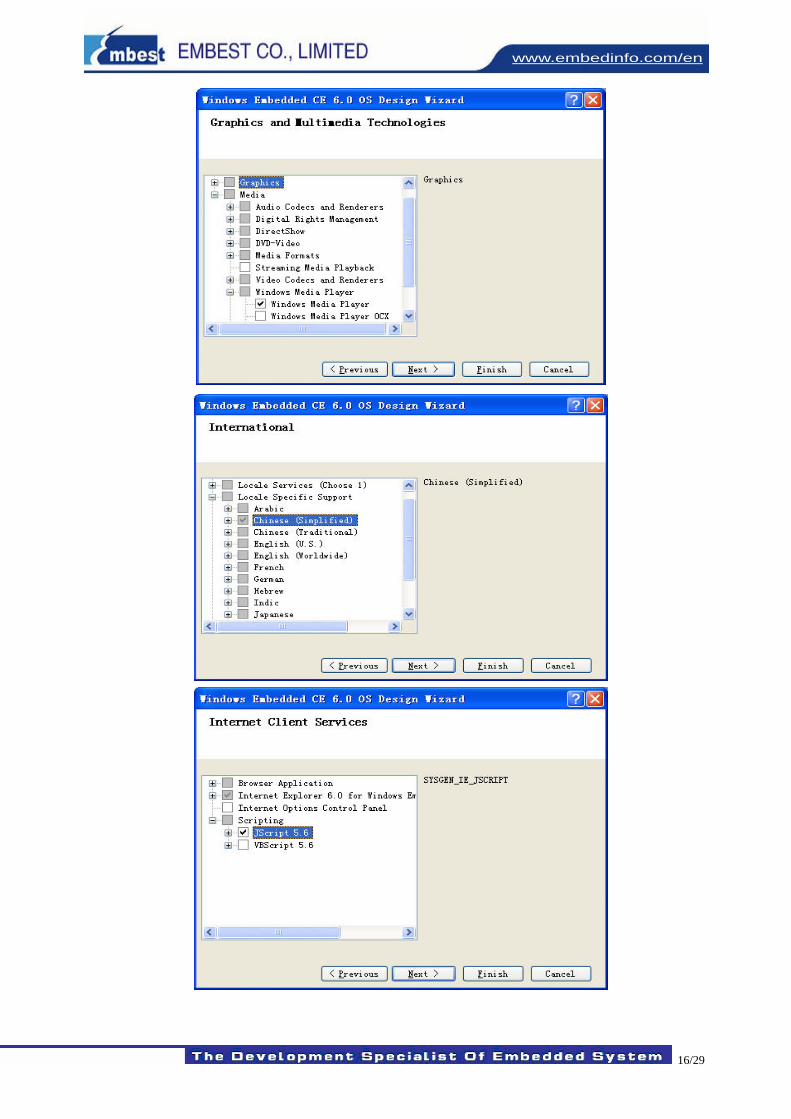
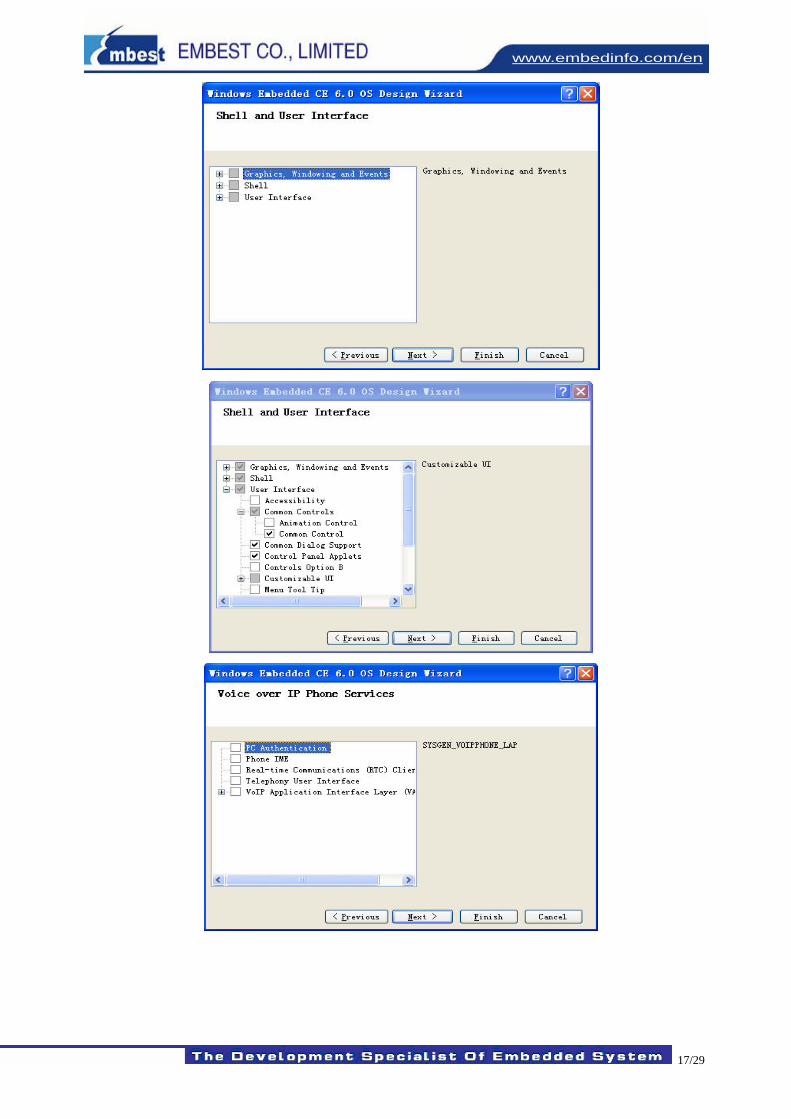
6) Then you can choose your own WinCE 6.0 components according to your require. The following picture is our design; it can be your reference.
14/29
www.embedinfo.com/en
15/29
www.embedinfo.com/en
16/29
www.embedinfo.com/en
17/29
www.embedinfo.com/en
18/29
www.embedinfo.com/en
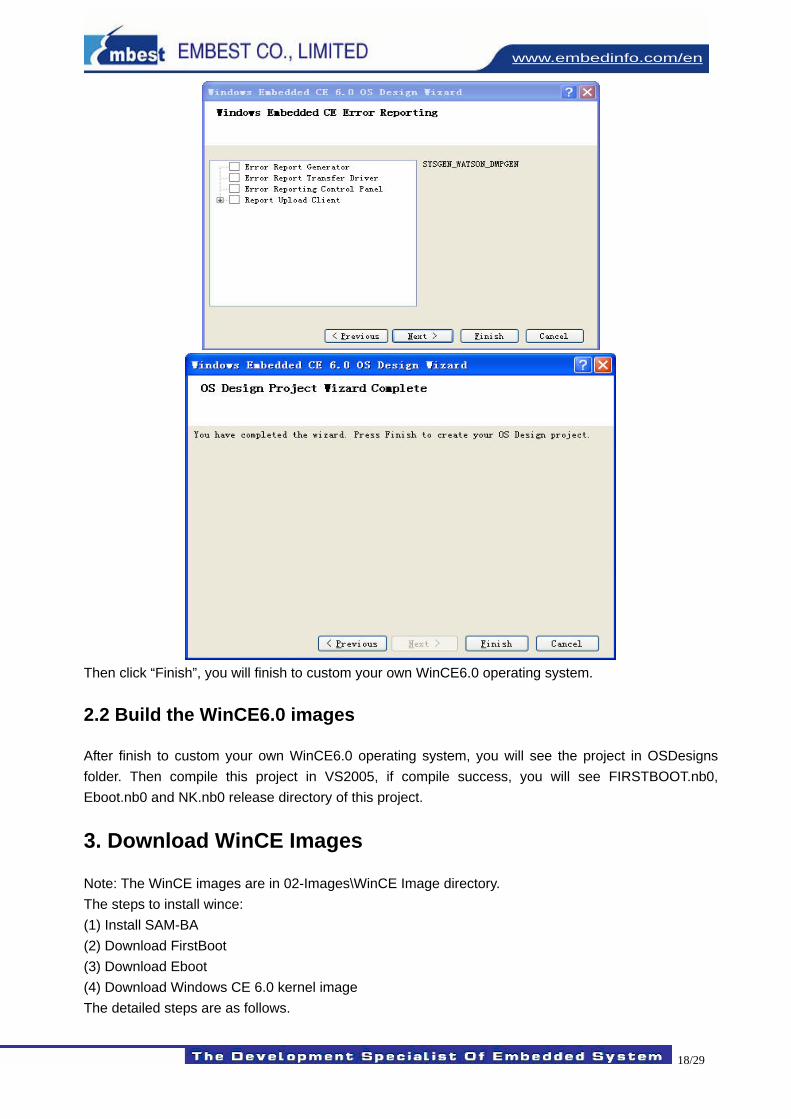
Then click “Finish”, you will finish to custom your own WinCE6.0 operating system.
2.2 Build the WinCE6.0 images
After finish to custom your own WinCE6.0 operating system, you will see the project in OSDesigns folder. Then compile this project in VS2005, if compile success, you will see FIRSTBOOT.nb0, Eboot.nb0 and NK.nb0 release directory of this project.
3. Download WinCE Images
Note: The WinCE images are in 02-Images\WinCE Image directory. The steps to install wince: (1) Install SAM-BA (2) Download FirstBoot (3) Download Eboot (4) Download Windows CE 6.0 kernel image The detailed steps are as follows.
19/29
www.embedinfo.com/en
3.1 Install SAM-BA
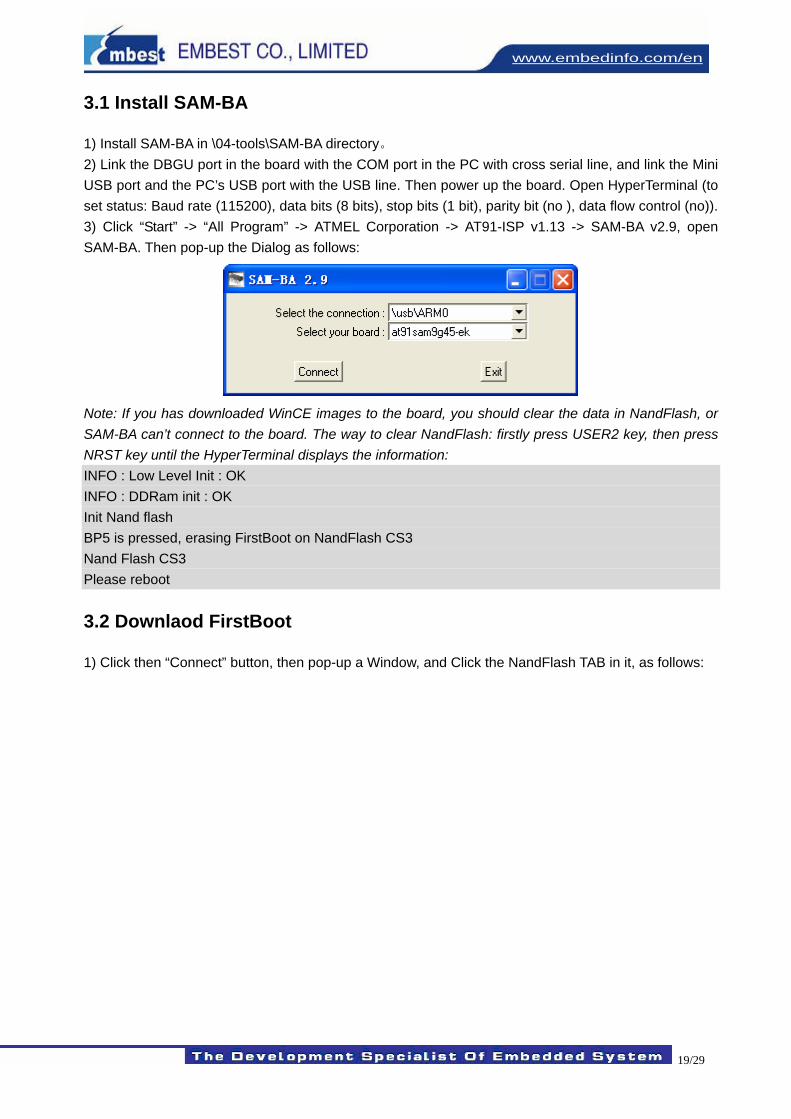
1) Install SAM-BA in \04-tools\SAM-BA directory。 2) Link the DBGU port in the board with the COM port in the PC with cross serial line, and link the Mini USB port and the PC’s USB port with the USB line. Then power up the board. Open HyperTerminal (to set status: Baud rate (115200), data bits (8 bits), stop bits (1 bit), parity bit (no ), data flow control (no)). 3) Click “Start” -> “All Program” -> ATMEL Corporation -> AT91-ISP v1.13 -> SAM-BA v2.9, open SAM-BA. Then pop-up the Dialog as follows:
Note: If you has downloaded WinCE images to the board, you should clear the data in NandFlash, or SAM-BA can’t connect to the board. The way to clear NandFlash: firstly press USER2 key, then press NRST key until the HyperTerminal displays the information: INFO : Low Level Init : OK INFO : DDRam init : OK Init Nand flash BP5 is pressed, erasing FirstBoot on NandFlash CS3 Nand Flash CS3 Please reboot
3.2 Downlaod FirstBoot
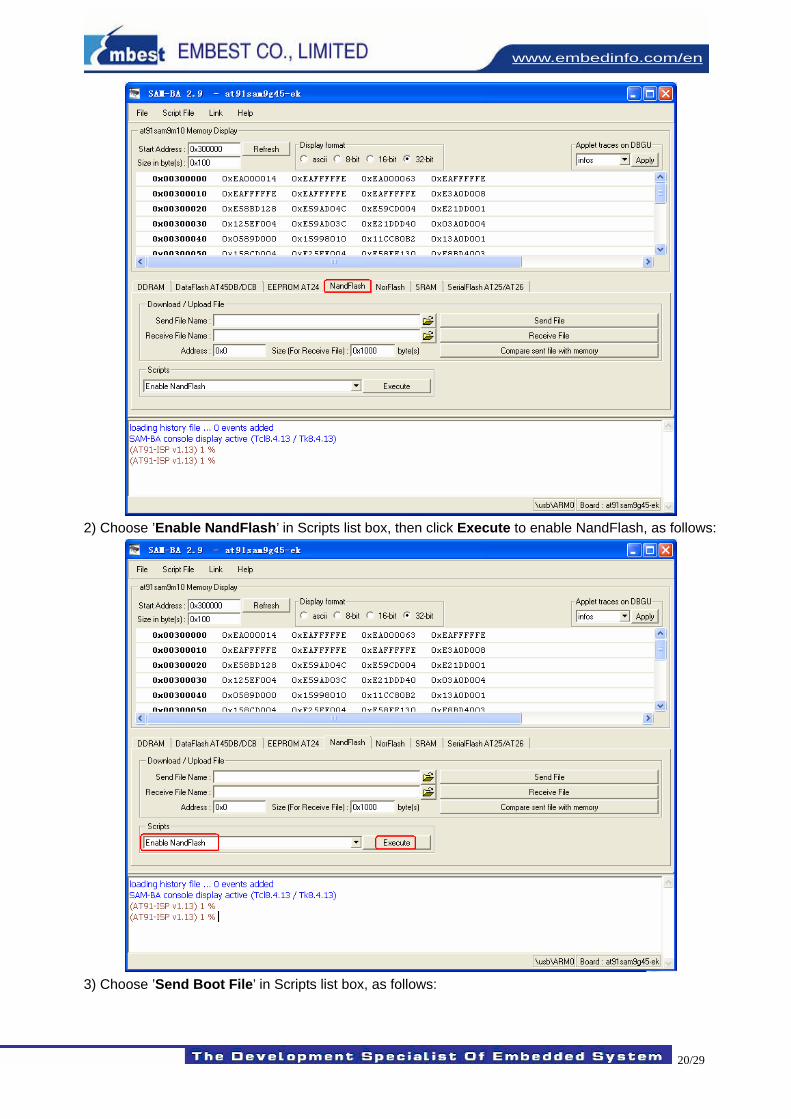
1) Click then “Connect” button, then pop-up a Window, and Click the NandFlash TAB in it, as follows:
20/29
www.embedinfo.com/en
2) Choose ’Enable NandFlash’ in Scripts list box, then click Execute to enable NandFlash, as follows:
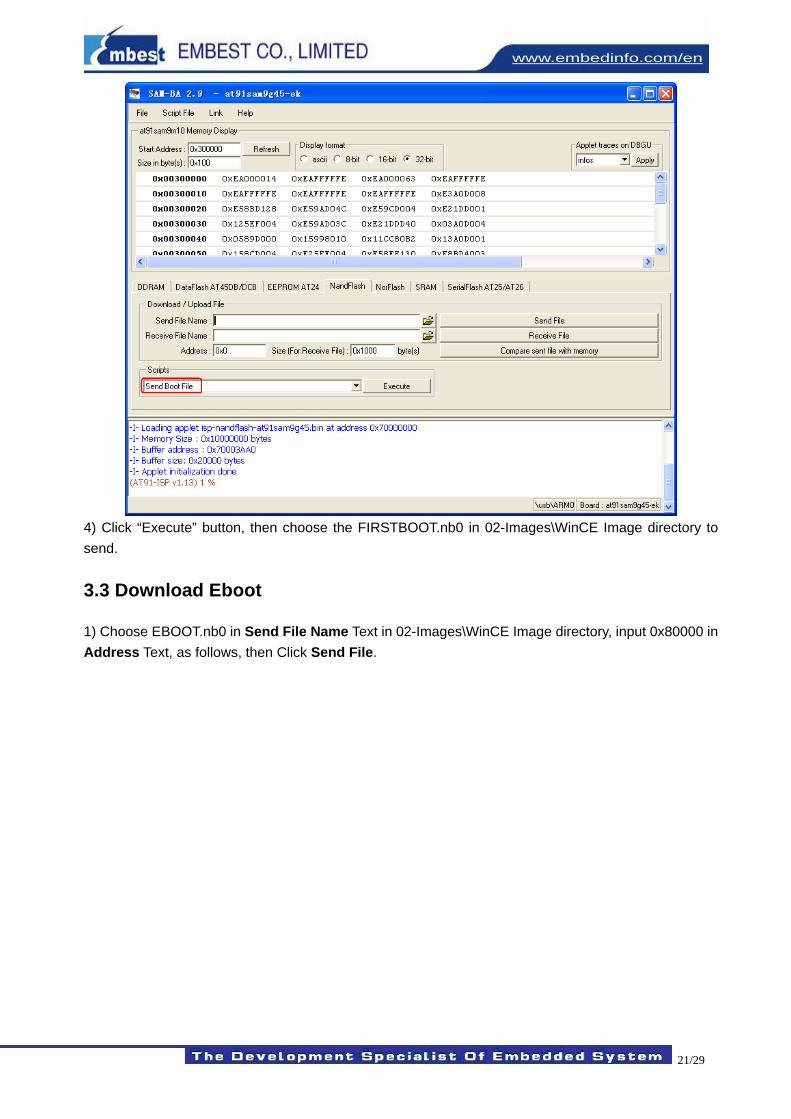
3) Choose ’Send Boot File’ in Scripts list box, as follows:
21/29
www.embedinfo.com/en
4) Click “Execute” button, then choose the FIRSTBOOT.nb0 in 02-Images\WinCE Image directory to send.
3.3 Download Eboot
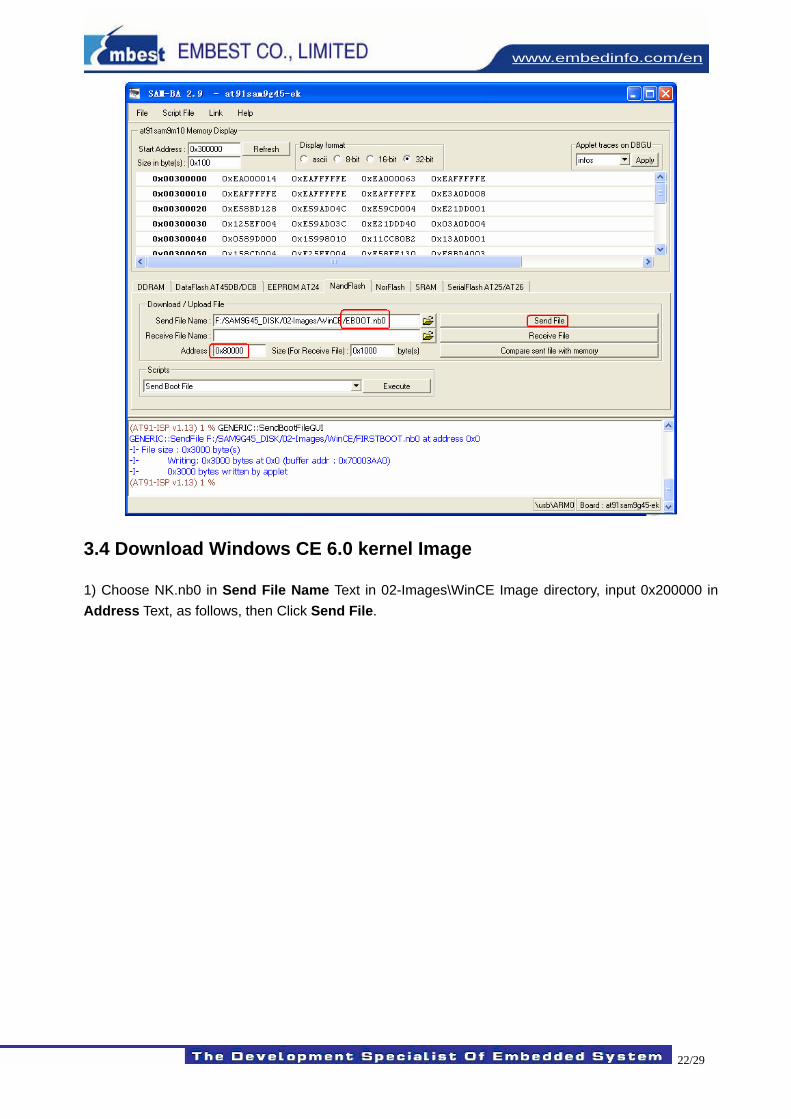
1) Choose EBOOT.nb0 in Send File Name Text in 02-Images\WinCE Image directory, input 0x80000 in Address Text, as follows, then Click Send File.
22/29
www.embedinfo.com/en
3.4 Download Windows CE 6.0 kernel Image
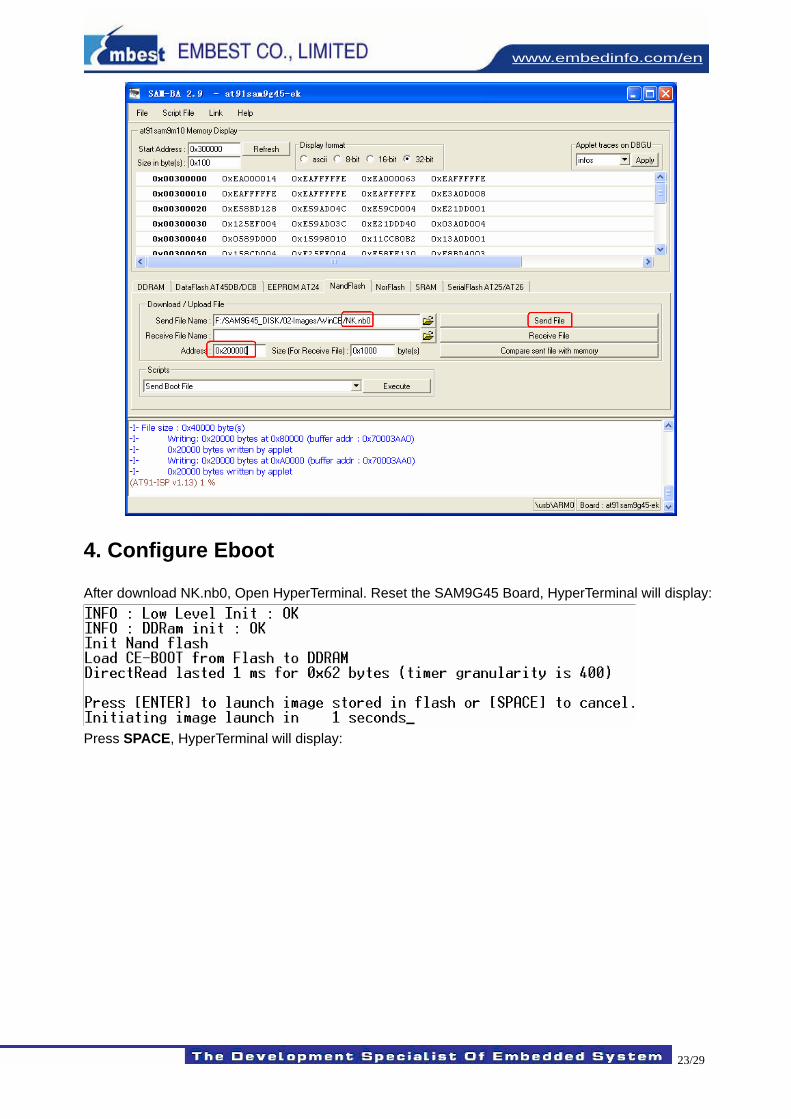
1) Choose NK.nb0 in Send File Name Text in 02-Images\WinCE Image directory, input 0x200000 in Address Text, as follows, then Click Send File.
23/29
www.embedinfo.com/en
4. Configure Eboot
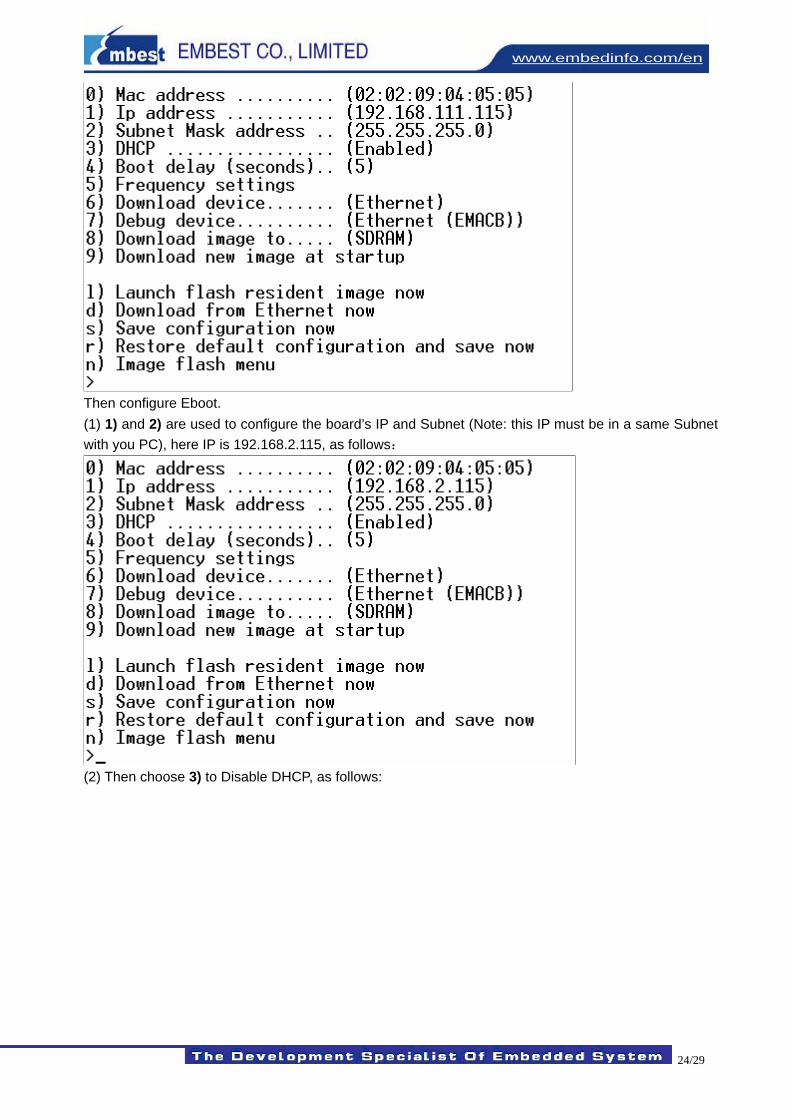
After download NK.nb0, Open HyperTerminal. Reset the SAM9G45 Board, HyperTerminal will display:
Press SPACE, HyperTerminal will display:
24/29
www.embedinfo.com/en
Then configure Eboot. (1) 1) and 2) are used to configure the board’s IP and Subnet (Note: this IP must be in a same Subnet with you PC), here IP is 192.168.2.115, as follows:
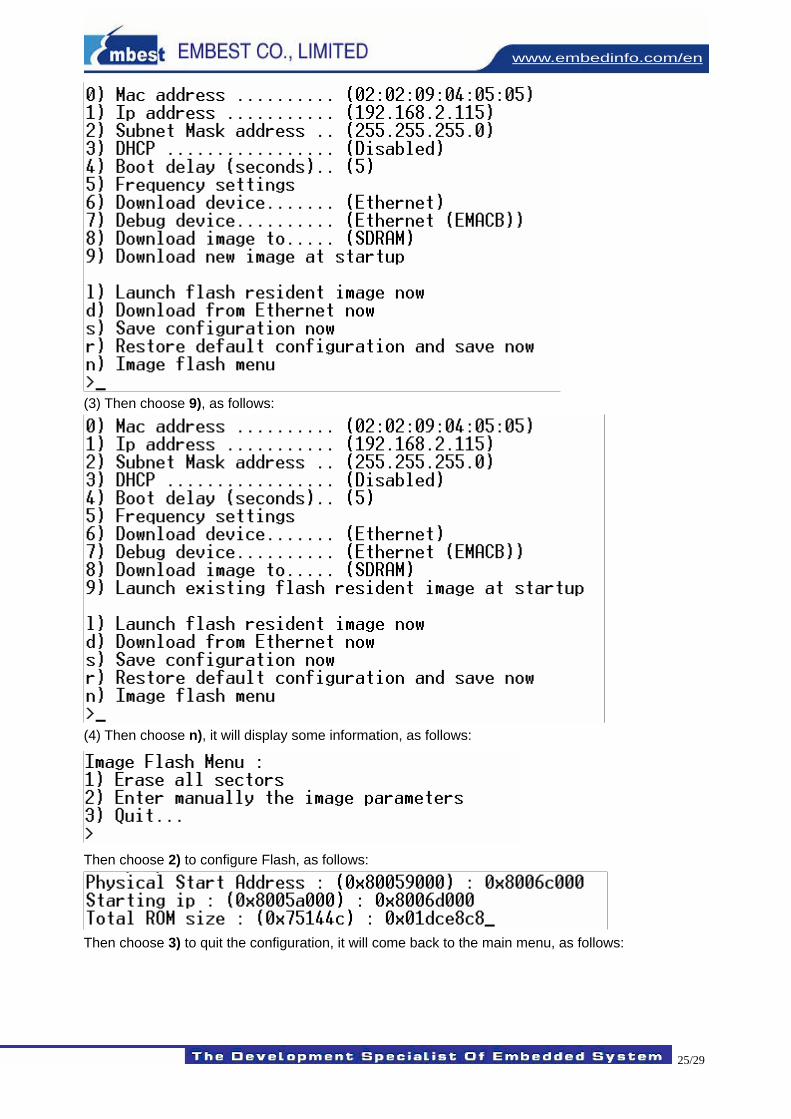
(2) Then choose 3) to Disable DHCP, as follows:
25/29
www.embedinfo.com/en
(3) Then choose 9), as follows:
(4) Then choose n), it will display some information, as follows:
Then choose 2) to configure Flash, as follows:
Then choose 3) to quit the configuration, it will come back to the main menu, as follows:
26/29
www.embedinfo.com/en
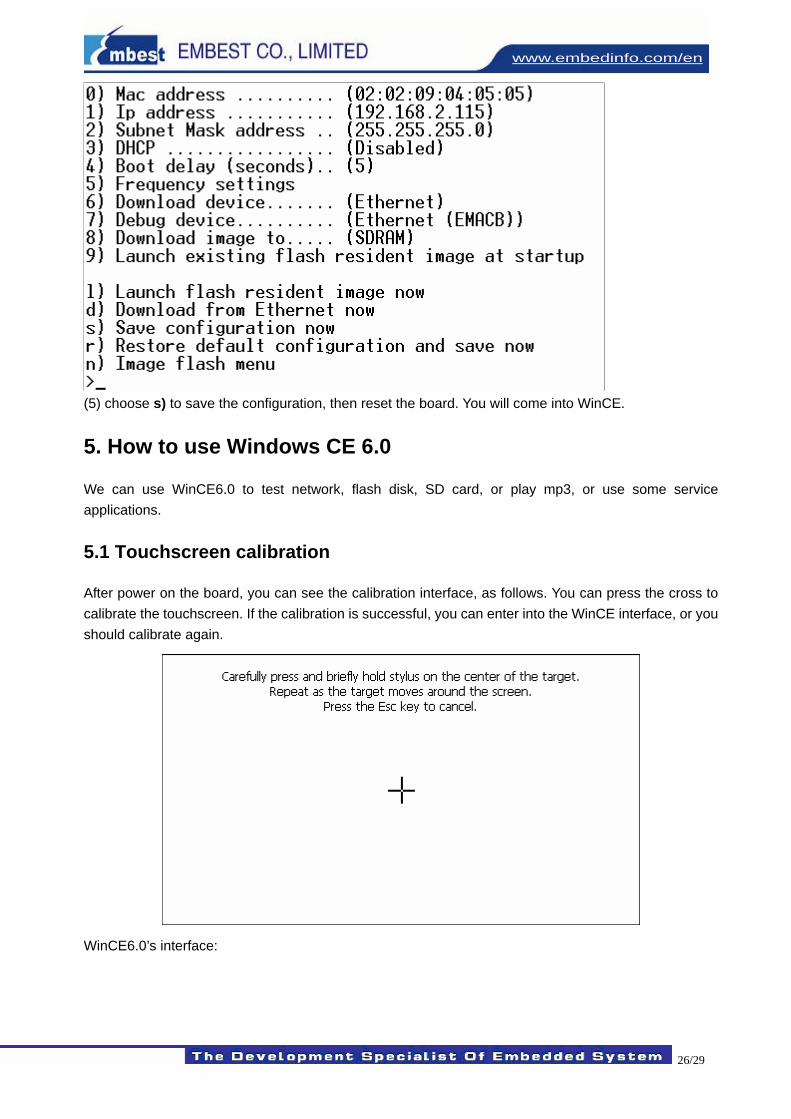
(5) choose s) to save the configuration, then reset the board. You will come into WinCE.
5. How to use Windows CE 6.0
We can use WinCE6.0 to test network, flash disk, SD card, or play mp3, or use some service applications.
5.1 Touchscreen calibration
After power on the board, you can see the calibration interface, as follows. You can press the cross to calibrate the touchscreen. If the calibration is successful, you can enter into the WinCE interface, or you should calibrate again.
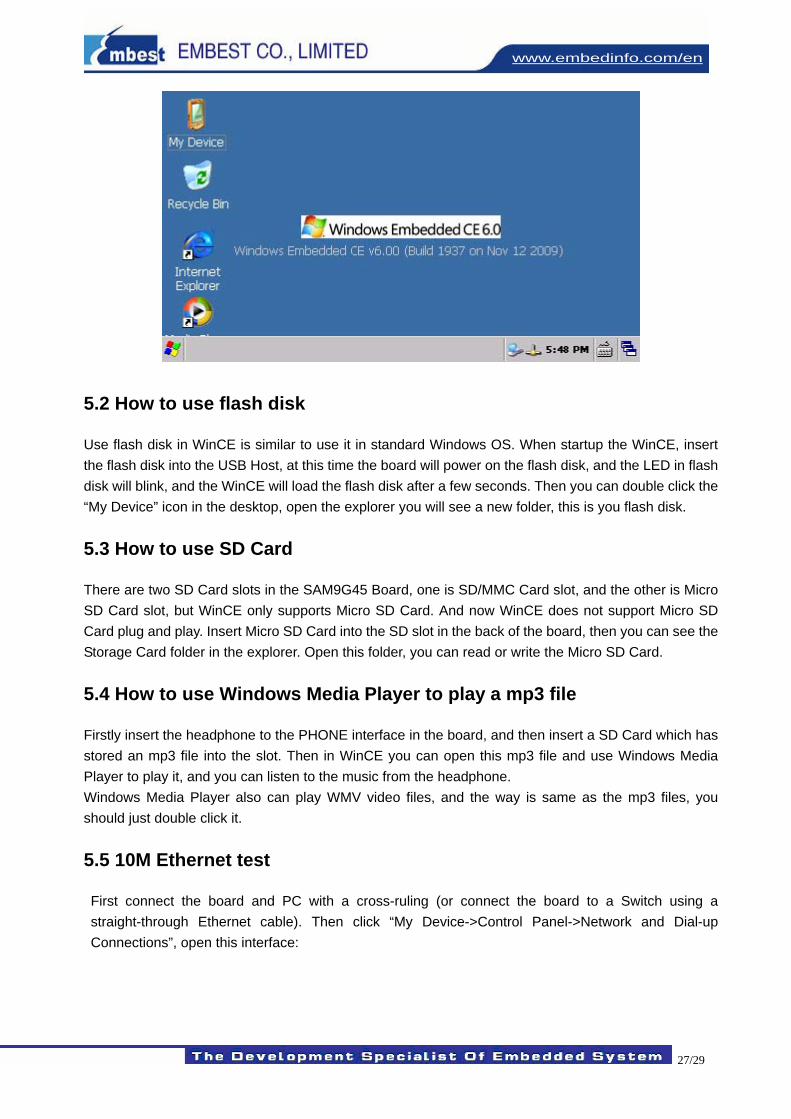
WinCE6.0’s interface:
27/29
www.embedinfo.com/en
5.2 How to use flash disk
Use flash disk in WinCE is similar to use it in standard Windows OS. When startup the WinCE, insert the flash disk into the USB Host, at this time the board will power on the flash disk, and the LED in flash disk will blink, and the WinCE will load the flash disk after a few seconds. Then you can double click the “My Device” icon in the desktop, open the explorer you will see a new folder, this is you flash disk.
5.3 How to use SD Card
There are two SD Card slots in the SAM9G45 Board, one is SD/MMC Card slot, and the other is Micro SD Card slot, but WinCE only supports Micro SD Card. And now WinCE does not support Micro SD Card plug and play. Insert Micro SD Card into the SD slot in the back of the board, then you can see the Storage Card folder in the explorer. Open this folder, you can read or write the Micro SD Card.
5.4 How to use Windows Media Player to play a mp3 file
Firstly insert the headphone to the PHONE interface in the board, and then insert a SD Card which has stored an mp3 file into the slot. Then in WinCE you can open this mp3 file and use Windows Media Player to play it, and you can listen to the music from the headphone. Windows Media Player also can play WMV video files, and the way is same as the mp3 files, you should just double click it.
5.5 10M Ethernet test
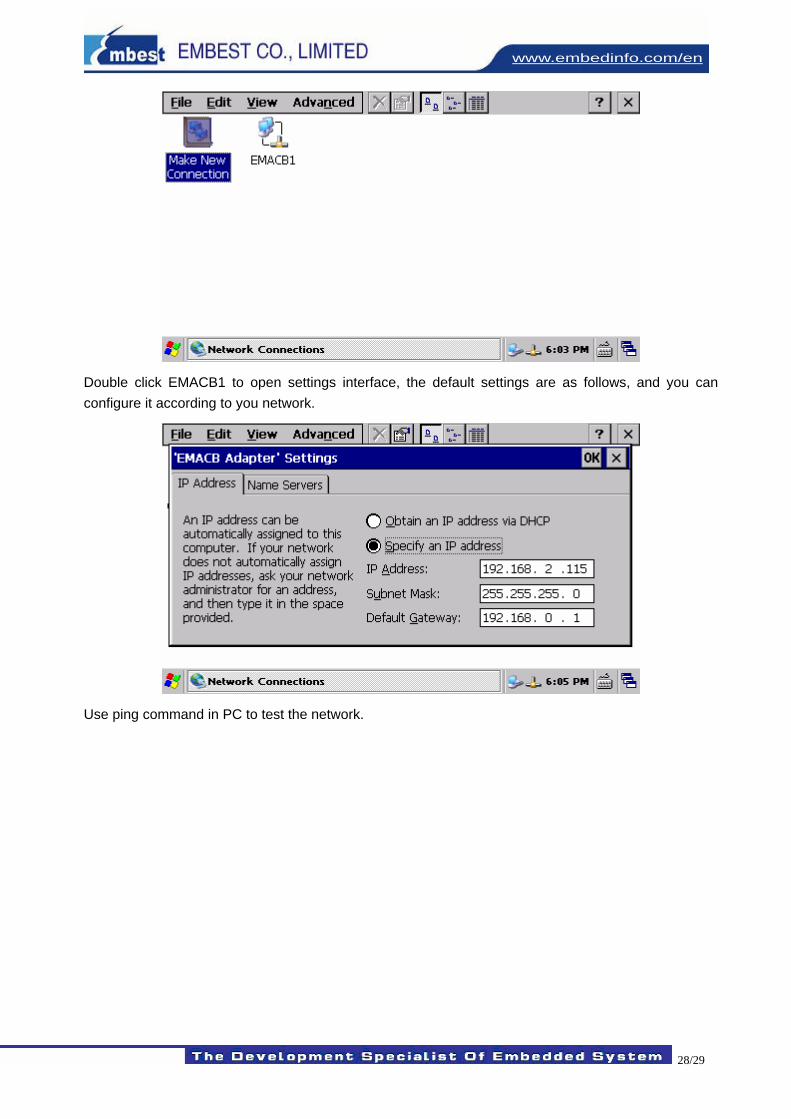
First connect the board and PC with a cross-ruling (or connect the board to a Switch using a straight-through Ethernet cable). Then click “My Device->Control Panel->Network and Dial-up Connections”, open this interface:
28/29
www.embedinfo.com/en
Double click EMACB1 to open settings interface, the default settings are as follows, and you can configure it according to you network.
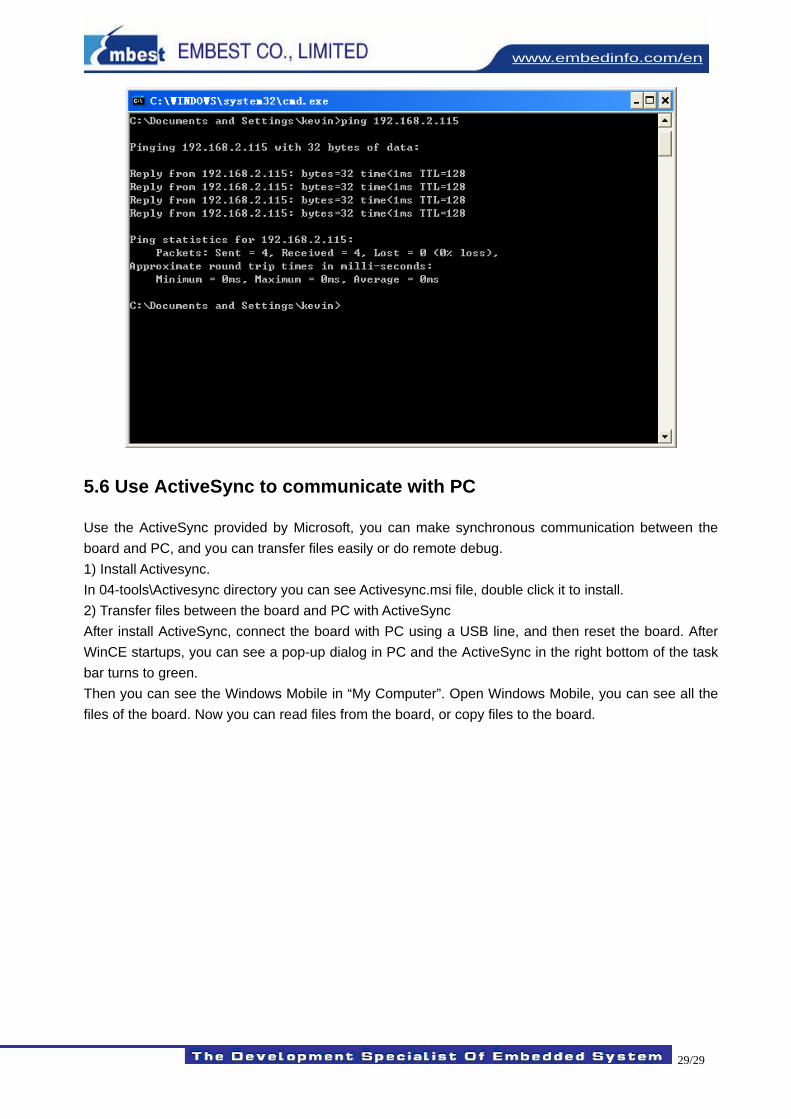
Use ping command in PC to test the network.
29/29
www.embedinfo.com/en
5.6 Use ActiveSync to communicate with PC
Use the ActiveSync provided by Microsoft, you can make synchronous communication between the board and PC, and you can transfer files easily or do remote debug. 1) Install Activesync. In 04-tools\Activesync directory you can see Activesync.msi file, double click it to install. 2) Transfer files between the board and PC with ActiveSync After install ActiveSync, connect the board with PC using a USB line, and then reset the board. After WinCE startups, you can see a pop-up dialog in PC and the ActiveSync in the right bottom of the task bar turns to green. Then you can see the Windows Mobile in “My Computer”. Open Windows Mobile, you can see all the files of the board. Now you can read files from the board, or copy files to the board.