Embed Size (px)
Citation preview
A product of a PHYTEC Technology Holding company
Yocto
Reference Manual
Document No.: L-813e_4
Release No.: phyCORE-AM335x R2 PD16.1.x
Yocto 2.0.2
Edition: June 2016
Yocto Reference Manual
© PHYTEC Messtechnik GmbH 2016 L-813e_4
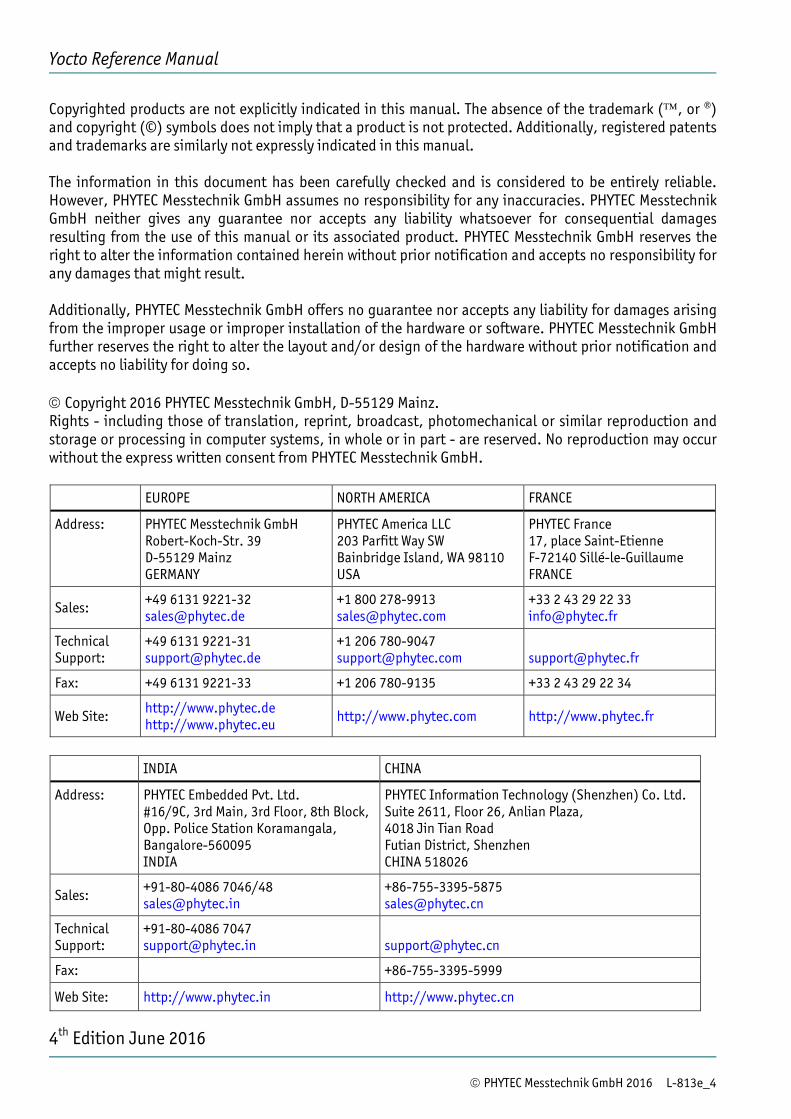
Copyrighted products are not explicitly indicated in this manual. The absence of the trademark (™, or ®) and copyright (©) symbols does not imply that a product is not protected. Additionally, registered patents and trademarks are similarly not expressly indicated in this manual. The information in this document has been carefully checked and is considered to be entirely reliable. However, PHYTEC Messtechnik GmbH assumes no responsibility for any inaccuracies. PHYTEC Messtechnik GmbH neither gives any guarantee nor accepts any liability whatsoever for consequential damages resulting from the use of this manual or its associated product. PHYTEC Messtechnik GmbH reserves the right to alter the information contained herein without prior notification and accepts no responsibility for any damages that might result. Additionally, PHYTEC Messtechnik GmbH offers no guarantee nor accepts any liability for damages arising from the improper usage or improper installation of the hardware or software. PHYTEC Messtechnik GmbH further reserves the right to alter the layout and/or design of the hardware without prior notification and accepts no liability for doing so. © Copyright 2016 PHYTEC Messtechnik GmbH, D-55129 Mainz. Rights - including those of translation, reprint, broadcast, photomechanical or similar reproduction and storage or processing in computer systems, in whole or in part - are reserved. No reproduction may occur without the express written consent from PHYTEC Messtechnik GmbH. EUROPE NORTH AMERICA FRANCE
Address: PHYTEC Messtechnik GmbH Robert-Koch-Str. 39 D-55129 Mainz GERMANY
PHYTEC America LLC 203 Parfitt Way SW Bainbridge Island, WA 98110 USA
PHYTEC France 17, place Saint-Etienne F-72140 Sillé-le-Guillaume FRANCE
Sales: +49 6131 9221-32 [email protected]
+1 800 278-9913 [email protected]
+33 2 43 29 22 33 [email protected]
Technical Support:
+49 6131 9221-31 [email protected]
+1 206 780-9047 [email protected]
Fax: +49 6131 9221-33 +1 206 780-9135 +33 2 43 29 22 34
Web Site: http://www.phytec.de http://www.phytec.eu
http://www.phytec.com http://www.phytec.fr
INDIA CHINA
Address: PHYTEC Embedded Pvt. Ltd. #16/9C, 3rd Main, 3rd Floor, 8th Block,Opp. Police Station Koramangala, Bangalore-560095 INDIA
PHYTEC Information Technology (Shenzhen) Co. Ltd. Suite 2611, Floor 26, Anlian Plaza, 4018 Jin Tian Road Futian District, Shenzhen CHINA 518026
Sales: +91-80-4086 7046/48 [email protected]
+86-755-3395-5875 [email protected]
Technical Support:
+91-80-4086 7047 [email protected]
Fax: +86-755-3395-5999
Web Site: http://www.phytec.in http://www.phytec.cn
4th Edition June 2016
Contents
© PHYTEC Messtechnik GmbH 2016 L-813e_4 i
Conventions, Abbreviations and Acronyms .................................................................... iii 1 The Yocto Project ............................................................................................... 1
1.1 Introduction .............................................................................................. 1 1.2 Core Components ........................................................................................ 1 1.3 Vocabulary ................................................................................................. 2
1.3.1 Recipes ........................................................................................... 2 1.3.2 Classes ............................................................................................ 2 1.3.3 Layers............................................................................................. 2 1.3.4 Machine .......................................................................................... 2 1.3.5 Distribution (Distro) ......................................................................... 2
1.4 Poky .......................................................................................................... 3 1.4.1 Bitbake ........................................................................................... 3 1.4.2 Toaster ........................................................................................... 3
1.5 Official Documentation................................................................................. 3 2 Compatible Linux Distributions.......................................................................... 4 3 Introduction to the Phytec BSP ............................................................................. 5
3.1 BSP Structure ............................................................................................. 5 3.1.1 BSP Management ............................................................................. 5
3.1.1.1 phyLinux............................................................................. 5 3.1.1.2 Repo .................................................................................. 5
3.1.2 BSP Metadata ................................................................................... 6 3.1.2.1 Poky................................................................................... 6 3.1.2.2 meta-openembedded ............................................................ 6 3.1.2.3 meta-qt5............................................................................. 6 3.1.2.4 meta-phytec ........................................................................ 6 3.1.2.5 meta-yogurt ........................................................................ 7
3.2 Build Configuration....................................................................................... 7 4 Installation........................................................................................................ 8
4.1 Setting up the Host ..................................................................................... 8 4.2 Git Configuration .......................................................................................... 8 4.3 site.conf Setup............................................................................................. 9
5 phyLinux Documentation ................................................................................... 10 5.1 Get phyLinux...............................................................................................10 5.2 Basic Usage ................................................................................................10 5.3 Initialization ..............................................................................................11 5.4 Advanced Usage ..........................................................................................12
6 Working with Poky and Bitbake........................................................................... 13 6.1 Start the Build.............................................................................................13 6.2 Images ......................................................................................................14 6.3 Installing the SDK ........................................................................................14 6.4 Accessing Development States between Releases ...............................................15 6.5 Inspect your Build Configuration.....................................................................15 6.6 BSP Features of meta-phytec and meta-yogurt...................................................16
Yocto Reference Manual
ii © PHYTEC Messtechnik GmbH 2016 L-813e_4
6.7 Customizing the BSP.................................................................................... 18 6.7.1 How to disable the Qt Demo ............................................................... 18 6.7.2 How to use the Framebuffer Console .................................................... 19 6.7.3 How to add additional Software to the BSP Image................................... 19
6.7.3.1 Notes about Packages and Recipes.......................................... 20 6.7.4 How to add an additional Layer........................................................... 20 6.7.5 How to create your own Layer ............................................................. 22 6.7.6 How to know your Kernel and Bootloader Recipe and Version.................... 23 6.7.7 How to Configure the Kernel or Bootloader ........................................... 24
6.7.7.1 How to add a Configuration Fragment to a Recipe ...................... 25 6.7.7.2 How to add a complete default Configuration (defconfig)
to a Recipe......................................................................... 26 6.7.8 How to patch the Kernel or Bootloader with devtool ................................ 27 6.7.9 How to patch the Kernel or Bootloader with the "temporary Method"......... 28 6.7.10 How to work with the Kernel and Bootloader using SRC_URI in local.conf .... 31 6.7.11 How to add existing Software with the "sustainable Method" ................... 32 6.7.12 How to add Linux Firmware Files to the Root Filesystem ........................... 33 6.7.13 How to change the Network Configuration ............................................ 34 6.7.14 How to change the Wireless Network Configuration................................. 35
6.7.14.1 Connecting to a WLAN Network .............................................. 35 6.7.14.2 Creating a WLAN Access Point ................................................ 36
6.7.15 How to add OpenCV Libraries and Examples ........................................... 38 6.8 Common Tasks............................................................................................ 39
6.8.1 Debugging a User Space Application ................................................... 39 6.8.2 Generating Source Mirrors, working offline ........................................... 40 6.8.3 Compiling on the Target .................................................................... 40 6.8.4 Different Toolchains ......................................................................... 41
6.8.4.1 Using the SDK .................................................................... 41 6.8.5 Working with Kernel Modules ............................................................. 43 6.8.6 Working with udev............................................................................ 43
7 Yocto Documentation......................................................................................... 45 8 Revision History................................................................................................ 46
Conventions, Abbreviations and Acronyms
Conventions, Abbreviations and Acronyms
This reference manual describes the Linux BSP accompanying our hardware products. It is based on The Yocto Project, extended with hardware support for our products. We give a brief introduction to Yocto in general and the specific changes and additions made by Phytec. Conventions The conventions used in this manual are as follows: Text in blue italic indicates a hyperlink within, or external to the document. Click these
links to quickly jump to the applicable URL, part, chapter, table, or figure. Text in bold italic indicates an interaction by the user, which is defined on the screen. Text in Consolas indicates an input by the user, without a premade text or button to
click on. Text in italic indicates proper names of development tools and corresponding controls
(windows, tabs, commands, file paths, etc.) used within the development tool, no interaction takes place.
White Text on black background shows the result of any user interaction (command, program execution, etc.)
This is a warning. It helps you to avoid annoying problems.
You can find useful supplementary information about the topic.
© PHYTEC Messtechnik GmbH 2016 L-813e_4 iii

Yocto Reference Manual
iv © PHYTEC Messtechnik GmbH 2016 L-813e_4
The Yocto Project
© PHYTEC Messtechnik GmbH 2016 L-813e_4 1
1 The Yocto Project
1.1 Introduction
Yocto is the smallest SI metric system prefix. Like m stands for milli = 10^-3, so is yocto y = 10^-24. Yocto is also a project working group of the Linux foundation and therefore backed up by several major companies in the field. On the project website http://www.yoctoproject.org/ you can read the official introduction: "The Yocto Project is an open source collaboration project that provides templates, tools and methods to help you create custom Linux-based systems for embedded products regardless of the hardware architecture. It was founded in 2010 as a collaboration among many hardware manufacturers, open-source operating systems vendors, and electronics companies to bring some order to the chaos of embedded Linux development." As said, the project wants to provide toolsets for embedded developers. It builds on top of the long lasting OpenEmbedded project. It is not a Linux distribution. It contains the tools to create a Linux distribution specially fitted to the product requirements. The most important step to bring order in the set of tools, is to define a common versioning scheme and a reference system. All subprojects have then to comply with the reference system and the versioning scheme. The release process is similar to the Linux kernel. Yocto increases its version number every six month and gives the release a name. The release list can be found here: https://wiki.yoctoproject.org/wiki/Releases
1.2 Core Components
The most important tools or subprojects of the Yocto Project are:
• Bitbake: build engine, a task scheduler like make, interprets metadata • OpenEmbedded-Core, a set of base layers, containing metadata of software, no sources • Yocto kernel
- Optimized for embedded devices - Includes many subprojects: rt-kernel, vendor patches - Infrastructure provided by Wind River - Alternative: classic kernel - we use classic and not Yocto kernel
• Yocto Reference BSP: beagleboneblack, minnow max • Poky, the reference system, a collection of projects and tools, used to bootstrap a new
distribution based on Yocto
Yocto Reference Manual
2 © PHYTEC Messtechnik GmbH 2016 L-813e_4
1.3 Vocabulary
1.3.1 Recipes
Recipes contain information about the software project (author, homepage and license). A recipe is versioned, defines dependencies, contains the URL of the source code, and describes how to fetch, configure and compile the sources. It describes how to package the software, e.g. into different .deb packages, which then contain the installation path. Recipes are basically written in Bitbake's own programming language, which has a simple syntax. However, a recipe can contain Python as well as bash code.
1.3.2 Classes
Classes combine functionality used inside recipes into reusable blocks.
1.3.3 Layers
A layer is a collection of recipes, classes and configuration metadata. A layer can depend on other layers and can be included or excluded one by one. It encapsulates a specific functionality and fulfills a specific purpose. Each layer falls into a specific category:
• Base • Machine (BSP) • Software • Distribution • Miscellaneous Yocto's versioning scheme is reflected in every layer as version branches. For each Yocto version, every layer has a named branch in its Git repository. You can add one or many layers of each category in your build. A collection of OpenEmbedded layers can be found here, the search function is very helpful to see if a software package can be retrieved and integrated easily. http://layers.openembedded.org/layerindex/branch/jethro/layers/
1.3.4 Machine
Machines are configuration variables, which describe the aspects of the target hardware.
1.3.5 Distribution (Distro)
A distribution describes the software configuration and comes with a set of software features.
The Yocto Project
© PHYTEC Messtechnik GmbH 2016 L-813e_4 3
1.4 Poky
Poky is the reference system to define Yocto Project compatibility. It combines several subprojects into releases:
• Bitbake • Toaster • OpenEmbedded Core • Yocto Documentation • Yocto Reference BSP
1.4.1 Bitbake
Bitbake is the task scheduler. It is written in Python and interprets recipes which contain code in Bitbake's own programming language, Python and bash code. The official documentation can be found here. http://www.yoctoproject.org/docs/2.0.2/bitbake-user-manual/bitbake-user-manual.html
1.4.2 Toaster
Toaster is a web frontend for Bitbake to investigate the build history and statistics. It is planned that it grows into a build management frontend for Bitbake. It is not yet complete in its features and under heavy development, but you can already keep an eye on the project. http://www.yoctoproject.org/docs/2.0.2/toaster-manual/toaster-manual.html#toaster-manual-intro
1.5 Official Documentation
For more general questions about Bitbake and Poky consult the mega-manual: http://www.yoctoproject.org/docs/2.0.2/mega-manual/mega-manual.html
Yocto Reference Manual
4 © PHYTEC Messtechnik GmbH 2016 L-813e_4
2 Compatible Linux Distributions
To build Yocto you need a compatible Linux host development machine. The list of supported distributions can be found in the reference manual: http://www.yoctoproject.org/docs/2.0.2/ref-manual/ref-manual.html#detailed-supported-distros
Introduction to the Phytec BSP
© PHYTEC Messtechnik GmbH 2016 L-813e_4 5
3 Introduction to the Phytec BSP
3.1 BSP Structure
The BSP consists roughly of three parts. BSP management, BSP metadata and BSP content. The management consists of repo and phyLinux, while the metadata depends on the SoC which describes how to build the software. The content comprises Phytec's Git repositories and external sources.
3.1.1 BSP Management
Yocto is an umbrella project. Naturally, this will force the user to base his work on several external repositories. They need to be managed in a deterministic way. The Repo tool is one way of managing Git repository tasks in a more comfortable way. Phytec's Yocto BSP is managed with Repo. This provides us with a method to deliver fixed releases as well as rolling releases.
3.1.1.1 phyLinux
phyLinux is a wrapper for Repo to handle downloading and setting up the BSP with an "out of the box" experience.
3.1.1.2 Repo
Repo is a wrapper around the Repo tool set. The phyLinux script will install the wrapper in a global path. This is only a wrapper, though. Whenever you run repo init ‐u <url>, you first download the Repo tools from Googles Git server in a specific version to the .repo/repo directory. Next time you run Repo, all the commands will be available. So be aware of the fact, that the Repo version in different build directories can drift apart over the years if you don not run Repo sync. Also if you store stuff for the archives, you need to include the complete .repo folder. Repo expects a Git repository which will be parsed from the command line. In case of our BSP, we called it phy²octo, derived from Phytec's Yocto, phyyocto, phy²octo. In this repository the whole information about a software BSP release is stored in the form of a Repo xml manifest. This data structure defines URLs of Git servers, called "remotes", and Git repositories and their states, called "projects". The Git repositories can be checked out in different states. The revision field can be a branch, tag or commit ID of a repository. So the state of the software is not necessarily unique, e.g. the HEAD of a branch, and can change over time. That is the reason we use only tags or commit IDs for our releases. The state of the working directory is therefore unique and does not change. The manifests for the releases have the same name as the release itself. It is a unique identifier for the complete BSP. The releases are sorted by SOC platform. That is why you have to choose the SOC you are using. The selected SOC will define the branch of the phy²octo Git repository which will be checked out for the manifest selection.
Yocto Reference Manual
6 © PHYTEC Messtechnik GmbH 2016 L-813e_4
3.1.2 BSP Metadata
We include several third party layers in our BSP to get a complete Linux distribution up and running without the need of integrating external projects at the beginning. All used repositories are described in the following section.
3.1.2.1 Poky
The Phytec BSP is build on top of Poky. It comes with a specific version of it, defined in the Repo manifest. Poky comes with a specific version of Bitbake. The OpenEmbedded-core layer "meta" is used as a base for our Linux system.
3.1.2.2 meta-openembedded
OpenEmbedded is a collection of different layers containing the meta description for a lot of open source software projects. We ship all OpenEmbedded layers with our BSP, but not all of them are activated. Our example images pull several software packages generated from OpenEmbedded recipes.
3.1.2.3 meta-qt5
This layer provides a community supported integration of Qt5 in Poky-based root filesystem and is integrated in our BSP.
3.1.2.4 meta-phytec
This layer contains all machines and common features for all our BSPs. It is Phytec's Yocto Board Support Package for all supported hardware (since fido) and designed to be standalone with Poky. Only those two parts are required if you want to integrate the Phytec's hardware into your existing Yocto workflow. The features are:
• Bootloaders in recipes-bsp/barebox/ • Kernels in recipes-kernel/linux/ • Many machines in conf/machine/ • Proprietary OpenGL ES/EGL user space libraries for AM335x and i.MX 6 platforms • Proprietary OpenCL libraries for i.MX 6 platforms
Introduction to the Phytec BSP
© PHYTEC Messtechnik GmbH 2016 L-813e_4 7
3.1.2.5 meta-yogurt
This is our example distribution. It extends the basic configuration of Poky with software projects described by all the other BSP components. It provides a base for some development scenarios. A configuration for systemd is provided. This is our example distribution and BSP layer. It extends the basic configuration of Poky with software projects described by all the other BSP components. It provides a base for your specific development scenarios. The current features are:
• systemd init system • Qt5 with eglfs backend for Phytec's AM335x and i.MX 6 platforms • Two different images: phytec-headless-image for non-graphic applications and
phytec-qt5demo-image for Qt5 and video applications • Camera integration for i.MX 6 platforms • A Qt5 demo application demonstrating how to create a Qt5 project using QML widgets
and a Bitbake recipe for the Yocto and systemd integration. It can be found at sources/meta-yogurt/recipes-qt/examples/phytec-qtdemo_git.bb
3.2 Build Configuration
The BSP initializes a build folder which will contain all files you create by running Bitbake commands. It contains a conf folder which handles build input variables.
• bblayers.conf defines activated meta-layers, • local.lonf defines build input variables specific to your build • site.conf defines build input variables specific to the development host The two topmost build input variables are DISTRO and MACHINE they will be preconfigured in local.conf when you check out the BSP using phyLinux. In short: DISTRO defines the software configuration, MACHINE defines the hardware configuration. As DISTRO we deliver "Yogurt" with our BSP. This distribution will be preselected and gives you a starting point for implementing your own configuration. A MACHINE defines a binary image which supports specific hardware combinations of module and baseboard. Have a look at the machine.conf file or our webpage for a description of the hardware.
Yocto Reference Manual
8 © PHYTEC Messtechnik GmbH 2016 L-813e_4
4 Installation
4.1 Setting up the Host
You need to have a running Linux distribution at your hand. It should be running on a powerful machine, as a lot of compiling will be done on it. Yocto needs a handful of additional packages on your host. For Ubuntu 14.04 you need: host$ sudo apt‐get install gawk wget git‐core diffstat unzip texinfo \
gcc‐multilib build‐essential chrpath socat \ libsdl1.2‐dev xterm
For the other distributions you can find information in the Yocto Quickstart:
http://www.yoctoproject.org/docs/2.0.2/yocto-project-qs/yocto-project-qs.html
4.2 Git Configuration
The BSP is heavily based on Git. Git needs some information from you as a user to be able to identify which changes were done by whom. If you do not have one, create a ~/.gitconfig. Here is an example: [user] name = <Your Name> email = <Your Mail>@phytec.de [core] editor = vim [merge] tool = vimdiff [alias] co = checkout br = branch ci = commit st = status unstage = reset HEAD ‐‐ last = log ‐1 HEAD [push] default = current [color] ui = auto You should at least set name and email in your Git configuration, otherwise Bitbake will complain on the first build. You can use the two commands to set them directly without editing ~/.gitconfig manually:
host$ git config ‐‐global user.email "[email protected]" host$ git config ‐‐global user.name "name surname"
Installation
© PHYTEC Messtechnik GmbH 2016 L-813e_4 9
4.3 site.conf Setup
Before starting the Yocto build, it is advisable to configure the development setup. Two things are most important: the download directory and the cache directory. It is not a precondition to do this, but strongly recommended, as it will reduce the compile time of consequent builds. The download directory is a place where Yocto stores all sources fetched from the internet. It can contain tar.gz, Git mirror or anything else. It is very useful to set this to a common shared location on the machine. Create this directory with 777 access rights. To be able to share this directory with different users all files need to have group write access. This will most probably be in conflict with default umask settings. One possible solution would be to use ACLs for this directory:
host$ sudo apt‐get install acl host$ sudo setfacl ‐R ‐d ‐m g::rwx <dl_dir> If you already created a download directory and want to fix the permissions afterwards, you can do so with:
host$ sudo find /home/share/ ‐perm /u=w ! ‐perm /g=w ‐exec chmod g+w \\ \;
host$ sudo find /home/share/ ‐perm /u=w ! ‐perm /g=w ‐exec chown g+w \\ \;
host$ sudo find /home/share/ ‐perm /u=r ! ‐perm /g=r ‐exec chmod g+r \\ \;
The cache directory stores all stages of the build process. Poky has quite an involved caching infrastructure. It is also advisable, to create a shared directory, as all builds can access this cache directory, called shared state cache. Create the two directories on a drive where you have approximately 50 GB of space and assign the following two variables in your build/conf/local.conf.
DL_DIR ?= "<your_directory>/yocto_downloads" SSTATE_DIR ?= "<your_directory>/yocto_sstate" If you want to know more about configuring your build, have a look at the documented example settings:
sources/poky/meta‐yocto/conf/local.conf.sample sources/poky/meta‐yocto/conf/local.conf.sample.extended
Yocto Reference Manual
10 © PHYTEC Messtechnik GmbH 2016 L-813e_4
5 phyLinux Documentation
The phyLinux script is a basic management tool for Phytec Yocto BSP releases written in Python. It is mainly a helper to get started with the BSP structure. You can get all the BSP sources without the need of interacting with Repo or Git. The phyLinux script has only one real dependency. It requires the wget tool installed on your host. It will also install the Repo tool in a global path (/usr/local/bin) on your host PC. You can install it to a different location manually. Repo will be automatically detected by phyLinux if it is found in the PATH. The Repo tool will be used to manage the different Git repositories of the Yocto BSP.
5.1 Get phyLinux
The phyLinux script can be found on the Phytec FTP server:
ftp://ftp.phytec.de/pub/Software/Linux/Yocto/Tools/phyLinux
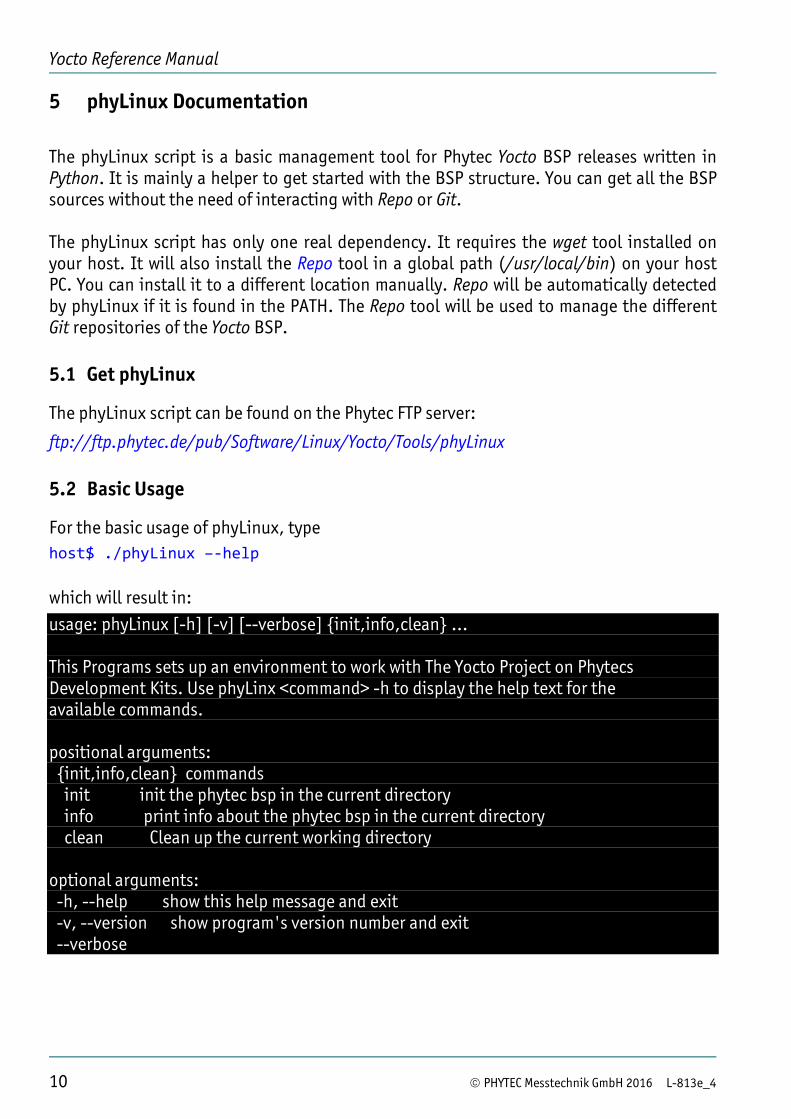
5.2 Basic Usage
For the basic usage of phyLinux, type host$ ./phyLinux –‐help
which will result in:
usage: phyLinux [-h] [-v] [--verbose] init,info,clean ... This Programs sets up an environment to work with The Yocto Project on Phytecs Development Kits. Use phyLinx <command> -h to display the help text for the available commands. positional arguments: init,info,clean commands init init the phytec bsp in the current directory info print info about the phytec bsp in the current directory clean Clean up the current working directory optional arguments: -h, --help show this help message and exit -v, --version show program's version number and exit --verbose
phyLinux Documentation
© PHYTEC Messtechnik GmbH 2016 L-813e_4 11
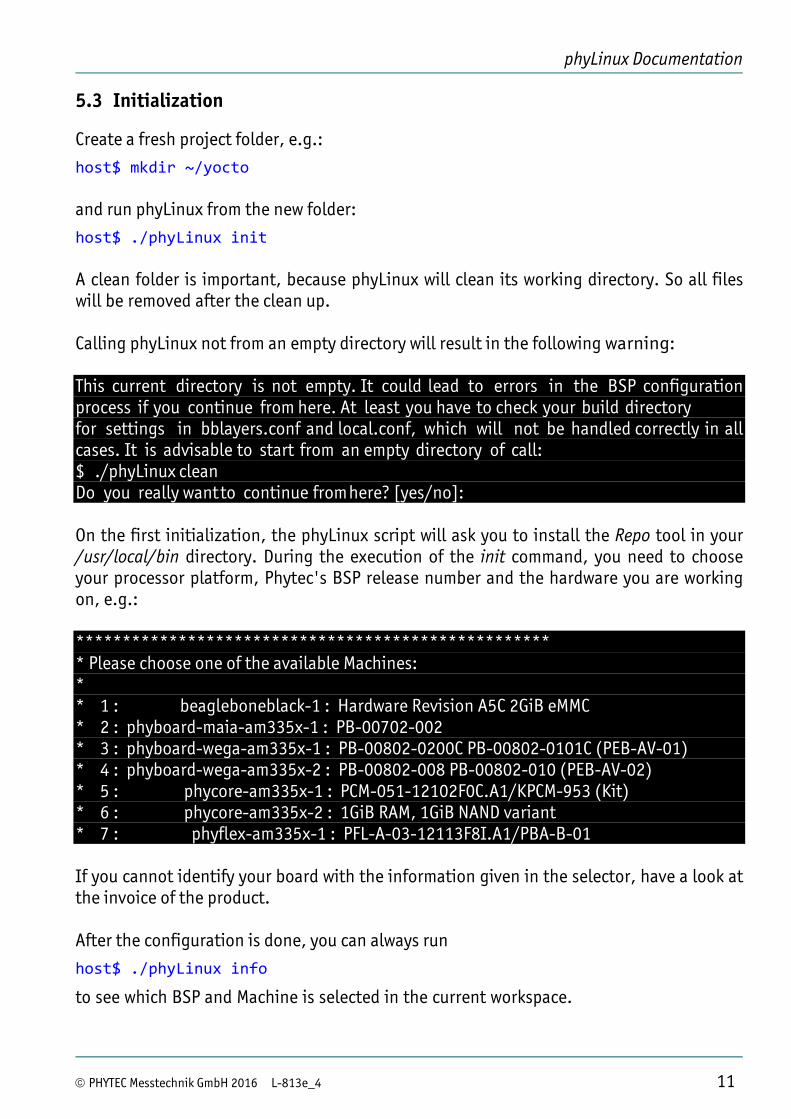
5.3 Initialization
Create a fresh project folder, e.g.:
host$ mkdir ~/yocto and run phyLinux from the new folder:
host$ ./phyLinux init A clean folder is important, because phyLinux will clean its working directory. So all files will be removed after the clean up. Calling phyLinux not from an empty directory will result in the following warning: This current directory is not empty. It could lead to errors in the BSP configuration process if you continue from here. At least you have to check your build directory for settings in bblayers.conf and local.conf, which will not be handled correctly in all cases. It is advisable to start from an empty directory of call: $ ./phyLinux clean Do you really want to continue from here? [yes/no]: On the first initialization, the phyLinux script will ask you to install the Repo tool in your /usr/local/bin directory. During the execution of the init command, you need to choose your processor platform, Phytec's BSP release number and the hardware you are working on, e.g.: *************************************************** * Please choose one of the available Machines: * * 1 : beagleboneblack-1 : Hardware Revision A5C 2GiB eMMC * 2 : phyboard-maia-am335x-1 : PB-00702-002 * 3 : phyboard-wega-am335x-1 : PB-00802-0200C PB-00802-0101C (PEB-AV-01) * 4 : phyboard-wega-am335x-2 : PB-00802-008 PB-00802-010 (PEB-AV-02) * 5 : phycore-am335x-1 : PCM-051-12102F0C.A1/KPCM-953 (Kit) * 6 : phycore-am335x-2 : 1GiB RAM, 1GiB NAND variant * 7 : phyflex-am335x-1 : PFL-A-03-12113F8I.A1/PBA-B-01 If you cannot identify your board with the information given in the selector, have a look at the invoice of the product. After the configuration is done, you can always run
host$ ./phyLinux info
to see which BSP and Machine is selected in the current workspace.
Yocto Reference Manual
12 © PHYTEC Messtechnik GmbH 2016 L-813e_4
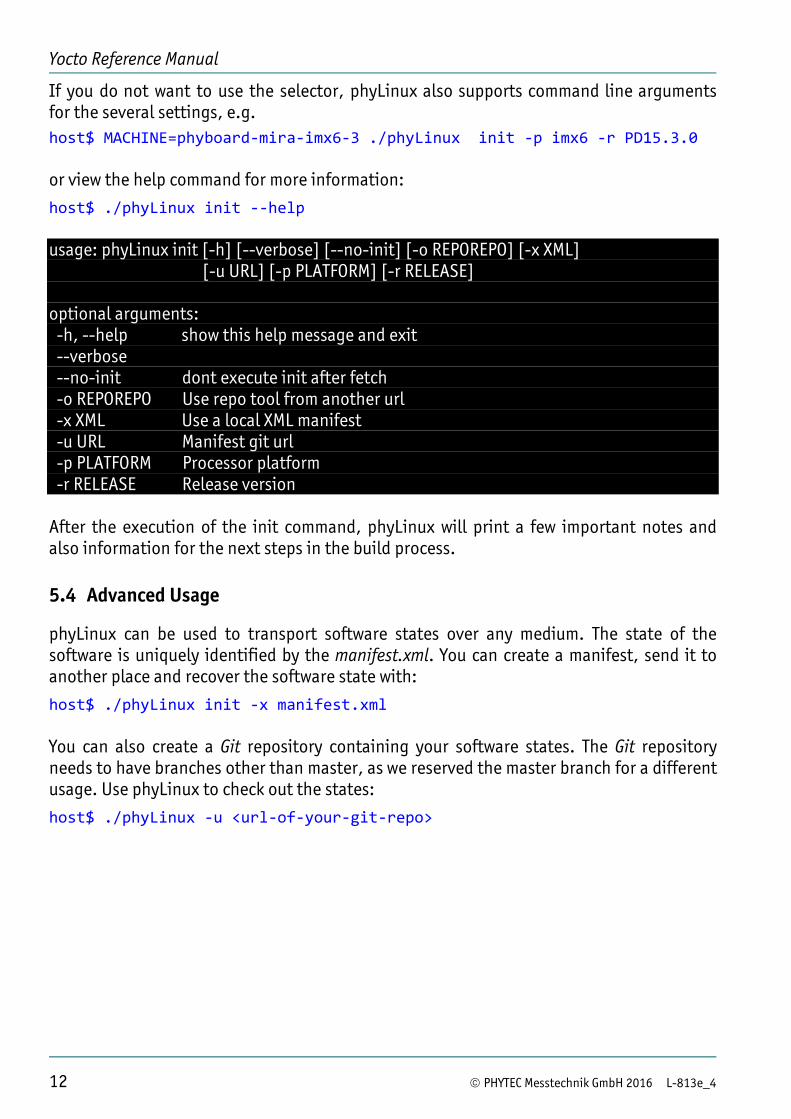
If you do not want to use the selector, phyLinux also supports command line arguments for the several settings, e.g. host$ MACHINE=phyboard‐mira‐imx6‐3 ./phyLinux init ‐p imx6 ‐r PD15.3.0 or view the help command for more information:
host$ ./phyLinux init ‐‐help usage: phyLinux init [-h] [--verbose] [--no-init] [-o REPOREPO] [-x XML] [-u URL] [-p PLATFORM] [-r RELEASE] optional arguments: -h, --help show this help message and exit --verbose --no-init dont execute init after fetch -o REPOREPO Use repo tool from another url -x XML Use a local XML manifest -u URL Manifest git url -p PLATFORM Processor platform -r RELEASE Release version After the execution of the init command, phyLinux will print a few important notes and also information for the next steps in the build process.
5.4 Advanced Usage
phyLinux can be used to transport software states over any medium. The state of the software is uniquely identified by the manifest.xml. You can create a manifest, send it to another place and recover the software state with:
host$ ./phyLinux init ‐x manifest.xml You can also create a Git repository containing your software states. The Git repository needs to have branches other than master, as we reserved the master branch for a different usage. Use phyLinux to check out the states:
host$ ./phyLinux ‐u <url‐of‐your‐git‐repo>
Working with Poky and Bitbake
© PHYTEC Messtechnik GmbH 2016 L-813e_4 13
6 Working with Poky and Bitbake
6.1 Start the Build
After you downloaded all the metadata with phyLinux init, you have to set up the shell environment variables. This needs to be done every time you open a new shell for starting builds. We use the shell script provided by Poky in its default configuration. From the root of your project directory type:
host$ source sources/poky/oe‐init‐build‐env The abbreviation for the source command is a single dot.
host$ . sources/poky/oe‐init‐build‐env The current working directory of the shell should change to build/ and you are now ready to build your first image. We suggest to start with our smaller non-graphical image phytec-headless-image to see if everything is working correctly. Before starting the build, you should have a look into the main build configuration conf/local.conf which contains explanations of some useful build options. You may also have to accept some extra licenses to build an image. If you want, you can separate the download process from the compile process to identify problems of your internet connection. This step is completely optional and not suggested per default, because the total build time will raise. With:
host$ bitbake ‐c fetchall phytec‐headless‐image
all external source repositories get pulled into the download directory. With
host$ du ‐sh <DL_DIR>
you can see what the download volume was. Now start the compile process.
host$ bitbake phytec‐headless‐image
The first compile process takes about 40 minutes on a modern Intel Core i7. All subsequent builds will use the filled caches and should take about 3 minutes.
Yocto Reference Manual
6.2 Images
If everything went fine, the images can be found under:
host$ cd deploy/images/<MACHINE>
The easiest way to test your image is to configure your board for booting from SD card and to flash the build image to the SD card:
host$ sudo dd if=phytec‐headless‐image‐<MACHINE>.sdcard of=/dev/<your_device> bs=1MB conv=fsync
Here <your_device> could be "sde" for example, depending on your system.
Be very careful when selecting the right drive! Selecting the wrong drive can erase your hard drive!
The parameter conv=fsync forces a data buffer write to the device before dd returns. After booting you can login using a serial cable or over ssh. There is no root password. That is because of the debug settings in conf/local.conf. If you comment out the line
#EXTRA_IMAGE_FEATURES = "debug‐tweaks"
the debug settings, like setting an empty root password, will not be applied.
6.3 Installing the SDK
To install the SDK for a machine and image type, you can create an SDK installer with Bitbake in the BSP itself. Ensure that the correct target machine is set. You also need to pass the image type you want to create the SDK for:
host$ bitbake <image> ‐c populate_sdk
This takes 1-5 hours depending on the image type and host machine (like building a BSP). After that you may find the installer in your Yocto directory under:
build/deploy/sdk
Install the SDK with (example):
host$ cd build/deploy/sdk host$ ./poky‐glibc‐x86_64‐phytec‐qt4demo‐image‐cortexa8t2hf‐vfp‐neon‐
toolchain‐1.7.sh
Usage example with a simple C file named bumpRTS.c
host$ source /opt/poky/1.7/environment‐setup‐cortexa8t2hf‐vfp‐neon‐poky‐linux‐gnueabi
host$ make bumpRTS
14 © PHYTEC Messtechnik GmbH 2016 L-813e_4
Working with Poky and Bitbake
© PHYTEC Messtechnik GmbH 2016 L-813e_4 15
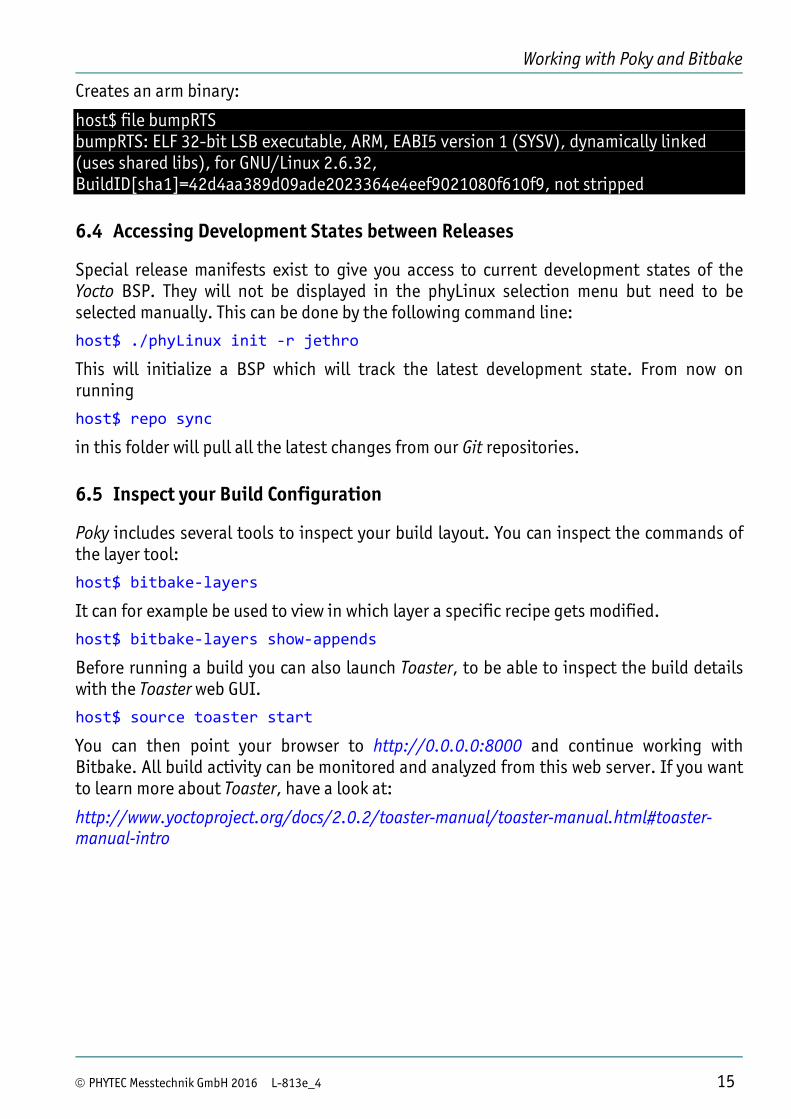
Creates an arm binary:
host$ file bumpRTS bumpRTS: ELF 32-bit LSB executable, ARM, EABI5 version 1 (SYSV), dynamically linked (uses shared libs), for GNU/Linux 2.6.32, BuildID[sha1]=42d4aa389d09ade2023364e4eef9021080f610f9, not stripped
6.4 Accessing Development States between Releases
Special release manifests exist to give you access to current development states of the Yocto BSP. They will not be displayed in the phyLinux selection menu but need to be selected manually. This can be done by the following command line:
host$ ./phyLinux init ‐r jethro
This will initialize a BSP which will track the latest development state. From now on running
host$ repo sync
in this folder will pull all the latest changes from our Git repositories.
6.5 Inspect your Build Configuration
Poky includes several tools to inspect your build layout. You can inspect the commands of the layer tool:
host$ bitbake‐layers
It can for example be used to view in which layer a specific recipe gets modified.
host$ bitbake‐layers show‐appends
Before running a build you can also launch Toaster, to be able to inspect the build details with the Toaster web GUI.
host$ source toaster start
You can then point your browser to http://0.0.0.0:8000 and continue working with Bitbake. All build activity can be monitored and analyzed from this web server. If you want to learn more about Toaster, have a look at:
http://www.yoctoproject.org/docs/2.0.2/toaster-manual/toaster-manual.html#toaster-manual-intro
Yocto Reference Manual
16 © PHYTEC Messtechnik GmbH 2016 L-813e_4
6.6 BSP Features of meta-phytec and meta-yogurt
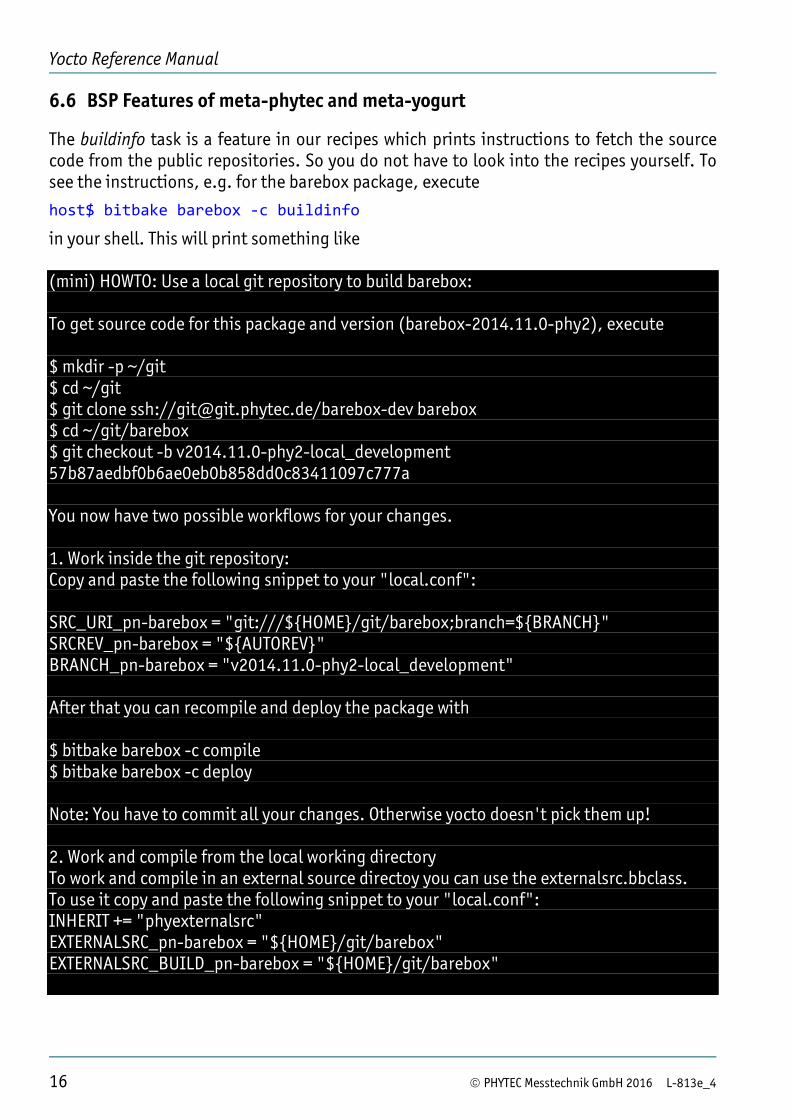
The buildinfo task is a feature in our recipes which prints instructions to fetch the source code from the public repositories. So you do not have to look into the recipes yourself. To see the instructions, e.g. for the barebox package, execute
host$ bitbake barebox ‐c buildinfo
in your shell. This will print something like (mini) HOWTO: Use a local git repository to build barebox: To get source code for this package and version (barebox-2014.11.0-phy2), execute $ mkdir -p ~/git $ cd ~/git $ git clone ssh://[email protected]/barebox-dev barebox $ cd ~/git/barebox $ git checkout -b v2014.11.0-phy2-local_development 57b87aedbf0b6ae0eb0b858dd0c83411097c777a You now have two possible workflows for your changes. 1. Work inside the git repository: Copy and paste the following snippet to your "local.conf": SRC_URI_pn-barebox = "git:///$HOME/git/barebox;branch=$BRANCH" SRCREV_pn-barebox = "$AUTOREV" BRANCH_pn-barebox = "v2014.11.0-phy2-local_development" After that you can recompile and deploy the package with $ bitbake barebox -c compile $ bitbake barebox -c deploy Note: You have to commit all your changes. Otherwise yocto doesn't pick them up! 2. Work and compile from the local working directory To work and compile in an external source directoy you can use the externalsrc.bbclass. To use it copy and paste the following snippet to your "local.conf": INHERIT += "phyexternalsrc" EXTERNALSRC_pn-barebox = "$HOME/git/barebox" EXTERNALSRC_BUILD_pn-barebox = "$HOME/git/barebox"
Working with Poky and Bitbake
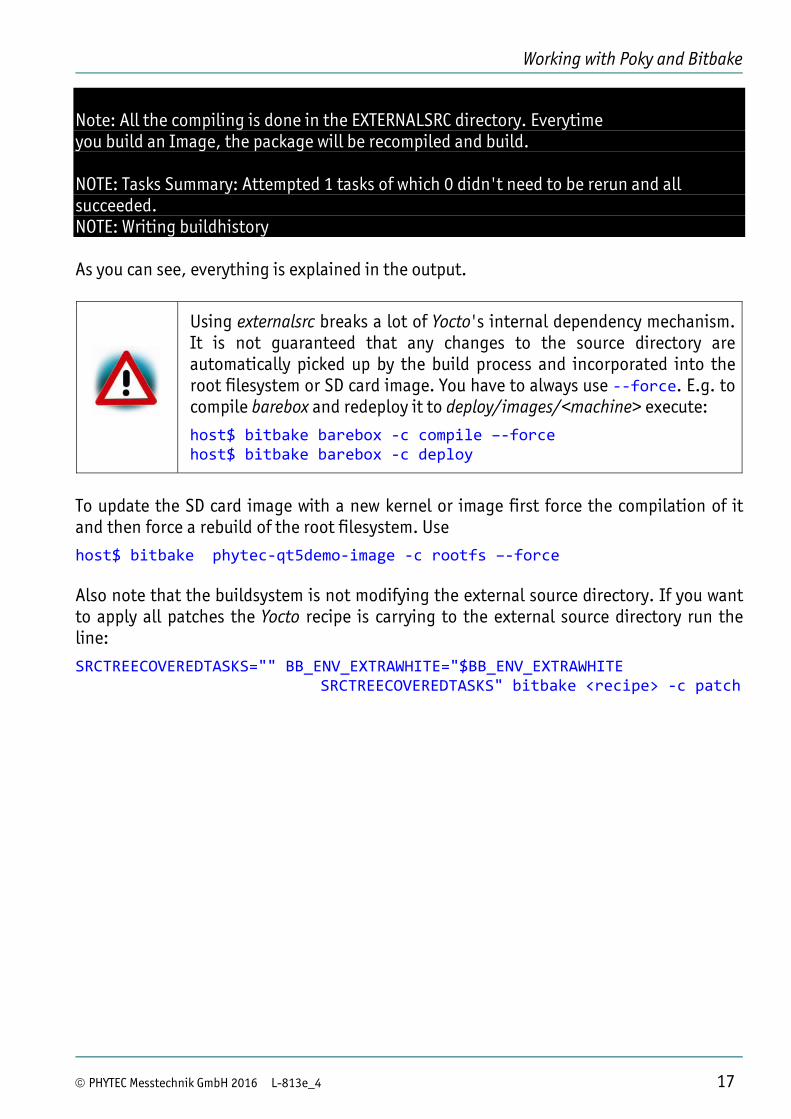
Note: All the compiling is done in the EXTERNALSRC directory. Everytime you build an Image, the package will be recompiled and build. NOTE: Tasks Summary: Attempted 1 tasks of which 0 didn't need to be rerun and all succeeded. NOTE: Writing buildhistory As you can see, everything is explained in the output.
Using externalsrc breaks a lot of Yocto's internal dependency mechanism. It is not guaranteed that any changes to the source directory are automatically picked up by the build process and incorporated into the root filesystem or SD card image. You have to always use ‐‐force. E.g. to compile barebox and redeploy it to deploy/images/<machine> execute:
host$ bitbake barebox ‐c compile –‐force host$ bitbake barebox ‐c deploy
To update the SD card image with a new kernel or image first force the compilation of it and then force a rebuild of the root filesystem. Use
host$ bitbake phytec‐qt5demo‐image ‐c rootfs –‐force Also note that the buildsystem is not modifying the external source directory. If you want to apply all patches the Yocto recipe is carrying to the external source directory run the line:
SRCTREECOVEREDTASKS="" BB_ENV_EXTRAWHITE="$BB_ENV_EXTRAWHITE SRCTREECOVEREDTASKS" bitbake <recipe> ‐c patch
© PHYTEC Messtechnik GmbH 2016 L-813e_4 17
Yocto Reference Manual
6.7 Customizing the BSP
To get you started with the BSP we summarize some basic tasks from the Yocto official documentation. It describes how to add additional software to the image, change the kernel and bootloader configuration and integrate patches for kernel and bootloader. Minor modifications, such as adding software, are done in the file build/conf/local.conf. There you can overwrite global configuration variables and make small modifications to recipes. For major changes you have generally to ways. Either create your own layer and use bbappends or add everything to Phytec's Distro layer meta-yogurt. How to create your own layer is describe in section 6.7.5.
6.7.1 How to disable the Qt Demo
By default the BSP image phytec-qt5demo-image starts a nice Qt5 Demo application on the display or monitor attached. If you want to stop the demo and use the Linux framebuffer console behind it, connect per serial cable, or ssh to the target and execute the shell command
target$ systemctl stop phytec‐qtdemo.service
The command stops the demo temporarily. To start it again reboot the board or execute target$ systemctl start phytec‐qtdemo.service You can disable the service permanently, so it does not start on boot, by executing
target$ systemctl disable phytec‐qtdemo.service
The last command only disables the service. It does not stop it immediately. To see the current status execute
target$ systemctl status phytec‐qtdemo.service
If you want to disable the service by default, edit the file build/conf/local.conf and add the following line:
# file build/conf/local.conf SYSTEMD_AUTO_ENABLE_pn‐phytec‐qtdemo = "disable" After that rebuild the image by executing
host$ bitbake phytec‐qt5demo‐image
18 © PHYTEC Messtechnik GmbH 2016 L-813e_4
Working with Poky and Bitbake
© PHYTEC Messtechnik GmbH 2016 L-813e_4 19
6.7.2 How to use the Framebuffer Console
On boards with display interface, the framebuffer console is enabled per default. You can attach an USB keyboard and login. To change the keyboard layout from the English default to German, type: target$ loadkeys /usr/share/keymaps/i386/qwertz/de‐latin1.map.gz To detach the framebuffer console, run: target$ echo 0 > sys/class/vtconsole/vtcon1/bind To completely deactivate the framebuffer console, disable the following kernel configuration option:
Device Drivers->Graphics Support->Support for framebuffer devices->Framebuffer Console Support More information can be found at: https://www.kernel.org/doc/Documentation/fb/fbcon.txt
6.7.3 How to add additional Software to the BSP Image
To add another software to the image have a look at the OpenEmbedded layer index at:
http://layers.openembedded.org/layerindex/branch/jethro/layers/ First select the Yocto version of the BSP you have from the drop-down list in the top left corner and click Recipes. Now you can search for a software project name and find out in which layer it can be found. In the simple case the program is in meta-openembedded, openembedded-core, or Poky, which means that the recipe is already in your build tree. This section describes how to add additional software in this case. If the package is in another layer, see the next section. You can also search the list of available recipes by executing
host$ bitbake ‐s | grep <program name> # fill in programm name, like in host$ bitbake ‐s | grep lsof
When the recipe for the program is already in the Yocto build, you can simply add it by appending a configuration option to your file build/conf/local.conf. The general syntax to add additional software to an image is:
# file build/conf/local.conf IMAGE_INSTALL_append = " <package1> <package2>"
Yocto Reference Manual For example the next line
# file build/conf/local.conf IMAGE_INSTALL_append = " ldd strace file lsof"
installs some little helper programs on the target image.
Please note the leading whitespace which is essential for the append command.
All configuration options in local.conf apply to all images. Consequently the tools are now included in both images phytec-headless-image and phytec-qt5demo-image.
6.7.3.1 Notes about Packages and Recipes
Please note that you are adding packages to the IMAGE_INSTALL variable. Those are not necessarily equivalent to the recipes in your meta-layers. A recipe defines per default a package with the same name. But a recipe can set the PACKAGES variable to something different and is able to generate packages with arbitrary names. Whenever you look for software, you have to search for the package name and, strictly speaking, not for the recipe. In the worst case you have to look at all PACKAGES variables. A tool like Hob or Toaster can be helpful in some cases. If you can not find your software in the layers provided in the folder sources/, see the next section to include another layer into the Yocto build. References: Yocto 2.0.2 Docu - Customizing Images Using local.conf
6.7.4 How to add an additional Layer
This is a step by step guide how to add another layer to your Yocto build and install additional software from it. As an example we include the network security scanner nmap in the layer meta-security. First you must locate in the layer which software is hosted. Checkout the OpenEmbedded MetaData Index and guess a little bit. The network scanner nmap is in the meta-security layer. See meta-security on layers.openembedded.org. To integrate it into the Yocto build, you have to checkout out the repository and then switch to the correct stable branch. Since the BSP is based on the Yocto 'jethro' build, you should try to use the 'jethro' branch in the layer, too, but other branches may also work.
host$ cd sources host$ git clone git://git.yoctoproject.org/meta‐security host$ git branch –r
20 © PHYTEC Messtechnik GmbH 2016 L-813e_4

Working with Poky and Bitbake
© PHYTEC Messtechnik GmbH 2016 L-813e_4 21
All available remote branches will show up. Usually there should be 'daisy', 'dizzy', 'fido', 'master', ...
host$ git checkout jethro Now we add the directory of the layer to the file build/conf/bblayers.conf by appending the line
# file build/conf/bblayers.conf BBLAYERS += "$BSPDIR/sources/meta‐security"
to the end of the file. After that you can check if the layer is available in the build configuration by executing
host$ bitbake‐layers show‐layers If there is an error like
ERROR: Layer 'security' depends on layer 'perl-layer', but this layer is not enabled in your configuration
the layer, that you want to add (here meta-security), depends on another layer, which you need to enable first. E.g. the dependency required here is a layer in meta-openembedded (in the Phytec BSP it is in the path sources/meta-openembedded/meta-perl/). To enable it, also add the following line to build/conf/bblayers.conf:
# file build/conf/bblayers.conf BBLAYERS += "$BSPDIR/sources/meta‐openembedded/meta‐perl" Now the command bitbake-layers show-layers should print a list of all layers enabled including meta-security and meta-perl. After the layer is included, you can install additional software from it as already described above. The easiest way is to add the following line (here the package nmap).
# file build/conf/local.conf IMAGE_INSTALL_append = " nmap"
to your build/conf/local.conf. Do not forget to rebuild the image, e.g.
host$ bitbake phytec‐qt5demo‐image
Yocto Reference Manual
22 © PHYTEC Messtechnik GmbH 2016 L-813e_4
6.7.5 How to create your own Layer
Creating your layer should be one of the first tasks when customizing the BSP. You have two basic options. You could either copy and rename our meta-yogurt, or you can create a new layer which will contain your changes. Which way is the better solution, depends on your use case. meta-yogurt is our example of how to create a custom Linux distribution and will be updated in future. If you want to benefit from those changes and are, in general, satisfied with the user space configuration, it could be the best solution to create your own layer on top of Yogurt. If you need to rework a lot of stuff and only need the basic hardware support from Phytec, better copy meta-yogurt, rename it and adapt it to your needs. You can also have a look at the OpenEmbedded layer index to find different distribution layers. If you just need to add your own application to the image, create your own layer. In the following chapter we assume that we have an embedded project called "racer" which we will implement using our Yogurt Linux distribution. First we need to create a new layer. Yocto provides a script for that. If you set up the BSP and the shell is ready, type:
host$ yocto‐layer create racer Default options are fine for now. Move the layer to the source directory: host$ mv meta‐racer ../sources/ Create a Git repository in this layer to track your changes:
host$ cd ../sources/meta‐racer host$ git init && git add . && git commit ‐s Now you can add the layer to your build/conf/bblayers.conf
BBLAYERS += "$BSPDIR/sources/meta‐racer"
Working with Poky and Bitbake
© PHYTEC Messtechnik GmbH 2016 L-813e_4 23
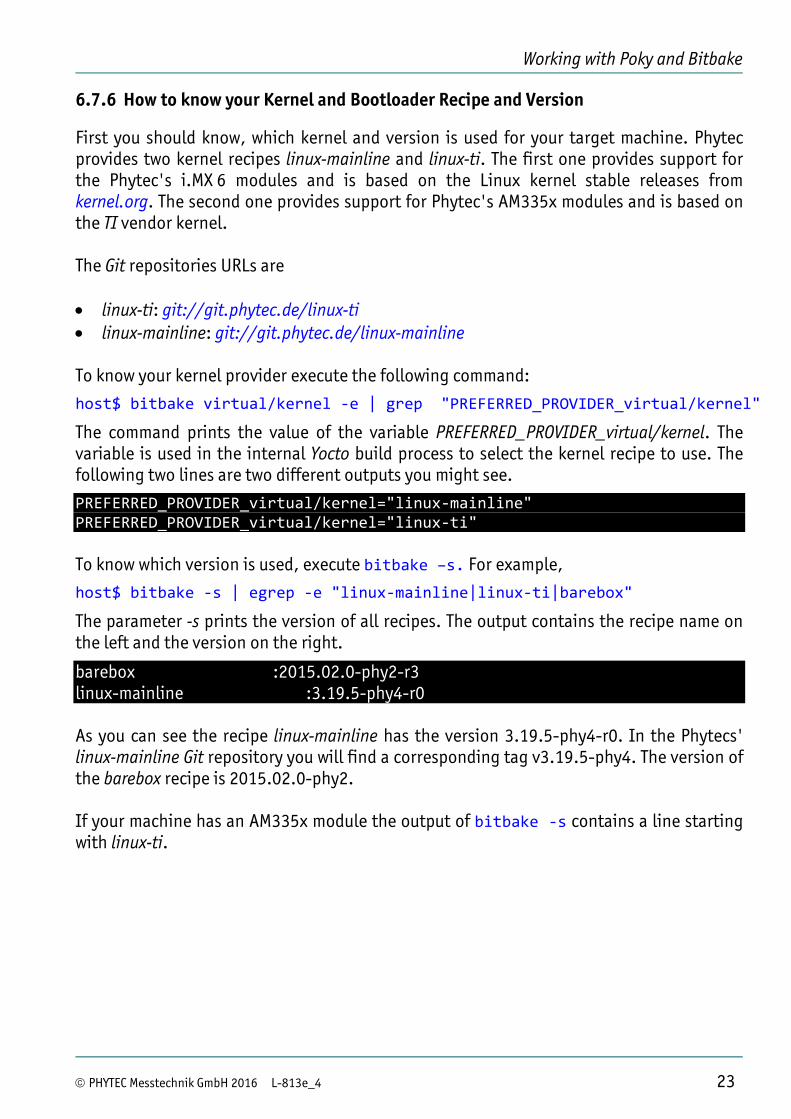
6.7.6 How to know your Kernel and Bootloader Recipe and Version
First you should know, which kernel and version is used for your target machine. Phytec provides two kernel recipes linux-mainline and linux-ti. The first one provides support for the Phytec's i.MX 6 modules and is based on the Linux kernel stable releases from kernel.org. The second one provides support for Phytec's AM335x modules and is based on the TI vendor kernel. The Git repositories URLs are • linux-ti: git://git.phytec.de/linux-ti • linux-mainline: git://git.phytec.de/linux-mainline To know your kernel provider execute the following command:
host$ bitbake virtual/kernel ‐e | grep "PREFERRED_PROVIDER_virtual/kernel"
The command prints the value of the variable PREFERRED_PROVIDER_virtual/kernel. The variable is used in the internal Yocto build process to select the kernel recipe to use. The following two lines are two different outputs you might see.
PREFERRED_PROVIDER_virtual/kernel="linux‐mainline" PREFERRED_PROVIDER_virtual/kernel="linux‐ti" To know which version is used, execute bitbake –s. For example,
host$ bitbake ‐s | egrep ‐e "linux‐mainline|linux‐ti|barebox"
The parameter -s prints the version of all recipes. The output contains the recipe name on the left and the version on the right.
barebox :2015.02.0-phy2-r3 linux-mainline :3.19.5-phy4-r0 As you can see the recipe linux-mainline has the version 3.19.5-phy4-r0. In the Phytecs' linux-mainline Git repository you will find a corresponding tag v3.19.5-phy4. The version of the barebox recipe is 2015.02.0-phy2. If your machine has an AM335x module the output of bitbake ‐s contains a line starting with linux-ti.
Yocto Reference Manual
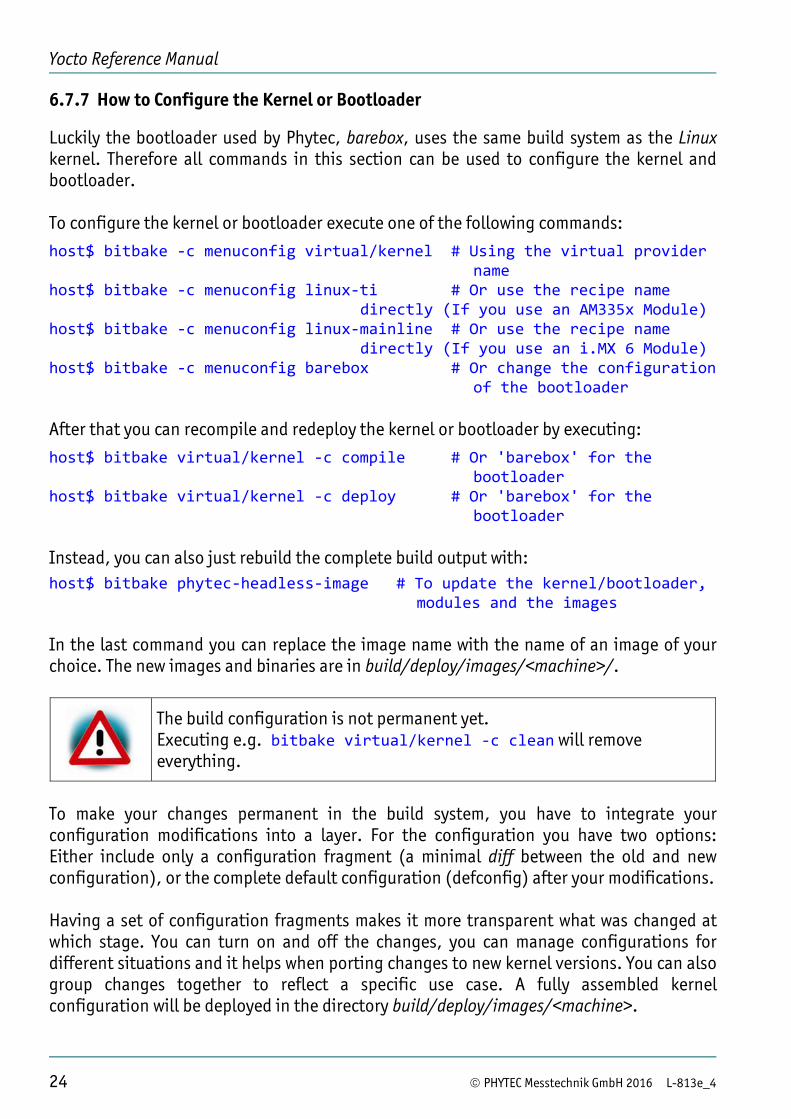
6.7.7 How to Configure the Kernel or Bootloader
Luckily the bootloader used by Phytec, barebox, uses the same build system as the Linux kernel. Therefore all commands in this section can be used to configure the kernel and bootloader. To configure the kernel or bootloader execute one of the following commands:
host$ bitbake ‐c menuconfig virtual/kernel # Using the virtual provider name
host$ bitbake ‐c menuconfig linux‐ti # Or use the recipe name directly (If you use an AM335x Module)
host$ bitbake ‐c menuconfig linux‐mainline # Or use the recipe name directly (If you use an i.MX 6 Module)
host$ bitbake ‐c menuconfig barebox # Or change the configuration of the bootloader
After that you can recompile and redeploy the kernel or bootloader by executing:
host$ bitbake virtual/kernel ‐c compile # Or 'barebox' for the bootloader
host$ bitbake virtual/kernel ‐c deploy # Or 'barebox' for the bootloader
Instead, you can also just rebuild the complete build output with: host$ bitbake phytec‐headless‐image # To update the kernel/bootloader,
modules and the images In the last command you can replace the image name with the name of an image of your choice. The new images and binaries are in build/deploy/images/<machine>/.
The build configuration is not permanent yet. Executing e.g. bitbake virtual/kernel ‐c clean will remove everything.
To make your changes permanent in the build system, you have to integrate your configuration modifications into a layer. For the configuration you have two options: Either include only a configuration fragment (a minimal diff between the old and new configuration), or the complete default configuration (defconfig) after your modifications. Having a set of configuration fragments makes it more transparent what was changed at which stage. You can turn on and off the changes, you can manage configurations for different situations and it helps when porting changes to new kernel versions. You can also group changes together to reflect a specific use case. A fully assembled kernel configuration will be deployed in the directory build/deploy/images/<machine>.
24 © PHYTEC Messtechnik GmbH 2016 L-813e_4
Working with Poky and Bitbake
© PHYTEC Messtechnik GmbH 2016 L-813e_4 25
If you do not have any of those requirements it might be simpler to just manage a separate defconfig file.
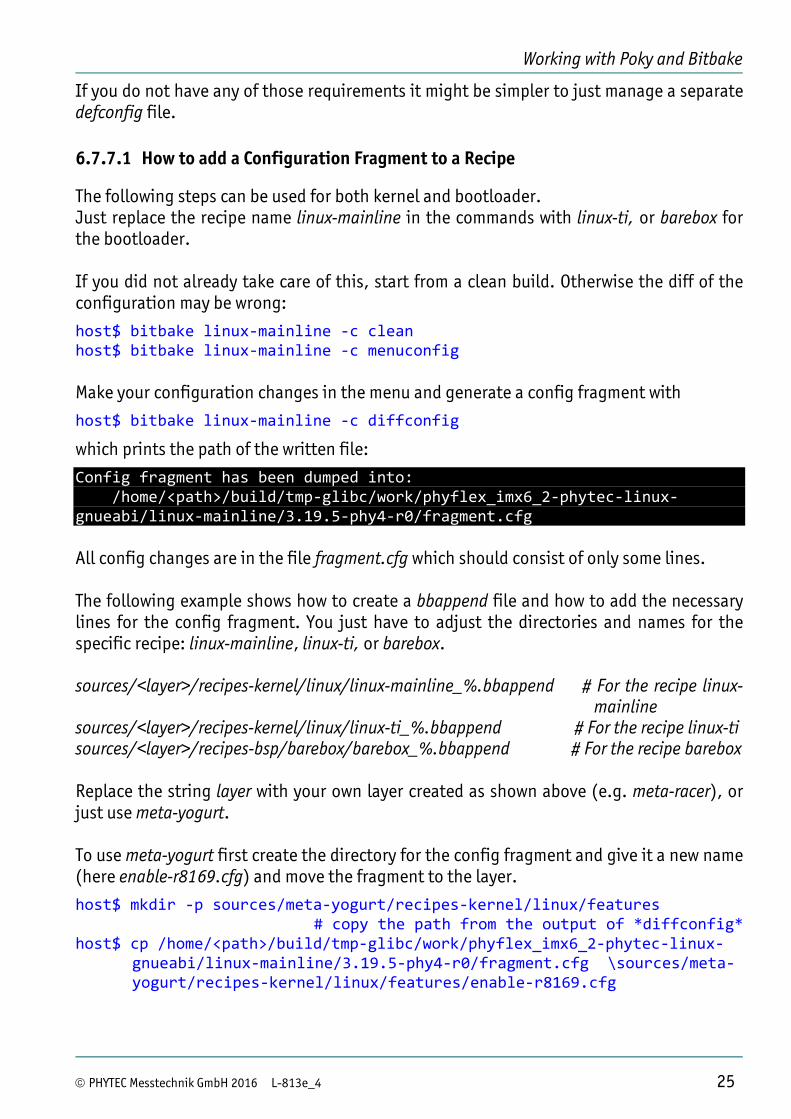
6.7.7.1 How to add a Configuration Fragment to a Recipe
The following steps can be used for both kernel and bootloader. Just replace the recipe name linux-mainline in the commands with linux-ti, or barebox for the bootloader. If you did not already take care of this, start from a clean build. Otherwise the diff of the configuration may be wrong:
host$ bitbake linux‐mainline ‐c clean host$ bitbake linux‐mainline ‐c menuconfig Make your configuration changes in the menu and generate a config fragment with
host$ bitbake linux‐mainline ‐c diffconfig
which prints the path of the written file:
Config fragment has been dumped into: /home/<path>/build/tmp‐glibc/work/phyflex_imx6_2‐phytec‐linux‐gnueabi/linux‐mainline/3.19.5‐phy4‐r0/fragment.cfg All config changes are in the file fragment.cfg which should consist of only some lines. The following example shows how to create a bbappend file and how to add the necessary lines for the config fragment. You just have to adjust the directories and names for the specific recipe: linux-mainline, linux-ti, or barebox. sources/<layer>/recipes-kernel/linux/linux-mainline_%.bbappend # For the recipe linux-
mainline sources/<layer>/recipes-kernel/linux/linux-ti_%.bbappend # For the recipe linux-ti sources/<layer>/recipes-bsp/barebox/barebox_%.bbappend # For the recipe barebox Replace the string layer with your own layer created as shown above (e.g. meta-racer), or just use meta-yogurt. To use meta-yogurt first create the directory for the config fragment and give it a new name (here enable-r8169.cfg) and move the fragment to the layer.
host$ mkdir ‐p sources/meta‐yogurt/recipes‐kernel/linux/features # copy the path from the output of *diffconfig*
host$ cp /home/<path>/build/tmp‐glibc/work/phyflex_imx6_2‐phytec‐linux‐gnueabi/linux‐mainline/3.19.5‐phy4‐r0/fragment.cfg \sources/meta‐yogurt/recipes‐kernel/linux/features/enable‐r8169.cfg
Yocto Reference Manual
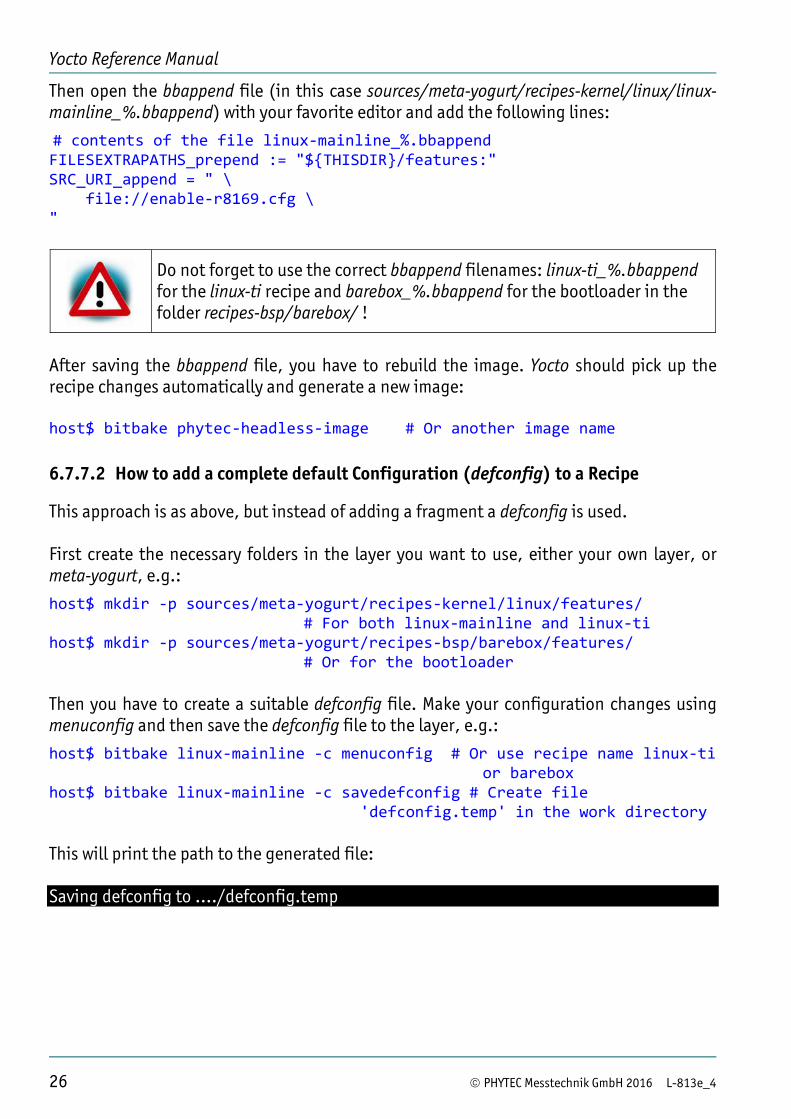
Then open the bbappend file (in this case sources/meta-yogurt/recipes-kernel/linux/linux-mainline_%.bbappend) with your favorite editor and add the following lines:
# contents of the file linux‐mainline_%.bbappend FILESEXTRAPATHS_prepend := "$THISDIR/features:" SRC_URI_append = " \ file://enable‐r8169.cfg \ "
Do not forget to use the correct bbappend filenames: linux-ti_%.bbappend for the linux-ti recipe and barebox_%.bbappend for the bootloader in the folder recipes-bsp/barebox/ !
After saving the bbappend file, you have to rebuild the image. Yocto should pick up the recipe changes automatically and generate a new image: host$ bitbake phytec‐headless‐image # Or another image name
6.7.7.2 How to add a complete default Configuration (defconfig) to a Recipe
This approach is as above, but instead of adding a fragment a defconfig is used. First create the necessary folders in the layer you want to use, either your own layer, or meta-yogurt, e.g.:
host$ mkdir ‐p sources/meta‐yogurt/recipes‐kernel/linux/features/ # For both linux‐mainline and linux‐ti
host$ mkdir ‐p sources/meta‐yogurt/recipes‐bsp/barebox/features/ # Or for the bootloader
Then you have to create a suitable defconfig file. Make your configuration changes using menuconfig and then save the defconfig file to the layer, e.g.:
host$ bitbake linux‐mainline ‐c menuconfig # Or use recipe name linux‐ti or barebox
host$ bitbake linux‐mainline ‐c savedefconfig # Create file 'defconfig.temp' in the work directory
This will print the path to the generated file: Saving defconfig to ..../defconfig.temp
26 © PHYTEC Messtechnik GmbH 2016 L-813e_4
Working with Poky and Bitbake
Then, as above, copy the generated file to your layer, rename it to defconfig and add the following lines to the bbappend file (here sources/meta-yogurt/recipes-kernel/linux/linux-mainline_%.bbappend):
# contents of the file linux‐mainline_%.bbappend FILESEXTRAPATHS_prepend := "$THISDIR/features:" SRC_URI_append = " \ file://defconfig \ "
Do not forget to use the correct bbappend filenames: linux-ti_%.bbappend for the linux-ti recipe and barebox_%.bbappend for the bootloader in the folder recipes-bsp/barebox/ !
After that rebuild your image as the changes are picked up automatically. host$ bitbake phytec‐headless‐image # Or another image name
6.7.8 How to patch the Kernel or Bootloader with devtool
Apart from using the standard versions of kernel and bootloader which are provided in the recipes, you can modify the source code or use our own repositories to build your customized kernel.
Pro Contra
Standard workflow of the official Yocto documentation
Uses additional hard drive space as the sources get duplicated
Toolchain does not have to recompile everything
No optimal cache usage, build overhead
Devtool is a set of helper scripts to enhance the user workflow of Yocto. It was integrated in version 1.8. It is available as soon as you set up your shell environment. Devtool is able to:
• modify existing sources, • integrate software projects into your build setup, • build software and deploy software modifications to your target Here we will use devtool to patch the kernel. We use linux-ti as an example for the AM335x TI kernel. The first command we use is devtool modify - x <recipe> <directory>:
host$ devtool modify ‐x linux‐ti linux‐ti Devtool will create a layer in build/workspace were you can revisit all modifications done by devtool. It will extract the sources corresponding to the recipe to the specified directory. A bbappend will be created in the workspace directing the SRC_URI to this directory.
© PHYTEC Messtechnik GmbH 2016 L-813e_4 27
Yocto Reference Manual
Building an image with Bitbake will now use the sources in this directory. Now you can modify something in the kernel, e.g.
host$ vim linux‐ti/arch/arm/boot/dts/am335x‐phycore‐som.dtsi
‐> make a change
host$ bitbake phytec‐qt5demo‐image Your changes will now be recompiled and added to the image. If you want to store your changes permanently, it is advisable to create a patch from the changes, and to store and backup only the patch. You can go into the linux-ti directory and create a patch using Git. How to create a patch is described in the middle of the next section and is common to all methods. If you want to learn more about devtool, visit: Yocto 2.0.2 - Devtool
6.7.9 How to patch the Kernel or Bootloader with the "temporary Method"
Pro Contra
No overhead, no extra configuration
Changes are easily overwritten by Yocto (Everything is lost!!)
Toolchain does not have to recompile everything
It is possible to alter the source code, before Bitbake configures and compiles the recipe. Use Bitbake's devshell command to jump into the source directory of the recipe. Here it is the barebox recipe:
host$ bitbake barebox ‐c devshell # or linux‐mainline, linux‐ti After executing the command, a shell window opens. The current working directory of the shell will be changed to the source directory of the recipe inside the tmp folder. Here you can use your favorite editor, e.g. vim, or emacs, or anything graphical, to alter the source code. When you are finished exit the devshell by typing exit, or hitting CTRL-D. After leaving the devshell you can recompile the package.
host$ bitbake barebox ‐c compile ‐‐force # or linux‐mainline, linux‐ti The extra argument --force is important, because Yocto does not recognize that the source code was changed.
You cannot execute the Bitbake command in the devshell. You have to leave it first.
28 © PHYTEC Messtechnik GmbH 2016 L-813e_4
Working with Poky and Bitbake
If the build fails, execute the devshell command again and fix it. If the build is successful, you can deploy the package and create a new SD card image.
host$ bitbake barbox ‐c deploy # new barebox in e.g. deploy/images/phyflex‐imx6‐2/barebox.bin
host$ bitbake phytec‐headless‐image # new sdcard image in e.g. deploy/images/phyflex‐imx6‐2/phytec‐headless‐image‐phyflex‐imx6‐2.sdcard
If you execute a clean e.g bitbake barebox -c clean, or if Yocto refetches the source code, all your changes are lost!!!
To avoid this, you can create a patch and add it to a bbappend file. It is the same workflow as described in the section about changing the configuration. You have to create the patch in the devshell if you use the temporary method, and in the subdirectory created by devtool if you used devtool:
host$ bitbake barebox ‐c devshell # Or linux‐mainline, linux‐ti host(devshell)$ git status # Show changes files host(devshell)$ git add <file> # Add a special file to the
staging area host(devshell)$ git commit ‐m "important modification" # Creates a
commit with a not so useful commit message host(devshell)$ git format‐patch ‐1 ‐o ~/ # Creates a patch of the
last commit and saves it in your home folder /home/<user>/0001‐important‐modification.patch # Git prints the path of
the written patch file host(devshell)$ exit After you have created the patch, you must create a bbappend file for it. The locations for the three different recipes - linux-mainline, linux-ti and barebox – are:
sources/<layer>/recipes-kernel/linux/linux-mainline_%.bbappend # For the recipe linux-mainline
sources/<layer>/recipes-kernel/linux/linux-ti_%.bbappend # For the recipe linux-ti sources/<layer>/recipes-bsp/barebox/barebox_%.bbappend # For the recipe barebox The following example is for the recipe barebox. You have to adjust the paths. First create the folders and move the patch to it. Then create the bbappend file.
host$ mkdir ‐p sources/meta‐yogurt/recipes‐bsp/barebox/features # Or use your own layer instead of *meta‐yogurt*
host$ cp ~/0001‐important‐modification.patch sources/meta‐yogurt/recipes‐bsp/barebox/features # copy patch
host$ touch sources/meta‐yogurt/recipes‐bsp/barebox/barebox_%.bbappend
© PHYTEC Messtechnik GmbH 2016 L-813e_4 29
Yocto Reference Manual
Pay attention to your current work directory. You have to execute the commands in the BSP top level directory. Not in the build directory!
After that use your favorite editor to add the following snipped into the bbappend file (here sources/meta-yogurt/recipes-bsp/barebox/barebox_%.bbappend).
# contents of the file barebox_%.bbappend FILESEXTRAPATHS_prepend := "$THISDIR/features:" SRC_URI_append = " \ file://0001‐important‐modification.patch \ " Save the file and rebuild the barebox recipe with:
host$ bitbake barebox ‐c clean # Or linux‐ti, linux‐mainline host$ bitbake barebox If the build is successful, you can rebuild the final image with:
host$ bitbake phytec‐headless‐image # Or another image name Further Resources: The Yocto Project has already some documentation for software developers. You should especially check the Kernel Development Manual for more information about how to configure the kernel. Please note that not all the information from the Yocto manual can be applied to the Phytec BSP as we use the classic kernel approach of Yocto and most of the documentation assumes the Yocto kernel approach. • Yocto - Kernel Development Manual • Yocto - Development Manual • http://www.yoctoproject.org/docs/1.7.2/dev-manual/dev-manual.html#modifying-
temporary-source-code
30 © PHYTEC Messtechnik GmbH 2016 L-813e_4
Working with Poky and Bitbake
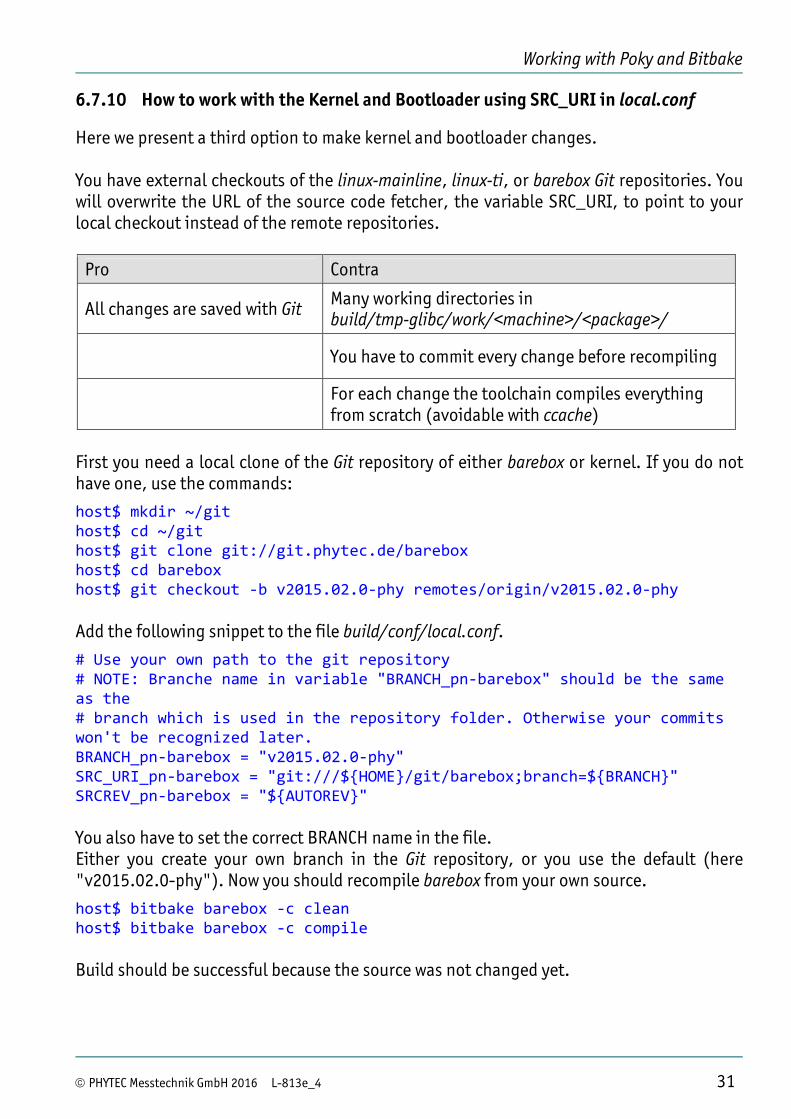
6.7.10 How to work with the Kernel and Bootloader using SRC_URI in local.conf
Here we present a third option to make kernel and bootloader changes. You have external checkouts of the linux-mainline, linux-ti, or barebox Git repositories. You will overwrite the URL of the source code fetcher, the variable SRC_URI, to point to your local checkout instead of the remote repositories.
Pro Contra
All changes are saved with Git Many working directories in build/tmp-glibc/work/<machine>/<package>/
You have to commit every change before recompiling
For each change the toolchain compiles everything from scratch (avoidable with ccache)
First you need a local clone of the Git repository of either barebox or kernel. If you do not have one, use the commands:
host$ mkdir ~/git host$ cd ~/git host$ git clone git://git.phytec.de/barebox host$ cd barebox host$ git checkout ‐b v2015.02.0‐phy remotes/origin/v2015.02.0‐phy Add the following snippet to the file build/conf/local.conf.
# Use your own path to the git repository # NOTE: Branche name in variable "BRANCH_pn‐barebox" should be the same as the # branch which is used in the repository folder. Otherwise your commits won't be recognized later. BRANCH_pn‐barebox = "v2015.02.0‐phy" SRC_URI_pn‐barebox = "git:///$HOME/git/barebox;branch=$BRANCH" SRCREV_pn‐barebox = "$AUTOREV" You also have to set the correct BRANCH name in the file. Either you create your own branch in the Git repository, or you use the default (here "v2015.02.0-phy"). Now you should recompile barebox from your own source.
host$ bitbake barebox ‐c clean host$ bitbake barebox ‐c compile Build should be successful because the source was not changed yet.
© PHYTEC Messtechnik GmbH 2016 L-813e_4 31
Yocto Reference Manual
32 © PHYTEC Messtechnik GmbH 2016 L-813e_4
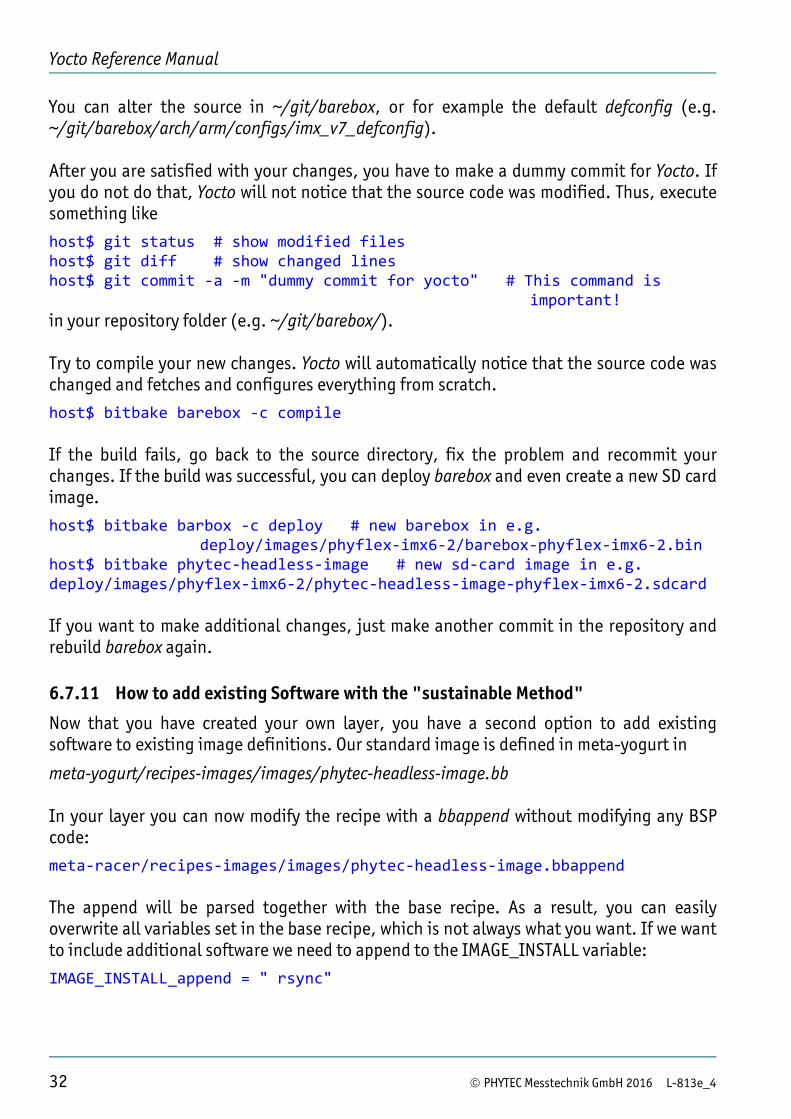
You can alter the source in ~/git/barebox, or for example the default defconfig (e.g. ~/git/barebox/arch/arm/configs/imx_v7_defconfig). After you are satisfied with your changes, you have to make a dummy commit for Yocto. If you do not do that, Yocto will not notice that the source code was modified. Thus, execute something like
host$ git status # show modified files host$ git diff # show changed lines host$ git commit ‐a ‐m "dummy commit for yocto" # This command is
important! in your repository folder (e.g. ~/git/barebox/). Try to compile your new changes. Yocto will automatically notice that the source code was changed and fetches and configures everything from scratch.
host$ bitbake barebox ‐c compile If the build fails, go back to the source directory, fix the problem and recommit your changes. If the build was successful, you can deploy barebox and even create a new SD card image.
host$ bitbake barbox ‐c deploy # new barebox in e.g. deploy/images/phyflex‐imx6‐2/barebox‐phyflex‐imx6‐2.bin
host$ bitbake phytec‐headless‐image # new sd‐card image in e.g. deploy/images/phyflex‐imx6‐2/phytec‐headless‐image‐phyflex‐imx6‐2.sdcard If you want to make additional changes, just make another commit in the repository and rebuild barebox again.
6.7.11 How to add existing Software with the "sustainable Method"
Now that you have created your own layer, you have a second option to add existing software to existing image definitions. Our standard image is defined in meta-yogurt in
meta-yogurt/recipes-images/images/phytec-headless-image.bb In your layer you can now modify the recipe with a bbappend without modifying any BSP code:
meta‐racer/recipes‐images/images/phytec‐headless‐image.bbappend The append will be parsed together with the base recipe. As a result, you can easily overwrite all variables set in the base recipe, which is not always what you want. If we want to include additional software we need to append to the IMAGE_INSTALL variable:
IMAGE_INSTALL_append = " rsync"
Working with Poky and Bitbake
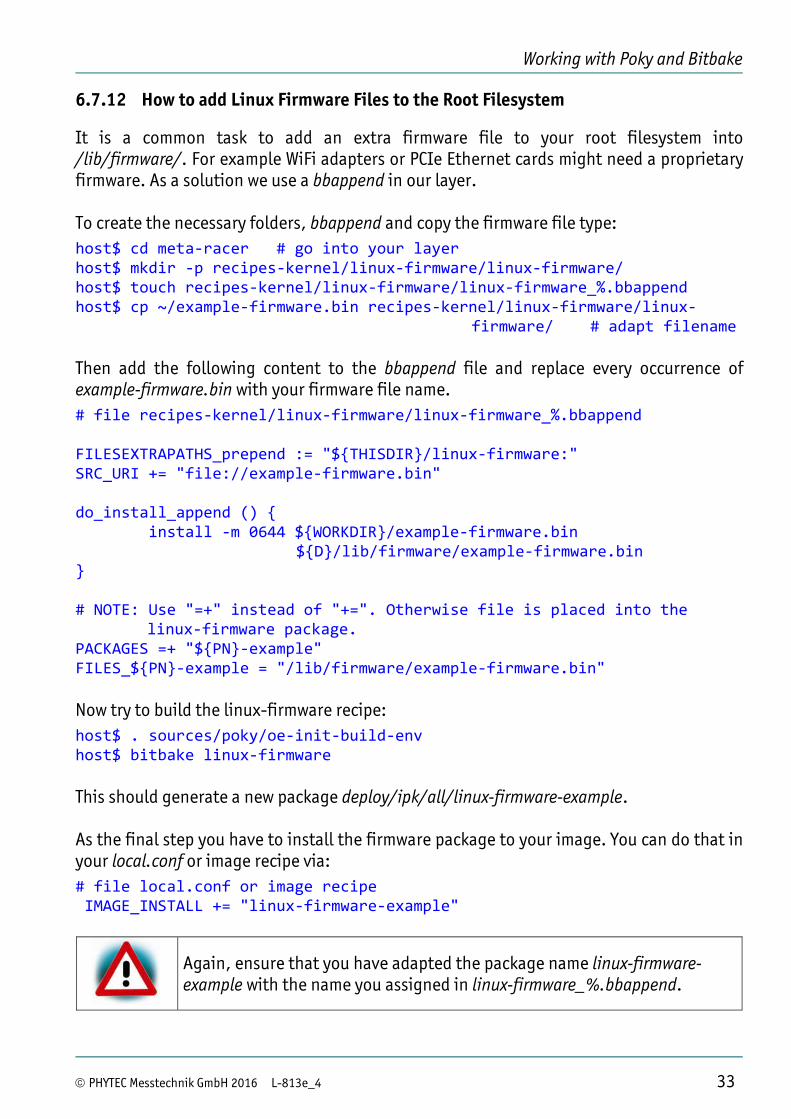
6.7.12 How to add Linux Firmware Files to the Root Filesystem
It is a common task to add an extra firmware file to your root filesystem into /lib/firmware/. For example WiFi adapters or PCIe Ethernet cards might need a proprietary firmware. As a solution we use a bbappend in our layer. To create the necessary folders, bbappend and copy the firmware file type: host$ cd meta‐racer # go into your layer host$ mkdir ‐p recipes‐kernel/linux‐firmware/linux‐firmware/ host$ touch recipes‐kernel/linux‐firmware/linux‐firmware_%.bbappend host$ cp ~/example‐firmware.bin recipes‐kernel/linux‐firmware/linux‐
firmware/ # adapt filename Then add the following content to the bbappend file and replace every occurrence of example-firmware.bin with your firmware file name. # file recipes‐kernel/linux‐firmware/linux‐firmware_%.bbappend FILESEXTRAPATHS_prepend := "$THISDIR/linux‐firmware:" SRC_URI += "file://example‐firmware.bin" do_install_append () install ‐m 0644 $WORKDIR/example‐firmware.bin
$D/lib/firmware/example‐firmware.bin # NOTE: Use "=+" instead of "+=". Otherwise file is placed into the
linux‐firmware package. PACKAGES =+ "$PN‐example" FILES_$PN‐example = "/lib/firmware/example‐firmware.bin" Now try to build the linux-firmware recipe: host$ . sources/poky/oe‐init‐build‐env host$ bitbake linux‐firmware This should generate a new package deploy/ipk/all/linux-firmware-example. As the final step you have to install the firmware package to your image. You can do that in your local.conf or image recipe via: # file local.conf or image recipe IMAGE_INSTALL += "linux‐firmware‐example"
Again, ensure that you have adapted the package name linux-firmware-example with the name you assigned in linux-firmware_%.bbappend.
© PHYTEC Messtechnik GmbH 2016 L-813e_4 33
Yocto Reference Manual
34 © PHYTEC Messtechnik GmbH 2016 L-813e_4
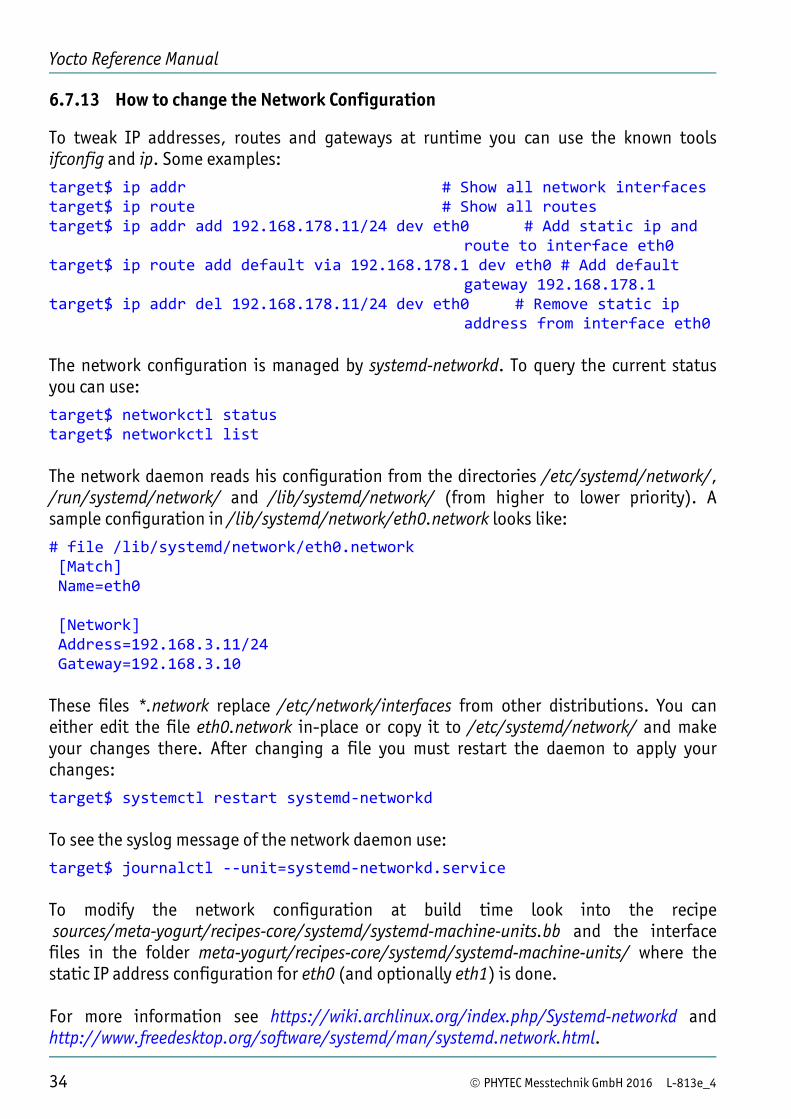
6.7.13 How to change the Network Configuration
To tweak IP addresses, routes and gateways at runtime you can use the known tools ifconfig and ip. Some examples:
target$ ip addr # Show all network interfaces target$ ip route # Show all routes target$ ip addr add 192.168.178.11/24 dev eth0 # Add static ip and
route to interface eth0 target$ ip route add default via 192.168.178.1 dev eth0 # Add default
gateway 192.168.178.1 target$ ip addr del 192.168.178.11/24 dev eth0 # Remove static ip
address from interface eth0 The network configuration is managed by systemd-networkd. To query the current status you can use:
target$ networkctl status target$ networkctl list The network daemon reads his configuration from the directories /etc/systemd/network/, /run/systemd/network/ and /lib/systemd/network/ (from higher to lower priority). A sample configuration in /lib/systemd/network/eth0.network looks like:
# file /lib/systemd/network/eth0.network [Match] Name=eth0 [Network] Address=192.168.3.11/24 Gateway=192.168.3.10 These files *.network replace /etc/network/interfaces from other distributions. You can either edit the file eth0.network in-place or copy it to /etc/systemd/network/ and make your changes there. After changing a file you must restart the daemon to apply your changes:
target$ systemctl restart systemd‐networkd To see the syslog message of the network daemon use:
target$ journalctl ‐‐unit=systemd‐networkd.service To modify the network configuration at build time look into the recipe sources/meta-yogurt/recipes-core/systemd/systemd-machine-units.bb and the interface files in the folder meta-yogurt/recipes-core/systemd/systemd-machine-units/ where the static IP address configuration for eth0 (and optionally eth1) is done. For more information see https://wiki.archlinux.org/index.php/Systemd-networkd and http://www.freedesktop.org/software/systemd/man/systemd.network.html.

Working with Poky and Bitbake
© PHYTEC Messtechnik GmbH 2016 L-813e_4 35
6.7.14 How to change the Wireless Network Configuration
6.7.14.1 Connecting to a WLAN Network
First set the correct regulatory domain for your country: target$ iw reg set DE target$ iw reg get
You will see: country DE: DFS-ETSI (2400 - 2483 @ 40), (N/A, 20), (N/A) (5150 - 5250 @ 80), (N/A, 20), (N/A), NO-OUTDOOR (5250 - 5350 @ 80), (N/A, 20), (0 ms), NO-OUTDOOR, DFS (5470 - 5725 @ 160), (N/A, 26), (0 ms), DFS (57000 - 66000 @ 2160), (N/A, 40), (N/A)
Set up the wireless interface: target$ ip link # list all interfaces. Search for wlan* target$ ip link set up dev wlan0
Now you can scan for available networks with: targe$ iw wlan0 scan | grep SSID
You can use a cross-platform supplicant with support for WEP, WPA and WPA2 called wpa_supplicant for an encrypted connection.
To do so, add the network-credentials to the file /etc/wpa_supplicant.conf: country=DE network= ssid="<SSID>" proto=WPA2 psk="<KEY>" Now a connection can be established with: target$ wpa_supplicant ‐Dnl80211 ‐c/etc/wpa_supplicant.conf ‐iwlan0 &
This should result in the following output:
... ENT-CONNECTED - Connection to 88:33:14:5d:db:b1 completed [id=0 id_str=]
To finish the configuration you can configure DHCP to receive an IP address (supported by most WLAN access points). For other possible IP configuration see section 6.7.13 "How to change the Network Configuration". First create the directory: target$ mkdir ‐p /etc/systemd/network/
Yocto Reference Manual
36 © PHYTEC Messtechnik GmbH 2016 L-813e_4
Then add the following configuration snippet in /etc/systemd/network/10-wlan0.network: # file /etc/systemd/network/10‐wlan0.network [Match] Name=wlan0 [Network] DHCP=yes
Now, restart the network daemon so that the configuration takes effect: target$ systemctl restart systemd‐networkd
6.7.14.2 Creating a WLAN Access Point
This section provides a basic access point (AP) configuration for a secured WPA2 network. Find the name of the WLAN interface with: target$ ip link
Edit the configuration in /etc/hostapd.conf. It is strongly dependent on the use case. The following shows an example: # file /etc/hostapd.conf interface=wlan0 driver=nl80211 ieee80211d=1 country_code=DE hw_mode=g ieee80211n=1 ssid=Test‐Wifi channel=2 wpa=2 wpa_passphrase=12345678 wpa_key_mgmt=WPA‐PSK wpa_pairwise=CCMP
Set up and start the DHCP server for the network interface wlan0 via systemd-networkd: target$ mkdir ‐p /etc/systemd/network/ target$ vi /etc/systemd/network/10‐wlan0.network
Insert the following text into the file: [Match] Name=wlan0 [Network] Address=192.168.0.1/24 DHCPServer=yes
Working with Poky and Bitbake
© PHYTEC Messtechnik GmbH 2016 L-813e_4 37
[DHCPServer] EmitDNS=yes target$ systemctl restart systemd‐networkd target$ systemctl status systemd‐networkd ‐l # check status and see errors
Start the user space daemon hostapd: target$ systemctl start hostapd target$ systemctl status hostapd ‐l # check for errors
Now, you should see the WLAN network Test-Wifi on your terminal device (laptop, smart phone, etc.).
If there are problems with the access point, you can either check the log messages with target$ journalctl ‐‐unit=hostapd
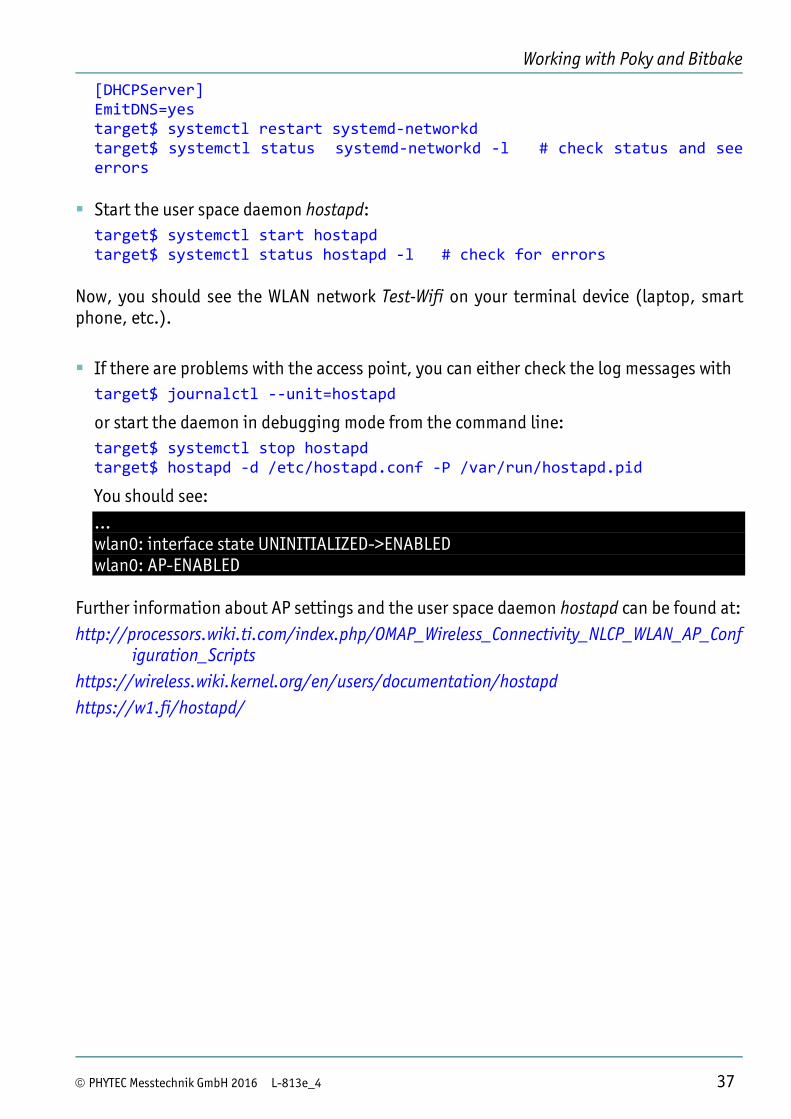
or start the daemon in debugging mode from the command line: target$ systemctl stop hostapd target$ hostapd ‐d /etc/hostapd.conf ‐P /var/run/hostapd.pid
You should see: ... wlan0: interface state UNINITIALIZED->ENABLED wlan0: AP-ENABLED
Further information about AP settings and the user space daemon hostapd can be found at: http://processors.wiki.ti.com/index.php/OMAP_Wireless_Connectivity_NLCP_WLAN_AP_Conf
iguration_Scripts
https://wireless.wiki.kernel.org/en/users/documentation/hostapd
https://w1.fi/hostapd/
Yocto Reference Manual
6.7.15 How to add OpenCV Libraries and Examples
OpenCV (Opensource Computer Vision http://opencv.org/) is an open-source library for computer vision applications. To install the libraries and examples edit the file conf/local.conf in the Yocto buildsystem
and add: # file conf/local.conf # Installing OpenCV libraries and examples LICENSE_FLAGS_WHITELIST += "commercial_libav" LICENSE_FLAGS_WHITELIST += "commercial_x264" IMAGE_INSTALL_append = " \ opencv \ opencv‐samples \ libopencv‐calib3d2.4 \ libopencv‐contrib2.4 \ libopencv‐core2.4 \ libopencv‐flann2.4 \ libopencv‐gpu2.4 \ libopencv‐highgui2.4 \ libopencv‐imgproc2.4 \ libopencv‐legacy2.4 \ libopencv‐ml2.4 \ libopencv‐nonfree2.4 \ libopencv‐objdetect2.4 \ libopencv‐ocl2.4 \ libopencv‐photo2.4 \ libopencv‐stitching2.4 \ libopencv‐superres2.4 \ libopencv‐video2.4 \ libopencv‐videostab2.4 \ "
Then rebuild your image: host$ bitbake phytec‐qt5demo‐image
Most examples do not work out of the box, because they depend on the GTK graphics library. The BSP only supports Qt5.
38 © PHYTEC Messtechnik GmbH 2016 L-813e_4
Working with Poky and Bitbake
© PHYTEC Messtechnik GmbH 2016 L-813e_4 39
6.8 Common Tasks
6.8.1 Debugging a User Space Application
The phytec-qt5demo-image can be cross debugged without any change. For cross debugging you just have to match the host sysroot with the image in use. So you need to create a toolchain for your image with:
host$ bitbake ‐c populate_sdk phytec‐qt5demo‐image Additionally, if you want to have full debug and backtrace capabilities for all programs and libraries in the image, you could add
DEBUG_BUILD = "1"
to the conf/local.conf. This is not necessary in all cases. The compiler options will then be switched from FULL_OPTIMIZATION to DEBUG_OPTIMIZATION. Have a look at the Poky source code for the default assignment of DEBUG_OPTIMIZATION. To start a cross debug session install the SDK as mentioned previously, source the SDK environment and run Qt Creator in the same shell. If you do not use Qt Creator you can directly call the arm-<..>-gdb debugger instead, which should be in your path after sourcing the environment script. If you work with Qt Creator, have a look in the appropriate documentation delivered with your product (either QuickStart, or Application Guide) for information on how to set up the toolchain. When starting the debugger with your user space application you will get a SIGILL, an illegal instruction from the libcrypto. Openssl probes for the system capabilities by trapping illegal instructions, which will trigger GDB. You can ignore this and hit Continue (c command). You can permanently ignore this stop by adding
handle SIGILL nostop
to your GDB startup script, or in the Qt Creator GDB configuration panel. Secondly you might need to disable a security feature by adding
set auto‐load safe‐path /
to the same startup script, which will enable automatic loading of libraries from any location. If you need to have native debugging you might want to install the debug symbols on the target. You can do this by adding the following line to your conf/local.conf :
EXTRA_IMAGE_FEATURES += "dbg‐pkgs" For cross debugging this is not required as the debug symbols will be loaded from the host side and the dbg-pkgs are included in the SDK of your image anyway.
Yocto Reference Manual
40 © PHYTEC Messtechnik GmbH 2016 L-813e_4
6.8.2 Generating Source Mirrors, working offline
Modify your site.conf (or local.conf if you do not use a site.conf) as follows:
#DL_DIR ?= "" don't set it! It will default to a directory inside /build SOURCE_MIRROR_URL = "file:///home/share/yocto_downloads/" INHERIT += "own‐mirrors BB_GENERATE_MIRROR_TARBALLS = "1" Now run a
host$ bitbake ‐c fetchall <image>
for all images and for all machines you want to provide sources for. This will create all necessary tar archives. We can remove all SCM subfolders, as they are duplicated with the tarballs.
host$ rm ‐rf build/download/git2/ etc... Please consider that we used a local source mirror for generating the dl_dir, and because of that, some archives will be linked locally. First we need to copy all files, resolving symbolic links into the new mirror directory:
host$ rsync ‐vaL <dl_dir> $TOPDIR/../src_mirror/ Now we clean the /build directory by deleting everything except /build/conf/ but including /build/conf/sanity. We change site.conf as follows:
SOURCE_MIRROR_URL = "file://$TOPDIR/../src_mirror" INHERIT += "own‐mirrors" BB_NO_NETWORK = "1" SCONF_VERSION = "1" The BSP directory can now be compressed with
host$ tar cfJ <filename>.tar.xz <folder>
where filename and folder should be the full BSP name.
6.8.3 Compiling on the Target
To your local.conf add:
IMAGE_FEATURES_append = “ tools‐sdk dev‐pkgs”
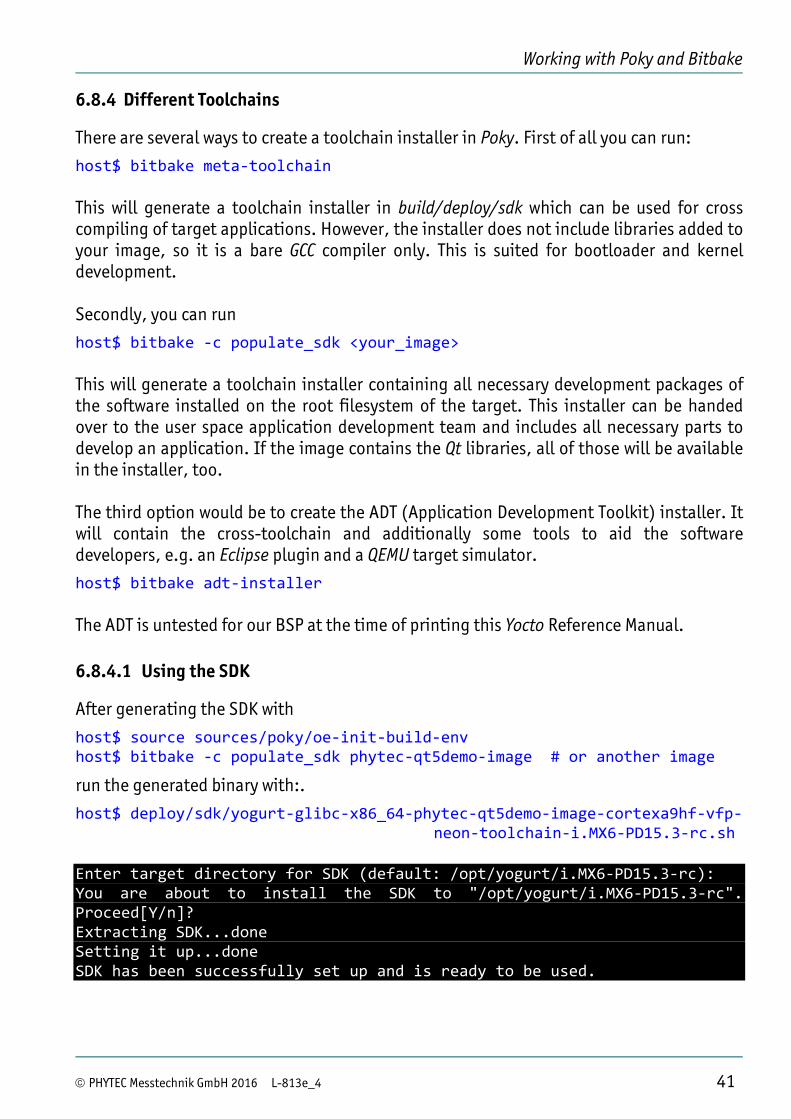
Working with Poky and Bitbake
© PHYTEC Messtechnik GmbH 2016 L-813e_4 41
6.8.4 Different Toolchains
There are several ways to create a toolchain installer in Poky. First of all you can run:
host$ bitbake meta‐toolchain This will generate a toolchain installer in build/deploy/sdk which can be used for cross compiling of target applications. However, the installer does not include libraries added to your image, so it is a bare GCC compiler only. This is suited for bootloader and kernel development. Secondly, you can run
host$ bitbake ‐c populate_sdk <your_image> This will generate a toolchain installer containing all necessary development packages of the software installed on the root filesystem of the target. This installer can be handed over to the user space application development team and includes all necessary parts to develop an application. If the image contains the Qt libraries, all of those will be available in the installer, too. The third option would be to create the ADT (Application Development Toolkit) installer. It will contain the cross-toolchain and additionally some tools to aid the software developers, e.g. an Eclipse plugin and a QEMU target simulator.
host$ bitbake adt‐installer The ADT is untested for our BSP at the time of printing this Yocto Reference Manual.
6.8.4.1 Using the SDK
After generating the SDK with
host$ source sources/poky/oe‐init‐build‐env host$ bitbake ‐c populate_sdk phytec‐qt5demo‐image # or another image
run the generated binary with:.
host$ deploy/sdk/yogurt‐glibc‐x86_64‐phytec‐qt5demo‐image‐cortexa9hf‐vfp‐neon‐toolchain‐i.MX6‐PD15.3‐rc.sh
Enter target directory for SDK (default: /opt/yogurt/i.MX6‐PD15.3‐rc): You are about to install the SDK to "/opt/yogurt/i.MX6‐PD15.3‐rc". Proceed[Y/n]? Extracting SDK...done Setting it up...done SDK has been successfully set up and is ready to be used.
Yocto Reference Manual You can activate the toolchain for your shell by sourcing the file environment-setup in the toolchain directory: host$ source /opt/yogurt/i.MX6‐PD15.3‐rc/environment‐setup‐cortexa9hf‐
vfp‐neon‐phytec‐linux‐gnueabi Then the necessary tools like cross compiler and linker are in your PATH. To compile a simple C program, use:
host$ $CC main.c ‐o main The environment variable $CC contains the path to the arm cross compiler and other compiler arguments needed like -march, -sysroot and --mfloat-abi.
You cannot compile programs only with the compiler name like host$ arm‐phytec‐linux‐gnueabi‐gcc main.c ‐o main. It will fail in many cases. Always use CC, CFLAGS, LDFLAGS, and so on.
For convenience the environment-setup exports other environment variables like CXX, LD, SDKTARGETSYSROOT, …. A simple Makefile compiling a C and C++ program may look like:
# Makefile TARGETS=c‐program cpp‐program all: $(TARGETS) c‐program: c‐program.c $(CC) $(CFLAGS) $(LDFLAGS) $< ‐o $@ cpp‐program: cpp‐program.cpp $(CXX) $(CXXFLAGS) $(LDFLAGS) $< ‐o $@ .PHONY: clean clean: rm ‐f $(TARGETS) To compile for the target just source the toolchain in your shell before executing make.
host$ make # Compiling with host CC, CXX for host architecture host$ source /opt/yogurt/i.MX6‐PD15.3‐rc/environment‐setup‐cortexa9hf‐
vfp‐neon‐phytec‐linux‐gnueabi host$ make # Compiling with target CC, CXX for target architecture If you need to specify additional include directories in the sysroot of the toolchain, you can use an '=' sign in the -I argument like
‐I=/usr/include/SDL
42 © PHYTEC Messtechnik GmbH 2016 L-813e_4
Working with Poky and Bitbake
GCC replaces it by the sysroot path (here /opt/yogurt/i.MX6-PD15.3-rc/sysroots/cortexa9hf-vfp-neon-phytec-linux-gnueabi/). See the manpage of GCC for more information.
The variables $CFLAGS and $CXXFLAGS contain the compiler debug flag '-g' by default. This includes debugging information in the binary and makes it bigger. Those should be removed in the production image. If you create a Bitbake recipe, the default behavior is to turn on '-g', too. The debugging symbols are used in the SDK rootfs to be able to get debugging information when invoking GDB from the host. Before installing the package to the target rootfs, Bitbake will invoke strip on the program which removes the debugging symbols. They are not found nor required on the target root filesystem per default.
6.8.5 Working with Kernel Modules
You will come to the point where you either need to set some options for a kernel module or you want to blacklist a module. Those things are handled by udev and go into *.conf files in /etc/modprobe.d/*.conf. If you want to specify an option at buildtime, there are three relevant variables. If you just want to auto load a module which has e.g. no auto load capabilities, add it to
KERNEL_MODULE_AUTOLOAD += "your‐module"
either in the kernel recipe or in the global variable scope. If you need to specify options for a module you can do so with:
KERNEL_MODULE_AUTOLOAD += "your‐module" KERNEL_MODULE_PROBECONF += "your‐module" module_conf_your‐module = "options your‐module
parametername=parametervalue" If you want to blacklist a module from auto loading, you can do it intuitively with:
KERNEL_MODULE_AUTOLOAD += "your‐module" KERNEL_MODULE_PROBECONF += "your‐module" module_conf_your‐module = "blacklist your‐module"
6.8.6 Working with udev
Udev (Linux dynamic device management) is a system daemon that handles dynamic device management in /dev.
© PHYTEC Messtechnik GmbH 2016 L-813e_4 43
It is controlled by udev rules that are located in /etc/udev/rules.d/ (sysadmin configuration space) and /lib/udev/rules.d/ (vendor provided).
Yocto Reference Manual
Here is an example of an udev rule file:
# file /etc/udev/rules.d/touchscreen.rules # Create a symlink to any touchscreen input device SUBSYSTEM=="input", KERNEL=="event[0‐9]*", ATTRSmodalias=="input:*‐
e0*,3,*a0,1,*18,*", SYMLINK+="input/touchscreen0" SUBSYSTEM=="input", KERNEL=="event[0‐9]*", ATTRSmodalias=="ads7846",
SYMLINK+="input/touchscreen0" See http://www.freedesktop.org/software/systemd/man/udev.html for more details about the syntax and usage. To get the list of attributes for a specific device that can be used in an udev rule you can use the udevadm info tool. It prints all existing attributes of the device node and its parents. The key value pairs from the output can be copied and pasted into a rule file. Some examples:
target$ udevadm info ‐a /dev/mmcblk0 target$ udevadm info ‐a /dev/v4l‐subdev25 target$ udevadm info ‐a ‐p /sys/class/net/eth0 After changing an udev rule, you have to notify the daemon about that. Otherwise your changes are not reflected. Use the following command:
target$ udevadm control ‐‐reload‐rules While developing udev rules you should monitor the events in order to see when devices are de- or attached to the system. Use:
target$ udevadm monitor Furthermore it is very useful to monitor the system log in another shell, especially if the rule executes external scripts. Execute:
target$ journalctl ‐f
44 © PHYTEC Messtechnik GmbH 2016 L-813e_4
You cannot start daemons or heavy scripts in a RUN attribute. See http://www.freedesktop.org/software/systemd/man/udev.html#RUNtype This can only be used for very short-running foreground tasks. Running an event process for a long period of time may block all further events for this ora dependent device. Starting daemons or other long-running processes is not appropriate for udev; the forked processes, detached or not, will be unconditionally killedafter the event handling has finished. You can use the special attribute ENVSYSTEMD_WANTS="service-name.service" and a systemd service instead. See http://unix.stackexchange.com/questions/63232/what-is-the-correct-way-to-write-a-udev-rule-to-stop-a-service-under-systemd.
Yocto Documentation
© PHYTEC Messtechnik GmbH 2016 L-813e_4 45
7 Yocto Documentation
The most important piece of the documentation for a BSP user is probably the developer manual.
http://www.yoctoproject.org/docs/2.0.2/dev-manual/dev-manual.html Especially the chapter about common tasks is a good starting point.
http://www.yoctoproject.org/docs/2.0.2/dev-manual/dev-manual.html#extendpoky The complete documentation is available in one single html page, which is good for searching for a feature or a variable name:
http://www.yoctoproject.org/docs/2.0.2/mega-manual/mega-manual.html

Yocto Reference Manual
46 © PHYTEC Messtechnik GmbH 2016 L-813e_4
8 Revision History
Date Version # Changes in this manual 14.08.2015 Manual
L-813e_1
First edition. Describes the Phytec BSP release PD15.1.0 for i.MX 6 and AM335x products.
16.09.2015 Manual L-813e_2
Second edition. Describes the Phytec BSP release PD15.1.x and PD15.2.x for i.MX 6 and PD15.1.x for AM335x products.
05.01.2016 Manual L-813e_3
Third edition. Describes the Phytec BSP release PD15.3.x for i.MX 6 and PD15.2.x for AM335x products and Yocto 1.8.
15.06.2016 Manual L-813e_4
Forth edition. Describes the Phytec BSP release PD16.y.x for i.MX 6 and R2 PD16.1.x for AM335x products and Yocto 2.0.2

Suggestions for Improvement
© PHYTEC Messtechnik GmbH 2016 L-813e_4
Document: Yocto Reference Manual Document number: L-813e_4, June 2016 How would you improve this manual? Did you find any mistakes in this manual? page Submitted by: Customer number: Name: Company: Address: Return to: PHYTEC Messtechnik GmbH Postfach 100403 D-55135 Mainz, Germany Fax : +49 (6131) 9221-33

Published by
© PHYTEC Messtechnik GmbH 2016 Ordering No. L-813e_4 Printed in Germany