Embed Size (px)
Citation preview

Copyright © 2003 GHS CorporationAll Rights Reserved.
Your MIDI XChange™ pedal has been tested and complies with the followingStandards and Directives as set forth by the European Union:
Council Directive(s): 89/336/EEC Electromagnetic Compatibility
Standard(s): EN55013, EN50082-1
This means that this product has been designed to meet stringent guide-lines on how much RF energy it can emit, and that it should be immune fromother sources of interference when properly used. Improper use of thisequipment could result in increased RF emissions, which may or may notinterfere with other electronic products.
To insure against this possibility, always use good shielded cables for allaudio input and output connections. This will help insure compliance withthe Directive(s).
For more information about other Rocktron products, please see your localdealer or one of our importers closest to you (listed on the Rocktron website- www.rocktron.com).
PrecautionsRead all instructions contained in this manual.Keep these instructionsHeed all warningsFollow all instructions.Do not use this apparatus near water.Clean with dry cloth
Do not block any ventilation openings (if applicable). Install in accordance with themanufacturer’s instructions.Do not install near any heat sources such as radiators, heat registers, stoves or otherapparatus (including amplifiers) that produce heat.This product is not equipped with a plug or cable. This pedal runs on a 9 VoltBattery, if a 9Volt DC adapter is the used please follow adapter manufacturer’soperation instructions.Only used attachments/accessories specified by the manufacturer.Do not use this product with any case, stand tripod, bracket or table that is notspecified by the manufacturer. Insure that the case, stand, tripod, bracket etc. isproperly adjusted and setup (follow all instructions). Extra care and caution shouldbe taken to avoid tip over and injury.Unplug this apparatus during lightening storms or when unused during long periods
of time.
Refer all service to qualified service personnel. Servicing is required when theapparatus has been damaged in any way, such as power supply or plug is damaged,liquid has been spilled or objects have fallen into the apparatus or if the apparatushas been exposed to rain or moisture, does not operate normally or has beendropped.
DO NOT ATTEMPT TO SERVICE THIS EQUIPMENT. QUALIFIED PERSON-NEL SHOULD SERVICE THIS EQUIPMENT ONLY. DO NOT MAKE ANYINTERNAL ADJUSTMENTS OR ADDITIONS TO THIS EQUIPMENT AT ANYTIME OR TAMPER WITH INTERNAL ELECTRONIC COMPONENTS AT ANYTIME. FAILURE TO FOLLOW THESE INSTRUCTIONS MAY VOID THEWARRANTY OF THIS EQUIPMENT AS WELL AS CAUSING A SHOCKHAZARD.
OPERATING TEMPERATURE
Do not expose this unit to excessive heat. This unit is designed to operate between32 F and 104 F (0 C and 40 C). This unit may not function properly under extreme
temperatures.
Precautions Continued....
IntroductionCongratulations on your purchase of the Rocktron MIDIXChange. The MIDI XChange is a simple to use, yetmultifunctional MIDI switcher that not only runs MIDIswitchable Rocktron product, but other MIDI switchableproducts as well.
Two built-in expression pedal ports allow you plug in up totwo Rocktron HEX expression/volume controllers forcontinuous controlling of all sorts of parameters.
A fantastic feature of the MIDI XChange is that it runs on a9-volt battery as well as external power. Thus, if you aredoing a gig where it is hard to run power out to your floorpedals - you won’t have any problem with the MIDIXChange as battery operation will allow you to make thepreset and controller changes you need. And, the MIDIXChange is also phantom powerable through select Rocktronprocessors and amplifiers (see “connection” sections formore details).
Finally, the MIDI XChange is housed in a ruggedroadworthy extruded aluminum chassis that will stand up touse and abuse. The easy access battery compartment willmake changing batteries during a gig a breeze.
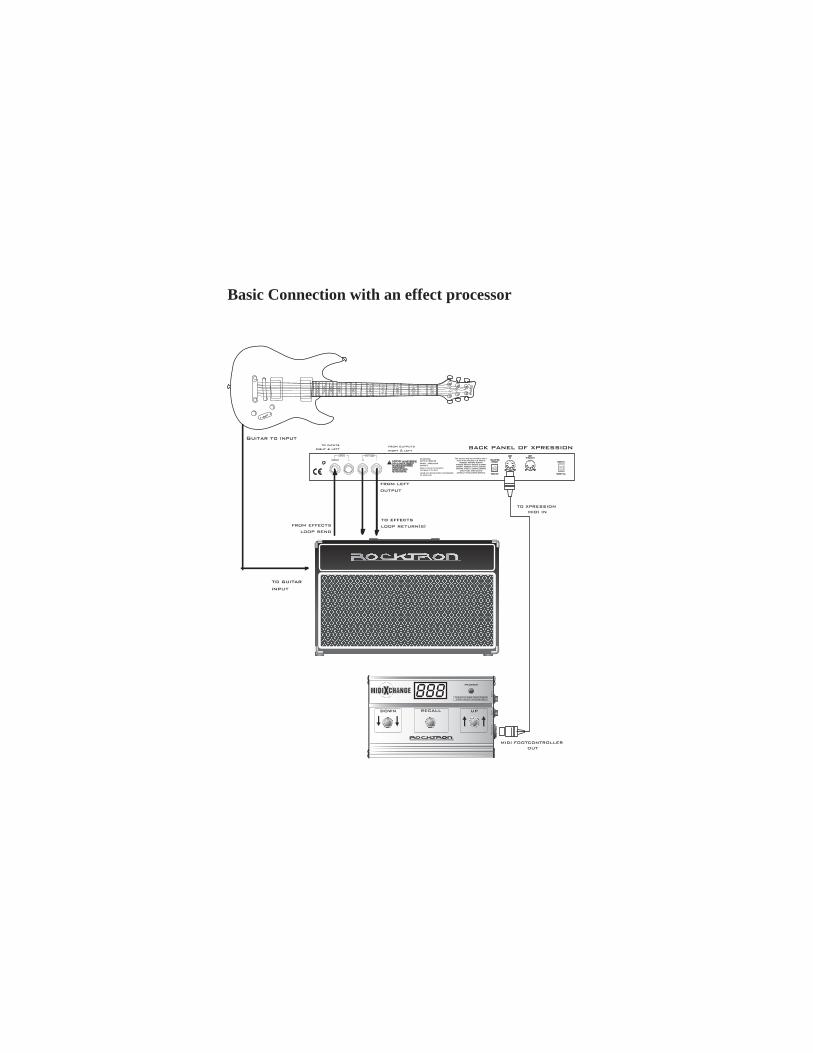
Basic Connection with an effect processor
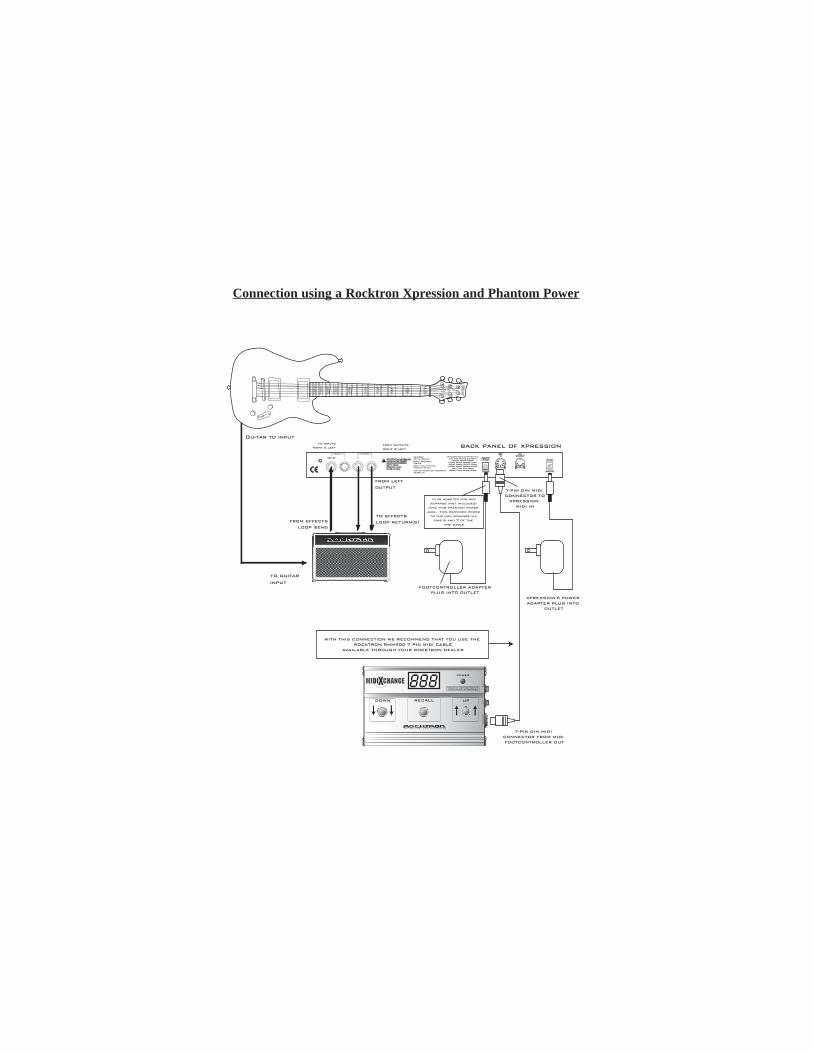
Connection using a Rocktron Xpression and Phantom Power
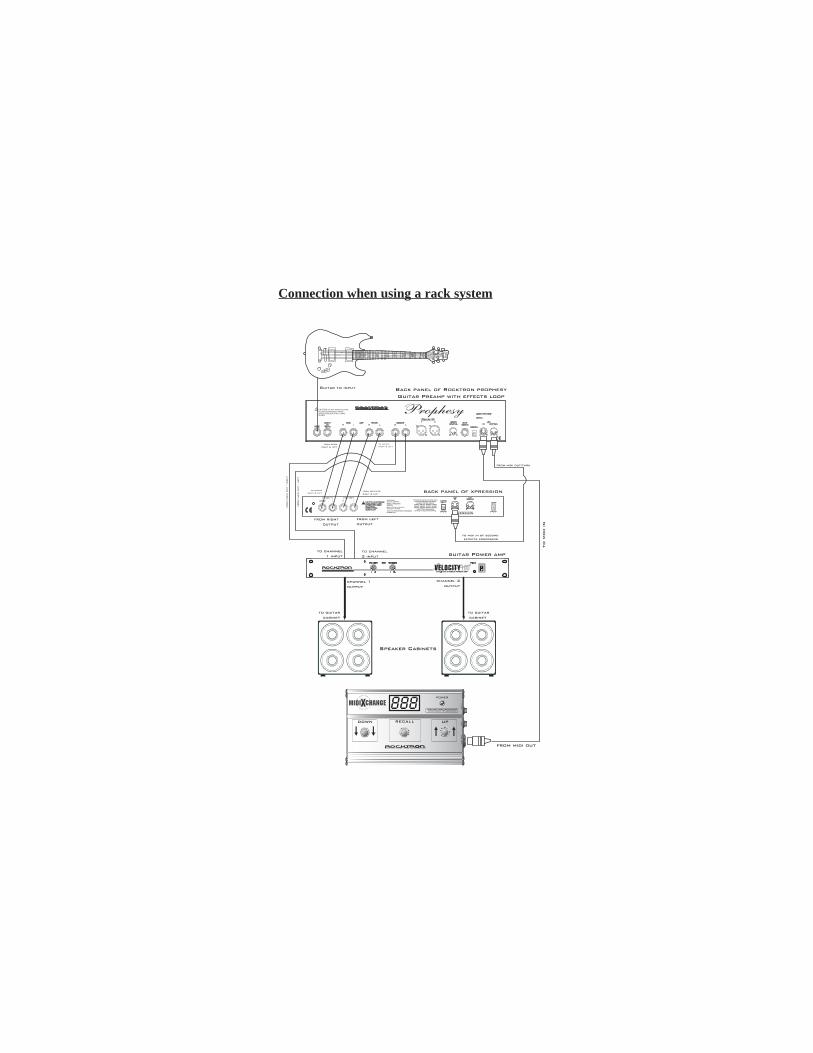
Connection when using a rack system
from midi out
to m
idi in
from midi out/thru
to midi in of second effects processor
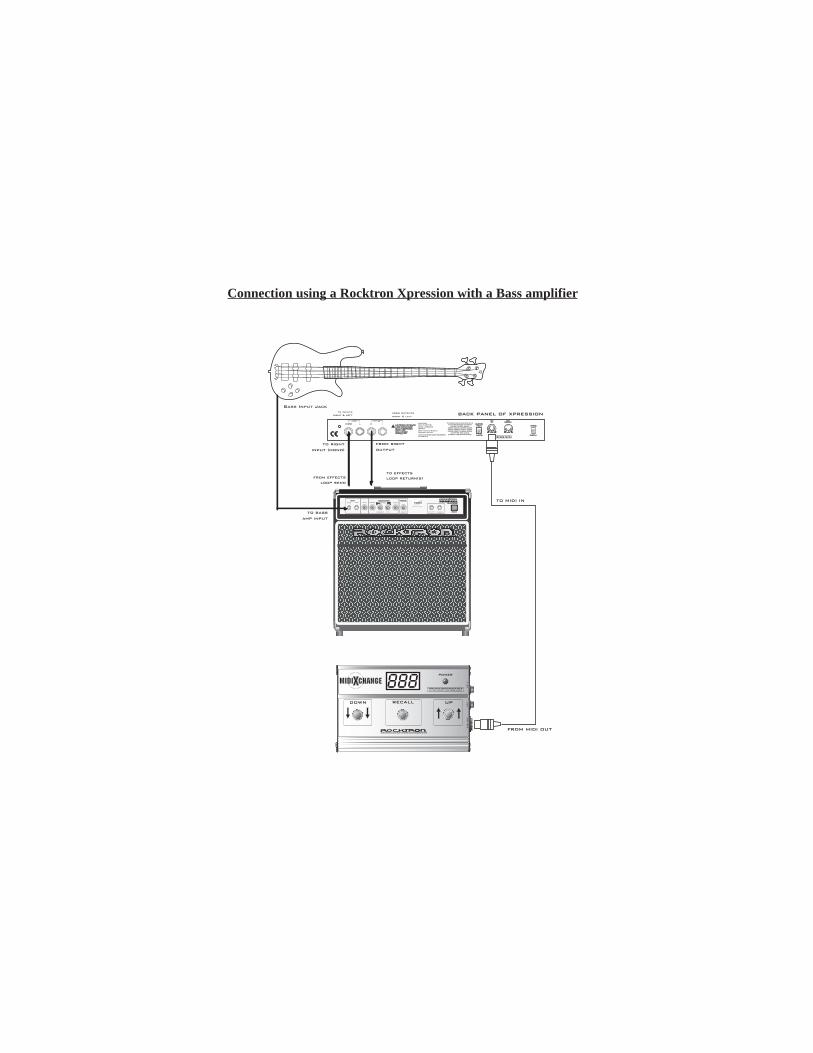
Connection using a Rocktron Xpression with a Bass amplifier
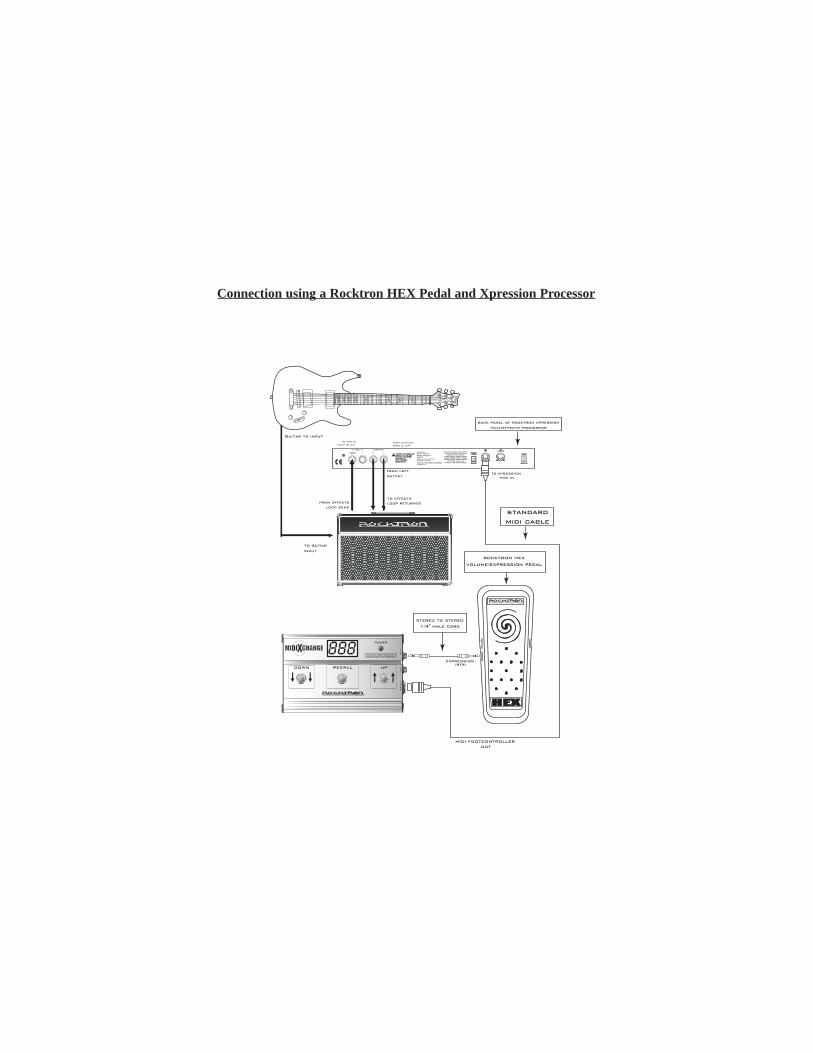
Connection using a Rocktron HEX Pedal and Xpression Processor

to midi in
back panel ofprocessor
Connection using a Rocktron HEX pedal and a non-Rocktroneffects processor
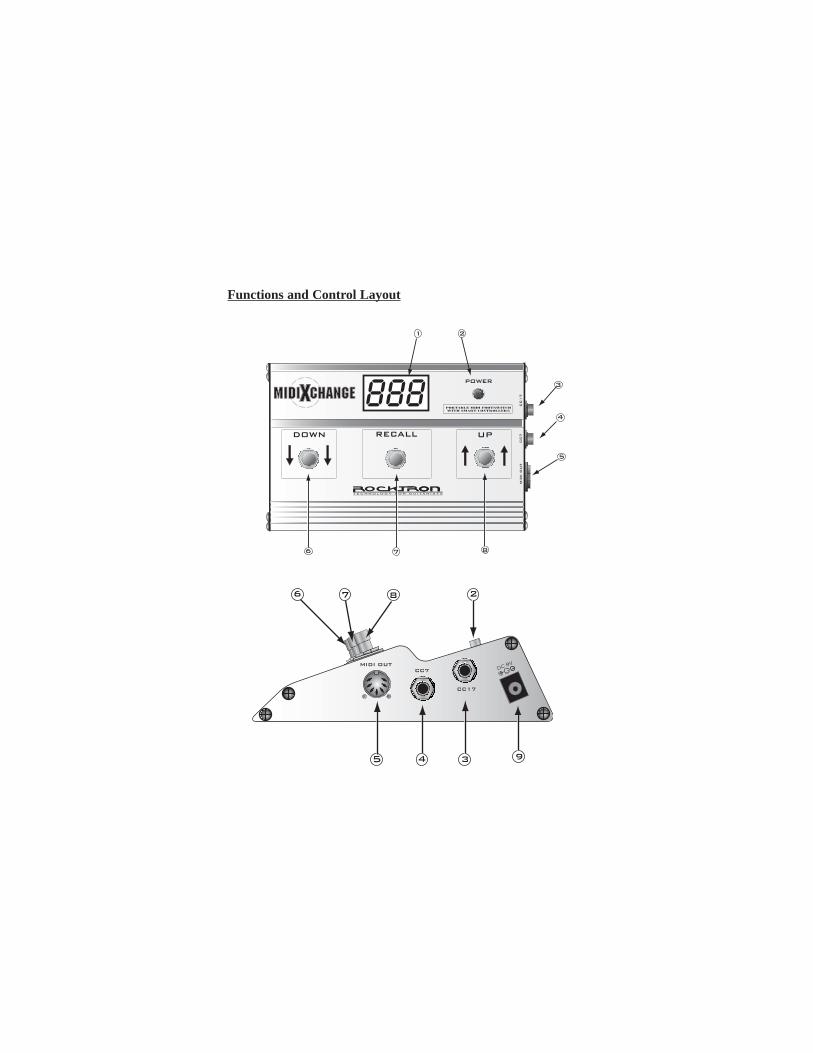
Functions and Control Layout
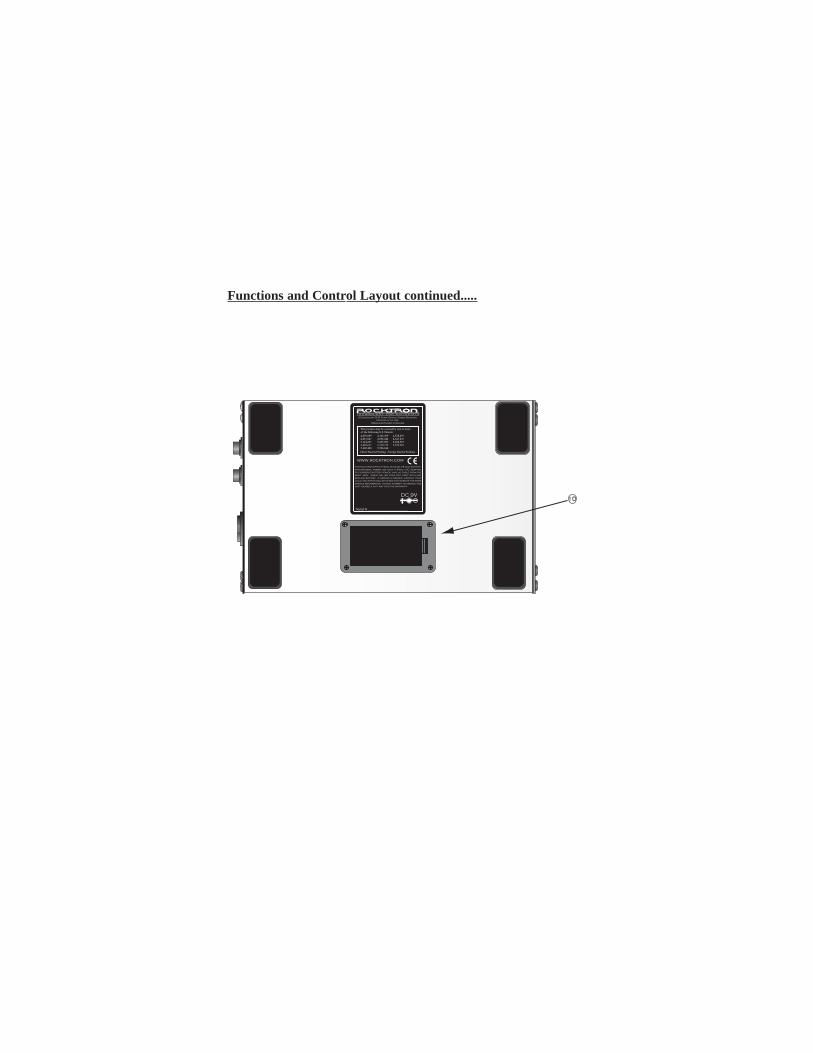
Functions and Control Layout continued.....
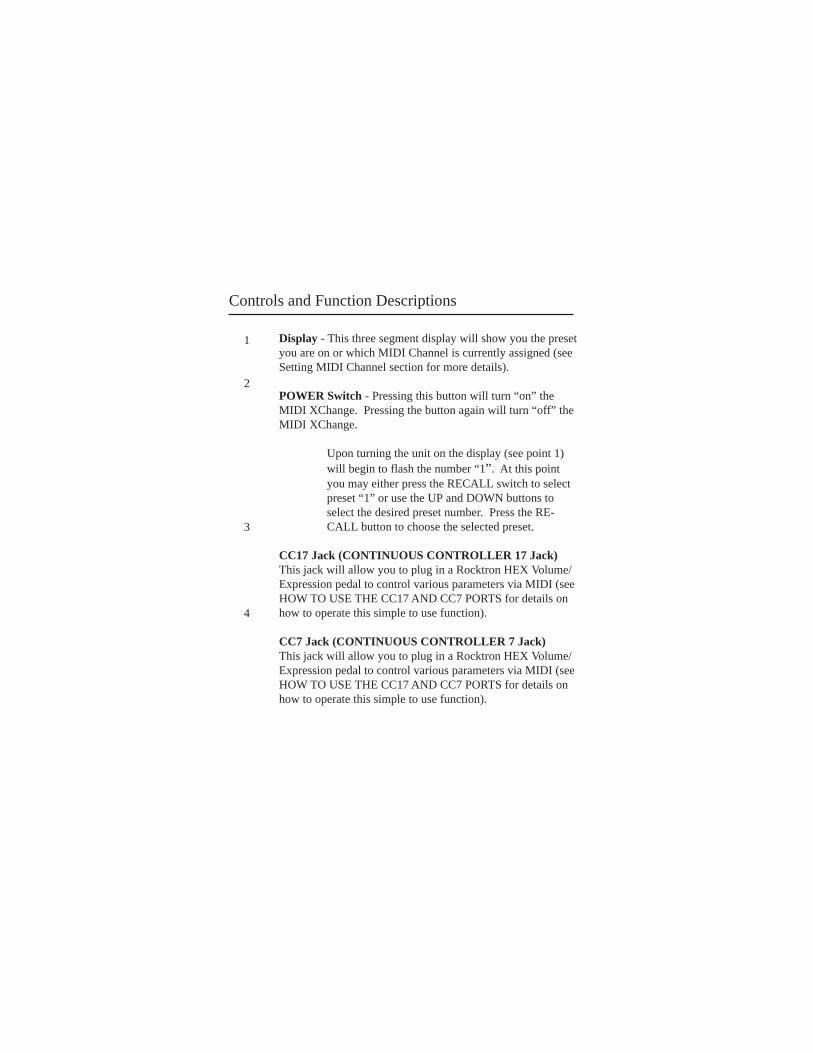
Display - This three segment display will show you the presetyou are on or which MIDI Channel is currently assigned (seeSetting MIDI Channel section for more details).
POWER Switch - Pressing this button will turn “on” theMIDI XChange. Pressing the button again will turn “off” theMIDI XChange.
Upon turning the unit on the display (see point 1)will begin to flash the number “1”. At this pointyou may either press the RECALL switch to selectpreset “1” or use the UP and DOWN buttons toselect the desired preset number. Press the RE-CALL button to choose the selected preset.
CC17 Jack (CONTINUOUS CONTROLLER 17 Jack)This jack will allow you to plug in a Rocktron HEX Volume/Expression pedal to control various parameters via MIDI (seeHOW TO USE THE CC17 AND CC7 PORTS for details onhow to operate this simple to use function).
CC7 Jack (CONTINUOUS CONTROLLER 7 Jack)This jack will allow you to plug in a Rocktron HEX Volume/Expression pedal to control various parameters via MIDI (seeHOW TO USE THE CC17 AND CC7 PORTS for details onhow to operate this simple to use function).
1
2
3
4
Controls and Function Descriptions
5
6
7
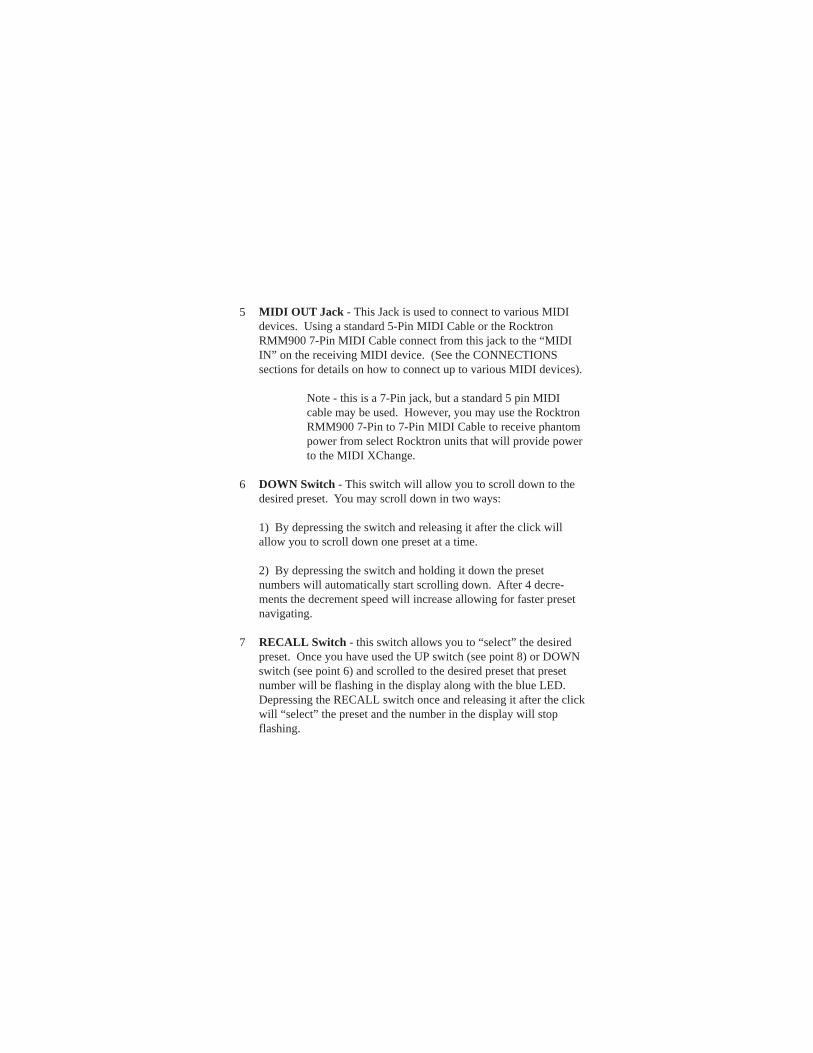
MIDI OUT Jack - This Jack is used to connect to various MIDIdevices. Using a standard 5-Pin MIDI Cable or the RocktronRMM900 7-Pin MIDI Cable connect from this jack to the “MIDIIN” on the receiving MIDI device. (See the CONNECTIONSsections for details on how to connect up to various MIDI devices).
Note - this is a 7-Pin jack, but a standard 5 pin MIDIcable may be used. However, you may use the RocktronRMM900 7-Pin to 7-Pin MIDI Cable to receive phantompower from select Rocktron units that will provide powerto the MIDI XChange.
DOWN Switch - This switch will allow you to scroll down to thedesired preset. You may scroll down in two ways:
1) By depressing the switch and releasing it after the click willallow you to scroll down one preset at a time.
2) By depressing the switch and holding it down the presetnumbers will automatically start scrolling down. After 4 decre-ments the decrement speed will increase allowing for faster presetnavigating.
RECALL Switch - this switch allows you to “select” the desiredpreset. Once you have used the UP switch (see point 8) or DOWNswitch (see point 6) and scrolled to the desired preset that presetnumber will be flashing in the display along with the blue LED.Depressing the RECALL switch once and releasing it after the clickwill “select” the preset and the number in the display will stopflashing.
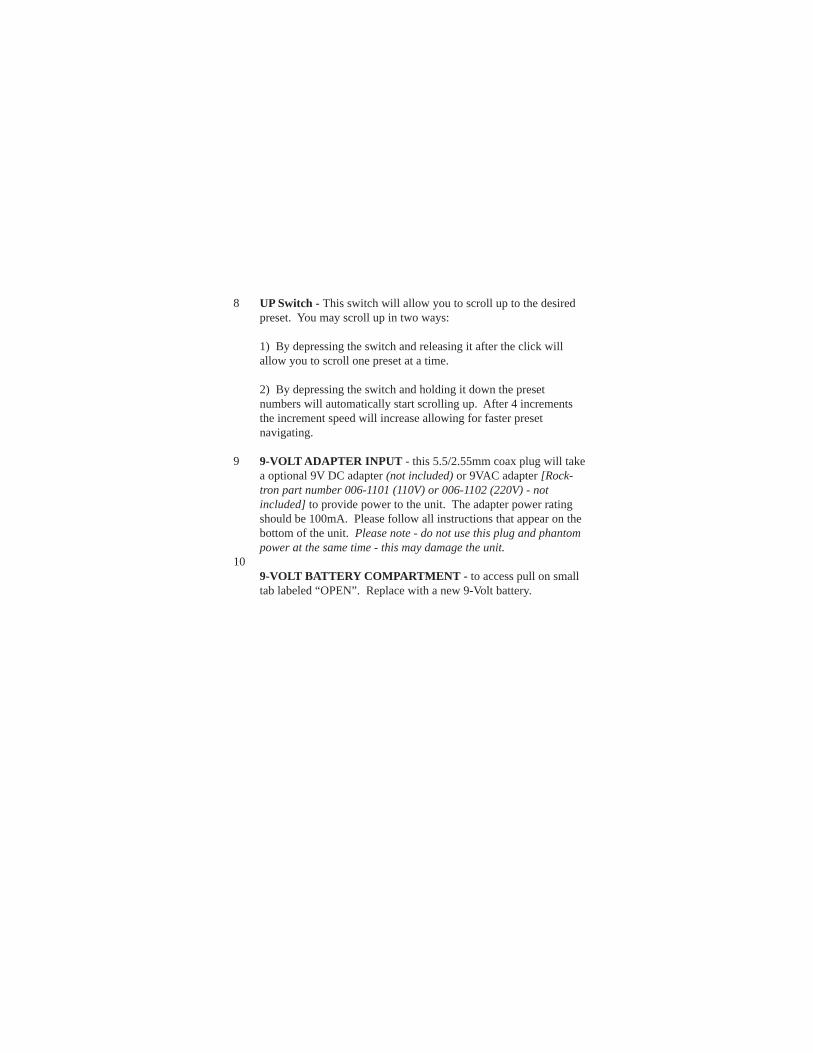
UP Switch - This switch will allow you to scroll up to the desiredpreset. You may scroll up in two ways:
1) By depressing the switch and releasing it after the click willallow you to scroll one preset at a time.
2) By depressing the switch and holding it down the presetnumbers will automatically start scrolling up. After 4 incrementsthe increment speed will increase allowing for faster presetnavigating.
9-VOLT ADAPTER INPUT - this 5.5/2.55mm coax plug will takea optional 9V DC adapter (not included) or 9VAC adapter [Rock-tron part number 006-1101 (110V) or 006-1102 (220V) - notincluded] to provide power to the unit. The adapter power ratingshould be 100mA. Please follow all instructions that appear on thebottom of the unit. Please note - do not use this plug and phantompower at the same time - this may damage the unit.
9-VOLT BATTERY COMPARTMENT - to access pull on smalltab labeled “OPEN”. Replace with a new 9-Volt battery.
8
9
10
MIDI Xchange Operation - Power Sources
The MIDI XChange is unique in respect that you may use mostany type of power.
9-VOLT BATTERYThe MIDI XChange is supplied with a 9Volt Battery - please see“9-VOLT BATTERY COMPARTMENT” section on how tochange the battery. Before operation you will need to open thebattery compartment and plug in the 9-Volt battery packaged in thecompartment. Expected battery life is 12 hours under constantoperation.
EXTERNAL ADAPTER - *Not IncludedThe MIDI XChange can also run off the following adapters:
1) 9VDC 100ma adapter (5.5/2.55mm Coax Plug - Outer ring positive (+) and Inner ring negative (-)*2) 9VAC 1.5A Rocktron Adapter [Part number 006-1101 (110V)]*3) 9VAC 1.5A Rocktron Adapter [Part number 006-1102 (220V)]*
PHANTOM POWERThe MIDI XChange can also run off Phantom power throughselected Rocktron products and the use of the Rocktron RMM9007-Pin to 7-Pin MIDI Cable (sold seperately). This operationrequires you to use a 9VAC 1.5A Adapter 5.5/2.55mm Coax Plug(not included) plugged into the back of select Rocktron products(see connection diagrams for more detail). Power is then suppliedto the MIDI XChange through pins 6 and 7 of the RMM900 MIDICord. This is a great set up to minimize adapters and cables out infront of you on stage.
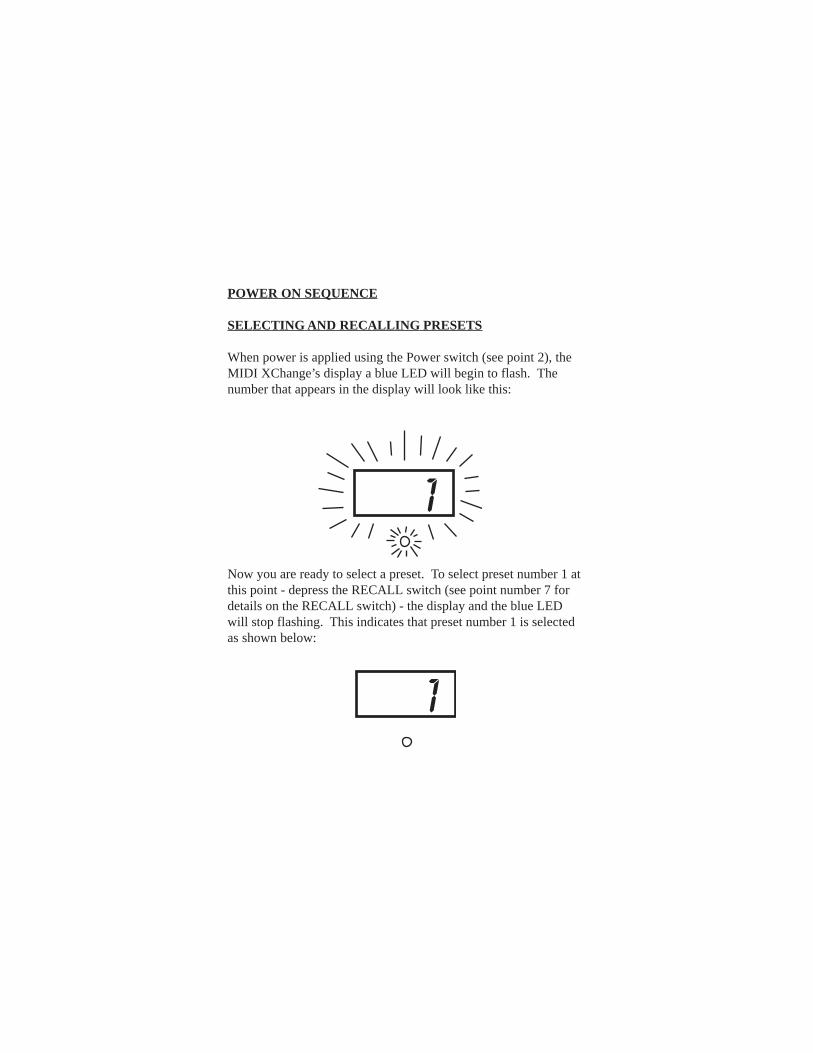
POWER ON SEQUENCE
SELECTING AND RECALLING PRESETS
When power is applied using the Power switch (see point 2), theMIDI XChange’s display a blue LED will begin to flash. Thenumber that appears in the display will look like this:
Now you are ready to select a preset. To select preset number 1 atthis point - depress the RECALL switch (see point number 7 fordetails on the RECALL switch) - the display and the blue LEDwill stop flashing. This indicates that preset number 1 is selectedas shown below:

UP, DOWN and RECALL SwitchesThese switches will allow you to change presets or MIDI channels.The range is 1-128 for the presets and 1-16 for the MIDI Channels.For details on changing the MIDI channel see section titledSETTING MIDI CHANNEL for more details on this function.
UP Switch - Depressing and releasing this switch once willincrease the preset number by one. Depressing and holding theswitch down will engage the automatic increment feature of theMIDI XChange. The MIDI XChange will now begin scrolling upthrough the preset numbers. After 4 increments the incrementspeed will increase allowing faster preset navigation.
DOWN Switch - Depressing and releasing this switch once willdecrease the preset number by one. Depressing and holding theswitch down will engage the automatic decrement feature of theMIDI XChange. The MIDI XChange will now begin scrollingdown through the preset numbers. After 4 decrements the decre-ment speed will increase allowing faster preset navigation.
RECALL Switch - This switch is used to “select” the preset orMIDI Channel. This switch is also used to toggle between the lasttwo presets selected.
Once you have used the UP or DOWN switches to reach yourdesired preset you must then depress and release the RECALLswitch to select the preset. In this example we have scrolled upfrom preset 1 to preset 35 (which is now flashing - see diagramfollowing page):
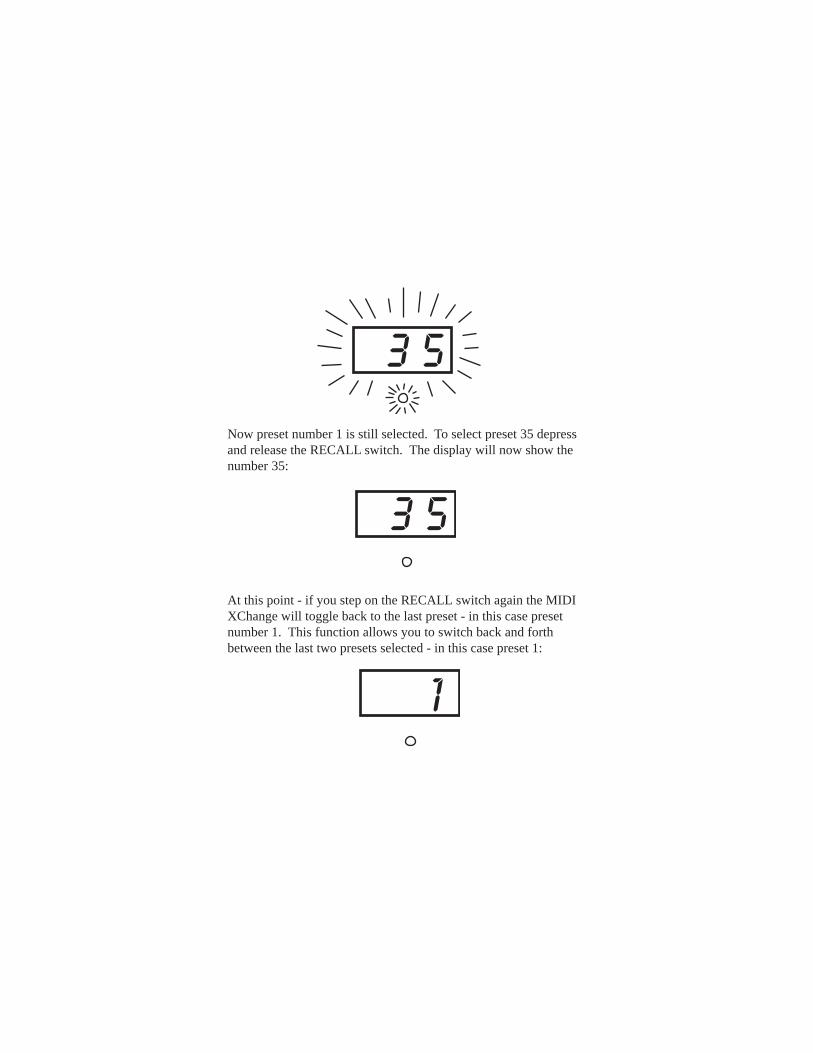
Now preset number 1 is still selected. To select preset 35 depressand release the RECALL switch. The display will now show thenumber 35:
At this point - if you step on the RECALL switch again the MIDIXChange will toggle back to the last preset - in this case presetnumber 1. This function allows you to switch back and forthbetween the last two presets selected - in this case preset 1:
SMART CONTROLLER PORTS
What are “SMART CONTROLLERS”Typically with most MIDI footcontrollers, when using continuouscontroller pedal(s) the “status” of the pedal(s) are not reportedwhen a new program change command has been sent. This wouldmost likely cause a discontinuity in volume requiring the user tostep on his volume pedal to correct the change thus updating thepedal status manually.
The MIDI XChange issues “current status” of both controllerpedal ports upon the recall program change command being sentout. Also auto enable of these controller messages are detectedwhen any of the two ports have a pedal attached to them.Everthing is handled by the MIDI XChange for ease of use.
An example of this would be - when you had reduce the volume ofpreset 1 with an expression pedal - when switching to preset 2,unlike other MIDI controllers, the MIDI XChange will automati-cally detect the position of the pedal and apply that to the volumeof preset 2 - thus no loud or abrupt volume changes. This is idealin a live situation.
The MIDI XChange has two SMART CONTROLLER PORTS -labeled CC17 (see point 3) and CC7 (see point 4). CC stands forCONTINUOUS CONTROLLER.
HOW TO USE THE CC17 and CC7 PORTS:
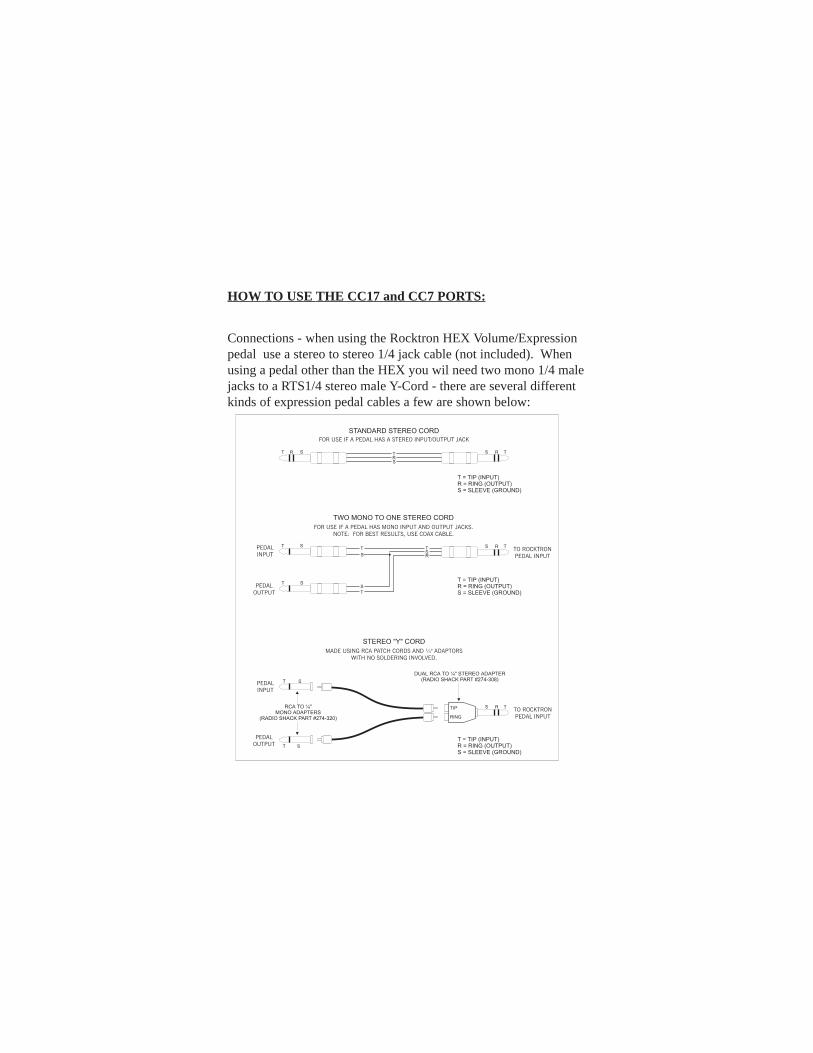
Connections - when using the Rocktron HEX Volume/Expressionpedal use a stereo to stereo 1/4 jack cable (not included). Whenusing a pedal other than the HEX you wil need two mono 1/4 malejacks to a RTS1/4 stereo male Y-Cord - there are several differentkinds of expression pedal cables a few are shown below:
CC17 Port - This controller port is the default volume controllerfor all Rocktron products. Thus, all you need to do to control thevolume of each preset is plug an expression pedal into this portand it will control the volume on all Rocktron products.
CC7 Port - This controller port is the default volume controller formost non-Rocktron products.
NOTE:
The use of these controllers numbers are not exclusive. Byprograming the receiving units (Rocktron processors or other non-Rocktron processors) controller assignments you could assigncontroller 17 or 7 to control various different parameters.
For example you can assign either controller to control the PITCHparameter in a PITCH SHIFTER to create a whammy effect.
SETTING MIDI CHANNELMIDI Channel selection allows you to select the channel that theMIDI XChange transmits MIDI information on. In most normaloperating modes you will want to have selected MIDI channel 1.In this case your receiving MIDI device would have to be set toReceive Channel 1 or OMNI
To change the MIDI Channel follow these instructions:
1) Turn MIDI XChange On
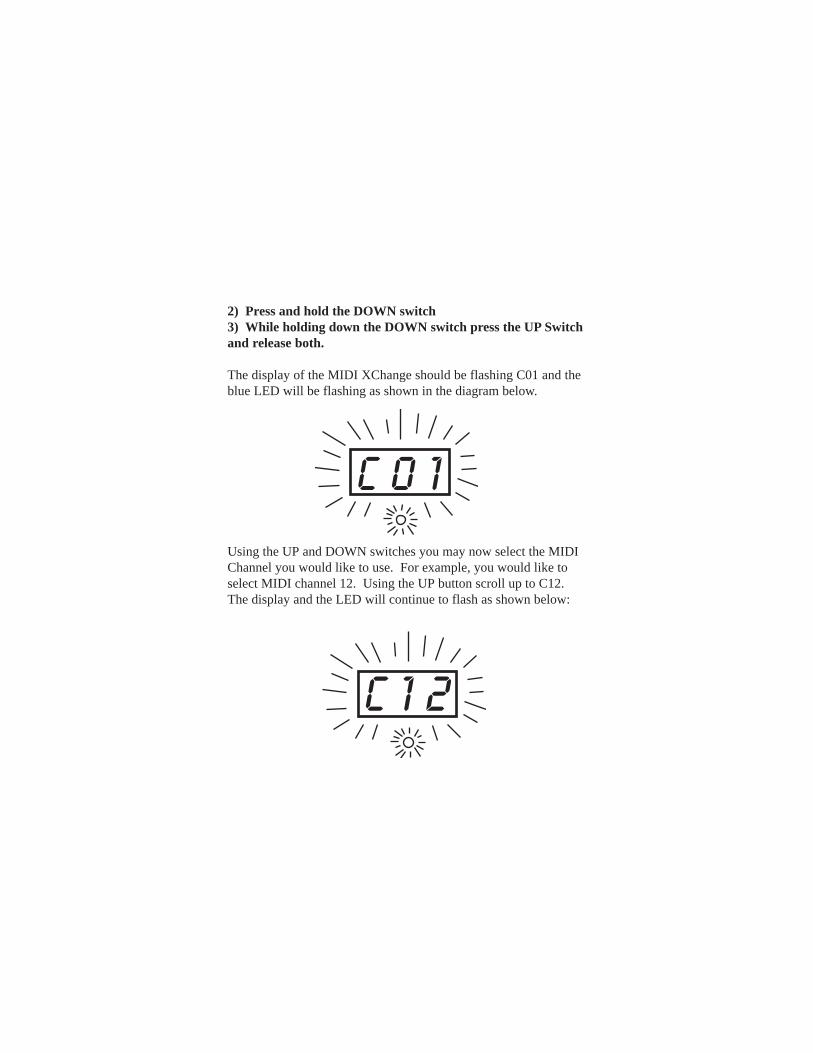
2) Press and hold the DOWN switch3) While holding down the DOWN switch press the UP Switchand release both.
The display of the MIDI XChange should be flashing C01 and theblue LED will be flashing as shown in the diagram below.
Using the UP and DOWN switches you may now select the MIDIChannel you would like to use. For example, you would like toselect MIDI channel 12. Using the UP button scroll up to C12.The display and the LED will continue to flash as shown below:
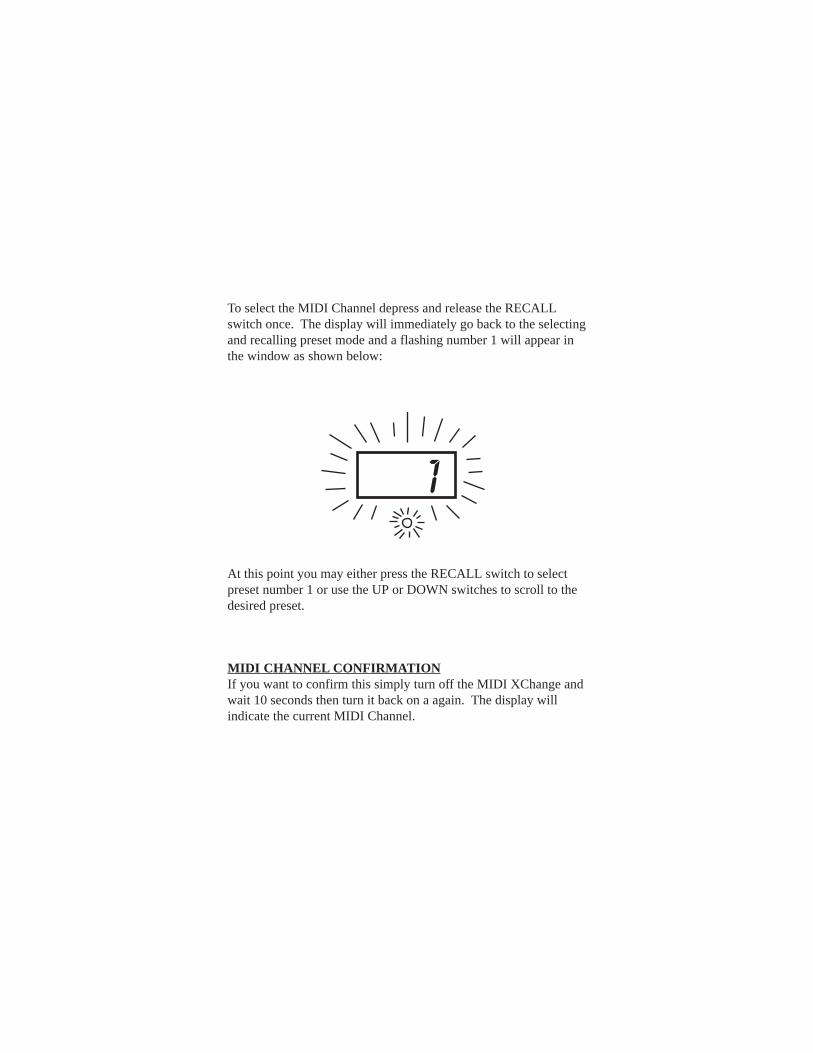
To select the MIDI Channel depress and release the RECALLswitch once. The display will immediately go back to the selectingand recalling preset mode and a flashing number 1 will appear inthe window as shown below:
MIDI CHANNEL CONFIRMATIONIf you want to confirm this simply turn off the MIDI XChange andwait 10 seconds then turn it back on a again. The display willindicate the current MIDI Channel.
At this point you may either press the RECALL switch to selectpreset number 1 or use the UP or DOWN switches to scroll to thedesired preset.
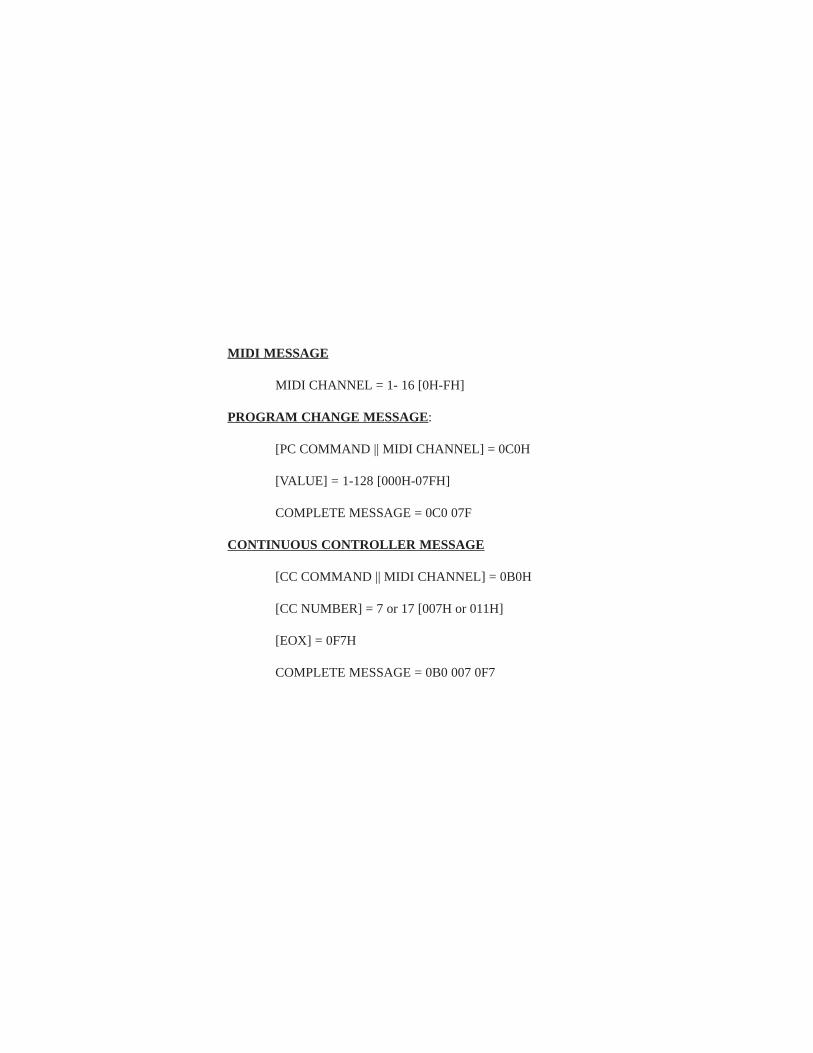
MIDI MESSAGE
MIDI CHANNEL = 1- 16 [0H-FH]
PROGRAM CHANGE MESSAGE:
[PC COMMAND || MIDI CHANNEL] = 0C0H
[VALUE] = 1-128 [000H-07FH]
COMPLETE MESSAGE = 0C0 07F
CONTINUOUS CONTROLLER MESSAGE
[CC COMMAND || MIDI CHANNEL] = 0B0H
[CC NUMBER] = 7 or 17 [007H or 011H]
[EOX] = 0F7H
COMPLETE MESSAGE = 0B0 007 0F7
Rack Gear:
Gainiac (preamp w/12ax7 tube)
Chameleon 2000 (preamp w/multi-effects)
RepliTone MP(modelling preamp w/multi-effects)
Xpression (multi-effects processor)
Blue Thunder (bass preamp w/multi-effects)
Voodu Valve (preamp w/12ax7 tube and multi-effects)
Prophesy (our top of the line preamp with multi-effects)
HUSH Super C (guitar noise silencing system)
Vendetta VP4 Preamp (All Tube 4-Channel Guitar preamp - 2 Rack Space)
Velocity 100 (2x50W Stereo Power Amp for Guitar)
Stomp Boxes:
Rampage Distortion, Tsunami Chorus, Austin Gold Overdrive,
Vertigo Vibe Rotating Vibe Pedal, HUSH The Pedal,
Sonic Glory Overdrive, Short Timer Digital Delay,
Big Crush Compressor, Deep Blue Chorus
Silver Dragon Tube Distortion Pedal,
Metal Planet Distortion
Banshee Talk Box
Black Cat Moan Wah Wah
Other Rocktron Products
Electric Guitar - Acoustic Guitar and Bass Amplifiers:
Vendetta Head(100 W Head 4-Channels All Tube - MIDI Switchable)
Vendetta Combo (100W 2x12 Combo Celestion 90s all Tube4-Channel MIDI Switchable)
R80DSP (80W 1x12 Amp w/Digital Effects)
RT80 (80W 1x12 Amp w/Reverb & Built-in Tuner)
R120DSP (120W 2x10 Amp w/Digital Effects)
RT122C (120W 2x12 Amp w/Stereo Chorus, Reverb & Chromatic Tuner)
R50DSP (50 Watt 2x8"Guitar Amp w/Digital Effects)
R50C (50 Watt 2x8"Guitar Amp w/Reverb & Chorus)
R20 (20 Watt 1x8"Amp w/Reverb) R10 (10 Watt 1x6.5")
ACOUSTIC (60 Watt Acoustic Amp with Chorus & Reverb)
RA50DSP (50W Acoustic Amp w/Digital Effects - Wedge Shape)
RA30DSP (30W Acoustic Amp w/Digital Effects - Wedge Shape)
RB20 (Bass Amp 20W with 8" Speaker) RB30 (Basss Amp 30W with 10" Speaker)
RB60 (Bass Amp 60W with 12" Speaker)
RB100 (Basss Amp 100W with 15" Speaker)
Foot Controllers:
MIDI Mate (Midi Foot Controller)
All Access (Midi Foot Controller ) HEX (Expression Pedal)
RMM900(7-pin Din MIDI Cable) RM4 (MIDI Controller for Vendetta amps)
RFS1 and RFS2 (Single and Double Latching Footswitches for Rampage Amps)
Rocktron - A Division of GHS Corporation2813 Wilber AveBattle Creek MI 49015USA
Rocktron Phone: 1-(269)-968-3351Email: [email protected]
www.rocktron.com
2003-0001Rev. 02/01/03