www.montiegear.com
Y-Shot Band Replacement
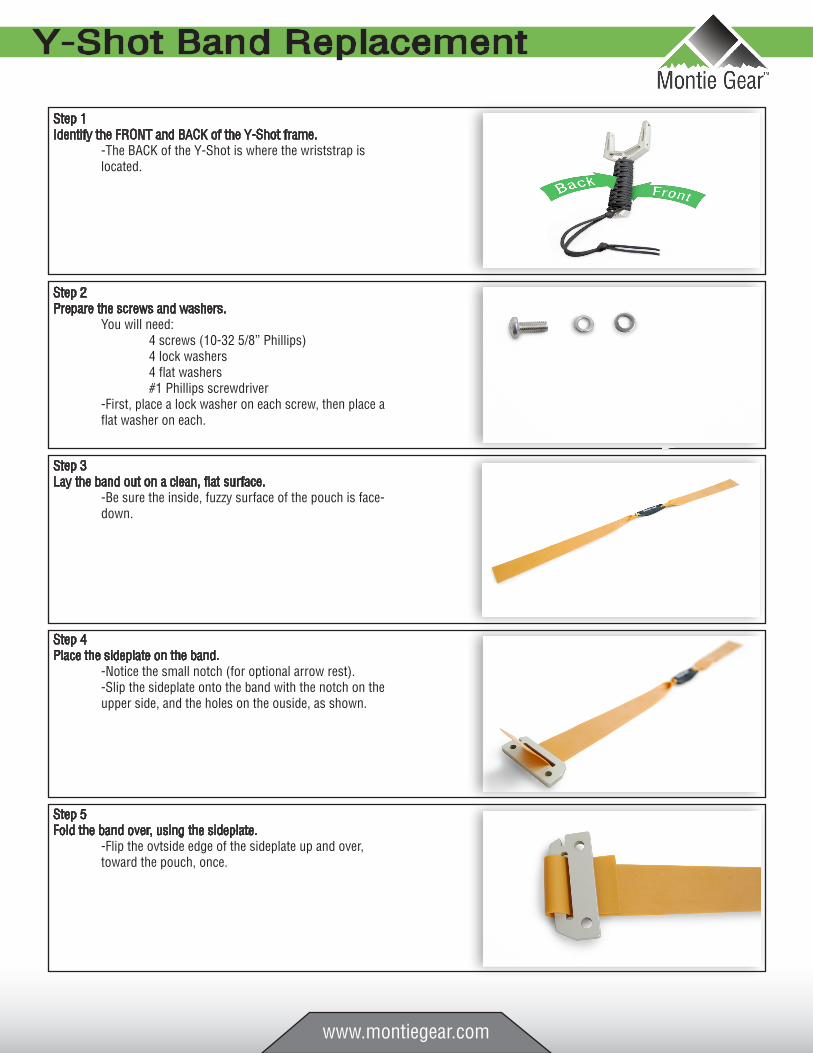
Step 1Identify the FRONT and BACK of the Y-Shot frame. -The BACK of the Y-Shot is where the wriststrap is located.
Step 2Prepare the screws and washers. You will need: 4 screws (10-32 5/8” Phillips) 4 lock washers 4 flat washers #1 Phillips screwdriver -First, place a lock washer on each screw, then place a flat washer on each.
Step 3Lay the band out on a clean, flat surface. -Be sure the inside, fuzzy surface of the pouch is face- down.
Step 4Place the sideplate on the band. -Notice the small notch (for optional arrow rest). -Slip the sideplate onto the band with the notch on the upper side, and the holes on the ouside, as shown.
Step 5Fold the band over, using the sideplate. -Flip the ovtside edge of the sideplate up and over, toward the pouch, once.
www.montiegear.com
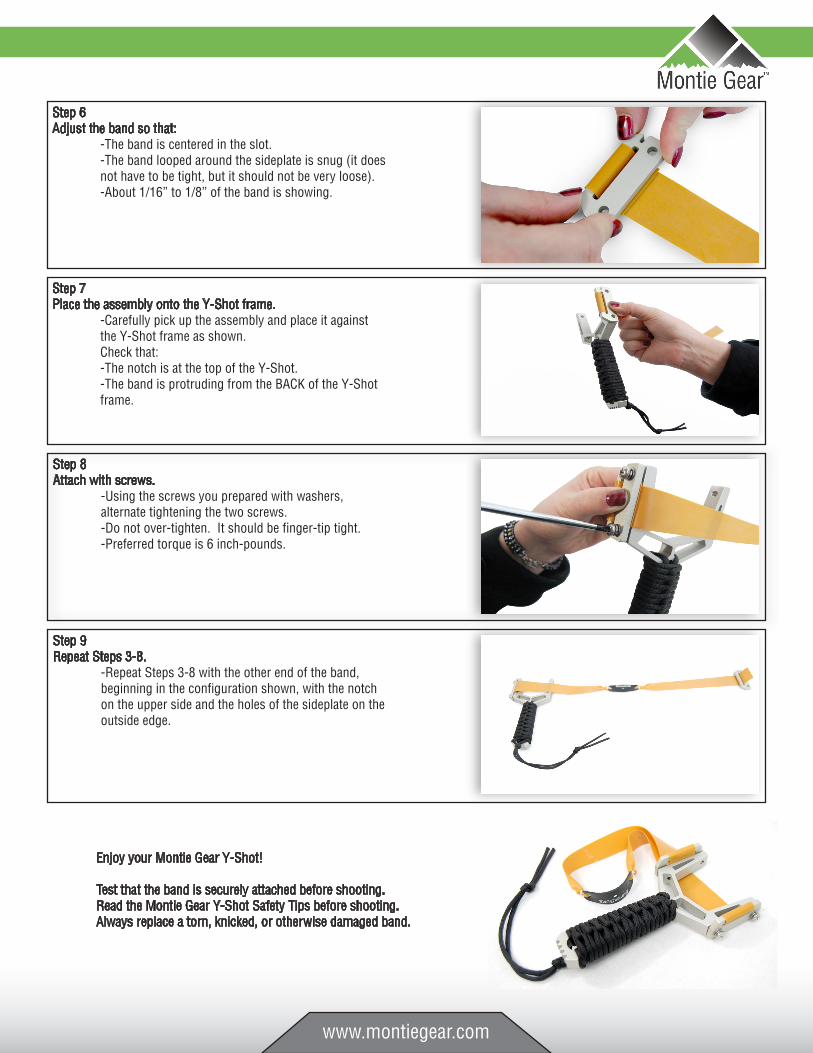
Step 9Repeat Steps 3-8. -Repeat Steps 3-8 with the other end of the band, beginning in the configuration shown, with the notch on the upper side and the holes of the sideplate on the outside edge.
Enjoy your Montie Gear Y-Shot!
Test that the band is securely attached before shooting.Read the Montie Gear Y-Shot Safety Tips before shooting.Always replace a torn, knicked, or otherwise damaged band.
Step 6Adjust the band so that: -The band is centered in the slot. -The band looped around the sideplate is snug (it does not have to be tight, but it should not be very loose). -About 1/16” to 1/8” of the band is showing.
Step 7Place the assembly onto the Y-Shot frame. -Carefully pick up the assembly and place it against the Y-Shot frame as shown. Check that: -The notch is at the top of the Y-Shot. -The band is protruding from the BACK of the Y-Shot frame.
Step 8Attach with screws. -Using the screws you prepared with washers, alternate tightening the two screws. -Do not over-tighten. It should be finger-tip tight. -Preferred torque is 6 inch-pounds.
Recommended