MAKE YOUR OWN INEXPENSIVE SELF-POWERED ROTARY SANDERS
1
In 2017 Rudy Lopez was one of AWA's featured professional turners. He put on a wonderful
demonstration, and followed it up with 3 days of hands-on classes for about 15 of our members.
Not only did he demonstrate a number of new woodturning ideas, he also showed us several of
the homemade tools he has made for himself. I have made my own versions of some of them,
including Rudy's grinder jig, and his self-powered rotary sander.
Rudy provided excellent directions for making the grinder jig, but no directions for making the
self-powered rotary sander; perhaps because he felt it was so darned easy to make that no
directions would be needed? It is much easier than it first appeared, but I supposed that some
members of AWA would like to have a pictorial "How To." I know I would have liked one. So
here it is.
Here's a picture of Rudy's dual-headed sander which he passed it around for his demonstration attendees to see.
I went to Home Depot and bought a 10-foot length of 3/4-inch plastic electrical conduit. As I
recall, it cost less than $3.00. I cut it into eight equal lengths. In retrospect, I could have cut it
into 10 lengths.
The next step is to flatten both ends of the conduit. Pre-set
the jaws of your bench vise to the diameter of the pipe, so
that once you heat the pipe, you don't waste valuable time
adjusting the vise jaws.
MAKE YOUR OWN INEXPENSIVE SELF-POWERED ROTARY SANDERS
2
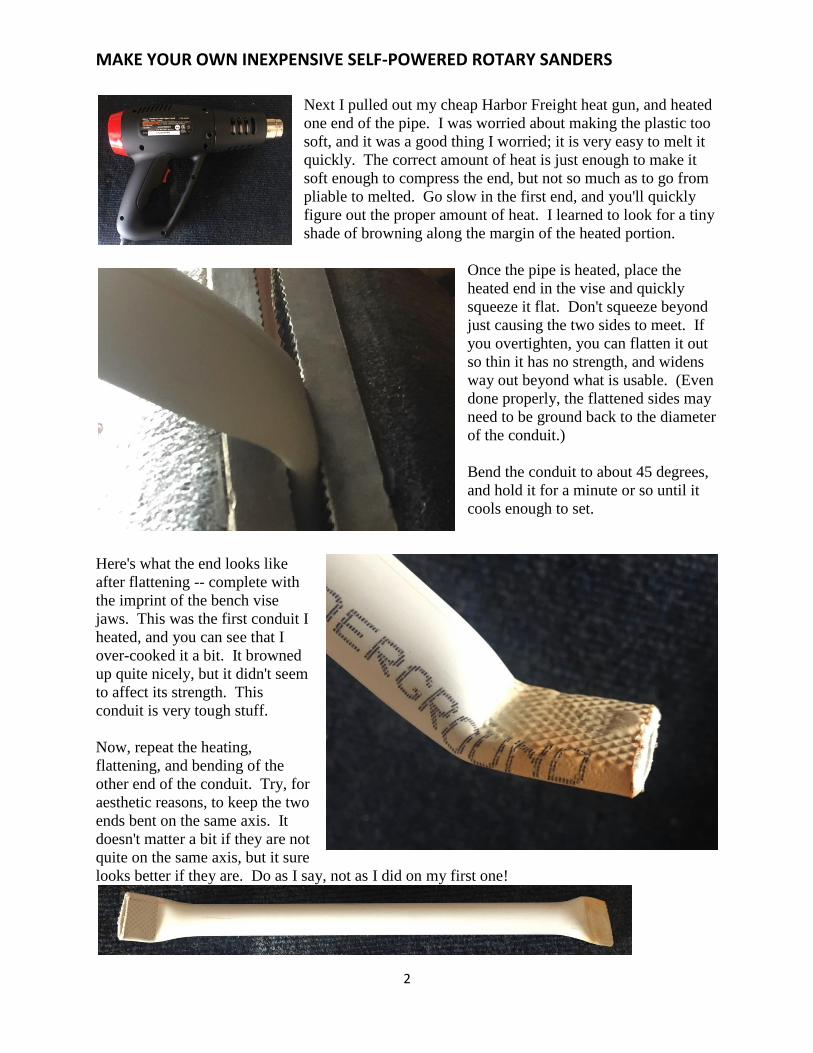
Next I pulled out my cheap Harbor Freight heat gun, and heated
one end of the pipe. I was worried about making the plastic too
soft, and it was a good thing I worried; it is very easy to melt it
quickly. The correct amount of heat is just enough to make it
soft enough to compress the end, but not so much as to go from
pliable to melted. Go slow in the first end, and you'll quickly
figure out the proper amount of heat. I learned to look for a tiny
shade of browning along the margin of the heated portion.
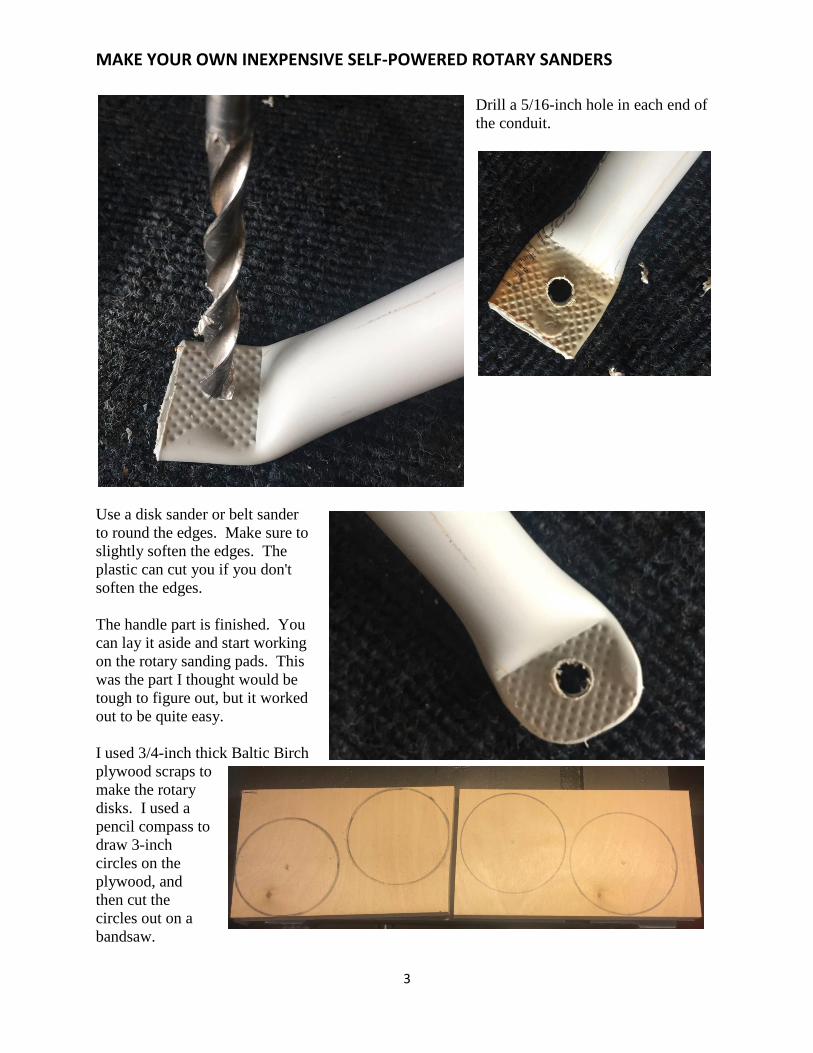
Once the pipe is heated, place the
heated end in the vise and quickly
squeeze it flat. Don't squeeze beyond
just causing the two sides to meet. If
you overtighten, you can flatten it out
so thin it has no strength, and widens
way out beyond what is usable. (Even
done properly, the flattened sides may
need to be ground back to the diameter
of the conduit.)
Bend the conduit to about 45 degrees,
and hold it for a minute or so until it
cools enough to set.
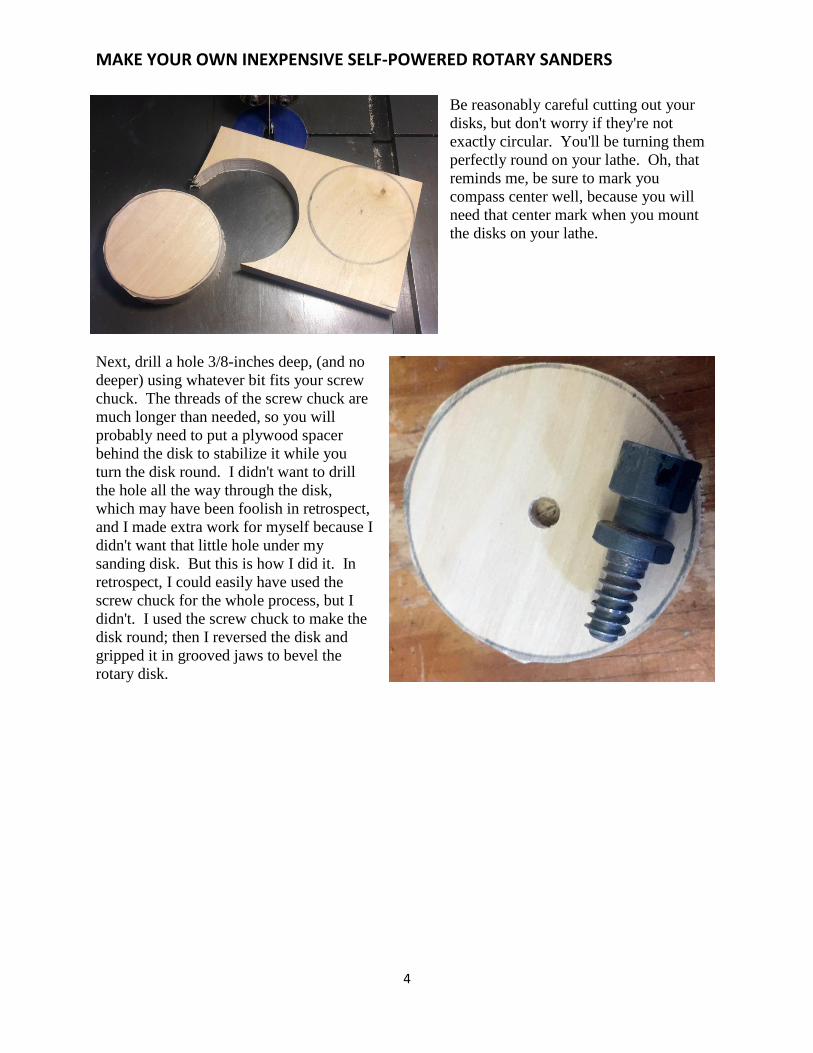
Here's what the end looks like
after flattening -- complete with
the imprint of the bench vise
jaws. This was the first conduit I
heated, and you can see that I
over-cooked it a bit. It browned
up quite nicely, but it didn't seem
to affect its strength. This
conduit is very tough stuff.
Now, repeat the heating,
flattening, and bending of the
other end of the conduit. Try, for
aesthetic reasons, to keep the two
ends bent on the same axis. It
doesn't matter a bit if they are not
quite on the same axis, but it sure
looks better if they are. Do as I say, not as I did on my first one!
MAKE YOUR OWN INEXPENSIVE SELF-POWERED ROTARY SANDERS
3
Drill a 5/16-inch hole in each end of
the conduit.
Use a disk sander or belt sander
to round the edges. Make sure to
slightly soften the edges. The
plastic can cut you if you don't
soften the edges.
The handle part is finished. You
can lay it aside and start working
on the rotary sanding pads. This
was the part I thought would be
tough to figure out, but it worked
out to be quite easy.
I used 3/4-inch thick Baltic Birch
plywood scraps to
make the rotary
disks. I used a
pencil compass to
draw 3-inch
circles on the
plywood, and
then cut the
circles out on a
bandsaw.
MAKE YOUR OWN INEXPENSIVE SELF-POWERED ROTARY SANDERS
4
Be reasonably careful cutting out your
disks, but don't worry if they're not
exactly circular. You'll be turning them
perfectly round on your lathe. Oh, that
reminds me, be sure to mark you
compass center well, because you will
need that center mark when you mount
the disks on your lathe.
Next, drill a hole 3/8-inches deep, (and no
deeper) using whatever bit fits your screw
chuck. The threads of the screw chuck are
much longer than needed, so you will
probably need to put a plywood spacer
behind the disk to stabilize it while you
turn the disk round. I didn't want to drill
the hole all the way through the disk,
which may have been foolish in retrospect,
and I made extra work for myself because I
didn't want that little hole under my
sanding disk. But this is how I did it. In
retrospect, I could easily have used the
screw chuck for the whole process, but I
didn't. I used the screw chuck to make the
disk round; then I reversed the disk and
gripped it in grooved jaws to bevel the
rotary disk.
MAKE YOUR OWN INEXPENSIVE SELF-POWERED ROTARY SANDERS
5
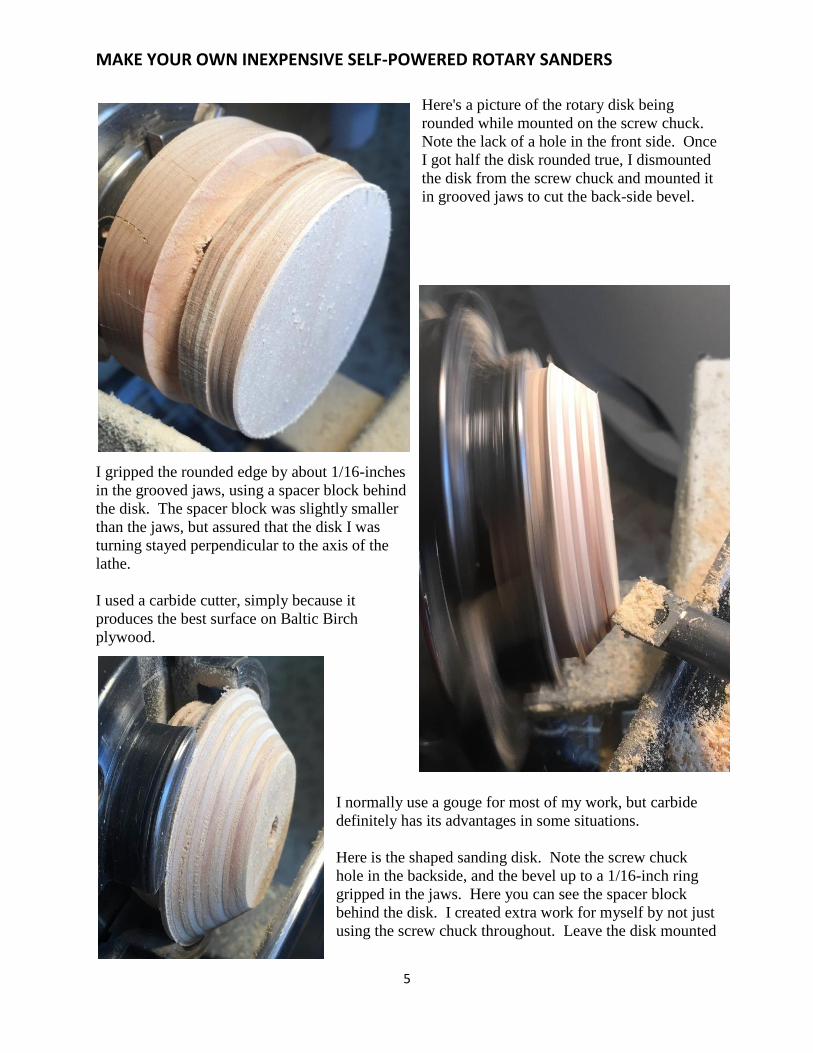
Here's a picture of the rotary disk being
rounded while mounted on the screw chuck.
Note the lack of a hole in the front side. Once
I got half the disk rounded true, I dismounted
the disk from the screw chuck and mounted it
in grooved jaws to cut the back-side bevel.
I gripped the rounded edge by about 1/16-inches
in the grooved jaws, using a spacer block behind
the disk. The spacer block was slightly smaller
than the jaws, but assured that the disk I was
turning stayed perpendicular to the axis of the
lathe.
I used a carbide cutter, simply because it
produces the best surface on Baltic Birch
plywood.
I normally use a gouge for most of my work, but carbide
definitely has its advantages in some situations.
Here is the shaped sanding disk. Note the screw chuck
hole in the backside, and the bevel up to a 1/16-inch ring
gripped in the jaws. Here you can see the spacer block
behind the disk. I created extra work for myself by not just
using the screw chuck throughout. Leave the disk mounted

MAKE YOUR OWN INEXPENSIVE SELF-POWERED ROTARY SANDERS
6
because the next step is to inlet the backside of the rotary disk to make room for the bearing and
nut that holds the bearing in place.
The skateboard bearing is sealed on one side, and is 7 mm thick by 22 mm in diameter. The
inner bearing race has an 8 mm hole, which accepts a 5/16-inch bolt loosely, but not too loose
(0.025 inches of play). The slight bit of play is immaterial in this application, because the
bearing is gripped from front to back in this application, which keeps it from wobbling.
Here is the "top" side of the bearing. You can see the
red rubber seal that will keep sawdust out of the bearing
race. The backside does not have the rubber seal, but it
is "buried" in the rotary sanding disk where no sawdust
should reach it.
Here is the
backside of
the bearing.
You can see
the seven
ball bearings
inside the
race, and
covered with a nylon retainer that has plenty of room
for application of bearing grease, if you ever need it.
I don’t think this application will ever call for a re-
greasing of the bearings unless you are a total turning
addict who cranks out thousands of bowls.
You can set your calipers to 22 mm, or you can run
the jaws up against the bearing, and the calipers will
set themselves at 22 mm. Even cheap plastic
calipers can do this. Look carefully, and you'll see
they are exactly on 22 mm.
Oh, you are wondering where to buy skateboard
bearings? I got mine through Amazon.com. I
bought good quality bearings: Bones Bearings' Red
Bearings brand, in an eight pack. No spacers. The
cost was $12, which included shipping. That's
$1.50 per rotating sanding disk.
MAKE YOUR OWN INEXPENSIVE SELF-POWERED ROTARY SANDERS
7
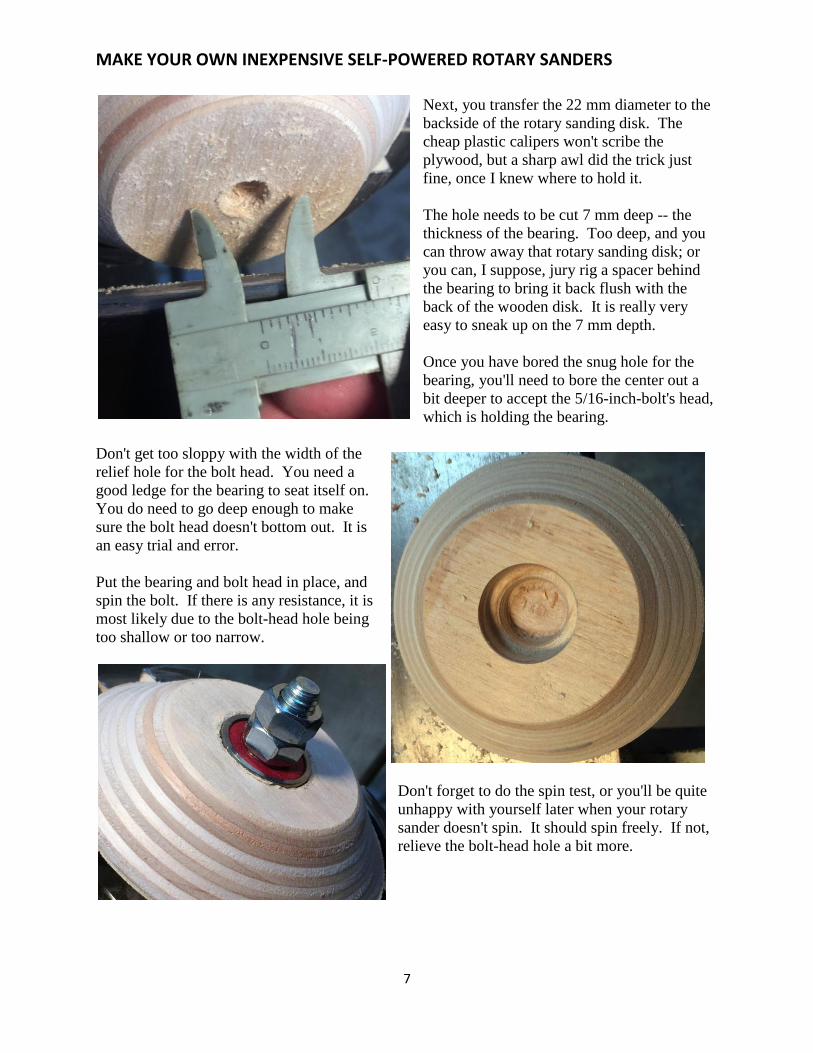
Next, you transfer the 22 mm diameter to the
backside of the rotary sanding disk. The
cheap plastic calipers won't scribe the
plywood, but a sharp awl did the trick just
fine, once I knew where to hold it.
The hole needs to be cut 7 mm deep -- the
thickness of the bearing. Too deep, and you
can throw away that rotary sanding disk; or
you can, I suppose, jury rig a spacer behind
the bearing to bring it back flush with the
back of the wooden disk. It is really very
easy to sneak up on the 7 mm depth.
Once you have bored the snug hole for the
bearing, you'll need to bore the center out a
bit deeper to accept the 5/16-inch-bolt's head,
which is holding the bearing.
Don't get too sloppy with the width of the
relief hole for the bolt head. You need a
good ledge for the bearing to seat itself on.
You do need to go deep enough to make
sure the bolt head doesn't bottom out. It is
an easy trial and error.
Put the bearing and bolt head in place, and
spin the bolt. If there is any resistance, it is
most likely due to the bolt-head hole being
too shallow or too narrow.
Don't forget to do the spin test, or you'll be quite
unhappy with yourself later when your rotary
sander doesn't spin. It should spin freely. If not,
relieve the bolt-head hole a bit more.
MAKE YOUR OWN INEXPENSIVE SELF-POWERED ROTARY SANDERS
8
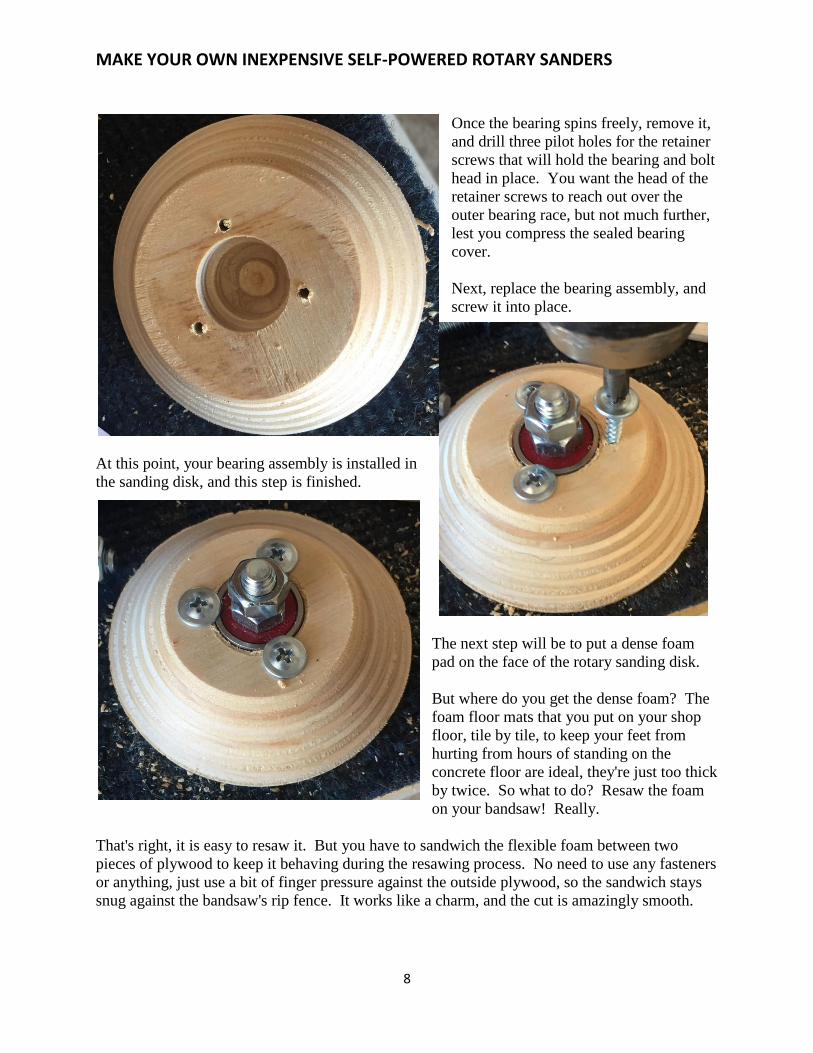
Once the bearing spins freely, remove it,
and drill three pilot holes for the retainer
screws that will hold the bearing and bolt
head in place. You want the head of the
retainer screws to reach out over the
outer bearing race, but not much further,
lest you compress the sealed bearing
cover.
Next, replace the bearing assembly, and
screw it into place.
At this point, your bearing assembly is installed in
the sanding disk, and this step is finished.
The next step will be to put a dense foam
pad on the face of the rotary sanding disk.
But where do you get the dense foam? The
foam floor mats that you put on your shop
floor, tile by tile, to keep your feet from
hurting from hours of standing on the
concrete floor are ideal, they're just too thick
by twice. So what to do? Resaw the foam
on your bandsaw! Really.
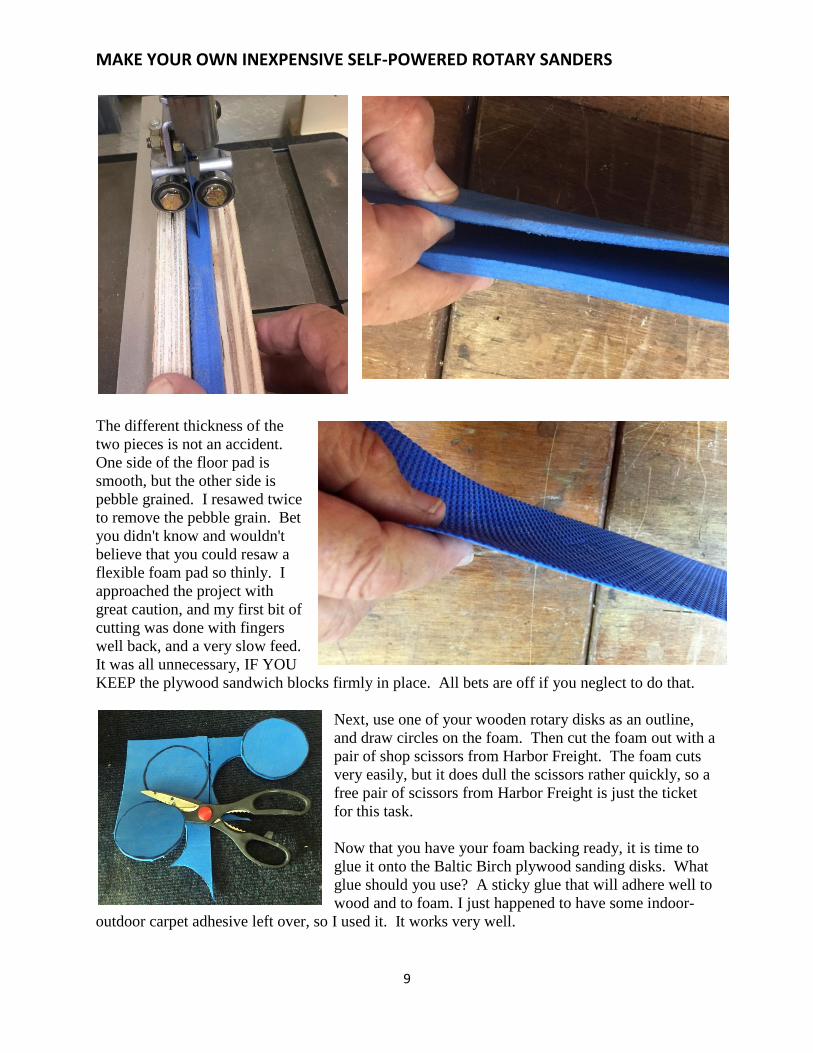
That's right, it is easy to resaw it. But you have to sandwich the flexible foam between two
pieces of plywood to keep it behaving during the resawing process. No need to use any fasteners
or anything, just use a bit of finger pressure against the outside plywood, so the sandwich stays
snug against the bandsaw's rip fence. It works like a charm, and the cut is amazingly smooth.
MAKE YOUR OWN INEXPENSIVE SELF-POWERED ROTARY SANDERS
9
The different thickness of the
two pieces is not an accident.
One side of the floor pad is
smooth, but the other side is
pebble grained. I resawed twice
to remove the pebble grain. Bet
you didn't know and wouldn't
believe that you could resaw a
flexible foam pad so thinly. I
approached the project with
great caution, and my first bit of
cutting was done with fingers
well back, and a very slow feed.
It was all unnecessary, IF YOU
KEEP the plywood sandwich blocks firmly in place. All bets are off if you neglect to do that.
Next, use one of your wooden rotary disks as an outline,
and draw circles on the foam. Then cut the foam out with a
pair of shop scissors from Harbor Freight. The foam cuts
very easily, but it does dull the scissors rather quickly, so a
free pair of scissors from Harbor Freight is just the ticket
for this task.
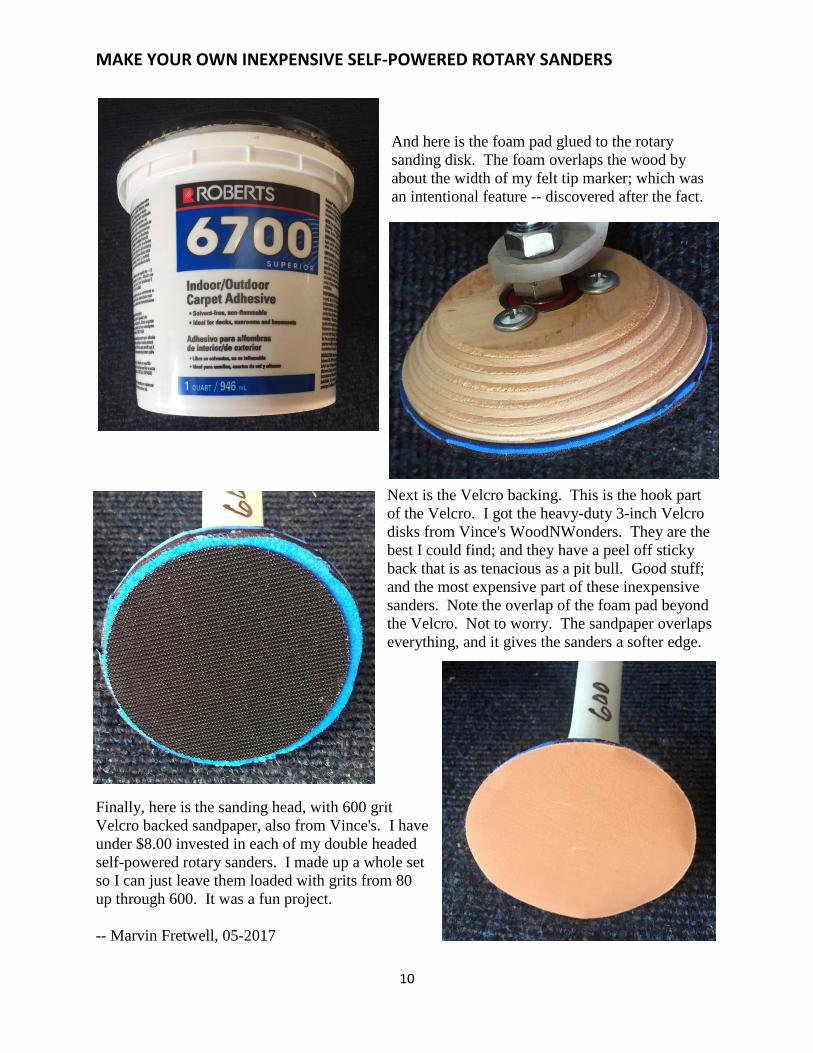
Now that you have your foam backing ready, it is time to
glue it onto the Baltic Birch plywood sanding disks. What
glue should you use? A sticky glue that will adhere well to
wood and to foam. I just happened to have some indoor-
outdoor carpet adhesive left over, so I used it. It works very well.
MAKE YOUR OWN INEXPENSIVE SELF-POWERED ROTARY SANDERS
10
And here is the foam pad glued to the rotary
sanding disk. The foam overlaps the wood by
about the width of my felt tip marker; which was
an intentional feature -- discovered after the fact.
Next is the Velcro backing. This is the hook part
of the Velcro. I got the heavy-duty 3-inch Velcro
disks from Vince's WoodNWonders. They are the
best I could find; and they have a peel off sticky
back that is as tenacious as a pit bull. Good stuff;
and the most expensive part of these inexpensive
sanders. Note the overlap of the foam pad beyond
the Velcro. Not to worry. The sandpaper overlaps
everything, and it gives the sanders a softer edge.
Finally, here is the sanding head, with 600 grit
Velcro backed sandpaper, also from Vince's. I have
under $8.00 invested in each of my double headed
self-powered rotary sanders. I made up a whole set
so I can just leave them loaded with grits from 80
up through 600. It was a fun project.
-- Marvin Fretwell, 05-2017
Recommended