Minnie's Statue of Liberty Papercraft
Page 1 of 9© Disney
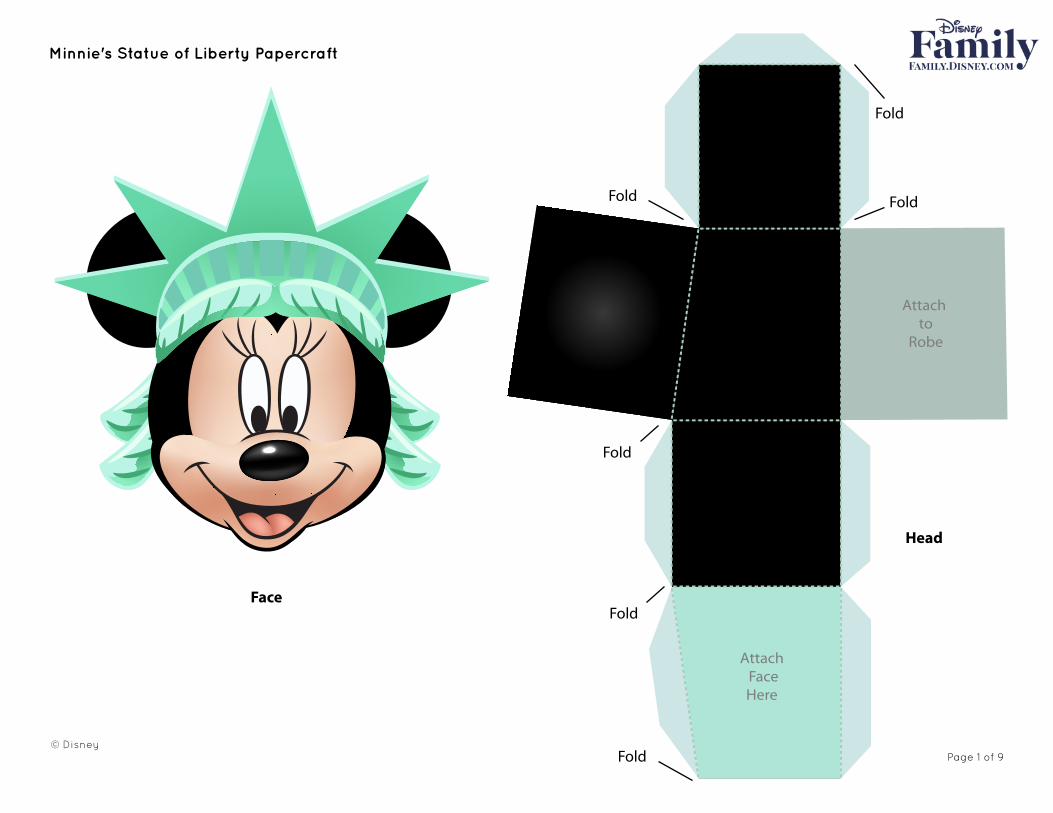
Fold
Fold
Fold
Fold
Fold
Fold
Attach to
Robe
Attach FaceHere
Head
Face
Minnie's Statue of Liberty Papercraft
Page 2 of 9© Disney
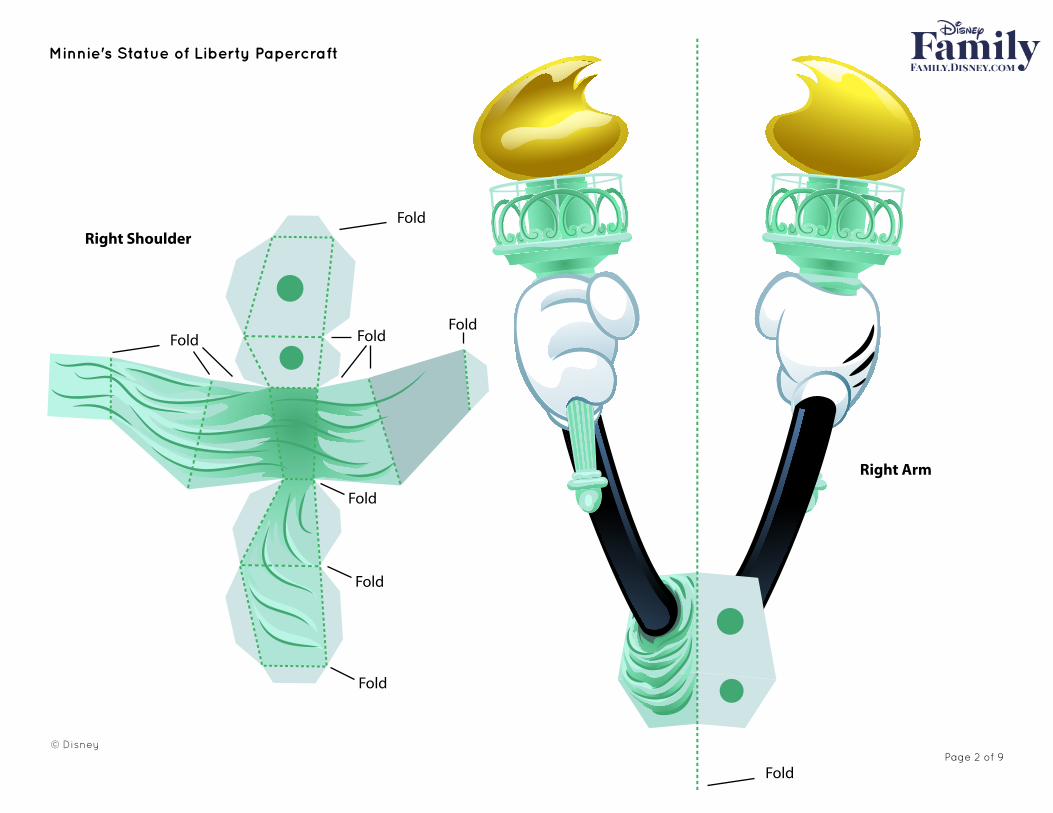
Fold
Fold
FoldFold
Fold
Fold
Fold
Fold
Right Shoulder
Right Arm
Minnie's Statue of Liberty Papercraft
Page 3 of 9© Disney
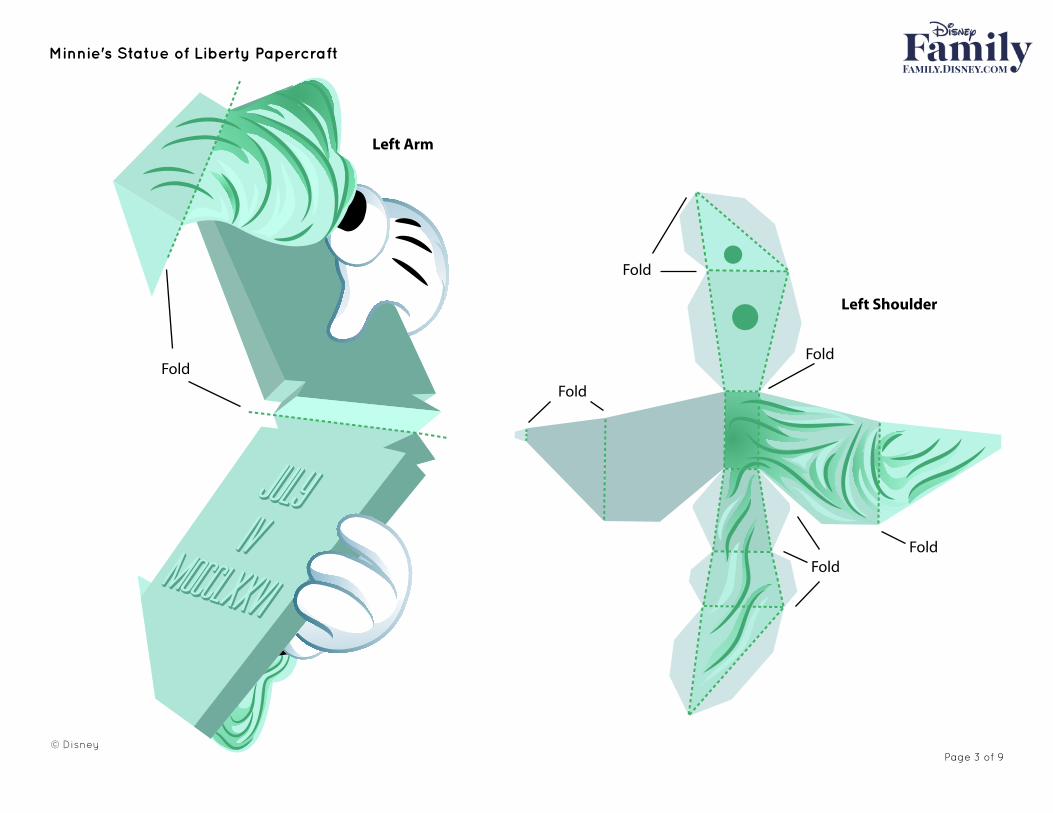
Fold
Fold
Fold
Fold
FoldFold
Left Arm
Left Shoulder
Minnie's Statue of Liberty Papercraft
Page 4 of 9© Disney
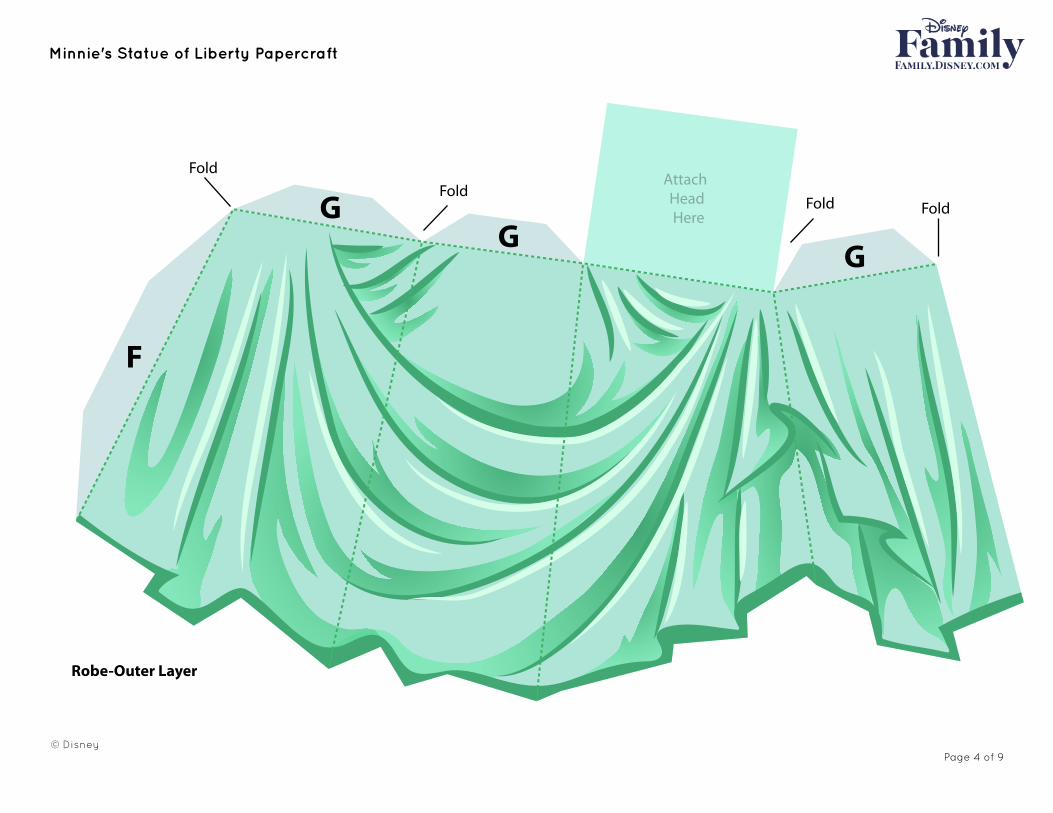
Fold FoldFold
Fold
Robe-Outer Layer
G
F
GG
Attach Head Here
Minnie's Statue of Liberty Papercraft
Page 5 of 9© Disney
Fold
Fold
Fold
Fold
Fold
Fold
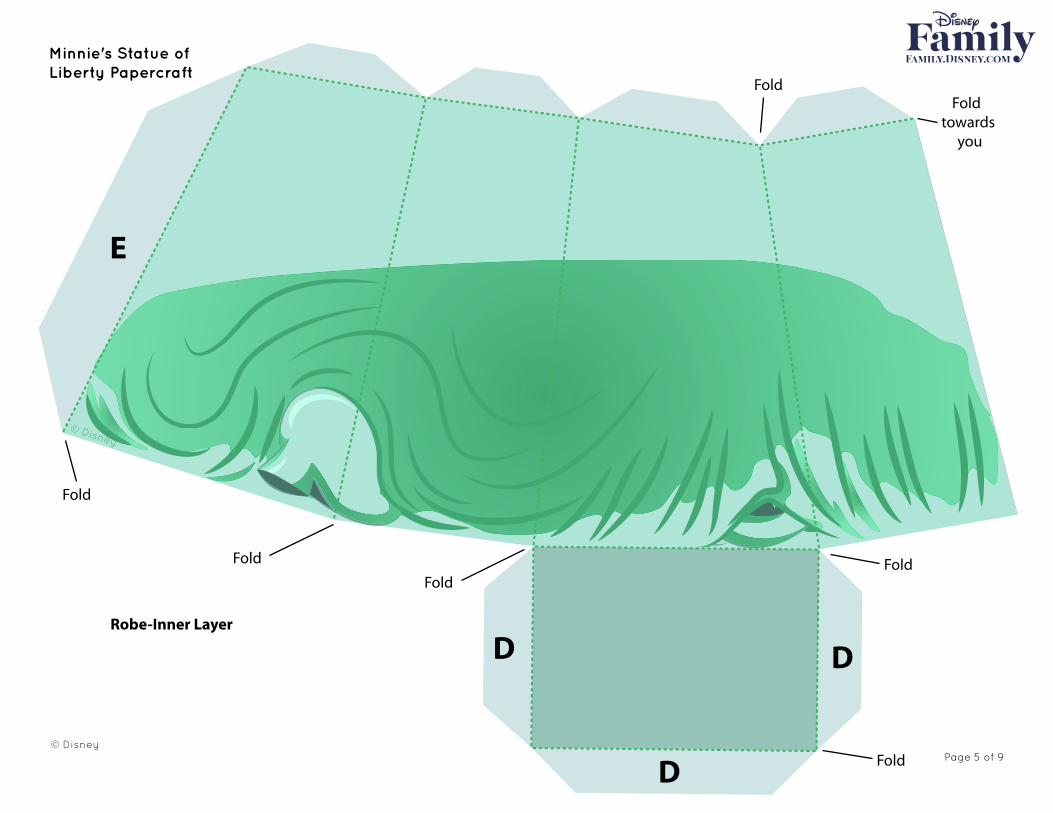
Robe-Inner Layer
D
D
D
E
Fold towards
you
© Disney
Minnie's Statue of Liberty Papercraft
Page 6 of 9© Disney
Fold
Fold
Fold
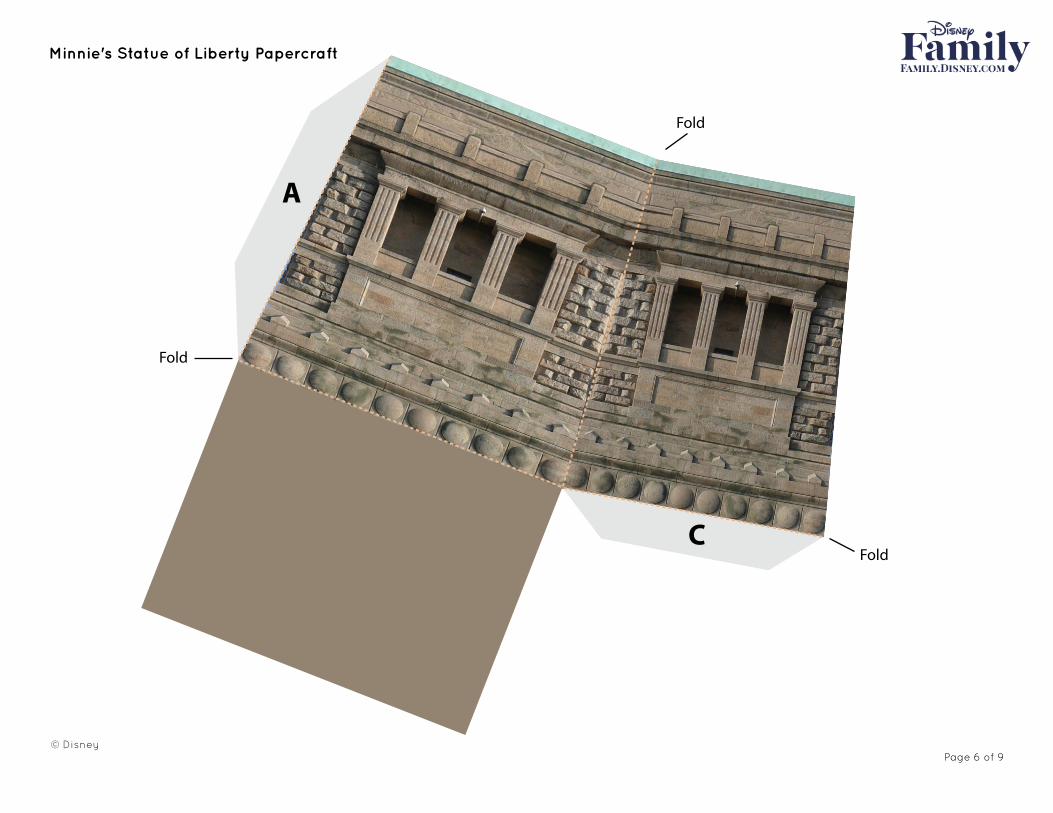
A
C
Minnie's Statue of Liberty Papercraft
Page 7 of 9© Disney
Fold Fold
Fold
Fold
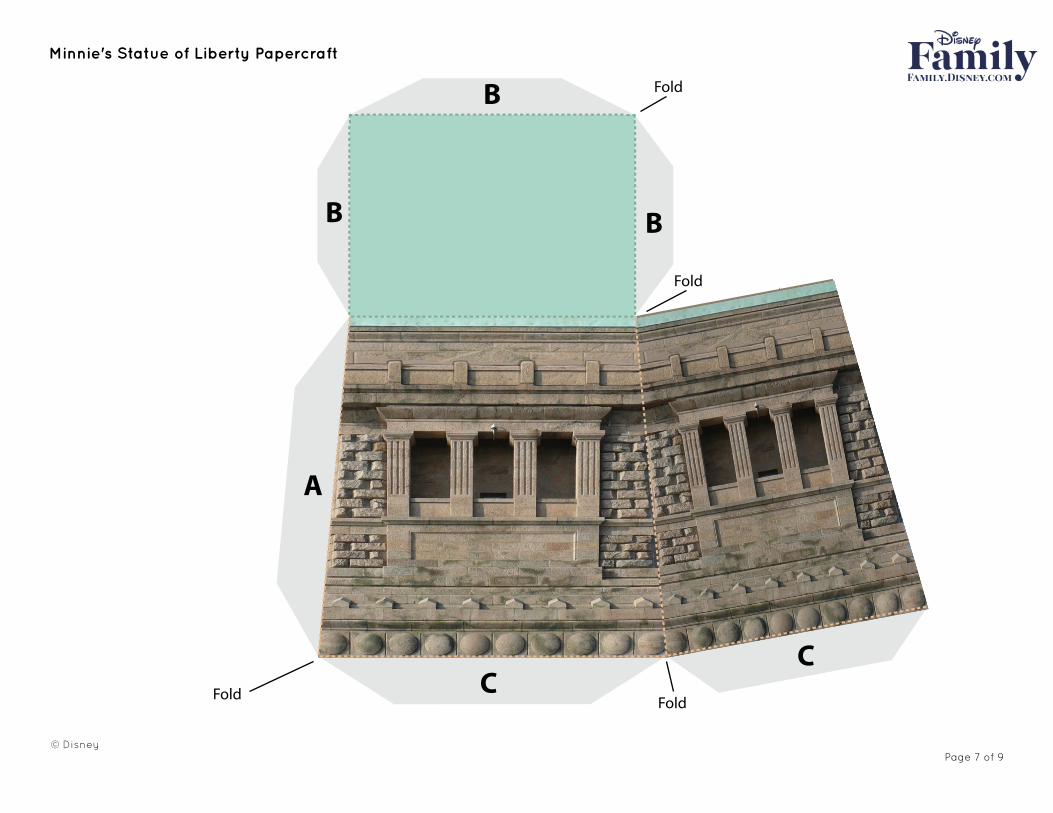
B
A
CC
B
B
Minnie's Statue of Liberty Papercraft
Page 8 of 9© Disney
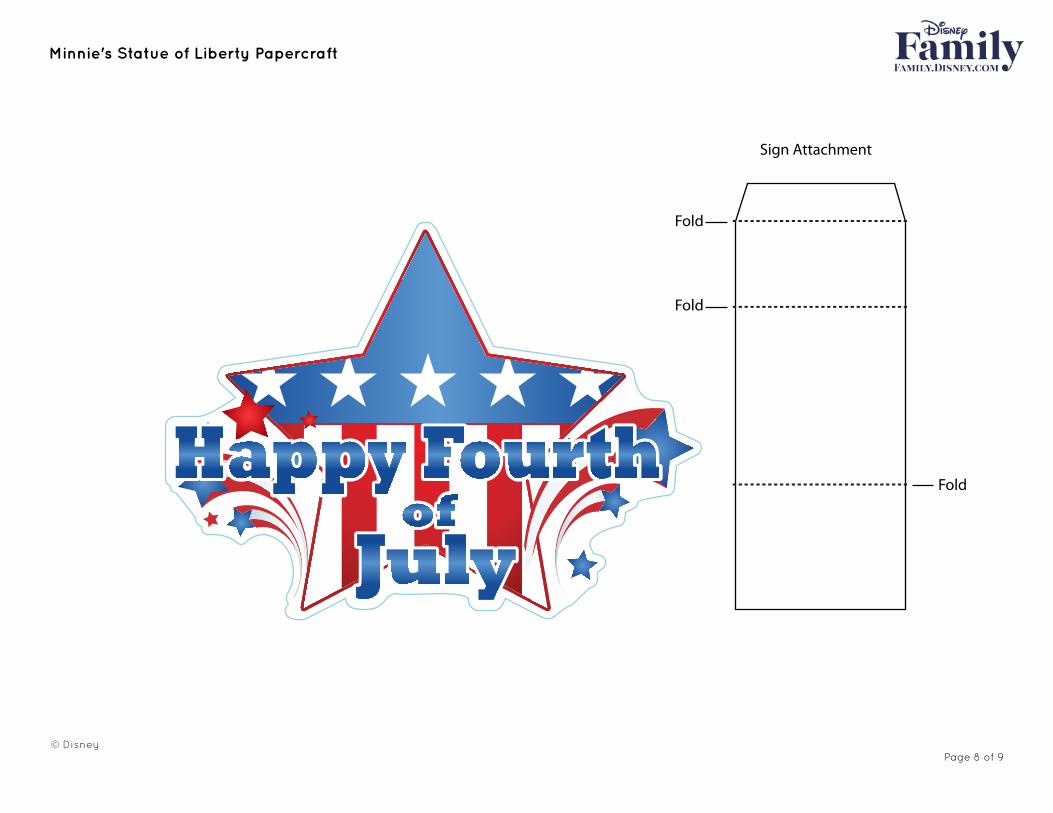
Sign Attachment
Fold
Fold
Fold
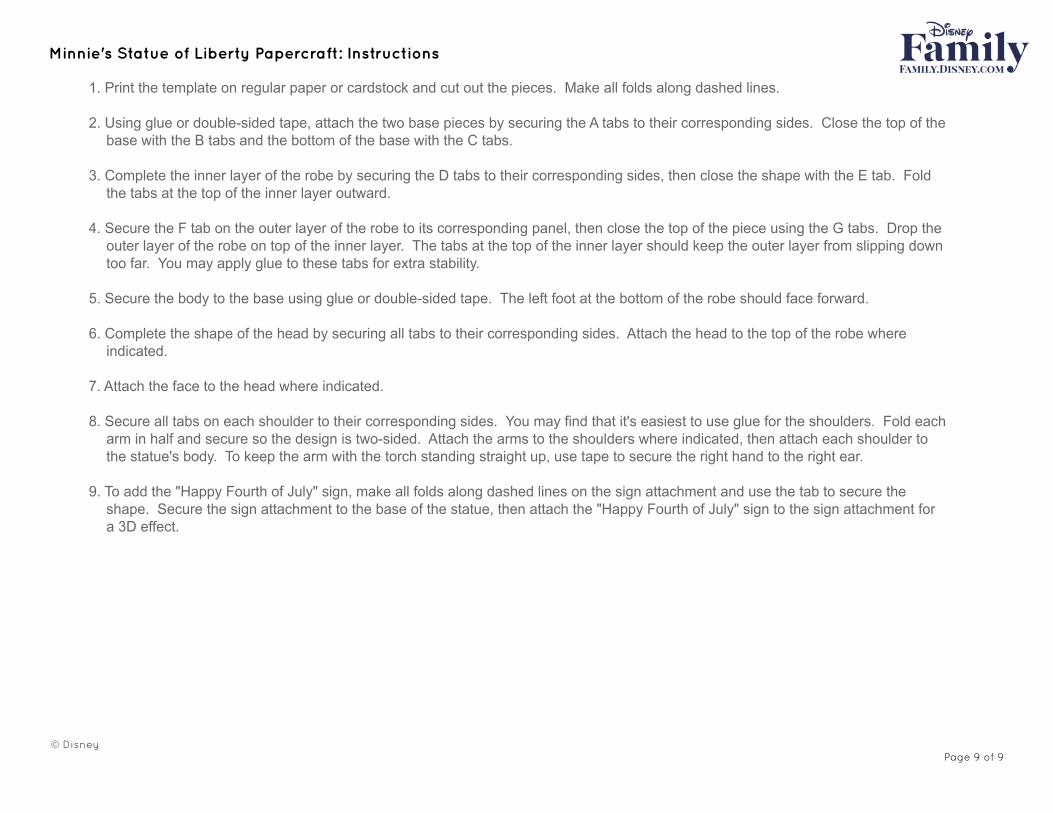
Minnie's Statue of Liberty Papercraft: Instructions
Page 9 of 9
1. Print the template on regular paper or cardstock and cut out the pieces. Make all folds along dashed lines.
2. Using glue or double-sided tape, attach the two base pieces by securing the A tabs to their corresponding sides. Close the top of theZZbase with the B tabs and the bottom of the base with the C tabs.
3. Complete the inner layer of the robe by securing the D tabs to their corresponding sides, then close the shape with the E tab. FoldZZthe tabs at the top of the inner layer outward.
4. Secure the F tab on the outer layer of the robe to its corresponding panel, then close the top of the piece using the G tabs. Drop theZZouter layer of the robe on top of the inner layer. The tabs at the top of the inner layer should keep the outer layer from slipping down ZZtoo far. You may apply glue to these tabs for extra stability.
5. Secure the body to the base using glue or double-sided tape. The left foot at the bottom of the robe should face forward.
6. Complete the shape of the head by securing all tabs to their corresponding sides. Attach the head to the top of the robe whereZZindicated.
7. Attach the face to the head where indicated.
8. Secure all tabs on each shoulder to their corresponding sides. You may find that it's easiest to use glue for the shoulders. Fold eachZZarm in half and secure so the design is two-sided. Attach the arms to the shoulders where indicated, then attach each shoulder to ZZthe statue's body. To keep the arm with the torch standing straight up, use tape to secure the right hand to the right ear.
9. To add the "Happy Fourth of July" sign, make all folds along dashed lines on the sign attachment and use the tab to secure theZZshape. Secure the sign attachment to the base of the statue, then attach the "Happy Fourth of July" sign to the sign attachment for ZZa 3D effect.
© Disney
Recommended


![[Papercraft] Panda](https://img.pdfslide.net/doc/110x75/5528876c49795921048b499c/papercraft-panda.jpg)

![[Papercraft] Pavão](https://img.pdfslide.net/doc/110x75/552887a9550346eb6e8b48d8/papercraft-pavao.jpg)