Thank you for joining Strava. Below are the steps you should take to get started on Strava and complete your first data upload on a PC. If you are on a Mac, these are not going to help much. Instead, download the instructions for Getting Started on a Mac: http://blog.strava.com/2009/06/15/strava-on-a-mac/
Getting Started on a PC
1. The first thing you should do when you get the device is to charge it. The first charge should be 10 h. This will improve the performance of the battery.
2. Strava for PC users is currently only compatible with the Firefox browser. If you don’t have
Firefox, you can download the latest version for free at: http://www.mozilla.com. After downloading the application, follow the prompts to install it.
3. Now login to Strava at http://www.strava.com/login using your username and password. If you
have forgotten them, email us at [email protected].
4. You will land on your home page where you will see an area called “Bikes” on the right side. Click on “Show” and if you do not have any bikes listed, click on “add new bike.” Fill in the form
to add at least one of your bikes before you do your first upload.
5. In the top nav bar there is a link called Upload. Click on that link. http://www.strava.com/upload
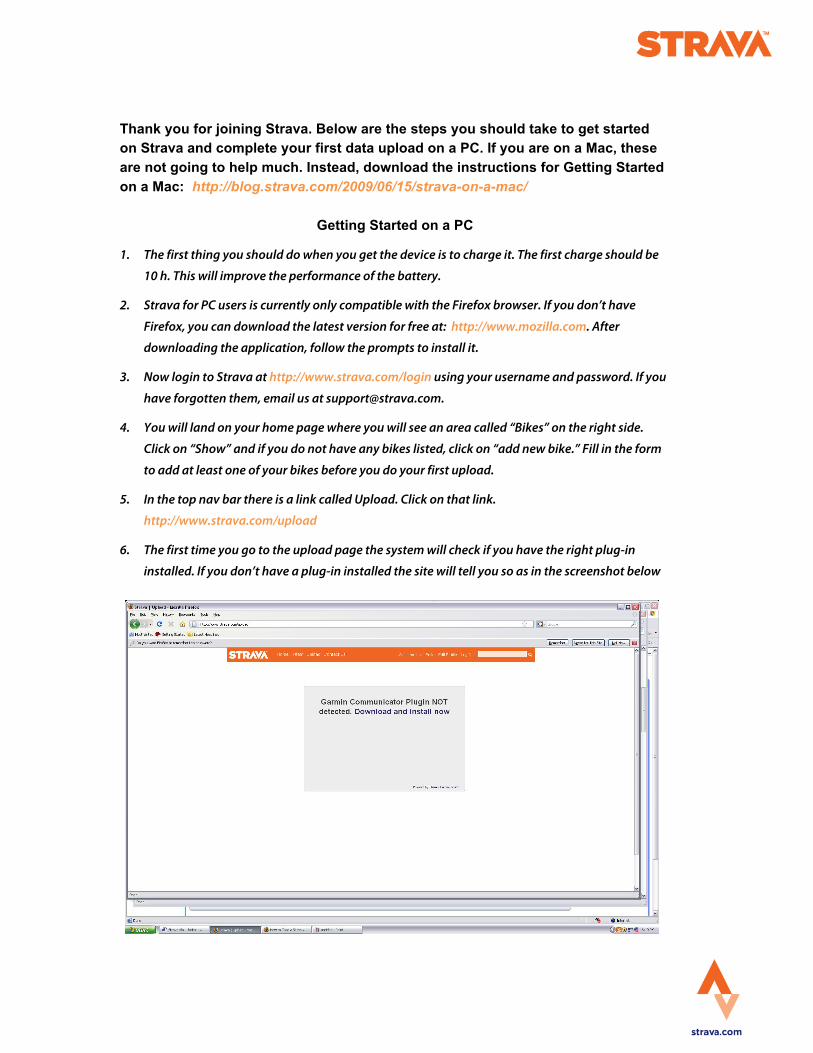
6. The first time you go to the upload page the system will check if you have the right plug-in installed. If you don’t have a plug-in installed the site will tell you so as in the screenshot below
7. Click on the link “Download and install now”. This link will take you to the Garmin site, where
you can download the plug-in (on the Garmin site, just click where it says “Download for Windows”)
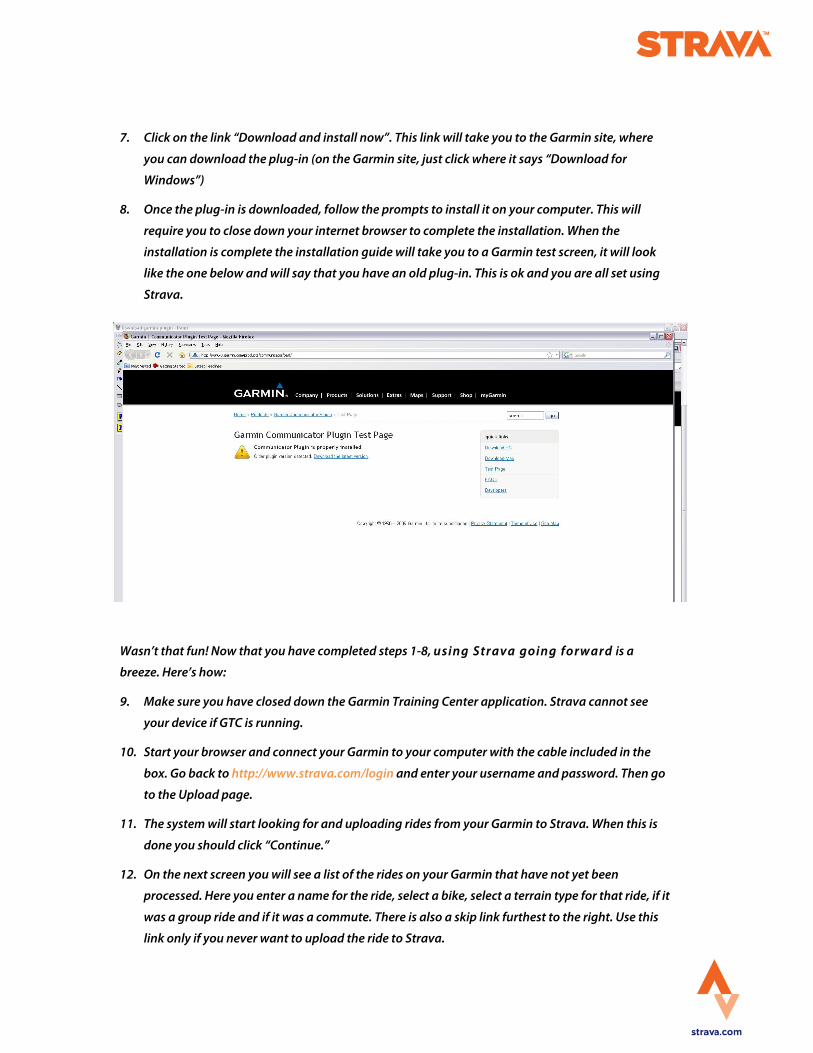
8. Once the plug-in is downloaded, follow the prompts to install it on your computer. This will
require you to close down your internet browser to complete the installation. When the installation is complete the installation guide will take you to a Garmin test screen, it will look like the one below and will say that you have an old plug-in. This is ok and you are all set using
Strava.
Wasn’t that fun! Now that you have completed steps 1-8, using Strava going forward is a breeze. Here’s how:
9. Make sure you have closed down the Garmin Training Center application. Strava cannot see your device if GTC is running.
10. Start your browser and connect your Garmin to your computer with the cable included in the
box. Go back to http://www.strava.com/login and enter your username and password. Then go to the Upload page.
11. The system will start looking for and uploading rides from your Garmin to Strava. When this is
done you should click “Continue.”
12. On the next screen you will see a list of the rides on your Garmin that have not yet been processed. Here you enter a name for the ride, select a bike, select a terrain type for that ride, if it
was a group ride and if it was a commute. There is also a skip link furthest to the right. Use this link only if you never want to upload the ride to Strava.

13. When you have entered the information for the ride you click “Continue”. Strava will now analyze your ride. When this is done you can go to your Home page to view your rides.
In case you are tempted to do so, please do not change your Garmin device’s Data Recording Settings (Main Menu > Settings > Data Recording) from the factory settings. (Data Recording
should be set to “Smart Data Recording.”) For more on this see http://blog.strava.com/2009/06/11/alert-data-recording-settings/
If you run into trouble you can always reach us at [email protected]
Recommended


![Skaffold - storage.googleapis.com · [getting-started getting-started] Hello world! [getting-started getting-started] Hello world! [getting-started getting-started] Hello world! 5](https://img.pdfslide.net/doc/110x75/5ec939f2a76a033f091c5ac7/skaffold-getting-started-getting-started-hello-world-getting-started-getting-started.jpg)