Embed Size (px)
Citation preview
Title: What’s Your Coordinate?? Brief Overview:
“What’s Your Coordinate?” is a Concept Development Unit focusing on the coordinate plane. The unit begins with an introduction to the characteristics of the coordinate plane and identification of quadrants. This is followed by a lesson on plotting ordered pairs on the coordinate plane. Incorporated into this lesson is an optional extension lesson utilizing graphing calculators (TI-73). The final lesson focuses on translations of points in the coordinate plane. Throughout this Concept Development Unit, a variety of activities are implemented that not only enhance student knowledge of the coordinate plane but also demonstrate relevancy to everyday life.
NCTM Content Standard/National Science Education Standard:
Number and Operations- understand numbers, ways of representing numbers, relationships among numbers, and number systems.
Algebra- understand patterns, relations, and functions. Geometry-specify locations and describe spatial relationships using coordinate
geometry and other representational systems. Grade/Level:
Middle School; 6-8 (Each lesson can be adapted to fit any grade level.)
Duration/Length: Three 86-minute blocks.
Student Outcomes: Students will:
• Create and interpret four quadrant graphs by first using their bodies and then using perpendicular number lines.
• Identify and graph points in a coordinate plane and correctly identify the quadrant in which each point is located.
• Manipulate points in a coordinate plane by translating ordered pairs. • Use knowledge of the coordinate plane to solve real-life problems.
Materials and Resources:
• Pencil/paper • Notebook • Red, blue, yellow construction paper (10 red marked with an X, 10 blue marked
with an X, 1 yellow marked with an X; 10 red marked with a Y, 10 blue marked with a Y, 1 yellow marked with a Y)
• Masking tape for human grid • Yarn • Graph paper

• Index cards • Colored pencils/crayons • Student Resource Sheet (SRS) #1: Coordinate Graphing Paper • SRS #2: Journal Prompt—Lesson 1 • SRS #3: Parts of the Coordinate Plane Chart • SRS #4: Practicing Plotting Points WS (overhead needed) • SRS #5: Battleship WS (overhead needed) • SRS #6: Journal Prompt—Lesson 2 • SRS #7: Plotting Coordinate Points WS • SRS #8: Fun With Translations WS • SRS #9: Journal Prompt—Lesson 3 • SRS #10: Treasure Island Translation WS • SRS #11: Translations of Complex Figures WS • SRS #12: Summative Assessment • Teacher Resource Sheet (TRS) #1A: Class Example • TRS #1B-#1E: More Class Examples • TRS #2: Graphing Pictures Key • TRS #3: Graphing Calculator Activity
Development/Procedures: Lesson 1 Preassessment – Prior to the lesson, students will have knowledge
of integers and how to use positive and negative numbers in all operations.
• Place students into groups of three to four. Each group should have one pencil and one piece of paper. Students will be given two minutes to perform a “Round Robin” on everything they know about integers. In a “Round Robin,” one student writes one fact about integers then quickly passes the paper to the next student, etc.
• At the end of the two minutes, discuss what students know about integers. Discuss the rules of all operations with integers.
• Tell students that they can use what they have learned about integers to do more sophisticated mathematics.
Launch
• Place students into two lines with the same number of students in each.
• Prior to the lesson, label red, blue, and yellow construction paper with X’s or Y’s as detailed in Materials and Resources.
• Make number lines out of the two student lines by giving one line blue X’s for positive numbers, red X’s for negative numbers and a yellow X for zero. Give students in the other line blue Y’s for positive numbers, red Y’s for negative numbers and a yellow Y for zero.
• Have students form two human number lines. Have the X-line form an x-axis. Have the Y-line form the y-axis by crossing the x-axis at 0.
Teacher Facilitation
• Explain to students that by crossing the x-axis with the y-axis they form four sections called quadrants.
• Tell students that the point where the lines cross is called the origin. This is because the point is located at the center of the coordinate plane and does not move along the x or y-axes. (Coordinate pairs will be explained in lesson 2.)
• Ask students if they can point out the four quadrants formed.
• Explain to students that the four quadrants make up the coordinate plane. Tell students that they are going to explore plotting different coordinates (points) on the coordinate plane.
• Stand in quadrant I. Tell students that this is quadrant I. Tell students to look at the x and y-axes surrounding this point. Have students describe what types of numbers are on these number lines (positive on x and y-axis).
• Ask this question for quadrant II, III, and IV (quadrant II-positive on y-axis, negative on x-axis; quadrant III-negative on both x and y-axes; quadrant IV-positive on x-axis, negative on y-axis).
• Have students define the following terms in their notebooks:
o Quadrants I, II, III, IV o Coordinate plane o x-axis and y-axis o Origin
Student Application
• Distribute coordinate plane Student Resource Sheet (SRS) #1 to students. Have students first label the number lines. Walk around to make sure they are appropriately labeling positive and negative numbers.
• Have students label quadrants I-IV. • Have students place a point anywhere in each
quadrant. • Have students write what types of numbers are on
the x and y-axes surrounding each point (positive, positive; positive, negative, etc.).
Embedded Assessment
• Have students complete journal prompt SRS #2 explaining what they have learned in class today. They must include information about quadrants, the coordinate plane, the x and y-axes, and integers.
Reteaching/Extension
• For those who have not completely understood the lesson, review the coordinate plane overhead discussing x and y-axes, quadrants and integers. Have students complete SRS #3 filling in the missing spaces in the chart.
• For those who have understood the lesson, give SRS #4. This sheet contains 10 different coordinates. Have students use a copy of SRS #1 to try and place those coordinates where they think they should go.
Lesson 2 Preassessment
• Show students the overhead of SRS #4. Some students explored the coordinates in the previous lesson. Have all students take a moment to think about where they would place each pair of numbers in the coordinate plane.
• Discuss the students’ responses.
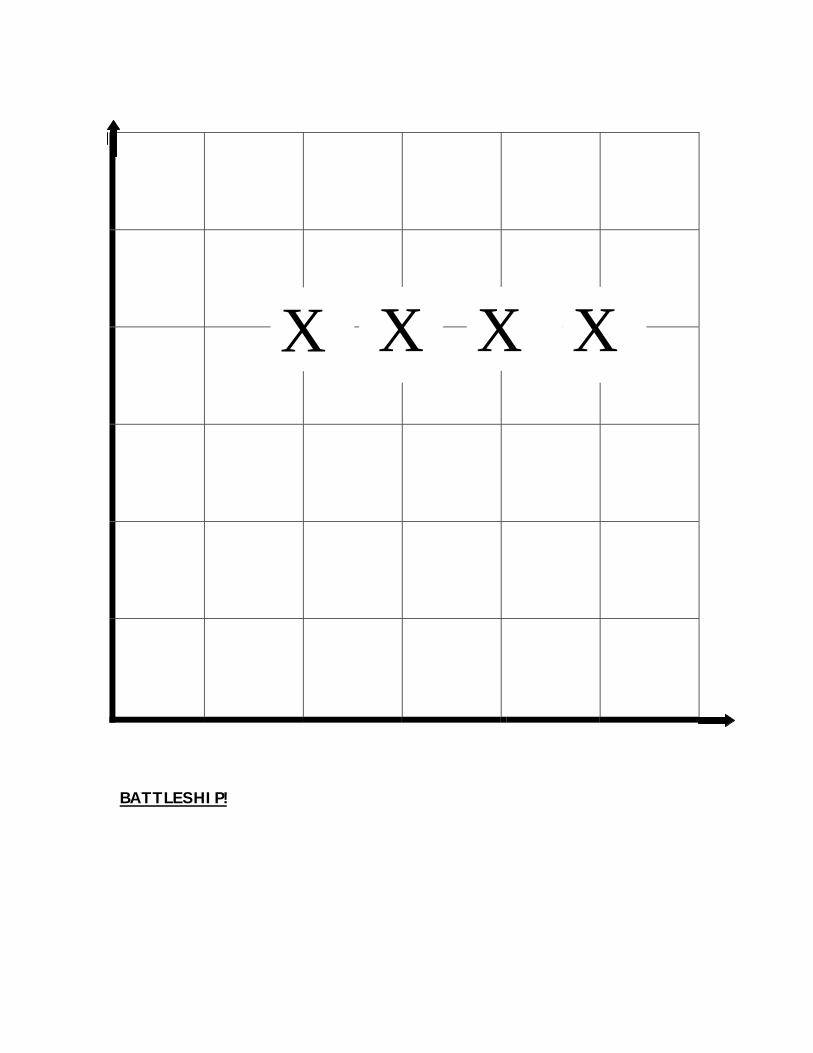
Launch • Display the overhead of SRS #5. Explain to
students that it is a battleship card with one ship located on the grid where the marks are.
• Have students explain in writing how they would tell their friend exactly where that ship is located.
• Have students offer explanations and discuss their answers.
• Explain to students that the coordinate plane is used for locating objects, drawing figures (animation), and much more.
• Tell students that today they will explore locating points on the coordinate plane.
Teacher Facilitation
• Take students into a large area that has been previously made into a coordinate plane with masking tape.
• Briefly review which parts of the axes are positive and negative.
• Have one volunteer stand at a point in any quadrant. • Ask students to describe specifically where he/she
is located from the origin. For example: Mary is located two places to the right, and three places down.
• Continue with a few more examples. • Have one student stand at the origin. Explain to
students that when placing points on the coordinate plane, we move along the x-axis first. For example, if the point is (2, 4) we would move to the right 2 spaces. Have student move to the right two places.
• Ask students where the example would go next for the point (2,4), (up 4 places).
• Discuss with students where the point would be placed if the first number was negative, the second number was negative, or both numbers were negative.
• Hold up Teacher Resource Sheet (TRS) #1A. Explain to students that this is called an ordered pair. Explain that the first number is movement along the x-axis and the second number is movement along the y-axis. A good way to help students remember the order of the movement is x comes before y in the alphabet.
• Ask students to locate the coordinate on the coordinate plane.
• Give students a few more examples (TRS #1B-#1E).
Student Application
• Students are still working on the large coordinate plane.
• Give each student an index card containing one ordered pair.
• In groups of five have students locate their coordinates and tell them to the class. Have
students not participating check whether the student is located at the correct point.
• After the large group activity, divide students into groups of five. Give students one set of previously made index cards that when plotted and connected form a figure (TRS #2).
• Have groups one at a time locate their coordinates on the large coordinate plane and vocalize the point so the class can check for accuracy.
• Start a ball of yarn with one student and have him/her gently toss the string to the next student holding on to the end of the string.
• When each student has received the yarn a figure should be formed. Have classmates name the figure.
• OPTIONAL TECHNOLOGY INTEGRATION follow TRS #3.
Embedded Assessment
• Have students complete journal prompt SRS #6 explaining how they can use what they have learned about the coordinate plane in a variety of careers.
Reteaching/Extension
• For those who have not completely understood the lesson, have students complete SRS #7. Students must plot points and connect the dots. Once they have plotted and connected the given points they will see a shape. If there is no shape, they have plotted incorrectly.
• For those who have understood the lesson, give a copy of SRS #1. Students will create their own figure using at least six coordinates. They must list each ordered pair on the back of the worksheet.
Lesson 3 Preassessment
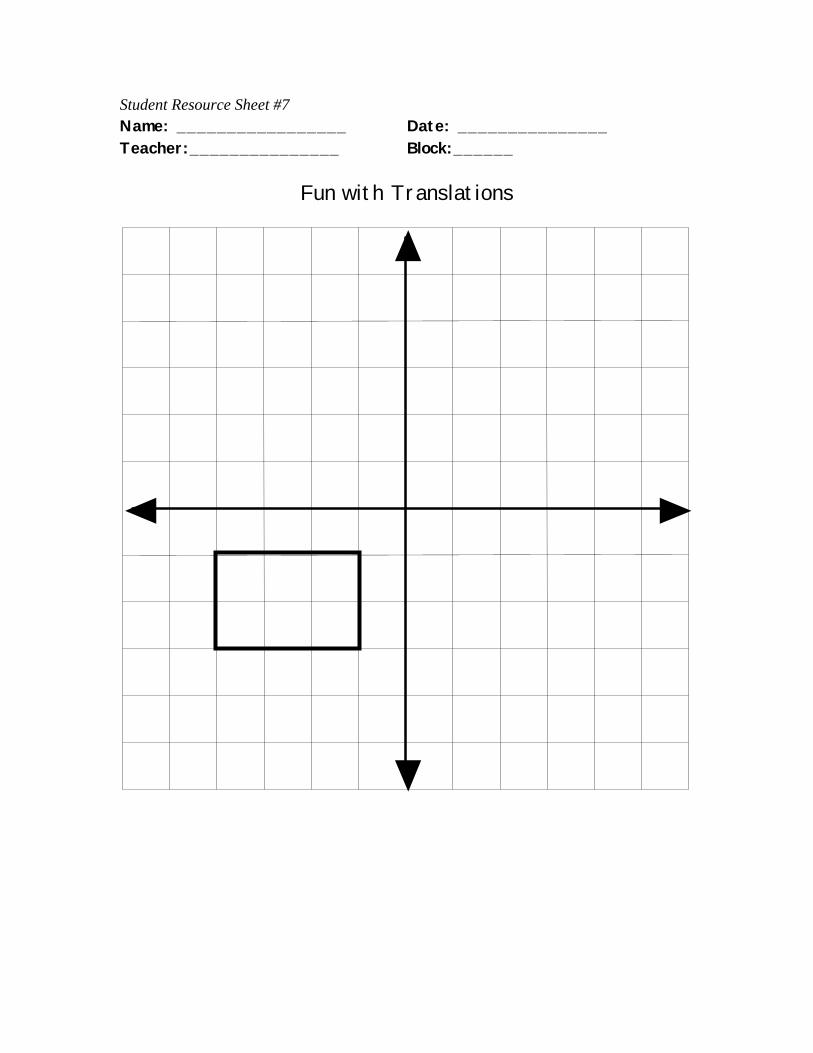
• Distribute SRS #8 to students as they enter the classroom. Tell students that you want to move the figure from Quadrant III to Quadrant I. Ask students to take a moment to discuss with a partner how this could be done.
• A volunteer from each team could share their methods with the class.
Launch • Take students to life-size coordinate plane pre-made from
masking tape. • Have four volunteers make the original figure located in
quadrant III • Use the coordinate (-1,-1) as the first example. Ask
students to identify the coordinate. • Have another student volunteer stand at the coordinate
(5,5). • Tell students that we want to move from point (-1,-1) to (5,
5). This will begin to move our rectangle from the third quadrant to the first quadrant.
• Ask students what we would have to do to the original coordinate (-1, -1) to make it (5, 5). Students should respond with “add six to both x and y-coordinates.”
• Take the second coordinate of the original rectangle (-1, -3). Tell students that the new coordinates have to be (5, 3). Ask students what we have to do to the original coordinates (add 6).
• Continue with the remaining coordinates.
Teacher Facilitation • Pick one volunteer from the class. Have him/her stand at
any coordinate in quadrant II. • Have students first identify the coordinate, then give
mathematical directions to move directly across into quadrant I (add any number to the x-axis).
• Have student return to original coordinate. Then have students give mathematical directions to move directly into quadrant III (subtract any number from the y-axis).
• Students may have difficulty realizing that to move to the right or left we subtract or add from the x-coordinate, and to move up and down we subtract or add from the y-coordinate.
• Continue with student examples moving up, down, left and right, until students have grasped the concept.
• Explain to students that what they are doing is translating points along the coordinate plane.
• Tell students that in a translation, each point of a figure moves the same distance in the same direction. Once each point has been translated, an identical image of the first figure is formed.
• Have students record the definition of a translation in their notebook.
Student Application
• Give each student one piece of graph paper and two different colored pencils.
• Have students first use a pencil to draw the x and y-axes of the coordinate plane, using the ENTIRE sheet of paper.
• Using one color, have students plot and connect the following points; (1, 6), (2, 9), (5, 10) and (4, 7). The figure should be a kite.
• Using a separate color, have students plot and connect the following points; (5, 1), (6, 4), (9, 5) and (8, 2). This figure should also be a kite.
• Have students work with a partner discussing what operations were done to the coordinates. (Add 4 to the x-coordinate to move four places to the right; Subtract 5 from the y-coordinate to move five places down)
• Discuss with students how adding and subtracting to each coordinate moves the point around the coordinate plane.
• On the same graph have students plot and connect the following points: (-3, 1), (0, 5), (2, -1).
• Have students subtract 4 from the x-coordinate and subtract 5 from the y-coordinate.
• Have students do the math and translate the figure. Discuss which direction the figure moved (4 places to the left and 5 places down).
Embedded Assessment
• Have students complete journal prompt SRS #9. Write a note to a friend who was absent explaining how to move a square from quadrant I to quadrant III. Be sure to explain what you need to do to the x and y-coordinates.
Reteaching/Extension
• For those who have not completely understood the lesson, have students complete SRS #10. They are given three simple points located in Quadrant I. Students are to move each point to a separate quadrant, identify the new coordinates, then explain what they added or subtracted to the x and y-coordinates.
• For those who have understood the lesson, give SRS #11. Students will first have to identify all coordinates of the complex figure. They will move the figure through addition and subtraction of coordinates into quadrant III.
Summative Assessment: The students will complete SRS #12, using a copy of SRS #1, for their summative assessment. They will apply what they have learned about the coordinate plane to a real life situation. The students will locate quadrants, plot coordinates, and translate coordinates while helping Commander DoGood with his submarine mission. The assessment contains brief constructed responses and also requires an extended response where students explain in detail how they performed a transformation. At the end of the assessment students will be able to relate their knowledge of the coordinate plane with many different real-life applications. Authors:
Amy Greif Teri Hinkle Brooklyn Park Middle School Chesapeake Bay Middle School Anne Arundel County Anne Arundel County
Kerri Van Mol Crofton Middle School Anne Arundel County
Name: _________________ Date: _______________ Teacher:_______________ Block:_______________
Coordinate Graphing
Student Resource Sheet #1
Name: _________________ Date: _______________ Teacher:_______________ Block:______
Classwork: Journal Prompt Please write to a fellow classmate that was not in class today. Explain to them what you learned about the coordinate plane. Make sure you describe the following in your entry:
• Quadrants I, II, III, IV • Coordinate Plane • X-axis and Y-axis • Positive and negative numbers (integers)
_____________________________________________________________
_____________________________________________________________
_____________________________________________________________
_____________________________________________________________
_____________________________________________________________
_____________________________________________________________
_____________________________________________________________
_____________________________________________________________
_____________________________________________________________
Student Resource Sheet #2
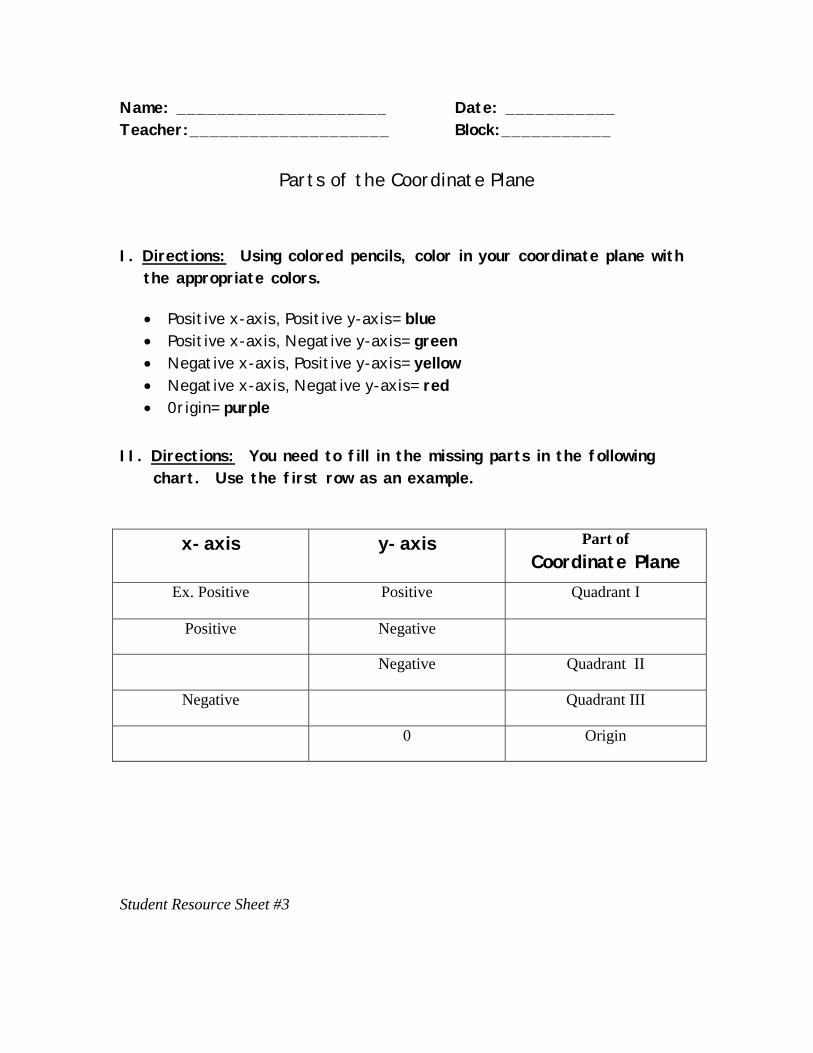
Name: _____________________ Date: ___________ Teacher:____________________ Block:___________
Parts of the Coordinate Plane I. Directions: Using colored pencils, color in your coordinate plane with
the appropriate colors.
• Positive x-axis, Positive y-axis= blue • Positive x-axis, Negative y-axis= green • Negative x-axis, Positive y-axis= yellow • Negative x-axis, Negative y-axis= red • 0rigin= purple
II. Directions: You need to fill in the missing parts in the following
chart. Use the first row as an example.
x-axis y-axis Part of Coordinate Plane
Ex. Positive Positive Quadrant I
Positive Negative
Negative Quadrant II
Negative Quadrant III
0 Origin
Student Resource Sheet #3
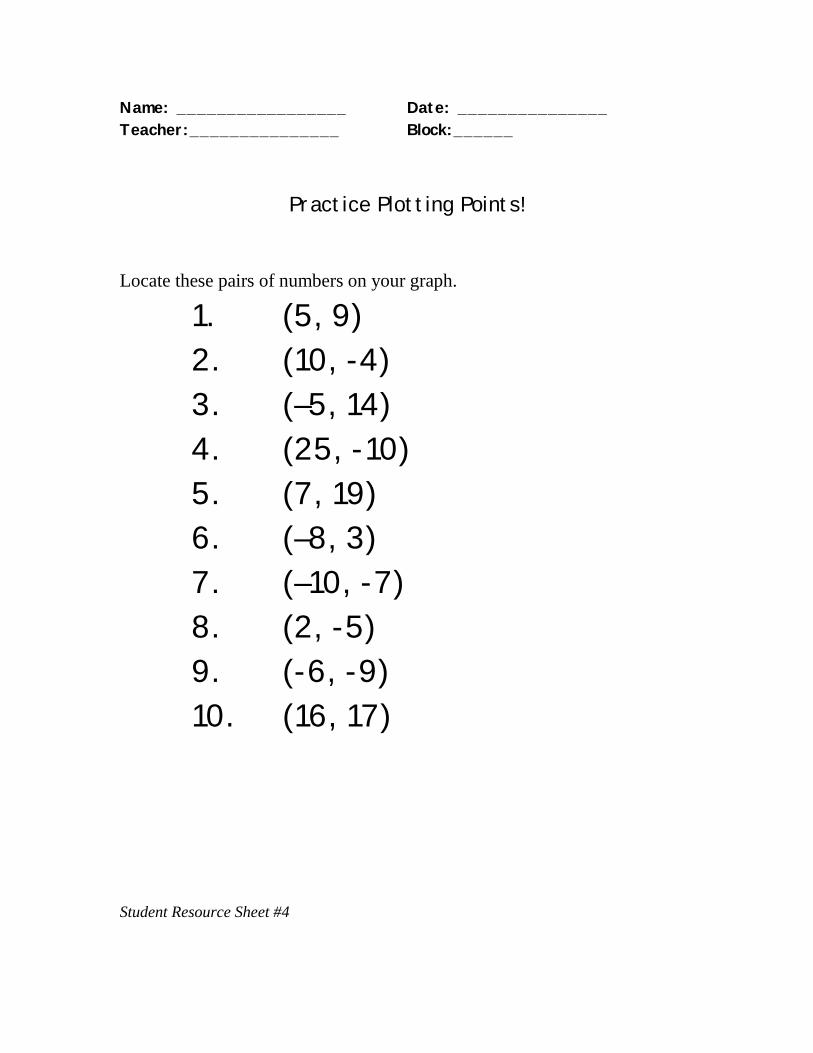
Name: _________________ Date: _______________ Teacher:_______________ Block:______
Practice Plotting Points!
Locate these pairs of numbers on your graph.
1. (5, 9) 2. (10, -4) 3. (–5, 14) 4. (25, -10) 5. (7, 19) 6. (–8, 3) 7. (–10, -7) 8. (2, -5) 9. (-6, -9) 10. (16, 17)
Student Resource Sheet #4
X X XX
BATTLESHIP!
Student Resource Sheet #5 Name: _________________ Date: _______________ Teacher:_______________ Block:______
Classwork: Journal Prompt Coordinate planes are used in a variety of careers. Choose any career that uses the coordinate plane and explain to a parent why you think that knowledge of the coordinate plane is important to that career. Here are some possibilities:
• Graphic design • Cartoon Animation • Search and Rescue • Cartography (creating maps)
_________________________________________________________
_________________________________________________________
_________________________________________________________
_________________________________________________________
_________________________________________________________
_________________________________________________________
_________________________________________________________
_________________________________________________________
_________________________________________________________
_________________________________________________________
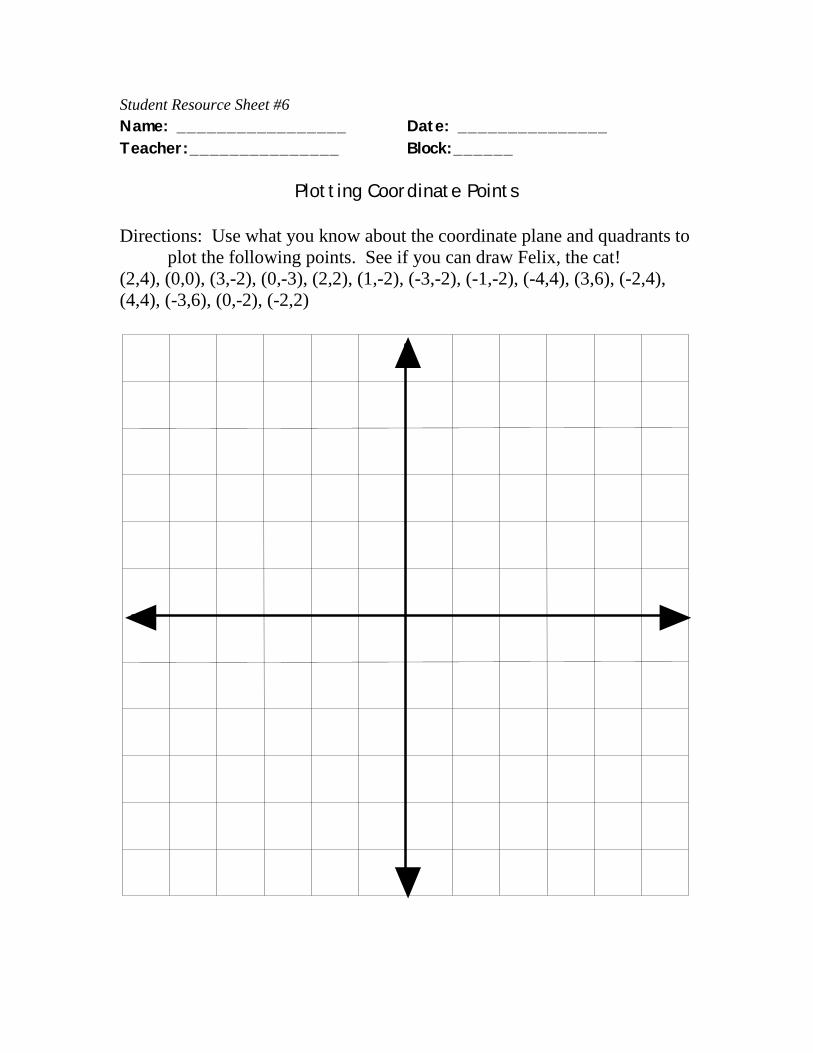
Student Resource Sheet #6 Name: _________________ Date: _______________ Teacher:_______________ Block:______
Plotting Coordinate Points Directions: Use what you know about the coordinate plane and quadrants to
plot the following points. See if you can draw Felix, the cat! (2,4), (0,0), (3,-2), (0,-3), (2,2), (1,-2), (-3,-2), (-1,-2), (-4,4), (3,6), (-2,4), (4,4), (-3,6), (0,-2), (-2,2)
Student Resource Sheet #7 Name: _________________ Date: _______________ Teacher:_______________ Block:______
Fun with Translations
Student Resource Sheet #8 Name: _________________ Date: _______________ Teacher:_______________ Block:______
Classwork: Journal Prompt Write a note to a friend who was absent explaining how to move a square from quadrant I to quadrant III. Be sure to explain what you need to do to both the x and y coordinates. You may use specific coordinates to explain your answer.
_________________________________________________________
_________________________________________________________
_________________________________________________________
_________________________________________________________
_________________________________________________________
_________________________________________________________
_________________________________________________________
_________________________________________________________
_________________________________________________________
_________________________________________________________
_________________________________________________________
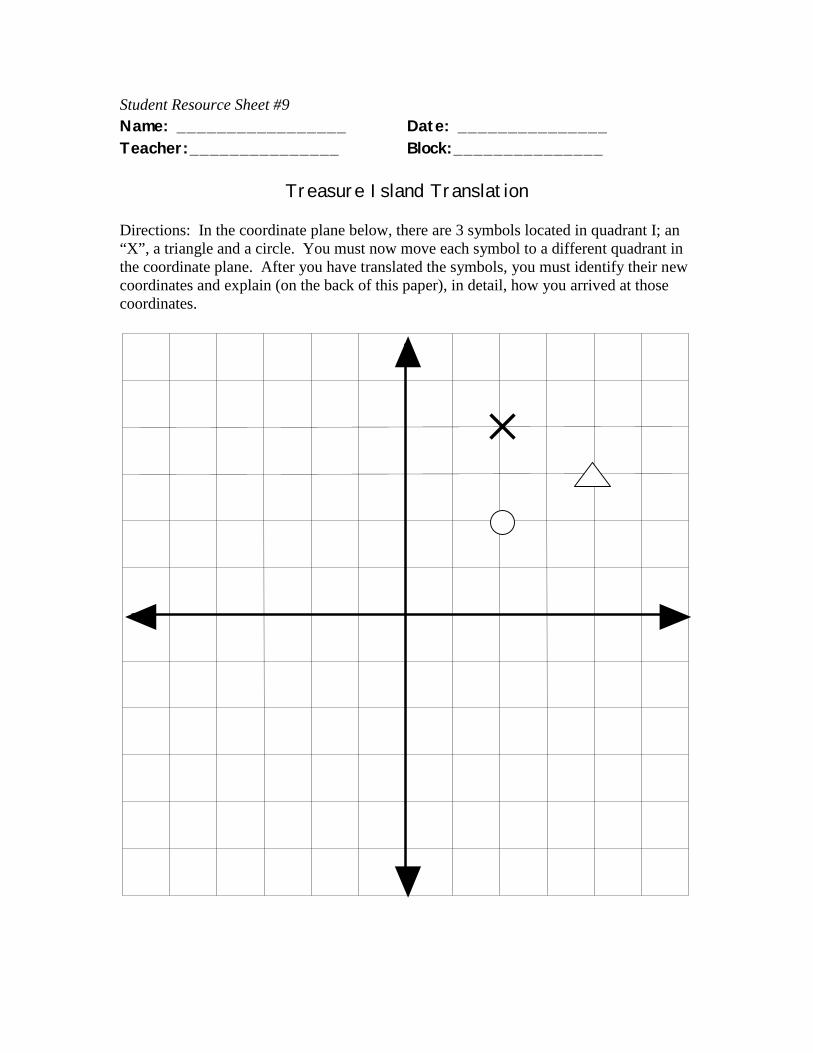
Student Resource Sheet #9 Name: _________________ Date: _______________ Teacher:_______________ Block:_______________
Treasure Island Translation Directions: In the coordinate plane below, there are 3 symbols located in quadrant I; an “X”, a triangle and a circle. You must now move each symbol to a different quadrant in the coordinate plane. After you have translated the symbols, you must identify their new coordinates and explain (on the back of this paper), in detail, how you arrived at those coordinates.
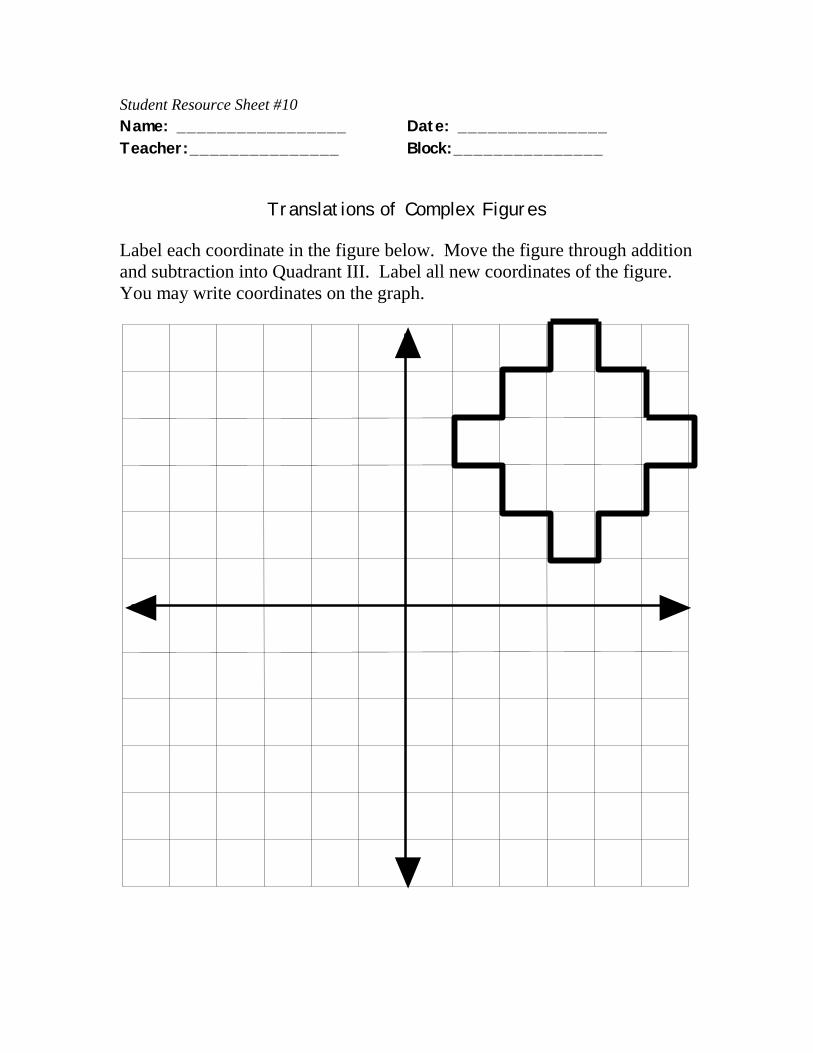
Student Resource Sheet #10 Name: _________________ Date: _______________ Teacher:_______________ Block:_______________
Translations of Complex Figures Label each coordinate in the figure below. Move the figure through addition and subtraction into Quadrant III. Label all new coordinates of the figure. You may write coordinates on the graph.
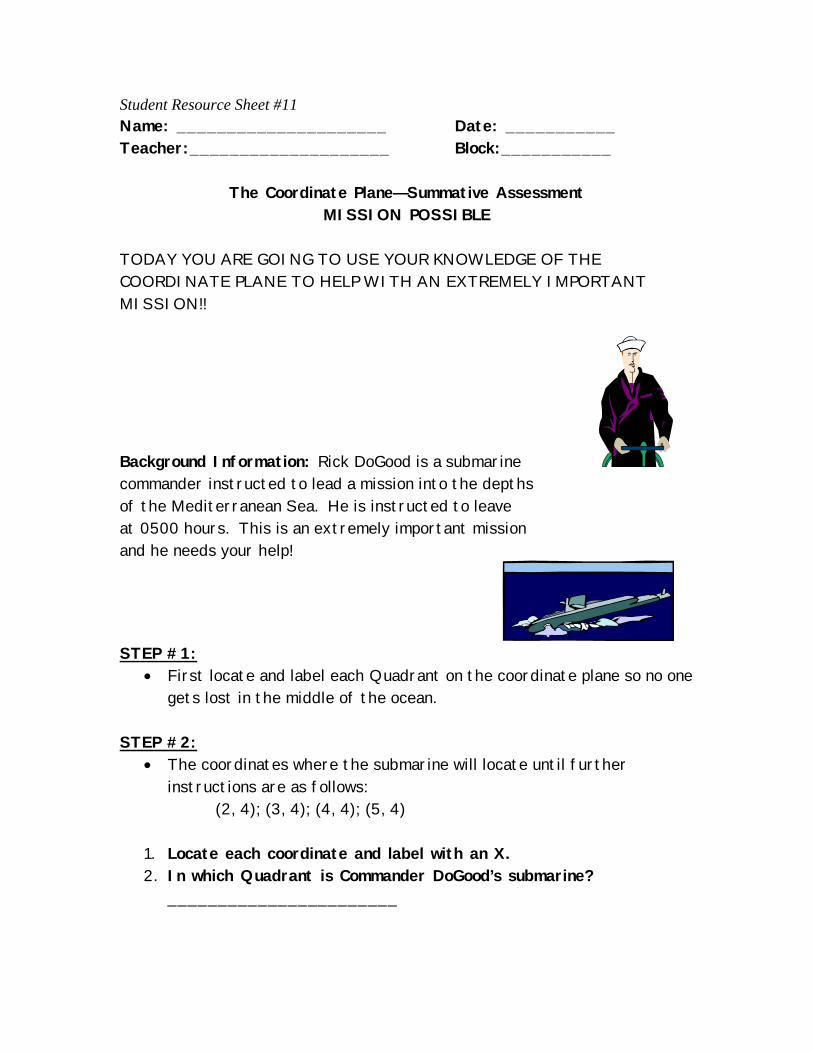
Student Resource Sheet #11 Name: _____________________ Date: ___________ Teacher:____________________ Block:___________
The Coordinate Plane—Summative Assessment MISSION POSSIBLE
TODAY YOU ARE GOING TO USE YOUR KNOWLEDGE OF THE COORDINATE PLANE TO HELP WITH AN EXTREMELY IMPORTANT MISSION!!
Background Information: Rick DoGood is a submarine commander instructed to lead a mission into the depths of the Mediterranean Sea. He is instructed to leave at 0500 hours. This is an extremely important mission and he needs your help!
STEP #1:
• First locate and label each Quadrant on the coordinate plane so no one gets lost in the middle of the ocean.
STEP #2:
• The coordinates where the submarine will locate until further instructions are as follows:
(2, 4); (3, 4); (4, 4); (5, 4) 1. Locate each coordinate and label with an X. 2. In which Quadrant is Commander DoGood’s submarine?
_______________________

Student Resource Sheet #12 STEP #3:
• Commander DoGood has just received his first orders: “Move the submarine 6 coordinates to the left and 3 coordinates down.”
1. In order for you to carry out these instructions you must subtract
6 from the x-coordinates and 3 from the y-coordinates. Place the new coordinates underneath the original coordinates.
(2, 4) (3, 4) (4, 4) (5, 4)
( ___, ___ ) ( ___, ___ ) ( ___, ___ ) ( ___, ___ )
2. Mark each new coordinate with an O. 3. In which Quadrant is the sub now located? __________________
STEP #4:
• Due to a security threat the commander has just received orders to relocate the submarine into quadrant IV.
1. Place the submarine anywhere in Quadrant IV. 2. Mark the new position of the submarine with *. 3. On your coordinate plane, identify and label the new coordinates. 4. Using the space below, explain what you did to each coordinate in
order to move the sub from Quadrant II to Quadrant IV. Be sure to use complete sentences.
_____________________________________________________________
_____________________________________________________________
_____________________________________________________________

_____________________________________________________________
_____________________________________________________________
_____________________________________________________________
_____________________________________________________________
_____________________________________________________________
_____________________________________________________________
_____________________________________________________________
Teacher Resource Sheet #1a
Teacher Resource Sheet #1b

Teacher Resource Sheet #1c
Teacher Resource Sheet #1d
Teacher Resource Sheet #1e
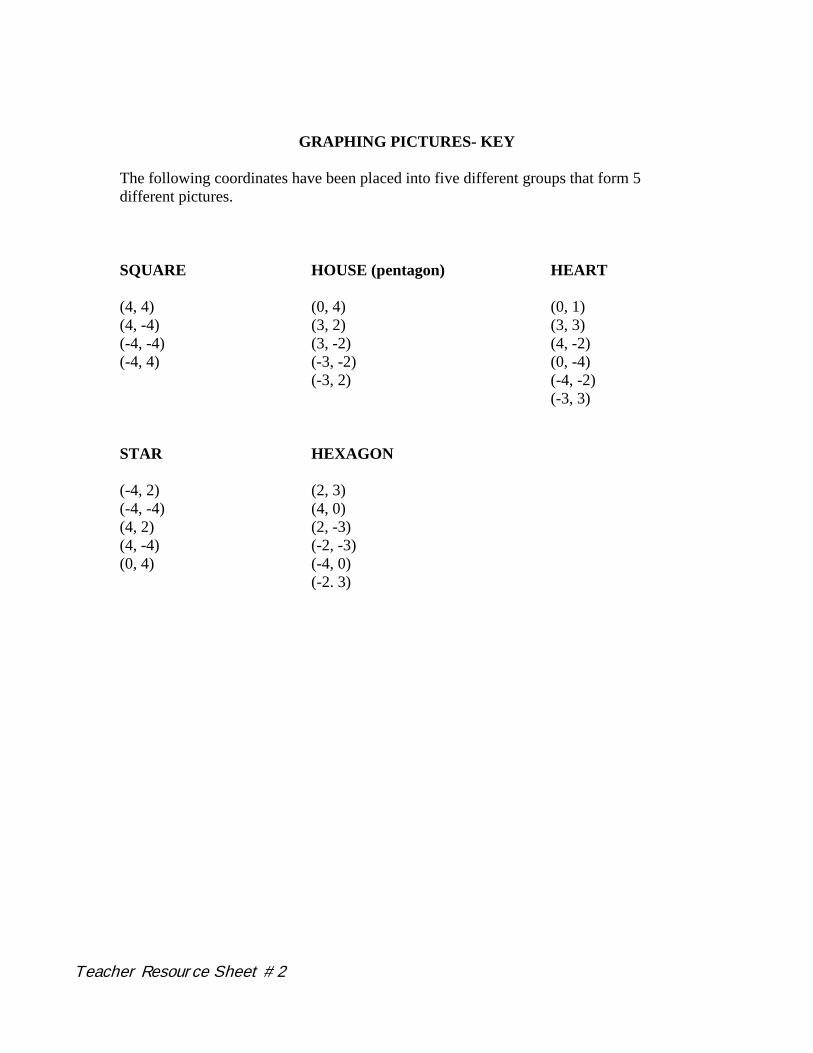
GRAPHING PICTURES- KEY
The following coordinates have been placed into five different groups that form 5 different pictures. SQUARE HOUSE (pentagon) HEART (4, 4) (0, 4) (0, 1) (4, -4) (3, 2) (3, 3) (-4, -4) (3, -2) (4, -2) (-4, 4) (-3, -2) (0, -4) (-3, 2) (-4, -2) (-3, 3) STAR HEXAGON (-4, 2) (2, 3) (-4, -4) (4, 0) (4, 2) (2, -3) (4, -4) (-2, -3) (0, 4) (-4, 0) (-2. 3)
Teacher Resource Sheet #2
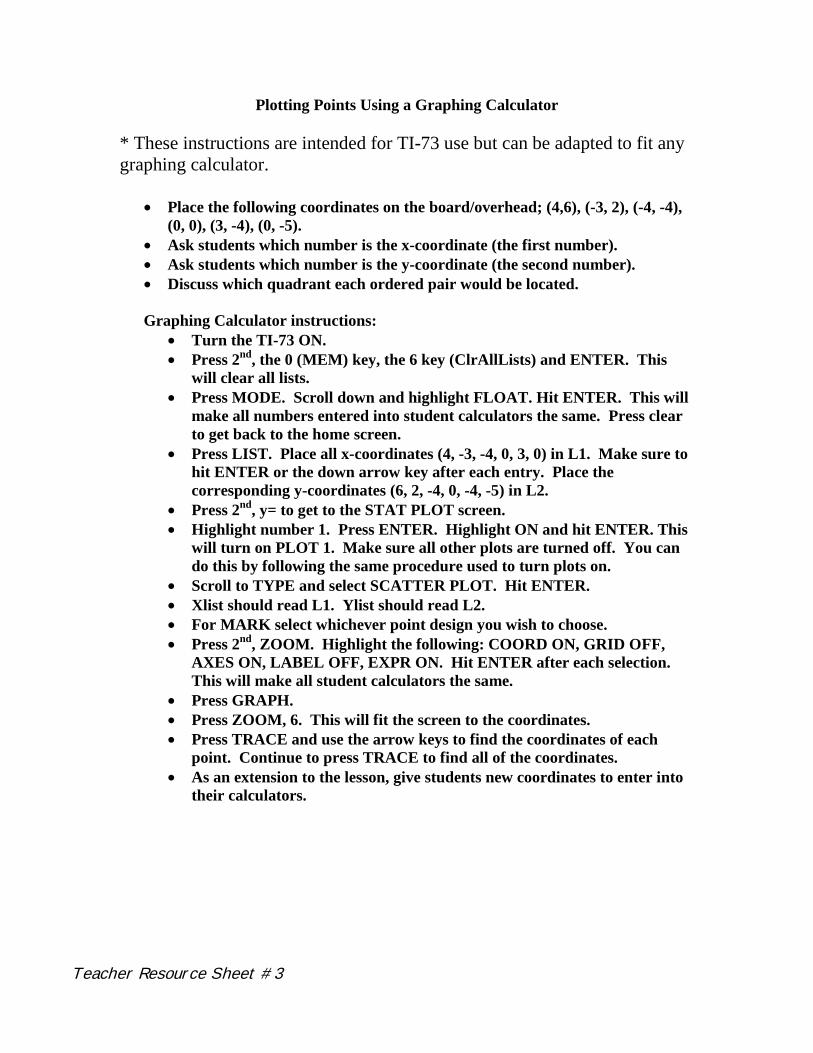
Plotting Points Using a Graphing Calculator * These instructions are intended for TI-73 use but can be adapted to fit any graphing calculator.
• Place the following coordinates on the board/overhead; (4,6), (-3, 2), (-4, -4), (0, 0), (3, -4), (0, -5).
• Ask students which number is the x-coordinate (the first number). • Ask students which number is the y-coordinate (the second number). • Discuss which quadrant each ordered pair would be located. Graphing Calculator instructions:
• Turn the TI-73 ON. • Press 2nd, the 0 (MEM) key, the 6 key (ClrAllLists) and ENTER. This
will clear all lists. • Press MODE. Scroll down and highlight FLOAT. Hit ENTER. This will
make all numbers entered into student calculators the same. Press clear to get back to the home screen.
• Press LIST. Place all x-coordinates (4, -3, -4, 0, 3, 0) in L1. Make sure to hit ENTER or the down arrow key after each entry. Place the corresponding y-coordinates (6, 2, -4, 0, -4, -5) in L2.
• Press 2nd, y= to get to the STAT PLOT screen. • Highlight number 1. Press ENTER. Highlight ON and hit ENTER. This
will turn on PLOT 1. Make sure all other plots are turned off. You can do this by following the same procedure used to turn plots on.
• Scroll to TYPE and select SCATTER PLOT. Hit ENTER. • Xlist should read L1. Ylist should read L2. • For MARK select whichever point design you wish to choose. • Press 2nd, ZOOM. Highlight the following: COORD ON, GRID OFF,
AXES ON, LABEL OFF, EXPR ON. Hit ENTER after each selection. This will make all student calculators the same.
• Press GRAPH. • Press ZOOM, 6. This will fit the screen to the coordinates. • Press TRACE and use the arrow keys to find the coordinates of each
point. Continue to press TRACE to find all of the coordinates. • As an extension to the lesson, give students new coordinates to enter into
their calculators.
Teacher Resource Sheet #3