Embed Size (px)
Citation preview
Find Nerd Project Management Process
FindNerd, a complete suite of project management, Web, Mobile & Game
Development Forums, technology blogs along with features to manage company and employee profiles easily, which is collectively called a social network for developers. Among all these exciting features online project managementis one of the powerful features. Here is the detailed information on this tool mentioned below:-
To describe the Find Nerd project management process flow we have divide the process into two categories-
Client steps Vendor steps
Client/ Stake holder steps
Starting with the procedure clients have to follow to use Find Nerd project management tool see the below steps.
Note: After every step each one client and vendor will receive alert mail for proceed further for next step.
Procedure to be followed by client-
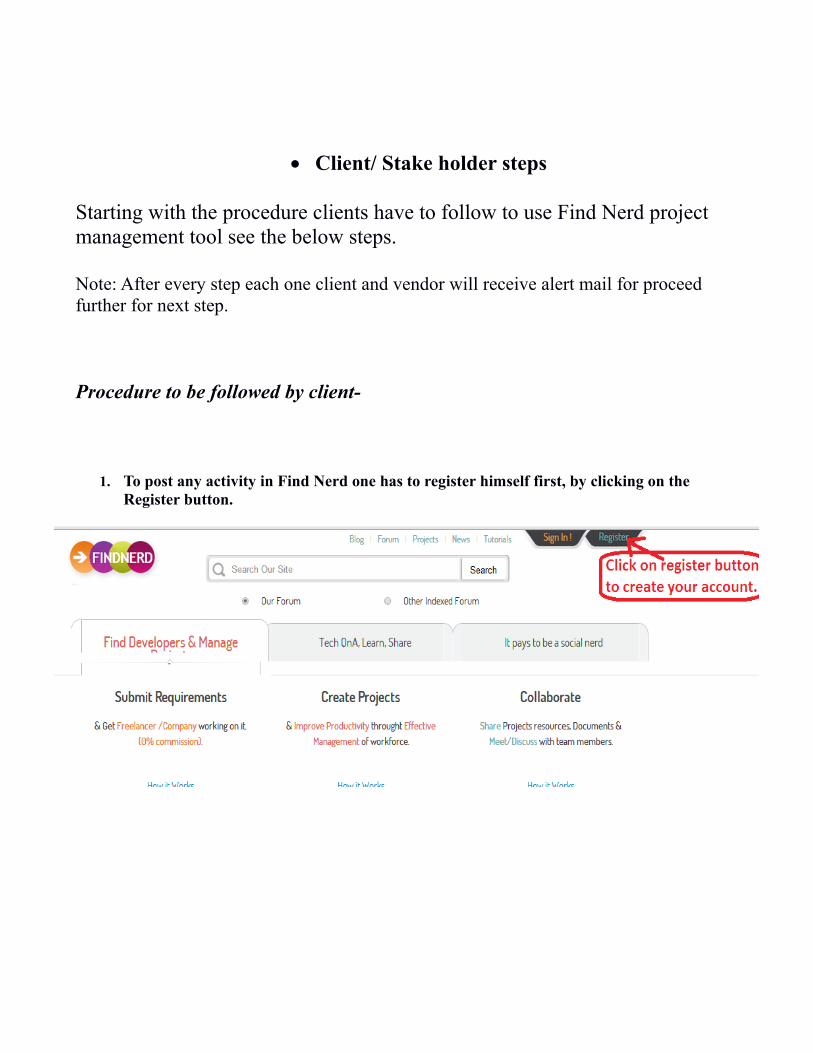
1. To post any activity in Find Nerd one has to register himself first, by clicking on the Register button.

2. When you click on the register button, the page will redirect you to the log-in page, fill all the required field and get the access on your account.
3. Once the above procedure is done you can post any project on Find Nerd by clicking on Post project on top menu, which is shown in snapshot below-
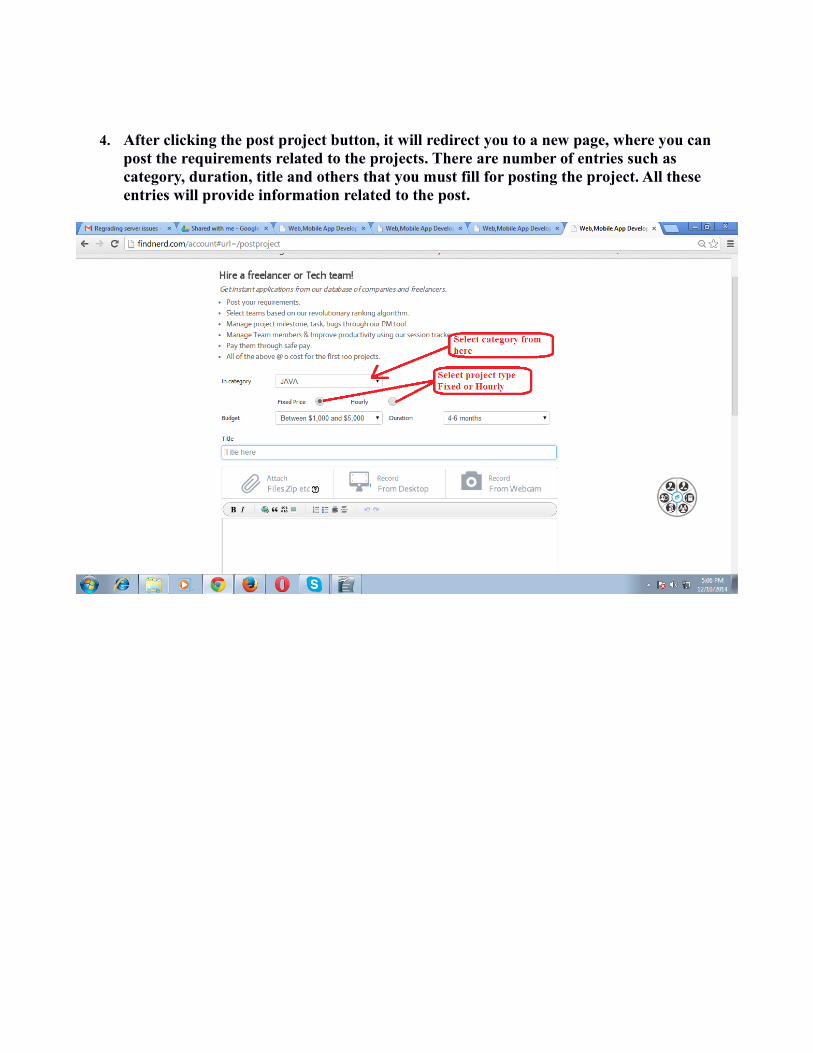
4. After clicking the post project button, it will redirect you to a new page, where you can post the requirements related to the projects. There are number of entries such as category, duration, title and others that you must fill for posting the project. All these entries will provide information related to the post.
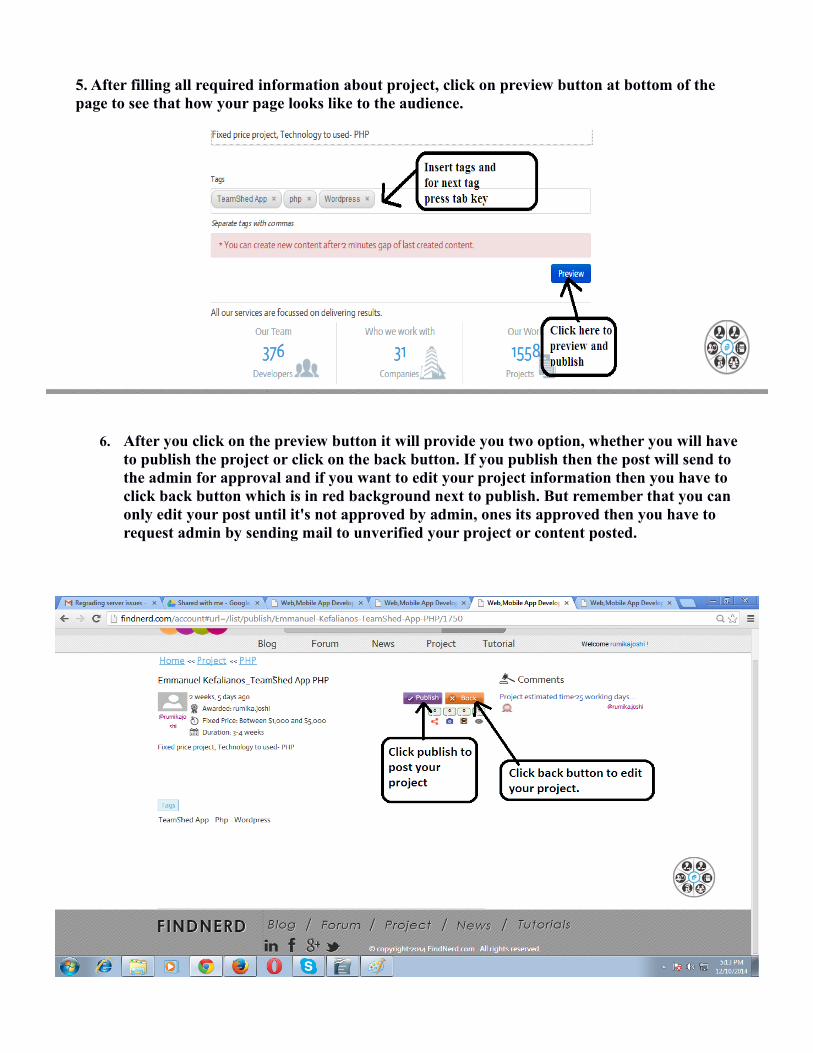
5. After filling all required information about project, click on preview button at bottom of the page to see that how your page looks like to the audience.
6. After you click on the preview button it will provide you two option, whether you will haveto publish the project or click on the back button. If you publish then the post will send to the admin for approval and if you want to edit your project information then you have to click back button which is in red background next to publish. But remember that you can only edit your post until it's not approved by admin, ones its approved then you have to request admin by sending mail to unverified your project or content posted.
After publishing your post Find Nerd Admin will review it and approve it after approval by admin your project will be live on Find Nerd and Audience can see it and bid on it.
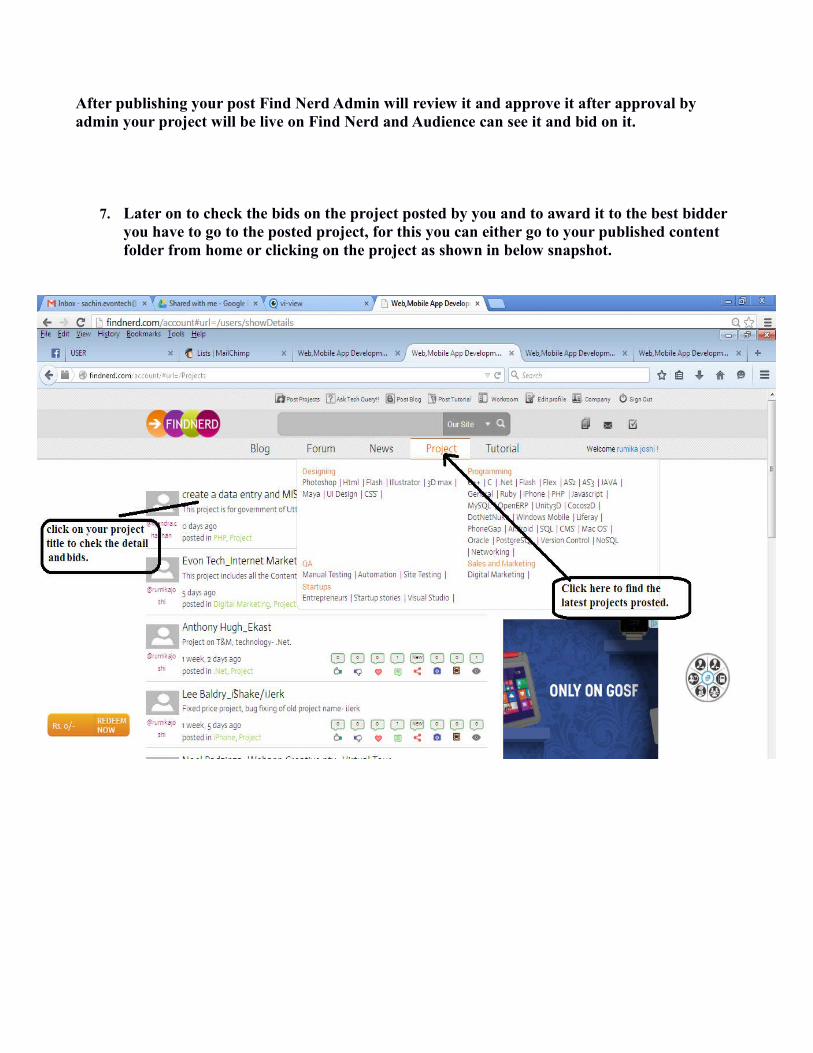
7. Later on to check the bids on the project posted by you and to award it to the best bidder you have to go to the posted project, for this you can either go to your published content folder from home or clicking on the project as shown in below snapshot.
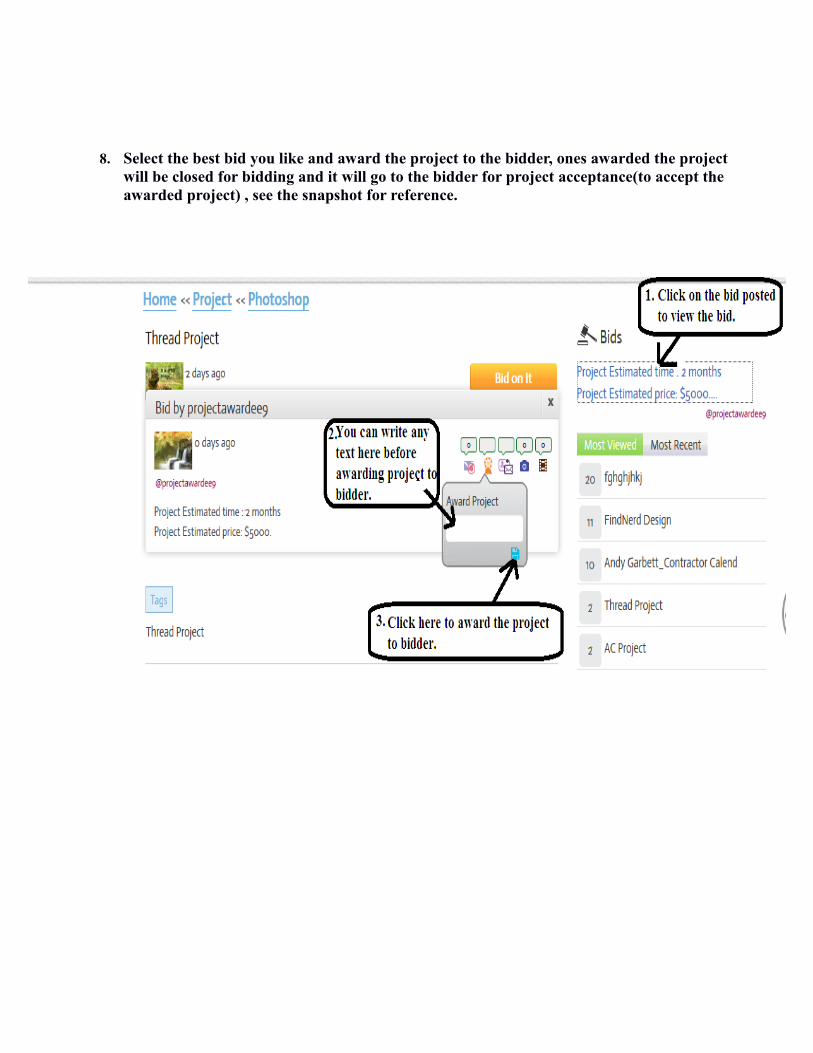
8. Select the best bid you like and award the project to the bidder, ones awarded the project will be closed for bidding and it will go to the bidder for project acceptance(to accept the awarded project) , see the snapshot for reference.
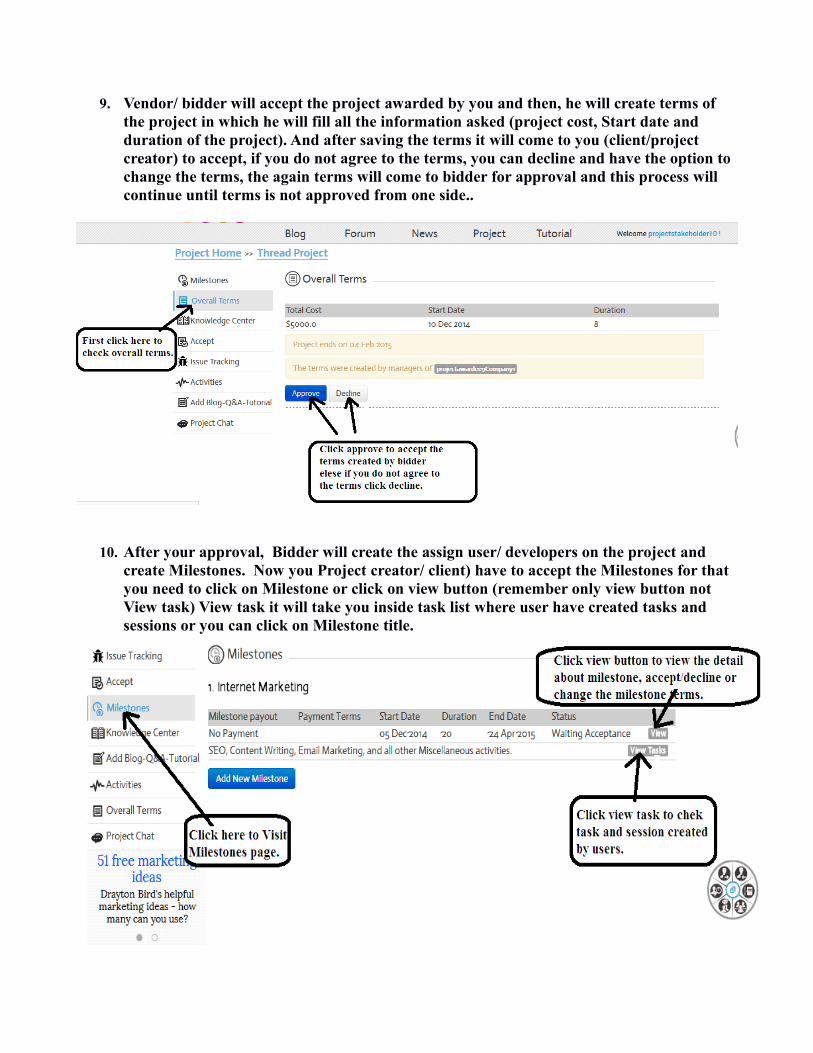
9. Vendor/ bidder will accept the project awarded by you and then, he will create terms of the project in which he will fill all the information asked (project cost, Start date and duration of the project). And after saving the terms it will come to you (client/project creator) to accept, if you do not agree to the terms, you can decline and have the option to change the terms, the again terms will come to bidder for approval and this process will continue until terms is not approved from one side..
10. After your approval, Bidder will create the assign user/ developers on the project and create Milestones. Now you Project creator/ client) have to accept the Milestones for that you need to click on Milestone or click on view button (remember only view button not View task) View task it will take you inside task list where user have created tasks and sessions or you can click on Milestone title.
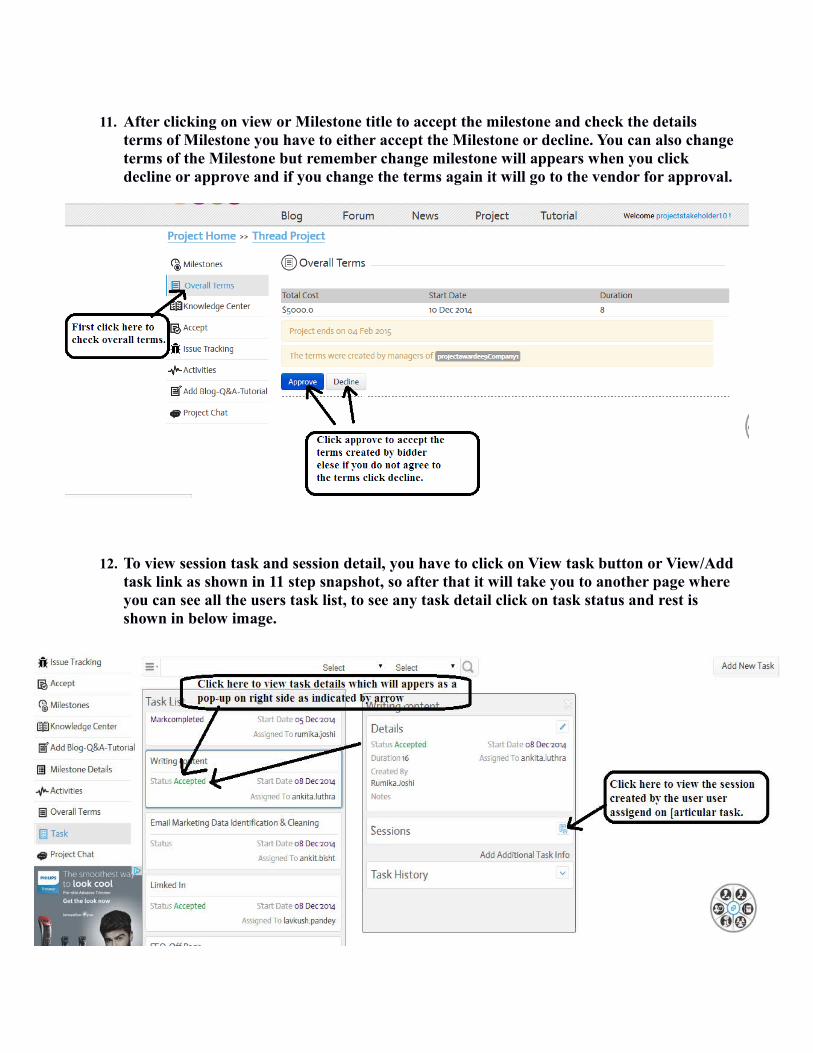
11. After clicking on view or Milestone title to accept the milestone and check the details terms of Milestone you have to either accept the Milestone or decline. You can also change terms of the Milestone but remember change milestone will appears when you click decline or approve and if you change the terms again it will go to the vendor for approval.
12. To view session task and session detail, you have to click on View task button or View/Add task link as shown in 11 step snapshot, so after that it will take you to another page where you can see all the users task list, to see any task detail click on task status and rest is shown in below image.
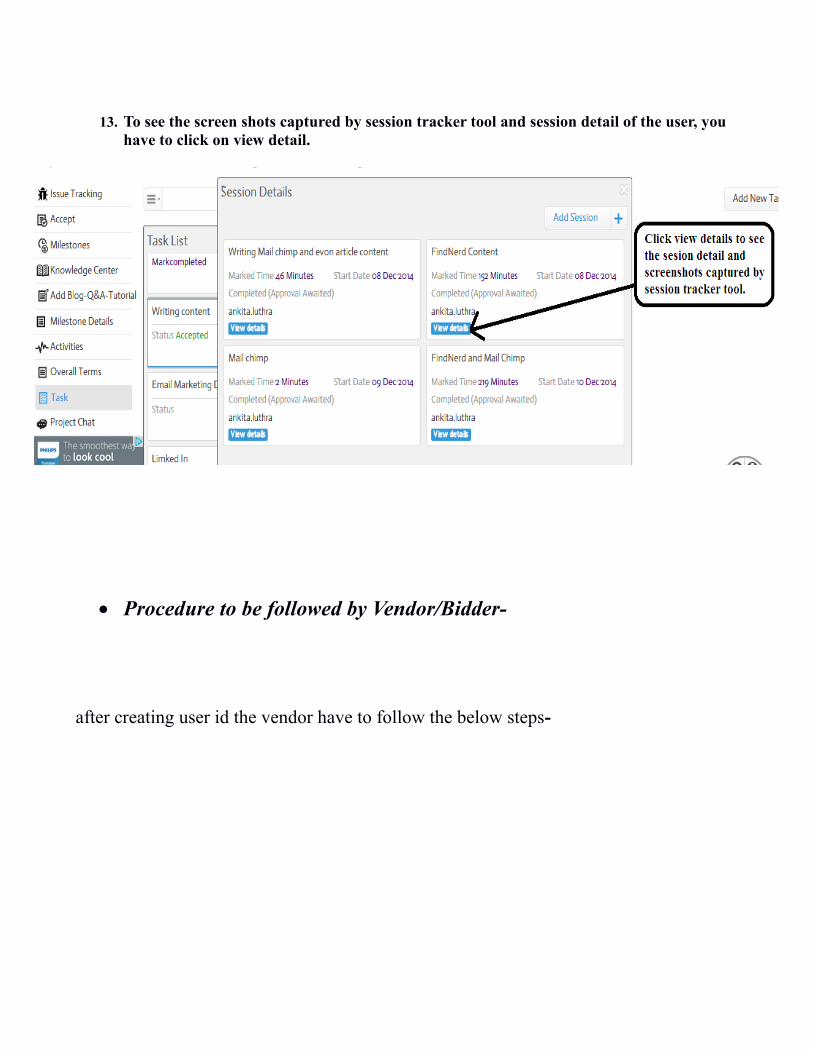
13. To see the screen shots captured by session tracker tool and session detail of the user, you have to click on view detail.
Procedure to be followed by Vendor/Bidder-
after creating user id the vendor have to follow the below steps-
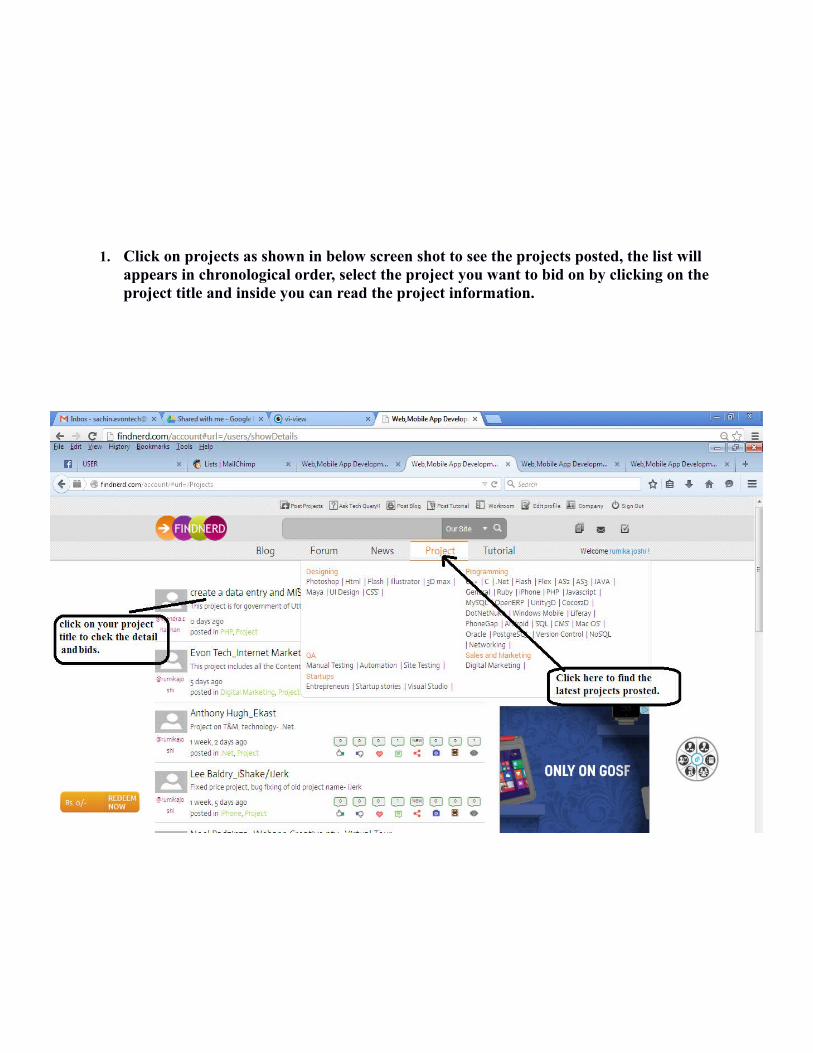
1. Click on projects as shown in below screen shot to see the projects posted, the list will appears in chronological order, select the project you want to bid on by clicking on the project title and inside you can read the project information.
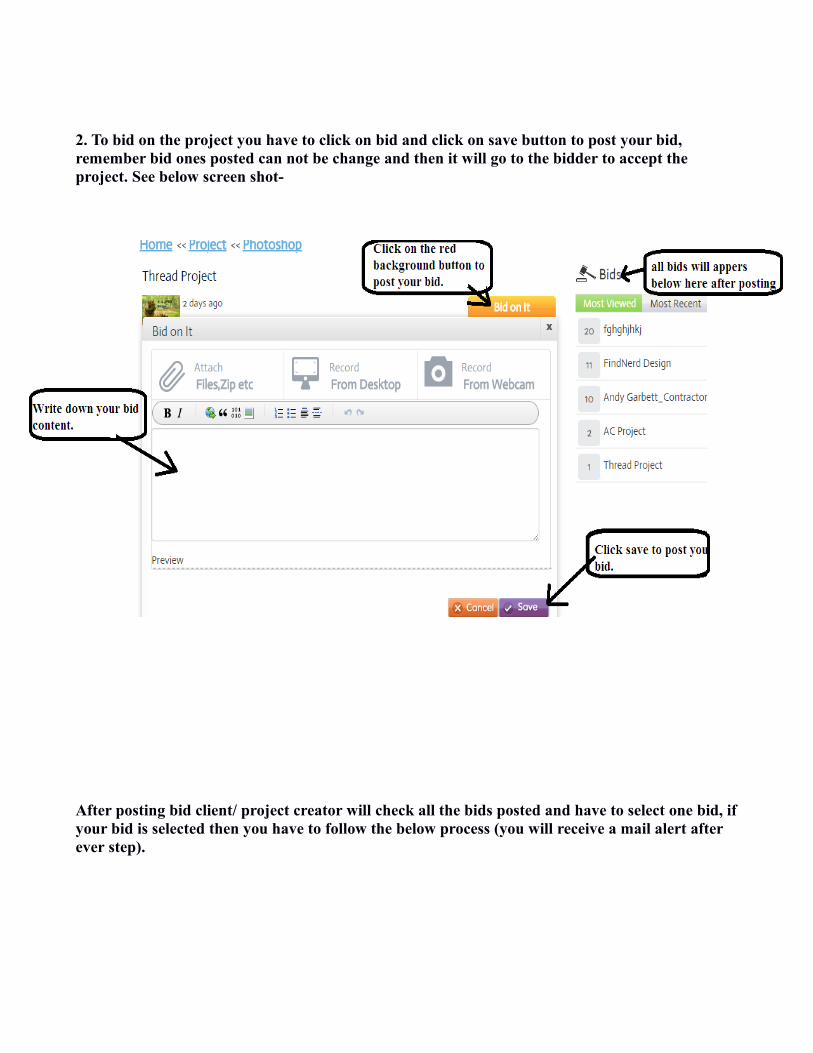
2. To bid on the project you have to click on bid and click on save button to post your bid, remember bid ones posted can not be change and then it will go to the bidder to accept the project. See below screen shot-
After posting bid client/ project creator will check all the bids posted and have to select one bid, ifyour bid is selected then you have to follow the below process (you will receive a mail alert after ever step).
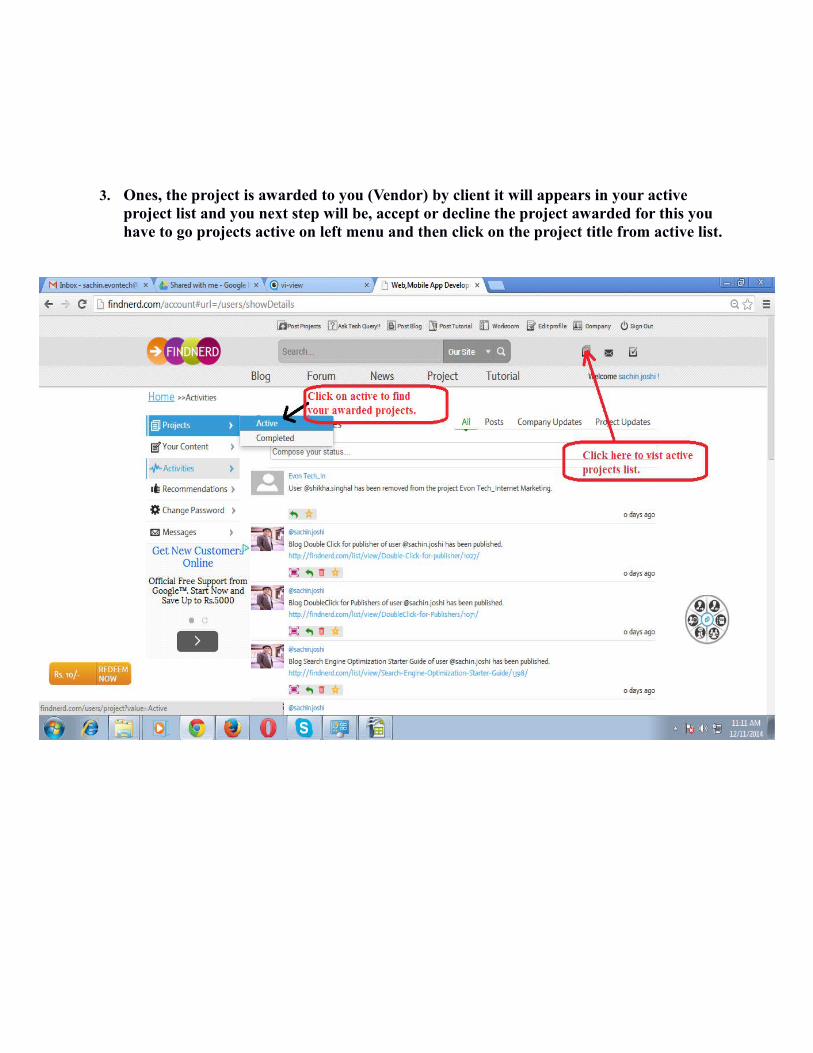
3. Ones, the project is awarded to you (Vendor) by client it will appears in your active project list and you next step will be, accept or decline the project awarded for this you have to go projects active on left menu and then click on the project title from active list.
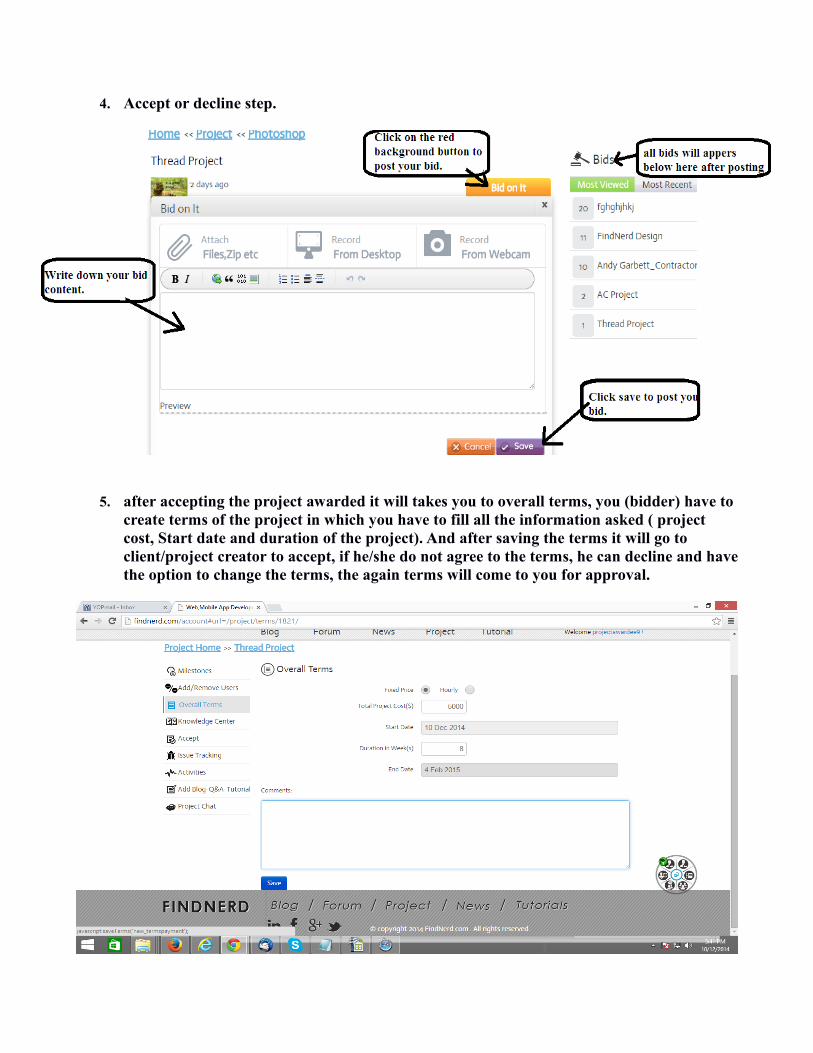
4. Accept or decline step.
5. after accepting the project awarded it will takes you to overall terms, you (bidder) have to create terms of the project in which you have to fill all the information asked ( project cost, Start date and duration of the project). And after saving the terms it will go to client/project creator to accept, if he/she do not agree to the terms, he can decline and havethe option to change the terms, the again terms will come to you for approval.
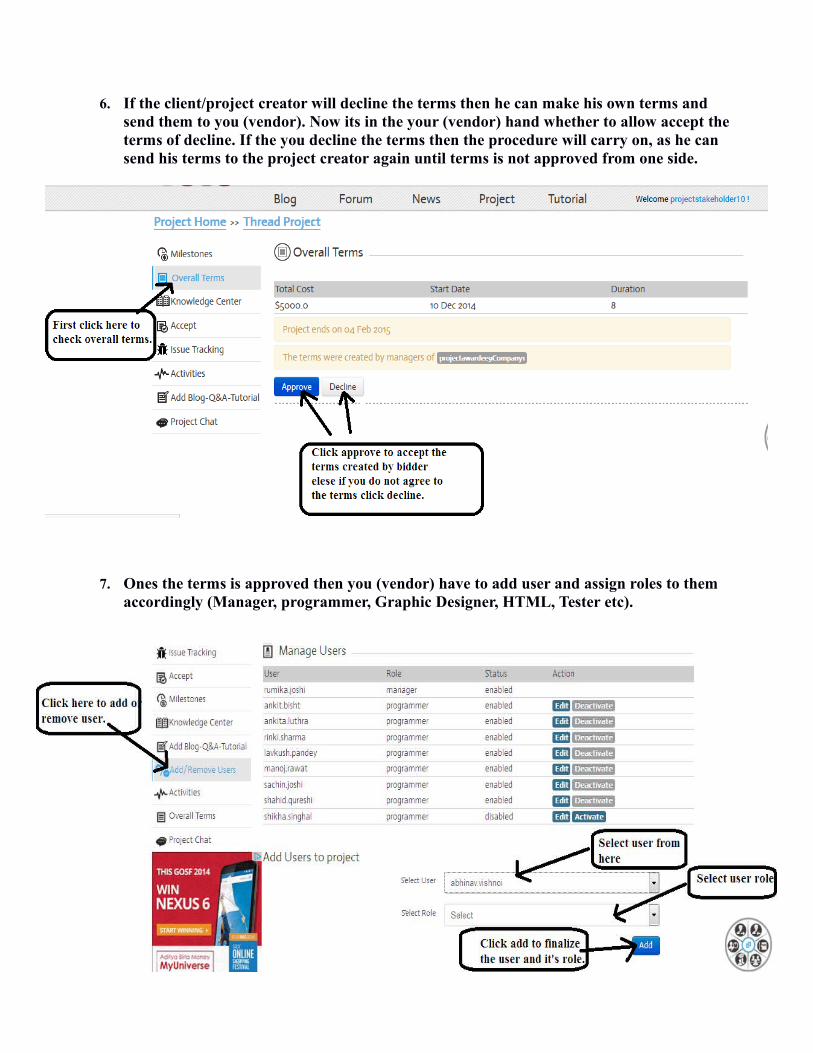
6. If the client/project creator will decline the terms then he can make his own terms and send them to you (vendor). Now its in the your (vendor) hand whether to allow accept the terms of decline. If the you decline the terms then the procedure will carry on, as he can send his terms to the project creator again until terms is not approved from one side.
7. Ones the terms is approved then you (vendor) have to add user and assign roles to them accordingly (Manager, programmer, Graphic Designer, HTML, Tester etc).
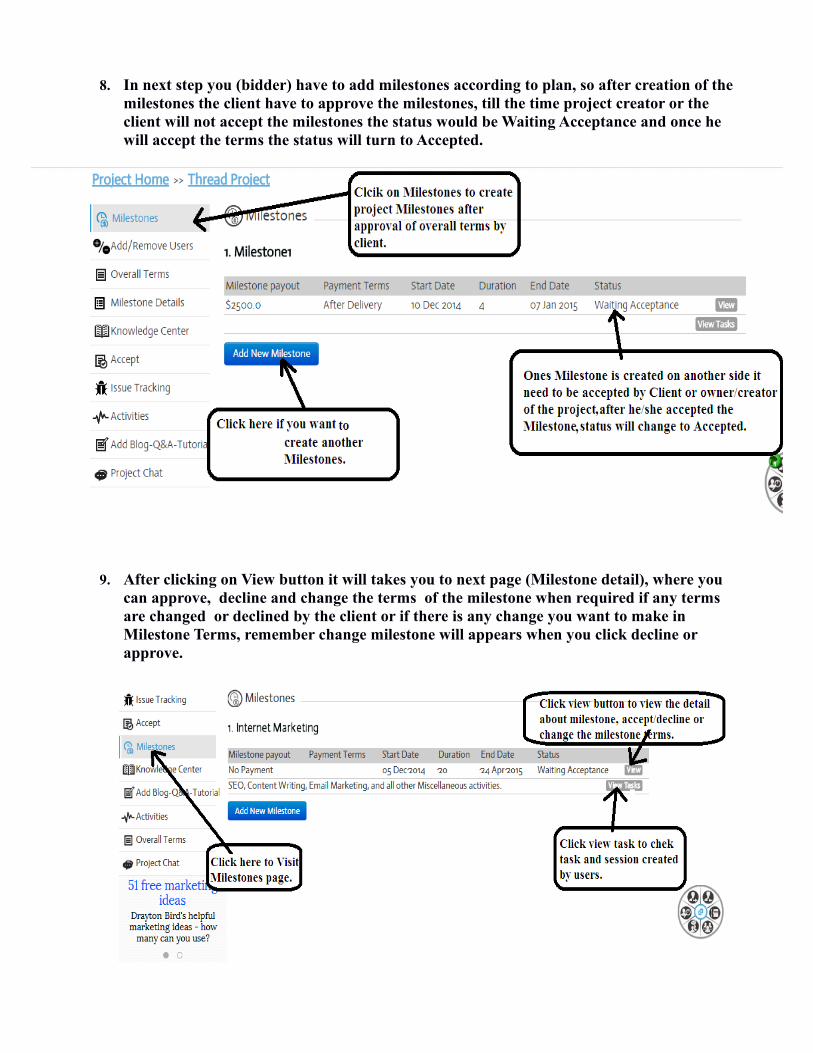
8. In next step you (bidder) have to add milestones according to plan, so after creation of the milestones the client have to approve the milestones, till the time project creator or the client will not accept the milestones the status would be Waiting Acceptance and once he will accept the terms the status will turn to Accepted.
9. After clicking on View button it will takes you to next page (Milestone detail), where you can approve, decline and change the terms of the milestone when required if any terms are changed or declined by the client or if there is any change you want to make in Milestone Terms, remember change milestone will appears when you click decline or approve.
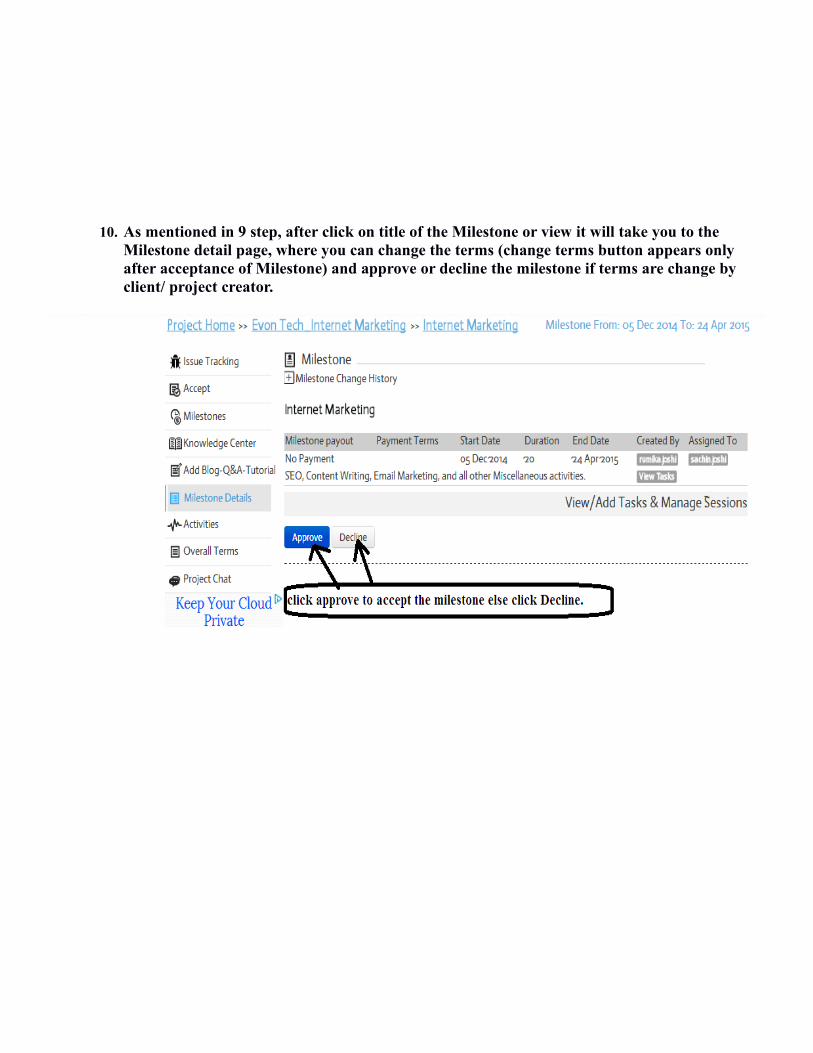
10. As mentioned in 9 step, after click on title of the Milestone or view it will take you to the Milestone detail page, where you can change the terms (change terms button appears onlyafter acceptance of Milestone) and approve or decline the milestone if terms are change byclient/ project creator.
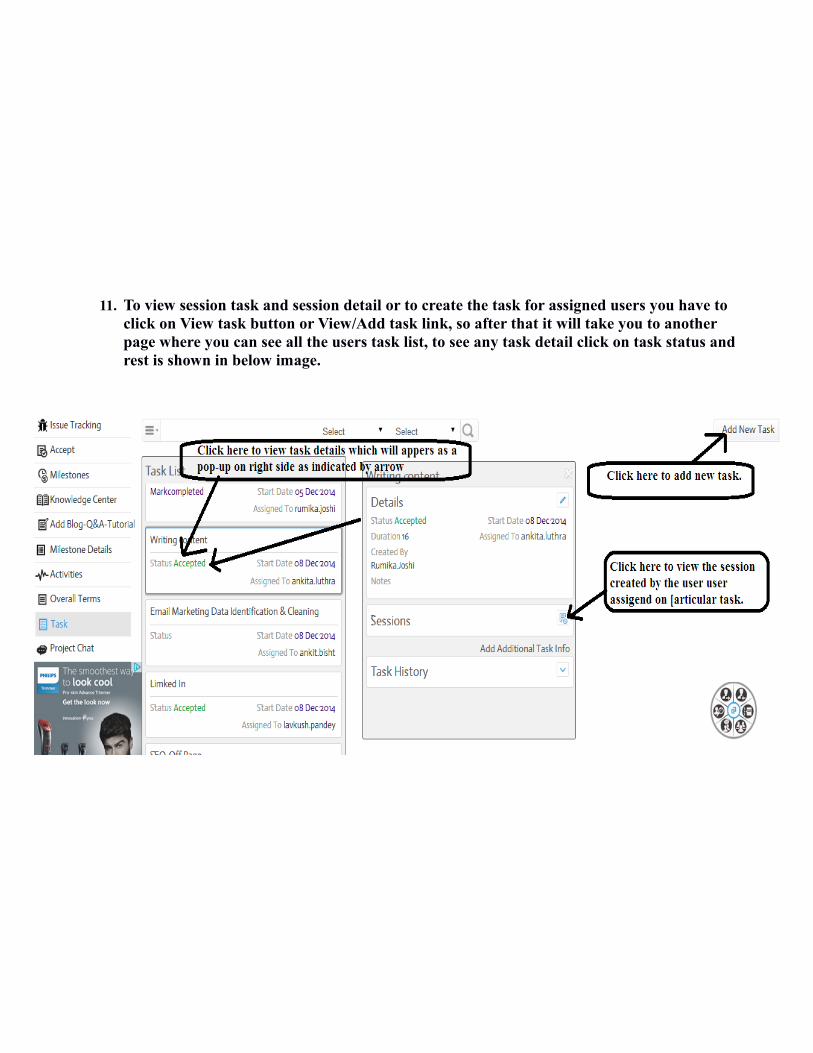
11. To view session task and session detail or to create the task for assigned users you have to click on View task button or View/Add task link, so after that it will take you to another page where you can see all the users task list, to see any task detail click on task status andrest is shown in below image.
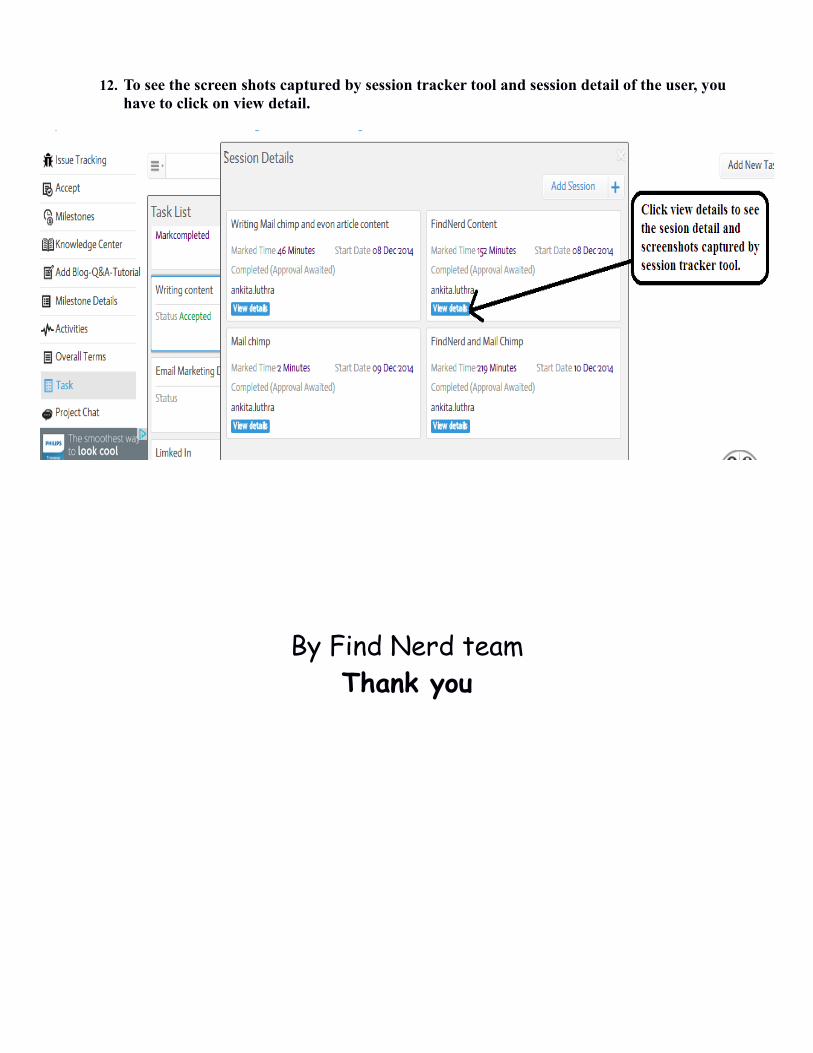
12. To see the screen shots captured by session tracker tool and session detail of the user, you have to click on view detail.
By Find Nerd teamThank you