Embed Size (px)
Citation preview
California State University, San Bernardino California State University, San Bernardino
CSUSB ScholarWorks CSUSB ScholarWorks
Theses Digitization Project John M. Pfau Library
2004
A Java image editor and enhancer A Java image editor and enhancer
Lalitha Darbhamulla
Follow this and additional works at: https://scholarworks.lib.csusb.edu/etd-project
Part of the Software Engineering Commons
Recommended Citation Recommended Citation Darbhamulla, Lalitha, "A Java image editor and enhancer" (2004). Theses Digitization Project. 2705. https://scholarworks.lib.csusb.edu/etd-project/2705
This Project is brought to you for free and open access by the John M. Pfau Library at CSUSB ScholarWorks. It has been accepted for inclusion in Theses Digitization Project by an authorized administrator of CSUSB ScholarWorks. For more information, please contact [email protected].
A JAVA IMAGE EDITOR AND ENHANCERI
A Project
Presented to the
Faculty of
California State University,
San Bernardino
In Partial Fulfillment
of the Requirements for the Degree
Master of Science
in
Computer Science
by
Lalitha Darbhamulla
June 2004
A JAVA IMAGE EDITOR AND ENHANCER
A Project
Presented to the
Faculty of
California State University,
San Bernardino
by
Lalitha Darbhamulla
June 2004
Approved by:
Date
Dr. David Turner
Dr.y^eorge Ge&rgiou
ABSTRACT
Nowadays computers constitute a very important part of
our modern lives. The Internet has transformed today's
world to a Global Village. Computers are involved in about
every aspect of our life, from e-mail to instant messaging
to shopping, banking, and imaging. Even though we don't
realize it, the use of computer in imaging affects our
lives in many ways. Whether the context is entertainment,
health care, or any other industry, many imaging
applications are key to its success. With the advent of the
World Wide Web, imaging is much closer to home than ever
before. When you use the Internet to get directions using a
map or to find a car dealer in your area, it is graphical
and imaging technology that makes these applications work.
Besides forming a backbone of many applications that affect
our day-to-day lives, imaging plays a very important role
in many hi-tech areas, including medical imaging, satellite
imaging, and astronomy.
Images are acquired through a variety of means,
ranging from cheap digital cameras to expensive medical
image scanners. Regardless of how images are acquired,
imaging applications typically provide three basic
iii
functions for handling images: loading, rendering, and
manipulating. Image processing is of central importance to
the Web. Of all the data formats that appear to be in wide
use, images take the greatest bandwidth. New image formats
appear all the time. Browsers are growing in size and
complexity as a result of having to install plug-ins and
helper functions that enable the decoding of the growing
number of formats. Java obviates the need for deployment of
bloated browsers or the gaggle of plug-ins and helper
applications that clog our computing environments. This is
the reason Java suits best for imaging.
The purpose of this project is to develop a Java
Applet (A Java Image Editor and Enhancer) that provides all
the tools needed for creating image fantasies. It lets the
user pick a template and an image, and combine them
together. The User can then apply image processing
techniques such as rotation, zooming, blurring etc
according to his/her requirements. Finished composite
images can be used to make entertaining greeting cards,
calendars, posters, invitations, signs, buttons, banners,
etc. It also provides a toolbar that has eraser, pencil,
paint brush, air brush, selector, free form selector,
iv

filler, and the ability to draw line, curve, circle, and
rectangle. The project also allows the images to be edge
detected, watermarked, and stitched.
The applet was developed to work in Microsoft Internet
Explorer 6.0/higher or Netscape Navigator 6.0/higher. We
assume that the client machines have browsers with Java
Plug-in version 1.4 or higher installed to run the applet.
The applet is cached first time the user runs the applet.
Applet caching allows an applet deployer to decide whether
an applet should be "sticky", that is, to stay on the disk
in a secondary cache that the browser cannot overwrite. The
only time "sticky" applets get downloaded after that is
when they are updated on their server. Otherwise the applet
is always available locally for quick loading. It is
recommended that applets which provide core business
applications be made sticky to improve their startup
performance.
v
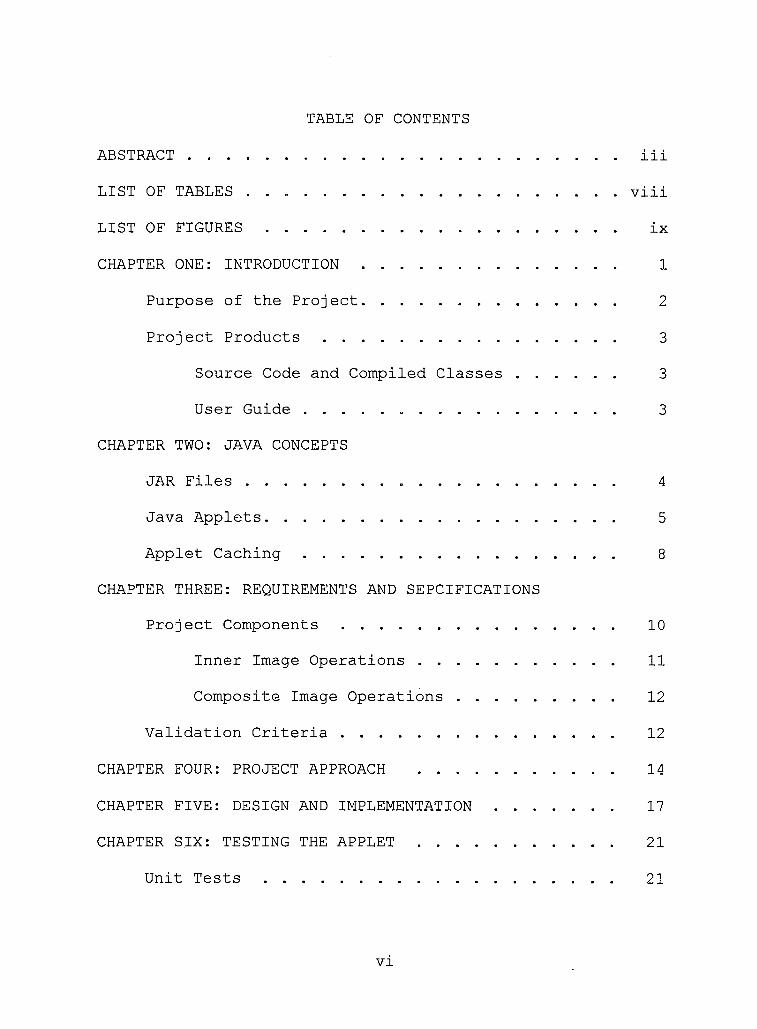
TABLE OF CONTENTS
ABSTRACT................................................ iii
LIST OF TABLES ............................................ viii
LIST OF FIGURES........................................ ix
CHAPTER ONE: INTRODUCTION ............................. 1
Purpose of the Project............................. 2
Project Products ................................. 3
Source Code and Compiled Classes ........... 3
User Guide.......... 3
CHAPTER TWO: JAVA CONCEPTS
JAR Files................. 4
Java Applets....................................... 5
Applet Caching ................................... 8
CHAPTER THREE: REQUIREMENTS AND SEPCIFICATIONS
Project Components ............................... 10
Inner Image Operations ...................... 11
Composite Image Operations ................. 12
Validation Criteria ............................... 12
CHAPTER FOUR: PROJECT APPROACH ...................... 14
CHAPTER FIVE: DESIGN AND IMPLEMENTATION ............. 17
CHAPTER SIX: TESTING THE APPLET...................... 21
Unit Tests....................................... 21
vi
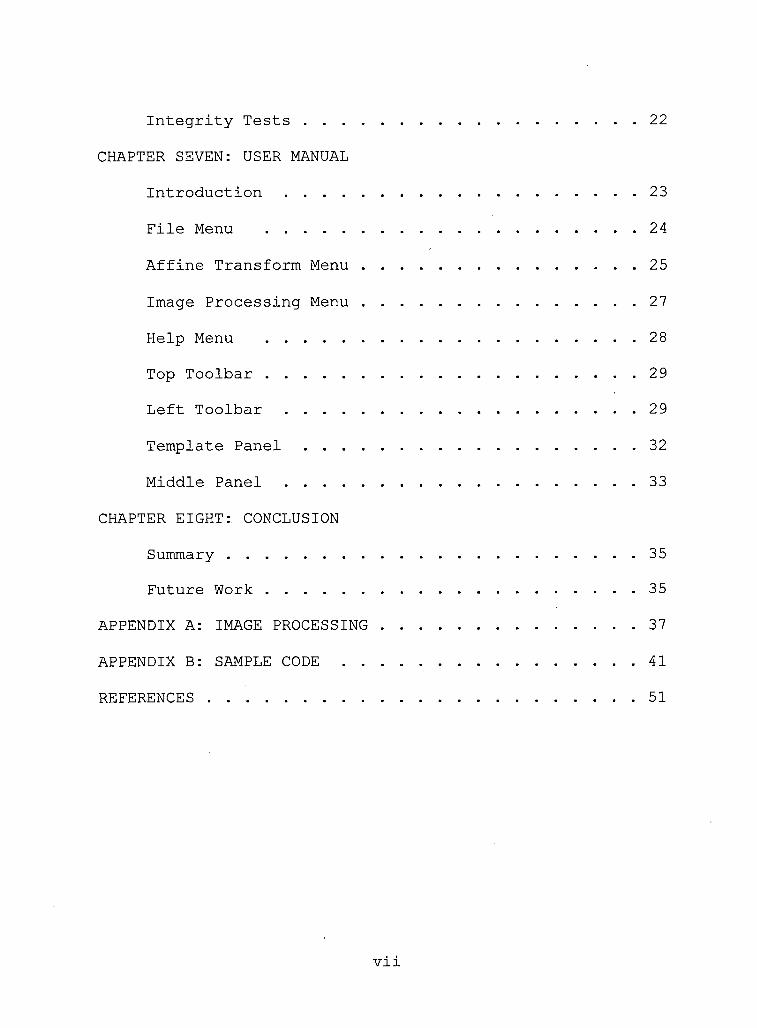
Integrity Tests ..................................... 22
CHAPTER SEVEN: USER MANUAL
Introduction ........................................ 23
File Menu ................... 24
Affine Transform Menu................................ 25
Image Processing Menu.......... 27
Help Menu ........................................... 28
Top Toolbar........................................... 29
Left Toolbar......................................... 29
Template Panel ..................................... 32
Middle Panel ....................................... 33
CHAPTER EIGHT: CONCLUSION
Summary................................................35
Future Work........................................... 35
APPENDIX A: IMAGE PROCESSING ............................ 37
APPENDIX B: SAMPLE CODE ................................... 41
REFERENCES . 51
vii
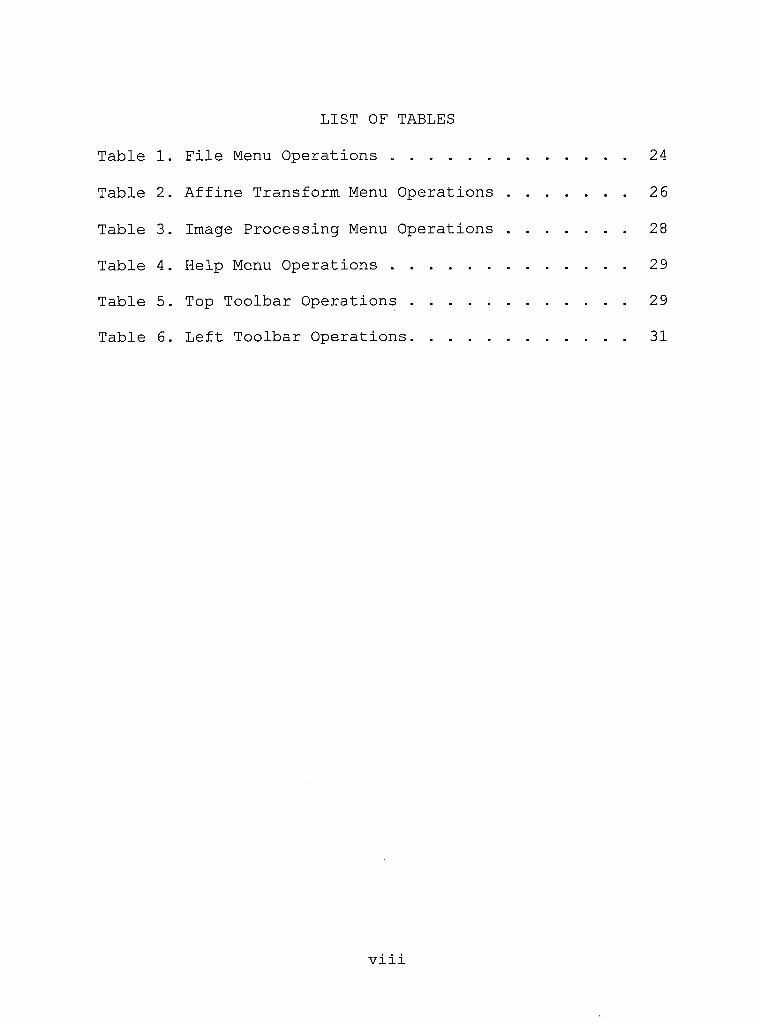
LIST OF TABLES
Table 1. File Menu Operations.......................... 24
Table 2. Affine Transform Menu Operations............. 26
Table 3. Image Processing Menu Operations............. 28
Table 4. Help Menu Operations.......................... 29
Table 5. Top Toolbar Operations........................ 29
Table 6. Left Toolbar Operations........................ 31
viii
LIST OF FIGURES
Figure 1. Architecture ................................... 15
Figure 2. GUI of the Applet..............................17
Figure 3. Class Diagram................. 20
Figure 4. File Menu......................................24
Figure 5. Affine Transform Menu ......................... 26
Figure 6. Image Processing Menu.................. 27
Figure 7. Help Menu...................................... 28
Figure 8. Left Toolbar.................................... 30
Figure 9. Text Options.................................... 32
Figure 10. Template Panel ............................... 33
Figure 11. Middle Panel ................................. 34
ix

CHAPTER ONE
INTRODUCTION
The applet was developed using the Java programming
language. The Java language offers the unique advantage of
a "write once, run anywhere" capability. Java programs are
written to run on a Java Virtual Machine (JVM). A
programmer can develop a program and expect it to run on
the JVM of different computers.. In the Java programming
language, the notion of the Java sandbox makes it possible
to ensure that Java programs respect their hosts. By
default, programs are prevented from reading privileged
files, consuming too many resources or communicating over
sockets on behalf of the host computer. Permissions are
required to be explicitly granted for the programs to do
so. The Java Archive (JAR) file format enables you to
bundle multiple files into a single archive file. Typically
a JAR file contains the class files and auxiliary resources
associated with applets and applications. The JAR file
format was introduced in version 1.1 of the Java
Development Kit, and version 1.2 includes several
enhancements to JAR file functionality. Since the project
involves working on images, all the images and Java class
1
files are archived in a jar file. Then the JAR file is
signed. Users who recognize the signature can then
optionally grant the image editor and enhancer security
privileges it wouldn't otherwise have. Since the applet is
bundled in a JAR file, the applet's class files and
associated resources can be downloaded to a browser in a
single HTTP transaction without the need for opening a new
connection for each file.
Purpose of the Project
The purpose of this project is to develop a Java
Applet that provides all the tools needed for creating
image fantasies. It lets the user pick a template and an
image, and combine them together. The user can then apply
image processing techniques such as rotation, zooming,
blurring etc according to his/her requirements. Finished
composite images can be used to make entertaining greeting
cards, calendars, posters, invitations, signs, buttons,
banners, etc. It also provides a toolbar that provides
eraser, pencil, paint brush, air brush, selector, free form
selector, filler, and the ability to draw line, curve,
circle, and rectangle. The project also allows the image to
be edge detected, watermarked, and stitched.
2
Project Products
The project delivers the following:
Source Code and Compiled Classes
The source files contain the implementation of all
image processing methods provided by the project as well as
comments within the source code for relevant statements and
methods. We also deliver the compiled classes and the image
resources that are needed in the project in a Java
Archive(JAR) file.
User Guide
The user guide contains the documentation of this
project's products. Detailed instructions are provided for:
• Using image processing functions
• Combining image template and the sub image
• Using the toolbar
• Use of image processing functions on the sub
image
The user guide contains sample code for reference.
3

CHAPTER TWO
JAVA CONCEPTS
JAR Files
The Java Archive (JAR) file format enables you to
bundle multiple files into a single archive file. Typically
a JAR file contains the class files and auxiliary resources
associated with applets and applications. The JAR file
format provides many benefits:
• Security: You can digitally sign the contents of
a JAR file. Users who recognize your signature
can then optionally grant your software security
privileges it wouldn't otherwise have.
• Decreased download time: If your applet is
bundled in a JAR file, the applet's class files
and associated resources can be downloaded to a
browser in a single HTTP transaction without the
need for opening a new connection for each file.
• Compression: The JAR format allows you to
compress your files for efficient storage.
• Packaging for extensions (version 1.2): The
extensions framework provides a means by which
you can add functionality to the Java core
4
platform, and the JAR file format defines the
packaging for extensions. Java 3D and JavaMail
are examples of extensions developed by Sun
Microsystems. By using the JAR file format, you
can turn your software into extensions as well.
• Package Sealing (version 1.2): Packages stored in
JAR files can be optionally sealed so that the
package can enforce version consistency. Sealing
a package within a JAR file means that all
classes defined in that package must be found in
the same JAR file.
• Package Versioning (version 1.2): A JAR file can
hold data about the files it contains, such as
vendor and version information.
• Portability: The mechanism for handling JAR files
is a standard part of the Java platform's core
API.
Java Applets
Java applets are programs written in the Java
programming language that can be embedded in a HTML page,
the same way other components such as images and tables are
included. Running applets requires the use of either a
5

Java-enabled browser or a browser with the Java plug-in
installed. The Java plug-in enables browsers to run applets
using Sun's Java Runtime Environment (JRE) instead of the
browser's default JRE. To view a page that contains an
applet, the applet's byte code is downloaded from the
server to the local system and executed by the browser's
JRE or the Java plug-in.
One of the benefits of using Java is the ability to
run mobile code. In Java, code is loaded either from a disk
or from a remote file system by a class loader. Class
loaders determine how and when classes are added to the
running environment making sure of the authenticity of the
byte code. Every Java Virtual Machine (JVM) starts by
loading classes from the user's class path using primordial
class loader; these classes are trusted and not subjected
to any verification. Java classes can be loaded by other
class loaders such as applet class loaders. Applet class
loaders load classes into a browser by first attempting to
load a class using primordial class loader, if the class is
not found then its byte code is downloaded from the remote
server by using HTTP and examined to ensure that it does
not break any security rule but still runs under strict
6
restrictions. The class loader used in the Java plug-in is
referred to as the plug-in class loader. The plug-in class
loader allows browsers to accept signed applets to be given
the same privileges as local code. When a plug-in class
loader detects a signed applet, it prompts the user for
permission to run it; the user also has the ability to
verify the certificate of the signer. Each Java applet is
associated with a code source that consists of the URL from
which it was loaded and the list of certificates used to
sign it if any. Each class belongs to one and only one
protection domain based on its code source; every
protection domain has a set of permissions granted to it.
An applet can be granted privileges when the user
explicitly states additional privileges in a file named
.java.policy located in the user's home directory.
In this project, the "Image Editor and Enhancer" runs
as an applet that is signed to provide the following
otherwise unauthorized actions:
• Writing files to the client file system.
• Opening files on the client file system.
In this project, it is assumed that client uses Java plug
in version 1.4.1 or above.
7
Applet Caching
Applet caching ensures that applets are not
unnecessarily downloaded by a browser every time a user
references them. Java Plug-in has supported disk caching in
previous versions by using the same cache the browser uses
for all other web documents. This works for casual applet
usage, but larger applets can often get flushed from the
cache to make room for other documents since the browser
has no knowledge that an applet file might be needed in the
future. The result is that this caching strategy fails
where is needed most in large business applets.
Java plug-in 1.3 introduces an alternative form of
applet caching which allows an applet deployer to decide
whether applet should be "sticky", that is, to stay on the
disk in a secondary cache that the browser cannot
overwrite. The only time "sticky" applets get downloaded
after that is when they are updated on their server.
Otherwise the applet is always available locally for quick
loading. It is recommended that applets that provide core
business applications be made sticky to improve their
startup performance.
This feature is activated by including the
"cache_option", "cache_archive" and "cache_version" values
8

in the EMBED/OBJECT/APPLET tag that specifies the use of
Java Plug-in.
9
CHAPTER THREE
REQUIREMENTS AND SPECIFICATIONS
Project Components
The mission of this project includes the design and
implementation of "Image Editor and Enhancer". This applet
provides classes and methods to perform image processing
operations such as rotation, zooming, blurring, detecting
edge, watermarking, image stitching etc. The project can be
divided into two components: set of operations that can be
performed on the image loaded into the template (Inner
Image Operations) and the set of operations that can be
performed on the composite image (Composite Image
Operations). The JCreator version 2.0 is the coding
platform used to implement the project. JCreator is a
powerful IDE for Java. JCreator provides the user with a
wide range of functionality such as: Project management,
project templates, code completion, debugger interface,
editor with syntax highlighting, wizards and a fully
customizable user interface. With JCreator one can directly
compile or run Java program without activating the main
document first. JCreator will automatically find the file
with the main method or the html file holding the java
10
applet then, it will start the appropriate tool. The Image
Editor and Enhancer consists of following steps:
• Selecting a template from an already available
set of templates or creating a new template.
• Creating up to 5 masks on the template to load
sub images into the template by clicking on the
mask or by using load control from the file menu.
• Performing image processing operations on the sub
image.
• Performing image processing operations on the
composite image.
• Performing operations such as erasing, painting,
drawing, etc by using a toolbar that is provided.
• Saving or printing the finished image.
Inner Image Operations
The inner image operations consist of a library of
Java classes and methods that can be used by the applet to
perform image processing operations on the image loaded
into the template. It includes different operations such as
rotating, blurring, sharpening, contrast, hue adjusting,
brightening, zooming the image loaded into the template.
11
Composite Image Operations
The composite image operations consist of a library of
Java classes and methods that can be used by the applet to
perform image processing operations on the composite image.
It includes different operations such as creating masks on
the template, watermarking, edge detection, and image
stitching. It also includes operations such as erasing,
drawing with a pencil, painting with a paint brush or air
brush, selecting an area using selector or free form
selector, filling an area by the chosen color, and the
ability to draw line, curve, circle, and rectangle.
Validation Criteria
Prior to being put into practices, all parts of the
project were verified to meet all the requirements stated
previously in this section. The following validation tests
were performed:
• Unit Tests: test the individual method
implementations to ensure that they perform as
desired.
• Integrating Tests: test the interfacing of
different components of the system after they are
assembled. These tests ensure that the system
12

elements were properly integrated and will
perform as expected.
13
CHAPTER FOUR
PROJECT APPROACH
The project consists of the development of an image
enhancer and editor. Image Enhancer and Editor is basically
an applet that can be downloaded from the Internet. All the
Java class files and resources are archived into a JAR file.
The JAR file is then signed and assigned a certificate. It
comes with a certificate that a user can view before giving
it permission to access local files. When a user accesses the
applet for the first time, the applet will be downloaded and
cached in the local system so that the user can access the
applet from the local machine itself next time onwards. Java
Plug-in has to be used for viewing Swing components of the
applet; it comes automatically if j2sdkl.4.1 is used. It is
required that Java Advanced Imaging (JAI) is installed on
the client system for the Image Editor and Enhancer to
work. It is necessary to mention the required directory
where the applet is cached in the Java plug-in. Since a
functionality of the Image Enhancer is to print images, the
client system must be connected to a printer where the
images can be printed. Internet Explorer 6 or higher,
Netscape 6 or higher provides the interface to the applet.
14
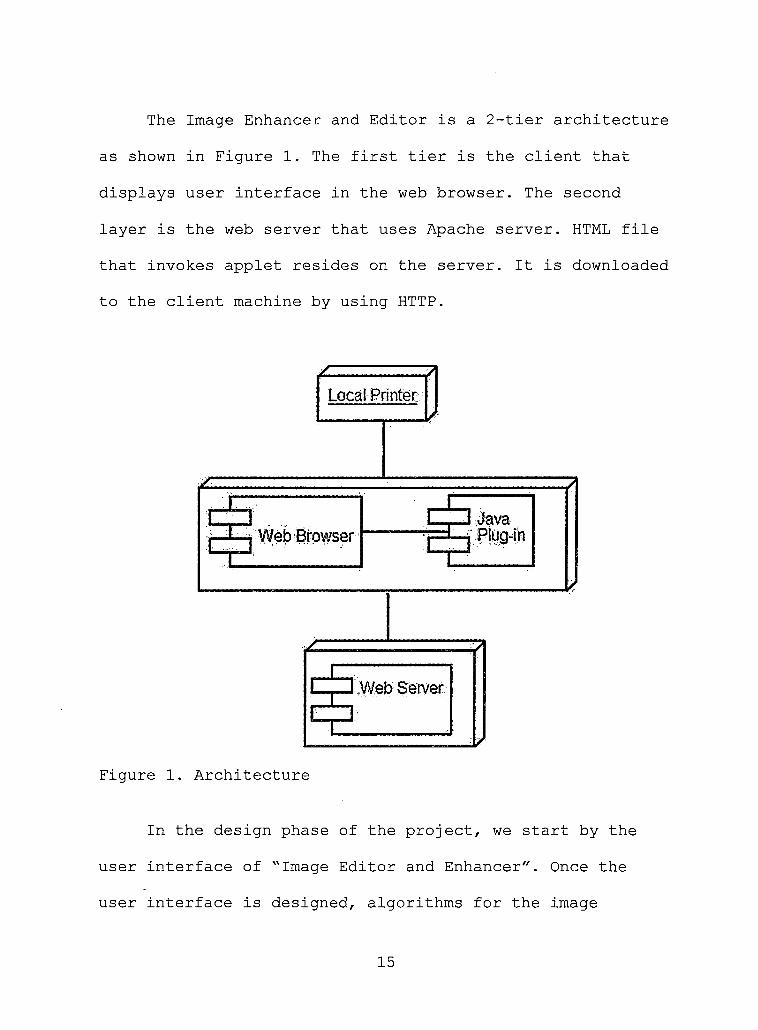
The Image Enhancer and Editor is a 2-tier architecture
as shown in Figure 1. The first tier is the client that
displays user interface in the web browser. The second
layer is the web server that uses Apache server. HTML file
that invokes applet resides on the server. It is downloaded
to the client machine by using HTTP.
Figure 1. Architecture
In the design phase of the project, we start by the
user interface of "Image Editor and Enhancer". Once the
user interface is designed, algorithms for the image
15

processing operations are written down. The applet is then
implemented. Finally the applet is validated using unit
tests and integrity tests.
16
CHAPTER FIVE
DESIGN AND IMPLEMENTATION
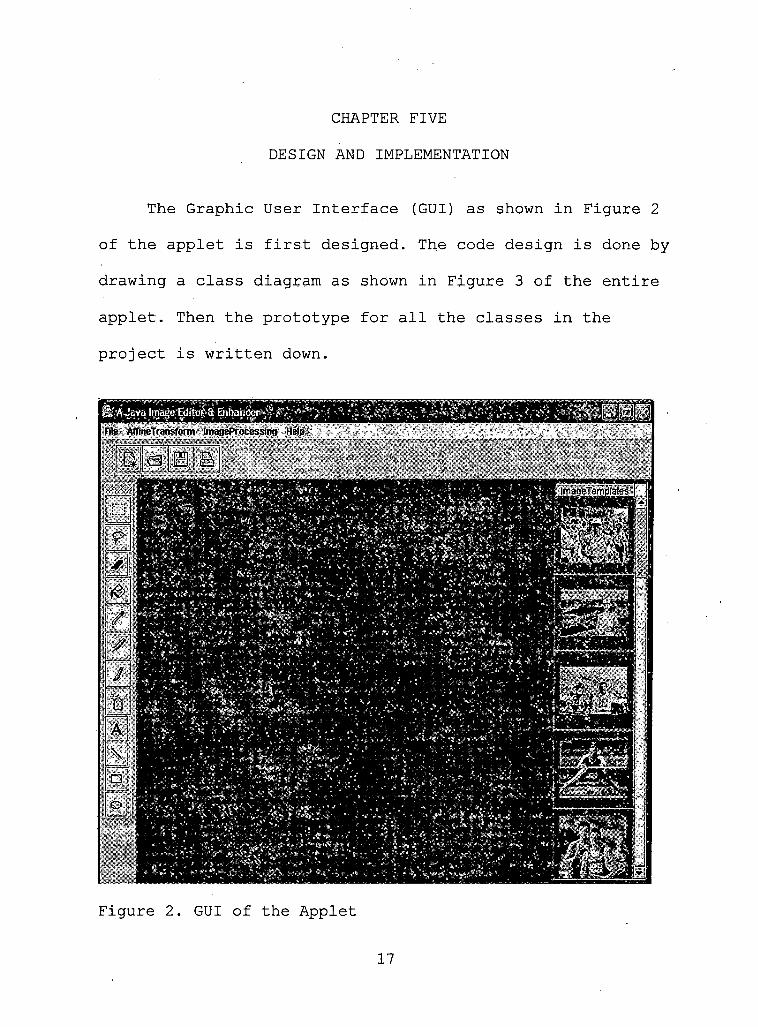
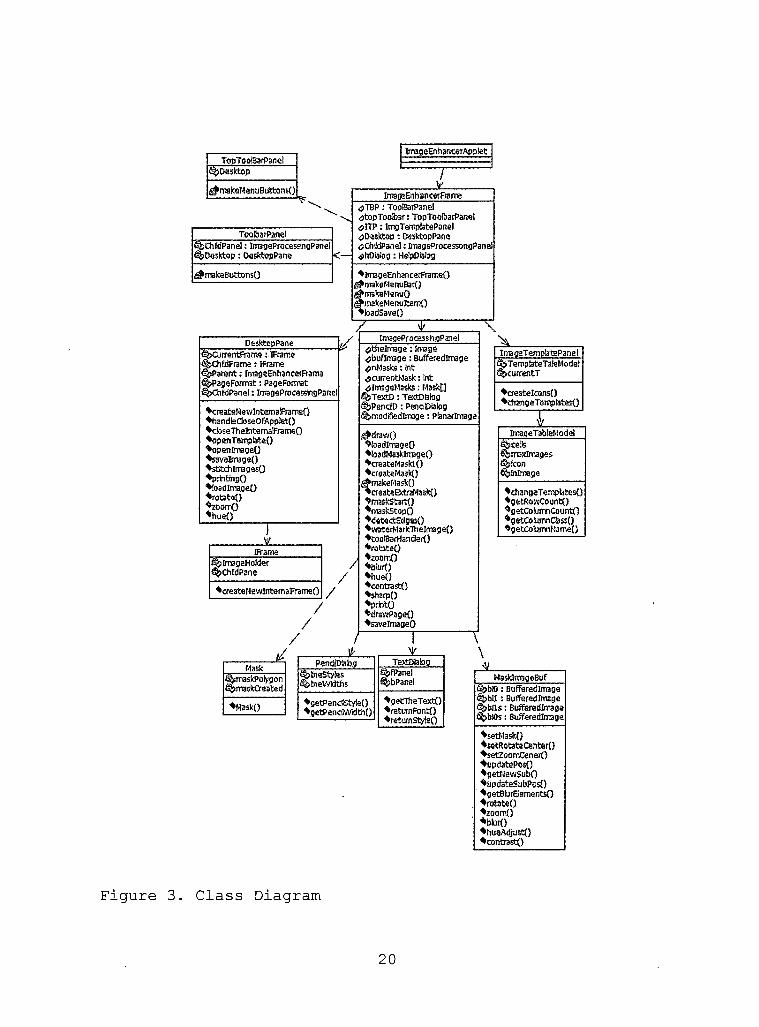
The Graphic User Interface (GUI) as shown in Figure 2
of the applet is first designed. The code design is done by
drawing a class diagram as shown in Figure 3 of the entire
applet. Then the prototype for all the classes in the
project is Written down.
Figure 2. GUI of the Applet
17
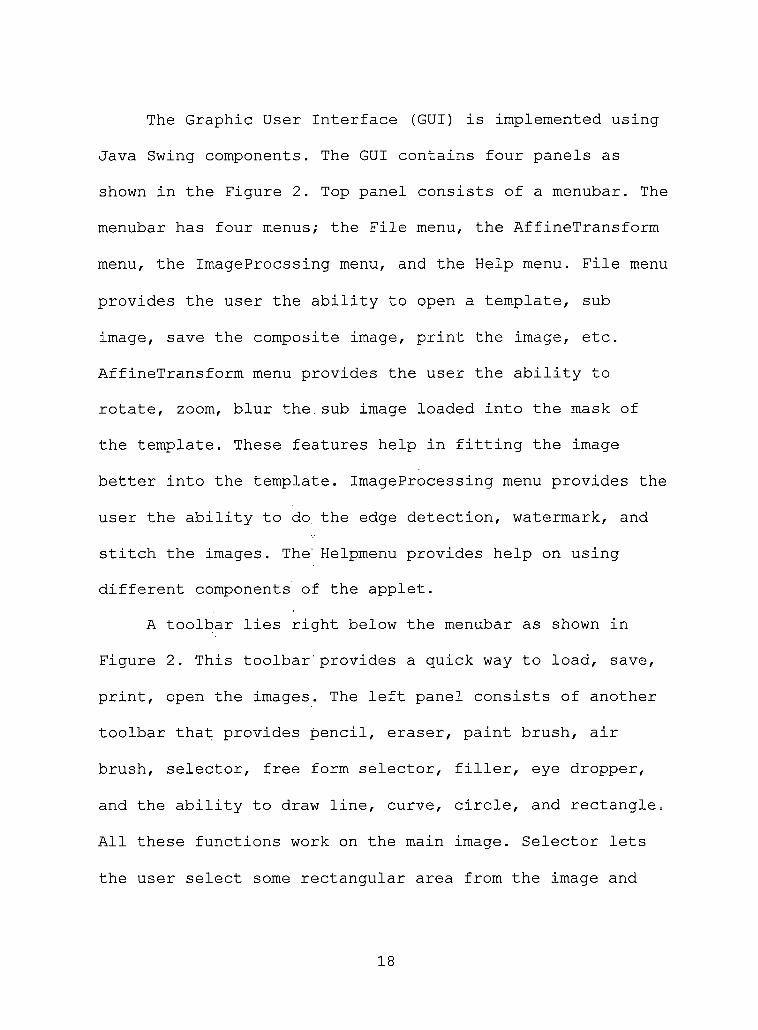
The Graphic User Interface (GUI) is implemented using
Java Swing components. The GUI contains four panels as
shown in the Figure 2. Top panel consists of a menubar. The
menubar has four menus; the File menu, the AffineTransform
menu, the ImageProcssing menu, and the Help menu. File menu
provides the user the ability to open a template, sub
image, save the composite image, print the image, etc.
AffineTransform menu provides the user the ability to
rotate, zoom, blur the.sub image loaded into the mask of
the template. These features help in fitting the image
better into the template. ImageProcessing menu provides the
user the ability to do. the edge detection, watermark, and
stitch the images. The' Helpmenu provides help on using
different components of the applet.
A toolbar lies right below the menubar as shown in
Figure 2. This toolbar’provides a quick way to load, save,
print, open the images. The left panel consists of another
toolbar that provides pencil, eraser, paint brush, air
brush, selector, free form selector, filler, eye dropper,
and the ability to draw line, curve, circle, and rectangle.
All these functions work on the main image. Selector lets
the user select some rectangular area from the image and
18
fill it with the chosen color. Free form select lets the
user select an area of any form. Pencil is used in drawing
something on the image. Eraser is used to erase certain
portion of the image. Paint brush is used for painting. Air
brush is used in spraying. Filler is used in filling the
area with the chosen color. Eye dropper lets user pick a
color. When user clicks on eye dropper, a color menu
appears. The color picked by the user is used in painting,
drawing etc.
The right panel consists of image templates the user
can choose from by clicking on a thumbnail. There are four
different categories of image templates that a user can
choose from. A User can change the category of templates by
using template categories in the file menu. The middle
panel is where a user sees the template after selecting a
template from the right panel or opening it from the file
menu. The template has a mask. The user can load an image
into the mask shown by clicking on the mask or by using
load image from the top toolbar. An interested user can
create some other masks too by using start mask and stop
mask from the affine transform menu. The Image Editor and
Enhancer allows up to 5 masks.
19
TopToolBarPanel^Desktop
^makeMenuButtnnsO
ImageEnhancerApplet
T
JeImagaEnhanterFiarre
__________ TooftarPanel__________fibChtdPanel: ImageProcessIngPanel^Desktop: OesktopPane
<pTBP: TooBatPanel <ptopToo!bar: TopToolbarPanel <jITP: lmgTempiatePanel ^Desktop: DesktopPana <jCh2dPanel: ImageProcessongPanel
<— <phOaiog: He'pDialog
^makeButtonsO ♦irrageEnhancerFrameO^makeMenuBarQj^makeMenuOiymakeMenuRemO♦loadSave()
__________ DesktopPane_______dbCurrentFrame MFrameSbChiMFrama: IFrama ^Parent: ImageEnhancerFrama S&PageFotmat: PageFormat QjCMdPanel: ImageProcassktgPanel
ImageProcesshgPanel
♦createNewIntema£rameO♦handledoseOfApptetO♦doseThelntemalFlameO♦opanTemptateO♦openlmageO♦savalmageQ♦stitch ImagesO♦printingO♦loadlmageO♦rotateO♦zoomO♦hueQ
(ptiielmage: Image ^buflmage: Bufferedlrrage ^nMasks: Int
currentMask: Int csIrrageMasks; Hask[]
^TextD: TaxtOalog SbPendD: PendIDialog %modffiedlmage: Planarlmaga
IrrageTemplataPanelfi^TempiateTaleModelS^currentT
♦createlconsQ♦changeTempbtesO
IFrama^ImageHoIder<$ch!dPana
♦creataHewIntemalFramaO
^draw()♦loadlmageO ♦toadHasklnageO ♦createMasklO ♦create MaskO
(AmakeMaskO ^♦craateExtraMaskO ♦maskStaitO ♦maskStopO ♦detectEdgesO ♦waterMarkThelmageO ♦toolBarHandleiO ♦rotateO ♦zoomO ♦blurO ♦hueO ♦contrast)♦sharpO♦prtitO♦drasvPageO♦savelmagefl
♦diangeTempbtesO♦getRowcountO♦getColumnCountO♦getCoiumnClassO♦getColumnNameO
X
/
X
////
/
T
♦HaskO
/
MaskS^maskPolygonS^maskCreated
PendlObbg TextDialogfi^fPanelS^bParrel
^&iaStylesdS&ieWIdths
♦getPendStyteQ^getPencWidtbQ
♦getlheTextO♦raturnFonff)♦returnStyleO
HasklmageBuf : Bufraredlrrage
Sjihll: Bufferedlrrage Sybils: Bufferedlrrage ^blOs; Bufferedlmage
♦setMaskQ♦setRotateCenterQ♦setZoomCenerO♦updatePos()♦getJia'.vSubO♦updateSubPosO♦getBlurEtementsO♦rotateO♦zoomO♦bluff)♦hueAdjustO♦contrastO
Figure 3. Class Diagram
20
CHAPTER SIX
TESTING THE APPLET
Two kinds of tests were carried out to make sure the
applet works fine; one is unit tests and the other is
integrity tests. All the methods were debugged and tested
individually by using print statements in the code.
Unit Tests
The applet cannot be considered for practical use
unless it is tested and validated. The following unit tests
were successfully performed:
• Opened, saved the template.
• Loaded the sub image into the template.
• Printed the template.
• Created up to 5 masks on the template.
• Watermarked the image.
• Stitched the images.
• Performed edge detection on the image.
• Implemented each toolbar function on the image.
21
Integrity Tests
During the development phase, the system is broken
down into smaller and simpler units that can be implemented
separately. Although the tests on individual units were ran
successfully, there is no guarantee that the applet will
perform as desired once the components are put together.
The integrity tests verify the functionality of applet as a
whole. The following, integrity functions were successfully
performed:
• Tested all functions of the toolbar together.
• Tested all image processing methods together.
• Tested many combinations of operations on the
images.
22

CHAPTER SEVEN
USER MANUAL
Introduction
There are two sets of operations that can be
performed; one is the set of operations that can be
performed on the sub image that is loaded into the template
and the other is the set of operations performed on the
template.
The GUI of the applet is shown in Figure 2. First step
is selecting an image to work on either by clicking on .a
thumbnail from the right panel or by opening an image file
from the client system. The user can either choose one of
the templates that come with the applet or choose his/her
own templates. If the user chooses a template from one of
the available templates, it comes with one or more
predefined masks. The user can load a sub image into the
mask. The user can even create more masks by using "start
mask" and "stop mask" from the affine transform menu. Image
Editor and Enhancer allows up to 5 masks. The user can
either print the composite image or save the image or do
the both.
23
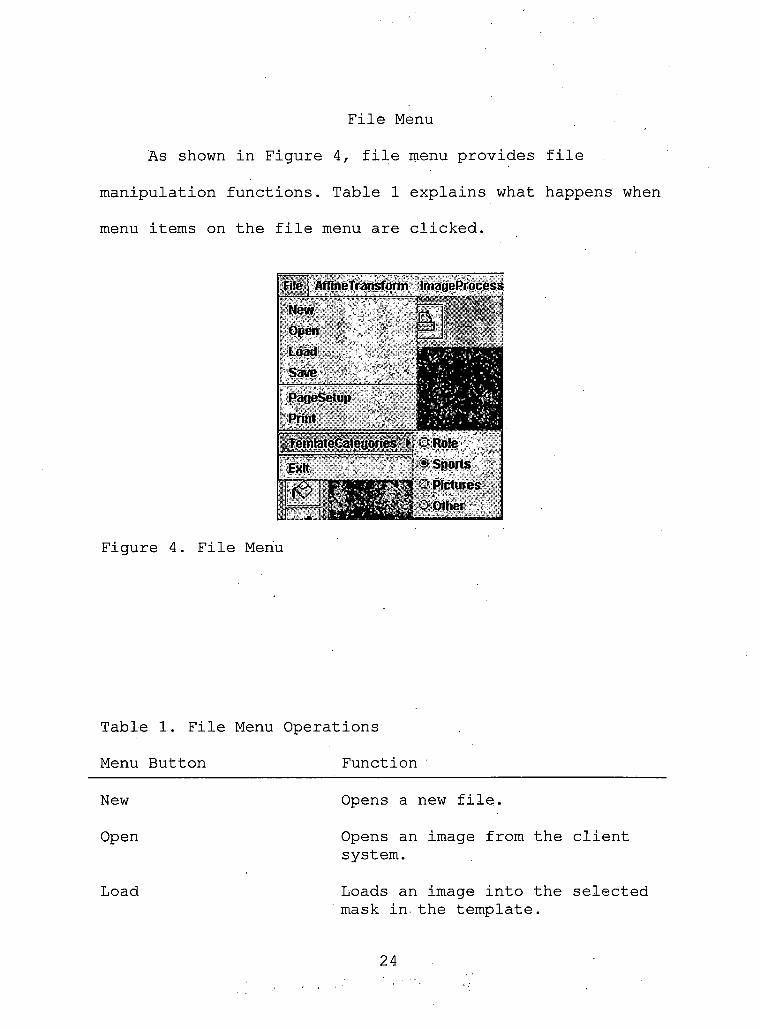
File Menu
As shown in Figure 4, file menu provides file
manipulation functions. Table 1 explains what happens when
menu items on the file menu are clicked.
PageSetup
File i AffineTransform ImageProcess
TemlateCategories t >? Role
! 0 Sports
7*^ j Pictures
1 1 Other
Exit
”1.
Figure 4. File Menu
Table 1. File Menu Operations
Menu Button Function
New Opens a new file.
Open Opens an image from the clientsystem.
Load Loads an image into the selected' mask in. the template.
24
Save Saves the image.
Page Setup Shows the page setup where usercan change settings for printing.
Print Prints the image.Template Categories Shows a sub menu of template
categories; the right panel reflects the selected category.
Exit Terminates the applet.
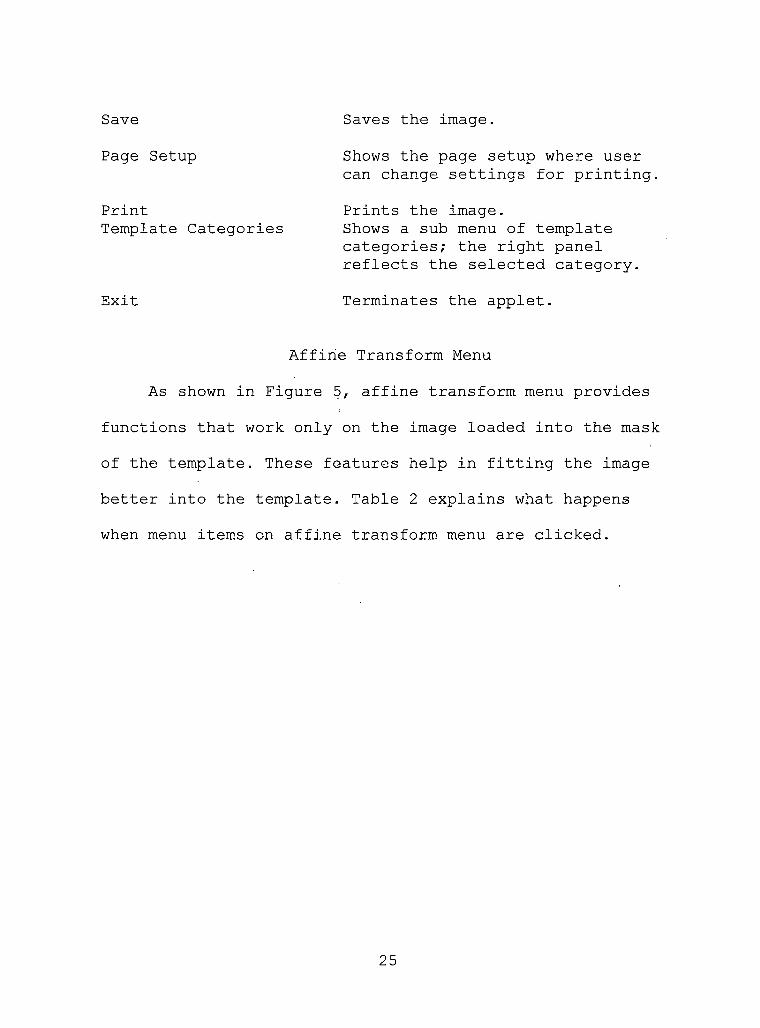
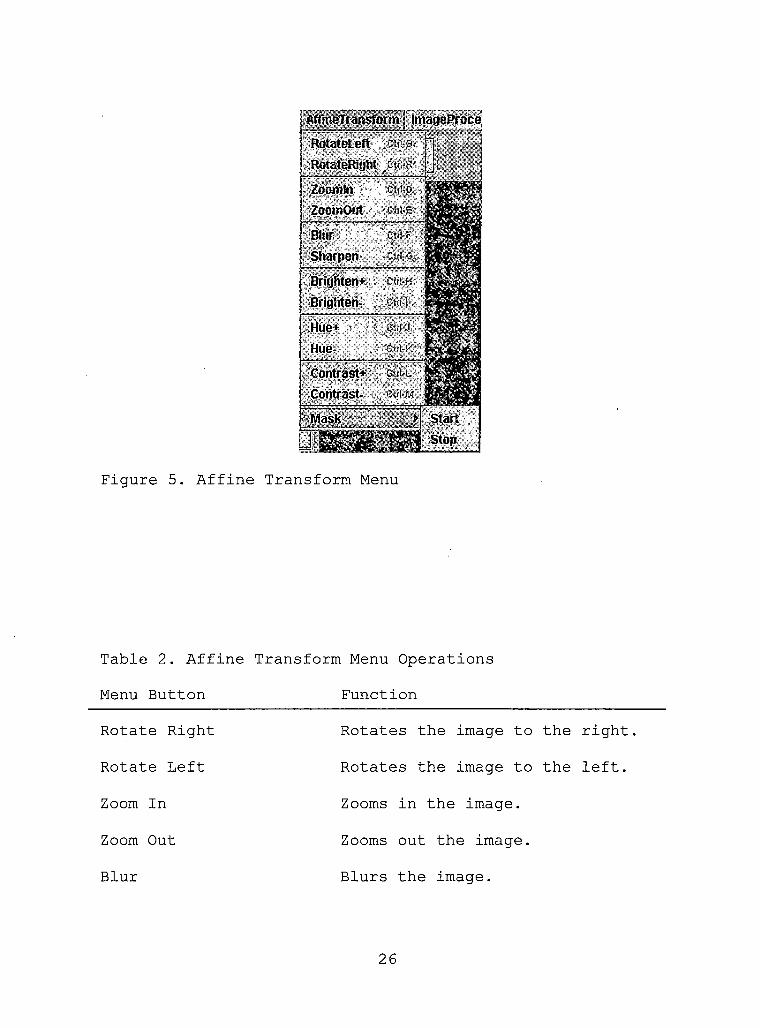
Affine Transform Menu
As shown in Figure 5, affine transform menu provides
functions that work only on the image loaded into the mask
of the template. These features help in fitting the image
better into the template. Table 2 explains what happens
when menu items on affine transform menu are clicked.
25
, AtfineTransform imatjeProce
I RotateLeft ' t J ! RolateRJrjht I J
) Zoomln ZooinOirtBlur
Sharpen-,’L ' j? "y- -Briyhten+
Bright en-
Hue+
Hue-
Contrast+. out
Contrast- ' .c ■ -
Figure 5. Affine Transform Menu
Table 2. Affine Transform Menu Operations
Menu Button Function
Rotate Right
Rotate Left
Zoom In
Zoom Out
Blur
Rotates the image to the right.
Rotates the image to the left.
Zooms in the image.
Zooms out the image.
Blurs the image.
26
Sharpen Sharpens the image.
Brighten+ Increases the image.
brightness of the
Brighten- Decreases the image.
brightness of the
Hue+ Increases the hue,of the image.
Hue- Decreases the hue of the image.
Contrast+ Increases the image.
contrast of the
Contrast- Decreases the contrast of theimage.
Mask Shows a sub menu that allows theuser to create a mask on the template. Start initiates the mask operation and Stop ends the mask operation and draws a mask on the template.
Image Processing Menu
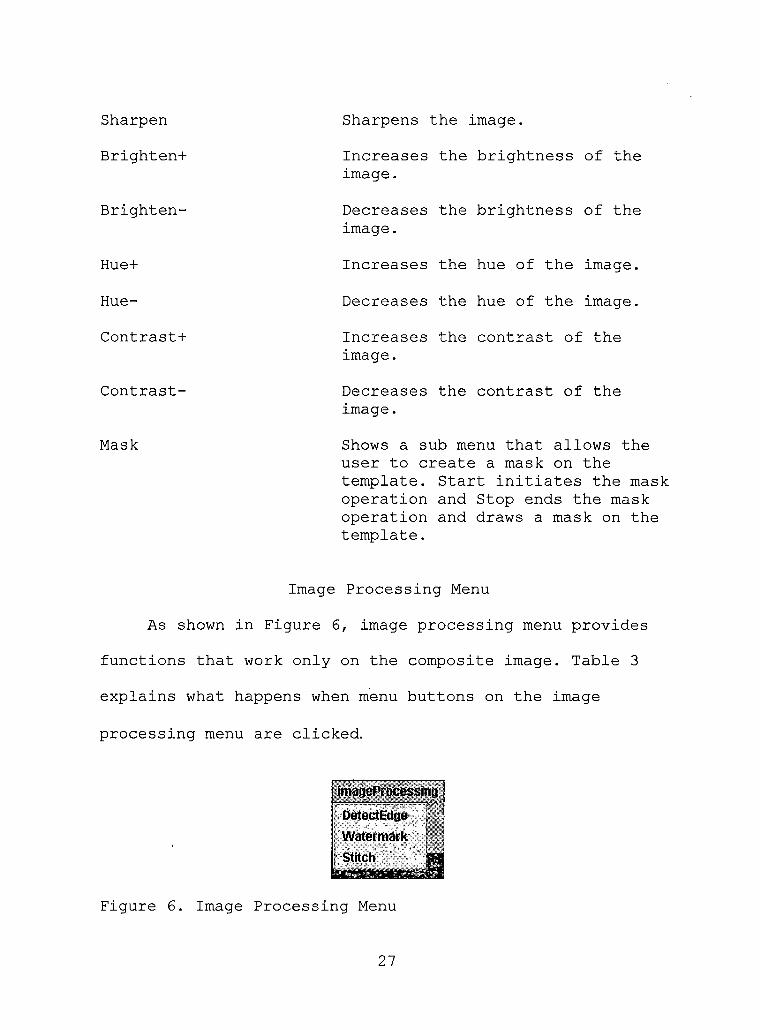
As shown in Figure 6, image processing menu provides
functions that work only on the composite image. Table 3
explains what happens when menu buttons on the image
processing menu are clicked.
: imageProcessing
DetectEdge
Watermark
Stitch
Figure 6. Image Processing Menu
27
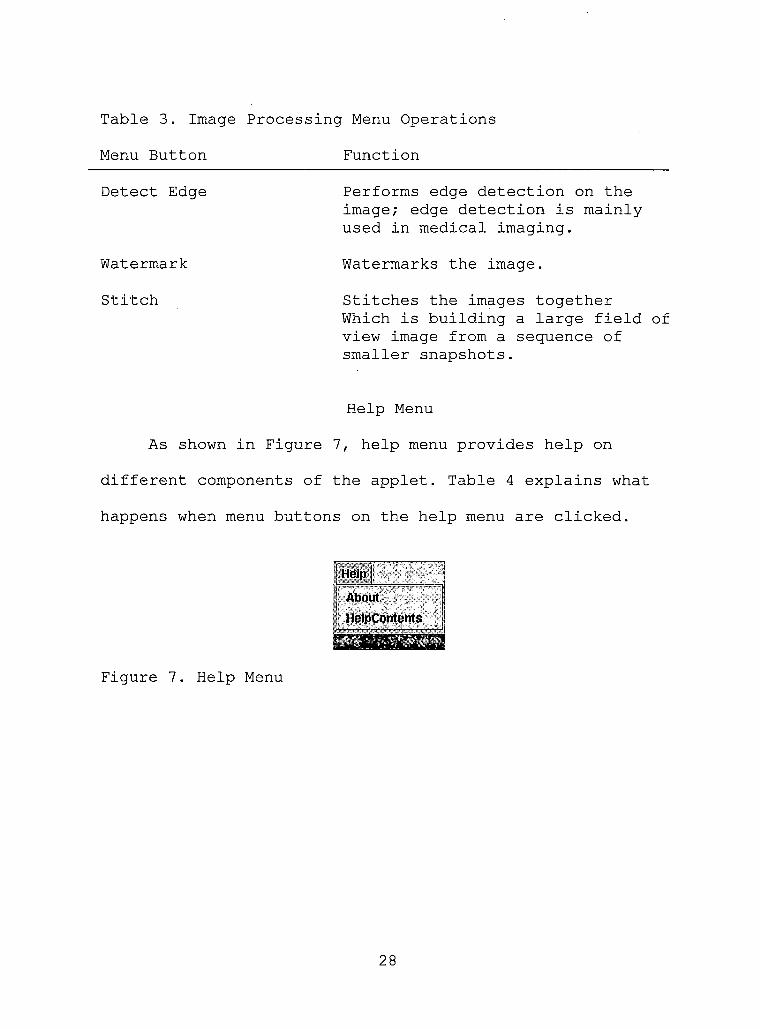
Table 3. Image Processing Menu Operations
Menu Button Function
Detect Edge Performs edge detection on the image; edge detection is mainly used in medical imaging.
Watermark Watermarks the image.
Stitch Stitches the images togetherWhich is building a large field of view image from a sequence of smaller snapshots.
As shown in Figure
Help Menu
7, help menu provides help on
different components of the applet. Table 4 explains what
happens when menu buttons on the help menu are clicked.
Help
About. 1
; HelpContents j
Figure 7. Help Menu
28
Table 4. Help Menu Operations
Menu Button Function
About Gives copyright information and version of the applet.
HelpContents Displays a window with all the components of the applet. When a component is clicked, help information is displayed in the bottom window.
Top Toolbar
As shown in Figure 2, top toolbar provides file
manipulation functions. Table 5 explains what happens when
top toolbar buttons are clicked.
Table 5. Top Toolbar Operations
Menu Button Function
New Opens a new file.
Open Opens an image from the client system.
Save Saves the image.
Print Prints the image.
As shown Figure
Left Toolbar
8, toolbar provides a user the
ability to paint and draw on the image. All of these
functions work by clicking the control on the toolbar and
29
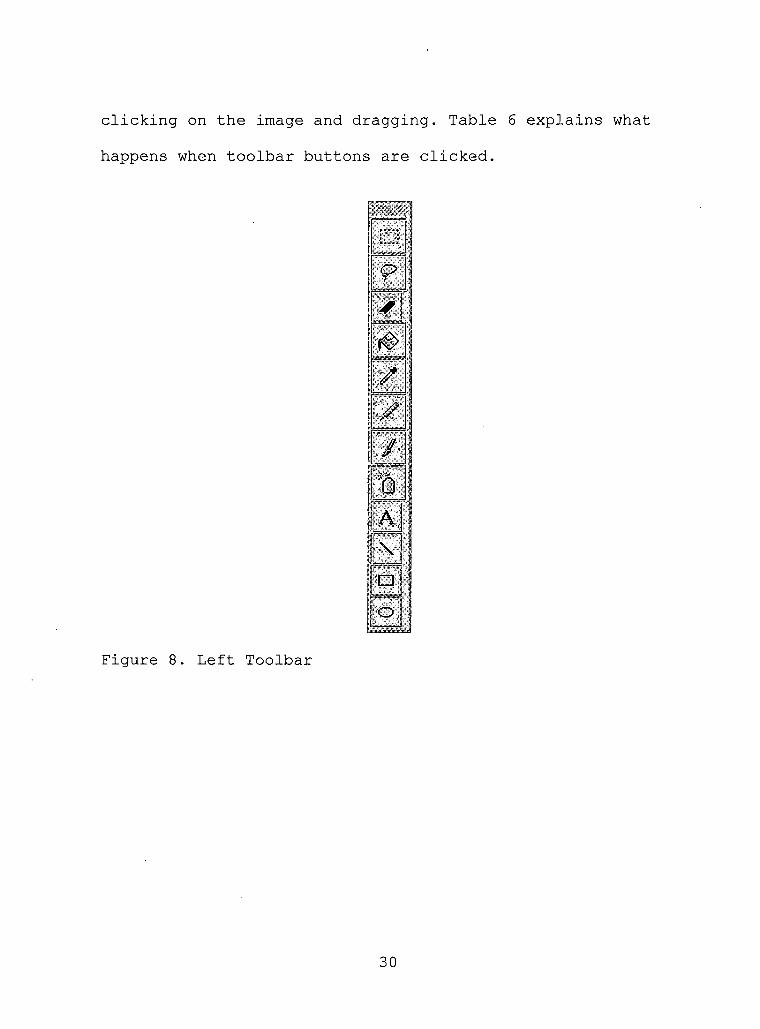
clicking on the image and dragging. Table 6 explains what
happens when toolbar buttons are clicked.
Figure 8. Left Toolbar
30

Table 6. Left Toolbar Operations
Menu Button Function
Select Lets the user select somerectangular area from the image and fill it with the chosen color.
Free form select Lets the user select an area of any form.
Eraser Lets the user erase certain portion of the image.
Filler Lets the user fill the chosen area with the chosen color.
Eye Dropper Lets the user pick a color. The color picked by the user is used in painting, drawing etc.
Pencil Used in drawing something on the image.
Brush Used for painting.
Air brush Used in spraying the paint.
Text Lets the user write something on the image. Displays a window as shown in Figure 9 where the user has to enter text, select font and text size.
Line Lets the user draw a line on the image by selecting "Line" and clicking and dragging on the image.
Rectangle Lets the user draw a rectangle on the image by selecting "Rectangle" and clicking and dragging on the
Ovalimage.Lets the user draw an oval on the
31
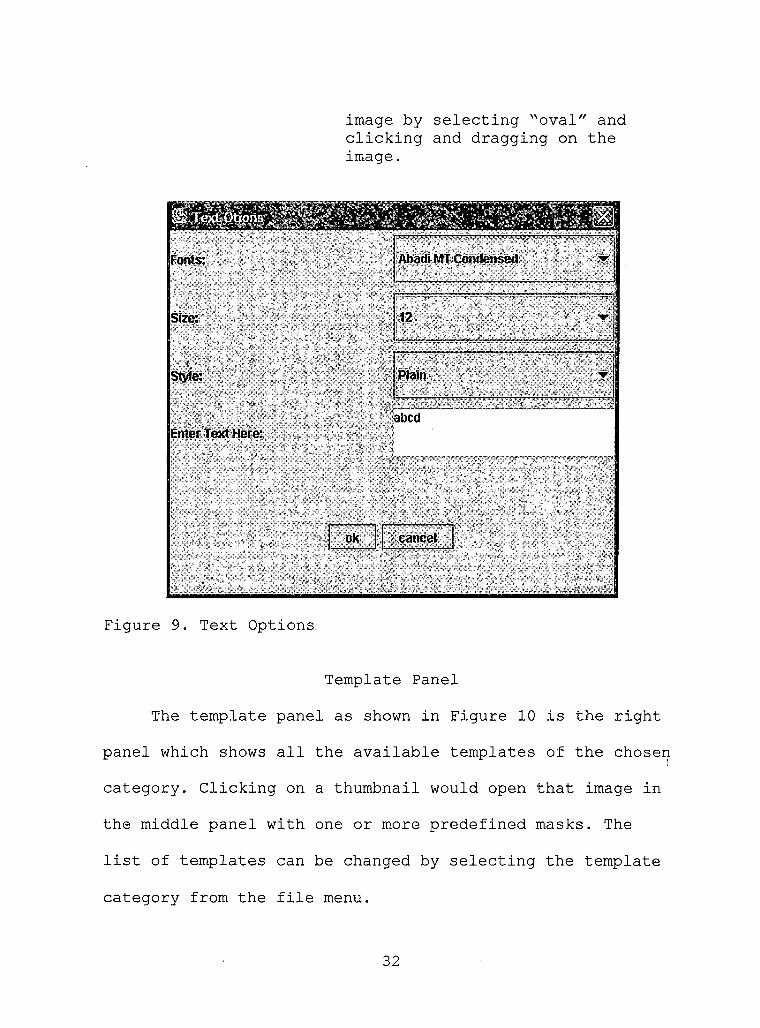
image by selecting "oval" and clicking and dragging on the image.
Figure 9. Text Options
Template Panel
The template panel as shown in Figure 10 is the right
panel which shows all the available templates of the chosen
category. Clicking on a thumbnail would open that image in
the middle panel with one or more predefined masks. The
list of templates can be changed by selecting the template
category from the file menu.
32
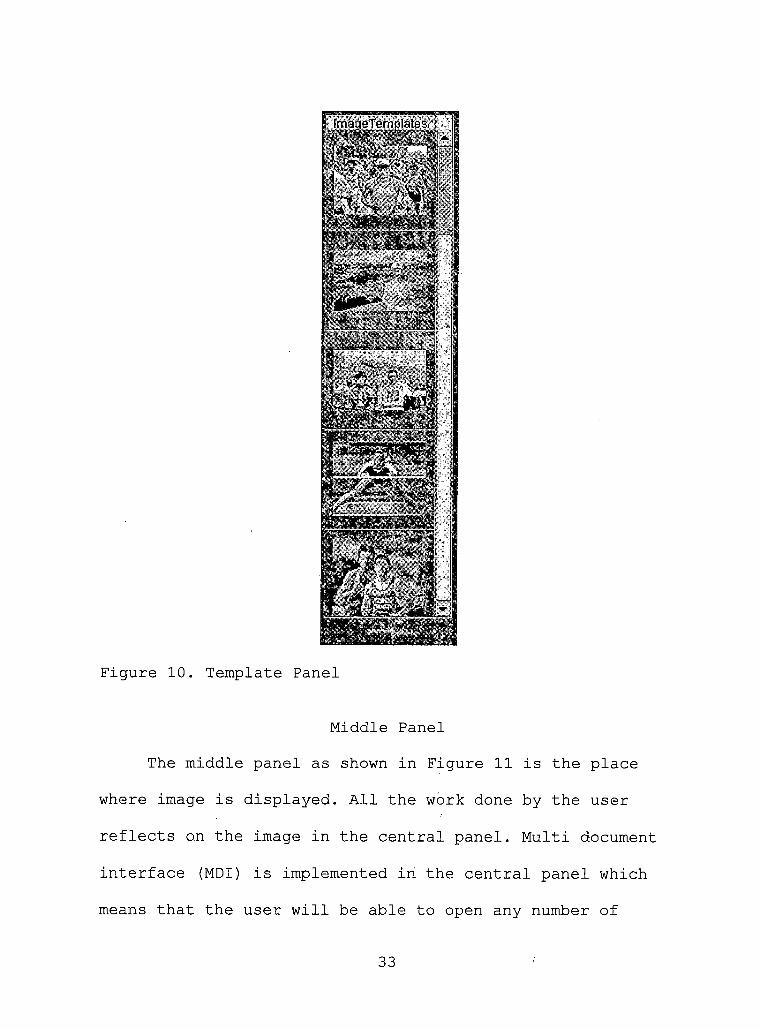
Figure 10. Template Panel
Middle Panel
The middle panel as shown in Figure 11 is the place
where image is displayed. All the work done by the user
reflects on the image in the central panel. Multi document
interface (MDI) is implemented in the central panel which
means that the user will be able to open any number of
33
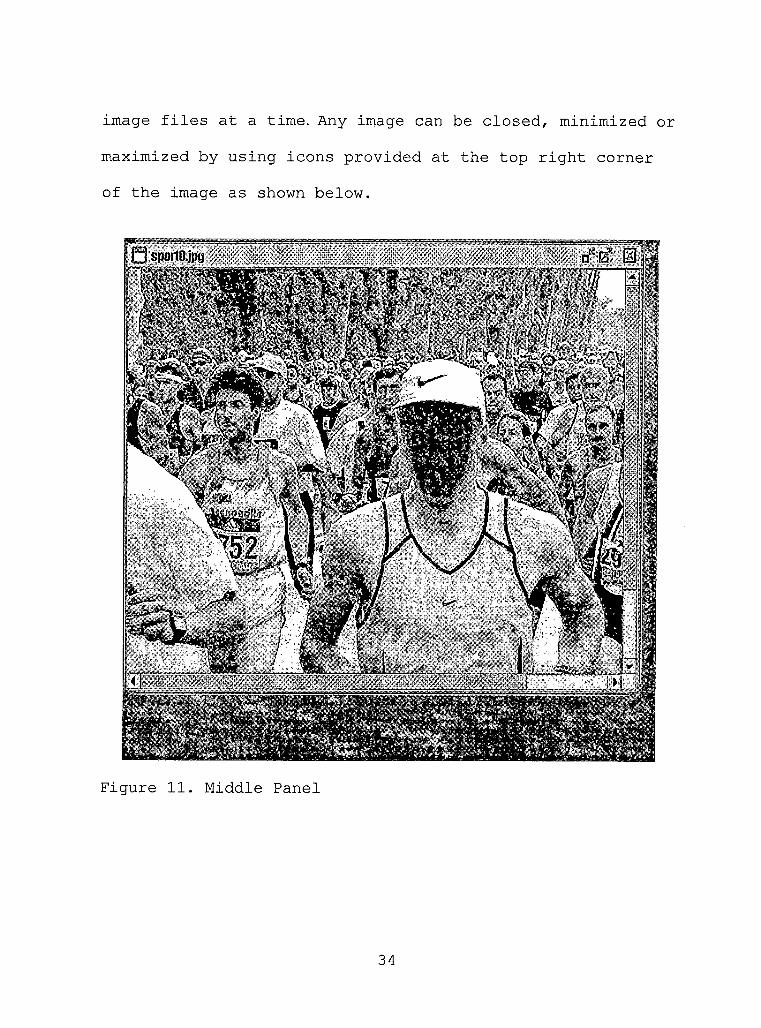
image files at a time. Any image can be closed, minimized or
maximized by using icons provided at the top right corner
of the image as shown below.
Figure 11. Middle Panel
34
CHAPTER EIGHT
CONCLUSION
Summary
Image Editor and Enhancer is a very easy to use applet
for creating professional digital imaging effects. It
provides the ability to edit, enhance your photos. It
provides all the tools needed for creating image fantasies.
It lets the user pick a template and an image and combine
the template and the image together. The User can then
apply image processing techniques such as rotation,
zooming, stitching, etc according to his/her requirements.
Finished composite images can be used to make entertaining
greeting cards, calendars, posters, invitations, signs,
buttons, banners, etc.
Since it is developed as an applet, it can be very
easily incorporated into a photo uploading software on the
internet. Applet caching is also implemented in this
project to speed up the downloading of the applet.
Future Work
The Image Editor and Enhancer can be extended to have
invisible watermarking, image restoration, image
35
segmentation implemented. Visible watermarking is
implemented in the project. Even though it was made sure
that the watermark remains intact even after applying image
processing operations, the invisible watermark is
than visible watermarking.
When the images are stitched together, we can
very fine line at the place of stitching. This can
rectified with image restoration.
stronger
see a
be
36

APPENDIX A
IMAGE PROCESSING
37

Introduction
An image may be defined as a two-dimensional function,
f(x,y), where x and y are spatial coordinates, and the
amplitude of f at any point (x,y) is called intensity at
that point. When x, y, and amplitude values of f are
finite, we call the image a digital image. The field of
digital image processing refers to processing digital
images by means of a digital computer. Image processing is
a set of techniques that help in extracting important
information from the images.
Today, there is almost no area of technical endeavor
that is not impacted in some way by digital image
processing. Applications of image processing include
nuclear medicine, astronomical observations, medical
imaging, remote sensing, satellite imaging, etc. Images are
acquired through variety of means, such as digital cameras,
medical imaging scanners, satellites, radars, and so on.
Once an image has been acquired, it is typically rendered
onto a computer screen or a printer. Depending on the
application, which may range from plain entertainment to
scientific visualization, an image is manipulated for a
variety of reasons, including better visualization.
38
In scientific imaging, images are visually inspected
and/or automatically processed to extract meaningful
information. Visual inspection of images often requires
image processing operations such as pan, zoom,
brightness/contrast adjustment.
Watermarking
Digital image watermarking is the practice of
embedding a piece of information in an image. There are two
kinds of watermarking: visible watermarking and invisible
watermarking. In visible watermarking, company logo or text
is written on the image indicating the ownership of the
image. Visible watermarking is much simpler than invisible
watermarking. All invisible watermarking systems have,
generically, two main steps: the watermark embedding and
watermark extraction. The embedding process takes as input
a watermark (the data to be embedded in the image), a
carrier signal (the digital image into which the watermark
will be embedded), and a key, similar to the keys used in
cryptographic systems. The output of the embedding process
is a new digital image which contains the watermark.
The reverse process, watermark extraction, is not the
same for all watermarking systems. The extraction process,
39
as a minimum, takes the watermarked image and the key as
inputs. Depending on the specific watermarking method, the
extraction may additionally take as input the original
(unwatermarked) image and/or the watermark that is thought
to be embedded in the image. The output of the extraction
process varies, as well. Some watermarking systems extract
the watermark and return it as an output, where others
(most often those that take the watermark as an input to
the extraction) will return a measure of confidence that
the specified watermark is found in the image.
Edge Detection
A kind of image processing that is used to outline the
boundaries of objects in the image plane. Most edge
detectors are based in some way on measuring the intensity
gradient at a point in the image. Edge detection operators
look typically like some sort of differencing operators.
Examples of these include the Roberts, Kirsch, Prewitt, and
Sobel operators. Convolution is one of the techniques used
in the edge detection. Edge detection is an important step
in image analysis and computer vision applications.
40

APPENDIX B
SAMPLE CODE
41
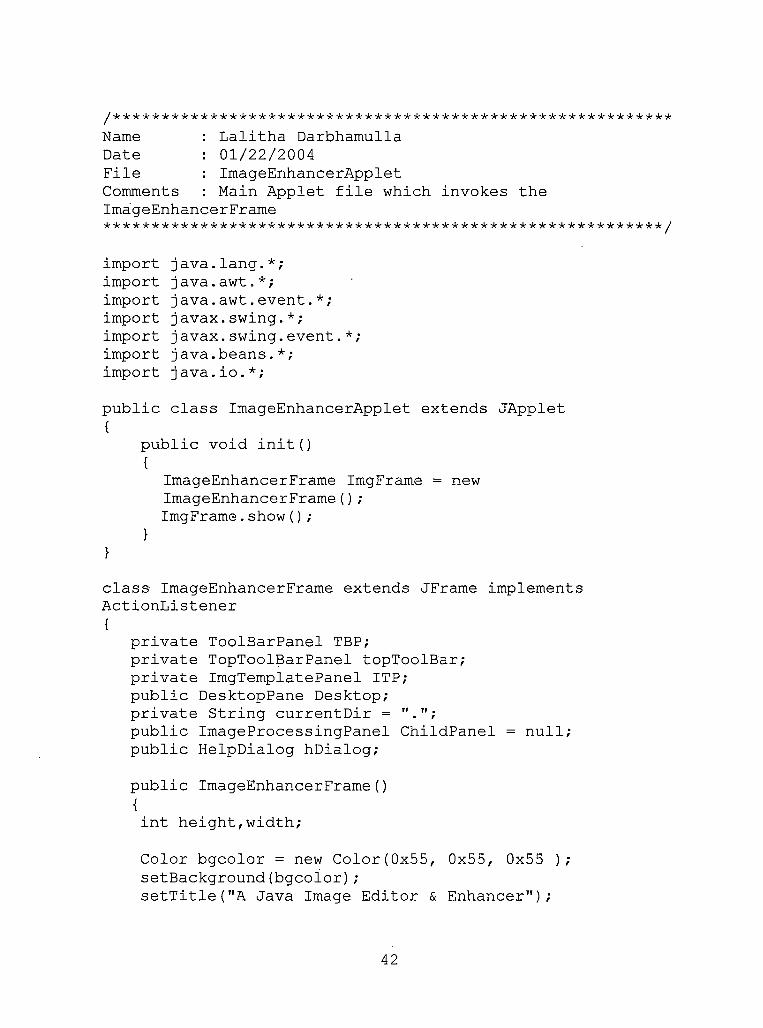
/********************************************************** Name : Lalitha DarbhamullaDate : 01/22/2004File : ImageEnhancerAppletComments : Main Applet file which invokes theImageEnhancerFrame**********************************************************/
import java.lang.*;import java.awt.*;import j ava.awt.event.*;import javax.swing. *;import javax.swing.event.*;import java.beans. *;import java.io.*;
public class ImageEnhancerApplet extends JApplet {
public void init(){
ImageEnhancerFrame ImgFrame = new ImageEnhancerFrame();ImgFrame.show();
}}
class ImageEnhancerFrame extends JFrame implements ActionListener{
private ToolBarPanel TBP; private TopToolBarPanel topToolBar; private ImgTemplatePanel ITP; public DesktopPane Desktop; private String currentDir =public ImageProcessingPanel ChildPanel = null; public HelpDialog hDialog;
public ImageEnhancerFrame(){int height,width;
Color bgcolor = new Color(0x55, 0x55, 0x55 ); setBackground(bgcolor);setTitle("A Java Image Editor & Enhancer’’);
42
setLocation(100,55);Toolkit tkt = Toolkit.getDefaultToolkit(); Dimension screenSize = tkt.getScreenSize(); if(screenSize.height > 650)height = 650;
elseheight = screenSize.height - 56;
if(screenSize.width > 800) width = 800;
elsewidth = screenSize.width - 56;
setSize(width,height);
JMenuBar mainMenuBar = makeMenuBar(); setJMenuBar(mainMenuBar);Container contentPane = getContentPane();Desktop = new DesktopPane(this) ; contentPane.setLayout(new BorderLayout());TBP = new ToolBarPanel(Desktop);topToolBar = new TopToolBarPanel(Desktop,this);ITP = new ImgTemplatePanel(Desktop); contentPane.add(TBP,"West"); contentPane.add(topToolBar,"North"); contentPane.add(ITP,"East"); contentPane.add(Desktop,"Center");
setDefaultCloseOperation(WindowConstants.DO_NOTHING_ON_CLOSEj ;addWindowListener(new WindowAdapter()}
private JMenuBar makeMenuBar(){JMenuBar mainMenuBar = new JMenuBar();ButtonGroup grp = new ButtonGroup();JRadioButtonMenuItem radbutl = new
JRadioButtonMenuItem("Role");JRadioButtonMenuItem radbut2 = new
JRadioButtonMenuItem("Sports");radbut2.setSelected(true);JRadioButtonMenuItem radbut3 = new
JRadioButtonMenuItem("Pictures");JRadioButtonMenuItem radbut4 = new
JRadioButtonMenuItem("Other");
43
grp.add(radbut1);grp.add(radbut2);grp.add(radbut 3);grp.add(radbut 4);radbutl.addActionListener(this);radbut2 . addActionListener (this)radbut3.addActionListener(this);radbut4.addActionListener(this);JMenu tempCat = new JMenu("TemlateCategories");tempCat.add(radbutl);tempCat.add(radbut2);tempCat.add(radbut3);tempCat.add(radbut4);}
private JMenu makeMenu(Object parent, Object[] items, Object target){ 'JMenu m = null;if( parent instanceof JMenu)
m = (JMenu) parent; elseif( parent instanceof String) m = new JMenu((String) parent);
elsereturn m;
,for(int i = 0;icitems.length;i++){if( items[i] == null)
m.addSeparator/);else
m.add(makeMenuItem(items[i],target));}return m;
privateJMenuItem makeMenuItem(Object item, Object target) {JMenuItem ml = null;
if( item instanceof JMenuItem) ml = (JMenuItem) item;
elseif( item instanceof String)
44
{ml = new JMenuItem((String) item);
if(item.equals("RotateLeft"))
ml.setAccelerator(Keystroke.getKeyStroke(KeyEvent.VK tEvent.CTRL_MASK));
if(item.equals("RotateRight"))
ml.setAccelerator(Keystroke.getKeyStroke(KeyEvent.VK tEvent.CTRL_MASK));
if (item, equals ("Zoomin’’) )
ml.setAccelerator(Keystroke.getKeyStroke(KeyEvent.VK tEvent.CTRL_MASK));
if(item.equals("ZoomOut") )
ml.setAccelerator(Keystroke.getKeyStroke(KeyEvent.VK tEvent.CTRL_MASK));
if(item.equals("Blur"))
ml.setAccelerator(Keystroke.getKeyStroke(KeyEvent.VK_ tEvent.CTRL_MASK));
if(item.equals("Sharpen"))
ml.setAccelerator(Keystroke.getKeyStroke(KeyEvent.VK tEvent.CTRL_MASK));
if(item.equals("Brighten+"))
ml.setAccelerator(Keystroke.getKeyStroke(KeyEvent.VK_ tEvent.CTRL_MASK));
if(item.equals("Brighten-"))
ml.setAccelerator(Keystroke.getKeyStroke(KeyEvent.VK_ tEvent.CTRL_MASK));
if(item.equals("Hue+"))
, Inpu
, Inpu
, Inpu
, Inpu
, Inpu
, Inpu
, Inpu
, Inpu
45
ml.setAccelerator(Keystroke.getKeyStroke(KeyEvent.VK_J,Inpu tEvent.CTRL_MASK));
if(item.equals("Hue-"))
ml.setAccelerator(Keystroke.getKeyStroke(KeyEvent.VK_K,Inpu tEvent.CTRL_MASK));
if(item.equals("Contrastf"))
ml.setAccelerator(Keystroke.getKeyStroke(KeyEvent.VK_L,Inpu tEvent.CTRL_MASK));
if(item.equals("Contrast-") )
ml.setAccelerator(Keystroke.getKeyStroke(KeyEvent.VK_M,Inpu tEvent.CTRL_MASK));}else
return ml;
if ( target instanceof ActionListener)ml.addActionListener((ActionListener)target);
return ml;}
public void actionPerformed(ActionEvent evt){
String action;if (evt.getSource() instanceof JMenuItem)
{action = evt.getActionCommand(); if (action.equals("New"))Desktop.createNewInternalFrame("New Frame");
if (action.equals("Open")) loadSave(1);
if (action.equals("Load")) loadSave(2);
if (action.equals("Save")) loadSave(3);
if (action.equals("Exit"))
46
{int n=0;System.out.printing"in Exit")
show();
if (action.equals("Role"))ITP.changeTemplates(0);
if (action.equals("Sports"))ITP.changeTemplates(1);
if (action.equals("Pictures")) ITP.changeTemplates(2);
if (action.equals("Other"))ITP.changeTemplates(3);
if(action.equals("Start")) Desktop.maskStart();
if(action.equals("Stop"))Desktop.maskStop();
if(action.equals("DetectEdge")) Desktop.detectEdges();
if(action.equals("Watermark"))Desktop.watermarkThelmage();
if(action.equals("Stitch")) loadSave(4) ;
if(action.equals("RotateLeft") ) Desktop.rotate(0);
if(action.equals("RotateRight")) Desktop.rotate(1);
if (action. equals ("Zoomin'*) ) Desktop.zoom(0) ;
if(action.equals("ZoomOut")) Desktop.zoom(l);
47
if(action.equals("Blur") )Desktop.blur() ;if(action.equals("Sharpen"))
Desktop.sharp();
if(action.equals("Brighten+"))Desktop.brightness(1);
if(action.equals("Brighten-"))Desktop.brightness(0);
if(action.equals("Hue+"))Desktop.hueAdjust(1) ;
if(action.equals("Hue-") )Desktop.hueAdjust(0) ;
if(action.equals("Contrast+"))Desktop.contrast(1) ;
if(action.equals("Contrast-") )Desktop.contrast(0);
if(action.equals("PageSetup"))Desktop.printing(0) ;
if(action.equals("Print") )Desktop.printing(1) ;
if(action.equals("About")){ AboutDialog AbtDialog = new AboutDialog(this);
AbtDialog.show();
if(action.equals("HelpContents") ) {
hDialog = new HelpDialog(); Thread runner = new Thread() public void run(){try{
hDialog.show();}
48
catch(Exception e){}
}runner.start() ;}}}
public void loadSave(int source){
if (source == 2){
Desktop.loadlmage() ; return;
}
JFileChooser chooser = new JFileChooser() ; chooser.setCurrentDirectory(new File(currentDir)); chooser.setFileFilter(newj avax.swing.filechooser.FileFilter(){
public boolean accept(File f){
String name = f.getName().toLowerCase(); return name.endsWith(".gif")
|| name.endsWith(".jpg")|| name.endsWith(".jpeg")
|| f.isDirectory();}
public String getDescription(){
return ".gif, .jpg, .jpeg";}
});
int r=l;
if (source == 4)chooser.setMultiSelectionEnabled(true);
if ( source == 1 || source == 4) //load mask or templater = chooser.showOpenDialog(this);
else if(source == 3)
49
r = chooser.showSaveDialog(this);
if(r == JFileChooser.APPROVE_OPTION){if (source == 4){
File[] multiFiles = chooser.getSelectedFiles();Desktop.stitchlmages(multiFiles); return;
}
String path = chooser.getSelectedFile().getAbsolutePath() String name = chooser.getSelectedFile().getName();File fdir = chooser.getCurrentDirectory(); currentDir = fdir.getPath() ;switch(source){case 1:Desktop.openlmage(path,name);
break;case 3:Desktop.savelmage(name);
}}}
} //End of ImageEnhancerApplet class
50
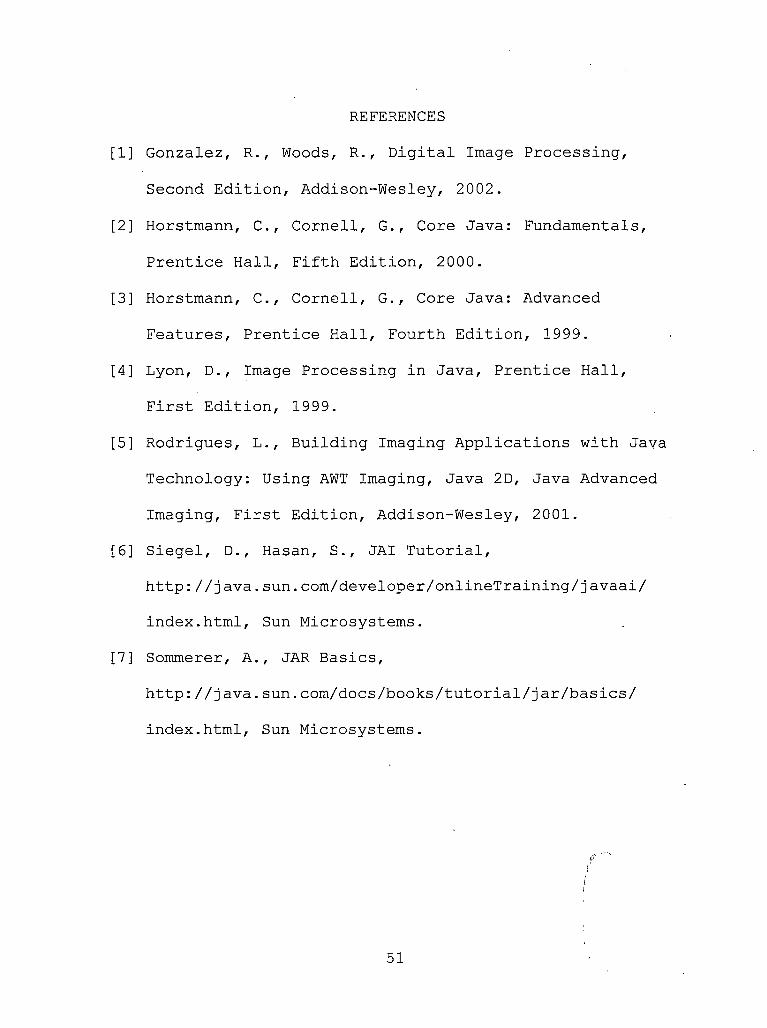
REFERENCES
[1] Gonzalez, R., Woods, R., Digital Image Processing,
Second Edition, Addison-Wesley, 2002.
[2] Horstmann, C., Cornell, G., Core Java: Fundamentals,
Prentice Hall, Fifth Edition, 2000.
[3] Horstmann, C., Cornell, G., Core Java: Advanced
Features, Prentice Hall, Fourth Edition, 1999.
[4] Lyon, D., Image Processing in Java, Prentice Hall,
First Edition, 1999.
[5] Rodrigues, L., Building Imaging Applications with Java
Technology: Using AWT Imaging, Java 2D, Java Advanced
Imaging, First Edition, Addison-Wesley, 2001.
[6] Siegel, D., Hasan, S., JAI Tutorial,
http://java.sun.com/developer/onlineTraining/j avaai/
index.html, Sun Microsystems.
[7] Sommerer, A., JAR Basics,
http://java.sun.com/docs/books/tutorial/jar/basics/
index.html, Sun Microsystems.
ii
51