Embed Size (px)
Citation preview

LifeThe Science of Biology
ELEVENth EditioN
Active LeArning guide for
SADAVA • HILLIS • HELLER • HACKER
© 2017 Sinauer Associates, Inc.
Active Learning Modules Life: The Science of Biology, Eleventh Edition
Sadava • Hillis • Heller • Hacker
Each Active Learning Module includes the following elements (all available in LaunchPad): instructor’s guide, pre-class video, pre-quiz, in-class exercise, handout, and post-quiz.
ALM Number & Title Relevant
Chapter(s) Part One: The Science of Life and Its Chemical Basis
ALM 1 Protein Folding 3 ALM 2 Phospholipids 3
Part Two: Cells
ALM 3 Fluid Mosaic Model 6 ALM 4 Signal Transduction Pathways 7
Part Three: Cells and Energy
ALM 5 Laws of Thermodynamics and Food Webs 8, 56 ALM 6 Glycolysis and the Citric Acid Cycle 9 ALM 7 Chemiosmotic Mechanism 9
Part Four: Genes and Heredity
ALM 8 Mitosis vs. Meiosis 11 ALM 9 Chromosomal Basis of Inheritance: Meiosis and Mendel’s Laws 11, 12 ALM 10 DNA Replication Fork 13 ALM 11 Gene Expression: From DNA to Protein 14
Part Five: Genomes
ALM 12 Identifying Cells Containing Recombinant DNA 18 Part Six: The Processes and Patterns of Evolution
ALM 13 Introduction to Population Genetics: Hardy–Weinberg Equilibrium 20 ALM 14 Reconstructing and Using Phylogenetic Trees 21 ALM 15 Speciation 22
Part Seven: The Evolution of Diversity
ALM 16 Understanding and Using the Tree of Life 25 ALM 17 Endosymbiosis 26
Part Eight: Flowering Plants: Form and Function
ALM 18 Water Movement in Plants 34 ALM 19 Nitrogen-Fixing Bacteria 35 ALM 20 Plant Growth and Development 36
Part Nine: Animals: Form and Function
ALM 21 Negative and Positive Feedback 39 ALM 22 Countercurrent Heat Exchange 39 ALM 23 Action Potential Propagation 45 ALM 24 Sliding Filament Theory 47 ALM 25 Positive Cooperativity 48 ALM 26 Countercurrent Multiplier 51
Part Ten: Ecology
ALM 27 Earth’s Climates: Global Air, Water, and Heat Circulation 53 ALM 28 Population Dynamics 54 ALM 29 Community Assembly and Island Biogeography 56, 58
Appendix B: Making Sense of Data: A Statistics Primer
ALM 30 Samples and Populations Appendix B
LifeThe Science of Biology
ELEVENth EditioN
Active LeArning guide for
Carly N. JordanThe George Washington University
Phillip HarrisUniversity of Alabama
Robert WiseUniversity of Wisconsin Oshkosh
SiNaueR aSSOCiaTeS MaCMillaN
© 2017 Sinauer Associates Life 11e Active Learning Guide
CHAPTER 1What Is Active Learning?
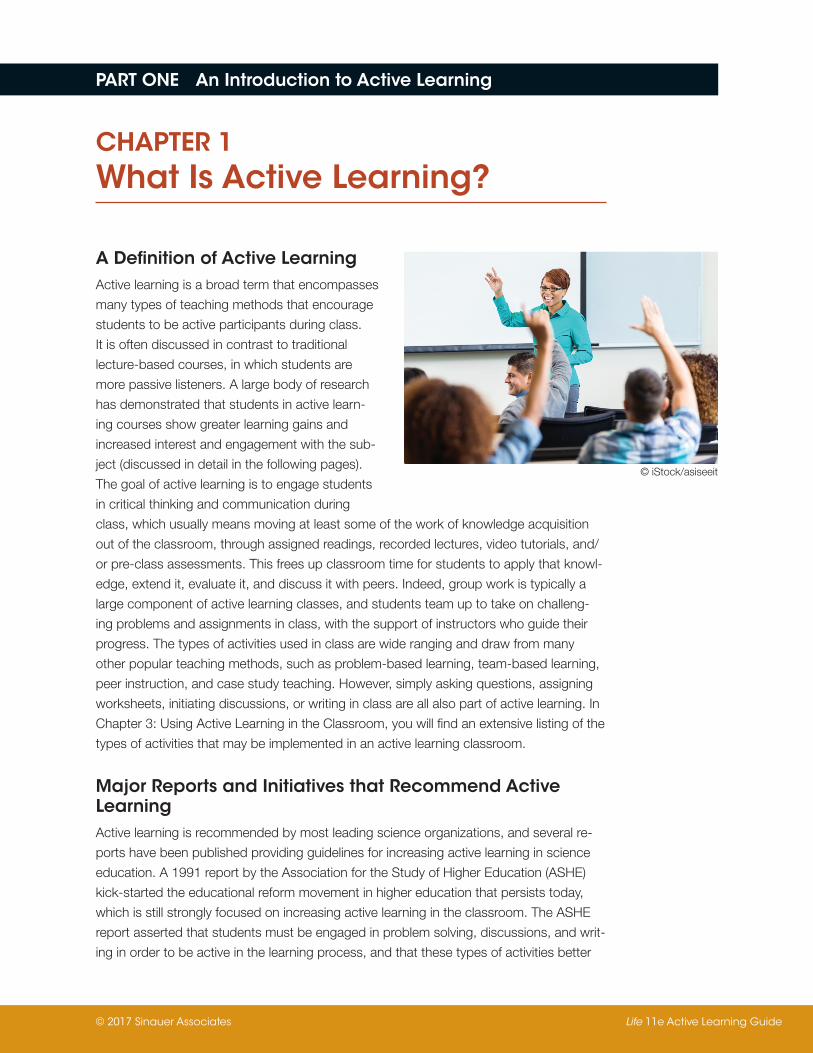
A Definition of Active LearningActive learning is a broad term that encompasses
many types of teaching methods that encourage
students to be active participants during class.
It is often discussed in contrast to traditional
lecture-based courses, in which students are
more passive listeners. A large body of research
has demonstrated that students in active learn-
ing courses show greater learning gains and
increased interest and engagement with the sub-
ject (discussed in detail in the following pages).
The goal of active learning is to engage students
in critical thinking and communication during
class, which usually means moving at least some of the work of knowledge acquisition
out of the classroom, through assigned readings, recorded lectures, video tutorials, and/
or pre-class assessments. This frees up classroom time for students to apply that knowl-
edge, extend it, evaluate it, and discuss it with peers. Indeed, group work is typically a
large component of active learning classes, and students team up to take on challeng-
ing problems and assignments in class, with the support of instructors who guide their
progress. The types of activities used in class are wide ranging and draw from many
other popular teaching methods, such as problem-based learning, team-based learning,
peer instruction, and case study teaching. However, simply asking questions, assigning
worksheets, initiating discussions, or writing in class are all also part of active learning. In
Chapter 3: Using Active Learning in the Classroom, you will find an extensive listing of the
types of activities that may be implemented in an active learning classroom.
Major Reports and Initiatives that Recommend Active LearningActive learning is recommended by most leading science organizations, and several re-
ports have been published providing guidelines for increasing active learning in science
education. A 1991 report by the Association for the Study of Higher Education (ASHE)
kick-started the educational reform movement in higher education that persists today,
which is still strongly focused on increasing active learning in the classroom. The ASHE
report asserted that students must be engaged in problem solving, discussions, and writ-
ing in order to be active in the learning process, and that these types of activities better
Life 11E ALGSinauer AssociatesLife11e ALG_01.01.ai Date 12-01-16
© iStock/asiseeit
PART ONE An Introduction to Active Learning
© 2017 Sinauer Associates Life 11e Active Learning Guide
PART 1 • CHAPTER 2 Designing Your Course for Active Learning 7
CHAPTER 2Designing Your Course for Active Learning
Now that you know all of the advantages of active learning, how do you begin? How
can you start to incorporate active learning into your course? This chapter will describe
best practices for course design and give suggestions for adding active learning to your
course. Depending on your current course structure, time available to prepare materi-
als, organizational constraints on your curriculum, and your level of comfort with active
learning techniques, you may choose to implement activities periodically into an existing
lecture-based course, or you can build your course around daily in-class activities and
remove lecture from your class time entirely. Before we look at different models for course
structure, let’s begin by considering best practices for curriculum design.
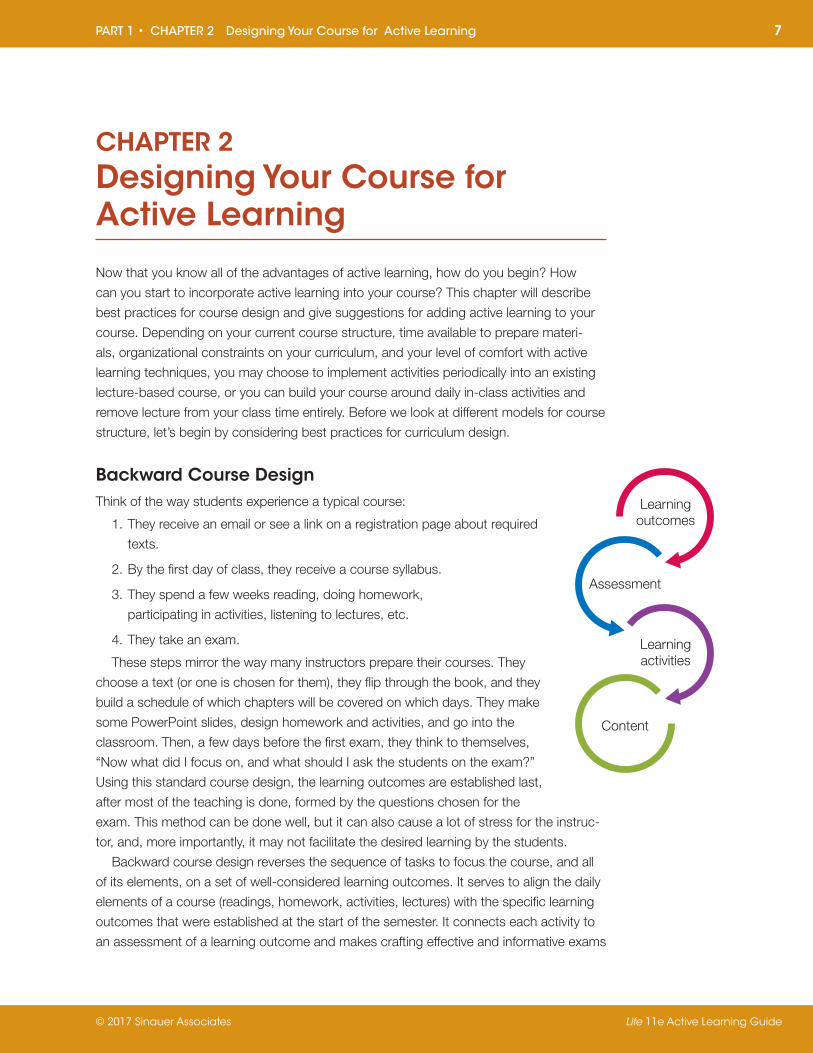
Backward Course DesignThink of the way students experience a typical course:
1. They receive an email or see a link on a registration page about required
texts.
2. By the first day of class, they receive a course syllabus.
3. They spend a few weeks reading, doing homework,
participating in activities, listening to lectures, etc.
4. They take an exam.
These steps mirror the way many instructors prepare their courses. They
choose a text (or one is chosen for them), they flip through the book, and they
build a schedule of which chapters will be covered on which days. They make
some PowerPoint slides, design homework and activities, and go into the
classroom. Then, a few days before the first exam, they think to themselves,
“Now what did I focus on, and what should I ask the students on the exam?”
Using this standard course design, the learning outcomes are established last,
after most of the teaching is done, formed by the questions chosen for the
exam. This method can be done well, but it can also cause a lot of stress for the instruc-
tor, and, more importantly, it may not facilitate the desired learning by the students.
Backward course design reverses the sequence of tasks to focus the course, and all
of its elements, on a set of well-considered learning outcomes. It serves to align the daily
elements of a course (readings, homework, activities, lectures) with the specific learning
outcomes that were established at the start of the semester. It connects each activity to
an assessment of a learning outcome and makes crafting effective and informative exams
Life 11ESinauer AssociatesElizabeth Morales Life11eALG_02.ai Date 11-29- 16
Learningoutcomes
Learningactivities
Assessment
Content
© 2017 Sinauer Associates Life 11e Active Learning Guide
PART 1 • CHAPTER 2 Designing Your Course for Active Learning 8
much easier. This student-centered method communicates to students what the learning
outcomes are and how they can show that they have achieved them.
The concept of backward course design was first put forth by Wiggins and McTighe
(1998) in their book Understanding by Design. They describe the process in three steps:
(1) identify the desired learning outcomes; (2) determine what evidence will demonstrate
mastery of those outcomes (summative assessments); and (3) plan learning experiences
to provide students the instruction and practice needed to achieve mastery (readings,
homework, activities, lectures).
Backward course design is widely recommended as a preferred method of instructional
design, and several studies have documented its positive effects. Its use has been shown
to facilitate the planning of brand-new lessons (Stiler, 2009), to improve teachers’ feelings
of preparedness, particularly for new teachers (Graff, 2011), and to encourage instructors
to focus on outcomes rather than daily activities (Shumway & Berret, 2004). Instructors
who are trained in using backward course design also demonstrate improved content
knowledge, set more appropriate goals for student learning, and better connect ideas
across the curriculum (Kelting-Gibson, 2005).
Backward course design can (and should) be applied using a whole-course view, and
it can also be used to ensure that individual units are well aligned. Let’s consider how to
apply backward course design to one unit in a biology course, using as an example the
topic of recombinant DNA technology (found in Chapter 18 of Life 11e).
Step 1: Establish learning outcomesIf broad course goals have already been established, you will ideally have one that en-
compasses some aspect of this unit (e.g., interpret visual data of all types). For the spe-
cific unit on recombinant DNA, you will also define specific learning outcomes. You may
choose to use the Life 11e learning outcomes, craft your own learning outcomes, or
identify outcomes based on recommendations from outside sources.
At this point, it is also useful to consider the level of mastery you wish students to
reach for a particular concept. Bloom’s Taxonomy (Bloom et al., 1956) describes six lev-
els of learning that lead to complete mastery of a concept, starting with lower-order skills
like basic retention of facts (knowledge/remembering) and ending with higher-order skills
like the ability to synthesize information (evaluate/create) (see the Appendix to this Guide
for more detail about Bloom’s taxonomy). You may choose to write multiple learning out-
comes at different levels, or choose one level as the goal for a specific unit. However they
are formed, good learning outcomes should be demonstrable and use clear action verbs
to describe what students should be able to do, not just what they know or understand.
The Life 11e authors constructed a “pedagogical pathway” through each chapter that
provides several opportunities for students and instructors to identify learning outcomes.
At the start of each section, defined by Key Concepts, there is a list of statements under
Focus Your Learning. These alert students to the main ideas forthcoming in that section.
At the end of the section, there is a Recap box, which includes a brief summary and a list
of Learning Outcomes that describe what the students should be able to do once they
have mastered that content. These statements are written at varying levels of Bloom’s
© 2017 Sinauer Associates Life 11e Active Learning Guide
PART 1 • CHAPTER 3 Using Active Learning in the Classroom 15
CHAPTER 3Using Active Learning in the Classroom
PreparationThe previous chapter gave you an idea of
how to make the big-picture preparations,
like setting learning outcomes and organizing
your course structure. Once you have spent
time thinking about your course as a whole,
the preparation for each class period can be-
gin. Depending on how much you intend to
use active learning strategies, your prepara-
tion will vary, from preparing a few minutes of
activities for one class period to choosing an
entire semester’s worth of assignments.
Preparing for an active learning class is
very different from preparing a lecture. Instead of crafting a narrative that you will deliver
to your students, you will create (or find) challenges to present to them. For most instruc-
tors, there is no need to design an activity from scratch for every class period—there are
many great repositories for curriculum, including the Life 11e instructor resources. Once
you decide what types of activities you want to use, your job is to find them, align them
with your course/unit goals and assessments, and plan for their implementation. Some
found activities will need a bit of tweaking to make them fit your course, to adjust for
time, content, or level of difficulty. Sometimes you may need to drop a section of an activ-
ity or add your own to customize the piece for your needs.
There are a few logistical considerations for active learning that would not be an is-
sue in a strictly lecture course. Most active learning methods involve some amount of
small group interaction, so if you are going to include frequent activities, you may want
to spend some time organizing student groups. This can certainly be done as needed
(“work with the folks around you for this activity”), but for large-enrollment courses, care-
ful planning can simplify assignment collection and the grading of student work. One
method, described in the book Pathways to Scientific Teaching (Ebert-May & Hodder,
2008), is to use folders to organize individual and group work. Each student is assigned
her own folder, which doubles as a name card in a large lecture hall, and group mem-
bers’ folders are stored together in a hanging file folder with a group ID. All of the folders
are brought to class each day, either in a file box or, for especially large classes, a rolling
Life 11E ALGSinauer AssociatesLife11e ALG_01.04.ai Date 12-01-16
© iStock/FatCamera
© 2017 Sinauer Associates Life 11e Active Learning Guide
PART 1 • CHAPTER 3 Using Active Learning in the Classroom 16
file cart. Instructors (or teaching assistants) place handouts for the day into the folders
before class, and one member of each group picks up the folder on the way in. Students
place completed work in the folder and return it to the box or cart on the way out. This
method keeps student work organized and makes paper exchange in a large classroom
much easier. See Diane Ebert-May talk about the folder system here:
https://www.youtube.com/watch?v=NoZdQv0629w
Since many of the activities you will encounter have physical handouts, also remember
to build a few minutes into your schedule for printing or give students enough notice to
have them print handouts and bring them to class. The same goes for pre-class work.
Activities may come with separate tasks for students to complete before class, you may
choose to assign the LaunchPad pre-quizzes before a module, or you may adapt a pub-
lished activity to a shorter class period by assigning part of it as homework. If you are go-
ing to use any of these strategies, it is important to convey due dates clearly to the class.
Setting the ToneAs in any course, expectation setting is fundamental to a successful semester, and this is
especially key for active learning courses. If students are used to lecture courses, if they
are fearful of the course material (as nonmajors in science courses often are), or if they
have had a previous negative experience with active learning, they may offer up substan-
tial resistance to your course structure. Working hard to set the tone for the course during
the first few meetings can help to overcome this hurdle.
On day one, or before, let the students know what the course structure will be. If you
plan to incorporate active learning regularly, let them know that your lectures will be pep-
pered with activity breaks and discussion. Most students won’t have any problem with
this approach and, in fact, will welcome the lecture break and find it energizing. On the
other end of the spectrum, if you intend to teach using the flipped-classroom method,
you will need to work harder to get students happily engaged in the course. Addressing
student motivation, concerns, and questions on the first day of class will help everyone
get up and running more smoothly.
Getting students to buy into your teaching methods is key to reducing student com-
plaints, and one great way to do that is to begin by asking them to establish their own
goals for the course. Below is a step-by-step guide to help you to scaffold the conversa-
tion about skill building in your active learning class.
1. Start by asking them to brainstorm a list of three things they hope to gain from the
course. You can do this ahead of time online, or give them a few minutes to think in
class on the first day.
2. Gather their responses, and show the entire list to the class. You are likely to receive
a fairly predictable set of answers: specific content that students are interested in
(genetics and evolution are always popular choices); essential science skills (labora-
tory techniques, data analysis); and some broad, transferable skills (communication,
critical thinking, problem solving).
3. Help the students to see how these learning goals fall into two basic categories—
knowledge acquisition and skill building. If you are doing this in person, you can ask
© 2017 Sinauer Associates Life 11e Active Learning Guide
PART 1 • CHAPTER 4 How to Implement Life 11e Resources 29
CHAPTER 4How to Implement Life 11e Resources
This chapter will provide concrete instruc-
tions and examples of how to access, com-
bine, and modify the many active learning
resources that accompany Life 11e. To make
best use of these resources, you will need to
create a LaunchPad account and familiarize
yourself with its layout and tools. (If you do
not already have a LaunchPad login, contact
your Macmillan Learning representative. You
can find your representative on the Macmillan
website.) Below, read a step-by-step guide
on finding and assigning different types of re-
sources on LaunchPad. Then, see a sample
plan for a one-week unit using a variety of active learning strategies and resources. Fi-
nally, consider how to modify materials to best suit your course.
How to Find Resources(Note: The LaunchPad User Guide has step-by-step walk-throughs of how to navigate
instructor resources, with screenshots. Visit this link for visual information to supplement
the instructions below: https://cmg.screenstepslive.com/s/MacmillanMedia/m/Launch-
PadIM)
• Sign in to LaunchPad and enter your course.
• The easiest way to access ALM materials is on the Home page. Listed with all the
chapter units, you will find a unit titled “Active Learning Modules.” Click the unit to
expand it, and you will find a list of all ALM topics. You can hover over an ALM title
and click Assign to move it to the Assignments section at the top of the page for
students. Click on a topic to access both the student and instructor materials:
Instructions for students, pre-class video, pre-quiz, handout PDF, and post-quiz are
visible to students and assignable via LaunchPad. Just hover over a title and click Assign
to set deadlines and points.
◆ Instructor guide, in-class exercise PPT, and editable handout are not visible to
students but are available for instructor download.
• To find non-ALM materials, click on the Resources link on the left panel. From here,
Life 11E ALGSinauer AssociatesLife11e ALG_01.06.ai Date 12-02-16
© iStock/mediaphotos
© 2017 Sinauer Associates Life 11e Active Learning Guide
PART 1 • CHAPTER 4 How to Implement Life 11e Resources 30
you can find content by type or by chapter:
◆ Click “Content by type” to find the entire collection of Activities, Animations,
Media Clips, Videos, Work with the Data exercises, etc. ALM materials are
also available here, listed separately by file type.
◆ Click “Content by chapter” to see which types of resources are available for
the key concepts of each chapter. Note: ALMs are not listed here, but ALMs
are available for most chapters.
• Once you identify content that you want to include in your LaunchPad course, sim-
ply hover over the title and click the “Add” link that will appear to the left of the title.
• Return to the Home page of your LaunchPad course, where you will see the re-
cently added content. When you hover over it, an option to Assign will appear. From
there, you can select a date and time for the content to be completed and can as-
sign possible points if it is to be graded. Students will see it in their Assignments list
when they log in.
• If you have integrated LaunchPad into your LMS, you will see student assignment
grades both on LaunchPad and in your LMS grade book. Refer back to Chapter 2
for a link to more information about LMS integration.
Sample Plan for a Chapter or WeekHere we will walk through a sample plan for teaching a unit on DNA replication. For this
example, imagine that your class meets twice a week for 75 minutes (Tuesday and Thurs-
day). Here is how the unit could be taught using a variety of publisher-provided tools.
Monday: Students complete pre-class work:
• Read Chapter 13 in Life 11e.
• Watch animations on key experiments (Animation 13.1 Hershey-Chase; Animation
13.3 Meselson-Stahl).
• Complete animation quizzes in LaunchPad.
Tuesday: In-class activity:
• 15 min.—Questions from Chapter 13 ALE, Key Concept 13.1. Students recall previ-
ous units on structures of proteins and nucleic acids. Where appropriate, ask for
responses from groups, and list them on the board.
• 5 min.—Show videos in class to highlight history of discovery and visualize struc-
ture of DNA (Media Clip 13.1 Discovery of the Double Helix; Video 13.1 DNA 3-D
model).
• 10 min.—Discuss who worked on the discovery of the double helix and who got
credit for that discovery. Allow time for follow-up discussion. For a longer class pe-
riod, you may choose to extend this discussion by showing the HHMI BioInteractive
video The Double Helix (17 min.; http://www.hhmi.org/biointeractive/double-helix).
• 30 min.—Students work in small groups to complete Work with the Data 13.1 The
Meselson-Stahl Experiment (textbook p. 277), or its online companion (Work with
© imageBROKER/Almay Stock Photo
13Chapter OverviewChapter 13 examines DNA structure and replica-
tion. The chapter opens with a description of clas-
sic experiments that first showed that DNA is the
genetic material and then determined its structure;
including a crucial X-ray diffraction experiment. A
major portion of the chapter covers DNA replica-
tion, including the topography of replication and
the contributions of many different proteins. The
importance of accurate DNA replication is dis-
cussed as are the mechanisms that repair DNA
damage. Chapter 13 closes with an overview of
PCR: the polymerase chain reaction technique
that revolutionized molecular biology.
PART TWO Active Learning Resources and Suggestions by Chapter
DNA and Its Role in Heredity
Formative and Summative Assessment Resources For each chapter, the following assessment resources are available in Launchpad. In
the question bank, all quizzes are tagged with the chapter’s Key Concepts, Focus Your
Learning statements, and Learning Outcomes.
• LearningCurve is a self-administered, formative, adaptive quizzing system that
draws from a bank of multiple-choice and fill-in-the-blank questions to help stu-
dents master the chapter’s content.
• Summative Quiz is a pre-built 20-question quiz designed to assess student com-
prehension of the chapter’s key concepts.
• Test Bank is an extensive bank of questions available to instructors for use in
building custom assessments.
© Biology Pics/Science Source
© 2017 Sinauer Associates Life 11e Active Learning Guide
© 2017 Sinauer Associates Life 11e Active Learning Guide
PART 2 • CHAPTER 13 DNA and Its Role in Heredity 55
Active Learning Resources and Suggestions
key concept 13.1 Experiments Revealed the Function of DNA as Genetic Material
In
for Students
• Animation 13.1 The Hershey-Chase Experiment (www.Life11e.com/a13.1)
focus your learning 13.1.3 Experiments using radiolabeled protein and DNA identified DNA as the material injected by a virus during its infection of a host cell.
Additional Suggestions and Resources
Figure 13.4 Have students connect the concepts in Figure 13.4 (p. 270) to
Key Concept 5.1 (Cells are the Fundamental Units of Life). Refer students to
the virus particle and the bacterial cells shown in Figure 5.1 (p. 82) and the ex-
planation of the electron microscope shown in Figure 5.3 (p. 84). Have students
form think-pair-share groups and discuss what they would expect to see if they
used an electron microscope to look at the supernatant fluid and the pellet that
were produced in the Hershey-Chase experiment.
Answer: Students should see the same result for both the 32P and 35S ex-
periments. The supernatant fluid in both would contain viruses and the pellet
in both would contain bacterial cells. The size difference shown in Figure 5.1
explains the different sedimentation properties.
focus your learning 13.1.3 Experiments using radiolabeled protein and DNA identified DNA as the material injected by a virus during its infection of a host cell.
Minute paper Have students explain the rationale behind the Griffith experi-
ment. Also, ask students to explain how the Avery experiment supported the
conclusions drawn by Griffith? focus your learning 13.1.2 Experiments showed that one strain of bacteria could be genetically transformed to another strain and that DNA was the trans-forming agent.
Minute paper Have students view the following video on lipid-based trans-
fection by Promega. Then have students write a minute paper explaining the
difference between transient transfection and stable transfection. https://www.
promega.com/resources/multimedia/reporter-assays-and-transfection/intro-
duction-to-transfection/. focus your learning 13.1.4 Transfection experiments provide conclusive evi-dence that DNA is the genetic material.
© 2017 Sinauer Associates Life 11e Active Learning Guide
PART 2 • CHAPTER 13 DNA and Its Role in Heredity 56
key concept 13.2 DNA Has a Structure That Suits Its Function
In
for Instructors
• Active Learning Exercise This ALE examines how the structure of DNA fits
its function.
focus your learning 13.2.7 The genetic material performs four important func-tions and is well suited to its biological functions.
• Active Learning Module DNA Replication Fork
This module reinforces three important aspects of DNA replication: 1) DNA
replicates semiconservatively with each parent DNA strand acting as a
template for the synthesis of a new strand that is its complement; 2) DNA
polymerases can only assemble new strands in the 5ʹ-to-3ʹ direction begin-
ning from a primer with a free 3ʹ hydroxyl group; and 3) DNA replication is
bidirectional from the replication fork and involves the action of a multiprotein
replication complex that includes DNA polymerase and additional proteins.
focus your learning 13.2.6 DNA is a double-stranded helix that twists in the right-handed direction with strands running antiparallel to each other, forming major and minor grooves that allow exposure of the outer edges of nitrogenous bases.
for Students
• Media Clip 13.1 Discovery of the Double Helix (www.Life11e.com/mc13.1)
focus your learning 13.2.5 Watson and Crick used X-ray diffraction data in conjunction with chemical evidence to build the double helix model for DNA.
• Video 13.1 Deoxyribonucleic Acid: A Three-Dimensional Model
focus your learning 13.2.6 DNA is a double-stranded helix that twists in the right-handed direction with strands running antiparallel to each other, forming major and minor grooves that allow exposure of the outer edges of nitrogenous bases.
Additional Suggestions and Resources
Construct Have students construct a spider map that relates DNA structure
and DNA function (p. 273–274). “DNA” will be at the center of the map. The
four legs will be the four functions of DNA:
1. storage of genetic information
2. susceptibility to mutations
3. precise replication
4. expression of phenotype
Each leg should be annotated with how DNA structure allows for that function.
focus your learning 13.2.7 The genetic material performs four important func-tions and is well suited to its biological functions.
© 2017 Sinauer Associates Life 11e Active Learning Guide
PART 2 • CHAPTER 13 DNA and Its Role in Heredity 57
key concept 13.3 DNA Is Replicated Semiconservatively
In
for Instructors
• Active Learning Exercise This ALE examines how the DNA is replicated
conservatively.
focus your learning 13.3.3 Semiconservative DNA replication requires deoxy-ribonucleoside triphosphates, DNA polymerase, and a DNA template.
• Active Learning Module DNA Replication Fork
This module reinforces three important aspects of DNA replication: 1) DNA
replicates semi-conservatively with each parent DNA strand acting as a
template for the synthesis of a new strand that is its complement; 2) DNA
polymerases can only assemble new strands in the 5ʹ-to-3ʹ direction begin-
ning from a primer with a free 3ʹ hydroxyl group; and 3) DNA replication is
bidirectional from the replication fork and involves the action of a multiprotein
replication complex that includes DNA polymerase and additional proteins.
focus your learning 13.3.3 Semiconservative DNA requires deoxyribonucleo-side triphosphates, DNA polymerase, and a DNA template.
focus your learning 13.3.4 DNA replication proceeds bidirectionally from an origin of replication (ori): E. coli has a single ori, and eukaryotic chromosomes have multiple ones.
focus your learning 13.3.5 The first replication event at the ori uses DNA heli-cases and single-stranded binding proteins.
focus your learning 13.3.6 Leading and lagging strands are synthesized simul-taneously at the replication fork.
for Students
• Activity 13.1 The Replication Complex (www.Life11e.com/ac13.1)
focus your learning 13.3.7 DNA replication involves teamwork among various proteins, which enables DNA polymerases to be processive.
• Animation 13.2 DNA Replication and Polymerization
(www.Life11e.com/a13.2)
focus your learning 13.3.4 DNA replication proceeds bidirectionally from an origin of replication (ori): E. coli has a single ori, and eukaryotic chromosomes have multiple ones.
• Animation 13.3 The Meselson-Stahl Experiment (www.Life11e.com/a13.3)
focus your learning 13.3.2 The Meselson-Stahl experiment provided evidence to support the semiconservative model of DNA replication.
• Animation 13.4 Leading and Lagging Strand Synthesis
(www.Life11e.com/a13.4)
focus your learning 13.3.6 Leading and lagging strands are synthesized simul-taneously at the replication fork.
© 2017 Sinauer Associates Life 11e Active Learning Guide
PART 2 • CHAPTER 13 DNA and Its Role in Heredity 58
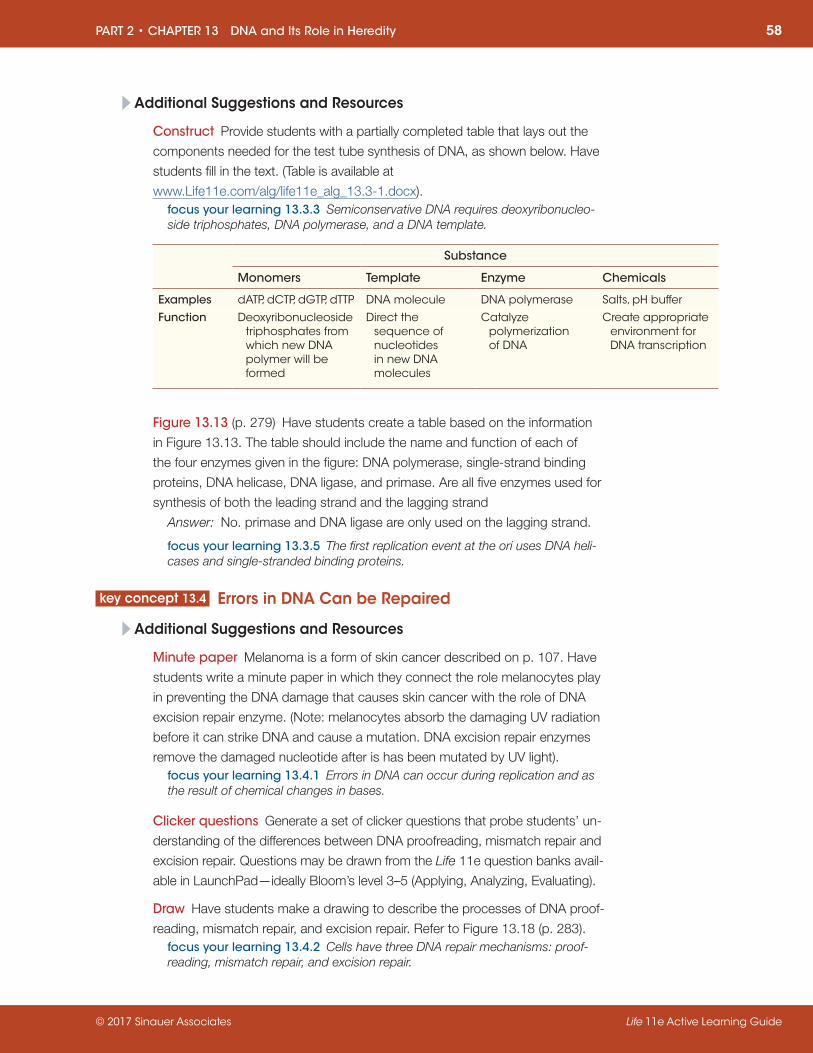
Additional Suggestions and Resources
Construct Provide students with a partially completed table that lays out the
components needed for the test tube synthesis of DNA, as shown below. Have
students fill in the text. (Table is available at
www.Life11e.com/alg/life11e_alg_13.3-1.docx).focus your learning 13.3.3 Semiconservative DNA requires deoxyribonucleo-side triphosphates, DNA polymerase, and a DNA template.
Substance
Monomers Template Enzyme Chemicals
Examples dATP, dCTP, dGTP, dTTP DNA molecule DNA polymerase Salts, pH buffer
Function Deoxyribonucleoside triphosphates from which new DNA polymer will be formed
Direct the sequence of nucleotides in new DNA molecules
Catalyze polymerization of DNA
Create appropriate environment for DNA transcription
Figure 13.13 (p. 279) Have students create a table based on the information
in Figure 13.13. The table should include the name and function of each of
the four enzymes given in the figure: DNA polymerase, single-strand binding
proteins, DNA helicase, DNA ligase, and primase. Are all five enzymes used for
synthesis of both the leading strand and the lagging strand
Answer: No. primase and DNA ligase are only used on the lagging strand.
focus your learning 13.3.5 The first replication event at the ori uses DNA heli-cases and single-stranded binding proteins.
key concept 13.4 Errors in DNA Can be Repaired
Additional Suggestions and Resources
Minute paper Melanoma is a form of skin cancer described on p. 107. Have
students write a minute paper in which they connect the role melanocytes play
in preventing the DNA damage that causes skin cancer with the role of DNA
excision repair enzyme. (Note: melanocytes absorb the damaging UV radiation
before it can strike DNA and cause a mutation. DNA excision repair enzymes
remove the damaged nucleotide after is has been mutated by UV light). focus your learning 13.4.1 Errors in DNA can occur during replication and as the result of chemical changes in bases.
Clicker questions Generate a set of clicker questions that probe students’ un-
derstanding of the differences between DNA proofreading, mismatch repair and
excision repair. Questions may be drawn from the Life 11e question banks avail-
able in LaunchPad—ideally Bloom’s level 3–5 (Applying, Analyzing, Evaluating).
Draw Have students make a drawing to describe the processes of DNA proof-
reading, mismatch repair, and excision repair. Refer to Figure 13.18 (p. 283). focus your learning 13.4.2 Cells have three DNA repair mechanisms: proof-reading, mismatch repair, and excision repair.
© 2017 Sinauer Associates Life 11e Active Learning Guide
PART 2 • CHAPTER 13 DNA and Its Role in Heredity 59
Video DNA Replication with a Proofreading Polymerase
(https://www.youtube.com/watch?v=6O0qD6KCOVE)
Video A 3D animation of mismatch repair in E. coli
(https://www.youtube.com/watch?v=p3MXIKWAi2w).
Video Nucleotide Excision Repair of DNA
(https://www.youtube.com/watch?v=apfESSx3g50)
key concept 13.5 The Polymerase Chain Reaction Amplifies DNA
In
for Students
• Activity 13.2 Polymerase Chain Reaction Simulation
(www.Life11e.com/ac13.2)
focus your learning 13.5.1 The polymerase chain reaction was developed for the purpose of rapidly making multiple copies of segments of DNA.
Additional Suggestions and Resources
Construct Have students create a flow chart of the steps involved in the poly-
merase chain reaction. Students should provide an explanation of each step.
Finally, have students explain the purpose and main application of PCR. focus your learning 13.5.1 The polymerase chain reaction was developed for the purpose of rapidly making multiple copies of segments of DNA.
Think-pair-share Have students write a minute paper on why the PCR tech-
nique is completely reliant on having the proper primer. (Note: PCR is usually
touted as a way to quickly make multiple copies of DNA. This is true. But stu-
dents should be reminded that PCR also is very specific and that specificity is
based on having the proper primer.) focus your learning 13.5.1 The polymerase chain reaction was developed for the purpose of rapidly making multiple copies of segments of DNA.