Embed Size (px)
Citation preview

AtmanAvr C/C++ User's Guide The AtmanAvr C/C++ User's Guide covers a broad range of subjects, such as working with IDE, programming with C/C++, and the various primary steps involved in creating your program.
Introduction
AtmanAvr C/C++ IDE
Create a Simple Application
Create an User Library
AVR GCC Language Reference
Library Function Reference
Bibliography
Atman Electronics 2009-02-10 Copyright© 2003-2009
http://www.atmanecl.net [email protected] [email protected]
http://www.atmanecl.com [email protected] [email protected]
Introduction
Welcome to AtmanAvr C/C++ IDE!
About AtmanAvr C/C++
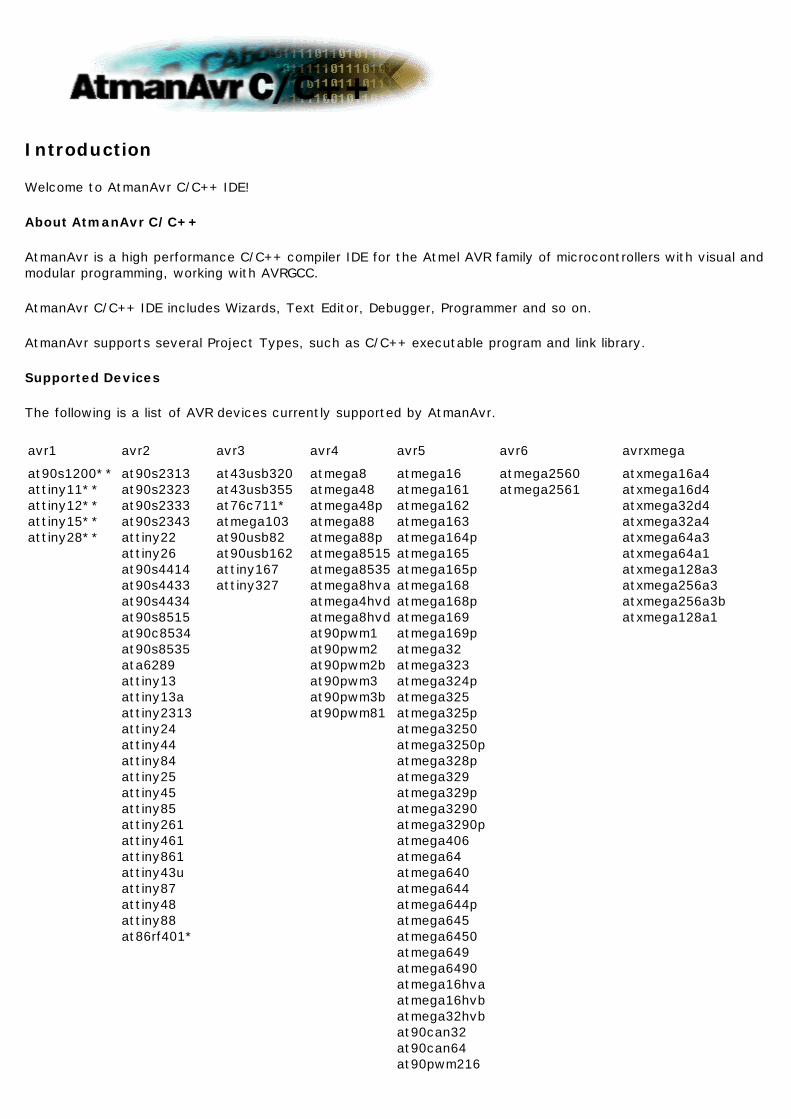
AtmanAvr is a high performance C/C++ compiler IDE for the Atmel AVR family of microcontrollers with visual and modular programming, working with AVRGCC.
AtmanAvr C/C++ IDE includes Wizards, Text Editor, Debugger, Programmer and so on.
AtmanAvr supports several Project Types, such as C/C++ executable program and link library.
Supported Devices
The following is a list of AVR devices currently supported by AtmanAvr.
avr1 avr2 avr3 avr4 avr5 avr6 avrxmega
at90s1200** attiny11** attiny12** attiny15** attiny28**
at90s2313 at90s2323 at90s2333 at90s2343 attiny22 attiny26 at90s4414 at90s4433 at90s4434 at90s8515 at90c8534 at90s8535 ata6289 attiny13 attiny13a attiny2313 attiny24 attiny44 attiny84 attiny25 attiny45 attiny85 attiny261 attiny461 attiny861 attiny43u attiny87 attiny48 attiny88 at86rf401*
at43usb320 at43usb355 at76c711* atmega103 at90usb82 at90usb162 attiny167 attiny327
atmega8 atmega48 atmega48p atmega88 atmega88p atmega8515 atmega8535 atmega8hva atmega4hvd atmega8hvd at90pwm1 at90pwm2 at90pwm2b at90pwm3 at90pwm3b at90pwm81
atmega16 atmega161 atmega162 atmega163 atmega164p atmega165 atmega165p atmega168 atmega168p atmega169 atmega169p atmega32 atmega323 atmega324p atmega325 atmega325p atmega3250 atmega3250p atmega328p atmega329 atmega329p atmega3290 atmega3290p atmega406 atmega64 atmega640 atmega644 atmega644p atmega645 atmega6450 atmega649 atmega6490 atmega16hva atmega16hvb atmega32hvb at90can32 at90can64 at90pwm216
atmega2560 atmega2561
atxmega16a4 atxmega16d4 atxmega32d4 atxmega32a4 atxmega64a3 atxmega64a1 atxmega128a3 atxmega256a3 atxmega256a3b atxmega128a1
Note:
* C/C++ supported but no Project Wizard and Code Wizard support.
** Assembly only and no Project Wizard and Code Wizard support.
at90pwm316 atmega16m1 atmega16u4 atmega32c1 atmega32m1 atmega32u4 atmega32u6 atmega64c1 atmega64m1 at90scr100 at90usb646 at90usb647 at94k atmega128 atmega1280 atmega1281 atmega1284p atmega128rfa1 at90can128 at90usb1286 at90usb1287

AtmanAvr C/C++ IDE
The AtmanAvr C/C++ development environment includes Workspace, Output, Text Editor, ProjectWizard, CodeWizard, Debugger, Programmer and so on.
l Customizing AtmanAvr C/C++
l Localizing AtmanAvr C/C++
l Working with Projects
l Working with Classes
l Output
l Text Editor
l Wizards
l Debugger
l Programmer
l Register AtmanAvr C/C++ IDE

Customizing AtmanAvr C/C++
You can customize various aspects of the layout and operation of AtmanAvr C/C++.
You can set the Text editor's behavior, for more information, see Customizing the Text Editor.
l Customizing Toolbars and Menus
l Customizing the Tools Menu
l Customizing Keyboard Shortcuts
l Setting Directories
l Setting Startup
l Customizing Keywords
l Customizing debugger windows

Customizing Toolbars and Menus
With toolbars you can organize the commands in AtmanAvr C/C++ the way you want to so you can find and use them quickly. You can easily customize toolbars - for example, you can add and remove menus and buttons, change the image or text for a button, create your own custom toolbars, hide or display toolbars, resize, and move toolbars. In previous versions of AtmanAvr C/C++, toolbars only contained buttons. Now toolbars can contain buttons, menus, or a combination of both.
The Menu Bar is a special toolbar at the top of the screen that contains menus such as File, Edit, and Build. You can customize the Menu Bar the same way you customize any toolbar; for example, you can quickly add and remove buttons and menus. You can add existing commands to these menus and delete commands. If you delete a default command (a command supplied with the AtmanAvr C/C++ user interface) from a menu, you can choose later to put it back or add it to a different menu or toolbar.
The only differences between the Menu Bar and other toolbars are:
The Menu Bar always spans the full width of the window when docked horizontally. But You cannot hide the Menu Bar.
l Create a toolbar l Customize a toolbar l Customize menus on toolbars l Customize menus and menu items l Customize a toolbar button or menu command l Customize menu items for recently used files and workspaces
To create a new toolbar
To create a newtolbar
Creating a Toolbar
You can create new custom toolbars to work more efficiently. You can include copies of frequently used buttons and menus from existing toolbars, or create a toolbar to use for a special purpose.
Create a new toolbar
Rename a custom toolbar
Show or hide a toolbar
Delete a custom toolbar
l On the Tools menu, click Customize, and then click the Toolbars tab.
l Click New, and in the Toolbar Name box, type a name for the new toolbar.
l Position the Customize dialog box out of the way so you can see the new toolbar, and then click the Commands tab.
l In the Categories box, click the category that contains the command or other item that you want to add to the new toolbar.
l From the Commands area, drag the commands or other item to the new toolbar.
To rename a custom toolbar
l On the Tools menu, click Customize, and then click the Toolbars tab.
l In the Toolbars box, click the toolbar you want to rename, and then click Rename.
l In the Toolbar name area, type the new name. Press ENTER.
To show or hide a toolbar
l On the Tools menu, click Customize, and then click the Toolbars tab.
l In the Toolbars box, select the check box for the toolbar to display it.
- or -
To hide the toolbar, clear the check box.
Note You cannot hide the Menu Bar.
To delete a custom toolbar
l On the Tools menu, click Customize, and then click the Toolbars tab.
l In the Toolbars box, select the name of the custom toolbar you want to delete, and click Delete.
Note
To create a new toolbar
Customizing a Toolbar
You can customize toolbars by dragging unwanted buttons off or adding a new button, menu, or command.
Group related buttons and menus on a toolbar
Add or delete a toolbar button
Create a button for a command or other item
Change the width of a drop-down list on a toolbar
Customize a toolbar button
Troubleshoot the customize command
To group related buttons and menus on a toolbar
To group related buttons and menus, you can add a separator bar before the first and after the last button or menu in the group to distinguish the group from other buttons and menus on the toolbar.
l Display the toolbar on which you want to group related buttons and menus.
l On the Tools menu, click Customize, and then click the Toolbars tab. The Customize dialog box must remain open; however, you might need to move it out of your way.
l Right-click the button you want to be the left-most or top button of a group. Click Begin Group on the shortcut menu. To put a separator bar at the end of the group, repeat this step for the first button of the next group.
l To remove a separator bar, right-click the first button after the separator bar. Click Start Group on the shortcut menu to clear the check mark and remove the separator bar.
To add or delete a toolbar button
l Display the toolbar you want to change.
l On the Tools menu, click Customize, and then click the Commands tab.
l Add a button by clicking the name of the category in the Categories box, and then dragging the button or item from the Commands area to the displayed toolbar. – or – To delete a button, drag it off the toolbar.
Notes If you add a new button, command, or other item to a toolbar that does not have a button, button name, or button image associated with it, you will need to create one or more of these items for it.
When you delete a default button from a toolbar, the button is still available in the Customize dialog box (Commands tab, Deleted Commands or All Commands category). However, when you delete a toolbar button with a custom appearance, its appearance is permanently lost, although the command is still available (Customize dialog box, Commands tab).
To save a toolbar button with a custom appearance for later use, create a toolbar for storing unused buttons, move the button to this storage toolbar, and then hide the storage toolbar.
To create a button for a command or other item
l Display the toolbar you want to add a button to.

l On the Tools menu, click Customize, and then click the Commands tab.
l In the Categories box, click All Commands, and then click the command or other item in the list that you want to add to the toolbar.
l Drag the item to the toolbar you want to change.
To change the width of a drop-down list on a toolbar
l On the Tools menu, click Customize, and then click the Toolbars tab.
l Click the drop-down list box on a toolbar.
l Point to the left or right border of the list box. When the mouse pointer changes to a double-headed arrow, drag the border of the list box to change its width.
To troubleshoot the Customize command
l If you removed the Customize command from the Tools menu or if you removed the Tools menu, you can still customize a toolbar by right-clicking any toolbar or the Menu Bar, and then clicking Customize on the shortcut menu.
l To restore the Tools menu to the Menu Bar, right-click any toolbar or the Menu Bar, and then click Customize on the shortcut menu. Click the Toolbars tab. In the Toolbars box, click Menu Bar, and then click Reset.
l To customize a toolbar if you removed the Customize command from the Tools menu, or if you removed the Tools menu, right-click any toolbar, and then click Customize on the shortcut menu.
Customizing Menus on Toolbars
You can move or copy a menu to a toolbar or from one toolbar to another. You can also add an existing menu to a toolbar, create a new menu on a toolbar, or delete a menu from a toolbar.
Add a custom menu to a toolbar
Move or copy a menu from one toolbar to another
Delete a menu from a toolbar
To add a custom menu to a toolbar
l Display the toolbar you want to add a custom menu to.
l On the Tools menu, click Customize, and then click the Commands tab. The Customize dialog box must remain open; however, you might need to move it out of your way.
l In the Categories box, click New Menu. The entry New Menu appears in the Commands box.
l Drag New Menu from the Commands box to the displayed toolbar.
l To rename the new menu, right-click the name on the toolbar, and then click Button Appearance. Type the new menu name in the Button Text box. To specify a letter as the accelerator key, insert an ampersand before the letter.
l To add a command to the custom menu, click the custom menu name on the toolbar to display an empty box. Click a category for the command in the Categories box, and then drag the command from the Commands box to the empty box in the custom menu.
To move or copy a menu from one toolbar to another
l Display both the toolbar with the menu you want to move and the toolbar you want to move or copy the menu to.
l On the Tools menu, click Customize. The Customize dialog box must remain open; however, you might need to move it out of your way.
l To move a menu, click the menu on the toolbar, and drag it to the new location on the same toolbar or another toolbar. To copy a menu, hold down the CTRL key and drag the menu on the toolbar to a new location.
To delete a menu from a toolbar
l Display the toolbar you want to delete a menu from.
l On the Tools menu, click Customize. The Customize dialog box must remain open; however, you might need to move it out of your way.
l Drag the menu you want to delete off the toolbar.

Customizing Menus and Menu Items
Some customization affects individual items on a menu, while other changes affect the menu as a whole. You can add, delete, copy, or move menu items. You can rename the menu or restore the original settings for a default menu.
Rename a custom menu
Add a command or other item to a menu
Delete a command from a menu
Move or copy a menu command
To rename a custom menu
l Display the toolbar that contains the menu you want to rename.
l On the Tools menu, click Customize. The Customize dialog box must remain open; however, you might need to move it out of your way.
l Right-click the menu you want to rename on the toolbar, and then click Button Appearance.
l Type the new menu name in the Button Text box. To specify a letter as the accelerator key, insert an ampersand before the letter.
To add a command or other item to a menu
l Display the toolbar that contains the menu to which you want to add a command or other item.
l On the Tools menu, click Customize, and then click the Commands tab. The Customize dialog box must remain open; however, you might need to move it out of your way.
l In the Categories box, click a category for the command or other item.
l Drag the item you want from the Commands box over the menu on the toolbar. When the menu displays a list of menu commands, point to the location where you want the item to appear on the menu, and then release the mouse.
Notes If you don't see the command you want under a particular category, click All Commands in the Categories box.
To delete a command from a menu
l Display the toolbar that contains the command you want to delete.
l On the Tools menu, click Customize, and then click the Commands tab. The Customize dialog box must remain open; however, you might need to move it out of your way.
l Click the menu on the toolbar that contains the command you want to delete.
l Drag the command you want to delete off the menu.
To move or copy a menu command
l Display the toolbar with the menu that contains the command you want to move or copy. Next, display the toolbar with the menu you want to add the command to.
l On the Tools menu, click Customize, and then click the Commands tab. The Customize dialog box must remain open; however, you might need to move it out of your way.

l On the toolbar, click the menu that contains the command you want to move or copy.
l To move the command, drag it over the menu you want. When the menu displays a list of commands, point to where you want the command to appear on the menu, and then release the mouse. To copy the command, hold down CTRL and drag the command over the menu you want. When the menu displays a list of commands, point to where you want the command to appear on the menu, and then release the mouse button.
Customizing a Toolbar Button or Menu Command
You can change the image on any toolbar button or menu command, except for a button that displays a list or a menu when you click it.
You can display text, an icon, or both on a toolbar button. And you can display either an icon and text or text only on a menu command.
Move or copy a toolbar button
Display text, an icon, or both on a toolbar button
Display an icon and text or text only on a menu command
Rename a toolbar button or menu command
To move or copy a toolbar button
l Display the toolbar that contains the toolbar button you want to move or copy.
l On the Tools menu, click Customize, and then click the Commands tab.
l To move a button, drag it to the new location on the same toolbar or to another displayed toolbar. To copy a button, hold down the CTRL key while you drag the button to the new location.
To display text, an icon, or both on a toolbar button
l Display the toolbar with the button you want to change.
l On the Tools menu, click Customize. The Customize dialog box must remain open; however, you might need to move it out of your way.
l On the toolbar, right-click the button you want to change, and then click Button Appearance on the shortcut menu.
l To display text, click the Text Only button or the Image and Text button, type the text in the Button Text box.
l To display an image, click Image Only or Image and Text, and click an image in the Images area.
Note You can't change the text and icon format for a button that displays a menu list when you click it. When you display text on a toolbar button, the button does not display a tooltip.
To display an icon and text or text only on a menu command
l Display the toolbar with the menu command you want to change.
l On the Tools menu, click Customize. The Customize dialog box must remain open; however, you might need to move it out of your way.
l Click the menu that contains the command you want to change.
l Right-click the menu command you want to change, and then click the option you want on the shortcut menu.
Note Some commands do not have an icon associated with them and can only be displayed on a menu as text. A menu command cannot be displayed as an icon only.
To rename a toolbar button or menu command

l Display the toolbar that contains the toolbar button or menu command you want to change.
l On the Tools menu, click Customize. The Customize dialog box must remain open; however, you might need to move it out of your way.
l To rename a toolbar button, right-click the toolbar button on the toolbar, and then click Button Appearance on the shortcut menu. To rename a menu command, click the menu that contains the command you want to change. Right-click the menu command, and then click Button Appearance on the shortcut menu.
l Type the new name in the Button Text box. To specify a letter as the accelerator key, insert an ampersand before the letter when you type the name.
Note If the toolbar button does not display text, you only see the name change when you view the tooltip.

Customizing Menu Items for Recently Used Files and Workspaces
Files and project workspaces that you have used recently can be opened by selecting the name of the file or workspace from a menu. You can customize the number of files and workspaces listed.
To customize the menu items for recently used files and workspaces
1. On the Tools menu, click Options, then click the Workspace tab.
2. To change the number of recently used files listed, type the number you want in the Recent File List Contains box. The default is four files.
3. To change the number of recently used workspaces listed, type the number you want in the Recent Workspace List Contains box. The default is four workspaces.
Customizing the Tools Menu
You can add up to 10 commands to the Tools menu. These commands can be associated with any program that will run on your operating system. You can also specify arguments for any command that you add to the Tools menu.
Add a command to the Tools menu
Edit a command on the Tools menu
Remove a command from the Tools menu
Specify an argument for a Tools menu command
Add an argument macro
To add a command to the Tools menu
As an example, the following procedure demonstrates how to add the Windows Notepad accessory to the Tools menu.
1. On the Tools menu, click Customize, and then click the Tools tab. 2. To add a tool, in the Menu Contents box, scroll to the bottom of the list, double-click the blank line
(indicated by an empty rectangle), type the name of the tool as you want it to appear on the Tools menu, and press ENTER. For example, if you want to add a command for the Windows Notepad accessory, you might type Notepad. The remaining steps specify what action will occur when the new Notepad command is selected.
3. In the Menu Contents box, highlight the name of the tool you just entered. 4. In the Command box browse or type the path and name of the program, for example,
C:\WINDOWS\NOTEPAD.EXE. 5. In the Arguments text box, browse or type any arguments to be passed to the program. 6. In the Initial Directory box, type the file directory where the command is located and click OK.
Notes Once the command appears on the Tools menu, to run the program, choose it from the menu.
You can change the default menu name of the newly added tool by editing the Menu Text box. You can also add arguments to be passed to the program by typing them in the Arguments text box or set the initial directory for your program by typing it in the Initial Directory text box.
To edit a command on the Tools menu
1. On the Tools menu, click Customize, and then click the Tools tab. 2. In the Menu Contents box, select the command that you want to edit. 3. Perform one or more of the following actions:
¡ To move the command up one position in the menu, choose the Move Up button. ¡ To move the command down one position in the menu, choose the Move Down button. ¡ To change the menu text, command line (tool path and file name), command-line arguments, or the
initial directory, type the new information in the appropriate text box. ¡ To specify a letter in the menu title as an access key, precede that letter in the Menu Contents
box with an ampersand. The first letter in the title is the keyboard access key by default.
¡ To specify that a console application's output is displayed in the Output window rather than in the console window, click Use Output Window.
To remove a command from the Tools menu
1. On the Tools menu, click Customize, and then click the Tools tab. 2. In the Menu Contents box, select the command you want to delete and press the Delete button.

To specify arguments for a Tools menu command
l On the Tools menu, click Customize, and then click the Tools tab. l In the Menu Contents box, select the command for which you want to specify arguments. l In the Arguments text box, type the arguments that you want.
AtmanAvr C/C++ provides the argument macros shown in the Argument Macros table.
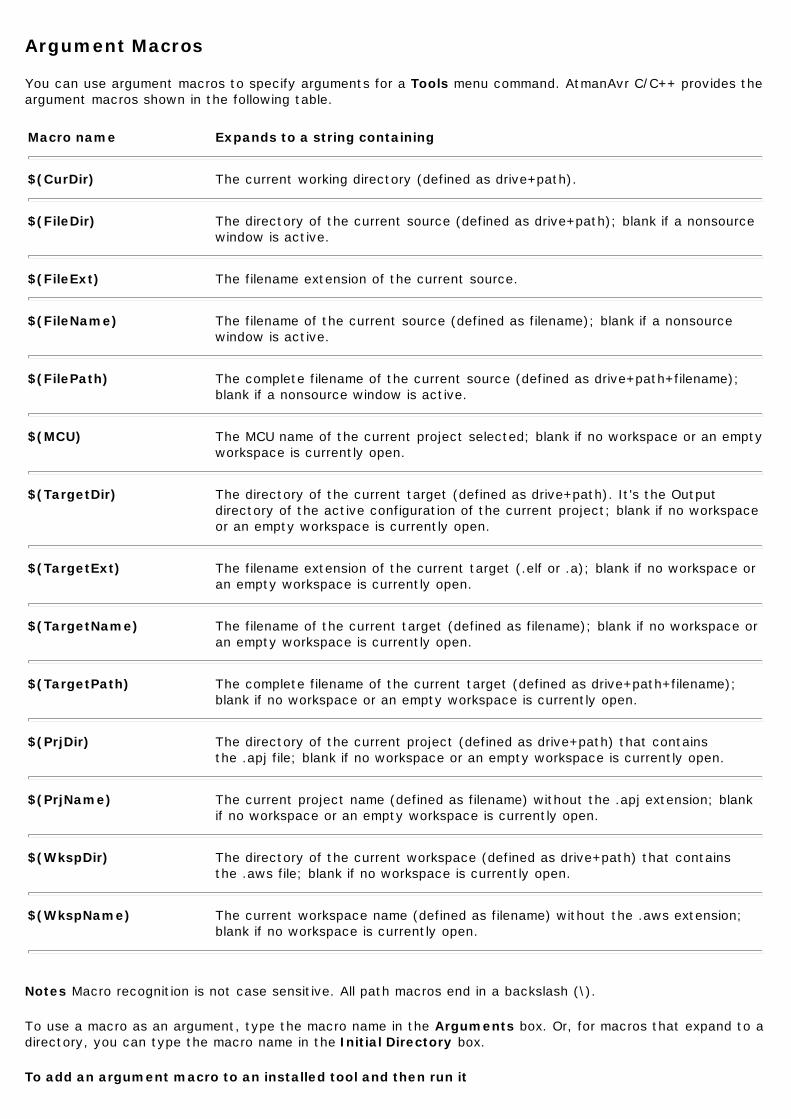
Argument Macros
You can use argument macros to specify arguments for a Tools menu command. AtmanAvr C/C++ provides the argument macros shown in the following table.
Notes Macro recognition is not case sensitive. All path macros end in a backslash (\).
To use a macro as an argument, type the macro name in the Arguments box. Or, for macros that expand to a directory, you can type the macro name in the Initial Directory box.
To add an argument macro to an installed tool and then run it
Macro name Expands to a string containing
$(CurDir) The current working directory (defined as drive+path).
$(FileDir) The directory of the current source (defined as drive+path); blank if a nonsource window is active.
$(FileExt) The filename extension of the current source.
$(FileName) The filename of the current source (defined as filename); blank if a nonsource window is active.
$(FilePath) The complete filename of the current source (defined as drive+path+filename); blank if a nonsource window is active.
$(MCU) The MCU name of the current project selected; blank if no workspace or an empty workspace is currently open.
$(TargetDir) The directory of the current target (defined as drive+path). It's the Output directory of the active configuration of the current project; blank if no workspace or an empty workspace is currently open.
$(TargetExt) The filename extension of the current target (.elf or .a); blank if no workspace or an empty workspace is currently open.
$(TargetName) The filename of the current target (defined as filename); blank if no workspace or an empty workspace is currently open.
$(TargetPath) The complete filename of the current target (defined as drive+path+filename); blank if no workspace or an empty workspace is currently open.
$(PrjDir) The directory of the current project (defined as drive+path) that contains the .apj file; blank if no workspace or an empty workspace is currently open.
$(PrjName) The current project name (defined as filename) without the .apj extension; blank if no workspace or an empty workspace is currently open.
$(WkspDir) The directory of the current workspace (defined as drive+path) that contains the .aws file; blank if no workspace is currently open.
$(WkspName) The current workspace name (defined as filename) without the .aws extension; blank if no workspace is currently open.

As an example, the following procedure demonstrates how to add the $(FilePath) argument macro to the Windows Notepad accessory.
1. On the Tools menu, click Customize and click the Tools tab.
2. In the Menu Contents box, select the command that you want to edit. In this case, select the Notepad accessory that you installed earlier.
3. In the arguments text box, type $(FilePath) or select the drop-down arrow to the right of the Arguments box to display a list of Arguments and then click Close.
4. To see your changes, on the Tools menu, click Notepad. The Windows Notepad accessory opens, with the active source file as its text file.
What do you want to do?
Customize the Tools menu
Customizing Keyboard Shortcuts
You can use the Keyboard tab on the Customize dialog box to establish your choice of shortcut keys for any of the available commands. You can assign more than one shortcut key for any command. You can delete or change key assignments. You can also reset all shortcut keys to their default settings.
Assign a shortcut key
Delete a shortcut key
Reset all shortcut keys to their default value
To assign a shortcut key
1. On the Tools menu, click Customize, and then click the Keyboard tab. 2. In the Categories list, select the menu that contains the command to which you want to assign the
shortcut key. 3. In the Commands list, select the command to which you want to assign the shortcut key. 4. Put the cursor in the Press New Shortcut Key box, press the shortcut key or key combination that you
want, and click Assign. If you press a key or key combination that is invalid, no key is displayed. You cannot assign key combinations with ESC, F1, or combinations such as CTRL+ALT+DEL that are already being used by your operating system.
5. If you press a key or key combination that is currently assigned to another command, that command appears under Currently Assigned To.
To delete a shortcut key
1. On the Tools menu, click Customize, and then click the Keyboard tab. 2. On the Categories, and Commands lists, select the location for the shortcut key you want to delete. 3. In the Current Keys list, select the shortcut key you want to delete and click Remove.
To reset all shortcut keys to their default values
1. On the Tools menu, click Customize, and then click the Keyboard tab. 2. Click Reset All.
Setting Directories
Add or remove a directory
Change the search order for a directory
To add or remove a directory from the Directories list
1. On the Tools menu, click Options, and then click the Directories tab. 2. In the Show Directories For list box, select the type of files for the directory. 3. To add a directory, in the Directories box, scroll to the bottom of the list, double-click the blank line
(indicated by an empty rectangle), and type the directory name. To remove a directory, select it, and then press delete.
To change the search order for a directory in the Directories list
1. On the Tools menu, click Options and then click the Directories tab. 2. In the Show Directories For list box, select the type of files for the directory. 3. In the Directories box, select the directory that you want to move. 4. Click Move up or Move down button to move the selected directory to its new position.
Note Directories are searched in the order in which they appear in the list.

Setting Startup
AtmanAvr C/C++ automatically load the workspace you last worked on when it start up.
When open a project you can restore your document windows to the positions they last occupied in the project workspace.
Load or not load the last workspace when startup
Show or hide document windows and display project documents when you open a project
To load or not load the last workspace when startup
l On the Tools menu, click Options, and then click the Workspace tab.
l Select Reload the Last Workspace When Startup to load the last workspace or clear Reload the Last Workspace When Startup to not load it.
To show or hide document windows and display project documents when you open a project
l On the Tools menu, click Options, and then click the Workspace tab.
l Select Reload Documents When Opening Workspace to display project documents or clear Reload Documents When Opening Workspace to not show them.

Customizing Keywords
You can use the Keywords tab on the Options dialog box to define your keywords.
To add or remove a custom keyword
1. On the Tools menu, click Options, and then click the Keywords tab.
2. To add a keyword, in the Custom Keywords box, scroll to the bottom of the list, double-click the blank line (indicated by an empty rectangle), and type the keyword. To remove a keyword, select it, and then press delete.

Localizing AtmanAvr C/C++
AtmanAvr C/C++ has some support for robust localization.
The scheme is as follows: The resources for the default language (typically English) DLL is English.dll. You might translate the resources to your local language and save as YourLanguage.dll. Then, apply the resources for your local language.
The follow languages can be supported:
l LANG_ARABIC ( arabic.dll ) l LANG_CHINESE ( chinese.dll ) l LANG_CZECH ( czech.dll ) l LANG_DANISH ( danish.dll ) l LANG_DUTCH ( dutch.dll ) l LANG_ENGLISH ( english.dll ) l LANG_FRENCH ( french.dll ) l LANG_GERMAN ( german.dll ) l LANG_GREEK ( greek.dll ) l LANG_HUNGARIAN ( hungarian.dll ) l LANG_ITALIAN ( italian.dll ) l LANG_JAPANESE ( japanese.dll ) l LANG_KOREAN ( korean.dll ) l LANG_POLISH ( polish.dll ) l LANG_RUSSIAN ( russian.dll ) l LANG_SLOVAK ( slovak.dll ) l LANG_SPANISH ( spanish.dll ) l LANG_SWEDISH ( swedish.dll ) l LANG_THAI ( thai.dll )
For additional language to be supported, you might send the language info you want to localize to [email protected].
Also, it is appreciated that you send your localization DLL to [email protected].

Applying Localization
AtmanAvr C/C++ will load the Toolbars from the registry instead of from resources DLL directly when startup. So, after translating the resources and making local language DLL, for update Toolbars, you can:
To apply your local language
1. Startup AtmanAvr C/C++
2. On the Tools menu, click Customize, and then click the Toolbars tab.
3. Click Reset All button.

Working with Projects
In AtmanAvr C/C++, the Project Workspace is a container for your development projects. When you create a new project, a workspace is created at the same time. You use the Project Workspace window to view and access the various elements of your projects.
After you have created a project workspace, you can add/delete projects to/from it.
The workspace directory is the root directory for the project workspace. The projects you add to the project workspace can be located on other paths, even on a different drive.
Project workspace files
Project workspace views
Elements of project workspaces
Project types
Project configurations
Work with projects and files
Use project folders
Work with project configurations
Build a project
Debug a Project
Program a Project

Project Workspace Files
When you create a project workspace, a project workspace file ProjectName.aws is created to store information at the workspace level. Other associated files are also created, including a project file (.apj), for building a single project, and a workspace options file (.opt).
The workspace options file stores settings such as those you specify in the Project Settings dialog, and the layout of the project workspace.

Project Workspace Views
Tabs at the bottom of the Project Workspace window provide different ways to view your project. A folder containing the various elements of your project workspace appears for each project view. Expanding the folder displays the details of the project workspace for that view.
The Project Workspace window contains the following views.
You can switch from one view to another by clicking the tabs at the bottom of the Project Workspace window.
Each view is hierarchical. You can expand the folders and other items to display their contents or collapse them to display their organization.
View Description
FileView Displays the files associated with projects that you have created. These can include buildable as well as non-buildable files.
ClassView Displays the C++ classes defined in your projects. Expanding the folders shows the classes; expanding a class shows its members.
IOView Displays the I/O registers and processor information. Only available while debugging your program.
FileViewFileVewFileView
The FileView pane shows relationships among the projects and files included in the project workspace. The relationships in FileView are logical relationships, not physical relationships, and do not reflect the organization of files on your hard disk.
FileView shows the relationships of the source files and the dependent files used to build all project configurations. The active project in the workspace is indicated in FileView by bold type. The active configuration determines which set of build options is used when you build the active project. The active project is the project that will be built when you use the commands Build or Rebuild All. You can select a different active configuration by using the Set Active Configuration command on the Build menu. You can select a different active project by using the Set Active Project command on the Project menu.
Note The External Dependencies folder lists files that are not part of the project but that are needed to build the project. You can add a file to the project by simply dragging it from the External Dependencies folder to any of the project folders, or to any top-level project node.
In the FileView pane you can:
l Open a folder that contains a file you want to move or copy.
l Select a file and move or copy it into another folder.
l Double-click a file to open it in the application workspace.
l Create, rename, or delete folders.
l Create or delete files.
FileView

Elements of Project Workspaces
Project workspaces can contain the following:
Project A set of zero or more source files, with one or more configurations. A project also specifies the type of application to build. Your project workspace can contain any number of projects.
Configuration The settings for a project that specify a CPU on which the output file is to run, and other build settings such as compiling, linking and debugging options. When you create a new project, you create Debug and Release configurations.
Project Types
Each project has a project type, which you choose when you create the project. The project type specifies what to generate and also specifies some default settings required in order to build that output type. It specifies, for instance, the settings that the compiler uses for the source files, the libraries that the linker uses to build each project configuration, the default locations for output files, the defined constants, and so on.
C executable program
C++ executable program
C static library
C boot loader program
C++ boot loader program
Blank project
AVR C Wizard executable program
A C executable program is an executable application written in C. When you create a new project and selected the type AVR C Wizard(exe) in the New dialog box, AtmanAvr C/C++ will create workspace and project files and C source files(.c) for your program, that you then add your own code to.
You can build all output files that specified in the project configuration settings.
AVR C++ Wizard executable program
A C++ executable program is an executable application written in C++. When you create a new project and selected the type AVR C++ Wizard(exe) in the New dialog box, AtmanAvr C/C++ will create workspace and project files and C++ source files(.cpp) for your program, that you then add your own code to.
You can build all output files that specified in the project configuration settings.
AVR Wizard library
A static library is a file containing objects and their functions and data that is linked into your program when the executable file is built. When you create a new project and selected the type AVR C Wizard(lib) in the New dialog box, AtmanAvr C/C++ will create workspace and project files and C source files(.c) for your program, that you then add your own code to.
You can build a library archive(ProjectName.a).
AVR C Wizard boot loader program
A C boot loader program is an executable application written in C. When you create a new project and selected the type AVR C Wizard(boot) in the New dialog box, AtmanAvr C/C++ will create workspace and project files and C source files(.c) for your program, that you then add your own code to.
You can build all output files that specified in the project configuration settings.
AVR C++ Wizard boot loader program
A C++ boot loader program is an executable application written in C++. When you create a new project and selected the type AVR C++ Wizard(boot) in the New dialog box, AtmanAvr C/C++ will create workspace and project files and C++ source files(.cpp) for your program, that you then add your own code to.
You can build all output files that specified in the project configuration settings.
Blank project

A blank project does not contain any source files. When you create a new project and selected the type Blank in the New dialog box, AtmanAvr C will create workspace and project files but not any source files, you can add files to the project. It's useful that you want to build your existing project but not created with AtmanAvr.

Project Configurations
Projects are controlled by their configuration settings. When you create a project, AtmanAvr C/C++ creates Debug and Release configurations and sets default options for both them. The Debug configuration contains full symbolic debugging information that can be used by the integrated debugger in AtmanAvr C/C++ or by other debuggers. AtmanAvr C/C++ also turns off optimizations in the Debug configuration because they generally make debugging more difficult. The Release configuration sets Default optimizations and also contains symbolic debugging information. The Debug and Release configurations can use any optimizations that you have set after creating the projects.
Project configurations have a hierarchical structure of settings. The settings specified at the project configuration level apply to all files within the configuration. For instance, if you specify Default optimizations for a configuration, all files contained within the configuration use Default optimizations.
Working with Project Configurations

Working With Projects and Workspaces
A project workspace contains your projects and their configurations. A project is defined as a configuration and a group of files that produce a program or final binary file(s). A workspace can contain multiple projects.
Work with the Project Workspace
Create a new project workspace
Display or hide the Project Workspace window
Open an existing project workspace
Close a project workspace
Work with Projects
Set the active project
Insert or delete projects
Add or remove files from projects
Use project folders
Export a Makefile

Creating a Project Workspace
With AtmanAvr C/C++, there are essentially two ways to create a new project workspace:
l Use a New Project wizard to create the initial project. AtmanAvr C/C++ wizards automatically create a project workspace that includes starter files appropriate for the project type. For more information about each type of wizard available with AtmanAvr C/C++, see Project types.
l Create a blank project workspace yourself. In this case, you must create all the files, select the project(s) to include in the project workspace, and select the files to add to the project. You must use this approach to create a workspace with a name or location different from the name and location for any of the projects it will contain. After you create the blank workspace, you can create a new project with a different location and insert it into the workspace at the same time.
To use a New Project wizard
1. From the File menu, click New.
2. In the New dialog box, click the Projects tab and select from the available project types to launch the wizard.
To create a blank project workspace
1. On the File menu, click New.
2. Click the Workspaces tab.
3. Select Blank Workspace from the type list, and type a name in the Workspace Name box.
If necessary, specify the directory where the project workspace files are stored by using the Location box.

Viewing the Project Workspace Window
In order to view or hide the workspace window, you must have a workspace loaded.
To display the Workspace window
l On the View menu, click Workspace.
To hide the Project Workspace window
1. Place the mouse cursor anywhere in the Project Workspace window and right-click to display the shortcut menu.
2. On the shortcut menu, click Hide.
Opening an Existing Project Workspace
To open an existing project workspace
1. On the File menu, click Open Workspace.
2. Select the drive and directory containing the project workspace that you want to open.
3. Select the .aws file for the project workspace from the File Name list and click OK.
To reopen a recently used project workspace
l On the File menu, click Recent Workspaces, and then click the name of the recently used workspace.
Note You can customize the menu items for recently used files and workspaces. You can specify how many items to list on submenus.
To close a project workspace
l On the File menu, click Close Workspace.

Setting the Active Project
The active project is the project that will be built when you use the Build or Rebuild All commands.
To set the active project
l On the Project menu, click Set Active Project and choose from the submenu of project names. -or-
l On the Build toolbar, choose a project from the Select Active Project drop-down list. (To view the Build toolbar, right-click an empty part of the menu bar and check Build.)
Inserting and Deleting Projects
You can insert new or existing projects into your project workspace, and delete existing projects from the workspace.
Insert a new project into an existing workspace
Add an existing project to the workspace
Delete a project from a workspace
To insert a new project into an existing project workspace
1. Open the project workspace to which you want to add a new project.
2. On the File menu, click New and then click the Projects tab.
3. Select the project type.
4. Specify the Project Name and Location for the project.
5. Click Add to Current Workspace.
6. Click OK.
The new project that you just created becomes the default project in the workspace.
To add an existing project to a project workspace
1. Open the project workspace to which you want to add a project.
2. On the Project menu, click Insert Project into Workspace.
3. In the Insert Projects into Workspace dialog box, browse to locate the project you want to add.
To delete a project from the workspace
l From the FileView tab, select the project.
l On the Edit menu, click Cut.
- or -
l From the FileView tab, right click on the project and select Delete command on the shortcut menu.
Adding and Removing Files from Projects
When you add a file to a project, you add the file to all configurations for that project. For instance, if you have a project named MyProject, with Debug and Release configurations, adding a file adds it to both those project configurations.
If you add files from directories on a different drive than the project, AtmanAvr C/C++ uses absolute paths in the filenames for those files in the project's .apj file. Because of the absolute paths, it is difficult to share the project (.apj) file.
Add files to a project
Move or copy files from one project to another
Remove files from a project
To add files to a project
1. Open the project to which you want to add files.
2. On the Project menu, click Add To Project, and then click Files.
3. In the Files of type box, specify the type of files to add.
4. Select one or more files.
5. Click OK.
Note You can also use the shortcut menu from FileView to add files more quickly.
To move or copy files from one workspace to another
1. From the FileView pane, select the files that you want to move or copy.
2. On the Edit menu, click Cut if you want to move the files, or Copy if you want to copy the files.
3. Select the project to receive the files.
4. On the Edit menu, click Paste.
To remove files from a project
l From the FileView pane, select the files that you want to remove.
l On the Edit menu, click Delete.
- or -
l From the FileView tab, right click on the files and select Delete command on the shortcut menu.
See Also Create New Modules
Using Folders in Projects
Project files are organized into folders in the FileView pane of the Project Workspace. AtmanAvr C/C++ creates a folder for source files, and header files, but you can reorganize these folders, or create new ones. You can use folders to organize explicitly logical clusters of files within the hierarchy of a project. For example, you could create folders to contain all your user interface source files, or specifications, documentation, or test suites. All file folder names should be unique.
The File Extensions is used when a new file is added to the project. If the file extension of the added file is listed in the folder's File Extensions field, the file is automatically added to the folder.
To add a folder
1. On the Project menu, click Add To Project.
2. Click New Folder.
3. Enter the Name of the New Folder.
4. Enter the File Extensions for the folder.
To delete a folder
1. Right click on the folder you want to delete.
2. Select Delete command.
Note Delete a folder will delete all its contained files from the project.

Exporting a Makefile
If you want to use command line tools to build a AtmanAvr C/C++ project, instead of building it from within the environment, you can export it as a makefile (ProjectDir\makfile). However, you can use the exported makefile as an external makefile to build your project from within the environment.
To export a makefile
1. From the Project menu, select Export Makefile.
2. In the Export Makefile(s) dialog box, select the project(s) for which you want to create a makefile. A separate makefile is created for each project you select.

Working with Project Configurations
There are several ways to build a project: you can build the active project, the selected project, or a specific project configuration.
Set the active project configuration
Specify project configuration settings
Build the project

Setting the Active Project Configuration
When you set the active project configuration, subsequent build commands act on the active configuration and build its output.
To set the active project configuration
l On the Build menu, select Set Active Configuration and click a project configuration. -or-
l On the Build toolbar, choose a project configuration from the Select Active Configuration drop-down list. (To view the Build toolbar, right-click an empty part of the menu bar and check Build.)

Specifying Project Configuration Settings
The options chosen in the Project Settings dialog box can be applied to multiple projects, but apply only to the selected project configuration. For instance, you can specify settings for the Release configuration that do not apply to the Debug configuration.
To specify project settings
1. On the Project menu, click Settings.
2. On the General tab, select the project.
3. In the Settings For pane, select the configuration.
4. Click OK to save the settings.
Adjust the Build Settings
Adjusting the Build Settings
Projects are controlled by their configuration settings.
Select the CPU type
Specify CPU clock frequency
Specify external RAM size
Select the directories for output files
Set compiler options
Set linker options
Set debugger options

Selecting the CPU Type
You can select the CPU type for your executable projects. This setting will apply to the all project configurations - Debug configuration and Release configuration.
To select CPU type
1. On the Project menu, click Settings, and select the General tab.
2. In the Settings For pane, select the project for which you want to set.
3. In the Device drop-down list, select a CPU type.
Specifying CPU Clock Frequency
You can select the CPU clock frequency for your executable projects. This setting will apply to the all project configurations - Debug configuration and Release configuration.
To select CPU clock frequency
1. On the Project menu, click Settings, and select the General tab.
2. In the Settings For pane, select the project for which you want to set.
3. In the Clock Frequency drop-down list, select a frequency value or directly type the value in it.
For example: You want to set 7.3728 MHz, in the Clock Frequency box you can type "7.3728 MHz" or "7372.8 kHz" or "7372800".

Specifying External RAM Size
You can select the external RAM size for your executable projects if the selected CPU support external RAM. This setting will apply to the all project configurations - Debug configuration and Release configuration.
To select external RAM size
1. On the Project menu, click Settings, and select the General tab.
2. In the Settings For pane, select the project for which you want to set.
3. In the External RAM text box, type the size value.
Selecting the Directories for Output Files
You can select the directories in which to put the intermediate and final output files for each project configuration. By putting these files in different directories, you can maintain copies of the same files built in different ways - for instance, the Debug and the Release versions of your project.
To select output directories
1. On the Project menu, click Settings, and select the General tab.
2. In the Settings For pane, select the project for which you want to set directories.
3. In the Intermediate Files text box, type the directory name for the intermediate files (.o files, for instance).
4. In the Output Files text box, type the directory name for the final output files (.elf, .cof, .hex, or .a files, for instance).

Setting Compiler Options
You can set compiler options in the development environment.
To set compiler options
l Click the Settings command on the Project menu. This opens the Project Settings dialog box, click the C/C++ tab, which shows the available options.
If you want to emit warning messages as error messages, select the Warnings As Errors check box.
Set optimizations
Specify preprocessor definitions
Specify additional include directories
Set Additional Compiler and Linker Options
Setting Optimizations
You can set optimizations to one of follows:
l Default - The compiler tries to reduce code size and execution time. This option is the default for Release configuration.
l Disabled(Debug) - This option turns off all optimizations in the program and speeds compilation. This option is the default for Debug configuration.
l Maximize Speed - Creates the fastest code in the majority of cases.
l Minimize Size - Creates the smallest code in the majority of cases.
To set optimizations
1. On the Project menu, click Settings, and select the C/C++ tab.
2. In the Settings For pane, select the project and configuration for which you want to set.
3. In the Optimizations drop-down list, select an optimization.

Specifying Preprocessor Definitions
You can define symbols or constants for your source file. When you create a new project, the default preprocessor definitions is set to _DEBUG for Debug configuration and NDEBUG for Release configuration.
To specify preprocessor definitions
1. On the Project menu, click Settings, and select the C/C++ tab.
2. In the Settings For pane, select the project and configuration for which you want to set.
3. In the Preprocessor Definitions text box, type the definition; use a comma to separate definitions when entering more than one definition.

Specifying Additional Include Directories
The Additional Include Directories option adds one or more directories to the list of directories searched for include files. Directories are searched only until the specified include file is found.
To specify additional include directories
1. On the Project menu, click Settings, and select the C/C++ tab.
2. In the Settings For pane, select the project and configuration for which you want to set.
3. In the Additional Include Directories text box, type the directory; use a comma to separate directories to be searched when entering more than one directory.
Setting Additional Compiler and Linker Options
You can set the additional compiler and linker options for your project.
To set additional compiler and linker options
1. On the Project menu, click Settings, and select the C/C++ tab.
2. In the Settings For pane, select the project and configuration for which you want to set.
3. In the Additional Options text box, type the additional compiler or linker options.
For example:
To declare a section named ".version" in program space started at address 0x004000, you can type in the Additional Options box:
-Wl,--section-start=.version=0x004000

Setting Linker Options
You can set linker options in the development environment.
To set linker options
l Click the Settings command on the Project menu. This opens the Project Settings dialog box, click the Link tab, which shows the available options.
If you want to generate mapfile, select the Generate Mapfile check box.
If you want to generate a external list file(.lss), select the Disassembly check box.
If you want to view the program space and RAM usage rate after build, select the Report Code Size check box.
Set file output formats
Set printf version
Set additional libraries and directories
Set stack, data and boot sections
Set Additional Compiler and Linker Options
Setting File Output Formats
You can specify the output files:
l Coff, Hex - Create .cof (for AVR Studio 3 debugger), .hex and .eep files.
l Dwarf2, Hex - Create dwarf-2 format .elf file (for AVR Studio 4 debugger), .hex and .eep files.
l extCoff, Hex - Create extended .cof (for AVR Studio 4 debugger), .hex and .eep files.
l intel Hex - Create intel hex format .hex and .eep files. This is default option.
l S-records - Create S-records format .hex and .eep files.
To set file output format
1. On the Project menu, click Settings, and select the Link tab.
2. In the Settings For pane, select the project and configuration for which you want to set.
3. In the File Output Format drop-down list, select a format.

Setting printf Version
You can specify the printf function verson as:
l Default
l Minimalistic
l Floating Point
To set printf function verson
1. On the Project menu, click Settings, and select the Link tab.
2. In the Settings For pane, select the project and configuration for which you want to set.
3. In the printf Version drop-down list, select a format.
Setting Additional Libraries and Directories
You can specify additional libraries and directories for your project.
To set additional libraries
1. On the Project menu, click Settings, and select the Link tab.
2. In the Settings For pane, select the project and configuration for which you want to set.
3. In the Additional Lib text box, type the library; use a white space to separate libraries when entering more than one library.
The additional libraries are user libraries the project depended on, such as library archive(.a) which is built by AtmanAvr C/C++. You can specify as: mylib1.a mylib2.a mylib3.a .
To set additional library directories
1. On the Project menu, click Settings, and select the Link tab.
2. In the Settings For pane, select the project and configuration for which you want to set.
3. In the Additional Library Directories text box, type the directory; use a comma to separate directories to be searched when entering more than one directory.
Note You should also set the additional libraries include directories in C/C++ tab, see Specify additional include directories.
Setting Stack, Data and Boot Sections
If your project use external RAM, you can specify the stack and data sections. About stack and data sections, for details see External RAM Interface.
If you write a bootloader, you can specify the boot section.
Set stack section
Set data section
Set boot section
To set stack section
1. On the Project menu, click Settings, and select the Link tab.
2. In the Settings For pane, select the project and configuration for which you want to set.
3. In the Stack Section drop-down list, select a position.
To set data section
1. On the Project menu, click Settings, and select the Link tab.
2. In the Settings For pane, select the project and configuration for which you want to set.
3. In the Data Section drop-down list, select a position.
To set boot section
1. On the Project menu, click Settings, and select the Link tab.
2. In the Settings For pane, select the project and configuration for which you want to set.
3. In the Boot Section drop-down list, select a position.
Setting Debugger Options
You can set debugger options to tell the integrated debugger in AtmanAvr C/C++ your program system infomation.
The Device and Frequency are same with the settings in General tab, and the Boot Start is also associated with the Boot Section in Link tab.
To set debugger options
1. On the Project menu, click Settings, and select the Debug tab.
2. In the Settings For pane, select the project and configuration for which you want to set.
3. Set the options.
If your program use external memory, check Enable External Memory. If your program reset entry locate at boot load section, check Enable Boot Reset and set the entry address in Boot Start box.

Building a Project
You can build all output files that you specified in the Project Settings dialog box. For more information about each type of wizard available with AtmanAvr C/C++, see Project types.
What do you want to do?
Build the active project configuration
Build multiple project configurations
Build the selected project
Clean the project directories
Build a project from an external makefile
Building the Active Project Configuration
You can choose the project configuration that is built by default. This configuration is called the active project configuration.
Set the active project configuration
Build the active project configuration
Rebuild the active project configuration
Stop a build
To set the active project configuration
l On the Build menu, select Set Active Configuration and click a project configuration.
To build the active project configuration
l On the Build menu, click Build project, where project represents the program or library defined by the project configuration.
To rebuild the active project configuration
l On the Build menu, click Rebuild All.
Note Information about the build is displayed in the Output window. The Output window displays information from the build tools and lists any errors or warnings that occur during the build. If no errors are reported, the build completed successfully. If errors are reported, you need to debug them.
To stop a build
l On the Build menu, click Stop Build.
Notes AtmanAvr C/C++ stops the currently executing rule if possible; otherwise, it stops the build as soon as the currently executing rule finishes.
Since builds occur in the background, you can continue to use AtmanAvr C/C++ during a build. However, some menu commands and toolbar buttons are disabled during a build.

Building Multiple Project Configurations
Any project workspace can have more than one project configuration. Instead of selecting each project configuration in turn and building it as the active configuration using the Build project command on the Build menu, you can select multiple project configurations and build them all.
What do you want to do?
Build multiple project configurations
Stop building multiple projects
To build multiple project configurations
1. On the Build menu, click Batch Build.
2. If you don't want to build certain project configurations, clear the check boxes in the Project Configurations list.
3. Click Build to build only those intermediate files of each project configuration that are out of date, or the Rebuild All button to build all intermediate files for each project configuration.
Note The results for each project configuration are separated in the Output window by a line containing the name of the project configuration being built.
To stop building multiple projects
l On the Build menu, click Stop Build.
AtmanAvr C/C++ stops the currently executing rule if possible; otherwise, it stops the build as soon as the currently executing rule finishes. The build of the project configuration currently in progress ends. A message box appears, asking if you wish to continue building the remaining project configurations. If you click Yes, then the batch build continues from the next configuration in the list. If you click No, then the entire batch build is stopped.

Building the Selected Project
AtmanAvr C/C++ can build the selected project.
To build the selected project
1. From the FileView pane, highlight the project.
2. Click the right mouse button to invoke the shortcut menu, and select Build (selection only).

Cleaning Project Directories
When you run the Clean command, AtmanAvr C/C++ deletes all intermediate files created during the build process, for example .o files, as well as output files such as the .elf, .hex or .a file. The location of these files corresponds to the location specified on the General tab of the Project Settings dialog box, under "Intermediate files" and "Output files".
To clean the active project
l From the Build menu, choose Clean.
To clean a specific project
1. From the FileView tab, select the project and click the right mouse button.
2. From the shortcut menu, choose Clean.
Building a Project from an External Makefile
You can build an AtmanAvr C/C++ project from an external makefile. The makefile must be located under the project directory and named makefile.
To build project from an external makefile
1. From the Project menu, choose Settings.
2. From the Project Settings dialog box, choose C/C++ tab and check Use External Makefile.
3. Click OK.
The commands Build, Rebuild All and Clean will use the external makefile to build the project. If no makefile found under the project directory, AtmanAvr C/C++ will pop up a message box and build the project automatically.
To stop using external makefile, uncheck Use External Makefile.
Compiling Files
You can select and compile files in any project in your project workspace.
To compile current opened file
l Select Compile from the Build menu. - or -
l With the mouse pointer over the Text editor window, Click the right mouse button to invoke the shortcut menu, and select Compile.
To compile selected files
1. Select the files in the FileView pane of the Project Workspace window.
2. With the mouse pointer over the selection, click the right mouse button to display the shortcut menu, and click Compile.

Debugging a Project
AtmanAvr C/C++ IDE now provides an integrated debugger to help locate bugs in an executable program, and also supports Atmel AVR Studio.
To debug a project
1. Open the project workspace.
2. Set the project as active project.
3. Choose the Go, Step Into, or Run To Cursor command from the Start Debug submenu of the Build menu.
See Also Debugger
To debug a project using AVR Studio
1. Open the project workspace.
2. Set the project as active project.
3. Choose the AVR Studio command from the Build menu.
4. From AVR Studio File menu, click Open to open the .elf file or .cof file.
Tip The next time you invoke AVR Studio to debug, AtmanAvr C/C++ will automatically search the AVR Studio project file (.aps), and pick up it to launch AVR Studio if found.
To set AVR Studio path name
1. Select AVR Studio from the Tools menu.
2. Type the AVR Studio path name or click browse(...) button.

Programming a Project
AtmanAvr C/C++ IDE now provides a flexible programming interface, you can use it to download or upload your project to MCUs.
To program a project
1. Open the project workspace.
2. Set the project as active project, and select configuration.
3. Select Program from the Build menu.
See Also Programmer

Working with Classes
AtmanAvr C/C++ provides you with simple and powerful ways to work with your application classes. WizardBar and ClassView are tools that give you visual access to the classes and members in your project.
ClassView and WizardBar complement each other's functionality in many ways. However, one distinction between them is that WizardBar provides immediate access to members of one class at a time, while ClassView displays all classes in all projects on the current workspace. Similarly, WizardBar displays, tracks, and acts on only the active project, while ClassView displays and acts on all projects on the workspace.
Unlike ClassView, WizardBar has the ability to track and display your current location in code. While you can use both ClassView and WizardBar to jump directly to code in the Source editor, once you're there, the WizardBar continues to update its display as you move around within a file, or from file to file. This provides you with immediate information about your location, without having to scroll through the code itself. For more information, see WizardBar Context Tracking.
l ClassView
l WizardBar
ClassView
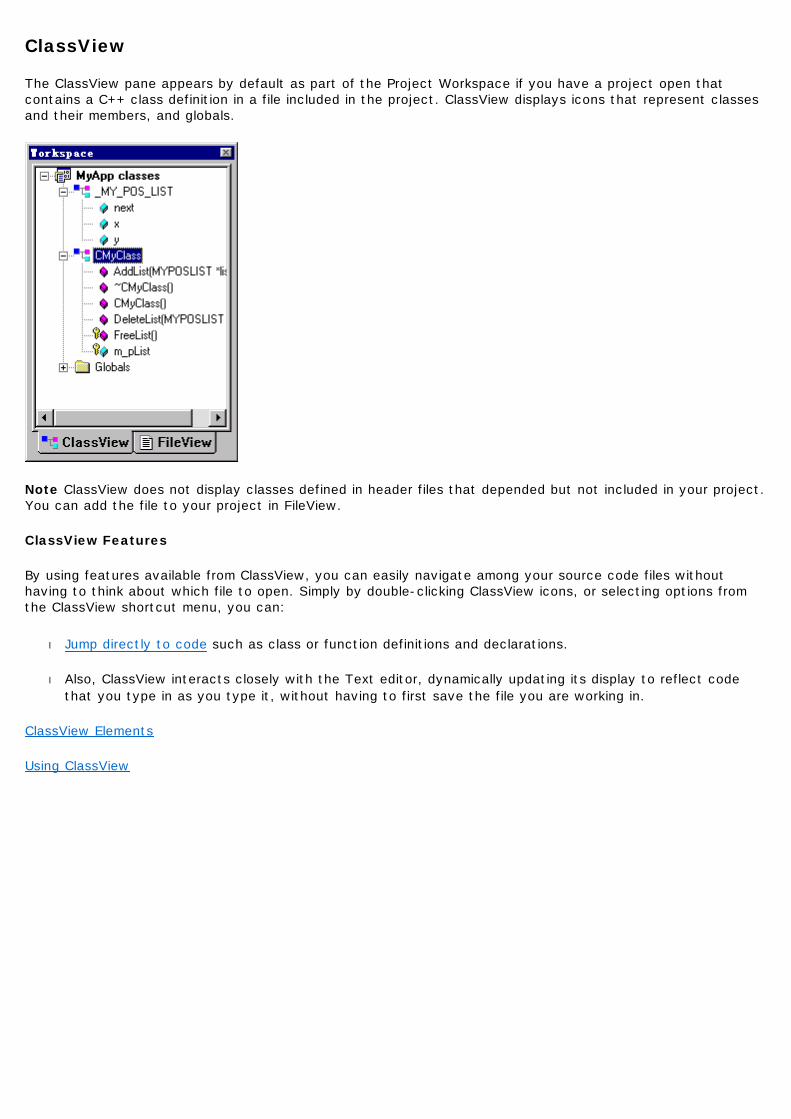
The ClassView pane appears by default as part of the Project Workspace if you have a project open that contains a C++ class definition in a file included in the project. ClassView displays icons that represent classes and their members, and globals.
Note ClassView does not display classes defined in header files that depended but not included in your project. You can add the file to your project in FileView.
ClassView Features
By using features available from ClassView, you can easily navigate among your source code files without having to think about which file to open. Simply by double-clicking ClassView icons, or selecting options from the ClassView shortcut menu, you can:
l Jump directly to code such as class or function definitions and declarations.
l Also, ClassView interacts closely with the Text editor, dynamically updating its display to reflect code that you type in as you type it, without having to first save the file you are working in.
ClassView Elements
Using ClassView
ClassView Elements
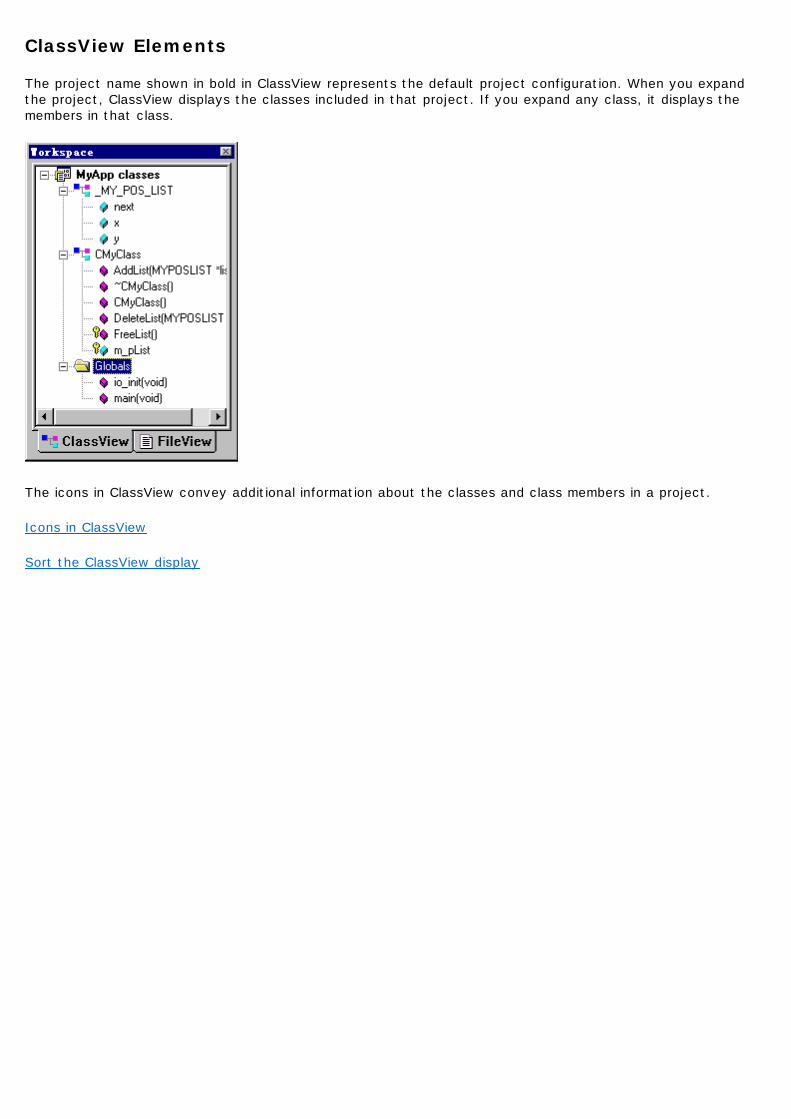
The project name shown in bold in ClassView represents the default project configuration. When you expand the project, ClassView displays the classes included in that project. If you expand any class, it displays the members in that class.
The icons in ClassView convey additional information about the classes and class members in a project.
Icons in ClassView
Sort the ClassView display

Sorting the ClassView Display
ClassView groups the members displayed under a class in alphabetical order by default. You can also group class members by their access specifier - private, protected, or public. The sort order applies to all classes in all projects on the workspace.
To sort members in a class
1. Select a class node in any given project.
2. Click the right mouse button to display the shortcut menu.
3. Choose Group By Access to toggle the grouping. If the command is checked, the members are grouped by access specifier; if not, they are grouped alphabetically.
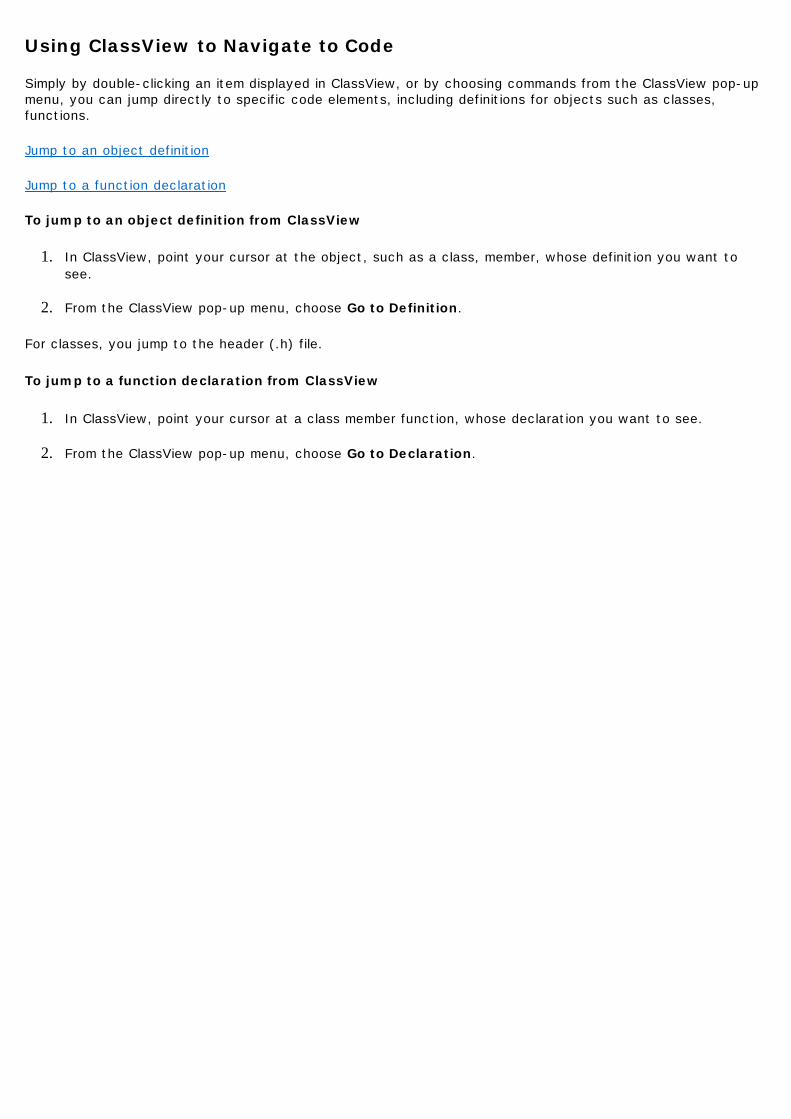
Using ClassView to Navigate to Code
Simply by double-clicking an item displayed in ClassView, or by choosing commands from the ClassView pop-up menu, you can jump directly to specific code elements, including definitions for objects such as classes, functions.
Jump to an object definition
Jump to a function declaration
To jump to an object definition from ClassView
1. In ClassView, point your cursor at the object, such as a class, member, whose definition you want to see.
2. From the ClassView pop-up menu, choose Go to Definition.
For classes, you jump to the header (.h) file.
To jump to a function declaration from ClassView
1. In ClassView, point your cursor at a class member function, whose declaration you want to see.
2. From the ClassView pop-up menu, choose Go to Declaration.
Using ClassView
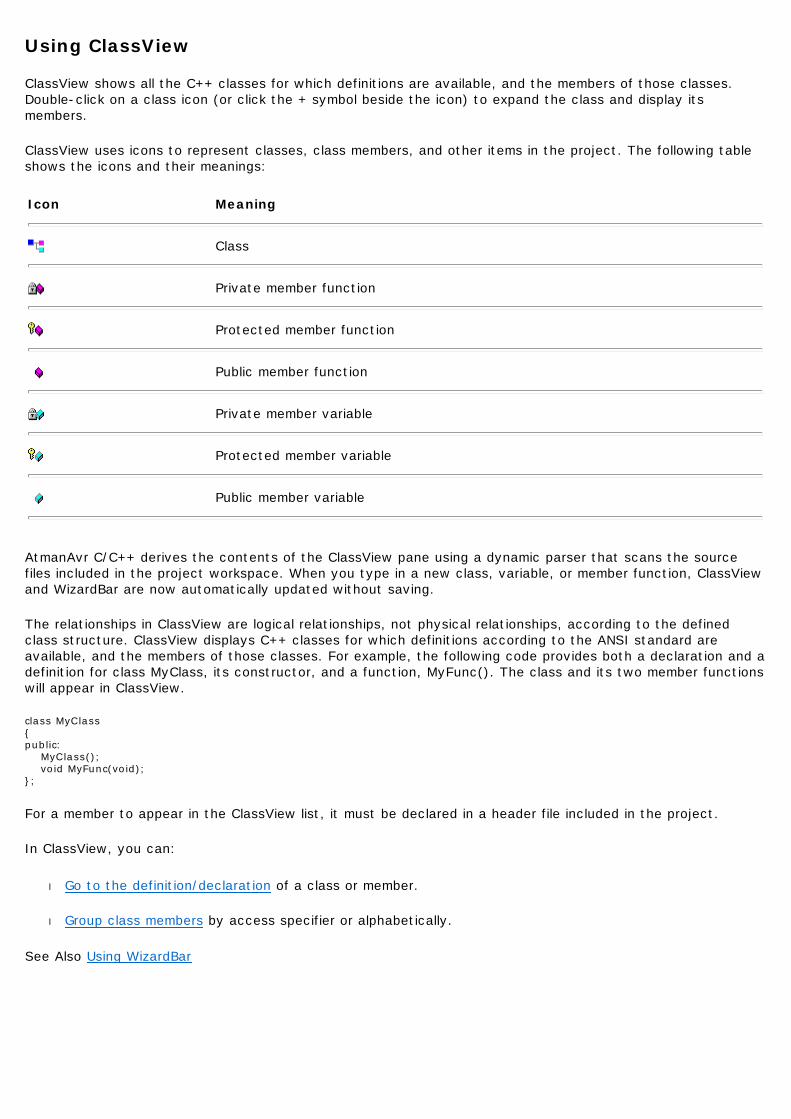
ClassView shows all the C++ classes for which definitions are available, and the members of those classes. Double-click on a class icon (or click the + symbol beside the icon) to expand the class and display its members.
ClassView uses icons to represent classes, class members, and other items in the project. The following table shows the icons and their meanings:
AtmanAvr C/C++ derives the contents of the ClassView pane using a dynamic parser that scans the source files included in the project workspace. When you type in a new class, variable, or member function, ClassView and WizardBar are now automatically updated without saving.
The relationships in ClassView are logical relationships, not physical relationships, according to the defined class structure. ClassView displays C++ classes for which definitions according to the ANSI standard are available, and the members of those classes. For example, the following code provides both a declaration and a definition for class MyClass, its constructor, and a function, MyFunc(). The class and its two member functions will appear in ClassView.
class MyClass { public: MyClass(); void MyFunc(void); };
For a member to appear in the ClassView list, it must be declared in a header file included in the project.
In ClassView, you can:
l Go to the definition/declaration of a class or member.
l Group class members by access specifier or alphabetically.
See Also Using WizardBar
Icon Meaning
Class
Private member function
Protected member function
Public member function
Private member variable
Protected member variable
Public member variable
Browsing Symbols from ClassView
From ClassView, you can get information about the use of the classes, functions, and variable symbols in your application. You can select a symbol, then automatically open that source file to the definition or declaration of the symbol.
To find a definition or declaration
1. Select the symbol (class, function, or variable) for which you want to find the definition or declaration.
2. With the mouse pointer over the selected symbol, click the right mouse button to display the shortcut menu, and click Go To Definition or Go To Declaration, as applicable.
-or-
Double-click the name of the symbol.
AtmanAvr C/C++ opens a text editor window and displays the source file containing the definition or declaration, with the insertion point positioned there.
To group members in a class
You can group the members in a class either alphabetically by name or alphabetically in access specifier groups — that is, private, protected, or public.
1. Select a class node.
2. Click the right mouse button to display the shortcut menu.
3. Click Group By Access to toggle the grouping. If the command has a check, the members are already grouped by access specifier; if not, they are grouped alphabetically.

WizardBar
WizardBar is a dockable toolbar that provides instant access to some of the most powerful features in AtmanAvr C/C++, such as those traditionally available from ClassWizard, as well as many of the new ClassView functions. WizardBar extends ClassView functionality by "tracking" your context - updating what's displayed in the WizardBar toolbar when your focus shifts. For example, WizardBar changes its display to reflect when your cursor moves from one function to another in the Text editor.
WizardBar makes working with classes, and members easier than ever - with the click of a button you can perform tasks such as:
l Jumping to an existing function
l Jumping to an existing class
l Opening an include file
To view WizardBar
l Click the right mouse button in an unused portion of the toolbar area, and select WizardBar in the shortcut menu that appears.
Note WizardBar remains inactive unless you have a project open.
WizardBar elements
WizardBar context tracking
Navigate to code
WizardBar Elements
The WizardBar interface consists of two combo boxes and the Action control. The Action control contains a button and a drop-down menu. The topics listed here describe the function of these user interface (UI) elements.
WizardBar combo controls
WizardBar Action control
WizardBar Action menu
WizardBar default action
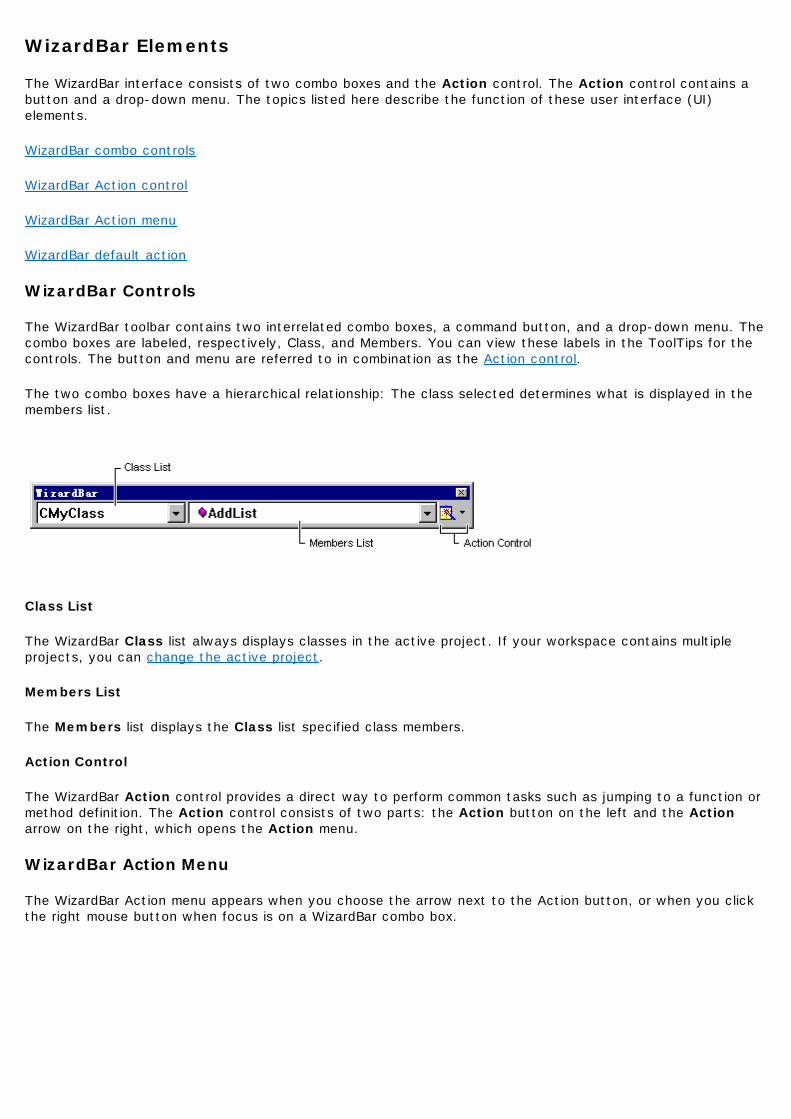
WizardBar Controls
The WizardBar toolbar contains two interrelated combo boxes, a command button, and a drop-down menu. The combo boxes are labeled, respectively, Class, and Members. You can view these labels in the ToolTips for the controls. The button and menu are referred to in combination as the Action control.
The two combo boxes have a hierarchical relationship: The class selected determines what is displayed in the members list.
Class List
The WizardBar Class list always displays classes in the active project. If your workspace contains multiple projects, you can change the active project.
Members List
The Members list displays the Class list specified class members.
Action Control
The WizardBar Action control provides a direct way to perform common tasks such as jumping to a function or method definition. The Action control consists of two parts: the Action button on the left and the Action arrow on the right, which opens the Action menu.
WizardBar Action Menu
The WizardBar Action menu appears when you choose the arrow next to the Action button, or when you click the right mouse button when focus is on a WizardBar combo box.
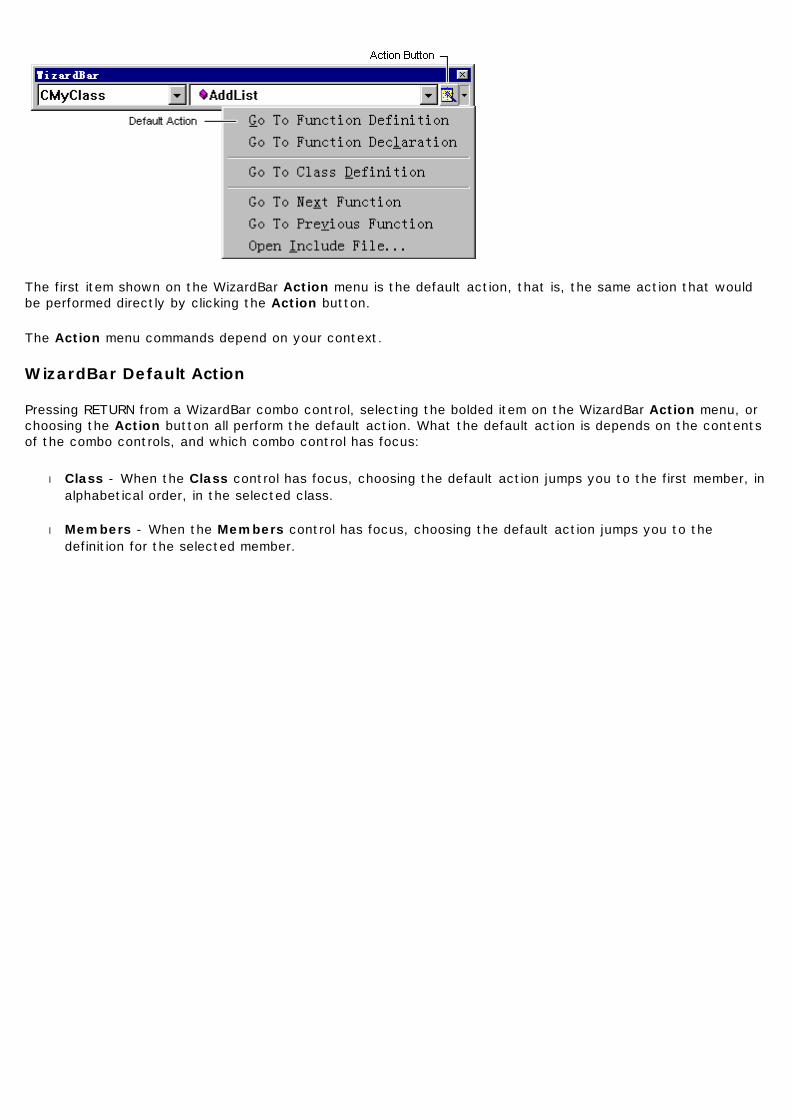
The first item shown on the WizardBar Action menu is the default action, that is, the same action that would be performed directly by clicking the Action button.
The Action menu commands depend on your context.
WizardBar Default Action
Pressing RETURN from a WizardBar combo control, selecting the bolded item on the WizardBar Action menu, or choosing the Action button all perform the default action. What the default action is depends on the contents of the combo controls, and which combo control has focus:
l Class - When the Class control has focus, choosing the default action jumps you to the first member, in alphabetical order, in the selected class.
l Members - When the Members control has focus, choosing the default action jumps you to the definition for the selected member.

Using WizardBar to Navigate to Code
Similar to ClassView, you can use WizardBar to quickly navigate through your class code. Many navigational commands are available from the WizardBar Action menu. By choosing commands from this menu, you can:
l Jump to C++ class or function definitions or declarations.
l Go to the next or previous function or method.
l Open a C++ include file from the current project.
You can also jump directly to the definition for a class member simply by selecting it from the Members combo list and pressing RETURN.
Using WizardBar

WizardBar Context Tracking
WizardBar passively tracks the current context of the focus in a project. It displays or attempts to display relevant information about the location in which you are currently working in a project.
When you work in a source editor window, WizardBar displays the class or member function in which the cursor is placed. In the source editor, a function effectively begins at the home location (left hand side) of the line on which its definition or declaration begins, and ends with the } end bracket. When the cursor is "between" functions, that is, after an end bracket but before the next function is defined, WizardBar displays the previous function name in a shaded font.
In other editors, WizardBar does not track, but retains its most recent context displayed in a shaded font.
Via Action menu, the WizardBar can perform some meaningful action.
The default action, invoked by clicking the Action button, is "go to function definition". You execute the default action by:
l clicking the Action button
l selecting an item in Members drop-down list and pressing ENTER
l selecting an element from the Members drop-down list
When WizardBar does not track context

When WizardBar Does not Track ContextWhen WizardBar Does Not Track Context
Even when WizardBar is not tracking context, you can use all the navigational functionality available from WizardBar. The combo lists remain accessible, as do the Action control and the Action menu.
There are several valid scenarios when WizardBar does not track your location in code.
l The current file may not belong to the active project.
If you have multiple projects open in the workspace, the file that has focus may not belong to the active project. In this case, you can change the active project.
l The current file may not be part of the project.
The file you are viewing may belong to a separate project in the workspace, to another workspace entirely, or be included in the project for building purposes, but not actually belong to the project. For example, selecting Open Include from the WizardBar Action menu provides a list of all header files included in the current file. These header files may or may not belong to the project. Merely opening a file does not add the file to the project.
If you decide to add the file to your project, WizardBar then tracks the members in the file.
l The current file may be included in the project, but not written in a programming language.
Non-buildable files such as plain text files, document server objects such as Excel spreadsheets, and so forth fall into this category.
l The window you are in might not support tracking.
WizardBar tracking is not supported in product windows other than the Text editor. If focus is in a window such as the Output window or ClassView, WizardBar tracking is disabled.
When WizardBar Does not Track Contex

Using WizardBar
The Universal WizardBar is a dockable toolbar that provides convenient access to ClassWizard and ClassView functionality. You use WizardBar to navigate through and perform actions on classes.
WizardBar tracks the current context. At any given time, it displays the most relevant information about the location of the focus in a project. For example, when you are working in the source editor window, WizardBar displays the class or member function in which the cursor is placed. However, by selecting a class or member function from the WizardBar menus, you can navigate through the class structure as you do with ClassView.
WizardBar tracks all class declarations, including those for empty classes that do not yet contain any members. If your cursor is in such a class declaration, the Classes drop-down list displays the class name, and the Members drop-down list displays the message "No members".
WizardBar also provides a menu of actions that comprise the most common navigation tasks you would perform on classes.
With WizardBar's Action menu, you can:
l Go to a function definition (implementation)
l Go to a function declaration
l Go to a class definition
l Go to the next function in a file
l Go to the previous function in a file
l Open an include file
WizardBar Navigation
WizardBar performs the same kind of navigation tasks as ClassView. You can open application files in the text editor by selecting classes and member functions.
Go To Function Definition
Selecting this action navigates to the location in the implementation file in which the selected member function is defined. (This is the same as double-clicking a member function in ClassView.)
This is the default action, that is, what happens when you click the Action button without selecting any menu items.
See WizardBar Context Tracking for more information.
Go To Function Declaration
Selecting this action navigates to the location in the header or implementation file in which the selected member function is declared.
Go To Class Definition
Selecting this action navigates to the location in which the selected class is declared in a header or implementation file. (To go to a different class declaration, select another class from the Class drop-down list and click the Action button.)
Go To Next Function
Selecting this action navigates to the next function in the file. If you have reached the last function in the file, the search starts again at the beginning of the file.
Go To Previous Function
Selecting this action navigates to the previous function in the file. If you have reached the first function in the file, the search starts again at the end of the file.
Open Include File
Selecting this action allows you to open header files associated with the current file. When you select this action, a dialog box prompts you to select a header file to open.
Output
The Output window is a virtual window that is maintained even when it is not displayed. You can display the Output window by choosing the Output command from the View menu.
When the Output window connects you to an error or tag line, AtmanAvr C/C++ always uses Intelli-Sense to go to the correct line even if you have edited the text and the line number changed.
Fix Build Errors
When you compile and link your program in the development environment, the Output window is automatically opened, and information about the build is displayed there, including error and warning messages. The Output window connects you to the line of code where the message is generated.
To see the code that generates a diagnostic message
l Double-click a diagnostic message in the Output window.
- or -
l Press F4 (GoToNextErrorTag ) to go to the line containing the next error. Press Shift+F4 (GoToPrevErrorTag ) to go to the line containing the previous error.
The appropriate source file opens, and a pointer shows the line which generates the diagnostic message.
Fix Find in Files Match
The Find in Files command supports two output panes. This allows you to conduct a second search through multiple files without losing the results from your first search.
To open a file containing a match
l double-click the entry in the Output window.
- or -
l Press F4 (GoToNextErrorTag ) to go to the line containing the next tag. Press Shift+F4 (GoToPrevErrorTag ) to go to the line containing the previous tag.
See Also Finding Text in Multiple Files
Text Editor
The AtmanAvr C/C++ environment includes an integrated text editor to manage, edit, and print source files. Most of the procedures for using the editor should seem familiar if you have used other Windows-based text editors. With the Text editor, you can:
l Automatically fill in code syntax by choosing from a generated list of class members, parameters or values.
l Automatic parameter information of functions. l Automatic smart indent. l Format the selection using the smart indent settings. l Replace spaces/tabs with tabs/spaces in the selection. l Comment out or uncomment the selected text. l Indent the selected text right or left one tab stop. l Open a file based on the string between delimiters '<' and '>' or '"' and '"', or the slected text. l Go to a symbol definition based on the word which the caret placed on, or the slected text. l Set and customize syntax coloring for source files. l Perform advanced find and replace operations in a single file or multiple files. l Navigate through sections of code by matching group delimiters. l Use Bookmarks to mark frequently accessed lines in your source file. l Customize the Text editor with save preferences, the selection margin, tabs, and indents. l Modify the font style, size, and color. l Select lines, or multiple lines. l Use drag-and-drop editing within one editor window, and between editor windows. l Manage the source window.
Automatic statement completion
Find and replace text
Navigate in files
Customize the Text Editor
Edit text
Select text
Manage files
Tip While using the Text editor, in many instances you can click the right mouse button to display a shortcut menu of frequently used commands. The commands available depend on what the mouse pointer is pointing to.

Automatically Completing Statements
The AtmanAvr C/C++ Text editor uses Intelli-Sense to make writing your code easier and more error-free. Intelli-Sense options include Statement Completion, which provides quick access to valid member functions or variables, including globals, via the Members list (as shown below). Selecting from the list inserts the member into your code.
You can also use Intelli-Sense to view function declarations and variable type information. The Complete Word option (available from the Edit menu) finishes typing your functions and variables for you, or displays a list of candidates if what you've typed has more than one possible match.
AtmanAvr C/C++ Intelli-Sense options appear by default. but you can control this behavior from the Editor tab of the Options dialog box (Tools menu), in the Statement completion options area. If you choose to disable the automatic behavior, you can still invoke Intelli-Sense options from the Edit menu, or with a keystroke combination.
With Intelli-Sense, the Text editor makes coding easier than ever. Intelli-Sense options include:
l List Members, a pop-up list of valid member functions and variables.
l Type Info, a ToolTip that displays the complete identifier declaration.
l Parameter Info, a ToolTip that displays the complete function declaration.
l Complete Word, a feature that fills in the rest of the variable or function name for you.
Note If there is an incomplete function or other coding error above the location of the insertion point, Intelli-Sense will be unable to parse the code elements and therefore will not work. You can comment out the applicable code to enable Intelli-Sense again.
Use the Members list
View the parameter list for a function
View the variable type
View globals
Automatically complete a variable or function name
Modify IntelliSense Options options
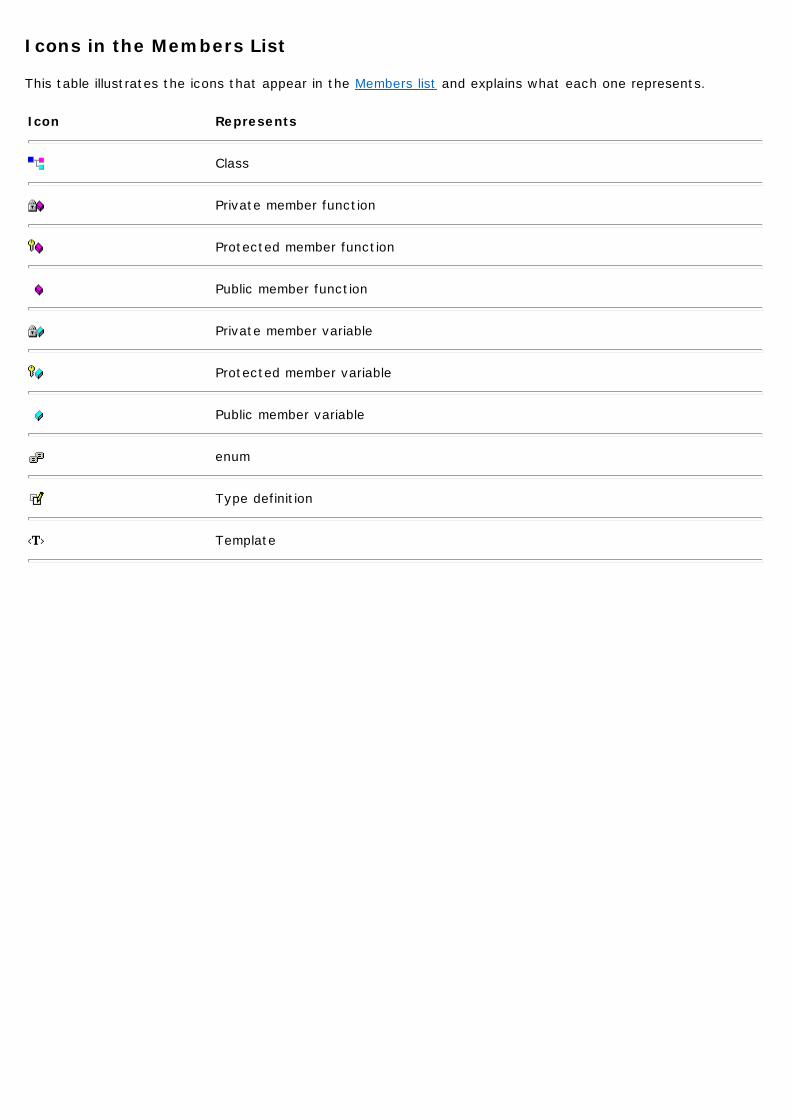
Icons in the Members List
This table illustrates the icons that appear in the Members list and explains what each one represents.
Icon Represents
Class
Private member function
Protected member function
Public member function
Private member variable
Protected member variable
Public member variable
enum
Type definition
Template
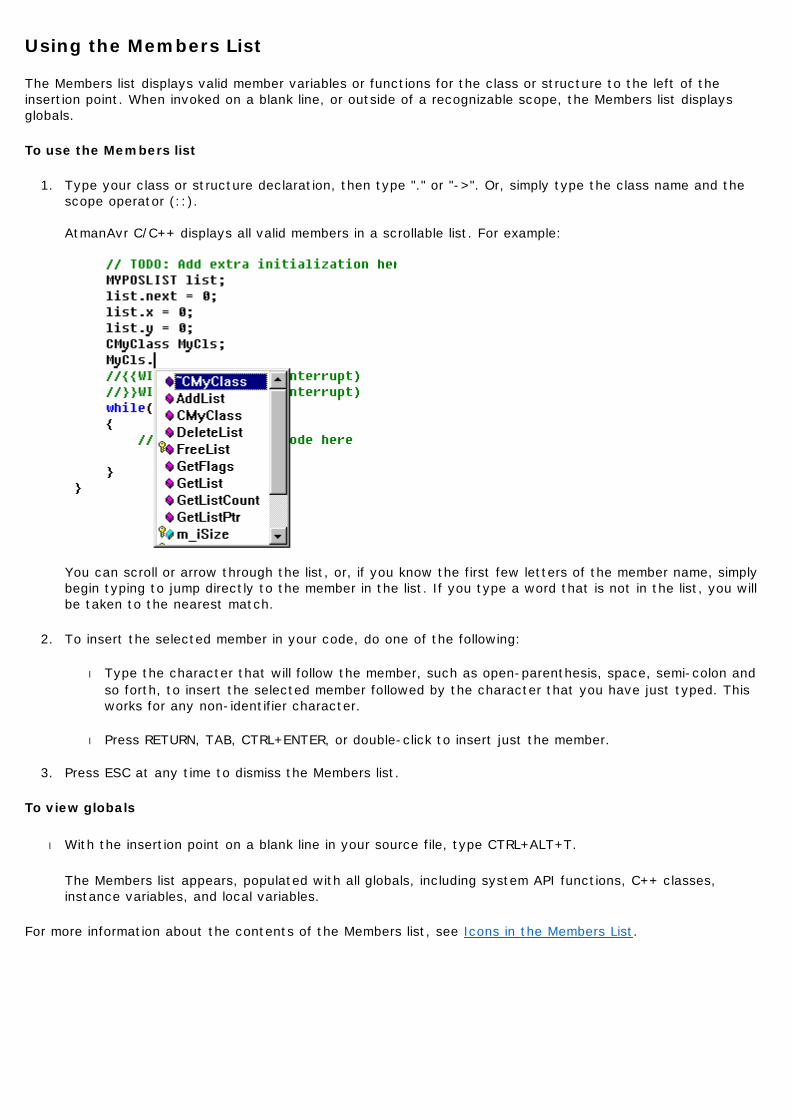
Using the Members List
The Members list displays valid member variables or functions for the class or structure to the left of the insertion point. When invoked on a blank line, or outside of a recognizable scope, the Members list displays globals.
To use the Members list
1. Type your class or structure declaration, then type "." or "->". Or, simply type the class name and the scope operator (::). AtmanAvr C/C++ displays all valid members in a scrollable list. For example:
You can scroll or arrow through the list, or, if you know the first few letters of the member name, simply begin typing to jump directly to the member in the list. If you type a word that is not in the list, you will be taken to the nearest match.
2. To insert the selected member in your code, do one of the following:
l Type the character that will follow the member, such as open-parenthesis, space, semi-colon and so forth, to insert the selected member followed by the character that you have just typed. This works for any non-identifier character.
l Press RETURN, TAB, CTRL+ENTER, or double-click to insert just the member.
3. Press ESC at any time to dismiss the Members list.
To view globals
l With the insertion point on a blank line in your source file, type CTRL+ALT+T.
The Members list appears, populated with all globals, including system API functions, C++ classes, instance variables, and local variables.
For more information about the contents of the Members list, see Icons in the Members List.
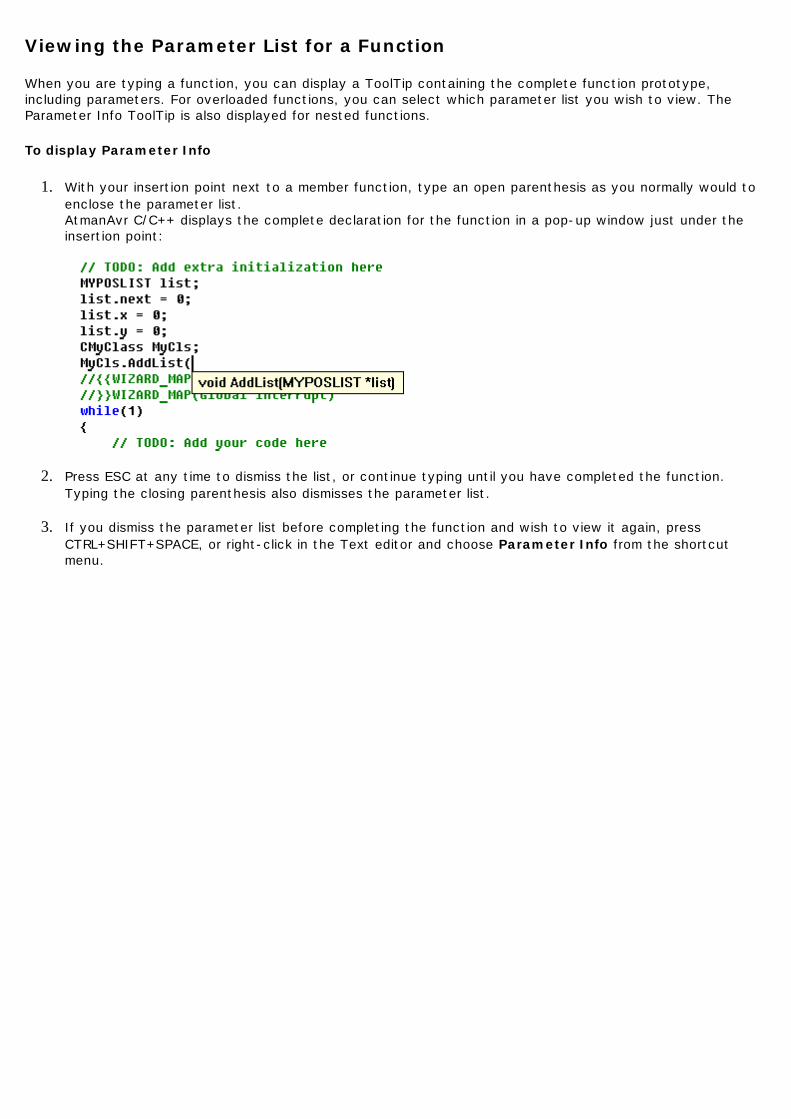
Viewing the Parameter List for a Function
When you are typing a function, you can display a ToolTip containing the complete function prototype, including parameters. For overloaded functions, you can select which parameter list you wish to view. The Parameter Info ToolTip is also displayed for nested functions.
To display Parameter Info
1. With your insertion point next to a member function, type an open parenthesis as you normally would to enclose the parameter list. AtmanAvr C/C++ displays the complete declaration for the function in a pop-up window just under the insertion point:
2. Press ESC at any time to dismiss the list, or continue typing until you have completed the function.
Typing the closing parenthesis also dismisses the parameter list.
3. If you dismiss the parameter list before completing the function and wish to view it again, press CTRL+SHIFT+SPACE, or right-click in the Text editor and choose Parameter Info from the shortcut menu.
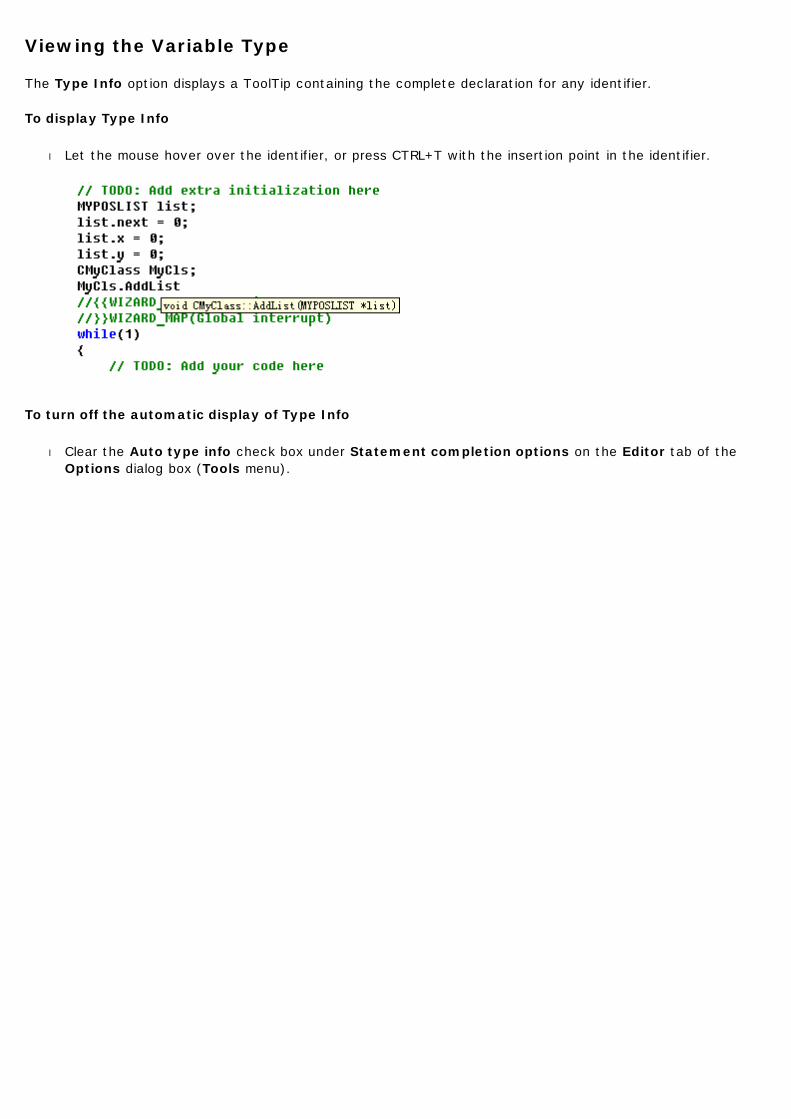
Viewing the Variable Type
The Type Info option displays a ToolTip containing the complete declaration for any identifier.
To display Type Info
l Let the mouse hover over the identifier, or press CTRL+T with the insertion point in the identifier.
To turn off the automatic display of Type Info
l Clear the Auto type info check box under Statement completion options on the Editor tab of the Options dialog box (Tools menu).

Automatically Completing a Variable or Function Name
The Complete Word option fills in the rest of your function or variable name for you. This can save you from having to repeatedly type long names.
To complete the current word
1. Type in the first few letters of the name, then press CTRL+ALT+SPACE. Intelli-Sense completes the name for you. If what you've typed cannot be disambiguated, the Members list appears, with the nearest matching word highlighted.
2. Continue typing to narrow the matches.
3. Press ENTER to select a term from the list.
Note Pressing CTRL+ALT+SPACE on an empty line, or outside of recognizable scope (for instance, just before a function name) opens the Members list populated with globals.

Viewing the List of Globals
You can use Intelli-Sense to view and select from a list of all globals, including system API functions, C++ classes, instance variables, and local variables.
To view globals
l With the insertion point on an empty line in your source file, or outside of a recognizable scope, press CTRL+ALT+T.
The Members list appears, populated with the globals. For more information about the items that populate this list, see Icons in the Members List.
Modifying Intelli-Sense Options
By default, most Intelli-Sense options appear automatically. You can turn off any of the automatic options so that they occur "on demand," so to speak. In this case, you invoke them only when you want, via a menu command or keystroke combination.
Even when the Intelli-Sense options are on by default, you can always explicitly invoke them. You can also change the default key mappings for each option.
Turn off automatic Intelli-Sense options
Invoke Intelli-Sense with a menu command
Invoke Intelli-Sense options from the keyboard
Change default Intelli-Sense key mappings
To turn off automatic Intelli-Sense options
1. From the Tools menu, choose Options.
2. On the Editors tab, in the Statement completion options area, clear the options you do not want.
To invoke Intelli-Sense with a menu command
1. While in a source file, right-click in the file to view the shortcut menu.
2. From this menu, or the main Edit menu, choose from the following commands:
l List Members
l Type Info
l Parameter Info
l Complete Word
To invoke Intelli-Sense options from the keyboard
The following are default key mappings for the Intelli-Sense options:
l To view the Members list, press CTRL+ALT+T.
l To view type information, press CTRL+T.
l To view parameter information, press CTRL+SHIFT+SPACE.
l To complete the current word, press CTRL+ALT+SPACE. (CTRL+ALT+SPACE on an empty line opens the Members list populated with globals.)
To change default key mappings for Intelli-Sense options
1. From the Tools menu, choose Customize, and select the Keyboard tab.
2. Under Category, choose Edit.
3. Under Commands, select from the following:
l Complete Word

l List Members
l Parameter Info
l Type Info
Use the Press new shortcut key box to specify your new key mapping, then click Assign.

Finding and Replacing Text
You can search for text in a single source file or in multiple files.
With the Find command, you can search the active window for the following types of text strings:
l Whole Word Match Matches all occurrences of a text string not preceded or followed by an alphanumeric character or the underscore (_).
l Case Match Searches for text that matches the capitalization of the text string.
With the Find and Replace commands, you can:
l Find text in a single file
l Find text in multiple files
l Replace text
Finding Text in a Single File
Find a text string
Start a find without using the Find dialog box
To find a text string
1. Move the insertion point to where you want to begin your search. The editor uses the location of the insertion point to select a default search string.
2. From the Edit menu, choose Find.
3. In the Find what box, type the search text. Tip You can also use the drop-down list to select from a list of up to 16 previous search strings.
4. Select any of the Find options.
5. Start the search by clicking the Find Next. The Find dialog box disappears when the search begins.
6. To continue your search, use the Find Next or Find Previous shortcut keys, or the equivalent toolbar buttons on the Edit toolbar. The default shortcut key for Find Next is F3; the default key combination for Find Previous is SHIFT+F3. Tip You can use buttons on the Edit toolbar to change whether searches are case-sensitive, match whole words. To view the Edit toolbar, right-click in an empty part of the menu bar and check Edit.
To start a find without using the Find dialog box
l Type or select a search string in the Find box on the Standard toolbar, and press ENTER.

Finding Text in Multiple Files
The Find in Files command supports two output panes. This allows you to conduct a second search through multiple files without losing the results from your first search.
To find a text string in multiple source files
1. From the File menu, choose Find In Files. 2. In the Find what box, type the search text.
Tip You can also use the drop-down list to select from a list of up to 16 previous search strings.
3. In the In files/file types box, select the file types you want to search. You can use the drop-down list to select from common file types or to type text specifying other file types.
4. In the In folder box, select the primary folder that you want to search. Click the Browse button to display the Choose Directory dialog box if you want to change drives and directories.
5. If necessary, select one or more of the Find options.
6. If you want to direct the search output to a second Find in Files pane, select the Output to pane 2 check box.
7. To select additional folders to search, click the Advanced button. The Look in additional folders portion of the dialog box appears.
8. If necessary, select the Look in folders for compiler include files check box. Note The compiler include files folder is directory \AtmanAvr\avrgcc\avr\include.
9. To add a folder to the Look in additional folders list, double-click the empty selection. Then type the path and filename, or click the Browse button to display the Choose Directory dialog box to change drives and directories. To remove a folder from the Look in additional folders list, select the folder and press DEL.
The AtmanAvr C/C++ environment retains the contents of the Find In Files list between uses of the Find In Files command in any single session.
10. Click the Find button to begin the search. The Output window displays the list of file locations where the text string appears. Each occurrence lists the fully qualified filename, followed by the line number of the occurrence and the line containing the match.
11. To open a file containing a match, double-click the entry in the Output window. An editor window containing the file opens, with the line containing the match selected. You can jump to other occurrences of the text string by double-clicking the specific entries in the Output window. or you can use the GoToNextErrorTag (F4) and GoToPrevErrorTag (Shift+F4) command.
When you jump to a found string location specified in the Output window, the corresponding source file is loaded if it is not already open in the editor.
Note The Output window is a virtual window that is maintained even when it is not displayed. You can display the output from your last multiple-file search done during your current session by choosing the Output command from the View menu and by choosing the Find In Files tab in the Output window.
Replacing Text
To replace text
1. Move the insertion point to where you want to begin your search. The editor uses the location of the insertion point to select a default search string.
2. From the Edit menu, choose Replace.
3. In the Find what text box, type the search text. Tip You can also use the drop-down list to select from up to 16 previous search strings.
4. In the Replace with text box, type the replacement text.
5. Select any of the remaining Find options.
6. Start the search by clicking the Find Next, Replace, or Replace All buttons.

Navigating in Files The Text editor provides a variety of methods with which to move around in a source file. In addition to the regular mouse movement and page controls, the Text editor includes an assortment of commands that enable you to move to almost any location in a file. Furthermore, the editor includes several advanced navigation features, such as matching group delimiters, and go to destinations.
What do you want to do?
Match delimiters
Use Go To
Matching Delimiters
Source code is often grouped using delimiters such as (), {}, and []. These groupings are called levels. You can navigate these levels using the Level Up and Level Down commands. The editor understands nested levels, and matches the correct delimiter even if the level spans several pages and itself contains many levels.
The editor also provides the command Go To Match Brace, which allows you to jump quickly between the start and end of a level. The Go To Match Brace Extend command extends the selection to the start or end of a level, instead of moving the cursor.
Search forward for a matching level
Move to a matching brace
Select code between the start and end of a level
To search forward for a matching level
l Press the Level Down key combination (Alt+Down).
The command begins searching for one of the left-side delimiters, which are (, {, and [. When the left-side delimiter is found, the cursor is positioned at the matching right-side delimiter. If a matching delimiter cannot be found, the editor beeps.
To move to a matching brace
1. Place the insertion point immediately in front of a brace.
2. Press the Go To Match Brace key combination (Ctrl+E or ctrl+]).
The insertion point moves forward or backward to the matching brace. Choosing the command again returns the insertion point to its starting place. If a matching brace cannot be found, the editor beeps. This method also works for parentheses, angle brackets, and square brackets.
To select code between the start and end of a level
1. Place the insertion point immediately in front of a brace.
2. Press the Go To Match Brace Extend key combination (Ctrl+Shift+E or ctrl+Shift+]).
The insertion point moves forward or backward to the matching brace, and all the code between the braces is selected.

Using Go To
The Go To dialog box allows you to jump quickly to several different items in a file, including definitions, errors or tags, or specific lines.
To use the Go To dialog box
1. From the Edit menu, choose Go To.
2. In the Go To what box, select the type of item you want.
3. Enter any additional information required.
4. Click one of the navigation buttons: Go To, Previous, or Next.
Note If the Go To what item is undefined, the additional selection criteria box is unavailable.

Customizing the Text Editor
You can set the Text editor's behavior to suit your preferences and work habits in several areas, including how you like to save your files; tabs and indents; and font style, size, and color.
You can customize the Edit toolbar, or place Text editor commands on any menu or toolbar. For more information, see Customizing AtmanAvr C/C++.
l Set save preferences
l Set tab size
l Set font style, size, and color
Save Preferences
You can set save preferences — such as whether to be prompted before saving a file — in the Options dialog box. By default, the Text editor saves all changed files before building an application. The following table lists the save preferences.
To change the save options
1. From the Tools menu, choose Options. 2. Select the Editor tab. 3. Select any of the Save options. 4. Click OK.
Save Option Description
Save before running tools Saves files before you build a project or run a tool
Prompt before saving files Confirms (with a dialog box prompt) that you want to save files.
Automatic reload of externally modified files
Automatically reloads externally modified files that have been loaded (but not yet changed) by the editor.
Setting Tabs and Indents
Set Smart Indent
To change tab settings
To set Smart Indent
l From the Tools menu, choose Options.
l Select the Editor tab.
l Under Auto Indent, select Smart.
l Click OK.
To change tab settings
1. From the Tools menu, choose Options.
2. Select the Editor tab.
3. In the Tab size box, type the number of spaces to use as a tab stop. The default is four spaces.
4. Click OK.
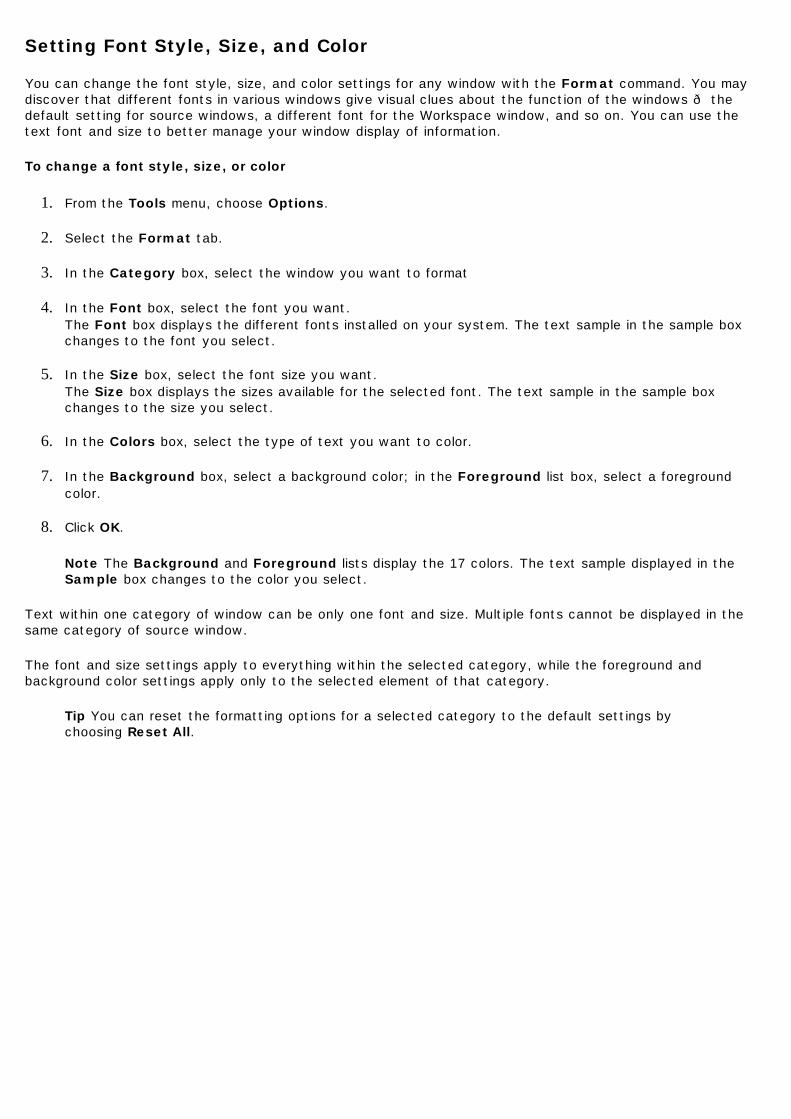
Setting Font Style, Size, and Color
You can change the font style, size, and color settings for any window with the Format command. You may discover that different fonts in various windows give visual clues about the function of the windows — the default setting for source windows, a different font for the Workspace window, and so on. You can use the text font and size to better manage your window display of information.
To change a font style, size, or color
1. From the Tools menu, choose Options.
2. Select the Format tab.
3. In the Category box, select the window you want to format
4. In the Font box, select the font you want. The Font box displays the different fonts installed on your system. The text sample in the sample box changes to the font you select.
5. In the Size box, select the font size you want. The Size box displays the sizes available for the selected font. The text sample in the sample box changes to the size you select.
6. In the Colors box, select the type of text you want to color.
7. In the Background box, select a background color; in the Foreground list box, select a foreground color.
8. Click OK.
Note The Background and Foreground lists display the 17 colors. The text sample displayed in the Sample box changes to the color you select.
Text within one category of window can be only one font and size. Multiple fonts cannot be displayed in the same category of source window.
The font and size settings apply to everything within the selected category, while the foreground and background color settings apply only to the selected element of that category.
Tip You can reset the formatting options for a selected category to the default settings by choosing Reset All.
Editing Text
With the Text editor, you can cut, copy, and paste selected text using menu commands or drag-and-drop operations. You can also undo and redo selected editing actions.
The Text editor provides the following editing commands:
l Cutting, copying, pasting, and deleting text
l Undoing and redoing editing actions
l Using the drag-and-drop feature
All editing commands require a selection in order to work. Some of the commands can make a selection based on the current cursor location.
Tip The Copy command can work on the current line even if there is no selection.
When you cut text from the file, the text is removed from your file and placed on the Clipboard. When you delete text from the file, the text is removed from your file, and the Clipboard is not used. All Windows applications share the same Clipboard. Commands that use the Clipboard overwrite whatever was previously placed onto the Clipboard by other commands or other Windows applications.
Cut, copy, paste, or delete text
Undo or redo an edit action
Use the drag-and-drop feature
Select text
Set tabs and indents
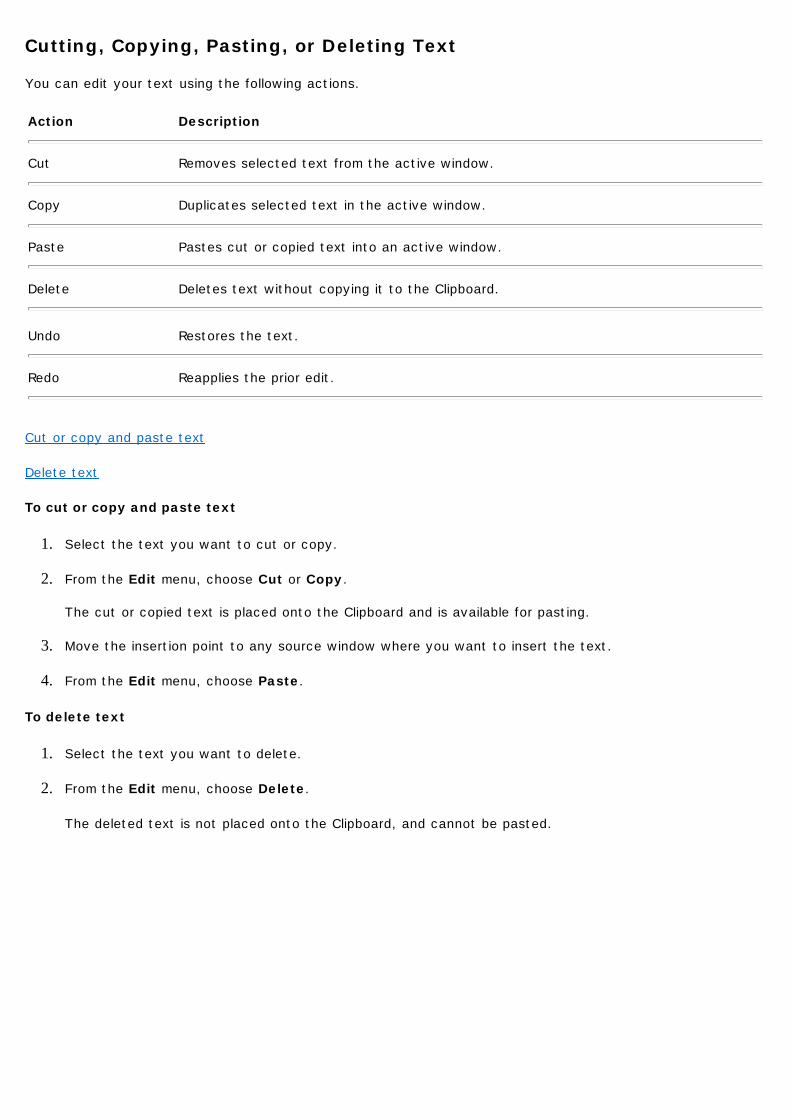
Cutting, Copying, Pasting, or Deleting Text
You can edit your text using the following actions.
Cut or copy and paste text
Delete text
To cut or copy and paste text
1. Select the text you want to cut or copy.
2. From the Edit menu, choose Cut or Copy. The cut or copied text is placed onto the Clipboard and is available for pasting.
3. Move the insertion point to any source window where you want to insert the text.
4. From the Edit menu, choose Paste.
To delete text
1. Select the text you want to delete.
2. From the Edit menu, choose Delete. The deleted text is not placed onto the Clipboard, and cannot be pasted.
Action Description
Cut Removes selected text from the active window.
Copy Duplicates selected text in the active window.
Paste Pastes cut or copied text into an active window.
Delete Deletes text without copying it to the Clipboard.
Undo Restores the text.
Redo Reapplies the prior edit.

Undoing or Redoing an Edit Action
Use the Undo command to undo previous editing actions. Use the Redo command to reapply editing actions that have been undone. Redo is unavailable unless you have used the Undo command.
To undo an edit action
l From the Edit menu, choose Undo.
To redo an edit action
l From the Edit menu, choose Redo.
Tip You can also undo or redo multi editing actions using Undo or Redo drop-down list on Standard toolbar.

Using Drag-and-Drop Editing
Drag-and-drop editing is the easiest way to move or copy a selection of text within a file, between files, or between applications. The text you drop remains selected, which makes it easy to copy a chunk of text into several places.
Move text
Copy text
To move text using drag-and-drop editing
1. Select the text you want to move.
2. Drag the selected text to the new location.
Tip At any time during a drag-and-drop procedure, you can click the other mouse button to cancel the operation.
To copy text using drag-and-drop editing
1. Select the text you want to copy.
2. While holding down the CTRL key, drag the selected text to the new location.
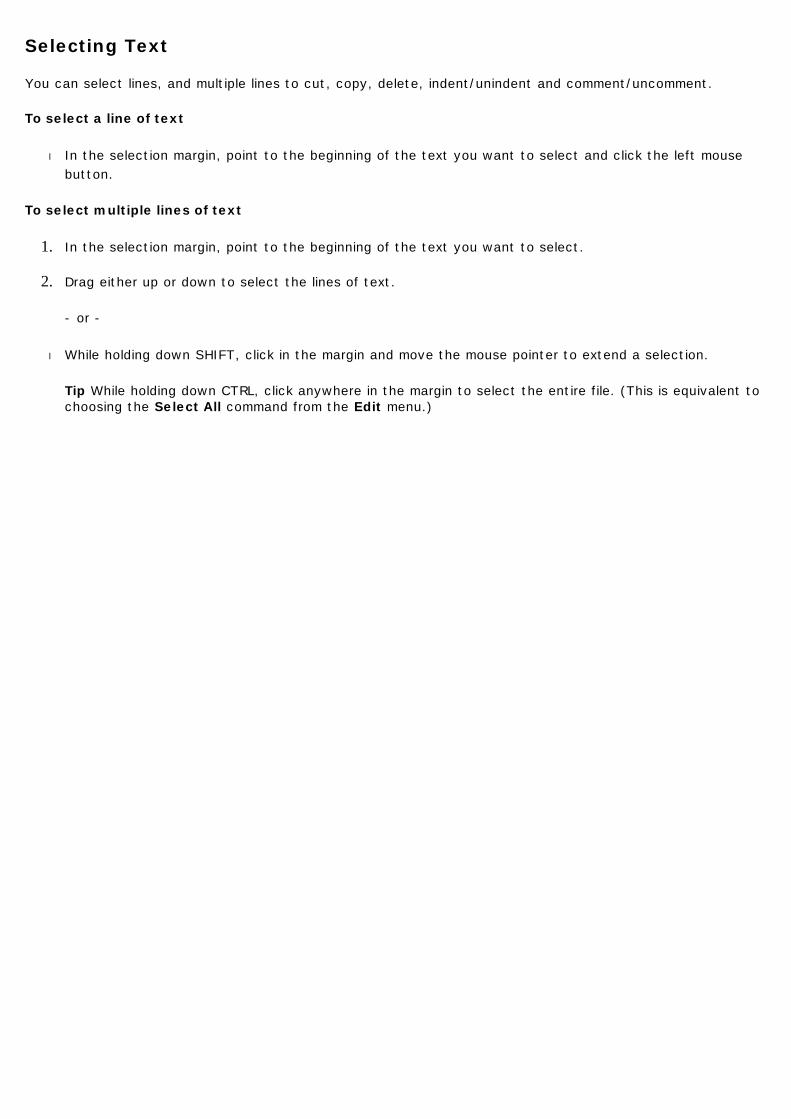
Selecting Text
You can select lines, and multiple lines to cut, copy, delete, indent/unindent and comment/uncomment.
To select a line of text
l In the selection margin, point to the beginning of the text you want to select and click the left mouse button.
To select multiple lines of text 1. In the selection margin, point to the beginning of the text you want to select.
2. Drag either up or down to select the lines of text.
- or -
l While holding down SHIFT, click in the margin and move the mouse pointer to extend a selection.
Tip While holding down CTRL, click anywhere in the margin to select the entire file. (This is equivalent to choosing the Select All command from the Edit menu.)

Managing Files
The Text editor File menu has several commands for standard file management.
Create a new file
Open a file
Open multiple files
Save a file
Print a file
Manage open windows
Set save preferences

Creating a New File
The New command creates a new source file. Creating a source file does not affect other open source files. You can create source files of many types, including C/C++ header or source files.
To create a new source file
1. From the File menu, click New.
2. Select the kind of source file you want to create.
3. Select or clear the Add to Project check box, if necessary.
4. Type a name in the File name box.
5. Type a path in the Location box.
6. Click OK.
Opening a File
When you open a source file, its name is added to the Window menu. You cannot use the Open command on the File menu to open another copy of an open source file.
To open a file
1. From the File menu, choose Open.
2. Select the drive and directory where the file is stored.
3. Specify the types of files to display in the Files of type box. Files with the chosen extension are displayed in the list box. For example, Project Workspaces displays all files with the .aws extension. The Files of type box initially lists commonly used file extensions. The default shows the .c, .cpp, and .h extensions. Tip You can specify wildcard patterns in the File name box to display file types. You can use any combination of wildcard patterns, delimited by semicolons. For example, if you type *.h;*.cpp, all files with these extensions are displayed. The wildcard patterns you specify are retained until you close the dialog box.
4. Select a filename, then click Open.
You can also open a file by double-clicking the file icon in the Project Workspace, or by dragging the icon of a non-project file into the application window.
Opening Multiple Files
You can open multiple files from the Open dialog box by using the mouse to select a file or group of files. Before you can select files, they must be visible in the Directories window.
Open two or more files in sequence
Open two or more files out of sequence
To open two or more files in sequence
1. From the File menu, choose Open.
2. Select the drive and directory where the files are stored. The default is the current drive and directory.
3. Specify the types of files to display in the Files of type box.
4. Click the first file or directory you want to select.
5. Hold down the SHIFT key while you click the last file or directory in the group, and then click Open.
To open two or more files out of sequence
1. From the File menu, choose Open.
2. Select the drive and directory where the files are stored. The default is the current drive and directory.
3. Specify the types of files to display in the Files of type box.
4. Hold down the CTRL key while you click each file or directory that you want. After your selection is complete, click Open. To cancel a selection, hold down CTRL while you click the selected file or directory
Saving a File
As you make changes to a source file, an asterisk (*) appears in the title bar to indicate that the file has changed since it was last saved. Each source window associated with a source file can retain its own sizing and other window attributes.
Save a file
Save all open files
Save selected open files
Save a new file or another copy of an existing file
To save a file
1. Switch to the source window.
2. From the File menu, choose Save. If you already named the file, the Save command saves changes without displaying the Save As dialog box. If your file is unnamed, the Save As dialog box appears.
3. In the Fle name box, type the filename.
4. Select the drive and directory where you want to save the file.
5. Click Save.
To save all open files
l From the File menu, choose Save All.
To save selected open files
1. From the Window menu, choose Windows.
2. Select one or more files from the file list.
3. Click Save.
4. Click Cancel.
You can also save another copy of an existing file. This procedure is useful for maintaining revised copies of a file while keeping the original unchanged. For more information, see To save a new file or another copy of an existing file.
To save a new file or another copy of an existing file
1. Make the file active by clicking the source window.
2. From the File menu, choose Save As.
3. In the File name box, type the filename.
4. Select the drive and the directory where you want to save the file.
5. Click Save.

Printing a File
With the Text editor, you can print selected text or a complete file. Text is printed in the default font for the printer if the default editor font is used. Otherwise, the text prints with the selected editor font, if that font is available on the printer.
You can customize your print jobs by adjusting margins.
Print selected text
Print an entire file
Customize a print job
To print selected text
1. Select the text you want to print.
2. From the File menu, choose Print. The Print dialog box appears. Under Print Range, the Selection option is automatically selected for you.
3. Click OK.
To print an entire file
1. Move the focus to the source file you want to print.
2. From the File menu, choose Print. The Print dialog box appears. Under Print Range, the All option is automatically selected for you.
3. Click OK.
To customize a print job
1. From the File menu, choose Page Setup.
2. Under Margins, type the left, right, top, and bottom measurements.
3. Click OK.

Managing Open Windows
The Text editor features options that control the display of source windows. You can switch between windows, open new windows, and split window views.
Switch to a source window
Create a new window for an open source file
Split a source window
Close a source file
To switch to a source window
1. From the Window menu, choose Windows.
2. Select a window from the Select Window list.
3. Click the Activate button, or double-click the selection.
To create a new window for an open source file
1. Switch to the source window.
2. From the Window menu, choose the New Window command. A second copy of the source file is displayed with an :n suffix. As you open more windows on the source file, the value of n increases. You can scroll and split each window independently. You can make changes to the source file from any window.
To split a source window
1. Switch to the source window. If there are multiple windows open on the source file, select one of them.
2. Drag the split bar to the location you want.
All files are automatically closed when you quit AtmanAvr C/C++ (you will be prompted to save any changed files). You can also close any individual source file without quitting the application.
To close a source file
1. From the Window menu, choose Windows.
2. Select one or more files from the Select window box.
3. Click Close Window.

Wizards
AtmanAvr C/C++ provides wizards. ProjectWizard Generates a complete suite of source files. CodeWizard help you add functionality to your AtmanAvr C/C++ programs.
l ProjectWizard
l CodeWizard

ProjectWizard
When you first create a project, you use the ProjectWizard to lead you through a series of dialog boxes in which you choose options for the MCU type, modules, functions and etc. of your project.
Once you have completed the steps in ProjectWizard, AtmanAvr C/C++ generate code automatically for you.
It is not necessary to set all of the steps. You can use CodeWizard to add any module which the MCU supported after the project is created.
See Create a Simple Application for details.

CodeWizard
CodeWizard is like a programmer's assistant: it makes it easier for you to do certain routine tasks such as creating new modules, adding or deleting interrupt functions.
With CodeWizard, you can:
l Create new modules
l Add interrupt functions
l Delete interrupt functions
l See which modules or interrupt handlers already defined and jump to the handler program code

Create new modules
You can use the CodeWizard dialog box to add a new module to projects which the MCU supported(such as ADC, SPI, UART and etc.).
To add new modules
1. Click the CodeWizard command on the Tools menu.
2. Select the module in the modules list box at the left of the CodeWizard dialog box, then click Add Module.
3. The ProjectWizard dialog box appears. After specify what you want, click Finish.
4. Repeat 2 and 3 to add another module. Finally click OK.
CodeWizard automatically create the source files, include the module`s header file in the main source file, and invoke the module`s initialization function in the main function.
Add interrupt functions
You can use the CodeWizard dialog box to add new interrupt functions to the existing modules in the project.
To add new interrupt functions
1. Click the CodeWizard command on the Tools menu.
2. Select a function in Functions list box at the right of the CodeWizard dialog box, then click Add Function.
3. Repeat 2 to add another function. Finally click OK.
CodeWizard automatically create the default interrupt functions, and enable the corresponding interrupts.
Delete interrupt functions
You can use the CodeWizard dialog box to delete the existing interrupt functions from the existing modules in the project.
To delete existing interrupt functions
1. Click the CodeWizard command on the Tools menu.
2. Select a function in Existing Functions list box at the bottom of the CodeWizard dialog box, then click Delete Function.
3. Repeat 2 to delete another function. Finally click OK.
CodeWizard automatically disable the corresponding interrupts. But requires manual removal of the implementations of the functions.
Editing a Interrupt Handler
Once you have defined a interrupt handler with CodeWizard, you can use the tool to go to the function's definition to add or modify code.
To jump to a function definition with CodeWizard
1. In the Modules list box, select the module containing the interrupt function you want to edit.
2. In the Existing Functions list box, select the function you want to edit.
3. Choose Edit Code.
The insertion point moves to the function.

Debugger
AtmanAvr C/C++ provides an integrated debugger to help locate bugs in an executable program. The debugger supports .elf and .hex files.
The Debugger feature:
l Any variable and expression can be watched, such as array, structure, union, enumeration, bit fields and parameters of function, even if it is located in eeprom or program memory space.
l Watchdog reset. l CPU Sleep and Wake up (mode Idle, ADC Noise Reduction, Power-down and Power-save). l EEPROM write time 2.5ms. l Peripheral simulating interface (Analog comparator, ADC and USARTs) l Simulating instruments (HD44780-based character-LCD, 8 x 8 segments LEDs and 4 x 4 keyboard)
For information about debugging:
l The debugger interface
l Running to a location
l Setting breakpoints
l Stepping into functions
l Modifying the value of a variable
l Adjusting Auto Step speed
l Debugging .elf and .hex files
l Using Breakpoints: Additional Information
l Using instruments

The Debugging Interface
Debugging is the process of correcting or modifying the code in your project so that your project can build, run smoothly, act as you expected, and be easy to maintain later.
To this end, AtmanAvr C provides a variety of tools to help with the varied tasks of tracking down errors in the code and program components.
The debugger interface provides special menus, windows, and dialog boxes. Occasionally the debugger is paused in break mode, meaning the debugger is waiting for user input after completing a debugging command (like break at breakpoint, step into/over/out/to cursor, break after Break command or Restart).
Debugger menu items
Debugger windows
Debugger dialog boxes
Viewing the value of a variable
Modifying the value of a variable
Edit and Continue

Debugger Menu Items
Commands for debugging can be found on the Build menu, the Debug menu, the View menu, and the Edit menu.
The Build menu contains a command called Start Debug, which contains a subset of the commands on the full Debug menu. These commands start the debugging process (Go, Step Into, and Run To Cursor ). The Debug menu appears in the menu bar while the debugger is running (even if it is stopped at a breakpoint). From the Debug menu, you can control program execution and access the QuickWatch window. When the debugger is not running, the Debug menu is replaced by the Build menu.
The View menu contains commands that display the various debugger windows, such as the Registers window and the Watch window.
From the Edit menu, you can access the Breakpoints dialog box, from which you can remove, enable, or disable breakpoints.
Debug options on the Build/Debug menu
Debugger Windows
Set breakpoints
Viewing, removing, enabling, and disabling breakpoints
Debug Options on the Build/Debug Menu
To start debugging, choose the Go, Step Into, or Run To Cursor command from the Start Debug submenu of the Build menu. The following table lists the Start Debug menu commands that may appear and their actions.
Start Debug Commands (Build menu)
When you begin debugging, the Debug menu appears, replacing the Build menu on the menu bar. You can then control program execution using the commands listed in the following table.
Debug Menu Commands that Control Program Execution
Menu command Action
Go
Executes code from the current statement until a breakpoint or the end of the program is reached, or until the application pauses for user input. (Equivalent to the Go button on the toolbar.)
Step Into Single-steps through instructions in the program, and enters each function call that is encountered.
Run to Cursor Executes the program as far as the line that contains the insertion point. This is equivalent to setting a temporary breakpoint at the insertion point location.
Debug menu command Action
Go
Executes code from the current statement until a breakpoint or the end of the program is reached, or until the application pauses for user input. (Equivalent to the Go button on the Standard toolbar.) When the Debug menu is not available, you can choose Go from the Start Debug submenu of the Build menu.
Restart
Resets execution to the first line of the program. This command discards the current values of all variables (breakpoints and watch still apply). It automatically halts at the first function(Typically main( ) fuction) or at the RESET entry when Disassembly window is active.
Stop Debugging Terminates the debugging session, and returns to a normal editing session.
Break Halts the program at its current location.
Step Into
Single-steps through instructions in the program, and enters each function call that is encountered. When the Debug menu is not available, you can choose Step Into from the Start Debug submenu of the Build menu.
Step Over
Single-steps through instructions in the program. If this command is used when you reach a function call, the function is executed without stepping through the function instructions.
Step Out
Executes the program out of a function call, and stops on the instruction immediately following the call to the function. Using this command, you can quickly finish executing the current function after determining that a bug is not present in the function.
Run to Cursor
Executes the program as far as the line that contains the insertion point. This

The following additional commands appear on the Debug menu:
command is equivalent to setting a temporary breakpoint at the insertion point location. When the Debug menu is not available, you can choose Run To Cursor from the Start Debug submenu of the Build menu.
Show Next Statement Shows the next statement in your program code. If source code is not available,
displays the statement within the Disassembly window.
QuickWatch Displays the QuickWatch window.

Debugger Windows
Several specialized windows display debugging information for your program. When you are debugging, you can access these windows using the View menu. (In addition to windows, the debugger also uses dialog boxes to display debugging information.)
The following table lists the debugger windows and describes the information they display.
Debugger Windows
Debugger windows can be docked or floating.
Tip To set formatting and other options for these windows, use the Debug tab in the Options dialog box (accessed from the Tools menu).
The I/OView window
The Watch window
The Registers window
The Memory window
The Disassembly window
The I/O Interface window
Window Displays
Workspace Information of the I/O registers and processor. The I/O view is located in the
Workspace window.
Output Information about the build and the debug process.
Watch Names and values of variables.
Registers Contents of the general purpose working registers.
Memory Current memory contents including RAM, FLASH and EEPROM.
Disassembly Assembly-language code derived from disassembly of the compiled program.
I/O Interface Peripheral simulating interface
I/O View Window
The I/O view is located in the Workspace window. The I/O View appears only while debugging.
Use I/O View to view and modify the value of the I/O registers and processor while debugging your program.
View the processor information
View the I/O register information
View the value of a I/O register
Modify the value of a I/O register
Toggle a bit value of a I/O register
To view the processor information
1. From the View menu, click Workspace.
2. Select the IOView tab and expand the Processor item.
Tip Double-click the value of StopWatch to reset the StopWatch.
To view the I/O register information
1. From the View menu, click Workspace.
2. Select the IOView tab and expand the I/O item.
To view the value of a I/O register
1. From the View menu, click Workspace.
2. Select the IOView tab and expand the I/O item.
3. Expand the peripheral item which contains the I/O register.
To modify the value of a I/O register
1. From the View menu, click Workspace.
2. Select the IOView tab and expand the I/O item.
3. Expand the peripheral item which contains the I/O register.
4. Click the value of the register and type the new value, and then press ENTER.
To toggle a bit value of a I/O register
1. From the View menu, click Workspace.
2. Select the IOView tab and expand the I/O item.
3. Expand the peripheral item which contains the I/O register.
4. Click the bit of the register in the Bits column.

- or -
5. Use the + box to expand the I/O register.
6. Click the bit value in the Value column.

Watch Window
Use the Watch window to specify variables and expressions that you want to watch while debugging your program. You can also modify the value of a variable using the Watch window.
The Watch window contains four tabs: Watch1, Watch2, Watch3, and Watch4 — Each tab displays a user-specified list of variables and expressions in a spreadsheet field. You can group variables that you want to watch together onto the same tab.
If you add an array, object, or structure variable to the Watch window, plus sign (+) or minus sign (-) boxes appear in the Name column. You can use these boxes to expand or collapse your view of the variable, as described in Spreadsheet Fields.
If the value of a variable appears in red, it indicates that the value has recently changed. Only the last value to change appears in red.
If the variable is a pointer to an object, the Watch window automatically downcasts the pointer. The Watch window adds an extra member to the expanded object. This extra member, which looks like another base class, indicates the derived subclass. For example, if a variable declared as a pointer to object really points to a structure, the Watch window recognizes this fact and adds an extra member so that you can access the structure members.
View the value of a variable
Modify the value of a variable

Viewing and Modifying Registers
The Registers window displays the contents of the CPU general purpose working registers. Using the Registers window, you can change the value of any register while the program is being debugged.
To view the value in a register
l From the View menu, click Debug Windows and Registers. Register values that have recently changed appear in red.
To change the value of a register
1. From the View menu, click Debug Windows and Registers.
2. In the Registers window, move the insertion point to the register value you want to change.
3. Type the new value.
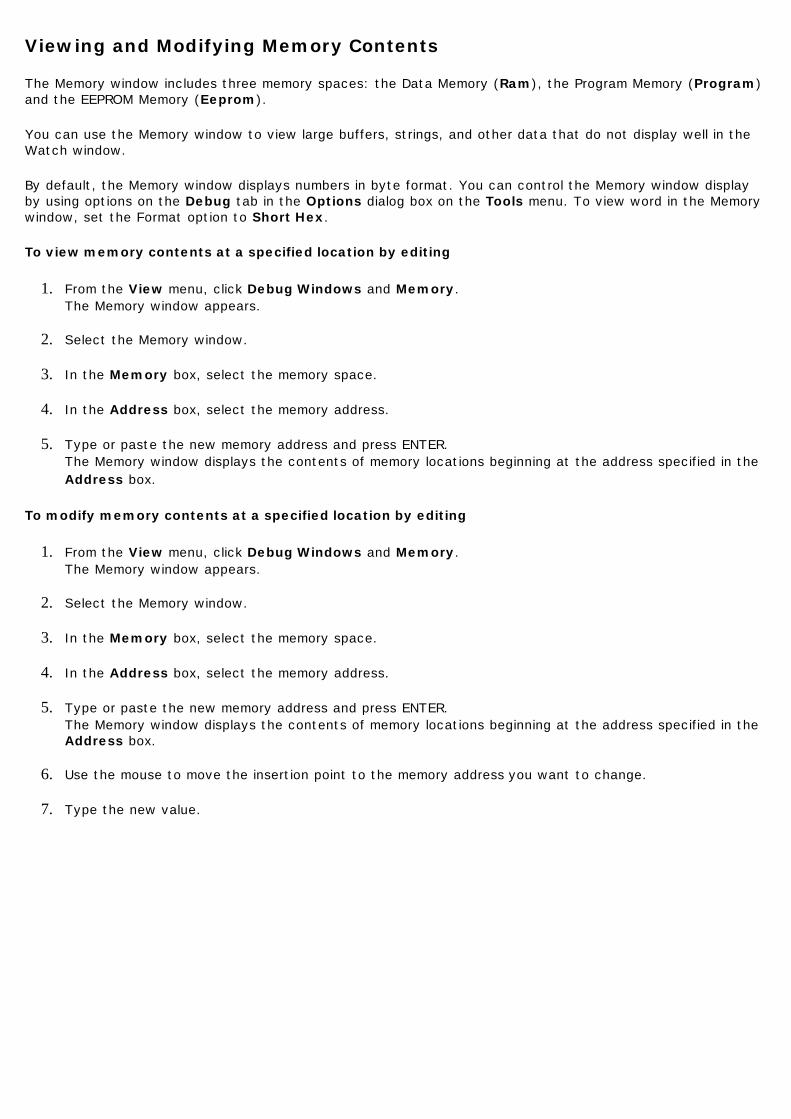
Viewing and Modifying Memory Contents
The Memory window includes three memory spaces: the Data Memory (Ram), the Program Memory (Program) and the EEPROM Memory (Eeprom).
You can use the Memory window to view large buffers, strings, and other data that do not display well in the Watch window.
By default, the Memory window displays numbers in byte format. You can control the Memory window display by using options on the Debug tab in the Options dialog box on the Tools menu. To view word in the Memory window, set the Format option to Short Hex.
To view memory contents at a specified location by editing
1. From the View menu, click Debug Windows and Memory. The Memory window appears.
2. Select the Memory window.
3. In the Memory box, select the memory space.
4. In the Address box, select the memory address.
5. Type or paste the new memory address and press ENTER. The Memory window displays the contents of memory locations beginning at the address specified in the Address box.
To modify memory contents at a specified location by editing
1. From the View menu, click Debug Windows and Memory. The Memory window appears.
2. Select the Memory window.
3. In the Memory box, select the memory space.
4. In the Address box, select the memory address.
5. Type or paste the new memory address and press ENTER. The Memory window displays the contents of memory locations beginning at the address specified in the Address box.
6. Use the mouse to move the insertion point to the memory address you want to change.
7. Type the new value.
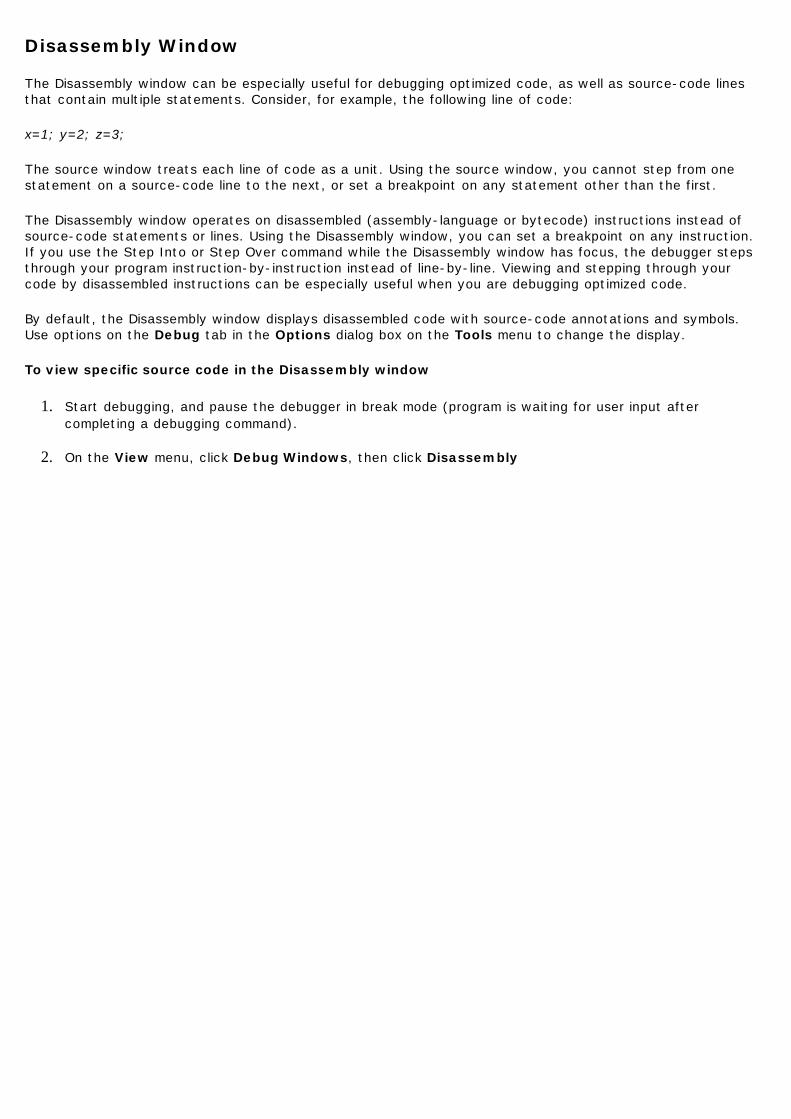
Disassembly Window
The Disassembly window can be especially useful for debugging optimized code, as well as source-code lines that contain multiple statements. Consider, for example, the following line of code:
x=1; y=2; z=3;
The source window treats each line of code as a unit. Using the source window, you cannot step from one statement on a source-code line to the next, or set a breakpoint on any statement other than the first.
The Disassembly window operates on disassembled (assembly-language or bytecode) instructions instead of source-code statements or lines. Using the Disassembly window, you can set a breakpoint on any instruction. If you use the Step Into or Step Over command while the Disassembly window has focus, the debugger steps through your program instruction-by-instruction instead of line-by-line. Viewing and stepping through your code by disassembled instructions can be especially useful when you are debugging optimized code.
By default, the Disassembly window displays disassembled code with source-code annotations and symbols. Use options on the Debug tab in the Options dialog box on the Tools menu to change the display.
To view specific source code in the Disassembly window
1. Start debugging, and pause the debugger in break mode (program is waiting for user input after completing a debugging command).
2. On the View menu, click Debug Windows, then click Disassembly
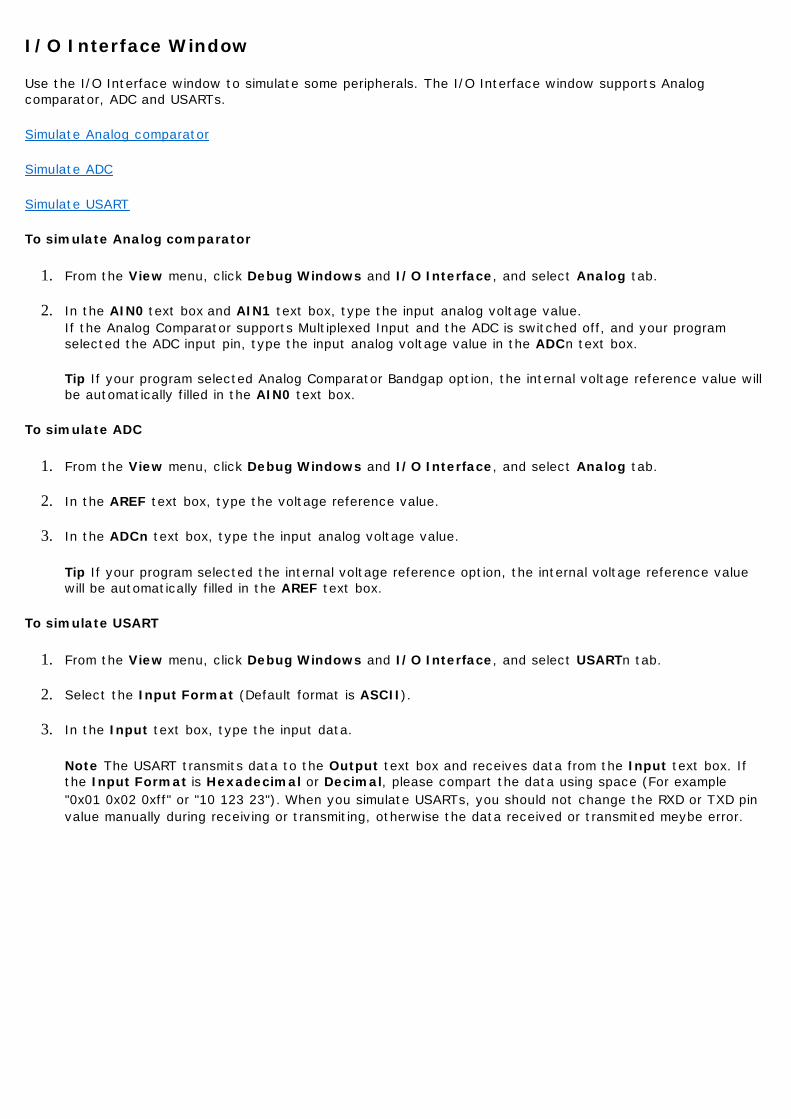
I/O Interface Window
Use the I/O Interface window to simulate some peripherals. The I/O Interface window supports Analog comparator, ADC and USARTs.
Simulate Analog comparator
Simulate ADC
Simulate USART
To simulate Analog comparator
1. From the View menu, click Debug Windows and I/O Interface, and select Analog tab.
2. In the AIN0 text box and AIN1 text box, type the input analog voltage value. If the Analog Comparator supports Multiplexed Input and the ADC is switched off, and your program selected the ADC input pin, type the input analog voltage value in the ADCn text box.
Tip If your program selected Analog Comparator Bandgap option, the internal voltage reference value will be automatically filled in the AIN0 text box.
To simulate ADC
1. From the View menu, click Debug Windows and I/O Interface, and select Analog tab.
2. In the AREF text box, type the voltage reference value.
3. In the ADCn text box, type the input analog voltage value.
Tip If your program selected the internal voltage reference option, the internal voltage reference value will be automatically filled in the AREF text box.
To simulate USART
1. From the View menu, click Debug Windows and I/O Interface, and select USARTn tab.
2. Select the Input Format (Default format is ASCII).
3. In the Input text box, type the input data.
Note The USART transmits data to the Output text box and receives data from the Input text box. If the Input Format is Hexadecimal or Decimal, please compart the data using space (For example "0x01 0x02 0xff" or "10 123 23"). When you simulate USARTs, you should not change the RXD or TXD pin value manually during receiving or transmiting, otherwise the data received or transmited meybe error.

Debugger Dialog Boxes
In addition to windows, the debugger uses a number of dialog boxes to manipulate breakpoints and variables. You can access the Breakpoints dialog box using the Breakpoints command on the Edit menu. You can access the other dialog boxes using commands from the Debug menu.
The following table lists the debugger dialog boxes and describes the information they display.
Debugger Dialog Boxes
Dialog box Displays
Breakpoints A list of all breakpoints assigned to your project. Use Breakpoints to View and Enable Breakpoints.
QuickWatch A variable. Use QuickWatch to quickly view or modify a variable or to add it to the Watch window.
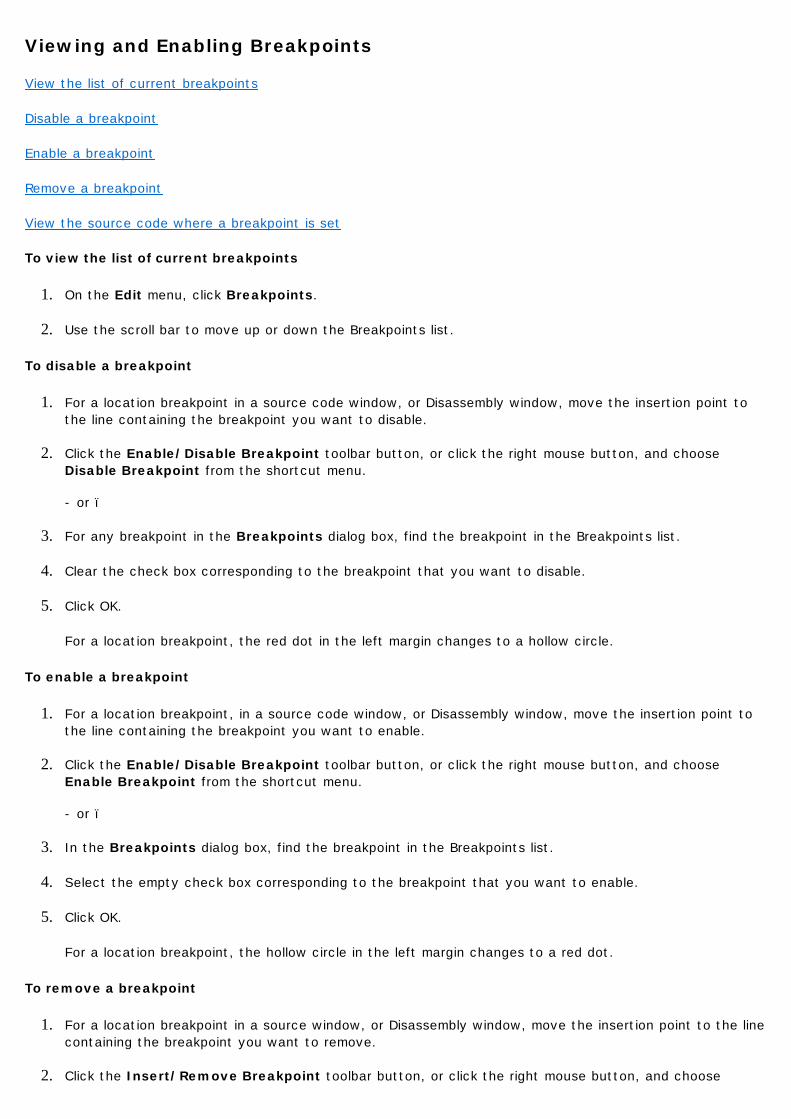
Viewing and Enabling Breakpoints
View the list of current breakpoints
Disable a breakpoint
Enable a breakpoint
Remove a breakpoint
View the source code where a breakpoint is set
To view the list of current breakpoints
1. On the Edit menu, click Breakpoints.
2. Use the scroll bar to move up or down the Breakpoints list.
To disable a breakpoint
1. For a location breakpoint in a source code window, or Disassembly window, move the insertion point to the line containing the breakpoint you want to disable.
2. Click the Enable/Disable Breakpoint toolbar button, or click the right mouse button, and choose Disable Breakpoint from the shortcut menu. - or –
3. For any breakpoint in the Breakpoints dialog box, find the breakpoint in the Breakpoints list.
4. Clear the check box corresponding to the breakpoint that you want to disable.
5. Click OK. For a location breakpoint, the red dot in the left margin changes to a hollow circle.
To enable a breakpoint
1. For a location breakpoint, in a source code window, or Disassembly window, move the insertion point to the line containing the breakpoint you want to enable.
2. Click the Enable/Disable Breakpoint toolbar button, or click the right mouse button, and choose Enable Breakpoint from the shortcut menu. - or –
3. In the Breakpoints dialog box, find the breakpoint in the Breakpoints list.
4. Select the empty check box corresponding to the breakpoint that you want to enable.
5. Click OK. For a location breakpoint, the hollow circle in the left margin changes to a red dot.
To remove a breakpoint
1. For a location breakpoint in a source window, or Disassembly window, move the insertion point to the line containing the breakpoint you want to remove.
2. Click the Insert/Remove Breakpoint toolbar button, or click the right mouse button, and choose
Click the Insert/Remove Breakpoint toolbar button, or click the right mouse button, and choose Remove Breakpoint from the shortcut menu. - or –
3. In the Breakpoints dialog box, select one or more breakpoints in the Breakpoints list.
4. Click the Remove button.
5. Click OK. For a location breakpoint, the red dot in the left margin disappears.
To view the source code where a breakpoint is set
1. In the Breakpoints list, select a location breakpoint.
2. Click the Edit Code button.
This action takes you to the source code for a breakpoint set at a line number.

Using the QuickWatch Window
You can use QuickWatch to quickly examine the value of variables. You can also use QuickWatch to modify the value of a variable or to add a variable to the Watch window.
The QuickWatch dialog box contains a text box, where you can type a variable name, and a spreadsheet field that displays the current value of the variable that you specified.
The Current Value spreadsheet field displays only one variable at a time. Typing a new variable in the text box and pressing ENTER replaces the previous variable.
To view the value of a variable using QuickWatch
1. Wait for the debugger to stop at a breakpoint. - or –
2. From the Debug menu click Break to halt the debugger.
3. From the Debug menu, click QuickWatch. The QuickWatch dialog box appears.
4. Type or paste the variable name into the Symbol text box.
5. Press ENTER.
6. Click Close.
Tip The Symbol drop-down list box contains the most recently used QuickWatch variables.
To quickly view the value of a variable using QuickWatch
1. When the debugger is stopped at a breakpoint, switch to a source window, and click the right mouse button on a variable.
2. From the shortcut menu, click QuickWatch.
3. Click Close.
When the program is paused at a breakpoint or between steps, you can change the value of any variable in your program. This gives you the flexibility to try out changes and see their results in real time or to recover from certain logic errors.
To modify the value of a variable using QuickWatch
1. From the Debug menu, click QuickWatch.
2. In the Symbol text box, type the variable name.
3. Press ENTER.
4. Double-click the value you want to modify.
5. Type the new value, and then press ENTER.
6. Click Close.
To add a QuickWatch variable to the Watch window

1. Use any of the procedures described previously to view the variable in the QuickWatch window.
2. Click Add Watch.
Viewing the Value of a Variable
View the value of a variable using QuickWatch
View a the value of a variable in the Watch window
To view the value of a variable using QuickWatch
1. When the debugger is stopped at a breakpoint, switch to a source window, and click the right mouse button on a variable.
2. On the shortcut menu, click QuickWatch.
3. Click Close.
To view the value of a variable in the Watch window
1. Start debugging, and pause the debugger in break mode (program is waiting for user input after completing a debugging command).
2. On the View menu, click Debug Windows, then click Watch.
3. Select a tab for the variable.
4. On the shortcut menu, click Add. - or - On the empty line containing an arrow, click the Name column. Type the variable name into the Name column on the tab. Press ENTER.
5. The Watch window evaluates the variable immediately and displays the value or an error message.
If you add an array or object variable to the Watch window, plus sign (+) or minus sign (-) boxes appear in the Name column. Use these boxes to expand or collapse your view of the variable.
Using Edit and Continue
With Edit and Continue , you can make changes to your source code while the program is being debugged. You can apply code changes while the program is running or halted under the debugger.
To apply code changes to a program you are debugging
l From the Debug menu, click Apply Code Changes.
Edit and Continue can also apply changes automatically when you select a Go or Step command for a program that is halted. You can turn off this automatic Edit and Continue, if you prefer. (If you turn the automatic feature off, you can still apply code changes manually using Apply Code Changes.)
To enable/disable Automatic Edit and Continue
1. From the Tools Menu, click Options.
2. In the Options dialog box, select the Debug tab.
3. On the Debug tab, select or clear the Debug commands invoke Edit and Continue check box, as appropriate.
Because Debug commands invoke Edit and Continue is a tools option rather than a project option, altering this setting affects all projects you work on. You do not need to rebuild your application after changing this setting. You can change the setting even while debugging.
Running to a Location
Run until a breakpoint is reached
Run to the cursor
Run to the cursor location in disassembly code
Set the next statement to execute
Set the next disassembled instruction to execute
To run until a breakpoint is reached
1. Set a breakpoint.
2. On the Build menu, click Start Debug.
3. From the Start Debug menu, choose Go.
To run to the cursor (while the debugger is running but halted)
1. In a source file, move the insertion point to the location where you want the debugger to break.
2. From the Debug menu, choose Run To Cursor.
To run to the cursor location in disassembly code (while the debugger is running but halted)
1. In the Disassembly window, move the insertion point to the location where you want the debugger to break.
2. On the Debug menu, click Run To Cursor.
To set the next statement to execute (while the debugger is running but halted)
1. In a source window, move the insertion point to the statement or instruction that you want to execute next.
2. Click the right mouse button.
3. On the shortcut menu, click Set Next Statement.
To set the next disassembled instruction to execute (while the debugger is running but halted)
1. In the Disassembly window, move the insertion point to the disassembled instruction you want to execute next.
2. Click the right mouse button.
3. On the shortcut menu, click Set Next Statement.
Tip You can use the Set Next Statement command to skip a section of code. For instance, a section that contains a known bug — and continue debugging other sections.
Caution The Set Next Statement command causes the program counter to jump to the new location. The intervening code is not executed. Use this command with caution.
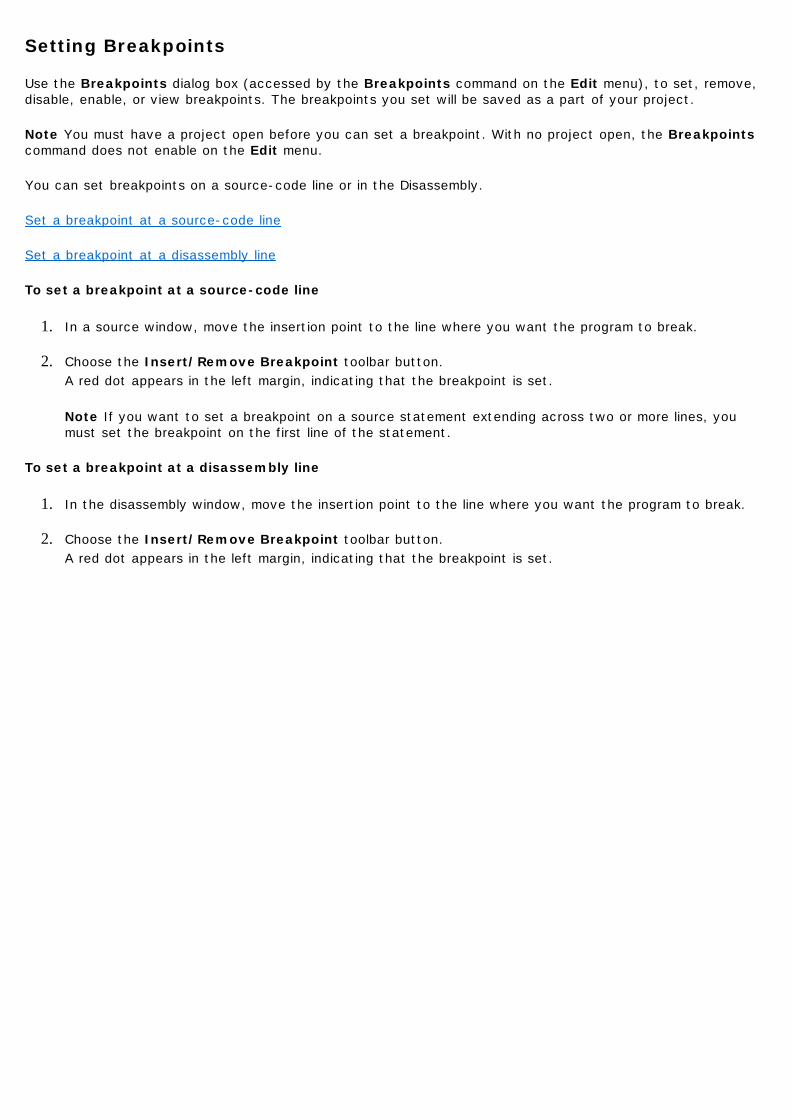
Setting Breakpoints
Use the Breakpoints dialog box (accessed by the Breakpoints command on the Edit menu), to set, remove, disable, enable, or view breakpoints. The breakpoints you set will be saved as a part of your project.
Note You must have a project open before you can set a breakpoint. With no project open, the Breakpoints command does not enable on the Edit menu.
You can set breakpoints on a source-code line or in the Disassembly.
Set a breakpoint at a source-code line
Set a breakpoint at a disassembly line
To set a breakpoint at a source-code line
1. In a source window, move the insertion point to the line where you want the program to break.
2. Choose the Insert/Remove Breakpoint toolbar button. A red dot appears in the left margin, indicating that the breakpoint is set.
Note If you want to set a breakpoint on a source statement extending across two or more lines, you must set the breakpoint on the first line of the statement.
To set a breakpoint at a disassembly line
1. In the disassembly window, move the insertion point to the line where you want the program to break.
2. Choose the Insert/Remove Breakpoint toolbar button. A red dot appears in the left margin, indicating that the breakpoint is set.
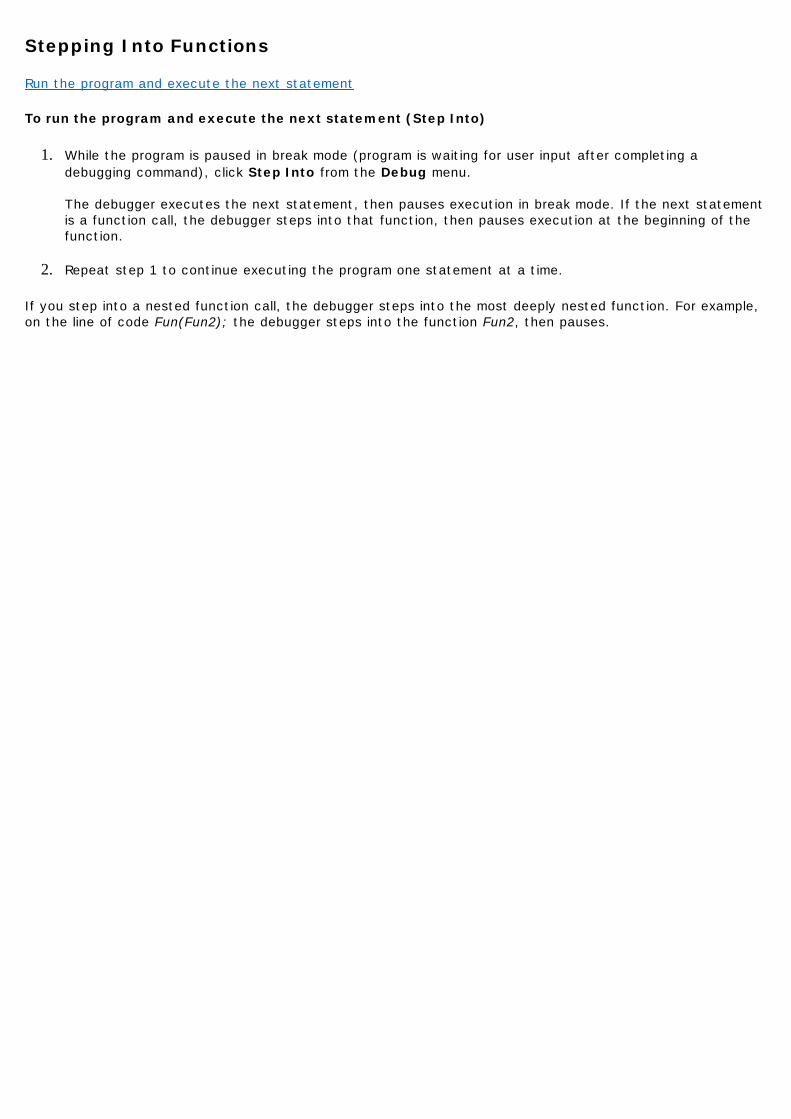
Stepping Into Functions
Run the program and execute the next statement
To run the program and execute the next statement (Step Into)
1. While the program is paused in break mode (program is waiting for user input after completing a debugging command), click Step Into from the Debug menu. The debugger executes the next statement, then pauses execution in break mode. If the next statement is a function call, the debugger steps into that function, then pauses execution at the beginning of the function.
2. Repeat step 1 to continue executing the program one statement at a time.
If you step into a nested function call, the debugger steps into the most deeply nested function. For example, on the line of code Fun(Fun2); the debugger steps into the function Fun2, then pauses.
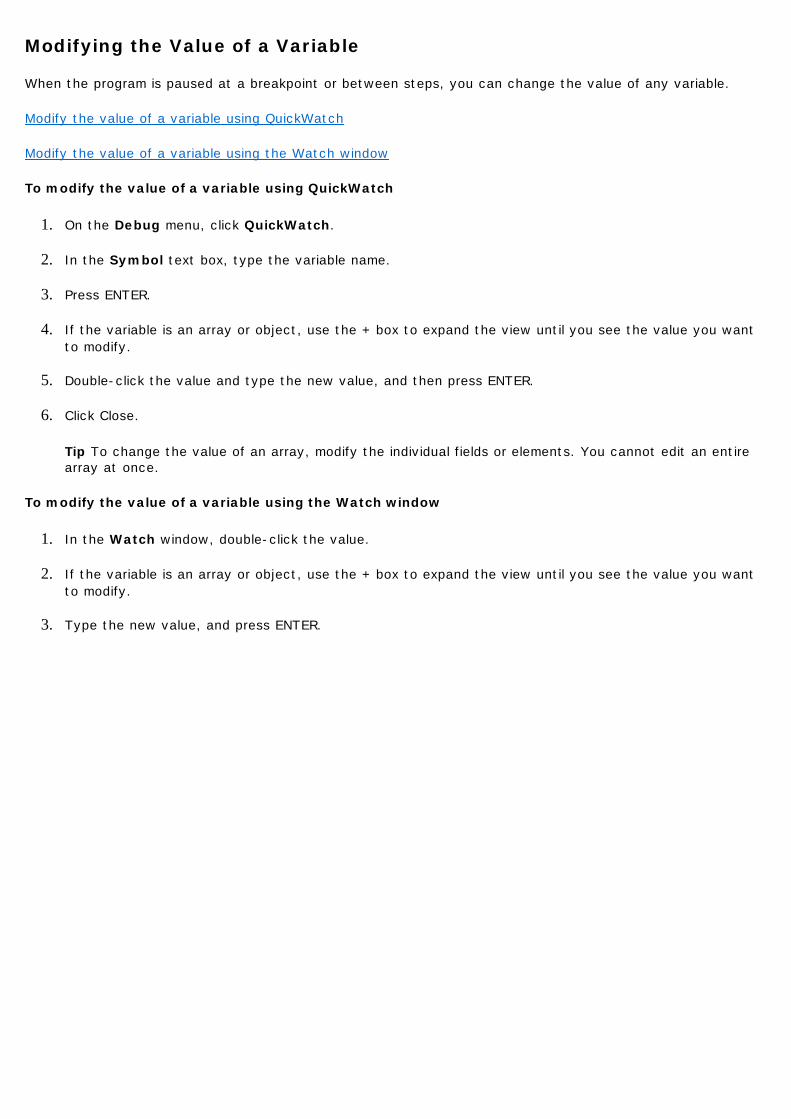
Modifying the Value of a Variable
When the program is paused at a breakpoint or between steps, you can change the value of any variable.
Modify the value of a variable using QuickWatch
Modify the value of a variable using the Watch window
To modify the value of a variable using QuickWatch
1. On the Debug menu, click QuickWatch.
2. In the Symbol text box, type the variable name.
3. Press ENTER.
4. If the variable is an array or object, use the + box to expand the view until you see the value you want to modify.
5. Double-click the value and type the new value, and then press ENTER.
6. Click Close.
Tip To change the value of an array, modify the individual fields or elements. You cannot edit an entire array at once.
To modify the value of a variable using the Watch window
1. In the Watch window, double-click the value.
2. If the variable is an array or object, use the + box to expand the view until you see the value you want to modify.
3. Type the new value, and press ENTER.

Adjusting Auto Step speed
You can adjust the Auto Step speed while debugging your program.
To adjust the Auto Step speed
1. From the Tools menu, click Options and select Debug tab.
2. Adjust the AutoStep speed slide
By default, the slide locate at the middle.
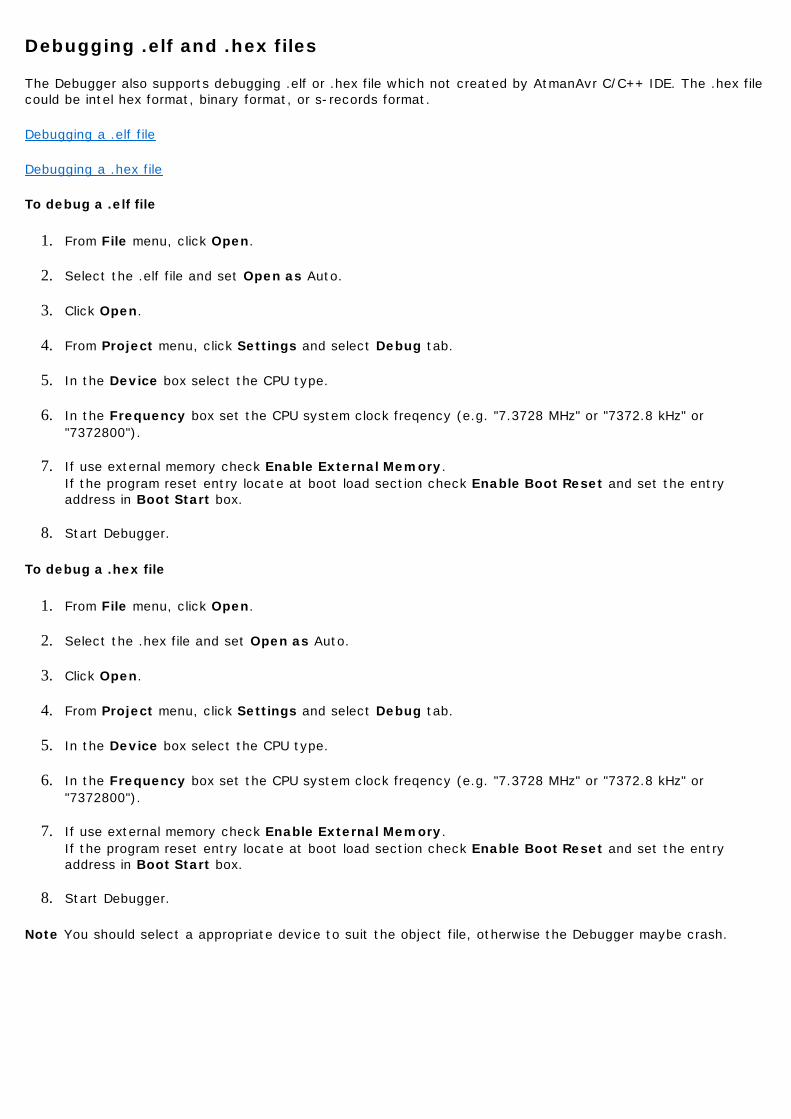
Debugging .elf and .hex files
The Debugger also supports debugging .elf or .hex file which not created by AtmanAvr C/C++ IDE. The .hex file could be intel hex format, binary format, or s-records format.
Debugging a .elf file
Debugging a .hex file
To debug a .elf file
1. From File menu, click Open.
2. Select the .elf file and set Open as Auto.
3. Click Open.
4. From Project menu, click Settings and select Debug tab.
5. In the Device box select the CPU type.
6. In the Frequency box set the CPU system clock freqency (e.g. "7.3728 MHz" or "7372.8 kHz" or "7372800").
7. If use external memory check Enable External Memory. If the program reset entry locate at boot load section check Enable Boot Reset and set the entry address in Boot Start box.
8. Start Debugger.
To debug a .hex file
1. From File menu, click Open.
2. Select the .hex file and set Open as Auto.
3. Click Open.
4. From Project menu, click Settings and select Debug tab.
5. In the Device box select the CPU type.
6. In the Frequency box set the CPU system clock freqency (e.g. "7.3728 MHz" or "7372.8 kHz" or "7372800").
7. If use external memory check Enable External Memory. If the program reset entry locate at boot load section check Enable Boot Reset and set the entry address in Boot Start box.
8. Start Debugger.
Note You should select a appropriate device to suit the object file, otherwise the Debugger maybe crash.

Using Breakpoints: Additional Information
In addition to the standard breakpoint functions, the debugging environment provides many additional breakpoint control features. For more information on standard breakpoints, see Setting Breakpoints.
This section covers the following topics:
l Setting Breakpoints at a Memory Location
l Setting Breakpoints When Values Change or Become True
Setting Breakpoints at a Memory Location
You can use the Breakpoints dialog box to stop program execution at a particular memory location or when a specified condition occurs.
To set a breakpoint at a program memory address
1. From the View menu, click Debug Windows and Disassembly. The Disassembly window opens.
2. In the Disassembly window, move the insertion point to the line where you want the program to break.
3. Click the Insert/Remove Breakpoint toolbar button. A red dot appears in the left margin, indicating that the breakpoint is set.
To set a conditional breakpoint
1. From the Edit menu, click Breakpoints. The Breakpoints dialog box appears.
2. Select the Location tab.
3. In the Break At text box, type the location (source line number, memory address) where you want to set the breakpoint.
4. Click Condition. The Breakpoint Condition dialog box appears.
5. Fill in the Expression and Number Of Elements text boxes as you would for a data breakpoint.
6. In the Breakpoint Condition dialog box, click OK to set the condition.
7. In the Breakpoints dialog box, click OK to set the breakpoint.
To set a conditional breakpoint with a skip count
1. From the Edit menu, click Breakpoints. The Breakpoints dialog box appears.
2. In the Breakpoints dialog box, select the Location tab.
3. In the Break At text box, type a location (source line number, memory address) where you want to set the breakpoint.
4. Click Condition. The Breakpoint Condition dialog box appears.
5. Fill in the Expression and Number Of Elements text boxes as you would for a data breakpoint.
6. Fill in the Enter The Numbers Of Times To Skip Before Stopping text box. If you want your program to break every Nth time the condition is met at the specified location, set the Enter The Numbers Of Times To Skip Before Stopping to N - 1. (The debugger skips the breakpoint the first N times.)
7. In the Breakpoint Condition dialog box, click OK to set the condition.
8. In the Breakpoints dialog box, click OK to set the breakpoint.
Note The interface does not allow you to set both Enter The Numbers Of Times To Skip Before Stopping and Number Of Elements for the same breakpoint.
Setting Breakpoints When Values Change or Become True
You can set data breakpoints that halt execution when an expression changes value or evaluates to true. The debugger automatically knows whether "changes" or "true" makes sense for the variable or expression you have entered - you don't need to set this yourself.
You can set a breakpoint on any valid C or C++ expression. Breakpoint expressions can also use program memory addresses.
This section covers the following topics:
l Setting a Breakpoint When a Variable Changes Value
l Setting a Breakpoint When an Expression Changes Value
l Setting a Breakpoint When an Expression Is True
l Setting a Breakpoint When the Initial Element of an Array Changes Value
l Setting a Breakpoint When the Initial Element of an Array Has a Specific Value
l Setting a Breakpoint When a Particular Element of an Array Changes Value
l Setting a Breakpoint When Any Element of an Array Changes Value
l Setting a Breakpoint When Any of the First n Elements of an Array Change Value
l Setting a Breakpoint When the Location Value of a Pointer Changes
l Setting a Breakpoint When the Value at a Location Pointed to Changes
l Setting a Breakpoint When an Array Pointed to by a Pointer Changes
l Setting a Breakpoint When the Value at a Specified Memory Address Changes
Setting a Breakpoint When a Variable Changes Value
To set a breakpoint when a variable changes value
1. From the Edit menu, click Breakpoints.
2. Click the Data tab of the Breakpoints dialog box.
3. In the Expression text box, type the name of the variable.
4. Click OK to set the breakpoint.
Setting a Breakpoint When an Expression Changes Value
To set a breakpoint when an expression changes value
1. From the Edit menu, click Breakpoints.
2. Click the Data tab of the Breakpoints dialog box.
3. In the Expression text box, type an expression such as x+y.
4. Click OK to set the breakpoint.
Setting a Breakpoint When an Expression Is True
To set a breakpoint when an expression is true
1. From the Edit menu, click Breakpoints.
2. Click the Data tab of the Breakpoints dialog box.
3. In the Expression text box, type an expression, such as x==3, that evaluates to true or false.
4. Click OK to set the breakpoint
Setting a Breakpoint When the Initial Element of an Array Changes Value
To break when the initial element of an array changes value
1. From the Edit menu, click Breakpoints.
2. Click the Data tab of the Breakpoints dialog box.
3. In the Expression text box, type the first element of the array (myArray[0], for example).
4. In the Number Of Elements text box on the Data tab, type 1.
5. Click OK to set the breakpoint on myArray [0].
Setting a Breakpoint When the Initial Element of an Array Has a Specific Value
To break when the initial element of an array has a specific value
1. From the Edit menu, click Breakpoints.
2. Click the Data tab of the Breakpoints dialog box.
3. In the Expression text box, type an expression containing the initial element of the array (myArray[0]==1, for example).
4. In the Number Of Elements text box, type 1.
5. Click OK to set the breakpoint on myArray [0].
Setting a Breakpoint When a Particular Element of an Array Changes Value
To break when a particular element of an array changes value
1. From the Edit menu, click Breakpoints.
2. Click the Data tab of the Breakpoints dialog box.
3. In the Expression text box, type the element of the array (myArray[12], for example).
4. In the Number Of Elements text box, type 1.
5. Click OK to set the breakpoint on myArray [12].
Setting a Breakpoint When Any Element of an Array Changes Value
To break when any element of an array changes value
1. From the Edit menu, click Breakpoints.
2. Click the Data tab of the Breakpoints dialog box.
3. In the Expression text box, type the first element of the array (myArray[0]).
4. In the Number Of Elements text box, type the number of elements in the array.
5. Click OK to set the breakpoint on myArray.
Setting a Breakpoint When Any of the First n Elements of an Array Change Value
To break when any of the first n elements of an array change value
1. From the Edit menu, click Breakpoints.
2. Click the Data tab of the Breakpoints dialog box.
3. In the Expression text box, type the first element of the array (myArray[0], for example).
4. In the Number Of Elements text box, type n (for example, 10).
5. Click OK to set the breakpoint on myArray[0] through myArray[9].
Setting a Breakpoint When the Location Value of a Pointer Changes
To break when the location value of a pointer changes
1. From the Edit menu, click Breakpoints.
2. Click the Data tab of the Breakpoints dialog box.
3. In the Expression text box, type the pointer variable name (p, for example).
4. Click OK to set the breakpoint.
Setting a Breakpoint When the Value at a Location Pointed to Changes
To break when the value at a location pointed to changes
1. From the Edit menu, click Breakpoints.
2. Click the Data tab of the Breakpoints dialog box.
3. In the Expression text box, type the dereferenced pointer variable name (*p or p->next, for example).
4. Click OK to set the breakpoint.
Setting a Breakpoint When an Array Pointed to by a Pointer Changes
To break when an array pointed to by a pointer changes
1. From the Edit menu, click Breakpoints.
2. Click the Data tab of the Breakpoints dialog box.
3. In the Expression text box, type the dereferenced pointer variable name (*p, for example).
4. In the Number Of Elements text box, type the length of the array in elements. For example, if the

In the Number Of Elements text box, type the length of the array in elements. For example, if the pointer is a pointer to double, and the array pointed to contains 100 values of type double, type 100.
5. Click OK to set the breakpoint.
Setting a Breakpoint When the Value at a Specified Memory Address Changes
To break when the value at a specified memory address changes
1. From the Edit menu, click Breakpoints.
2. Click the Data tab of the Breakpoints dialog box.
3. In the Expression text box, type the memory address for the byte. For a word or doubleword memory address, enclose the address in parentheses, and precede it with a cast operator. For example, *(unsigned short*)(30) for the word at memory location 30. Use the cast operator *(unsigned char*) for a byte , *(unsigned short*) for a word, or *(unsigned long*) for a doubleword. (The debugger interprets all integer constants as decimal unless they begin with zero (0) for octal or zero and x (0x) for hexadecimal.)
4. In the Number Of Elements text box, type the number of bytes, words, or doublewords to monitor.
5. Click OK to set the breakpoint.
Using Instruments
Several specialized instrument windows provide simulating instruments for your program. When you are debugging, you can access these windows using the View menu.
The following table lists the instrument windows.
Instrument Windows
Instrument windows can't be docked.
Using LCD
Using LED
Using Keyboard
Window Describes
LCD HD44780-based character-LCD.
LED 8 x 8 segments LEDs.
Keyboard 4 x 4 keyboard.
Using LCD
Use the LCD window to simulate the HD44780-based character-LCD while debugging your program. You can modify the LCD's format(columns and lines) and ROM code pattern(A00 or A02) to suit your program.
Connect the LCD to CPU
Modify the LCD's format and ROM code pattern
To connect the LCD
1. On the View menu, click Debug Windows, then click LCD.
2. Right click on the LCD window and select Properties command.
3. Choose the CPU port in the CPU Port box and specify the pin in the Pin box for each LCD pin.
4. Click OK.
Tip For some LCD pins, you can connect them to VCC or GND specified in the Pin box.
To modify the LCD's format and ROM code pattern
1. On the View menu, click Debug Windows, then click LCD.
2. Right click on the LCD window and select Properties command.
3. Choose the LCD format in the Formats box and select the ROM code pattern in the Patterns box.
4. Click OK.
A LCD demo project is located at the directory \AtmanAvr\Examples\LcdTest.
Using LED
Use the LED window to simulate the 8 segments LED while debugging your program. You can modify the LED's type(common kathode or common anode) and debugging behavior.
Connect the LED to CPU
Modify the LED's type and debugging behavior
To connect the LED
1. On the View menu, click Debug Windows, then click LED.
2. Right click on the LED window and select Properties command.
3. Select the LED index you want to use in the LED Index box.
4. Choose the CPU port in the CPU Port box and specify the pin in the Pin box for each LED pin.
5. Repeat step 3 and 4.
6. Click OK.
Tip For some LED pins, you can connect them to VCC or GND specified in the Pin box. You can invoke a shortcut menu (right click on the dialog box) to Copy the current LED's pins connection and Paste to another LED.
To modify the LED's type and debugging behavior
1. On the View menu, click Debug Windows, then click LED.
2. Right click on the LED window and select Properties command.
3. Choose the LED type in the Common box.
4. Specify the debugging behavior in the Display hold box. When the LEDs are dynamic display, you can select YES to hold each LED display to avoid blink.
5. Click OK.
A LED demo project is located at the directory \AtmanAvr\Examples\LedTest.
Using Keyboard
Use the Keyboard window to simulate the keyboard while debugging your program. You can specify the buttons pushed delay time.
When you push a button, the button will hold until the CPU runtime over the delay time. If a button is pushed, next click will release the button.
Connect the Keyboard to CPU
Modify the buttons delay time
To connect the Keyboard
1. On the View menu, click Debug Windows, then click Keyboard.
2. Right click on the Keyboard window and select Properties command.
3. Select the button index you want to use in the Button box.
4. Choose the CPU port in the CPU Port box and specify the pin in the Pin box for each button pin.
5. Repeat step 3 and 4.
6. Click OK.
Tip For the Input pins, you can connect them to VCC or GND specified in the Pin box.
To modify the buttons delay time
1. On the View menu, click Debug Windows, then click Keyboard.
2. Right click on the Keyboard window and select Properties command.
3. Choose the button pushed delay time in the Delay box.
4. Click OK.
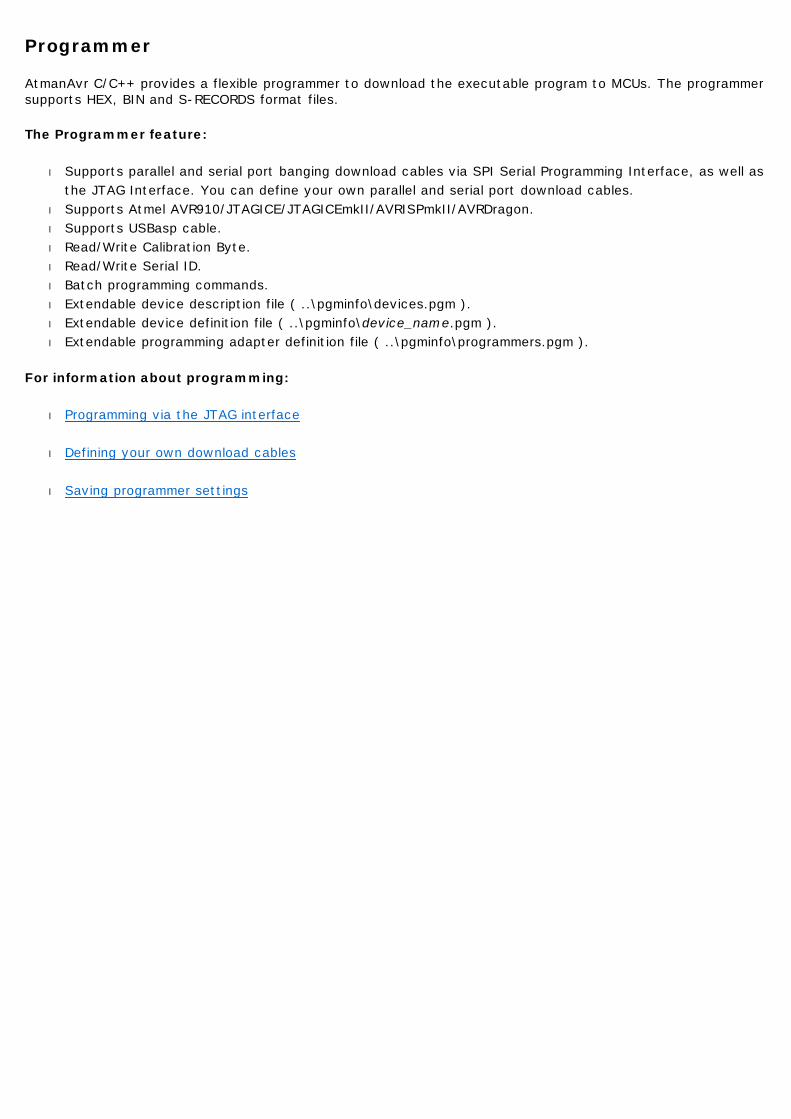
Programmer
AtmanAvr C/C++ provides a flexible programmer to download the executable program to MCUs. The programmer supports HEX, BIN and S-RECORDS format files.
The Programmer feature:
l Supports parallel and serial port banging download cables via SPI Serial Programming Interface, as well as the JTAG Interface. You can define your own parallel and serial port download cables.
l Supports Atmel AVR910/JTAGICE/JTAGICEmkII/AVRISPmkII/AVRDragon. l Supports USBasp cable. l Read/Write Calibration Byte. l Read/Write Serial ID. l Batch programming commands. l Extendable device description file ( ..\pgminfo\devices.pgm ). l Extendable device definition file ( ..\pgminfo\device_name.pgm ). l Extendable programming adapter definition file ( ..\pgminfo\programmers.pgm ).
For information about programming:
l Programming via the JTAG interface
l Defining your own download cables
l Saving programmer settings
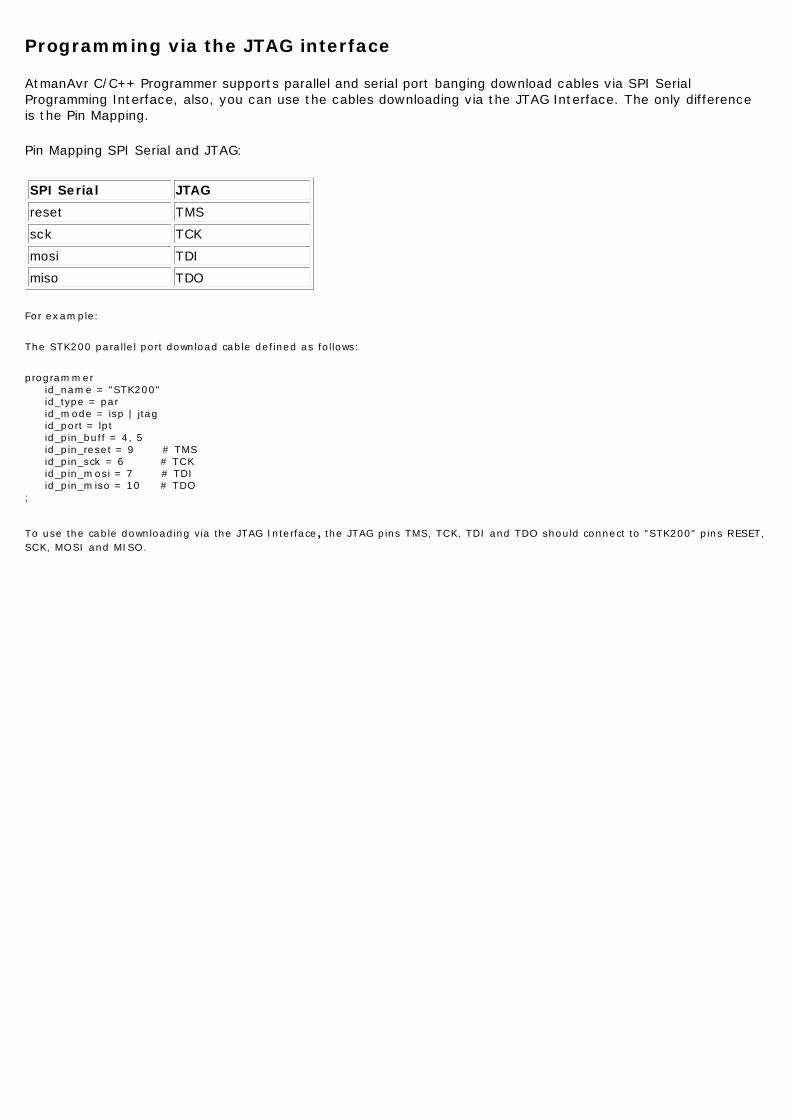
Programming via the JTAG interface
AtmanAvr C/C++ Programmer supports parallel and serial port banging download cables via SPI Serial Programming Interface, also, you can use the cables downloading via the JTAG Interface. The only difference is the Pin Mapping.
Pin Mapping SPI Serial and JTAG:
For example:
The STK200 parallel port download cable defined as follows:
programmer id_name = "STK200" id_type = par id_mode = isp | jtag id_port = lpt id_pin_buff = 4, 5 id_pin_reset = 9 # TMS id_pin_sck = 6 # TCK id_pin_mosi = 7 # TDI id_pin_miso = 10 # TDO ;
To use the cable downloading via the JTAG Interface, the JTAG pins TMS, TCK, TDI and TDO should connect to "STK200" pins RESET, SCK, MOSI and MISO.
SPI Serial JTAG
reset TMS
sck TCK
mosi TDI
miso TDO
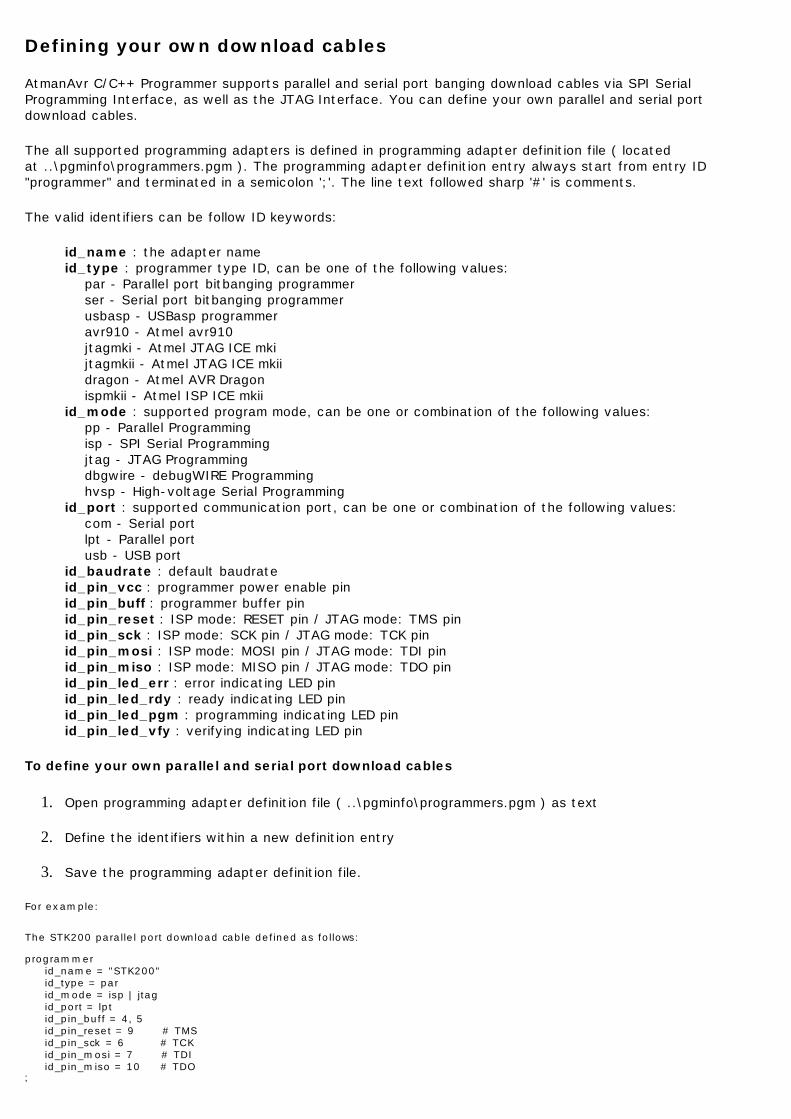
Defining your own download cables
AtmanAvr C/C++ Programmer supports parallel and serial port banging download cables via SPI Serial Programming Interface, as well as the JTAG Interface. You can define your own parallel and serial port download cables.
The all supported programming adapters is defined in programming adapter definition file ( located at ..\pgminfo\programmers.pgm ). The programming adapter definition entry always start from entry ID "programmer" and terminated in a semicolon ';'. The line text followed sharp '#' is comments.
The valid identifiers can be follow ID keywords:
id_name : the adapter name id_type : programmer type ID, can be one of the following values: par - Parallel port bitbanging programmer ser - Serial port bitbanging programmer usbasp - USBasp programmer avr910 - Atmel avr910 jtagmki - Atmel JTAG ICE mki jtagmkii - Atmel JTAG ICE mkii dragon - Atmel AVR Dragon ispmkii - Atmel ISP ICE mkii id_mode : supported program mode, can be one or combination of the following values: pp - Parallel Programming isp - SPI Serial Programming jtag - JTAG Programming dbgwire - debugWIRE Programming hvsp - High-voltage Serial Programming id_port : supported communication port, can be one or combination of the following values: com - Serial port lpt - Parallel port usb - USB port id_baudrate : default baudrate id_pin_vcc : programmer power enable pin id_pin_buff : programmer buffer pin id_pin_reset : ISP mode: RESET pin / JTAG mode: TMS pin id_pin_sck : ISP mode: SCK pin / JTAG mode: TCK pin id_pin_mosi : ISP mode: MOSI pin / JTAG mode: TDI pin id_pin_miso : ISP mode: MISO pin / JTAG mode: TDO pin id_pin_led_err : error indicating LED pin id_pin_led_rdy : ready indicating LED pin id_pin_led_pgm : programming indicating LED pin id_pin_led_vfy : verifying indicating LED pin
To define your own parallel and serial port download cables
1. Open programming adapter definition file ( ..\pgminfo\programmers.pgm ) as text
2. Define the identifiers within a new definition entry
3. Save the programming adapter definition file.
For example:
The STK200 parallel port download cable defined as follows: programmer
id_name = "STK200" id_type = par
id_mode = isp | jtag id_port = lpt
id_pin_buff = 4, 5 id_pin_reset = 9 # TMS
id_pin_sck = 6 # TCK id_pin_mosi = 7 # TDI id_pin_miso = 10 # TDO
;
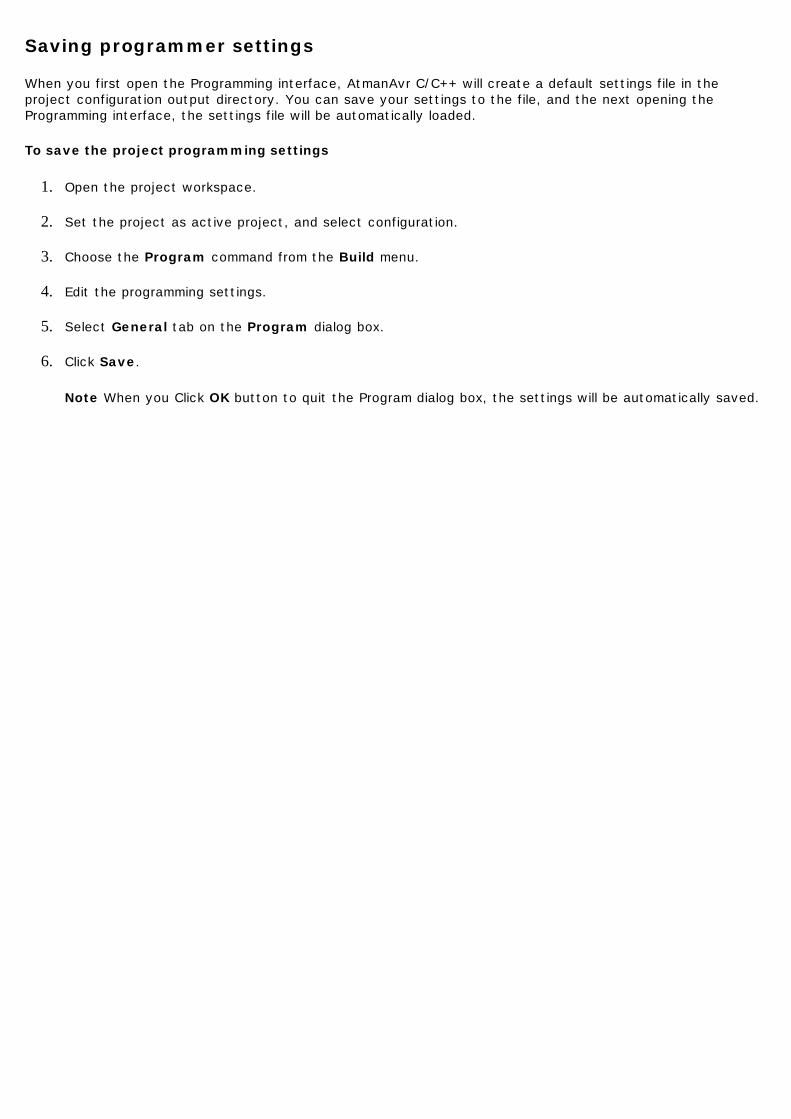
Saving programmer settings
When you first open the Programming interface, AtmanAvr C/C++ will create a default settings file in the project configuration output directory. You can save your settings to the file, and the next opening the Programming interface, the settings file will be automatically loaded.
To save the project programming settings
1. Open the project workspace.
2. Set the project as active project, and select configuration.
3. Choose the Program command from the Build menu.
4. Edit the programming settings.
5. Select General tab on the Program dialog box.
6. Click Save.
Note When you Click OK button to quit the Program dialog box, the settings will be automatically saved.
Register AtmanAvr C/C++ IDE
AtmanAvr is shareware, for more register information please visit the website How to register AtmanAvr C/C++ IDE .
If you want register within evaluation period, you can use Register command to show Register window .
AtmanAvr C/C++ now supports to register via an unique Series ID, so after you send the Series ID, you will receive a License file. During you wait for the License file, you never need to remain the software opening.
To show Register window
l From Tools menu click Register.
To register AtmanAvr C/C++
1. From Tools menu select Register.
2. On Registration window, click Order to purchase.
3. On Registration window, click Send to email the Series ID to [email protected].
4. Copy the received License file to the [install dir]\bin\.
Note: Recommend to backup your License file.

Create a Simple Application
AtmanAvr C/C++ provides several tools including ProjectWizard and CodeWizard. For an application, You create projects through ProjectWizard first, and you can edit the project through CodeWizard anytime.
l Create an Application Through ProjectWizard
l Edit Project Dynamically Through CodeWizard

Create an Application
When you create an application through ProjectWizard, you set the MCU environment step by step.
In this section, we create a simple C language executable application named "Simple".
l Start-up ProjectWizard l Setting MCU l Setting IO Ports l Setting Timer/Counter l Setting External Interrupts l Setting ADC l Setting Analog Comparator l Setting SPI l Setting UART l Setting TWI l Setting LCD l Final Project
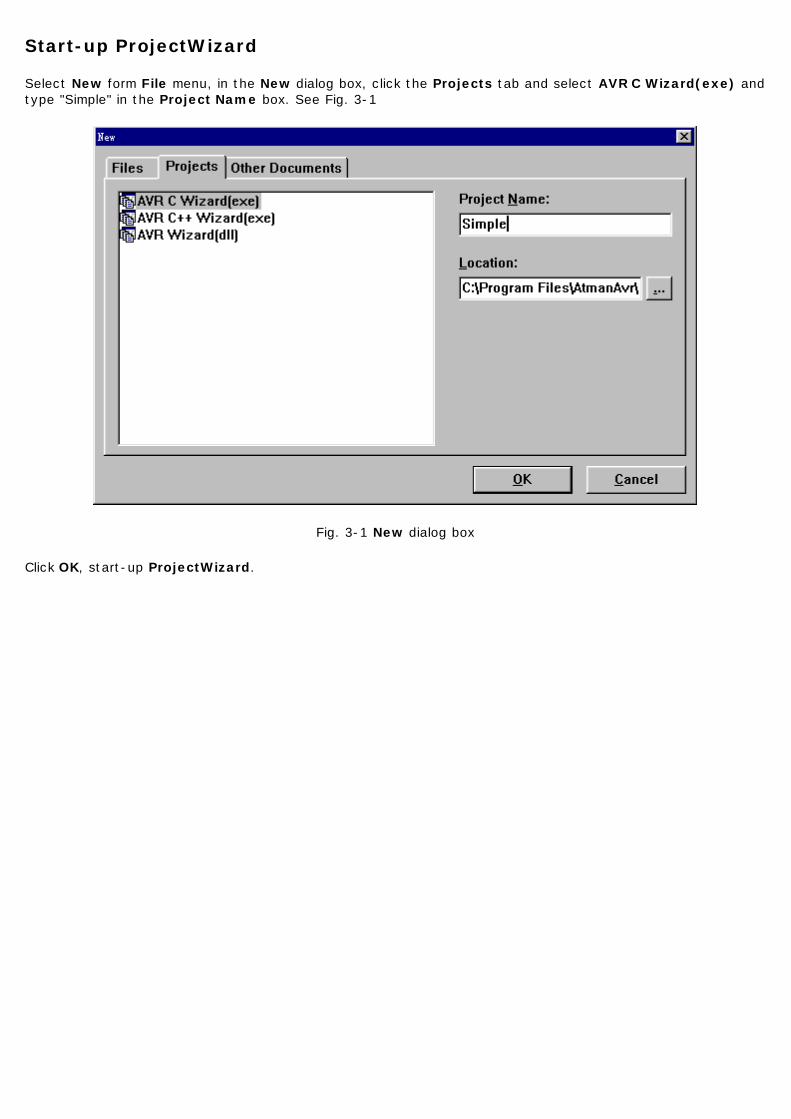
Start-up ProjectWizard
Select New form File menu, in the New dialog box, click the Projects tab and select AVR C Wizard(exe) and type "Simple" in the Project Name box. See Fig. 3-1
Fig. 3-1 New dialog box
Click OK, start-up ProjectWizard.
Setting MCU
Select MCU interface
Chip: The chip type can be specified using the Chip combo box. Select the "Custom" to create an empty project workspace.
Clock: Specify the system clock frequency.
Crystal Oscillator Divider Enabled: (*)
Divider: specify the division ratio
Check Reset Source: (*) The code will be generated that allows identification of the conditions that caused the chip reset when checked.
Watchdog:
Enabled: Activates the watchdog timer when checked.
Prescale: Sets the watchdog timer's Oscillator Prescaller.
External RAM: (*)
Size: The external RAM size. Sets 0 when external RAM is unused.
Sector Limit: Configure different wait-states for different External Memory addresses.
U_Wait-state: Control the number of wait-states for the upper sector of the external memory address space.
L_Wait-state: Control the number of wait-states for the lower sector of the external memory address space.
Released Pins: Release Port C pins for normal Port Pin function.
Setting external memory interface, See Also External RAM Interface.
Note: (*) Depended on MCU
For Simple project
Chip - AT90S8515;
Clock - 4.0MHz;
Watchdog - check Enabled£¬Prescale select OSC/16;
External RAM - unused.
Click Next.
Setting IO Ports
IO Ports interface:
Data Direction:
I: Input
O: Output
Pullup/Output:
Data Direction = I:
P: Pullup
T: Tri-state (Hi-Z)
Data Direction = O:
0: Output Low (Sink)
1: Output High (Source)
The number of IO ports depended on MCU.
For Simple project
No settings.
Click Next.
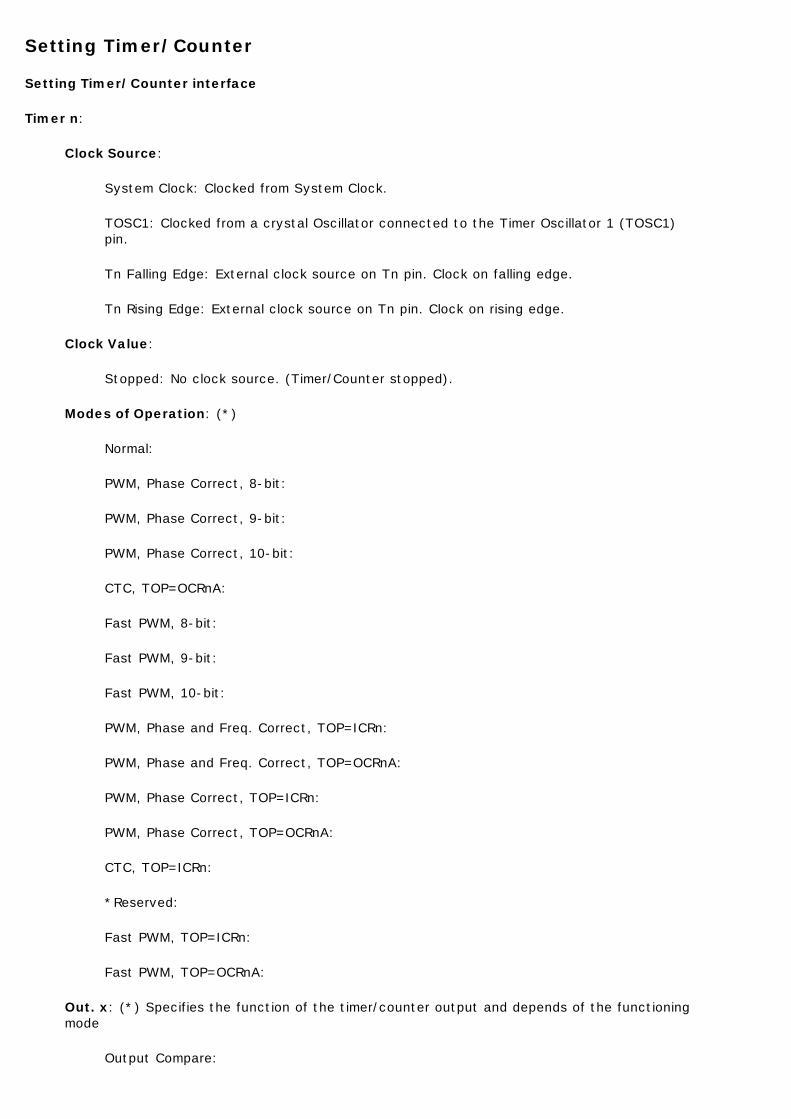
Setting Timer/Counter
Setting Timer/Counter interface
Timer n:
Clock Source:
System Clock: Clocked from System Clock.
TOSC1: Clocked from a crystal Oscillator connected to the Timer Oscillator 1 (TOSC1) pin.
Tn Falling Edge: External clock source on Tn pin. Clock on falling edge.
Tn Rising Edge: External clock source on Tn pin. Clock on rising edge.
Clock Value:
Stopped: No clock source. (Timer/Counter stopped).
Modes of Operation: (*)
Normal:
PWM, Phase Correct, 8-bit:
PWM, Phase Correct, 9-bit:
PWM, Phase Correct, 10-bit:
CTC, TOP=OCRnA:
Fast PWM, 8-bit:
Fast PWM, 9-bit:
Fast PWM, 10-bit:
PWM, Phase and Freq. Correct, TOP=ICRn:
PWM, Phase and Freq. Correct, TOP=OCRnA:
PWM, Phase Correct, TOP=ICRn:
PWM, Phase Correct, TOP=OCRnA:
CTC, TOP=ICRn:
*Reserved:
Fast PWM, TOP=ICRn:
Fast PWM, TOP=OCRnA:
Out. x: (*) Specifies the function of the timer/counter output and depends of the functioning mode
Output Compare:

Disconnected: Normal port operation, OCnx disconnected.
Toogle:Toggle OCnx on compare match.
Clear: Clear OCnx on compare match (set output to low level).
Set: Set OCnx on compare match (set output to high level).
Pulse Width Modulation:
disconnected: Normal port operation, OCnx disconnected.
*Reserved: Unused.
Normal:
Inverted:
Input Capture: (*)
Noise Canceler: Activates the Input Capture Noise Canceler when checked.
ICP Rising Edge: Selects which edge on the Input Capture Pin (ICPn) that is used to trigger a capture event. When checked, a rising (positive) edge will trigger the capture. Ortherwise a falling (negative) edge is used as trigger.
Interrupt on: Specifies if an interrupt is to be generated on timer/counter n.
Capture Event: Timer/Counter n Capture Event.
Compare Match x: Timer/Counter n Compare Match x.
Overflow: Timer/Counter n Overflow.
Val: Specifies the initial value of timer/counter n at startup.
Cmp.x: (*) Specifies the initial value of timer/counter n output compare registers x.
n: timer/counter÷ 0, 1, 2 or 3 x: Output A, B or C
Cal...: Calculator of timer/counter. When dismissed by click OK, the Val and Cmp.x of the current timer/counter are filled in automatically.
Note: (*) Depended on MCU
For Simple project
Use timer/counter0£º
Clock Source - System Clock
Clock Value - 4.0MHz
Interrupt on - Overflow
Click Next.
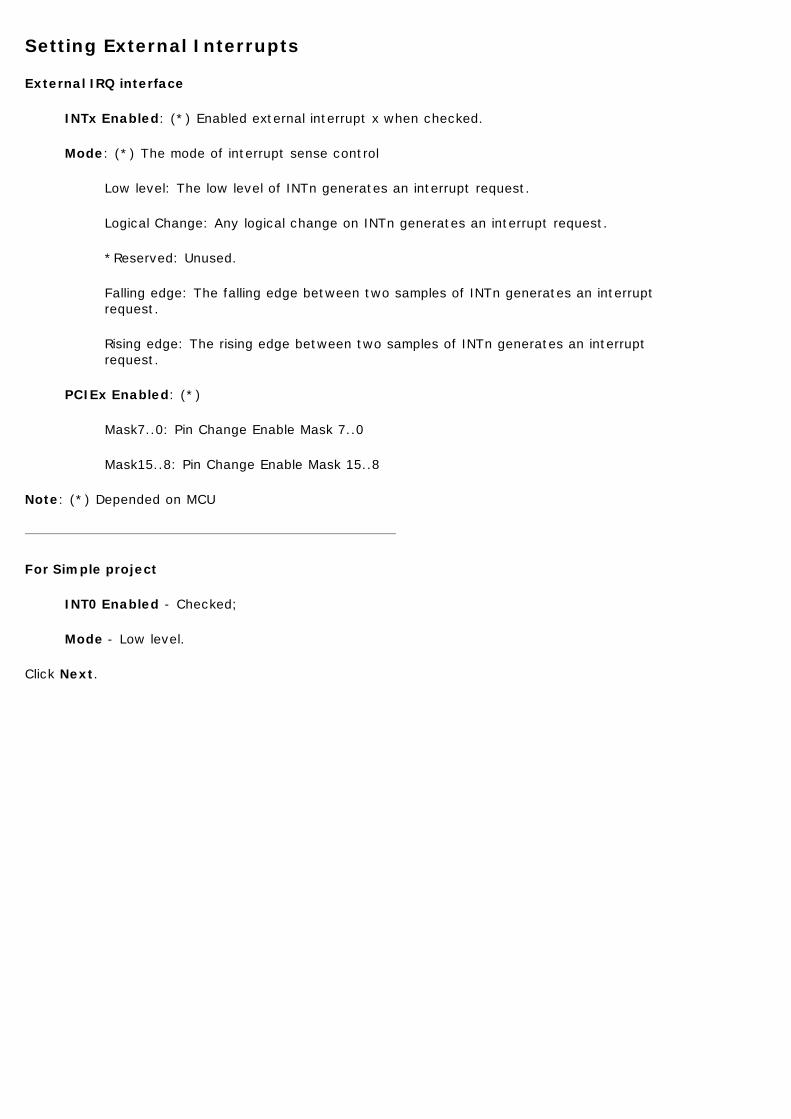
Setting External Interrupts
External IRQ interface
INTx Enabled: (*) Enabled external interrupt x when checked.
Mode: (*) The mode of interrupt sense control
Low level: The low level of INTn generates an interrupt request.
Logical Change: Any logical change on INTn generates an interrupt request.
*Reserved: Unused.
Falling edge: The falling edge between two samples of INTn generates an interrupt request.
Rising edge: The rising edge between two samples of INTn generates an interrupt request.
PCIEx Enabled: (*)
Mask7..0: Pin Change Enable Mask 7..0
Mask15..8: Pin Change Enable Mask 15..8
Note: (*) Depended on MCU
For Simple project
INT0 Enabled - Checked;
Mode - Low level.
Click Next.
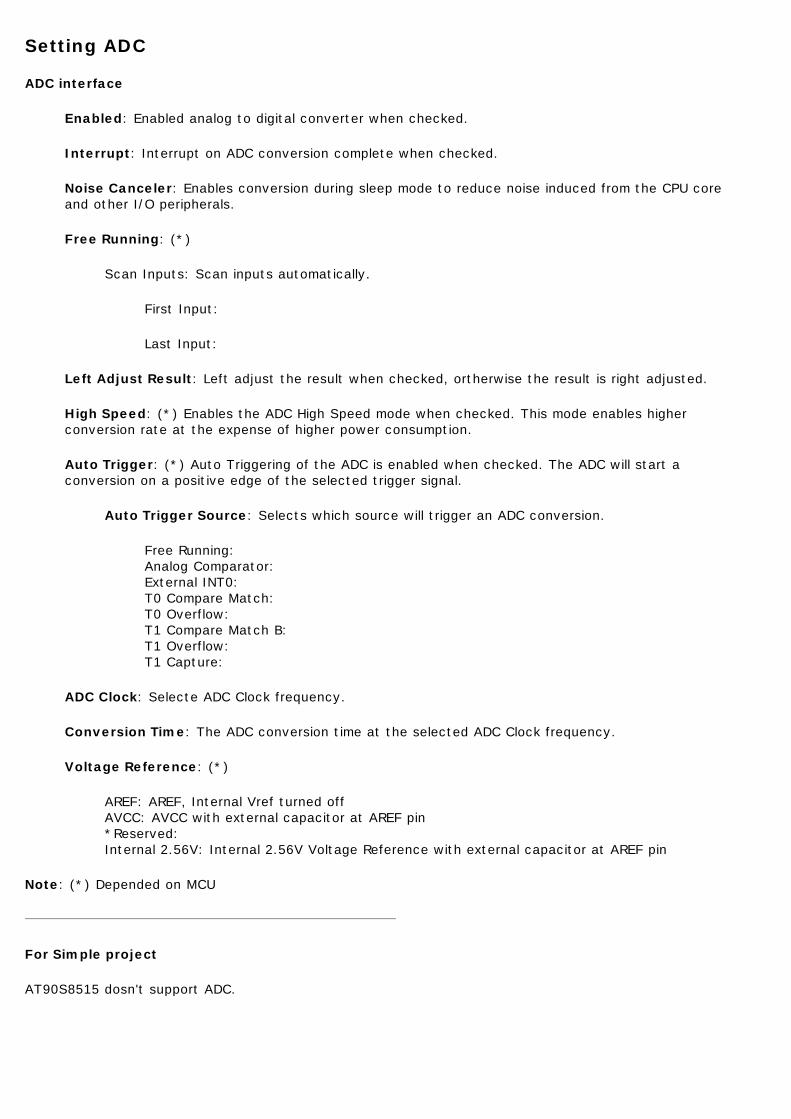
Setting ADC
ADC interface
Enabled: Enabled analog to digital converter when checked.
Interrupt: Interrupt on ADC conversion complete when checked.
Noise Canceler: Enables conversion during sleep mode to reduce noise induced from the CPU core and other I/O peripherals.
Free Running: (*)
Scan Inputs: Scan inputs automatically.
First Input:
Last Input:
Left Adjust Result: Left adjust the result when checked, ortherwise the result is right adjusted.
High Speed: (*) Enables the ADC High Speed mode when checked. This mode enables higher conversion rate at the expense of higher power consumption.
Auto Trigger: (*) Auto Triggering of the ADC is enabled when checked. The ADC will start a conversion on a positive edge of the selected trigger signal.
Auto Trigger Source: Selects which source will trigger an ADC conversion.
Free Running: Analog Comparator: External INT0: T0 Compare Match: T0 Overflow: T1 Compare Match B: T1 Overflow: T1 Capture:
ADC Clock: Selecte ADC Clock frequency.
Conversion Time: The ADC conversion time at the selected ADC Clock frequency.
Voltage Reference: (*)
AREF: AREF, Internal Vref turned off AVCC: AVCC with external capacitor at AREF pin *Reserved: Internal 2.56V: Internal 2.56V Voltage Reference with external capacitor at AREF pin
Note: (*) Depended on MCU
For Simple project
AT90S8515 dosn't support ADC.
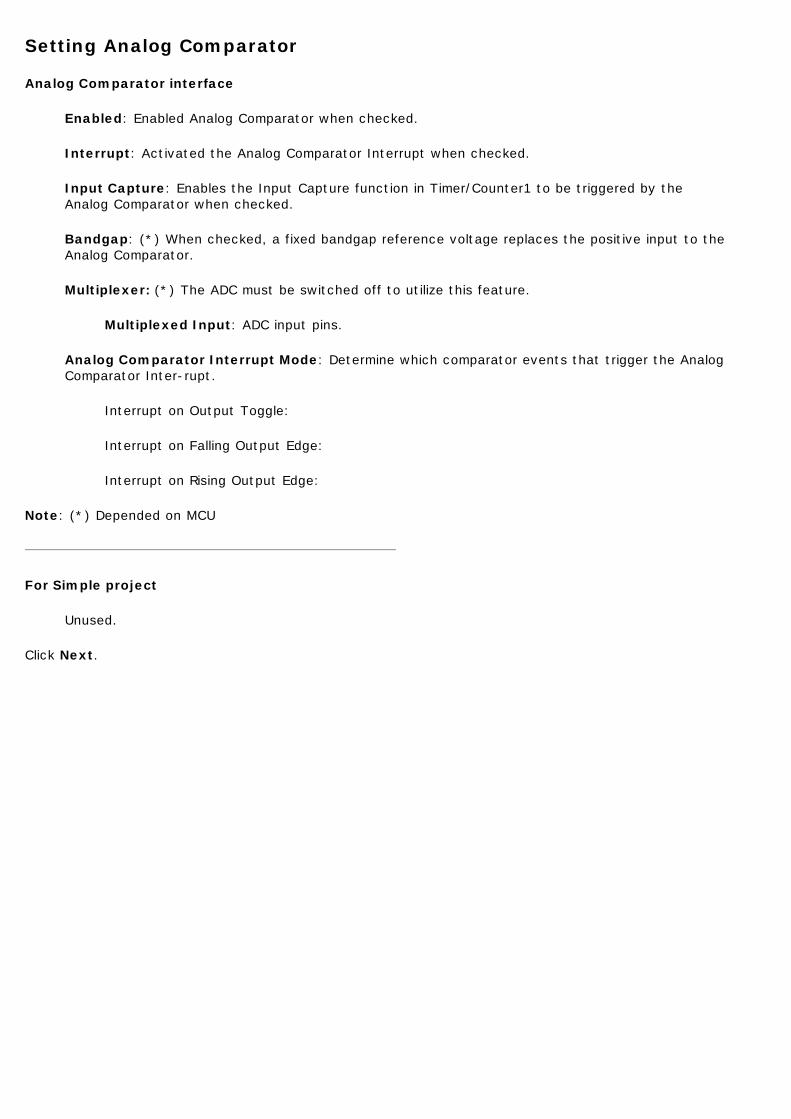
Setting Analog Comparator
Analog Comparator interface
Enabled: Enabled Analog Comparator when checked.
Interrupt: Activated the Analog Comparator Interrupt when checked.
Input Capture: Enables the Input Capture function in Timer/Counter1 to be triggered by the Analog Comparator when checked.
Bandgap: (*) When checked, a fixed bandgap reference voltage replaces the positive input to the Analog Comparator.
Multiplexer: (*) The ADC must be switched off to utilize this feature.
Multiplexed Input: ADC input pins.
Analog Comparator Interrupt Mode: Determine which comparator events that trigger the Analog Comparator Inter-rupt.
Interrupt on Output Toggle:
Interrupt on Falling Output Edge:
Interrupt on Rising Output Edge:
Note: (*) Depended on MCU
For Simple project
Unused.
Click Next.
Setting SPI
SPI interface
SPI Enabled: Enabled SPI when checked.
SPI Interrupt: Enabled SPI interrupt when checked.
Double Speed: (*) When checked the SPI speed (SCK Frequency) will be doubled when the SPI is in Master mode.
SPI Clock Rate: Control the SCK rate of the device configured as a Master.
SPI Type: Master or Slave SPI mode.
Clock Phase: Cycle Half or Cycle Start.
Clock Polarity: SCK is high or low when idle.
Data Order: The LSB or MSB of the data word is transmitted first.
Note: (*) Depended on MCU
For Simple project
Unused.
Click Next.
Setting UART
UART interface
Receiver: Enables the UART Receiver when checked.
Rx Interrupt: Enables USART Receive Complete interrupt when checked.
Transmitter: Enables the UART Transmitter when checked.
Tx Interrupt: Enables USART Transmitter Complete interrupt when checked.
Multi-Processor Communication: (*) When checked enables the Multi-processor Communication mode.
Double Speed: (*) Double the transfer rate, only has effect for the asynchronous operation.
Mode: (*) Selects between asynchronous and synchronous mode of operation.
Clock Polarity: (*) Sets the relationship between data output change and data input sample, and the synchronous clock (XCK), used for Synchronous mode only.
Tx Rising Edge: Transmitted data changed on falling XCK edge, and received data sampled on rising XCK edge. Tx Falling Edge: Transmitted data changed on rising XCK edge, and received data sampled on falling XCK edge.
Parity:(*) Enable and set type of parity generation and check.
Disabled: *Reserved: Even Parity: Odd Parity:
Stop Bit(s): Selects the number of stop bits to be inserted by the Transmitter. The Receiver ignores this setting.
Baud Rate: Sets the Transmitter baud rate.
Character Size: Sets the number of data bits (character size) in a frame the Receiver and Transmitter use.
Baud Rate Error:
Note: (*) Depended on MCU
For Simple project
Unused.
Click Next.
Setting TWI
Two-wire interface
Enabled: When checked enables TWI operation and activates the TWI interface.
Interrupt: When checked enables TWI interrupt.
Enable Acknowledge: If checked, the ACK pulse is generated on the TWI bus if the following conditions are met: 1. The device's own slave address has been received. 2. A general call has been received, while the TWGCE bit in the TWAR is set. 3. A data byte has been received in Master Receiver or Slave Receiver mode.
Bit Rate Prescaler: Selects the bit rate prescaler.
Bit Rate Register: Selects the division factor for the bit rate generator.
SCL Frequency (kHz): Sets the SCL frequency.
Actual SCL Frequency: The actual SCL frequency at the current Bit Rate Prescaler and Bit Rate Register.
For Simple project
AT90S8515 dosn't support TWI.

Setting LCD
LCD interface
LCD Port: Specify the MCU port connected with LCD.
Chars./Line: Specify the number of characters per display line.
For Simple project
LCD Port - PortB
Chars./Line - 16, 16 characters per display line.
Click Finish.
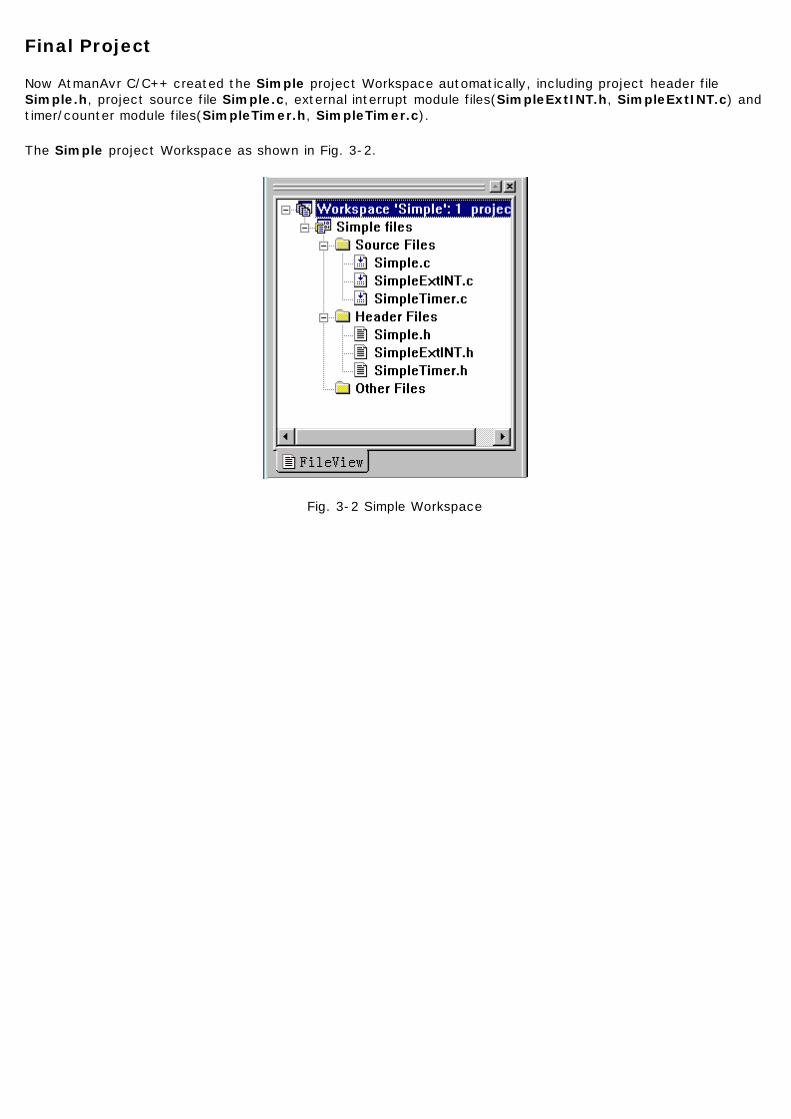
Final Project
Now AtmanAvr C/C++ created the Simple project Workspace automatically, including project header file Simple.h, project source file Simple.c, external interrupt module files(SimpleExtINT.h, SimpleExtINT.c) and timer/counter module files(SimpleTimer.h, SimpleTimer.c).
The Simple project Workspace as shown in Fig. 3-2.
Fig. 3-2 Simple Workspace

Edit Project Dynamically
You can add modules and interrupt routines to an existing project, or delete some interrupt routines from an existing project through CodeWizard.
Now we edit the Simple project using CodeWizard.
l CodeWizard Window
l Edit Project
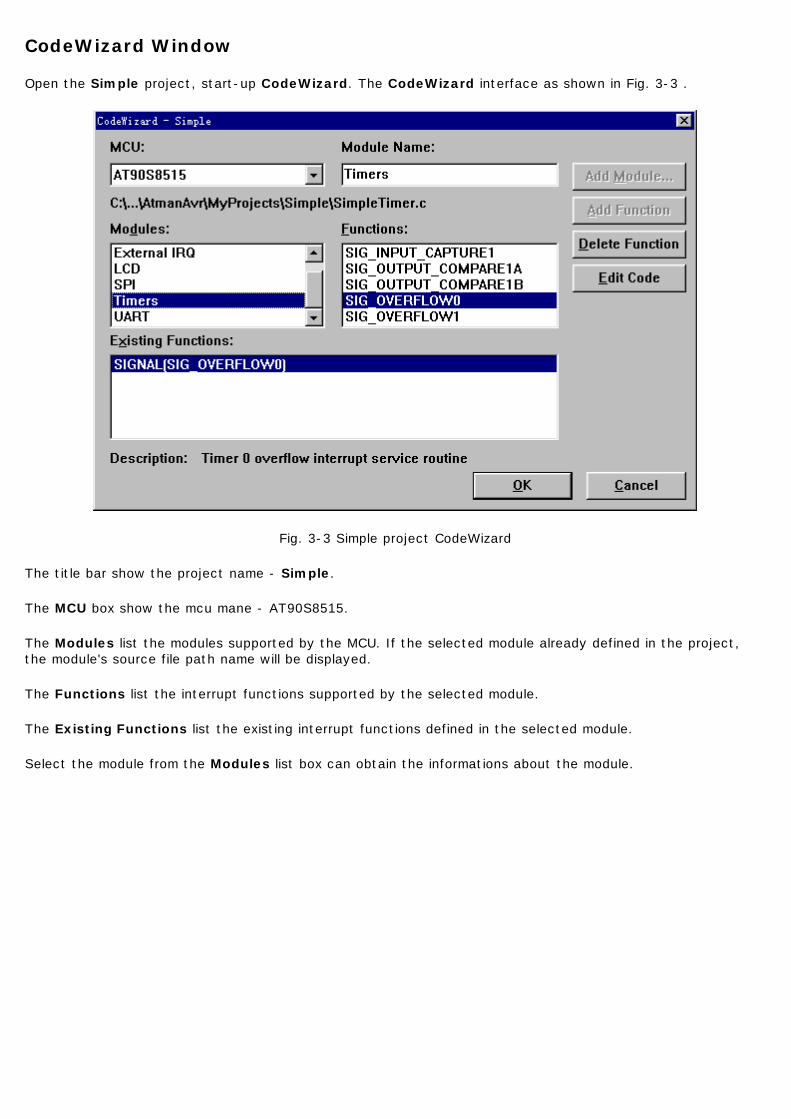
CodeWizard Window
Open the Simple project, start-up CodeWizard. The CodeWizard interface as shown in Fig. 3-3 .
Fig. 3-3 Simple project CodeWizard
The title bar show the project name - Simple.
The MCU box show the mcu mane - AT90S8515.
The Modules list the modules supported by the MCU. If the selected module already defined in the project, the module's source file path name will be displayed.
The Functions list the interrupt functions supported by the selected module.
The Existing Functions list the existing interrupt functions defined in the selected module.
Select the module from the Modules list box can obtain the informations about the module.
Edit Project
First, we add the SPI module to the Simple Project.
l Selecte the SPI module from Modules list box, click Add Module. l ProjectWizard start-up l Enable SPI and SPI interrupt, click Finish.
The SPI module files are created and inserted in the Simple project.
Next, we add the external interrupt 1 to the Simple project.
l Selecte the External IRQ module from Modules list box. l Selecte SIG_INTERRUPT1 from the Functions list box, click Add Function.
In the Existing Functions list box, you can see the function SIGNAL(SIG_INTERRUPT1). If click OK, the function will add to the project, otherwise will cancel this action.
Note: The action of adding SPI module can't be canceled.

Create an User Library
AtmanAvr C/C++ supports creating and using the user library.
Generally, the user libraries are built based on avr2(e.g. AT90S8515) for compatibility, also, you can build an independent library for avr2, avr3, avr4, avr5 or avr6. You can use them in any compatible devices. So the libraries should not include IO register, they should be independent of the actual device.
l Create User Library
l Use User Library

Creating User Library
Creating user library must create a project workspace, the project type is AVR Wizard library. For the library project, ProjectWizard and CodeWizard are ignored.
To Create User Library
1. From the File menu, click New. 2. In the New dialog box, click the Projects tab and select the AVR Wizard(lib) project types to
launch the wizard.
If necessary, specify the directory where the project workspace files are stored by using the Location box.
After building the project, the library file (ProjectName.a) created.

Using User Library
AtmanAvr C/C++ supports using the user library as Additional library.
To Use User Library
l Copy the library (.a) to the directory \avrgcc\avr\lib and copy the header file (.h) to the directory \avrgcc\avr\include. - or - Setting Additional Libraries and Directories and Specifying Additional Include Directories in Project Settings dialog box.

AVRGCC Language Reference
In this section, we just discuss the C language about handling the hardware of the AVR microcontrollers, not Standard C.
l Variables
l Interrupts and Signals
l Assembler Code
l Memory Sections

Variables
AVR microcontrollers have several memory space, such as SRAM, FLASH and EEPROM. You can declare variables anywhere. The creation and access of a variable in SRAM, in FLASH and in EEPROM is different each other.
l Variables in the Program Memory
l Variables in the Eeprom
l External RAM Interface

Variables in the Program Memory
Placing data in ROM is very useful to embedded applications: the data is always available and doesn't have to be generated at startup. Even more importantly, the data cannot get corrupted by an errant application, which reduces the number of considerations when debugging.
Since the ROM resides in a different address space, we need a way to tell the compiler to place variables there. We also need a way to access the data (i.e. the compiler has to use the lpm instruction.)
The first detail is provided by the __attribute__ keyword. By tagging a variable with __attribute__((progmem)), you can force it to reside in the ROM. Variables with this attribute cannot be accessed like variables not using the attribute. You need to use the macros described in this section to access the data in ROM. There are a number of data types already defined for the primitive types.
The second step, accessing the data, is done using the Program Memory API.
For example:
prog_char LINE = {1};
char res = PRG_RDB(&LINE);
AtmanAvr C/C++ already defined a macro FLASH , the variable also can be defined as follows:
FLASH char str[] = {"string in flash"};
FLASH double d = 123.456;
Primitive types in program memory
Type Name Definitionprog_void void __attribute__((progmem))prog_char char __attribute__((progmem))prog_uchar unsigned char __attribute__((progmem))prog_int int __attribute__((progmem))prog_long long __attribute__((progmem))prog_long_long long long __attribute__((progmem))PGM_P prog_char const*PGM_VOID_P prog_void const*
Variables in the Eeprom
All AVR processors contain a bank of nonvolatile memory. Unfortunately, this memory doesn't reside in the same address space as the static RAM; the architecture requires that the EEPROM cells be accessed through I/O registers. The EEPROM API provides a high-level interface to the hardware, which makes using the nonvolatile memory much easier. To gain access to these functions, include the file eeprom.h.
The routines take an argument representing the address of the cell. Rather than using hard-coded numbers or defined symbols, it would be nice to use actual variables. AVR-GCC allows this by using the __attribute__ keyword. example:
static uint8_t val1 __attribute__((section(".eeprom")));
AtmanAvr C/C++ already defined a macro EEPROM , the variable also can be defined as follows:
EEPROM char str[] = {"string in eeprom"};
EEPROM double d = 123.456;
/* Read value from EEPROM */
double dsram;
eeprom_read_block(&dsram, &d, sizeof(double)); /* dsram = 123.456 */
/* Write value to EEPROM */
dsram = 654.321;
eeprom_write_block(&dsram, &d, sizeof(double)); /* d = 654.321 */
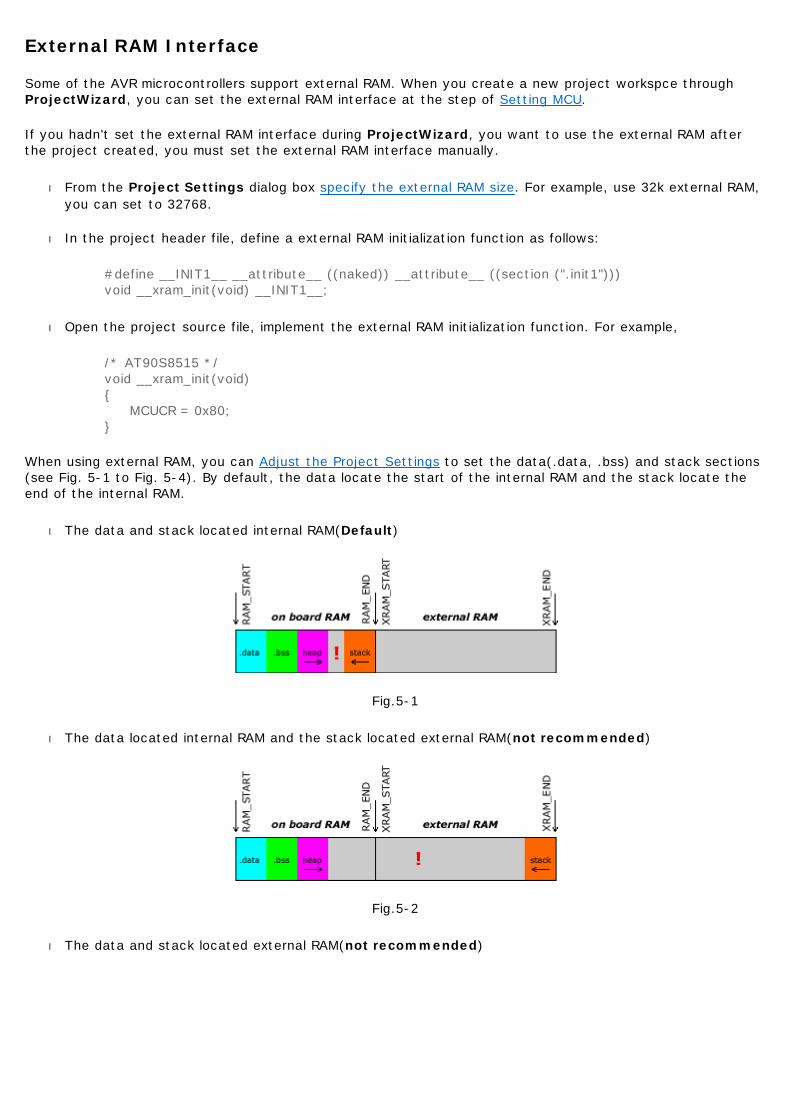
External RAM Interface
Some of the AVR microcontrollers support external RAM. When you create a new project workspce through ProjectWizard, you can set the external RAM interface at the step of Setting MCU.
If you hadn't set the external RAM interface during ProjectWizard, you want to use the external RAM after the project created, you must set the external RAM interface manually.
l From the Project Settings dialog box specify the external RAM size. For example, use 32k external RAM, you can set to 32768.
l In the project header file, define a external RAM initialization function as follows:
#define __INIT1__ __attribute__ ((naked)) __attribute__ ((section (".init1"))) void __xram_init(void) __INIT1__;
l Open the project source file, implement the external RAM initialization function. For example,
/* AT90S8515 */ void __xram_init(void) { MCUCR = 0x80; }
When using external RAM, you can Adjust the Project Settings to set the data(.data, .bss) and stack sections(see Fig. 5-1 to Fig. 5-4). By default, the data locate the start of the internal RAM and the stack locate the end of the internal RAM.
l The data and stack located internal RAM(Default)
Fig.5-1
l The data located internal RAM and the stack located external RAM(not recommended)
Fig.5-2
l The data and stack located external RAM(not recommended)
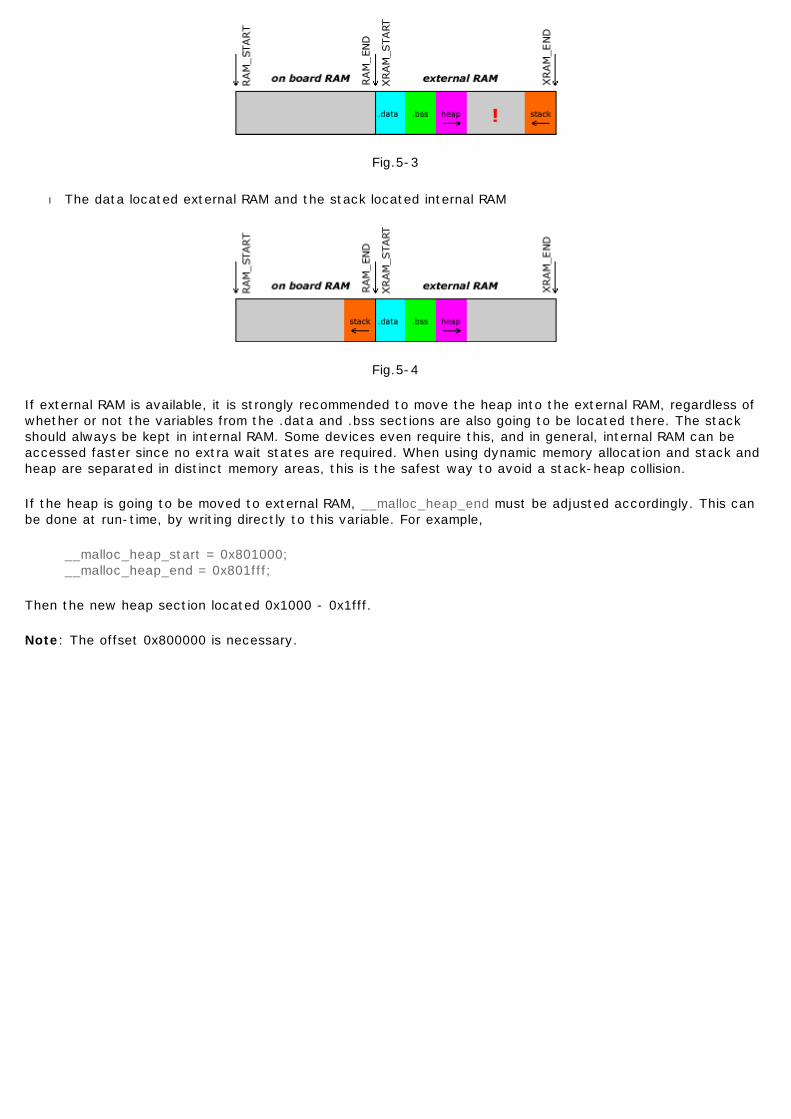
Fig.5-3
l The data located external RAM and the stack located internal RAM
Fig.5-4
If external RAM is available, it is strongly recommended to move the heap into the external RAM, regardless of whether or not the variables from the .data and .bss sections are also going to be located there. The stack should always be kept in internal RAM. Some devices even require this, and in general, internal RAM can be accessed faster since no extra wait states are required. When using dynamic memory allocation and stack and heap are separated in distinct memory areas, this is the safest way to avoid a stack-heap collision.
If the heap is going to be moved to external RAM, __malloc_heap_end must be adjusted accordingly. This can be done at run-time, by writing directly to this variable. For example,
__malloc_heap_start = 0x801000; __malloc_heap_end = 0x801fff;
Then the new heap section located 0x1000 - 0x1fff.
Note: The offset 0x800000 is necessary.

Interrupts and Signals
Interrupts are used when you have to react fast to special incidents. These incidents are actuated either through the internal pheripherie or through external signals. During the running program an interrupt routine is called in order to analyse these incidents.
There the interrupt is processed and jumped back to the place where the program has been left before.
That an interrupt is licensed different bits have to be set in the suitable registers of the peripherie and the status register.
For the use of the interrupt functions include the files <avr/interrupt.h>.
For the definition of such an interrupt routine you need to write the keyword "ISR".
l Signal Names
l Interrupt Handler Functions
See Also Interrupt API
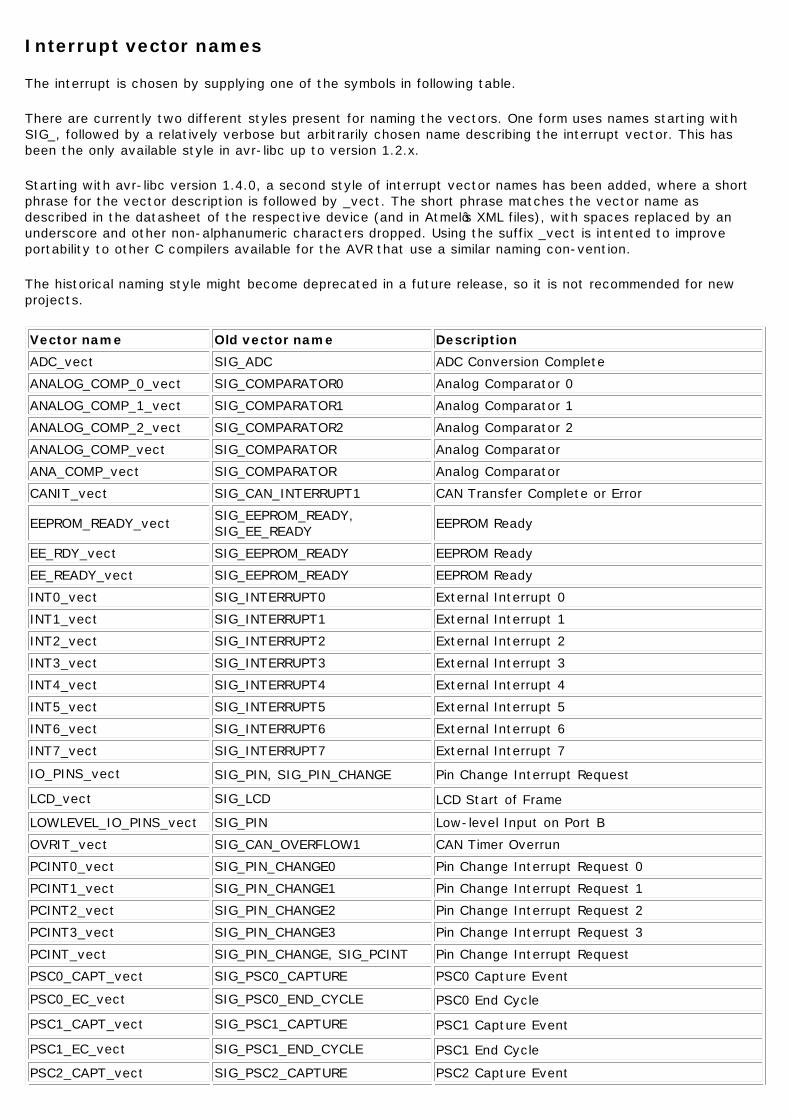
Interrupt vector names
The interrupt is chosen by supplying one of the symbols in following table.
There are currently two different styles present for naming the vectors. One form uses names starting with SIG_, followed by a relatively verbose but arbitrarily chosen name describing the interrupt vector. This has been the only available style in avr-libc up to version 1.2.x.
Starting with avr-libc version 1.4.0, a second style of interrupt vector names has been added, where a short phrase for the vector description is followed by _vect. The short phrase matches the vector name as described in the datasheet of the respective device (and in Atmel’s XML files), with spaces replaced by an underscore and other non-alphanumeric characters dropped. Using the suffix _vect is intented to improve portability to other C compilers available for the AVR that use a similar naming con-vention.
The historical naming style might become deprecated in a future release, so it is not recommended for new projects.
Vector name Old vector name Description
ADC_vect SIG_ADC ADC Conversion Complete
ANALOG_COMP_0_vect SIG_COMPARATOR0 Analog Comparator 0
ANALOG_COMP_1_vect SIG_COMPARATOR1 Analog Comparator 1
ANALOG_COMP_2_vect SIG_COMPARATOR2 Analog Comparator 2
ANALOG_COMP_vect SIG_COMPARATOR Analog Comparator
ANA_COMP_vect SIG_COMPARATOR Analog Comparator
CANIT_vect SIG_CAN_INTERRUPT1 CAN Transfer Complete or Error
EEPROM_READY_vect SIG_EEPROM_READY, SIG_EE_READY EEPROM Ready
EE_RDY_vect SIG_EEPROM_READY EEPROM Ready
EE_READY_vect SIG_EEPROM_READY EEPROM Ready
INT0_vect SIG_INTERRUPT0 External Interrupt 0
INT1_vect SIG_INTERRUPT1 External Interrupt 1
INT2_vect SIG_INTERRUPT2 External Interrupt 2
INT3_vect SIG_INTERRUPT3 External Interrupt 3
INT4_vect SIG_INTERRUPT4 External Interrupt 4
INT5_vect SIG_INTERRUPT5 External Interrupt 5
INT6_vect SIG_INTERRUPT6 External Interrupt 6
INT7_vect SIG_INTERRUPT7 External Interrupt 7
IO_PINS_vect SIG_PIN, SIG_PIN_CHANGE Pin Change Interrupt Request LCD_vect SIG_LCD LCD Start of Frame LOWLEVEL_IO_PINS_vect SIG_PIN Low-level Input on Port B
OVRIT_vect SIG_CAN_OVERFLOW1 CAN Timer Overrun
PCINT0_vect SIG_PIN_CHANGE0 Pin Change Interrupt Request 0
PCINT1_vect SIG_PIN_CHANGE1 Pin Change Interrupt Request 1
PCINT2_vect SIG_PIN_CHANGE2 Pin Change Interrupt Request 2
PCINT3_vect SIG_PIN_CHANGE3 Pin Change Interrupt Request 3
PCINT_vect SIG_PIN_CHANGE, SIG_PCINT Pin Change Interrupt Request
PSC0_CAPT_vect SIG_PSC0_CAPTURE PSC0 Capture Event
PSC0_EC_vect SIG_PSC0_END_CYCLE PSC0 End Cycle PSC1_CAPT_vect SIG_PSC1_CAPTURE PSC1 Capture Event PSC1_EC_vect SIG_PSC1_END_CYCLE PSC1 End Cycle PSC2_CAPT_vect SIG_PSC2_CAPTURE PSC2 Capture Event
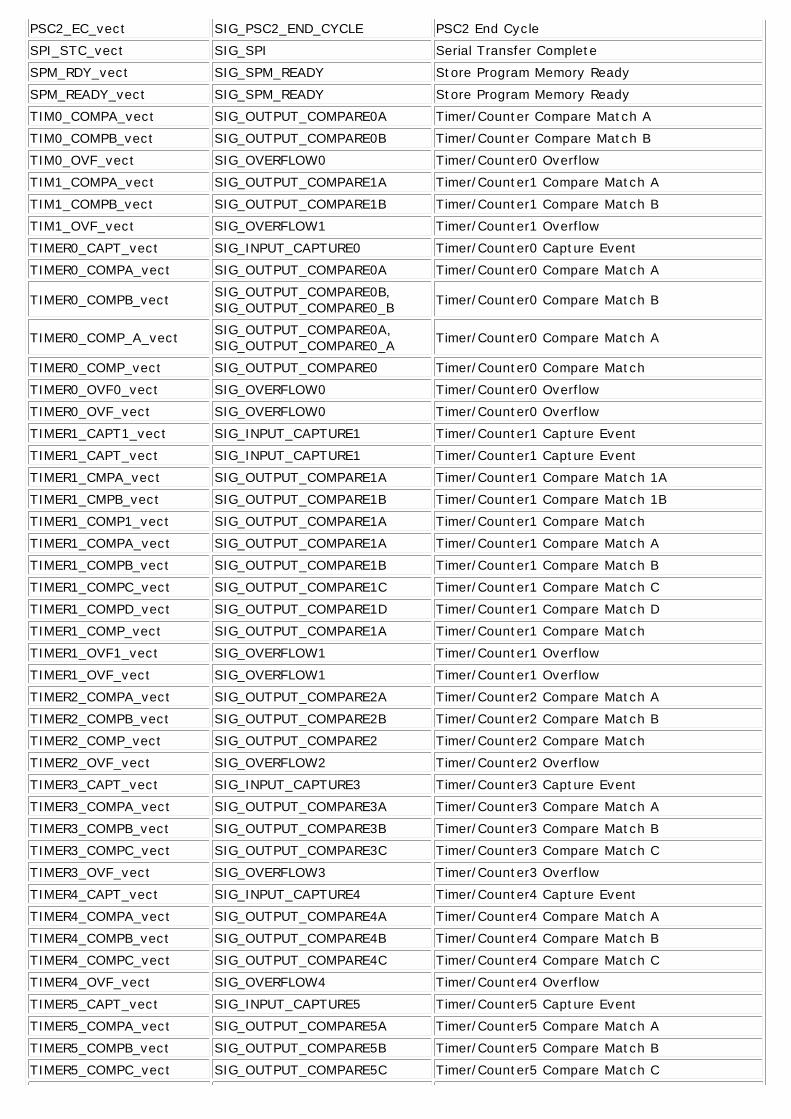
PSC2_EC_vect SIG_PSC2_END_CYCLE PSC2 End Cycle
SPI_STC_vect SIG_SPI Serial Transfer Complete
SPM_RDY_vect SIG_SPM_READY Store Program Memory Ready
SPM_READY_vect SIG_SPM_READY Store Program Memory Ready
TIM0_COMPA_vect SIG_OUTPUT_COMPARE0A Timer/Counter Compare Match A
TIM0_COMPB_vect SIG_OUTPUT_COMPARE0B Timer/Counter Compare Match B
TIM0_OVF_vect SIG_OVERFLOW0 Timer/Counter0 Overflow
TIM1_COMPA_vect SIG_OUTPUT_COMPARE1A Timer/Counter1 Compare Match A
TIM1_COMPB_vect SIG_OUTPUT_COMPARE1B Timer/Counter1 Compare Match B
TIM1_OVF_vect SIG_OVERFLOW1 Timer/Counter1 Overflow
TIMER0_CAPT_vect SIG_INPUT_CAPTURE0 Timer/Counter0 Capture Event
TIMER0_COMPA_vect SIG_OUTPUT_COMPARE0A Timer/Counter0 Compare Match A
TIMER0_COMPB_vect SIG_OUTPUT_COMPARE0B, SIG_OUTPUT_COMPARE0_B Timer/Counter0 Compare Match B
TIMER0_COMP_A_vect SIG_OUTPUT_COMPARE0A, SIG_OUTPUT_COMPARE0_A Timer/Counter0 Compare Match A
TIMER0_COMP_vect SIG_OUTPUT_COMPARE0 Timer/Counter0 Compare Match
TIMER0_OVF0_vect SIG_OVERFLOW0 Timer/Counter0 Overflow
TIMER0_OVF_vect SIG_OVERFLOW0 Timer/Counter0 Overflow
TIMER1_CAPT1_vect SIG_INPUT_CAPTURE1 Timer/Counter1 Capture Event
TIMER1_CAPT_vect SIG_INPUT_CAPTURE1 Timer/Counter1 Capture Event
TIMER1_CMPA_vect SIG_OUTPUT_COMPARE1A Timer/Counter1 Compare Match 1A
TIMER1_CMPB_vect SIG_OUTPUT_COMPARE1B Timer/Counter1 Compare Match 1B
TIMER1_COMP1_vect SIG_OUTPUT_COMPARE1A Timer/Counter1 Compare Match
TIMER1_COMPA_vect SIG_OUTPUT_COMPARE1A Timer/Counter1 Compare Match A
TIMER1_COMPB_vect SIG_OUTPUT_COMPARE1B Timer/Counter1 Compare Match B
TIMER1_COMPC_vect SIG_OUTPUT_COMPARE1C Timer/Counter1 Compare Match C
TIMER1_COMPD_vect SIG_OUTPUT_COMPARE1D Timer/Counter1 Compare Match D
TIMER1_COMP_vect SIG_OUTPUT_COMPARE1A Timer/Counter1 Compare Match
TIMER1_OVF1_vect SIG_OVERFLOW1 Timer/Counter1 Overflow
TIMER1_OVF_vect SIG_OVERFLOW1 Timer/Counter1 Overflow
TIMER2_COMPA_vect SIG_OUTPUT_COMPARE2A Timer/Counter2 Compare Match A
TIMER2_COMPB_vect SIG_OUTPUT_COMPARE2B Timer/Counter2 Compare Match B
TIMER2_COMP_vect SIG_OUTPUT_COMPARE2 Timer/Counter2 Compare Match
TIMER2_OVF_vect SIG_OVERFLOW2 Timer/Counter2 Overflow
TIMER3_CAPT_vect SIG_INPUT_CAPTURE3 Timer/Counter3 Capture Event
TIMER3_COMPA_vect SIG_OUTPUT_COMPARE3A Timer/Counter3 Compare Match A
TIMER3_COMPB_vect SIG_OUTPUT_COMPARE3B Timer/Counter3 Compare Match B
TIMER3_COMPC_vect SIG_OUTPUT_COMPARE3C Timer/Counter3 Compare Match C
TIMER3_OVF_vect SIG_OVERFLOW3 Timer/Counter3 Overflow
TIMER4_CAPT_vect SIG_INPUT_CAPTURE4 Timer/Counter4 Capture Event
TIMER4_COMPA_vect SIG_OUTPUT_COMPARE4A Timer/Counter4 Compare Match A
TIMER4_COMPB_vect SIG_OUTPUT_COMPARE4B Timer/Counter4 Compare Match B
TIMER4_COMPC_vect SIG_OUTPUT_COMPARE4C Timer/Counter4 Compare Match C
TIMER4_OVF_vect SIG_OVERFLOW4 Timer/Counter4 Overflow
TIMER5_CAPT_vect SIG_INPUT_CAPTURE5 Timer/Counter5 Capture Event
TIMER5_COMPA_vect SIG_OUTPUT_COMPARE5A Timer/Counter5 Compare Match A
TIMER5_COMPB_vect SIG_OUTPUT_COMPARE5B Timer/Counter5 Compare Match B
TIMER5_COMPC_vect SIG_OUTPUT_COMPARE5C Timer/Counter5 Compare Match C
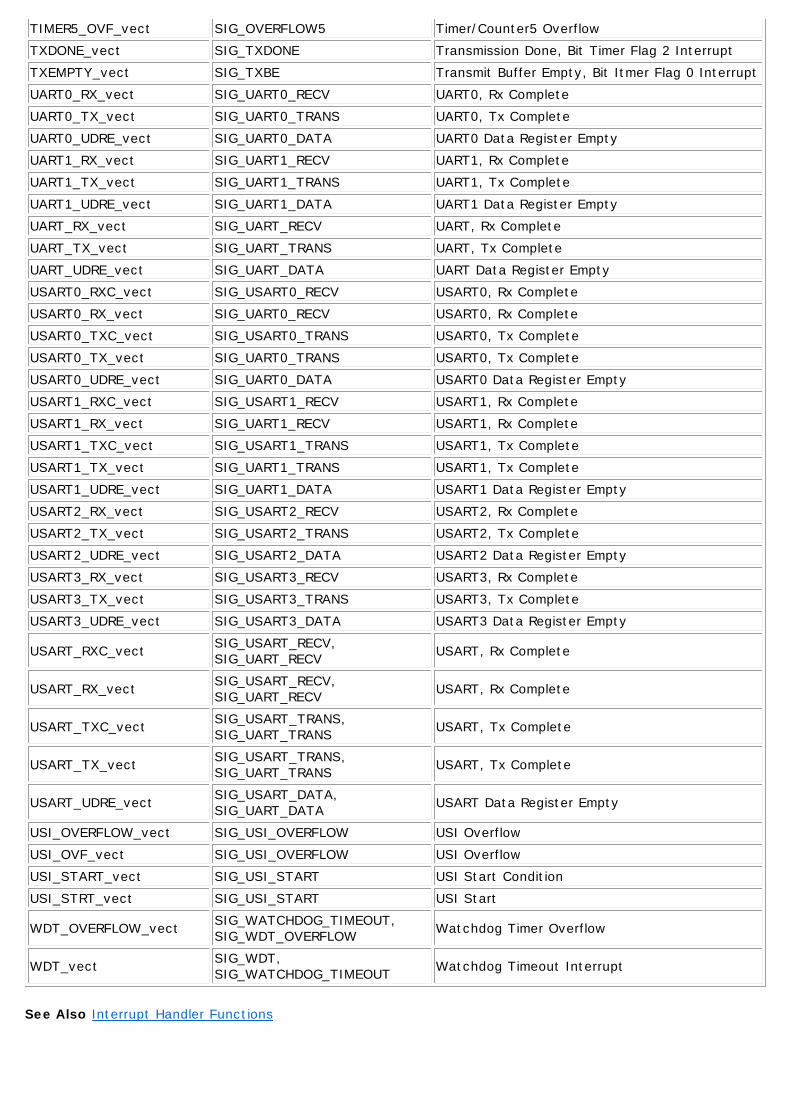
See Also Interrupt Handler Functions
TIMER5_OVF_vect SIG_OVERFLOW5 Timer/Counter5 Overflow
TXDONE_vect SIG_TXDONE Transmission Done, Bit Timer Flag 2 Interrupt
TXEMPTY_vect SIG_TXBE Transmit Buffer Empty, Bit Itmer Flag 0 Interrupt
UART0_RX_vect SIG_UART0_RECV UART0, Rx Complete
UART0_TX_vect SIG_UART0_TRANS UART0, Tx Complete
UART0_UDRE_vect SIG_UART0_DATA UART0 Data Register Empty
UART1_RX_vect SIG_UART1_RECV UART1, Rx Complete
UART1_TX_vect SIG_UART1_TRANS UART1, Tx Complete
UART1_UDRE_vect SIG_UART1_DATA UART1 Data Register Empty
UART_RX_vect SIG_UART_RECV UART, Rx Complete
UART_TX_vect SIG_UART_TRANS UART, Tx Complete
UART_UDRE_vect SIG_UART_DATA UART Data Register Empty
USART0_RXC_vect SIG_USART0_RECV USART0, Rx Complete
USART0_RX_vect SIG_UART0_RECV USART0, Rx Complete
USART0_TXC_vect SIG_USART0_TRANS USART0, Tx Complete
USART0_TX_vect SIG_UART0_TRANS USART0, Tx Complete
USART0_UDRE_vect SIG_UART0_DATA USART0 Data Register Empty
USART1_RXC_vect SIG_USART1_RECV USART1, Rx Complete
USART1_RX_vect SIG_UART1_RECV USART1, Rx Complete
USART1_TXC_vect SIG_USART1_TRANS USART1, Tx Complete
USART1_TX_vect SIG_UART1_TRANS USART1, Tx Complete
USART1_UDRE_vect SIG_UART1_DATA USART1 Data Register Empty
USART2_RX_vect SIG_USART2_RECV USART2, Rx Complete
USART2_TX_vect SIG_USART2_TRANS USART2, Tx Complete
USART2_UDRE_vect SIG_USART2_DATA USART2 Data Register Empty
USART3_RX_vect SIG_USART3_RECV USART3, Rx Complete
USART3_TX_vect SIG_USART3_TRANS USART3, Tx Complete
USART3_UDRE_vect SIG_USART3_DATA USART3 Data Register Empty
USART_RXC_vect SIG_USART_RECV, SIG_UART_RECV USART, Rx Complete
USART_RX_vect SIG_USART_RECV, SIG_UART_RECV USART, Rx Complete
USART_TXC_vect SIG_USART_TRANS, SIG_UART_TRANS USART, Tx Complete
USART_TX_vect SIG_USART_TRANS, SIG_UART_TRANS USART, Tx Complete
USART_UDRE_vect SIG_USART_DATA, SIG_UART_DATA USART Data Register Empty
USI_OVERFLOW_vect SIG_USI_OVERFLOW USI Overflow
USI_OVF_vect SIG_USI_OVERFLOW USI Overflow
USI_START_vect SIG_USI_START USI Start Condition
USI_STRT_vect SIG_USI_START USI Start
WDT_OVERFLOW_vect SIG_WATCHDOG_TIMEOUT, SIG_WDT_OVERFLOW Watchdog Timer Overflow
WDT_vect SIG_WDT, SIG_WATCHDOG_TIMEOUT Watchdog Timeout Interrupt

Interrupt Handler Functions
An interrupt routine is defined with the macro ISR(). The macro register and mark the routine as an interrupt handler for the specified peripheral. The interrupt is chosen by supplying one of the Signal Names.
Example: Setting up an interrupt handler
/* This function will get attached to the ADC_vect interrupt vector. */
#include <AVR/interrupt.h> ISR(ADC_vect) { // user code here }
See Also Interrupt API

Assembler Code
Sometimes you need functions for programming that cannot be carried out through a C instruction or it seems easier to write a few assembler instructions. There are two possibilities to add an assembler code into the C sourcefile.
The first possibility is to write the assembler instructions directly into the sourcecode and the second one is to write macros.
Macros are always used in case you need the implemented function more often. The macros are always directly added at the place where they are called. Suitable assembler instructions you need for programming you can take out of the instructional sentence of the AVR processor series. The keyword asm must be together with the instructions so that the compiler realises that assembler instructions are given.
You can put multiple assembler instructions together in a single asm template, separated wither with "\n" or with semicolons. Further labels can be defined that can be called up through jump instructions.
It's not possible to jump from one asm to another asm area. After the input of the instructions, which are put in inverted commas, you can specify the characteristics of the used input variables, output variables or registers.
A colon separates the assembler template from the first output operand and another separates the last output operand from the first input operand.
If there are no output operands but there are input operands, you must place two consecutive colons that urround the place where the output operands would go.
l Using Assembler Modules
l Inline Assembler
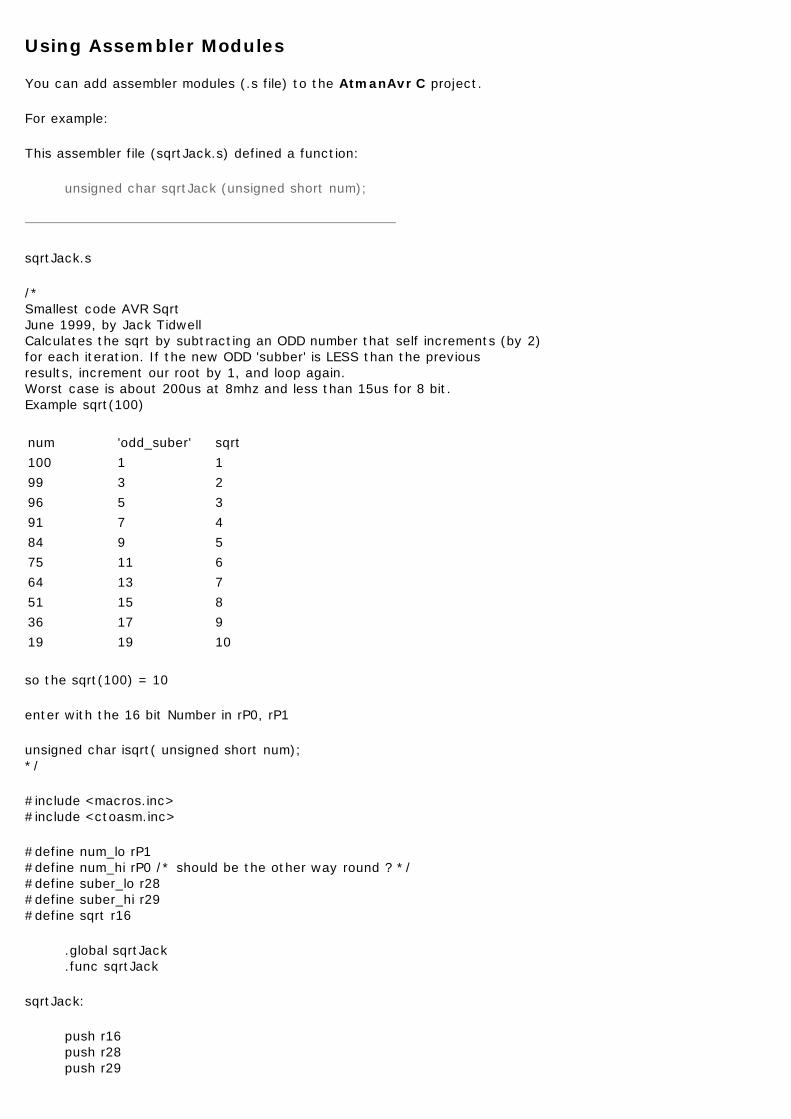
Using Assembler Modules
You can add assembler modules (.s file) to the AtmanAvr C project.
For example:
This assembler file (sqrtJack.s) defined a function:
unsigned char sqrtJack (unsigned short num);
sqrtJack.s
/* Smallest code AVR Sqrt June 1999, by Jack Tidwell Calculates the sqrt by subtracting an ODD number that self increments (by 2) for each iteration. If the new ODD 'subber' is LESS than the previous results, increment our root by 1, and loop again. Worst case is about 200us at 8mhz and less than 15us for 8 bit. Example sqrt(100)
so the sqrt(100) = 10
enter with the 16 bit Number in rP0, rP1
unsigned char isqrt( unsigned short num); */
#include <macros.inc> #include <ctoasm.inc>
#define num_lo rP1 #define num_hi rP0 /* should be the other way round ? */ #define suber_lo r28 #define suber_hi r29 #define sqrt r16
.global sqrtJack
.func sqrtJack
sqrtJack:
push r16 push r28 push r29
num 'odd_suber' sqrt100 1 199 3 296 5 391 7 484 9 575 11 664 13 751 15 836 17 919 19 10
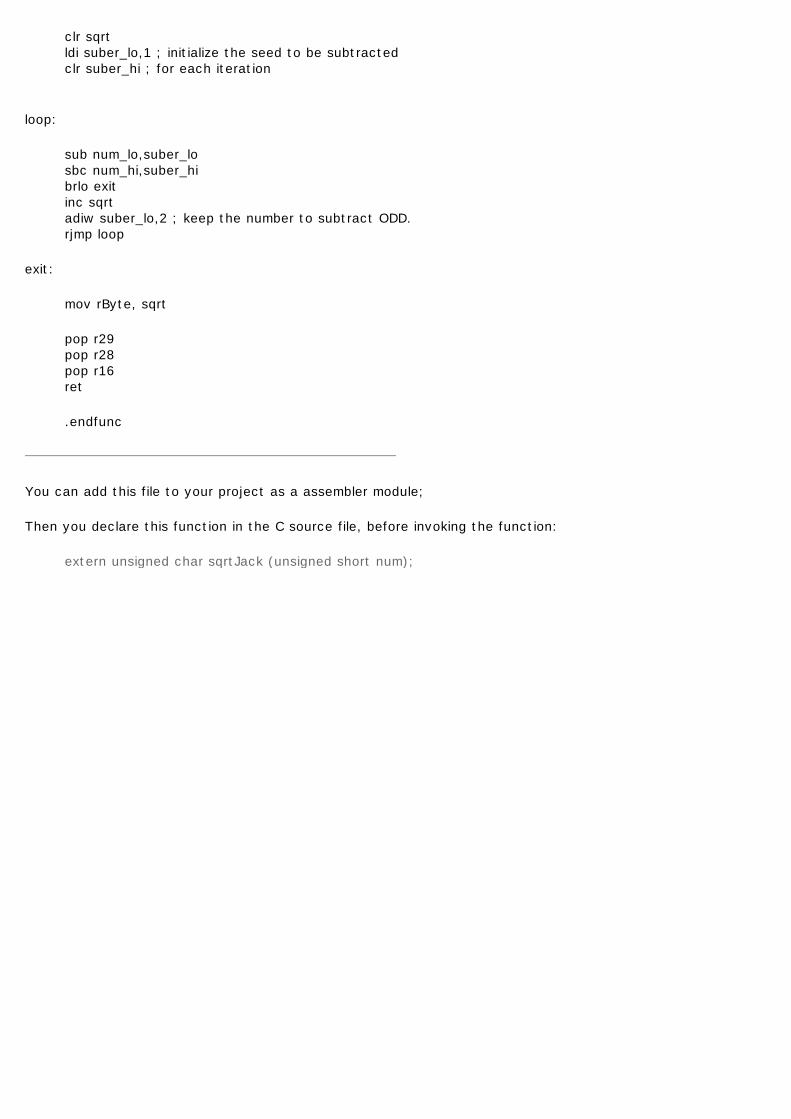
clr sqrt ldi suber_lo,1 ; initialize the seed to be subtracted clr suber_hi ; for each iteration
loop:
sub num_lo,suber_lo sbc num_hi,suber_hi brlo exit inc sqrt adiw suber_lo,2 ; keep the number to subtract ODD. rjmp loop
exit:
mov rByte, sqrt
pop r29 pop r28 pop r16 ret
.endfunc
You can add this file to your project as a assembler module;
Then you declare this function in the C source file, before invoking the function:
extern unsigned char sqrtJack (unsigned short num);
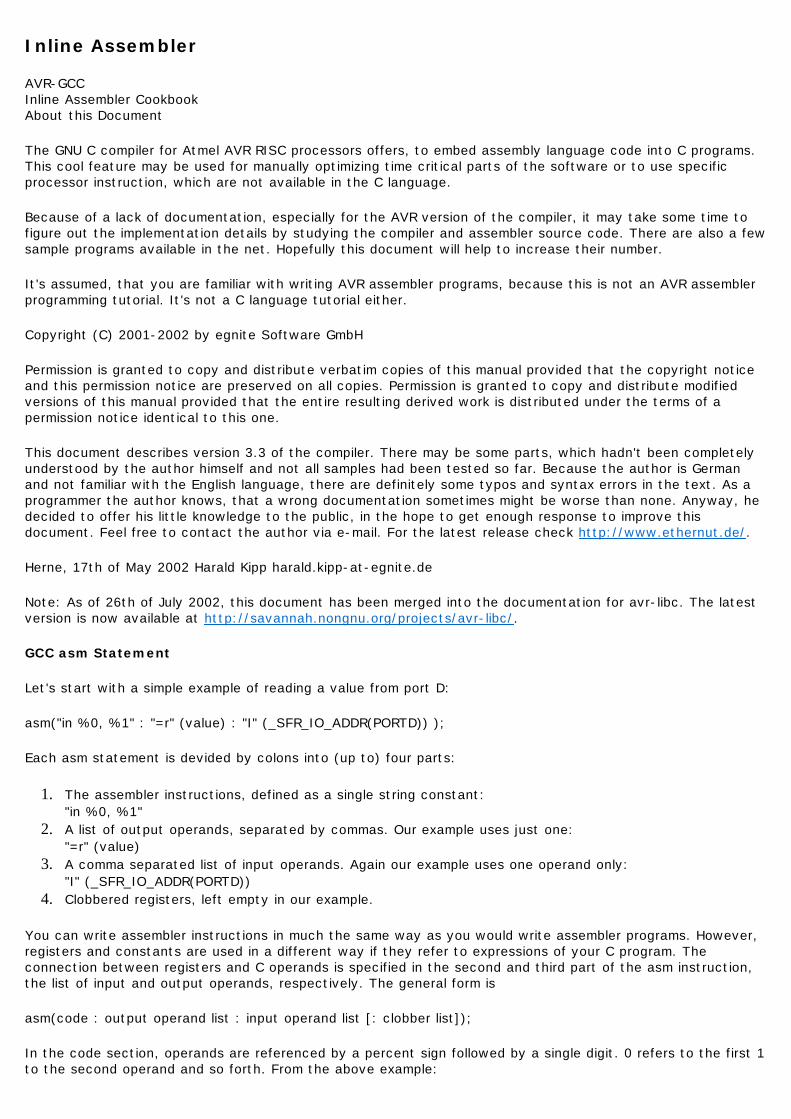
Inline Assembler
AVR-GCC Inline Assembler Cookbook About this Document
The GNU C compiler for Atmel AVR RISC processors offers, to embed assembly language code into C programs. This cool feature may be used for manually optimizing time critical parts of the software or to use specific processor instruction, which are not available in the C language.
Because of a lack of documentation, especially for the AVR version of the compiler, it may take some time to figure out the implementation details by studying the compiler and assembler source code. There are also a few sample programs available in the net. Hopefully this document will help to increase their number.
It's assumed, that you are familiar with writing AVR assembler programs, because this is not an AVR assembler programming tutorial. It's not a C language tutorial either.
Copyright (C) 2001-2002 by egnite Software GmbH
Permission is granted to copy and distribute verbatim copies of this manual provided that the copyright notice and this permission notice are preserved on all copies. Permission is granted to copy and distribute modified versions of this manual provided that the entire resulting derived work is distributed under the terms of a permission notice identical to this one.
This document describes version 3.3 of the compiler. There may be some parts, which hadn't been completely understood by the author himself and not all samples had been tested so far. Because the author is German and not familiar with the English language, there are definitely some typos and syntax errors in the text. As a programmer the author knows, that a wrong documentation sometimes might be worse than none. Anyway, he decided to offer his little knowledge to the public, in the hope to get enough response to improve this document. Feel free to contact the author via e-mail. For the latest release check http://www.ethernut.de/.
Herne, 17th of May 2002 Harald Kipp harald.kipp-at-egnite.de
Note: As of 26th of July 2002, this document has been merged into the documentation for avr-libc. The latest version is now available at http://savannah.nongnu.org/projects/avr-libc/.
GCC asm Statement
Let's start with a simple example of reading a value from port D:
asm("in %0, %1" : "=r" (value) : "I" (_SFR_IO_ADDR(PORTD)) );
Each asm statement is devided by colons into (up to) four parts:
1. The assembler instructions, defined as a single string constant: "in %0, %1"
2. A list of output operands, separated by commas. Our example uses just one: "=r" (value)
3. A comma separated list of input operands. Again our example uses one operand only: "I" (_SFR_IO_ADDR(PORTD))
4. Clobbered registers, left empty in our example.
You can write assembler instructions in much the same way as you would write assembler programs. However, registers and constants are used in a different way if they refer to expressions of your C program. The connection between registers and C operands is specified in the second and third part of the asm instruction, the list of input and output operands, respectively. The general form is
asm(code : output operand list : input operand list [: clobber list]);
In the code section, operands are referenced by a percent sign followed by a single digit. 0 refers to the first 1 to the second operand and so forth. From the above example:
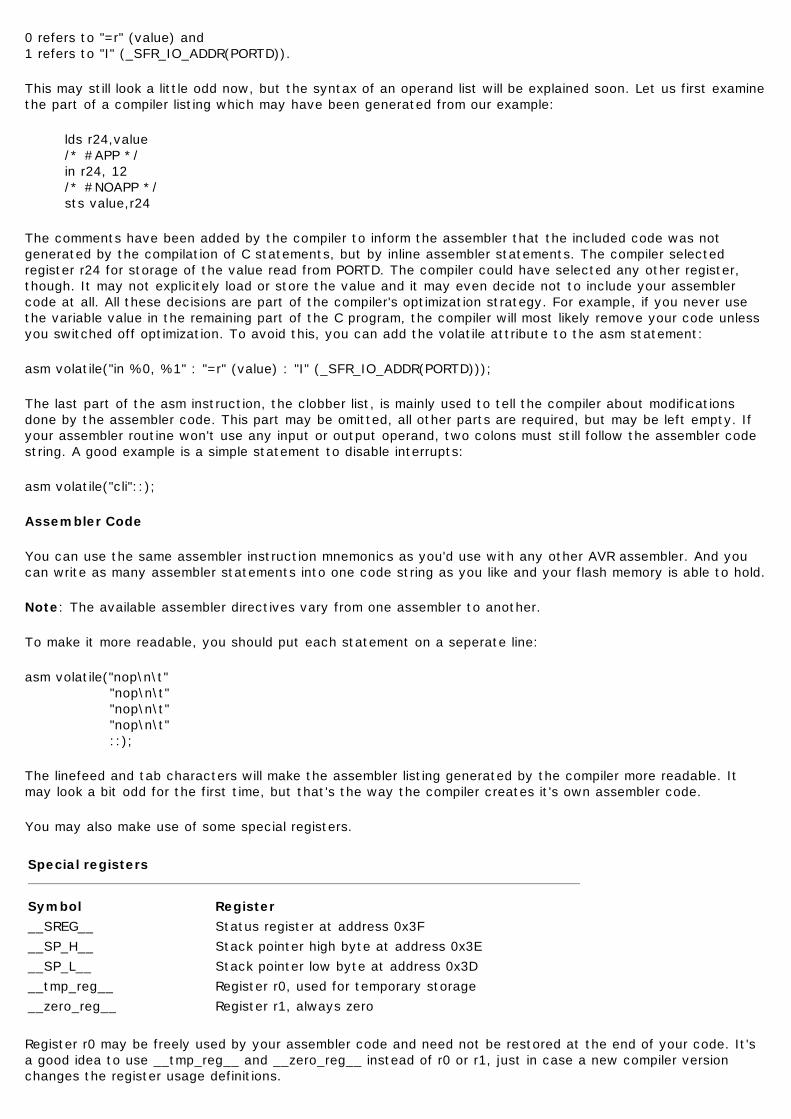
0 refers to "=r" (value) and 1 refers to "I" (_SFR_IO_ADDR(PORTD)).
This may still look a little odd now, but the syntax of an operand list will be explained soon. Let us first examine the part of a compiler listing which may have been generated from our example:
lds r24,value /* #APP */ in r24, 12 /* #NOAPP */ sts value,r24
The comments have been added by the compiler to inform the assembler that the included code was not generated by the compilation of C statements, but by inline assembler statements. The compiler selected register r24 for storage of the value read from PORTD. The compiler could have selected any other register, though. It may not explicitely load or store the value and it may even decide not to include your assembler code at all. All these decisions are part of the compiler's optimization strategy. For example, if you never use the variable value in the remaining part of the C program, the compiler will most likely remove your code unless you switched off optimization. To avoid this, you can add the volatile attribute to the asm statement:
asm volatile("in %0, %1" : "=r" (value) : "I" (_SFR_IO_ADDR(PORTD)));
The last part of the asm instruction, the clobber list, is mainly used to tell the compiler about modifications done by the assembler code. This part may be omitted, all other parts are required, but may be left empty. If your assembler routine won't use any input or output operand, two colons must still follow the assembler code string. A good example is a simple statement to disable interrupts:
asm volatile("cli"::);
Assembler Code
You can use the same assembler instruction mnemonics as you'd use with any other AVR assembler. And you can write as many assembler statements into one code string as you like and your flash memory is able to hold.
Note: The available assembler directives vary from one assembler to another.
To make it more readable, you should put each statement on a seperate line:
asm volatile("nop\n\t" "nop\n\t" "nop\n\t" "nop\n\t" ::);
The linefeed and tab characters will make the assembler listing generated by the compiler more readable. It may look a bit odd for the first time, but that's the way the compiler creates it's own assembler code.
You may also make use of some special registers.
Register r0 may be freely used by your assembler code and need not be restored at the end of your code. It's a good idea to use __tmp_reg__ and __zero_reg__ instead of r0 or r1, just in case a new compiler version changes the register usage definitions.
Special registers
Symbol Register__SREG__ Status register at address 0x3F__SP_H__ Stack pointer high byte at address 0x3E__SP_L__ Stack pointer low byte at address 0x3D__tmp_reg__ Register r0, used for temporary storage__zero_reg__ Register r1, always zero

Input and Output Operands
Each input and output operand is described by a constraint string followed by a C expression in parantheses. AVR-GCC 3.3 knows the following constraint characters:
Note: The most up-to-date and detailed information on contraints for the avr can be found in the gcc manual.
The x register is r27:r26, the y register is r29:r28, and the z register is r31:r30
These definitions seem not to fit properly to the AVR instruction set. The author's assumption is, that this part of the compiler has never been really finished in this version, but that assumption may be wrong. The selection of the proper contraint depends on the range of the constants or registers, which must be acceptable to the AVR instruction they are used with. The C compiler doesn't check any line of your assembler code. But it is able to check the constraint against your C expression. However, if you specify the wrong constraints, then the compiler may silently pass wrong code to the assembler. And, of course, the assembler will fail with some cryptic output or internal errors. For example, if you specify the constraint "r" and you are using this register with an "ori" instruction in your assembler code, then the compiler may select any register. This will fail, if the compiler chooses r2 to r15. (It will never choose r0 or r1, because these are uses for special purposes.) That's why the correct constraint in that case is "d". On the other hand, if you use the constraint "M", the compiler will make sure that you don't pass anything else but an 8-bit value. Later on we will see how to pass multibyte expression results to the assembler code.
The following table shows all AVR assembler mnemonics which require operands, and the related contraints. Because of the improper constraint definitions in version 3.3, they aren't strict enough. There is, for example, no constraint, which restricts integer constants to the range 0 to 7 for bit set and bit clear operations.
Input and Output Operands
Constraint Used for Rangea Simple upper registers r16 to r23
b Base pointer registers pairs y,z
d Upper register r16 to r31e Pointer register pairs x,y,zG Floating point constant 0.0
I 6-bit positive integer constant 0 to 63
J 6-bit negative integer constant -63 to 0
K Integer constant 2L Integer constant 0l Lower registers r0 to r15M 8-bit integer constant 0 to 255N Integer constant -1O Integer constant 8, 16, 24P Integer constant 1q Stack pointer register SPH:SPLr Any register r0 to r31t Temporary register r0
w Special upper register pairs r24, r26, r28, r30
x Pointer register pair X r27:r26y Pointer register pair Y r29:r28z Pointer register pair Z r31:r30
Mnemonic Constraints Mnemonic Constraintsadc r,r add r,r
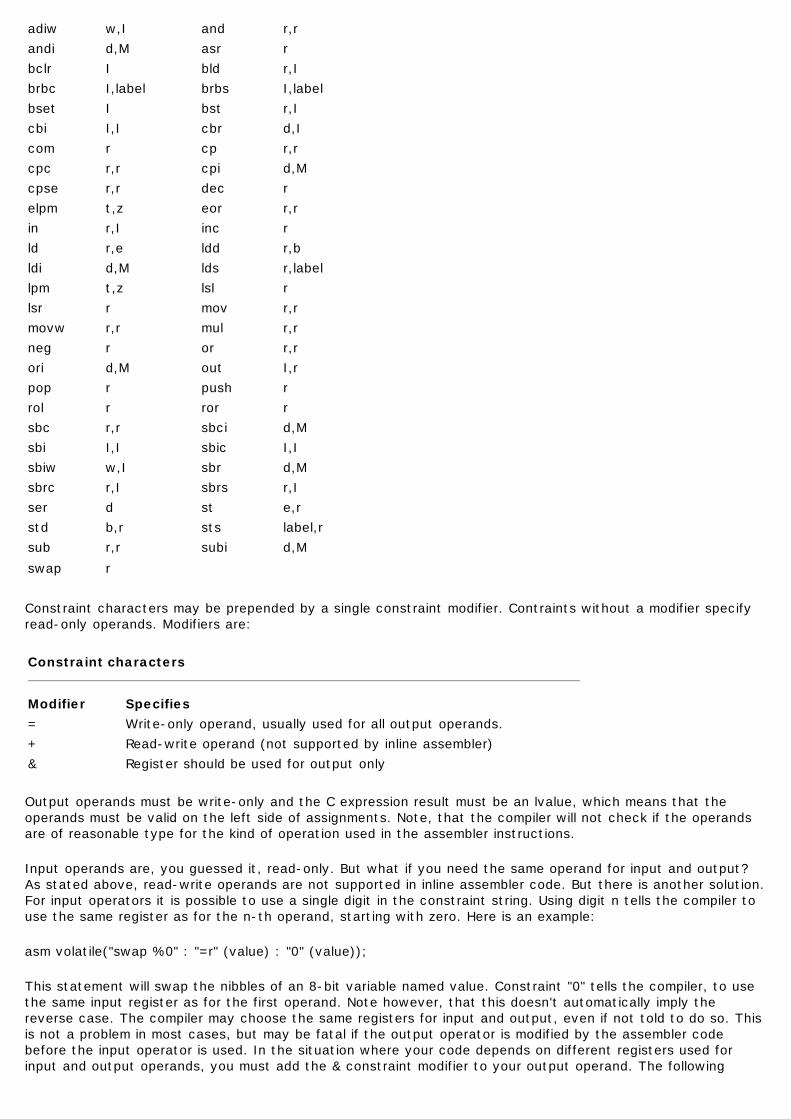
Constraint characters may be prepended by a single constraint modifier. Contraints without a modifier specify read-only operands. Modifiers are:
Output operands must be write-only and the C expression result must be an lvalue, which means that the operands must be valid on the left side of assignments. Note, that the compiler will not check if the operands are of reasonable type for the kind of operation used in the assembler instructions.
Input operands are, you guessed it, read-only. But what if you need the same operand for input and output? As stated above, read-write operands are not supported in inline assembler code. But there is another solution. For input operators it is possible to use a single digit in the constraint string. Using digit n tells the compiler to use the same register as for the n-th operand, starting with zero. Here is an example:
asm volatile("swap %0" : "=r" (value) : "0" (value));
This statement will swap the nibbles of an 8-bit variable named value. Constraint "0" tells the compiler, to use the same input register as for the first operand. Note however, that this doesn't automatically imply the reverse case. The compiler may choose the same registers for input and output, even if not told to do so. This is not a problem in most cases, but may be fatal if the output operator is modified by the assembler code before the input operator is used. In the situation where your code depends on different registers used for input and output operands, you must add the & constraint modifier to your output operand. The following
adiw w,I and r,randi d,M asr rbclr I bld r,Ibrbc I,label brbs I,labelbset I bst r,Icbi I,I cbr d,Icom r cp r,rcpc r,r cpi d,Mcpse r,r dec relpm t,z eor r,rin r,I inc rld r,e ldd r,bldi d,M lds r,labellpm t,z lsl rlsr r mov r,rmovw r,r mul r,rneg r or r,rori d,M out I,rpop r push rrol r ror rsbc r,r sbci d,Msbi I,I sbic I,Isbiw w,I sbr d,Msbrc r,I sbrs r,Iser d st e,rstd b,r sts label,rsub r,r subi d,Mswap r
Constraint characters
Modifier Specifies= Write-only operand, usually used for all output operands.+ Read-write operand (not supported by inline assembler)& Register should be used for output only
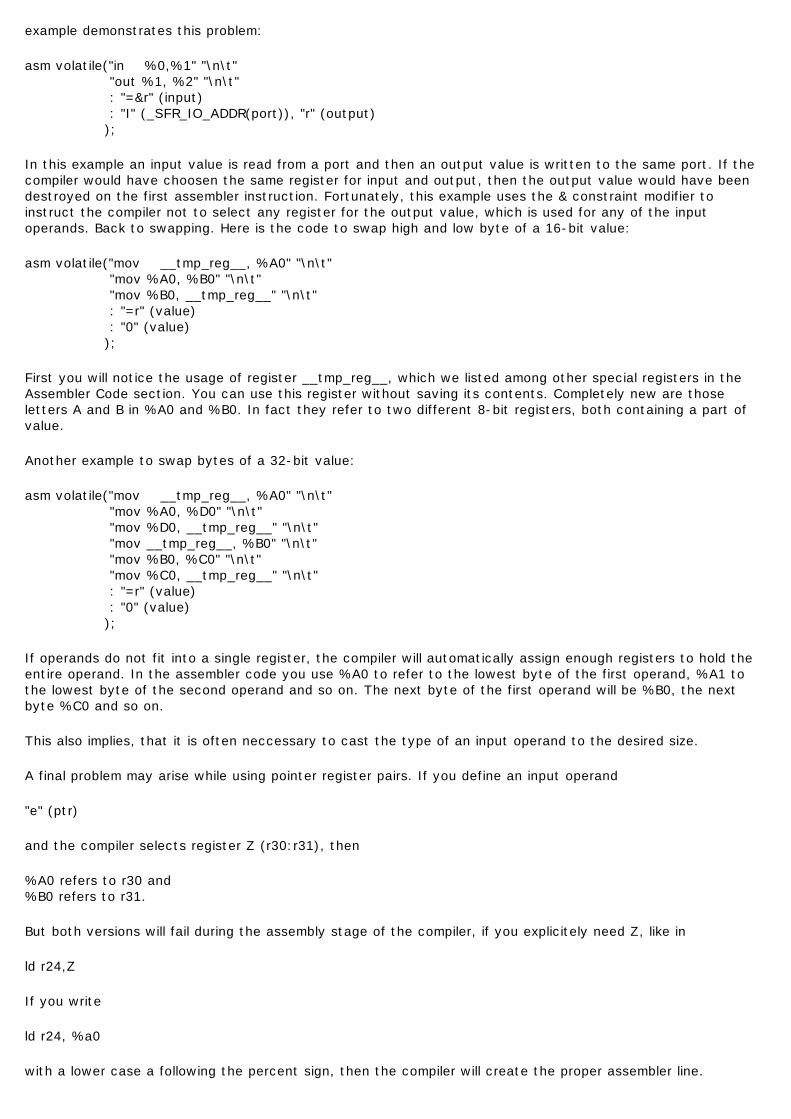
example demonstrates this problem:
asm volatile("in %0,%1" "\n\t" "out %1, %2" "\n\t" : "=&r" (input) : "I" (_SFR_IO_ADDR(port)), "r" (output) );
In this example an input value is read from a port and then an output value is written to the same port. If the compiler would have choosen the same register for input and output, then the output value would have been destroyed on the first assembler instruction. Fortunately, this example uses the & constraint modifier to instruct the compiler not to select any register for the output value, which is used for any of the input operands. Back to swapping. Here is the code to swap high and low byte of a 16-bit value:
asm volatile("mov __tmp_reg__, %A0" "\n\t" "mov %A0, %B0" "\n\t" "mov %B0, __tmp_reg__" "\n\t" : "=r" (value) : "0" (value) );
First you will notice the usage of register __tmp_reg__, which we listed among other special registers in the Assembler Code section. You can use this register without saving its contents. Completely new are those letters A and B in %A0 and %B0. In fact they refer to two different 8-bit registers, both containing a part of value.
Another example to swap bytes of a 32-bit value:
asm volatile("mov __tmp_reg__, %A0" "\n\t" "mov %A0, %D0" "\n\t" "mov %D0, __tmp_reg__" "\n\t" "mov __tmp_reg__, %B0" "\n\t" "mov %B0, %C0" "\n\t" "mov %C0, __tmp_reg__" "\n\t" : "=r" (value) : "0" (value) );
If operands do not fit into a single register, the compiler will automatically assign enough registers to hold the entire operand. In the assembler code you use %A0 to refer to the lowest byte of the first operand, %A1 to the lowest byte of the second operand and so on. The next byte of the first operand will be %B0, the next byte %C0 and so on.
This also implies, that it is often neccessary to cast the type of an input operand to the desired size.
A final problem may arise while using pointer register pairs. If you define an input operand
"e" (ptr)
and the compiler selects register Z (r30:r31), then
%A0 refers to r30 and %B0 refers to r31.
But both versions will fail during the assembly stage of the compiler, if you explicitely need Z, like in
ld r24,Z
If you write
ld r24, %a0
with a lower case a following the percent sign, then the compiler will create the proper assembler line.
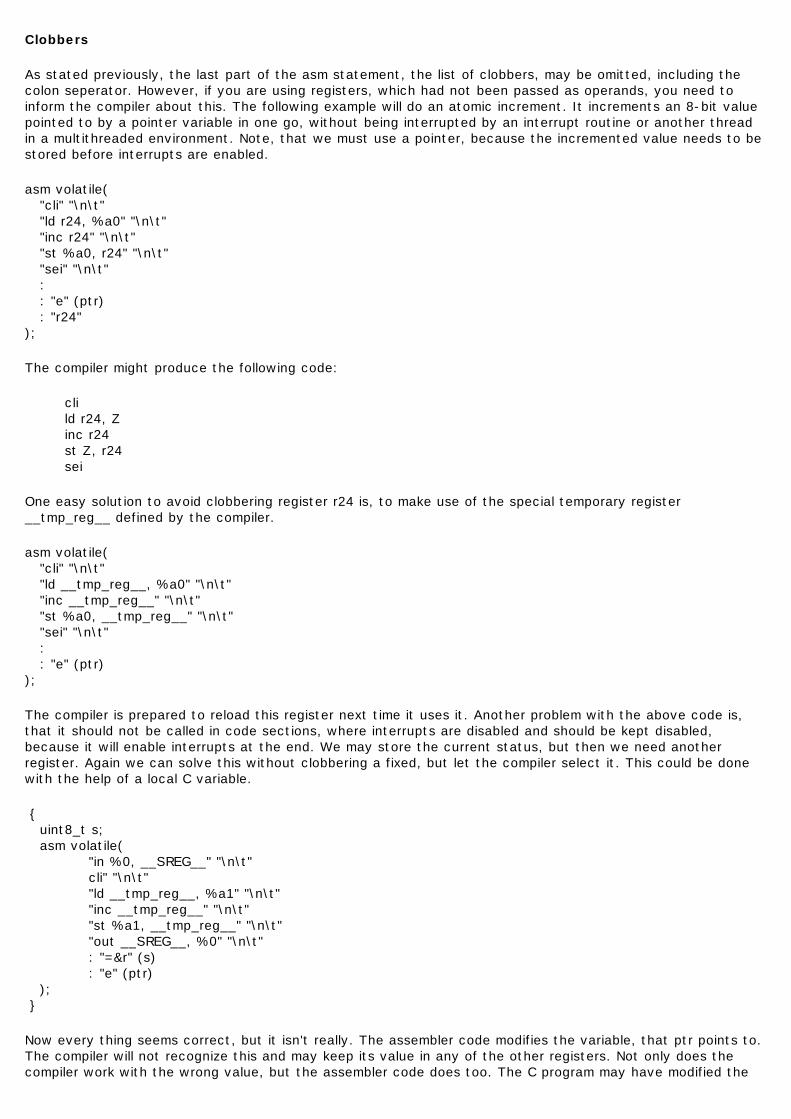
Clobbers
As stated previously, the last part of the asm statement, the list of clobbers, may be omitted, including the colon seperator. However, if you are using registers, which had not been passed as operands, you need to inform the compiler about this. The following example will do an atomic increment. It increments an 8-bit value pointed to by a pointer variable in one go, without being interrupted by an interrupt routine or another thread in a multithreaded environment. Note, that we must use a pointer, because the incremented value needs to be stored before interrupts are enabled.
asm volatile( "cli" "\n\t" "ld r24, %a0" "\n\t" "inc r24" "\n\t" "st %a0, r24" "\n\t" "sei" "\n\t" : : "e" (ptr) : "r24" );
The compiler might produce the following code:
cli ld r24, Z inc r24 st Z, r24 sei
One easy solution to avoid clobbering register r24 is, to make use of the special temporary register __tmp_reg__ defined by the compiler.
asm volatile( "cli" "\n\t" "ld __tmp_reg__, %a0" "\n\t" "inc __tmp_reg__" "\n\t" "st %a0, __tmp_reg__" "\n\t" "sei" "\n\t" : : "e" (ptr) );
The compiler is prepared to reload this register next time it uses it. Another problem with the above code is, that it should not be called in code sections, where interrupts are disabled and should be kept disabled, because it will enable interrupts at the end. We may store the current status, but then we need another register. Again we can solve this without clobbering a fixed, but let the compiler select it. This could be done with the help of a local C variable.
{ uint8_t s; asm volatile( "in %0, __SREG__" "\n\t" cli" "\n\t" "ld __tmp_reg__, %a1" "\n\t" "inc __tmp_reg__" "\n\t" "st %a1, __tmp_reg__" "\n\t" "out __SREG__, %0" "\n\t" : "=&r" (s) : "e" (ptr) ); }
Now every thing seems correct, but it isn't really. The assembler code modifies the variable, that ptr points to. The compiler will not recognize this and may keep its value in any of the other registers. Not only does the compiler work with the wrong value, but the assembler code does too. The C program may have modified the
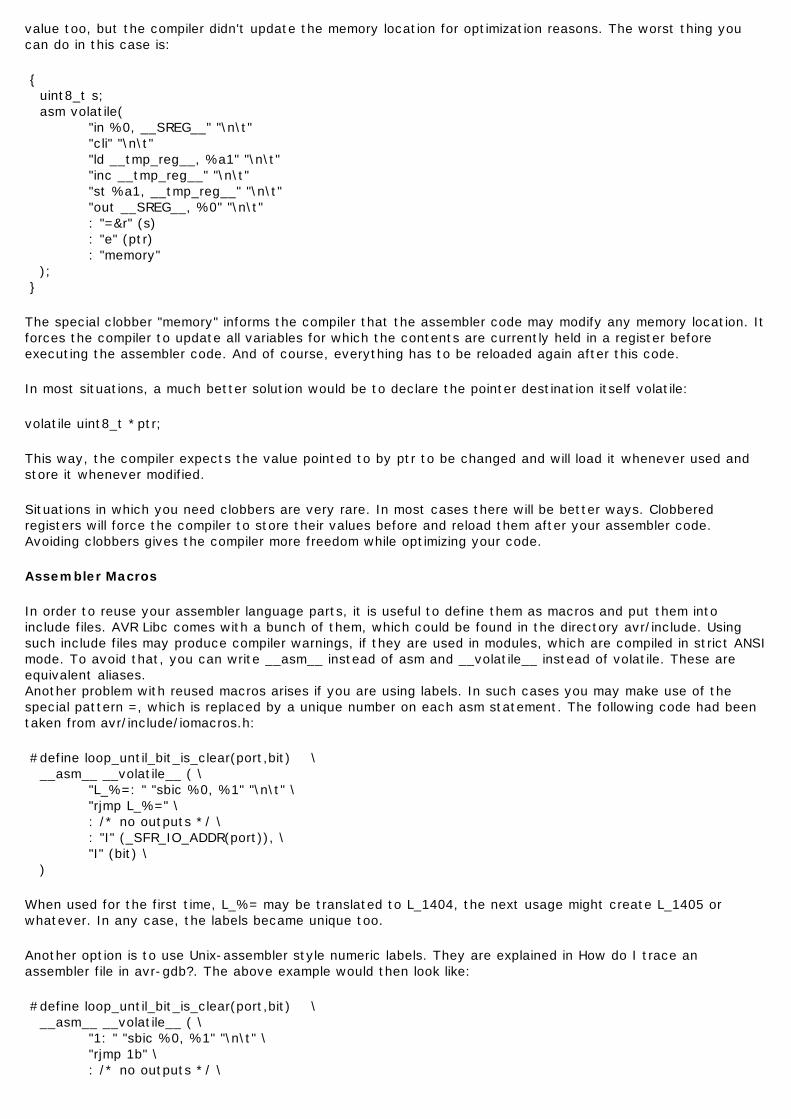
value too, but the compiler didn't update the memory location for optimization reasons. The worst thing you can do in this case is:
{ uint8_t s; asm volatile( "in %0, __SREG__" "\n\t" "cli" "\n\t" "ld __tmp_reg__, %a1" "\n\t" "inc __tmp_reg__" "\n\t" "st %a1, __tmp_reg__" "\n\t" "out __SREG__, %0" "\n\t" : "=&r" (s) : "e" (ptr) : "memory" ); }
The special clobber "memory" informs the compiler that the assembler code may modify any memory location. It forces the compiler to update all variables for which the contents are currently held in a register before executing the assembler code. And of course, everything has to be reloaded again after this code.
In most situations, a much better solution would be to declare the pointer destination itself volatile:
volatile uint8_t *ptr;
This way, the compiler expects the value pointed to by ptr to be changed and will load it whenever used and store it whenever modified.
Situations in which you need clobbers are very rare. In most cases there will be better ways. Clobbered registers will force the compiler to store their values before and reload them after your assembler code. Avoiding clobbers gives the compiler more freedom while optimizing your code.
Assembler Macros
In order to reuse your assembler language parts, it is useful to define them as macros and put them into include files. AVR Libc comes with a bunch of them, which could be found in the directory avr/include. Using such include files may produce compiler warnings, if they are used in modules, which are compiled in strict ANSI mode. To avoid that, you can write __asm__ instead of asm and __volatile__ instead of volatile. These are equivalent aliases. Another problem with reused macros arises if you are using labels. In such cases you may make use of the special pattern =, which is replaced by a unique number on each asm statement. The following code had been taken from avr/include/iomacros.h:
#define loop_until_bit_is_clear(port,bit) \ __asm__ __volatile__ ( \ "L_%=: " "sbic %0, %1" "\n\t" \ "rjmp L_%=" \ : /* no outputs */ \ : "I" (_SFR_IO_ADDR(port)), \ "I" (bit) \ )
When used for the first time, L_%= may be translated to L_1404, the next usage might create L_1405 or whatever. In any case, the labels became unique too.
Another option is to use Unix-assembler style numeric labels. They are explained in How do I trace an assembler file in avr-gdb?. The above example would then look like:
#define loop_until_bit_is_clear(port,bit) \ __asm__ __volatile__ ( \ "1: " "sbic %0, %1" "\n\t" \ "rjmp 1b" \ : /* no outputs */ \
: "I" (_SFR_IO_ADDR(port)), \ "I" (bit) \ )
C Stub Functions
Macro definitions will include the same assembler code whenever they are referenced. This may not be acceptable for larger routines. In this case you may define a C stub function, containing nothing other than your assembler code.
void delay(uint8_t ms) { uint16_t cnt; asm volatile ( "\n" "L_dl1%=:" "\n\t" "mov %A0, %A2" "\n\t" "mov %B0, %B2" "\n" "L_dl2%=:" "\n\t" "sbiw %A0, 1" "\n\t" "brne L_dl2%=" "\n\t" "dec %1" "\n\t" "brne L_dl1%=" "\n\t" : "=&w" (cnt) : "r" (ms), "r" (delay_count) ); }
The purpose of this function is to delay the program execution by a specified number of milliseconds using a counting loop. The global 16 bit variable delay_count must contain the CPU clock frequency in Hertz divided by 4000 and must have been set before calling this routine for the first time. As described in the clobber section, the routine uses a local variable to hold a temporary value.
Another use for a local variable is a return value. The following function returns a 16 bit value read from two successive port addresses.
uint16_t inw(uint8_t port) { uint16_t result; asm volatile ( "in %A0,%1" "\n\t" "in %B0,(%1) + 1" : "=r" (result) : "I" (_SFR_IO_ADDR(port)) ); return result; }
Note: inw() is supplied by avr-libc.
C Names Used in Assembler Code
By default AVR-GCC uses the same symbolic names of functions or variables in C and assembler code. You can specify a different name for the assembler code by using a special form of the asm statement:
unsigned long value asm("clock") = 3686400;
This statement instructs the compiler to use the symbol name clock rather than value. This makes sense only for external or static variables, because local variables do not have symbolic names in the assembler code. However, local variables may be held in registers.
With AVR-GCC you can specify the use of a specific register:
void Count(void)
{ register unsigned char counter asm("r3");
... some code... asm volatile("clr r3"); ... more code... }
The assembler instruction, "clr r3", will clear the variable counter. AVR-GCC will not completely reserve the specified register. If the optimizer recognizes that the variable will not be referenced any longer, the register may be re-used. But the compiler is not able to check wether this register usage conflicts with any predefined register. If you reserve too many registers in this way, the compiler may even run out of registers during code generation.
In order to change the name of a function, you need a prototype declaration, because the compiler will not accept the asm keyword in the function definition:
extern long Calc(void) asm ("CALCULATE");
Calling the function Calc() will create assembler instructions to call the function CALCULATE.
Links
For a more thorough discussion of inline assembly usage, see the gcc user manual. The latest version of the gcc manual is always available here: http://gcc.gnu.org/onlinedocs/
Memory Sections
Remarks:
Need to list all the sections which are available to the avr.
Weak Bindings
FIXME: need to discuss the .weak directive.
The following describes the various sections available.
The .text Section
The .text section contains the actual machine instructions which make up your program. This section is further subdivided by the .initN and .finiN sections dicussed below.
Note:
The avr-size program (part of binutils), coming from a Unix background, doesn't account for the .data initialization space added to the .text section, so in order to know how much flash the final program will consume, one needs to add the values for both, .text and .data (but not .bss), while the amount of pre-allocated SRAM is the sum of .data and .bss.
The .data Section
This section contains static data which was defined in your code. Things like the following would end up in .data:
char err_str[] = "Your program has died a horrible death!";
struct point pt = { 1, 1 };
It is possible to tell the linker the SRAM address of the beginning of the .data section. This is accomplished by adding -Wl,-Tdata,addr to the avr-gcc command used to the link your program. Not that addr must be offset by adding 0x800000 the to real SRAM address so that the linker knows that the address is in the SRAM memory space. Thus, if you want the .data section to start at 0x1100, pass 0x801100 at the address to the linker. [offset explained]
Note: When using malloc() in the application (which could even happen inside library calls), additional adjustments are required.
The .bss Section
Uninitialized global or static variables end up in the .bss section.
The .eeprom Section
This is where eeprom variables are stored.
The .noinit Section
This sections is a part of the .bss section. What makes the .noinit section special is that variables which are defined as such: int foo __attribute__ ((section (".noinit")));
will not be initialized to zero during startup as would normal .bss data.
Only uninitialized variables can be placed in the .noinit section. Thus, the following code will cause avr-gcc to issue an error:
int bar __attribute__ ((section (".noinit"))) = 0xaa;
It is possible to tell the linker explicitly where to place the .noinit section by adding -Wl,--section-start=.noinit=0x802000 to the avr-gcc command line at the linking stage. For example, suppose you wish to place the .noinit section at SRAM address 0x2000:
$ avr-gcc ... -Wl,--section-start=.noinit=0x802000 ...
Note:
Because of the Harvard architecture of the AVR devices, you must manually add 0x800000 to the address you pass to the linker as the start of the section. Otherwise, the linker thinks you want to put the .noinit section into the .text section instead of .data/.bss and will complain.
Alternatively, you can write your own linker script to automate this. [FIXME: need an example or ref to dox for writing linker scripts.]
The .initN Sections
These sections are used to define the startup code from reset up through the start of main(). These all are subparts of the .text section.
The purpose of these sections is to allow for more specific placement of code within your program.
Note:
Sometimes, it is convenient to think of the .initN and .finiN sections as functions, but in reality they are just symbolic names which tell the linker where to stick a chunk of code which is not a function. Notice that the examples for asm and C can not be called as functions and should not be jumped into.
The .initN sections are executed in order from 0 to 9.
.init0:
Weakly bound to __init(). If user defines __init(), it will be jumped into immediately after a reset.
.init1:
Unused. User definable.
.init2:
In C programs, weakly bound to initialize the stack.
.init3:
Unused. User definable.
.init4:
Copies the .data section from flash to SRAM. Also sets up and zeros out the .bss section. In Unix-like targets, .data is normally initialized by the OS directly from the executable file. Since this is impossible in an MCU environment, avr-gcc instead takes care of appending the .data variables after .text in the flash ROM image. .init4 then defines the code (weakly bound) which takes care of copying the contents of .data from the flash to SRAM.
.init5:
Unused. User definable.
.init6:

Unused for C programs, but used for constructors in C++ programs.
.init7:
Unused. User definable.
.init8:
Unused. User definable.
.init9:
Jumps into main().
The .finiN Sections
These sections are used to define the exit code executed after return from main() or a call to exit(). These all are subparts of the .text section.
The .finiN sections are executed in descending order from 9 to 0.
.finit9:
Unused. User definable. This is effectively where _exit() starts.
.fini8:
Unused. User definable.
.fini7:
Unused. User definable.
.fini6:
Unused for C programs, but used for destructors in C++ programs.
.fini5:
Unused. User definable.
.fini4:
Unused. User definable.
.fini3:
Unused. User definable.
.fini2:
Unused. User definable.
.fini1:
Unused. User definable.
.fini0:
Goes into an infinite loop after program termination and completion of any _exit() code (execution of code in the .fini9 -> .fini1 sections).
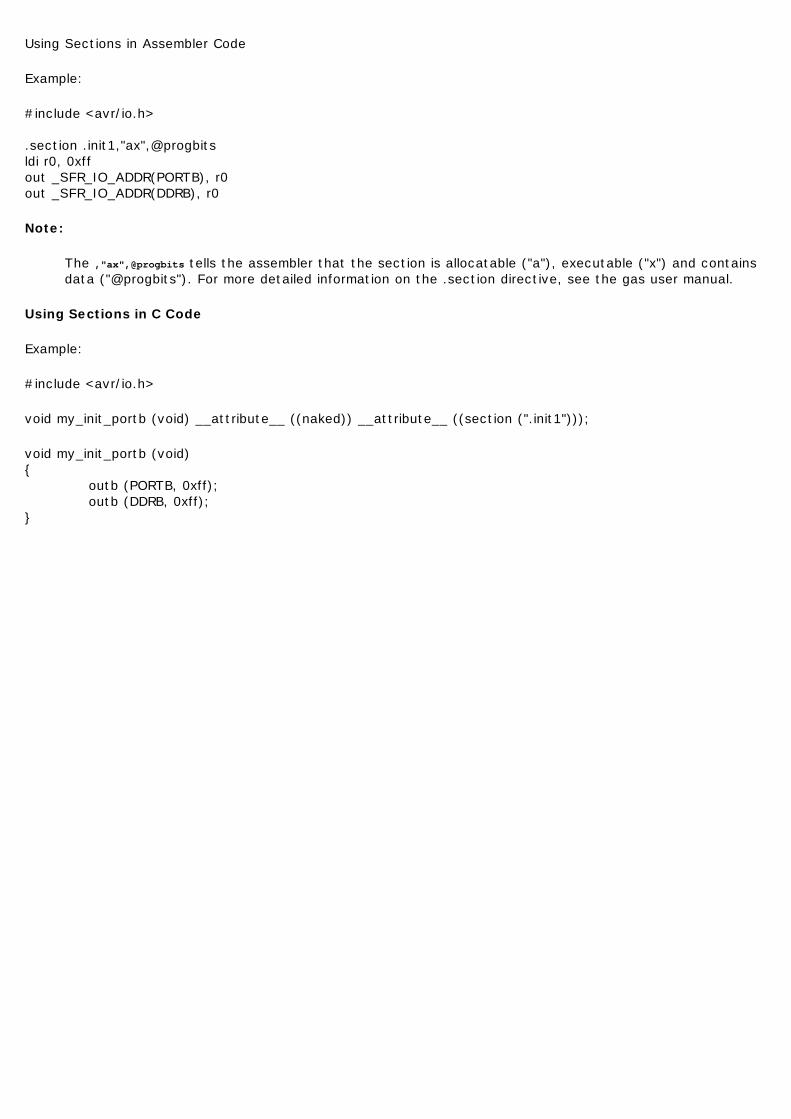
Using Sections in Assembler Code
Example:
#include <avr/io.h> .section .init1,"ax",@progbits ldi r0, 0xff out _SFR_IO_ADDR(PORTB), r0 out _SFR_IO_ADDR(DDRB), r0
Note:
The ,"ax",@progbits tells the assembler that the section is allocatable ("a"), executable ("x") and contains data ("@progbits"). For more detailed information on the .section directive, see the gas user manual.
Using Sections in C Code
Example:
#include <avr/io.h>
void my_init_portb (void) __attribute__ ((naked)) __attribute__ ((section (".init1")));
void my_init_portb (void) { outb (PORTB, 0xff); outb (DDRB, 0xff); }

Library Function Reference
l Standard C Library l Standard IO Functions l Mathematics Functions l Character Functions l String Functions l Memory APIs l Interrupt API l I/O API l Watchdog API l LCD Library l Other Functions

Standard C Library
A subset of the C standard library is supported. This chapter covers the functions that have been supported. Since AVR processors have several memory spaces, developers must be careful when passing parameters to functions that expect pointers. The C library understands only one type of pointer, so passing addresses to data in the EEPROM or FLASH will fail. Routines that understand these other memory spaces are addressed in Memory APIs.
#include <stdlib.h>
Symbolic constants
#define DTOSTR_ALWAYS_SIGN 0x01 Bit value that can be passed in flags to dtostre().
#define DTOSTR_PLUS_SIGN 0x02 Bit value that can be passed in flags to dtostre().
#define DTOSTR_UPPERCASE 0x04 Bit value that can be passed in flags to dtostre().
#define RAND_MAX 0x7FFF Highest number that can be generated by rand().
#define RANDOM_MAX 0x7FFFFFFF Highest number that can be generated by random().
l abort l abs l atoi l atol l bsearch l calloc l div l dtostre l dtostrf l exit l free l itoa l labs l ldiv l longjmp l ltoa l malloc l qsort l rand l rand_r l random l random_r l setjmp l srand l srandom l strtod l strtol l strtoul l ultoa l utoa

Variables
size_t __malloc_margin char * __malloc_heap_start char * __malloc_heap_end

abort
#include <stdlib.h>
void abort(void);
Return Value
Parameters
Remarks
Stops application. It is currently implemented as an infinite loop.

abs
#include <stdlib.h>
int abs(int x);
Return Value
Returns the absolute value of its parameter.
Parameters
x Integer value
Remarks
See Also fabs(), labs().
atoi
#include <stdlib.h>
int atoi(char const* str);
Return Value
Returns an integer represented by str.
Parameters
str String to be converted.
Remarks
This function ignores leading whitespace. It stops converting when it sees the first nonsensical characters (i.e. "123test" will return 123). If no leading portion of the string represents an integer, 0 is returned.)
atol
#include <stdlib.h>
long atol(char const* str);
Return Value
Returns a long integer represented by str.
Parameters
str String to be converted.
Remarks
This function ignores leading whitespace. It stops converting when it sees the first nonsensical characters (i.e. "123test" will return 123). If no leading portion of the string represents a long integer, 0 is returned.)
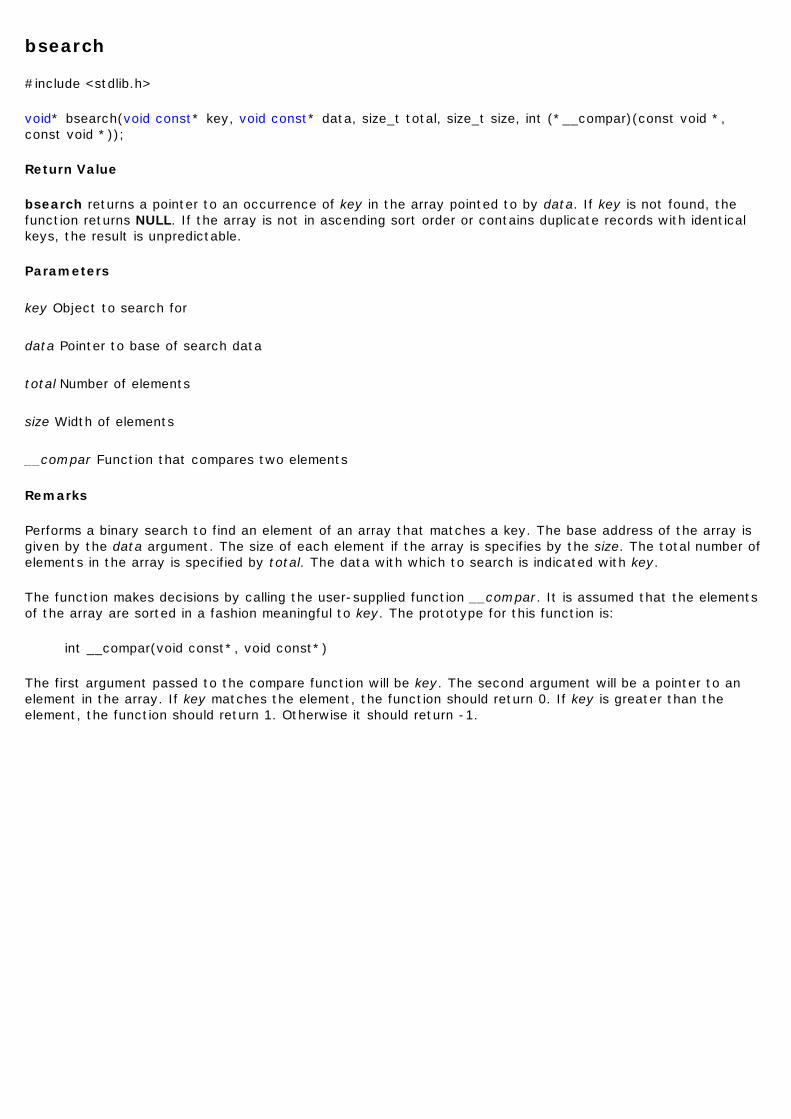
bsearch
#include <stdlib.h>
void* bsearch(void const* key, void const* data, size_t total, size_t size, int (*__compar)(const void *, const void *));
Return Value
bsearch returns a pointer to an occurrence of key in the array pointed to by data. If key is not found, the function returns NULL. If the array is not in ascending sort order or contains duplicate records with identical keys, the result is unpredictable.
Parameters
key Object to search for
data Pointer to base of search data
total Number of elements
size Width of elements
__compar Function that compares two elements
Remarks
Performs a binary search to find an element of an array that matches a key. The base address of the array is given by the data argument. The size of each element if the array is specifies by the size. The total number of elements in the array is specified by total. The data with which to search is indicated with key.
The function makes decisions by calling the user-supplied function __compar. It is assumed that the elements of the array are sorted in a fashion meaningful to key. The prototype for this function is:
int __compar(void const*, void const*)
The first argument passed to the compare function will be key. The second argument will be a pointer to an element in the array. If key matches the element, the function should return 0. If key is greater than the element, the function should return 1. Otherwise it should return -1.
calloc
#include <stdlib.h>
void *calloc(size_t nele, size_t size);
Return Value
calloc returns a pointer to the allocated space. The storage space pointed to by the return value is guaranteed to be suitably aligned for storage of any type of object. To get a pointer to a type other than void, use a type cast on the return value.
Parameters
nele Number of elements
size Length in bytes of each element
Remarks
The calloc function allocates storage space for an array of nele elements, each of length size bytes. Each element is initialized to 0.
div
#include <stdlib.h>
div_t div(int num, int denom);
Return Value
div returns a structure of type div_t, comprising the quotient and the remainder.
Parameters
num Numerator
denom Denominator
Remarks
The quotient and remainder are stored and returned in a div_t structure: typedef struct { int quot; int rem; } div_t;
See Also ldiv
dtostre
#include <stdlib.h>
char *dtostre(double val, char *s, unsigned char prec, unsigned char flags);
Return Value
Returns a pointer to string. The dtostre() function converts the double value passed in val into an ASCII representation that will be stored under s. The caller is responsible for providing sufficient storage in s.
Parameters
val Number to be converted
s String result
prec The number of digits after the decimal-point character
flags Format flags
Remarks
Conversion is done in the format "[-]d.ddde±dd" where there is one digit before the decimal-point character and the number of digits after it is equal to the precision prec; if the precision is zero, no decimal-point character appears. If flags has the DTOSTRE_UPPERCASE bit set, the letter 'E' (rather than 'e' ) will be used to introduce the exponent. The exponent always contains two digits; if the value is zero, the exponent is "00".
If flags has the DTOSTRE_ALWAYS_SIGN bit set, a space character will be placed into the leading position for positive numbers.
If flags has the DTOSTRE_PLUS_SIGN bit set, a plus sign will be used instead of a space character in this case.
dtostrf
#include <stdlib.h>
char *dtostrf(double val, char width, char prec, char *s);
Return Value
Returns a pointer to string. The dtostrf() function converts the double value passed in val into an ASCII representationthat will be stored under s. The caller is responsible for providing sufficient storage in s.
Parameters
val Number to be converted
width The minimum field width of the output string
prec The number of digits after the decimal-point character
s String result
Remarks
Conversion is done in the format "[-]d.ddd". The minimum field width of the output string (including the '.' and the possible sign for negative values) is given in width, and prec determines the number of digits after the decimal sign.

exit
#include <stdlib.h>
int exit(void);
Return Value
Parameters
Remarks
Stops application. It is currently implemented as an infinite loop.
free
#include <stdlib.h>
void free( void *memblock );
Return Value
Parameters
memblock Previously allocated memory block to be freed
Remarks
The free function deallocates a memory block (memblock) that was previously allocated by a call to calloc or malloc. The number of freed bytes is equivalent to the number of bytes requested when the block was allocated. If memblock is NULL, the pointer is ignored and free immediately returns. Attempting to free an invalid pointer (a pointer to a memory block that was not allocated by calloc or malloc) may affect subsequent allocation requests and cause errors.
itoa
#include <stdlib.h>
char *itoa(int val, char *s, int radix);
Return Value
The itoa returns the pointer passed as s.
Parameters
val Number to be converted
s String result
radix Base of val; must be in the range 2 ¨C 36
Remarks
Convert an integer to a string.
The function itoa() converts the integer value from val into an ASCII representation that will be stored under s. The caller is responsible for providing sufficient storage in s.
Conversion is done using the radix as base, which may be a number between 2 (binary conversion) and up to 36. If radix is greater than 10, the next digit after '9' will be the letter 'a'.
If radix is 10 and val is negative, a minus sign will be prepended.

labs
#include <stdlib.h>
long labs(long x);
Return Value
The labs function returns the absolute value of its argument.
Parameters
x Long-integer value
Remarks
See Also abs(), fabs()
ldiv
#include <stdlib.h>
ldiv_t ldiv(long num, long denom);
Return Value
ldiv returns a structure of type ldiv_t, comprising the quotient and the remainder.
Parameters
num Numerator
denom Denominator
Remarks
The quotient and remainder are stored and returned in a ldiv_t structure: typedef struct { long quot; long rem; } ldiv_t;
See Also div()
longjmp
#include <setjmp.h>
void longjmp(jmp_buf buf, int ret);
Return Value
Parameters
buf Variable in which environment is stored
ret Value to be returned to setjmp call
Remarks
This function restores the application environment to what it was when setjmp() was used to initialize buf. This function does not return. Instead, execution continues after the corresponding setjmp(). The only difference is that the function setjmp() returns the value ret rather than 0.
See Also setjmp()
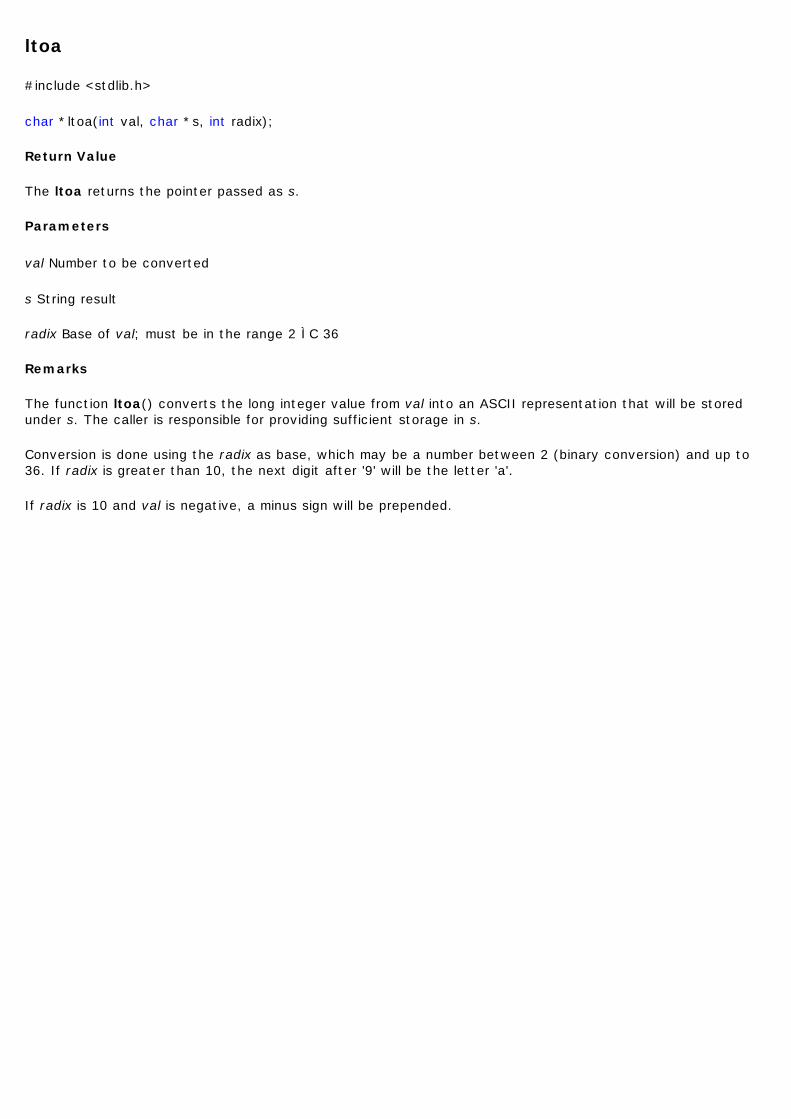
ltoa
#include <stdlib.h>
char *ltoa(int val, char *s, int radix);
Return Value
The ltoa returns the pointer passed as s.
Parameters
val Number to be converted
s String result
radix Base of val; must be in the range 2 ¨C 36
Remarks
The function ltoa() converts the long integer value from val into an ASCII representation that will be stored under s. The caller is responsible for providing sufficient storage in s.
Conversion is done using the radix as base, which may be a number between 2 (binary conversion) and up to 36. If radix is greater than 10, the next digit after '9' will be the letter 'a'.
If radix is 10 and val is negative, a minus sign will be prepended.
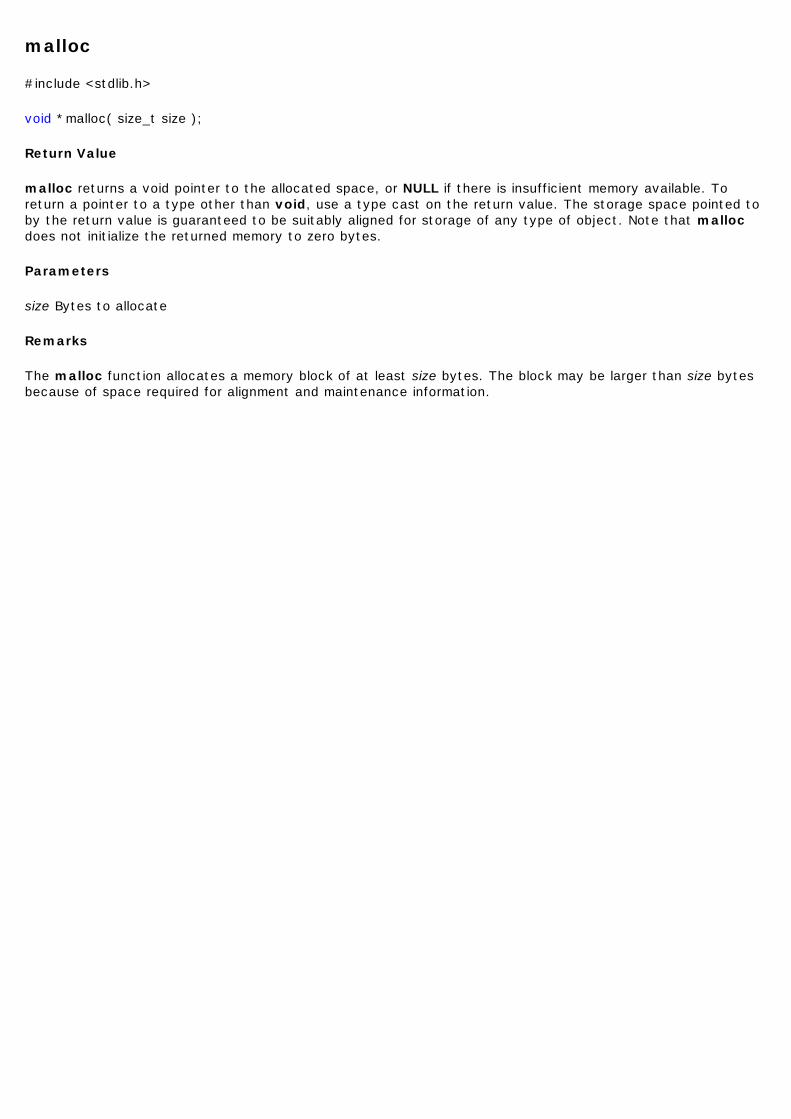
malloc
#include <stdlib.h>
void *malloc( size_t size );
Return Value
malloc returns a void pointer to the allocated space, or NULL if there is insufficient memory available. To return a pointer to a type other than void, use a type cast on the return value. The storage space pointed to by the return value is guaranteed to be suitably aligned for storage of any type of object. Note that malloc does not initialize the returned memory to zero bytes.
Parameters
size Bytes to allocate
Remarks
The malloc function allocates a memory block of at least size bytes. The block may be larger than size bytes because of space required for alignment and maintenance information.
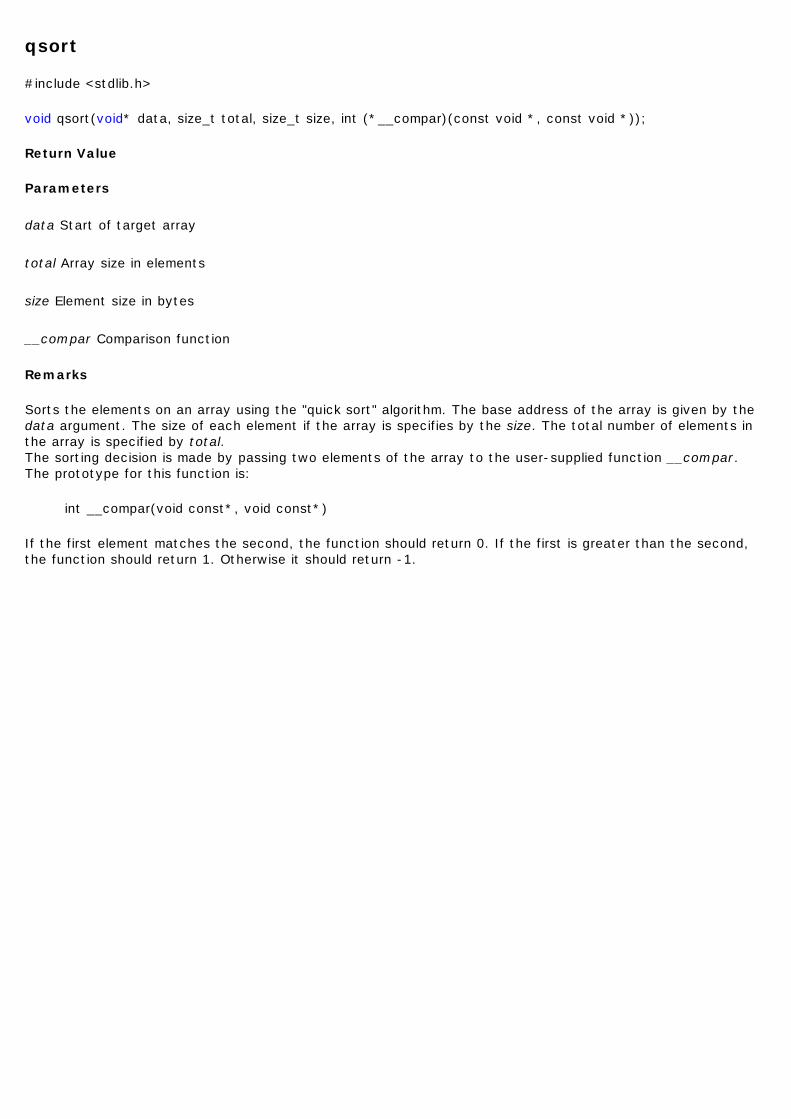
qsort
#include <stdlib.h>
void qsort(void* data, size_t total, size_t size, int (*__compar)(const void *, const void *));
Return Value
Parameters
data Start of target array
total Array size in elements
size Element size in bytes
__compar Comparison function
Remarks
Sorts the elements on an array using the "quick sort" algorithm. The base address of the array is given by the data argument. The size of each element if the array is specifies by the size. The total number of elements in the array is specified by total. The sorting decision is made by passing two elements of the array to the user-supplied function __compar. The prototype for this function is:
int __compar(void const*, void const*)
If the first element matches the second, the function should return 0. If the first is greater than the second, the function should return 1. Otherwise it should return -1.

rand
#include <stdlib.h>
int rand( void );
Return Value
rand returns a pseudorandom number.
Parameters
Remarks
The rand function returns a pseudorandom integer in the range 0 to RAND_MAX. Use the srand function to seed the pseudorandom-number generator before calling rand.
If no seed value is provided, the functions are automatically seeded with a value of 1.
In compliance with the C standard, these functions operate on int arguments. Since the underlying algorithm already uses 32-bit calculations, this causes a loss of precision. See random for an alternate set of functions that retains full 32-bit precision.
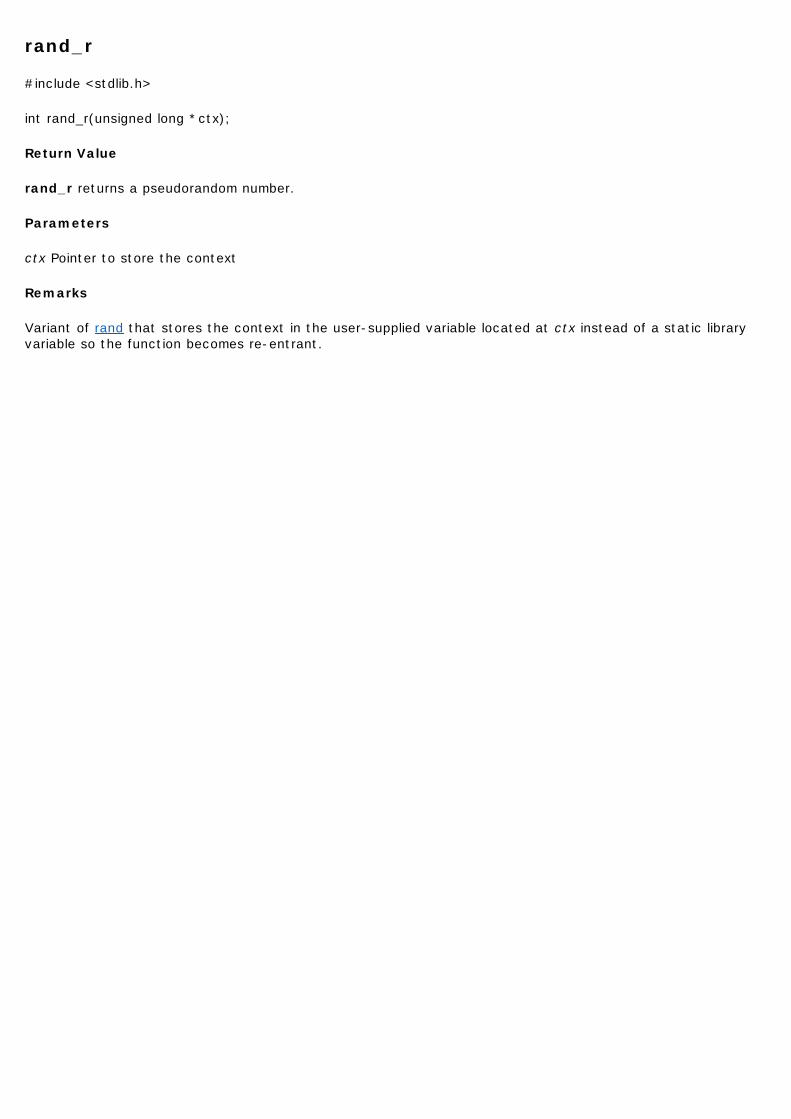
rand_r
#include <stdlib.h>
int rand_r(unsigned long *ctx);
Return Value
rand_r returns a pseudorandom number.
Parameters
ctx Pointer to store the context
Remarks
Variant of rand that stores the context in the user-supplied variable located at ctx instead of a static library variable so the function becomes re-entrant.
random
#include <stdlib.h>
long random ( void )
Return Value
random returns a pseudorandom number.
Parameters
Remarks
The random function returns a pseudorandom integer in the range 0 to RANDOM_MAX. Use the srandom function to seed the pseudorandom-number generator before calling random.
If no seed value is provided, the functions are automatically seeded with a value of 1.
random_r
#include <stdlib.h>
long random_r(unsigned long *ctx);
Return Value
random_r returns a pseudorandom number.
Parameters
ctx Pointer to store the context
Remarks
Variant of random that stores the context in the user-supplied variable located at ctx instead of a static library variable so the function becomes re-entrant.

setjmp
#include <setjmp.h>
int setjmp(jmp_buf buf);
Return Value
setjmp returns 0 after saving the stack environment. If setjmp returns as a result of a longjmp call, it returns the value argument of longjmp, or if the value argument of longjmp is 0, setjmp returns 1.
Parameters
buf Variable in which environment is stored
Remarks
This function saves its environment into the chunk of memory defined by buf. The buffer is used by a later call to longjmp().
On the AVR processors, jmp_buf structures need 24 bytes of storage, so make sure you have enough stack space or RAM available.
srand
#include <stdlib.h>
void srand( unsigned int seed );
Return Value
None
Parameters
seed Seed for random-number generation
Remarks
The srand function sets the starting point for generating a series of pseudorandom integers. To reinitialize the generator, use 1 as the seed argument. Any other value for seed sets the generator to a random starting point. rand retrieves the pseudorandom numbers that are generated. Calling rand before any call to srand generates the same sequence as calling srand with seed passed as 1.

srandom
#include <stdlib.h>
void srandom( unsigned long seed );
Return Value
None
Parameters
seed Seed for random-number generation
Remarks
The srandom function sets the starting point for generating a series of pseudorandom integers. To reinitialize the generator, use 1 as the seed argument. Any other value for seed sets the generator to a random starting point. random retrieves the pseudorandom numbers that are generated. Calling random before any call to srandom generates the same sequence as calling srandom with seed passed as 1.
strtod
#include <stdlib.h>
double strtod( const char *nptr, char **endptr );
Return Value
strtod returns the value of the floating-point number, except when the representation would cause an overflow, in which case the function returns +/–HUGE_VAL. The sign of HUGE_VAL matches the sign of the value that cannot be represented. strtod returns 0 if no conversion can be performed or an underflow occurs.
errno is set to ERANGE if overflow or underflow occurs.
Parameters
nptr Null-terminated string to convert
endptr Pointer to character that stops scan
Remarks
The strtod function converts the initial portion of the string pointed to by nptr to double representation.
The expected form of the string is an optional plus ( '+' ) or minus sign ( '-' ) followed by a sequence of digits optionally containing a decimal-point character, optionally followed by an exponent. An exponent consists of an 'E' or 'e', followed by an optional plus or minus sign, followed by a sequence of digits.
Leading white-space characters in the string are skipped.
The strtod function returns the converted value, if any.
If endptr is not NULL, a pointer to the character after the last character used in the conversion is stored in the location referenced by endptr.
If no conversion is performed, zero is returned and the value of nptr is stored in the location referenced by endptr.
If the correct value would cause overflow, plus or minus HUGE_VAL is returned (according to the sign of the value), and ERANGE is stored in errno. If the correct value would cause underflow, zero is returned and ERANGE is stored in errno.
strtol
#include <stdlib.h>
long strtol( const char *nptr, char **endptr, int base );
Return Value
strtol returns the value represented in the string nptr, except when the representation would cause an overflow, in which case it returns LONG_MAX or LONG_MIN. strtol returns 0 if no conversion can be performed. errno is set to ERANGE if overflow or underflow occurs.
Parameters
nptr Null-terminated string to convert
endptr Pointer to character that stops scan
base Number base to use
Remarks
The strtol function converts nptr to a long. strtol stops reading the string nptr at the first character it cannot recognize as part of a number. This may be the terminating null character, or it may be the first numeric character greater than or equal to base.

strtoul
#include <stdlib.h>
unsigned long strtoul( const char *nptr, char **endptr, int base );
Return Value
strtoul returns the converted value, if any, or ULONG_MAX on overflow. strtoul returns 0 if no conversion can be performed. errno is set to ERANGE if overflow or underflow occurs.
Parameters
nptr Null-terminated string to convert
endptr Pointer to character that stops scan
base Number base to use
Remarks
The strtoul function converts the string in nptr to an unsigned long value. The conversion is done according to the given base, which must be between 2 and 36 inclusive, or be the special value 0.
The string may begin with an arbitrary amount of white space (as determined by isspace()) followed by a single optional '+' or '-' sign. If base is zero or 16, the string may then include a "0x" prefix, and the number will be read in base 16; otherwise, a zero base is taken as 10 (decimal) unless the next character is '0', in which case it is taken as 8 (octal).
The remainder of the string is converted to an unsigned long value in the obvious manner, stopping at the first character which is not a valid digit in the given base. (In bases above 10, the letter 'A' in either upper or lower case represents 10, 'B' represents 11, and so forth, with 'Z' representing 35.)
If endptr is not NULL, strtoul stores the address of the first invalid character in *endptr. If there were no digits at all, however, strtoul stores the original value of nptr in endptr. (Thus, if *nptr is not '\0' but **endptr is '\0' on return, the entire string was valid.)
ultoa
#include <stdlib.h>
char *ultoa( unsigned long int val, char *s, int radix );
Return Value
ultoa returns a pointer to string. There is no error return.
Parameters
val Number to be converted
s String result
radix Base of value
Remarks
The ultoa function converts val to a null-terminated character string and stores the result (up to 33 bytes) in s. No overflow checking is performed. radix specifies the base of value; radix must be in the range 2 ¨C 36.
utoa
#include <stdlib.h>
char *utoa( unsigned int val, char *s, int radix );
Return Value
utoa returns a pointer to string. There is no error return.
Parameters
val Number to be converted
s String result
radix Base of value
Remarks
The utoa function converts val to a null-terminated character string and stores the result (up to 33 bytes) in s. No overflow checking is performed. radix specifies the base of value; radix must be in the range 2 ¨C 36.
Standard IO facilities
This file declares the standard IO facilities that are implemented in avr-libc. Due to the nature of the underlying hardware, only a limited subset of standard IO is implemented. There is no actual file implementation available, so only device IO can be performed. Since there's no operating system, the application needs to provide enough details about their devices in order to make them usable by the standard IO facilities. Due to space constraints, some functionality has not been implemented at all (like some of the printf conversions that have been left out). Nevertheless, potential users of this implementation should be warned: the printf and scanf families of functions, although usually associated with presumably simple things like the famous "Hello, world!" program, are actually fairly complex which causes their inclusion to eat up a fair amount of code space. Also, they are not fast due to the nature of interpreting the format string at run-time. Whenever possible, resorting to the (sometimes non-standard) predetermined conversion facilities that are offered by avr-libc will usually cost much less in terms of speed and code size.
In order to allow programmers a code size vs. functionality tradeoff, the function vfprintf() which is the heart of the printf family can be selected in different flavours using linker options.
#include <stdio.h>
l clearerr l EOF l fclose l fdevopen l feof l ferror l fgetc l fgets l fprintf, fprintf_P l fputc l fputs, fputs_P l fread l fscanf, fscanf_P l fwrite l getc l getchar l gets l printf, printf_P l putc l putchar l puts, puts_P l scanf, scanf_P l snprintf, snprintf_P l sprintf, sprintf_P l sscanf, sscanf_P l stderr, stdin, stdout l ungetc l vfprintf l vfscanf

clearerr
#include <stdio.h>
void clearerr (FILE *stream);
Return Value
None
Parameters
stream Pointer to FILE structure
Remarks
The clearerr function resets the error indicator and end-of-file indicator for stream. Error indicators are not automatically cleared; once the error indicator for a specified stream is set, operations on that stream continue to return an error value until clearerr is called.

EOF
#include <stdio.h>
EOF (-1)
Remarks
EOF declares the value that is returned by various standard IO functions in case of an error. Since the AVR platform (currently) doesn't contain an abstraction for actual files, its origin as "end of file" is somewhat meaningless here.
fclose
#include <stdio.h>
int fclose( FILE *stream );
Return Value
fclose returns 0 if the stream is successfully closed. return EOF to indicate an error.
Parameter
stream Pointer to FILE structure
Remarks
This function closes stream, and disallows and further IO to and from it.
fdevopen
#include <stdio.h>
FILE *fdevopen (int(*)(char, FILE *) put, int(*)(FILE *) get)
Return Value
Returns a pointer to the open stream. A null pointer value indicates an error.
Parameters
put User defined output function
get User defined input function
Remarks
This function is a replacement for fopen().
It opens a stream for a device where the actual device implementation needs to be provided by the application. If successful, a pointer to the structure for the opened stream is returned. Reasons for a possible failure currently include that neither the put nor the get argument have been provided, thus attempting to open a stream with no IO intent at all, or that insufficient dynamic memory is available to establish a new stream.
If the put function pointer is provided, the stream is opened with write intent. The function passed as put shall take one character to write to the device as argument , and shall return 0 if the output was successful, and a nonzero value if the character could not be sent to the device.
If the get function pointer is provided, the stream is opened with read intent. The function passed as get shall take no arguments, and return one character from the device, passed as an int type. If an error occurs when trying to read from the device, it shall return _FDEV_ERR. If an end-of-file condition was reached while reading from the device, _FDEV_EOF shall be returned..
If both functions are provided, the stream is opened with read and write intent.
The first stream opened with read intent is assigned to stdin, and the first one opened with write intent is assigned to both, stdout and stderr.
fdevopen() uses calloc() (und thus malloc()) in order to allocate the storage for the new stream.
Note:
The definition of fdevopen() changed since avr-libc version 1.3. If you get errors about the function during compling, recommend you to check your avr-libc version and prefer you to update your AVRGCC tool chain.
If the macro __STDIO_FDEVOPEN_COMPAT_12 is declared before including <stdio.h>, a function prototype for fdevopen() will be chosen that is backwards compatible with avr-libc version 1.2 and before. [FILE* fdevopen ( int(* put)(char), int(* get)(void), int opts __attribute__((unused)))]. This is solely intented for pro-viding a simple migration path without the need to immediately change all source code. Do not use for new code.
feof
#include <stdio.h>
int feof( FILE *stream );
Return Value
Since there is currently no notion for end-of-file on a device, this function will always return a false value.
Parameter
stream Pointer to FILE structure
Remarks
Test the end-of-file flag of stream. This flag can only be cleared by a call to clearerr().
ferror
#include <stdio.h>
int ferror( FILE *stream );
Return Value
If no error has occurred on stream, ferror returns 0. Otherwise, it returns a nonzero value.
Parameter
stream Pointer to FILE structure
Remarks
The ferror routine tests for a reading or writing error on the file associated with stream. If an error has occurred, the error indicator for the stream remains set until the stream is closed or rewound, or until clearerr is called against it.

fgetc
#include <stdio.h>
int fgetc( FILE *stream );
Return Value
The function fgetc reads a character from stream. It returns the character, or EOF in case end-of-file was encountered or an error occurred. The routines feof() or ferror() must be used to distinguish between both situations.
Parameter
stream Pointer to FILE structure
Remarks

fgets
#include <stdio.h>
char *fgets( char *string, int n, FILE *stream );
Return Value
fgets function returns string. NULL is returned to indicate an error or an end-of-file condition. Use feof or ferror to determine whether an error occurred.
Parameters
string Storage location for data
n Maximum number of characters to read
stream Pointer to FILE structure
Remarks
The fgets function reads a string from the input stream argument and stores it in string. fgets reads characters from the current stream position to and including the first newline character, to the end of the stream, or until the number of characters read is equal to n - 1, whichever comes first. The result stored in string is appended with a null character. The newline character, if read, is included in the string.
fprintf, printf_P
#include <stdio.h>
int fprintf( FILE *stream, const char *format [, argument ]...);
int fprintf_P( FILE *stream, const char *format [, argument ]...);
Return Value
Each of these functions returns the number of bytes written.
Parameters
stream Pointer to FILE structure
format Format-control string
argument Optional arguments
Remarks
Each function formats and prints a series of characters and values to the output stream. fprintf_P uses a format string that resides in program memory.

fputc
#include <stdio.h>
int fputc( int c, FILE *stream );
Return Value
The function fputc sends the character c (though given as type int) to stream. It returns the character, or EOF in case an error occurred.
Parameters
c Character to be written
stream Pointer to FILE structure
Remarks
fputs, fputs_P
#include <stdio.h>
int fputs( const char *string, FILE *stream );
int fputs_P( const char *string, FILE *stream );
Return Value
Each of these functions returns a nonnegative value if it is successful. On an error, returns EOF.
Parameters
string Output string
stream Pointer to FILE structure
Remarks
Each of these functions copies string to the output stream at the current position. fputs_P uses string that resides in program memory.
fread
#include <stdio.h>
size_t fread( void *buffer, size_t size, size_t count, FILE *stream );
Return Value
fread returns the number of full items actually read, which may be less than count if an error occurs or if the end of the file is encountered before reaching count. Use the feof or ferror function to distinguish a read error from an end-of-file condition. If size or count is 0, fread returns 0 and the buffer contents are unchanged.
Parameters
buffer Storage location for data
size Item size in bytes
count Maximum number of items to be read
stream Pointer to FILE structure
Remarks
The fread function reads up to count items of size bytes from the input stream and stores them in buffer. The file pointer associated with stream (if there is one) is increased by the number of bytes actually read.
fscanf, fscanf_P
#include <stdio.h>
int fscanf( FILE *stream, const char *format [, argument ]... );
int fscanf_P( FILE *stream, const char *format [, argument ]... );
Return Value
Each of these functions returns the number of fields successfully converted and assigned; the return value does not include fields that were read but not assigned. A return value of 0 indicates that no fields were assigned. If an error occurs, or if the end of the file stream is reached before the first conversion, the return value is EOF.
Parameters
stream Pointer to FILE structure
format Format-control string
argument Optional arguments
Remarks
Each of these functions reads data from the current position of stream into the locations given by argument (if any). Each argument must be a pointer to a variable of a type that corresponds to a type specifier in format. format controls the interpretation of the input fields and has the same form and function as the format argument for scanf. fscanf_P uses a format string that resides in program memory.
fwrite
#include <stdio.h>
size_t fwrite( const void *buffer, size_t size, size_t count, FILE *stream );
Return Value
fwrite returns the number of full items actually written, which may be less than count if an error occurs. Also, if an error occurs, the file-position indicator cannot be determined.
Parameters
buffer Pointer to data to be written
size Item size in bytes
count Maximum number of items to be written
stream Pointer to FILE structure
Remarks
The fwrite function writes up to count items, of size length each, from buffer to the output stream. The file pointer associated with stream (if there is one) is incremented by the number of bytes actually written.
getc
#include <stdio.h>
int getc( FILE *stream );
Return Value
getc returns the character read. To indicate an read error or end-of-file condition, return EOF.
Parameter
stream Input stream
Remarks
The macro getc used to be a "fast" macro implementation with a functionality identical to fgetc(). For space constraints, in avr-libc, it is just an alias for fgetc.

getchar
#include <stdio.h>
int getchar( void );
Return Value
getchar returns the character read. To indicate an read error or end-of-file condition, return EOF.
Parameter
Remarks
The macro getchar reads a character from stdin. Return values and error handling is identical to fgetc().
gets
#include <stdio.h>
char *gets( char *buffer );
Return Value
gets returns its argument if successful. A NULL pointer indicates an error or end-of-file condition. Use ferror or feof to determine which one has occurred.
Parameter
buffer Storage location for input string
Remarks
The gets function reads a line from the standard input stream stdin and stores it in buffer. The line consists of all characters up to and including the first newline character ('\n'). gets then replaces the newline character with a null character ('\0') before returning the line. In contrast, the fgets function retains the newline character.
printf, printf_P
#include <stdio.h>
int printf( const char *format [, argument]... );
int printf_P( const char *format [, argument]... );
Return Value
Each of these functions returns the number of characters printed, or a negative value if an error occurs.
Parameters
format Format control
argument Optional arguments
Remarks
The printf function formats and prints a series of characters and values to the standard output stream, stdout. If arguments follow the format string, the format string must contain specifications that determine the output format for the arguments. printf and fprintf behave identically except that printf writes output to stdout rather than to a destination of type FILE. printf_P uses a format string that resides in program memory.
putc
#include <stdio.h>
int putc( int c, FILE *stream );
Return Value
putc returns the character written. To indicate an error or end-of-file condition, return EOF.
Parameters
c Character to be written
stream Pointer to FILE structure
Remarks
The macro putc used to be a "fast" macro implementation with a functionality identical to fputc(). For space constraints, in avr-libc, it is just an alias for fputc.

putchar
#include <stdio.h>
int putchar( int c );
Return Value
putchar returns the character written. To indicate an error or end-of-file condition, return EOF.
Parameters
c Character to be written
Remarks
The macro putchar sends character c to stdout.
puts, puts_P
#include <stdio.h>
int puts( const char *string );
int puts_P( const char *string );
Return Value
Each of these returns a nonnegative value if successful. If fails it returns EOF;
Parameter
string Output string
Remarks
Each of these functions writes string to the standard output stream stdout, replacing the string's terminating null character ('\0') with a newline character ('\n') in the output stream. puts_P uses a string that resides in program memory.
scanf, scanf_P
#include <stdio.h>
int scanf( const char *format [,argument]... );
int scanf_P( const char *format [,argument]... );
Return Value
Both scanf and scanf_P return the number of fields successfully converted and assigned; the return value does not include fields that were read but not assigned. A return value of 0 indicates that no fields were assigned. The return value is EOF for an error or if the end-of-file character or the end-of-string character is encountered in the first attempt to read a character.
Parameters
format Format control string
argument Optional arguments
Remarks
The scanf function reads data from the standard input stream stdin and writes the data into the location given by argument. Each argument must be a pointer to a variable of a type that corresponds to a type specifier in format. If copying takes place between strings that overlap, the behavior is undefined. scanf_P uses a format string that resides in program memory.
snprintf, snprintf_P
#include <stdio.h>
int snprintf( char *buffer, size_t count, const char *format [, argument] ... );
int snprintf_P( char *buffer, size_t count, const char *format [, argument] ... );
Return Value
snprintf returns the number of bytes stored in buffer, not counting the terminating null character. If the number of bytes required to store the data exceeds count, then count bytes of data including the trailing NULL character are stored in buffer and the formatted string length is returned.
Parameters
buffer Storage location for output
count Maximum number of characters to store
format Format-control string
argument Optional arguments
Remarks
The snprintf function formats and stores count or fewer characters and values (including a terminating null character that is always appended unless count is zero or the formatted string length is greater than or equal to count characters) in buffer. Each argument (if any) is converted and output according to the corresponding format specification in format. snprintf_P uses a format string that resides in program memory.
sprintf, sprintf_P
#include <stdio.h>
int sprintf( char *buffer, const char *format [, argument] ... );
int sprintf_P( char *buffer, const char *format [, argument] ... );
Return Value
sprintf returns the number of bytes stored in buffer, not counting the terminating null character.
Parameters
buffer Storage location for output
format Format-control string
argument Optional arguments
Remarks
The sprintf function formats and stores a series of characters and values in buffer. Each argument (if any) is converted and output according to the corresponding format specification in format. sprintf_P uses a format string that resides in program memory.
sscanf, sscanf_P
#include <stdio.h>
int sscanf( const char *buffer, const char *format [, argument ] ... );
int sscanf_P( const char *buffer, const char *format [, argument ] ... );
Return Value
Each of these functions returns the number of fields successfully converted and assigned; the return value does not include fields that were read but not assigned. A return value of 0 indicates that no fields were assigned. The return value is EOF for an error or if the end of the string is reached before the first conversion.
Parameters
buffer Stored data
format Format-control string
argument Optional arguments
Remarks
The sscanf function reads data from buffer into the location given by each argument. Every argument must be a pointer to a variable with a type that corresponds to a type specifier in format. The format argument controls the interpretation of the input fields and has the same form and function as the format argument for the scanf function. sscanf_P uses a format string that resides in program memory.

stdin, stdout, stderr
#include <stdio.h>
FILE *stdin;
FILE *stdout;
FILE *stderr;
Remarks
These are standard streams for input, output, and error output.
ungetc
int ungetc( int c, FILE *stream );
Return Value
If successful, ungetc returns the character argument c. If c cannot be pushed back or if no character has been read, the input stream is unchanged and ungetc returns EOF.
Parameters
c Character to be pushed
stream Pointer to FILE structure
Remarks
The ungetc function pushes the character c (converted to an unsigned char) back onto the input stream pointed to by stream. The pushed-back character will be returned by a subsequent read on the stream.
Currently, only a single character can be pushed back onto the stream.
The ungetc function returns the character pushed back after the conversion, or EOF if the operation fails. If the value of the argument c character equals EOF, the operation will fail and the stream will remain unchanged.
vfprintf
int vfprintf( FILE *stream, const char *format, va_list argptr );
Return Value
vfprintf return the number of characters written, not including the terminating null character, or a negative value if an output error occurs.
Parameters
stream Pointer to FILE structure
format Format specification
argptr Pointer to list of arguments
Remarks
vfprintf is the central facility of the printf family of functions. It outputs values to stream under control of a format string passed in format. The actual values to print are passed as a variable argument list argptr.
The format string is composed of zero or more directives: ordinary characters (not %), which are copied unchanged to the output stream; and conversion specifications, each of which results in fetching zero or more subsequent arguments. Each conversion specification is introduced by the % character. The arguments must properly correspond (after type promotion) with the conversion specifier. After the %, the following appear in sequence:
l Zero or more of the following flags:
¡ # The value should be converted to an "alternate form". For c, d, i, s, and u conversions, this option has no effect. For o conversions, the precision of the number is increased to force the first character of the output string to a zero (except if a zero value is printed with an explicit precision of zero). For x and X conversions, a non-zero result has the string `0x' (or `0X' for X conversions) prepended to it.
¡ 0 (zero) Zero padding. For all conversions, the converted value is padded on the left with zeros rather than blanks. If a precision is given with a numeric conversion (d, i, o, u, i, x, and X), the 0 flag is ignored.
¡ - A negative field width flag; the converted value is to be left adjusted on the field boundary. The converted value is padded on the right with blanks, rather than on the left with blanks or zeros. A - overrides a 0 if both are given.
¡ ' ' (space) A blank should be left before a positive number produced by a signed conversion (d, or i).
¡ + A sign must always be placed before a number produced by a signed conversion. A + overrides a space if both are used.
- An optional decimal digit string specifying a minimum field width. If the converted value has fewer characters than the field width, it will be padded with spaces on the left (or right, if the left-adjust ment flag has been given) to fill out the field width.
l An optional precision, in the form of a period . followed by an optional digit string. If the digit string is omitted, the precision is taken as zero. This gives the minimum number of digits to appear for d, i, o, u, x, and X conversions, or the maximum number of characters to be printed from a string for s conversions.
l An optional l length modifier, that specifies that the argument for the d, i, o, u, x, or X conversion is a "long int" rather than int.
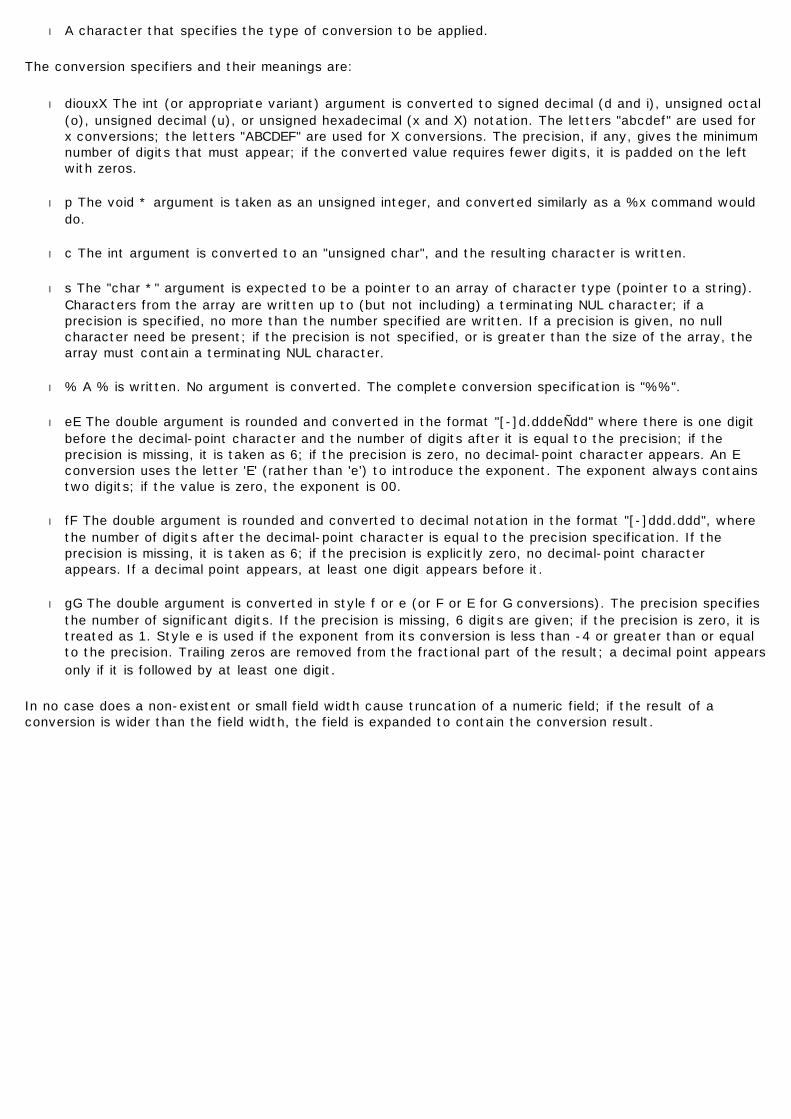
l A character that specifies the type of conversion to be applied.
The conversion specifiers and their meanings are:
l diouxX The int (or appropriate variant) argument is converted to signed decimal (d and i), unsigned octal (o), unsigned decimal (u), or unsigned hexadecimal (x and X) notation. The letters "abcdef" are used for x conversions; the letters "ABCDEF" are used for X conversions. The precision, if any, gives the minimum number of digits that must appear; if the converted value requires fewer digits, it is padded on the left with zeros.
l p The void * argument is taken as an unsigned integer, and converted similarly as a %x command would do.
l c The int argument is converted to an "unsigned char", and the resulting character is written.
l s The "char *" argument is expected to be a pointer to an array of character type (pointer to a string). Characters from the array are written up to (but not including) a terminating NUL character; if a precision is specified, no more than the number specified are written. If a precision is given, no null character need be present; if the precision is not specified, or is greater than the size of the array, the array must contain a terminating NUL character.
l % A % is written. No argument is converted. The complete conversion specification is "%%".
l eE The double argument is rounded and converted in the format "[-]d.ddde±dd" where there is one digit before the decimal-point character and the number of digits after it is equal to the precision; if the precision is missing, it is taken as 6; if the precision is zero, no decimal-point character appears. An E conversion uses the letter 'E' (rather than 'e') to introduce the exponent. The exponent always contains two digits; if the value is zero, the exponent is 00.
l fF The double argument is rounded and converted to decimal notation in the format "[-]ddd.ddd", where the number of digits after the decimal-point character is equal to the precision specification. If the precision is missing, it is taken as 6; if the precision is explicitly zero, no decimal-point character appears. If a decimal point appears, at least one digit appears before it.
l gG The double argument is converted in style f or e (or F or E for G conversions). The precision specifies the number of significant digits. If the precision is missing, 6 digits are given; if the precision is zero, it is treated as 1. Style e is used if the exponent from its conversion is less than -4 or greater than or equal to the precision. Trailing zeros are removed from the fractional part of the result; a decimal point appears only if it is followed by at least one digit.
In no case does a non-existent or small field width cause truncation of a numeric field; if the result of a conversion is wider than the field width, the field is expanded to contain the conversion result.
vfscanf
int vfscanf( FILE *stream, const char *format, va_list argptr );
Return Value
vfscanf returns the number of fields successfully converted and assigned; the return value does not include fields that were read but not assigned. A return value of 0 indicates that no fields were assigned. If an error occurs, or if the end of the file stream is reached before the first conversion, the return value is EOF.
Parameters
stream Pointer to FILE structure
format Format specification
argptr Pointer to list of arguments
Remarks
Formatted input. This function is the heart of the scanf family of functions.
Characters are read from stream and processed in a way described by format. Conversion results will be assigned to the parameters passed via argptr.
The format string format is scanned for conversion specifications. Anything that doesn't comprise a conversion specification is taken as text that is matched literally against the input. White space in the format string will match any white space in the data (including none), all other characters match only itself. Processing is aborted as soon as the data and format string no longer match, or there is an error or end-of-file condition on stream.
Most conversions skip leading white space before starting the actual conversion.
Conversions are introduced with the character %. Possible options can follow the %:
l a * indicating that the conversion should be performed but the conversion result is to be discarded; no parameters will be processed from argptr,
l the character h indicating that the argument is a pointer to short int (rather than int),
l the character l indicating that the argument is a pointer to long int (rather than int, for integer type conversions), or a pointer to double (for floating point conversions).
In addition, a maximal field width may be specified as a nonzero positive decimal integer, which will restrict the conversion to at most this many characters from the input stream. This field width is limited to at most 127 characters which is also the default value (except for the c conversion that defaults to 1).
The following conversion flags are supported:
l % Matches a literal % character. This is not a conversion.
l d Matches an optionally signed decimal integer; the next pointer must be a pointer to int.
l i Matches an optionally signed integer; the next pointer must be a pointer to int. The integer is read in base 16 if it begins with 0x or 0X, in base 8 if it begins with 0, and in base 10 otherwise. Only characters that correspond to the base are used.
l o Matches an octal integer; the next pointer must be a pointer to unsigned int.
l u Matches an optionally signed decimal integer; the next pointer must be a pointer to unsigned int.
l x Matches an optionally signed hexadecimal integer; the next pointer must be a pointer to unsigned int.
l f Matches an optionally signed floating-point number; the next pointer must be a pointer to float.
l e, g, E, G Equivalent to f.
l s Matches a sequence of non-white-space characters; the next pointer must be a pointer to char, and the array must be large enough to accept all the sequence and the terminating NUL character. The input string stops at white space or at the maximum field width, whichever occurs first.
l c Matches a sequence of width count characters (default 1); the next pointer must be a pointer to char, and there must be enough room for all the characters (no terminating NUL is added). The usual skip of leading white space is suppressed. To skip white space first, use an explicit space in the format.
l [ Matches a nonempty sequence of characters from the specified set of accepted characters; the next pointer must be a pointer to char, and there must be enough room for all the characters in the string, plus a terminating NUL character. The usual skip of leading white space is suppressed. The string is to be made up of characters in (or not in) a particular set; the set is defined by the characters between the open bracket [ character and a close bracket ] character. The set excludes those characters if the first character after the open bracket is a circumflex ^. To include a close bracket in the set, make it the first character after the open bracket or the circumflex; any other position will end the set. The hyphen character - is also special; when placed between two other characters, it adds all intervening characters to the set. To include a hyphen, make it the last character before the final close bracket. For instance, [^]0-9-] means the set of everything except close bracket, zero through nine, and hyphen. The string ends with the appearance of a character not in the (or, with a circumflex, in) set or when the field width runs out.
l p Matches a pointer value (as printed by p in printf()); the next pointer must be a pointer to void.
l n Nothing is expected; instead, the number of characters consumed thus far from the input is stored through the next pointer, which must be a pointer to int. This is not a conversion, although it can be suppressed with the * flag.

Mathematics
Basic mathematics constants and functions.
#include <math.h>
constants
#define M_PI 3.141592653589793238462643 #define M_SQRT2 1.4142135623730950488016887
Functions
l acos l asin l atan, atan2 l ceil l cos l cosh l exp l fabs l floor l fmod l frexp l inverse l isinf l isnan l ldexp l log, log10 l modf l pow l sin l sinh l sqrt l square l tan l tanh

acos
#include <math.h>
double acos( double x );
Return Value
The acos function returns the arccosine of x in the range 0 to pi radians. A domain error occurs for arguments not in the range [-1, +1].
Parameters
x Value between ¨C1 and 1 whose arccosine is to be calculated
Remarks

asin
#include <math.h>
double asin( double x );
Return Value
The asin function returns the arcsine of x in the range 0 to pi radians. A domain error occurs for arguments not in the range [-1, +1].
Parameters
x Value between ¨C1 and 1 whose arcsine is to be calculated
Remarks
atan, atan2
#include <math.h>
double atan( double x );
double atan2( double y, double x );
Return Value
atan returns the arctangent of x. atan2 returns the arctangent of y/x. If x is 0, atan returns 0. If both parameters of atan2 are 0, the function returns 0. atan returns a value in the range 0 to pi radians; atan2 returns a value in the range -pi to +pi radians, using the signs of both parameters to determine the quadrant of the return value.
Parameters
x, y Any numbers
Remarks
The atan function calculates the arctangent of x. atan2 calculates the arctangent of y/x. If both x and y are zero, the global variable errno is set to EDOM.

ceil
#include <math.h>
double ceil( double x );
Return Value
The ceil function returns a double value representing the smallest integer that is greater than or equal to x. There is no error return.
Parameters
x Floating-point value
Remarks

cos
#include <math.h>
double cos(double x);
Return Value
Returns the cosine of x
Parameters
x Angle in radians
Remarks

cosh
#include <math.h>
double cosh(double x);
Return Value
Returns the hyperbolic cosine of x
Parameters
x Angle in radians
Remarks

exp
#include <math.h>
double exp( double x );
Return Value
The exp function returns the exponential value of the floating-point parameter, x, if successful. On overflow, the function returns INF (infinite) and on underflow, exp returns 0.
Parameters
x Floating-point value
Remarks

fabs
#include <math.h>
double fabs(double x);
Return Value
fabs returns the absolute value of its argument.
Parameters
x Floating-point value
Remarks
See Also abs(), labs()

floor
#include <math.h>
double floor( double x );
Return Value
The floor function returns a floating-point value representing the largest integer that is less than or equal to x.There is no error return.
Parameters
x Floating-point value
Remarks
fmod
#include <math.h>
double fmod( double x, double y );
Return Value
fmod returns the floating-point remainder of x / y.
Parameters
x, y Floating-point values
Remarks
The fmod function calculates the floating-point remainder f of x / y such that x = i * y + f, where i is an integer, f has the same sign as x, and the absolute value of f is less than the absolute value of y.
frexp
#include <math.h>
double frexp( double x, int *expptr );
Return Value
frexp returns the mantissa. If x is 0, the function returns 0 for both the mantissa and the exponent. There is no error return.
Parameters
x Floating-point value
expptr Pointer to stored integer exponent
Remarks
The frexp function breaks down the floating-point value (x) into a mantissa (m) and an exponent (n), such that the absolute value of m is greater than or equal to 0.5 and less than 1.0, and x = m*2^n. The integer exponent n is stored at the location pointed to by expptr.

inverse
#include <math.h>
double inverse(double x);
Return Value
inverse returns 1 / x.
Parameters
x Floating-point value
Remarks
This function does not belong to the C standard definition.

isinf
#include <math.h>
int isinf ( double x );
Return Value
isinf returns 1 if the argument x is either positive or negative infinity, otherwise 0.
Parameters
x Floating-point value
Remarks

isnan
#include <math.h>
int isnan( double x );
Return Value
isnan returns 1 if the argument x represents a "not-a-number" (NaN) object, otherwise 0.
Parameters
x Floating-point value
Remarks
ldexp
#include <math.h>
double ldexp( double x, int exp );
Return Value
The ldexp function returns the value of x times 2 raised to the power exp.
Parameters
x Floating-point value
exp Integer exponent
Remarks
The ldexp function multiplies a floating-point number by an integral power of 2.
If the resultant value would cause an overflow, the global variable errno is set to ERANGE, and the value NaN is returned.

log, log10
#include <math.h>
double log( double x );
double log10( double x );
Return Value
The log functions return the logarithm of x if successful. If x is less than or equal 0, a domain error will occur.
Parameters
x Value whose logarithm is to be found
Remarks
modf
#include <math.h>
double modf( double x, double *intptr );
Return Value
This function returns the signed fractional portion of x. There is no error return.
Parameters
x Floating-point value
intptr Pointer to stored integer portion
Remarks
The modf function breaks down the floating-point value x into fractional and integer parts, each of which has the same sign as x. The signed fractional portion of x is returned. The integer portion is stored as a floating-point value at intptr.

pow
#include <math.h>
double pow( double x, double y );
Return Value
pow returns the value of x to the exponent y.
Parameters
x Base
y Exponent
Remarks
The pow function computes x raised to the power of y.

sin
#include <math.h>
double sin(double x);
Return Value
Returns the sine of x
Parameters
x Angle in radians
Remarks

sinh
#include <math.h>
double sinh(double x);
Return Value
Returns the hyperbolic sine of x
Parameters
x Angle in radians
Remarks

sqrt
#include <math.h>
double sqrt(double x);
Return Value
The sqrt function returns the square-root of x. The argument x should be positive. If it is negative, errno will be set to EDOM.
Parameters
x Nonnegative floating-point value
Remarks

square
#include <math.h>
double square ( double x );
Return Value
square returns x * x.
Parameters
x Floating-point value
Remarks

tan
#include <math.h>
double tan(double x);
Return Value
tan returns the tangent of x.
Parameters
x Angle in radians
Remarks

tanh
#include <math.h>
double tanh(double x);
Return Value
tanh returns the hyperbolic tangent of x.
Parameters
x Angle in radians
Remarks

Character Operations
These functions perform various operations on characters.
#include <ctype.h>
l isalnum l isalpha l isascii l isblank l iscntrl l isdigit l isgraph l islower l isprint l ispunct l isspace l isupper l isxdigit l toascii l tolower l toupper
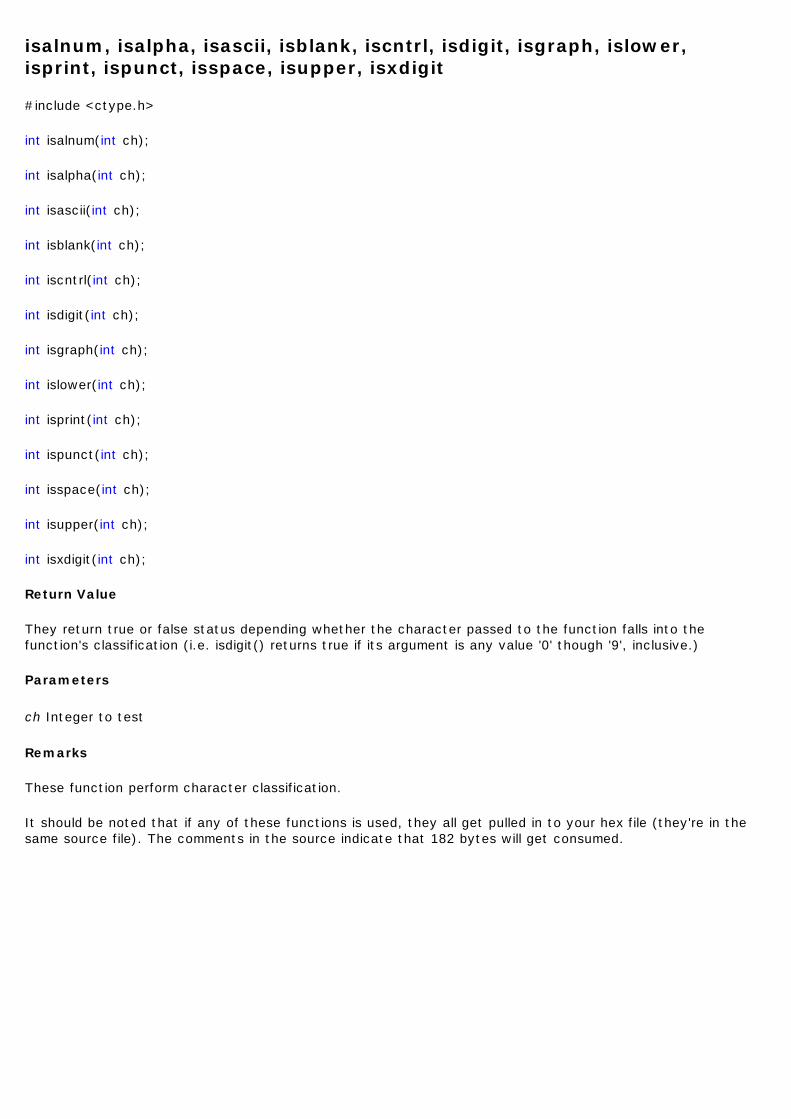
isalnum, isalpha, isascii, isblank, iscntrl, isdigit, isgraph, islower, isprint, ispunct, isspace, isupper, isxdigit
#include <ctype.h>
int isalnum(int ch);
int isalpha(int ch);
int isascii(int ch);
int isblank(int ch);
int iscntrl(int ch);
int isdigit(int ch);
int isgraph(int ch);
int islower(int ch);
int isprint(int ch);
int ispunct(int ch);
int isspace(int ch);
int isupper(int ch);
int isxdigit(int ch);
Return Value
They return true or false status depending whether the character passed to the function falls into the function's classification (i.e. isdigit() returns true if its argument is any value '0' though '9', inclusive.)
Parameters
ch Integer to test
Remarks
These function perform character classification.
It should be noted that if any of these functions is used, they all get pulled in to your hex file (they're in the same source file). The comments in the source indicate that 182 bytes will get consumed.

toascii
#include <ctype.h>
int toascii(int ch);
Return Value
toascii converts a copy of ch if possible, and returns the result.
Parameters
ch Character to convert
Remarks
Converts the argument to a value that fits in the range of ASCII values (0 - 0x7f). It does this masking off the upper bits. This function is defined in the same file as the isalpha(), etc. set of functions, so if you use this function in your code, you will pull in all the others. If you don't need those other functions, you can save a lot of program space by simply ANDing your value with 0x7f.

tolower, toupper
#include <ctype.h>
int tolower(int ch);
int toupper(int ch);
Return Value
Each of these routines converts a copy of ch, if possible, and returns the result.
Parameters
ch Character to convert
Remarks
Converts the argument to its upper-case or lower-case representation, depending upon which function you call. This function does not recognise international characters. These functions are defined in the same file as the isalpha(), etc. set of functions, so if you use either function in your code, you will pull in all the others.
Strings
The string functions perform string operations on NULL terminated strings.
If the strings you are working on resident in program space (flash), you will need to use the string functions described in Program Memory APIs.
#include <string.h>
Defines
l #define _FFS(x)
Functions
l ffs l ffsl l ffsll l memccpy l memchr l memcmp l memcpy l memmove l memset l strcasecmp l strcat l strchr l strcmp l strcpy l strlcat l strlcpy l strlen l strlwr l strncasecmp l strncat l strncmp l strncpy l strnlen l strrchr l strrev l strsep l strstr l strtok_r l strupr
_FFS
#include <string.h>
_FFS(x)
Return Value
The macro returns the position of the first (least significant) bit set in the word val, or 0 if no bits are set. The least significant bit is position 1.
Parameters
x Input value
Remarks
This macro finds the first (least significant) bit set in the input value.
This macro is very similar to the function ffs() except that it evaluates its argument at compile-time, so it should only be applied to compile-time constant expressions where it will reduce to a constant itself. Application of this macro to expressions that are not constant at compile-time is not recommended, and might result in a huge amount of code generated.
ffs
#include <string.h>
int ffs (int val) const
Return Value
The ffs() function returns the position of the first (least significant) bit set in the word val, or 0 if no bits are set. The least significant bit is position 1.
Parameters
val Input value
Remarks
This function finds the first (least significant) bit set in the input value.
Note: For expressions that are constant at compile time, consider using the _FFS macro instead.
ffsl
#include <string.h>
int ffsl (long val) const
Return Value
The ffsl() function returns the position of the first (least significant) bit set in the word val, or 0 if no bits are set. The least significant bit is position 1.
Parameters
val Input value
Remarks
This function finds the first (least significant) bit set in the input value.
Same as ffs(), for an argument of type long.
ffsll
#include <string.h>
int ffsll (long long val) const
Return Value
The ffsll() function returns the position of the first (least significant) bit set in the word val, or 0 if no bits are set. The least significant bit is position 1.
Parameters
val Input value
Remarks
This function finds the first (least significant) bit set in the input value.
Same as ffs(), for an argument of type long long.
memccpy
#include <string.h>
void *memccpy( void *dest, const void *src, int c, unsigned int count );
Return Value
If the character c is copied, memccpy returns a pointer to the byte in dest that immediately follows the character. If c is not copied, it returns NULL.
Parameters
dest Pointer to destination
src Pointer to source
c Last character to copy
count Number of characters
Remarks
The memccpy function copies 0 or more bytes of src to dest, halting when the character c has been copied or when count bytes have been copied, whichever comes first.
memchr
#include <string.h>
void *memchr( const void *buf, int c, size_t count );
Return Value
If successful, memchr returns a pointer to the first location of c in buf. Otherwise it returns NULL.
Parameters
buf Pointer to buffer
c Character to look for
count Number of characters to check
Remarks
The memchr function looks for the first occurrence of c in the first count bytes of buf. It stops when it finds c or when it has checked the first count bytes.
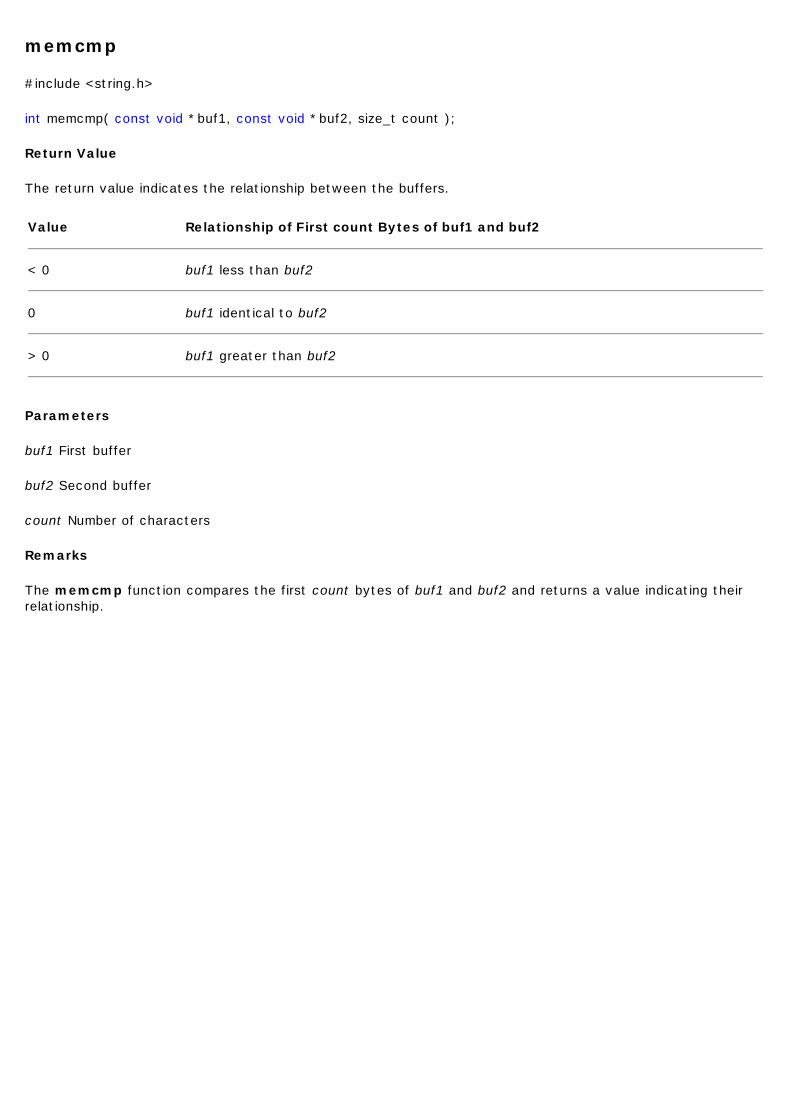
memcmp
#include <string.h>
int memcmp( const void *buf1, const void *buf2, size_t count );
Return Value
The return value indicates the relationship between the buffers.
Parameters
buf1 First buffer
buf2 Second buffer
count Number of characters
Remarks
The memcmp function compares the first count bytes of buf1 and buf2 and returns a value indicating their relationship.
Value Relationship of First count Bytes of buf1 and buf2
< 0 buf1 less than buf2
0 buf1 identical to buf2
> 0 buf1 greater than buf2
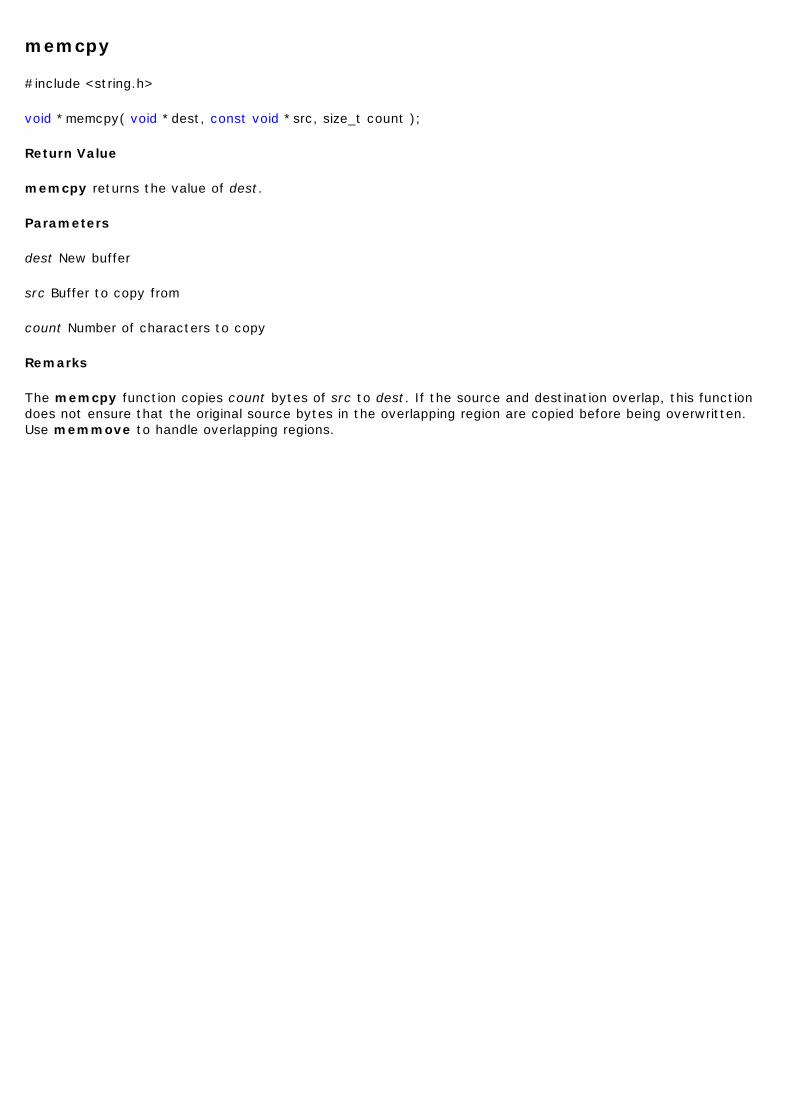
memcpy
#include <string.h>
void *memcpy( void *dest, const void *src, size_t count );
Return Value
memcpy returns the value of dest.
Parameters
dest New buffer
src Buffer to copy from
count Number of characters to copy
Remarks
The memcpy function copies count bytes of src to dest. If the source and destination overlap, this function does not ensure that the original source bytes in the overlapping region are copied before being overwritten. Use memmove to handle overlapping regions.

memmove
#include <string.h>
void *memmove( void *dest, const void *src, size_t count );
Return Value
memmove returns the value of dest.
Parameters
dest Destination object
src Source object
count Number of bytes of characters to copy
Remarks
The memmove function copies count bytes of characters from src to dest. If some regions of the source area and the destination overlap, memmove ensures that the original source bytes in the overlapping region are copied before being overwritten.
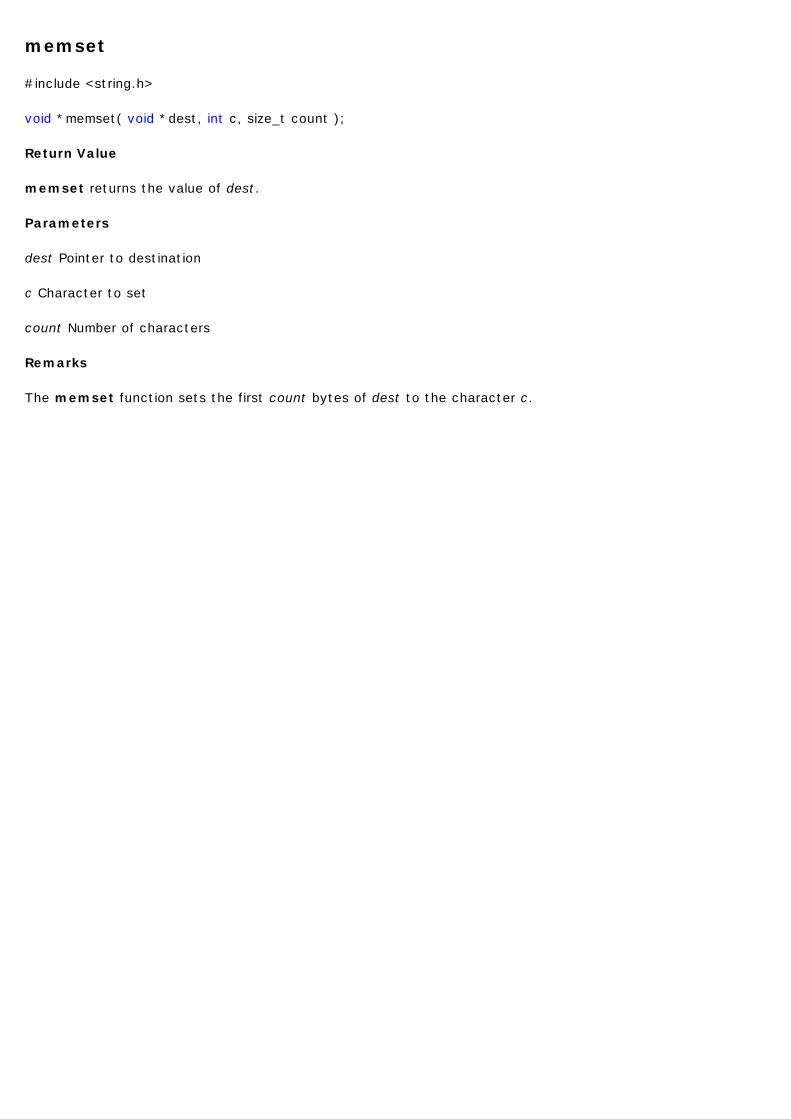
memset
#include <string.h>
void *memset( void *dest, int c, size_t count );
Return Value
memset returns the value of dest.
Parameters
dest Pointer to destination
c Character to set
count Number of characters
Remarks
The memset function sets the first count bytes of dest to the character c.
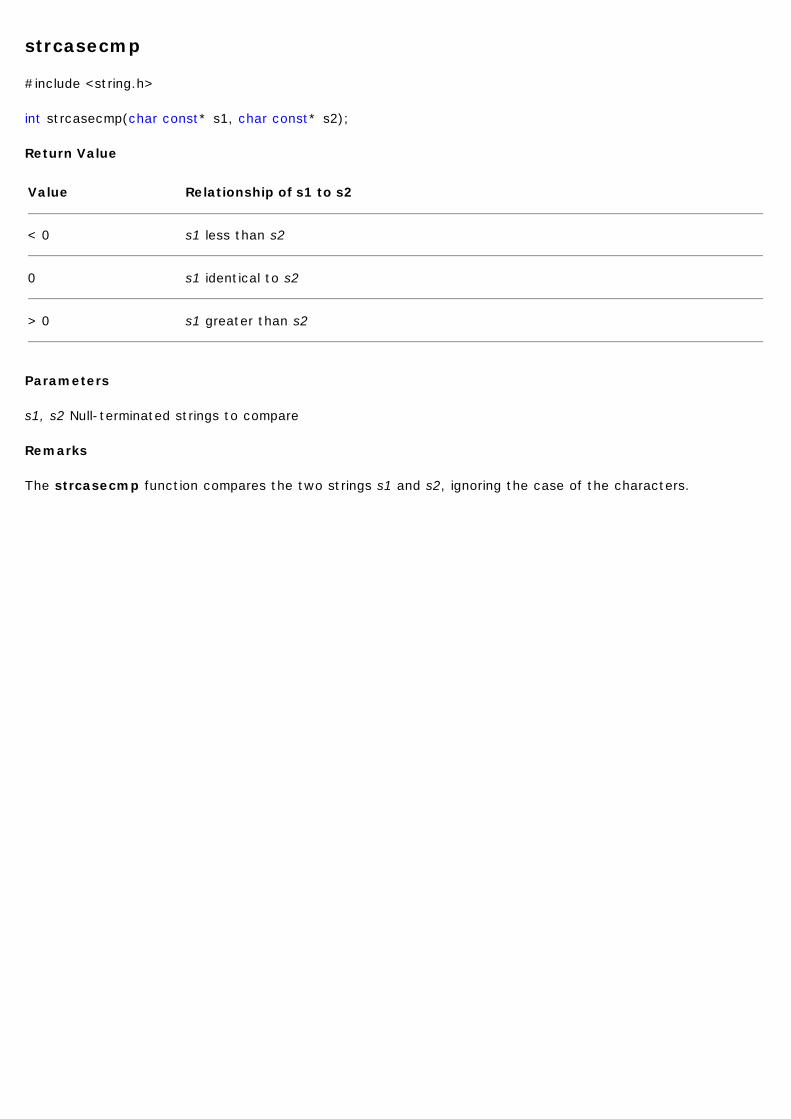
strcasecmp
#include <string.h>
int strcasecmp(char const* s1, char const* s2);
Return Value
Parameters
s1, s2 Null-terminated strings to compare
Remarks
The strcasecmp function compares the two strings s1 and s2, ignoring the case of the characters.
Value Relationship of s1 to s2
< 0 s1 less than s2
0 s1 identical to s2
> 0 s1 greater than s2
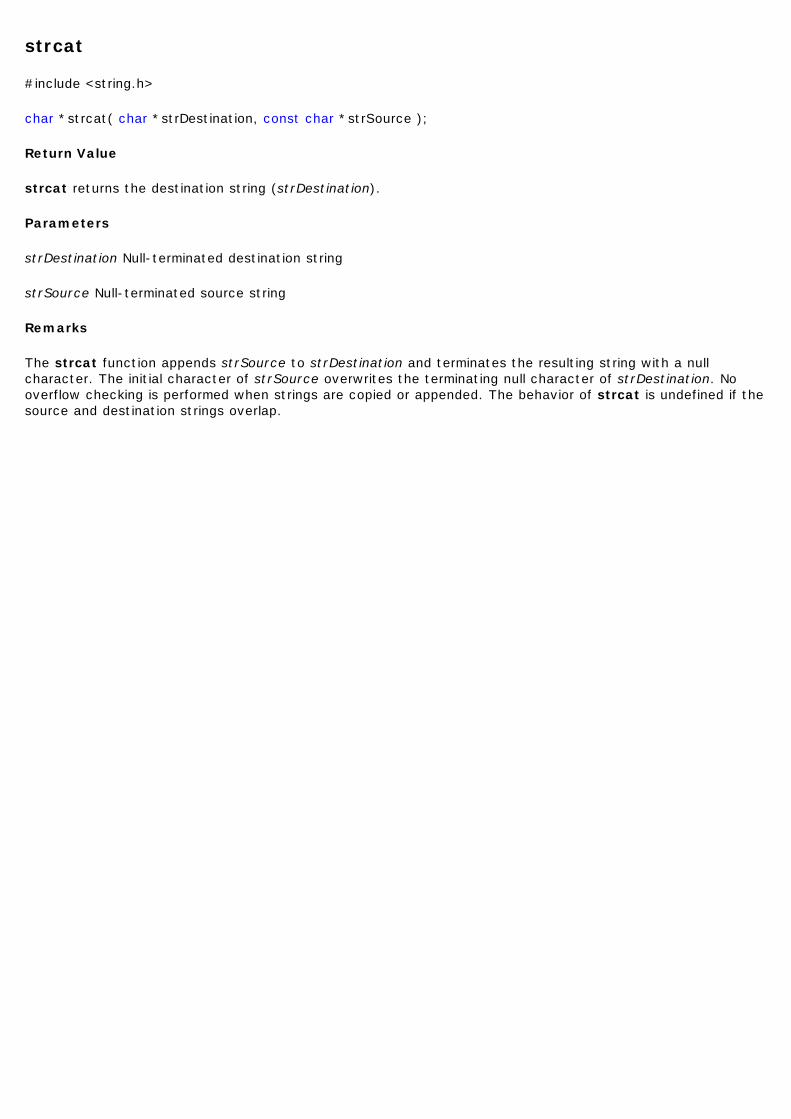
strcat
#include <string.h>
char *strcat( char *strDestination, const char *strSource );
Return Value
strcat returns the destination string (strDestination).
Parameters
strDestination Null-terminated destination string
strSource Null-terminated source string
Remarks
The strcat function appends strSource to strDestination and terminates the resulting string with a null character. The initial character of strSource overwrites the terminating null character of strDestination. No overflow checking is performed when strings are copied or appended. The behavior of strcat is undefined if the source and destination strings overlap.
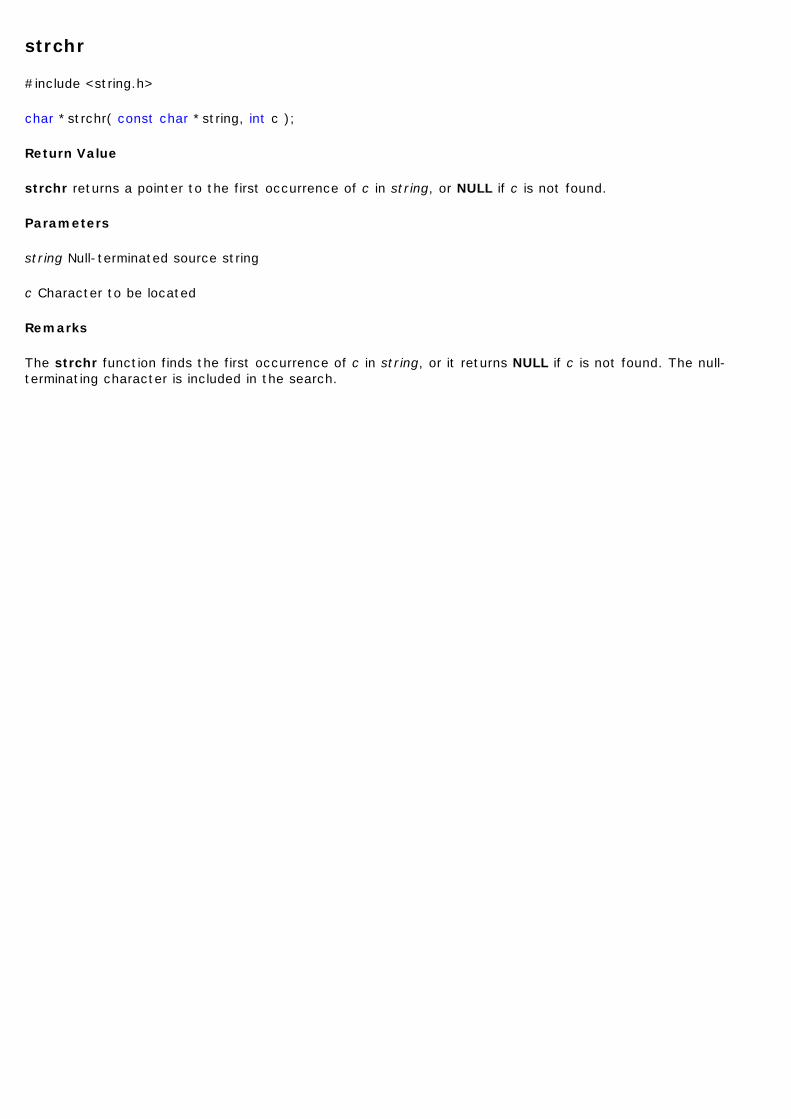
strchr
#include <string.h>
char *strchr( const char *string, int c );
Return Value
strchr returns a pointer to the first occurrence of c in string, or NULL if c is not found.
Parameters
string Null-terminated source string
c Character to be located
Remarks
The strchr function finds the first occurrence of c in string, or it returns NULL if c is not found. The null-terminating character is included in the search.
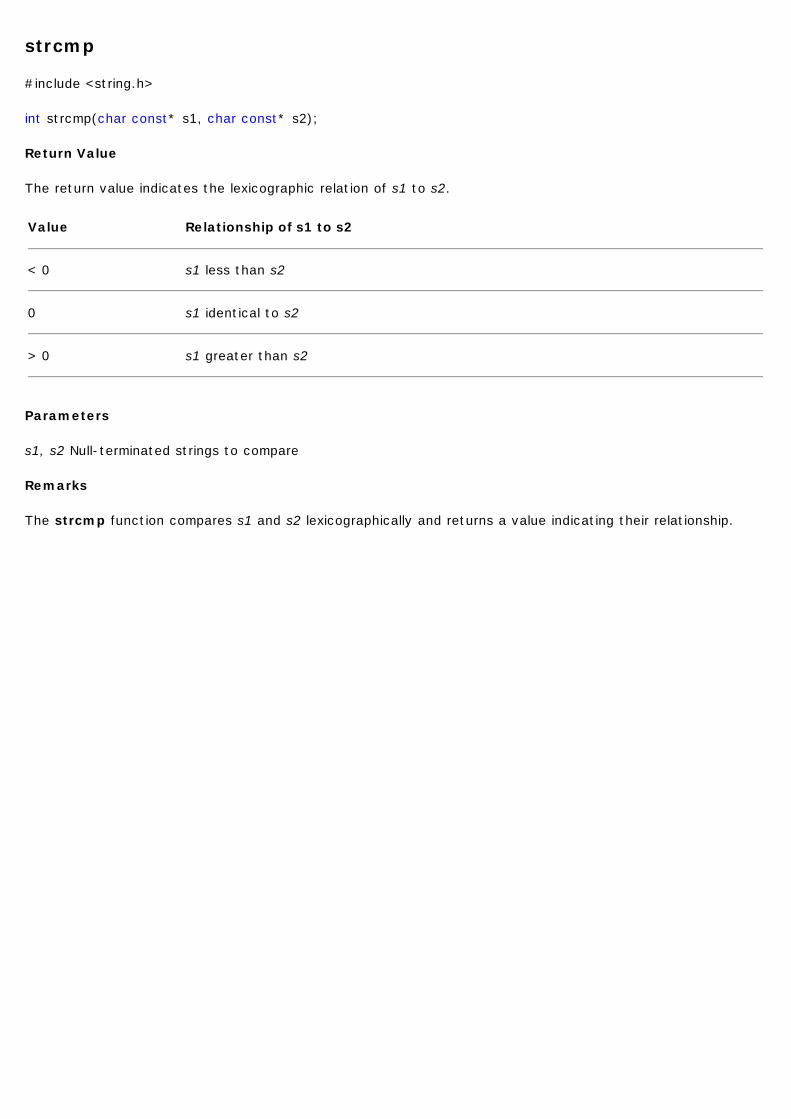
strcmp
#include <string.h>
int strcmp(char const* s1, char const* s2);
Return Value
The return value indicates the lexicographic relation of s1 to s2.
Parameters
s1, s2 Null-terminated strings to compare
Remarks
The strcmp function compares s1 and s2 lexicographically and returns a value indicating their relationship.
Value Relationship of s1 to s2
< 0 s1 less than s2
0 s1 identical to s2
> 0 s1 greater than s2
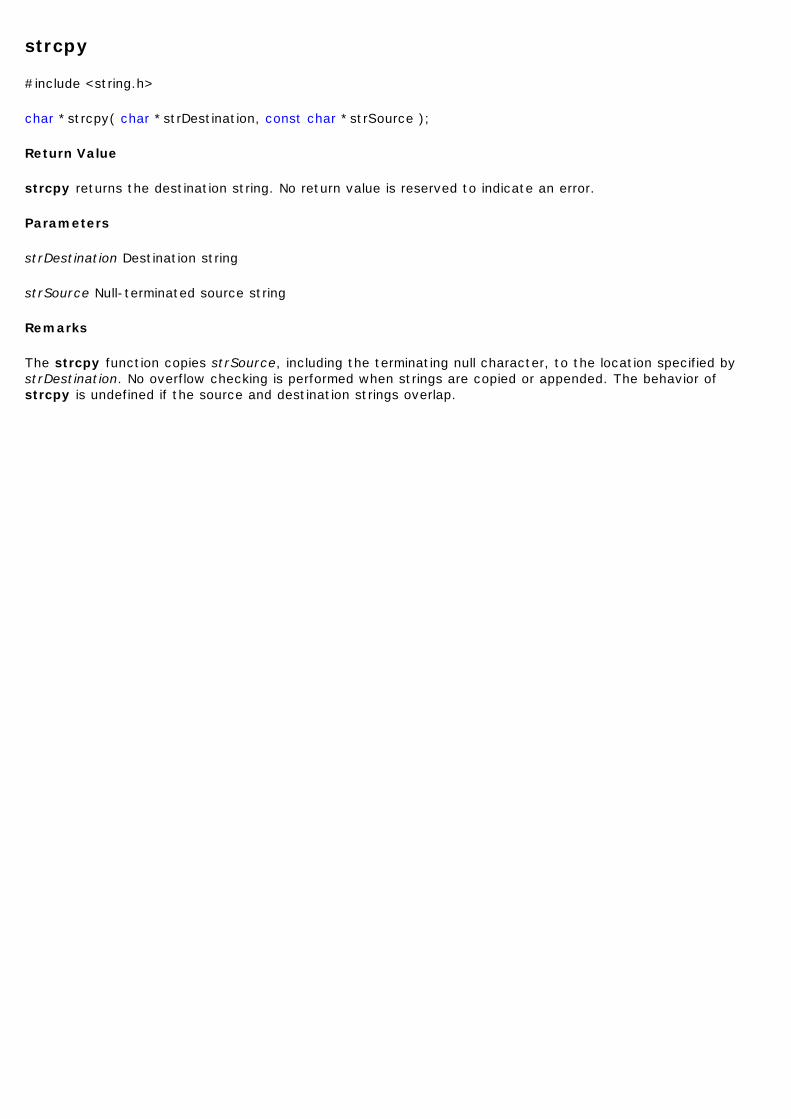
strcpy
#include <string.h>
char *strcpy( char *strDestination, const char *strSource );
Return Value
strcpy returns the destination string. No return value is reserved to indicate an error.
Parameters
strDestination Destination string
strSource Null-terminated source string
Remarks
The strcpy function copies strSource, including the terminating null character, to the location specified by strDestination. No overflow checking is performed when strings are copied or appended. The behavior of strcpy is undefined if the source and destination strings overlap.
strlcat
#include <string.h>
size_t strlcat ( char * dst, const char * src, size_t siz )
Return Value
The strlcat function returns strlen(src) + MIN(siz, strlen(initial dst)). If retval >= siz, truncation occurred.
Parameter
dst Null-terminated destination string
src Null-terminated source string
siz Size of destination string
Remarks
Concatenate two strings.
Appends src to string dst of size siz (unlike strncat(), siz is the full size of dst, not space left). At most siz-1 characters will be copied. Always NULL terminates (unless siz <= strlen(dst)).
strlcpy
#include <string.h>
size_t strlcpy ( char * dst, const char * src, size_t siz )
Return Value
The strlcpy function returns strlen(src). If retval >= siz, truncation occurred.
Parameter
dst Null-terminated destination string
src Null-terminated source string
siz Size of destination string
Remarks
Copy a string.
Copy src to string dst of size siz. At most siz-1 characters will be copied. Always NULL terminates (unless siz == 0).
strlen
#include <string.h>
size_t strlen( const char *string );
Return Value
strlen returns the number of characters in string, excluding the terminal NULL. No return value is reserved to indicate an error.
Parameter
string Null-terminated string
Remarks
strlen returns the number of characters in string, not including the terminating null character.
strlwr
#include <string.h>
char *strlwr( char *string );
Return Value
The strlwr function returns a pointer to the converted string.
Parameter
string Null-terminated string to convert to lowercase
Remarks
Convert a string to lower case.
The strlwr function will convert a string to lower case. Only the upper case alphabetic characters [A .. Z] are converted. Non-alphabetic characters will not be changed.
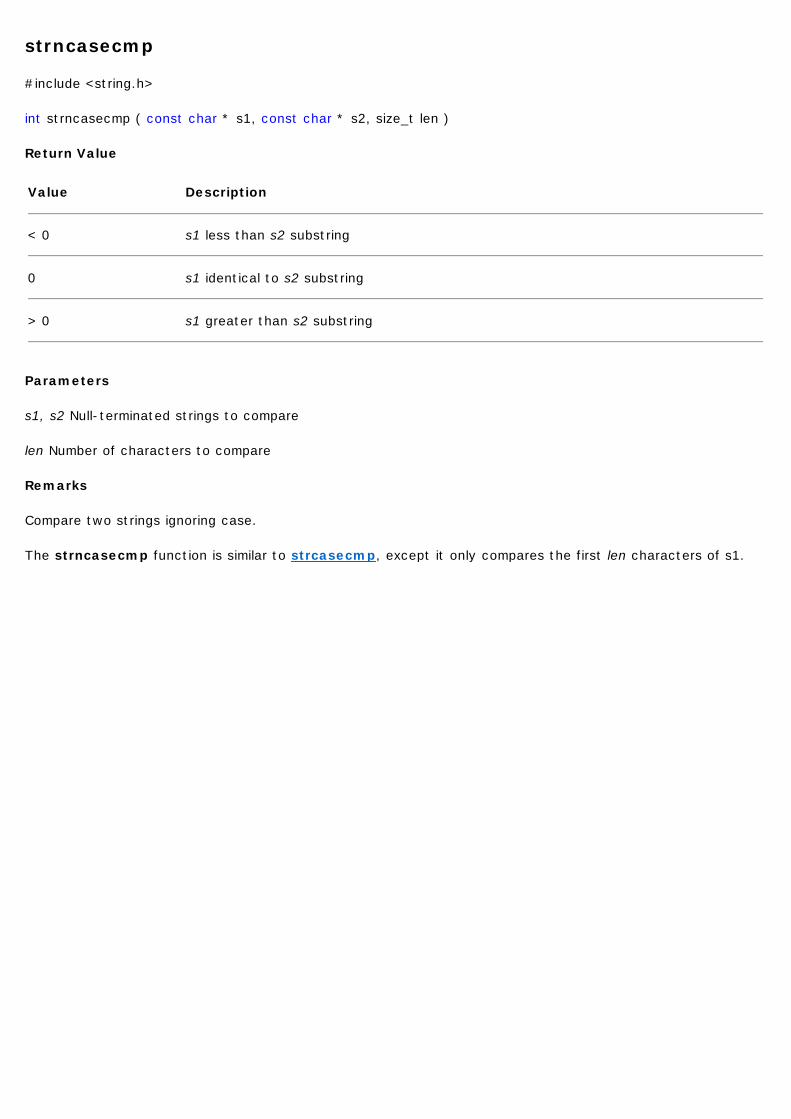
strncasecmp
#include <string.h>
int strncasecmp ( const char * s1, const char * s2, size_t len )
Return Value
Parameters
s1, s2 Null-terminated strings to compare
len Number of characters to compare
Remarks
Compare two strings ignoring case.
The strncasecmp function is similar to strcasecmp, except it only compares the first len characters of s1.
Value Description
< 0 s1 less than s2 substring
0 s1 identical to s2 substring
> 0 s1 greater than s2 substring
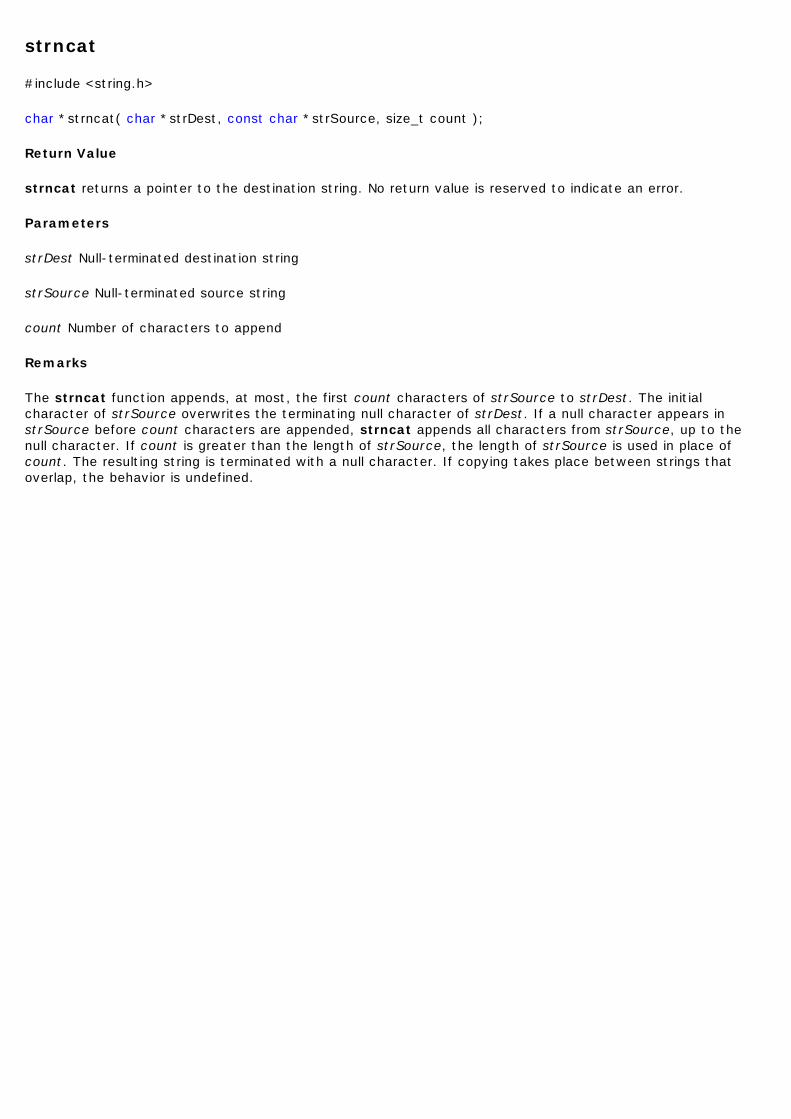
strncat
#include <string.h>
char *strncat( char *strDest, const char *strSource, size_t count );
Return Value
strncat returns a pointer to the destination string. No return value is reserved to indicate an error.
Parameters
strDest Null-terminated destination string
strSource Null-terminated source string
count Number of characters to append
Remarks
The strncat function appends, at most, the first count characters of strSource to strDest. The initial character of strSource overwrites the terminating null character of strDest. If a null character appears in strSource before count characters are appended, strncat appends all characters from strSource, up to the null character. If count is greater than the length of strSource, the length of strSource is used in place of count. The resulting string is terminated with a null character. If copying takes place between strings that overlap, the behavior is undefined.
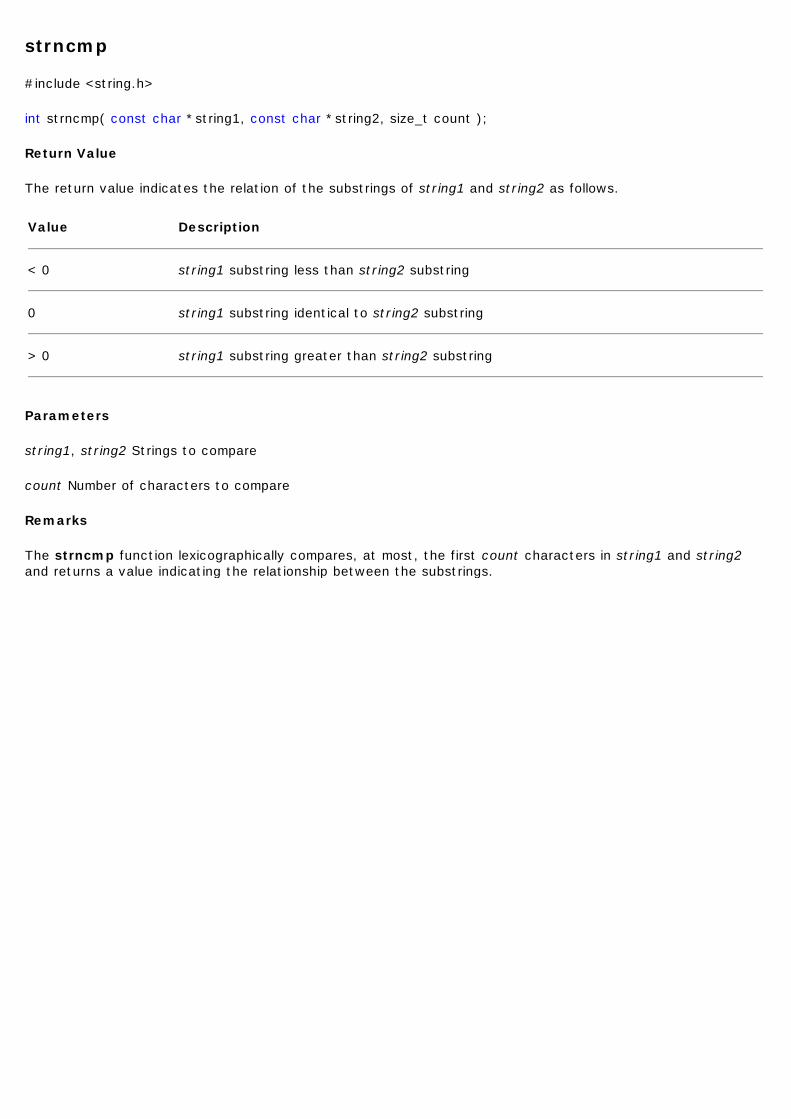
strncmp
#include <string.h>
int strncmp( const char *string1, const char *string2, size_t count );
Return Value
The return value indicates the relation of the substrings of string1 and string2 as follows.
Parameters
string1, string2 Strings to compare
count Number of characters to compare
Remarks
The strncmp function lexicographically compares, at most, the first count characters in string1 and string2 and returns a value indicating the relationship between the substrings.
Value Description
< 0 string1 substring less than string2 substring
0 string1 substring identical to string2 substring
> 0 string1 substring greater than string2 substring

strncpy
#include <string.h>
char *strncpy( char *strDest, const char *strSource, size_t count );
Return Value
strncpy returns strDest. No return value is reserved to indicate an error.
Parameters
strDest Destination string
strSource Null-terminated source string
count Number of characters to be copied
Remarks
The strncpy function copies the initial count characters of strSource to strDest and returns strDest. If count is less than or equal to the length of strSource, a null character is not appended automatically to the copied string. If count is greater than the length of strSource, the destination string is padded with null characters up to length count. The behavior of strncpy is undefined if the source and destination strings overlap.
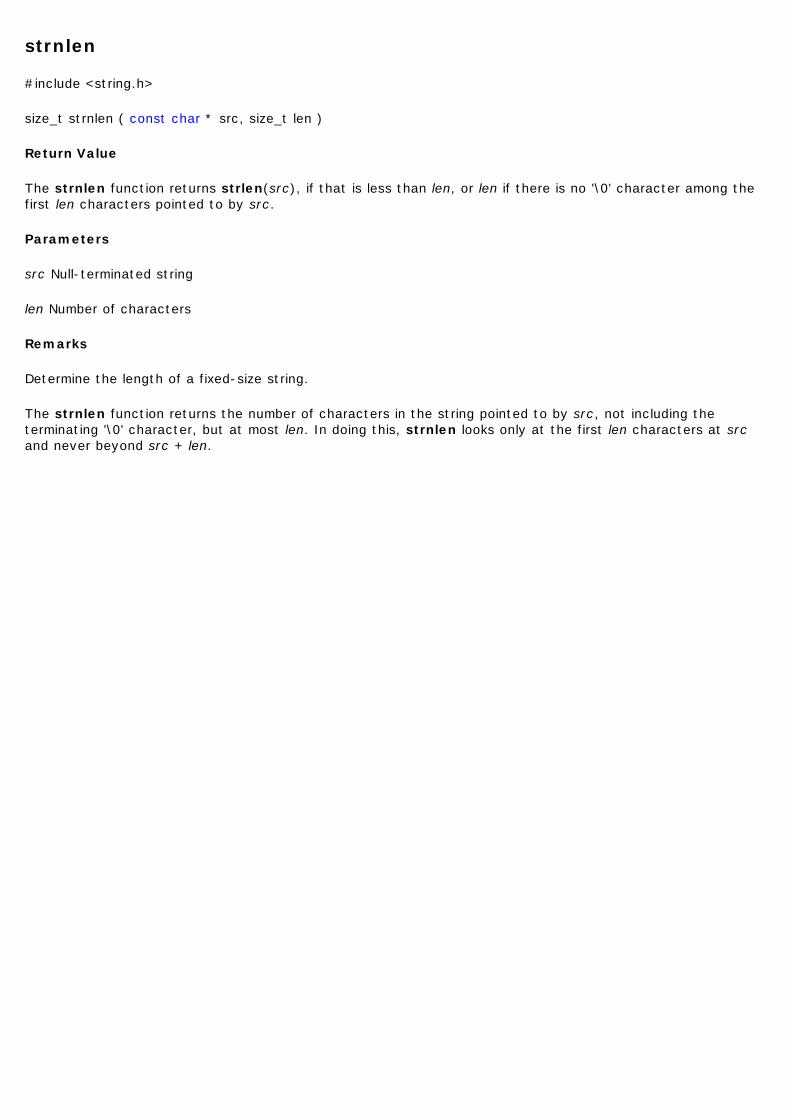
strnlen
#include <string.h>
size_t strnlen ( const char * src, size_t len )
Return Value
The strnlen function returns strlen(src), if that is less than len, or len if there is no '\0' character among the first len characters pointed to by src.
Parameters
src Null-terminated string
len Number of characters
Remarks
Determine the length of a fixed-size string.
The strnlen function returns the number of characters in the string pointed to by src, not including the terminating '\0' character, but at most len. In doing this, strnlen looks only at the first len characters at src and never beyond src + len.
strrchr
#include <string.h>
char *strrchr( const char *string, int c );
Return Value
strrchr returns a pointer to the last occurrence of c in string, or NULL if c is not found.
Parameters
string Null-terminated string to search
c Character to be located
Remarks
The strrchr function finds the last occurrence of c (converted to char) in string. The search includes the terminating null character.
strrev
#include <string.h>
char *strrev( char *string );
Return Value
strrev returns a pointer to the altered string. No return value is reserved to indicate an error.
Parameter
string Null-terminated string to reverse
Remarks
The strrev function reverses the order of the characters in string. The terminating null character remains in place.
strsep
#include <string.h>
char *strsep (char **string, const char *delim)
Return Value
The strsep() function returns a pointer to the original value of *string. If *string is initially NULL, strsep() returns NULL .
Parameters
string
Pointer to the string containing token(s)
delim
Set of delimiter characters
Remarks
Parse a string into tokens.
The strsep () function locates, in the string referenced by *string, the first occurrence of any character in the string delim (or the terminating '\0' character) and replaces it with a '\0'. The location of the next character after the delimiter character (or NULL , if the end of the string was reached) is stored in *string. An "empty" field, i.e. one caused by two adjacent delimiter characters, can be detected by comparing the location referenced by the pointer returned in *string to '\0'.
strstr
#include <string.h>
char *strstr( const char *string, const char *strCharSet );
Return Value
strstr returns a pointer to the first occurrence of strCharSet in string, or NULL if strCharSet does not appear in string. If strCharSet points to a string of zero length, the function returns string.
Parameters
string Null-terminated string to search
strCharSet Null-terminated string to search for
Remarks
The strstr function returns a pointer to the first occurrence of strCharSet in string. The search does not include terminating null characters.
strtok_r
#include <string.h>
char *strtok_r (char *s, const char *delim, char **last)
Return Value
The strtok_r() function returns a pointer to the next token or NULL when no more tokens are found.
Parameters
s
String containing token(s)
delim
Set of delimiter characters
last
Pointer to character that stops scan
Remarks
Parses the string s into tokens.
strtok_r parses the string s into tokens. The first call to strtok_r should have string as its first argument. Subsequent calls should have the first argument set to NULL. If a token ends with a delimiter, this delimiting character is overwritten with a '\0' and a pointer to the next character is saved for the next call to strtok_r. The delimiter string delim may be different for each call. last is a user allocated char * pointer. It must be the same while parsing the same string. strtok_r is a reentrant version of strtok().
strupr
#include <string.h>
char *strupr( char *string );
Return Value
The function return a pointer to the altered string. Because the modification is done in place, the pointer returned is the same as the pointer passed as the input argument. No return value is reserved to indicate an error.
Parameter
string String to capitalize
Remarks
The strupr function converts, in place, each lowercase letter in string to uppercase.
Diagnostics
Detailed Description
#include <assert.h>
This header file defines a debugging aid.
As there is no standard error output stream available for many applications using this library, the generation of a printable error message is not enabled by default. These messages will only be generated if the application defines the macro
__ASSERT_USE_STDERR
before including the <assert.h> header file. By default, only abort() will be called to halt the application.
Defines
#define assert(expression)
Parameters:
expression
Expression to test for.
The assert() macro tests the given expression and if it is false, the calling process is terminated. A diagnostic message is written to stderr and the function abort() is called, effectively terminating the program.
If expression is true, the assert() macro does nothing.
The assert() macro may be removed at compile time by defining NDEBUG as a macro (e.g., by using the compiler option -DNDEBUG).
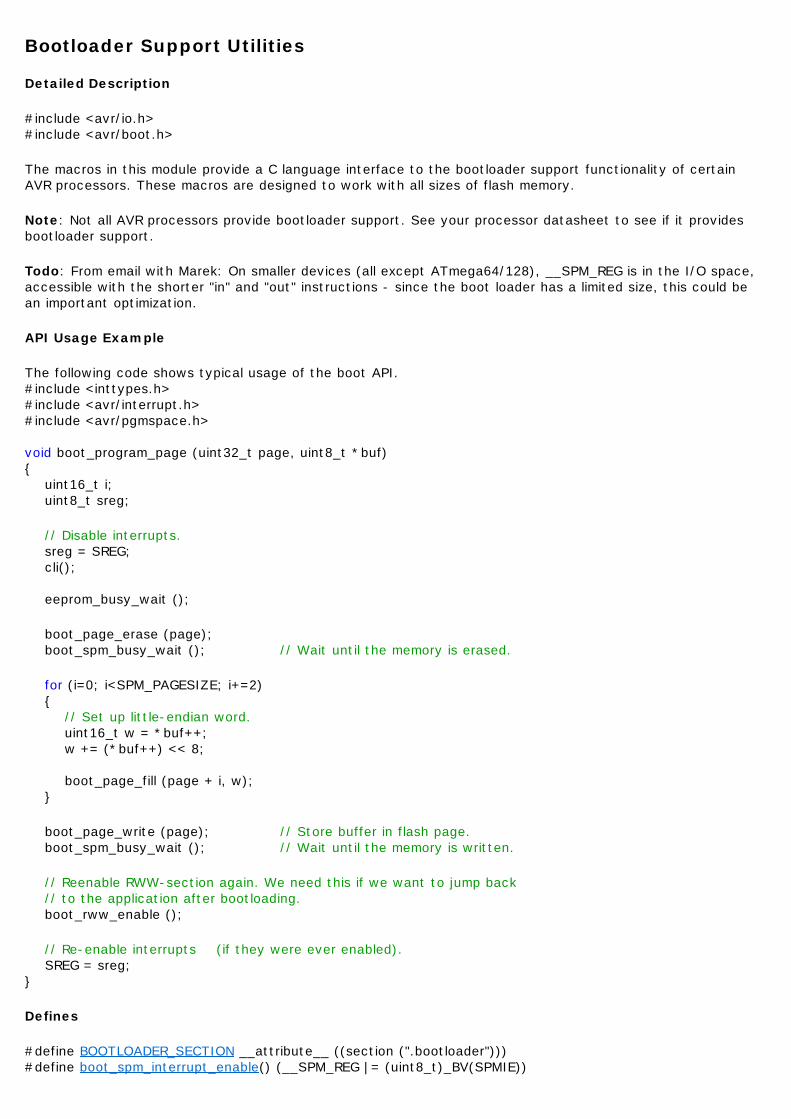
Bootloader Support Utilities
Detailed Description
#include <avr/io.h> #include <avr/boot.h>
The macros in this module provide a C language interface to the bootloader support functionality of certain AVR processors. These macros are designed to work with all sizes of flash memory.
Note: Not all AVR processors provide bootloader support. See your processor datasheet to see if it provides bootloader support.
Todo: From email with Marek: On smaller devices (all except ATmega64/128), __SPM_REG is in the I/O space, accessible with the shorter "in" and "out" instructions - since the boot loader has a limited size, this could be an important optimization.
API Usage Example
The following code shows typical usage of the boot API. #include <inttypes.h> #include <avr/interrupt.h> #include <avr/pgmspace.h> void boot_program_page (uint32_t page, uint8_t *buf) { uint16_t i; uint8_t sreg;
// Disable interrupts. sreg = SREG; cli(); eeprom_busy_wait ();
boot_page_erase (page); boot_spm_busy_wait (); // Wait until the memory is erased.
for (i=0; i<SPM_PAGESIZE; i+=2) { // Set up little-endian word. uint16_t w = *buf++; w += (*buf++) << 8; boot_page_fill (page + i, w); }
boot_page_write (page); // Store buffer in flash page. boot_spm_busy_wait (); // Wait until the memory is written.
// Reenable RWW-section again. We need this if we want to jump back // to the application after bootloading. boot_rww_enable ();
// Re-enable interrupts (if they were ever enabled). SREG = sreg; }
Defines
#define BOOTLOADER_SECTION __attribute__ ((section (".bootloader"))) #define boot_spm_interrupt_enable() (__SPM_REG |= (uint8_t)_BV(SPMIE))
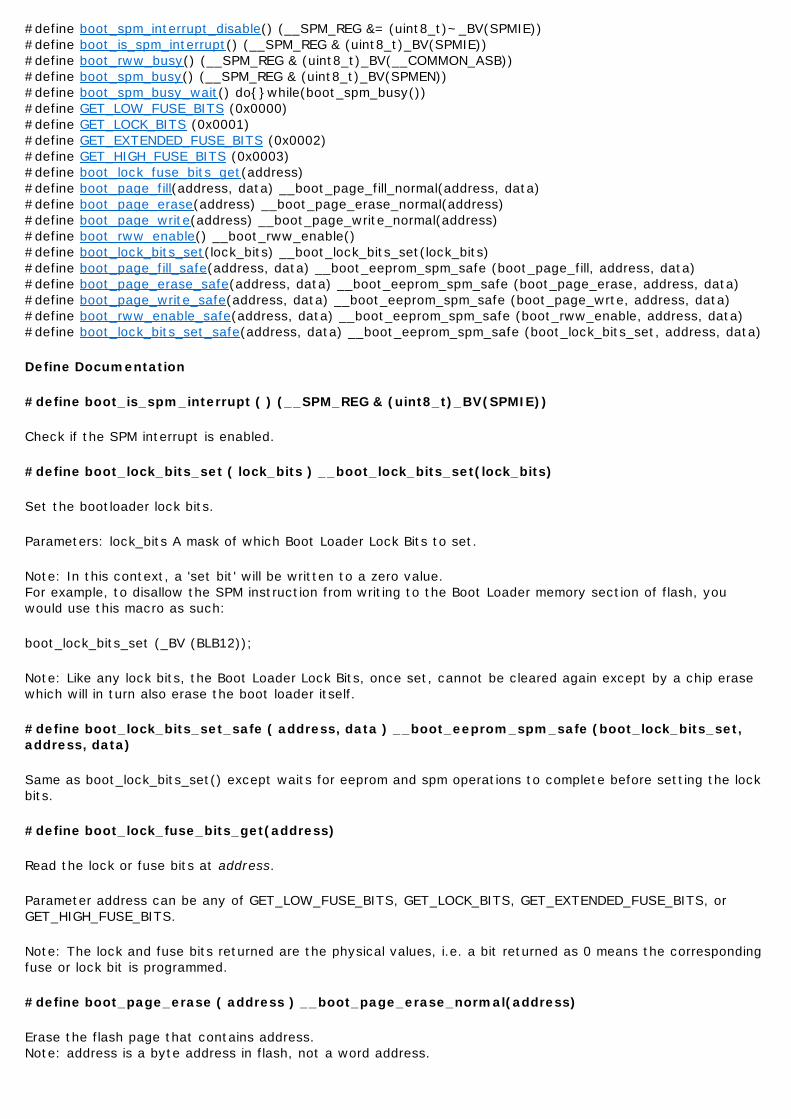
#define boot_spm_interrupt_disable() (__SPM_REG &= (uint8_t)~_BV(SPMIE)) #define boot_is_spm_interrupt() (__SPM_REG & (uint8_t)_BV(SPMIE)) #define boot_rww_busy() (__SPM_REG & (uint8_t)_BV(__COMMON_ASB)) #define boot_spm_busy() (__SPM_REG & (uint8_t)_BV(SPMEN)) #define boot_spm_busy_wait() do{}while(boot_spm_busy()) #define GET_LOW_FUSE_BITS (0x0000) #define GET_LOCK_BITS (0x0001) #define GET_EXTENDED_FUSE_BITS (0x0002) #define GET_HIGH_FUSE_BITS (0x0003) #define boot_lock_fuse_bits_get(address) #define boot_page_fill(address, data) __boot_page_fill_normal(address, data) #define boot_page_erase(address) __boot_page_erase_normal(address) #define boot_page_write(address) __boot_page_write_normal(address) #define boot_rww_enable() __boot_rww_enable() #define boot_lock_bits_set(lock_bits) __boot_lock_bits_set(lock_bits) #define boot_page_fill_safe(address, data) __boot_eeprom_spm_safe (boot_page_fill, address, data) #define boot_page_erase_safe(address, data) __boot_eeprom_spm_safe (boot_page_erase, address, data) #define boot_page_write_safe(address, data) __boot_eeprom_spm_safe (boot_page_wrte, address, data) #define boot_rww_enable_safe(address, data) __boot_eeprom_spm_safe (boot_rww_enable, address, data) #define boot_lock_bits_set_safe(address, data) __boot_eeprom_spm_safe (boot_lock_bits_set, address, data)
Define Documentation
#define boot_is_spm_interrupt ( ) (__SPM_REG & (uint8_t)_BV(SPMIE))
Check if the SPM interrupt is enabled.
#define boot_lock_bits_set ( lock_bits ) __boot_lock_bits_set(lock_bits)
Set the bootloader lock bits.
Parameters: lock_bits A mask of which Boot Loader Lock Bits to set.
Note: In this context, a 'set bit' will be written to a zero value. For example, to disallow the SPM instruction from writing to the Boot Loader memory section of flash, you would use this macro as such:
boot_lock_bits_set (_BV (BLB12));
Note: Like any lock bits, the Boot Loader Lock Bits, once set, cannot be cleared again except by a chip erase which will in turn also erase the boot loader itself.
#define boot_lock_bits_set_safe ( address, data ) __boot_eeprom_spm_safe (boot_lock_bits_set, address, data)
Same as boot_lock_bits_set() except waits for eeprom and spm operations to complete before setting the lock bits.
#define boot_lock_fuse_bits_get(address)
Read the lock or fuse bits at address.
Parameter address can be any of GET_LOW_FUSE_BITS, GET_LOCK_BITS, GET_EXTENDED_FUSE_BITS, or GET_HIGH_FUSE_BITS.
Note: The lock and fuse bits returned are the physical values, i.e. a bit returned as 0 means the corresponding fuse or lock bit is programmed.
#define boot_page_erase ( address ) __boot_page_erase_normal(address)
Erase the flash page that contains address. Note: address is a byte address in flash, not a word address.
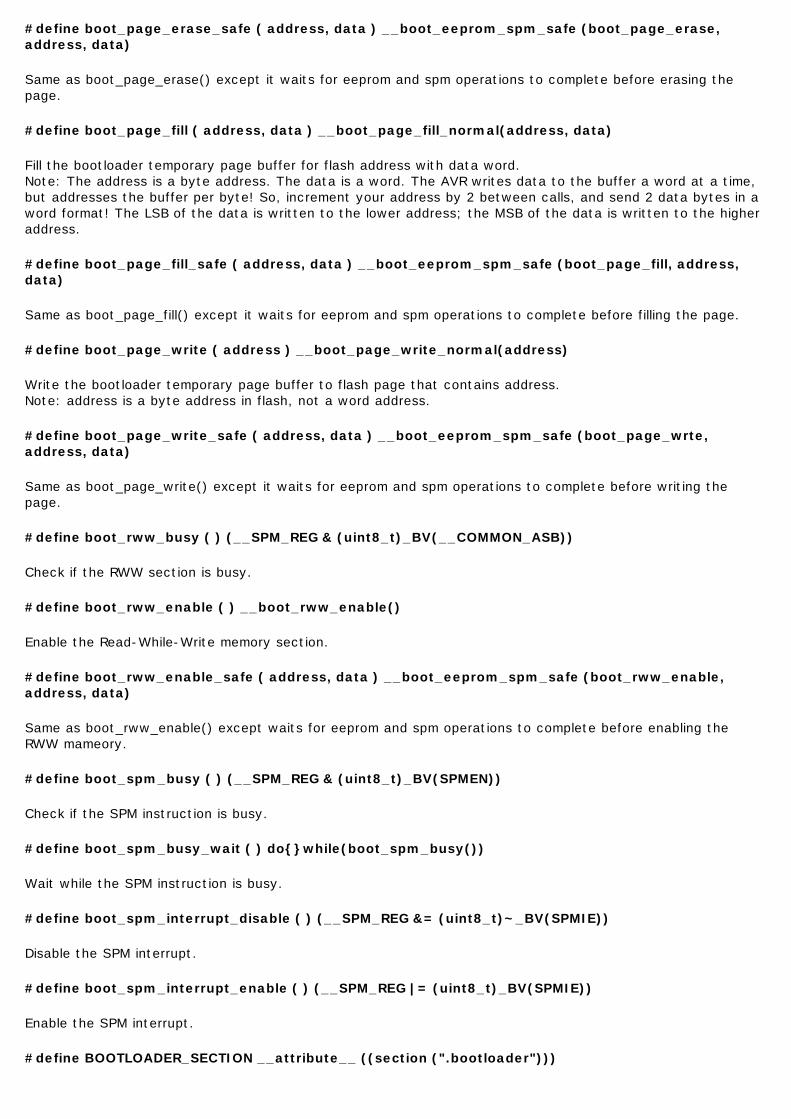
#define boot_page_erase_safe ( address, data ) __boot_eeprom_spm_safe (boot_page_erase, address, data)
Same as boot_page_erase() except it waits for eeprom and spm operations to complete before erasing the page.
#define boot_page_fill ( address, data ) __boot_page_fill_normal(address, data)
Fill the bootloader temporary page buffer for flash address with data word. Note: The address is a byte address. The data is a word. The AVR writes data to the buffer a word at a time, but addresses the buffer per byte! So, increment your address by 2 between calls, and send 2 data bytes in a word format! The LSB of the data is written to the lower address; the MSB of the data is written to the higher address.
#define boot_page_fill_safe ( address, data ) __boot_eeprom_spm_safe (boot_page_fill, address, data)
Same as boot_page_fill() except it waits for eeprom and spm operations to complete before filling the page.
#define boot_page_write ( address ) __boot_page_write_normal(address)
Write the bootloader temporary page buffer to flash page that contains address. Note: address is a byte address in flash, not a word address.
#define boot_page_write_safe ( address, data ) __boot_eeprom_spm_safe (boot_page_wrte, address, data)
Same as boot_page_write() except it waits for eeprom and spm operations to complete before writing the page.
#define boot_rww_busy ( ) (__SPM_REG & (uint8_t)_BV(__COMMON_ASB))
Check if the RWW section is busy.
#define boot_rww_enable ( ) __boot_rww_enable()
Enable the Read-While-Write memory section.
#define boot_rww_enable_safe ( address, data ) __boot_eeprom_spm_safe (boot_rww_enable, address, data)
Same as boot_rww_enable() except waits for eeprom and spm operations to complete before enabling the RWW mameory.
#define boot_spm_busy ( ) (__SPM_REG & (uint8_t)_BV(SPMEN))
Check if the SPM instruction is busy.
#define boot_spm_busy_wait ( ) do{}while(boot_spm_busy())
Wait while the SPM instruction is busy.
#define boot_spm_interrupt_disable ( ) (__SPM_REG &= (uint8_t)~_BV(SPMIE))
Disable the SPM interrupt.
#define boot_spm_interrupt_enable ( ) (__SPM_REG |= (uint8_t)_BV(SPMIE))
Enable the SPM interrupt.
#define BOOTLOADER_SECTION __attribute__ ((section (".bootloader")))

Used to declare a function or variable to be placed into a new section called .bootloader. This section and its contents can then be relocated to any address (such as the bootloader NRWW area) at link-time.
#define GET_EXTENDED_FUSE_BITS (0x0002)
address to read the extended fuse bits, using boot_lock_fuse_bits_get
#define GET_HIGH_FUSE_BITS (0x0003)
address to read the high fuse bits, using boot_lock_fuse_bits_get
#define GET_LOCK_BITS (0x0001)
address to read the lock bits, using boot_lock_fuse_bits_get
#define GET_LOW_FUSE_BITS (0x0000)
address to read the low fuse bits, using boot_lock_fuse_bits_get
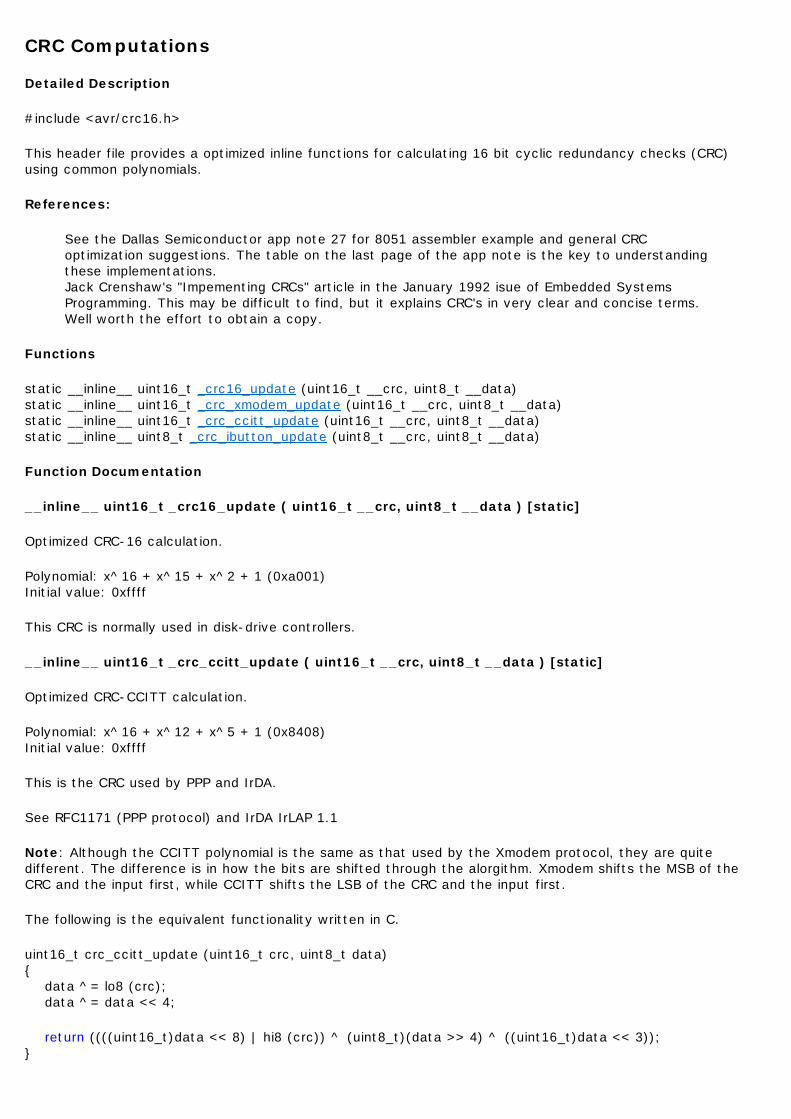
CRC Computations
Detailed Description
#include <avr/crc16.h>
This header file provides a optimized inline functions for calculating 16 bit cyclic redundancy checks (CRC) using common polynomials.
References:
See the Dallas Semiconductor app note 27 for 8051 assembler example and general CRC optimization suggestions. The table on the last page of the app note is the key to understanding these implementations. Jack Crenshaw's "Impementing CRCs" article in the January 1992 isue of Embedded Systems Programming. This may be difficult to find, but it explains CRC's in very clear and concise terms. Well worth the effort to obtain a copy.
Functions
static __inline__ uint16_t _crc16_update (uint16_t __crc, uint8_t __data) static __inline__ uint16_t _crc_xmodem_update (uint16_t __crc, uint8_t __data) static __inline__ uint16_t _crc_ccitt_update (uint16_t __crc, uint8_t __data) static __inline__ uint8_t _crc_ibutton_update (uint8_t __crc, uint8_t __data)
Function Documentation
__inline__ uint16_t _crc16_update ( uint16_t __crc, uint8_t __data ) [static]
Optimized CRC-16 calculation.
Polynomial: x^16 + x^15 + x^2 + 1 (0xa001) Initial value: 0xffff
This CRC is normally used in disk-drive controllers.
__inline__ uint16_t _crc_ccitt_update ( uint16_t __crc, uint8_t __data ) [static]
Optimized CRC-CCITT calculation.
Polynomial: x^16 + x^12 + x^5 + 1 (0x8408) Initial value: 0xffff
This is the CRC used by PPP and IrDA.
See RFC1171 (PPP protocol) and IrDA IrLAP 1.1
Note: Although the CCITT polynomial is the same as that used by the Xmodem protocol, they are quite different. The difference is in how the bits are shifted through the alorgithm. Xmodem shifts the MSB of the CRC and the input first, while CCITT shifts the LSB of the CRC and the input first.
The following is the equivalent functionality written in C.
uint16_t crc_ccitt_update (uint16_t crc, uint8_t data) { data ^= lo8 (crc); data ^= data << 4;
return ((((uint16_t)data << 8) | hi8 (crc)) ^ (uint8_t)(data >> 4) ^ ((uint16_t)data << 3)); }
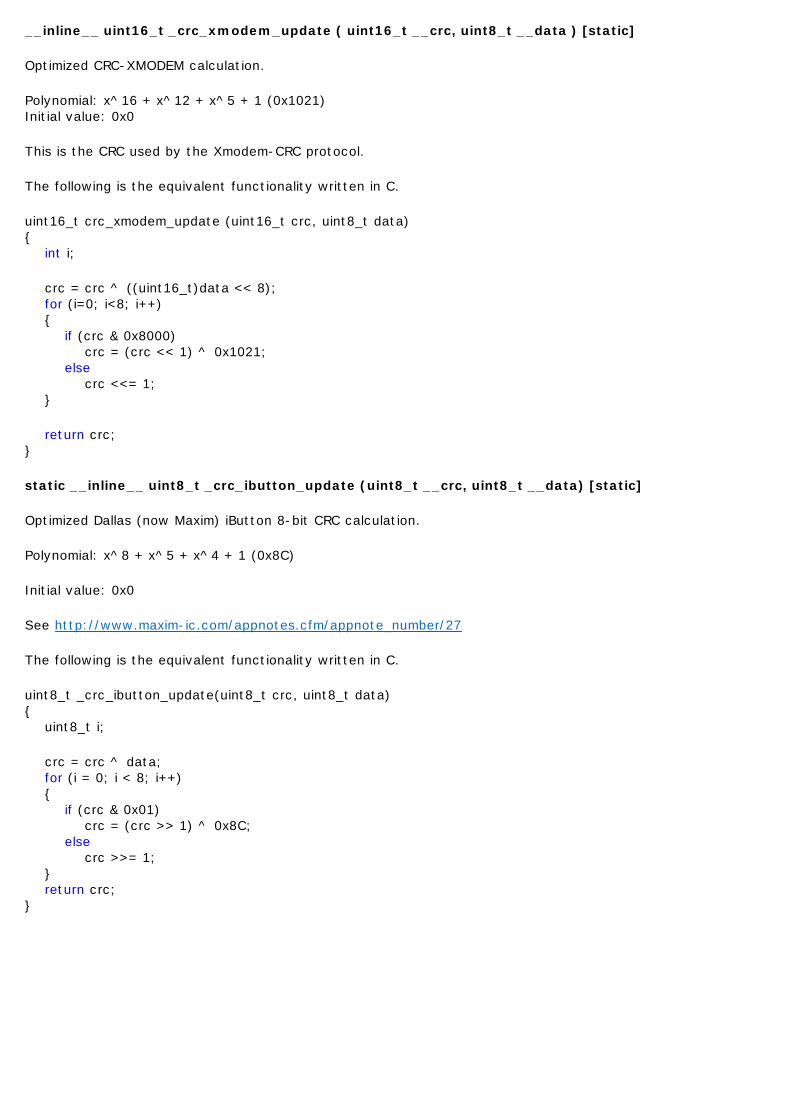
__inline__ uint16_t _crc_xmodem_update ( uint16_t __crc, uint8_t __data ) [static]
Optimized CRC-XMODEM calculation.
Polynomial: x^16 + x^12 + x^5 + 1 (0x1021) Initial value: 0x0
This is the CRC used by the Xmodem-CRC protocol.
The following is the equivalent functionality written in C.
uint16_t crc_xmodem_update (uint16_t crc, uint8_t data) { int i;
crc = crc ^ ((uint16_t)data << 8); for (i=0; i<8; i++) { if (crc & 0x8000) crc = (crc << 1) ^ 0x1021; else crc <<= 1; }
return crc; }
static __inline__ uint8_t _crc_ibutton_update (uint8_t __crc, uint8_t __data) [static]
Optimized Dallas (now Maxim) iButton 8-bit CRC calculation.
Polynomial: x^8 + x^5 + x^4 + 1 (0x8C)
Initial value: 0x0
See http://www.maxim-ic.com/appnotes.cfm/appnote_number/27
The following is the equivalent functionality written in C.
uint8_t _crc_ibutton_update(uint8_t crc, uint8_t data) { uint8_t i;
crc = crc ^ data; for (i = 0; i < 8; i++) { if (crc & 0x01) crc = (crc >> 1) ^ 0x8C; else crc >>= 1; } return crc; }
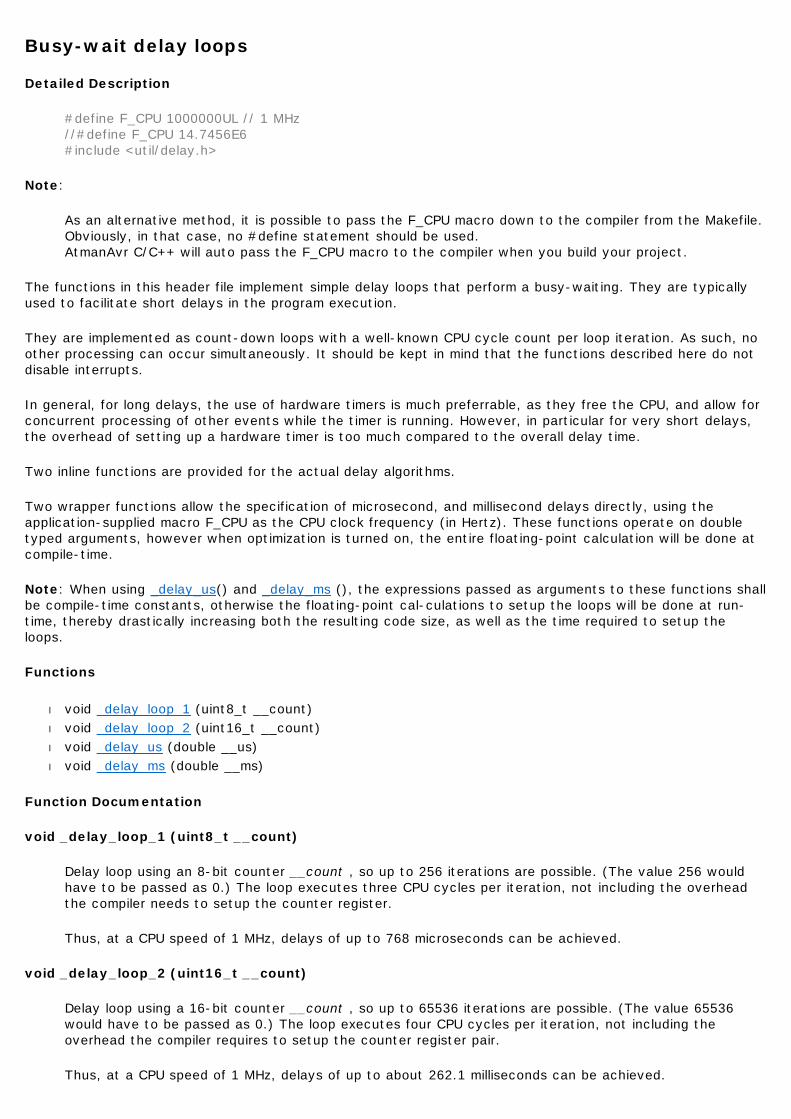
Busy-wait delay loops
Detailed Description
#define F_CPU 1000000UL // 1 MHz //#define F_CPU 14.7456E6 #include <util/delay.h>
Note:
As an alternative method, it is possible to pass the F_CPU macro down to the compiler from the Makefile. Obviously, in that case, no #define statement should be used. AtmanAvr C/C++ will auto pass the F_CPU macro to the compiler when you build your project.
The functions in this header file implement simple delay loops that perform a busy-waiting. They are typically used to facilitate short delays in the program execution.
They are implemented as count-down loops with a well-known CPU cycle count per loop iteration. As such, no other processing can occur simultaneously. It should be kept in mind that the functions described here do not disable interrupts.
In general, for long delays, the use of hardware timers is much preferrable, as they free the CPU, and allow for concurrent processing of other events while the timer is running. However, in particular for very short delays, the overhead of setting up a hardware timer is too much compared to the overall delay time.
Two inline functions are provided for the actual delay algorithms.
Two wrapper functions allow the specification of microsecond, and millisecond delays directly, using the application-supplied macro F_CPU as the CPU clock frequency (in Hertz). These functions operate on double typed arguments, however when optimization is turned on, the entire floating-point calculation will be done at compile-time.
Note: When using _delay_us() and _delay_ms (), the expressions passed as arguments to these functions shall be compile-time constants, otherwise the floating-point cal-culations to setup the loops will be done at run-time, thereby drastically increasing both the resulting code size, as well as the time required to setup the loops.
Functions
l void _delay_loop_1 (uint8_t __count) l void _delay_loop_2 (uint16_t __count) l void _delay_us (double __us) l void _delay_ms (double __ms)
Function Documentation
void _delay_loop_1 (uint8_t __count)
Delay loop using an 8-bit counter __count , so up to 256 iterations are possible. (The value 256 would have to be passed as 0.) The loop executes three CPU cycles per iteration, not including the overhead the compiler needs to setup the counter register.
Thus, at a CPU speed of 1 MHz, delays of up to 768 microseconds can be achieved.
void _delay_loop_2 (uint16_t __count)
Delay loop using a 16-bit counter __count , so up to 65536 iterations are possible. (The value 65536 would have to be passed as 0.) The loop executes four CPU cycles per iteration, not including the overhead the compiler requires to setup the counter register pair.
Thus, at a CPU speed of 1 MHz, delays of up to about 262.1 milliseconds can be achieved.
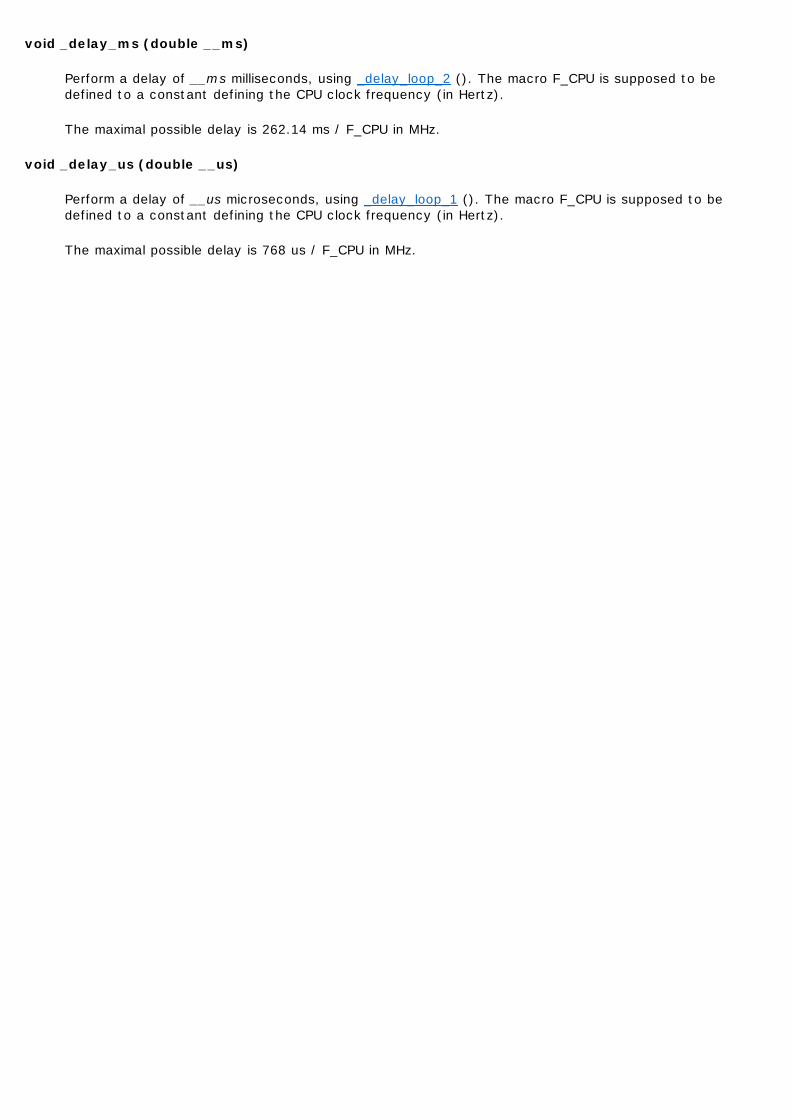
void _delay_ms (double __ms)
Perform a delay of __ms milliseconds, using _delay_loop_2 (). The macro F_CPU is supposed to be defined to a constant defining the CPU clock frequency (in Hertz).
The maximal possible delay is 262.14 ms / F_CPU in MHz.
void _delay_us (double __us)
Perform a delay of __us microseconds, using _delay_loop_1 (). The macro F_CPU is supposed to be defined to a constant defining the CPU clock frequency (in Hertz).
The maximal possible delay is 768 us / F_CPU in MHz.
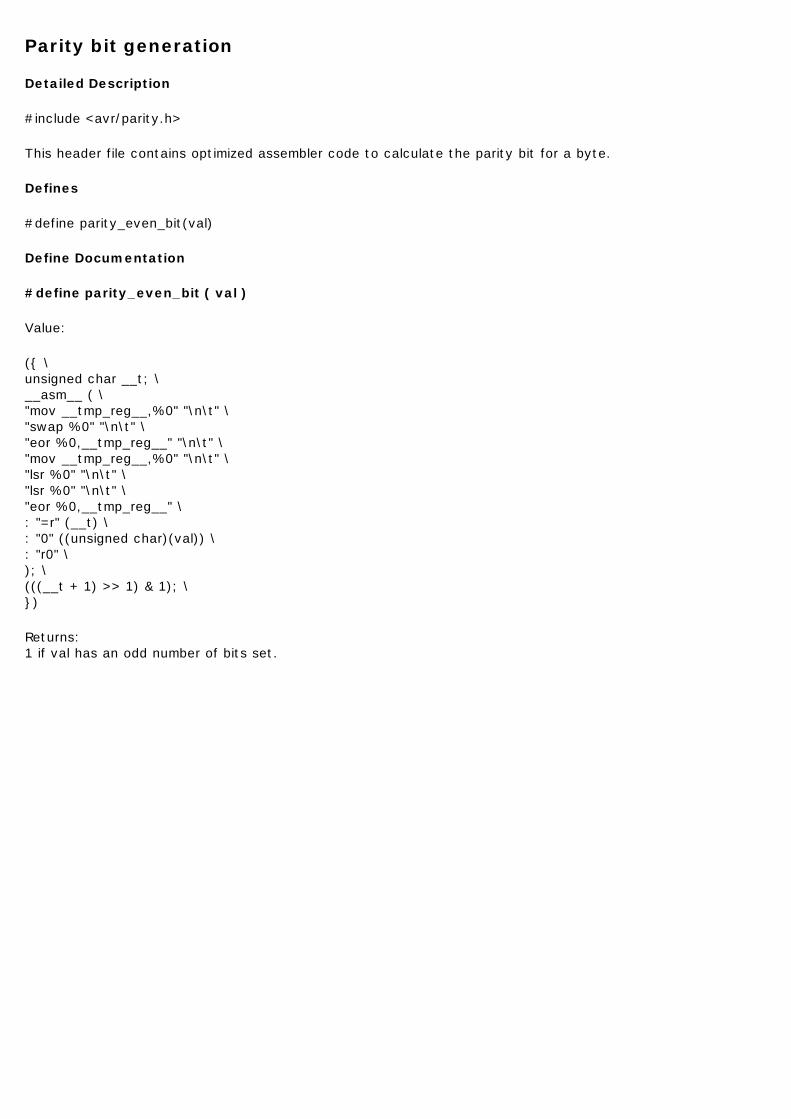
Parity bit generation
Detailed Description
#include <avr/parity.h>
This header file contains optimized assembler code to calculate the parity bit for a byte.
Defines
#define parity_even_bit(val)
Define Documentation
#define parity_even_bit ( val )
Value:
({ \ unsigned char __t; \ __asm__ ( \ "mov __tmp_reg__,%0" "\n\t" \ "swap %0" "\n\t" \ "eor %0,__tmp_reg__" "\n\t" \ "mov __tmp_reg__,%0" "\n\t" \ "lsr %0" "\n\t" \ "lsr %0" "\n\t" \ "eor %0,__tmp_reg__" \ : "=r" (__t) \ : "0" ((unsigned char)(val)) \ : "r0" \ ); \ (((__t + 1) >> 1) & 1); \ })
Returns: 1 if val has an odd number of bits set.
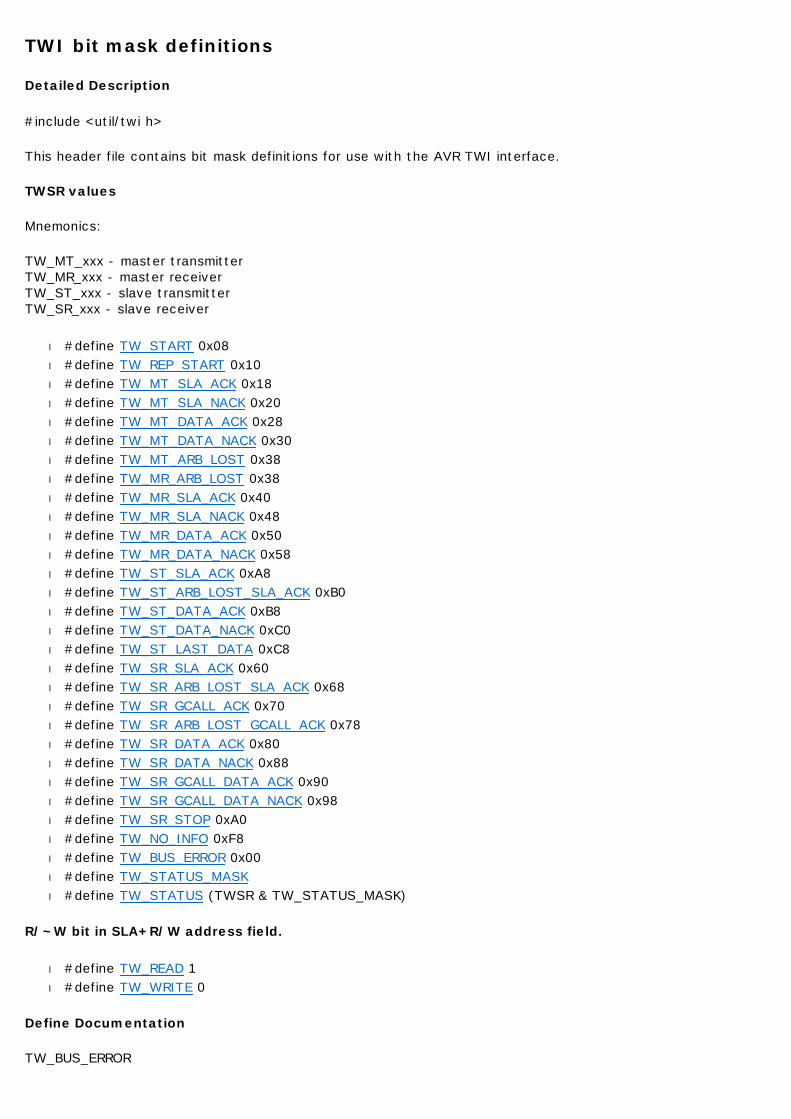
TWI bit mask definitions
Detailed Description
#include <util/twi h>
This header file contains bit mask definitions for use with the AVR TWI interface.
TWSR values
Mnemonics:
TW_MT_xxx - master transmitter TW_MR_xxx - master receiver TW_ST_xxx - slave transmitter TW_SR_xxx - slave receiver
l #define TW_START 0x08 l #define TW_REP_START 0x10 l #define TW_MT_SLA_ACK 0x18 l #define TW_MT_SLA_NACK 0x20 l #define TW_MT_DATA_ACK 0x28 l #define TW_MT_DATA_NACK 0x30 l #define TW_MT_ARB_LOST 0x38 l #define TW_MR_ARB_LOST 0x38 l #define TW_MR_SLA_ACK 0x40 l #define TW_MR_SLA_NACK 0x48 l #define TW_MR_DATA_ACK 0x50 l #define TW_MR_DATA_NACK 0x58 l #define TW_ST_SLA_ACK 0xA8 l #define TW_ST_ARB_LOST_SLA_ACK 0xB0 l #define TW_ST_DATA_ACK 0xB8 l #define TW_ST_DATA_NACK 0xC0 l #define TW_ST_LAST_DATA 0xC8 l #define TW_SR_SLA_ACK 0x60 l #define TW_SR_ARB_LOST_SLA_ACK 0x68 l #define TW_SR_GCALL_ACK 0x70 l #define TW_SR_ARB_LOST_GCALL_ACK 0x78 l #define TW_SR_DATA_ACK 0x80 l #define TW_SR_DATA_NACK 0x88 l #define TW_SR_GCALL_DATA_ACK 0x90 l #define TW_SR_GCALL_DATA_NACK 0x98 l #define TW_SR_STOP 0xA0 l #define TW_NO_INFO 0xF8 l #define TW_BUS_ERROR 0x00 l #define TW_STATUS_MASK l #define TW_STATUS (TWSR & TW_STATUS_MASK)
R/~W bit in SLA+R/W address field.
l #define TW_READ 1 l #define TW_WRITE 0
Define Documentation
TW_BUS_ERROR
illegal start or stop condition
TW_MR_ARB_LOST
arbitration lost in SLA+R or NACK
TW_MR_DATA_ACK
data received, ACK returned
TW_MR_DATA_NACK
data received, NACK returned
TW_MR_SLA_ACK
SLA+R transmitted, ACK received
TW_MR_SLA_NACK
SLA+R transmitted, NACK received
TW_MT_ARB_LOST
arbitration lost in SLA+W or data
TW_MT_DATA_ACK
data transmitted, ACK received
TW_MT_DATA_NACK
data transmitted, NACK received
TW_MT_SLA_ACK
SLA+W transmitted, ACK received
TW_MT_SLA_NACK
SLA+W transmitted, NACK received
TW_NO_INFO
no state information available
TW_READ
SLA+R address
TW_REP_START
repeated start condition transmitted
TW_SR_ARB_LOST_GCALL_ACK
arbitration lost in SLA+RW, general call received, ACK returned
TW_SR_ARB_LOST_SLA_ACK
arbitration lost in SLA+RW, SLA+W received, ACK returned
TW_SR_DATA_ACK
data received, ACK returned
TW_SR_DATA_NACK
data received, NACK returned
TW_SR_GCALL_ACK
general call received, ACK returned
TW_SR_GCALL_DATA_ACK
general call data received, ACK returned
TW_SR_GCALL_DATA_NACK
general call data received, NACK returned
TW_SR_SLA_ACK
SLA+W received, ACK returned
TW_SR_STOP
stop or repeated start condition received while selected
TW_ST_ARB_LOST_SLA_ACK
arbitration lost in SLA+RW, SLA+R received, ACK returned
TW_ST_DATA_ACK
data transmitted, ACK received
TW_ST_DATA_NACK
data transmitted, NACK received
TW_ST_LAST_DATA
last data byte transmitted, ACK received
TW_ST_SLA_ACK
SLA+R received, ACK returned
TW_START
start condition transmitted
TW_STATUS (TWSR & TW_STATUS_MASK)
TWSR, masked by TW_STATUS_MASK
TW_STATUS_MASK
Value: (_BV(TWS7)|_BV(TWS6)|_BV(TWS5)|_BV(TWS4)|\ _BV(TWS3))

The lower 3 bits of TWSR are reserved on the ATmega163. The 2 LSB carry the prescaler bits on the newer ATmegas.
TW_WRITE
SLA+W address
Power Management and Sleep Modes
Detailed Description
#include <avr/sleep.h>
Use of the SLEEP instruction can allow your application to reduce it's power comsumption considerably. AVR devices can be put into different sleep modes. Refer to the datasheet for the details relating to the device you are using.
There are several macros provided in this header file to actually put the device into sleep mode. The simplest way is to optionally set the desired sleep mode using set_sleep_mode() (it usually defaults to idle mode where the CPU is put on sleep but all peripheral clocks are still running), and then call sleep_mode(). Unless it is the purpose to lock the CPU hard (until a hardware reset), interrupts need to be enabled at this point. This macro automatically takes care to enable the sleep mode in the CPU before going to sleep, and disable it again afterwards.
As this combined macro might cause race conditions in some situations, the individual steps of manipulating the sleep enable (SE) bit, and actually issuing the SLEEP instruction are provided in the macros sleep_enable(), sleep_disable(), and sleep_cpu(). This also allows for test-and-sleep scenarios that take care of not missing the interrupt that will awake the device from sleep.
Example: #include <avr/interrupt.h> #include <avr/sleep.h> ... cli(); if (some_condition) { sleep_enable(); sei(); sleep_cpu(); sleep_disable(); } sei();
This sequence ensures an atomic test of some_condition with interrupts being disabled. If the condition is met, sleep mode will be prepared, and the SLEEP instruction will be scheduled immediately after an SEI instruction. As the intruction right after the SEI is guaranteed to be executed before an interrupt could trigger, it is sure the device will really be put on sleep.
Sleep Modes
Note: Some of these modes are not available on all devices. See the datasheet for target device for the available sleep modes.
• #define SLEEP_MODE_IDLE 0 • #define SLEEP_MODE_ADC _BV(SM0) • #define SLEEP_MODE_PWR_DOWN _BV(SM1) • #define SLEEP_MODE_PWR_SAVE (_BV(SM0) | _BV(SM1)) • #define SLEEP_MODE_STANDBY (_BV(SM1) | _BV(SM2)) • #define SLEEP_MODE_EXT_STANDBY (_BV(SM0) | _BV(SM1) | _BV(SM2))
Sleep Functions
void set_sleep_mode (uint8_t mode) void sleep_mode (void) void sleep_enable (void) void sleep_disable (void) void sleep_cpu (void)
Define Documentation
SLEEP_MODE_ADC
ADC Noise Reduction Mode.
SLEEP_MODE_EXT_STANDBY
Extended Standby Mode.
SLEEP_MODE_IDLE
Idle mode.
SLEEP_MODE_PWR_DOWN
Power Down Mode.
SLEEP_MODE_PWR_SAVE
Power Save Mode.
SLEEP_MODE_STANDBY
Standby Mode.
Function Documentation
void set_sleep_mode ( uint8_t mode )
Select a sleep mode.
void sleep_mode ( void )
Put the device in sleep mode. How the device is brought out of sleep mode depends on the specific mode selected with the set_sleep_mode() function. See the data sheet for your device for more details.
void sleep_enable (void)
Set the SE (sleep enable) bit.
void sleep_disable (void)
Clear the SE (sleep enable) bit.
void sleep_cpu (void)
Put the device into sleep mode. The SE bit must be set beforehand, and it is recommended to clear it afterwards.
System Errors (errno)
Detailed Description
#include <errno.h>
Some functions in the library set the global variable errno when an error occurs. The file, <errno.h>, provides symbolic names for various error codes.
Warning: The errno global variable is not safe to use in a threaded or multi-task system. A race condition can occur if a task is interrupted between the call which sets error and when the task examines errno. If another task changes errno during this time, the result will be incorrect for the interrupted task.
Defines
#define EDOM 33 #define ERANGE 34
Define Documentation
#define EDOM 33
Domain error.
#define ERANGE 34
Range error.
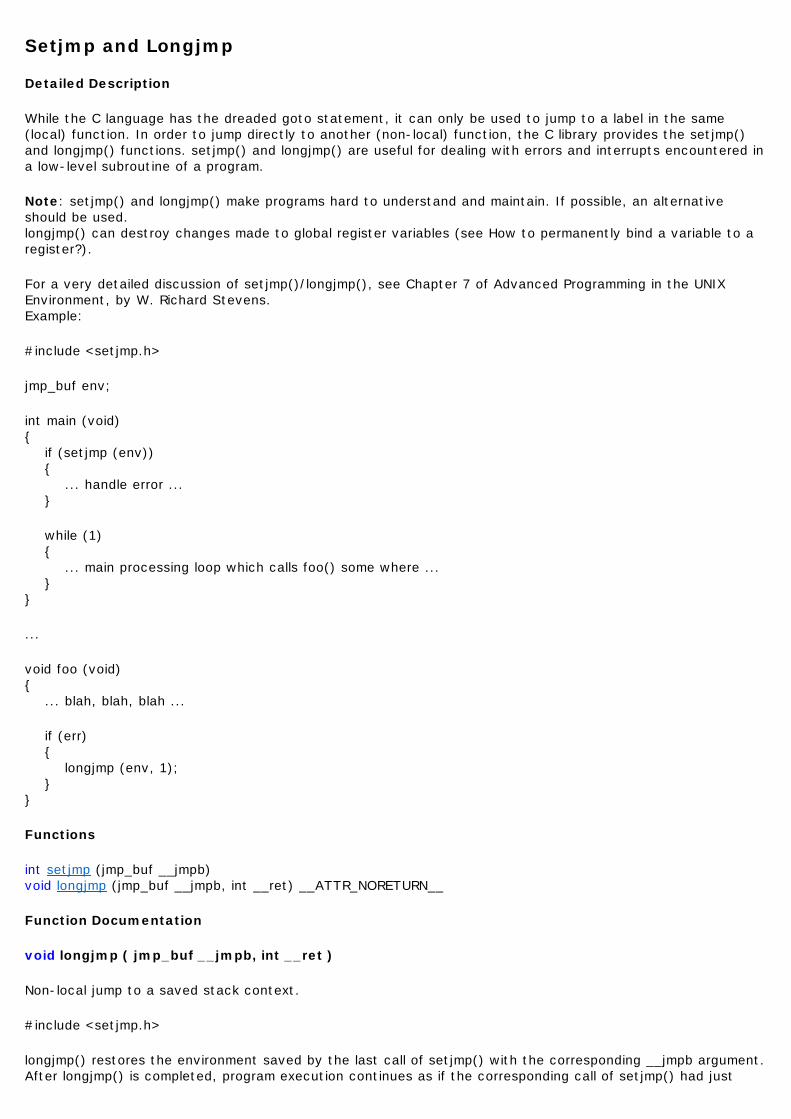
Setjmp and Longjmp
Detailed Description
While the C language has the dreaded goto statement, it can only be used to jump to a label in the same (local) function. In order to jump directly to another (non-local) function, the C library provides the setjmp() and longjmp() functions. setjmp() and longjmp() are useful for dealing with errors and interrupts encountered in a low-level subroutine of a program.
Note: setjmp() and longjmp() make programs hard to understand and maintain. If possible, an alternative should be used. longjmp() can destroy changes made to global register variables (see How to permanently bind a variable to a register?).
For a very detailed discussion of setjmp()/longjmp(), see Chapter 7 of Advanced Programming in the UNIX Environment, by W. Richard Stevens. Example:
#include <setjmp.h>
jmp_buf env;
int main (void) { if (setjmp (env)) { ... handle error ... }
while (1) { ... main processing loop which calls foo() some where ... } }
...
void foo (void) { ... blah, blah, blah ...
if (err) { longjmp (env, 1); } }
Functions
int setjmp (jmp_buf __jmpb) void longjmp (jmp_buf __jmpb, int __ret) __ATTR_NORETURN__
Function Documentation
void longjmp ( jmp_buf __jmpb, int __ret )
Non-local jump to a saved stack context.
#include <setjmp.h>
longjmp() restores the environment saved by the last call of setjmp() with the corresponding __jmpb argument. After longjmp() is completed, program execution continues as if the corresponding call of setjmp() had just
returned the value __ret.
Note: longjmp() cannot cause 0 to be returned. If longjmp() is invoked with a second argument of 0, 1 will be returned instead.
Parameters: __jmpb Information saved by a previous call to setjmp(). __ret Value to return to the caller of setjmp().
Returns: This function never returns.
int setjmp ( jmp_buf __jmpb )
Save stack context for non-local goto.
#include <setjmp.h>
setjmp() saves the stack context/environment in __jmpb for later use by longjmp(). The stack context will be invalidated if the function which called setjmp() returns.
Parameters: __jmpb Variable of type jmp_buf which holds the stack information such that the environment can be restored.
Returns: setjmp() returns 0 if returning directly, and non-zero when returning from longjmp() using the saved context.

Memory APIs
The AVR family of processors do not use a single address space to map data and code. Since the registers are 8 bits wide, and the registers are used to write to RAM, the static RAM was made 8 bits wide. The program memory, on the other hand, is 16 bits wide. This allows the instructions to represent more operations in a single memory access. In addition, the EEPROM resides in yet another bank of memory. AVR-GCC places code in the flash ROM and places data in the SRAM, which would be expected. If your program needs to access the EEPROM or place data in the ROM, however, things are a little less intuitive. This chapter shows what support has been provide for these situations.
l Program Memory API
l EEPROM API
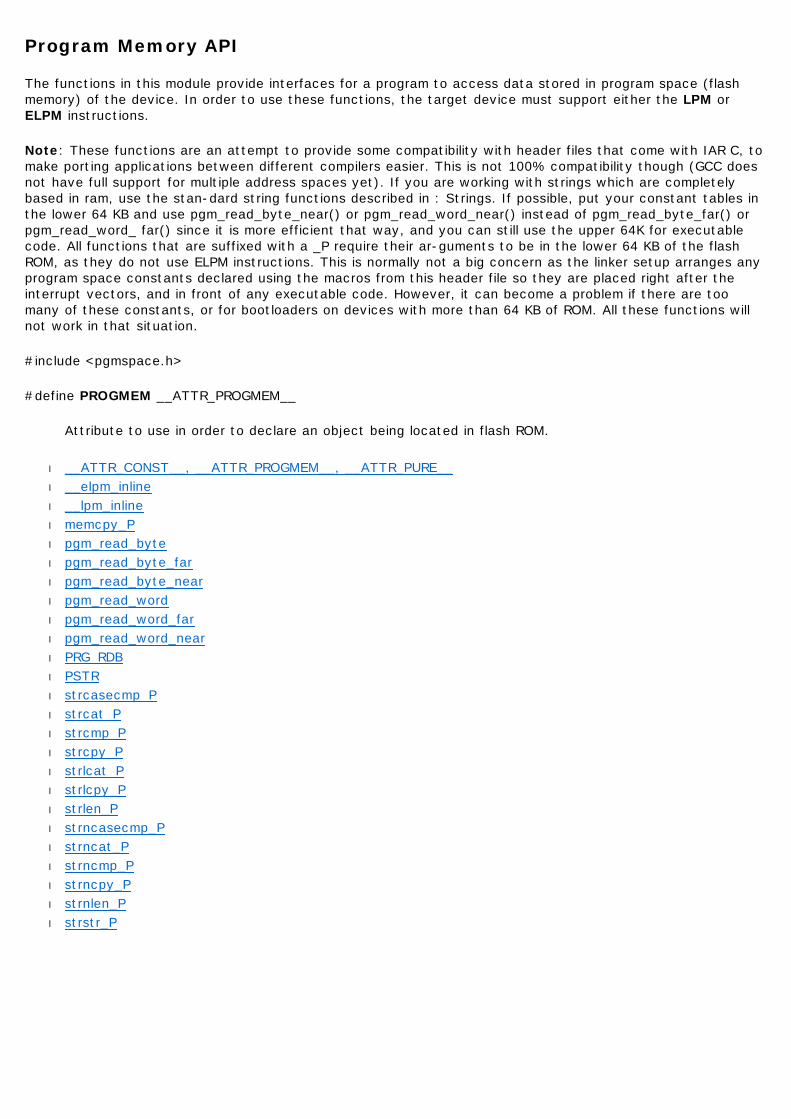
Program Memory API
The functions in this module provide interfaces for a program to access data stored in program space (flash memory) of the device. In order to use these functions, the target device must support either the LPM or ELPM instructions.
Note: These functions are an attempt to provide some compatibility with header files that come with IAR C, to make porting applications between different compilers easier. This is not 100% compatibility though (GCC does not have full support for multiple address spaces yet). If you are working with strings which are completely based in ram, use the stan-dard string functions described in : Strings. If possible, put your constant tables in the lower 64 KB and use pgm_read_byte_near() or pgm_read_word_near() instead of pgm_read_byte_far() or pgm_read_word_ far() since it is more efficient that way, and you can still use the upper 64K for executable code. All functions that are suffixed with a _P require their ar-guments to be in the lower 64 KB of the flash ROM, as they do not use ELPM instructions. This is normally not a big concern as the linker setup arranges any program space constants declared using the macros from this header file so they are placed right after the interrupt vectors, and in front of any executable code. However, it can become a problem if there are too many of these constants, or for bootloaders on devices with more than 64 KB of ROM. All these functions will not work in that situation.
#include <pgmspace.h>
#define PROGMEM __ATTR_PROGMEM__
Attribute to use in order to declare an object being located in flash ROM.
l __ATTR_CONST__, __ATTR_PROGMEM__, __ATTR_PURE__ l __elpm_inline l __lpm_inline l memcpy_P l pgm_read_byte l pgm_read_byte_far l pgm_read_byte_near l pgm_read_word l pgm_read_word_far l pgm_read_word_near l PRG_RDB l PSTR l strcasecmp_P l strcat_P l strcmp_P l strcpy_P l strlcat_P l strlcpy_P l strlen_P l strncasecmp_P l strncat_P l strncmp_P l strncpy_P l strnlen_P l strstr_P
__ATTR_CONST__, __ATTR_PROGMEM__, __ATTR_PURE__
#include <pgmspace.h>
__ATTR_CONST__, __ATTR_PROGMEM__, __ATTR_PURE__
Return Value
Parameters
Remarks
These macros are used to notify the compiler that it is to handle a function or variable specially. If a function is marked with the __ATTR_CONST__ macro, the compiler will assume the function produces no side effects and produces an identical result when rpesented with identical inputs. (i.e. the function takes the parameters and produces a result, but doesn't change any memory locations.) If a function marked with this attribute is in a loop and its parameters don't change, the compiler can call it once and use the return value in the loop. The __ATTR_PROGMEM__ macro is used in variable definitions. If a variable has this attribute, it is allocated in program memory. Since program memory can't be changed when the processor is running, a variable with this attribute is always defined with an initial value. The __ATTR_PURE__ macro, when used on a function, tells the compiler not to generate any prologue or epilogue code (the function's ret instruction is even suppressed!)
__elpm_inline
#include <pgmspace.h>
uint8_t __elpm_inline(uint32_t addr);
Return Value
8-bit value
Parameters
addr 32-bit ROM address
Remarks
This macro gets converted into in-line assembly instructions to pull a byte from program ROM. The elpm instruction is used, so this macro can only be used with AVR devices that support it. The argument is the 32-bit address of the cell. The maximum address depends upon the device being used.
__lpm_inline
#include <pgmspace.h>
uint8_t __lpm_inline(uint16_t addr);
Return Value
8-bit value
Parameters
addr 16-bit ROM address
Remarks
This function gets converted into in-line assembly instructions to pull a byte from program ROM. The argument is the 16-bit address of the cell. The maximum address depends upon the device being used. Only one byte is returned by this function. When pulling wider values from the program memory, the memcpy_P() and strcpy_P() functions should be used.
See Also memcpy_P, strcpy_P
memcpy_P
#include <pgmspace.h>
void* memcpy_P(void* dst, PGM_VOID_P src, size_t n);
Return Value
Returns the value of dst.
Parameters
dst SRAM buffer
src Program memory to copy from
n Number of characters to copy
Remarks
This is a special version of the memcpy function that copies data from program memory to RAM.

pgm_read_byte
#include <pgmspace.h>
pgm_read_byte(unsigned short addr);
Return Value
8-bit value
Parameters
addr 16-bit ROM address
Remarks
Reads a byte from the program space with a 16-bit (near) address.
pgm_read_byte_far
#include <pgmspace.h>
pgm_read_byte_far(unsigned long addr);
Return Value
8-bit value
Parameters
addr 32-bit ROM address
Remarks
Reads a byte from the program space with a 32-bit (far) address.

pgm_read_byte_near
#include <pgmspace.h>
pgm_read_byte_near(unsigned short addr);
Return Value
8-bit value
Parameters
addr 16-bit ROM address
Remarks
Reads a byte from the program space with a 16-bit (near) address.
pgm_read_word
#include <pgmspace.h>
pgm_read_word(unsigned short addr);
Return Value
16-bit value
Parameters
addr 16-bit ROM address
Remarks
Reads a word from the program space with a 16-bit (near) address.
pgm_read_word_far
#include <pgmspace.h>
pgm_read_word_far(unsigned long addr);
Return Value
16-bit value
Parameters
addr 32-bit ROM address
Remarks
Reads a word from the program space with a 32-bit (far) address.

pgm_read_word_near
#include <pgmspace.h>
pgm_read_word_near(unsigned short addr);
Return Value
16-bit value
Parameters
addr 16-bit ROM address
Remarks
Reads a word from the program space with a 16-bit (near) address.
PRG_RDB
#include <pgmspace.h>
uint8_t PRG_RDB(uint16_t addr);
Return Value
8-bit value
Parameters
addr 16-bit ROM address
Remarks
This macro simply invokes the __lpm_inline() function.
Note: This macro is removed, please use pgm_read_byte() instead.
PSTR
#include <pgmspace.h>
PSTR(s);
Return Value
Returns ROM address
Parameters
s Character string
Remarks
This macro takes a literal string as an argument. It places the string into the program address space and returns its address. The string can be accessed using the macros and functions in this section.
strcasecmp_P
#include <pgmspace.h>
int strcasecmp_P(char const* s1, PGM_P s2);
Return Value
Parameters
s1 Null-terminated string in SRAM
s2 Null-terminated string in program memory
Remarks
This function operates similarly to the strcasecmp function. Its second argument, however, refers to a string in program memory.
Value Relationship of s1 to s2
< 0 s1 less than s2
0 s1 identical to s2
> 0 s1 greater than s2
strcat_P
#include <pgmspace.h>
char* strcat_P(char* s1, PGM_P s2);
Return Value
Returns the destination string (s1).
Parameters
s1 Null-terminated destination string in SRAM
s2 Null-terminated source string in program memory
Remarks
This function operates similarly to the strcat() function. Its second argument, however, refers to a string in program memory.

strcmp_P
#include <pgmspace.h>
int strcmp_P(char const* s1, PGM_P s2);
Return Value
< 0 s1 less than s2 0 s1 identical to s2 > 0 s1 greater than s2
Parameters
s1 Null-terminated string in SRAM
s2 Null-terminated string in program memory
Remarks
This function operates similarly to the strcmp() function. Its second argument, however, refers to a string in program memory. Make sure you don¡¯t get the arguments reversed.

strcpy_P
#include <pgmspace.h>
char* strcpy_P(char* s1, PGM_P s2);
Return Value
Returns the destination string (s1).
Parameters
s1 Null-terminated destination string in SRAM
s2 Null-terminated source string in program memory
Remarks
This function operates similarly to the strcpy() function. Its second argument, however, refers to a string in program memory.
strlcat_P
#include <pgmspace.h>
size_t strlcat_P (char *dst, PGM_P src, size_t siz)
Return Value
Returns strlen(src) + MIN(siz, strlen(initial dst)). If retval >= siz, truncation occurred.
Parameters
dst Null-terminated destination string in SRAM
src Null-terminated source string in program memory
siz Size of destination string
Remarks
Concatenate two strings.
The strlcat_P () function is similar to strlcat(), except that the src string must be located in program space (flash).
Appends src to string dst of size siz (unlike strncat(), siz is the full size of dst, not space left). At most siz-1 characters will be copied. Always NULL terminates (unless siz <= strlen(dst< /EM> )).
strlcpy_P
#include <pgmspace.h>
size_t strlcpy_P (char *dst, PGM_P src, size_t siz)
Return Value
Returns strlen(src). If retval >= siz, truncation occurred.
Parameters
dst Null-terminated destination string in SRAM
src Null-terminated source string in program memory
siz Size of destination string
Remarks
Copy a string from progmem to RAM.
Copy src to string dst of size siz. At most siz-1 characters will be copied. Always NULL terminates (unless siz == 0).
strlen_P
#include <pgmspace.h>
size_t strlen_P(PGM_P s);
Return Value
Returns the number of characters in string, excluding the terminal NULL.
Parameters
s Null-terminated string in program memory
Remarks
This function operates similarly to the strlen() function. Its argument, however, refers to a string in program memory.
strncasecmp_P
#include <pgmspace.h>
int strncasecmp_P(char const* s1, PGM_P s2, size_t n);
Return Value
The return value indicates the lexicographic relation of s1 to s2.
Parameters
s1 Null-terminated string in SRAM
s2 Null-terminated string in program memory
n Number of characters to compare
Remarks
This function operates similarly to the strncasecmp function. Its second argument, however, refers to a string in program memory.
Value Relationship of s1 to s2
< 0 s1 less than s2
0 s1 identical to s2
> 0 s1 greater than s2
strncat_P
#include <pgmspace.h>
char *strncat_P (char *dest, PGM_P src, size_t len)
Return Value
Returns a pointer to the resulting string dest.
Parameters
dest Null-terminated destination string in SRAM
src Null-terminated source string in program memory
len Number of characters to append
Remarks
Concatenate two strings.
The strncat_P () function is similar to strncat(), except that the src string must be located in program space (flash).
strncmp_P
#include <pgmspace.h>
int strncmp_P(char const* s1, PGM_P s2, size_t n);
Return Value
< 0 s1 less than s2 0 s1 identical to s2 > 0 s1 greater than s2
Parameters
s1 Null-terminated string in SRAM
s2 Null-terminated string in program memory
n Number of characters to compare
Remarks
This function operates similarly to the strncmp() function. Its second argument, however, refers to a string in program memory. Make sure you don¡¯t get the arguments reversed.
strncpy_P
#include <pgmspace.h>
char* strncpy_P(char* s1, PGM_P s2, size_t n);
Return Value
Returns the destination string (s1).
Parameters
s1 Null-terminated destination string in SRAM
s2 Null-terminated source string in program memory
n Number of characters to be copied
Remarks
This function operates similarly to the strncpy() function. Its second argument, however, refers to a string in program memory.
strnlen_P
#include <pgmspace.h>
size_t strnlen_P (PGM_P src, size_t len)
Return Value
Returns strlen_P(src), if that is less than len, or len if there is no '\0' character among the first len characters pointed to by src.
Parameters
src Null-terminated source string in program memory
len Number of characters
Remarks
Determine the length of a fixed-size string.
The strnlen_P () function is similar to strnlen(), except that the src string must be located in program space (flash).
strstr_Pstrstr_Pstrstr_Pstrstr_P
#include <pgmspace.h>
char *strstr_P (const char *s1, PGM_P s2)
Return Value
Returns a pointer to the beginning of the substring, or NULL if the substring is not found. If s2 points to a string of zero length, the function returns s1.
Parameters
s1 Null-terminated string to search
s2 Null-terminated string in program memory to search for
Remarks
Locate a substring.
The strstr_P() function finds the first occurrence of the substring s2 in the string s1. The terminating '\0' characters are not compared. The strstr_P() function is similar to strstr() except that s2 is pointer to a string in program space.
EEPROM API
#include <eeprom.h>
This header file declares the interface to some simple library routines suitable for handling the data EEPROM contained in the AVR microcontrollers. The implementation uses a simple polled mode interface. Applications that require interrupt-controlled EEPROM access to ensure that no time will be wasted in spinloops will have to deploy their own implementation.
Note:
All of the read/write functions first make sure the EEPROM is ready to be ac-cessed. Since this may cause long delays if a write operation is still pending, time-critical applications should first poll the EEPROM e. g. using eeprom_is_ready() before attempting any actual I/O. This header file declares inline functions that call the assembler subroutines di-rectly. This prevents that the compiler generates push/pops for the call-clobbered registers. This way also a specific calling convention could be used for the eep-rom routines e.g. by passing values in __tmp_reg__, eeprom addresses in X and memory addresses in Z registers. Method is optimized for code size. Presently supported are two locations of the EEPROM register set: 0x1F,0x20,0x21 and 0x1C,0x1D,0x1E (see __EEPROM_REG_LOCATIONS__). As these functions modify IO registers, they are known to be non-reentrant. If any of these functions are used from both, standard and interrupt context, the applica-tions must ensure proper protection (e.g. by disabling interrupts before accessing them).
l eeprom_is_ready
l eeprom_read_byte
l eeprom_read_block
l eeprom_read_word
l eeprom_write_byte
l eeprom_write_block
l eeprom_write_word
IAR C compatibility defines
#define _EEPUT (addr, val) eeprom_write_byte ((uint8_t *)(addr), (uint8_t)( val))
#define _EEGET(var, addr) (var) = eeprom_read_byte ((uint8_t *)(addr))
Defines
#define __EEPROM_REG_LOCATIONS__ 1C1D1E
In order to be able to work without a requiring a multilib approach for dealing with controllers having the EEPROM registers at different positions in memory space, the eeprom functions evaluate __EEPROM_REG_LOCATIONS__: It is assumed to be defined by the device io header and contains 6 uppercase hex digits encoding the ad-dresses of EECR,EEDR and EEAR. First two letters: EECR address. Second two letters: EEDR address. Last two letters: EEAR address. The default 1C1D1E corre-sponds to the register location that is valid for most controllers. The value of this define symbol is used for appending it to the base name of the assembler functions.
#define EEMEM __attribute__((section(".eeprom")))
Attribute expression causing a variable to be allocated within the .eeprom section.
eeprom_is_ready
#include <eeprom.h>
int eeprom_is_ready(void);
Return Value
Return 1 when the eeprom is able to be accessed; otherwise 0.
Parameters
Remarks
This function indicates when the eeprom is able to be accessed. When an EEPROM location is written to, the entire EEPROM become unavailable for up to 4 milliseconds. Unlike some other microcontrollers, the AVR processors use hardware timers to program EEPROM cells. A status bit is provided to give an application the state of the EEPROM. This function allows an application to poll the status to find out when the memory is accessible.
eeprom_read_byte
#include <eeprom.h>
uint8_t eeprom_read_byte (uint8_t *addr);
Return Value
8-bit value
Parameters
addr EEPROM address
Remarks
Reads a single byte from the EEPROM. The parameter addr specifies the location to read. The maximum address that can be specified depends upon the device. A macro has been defined to provide compatibility with the IAR compiler. Using the macro _EEGET(addr) will actually call this function.
eeprom_read_block
#include <eeprom.h>
void eeprom_read_block(void *buf, const void *addr, size_t n);
Return Value
Parameters
buf SRAM buffer
addr The starting address of the EEPROM block
n Size of the EEPROM block
Remarks
Reads a block of EEPROM memory. The starting address of the EEPROM block is specified in the addr parameter. The maximum address depends upon the device. The number of bytes to transfer is indicated by the n parameter. The data is transferred to an SRAM buffer, the starting address of which is passed in the buf argument.
eeprom_read_word
#include <eeprom.h>
uint16_t eeprom_read_word (uint16_t *addr);
Return Value
16-bit value
Parameters
addr EEPROM address
Remarks
Reads a 16-bit value from the EEPROM. The data is assumed to be in little endian format. The parameter addr specifies the location to read. The maximum address that can be specified depends upon the device.
eeprom_write_byte
#include <eeprom.h>
void eeprom_write_byte (uint8_t *addr, uint8_t val);
Return Value
Parameters
addr EEPROM address
val 8-bit value
Remarks
Writes a value val to the EEPROM. The value is written to address addr. To be compatible with the IAR compiler, a macro has been defined. _EEPUT(addr, val) will expand to a call to eeprom_wb().
eeprom_write_block
#include <eeprom.h>
void eeprom_write_block (const void *buf, void *addr, size_t n);
Return Value
Parameters
addr The starting address of the EEPROM block
buf SRAM buffer
n Size of the SRAM buffer
Remarks
Write a block of n bytes to EEPROM address addr from buf.

eeprom_write_word
#include <eeprom.h>
void eeprom_write_word(unsigned int *addr, unsigned int val);
Return Value
Parameters
addr EEPROM address
val 16-bit value
Remarks
Writes a word val to EEPROM address addr.

Interrupt API
It's nearly impossible to find compilers that agree on how to handle interrupt code. Since the C language tries to stay away from machine dependent details, each compiler writer is forced to design their method of support.
In the AVR-GCC environment, the vector table is predefined to point to interrupt routines with predetermined names. By using the appropriate name, your routine will be called when the correspondi ng interrupt occurs. The device library provides a set of default interrupt routines, which will get used if you don't define your own.
Patching into the vector table is only one part of the problem. The compiler uses, by convention, a set of registers when it's normally executing compiler-generated code. It's important that these registers, as well as the status register, get saved and restored. The extra code needed to do this is enabled by tagging the interrupt function with __attribute__(( signal)).
These details seem to make interrupt routines a little messy, but all these details are handled by the Interrupt API. An interrupt routine is defined with ISR(). This macro register and mark the routine as an interrupt handler for the specified peripheral. The following is an example definition of a handler for the ADC interrupt.
#include <AVR/interrupt.h> ISR(ADC_vect) { // user code here }
Catch-all interrupt vector If an unexpected interrupt occurs (interrupt is enabled and no handler is installed, which usually indicates a bug), then the default action is to reset the device by jumping to the reset vector. You can override this by supplying a function named __vector_default which should be defined with ISR() as such.
#include <AVR/interrupt.h> ISR(__vector_default) { // user code here }
Nested interrupts The AVR hardware clears the global interrupt flag in SREG before entering an interrupt vector. Thus, normally interrupts will remain disabled inside the handler until the handler exits, where the RETI instruction (that is emitted by the compiler as part of the normal function epilogue for an interrupt handler) will eventually re-enable further interrupts. For that reason, interrupt handlers normally do not nest. For most interrupt handlers, this is the desired behaviour, for some it is even required in order to prevent infinitely recursive interrupts (like UART interrupts, or level-triggered external interrupts). In rare circumstances though it might be desired to re-enable the global interrupt flag as early as possible in the interrupt handler, in order to not defer any other interrupt more than absolutely needed. This could be done using an sei() instruction right at the beginning of the interrupt handler, but this still leaves few instructions inside the compiler-generated function prologue to run with global interrupts disabled. The compiler can be instructed to insert an SEI instruction right at the beginning of an interrupt handler by declaring the handler the following way:
void XXX_vect(void) __attribute__((interrupt)); void XXX_vect(void) { ... }
where XXX_vect is the name of a valid interrupt vector for the MCU type in question.
See Also Interrupts and Signals
l cli l ISR l sei

Deprecated
Note: Do not use the follow macros anymore in new code, they will be deprecated in a future release.
l INTERRUPT l SIGNAL l timer_enable_int

cli
#include <interrupt.h>
void cli(void);
Return Value
Parameters
Remarks
Disables all interrupts by clearing the global interrupt mask. This function actually compiles into a single line of assembly, so there is no function call overhead.
ISR
#include <avr/interupt.h>
ISR(vector);
Return Value
Parameters
vector Predetermined signal name
Remarks
Introduces an interrupt handler function (interrupt service routine) that runs with global interrupts initially disabled. vector must be one of the interrupt vector names that are valid for the particular MCU type.
Note The ISR() macro cannot really spell-check the argument passed to them. Thus, by misspelling one of the names below in a call to ISR(), a function will be created that, while possibly being usable as an interrupt function, is not actually wired into the interrupt vector table. The compiler will generate a warning if it detects a sus-piciously looking name of a ISR () function (i.e. one that after macro replacement does not start with "__vector_").

sei
#include <interrupt.h>
void sei(void);
Return Value
Parameters
Remarks
Enables interrupts by clearing the global interrupt mask. This function actually compiles into a single line of assembly, so there is no function call overhead.
INTERRUPT
#include <compat/deprecated.h>
INTERRUPT(signame);
Return Value
Parameters
signame Predetermined signal name
Remarks
This macro creates the prototype and opening of a function that is to be used as an interrupt. The routine will be executed with interrupts enabled.
Note: Do not use anymore in new code, it will be deprecated in a future release.
See Also ISR and SIGNAL

SIGNAL
#include <interupt.h>
SIGNAL(signame);
Return Value
Parameters
signame Predetermined signal name
Remarks
Introduces an interrupt handler function that runs with global interrupts initially dis-abled.
This is the same as the ISR macro.
Note: Do not use anymore in new code, it will be deprecated in a future release.
timer_enable_int
#include <compat/deprecated.h>
void timer_enable_int(uint8_t ints);
Return Value
Parameters
ints 8-bit value
Remarks
This function modifies the timsk register.
Note: Do not use anymore in new code, it will be deprecated in a future release.

I/O API
This section describes the functions and macros that make it easier to access the I/O registers. Most of these routines actually get replaced with in-line assembly, so there is little to no performance penalty to use them. These routines are defined in io.h. This header file also defines the registers and bit definitions for the correct AVR device.
#include <io.h>
l BV l bit_is_clear l bit_is_set l cbi l inp, inb l inw l __inw l __inw_atomic l loop_until_bit_is_clear l loop_until_bit_is_set l outp, outb l outw l __outw l __outw_atomic l parity_even_bit l sbi
BV
#include <io.h>
BV(bit);
Return Value
Return 1 << bit
Parameters
bit Bit
Remarks
This macro converts a bit definition into a bit mask.

bit_is_clear
#include <io.h>
uint8_t bit_is_clear(sfr, bit);
Return Value
Returns 1 if the specified bit in sfr is clear; otherwise 0.
Parameters
sfr IO register
bit Bit to test
Remarks
Test whether bit bit in IO register sfr is clear. bit can be 0 to 7.
bit_is_set
#include <io.h>
uint8_t bit_is_set(sfr, bit);
Return Value
Returns 1 if the specified bit in sfr is set; otherwise 0.
Parameters
sfr IO register
bit Bit to test
Remarks
Test whether bit bit in IO register sfr is set. bit can be 0 to 7.
cbi
#include <io.h>
void cbi(sfr, bit);
Return Value
Parameters
sfr IO register
bit Bit to clear
Remarks
Clears the specified bit bit in the I/O register specified by sfr. bit is a value from 0 to 7.
See Also sbi

inp, inb
#include <io.h>
uint8_t inp(sfr);
uint8_t inb(sfr);
Return Value
8-bit value
Parameters
sfr IO register
Remarks
Reads the 8-bit value from the I/O port specified by sfr. If sfr is a constant value, this macro assumes the value refers to a valid address and tries to use the in instruction. A variable argument results in an access using direct addressing.
inw
#include <io.h>
uint16_t inw(sfr);
Return Value
16-bit value
Parameters
sfr IO register pair
Remarks
Read a 16-bit word from IO register pair sfr.
__inw
#include <iomacros.h>
uint16_t __inw(uint8_t port);
Return Value
16-bit value
Parameters
port IO register
Remarks
Reads a 16-bit value from I/O registers. This routine was created for accessing the 16-bit registers (ADC, ICR1, OCR1, TCNT1) because they need to be read in the proper order. This macro should only be used if interrupts are disabled since it only generates the two lines of assembly that reads the register.

__inw_atomic
#include <iomacros.h>
uint16_t __inw_atomic(uint8_t port);
Return Value
16-bit value
Parameters
port IO register
Remarks
Atomically reads a 16-bit value from I/O registers. The generated code disables interrupts during the access and properly restores the interrupt state when through. This routine was created for accessing the 16-bit registers (ADC, ICR1, OCR1, TCNT1) because they need to be read in the proper order. This macro can safely be used in interrupt and non-interrupt routines because it preserves the interrupt enable flag (although you may not want to pay for the extra lines of assembly in an interrupt routine.)
loop_until_bit_is_clear
#include <io.h>
void loop_until_bit_is_clear(sfr, bit);
Return Value
Parameters
sfr IO register
bit Bit to test
Remarks
This macro generates a very tight polling loop that waits for a bit to become cleared. It uses the sbic instruction to perform the test, so the value of port sfr is restricted to valid I/O register addresses for that instruction. bit is a value from 0 to 7.

loop_until_bit_is_set
#include <io.h>
void loop_until_bit_is_set(sfr, bit);
Return Value
Parameters
sfr IO register
bit Bit to test
Remarks
This macro generates a very tight polling loop that waits for a bit to become set. It uses the cbic instruction to perform the test, so the value of port sfr is restricted to valid I/O register addresses for that instruction. bit is a value from 0 to 7.

outp, outb
#include <io.h>
void outp(val, sfr);
void outb(sfr, val);
Return Value
Parameters
val 8-bit value
sfr IO register
Remarks
Writes the 8-bit value val to sfr. If sfr is a constant value, this macro assumes the value refers to a valid address and tries to use the out instruction. A variable argument results in an access using direct addressing.
outw
#include <io.h>
void outw(sfr, val);
Return Value
Parameters
sfr IO register pair
val 16-bit value
Remarks
Write the 16-bit value val to IO register pair sfr. Care will be taken to write the lower register first. When used to update 16-bit registers where the timing is critical and the operation can be interrupted, the programmer is the responsible for disabling interrupts before accessing the register pair.
__outw
#include <iomacros.h>
void __outw(uint16_t val, uint8_t port);
Return Value
Parameters
val 16-bit value
port IO register
Remarks
Writes to a 16-bit I/O register. This routine was created for manipulating the 16-bit registers (ADC, ICR1, OCR1, TCNT1) because they need to be written in the proper order. This macro should only be used if interrupts are disabled since it only generates the two lines of assembly that modify the register.
__outw_atomic
#include <iomacros.h>
void __outw_atomic(uint16_t val, uint8_t port);
Return Value
Parameters
val 16-bit value
port IO register
Remarks
Atomically writes to a 16-bit I/O register. The generated code disables interrupts during the access and properly restores the interrupt state when through. This routine was created for accessing the 16-bit registers (ADC, ICR1, OCR1, TCNT1) because they need to be written in the proper order. This macro can safely be used in interrupt and non-interrupt routines because it preserves the interrupt enable flag (although you may not want to pay for the extra lines of assembly in an interrupt routine.)
parity_even_bit
#include <parity.h>
uint8_t parity_even_bit(uint8_t val);
Return Value
Returns 1 if val has even parity; otherwise 0.
Parameters
val 8-bit value
Remarks
All eight bits are used in the calculation.
sbi
#include <io.h>
void sbi(sfr, bit);
Return Value
Parameters
sfr IO register
bit bit to set
Remarks
Sets the specified bit bit in the I/O register specified by sfr. bit is a value from 0 to 7 and should be specified as one of the defined symbols in the I/O header files. If sfr specifies an actual I/O register, this macro reduces to a single in-line assembly instruction. If it isn¡¯t an I/O register, it attempts to generate the most efficient code to complete the operation.
See Also cbi
Watchdog API
The functions in this section manipulate the watchdog hardware. These macros are defined in wdt.h.
#include <wdt.h>
Symbolic constants for the watchdog timeout.
Since the watchdog timer is based on a free-running RC oscillator, the times are approximate only and apply to a supply voltage of 5 V. At lower supply voltages, the times will increase. For older devices, the times will be as large as three times when operating at Vcc = 3 V, while the newer devices (e. g. ATmega128, ATmega8) only experience a negligible change.
Possible timeout values are: 15 ms, 30 ms, 60 ms, 120 ms, 250 ms, 500 ms, 1 s, 2 s. (Some devices also allow for 4 s and 8 s.) Symbolic constants are formed by the prefix WDTO_, followed by the time.
Example that would select a watchdog timer expiry of approximately 500 ms: wdt_enable(WDTO_500MS);
#define WDTO_15MS 0 #define WDTO_30MS 1 #define WDTO_60MS 2 #define WDTO_120MS 3 #define WDTO_250MS 4 #define WDTO_500MS 5 #define WDTO_1S 6 #define WDTO_2S 7 #define WDTO_4S 8 #define WDTO_8S 9
l wdt_disable
l wdt_enable
l wdt_reset

wdt_disable
#include <wdt.h>
void wdt_disable(void);
Return Value
Parameters
Remarks
Disables the watchdog timer. This function actually generates six inline assembly instructions.
wdt_enable
#include <wdt.h>
void wdt_enable(uint8_t timeout);
Return Value
Parameters
timeout The prescaler timeout (0..7)
Remarks
Enables the watchdog timer. The passed value, timeout, is loaded in the watchdog control register.

wdt_reset
#include <wdt.h>
void wdt_reset(void);
Return Value
Parameters
Remarks
Resets the watchdog timer. This function generates a single wdr instruction. Your application must guarantee that this function is called sooner than the timeout rate of the watchdog. Otherwise the processor will reset.

LCD Library
The LCD Functions are intended for easy interfacing between C programs and alphanumeric LCD modules built with the Hitachi HD44780 chip or equivalent. The following LCD formats are supported in lcd.h: 1x8, 2x12, 3x12, 1x16, 2x16, 2x20, 4x20, 2x24 and 2x40 characters. The LCD module must be connected to the port bits as follows:
MCU PortX 0 - RS (LCD pin4) MCU PortX 1 - RD (LCD pin 5) MCU PortX 2 - EN (LCD pin 6) MCU PortX 4 - DB4 (LCD pin 11) MCU PortX 5 - DB5 (LCD pin 12) MCU PortX 6 - DB6 (LCD pin 13) MCU PortX 7 - DB7 (LCD pin 14)
#include <lcd.h>
l lcd_clear
l lcd_command
l lcd_gotoxy
l lcd_home
l lcd_init
l lcd_putchar
l lcd_puts
l lcd_puts_P
l lcd_read_byte
l lcd_set_custom_char
l lcd_write_byte

lcd_clear
#include <lcd.h>
void lcd_clear(void);
Return Value
Parameters
Remarks
Clears the LCD and sets the printing character position at row 0 and column 0.
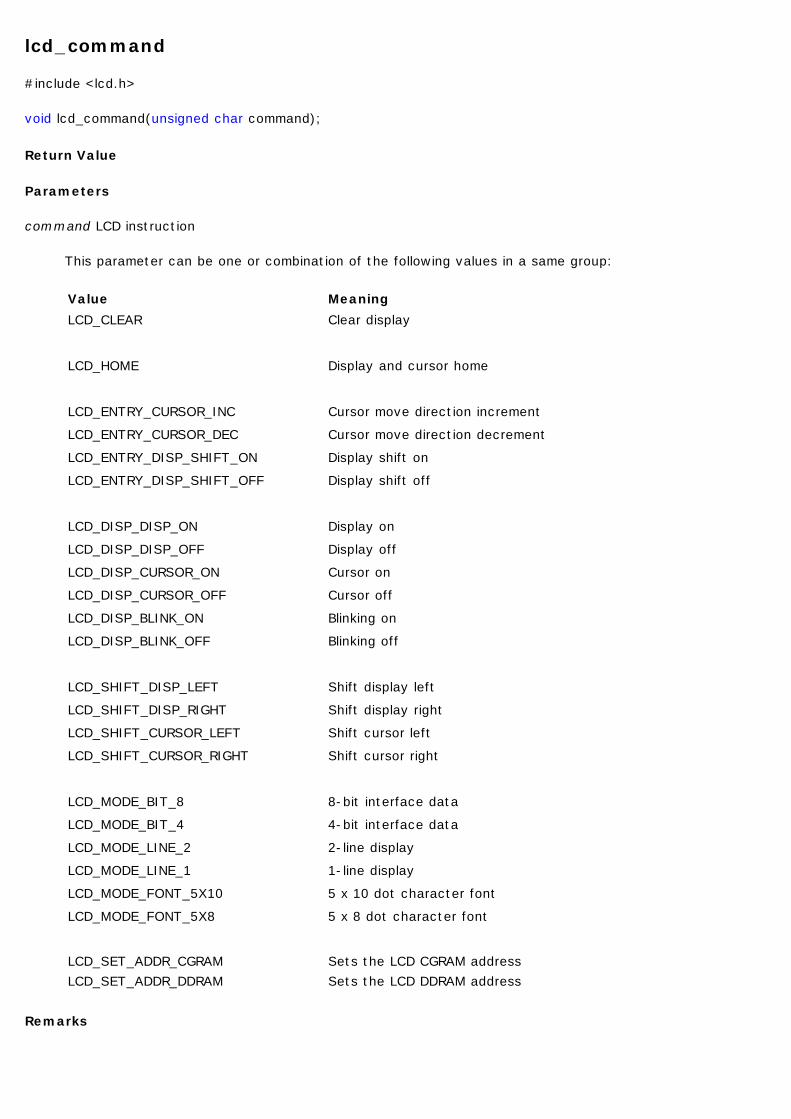
lcd_command
#include <lcd.h>
void lcd_command(unsigned char command);
Return Value
Parameters
command LCD instruction
This parameter can be one or combination of the following values in a same group:
Remarks
Value MeaningLCD_CLEAR Clear display
LCD_HOME Display and cursor home
LCD_ENTRY_CURSOR_INC Cursor move direction increment
LCD_ENTRY_CURSOR_DEC Cursor move direction decrement
LCD_ENTRY_DISP_SHIFT_ON Display shift on
LCD_ENTRY_DISP_SHIFT_OFF Display shift off
LCD_DISP_DISP_ON Display on
LCD_DISP_DISP_OFF Display off
LCD_DISP_CURSOR_ON Cursor on
LCD_DISP_CURSOR_OFF Cursor off
LCD_DISP_BLINK_ON Blinking on
LCD_DISP_BLINK_OFF Blinking off
LCD_SHIFT_DISP_LEFT Shift display left
LCD_SHIFT_DISP_RIGHT Shift display right
LCD_SHIFT_CURSOR_LEFT Shift cursor left
LCD_SHIFT_CURSOR_RIGHT Shift cursor right
LCD_MODE_BIT_8 8-bit interface data
LCD_MODE_BIT_4 4-bit interface data
LCD_MODE_LINE_2 2-line display
LCD_MODE_LINE_1 1-line display
LCD_MODE_FONT_5X10 5 x 10 dot character font
LCD_MODE_FONT_5X8 5 x 8 dot character font
LCD_SET_ADDR_CGRAM Sets the LCD CGRAM addressLCD_SET_ADDR_DDRAM Sets the LCD DDRAM address
lcd_gotoxy
#include <lcd.h>
void lcd_gotoxy(unsigned char x, unsigned char y);
Return Value
Parameters
x Specifies the zero-based index of the column
y Specifies the zero-based index of the row
Remarks
Sets the current display position at column x and row y.

lcd_home
#include <lcd.h>
void lcd_home(void);
Return Value
Parameters
Remarks
Sets cursor and display to the home position.
lcd_init
#include <lcd.h>
void lcd_init(unsigned char lcd_columns, unsigned char lcd_lines, volatile unsigned char* lcd_port);
Return Value
Parameters
lcd_columns The numbers of columns of the LCD
lcd_lines The numbers of lines of the LCD
lcd_port MCU port connected to the LCD
Remarks
Initializes the LCD module, clears the display and sets the printing character position at row 0 and column 0. The numbers of columns of the LCD lcd_columns, the numbers of lines of the LCD lcd_lines and the using port lcd_port must be specified (e.g. (16, 2, &PORTB)).
This is the first function that must be called before using the other LCD Functions.

lcd_putchar
#include <lcd.h>
void lcd_putchar(char c);
Return Value
Parameters
c character
Remarks
Displays the character c at the current display position.

lcd_puts
#include <lcd.h>
void lcd_puts(const char *str);
Return Value
Parameters
str character string
Remarks
Displays at the current display position the string str, located in RAM.
lcd_puts_P
#include <lcd.h>
void lcd_puts_P(const char *prog_str);
Return Value
Parameters
prog_str character string
Remarks
Displays at the current display position the string prog_str, located in FLASH.

lcd_read_byte
#include <lcd.h>
unsigned char lcd_read_byte(unsigned char addr, unsigned char section);
Return Value
Unsigned Character
Parameters
addr Address of the LCD character generator or display RAM
section Specify the address locate in CGRAM or DDRAM.
This parameter must be one of the following values:
Remarks
Read a byte from the LCD character generator or display RAM
Value MeaningLCD_SET_ADDR_CGRAM Sets the LCD CGRAM addressLCD_SET_ADDR_DDRAM Sets the LCD DDRAM address
lcd_set_custom_char
#include <lcd.h>
void lcd_set_custom_char(char index, LCC *cchr);
Return Value
Parameters
index The custom character index, 0..7
cchr Pointer of struct LCC
Remarks
Sets the custom character cchr at the LCD character generator RAM position index.
The struct LCC:
typedef struct _LCD_CUSTOM_CHAR { unsigned char cgram[8]; } LCC;
lcd_write_byte
#include <lcd.h>
void lcd_write_byte(unsigned char addr, unsigned char data, unsigned char section);
Return Value
Parameters
addr Address of the LCD character generator or display RAM
data Character
section Specify the address locate in CGRAM or DDRAM.
This parameter must be one of the following values:
Remarks
Write a byte to the LCD character generator or display RAM
Value MeaningLCD_SET_ADDR_CGRAM Sets the LCD CGRAM addressLCD_SET_ADDR_DDRAM Sets the LCD DDRAM address

Other Functions
Functions AtmanAvr C/C++ supported.
l delay
delay
#include <delay.h>
void delay(unsigned int milliseconds, unsigned int kilohertz);
Return Value
Parameters
milliseconds Delay time in milliseconds
kilohertz CPU clock in kilohertz
Remarks
Delay milliseconds ms at kilohertz kHz, error <= 6‰. milliseconds >= 1ms, kilohertz >= 1000kHz.

Bibliography
l avr-libc Reference Manual, 1.4.2 l Leitner Harald, AppLication Notes. l Microsoft, MSDN Library Visual Studio 6.0 l Peter Fleury, GCC.hlp. l Rich Neswold, A GNU Development Environment for the AVR Microcontroller, 2002. l ¹¢µÂ¸ùµÈ±à£¬AVR¸ßËÙǶÈëʽµ¥Æ¬»úÔÀíÓëÓ¦Ó㬱±¾©£º±±¾©º½¿Õº½Ìì́ óѧ³ö°æÉ磬2001.
you can visit the follow websites for more information.
AVR Libc (http://www.nongnu.org/avr-libc/) AVRGCC (http://www.avrfreaks.net/) GCC and other GNU software (http://www.gnu.org/) GNU Manuals Online (http://www.gnu.org/manual/manual.html) WinAVR (http://sourceforge.net/projects/winavr/)
Atman Electronics 2009-02-10 Copyright© 2003-2009
http://www.atmanecl.net [email protected] [email protected]
http://www.atmanecl.com [email protected] [email protected]


