Embed Size (px)
Citation preview

preinstallazione • installazione • uso & manutenzioneCONSERVARE CON CURA
preinstallation • installation • use & maintenanceKEEP CAREFULLY
pre-installation • installation • emploi et entretien CONSERVER AVEC SOIN
Vorinstallationsblatt • Installation • Bedienung und WartungSORGFÄLTIG AUFBEWAHREN
preinstalación • instalación • uso y mantenimientoCONSÉRVESE CON CUIDADO
Руководство по установке • установка • эксплуатация и техобслуживаниеТЩАТЕЛЬНО ХРАНИТЬ
boosterKIT
spa-pack


3
IndiceAVVERTENZE ...................................................................................... 6
Info ........................................................................................................ 13- Predisposizioni - Sicurezza elettrica
INSTALLAZIONE .............................................................................. 19- Impostazione della lingua e dell’ora ........................................... 27- Calibrazione della sonda redox .................................................... 28- Calibrazione della sonda pH .................................................. 29-30
USO & MANUTENZIONE .............................................................. 31
Importante ........................................................................................... 31
Note sull’utilizzo dello strumento .................................................. 31
Note sulla calibrazione delle sonde ................................................ 31
Impostazione del valore di redox .................................................... 31
Impostazione dello strumentonel caso di acqua con pH acido ......................................................... 31
Altre operazioni da tastiera ............................................................. 32- Attivazione/cambio della password- Regolazione del livello d’illuminazione del display- Visualizzazione della temperatura e del potenziale redox (rdx)- Visualizzazione, impostazione e back-up delle misure- Reset delle impostazioni
Sostituzione del reagente .................................................................. 33
Sospensione del funzionamento per medi-lunghi periodi ....... 33
Calibrazione “di riferimento” ............................................................ 34
Manutenzione ...................................................................................... 34- Verifiche- Pulizia dello strumento- Pulizia delle sonde- Pulizia della cella di misura- Pulizia dell’elettrovalvola dello spa-pack- Sostituzione del fusibile
In caso di difficoltà... ........................................................................... 35- Lo strumento non si accende- La pompa dello spa-pack non funziona- Intervento dell’allarme esterno (il display visualizza il simbolo )
ed eventuale arresto dell’apparecchiatura- Il display visualizza il simbolo - Il display visualizza “std by”- Il display visualizza “errore cloro”- Il display segnala che una sonda è guasta- Il display visualizza “mancanza H
2O”
- Il display segnala problemi alla cella di misura- L’archivio dei dati relativi alle misure è vuoto
IndexWARNINGS .......................................................................................... 7
Info ......................................................................................................... 14- Set-up - Electrical safety
INSTALLATION ................................................................................. 19- Language and time settings .......................................................... 27- Redox sensor calibration ................................................................ 28- pH sensor calibration .............................................................. 29 - 30
USE AND MAINTENANCE ............................................................ 39
Important .............................................................................................. 39
Using the device ................................................................................... 39
Sensor calibration ............................................................................... 39
Setting the redox value ...................................................................... 39
Setting the device in the case of water with acid pH .................. 39
Additional keypad operations .......................................................... 40- Activating/changing the password- Adjusting the display brightness level- Displaying the temperature and redox potential (rdx)- Displaying, set up and back-up of the values- Reset of the settings
Reactant replacement ........................................................................ 41
Suspending operation for medium-long-term periods ............. 41
“Reference" calibration ...................................................................... 42
Maintenance ..........................................................................................42- Checks- Cleaning the device- Cleaning the sensors- Cleaning the measurement unit- Cleaning the spa-pack solenoid valve- Replacing the fuse
Troubleshooting... ................................................................................43- The device does not switch on- The spa-pack pump does not work- Tripping of the external alarm (the display shows the symbol )
and stops the device if necessary- The display shows the symbol - The display presents “std by”- The display presents “errore cloro” (chloro error)- The display indicates that a sensor is faulty- The display presents “mancanza H
2O” (insufficient H
2O)
- The display indicates problems with the measurement unit- The measurement data archive is empty

4
SommaireRECOMMANDATIONS ..................................................................... 8
Info ......................................................................................................... 15- Opérations préalables - Sécurité électrique
INSTALLATION ................................................................................. 19- Configuration de la langue et de l'heure .................................... 27- Calibrage de la sonde redox ......................................................... 28- Calibrage de la sonde pH ...................................................... 29 - 30
UTILISATION & ENTRETIEN ....................................................... 46
Important .............................................................................................. 46
Remarques concernant l'utilisation de l'instrument .................................................................................... 46
Remarques concernant le calibrage des sondes .......................... 46
Configuration de la valeur de redox ................................................ 46
Configuration de l'instrument en cas d'eau avec pH acide ........ 46
Autres opérations depuis clavier ..................................................... 47- Activation/changement du mot de passe- Réglage du niveau d'éclairage de l'afficheur- Visualisation de la température et du potentiel redox (rdx)- Visualisation, configuration et back-up des mesures- Réinitialisation des configurations
Remplacement du réactif ................................................................... 48
Interruption du fonctionnementpour de moyennes-longues périodes ............................................. 49
Calibrage “de référence” .................................................................... 49
Entretien .................................................................................................49- Contrôles- Nettoyage de l’instrument- Nettoyage des sondes- Nettoyage de la cellule de mesure- Nettoyage de l'électrovanne du spa-pack- Remplacement du fusible
En cas de difficultés... ...........................................................................50- L'instrument ne s'allume pas- La pompe du spa-pack ne fonctionne pas- Intervention de l’alarme externe (sur l’afficheur apparaît le
symbole ) et éventuel arrêt de l’instrument- Sur l’afficheur apparaît le symbole - L'afficheur visualise “std by”- L'afficheur visualise“errore cloro” (erreur chlore)”- L'afficheur signale qu'une sonde est en panne- L'afficheur visualise “mancanza H
2O” (absence de H
2O
- L'afficheur signale des problèmes sur la cellule de mesure- L’archive des données relatives aux mesures est vide
InhaltsverzeichnisHINWEISE ............................................................................................. 9
Info ......................................................................................................... 16- Vorbereitende Arbeiten - Elektrische Sicherheit
INSTALLATION ................................................................................. 19- Einstellung von Sprache und Uhrzeit .......................................... 27- Kalibrierung der Redox-Sonde ..................................................... 28- Kalibrierung der pH-Sonde ................................................. 29- - 30
GEBRAUCH UND WARTUNG ..................................................... 54
Wichtig ................................................................................................... 54
Hinweise zum Gebrauch des Gerätes .............................................. 54
Hinweise zur Kalibrierung der Sonden .......................................... 54
Einstellung des Redox-Wertes ......................................................... 54
Einstellung des Gerätes bei Wasser mit saurem pH-Wert ......... 54
Andere Tastaturvorgänge ................................................................. 55- Aktivierung/Änderung des Passworts- Einstellung der Displayhelligkeit- Anzeige der Temperatur und des Redoxpotenzials (rdx)- Anzeige, Einstellung und Backup der Messwerte- Zurücksetzen der Einstellungen
Auswechseln des Reagenzes ............................................................. 56
Unterbrechung des Betriebs für mittlere-lange Zeiträume ..... 57
Referenzkalibrierung ......................................................................... 57
Wartung ..................................................................................................57- Kontrollen- Reinigung des Geräts- Reinigung der Sonden- Reinigung der Messzelle- Reinigung des Magnetventils des Spa-Pack- Austausch der Sicherung
Im Falle von Betriebsstörungen........................................................58- Das Gerät schaltet sich nicht ein- Die Pumpe des Spa-Pack funktioniert nicht- Auslösen des externen Alarms (auf dem Display erscheint das
Symbol ) und eventuelles Anhalten des Gerätes- Auf dem Display erscheint das Symbol - Auf dem Display erscheint “std by” - Auf dem Display erscheint “Errore cloro” (Chlorfehler)- Das Display zeigt an, dass eine Sonde defekt ist- Auf dem Display erscheint “mancanza H2O” (H2O fehlt)- Das Display zeigt Probleme mit der Messzelle an- Das Archiv der Messdaten ist leer

5
ÍndiceADVERTENCIAS ............................................................................... 10
Información ....................................................................................... 17- Preinstalación - Seguridad eléctrica
INSTALACIÓN ................................................................................... 19- Selección del idioma y puesta en hora ....................................... 27- Calibración de la sonda de redox ................................................ 28- Calibración de la sonda de pH .............................................. 29 - 30
USO Y MANTENIMIENTO ............................................................ 62
Importante ............................................................................................ 62
Notas sobre el uso del instrumento ................................................ 62
Notas sobre la calibración de las sondas ........................................ 62
Ajuste del valor de redox ................................................................... 62
Ajuste del instrumento en caso de agua con pH ácido ............... 62
Otras operaciones realizadas con el teclado ................................. 63- Activación/cambio de la contraseña- Ajuste del nivel de iluminación de la pantalla- Visualización de la temperatura y del potencial redox (rdx)- Visualización, ajuste y copia de seguridad de las mediciones- Restablecimiento de los ajustes
Sustitución del reactivo ...................................................................... 64
Suspensión del funcionamientodurante periodos medios-largos ..................................................... 64
Calibración “de referencia” ................................................................ 65
Mantenimiento .....................................................................................65- Comprobaciones- Limpieza del equipo- Limpieza de las sondas- Limpieza de la celda de medición- Limpieza de la electroválvula del spa-pack- Sustitución del fusible
En caso de problemas... .......................................................................66- El instrumento no se enciende- La bomba del spa-pack no funciona- Disparo de la alarma externa (la pantalla muestra el símbolo ) y
posible parada del instrumento- La pantalla muestra el símbolo - La pantalla muestra “std by”- La pantalla muestra “errore cloro” (error de cloro)- La pantalla indica que hay una sonda averiada- La pantalla muestra “mancanza H
2O” (falta de agua)
- La pantalla indica problemas en la celda de medición- El archivo de datos de medición está vacío
УказательПРЕДУПРЕЖДЕНИЯ ..................................................................... 11
Информация ................................................................................... 18- Подготовка - Электрическая безопасность
УСТАНОВКА ...................................................................................... 19- Настройка языка и времени ........................................................ 27- Калибровка датчика redox .......................................................... 28- Калибровка датчика pH ....................................................... 29 - 30
ЭКСПЛУАТАЦИЯ И ОБСЛУЖИВАНИЕ ................................. 70
Важно ..................................................................................................... 70
Замечания по использованию прибора ................................... 70
Замечания по калибровке датчиков ......................................... 70
Настройка значения redox ............................................................. 70
Настройка прибора в случае воды с кислым pH .....................70
Другие операции на кнопочной панели .................................... 71- Активация/смена пароля- Регулировка уровня освещенности дисплея- Визуализация температуры и потенциала redox (rdx)- Визуализация, настройка и резервное сохранение параметров- Сброс настроек
Замена реагента ................................................................................. 72
Приостановка функционированияна средние-длительные периоды времени ............................. 73
Калибровка “контрольного значения” ...................................... 73
Обслуживание .....................................................................................73- Проверки- Очистка прибора- Очистка датчиков- Очистка измерительной ячейки- Очистка электроклапана spa-pack- Замена плавкого предохранителя
В случае трудностей... .......................................................................74- Прибор не включается- Насос spa-pack не работает- Срабатывание внешнего аварийного сигнала (на дисплее
отображается символ ) и возможная остановка прибора- На дисплее отображается символ - На дисплее визуализируется “std by”- На дисплее отображается “errore cloro” (ошибка хлора)”- На дисплее сигнализируется неисправность датчика- На дисплее визуализируется “mancanza H
2O” (отсутствие H
2O)
- На дисплее сигнализируются проблемы измерительной ячейки- Архив данных, соответствующих замерам, пустой

6
Avvertenze
Verificare all’arrivo l’integrità della merce, per un eventuale e tempestivo reclamo allo spedizioniere.
LEGGERE COMPLETAMENTE LE SEGUENTI AVVERTENZE E LE ISTRUZIONI CONTENUTE NEL PRESENTE MANUALE PRI-MA DI PROCEDERE ALL’INSTALLAZIONE.
� Le sostanze chimiche impiegate possono provocare sintomi allergici o asmatici o difficoltà respiratorie se inalate nonché provocare grave irritazione oculare e reazione allergica cutanea.
� Prima di manipolare le varie sostanze chimiche legge-re attentamente le relative schede di sicurezza. Utilizzare sempre i “dispositivi di protezione indivi-duali” (guanti, occhiali, ed eventualmente respiratori, ove necessario).
� Non mescolare le sostanze chimiche tra loro! Pericolo di gas tossici! Verificare periodicamente i contenitori delle sostanze chimiche ed eliminare immediatamente eventuali fuo-riuscite di liquidi.
Lo spa-pack booster kit deve essere installato in ambiente chiuso, MA AREATO, non accessibile alle persone senza l’uso di chiavi od utensili, e protetto dall’acqua e dalle intemperie. N.B.: Poiché certe operazioni richiedono l’accesso allo spa-pack si consiglia di garantirne un facile e comodo accesso.
Gli scarichi dell’apparecchiatura di misura non devono mai essere collegati in tubazioni pressurizzate.
Contenitori, eventuali residui di sostanze chimiche nonché ii reagente esaurito devono essere smaltiti secondo le norma-tive vigenti in materia; consultare inoltre le autorità locali circa lo scarico di acqua trattata chimicamente.
� Prima di effettuare l’installazione e i vari allacciamenti assicurarsi che le varie parti non siano sotto tensione.
� I bambini devono essere sorvegliati per assicurarsi che non giochino con l’apparecchiatura.
� In caso di rottura del display e di contatto con eventuali fuoriuscite di liquidi spegnere l’apparecchiatura e la-vare con acqua abbondante le parti interessate.
In caso di malessere, consultare immediatamente un medico.
� Quando si effettua la clorazione manuale della spa (primo avviamento, trattamento “shock” periodico) è opportuno spegnere l’apparecchiatura ed attendere che la concentrazione del cloro scenda a livelli normali prima di utilizzare nuovamente la clorazione automa-tica (vedere anche “In caso di difficoltà - errore cloro”).
Verificare quotidianamente (anche in relazione alla frequen-za d’uso della spa) il buon funzionamento dello strumento e la presenza di eventuali segnalazioni d’allarme. Effettuare periodicamente la calibrazione di riferimento del-le sonde.Questa apparecchiatura non deve essere usata da persone (bambini inclusi) con ridotte capacità motorie, sensitive e/o cognitive o comunque prive delle nozioni necessarie per il suo utilizzo.È fatto assoluto divieto di utilizzare l’apparecchiatura per usi diversi da quelli espressamente previsti.Jacuzzi non risponde per eventuali danni derivati da utilizzi impropri.
Nel caso di interventi di manutenzione e/o riparazione che comportino la sostituzione di componenti, devono essere utilizzati ricambi originali Jacuzzi®, pena la decadenza della garanzia e della responsabilità del Costruttore per danni de-rivanti dall’intervento eseguito.
Se l’apparecchiatura viene utilizzata da persone diverse dall’Acquirente, questo deve istruire opportunamente gli utilizzatori sull’uso corretto dell’apparecchiatura e le avver-tenze di sicurezza.
Jacuzzi Europe S.p.A. declina ogni responsabilità qualora:
- l’installazione venga eseguita da personale non qualificato e/o non abilitato ad eseguire l’installazione stessa.
- non vengano rispettate le norme e disposizioni di legge relative agli impianti elettrici degli immobili in vigore nello Stato in cui viene eseguita l’installazione.
- non vengano rispettate le disposizioni di installazione ed uso e manutenzione riportate nel presente manuale.
- vengano utilizzati per l’installazione materiali non idonei e/o non certificati.
- vengano eseguite operazioni non corrette che riducano il grado di protezione delle apparecchiature elettriche contro i getti d’acqua o modifichino la protezione contro l’elettro-cuzione per contatti diretti ed indiretti, o altresi generino condizioni di isolamento, dispersioni di corrente e surriscal-damento anomali.
- vengano cambiati o modificati componenti o parti dell’ap-parecchio rispetto allo stato di fornitura, facendo decadere la responsabilità del Costruttore.
- l’apparecchio venga riparato da personale non autorizzato o usando parti di ricambio non originali Jacuzzi®.

7
Warnings
As soon as you receive the product, check that it is in perfect condition and if not, immediately notify the forwarding agent.
PLEASE READ THE FOLLOWING WARNINGS AND INSTRUC-TIONS WHICH FEATURE IN THIS PRESENT MANUAL FULLY BEFORE PROCEEDING WITH THE INSTALLATION PROCE-DURE.
� The chemical substances used may cause allergic or asthmatic reactions or breathing difficulties if inhaled, additionally, they may irritate eyes or cause skin irri-tations.
� Before using the chemical substances, carefully read the relative safety instructions, Always use "personal protection devices" (gloves, goggles, and breathing equipment, where required).
� Do not mix the chemical substances! Danger of toxic gases! Periodically check the chemical substance con-tainers and immediately clear up any liquid leakages.
The spa-pack booster kit must be installed within a closed environment, which must BE VENTILATED, and which is not accessible to persons not in possession of keys or utensils; it must be protected from water and weather conditions. NOTE: As many operations necessitate access to the spa-pack, it is recommended that it is easy and convenient to access.
Refuse from the measurement appliance must never be gathered in pressurised pipes.
Containers, possible residues of chemical substances as well as the finished reactant must be disposed of in accordance with current applicable legislation. Also contact local au-thorities regarding the disposal of chemically treated water.
� Before proceeding with installation and the various connection operations, ensure that the various parts are not powered.
� Children must be supervised to make sure they do not play with the equipment.
� In the instance where the display is broken and is in contact with liquids, switch off the appliance and wash the parts affected with plenty of water.
Should you experience discomfort, immediately con-tact a doctor.
� When carrying out manual chlorination of the spa (first start-up, periodic “shock” treatment) it is advisable that you switch off the appliance and wait until the chlorine concentration drops to normal levels before re-using automatic chlorination (see also “Trouble-shooting - chloro error”).
On a daily basis (even dependent on spa frequency of use), check that the device is working correctly and check that there are no alarm warnings. Periodically carry out sensor reference calibration.This equipment must not be used by individuals (including children) with limited physical, sensorial and/or cognitive abilities, or individuals who do not have the knowledge nec-essary for its use.It is completely forbidden to use the appliance in ways that differ from those expressly detailed.Jacuzzi will not assume responsibility for any damage caused by improper use.
In the instance of maintenance and/or repair operations, which involve the replacement of components, Jacuzzi® original spare parts must be used, otherwise the warranty shall no longer be valid and the Manufacturer will not be re-sponsible for any damage resulting from the operation car-ried out.
If other persons, in addition to the Purchaser, use the ap-pliance, it is the Purchaser's responsibility to instruct users on the correct use of the appliance in addition to providing safety warnings.
Jacuzzi Europe S.p.A. denies all responsibility:
- if installation is carried out by unqualified personnel and/or personnel unauthorised to carry out the installation itself.
- if compliance is not ensured with current norms and legal provisions regarding the electric systems of buildings in the country in which installation is carried out.
- if the instructions for installation and maintenance con-tained in this manual are not followed.
- if unsuitable and/or uncertified materials are used for in-stallation.
- if incorrect operations are performed that reduce the level of protection of the electrical equipment against water jets, modify the protection against electrocution due to direct or indirect contact, or produce abnormal conditions of insula-tion, current leakage or overheating.
- if any components or parts of the appliance are altered in relation to the original state when supplied, releasing the Manufacturer from any liability.
- if the appliance is repaired by unauthorised personnel or if spare parts are used other than the original ones supplied by Jacuzzi®.
8
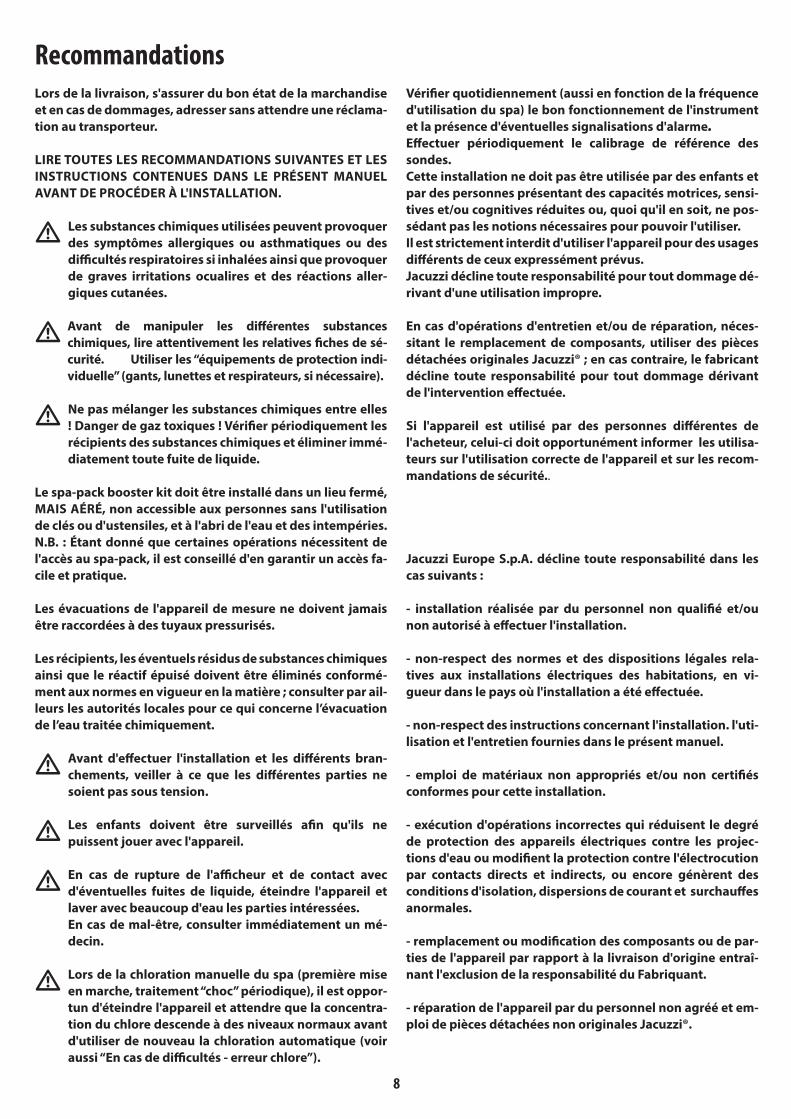
RecommandationsLors de la livraison, s'assurer du bon état de la marchandise et en cas de dommages, adresser sans attendre une réclama-tion au transporteur.
LIRE TOUTES LES RECOMMANDATIONS SUIVANTES ET LES INSTRUCTIONS CONTENUES DANS LE PRÉSENT MANUEL AVANT DE PROCÉDER À L'INSTALLATION.
� Les substances chimiques utilisées peuvent provoquer des symptômes allergiques ou asthmatiques ou des difficultés respiratoires si inhalées ainsi que provoquer de graves irritations ocualires et des réactions aller-giques cutanées.
� Avant de manipuler les différentes substances chimiques, lire attentivement les relatives fiches de sé-curité. Utiliser les “équipements de protection indi-viduelle” (gants, lunettes et respirateurs, si nécessaire).
� Ne pas mélanger les substances chimiques entre elles ! Danger de gaz toxiques ! Vérifier périodiquement les récipients des substances chimiques et éliminer immé-diatement toute fuite de liquide.
Le spa-pack booster kit doit être installé dans un lieu fermé, MAIS AÉRÉ, non accessible aux personnes sans l'utilisation de clés ou d'ustensiles, et à l'abri de l'eau et des intempéries. N.B. : Étant donné que certaines opérations nécessitent de l'accès au spa-pack, il est conseillé d'en garantir un accès fa-cile et pratique.
Les évacuations de l'appareil de mesure ne doivent jamais être raccordées à des tuyaux pressurisés.
Les récipients, les éventuels résidus de substances chimiques ainsi que le réactif épuisé doivent être éliminés conformé-ment aux normes en vigueur en la matière ; consulter par ail-leurs les autorités locales pour ce qui concerne l’évacuation de l’eau traitée chimiquement.
� Avant d'effectuer l'installation et les différents bran-chements, veiller à ce que les différentes parties ne soient pas sous tension.
� Les enfants doivent être surveillés afin qu'ils ne puissent jouer avec l'appareil.
� En cas de rupture de l'afficheur et de contact avec d'éventuelles fuites de liquide, éteindre l'appareil et laver avec beaucoup d'eau les parties intéressées.
En cas de mal-être, consulter immédiatement un mé-decin.
� Lors de la chloration manuelle du spa (première mise en marche, traitement “choc” périodique), il est oppor-tun d'éteindre l'appareil et attendre que la concentra-tion du chlore descende à des niveaux normaux avant d'utiliser de nouveau la chloration automatique (voir aussi “En cas de difficultés - erreur chlore”).
Vérifier quotidiennement (aussi en fonction de la fréquence d'utilisation du spa) le bon fonctionnement de l'instrument et la présence d'éventuelles signalisations d'alarme. Effectuer périodiquement le calibrage de référence des sondes.Cette installation ne doit pas être utilisée par des enfants et par des personnes présentant des capacités motrices, sensi-tives et/ou cognitives réduites ou, quoi qu'il en soit, ne pos-sédant pas les notions nécessaires pour pouvoir l'utiliser.Il est strictement interdit d'utiliser l'appareil pour des usages différents de ceux expressément prévus.Jacuzzi décline toute responsabilité pour tout dommage dé-rivant d'une utilisation impropre.
En cas d'opérations d'entretien et/ou de réparation, néces-sitant le remplacement de composants, utiliser des pièces détachées originales Jacuzzi® ; en cas contraire, le fabricant décline toute responsabilité pour tout dommage dérivant de l'intervention effectuée.
Si l'appareil est utilisé par des personnes différentes de l'acheteur, celui-ci doit opportunément informer les utilisa-teurs sur l'utilisation correcte de l'appareil et sur les recom-mandations de sécurité..
Jacuzzi Europe S.p.A. décline toute responsabilité dans les cas suivants :
- installation réalisée par du personnel non qualifié et/ou non autorisé à effectuer l'installation.
- non-respect des normes et des dispositions légales rela-tives aux installations électriques des habitations, en vi-gueur dans le pays où l'installation a été effectuée.
- non-respect des instructions concernant l'installation. l'uti-lisation et l'entretien fournies dans le présent manuel.
- emploi de matériaux non appropriés et/ou non certifiés conformes pour cette installation.
- exécution d'opérations incorrectes qui réduisent le degré de protection des appareils électriques contre les projec-tions d'eau ou modifient la protection contre l'électrocution par contacts directs et indirects, ou encore génèrent des conditions d'isolation, dispersions de courant et surchauffes anormales.
- remplacement ou modification des composants ou de par-ties de l'appareil par rapport à la livraison d'origine entraî-nant l'exclusion de la responsabilité du Fabriquant.
- réparation de l'appareil par du personnel non agréé et em-ploi de pièces détachées non originales Jacuzzi®.

9
Hinweise
Überprüfen Sie bei Erhalt die Unversehrtheit der Ware, um sie gegebenenfalls umgehend beim Spediteur reklamieren zu können.
LESEN SIE DIE FOLGENDEN HINWEISE UND ANWEISUNGEN DER VORLIEGENDEN ANLEITUNG DURCH, BEVOR SIE MIT DER INSTALLATION BEGINNEN.
� Die verwendeten Chemikalien können Symptome von Allergien oder Asthma hervorrufen, beim Einatmen zu Atembeschwerden führen oder schwere Augenreizun-gen und allergische Hautreaktionen hervorrufen.
� Vor dem Umgang mit den verschiedenen Chemikali-en sorgfältig die entsprechenden Sicherheitsdaten-blätter lesen. Verwenden Sie immer die entsprechende "persönliche Schutzausrüstung" (Handschuhe, Schutzbrille und bei Bedarf Atemschutz).
� Mischen Sie niemals Chemikalien zusammen! Gefahr durch giftige Gase! Überprüfen Sie regelmäßig die Behälter der Chemika-lien und beseitigen Sie sofort alle ausgetretenen Flüs-sigkeiten.
Das Spa-Pack Booster Kit muss in einem geschlossenen, ABER BELÜFTETEN Raum installiert werden, der nur mithil-fe von Schlüsseln oder Werkzeugen zugänglich und vor Was-ser und Unwetter geschützt ist.Anm.: Da bestimmte Arbeiten den Zugang zum Spa-Pack er-fordern, ist es empfehlenswert, einen einfachen und beque-men Zugang zu diesem gewährleisten.
Die Abflüsse des Messgerätes dürfen niemals an Drucklei-tungen angeschlossen werden.
Behälter, eventuelle Rückstände von Chemikalien sowie aufgebrauchtes Reagenz müssen gemäß den geltenden Be-stimmungen entsorgt werden; wenden Sie sich für die Ablei-tung von chemisch behandeltem Abwasser zudem bitte an die zuständigen lokalen Behörden.
� Stellen Sie vor der Durchführung der Installation und der verschiedenen Anschlüsse sicher, dass die ver-schiedenen Teile nicht unter Spannung stehen.
� Kinder müssen beaufsichtigt werden, damit sicherge-stellt wird, dass sie nicht mit dem Gerät spielen.
� Bei Brechen des Displays und Kontakt mit eventuell aus-getretenen Flüssigkeiten das Gerät sofort ausschalten und die betroffenen Teile mit viel Wasser abwaschen.
Wenn Sie sich unwohl fühlen, sofort ärztlichen Rat ein-holen.
� Wenn Sie die manuelle Chlorung des Whirlpools vor-nehmen (beim ersten Start oder der regelmäßigen "Schock-Aufbereitung"), sollten Sie das Gerät aus-schalten und warten, bis die Chlor-Konzentration wie-der auf ein normales Niveau abgesunken ist, bevor Sie wieder die automatische Chlorung aktivieren (siehe auch "Im Falle von Betriebsstörungen - Chlorfehler").
Prüfen Sie das Gerät täglich (auch in Abhängigkeit der Nut-zungshäufigkeit des Whirlpools) auf ordnungsgemäßes Funkti-onieren und das Vorhandensein eventueller Alarmmeldungen. Führen Sie regelmäßig die Referenzkalibrierung der Sonden durch.Dieses Gerät darf nicht von Personen (einschließlich Kin-dern) benutzt werden, deren motorische, sensorische und/oder kognitive Fähigkeiten eingeschränkt sind, oder die nicht die erforderlichen Kenntnisse zur Benutzung besitzen.Es ist streng verboten, die Anlage für andere Zwecke, als die ausdrücklich vorgesehenen zu benutzen.Jacuzzi haftet nicht für Schäden, die durch unsachgemäßen Gebrauch entstehen können.
Bei Wartungsarbeiten und/oder Reparaturen dürfen aus-schließlich Original-Ersatzteile von Jacuzzi® verwendet werden. Der Hersteller haftet nicht für Schäden, die auf die Nichtbeachtung dieser Vorschrift zurückzuführen sind.
Wenn die Anlage von Dritten benutzt wird, muss der Eigen-tümer diese Benutzer über den richtigen Gebrauch und die Sicherheitshinweise aufklären.
Jacuzzi Europe S.p.A. lehnt jede Haftung ab, falls:
- die Installation nicht durch Personal durchgeführt wird, das nicht qualifiziert und/oder nicht zur Installation befugt ist.
- die im Anwenderland des Geräts geltenden Richtlinien und Gesetzesvorschriften in Bezug auf elektrische Anlagen in Gebäuden nicht eingehalten werden.
- die in dieser Anleitung enthaltenen Installations- und War-tungsanweisungen nicht befolgt werden.
- für die Installation ungeeignete und/oder nicht beschei-nigte Materialien verwendet werden.
- die Arbeiten nicht korrekt ausgeführt werden, so dass der Schutzgrad der elektrischen Geräte gegen Spritzwasser be-einträchtigt oder der Schutz gegen elektrische Schläge bei direkter oder indirekter Berührung verändert wird, bzw. anomale Bedingungen hinsichtlich Isolierung, Fehlerstrom oder Überhitzung erzeugt werden.
- falls Bauteile oder Geräteteile ausgewechselt oder geän-dert werden, so dass sie nicht mehr dem Zustand bei der An-lieferung entsprechen.
- wenn das Gerät durch unbefugtes Personal repariert wird oder keine Originalersatzteile von Jacuzzi® verwendet werden
10
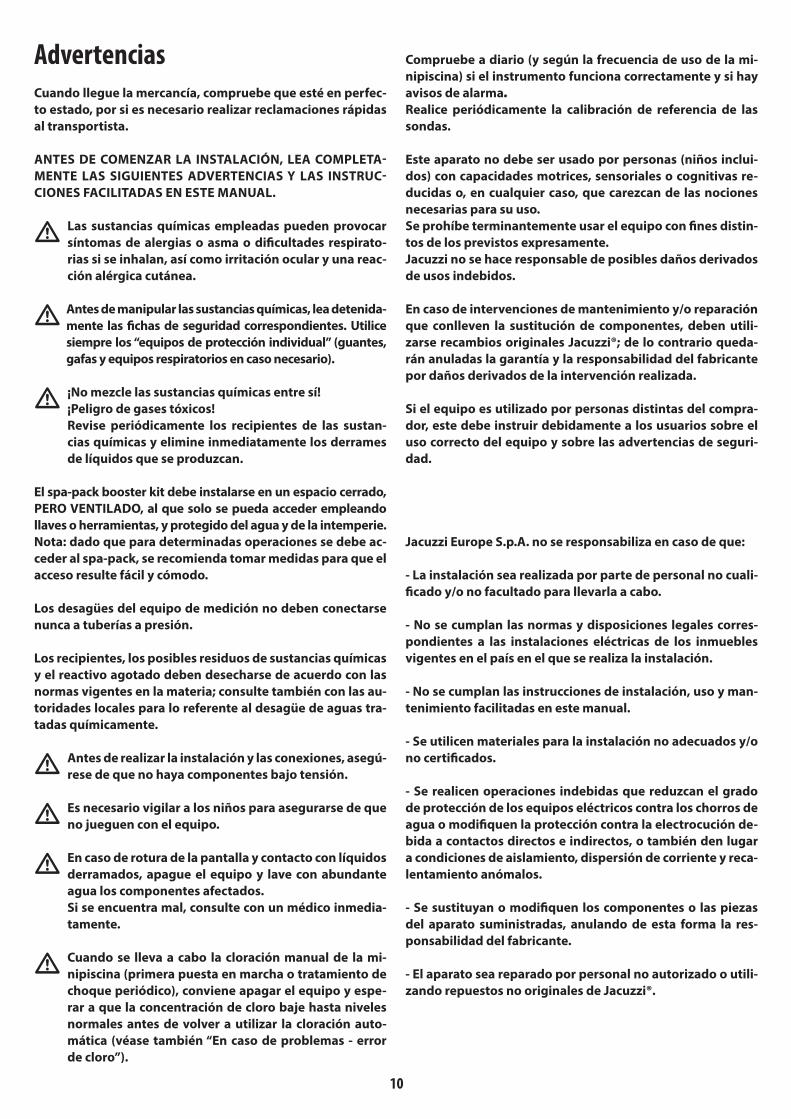
AdvertenciasCuando llegue la mercancía, compruebe que esté en perfec-to estado, por si es necesario realizar reclamaciones rápidas al transportista.
ANTES DE COMENZAR LA INSTALACIÓN, LEA COMPLETA-MENTE LAS SIGUIENTES ADVERTENCIAS Y LAS INSTRUC-CIONES FACILITADAS EN ESTE MANUAL.
� Las sustancias químicas empleadas pueden provocar síntomas de alergias o asma o dificultades respirato-rias si se inhalan, así como irritación ocular y una reac-ción alérgica cutánea.
� Antes de manipular las sustancias químicas, lea detenida-mente las fichas de seguridad correspondientes. Utilice siempre los “equipos de protección individual” (guantes, gafas y equipos respiratorios en caso necesario).
� ¡No mezcle las sustancias químicas entre sí! ¡Peligro de gases tóxicos! Revise periódicamente los recipientes de las sustan-cias químicas y elimine inmediatamente los derrames de líquidos que se produzcan.
El spa-pack booster kit debe instalarse en un espacio cerrado, PERO VENTILADO, al que solo se pueda acceder empleando llaves o herramientas, y protegido del agua y de la intemperie. Nota: dado que para determinadas operaciones se debe ac-ceder al spa-pack, se recomienda tomar medidas para que el acceso resulte fácil y cómodo.
Los desagües del equipo de medición no deben conectarse nunca a tuberías a presión.
Los recipientes, los posibles residuos de sustancias químicas y el reactivo agotado deben desecharse de acuerdo con las normas vigentes en la materia; consulte también con las au-toridades locales para lo referente al desagüe de aguas tra-tadas químicamente.
� Antes de realizar la instalación y las conexiones, asegú-rese de que no haya componentes bajo tensión.
� Es necesario vigilar a los niños para asegurarse de que no jueguen con el equipo.
� En caso de rotura de la pantalla y contacto con líquidos derramados, apague el equipo y lave con abundante agua los componentes afectados.
Si se encuentra mal, consulte con un médico inmedia-tamente.
� Cuando se lleva a cabo la cloración manual de la mi-nipiscina (primera puesta en marcha o tratamiento de choque periódico), conviene apagar el equipo y espe-rar a que la concentración de cloro baje hasta niveles normales antes de volver a utilizar la cloración auto-mática (véase también “En caso de problemas - error de cloro”).
Compruebe a diario (y según la frecuencia de uso de la mi-nipiscina) si el instrumento funciona correctamente y si hay avisos de alarma. Realice periódicamente la calibración de referencia de las sondas.
Este aparato no debe ser usado por personas (niños inclui-dos) con capacidades motrices, sensoriales o cognitivas re-ducidas o, en cualquier caso, que carezcan de las nociones necesarias para su uso.Se prohíbe terminantemente usar el equipo con fines distin-tos de los previstos expresamente.Jacuzzi no se hace responsable de posibles daños derivados de usos indebidos.
En caso de intervenciones de mantenimiento y/o reparación que conlleven la sustitución de componentes, deben utili-zarse recambios originales Jacuzzi®; de lo contrario queda-rán anuladas la garantía y la responsabilidad del fabricante por daños derivados de la intervención realizada.
Si el equipo es utilizado por personas distintas del compra-dor, este debe instruir debidamente a los usuarios sobre el uso correcto del equipo y sobre las advertencias de seguri-dad.
Jacuzzi Europe S.p.A. no se responsabiliza en caso de que:
- La instalación sea realizada por parte de personal no cuali-ficado y/o no facultado para llevarla a cabo.
- No se cumplan las normas y disposiciones legales corres-pondientes a las instalaciones eléctricas de los inmuebles vigentes en el país en el que se realiza la instalación.
- No se cumplan las instrucciones de instalación, uso y man-tenimiento facilitadas en este manual.
- Se utilicen materiales para la instalación no adecuados y/o no certificados.
- Se realicen operaciones indebidas que reduzcan el grado de protección de los equipos eléctricos contra los chorros de agua o modifiquen la protección contra la electrocución de-bida a contactos directos e indirectos, o también den lugar a condiciones de aislamiento, dispersión de corriente y reca-lentamiento anómalos.
- Se sustituyan o modifiquen los componentes o las piezas del aparato suministradas, anulando de esta forma la res-ponsabilidad del fabricante.
- El aparato sea reparado por personal no autorizado o utili-zando repuestos no originales de Jacuzzi®.

11
ПредупрежденияВ момент прибытия оборудования проверить его на предмет це-лостности в целях предъявления своевременной претензии пере-возчику, в случае необходимости.
ПОЛНОСТЬЮ ОЗНАКОМИТЬСЯ С ПРИВЕДЕННЫМИ ДАЛЕЕ ПРЕД-УПРЕЖДЕНИЯМИ И ИНСТРУКЦИЯМИ, СОДЕРЖАЩИМИСЯ В ДАН-НОМ РУКОВОДСТВЕ ПЕРЕД ВЫПОЛНЕНИЕМ МОНТАЖНЫХ РАБОТ.
� Использованные химические вещества могут вызывать ал-лергические или астматические реакции, а также трудности с дыханием, серьезные раздражения глаз и кожную аллергиче-скую реакцию.
� Перед обращением с различными химическими веществами внимательно ознакомиться с соответствующими паспортами безопасности. Всегда использовать “средства индивидуаль-ной защиты” (перчатки, очки, а также респираторы, когда это необходимо).
� Не смешивать химические вещества! Опасность токсичных газов! Периодически проверять емкости химических веществ и незамедлительно устранять утечки жидкостей.
Блок spa-pack booster должен устанавливаться в закрытом, НО ПРОВЕТРИВАЕМОМ ПОМЕЩЕНИИ, не доступном для посторон-них лиц, без использования ключей или инструментов, в защите от воды и непогоды. ПРИМЕЧАНИЕ: В связи с тем, что некоторые операции требуют до-ступа к spa-pack, рекомендуется гарантировать простой и удобный доступ.
Сливы измерительного прибора не должны подсоединяться к тру-бам под давлением.
Емкости, возможные остатки химических веществ, а также отрабо-тавший реагент подлежат утилизации в соответствии с действую-щими нормативами; кроме того, следует обращаться в местные ор-ганы относительно слива обработанной химическими средствами воды.
� Перед монтажом и выполнением различных соединений, убе-диться, что различные компоненты не находятся под напря-жением.
� За детьми необходимо присматривать и не допускать, чтобы они играли с оборудованием.
� В случае повреждения дисплея и контакта с возможными утечками жидкости, выключить устройство и промыть соот-ветствующие части большим количеством воды.
В случае плохого самочувствия, незамедлительно обратить-ся к врачу.
� Когда производится ручное хлорирование spa (первое подключение, периодическая “шоковая” обработка), целе-сообразно выключить устройство и подождать снижения концентрации хлора до нормальных параметров перед по-вторным использованием цикла автоматического хлориро-вания (также см. “В случае трудностей - ошибка хлора”).
Ежедневно проверять (также в соответствии с периодичностью ис-пользования spa) соответствующее функционирование прибора и присутствие возможных аварийных сигналов. Периодически производить контрольную калибровку датчиков.Не допускать использования данного оборудования лицами (в том числе детьми) с нарушением координации движений, ощущений и/или восприятия, либо не имеющими достаточных сведений относи-тельно эксплуатации данного оборудования.Категорически запрещается использовать устройство в целях, от-личных от предусмотренных.Jacuzzi не несет ответственность за возможный ущерб, вызванный несоответствующим использованием.
В случае проведения работ по обслуживанию и/или ремонту, кото-рые обуславливают замену компонентов, должны всегда использо-ваться оригинальные запасные части Jacuzzi®, в противном случае, гарантия утрачивается, и Изготовитель не несет ответственность за ущерб, обусловленный произведенным вмешательством.
Если устройство используется лицами, отличными от Покупателя, он должен предварительно подготовить пользователей относи-тельно правильного использования оборудования и правил техни-ки безопасности.
Jacuzzi Europe S.p.A. не несет ответственность в следующих случаях:
- установка осуществляется неквалифицированным и/или не име-ющим разрешение на проведение монтажных работ персоналом.
- не соблюдаются нормы и положения закона, соответствующие электрооборудованию помещений, действующие в стране монта-жа оборудования.
- не соблюдаются правила установки, эксплуатации и техобслужи-вания, приведённые в данном руководстве.
- для установки используются непригодные и/или несертифициро-ванные материалы.
- выполняются неправильные операции, снижающие класс защиты электрооборудования от струй воды, или изменяющие защиту от поражения электрическим током при прямых и непрямых контак-тах, или приводящие к аномальным условиям изоляции, утечкам тока или перегреву.
- изменяются компоненты или части оборудования по отношению к их состоянию при поставке, что приводит к снятию ответственно-сти с Изготовителя.
- ремонт оборудования осуществляется неавторизованным пер-соналом, или при использовании нефирменных запасных частей Jacuzzi®.

12
c2
c2
c
c
b c c2
110-240 V50/60 Hz
110-240 V50/60 Hz
3A MAX
6080
93
97
MAX 6 m
MAX
3 m
b
spa-pack principale main spa-pack
spa-pack principal Primäres Spa-Pack spa-pack principal
главный блок spa-pack
spa-pack booster kit spa-pack booster kit spa-pack booster kit Spa-Pack Booster Kit spa-pack booster kit блок spa-pack booster

13
Info Lo spa-pack booster kit è composto dal gruppo filtrante (pompa + filtro a sabbia) e dall’analizzatore fotometrico Jacuzzi®. L’analizzatore fotometrico Jacuzzi® consente di misurare i valori di Cloro (libero), pH e temperatura, nonché di dosare i prodotti chi-mici necessari al trattamento dell’acqua della spa. Il principio di funzionamento è semplice: una certa quantità d’ac-qua viene immessa in un’apposita cella di misura; il cloro contenuto, a contatto con uno speciale reagente, fa si che l’acqua assuma una colorazione rosa, la cui intensità consente di stabilire la concentra-zione del disinfettante ed eventualmente di correggerne il valore. Lo strumento svolge il suo compito durante i cicli di filtrazione, che vanno sempre programmati tenendo conto della frequenza di utilizzo della spa (vedere la documentazione relativa). Il campo d’impiego dello strumento va da 0 a 50 °C, con un’umi-dità relativa (non condensante) da 10 a 95 % RH.
� I valori memorizzati in fabbrica sono conformi alla nor-ma UNI 10637. Nei Paesi in cui questa direttiva non è recepita o è integrata da disposizioni locali, fare riferi-mento alle rispettive normative.
Predisposizioni
� Fare riferimento anche alla documentazione della spa per la predisposizione degli impianti idraulico ed elet-trico.
� ATTENZIONE: Prima di predisporre il sistema di scarico consultare le autorità locali per le norme che regolano lo scarico di acqua trattata chimicamente.
Il sistema di tubazioni per il collegamento dello spa-pack deve esse-re realizzato a cura dell’installatore.
- A cura del Cliente deve essere predisposto un sistema di scarico di adeguate dimensioni ed ispezionabile per l’eventuale pulizia, al quale collegare lo scarico proveniente dal filtro e quello prove-niente dall’analizzatore fotometrico.
- È necessario predisporre una linea di alimentazione elettrica indipendente (non derivata dallo spa-pack principale) mediante un cavo con caratteristiche non inferiori al tipo H 05 VV-F 3x1,5 mm2.
Caratteristiche elettricheVolt Hertz Ampere kW
220-240 ~ 50/60 3,5 (a) ~ 0,7 (b)
(a): a 230 V - (b): potenza assorbita
- È possibile collegare l’apparecchiatura ad un circuito d’allarme; a tal fine, predisporre nella zona indicata dal simbolo “campa-nello”, un cavo con caratteristiche noni nferiori al tipo H 05 VV-F 2x0,75 mm2.
Pesipeso max.
a pieno caricoarea d’appoggio
a pavimentocarico
a pavimento
kg m2 kg/ m2
~ 140 ~ 0,5 ~ 280
- Eventuali pannelli o parti strutturali, se di materiale conduttivo, devono garantire il collegamento al circuito di protezione (terra) e al collegamento equipotenziale.
- Quando si usano materiali plastici, legno, ecc., accertarsi che siano omologati per l’uso in installazioni elettriche, anche per quanto concerne le caratteristiche di autoestinguenza.
- Lo spa-pack booster kit deve essere installato secondo le quote indicate. Si consiglia l’uso di tubazioni flessibili in PVC.
Sicurezza elettrica
� È responsabilità dell’installatore la scelta dei materia-li in relazione all’uso, l’esecuzione corretta dei lavo-ri, la verifica dello stato dell’impianto a cui si allaccia l’apparecchio e l’idoneità dello stesso a garantire la sicurezza d’uso, relativa agli interventi di manuten-zione ed ispezionabilità dell’impianto.
- Lo spa-pack booster kit è un’apparecchiatura di classe “1” e per-tanto deve essere collegata in modo permanente, senza giun-zioni intermedie, alla rete elettrica ed all’impianto di protezione (impianto di terra).
� L’impianto elettrico e quello di terra dell’immobile devono essere efficienti e conformi alle disposizioni di legge ed alle specifiche norme nazionali.
� Ove previsto, devono essere presenti opportuni di-spositivi, facenti parte dell’impianto fisso ed installa-ti secondo le normative in vigore, che disconnettano l’apparecchiatura dalla rete.
- Per l’allacciamento alla rete, si impone l’installazione di un in-terruttore di sezionamento omnipolare, che assicuri la completa disconnessione nelle condizioni della categoria di sovratensione III, da collocare in una zona che rispetti le prescrizioni di sicurez-za e comunque non raggiungibile dagli utenti che stanno usan-do la minipiscina.
� L’apparecchiatura deve essere alimentata attraverso un interruttore differenziale la cui corrente d’inter-vento non superi i 30mA.
- Ai fini del collegamento equipotenziale (norma EN 60335.2.60) l’installatore dovrà usare il morsetto predisposto sullo spa-pack e contraddistinto dal simbolo . In particolare, dovrà essere realiz-zata l’equipotenzialità di tutte le masse metalliche circostanti, ad esempio tubazioni idriche, del gas, eventuali pedane metalliche perimetrali, ecc.
� ATTENZIONE! Scollegare l’apparecchiatura dalla linea di alimentazione elettrica prima di effettuare qualsia-si intervento di manutenzione.

14
Info The spa-pack booster kit includes the filter system (pump + sand filter) and the Jacuzzi® photometric analyser. The Jacuzzi® photometric analyser enables the measurement of Chlorine (free), pH and temperature values in addition to measuring out the chemical products required to treat the spa water. The operating principle is simple: a specific quantity of water is placed in a suitable measurement unit; the chlorine inside, upon contact with a special reactant, turns the water colour, red, the brightness of which enables the stabilization of the disinfectant concentration and subsequently, corrects the value. The device completes its task during the filtering cycles, which must always be scheduled in consideration of the frequency of use of the spa (refer to the relative documentation). The range of use of the device falls within 0 to 50 °C, with relative humidity (non-condensed) in the range of 10 to 95 % RH.
� The factory stored values comply with the standard UNI 10637. For countries in which this directive has not been acknowledged or integrated in the local regula-tions, refer to the respective legislation.
Set-up
� Please refer to the spa documentation for the set-up of the hydraulic and electrical systems.
� ATTENTION! Before preparing the drain system, con-sult the local authorities about the regulations for the discharging of chemically-treated water.
The installer must oversee the piping system enabling connection of the spa-pack.
- The Client is responsible for providing a drain system of ade-quate size which can be accessed for cleaning, to which the drain from the filter and the drain from the photometric analyser, are connected.
- It is necessary to provide an independent power supply line (not originating from the main spa-pack) using a cable with char-acteristics not inferior to H 05 VV-F 3x1.5 mm2.
Electrical featuresVolt Hertz Ampere (k) kW
220-240 ~ 50/60 3.5 (a) ~ 0.7 (b)
(a): a 230 V - (b): power absorption
- It is possible to connect the appliance to an alarm circuit; there must be, within the area marked with the bell symbol, a cable with characteristics not inferior to type H 05 VV-F 2x0.75 mm2.
Weightsmax. weight at full load
ground resting surface ground load
kg m2 kg/m2
~ 140 ~ 0.5 ~ 280
- Any panels, or structural parts, where made from conductive materials, must be connected to the protection circuit (ground system) and to the equipotential connection.
- Where plastic, wood, etc. materials are used, ensure that they are certified to be used with electrical installations, even in terms of flame retardant properties.- The spa-pack booster kit must be installed according to the in-structions provided. It is recommended that PVC pipes are used.
Electrical safety
� It is the installer’s responsibility to select the materi-als, considering the way they will be used; to carry out the installation correctly; and to verify the condition of the network to which the system will be connect-ed and its capability to ensure safety in maintenance and inspection operations.
- The spa-pack booster kit is a class “1” apparatus, so it must be connected permanently, without intermediate junctions, to the electrical network and protection circuit (ground system).
� The building's electrical system and ground system must be efficient and must conform to legal regula-tions and specific national standards.
� Where required, appropriate devices must be provid-ed, which form part of the fixed system, and installed in compliance with current legislation in force, with the purpose of disconnecting the appliance from the mains.
- For connection to the electric mains, you will need to install an isolating multi-pole switch, which will ensure complete discon-nection in the instance of a category III over voltage; this device must be connected to an area that complies with the safety reg-ulations governing bathroom safety and in any case out of the reach of the people using the spa.
� The appliance must be powered by means of a differ-ential switch with operating current which does not exceed 30 mA.
- For the equipotential connection (Standard EN 60335.2.60) the installer must use the terminal provided on the spa-pack and identified by the symbol . In particular, it is necessary to ensure that all the surrounding metal masses are equipotential, such as water pipes, gas pipes, perimetric metal boards, etc.
� ATTENTION! Before carrying out any maintenance operation, disconnect the appliance from the power supply line.

15
Info Le spa-pack booster kit est composé du groupe filtrant (pompe + filtre à sable) et de l'analyseur photométrique Jacuzzi®. L’analyseur photométrique Jacuzzi® permet de mesurer les va-leurs de Chlore (libre), pH et température et de doser les produits chimiques nécessaires au traitement de l'eau du spa. Le principe de fonctionnement est simple : une certaine quantité d'eau est introduite dans une cellule de mesure prévue à cet effet ; le chlore contenu, en contact avec un réactif spécial, donne à l'eau un coloris rose, dont l'intensité permet d'établir la concentration du désinfectant et si nécessaire, d'en corriger la valeur. L'instrument effectue sa tache pendant les cycles de filtration, qui doivent toujours être programmés en tenant compte de la fréquence d'utilisation du spa (voir la documentation correspondante). Le champ d'utilisation de l'instrument va de 0 à 50 °C, avec une humidité relative (non condensante) de 10 à 95 % RH.
� Les valeurs mémorisées en usine sont conformes à la norme UNI 10637. Dans les pays où cette directive n’est pas transposée ou est intégrée par des dispositions lo-cales, se référer aux respectives normes.
Opérations préalables
� Se référer aussi à la documentation du spa pour la pré-installation des installations hydraulique et élec-trique.
� ATTENTION : Avant d'installer le système d'évacua-tion, consulter les autorités locales pour connaître les normes qui régissent l'évacuation de l'eau traitée chimiquement.
Le système de tuyaux pour le raccordement du spa-pack doit être réalisé par l'installateur.
- Le client doit prévoir un système d'évacuation de dimensions adéquates et disposant d'un regard permettant de procéder le cas échéant à son nettoyage, auquel raccorder l'évacuation pro-venant du filtre et celui provenant de l'analyseur photométrique.
- Il est nécessaire de prévoir une ligne d'alimentation électrique indépendante (ne dérivant pas du spa-pack principal) moyen-nant un câble ayant des caractéristiques non inférieures au type H 05 VV-F 3x1,5 mm2.
Caractéristiques électriquesVolt Hertz Ampère (k) kW
220-240 ~ 50/60 3,5 (a) ~ 0,7 (b)
(a) : a 230 V - (b) : puissance absorbée
- Il est possible de raccorder l'appareil à un circuit d'alarme : pour cela, prévoir, dans la zone indiquée par le symbole de la cloche, un câble ayant des caractéristiques non inférieures au type H 05 VV-F 2x0,75 mm2.
Poidspoids max. à pleine
charge zone d'appui au sol charge au sol
kg m2 kg/ m2
~ 140 ~ 0,5 ~ 280
- Les panneaux ou parties structurelles, si dans un matériau conducteur, doivent garantir le raccordement au circuit de pro-tection (terre) et au raccordement équipotentiel.- Lorsque sont utilisés des matériaux plastiques, du bois, etc., s'assurer que ceux-ci soient homologués pour l'utilisation sur des installations électriques, également pour ce qui concerne les caractéristiques d'auto-extinction.
- Le spa-pack booster kit doit être installé selon les cotes indi-quées. Il est conseillé d'utiliser des tuyaux flexibles en PVC.
Sécurité électrique
� C'est l'installateur qui est responsable du choix du matériel nécessaire pour l'utilisation, l’exécution cor-recte des travaux, la vérification de l'état de l'installa-tion à laquelle est branché l'appareil et le contrôle de la sécurité durant l'utilisation, les interventions d'en-tretien et l'inspection de l'installation.
- Le spa-pack booster kit est un appareil de classe “1” et doit être raccordé de manière permanente, sans jonctions intermédiaires, à l'alimentation électrique et à l'installation de protection (mise à la terre).
� L'installation électrique et de mise à la terre de l'habi-tation doivent être en parfait état et conformes aux dispositions légales en vigueur et aux spécifiques normes nationales.
� Si prévu, doivent être présents d'opportuns dispo-sitifs, faisant partie de l'installation fixe et installés conformément aux normes en vigueur, qui décon-nectent l'appareil de l'alimentation.
- Pour le branchement à l'installation électrique, s'impose l'ins-tallation d'un interrupteur de sectionnement omnipolaire, assu-rant la complète déconnexion dans la condition de la catégorie de surtension III, à installer dans une zone conforme aux pres-criptions de sécurité, qui devra par ailleurs être inaccessible de la part des utilisateurs de la mini-piscine.
� L’appareil doit être alimenté à travers un interrupteur différentiel dont le courant d'intervention ne dépasse pas 30mA.
- Pour le branchement équipotentiel (norme EN 60335.2.60) l’installateur devra utiliser la borne prévues sur le spa-pack et marquée du symbole . Il faudra notamment réaliser l’équipo-tentialité de toutes les masses métalliques situées autour, par exemple les tuyauteries hydrauliques, du gaz, les éventuelles estrades métalliques du périmètre, etc.
� ATTENTION ! Débrancher l'appareil de la ligne d'ali-mentation électrique avant d'effectuer toute inter-vention d'entretien.

16
Info Das Spa-Pack Booster Kit besteht aus der Filtereinheit (Pumpe + Sandfilter) und dem photometrischen Analysator Jacuzzi®. Der photometrische Analysator Jacuzzi® gestattet das Messen der Werte (freies) Chlor, pH-Wert und Temperatur sowie das Dosieren der erforderlichen Chemikalien für die Wasseraufbereitung. Die Funktionsweise ist einfach: Eine bestimmte Wassermenge wird in eine spezielle Messzelle eingegeben; dort führt der Chlorgehalt bei Kon-takt mit einem speziellen Reagenz dazu, dass das Wasser eine rosa Farbe annimmt. Anhand der Intensität der Farbe kann dann die Konzentration des Desinfektionsmittels bestimmt und bei Bedarf korrigiert werden. Das Gerät führt seine Aufgabe während der Filterzyklen durch, die immer unter Berücksichtigung der Nutzungshäufigkeit des Whirlpools programmiert werden müssen (siehe dazu die entsprechenden Unterla-gen). Der Einsatzbereich des Gerätes reicht von 0 bis 50 °C, bei einer relati-ven Luftfeuchtigkeit (nicht kondensierend) von 10 bis 95 %.
� Die werkseitig abgespeicherten Werte sind mit der Norm UNI 10637 konform. In den Ländern, in denen diese Richtlinie nicht gilt oder in lokale Bestimmun-gen integriert ist, wird auf die geltenden Vorschriften in diesem Bereich verwiesen.
Vorbereitende Arbeiten
� Beachten Sie auch die Unterlagen des Whirlpools für die Realisierung der Wasser- und Stromanlagen.
� ACHTUNG: Setzen Sie sich vor der Vorbereitung des Ab-flusssystems mit den lokalen Behörden in Verbindung, die für chemisch behandeltes Abwasser zuständig sind.
Das Leitungssystem für den Anschluss des Spa-Pack geht zu Lasten des Installateurs.
- Durch den Kunden muss eine Abflussanlage von ausreichender Größe vorgesehen werden, die für Reinigungsarbeiten zugäng-lich ist und an die der Abfluss vom Filter und der des photomet-rischen Analysators angeschlossen werden müssen.
- Es muss eine Leitung für die unabhängige Stromversorgung vorbereitet werden (die nicht vom primären Spa-Pack kommt); das entsprechende Kabel muss Eigenschaften aufweisen, die mindestens denen des Typs H 05 VV-F 3x1,5 mm2 entsprechen.
Technischen EigenschaftenVolt Hertz Ampere (k) kW
220-240 ~ 50/60 3,5 (a) ~ 0,7 (b)
(a): bei 230 V - (b): Stromaufnahme
- Das Gerät kann an einen Alarmkreis angeschlossen werden. Se-hen Sie dazu im mit dem Symbol "Glocke" markierten Bereich ein Kabel vor, dessen Eigenschaften mindestens denen des Typs H H 05 VV-F 2x0,75 mm2 entsprechen.
GewichtHöchstgewicht bei
voller BeladungAuflagefläche
auf dem Boden Bodenbelastung
kg m2 kg/ m2
~ 140 ~ 0,5 ~ 280
- Eventuelle Platten oder Bauteile, die aus leitfähigem Material bestehen, müssen den Anschluss an den Schutzleiter (Erde) und den Potenzialausgleich gewährleisten.- Achten Sie bei der Verwendung von Kunststoff, Holz usw. dar-auf, dass diese für den Einsatz in elektrischen Anlagen zugelas-sen sind, auch im Hinblick auf selbstverlöschende Eigenschaften.
- Das Spa-Pack Booster Kit muss gemäß den angegebenen Ab-messungen installiert werden. Wir empfehlen die Verwendung von PVC-Schläuchen.
Elektrische Sicherheit
� Der Installateur haftet für das verwendete Installati-onsmaterial, das der Schutzart der Anlage zu entspre-chen hat, für den einwandfreien Zustand der Netzins-tallation und die Übereinstimmung der Anlage; nur dann kann einwandfreie Betriebssicherheit garan-tiert werden. Außerdem hat der Installateur die ein-schlägigen Rechtsverordnungen, technische Regeln und Richtlinien, die zur Durchführung einer Prüfung verbindlich sein könnten, zu beachten.
- Das Spa-Pack "Booster Kit" ist ein Gerät der Klasse "1" und muss als solches ortsfester und ohne Zwischenschaltungen an das Stromnetz und die Erdungsanlage angeschlossen werden.
� Die elektrische oder die Erdungsanlage müssen ein-wandfrei funktionstüchtig sein und den geltenden gesetzlichen Vorschriften und spezifischen nationa-len Normen entsprechen.
� Wo vorgesehen, müssen entsprechende Vorrichtun-gen vorbereitet werden, die Teil der ortsfesten An-lage und nach den geltenden Vorschriften installiert sind, die den Apparat vom Netz trennen.
- Für den Anschluss an das Stromversorgungsnetz muss ein all-poliger Trennschalter installiert werden, der eine vollständige Trennung unter den Bedingungen der Überspannungskatego-rie III gewährleistet. Dieser muss in einem Bereich untergebracht werden, der den Sicherheitsvorschriften genügt und nicht von den Benutzern des Whirlpools erreicht werden kann
� Das Gerät muss über einen Schutzschalter versorgt werden, dessen Auslösestrom höchstens 30 mA be-trägt.
- Für die Realisierung des Potenzialausgleichs (Norm EN 60335.2.60) muss der Installateur die vorgesehene Klemme am Spa-Pack verwenden, die mit dem Symbol markiert ist. Insbe-sondere sind alle metallischen Massen in der Nähe des Whirlpools, wie zum Beispiel Wasserrohre, Gasrohre, eventuelle um den Whirl-pool angebrachte metallische Trittbretter usw., zu erden.
� ACHTUNG! Das Gerät vor jedem Wartungseingriff von der Netzversorgung trennen.

17
Información El spa-pack booster kit está formado por el grupo filtrante (bom-ba + filtro de arena) y el analizador fotométrico Jacuzzi®. El analizador fotométrico Jacuzzi® permite medir los valores de cloro (libre), pH y temperatura, así como dosificar los productos quí-micos necesarios para tratar el agua de la minipiscina. El principio de funcionamiento es sencillo: se inyecta una cierta cantidad de agua en una celda de medición; el cloro contenido en ella, al entrar en contacto con un reactivo especial, hace que el agua adquiera un tono rosado, cuya intensidad permite determinar la con-centración del desinfectante y corregir su valor en caso necesario. El instrumento desempeña su función durante los ciclos de filtra-ción, que se deben programar siempre teniendo en cuenta la fre-cuencia de uso de la minipiscina (véase la documentación corres-pondiente). El campo de uso del instrumento va de 0 a 50 °C, con una hume-dad relativa (no condensante) de 10 a 95 % RH.
� Los valores memorizados de serie son conformes a la norma UNI 10637. En los países que no hayan incorpo-rado esta directiva o que la complementen con disposi-ciones locales, consulte las normas correspondientes.
Preinstalación
� Consulte también la documentación de la minipiscina para lo referente a la preparación de las instalaciones hidráulica y eléctrica.
� ATENCIÓN: antes de preparar el sistema de desagüe, consulte con las autoridades locales para conocer las normas que reglamentan el desagüe de aguas trata-das químicamente.
El sistema de tuberías para la conexión del spa-pack deberá ser rea-lizado por el instalador.
- El cliente deberá preparar por su cuenta un sistema de desagüe de dimensiones adecuadas, registrable para su limpieza en caso necesario, al que se conectará el desagüe procedente del filtro y el procedente del analizador fotométrico.
- Deberá prepararse una línea de alimentación eléctrica indepen-diente (no derivada del spa-pack principal) mediante un cable de características no inferiores a las del tipo H 05 VV-F 3x1,5 mm2.
Características eléctricasVoltios Hertzios Amperios (k) kW
220-240 ~ 50/60 3,5 (a) ~ 0,7 (b)
(a): a 230 V - (b): potencia absorbida
- Se puede conectar el equipo a un circuito de alarma. Para ello, tienda en la zona indicada por el símbolo “campanilla” un cable de características no inferiores a las del tipo H 05 VV-F 2x0,75 mm2.
Pesospeso máx. a plena
cargaárea de apoyo
en el suelo carga sobre el suelo
kg m2 kg/ m2
~ 140 ~ 0,5 ~ 280
- Los paneles o componentes estructurales que haya, si están fa-bricados en material conductor, deberán estar conectados al cir-cuito de protección (tierra) y al sistema de conexión equipotencial.
- Cuando se utilicen materiales plásticos, madera, etc., asegúrese de que estén homologados para el uso en instalaciones eléctri-cas, también en lo que se refiere a las características de autoex-tinción de fuego.
- El spa-pack booster kit debe instalarse según las medidas indi-cadas. Se recomienda utilizar tuberías flexibles de PVC.
Seguridad eléctrica
� Son tarea del instalador la elección de los materiales en función del uso, la ejecución correcta de las obras, la verificación del estado de la instalación a la que se conecta el equipo y la idoneidad de esta para garanti-zar su uso seguro, en relación con las operaciones de mantenimiento y registro de la instalación.
- El spa-pack booster kit es un equipo de clase “1”, y por lo tanto debe conectarse de modo permanente, sin empalmes interme-dios, a la red eléctrica y a la instalación de protección (instalación de tierra).
� La instalación eléctrica y la de tierra del inmueble deben ser eficientes y conformes a las disposiciones legales y a las normas nacionales específicas.
� Cuando así esté previsto, es necesario montar dispo-sitivos oportunos que formen parte de la instalación fija, instalados según las normas en vigor, que desco-necten el equipo de la red.
- Para la conexión a la red, se debe instalar un interruptor om-nipolar de corte, que asegure la desconexión completa en las condiciones de la categoría III de sobretensión, colocado en una zona que cumpla las disposiciones de seguridad y en cualquier caso fuera del alcance de las personas que estén usando la mi-nipiscina.
� El equipo debe alimentarse por medio de un inte-rruptor diferencial cuya corriente de disparo no su-pere los 30mA.
- Para la conexión equipotencial (norma EN 60335.2.60), el ins-talador deberá utilizar el borne preparado en el spa-pack, mar-cado con el símbolo . En especial se debe realizar la equipo-tencialidad de todas las masas metálicas circundantes, como por ejemplo tuberías del agua, del gas, tarimas metálicas perimetra-les, si las hay, etc.
� ATENCIÓN: Antes de realizar cualquier operación de mantenimiento, desconecte el equipo de la línea de alimentación eléctrica.

18
Информация Блок spa-pack booster состоит из фильтрующего узла (насос + пе-сочный фильтр) и фотометрического анализатора Jacuzzi®. Фотометрический анализатор Jacuzzi® позволяет замерять па-раметры хлора (свободный), pH и температуры, а также произво-дить дозировку химических средств, необходимых для обработки воды spa. Принцип функционирования простой: определенное количество воды заливается в специальную измерительную ячейку; содержа-щийся хлор, в контакте со специальным реагентом, обеспечивает приобретение водой розового цвета, интенсивность которого по-зволяет устанавливать концентрацию дезинфицирующего сред-ства и при необходимости осуществлять корректировку значения. Данная функция выполняется прибором в ходе выполнения циклов фильтрации, которые всегда программируются с учетом периодич-ности использования spa (см.соответствующую документацию). Диапазон применения прибора составляет от 0 до 50 °C, с относи-тельной влажностью (не конденсатной) от 10 до 95 % RH.
� Сохраненные на заводе параметры соответствуют нормативу UNI 10637. В странах, где данная директива не используется или дополняется местными предписаниями, следует обращаться к соответствующим нормам.
Подготовка
� Также смотрите документацию на spa в отношении подго-товки гидравлической и электрической системы.
� ВНИМАНИЕ: Перед подготовкой системы слива обратиться за информацией в местные органы в отношении правил, регулирующих слив обработанной химическими средства-ми воды.
Система монтажа труб для подключения spa-pack должна осущест-вляться монтажником.
- Заказчиком должна быть подготовлена система слива соответству-ющих размеров с возможностью контроля и очистки, к которой не-обходимо подсоединить слив, выходящий из фильтра, а также из фо-тометрического анализатора.
- Необходимо предусмотреть независимую линию электропитания (не выходящую от главного spa-pack) посредством кабеля с характе-ристиками не ниже H 05 VV-F 3x1,5 мм2.
Электрические характеристикиВольт Герц Ампер кВт
220-240 ~ 50/60 3,5 (a) ~ 0,7 (b)
(a): при 230 В - (b): потребленная мощность
- Можно подсоединить устройство к аварийному контуру; в этих це-лях подготовить в зоне, обозначенной символом “звонка”, кабель с характеристиками не менее типа H 05 VV-F 2x0,75 мм2.
Весмакс.вес при пол-
ной нагрузкеплощадь опо-
ры на пол нагрузка на пол
кг м2 кг/ м2
~ 140 ~ 0,5 ~ 280
- Возможные панели или структурные части, если они реализованы из проводящего материала, должны гарантировать подсоединение к защитному контуру (заземление) и к эквипотенциальному соедине-нию.
- При использовании пластиковых материалов, дерева и т.д., убедить-ся, что они сертифицированы для использования в электрических установках, в том числе в отношении характеристик самогашения.
- Блок spa-pack booster должен устанавливаться в соответствии с ука-занными размерами. Рекомендуется использование шлангов из ПВХ.
Электрическая безопасность
� Монтажник несет ответственность за выбор материалов в соответствии с использованием, надлежащее выпол-нение работ, проверку состояния системы, к которой подсоединяется оборудование, и ее пригодность в целях гарантии безопасности использования при проведении работ техобслуживания и возможности осмотра систе-мы.
- Блок spa-pack booster представляет собой оборудование класса “1” и поэтому должен быть подсоединен на постоянной основе, без про-межуточных соединений, к электрической сети и защитной системе (заземление).
� Электрическая и заземляющая система помещения должны быть эффективными и соответствовать дей-ствующим положениям закона, а также специфическим национальным нормативам.
� Где это предусмотрено, должны быть монтированы специальные устройства, являющиеся составной частью фиксированной системы, устанавливаемые в соответ-ствии с действующими нормативами, отсоединяющие оборудование от сети.
- Для подсоединения к электрической сети предусматривается уста-новка всеполюсного выключателя-разъединителя, который обеспе-чивает полное разъединение при условиях категории избыточного напряжения III; он должен позиционироваться в зоне, соответству-ющей правилам техники безопасности, в любом случае, вне доступа для пользователей, пользующихся минибассейном.
� Питание устройства должно осуществляться посред-ством дифференциального выключателя, ток срабаты-вания которого не превышает 30мA.
- В целях эквипотенциального соединения (стандарт EN 60335.2.60) монтажник должен использовать специальную клемму на spa-pack,о-бозначенную символом . В частности, должна обеспечиваться эк-випотенциальность всех окружающих металлических масс, напри-мер, гидравлических труб, возможных металлических периметровых площадок и т.д.
� ВНИМАНИЕ! Отсоединять оборудование от линии элек-тропитания перед проведением каких-либо работ техоб-служивания.

19
1
3
2
4
Da fare prima dell’installazione dello spa-pack- Scollegare i tubi e togliere la valvola; - Coprire l’apertura del tubo per mezzo della flangia e versare
all’interno del contenitore la sabbia quarzifera; versare la sab-bia lentamente, distribuendola bene intorno al tubo, facendo attenzione che questo non si sposti dalla sua sede.
- Terminata l’operazione, togliere la flangia e conservarla per quando si renderà necessaria la sostituzione della sabbia; pu-lire il bordo del contenitore da eventuali residui.
- Rimontare quindi la valvola selettrice, ricollegando i tubi prece-dentemente rimossi.
Complete before installation of the spa-pack- Disconnect the pipes and remove the valve; - Cover the pipe opening using the flange and pour the quartz-
iferous sand inside the container; pour the sand slowly, spread-ing it well inside the pipe, taking care that the aforementioned does not come out of its place.
- Upon completion of the operation, remove the flange and keep it until it is required to replace the sand; clean any residue from the container edge.
- Reassemble the selector valve, re-connecting the previously removed pipes.
À effectuer avant l’installation du spa-pack- Détacher les tuyaux et retirer la vanne ; - Couvrir l’ouverture moyennant la bride et verser à l’intérieur du
récipient le sable quartzifère ; verser le sable lentement, en le distribuant bien autour du tuyau, en veillant à ce qu’il ne se dé-place pas de son siège.
- Une fois l’opération terminée, retirer la bride et la conserver pour le remplacement du sable ; nettoyer le bord du récipient de tout résidu.
- Remonter la vanne de sélection, en raccordant les tuyaux pré-cédemment retirés.
Vor der Installation des Spa-Packdurchzuführende Arbeiten- Die Schläuche trennen und das Ventil entfernen; - Die Öffnung des Rohrs mit dem Flansch abdecken und den
Quarzsand in den Behältern schütten; den Quarzsand langsam einfüllen und dabei gut im Rohr verteilen; dabei achtgeben, das das Rohr nicht aus seinem Sitz rutscht.
- Anschließend den Flansch entfernen und für den nächsten Sandwechsel aufbewahren; den Rand des Behälters von even-tuellen Rückständen befreien.
- Dann das Umschaltventil wieder anbringen und die zuvor ent-fernten Schläuche wieder anschließen.
Operaciones previas a la instalacióndel spa-pack- Desconecte los tubos y quite la válvula. - Cubra la abertura del tubo mediante la brida y vierta en el reci-
piente la arena de cuarzo; vierta la arena lentamente, distribu-yéndola bien alrededor del tubo y asegurándose de que este no se mueva de su alojamiento.
- Una vez concluida la operación, quite la brida y guárdela para cuando se deba cambiar la arena; elimine los restos que se ha-yan acumulado en el borde del recipiente.
- A continuación vuelva a montar la válvula selectora, conectan-do de nuevo los tubos retirados previamente.
Перед монтажом spa-pack- Отсоединить трубы и снять клапан; - Закрыть отверстие трубы при помощи фланца и засыпать
вовнутрь емкости кварцевый песок; засыпать песок мед-ленно, тщательно распределить его вокруг трубы, соблю-дая осторожность, чтобы она не смещалась.
- После завершения операции снять фланец и сохранить его для последующей операции по замене песка; произвести очистку края емкости от возможных остатков.
- Вновь монтировать селективный клапан, подсоединяя ра-нее снятые трубы.
Installazione - Installation - Installation - Installation - Instalación - Установка

20
a1a
1 2
aa1
- tubo rigido- stiff pipe- tuyau rigide- Rohr- tubo rígido- жесткая труба
- riscaldatore o scambiatore- heater or exchanger- réchauffeur ou échangeur- Heizgerät oder Wärmetauscher- calentador o intercambiador- нагреватель или обменник
1
2

21
a1
a
a1a
1
2
b1b
b1b
bb1 aa11
2- tubo flessibile- hose- tuyau flexible- Schlauch- tubo flexible- шланг
3
4

22
b1b
1
23
4
5
= pH+/-b
= Clb1
H2O
� Inserire le taniche in un contenitore a tenuta stagna ed aggiungervi dell’acqua, in modo da diluire eventuali fuo-riuscite di liquido. Verificare periodicamente il buono sta-to del contenitore e delle taniche.
� Place the tanks in a watertight container and add water to dilute any liquid discharge. Periodically check that the container and tanks are in good condition.
� Insérer les bidons dans un récipient étanche et y ajouter de l’eau, de manière à diluer toute fuite de liquide. Vérif-ier périodiquement le bon état du récipient et des bidons.
� Legen Sie die Kanister in einen dichten Behälter und ge-ben Sie Wasser hinzu, damit eventuell austretende Flüss-igkeiten verdünnt werden. Regelmäßig den Zustand der Behälter und der Kanister überprüfen.
� Introduzca los bidones en un recipiente estanco y añada agua para diluir los posibles derrames de líquido. Com-pruebe periódicamente que el recipiente y los bidones estén en buen estado.
� Установить канистры в герметичную емкость и добавить воду, таким образом, чтобы разбавить возможные утечки жидкости. Периодически проверять соответствующее состояние емкости и канистр.
5
6

23
3
2
A
4A
A
~ 8 mm
1
2 31
54
86
9
R2A
7
R2B
7
8
� Assicurarsi di inserire il magnete all’interno della cella di misura! Ensure that you place the magnet inside the measurement unit! Veiller à insérer l’aimant à l’intérieur de la cellule de mesure ! Achten Sie darauf, den Magneten ins Innere der Messzelle einzusetzen! ¡Asegúrese de colocar el imán dentro de la celda de medición! Проверить установку магнита вовнутрь измерительной ячейки!

24
L N A1 A2 Lpf Lpf
220-240 V - 1~50/60 Hz
LN
2x1 mm2
2x1 mm2
ALARMFREE
13
12
A1/A2
Lpf/Lpf
220-240 V 50/60 Hz1~3A MAX
9
interruttore pompa di filtrazionefilter pump switchinterrupteur de la pompe de filtrationSchalter der Filterpumpeinterruptor bomba de filtraciónвыключатель фильтрующего насоса
solo per spa-pack trifaseonly for three-phase spa-pack
uniquement pour Spa-Pack triphasénur für Spa-Pack dreiphasigsólo para spa-pack trifásico
только для трехфазной spa-pack
per spa-pack trifase e monofasefor three-phase and mono-phase spa-pack
pour Spa-Pack triphasé et monophaséfür Spa-Pack dreiphasig und einphasig
para spa-pack trifásico y monofásicoдля трехфазной и однофазнoй spa-pack

25
1
2
3
4
A1/A2
Lpf/Lpf
A1/A2
Lpf/Lpf
A1
Lpf Lpf
A2
KT3
1
2
3
HEATER
J18
L/HIPUM
P1
1
J17
1
J23
1
J24
1
LN
1
LN
1
LN
1
LN
1
LN
1
J2
L1L2
INPU
TVO
LTAG
EL3
N1
+-
acac
W1
111
1
1
1
1 1
1 2 3 4
ON
1
11 1
F5 5AT F7 6.3ATF3 6.3AT
OZON
E
CIRC
.PU
MPBL
OWER
COMP
.TA
NKAU
X
FLU
XA
UX
KEY
BTE
MP.
PROB
E
SD
INT
ER
FA
CE
ISP
FL
AS
HP
RO
G
MA
INK
EYB
TSC
9K
EYB
LIG
HT
CLOCK MODULE
LEVE
LSEN
SE
VAR
PUM
P
STO
RE
TUB
LEVE
L
I2C
BU
S
OZO
NE
12V
AC
OZO
NE
OZO
NE
12V12V
AACC
UART
VAR BLW
TM1
C53
JS9 J19
J8
M1
1
M1
0
J10
JS6
J9
PF1F1 2AT
K3
J12
1
M1
M5
K10
K4
K11
PF5 PF3 PF7M9 M8
1
1
1
J13
J20
LN
CIRC
.PU
MPJ20J14
J21
J22
K12
J4
K7
M7
M6
JS1
JS2
CO
NFI
GK
EY
J6
J7
TP5TP4
J1
1
J5
J4J3 JS5
TP6
TP8 TP7
TP3
JS7 JS10
JS8
1
R71
R72
R73
R74JS
4
J6
230 VAC
PF2F2 2AT
F8 250mATV3
R87
R86 R84
R85
JS3
TP1
TP2
P1
K2 K1
J16 J15
N L
K9
K8
K5
K6
F4 20AT
F6 20AT
NL/LO
NPU
MP1
L/HIN
PUM
P2PU
MP2
L/LON
R91R90R89R88
R94R118R119R120
+
12 VAC
M1
3
M1
2
C71
M4
1
1
J1
R70
R69
A1/A2
A1/A2
A2
A1
10b
10a
versione trifasetriphase versionversion triphaséedreiphasigen Versionversión trifásicaтрёхфазной версии
versione monofasesingle-phase versionversion monophaséeeinphasig Versionversión monofásicaоднофазная версии

26
outclear
outclear
outwaste
outwaste
ENTER
Cal
ESC
Mode
PUMPWAIT...
Ver x.xCL2 ppm
LAVAGGIO 1
O51 O51O52
19s
pH7.40-.--
21.7°C
SETUP
- per aspirare il reagente, tenere premuto il tasto fino a che i tubi si sono riempiti di liquido.- to suck the reactant, keep the key pressed down until the pipes are filled with liquid.- pour aspirer le réactif, maintenir enfoncée la touche jusqu’à ce que les tuyaux soient remplis de liquide.- Halten Sie zum Ansaugen des Reagenzes die Taste gedrückt, bis die Schläuche mit Flüssigkeit gefüllt sind.- para aspirar el reactivo, mantenga pulsada la tecla hasta que los tubos se llenen de líquido.- для всасывания реагента удерживать клавишу до заполнения труб жидкостью.
13
11 12

27
ENTER
Cal
ESC
Mode
PUMP
ENTER
Cal
ESC
Mode
PUMP
SETUP SISTEMADATA/ORA SISTEMA
PASSWORDDISPLAYIMPOSTAZIONI RELE’
LINGUA
SETUP SYSTEM DATE/HOUR SYSTEM
PASSWORDDISPLAYSETUP RELAY SETUP RELAY
LANGUAGE
SETUP SISTEMALingua
Italiano
EnglishFrançaisEspañolDeutsch
ENTER
Cal
ESC
Mode
PUMPEXIT?
SAVE?
ENTER
Cal
ESC
Mode
PUMP
ENTER
Cal
ESC
Mode
PUMP
ENTER
Cal
ESC
Mode
PUMP
ENTER
Cal
ESC
Mode
PUMP
ENTER
Cal
ESC
Mode
PUMP
SETUP SYSTEMDATE/HOUR SYSTEM
PASSWORDDISPLAY
LANGUAGE
SETUP RELAY
SETUP SYSTEMDATE/HOUR SYSTEM
PASSWORDDISPLAY
LANGUAGE
ENTER
Cal
ESC
Mode
PUMP
DATE/HOURDAY
YEARHOURMINUTE
MONTH 09
20111711
03
DATE/HOURDAY
YEARHOURMINUTE
MONTH11
20111711
03
DATE/HOURDAY
YEARHOURMINUTE
MONTH09
20111711
03
ENTER
Cal
ESC
Mode
PUMP
ENTER
Cal
ESC
Mode
PUMP2
11
ENTER
Cal
ESC
Mode
PUMP
ENTER
Cal
ESC
Mode
PUMP
1
22
1
CL2 ppm
WASHING 1...
OS1 OS1OS2
19s
pH
21.7°C
ENTER
Cal
ESC
Mode
PUMP
CL2 ppm
OS1 OS1OS2
19s
pH
21.7°C2
1 2
ENTER
Cal
ESC
Mode
PUMP
CL2 ppm
OS1 OS1OS2
19s
pH
21.7°C
CL2 ppm
WASHING 1...
OS1 OS1OS2
19s
pH
21.7°C
A
C
D
E
B
IMPOSTAZIONI SISTEMA
1
SETUP
1
Impostazione della lingua e dell’ora - Language and time settings - Configuration de la langue et de l’heureEinstellung von Sprache und Uhrzeit - Selección del idioma y puesta en hora - Настройка языка и времени
- premere enter per memorizzare- press enter to save- appuyer sur enter pour mémoriser- Um abzuspeichern, drücken Sie Enter- pulse enter para memorizar- нажать enter для сохранения параметров в памяти
- premere esc per non memorizzare- press esc to exit- appuyer sur esc pour ne pas mémoriser- Um nicht abzuspeichern, drücken Sie Esc- pulse esc para no memorizar- нажать esc для того, чтобы не сохранять параметры в памяти
14
“funzionamento normale” (il display visualizza i valori di cloro libero e di pH) - “normal operation” (the display presents the chlorine free and pH values) - “fonctionnement normal” (l’afficheur visualise les valeurs de chlore libre et de pH) - Normalbetrieb“ (auf dem Display werden die Werte freies Chlor und pH angezeigt) - “funcionamiento normal” (la pantalla muestra los valores de cloro libre y de pH) - “нормальным функционированием” (на дисплее отображаются параметры свободного хлора и pH)
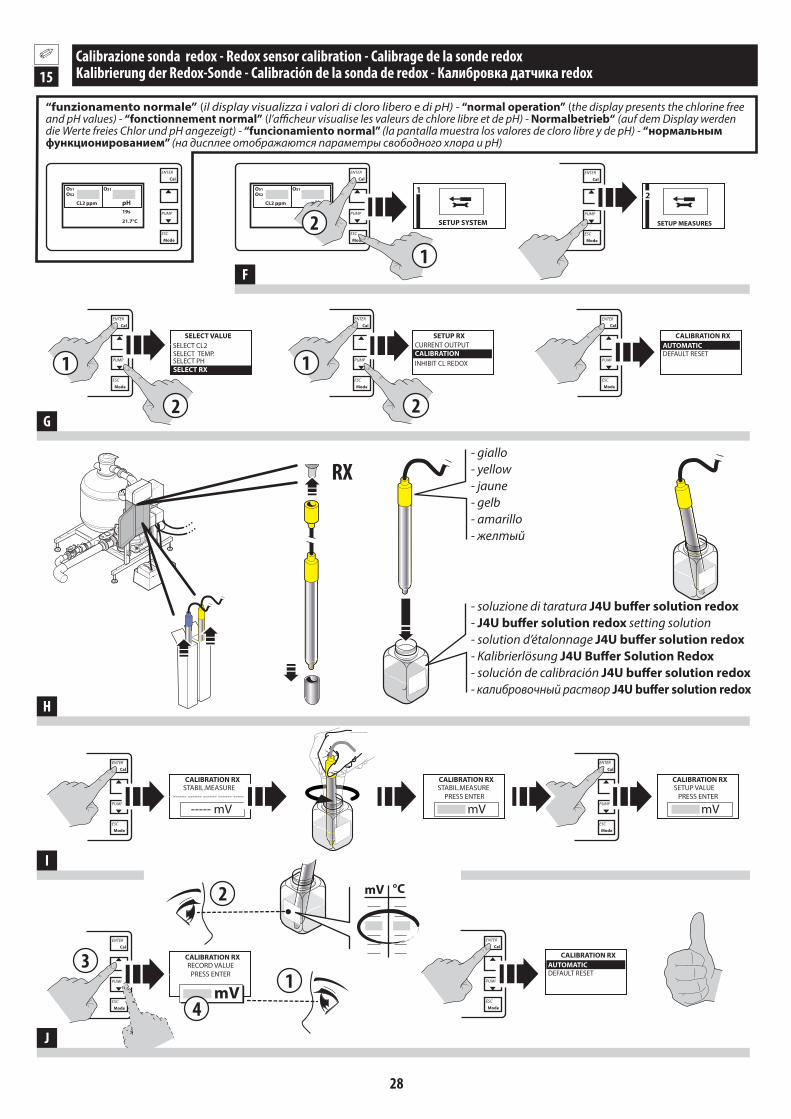
28
ENTER
Cal
ESC
Mode
PUMP
CL2 ppm
OS1 OS1OS2
19s
pH
21.7°C
ENTER
Cal
ESC
Mode
PUMP
CL2 ppm
OS1 OS1OS2
19s
pH
21.7°C 2
1
STABIL.MEASURE ------ ------ ------ ------ ------
----- mV
ENTER
Cal
ESC
Mode
PUMP
SETUP MEASURES
2
ENTER
Cal
ESC
Mode
PUMP
SELECT VALUE
SELECT TEMP. SELECT PH SELECT RX
SELECT CL2
ENTER
Cal
ESC
Mode
PUMP
ENTER
Cal
ESC
Mode
PUMP
CALIBRATION RXSTABIL.MEASURE
PRESS ENTER
657 mV
CALIBRATION RXSETUP VALUE
PRESS ENTER
655 mV
CALIBRATION RX
RECORD VALUEPRESS ENTER
CALIBRATION RX
ENTER
Cal
ESC
Mode
PUMP
SETUP RX CURRENT OUTPUT
INHIBIT CL REDOX CALIBRATION
CALIBRATION RX
DEFAULT RESET AUTOMATIC
CALIBRATION RX
DEFAULT RESET AUTOMATIC
ENTER
Cal
ESC
Mode
PUMP
RX
2 2
1
3
1
ENTER
Cal
ESC
Mode
PUMP
ENTER
Cal
ESC
Mode
PUMP
625 mV
G
H
I
J
1
2 mV °C
4
F
SETUP SYSTEM
1
- soluzione di taratura J4U buffer solution redox- J4U buffer solution redox setting solution- solution d’étalonnage J4U buffer solution redox- Kalibrierlösung J4U Buffer Solution Redox- solución de calibración J4U buffer solution redox- калибровочный раствор J4U buffer solution redox
Calibrazione sonda redox - Redox sensor calibration - Calibrage de la sonde redox Kalibrierung der Redox-Sonde - Calibración de la sonda de redox - Калибровка датчика redox
- giallo - yellow - jaune - gelb - amarillo - желтый
15
“funzionamento normale” (il display visualizza i valori di cloro libero e di pH) - “normal operation” (the display presents the chlorine free and pH values) - “fonctionnement normal” (l’afficheur visualise les valeurs de chlore libre et de pH) - Normalbetrieb“ (auf dem Display werden die Werte freies Chlor und pH angezeigt) - “funcionamiento normal” (la pantalla muestra los valores de cloro libre y de pH) - “нормальным функционированием” (на дисплее отображаются параметры свободного хлора и pH)

29
ENTER
Cal
ESC
Mode
PUMP
CL2 ppm
OS1 OS1OS2
19s
pH
21.7°C
ENTER
Cal
ESC
Mode
PUMP
CL2 ppm
OS1 OS1OS2
19s
pH
21.7°C 2
1
ENTER
Cal
ESC
Mode
PUMP
SELECT VALUE
SELECT TEMP. SELECT PH SELECT RX
SELECT CL2
ENTER
Cal
ESC
Mode
PUMP
°C
ENTER
Cal
ESC
Mode
PUMP
SETUP PH
CURRENT OUTPUT CALIBRATION
RELAY OUTPUTS CALIBRATION pH
PROBE EFFECTIVENESS
MANUAL
DEFAULT RESET
AUTOMATIC
CALIBRATION pH
TEMPERATUREFIRST CALIBRATION
CALIBRATION pH
INSERT PROBEPRESS ENTER
FIRST CALIBRATION
pH
2 2
1 1
ENTER
Cal
ESC
Mode
PUMP
ENTER
Cal
ESC
Mode
PUMP
----- pH
CALIBRATION pH
WAIT STABILIZATIONFIRST CALIBRATION
WAIT STABILIZATION
PRESS ENTER
FIRST CALIBRATION
ENTER
Cal
ESC
Mode
PUMP
6.69 pH
CALIBRATION pH
VALUE -------: FIRST CALIBRATION
ENTER
Cal
ESC
Mode
PUMP
CALIBRATION pH
7.00 pH
L
M
ENTER
Cal
ESC
Mode
PUMP
SETUP MEASURES
2
K
SETUP SYSTEM
1
- soluzione di taratura J4U buffer solution pH 7- J4U buffer solution pH 7 setting solution- solution d’étalonnage J4U buffer solution pH 7- Kalibrierlösung J4U Buffer Solution pH 7- solución de calibración J4U buffer solution pH 7- калибровочный раствор J4U buffer solution pH 7
Calibrazione sonda pH (1/2) - pH sensor calibration (1/2) - Calibrage de la sonde pH (1/2)Kalibrierung der pH-Sonde (1/2) - Calibración de la sonda de pH (1/2) - Калибровка датчика pH (1/2)
blubluebleublauazulсиний
16A
“funzionamento normale” (il display visualizza i valori di cloro libero e di pH) - “normal operation” (the display presents the chlorine free and pH values) - “fonctionnement normal” (l’afficheur visualise les valeurs de chlore libre et de pH) - Normalbetrieb“ (auf dem Display werden die Werte freies Chlor und pH angezeigt) - “funcionamiento normal” (la pantalla muestra los valores de cloro libre y de pH) - “нормальным функционированием” (на дисплее отображаются параметры свободного хлора и pH)

30
Calibrazione sonda pH (2/2) - pH sensor calibration (2/2) - Calibrage de la sonde pH (2/2) Kalibrierung der pH-Sonde (2/2) - Calibración de la sonda de pH (2/2) - Калибровка датчика pH (2/2) 16B
ENTER
Cal
ESC
Mode
PUMP
CALIBRATION pH
PROBE EFFECTIVENESS AUTOMATIC
DEFAULT RESET
MANUAL
CALIBRATION pHPROBE EFFECTIVENESS OFFSET: +006 mVGAIN: 000 %
ENTER
Cal
ESC
Mode
PUMP
ENTER
Cal
ESC
Mode
PUMP
CALIBRATION pH
PRESS ENTER
SECOND CALIBRATION
+ 026 °C
CALIBRATION pH
TemperaturaSeconda calibrazione
second calibration
Calibrazione OK
N
P
O
°C
CALIBRATION pH
TEMPERATURESECOND CALIBRATION
CALIBRATION pH
INSERT PROBEPRESS ENTER
SECOND CALIBRATION
ENTER
Cal
ESC
Mode
PUMP
ENTER
Cal
ESC
Mode
PUMP
----- pH
CALIBRATION pH
WAIT STABILIZATIONSECOND CALIBRATION WAIT STABILIZATION
PRESS ENTER
SECOND CALIBRATION
ENTER
Cal
ESC
Mode
PUMP 6.69 pH
CALIBRATION pH
VALUE -------: SECOND CALIBRATION
ENTER
Cal
ESC
Mode
PUMP
CALIBRATION pH
4.00 pH
17
- soluzione di taratura J4U buffer solution pH 4- J4U buffer solution pH 4 setting solution- solution d’étalonnage J4U buffer solution pH 4- Kalibrierlösung J4U Buffer Solution pH 4- solución de calibración J4U buffer solution pH 4- калибровочный раствор J4U buffer solution pH 4

31
Importante
� Per quanto riguarda le modalità di funzionamento del fil-tro a sabbia e della pompa di filtrazione, fare riferimento alla documentazione dello spa-pack principale.
� Si raccomanda di verificare quotidianamente (e comun-que in relazione alla frequenza d’uso della spa) il buon funzionamento dello strumento e la presenza di even-tuali segnalazioni d’allarme. Effettuare periodicamente la calibrazione di riferimento delle sonde.
Note sull’utilizzo dello strumento
� Ad ogni accensione (compreso il primo avviamento) lo strumento esegue una verifica di funzionamento, della durata di circa 10 minuti, dopo di che viene effettuata la prima misurazione e vengono dosati gli elementi chi-mici. Al momento dell’accensione, quindi, eventuali valori visualizzati sul display non vanno presi in considera-zione.
- Viene definito “funzionamento normale” lo svolgimento delle attività di controllo/dosaggio (il display visualizza i valori di cloro -libero- e di pH). � Quando si accede ai menu di regolazione, le attività di
controllo/dosaggio vengono sospese; quindi, termina-te le regolazioni, accertarsi di riportare lo strumento allo stato di “funzionamento normale”. In caso contra-rio, non verrebbe effettuata alcuna operazione di con-trollo/dosaggio e quindi non sarebbe assicurato il cor-retto trattamento dell’acqua.
Note sulla calibrazione delle sonde - Fare attenzione che le estremità delle sonde non siano a contat-to con il fondo del contenitore ( 17).
- Per la calibrazione della sonda pH, utilizzare per prima la solu-zione pH 7.
- Una volta inserita la sonda nella soluzione di taratura, agitarla per qualche secondo ed attendere che il valore sul display si sta-bilizzi (il valore visualizzato non deve variare).
- Se il valore sul display non corrisponde al valore “di riferimen-to” (riportato sul contenitore della soluzione di taratura e riferito ai diversi valori di temperatura) agire sui tasti / per impostare tale valore.
- Per annullare eventuali valori errati, selezionare “reset default” e premere “enter”.
Impostazione del valore di redoxIl redox, misurato in mV (millivolt), è legato alla concentrazione di cloro presente in acqua: se questa supera un certo valore, viene dato un segnale di allarme. Occorre notare però che il redox dipende dal tipo di acqua impiegato (contenuto di sali minerali, ecc.) ed è quindi necessario determinarne il valore caso per caso.
- Dopo aver installato lo spa-pack e calibrato le sonde, avviare l’impianto e lasciarlo in funzione per circa 24 ore, in modo da rag-giungere i valori corretti relativi al trattamento dell’acqua.
- Premere il tasto “enter” in modo da visualizzare, in basso a de-stra, il valore di redox (espresso in mV); aggiungere “50” al valore visualizzato ed annotarlo.
- Premere “esc” : il display dovrebbe visualizzare “impostazioni sistema”; se ciò non accadesse, premere successivamente il ta-sto “enter”.
- Con il tasto selezionare il menu “impostazioni misure” e premere “enter”.
- Selezionare quindi “selezione rx” e premere “enter”.
- Verificare che “abilita inibit” sia “on” (in caso contrario, sele-zionare questa voce, premere “enter” e con i tasti / impostare “on”).
- Selezionare “inibit cl redox” e premere “enter”.
- Selezionare “set point” e premere “enter”. Inserire quindi il valore annotato precedentemente (agire sui tasti / , selezionare il valore che s’intende assegnare al para-metro e premere “enter”).
- Per uscire dai menu e tornare al funzionamento normale, pre-mere “esc” fino a che il display visualizza “exit” e quindi premere “enter”. A questo punto il display visualizza “save?”: » premere nuovamente “enter” per memorizzare le variazioni
effettuate; » premere invece “esc” per uscire dai menu senza memorizza-
re le variazioni effettuate.
Impostazione dello strumento nel caso di acqua con pH acido Nella maggior parte dei casi, l’acqua di una spa è caratterizzata da un valore di pH alcalino (ovvero, superiore a 7). Lo strumento viene perciò configurato in fabbrica in modo da funzionare correttamen-te con l’acqua caratterizzata da questi valori: utilizzando il prodotto specifico Jacuzzi ® pH- in abbinata con lo strumento, quest’ultimo provvederà a mantenere il pH entro valori idonei.
Uso & manutenzione

32
Al contrario, se l’acqua della spa è caratterizzata da bassi valori di pH (inferiori a 7) si dovrà utilizzare il prodotto Jacuzzi® ph+ va-riando però alcuni parametri operativi dello strumento: - Premere “esc” : il display dovrebbe visualizzare “impostazioni sistema”; se ciò non accadesse, premere successivamente il ta-sto “enter”.
- Con il tasto selezionare il menu “impostazioni misure” e premere “enter”.
- Con il tasto selezionare “selezione pH” e premere “enter”.
- Verificare che sia selezionato “uscite relè” e premere “enter”: il display visualizza “set point1”; premere nuovamente “enter”.
- Accertarsi che sia selezionato “on” e premere “enter”. Con i tasti / , impostare il valore 7.00 pH.
- Premere “enter” e selezionare quindi il parametro “off”; preme-re nuovamente “enter”.
- Con i tasti / , impostare il valore 7.40 pH e premere “enter” per confermare il valore scelto.
- Per uscire dai menu e tornare al funzionamento normale, pre-mere “esc” fino a che il display visualizza “exit” e quindi premere “enter”. A questo punto il display visualizza “save?”: » premere nuovamente “enter” per memorizzare le variazioni
effettuate; » premere invece “esc” per uscire dai menu senza memorizza-
re le variazioni effettuate.
Altre operazioni da tastiera
Attivazione / cambio della password
ATTENZIONE: una volta impostata la password, questa verrà richiesta ogni volta che si accede a determinate fasi di pro-grammazione.
- Premere “esc” : il display dovrebbe visualizzare “impostazioni sistema”; se ciò non accadesse, premere successivamente il ta-sto “enter”.
- Premere “enter” per accedere al menu “setup sistema”; con il tasto selezionare quindi “password” .
- Premere ancora “enter”: il display visualizza “password: 0”. Agi-re ancora sul tasto “enter” fino a che il display visualizza le due opzioni disponibili: “stato password” e “nuova password”.
- Per attivare/disattivare la password, accertarsi che sia selezio-nato “stato password”, premere “enter” e, con i tasti / , se-lezionare rispettivamente “on” o “off”(quando la password è attiva, sul display compare il simbolo ).
- Per cambiare la password, selezionare “nuova password” e premere “enter”: con i tasti / , selezionare il valore che s’in-
tende assegnare alla prima cifra e premere nuovamente “enter”. Agire allo stesso modo per le cifre restanti.
- Premendo un’ultima volta il tasto “enter”, il display visualizza “nuova password”: a questo punto, la password è impostata.
- Per uscire dai menu e tornare al funzionamento normale, pre-mere “esc” fino a che il display visualizza “exit” e quindi premere “enter”. A questo punto il display visualizza “save?”: » premere nuovamente “enter” per memorizzare le variazioni
effettuate; » premere invece “esc” per uscire dai menu senza memorizza-
re le variazioni effettuate.
Regolazione del livello d’illuminazione del display - Premere “esc” : il display dovrebbe visualizzare “impostazioni sistema”; se ciò non accadesse, premere successivamente il ta-sto “enter”.
- Premere “enter” per accedere al menu “setup sistema”; con il tasto selezionare quindi “display” .
- Premere ancora “enter”: il display visualizza le due opzioni di-sponibili: “contrasto” e “retroilluminazione”.
- Per regolare il livello di visualizzazione, accertarsi che sia sele-zionato “contrasto”; premere quindi “enter” e, con i tasti / , selezionare il valore desiderato. Premere nuovamente “enter”.
- Per regolare il tempo durante il quale il display rimane illumina-to selezionare invece “retroilluminazione”. » Impostando “si”, il display resta sempre illuminato. » Impostando “no” il display si spegne automaticamente un mi-
nuto dopo la pressione di un tasto.
- Per uscire dai menu e tornare al funzionamento normale, pre-mere “esc” fino a che il display visualizza “exit” e quindi premere “enter”. A questo punto il display visualizza “save?”: » premere nuovamente “enter” per memorizzare le variazioni
effettuate; » premere invece “esc” per uscire dai menu senza memorizza-
re le variazioni effettuate.
Visualizzazione della temperatura e del potenziale redox (rdx) - Per visualizzare, alternativamente, il valore della temperatura e del potenziale redox (rdx) premere ripetutamente “enter”; i valori verranno visualizzati in basso a destra.
Visualizzazione, impostazione e back-up delle misure - Premere “esc” : il display dovrebbe visualizzare “impostazioni sistema”; se ciò non accadesse, premere successivamente il ta-sto “enter”.
- Accedere ai menu “archivio” e/o “grafici misure” per visualiz-zare la cronologia ed i diagrammi relativi alle misure effettuate.

33
- In particolare, selezionando “primo dato”, la visualizzazione ini-zia dal primo dato e prosegue con i successivi. Selezionando invece “ultimo dato”, la visualizzazione inizia dall’ultimo dato e prosegue a ritroso. Infine, il parametro “data/ora” permette d’impostare la visua-lizzazione scegliendo un determinato giorno ed una determina-ta ora.
- Il menu “grafici misure” è anche dotato del parametro “base tempi”: questo permette di visualizzare la variazione della gran-dezza in esame su un intervallo di 1, 6 o 24 ore. Una volta visualizzato il grafico, premendo il tasto “enter” ap-pare una tabella sulla quale sono indicati i valori massimo, mini-mo e medio relativi alla grandezza in esame. Premendo nuovamente il tasto “enter” viene visualizzato in dettaglio l’andamento della misura, mente premendolo una se-conda volta il display riprende la visualizzazione iniziale. - Per scorrere i dati in elenco, agire sui tasti / . - Per variare le impostazioni della registrazione delle misure, ac-cedere al menu “archivio” - sottomenu “setup” ed agire sui se-guenti parametri:
Step: definisce l’intervallo di registrazione (da 0 a 99 minuti); se uguale a 0 non viene registrato alcun dato.
Tipo Archivio: se si seleziona il simbolo “anello”, una volta ri-
empito l’archivio, i dati successivi vengono scritti sopra i primi. Se si seleziona il simbolo “freccia”, una volta riempito l’archivio
non è più possibile salvare alcun dato (occorre prima svuotare la memoria).
Reset memoria: cancella i dati presenti in archivio.
La voce “occupazione” indica la percentuale di memoria oc-cupata.
- Tramite il sottomenu “pendrive back-up” è possibile fare una copia dei dati memorizzati, inserendo una chiavetta usb nell’ap-posito connettore.
- I dati possono quindi essere importati in un normale foglio di calcolo ed organizzati nel modo preferito.
Reset delle impostazioniNel caso vengano impostati valori errati per quanto riguarda la calibrazione dei parametri relativi al cloro (o si desideri reimpo-stare i parametri di fabbrica), è necessario:
- Accedere alla sezione “3 - impostazione misure”.
- Accedere quindi a “selezione cl2”, “impostazione cl2” e “uscite relè”.
- Selezionare “calibrazione” ed infine “reset default” (vengono ripristinate le impostazioni di fabbrica, secondo le specifiche di col-laudo del singolo strumento).
- Procedere quindi all’impostazione dei nuovi valori.
Agire allo stesso modo nel caso si desideri azzerare e reimpostare i parametri relativi al pH e/o al redox (rx); in questo caso, occorre accedere, rispettivamente, a “selezione pH” e/o a “selezione rx”.
� I valori memorizzati in fabbrica sono conformi alla nor-ma UNI 10637. Nei Paesi in cui questa direttiva non è recepita o è integrata da disposizioni locali, fare riferi-mento alle rispettive normative.
Sostituzione del reagenteIl reagente dev’essere sostituito quand’è finito e/o quando la sua co-lorazione assume una tonalità scura.
- Togliere tensione all’apparecchiatura.
- Preparare la soluzione utilizzando i due componenti ( 8).
- Svitare il tappo dal contenitore del reagente esaurito ed appli-carlo a quello nuovo; sostituire quindi il contenitore esaurito con quello nuovo ed infilarvi il tubo della pompa ( 8).
NOTA: eliminare eventuali tracce di vecchio reagente e sosti-tuire il contenitore; non aggiungere il nuovo reagente a quello vecchio .
- Dare tensione e premere il tasto in modo che il reagente riempia i tubi e vengano eliminate eventuali bolle d’aria. - Spegnere e riaccendere l’apparecchiatura ed effettuare la cali-brazione delle sonde (vedere “Calibrazione di riferimento”).
� Contenitori, eventuali residui di sostanze chimiche nonché ii reagente esaurito devono essere smaltiti se-condo le normative vigenti in materia; consultare inol-tre le autorità locali circa lo scarico di acqua trattata chimicamente.
Sospensione del funzionamento per medi-lunghi periodiSe l’apparecchiatura non viene utilizzata per alcuni giorni (una set-timana circa) occorre effettuare le seguenti operazioni:
- Eliminare il reagente sostituendolo con acqua distillata o demi-neralizzata.

34
- Azionare la pompa del reagente premendo il tasto per alcuni secondi, in modo da lavare i tubi (alla fine, i tubi devono risultare puliti e riempiti di acqua).
- Lasciare l’apparecchiatura in funzione per una decina di minu-ti, in modo che venga lavata la cella di misura (fare riferimento anche al paragrafo “Pulizia della cella di misura”).Rimuovere il ma-gnete presente sul fondo ( 7), pulirlo e riporlo in luogo sicuro.
- Togliere tensione all’apparecchiatura mediante l’interruttore incorporato.
- Riporre in luogo sicuro le taniche del cloro e del correttore del pH, chiudendo le aperture presente sui tappi. Pulire inoltre il contenitore nel quale sono posizionate le ta-
niche durante il normale funzionamento.
- Rimuovere le sonde dal contenitore, scollegarle dallo strumen-to e pulirle; applicare quindi alle esetremità i rispettivi cappucci di protezione e riporle in luogo sicuro.
- Lavare i tubi che: » dalle pompe dello strumento vanno alle taniche; » dalle pompe dello strumento vanno all’impianto della spa.
Calibrazione di riferimentoA fine stagione e comunque periodicamente (secondo il tipo di uti-lizzo a cui è soggetto lo strumento) occorre verificare l’affidabilità delle sonde tramite una calibrazione “di riferimento”:
- sonda cloro: è necessario un fotometro, con il quale effettuare delle misure nello stesso istante in cui viene prelevata l’acqua dall’impianto. Effettuata la misura, la si confronta con quella dell’apparecchiatura e, se non risulta corretta, occorre procedere alla calibrazione della sonda con la soluzione di taratura. È opportuno effettuare questa calibrazione anche quando si sostituisce il reagente e/o il gruppo di misura (formato dal senso-re e dal proiettore a led, situati alla base della cella di misura).
- sonda pH: l’affidabilità della sonda pH viene stabilita con le so-luzioni di taratura (generalmente pH 7.0 e pH 4.0), come indicato durante le fasi d’installazione.
NOTA: è consigliabile sostituire le sonde ogni anno.
Manutenzione
� Prima di effettuare qualsiasi pulizia o sostituzione di componenti è tassativo togliere tensione all’apparec-chiatura.
NOTA: per quanto riguarda la manutenzione del filtro e della pompa di filtrazione, fare riferimento alla documentazione dello spa-pack principale.
VerificheVerificare periodicamente il funzionamento e lo stato di usura di:- pompe dello strumento;
- tubi di collegamento delle pompe allo strumento e/o ai conte-nitori del cloro e del correttore del pH.
- cella di misura (vedere più avanti).- sonda cloro e /o sonda pH.
Procedere eventualmente alla sostituzione dei componenti gua-sti; rivolgersi ad un Centro di Assistenza autorizzato Jacuzzi®.
Pulizia dello strumento - Utilizzare un panno inumidito, cercando di eliminare eventuali sporcizie/incrostazioni. Non utlizzare detersivi abrasivi o solventi. - Rimuovere immediatamente qualsiasi traccia di reagente.
Pulizia delle sonde - Ogni mese, si consiglia di pulire le sonde con un panno mor-bido ed inumidito con un po’ d’acqua. Per rimuovere eventuali incrostazioni, immergere le sonde in una soluzione di acqua e acido cloridrico al 10%.
- Dopo la pulizia, si consiglia di effettuare la calibrazione delle sonde (vedere cap. “Calibrazione di riferimento”).
Pulizia della cella di misura - A fine stagione, e/o secondo la frequenza d’uso a cui è soggetto lo strumento, effettuare la pulizia della cella di misura: dopo aver tolto tensione e rimosso il coperchio, togliere il magnete presen-te all’interno. Pulire quindi la cella utilizzando un panno morbido ed inumidito con un po’ d’acqua; per rimuovere eventuali incro-stazioni, utilizzare una soluzione di acqua ed acido cloridrico al 10 %.- Controllare e, se necessario, pulire anche l’elettrovalvola situata accanto alla cella di misura.
- Rimontare i componenti, ricordandosi di posizionare nuova-mente il magnete all’interno della cella di misura.
� Non pulire la cella con solventi, diluenti o sostanze abrasive. Non utilizzare attrezzi metallici.

35
Pulizia dell’elettrovalvola dello spa-pack - Periodicamente controllare e, se necessario, pulire l’elettroval-vola indicata.
Sostituzione del fusibile - Dopo aver tolto tensione e aperto il coperchio, individuare e sostituire il fusibile indicato con uno di pari valore.
� Questa operazione dev’essere effettuata da personale qualificato.
NOTA: per altri interventi di manutenzione e/o sostituzione di parti dello spa-pack rivolgersi esclusivamente a rivendi-tori e a Centri Assistenza Jacuzzi® autorizzati.
In caso di difficoltà...
NOTA: in caso di funzionamento anomalo, fare riferimento an-che a eventuali segnalazioni della cassetta elettronica delllo spa-pack principale (vedere la documentazione relativa).
Lo strumento non si accende - Verificare che lo strumento sia alimentato (interruttore acceso, im-pianto elettrico funzionante). - Verificare che il fusibile non sia bruciato (vedere “Sostituzione del fusibile”).
La pompa dello spa-pack non funziona - Verificare che l’interruttore presente nella cassetta dello spa-pack sia acceso.
- Verificare che non vi sia qualche errore di funzionamento della pompa dello spa-pack principale (fare riferimento alla documenta-zione relativa).
Intervento dell’allarme esterno (il display visualizza il sim-bolo ) ed eventuale arresto dello strumento
- Verificare che la temperatura dell’acqua non risulti eccessiva (ve-dere anche “mancanza H2O”).
- Verificare la presenza del reagente ed eventualmente sostituirlo (vedere “Sostituzione del reagente”). - Verificare che i tubi collegati alla cella di misura non siano otturati.
- Verificare che l’alimentazione dell’acqua nella cella di misura non sia interrotta. - Verificare che la cella di misura non sia sporca; procedere eventual-mente alla sua pulizia (vedere “Pulizia della cella di misura”). - Il cablaggio della cella di misura potrebbe essere daneggiato. R i -volgersi ad un Centro Assistenza Jacuzzi®. - Il proiettore potrebbe essere guasto. Rivolgersi ad un Centro Assi-stenza Jacuzzi®.
Il display visualizza il simbolo - L’archivio delle misure è pieno; occorre effettuare il back-up dei dati (vedere “Visualizzazione, impostazione e back-up delle misu-re") e/o procedere quindi alla cancellazione dei dati stessi.
Il display visualizza “std by” - Il ciclo di filtrazione è sospeso\interrotto (fare riferimento alla do-cumentazione dello spa-pack principale). - Verificare che non vi sia qualche errore di funzionamento della pompa dello spa-pack principale (fare riferimento alla documenta-zione relativa).
Il display visualizza “errore cloro” - Potrebbe essere dovuto ad una concentrazione molto bassa di clo-ro nell’acqua della spa, che lo strumento non riesce ad innalzare in un determinato tempo (se dopo alcuni tentativi lo strumento non riesce a rilevare la minima concentrazione di cloro, il funzionamen-to viene sospeso). - Verificare che soluzione di cloro presente all’interno della tanica rispettiva non abbia perso efficacia.

36
- ATTENZIONE: quando si effettua la clorazione manuale (come nel caso del trattamento “shock” o super-clorazione) la concentrazione di cloro risulta assai elevata (si raccomanda di non entrare in acqua): ciò potrebbe rendere la colorazione del reagente di misura quasi trasparente ed impedire così all’ap-parecchiatura di rilevare l’effettiva quantità di cloro presente. La conseguenza di questa anomalia è che lo strumento po-trebbe continuare ad aggiungere cloro, dando luogo così ad un sovradosaggio. Per questa ragione la clorazione manuale va effettuata a strumento spento.
Il display segnala che una sonda è guasta - Verificare che la sonda indicata sia pulita e/o che non sia dan-neggiata; verificare inoltre che sia stato rimosso il cappuccio di pro-tezione prima di essere stata inserita nell’apposito contenitore. - Verificare che la sonda sia collegata allo strumento in modo cor-retto. NOTA: se il parametro “Bontà sonda” presenta un valore di OF-FSET superiore a ± 100 mV e/o di GAIN inferiore al 50 %, occor-re sostituire la sonda. Rivolgersi ad un Centro Assistenza Jacuzzi®.
Il display visualizza “mancanza H2O” - Verificare che il circuito che immette l’acqua nella cella di misura e nel contenitore delle sonde funzioni correttamente. - Verificare che la temperatura dell’acqua non sia elevata. - Il valore del parametro “taratura sensore H2O” potrebbe essere troppo basso. Rivolgersi ad un Centro Assistenza Jacuzzi®.
Il display segnala problemi alla cella di misura - Verificare che la cella di misura sia pulita (vedere cap. “Pulizia della cella di misura”).
- Il proiettore (P) e/o il fotosensore (F) potrebbero essere danneggia-ti. Rivolgersi ad un Centro Assistenza Jacuzzi®.
F
P
L’archivio dei dati relativi alle misure è vuoto. - Verificare che il parametro “step” non sia uguale a zero (vedere an-che il paragrafo “Visualizzazione e back-up dei valori delle misure”)
Struttura dei menue relative impostazioni di fabbrica
1 - impostazioni sistema
data/ora sistema impostare giorno/mese/anno/ora/minuto
lingua italiano
password (predefinita: 00000)
display contrasto 88 retroilluminazione NO
impostazioni relè impostazioni relè allarme t.allarme cl 0000 t.allarme pH 0000 sgancio set SI
2 - impostazioni misure
selezione misura selezione cl2 impostazioni cl2 uscite relè
set point 1 on 0.80 ppm off 1.10 ppm tempo on +000 tempo off +000 modo relè modo relè pwm periodo pwm 30 sec
set point 2 on 0.80 ppm off 1.10 ppm tempo on +000 tempo off +000 modo relè modo relè pwm periodo pwm 30 sec uscita analogica range uscita 4-20 mA limite inf. 0.00 ppm limite sup. 5.00 ppm calibrazione cloro libero automatica reset default intervalli metodica intervallo analisi 10 min

37
menu service guadagno cloro 4.00 ppm allarme cella on alarme acqua on
impostazioni metodica tempi metodica durata lavaggio 35 sec analisi zero 10 sec stabil. misura 20 sec tempo agitatore 2 sec immiss. reattivo 3 sec
impostazione reagenti allarme reagenti off impostazioni relè aux1 3 min
altre impostazioni valori default num. metodiche resetta num. misure continue SI max. misure zero 10
selezione temp. impostazioni temp. uscita analogica range uscita 4-20 mA limite inf. 0.00 ppm limite sup. 5.00 ppm
calibrazione offset di temp. -04.5 °C
selezione pH impostazioni pH uscita relè
setpoint 1 on 7.40 pH off 7.00 pH tempo on 010 tempo off 050 modo relè modo relè soglia periodo pwm 10 sec
uscita analogica range uscita 4-20 mA limite inf. 0.00 ppm limite sup. 5.00 ppm
calibrazione automatica manuale reset default
selezione rx impostazioni rx uscita analogica range uscita 4-20 mA
limite inf. 700 mV limite sup. 1500 mV calibrazione auomatica reset default inibit cl redox Abilita Inibit ON Set point 750
3 - controllo manuale
ingressi ingressi digitali dig. input aux off dig. input real off
uscite uscite relè set1 cl off set2 cl off set ph off aux off alarm off
uscite analogiche uscita 1 0.00 mA uscita 2 0.00 mA uscita 3 0.00 mA uscita 4 0.00 mA calibrazione dac reset default
uscite digitali valvola off mot.agitatore off led cl2 on led allarme off peristaltica off
taratura sensore H2O controllo manuale 45.0 °C
set motore agitatore duty cycle 33% frequenza 1000 Hz
abil. input 220 V on
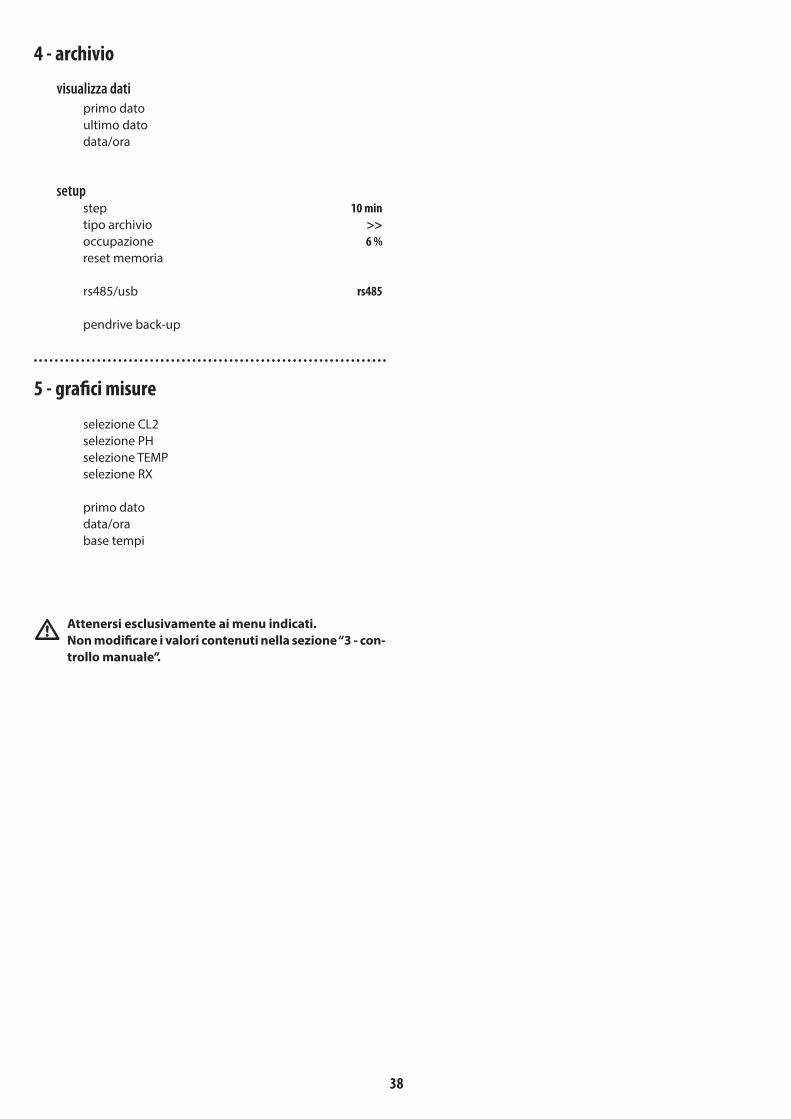
38
4 - archivio
visualizza dati primo dato ultimo dato data/ora
setup step 10 min tipo archivio >> occupazione 6 % reset memoria
rs485/usb rs485
pendrive back-up
5 - grafici misure
selezione CL2 selezione PH selezione TEMP selezione RX
primo dato data/ora base tempi
� Attenersi esclusivamente ai menu indicati. Non modificare i valori contenuti nella sezione “3 - con-trollo manuale”.

39
Important� Please refer to the main spa-pack documentation for op-
eration of the sand filter and filter pump.
� On a daily basis (even dependent on spa frequency of use) it is recommended that you check that the device is working correctly and check that there are no alarm warnings.
Periodically carry out sensor reference calibration.
Using the device
� Each time it is turned on (including the first start-up), the device carries out an operation check which lasts approximately 10 minutes, after which time, it takes the first measurement and the chemical elements are measured out.
Therefore, upon switching on, the values presented on the display, should be dismissed.
- The phrase “normal operation” refers to the implementation of checking/measuring activities (the display presents the chlorine - free- and pH values). � When a user accesses the adjustment menu, the check-
ing/measuring activities are suspended: upon comple-tion of adjustments, ensure the device returns to the “normal operation” status. In the instance where this does not appear, checking/measuring activities have not been carried out and therefore correct water treat-ment is not guaranteed.
Sensor calibration - Ensure that the sensor ends are not in contact with the bottom of the container ( 17).
- In order to calibrate the pH sensor, firstly use the pH 7 solution.
- Once the sensor has been inserted into the setting solution, mix it for a few seconds and wait until the display value stabilises (the displayed value should not vary).
- In the instance where the value on the display does not corre-spond with the “reference” value (presented on the setting solution container and with reference to the various temperature values), press keys / to set the value.
- To delete any incorrect values, select “reset default” and press “enter”.
Setting the redox valueThe redox, measured in mV (millivolt) is associated with the chlorine concentration in the water: where this exceeds a certain threshold, an alarm signal is issued. It must be noted that the redox is dependent on the type of water used (mineral salt content, etc.) and it is therefore necessary to determine the value on a case-by-case basis.
- Subsequent to installing the spa-pack and subsequent to sen-sor calibration, start up the system and leave it to function for approximately 24 hours, so that the correct water treatment val-ues are achieved.
- Press the “enter” key so that the redox value appears on the bottom right (presented in mV); add “50” to the value presented and note it down.
- Press “esc” : the display should present “impostazioni sistema” (system settings) ; where this is not the case, subsequently press the “enter” key.
- Using the key, select the “impostazioni misure” (measure-ment setting) menu and press “enter”.
- Select “selezione rx” (rx selection) and press “enter”.
- Check that “abilita inibit” (enable inibit) is “on” (if not on, select this item, press “enter” and using the keys / set to “on”).
- Select “inibit cl redox” (enable cl redox) and press “enter”.
- Select “set point” and press “enter”. Enter the value noted down previously (press the keys / , se-lect the value to be assigned to the parameter and press “enter”).
- To exit from the menu and return to normal operation, press “esc” until “exit” appears on the display and then press “enter”. At this stage, “save?": will appear on the display. » press “enter” once again to save the changes made; » press “esc” to exit the menu without saving the changes
made.
Setting the device in the case of water with acid pHIn the majority of cases, the spa water has an alkaline pH value (hence, over 7). The device is therefore configured in the factory to operate correctly using water with these values: the specific Jacuz-zi ® pH product - suited to the device, can be used to keep the pH within these suitable values. On the contrary, where the spa water demonstrates low pH val-ues (lower than 7), the Jacuzzi® ph+ product must be used, whilst modifying some device operating parameters. - Press “esc” : the display should present “impostazioni sistema”
Use and maintenance

40
(system settings); where this is not the case, subsequently press the “enter” key.- Using the key, select the “impostazioni misure” (measure-ment setting) menu and press “enter”.
- Using the key, select “selezione pH” (pH selection) and press “enter”.
- Check that “uscite relè” (relay outlet) has been selected and press "enter”: The display will present “set point1”; press “enter ”once again.
- Ensure that “on” has been selected and press “enter”. Using keys / , set the value 7.00 pH.
- Press “enter” and select the “off” parameter; press “enter” once again.
- Using keys / , set the value 7.40 pH and press “enter” to confirm the value selected.
- To exit from the menu and return to normal operation, press “esc” until “exit” appears on the display and then press “enter”. At this stage, “save?": will appear on the display. » press “enter” once again to save the changes made; » press “esc” to exit the menu without saving the changes made.
Additional keypad operations
Activating/changing the password
WARNING: once the password has been set, it will be required every time access to setting phases is needed.
- Press “esc” : the display should present “impostazioni sistema” (system settings); where this is not the case, subsequently press the “enter” key.
- Press “enter” to access the “setup sistema” (system setup) menu; using the key, select “password”.
- Press “enter” once again: the display will present “password: 0”. Press “enter” again until the display presents the two available options: “stato password” (password status) and “nuova pas-sword” (new password).
- To activate/deactivate the password, ensure that “stato pas-sword” (password status) has been selected, press “enter” and, using the keys, / , select “on” or “off” respectively (when the password is active, the symbol
appears on the display).
- To change the password, select “nuova password” (new pass-word) and press “enter”: Using keys / , select the desired val-ue to be assigned to the first figure and press “enter” once again. Repeat this same operation for the remaining figures.
- Press “enter” for the final time, the display presents “nuova pas-sword” (new password): at this stage, the password has been set.
- To exit from the menu and return to normal operation, press “esc” until “exit” appears on the display and then press “enter”. At this stage, “save?": will appear on the display. » press “enter” once again to save the changes made; » press “esc” to exit the menu without saving the changes
made.
Adjusting the display brightness level - Press “esc” : the display should present “impostazioni sistema” (system settings); where this is not the case, subsequently press the “enter” key. - Press “enter” to access the setup sistema” (system setup) menu; using the key, select “display”.
- Press “enter” once again: the display presents the two available options: “contrasto” (contrast) and “retroilluminazione” (back-lighting).
- To adjust the brightness level, ensure that “contrasto” (contrast) has been selected; press “enter” and, using keys / , select the desired value. Press “enter” once again.
- To adjust the time frame during which time the display remains lit, select “retroilluminazione” (backlighting) » By selecting “si”(yes), the display remains permanently lit. » By selecting “no” (no) the display automatically switches itself
off after a minute passes since a key was pressed.
- To exit from the menu and return to normal operation, press “esc” until “exit” appears on the display and then press “enter”. At this stage, “save?": will appear on the display. » press “enter” once again to save the changes made; » press “esc” to exit the menu without saving the changes
made.
Displaying the temperature/redox potential (rdx) - Alternatively, to view the temperature and redox potential (rdx) value, repeatedly press “enter” ; the values will be displayed on the bottom right.
Displaying, set up and back-up of the values - Press “esc” : the display should present “impostazioni sistema” (system settings); where this is not the case, subsequently press the “enter” key.
- Access the “archivio” (archive) and/or “grafici misure” (meas-urement graphics) to view the chronology and diagrams relative to the measurements made.
- In particular, by selecting “first value”, the display starts from the first value and continues with the following ones. By instead selecting “last value”, the display starts from the last value and continues in reverse. Finally, the “date/time” parameter is used to set the display, selecting a certain day and time.

41
- The “graphical measurement” menu also includes the “time base”: parameter, this is used to display the change in the values being examined over a period of 1, 6 or 24 hours. Once the graphic is displayed, pressing the “enter” key di-splays a table that indicates the maximum, minimum and avera-ge values related to the values being examined. Pressing the “enter” key again displays the details of the pro-gress of the measurement, and pressing the display a second time returns to the initial view. - Press the / keys to scroll the data in the list. - To change the measurement saving settings, access the “archi-ve” menu - “setup” submenu and set the following parameters:
Step: defines the saving interval (from 0 to 99 minutes); no value is saved if it is equal to 0. Archive type: if the “ring” symbol is selected, once the archi-ve is full the subsequent values overwrite the oldest data.If the “arrow” symbol is selected, once the archive is full it is not possible to save any more data (the memory must first be emptied).
Reset memory: deletes all the data in the archive.
The “occupation” item indicates the percentage of used memory.
- Using the “pendrive back-up” sub-menu, it is possible to make a copy of the saved data, by inserting a USB key into the relevant connector.
- The data can be imported into a normal spreadsheet and or-ganised according to preference.
Reset of the settingsIf incorrect values are set that concern the calibration of the pa-rameters related to the chlorine (or if you want to reset the fac-tory parameters), proceed as follows:
- Access section 3 - measurement setting”.
- Then access “cl2 selection ”, “cl2 setting ” and “relay outputs”.
- Select “calibration” and finally “reset default” (the factory set-tings are restored, according to the test specifications of the indivi-dual tool).
- Now set the new values..
Proceed in the same manner if you want to reset the parameters related to the pH and/or the redox (rx); in this case, access, re-spectively “pH selection” and/or “rx selection”.
� The factory stored values comply with the standard UNI 10637. For countries in which this directive has not been acknowledged or integrated in the local regula-tions, refer to the respective legislation.
Reactant replacementThe reactant must be replaced when it is finished and/or when its colour goes darker.
- Shut off the power supply to the appliance.
- Prepare the solution using the two components ( 8).
- Unscrew the finished reactant container top and place it on the new one; replace the finished container with the new one and insert the pump pipe ( 8).
NOTE: remove any traces of old reactant and replace the con-tainer; do not add the new reactant to the old container.
- Supply power and press the key so that the reactant pene-trates the pipes and any air bubbles are eliminated.
- Switch the appliance off and then on again and carry out sen-sor calibration (see “Reference calibration”).
� Containers, possible residues of chemical substances as well as the finished reactant must be disposed of in accordance with current applicable legislation. Also contact local authorities regarding the disposal of che-mically treated water.
Suspending operation for medium-long-term periodsWhere the appliance is not used for a few days (approximately one week), the following operations should be completed:
- Remove the reactant replacing it with distilled or purified water.
- Activate the reactant pump by pressing the key for a few seconds, in order to wash the pipes upon completion, the pipes should be clean and filled with water).
- Leave the appliance in operation for approximately ten min-utes so that the measurement unit is cleaned (please refer to the section “Cleaning the measurement unit”). Remove the magnet present on the bottom ( 7), clean it and store it in a safe place.- Shut off the power supply to the appliance using the built-in switch. - Place the chlorine and pH corrector tanks in a safe place, clos-ing the cover openings. Also clean the container which holds the tanks during nor-
mal operation.

42
- Remove the sensors from the container, disconnect them from the device and clean them; apply the respective protective caps to the ends and place them in a safe location.- Clean the pipes: » which go from the device pump to the tanks; » which go from the device pump to the spa system;
Reference calibrationAt the end of the season and periodically (dependent on the device type of usage), the reliability of sensors must be checked by means of "reference" calibration.
- chlorine sensor: a photometer is required to take measure-ments at the time water is taken from the system. Once the measurement has been taken, it is compared with that of the appliance, and where incorrect, sensor calibration must be im-plemented using the setting solution. It is advisable carrying out this calibration even where the reac-tant and/or measurement system is being replaced (formed of sen-sor and LED spotlight, located at the base of the measurement unit).
- pH sensor: the reliability of the pH sensor is checked using set-ting solutions (generally pH 7.0 and pH 4.0), as indicated during the installation stages.
NOTE: the sensors should be replaced every year.
Maintenance
� Before carrying out any cleaning operations or replac-ing components, it is necessary to shut off the power to the appliance.
NOTE: Please refer to the main spa-pack documentation for maintenance of the sand filter and filter pump.
Checks ChecksPeriodically check the operation and state of wear of:- the instrument pumps;- the pipes connecting the pumps to the instrument and/or the chlorine or pH corrector containers.- measurement cell (see below).- chlorine sensor and/or pH sensor.
If necessary, replace the faulty parts, contacting an authorised Jacuzzi® Service Centre.
Cleaning the device - Use a dampened cloth to remove any dirt/encrustations. Do not use abrasive detergents or solvents. - Immediately remove all reactant traces.
Cleaning the sensors - It is recommended that sensors are cleaned every month using a soft cloth dampened with a little water. To remove encrusta-tions, immerse the sensors in a solution of water and 10% hydro-chloric acid.
- Subsequent to cleaning, it is recommended that sensor calibra-tion is carried out (see section on “Reference calibration”).
Cleaning the measurement unit - At the end of the season and/or dependent on the frequen-cy of use to which the device is subjected, clean the measure-ment unit: after disconnecting the power supply and removing the cover, remove the magnet inside. Clean the unit using a soft cloth dampened with a little water; to remove any encrustations, use a solution of water and 10% hydrochloric acid.
- Check, and where necessary, clean the solenoid valve too, which is located next to the measurement unit.
- Re-assemble the components, remembering to position the magnet once again, inside the measurement unit.
� Do not use solvents, diluents or abrasive substances to clean the measurement unit. Do not use metal tools.
Cleaning the spa-pack solenoid valve
- Periodically check and, where necessary, clean the solenoid valve.

43
Replacing the fuse - Subsequent to disconnecting the power and opening the cov-er, identify and replace the fuse with an identical one.
� This operation must be carried out by qualified per-sonnel.
NOTE: for all other spa-pack maintenance and/or replace-ment of parts operations, refer exclusively to authorised Jacuzzi® retailers and Service Centres.
Troubleshooting...
NOTE: in the case of abnormal operation, also refer to the indi-cations provided by the main spa-pack electrical box (refer to the relative documentation).
The device does not switch on - Check that it is powered (switch is on, the electrical system is work-ing).
- Check that the fuse is not burnt (refer to “Replacing the fuse”).
The spa-pack pump does not work - Check that the switch in the spa-pack is on.
- Check that there are no operation errors with the main spa-pack pump (refer to the relative documentation).
Tripping of the external alarm (the display shows the sym-bol ) and stops the device if necessary
- Check that the water temperature is not too high (refer also to “in-sufficient H2O”).- Check that there is enough reactant and if necessary, replace it (re-fer to “Reactant replacement”).
- Check that the pipes connected to the measurement unit are not blocked.
- Check that the water supply to the measurement unit is not blocked. - Check that the measurement unit is not dirty; proceed with clean-ing it (refer to “Cleaning the measurement unit”). - The measurement unit cables may be damaged. Consult a Jacuz-zi® Service Centre. - The spotlight may be faulty. Contact a Jacuzzi® Service Centre.
The display shows the symbol - The measurement archive is full, back-up the data (see “Displaying, set up and back-up of the values”) and/or delete the data.
The display presents “std by” - The filtering cycle has been suspended/interrupted (refer to the main spa-pack documentation). - Check that there are no operation errors with the main spa-pack pump (refer to the relative documentation).
The display presents “errore cloro” (chloro error) - This may be owing to an extremely low chlorine concentration with-in the spa water, which the device fails to increase during a specific time frame (if after a few attempts, the device does not manage to raise the minimal chlorine concentration, operation is suspended). - Check that the chlorine solution within the respective tank is still effective. - WARNING: when carrying out manual chlorination (for ex-ample, with the "shock" treatment or super-chlorination), the chlorine concentration remains too high (it is recommend that you do not enter the water): this may turn the reactant an al-most transparent colour and stops the appliance from indicat-ing the effective chlorine quantity present. The consequence being that the device may continue to add chlorine, resulting in overdosage. For this reason, manual chlorination must be carried out when the device is off.
The display indicates that a sensor is faulty - Check that the sensor indicated is clean and/or not damaged: also check that the protective cap has been removed before being insert-ed into the relevant container. - Check that the sensor is connected to the device correctly. NOTE: where the “Bontà sonda” (Sensor reliability) parameter presents an OFFSET value over ± 100 mV and/or GAIN value under 50 %, the sensor must be replaced. Contact an authorized Jacuzzi® service centre.
The display presents “mancanza H2O” (insufficient H2O) - Check that the circuit releasing water into the measurement unit and sensor container is working correctly.

44
- Check that the water temperature is not too high. - The “taratura sensore H2O” (H2O sensor setting) value may be too low. Contact an authorized Jacuzzi® service centre.
The display indicates problems with the measurement unit - Check that the measurement unit is clean (refer to the section, “Cleaning the measurement unit”).
- The spotlight (P) and/or (F) photosensor may be damaged. Con-tact an authorized Jacuzzi® service centre.
F
P
The measurement data archive is empty. - Check that the “step” parameter is not equal to 0 (refer also to sec-tion, “Displaying and back-up of the measurement values”).
Structure of the menusand the relative factory settings
1 - SETUP SYSTEM
DATE/HOUR SYSTEM DAY/MONTH/ YEAR/ HOUR/ MINUTE
LANGUAGE ENGLISH
PASSWORD 00000
DISPLAY CONTRAST 88 BACK LIGHTEN. NO
SETUP RELAY SETUP RELAY ALARM ALARM TIME CL 0000 ALARM TIME PH 0000 DISAB.SET POINT SI
2 - SETUP MEASURES
SELECT VALUE SELECT CL2 SETUP CL2 RELAY OUTPUTS
SET POINT 1 ON 0.80 ppm OFF 1.10 ppm ON TIME +000 OFF TIME +000 MODE RELAY MODE RELAY pwm PWM PERIOD 30 sec
SET POINT 2 ON 0.80 ppm OFF 1.10 ppm ON TIME +000 OFF TIME +000 MODE RELAY MODE RELAY pwm PWM PERIOD 30 sec
CURRENT OUTPUT OUTPUT RANGE 4-20 mA LOW LIMIT 0.00 ppm HIGH LIMIT 5.00 ppm CALIBRATION CLHLORINE AUTOMATIC DEFAULT RESET ANALYSIS LAG LAG 10 min
SERVICE MENU CHLORINE GAIN 4.00 ppm CELL ALARM on WATER ALARM on
SETUP ANALYSIS TIME METHOD WASHING TIME 35 sec ZERO TIME 10 sec STABIL.MEASURE 20 sec AGITATION TIME 2 sec REAGENT TIME 3 sec
REAGENT SETUP REAG. ALARM off SETUP RELAY aux1 3 min
OTHER SETTINGS DEFAULT VALUES MEASURE COUNTER RESET COUNTER MEASURE OUT SET SI MAX.ZERO MEAS. 10
SELECT TEMP. SETUP TEMP. CURRENT OUTPUT OUTPUT RANGE 4-20 mA LOW LIMIT 0.00 ppm HIGH LIMIT 5.00 ppm

45
CALIBRATION TEMPER. OFFSET -04.5 °C
PH SELECT PH SETUP OUTPUT RELAY
SETPOINT 1 ON 7.40 pH OFF 7.00 pH ON TIME 010 OFF TIME 050 MODE RELAY MODE RELAY soglia PWM PERIOD 10 sec
ANALOG OUTPUT OUTPUT RANGE 4-20 mA LOW LIMIT 0.00 ppm HIGH LIMIT 5.00 ppm
CALIBRATION AUTOMATIC MANUAL DEFAULT RESET
SELECT RX SETUP RX CURRENT OUTPUT OUTPUT RANGE 4-20 mA LOW LIMIT 700 mV HIGH LIMIT 1500 mV CALIBRATION AUTOMATIC DEFAULT RESET
INHIBIT CL REDOX ENABLE INHIBIT ON SET POINT 750
3 - MANUAL CONTROL
INPUTS DIGITAL INPUTS DIG. INPUT AUX off DIG. INPUT REAL off
OUTPUTS OUTPUTS RELAY SET1 CL off SET2 CL off SET PH off AUX off ALARM off
ANALOG OUTPUTS OUTPUT 1 0.00 mA OUTPUT 2 0.00 mA
OUTPUT 3 0.00 mA OUTPUT 4 0.00 mA CALIBRATION DAC RESET DEFAULT
DIGITAL OUTPUTS VALVE off AGITATOR MOTOR off LED CL2 on LED ALARM off PERISTALTIC off
CALIBRAT. H2O SENSOR MANUAL CONTROL 45.0 °C
SET AGITATOR MOTOR DUTY CYCLE 33% FREQUENCY 1000 Hz
ENABL.INPUT 220V on
4 - ARCHIVE
SHOW RECORDS FIRST RECORD LAST RECORD DATE/HOUR
SETUP STEP 10 min ARCHIVE TYPE >> MEMORY FILLI. 6 % MEMORY RESET RS485/USB rs485
PENDRIVE BACK-UP
5 - GRAPHIC MEASURE
SELECT CL2 SELECT PH SELECT TEMP. SELECT RX
FIRST RECORD DATE/HOUR TIME SETTING
� Comply only with the indicated menus. Do not change the values contained in section “3 - ma-nual control”.

46
Important� Pour les modes de fonctionnement du filtre à sable et de
la pompe de filtration, se référer à la documentation du spa-pack principal.
� Il est recommandé de vérifier quotidiennement (aussi en fonction de la fréquence d'utilisation du spa) le bon fonc-tionnement de l'instrument et la présence d'éventuelles signalisations d'alarme. Effectuer périodiquement le calibrage de référence des sondes.
Remarques concernant l'utilisation de l'instru-ment
� À chaque allumage (première mise en marche com-prise), l'instrument effectue un contrôle de fonction-nement, d'une durée d'environ 10 minutes, après quoi la première mesure est effectuée et les éléments chimiques sont dosés.
Lors de l'allumage, donc, les éventuelles valeurs vi-sualisées sur l'afficheur ne doivent pas être prises en considération.
- On définit par “fonctionnement normal” le déroulement des activités de contrôle/dosage (l'afficheur visualise les valeurs de chlore -libre- et de pH). � Lorsqu'on accède aux menus de réglage, les activités
de contrôle/dosage sont interrompues ; une fois les réglages terminés, veiller par conséquent à reporter l'instrument à l'état de “fonctionnement normal”. En cas contraire, aucune opération de contrôle/dosage n'est effectuée et le correct traitement de l'eau n'est pas garanti.
Remarques concernant le calibrage des sondes - Veiller à ce que les extrémités des sondes ne soient pas en contact avec le fond du récipient ( 17).
- Pour le calibrage de la sonde pH, utiliser en premier la solution pH 7.
- Une fois la sonde insérée dans la solution d'étalonnage, l'agiter pendant quelques secondes et attendre que la valeur sur l'affi-cheur se stabilise (la valeur visualisée ne doit pas varier).
- Si la valeur sur l'afficheur ne correspond pas à la valeur “de ré-férence” (reportée sur le récipient de la solution d'étalonnage et se référant aux différentes valeurs de température), appuyer sur les touches / pour configurer cette valeur.
- Pour annuler toute valeur erronée, sélectionner “reset default” et appuyer sur “enter”.
Configuration de la valeur de redoxLe redox, mesuré en mV (millivolt), est lié à la concentration de chlore présente dans l'eau : si celle-ci dépasse une certaine valeur, un signal d'alarme est émis. Il faut toutefois considérer que le redox dépend du type d'eau utilisée (contenu de sels minéraux, etc.) et il est par conséquent nécessaire d'en déterminer la valeur cas par cas.
- Après avoir installé le spa-pack et calibré les sondes, mettre en marche l'installation et la laisser en marche pendant environ 24 heures, de manière à atteindre les valeurs correctes relatives au traitement de l'eau.
- Appuyer sur la touche “enter” de manière à visualiser, en bas à droite, la valeur de redox (exprimée en mV) ; ajouter “50” à la valeur visualisée et la noter.
- Appuyer sur “esc” : l'afficheur devrait visualiser “impostazioni sistema” (configurations du système) ; si ce n'est pas le cas, ap-puyer ensuite sur la touche “enter”.
- Avec la touche sélectionner le menu “impostazioni misure” (configurations de mesures) et appuyer sur “enter”.
- Sélectionner “selezione rx” (sélection du rx) et appuyer sur “enter”.
- Vérifier que “abilita inibit” (activation inibit) soit sur “on” (en cas contraire, sélectionner cette fonction, appuyer sur “enter” et avec les touches / configurer “on”).
- Sélectionner “inibit cl redox” et appuyer sur “enter”.
- Sélectionner “set point” et appuyer sur “enter”. Saisir la valeur notée précédemment (agir sur les touches / , sélectionner la valeur à assigner au paramètre et appuyer sur “enter”).
- Pour sortir des menus et retourner au fonctionnement normal, appuyer sur “esc” jusqu'à ce que l'afficheur visualise “exit” et ap-puyer sur “enter”. L'afficheur visualise maintenant “save?”: » appuyer de nouveau sur “enter” pour mémoriser les varia-
tions effectuées ; » appuyer par contre sur “esc” pour sortir des menus sans mé-
moriser les variations effectuées.
Configuration de l'instrument en cas d'eau avec pH acide Dans la plupart des cas, l'eau d'un spa est caractérisée par une valeur de pH alcalin (à savoir, supérieure à 7). L'instrument est par conséquent configuré en usine de manière à fonctionner correcte-ment avec l'eau caractérisée par ces valeurs : en utilisant le produit
Utilisation & entretien

47
spécifique Jacuzzi ® pH- associé à l'instrument, ce dernier pourvoira à maintenir le pH à l'intérieur de valeurs adéquates. Au contraire, si l'eau du spa est caractérisé par de basses valeurs de pH (inférieures à 7), il faudra utiliser le produit Jacuzzi® ph+ en modi-fiant toutefois certains paramètres opérationnels de l'instrument : - Appuyer sur “esc” : l'afficheur devrait visualiser “impostazioni sistema” (configurations du système) ; si ce n'est pas le cas, ap-puyer ensuite sur la touche “enter”. - Avec la touche sélectionner le menu “impostazioni misure” (configurations de mesures) et appuyer sur “enter”.
- Avec la touche sélectionner “selezione pH” (sélection pH) et appuyer sur “enter”.
- Vérifier que soit sélectionné “uscite relè” (sorties relais) et ap-puyer sur “enter” : l'afficheur visualise “set point1” (valeur de ré-glage1) ; appuyer de nouveau sur “enter”.
- Veiller à ce que soit sélectionné “on” et appuyer sur “enter”. Avec les touches / , configurer la valeur 7.00 pH.
- Appuyer sur “enter” et sélectionner le paramètre “off” ; appuyer de nouveau sur “enter”.
- Avec les touches / , configurer la valeur 7.40 pH et appuyer sur “enter” pour confirmer la valeur choisie.
- Pour sortir des menus et retourner au fonctionnement normal, appuyer sur “esc” jusqu'à ce que l'afficheur visualise “exit” et ap-puyer sur “enter”. L'afficheur visualise maintenant “save?”: » appuyer de nouveau sur “enter” pour mémoriser les varia-
tions effectuées ; » appuyer par contre sur “esc” pour sortir des menus sans mé-
moriser les variations effectuées.
Autres opérations depuis clavier
Activation / changement du mot de passe
ATTENTION : une fois le mot de passe configuré, celui-ci sera requis toutes les fois que l'on accède à des phases déterminées de programmation.
- Appuyer sur “esc” : l'afficheur devrait visualiser “impostazioni sistema” (configurations du système) ; si ce n'est pas le cas, ap-puyer ensuite sur la touche “enter”.
- Appuyer sur “enter” pour accéder au menu “setup sistema” (ré-glage du système) ; avec la touche sélectionner “password” (mot de passe) .
- Appuyer encore sur “enter” : l'afficheur visualise “password : 0” (mot de passe : 0). Appuyer encore sur la touche “enter” jusqu'à ce que l'afficheur visualise les deux options disponibles : “stato password” (état du mot de passe) et “nuova password” (nou-veau mot de passe).
- Pour activer/désactiver le mot de passe, s'assurer que soit sélec-tionné “stato password” (état du mot de passe) , appuyer sur “enter” et, avec les touches / , sélectionner respectivement “on” ou “off” (lorsque le mot de passe est actif, sur l’afficheur apparaît le symbole ).
- Pour changer le mot de passe, sélectionner “nuova password” (nouveau mot de passe) et appuyer sur “enter” : avec les touches
/ , sélectionner la valeur à assigner au premier chiffre et ap-puyer de nouveau sur “enter”. Agir de la même façon pour les chiffres restants.
- En appuyant une dernière fois sur la touche “enter”, l'afficheur visualise “nuova password” (nouveau mot de passe) : le mot de passe est maintenant configuré.
- Pour sortir des menus et retourner au fonctionnement normal, appuyer sur “esc” jusqu'à ce que l'afficheur visualise “exit” et ap-puyer sur “enter”. L'afficheur visualise maintenant “save?”:
» appuyer de nouveau sur “enter” pour mémoriser les varia-tions effectuées ;
» appuyer par contre sur “esc” pour sortir des menus sans mé-moriser les variations effectuées.
Réglage du niveau d'éclairage de l'afficheur - Appuyer sur “esc” : l'afficheur devrait visualiser “impostazioni sistema” (configurations du système) ; si ce n'est pas le cas, ap-puyer ensuite sur la touche “enter”.
- Appuyer sur “enter” pour accéder au menu “setup sistema” (réglage du système) ; avec la touche sélectionner “display” (afficheur) .
- Appuyer encore sur “enter” : l'afficheur visualise les deux op-tions disponibles : “contrasto” (contraste) et “retroilluminazio-ne” (rétro-éclairage).
- Pour régler le niveau de visualisation, s'assurer que soit sélec-tionné “contrasto” (contraste) ; appuyer sur “enter” et, avec les touches / , sélectionner la valeur souhaitée. Appuyer de nouveau sur “enter”.
- Pour régler le temps pendant lequel l'afficheur reste éclairé, sé-lectionner par contre “retroilluminazione“ (rétro-éclairage). » En configurant “si” (oui), l'afficheur reste toujours éclairé. » En configurant “no” (non), l'afficheur s'éteint automatique-
ment une minute après la pression d'une touche.
- Pour sortir des menus et retourner au fonctionnement normal, appuyer sur “esc” jusqu'à ce que l'afficheur visualise “exit” et ap-puyer sur “enter”. L'afficheur visualise maintenant “save?”: » appuyer de nouveau sur “enter” pour mémoriser les varia-
tions effectuées ; » appuyer par contre sur “esc” pour sortir des menus sans mé-
moriser les variations effectuées.
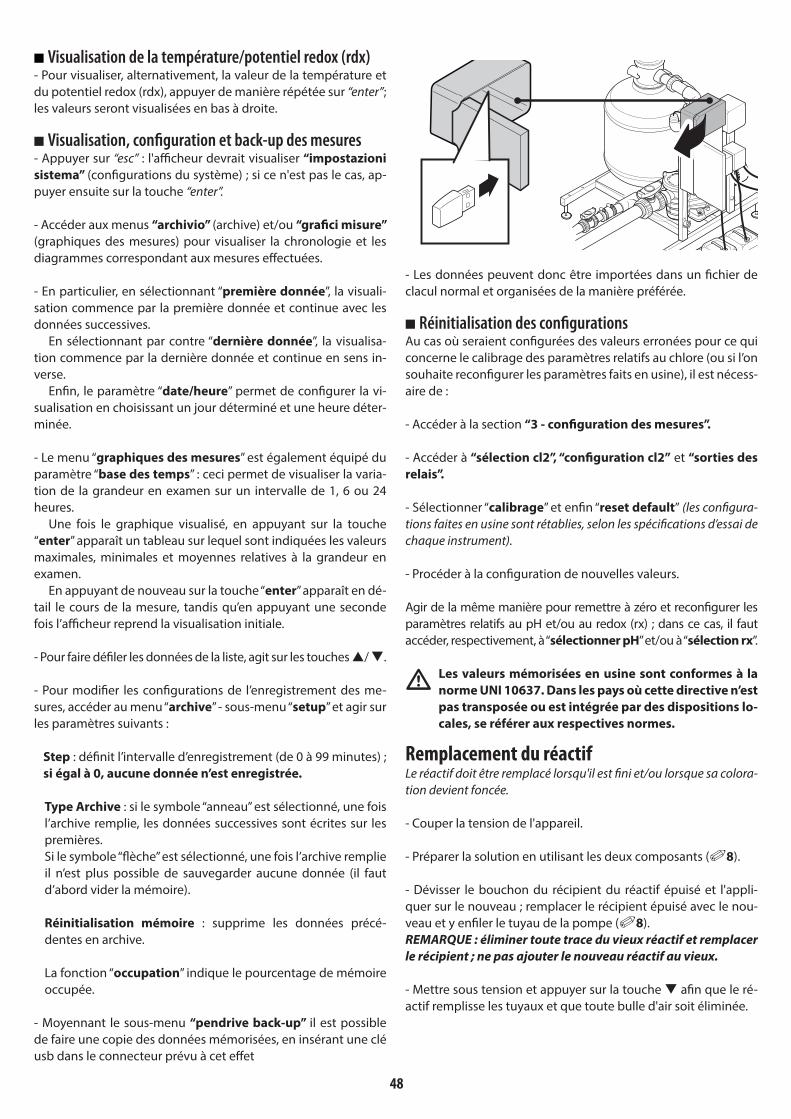
48
Visualisation de la température/potentiel redox (rdx) - Pour visualiser, alternativement, la valeur de la température et du potentiel redox (rdx), appuyer de manière répétée sur “enter”; les valeurs seront visualisées en bas à droite.
Visualisation, configuration et back-up des mesures - Appuyer sur “esc” : l'afficheur devrait visualiser “impostazioni sistema” (configurations du système) ; si ce n'est pas le cas, ap-puyer ensuite sur la touche “enter”.
- Accéder aux menus “archivio” (archive) et/ou “grafici misure” (graphiques des mesures) pour visualiser la chronologie et les diagrammes correspondant aux mesures effectuées. - En particulier, en sélectionnant “première donnée”, la visuali-sation commence par la première donnée et continue avec les données successives. En sélectionnant par contre “dernière donnée”, la visualisa-tion commence par la dernière donnée et continue en sens in-verse. Enfin, le paramètre “date/heure” permet de configurer la vi-sualisation en choisissant un jour déterminé et une heure déter-minée.
- Le menu “graphiques des mesures” est également équipé du paramètre “base des temps” : ceci permet de visualiser la varia-tion de la grandeur en examen sur un intervalle de 1, 6 ou 24 heures. Une fois le graphique visualisé, en appuyant sur la touche “enter” apparaît un tableau sur lequel sont indiquées les valeurs maximales, minimales et moyennes relatives à la grandeur en examen. En appuyant de nouveau sur la touche “enter” apparaît en dé-tail le cours de la mesure, tandis qu’en appuyant une seconde fois l’afficheur reprend la visualisation initiale. - Pour faire défiler les données de la liste, agit sur les touches / . - Pour modifier les configurations de l’enregistrement des me-sures, accéder au menu “archive” - sous-menu “setup” et agir sur les paramètres suivants :
Step : définit l’intervalle d’enregistrement (de 0 à 99 minutes) ; si égal à 0, aucune donnée n’est enregistrée.
Type Archive : si le symbole “anneau” est sélectionné, une fois l’archive remplie, les données successives sont écrites sur les premières.Si le symbole “flèche” est sélectionné, une fois l’archive remplie il n’est plus possible de sauvegarder aucune donnée (il faut d’abord vider la mémoire).
Réinitialisation mémoire : supprime les données précé-dentes en archive.
La fonction “occupation” indique le pourcentage de mémoire occupée.
- Moyennant le sous-menu “pendrive back-up” il est possible de faire une copie des données mémorisées, en insérant une clé usb dans le connecteur prévu à cet effet
- Les données peuvent donc être importées dans un fichier de clacul normal et organisées de la manière préférée.
Réinitialisation des configurationsAu cas où seraient configurées des valeurs erronées pour ce qui concerne le calibrage des paramètres relatifs au chlore (ou si l’on souhaite reconfigurer les paramètres faits en usine), il est nécess-aire de :
- Accéder à la section “3 - configuration des mesures”.
- Accéder à “sélection cl2”, “configuration cl2” et “sorties des relais”.
- Sélectionner “calibrage” et enfin “reset default” (les configura-tions faites en usine sont rétablies, selon les spécifications d’essai de chaque instrument).
- Procéder à la configuration de nouvelles valeurs.
Agir de la même manière pour remettre à zéro et reconfigurer les paramètres relatifs au pH et/ou au redox (rx) ; dans ce cas, il faut accéder, respectivement, à “sélectionner pH” et/ou à “sélection rx”.
� Les valeurs mémorisées en usine sont conformes à la norme UNI 10637. Dans les pays où cette directive n’est pas transposée ou est intégrée par des dispositions lo-cales, se référer aux respectives normes.
Remplacement du réactifLe réactif doit être remplacé lorsqu'il est fini et/ou lorsque sa colora-tion devient foncée.
- Couper la tension de l'appareil.
- Préparer la solution en utilisant les deux composants ( 8).
- Dévisser le bouchon du récipient du réactif épuisé et l'appli-quer sur le nouveau ; remplacer le récipient épuisé avec le nou-veau et y enfiler le tuyau de la pompe ( 8). REMARQUE : éliminer toute trace du vieux réactif et remplacer le récipient ; ne pas ajouter le nouveau réactif au vieux.
- Mettre sous tension et appuyer sur la touche afin que le ré-actif remplisse les tuyaux et que toute bulle d'air soit éliminée.

49
- Éteindre et rallumer l'appareil et effectuer le calibrage des sondes (voir “Calibrage de référence”).
� Les récipients, les éventuels résidus de substances chi-miques ainsi que le réactif épuisé doivent être éliminés conformément aux normes en vigueur en la matière ; consulter par ailleurs les autorités locales pour ce qui concerne l’évacuation de l’eau traitée chimiquement.
Interruption du fonctionnement pour de moyennes-longues périodes Si l'appareil n'est pas utilisé pendant quelques jours (une semaine environ), effectuer les opérations suivantes :
- Éliminer le réactif en le remplaçant avec de l'eau distillée ou déminéralisée.
- Actionner la pompe du réactif en appuyant sur la touche pendant quelques secondes, de manière à laver les tuyaux (à la fin, les tuyaux doivent être propres et remplis d'eau).
- Laisser l'appareil en marche pendant une dizaine de minutes, de manière à ce que soit lavée la cellule de mesure (se référer aussi au paragraphe “Nettoyage de la cellule de mesure”). Retirer l'aimant présent sur le fond ( 7), le nettoyer et le ranger dans un lieu sûr.
- Couper la tension de l'appareil moyennant l'interrupteur incorporé.
- Ranger dans un lieu sûr les bidons du chlore et du correcteur du pH, en fermant les ouvertures présentes sur les bouchons. Nettoyer le récipient dans lequel sont positionnés les bidons
pendant le fonctionnement normal.
- Retirer les sondes du récipient, les débrancher de l'instrument et les nettoyer ; puis, appliquer aux extrémités les respectifs ca-puchons de protection et les ranger dans un lieu sûr.- Laver les tuyaux qui : » des pompes de l'instrument vont aux bidons ; » des pompes de l'instrument vont à l'installation du spa.
Calibrage de référence En fin de saison et dans tous les cas périodiquement (selon le type d'utilisation à laquelle est sujet l'instrument), vérifier la fiabilité des sondes moyennant un calibrage “de référence” : - sonde du chlore : est nécessaire un photomètre, avec lequel effectuer des mesures lorsque l'eau est prélevée de l'installation. Une fois la mesure effectuée, la confronter avec celle de l'appa-reil et, si non correcte, procéder au calibrage de la sonde avec la solution d'étalonnage. Il est opportun d'effectuer ce calibrage même lorsque l'on rem-place le réactif et/ou le groupe de mesure (formé par le capteur et par le projecteur à led, situés à la base de la cellule de mesure).
- sonde pH : la fiabilité de la sonde pH est établie avec les solu-tions d'étalonnage (généralement pH 7.0 et pH 4.0), comme indi-qué pendant les phases d'installation.
REMARQUE : il est conseillé de remplacer les sondes chaque année.
Entretien
� Avant d'effectuer tout nettoyage ou remplacement, il faut absolument couper la tension de l'appareil.
REMARQUE : pour ce qui concerne les modalités d'entretien du filtre à sable et de la pompe de filtration, se référer à la docu-mentation du spa-pack principal.
ContrôlesVérifier périodiquement le fonctionnement et l’état d’usure des :- pompes de l’instrument ;- tuyaux de raccordement des pompes à l’instrument et/ou aux récipients du chlore et du correcteur du pH.- cellule de mesure (voir plus en avant).- sonde du chlore et/ou sonde pH.
Procéder éventuellement au remplacement des composants en panne ; s’adresser à un Centre d’Assistance agréé Jacuzzi®.
Nettoyage de l'instrument - Utiliser un chiffon humide, en essayant d'éliminer toute saleté/incrustation. Ne pas utiliser de détergents abrasifs ni de solvants. - Retirer immédiatement toute trace de réactif.
Nettoyage des sondes - Tous les mois, il est conseillé de nettoyer les sondes avec un chiffon doux imbibé d'un peu d'eau. Pour éliminer toute incrus-tation, plonger les sondes dans une solution d'eau et d'acide chlorhydrique à 10%. - Après le nettoyage, il est conseillé d'effectuer le calibrage des sondes (voir chap. “Calibrage de référence”).
Nettoyage de la cellule de mesure En fin de saison, et/ou selon la fréquence d'utilisation à laquelle est sujet l'instrument, nettoyer la cellule de mesure : après avoir coupé la tension et retiré le couvercle, retirer l'aimant présent à l'intérieur. Nettoyer la cellule à l'aide d'un chiffon doux imbibé d'un peu d'eau ; pour retirer toute incrustation, utiliser une solu-tion d'eau et d'acide chlorhydrique à 10 %.
- Contrôler et, si nécessaire, nettoyer aussi l'électrovanne située à côté de la cellule de mesure.
- Remonter les composants, en n'oubliant pas de repositionner l'aimant à l'intérieur de la cellule de mesure.
� Ne pas nettoyer la cellule avec des solvants, des dis-solvants ou des substances abrasives. Ne pas utiliser d'ustensiles métalliques.

50
Nettoyage de l'électrovanne du spa-pack - Contrôler périodiquement et, si nécessaire, nettoyer l'élec-trovanne indiquée.
Remplacement du fusible - Après avoir coupé la tension et ouvert le couvercle, repérer et rem-placer le fusible indiqué avec un fusible de valeur équivalente.
� Cette opération doit être effectuée par un personnel qualifié.
REMARQUE : pour les autres interventions d'entretien et/ou remplacement de pièces du spa-pack, s'adresser exclusive-ment à des revendeurs et à des centres d'Assistance Jacuz-zi® agréés.
En cas de difficultés...
REMARQUE : en cas de fonctionnement anormal, se référer aussi aux éventuelles signalisations du boîtier électronique du spa-pack principal (voir la documentation relative).
L'instrument ne s'allume pas - Vérifier que l'instrument soit alimenté (interrupteur allumé, instal-lation électrique fonctionnante).
- Vérifier que le fusible ne soit pas brûlé (voir “Remplacement du fusible”).La pompe du spa-pack ne fonctionne pas
- Vérifier que l'interrupteur présent dans le boîtier du spa-pack soit allumé.
- Vérifier qu'il n'y ait pas d'erreur de fonctionnement de la pompe du spa-pack principal (se référer à la documentation relative).
Intervention de l’alarme externe (sur l’afficheur apparaît le symbole ) et éventuel arrêt de l’instrument
- Vérifier que la température de l'eau ne soit pas excessive (voir aussi “absence de H2O”).- Vérifier la présence du réactif et si nécessaire, le remplacer (voir “Remplacement du réactif”). - Vérifier que les tuyaux raccordés à la cellule ne soient obstrués.
- Vérifier que l'alimentation de l'eau dans la cellule de mesure ne soit pas interrompue. - Vérifier que la cellule de mesure ne soit pas sale ; si nécessaire, la nettoyer (voir “Nettoyage de la cellule de mesure”). - Le câblage de la cellule de mesure pourrait être endommagé. - S'adresser à un Centre d'Assistance Jacuzzi®. - Le projecteur pourrait être en panne. S'adresser à un Centre d'As-sistance Jacuzzi®.
Sur l’afficheur apparaît le symbole - L’archive des mesures est pleine ; il faut effectuer le back-up des données (voir “Visualisation, configuration et back-up des mesu-res”) et/ou procéder à la suppression des données.
L'afficheur visualise “std by” - Le cycle de filtration est interrompu (se référer à la documentation du spa-pack principal). - Vérifier qu'il n'y ait pas d'erreur de fonctionnement de la pompe du spa-pack principal (se référer à la documentation relative).
L'afficheur visualise “errore cloro” (erreur chlore) - Cella pourrait être dû à une concentration très basse de chlore dans l'eau du spa, que l'instrument ne réussit pas à augmenter dans

51
un déterminé laps de temps (si après quelques tentatives l'instru-ment ne réussit pas à relever la concentration minimale de chlore, le fonctionnement est interrompu). - Vérifier que la solution de chlore présente à l'intérieur du bidon res-pectif n'ait pas perdu de son efficacité. - ATTENTION : lorsque l'on effectue la chloration manuelle (com-me en cas de traitement “choc” ou super-chloration), la concen-tration de chlore est assez élevée (il est recommandé de ne pas entrer dans l'eau) : ceci pourrait rendre la chloration du réactif de mesure presque transparente et empêcher ainsi à l'appareil de relever l'effective quantité de chlore présente. La conséquence de cette anomalie est que l'instrument pourrait continuer à ajou-ter du chlore, donnant ainsi lieu à un surdosage. Pour cela, la chloration manuelle doit être effectuée avec l'instru-ment éteint.
L'afficheur signale qu'une sonde est en panne - Vérifier que la sonde indiquée soit propre et/ou qu'elle ne soit pas endommagée ; vérifier aussi que le capuchon de protection ait été retiré avant de l'insérer dans le récipient prévu à cet effet. - Vérifier que la sonde soit raccordée à l'instrument de manière correcte.
REMARQUE : si le paramètre “Bontà sonda” (Bonté sonde) pré-sente une valeur de OFFSET supérieure à ± 100 mV et/ou de GAIN inférieure à 50 %, il faut remplacer la sonde. - S'adresser à un Centre d'Assistance Jacuzzi®.
L'afficheur visualise “mancanza H2O” (absence de H2O) - Vérifier que le circuit qui introduit l'eau dans la cellule de mesure et dans le récipient des sondes fonctionne correctement. - Vérifier que la température de l'eau ne soit pas élevée. - La valeur du paramètre “taratura sensore H2O” (étalonnage du capteur H2O) pourrait être trop basse. S'adresser à un Centre d'As-sistance Jacuzzi®.
L'afficheur signale des problèmes sur la cellule de mesure - Vérifier que la cellule de mesure soit propre (voir chap. “Nettoyage de la cellule de mesure”).
- Le projecteur (P) et/ou le photocapteur (F) pourraient être endom-magés. - S'adresser à un Centre d'Assistance Jacuzzi®.
F
P
L’archive des données relatives aux mesures est vide. - Vérifier que le paramètre “step” ne soit pas égal à zéro (voir aussi le paragraphe “Visualisation et back-up des valeurs des mesures”).
Structure des menuset relatives configurations faites en usine
1 - MENU SYSTEME
DATE/HEURE SYSTÈME JOUR/MOIS/ANNÉE/ HEURE / MINUTE
LANGUE FRANÇAIS
PASSWORD 00000
DISPLAY CONTRASTE 88 RÉTROÈCLAIRAG NO
SELECT. RELAY SELECT. RELAY ALARME T. D’ALAR. CL 0000 T. D’ALAR. PH 0000 SET DÉCLENCH. SI
2 - MENU MESURES
SELECTION MESURE SELECTION CL2 MENU CL2 SORTIES RELAIS
set point 1 on 0.80 ppm off 1.10 ppm TEMPS ON +000 TEMPS OFF +000 MODE RELAIS MODE RELAIS pwm PÉRIODE PWM 30 sec
set point 2 on 0.80 ppm off 1.10 ppm TEMPS ON +000 TEMPS OFF +000 MODE RELAIS MODE RELAIS pwm PÉRIODE PWM 30 sec
SORTIE EN COURANT CHAMP SORTIE 4-20 mA LIMITE INF. 0.00 ppm LIMITE SUP. 5.00 ppm ÉTALONNAGE CHLORE AUTOMATIQUE RÉINIT. DÉFAUT

52
LAPS DE MESURE LAPS 10 min
MENU DE SERVICE GAIN CHLORE 4.00 ppm CELL D’ALARME on ALARME DE L’EAU on
MENU ANALYSE MÉTHODE TEMPS TEMPS DE LAVAGE 35 sec TEMPS ZERO 10 sec STABIL. MESURE 20 sec DES TEMPS AGIT. 2 sec TEMPS REACTIF 3 sec
REACTIF SETUP ALARME REAC. off SELECTION RELAY AUX1 3 min
AUTRES RÉGLAGES VAL. PAR DÉFAUT MÉTHODES DE COM COUNT RESET MESURE OUT SET SI MAX.MESU A ZERO 10
SELECTION TEMP. MENU TEMPERATURE SORTIE EN COURANT CHAMP SORTIE 4-20 mA LIMITE INF. 0.00 ppm LIMITE SUP. 5.00 ppm
ÉTALONNAGE DÉCALAGE DE TEMP -04.5 °C
SELECTION PH PH SETUP SORTIE RELAY
setpoint 1 ON 7.40 pH OFF 7.00 pH TEMPS ON 010 TEMPS OFF 050 MODE RELAY MODE RELAY soglia PÉRIODE PWM 10 sec
SORTIE ANALOG. CHAMP SORTIE 4-20 mA LIMITE INF. 0.00 ppm LIMITE SUP. 5.00 ppm
ÉTALONNAGE AUTOMATIQUE MANUEL RÉINIT. DÉFAUT
SELECTION RX MENU RX SORTIE EN COURANT CHAMP SORTIE 4-20 mA LIMITE INF. 700 mV LIMITE SUP. 1500 mV
ÉTALONNAGE AUTOMATIQUE RÉINIT. DÉFAUT
INIBIT CL REDOX ABILITA INIBIT ON SET POINT 750
3 - CONTRÔLE MANUEL
ENTRÉES ENTRÉES NUMÉR. dig. input aux off dig. input real off
SORTIES SORTIES RELAIS set1 cl off set2 cl off set ph off aux off alarm off
SORTIES EN COURANT SORTIE 1 0.00 mA SORTIE 2 0.00 mA SORTIE 3 0.00 mA SORTIE 4 0.00 mA ETALONNAGE DAC RÉINIT. DÉFAUT
SORTIES NUMÉR. VALVE off MOTEUR DE L’AGITATEUR off LED CL2 on LED ALARM off PERISTALTIQUE off
CALIBRAT. SONDE H2O CONTRÔLE MANUEL 45.0 °C
MOTEUR DE L’AGITATEUR DUTY CYCLE 33% FREQUENCE 1000 Hz
ABIL.INPUT 220V on

53
4 - ARCHIVE
MONTRER DONNÈES PREMER DONNÉE DERN. DONNÉE DATE/HEURE
SETUP STEP 10 min TYPE ARCHIVE >> ENGAGEMENT 6 % RESET MEMOIRE RS485/USB rs485
SAUVEGARDE CLEF USB
5 - GRAPHIQUES MESURES
SELECTION CL2 SELECTION PH SELECTION TEMP. SELECTION RX
PREMER DONNÉE DATE/HEURE BASE TEMPS
� Suivre exclusivement les menus indiqués. Ne pas modifier les valeurs contenues dans la section “3 - contrôle manuel”.

54
Wichtig� Für die Funktionsweise des Sandfilters und der Filter-
pumpe siehe die Unterlagen des primären Spa-Pack.
� Prüfen Sie das Gerät täglich (auch in Abhängigkeit der Nutzungshäufigkeit des Whirlpools) auf ordnungsgemä-ßes Funktionieren und das Vorhandensein eventueller Alarmmeldungen. Führen Sie regelmäßig die Referenzkalibrierung der Son-den durch.
Hinweise zum Gebrauch des Gerätes
� Bei jedem Start (auch beim Erststart) führt das Gerät ei-nen Funktionstest mit einer Dauer von ca. 10 Minuten durch und anschließend die erste Messung sowie die Dosierung der Chemikalien.
Eventuelle Messwerte, die beim Einschalten auf dem Display erscheinen, müssen daher nicht berücksichtigt werden.
- Unter "Normalbetrieb" wird die Durchführung der Kontroll-/Dosiervorgänge verstanden (auf dem Display werden die Werte freies Chlor und pH angezeigt). � Wenn Sie auf die Einstellmenüs zugreifen, werden die
Kontroll-/Dosiervorgänge unterbrochen; nach Been-digung der Einstellungen müssen Sie daher das Gerät wieder in den Zustand des "Normalbetriebs" bringen. Anderenfalls werden keine Kontroll-/Dosiervorgänge durchgeführt und somit ist die korrekte Aufbereitung des Wassers nicht gewährleistet.
Hinweise zur Kalibrierung der Sonden - Vergewissern Sie sich, dass die Enden der Sonden nicht den Bo-den des Behälters berühren ( 17).
- Verwenden Sie für die Kalibrierung der pH-Sonde zuerst die Lö-sung pH 7.
- Schütteln Sie die Kalibrierlösung, nachdem Sie die Sonde hi-neingegeben haben, und warten Sie dann ein paar Sekunden, bis sich der Wert auf dem Display stabilisiert (der angezeigte Wert darf nicht variieren).
- Wenn der angezeigte Wert nicht dem "Referenzwert" entspricht (der auf dem Behälter der Kalibrierlösung für unterschiedliche Tem-peraturwerte angegeben ist), so stellen Sie den Wert mit den Tas-ten / ein.
- Wenn Sie falsche Werte zurücksetzen möchten, wählen Sie "Re-set Default", und drücken Sie dann "Enter".
Einstellung des Redox-WertesDer Wert Redox, gemessen in mV (Millivolt), hängt mit der Chlor-konzentration im Wasser zusammen: Wenn diese einen bestimm-ten Wert überschreitet, wird ein Alarmsignal ausgegeben. Es sollte jedoch beachtet werden, dass der Redox-Wert von der Art des ver-wendeten Wassers abhängt (Mineralsalzgehalt usw.). Aus diesem Grund muss der Wert für jeden einzelnen Fall bestimmt werden.
- Nachdem das Spa-Pack installiert und die Sonden kalibriert wurden, starten Sie die Anlage und lassen Sie sie etwa 24 Stun-den laufen, damit die korrekten Werte der Wasseraufbereitung erreicht werden können.
- Drücken Sie die Taste "Enter", um unten rechts im Display den Wert Redox (ausgedrückt in mV) anzeigen zu lassen; addieren Sie "50" zum angezeigten Wert, und schreiben Sie das Ergebnis auf.
- Drücken Sie die Taste "ESC": Auf dem Display sollte “imposta-zioni sistema” (Systemeinstellungen) angezeigt werden; wenn dem nicht so ist, drücken Sie anschließend die Taste "Enter".
- Wählen Sie mit der Taste das Menü “impostazioni misure” (Messwerteinstellungen) aus und drücken Sie "Enter".
- Wählen Sie dann “selezione rx” (Auswahl rx) und drücken Sie "Enter".
- Überprüfen Sie, dass “abilita inibit” (Inibit aktivieren) auf "on" steht (wenn dem nicht so ist, wählen Sie diese Option aus, drücken Sie "Enter", und stellen Sie mit den Tasten / "on" ein).
- Wählen Sie "Inibit cl redox", und drücken Sie "Enter".
- Wählen Sie "Set point", und drücken Sie "Enter". Geben Sie dann den zuvor notierten Wert ein (mit den Tasten /
den Wert auswählen, der dem Parameter zugewiesen werden soll, und dann "Enter" drücken).
- Um das Menü zu verlassen und zum normalen Betrieb zurück-zukehren, drücken Sie "ESC", bis auf dem Display "Exit" erscheint, und dann "Enter". Dann erscheint auf dem Display "Save?": » Drücken Sie erneut "Enter, um die vorgenommenen Ände-
rungen abzuspeichern; » Oder drücken Sie "Esc", um das Menü zu verlassen, ohne die
vorgenommenen Änderungen abzuspeichern.
Einstellung des Gerätes bei Wasser mit saurem pH-Wert In den meisten Fällen wird das Wasser eines Whirlpools durch einen alkalischen pH-Wert charakterisiert (d. h. größer als 7). Das Gerät wird daher im Werk für den korrekten Betrieb mit Wasser konfigu-riert, das diese Werte aufweist : Mithilfe des spezifischen Produktes Jacuzzi ® pH in Kombination mit dem Gerät sorgt Letzteres dafür, den pH-Wert innerhalb des zulässigen Bereichs zu halten.
Gebrauch und Wartung
55
Umgekehrt, wenn das Wasser des Whirlpools durch niedrige pH-Werte charakterisiert ist (unter 7), muss das Produkt Jacuzzi® ph+ verwendet werden, wobei jedoch einige Betriebsparameter des Geräts geändert werden müssen: - Drücken Sie die Taste "ESC": Auf dem Display sollte “imposta-zioni sistema” (Systemeinstellungen) angezeigt werden; wenn dem nicht so ist, drücken Sie anschließend die Taste "Enter".
- Wählen Sie mit der Taste das Menü “impostazioni misure” (Messwerteinstellungen) aus und drücken Sie "Enter".
- Wählen Sie mit der Taste “selezione pH” (Auswahl pH) und drücken Sie "Enter".
- Stellen Sie sicher, dass “uscite relè” (Relais-Ausgang) ausge-wählt ist, und drücken Sie "Enter": Auf dem Display erscheint "Set Point1"; dann erneut "Enter" drücken.
- Stellen Sie sicher, dass "On" ausgewählt ist, und drücken Sie dann "Enter". Stellen Sie mit den Tasten / den Wert 7,00 pH ein.
- Drücken Sie "Enter", und wählen Sie dann den Parameter "off" aus; drücken Sie dann erneut "Enter".
- Stellen Sie mit den Tasten / den Wert 7.40 pH ein, und drücken Sie "Enter", um den gewählten Wert zu bestätigen.
- Um das Menü zu verlassen und zum normalen Betrieb zurück-zukehren, drücken Sie "ESC", bis auf dem Display "Exit" erscheint, und dann "Enter". Dann erscheint auf dem Display "Save?": » Drücken Sie erneut "Enter, um die vorgenommenen Ände-
rungen abzuspeichern; » Oder drücken Sie "Esc", um das Menü zu verlassen, ohne die
vorgenommenen Änderungen abzuspeichern.
Andere Tastaturvorgänge
Aktivierung/Änderung des Passworts
ACHTUNG: Wenn das Passwort eingestellt wurde, wird dieses bei jedem Zugriff auf bestimmte Programmiervorgänge abge-fragt.
- Drücken Sie die Taste "ESC": Auf dem Display sollte “imposta-zioni sistema” (Systemeinstellungen) angezeigt werden; wenn dem nicht so ist, drücken Sie anschließend die Taste "Enter".
- Drücken Sie "Enter", um auf das Menü “setup sistema” (Sys-tem-Setup) zuzugreifen; mit der Taste dann “password” (Passwort) auswählen.
- Drücken Sie erneut "Enter": Auf dem Display erscheint “pas-sword: 0” (Passwort: 0). Erneut die Taste "Enter" drücken, bis auf dem Display die beiden verfügbaren Optionen angezeigt werden: “stato password” (Status Passwort) und “nuova pas-sword” (Neues Passwort).
- Zum Aktivieren/Deaktivieren des Passworts sichergehen, dass “stato password” (Status Passwort) ausgewählt ist; dann "Enter" drücken und mit den Tasten / "on" bzw. "off" auswählen (wenn das Passwort aktiv ist, erscheint auf dem Display das Sym-bol ).
- Zum Ändern des Passworts “nuova password” (Neues Pass-wort) auswählen und dann "Enter" drücken: Wählen Sie dann mit den Tasten / den Wert aus, der der ersten Stelle zugewiesen werden soll, und drücken Sie dann erneut "Enter". Gehen Sie für die restlichen Stellen genauso vor.
- Drücken Sie ein letztes Mal die Taste "Enter"; daraufhin erscheint auf dem Display "Neues Passwort": Nun ist das Passwort eingestellt.
- Um das Menü zu verlassen und zum normalen Betrieb zurück-zukehren, drücken Sie "ESC", bis auf dem Display "Exit" erscheint, und dann "Enter". Dann erscheint auf dem Display "Save?":
» Drücken Sie erneut "Enter, um die vorgenommenen Ände-rungen abzuspeichern;
» Oder drücken Sie "Esc", um das Menü zu verlassen, ohne die vorgenommenen Änderungen abzuspeichern.
Einstellung der Displayhelligkeit - Drücken Sie die Taste "ESC": Auf dem Display sollte “imposta-zioni sistema” (Systemeinstellungen) angezeigt werden; wenn dem nicht so ist, drücken Sie anschließend die Taste "Enter".
- Drücken Sie "Enter", um auf das Menü “setup sistema” (System-Se-tup) zuzugreifen; mit der Taste dann "Display" auswählen.
- Drücken Sie erneut "Enter": Auf dem Display erscheinen zwei mögliche Optionen: “contrasto” (Kontrast) und “retroillumina-zione” (Hintergrundbeleuchtung).
- Um den “contrasto” (Kontrast) des Displays einzustellen, prü-fen Sie, dass die entsprechende Option ausgewählt ist; drücken Sie dann "Enter", und wählen Sie mit den Tasten / den ge-wünschten Wert aus. Drücken Sie erneut "Enter".
- Um die Zeit einzustellen, für die das Display beleuchtet bleiben soll, wählen Sie hingegen „Retroilluminazione“ (Hintergrundbe-leuchtung) aus. » Durch Einstellen von “si” (Ja) bleibt die Hintergrundbeleuch-tung des Displays immer aktiv. » Durch Einstellen von “no” (Nein) schaltet sich das Display eine
Minute nach dem letzten Tastendruck automatisch ab.
- Um das Menü zu verlassen und zum normalen Betrieb zurück-zukehren, drücken Sie "ESC", bis auf dem Display "Exit" erscheint, und dann "Enter". Dann erscheint auf dem Display "Save?": » Drücken Sie erneut "Enter, um die vorgenommenen Ände-
rungen abzuspeichern; » Oder drücken Sie "Esc", um das Menü zu verlassen, ohne die
vorgenommenen Änderungen abzuspeichern.
Anzeige der Temperatur und des Redoxpotenzials (rdx) - Um abwechselnd die Werte der Temperatur und des Redoxpo-tenzials (rdx) anzeigen zu lassen, drücken Sie wiederholt "Enter"; die Werte erscheinen unten rechts auf dem Display.

56
Anzeige, Einstellung und Backup der Messwerte
- Drücken Sie die Taste "ESC": Auf dem Display sollte “impostazioni siste-ma” (Systemeinstellungen) angezeigt werden; wenn dem nicht so ist, drü-cken Sie anschließend die Taste "Enter". - Greifen Sie auf die Menüs “archivio” (Archiv) und/oder “grafici misure” (Messwertgrafiken) zu, um die Chronologie und die Diagramme der durch-geführten Messungen anzeigen zu lassen. - Insbesondere beginnt die Anzeige bei Auswahl von „erster Wert“ beim ersten Wert und fährt dann mit den folgenden fort. Wird hingegen „letzter Wert“ ausgewählt, beginnt die Anzeige beim letzten Wert und läuft dann in umgekehrter Reihenfolge ab. Der Parameter „Datum/Uhrzeit“ gestattet schließlich die Einstellung dieser Werte durch Auswahl eines bestimmten Tags und einer bestimmten Uhrzeit.
- Im Menü „Messwert-Grafiken“ ist auch der Parameter „Basis Zeiten“ vor-handen: Dieses gestattet die Anzeige der Variation der zu untersuchenden Größe in Intervallen von 1, 6 oder 24 Stunden. Wenn die Grafik angezeigt wird, erscheint bei Drücken der Enter-Taste eine Tabelle mit den Höchst-, Mindest- und Mittelwerten der untersuchten Größen. Durch erneutes Drücken der Enter-Taste erscheint der detaillierte Ver-lauf des Messwertes. Wird die Taste anschließend noch einmal gedrückt, wird auf dem Display wieder der Startbildschirm gezeigt. - Zum Durchblättern der Daten im Verzeichnis betätigen Sie die Tasten / - Zum Ändern der Einstellungen der Messwertaufzeichnung rufen Sie das Menü „Archiv“ und dort das Untermenü „Setup“ auf, wo Sie die folgenden Parameter finden:
Step: definiert das Aufzeichnungsintervall (0 bis 99 Minuten); wenn dieses gleich 0 ist, werden keine Daten aufgezeichnet. Archivtyp: Bei Auswahl des „Ring“-Symbols werden, wenn das Archiv soll ist, die ältesten Daten mit den neuen überschrieben.Bei Auswahl des „Pfeil“-Symbols können bei vollem Archiv keine Daten mehr gespeichert werden (erst muss der Speicher geleert werden).
Zurücksetzen des Speichers: löscht die vorhandenen Daten im Archiv.
Der Punkt „Belegung“ zeigt den Prozentsatz des belegten Speichers an.
- Durch das Untermenü "Pendrive Back-up" können Sie eine Sicherungs-kopie der abgespeicherten Daten anfertigen, indem Sie einen USB-Stick an den entsprechenden Anschluss anschließen.
- Die Daten können dann in ein normales Tabellenblatt eines Ta-bellenkalkulationsprogramms kopiert und nach Belieben orga-nisiert werden,
Zurücksetzen der EinstellungenBei Einstellung falscher Werte im Hinblick auf die Kalibrierung der Chlor-Parameter (oder wenn die werkseitig eingestellten Pa-rameter geändert werden sollen), gehen Sie wie folgt vor:
- rufen Sie den Bereich „3 - Einstellung der Messwerte“ auf;
- rufen Sie dann „Auswahl cl2“, „Einstellung cl2“ und „Relai-sausgänge“ auf;
- wählen Sie „Kalibrierung“ und schließlich „Standardwert zurücksetzen“ (daraufhin werden die werkseitigen Einstellungen je nach Abnahmewerten des einzelnen Instruments wieder herge-stellt).
- Nehmen Sie dann die Einstellung der neuen Werte vor.
Gehen Sie genauso vor, wenn Sie die Parameter des pH- und/oder Redox-Wertes (rx) zurücksetzen und neu einstellen möchten; in diesem Fall müssen Sie „Auswahl pH“ bzw. „Auswahl rx“ aufru-fen.
� Die werkseitig abgespeicherten Werte sind mit der Norm UNI 10637 konform. In den Ländern, in denen diese Richtlinie nicht gilt oder in lokale Bestimmun-gen integriert ist, wird auf die geltenden Vorschriften in diesem Bereich verwiesen.
Auswechseln des ReagenzesDas Reagenz muss ausgewechselt werden, wenn es aufgebraucht ist oder sich dunkel gefärbt hat.
- Schalten Sie die Stromversorgung des Gerätes ab.
- Bereiten Sie die Lösung mit den beiden Komponenten zu ( 8).
- Lösen Sie die Kappe des Behälters mit dem verbrauchten Re-agenz, und bringen Sie ihn an dem Behälter des neuen Reagenz an; ersetzen Sie den den alten mit dem neuen Behälter und set-zen Sie den Schlauch der Pumpe ein ( 8).
HINWEIS: Beseitigen Sie alle Spuren des alten Reagenzes, und ersetzen Sie den Behälter; fügen Sie das neue Reagenz nicht zu dem alten hinzu.
- Schalten Sie die Stromversorgung wieder ein, und drücken Sie die Taste , damit das Reagenz sämtliche Leitungen füllt und eventuelle Luftblasen beseitigt werden. - Schalten Sie das Gerät ab und wieder ein und führen Sie die Kalibrierung der Sonden durch (siehe "Referenzkalibrierung").
� Behälter, eventuelle Rückstände von Chemikalien sowie aufgebrauchtes Reagenz müssen gemäß den geltenden Bestimmungen entsorgt werden; wenden Sie sich für die Ableitung von chemisch behandeltem Abwasser zudem bitte an die zuständigen lokalen Behörden.

57
Unterbrechung des Betriebs für mittlere-lange ZeiträumeWenn das Gerät für ein paar Tage (etwa eine Woche) nicht genutzt wird, gehen Sie wie folgt vor:
- Entfernen Sie das Reagenz, und ersetzen sie es mit destilliertem oder entmineralisiertem Wasser. - Betätigen Sie die Pumpe des Reagenzes durch Drücken der Tas-te für einige Sekunden, um die Schläuche zu spülen (diese müssen am Ende sauber und mit Wasser gefüllt sein).
- Lassen Sie das Gerät etwa zehn Minuten lang laufen, damit die Messzelle gespült wird (siehe auch den Abschnitt "Reinigung der Messzelle"). Entfernen Sie den Magneten an der Unterseite ( 7), reinigen Sie ihn, und verstauen Sie ihn an einem sicheren Ort.- Schalten Sie die Stromversorgung des Gerätes mit dem einge-bauten Schalter ab.
- Die Kanister des Chlors und des pH-Korrektors sicher verstauen und die Öffnungen an den Verschlüssen verschließen. Reinigen Sie auch den Behälter, in dem die Tanks während
des normalen Betriebs positioniert sind.
- Entfernen Sie die Sonden aus dem Behälter, trennen Sie sie vom Gerät, und reinigen Sie sie; bringen Sie dann an den Enden die entsprechenden Schutzkappen an, und verstauen Sie sie an ei-nem sicheren Ort.- Spülen Sie die Schläuche, die: » von den Pumpen des Gerätes zu den Kanistern führen; » von den Pumpen des Gerätes zur Anlage des Whirlpools führen;
ReferenzkalibrierungAm Ende der Saison und in regelmäßigen Abständen (je nach Art der Nutzung des Gerätes) ist es erforderlich, die Zuverlässigkeit der Sonden durch eine "Referenzkalibrierung" zu überprüfen:
- Chlor-Sonde: Sie benötigen ein Photometer, mit dem die Mes-sungen im selben Augenblick durchgeführt werden müssen, in dem das Wasser der Anlage entnommen wird. Nach durchge-führter Messung werden die Messwerte mit denen des Gerätes verglichen; sollten sie nicht übereinstimmen, muss die Kalibrie-rung der Sonde mit der Kalibrierlösung vorgenommen werden. Dies Kalibrierung sollte auch beim Austausch des Reagenzes und/oder der Messeinheit durchgeführt werden (bestehend aus dem Sen-sor und dem LED-Projektor, die sich am Boden der Messzelle befinden).
- pH-Sonde: Die Zuverlässigkeit der pH-Sonde lässt sich anhand der Kalibrierlösungen (in der Regel pH 7.0 und pH 4.0) ermittelt werden, wie bei der Installation erläutert.
HINWEIS: Die Sonden sollten jedes Jahr ausgetauscht werden.
Wartung
� Vor der Durchführung jeglicher Reinigungsarbeiten oder dem Austausch von Teilen ist es zwingend not-wendig, die Spannung vom Gerät zu nehmen.
HINWEIS: Für die Wartung des Sandfilters und der Filterpumpe siehe die Unterlagen des primären Spa-Pack.
KontrollenKontrollieren Sie regelmäßig den Betrieb und den Verschleißz-ustand der:- Pumpen des Gerätes;- Leitungen für den Anschluss der Pumpen an das Gerät und/
oder die Behälter von Chlor und pH-Korrektor;- Messzelle (siehe weiter vorn);- Chlor- und/oder pH-Sonde.
Tauschen Sie bei Bedarf defekte Bauteile aus; wenden Sie sich dazu an ein autorisiertes Kundendienstzentrum von Jacuzzi®.
Reinigung des Gerätes - Versuchen Sie, eventuelle Verschmutzungen/Ablagerungen mit einem feuchten Lappen zu entfernen. Verwenden Sie keine Scheuermittel oder Lösungsmittel. - Entfernen Sie Rückstände des Reagenzes umgehend.
Reinigung der Sonden - Jeden Monat sollten die Sonden mit einem weichen und mit wenig Wasser angefeuchteten Lappen gereinigt werden. Zum Entfernen eventueller Verkrustungen können Sie die Sonden in eine Lösung aus Wasser und 10 % Salzsäure tauchen. - Nach der Reinigung empfiehlt sich die Kalibrierung der Sonden (siehe Kap. "Referenzkalibrierung").
Reinigung der Messzelle - Am Ende der Saison oder häufiger (je nach Nutzungshäufigkeit des Gerätes) muss eine Reinigung der Messzelle durchgeführt wer-den: Schalten Sie dazu die Stromversorgung des Gerätes ab, und entfernen Sie dann den Deckel sowie den Magneten im Inneren. Reinigen Sie die Zelle mit einem weichen und mit wenig Wasser angefeuchteten Lappen; zum Entfernen eventueller Verkrustungen können Sie eine Lösung aus Wasser und 10 % Salzsäure verwenden.
- Überprüfen und, wenn nötig, reinigen Sie auch das Magnet-ventil neben der Messzelle.
- Bauen Sie wieder alle entfernten Komponenten ein, und verges-sen Sie dabei nicht das Einsetzen des Magneten in die Messzelle.
� Reinigen Sie die Zelle nicht mit Lösungsmitteln, Ver-dünnern oder Scheuermitteln. Verwenden Sie keine Werkzeuge aus Metall.

58
Reinigung des Magnetventils des Spa-Pack - Das angegebene Magnetventil muss regelmäßig kontrolliert und bei Bedarf gereinigt werden.
Austausch der Sicherung - Nachdem Sie die Stromversorgung des Gerätes abgeschaltet und die Abdeckung geöffnet haben, ermitteln und ersetzen Sie die angegebene Sicherung mit einer vom gleichen Typ.
� Dieser Vorgang muss durch qualifiziertes Personal durchgeführt werden.
HINWEIS: Für andere Wartungsarbeiten und/oder den
Austausch von Teilen des Spa-Pack wenden Sie sich bitte ausschließlich an autorisierte Jacuzzi®-Händler und Kun-dendienststellen.
Im Falle von Betriebsstörungen...
HINWEIS: Im Falle von Betriebsstörungen achten Sie auch auf eventuelle Anzeigen vom Schaltkasten des primären Spa-Pack (siehe entsprechende Unterlagen).
Das Gerät schaltet sich nicht ein - Stellen Sie sicher, dass das Gerät eingeschaltet ist (Schalter einge-schaltet, Stromversorgung aktiv). - Prüfen Sie, ob die Sicherung durchgebrannt ist (siehe "Austausch der Sicherung").
Die Pumpe des Spa-Pack funktioniert nicht - Prüfen Sie, ob der Schalter am Schaltkasten des Spa-Pack einge-schaltet ist.
- Prüfen Sie, ob die Pumpe des primären Spa-Pack ordnungsgemäß funktioniert (siehe entsprechende Unterlagen).
Auslösen des externen Alarms (auf dem Display erscheint das Symbol ) und eventuelles Anhalten des Gerätes
- Prüfen Sie, dass die Wassertemperatur nicht zu hoch ist (siehe auch "H2 O fehlt").
- Prüfen Sie, ob Reagenz vorhanden ist und ersetzen Sie es bei Be-darf (siehe "Auswechseln des Reagenzes"). - Prüfen Sie, dass die Schläuche an der Messzelle nicht verstopft sind.
- Prüfen Sie, dass die Wasserversorgung in der Messzelle nicht un-terbrochen ist. - Prüfen Sie, ob die Messzelle schmutzig ist, und reinigen Sie sie bei Bedarf (siehe "Reinigung der Messzelle"). - Die Verkabelung der Messzelle konnte beschädigt sein. Wenden Sie sich an eine Jacuzzi® Kundendienststelle. - Der Projektor ist möglicherweise defekt. Wenden Sie sich an eine Jacuzzi® Kundendienststelle.
Auf dem Display erscheint das Symbol - Das Archiv der Messwerte ist voll; es müssen ein Backup der Daten durchgeführt (siehe „Anzeige, Einstellung und Backup der Messwer-te“) und die Daten anschließend eventuell gelöscht werden.
Auf dem Display erscheint "std by" - Der Filterzyklus ist ausgesetzt/unterbrochen (siehe Unterlagen des primären Spa-Pack). - Prüfen Sie, ob die Pumpe des primären Spa-Pack ordnungsgemäß funktioniert (siehe entsprechende Unterlagen).
Auf dem Display erscheint "Errore cloro" (Chlorfehler)

59
- Dieser könnte auf eine zu niedrige Chlorkonzentration im Wasser des Whirlpools zurückzuführen sein, die das Gerät innerhalb einer bestimmten Zeit nicht anheben kann (wenn das Gerät nach einigen Versuchen nicht die minimale Chlorkonzentration erkennen kann, wird der Betrieb ausgesetzt ist). - Überprüfen Sie, dass die Chlorlösung im entsprechenden Kanister nicht an Wirksamkeit verloren hat. - ACHTUNG: Bei Durchführung der manuellen Chlorung (wie im Fall der "Schock-Aufbereitung" oder der Hochchlorung) ist die Chlorkonzentration sehr hoch (das Wasser dann nicht be-treten): Dies kann zu einer fast durchsichtigen Färbung des Messreagenzes führen, wodurch das Gerät die tatsächlich vor-handene Chlormenge nicht erkennen kann. Die Folge dieser Anomalie ist, dass das Gerät weiter Chlor hinzufügt und so eine Überdosierung erzeugt. Aus diesem Grund sollte die manuelle Chlorung bei ausgeschaltetem Gerät durchgeführt werden.
Das Display zeigt an, dass eine Sonde defekt ist - Prüfen Sie, ob die angegebene Sonde verschmutzt oder beschädigt ist; prüfen Sie außerdem, dass vor Einsetzen in den entsprechenden Behälter die Schutzabdeckung entfernt wurde. - Prüfen Sie, dass die Sonde richtig an das Gerät angeschlossen ist. HINWEIS: Wenn der Parameter “Bontà sonda” (Güte der Son-de) einen OFFSET-Wert von mehr als ± 100 mV und/oder einen GAIN-Wert von unter 50 % aufweist, ersetzen Sie die Sonde. Wenden Sie sich an eine Jacuzzi® Kundendienststelle.
Auf dem Display erscheint “mancanza H2O” (H2O fehlt) - Prüfen Sie, das der Kreis, der die Messzelle und den Behälter der Sonden mit Wasser versorgt, ordnungsgemäß funktioniert. - Achten Sie darauf, dass die Wassertemperatur nicht zu hoch ist. - Der Wert des Parameters “taratura sensore H2O” (Kalibrierung H2O-Sensor) könnte zu niedrig sein. Wenden Sie sich an eine Jacuz-zi® Kundendienststelle.
Das Display zeigt Probleme mit der Messzelle an - Prüfen Sie, dass die Messzelle sauber ist (siehe Kap. "Reinigung der Messzelle").
- Der Projektor (P) und/oder der Sensor (F) könnten beschädigt sein. Wenden Sie sich an eine Jacuzzi® Kundendienststelle.
F
P
Das Archiv der Messdaten ist leer. - Prüfen Sie, dass der Parameter "Step" nicht gleich Null ist (siehe auch Abschnitt "Anzeige und Backup der Messwerte").
Struktur der Menüs und zugehörige Werkseinstellungen
1 - EINSTELLUNGEN SYSTEM
DATUM/UHR TAG/MONAT/ JAHR/ STUNDE/ MINUTE
SPRACHE ENGLISH
PASSWORD 00000
DISPLAY KONTRAST 88 HINTENBELEUTC NO
EINSTELL. RELAY EINSTELL. RELAY ALARM ALARM ZEIT CL 0000 ALARM ZEIT PH 0000 VERLASSE SET SI
2 - EINSTE. ABMESSUNGEN
ABMESSUNG AUSWÄHLEN AUSWÄHLEN CL2 EINSTELLUNGEN CL2 RELAY AUSGÄN.
SET POINT 1 ON 0.80 ppm OFF 1.10 ppm ZEIT ON +000 ZEIT OFF +000 MODE RELAY MODE RELAY pwm ZEIT PWM 30 sec
SET POINT 2 ON 0.80 ppm OFF 1.10 ppm ZEIT ON +000 ZEIT OFF +000 MODE RELAY MODE RELAY pwm ZEIT PWM 30 sec
OUTIN AKTUELL AUSG. FELD 4-20 mA UNT. GRENZE 0.00 ppm OB. GRENZE 5.00 ppm EICHUNG FREIES CHLOR AUTOMATISCH DEFAULT RESET

60
ANALYSEINTERVALL ANALYSEINTERVALL 10 min
SERVICE MENU GEWINN AN CHLOR 4.00 ppm CELL ALARM on WASSER ALARM on
EINSTELLUNG ANALYSE TIME METHODE ZEIT WASCHUNG 35 sec ZEIT NULLANALYS 10 sec EINSTELL.ZEIT 20 sec UNRUHIGE ZEITEN 2 sec ZEIT REAGENZ 3 sec
REAGENZ SETUP REAG. ALARM off EINSTELL. RELAY AUX 1 3 min
ANDERE EINSTELLUNGEN DEFAULT WERTE ZÄHLVERFAHREN GRAF RESET MEASURE OUT SET SI MAX.ZUR ZERO 10
AUSWÄHLEN TEMP. EINSTELLUNGEN TEMP. OUTIN AKTUELL AUSG. FELD 4-20 mA UNT. GRENZE 0.00 ppm OB. GRENZE 5.00 ppm
EICHUNG OFFSET TEMP. -04.5 °C
AUSWÄHLEN PH EINSTELLUNGEN PH RELAY AUSGÄN.
SETPOINT 1 ON 7.40 pH OFF 7.00 pH ZEIT ON 010 ZEIT OFF 050 MODE RELAY MODE RELAY soglia ZEIT PWM 10 sec
OUTIN AKTUELL AUSG. FELDE 4-20 mA UNT. GRENZE 0.00 ppm OB. GRENZE 5.00 ppm
EICHUNG AUTOMATISCH MANUELL DEFAULT RESET
AUSWÄHLEN RX EINSTELLUNGEN RX OUTIN AKTUELL AUSG. FELD 4-20 mA LOW LIMIT 700 mV HIGH LIMIT 1500 mV EICHUNG AUTOMATISCH DEFAULT RESET
INIBIT CL REDOX ENABLE INIBIT ON SET POINT 750
3 - MANUELLKONTR.
EINGANG DIGITALEINGÄN. DIG. INPUT AUX off DIG. INPUT REAL off
AUSGANG AUSGANG RELAY SET1 CL off SET2 CL off SET PH off AUX off ALARM off
ANALOGAUSGÄN. AUSGANG 1 0.00 mA AUSGANG 2 0.00 mA AUSGANG 3 0.00 mA AUSGANG 4 0.00 mA KALIBRIERUNG DAC RESET DEFAULT
DIGITALEAUSGÄN. VENTIL off MOT.AGITATORE off LED CL2 on LED ALARM off PERISTALTIC off
EICHUNG H2O SENSOR MANUELLKONTR. 45.0 °C
SET AGITATOR MOTOR DUTY CYCLE 33% FREQUENZ 1000 Hz
ENABL.INPUT 220V on

61
4 - ARCHIV
ZEIGE DATEN ERSTE DATEN LETZTE DATEN DATUM/UHR
SETUP STEP 10 min ARCHIVSART >> BESCHAFTIGUNG 6 % RESET RS485/USB rs485
USB-STICK DOWNLOAD
5 - GRAP.MASSEINH.
AUSWÄHLEN CL2 AUSWÄHLEN PH AUSWÄHLEN TEMP. AUSWÄHLEN RX
ERSTE DATEN DATUM/UHR ZEITBASIS
� Halten Sie sich ausschließlich an die genannten Menüs. Ändern Sie nicht die Werte aus Abschnitt 3„ - Manuelle
Kontrolle“.

62
Importante
� Para lo referente a las modalidades de funcionamiento del filtro de arena y de la bomba de filtración, consulte la documentación del spa-pack principal.
� Se debe comprobar a diario (y en cualquier caso según la frecuencia de uso de la minipiscina) si el instrumento funciona correctamente y si hay avisos de alarma. Realice periódicamente la calibración de referencia de las sondas.
Notas sobre el uso del instrumento
� Con cada encendido (incluida la primera puesta en marcha), el instrumento realiza una comprobación de funcionamiento, que dura unos 10 minutos, tras la cual se lleva a cabo la primera medición y se dosifican los productos químicos.
Así pues, durante el encendido no se deben tener en cuenta los valores que aparezcan en la pantalla.
- Se define como “funcionamiento normal” la realización de las actividades de control/dosificación (la pantalla muestra los valo-res de cloro -libre- y de pH). � Cuando se entra en el menú de regulación, se suspen-
den las actividades de control/dosificación; por lo tan-to, una vez concluidos los ajustes, asegúrese de volver a poner el instrumento en estado de “funcionamiento normal”. De lo contrario no se llevaría a cabo ninguna operación de control/dosificación y, por tanto, no se garantizaría el correcto tratamiento del agua.
Notas sobre la calibración de las sondas - Asegúrese de que los extremos de las sondas no estén en con-tacto con el fondo del recipiente ( 17).
- Para calibrar la sonda de pH, utilice en primer lugar la solución pH 7.
- Una vez sumergida la sonda en la solución de calibración, agí-tela durante unos segundos y espere a que se estabilice el valor de la pantalla (el valor mostrado no debe variar).
- Si el valor de la pantalla no coincide con el valor “de referencia” (que se indica en el recipiente de la solución de calibración en rela-ción con los distintos valores de temperatura), use las teclas / para ajustarlo.
- Para cancelar valores incorrectos, seleccione “reset default” (restablecer predeterminado) y pulse “enter”.
Ajuste del valor de redoxEl redox, medido en mV (milivoltios), está ligado a la concentración de cloro en el agua: si esta supera un cierto valor, se da un aviso de alarma. Sin embargo, hay que destacar que el redox depende del tipo de agua empleado (contenido en sales minerales, etc.), por lo que su valor debe determinarse caso por caso.
- Una vez instalado el spa-pack y calibradas las sondas, ponga en marcha la instalación y déjela funcionando unas 24 horas, para que se alcancen los valores correctos del tratamiento del agua.
- Pulse la tecla “enter” para que aparezca, abajo a la derecha, el valor de redox (expresado en mV); añada “50” al valor mostrado y anótelo.
- Pulse “esc”: la pantalla debería mostrar “impostazioni sistema” (ajustes del sistema); de no ser así, vuelva a pulsar la tecla “enter”.
- Use la tecla para seleccionar el menú “impostazioni misu-re” (ajustes de las mediciones) y pulse “enter”.
- A continuación pulse “selezione rx” (selección de rx) y pulse “enter”.
- Compruebe que el parámetro “abilita inibit” (habilitar inhi-bidor) esté en “on” (de lo contrario, seleccione esta opción, pulse “enter” y use las teclas / para ponerlo en “on”).
- Seleccione “inibit cl redox” (inhibidor cl redox) y pulse “enter”.
- Seleccione “set point” (punto de consigna) y pulse “enter”. A continuación introduzca el valor anotado previamente (use las teclas / , seleccione el valor que desea asignar al parámetro y pulse “enter”).
- Para salir de los menús y volver al funcionamiento normal, pul-se “esc” hasta que aparezca “exit” (salir) en la pantalla, y luego pulse “enter”. A continuación la pantalla mostrará el mensaje “save?” (¿guardar?): » vuelva a pulsar “enter” para memorizar los cambios realizados; » pulse “esc” si desea salir de los menús sin memorizar los
cambios realizados.
Ajuste del instrumento en caso de agua con pH ácido En la mayoría de los casos, el agua de una minipiscina se carac-teriza por un valor de pH alcalino (es decir, superior a 7). Por ello, el instrumento viene configurado de fábrica para funcionar correcta-mente con agua que presente estos valores: utilizando el producto específico Jacuzzi ® pH- junto con el instrumento, este mantendrá el pH dentro de los valores ideales. Por el contrario, si el agua de la minipiscina presenta bajos va-lores de pH (inferiores a 7), se deberá utilizar el producto Jacuzzi® ph+, modificando también determinados parámetros de funciona-miento del instrumento:
Uso y mantenimiento

63
- Pulse “esc”: la pantalla debería mostrar “impostazioni siste-ma” (ajustes del sistema); de no ser así, vuelva a pulsar la tecla “enter”.
- Use la tecla para seleccionar el menú “impostazioni misu-re” (ajustes de las mediciones) y pulse “enter”.
- Use la tecla para seleccionar “selezione pH” (selección de pH) y pulse “enter”.
- Asegúrese de que esté seleccionada la opción “uscite relè” (sa-lidas de relé) y pulse “enter”: la pantalla mostrará “set point1” (punto de consigna 1); vuelva a pulsar “enter”.
- Asegúrese de que esté seleccionado “on” y pulse “enter”. Con las teclas / , defina el valor 7.00 pH.
- Pulse “enter” y ponga el parámetro en “off”; vuelva a pulsar “enter”.
- Con las teclas / , defina el valor 7.40 pH y pulse “enter” para confirmar el valor ajustado.
- Para salir de los menús y volver al funcionamiento normal, pul-se “esc” hasta que aparezca “exit” (salir) en la pantalla, y luego pulse “enter”. A continuación la pantalla mostrará el mensaje “save?” (¿guardar?): » vuelva a pulsar “enter” para memorizar los cambios realiza-
dos; » pulse “esc” si desea salir de los menús sin memorizar los
cambios realizados.
Otras operaciones realizadas con el teclado
Activación / cambio de la contraseña
ATENCIÓN: una vez definida la contraseña, se solicitará cada vez que se acceda a determinadas fases de programación.
- Pulse “esc”: la pantalla debería mostrar “impostazioni sistema” (ajustes del sistema); de no ser así, vuelva a pulsar la tecla “enter”.
- Pulse “enter” para entrar en el menú “setup sistema” (confi-guración del sistema); luego use la tecla para seleccionar “password” (contraseña).
- Pulse de nuevo “enter”: la pantalla mostrará el mensaje “password: 0” (contraseña: 0). Vuelva a pulsar la tecla “enter” hasta que la pantalla muestre las dos opciones disponibles: “sta-to password” (estado de la contraseña) y “nuova password” (nueva contraseña).
- Para activar/desactivar la contraseña, asegúrese de que esté se-leccionado “stato password” (estado de la contraseña), pulse “enter” y, con las teclas / , seleccione “on” u “off”, respecti-vamente (cuando la contraseña está activada, la pantalla mues-tra el símbolo ).
- Para cambiar la contraseña, seleccione “nuova password” (nueva contraseña) y pulse “enter”: con las teclas / , seleccio-ne el valor que desea asignar al primer dígito y vuelva a pulsar “enter”. Siga el mismo procedimiento para los demás dígitos. - Pulsando por última vez la tecla “enter”, la pantalla mostrará “nuo-va password” (nueva contraseña): la contraseña ya está definida.
- Para salir de los menús y volver al funcionamiento normal, pul-se “esc” hasta que aparezca “exit” (salir) en la pantalla, y luego pulse “enter”. A continuación la pantalla mostrará el mensaje “save?” (¿guardar?):
» vuelva a pulsar “enter” para memorizar los cambios realizados; » pulse “esc” si desea salir de los menús sin memorizar los
cambios realizados.
Ajuste del nivel de iluminación de la pantalla - Pulse “esc”: la pantalla debería mostrar “impostazioni sistema” (ajustes del sistema); de no ser así, vuelva a pulsar la tecla “enter”.
- Pulse “enter” para entrar en el menú “setup sistema” (configu-ración del sistema); luego use la tecla para seleccionar “dis-play” (pantalla).
- Pulse de nuevo “enter”: la pantalla mostrará las dos opciones disponibles: “contrasto” (contraste) y “retroilluminazione” (re-troiluminación).
- Para ajustar el nivel de visualización, asegúrese de que esté se-leccionado “contrasto” (contraste); luego pulse “enter” y, con las teclas / , seleccione el valor deseado. Vuelva a pulsar “enter”.
- Para ajustar el tiempo durante el que permanece iluminada la pantalla, seleccione “retroilluminazione” (retroiluminación). » Si se selecciona “si”, la pantalla permanece siempre iluminada. » Si se selecciona “no”, la pantalla se apaga automáticamente
un minuto después de pulsar una tecla.
- Para salir de los menús y volver al funcionamiento normal, pul-se “esc” hasta que aparezca “exit” (salir) en la pantalla, y luego pulse “enter”. A continuación la pantalla mostrará el mensaje “save?” (¿guardar?):
» vuelva a pulsar “enter” para memorizar los cambios realizados; » pulse “esc” si desea salir de los menús sin memorizar los
cambios realizados.
Visualización de la temperatura/potencial redox (rdx) - Para consultar, de manera alternada, el valor de la temperatura y el del potencial de redox (rdx) pulse varias veces la tecla “enter”; los valores aparecerán abajo a la derecha.
Visualización, ajuste y copia de seguridad de las medi-ciones - Pulse “esc”: la pantalla debería mostrar “impostazioni sistema” (ajustes del sistema); de no ser así, vuelva a pulsar la tecla “enter”.

64
- Entre en los menús “archivio” (archivo) y/o “grafici misure” (gráficos de las mediciones) para consultar el histórico y los dia-gramas de las mediciones realizadas.
- Concretamente, si se selecciona “primo dato” (primer dato), la visualización empieza por el primer dato y continúa con los si-guientes. En cambio, si se selecciona “ultimo dato” (último dato), la vi-sualización empieza por el último dato y prosigue hacia atrás. Por último, el parámetro “data/ora” (fecha/hora) permite ajustar la visualización seleccionando un día y una hora determi-nados.
- El menú “grafici misure” (gráficos de las mediciones) también contiene el parámetro “base tempi” (base de los tiempos), que permite consultar la variación de la magnitud examinada en un intervalo de 1, 6 o 24 horas. Cuando se muestra el gráfico, si se pulsa la tecla “enter” apare-ce una tabla que indica los valores máximo, mínimo y medio de la magnitud que se está examinando. Si se vuelve a pulsar la tecla “enter” se muestra la evolución detallada de la medición y, si se pulsa una vez más, la pantalla retoma la visualización inicial. - Para desplazar los datos de la lista, utilice las teclas / . - Para modificar los ajustes del registro de las mediciones, entre en el menú “archivio” (archivo) - submenú “setup” (configura-ción) y defina los siguientes parámetros:
Step (intervalo): define el intervalo de registro (de 0 a 99 mi-nutos); si se pone a 0 no se registra ningún dato. Tipo Archivio (tipo de archivo): si se selecciona el símbolo “anillo”, cuando se llena el archivo, los datos posteriores se es-criben por encima de los primeros.Si se selecciona el símbolo “flecha”, cuando se llena el archivo ya no se puede guardar ningún dato (hay que vaciar antes la memoria).
Reset memoria (borrado de memoria): elimina todos los da-tos almacenados en el archivo.
La opción “occupazione” (espacio ocupado) indica el porcen-taje de memoria ocupado.
- Mediante el submenú “pendrive back-up” (copia de seguri-dad en memoria USB) se puede hacer una copia de los datos memorizados conectando una memoria USB al puerto previsto.
- A continuación podrán importarse los datos a una hoja de cál-culo normal y organizarse según convenga
Restablecimiento de los ajustesSi se ajustan valores incorrectos en lo que respecta a la cali-bración de los parámetros del cloro (o si se desea restaurar los parámetros predeterminados), hay que:
- Entrar en la sección “3 - impostazione misure” (ajuste de me-diciones).
- Entrar luego en “selezione cl2” (selección del cl2), “impostazio-ne cl2” (ajuste del cl2) y “uscite relè” (salidas de relé).
- Seleccione “calibrazione” (calibración) y, por último, “reset de-fault” (se restablecerán los valores predeterminados, de acuerdo con las especificaciones de ensayo del instrumento en cuestión).
- A continuación defina los nuevos valores.
Siga los mismos pasos si desea poner a cero y reajustar los parámetros correspondientes al pH y/o al redox (rx); en este caso, hay que entrar en “selezione pH” (selección del pH) y/o en “selezione rx” (selección del rx), respectivamente.
� Los valores memorizados de serie son conformes a la norma UNI 10637. En los países que no hayan incorpo-rado esta directiva o que la complementen con disposi-ciones locales, consulte las normas correspondientes.
Sustitución del reactivoEl reactivo debe sustituirse cuando se haya agotado y/o cuando ad-quiera un tono oscuro.
- Corte la corriente del equipo.
- Prepare la solución utilizando los dos componentes ( 8).
- Desenrosque el tapón del recipiente del reactivo agotado y co-lóquelo en el nuevo; a continuación cambie el recipiente agota-do por el nuevo e introduzca en él el tubo de la bomba ( 8). NOTA: elimine los restos de reactivo antiguo que pueda haber y cambie el recipiente; no añada el nuevo reactivo al antiguo.
- Conecte la corriente y pulse la tecla para que los tubos se llenen de reactivo y se eliminen las burbujas de aire que pudiese haber. - Apague y vuelva a encender el equipo y calibre las sondas (véa-se “Calibración de referencia”).
� Los recipientes, los posibles residuos de sustancias químicas y el reactivo agotado deben desecharse de acuerdo con las normas vigentes en la materia; consul-te también con las autoridades locales para lo referen-te al desagüe de aguas tratadas químicamente..
Suspensión del funcionamiento durante perio-dos medios-largosSi no se utiliza el equipo durante varios días (aproximadamente una semana), realice las siguientes operaciones:

65
- Elimine el reactivo sustituyéndolo por agua destilada o desmi-neralizada.
- Accione la bomba del reactivo pulsando la tecla durante unos segundos, para lavar los tubos (al final, los tubos deben quedar limpios y llenos de agua).
- Deje el equipo funcionando durante unos diez minutos, para que se lave la celda de medición (consulte también el apartado “Limpieza de la celda de medición”). Quite el imán colocado en el fondo ( 7), límpielo y guárdelo en un lugar seguro.- Corte la corriente del equipo mediante el interruptor incorporado.
- Guarde en un lugar seguro los bidones del cloro y del corrector del pH, cerrando las aberturas de los tapones. Limpie también el recipiente en el que se colocan los bido-
nes durante el funcionamiento normal.
- Extraiga las sondas del recipiente, desconéctelas del instru-mento y límpielas; luego coloque los capuchones de protección en sus extremos y guárdelas en un lugar seguro.- Lave los tubos que: » van de las bombas del instrumento a los bidones; » van de las bombas del instrumento a la instalación de la mini-piscina.
Calibración de referenciaA final de temporada y, en cualquier caso, periódicamente (según el tipo de uso que se haga del instrumento) se debe comprobar la fiabilidad de las sondas mediante una calibración “de referencia”: - sonda de cloro: se necesita un fotómetro con el que realizar mediciones en el preciso instante en que se toma el agua de la instalación. Una vez realizada la medición, se compara con la del equipo; si no es correcta, se deberá calibrar la sonda con la solu-ción de calibración. Conviene llevar a cabo esta calibración también cuando se sustitu-ye el reactivo y/o el grupo de medición (formado por el sensor y por el proyector led, situados en la parte inferior de la celda de medición).
- sonda de pH: la fiabilidad de la sonda de pH se determina con las soluciones de calibración (generalmente pH 7.0 y pH 4.0), tal y como se indica en las fases de instalación.
NOTA: se recomienda sustituir las sondas una vez al año.
Mantenimiento
� Antes de comenzar cualquier operación de limpieza o sustitución de componentes, es obligatorio cortar la corriente del equipo.
NOTA: para lo referente a las modalidades de mantenimiento del filtro de arena y de la bomba de filtración, consulte la docu-mentación del spa-pack principal.
ComprobacionesCompruebe periódicamente el funcionamiento y el estado de desgaste de:- bombas del instrumento;- tubos de conexión de las bombas al instrumento y/o a los reci-pientes del cloro y del corrector del pH.- celda de medición (véase más adelante).- sonda de cloro y/o sonda de pH.
En caso necesario, sustituya los componentes averiados; acuda a un Centro de Asistencia autorizado de Jacuzzi®.
Limpieza del instrumento - Utilice una bayeta húmeda, procurando eliminar la suciedad o las incrustaciones que pueda haber. No utilice detergentes abrasivos o disolventes. - Elimine inmediatamente todo resto de reactivo.
Limpieza de las sondas - Se recomienda limpiar las sondas una vez al mes con una ba-yeta suave humedecida con un poco de agua. Para eliminar las incrustaciones, sumerja las sondas en una solución de agua y ácido clorhídrico al 10%.
- Tras la limpieza, se recomienda calibrar las sondas (véase el cap. “Calibración de referencia”).
Limpieza de la celda de medición - A final de temporada y/o dependiendo de la frecuencia de uso del instrumento, se debe limpiar la celda de medición: tras cortar la corriente y retirar la tapa, quite el imán situado en el interior. A continuación limpie la celda utilizando una bayeta suave hu-medecida con un poco de agua. Para eliminar las incrustaciones, emplee una solución de agua y ácido clorhídrico al 10 %.
- Revise y, en caso necesario, limpie también la electroválvula si-tuada al lado de la celda de medición.
- Vuelva a montar los componentes, recordando colocar de nue-vo el imán en el interior de la celda de medición.
� No use disolventes, diluyentes o sustancias abrasivas para limpiar la celda. No utilice herramientas metálicas.

66
Limpieza de la electroválvula del spa-pack - Revise periódicamente la electroválvula indicada y límpiela en caso necesario.
Sustitución del fusible - Tras cortar la corriente y abrir la tapa, localice y sustituya el fusi-ble indicado por uno del mismo valor.
� Esta operación debe ser realizada por personal cuali-ficado.
NOTA: para otras operaciones de mantenimiento y/o susti-tución de componentes del spa-pack, acuda únicamente a distribuidores y Centros de Asistencia Jacuzzi® autorizados.
En caso de problemas...
NOTA: si se producen fallos de funcionamiento, consulte tam-bién los avisos de la caja electrónica y del spa-pack principal (véase la documentación correspondiente).
El instrumento no se enciende - Compruebe que el instrumento esté recibiendo alimentación eléc-trica (interruptor encendido, instalación eléctrica funcionando).
- Compruebe que el fusible no esté quemado (véase “Sustitución del fusible”).
La bomba del spa-pack no funciona - Compruebe que el interruptor situado en la caja del spa-pack esté encendido.
- Compruebe que no se hayan producido errores de funcionamien-to en la bomba del spa-pack principal (consulte la documentación correspondiente).
Disparo de la alarma externa (la pantalla muestra el sím-bolo ) y posible parada del instrumento
- Compruebe que la temperatura del agua no sea excesiva (véase también “mancanza H2O” (falta de agua)).
- Compruebe si hay reactivo y, en caso necesario, sustitúyalo (véase “Sustitución del reactivo”). - Compruebe que los tubos conectados a la celda de medición no estén obstruidos.
- Compruebe que no se haya interrumpido la alimentación del agua en la celda de medición. - Compruebe que la celda de medición no esté sucia y límpiela en caso necesario (véase “Limpieza de la celda de medición”). - El cableado de la celda de medición podría estar estropeado. Acuda a un Centro de Asistencia Jacuzzi®. - El proyector podría estar averiado. Acuda a un Centro de Asisten-cia Jacuzzi®.
Ia pantalla muestra el símbolo - El archivo de las mediciones está lleno; hay que hacer una copia de seguridad de los datos (véase “Visualización, ajuste y copia de seguridad de las mediciones”) y/o eliminar los datos almacenados.
La pantalla muestra “std by” - El ciclo de filtración está suspendido\interrumpido (consulte la do-cumentación del spa-pack principal). - Compruebe que no se hayan producido errores de funcionamien-to en la bomba del spa-pack principal (consulte la documentación correspondiente).
La pantalla muestra “errore cloro” (error de cloro) - Podría deberse a una concentración muy baja de cloro en el agua de la minipiscina, que el instrumento no logra aumentar en un tiem-po determinado (si, tras varios intentos, el instrumento no detecta la concentración de cloro mínima, se suspende el funcionamiento). - Compruebe que la solución de cloro contenida en el bidón corres-pondiente no haya perdido eficacia. - ATENCIÓN: cuando se lleva a cabo la cloración manual (como en el caso del tratamiento de choque o supercloración), la con-centración de cloro es muy alta (no se debe entrar en el agua): esto podría provocar que el reactivo de medición adquiera un tono casi transparente, impidiendo así que el equipo mida la cantidad de cloro efectiva. Como consecuencia de este fallo, el instrumento podría seguir añadiendo cloro y provocar así una sobredosificación. Por este motivo, la cloración manual debe realizarse con el instrumento apagado.
La pantalla indica que hay una sonda averiada

67
- Compruebe que la sonda indicada esté limpia y/o no esté estropea-da. Asegúrese también de que se le haya quitado el capuchón de pro-tección antes de introducirla en el recipiente correspondiente. - Compruebe que la sonda esté debidamente conectada al instru-mento. NOTA: si el parámetro “Bontà sonda” (calidad de la sonda) pre-senta un valor de OFFSET superior a ± 100 mV y/o de GAIN infe-rior al 50 %, hay que cambiar la sonda. Acuda a un Centro de Asistencia Jacuzzi®.
La pantalla muestra “mancanza H2O” (falta de agua) - Compruebe que el circuito que inyecta el agua en la celda de medi-ción y en el recipiente de las sondas funcione correctamente. - Compruebe que la temperatura del agua no sea alta. - El valor del parámetro “taratura sensore H2O” (calibración del sen-sor de agua) podría ser demasiado bajo. Acuda a un Centro de Asis-tencia Jacuzzi®.
La pantalla indica problemas en la celda de medición - Compruebe que la celda de medición esté limpia (véase el cap. “Limpieza de la celda de medición”).
- El proyector (P) y/o el fotosensor (F) podrían estar estropeados. Acuda a un Centro de Asistencia Jacuzzi®.
F
P
El archivo de datos de medición está vacío. - Compruebe que el parámetro “step” (intervalo) no esté a cero (véa-se también el apartado “Visualización y copia de seguridad de las mediciones”).
Estructura de los menúsy ajustes predeterminados.
1 - MENU SISTEMA
FECHA/HORA SISTEMA DIA/MES/ AÑO/HORA/ MINUTO
IDIOMA ESPAÑOL
PASSWORD 00000
DISPLAY CONTRASTE 88 ILUMINACIÓN NO
SELECCIÓN RELÉ SELECCIÓN RELÉ ALARMA RET. ALAR. CL 0000 RET. ALAR. PH 0000 DESENGAN.SET SI
2 - MENU MEDICIONES
SELECCIÓN PARAMETRO SELECCIÓN CL2 MENU CL2 SALIDAS RELÉ
SET POINT 1 ON 0.80 ppm OFF 1.10 ppm TIEMPO ON +000 TIEMPO OFF +000 MODO DE RELÉ MODO DE RELÉ pwm PERIODO PWM 30 sec
SET POINT 2 ON 0.80 ppm OFF 1.10 ppm TIEMPO ON +000 TIEMPO OFF +000 MODO DE RELÉ MODO DE RELÉ pwm PERIODO PWM 30 sec
OUT EN CORRIENTE RANGE SALIDA 4-20 mA LÌMITE INF. 0.00 ppm LÌMITE SUP. 5.00 ppm CALIBRACIÓN CL LIBRE AUTOMÁTICA RESET DEFAULT

68
INTERVALO MEDICIONES ANALISIS 10 min
MENÚ SERVICIO COSTANTE CLORO 4.00 ppm CÉL. DE ALARMA on AGUA DE ALARMA on
MENU ANALISIS TIEMPO DE METODO TIEMPO LAVADO 35 sec TIEMPO DEL CERO 10 sec ESTABIL. MEDIDA 20 sec TIEMPO AGITATOR 2 sec TIEMPO REACTIVO 3 sec
REACTIVO DE CONFIG. REAC. DE ALARMA off ASIGNACIÓN RELÉ AUX1 3 min
OTROS AJUSTES VALORES DEFAULT CONT. ANÁLISIS RESET CONTAR MEASURE OUT SET SI MEDIDAS A CERO. 10
SELECCIÓN TEMP. MENU TEMPERATURA OUT EN CORRIENTE RANGE SALIDA 4-20 mA LÌMITE INF. 0.00 ppm LÌMITE SUP. 5.00 ppm
CALIBRACIÓN OFFSET DE TEMP. -04.5 °C SELECCIÓN PH MENU PH SALIDAS RELE
SETPOINT 1 ON 7.40 pH OFF 7.00 pH TIEMPO ON 010 TIEMPO OFF 050 MODO DE RELÉ MODO DE RELÉ soglia PERIODO PWM 10 sec
OUT EN CORRIENTE RANGE SALIDA 4-20 mA LÌMITE INF. 0.00 ppm LÌMITE SUP. 5.00 ppm
CALIBRACIÓN AUTOMÁTICA MANUAL RESET DEFAULT
SELECCIÓN RX MENU RX OUT EN CORRIENTE RANGE SALIDA 4-20 mA LÌMITE INF. 700 mV LÌMITE SUP. 1500 mV CALIBRACIÓN AUTOMÁTICA RESET DEFAULT
INIBIT CL REDOX ABILITA INIBIT ON SET POINT 750
3 - CONTROL MANUAL
ENTRADAS ENTRADAS DIGITALES DIG. INPUT AUX off DIG. INPUT REAL off
SALIDAS SALIDAS RELÉ SET1 CL off SET2 CL off SET PH off AUX off ALARMA off
SALIDAS ANALÓGICAS SALIDA 1 0.00 mA SALIDA 2 0.00 mA SALIDA 3 0.00 mA SALIDA 4 0.00 mA CALIBRACIÓN DAC RESET DEFAULT
SALIDAS DIGITALES VALVULA off MOTORE AGITATORE off LED CL2 on LED ALARM off PERISTALTICA off
CALIBRACIÓN SENSOR H2O CONTROL MANUAL 45.0 °C
MOTOR DEL AGITADOR DUTY CYCLE 33% FRECUENCIA 1000 Hz
ABIL.INPUT 220V on

69
4 - ARCHIVO
VISUALIZA DATOS PRIMER DATO ULTIMO DATO FECHA/HORA
SETUP STEP 10 min TIPO ARCHIVO >> OCUPACIÒN 6 % RESET MEMORIA RS485/USB rs485
PENDRIVE BACK-UP
5 - GRAFICOS MEDIDAS
SELECCIÓN CL2 SELECCIÓN PH SELECCIÓN TEMP. SELECCIÓN RX
PRIMER DATO FECHA/HORA BASE TIEMPOS
� Cíñase únicamente a los menús que se indican. No modifique los valores de la sección “3 - controllo manuale” (control manual).

70
Важно
� В отношении того, что касается функционирова-ния песочного фильтра и фильтрующего насоса, смотрите документацию на главный spa-pack.
� Ежедневно проверять (в любом случае, в соответ-ствии с периодичностью использования spa) соот-ветствующее функционирование прибора и при-сутствие возможных аварийных сигналов.
Периодически производить контрольную кали-бровку датчиков.
Замечания по использованию прибора
� При каждом включении (в том числе первый за-пуск) прибором осуществляется проверка функ-ционирования длительностью примерно 10 минут, после чего производится первое измерение пара-метров и дозировка химических элементов.
Поэтому в момент включения возможные значе-ния, отображенные на дисплее, не принимаются во внимание.
- Под “нормальным функционированием” подразумева-ется контрольная/дозировочная деятельность (на дисплее отображаются параметры свободного хлора и pH). � При доступе к меню регулировки, контрольные/до-
зировочные работы приостанавливаются; поэтому при завершении регулировок, убедиться в приве-дении прибора в состояние “нормального функци-онирования”. В противном случае, не выполняется никакая контрольная/дозировочная операция, а поэтому не гарантируется соответствующая обра-ботка воды.
Замечания по калибровке датчиков - Соблюдать осторожность, чтобы концы датчиков не находи-лись в контакте с днищем емкости ( 17).
- Для калибровки датчика pH, в первую очередь, использо-вать раствор pH 7.
- После установки датчика в калибровочный раствор, встрях-нуть его несколько секунд и подождать стабилизации значе-ния (отображаемое значение не должно изменяться).
- Если значение на дисплее не соответствует “контрольной” величине (указанной на емкости калибровочного раствора и соответствующей различным параметрам температуры), нажать на клавиши / для установки данного значения.
- Для отмены возможных ошибочных значений, выбрать оп-цию “reset default” и нажать “enter”.
Настройка значения redoxRedox, замеряемый в мВ (милливольт), соответствует кон-центрации хлора, присутствующего в воде: если превышает-ся определенное значение, подается аварийный сигнал. Однако, необходимо заметить, что redox зависит от типа исполь-зуемой воды (содержание минеральных солей и т.д.), поэтому необходимо определять значения в каждом отдельном случае.
- После установки spa-pack и калибровки датчиков, запустить систему и оставить ее функционировать в течение приблизи-тельно 24 часов, в целях достижения соответствующих зна-чений обработки воды.
- Нажать клавишу “enter” таким образом, чтобы отобразить в нижней правой стороне значение redox (выраженное в мВ); до-бавить “50” к показанному значению и зарегистрировать его.
- Нажать “esc” : на дисплее должны быть отображены “impo-stazioni sistema” (настройки системы); если это не происхо-дит, нажать клавишу “enter”.
- Посредством клавиши выбрать меню “impostazioni mi-sure” (настройки замеров) и нажать “enter”.
- Затем выбрать опцию “selezione rx” (выбор rx) и нажать “enter”.
- Проверить, что опция “abilita inibit” находится в положе-нии “on” (в противном случае, выбрать данную опцию, на-жать “enter” и при помощи клавиш / установить “on”).
- Выбрать “inibit cl redox” и нажать “enter”.
- Выбрать “set point” и нажать “enter”. Затем ввести ранее зарегистрированное значение (нажать на клавиши / , выбрать значение, присваиваемое пара-метру, и нажать “enter”).
- Для выхода из меню и возврата к нормальному режиму функционирования, нажать “esc” пока на дисплее не будет отображаться “exit”, после чего нажать“enter”. Тогда на дис-плее отображается вопрос “save?”: » вновь нажать “enter” для сохранения внесенных измене-
ний; » нажать “esc” для выхода из меню, без сохранения значе-
ния и внесенных изменений.
Настройка прибора в случае воды с кислым pHВ большинстве случаев вода spa характеризуется щелоч-ным значением pH (или превышающим 7). Поэтому прибор конфигурируется на заводе для соответствующего функци-онирования с водой, обладающей данными характеристика-ми: при использовании специального средства Jacuzzi ® pH- в сочетании с прибором, последний обеспечивает выдержива-ние параметра pH в соответствующих пределах.
Эксплуатация и обслуживание

71
Наоборот, если вода spa характеризуется низкими значени-ями pH (менее 7), необходимо использовать средство Jacuzzi® ph+, изменяя, однако, некоторые рабочие параметры прибора: - Нажать “esc” : на дисплее должны быть отображены “imposta-zioni sistema” (настройки системы); если это не происходит, на-жать клавишу “enter”.
- Посредством клавиши выбрать меню “impostazioni misu-re” (настройки замеров) и нажать “enter”.
- Посредством клавиши выбрать опцию “selezione pH” (вы-бор pH) и нажать “enter”.
- Проверить выбор опции “uscite relè” (выходы реле) и нажать “enter”: на дисплее отображается “set point1”; вновь нажать “enter”.
- Убедиться в выборе опции “on” и нажать “enter”. Посредством клавиш / установить значение 7.00 pH.
- Нажать “enter”, а затем выбрать параметр “off”; вновь нажать “enter”.
- Посредством клавиш / установить значение 7.40 pH и на-жать “enter” для подтверждения выбранного значения.
- Для выхода из меню и возврата к нормальному режиму функ-ционирования нажать “esc” пока на дисплее не будет отобра-жаться “exit”, после чего нажать“enter”. Тогда на дисплее ото-бражается вопрос “save?”: » вновь нажать “enter” для сохранения внесенных измене-
ний; » нажать “esc” для выхода из меню, без сохранения значений
и внесенных изменений.
Другие операции на кнопочной панели
Активация / смена пароля
ВНИМАНИЕ: после установки пароля, он будет запраши-ваться каждый раз при доступе к определенным этапам программирования.
- Нажать “esc” : на дисплее должны быть отображены “imposta-zioni sistema” (настройки системы); если это не происходит, на-жать клавишу “enter”.
- Нажать “enter” для доступа к меню “setup sistema” (настройки системы); клавишей выбрать “password” (пароль).
- Еще раз нажать “enter”: на дисплее отображается “password: 0” (пароль: 0). Еще раз нажать на клавишу “enter” пока на дисплее не будут отображены две имеющиеся опции: “stato password” (статус пароля) и “nuova password” (новый пароль).
- Для активации/дезактивации пароля убедиться в выборе оп-ции “stato password” (статус пароля), нажать “enter” и при помо-щи клавиш / , выбрать соответственно “on” или “off”. (при активации пароля, на дисплее отображается символ
).
- Для смены пароля выбрать “nuova password” (новый пароль) и нажать “enter”: посредством клавиш / выбрать значение, присваиваемой первой цифре, и вновь нажать “enter”. Действо-вать таким же образом для остальных цифр.
- Нажимая в последний раз клавишу “enter”, на дисплее отобра-жается “nuova password” (новый пароль): таким образом, па-роль установлен.
- Для выхода из меню и возврата к нормальному режиму функ-ционирования нажать “esc” пока на дисплее не будет отобра-жаться “exit”, после чего нажать“enter”. Тогда на дисплее ото-бражается вопрос “save?”:
» вновь нажать “enter” для сохранения внесенных изменений; » нажать “esc” для выхода из меню, без сохранения значения
и внесенных изменений.
Регулировка уровня освещенности дисплея - Нажать “esc” : на дисплее должны быть отображены “imposta-zioni sistema” (настройки системы); если это не происходит, на-жать клавишу “enter”.
- Нажать “enter” для доступа к меню “setup sistema” (настройки системы); клавишей выбрать “display” (дисплей).
- Еще раз нажать “enter”: на дисплее отображаются две имею-щиеся опции: “contrasto” (контраст) и “retroilluminazione” (за-дняя подсветка).
- Для регулировки уровня визуализации убедиться, что выбра-на опция “contrasto” (контраст); затем нажать “enter” и клавиша-ми / , выбрать желаемое значение. Вновь нажать “enter”.
- Для регулировки времени, в течение которого дисплей оста-ется освещенным, выбрать опцию “retroilluminazione” (задняя подсветка). » Устанавливая опцию “si” (да), дисплей остается всегда
включенным. » Устанавливая “no” (нет), дисплей автоматически выклю-
чается спустя одну минуту после нажатия клавиши.
- Для выхода из меню и возврата к нормальному режиму функ-ционирования, нажать “esc”, пока на дисплее не будет отобра-жаться “exit”, после чего нажать“enter”. Тогда на дисплее ото-бражается вопрос “save?”: » вновь нажать “enter” для сохранения внесенных изменений; » нажать “esc” для выхода из меню, без сохранения значений
и внесенных изменений.
Визуализация температуры и потенциала redox (rdx) - Для поочередной визуализации значения температуры и по-тенциала redox (rdx) неоднократно нажать “enter”; значения бу-дут отображены в нижней правой стороне.

72
Визуализация, настройка и резервное и сохранение параметров - Нажать “esc” : на дисплее должны быть отображены “impo-stazioni sistema” (настройки системы); если это не происхо-дит, нажать клавишу “enter”.
- Зайти в меню “archivio” (архив) и/или “grafici misure” (гра-фики замеров) для визуализации хронологии и диаграмм, соответствующих сделанным размерам.
- В частности, при выборе “первого параметра”, визуализация начинается с первого параметра и продолжается с последующими. При выборе “последнего параметра”, визуализация начинается с последнего параметра и продолжается в обратном порядке. Наконец, параметр “дата/время” позволяет установить визуализацию, выбирая определенный день и определенный час.
- Меню “графики параметров” также оснащено параметром “временной базы”: оно позволяет отображать изменение анализируемой величины в пределах интервала 1, 6 или 24 часов. После визуализации графика, нажимая кнопку “enter”, появляется таблица, в которой указаны максимальное, минимальное и среднее значение, соответствующие анализируемой величине. Вновь нажимая кнопку “enter”, детально отображается динамика параметра, в то время как при повторном нажатии, на дисплее возобновляется начальное изображение. - Для прокрутки данных списка следует воздействовать на кнопки / - Для изменения настроек регистрации параметров, следует получить доступ к меню “архив” - подменю “настройка” и воздействовать на следующие параметры:
Шаг: определяет интервал регистрации (от 0 до 99 минут); если он равен 0, ни один параметр не регистрируется. Тип архива: при выборе символа “кольца”, после заполнения архива, следующие данные перезаписываются на предыдущие.При выборе символа “стрелка”, после заполнения архива, нет возможности сохранения каких-либо параметров (необходимо сначала опустошить память).
Сброс памяти: удаляет данные, присутствующие в архиве.
Опция “заполнение” указывает на процент занятой памяти.
- Посредством подменю “pendrive back-up” можно копиро-вать сохраненные данные, вставляя флэш-карту usb в специ-альный паз.
- Затем данные могут импортироваться на обычный расчет-ный лист и организовываться предпочитаемым образом.
Сброс настроекВ случае настройки ошибочных значений в отношении того, что касается калибровки параметров, соответствующих хлору (или при желании повторной настройки заводских параметров), необходимо:
- Зайти в секцию “3 - настройка параметров”.
- Затем получить доступ к “выбору cl2”, “настройке cl2” и “выходам реле”.
- Выбрать опцию “калибровка”, а затем “сброс по умолчанию” (восстанавливаются заводские настройки, в соответствии с техническими условиями испытания отдельного прибора).
- Затем произвести настройку новых значений.
Действовать таким же образом в случае необходимости обнуления и повторной установки параметров, соответствующих pH и/или redox (rx); в данном случае необходимо получить доступ к “выбору pH” и/или “выбору rx”.
� Сохраненные на заводе параметры соответствуют нормативу UNI 10637. В странах, где данная директива не используется или дополняется местными предписаниями, следует обращаться к соответствующим нормам.
Замена реагентаРеагент должен заменяться при его завершении и/или когда его цвет приобретает темный оттенок.
- Отключить напряжение устройства.
- Подготовить раствор при использовании двух компонентов ( 8).
- Отвинтить пробку емкости закончившегося реагента и уста-новить на новую; затем заменить пустую емкость на новую и вставить трубу насоса ( 8).
ПРИМЕЧАНИЕ: удалить возможные остатки старого реагента и заменить емкость; не добавлять новый ре-агент в старый.
73
- Подать напряжение и нажать клавишу таким образом, чтобы реагент заполнил трубы и были удалены возможные воздушные пузыри. - Выключить и вновь включить прибор и произвести кали-бровку датчиков (см. “Контрольная калибровка”).
� Сохраненные на заводе параметры соответствуют нормативу UNI 10637. В странах, где данная директива не используется или дополняется местными предписаниями, следует обращаться к соответствующим нормам.
Приостановка функционирования на средние-длительные периоды времениЕсли устройство не используется в течение нескольких дней (приблизительно одна неделя), необходимо выполнить сле-дующие операции:
- Удалить реагент, заменяя его дистиллированной или деми-нерализованной водой.
- Подключить насос реагента, нажимая клавишу на не-сколько секунд, таким образом, чтобы промыть трубы (трубы должны быть чистыми и наполненными водой).
- Оставить устройство в работе приблизительно на десять минут, таким образом, чтобы измерительная ячейка была промыта (также см.параграф “Очистка измерительной ячейки”). Удалить магнит, присутствующий на днище ( 7), очистить и положить в надежное место.- Отключить напряжение оборудования посредством встро-енного выключателя.
- Позиционировать в надежное место канистры с хлором и кор-ректором pH, закрывая отверстия, присутствующие на пробках. Кроме того, очистить емкость, в которой позиционирова-
ны канистры в ходе нормального функционирования.
- Снять датчики емкости, отсоединить их от прибора и очи-стить; установить на концы соответствующие защитные кол-пачки и убрать в надежное место.- Промыть трубы, которые: » от насосов прибора идут к канистрам; » от насосов прибора идут к системе spa;
Контрольная калибровкаВ конце сезона и, в любом случае, периодически (в зависимо-сти от использования прибора), необходимо проверять достоверность датчиков посредством “контрольной” ка-либровки: - датчик хлора: необходимо наличие фотометра, посред-ством которого производить замеры в тот же самый момент, когда отбирается вода из системы. После замера, произво-дится сравнение с параметрами прибора и в случае несоот-ветствия, необходимо произвести калибровку датчика по-средством калибровочного раствора. Целесообразно осуществлять данную калибровку в том чис-ле при замене реагента и/или измерительного узла (состоя-щего из датчика и светодиодного прожектора, расположен-ных в основании измерительной ячейки).
- датчик pH: достоверность датчика pH определяется по-средством калибровочных растворов (как правило, pH 7.0 и pH 4.0), в соответствии с указаниями на этапе установки.
ПРИМЕЧАНИЕ: рекомендуется производить замену дат-чиков один раз в год.
Обслуживание
� Перед выполнением каких-либо работ по очистке или замене компонентов обязательно отключить напряжение устройства.
ПРИМЕЧАНИЕ: в отношении того, что касается функци-онирования песочного фильтра и фильтрующего насо-са, смотрите документацию на главный spa-pack.
ПроверкиПериодически проверять функционирование и степень изнашивания:- насосов прибора;- труб соединения насосов с прибором и/или с емкостями хлора и корректора pH.- измерительной ячейки (см.далее).- датчика хлора и/или датчика pH.
При необходимости произвести замену неисправных компонентов; обращаться в авторизованный центр технической поддержки Jacuzzi®.
Очистка прибора - Использовать влажную тряпку, стараясь удалить загрязне-ния/отложения. Не использовать абразивные моющие средства или рас-творители. - Незамедлительно удалять любые следы реагента.
Очистка датчиков - Ежемесячно рекомендуется производить очистку датчиков мягкой и увлажненной водой тряпкой. Для удаления воз-можных отложений, погрузить датчики в 10% раствор воды и соляной кислоты. - После очистки рекомендуется произвести калибровку дат-чиков (см. “Контрольная калибровка”).
Очистка измерительной ячейки - В конце сезона и/или в зависимости от использования при-бора, производить очистку измерительной ячейки: после от-ключения напряжения и снятия крышки, убрать имеющийся внутри магнит. Затем очистить ячейку при использовании мяг-кой и смоченной водой тряпкой; для удаления возможных от-ложений использовать 10% раствор воды и соляной кислоты.
- Проверить и при необходимости очистить также и электро-клапан, расположенный рядом с измерительной ячейкой.
- Вновь монтировать компоненты, не забывая о повторном позиционировании магнита внутри измерительной ячейки.

74
� Не производить очистку ячейки посредством рас-творителей, разбавителей или абразивных веществ. Не использовать металлические инструменты
Очистка электроклапана spa-pack
- Периодически проверять и при необходимости очищать указанный электроклапан.
Замена плавкого предохранителя - После отключения напряжения и открытия крышки опре-делить и заменить указанный предохранитель на другой с такими же характеристиками.
� Данная операция должна производиться квалифи-цированным персоналом.
ПРИМЕЧАНИЕ: для других работ по обслуживанию и/или замене частей spa-pack обращаться только к диле-рам и в авторизованные Сервисные центры Jacuzzi®.
В случае трудностей...
ПРИМЕЧАНИЕ: в случае несоответствующего функцио-нирования, также смотрите сигнализацию электрон-ной коробки главного spa-pack (см.соответствующую документацию).
Прибор не включается - Проверить, что прибор подключен (выключатель включен, электрическая система работает).
- Проверить, что плавкий предохранитель не перегорел (см. “Замена плавкого предохранителя”).
Насос spa-pack не работает - Проверить, что выключатель на коробке spa-pack включен.
- Проверить отсутствие ошибок функционирования насоса главного spa-pack (см.соответствующую документацию).
Срабатывание внешнего аварийного сигнала (на дис-плее отображается символ ) и возможная останов-ка прибора
- Проверить, что температура воды не является чрезмер-ной (также см. “отсутствие H2O”).
- Проверить наличие реагента и при необходимости заме-нить его (см. “Замена реагента”). - Проверить, что трубы, подсоединенные к измерительной ячейке, не закупорены.
- Проверить, что подача воды в измерительной ячейке не прервана. - Проверить, что измерительная ячейка не запачкана; при необходимости произвести очистку (см. “Очистка измери-тельной ячейки”). - Проводка измерительной ячейки может быть повреждена. Обратиться в сервисный центр Jacuzzi®. - Прожектор может быть неисправен. Обратиться в сервис-ный центр Jacuzzi®.
На дисплее отображается символ - Архив параметров переполнен; следует выполнить резервное копирование данных (см. “Визуализация, настройка и резервное сохранение параметров”) и/или удалить их.

75
На дисплее визуализируется “std by” - Цикл фильтрации приостановлен\прерван (см.соответ-ствующую документацию на главный spa-pack). - Проверить отсутствие ошибок функционирования насоса главного spa-pack (см.соответствующую документацию).
На дисплее отображается “errore cloro” (ошибка хлора) - Может быть обусловлена очень низкой концентрацией хло-ра в воде spa, которую прибор не может повысить за опре-деленный промежуток времени (если после нескольких попы-ток прибор не может выявить минимальную концентрацию хлора, работа приостанавливается). - Проверить, что раствор хлора, присутствующий в кани-стре, не утратил собственную эффективность. - ВНИМАНИЕ: при выполнении ручного цикла хлориро-вания (например, в случае “шоковой” обработки или су-перхлорированием), концентрация хлора является очень высокой (не входить в воду): это может сделать окраску измерительного реагента почти прозрачной и таким образом, мешать устройству определять эффектив-ное количество присутствующего хлора. Последствием данной аномалии является возможность постоянного добавления хлора прибором с соответствующей передо-зировкой. В связи с этим ручной режим хлорирования дол-жен осуществляться при выключенном приборе.
На дисплее сигнализируется неисправность датчика - Проверить, что указанный датчик чистый и/или не повре-жден; кроме того, проверить, что был снять защитный кол-пачок перед установкой в специальную емкость. - Проверить, что датчик подсоединен к прибору соответ-ствующим образом.
ПРИМЕЧАНИЕ: если параметр “Bontà sonda” (Соответ-ствия датчика) представляет значение OFFSET, превы-шающее ± 100 мВ, и/или GAIN менее 50 %, необходимо за-менить датчик. Обратиться в сервисный центр Jacuzzi®.
На дисплее визуализируется “mancanza H2O” (отсут-ствие H2O) - Проверить, что контур, подающий воду в измерительную ячейку и в емкость датчиков функционирует соответству-ющим образом. - Проверить, что температура воды не высокая. - Значение параметра “taratura sensore H2O” (калибровка дат-чика H2O) может быть слишком низким. Обратиться в сер-висный центр Jacuzzi®.
На дисплее сигнализируются проблемы измеритель-ной ячейки - Проверить, что измерительная ячейка очищена (см.главу “Очистка измерительной ячейки”).
- Прожектор (P) и/или фотодатчик (F) могут быть поврежде-ны. Обратиться в сервисный центр Jacuzzi®.
F
P
Архив данных, соответствующих замерам, пустой. - Проверить, что параметр “step” не равен нулю (также см.параграф “Визуализация и сохранение значений замеров”).
Структура менюи соответствующие заводские настройки
1 - SETUP SYSTEM
DATE/HOUR SYSTEM DAY/MONTH/ YEAR/ HOUR/ MINUTE
LANGUAGE ENGLISH
PASSWORD 00000
DISPLAY CONTRAST 88 BACK LIGHTEN. NO
SETUP RELAY SETUP RELAY ALARM ALARM TIME CL 0000 ALARM TIME PH 0000 DISAB.SET POINT SI
2 - SETUP MEASURES
SELECT VALUE SELECT CL2 SETUP CL2 RELAY OUTPUTS
SET POINT 1 ON 0.80 ppm OFF 1.10 ppm ON TIME +000 OFF TIME +000

76
MODE RELAY MODE RELAY pwm PWM PERIOD 30 sec
SET POINT 2 ON 0.80 ppm OFF 1.10 ppm ON TIME +000 OFF TIME +000 MODE RELAY MODE RELAY pwm PWM PERIOD 30 sec
CURRENT OUTPUT OUTPUT RANGE 4-20 mA LOW LIMIT 0.00 ppm HIGH LIMIT 5.00 ppm CALIBRATION CLHLORINE AUTOMATIC DEFAULT RESET ANALYSIS LAG LAG 10 min
SERVICE MENU CHLORINE GAIN 4.00 ppm CELL ALARM on WATER ALARM on
SETUP ANALYSIS TIME METHOD WASHING TIME 35 sec ZERO TIME 10 sec STABIL.MEASURE 20 sec AGITATION TIME 2 sec REAGENT TIME 3 sec
REAGENT SETUP REAG. ALARM off SETUP RELAY aux1 3 min
OTHER SETTINGS DEFAULT VALUES MEASURE COUNTER RESET COUNTER MEASURE OUT SET SI MAX.ZERO MEAS. 10
SELECT TEMP. SETUP TEMP. CURRENT OUTPUT OUTPUT RANGE 4-20 mA LOW LIMIT 0.00 ppm HIGH LIMIT 5.00 ppm
CALIBRATION TEMPER. OFFSET -04.5 °C
PH SELECT PH SETUP OUTPUT RELAY
SETPOINT 1 ON 7.40 pH OFF 7.00 pH ON TIME 010 OFF TIME 050 MODE RELAY MODE RELAY soglia PWM PERIOD 10 sec
ANALOG OUTPUT OUTPUT RANGE 4-20 mA LOW LIMIT 0.00 ppm HIGH LIMIT 5.00 ppm
CALIBRATION AUTOMATIC MANUAL DEFAULT RESET
SELECT RX SETUP RX CURRENT OUTPUT OUTPUT RANGE 4-20 mA LOW LIMIT 700 mV HIGH LIMIT 1500 mV CALIBRATION AUTOMATIC DEFAULT RESET
INHIBIT CL REDOX ENABLE INHIBIT ON SET POINT 750
3 - MANUAL CONTROL
INPUTS DIGITAL INPUTS DIG. INPUT AUX off DIG. INPUT REAL off
OUTPUTS OUTPUTS RELAY SET1 CL off SET2 CL off SET PH off AUX off ALARM off
ANALOG OUTPUTS OUTPUT 1 0.00 mA OUTPUT 2 0.00 mA OUTPUT 3 0.00 mA OUTPUT 4 0.00 mA

77
CALIBRATION DAC RESET DEFAULT
DIGITAL OUTPUTS VALVE off AGITATOR MOTOR off LED CL2 on LED ALARM off PERISTALTIC off
CALIBRAT. H2O SENSOR MANUAL CONTROL 45.0 °C
SET AGITATOR MOTOR DUTY CYCLE 33% FREQUENCY 1000 Hz
ENABL.INPUT 220V on
4 - ARCHIVE
SHOW RECORDS FIRST RECORD LAST RECORD DATE/HOUR
SETUP STEP 10 min ARCHIVE TYPE >> MEMORY FILLI. 6 % MEMORY RESET RS485/USB rs485
PENDRIVE BACK-UP
5 - GRAPHIC MEASURE
SELECT CL2 SELECT PH SELECT TEMP. SELECT RX
FIRST RECORD DATE/HOUR TIME SETTING
� Придерживаться только указанных меню.Не изменять значения, содержащиеся в секции “3 - ручной контроль”.


I dati e le caratteristiche non impegnano la Jacuzzi Europe S.p.A., che si riserva il dirittodi apportare tutte le modifiche ritenute opportune senza obbligo di preavviso o di sostituzione
The data and characteristics indicated do not oblige Jacuzzi Europe, who reserves the rightto make the necessary changes they feel opportune without forewarning or substitution
Les caractéristiques indiquées, n’engagent pas la Jacuzzi Europe, qui se réserve le droit d’apportertoutes les modifications qu’elle jugera opportune sans obligation de préavis ou de remplacement
Die Angaben sind für Jacuzzi Europe nicht bindend. Änderungen, die dem Fortschritt dienen,halten wir uns vor
Los datos y caracteristicas indicadas no comprometen a Jacuzzi Europe que se reserva el derechode aportar todas las modificaciones que considere oportunas sin obligación de preaviso o de sustitución
è˂‰ÂÌÌ˚ ‰‡ÌÌ˚Â Ë ı‡‡ÍÚÂËÒÚËÍË fl‚Îfl˛ÚÒfl ‰Îfl ÙËÏ˚ Jacuzzi Europe S.p.A. ÌÂÓ·flÁ‡ÚÂθÌ˚ÏË. îËχ ÓÒÚ‡‚ÎflÂÚ Á‡ ÒÓ·ÓÈ Ô‡‚Ó ‚ÌÂÒÂÌËfl ‚ÒÂı ÚÂı ËÁÏÂÌÂÌËÈ, ÍÓÚÓ˚ ·Û‰ÛÚ ÔËÁ̇Ì˚ ÌÂÓ·ıÓ‰ËÏ˚ÏË, ·ÂÁ Ó·flÁ‡ÚÂθÒÚ‚‡ Ô‰‚‡ËÚÂθÌÓ„Ó Û‚Â‰ÓÏÎÂÌËfl ËÎË Á‡ÏÂÌ˚.
JACUZZI EUROPE S.p.A. • all rights reserved • JUNE 2014
JACUZZI EUROPE S.p.A.Socio Unico
Direzione e Coordinamento
Jacuzzi Brands, Corp. (USA)
S.S. Pontebbana, km 97,20033098 Valvasone (PN) ITALIATel + 39 0434 859111• Fax + 39 0434 85278www.jacuzzi.eu
Jacuzzi Spa & Bath Ltd
Woodlands, Roydsdale Way, Euroway Trading Estate
Bradford, West Yorkshire - BD4 6ST
SALES
Hot Tubs - 0044 1274 471889 - [email protected]
Bathroom - 0044 1274 471888 - [email protected]
AFTER SALES
Hot Tubs - 0044 1274 471887 - [email protected]
Bathroom - 0044 1274 471886 - [email protected]
Jacuzzi Whirlpool GmbHA Company of Jacuzzi Brands, Corp. (USA) Humboldtstr. 30/323D-70771 Leinfelden-EchterdingenTel. 0049 (0)711 933247-20 Technik/Service/Kundendienst/Ersatzteile (After Sales)Tel. 0049 (0)711 933247-40 Verkauf/Preise/Finish ProductsFax. 0049 (0)711 933247-50 www.jacuzzi.de
Jacuzzi France s.a.s.
8 Route de Paris
03300 Cusset Cedex (FRANCE)
Tél: +33 (0)4 70 30 90 50 • Fax: +33 (0)4 70 97 41 90
Jacuzzi Bathroom España, SLSociedad unipersonal
A Company of Jacuzzi Brands, Corp. (USA) Ausias Marc, 157-159Graner, Local A08013 Barcelona (España)Tel (93) 238 5031 • Fax (93) 238 5032 www.jacuzzi.eu
220108440


![[DEM200] Guide d'utilisation Booster de démarrage et ... - EZA](https://img.pdfslide.net/doc/110x75/6316472a1e5d335f8d09ef5f/dem200-guide-dutilisation-booster-de-demarrage-et-eza.jpg)