Embed Size (px)
Citation preview
1
Crown and ridge Prosthodontics Dr. Sahar Abdul Razzaq
Lecture.1
Prosthodontics
The dental specialty was concerned with the making of artificial replacements for
missing parts of the mouth and jaw. Also prosthetic dentistry or prosthodontics.
Partial dentures: Are divided into two types: fixed partial dentures and
removable partial dentures.
Crown: It's a cemented extra coronal restoration that covers, or veneers, the outer
surface of the clinical crown.
It must restore the morphology, contour and function of the tooth and should
protect the remaining structures from further damage.
Fixed Prosthodontics (Crown and Bridge Prosthodontics);
It’s a branch of dental science that deals with the restoration of damaged
teeth with artificial crown and replacing the missing natural teeth by a dental
prosthesis permanently cemented in place [Fixed partial denture].
Fixed Prosthodontics involves:
-gold and all- -full and partial veneer.
-
Types of crowns: (classification (
A) According to the coverage area
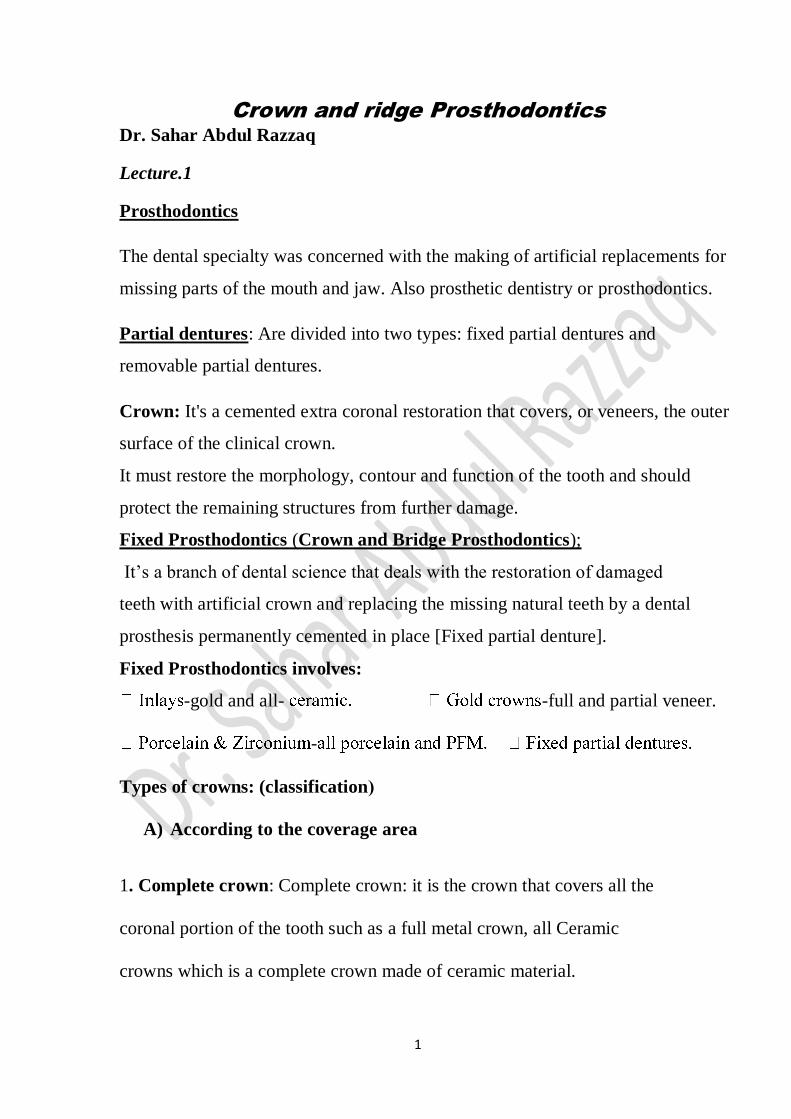
1. Complete crown: Complete crown: it is the crown that covers all the
coronal portion of the tooth such as a full metal crown, all Ceramic
crowns which is a complete crown made of ceramic material.
2
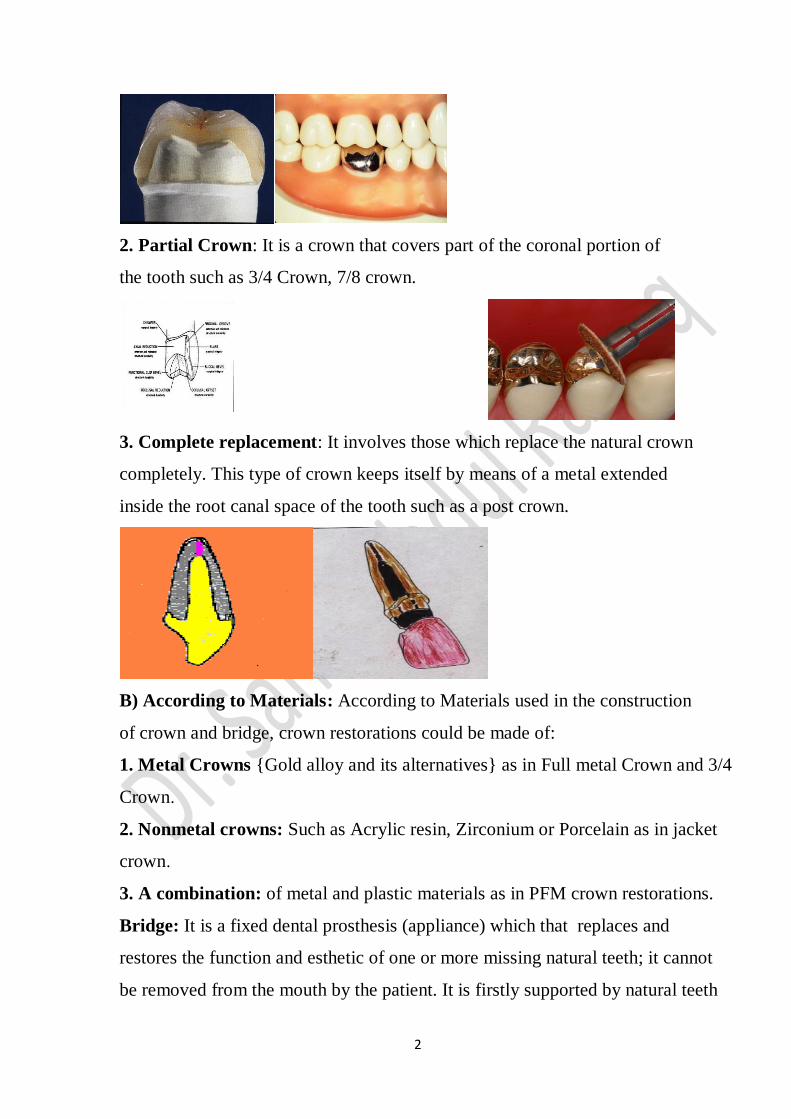
2. Partial Crown: It is a crown that covers part of the coronal portion of
the tooth such as 3/4 Crown, 7/8 crown.
3. Complete replacement: It involves those which replace the natural crown
completely. This type of crown keeps itself by means of a metal extended
inside the root canal space of the tooth such as a post crown.
B) According to Materials: According to Materials used in the construction
of crown and bridge, crown restorations could be made of:
1. Metal Crowns {Gold alloy and its alternatives} as in Full metal Crown and 3/4
Crown.
2. Nonmetal crowns: Such as Acrylic resin, Zirconium or Porcelain as in jacket
crown.
3. A combination: of metal and plastic materials as in PFM crown restorations.
Bridge: It is a fixed dental prosthesis (appliance) which that replaces and
restores the function and esthetic of one or more missing natural teeth; it cannot
be removed from the mouth by the patient. It is firstly supported by natural teeth
3
or roots. A tooth that gives support to the bridge or part of the bridge to which
retainer is cemented an abutment tooth.
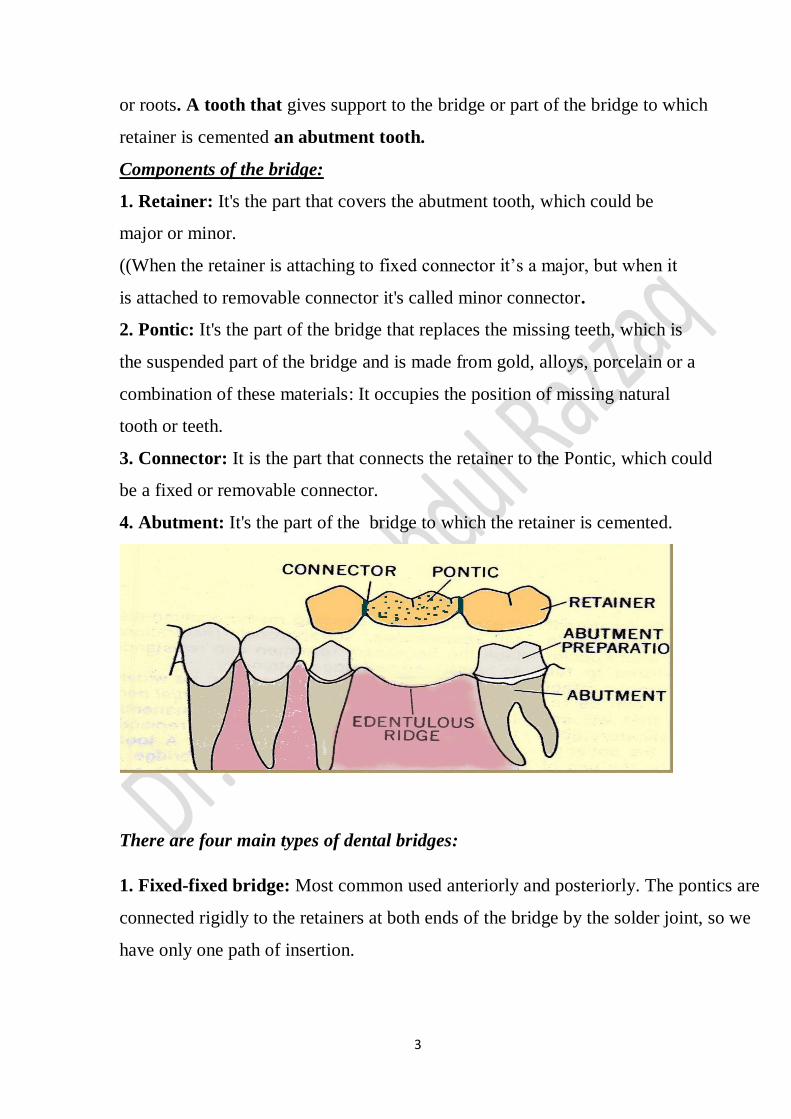
Components of the bridge:
1. Retainer: It's the part that covers the abutment tooth, which could be
major or minor.
((When the retainer is attaching to fixed connector it’s a major, but when it
is attached to removable connector it's called minor connector.
2. Pontic: It's the part of the bridge that replaces the missing teeth, which is
the suspended part of the bridge and is made from gold, alloys, porcelain or a
combination of these materials: It occupies the position of missing natural
tooth or teeth.
3. Connector: It is the part that connects the retainer to the Pontic, which could
be a fixed or removable connector.
4. Abutment: It's the part of the bridge to which the retainer is cemented.
There are four main types of dental bridges:
1. Fixed-fixed bridge: Most common used anteriorly and posteriorly. The pontics are
connected rigidly to the retainers at both ends of the bridge by the solder joint, so we
have only one path of insertion.
4
2. Fixed-movable bridge: The Pontic is attached to a fixed retainer on
one side while the another side is a movable joint that connected with
other retainer.
3. Cantilever bridge:
a. Simple: consist of one or two retainers with the Pontic that replaces the missing
tooth.
b. Spring: the Pontic is connected to a gold bar that also connected to the retainer
which is away from the Pontic. usually used in case of missing maxillary central or
lateral on one side of the maxillary arch with the presence of distance between the
anterior teeth.
4. Resin –bonded bridge. (Maryland)
There is minimal preparation within the enamel, used for short span (3-units), less
retentive than other types and use composite or resin for cementation to the
abutment tooth.
Materials of crown and bridge:
1. Metal material: in full metal crown
2. Plastic material: such as acrylic resin or porcelain
3. A combination: metal and plastic material as in full veneer crown.
Advantages of fixed bridge
1. Replacing missing teeth to provide function and esthetic.
2. As space maintainer following extraction to prevent over eruption of
opposing tooth.
3. To restore the fractured and badly carious tooth by retainer part of the bridge.
5
4. Maintain periodontal health of abutment by the retainer.
5. Restoring the psychological demand of patients (esthetic, function,
phonetic).
Contra indication of the bridge:
1. Long span edentulous area.
2. Free end extension area.
3. Abutment teeth with unstable bone support.
4. Short inter jaw space and short teeth.
5. Excessive bone loss especially in the visible anterior teeth because the
bridge will have an unacceptable appearance.
6. Patient with dry mouth (xerostomia) because of the great risk of recurrent caries.
7. Occupation and habit limitation (bruxism)
8. Financial limitation.
Principles of tooth preparation
Objectives of tooth Preparation:-
The main objectives of tooth preparation
1-To eliminate undercuts from the axial surface of the tooth.
2-To provide enough space for the crown restoration to withstand the force
of mastication, this space depends on the material used, so the metal
material needs little space while the plastic material needs more space.
3- Not to enlarge the size of the tooth.
4- To provide good esthetic.
6
Finishing line of the preparation (F. l):
It’s the final margin that separates between the prepared and the unprepared tooth
structure.
Requirement of F.L.:-
1. It must be clear, smooth and well defined.
2. It must be continuous from one surface to the other.
3. It must lie on sound tooth structure
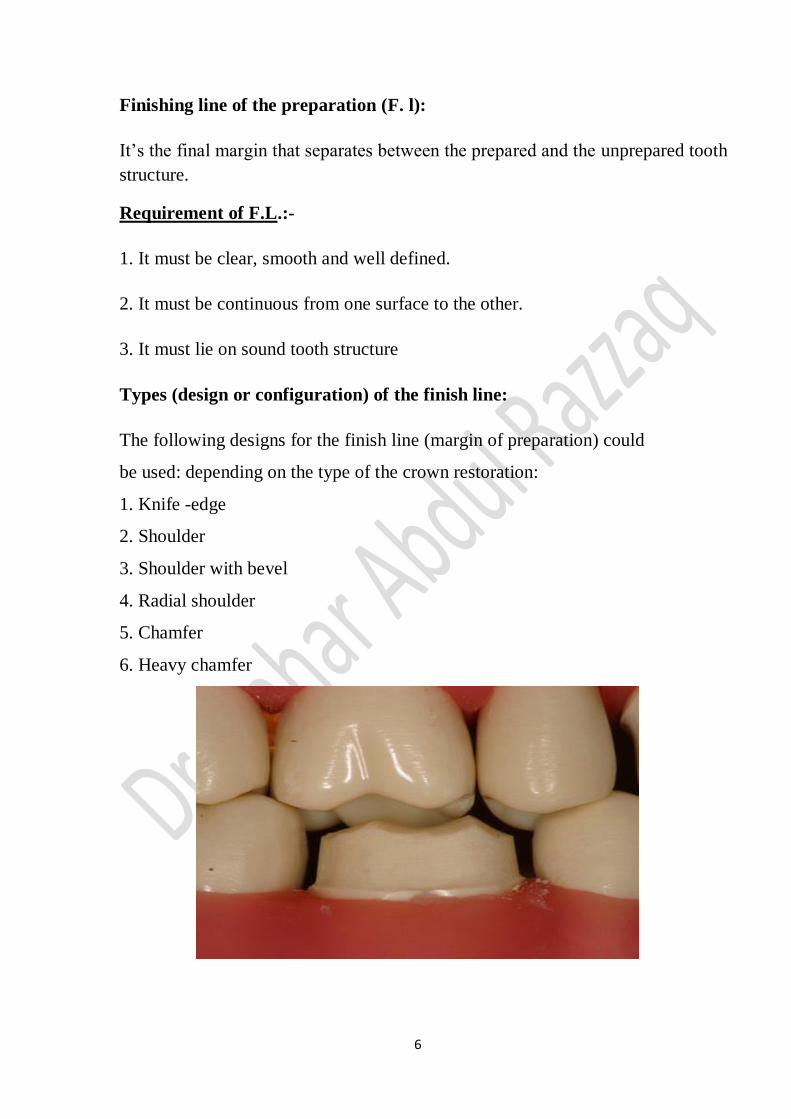
Types (design or configuration) of the finish line:
The following designs for the finish line (margin of preparation) could
be used: depending on the type of the crown restoration:
1. Knife -edge
2. Shoulder
3. Shoulder with bevel
4. Radial shoulder
5. Chamfer
6. Heavy chamfer
7
Crowns and bridges Prosthodontics Dr. Sahar Abdul Razzaq
Lecture.2
Impression material
Impression material
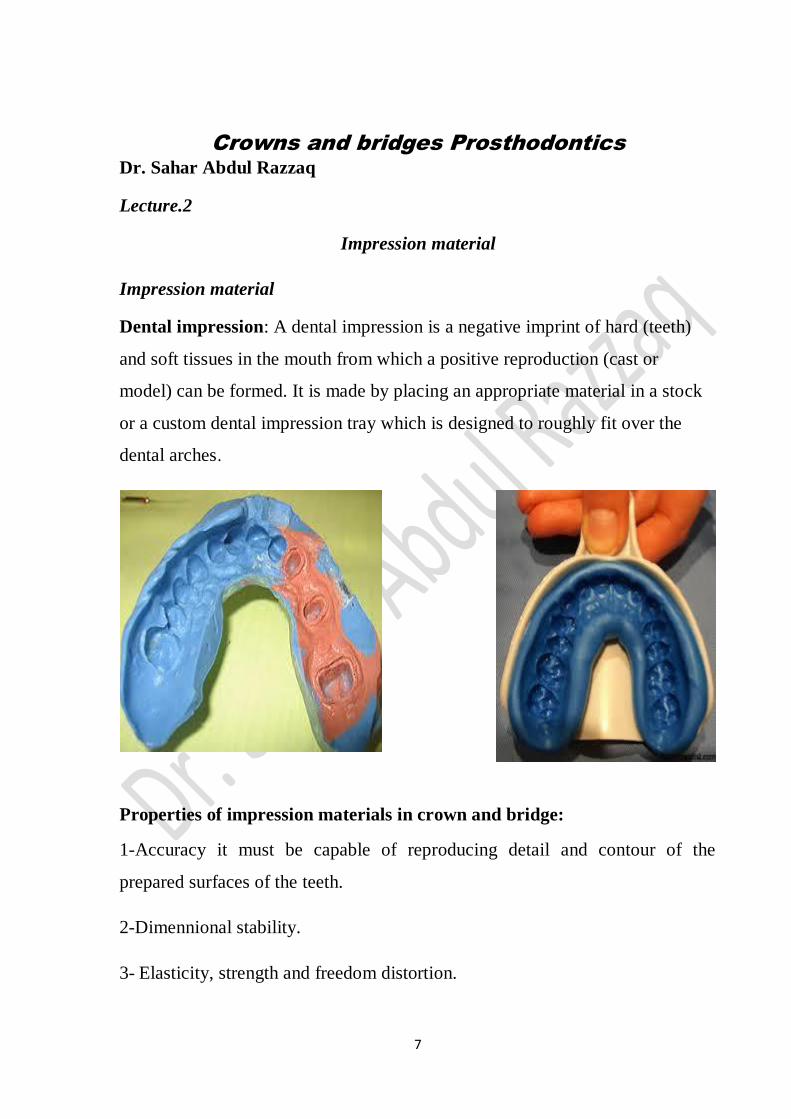
Dental impression: A dental impression is a negative imprint of hard (teeth)
and soft tissues in the mouth from which a positive reproduction (cast or
model) can be formed. It is made by placing an appropriate material in a stock
or a custom dental impression tray which is designed to roughly fit over the
dental arches.
Properties of impression materials in crown and bridge:
1-Accuracy it must be capable of reproducing detail and contour of the
prepared surfaces of the teeth.
2-Dimennional stability.
3- Elasticity, strength and freedom distortion.

8
4-Flow the material must have a low viscosity so as to flow readily when
Inserted into the mouth and thus penetrate the finest crevices and
reproduce the smoothest details.
5- Compatibility with die materials.
Primary impression: It is a negative, replace of dental arch from which
study cast is fabricated; it is taken by use of a stock tray.
From a Primary cast: (study bridge, temporary, bridge a closely
adapted tray especially, made for each patient must be):
Final impression: It is a negative, replace of dental arch from which
master cast is fabricated; it is taken by use of a special tray.
Special tray (or individual tray): It is made of acrylic used for only one patient
to take a final impression; it is either perforated or non-perforated according to
impression material. It is made of acrylic used for only one patient to take a final
impression; it is either perforated or non-perforated according to impression
material. Three occlusal stoppers must be incorporated in the tray to prevent it
from being forced onto prepared teeth.
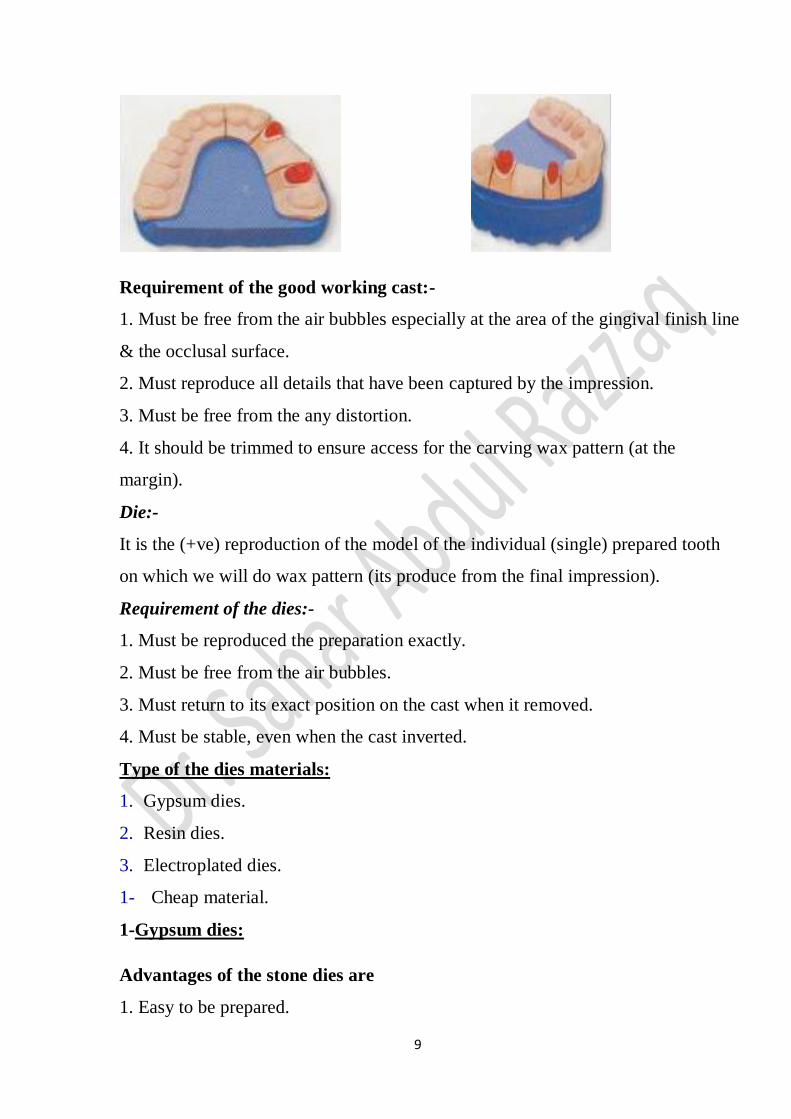
Working cast
It is a replica of the prepared tooth (teeth), ridge area & the other part of the
dental arch. It is produced from the final impression, on which we will make the
wax pattern (Lab. work) of the final restoration.
Working casts and dies:
Because direct fabrication of wax patterns in the mouth is difficult. All wax
patterns are made in the laboratory with the indirect technique. This technique
requires an accurate reproduction of the prepared tooth, the surrounding soft
tissues, and the adjacent and opposing teeth. A cast-and-die system captures the
necessary information so that it can be transferred to the laboratory.
9
Requirement of the good working cast:-
1. Must be free from the air bubbles especially at the area of the gingival finish line
& the occlusal surface.
2. Must reproduce all details that have been captured by the impression.
3. Must be free from the any distortion.
4. It should be trimmed to ensure access for the carving wax pattern (at the
margin).
Die:-
It is the (+ve) reproduction of the model of the individual (single) prepared tooth
on which we will do wax pattern (its produce from the final impression).
Requirement of the dies:-
1. Must be reproduced the preparation exactly.
2. Must be free from the air bubbles.
3. Must return to its exact position on the cast when it removed.
4. Must be stable, even when the cast inverted.
Type of the dies materials:
1. Gypsum dies.
2. Resin dies.
3. Electroplated dies.
1- Cheap material.
1-Gypsum dies:
Advantages of the stone dies are
1. Easy to be prepared.
10
2. Can be used with all type of impression material.
3. Cheap.
4. Need less requirements and easy to manipulate.
The Disadvantage of this material is:
1. Its comparatively poor resistance to and abrasion, low strength.
2. Undergo dimensional changes (expansion).
2- Resin dies:
Characteristics of this type of the die:
1- Most available resin die materials are epoxy resins, but polyurethane
is also used.
2- It can be cured at room temperature without expensive or complicated
equipment.
3- Its abrasion resistance is many times greater than that of gypsum products.
4- Detail reproduction is better on resin die than gypsum die.
5- Prostheses fabricated on resin dies will fit more tightly than those made of
gypsum.
The Disadvantage of this material is
1. It is more expensive than gypsum.
2. It undergoes some shrinkage during polymerization.
3- Electroplated the die:
1. This technique involves the deposition of a coat of pure silver or copper on
the impression.
2. The areas to be plated are first coated with finely powdered silver or
graphite to make them conduct electricity, and the impression is then
placed in an electroplating bath.
3. A layer of pure metal is deposited on the impression and is supported with
type IV stone or resin.
11
Note:
The main drawback of silver plating is the use of a cyanide solution, which
requires a special reservation because of its extreme toxicity.
There are two basic working casts and die systems:
a. Working cast with separating die.
b. Working cast with soled die.
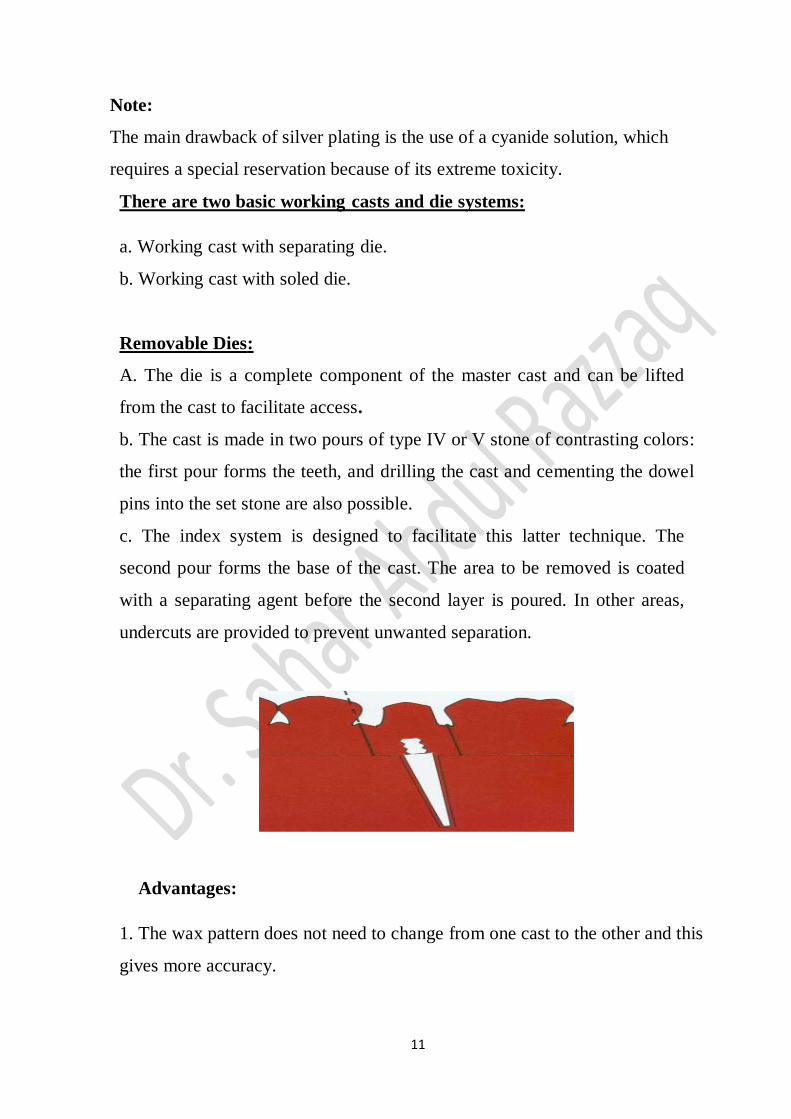
Removable Dies:
A. The die is a complete component of the master cast and can be lifted
from the cast to facilitate access.
b. The cast is made in two pours of type IV or V stone of contrasting colors:
the first pour forms the teeth, and drilling the cast and cementing the dowel
pins into the set stone are also possible.
c. The index system is designed to facilitate this latter technique. The
second pour forms the base of the cast. The area to be removed is coated
with a separating agent before the second layer is poured. In other areas,
undercuts are provided to prevent unwanted separation.
Advantages:
1. The wax pattern does not need to change from one cast to the other and this
gives more accuracy.
12
2. It eliminates the discrepancy between cast and die which produce from the
separate impression.
Solid Cast with Individual Die (separated die).
The solid cast-and-individual die system also referred to as the multiple pour
technique.
Advantage of separated die:
1. It is a simplest means of fabricating the working cast and die.
2. The working cast requires only minimum trimming. Since the gingival tissues
around the prepared teeth are left intact, they can be used as a guide when
contouring the restorations.
It keeps the attachment shape between cast & abutments fix &movable.
Disadvantages of the solid cast technique include the following:
1-Distortion of the wax pattern may occur during transfer it from the die to
another cast.
2-The technique can be used only with elastomeric impression materials.
3-Not suitable for long span bridge because of giving more changes in the long
span during work.
4-The accurate setting of wax pattern and the casting may be uncensored.
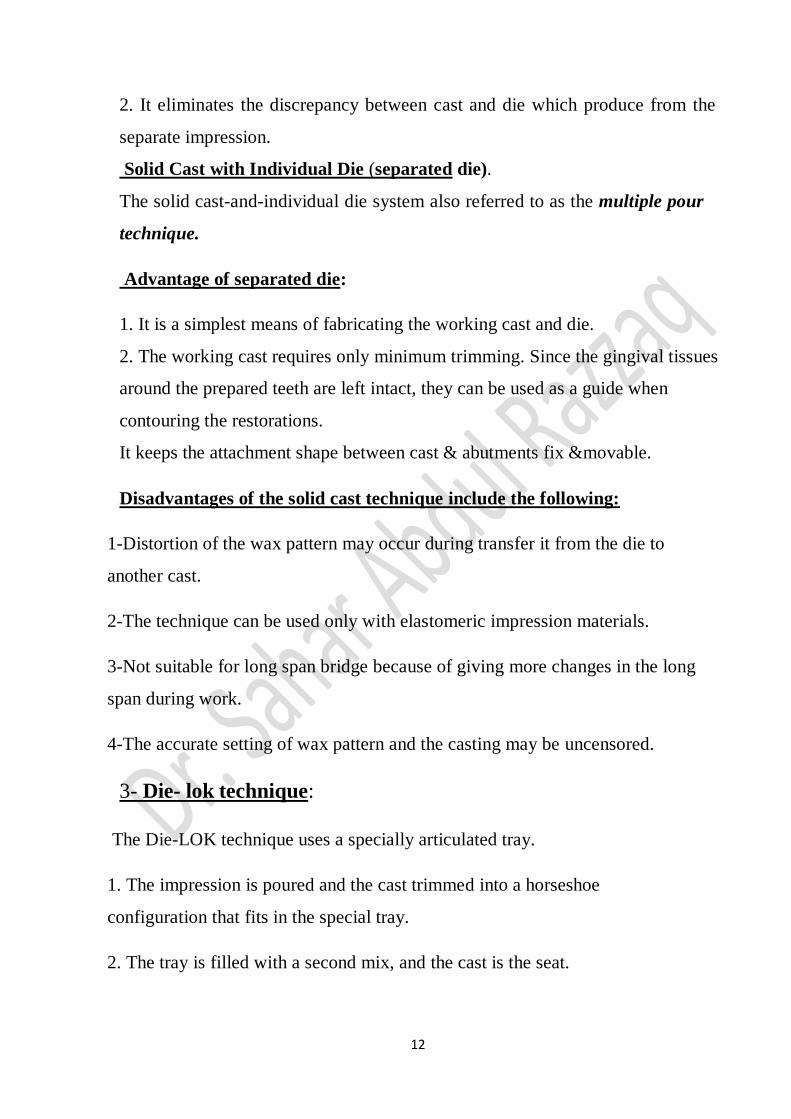
3- Die- lok technique:
The Die-LOK technique uses a specially articulated tray.
1. The impression is poured and the cast trimmed into a horseshoe
configuration that fits in the special tray.
2. The tray is filled with a second mix, and the cast is the seat.
13
3. When the stone has set, the tray is disassembled, saw cuts are made on each
side of the preparation, and the resulting die is trimmed.
4. The cast and die can be reassembled in the tray, which is then mounted
on an articulator. A disadvantage of this system is that the overall size of the
tray can make articulation and manipulation difficult.
There are two systems for producing cast with removable die:
1. Dowel pin with the hair pin system.
2. A Pindex, technique.
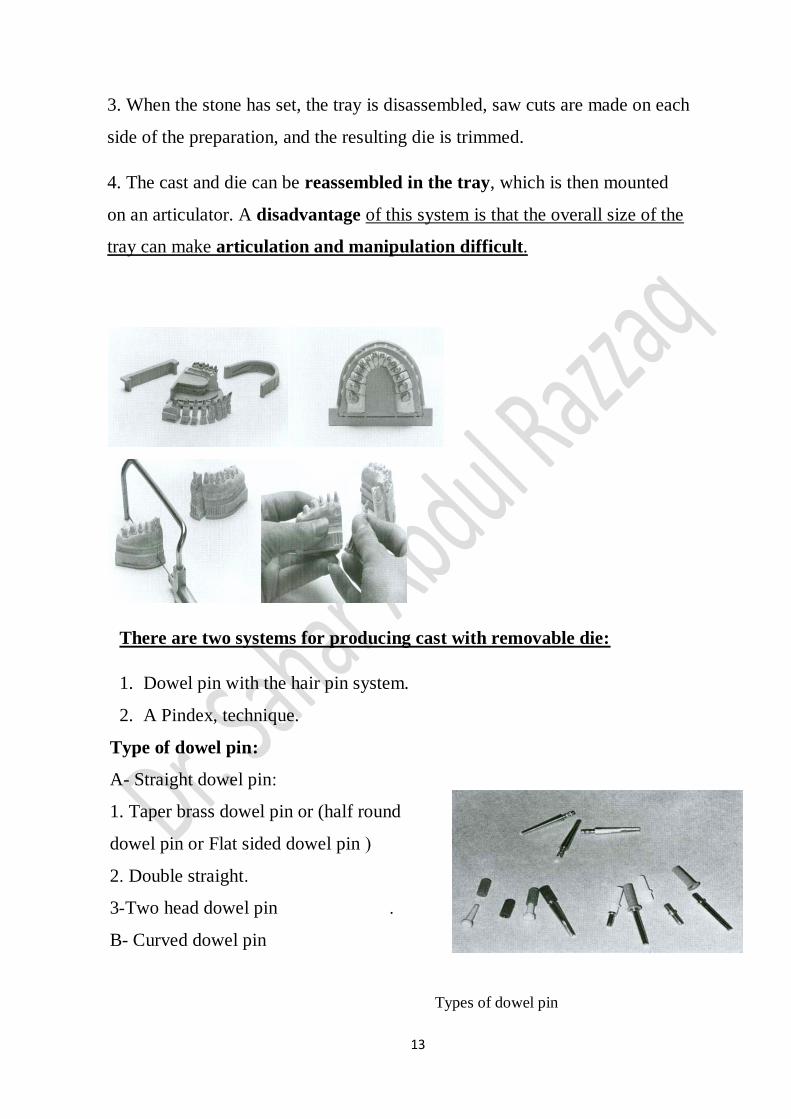
Type of dowel pin:
A- Straight dowel pin:
1. Taper brass dowel pin or (half round
dowel pin or Flat sided dowel pin (
2. Double straight.
3-Two head dowel pin .
B- Curved dowel pin
Types of dowel pin
14
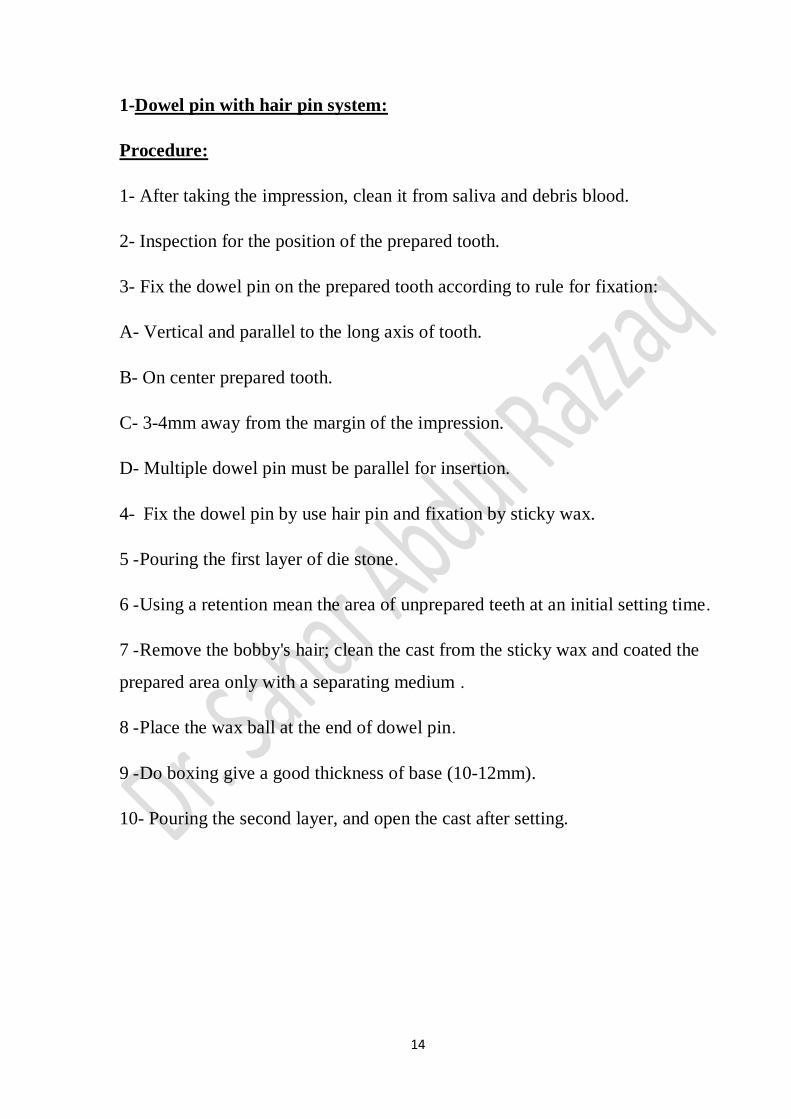
1-Dowel pin with hair pin system:
Procedure:
1- After taking the impression, clean it from saliva and debris blood.
2- Inspection for the position of the prepared tooth.
3- Fix the dowel pin on the prepared tooth according to rule for fixation:
A- Vertical and parallel to the long axis of tooth.
B- On center prepared tooth.
C- 3-4mm away from the margin of the impression.
D- Multiple dowel pin must be parallel for insertion.
4- Fix the dowel pin by use hair pin and fixation by sticky wax.
5 - Pouring the first layer of die stone.
6 - Using a retention mean the area of unprepared teeth at an initial setting time.
7 - Remove the bobby's hair; clean the cast from the sticky wax and coated the
prepared area only with a separating medium .
8 - Place the wax ball at the end of dowel pin.
9 - Do boxing give a good thickness of base (10-12mm).
10- Pouring the second layer, and open the cast after setting.
15
Positioning dowel pins before cast pouring can be accomplished with bobby's pins and sticky
wax.
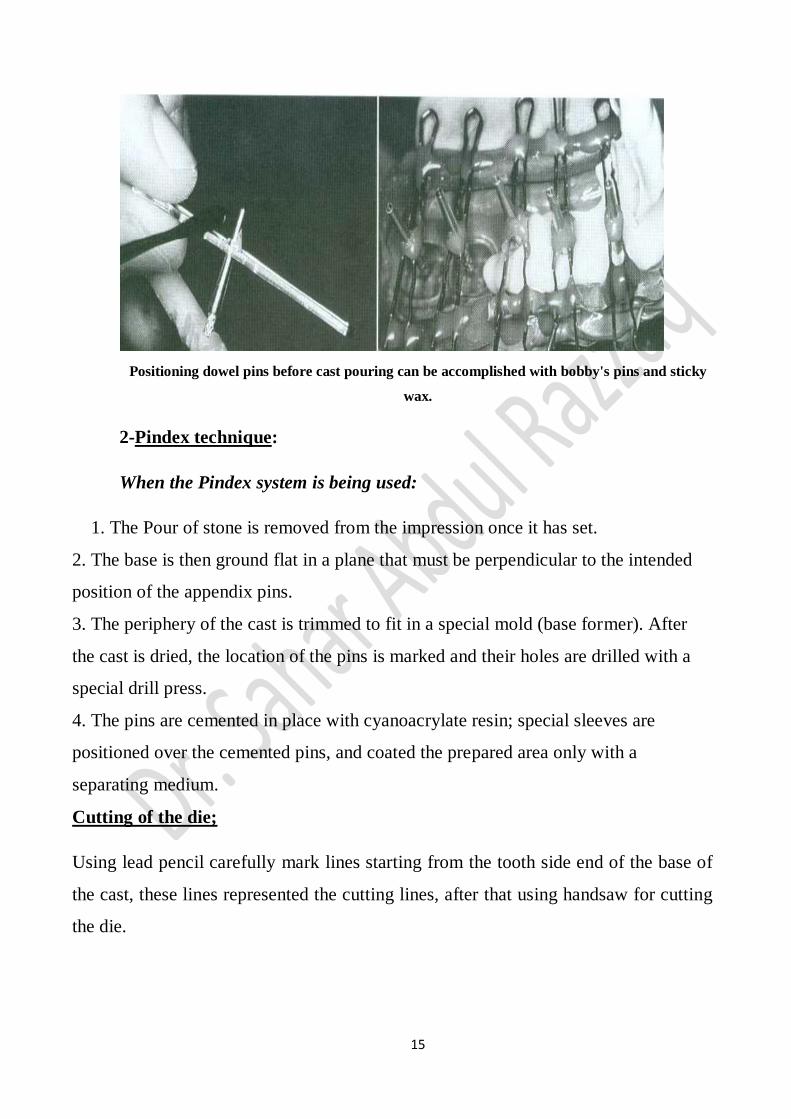
2-Pindex technique:
When the Pindex system is being used:
1. The Pour of stone is removed from the impression once it has set.
2. The base is then ground flat in a plane that must be perpendicular to the intended
position of the appendix pins.
3. The periphery of the cast is trimmed to fit in a special mold (base former). After
the cast is dried, the location of the pins is marked and their holes are drilled with a
special drill press.
4. The pins are cemented in place with cyanoacrylate resin; special sleeves are
positioned over the cemented pins, and coated the prepared area only with a
separating medium.
Cutting of the die;
Using lead pencil carefully mark lines starting from the tooth side end of the base of
the cast, these lines represented the cutting lines, after that using handsaw for cutting
the die.

16
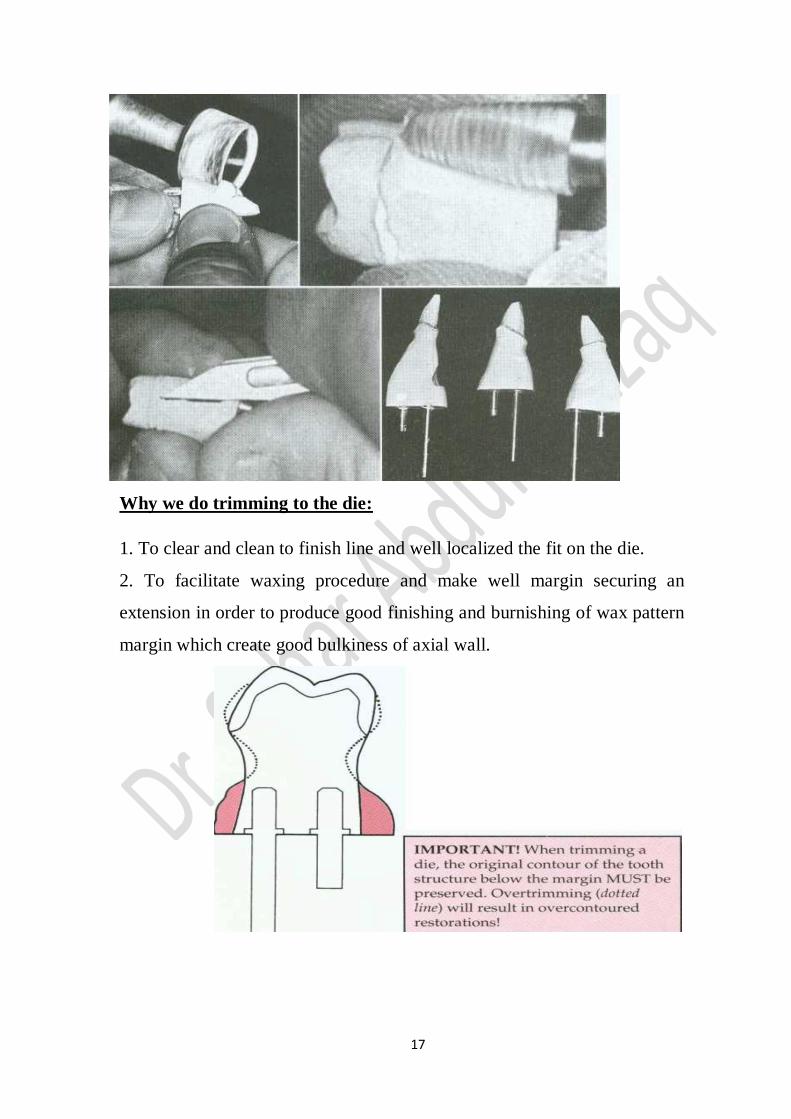
Trimming of the die:
1. Cutting from the die to make the finish line clear and clean.
2. The die should be trimmed gingival of the finish line to provide edict of
the finish line and burnishing, there are two designs for trimming either
ditching creating a sharp undercut below the finish line which makes it
thin or more suitable to fracture in finish line and over bulkiness in the
wax pattern. While in trimming slight removal below the finish line which
is approximately like natural so it gives a normal thickness of wax
patterns. How to make the trimming:
1- Remove stone at 2-3mm apical to finish line, using pear shape tungsten
carbide burs.
2- Using sharp blades number 25 for the cutting all around the finish line,
and smoothing the die stone below the finish line.
3- Mark the finish line of bright red. Color pen this facilitate the carving of
the margin of wax pattern black graphite should not be used for
contamination.
17
Why we do trimming to the die:
1. To clear and clean to finish line and well localized the fit on the die.
2. To facilitate waxing procedure and make well margin securing an
extension in order to produce good finishing and burnishing of wax pattern
margin which create good bulkiness of axial wall.
18
Crowns and bridges Prosthodontics Dr. Sahar Abdul Razzaq
Lecture.3
Inter occlusal relationship: Is the relationship between the maxillary and
mandibular jaw that exists when teeth together.
Occlusion: Means the contact of teeth in opposing denture arch when jaws are
closed [static occlusal relationship] and during various jaw movements [dynamic
occlusal relationships].
Centric relationship: The relationship between maxillary and mandibular arches
that exists when the condyles are in their terminal hinge axis (on the most
superior posterior position) in the glenoid fossa. It is the starting point of
occlusion. Centric relation is the physiologic position of the condylar head of the
mandible (without stress) from which all other movement is initiated.
Centric relation is taken when no enough occlusal stops are left after teeth
preparation especially in cases of full mouth rehabilitation of FPD, including
distal terminal abutments (Uni or bilaterally( In centric relation, it must not
perforate the registration material.
Centric occlusion: Teeth to teeth relationship, it is the maximum occlusal
contact or interception irrespective of condylar position. Maxillary and
mandibular teeth should contact in a harmonious manner that allows optimum
function, minimum trauma to the supporting structure and an even distribution
of load through the dentition.
Centric occlusion can be taken when there are enough occlusal stops after
preparation for a crown & bridge.
In recording the centric occlusion with maximum interception, the recording
material must show perforation in the area of contact teeth.
If the centric occlusion is not in harmony with centric relation, the
interfering tooth contact requires the condyle to be pulled out of their terminal
19
hinge position to make the teeth fit, the final result of such disharmony
between the teeth & the joint is stress, which may be manifested in several
ways problems of T.M.J articulation, maintenance of periodontal support of
the teeth or excessive or premature wear of tooth surface.
Methods of inter- Occlusal record techniques:
A. If enough teeth are present in both upper and lower arches to stabilize
their relationship, no bite registration is needed, we can transfer the relation
by hand articulation.
B. If the remaining teeth are insufficient to provide hand articulation of the cast
we can use:
1. Pink base plate wax or Alu-wax (wax reinforced with AL fiber).
2 .Registration past:
A zinc-oxide eugenol quick set paste is mixed and applied to a plastic bite
frame with fiberglass to support B.R.P.
3. The base plate and bite rime.
Articulator :
Is a mechanical device e that represents the T.M.J, the maxilla, the mandible,
to which maxillary and mandibular casts may be attached to stimulate some or
all mandibular movements. It's made from metal.
Anterior bite stop: This bite stop is a piece of acrylic which made by biting
in a piece of acrylic in the incisal region which assistance in mounting the
mandibular in relation to the maxilla after the occlusal surface of posterior
teeth have been prepared for preventing over closure which made in the
incisal region. The accuracy of this procedure is the primary importance
because it represents the anatomic and functional of the patent.
Preparing the cast for mounting: In preparing casts for mounting on at
articulator it is necessary to perform several initial checks.
20
1. Inspect the occlusal surface of the teeth in both the working and opposing
the casts. Carefully remove all nodules or bubbles of stone so that there is no
interference with the tooth –to- tooth contact.
2. If there are broken or chipped working cusps on the Buccal surface of the
mandibular cast or lingual surface of the maxillary cast considers obtaining new
cast.
3. Inspect thoroughly the surface of the teeth or the land areas of the cast for any
interference with occlusion.
4. If most of the teeth are present and in good condition and on interference
remains the interception will make it possible to articulate the cast by hand.
5 .Trim the casts to the desired thickness in relation to the articulator.
6 .Position the cast between the upper and lower member of the articulator.
7. If a face- bow is available make certain that the model will fit in the face bow
without touching mounting plate.
8. Create wedge-shaped V indices in the wax occlusion rims.
9. Block out the dowel pin recesses to the pins after mounting and to prevent
interference with accurate and positive seating of the dies and dowel pins in the
model.
Orienting the maxillary cast: The indirect technique of mounting the maxillary
cast will be demonstrated. However, the direct mounting technique may also be
used to mount the maxillary edentulous cast.
Casts in centric relation:
Trim the record to include only the tips of the cusps and make it possible to
observe the relationships of the record no teeth anterior to the preparation to
prevent improper separation and distortion of both vertical and frontal
occlusal relationships after properly relating the casts in tooth to tooth
relationship with either interception by hand or unilateral record maintain the
relationships by uses sticky wax directly on the teeth or by using a rubber
bands or using section of wooden tongue blade and sticky wax.
21
Crown and ridge Prosthodontics Dr. Sahar Abdul Razzaq
Lectur 4 Wax pattern
The first procedure for the casting of an inlay or crown is the preparation of a
wax pattern.
Wax pattern: it is the precursor of the final cast restoration were the wax
placed on the prepared tooth, it should be clear, smooth, should be duplicate
accurately the final anatomical feature of the original tooth & should be free
from any debris.
The information needed to duplicate the anatomical feature is taken from the
adjacent teeth, the opposing teeth &from the general knowledge of the dental
anatomy.
Techniques of construction of wax pattern (w. p):-
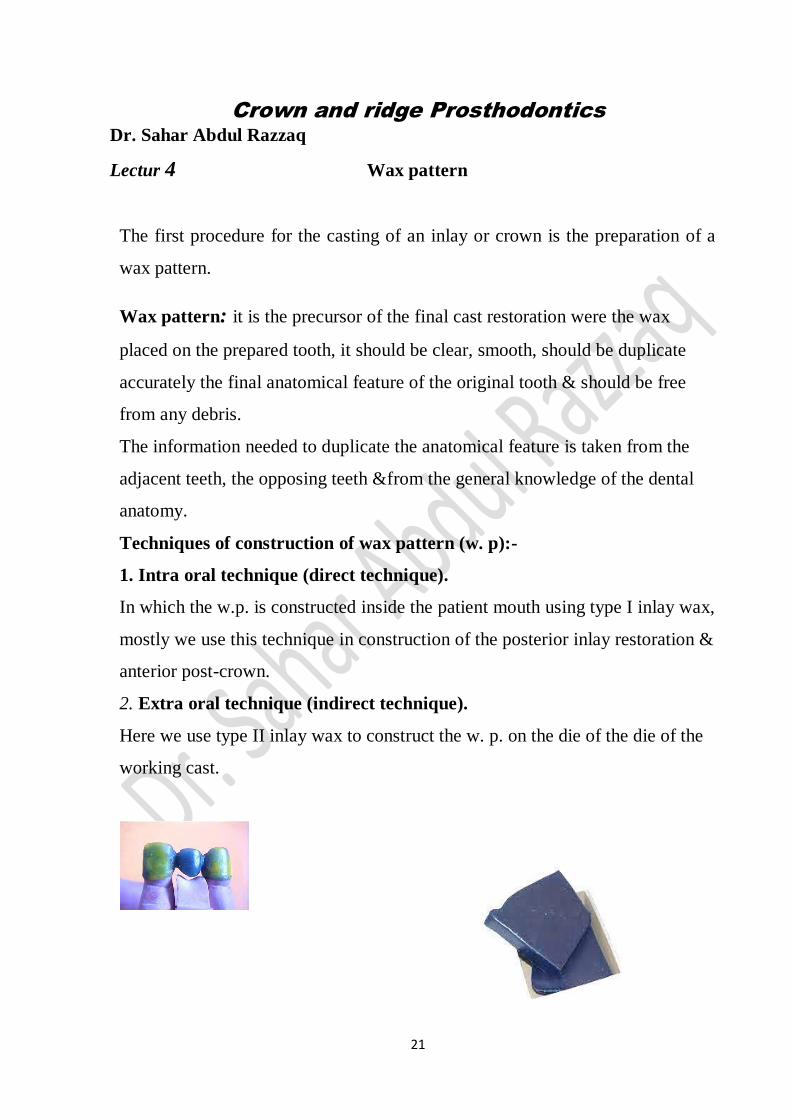
1. Intra oral technique (direct technique).
In which the w.p. is constructed inside the patient mouth using type I inlay wax,
mostly we use this technique in construction of the posterior inlay restoration &
anterior post-crown.
2. Extra oral technique (indirect technique).
Here we use type II inlay wax to construct the w. p. on the die of the die of the
working cast.
22
The advantage of the indirect over the direct tech.:-
1. It reduces the chair time so it saves the dentist time & more comfortable to
the patient.
2. It offer opportunity for the visualization of the restoration & readily (direct)
access to waxing the margin.
3. It is probably the easiest mean of fabricating cast restoration
Inlay wax: The wax pattern is an accurate reproduction of the missing tooth
structure. It forms the outline of the mold into which the gold alloy is cast.
Inlay Wax Composition:
a. Paraffin wax =base wax
b. Carnauba wax =Modifier wax
c. Ceresin = modifier wax
d. Bees wax =modifier wax
e. Colorants = colorant
Classification of inlay wax
The American dental association [ADA] No.4 divided inlay casting wax.
Type A: a hard or low flow, wax used in the same indirect technique.
Type B: a medium wax [used with direct techniques].
Type C: a softer [generally used for the indirect fabrication of casting].
Three Requirement and properties of inlay wax must be controlled while in order
to have accurate cast restoration.
1- Residual: Since the mold must burn out cleanly for entry of molten alloy there
must be no residual as the specification to allow.
2- Flow or plasticity: They must there a good flow, which sufficient to fill
the area in the preparation and reproduce the required detail so the wax
must be flow readily when heated without chipping or losing its
smoothness and it is necessary to contour the stability of the wax once it
has reached the top rather at which its carved burnished and polished.
23
3- Expansion: The inlay wax is softened with heat and all waxes expansions
under heating and contract Harding in cooling when heated or cooled, but it
must be rigid enough to allow good carrying without chipping or distortion.
The color of inlay wax either blue- red or green to distinguish from the color of the
die.
Wax pattern of anterior teeth:
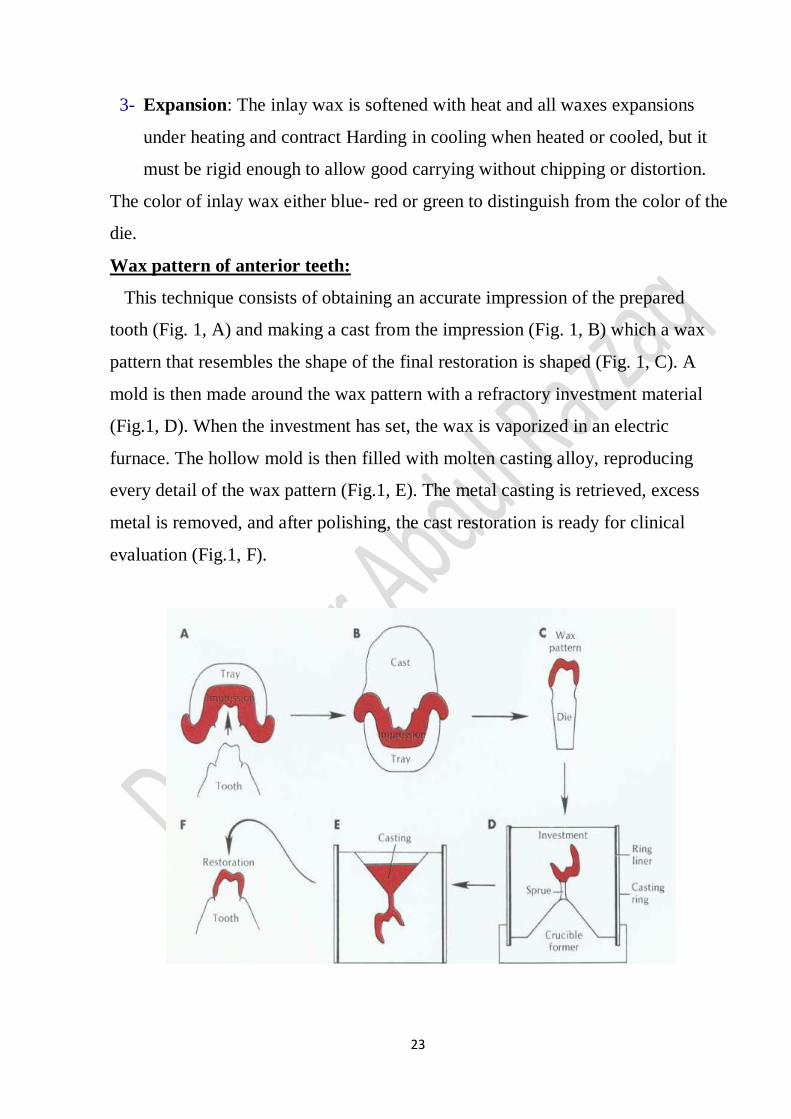
This technique consists of obtaining an accurate impression of the prepared
tooth (Fig. 1, A) and making a cast from the impression (Fig. 1, B) which a wax
pattern that resembles the shape of the final restoration is shaped (Fig. 1, C). A
mold is then made around the wax pattern with a refractory investment material
(Fig.1, D). When the investment has set, the wax is vaporized in an electric
furnace. The hollow mold is then filled with molten casting alloy, reproducing
every detail of the wax pattern (Fig.1, E). The metal casting is retrieved, excess
metal is removed, and after polishing, the cast restoration is ready for clinical
evaluation (Fig.1, F).
24
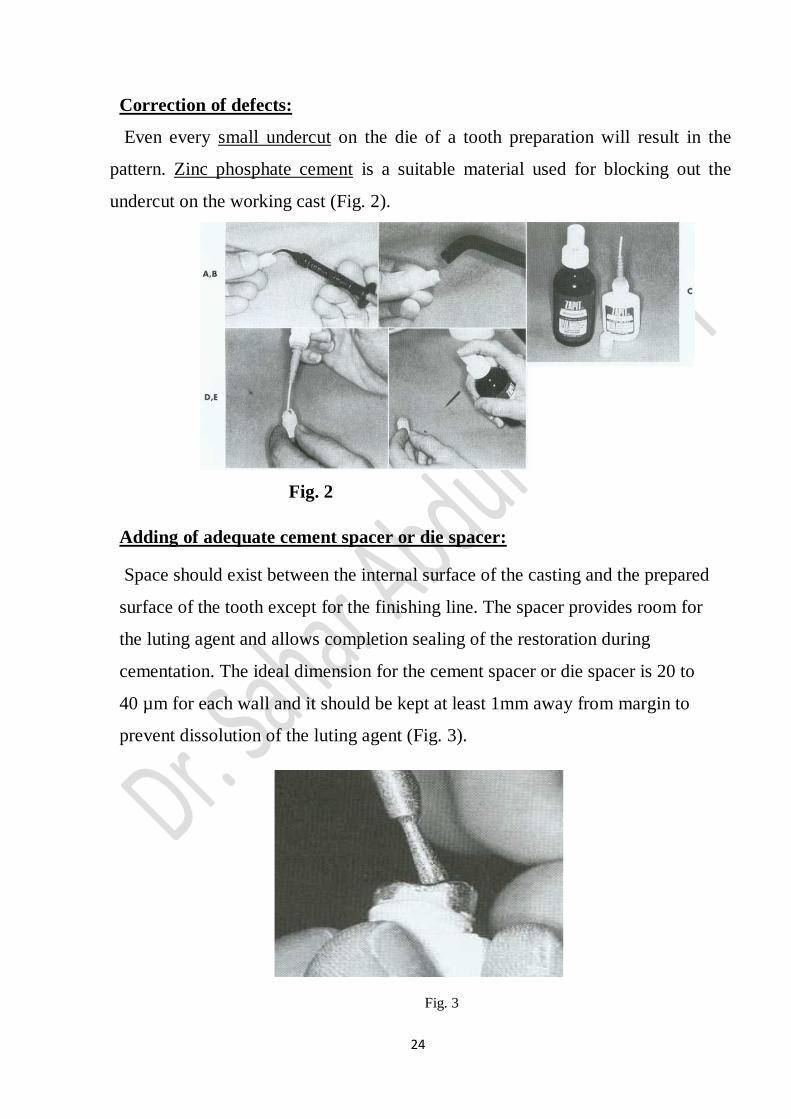
Correction of defects:
Even every small undercut on the die of a tooth preparation will result in the
pattern. Zinc phosphate cement is a suitable material used for blocking out the
undercut on the working cast (Fig. 2).
Fig. 2
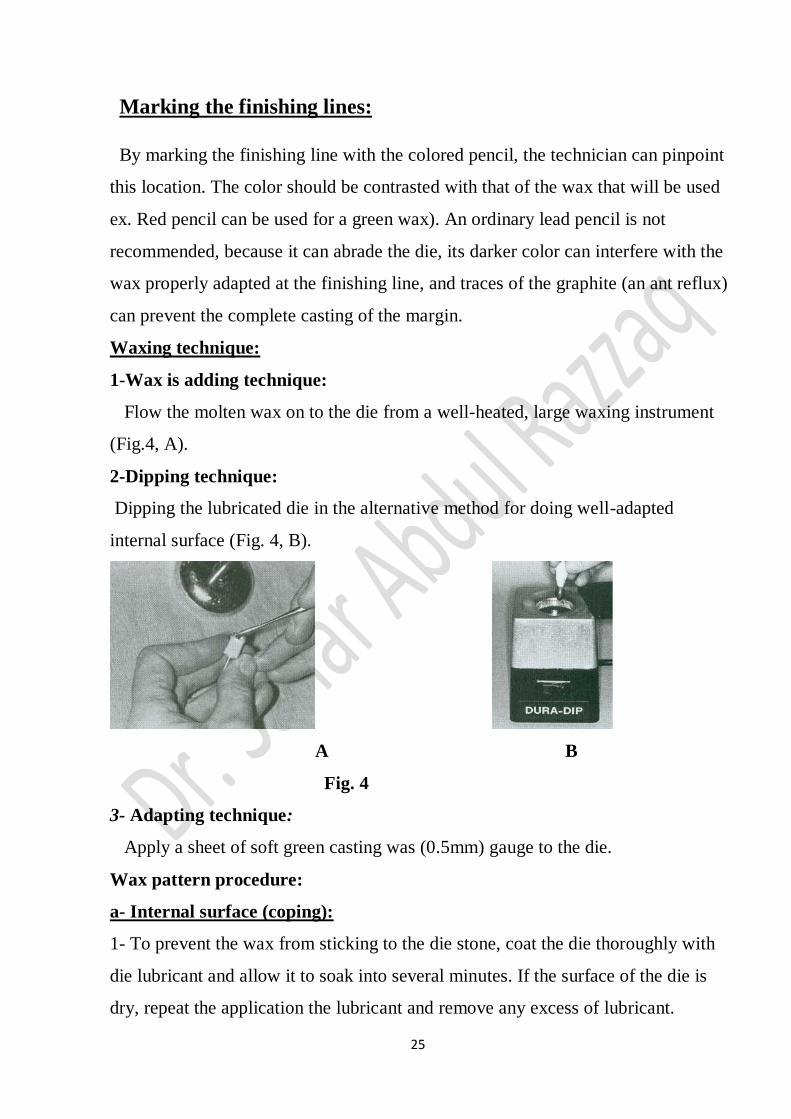
Adding of adequate cement spacer or die spacer:
Space should exist between the internal surface of the casting and the prepared
surface of the tooth except for the finishing line. The spacer provides room for
the luting agent and allows completion sealing of the restoration during
cementation. The ideal dimension for the cement spacer or die spacer is 20 to
40 µm for each wall and it should be kept at least 1mm away from margin to
prevent dissolution of the luting agent (Fig. 3).
Fig. 3
25
Marking the finishing lines:
By marking the finishing line with the colored pencil, the technician can pinpoint
this location. The color should be contrasted with that of the wax that will be used
ex. Red pencil can be used for a green wax). An ordinary lead pencil is not
recommended, because it can abrade the die, its darker color can interfere with the
wax properly adapted at the finishing line, and traces of the graphite (an ant reflux)
can prevent the complete casting of the margin.
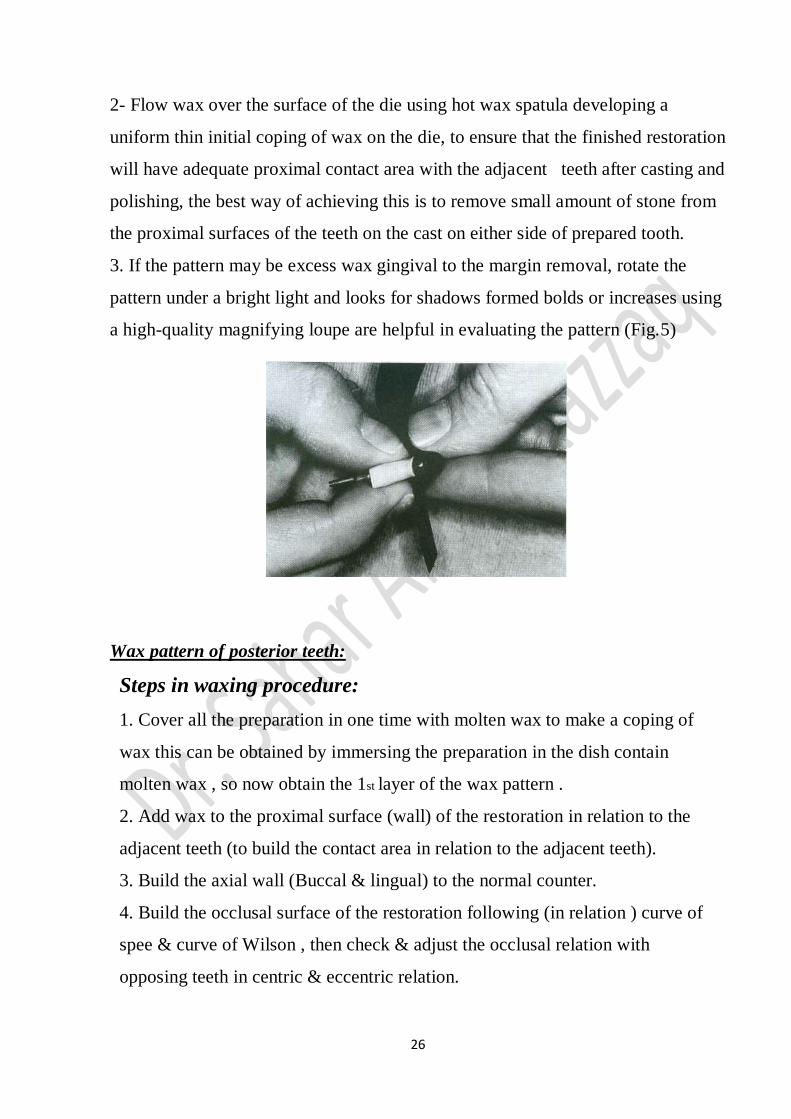
Waxing technique:
1-Wax is adding technique:
Flow the molten wax on to the die from a well-heated, large waxing instrument
(Fig.4, A).
2-Dipping technique:
Dipping the lubricated die in the alternative method for doing well-adapted
internal surface (Fig. 4, B).
A B
Fig. 4
3- Adapting technique:
Apply a sheet of soft green casting was (0.5mm) gauge to the die.
Wax pattern procedure:
a- Internal surface (coping):
1- To prevent the wax from sticking to the die stone, coat the die thoroughly with
die lubricant and allow it to soak into several minutes. If the surface of the die is
dry, repeat the application the lubricant and remove any excess of lubricant.
26
2- Flow wax over the surface of the die using hot wax spatula developing a
uniform thin initial coping of wax on the die, to ensure that the finished restoration
will have adequate proximal contact area with the adjacent teeth after casting and
polishing, the best way of achieving this is to remove small amount of stone from
the proximal surfaces of the teeth on the cast on either side of prepared tooth.
3. If the pattern may be excess wax gingival to the margin removal, rotate the
pattern under a bright light and looks for shadows formed bolds or increases using
a high-quality magnifying loupe are helpful in evaluating the pattern (Fig.5)
Wax pattern of posterior teeth:
Steps in waxing procedure:
1. Cover all the preparation in one time with molten wax to make a coping of
wax this can be obtained by immersing the preparation in the dish contain
molten wax , so now obtain the 1st layer of the wax pattern .
2. Add wax to the proximal surface (wall) of the restoration in relation to the
adjacent teeth (to build the contact area in relation to the adjacent teeth).
3. Build the axial wall (Buccal & lingual) to the normal counter.
4. Build the occlusal surface of the restoration following (in relation ) curve of
spee & curve of Wilson , then check & adjust the occlusal relation with
opposing teeth in centric & eccentric relation.
27
5. Check again all the margins of the restoration (w.p) to ensure that the margin
of the (w. p) have no over or under extension, so the wax pattern is now ready
for the next step.
Margin finishing:
Lift of the pattern, replace it and check for defects:
1-Overwaxed margin:
This may lead to breaking off when a pattern is withdrawn from the die.
2-Short margin:
The waxing does not extend to the red finish line will not provide an adequate seal
for the final restoration.
3-Ripples:
Any roughness in the wax near from the margin will be duplicated in the
casting. These roughness's in the final restoration lead to plaque collections
that lead to irritation and inflammation of the adjacent gingival tissue.
4-Thick margin:
28
Thick, round margin will result in poor sealing of the restoration and poor axial
contours lead to periodontal problems. The margin should be fabricated with the
fine edge.
4- Open margin:
It may occur during any stages of fabrication the wax pattern. The margin
must be remitted to ensure close adaptation on the finish line.
After complete, all these procedures the wax pattern smoothing with a cotton
roll dipped in die lubricant.
29
Crown and ridge Prosthodontics Dr. Sahar Abdul Razzaq
Lecture.5
Distortion of the wax pattern cannot be prevented, but can be minimized
by:
1. Using only waxes which guarantee to melt the A.D.A. Specification
No.4. Type 1 for direct and type 2 for indirect.
2. The wax pattern should never be left off the die.
3. The wax pattern should be invested as soon as possible after lubrication.
4. Method of heating which must be uniform.
5. Adding molten wax for repair purpose or by car this must be minimized
to prevent localized energy changes.
6. The flow of the solidified wax when the pattern is removed from the
mouth or die.
7 . Delay the investment of the pattern longer than 30minutes it will be often under
90 distortions so it must be invested immediately to avoid the distortion. Not; if
delay cannot be avoided the pattern should be placed in a refrigerator, and they
should be allowed to roam temperature before investment and the margin should
be adapted well and punished to avoid open margin the wax pattern should be left
of the die .
8. Never left the wax pattern near the heat source.
Spruing Procedure:
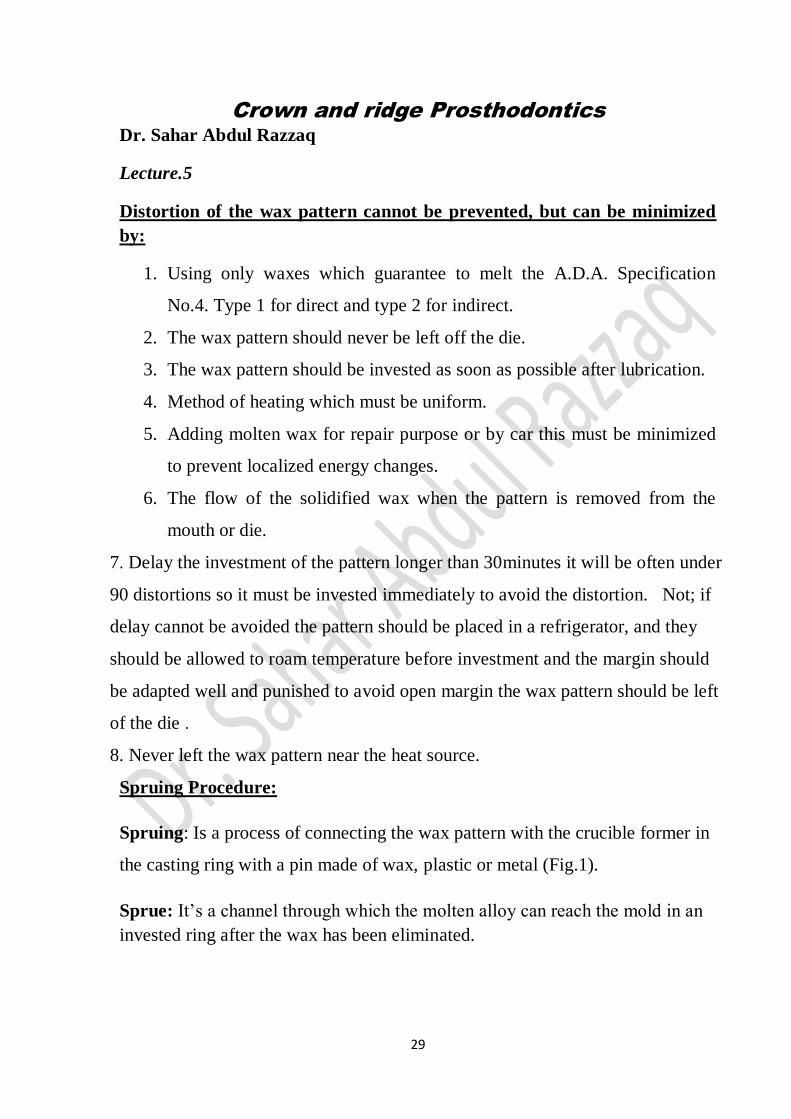
Spruing: Is a process of connecting the wax pattern with the crucible former in
the casting ring with a pin made of wax, plastic or metal (Fig.1).
Sprue: It’s a channel through which the molten alloy can reach the mold in an
invested ring after the wax has been eliminated.
30
Fig. 1.
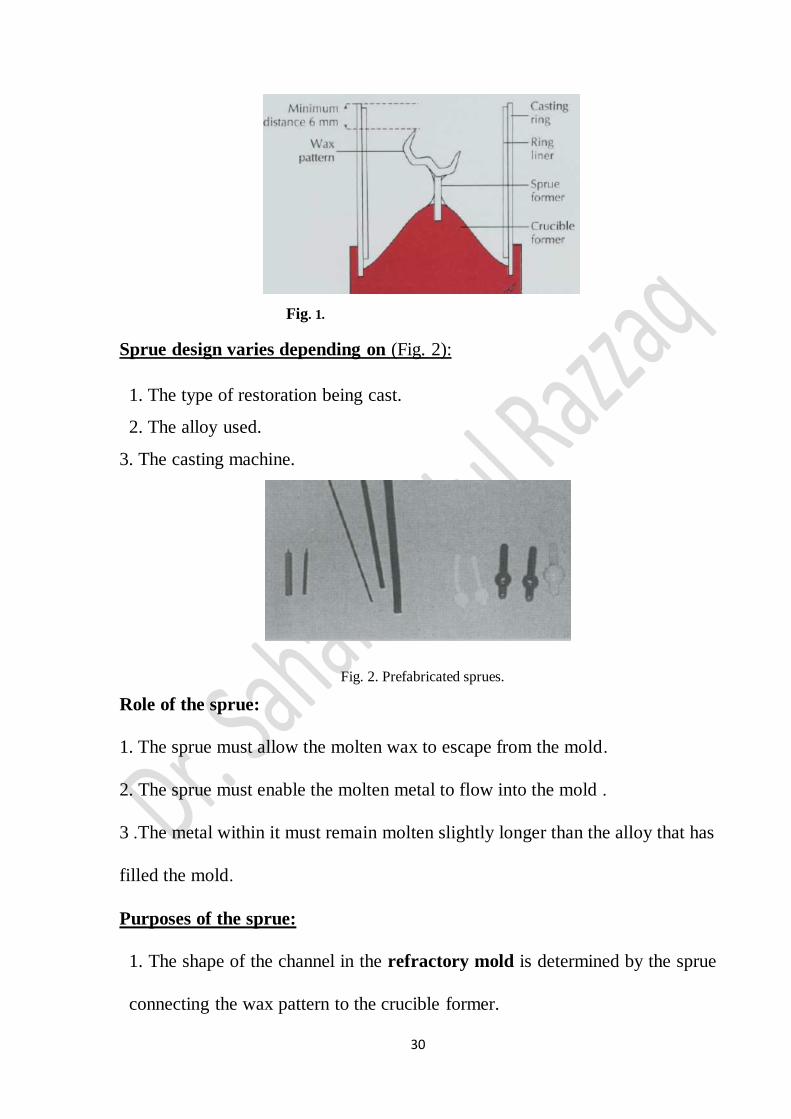
Sprue design varies depending on (Fig. 2):
1. The type of restoration being cast.
2. The alloy used.
3. The casting machine.
Fig. 2. Prefabricated sprues.
Role of the sprue:
1. The sprue must allow the molten wax to escape from the mold.
2. The sprue must enable the molten metal to flow into the mold .
3 .The metal within it must remain molten slightly longer than the alloy that has
filled the mold.
Purposes of the sprue:
1. The shape of the channel in the refractory mold is determined by the sprue
connecting the wax pattern to the crucible former.
31
2. The sprue can be wax, plastic, or metal. Wax sprues are preferred for most
castings because they melt at the same rate as the pattern and thus allow easy
escape of the molten wax.
3. Solid plastic sprues soften at a higher temperature than the wax pattern and
may block the escape of wax, resulting in increased casting roughness.
4. Also, hollow plastic sprues are available that permit the escape of wax.
5. Metal sprue is used; it should be made of non-rusting metal to avoid
possible contamination of the wax. Metal sprues are often hollow to increase
the contact surface area and strengthen the attachment between the sprue and
pattern.
6. They are usually removed from the investment at the same time as the
crucible former.
7. Special care must be taken to examine the orifice for small particles of
investment that may break off when such a sprue is removed because these can
cause an incomplete casting if undetected.
Requirements of sprue
Dimensions and location of the sprue
Diameter: the diameter of the sprue should be as large as possible to improve
the flow the molten metal into the mold cavity and to provide a reservoir to
compensate for the shrinkage of the metal during solidification.
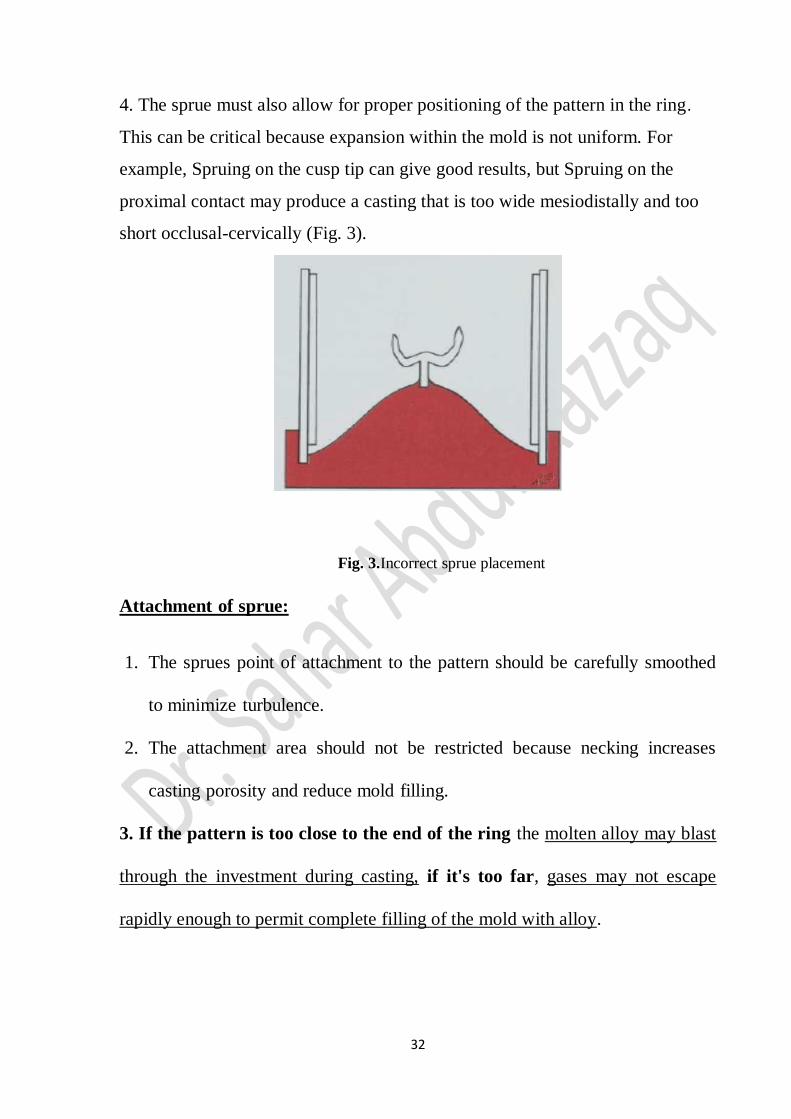
Length: the length of the sprue should be adjusted so that when we attach it
to the crucible former the margin of the wax pattern should be about 6 mm
away from the end of the casting ring. It is made so that the wax pattern will be
in the center of the casting ring and surrounded by a uniform thickness of the
investment material.
Location: the attachment of the sprue with the wax pattern should be to the
bulkiest area of the wax pattern and should be at an angle to allow the incoming
metal to pass freely to all portions of the mold cavity without any turbulence.
The attachment should be at the non-centric area.
32
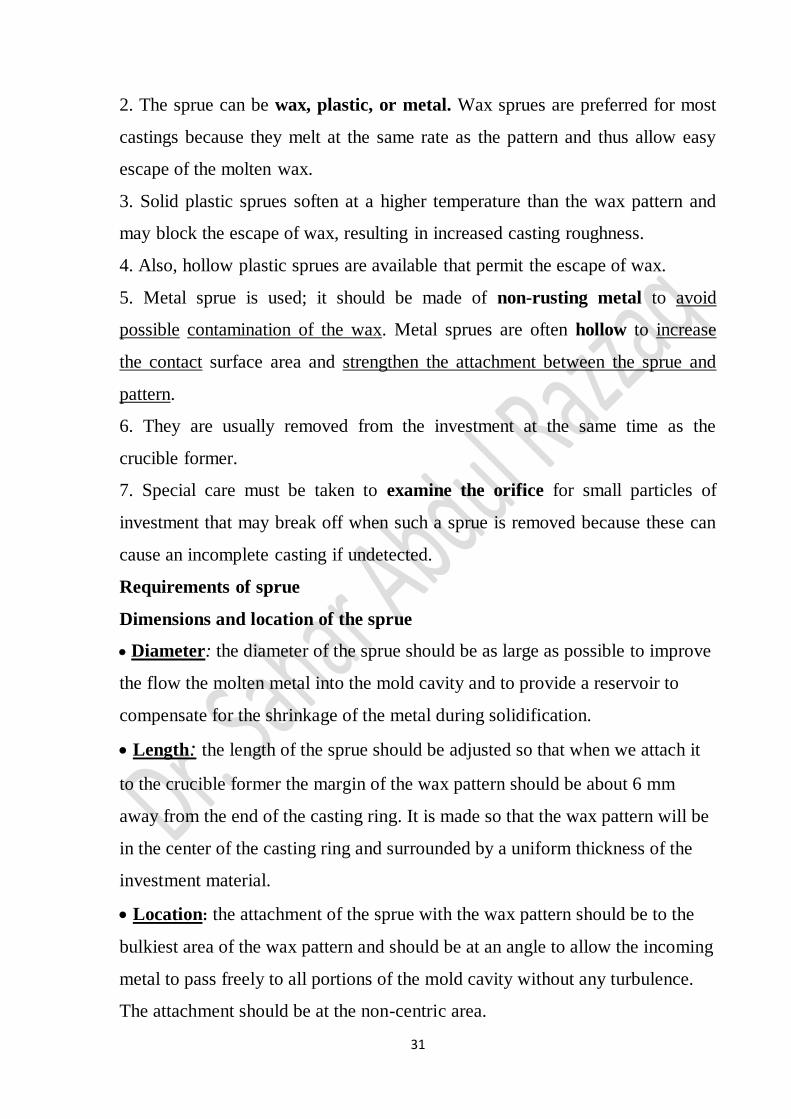
4. The sprue must also allow for proper positioning of the pattern in the ring.
This can be critical because expansion within the mold is not uniform. For
example, Spruing on the cusp tip can give good results, but Spruing on the
proximal contact may produce a casting that is too wide mesiodistally and too
short occlusal-cervically (Fig. 3).
Fig. 3.Incorrect sprue placement
Attachment of sprue:
1. The sprues point of attachment to the pattern should be carefully smoothed
to minimize turbulence.
2. The attachment area should not be restricted because necking increases
casting porosity and reduce mold filling.
3. If the pattern is too close to the end of the ring the molten alloy may blast
through the investment during casting, if it's too far, gases may not escape
rapidly enough to permit complete filling of the mold with alloy.
33
Fig.4
Venting
Small auxiliary sprue or vents have been recommended to improve casting of
thin patterns and may help in gases escape during casting.
Compensate for shrinkage during solidification.
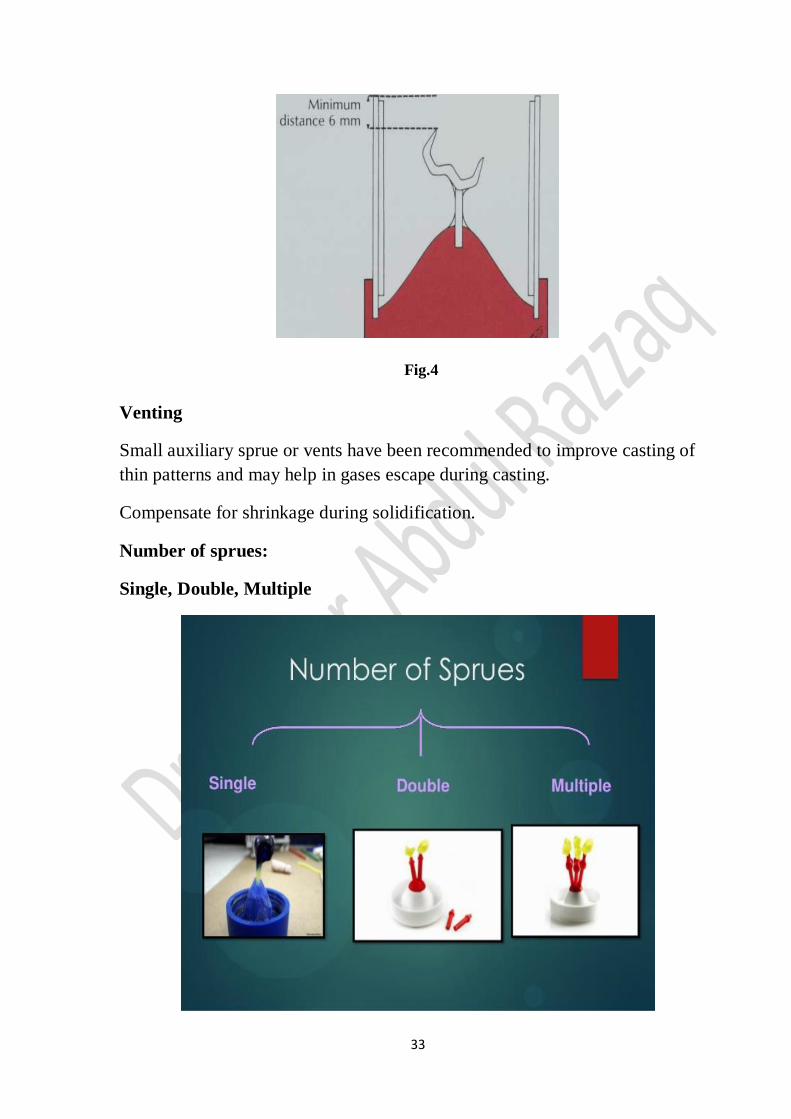
Number of sprues:
Single, Double, Multiple
34
Crown and ridge Prosthodontics Dr. Sahar Abdul Razzaq
Lecture 6
Investing:
It is the surrounding of the wax pattern with a mold of heat resistant material
that can accurately duplicate the shape and anatomical features of the wax
pattern to obtain a mold after burning out the wax pattern.
Objectives of investing:
1. It should provide an accurate reproduction of the anatomical form of the wax
pattern.
2. It should provide sufficient strength to withstand the heat of the burnout
procedure and the actual casting of the molten metal.
3. It should provide compensation expansion equal to the solidification shrinkage of
the metal; therefore, the mold cavity should be larger than the wax pattern (if this
does not happen, the restoration will be smaller than the wax pattern).
To do investing we need:
1-Casting ring.
2-Ring liner.
3-Crucible former.
Casting Ring:
The casting ring is made of metal and is used to hold the investment material in
place during its setting and to restrict its expansion. If we use the casting ring alone
we will not have the expansion, so we need to use the ring liner to allow a certain
degree of expansion.
Ring Liner:
The liner is used to line the inside of the casting ring. It is made from a
35
compressible material. e.g., asbestos (0.6mm thick) that allows the investment
material to expand to some degree, but as it is carcinogenic other materials as
fiberglass may be used. If there is no room for expansion outward the mold cavity
would produce a small casting. The liner should be 3mm shorter than both ends of
the casting ring because it will bind the investment to the ring to prevent the
slipping of the whole mass during the casting procedure.
Advantages of the ring liner:
1. It provides a room of pliable material against which the investment can expand to
enlarge the mold cavity to compensate for solidification shrinkage of the metal.
2. It permits easier removal of the investment and casting from the ring after the
burnout procedure.
3. It acts as an insulator against loss of heat during the casting procedure
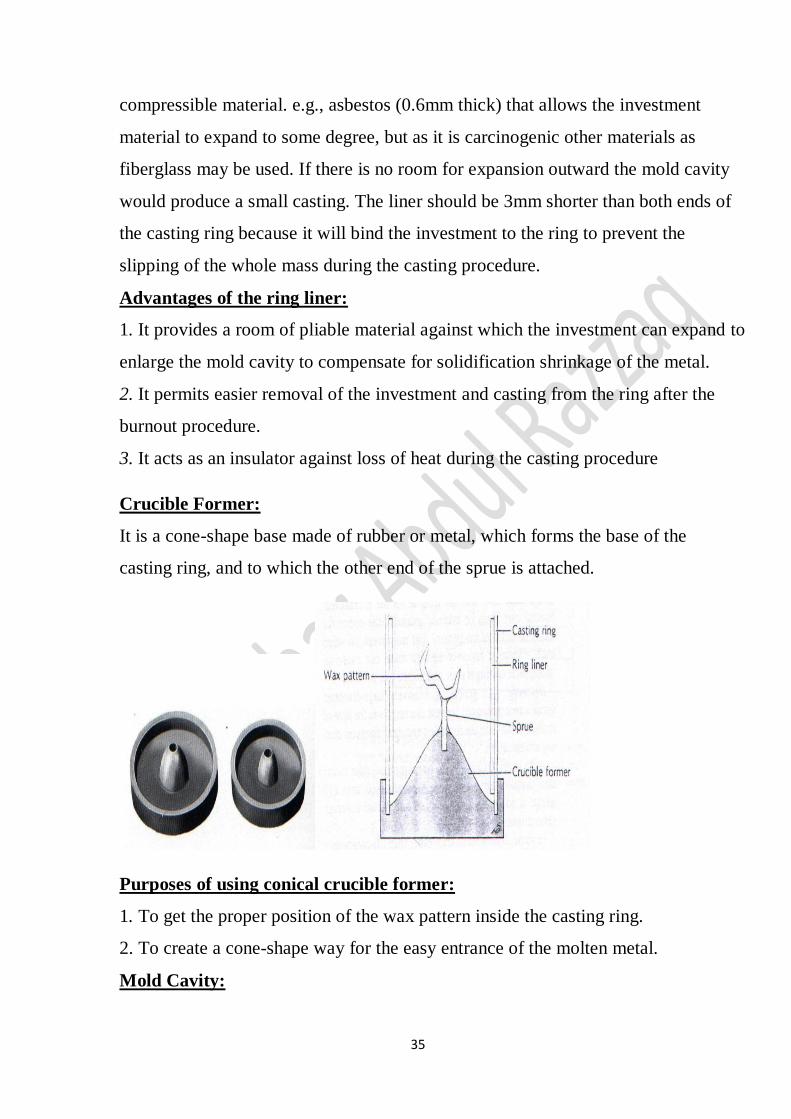
Crucible Former:
It is a cone-shape base made of rubber or metal, which forms the base of the
casting ring, and to which the other end of the sprue is attached.
Purposes of using conical crucible former:
1. To get the proper position of the wax pattern inside the casting ring.
2. To create a cone-shape way for the easy entrance of the molten metal.
Mold Cavity:
36
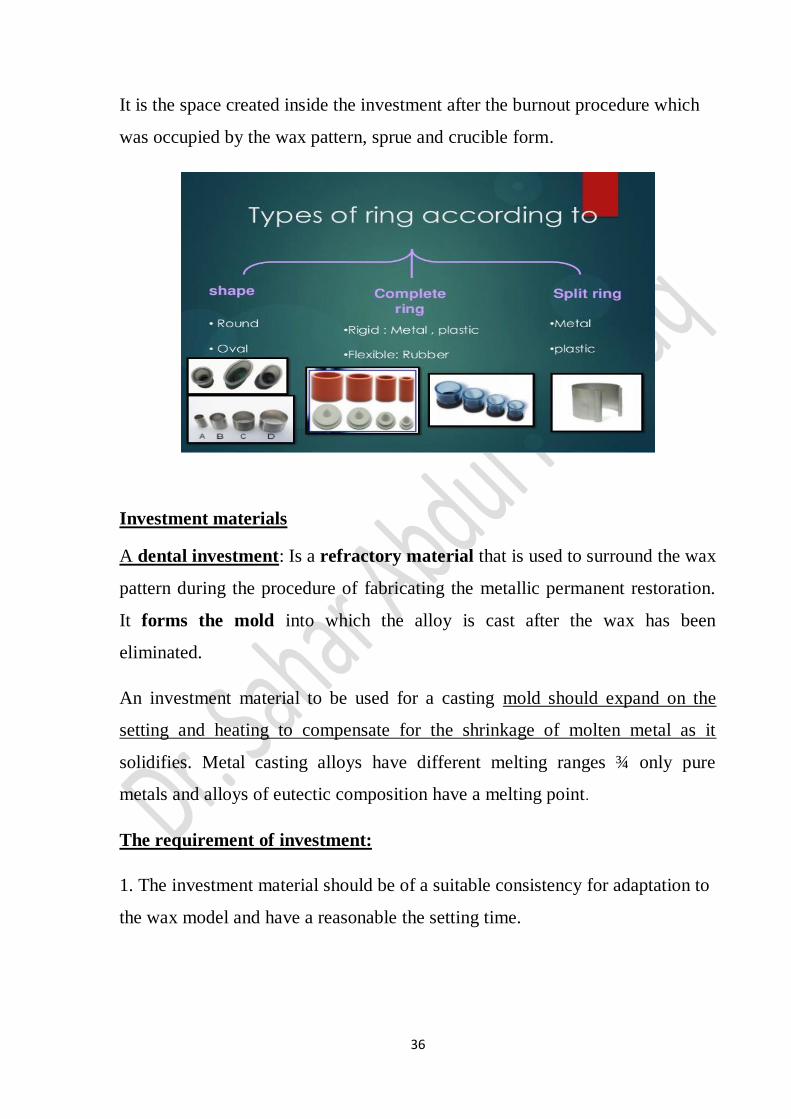
It is the space created inside the investment after the burnout procedure which
was occupied by the wax pattern, sprue and crucible form.
Investment materials
A dental investment: Is a refractory material that is used to surround the wax
pattern during the procedure of fabricating the metallic permanent restoration.
It forms the mold into which the alloy is cast after the wax has been
eliminated.
An investment material to be used for a casting mold should expand on the
setting and heating to compensate for the shrinkage of molten metal as it
solidifies. Metal casting alloys have different melting ranges ¾ only pure
metals and alloys of eutectic composition have a melting point.
The requirement of investment:
1. The investment material should be of a suitable consistency for adaptation to
the wax model and have a reasonable the setting time.
37
2. To withstand the temperatures required for the casting process, there should
be no distortion, no decomposition; the investment should not fragment under
the impact of the molten metal.
3. The material should be porous to allow the escape of air and gases and the
investment should be easily removed from the casting after cooling.
Classification of Dental Investment Materials:
• Gypsum-bonded investments: binder is gypsum (calcium sulfate
hemihydrate). Used when casting conventional gold alloys containing 65% to
75% gold at temperatures near 1,100°C.
• Phosphate-bonded investments: binder is a metallic oxide and a phosphate.
Two types: (Type I) is used when casting base metal alloys for metal-ceramic
crowns and (Type II) is used for removable partial denture frameworks. Are
capable of withstanding high temperatures (above 1,100°C).
• Silica-bonded investments: binder is ethyl silicate. Not used much today.
The refractory material for these investments is either quartz or cristobalite.
This material provides the thermal expansion for the investment. Note: The
expansion of the investment provides a larger mold to compensate for the
subsequent contraction of the alloy.
Methods of mixing the investment material:
1. Manual: mixing and pouring of the investment is done by the spatula
manually.
2. Mechanical: mixing is done by a vacuum mixer to ensure that the mix is
completely free from any bubbles. Pouring the investment is done by one of
the following methods:
i. Brush technique: the investment is applied to the wax pattern with a brush
and then we fill the casting ring.
38
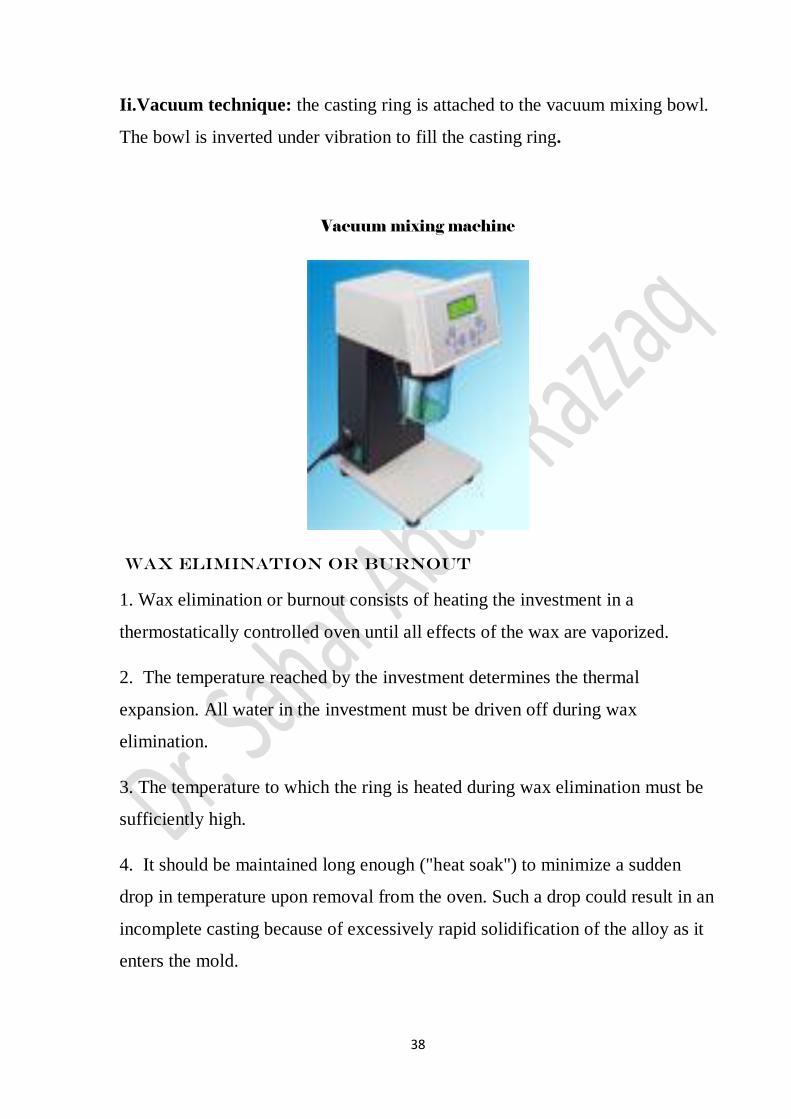
Ii.Vacuum technique: the casting ring is attached to the vacuum mixing bowl.
The bowl is inverted under vibration to fill the casting ring.
Vacuum mixing machine
WAX ELIMINATION OR BURNOUT
1. Wax elimination or burnout consists of heating the investment in a
thermostatically controlled oven until all effects of the wax are vaporized.
2. The temperature reached by the investment determines the thermal
expansion. All water in the investment must be driven off during wax
elimination.
3. The temperature to which the ring is heated during wax elimination must be
sufficiently high.
4. It should be maintained long enough ("heat soak") to minimize a sudden
drop in temperature upon removal from the oven. Such a drop could result in an
incomplete casting because of excessively rapid solidification of the alloy as it
enters the mold.
39
5. Once the investment is heated during the wax-elimination procedure, heating
must be continued, and casting must be completed. Cooling and reheating of
the investment can cause casting inaccuracy because the refractory and binder
will not revert to their original forms.
6. Inadequate expansion and cracking of the investment are typical results.
Step-by-step PROCEDURE
1. Allow the investment to set for the recommended time (usually 1 hour) and
then remove the rubber crucible former. If a metal sprue is used, remove it as
well. The smooth skin that forms on the ring with phosphate- bonded
investments should be removed, and any loose particles of investment should
be blown off with compressed air.
2. Reexamine the ring for any residual particles and then place it with the sprue
facing down in the furnace on a ribbed tray. The tray allows the molten wax to
flow out freely.
3. Bring the furnace to 200° C (400° F) and hold this temperature for 30
minutes. Most of the wax is eliminated by this time.
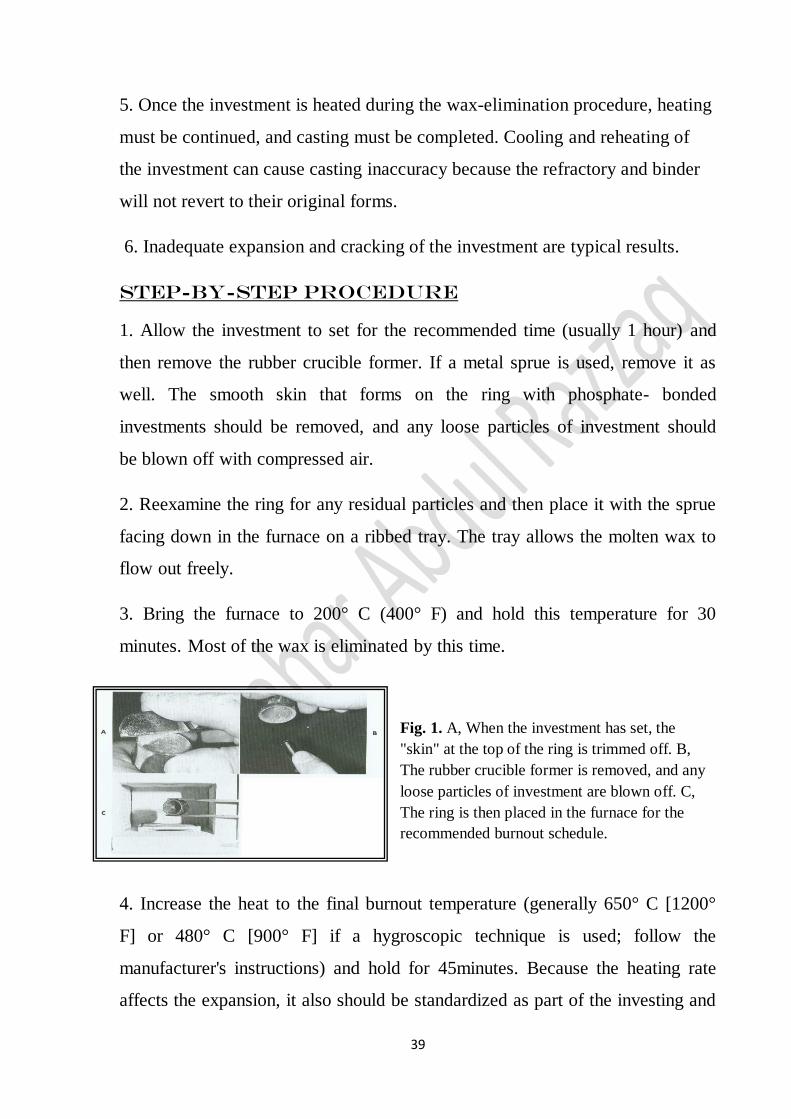
Fig. 1. A, When the investment has set, the
"skin" at the top of the ring is trimmed off. B,
The rubber crucible former is removed, and any
loose particles of investment are blown off. C,
The ring is then placed in the furnace for the
recommended burnout schedule.
4. Increase the heat to the final burnout temperature (generally 650° C [1200°
F] or 480° C [900° F] if a hygroscopic technique is used; follow the
manufacturer's instructions) and hold for 45minutes. Because the heating rate
affects the expansion, it also should be standardized as part of the investing and
40
casting protocol for the accurately fitting castings. The mold is now ready for
casting, although a large casting ring usually requires increased heating time. If
preferred, two burnout furnaces can be set of 200° C and 650° C or 480° C, or a
programmable two-stage furnace can serve equally well. However, the
investment should not be overheated or kept at the temperature too long.
Gypsum-bonded investments are not stable above 650 ° C (1200° F).
Also, some carbon in carbon-containing investments burns off; causing
increased surface roughness of the casting.
When transferring the casting ring to the casting machine, a quick visual check
of the sprue in shaded light is helpful to see whether it is properly heated. It
should be a cherry-red color.
Casting
Casting machines;
1. A casting machine requires a heat source to melt the alloy and a casting
force. 2. For a complete casting, the casting force must be high enough to
overcome the high surface tension of the molten alloy as well as the resistance
of the gas within the mold.
3. The heat source can be either the reducing flame of a torch or electricity.
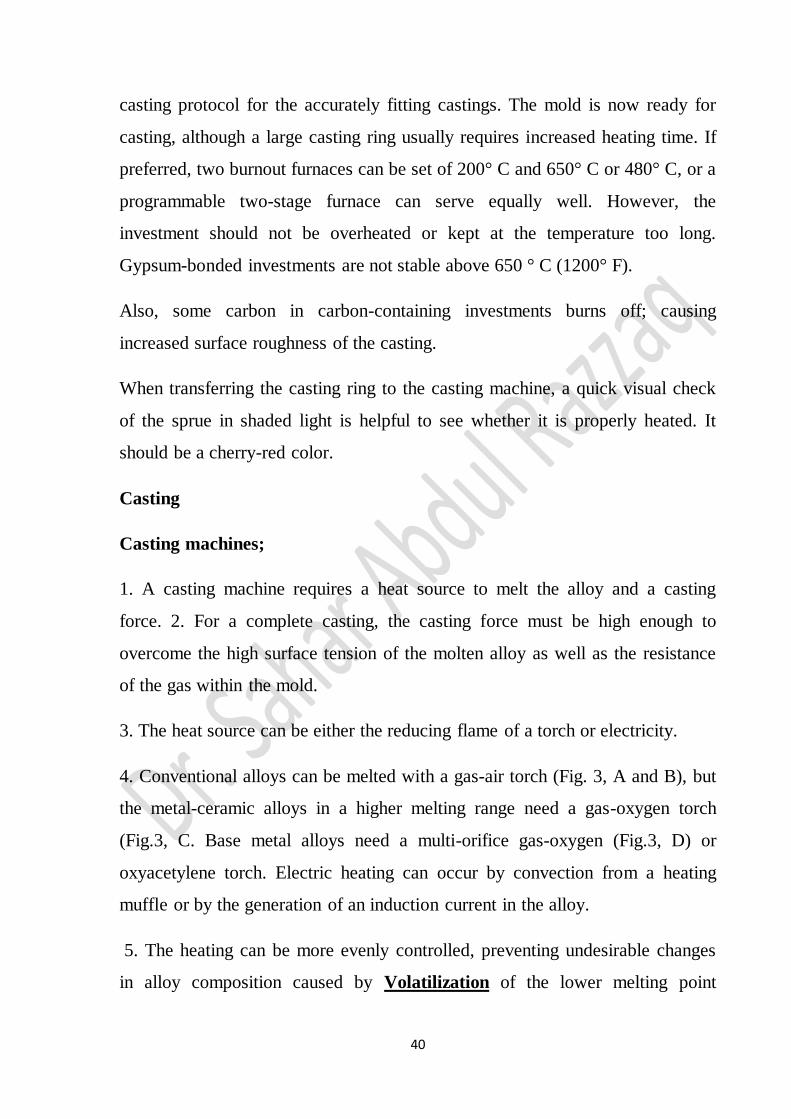
4. Conventional alloys can be melted with a gas-air torch (Fig. 3, A and B), but
the metal-ceramic alloys in a higher melting range need a gas-oxygen torch
(Fig.3, C. Base metal alloys need a multi-orifice gas-oxygen (Fig.3, D) or
oxyacetylene torch. Electric heating can occur by convection from a heating
muffle or by the generation of an induction current in the alloy.
5. The heating can be more evenly controlled, preventing undesirable changes
in alloy composition caused by Volatilization of the lower melting point
41
elements. 6. The electric machines are expensive and more appropriate for
larger dental laboratories, where as a torch may be the method of choice for
smaller laboratories and dental offices.
7. Present-day casting machines still use either air pressure or centrifugal force
to fill the mold, which were first proposed in the early days of lost-wax
castings. Some machines evacuate the mold before it is filled with metal, and
the vacuum has been shown to improve mold filling, although it is not clear if
the difference is clinically significant
Fig. 2. Casting machines. Fig. 3
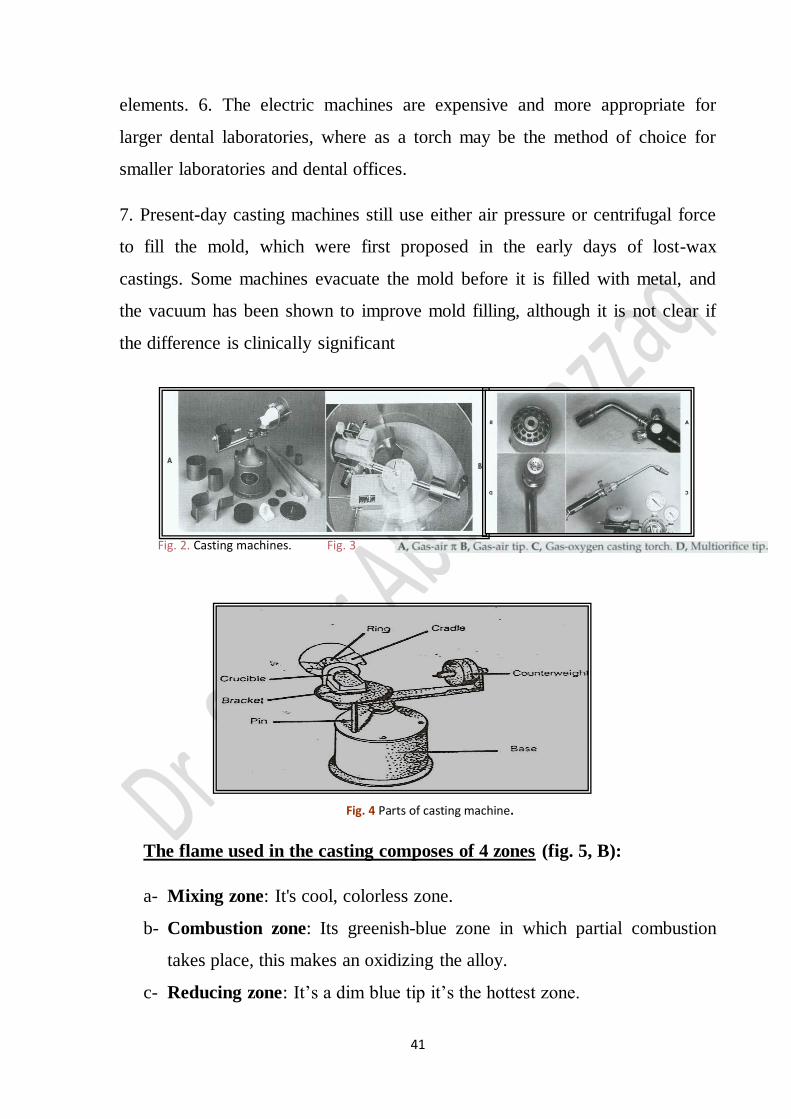
Fig. 4 Parts of casting machine.
The flame used in the casting composes of 4 zones (fig. 5, B):
a- Mixing zone: It's cool, colorless zone.
b- Combustion zone: Its greenish-blue zone in which partial combustion
takes place, this makes an oxidizing the alloy.
c- Reducing zone: It’s a dim blue tip it’s the hottest zone.

42
D-Oxidizing zone: In which final combustion between the gas and
surrounding air occurs, it makes an oxidizing the alloy.
Fig. 5, B Flame's zones.
CASTING TECHNIQUE
1. The mold is not removed from the burnout furnace until the alloy has been
melted and is ready to cast.
2. Cleaning a previously cast alloy is necessary to remove investment debris
and oxides before its reuse.
3. Noble metal alloys can be melted on a charcoal block with a gas-air torch,
which provides a reducing atmosphere, and remaining impurities are removed
through pickling and ultrasonic or steam cleaning.
4. Alloys from different manufacturers should not be mixed, even if they are
similar. Overheated or otherwise misapplied alloys, as well as grindings and old
restorations, should be returned to the manufacturer as scrap materials, rather
than being reused.
Crown and ridge Prosthodontics Dr. Sahar Abdul Razzaq
Lecture 7
43
Casting procedure:
1. The casting machine is given three clockwise turns (four if using metal-
ceramic alloys) and locked in position with the pin.
2. The counterbalance weights check for the appropriate size of the casting
ring.
3. A crucible for the alloy being cast is placed in the machine.
4. The torch is lit and adjusted (gas-air for regular alloys, gas oxygen for
metal-ceramic).
5. The crucible is preheated particularly in the area that will be in contact with
the alloy, and the alloy is added. Preheating avoids excessive slag formation
during casting. Also, when metal, ceramic alloys are cast, a crucible that is
too cool can "freeze" the alloy, resulting in an incomplete casting .
6. Sufficient mass of alloy must be present to bear adequate casting pressure.
With a high-density noble metal alloy, 6 g is typically adequate for premolar
and anterior castings, 9 g is adequate for molar castings, and 12 g is adequate
for pontics .
7. The alloy is heated in the reducing part of the flame until it is ready to cast.
8. A little flux can be added to conventional gold alloys (not metal ceramic
alloys). Gold alloys ball up and have a mirror- like shiny surface that appears to
be spinning. Nickel-chromium and cobalt alloys are ready to cast when the
sharp edges of the ingot round over.
9. The mold is placed in the cradle of the casting machine and kept on the alloy
with the reducing flame until the crucible is moved into position .
10. The casting machine arm is then free to make the casting. The machine is
allowed to spin until it has slowed enough that it can be stopped by hand, and
the ring is removed with casting tongs.
Dental casting alloy:
44
May select from alloys based on palladium, silver, nickel, cobalt, and titanium,
among others. Furthermore, alloys within each of these groups are diverse,
Because of the long-term role, these materials play in dental treatment, the
selection of an appropriate alloy is critical from technical, ethical, and legal
perspectives. Although uses for pure metals such as gold foil and platinum foil
exist in dentistry, the main role of metals in dentistry has been in alloys.
Properties of alloys:
Color: The color of alloys is often described as being ‘‘yellow’’ or ‘‘white.’’
These limited terms are inadequate because the range of alloy colors is much
greater, including reddish, brownish, and even greenish.
Phase structure:
If most of the components of the alloy dissolve into one another, the alloy is
described as a single-phase alloy and has a more or less homogeneous
composition throughout. If one or more components are not soluble at the
other, then two or more phases form in the solid state, each having a different
composition. In this case, the alloy is described as a multiple-phase alloy.
Single-phase alloys are generally easier to manipulate (ie, easier to cast) and
have lower corrosion rates than multiple phase alloys; however, multiple-phase
alloys may be etched for bonding and may be significantly stronger than single-
phase alloys.
Grain size:
Grains are crystals of the alloy that form upon solidification from the small
central part, much as ice crystals form water the size of the grains is influenced
by factors such as the cooling rate of the alloy and the composition of the alloy.
For gold-based alloys, a small grain size has been shown to improve tensile
strength and elongation.
45
Strength and hardness:
Tensile strength above 300 MPa is necessary to avoid fracture of alloys in
high-risk areas such as between pontics of a multiple-unit fixed restoration.
Because tensile strength is difficult to measure in practice, the hardness of an
alloy must be sufficient to resist wear from opposing teeth or restorations and
not so hard as to wear enamel and other materials such as porcelain.
Alloy solidus and fit:
When a molten alloy solidifies from the liquid state during casting, a large
amount of shrinkage occurs, but is compensated for by the addition of molten
metal from the reservoir in the casting ring. The higher the solidus temperature,
the more shrinkage occurs. The shrinkage must be compensated for by the
expansion of the die, application of die spacers, the use of special expanding
investment mechanisms, or increasing the burnout temperature of the
investment. The risk of ill-fitting crowns is much greater for alloys with high
solidi, and this factor is a significant consideration in the choice of alloys.
Corrosion:
Corrosion may compromise the strength of the restoration, leading to
catastrophic failure or the release of oxidized components may discolor natural
teeth, porcelain veneers, the electrons released during corrosion may be
detectable by the patient as a shock that can be worrying. Released metallic
components may cause an undesirable metallic taste leading the patient to
request that the restoration is removed. Because corrosion generally results in
46
the release of mass from the alloy into the oral environment, it is related in
complex ways to alloy biocompatibility.
Biocompatibility:
Biocompatibility is best described as how an alloy interacts with and affects
biologic systems.
Soldering:
Soldering of alloys is highly dependent on the type of alloy and may be a
significant factor in the clinician’s choice of alloy. In general, gold-based alloys
are most easily soldered compared with palladium-, nickel-, silver-, or nickel-
based alloys. Furthermore, the heating that occurs during soldering is more
likely to alter complex phase structures of base–metal alloys than of high-noble
alloys.
Classification of casting alloys by physical properties:
ADA designation Yield strength (MPa, in tension) Elongation (%)
Soft < 140 18
Medium 140 – 200 18
Hard 201– 340 12
Extra-hard > 340 10
High-noble alloys
47
Crown and ridge Prosthodontics Dr. Sahar Abdul Razzaq
Lecture 8
Cleaning Of Cast Restorations:
After casting procedure is completed, the casting ring is taken immediately
from the casting machine, and thrust or plunged under running cold water into a
large mixing rubber bowl. This procedure is called Quenching.
Purposes or Benefits of Quenching:
1. To anneal the alloy to provide better working qualities during finishing.
2. The disintegration of the hot investment material when it contacts cold water.
Laboratory Seating & Adjustment:
1. Clean casting and remove oxides
2. Seat on die
3. Adjust interproximal contacts
4. Adjust occlusion
5. Final laboratory polish
Cleaning of the cast restoration:
1. After quenching the cast restoration is cleaned from the remnants of
investment material by a sharp hand instrument and a tooth brush.
2. The cast restoration is sandblasted to remove the remaining residues of the
investment material. (Sandblast: it is a machine that throws sand and
compressed air on the cast restoration to clean it)
3. The cast restoration was then placed into a pickling solution (a solution made
of 50% hydrochloride acid). This procedure is called Pickling.
48
Advantages;
1. It is used to remove oxide from the surface of the metal.
2. It is used to remove any remnant of investment material
3. The casting restoration is ready now for finishing procedure.
Finishing of the Cast Restoration:
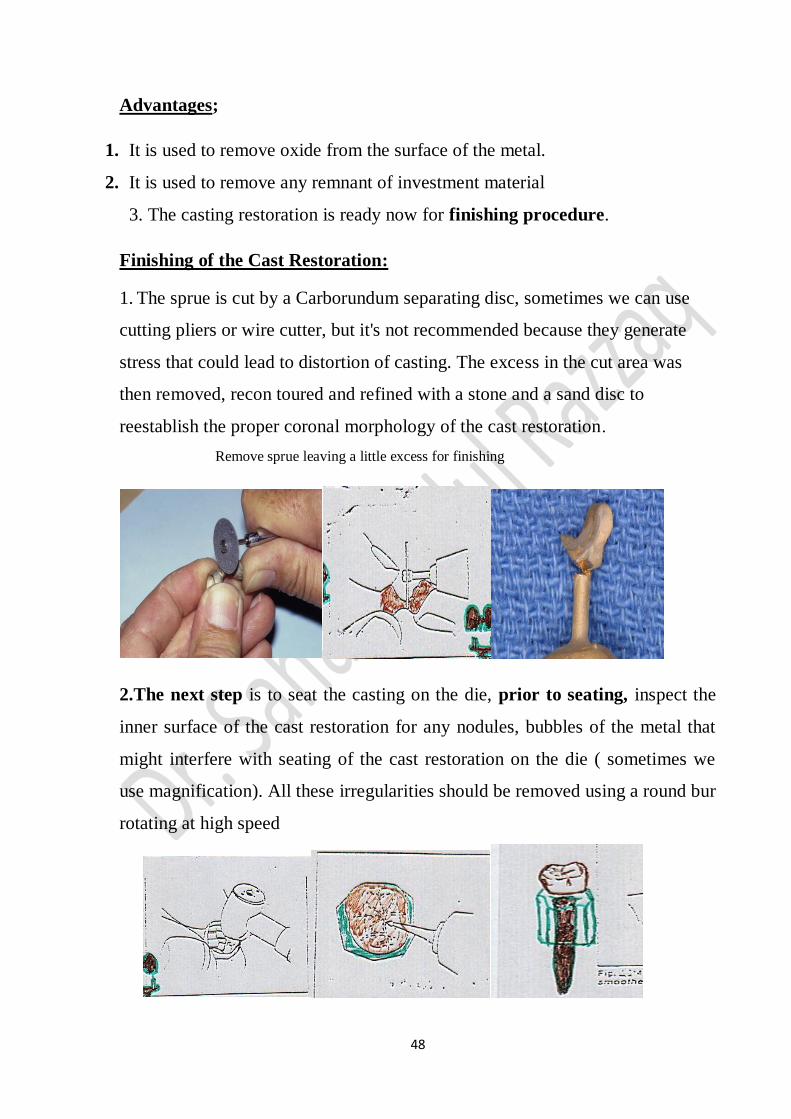
1. The sprue is cut by a Carborundum separating disc, sometimes we can use
cutting pliers or wire cutter, but it's not recommended because they generate
stress that could lead to distortion of casting. The excess in the cut area was
then removed, recon toured and refined with a stone and a sand disc to
reestablish the proper coronal morphology of the cast restoration.
Remove sprue leaving a little excess for finishing
2.The next step is to seat the casting on the die, prior to seating, inspect the
inner surface of the cast restoration for any nodules, bubbles of the metal that
might interfere with seating of the cast restoration on the die ( sometimes we
use magnification). All these irregularities should be removed using a round bur
rotating at high speed
49
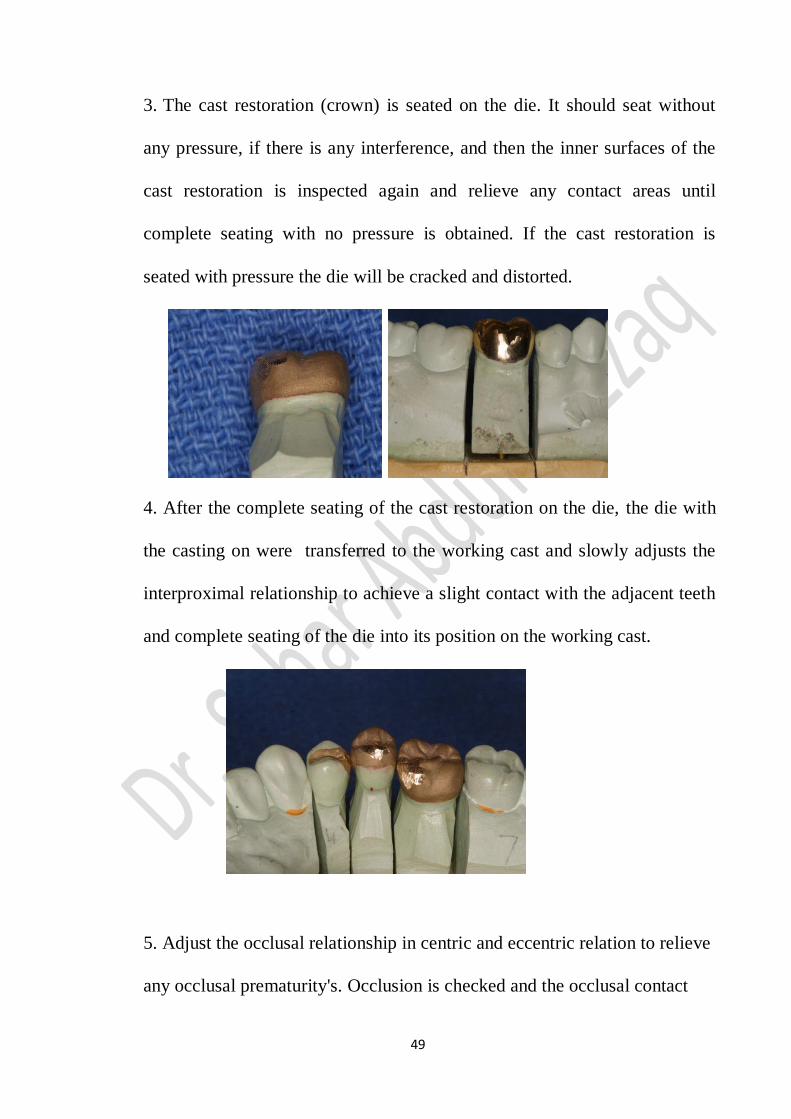
3. The cast restoration (crown) is seated on the die. It should seat without
any pressure, if there is any interference, and then the inner surfaces of the
cast restoration is inspected again and relieve any contact areas until
complete seating with no pressure is obtained. If the cast restoration is
seated with pressure the die will be cracked and distorted.
4. After the complete seating of the cast restoration on the die, the die with
the casting on were transferred to the working cast and slowly adjusts the
interproximal relationship to achieve a slight contact with the adjacent teeth
and complete seating of the die into its position on the working cast.
5. Adjust the occlusal relationship in centric and eccentric relation to relieve
any occlusal prematurity's. Occlusion is checked and the occlusal contact
50
reestablished in static as well as dynamic relationships to the opposing arch.
Articulating paper can be used for this purpose, Be certain of complete
seating of the casting otherwise you might, ground out of occlusion
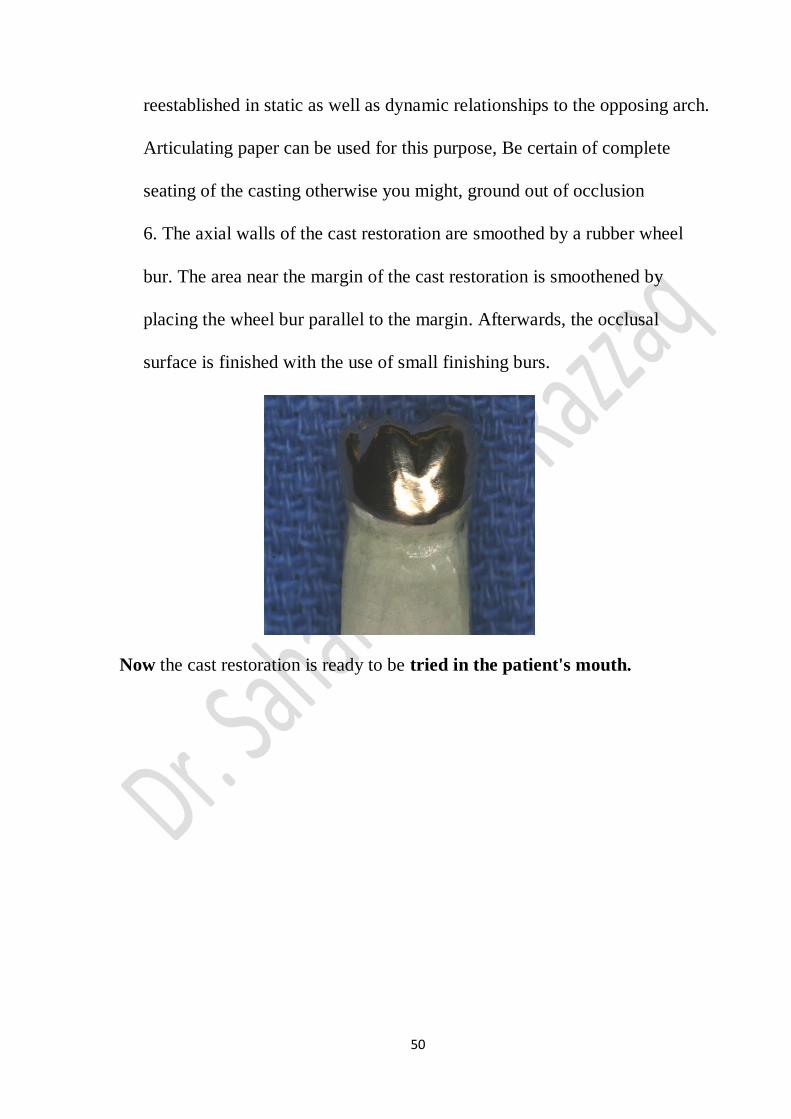
6. The axial walls of the cast restoration are smoothed by a rubber wheel
bur. The area near the margin of the cast restoration is smoothened by
placing the wheel bur parallel to the margin. Afterwards, the occlusal
surface is finished with the use of small finishing burs.
Now the cast restoration is ready to be tried in the patient's mouth.
51
Crown and ridge Prosthodontics Dr. Sahar Abdul Razzaq
Lecture 9
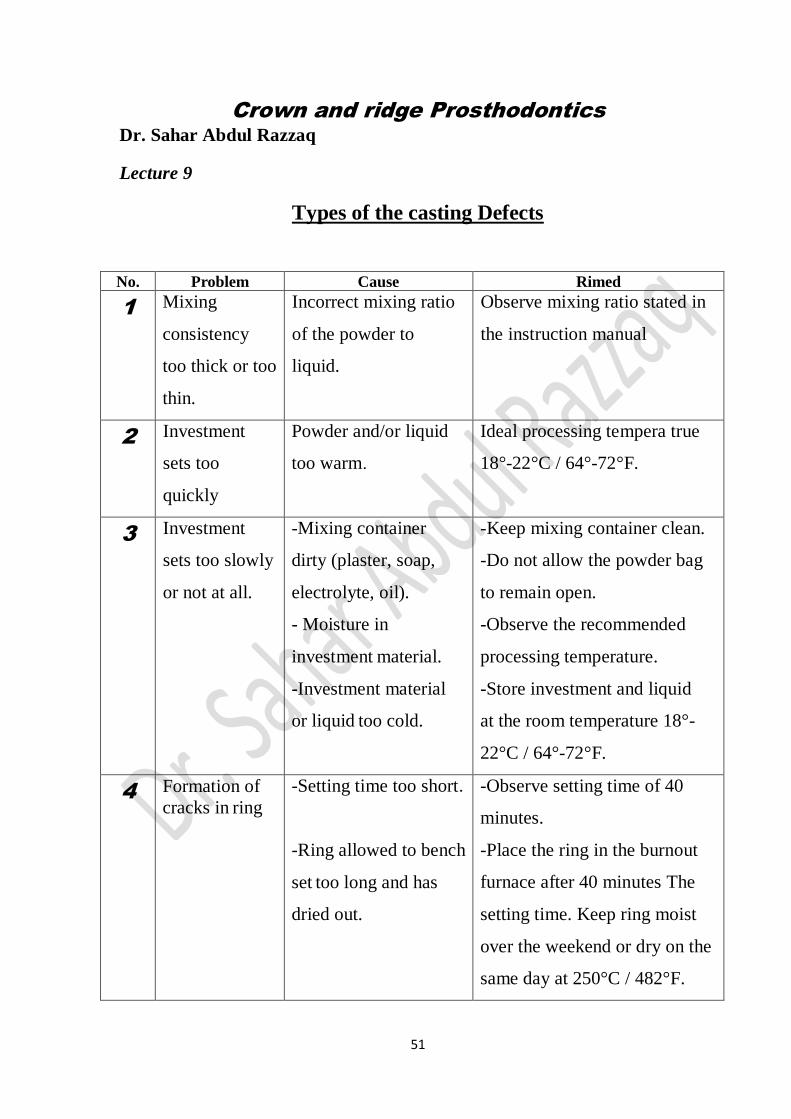
Types of the casting Defects
No. Problem Cause Rimed
1 Mixing
consistency
too thick or too
thin.
Incorrect mixing ratio
of the powder to
liquid.
Observe mixing ratio stated in
the instruction manual
2 Investment
sets too
quickly
Powder and/or liquid
too warm.
Ideal processing tempera true
18°-22°C / 64°-72°F.
3 Investment
sets too slowly
or not at all.
-Mixing container
dirty (plaster, soap,
electrolyte, oil).
- Moisture in
investment material.
-Investment material
or liquid too cold.
-Keep mixing container clean.
-Do not allow the powder bag
to remain open.
-Observe the recommended
processing temperature.
-Store investment and liquid
at the room temperature 18°-
22°C / 64°-72°F.
4 Formation of
cracks in ring -Setting time too short.
-Ring allowed to bench
set too long and has
dried out.
-Observe setting time of 40
minutes.
-Place the ring in the burnout
furnace after 40 minutes The
setting time. Keep ring moist
over the weekend or dry on the
same day at 250°C / 482°F.
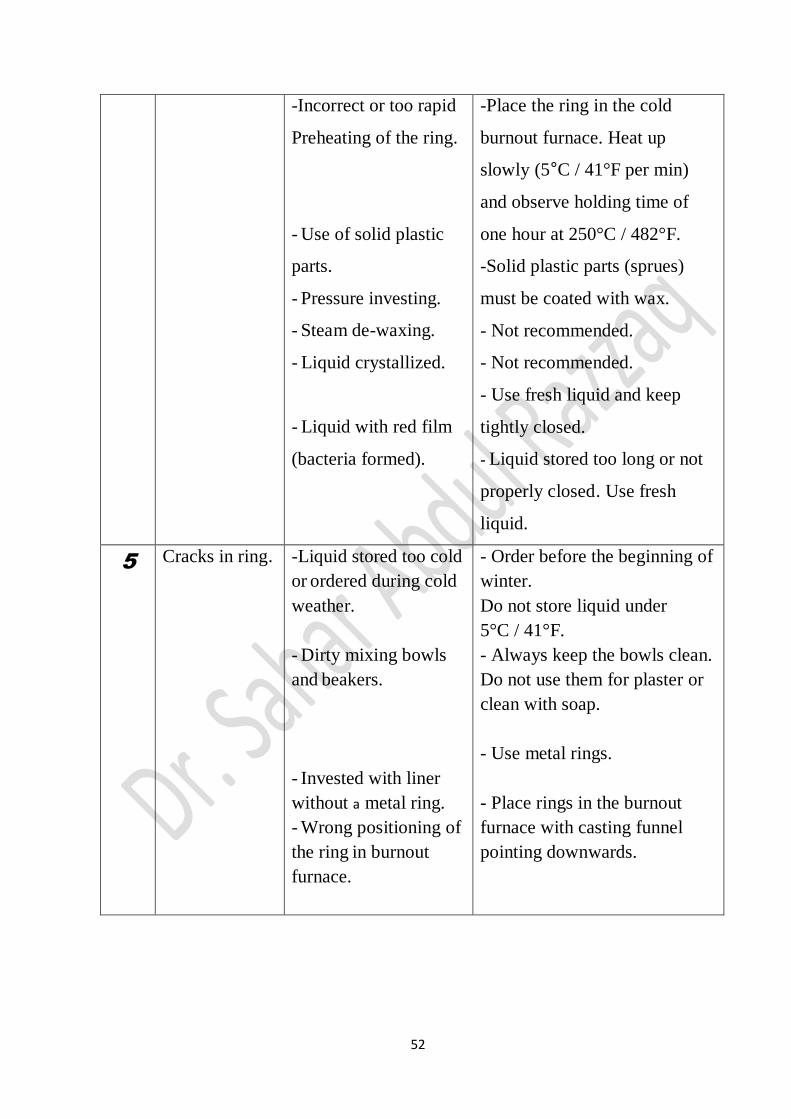
52
-Incorrect or too rapid
Preheating of the ring.
- Use of solid plastic
parts.
- Pressure investing.
- Steam de-waxing.
- Liquid crystallized.
- Liquid with red film
(bacteria formed).
-Place the ring in the cold
burnout furnace. Heat up
slowly (5°C / 41°F per min)
and observe holding time of
one hour at 250°C / 482°F.
-Solid plastic parts (sprues)
must be coated with wax.
- Not recommended.
- Not recommended.
- Use fresh liquid and keep
tightly closed.
- Liquid stored too long or not
properly closed. Use fresh
liquid.
5 Cracks in ring. -Liquid stored too cold
or ordered during cold
weather.
- Dirty mixing bowls
and beakers.
- Invested with liner
without a metal ring.
- Wrong positioning of
the ring in burnout
furnace.
- Order before the beginning of
winter.
Do not store liquid under
5°C / 41°F.
- Always keep the bowls clean.
Do not use them for plaster or
clean with soap.
- Use metal rings.
- Place rings in the burnout
furnace with casting funnel
pointing downwards.
53
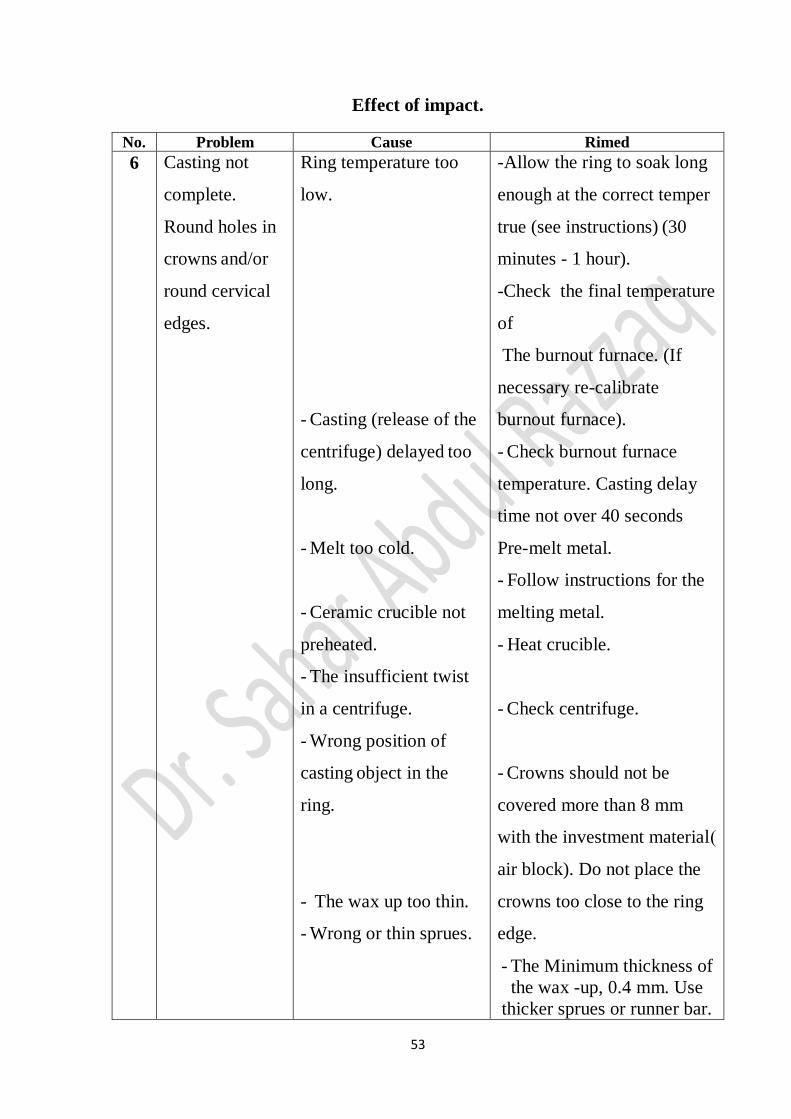
Effect of impact.
No. Problem Cause Rimed
6 Casting not
complete.
Round holes in
crowns and/or
round cervical
edges.
Ring temperature too
low.
- Casting (release of the
centrifuge) delayed too
long.
- Melt too cold.
- Ceramic crucible not
preheated.
- The insufficient twist
in a centrifuge.
- Wrong position of
casting object in the
ring.
- The wax up too thin.
- Wrong or thin sprues.
-Allow the ring to soak long
enough at the correct temper
true (see instructions) (30
minutes - 1 hour).
-Check the final temperature
of
The burnout furnace. (If
necessary re-calibrate
burnout furnace).
- Check burnout furnace
temperature. Casting delay
time not over 40 seconds
Pre-melt metal.
- Follow instructions for the
melting metal.
- Heat crucible.
- Check centrifuge.
- Crowns should not be
covered more than 8 mm
with the investment material)
air block). Do not place the
crowns too close to the ring
edge.
- The Minimum thickness of
the wax -up, 0.4 mm. Use
thicker sprues or runner bar.
54
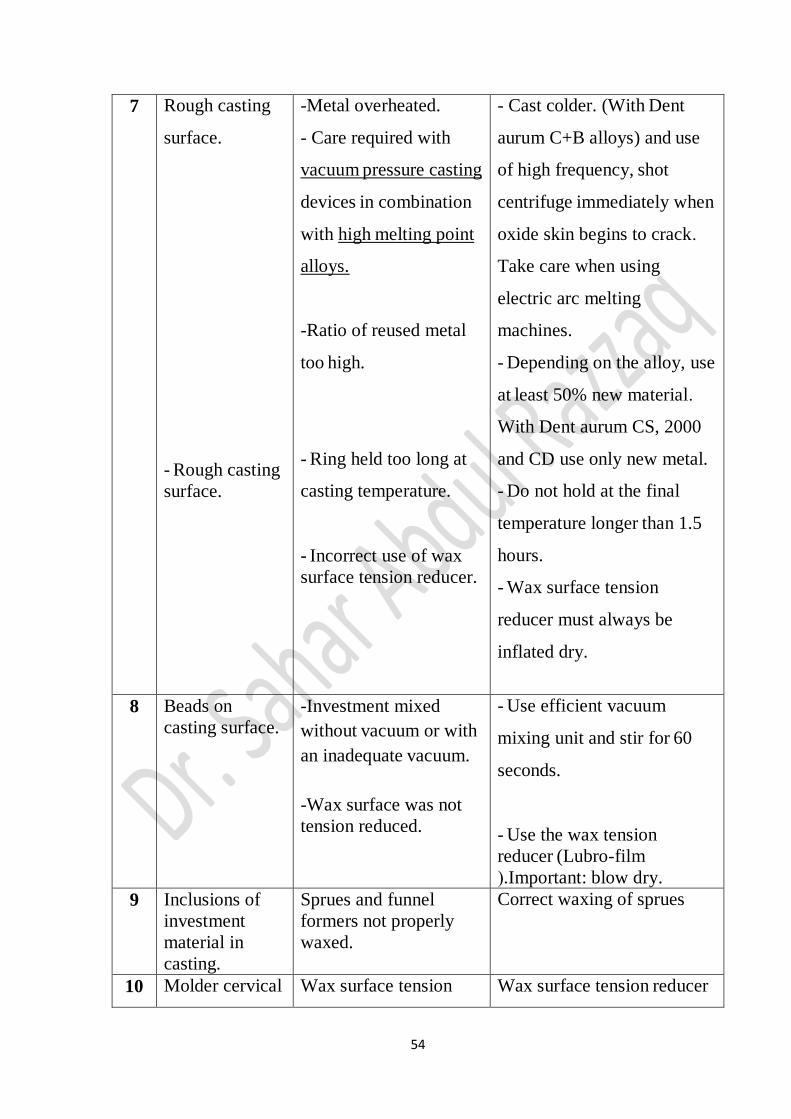
7 Rough casting
surface.
- Rough casting
surface.
-Metal overheated.
- Care required with
vacuum pressure casting
devices in combination
with high melting point
alloys.
-Ratio of reused metal
too high.
- Ring held too long at
casting temperature.
- Incorrect use of wax
surface tension reducer.
- Cast colder. (With Dent
aurum C+B alloys) and use
of high frequency, shot
centrifuge immediately when
oxide skin begins to crack.
Take care when using
electric arc melting
machines.
- Depending on the alloy, use
at least 50% new material.
With Dent aurum CS, 2000
and CD use only new metal.
- Do not hold at the final
temperature longer than 1.5
hours.
- Wax surface tension
reducer must always be
inflated dry.
8 Beads on
casting surface.
-Investment mixed
without vacuum or with
an inadequate vacuum.
-Wax surface was not
tension reduced.
- Use efficient vacuum
mixing unit and stir for 60
seconds.
- Use the wax tension
reducer (Lubro-film
(.Important: blow dry.
9 Inclusions of
investment
material in
casting.
Sprues and funnel
formers not properly
waxed.
Correct waxing of sprues
10 Molder cervical Wax surface tension Wax surface tension reducer
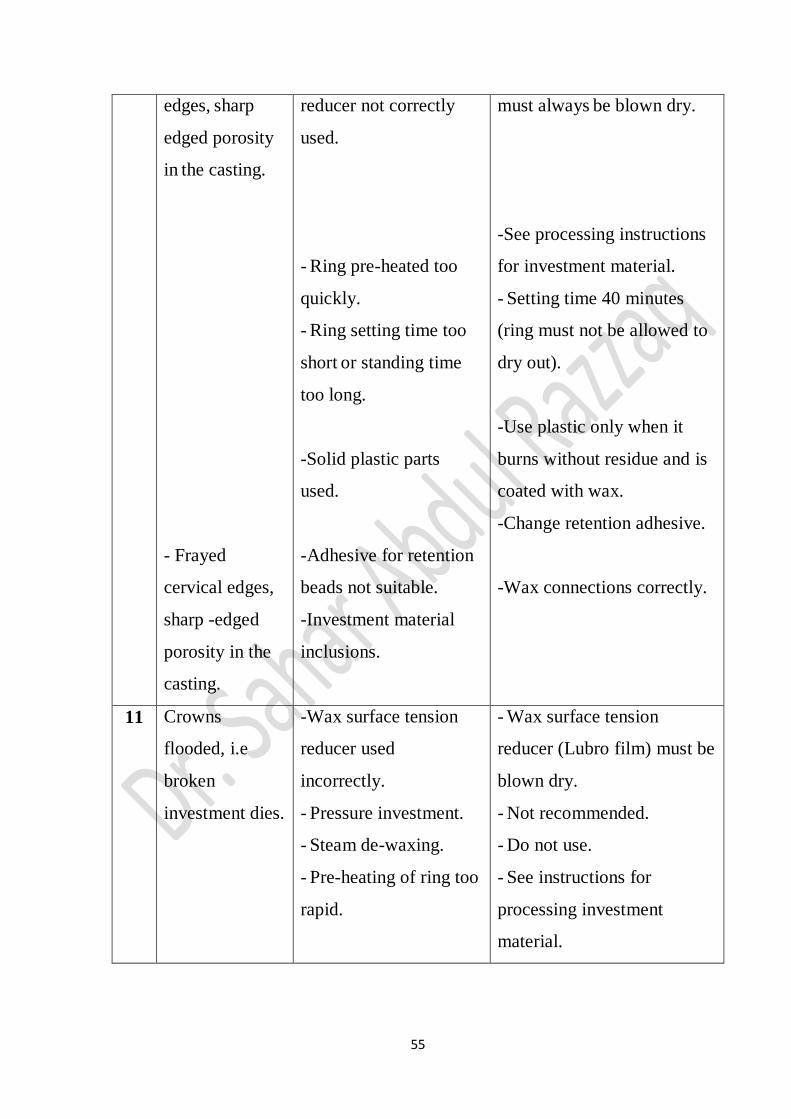
55
edges, sharp
edged porosity
in the casting.
- Frayed
cervical edges,
sharp -edged
porosity in the
casting.
reducer not correctly
used.
- Ring pre-heated too
quickly.
- Ring setting time too
short or standing time
too long.
-Solid plastic parts
used.
-Adhesive for retention
beads not suitable.
-Investment material
inclusions.
must always be blown dry.
-See processing instructions
for investment material.
- Setting time 40 minutes
(ring must not be allowed to
dry out).
-Use plastic only when it
burns without residue and is
coated with wax.
-Change retention adhesive.
-Wax connections correctly.
11 Crowns
flooded, i.e
broken
investment dies.
-Wax surface tension
reducer used
incorrectly.
- Pressure investment.
- Steam de-waxing.
- Pre-heating of ring too
rapid.
- Wax surface tension
reducer (Lubro film) must be
blown dry.
- Not recommended.
- Do not use.
- See instructions for
processing investment
material.
56
Crown and ridge Prosthodontics Dr. Sahar Abdul Razzaq
Lectur 10
Full Metal With or Without Acrylic or Ceramic Facing
These types of crowns and bridges have a metallic body and prove to be a cost-
effective option for posterior teeth. An acrylic or ceramic facing contributes to
the aesthetics in such type of restorations. The advantage of this type of crown
or bridge is the low cost, the strength of the metal and longevity. Plus very
less tooth structure is lost while preparing the tooth for a crown or bridge.
The disadvantage is the aesthetics since there is a possibility of the metal
showing in cases of acrylic facing wearing off due to long-term use.
The normal lifespan of such restorations is 6 - 8 years.
Indications
When the cost of a porcelain (or composite) restoration is too high for the
patient. To overcome the negative consequences of tooth loss, it is very
important to restore the edentulous spaces as soon as possible.
This is why an acrylic restoration is better than nothing, at least until the
patient will have the financial situation for a superior prosthesis.
Limited indications for the following cases: elderly persons, people with
other acrylic restorations which they don't want to change, very poor
persons.
Temporary crowns or other temporary restorations. It is the main
indication of acrylic restorations. In this case, the temporary crown
doesn't need a metal shell because its life span is very short (until the
definitive restoration is completed).
57
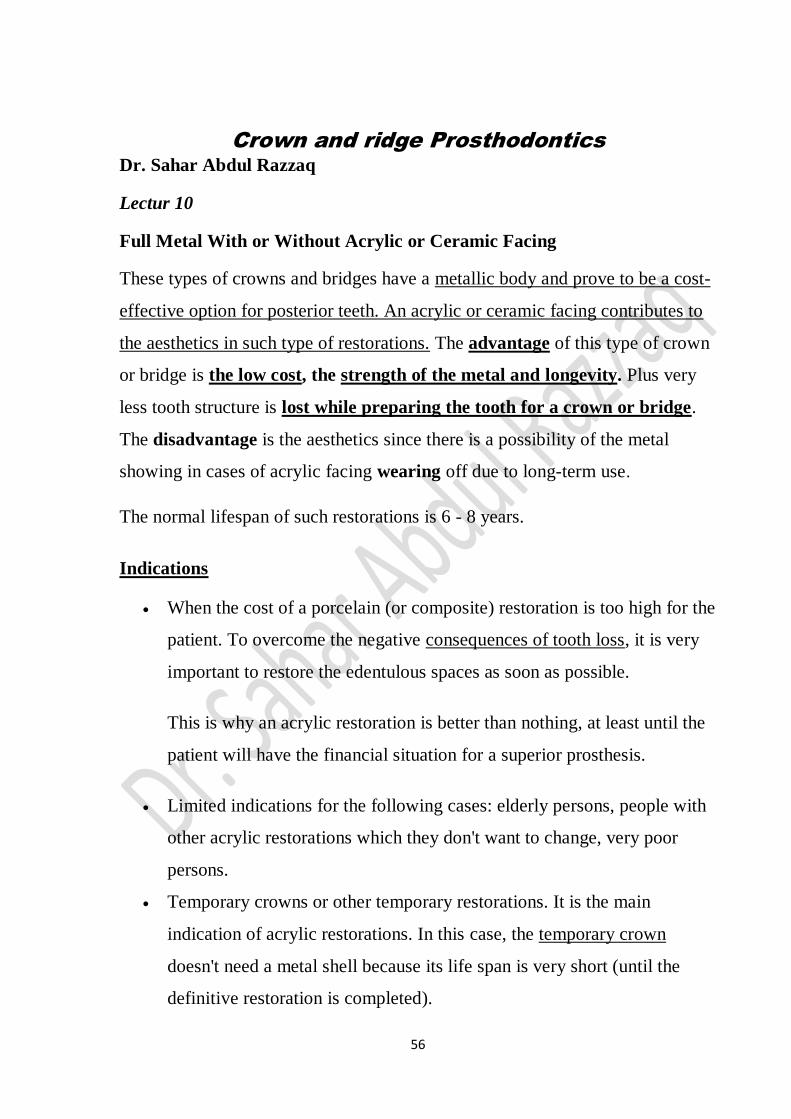
Metal frame
The metal shell can be constructed from various types of metal alloys (chromium
/nickel, chromium/cobalt etc.). Normally, base metal alloys are utilized but it is
possible to use noble alloys as well.
Basically, the metal frame covers the full tooth; on the visible part, it has a special
"window" which is carved inside the metal shell (The acrylic is placed inside this
window and is held in place by small metal "dots".
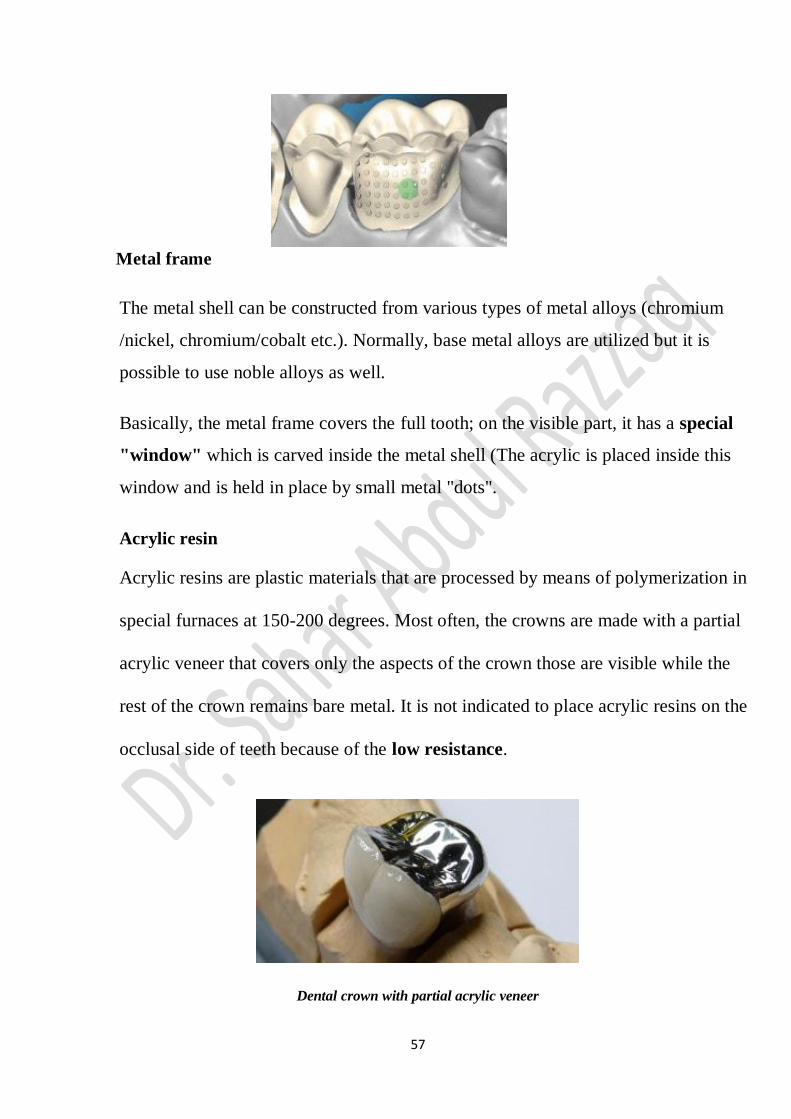
Acrylic resin
Acrylic resins are plastic materials that are processed by means of polymerization in
special furnaces at 150-200 degrees. Most often, the crowns are made with a partial
acrylic veneer that covers only the aspects of the crown those are visible while the
rest of the crown remains bare metal. It is not indicated to place acrylic resins on the
occlusal side of teeth because of the low resistance.
Dental crown with partial acrylic veneer
58
Disadvantages
Weak resistance and durability
Smaller range of shades and a lower possibility of combining them,
hence inferior aesthetics
No translucency
Weak connection with the metal part. This may lead to the detachment of
acrylic veneers
Normally, it has a low cost
Uses
1. Definitive acrylic restorations have limited indications nowadays. They are
normally utilized when patients cannot afford more expensive (and superior) dental
restorations: zirconia, porcelain etc.
2. Temporary acrylic restorations are widely used. Temporary crowns are usually
manufactured without a metal frame and their main function is to protect the
prepared teeth until the definitive restoration is completed.
What Types of Crowns Are Available?
1. Stainless steel crowns: Fabricated crowns that are used on permanent teeth
primarily as a temporary measure. The crown protects the tooth or filling while a
permanent crown is made from another material.
2. Metals used in crowns: Include alloys that have a high content of gold or
platinum, or base-metal alloys (for example, cobalt- chromium and nickel-
chromium alloys). Metal crowns withstand biting and chewing forces well and
probably last the longest in terms of wear down.
3. Porcelain-fused-to-metal: Dental crowns can be color matched to your
adjacent teeth (unlike the metallic crowns). However, more wearing to the
opposing teeth occurs with this crown type compared with metal or resin
crowns. The crown's porcelain portion can also chip or break off.

59
4. All-resin: Dental crowns are less expensive than other crown types.
However, they wear down over time and are more prone to fractures than
porcelain-fused-to-metal crowns.
All-ceramic or all-porcelain: Dental crowns provide better natural color match
than any other crown type and may be more suitable for people with metal
allergies. All-ceramic crowns can be used for front and back teeth.
Procedure
1. After finish full wax, mark the cavity margins with the red pencil so that
you can clearly identify them all around.
2. The LeCron will refine the whole morphology, removing all flash and
excess material so that no wax is extending over the pencil mark. Lay the
sharp cutting side of the carver on a cusp (around 45° inclination) with
the point of the instrument in the groove at the center of a tooth. Scrape
away the excess wax following the line of the cusps. The marginal ridges
should be at the same level as the adjacent.
3. In the presence of voids or if too much wax was removed, add an
appropriate amount of wax back by repeating and recarve. Polish your
restoration with a toothbrush, gauze, and/or a piece of nylon or cotton.
General wax-up characteristics:
Margins: Wax should be flush with the margin of the tooth preparation with
no overhangs or sub margins.
Contour: Should be smooth and curved with no flat (under) or bulbous (over)
contour.
Outer surfaces (facial, lingual, mesial, distal): Should respect proper
convexity, appear smooth, even and polished (with no scratches, waviness
or voids).
60
Morphological structures: All ridges, fossae, cingulum area and grooves
should exhibit a polished surface with no scratches. The junctions between
these structures should flow naturally.
The frame has a greater thickness and it is not so closely adapted from the
underneath tooth.
The contacts with neighboring teeth are carefully shaped and all details from
the occlusal side (cusps and grooves) are built up in wax. Because the
aesthetic materials are normally placed only on the visible side of the tooth, the
rest will remain bare metal. The bite is carefully checked.
The aesthetic material (acrylic or composite) will be positioned in a specific
window carved inside the wax. The window may contain small retention beads
that will hold the aesthetic material in place.
61
Crown and ridge Prosthodontics Dr. Sahar Abdul Razzaq
Lectur 11
Pontic:
Pontic: An artificial tooth that suspended a member of the fixed dental
prosthesis that replaces a missing natural tooth restores its esthetic and function,
it replaces the space previously occupied by the missing clinical crown. They
must be compatible with continued oral health and comfort. The part that
connects the Pontic to the abutment is the retainer which is either:
1- The rigid (ex. fixed by solder joint) the retainer is called major retainer.
2- When the connection is not rigid (flexible) ex. Stress breaker, the retainer is
called minor retainer.
The Pontic rigidly attached to crowns on the abutment teeth. The
connectors should occupy the normal interproximal contact area and be
large enough for strength but not so large as to impede plaque control.
Benefits:
• Replacing a missing tooth can prevent the other teeth from shifting in ways
that can lead to further oral problems and cause discomfort for the patient.
• Curved teeth, which can result from shifting caused by the missing tooth,
can lead to further tooth decay and periodontal disease because cleaning
between them is difficult. This can lead to further tooth loss.
• Pontics and their attachments provide support for facial muscles, improve

62
oral functions such as speech and chewing ability, and enhance one’s smile
and general facial appearance.
Reasons for Getting Pontics:
•Correct a malocclusion, or bad bite .
•Keep the shape of your face intact.
•Reinstate your ability to bite properly.
•Reduce your risk of gum disease.
•Improve your ability to chew properly.
• Improve your speech.
Pontic design principles:
1. The inter proximal embrasure should be large for good self-cleaning in
posterior teeth in anterior is less Bucco lingually for esthetic.
2. Tissue covered must be minimized to give good health to the gingiva.
3. The occlusal surface should be reduced about 20% width and the depend
on the: a- length of the span. B- strength of the tooth. C-Ridge form.
4. Tissue contact: The Pontic must touch the gum, but without the pressure
and the surface which face the tissue is best from porcelain or gold and not
at the junction line between the gold with porcelain.
5. Length of span: The more length of span it needs more strength of the
bridge, especially in the joint also using a hard metal alloy to tolerate the
excessive occlusal force.
63
6. The relationship of the ridge to Pontic design it should be concave
buccolingual and convex mesiodistally and thus the surface can be carved in
such design to cover the mucosa with the same shape.
Biologic principles:
These include cleanable tissue surface, access to abutment teeth and no
pressure on the ridge.
Mechanical principles: These include strong connectors to prevent
fracture.
Rigidity to resist deformation and material choice to resist porcelain
fracture.
Esthetic principles: These have to include looking like the tooth it's
replacing, appearing to "grow" out of the ridge and have space for
porcelain design.
Pontic designed according to the shape:
1-Saddle pontic.
2-Ridge lap
3-Modified ridge lap.
4-Ovate.
Saddle Or Ridge Lap Pontic:
The saddle pontic has a concave fitting surface that overlaps the residual ridge
buccolingual, simulating the contours and development profile of the missing
tooth on both sides of the residual ridge. However, saddle or ridge lap designs
should be avoided because the concave gingival surface of the pontic is not
accessible to cleaning with dental fiber, which will lead to plaque
accumulation.
64
Modified ridge lap poetic: This type of poetic demonstrates acceptable
esthetics and works best with broad edentulous ridges.
Stein Pontic: This type of poetic, which is designed for sharp edentulous
ridges, demonstrates minimal tissue contact and acceptable esthetics. It is
contraindicated in edentulous ridges with broad bucco-lingual dimensions.
Sanitary Pontic; This type of poetic is 2 to 3 mm distant from the ridge.
This design is easily cleaned and allows for a free flow of food beneath the
poetic. However, it exhibits unacceptable esthetics.
Renovate Pontic: This type of poetic exhibits excellent esthetics and
function. It produces minimal tissue contact and is very hygienic. However,
if ridge resorption occurs, deterioration of esthetics results.
For instance, ovate and modified ridge lap is recommended for the
anterior maxilla, sanitary and modified ridge lap for the posterior
maxilla, conical, and modified ridge lap for the anterior mandible and
sanitary for the posterior mandible, respectively.
65
Crown and ridge Prosthodontics Dr. Sahar Abdul Razzaq
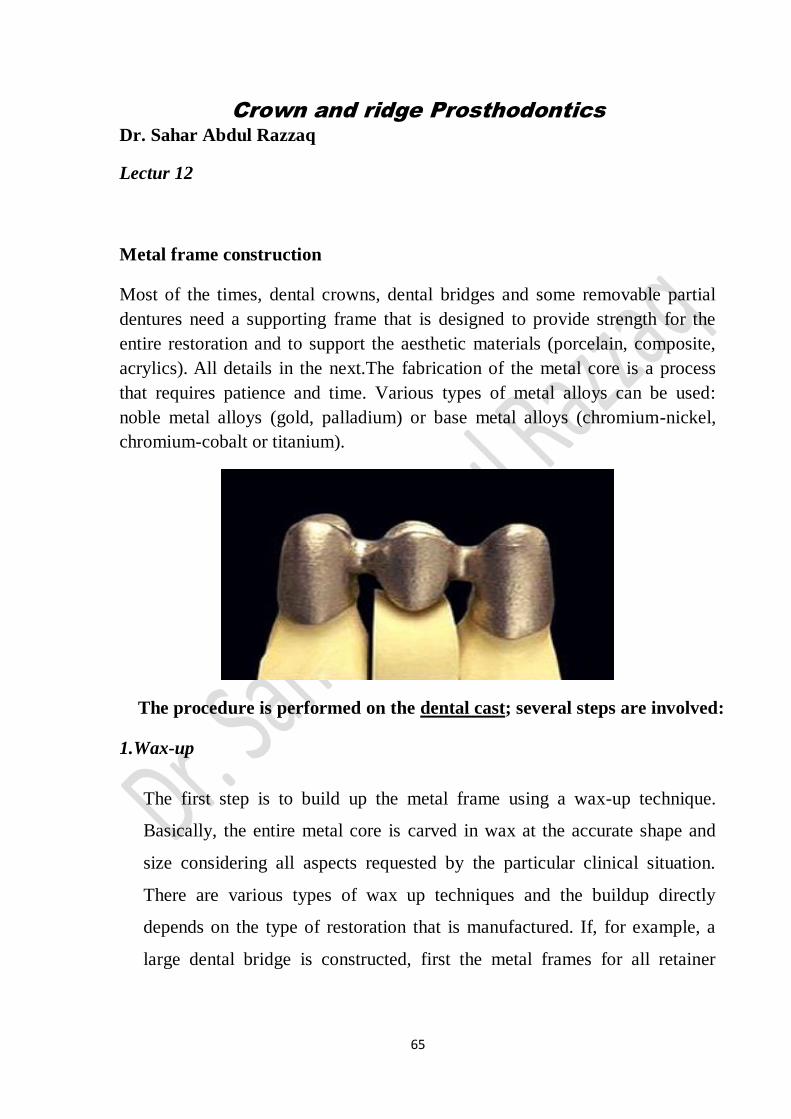
Lectur 12
Metal frame construction
Most of the times, dental crowns, dental bridges and some removable partial
dentures need a supporting frame that is designed to provide strength for the
entire restoration and to support the aesthetic materials (porcelain, composite,
acrylics). All details in the next.The fabrication of the metal core is a process
that requires patience and time. Various types of metal alloys can be used:
noble metal alloys (gold, palladium) or base metal alloys (chromium-nickel,
chromium-cobalt or titanium).
The procedure is performed on the dental cast; several steps are involved:
1.Wax-up
The first step is to build up the metal frame using a wax-up technique.
Basically, the entire metal core is carved in wax at the accurate shape and
size considering all aspects requested by the particular clinical situation.
There are various types of wax up techniques and the buildup directly
depends on the type of restoration that is manufactured. If, for example, a
large dental bridge is constructed, first the metal frames for all retainer
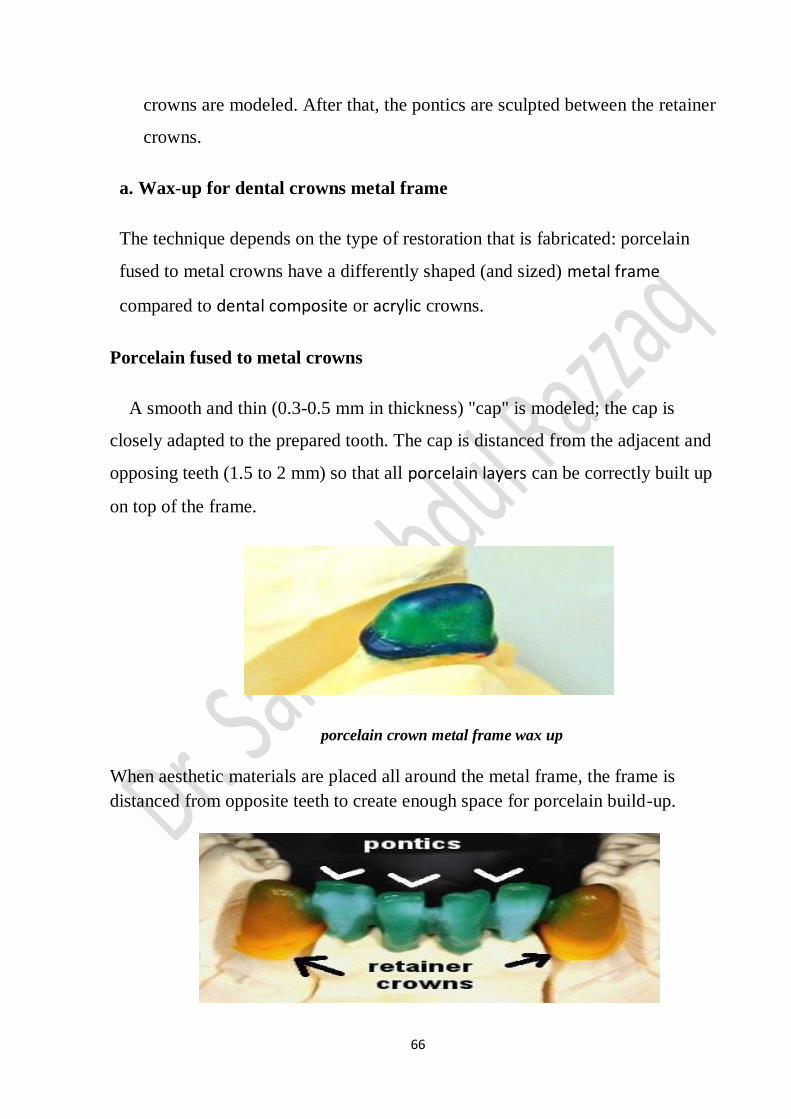
66
crowns are modeled. After that, the pontics are sculpted between the retainer
crowns.
a. Wax-up for dental crowns metal frame
The technique depends on the type of restoration that is fabricated: porcelain
fused to metal crowns have a differently shaped (and sized) metal frame
compared to dental composite or acrylic crowns.
Porcelain fused to metal crowns
A smooth and thin (0.3-0.5 mm in thickness) "cap" is modeled; the cap is
closely adapted to the prepared tooth. The cap is distanced from the adjacent and
opposing teeth (1.5 to 2 mm) so that all porcelain layers can be correctly built up
on top of the frame.
porcelain crown metal frame wax up
When aesthetic materials are placed all around the metal frame, the frame is
distanced from opposite teeth to create enough space for porcelain build-up.
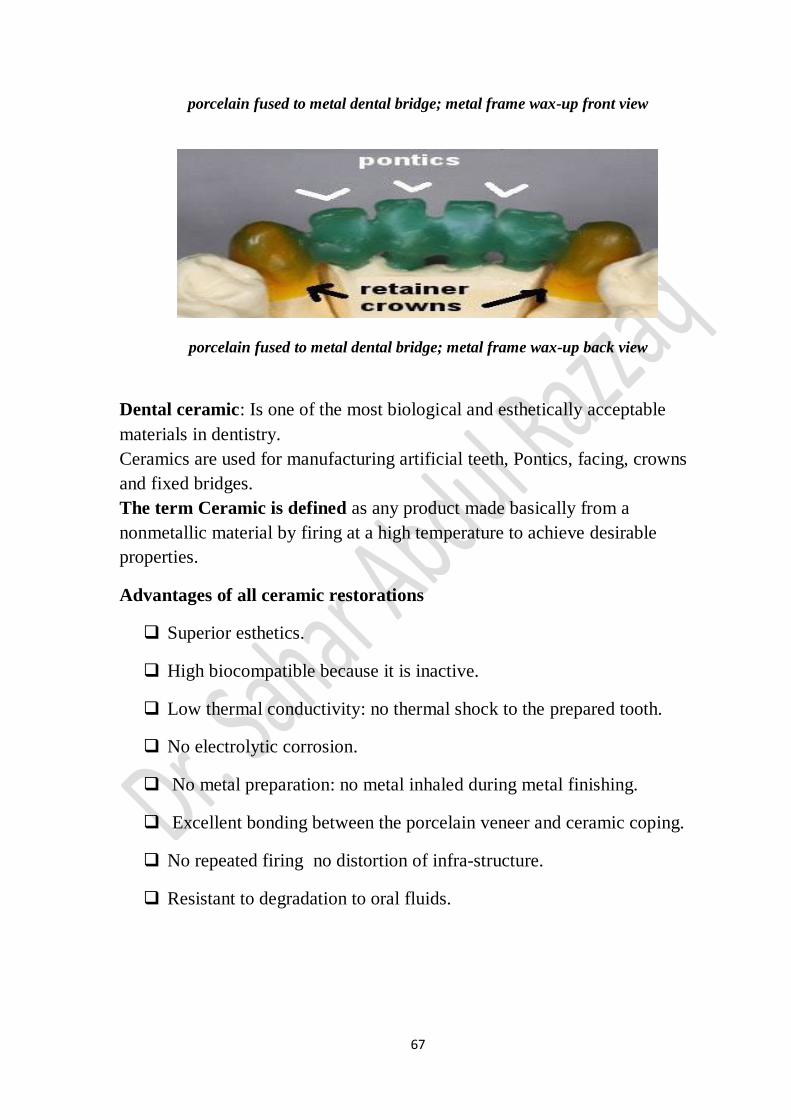
67
porcelain fused to metal dental bridge; metal frame wax-up front view
porcelain fused to metal dental bridge; metal frame wax-up back view
Dental ceramic: Is one of the most biological and esthetically acceptable
materials in dentistry.
Ceramics are used for manufacturing artificial teeth, Pontics, facing, crowns
and fixed bridges.
The term Ceramic is defined as any product made basically from a
nonmetallic material by firing at a high temperature to achieve desirable
properties.
Advantages of all ceramic restorations
Superior esthetics.
High biocompatible because it is inactive.
Low thermal conductivity: no thermal shock to the prepared tooth.
No electrolytic corrosion.
No metal preparation: no metal inhaled during metal finishing.
Excellent bonding between the porcelain veneer and ceramic coping.
No repeated firing no distortion of infra-structure.
Resistant to degradation to oral fluids.
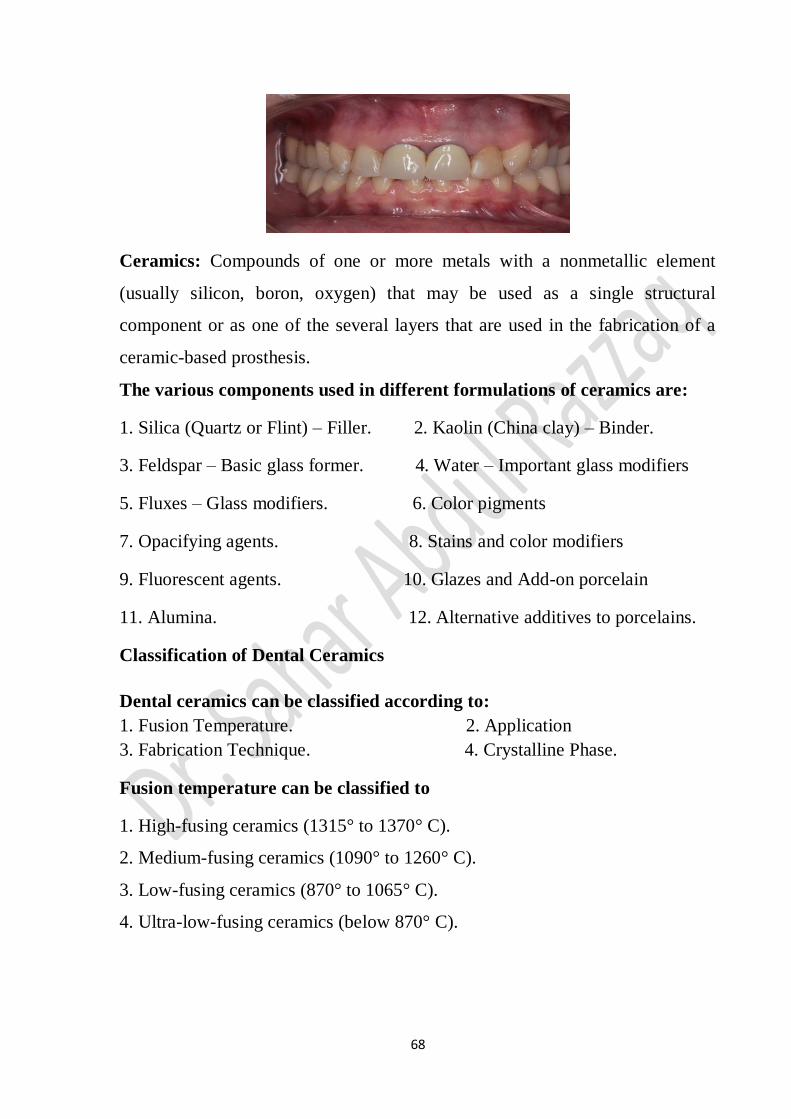
68
Ceramics: Compounds of one or more metals with a nonmetallic element
(usually silicon, boron, oxygen) that may be used as a single structural
component or as one of the several layers that are used in the fabrication of a
ceramic-based prosthesis.
The various components used in different formulations of ceramics are:
1. Silica (Quartz or Flint) – Filler. 2. Kaolin (China clay) – Binder.
3. Feldspar – Basic glass former. 4. Water – Important glass modifiers
5. Fluxes – Glass modifiers. 6. Color pigments
7. Opacifying agents. 8. Stains and color modifiers
9. Fluorescent agents. 10. Glazes and Add-on porcelain
11. Alumina. 12. Alternative additives to porcelains.
Classification of Dental Ceramics
Dental ceramics can be classified according to:
1. Fusion Temperature. 2. Application
3. Fabrication Technique. 4. Crystalline Phase.
Fusion temperature can be classified to
1. High-fusing ceramics (1315° to 1370° C).
2. Medium-fusing ceramics (1090° to 1260° C).
3. Low-fusing ceramics (870° to 1065° C).
4. Ultra-low-fusing ceramics (below 870° C).
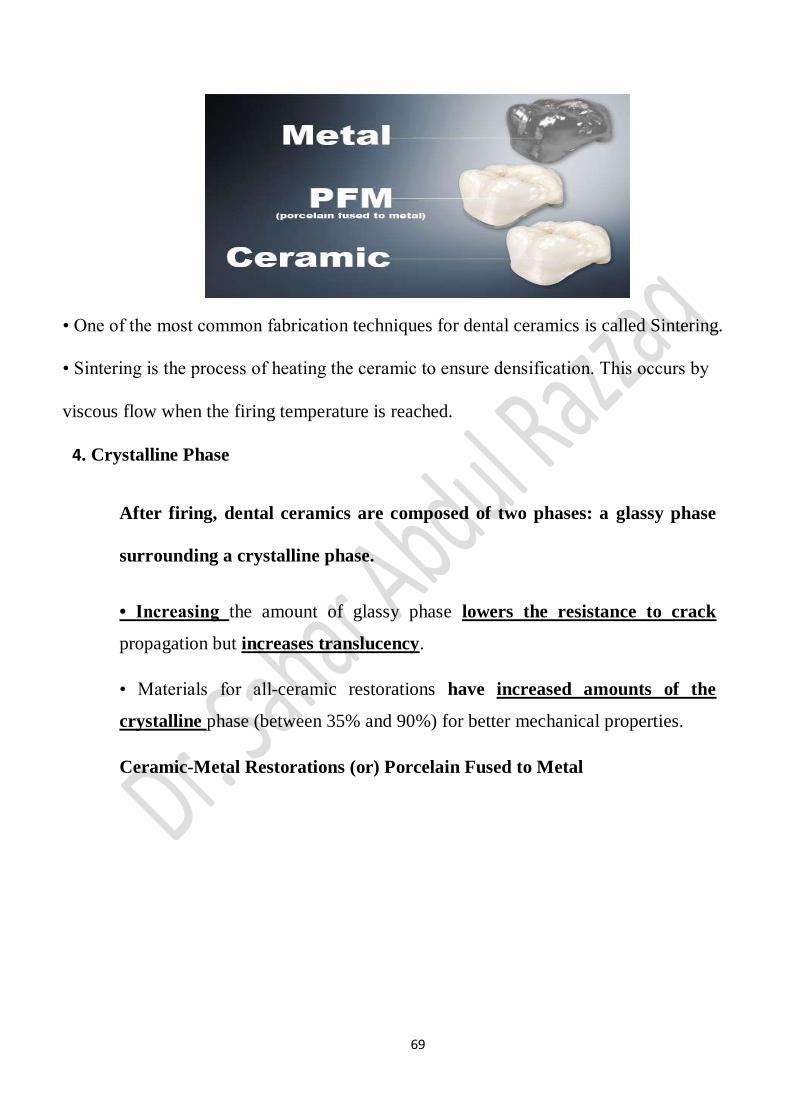
69
• One of the most common fabrication techniques for dental ceramics is called Sintering.
• Sintering is the process of heating the ceramic to ensure densification. This occurs by
viscous flow when the firing temperature is reached.
4. Crystalline Phase
After firing, dental ceramics are composed of two phases: a glassy phase
surrounding a crystalline phase.
• Increasing the amount of glassy phase lowers the resistance to crack
propagation but increases translucency.
• Materials for all-ceramic restorations have increased amounts of the
crystalline phase (between 35% and 90%) for better mechanical properties.
Ceramic-Metal Restorations (or) Porcelain Fused to Metal
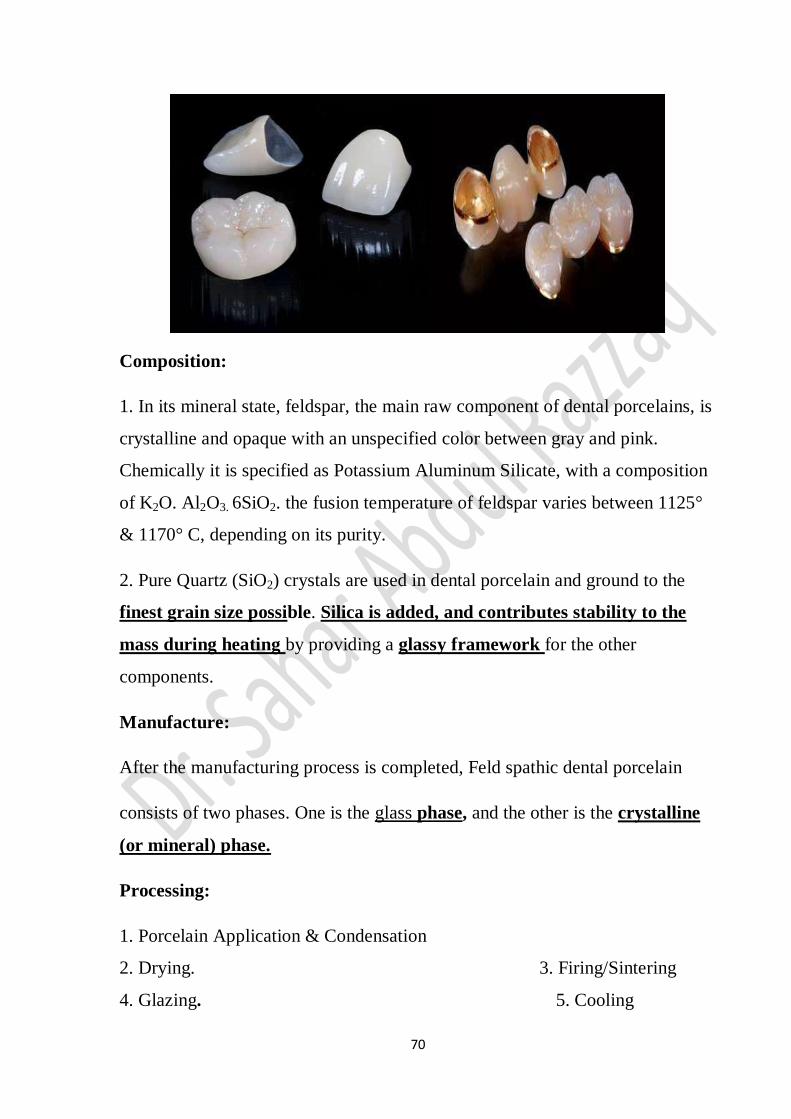
70
Composition:
1. In its mineral state, feldspar, the main raw component of dental porcelains, is
crystalline and opaque with an unspecified color between gray and pink.
Chemically it is specified as Potassium Aluminum Silicate, with a composition
of K2O. Al2O3. 6SiO2. the fusion temperature of feldspar varies between 1125°
& 1170° C, depending on its purity.
2. Pure Quartz (SiO2) crystals are used in dental porcelain and ground to the
finest grain size possible. Silica is added, and contributes stability to the
mass during heating by providing a glassy framework for the other
components.
Manufacture:
After the manufacturing process is completed, Feld spathic dental porcelain
consists of two phases. One is the glass phase, and the other is the crystalline
(or mineral) phase.
Processing:
1. Porcelain Application & Condensation
2. Drying. 3. Firing/Sintering
4. Glazing. 5. Cooling
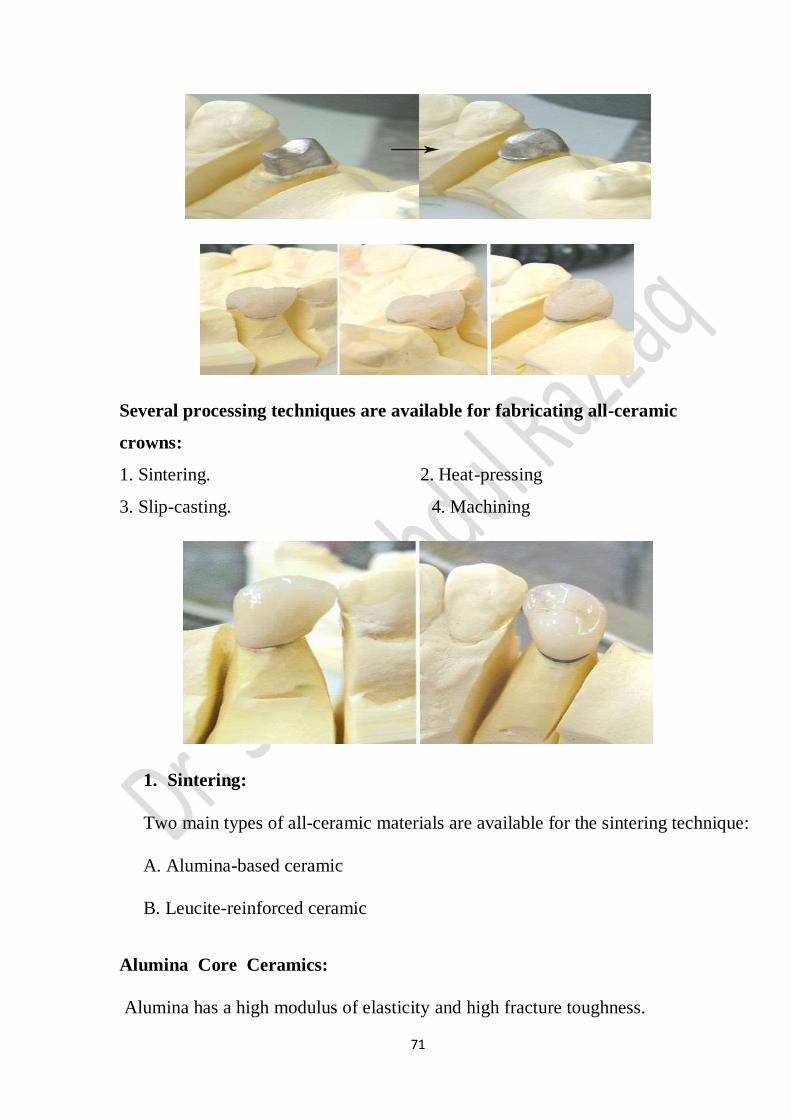
71
Several processing techniques are available for fabricating all-ceramic
crowns:
1. Sintering. 2. Heat-pressing
3. Slip-casting. 4. Machining
1. Sintering:
Two main types of all-ceramic materials are available for the sintering technique:
A. Alumina-based ceramic
B. Leucite-reinforced ceramic
Alumina Core Ceramics:
Alumina has a high modulus of elasticity and high fracture toughness.
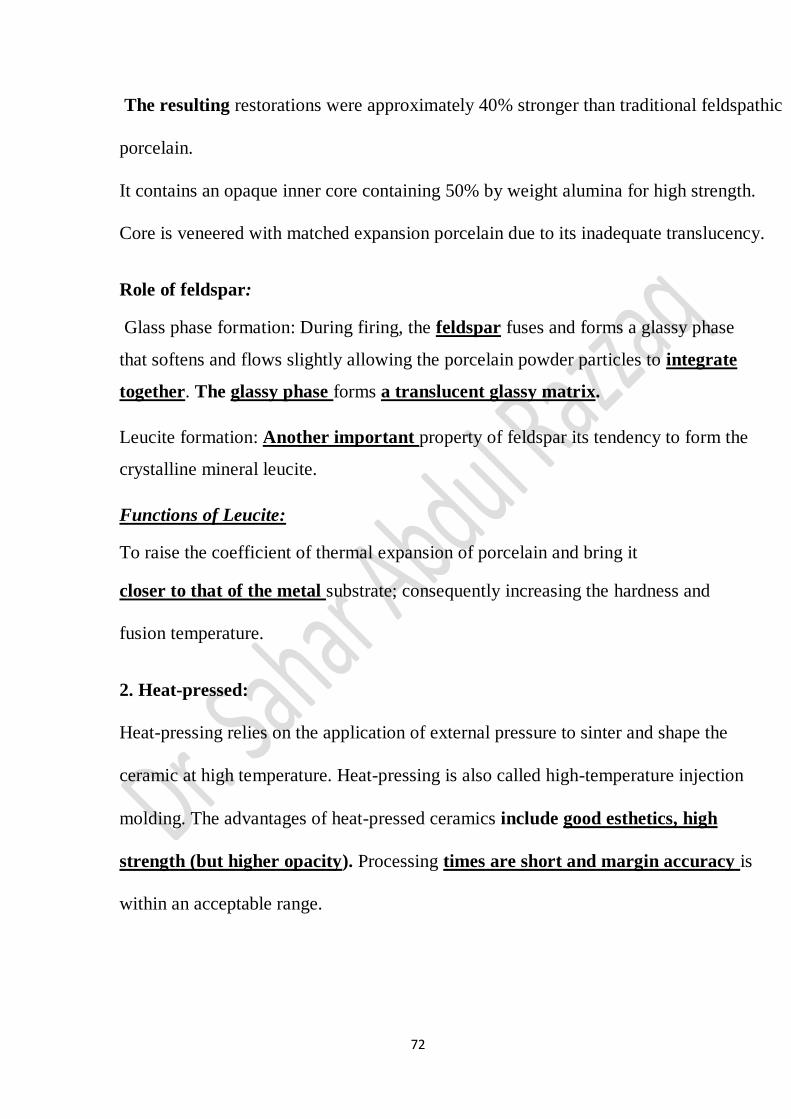
72
The resulting restorations were approximately 40% stronger than traditional feldspathic
porcelain.
It contains an opaque inner core containing 50% by weight alumina for high strength.
Core is veneered with matched expansion porcelain due to its inadequate translucency.
Role of feldspar:
Glass phase formation: During firing, the feldspar fuses and forms a glassy phase
that softens and flows slightly allowing the porcelain powder particles to integrate
together. The glassy phase forms a translucent glassy matrix.
Leucite formation: Another important property of feldspar its tendency to form the
crystalline mineral leucite.
Functions of Leucite:
To raise the coefficient of thermal expansion of porcelain and bring it
closer to that of the metal substrate; consequently increasing the hardness and
fusion temperature.
2. Heat-pressed:
Heat-pressing relies on the application of external pressure to sinter and shape the
ceramic at high temperature. Heat-pressing is also called high-temperature injection
molding. The advantages of heat-pressed ceramics include good esthetics, high
strength (but higher opacity). Processing times are short and margin accuracy is
within an acceptable range.
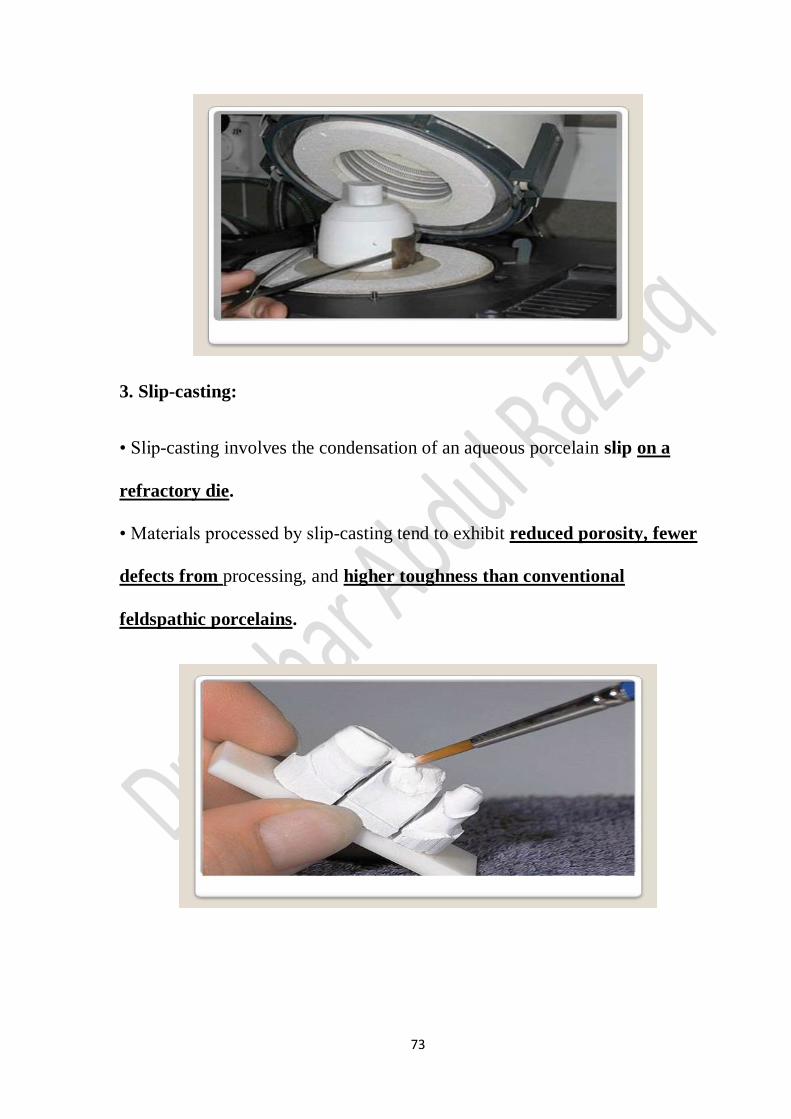
73
3. Slip-casting:
• Slip-casting involves the condensation of an aqueous porcelain slip on a
refractory die.
• Materials processed by slip-casting tend to exhibit reduced porosity, fewer
defects from processing, and higher toughness than conventional
feldspathic porcelains.


