Embed Size (px)
Citation preview

0
Sample
file
1
Fired & Forgotten
Take a literal leap of faith into Sharn's industrial underworld. Will you fight for warforged rights?
Episode 1 of Convergence Manifesto
An Across Eberron Adventure
CREDITS
Writer & Designer: Imogen Gingell
Editors: Wayne Chang, Laura Hirsbrunner, Anthony Turco Executive Producer: Keith Baker
Cover Art & Design: Kristóf Köteles, Laura Hirsbrunner
Interior Art: Imogen Gingell, Kristóf Köteles Layout: Anthony Turco
Playtesters: Alastair Skerman, Charlix Whipp, Freya Griffiths, Josie Dandrige, Rosana Griffin, Thomas Loades, Tom Cosans, Zi Graves
Special thanks to Freya Griffiths for fueling my enthusiasm, and Keith Baker for creating Eberron!
Published by Across Eberron, an Eberron community project.
Disclaimer: The editorial staff of Across Eberron is not responsible for any damages due to hobgoblin wrestlers, levitating glass, or hypothetical lava. DUNGEONS & DRAGONS, D&D, Wizards of the Coast, Forgotten Realms, Ravenloft, Eberron, the dragon ampersand, Ravnica and all other Wizards of the Coast product names, and their respective logos are trademarks of Wizards of the Coast in the USA and other countries. This work contains material that is copyright Wizards of the Coast and/or other authors. Such material is used with permission under the Community Content Agreement for Dungeon Masters Guild. All other original material in this work is copyright 2020 by Across Eberron and published under the Community Content Agreement for Dungeon Masters Guild.
Sample
file
2
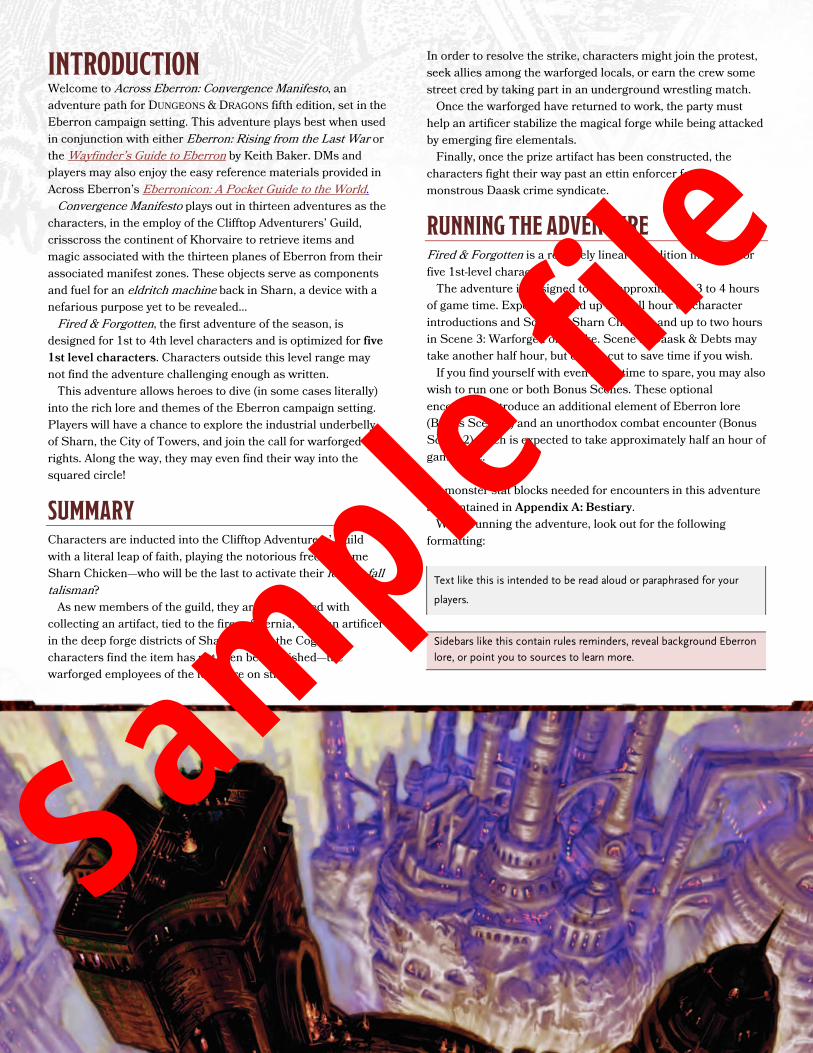
INTRODUCTION Welcome to Across Eberron: Convergence Manifesto, an adventure path for DUNGEONS & DRAGONS fifth edition, set in the Eberron campaign setting. This adventure plays best when used in conjunction with either Eberron: Rising from the Last War or the Wayfinder’s Guide to Eberron by Keith Baker. DMs and players may also enjoy the easy reference materials provided in Across Eberron’s Eberronicon: A Pocket Guide to the World. Convergence Manifesto plays out in thirteen adventures as the characters, in the employ of the Clifftop Adventurers’ Guild, crisscross the continent of Khorvaire to retrieve items and magic associated with the thirteen planes of Eberron from their associated manifest zones. These objects serve as components and fuel for an eldritch machine back in Sharn, a device with a nefarious purpose yet to be revealed… Fired & Forgotten, the first adventure of the season, is designed for 1st to 4th level characters and is optimized for five 1st level characters. Characters outside this level range may not find the adventure challenging enough as written. This adventure allows heroes to dive (in some cases literally) into the rich lore and themes of the Eberron campaign setting. Players will have a chance to explore the industrial underbelly of Sharn, the City of Towers, and join the call for warforged rights. Along the way, they may even find their way into the squared circle!
SUMMARY Characters are inducted into the Clifftop Adventurers’ Guild with a literal leap of faith, playing the notorious freefall game Sharn Chicken—who will be the last to activate their feather fall talisman? As new members of the guild, they are then tasked with collecting an artifact, tied to the fires of Fernia, from an artificer in the deep forge districts of Sharn. Within the Cogs, the characters find the item has not even been finished—the warforged employees of the forge are on strike!
In order to resolve the strike, characters might join the protest, seek allies among the warforged locals, or earn the crew some street cred by taking part in an underground wrestling match. Once the warforged have returned to work, the party must help an artificer stabilize the magical forge while being attacked by emerging fire elementals. Finally, once the prize artifact has been constructed, the characters fight their way past an ettin enforcer for the monstrous Daask crime syndicate.
RUNNING THE ADVENTURE Fired & Forgotten is a relatively linear expedition intended for five 1st-level characters. The adventure is designed to take approximately 3 to 4 hours of game time. Expect to spend up to a full hour on character introductions and Scene 1: Sharn Chicken, and up to two hours in Scene 3: Warforged on Strike. Scene 5: Daask & Debts may take another half hour, but can be cut to save time if you wish. If you find yourself with even more time to spare, you may also wish to run one or both Bonus Scenes. These optional encounters introduce an additional element of Eberron lore (Bonus Scene 1) and an unorthodox combat encounter (Bonus Scene 2). Each is expected to take approximately half an hour of game time. All monster stat blocks needed for encounters in this adventure are contained in Appendix A: Bestiary. While running the adventure, look out for the following formatting:
Text like this is intended to be read aloud or paraphrased for your
players.
Sidebars like this contain rules reminders, reveal background Eberron
lore, or point you to sources to learn more.
Sample
file
3
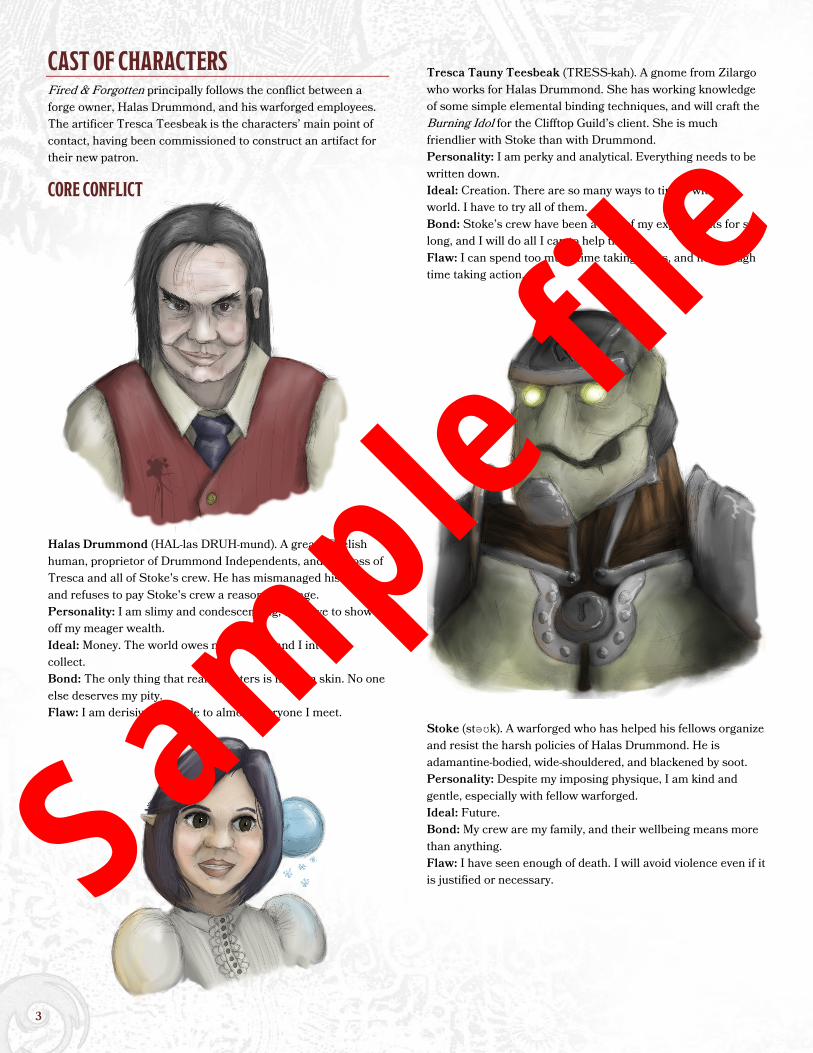
CAST OF CHARACTERS Fired & Forgotten principally follows the conflict between a forge owner, Halas Drummond, and his warforged employees. The artificer Tresca Teesbeak is the characters’ main point of contact, having been commissioned to construct an artifact for their new patron.
CORE CONFLICT Halas Drummond (HAL-las DRUH-mund). A greasy Brelish human, proprietor of Drummond Independents, and the boss of Tresca and all of Stoke's crew. He has mismanaged his funds and refuses to pay Stoke's crew a reasonable wage. Personality: I am slimy and condescending, and love to show off my meager wealth. Ideal: Money. The world owes me comfort and I intend to collect. Bond: The only thing that really matters is my own skin. No one else deserves my pity. Flaw: I am derisive and rude to almost everyone I meet.
Tresca Tauny Teesbeak (TRESS-kah). A gnome from Zilargo who works for Halas Drummond. She has working knowledge of some simple elemental binding techniques, and will craft the Burning Idol for the Clifftop Guild’s client. She is much friendlier with Stoke than with Drummond. Personality: I am perky and analytical. Everything needs to be written down. Ideal: Creation. There are so many ways to tinker with the world. I have to try all of them. Bond: Stoke’s crew have been a part of my experiments for so long, and I will do all I can to help them. Flaw: I can spend too much time taking notes, and not enough time taking action. Stoke (stəʊk). A warforged who has helped his fellows organize and resist the harsh policies of Halas Drummond. He is adamantine-bodied, wide-shouldered, and blackened by soot. Personality: Despite my imposing physique, I am kind and gentle, especially with fellow warforged. Ideal: Future. Bond: My crew are my family, and their wellbeing means more than anything. Flaw: I have seen enough of death. I will avoid violence even if it is justified or necessary.
Sample
file
4
Yadha-Ro (YA-da rəʊ). An ettin veteran with a missing arm, now working for the criminal syndicate Daask in the Cogs. Twin heads Yadha and Ro are unusually coordinated for an ettin, but age and injury have caught up to them. Nevertheless, they are willing and able to throw their weight around. Personality: We are impatient and quick to anger, especially if people try to turn us against each other. Ideal: Strength. We earned our place through power and persistence. They are the only things that matter. Bond: Throwing our weight around on behalf of Daask is our duty and our pleasure. Flaw: We are prone to frustration at minor mistakes.
MINOR CHARACTERS The following are minor characters in this adventure. Auger. A warforged in Stoke's crew. When she isn’t working, she dons the disguise of the Silver Kiss to fight in the pit at the Troll’s Nose tavern, but has yet to win a match. Blue and Crucible. A pair of warforged with connections and an interest in construct welfare, both based at the Red Hammer club in Blackbones, deep in the Cogs. Bolaar. A hobgoblin manager of the prize fighting ring at the Troll’s Nose. He expects Auger to turn up at any moment. Daring Dar. A hobgoblin heel wrestler in the Troll’s Nose tavern and fighting pit, specializing in traditional Dhakaani forms.
Chandra Thane. A human historian studying the migration of Lhazaar at Sharn’s infamous Morgrave University. She unexpectedly manifests an aberrant dragonmark in Bonus Scene 1. Deathsgate Guild Rivals. Ferrin (female halfling ranger), Aena Thennas (female elf warlock) and Gor'aashta (male half-orc fighter) represent the Deathsgate Guild of adventurers. They are pitted against the characters in a game of Sharn Chicken during the opening scene of the game.
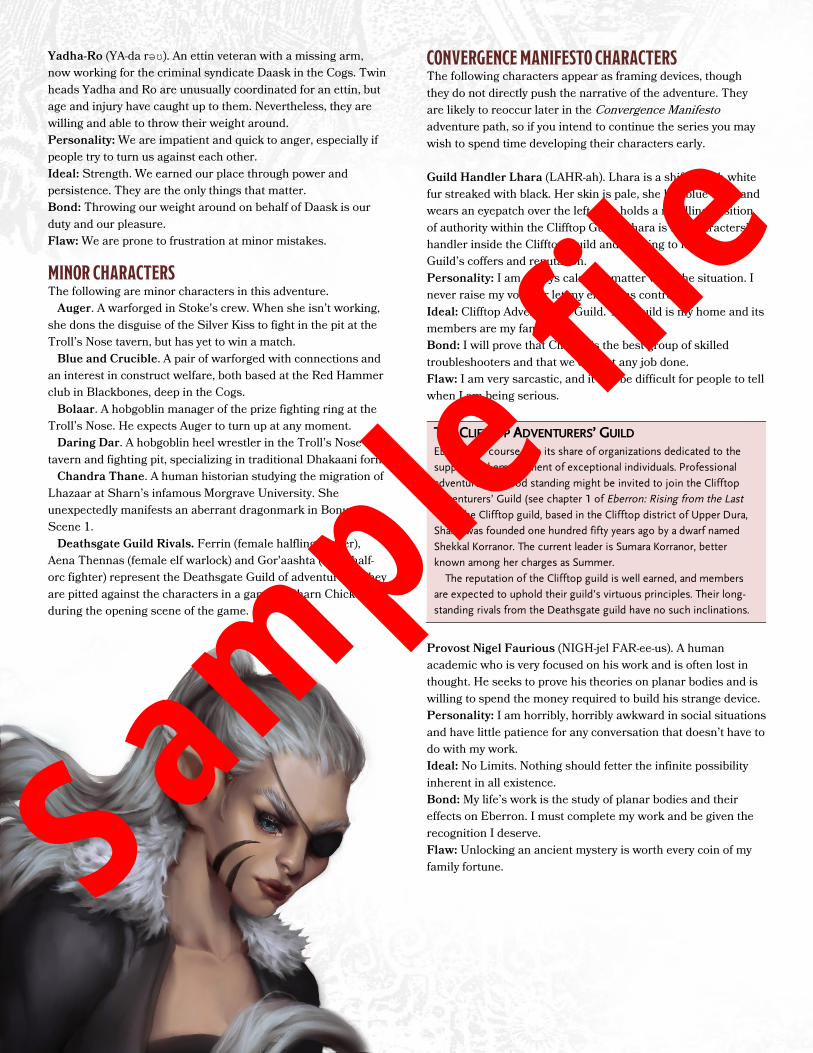
CONVERGENCE MANIFESTO CHARACTERS The following characters appear as framing devices, though they do not directly push the narrative of the adventure. They are likely to reoccur later in the Convergence Manifesto adventure path, so if you intend to continue the series you may wish to spend time developing their characters early. Guild Handler Lhara (LAHR-ah). Lhara is a shifter with white fur streaked with black. Her skin is pale, she has blue eyes, and wears an eyepatch over the left. She holds a middling position of authority within the Clifftop Guild. Lhara is the characters’ handler inside the Clifftop Guild and is trying to increase the Guild’s coffers and reputation. Personality: I am always calm, no matter what the situation. I never raise my voice or let my emotions control me. Ideal: Clifftop Adventurers’ Guild. The Guild is my home and its members are my family. Bond: I will prove that Clifftop is the best group of skilled troubleshooters and that we can get any job done. Flaw: I am very sarcastic, and it can be difficult for people to tell when I am being serious. THE CLIFFTOP ADVENTURERS’ GUILD Eberron, of course, has its share of organizations dedicated to the support and employment of exceptional individuals. Professional
adventurers in good standing might be invited to join the Clifftop Adventurers’ Guild (see chapter 1 of Eberron: Rising from the Last
War).The Clifftop guild, based in the Clifftop district of Upper Dura, Sharn, was founded one hundred fifty years ago by a dwarf named
Shekkal Korranor. The current leader is Sumara Korranor, better known among her charges as Summer.
The reputation of the Clifftop guild is well earned, and members are expected to uphold their guild’s virtuous principles. Their long-standing rivals from the Deathsgate guild have no such inclinations.
Provost Nigel Faurious (NIGH-jel FAR-ee-us). A human academic who is very focused on his work and is often lost in thought. He seeks to prove his theories on planar bodies and is willing to spend the money required to build his strange device. Personality: I am horribly, horribly awkward in social situations and have little patience for any conversation that doesn’t have to do with my work. Ideal: No Limits. Nothing should fetter the infinite possibility inherent in all existence. Bond: My life’s work is the study of planar bodies and their effects on Eberron. I must complete my work and be given the recognition I deserve. Flaw: Unlocking an ancient mystery is worth every coin of my family fortune. Sam
ple file
5
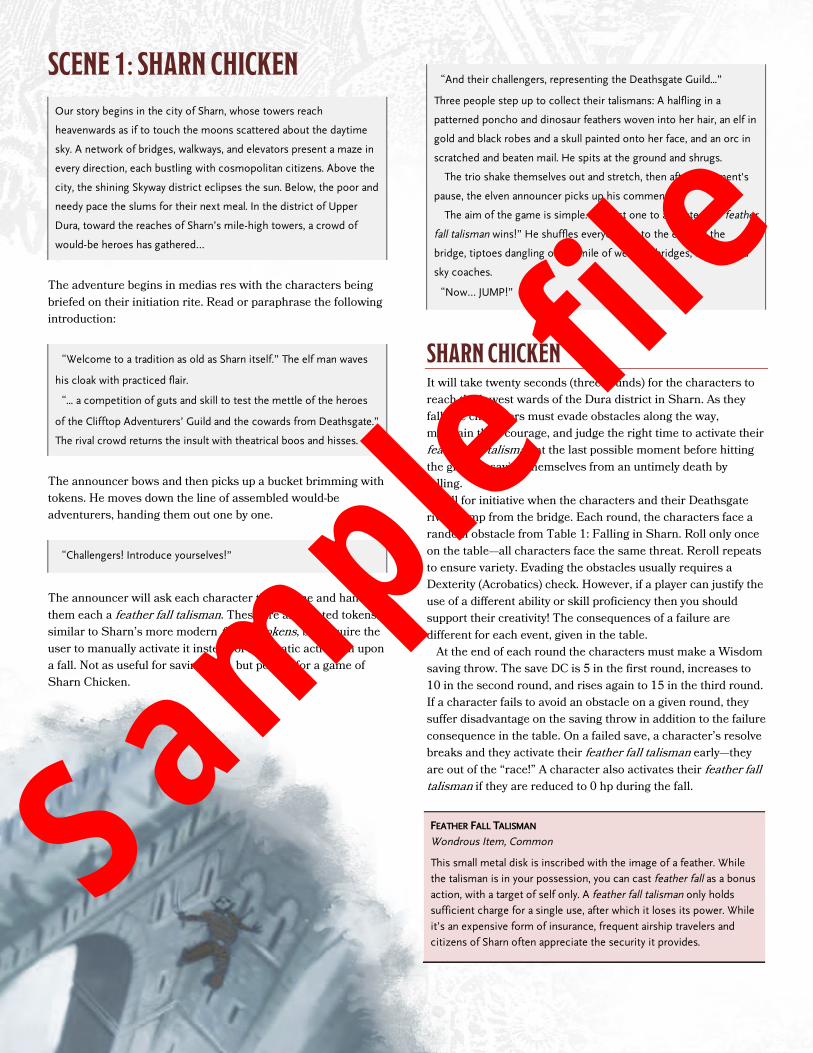
SCENE 1: SHARN CHICKEN
Our story begins in the city of Sharn, whose towers reach
heavenwards as if to touch the moons scattered about the daytime
sky. A network of bridges, walkways, and elevators present a maze in
every direction, each bustling with cosmopolitan citizens. Above the
city, the shining Skyway district eclipses the sun. Below, the poor and
needy pace the slums for their next meal. In the district of Upper
Dura, toward the reaches of Sharn’s mile-high towers, a crowd of
would-be heroes has gathered…
The adventure begins in medias res with the characters being briefed on their initiation rite. Read or paraphrase the following introduction:
“Welcome to a tradition as old as Sharn itself.” The elf man waves
his cloak with practiced flair.
“... a competition of guts and skill to test the mettle of the heroes
of the Clifftop Adventurers’ Guild and the cowards from Deathsgate.”
The rival crowd returns the insult with theatrical boos and hisses.
The announcer bows and then picks up a bucket brimming with tokens. He moves down the line of assembled would-be adventurers, handing them out one by one.
“Challengers! Introduce yourselves!”
The announcer will ask each character their name and hand them each a feather fall talisman. These are antiquated tokens, similar to Sharn’s more modern feather tokens, but require the user to manually activate it instead of automatic activation upon a fall. Not as useful for saving lives, but perfect for a game of Sharn Chicken.
“And their challengers, representing the Deathsgate Guild...”
Three people step up to collect their talismans: A halfling in a
patterned poncho and dinosaur feathers woven into her hair, an elf in
gold and black robes and a skull painted onto her face, and an orc in
scratched and beaten mail. He spits at the ground and shrugs.
The trio shake themselves out and stretch, then after a moment's
pause, the elven announcer picks up his commentary.
The aim of the game is simple. The last one to activate your feather
fall talisman wins!” He shuffles everyone up to the edge of the
bridge, tiptoes dangling over a mile of weaving bridges, towers, and
sky coaches.
“Now… JUMP!”
SHARN CHICKEN It will take twenty seconds (three rounds) for the characters to reach the lowest wards of the Dura district in Sharn. As they fall, the characters must evade obstacles along the way, maintain their courage, and judge the right time to activate their feather fall talisman at the last possible moment before hitting the ground, saving themselves from an untimely death by falling. Roll for initiative when the characters and their Deathsgate rivals jump from the bridge. Each round, the characters face a random obstacle from Table 1: Falling in Sharn. Roll only once on the table—all characters face the same threat. Reroll repeats to ensure variety. Evading the obstacles usually requires a Dexterity (Acrobatics) check. However, if a player can justify the use of a different ability or skill proficiency then you should support their creativity! The consequences of a failure are different for each event, given in the table. At the end of each round the characters must make a Wisdom saving throw. The save DC is 5 in the first round, increases to 10 in the second round, and rises again to 15 in the third round. If a character fails to avoid an obstacle on a given round, they suffer disadvantage on the saving throw in addition to the failure consequence in the table. On a failed save, a character’s resolve breaks and they activate their feather fall talisman early—they are out of the “race!” A character also activates their feather fall talisman if they are reduced to 0 hp during the fall.
FEATHER FALL TALISMAN Wondrous Item, Common
This small metal disk is inscribed with the image of a feather. While the talisman is in your possession, you can cast feather fall as a bonus
action, with a target of self only. A feather fall talisman only holds sufficient charge for a single use, after which it loses its power. While
it’s an expensive form of insurance, frequent airship travelers and citizens of Sharn often appreciate the security it provides.
Sample
file
6
OPTIONAL: WHAT WAS THAT? If you have time and wish to include an extra scene in this adventure, when you come to round 3, read the following text in place of rolling on Table 1:
Light in a full spectrum of color bursts from a fast-approaching
bridge. The crowd screams and parts around a central figure. Before
you can fully assess the source, the prismatic cloud engulfs you and
your vision is overwhelmed by dancing lights.
As part of this obstacle, characters must succeed on a DC 12 Constitution saving throw or become blinded for one round. A blinded character will automatically fail their Wisdom saving throw to maintain their resolve at the end of the current round, effectively ending their part in the game of Sharn Chicken. If the characters are curious what happened or who ruined their chance at victory, they can track back to the location of the disturbance. Move on to Bonus Scene 1.
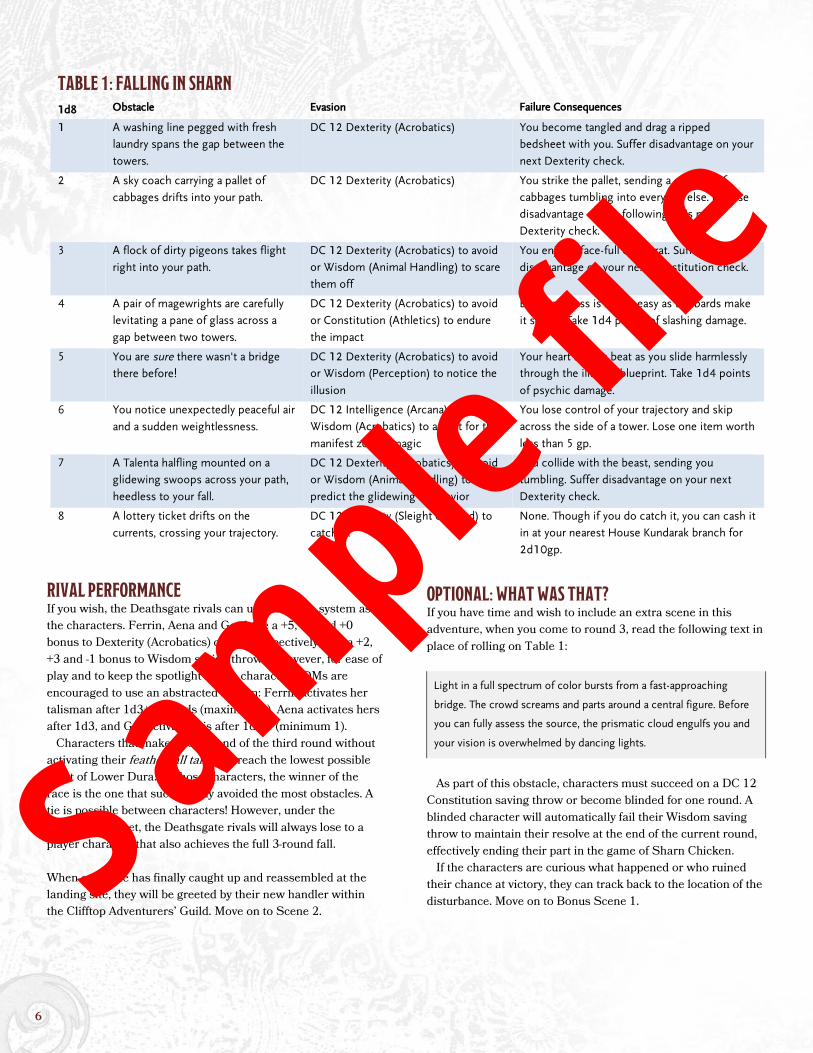
TABLE 1: FALLING IN SHARN 1d8 Obstacle Evasion Failure Consequences
1 A washing line pegged with fresh laundry spans the gap between the
towers.
DC 12 Dexterity (Acrobatics) You become tangled and drag a ripped bedsheet with you. Suffer disadvantage on your
next Dexterity check.
2 A sky coach carrying a pallet of
cabbages drifts into your path.
DC 12 Dexterity (Acrobatics) You strike the pallet, sending a cascade of cabbages tumbling into everyone else. Impose disadvantage on the following PC’s next
Dexterity check.
3 A flock of dirty pigeons takes flight
right into your path.
DC 12 Dexterity (Acrobatics) to avoid or Wisdom (Animal Handling) to scare
them off
You enjoy a face-full of sky rat. Suffer
disadvantage on your next Constitution check.
4 A pair of magewrights are carefully levitating a pane of glass across a
gap between two towers.
DC 12 Dexterity (Acrobatics) to avoid or Constitution (Athletics) to endure
the impact
Breaking glass is not as easy as the bards make
it sound. Take 1d4 points of slashing damage.
5 You are sure there wasn't a bridge there before!
DC 12 Dexterity (Acrobatics) to avoid or Wisdom (Perception) to notice the
illusion
Your heart skips a beat as you slide harmlessly through the illusory blueprint. Take 1d4 points
of psychic damage.
6 You notice unexpectedly peaceful air
and a sudden weightlessness.
DC 12 Intelligence (Arcana) or Wisdom (Acrobatics) to adjust for the
manifest zone’s magic
You lose control of your trajectory and skip across the side of a tower. Lose one item worth
less than 5 gp.
7 A Talenta halfling mounted on a glidewing swoops across your path,
heedless to your fall.
DC 12 Dexterity (Acrobatics) to avoid or Wisdom (Animal Handling) to
predict the glidewing’s behavior
You collide with the beast, sending you tumbling. Suffer disadvantage on your next
Dexterity check.
8 A lottery ticket drifts on the
currents, crossing your trajectory.
DC 12 Dexterity (Sleight of Hand) to
catch it!
None. Though if you do catch it, you can cash it in at your nearest House Kundarak branch for
2d10gp.
RIVAL PERFORMANCE If you wish, the Deathsgate rivals can use the same system as the characters. Ferrin, Aena and Gor have a +5, +2 and +0 bonus to Dexterity (Acrobatics) checks, respectively, and a +2, +3 and -1 bonus to Wisdom saving throws. However, for ease of play and to keep the spotlight on the characters, DMs are encouraged to use an abstracted system: Ferrin activates her talisman after 1d3+1 rounds (maximum 3), Aena activates hers after 1d3, and Gor activates his after 1d3-1 (minimum 1). Characters that make it to the end of the third round without activating their feather fall talisman reach the lowest possible point of Lower Dura. Of those characters, the winner of the race is the one that successfully avoided the most obstacles. A tie is possible between characters! However, under the simplified ruleset, the Deathsgate rivals will always lose to a player character that also achieves the full 3-round fall. When everyone has finally caught up and reassembled at the landing site, they will be greeted by their new handler within the Clifftop Adventurers’ Guild. Move on to Scene 2.
Sample
file
7
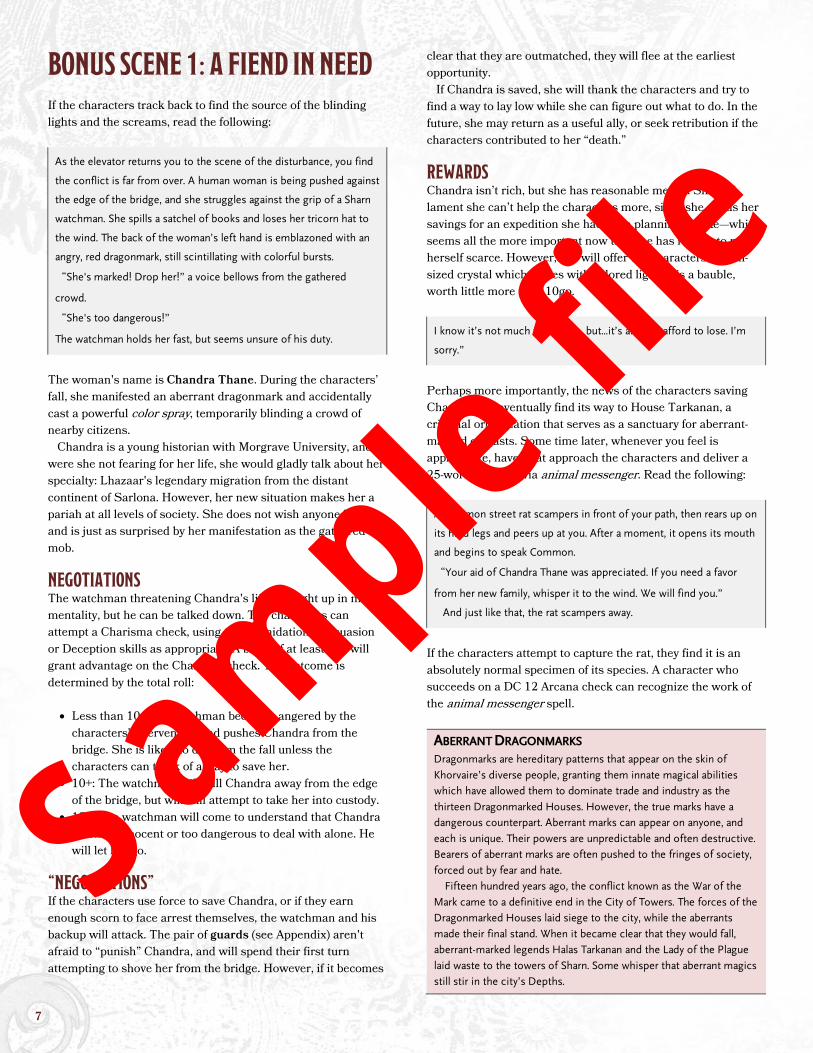
BONUS SCENE 1: A FIEND IN NEED If the characters track back to find the source of the blinding lights and the screams, read the following:
As the elevator returns you to the scene of the disturbance, you find
the conflict is far from over. A human woman is being pushed against
the edge of the bridge, and she struggles against the grip of a Sharn
watchman. She spills a satchel of books and loses her tricorn hat to
the wind. The back of the woman’s left hand is emblazoned with an
angry, red dragonmark, still scintillating with colorful bursts.
“She's marked! Drop her!” a voice bellows from the gathered
crowd.
“She's too dangerous!”
The watchman holds her fast, but seems unsure of his duty.
The woman's name is Chandra Thane. During the characters’ fall, she manifested an aberrant dragonmark and accidentally cast a powerful color spray, temporarily blinding a crowd of nearby citizens. Chandra is a young historian with Morgrave University, and were she not fearing for her life, she would gladly talk about her specialty: Lhazaar's legendary migration from the distant continent of Sarlona. However, her new situation makes her a pariah at all levels of society. She does not wish anyone harm, and is just as surprised by her manifestation as the gathered mob.
NEGOTIATIONS The watchman threatening Chandra's life is caught up in mob mentality, but he can be talked down. The characters can attempt a Charisma check, using the Intimidation, Persuasion or Deception skills as appropriate. A bribe of at least 5gp will grant advantage on the Charisma check. The outcome is determined by the total roll: • Less than 10: The watchman becomes angered by the
characters’ intervention and pushes Chandra from the bridge. She is likely to die from the fall unless the characters can think of a way to save her.
• 10+: The watchman will pull Chandra away from the edge of the bridge, but will still attempt to take her into custody.
• 15+: The watchman will come to understand that Chandra is either innocent or too dangerous to deal with alone. He will let her go.
“NEGOTIATIONS” If the characters use force to save Chandra, or if they earn enough scorn to face arrest themselves, the watchman and his backup will attack. The pair of guards (see Appendix) aren't afraid to “punish” Chandra, and will spend their first turn attempting to shove her from the bridge. However, if it becomes
clear that they are outmatched, they will flee at the earliest opportunity. If Chandra is saved, she will thank the characters and try to find a way to lay low while she can figure out what to do. In the future, she may return as a useful ally, or seek retribution if the characters contributed to her “death.”
REWARDS Chandra isn’t rich, but she has reasonable means. She will lament she can’t help the characters more, since she needs her savings for an expedition she had been planning to take—which seems all the more important now that she has reason to make herself scarce. However, she will offer the characters a palm-sized crystal which pulses with colored light. It is a bauble, worth little more than 10gp.
I know it’s not much for my life, but...it’s all I can afford to lose. I’m
sorry.”
Perhaps more importantly, the news of the characters saving Chandra will eventually find its way to House Tarkanan, a criminal organization that serves as a sanctuary for aberrant-marked outcasts. Some time later, whenever you feel is appropriate, have a rat approach the characters and deliver a 25-word message via animal messenger. Read the following:
A common street rat scampers in front of your path, then rears up on
its hind legs and peers up at you. After a moment, it opens its mouth
and begins to speak Common.
“Your aid of Chandra Thane was appreciated. If you need a favor
from her new family, whisper it to the wind. We will find you.”
And just like that, the rat scampers away.
If the characters attempt to capture the rat, they find it is an absolutely normal specimen of its species. A character who succeeds on a DC 12 Arcana check can recognize the work of the animal messenger spell. ABERRANT DRAGONMARKS Dragonmarks are hereditary patterns that appear on the skin of
Khorvaire’s diverse people, granting them innate magical abilities which have allowed them to dominate trade and industry as the
thirteen Dragonmarked Houses. However, the true marks have a dangerous counterpart. Aberrant marks can appear on anyone, and
each is unique. Their powers are unpredictable and often destructive. Bearers of aberrant marks are often pushed to the fringes of society,
forced out by fear and hate. Fifteen hundred years ago, the conflict known as the War of the
Mark came to a definitive end in the City of Towers. The forces of the Dragonmarked Houses laid siege to the city, while the aberrants
made their final stand. When it became clear that they would fall, aberrant-marked legends Halas Tarkanan and the Lady of the Plague
laid waste to the towers of Sharn. Some whisper that aberrant magics still stir in the city’s Depths.
Sample
file
8
SCENE 2: YOUR MISSION... Once the characters have landed in the lower districts, they will have a moment to catch their breath and interact with the Deathsgate rivals if they so choose.
FIRST TASK Before long, however, Clifftop Guild Handler Lhara arrives and congratulates or commiserates with the characters, then launches into their first mission briefing, right on the spot. Read the following.
A shifter woman pushes through the crowd, clapping slowly. Her hair
is white and striped with black and her skin is unusually pale. Her
right eye is striking blue. The left is hidden behind an eyepatch. She
wears a mantle of command for the Clifftop Guild.
“Well, well, well….impressive show for new blood.”
She holds out a clawed hand to shake with any who will accept it.
“Name’s Lhara. I’ll be taking care of your first steps in the Guild.
And now that you've officially joined our little family, it's time to put
you straight to work. I need you to collect an order for a client—a
bespoke piece, courtesy of an old friend and artificer called Tresca
Teesbeak. She works at a workshop called Drummond Independents
way down in the Cogs. Blackbones district. Ask her for the Burning
Idol and give her this…”
She hands over an envelope sealed with the crest of the Banking
Guild of House Kundarak.
“That credit note is properly notarized so don't bother getting funny
with me. You couldn’t keep up anyway.”
“Bring the Idol to my office in Clifftop. And hey, newbloods… be
careful, yeah? The Cogs ain’t always friendly.” She winks, pulls up her
hood, ready to disappear into the bustling crowd.
“Any questions, ask ‘em quick...I got a schedule to keep.”
Guild Handler Lhara will not be particularly patient with the characters, but she is willing to elaborate if asked. The players might wonder: • What is the Burning Idol? A conduit to Fernia, the Sea of
Fire—an elemental plane that drifts in and out of alignment with Eberron (see sidebar).
• What’s special about the Cogs? The Cogs are the heart of Sharn’s industry, and home to a number of forges and foundries. It is said that fires burn extra hot in the Cogs, owing to a manifest zone linking it to Fernia.
• How can we find Drummond Independents? Head to the fountain known as the Pool of Onatar’s Tears, and look for the crossed iron staves above the door.
• Why aren’t the Cogs friendly? It’s dark, the City Watch never go down there, and it’s a home to all manner of unsavory goblins, gnolls and...others. They basically run the place.
FERNIA, THE SEA OF FIRE To most, Fernia is considered the embodiment of evil in the form of
fire, featuring endless pools of magma and flame, dotted with blasted obsidian isles where creatures of fire manifest and make war with one
another. Some scholars, however, believe that the plane embodies
neither evil nor good, but is merely an elemental force unto itself—representing fire as a destructive force, but also fire as a creative force, one that yields warmth and light and the potential for craft and
industry. When Fernia is coterminous with Eberron, heat waves and drought
follow. Volcanoes and magma pools often become portals between the worlds, though inaccessible to most mortals
More information about Fernia can be found in chapter 4 of Eberron: Rising from the Last War.
Sample
file
9
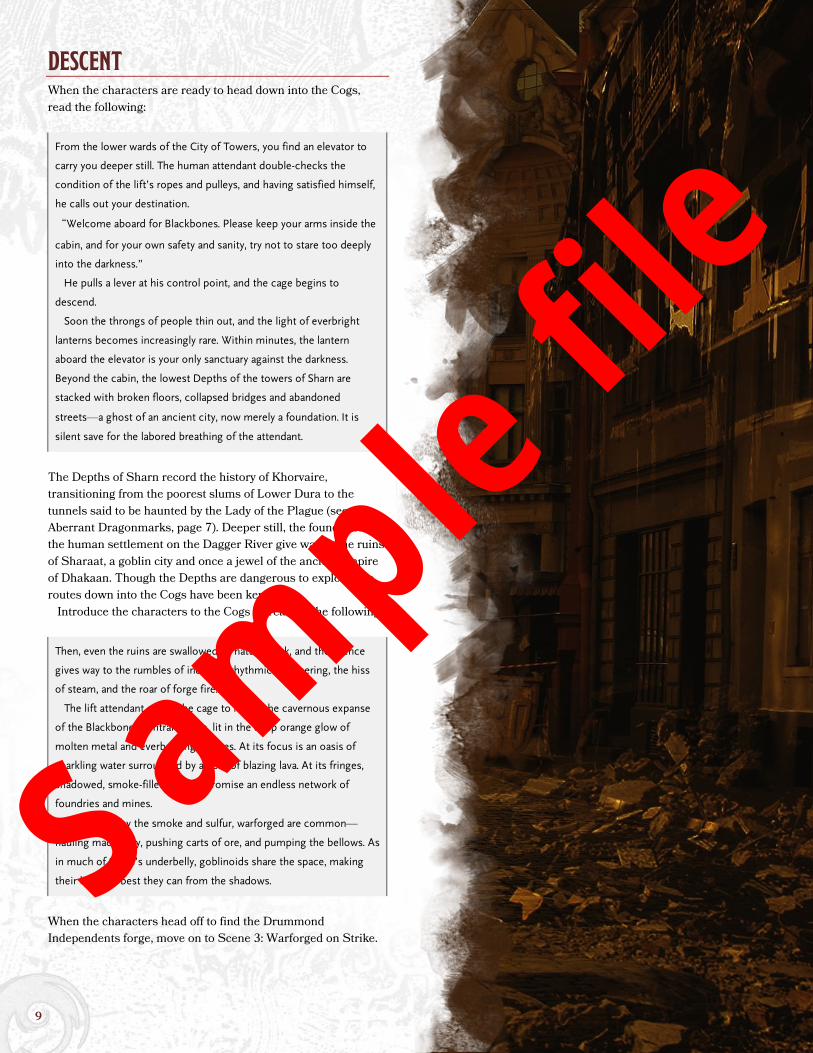
DESCENT When the characters are ready to head down into the Cogs, read the following:
From the lower wards of the City of Towers, you find an elevator to
carry you deeper still. The human attendant double-checks the
condition of the lift’s ropes and pulleys, and having satisfied himself,
he calls out your destination.
“Welcome aboard for Blackbones. Please keep your arms inside the
cabin, and for your own safety and sanity, try not to stare too deeply
into the darkness.”
He pulls a lever at his control point, and the cage begins to
descend.
Soon the throngs of people thin out, and the light of everbright
lanterns becomes increasingly rare. Within minutes, the lantern
aboard the elevator is your only sanctuary against the darkness.
Beyond the cabin, the lowest Depths of the towers of Sharn are
stacked with broken floors, collapsed bridges and abandoned
streets—a ghost of an ancient city, now merely a foundation. It is
silent save for the labored breathing of the attendant.
The Depths of Sharn record the history of Khorvaire, transitioning from the poorest slums of Lower Dura to the tunnels said to be haunted by the Lady of the Plague (see Aberrant Dragonmarks, page 7). Deeper still, the foundations of the human settlement on the Dagger River give way to the ruins of Sharaat, a goblin city and once a jewel of the ancient empire of Dhakaan. Though the Depths are dangerous to explore, the routes down into the Cogs have been kept clear. Introduce the characters to the Cogs by reading the following:
Then, even the ruins are swallowed by natural rock, and the silence
gives way to the rumbles of industry: rhythmic hammering, the hiss
of steam, and the roar of forge fire.
The lift attendant opens the cage to reveal the cavernous expanse
of the Blackbones central square, lit in the deep orange glow of
molten metal and everburning torches. At its focus is an oasis of
sparkling water surrounded by a pool of blazing lava. At its fringes,
shadowed, smoke-filled tunnels promise an endless network of
foundries and mines.
Untroubled by the smoke and sulfur, warforged are common—
hauling machinery, pushing carts of ore, and pumping the bellows. As
in much of Sharn’s underbelly, goblinoids share the space, making
their living as best they can from the shadows.
When the characters head off to find the Drummond Independents forge, move on to Scene 3: Warforged on Strike.
Sample
file
10
SCENE 3: WARFORGED ON STRIKE
You arrive at the Drummond Independent workshop to find a barrier
of steel and stone blocking the entrance to the grounds - not a wall,
but a crew of warforged standing sentinel. Their chanting is
accompanied with the thumping of their hammers against the
ground.
Many of the crew are carrying protest boards made from offcuts of
soot-covered wood: “Thronehold means Freedom,” “Sovereigns not
Slaves,” and “Our war is not over!”
A hulking warforged paces in front of the picket, rousing the
chanting crowd. His adamantine frame shines with the reflected
orange glow of the forges, though his hands and forearms are
charred and blackened.
“For too long the charlatan Drummond has taken us for granted.
We work until our joints weaken and our armor is shot—but we are
cast as servants and slaves, not partners or comrades.”
He stops down the line, and places a hand on one of his crew
mate's shoulders, then he takes the hand of another. His touch is
tender despite his strength.
“They cast us as weapons, as slaves of war. Today we show them
how we build our future without shedding blood. It is time we earned
what we are worth. It is time for Drummond to listen.”
His crew muster all the enthusiasm they can, but it’s clear that
some of them are nervous about the display, or struggling to keep up
the furor.
The warforged employed by the Drummond workshop are on strike. Led by a towering warforged named Stoke, they have ceased maintaining and working Drummond's forge to demand fair wages, fair treatment, and proper acknowledgment of their toil. The artificer employed by Drummond's workshop, a gnome named Tresca, is ready to explain the situation to the characters.
You are approached by a young gnome woman wearing the
incongruous mix of a prim, buttoned blouse and a heavy artificer's
tool belt. She is scribbling notes into a tiny book, and a floating snow
globe follows her closely, emanating a cool breeze.
“You must be here for the Clifftop commission? I'm Tresca, the
artificer for this forge. I'd love to finish your order, but my friend
Stoke there has taken an opportunity. Drummond seems on the
verge of cracking, but if you want your order today, I think you'll have
to grease the wheels for Stoke and the others.”
Tresca is firmly on the side of Stoke's crew. Their years of working together have lead to a much stronger friendship between the gnome and the warforged than with their mutual employer Drummond. She won't tolerate breaking their strike with violence, extortion or Intimidation. If the characters want Tresca to deliver their commission, they'll have to find a way to help Stoke's crew achieve their demands. The employer, Drummond, is also on the scene, jeering at them. Allow the characters some interaction with Tresca and a chance to survey the environment before introducing him.
“I can wait you out, you'll come crawling back!” A human man leans
against a thick wood door emblazoned with a pair of tongs and the
word Drummond in brass. His shoulder-length black hair is greasy
and his waistcoat is stained with ink.
“I ain't paying you any more than I spend on my hammers. Some of
us folk actually have to eat, you know.”
Drummond is the owner of the eponymous workshop, and has been for many years. Since the Treaty of Thronehold recognized warforged as people, he has enjoyed the fruits of their labor. However, he barely considers Stoke's crew to be people. On discovering how much House Cannith's forges in the Cogs pay their workers, Stoke brought his grievance to his boss. When he was refused, he and his crew walked out. The characters can help Stoke's crew in the following ways: • The characters join the protest, improving morale. See
Scene 3A. • The characters secure the allegiance of local influencers.
See Scene 3B. • The characters help Stoke's crew with their lives outside
work, ensuring they can maintain the picket. See Scene 3C. If the characters achieve two of three, Drummond will finally cave to Stoke's demands and the forge will reopen. If they fail two, Stoke's crew will still return to work, but remain under the exploitative conditions they had previously labored under. Once the strike resolves, whether in Stoke’s favor or in Drummond’s, progress to Scene 4.
Sam
ple file
11
SCENE 3A: PROTEST Like most warforged, Stoke has learned the hard way that friends and allies are worth their weight in gold. He lost countless brothers and sisters during the Last War, all while fighting for the causes of others. Now that he is free, he has found a reason to stand up for himself and the family he has built while working in the Cogs. However, despite his newfound focus on warforged welfare, he recognizes their precarious position in the post-War society, and therefore he is happy to accept help from anyone that can offer it. If the characters approach Stoke and the picket, read the following:
“Welcome, folk from the Towers.” The warforged leading the
protest offers you a soot-stained gauntlet to shake. “The name's
Stoke. This here's our crew. Are you with us?”
STOKE’S CREW The warforged working at the Drummond workshop come in all shapes and sizes, and Stoke is not alone in considering them a kind of found family. The crew include: Anvil, Auger, Axle, Flux, Graver, Hammer, Helve, Matchet, Mint, Pig, Quench, Slag, Striker, Tilt, and Tongs.
HEART TO HEART Stoke especially is willing to talk to the players about his crew and their struggles. It may not directly influence the outcome of their strike, but it could still earn the characters an ally and friend. Additionally, if Stoke believes the characters are sincere in their interest, he will allow them to join the protest and rouse the crowd (see below). Stoke will share his thoughts and situation as follows: • The Last War. “I was taught to kill for Breland, and
every day, I regret that I did my duty.” Stoke fought for Breland, like most of his crew. At the time, he did not think about what he wanted—others told him where to swing his sword and he obeyed. At first, their losses were material, then comrades, then friends. He deeply regrets his time fighting, despite how little choice he was offered.
• Freedom. “We aren't truly free until we can forget we ever heard the names of the Five Nations.” Like many warforged, Stoke only considered that choice was an option when the Treaty of Thronehold released him from service to Breland. Stoke is frustrated that despite how few his material needs actually are, he feels suppressed by the role House Cannith and the Five Nations have constructed for his kind.
• Personhood. “I don't care what they think. I care about what we need.” Stoke knows full well how many people consider him a weapon rather than a person. He sees little point in arguing the philosophy of it all with other people.
What matters to him is what he can do for his kin. That's why he is leading the strike—to see that his crew, whether they're weapons, tools, or people, get what they need to live their lives. Though the warforged have no need of food, they still require money for repairs, improvements, socializing, and supporting dependents, among other things. Even if Drummond will never see that Stoke's crew are people deserving of reasonable wages, Stoke would be satisfied if Drummond decides he needs to better maintain his “machinery.”
• Vocation. “I was finished with destruction. The Cogs offer a chance to create.” Like many warforged, Stoke enjoys the rote work in the foundry. He finds it meditative and satisfying.
• Family. “A warforged has the privilege of choosing their family.” Stoke considers his crew his family. Not by circumstance, but because they build their life together.
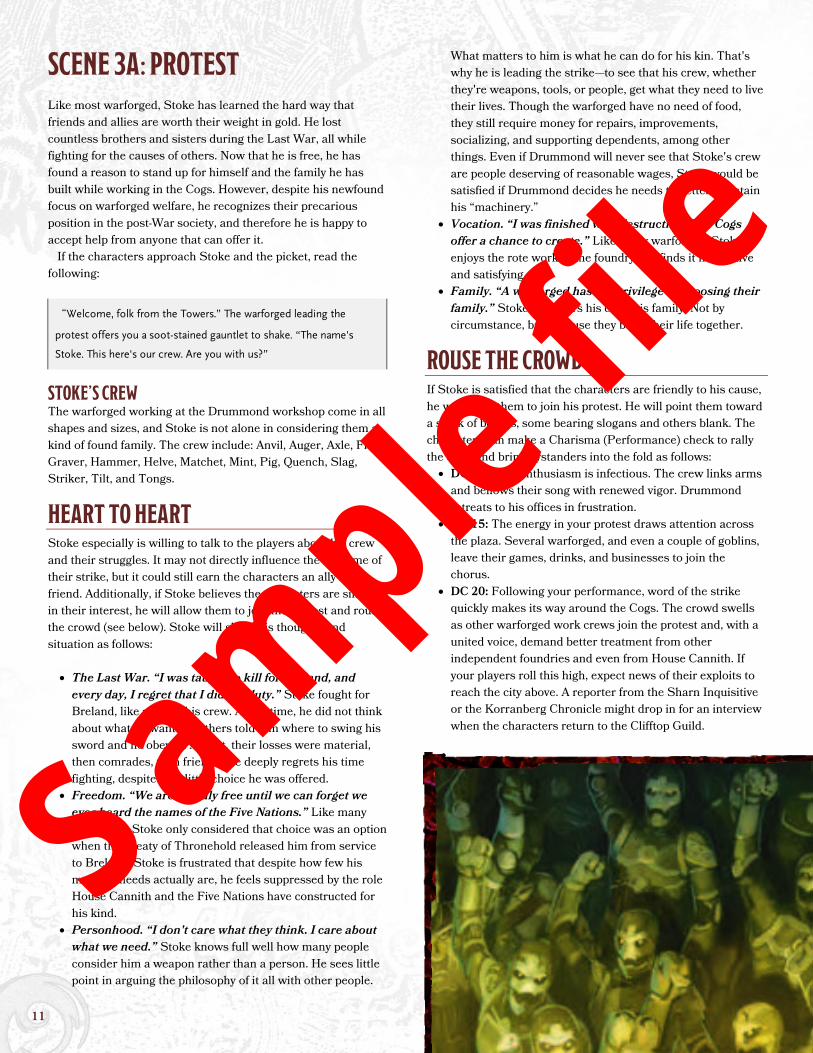
ROUSE THE CROWD If Stoke is satisfied that the characters are friendly to his cause, he will invite them to join his protest. He will point them toward a stack of boards, some bearing slogans and others blank. The characters can make a Charisma (Performance) check to rally the crew and bring bystanders into the fold as follows: • DC 12: Your enthusiasm is infectious. The crew links arms
and bellows their song with renewed vigor. Drummond retreats to his offices in frustration.
• DC 15: The energy in your protest draws attention across the plaza. Several warforged, and even a couple of goblins, leave their games, drinks, and businesses to join the chorus.
• DC 20: Following your performance, word of the strike quickly makes its way around the Cogs. The crowd swells as other warforged work crews join the protest and, with a united voice, demand better treatment from other independent foundries and even from House Cannith. If your players roll this high, expect news of their exploits to reach the city above. A reporter from the Sharn Inquisitive or the Korranberg Chronicle might drop in for an interview when the characters return to the Clifftop Guild.
Sample
file
12
TALK DOWN CRITICS Alternatively, characters might attempt to convince Stoke's employer, Halas Drummond, to do the right thing. However, he is currently spending his time heckling the picket. If engaged in debate, Drummond will simply laugh off their concerns.
“I don’t pay my hammer, and I don't pay my kiln. I'm already more
generous than I ought to be. Treaty or not, they got a long way to go
to prove themselves to me.”
Drummond isn't much for philosophy, and he cares for nothing but himself. A favorable response is possible if the characters can find the right buttons to press.
• Investigation (DC 12) - Searching the workshop offices can reveal the depth of Drummond's issues. He is not as good at accounts as he thinks he is. He is cutting corners with more than just labor—he has also elected not to pay for House Cannith certification and stiffed a local chapter of the Daask crime syndicate out of their protection money.
• Intimidation or Persuasion (DC 15) - The characters can
only sway Drummond by speaking to his greed. He should consider the risk to his profits, his reputation, and ultimately his business if he were to break Stoke's crew of their ambition and their morale. If the characters have discovered Drummond's dodgy accounts, the characters will have advantage on their Intimidation or Persuasion check.
Any attempt at ending the strike by visiting violence upon Drummond will be strongly resisted by Stoke. He wishes for his people to win favor with peace and mutual respect, not fear and a heavy fist. He is conscious of most people’s perceptions of him and his crew as living weapons, and hopes for better in the future. Successfully rousing the crowd or talking down Drummond will give the protest the space and the voice to grow, counting for one success toward resolving the strike.
Sample
file
13
SCENE 3B: RED HAMMER Since they do not tire and have no need to worry about breathing, the Cogs are a hotbed for warforged workers. Stoke's crew could find many potential allies among the folk here, but they do not wish to leave their picket.
SEARCH FOR SOLIDARITY Characters can ask around for leads on potential allies for Stoke's crew. An Intelligence or Charisma (Investigation) check to gather information from locals can reveal much of the local politics. Warforged, goblinoids, and humans with the Mark of Making gain advantage on their roll. Depending on the total of the roll, reveal the following: • DC 8: There is no significant law enforcement in the Cogs. • DC 10: House Cannith controls most of the legitimate
industry in the Cogs. However, most Cannith forgeholds aren't much interested in the support of warforged rights. Instead, they seek to exploit wayward warforged in much the same way as Drummond Independents, albeit to a lesser extent.
• DC 12: The Red Hammer is a tavern and smithy run by and for warforged. It is a popular social hub and its proprietors Blue and Crucible are pillars of the community.
• DC 15: The monstrous criminal syndicate known as Daask has significant presence in the Cogs, especially in the district known as Khyber's Gate.
• DC 20: Some people have heard that a House Cannith leader is bankrolling Blue and Crucible at the Red Hammer. Perhaps some of the creators care for their ‘children’ after all?
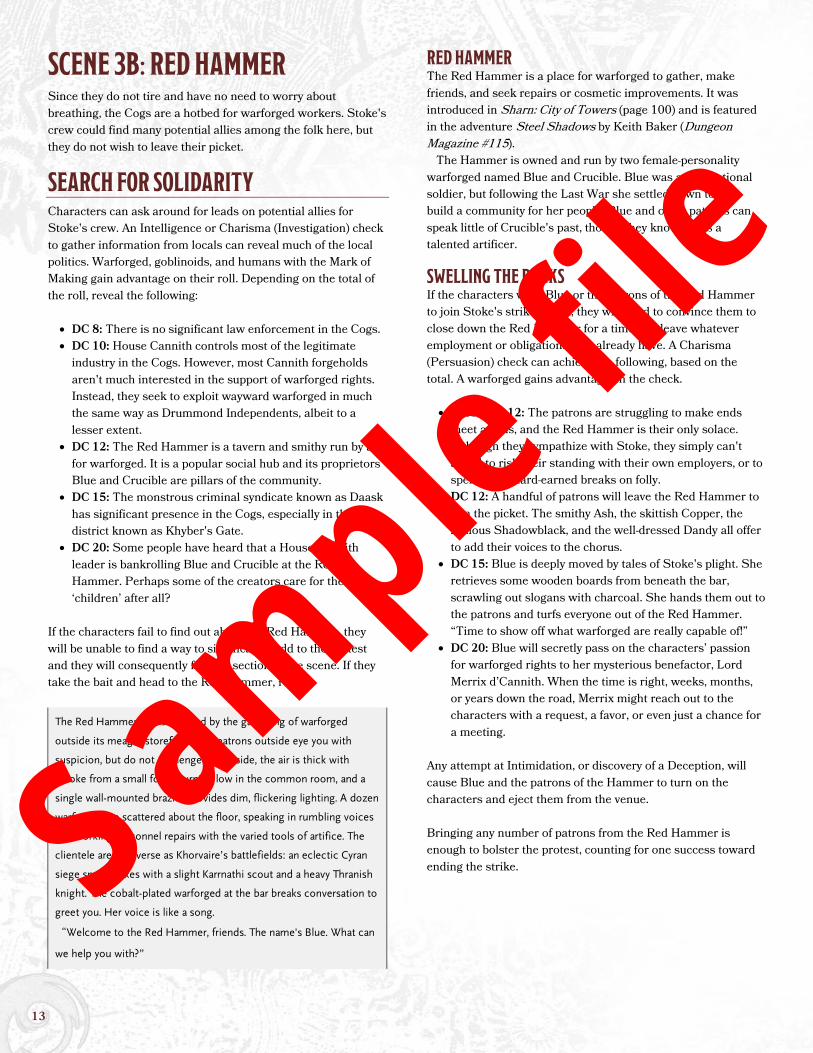
If the characters fail to find out about the Red Hammer, they will be unable to find a way to significantly add to the protest and they will consequently fail this section of the scene. If they take the bait and head to the Red Hammer, read:
The Red Hammer is easily found by the gathering of warforged
outside its meager storefront. The patrons outside eye you with
suspicion, but do not challenge you. Inside, the air is thick with
smoke from a small forge burning low in the common room, and a
single wall-mounted brazier provides dim, flickering lighting. A dozen
warforged are scattered about the floor, speaking in rumbling voices
and working personnel repairs with the varied tools of artifice. The
clientele are as diverse as Khorvaire’s battlefields: an eclectic Cyran
siege smith mixes with a slight Karrnathi scout and a heavy Thranish
knight. The cobalt-plated warforged at the bar breaks conversation to
greet you. Her voice is like a song.
“Welcome to the Red Hammer, friends. The name's Blue. What can
we help you with?”
RED HAMMER The Red Hammer is a place for warforged to gather, make friends, and seek repairs or cosmetic improvements. It was introduced in Sharn: City of Towers (page 100) and is featured in the adventure Steel Shadows by Keith Baker (Dungeon Magazine #115). The Hammer is owned and run by two female-personality warforged named Blue and Crucible. Blue was an exceptional soldier, but following the Last War she settled down to help build a community for her people. Blue and other patrons can speak little of Crucible's past, though they know she is a talented artificer.
SWELLING THE RANKS If the characters want Blue or the patrons of the Red Hammer to join Stoke's strike action, they will need to convince them to close down the Red Hammer for a time and leave whatever employment or obligations they already have. A Charisma (Persuasion) check can achieve the following, based on the total. A warforged gains advantage on the check. • Less than 12: The patrons are struggling to make ends
meet as it is, and the Red Hammer is their only solace. Although they sympathize with Stoke, they simply can't afford to risk their standing with their own employers, or to spend their hard-earned breaks on folly.
• DC 12: A handful of patrons will leave the Red Hammer to join the picket. The smithy Ash, the skittish Copper, the zealous Shadowblack, and the well-dressed Dandy all offer to add their voices to the chorus.
• DC 15: Blue is deeply moved by tales of Stoke's plight. She retrieves some wooden boards from beneath the bar, scrawling out slogans with charcoal. She hands them out to the patrons and turfs everyone out of the Red Hammer. “Time to show off what warforged are really capable of!”
• DC 20: Blue will secretly pass on the characters’ passion for warforged rights to her mysterious benefactor, Lord Merrix d’Cannith. When the time is right, weeks, months, or years down the road, Merrix might reach out to the characters with a request, a favor, or even just a chance for a meeting.
Any attempt at Intimidation, or discovery of a Deception, will cause Blue and the patrons of the Hammer to turn on the characters and eject them from the venue. Bringing any number of patrons from the Red Hammer is enough to bolster the protest, counting for one success toward ending the strike. Sam
ple file
14
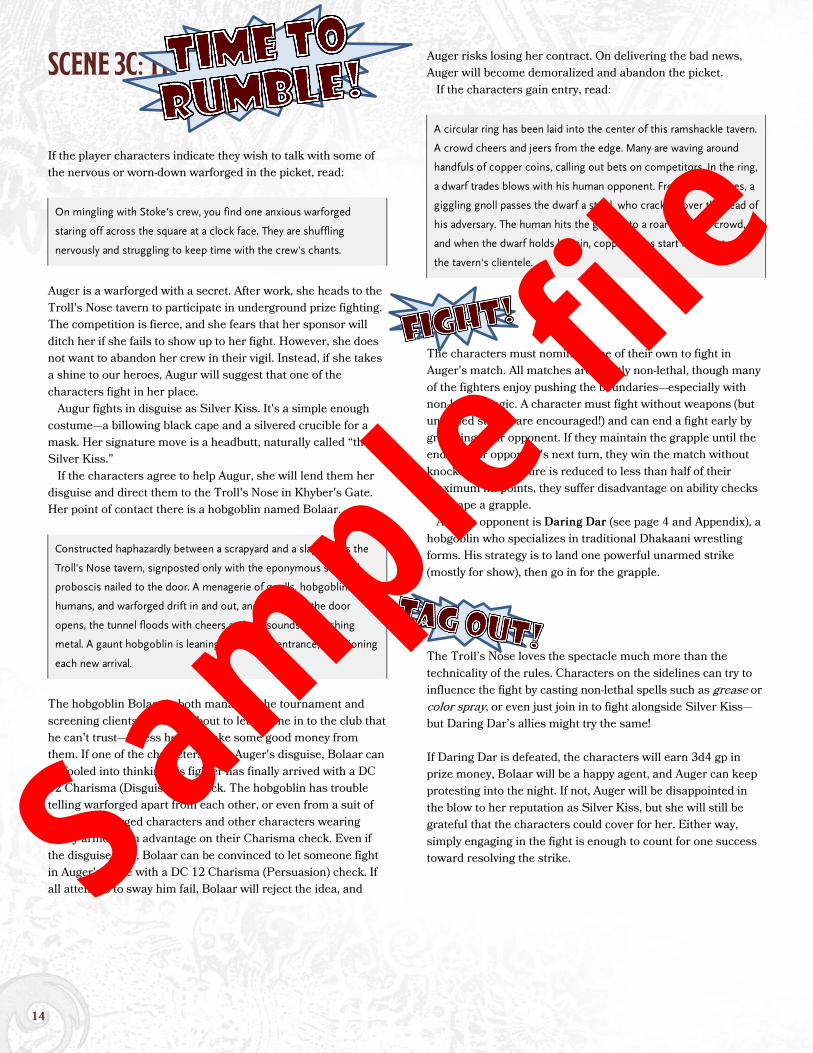
SCENE 3C: THE SQUARED CIRCLE If the player characters indicate they wish to talk with some of the nervous or worn-down warforged in the picket, read:
On mingling with Stoke's crew, you find one anxious warforged
staring off across the square at a clock face. They are shuffling
nervously and struggling to keep time with the crew's chants.
Auger is a warforged with a secret. After work, she heads to the Troll's Nose tavern to participate in underground prize fighting. The competition is fierce, and she fears that her sponsor will ditch her if she fails to show up to her fight. However, she does not want to abandon her crew in their vigil. Instead, if she takes a shine to our heroes, Augur will suggest that one of the characters fight in her place. Augur fights in disguise as Silver Kiss. It's a simple enough costume—a billowing black cape and a silvered crucible for a mask. Her signature move is a headbutt, naturally called “the Silver Kiss.” If the characters agree to help Augur, she will lend them her disguise and direct them to the Troll's Nose in Khyber's Gate. Her point of contact there is a hobgoblin named Bolaar.
Constructed haphazardly between a scrapyard and a slagheap is the
Troll's Nose tavern, signposted only with the eponymous severed
proboscis nailed to the door. A menagerie of gnolls, hobgoblins,
humans, and warforged drift in and out, and each time the door
opens, the tunnel floods with cheers and the sounds of crashing
metal. A gaunt hobgoblin is leaning against the entrance, questioning
each new arrival.
The hobgoblin Bolaar is both managing the tournament and screening clients. He's not about to let anyone in to the club that he can't trust—unless he can make some good money from them. If one of the characters dons Auger's disguise, Bolaar can be fooled into thinking his fighter has finally arrived with a DC 12 Charisma (Disguise kit) check. The hobgoblin has trouble telling warforged apart from each other, or even from a suit of armor. Warforged characters and other characters wearing heavy armor gain advantage on their Charisma check. Even if the disguise fails, Bolaar can be convinced to let someone fight in Auger's place with a DC 12 Charisma (Persuasion) check. If all attempts to sway him fail, Bolaar will reject the idea, and
Auger risks losing her contract. On delivering the bad news, Auger will become demoralized and abandon the picket. If the characters gain entry, read:
A circular ring has been laid into the center of this ramshackle tavern.
A crowd cheers and jeers from the edge. Many are waving around
handfuls of copper coins, calling out bets on competitors. In the ring,
a dwarf trades blows with his human opponent. From the sidelines, a
giggling gnoll passes the dwarf a stool, who cracks it over the head of
his adversary. The human hits the ground to a roar from the crowd,
and when the dwarf holds his pin, copper coins start flying between
the tavern's clientele.
FIGHT! The characters must nominate one of their own to fight in Auger's match. All matches are strictly non-lethal, though many of the fighters enjoy pushing the boundaries—especially with non-lethal magic. A character must fight without weapons (but unarmed strikes are encouraged!) and can end a fight early by grappling their opponent. If they maintain the grapple until the end of their opponent's next turn, they win the match without knockout. If a creature is reduced to less than half of their maximum hit points, they suffer disadvantage on ability checks to escape a grapple. Auger's opponent is Daring Dar (see page 4 and Appendix), a hobgoblin who specializes in traditional Dhakaani wrestling forms. His strategy is to land one powerful unarmed strike (mostly for show), then go in for the grapple.
TAG OUT! The Troll’s Nose loves the spectacle much more than the technicality of the rules. Characters on the sidelines can try to influence the fight by casting non-lethal spells such as grease or color spray, or even just join in to fight alongside Silver Kiss—but Daring Dar’s allies might try the same! If Daring Dar is defeated, the characters will earn 3d4 gp in prize money, Bolaar will be a happy agent, and Auger can keep protesting into the night. If not, Auger will be disappointed in the blow to her reputation as Silver Kiss, but she will still be grateful that the characters could cover for her. Either way, simply engaging in the fight is enough to count for one success toward resolving the strike. Sam
ple file
15
SCENE 4: LIGHT ‘ER UP! If the strike resolved in Stoke's favor, read the following:
A chorus of steel and stone echoes across Blackbones as Stoke's
warforged proclaim, with one voice, their right to be treated as
people, not tools or weapons. Having retreated from the growing
display, Drummond returns with a sack of sovereign coins and
paperwork promising more.
“Fine, fine.” He speaks through gritted teeth. “Take your money.
And you'd best be worth it.”
As his crew cheer on, Stoke finds a moment with you. “We won't
forget your part in this. I don't think any warforged in the Cogs will.
I'll make sure of it. You'll have friends here, if you need ‘em. Now
come on, let's get your artifact finished.”
If the strike resolved in Drummond’s favor, read the following instead:
With local support dwindling, morale among Stoke's crew begins to
fall. Before long, defeated warforged drift away from the picket. Some
head out in search of employment elsewhere in the Cogs. Others
return to a gleeful Drummond, accepting the meager reward he is
prepared to offer.
Stoke finds a moment with you by the entrance of Drummond's
forge.
“Thank you for your help, my friends. It seems today was not meant
for us. Now don't you worry about old Stoke, I'll be here with my
crew the next time opportunity strikes.”
He sighs—a rattling imitation of a living human's breath. “Come
on, let's get you your artifact.”
Either way, there’s work to be done!
Stoke hefts a wrench as Tresca rolls up her sleeves. She whispers a
word of power to her snow globe, which bursts into a shower of ice.
“Listen, that forge has been unattended for too long.” She hands a
stone crucible to Clifftop's finest. “I can handle the planar instability,
but I need you to help me lock it down. You might want to cover
yourselves. Come on.”
She skips off into murky tunnels beside Drummond's workshop.
The heat soon becomes nearly unbearable, stinging skin, singeing
hair, and drying wood. Protected by her snow globe, Tresca doesn't
seem to mind.
“Who knows what the fires of Fernia have brought with them,” the
gnome mutters as she scribbles notes into her book. “But keep them
off me and wait for my signals. It's important we do this together.”
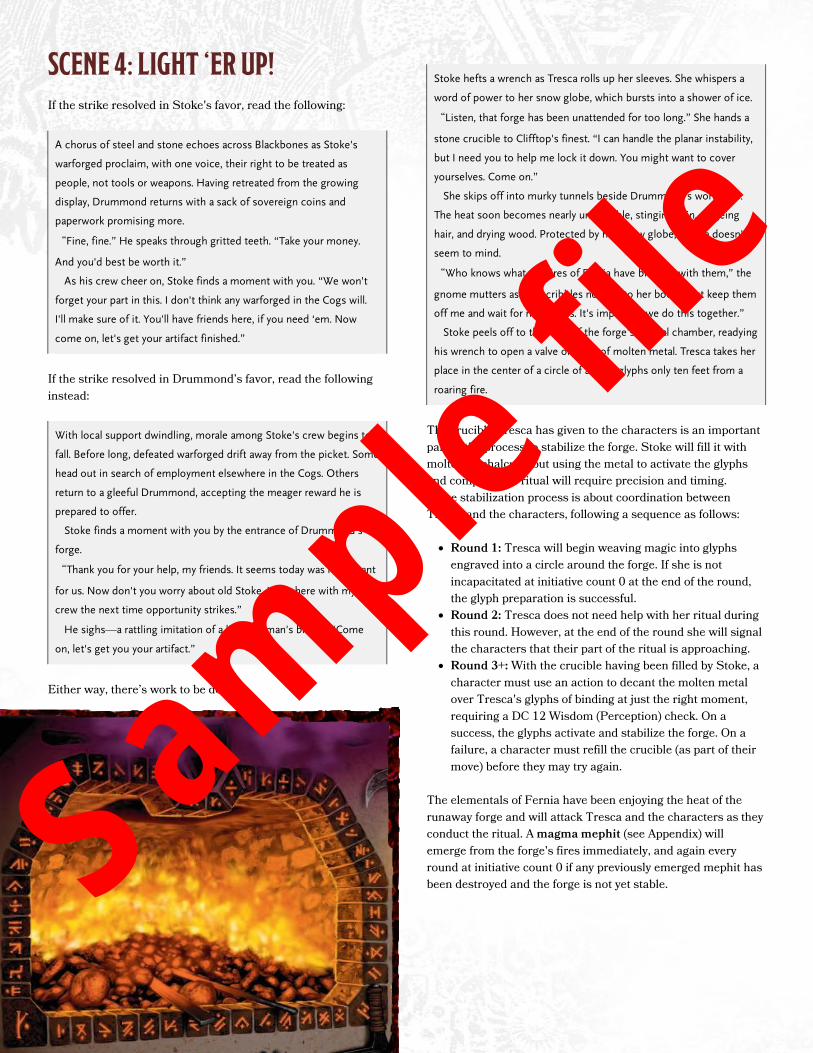
Stoke peels off to the right of the forge’s central chamber, readying
his wrench to open a valve on a vat of molten metal. Tresca takes her
place in the center of a circle of arcane glyphs only ten feet from a
roaring fire.
The crucible Tresca has given to the characters is an important part of the process to stabilize the forge. Stoke will fill it with molten orichalcum, but using the metal to activate the glyphs and complete the ritual will require precision and timing. The stabilization process is about coordination between Tresca and the characters, following a sequence as follows: • Round 1: Tresca will begin weaving magic into glyphs
engraved into a circle around the forge. If she is not incapacitated at initiative count 0 at the end of the round, the glyph preparation is successful.
• Round 2: Tresca does not need help with her ritual during this round. However, at the end of the round she will signal the characters that their part of the ritual is approaching.
• Round 3+: With the crucible having been filled by Stoke, a character must use an action to decant the molten metal over Tresca's glyphs of binding at just the right moment, requiring a DC 12 Wisdom (Perception) check. On a success, the glyphs activate and stabilize the forge. On a failure, a character must refill the crucible (as part of their move) before they may try again.
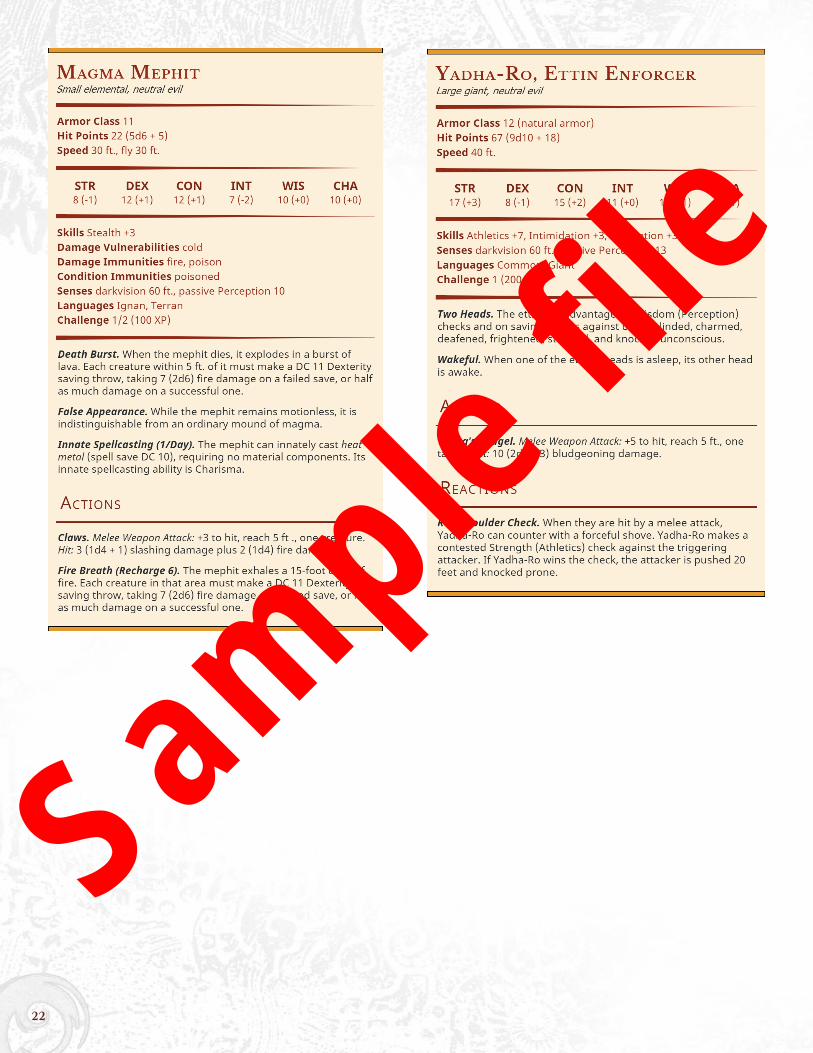
The elementals of Fernia have been enjoying the heat of the runaway forge and will attack Tresca and the characters as they conduct the ritual. A magma mephit (see Appendix) will emerge from the forge's fires immediately, and again every round at initiative count 0 if any previously emerged mephit has been destroyed and the forge is not yet stable.
Sample
file
16
FERNIAN HEAT A creature that ends their turn within 30 feet of the forge must succeed on a Constitution saving throw or gain one level of exhaustion. The DC is 5 for the first round and increases by 1 for each additional round. Creatures wearing medium or heavy armor, or who are clad in heavy clothing, have disadvantage on the saving throw. Creatures with resistance or immunity to fire damage automatically succeed on the saving throw. Creatures can remove one level of exhaustion caused by the Fernian heat effect when they finish a short rest.
SUCCESS When the forge has been stabilized and any remaining mephit has been defeated, read:
As the molten metal flows into the glyphs, they spark to life with a
hum and an orange glow. Tresca slams her rod into the focus of the
circle and roars a command in an arcane tongue. A net of ethereal
tendrils gathers at the gnome's feet and then erupt toward the forge
fire, caging its otherworldly fury. Tresca takes a deep breath as the
fires calm.
“Great work, everyone!” Tresca scribbles down some notes, then
starts rummaging through a chest of materials. “It should be safe to
finish your client’s order now…” She retrieves a mold and starts
cleaning out the soot.
“You're right to come to us. Only Stoke and I can get the magic
worked into the metal as it's being cast. And you know you can trust
the word of a Zil. But it'll take even us a couple of hours to finish up.”
Allow time for the characters to take a short rest. The next scene will depend on the time you have available. With time to spare, Tresca can send the characters on an errand into the forgotten tunnels of the Cogs—see Bonus Scene 2. Otherwise, move on to Scene 5.
Sample
file
17
BONUS SCENE 2: PLAYING WITH FIRE
“If you'd like to keep yourselves busy while I finish up, I know just
the thing. Right, Stoke?” Tresca doesn't look up from her
enchantments.
“While I'm shoring up the Idol's connection to the Sea of Fire, I can
recycle the excess magic into a little alchemy project I've been toying
with. Something to protect against the heat or, if you prefer, to
harness it instead.”
Tresca holds out a hand expectantly. Stoke throws her a wand from
across the room.
“The concoction needs a live fire fungus hood. LIVE, understand?
Just the one, but it best still be wiggling. Follow the lava veins down
Khyber's Gate and I'm sure you'll find some.”
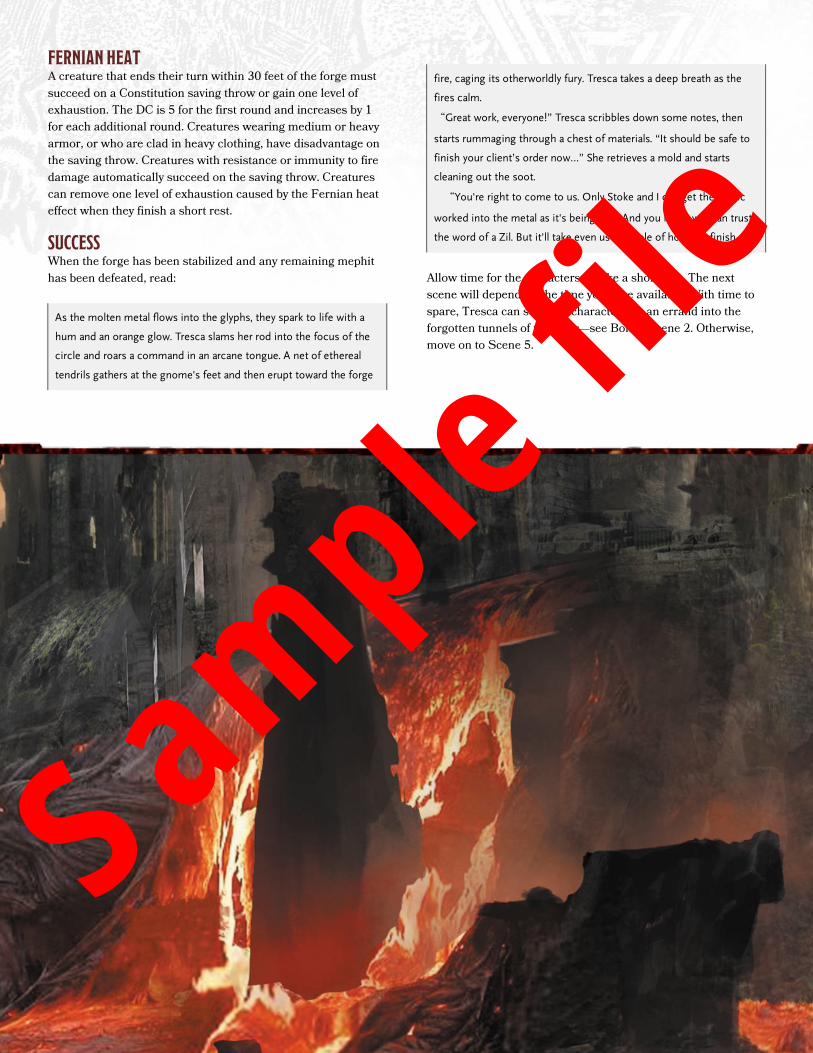
THE HUNT The tunnels beneath Khyber's Gate are even more difficult to navigate than the back “roads” around Drummond Independents. A DC 14 Wisdom (Survival) check is required to successfully navigate underground and follow the trail to where the fire fungi are growing. On a success, the characters will find the crop without issue. Read the following:
The twisted tunnels of Khyber's Gate give way to blackened caves of
cooled lava and shining obsidian. The orange glow of superheated
rock still emanates from cracks beneath your feet, drawing a network
like the roots of a magical tree. Where the heat and light are
strongest, four red mushrooms sprout from the solidified lava. Each
is the size of a halfling, and caresses the broken rock with a forest of
writhing tendrils.
However, if their tracker fails, they will instead follow the fungal network to an unstable tunnel. It will break, dropping the characters into the middle of the fire fungus crop. The fungi will attack while the characters are surprised.
FUNGAL CROP The characters will find four fire fungus (see Appendix) in this cave. Each is hungry to consume organic creatures that wander into their territory. If all four die without being captured, there will be no suitable material for Tresca's alchemy. If a character succeeds on a DC 15 Intelligence (Arcana or Nature) check to determine the weaknesses of the fire fungi, reveal both the Heat Death and Hibernation traits and see Douse the Flame below.
CAPTURE A strong hero can subdue the fire fungus by grappling it, then they or an ally can tie off its tendrils. A fire fungus is slow and easy to hold—it has a −4 modifier on Strength (Athletics) checks and a −5 modifier on Dexterity (Acrobatics) checks. To properly restrain a fungus by tying off its tendrils, a character must succeed on a DC 10 Dexterity (Sleight of Hand) check while the fungus is grappled.
DOUSE THE FLAME Fire fungus doesn't have a physical connection to a fungal network. Instead, each mushroom is woven through Fernia itself. Removing it from the manifest zone in the Cogs will therefore kill it. However, it also means it can enter a dormant state if it is temporarily cut off from Fernian influence. Fire fungi are vulnerable to water, and enter into a dormant state if they come into contact with more than half a gallon at one time. That water might be collected from wells in the populated areas of the Cogs, or even from water features like the sacred Pool of Onatar's Tears fountain in the Blackbones district (see chapter 3 of Eberron: Rising from the Last War). Water summoned via spells such as create or destroy water is also an option for savvy spellcasters. If a fire fungus is doused with half a gallon of water within one round, it must succeed on a DC 15 Constitution saving throw or become incapacitated for one hour.
REWARD If the characters bring Tresca a living fire fungus, she will harvest it to create their choice of a potion of fire resistance or a potion of fire breath. It is a quick process—Stoke has already fetched her cauldron. When the players have decided who gets the potion, move on to Scene 5.
Sam
ple file
18
SCENE 5: DAASK & DEBTS
“Now for the grand finale! Brace yourselves!” Tresca retrieves a blue
crystal sliver from her belt pouch, sets it into a crucible, and gently
slides it into the stabilized fire with a pair of tongs. It rests atop a
glowing stone mold.
A moment later a wave of heat washes over you. It is infused with
malevolent intent and an insatiable hunger to burn.
With one practiced motion, Tresca pulls out the mold with her
tongs, and Stoke smashes it with an oversized iron maul.
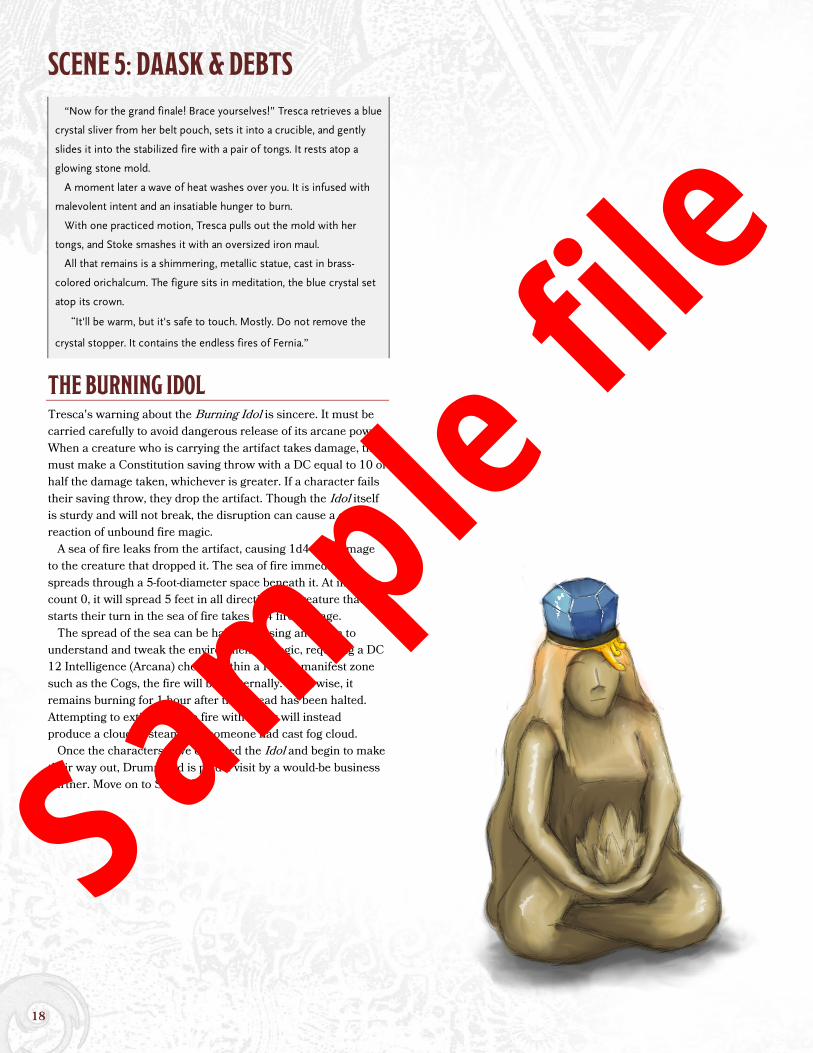
All that remains is a shimmering, metallic statue, cast in brass-
colored orichalcum. The figure sits in meditation, the blue crystal set
atop its crown.
“It'll be warm, but it's safe to touch. Mostly. Do not remove the
crystal stopper. It contains the endless fires of Fernia.”
THE BURNING IDOL Tresca's warning about the Burning Idol is sincere. It must be carried carefully to avoid dangerous release of its arcane power. When a creature who is carrying the artifact takes damage, they must make a Constitution saving throw with a DC equal to 10 or half the damage taken, whichever is greater. If a character fails their saving throw, they drop the artifact. Though the Idol itself is sturdy and will not break, the disruption can cause a chain reaction of unbound fire magic. A sea of fire leaks from the artifact, causing 1d4 fire damage to the creature that dropped it. The sea of fire immediately spreads through a 5-foot-diameter space beneath it. At initiative count 0, it will spread 5 feet in all directions. A creature that starts their turn in the sea of fire takes 1d4 fire damage. The spread of the sea can be halted by using an action to understand and tweak the environmental magic, requiring a DC 12 Intelligence (Arcana) check. Within a Fernia manifest zone such as the Cogs, the fire will burn eternally. Otherwise, it remains burning for 1 hour after the spread has been halted. Attempting to extinguish the fire with water will instead produce a cloud of steam as if someone had cast fog cloud. Once the characters have collected the Idol and begin to make their way out, Drummond is paid a visit by a would-be business partner. Move on to Scene 5A.
Sample
file
19
SCENE 5A: TWO HEADS ARE BETTER THAN NONE
“Drummond, you worm, we've come to collect.”
Their twin voices, in unison, shake the pebbles scattered about the
floor. She is twelve feet tall, built like a lightning rail car, and sports
two heads—each as angry and each as disheveled. Her tangled braids
trail behind her, blackened by soot, and she thumps a club against
the ground with her one remaining arm.
“Money or blood, Drummond, ” her left head roars. “Blood or
money,” the right echoes.
Yadha-Ro is an enforcer for the criminal syndicate known as Daask. The warforged workers are not the only faction that Drummond has failed to pay properly, and Daask intends to teach him a swift lesson about tribute in the Cogs. Although their kind are usually cast as dumb brutes, Yadha-Ro has years of experience working the racket in Khyber's Gate. Age and injury limit their strength compared to others of their kind, but they still tower above any common gnoll, orc, or hobgoblin. Perhaps more rarely for an ettin, twin heads Yadha and Ro get on well with each other. Their coordination serves them well, and together they are sharper than the lowest of Daask's leadership. Their relationship is born out of necessity, at least for Ro. Having lost her arm in Droaam's consolidation, she is almost entirely reliant on Yadha. Daask's patience with Drummond has worn through, and the attention brought by Stoke's crew hasn't helped. Despite their warning, Yadha-Ro isn't much interested in money. For them, it's leg breaking time. As far as Yadha-Ro and Daask are concerned, Stoke's crew, Tresca and even the player characters are guilty by association. Even without Drummond in the picture, failing to deal with Yadha-Ro will make life difficult for Tresca and Stoke in the near future. Characters might defuse the situation in the following ways:
DIPLOMACY Yadha-Ro is not interested in letting the characters go free for nothing, no matter how silver-tongued their bard might be. Yadha-Ro can only be persuaded to back off for the moment if they offer tangible reason to do so. Regardless, sweet-talking them might get Yadha-Ro talking about Daask's role in the Cogs. With a Charisma (Persuasion) check, Yadha-Ro will gladly reveal the following lore: • DC 8: Daask is a syndicate claiming to represent the
interests of so-called monstrous peoples in Khorvaire. • DC 10: Daask supremacy is unquestioned in the Cogs, and
their presence is also strong in Lower Dura. • DC 12: If you need narcotics in the lower wards, Daask can
get it for you. They also have a particular interest in “protection” of certain businesses in Sharn. Especially protection from Boromar influence.
• DC 15: The leader of Daask in Sharn is an oni named Cavallah. If the characters have grievance with Daask, they could always go see her in Callestan, Lower Dura.
Yadha-Ro expects a lot of a business relationship, especially one that would save Drummond's forge. With a successful DC 18 Charisma (Persuasion, Intimidation or Deception) check, Yadha or Ro can be persuaded to trade the satisfaction of breaking Drummond's legs for a favor owed to Daask. Both heads, Yadha and Ro, must be persuaded separately, using two different types of skill. However, failing a Charisma check, either in pursuit of knowledge about Daask or as a means of bargaining, will anger Yadha-Ro enough that they attack (see Show of Strength below). If the characters convinced just one of the heads to play nice, Yadha-Ro will have disadvantage on attack rolls, ability checks, and saving throws until the end of their first turn.
SHOW OF STRENGTH The surest way to get Yadha-Ro to back off is to best them in combat. Ettins respect strength, and proving that the forge has powerful friends will be enough to cause Daask to back off—at least for now. Yadha will freely admit that, though Ro will chastise her twin's loose lips. If a fight breaks out, the players will first face Yadha-Ro (see Appendix). The commotion will draw the ettins’ two goblin (see Appendix) goons from their lookout spots. Each goblin will arrive after 1d3+1 rounds (roll separately). If Yadha-Ro has been defeated in that time, they will back off without a fight. Yadha-Ro and their goons will attempt to disrupt whoever is carrying the Burning Idol. Dropping the Idol will not damage it, but it may cause a fire to spread through the battleground (see the Burning Idol section on page18). Once Yadha-Ro and Daask have been subdued or satisfied, the characters are free to return to their employer. Move on to the conclusion in Scene 6.
DAASK An aggressive criminal organisation, Daask (see chapter 4 of
Eberron: Rising from the Last War) is led by monstrous immigrants from the land of Droaam. Active principally within the Cogs and the
district Malleon’s Gate, Daask appear to most to be a violent gang keen on selling narcotics and expanding their influence. However,
the leadership are careful to ensure that their growth is sustainable. The leader of the Sharn chapter, Cavallah, is an oni scholar who may end up an unlikely ally if her goals align with the characters’.
Sample
file

20
SCENE 6: NEW BEGINNINGS Once the characters have retrieved the Burning Idol and have safely navigated the aggressions of Daask, they can return to the Clifftop Adventurers’ Guild in Upper Dura without further conflict. When they do, read the following:
Guild Handler Lhara, the pale shifter who had given you your mission,
is waiting for you beneath the arches of the Clifftop guildhall. Leaning
casually against the stone walls, she flicks away a toothpick and
saunters over to meet you.
“I hope you have our client’s Idol?” She grins, baring her fangs.
“Speaking of which, there’s someone you should meet.”
Lhara beckons you into the guild hall and leads you through a maze
of stone corridors. The walkways are flanked by statues of previous
guild heroes: Shekkal Korranor, the Guild’s Founder, plus the likes of
Kallon ir'Harwent, Rayla of Farcove, Mira Dread, and more. Before
long, your Guild Handler has led you to a well-appointed sitting room
decorated in oak.
A middle-aged human man is seated in one of the plush chairs. He
appears well-to-do, with a well-maintained mustache and academic
robes. He is scratching away in a notebook with an ink pen at an
almost feverish pace. Lhara clears her throat when the man doesn't
immediately notice your group enter. She makes introductions when
his attention is finally drawn from his writing.
“This is Provost Nigel Faurious, our client for your little endeavor.
It’s my hope the group of us will have a very fruitful relationship.”
THE PROVOST'S MANIFESTO The Provost is a studious man and pays more attention to his work than the characters. However, if pushed, he is happy to discuss his field of expertise, interest, and some might say obsession: the thirteen outer planes moving through the cosmos. The Burning Idol is the focus for tracking Fernia, the Sea of Fire. If asked specifically what he is writing, he reveals only the title of his thesis: The Convergence Manifesto. He will under no circumstances let the characters read it. If the characters try to sneak a peek at what he’s writing, a DC 18 Wisdom (Perception) check will allow them to catch a few snippets before he closes the notebook (see sidebar). If the players attempt to steal the book, they will find it locked by an arcane lock, and any attempt to force it open will damage the book beyond readability.
THE CONVERGENCE MANIFESTO For too long, my theories have been dismissed…
There are no barriers. No limits!
I will prove my thesis, once and for all…
The Sea of Fire can be channeled for the betterment of all nations…
MISSION REWARD Lhara was not expecting the characters to run into much trouble in the Cogs, so she had not expected to pay them much for what might have been done by any competent courier. However, she will gift each of the characters a 100 gp ‘signing on’ bonus for joining the Clifftop Adventurers’ Guild, in hopes that'll tempt them into keeping contact. She will congratulate them on passing probation.
THE END? The Provost needs thirteen focuses to prove his thesis correct. If the players wish to continue this story and work closely with Guild Handler Lhara, they can look forward to a further 12 adventures as the Convergence Manifesto series continues with AE01-02: Live Another Day.
Sample
file
21
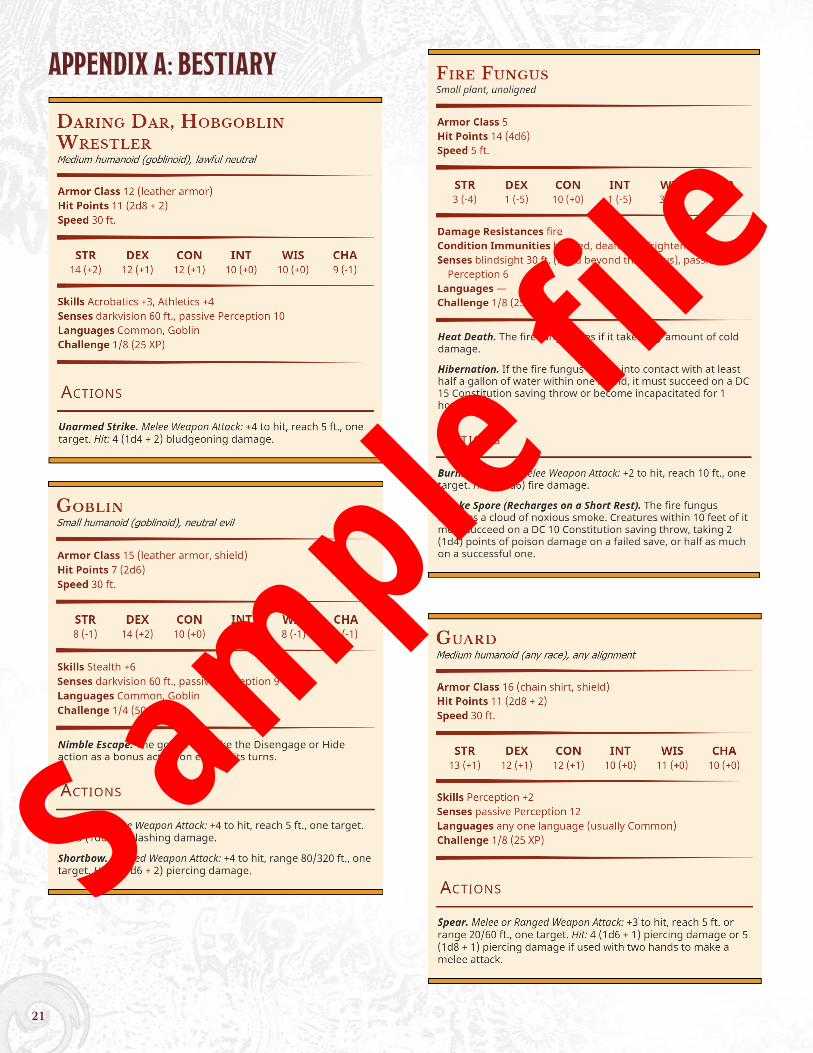
APPENDIX A: BESTIARY
Sample
file
22
Sample
file


