Embed Size (px)
Citation preview

Full-Stack React ProjectsSecond Edition
Learn MERN stack development by building modern webapps using MongoDB, Express, React, and Node.js
Shama Hoque
BIRMINGHAM - MUMBAI
Full-Stack React ProjectsSecond EditionCopyright © 2020 Packt Publishing
All rights reserved. No part of this book may be reproduced, stored in a retrieval system, or transmitted inany form or by any means, without the prior written permission of the publisher, except in the case of briefquotations embedded in critical articles or reviews.
Every effort has been made in the preparation of this book to ensure the accuracy of the informationpresented. However, the information contained in this book is sold without warranty, either express orimplied. Neither the author, nor Packt Publishing or its dealers and distributors, will be held liable for anydamages caused or alleged to have been caused directly or indirectly by this book.
Packt Publishing has endeavored to provide trademark information about all of the companies and productsmentioned in this book by the appropriate use of capitals. However, Packt Publishing cannot guarantee theaccuracy of this information.
Acquisition Editor: Clint RodricksContent Development Editor: Aamir AhmedSenior Editor: Hayden EdwardsTechnical Editor: Deepesh PatelCopy Editor: Safis EditingProject Coordinator: Kinjal BariProofreader: Safis EditingIndexer: Manju ArasanProduction Designer: Joshua Misquitta
First published: May 2018Second edition: April 2020
Production reference: 1160420
Published by Packt Publishing Ltd.Livery Place35 Livery StreetBirminghamB3 2PB, UK.
ISBN 978-1-83921-541-4
www.packt.com

To my parents, for setting examples of perseverance and relentless dedication.
-Shama Hoque

Packt.com
Subscribe to our online digital library for full access to over 7,000 books and videos,as well as industry leading tools to help you plan your personal development andadvance your career. For more information, please visit our website.
Why subscribe?Spend less time learning and more time coding with practical eBooks andVideos from over 4,000 industry professionals
Improve your learning with Skill Plans built especially for you
Get a free eBook or video every month
Fully searchable for easy access to vital information
Copy and paste, print, and bookmark content
Did you know that Packt offers eBook versions of every book published, with PDFand ePub files available? You can upgrade to the eBook version at www.packt.com andas a print book customer, you are entitled to a discount on the eBook copy. Get intouch with us at [email protected] for more details.
At www.packt.com, you can also read a collection of free technical articles, sign up fora range of free newsletters, and receive exclusive discounts and offers on Packt booksand eBooks.

Contributors
About the authorShama Hoque has more than 9 years of experience as a software developer andmentor, with a master's in software engineering from Carnegie Mellon University.
From Java programming to full-stack development with JavaScript, the applicationsshe has worked on include national Olympiad registration websites, universallyaccessible widgets, video conferencing apps, and 3D medical reconstruction software.
Currently, she makes web-based prototypes for R&D start-ups in California, whiletraining aspiring software engineers and teaching web development to CSundergrads in Bangladesh.
About the reviewersKirill Ezhemenskii is an experienced software engineer, frontend and mobiledeveloper, solution architect, and the CTO of a healthcare company. He is also afunctional programming advocate; an expert in the React stack, GraphQL, andTypeScript; and a React Native mentor.
Carlos Santana Roldán is a senior web developer with more than 12 years ofexperience. Currently, he is working as a senior React developer at MindBody Inc. Heis the founder of Dev Education, one of the most popular developer communities inLatin America, training people in web technologies such as React, Node.js, GraphQL,and JavaScript in general.
Packt is searching for authors like youIf you're interested in becoming an author for Packt, please visitauthors.packtpub.com and apply today. We have worked with thousands ofdevelopers and tech professionals, just like you, to help them share their insight withthe global tech community. You can make a general application, apply for a specifichot topic that we are recruiting an author for, or submit your own idea.
Table of ContentsPreface 1
Section 1: Getting Started with MERNChapter 1: Unleashing React Applications with MERN 8
What is new in the second edition? 9Book structure 9
Getting started with MERN 10Building MERN applications from the ground up 10Developing web applications with MERN 10Advancing to complex MERN applications 10Going forward with MERN 11
Getting the most out of this book 11The MERN stack 13
Node 13Express 14MongoDB 15React 16
Relevance of MERN 16Consistency across the technology stack 17Takes less time to learn, develop, deploy, and extend 17Widely adopted in the industry 17Community support and growth 17
Range of MERN applications 18MERN applications developed in this book 18
Social media platform 19Web-based classroom application 20Online marketplace 21Expense tracking application 22Media streaming application 23VR game for the web 24
Summary 25
Chapter 2: Preparing the Development Environment 26Selecting development tools 26
Workspace options 27Local and cloud development 27
IDE or text editors 27Chrome Developer Tools 28Git 28
Installation 28
Table of Contents
[ ii ]
Remote Git hosting services 29Setting up MERN stack technologies 29
MongoDB 29Installation 30Running the mongo shell 30
Node.js 30Installation 31Node version management with nvm 31
Yarn package manager 31Modules for MERN 32
Key modules 32devDependency modules 32
Checking your development setup 34Initializing package.json and installing Node.js modules 35Configuring Babel, Webpack, and Nodemon 36
Babel 37Webpack 37
Client-side Webpack configuration for development 38Server-side Webpack configuration 40Client-side Webpack configuration for production 41
Nodemon 42Frontend views with React 42Server with Express and Node 44
Express app 44Bundling React app during development 44Serving static files from the dist folder 45Rendering templates at the root 45
Connecting the server to MongoDB 46Run scripts 47Developing and debugging in real time 48
Summary 48
Section 2: Building MERN from the Ground UpChapter 3: Building a Backend with MongoDB, Express, and Node 51
Overview of the skeleton application 52Feature breakdown 52Defining the backend components 52
User model 53API endpoints for user CRUD 53Auth with JSON Web Tokens 54
How JWT works 54Setting up the skeleton backend 56
Folder and file structure 56Initializing the project 57
Adding package.json 57Development dependencies 58
Babel 58
Table of Contents
[ iii ]
Webpack 59Nodemon 59
Config variables 59Running scripts 60
Preparing the server 60Configuring Express 60Starting the server 62Setting up Mongoose and connecting to MongoDB 63Serving an HTML template at a root URL 64
Implementing the user model 65User schema definition 66
Name 66Email 66Created and updated timestamps 67Hashed password and salt 67
Password for auth 67Handling the password string as a virtual field 68Encryption and authentication 68Password field validation 70
Mongoose error handling 70Adding user CRUD APIs 72
User routes 73User controller 74Creating a new user 75Listing all users 76Loading a user by ID to read, update, or delete 76
Loading 77Reading 77Updating 78Deleting 79
Integrating user auth and protected routes 80Auth routes 80Auth controller 81Sign-in 82Signout 83Protecting routes with express-jwt 84
Protecting user routes 84Requiring sign-in 85Authorizing signed in users 85Auth error handling for express-jwt 86
Checking the standalone backend 86Creating a new user 87Fetching the user list 88Trying to fetch a single user 89Signing in 90Fetching a single user successfully 91
Summary 92
Table of Contents
[ iv ]
Chapter 4: Adding a React Frontend to Complete MERN 93Defining the skeleton application frontend 94
Folder and file structure 95Setting up for React development 96
Configuring Babel and Webpack 97Babel 97Webpack 98Loading Webpack middleware for development 98
Loading bundled frontend code 100Serving static files with Express 100Updating the template to load a bundled script 100
Adding React dependencies 101React 101React Router 101Material-UI 102
Rendering a home page view 102Entry point at main.js 103Root React component 103
Customizing the Material-UI theme 104Wrapping the root component with ThemeProvider and BrowserRouter 105Marking the root component as hot-exported 106
Adding a home route to MainRouter 106The Home component 107
Imports 108Style declarations 108Component definition 110
Bundling image assets 111Running and opening in the browser 111
Integrating backend APIs 112Fetch for user CRUD 112
Creating a user 112Listing users 113Reading a user profile 113Updating a user's data 114Deleting a user 115
Fetch for the auth API 116Sign-in 116Sign-out 117
Adding auth in the frontend 117Managing auth state 118
Saving credentials 118Retrieving credentials 119Deleting credentials 119
The PrivateRoute component 120Completing the User frontend 121
The Users component 122The Signup component 125
Table of Contents
[ v ]
The Signin component 129The Profile component 131The EditProfile component 135The DeleteUser component 137
Validating props with PropTypes 140The Menu component 140
Implementing basic server-side rendering 143Modules for server-side rendering 144Generating CSS and markup 144Sending a template with markup and CSS 145Updating template.js 146Updating App.js 146Hydrate instead of render 147
Summary 147
Chapter 5: Growing the Skeleton into a Social Media Application 149Introducing MERN Social 150Updating the user profile 153
Adding an about description 153Uploading a profile photo 154
Updating the user model to store a photo in MongoDB 155Uploading a photo from the edit form 155
File input with Material-UI 156Form submission with the file attached 157
Processing a request containing a file upload 158Retrieving a profile photo 160
Profile photo URL 160Showing a photo in a view 161
Following users in MERN Social 162Following and unfollowing 162
Updating the user model 162Updating the userByID controller method 163Adding APIs to follow and unfollow 163Accessing the follow and unfollow APIs in views 166Follow and unfollow buttons 167
The FollowProfileButton component 167Updating the Profile component 168
Listing followings and followers 170Making a FollowGrid component 171
Finding people to follow 172Fetching users not followed 172The FindPeople component 174
Posting on MERN Social 176Mongoose schema model for Post 178The Newsfeed component 179Listing posts 181
Listing posts in Newsfeed 182Newsfeed API for posts 182
Table of Contents
[ vi ]
Fetching Newsfeed posts in the view 183Listing posts by user in Profile 186
API for posts by a user 186Fetching user posts in the view 187
Creating a new post 189Creating the post API 189Retrieving a post's photo 190Fetching the create post API in the view 191Making the NewPost component 192
The Post component 193Layout 193
Header 194Content 194Actions 195Comments 195
Deleting a post 196Interacting with Posts 197
Likes 198The Like API 198The Unlike API 199Checking if a post has been liked and counting likes 200Handling like clicks 201
Comments 202Adding a comment 203
The Comment API 203Writing something in the view 204
Listing comments 206Deleting a comment 207
The Uncomment API 207Removing a comment from the view 208
Comment count update 209Summary 210
Section 3: Developing Web Applications with MERNChapter 6: Building a Web-Based Classroom Application 212
Introducing MERN Classroom 213Updating the user with an educator role 215
Adding a role to the user model 215Updating the EditProfile view 216Rendering an option to teach 218
Adding courses to the classroom 219Defining a Course model 219Creating a new course 221
The create course API 221Fetching the create API in the view 223The NewCourse component 223
Listing courses by educator 227The list course API 227
Table of Contents
[ vii ]
Fetching the list API in the view 228The MyCourses component 229
Display a course 231A read course API 231The Course component 233
Updating courses with lessons 236Storing lessons 236Adding new lessons 237
Adding a lesson API 237The NewLesson component 239Displaying lessons 243
Editing a course 244Updating the course API 244The EditCourse component 245Updating lessons 249
Editing lesson details 249Moving the lessons to rearrange the order 250Deleting a lesson 251
Deleting a course 252The delete course API 252The DeleteCourse component 253
Publishing courses 254Implementing the publish option 254
Publish button states 254Confirm to publish 255
Listing published courses 257The published courses API 258The Courses component 259
Enrolling on courses 261Defining an Enrollment model 261The create Enrollment API 262The Enroll component 265The Enrolled Course view 266
The read enrollment API 267The Enrollment component 269
Tracking progress and enrollment stats 272Completing lessons 273
Lessons completed API 273Completed lessons from the view 274
Listing all enrollments for a user 277The list of enrollments API 277The Enrollments component 278
Enrollment stats 279The enrollment stats API 279Displaying enrollment stats for a published course 280
Summary 282
Chapter 7: Exercising MERN Skills with an Online Marketplace 284
Table of Contents
[ viii ]
Introducing the MERN Marketplace app 285Allowing users to be sellers 287
Updating the user model 287Updating the Edit Profile view 288Updating the menu 290
Adding shops to the marketplace 290Defining a Shop model 291Creating a new shop 292
The create shop API 292Fetching the create API in the view 295The NewShop component 295
Listing shops 298Listing all shops 298
The shops list API 299Fetch all shops for the view 299The Shops component 300
Listing shops by owner 302The shops by owner API 302Fetch all shops owned by a user for the view 303The MyShops component 304
Displaying a shop 305The read a shop API 306The Shop component 307
Editing a shop 309The edit shop API 309The EditShop component 311
Deleting a shop 312The delete shop API 312The DeleteShop component 313
Adding products to shops 314Defining a Product model 315Creating a new product 317
The create product API 317The NewProduct component 319
Listing products 320Listing by shop 320
The products by shop API 321Products component for buyers 322MyProducts component for shop owners 324
Listing product suggestions 326Latest products 326Related products 327The Suggestions component 329
Displaying a product 330Read a product API 331Product component 331
Editing and deleting a product 334Edit 334Delete 335
Table of Contents
[ ix ]
Searching for products with name and category 336The categories API 336The search products API 337
Fetch search results for the view 338The Search component 339The Categories component 341
Summary 342
Chapter 8: Extending the Marketplace for Orders and Payments 343Introducing cart, payments, and orders in the MERNMarketplace 344Implementing a shopping cart 345
Adding to the cart 345Cart icon in the menu 347The cart view 348
The CartItems component 349Retrieving cart details 350Modifying quantity 352Removing items 353Showing the total price 354Option to check out 354
Using Stripe for payments 355Stripe-connected account for each seller 356
Updating the user model 356Button to connect with Stripe 357The StripeConnect component 358The stripe auth update API 360
Stripe Card Elements for checkout 362Stripe Customer for recording card details 363
Updating the user model 363Updating the user controller 363
Creating a new Stripe Customer 364Updating an existing Stripe Customer 365
Creating a charge for each product that's processed 365Integrating the checkout process 367
Initializing checkout details 368Customer information 368Delivery address 369
Placing an order 370Using Stripe Card Elements 370The CardElement component 371Adding a button to place an order 372Empty cart 373Redirecting to the order view 373
Creating a new order 374Defining an Order model 374
The Order schema 374The CartItem schema 376
Table of Contents
[ x ]
Create order API 376Decrease product stock quantity 378Create controller method 379
Listing orders by shop 379The list by shop API 380The ShopOrders component 381
List orders 382The ProductOrderEdit component 384
Handling actions to cancel a product order 386Handling the action to process charge for a product 387Handling the action to update the status of a product 388
APIs for products ordered 389Get status values 389Update order status 390Cancel product order 391Process charge for a product 393
Viewing single-order details 394Summary 396
Chapter 9: Adding Real-Time Bidding Capabilities to theMarketplace 397
Introducing real-time bidding in the MERN Marketplace 398Adding auctions to the marketplace 400
Defining an Auction model 400Creating a new auction 402
The create auction API 403Fetching the create API in the view 405The NewAuction component 405
Listing auctions 408The open Auctions API 409The Auctions by bidder API 410The Auctions by seller API 411The Auctions component 412
Editing and deleting auctions 415Updating the list view 416Edit and delete auction APIs 416
Displaying the auction view 418The read auction API 419The Auction component 420Adding the Timer component 422
Implementing real-time bidding with Socket.IO 425Integrating Socket.IO 425Placing bids 428
Adding a form to enter a bid 429Receiving a bid on the server 430
Displaying the changing bidding history 431Updating the view state with a new bid 432Rendering the bidding history 432
Table of Contents
[ xi ]
Summary 434
Section 4: Advancing to Complex MERN ApplicationsChapter 10: Integrating Data Visualization with an ExpenseTracking Application 436
Introducing MERN Expense Tracker 437Adding expense records 438
Defining an Expense model 439Creating a new expense record 441
The create expense API 441The NewExpense component 442
Listing expenses 445The expenses by user API 446The Expenses component 447
Searching by date range 449Rendering expenses 451
Modifying an expense record 452Rendering the edit form and delete option 453Editing and deleting an expense in the backend 455
Visualizing expense data over time 458Summarizing recent expenses 458
Previewing expenses in the current month 459The current month preview API 459Rendering the preview of current expenses 461
Tracking current expenses by category 463The current expenses by category API 464Rendering an overview of expenses per category 466
Displaying expense data charts 469A month's expenses in a scatter plot 469
The scatter plot data API 470The MonthlyScatter component 472
Total expenses per month in a year 474The yearly expenses API 474The YearlyBar component 476
Average expenses per category in a pie chart 478The average expenses by category API 479The CategoryPie component 480
Summary 482
Chapter 11: Building a Media Streaming Application 483Introducing MERN Mediastream 484Uploading and storing media 486
Defining a Media model 486Using MongoDB GridFS to store large files 487Creating a new media post 489
The create media API 489The NewMedia component 491
Retrieving and streaming media 494
Table of Contents
[ xii ]
The video API 495Using a React media player to render the video 498
Listing media 499The MediaList component 500Listing popular media 501Listing media by users 502
Displaying, updating, and deleting media 504Displaying media 504
The read media API 504The Media component 506
Updating media details 509The media update API 509The media edit form 511
Deleting media 513The delete media API 513The DeleteMedia component 514
Summary 515
Chapter 12: Customizing the Media Player and Improving SEO 516Adding a custom media player to MERN Mediastream 517
The play media page 519The component structure 519
Listing related media 520The related media list API 521The RelatedMedia component 523
The PlayMedia component 524Customizing the media player 527
Updating the Media component 528Initializing the media player 528Custom media controls 532
Play, pause, and replay 532Play next 533Loop when a video ends 533Volume control 535Progress control 536Fullscreen 539Played duration 540
Autoplaying related media 542Toggling autoplay 542Handling autoplay across components 543Updating the state when a video ends in MediaPlayer 545
Server-side rendering with data 546Adding a route configuration file 547Updating SSR code for the Express server 548
Using route configuration to load data 548Isomorphic-fetch 549
Absolute URLs 549

Table of Contents
[ xiii ]
Injecting data into the React app 550Applying server-injected data to client code 551
Passing data props to PlayMedia from MainRouter 551Rendering received data in PlayMedia 552
Checking the implementation of SSR with data 552Testing in Chrome 552
Loading a page with JavaScript enabled 553Disabling JavaScript from settings 553PlayMedia view with JavaScript blocked 553
Summary 555
Chapter 13: Developing a Web-Based VR Game 556Introducing the MERN VR Game 557
Game features 557Getting started with React 360 558
Setting up a React 360 project 558Key concepts for developing the VR game 561
Equirectangular panoramic images 5613D position – coordinates and transforms 562
3D coordinate system 562Transforming 3D objects 563
React 360 components 565Core components 565
View 565Text 566
Components for the 3D VR experience 566Entity 566VrButton 568
The React 360 API 568Environment 568Native modules 569
AudioModule 569Location 570
StyleSheet 571VrHeadModel 572Loading assets 572
React 360 input events 573Defining game details 574
Game data structure 574Details of VR objects 575
Static data versus dynamic data 576Building the game view in React 360 577
Updating client.js and mounting to Location 578Defining styles with StyleSheet 579World background 580Adding 3D VR objects 581Interacting with VR objects 582
Rotating a VR object 583Animation with requestAnimationFrame 583

Table of Contents
[ xiv ]
Clicking on the 3D objects 585Collecting the correct object on click 586
Game completed state 589Bundling for production and integration with MERN 591
Bundling React 360 files 592Integrating with a MERN application 592
Adding the React 360 production files 593Updating references in index.html 593Trying out the integration 594
Summary 595
Chapter 14: Making the VR Game Dynamic using MERN 596Introducing the dynamic MERN VR Game application 597Defining a Game model 598
Exploring the game schema 599Specifying the VR object schema 600Validating array length in the game schema 602
Implementing game CRUD APIs 603Creating a new game 603Listing all games 606Listing games by the maker 607Loading a game 608Editing a game 610Deleting a game 613
Adding a form for creating and editing games 614Making a new game 615
Updating the menu 615The NewGame component 615
Editing the game 617The EditGame component 618
Implementing the GameForm component 620Inputting simple game details 621Modifying arrays of VR objects 623
Iterating and rendering the object details form 623Adding a new object to the array 625Removing an object from the array 625Handling the object detail change 626
The VRObjectForm component 627Adding the game list views 630
Rendering lists of games 631The GameDetail component 633
Playing the VR game 636Implementing the API to render the VR game view 636
Updating the game code in React 360 637Getting the game ID from a link 638Fetching the game data with the load game API 639Bundling and integrating the updated code 639

Table of Contents
[ xv ]
Summary 640
Section 5: Going Forward with MERNChapter 15: Following Best Practices and Developing MERNFurther 642
Separation of concerns with modularity 643Revisiting the application folder structure 643
Server-side code 643Client-side code 644
Adding CSS styles 645External style sheets 645Inline styles 646JavaScript Style Sheets (JSS) 646
Selective server-side rendering with data 647When is server-side rendering with data relevant? 648
Using stateful versus pure functional components 648Stateful React components with ES6 classes or Hooks 649Stateless React components as pure functions 649Designing the UI with stateful components and stateless functionalcomponents 650
Using Redux or Flux 651Enhancing security 651
JSON web tokens – client-side or server-side storage 652Securing password storage 652
Writing test code 653Testing tools for full-stack JavaScript projects 654
Static analysis with ESLint 654End-to-end testing with Cypress 654Comprehensive testing with Jest 655
Adding a test to the MERN Social application 655Installing the packages 656Defining the script to run tests 656Adding a tests folder 656Adding the test 657Generating a snapshot of the correct Post view 658Running and checking the test 659
Optimizing the bundle size 660Code splitting 661
Dynamic import() 662Extending the applications 663
Extending the server code 664Adding a model 664Implementing the APIs 664
Adding controllers 664Adding routes 664
Extending the client code 665
Table of Contents
[ xvi ]
Adding the API fetch methods 665Adding components 665Loading new components 665
Summary 666
Other Books You May Enjoy 668
Index 671
PrefaceThis book explores the development of full-stack JavaScript web applications bycombining the power of React with industry-tested server-side technologies, such asNode.js, Express, and MongoDB. The JavaScript landscape has been growing rapidlyfor some time now. With an abundance of options and resources available in relationto full-stack JavaScript web applications, it is easy to get lost when you need to choosefrom these frequently changing entities, learn about them, and make them worktogether to build your own web applications. In an attempt to address this pain point,this book adopts a practical approach to help you set up and build a diverse range ofworking applications using the popular MERN stack.
Who this book is forThis book is for JavaScript developers who may have worked with React but haveminimal experience with full-stack development involving Node.js, Express, andMongoDB.
What this book coversChapter 1, Unleashing React Applications with MERN, introduces the MERN stacktechnologies and the applications that will be developed in this book. We will discussdeveloping web applications with React, Node.js, Express, and MongoDB.
Chapter 2, Preparing the Development Environment, helps you to set up the MERNstack technologies for development. We will explore essential development tools;install Node.js, MongoDB, Express, React, and any other required libraries; and thenrun code to check the setup.
Chapter 3, Building a Backend with MongoDB, Express, and Node, implements thebackend of a skeleton MERN application. We will build a standalone server-sideapplication with MongoDB, Express, and Node.js that stores user details and hasAPIs for user authentication and CRUD operations.

Preface
[ 2 ]
Chapter 4, Adding a React Frontend to Complete MERN, completes the MERN skeletonapplication by integrating a React frontend. We will implement a working frontendwith React views for interacting with the user CRUD operations and auth APIs on theserver.
Chapter 5, Growing the Skeleton into a Social Media Application, builds a social mediaapplication by extending the skeleton application. We will explore the capabilities ofthe MERN stack by implementing social media features, such as post sharing, liking,commenting, following friends, and an aggregated newsfeed.
Chapter 6, Building a Web-Based Classroom Application, focuses on building a simpleonline classroom application by extending the MERN stack skeleton application. Thisclassroom application will support multiple user roles, the addition of course contentand lessons, student enrollments, progress tracking, and course enrollment statistics.
Chapter 7, Exercising MERN Skills with an Online Marketplace, utilizes the MERN stacktechnologies to develop basic features in an online marketplace application. We willimplement buying-and selling-related features with support for seller accounts,product listings, and product search by category.
Chapter 8, Extending the Marketplace for Orders and Payments, focuses on extending theonline marketplace we built in the previous chapter by implementing capabilities forbuyers to add products to a shopping cart, checkout, and place orders, and for sellersto manage these orders and have payments processed from the marketplaceapplication. We will also integrate Stripe to collect and process payments.
Chapter 9, Adding Real-Time Bidding Capabilities to the Marketplace, focuses on teachingyou how to use the MERN stack technologies, along with Socket.IO, to easilyintegrate real-time behavior in a full-stack application. We will do thisby incorporating an auctioning feature with real-time bidding capabilities in theMERN marketplace application.
Chapter 10, Integrating Data Visualization with an Expense Tracking Application, focuseson using MERN stack technologies along with Victory—a charting library forReact—to easily integrate data visualization features in a full-stack application. Wewill extend the MERN skeleton application to build an expense tracking applicationthat will incorporate data processing and visualization features for expense datarecorded by a user over time.
Preface
[ 3 ]
Chapter 11, Building a Media Streaming Application, focuses on extending the MERNskeleton application to build a media uploading and streaming application usingMongoDB GridFS. We will start by building a basic media streaming application,allowing registered users to upload video files that will be stored on MongoDB andstreamed back so that viewers can play each video in a simple React media player.
Chapter 12, Customizing the Media Player and Improving SEO, upgrades the mediaviewing capabilities of our media application with a custom media player andautoplay media list. We will implement customized controls on the default Reactmedia player, add a playlist that can be autoplayed, and improve SEO for the mediadetails by adding selective server-side rendering with data for just the media detailview.
Chapter 13, Developing a Web-Based VR Game, uses React 360 to develop a three-dimensional virtual reality (VR)-infused game for the web. We will explore the three-dimensional and VR capabilities of React 360 and build a simple web-based VR game.
Chapter 14, Making the VR Game Dynamic Using MERN, is where you will build adynamic VR game application by extending the MERN skeleton application andintegrating React 360. We will implement a game data model that allows users tocreate their own VR games and incorporate the dynamic game data with the gamedeveloped using React 360.
Chapter 15, Following Best Practices and Developing MERN Further, reflects on thelessons learned in previous chapters and suggests improvements for further MERN-based application development. We will expand on some of the best practices alreadyapplied, such as modularity in the app structure, other practices that should beapplied, such as writing test code, and possible improvements, such as optimizingbundle size.
To get the most out of this bookThis book assumes that you have familiarity with basic web-based technologies,working knowledge of programming constructs in JavaScript, and a general idea ofhow React applications work. As you go through the book, you will uncover howthese concepts come together when building fully-fledged web applications withReact 16.13.1, Node.js 13.12.0, Express 4.17.1, and MongoDB 4.2.5.
In order to maximize your learning experience while reading through the chapters, itis recommended that you run the associated application code in parallel, maintainingthe specified package versions and using the relevant instructions provided in eachchapter.
Preface
[ 4 ]
If you are using the digital version of this book, we advise you to type the codeyourself or access the code via the GitHub repository (link available in the nextsection). Doing so will help you avoid any potential errors related to the copyingand pasting of code.
Download the example code filesYou can download the example code files for this book from your account atwww.packt.com. If you purchased this book elsewhere, you can visitwww.packtpub.com/support and register to have the files emailed directly to you.
You can download the code files by following these steps:
Log in or register at www.packt.com.1.Select the Support tab.2.Click on Code Downloads.3.Enter the name of the book in the Search box and follow the onscreen4.instructions.
Once the file is downloaded, please make sure that you unzip or extract the folderusing the latest version of:
WinRAR/7-Zip for WindowsZipeg/iZip/UnRarX for Mac7-Zip/PeaZip for Linux
The code bundle for the book is also hosted on GitHubat https://github.com/PacktPublishing/Full-Stack-React-Projects-Second-Edition. In case there's an update to the code, it will be updated on the existing GitHubrepository.
We also have other code bundles from our rich catalog of books and videos availableat https://github. com/ PacktPublishing/ . Check them out!
Conventions usedThere are a number of text conventions used throughout this book.
Preface
[ 5 ]
CodeInText: Indicates code words in text, database table names, folder names,filenames, file extensions, pathnames, dummy URLs, user input, and Twitter handles.Here is an example: "Mount the downloaded WebStorm-10*.dmg disk image file asanother disk in your system."
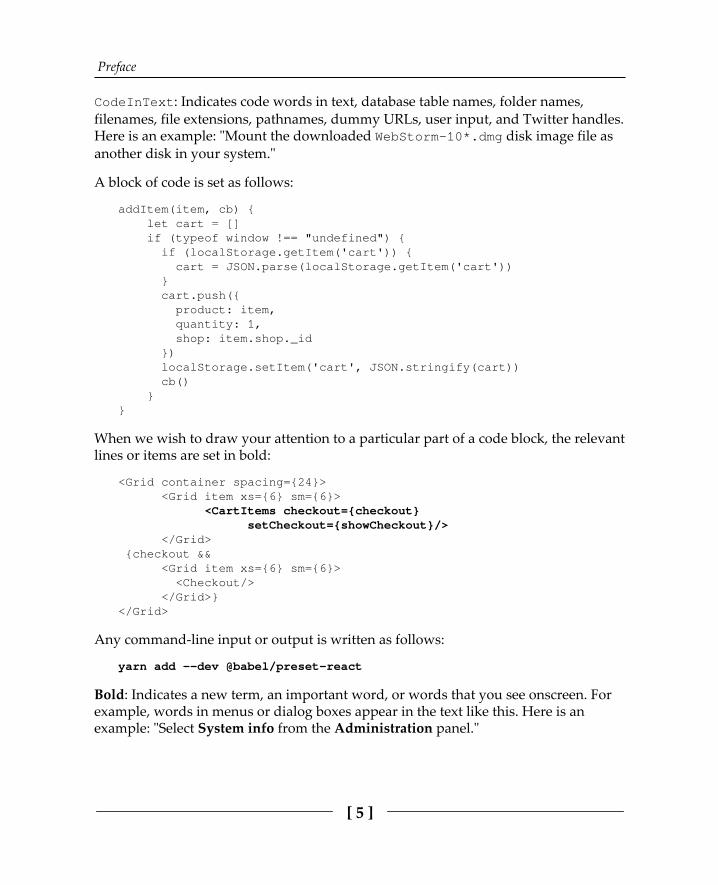
A block of code is set as follows:
addItem(item, cb) { let cart = [] if (typeof window !== "undefined") { if (localStorage.getItem('cart')) { cart = JSON.parse(localStorage.getItem('cart')) } cart.push({ product: item, quantity: 1, shop: item.shop._id }) localStorage.setItem('cart', JSON.stringify(cart)) cb() }}
When we wish to draw your attention to a particular part of a code block, the relevantlines or items are set in bold:
<Grid container spacing={24}> <Grid item xs={6} sm={6}> <CartItems checkout={checkout} setCheckout={showCheckout}/> </Grid> {checkout && <Grid item xs={6} sm={6}> <Checkout/> </Grid>}</Grid>
Any command-line input or output is written as follows:
yarn add --dev @babel/preset-react
Bold: Indicates a new term, an important word, or words that you see onscreen. Forexample, words in menus or dialog boxes appear in the text like this. Here is anexample: "Select System info from the Administration panel."
Preface
[ 6 ]
Warnings or important notes appear like this.
Tips and tricks appear like this.
Get in touchFeedback from our readers is always welcome.
General feedback: If you have questions about any aspect of this book, mention thebook title in the subject of your message and email us [email protected].
Errata: Although we have taken every care to ensure the accuracy of our content,mistakes do happen. If you have found a mistake in this book, we would be grateful ifyou would report this to us. Please visit www.packtpub.com/support/errata,selecting your book, clicking on the Errata Submission Form link, and entering thedetails.
Piracy: If you come across any illegal copies of our works in any form on the Internet,we would be grateful if you would provide us with the location address or websitename. Please contact us at [email protected] with a link to the material.
If you are interested in becoming an author: If there is a topic that you haveexpertise in and you are interested in either writing or contributing to a book, pleasevisit authors.packtpub.com.
ReviewsPlease leave a review. Once you have read and used this book, why not leave areview on the site that you purchased it from? Potential readers can then see and useyour unbiased opinion to make purchase decisions, we at Packt can understand whatyou think about our products, and our authors can see your feedback on their book.Thank you!
For more information about Packt, please visit packt.com.

1Getting Started with MERN
In this part, we get an introduction to MERN and an overview of its differentcomponents. Additionally, you will develop an understanding of how to configureyour development environment correctly, before you start developing full-fledgedweb applications with these technologies.
This section comprises the following chapters:
Chapter 1, Unleashing React Applications with MERNChapter 2, Preparing the Development Environment

1Unleashing React
Applications with MERNReact may have opened up new frontiers for frontend web development and changedthe way we program JavaScript user interfaces, but we still need a solid backend tobuild a complete web application. While there are myriad options when selectingbackend technologies, the benefits and appeal of using a full JavaScript stack areundeniable, especially when there are robust and widely adopted backendtechnologies such as Node, Express, and MongoDB. Combining the potential of Reactwith these industry-tested, server-side technologies creates a diverse array ofpossibilities when developing real-world web applications. This book guides youthrough Setting up MERN (short for MongoDB, Express.js, React, and Node.js) -based web development, to building real-world web applications of varyingcomplexities.
Before diving into the development of these web applications, we are going to answerthe following questions in this chapter, so you can use this book effectively to acquirefull-stack development skills, and also understand the context behind choosing theMERN stack to build your applications:
What is new in the second edition?How is this book organized to help master MERN?What is the MERN stack?Why is MERN relevant today?When is MERN a good fit for developing web apps?
Unleashing React Applications with MERN Chapter 1
[ 9 ]
What is new in the second edition?MERN stack technologies along with the whole full-stack development ecosystem arecontinuously growing and improving with increased adoption and usage in theindustry. In this edition, we take these new developments into account and update allthe applications and corresponding code bases from the first edition.
We use the latest versions and conventions of each technology, library, and moduleneeded for both development-related setup and feature implementations.Additionally, we highlight the use of new features from these technology upgradessuch as React Hooks, and JavaScript features such as async/await.
In order to showcase even more possibilities with the MERN stack, we updated theexisting marketplace application to add a more advanced feature such as real-timebidding. We also add two new projects, a web-based classroom application and anexpense tracking application with data visualization features.
To better understand the content and concepts covered throughout the book, weexpand on explanations and provide leads to the latest resources that may help youget a deeper grasp and improve your learning experience.
Besides covering the latest updates to MERN technologies and providing elaborateexplanations, the concepts and projects in this book are organized to help you learnfrom easy to advanced topics with the flexibility to start at any project of yourchoosing. In the next section, we will discuss the structure of the book and how youcan utilize it based on your preference and experience level.
Book structureThis book aims to help JavaScript developers who have zero-to-some experience withthe MERN stack to set up and start developing web applications of varyingcomplexity. It includes guidelines for building out and running the differentapplications supplemented with code snippets and explanations of key concepts.
The book is organized into five parts, progressing from basic to advanced topics,taking you on a journey of building MERN from the ground up, then using it todevelop different applications with simple to complex features, while demonstratinghow to extend the capabilities of the MERN stack based on an application'srequirements.
Unleashing React Applications with MERN Chapter 1
[ 10 ]
Getting started with MERNChapter 1, Unleashing React Applications with MERN, and Chapter 2, Preparing theDevelopment Environment, set the context for developing web applications in a MERNstack and guide you through setting up your development environment.
Building MERN applications from the groundup Chapter 3, Building a Backend with MongoDB, Express, and Node, and Chapter4, Adding a React Frontend to Complete MERN, show you how to bring the MERN stacktechnologies together to form a skeleton web application with minimal and basicfeatures. Chapter 5, Growing the Skeleton into a Social Media Application, demonstrateshow this skeletal MERN application can act as a base and be easily extended to builda simple social media platform. This ability to extend and customize the baseapplication will be employed with the other applications developed in the rest of thisbook.
Developing web applications with MERNIn this part, you will become more familiar with the core attributes of a MERN stackweb application by building out two real-world applications—a web-based classroomapplication in Chapter 6, Building a Web-Based Classroom Application, and a feature-rich online marketplace in Chapter 7, Exercising MERN Skills with an OnlineMarketplace, Chapter 8, Extending the Marketplace for Orders andPayments, and Chapter 9, Adding Real-Time Bidding Capabilities to the Marketplace.
Advancing to complex MERN applicationsChapter 10, Integrating Data Visualization with an Expense Tracking Application, Chapter11, Building a Media Streaming Application, Chapter 12, Customizing the Media Playerand Improving SEO, Chapter 13, Developing a Web-Based VR Game, and Chapter14, Making the VR Game Dynamic Using MERN, demonstrate how this stack can beused to develop applications with more complex and immersive features, such as data visualization, media streaming, and virtual reality (VR) using React 360.
Unleashing React Applications with MERN Chapter 1
[ 11 ]
Going forward with MERNFinally, Chapter 15, Following Best Practices and Developing MERN Further, wraps upthe preceding chapters and applications developed by expanding on the bestpractices to follow to make successful MERN applications, suggesting improvementsand further developments.
You may choose to use the book out of the prescribed order based on your experiencelevel and preference. A developer who is new to MERN can follow the path set out inthe book. For a more seasoned JavaScript developer, the chapters in the BuildingMERN from the Ground up section would be a good place to start setting up the baseapplication, then pick any of the six applications to build and extend.
This structure is set out with the intention to enable hands-on learning for developersfrom varying backgrounds. In order to maximize this intent, we recommend apractical approach for following along with the material in the book, as described inmore detail in the next section.
Getting the most out of this bookThe content in this book is practical-oriented and covers the implementation steps,code, and concepts relevant to building each MERN application. However, most ofthe code explanations will refer to specific snippets from files that may contain morelines of code, making up the complete and working application code.
Put simply, it is highly recommended that, rather than attempting to just readthrough the chapters, you should run the relevant code in parallel, and browsethrough the application features while following the explanations in the book.
Chapters that discuss code implementations will point to the GitHub repositoriescontaining the complete code with instructions on how to run the code. You can pullthe code, install it, and then run it before reading through the chapter:
Unleashing React Applications with MERN Chapter 1
[ 12 ]
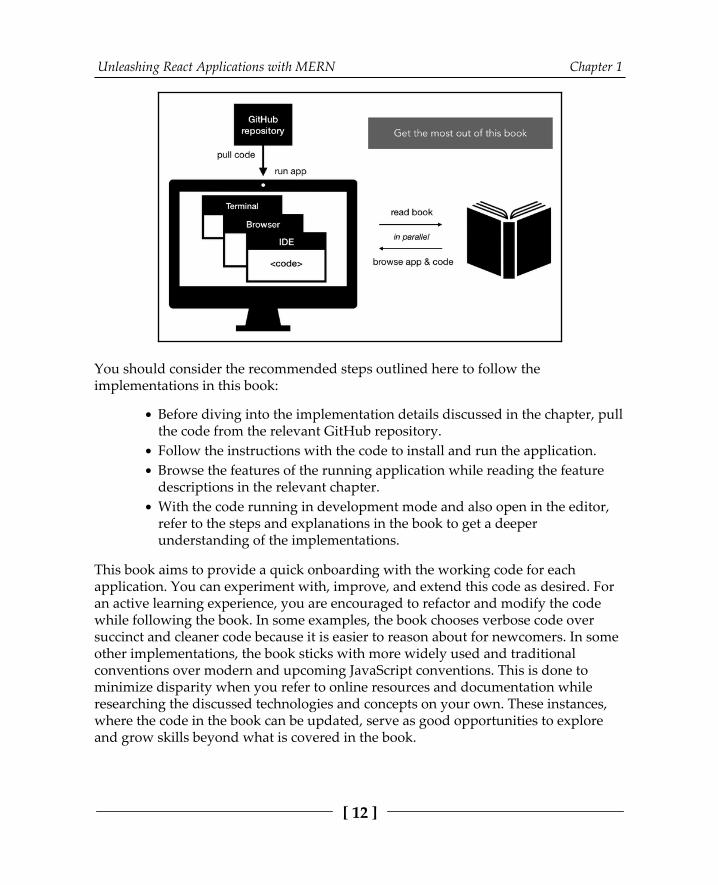
You should consider the recommended steps outlined here to follow theimplementations in this book:
Before diving into the implementation details discussed in the chapter, pullthe code from the relevant GitHub repository.Follow the instructions with the code to install and run the application.Browse the features of the running application while reading the featuredescriptions in the relevant chapter.With the code running in development mode and also open in the editor,refer to the steps and explanations in the book to get a deeperunderstanding of the implementations.
This book aims to provide a quick onboarding with the working code for eachapplication. You can experiment with, improve, and extend this code as desired. Foran active learning experience, you are encouraged to refactor and modify the codewhile following the book. In some examples, the book chooses verbose code oversuccinct and cleaner code because it is easier to reason about for newcomers. In someother implementations, the book sticks with more widely used and traditionalconventions over modern and upcoming JavaScript conventions. This is done tominimize disparity when you refer to online resources and documentation whileresearching the discussed technologies and concepts on your own. These instances,where the code in the book can be updated, serve as good opportunities to exploreand grow skills beyond what is covered in the book.
Unleashing React Applications with MERN Chapter 1
[ 13 ]
You should now have an overall idea of what to expect in this book and how you canutilize its content and structure to the fullest as we move on to discussing the specificsof the MERN stack and start uncovering its potential.
The MERN stackMongoDB, Express, React, and Node are all used in tandem to build web applicationsand make up the MERN stack. In this lineup, Node and Express bind the webbackend together, MongoDB serves as the NoSQL database, and React makes thefrontend that the user sees and interacts with.
All four of these technologies are free, open source, cross-platform, and JavaScript-based, with extensive community and industry support. Each technology has aunique set of attributes, which, when integrated together, make a simple but effectivefull JavaScript stack for web development.
Since these are independent technologies, it is also important to recognize these asmoving parts in your project that need to be configured, combined, and extendedwith additional parts to meet the specific requirements of your project. Even if youare not an expert in all the technologies in this stack, you need familiarity with eachand an understanding of how these can work together.
NodeNode was developed as a JavaScript runtime environment built on Chrome's V8JavaScript engine. Node made it possible to start using JavaScript on the server sideto build a variety of tools and applications beyond previous use cases that werelimited to being within a browser.
Node has an event-driven architecture capable of asynchronous, non-blocking I/O(short for Input/Output). Its unique non-blocking I/O model eliminates the waitingapproach to serving requests. This allows you to build scalable and lightweight real-time web applications that can efficiently handle many requests.
Node's default package management system, the Node Package Manager or npm,comes bundled with the Node installation. npm gives you access to hundreds ofthousands of reusable Node packages built by developers all over the world andboasts that it is currently the largest ecosystem of open source libraries in the world.
Unleashing React Applications with MERN Chapter 1
[ 14 ]
Learn more about Node at https://nodejs.org/en/, and browsethrough the available npm registry at https://www.npmjs.com/.
However, npm isn't the only package management system at your disposal. Yarn is anewer package manager developed by Facebook and has been gaining popularity inrecent years. It can be used as an alternative to npm, with access to all the samemodules from the npm registry and more features that are not yet available with npm.
Learn more about Yarn and its features at https:/ /yarnpkg. com.
Node will enable us to build and run complete full-stack JavaScript applications.However, to implement an extensible server-side application with web application-specific features such as API routing, we will use the Express module on top of Node.
ExpressExpress is a simple server-side web framework for building web applications withNode. It complements Node with a layer of rudimentary web application features that provide HTTP utility methods and middleware functionality.
In general terms, middleware functionality in any applicationenables different components to be added on to work together. Inthe specific context of server-side web application frameworks,middleware functions have access to the HTTP request-responsepipeline, which means access to request-response objects and alsothe next middleware functions in the web application's request-response cycle.
In any web application developed with Node, Express can be used as an API routingand middleware web framework. It is possible to insert almost any compatiblemiddleware of your choice into the request handling chain, in almost any order,making Express very flexible to work with.
Find out what is possible with Express.js at expressjs.com.

Unleashing React Applications with MERN Chapter 1
[ 15 ]
In the MERN-based applications that we will develop, Express can be used to handleAPI routing on the server side, serve static files to the client, restrict access toresources with authentication integration, implement error handling, and, essentially,add on any middleware package that will extend the web application functionality asrequired.
A crucial functionality in any complete web application is the data storage system.The Express module does not define requirements or put restrictions on integratingdatabases with a Node-Express web application. Therefore, this gives you theflexibility to choose any database option, be it a relational database suchas PostgreSQL or a NoSQL database such as MongoDB.
MongoDBMongoDB is a top choice when deciding on a NoSQL database for any application. Itis a document-oriented database that stores data in flexible, JSON-like documents.This means that fields can vary from document to document and data models canevolve over time in response to changing application requirements.
Applications that place a high priority on availability and scalability benefit fromMongoDB's distributed architecture features. It comes with built-in support for highavailability, horizontal scaling using sharding, and multi-data center scalability acrossgeographic distributions.
MongoDB has an expressive query language, enabling ad hoc queries, indexing forfast lookups, and real-time aggregation that provides powerful ways to access andanalyze data while maintaining performance even when data size growsexponentially.
Explore MongoDB's features and services athttps://www.mongodb.com/.
Choosing MongoDB as the database for a Node and Express web application willmake a fully JavaScript-based and standalone server-side application. This will leaveyou with the option to integrate a client-side interface that may be built with acompatible frontend library such as React to complete the full-stack application.
Unleashing React Applications with MERN Chapter 1
[ 16 ]
ReactReact is a declarative and component-based JavaScript library for building userinterfaces. Its declarative and modular nature makes it easy for developers to createand maintain reusable, interactive, and complex user interfaces.
Large applications that display a lot of changing data can be fast and responsive ifbuilt with React, as it takes care of efficiently updating and rendering just the rightuser interface components when specific data changes. React does this efficientrendering with its notable implementation of a virtual DOM, setting React apart fromother web user interface libraries that handle page updates with expensivemanipulations directly in the browser's DOM.
Developing user interfaces using React also forces frontend programmers to writewell-reasoned, modular code that is reusable and easier to debug, test, and extend.
Take a look at the resources on React at https://reactjs.org/.
Since all four technologies are JavaScript-based, these are inherently optimized forintegration. However, how these are actually put together in practice to form theMERN stack can vary based on application requirements and developer preferences,making MERN customizable and extensible to specific needs. Whether this stack is arelevant option for your next full-stack web project not only depends on how well itcan meet your requirements, but also on how it is currently faring in the industry andwhere these technologies are headed.
Relevance of MERNJavaScript has come a long way since its inception, and it is ever-growing. MERNstack technologies have challenged the status quo and broken new ground for what ispossible with JavaScript. But when it comes to developing real-world applicationsthat need to be sustainable, is it a worthy choice? Some of the reasons that make astrong case for choosing MERN for your next web application are briefly outlined inthe following sections.
Unleashing React Applications with MERN Chapter 1
[ 17 ]
Consistency across the technology stackAs JavaScript is used throughout, developers don't need to learn and change gearsfrequently to work with very different technologies. This also enables bettercommunication and understanding across teams working on different parts of theweb application.
Takes less time to learn, develop, deploy, andextendConsistency across the stack also makes it easy to learn and work with MERN,reducing the overhead of adopting a new stack and the time to develop a workingproduct. Once the working base of a MERN application is set up and a workflowestablished, it takes less effort to replicate, further develop, and extend anyapplication.
Widely adopted in the industryOrganizations of all sizes have been adopting the technologies in this stack based ontheir needs because they can build applications faster, handle highly diverserequirements, and manage applications more efficiently at scale.
Community support and growthDeveloper communities surrounding the very popular MERN stack technologies arequite diverse and are growing on a regular basis. With lots of people continuouslyusing, fixing, updating, and willing to help grow these technologies, the supportsystem will remain strong for the foreseeable future. These technologies will continueto be maintained, and resources are very likely to be available in terms ofdocumentation, add-on libraries, and technical support.
The ease and benefits of using these technologies are already widely recognized.Because of the high-profile companies that continue adoption and adaptation, and thegrowing number of people contributing to the code bases, providing support, andcreating resources, the technologies in the MERN stack will continue to be relevantfor a long time to come.
Unleashing React Applications with MERN Chapter 1
[ 18 ]
In order to determine whether this widely adopted stack will meet the specificrequirements of your project, you can explore the extent of feature implementationspossible with this group of technologies. In the next section, we will highlight a fewaspects of this stack and also several features of the book's example applications thatdemonstrate the diverse array of options that are available with these technologies.
Range of MERN applicationsGiven the unique features attributed to each technology, along with the ease ofextending functionalities of this stack by integrating other technologies, the range ofapplications that can be built with this stack is actually quite vast.
These days, web applications are, by default, expected to be rich client apps that areimmersive, interactive, and don't fall short on performance or availability. Thegrouping of MERN strengths makes it perfect for developing web applications thatmeet these very aspects and demands.
Moreover, novel and upcoming attributes of some of these technologies, such as low-level operation manipulation with Node, large file streaming capabilities withMongoDB GridFS, and VR features on the web using React 360, make it possible tobuild even more complex and unique applications with MERN.
It may seem reasonable to pick specific features in the MERN technologies and arguewhy they don't work for certain applications. However, given the versatile nature ofhow a MERN stack can come together and be extended, these concerns can beaddressed in MERN on a case-by-case basis. In this book, we will demonstrate how tomake such considerations when faced with specific requirements and demands in theapplication being built.
MERN applications developed in this bookTo demonstrate the breadth of possibilities with MERN and how you can easily startbuilding a web application with varying features, this book will showcase everyday-use web applications alongside complex and rare web experiences.
Unleashing React Applications with MERN Chapter 1
[ 19 ]
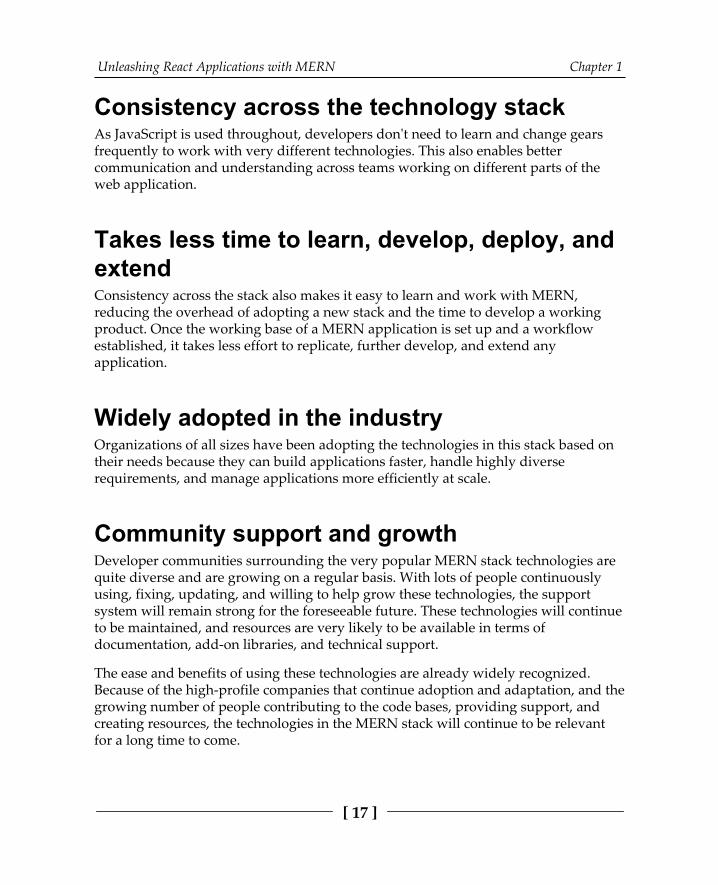
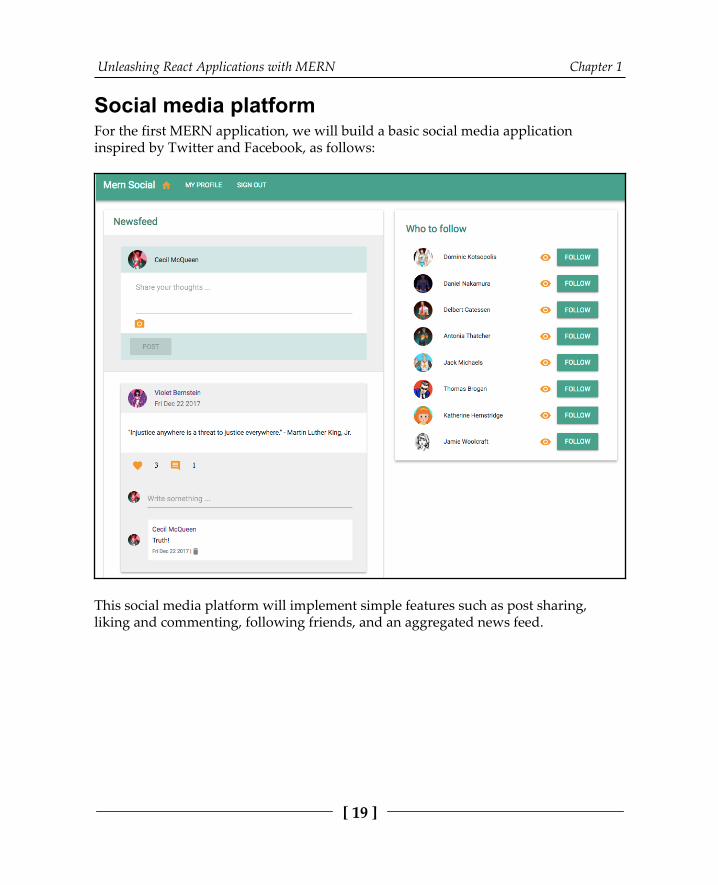
Social media platformFor the first MERN application, we will build a basic social media applicationinspired by Twitter and Facebook, as follows:
This social media platform will implement simple features such as post sharing,liking and commenting, following friends, and an aggregated news feed.
Unleashing React Applications with MERN Chapter 1
[ 20 ]
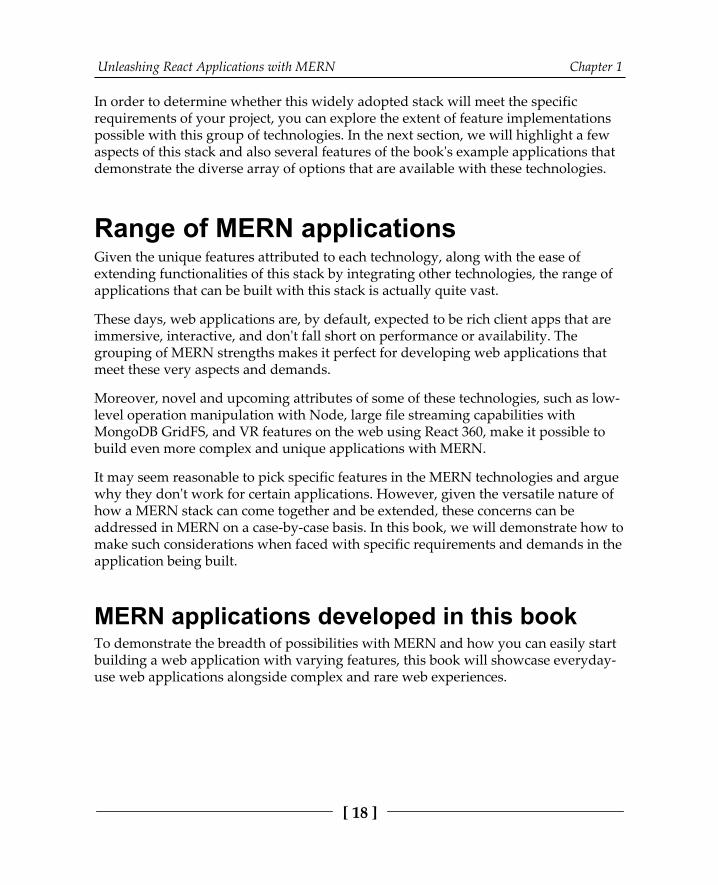
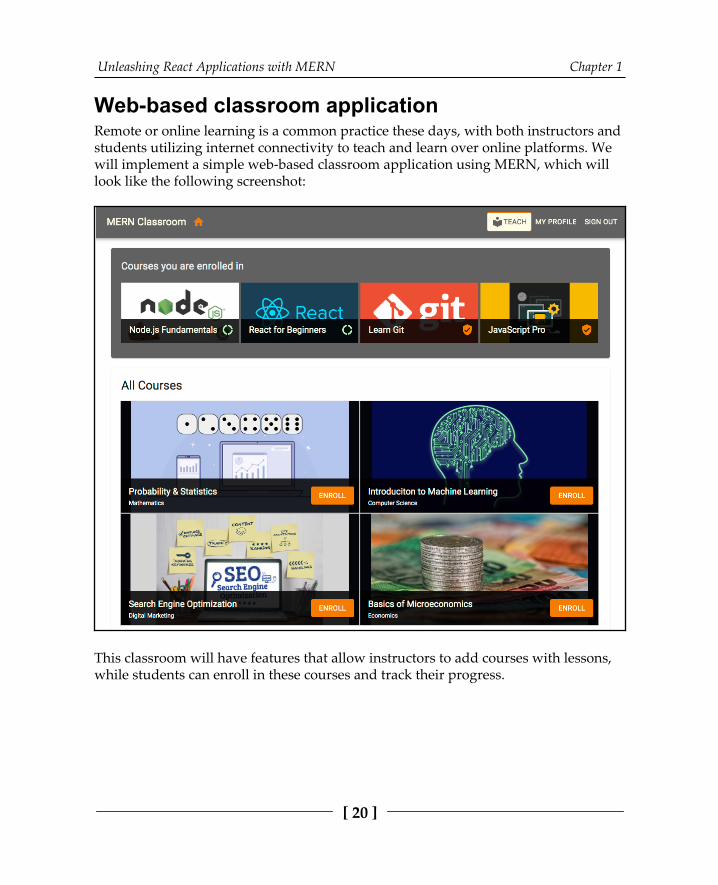
Web-based classroom applicationRemote or online learning is a common practice these days, with both instructors andstudents utilizing internet connectivity to teach and learn over online platforms. Wewill implement a simple web-based classroom application using MERN, which willlook like the following screenshot:
This classroom will have features that allow instructors to add courses with lessons,while students can enroll in these courses and track their progress.
Unleashing React Applications with MERN Chapter 1
[ 21 ]
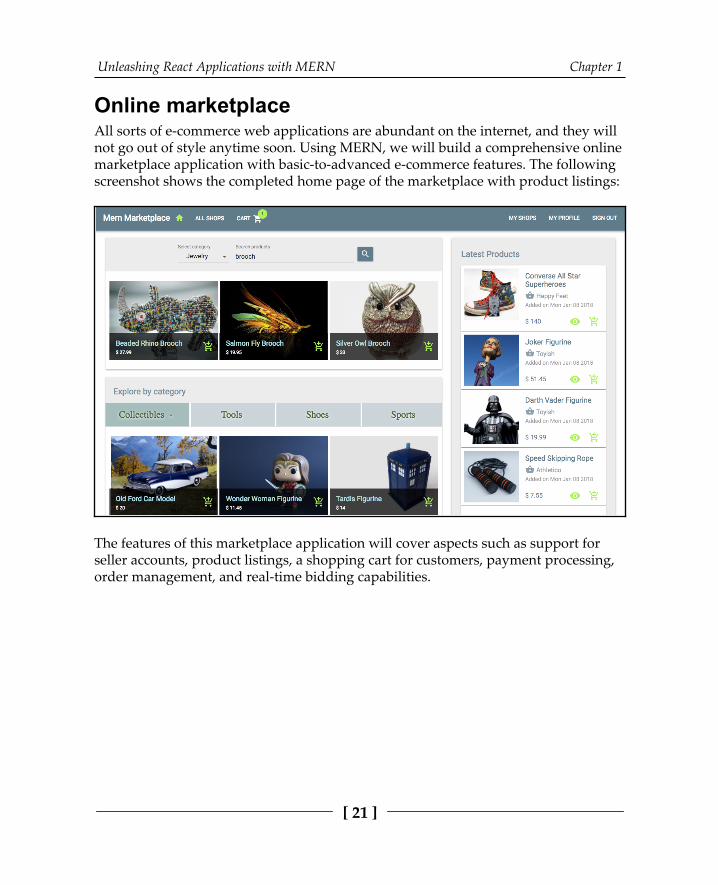
Online marketplaceAll sorts of e-commerce web applications are abundant on the internet, and they willnot go out of style anytime soon. Using MERN, we will build a comprehensive onlinemarketplace application with basic-to-advanced e-commerce features. The followingscreenshot shows the completed home page of the marketplace with product listings:
The features of this marketplace application will cover aspects such as support forseller accounts, product listings, a shopping cart for customers, payment processing,order management, and real-time bidding capabilities.
Unleashing React Applications with MERN Chapter 1
[ 22 ]
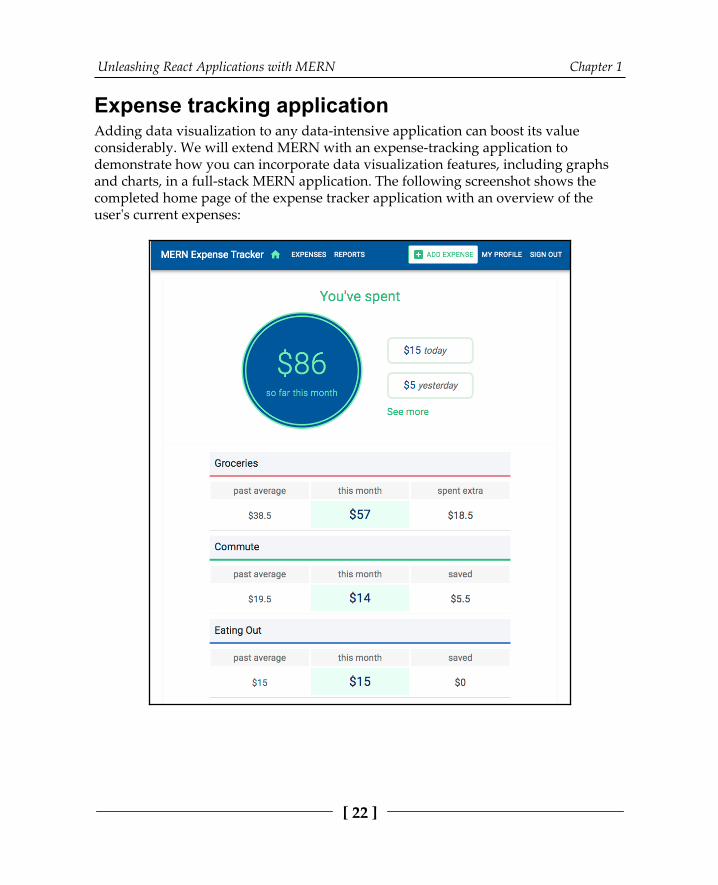
Expense tracking applicationAdding data visualization to any data-intensive application can boost its valueconsiderably. We will extend MERN with an expense-tracking application todemonstrate how you can incorporate data visualization features, including graphsand charts, in a full-stack MERN application. The following screenshot shows thecompleted home page of the expense tracker application with an overview of theuser's current expenses:
Unleashing React Applications with MERN Chapter 1
[ 23 ]
With this application, users will be able to keep track of their day-to-day expenses.The application will add the expenses incurred over time. Then, the application willextract data patterns to give the users a visual representation of how their expensehabits fare as time progresses.
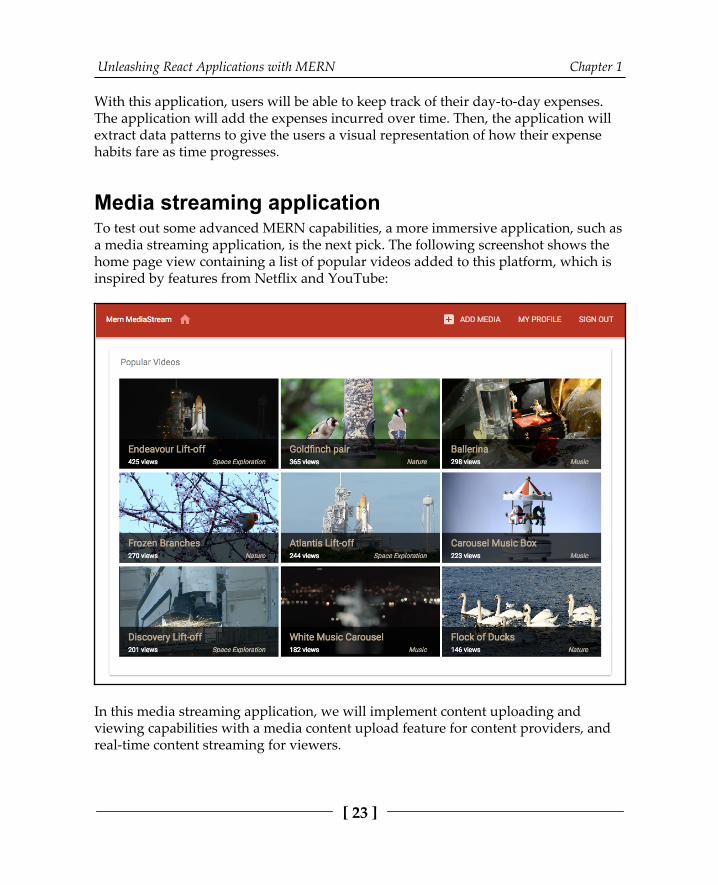
Media streaming applicationTo test out some advanced MERN capabilities, a more immersive application, such asa media streaming application, is the next pick. The following screenshot shows thehome page view containing a list of popular videos added to this platform, which isinspired by features from Netflix and YouTube:
In this media streaming application, we will implement content uploading andviewing capabilities with a media content upload feature for content providers, andreal-time content streaming for viewers.

Unleashing React Applications with MERN Chapter 1
[ 24 ]
VR game for the webWith frameworks such as React 360, which is built on top of React, it is possible toapply web VR and 3D capabilities to React's user interfaces. We will explore how tocreate rare web experiences with React 360 in MERN by putting together a basic VRgame application for the web, as shown in the following screenshot:
Users will be able to play the VR games and also make their own games with thisweb-based application. Each game will have animated VR objects placed across a 360world, and players will have to find and collect these objects to complete the game.
Following along with the implementations for these diverse applications in the bookwill teach you how to combine, extend, and use MERN stack technologies to buildfull-stack web applications, and also reveal a diverse range of options for your ownfull-stack projects.
Unleashing React Applications with MERN Chapter 1
[ 25 ]
SummaryIn this chapter, we discovered the context for developing web applications in theMERN stack and how this book will help you to develop with this stack. MERN stackprojects integrate MongoDB, Express, React, and Node to build web applications.Each of the technologies in this stack has made relevant strides in the world of webdevelopment. These are widely adopted and continue to improve with the support ofgrowing communities. It is possible to develop MERN applications with diverserequirements, ranging from everyday-use applications to more complex webexperiences. The practical-oriented approach in this book can be used to grow MERNskills from basic to advanced, or for diving right into building more complexapplications.
In the next chapter, we will start gearing up for MERN application development bylearning how to set up the development environment with each MERN stacktechnology, and also write code for a MERN starter application to ensure the setup onyour system is correct.

2Preparing the Development
EnvironmentBefore building applications with the MERN stack, we first need to prepare thedevelopment environment with each technology, and also with tools to aiddevelopment and debugging. Working with this stack requires that you makedifferent technologies and tools work well together, and given the many options andresources available on this topic, it can seem like a daunting task to figure out how itall comes together. This chapter guides you through the workspace options, theessential development tools, how to set up the MERN technologies in yourworkspace, and how to check this setup with actual code.
We are going to cover the following topics:
Selecting development toolsSetting up MERN stack technologiesChecking your development setup
Selecting development toolsThere are plenty of options available when it comes to selecting basic developmenttools such as text editors or IDEs, version control software, and even the developmentworkspace itself. In this section, we will go over the options and recommendationsthat are relevant to web development with the MERN stack so you can makeinformed decisions when selecting these tools based on individual preferences.
Preparing the Development Environment Chapter 2
[ 27 ]
Workspace optionsDeveloping on a local machine is a common practice among programmers, but withthe advent of good cloud and remote development services, such as AWS Cloud9(https://aws.amazon. com/ cloud9/ ?origin= c9io) and Visual Studio Code's RemoteDevelopment extension (https:/ /code. visualstudio. com/ docs/ remote), you can setup your local workspace with MERN technologies (and this will be assumed to bethe case for the rest of the book), but you can also choose to run and develop the codein cloud services that are equipped for Node development.
Local and cloud developmentYou can choose to use both types of workspaces to enjoy the benefits of working locally without worrying about bandwidth/internet issues and to work remotelywhen you don't physically have your favorite local machine. To do this, you can useGit to version control your code, store your latest code on remote Git hosting servicessuch as GitHub or BitBucket, and then share the same code across all yourworkspaces. On your workspaces, you can compose the code in an IDE of your choicefrom the many available options, some of which are discussed next.
IDE or text editorsMost cloud development environments will come integrated with source codeeditors, but for your local workspace, you can pick any based on your preference as aprogrammer and then customize it for MERN development. For example, the following popular options can each be customized as required:
Visual Studio Code (https://code.visualstudio.com/): A feature-richsource code editor by Microsoft with extensive support for modern webapplication development workflow, including support for MERN stacktechnologiesAtom (https://atom.io/): A free, open source text editor for GitHub thathas many packages relevant to the MERN stack from other developersSublimeText (https://www.sublimetext.com/): A proprietary, cross-platform text editor that also has many packages relevant to the MERNstack, along with support for JavaScript developmentWebStorm (https://www.jetbrains.com/webstorm/): A full-fledgedJavaScript IDE by JetBrains, with support for MERN stack development
Preparing the Development Environment Chapter 2
[ 28 ]
There are other editors at your disposal, but besides focusing on what each has tooffer, it is important that you choose one that is right for you, enables a productiveworkflow, and also integrates well with the other tools necessary for web applicationdevelopment.
Chrome Developer ToolsLoading, viewing, and debugging the frontend is a very crucial part of the webdevelopment process. Chrome DevTools (https:/ /developers. google. com/ web/tools/chrome-devtools), which is a part of the Chrome browser, has many greatfeatures that allow debugging, testing, and experimenting with the frontend code andthe look, feel, responsiveness, and performance of the UI. Additionally, the ReactDeveloper Tools extension is available as a Chrome plugin, and it adds Reactdebugging tools to Chrome DevTools.
Utilizing tools like this in your development workflow can help you to understandthe code better and to build your applications effectively. Similarly, integrating codeversion control with a tool such as Git can increase your productivity and efficiencyas a developer.
GitAny development workflow is incomplete without a version control system thatenables tracking code changes, code sharing, and collaboration. Over the years, Githas become the leading version control system for many developers and is the mostwidely used distributed source code management tool. For code development in thisbook, Git will help primarily to track progress as we go through the steps to buildeach application.
InstallationTo start using Git, first install it on your local machine or cloud developmentenvironment based on your system specifications. Instructions to download andinstall the latest version of Git, along with documentation on using Git commands,can be found at https:/ / git- scm. com/ downloads.
Preparing the Development Environment Chapter 2
[ 29 ]
Remote Git hosting servicesCloud-based Git repository hosting services such as GitHub and BitBucket help shareyour latest code across workspaces and deployment environments, and also to backup your code. These services pack in a lot of useful features to help with codemanagement and the development workflow. To get started, you can create anaccount and set up remote repositories for your code bases.
All these essential tools will help enrich your web development workflow andincrease productivity. Once you've completed the necessary setup in your workspaceaccording to the discussion in the next section, we'll move on and start buildingMERN applications.
Setting up MERN stack technologiesMERN stack technologies are being developed and upgraded as this book is beingwritten, so for the work demonstrated throughout this book, we use the latest stableversions at the time of writing. Installation guidelines for most of these technologiesare dependent on the system environment of your workspaces, so this section pointsto all relevant installation resources and also acts as a guide for setting up a fullyfunctioning MERN stack.
MongoDBMongoDB must be set up, running, and accessible to your development environmentbefore any database features are added to MERN applications. At the time of writing,the current stable version of MongoDB is 4.2.0, and this version of the MongoDBCommunity Edition is used for developing the applications in this book. The rest ofthis section provides resources on how to install and run MongoDB.
Preparing the Development Environment Chapter 2
[ 30 ]
InstallationYou need to install and start MongoDB on your workspace before you can use it fordevelopment. The installation and startup process for MongoDB depends on yourworkspace specifications:
Cloud development services will have their own instructions for installingand setting up MongoDB. For example, the how-to steps for AWS Cloud9can be found at https:/ / docs. c9.io/ docs/ setup- a- database#mongodb.The guide for MongoDB installation on your local machine is at https:/ /docs. mongodb. com/ manual/ administration/ install- community
After you have successfully installed MongoDB on your workspace and have itrunning, you can interact with it using the mongo shell.
Running the mongo shellThe mongo shell is an interactive tool for MongoDB that comes as a part of the MongoDB installation. It is a good place to start getting familiar with MongoDBoperations. Once MongoDB is installed and running, you can run the mongo shell onthe command line. In the mongo shell, you can use commands to query and updatedata and perform administrative operations.
You could also skip the local installation of MongoDB and insteaddeploy a MongoDB database in the cloud using MongoDB Atlas(https:/ /www. mongodb. com/ cloud/ atlas). It is a global clouddatabase service that can be used to add fully managed MongoDBdatabases to modern applications.
The next core component of MERN development is Node.js, which will be necessaryto complete the remaining MERN setup.
Node.jsBackend server implementation for the MERN applications relies on Node.js. At thetime of writing, 13.12.0 is the latest stable Node.js version available, and the code inthe book has also been tested with version 14.0.0 from the latest nightly builds. Theversion of Node.js you choose to download will come bundled with npm as thepackage manager. Depending on whether you choose npm or Yarn as the packagemanager for your MERN projects, you can install Node.js with or without npm.
Preparing the Development Environment Chapter 2
[ 31 ]
InstallationNode.js can be installed via direct download, installers, or the Node VersionManager:
You can install Node.js by directly downloading the source code or a pre-built installer specific to your workspace platform. Downloads are available at nodejs.org/en/download.Cloud development services may come with Node.js pre-installed, as AWSCloud9 does, or will have specific instructions for adding and updating it.
To test if the installation was successful, you can open the command line andrun node -v to see if it correctly returns the version number.
Node version management with nvmIf you need to maintain multiple versions of Node.js and npm for different projects,nvm is a useful command-line tool to install and manage different versions on thesame workspace. You have to install nvm separately. Instructions for setup can befound at github.com/creationix/nvm.
With Node.js set up on your system, you can use a package manager such as npm orYarn to start integrating the remaining parts of the MERN stack.
Yarn package managerYarn is a relatively new package manager for JavaScript dependencies, and it can beused as an alternative to npm. It is a fast, reliable, and secure dependency managerthat provides a different range of additional features, including an offline mode forre-installation of packages without an internet connection and support for multiplepackage registries, such as npmjs.com and Bower.
We will use Yarn (v1.22.4) to manage Node modules and packages for the projects inthis book. Before using Yarn, you will need to install it on your workspace. There area number of ways to install Yarn depending on your operating system and itsversion.
To learn more about your options for installing Yarn on yourworkspace, visit https:/ /yarnpkg. com/ lang/ en/docs/ install.

Preparing the Development Environment Chapter 2
[ 32 ]
Once Yarn is installed, it can be used to add the other necessary modules includingExpress and React.
Modules for MERNThe remaining MERN stack technologies are all available as Node.js package modulesand can be added to each project using Yarn. These include key modules, such asReact and Express, that are required to run each MERN application, and also modulesthat will be necessary during development. In this section, we list and discuss thesemodules, then see how to use the modules in a working project in the followingsection.
Key modulesTo integrate the MERN stack technologies and run your applications, we will needthe following modules:
React: To start using React, we will need two modules:react
react-dom
Express: To use Express in your code, you will need the express module.MongoDB: To use MongoDB directly with Node applications, you need toadd the driver, which is available as a Node module named mongodb.
These key modules will produce full-stack web applications, but we will need someadditional modules to aid in the development and generation of the application code.
devDependency modulesTo maintain consistency throughout the development of our MERN applications, wewill use new JavaScript syntax from ES6 and higher versions in both client- andserver-side implementations. As a consequence, and also to aid the developmentprocess, we will use the following additional modules to compile and bundle thecode, and also to automatically reload the server and browser app as the code isupdated during development:
Preparing the Development Environment Chapter 2
[ 33 ]
Babel modules are needed to convert ES6 and JSX to suitable JavaScript forall browsers. The modules needed to get Babel working are as follows:
@babel/core
babel-loader
for transpiling JavaScript files with Webpack @babel/preset-env and @babel/preset-react toprovide support for React, and the latest JavaScript feature
Webpack modules will help bundle the compiled JavaScript, both for theclient-side and the server-side code. Modules needed to get Webpackworking are as follows:
webpack.webpack-cli to run Webpack commands.webpack-node-externals to ignore external Node.jsmodule files when bundling in Webpack.webpack-dev-middleware to serve the files emitted fromWebpack over a connected server during the development ofthe code.webpack-hot-middleware to add hot module reloadinginto an existing server by connecting a browser client to aWebpack server and receiving updates as code changesduring development.nodemon to watch server-side changes during development,so the server can be reloaded to put changes into effect.react-hot-loader for faster development on the clientside. Every time a file changes in the React frontend, react-hot-loader enables the browser app to update without re-bundling the whole frontend code.@hot-loader/react-dom to enable hot-reloading supportfor React hooks. It essentially replaces the react-dompackage of the same version, but with additional patches to support hot reloading.
Although react-hot-loader is meant to help the developmentflow, it is safe to install this module as a regular dependency ratherthan a devDependency. It automatically ensures that hot reloadingis disabled in production and the footprint is minimal.
Preparing the Development Environment Chapter 2
[ 34 ]
With the necessary MERN stack technologies and associated tools installed and readyfor use, in the next section, we will use this toolset and write code that can confirm ifyour workspace is set up correctly to begin developing MERN-based webapplications.
Checking your development setupIn this section, we will go through the development workflow and write code step bystep to ensure that the environment is correctly set up to start developing andrunning MERN applications.
We will generate these project files in the following folder structure to run a simplesetup project:
| mern-simplesetup/ | -- client/ | --- HelloWorld.js | --- main.js | -- server/ | --- devBundle.js | --- server.js | -- .babelrc | -- nodemon.json | -- package.json | -- template.js | -- webpack.config.client.js | -- webpack.config.client.production.js | -- webpack.config.server.js
The code discussed in this section is available on GitHub in therepository at https:/ / github. com/ PacktPublishing/ Full- Stack-React- Projects- Second- Edition/ tree/ master/ Chapter02/ mern-simplesetup. You can clone this code and run it as you go throughthe code explanations in the rest of this chapter.
We will leave the configuration files in the root folder and organize the applicationcode into client-side and server-side folders. The client folder will contain thefrontend code and the server folder will contain the backend code. In the rest of thissection, we will generate these files and implement both frontend and backend codeto build a working full-stack web application.
Preparing the Development Environment Chapter 2
[ 35 ]
Initializing package.json and installing Node.jsmodulesWe will begin by using Yarn to install all the required modules. It is a best practice toadd a package.json file in every project folder to maintain, document, and share theNode.js modules being used in the MERN application. The package.json file willcontain meta-information about the application, as well as list the moduledependencies.
Perform the steps outlined in the following points to generate a package.json file,modify it, and use it to install the modules:
yarn init: From the command line, enter your project folder and runyarn init. You will be asked a series of questions to gather meta-information about your project, such as name, license, and author. Then, apackage.json file will be auto generated with your answers.dependencies: Open package.json in your editor and modify the JSONobject to add the key modules and react-hot-loader as regulardependencies:
The file path mentioned before a code block indicates the location ofthe code in the project directory. This convention has beenmaintained throughout the book to provide better context andguidance as you follow along with the code.
mern-simplesetup/package.json:
"dependencies": { "@hot-loader/react-dom": "16.13.0", "express": "4.17.1", "mongodb": "3.5.5", "react": "16.13.1", "react-dom": "16.13.1", "react-hot-loader": "4.12.20" }
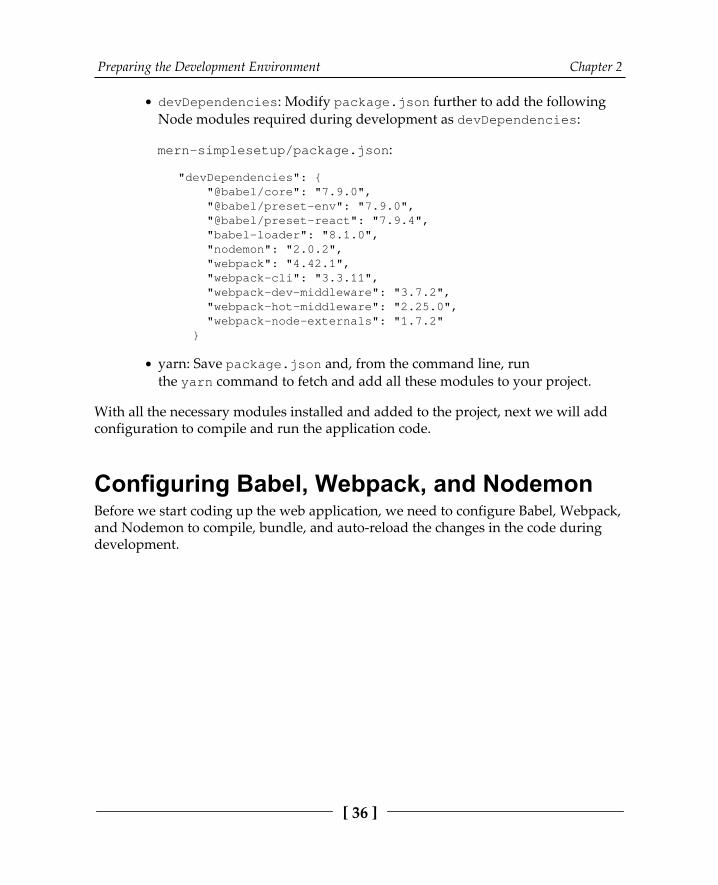
Preparing the Development Environment Chapter 2
[ 36 ]
devDependencies: Modify package.json further to add the followingNode modules required during development as devDependencies:
mern-simplesetup/package.json:
"devDependencies": { "@babel/core": "7.9.0", "@babel/preset-env": "7.9.0", "@babel/preset-react": "7.9.4", "babel-loader": "8.1.0", "nodemon": "2.0.2", "webpack": "4.42.1", "webpack-cli": "3.3.11", "webpack-dev-middleware": "3.7.2", "webpack-hot-middleware": "2.25.0", "webpack-node-externals": "1.7.2" }
yarn: Save package.json and, from the command line, runthe yarn command to fetch and add all these modules to your project.
With all the necessary modules installed and added to the project, next we will addconfiguration to compile and run the application code.
Configuring Babel, Webpack, and NodemonBefore we start coding up the web application, we need to configure Babel, Webpack,and Nodemon to compile, bundle, and auto-reload the changes in the code duringdevelopment.
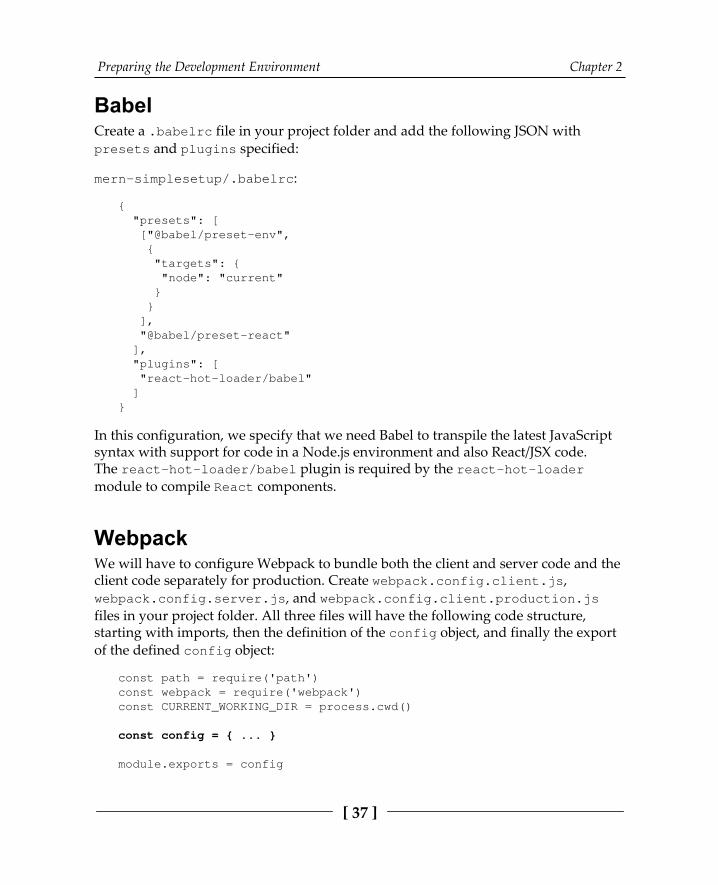
Preparing the Development Environment Chapter 2
[ 37 ]
BabelCreate a .babelrc file in your project folder and add the following JSON withpresets and plugins specified:
mern-simplesetup/.babelrc:
{ "presets": [ ["@babel/preset-env", { "targets": { "node": "current" } } ], "@babel/preset-react" ], "plugins": [ "react-hot-loader/babel" ]}
In this configuration, we specify that we need Babel to transpile the latest JavaScriptsyntax with support for code in a Node.js environment and also React/JSX code.The react-hot-loader/babel plugin is required by the react-hot-loadermodule to compile React components.
WebpackWe will have to configure Webpack to bundle both the client and server code and theclient code separately for production. Create webpack.config.client.js,webpack.config.server.js, and webpack.config.client.production.jsfiles in your project folder. All three files will have the following code structure,starting with imports, then the definition of the config object, and finally the exportof the defined config object:
const path = require('path')const webpack = require('webpack')const CURRENT_WORKING_DIR = process.cwd()
const config = { ... }
module.exports = config
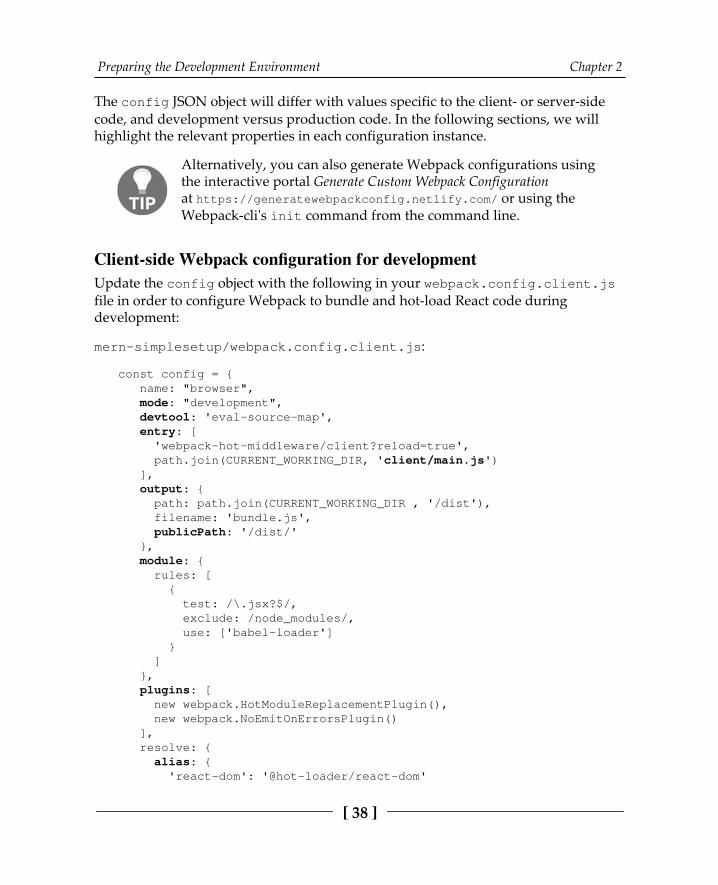
Preparing the Development Environment Chapter 2
[ 38 ]
The config JSON object will differ with values specific to the client- or server-sidecode, and development versus production code. In the following sections, we willhighlight the relevant properties in each configuration instance.
Alternatively, you can also generate Webpack configurations usingthe interactive portal Generate Custom Webpack Configurationat https:/ / generatewebpackconfig. netlify. com/ or using theWebpack-cli's init command from the command line.
Client-side Webpack configuration for developmentUpdate the config object with the following in your webpack.config.client.jsfile in order to configure Webpack to bundle and hot-load React code duringdevelopment:
mern-simplesetup/webpack.config.client.js:
const config = { name: "browser", mode: "development", devtool: 'eval-source-map', entry: [ 'webpack-hot-middleware/client?reload=true', path.join(CURRENT_WORKING_DIR, 'client/main.js') ], output: { path: path.join(CURRENT_WORKING_DIR , '/dist'), filename: 'bundle.js', publicPath: '/dist/' }, module: { rules: [ { test: /\.jsx?$/, exclude: /node_modules/, use: ['babel-loader'] } ] }, plugins: [ new webpack.HotModuleReplacementPlugin(), new webpack.NoEmitOnErrorsPlugin() ], resolve: { alias: { 'react-dom': '@hot-loader/react-dom'
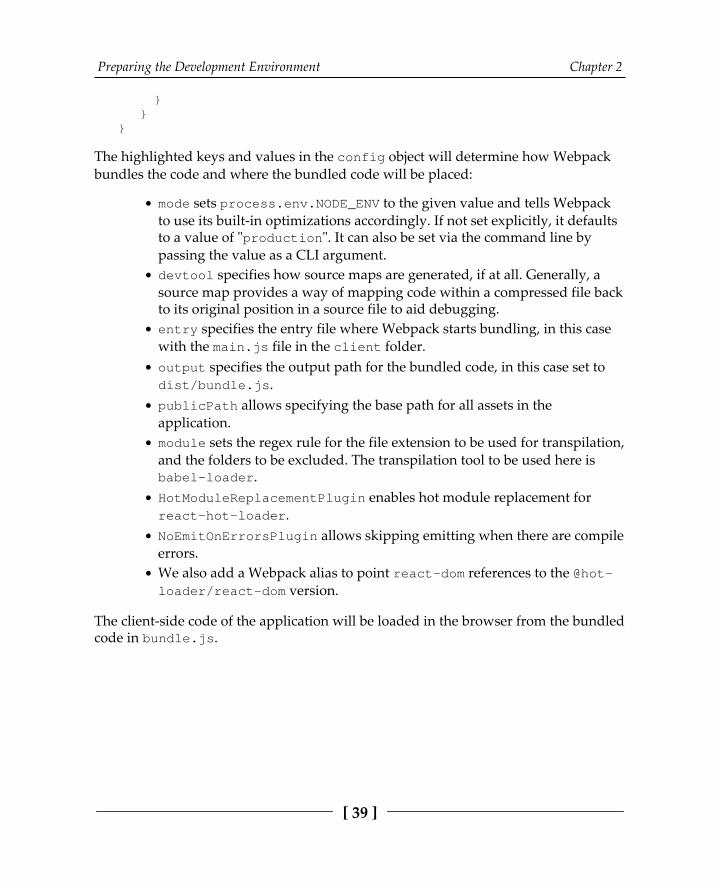
Preparing the Development Environment Chapter 2
[ 39 ]
} }}
The highlighted keys and values in the config object will determine how Webpackbundles the code and where the bundled code will be placed:
mode sets process.env.NODE_ENV to the given value and tells Webpackto use its built-in optimizations accordingly. If not set explicitly, it defaultsto a value of "production". It can also be set via the command line bypassing the value as a CLI argument.devtool specifies how source maps are generated, if at all. Generally, asource map provides a way of mapping code within a compressed file backto its original position in a source file to aid debugging.entry specifies the entry file where Webpack starts bundling, in this casewith the main.js file in the client folder. output specifies the output path for the bundled code, in this case set todist/bundle.js.publicPath allows specifying the base path for all assets in theapplication.module sets the regex rule for the file extension to be used for transpilation,and the folders to be excluded. The transpilation tool to be used here isbabel-loader.HotModuleReplacementPlugin enables hot module replacement forreact-hot-loader.NoEmitOnErrorsPlugin allows skipping emitting when there are compileerrors.We also add a Webpack alias to point react-dom references to the @hot-loader/react-dom version.
The client-side code of the application will be loaded in the browser from the bundledcode in bundle.js.
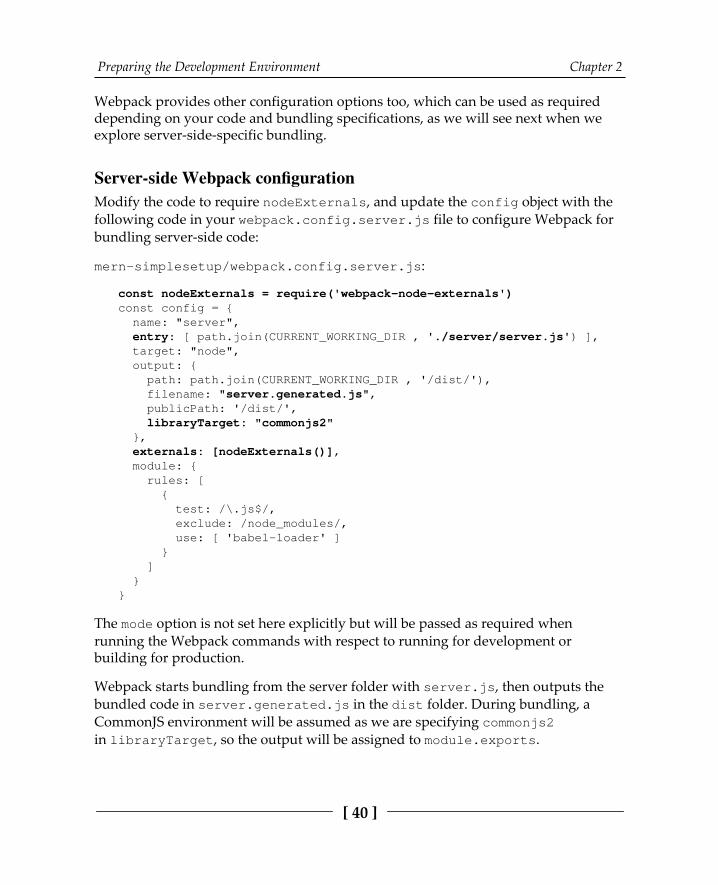
Preparing the Development Environment Chapter 2
[ 40 ]
Webpack provides other configuration options too, which can be used as requireddepending on your code and bundling specifications, as we will see next when weexplore server-side-specific bundling.
Server-side Webpack configurationModify the code to require nodeExternals, and update the config object with the following code in your webpack.config.server.js file to configure Webpack forbundling server-side code:
mern-simplesetup/webpack.config.server.js:
const nodeExternals = require('webpack-node-externals')const config = { name: "server", entry: [ path.join(CURRENT_WORKING_DIR , './server/server.js') ], target: "node", output: { path: path.join(CURRENT_WORKING_DIR , '/dist/'), filename: "server.generated.js", publicPath: '/dist/', libraryTarget: "commonjs2" }, externals: [nodeExternals()], module: { rules: [ { test: /\.js$/, exclude: /node_modules/, use: [ 'babel-loader' ] } ] }}
The mode option is not set here explicitly but will be passed as required whenrunning the Webpack commands with respect to running for development orbuilding for production.
Webpack starts bundling from the server folder with server.js, then outputs thebundled code in server.generated.js in the dist folder. During bundling, aCommonJS environment will be assumed as we are specifying commonjs2in libraryTarget, so the output will be assigned to module.exports.
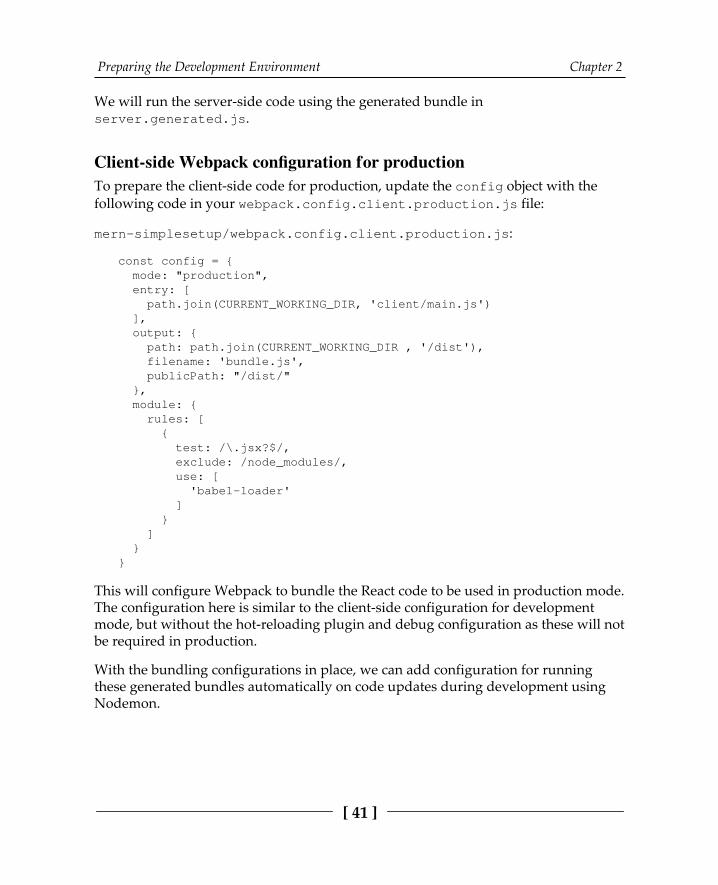
Preparing the Development Environment Chapter 2
[ 41 ]
We will run the server-side code using the generated bundle inserver.generated.js.
Client-side Webpack configuration for production To prepare the client-side code for production, update the config object with the following code in your webpack.config.client.production.js file:
mern-simplesetup/webpack.config.client.production.js:
const config = { mode: "production", entry: [ path.join(CURRENT_WORKING_DIR, 'client/main.js') ], output: { path: path.join(CURRENT_WORKING_DIR , '/dist'), filename: 'bundle.js', publicPath: "/dist/" }, module: { rules: [ { test: /\.jsx?$/, exclude: /node_modules/, use: [ 'babel-loader' ] } ] }}
This will configure Webpack to bundle the React code to be used in production mode.The configuration here is similar to the client-side configuration for developmentmode, but without the hot-reloading plugin and debug configuration as these will notbe required in production.
With the bundling configurations in place, we can add configuration for runningthese generated bundles automatically on code updates during development usingNodemon.
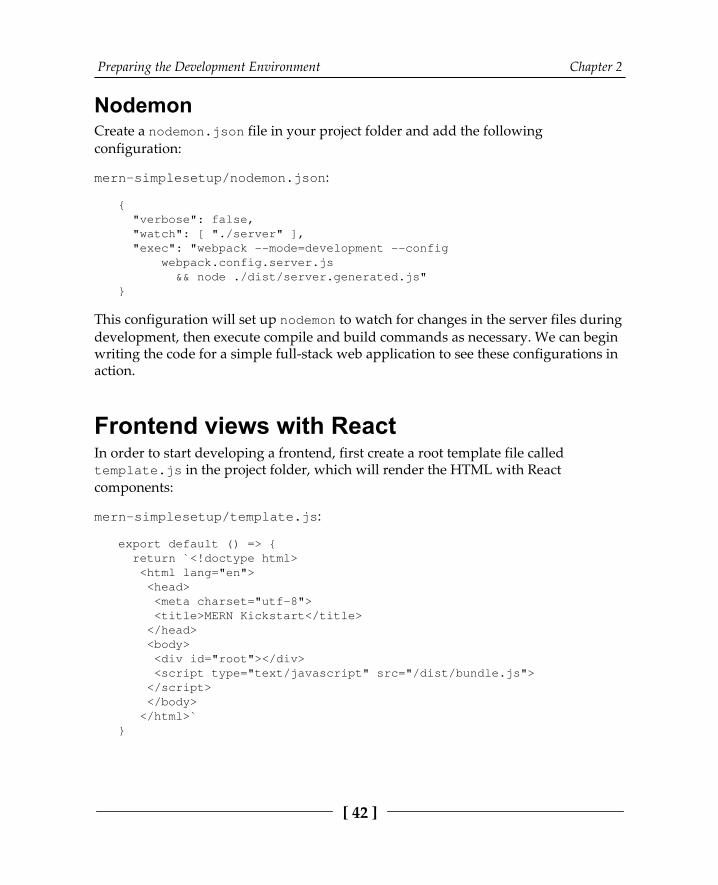
Preparing the Development Environment Chapter 2
[ 42 ]
NodemonCreate a nodemon.json file in your project folder and add the followingconfiguration:
mern-simplesetup/nodemon.json:
{ "verbose": false, "watch": [ "./server" ], "exec": "webpack --mode=development --config webpack.config.server.js && node ./dist/server.generated.js"}
This configuration will set up nodemon to watch for changes in the server files duringdevelopment, then execute compile and build commands as necessary. We can beginwriting the code for a simple full-stack web application to see these configurations inaction.
Frontend views with ReactIn order to start developing a frontend, first create a root template file calledtemplate.js in the project folder, which will render the HTML with Reactcomponents:
mern-simplesetup/template.js:
export default () => { return `<!doctype html> <html lang="en"> <head> <meta charset="utf-8"> <title>MERN Kickstart</title> </head> <body> <div id="root"></div> <script type="text/javascript" src="/dist/bundle.js"> </script> </body> </html>`}
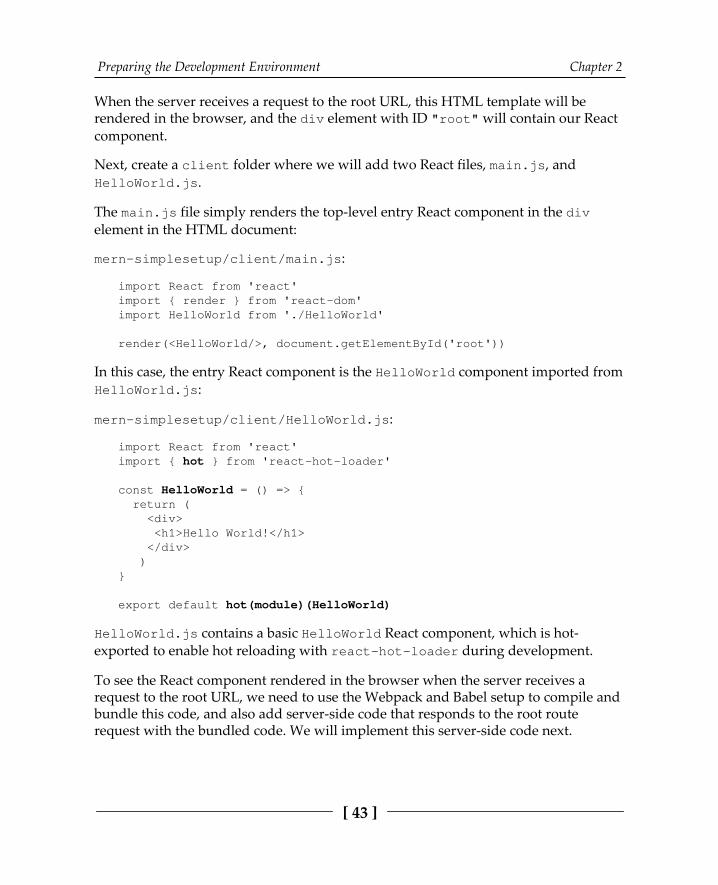
Preparing the Development Environment Chapter 2
[ 43 ]
When the server receives a request to the root URL, this HTML template will berendered in the browser, and the div element with ID "root" will contain our Reactcomponent.
Next, create a client folder where we will add two React files, main.js, andHelloWorld.js.
The main.js file simply renders the top-level entry React component in the divelement in the HTML document:
mern-simplesetup/client/main.js:
import React from 'react'import { render } from 'react-dom'import HelloWorld from './HelloWorld'
render(<HelloWorld/>, document.getElementById('root'))
In this case, the entry React component is the HelloWorld component imported fromHelloWorld.js:
mern-simplesetup/client/HelloWorld.js:
import React from 'react'import { hot } from 'react-hot-loader'
const HelloWorld = () => { return ( <div> <h1>Hello World!</h1> </div> )}
export default hot(module)(HelloWorld)
HelloWorld.js contains a basic HelloWorld React component, which is hot-exported to enable hot reloading with react-hot-loader during development.
To see the React component rendered in the browser when the server receives arequest to the root URL, we need to use the Webpack and Babel setup to compile andbundle this code, and also add server-side code that responds to the root routerequest with the bundled code. We will implement this server-side code next.

Preparing the Development Environment Chapter 2
[ 44 ]
Server with Express and NodeIn the project folder, create a folder called server, and add a file calledserver.js that will set up the server. Then, add another file called devBundle.js,which will help compile the React code using Webpack configurations while indevelopment mode. In the following sections, we will implement the Node-Expressapp, which initiates client-side code bundling, starts the server, sets up the path toserve static assets to the client, and renders the React view in a template when a GETrequest is made to the root route.
Express appIn server.js, we will first add code to import the express module in order toinitialize an Express app:
mern-simplesetup/server/server.js:
import express from 'express'
const app = express()
Then we will use this Express app to build out the rest of the Node server application.
Bundling React app during developmentIn order to keep the development flow simple, we will initialize Webpack to compilethe client-side code when the server is run. In devBundle.js, we will set up acompile method that takes the Express app and configures it to use the Webpackmiddleware to compile, bundle, and serve code, as well as enable hot reloading indevelopment mode:
mern-simplesetup/server/devBundle.js:
import webpack from 'webpack'import webpackMiddleware from 'webpack-dev-middleware'import webpackHotMiddleware from 'webpack-hot-middleware'import webpackConfig from './../webpack.config.client.js'
const compile = (app) => { if(process.env.NODE_ENV == "development"){ const compiler = webpack(webpackConfig) const middleware = webpackMiddleware(compiler, { publicPath: webpackConfig.output.publicPath
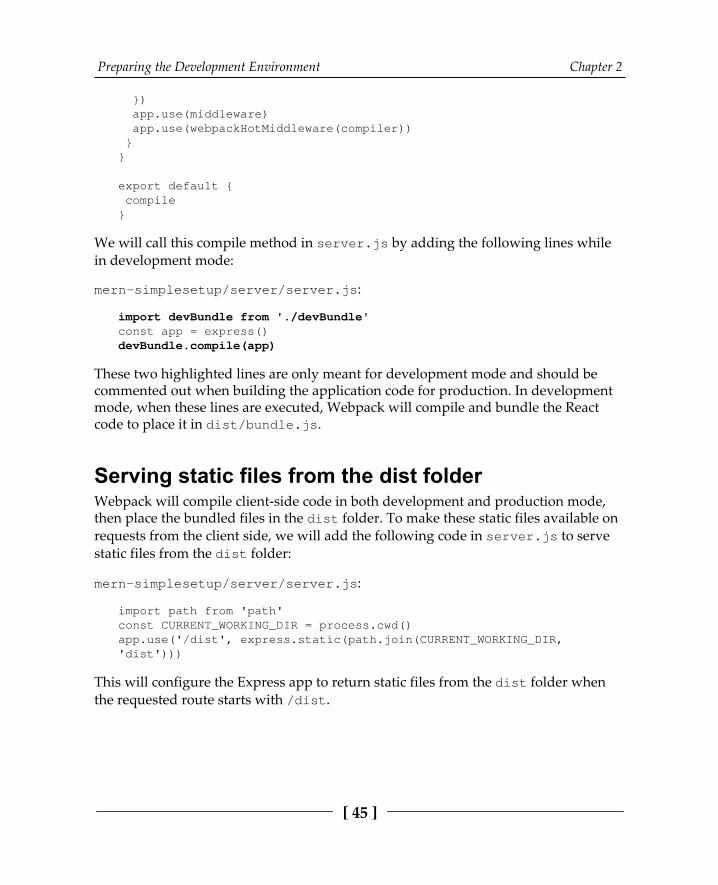
Preparing the Development Environment Chapter 2
[ 45 ]
}) app.use(middleware) app.use(webpackHotMiddleware(compiler)) }}
export default { compile}
We will call this compile method in server.js by adding the following lines whilein development mode:
mern-simplesetup/server/server.js:
import devBundle from './devBundle'const app = express()devBundle.compile(app)
These two highlighted lines are only meant for development mode and should becommented out when building the application code for production. In developmentmode, when these lines are executed, Webpack will compile and bundle the Reactcode to place it in dist/bundle.js.
Serving static files from the dist folderWebpack will compile client-side code in both development and production mode,then place the bundled files in the dist folder. To make these static files available onrequests from the client side, we will add the following code in server.js to servestatic files from the dist folder:
mern-simplesetup/server/server.js:
import path from 'path'const CURRENT_WORKING_DIR = process.cwd()app.use('/dist', express.static(path.join(CURRENT_WORKING_DIR,'dist')))
This will configure the Express app to return static files from the dist folder whenthe requested route starts with /dist.
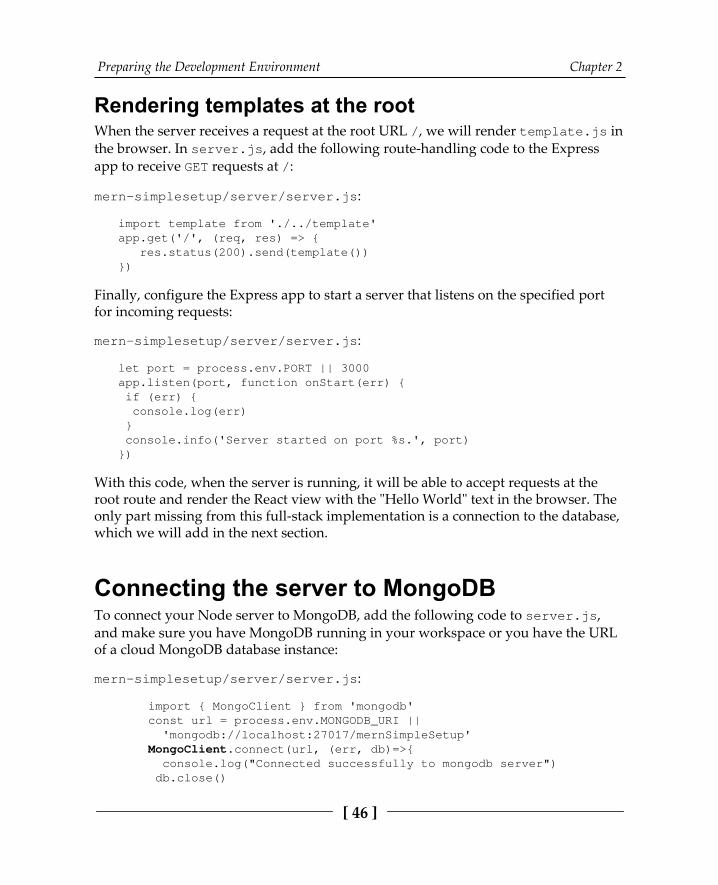
Preparing the Development Environment Chapter 2
[ 46 ]
Rendering templates at the root When the server receives a request at the root URL /, we will render template.js inthe browser. In server.js, add the following route-handling code to the Expressapp to receive GET requests at /:
mern-simplesetup/server/server.js:
import template from './../template'app.get('/', (req, res) => { res.status(200).send(template())})
Finally, configure the Express app to start a server that listens on the specified portfor incoming requests:
mern-simplesetup/server/server.js:
let port = process.env.PORT || 3000app.listen(port, function onStart(err) { if (err) { console.log(err) } console.info('Server started on port %s.', port)})
With this code, when the server is running, it will be able to accept requests at theroot route and render the React view with the "Hello World" text in the browser. Theonly part missing from this full-stack implementation is a connection to the database,which we will add in the next section.
Connecting the server to MongoDBTo connect your Node server to MongoDB, add the following code to server.js,and make sure you have MongoDB running in your workspace or you have the URLof a cloud MongoDB database instance:
mern-simplesetup/server/server.js:
import { MongoClient } from 'mongodb'const url = process.env.MONGODB_URI || 'mongodb://localhost:27017/mernSimpleSetup'MongoClient.connect(url, (err, db)=>{ console.log("Connected successfully to mongodb server") db.close()
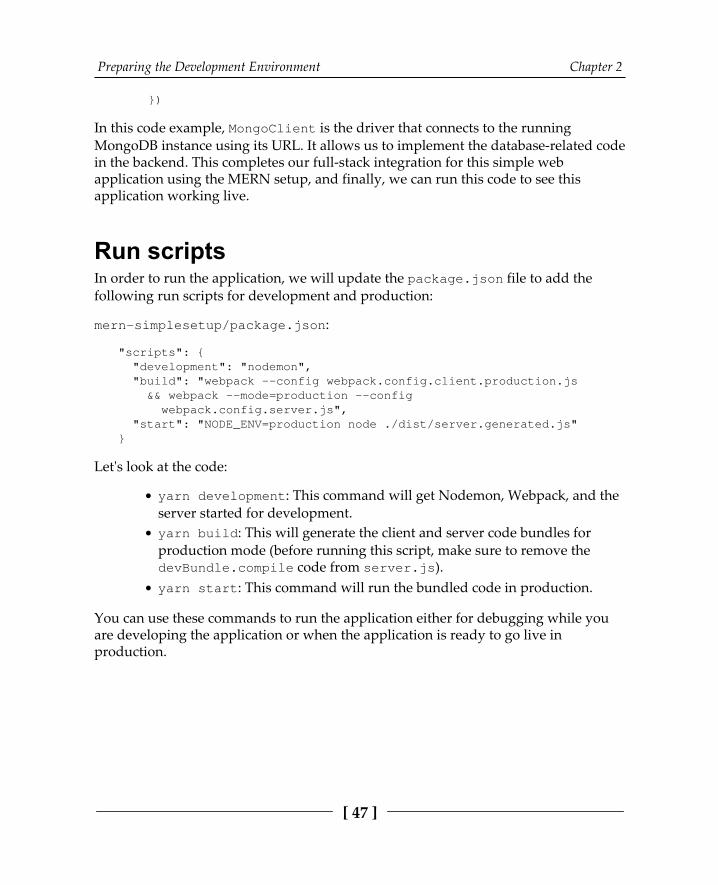
Preparing the Development Environment Chapter 2
[ 47 ]
})
In this code example, MongoClient is the driver that connects to the runningMongoDB instance using its URL. It allows us to implement the database-related codein the backend. This completes our full-stack integration for this simple webapplication using the MERN setup, and finally, we can run this code to see thisapplication working live.
Run scriptsIn order to run the application, we will update the package.json file to add thefollowing run scripts for development and production:
mern-simplesetup/package.json:
"scripts": { "development": "nodemon", "build": "webpack --config webpack.config.client.production.js && webpack --mode=production --config webpack.config.server.js", "start": "NODE_ENV=production node ./dist/server.generated.js"}
Let's look at the code:
yarn development: This command will get Nodemon, Webpack, and theserver started for development.yarn build: This will generate the client and server code bundles forproduction mode (before running this script, make sure to remove thedevBundle.compile code from server.js).yarn start: This command will run the bundled code in production.
You can use these commands to run the application either for debugging while youare developing the application or when the application is ready to go live inproduction.

Preparing the Development Environment Chapter 2
[ 48 ]
Developing and debugging in real timeTo run the code developed so far, and to ensure that everything is working, you cango through the following steps:
Run the application from the command line: yarn development.1.Load in browser: Open the root URL in the browser, which is2.http://localhost:3000 if you are using your local machine. You shouldsee a page with the title MERN Kickstart that just shows Hello World!.Develop code and debug live: Change the HelloWorld.js component3.text from "Hello World!" to just "hello". Save the changes to see theinstantaneous update in the browser, and also check the command-lineoutput to see that bundle.js is not re-created. Similarly, you can also seeinstant updates when you change the server-side code, increasingproductivity during development.
If you have made it this far, congratulations! You are all set to start developingexciting MERN applications.
SummaryIn this chapter, we discussed development tool options and how to install MERNtechnologies, and then we wrote code to check whether the developmentenvironment is set up correctly.
We began by looking at the recommended workspace, IDE, version control software,and browser options suitable for web development. You can select from these optionsbased on your preferences as a developer.
Next, we set up the MERN stack technologies by first installing MongoDB, Node, andYarn, and then adding the remaining required libraries using Yarn.
Before moving on to writing code to check this setup, we configured Webpack andBabel to compile and bundle code during development, and to build production-ready code. We learned that it is necessary to compile the ES6 and JSX code that isused for developing a MERN application before opening the application on browsers.

Preparing the Development Environment Chapter 2
[ 49 ]
Additionally, we made the development flow efficient by including React Hot Loaderfor frontend development, configuring Nodemon for backend development, andcompiling both the client and server code in one command when the server is runduring development.
In the next chapter, we will use this setup to start building a skeleton MERNapplication that will function as a base for full-featured applications.

2Building MERN from the
Ground UpIn this part, we build out a full-stack MERN application base from scratch anddemonstrate how it can be easily extended to develop the first example application.
This section comprises the following chapters:
Chapter 3, Building a Backend with MongoDB, Express, and NodeChapter 4, Adding a React Frontend to Complete MERNChapter 5, Growing the Skeleton into a Social Media Application

3Building a Backend withMongoDB, Express, and
NodeWhile developing different web applications, you will find there are common tasks,basic features, and implementation code repeated across the process. The same is truefor the MERN applications that will be developed in this book. Taking thesesimilarities into consideration, we will first lay the foundations for a skeleton MERNapplication that can be easily modified and extended to implement a variety ofMERN applications.
In this chapter, we will cover the following topics and start with the backendimplementation of the MERN skeleton using Node, Express, and MongoDB:
Overview of the skeleton applicationBackend code setupUser model with MongooseUser CRUD API endpoints with ExpressUser Auth with JSON Web TokensRunning backend code and checking APIs
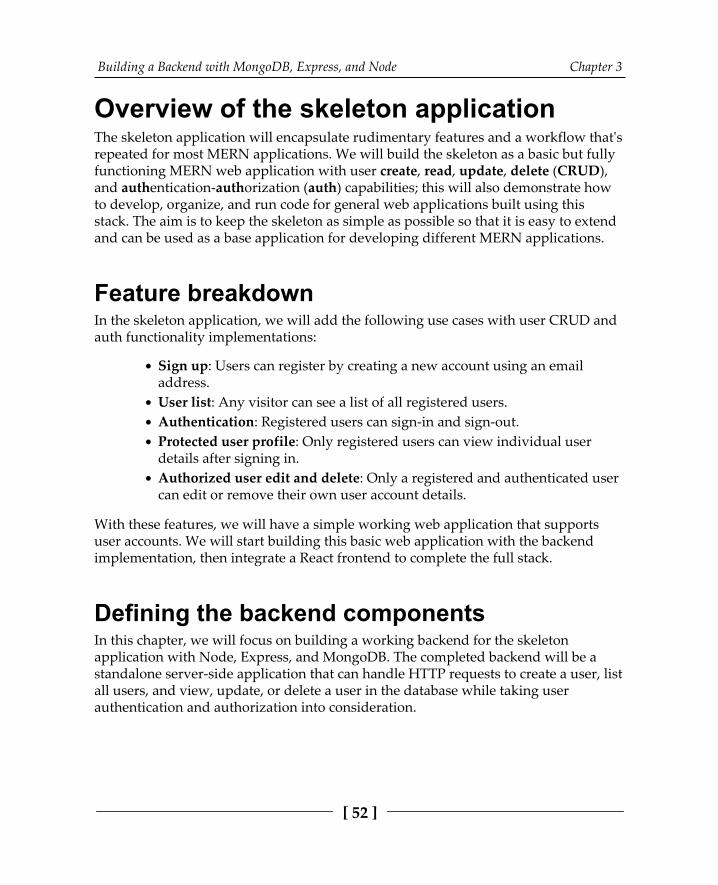
Building a Backend with MongoDB, Express, and Node Chapter 3
[ 52 ]
Overview of the skeleton applicationThe skeleton application will encapsulate rudimentary features and a workflow that'srepeated for most MERN applications. We will build the skeleton as a basic but fullyfunctioning MERN web application with user create, read, update, delete (CRUD),and authentication-authorization (auth) capabilities; this will also demonstrate howto develop, organize, and run code for general web applications built using thisstack. The aim is to keep the skeleton as simple as possible so that it is easy to extendand can be used as a base application for developing different MERN applications.
Feature breakdownIn the skeleton application, we will add the following use cases with user CRUD andauth functionality implementations:
Sign up: Users can register by creating a new account using an emailaddress.User list: Any visitor can see a list of all registered users.Authentication: Registered users can sign-in and sign-out.Protected user profile: Only registered users can view individual userdetails after signing in.Authorized user edit and delete: Only a registered and authenticated usercan edit or remove their own user account details.
With these features, we will have a simple working web application that supportsuser accounts. We will start building this basic web application with the backendimplementation, then integrate a React frontend to complete the full stack.
Defining the backend componentsIn this chapter, we will focus on building a working backend for the skeletonapplication with Node, Express, and MongoDB. The completed backend will be astandalone server-side application that can handle HTTP requests to create a user, listall users, and view, update, or delete a user in the database while taking userauthentication and authorization into consideration.
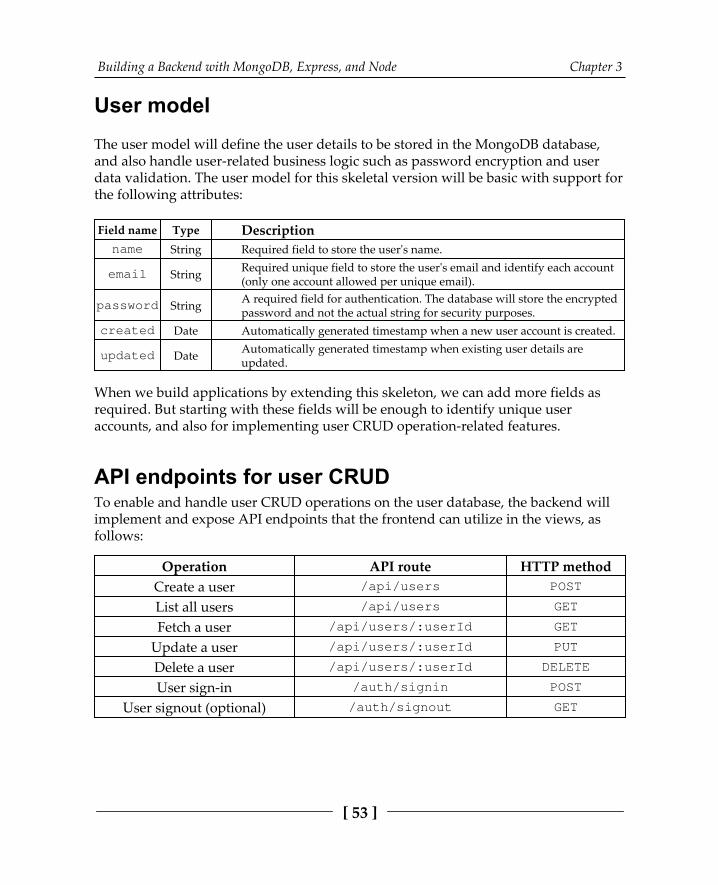
Building a Backend with MongoDB, Express, and Node Chapter 3
[ 53 ]
User modelThe user model will define the user details to be stored in the MongoDB database,and also handle user-related business logic such as password encryption and userdata validation. The user model for this skeletal version will be basic with support forthe following attributes:
Field name Type Descriptionname String Required field to store the user's name.
email String Required unique field to store the user's email and identify each account(only one account allowed per unique email).
password String A required field for authentication. The database will store the encryptedpassword and not the actual string for security purposes.
created Date Automatically generated timestamp when a new user account is created.
updated Date Automatically generated timestamp when existing user details areupdated.
When we build applications by extending this skeleton, we can add more fields asrequired. But starting with these fields will be enough to identify unique useraccounts, and also for implementing user CRUD operation-related features.
API endpoints for user CRUDTo enable and handle user CRUD operations on the user database, the backend willimplement and expose API endpoints that the frontend can utilize in the views, asfollows:
Operation API route HTTP methodCreate a user /api/users POST
List all users /api/users GET
Fetch a user /api/users/:userId GET
Update a user /api/users/:userId PUT
Delete a user /api/users/:userId DELETE
User sign-in /auth/signin POST
User signout (optional) /auth/signout GET

Building a Backend with MongoDB, Express, and Node Chapter 3
[ 54 ]
Some of these user CRUD operations will have protected access, which will requirethe requesting client to be authenticated, authorized, or both, as defined by thefeature specifications. The last two routes in the table are for authentication and willallow the user to sign-in and sign-out. For the applications developed in this book, wewill use the JWT mechanism to implement these authentication features, as discussedin more detail in the next section.
Auth with JSON Web TokensTo restrict and protect access to user API endpoints according to the skeleton features,the backend will need to incorporate authentication and authorization mechanisms.There are a number of options when it comes to implementing user auth for webapplications. The most common and time-tested option is the use of sessions to storeuser state on both the client and server-side. But a newer approach is the use of JSONWeb Token (JWT) as a stateless authentication mechanism that does not requirestoring user state on the server side.
Both approaches have strengths for relevant real-world use cases. However, for thepurpose of keeping the code simple in this book, and because it pairs well with theMERN stack and our example applications, we will use JWT for authimplementation.
How JWT worksBefore diving into the implementation of authentication with JWT in the MERN stack,we will look at how this mechanism generally works across a client-serverapplication, as outlined in the following diagram:
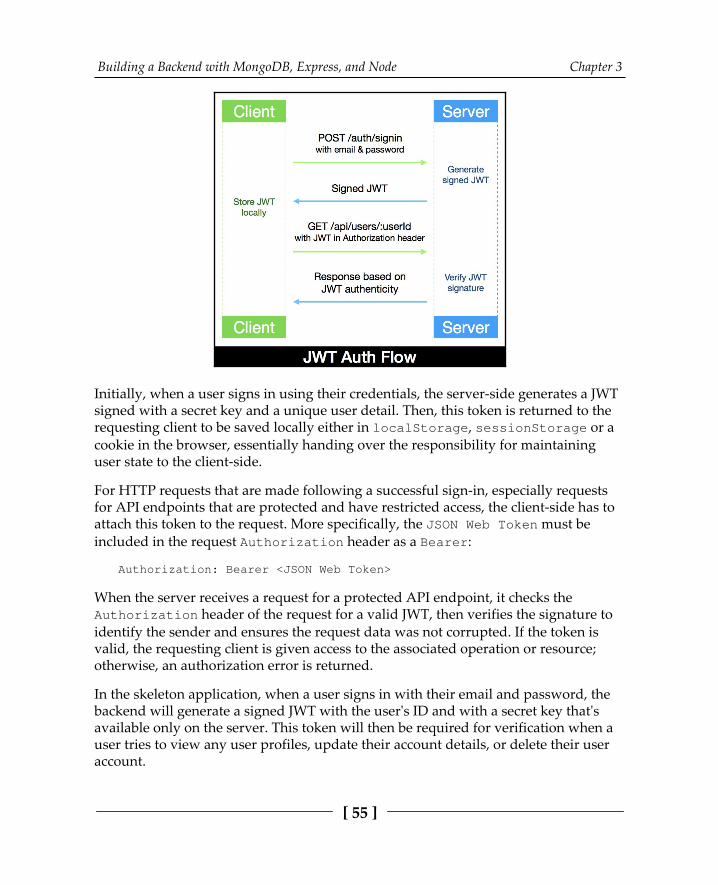
Building a Backend with MongoDB, Express, and Node Chapter 3
[ 55 ]
Initially, when a user signs in using their credentials, the server-side generates a JWTsigned with a secret key and a unique user detail. Then, this token is returned to therequesting client to be saved locally either in localStorage, sessionStorage or acookie in the browser, essentially handing over the responsibility for maintaininguser state to the client-side.
For HTTP requests that are made following a successful sign-in, especially requestsfor API endpoints that are protected and have restricted access, the client-side has toattach this token to the request. More specifically, the JSON Web Token must beincluded in the request Authorization header as a Bearer:
Authorization: Bearer <JSON Web Token>
When the server receives a request for a protected API endpoint, it checks theAuthorization header of the request for a valid JWT, then verifies the signature toidentify the sender and ensures the request data was not corrupted. If the token isvalid, the requesting client is given access to the associated operation or resource;otherwise, an authorization error is returned.
In the skeleton application, when a user signs in with their email and password, thebackend will generate a signed JWT with the user's ID and with a secret key that'savailable only on the server. This token will then be required for verification when auser tries to view any user profiles, update their account details, or delete their useraccount.
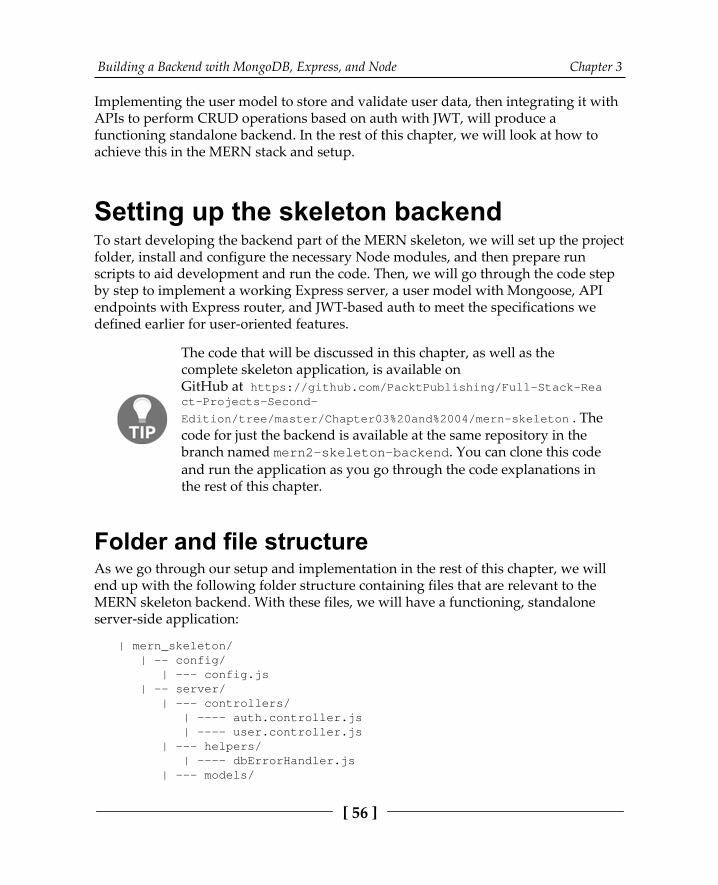
Building a Backend with MongoDB, Express, and Node Chapter 3
[ 56 ]
Implementing the user model to store and validate user data, then integrating it withAPIs to perform CRUD operations based on auth with JWT, will produce afunctioning standalone backend. In the rest of this chapter, we will look at how toachieve this in the MERN stack and setup.
Setting up the skeleton backendTo start developing the backend part of the MERN skeleton, we will set up the projectfolder, install and configure the necessary Node modules, and then prepare runscripts to aid development and run the code. Then, we will go through the code stepby step to implement a working Express server, a user model with Mongoose, APIendpoints with Express router, and JWT-based auth to meet the specifications wedefined earlier for user-oriented features.
The code that will be discussed in this chapter, as well as thecomplete skeleton application, is available onGitHub at https://github.com/PacktPublishing/Full-Stack-React-Projects-Second-
Edition/tree/master/Chapter03%20and%2004/mern-skeleton . Thecode for just the backend is available at the same repository in thebranch named mern2-skeleton-backend. You can clone this codeand run the application as you go through the code explanations inthe rest of this chapter.
Folder and file structureAs we go through our setup and implementation in the rest of this chapter, we willend up with the following folder structure containing files that are relevant to theMERN skeleton backend. With these files, we will have a functioning, standaloneserver-side application:
| mern_skeleton/ | -- config/ | --- config.js | -- server/ | --- controllers/ | ---- auth.controller.js | ---- user.controller.js | --- helpers/ | ---- dbErrorHandler.js | --- models/
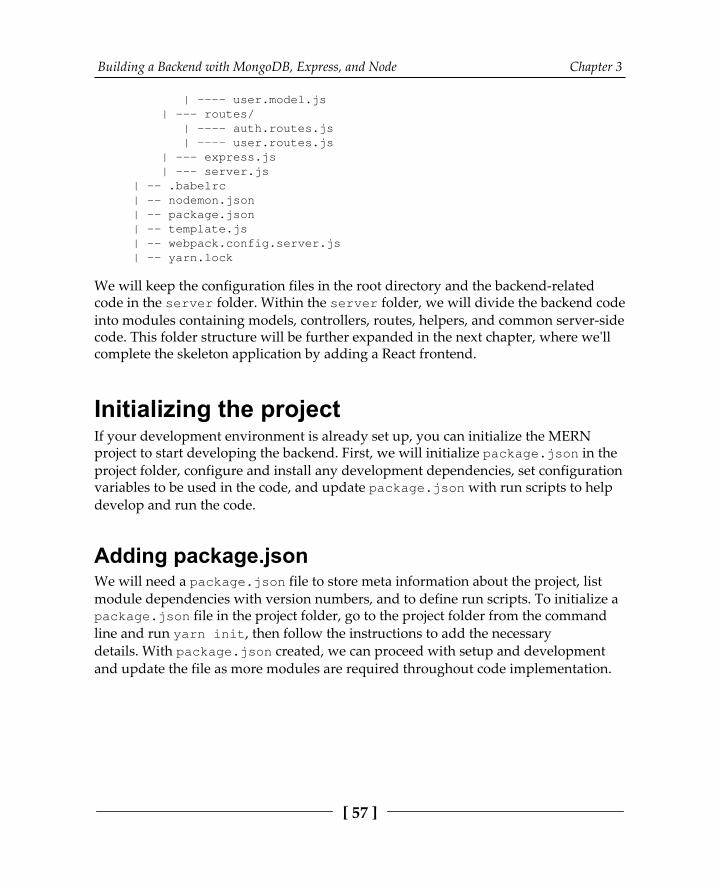
Building a Backend with MongoDB, Express, and Node Chapter 3
[ 57 ]
| ---- user.model.js | --- routes/ | ---- auth.routes.js | ---- user.routes.js | --- express.js | --- server.js | -- .babelrc | -- nodemon.json | -- package.json | -- template.js | -- webpack.config.server.js | -- yarn.lock
We will keep the configuration files in the root directory and the backend-relatedcode in the server folder. Within the server folder, we will divide the backend codeinto modules containing models, controllers, routes, helpers, and common server-sidecode. This folder structure will be further expanded in the next chapter, where we'llcomplete the skeleton application by adding a React frontend.
Initializing the projectIf your development environment is already set up, you can initialize the MERNproject to start developing the backend. First, we will initialize package.json in theproject folder, configure and install any development dependencies, set configurationvariables to be used in the code, and update package.json with run scripts to helpdevelop and run the code.
Adding package.jsonWe will need a package.json file to store meta information about the project, listmodule dependencies with version numbers, and to define run scripts. To initialize apackage.json file in the project folder, go to the project folder from the commandline and run yarn init, then follow the instructions to add the necessarydetails. With package.json created, we can proceed with setup and developmentand update the file as more modules are required throughout code implementation.
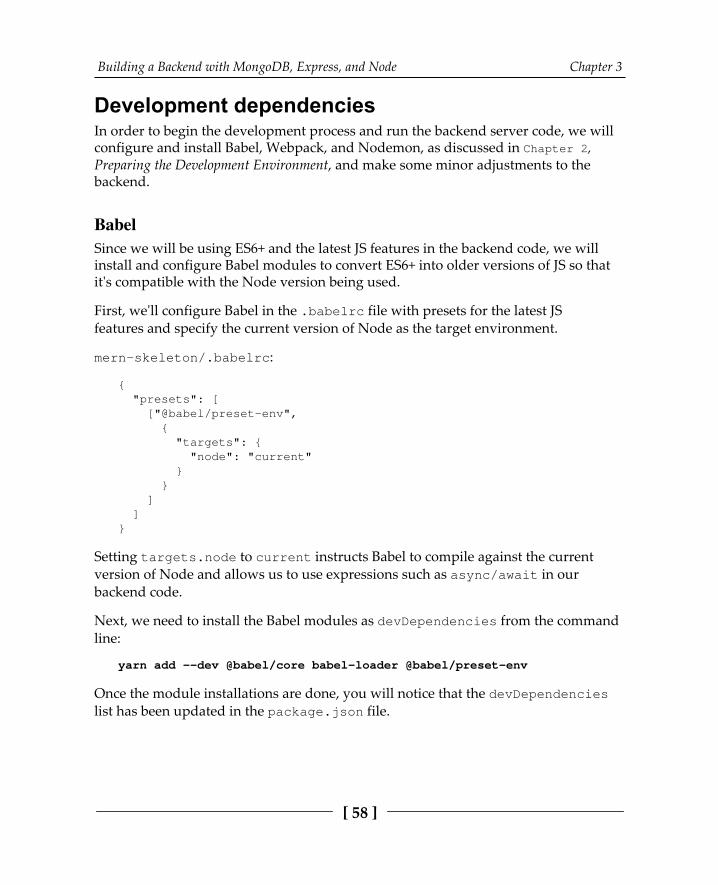
Building a Backend with MongoDB, Express, and Node Chapter 3
[ 58 ]
Development dependenciesIn order to begin the development process and run the backend server code, we willconfigure and install Babel, Webpack, and Nodemon, as discussed in Chapter 2,Preparing the Development Environment, and make some minor adjustments to thebackend.
BabelSince we will be using ES6+ and the latest JS features in the backend code, we willinstall and configure Babel modules to convert ES6+ into older versions of JS so thatit's compatible with the Node version being used.
First, we'll configure Babel in the .babelrc file with presets for the latest JSfeatures and specify the current version of Node as the target environment.
mern-skeleton/.babelrc:
{ "presets": [ ["@babel/preset-env", { "targets": { "node": "current" } } ] ]}
Setting targets.node to current instructs Babel to compile against the currentversion of Node and allows us to use expressions such as async/await in ourbackend code.
Next, we need to install the Babel modules as devDependencies from the commandline:
yarn add --dev @babel/core babel-loader @babel/preset-env
Once the module installations are done, you will notice that the devDependencieslist has been updated in the package.json file.
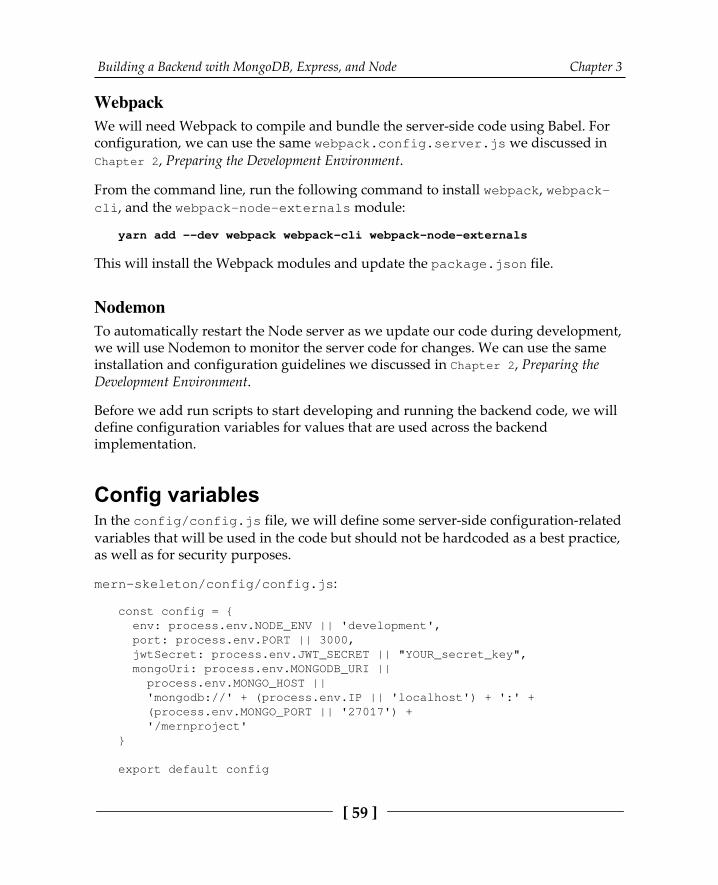
Building a Backend with MongoDB, Express, and Node Chapter 3
[ 59 ]
WebpackWe will need Webpack to compile and bundle the server-side code using Babel. Forconfiguration, we can use the same webpack.config.server.js we discussed inChapter 2, Preparing the Development Environment.
From the command line, run the following command to install webpack, webpack-cli, and the webpack-node-externals module:
yarn add --dev webpack webpack-cli webpack-node-externals
This will install the Webpack modules and update the package.json file.
NodemonTo automatically restart the Node server as we update our code during development,we will use Nodemon to monitor the server code for changes. We can use the sameinstallation and configuration guidelines we discussed in Chapter 2, Preparing theDevelopment Environment.
Before we add run scripts to start developing and running the backend code, we willdefine configuration variables for values that are used across the backendimplementation.
Config variablesIn the config/config.js file, we will define some server-side configuration-relatedvariables that will be used in the code but should not be hardcoded as a best practice,as well as for security purposes.
mern-skeleton/config/config.js:
const config = { env: process.env.NODE_ENV || 'development', port: process.env.PORT || 3000, jwtSecret: process.env.JWT_SECRET || "YOUR_secret_key", mongoUri: process.env.MONGODB_URI || process.env.MONGO_HOST || 'mongodb://' + (process.env.IP || 'localhost') + ':' + (process.env.MONGO_PORT || '27017') + '/mernproject'}
export default config
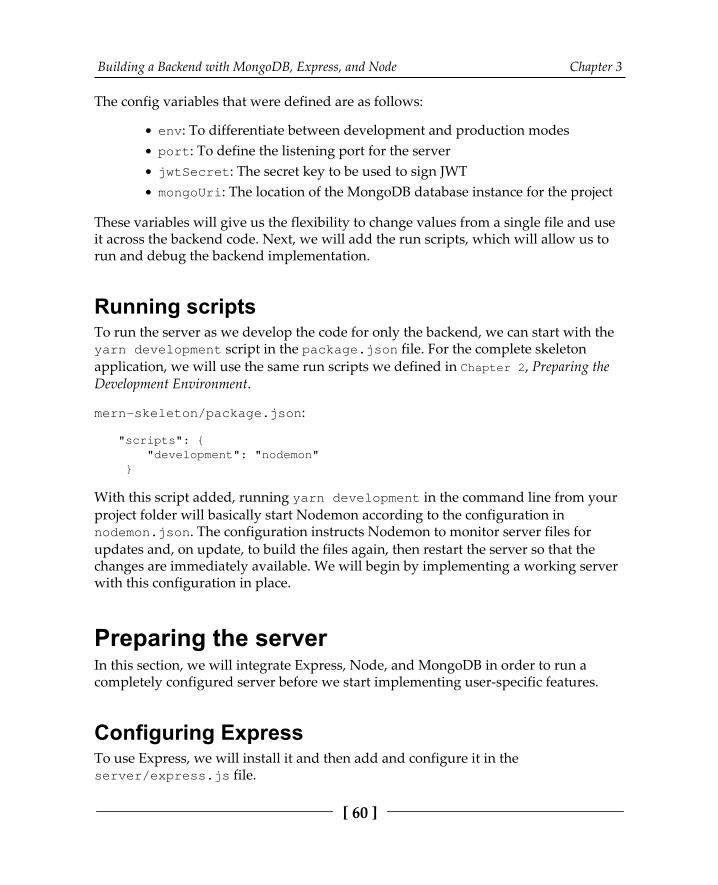
Building a Backend with MongoDB, Express, and Node Chapter 3
[ 60 ]
The config variables that were defined are as follows:
env: To differentiate between development and production modesport: To define the listening port for the serverjwtSecret: The secret key to be used to sign JWTmongoUri: The location of the MongoDB database instance for the project
These variables will give us the flexibility to change values from a single file and useit across the backend code. Next, we will add the run scripts, which will allow us torun and debug the backend implementation.
Running scriptsTo run the server as we develop the code for only the backend, we can start with theyarn development script in the package.json file. For the complete skeletonapplication, we will use the same run scripts we defined in Chapter 2, Preparing theDevelopment Environment.
mern-skeleton/package.json:
"scripts": { "development": "nodemon" }
With this script added, running yarn development in the command line from yourproject folder will basically start Nodemon according to the configuration innodemon.json. The configuration instructs Nodemon to monitor server files forupdates and, on update, to build the files again, then restart the server so that thechanges are immediately available. We will begin by implementing a working serverwith this configuration in place.
Preparing the serverIn this section, we will integrate Express, Node, and MongoDB in order to run acompletely configured server before we start implementing user-specific features.
Configuring ExpressTo use Express, we will install it and then add and configure it in theserver/express.js file.
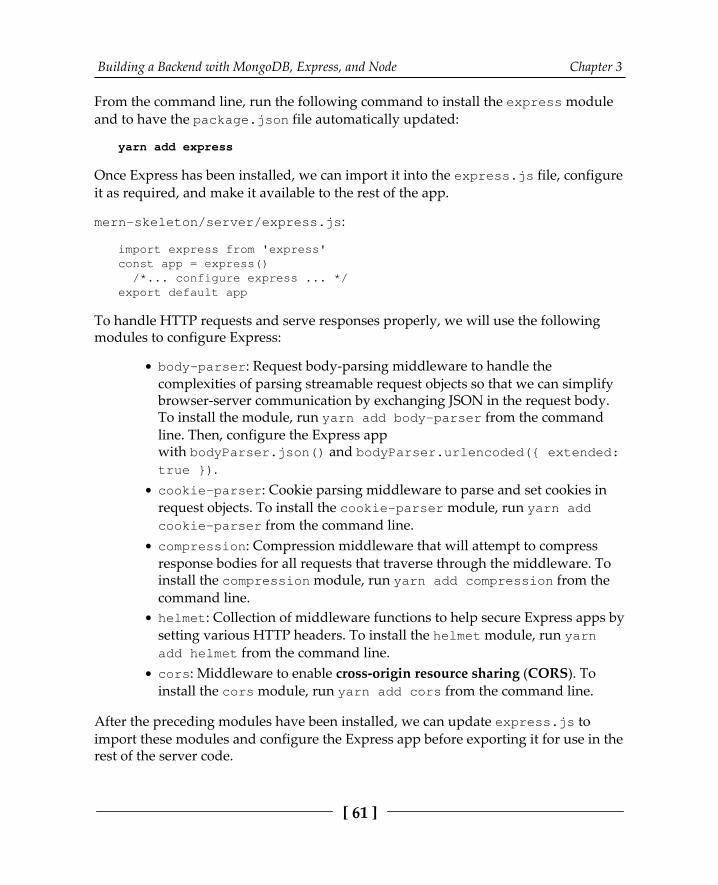
Building a Backend with MongoDB, Express, and Node Chapter 3
[ 61 ]
From the command line, run the following command to install the express moduleand to have the package.json file automatically updated:
yarn add express
Once Express has been installed, we can import it into the express.js file, configureit as required, and make it available to the rest of the app.
mern-skeleton/server/express.js:
import express from 'express'const app = express() /*... configure express ... */export default app
To handle HTTP requests and serve responses properly, we will use the followingmodules to configure Express:
body-parser: Request body-parsing middleware to handle thecomplexities of parsing streamable request objects so that we can simplifybrowser-server communication by exchanging JSON in the request body.To install the module, run yarn add body-parser from the commandline. Then, configure the Express appwith bodyParser.json() and bodyParser.urlencoded({ extended:true }).cookie-parser: Cookie parsing middleware to parse and set cookies inrequest objects. To install the cookie-parser module, run yarn addcookie-parser from the command line.compression: Compression middleware that will attempt to compressresponse bodies for all requests that traverse through the middleware. Toinstall the compression module, run yarn add compression from thecommand line.helmet: Collection of middleware functions to help secure Express apps bysetting various HTTP headers. To install the helmet module, run yarnadd helmet from the command line.cors: Middleware to enable cross-origin resource sharing (CORS). Toinstall the cors module, run yarn add cors from the command line.
After the preceding modules have been installed, we can update express.js toimport these modules and configure the Express app before exporting it for use in therest of the server code.
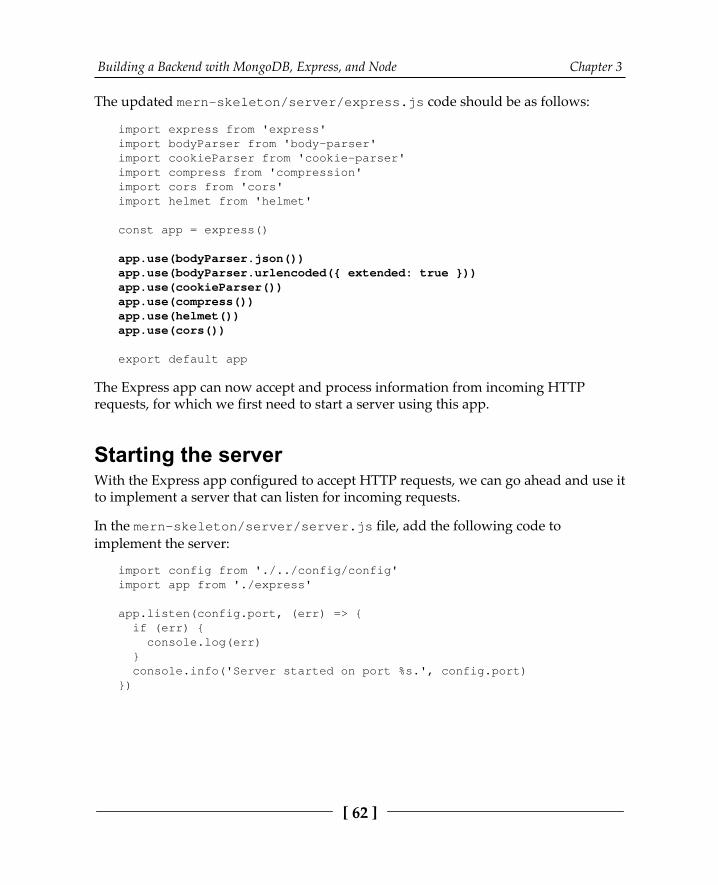
Building a Backend with MongoDB, Express, and Node Chapter 3
[ 62 ]
The updated mern-skeleton/server/express.js code should be as follows:
import express from 'express'import bodyParser from 'body-parser'import cookieParser from 'cookie-parser'import compress from 'compression'import cors from 'cors'import helmet from 'helmet'
const app = express()
app.use(bodyParser.json())app.use(bodyParser.urlencoded({ extended: true }))app.use(cookieParser())app.use(compress())app.use(helmet())app.use(cors())
export default app
The Express app can now accept and process information from incoming HTTPrequests, for which we first need to start a server using this app.
Starting the serverWith the Express app configured to accept HTTP requests, we can go ahead and use itto implement a server that can listen for incoming requests.
In the mern-skeleton/server/server.js file, add the following code toimplement the server:
import config from './../config/config'import app from './express'
app.listen(config.port, (err) => { if (err) { console.log(err) } console.info('Server started on port %s.', config.port)})
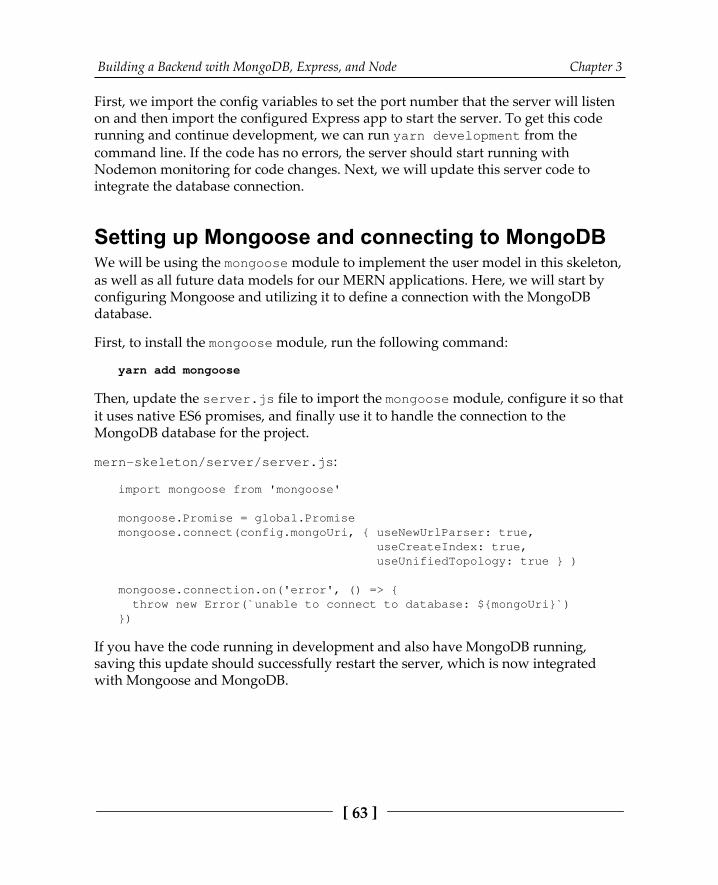
Building a Backend with MongoDB, Express, and Node Chapter 3
[ 63 ]
First, we import the config variables to set the port number that the server will listenon and then import the configured Express app to start the server. To get this coderunning and continue development, we can run yarn development from thecommand line. If the code has no errors, the server should start running withNodemon monitoring for code changes. Next, we will update this server code tointegrate the database connection.
Setting up Mongoose and connecting to MongoDBWe will be using the mongoose module to implement the user model in this skeleton,as well as all future data models for our MERN applications. Here, we will start by configuring Mongoose and utilizing it to define a connection with the MongoDBdatabase.
First, to install the mongoose module, run the following command:
yarn add mongoose
Then, update the server.js file to import the mongoose module, configure it so thatit uses native ES6 promises, and finally use it to handle the connection to theMongoDB database for the project.
mern-skeleton/server/server.js:
import mongoose from 'mongoose'
mongoose.Promise = global.Promisemongoose.connect(config.mongoUri, { useNewUrlParser: true, useCreateIndex: true, useUnifiedTopology: true } )
mongoose.connection.on('error', () => { throw new Error(`unable to connect to database: ${mongoUri}`)})
If you have the code running in development and also have MongoDB running,saving this update should successfully restart the server, which is now integratedwith Mongoose and MongoDB.
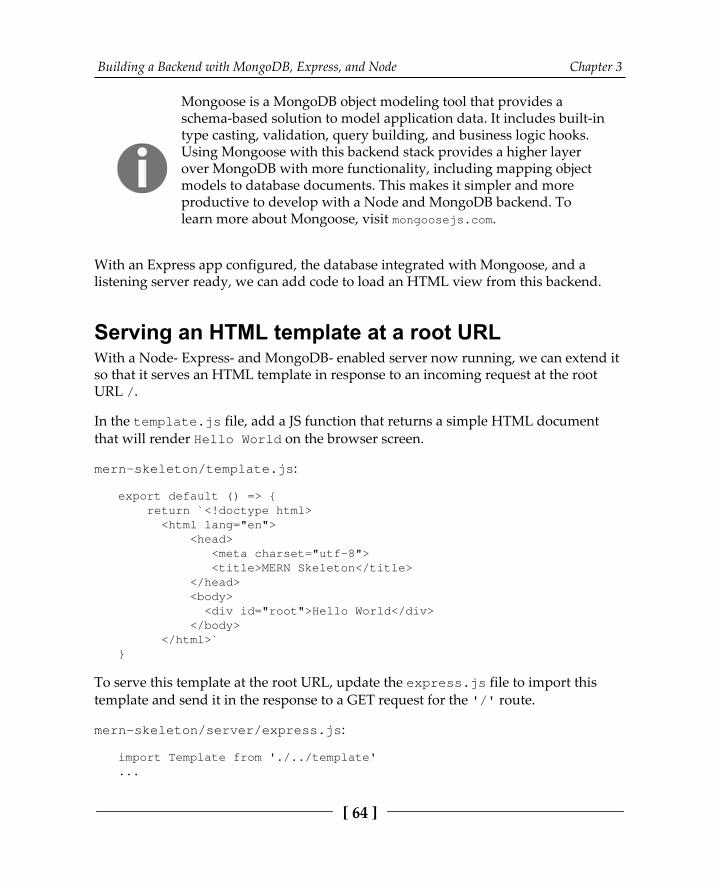
Building a Backend with MongoDB, Express, and Node Chapter 3
[ 64 ]
Mongoose is a MongoDB object modeling tool that provides aschema-based solution to model application data. It includes built-intype casting, validation, query building, and business logic hooks.Using Mongoose with this backend stack provides a higher layerover MongoDB with more functionality, including mapping objectmodels to database documents. This makes it simpler and moreproductive to develop with a Node and MongoDB backend. Tolearn more about Mongoose, visit mongoosejs.com.
With an Express app configured, the database integrated with Mongoose, and alistening server ready, we can add code to load an HTML view from this backend.
Serving an HTML template at a root URLWith a Node- Express- and MongoDB- enabled server now running, we can extend itso that it serves an HTML template in response to an incoming request at the rootURL /.
In the template.js file, add a JS function that returns a simple HTML documentthat will render Hello World on the browser screen.
mern-skeleton/template.js:
export default () => { return `<!doctype html> <html lang="en"> <head> <meta charset="utf-8"> <title>MERN Skeleton</title> </head> <body> <div id="root">Hello World</div> </body> </html>`}
To serve this template at the root URL, update the express.js file to import thistemplate and send it in the response to a GET request for the '/' route.
mern-skeleton/server/express.js:
import Template from './../template'...
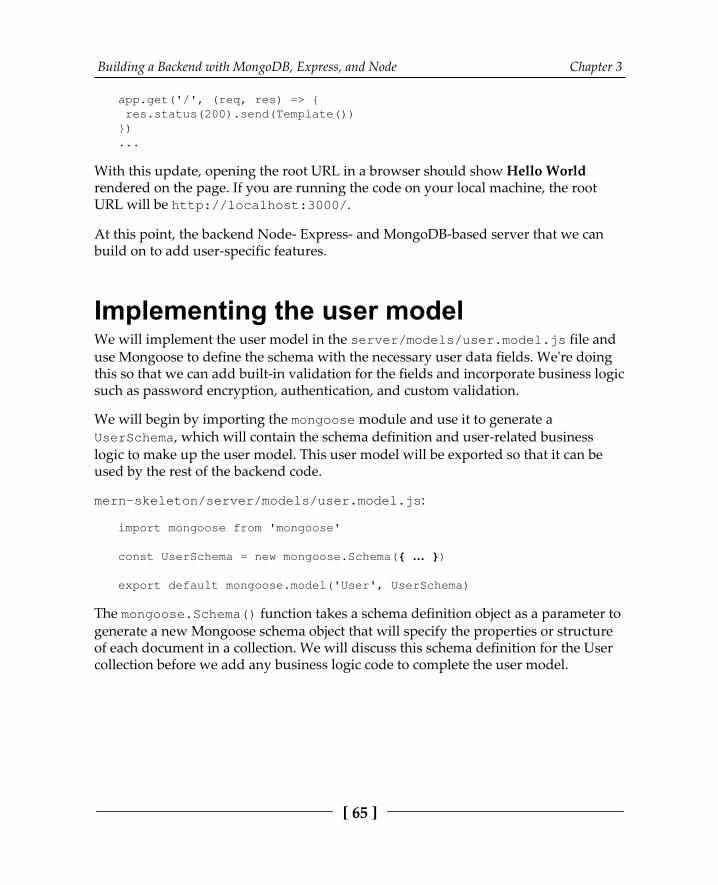
Building a Backend with MongoDB, Express, and Node Chapter 3
[ 65 ]
app.get('/', (req, res) => { res.status(200).send(Template())})...
With this update, opening the root URL in a browser should show Hello Worldrendered on the page. If you are running the code on your local machine, the rootURL will be http://localhost:3000/.
At this point, the backend Node- Express- and MongoDB-based server that we canbuild on to add user-specific features.
Implementing the user modelWe will implement the user model in the server/models/user.model.js file anduse Mongoose to define the schema with the necessary user data fields. We're doingthis so that we can add built-in validation for the fields and incorporate business logicsuch as password encryption, authentication, and custom validation.
We will begin by importing the mongoose module and use it to generate aUserSchema, which will contain the schema definition and user-related businesslogic to make up the user model. This user model will be exported so that it can beused by the rest of the backend code.
mern-skeleton/server/models/user.model.js:
import mongoose from 'mongoose'
const UserSchema = new mongoose.Schema({ … })
export default mongoose.model('User', UserSchema)
The mongoose.Schema() function takes a schema definition object as a parameter togenerate a new Mongoose schema object that will specify the properties or structureof each document in a collection. We will discuss this schema definition for the Usercollection before we add any business logic code to complete the user model.
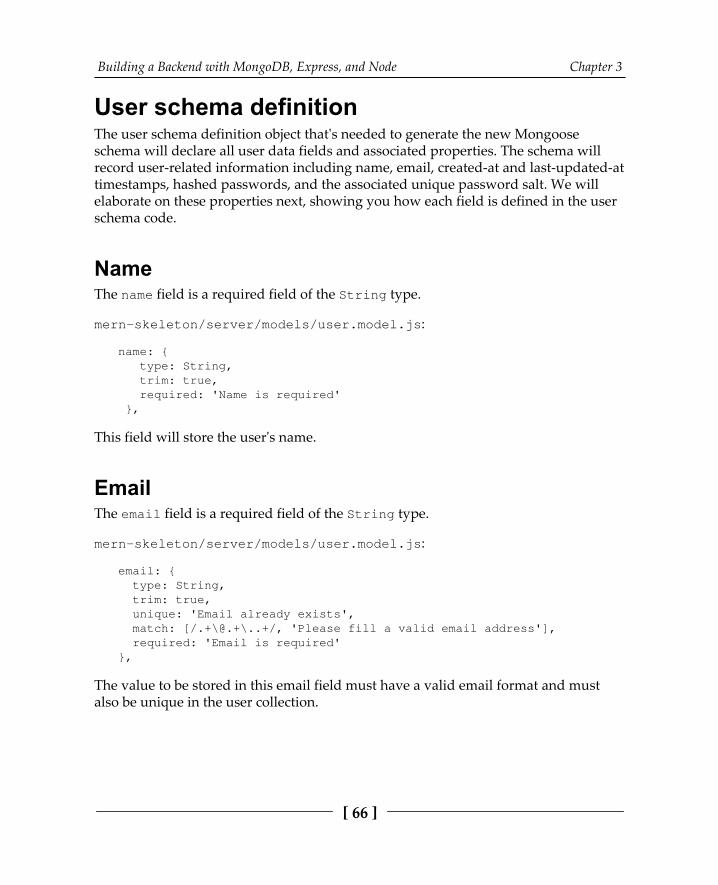
Building a Backend with MongoDB, Express, and Node Chapter 3
[ 66 ]
User schema definitionThe user schema definition object that's needed to generate the new Mongooseschema will declare all user data fields and associated properties. The schema willrecord user-related information including name, email, created-at and last-updated-attimestamps, hashed passwords, and the associated unique password salt. We willelaborate on these properties next, showing you how each field is defined in the userschema code.
NameThe name field is a required field of the String type.
mern-skeleton/server/models/user.model.js:
name: { type: String, trim: true, required: 'Name is required' },
This field will store the user's name.
EmailThe email field is a required field of the String type.
mern-skeleton/server/models/user.model.js:
email: { type: String, trim: true, unique: 'Email already exists', match: [/.+\@.+\..+/, 'Please fill a valid email address'], required: 'Email is required'},
The value to be stored in this email field must have a valid email format and mustalso be unique in the user collection.
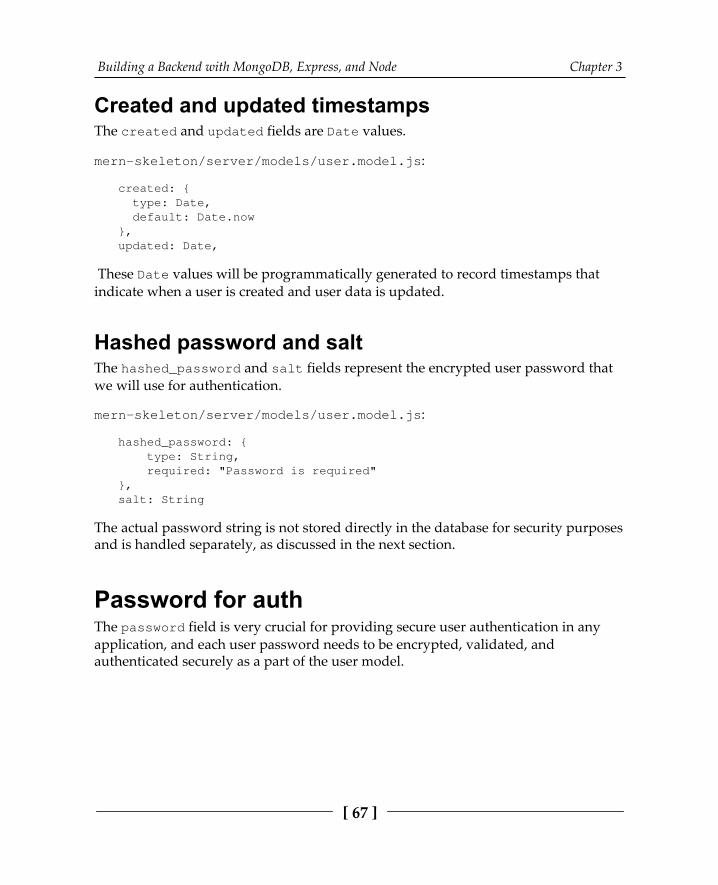
Building a Backend with MongoDB, Express, and Node Chapter 3
[ 67 ]
Created and updated timestampsThe created and updated fields are Date values.
mern-skeleton/server/models/user.model.js:
created: { type: Date, default: Date.now},updated: Date,
These Date values will be programmatically generated to record timestamps thatindicate when a user is created and user data is updated.
Hashed password and saltThe hashed_password and salt fields represent the encrypted user password thatwe will use for authentication.
mern-skeleton/server/models/user.model.js:
hashed_password: { type: String, required: "Password is required"},salt: String
The actual password string is not stored directly in the database for security purposesand is handled separately, as discussed in the next section.
Password for authThe password field is very crucial for providing secure user authentication in anyapplication, and each user password needs to be encrypted, validated, andauthenticated securely as a part of the user model.
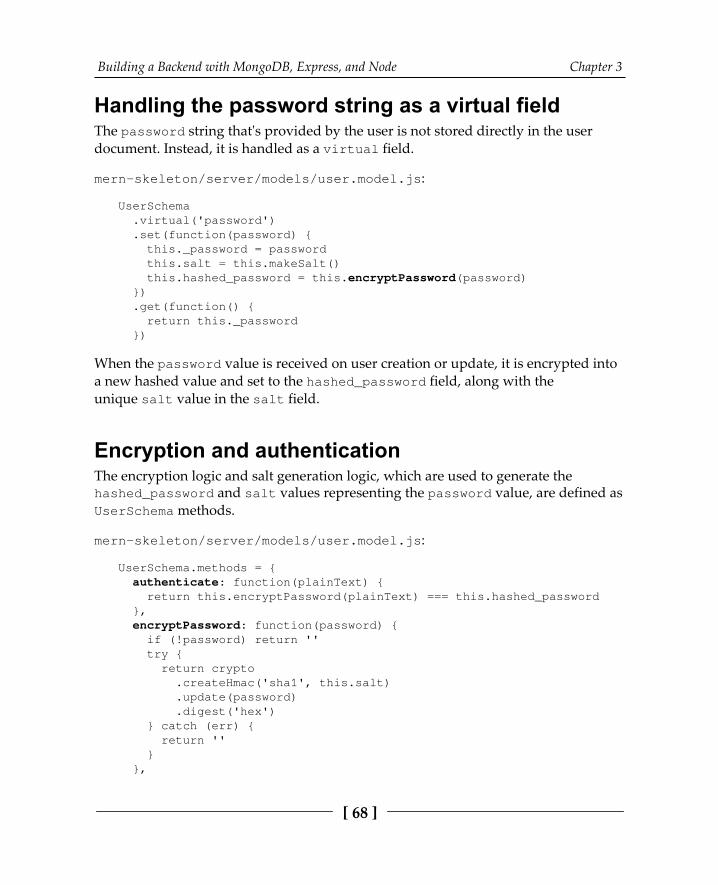
Building a Backend with MongoDB, Express, and Node Chapter 3
[ 68 ]
Handling the password string as a virtual fieldThe password string that's provided by the user is not stored directly in the userdocument. Instead, it is handled as a virtual field.
mern-skeleton/server/models/user.model.js:
UserSchema .virtual('password') .set(function(password) { this._password = password this.salt = this.makeSalt() this.hashed_password = this.encryptPassword(password) }) .get(function() { return this._password })
When the password value is received on user creation or update, it is encrypted intoa new hashed value and set to the hashed_password field, along with theunique salt value in the salt field.
Encryption and authenticationThe encryption logic and salt generation logic, which are used to generate thehashed_password and salt values representing the password value, are defined asUserSchema methods.
mern-skeleton/server/models/user.model.js:
UserSchema.methods = { authenticate: function(plainText) { return this.encryptPassword(plainText) === this.hashed_password }, encryptPassword: function(password) { if (!password) return '' try { return crypto .createHmac('sha1', this.salt) .update(password) .digest('hex') } catch (err) { return '' } },
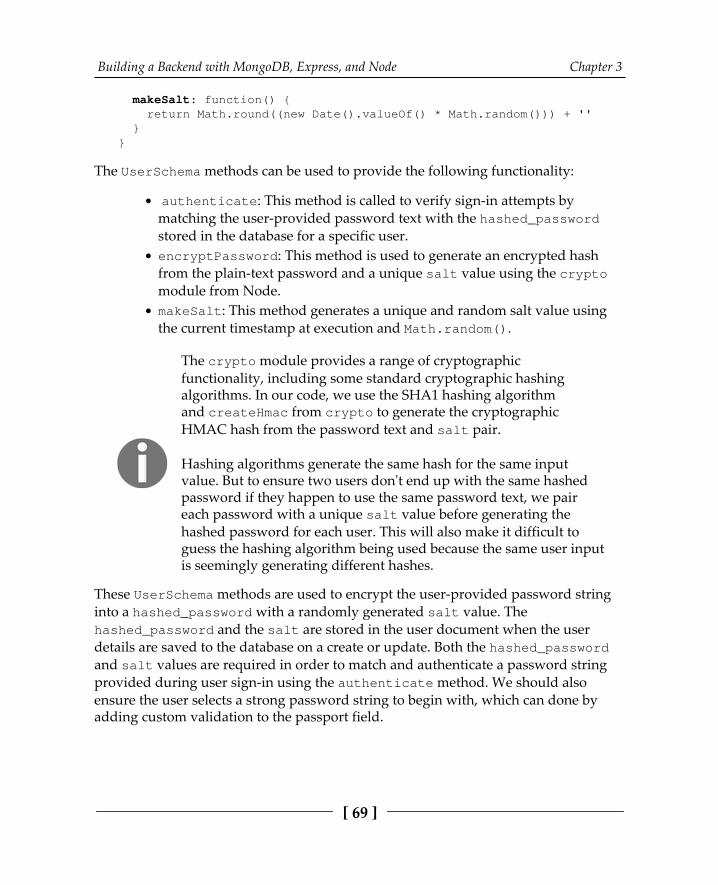
Building a Backend with MongoDB, Express, and Node Chapter 3
[ 69 ]
makeSalt: function() { return Math.round((new Date().valueOf() * Math.random())) + '' }}
The UserSchema methods can be used to provide the following functionality:
authenticate: This method is called to verify sign-in attempts bymatching the user-provided password text with the hashed_passwordstored in the database for a specific user. encryptPassword: This method is used to generate an encrypted hashfrom the plain-text password and a unique salt value using the cryptomodule from Node. makeSalt: This method generates a unique and random salt value usingthe current timestamp at execution and Math.random().
The crypto module provides a range of cryptographicfunctionality, including some standard cryptographic hashingalgorithms. In our code, we use the SHA1 hashing algorithmand createHmac from crypto to generate the cryptographicHMAC hash from the password text and salt pair.
Hashing algorithms generate the same hash for the same inputvalue. But to ensure two users don't end up with the same hashedpassword if they happen to use the same password text, we paireach password with a unique salt value before generating thehashed password for each user. This will also make it difficult toguess the hashing algorithm being used because the same user inputis seemingly generating different hashes.
These UserSchema methods are used to encrypt the user-provided password stringinto a hashed_password with a randomly generated salt value. Thehashed_password and the salt are stored in the user document when the userdetails are saved to the database on a create or update. Both the hashed_passwordand salt values are required in order to match and authenticate a password stringprovided during user sign-in using the authenticate method. We should alsoensure the user selects a strong password string to begin with, which can done byadding custom validation to the passport field.
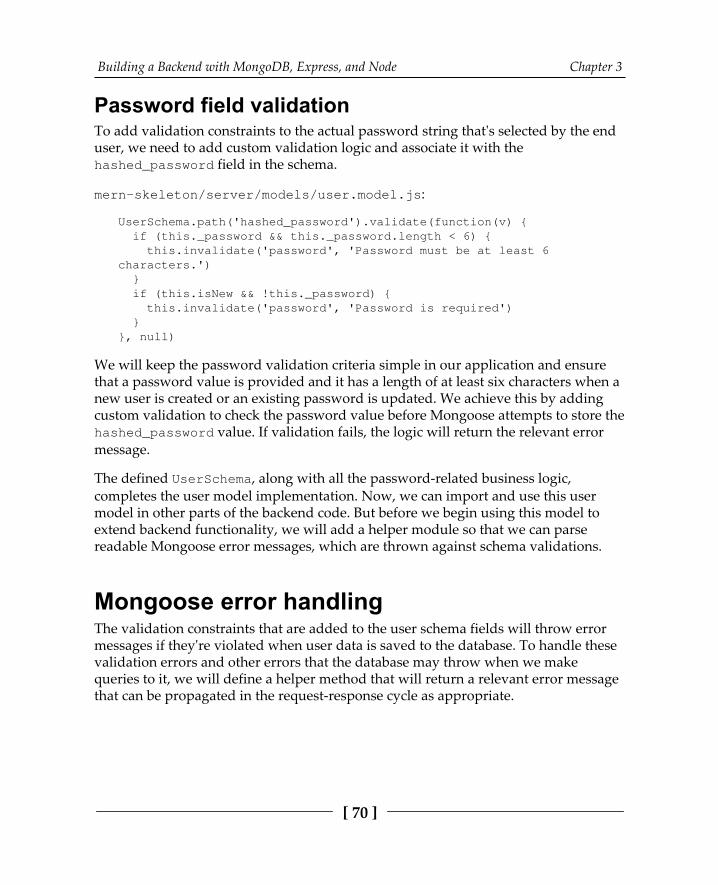
Building a Backend with MongoDB, Express, and Node Chapter 3
[ 70 ]
Password field validationTo add validation constraints to the actual password string that's selected by the enduser, we need to add custom validation logic and associate it with thehashed_password field in the schema.
mern-skeleton/server/models/user.model.js:
UserSchema.path('hashed_password').validate(function(v) { if (this._password && this._password.length < 6) { this.invalidate('password', 'Password must be at least 6characters.') } if (this.isNew && !this._password) { this.invalidate('password', 'Password is required') }}, null)
We will keep the password validation criteria simple in our application and ensurethat a password value is provided and it has a length of at least six characters when anew user is created or an existing password is updated. We achieve this by addingcustom validation to check the password value before Mongoose attempts to store thehashed_password value. If validation fails, the logic will return the relevant errormessage.
The defined UserSchema, along with all the password-related business logic,completes the user model implementation. Now, we can import and use this usermodel in other parts of the backend code. But before we begin using this model toextend backend functionality, we will add a helper module so that we can parsereadable Mongoose error messages, which are thrown against schema validations.
Mongoose error handlingThe validation constraints that are added to the user schema fields will throw errormessages if they're violated when user data is saved to the database. To handle thesevalidation errors and other errors that the database may throw when we makequeries to it, we will define a helper method that will return a relevant error messagethat can be propagated in the request-response cycle as appropriate.
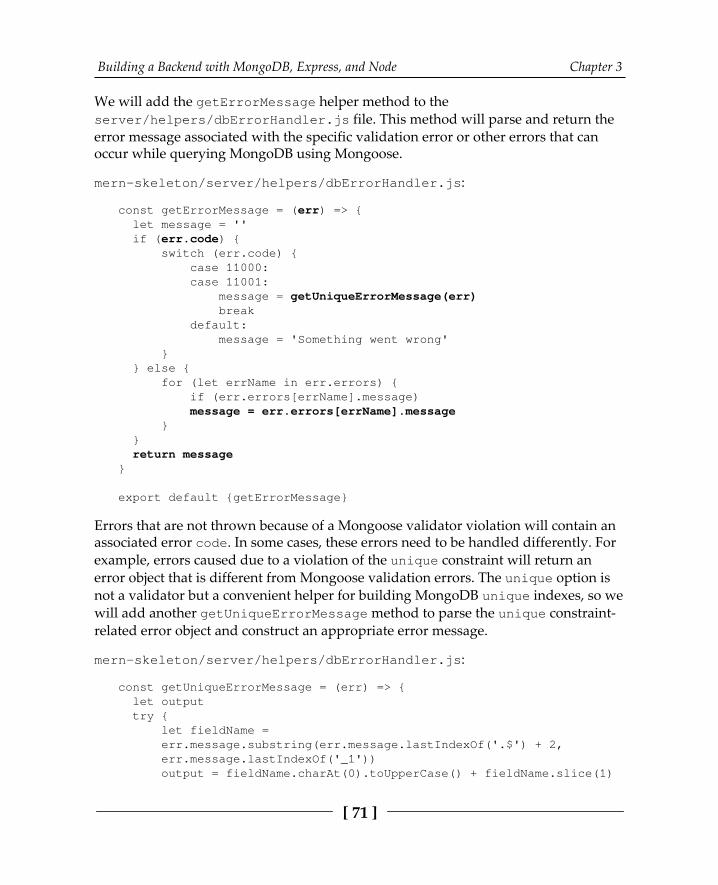
Building a Backend with MongoDB, Express, and Node Chapter 3
[ 71 ]
We will add the getErrorMessage helper method to theserver/helpers/dbErrorHandler.js file. This method will parse and return theerror message associated with the specific validation error or other errors that canoccur while querying MongoDB using Mongoose.
mern-skeleton/server/helpers/dbErrorHandler.js:
const getErrorMessage = (err) => { let message = '' if (err.code) { switch (err.code) { case 11000: case 11001: message = getUniqueErrorMessage(err) break default: message = 'Something went wrong' } } else { for (let errName in err.errors) { if (err.errors[errName].message) message = err.errors[errName].message } } return message}
export default {getErrorMessage}
Errors that are not thrown because of a Mongoose validator violation will contain anassociated error code. In some cases, these errors need to be handled differently. Forexample, errors caused due to a violation of the unique constraint will return anerror object that is different from Mongoose validation errors. The unique option isnot a validator but a convenient helper for building MongoDB unique indexes, so wewill add another getUniqueErrorMessage method to parse the unique constraint-related error object and construct an appropriate error message.
mern-skeleton/server/helpers/dbErrorHandler.js:
const getUniqueErrorMessage = (err) => { let output try { let fieldName = err.message.substring(err.message.lastIndexOf('.$') + 2, err.message.lastIndexOf('_1')) output = fieldName.charAt(0).toUpperCase() + fieldName.slice(1)
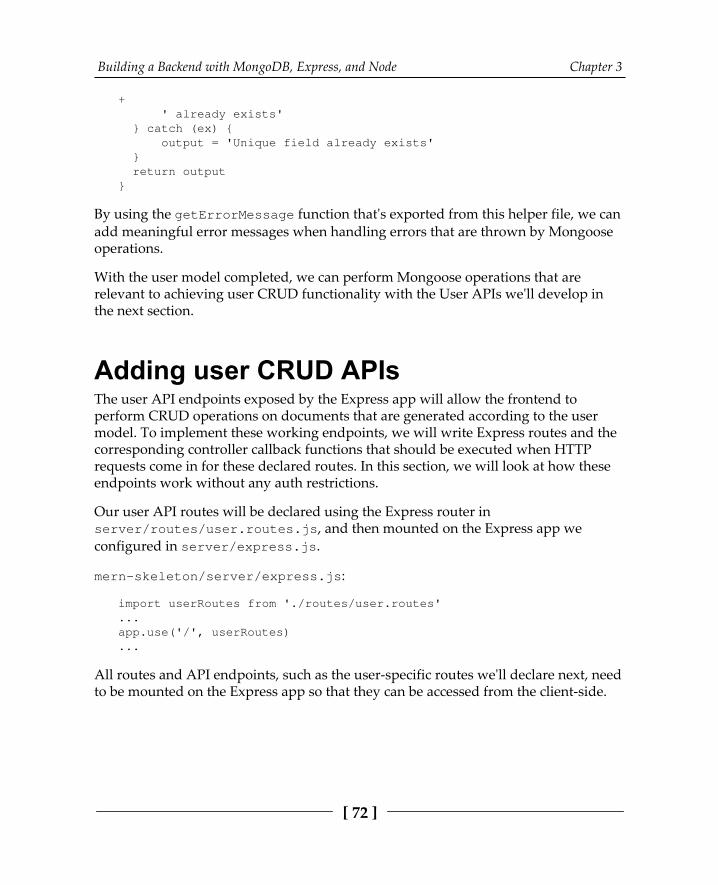
Building a Backend with MongoDB, Express, and Node Chapter 3
[ 72 ]
+ ' already exists' } catch (ex) { output = 'Unique field already exists' } return output}
By using the getErrorMessage function that's exported from this helper file, we can add meaningful error messages when handling errors that are thrown by Mongooseoperations.
With the user model completed, we can perform Mongoose operations that arerelevant to achieving user CRUD functionality with the User APIs we'll develop inthe next section.
Adding user CRUD APIs The user API endpoints exposed by the Express app will allow the frontend toperform CRUD operations on documents that are generated according to the usermodel. To implement these working endpoints, we will write Express routes and thecorresponding controller callback functions that should be executed when HTTPrequests come in for these declared routes. In this section, we will look at how theseendpoints work without any auth restrictions.
Our user API routes will be declared using the Express router inserver/routes/user.routes.js, and then mounted on the Express app weconfigured in server/express.js.
mern-skeleton/server/express.js:
import userRoutes from './routes/user.routes'...app.use('/', userRoutes)...
All routes and API endpoints, such as the user-specific routes we'll declare next, needto be mounted on the Express app so that they can be accessed from the client-side.
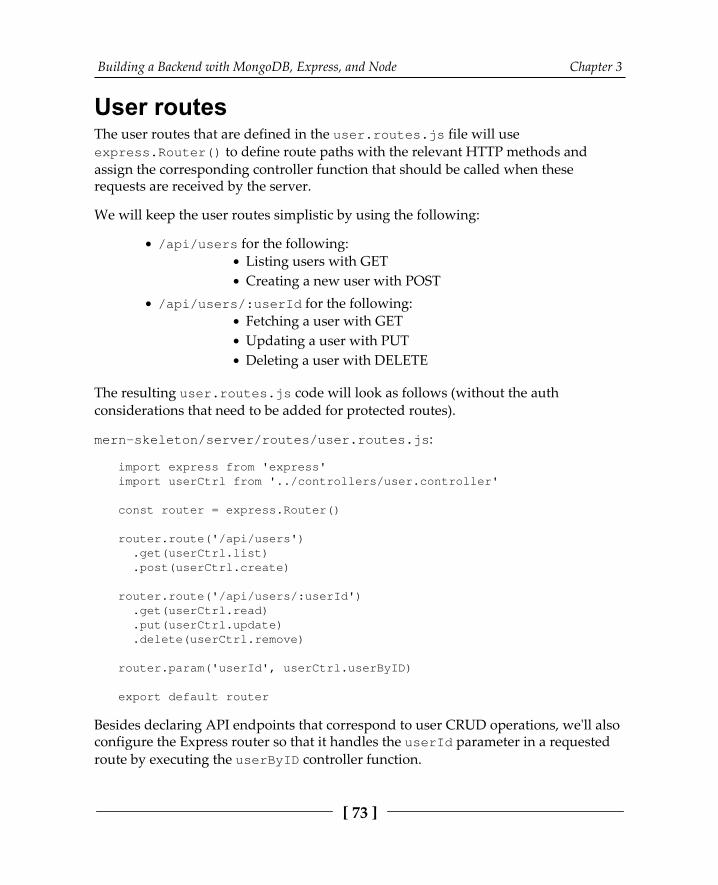
Building a Backend with MongoDB, Express, and Node Chapter 3
[ 73 ]
User routesThe user routes that are defined in the user.routes.js file will useexpress.Router() to define route paths with the relevant HTTP methods andassign the corresponding controller function that should be called when theserequests are received by the server.
We will keep the user routes simplistic by using the following:
/api/users for the following:Listing users with GETCreating a new user with POST
/api/users/:userId for the following:Fetching a user with GETUpdating a user with PUTDeleting a user with DELETE
The resulting user.routes.js code will look as follows (without the authconsiderations that need to be added for protected routes).
mern-skeleton/server/routes/user.routes.js:
import express from 'express'import userCtrl from '../controllers/user.controller'
const router = express.Router()
router.route('/api/users') .get(userCtrl.list) .post(userCtrl.create)
router.route('/api/users/:userId') .get(userCtrl.read) .put(userCtrl.update) .delete(userCtrl.remove)
router.param('userId', userCtrl.userByID)
export default router
Besides declaring API endpoints that correspond to user CRUD operations, we'll alsoconfigure the Express router so that it handles the userId parameter in a requestedroute by executing the userByID controller function.
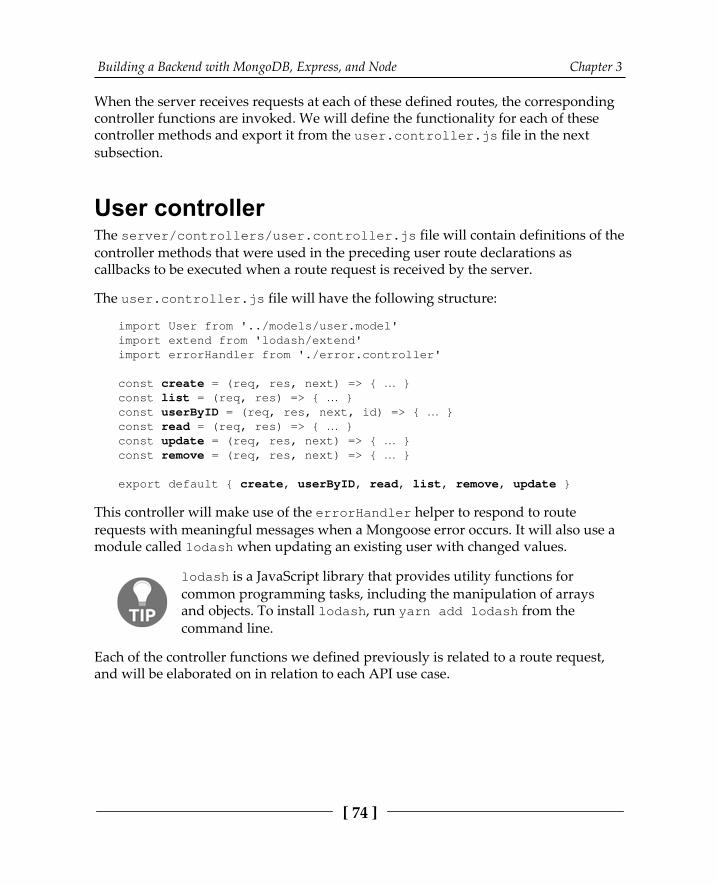
Building a Backend with MongoDB, Express, and Node Chapter 3
[ 74 ]
When the server receives requests at each of these defined routes, the correspondingcontroller functions are invoked. We will define the functionality for each of thesecontroller methods and export it from the user.controller.js file in the nextsubsection.
User controllerThe server/controllers/user.controller.js file will contain definitions of thecontroller methods that were used in the preceding user route declarations ascallbacks to be executed when a route request is received by the server.
The user.controller.js file will have the following structure:
import User from '../models/user.model'import extend from 'lodash/extend'import errorHandler from './error.controller'
const create = (req, res, next) => { … }const list = (req, res) => { … }const userByID = (req, res, next, id) => { … }const read = (req, res) => { … }const update = (req, res, next) => { … }const remove = (req, res, next) => { … }
export default { create, userByID, read, list, remove, update }
This controller will make use of the errorHandler helper to respond to routerequests with meaningful messages when a Mongoose error occurs. It will also use amodule called lodash when updating an existing user with changed values.
lodash is a JavaScript library that provides utility functions forcommon programming tasks, including the manipulation of arraysand objects. To install lodash, run yarn add lodash from thecommand line.
Each of the controller functions we defined previously is related to a route request,and will be elaborated on in relation to each API use case.
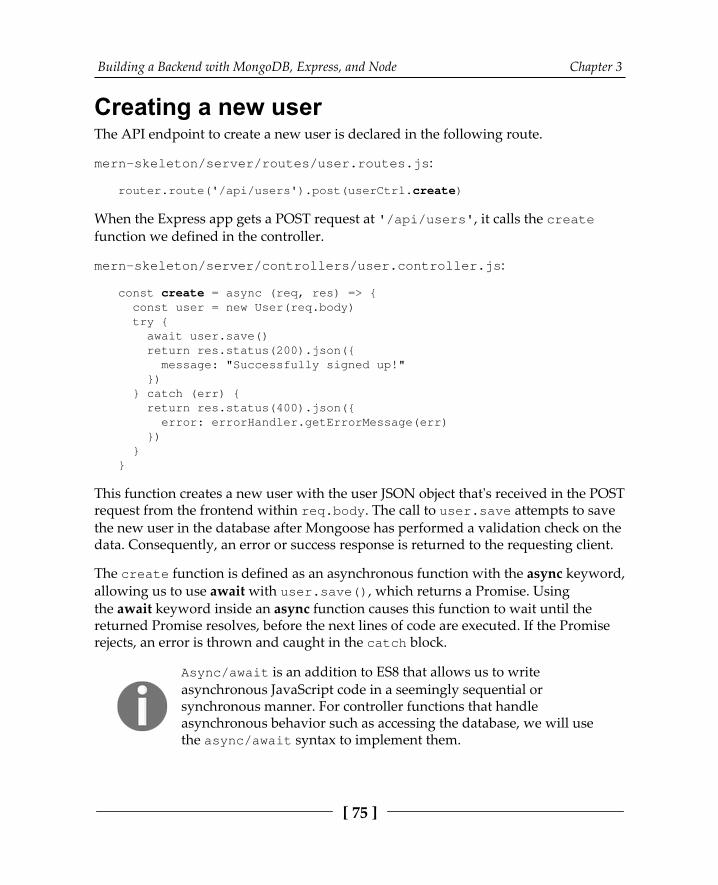
Building a Backend with MongoDB, Express, and Node Chapter 3
[ 75 ]
Creating a new userThe API endpoint to create a new user is declared in the following route.
mern-skeleton/server/routes/user.routes.js:
router.route('/api/users').post(userCtrl.create)
When the Express app gets a POST request at '/api/users', it calls the createfunction we defined in the controller.
mern-skeleton/server/controllers/user.controller.js:
const create = async (req, res) => { const user = new User(req.body) try { await user.save() return res.status(200).json({ message: "Successfully signed up!" }) } catch (err) { return res.status(400).json({ error: errorHandler.getErrorMessage(err) }) }}
This function creates a new user with the user JSON object that's received in the POSTrequest from the frontend within req.body. The call to user.save attempts to savethe new user in the database after Mongoose has performed a validation check on thedata. Consequently, an error or success response is returned to the requesting client.
The create function is defined as an asynchronous function with the async keyword,allowing us to use await with user.save(), which returns a Promise. Usingthe await keyword inside an async function causes this function to wait until thereturned Promise resolves, before the next lines of code are executed. If the Promiserejects, an error is thrown and caught in the catch block.
Async/await is an addition to ES8 that allows us to writeasynchronous JavaScript code in a seemingly sequential orsynchronous manner. For controller functions that handleasynchronous behavior such as accessing the database, we will usethe async/await syntax to implement them.
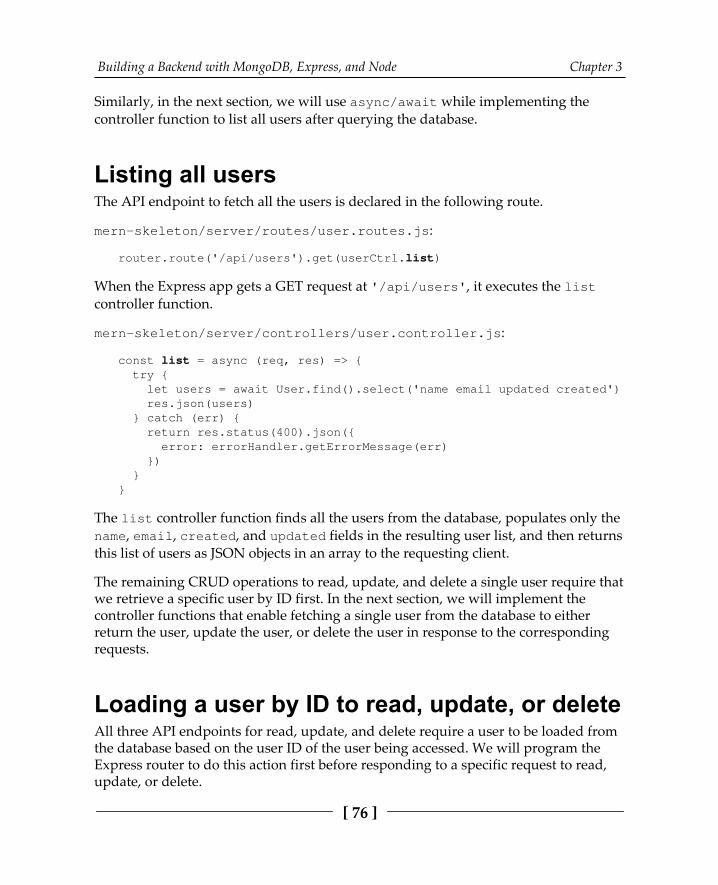
Building a Backend with MongoDB, Express, and Node Chapter 3
[ 76 ]
Similarly, in the next section, we will use async/await while implementing thecontroller function to list all users after querying the database.
Listing all usersThe API endpoint to fetch all the users is declared in the following route.
mern-skeleton/server/routes/user.routes.js:
router.route('/api/users').get(userCtrl.list)
When the Express app gets a GET request at '/api/users', it executes the listcontroller function.
mern-skeleton/server/controllers/user.controller.js:
const list = async (req, res) => { try { let users = await User.find().select('name email updated created') res.json(users) } catch (err) { return res.status(400).json({ error: errorHandler.getErrorMessage(err) }) }}
The list controller function finds all the users from the database, populates only thename, email, created, and updated fields in the resulting user list, and then returnsthis list of users as JSON objects in an array to the requesting client.
The remaining CRUD operations to read, update, and delete a single user require thatwe retrieve a specific user by ID first. In the next section, we will implement thecontroller functions that enable fetching a single user from the database to eitherreturn the user, update the user, or delete the user in response to the correspondingrequests.
Loading a user by ID to read, update, or deleteAll three API endpoints for read, update, and delete require a user to be loaded fromthe database based on the user ID of the user being accessed. We will program theExpress router to do this action first before responding to a specific request to read,update, or delete.
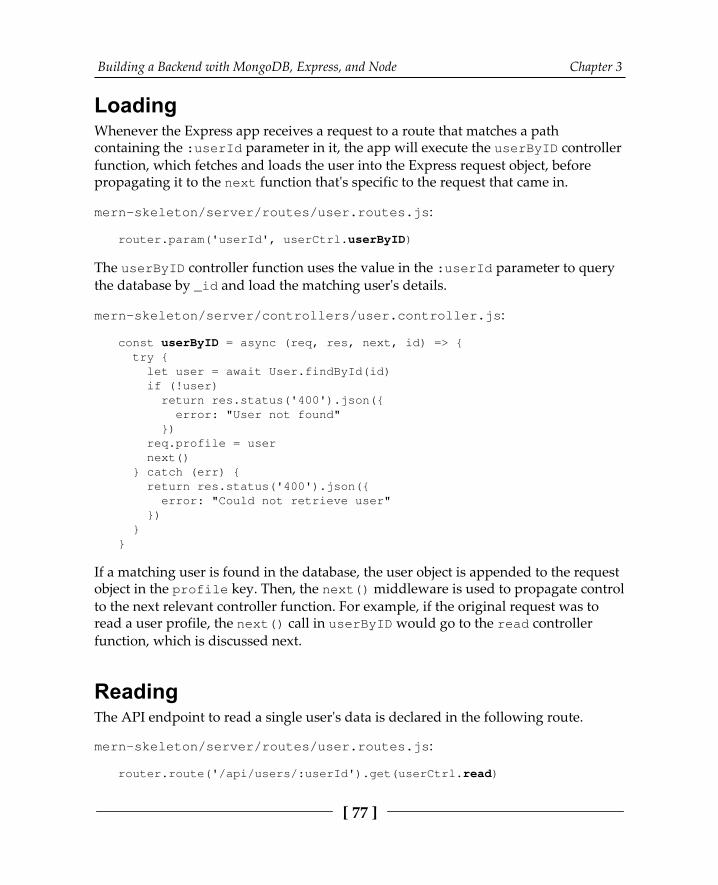
Building a Backend with MongoDB, Express, and Node Chapter 3
[ 77 ]
Loading Whenever the Express app receives a request to a route that matches a pathcontaining the :userId parameter in it, the app will execute the userByID controllerfunction, which fetches and loads the user into the Express request object, beforepropagating it to the next function that's specific to the request that came in.
mern-skeleton/server/routes/user.routes.js:
router.param('userId', userCtrl.userByID)
The userByID controller function uses the value in the :userId parameter to querythe database by _id and load the matching user's details.
mern-skeleton/server/controllers/user.controller.js:
const userByID = async (req, res, next, id) => { try { let user = await User.findById(id) if (!user) return res.status('400').json({ error: "User not found" }) req.profile = user next() } catch (err) { return res.status('400').json({ error: "Could not retrieve user" }) }}
If a matching user is found in the database, the user object is appended to the requestobject in the profile key. Then, the next() middleware is used to propagate controlto the next relevant controller function. For example, if the original request was toread a user profile, the next() call in userByID would go to the read controllerfunction, which is discussed next.
ReadingThe API endpoint to read a single user's data is declared in the following route.
mern-skeleton/server/routes/user.routes.js:
router.route('/api/users/:userId').get(userCtrl.read)
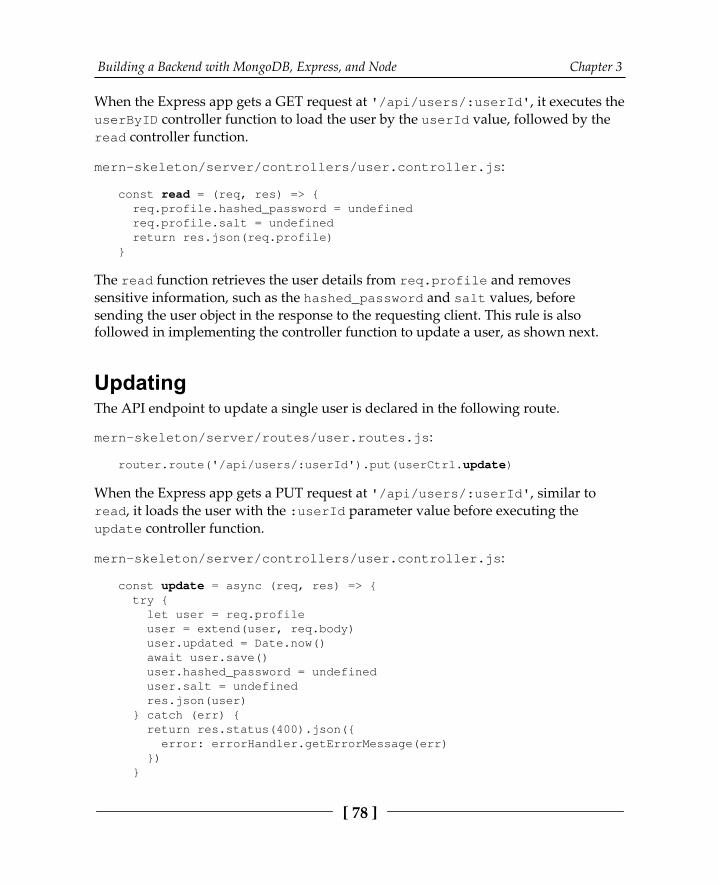
Building a Backend with MongoDB, Express, and Node Chapter 3
[ 78 ]
When the Express app gets a GET request at '/api/users/:userId', it executes theuserByID controller function to load the user by the userId value, followed by theread controller function.
mern-skeleton/server/controllers/user.controller.js:
const read = (req, res) => { req.profile.hashed_password = undefined req.profile.salt = undefined return res.json(req.profile)}
The read function retrieves the user details from req.profile and removessensitive information, such as the hashed_password and salt values, beforesending the user object in the response to the requesting client. This rule is alsofollowed in implementing the controller function to update a user, as shown next.
UpdatingThe API endpoint to update a single user is declared in the following route.
mern-skeleton/server/routes/user.routes.js:
router.route('/api/users/:userId').put(userCtrl.update)
When the Express app gets a PUT request at '/api/users/:userId', similar toread, it loads the user with the :userId parameter value before executing theupdate controller function.
mern-skeleton/server/controllers/user.controller.js:
const update = async (req, res) => { try { let user = req.profile user = extend(user, req.body) user.updated = Date.now() await user.save() user.hashed_password = undefined user.salt = undefined res.json(user) } catch (err) { return res.status(400).json({ error: errorHandler.getErrorMessage(err) }) }
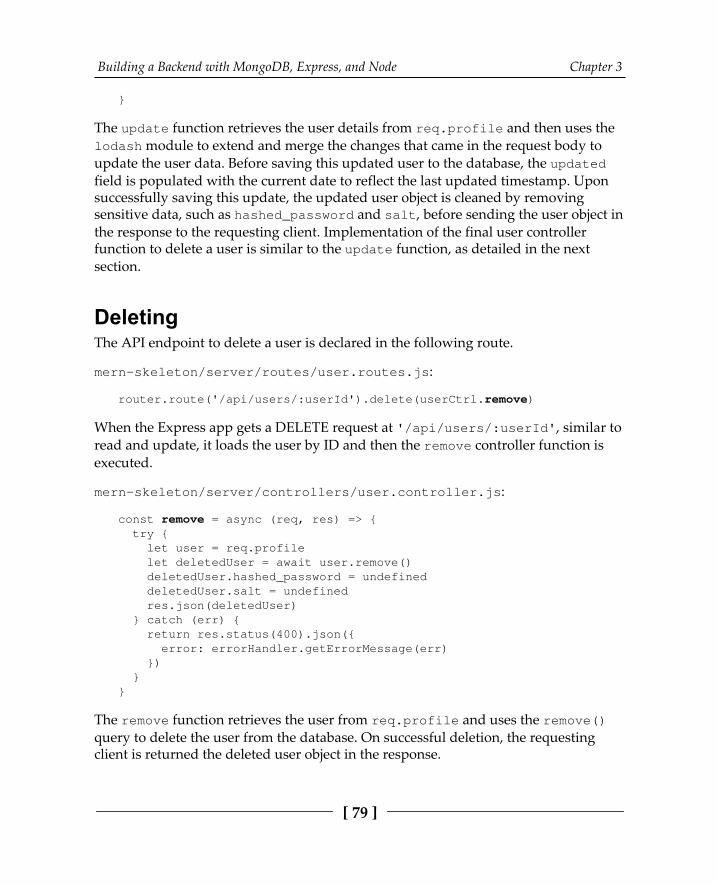
Building a Backend with MongoDB, Express, and Node Chapter 3
[ 79 ]
}
The update function retrieves the user details from req.profile and then uses thelodash module to extend and merge the changes that came in the request body toupdate the user data. Before saving this updated user to the database, the updatedfield is populated with the current date to reflect the last updated timestamp. Uponsuccessfully saving this update, the updated user object is cleaned by removingsensitive data, such as hashed_password and salt, before sending the user object inthe response to the requesting client. Implementation of the final user controllerfunction to delete a user is similar to the update function, as detailed in the nextsection.
DeletingThe API endpoint to delete a user is declared in the following route.
mern-skeleton/server/routes/user.routes.js:
router.route('/api/users/:userId').delete(userCtrl.remove)
When the Express app gets a DELETE request at '/api/users/:userId', similar toread and update, it loads the user by ID and then the remove controller function isexecuted.
mern-skeleton/server/controllers/user.controller.js:
const remove = async (req, res) => { try { let user = req.profile let deletedUser = await user.remove() deletedUser.hashed_password = undefined deletedUser.salt = undefined res.json(deletedUser) } catch (err) { return res.status(400).json({ error: errorHandler.getErrorMessage(err) }) }}
The remove function retrieves the user from req.profile and uses the remove()query to delete the user from the database. On successful deletion, the requestingclient is returned the deleted user object in the response.
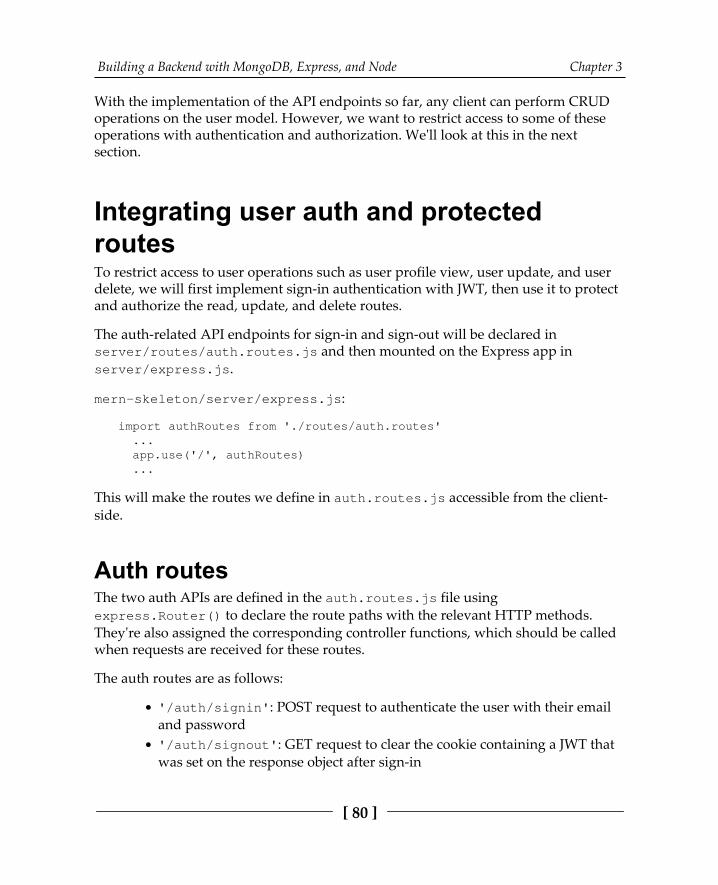
Building a Backend with MongoDB, Express, and Node Chapter 3
[ 80 ]
With the implementation of the API endpoints so far, any client can perform CRUDoperations on the user model. However, we want to restrict access to some of theseoperations with authentication and authorization. We'll look at this in the nextsection.
Integrating user auth and protectedroutesTo restrict access to user operations such as user profile view, user update, and userdelete, we will first implement sign-in authentication with JWT, then use it to protectand authorize the read, update, and delete routes.
The auth-related API endpoints for sign-in and sign-out will be declared inserver/routes/auth.routes.js and then mounted on the Express app inserver/express.js.
mern-skeleton/server/express.js:
import authRoutes from './routes/auth.routes' ... app.use('/', authRoutes) ...
This will make the routes we define in auth.routes.js accessible from the client-side.
Auth routesThe two auth APIs are defined in the auth.routes.js file usingexpress.Router() to declare the route paths with the relevant HTTP methods.They're also assigned the corresponding controller functions, which should be calledwhen requests are received for these routes.
The auth routes are as follows:
'/auth/signin': POST request to authenticate the user with their emailand password'/auth/signout': GET request to clear the cookie containing a JWT thatwas set on the response object after sign-in

Building a Backend with MongoDB, Express, and Node Chapter 3
[ 81 ]
The resulting mern-skeleton/server/routes/auth.routes.js file will be asfollows:
import express from 'express'import authCtrl from '../controllers/auth.controller'
const router = express.Router()
router.route('/auth/signin') .post(authCtrl.signin)router.route('/auth/signout') .get(authCtrl.signout)
export default router
A POST request to the signin route and a GET request to the signout route willinvoke the corresponding controller functions defined in the auth.controller.jsfile, as discussed in the next section.
Auth controllerThe auth controller functions in server/controllers/auth.controller.js willnot only handle requests to the signin and signout routes, but also provide JWTand express-jwt functionality to enable authentication and authorization forprotected user API endpoints.
The mern-skeleton/server/controllers/auth.controller.js file will havethe following structure:
import User from '../models/user.model'import jwt from 'jsonwebtoken'import expressJwt from 'express-jwt'import config from './../../config/config'
const signin = (req, res) => { … }const signout = (req, res) => { … }const requireSignin = …const hasAuthorization = (req, res) => { … }
export default { signin, signout, requireSignin, hasAuthorization }
The four controller functions are elaborated on in the following sections to show howthe backend implements user auth using JSON Web Tokens. We'll start with thesignin controller function in the next section.
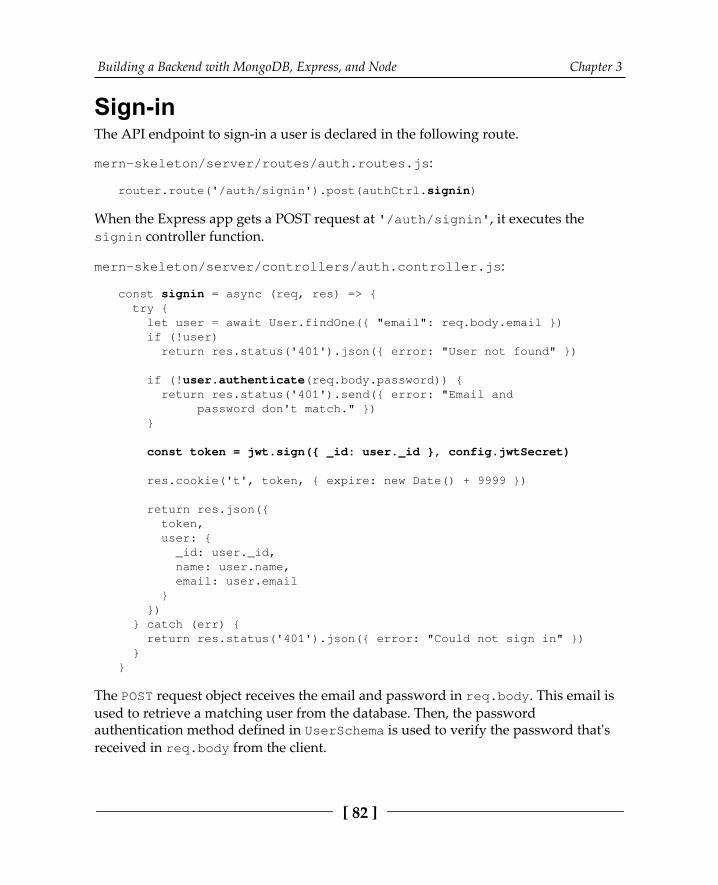
Building a Backend with MongoDB, Express, and Node Chapter 3
[ 82 ]
Sign-inThe API endpoint to sign-in a user is declared in the following route.
mern-skeleton/server/routes/auth.routes.js:
router.route('/auth/signin').post(authCtrl.signin)
When the Express app gets a POST request at '/auth/signin', it executes thesignin controller function.
mern-skeleton/server/controllers/auth.controller.js:
const signin = async (req, res) => { try { let user = await User.findOne({ "email": req.body.email }) if (!user) return res.status('401').json({ error: "User not found" })
if (!user.authenticate(req.body.password)) { return res.status('401').send({ error: "Email and password don't match." }) }
const token = jwt.sign({ _id: user._id }, config.jwtSecret)
res.cookie('t', token, { expire: new Date() + 9999 })
return res.json({ token, user: { _id: user._id, name: user.name, email: user.email } }) } catch (err) { return res.status('401').json({ error: "Could not sign in" }) }}
The POST request object receives the email and password in req.body. This email isused to retrieve a matching user from the database. Then, the passwordauthentication method defined in UserSchema is used to verify the password that'sreceived in req.body from the client.
Building a Backend with MongoDB, Express, and Node Chapter 3
[ 83 ]
If the password is successfully verified, the JWT module is used to generate a signedJWT using a secret key and the user's _id value.
Install the jsonwebtoken module to make it available to thiscontroller in the import by running yarn addjsonwebtoken from the command line.
Then, the signed JWT is returned to the authenticated client, along with the user'sdetails. Optionally, we can also set the token to a cookie in the response object so thatit is available to the client-side if cookies are the chosen form of JWT storage. On theclient-side, this token must be attached as an Authorization header whenrequesting protected routes from the server. To sign-out a user, the client-side cansimply delete this token depending on how it is being stored. In the next section, wewill learn how to use a signout API endpoint to clear the cookie containing thetoken.
SignoutThe API endpoint to sign-out a user is declared in the following route.
mern-skeleton/server/routes/auth.routes.js:
router.route('/auth/signout').get(authCtrl.signout)
When the Express app gets a GET request at '/auth/signout', it executes thesignout controller function.
mern-skeleton/server/controllers/auth.controller.js:
const signout = (req, res) => { res.clearCookie("t") return res.status('200').json({ message: "signed out" })}
The signout function clears the response cookie containing the signed JWT. This isan optional endpoint and not really necessary for auth purposes if cookies are notused at all in the frontend.
Building a Backend with MongoDB, Express, and Node Chapter 3
[ 84 ]
With JWT, user state storage is the client's responsibility, and there are multipleoptions for client-side storage besides cookies. On signout, the client needs to deletethe token on the client-side to establish that the user is no longer authenticated. Onthe server-side, we can use and verify the token that's generated at sign-in to protectroutes that should not be accessed without valid authentication. In the next section,we will learn how to implement these protected routes using JWT.
Protecting routes with express-jwtTo protect access to the read, update, and delete routes, the server will need to checkthat the requesting client is actually an authenticated and authorized user.
To check whether the requesting user is signed in and has a valid JWT when aprotected route is accessed, we will use the express-jwt module.
The express-jwt module is a piece of middleware that validatesJSON Web Tokens. Run yarn add express-jwt from thecommand line to install express-jwt.
Protecting user routesWe will define two auth controller methods called requireSignin and hasAuthorization, both of which will beadded to the user route declarations that need to be protected with authentication andauthorization.
The read, update, and delete routes in user.routes.js need to be updated asfollows.
mern-skeleton/server/routes/user.routes.js:
import authCtrl from '../controllers/auth.controller'...router.route('/api/users/:userId') .get(authCtrl.requireSignin, userCtrl.read) .put(authCtrl.requireSignin, authCtrl.hasAuthorization, userCtrl.update) .delete(authCtrl.requireSignin, authCtrl.hasAuthorization, userCtrl.remove)...
Building a Backend with MongoDB, Express, and Node Chapter 3
[ 85 ]
The route to read a user's information only needs authentication verification, whereasthe update and delete routes should check for both authentication and authorizationbefore these CRUD operations are executed. We will look into the implementation ofthe requireSignin method, which checks authentication, and thehasAuthorization method, which checks authorization, in the next section.
Requiring sign-inThe requireSignin method in auth.controller.js uses express-jwt to verifythat the incoming request has a valid JWT in the Authorization header. If the tokenis valid, it appends the verified user's ID in an 'auth' key to the request object;otherwise, it throws an authentication error.
mern-skeleton/server/controllers/auth.controller.js:
const requireSignin = expressJwt({ secret: config.jwtSecret, userProperty: 'auth'})
We can add requireSignin to any route that should be protected againstunauthenticated access.
Authorizing signed in usersFor some of the protected routes, such as update and delete, on top of checking forauthentication we also want to make sure the requesting user is only updating ordeleting their own user information.
To achieve this, the hasAuthorization function defined in auth.controller.jswill check whether the authenticated user is the same as the user being updated ordeleted before the corresponding CRUD controller function is allowed to proceed.
mern-skeleton/server/controllers/auth.controller.js:
const hasAuthorization = (req, res, next) => { const authorized = req.profile && req.auth && req.profile._id == req.auth._id if (!(authorized)) { return res.status('403').json({ error: "User is not authorized" }) }
Building a Backend with MongoDB, Express, and Node Chapter 3
[ 86 ]
next()}
The req.auth object is populated by express-jwt in requireSignin afterauthentication verification, while req.profile is populated by the userByIDfunction in user.controller.js. We will add the hasAuthorization function toroutes that require both authentication and authorization.
Auth error handling for express-jwtTo handle auth-related errors thrown by express-jwt when it tries to validate JWTtokens in incoming requests, we need to add the following error-catching code to theExpress app configuration in mern-skeleton/server/express.js, near the end ofthe code, after the routes are mounted and before the app is exported:
app.use((err, req, res, next) => { if (err.name === 'UnauthorizedError') { res.status(401).json({"error" : err.name + ": " + err.message}) }else if (err) { res.status(400).json({"error" : err.name + ": " + err.message}) console.log(err) }})
express-jwt throws an error named UnauthorizedError when a token cannot bevalidated for some reason. We catch this error here to return a 401 status back to therequesting client. We also add a response to be sent if other server-side errors aregenerated and caught here.
With user auth implemented for protecting routes, we have covered all the desiredfeatures of a working backend for our skeleton MERN application. In the next section,we will look at how we can check whether this standalone backend is functioning asdesired without implementing a frontend.
Checking the standalone backendThere are a number of options when it comes to selecting tools to check backendAPIs, ranging from the command-line tool curl (https:/ /github. com/ curl/ curl) toAdvanced REST Client (ARC) (https:/ /chrome. google. com/ webstore/ detail/advanced-rest- client/ hgmloofddffdnphfgcellkdfbfbjeloo), a Chrome extension app with an interactive user interface.
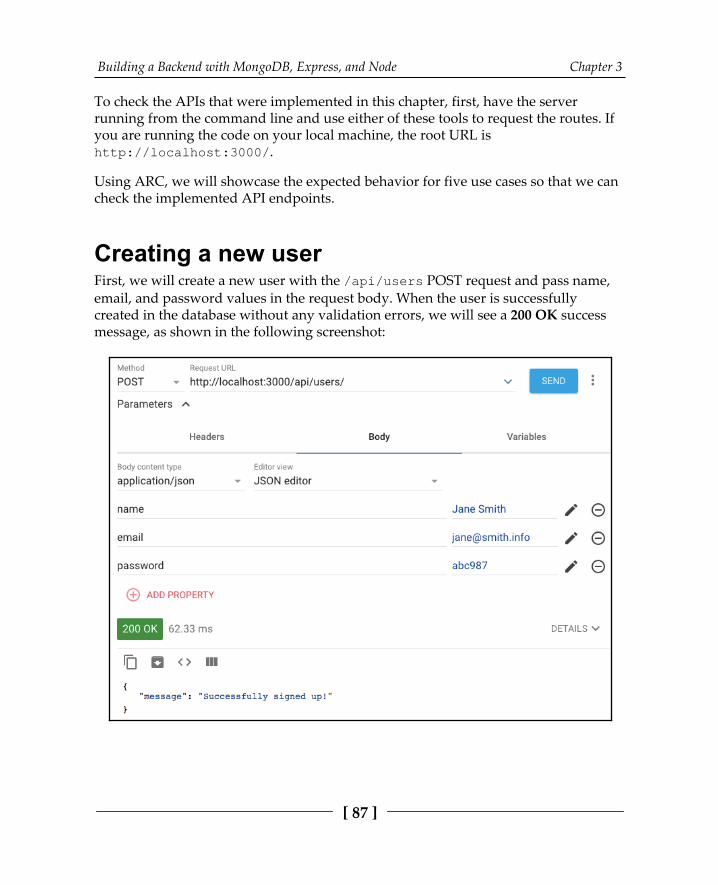
Building a Backend with MongoDB, Express, and Node Chapter 3
[ 87 ]
To check the APIs that were implemented in this chapter, first, have the serverrunning from the command line and use either of these tools to request the routes. Ifyou are running the code on your local machine, the root URL ishttp://localhost:3000/.
Using ARC, we will showcase the expected behavior for five use cases so that we cancheck the implemented API endpoints.
Creating a new userFirst, we will create a new user with the /api/users POST request and pass name,email, and password values in the request body. When the user is successfullycreated in the database without any validation errors, we will see a 200 OK successmessage, as shown in the following screenshot:
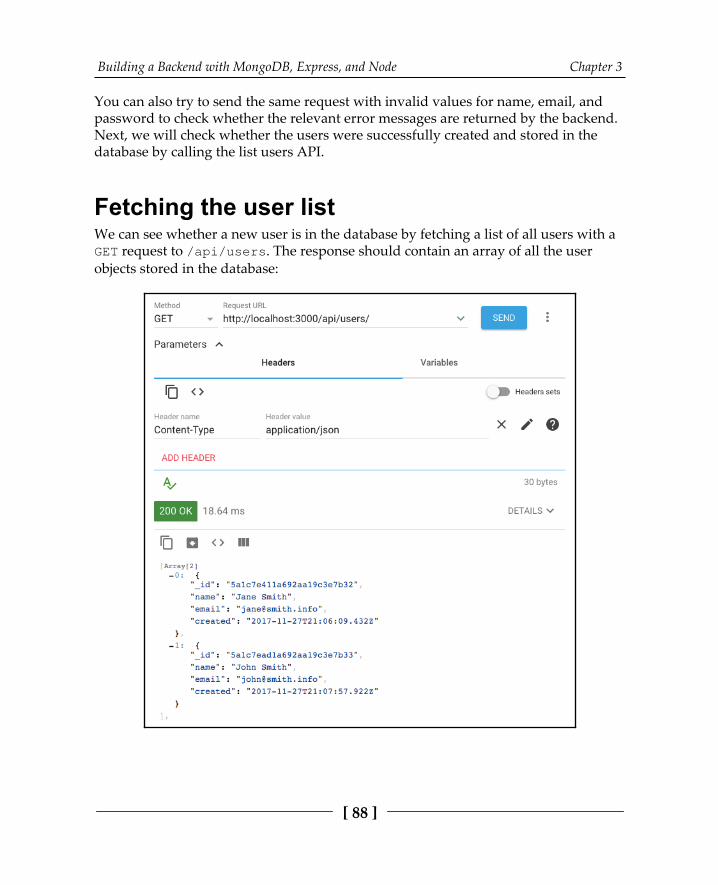
Building a Backend with MongoDB, Express, and Node Chapter 3
[ 88 ]
You can also try to send the same request with invalid values for name, email, andpassword to check whether the relevant error messages are returned by the backend.Next, we will check whether the users were successfully created and stored in thedatabase by calling the list users API.
Fetching the user listWe can see whether a new user is in the database by fetching a list of all users with aGET request to /api/users. The response should contain an array of all the userobjects stored in the database:
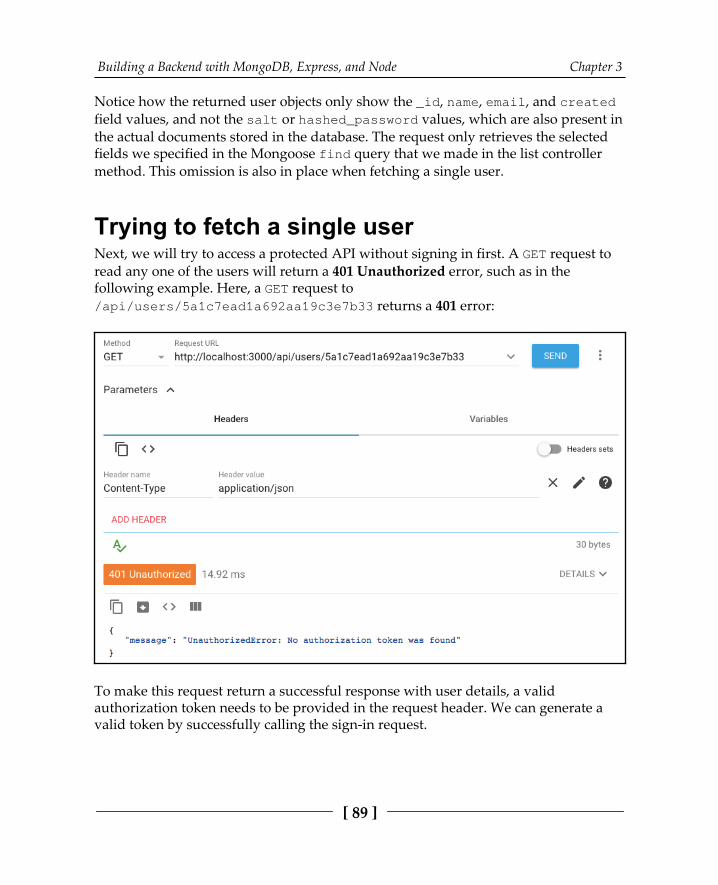
Building a Backend with MongoDB, Express, and Node Chapter 3
[ 89 ]
Notice how the returned user objects only show the _id, name, email, and createdfield values, and not the salt or hashed_password values, which are also present inthe actual documents stored in the database. The request only retrieves the selectedfields we specified in the Mongoose find query that we made in the list controllermethod. This omission is also in place when fetching a single user.
Trying to fetch a single userNext, we will try to access a protected API without signing in first. A GET request toread any one of the users will return a 401 Unauthorized error, such as in thefollowing example. Here, a GET request to/api/users/5a1c7ead1a692aa19c3e7b33 returns a 401 error:
To make this request return a successful response with user details, a validauthorization token needs to be provided in the request header. We can generate avalid token by successfully calling the sign-in request.
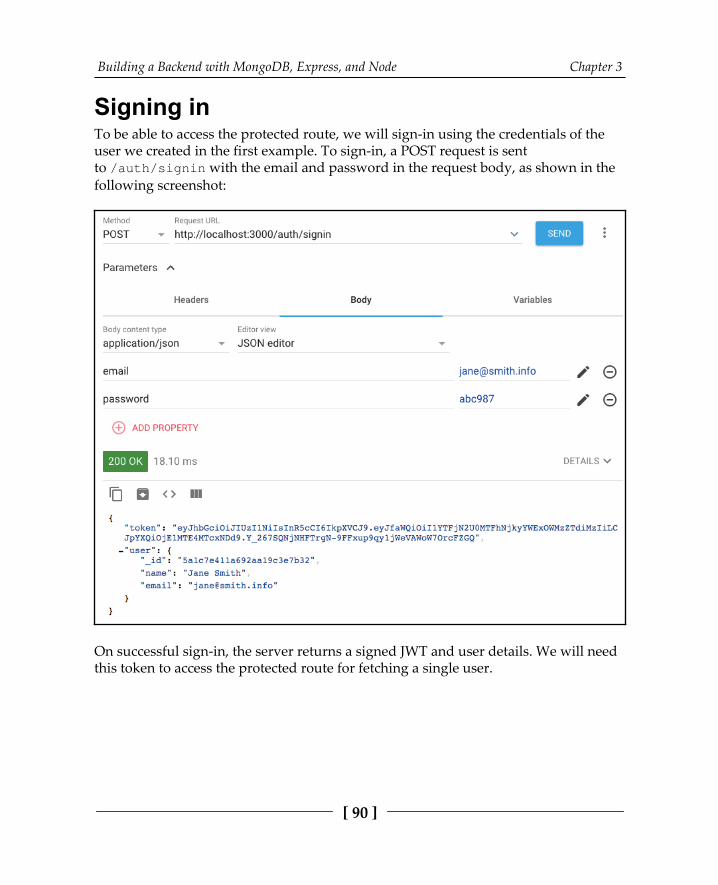
Building a Backend with MongoDB, Express, and Node Chapter 3
[ 90 ]
Signing inTo be able to access the protected route, we will sign-in using the credentials of theuser we created in the first example. To sign-in, a POST request is sentto /auth/signin with the email and password in the request body, as shown in thefollowing screenshot:
On successful sign-in, the server returns a signed JWT and user details. We will needthis token to access the protected route for fetching a single user.
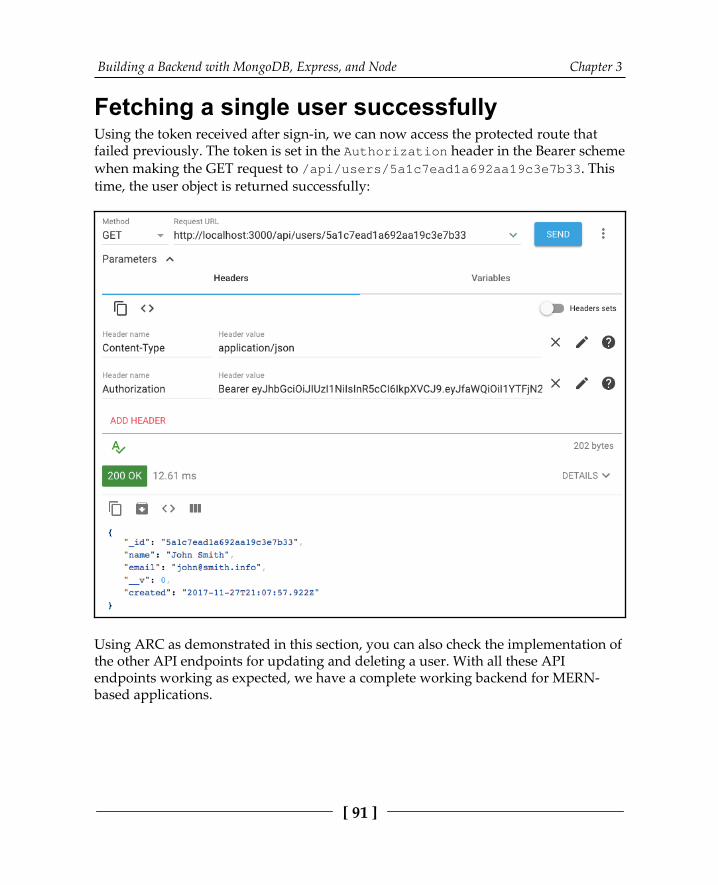
Building a Backend with MongoDB, Express, and Node Chapter 3
[ 91 ]
Fetching a single user successfullyUsing the token received after sign-in, we can now access the protected route thatfailed previously. The token is set in the Authorization header in the Bearer schemewhen making the GET request to /api/users/5a1c7ead1a692aa19c3e7b33. Thistime, the user object is returned successfully:
Using ARC as demonstrated in this section, you can also check the implementation ofthe other API endpoints for updating and deleting a user. With all these APIendpoints working as expected, we have a complete working backend for MERN-based applications.
Building a Backend with MongoDB, Express, and Node Chapter 3
[ 92 ]
SummaryIn this chapter, we developed a fully functioning standalone server-side applicationusing Node, Express, and MongoDB and covered the first part of the MERN skeletonapplication. In the backend, we implemented a user model for storing user data,implemented with Mongoose; user API endpoints to perform CRUD operations,which were implemented with Express; and user auth for protected routes, whichwas implemented with JWT and express-jwt.
We also set up the development flow by configuring Webpack so that it compilesES6+ code using Babel. We also configured Nodemon so that it restarts the serverwhen the code changes. Finally, we checked the implementation of the APIs using theAdvanced Rest API Client extension app for Chrome.
Now, we are ready to extend this backend application code and add the Reactfrontend, which will complete the MERN skeleton application. We will do this in thenext chapter.
4Adding a React Frontend to
Complete MERNA web application is incomplete without a frontend. It is the part that users interactwith and it is crucial to any web experience. In this chapter, we will use React to addan interactive user interface to the basic user and auth features that have beenimplemented for the backend of the MERN skeleton application, which we startedbuilding in the previous chapter. This functional frontend will add React componentsthat connect to the backend API and allow users to navigate seamlessly within theapplication based on authorization. By the end of this chapter, you will have learnedhow to easily integrate a React client-side with a Node-Express-MongoDB server-sideto make a full-stack web application.
In this chapter, we will cover the following topics:
Frontend features of the skeletonSetting up development with React, React Router, and Material-UIRendering a home page built with ReactBackend user API integrationAuth integration for restricted accessUser list, profile, edit, delete, sign up, and sign in UI to complete the userfrontendBasic server-side rendering
Adding a React Frontend to Complete MERN Chapter 4
[ 94 ]
Defining the skeleton applicationfrontendIn order to fully implement the skeleton application features we discussed in theFeature breakdown section of Chapter 3, Building a Backend with MongoDB, Express, andNode, we will add the following user interface components to our base application:
Home page: A view that renders at the root URL to welcome users to theweb application.Sign-up page: A view with a form for user sign-up, allowing new users tocreate a user account and redirecting them to a sign-in page whensuccessfully created.Sign-in page: A view with a sign-in form that allows existing users to signin so they have access to protected views and actions.User list page: A view that fetches and shows a list of all the users in thedatabase, and also links to individual user profiles.Profile page: A component that fetches and displays an individual user'sinformation. This is only accessible by signed-in users and also containsedit and delete options, which are only visible if the signed-in user islooking at their own profile.Edit profile page: A form that fetches the user's information to prefill theform fields. This allows the user to edit the information and this form isaccessible only if the logged-in user is trying to edit their own profile.Delete user component: An option that allows the signed-in user to deletetheir own profile after confirming their intent.Menu navigation bar: A component that lists all the available and relevantviews to the user, and also helps to indicate the user's current location inthe application.
The following React component tree diagram shows all the React components we willdevelop to build out the views for this base application:

Adding a React Frontend to Complete MERN Chapter 4
[ 95 ]
MainRouter will be the main React component. This contains all the other customReact views in the application. Home, Signup, Signin, Users, Profile, and EditProfilewill render at individual routes declared with React Router, whereas the Menucomponent will render across all these views. DeleteUser will be a part of the Profileview.
The code discussed in this chapter, as well as the complete skeleton,is available on GitHub at https:/ /github. com/ PacktPublishing/Full- Stack- React- Projects- Second- Edition/ tree/ master/Chapter03%20and%2004/ mern-skeleton. You can clone this code andrun the application as you go through the code explanations in therest of this chapter.
In order to implement these frontend React views, we will have to extend the existingproject code, which contains the standalone server application for the MERNskeleton. Next, we'll take a brief look at the files that will make up this frontend andthat are needed to complete the full-stack skeleton application code.
Folder and file structureThe following folder structure shows the new folders and files to be added to theskeleton project we started implementing in the previous chapter, in order tocomplete it with a React frontend:
| mern_skeleton/ | -- client/ | --- assets/
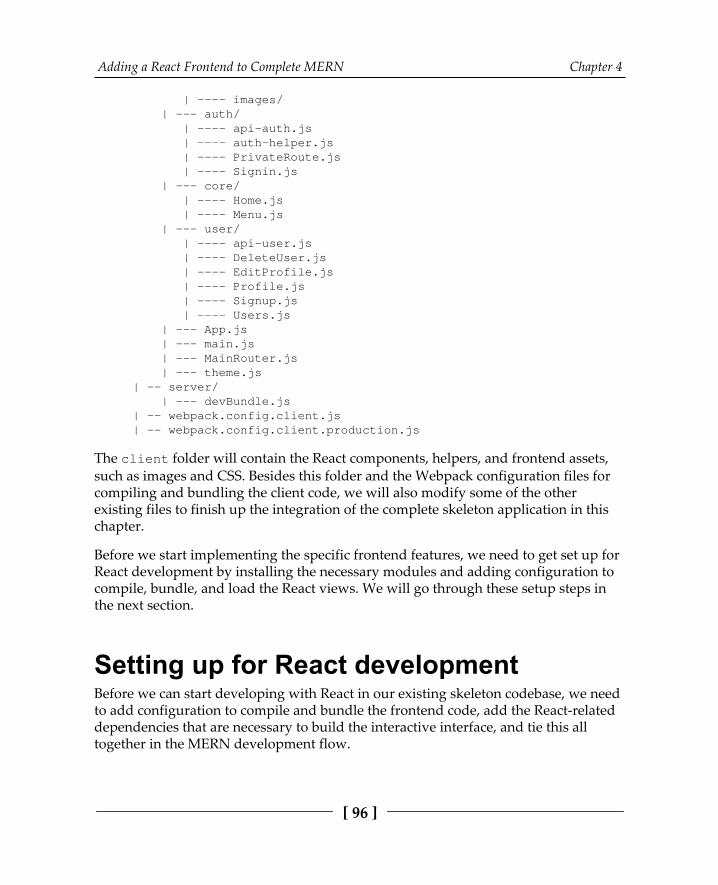
Adding a React Frontend to Complete MERN Chapter 4
[ 96 ]
| ---- images/ | --- auth/ | ---- api-auth.js | ---- auth-helper.js | ---- PrivateRoute.js | ---- Signin.js | --- core/ | ---- Home.js | ---- Menu.js | --- user/ | ---- api-user.js | ---- DeleteUser.js | ---- EditProfile.js | ---- Profile.js | ---- Signup.js | ---- Users.js | --- App.js | --- main.js | --- MainRouter.js | --- theme.js | -- server/ | --- devBundle.js | -- webpack.config.client.js | -- webpack.config.client.production.js
The client folder will contain the React components, helpers, and frontend assets,such as images and CSS. Besides this folder and the Webpack configuration files forcompiling and bundling the client code, we will also modify some of the otherexisting files to finish up the integration of the complete skeleton application in thischapter.
Before we start implementing the specific frontend features, we need to get set up forReact development by installing the necessary modules and adding configuration tocompile, bundle, and load the React views. We will go through these setup steps inthe next section.
Setting up for React developmentBefore we can start developing with React in our existing skeleton codebase, we needto add configuration to compile and bundle the frontend code, add the React-relateddependencies that are necessary to build the interactive interface, and tie this alltogether in the MERN development flow.
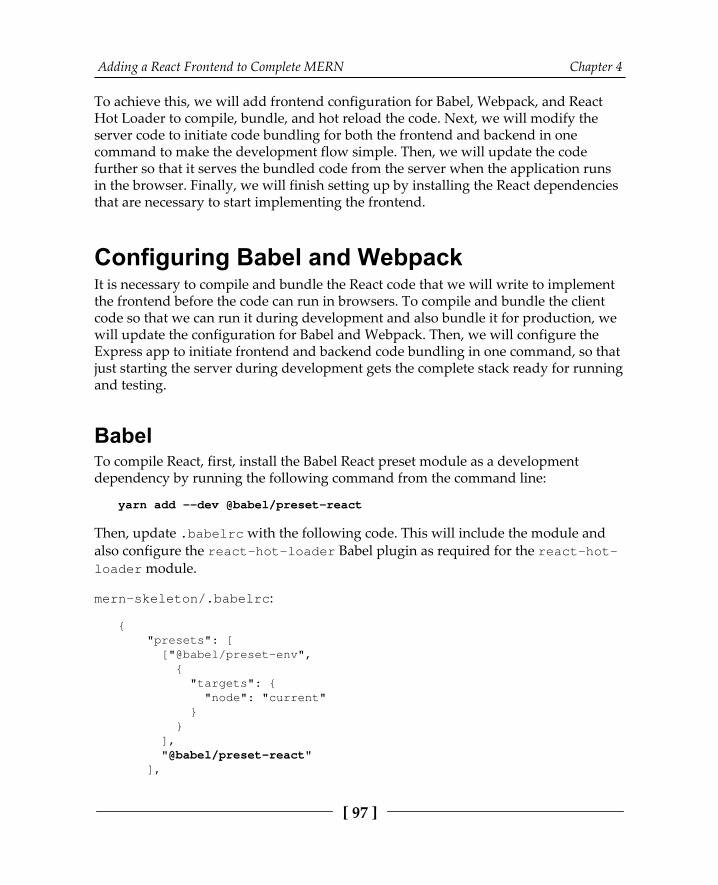
Adding a React Frontend to Complete MERN Chapter 4
[ 97 ]
To achieve this, we will add frontend configuration for Babel, Webpack, and ReactHot Loader to compile, bundle, and hot reload the code. Next, we will modify theserver code to initiate code bundling for both the frontend and backend in onecommand to make the development flow simple. Then, we will update the codefurther so that it serves the bundled code from the server when the application runsin the browser. Finally, we will finish setting up by installing the React dependenciesthat are necessary to start implementing the frontend.
Configuring Babel and WebpackIt is necessary to compile and bundle the React code that we will write to implementthe frontend before the code can run in browsers. To compile and bundle the clientcode so that we can run it during development and also bundle it for production, wewill update the configuration for Babel and Webpack. Then, we will configure theExpress app to initiate frontend and backend code bundling in one command, so thatjust starting the server during development gets the complete stack ready for runningand testing.
BabelTo compile React, first, install the Babel React preset module as a developmentdependency by running the following command from the command line:
yarn add --dev @babel/preset-react
Then, update .babelrc with the following code. This will include the module andalso configure the react-hot-loader Babel plugin as required for the react-hot-loader module.
mern-skeleton/.babelrc:
{ "presets": [ ["@babel/preset-env", { "targets": { "node": "current" } } ], "@babel/preset-react" ],
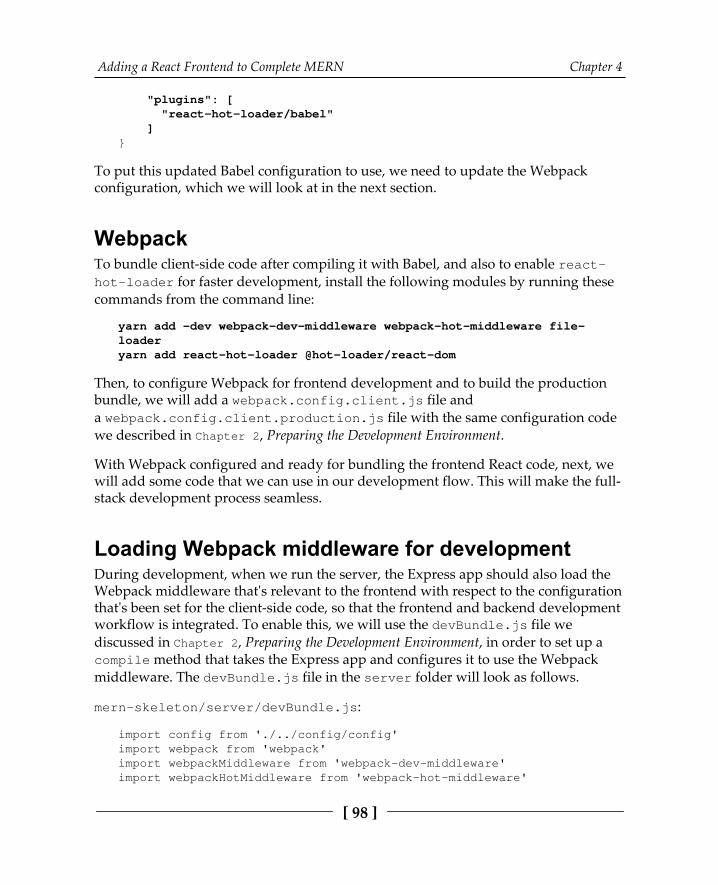
Adding a React Frontend to Complete MERN Chapter 4
[ 98 ]
"plugins": [ "react-hot-loader/babel" ]}
To put this updated Babel configuration to use, we need to update the Webpackconfiguration, which we will look at in the next section.
WebpackTo bundle client-side code after compiling it with Babel, and also to enable react-hot-loader for faster development, install the following modules by running thesecommands from the command line:
yarn add -dev webpack-dev-middleware webpack-hot-middleware file-loaderyarn add react-hot-loader @hot-loader/react-dom
Then, to configure Webpack for frontend development and to build the productionbundle, we will add a webpack.config.client.js file anda webpack.config.client.production.js file with the same configuration codewe described in Chapter 2, Preparing the Development Environment.
With Webpack configured and ready for bundling the frontend React code, next, wewill add some code that we can use in our development flow. This will make the full-stack development process seamless.
Loading Webpack middleware for developmentDuring development, when we run the server, the Express app should also load theWebpack middleware that's relevant to the frontend with respect to the configurationthat's been set for the client-side code, so that the frontend and backend developmentworkflow is integrated. To enable this, we will use the devBundle.js file wediscussed in Chapter 2, Preparing the Development Environment, in order to set up acompile method that takes the Express app and configures it to use the Webpackmiddleware. The devBundle.js file in the server folder will look as follows.
mern-skeleton/server/devBundle.js:
import config from './../config/config'import webpack from 'webpack'import webpackMiddleware from 'webpack-dev-middleware'import webpackHotMiddleware from 'webpack-hot-middleware'
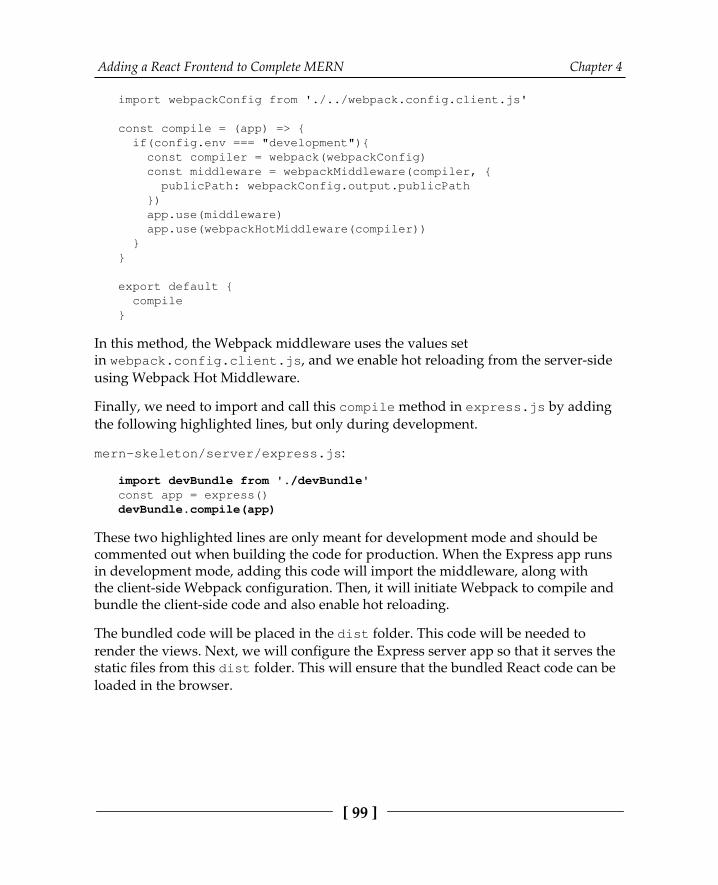
Adding a React Frontend to Complete MERN Chapter 4
[ 99 ]
import webpackConfig from './../webpack.config.client.js'
const compile = (app) => { if(config.env === "development"){ const compiler = webpack(webpackConfig) const middleware = webpackMiddleware(compiler, { publicPath: webpackConfig.output.publicPath }) app.use(middleware) app.use(webpackHotMiddleware(compiler)) }}
export default { compile}
In this method, the Webpack middleware uses the values setin webpack.config.client.js, and we enable hot reloading from the server-sideusing Webpack Hot Middleware.
Finally, we need to import and call this compile method in express.js by addingthe following highlighted lines, but only during development.
mern-skeleton/server/express.js:
import devBundle from './devBundle'const app = express()devBundle.compile(app)
These two highlighted lines are only meant for development mode and should becommented out when building the code for production. When the Express app runsin development mode, adding this code will import the middleware, along withthe client-side Webpack configuration. Then, it will initiate Webpack to compile andbundle the client-side code and also enable hot reloading.
The bundled code will be placed in the dist folder. This code will be needed torender the views. Next, we will configure the Express server app so that it serves thestatic files from this dist folder. This will ensure that the bundled React code can beloaded in the browser.
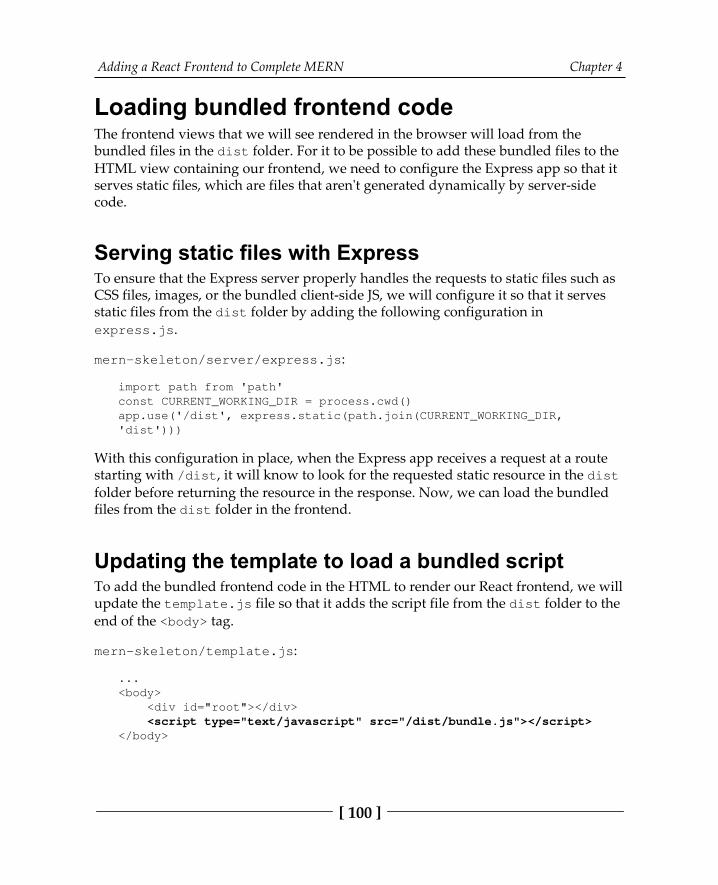
Adding a React Frontend to Complete MERN Chapter 4
[ 100 ]
Loading bundled frontend codeThe frontend views that we will see rendered in the browser will load from the bundled files in the dist folder. For it to be possible to add these bundled files to theHTML view containing our frontend, we need to configure the Express app so that itserves static files, which are files that aren't generated dynamically by server-sidecode.
Serving static files with ExpressTo ensure that the Express server properly handles the requests to static files such asCSS files, images, or the bundled client-side JS, we will configure it so that it servesstatic files from the dist folder by adding the following configuration inexpress.js.
mern-skeleton/server/express.js:
import path from 'path'const CURRENT_WORKING_DIR = process.cwd()app.use('/dist', express.static(path.join(CURRENT_WORKING_DIR,'dist')))
With this configuration in place, when the Express app receives a request at a routestarting with /dist, it will know to look for the requested static resource in the distfolder before returning the resource in the response. Now, we can load the bundledfiles from the dist folder in the frontend.
Updating the template to load a bundled scriptTo add the bundled frontend code in the HTML to render our React frontend, we willupdate the template.js file so that it adds the script file from the dist folder to theend of the <body> tag.
mern-skeleton/template.js:
...<body> <div id="root"></div> <script type="text/javascript" src="/dist/bundle.js"></script></body>
Adding a React Frontend to Complete MERN Chapter 4
[ 101 ]
This script tag will load our React frontend code in the browser when we visit theroot URL '/' with the server running. We are ready to see this in action and can startinstalling the dependencies that will add the React views.
Adding React dependenciesThe frontend views in our skeleton application will primarily be implemented usingReact. In addition, to enable client-side routing, we will use React Router, and toenhance the user experience with a sleek look and feel, we will use Material-UI. Toadd these libraries, we will install the following modules in this section:
Core React modules: react and react-dom React Router modules: react-router and react-router-domMaterial-UI modules: @material-ui/core and @material-ui/icons
ReactThroughout this book, we will use React to code up the frontend. To start writing theReact component code, we will need to install the following modules as regulardependencies:
yarn add react react-dom
These are the core React library modules that are necessary for implementing theReact-based web frontend. With other additional modules, we will add morefunctionality on top of React.
React RouterReact Router provides a collection of navigational components that enable routing onthe frontend for React applications. We will add the following React Router modules:
yarn add react-router react-router-dom
These modules will let us utilize declarative routing and have bookmarkable URLroutes in the frontend.
Adding a React Frontend to Complete MERN Chapter 4
[ 102 ]
Material-UIIn order to keep the UI in our MERN applications sleek without delving too muchinto UI design and implementation, we will utilize the Material-UI library. It providesready to use and customizable React components that implement Google's materialdesign. To start using Material-UI components to make the frontend, we need toinstall the following modules:
yarn add @material-ui/core @material-ui/icons
At the time of writing, the latest version of Material-UI is 4.9.8. It isrecommended that you install this exact version in order to ensurethe code for the example projects does not break.
To add the Roboto fonts that are recommended by Material-UI and to use theMaterial-UI icons, we will add the relevant style links into the template.js file, inthe HTML document's <head> section:
<link rel="stylesheet"href="https://fonts.googleapis.com/css?family=Roboto:100,300,400"><link href="https://fonts.googleapis.com/icon?family=Material+Icons"rel="stylesheet">
With the development configuration all set up and the necessary React modulesadded to the code base, we can now implement the custom React components,starting with a home page. This should load up as the first view of the completeapplication.
Rendering a home page view To demonstrate how to implement a functional frontend for this MERN skeleton, we will start by detailing how to render a simple home page at the root route of theapplication, before covering backend API integration, user auth integration, andimplementing the other view components in the rest of this chapter.
The process of implementing and rendering a working Home component at the rootroute will also expose the basic structure of the frontend code in the skeleton. We willstart with the top-level entry component that houses the whole React app and rendersthe main router component, which links all the React components in the application.
Adding a React Frontend to Complete MERN Chapter 4
[ 103 ]
In the following sections, we will begin implementing the React frontend. First, wewill add the root React component, which is integrated with React Router andMaterial-UI and configured for hot reloading. We will also learn how to customizethe Material-UI theme and make the theme available to all our components. Finally,we will implement and load the React component representing the home page, inturn demonstrating how to add and render React views in this application.
Entry point at main.jsThe client/main.js file in the client folder will be the entry point to render thecomplete React app, as already indicated in the client-side Webpack configurationobject. In client/main.js, we import the root or top-level React component thatwill contain the whole frontend and render it to the div element with the 'root' IDspecified in the HTML document in template.js.
mern-skeleton/client/main.js:
import React from 'react'import { render } from 'react-dom'import App from './App'
render(<App/>, document.getElementById('root'))
Here, the top-level root React component is the App component and it is beingrendered in the HTML. The App component is defined in client/App.js, asdiscussed in the next subsection.
Root React componentThe top-level React component that will contain all the components for theapplication's frontend is defined in the client/App.js file. In this file, we configurethe React app so that it renders the view components with a customized Material-UItheme, enables frontend routing, and ensures that the React Hot Loader can instantlyload changes as we develop the components.
In the following sections, we will add code to customize the theme, make this themeand React Router capabilities available to our React components, and configure theroot component for hot reloading.
Adding a React Frontend to Complete MERN Chapter 4
[ 104 ]
Customizing the Material-UI themeThe Material-UI theme can be easily customized using the ThemeProvidercomponent. It can also be used to configure the custom values of theme variables increateMuiTheme(). We will define a custom theme for the skeleton application inclient/theme.js using createMuiTheme, and then export it so that it can be usedin the App component.
mern-skeleton/client/theme.js:
import { createMuiTheme } from '@material-ui/core/styles'import { pink } from '@material-ui/core/colors'
const theme = createMuiTheme({ typography: { useNextVariants: true, }, palette: { primary: { light: '#5c67a3', main: '#3f4771', dark: '#2e355b', contrastText: '#fff', }, secondary: { light: '#ff79b0', main: '#ff4081', dark: '#c60055', contrastText: '#000', }, openTitle: '#3f4771', protectedTitle: pink['400'], type: 'light' }})
export default theme
For the skeleton, we only apply minimal customization by setting some color valuesto be used in the UI. The theme variables that are generated here will be passed to,and available in, all the components we build.
Adding a React Frontend to Complete MERN Chapter 4
[ 105 ]
Wrapping the root component with ThemeProviderand BrowserRouterThe custom React components that we will create to make up the user interface willbe accessed with the frontend routes specified in the MainRouter component.Essentially, this component houses all the custom views that have been developed forthe application and needs to be given the theme values and routing features. Thiscomponent will be our core component in the root App component, which is definedin the following code.
mern-skeleton/client/App.js:
import React from 'react'import MainRouter from './MainRouter'import {BrowserRouter} from 'react-router-dom'import { ThemeProvider } from '@material-ui/styles'import theme from './theme'
const App = () => { return ( <BrowserRouter> <ThemeProvider theme={theme}> <MainRouter/> </ThemeProvider> </BrowserRouter>)}
When defining this root component in App.js, we wrap the MainRouter componentwith ThemeProvider, which gives it access to the Material-UI theme,and BrowserRouter, which enables frontend routing with React Router. The customtheme variables we defined previously are passed as a prop to ThemeProvider,making the theme available in all our custom React components. Finally, in theApp.js file, we need to export this App component so that it can be imported andused in main.js.
Adding a React Frontend to Complete MERN Chapter 4
[ 106 ]
Marking the root component as hot-exportedThe last line of code in App.js, which exports the App component, uses the higher-order component (HOC) hot module from react-hot-loader to mark the rootcomponent as hot.
mern-skeleton/client/App.js:
import { hot } from 'react-hot-loader'const App = () => { ... }export default hot(module)(App)
Marking the App component as hot in this way essentially enables live reloading ofour React components during development.
For our MERN applications, we won't have to change the main.js and App.js codeall that much after this point, and we can continue building out the rest of the Reactapp by injecting new components into the MainRouter component, which is whatwe'll do in the next section.
Adding a home route to MainRouterThe MainRouter.js code will help render our custom React components withrespect to the routes or locations in the application. In this first version, we will onlyadd the root route for rendering the Home component.
mern-skeleton/client/MainRouter.js:
import React from 'react'import {Route, Switch} from 'react-router-dom'import Home from './core/Home'const MainRouter = () => { return ( <div> <Switch> <Route exact path="/" component={Home}/> </Switch> </div> )}export default MainRouter
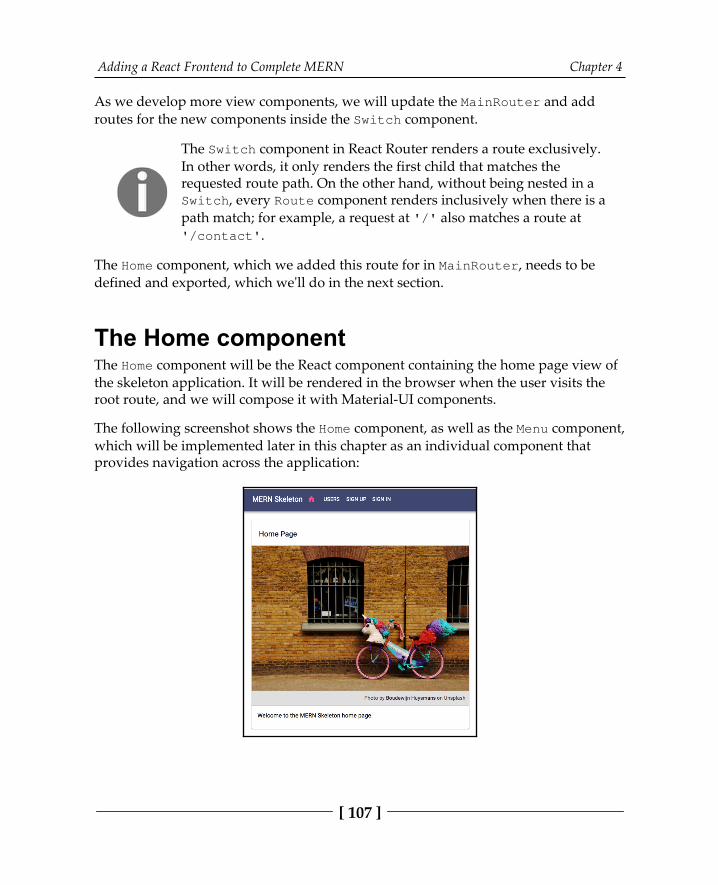
Adding a React Frontend to Complete MERN Chapter 4
[ 107 ]
As we develop more view components, we will update the MainRouter and addroutes for the new components inside the Switch component.
The Switch component in React Router renders a route exclusively.In other words, it only renders the first child that matches therequested route path. On the other hand, without being nested in aSwitch, every Route component renders inclusively when there is apath match; for example, a request at '/' also matches a route at'/contact'.
The Home component, which we added this route for in MainRouter, needs to bedefined and exported, which we'll do in the next section.
The Home componentThe Home component will be the React component containing the home page view ofthe skeleton application. It will be rendered in the browser when the user visits theroot route, and we will compose it with Material-UI components.
The following screenshot shows the Home component, as well as the Menu component,which will be implemented later in this chapter as an individual component thatprovides navigation across the application:
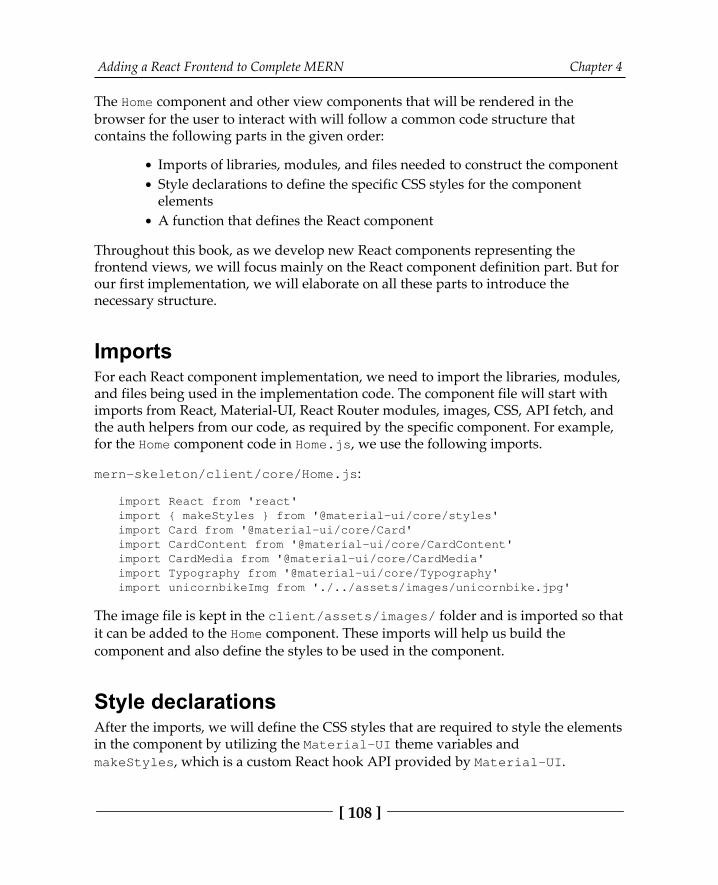
Adding a React Frontend to Complete MERN Chapter 4
[ 108 ]
The Home component and other view components that will be rendered in thebrowser for the user to interact with will follow a common code structure thatcontains the following parts in the given order:
Imports of libraries, modules, and files needed to construct the componentStyle declarations to define the specific CSS styles for the componentelementsA function that defines the React component
Throughout this book, as we develop new React components representing thefrontend views, we will focus mainly on the React component definition part. But forour first implementation, we will elaborate on all these parts to introduce thenecessary structure.
ImportsFor each React component implementation, we need to import the libraries, modules,and files being used in the implementation code. The component file will start withimports from React, Material-UI, React Router modules, images, CSS, API fetch, andthe auth helpers from our code, as required by the specific component. For example,for the Home component code in Home.js, we use the following imports.
mern-skeleton/client/core/Home.js:
import React from 'react'import { makeStyles } from '@material-ui/core/styles'import Card from '@material-ui/core/Card'import CardContent from '@material-ui/core/CardContent'import CardMedia from '@material-ui/core/CardMedia'import Typography from '@material-ui/core/Typography'import unicornbikeImg from './../assets/images/unicornbike.jpg'
The image file is kept in the client/assets/images/ folder and is imported so thatit can be added to the Home component. These imports will help us build thecomponent and also define the styles to be used in the component.
Style declarationsAfter the imports, we will define the CSS styles that are required to style the elementsin the component by utilizing the Material-UI theme variables andmakeStyles, which is a custom React hook API provided by Material-UI.

Adding a React Frontend to Complete MERN Chapter 4
[ 109 ]
Hooks are new to React. Hooks are functions that make it possible touse React state and life cycle features in function components,without having to write a class to define the component. Reactprovides some built-in hooks, but we can also build custom hooks asneeded to reuse stateful behavior across different components. Tolearn more about React Hooks, visit reactjs.org/docs/hooks-intro.html.
For the Home component in Home.js, we have the following styles.
mern-skeleton/client/core/Home.js:
const useStyles = makeStyles(theme => ({ card: { maxWidth: 600, margin: 'auto', marginTop: theme.spacing(5) }, title: { padding:`${theme.spacing(3)}px ${theme.spacing(2.5)}px${theme.spacing(2)}px`, color: theme.palette.openTitle }, media: { minHeight: 400 }}))
The JSS style objects defined here will be injected into the component using the hookreturned by makeStyles. The makeStyles hook API takes a function as anargument and gives access to our custom theme variables, which we can use whendefining the styles.
Material-UI uses JSS, which is a CSS-in-JS styling solution for addingstyles to components. JSS uses JavaScript as a language to describestyles. This book will not cover CSS and styling implementations indetail. It will mostly rely on the default look and feel of Material-UIcomponents. To learn more about JSS, visit http:/ /cssinjs. org/ ?v=v9. 8.1. For examples of how to customize the Material-UIcomponent styles, check out the Material-UI documentation athttps:/ / material- ui. com/.
We can use these generated styles to style the elements in the component, as shown inthe following Home component definition.
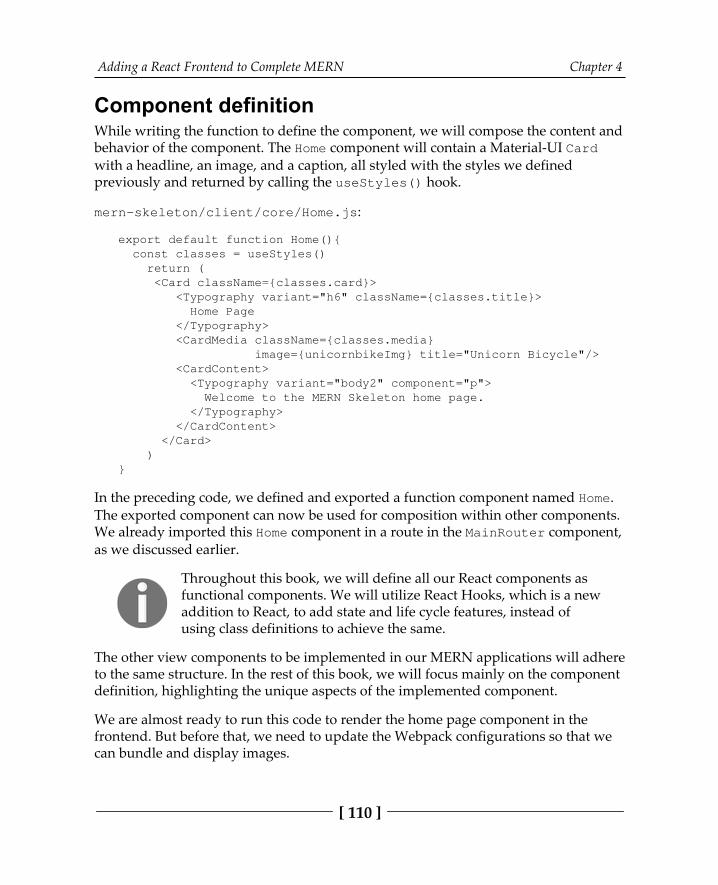
Adding a React Frontend to Complete MERN Chapter 4
[ 110 ]
Component definitionWhile writing the function to define the component, we will compose the content andbehavior of the component. The Home component will contain a Material-UI Cardwith a headline, an image, and a caption, all styled with the styles we definedpreviously and returned by calling the useStyles() hook.
mern-skeleton/client/core/Home.js:
export default function Home(){ const classes = useStyles() return ( <Card className={classes.card}> <Typography variant="h6" className={classes.title}> Home Page </Typography> <CardMedia className={classes.media} image={unicornbikeImg} title="Unicorn Bicycle"/> <CardContent> <Typography variant="body2" component="p"> Welcome to the MERN Skeleton home page. </Typography> </CardContent> </Card> )}
In the preceding code, we defined and exported a function component named Home.The exported component can now be used for composition within other components.We already imported this Home component in a route in the MainRouter component,as we discussed earlier.
Throughout this book, we will define all our React components asfunctional components. We will utilize React Hooks, which is a newaddition to React, to add state and life cycle features, instead ofusing class definitions to achieve the same.
The other view components to be implemented in our MERN applications will adhereto the same structure. In the rest of this book, we will focus mainly on the componentdefinition, highlighting the unique aspects of the implemented component.
We are almost ready to run this code to render the home page component in thefrontend. But before that, we need to update the Webpack configurations so that wecan bundle and display images.
Adding a React Frontend to Complete MERN Chapter 4
[ 111 ]
Bundling image assetsThe static image file that we imported into the Home component view must also beincluded in the bundle with the rest of the compiled JS code so that the code canaccess and load it. To enable this, we need to update the Webpack configuration filesand add a module rule to load, bundle, and emit image files to the dist outputdirectory, which contains the compiled frontend and backend code.
Update the webpack.config.client.js, webpack.config.server.js, andwebpack.config.client.production.js files so that you can add the followingmodule rule after the use of babel-loader:
[ … { test: /\.(ttf|eot|svg|gif|jpg|png)(\?[\s\S]+)?$/, use: 'file-loader' }]
This module rule uses the file-loader node module for Webpack, which needs tobe installed as a development dependency, as follows:
yarn add --dev file-loader
With this image bundling configuration added, the home page component shouldsuccessfully render the image when we run the application.
Running and opening in the browserThe client code up to this point can be run so that we can view the Home componentin the browser at the root URL. To run the application, use the following command:
yarn development
Then, open the root URL (http://localhost:3000) in the browser to see the Homecomponent.
The Home component we've developed in this section is a basic view componentwithout interactive features and does not require the use of the backend APIs for userCRUD or auth. However, the remaining view components for our skeleton frontendwill need the backend APIs and auth, so we will look at how to integrate these in thenext section.
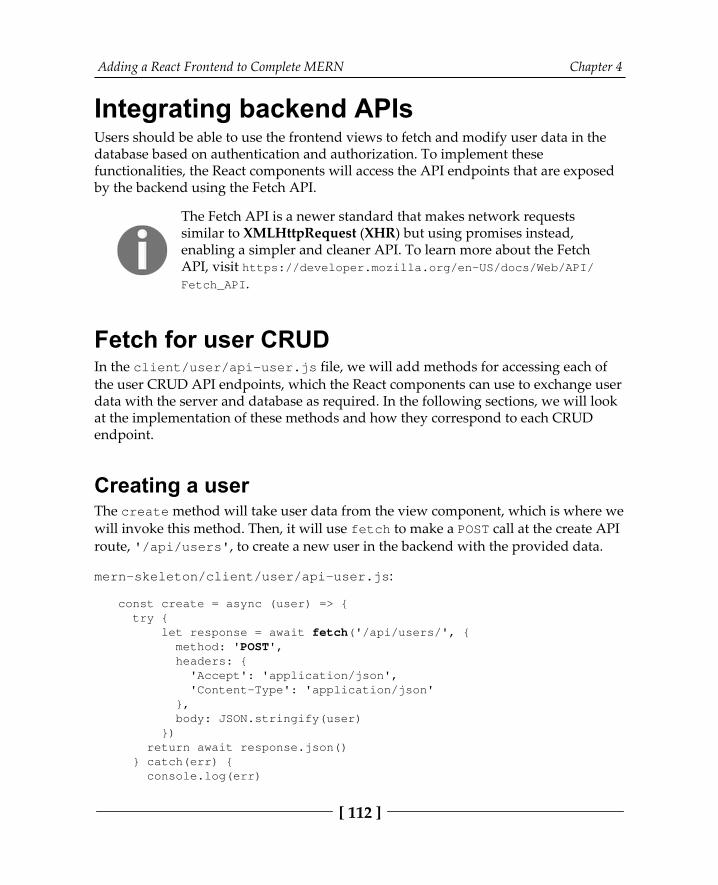
Adding a React Frontend to Complete MERN Chapter 4
[ 112 ]
Integrating backend APIsUsers should be able to use the frontend views to fetch and modify user data in thedatabase based on authentication and authorization. To implement thesefunctionalities, the React components will access the API endpoints that are exposedby the backend using the Fetch API.
The Fetch API is a newer standard that makes network requestssimilar to XMLHttpRequest (XHR) but using promises instead,enabling a simpler and cleaner API. To learn more about the FetchAPI, visit https:/ / developer. mozilla. org/ en-US/ docs/ Web/ API/Fetch_ API.
Fetch for user CRUDIn the client/user/api-user.js file, we will add methods for accessing each ofthe user CRUD API endpoints, which the React components can use to exchange userdata with the server and database as required. In the following sections, we will lookat the implementation of these methods and how they correspond to each CRUDendpoint.
Creating a userThe create method will take user data from the view component, which is where wewill invoke this method. Then, it will use fetch to make a POST call at the create APIroute, '/api/users', to create a new user in the backend with the provided data.
mern-skeleton/client/user/api-user.js:
const create = async (user) => { try { let response = await fetch('/api/users/', { method: 'POST', headers: { 'Accept': 'application/json', 'Content-Type': 'application/json' }, body: JSON.stringify(user) }) return await response.json() } catch(err) { console.log(err)
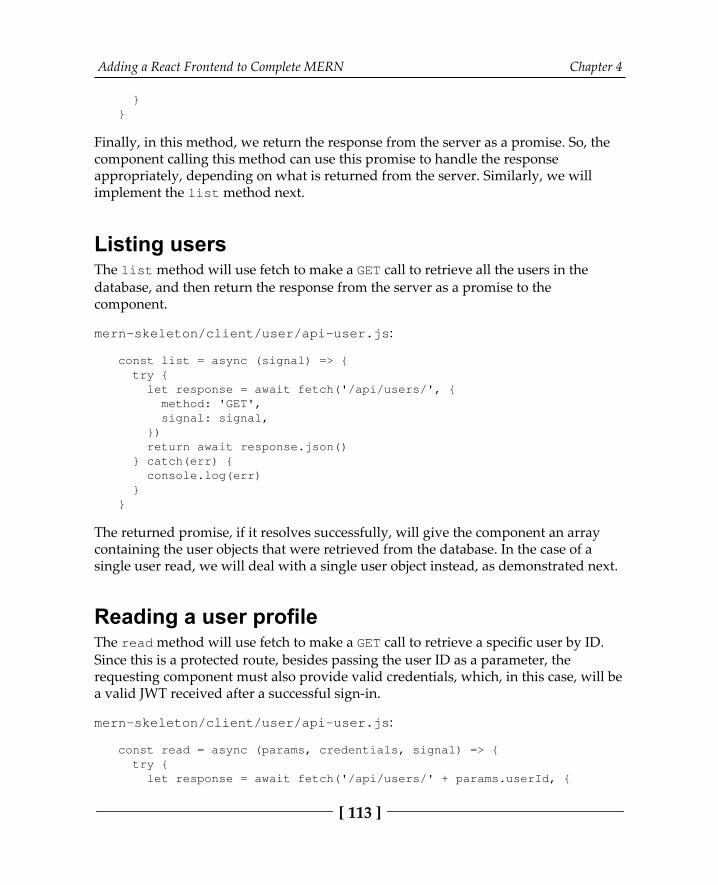
Adding a React Frontend to Complete MERN Chapter 4
[ 113 ]
}}
Finally, in this method, we return the response from the server as a promise. So, thecomponent calling this method can use this promise to handle the responseappropriately, depending on what is returned from the server. Similarly, we willimplement the list method next.
Listing usersThe list method will use fetch to make a GET call to retrieve all the users in thedatabase, and then return the response from the server as a promise to thecomponent.
mern-skeleton/client/user/api-user.js:
const list = async (signal) => { try { let response = await fetch('/api/users/', { method: 'GET', signal: signal, }) return await response.json() } catch(err) { console.log(err) }}
The returned promise, if it resolves successfully, will give the component an arraycontaining the user objects that were retrieved from the database. In the case of asingle user read, we will deal with a single user object instead, as demonstrated next.
Reading a user profileThe read method will use fetch to make a GET call to retrieve a specific user by ID.Since this is a protected route, besides passing the user ID as a parameter, therequesting component must also provide valid credentials, which, in this case, will bea valid JWT received after a successful sign-in.
mern-skeleton/client/user/api-user.js:
const read = async (params, credentials, signal) => { try { let response = await fetch('/api/users/' + params.userId, {

Adding a React Frontend to Complete MERN Chapter 4
[ 114 ]
method: 'GET', signal: signal, headers: { 'Accept': 'application/json', 'Content-Type': 'application/json', 'Authorization': 'Bearer ' + credentials.t } }) return await response.json() } catch(err) { console.log(err) }}
The JWT is attached to the GET fetch call in the Authorization header using theBearer scheme, and then the response from the server is returned to the componentin a promise. This promise, when it resolves, will either give the component the userdetails for the specific user or notify that access is restricted to authenticated users.Similarly, the updated user API method also needs to be passed valid JWT credentialsfor the fetch call, as shown in the next section.
Updating a user's dataThe update method will take changed user data from the view component for aspecific user, then use fetch to make a PUT call to update the existing user in thebackend. This is also a protected route that will require a valid JWT as the credential.
mern-skeleton/client/user/api-user.js:
const update = async (params, credentials, user) => { try { let response = await fetch('/api/users/' + params.userId, { method: 'PUT', headers: { 'Accept': 'application/json', 'Content-Type': 'application/json', 'Authorization': 'Bearer ' + credentials.t }, body: JSON.stringify(user) }) return await response.json() } catch(err) { console.log(err) }}
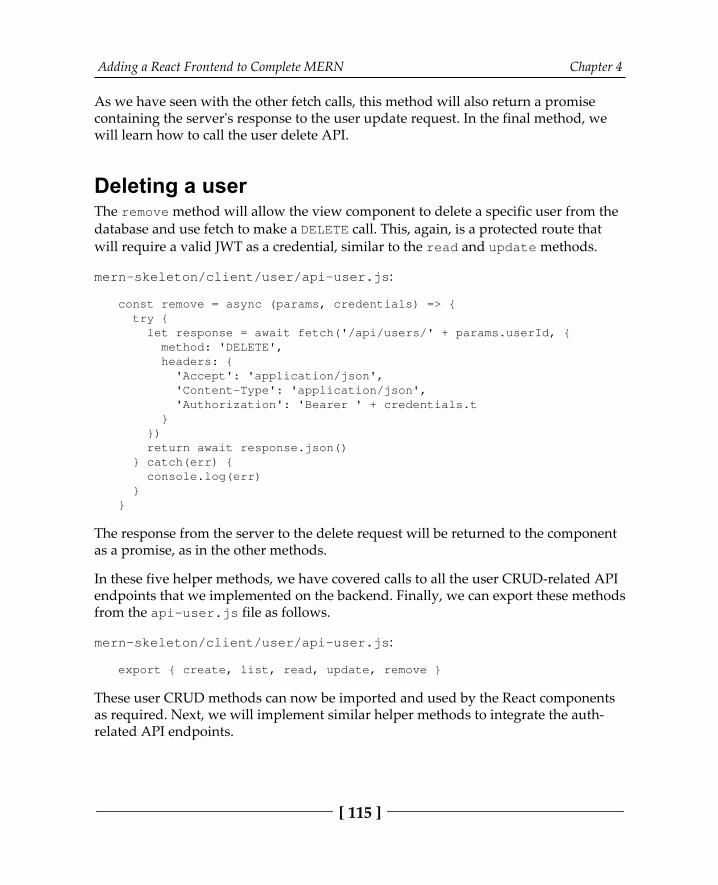
Adding a React Frontend to Complete MERN Chapter 4
[ 115 ]
As we have seen with the other fetch calls, this method will also return a promisecontaining the server's response to the user update request. In the final method, wewill learn how to call the user delete API.
Deleting a userThe remove method will allow the view component to delete a specific user from thedatabase and use fetch to make a DELETE call. This, again, is a protected route thatwill require a valid JWT as a credential, similar to the read and update methods.
mern-skeleton/client/user/api-user.js:
const remove = async (params, credentials) => { try { let response = await fetch('/api/users/' + params.userId, { method: 'DELETE', headers: { 'Accept': 'application/json', 'Content-Type': 'application/json', 'Authorization': 'Bearer ' + credentials.t } }) return await response.json() } catch(err) { console.log(err) }}
The response from the server to the delete request will be returned to the componentas a promise, as in the other methods.
In these five helper methods, we have covered calls to all the user CRUD-related APIendpoints that we implemented on the backend. Finally, we can export these methodsfrom the api-user.js file as follows.
mern-skeleton/client/user/api-user.js:
export { create, list, read, update, remove }
These user CRUD methods can now be imported and used by the React componentsas required. Next, we will implement similar helper methods to integrate the auth-related API endpoints.

Adding a React Frontend to Complete MERN Chapter 4
[ 116 ]
Fetch for the auth APIIn order to integrate the auth API endpoints from the server with the frontend Reactcomponents, we will add methods for fetching sign-in and sign-out API endpoints inthe client/auth/api-auth.js file. Let's take a look at them.
Sign-inThe signin method will take user sign-in data from the view component, then usefetch to make a POST call to verify the user with the backend.
mern-skeleton/client/auth/api-auth.js:
const signin = async (user) => { try { let response = await fetch('/auth/signin/', { method: 'POST', headers: { 'Accept': 'application/json', 'Content-Type': 'application/json' }, credentials: 'include', body: JSON.stringify(user) }) return await response.json() } catch(err) { console.log(err) }}
The response from the server will be returned to the component in a promise, whichmay provide the JWT if sign-in was successful. The component invoking this methodneeds to handle the response appropriately, such as storing the received JWT locallyso it can be used when making calls to other protected API routes from the frontend.We will look at the implementation for this when we implement the Sign In viewlater in this chapter.
After the user is successfully signed in, we also want the option to call the signoutAPI when the user is signing out. The call to the signout API is discussed next.
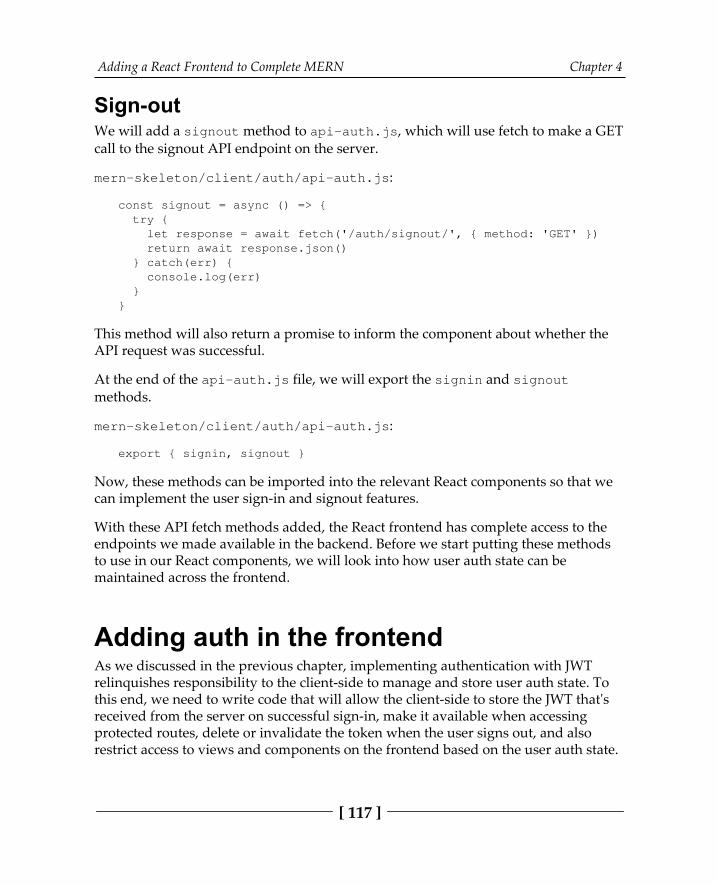
Adding a React Frontend to Complete MERN Chapter 4
[ 117 ]
Sign-outWe will add a signout method to api-auth.js, which will use fetch to make a GETcall to the signout API endpoint on the server.
mern-skeleton/client/auth/api-auth.js:
const signout = async () => { try { let response = await fetch('/auth/signout/', { method: 'GET' }) return await response.json() } catch(err) { console.log(err) }}
This method will also return a promise to inform the component about whether theAPI request was successful.
At the end of the api-auth.js file, we will export the signin and signoutmethods.
mern-skeleton/client/auth/api-auth.js:
export { signin, signout }
Now, these methods can be imported into the relevant React components so that wecan implement the user sign-in and signout features.
With these API fetch methods added, the React frontend has complete access to theendpoints we made available in the backend. Before we start putting these methodsto use in our React components, we will look into how user auth state can bemaintained across the frontend.
Adding auth in the frontendAs we discussed in the previous chapter, implementing authentication with JWTrelinquishes responsibility to the client-side to manage and store user auth state. Tothis end, we need to write code that will allow the client-side to store the JWT that'sreceived from the server on successful sign-in, make it available when accessingprotected routes, delete or invalidate the token when the user signs out, and alsorestrict access to views and components on the frontend based on the user auth state.
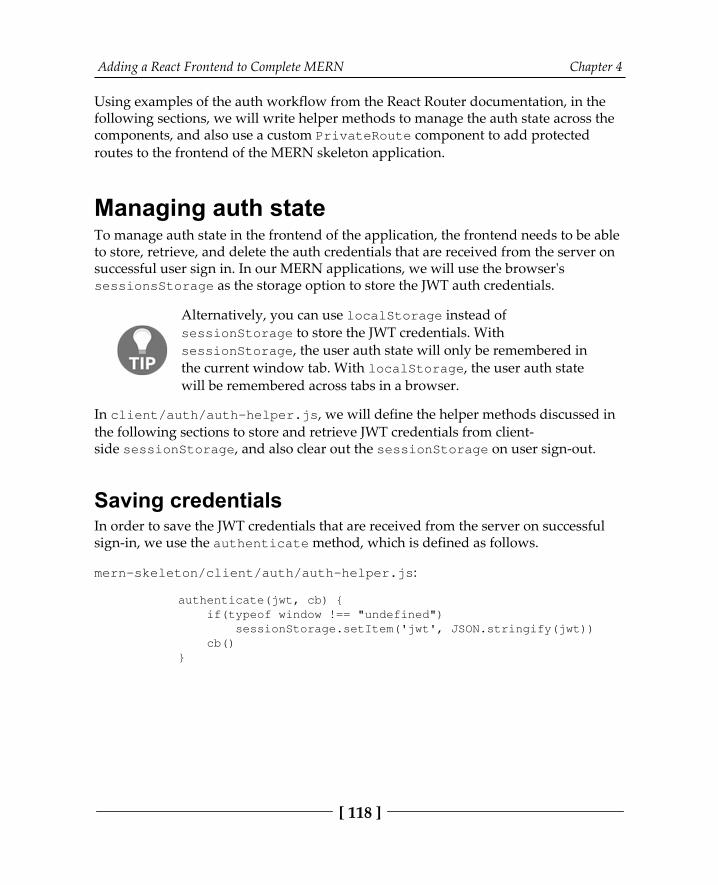
Adding a React Frontend to Complete MERN Chapter 4
[ 118 ]
Using examples of the auth workflow from the React Router documentation, in thefollowing sections, we will write helper methods to manage the auth state across thecomponents, and also use a custom PrivateRoute component to add protectedroutes to the frontend of the MERN skeleton application.
Managing auth stateTo manage auth state in the frontend of the application, the frontend needs to be ableto store, retrieve, and delete the auth credentials that are received from the server on successful user sign in. In our MERN applications, we will use the browser'ssessionsStorage as the storage option to store the JWT auth credentials.
Alternatively, you can use localStorage instead ofsessionStorage to store the JWT credentials. WithsessionStorage, the user auth state will only be remembered inthe current window tab. With localStorage, the user auth statewill be remembered across tabs in a browser.
In client/auth/auth-helper.js, we will define the helper methods discussed inthe following sections to store and retrieve JWT credentials from client-side sessionStorage, and also clear out the sessionStorage on user sign-out.
Saving credentialsIn order to save the JWT credentials that are received from the server on successfulsign-in, we use the authenticate method, which is defined as follows.
mern-skeleton/client/auth/auth-helper.js:
authenticate(jwt, cb) { if(typeof window !== "undefined") sessionStorage.setItem('jwt', JSON.stringify(jwt)) cb()}
Adding a React Frontend to Complete MERN Chapter 4
[ 119 ]
The authenticate method takes the JWT credentials, jwt, and a callbackfunction, cb, as arguments. It stores the credentials in sessionStorage afterensuring window is defined, in other words ensuring this code is running in abrowser and hence has access to sessionStorage. Then, it executes the callbackfunction that is passed in. This callback will allow the component – in our case, thecomponent where sign-in is called – to define actions that should take place aftersuccessfully signing in and storing credentials. Next, we will discuss the method thatlets us access these stored credentials.
Retrieving credentialsIn our frontend components, we will need to retrieve the stored credentials to check ifthe current user is signed in. In the isAuthenticated() method, we can retrievethese credentials from sessionStorage.
mern-skeleton/client/auth/auth-helper.js:
isAuthenticated() { if (typeof window == "undefined") return false
if (sessionStorage.getItem('jwt')) return JSON.parse(sessionStorage.getItem('jwt')) else return false}
A call to isAuthenticated() will return either the stored credentials or false,depending on whether credentials were found in sessionStorage. Findingcredentials in storage will mean a user is signed in, whereas not finding credentialswill mean the user is not signed in. We will also add a method that allows us to deletethe credentials from storage when a signed-in user signs out from the application.
Deleting credentialsWhen a user successfully signs out from the application, we want to clear the storedJWT credentials from sessionStorage. This can be accomplished by calling theclearJWT method, which is defined in the following code.
mern-skeleton/client/auth/auth-helper.js:
clearJWT(cb) {

Adding a React Frontend to Complete MERN Chapter 4
[ 120 ]
if(typeof window !== "undefined") sessionStorage.removeItem('jwt') cb() signout().then((data) => { document.cookie = "t=; expires=Thu, 01 Jan 197000:00:00 UTC; path=/;" })}
This clearJWT method takes a callback function as an argument, and it removes theJWT credential from sessionStorage. The passed in cb() function allows thecomponent initiating the signout functionality to dictate what should happen after asuccessful sign-out.
The clearJWT method also uses the signout method we defined earlier in api-auth.js to call the signout API in the backend. If we had used cookies to store thecredentials instead of sessionStorage, the response to this API call would be wherewe clear the cookie, as shown in the preceding code. Using the signout API call isoptional since this is dependent on whether cookies are used as the credential storagemechanism.
With these three methods, we now have ways of storing, retrieving, and deleting JWTcredentials on the client-side. Using these methods, the React components we buildfor the frontend will be able to check and manage user auth state to restrict access inthe frontend, as demonstrated in the following section with the customPrivateRoute component.
The PrivateRoute componentThe code in the file defines the PrivateRoute component, as shown in the auth flowexample at https:/ / reacttraining. com/react- router/ web/ example/ auth-workflow, which can be found in the React Router documentation. It will allow us todeclare protected routes for the frontend to restrict view access based on user auth.
mern-skeleton/client/auth/PrivateRoute.js:
import React, { Component } from 'react'import { Route, Redirect } from 'react-router-dom'import auth from './auth-helper'
const PrivateRoute = ({ component: Component, ...rest }) => ( <Route {...rest} render={props => (
Adding a React Frontend to Complete MERN Chapter 4
[ 121 ]
auth.isAuthenticated() ? ( <Component {...props}/> ) : ( <Redirect to={{ pathname: '/signin', state: { from: props.location } }}/> ) )}/>)
export default PrivateRoute
Components to be rendered in this PrivateRoute will only load when the user isauthenticated, which is determined by a call to the isAuthenticated method;otherwise, the user will be redirected to the Signin component. We load thecomponents that should have restricted access, such as the user profile component, ina PrivateRoute. This will ensure that only authenticated users are able to view theuser profile page.
With the backend APIs integrated and the auth management helper methods readyfor use in the components, we can now start building the remaining view componentsthat utilize these methods and complete the frontend.
Completing the User frontend The React components that will be described in this section complete the interactivefeatures we defined for the skeleton by allowing users to view, create, and modifyuser data stored in the database with respect to auth restrictions. The components wewill implement are as follows:
Users: To fetch and list all users from the database to the viewSignup: To display a form that allows new users to sign up Signin: To display a form that allows existing users to sign inProfile: To display details for a specific user after retrieving from thedatabaseEditProfile: To display details for a specific user and allow authorizeduser to update these details
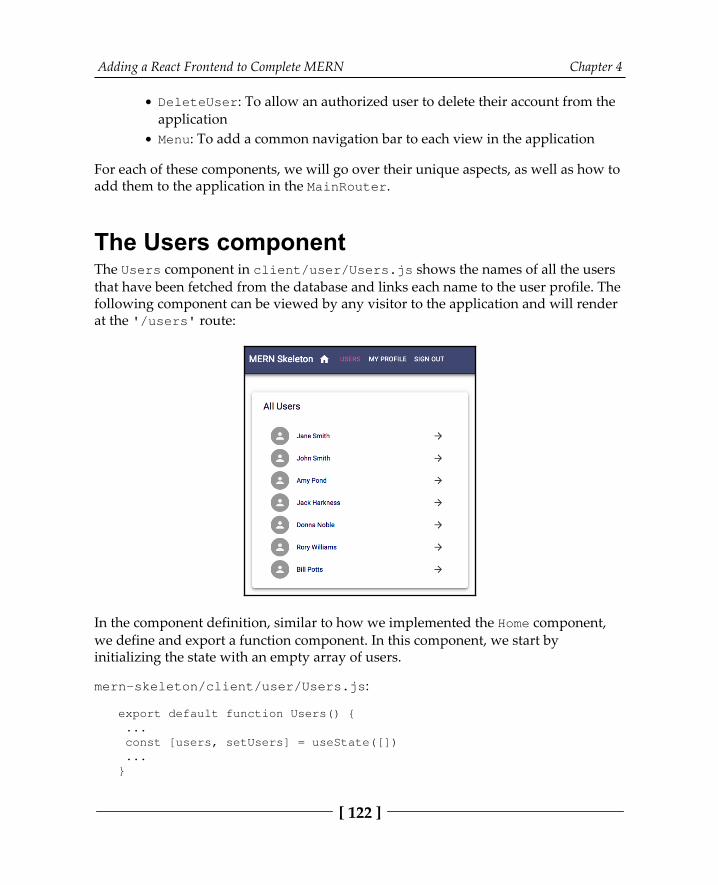
Adding a React Frontend to Complete MERN Chapter 4
[ 122 ]
DeleteUser: To allow an authorized user to delete their account from theapplicationMenu: To add a common navigation bar to each view in the application
For each of these components, we will go over their unique aspects, as well as how toadd them to the application in the MainRouter.
The Users componentThe Users component in client/user/Users.js shows the names of all the usersthat have been fetched from the database and links each name to the user profile. Thefollowing component can be viewed by any visitor to the application and will renderat the '/users' route:
In the component definition, similar to how we implemented the Home component,we define and export a function component. In this component, we start byinitializing the state with an empty array of users.
mern-skeleton/client/user/Users.js:
export default function Users() { ... const [users, setUsers] = useState([]) ...}
Adding a React Frontend to Complete MERN Chapter 4
[ 123 ]
We are using the built-in React hook, useState, to add state to this functioncomponent. By calling this hook, we are essentially declaring a state variablenamed users, which can be updated by invoking setUsers, and also set the initialvalue of users to [].
Using the built-in useState hook allows us to add state behavior to a functioncomponent in React. Calling it will declare a state variable, similar to usingthis.state in class component definitions. The argument that's passed to useStateis the initial value of this variable – in other words, the initial state. InvokinguseState returns the current state and a function that updates the state value, whichis similar to this.setState in a class definition.
With the users state initialized, next, we will use another built-in React hook nameduseEffect to fetch a list of users from the backend and update the users value inthe state.
The Effect Hook, useEffect, serves the purpose ofthe componentDidMount, componentDidUpdate, andcomponentWillUnmount React life cycle methods that we wouldotherwise use in React classes. Using this hook in a functioncomponent allows us to perform side effects such as fetching datafrom a backend. By default, React runs the effects defined withuseEffect after every render, including the first render. But we canalso instruct the effect to only rerun if something changes in state.Optionally, we can also define how to clean up after an effect, forexample, to perform an action such as aborting a fetch signal whenthe component unmounts to avoid memory leaks.
In our Users component, we use useEffect to call the list method from the api-user.js helper methods. This will fetch the user list from the backend and load theuser data into the component by updating the state.
mern-skeleton/client/user/Users.js:
useEffect(() => { const abortController = new AbortController() const signal = abortController.signal
list(signal).then((data) => { if (data && data.error) { console.log(data.error) } else { setUsers(data)
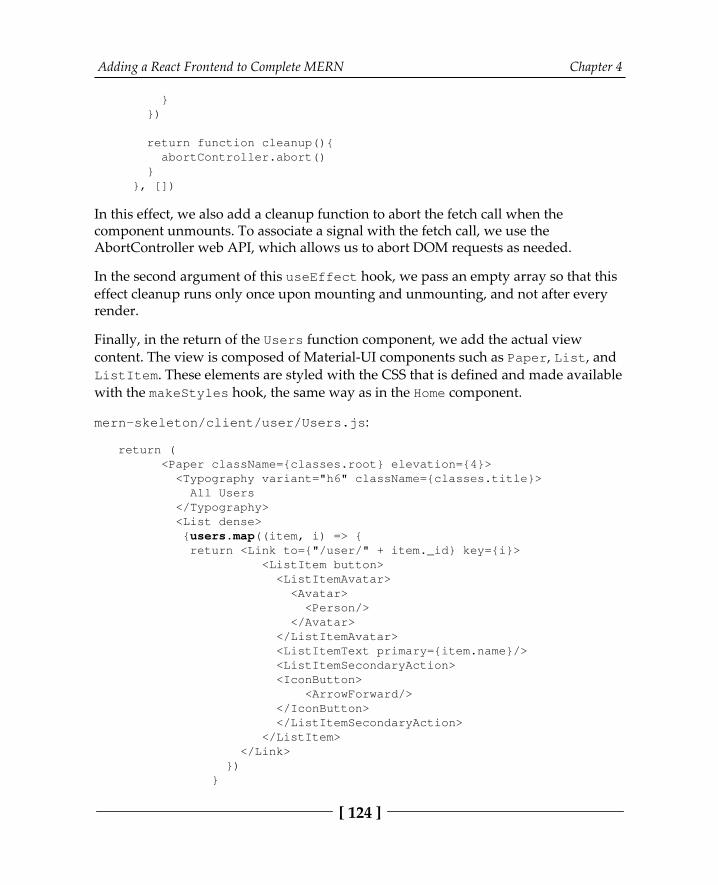
Adding a React Frontend to Complete MERN Chapter 4
[ 124 ]
} })
return function cleanup(){ abortController.abort() } }, [])
In this effect, we also add a cleanup function to abort the fetch call when thecomponent unmounts. To associate a signal with the fetch call, we use theAbortController web API, which allows us to abort DOM requests as needed.
In the second argument of this useEffect hook, we pass an empty array so that thiseffect cleanup runs only once upon mounting and unmounting, and not after everyrender.
Finally, in the return of the Users function component, we add the actual viewcontent. The view is composed of Material-UI components such as Paper, List, andListItem. These elements are styled with the CSS that is defined and made availablewith the makeStyles hook, the same way as in the Home component.
mern-skeleton/client/user/Users.js:
return ( <Paper className={classes.root} elevation={4}> <Typography variant="h6" className={classes.title}> All Users </Typography> <List dense> {users.map((item, i) => { return <Link to={"/user/" + item._id} key={i}> <ListItem button> <ListItemAvatar> <Avatar> <Person/> </Avatar> </ListItemAvatar> <ListItemText primary={item.name}/> <ListItemSecondaryAction> <IconButton> <ArrowForward/> </IconButton> </ListItemSecondaryAction> </ListItem> </Link> }) }
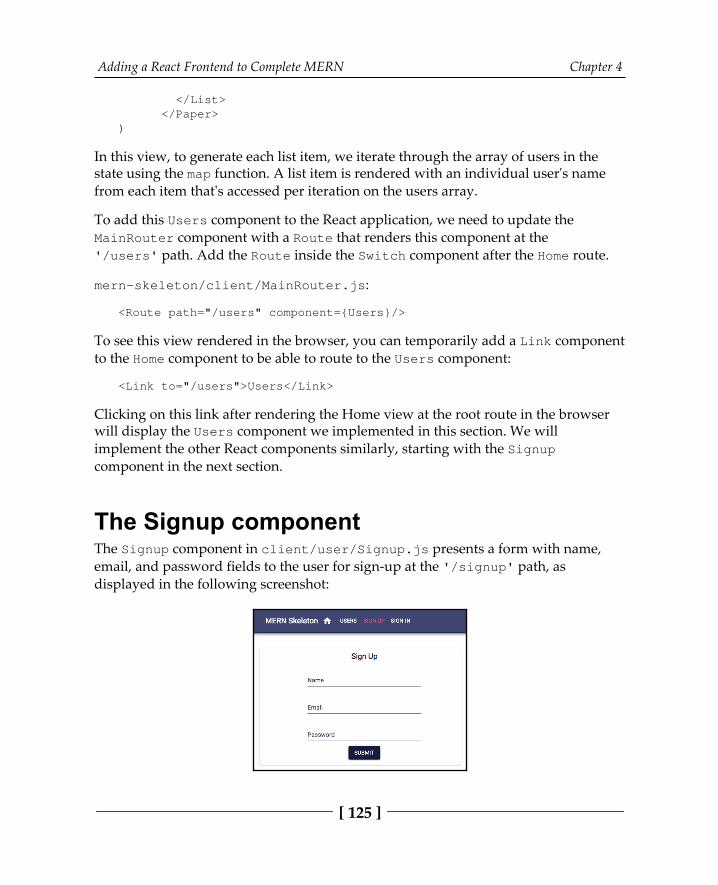
Adding a React Frontend to Complete MERN Chapter 4
[ 125 ]
</List> </Paper>)
In this view, to generate each list item, we iterate through the array of users in thestate using the map function. A list item is rendered with an individual user's namefrom each item that's accessed per iteration on the users array.
To add this Users component to the React application, we need to update theMainRouter component with a Route that renders this component at the'/users' path. Add the Route inside the Switch component after the Home route.
mern-skeleton/client/MainRouter.js:
<Route path="/users" component={Users}/>
To see this view rendered in the browser, you can temporarily add a Link componentto the Home component to be able to route to the Users component:
<Link to="/users">Users</Link>
Clicking on this link after rendering the Home view at the root route in the browserwill display the Users component we implemented in this section. We willimplement the other React components similarly, starting with the Signupcomponent in the next section.
The Signup component The Signup component in client/user/Signup.js presents a form with name,email, and password fields to the user for sign-up at the '/signup' path, asdisplayed in the following screenshot:
Adding a React Frontend to Complete MERN Chapter 4
[ 126 ]
In the component definition, we initialize the state using the useState hook withempty input field values, an empty error message, and set the dialog open variable tofalse.
mern-skeleton/client/user/Signup.js:
export default function Signup() { ... const [values, setValues] = useState({ name: '', password: '', email: '', open: false, error: '' }) ...}
We also define two handler functions to be called when the input values change orthe submit button is clicked. The handleChange function takes the new value that'sentered in the input field and sets it as the state.
mern-skeleton/client/user/Signup.js:
const handleChange = name => event => { setValues({ ...values, [name]: event.target.value })}
The clickSubmit function is called when the form is submitted. It takes the inputvalues from the state and calls the create fetch method to sign up the user with thebackend. Then, depending on the response from the server, either an error message isshown or a success dialog is shown.
mern-skeleton/client/user/Signup.js:
const clickSubmit = () => { const user = { name: values.name || undefined, email: values.email || undefined, password: values.password || undefined } create(user).then((data) => { if (data.error) { setValues({ ...values, error: data.error}) } else { setValues({ ...values, error: '', open: true}) }
Adding a React Frontend to Complete MERN Chapter 4
[ 127 ]
}) }
In the return function, we compose and style the form components in the signupview using components such as TextField from Material-UI.
mern-skeleton/client/user/Signup.js:
return ( <div> <Card className={classes.card}> <CardContent> <Typography variant="h6" className={classes.title}> Sign Up </Typography> <TextField id="name" label="Name" className={classes.textField} value={values.name} onChange={handleChange('name')} margin="normal"/> <br/> <TextField id="email" type="email" label="Email" className={classes.textField} value={values.email} onChange={handleChange('email')} margin="normal"/> <br/> <TextField id="password" type="password" label="Password" className={classes.textField} value={values.password} onChange={handleChange('password')} margin="normal"/> <br/> { values.error && (<Typography component="p" color="error"> <Icon color="error"className={classes.error}>error</Icon> {values.error}</Typography>) } </CardContent> <CardActions> <Button color="primary" variant="contained"onClick={clickSubmit} className={classes.submit}>Submit</Button> </CardActions> </Card> </div>)
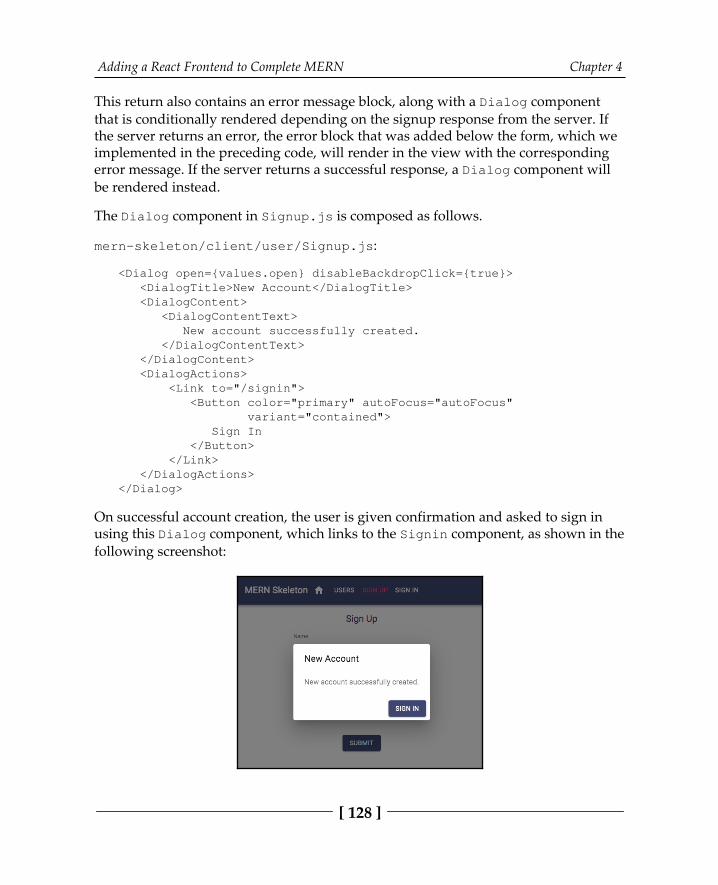
Adding a React Frontend to Complete MERN Chapter 4
[ 128 ]
This return also contains an error message block, along with a Dialog componentthat is conditionally rendered depending on the signup response from the server. Ifthe server returns an error, the error block that was added below the form, which weimplemented in the preceding code, will render in the view with the correspondingerror message. If the server returns a successful response, a Dialog component willbe rendered instead.
The Dialog component in Signup.js is composed as follows.
mern-skeleton/client/user/Signup.js:
<Dialog open={values.open} disableBackdropClick={true}> <DialogTitle>New Account</DialogTitle> <DialogContent> <DialogContentText> New account successfully created. </DialogContentText> </DialogContent> <DialogActions> <Link to="/signin"> <Button color="primary" autoFocus="autoFocus" variant="contained"> Sign In </Button> </Link> </DialogActions></Dialog>
On successful account creation, the user is given confirmation and asked to sign inusing this Dialog component, which links to the Signin component, as shown in thefollowing screenshot:
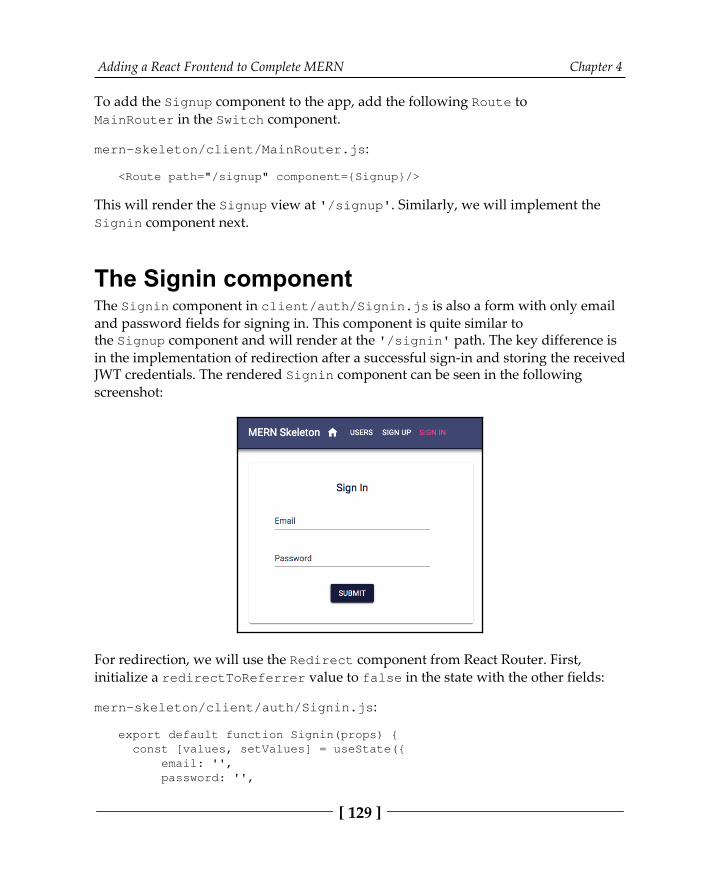
Adding a React Frontend to Complete MERN Chapter 4
[ 129 ]
To add the Signup component to the app, add the following Route toMainRouter in the Switch component.
mern-skeleton/client/MainRouter.js:
<Route path="/signup" component={Signup}/>
This will render the Signup view at '/signup'. Similarly, we will implement theSignin component next.
The Signin componentThe Signin component in client/auth/Signin.js is also a form with only emailand password fields for signing in. This component is quite similar tothe Signup component and will render at the '/signin' path. The key difference isin the implementation of redirection after a successful sign-in and storing the receivedJWT credentials. The rendered Signin component can be seen in the followingscreenshot:
For redirection, we will use the Redirect component from React Router. First,initialize a redirectToReferrer value to false in the state with the other fields:
mern-skeleton/client/auth/Signin.js:
export default function Signin(props) { const [values, setValues] = useState({ email: '', password: '',
Adding a React Frontend to Complete MERN Chapter 4
[ 130 ]
error: '', redirectToReferrer: false })}
The Signin function will take props in the argument that contain React Routervariables. We will use these for the redirect. redirectToReferrer should be setto true when the user successfully signs in after submitting the form and thereceived JWT is stored in sessionStorage. To store the JWT and redirect afterward,we will call the authenticate() method defined in auth-helper.js. Thisimplementation will go in the clickSubmit() function so that it can be called onform submit.
mern-skeleton/client/auth/Signin.js:
const clickSubmit = () => { const user = { email: values.email || undefined, password: values.password || undefined }
signin(user).then((data) => { if (data.error) { setValues({ ...values, error: data.error}) } else { auth.authenticate(data, () => { setValues({ ...values, error: '',redirectToReferrer: true}) }) } })}
The redirection will happen conditionally based on the redirectToReferrer value using the Redirect component from React Router. We add the redirect code insidethe function before the return block, as follows.
mern-skeleton/client/auth/Signin.js:
const {from} = props.location.state || { from: { pathname: '/' } }const {redirectToReferrer} = valuesif (redirectToReferrer) { return (<Redirect to={from}/>)
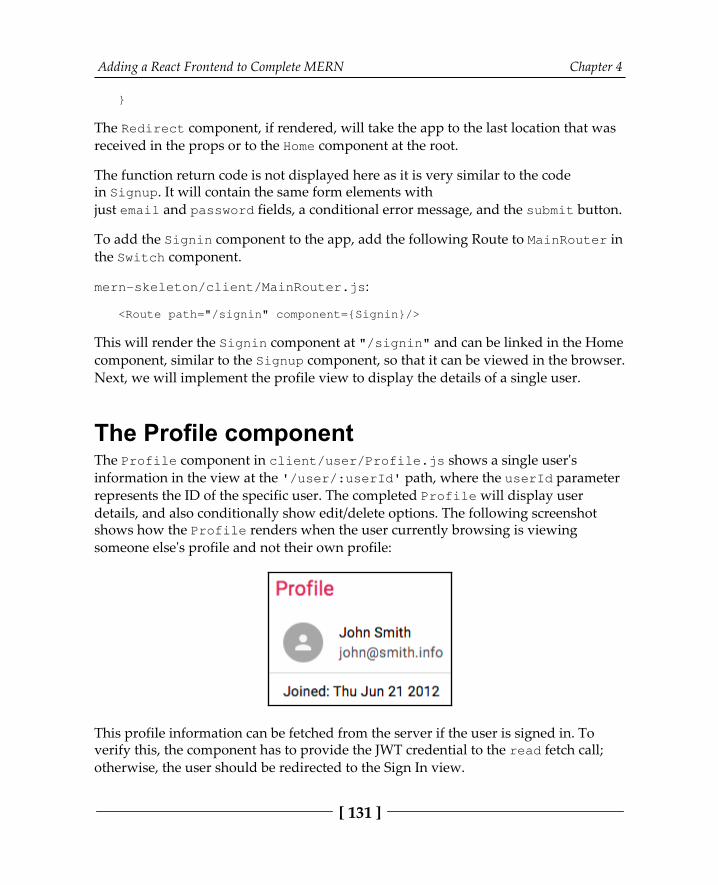
Adding a React Frontend to Complete MERN Chapter 4
[ 131 ]
}
The Redirect component, if rendered, will take the app to the last location that wasreceived in the props or to the Home component at the root.
The function return code is not displayed here as it is very similar to the codein Signup. It will contain the same form elements withjust email and password fields, a conditional error message, and the submit button.
To add the Signin component to the app, add the following Route to MainRouter inthe Switch component.
mern-skeleton/client/MainRouter.js:
<Route path="/signin" component={Signin}/>
This will render the Signin component at "/signin" and can be linked in the Homecomponent, similar to the Signup component, so that it can be viewed in the browser.Next, we will implement the profile view to display the details of a single user.
The Profile componentThe Profile component in client/user/Profile.js shows a single user's information in the view at the '/user/:userId' path, where the userId parameterrepresents the ID of the specific user. The completed Profile will display userdetails, and also conditionally show edit/delete options. The following screenshotshows how the Profile renders when the user currently browsing is viewingsomeone else's profile and not their own profile:
This profile information can be fetched from the server if the user is signed in. Toverify this, the component has to provide the JWT credential to the read fetch call;otherwise, the user should be redirected to the Sign In view.
Adding a React Frontend to Complete MERN Chapter 4
[ 132 ]
In the Profile component definition, we need to initialize the state with an emptyuser and set redirectToSignin to false.
mern-skeleton/client/user/Profile.js:
export default function Profile({ match }) { ... const [user, setUser] = useState({}) const [redirectToSignin, setRedirectToSignin] = useState(false) ...}
We also need to get access to the match props passed by the Route component,which will contain a :userId parameter value. This can be accessed asmatch.params.userId.
The Profile component should fetch user information and render the view withthese details. To implement this, we will use the useEffect hook, as we did in theUsers component.
mern-skeleton/client/user/Profile.js:
useEffect(() => { const abortController = new AbortController() const signal = abortController.signal const jwt = auth.isAuthenticated() read({ userId: match.params.userId }, {t: jwt.token}, signal).then((data) => { if (data && data.error) { setRedirectToSignin(true) } else { setUser(data) } })
return function cleanup(){ abortController.abort() }
}, [match.params.userId])
This effect uses the match.params.userId value and calls the read user fetchmethod. Since this method also requires credentials to authorize the signed-in user,the JWT is retrieved from sessionStorage using the isAuthenticated methodfrom auth-helper.js, and passed in the call to read.
Adding a React Frontend to Complete MERN Chapter 4
[ 133 ]
Once the server responds, either the state is updated with the user information or theview is redirected to the Sign In view if the current user is not authenticated. We alsoadd a cleanup function in this effect hook to abort the fetch signal when thecomponent unmounts.
This effect only needs to rerun when the userId parameter changes in the route, forexample, when the app goes from one profile view to the other. To ensure this effectreruns when the userId value updates, we will add [match.params.userId] inthe second argument to useEffect.
If the current user is not authenticated, we set up the conditional redirect to the SignIn view.
mern-skeleton/client/user/Profile.js
if (redirectToSignin) { return <Redirect to='/signin'/>}
The function will return the Profile view with the following elements if the userwho's currently signed in is viewing another user's profile.
mern-skeleton/client/user/Profile.js:
return ( <Paper className={classes.root} elevation={4}> <Typography variant="h6" className={classes.title}> Profile </Typography> <List dense> <ListItem> <ListItemAvatar> <Avatar> <Person/> </Avatar> </ListItemAvatar> <ListItemText primary={user.name} secondary={user.email}/> </ListItem> <Divider/> <ListItem> <ListItemText primary={"Joined: " + ( new Date(user.created)).toDateString()}/> </ListItem> </List> </Paper>)
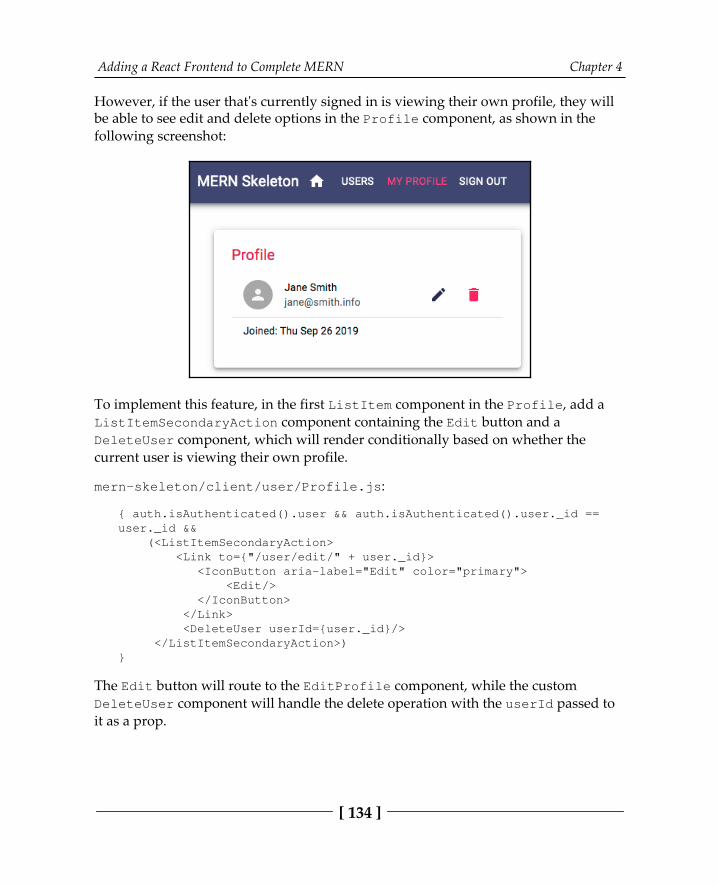
Adding a React Frontend to Complete MERN Chapter 4
[ 134 ]
However, if the user that's currently signed in is viewing their own profile, they willbe able to see edit and delete options in the Profile component, as shown in thefollowing screenshot:
To implement this feature, in the first ListItem component in the Profile, add aListItemSecondaryAction component containing the Edit button and aDeleteUser component, which will render conditionally based on whether thecurrent user is viewing their own profile.
mern-skeleton/client/user/Profile.js:
{ auth.isAuthenticated().user && auth.isAuthenticated().user._id ==user._id && (<ListItemSecondaryAction> <Link to={"/user/edit/" + user._id}> <IconButton aria-label="Edit" color="primary"> <Edit/> </IconButton> </Link> <DeleteUser userId={user._id}/> </ListItemSecondaryAction>)}
The Edit button will route to the EditProfile component, while the customDeleteUser component will handle the delete operation with the userId passed toit as a prop.
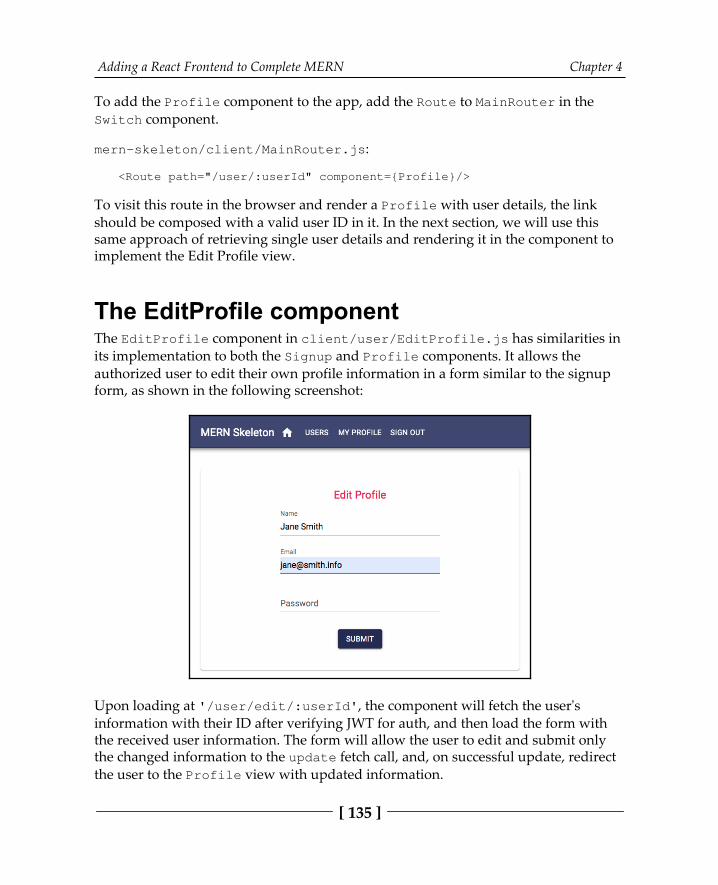
Adding a React Frontend to Complete MERN Chapter 4
[ 135 ]
To add the Profile component to the app, add the Route to MainRouter in theSwitch component.
mern-skeleton/client/MainRouter.js:
<Route path="/user/:userId" component={Profile}/>
To visit this route in the browser and render a Profile with user details, the linkshould be composed with a valid user ID in it. In the next section, we will use thissame approach of retrieving single user details and rendering it in the component toimplement the Edit Profile view.
The EditProfile componentThe EditProfile component in client/user/EditProfile.js has similarities inits implementation to both the Signup and Profile components. It allows theauthorized user to edit their own profile information in a form similar to the signupform, as shown in the following screenshot:
Upon loading at '/user/edit/:userId', the component will fetch the user'sinformation with their ID after verifying JWT for auth, and then load the form withthe received user information. The form will allow the user to edit and submit onlythe changed information to the update fetch call, and, on successful update, redirectthe user to the Profile view with updated information.
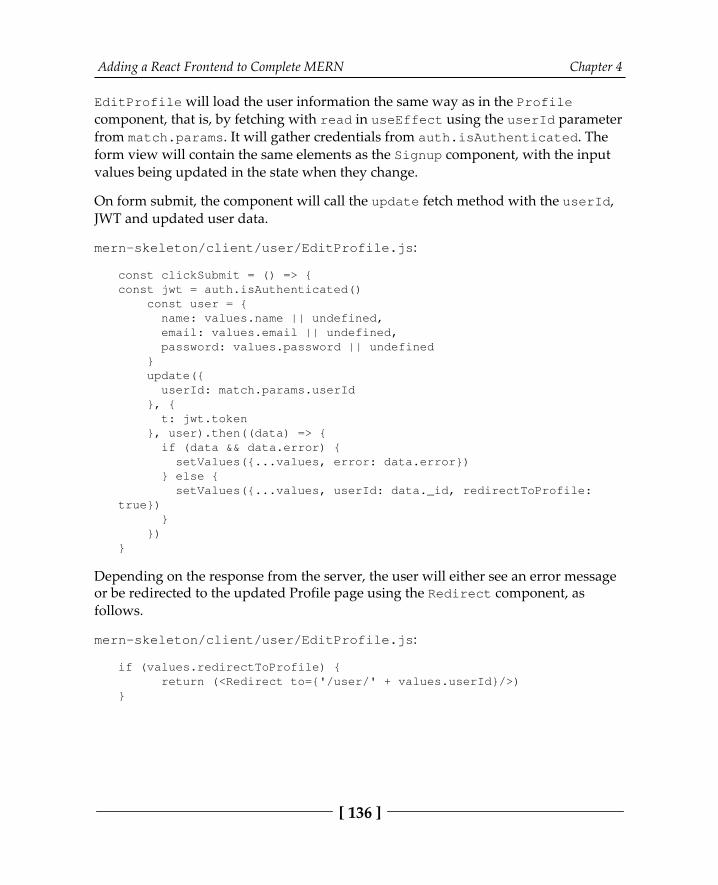
Adding a React Frontend to Complete MERN Chapter 4
[ 136 ]
EditProfile will load the user information the same way as in the Profilecomponent, that is, by fetching with read in useEffect using the userId parameterfrom match.params. It will gather credentials from auth.isAuthenticated. Theform view will contain the same elements as the Signup component, with the inputvalues being updated in the state when they change.
On form submit, the component will call the update fetch method with the userId,JWT and updated user data.
mern-skeleton/client/user/EditProfile.js:
const clickSubmit = () => {const jwt = auth.isAuthenticated() const user = { name: values.name || undefined, email: values.email || undefined, password: values.password || undefined } update({ userId: match.params.userId }, { t: jwt.token }, user).then((data) => { if (data && data.error) { setValues({...values, error: data.error}) } else { setValues({...values, userId: data._id, redirectToProfile:true}) } })}
Depending on the response from the server, the user will either see an error messageor be redirected to the updated Profile page using the Redirect component, asfollows.
mern-skeleton/client/user/EditProfile.js:
if (values.redirectToProfile) { return (<Redirect to={'/user/' + values.userId}/>)}
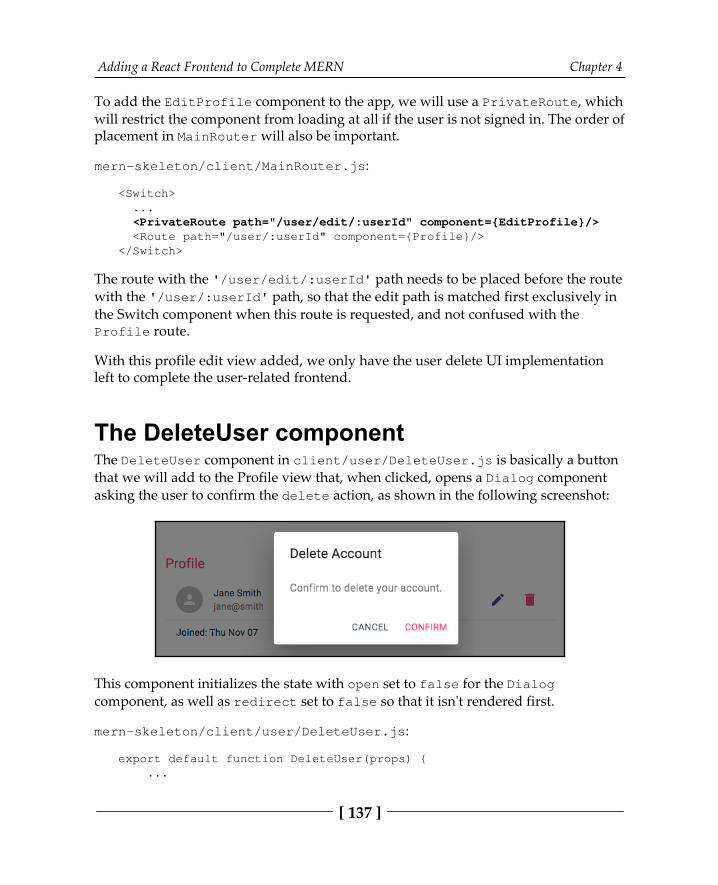
Adding a React Frontend to Complete MERN Chapter 4
[ 137 ]
To add the EditProfile component to the app, we will use a PrivateRoute, whichwill restrict the component from loading at all if the user is not signed in. The order ofplacement in MainRouter will also be important.
mern-skeleton/client/MainRouter.js:
<Switch> ... <PrivateRoute path="/user/edit/:userId" component={EditProfile}/> <Route path="/user/:userId" component={Profile}/></Switch>
The route with the '/user/edit/:userId' path needs to be placed before the routewith the '/user/:userId' path, so that the edit path is matched first exclusively inthe Switch component when this route is requested, and not confused with theProfile route.
With this profile edit view added, we only have the user delete UI implementationleft to complete the user-related frontend.
The DeleteUser componentThe DeleteUser component in client/user/DeleteUser.js is basically a buttonthat we will add to the Profile view that, when clicked, opens a Dialog componentasking the user to confirm the delete action, as shown in the following screenshot:
This component initializes the state with open set to false for the Dialogcomponent, as well as redirect set to false so that it isn't rendered first.
mern-skeleton/client/user/DeleteUser.js:
export default function DeleteUser(props) { ...
Adding a React Frontend to Complete MERN Chapter 4
[ 138 ]
const [open, setOpen] = useState(false) const [redirect, setRedirect] = useState(false) ...}
The DeleteUser component will also receive props from the parent component. Inthis case, the props will contain the userId that was sent from the Profilecomponent.
Next, we need some handler methods to open and close the dialog button. Thedialog is opened when the user clicks the delete button.
mern-skeleton/client/user/DeleteUser.js:
const clickButton = () => { setOpen(true)}
The dialog is closed when the user clicks cancel on the dialog.
mern-skeleton/client/user/DeleteUser.js:
const handleRequestClose = () => { setOpen(false)}
The component will have access to the userId that's passed in as a prop from theProfile component, which is needed to call the remove fetch method, along withthe JWT credentials, after the user confirms the delete action in the dialog.
mern-skeleton/client/user/DeleteUser.js:
const deleteAccount = () => {const jwt = auth.isAuthenticated() remove({ userId: props.userId }, {t: jwt.token}).then((data) => { if (data && data.error) { console.log(data.error) } else { auth.clearJWT(() => console.log('deleted')) setRedirect(true) } })}
Adding a React Frontend to Complete MERN Chapter 4
[ 139 ]
On confirmation, the deleteAccount function calls the remove fetch method withthe userId from props and JWT from isAuthenticated. On successful deletion, theuser will be signed out and redirected to the Home view. The Redirect componentfrom React Router is used to redirect the current user to the Home view, as follows:
if (redirect) { return <Redirect to='/'/>}
The component function returns the DeleteUser component elements, including aDeleteIcon button and the confirmation Dialog.
mern-skeleton/client/user/DeleteUser.js:
return (<span> <IconButton aria-label="Delete" onClick={clickButton} color="secondary"> <DeleteIcon/> </IconButton>
<Dialog open={open} onClose={handleRequestClose}> <DialogTitle>{"Delete Account"}</DialogTitle> <DialogContent> <DialogContentText> Confirm to delete your account. </DialogContentText> </DialogContent> <DialogActions> <Button onClick={handleRequestClose} color="primary"> Cancel </Button> <Button onClick={deleteAccount} color="secondary" autoFocus="autoFocus"> Confirm </Button> </DialogActions> </Dialog> </span>)
DeleteUser takes the userId as a prop to be used in the delete fetch call, so weneed to add a required prop validation check for this React component. We'll do thisnext.
Adding a React Frontend to Complete MERN Chapter 4
[ 140 ]
Validating props with PropTypes To validate the required injection of userId as a prop to the component, we'll addthe PropTypes requirement validator to the defined component.
mern-skeleton/client/user/DeleteUser.js:
DeleteUser.propTypes = { userId: PropTypes.string.isRequired}
Since we are using the DeleteUser component in the Profile component, it getsadded to the application view when Profile is added in MainRouter.
With the delete user UI added, we now have a frontend that contains all the Reactcomponent views in order to complete the skeleton application features. But, we stillneed a common navigation UI to link all these views together and make each vieweasy to access for the frontend user. In the next section, we will implement thisnavigation menu component.
The Menu componentThe Menu component will function as a navigation bar across the frontend applicationby providing links to all the available views, and also by indicating the user's currentlocation in the application.
To implement these navigation bar functionalities, we will use theHOC withRouter from React Router to get access to the history object's properties.The following code in the Menu component adds just the title, the Home icon linked tothe root route, and the Users button, which is linked to the '/users' route.
mern-skeleton/client/core/Menu.js:
const Menu = withRouter(({history}) => ( <AppBar position="static"> <Toolbar> <Typography variant="h6" color="inherit"> MERN Skeleton </Typography> <Link to="/"> <IconButton aria-label="Home" style={isActive(history, "/")}> <HomeIcon/> </IconButton> </Link>
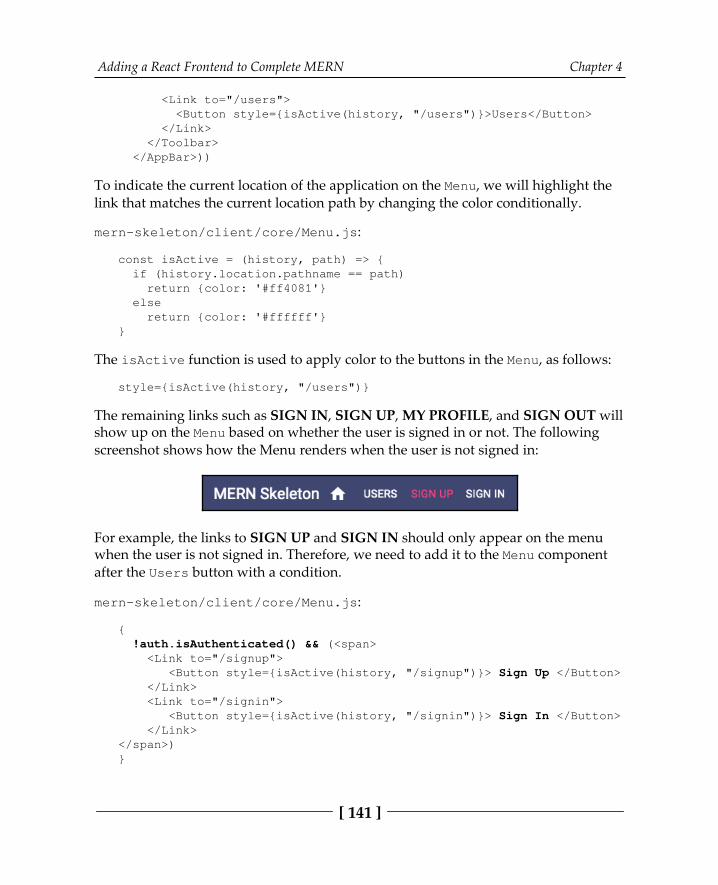
Adding a React Frontend to Complete MERN Chapter 4
[ 141 ]
<Link to="/users"> <Button style={isActive(history, "/users")}>Users</Button> </Link> </Toolbar> </AppBar>))
To indicate the current location of the application on the Menu, we will highlight thelink that matches the current location path by changing the color conditionally.
mern-skeleton/client/core/Menu.js:
const isActive = (history, path) => { if (history.location.pathname == path) return {color: '#ff4081'} else return {color: '#ffffff'}}
The isActive function is used to apply color to the buttons in the Menu, as follows:
style={isActive(history, "/users")}
The remaining links such as SIGN IN, SIGN UP, MY PROFILE, and SIGN OUT willshow up on the Menu based on whether the user is signed in or not. The followingscreenshot shows how the Menu renders when the user is not signed in:
For example, the links to SIGN UP and SIGN IN should only appear on the menuwhen the user is not signed in. Therefore, we need to add it to the Menu componentafter the Users button with a condition.
mern-skeleton/client/core/Menu.js:
{ !auth.isAuthenticated() && (<span> <Link to="/signup"> <Button style={isActive(history, "/signup")}> Sign Up </Button> </Link> <Link to="/signin"> <Button style={isActive(history, "/signin")}> Sign In </Button> </Link></span>)}
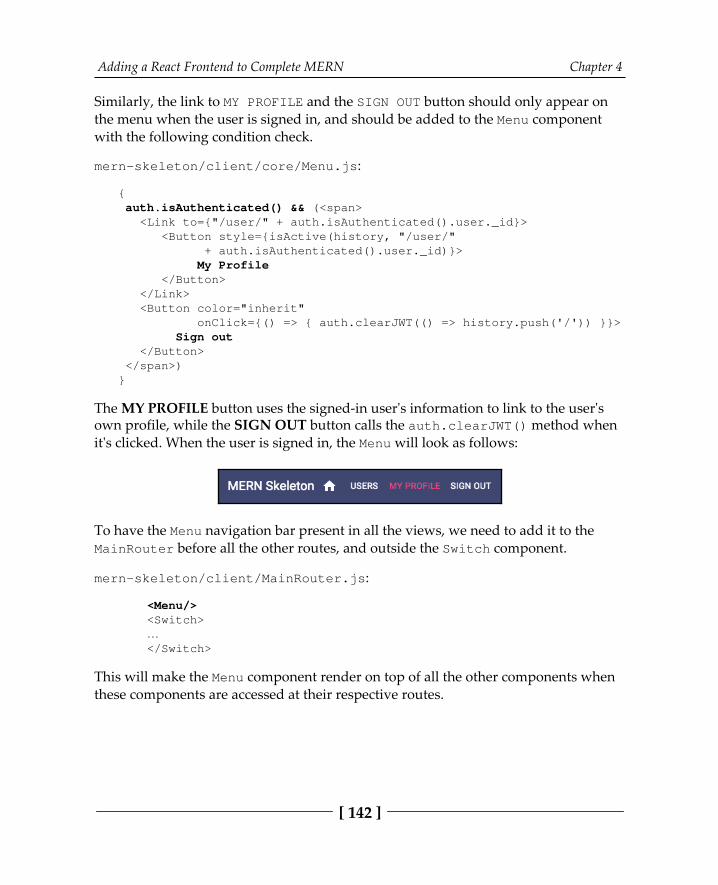
Adding a React Frontend to Complete MERN Chapter 4
[ 142 ]
Similarly, the link to MY PROFILE and the SIGN OUT button should only appear onthe menu when the user is signed in, and should be added to the Menu componentwith the following condition check.
mern-skeleton/client/core/Menu.js:
{ auth.isAuthenticated() && (<span> <Link to={"/user/" + auth.isAuthenticated().user._id}> <Button style={isActive(history, "/user/" + auth.isAuthenticated().user._id)}> My Profile </Button> </Link> <Button color="inherit" onClick={() => { auth.clearJWT(() => history.push('/')) }}> Sign out </Button> </span>)}
The MY PROFILE button uses the signed-in user's information to link to the user'sown profile, while the SIGN OUT button calls the auth.clearJWT() method whenit's clicked. When the user is signed in, the Menu will look as follows:
To have the Menu navigation bar present in all the views, we need to add it to theMainRouter before all the other routes, and outside the Switch component.
mern-skeleton/client/MainRouter.js:
<Menu/> <Switch> … </Switch>
This will make the Menu component render on top of all the other components whenthese components are accessed at their respective routes.
Adding a React Frontend to Complete MERN Chapter 4
[ 143 ]
The skeleton frontend is now complete and has all necessary components to allow auser to sign up, view, and modify user data on the backend while consideringauthentication and authorization restrictions. However, it is still not possible to visitthe frontend routes directly in the browser address bar; these can only be accessedwhen they're linked from within the frontend view. To enable this functionality in theskeleton application, we need to implement basic server-side rendering.
Implementing basic server-side renderingCurrently, when the React Router routes or pathnames are directly entered in thebrowser address bar or when a view that is not at the root path is refreshed, the URLdoes not work. This happens because the server does not recognize the React Routerroutes we defined in the frontend. We have to implement basic server-side renderingon the backend so that the server is able to respond when it receives a request to afrontend route.
To render the relevant React components properly when the server receives requeststo the frontend routes, we need to initially generate the React components on theserver-side with regard to the React Router and Material-UI components, before theclient-side JS is ready to take over the rendering.
The basic idea behind server-side rendering React apps is to use therenderToString method from react-dom to convert the root React component intoa markup string. Then, we can attach it to the template that the server renders when itreceives a request.
In express.js, we will replace the code that returns template.js in response tothe GET request for '/' with code that, upon receiving any incoming GET request,generates some server-side rendered markup and the CSS of the relevant Reactcomponent tree, before adding this markup and CSS to the template. This updatedcode will achieve the following:
app.get('*', (req, res) => {
// 1. Generate CSS styles using Material-UI's ServerStyleSheets // 2. Use renderToString to generate markup which renders components specific to the route requested // 3. Return template with markup and CSS styles in the response})
In the following sections, we will look at the implementation of the steps outlined inthe preceding code block, and also discuss how to prepare the frontend so that itaccepts and handles this server-rendered code.
Adding a React Frontend to Complete MERN Chapter 4
[ 144 ]
Modules for server-side renderingTo implement basic server-side rendering, we will need to import the followingReact, React Router, and Material-UI-specific modules into the server code. In ourcode structure, the following modules will be imported into server/express.js:
React modules: The following modules are required to render the Reactcomponents and use renderToString:
import React from 'react'import ReactDOMServer from 'react-dom/server'
Router modules: StaticRouter is a stateless router that takes therequested URL to match with the frontend route which was declared in theMainRouter component. The MainRouter is the root component in ourfrontend.
import StaticRouter from 'react-router-dom/StaticRouter'import MainRouter from './../client/MainRouter'
Material-UI modules and the custom theme: The following modules willhelp generate the CSS styles for the frontend components based on thestylings and Material-UI theme that are used on the frontend:
import { ServerStyleSheets, ThemeProvider } from '@material-ui/styles'import theme from './../client/theme'
With these modules, we can prepare, generate, and return server-side renderedfrontend code, as we will discuss next.
Generating CSS and markupTo generate the CSS and markup representing the React frontend views on the server-side, we will use Material-UI's ServerStyleSheets and React's renderToString.
On every request received by the Express app, we will create a newServerStyleSheets instance. Then, we will render the relevant React tree with theserver-side collector in a call to renderToString, which ultimately returns theassociated markup or HTML string version of the React view that is to be shown tothe user in response to the requested URL.

Adding a React Frontend to Complete MERN Chapter 4
[ 145 ]
The following code will be executed on every GET request that's received by theExpress app.
mern-skeleton/server/express.js:
const sheets = new ServerStyleSheets()const context = {}const markup = ReactDOMServer.renderToString( sheets.collect( <StaticRouter location={req.url} context={context}> <ThemeProvider theme={theme}> <MainRouter /> </ThemeProvider> </StaticRouter> ) )
While rendering the React tree, the client app's root component, MainRouter, iswrapped with the Material-UI ThemeProvider to provide the styling props that areneeded by the MainRouter child components. The stateless StaticRouter is usedhere instead of the BrowserRouter that's used on the client-side in order to wrapMainRouter and provide the routing props that are used for implementing the client-side components.
Based on these values, such as the requested location route and theme that arepassed in as props to the wrapping components, renderToString will return themarkup containing the relevant view.
Sending a template with markup and CSSOnce the markup has been generated, we need to check if there was a redirectrendered in the component to be sent in the markup. If there was no redirect, then weget the CSS string from sheets using sheets.toString, and, in the response, wesend the Template back with the markup and CSS injected, as shown in thefollowing code.
mern-skeleton/server/express.js:
if (context.url) { return res.redirect(303, context.url)}const css = sheets.toString()res.status(200).send(Template({ markup: markup,
Adding a React Frontend to Complete MERN Chapter 4
[ 146 ]
css: css}))
An example of a case where redirect is rendered in the component is when we'retrying to access a PrivateRoute via a server-side render. As the server-side cannot access the auth token from the browser's sessionStorage, the redirect inPrivateRoute will render. The context.url value , in this case, will have the'/signin' route, and hence, instead of trying to render the PrivateRoutecomponent, it will redirect to the '/signin' route.
This completes the code we need to add to the server-side to enable the basic server-side rendering of the React views. Next, we need to update the frontend so it is able tointegrate and render this server-generated code.
Updating template.jsThe markup and CSS that we generated on the server must be added to thetemplate.js HTML code for it to be loaded when the server renders the template.
mern-skeleton/template.js:
export default ({markup, css}) => { return `... <div id="root">${markup}</div> <style id="jss-server-side">${css}</style> ...`}
This will load the server-generated code in the browser before the frontend script isready to take over. In the next section, we will learn how the frontend script needs toaccount for this takeover from server-rendered code.
Updating App.jsOnce the code that's been rendered on the server-side reaches the browser and thefrontend script takes over, we need to remove the server-side injected CSS when theroot React component mounts, using the useEffect hook.
mern-skeleton/client/App.js:
React.useEffect(() => { const jssStyles = document.querySelector('#jss-server-side')
Adding a React Frontend to Complete MERN Chapter 4
[ 147 ]
if (jssStyles) { jssStyles.parentNode.removeChild(jssStyles) }}, [])
This will give back full control over rendering the React app to the client-side. Toensure this transfer happens efficiently, we need to update how the ReactDOMrenders the views.
Hydrate instead of renderNow that the React components will be rendered on the server-side, we can updatethe main.js code so that it uses ReactDOM.hydrate() instead ofReactDOM.render():
import React from 'react'import { hydrate } from 'react-dom'import App from './App'
hydrate(<App/>, document.getElementById('root'))
The hydrate function hydrates a container that already has HTML content renderedby ReactDOMServer. This means the server-rendered markup is preserved and onlyevent handlers are attached when React takes over in the browser, allowing the initialload performance to be better.
With basic server-side rendering implemented, direct requests to the frontend routesfrom the browser address bar can now be handled properly by the server, making itpossible to bookmark the React frontend views.
The skeleton MERN application that we've developed in this chapter is now acompletely functioning MERN web application with basic user features. We canextend the code in this skeleton to add a variety of features for different applications.
SummaryIn this chapter, we completed the MERN skeleton application by adding a workingReact frontend, including frontend routing and basic server-side rendering of theReact views.
Adding a React Frontend to Complete MERN Chapter 4
[ 148 ]
We started off by updating the development flow so that it included client-side codebundling for the React views. We updated the configuration for Webpack and Babelto compile the React code and discussed how to load the configured Webpackmiddleware from the Express app to initiate server-side and client-side codecompilation from one place during development.
With the development flow updated, and before building out the frontend, we addedthe relevant React dependencies, along with React Router for frontend routing andMaterial-UI, to use their existing components in the skeleton app's user interface.
Then, we implemented the top-level root React components and integrated ReactRouter, which allowed us to add client-side routes for navigation. Using these routes,we loaded the custom React components that we developed using Material-UIcomponents to make up the skeleton application's user interface.
To make these React views dynamic and interactive with data fetched from thebackend, we used the Fetch API to connect to the backend user APIs. Then, weincorporated authentication and authorization on the frontend views. We did thisusing sessionStorage, which stores user-specific details, and JWT fetched from theserver on successful sign-in, as well as by limiting access to certain views using aPrivateRoute component.
Finally, we modified the server code so that we could implement basic server-siderendering, which allows us to load the frontend routes directly in the browser withserver-side rendered markup after the server recognizes that the incoming request isactually for a React route.
Now, you should be able to implement and integrate a React-based frontend thatincorporates client-side routing and auth management with a standaloneserver application.
In the next chapter, we will use the concepts we've learned in this chapter to extendthe skeleton application code so that we can build a fully-featured social mediaapplication.

5Growing the Skeleton into a
Social Media ApplicationSocial media is an integral part of the web these days, and many of the user-centricweb applications we build end up requiring a social component down the line todrive user engagement.
For our first real-world MERN application, we will modify the MERN skeletonapplication we developed in Chapter 3, Building a Backend with MongoDB, Express,and Node, and Chapter 4, Adding a React Frontend to Complete MERN, to build a simplesocial media application in this chapter. While doing this, you will learn how toextend the integration of the MERN stack technologies and add new features to growyour own full-stack web applications.
In this chapter, we will go over the following topics:
Introducing MERN SocialUpdating the user profileFollowing users in MERN SocialPosting messages with photosImplementing interactions on posts
Growing the Skeleton into a Social Media Application Chapter 5
[ 150 ]
Introducing MERN SocialMERN Social is a social media application with rudimentary features inspired byexisting social media platforms such as Facebook and Twitter. The main purpose ofthis application is to demonstrate how to use the MERN stack technologies toimplement features that allow users to connect or follow each other, and interact overshared content. While building out MERN Social in this chapter, we will go over theimplementation of the following social media-flavored features:
User profile with a description and a photoUsers following each otherWho to follow suggestionsPosting messages with photosNewsfeed with posts from followed usersListing posts by userLiking postsCommenting on posts
You can extend these implementations further, as desired, for more complex features.The MERN Social home page looks as follows:
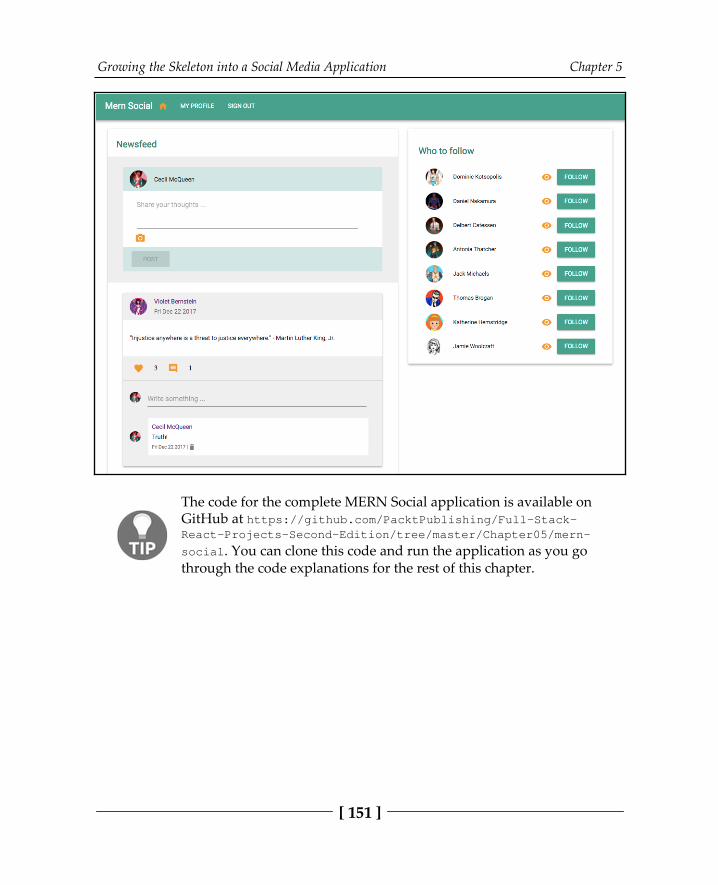
Growing the Skeleton into a Social Media Application Chapter 5
[ 151 ]
The code for the complete MERN Social application is available onGitHub at https:/ / github. com/ PacktPublishing/ Full- Stack-React- Projects- Second- Edition/ tree/ master/ Chapter05/ mern-social. You can clone this code and run the application as you gothrough the code explanations for the rest of this chapter.
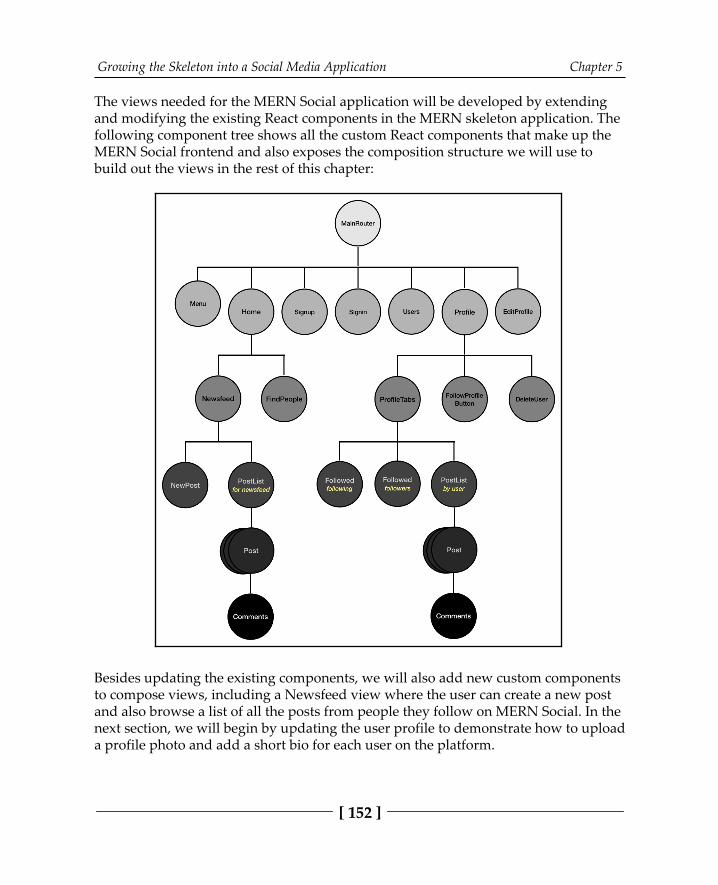
Growing the Skeleton into a Social Media Application Chapter 5
[ 152 ]
The views needed for the MERN Social application will be developed by extendingand modifying the existing React components in the MERN skeleton application. Thefollowing component tree shows all the custom React components that make up theMERN Social frontend and also exposes the composition structure we will use tobuild out the views in the rest of this chapter:
Besides updating the existing components, we will also add new custom componentsto compose views, including a Newsfeed view where the user can create a new postand also browse a list of all the posts from people they follow on MERN Social. In thenext section, we will begin by updating the user profile to demonstrate how to uploada profile photo and add a short bio for each user on the platform.
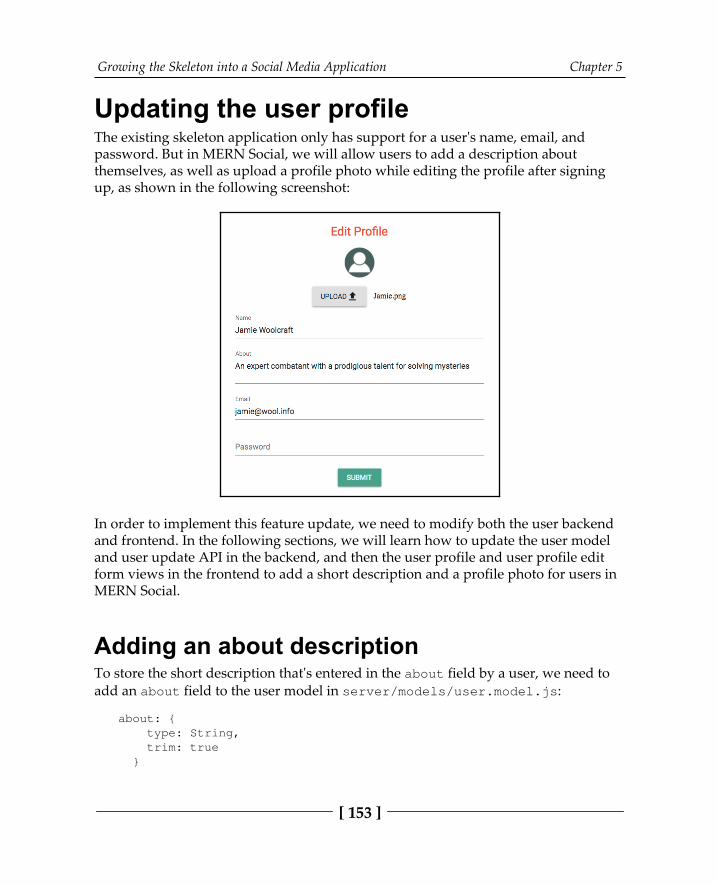
Growing the Skeleton into a Social Media Application Chapter 5
[ 153 ]
Updating the user profileThe existing skeleton application only has support for a user's name, email, andpassword. But in MERN Social, we will allow users to add a description aboutthemselves, as well as upload a profile photo while editing the profile after signingup, as shown in the following screenshot:
In order to implement this feature update, we need to modify both the user backendand frontend. In the following sections, we will learn how to update the user modeland user update API in the backend, and then the user profile and user profile editform views in the frontend to add a short description and a profile photo for users inMERN Social.
Adding an about descriptionTo store the short description that's entered in the about field by a user, we need to add an about field to the user model in server/models/user.model.js:
about: { type: String, trim: true }
Growing the Skeleton into a Social Media Application Chapter 5
[ 154 ]
Then, to get the description as input from the user, we need to add a multilineTextField to the EditProfile form and handle the value change the same way wedid for the user's name input.
mern-social/client/user/EditProfile.js:
<TextField id="multiline-flexible" label="About" multiline rows="2" value={values.about} onChange={handleChange('about')} />
Finally, to show the description text that was added to the about field on the userprofile page, we can add it to the existing profile view.
mern-social/client/user/Profile.js:
<ListItem> <ListItemText primary={this.state.user.about}/> </ListItem>
With this modification to the user feature in the MERN skeleton code, users can nowadd and update a description about themselves to be displayed on their profiles.Next, we will add the ability to upload a photo to complete the user profile.
Uploading a profile photoAllowing a user to upload a profile photo will require that we store the uploadedimage file and retrieve it on request to load it in the view. There are multiple ways ofimplementing this upload feature while considering the different file storage options:
Server filesystem: Upload and save files to a server filesystem and storethe URL in MongoDB.External file storage: Save files to external storage such as Amazon S3 andstore the URL in MongoDB.Store as data in MongoDB: Save files that are small in size (less than 16MB) to MongoDB as data of the Buffer type.
For MERN Social, we will assume that the photo files that are uploaded by the userwill be small in size and demonstrate how to store these files in MongoDB for theprofile photo upload feature. In Chapter 8, Extending the Marketplace for Orders andPayments, we will discuss how to store larger files in MongoDB using GridFS.

Growing the Skeleton into a Social Media Application Chapter 5
[ 155 ]
To implement this photo upload feature, in the following sections, we will do thefollowing:
Update the user model to store the photo.Integrate updated frontend views to upload the photo from the client- side.Modify the user update controller in the backend to process the uploadedphoto.
Updating the user model to store a photo inMongoDBIn order to store the uploaded profile photo directly in the database, we will updatethe user model to add a photo field that stores the file as data of the Buffer type,along with the file's contentType.
mern-social/server/models/user.model.js:
photo: { data: Buffer, contentType: String}
An image file that's uploaded by the user from the client- side will be converted intobinary data and stored in this photo field for documents in the Users collection inMongoDB. Next, we will look at how to upload the file from the frontend.
Uploading a photo from the edit formUsers will be able to upload an image file from their local files when editing theprofile. In order to implement this interaction, we will update the EditProfilecomponent in client/user/EditProfile.js with an upload photo option andthen attach the user selected file in the form data that's submitted to the server. Wewill discuss this in the following sections.
Growing the Skeleton into a Social Media Application Chapter 5
[ 156 ]
File input with Material-UIWe will utilize the HTML5 file input type to let the user select an image from theirlocal files. The file input will return the filename in the change event when the userselects a file. We will add the file input element to the edit profile form as follows:
mern-social/client/user/EditProfile.js:
<input accept="image/*" type="file" onChange={handleChange('photo')} style={{display:'none'}} id="icon-button-file" />
To integrate this file input element with Material-UI components, we applydisplay:none to hide the input element from the view, then add a Material-UIbutton inside the label for this file input. This way, the view displays the Material-UIbutton instead of the HTML5 file input element. The label is added as follows:
mern-social/client/user/EditProfile.js:
<label htmlFor="icon-button-file"> <Button variant="contained" color="default" component="span"> Upload <FileUpload/> </Button></label>
When the Button's component prop is set to span, the Button component renders asa span element inside the label element. A click on the Upload span or label isregistered by the file input with the same ID as the label, and as a result, the file selectdialog is opened. Once the user selects a file, we can set it to state in the callto handleChange(...) and display the name in the view, as shown in the followingcode.
mern-social/client/user/EditProfile.js:
<span className={classes.filename}> {values.photo ? values.photo.name : ''}</span>
This way, the user will see the name of the file they are trying to upload as the profilephoto. With the file selected for uploading, next, we have to attach and send this filewith the request to the server to update the user information in the database.
Growing the Skeleton into a Social Media Application Chapter 5
[ 157 ]
Form submission with the file attachedUploading files to the server with a form requires a multipart form submission. Thisis in contrast to the stringified object we sent in previous implementations of fetch.We will modify the EditProfile component so that it uses the FormData API tostore the form data in the format needed for encoding in the multipart/form-data type.
You can learn more about the FormData APIat developer.mozilla.org/en-US/docs/Web/API/FormData.
First, we will update the input handleChange function so that we can store inputvalues for both the text fields and the file input, as shown in the following code.
mern-social/client/user/EditProfile.js:
const handleChange = name => event => { const value = name === 'photo' ? event.target.files[0] : event.target.value setValues({...values, [name]: value })}
Then, on form submission, we need to initialize FormData and append the valuesfrom the fields that were updated, as shown here.
mern-social/client/user/EditProfile.js:
const clickSubmit = () => { let userData = new FormData() values.name && userData.append('name', values.name) values.email && userData.append('email', values.email) values.passoword && userData.append('passoword', values.passoword) values.about && userData.append('about', values.about) values.photo && userData.append('photo', values.photo) ...}
After appending all the fields and values to it, userData is sent with the fetch APIcall to update the user, as shown in the following code.
mern-social/client/user/EditProfile.js:
update({
Growing the Skeleton into a Social Media Application Chapter 5
[ 158 ]
userId: match.params.userId }, { t: jwt.token }, userData).then((data) => { if (data && data.error) { setValues({...values, error: data.error}) } else { setValues({...values, 'redirectToProfile': true}) }})
Since the content type of the data that's sent to the server is no longer'application/json', we also need to modify the update fetch method in api-user.js to remove Content-Type from the headers in the fetch call, as shownhere.
mern-social/client/user/api-user.js:
const update = async (params, credentials, user) => { try { let response = await fetch('/api/users/' + params.userId, { method: 'PUT', headers: { 'Accept': 'application/json', 'Authorization': 'Bearer ' + credentials.t }, body: user }) return await response.json() } catch(err) { console.log(err) }}
Now, if the user chooses to upload a profile photo when editing the profile, the serverwill receive a request with the file attached, along with the other field values. Next,we need to modify the server-side code to be able to process this request.
Processing a request containing a file uploadOn the server, to process the request to the update API that may now contain a file,we will use the formidable Node module. Run the following command from thecommand line to install formidable:
yarn add formidable
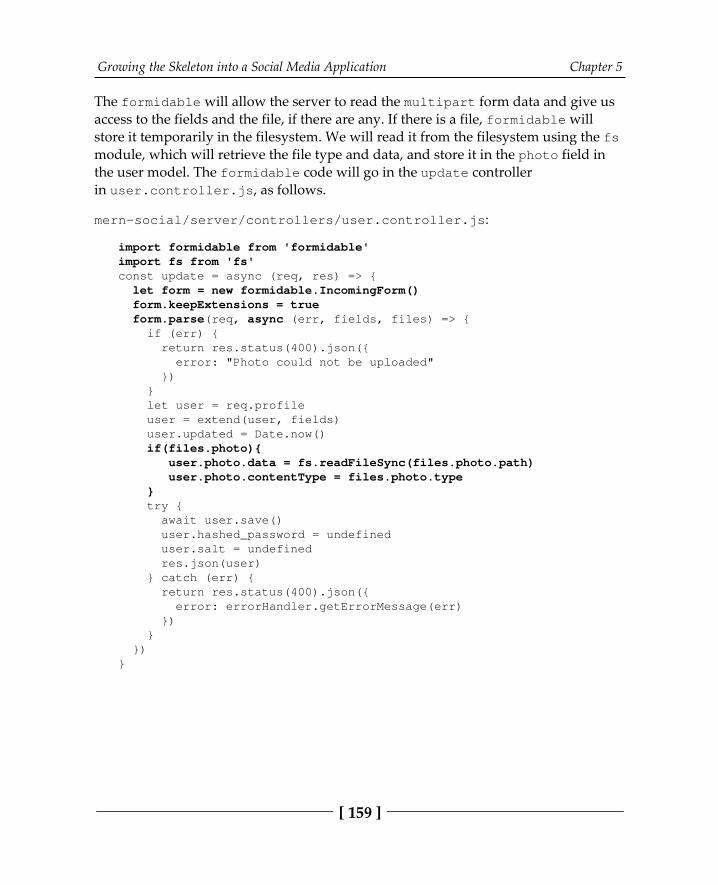
Growing the Skeleton into a Social Media Application Chapter 5
[ 159 ]
The formidable will allow the server to read the multipart form data and give usaccess to the fields and the file, if there are any. If there is a file, formidable willstore it temporarily in the filesystem. We will read it from the filesystem using the fsmodule, which will retrieve the file type and data, and store it in the photo field inthe user model. The formidable code will go in the update controllerin user.controller.js, as follows.
mern-social/server/controllers/user.controller.js:
import formidable from 'formidable'import fs from 'fs'const update = async (req, res) => { let form = new formidable.IncomingForm() form.keepExtensions = true form.parse(req, async (err, fields, files) => { if (err) { return res.status(400).json({ error: "Photo could not be uploaded" }) } let user = req.profile user = extend(user, fields) user.updated = Date.now() if(files.photo){ user.photo.data = fs.readFileSync(files.photo.path) user.photo.contentType = files.photo.type } try { await user.save() user.hashed_password = undefined user.salt = undefined res.json(user) } catch (err) { return res.status(400).json({ error: errorHandler.getErrorMessage(err) }) } })}
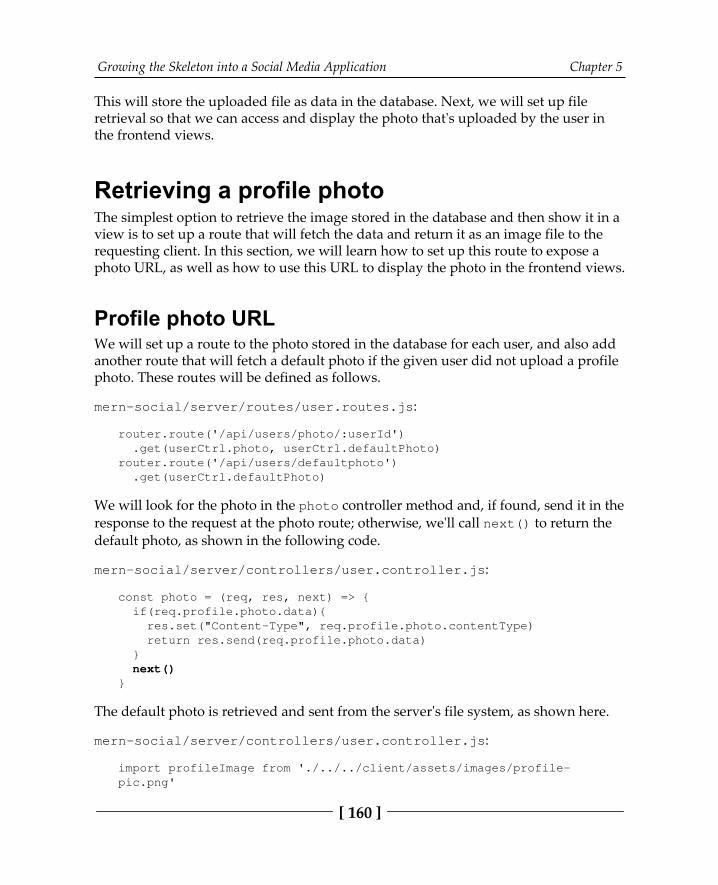
Growing the Skeleton into a Social Media Application Chapter 5
[ 160 ]
This will store the uploaded file as data in the database. Next, we will set up fileretrieval so that we can access and display the photo that's uploaded by the user inthe frontend views.
Retrieving a profile photoThe simplest option to retrieve the image stored in the database and then show it in aview is to set up a route that will fetch the data and return it as an image file to therequesting client. In this section, we will learn how to set up this route to expose aphoto URL, as well as how to use this URL to display the photo in the frontend views.
Profile photo URLWe will set up a route to the photo stored in the database for each user, and also addanother route that will fetch a default photo if the given user did not upload a profilephoto. These routes will be defined as follows.
mern-social/server/routes/user.routes.js:
router.route('/api/users/photo/:userId') .get(userCtrl.photo, userCtrl.defaultPhoto)router.route('/api/users/defaultphoto') .get(userCtrl.defaultPhoto)
We will look for the photo in the photo controller method and, if found, send it in theresponse to the request at the photo route; otherwise, we'll call next() to return thedefault photo, as shown in the following code.
mern-social/server/controllers/user.controller.js:
const photo = (req, res, next) => { if(req.profile.photo.data){ res.set("Content-Type", req.profile.photo.contentType) return res.send(req.profile.photo.data) } next()}
The default photo is retrieved and sent from the server's file system, as shown here.
mern-social/server/controllers/user.controller.js:
import profileImage from './../../client/assets/images/profile-pic.png'
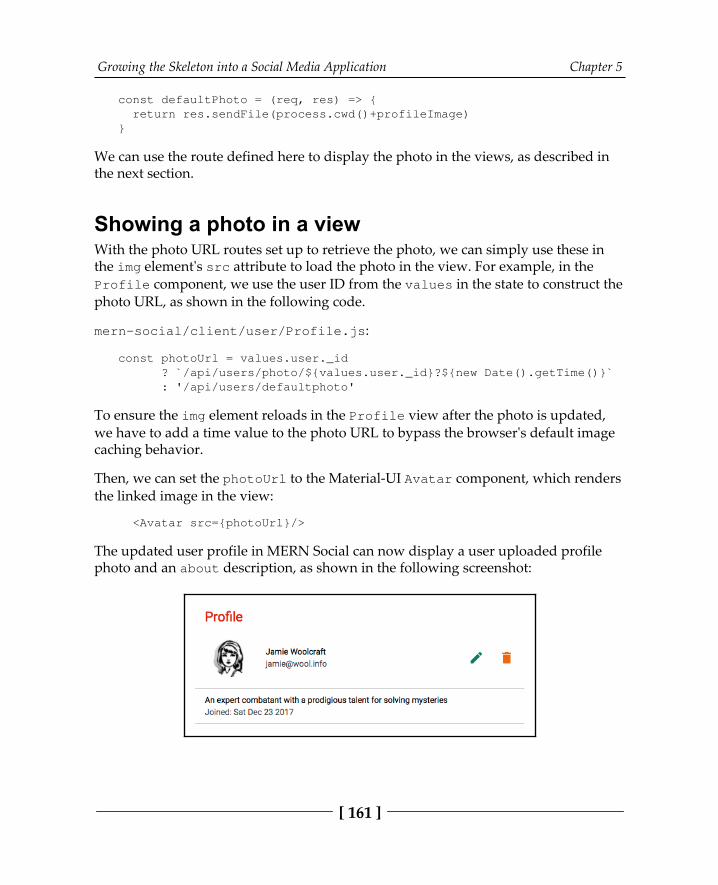
Growing the Skeleton into a Social Media Application Chapter 5
[ 161 ]
const defaultPhoto = (req, res) => { return res.sendFile(process.cwd()+profileImage)}
We can use the route defined here to display the photo in the views, as described inthe next section.
Showing a photo in a viewWith the photo URL routes set up to retrieve the photo, we can simply use these inthe img element's src attribute to load the photo in the view. For example, in theProfile component, we use the user ID from the values in the state to construct thephoto URL, as shown in the following code.
mern-social/client/user/Profile.js:
const photoUrl = values.user._id ? `/api/users/photo/${values.user._id}?${new Date().getTime()}` : '/api/users/defaultphoto'
To ensure the img element reloads in the Profile view after the photo is updated,we have to add a time value to the photo URL to bypass the browser's default imagecaching behavior.
Then, we can set the photoUrl to the Material-UI Avatar component, which rendersthe linked image in the view:
<Avatar src={photoUrl}/>
The updated user profile in MERN Social can now display a user uploaded profilephoto and an about description, as shown in the following screenshot:
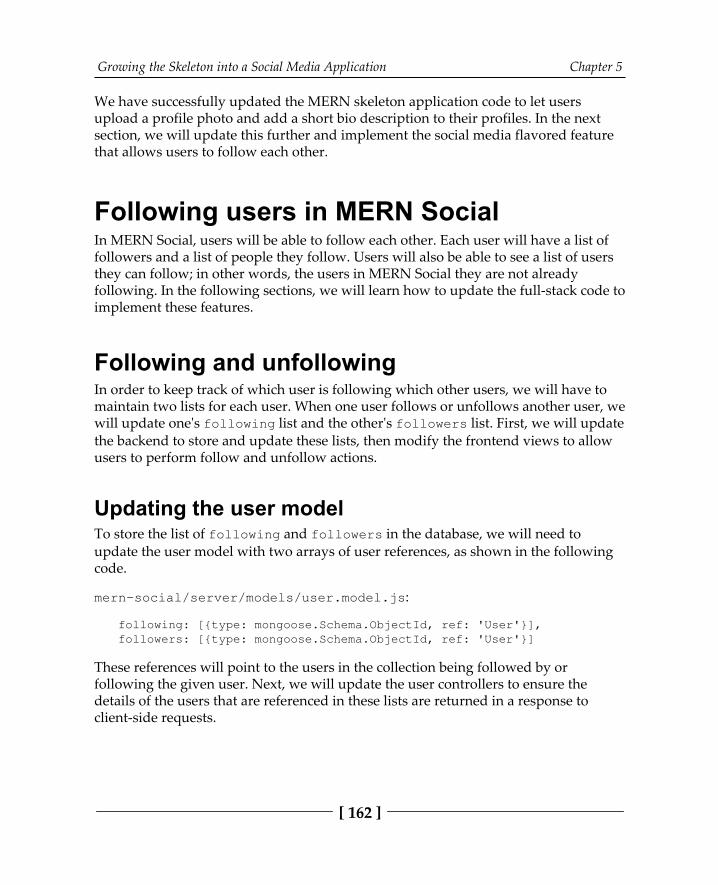
Growing the Skeleton into a Social Media Application Chapter 5
[ 162 ]
We have successfully updated the MERN skeleton application code to let usersupload a profile photo and add a short bio description to their profiles. In the nextsection, we will update this further and implement the social media flavored featurethat allows users to follow each other.
Following users in MERN SocialIn MERN Social, users will be able to follow each other. Each user will have a list offollowers and a list of people they follow. Users will also be able to see a list of usersthey can follow; in other words, the users in MERN Social they are not alreadyfollowing. In the following sections, we will learn how to update the full-stack code toimplement these features.
Following and unfollowingIn order to keep track of which user is following which other users, we will have to maintain two lists for each user. When one user follows or unfollows another user, wewill update one's following list and the other's followers list. First, we will updatethe backend to store and update these lists, then modify the frontend views to allowusers to perform follow and unfollow actions.
Updating the user modelTo store the list of following and followers in the database, we will need to update the user model with two arrays of user references, as shown in the followingcode.
mern-social/server/models/user.model.js:
following: [{type: mongoose.Schema.ObjectId, ref: 'User'}],followers: [{type: mongoose.Schema.ObjectId, ref: 'User'}]
These references will point to the users in the collection being followed by orfollowing the given user. Next, we will update the user controllers to ensure thedetails of the users that are referenced in these lists are returned in a response toclient-side requests.

Growing the Skeleton into a Social Media Application Chapter 5
[ 163 ]
Updating the userByID controller methodWhen a single user is retrieved from the backend, we want the user object to includethe names and IDs of the users referenced in the following and followers arrays.To retrieve these details, we need to update the userByID controller method so that itpopulates the returned user object, as shown in the highlighted code.
mern-social/server/controllers/user.controller.js:
const userByID = async (req, res, next, id) => { try { let user = await User.findById(id) .populate('following', '_id name') .populate('followers', '_id name') .exec() if (!user) return res.status('400').json({ error: "User not found" }) req.profile = user next() } catch (err) { return res.status('400').json({ error: "Could not retrieve user" }) }}
We use the Mongoose populate method to specify that the user object that'sreturned from the query should contain the name and ID of the users referenced inthe following and followers lists. This will give us the names and IDs of the userreferences in the followers and following lists when we fetch the user with theread API call.
With the user model updated, we are ready to add API endpoints that will updatethese lists to either add or remove users from the lists, as discussed in the nextsection.
Adding APIs to follow and unfollowWhen a user follows or unfollows another user from the view, both users' records inthe database will be updated in response to the follow or unfollow requests.
Growing the Skeleton into a Social Media Application Chapter 5
[ 164 ]
Set up follow and unfollow routes in user.routes.js as follows.
mern-social/server/routes/user.routes.js:
router.route('/api/users/follow') .put(authCtrl.requireSignin, userCtrl.addFollowing, userCtrl.addFollower)router.route('/api/users/unfollow') .put(authCtrl.requireSignin, userCtrl.removeFollowing, userCtrl.removeFollower)
The addFollowing controller method in the user controller will update thefollowing array for the current user by pushing the followed user's reference intothe array, as shown in the following code.
mern-social/server/controllers/user.controller.js:
const addFollowing = async (req, res, next) => { try{ await User.findByIdAndUpdate(req.body.userId, {$push: {following: req.body.followId}}) next() }catch(err){ return res.status(400).json({ error: errorHandler.getErrorMessage(err) }) }}
On successful update of the following array, next() is invoked, and as a result,the addFollower method is executed to add the current user's reference to thefollowed user's followers array. The addFollower method is defined as follows.
mern-social/server/controllers/user.controller.js:
const addFollower = async (req, res) => { try{ let result = await User.findByIdAndUpdate(req.body.followId, {$push: {followers: req.body.userId}}, {new: true}) .populate('following', '_id name') .populate('followers', '_id name') .exec() result.hashed_password = undefined result.salt = undefined

Growing the Skeleton into a Social Media Application Chapter 5
[ 165 ]
res.json(result) }catch(err) { return res.status(400).json({ error: errorHandler.getErrorMessage(err) }) }}
For unfollowing, the implementation is similar. The removeFollowing andremoveFollower controller methods update the respective 'following' and'followers' arrays by removing the user references with $pull instead of$push. removeFollowing and removeFollower will look as follows.
mern-social/server/controllers/user.controller.js:
const removeFollowing = async (req, res, next) => { try{ await User.findByIdAndUpdate(req.body.userId, {$pull: {following: req.body.unfollowId}}) next() }catch(err) { return res.status(400).json({ error: errorHandler.getErrorMessage(err) }) }}const removeFollower = async (req, res) => { try{ let result = await User.findByIdAndUpdate(req.body.unfollowId, {$pull: {followers: req.body.userId}}, {new: true}) .populate('following', '_id name') .populate('followers', '_id name') .exec() result.hashed_password = undefined result.salt = undefined res.json(result) }catch(err){ return res.status(400).json({ error: errorHandler.getErrorMessage(err) }) }}
The user backend on the server-side is ready for the follow and unfollow features.Next, we will update the frontend to utilize these new backend APIs and completethis feature.
Growing the Skeleton into a Social Media Application Chapter 5
[ 166 ]
Accessing the follow and unfollow APIs in viewsIn order to access these API calls in the views, we will update api-user.js withthe follow and unfollow fetch methods. The follow and unfollow methods willbe similar, making calls to the respective routes with the current user's ID andcredentials, and the followed or unfollowed user's ID. The follow method will be asfollows.
mern-social/client/user/api-user.js:
const follow = async (params, credentials, followId) => { try { let response = await fetch('/api/users/follow/', { method: 'PUT', headers: { 'Accept': 'application/json', 'Content-Type': 'application/json', 'Authorization': 'Bearer ' + credentials.t }, body: JSON.stringify({userId:params.userId, followId: followId}) }) return await response.json() } catch(err) { console.log(err) }}
The unfollow fetch method is similar; it takes the unfollowed user's ID and calls theunfollow API, as shown in the following code.
mern-social/client/user/api-user.js:
const unfollow = async (params, credentials, unfollowId) => { try { let response = await fetch('/api/users/unfollow/', { method: 'PUT', headers: { 'Accept': 'application/json', 'Content-Type': 'application/json', 'Authorization': 'Bearer ' + credentials.t }, body: JSON.stringify({userId:params.userId, unfollowId:unfollowId}) }) return await response.json() } catch(err) { console.log(err)
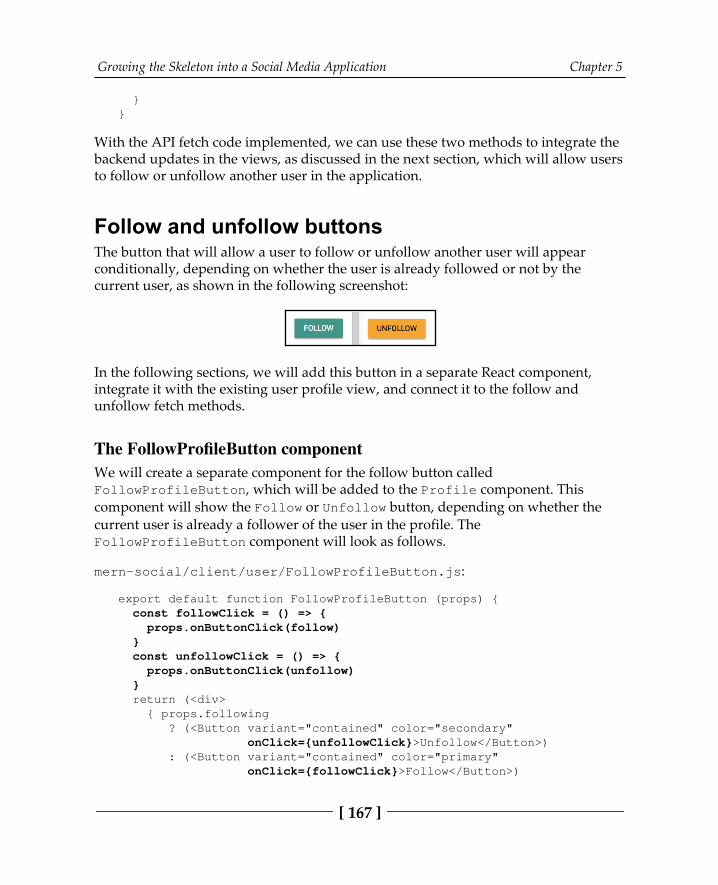
Growing the Skeleton into a Social Media Application Chapter 5
[ 167 ]
}}
With the API fetch code implemented, we can use these two methods to integrate thebackend updates in the views, as discussed in the next section, which will allow usersto follow or unfollow another user in the application.
Follow and unfollow buttonsThe button that will allow a user to follow or unfollow another user will appearconditionally, depending on whether the user is already followed or not by thecurrent user, as shown in the following screenshot:
In the following sections, we will add this button in a separate React component,integrate it with the existing user profile view, and connect it to the follow andunfollow fetch methods.
The FollowProfileButton componentWe will create a separate component for the follow button calledFollowProfileButton, which will be added to the Profile component. Thiscomponent will show the Follow or Unfollow button, depending on whether thecurrent user is already a follower of the user in the profile. TheFollowProfileButton component will look as follows.
mern-social/client/user/FollowProfileButton.js:
export default function FollowProfileButton (props) { const followClick = () => { props.onButtonClick(follow) } const unfollowClick = () => { props.onButtonClick(unfollow) } return (<div> { props.following ? (<Button variant="contained" color="secondary" onClick={unfollowClick}>Unfollow</Button>) : (<Button variant="contained" color="primary" onClick={followClick}>Follow</Button>)
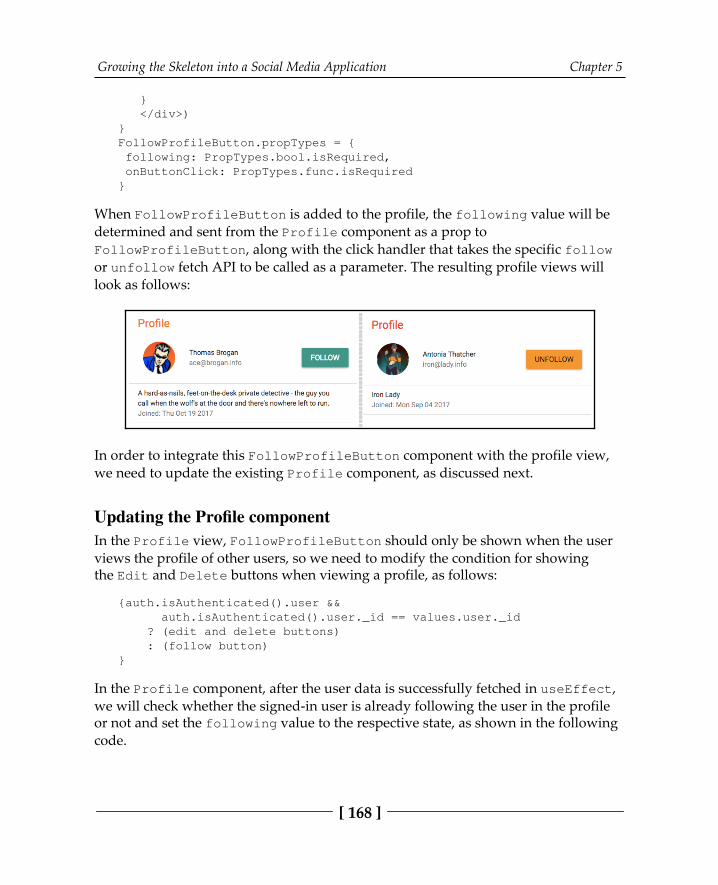
Growing the Skeleton into a Social Media Application Chapter 5
[ 168 ]
} </div>)}FollowProfileButton.propTypes = { following: PropTypes.bool.isRequired, onButtonClick: PropTypes.func.isRequired}
When FollowProfileButton is added to the profile, the following value will bedetermined and sent from the Profile component as a prop toFollowProfileButton, along with the click handler that takes the specific followor unfollow fetch API to be called as a parameter. The resulting profile views willlook as follows:
In order to integrate this FollowProfileButton component with the profile view,we need to update the existing Profile component, as discussed next.
Updating the Profile componentIn the Profile view, FollowProfileButton should only be shown when the user views the profile of other users, so we need to modify the condition for showingthe Edit and Delete buttons when viewing a profile, as follows:
{auth.isAuthenticated().user && auth.isAuthenticated().user._id == values.user._id ? (edit and delete buttons) : (follow button)}
In the Profile component, after the user data is successfully fetched in useEffect,we will check whether the signed-in user is already following the user in the profileor not and set the following value to the respective state, as shown in the followingcode.
Growing the Skeleton into a Social Media Application Chapter 5
[ 169 ]
mern-social/client/user/Profile.js:
let following = checkFollow(data)setValues({...values, user: data, following: following})
To determine the value to set in following, the checkFollow method will check ifthe signed-in user exists in the fetched user's followers list, then return match iffound; otherwise, it will return undefined if a match is not found.The checkFollow method is defined as follows.
mern-social/client/user/Profile.js:
const checkFollow = (user) => { const match = user.followers.some((follower)=> { return follower._id == jwt.user._id }) return match}
The Profile component will also define the click handler forFollowProfileButton so that the state of the Profile can be updated when thefollow or unfollow action completes, as shown in the following code.
mern-social/client/user/Profile.js:
const clickFollowButton = (callApi) => { callApi({ userId: jwt.user._id }, { t: jwt.token }, values.user._id).then((data) => { if (data.error) { setValues({...values, error: data.error}) } else { setValues({...values, user: data, following:!values.following}) } }) }
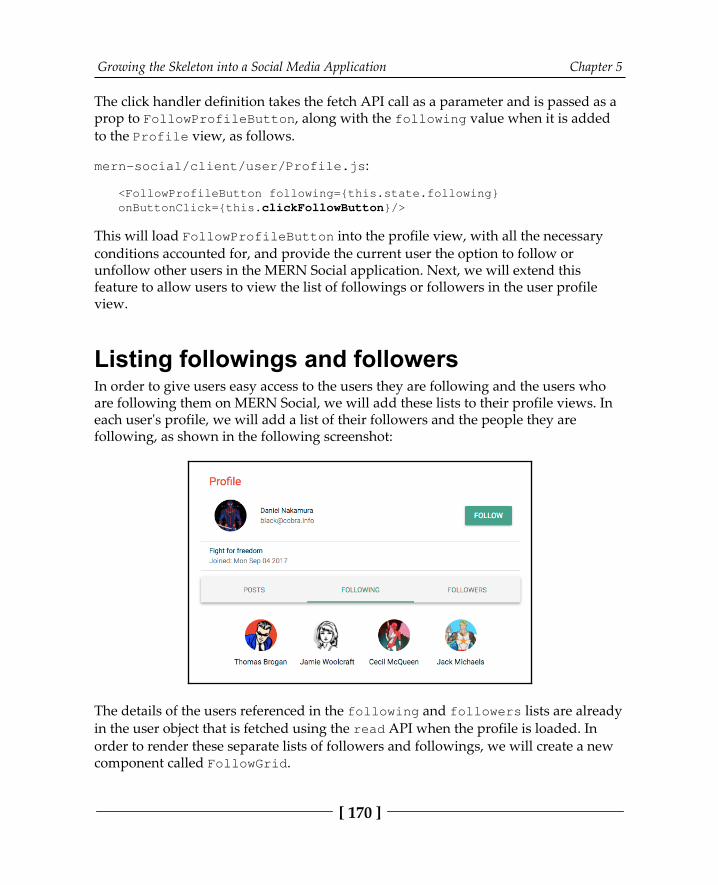
Growing the Skeleton into a Social Media Application Chapter 5
[ 170 ]
The click handler definition takes the fetch API call as a parameter and is passed as aprop to FollowProfileButton, along with the following value when it is addedto the Profile view, as follows.
mern-social/client/user/Profile.js:
<FollowProfileButton following={this.state.following}onButtonClick={this.clickFollowButton}/>
This will load FollowProfileButton into the profile view, with all the necessaryconditions accounted for, and provide the current user the option to follow orunfollow other users in the MERN Social application. Next, we will extend thisfeature to allow users to view the list of followings or followers in the user profileview.
Listing followings and followersIn order to give users easy access to the users they are following and the users whoare following them on MERN Social, we will add these lists to their profile views. Ineach user's profile, we will add a list of their followers and the people they arefollowing, as shown in the following screenshot:
The details of the users referenced in the following and followers lists are alreadyin the user object that is fetched using the read API when the profile is loaded. Inorder to render these separate lists of followers and followings, we will create a newcomponent called FollowGrid.
Growing the Skeleton into a Social Media Application Chapter 5
[ 171 ]
Making a FollowGrid componentThe FollowGrid component will take a list of users as props, display the avatars ofthe users with their names, and link them to each user's own profile. We can add thiscomponent to the Profile view to display followings or followers. TheFollowGrid component is defined as follows.
mern-social/client/user/FollowGrid.js:
export default function FollowGrid (props) { const classes = useStyles() return (<div className={classes.root}> <GridList cellHeight={160} className={classes.gridList}cols={4}> {props.people.map((person, i) => { return <GridListTile style={{'height':120}} key={i}> <Link to={"/user/" + person._id}> <Avatar src={'/api/users/photo/'+person._id} className={classes.bigAvatar}/> <Typography className={classes.tileText}> {person.name} </Typography> </Link> </GridListTile> })} </GridList> </div>)}
FollowGrid.propTypes = { people: PropTypes.array.isRequired}
To add the FollowGrid component to the Profile view, we can place it as desiredin the view and pass the list of followers or followings as the people prop:
<FollowGrid people={props.user.followers}/><FollowGrid people={props.user.following}/>
As shown previously, in MERN Social, we chose to display the FollowGridcomponents in tabs within the Profile component. We created a separateProfileTabs component using Material-UI tab components and added that to theProfile component. This ProfileTabs component contains the two FollowGridcomponents with following and followers lists, along with a PostList componentthat shows the posts by the user.
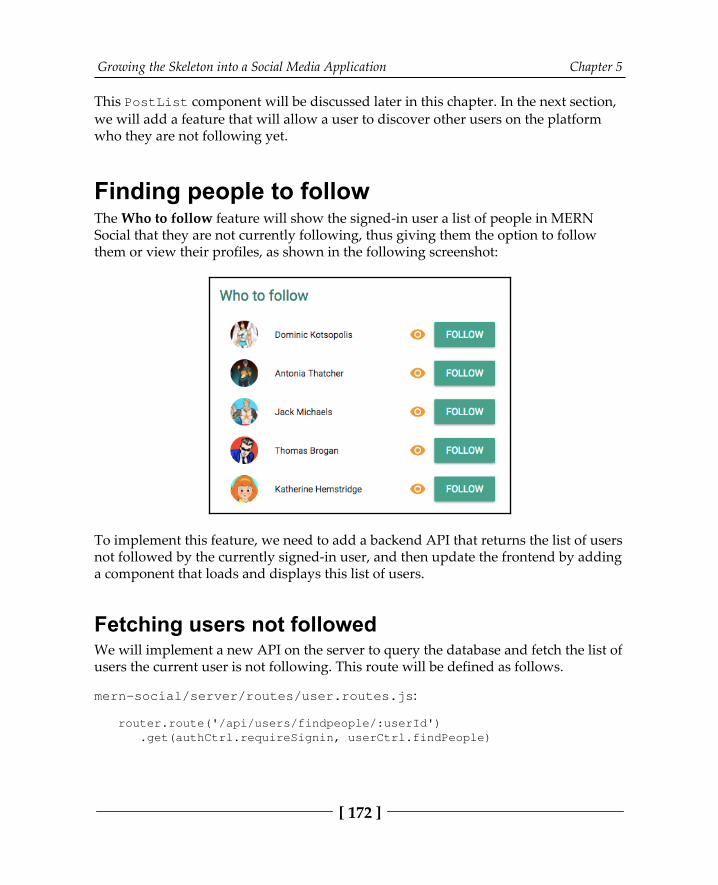
Growing the Skeleton into a Social Media Application Chapter 5
[ 172 ]
This PostList component will be discussed later in this chapter. In the next section,we will add a feature that will allow a user to discover other users on the platformwho they are not following yet.
Finding people to followThe Who to follow feature will show the signed-in user a list of people in MERNSocial that they are not currently following, thus giving them the option to followthem or view their profiles, as shown in the following screenshot:
To implement this feature, we need to add a backend API that returns the list of usersnot followed by the currently signed-in user, and then update the frontend by addinga component that loads and displays this list of users.
Fetching users not followedWe will implement a new API on the server to query the database and fetch the list ofusers the current user is not following. This route will be defined as follows.
mern-social/server/routes/user.routes.js:
router.route('/api/users/findpeople/:userId') .get(authCtrl.requireSignin, userCtrl.findPeople)
Growing the Skeleton into a Social Media Application Chapter 5
[ 173 ]
In the findPeople controller method, we will query the User collection in thedatabase to find the users that are not in the current user's following list.
mern-social/server/controllers/user.controller.js:
const findPeople = async (req, res) => { let following = req.profile.following following.push(req.profile._id) try { let users = await User.find({ _id:{ $nin : following }}) .select('name') res.json(users) }catch(err){ return res.status(400).json({ error: errorHandler.getErrorMessage(err) }) }}
This query will return an array of users that are not followed by the current user. Touse this list of users in the frontend, we will update the api-user.js file and add afetch for this API. The findPeople fetch method is defined as follows.
mern-social/client/user/api-user.js:
const findPeople = async (params, credentials, signal) => { try { let response = await fetch('/api/users/findpeople/' +params.userId, { method: 'GET', signal: signal, headers: { 'Accept': 'application/json', 'Content-Type': 'application/json', 'Authorization': 'Bearer ' + credentials.t } }) return await response.json() } catch(err) { console.log(err) }}
We can use this findPeople fetch method in the component that will display this listof users. In the next section, we will create the FindPeople component for thispurpose.
Growing the Skeleton into a Social Media Application Chapter 5
[ 174 ]
The FindPeople componentTo display the who to follow feature, we will create a component called FindPeople,which can be added to any of the views or rendered on its own. In this component,we will fetch the users not being followed by calling the findPeople method inuseEffect, as shown in the following code.
mern-social/client/user/FindPeople.js:
useEffect(() => { const abortController = new AbortController() const signal = abortController.signal
findPeople({ userId: jwt.user._id }, { t: jwt.token }, signal).then((data) => { if (data && data.error) { console.log(data.error) } else { setValues({...values, users:data}) } }) return function cleanup(){ abortController.abort() } }, [])
The fetched list of users will be iterated over and rendered in a Material-UI Listcomponent, with each list item containing the user's avatar, name, a link to the profilepage, and a Follow button, as shown in the following code.
mern-social/client/user/FindPeople.js:
<List> {values.users.map((item, i) => { return <span key={i}> <ListItem> <ListItemAvatar className={classes.avatar}> <Avatar src={'/api/users/photo/'+item._id}/> </ListItemAvatar> <ListItemText primary={item.name}/> <ListItemSecondaryAction className={classes.follow}> <Link to={"/user/" + item._id}> <IconButton variant="contained" color="secondary" className={classes.viewButton}>
Growing the Skeleton into a Social Media Application Chapter 5
[ 175 ]
<ViewIcon/> </IconButton> </Link> <Button aria-label="Follow" variant="contained" color="primary" onClick={()=> {clickFollow(item, i)}}> Follow </Button> </ListItemSecondaryAction> </ListItem> </span> }) }</List>
Clicking the Follow button will make a call to the follow API and update the list ofusers to follow by splicing out the newly followed user. The clickFollow methodimplements this behavior as follows.
mern-social/client/user/FindPeople.js:
const clickFollow = (user, index) => { follow({ userId: jwt.user._id }, { t: jwt.token }, user._id).then((data) => { if (data.error) { console.log(data.error) } else { let toFollow = values.users toFollow.splice(index, 1) setValues({...values, users: toFollow, open: true, followMessage: `Following ${user.name}!`}) } })}
We will also add a Material-UI Snackbar component that will open temporarilywhen the user is successfully followed in order to tell the user that they startedfollowing this new user. Snackbar will be added to the view code as follows.
mern-social/client/user/FindPeople.js:
<Snackbar anchorOrigin={{ vertical: 'bottom',
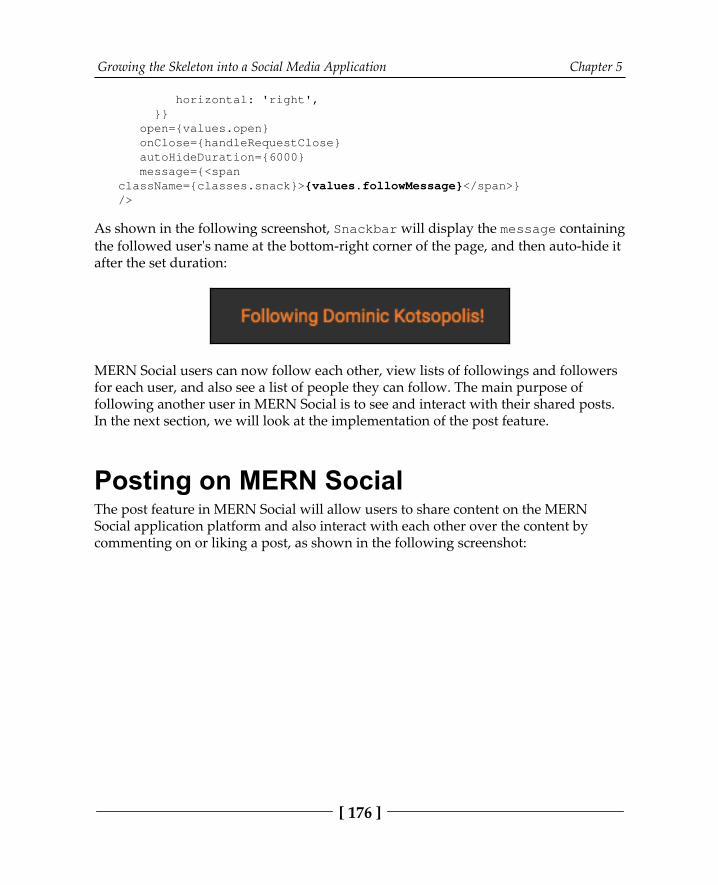
Growing the Skeleton into a Social Media Application Chapter 5
[ 176 ]
horizontal: 'right', }} open={values.open} onClose={handleRequestClose} autoHideDuration={6000} message={<spanclassName={classes.snack}>{values.followMessage}</span>}/>
As shown in the following screenshot, Snackbar will display the message containingthe followed user's name at the bottom-right corner of the page, and then auto-hide itafter the set duration:
MERN Social users can now follow each other, view lists of followings and followersfor each user, and also see a list of people they can follow. The main purpose offollowing another user in MERN Social is to see and interact with their shared posts.In the next section, we will look at the implementation of the post feature.
Posting on MERN SocialThe post feature in MERN Social will allow users to share content on the MERNSocial application platform and also interact with each other over the content bycommenting on or liking a post, as shown in the following screenshot:
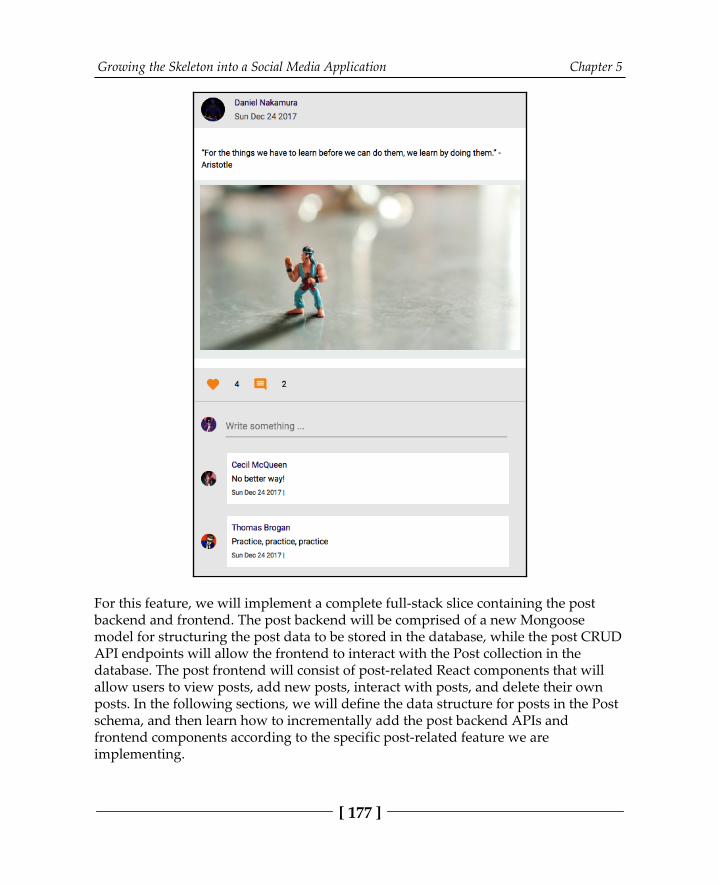
Growing the Skeleton into a Social Media Application Chapter 5
[ 177 ]
For this feature, we will implement a complete full-stack slice containing the postbackend and frontend. The post backend will be comprised of a new Mongoosemodel for structuring the post data to be stored in the database, while the post CRUDAPI endpoints will allow the frontend to interact with the Post collection in thedatabase. The post frontend will consist of post-related React components that will allow users to view posts, add new posts, interact with posts, and delete their ownposts. In the following sections, we will define the data structure for posts in the Postschema, and then learn how to incrementally add the post backend APIs andfrontend components according to the specific post-related feature we areimplementing.
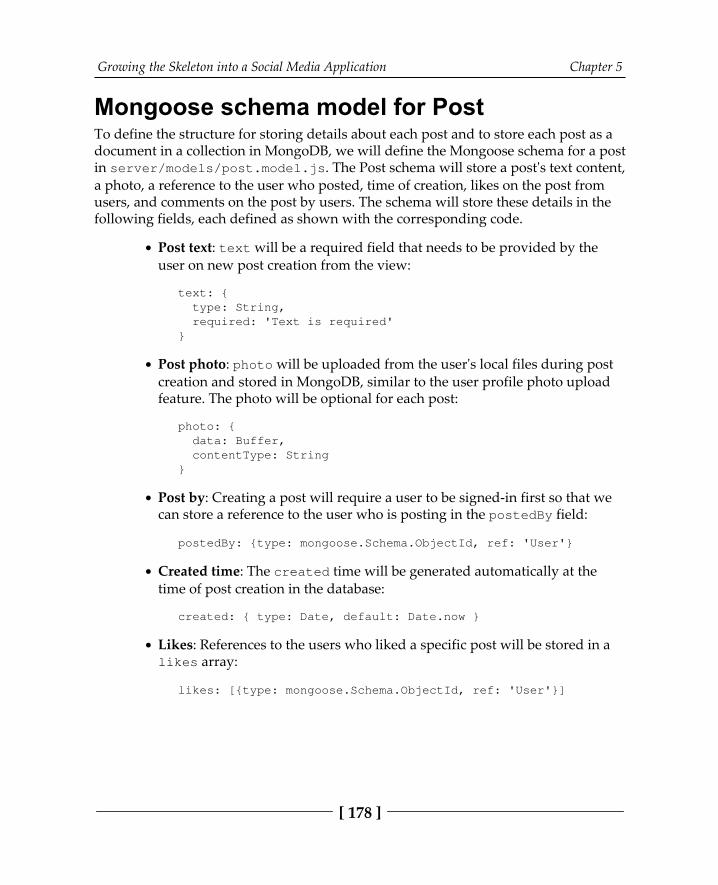
Growing the Skeleton into a Social Media Application Chapter 5
[ 178 ]
Mongoose schema model for PostTo define the structure for storing details about each post and to store each post as adocument in a collection in MongoDB, we will define the Mongoose schema for a postin server/models/post.model.js. The Post schema will store a post's text content,a photo, a reference to the user who posted, time of creation, likes on the post fromusers, and comments on the post by users. The schema will store these details in thefollowing fields, each defined as shown with the corresponding code.
Post text: text will be a required field that needs to be provided by theuser on new post creation from the view:
text: { type: String, required: 'Text is required'}
Post photo: photo will be uploaded from the user's local files during postcreation and stored in MongoDB, similar to the user profile photo uploadfeature. The photo will be optional for each post:
photo: { data: Buffer, contentType: String}
Post by: Creating a post will require a user to be signed-in first so that wecan store a reference to the user who is posting in the postedBy field:
postedBy: {type: mongoose.Schema.ObjectId, ref: 'User'}
Created time: The created time will be generated automatically at thetime of post creation in the database:
created: { type: Date, default: Date.now }
Likes: References to the users who liked a specific post will be stored in alikes array:
likes: [{type: mongoose.Schema.ObjectId, ref: 'User'}]

Growing the Skeleton into a Social Media Application Chapter 5
[ 179 ]
Comments: Each comment on a post will contain text content, the time ofcreation, and a reference to the user who posted the comment. Each postwill have an array of comments:
comments: [{ text: String, created: { type: Date, default: Date.now }, postedBy: { type: mongoose.Schema.ObjectId, ref: 'User'} }]
This schema definition will enable us to implement all the post-related features inMERN Social. Next, we will start with a discussion of the Newsfeed feature to learnhow to compose frontend React components.
The Newsfeed componentOn MERN Social, each user will see posts that have been shared by people theyfollow, along with posts that they themselves share, all aggregated in a Newsfeedview. Before delving further into the implementations of the post-related features inMERN Social, we will look at the composition of this Newsfeed view to showcase abasic example of how to design nested UI components that share state. The Newsfeedcomponent will contain two main child components – a new post form and a list ofposts from followed users, as shown in the following screenshot:
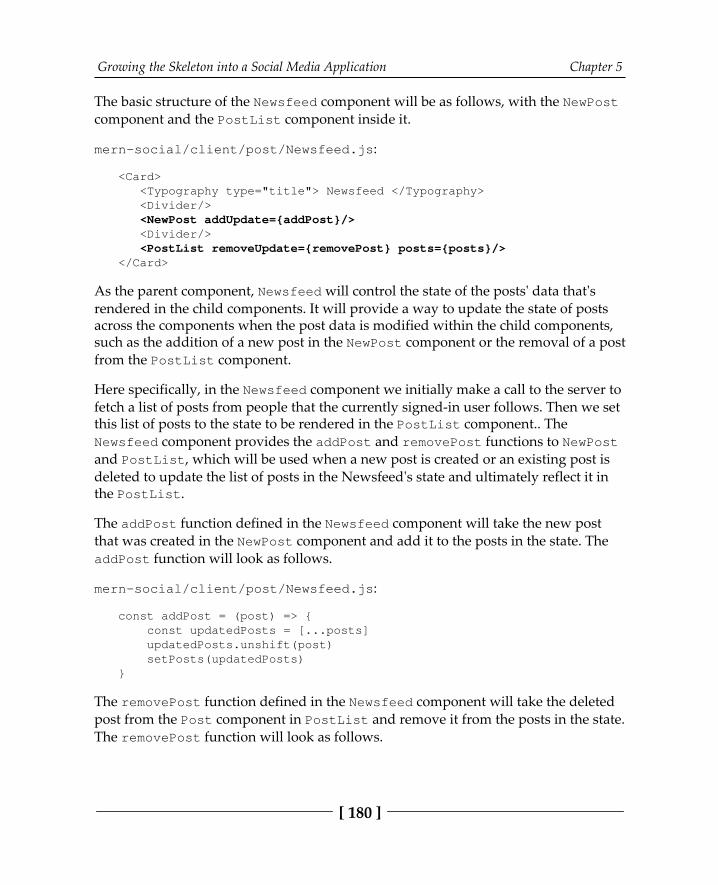
Growing the Skeleton into a Social Media Application Chapter 5
[ 180 ]
The basic structure of the Newsfeed component will be as follows, with the NewPostcomponent and the PostList component inside it.
mern-social/client/post/Newsfeed.js:
<Card> <Typography type="title"> Newsfeed </Typography> <Divider/> <NewPost addUpdate={addPost}/> <Divider/> <PostList removeUpdate={removePost} posts={posts}/></Card>
As the parent component, Newsfeed will control the state of the posts' data that'srendered in the child components. It will provide a way to update the state of postsacross the components when the post data is modified within the child components,such as the addition of a new post in the NewPost component or the removal of a postfrom the PostList component.
Here specifically, in the Newsfeed component we initially make a call to the server tofetch a list of posts from people that the currently signed-in user follows. Then we setthis list of posts to the state to be rendered in the PostList component.. TheNewsfeed component provides the addPost and removePost functions to NewPostand PostList, which will be used when a new post is created or an existing post isdeleted to update the list of posts in the Newsfeed's state and ultimately reflect it inthe PostList.
The addPost function defined in the Newsfeed component will take the new postthat was created in the NewPost component and add it to the posts in the state. TheaddPost function will look as follows.
mern-social/client/post/Newsfeed.js:
const addPost = (post) => { const updatedPosts = [...posts] updatedPosts.unshift(post) setPosts(updatedPosts)}
The removePost function defined in the Newsfeed component will take the deletedpost from the Post component in PostList and remove it from the posts in the state.The removePost function will look as follows.
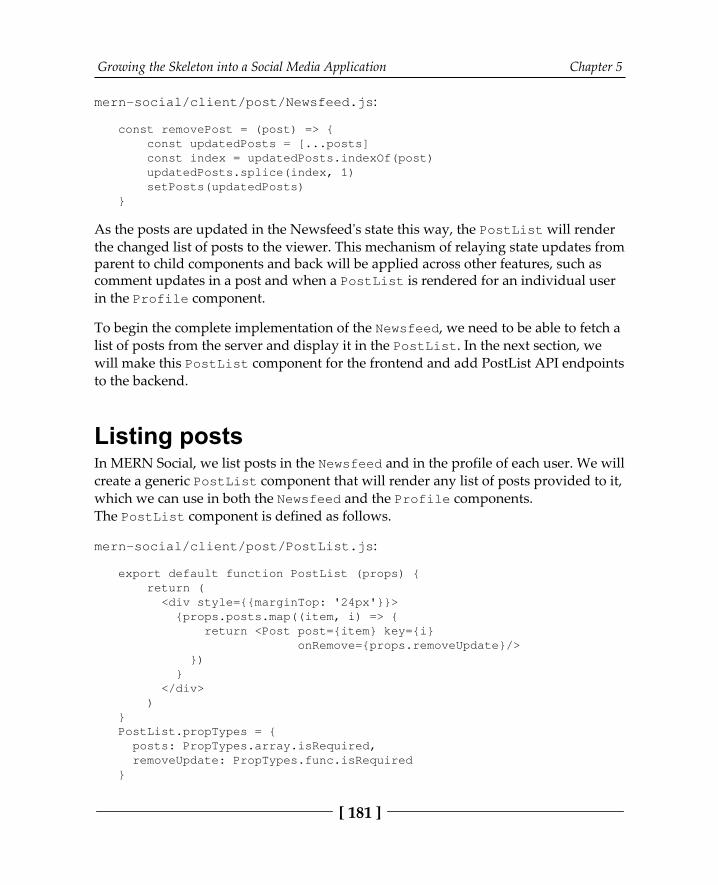
Growing the Skeleton into a Social Media Application Chapter 5
[ 181 ]
mern-social/client/post/Newsfeed.js:
const removePost = (post) => { const updatedPosts = [...posts] const index = updatedPosts.indexOf(post) updatedPosts.splice(index, 1) setPosts(updatedPosts)}
As the posts are updated in the Newsfeed's state this way, the PostList will renderthe changed list of posts to the viewer. This mechanism of relaying state updates fromparent to child components and back will be applied across other features, such ascomment updates in a post and when a PostList is rendered for an individual userin the Profile component.
To begin the complete implementation of the Newsfeed, we need to be able to fetch alist of posts from the server and display it in the PostList. In the next section, wewill make this PostList component for the frontend and add PostList API endpointsto the backend.
Listing postsIn MERN Social, we list posts in the Newsfeed and in the profile of each user. We willcreate a generic PostList component that will render any list of posts provided to it,which we can use in both the Newsfeed and the Profile components.The PostList component is defined as follows.
mern-social/client/post/PostList.js:
export default function PostList (props) { return ( <div style={{marginTop: '24px'}}> {props.posts.map((item, i) => { return <Post post={item} key={i} onRemove={props.removeUpdate}/> }) } </div> )}PostList.propTypes = { posts: PropTypes.array.isRequired, removeUpdate: PropTypes.func.isRequired}
Growing the Skeleton into a Social Media Application Chapter 5
[ 182 ]
The PostList component will iterate through the list of posts passed to it as propsfrom the Newsfeed or the Profile, and pass the data of each post to a Postcomponent that will render details of the post. PostList will also pass theremoveUpdate function that was sent as a prop from the parent component to thePost component so that the state can be updated when a single post is deleted. Next,we will complete the post lists in the Newsfeed view after fetching the relevant postsfrom the backend.
Listing posts in NewsfeedWe will set up an API on the server that queries the Post collection and returns a listof posts from the people a specified user is following. Then, to populate the Newsfeedview, these posts will be retrieved in the frontend by calling this API and they willbe displayed in the PostList in Newsfeed.
Newsfeed API for postsTo implement the Newsfeed-specific API, we need to add the route endpoint that willreceive the request for Newsfeed posts and respond accordingly to the requestingclient- side.
On the backend, we need to define the route path that will receive the request forretrieving Newsfeed posts for a specific user, as shown in the following code.
server/routes/post.routes.js
router.route('/api/posts/feed/:userId') .get(authCtrl.requireSignin, postCtrl.listNewsFeed)
We are using the :userID parameter in this route to specify the currently signed-inuser. We will utilize the userByID controller method in user.controller to fetchthe user details, as we did previously, and append these to the request object that isaccessed in the listNewsFeed post controller method. Add the following to mern-social/server/routes/post.routes.js:
router.param('userId', userCtrl.userByID)
The post.routes.js file will be very similar to the user.routes.js file. To loadthese new routes in the Express app, we need to mount the post routes inexpress.js, just like we did for the auth and user routes. The post-related routes aremounted as follows.
Growing the Skeleton into a Social Media Application Chapter 5
[ 183 ]
mern-social/server/express.js:
app.use('/', postRoutes)
The listNewsFeed controller method in post.controller.js will query the Postcollection in the database to get the matching posts. The listNewsFeed controllermethod is defined as follows.
mern-social/server/controllers/post.controller.js:
const listNewsFeed = async (req, res) => { let following = req.profile.following following.push(req.profile._id) try { let posts = await Post.find({postedBy:{ $in :req.profile.following }}) .populate('comments.postedBy', '_id name') .populate('postedBy', '_id name') .sort('-created') .exec() res.json(posts) } catch(err) { return res.status(400).json({ error: errorHandler.getErrorMessage(err) }) }}
In the query to the Post collection, we find all the posts that have postedBy userreferences that match the current user's followings and the current user. The poststhat are returned will be sorted by the created timestamp, with the most recent postlisted first. Each post will also contain the id and name of the user who created thepost and of the users who left comments on the post. Next, we will fetch this API inthe frontend Newsfeed component and render the list details.
Fetching Newsfeed posts in the viewWe will use the Newsfeed API in the frontend to fetch the related posts and displaythese posts in the Newsfeed view. First, we will add a fetch method to make a requestto the API, as shown in the following code.
client/post/api-post.js:
const listNewsFeed = async (params, credentials, signal) => { try { let response = await fetch('/api/posts/feed/'+ params.userId, {
Growing the Skeleton into a Social Media Application Chapter 5
[ 184 ]
method: 'GET', signal: signal, headers: { 'Accept': 'application/json', 'Content-Type': 'application/json', 'Authorization': 'Bearer ' + credentials.t } }) return await response.json() } catch(err) { console.log(err) }}
This is the fetch method that will load the posts that are rendered in PostList, whichis added as a child component to the Newsfeed component. So, this fetch needs to becalled in the useEffect hook in the Newsfeed component, as shown in the followingcode.
mern-social/client/post/Newsfeed.js:
useEffect(() => { const abortController = new AbortController() const signal = abortController.signal
listNewsFeed({ userId: jwt.user._id }, { t: jwt.token }, signal).then((data) => { if (data.error) { console.log(data.error) } else { setPosts(data) } }) return function cleanup(){ abortController.abort() }
}, [])
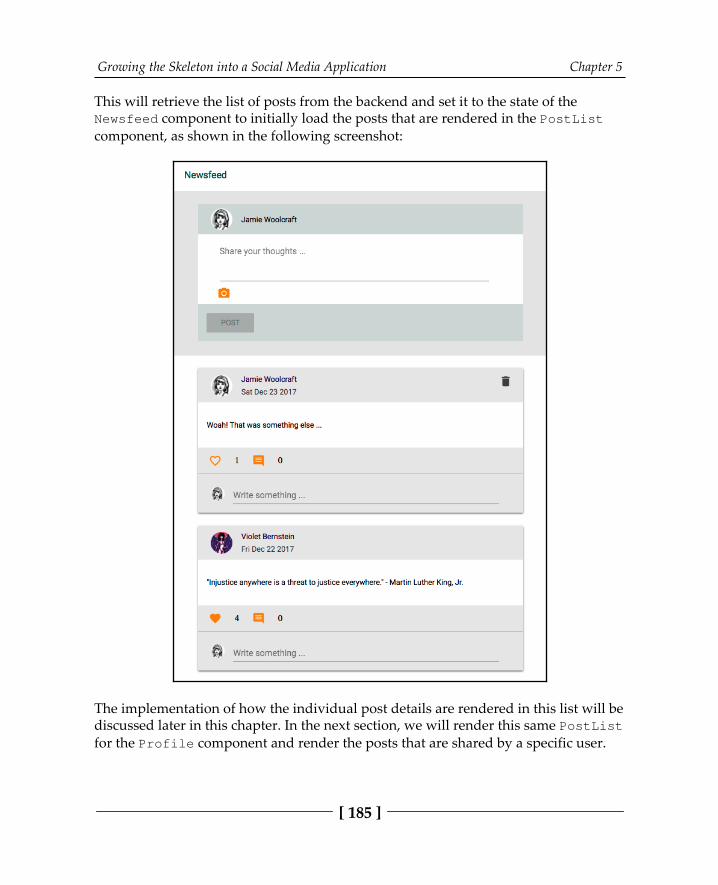
Growing the Skeleton into a Social Media Application Chapter 5
[ 185 ]
This will retrieve the list of posts from the backend and set it to the state of theNewsfeed component to initially load the posts that are rendered in the PostListcomponent, as shown in the following screenshot:
The implementation of how the individual post details are rendered in this list will bediscussed later in this chapter. In the next section, we will render this same PostListfor the Profile component and render the posts that are shared by a specific user.
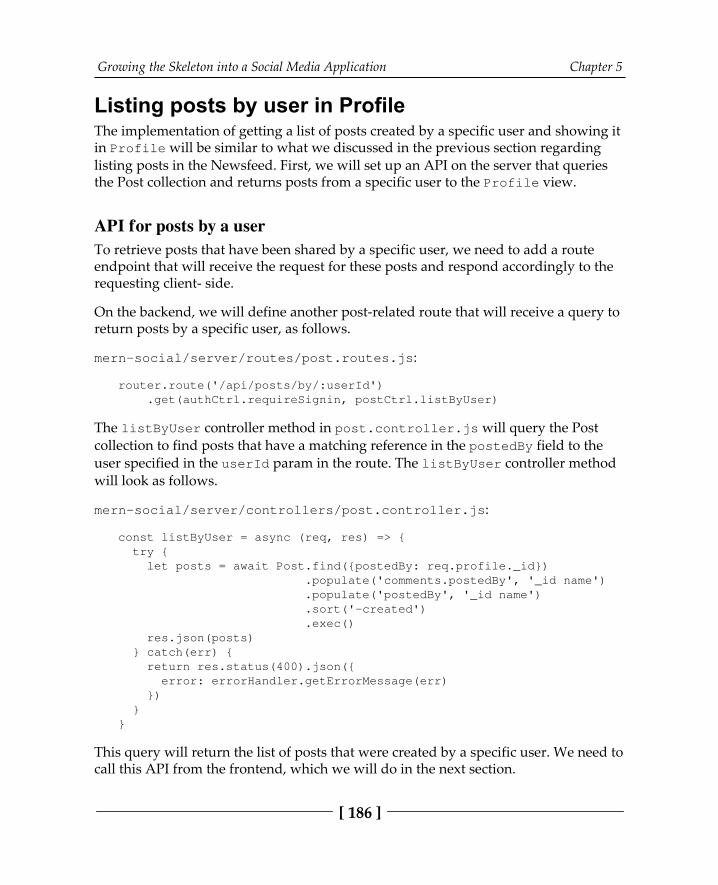
Growing the Skeleton into a Social Media Application Chapter 5
[ 186 ]
Listing posts by user in ProfileThe implementation of getting a list of posts created by a specific user and showing itin Profile will be similar to what we discussed in the previous section regardinglisting posts in the Newsfeed. First, we will set up an API on the server that queriesthe Post collection and returns posts from a specific user to the Profile view.
API for posts by a userTo retrieve posts that have been shared by a specific user, we need to add a routeendpoint that will receive the request for these posts and respond accordingly to therequesting client- side.
On the backend, we will define another post-related route that will receive a query toreturn posts by a specific user, as follows.
mern-social/server/routes/post.routes.js:
router.route('/api/posts/by/:userId') .get(authCtrl.requireSignin, postCtrl.listByUser)
The listByUser controller method in post.controller.js will query the Postcollection to find posts that have a matching reference in the postedBy field to theuser specified in the userId param in the route. The listByUser controller methodwill look as follows.
mern-social/server/controllers/post.controller.js:
const listByUser = async (req, res) => { try { let posts = await Post.find({postedBy: req.profile._id}) .populate('comments.postedBy', '_id name') .populate('postedBy', '_id name') .sort('-created') .exec() res.json(posts) } catch(err) { return res.status(400).json({ error: errorHandler.getErrorMessage(err) }) }}
This query will return the list of posts that were created by a specific user. We need tocall this API from the frontend, which we will do in the next section.
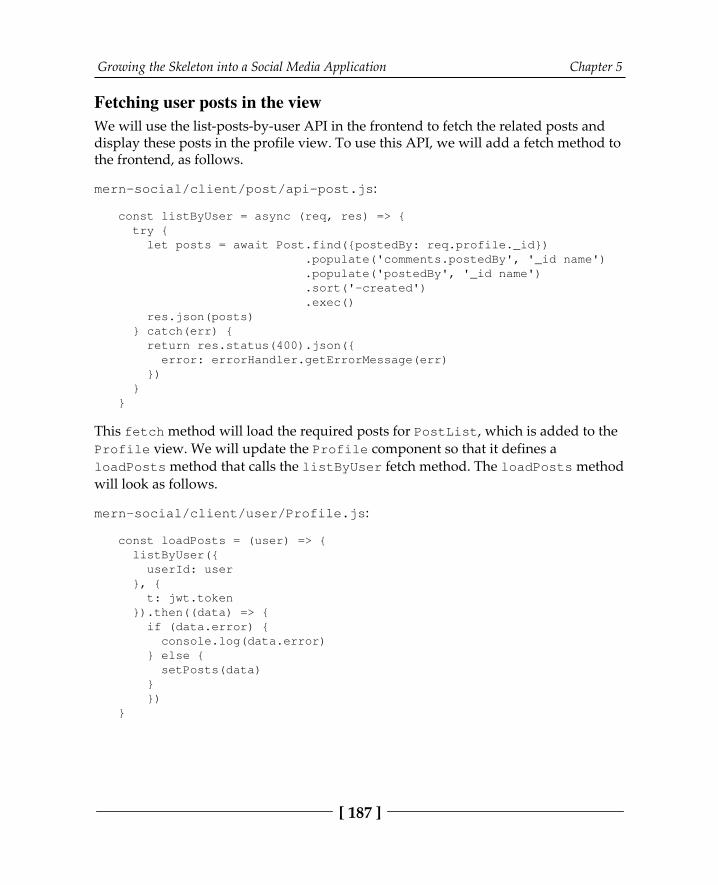
Growing the Skeleton into a Social Media Application Chapter 5
[ 187 ]
Fetching user posts in the viewWe will use the list-posts-by-user API in the frontend to fetch the related posts anddisplay these posts in the profile view. To use this API, we will add a fetch method tothe frontend, as follows.
mern-social/client/post/api-post.js:
const listByUser = async (req, res) => { try { let posts = await Post.find({postedBy: req.profile._id}) .populate('comments.postedBy', '_id name') .populate('postedBy', '_id name') .sort('-created') .exec() res.json(posts) } catch(err) { return res.status(400).json({ error: errorHandler.getErrorMessage(err) }) }}
This fetch method will load the required posts for PostList, which is added to theProfile view. We will update the Profile component so that it defines aloadPosts method that calls the listByUser fetch method. The loadPosts methodwill look as follows.
mern-social/client/user/Profile.js:
const loadPosts = (user) => { listByUser({ userId: user }, { t: jwt.token }).then((data) => { if (data.error) { console.log(data.error) } else { setPosts(data) } })}

Growing the Skeleton into a Social Media Application Chapter 5
[ 188 ]
In the Profile component, the loadPosts method will be called with the user ID ofthe user whose profile is being loaded, after the user details have been fetched fromthe server in the useEffect() hook function. The posts that are loaded for thespecific user are set to the state and rendered in the PostList component that'sadded to the Profile component. The Profile component also provides aremovePost function, similar to the Newsfeed component, as a prop to thePostList component so that the list of posts can be updated if a post is removed.The resulting PostList in the Profile component will render similar to what canbe seen in the following screenshot:
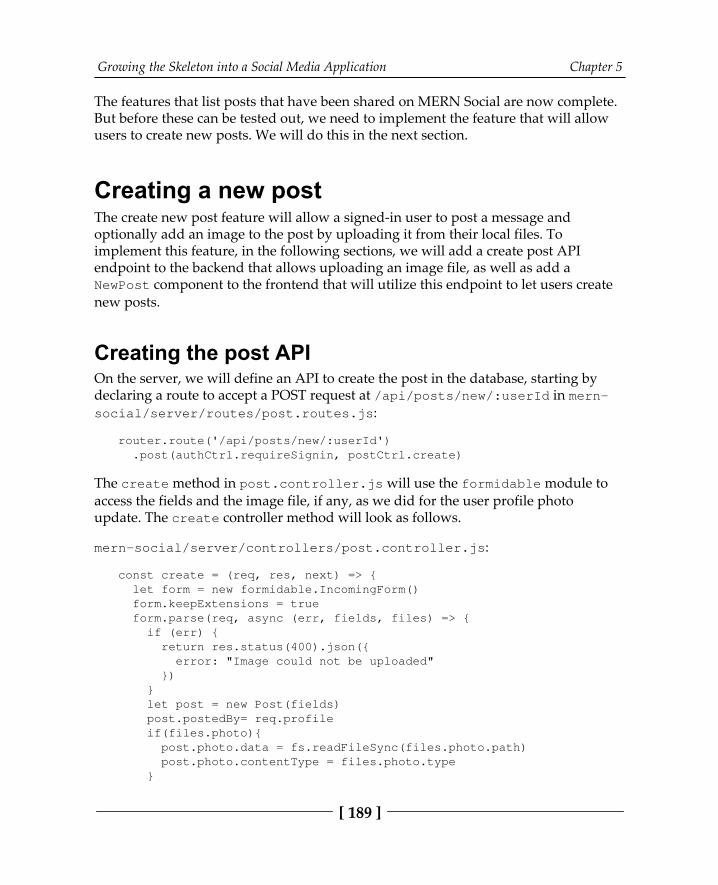
Growing the Skeleton into a Social Media Application Chapter 5
[ 189 ]
The features that list posts that have been shared on MERN Social are now complete.But before these can be tested out, we need to implement the feature that will allowusers to create new posts. We will do this in the next section.
Creating a new postThe create new post feature will allow a signed-in user to post a message andoptionally add an image to the post by uploading it from their local files. Toimplement this feature, in the following sections, we will add a create post APIendpoint to the backend that allows uploading an image file, as well as add aNewPost component to the frontend that will utilize this endpoint to let users createnew posts.
Creating the post APIOn the server, we will define an API to create the post in the database, starting bydeclaring a route to accept a POST request at /api/posts/new/:userId in mern-social/server/routes/post.routes.js:
router.route('/api/posts/new/:userId') .post(authCtrl.requireSignin, postCtrl.create)
The create method in post.controller.js will use the formidable module toaccess the fields and the image file, if any, as we did for the user profile photoupdate. The create controller method will look as follows.
mern-social/server/controllers/post.controller.js:
const create = (req, res, next) => { let form = new formidable.IncomingForm() form.keepExtensions = true form.parse(req, async (err, fields, files) => { if (err) { return res.status(400).json({ error: "Image could not be uploaded" }) } let post = new Post(fields) post.postedBy= req.profile if(files.photo){ post.photo.data = fs.readFileSync(files.photo.path) post.photo.contentType = files.photo.type }
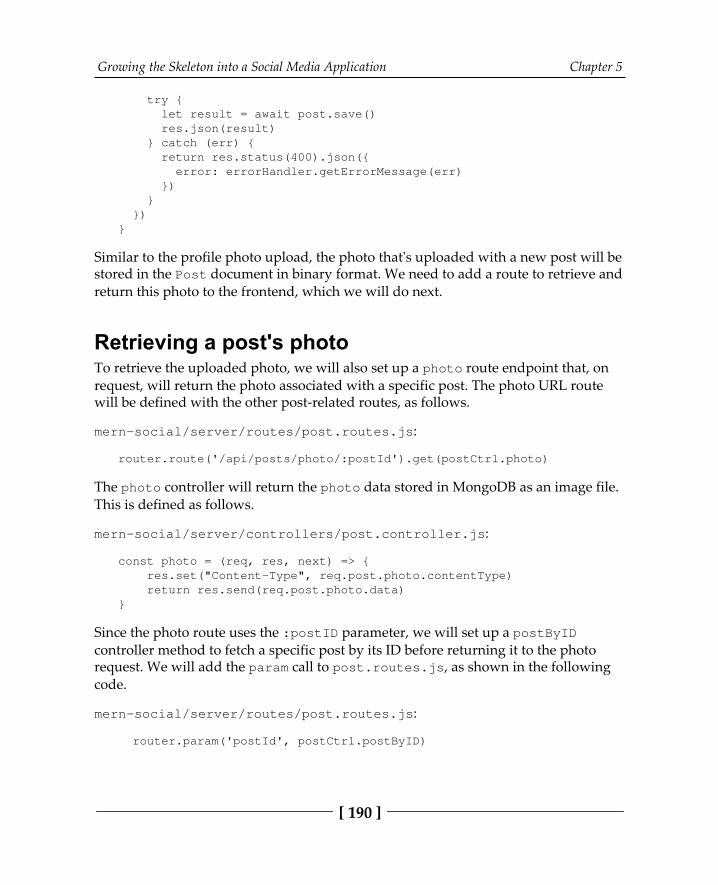
Growing the Skeleton into a Social Media Application Chapter 5
[ 190 ]
try { let result = await post.save() res.json(result) } catch (err) { return res.status(400).json({ error: errorHandler.getErrorMessage(err) }) } })}
Similar to the profile photo upload, the photo that's uploaded with a new post will bestored in the Post document in binary format. We need to add a route to retrieve andreturn this photo to the frontend, which we will do next.
Retrieving a post's photoTo retrieve the uploaded photo, we will also set up a photo route endpoint that, onrequest, will return the photo associated with a specific post. The photo URL routewill be defined with the other post-related routes, as follows.
mern-social/server/routes/post.routes.js:
router.route('/api/posts/photo/:postId').get(postCtrl.photo)
The photo controller will return the photo data stored in MongoDB as an image file.This is defined as follows.
mern-social/server/controllers/post.controller.js:
const photo = (req, res, next) => { res.set("Content-Type", req.post.photo.contentType) return res.send(req.post.photo.data)}
Since the photo route uses the :postID parameter, we will set up a postByIDcontroller method to fetch a specific post by its ID before returning it to the photorequest. We will add the param call to post.routes.js, as shown in the followingcode.
mern-social/server/routes/post.routes.js:
router.param('postId', postCtrl.postByID)
Growing the Skeleton into a Social Media Application Chapter 5
[ 191 ]
postByID will be similar to the userByID method, and it will attach the postretrieved from the database to the request object so that it can be accessed by the nextmethod. The postByID method is defined as follows.
mern-social/server/controllers/post.controller.js:
const postByID = async (req, res, next, id) => { try{ let post = await Post.findById(id) .populate('postedBy', '_id name') .exec() if (!post) return res.status('400').json({ error: "Post not found" }) req.post = post next() }catch(err){ return res.status('400').json({ error: "Could not retrieve use post" }) }}
The attached post data in this implementation will also contain the ID and name ofthe postedBy user reference since we are invoking populate(). In the next section,we will add a fetch method to access this API endpoint in the frontend.
Fetching the create post API in the viewWe will update api-post.js by adding a create method to make a fetch call tothe create API. The create fetch method will look as follows.
mern-social/client/post/api-post.js:
const create = async (params, credentials, post) => { try { let response = await fetch('/api/posts/new/'+ params.userId, { method: 'POST', headers: { 'Accept': 'application/json', 'Authorization': 'Bearer ' + credentials.t }, body: post }) return await response.json()

Growing the Skeleton into a Social Media Application Chapter 5
[ 192 ]
} catch(err) { console.log(err) }}
This method, like the user edit fetch method, will send a multipart form submissionusing a FormData object that will contain the text field and the image file. Finally, weare ready to integrate this create new post feature in the backend with a frontendcomponent that will allow users to compose a post and submit it to the backend.
Making the NewPost componentThe NewPost component that we added in the Newsfeed component will allow usersto compose a new post containing a text message and, optionally, an image, as shownin the following screenshot:
The NewPost component will be a standard form with a Material-UI TextField anda file upload button, as implemented in EditProfile, that takes the values and setsthem in a FormData object to be passed in the call to the create fetch method onpost submission. Post submission will invoke the following clickPost method.
mern-social/client/post/NewPost.js:
const clickPost = () => { let postData = new FormData() postData.append('text', values.text) postData.append('photo', values.photo) create({ userId: jwt.user._id }, { t: jwt.token }, postData).then((data) => { if (data.error) { setValues({...values, error: data.error})
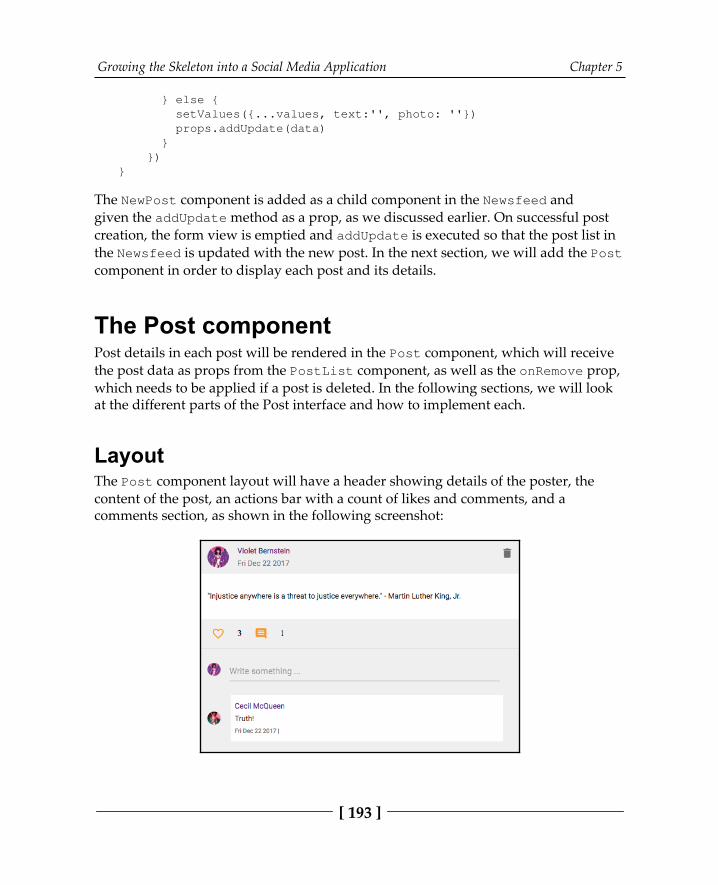
Growing the Skeleton into a Social Media Application Chapter 5
[ 193 ]
} else { setValues({...values, text:'', photo: ''}) props.addUpdate(data) } })}
The NewPost component is added as a child component in the Newsfeed andgiven the addUpdate method as a prop, as we discussed earlier. On successful postcreation, the form view is emptied and addUpdate is executed so that the post list inthe Newsfeed is updated with the new post. In the next section, we will add the Postcomponent in order to display each post and its details.
The Post componentPost details in each post will be rendered in the Post component, which will receivethe post data as props from the PostList component, as well as the onRemove prop,which needs to be applied if a post is deleted. In the following sections, we will lookat the different parts of the Post interface and how to implement each.
LayoutThe Post component layout will have a header showing details of the poster, thecontent of the post, an actions bar with a count of likes and comments, and acomments section, as shown in the following screenshot:
Growing the Skeleton into a Social Media Application Chapter 5
[ 194 ]
Next, we will look into the implementation details of the header, content, actions, andcomments sections of this Post component.
HeaderThe header will contain information such as the name, avatar, and link to the profileof the user who posted, as well as the date the post was created. The code to displaythese details in the header section will be as follows.
mern-social/client/post/Post.js:
<CardHeader avatar={ <Avatar src={'/api/users/photo/'+props.post.postedBy._id}/> } action={ props.post.postedBy._id ===auth.isAuthenticated().user._id && <IconButton onClick={deletePost}> <DeleteIcon /> </IconButton> } title={<Link to={"/user/" +props.post.postedBy._id}>{props.post.postedBy.name}</Link>} subheader={(new Date(props.post.created)).toDateString()} className={classes.cardHeader}/>
The header will also conditionally show a delete button if the signed-in user isviewing their own post. This header section will be above the main content section,which is discussed next.
ContentThe content section will show the text of the post and the image if the post contains aphoto. The code to display these details in the content section will be as follows.
mern-social/client/post/Post.js:
<CardContent className={classes.cardContent}> <Typography component="p" className={classes.text}> {props.post.text} </Typography> {props.post.photo && (<div className={classes.photo}> <img className={classes.media} src={'/api/posts/photo/'+ props.post._id}/>
Growing the Skeleton into a Social Media Application Chapter 5
[ 195 ]
</div>) }</CardContent>
The image is loaded by adding the photo API to the src attribute in the img tag if thegiven post contains a photo. Followed by this content section is the actions section.
ActionsThe actions section will contain an interactive "like" option with a display of thetotal number of likes on the post and a comment icon with the total number ofcomments on the post. The code to display these actions will be as follows.
mern-social/client/post/Post.js:
<CardActions> { values.like ? <IconButton onClick={clickLike} className={classes.button} aria-label="Like" color="secondary"> <FavoriteIcon /> </IconButton> : <IconButton onClick={clickLike} className={classes.button} aria-label="Unlike" color="secondary"> <FavoriteBorderIcon /> </IconButton> } <span>{values.likes}</span> <IconButton className={classes.button} aria-label="Comment" color="secondary"> <CommentIcon/> </IconButton> <span>{values.comments.length}</span></CardActions>
We will discuss the implementation of the "like" button later in this chapter. Thedetails of the likes for each post are retrieved within the post object that's received inthe props.
In the Post component, the final section will display the comments that have been lefton the given post. We'll discuss this next.
CommentsThe comments section will contain all the comment-related elements in the Commentscomponent and will get props such as the postId and the comments data, alongwith a state updating method that can be called when a comment is added ordeleted in the Comments component.
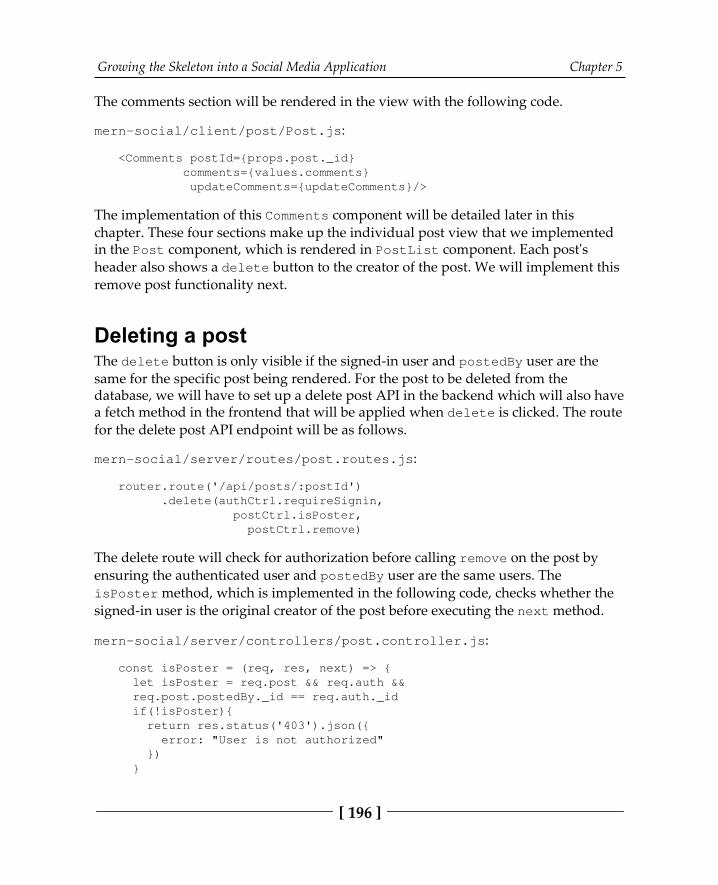
Growing the Skeleton into a Social Media Application Chapter 5
[ 196 ]
The comments section will be rendered in the view with the following code.
mern-social/client/post/Post.js:
<Comments postId={props.post._id} comments={values.comments} updateComments={updateComments}/>
The implementation of this Comments component will be detailed later in thischapter. These four sections make up the individual post view that we implementedin the Post component, which is rendered in PostList component. Each post'sheader also shows a delete button to the creator of the post. We will implement thisremove post functionality next.
Deleting a postThe delete button is only visible if the signed-in user and postedBy user are thesame for the specific post being rendered. For the post to be deleted from thedatabase, we will have to set up a delete post API in the backend which will also havea fetch method in the frontend that will be applied when delete is clicked. The routefor the delete post API endpoint will be as follows.
mern-social/server/routes/post.routes.js:
router.route('/api/posts/:postId') .delete(authCtrl.requireSignin, postCtrl.isPoster, postCtrl.remove)
The delete route will check for authorization before calling remove on the post byensuring the authenticated user and postedBy user are the same users. TheisPoster method, which is implemented in the following code, checks whether thesigned-in user is the original creator of the post before executing the next method.
mern-social/server/controllers/post.controller.js:
const isPoster = (req, res, next) => { let isPoster = req.post && req.auth && req.post.postedBy._id == req.auth._id if(!isPoster){ return res.status('403').json({ error: "User is not authorized" }) }
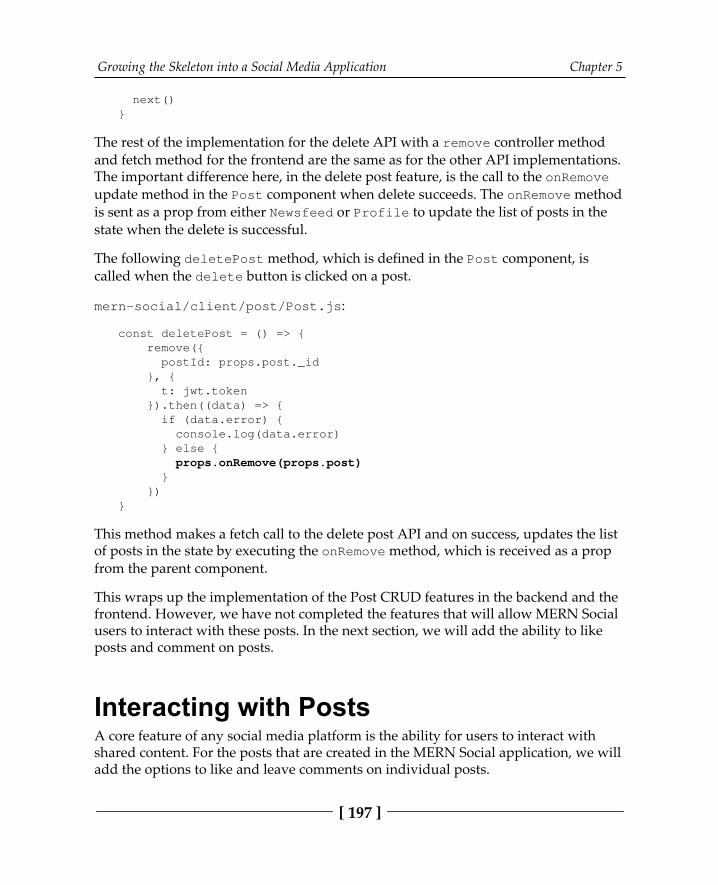
Growing the Skeleton into a Social Media Application Chapter 5
[ 197 ]
next()}
The rest of the implementation for the delete API with a remove controller methodand fetch method for the frontend are the same as for the other API implementations.The important difference here, in the delete post feature, is the call to the onRemoveupdate method in the Post component when delete succeeds. The onRemove methodis sent as a prop from either Newsfeed or Profile to update the list of posts in thestate when the delete is successful.
The following deletePost method, which is defined in the Post component, iscalled when the delete button is clicked on a post.
mern-social/client/post/Post.js:
const deletePost = () => { remove({ postId: props.post._id }, { t: jwt.token }).then((data) => { if (data.error) { console.log(data.error) } else { props.onRemove(props.post) } })}
This method makes a fetch call to the delete post API and on success, updates the listof posts in the state by executing the onRemove method, which is received as a propfrom the parent component.
This wraps up the implementation of the Post CRUD features in the backend and thefrontend. However, we have not completed the features that will allow MERN Socialusers to interact with these posts. In the next section, we will add the ability to likeposts and comment on posts.
Interacting with PostsA core feature of any social media platform is the ability for users to interact withshared content. For the posts that are created in the MERN Social application, we willadd the options to like and leave comments on individual posts.
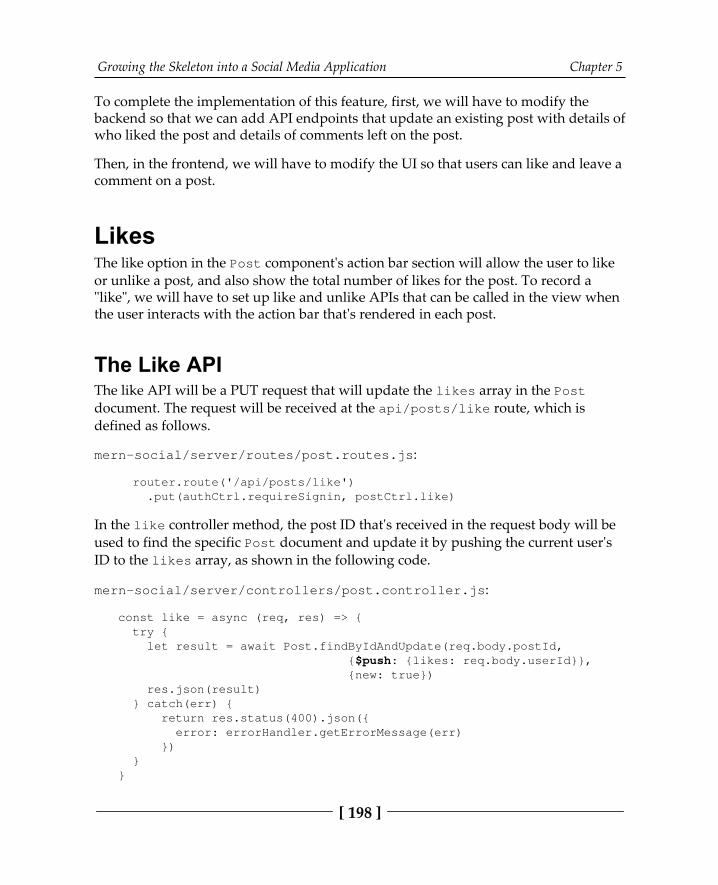
Growing the Skeleton into a Social Media Application Chapter 5
[ 198 ]
To complete the implementation of this feature, first, we will have to modify thebackend so that we can add API endpoints that update an existing post with details ofwho liked the post and details of comments left on the post.
Then, in the frontend, we will have to modify the UI so that users can like and leave acomment on a post.
LikesThe like option in the Post component's action bar section will allow the user to likeor unlike a post, and also show the total number of likes for the post. To record a"like", we will have to set up like and unlike APIs that can be called in the view whenthe user interacts with the action bar that's rendered in each post.
The Like APIThe like API will be a PUT request that will update the likes array in the Postdocument. The request will be received at the api/posts/like route, which isdefined as follows.
mern-social/server/routes/post.routes.js:
router.route('/api/posts/like') .put(authCtrl.requireSignin, postCtrl.like)
In the like controller method, the post ID that's received in the request body will beused to find the specific Post document and update it by pushing the current user'sID to the likes array, as shown in the following code.
mern-social/server/controllers/post.controller.js:
const like = async (req, res) => { try { let result = await Post.findByIdAndUpdate(req.body.postId, {$push: {likes: req.body.userId}}, {new: true}) res.json(result) } catch(err) { return res.status(400).json({ error: errorHandler.getErrorMessage(err) }) }}
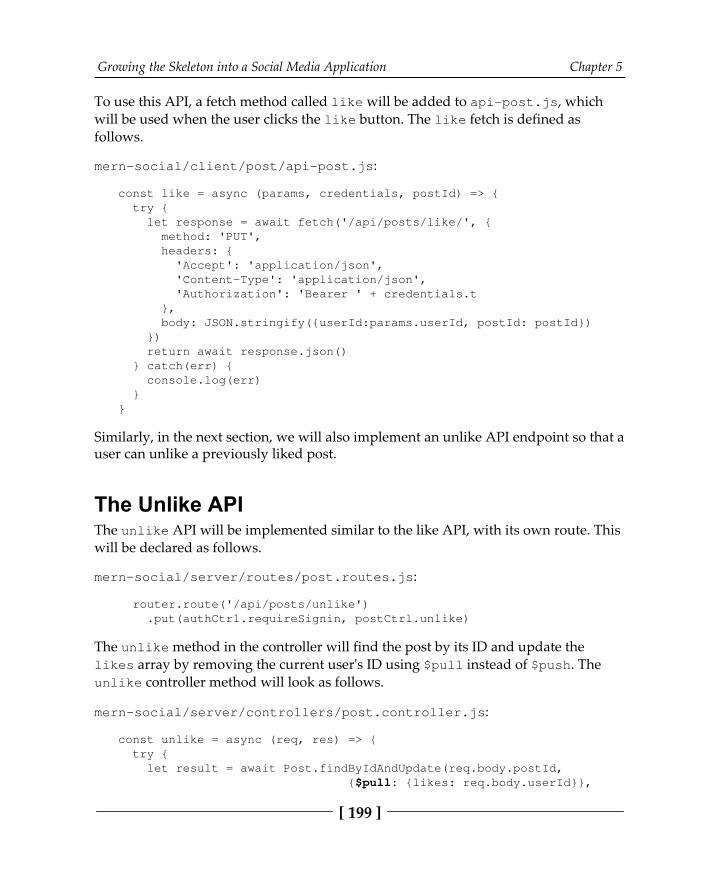
Growing the Skeleton into a Social Media Application Chapter 5
[ 199 ]
To use this API, a fetch method called like will be added to api-post.js, whichwill be used when the user clicks the like button. The like fetch is defined asfollows.
mern-social/client/post/api-post.js:
const like = async (params, credentials, postId) => { try { let response = await fetch('/api/posts/like/', { method: 'PUT', headers: { 'Accept': 'application/json', 'Content-Type': 'application/json', 'Authorization': 'Bearer ' + credentials.t }, body: JSON.stringify({userId:params.userId, postId: postId}) }) return await response.json() } catch(err) { console.log(err) }}
Similarly, in the next section, we will also implement an unlike API endpoint so that auser can unlike a previously liked post.
The Unlike APIThe unlike API will be implemented similar to the like API, with its own route. Thiswill be declared as follows.
mern-social/server/routes/post.routes.js:
router.route('/api/posts/unlike') .put(authCtrl.requireSignin, postCtrl.unlike)
The unlike method in the controller will find the post by its ID and update thelikes array by removing the current user's ID using $pull instead of $push. Theunlike controller method will look as follows.
mern-social/server/controllers/post.controller.js:
const unlike = async (req, res) => { try { let result = await Post.findByIdAndUpdate(req.body.postId, {$pull: {likes: req.body.userId}},
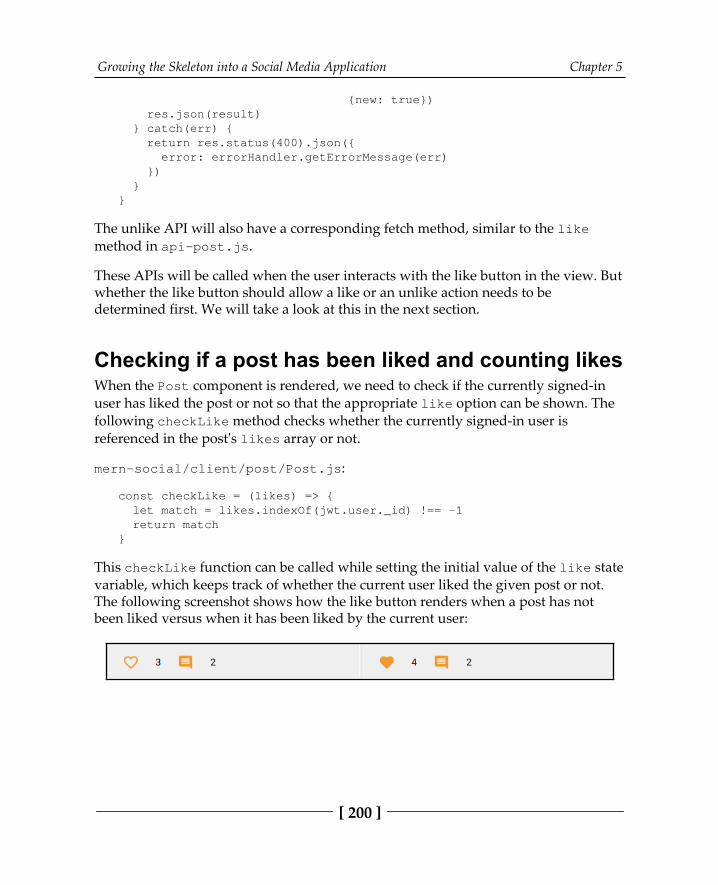
Growing the Skeleton into a Social Media Application Chapter 5
[ 200 ]
{new: true}) res.json(result) } catch(err) { return res.status(400).json({ error: errorHandler.getErrorMessage(err) }) }}
The unlike API will also have a corresponding fetch method, similar to the likemethod in api-post.js.
These APIs will be called when the user interacts with the like button in the view. Butwhether the like button should allow a like or an unlike action needs to bedetermined first. We will take a look at this in the next section.
Checking if a post has been liked and counting likesWhen the Post component is rendered, we need to check if the currently signed-inuser has liked the post or not so that the appropriate like option can be shown. Thefollowing checkLike method checks whether the currently signed-in user isreferenced in the post's likes array or not.
mern-social/client/post/Post.js:
const checkLike = (likes) => { let match = likes.indexOf(jwt.user._id) !== -1 return match}
This checkLike function can be called while setting the initial value of the like statevariable, which keeps track of whether the current user liked the given post or not.The following screenshot shows how the like button renders when a post has notbeen liked versus when it has been liked by the current user:
Growing the Skeleton into a Social Media Application Chapter 5
[ 201 ]
The like value that's set in the state using the checkLike method can be used torender a heart outline button or a full heart button. A heart outline button will renderif the user has not liked the post; clicking it will make a call to the like API, show thefull heart button, and increment the likes count. The full heart button will indicatethe current user has already liked this post; clicking this will call the unlike API,render the heart outline button, and decrement the likes count.
The likes count is also set initially when the Post component mounts and props arereceived by setting the likes value to the state with props.post.likes.length, asshown in the following code.
mern-social/client/post/Post.js:
const [values, setValues] = useState({ like: checkLike(props.post.likes), likes: props.post.likes.length, comments: props.post.comments })
The likes-related values are updated again when a "like" or "unlike" action takesplace, and the updated post data is returned from the API call. Next, we will look athow to handle these clicks on the like button.
Handling like clicksTo handle clicks on the like and unlike buttons, we will set up a clickLikemethod that will call the appropriate fetch method based on whether it is a "like" or"unlike" action, and then update the state of the like and likes count for the post.This clickLike method will be defined as follows.
mern-social/client/post/Post.js:
const clickLike = () => { let callApi = values.like ? unlike : like const jwt = auth.isAuthenticated() callApi({ userId: jwt.user._id }, { t: jwt.token }, props.post._id).then((data) => { if (data.error) { console.log(data.error) } else { setValues({...values, like: !values.like,
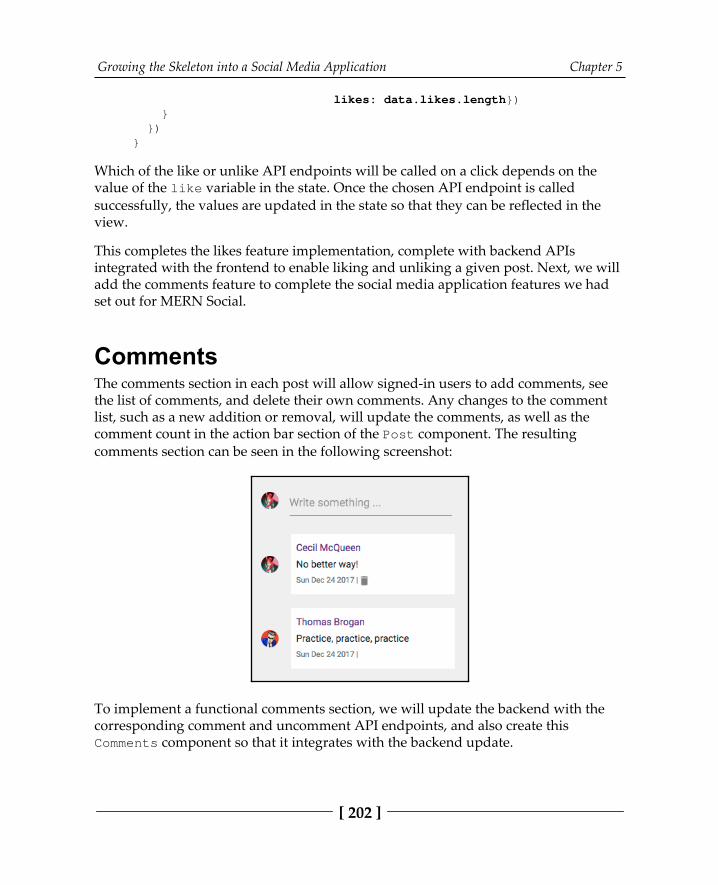
Growing the Skeleton into a Social Media Application Chapter 5
[ 202 ]
likes: data.likes.length}) } }) }
Which of the like or unlike API endpoints will be called on a click depends on thevalue of the like variable in the state. Once the chosen API endpoint is calledsuccessfully, the values are updated in the state so that they can be reflected in theview.
This completes the likes feature implementation, complete with backend APIsintegrated with the frontend to enable liking and unliking a given post. Next, we willadd the comments feature to complete the social media application features we hadset out for MERN Social.
CommentsThe comments section in each post will allow signed-in users to add comments, seethe list of comments, and delete their own comments. Any changes to the commentlist, such as a new addition or removal, will update the comments, as well as thecomment count in the action bar section of the Post component. The resultingcomments section can be seen in the following screenshot:
To implement a functional comments section, we will update the backend with thecorresponding comment and uncomment API endpoints, and also create thisComments component so that it integrates with the backend update.
Growing the Skeleton into a Social Media Application Chapter 5
[ 203 ]
Adding a commentWhen a user adds a comment, the Post document will be updated in the databasewith the new comment. First, we need to implement an API that receives thecomment details from the client- side and updates the Post document. Then, we needto create the UI in the frontend, which allows us to compose a new comment andsubmit it to the backend API.
The Comment APITo implement the add comment API, we will set up a PUT route as follows to updatethe post.
mern-social/server/routes/post.routes.js:
router.route('/api/posts/comment') .put(authCtrl.requireSignin, postCtrl.comment)
The comment controller method, which is defined in the following code, will find therelevant post to be updated by its ID and push the comment object that's received inthe request body to the comments array of the post.
mern-social/server/controllers/post.controller.js:
const comment = async (req, res) => { let comment = req.body.comment comment.postedBy = req.body.userId try { let result = await Post.findByIdAndUpdate(req.body.postId, {$push: {comments: comment}}, {new: true}) .populate('comments.postedBy', '_id name') .populate('postedBy', '_id name') .exec() res.json(result) } catch(err) { return res.status(400).json({ error: errorHandler.getErrorMessage(err) }) }}
In the response, the updated post object will be sent back with details of thepostedBy users populated in the post and in the comments.
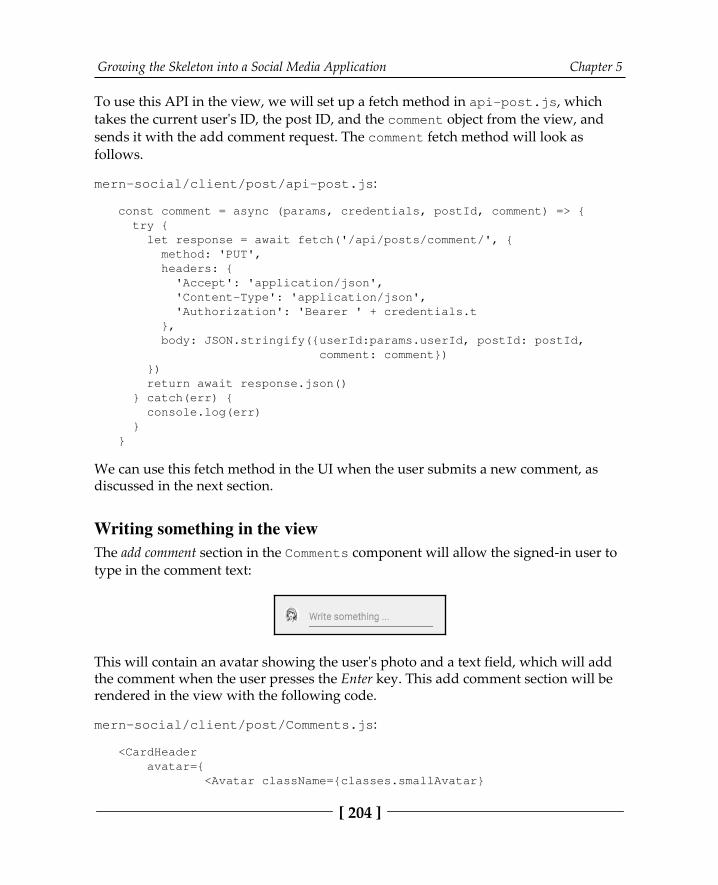
Growing the Skeleton into a Social Media Application Chapter 5
[ 204 ]
To use this API in the view, we will set up a fetch method in api-post.js, whichtakes the current user's ID, the post ID, and the comment object from the view, andsends it with the add comment request. The comment fetch method will look asfollows.
mern-social/client/post/api-post.js:
const comment = async (params, credentials, postId, comment) => { try { let response = await fetch('/api/posts/comment/', { method: 'PUT', headers: { 'Accept': 'application/json', 'Content-Type': 'application/json', 'Authorization': 'Bearer ' + credentials.t }, body: JSON.stringify({userId:params.userId, postId: postId, comment: comment}) }) return await response.json() } catch(err) { console.log(err) }}
We can use this fetch method in the UI when the user submits a new comment, asdiscussed in the next section.
Writing something in the viewThe add comment section in the Comments component will allow the signed-in user totype in the comment text:
This will contain an avatar showing the user's photo and a text field, which will addthe comment when the user presses the Enter key. This add comment section will berendered in the view with the following code.
mern-social/client/post/Comments.js:
<CardHeader avatar={ <Avatar className={classes.smallAvatar}
Growing the Skeleton into a Social Media Application Chapter 5
[ 205 ]
src= {'/api/users/photo/' +auth.isAuthenticated().user._id}/> } title={ <TextField onKeyDown={addComment} multiline value={text} onChange={handleChange} placeholder="Write something ..." className={classes.commentField} margin="normal" /> } className={classes.cardHeader}/>
The text will be stored in the state when the value changes, and on the onKeyDownevent, the addComment method will call the comment fetch method if the Enter key ispressed. The Enter key corresponds to keyCode 13, as shown in the following code.
mern-social/client/post/Comments.js:
const addComment = (event) => { if(event.keyCode == 13 && event.target.value){ event.preventDefault() comment({ userId: jwt.user._id }, { t: jwt.token }, props.postId, {text: text}).then((data) => { if (data.error) { console.log(data.error) } else { setText('') props.updateComments(data.comments) } }) }}
The Comments component receives the updateComments method (as discussed in theprevious section) as a prop from the Post component. This will be executed when thenew comment is added in order to update the comments list and the comment countin the Post view. The part of Comments that lists all the comments for the post will beadded in the next section.
Growing the Skeleton into a Social Media Application Chapter 5
[ 206 ]
Listing commentsThe Comments component receives the list of comments for the specific post as propsfrom the Post component. Then, it iterates over the individual comments to renderthe details of the commenter and the comment content. This view is implementedwith the following code.
mern-social/client/post/Comments.js:
{ props.comments.map((item, i) => { return <CardHeader avatar={ <Avatar className={classes.smallAvatar}src={'/api/users/photo/'+item.postedBy._id}/> } title={commentBody(item)} className={classes.cardHeader} key={i}/> })}
commentBody renders the content, including the name of the commenter linked totheir profile, the comment text, and the date of comment creation. commentBody isdefined as follows.
mern-social/client/post/Comments.js:
const commentBody = item => { return ( <p className={classes.commentText}> <Link to={"/user/" + item.postedBy._id}> {item.postedBy.name} </Link><br/> {item.text} <span className={classes.commentDate}> { (new Date(item.created)).toDateString()} | { auth.isAuthenticated().user._id === item.postedBy._id && <Icon onClick={deleteComment(item)} className={classes.commentDelete}>delete</Icon> } </span> </p> )}
commentBody will also render a delete option for the comment if the postedByreference of the comment matches the currently signed-in user. We will look at theimplementation of this comment deletion option in the next section.
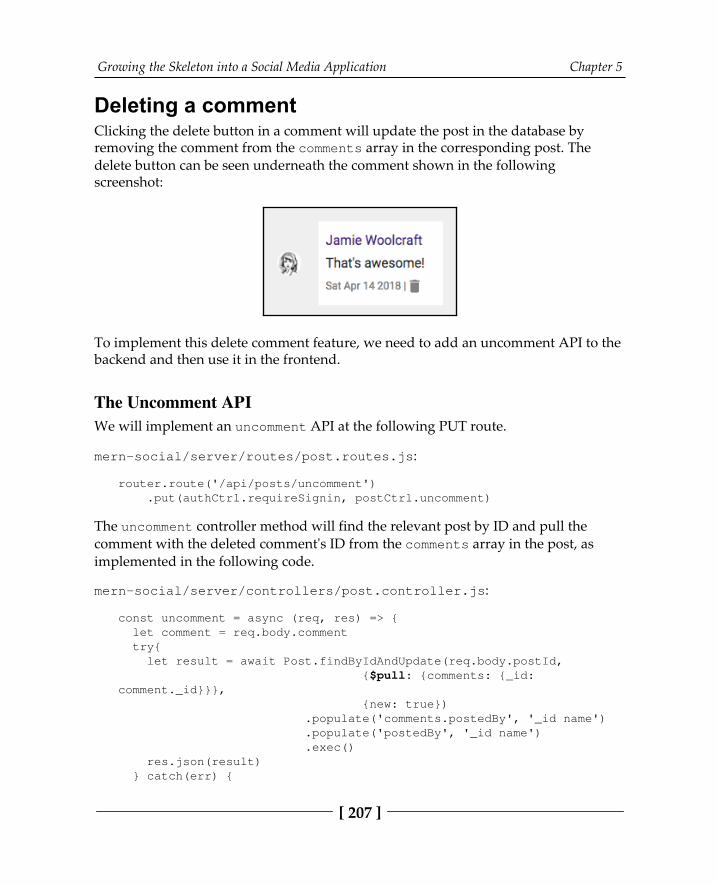
Growing the Skeleton into a Social Media Application Chapter 5
[ 207 ]
Deleting a commentClicking the delete button in a comment will update the post in the database byremoving the comment from the comments array in the corresponding post. Thedelete button can be seen underneath the comment shown in the followingscreenshot:
To implement this delete comment feature, we need to add an uncomment API to thebackend and then use it in the frontend.
The Uncomment APIWe will implement an uncomment API at the following PUT route.
mern-social/server/routes/post.routes.js:
router.route('/api/posts/uncomment') .put(authCtrl.requireSignin, postCtrl.uncomment)
The uncomment controller method will find the relevant post by ID and pull thecomment with the deleted comment's ID from the comments array in the post, asimplemented in the following code.
mern-social/server/controllers/post.controller.js:
const uncomment = async (req, res) => { let comment = req.body.comment try{ let result = await Post.findByIdAndUpdate(req.body.postId, {$pull: {comments: {_id:comment._id}}}, {new: true}) .populate('comments.postedBy', '_id name') .populate('postedBy', '_id name') .exec() res.json(result) } catch(err) {
Growing the Skeleton into a Social Media Application Chapter 5
[ 208 ]
return res.status(400).json({ error: errorHandler.getErrorMessage(err) }) }}
The updated post will be returned in the response, similar to the comment API.
To use this API in the view, we will also set up a fetch method in api-post.js,similar to the addComment fetch method, that takes the current user's ID, the post ID,and the deleted comment object to send with the uncomment request. Next, we willlearn how to use this fetch method when the delete button is clicked.
Removing a comment from the viewWhen a comment's delete button is clicked by the commenter, the Commentscomponent will call the deleteComment method to fetch the uncomment API andupdate the comments, along with the comment count, when the comment issuccessfully removed from the server. The deleteComment method is defined asfollows.
mern-social/client/post/Comments.js:
const deleteComment = comment => event => { uncomment({ userId: jwt.user._id }, { t: jwt.token }, props.postId, comment).then((data) => { if (data.error) { console.log(data.error) } else { props.updateComments(data.comments) } }) }
On successfully removing a comment from the backend, the updateCommentsmethod that's sent in the props from the Post component will be invoked. This willupdate the state of the Post component to update the view. This will be discussed inthe next section.
Growing the Skeleton into a Social Media Application Chapter 5
[ 209 ]
Comment count updateThe updateComments method, which will allow the comments and comment countto be updated when a comment is added or deleted, is defined in the Postcomponent and passed as a prop to theComments component. The updateComments method will look as follows:
mern-social/client/post/Post.js:
const updateComments = (comments) => { setValues({...values, comments: comments})}
This method takes the updated list of comments as a parameter and updates the statethat holds the list of comments rendered in the view. The initial state of comments inthe Post component is set when the Post component mounts and receives the postdata as props. The comments that are set here are sent as props to the Commentscomponent and used to render the comment count next to the likes action in theaction bar of the Post layout, as follows.
mern-social/client/post/Post.js:
<IconButton aria-label="Comment" color="secondary"> <CommentIcon/></IconButton> <span>{values.comments.length}</span>
This relationship between the comment count in the Post component and thecomments that are rendered and updated in the Comments component gives a simpledemonstration of how changing data is shared among nested components in React tocreate dynamic and interactive user interfaces.
The MERN Social application now contains the set of features we defined earlier forthe application. Users are able to update their profiles with a photo and description,follow each other on the application, and create posts with photos and text, as well aslike and comment on posts. The implementations shown here can be tuned andextended further to add more features in order to utilize the revealed mechanisms ofworking with the MERN stack.
Growing the Skeleton into a Social Media Application Chapter 5
[ 210 ]
SummaryThe MERN Social application we developed in this chapter demonstrated how theMERN stack technologies can be used together to build out a fully-featured andfunctioning web application with social media features.
We began by updating the user feature in the skeleton application to allow anyonewith an account on MERN Social to add a description about themselves, as well asupload a profile picture from their local files. In the implementation of uploading aprofile picture, we explored how to upload multipart form data from the client, thenreceive it on the server to store the file data directly in the MongoDB database, andthen be able to retrieve it back for viewing.
Next, we updated the user feature further to allow users to follow each other on theMERN Social platform. In the user model, we added the capability to maintain arraysof user references to represent lists of followers and followings for each user.Extending this capability, we incorporated follow and unfollow options in the viewand displayed lists of followers, followings, and even lists of users not followed yet.
Then, we added the ability to allow users to post content and interact over the contentby liking or commenting on the post. On the backend, we set up the Post model andcorresponding APIs, which are capable of storing the post content that may or maynot include an image, as well as maintaining records of likes and comments that areincurred on a post by any user.
Finally, while implementing the views for the posting, liking, and commentingfeatures, we explored how to use component composition and share changing statevalues across the components to create complex and interactive views.
By completing this MERN Social application implementation, we learned how toextend and modify the base application code to grow it into a full-fledged webapplication according to our desired features. You can apply similar strategies togrow the skeleton application into any real-world application of your choosing.
In the next chapter, we will expand further on these abilities in the MERN stack andunlock new possibilities as we develop an online classroom application by extendingthe skeleton application.

3Developing Web Applications
with MERNIn this part, we develop two different web applications using the MERN skeletonapplication from the previous section, demonstrating how basic to complex featurescan be implemented and added on to growing MERN applications.
This section comprises the following chapters:
Chapter 6, Building a Web-Based Classroom ApplicationChapter 7, Exercising MERN Skills with an Online MarketplaceChapter 8, Extending the Marketplace for Orders and PaymentsChapter 9, Adding Real-Time Bidding Capabilities to the Marketplace

6Building a Web-BasedClassroom Application
As the world is moving to the internet, so are our tools for learning and acquiringknowledge in different disciplines. Right now on the web, there is a plethora of onlineplatforms that offer both educators and students options to teach and learn differenttopics remotely, without the necessity to be physically co-located in a classroom.
In this chapter, we will build a simple online classroom application, by extending theMERN stack skeleton application. This classroom application will support multipleuser roles, the addition of course content and lessons, student enrollments, progresstracking, and course enrollment statistics. While building out this application, wewill uncover more capabilities of this stack, such as how to implement role-basedaccess to resources and actions, how to combine multiple schemas, and how to rundifferent query operations in order to gather stats. By the end of this chapter, you willbe familiar with the techniques that are needed to easily integrate new full-stackfeatures in any MERN-based application.
We will build out the online classroom application by covering the following topics inthis chapter:
Introducing MERN ClassroomAdding an educator role to usersAdding courses to the classroomUpdating courses with lessonsPublishing coursesEnrolling in coursesTracking progress and enrollment stats

Building a Web-Based Classroom Application Chapter 6
[ 213 ]
Introducing MERN ClassroomMERN Classroom is a simple online classroom application, which allows educators toadd courses that are made up of various lessons, while students can enroll on thesecourses. Additionally, the application will allow students to track their progressthroughout the course, whereas instructors can monitor how many students haveenrolled in/on a course, and how many have completed each course. The completedapplication, with all these features, will end up with a home page as shown in thefollowing screenshot:
The code for the complete MERN Classroom application is availableon GitHub in the repository at https:/ /github. com/PacktPublishing/ Full- Stack- React- Projects- Second- Edition/tree/ master/ Chapter06/ mern- classroom. You can clone this codeand run the application as you go through the code explanations forthe rest of this chapter.
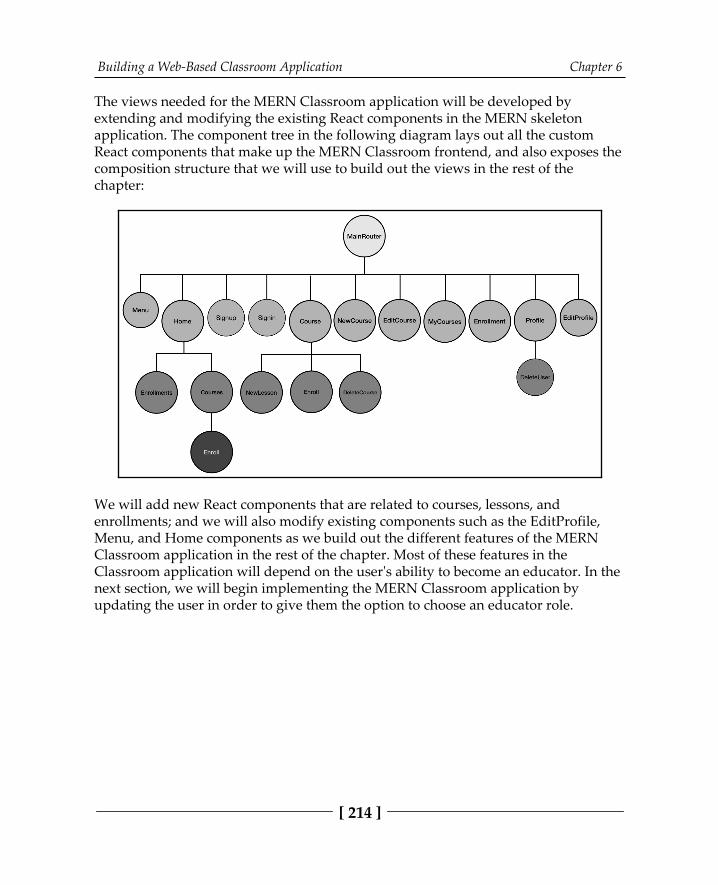
Building a Web-Based Classroom Application Chapter 6
[ 214 ]
The views needed for the MERN Classroom application will be developed byextending and modifying the existing React components in the MERN skeletonapplication. The component tree in the following diagram lays out all the customReact components that make up the MERN Classroom frontend, and also exposes thecomposition structure that we will use to build out the views in the rest of thechapter:
We will add new React components that are related to courses, lessons, andenrollments; and we will also modify existing components such as the EditProfile,Menu, and Home components as we build out the different features of the MERNClassroom application in the rest of the chapter. Most of these features in theClassroom application will depend on the user's ability to become an educator. In thenext section, we will begin implementing the MERN Classroom application byupdating the user in order to give them the option to choose an educator role.
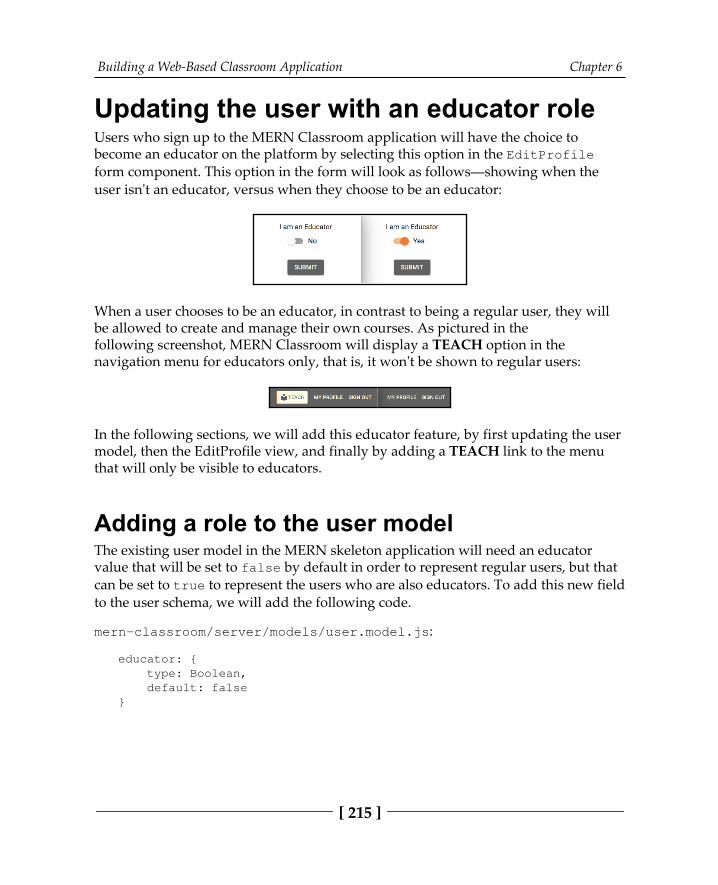
Building a Web-Based Classroom Application Chapter 6
[ 215 ]
Updating the user with an educator roleUsers who sign up to the MERN Classroom application will have the choice tobecome an educator on the platform by selecting this option in the EditProfileform component. This option in the form will look as follows—showing when theuser isn't an educator, versus when they choose to be an educator:
When a user chooses to be an educator, in contrast to being a regular user, they willbe allowed to create and manage their own courses. As pictured in thefollowing screenshot, MERN Classroom will display a TEACH option in thenavigation menu for educators only, that is, it won't be shown to regular users:
In the following sections, we will add this educator feature, by first updating the usermodel, then the EditProfile view, and finally by adding a TEACH link to the menuthat will only be visible to educators.
Adding a role to the user modelThe existing user model in the MERN skeleton application will need an educatorvalue that will be set to false by default in order to represent regular users, but thatcan be set to true to represent the users who are also educators. To add this new fieldto the user schema, we will add the following code.
mern-classroom/server/models/user.model.js:
educator: { type: Boolean, default: false}
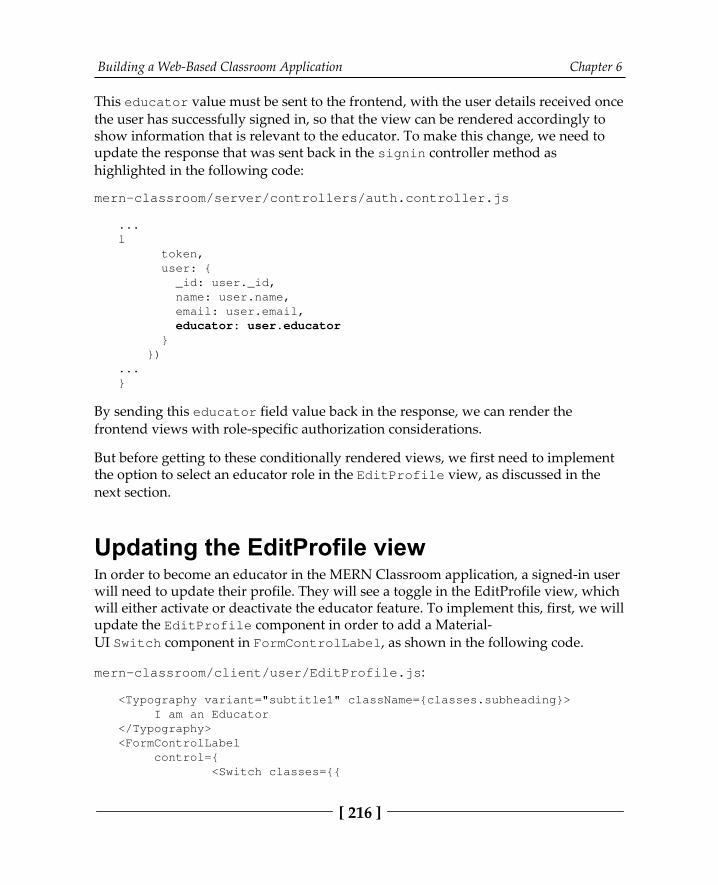
Building a Web-Based Classroom Application Chapter 6
[ 216 ]
This educator value must be sent to the frontend, with the user details received oncethe user has successfully signed in, so that the view can be rendered accordingly toshow information that is relevant to the educator. To make this change, we need toupdate the response that was sent back in the signin controller method ashighlighted in the following code:
mern-classroom/server/controllers/auth.controller.js
...l token, user: { _id: user._id, name: user.name, email: user.email, educator: user.educator } })...}
By sending this educator field value back in the response, we can render thefrontend views with role-specific authorization considerations.
But before getting to these conditionally rendered views, we first need to implementthe option to select an educator role in the EditProfile view, as discussed in thenext section.
Updating the EditProfile viewIn order to become an educator in the MERN Classroom application, a signed-in userwill need to update their profile. They will see a toggle in the EditProfile view, whichwill either activate or deactivate the educator feature. To implement this, first, we willupdate the EditProfile component in order to add a Material-UI Switch component in FormControlLabel, as shown in the following code.
mern-classroom/client/user/EditProfile.js:
<Typography variant="subtitle1" className={classes.subheading}> I am an Educator</Typography><FormControlLabel control={ <Switch classes={{

Building a Web-Based Classroom Application Chapter 6
[ 217 ]
checked: classes.checked, bar: classes.bar, }} checked={values.educator} onChange={handleCheck} />} label={values.educator? 'Yes' : 'No'}/>
Any changes to the switch will be set to the value of the educator variable in thestate by calling the handleCheck method, as defined in the following code.
mern-classroom/client/user/EditProfile.js:
const handleCheck = (event, checked) => { setValues({...values, 'educator': checked})}
The handleCheck method receives the checked Boolean value to indicate whetherthe switch has been selected or not, and this value is set to educator.
On form submit, the educator value is added to the details that were sent in theupdate to the server, as highlighted in the following code.
mern-classroom/client/user/EditProfile.js:
clickSubmit = () => { const jwt = auth.isAuthenticated() const user = { name: this.state.name || undefined, email: this.state.email || undefined, password: this.state.password || undefined, educator: values.educator || undefined } update({ userId: this.match.params.userId }, { t: jwt.token }, user).then((data) => { if (data.error) { this.setState({error: data.error}) } else { auth.updateUser(data, ()=> { setValues({...values, userId: data._id, redirectToProfile:true}) }) }
Building a Web-Based Classroom Application Chapter 6
[ 218 ]
}) }
Once the EditProfile view has been successfully updated, the user details that arestored in sessionStorage for auth purposes should also be updated. Theauth.updateUser method is called to do this sessionStorage update. It is definedwith the other auth-helper.js methods, and the parameters that are passed are theupdated user data and a callback function that updates the view. This updateUsermethod is defined as follows.
mern-classroom/client/auth/auth-helper.js:
updateUser(user, cb) { if(typeof window !== "undefined"){ if(sessionStorage.getItem('jwt')){ let auth = JSON.parse(sessionStorage.getItem('jwt')) auth.user = user sessionStorage.setItem('jwt', JSON.stringify(auth)) cb() } }}
Once the updated educator role is available in the frontend, we can use it to renderthe frontend accordingly. In the next section, we will see how to render the menudifferently, based on whether an educator or a regular user is viewing theapplication.
Rendering an option to teach In the frontend of the classroom application, we can render different options based onwhether an educator is currently browsing the application. In this section, we willadd the code to conditionally display a link to TEACH on the navigation bar, whichwill only be visible to the signed-in users who are also educators.
We will update the Menu component, as follows, within the previous code that onlyrenders when a user is signed in.
mern-classroom/client/core/Menu.js:
{auth.isAuthenticated() && (<span> {auth.isAuthenticated().user.educator && (<Link to="/teach/courses"> <Button style={isPartActive(history, "/teach/")}>
Building a Web-Based Classroom Application Chapter 6
[ 219 ]
<Library/> Teach </Button> </Link>) } ...}
This link, which is only visible to educators, will take them to the educator dashboardview, where they can manage the courses that they are instructing.
This section has taught us how to update a user role to an educator role in theapplication, and we can now begin incorporating features that will allow an educatorto add courses to the classroom.
Adding courses to the classroomEducators in the MERN Classroom can create courses and add lessons to each course.In this section, we will walk through the implementations of the course-relatedfeatures, such as adding new courses, listing courses by a specific instructor, anddisplaying the details of a single course. To store the course data and enable coursemanagement, we will start by implementing a Mongoose schema for courses, thenbackend APIs to create and list the courses, along with frontend views for bothauthorized educators and for regular users interacting with courses in the application.
Defining a Course modelThe Course schema—defined in server/models/course.model.js—will havesimple fields to store course details, along with with an image, a category, whetherthe course is published or not, and a reference to the user who created the course. Thecode defining the course fields are given in the following list with explanations:
Course name and description: name and description fields will havestring types, with name as a required field:
name: { type: String, trim: true, required: 'Name is required'},description: { type: String, trim: true},

Building a Web-Based Classroom Application Chapter 6
[ 220 ]
Course image: The image field will store the course image file to beuploaded by the user as binary data in the MongoDB database:
image: { data: Buffer, contentType: String},
Course category: The category field will store the category value of thecourse as a string, and it will be a required field:
category: { type: String, required: 'Category is required'},
Course published state: The published field will be a Boolean value,indicating whether the course is published or not:
published: { type: Boolean, default: false},
Course instructor: The instructor field will reference the user whocreated the course:
instructor: { type: mongoose.Schema.ObjectId, ref: 'User'}
Created and updated at times: The created and updated fields willbe Date types, with created generated when a new course is added,and updated changed when any course details are modified:
updated: Date,created: { type: Date, default: Date.now},
The fields in this schema definition will enable us to implement the course-relatedfeatures in MERN Classroom. To start off these features, in the next section, we will implement the full-stack slice that will allow educators to create new courses.
Building a Web-Based Classroom Application Chapter 6
[ 221 ]
Creating a new courseIn MERN Classroom, a user who is signed in—and who is also an educator—will beable to create new courses. To implement this feature, in the following sections wewill add a create course API in the backend, along with a way to fetch this API in thefrontend, and a create new course form view that takes user input for course fields.
The create course APIIn order to start the implementation of the create course API in the backend, we willadd a POST route that verifies that the current user is an educator, and then creates anew course with the course data passed in the request body. The route is defined asfollows:
mern-classroom/server/routes/course.routes.js:
router.route('/api/courses/by/:userId') .post(authCtrl.requireSignin, authCtrl.hasAuthorization, userCtrl.isEducator, courseCtrl.create)
The course.routes.js file will be very similar to the user.routes file, and to loadthese new routes in the Express app, we need to mount the course routesin express.js, in the same way that we did for the auth and user routes, as shownin the following code:
mern-classroom/server/express.js:
app.use('/', courseRoutes)
Next, we will update the user controller to add the isEducator method—which willensure that the current user is actually an educator—before creating the new course.The isEducator method is defined as follows:
mern-classroom/server/controllers/user.controller.js:
const isEducator = (req, res, next) => { const isEducator = req.profile && req.profile.educator if (!isEducator) { return res.status('403').json({ error: "User is not an educator" }) } next()
Building a Web-Based Classroom Application Chapter 6
[ 222 ]
}
The create method, in the course controller, uses the formidable Node module toparse the multipart request that may contain an image file that has been uploaded bythe user for the course image. If there is a file, formidable will store it temporarily inthe filesystem, and we will read it using the fs module to retrieve the file type anddata, and then it will be stored to the image field in the course document. Thecreate controller method will look as shown in the following code:
mern-classroom/server/controllers/course.controller.js:
const create = (req, res) => { let form = new formidable.IncomingForm() form.keepExtensions = true form.parse(req, async (err, fields, files) => { if (err) { return res.status(400).json({ error: "Image could not be uploaded" }) } let course = new Course(fields) course.instructor= req.profile if(files.image){ course.image.data = fs.readFileSync(files.image.path) course.image.contentType = files.image.type } try { let result = await course.save() res.json(result) }catch (err){ return res.status(400).json({ error: errorHandler.getErrorMessage(err) }) } })}
The image file for the course, if uploaded by the user, is stored in MongoDB as data.Then, in order to be shown in the views, it is retrieved from the database as an imagefile at a separate GET API route. The GET API is set up as an Express routeat /api/courses/photo/:courseId, which gets the image data from MongoDBand sends it as a file in the response. The implementation steps for fileupload, storage, and retrieval are outlined in detail in the Upload profile photo sectionin Chapter 5, Starting with a Simple Social Media Application.
Building a Web-Based Classroom Application Chapter 6
[ 223 ]
With the create course API endpoint ready on the server, next, we can add a fetchmethod in the frontend in order to utilize it.
Fetching the create API in the viewIn order to use the create API in the frontend, we will set up a fetch method on theclient- side to make a POST request to the create API, by passing the multipart formdata, as shown in the following code:
mern-classroom/client/course/api-course.js
const create = async (params, credentials, course) => { try { let response = await fetch('/api/courses/by/'+ params.userId,{ method: 'POST', headers: { 'Accept': 'application/json', 'Authorization': 'Bearer ' + credentials.t }, body: course }) return response.json() } catch(err) { console.log(err) }}
This method will be used in the new course form view to submit the user-enteredcourse details to the backend to create a new course in the database. In the nextsection, we will implement this new course form view in a React component.
The NewCourse componentIn order to allow educators to create new courses, we will add a React componentthat contains a form to the frontend of the application. This form view will look asshown in the following screenshot:
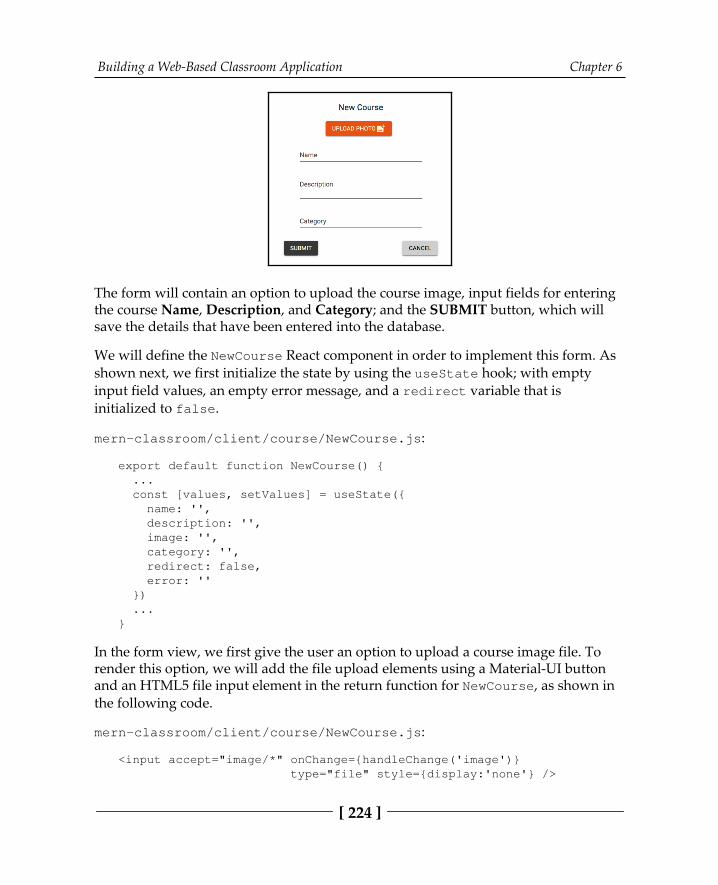
Building a Web-Based Classroom Application Chapter 6
[ 224 ]
The form will contain an option to upload the course image, input fields for enteringthe course Name, Description, and Category; and the SUBMIT button, which willsave the details that have been entered into the database.
We will define the NewCourse React component in order to implement this form. Asshown next, we first initialize the state by using the useState hook; with emptyinput field values, an empty error message, and a redirect variable that isinitialized to false.
mern-classroom/client/course/NewCourse.js:
export default function NewCourse() { ... const [values, setValues] = useState({ name: '', description: '', image: '', category: '', redirect: false, error: '' }) ...}
In the form view, we first give the user an option to upload a course image file. Torender this option, we will add the file upload elements using a Material-UI buttonand an HTML5 file input element in the return function for NewCourse, as shown inthe following code.
mern-classroom/client/course/NewCourse.js:
<input accept="image/*" onChange={handleChange('image')} type="file" style={display:'none'} />
Building a Web-Based Classroom Application Chapter 6
[ 225 ]
<label htmlFor="icon-button-file"> <Button variant="contained" color="secondary" component="span"> Upload Photo <FileUpload/> </Button></label><span>{values.image ? values.image.name : ''}</span>
Then, we add the name, description, and category form fields using theTextField components from Material-UI.
mern-classroom/client/course/NewCourse.js:
<TextField id="name" label="Name" value={values.name} onChange={handleChange('name')}/> <br/><TextField id="multiline-flexible" label="Description" multiline rows="2" value={values.description} onChange={handleChange('description')}/> <br/><TextField id="category" label="Category" value={values.category} onChange={handleChange('category')}/>
We will define a handler function in NewCourse so that we can track changes to thesefields in the form view. The handleChange function will be defined as shown in thefollowing code:
mern-classroom/client/course/NewCourse.js
const handleChange = name => event => { const value = name === 'image' ? event.target.files[0] : event.target.value setValues({...values, [name]: value })}
This handleChange function takes the new value that has been entered into the inputfield and sets it to state, including the name of the file if one is uploaded by the user.
Building a Web-Based Classroom Application Chapter 6
[ 226 ]
Finally, in the view, you can add the Submit button, which, when clicked, should calla click-handling function. We will define a function for this purpose in NewCourse asfollows.
mern-classroom/client/course/NewCourse.js:
const clickSubmit = () => { let courseData = new FormData() values.name && courseData.append('name', values.name) values.description && courseData.append('description', values.description) values.image && courseData.append('image', values.image) values.category && courseData.append('category', values.category) create({ userId: jwt.user._id }, { t: jwt.token }, courseData).then((data) => { if (data.error) { setValues({...values, error: data.error}) } else { setValues({...values, error: '', redirect: true}) } })}
This clickSubmit function will be called when the form is submitted. It first takesthe input values from the state and sets it to a FormData object. This ensures that thedata is stored in the correct format that is needed for the multipart/form-data encoding type that is necessary for sending requests containing file uploads.Then, the create fetch method is called to create a new course in the backend.Finally, depending on the response from the server, either an error message is shown,or the user is redirected to the MyCourses view with the following code.
mern-classroom/client/course/NewCourse.js:
if (values.redirect) { return (<Redirect to={'/teach/courses'}/>)}
Building a Web-Based Classroom Application Chapter 6
[ 227 ]
The NewCourse component can only be viewed by a signed-in user who is also aneducator. So, we will add a PrivateRoute to the MainRouter component, whichwill render this form only for authorized users at /teach/course/new.
mern-classroom/client/MainRouter.js:
<PrivateRoute path="/teach/course/new" component={NewCourse}/>
This link can be added to any of the view components that may be accessed by theeducator, such as the MyCourses view, which will be implemented in the next sectionin order to list the courses that have been created by an educator.
Listing courses by educatorAuthorized educators will be able to see a list of the courses that they have created onthe platform. In order to implement this feature, in the following sections we will adda backend API that retrieves the list of courses for a specific instructor, and then wewill call this API in the frontend to render this data in a React component.
The list course APIIn order to implement the API to return the list of courses that have been created by aspecific instructor, first, we will add a route in the backend to retrieve all the coursesthat have been created by a given user when the server receives a GET requestat /api/courses/by/:userId. This route will be declared as shown next.
mern-classroom/server/routes/course.routes.js:
router.route('/api/courses/by/:userId') .get(authCtrl.requireSignin, authCtrl.hasAuthorization, courseCtrl.listByInstructor)

Building a Web-Based Classroom Application Chapter 6
[ 228 ]
To process the :userId param in the route and retrieve the associated user from thedatabase, we will utilize the userByID method in our user controller. We will add thefollowing code to the Course routes in course.routes.js, so that the user isavailable in the request object as profile.
mern-classroom/server/routes/course.routes.js:
router.param('userId', userCtrl.userByID)
The listByInstructor controller method in course.controller.js will querythe Course collection in the database in order to get the matching courses, as shownnext.
mern-classroom/server/controllers/course.controller.js:
const listByInstructor = (req, res) => { Course.find({instructor: req.profile._id}, (err, courses) => { if (err) { return res.status(400).json({ error: errorHandler.getErrorMessage(err) }) } res.json(courses) }).populate('instructor', '_id name')}
In the query to the Course collection, we find all the courses that have aninstructor field that matches the user specified with the userId param. Then, the resulting courses are sent back in the response to the client. In the next section, wewill see how to call this API from the frontend.
Fetching the list API in the viewIn order to use the list API in the frontend, we will define a fetch method that can beused by the React components to load this list of courses. The fetch method that isneeded in order to retrieve a list of courses by a specific instructor will be defined asfollows.
mern-classroom/client/course/api-course.js
const listByInstructor = async (params, credentials, signal) => { try { let response = await fetch('/api/courses/by/'+params.userId, { method: 'GET', signal: signal,
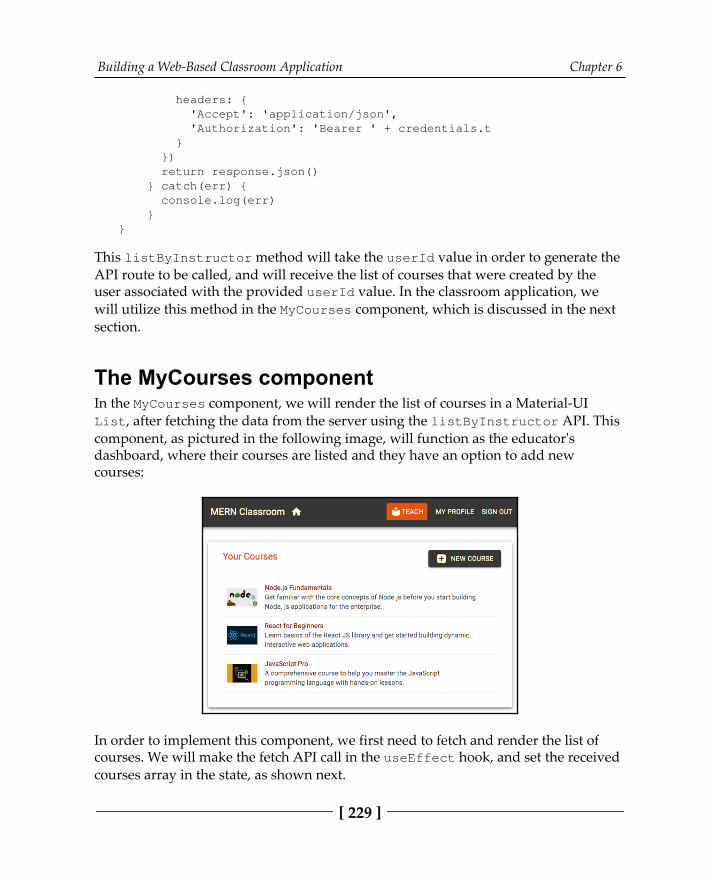
Building a Web-Based Classroom Application Chapter 6
[ 229 ]
headers: { 'Accept': 'application/json', 'Authorization': 'Bearer ' + credentials.t } }) return response.json() } catch(err) { console.log(err) }}
This listByInstructor method will take the userId value in order to generate theAPI route to be called, and will receive the list of courses that were created by theuser associated with the provided userId value. In the classroom application, wewill utilize this method in the MyCourses component, which is discussed in the nextsection.
The MyCourses componentIn the MyCourses component, we will render the list of courses in a Material-UIList, after fetching the data from the server using the listByInstructor API. Thiscomponent, as pictured in the following image, will function as the educator'sdashboard, where their courses are listed and they have an option to add newcourses:
In order to implement this component, we first need to fetch and render the list ofcourses. We will make the fetch API call in the useEffect hook, and set the receivedcourses array in the state, as shown next.
Building a Web-Based Classroom Application Chapter 6
[ 230 ]
mern-classroom/client/course/MyCourses.js
export default function MyCourses(){ const [courses, setCourses] = useState([]) const [redirectToSignin, setRedirectToSignin] = useState(false) const jwt = auth.isAuthenticated()
useEffect(() => { const abortController = new AbortController() const signal = abortController.signal listByInstructor({ userId: jwt.user._id }, {t: jwt.token}, signal).then((data) => { if (data.error) { setRedirectToSignin(true) } else { setCourses(data) } }) return function cleanup(){ abortController.abort() } }, []) if (redirectToSignin) { return <Redirect to='/signin'/> } ...}
When the listByInstructor API is fetched, we pass the currently signed-in user'sauth token to check for authorization on the server- side. Users should only be able tosee their own courses, and if the current user is not authorized to make this fetch call,the view will be redirected to the sign-in page. Otherwise, the list of courses will bereturned and displayed in the view.
In this MyCourses component's view, we will render the retrieved courses array byiterating over it using map, with each course data rendered in the view in a Material-UI ListItem. Each ListItem will also be linked to the individual course view, asshown in the following code:
mern-classroom/client/course/MyCourses.js
{courses.map((course, i) => { return <Link to={"/teach/course/"+course._id} key={i}> <ListItem button> <ListItemAvatar> <Avatar src={'/api/courses/photo/'+course._id+"?" +
Building a Web-Based Classroom Application Chapter 6
[ 231 ]
new Date().getTime()}/> </ListItemAvatar> <ListItemText primary={course.name} secondary={course.description}/> </ListItem> <Divider/> </Link>} )}
The MyCourses component can only be viewed by a signed-in user who is also aneducator. So, we will add a PrivateRoute in the MainRouter component, whichwill render this component only for authorized users, at /seller/courses.
mern-classroom/client/MainRouter.js:
<PrivateRoute path="/seller/courses" component={MyCourses}/>
We use this frontend route in the TEACH link on the menu, which directs a signed-ineducator to this MyCourses view. In this view, users can click on each course in thelist, and go to the page that shows the details of a specific course. In the next section,we will implement the feature to render an individual course.
Display a courseUsers on the MERN Classroom application, including visitors, signed-in students,and educators alike, will all be able to browse through course pages, with interactionsthat are specific to their authorization level. In the following sections, we will startimplementing the individual course view feature by adding a read course API to thebackend, a way to call this API from the frontend, and the React component that willhouse the course detail view.
A read course APIIn order to implement a read course API in the backend, we will start by declaring theGET route and the parameter-handling trigger, as shown in the following code.
mern-classroom/server/routes/course.routes.js:
router.route('/api/courses/:courseId') .get(courseCtrl.read)router.param('courseId', courseCtrl.courseByID)

Building a Web-Based Classroom Application Chapter 6
[ 232 ]
We are adding this GET route to query the Course collection with an ID and returnthe corresponding course in the response. The :courseId param in the route URLwill call the courseByID controller method, which is similar tothe userByID controller method. It retrieves the course from the database, andattaches it to the request object that is to be used in the next method, as shown in thefollowing code.
mern-classroom/server/controllers/course.controller.js:
const courseByID = async (req, res, next, id) => { try { let course = await Course.findById(id) .populate('instructor', '_id name') if (!course) return res.status('400').json({ error: "Course not found" }) req.course = course next() } catch (err) { return res.status('400').json({ error: "Could not retrieve course" }) }}
The course object that is queried from the database will also contain the name and IDdetails of the instructor, as we specified in the populate() method. The call tonext() after this course object is attached to the request object invokes the readcontroller method. The read controller method then returns this course object in theresponse to the client, as shown in the following code.
mern-classroom/server/controllers/course.controller.js:
const read = (req, res) => { req.course.image = undefined return res.json(req.course)}
We are removing the image field before sending the response, since images will beretrieved as files in separate routes. With this API ready in the backend, you can nowadd the implementation in order to call it in the frontend, by adding a fetch methodin api-course.js, which is similar to other fetch methods that have already beenadded. We will use the fetch method to call the read course API in the Reactcomponent that will render the course details, as discussed in the next section.
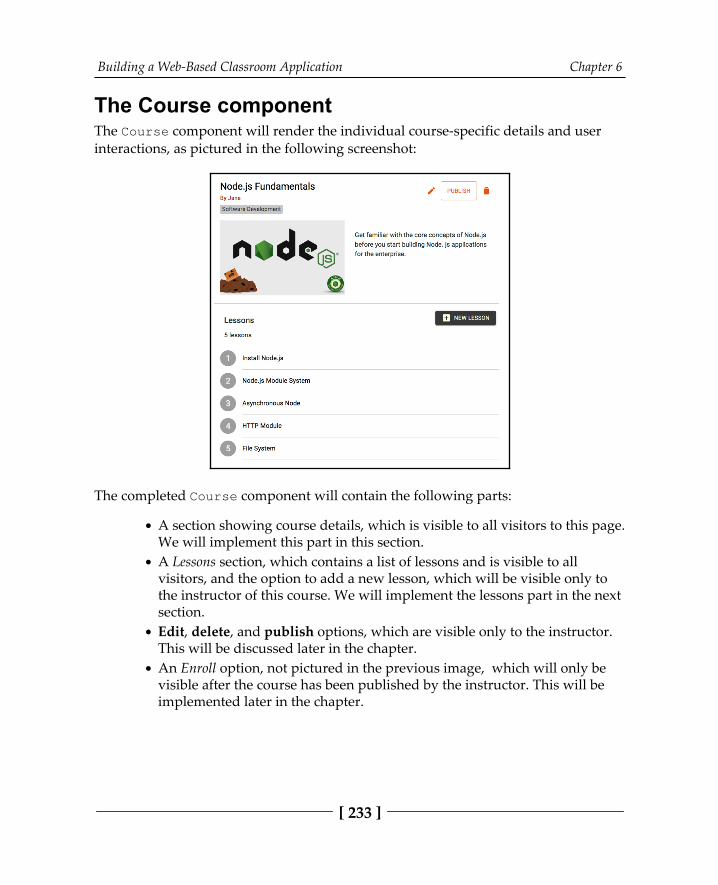
Building a Web-Based Classroom Application Chapter 6
[ 233 ]
The Course componentThe Course component will render the individual course-specific details and userinteractions, as pictured in the following screenshot:
The completed Course component will contain the following parts:
A section showing course details, which is visible to all visitors to this page.We will implement this part in this section.A Lessons section, which contains a list of lessons and is visible to allvisitors, and the option to add a new lesson, which will be visible only tothe instructor of this course. We will implement the lessons part in the nextsection.Edit, delete, and publish options, which are visible only to the instructor.This will be discussed later in the chapter.An Enroll option, not pictured in the previous image, which will only bevisible after the course has been published by the instructor. This will beimplemented later in the chapter.
Building a Web-Based Classroom Application Chapter 6
[ 234 ]
To start off the implementation of this Course component, we will first retrieve thecourse details with a fetch call to the read API in a useEffect hook, and then we willset the received values to state, as shown in the following code.
mern-classroom/client/course/Course.js
export default function Course ({match}) { const [course, setCourse] = useState({instructor:{}}) const [values, setValues] = useState({ error: '' }) useEffect(() => { const abortController = new AbortController() const signal = abortController.signal read({courseId: match.params.courseId}, signal).then((data) => { if (data.error) { setValues({...values, error: data.error}) } else { setCourse(data) } }) return function cleanup(){ abortController.abort() } }, [match.params.courseId])...}
useEffect will only run when courseId changes in the route params.
In the view, we will render the received details, such as course name, description,category, image, and a link to the instructor's user profile in a Material-UI Cardcomponent, as shown in the following code:
mern-classroom/client/course/Course.js
<Card> <CardHeader title={course.name} subheader={<div> <Link to={"/user/"+course.instructor._id}> By {course.instructor.name} </Link> <span>{course.category}</span> </div> } />

Building a Web-Based Classroom Application Chapter 6
[ 235 ]
<CardMedia image={imageUrl} title={course.name} /> <div> <Typography variant="body1"> {course.description} </Typography> </div></Card>
imageUrl consists of the route that will retrieve the course image as a file response,and it is constructed as follows:
mern-classroom/client/course/Course.js
const imageUrl = course._id ? `/api/courses/photo/${course._id}?${new Date().getTime()}` : '/api/courses/defaultphoto'
When the course instructor is signed in and views the course page, we will render theedit and other course data-modifying options in the Course component. For now, wewill only look at how the edit option is added conditionally to the view code:
mern-classroom/client/course/Course.js
{auth.isAuthenticated().user && auth.isAuthenticated().user._id ==course.instructor._id && (<span><Link to={"/teach/course/edit/" + course._id}> <IconButton aria-label="Edit" color="secondary"> <Edit/> </IconButton> </Link> </span>)}
If the current user is signed in, and their ID matches with the course instructor's ID,only then will the Edit option be rendered. This part will be edited further inupcoming sections, in order to show the publish and delete options.
In order to load this Course component in the frontend, we will add a route toMainRouter as follows:
<Route path="/course/:courseId" component={Course}/>
This route URL (/course/:courseId) can now be added into any component to linkto a specific course, with the :courseId param replaced with the course's ID value.Clicking on the link will take the user to the corresponding Course view.
Building a Web-Based Classroom Application Chapter 6
[ 236 ]
We now have the relevant backend model and API endpoints integrated with thefrontend views, meaning that we have a functioning implementation of the newcourse creation, a course listing by the instructor, and single-course display features.We can now move on to extending these implementations further, giving instructorsthe ability to add lessons to each course and update the course as desired, beforepublishing it.
Updating courses with lessonsEach course in the MERN Classroom will contain a list of lessons that make up thecourse content and what the students need to cover when they enroll. We will keepthe lesson structure simple for this application, putting more emphasis on theimplementation of managing lessons and allowing students to go through lessons inorder to complete a course. In the following sections, we will focus on theimplementation of managing lessons for a course, and we will also look at how toupdate an existing course—either to edit details or to delete the course. First, we willlook into how to store lesson details, then we will implement the full-stack features toallow instructors to add lessons, update lessons, update details of the course, anddelete a course.
Storing lessonsWe need to define the lesson data structure and associate it with the course datastructure before we can store and retrieve lesson details for each course.
We will start by defining the Lesson model, with a schema containing the title, thecontent, and the resource URL fields of the string type, as shown in the followingcode.
mern-classroom/server/models/course.model.js
const LessonSchema = new mongoose.Schema({ title: String, content: String, resource_url: String})const Lesson = mongoose.model('Lesson', LessonSchema)
Building a Web-Based Classroom Application Chapter 6
[ 237 ]
These schemas will let educators create and store basic lessons for their courses. Tointegrate lessons with the course structure, we will add a field called lessons in theCourse model, which will store an array of lesson documents, as shown in thefollowing code:
mern-classroom/server/models/course.model.js
lessons: [LessonSchema]
With this updated Course schema and model, we can now proceed with theimplementations that will allow educators to add lessons to their course, as discussedin the next section.
Adding new lessonsEducators on the MERN Classroom application will be able to add new lessons to thecourses that they are still building and have not yet published. In the followingsections, we will make this feature possible, first by implementing a backend API thatadds lessons to an existing course, then by creating a frontend form view for enteringand sending the new lesson details, and finally, by displaying the newly addedlessons on the Course page.
Adding a lesson APIIn order to implement a backend API that will allow us to add and store new lessonsfor a given course, we first need to declare a PUT route as follows:
mern-classroom/server/routes/course.routes.js:
router.route('/api/courses/:courseId/lesson/new') .put(authCtrl.requireSignin, courseCtrl.isInstructor, courseCtrl.newLesson)
When this route gets a PUT request with the course ID in the URL, we will first use theisInstructor method to check whether the current user is the instructor for thecourse, and then we will save the lesson in the database with the newLesson method.The isInstructor controller method will be defined as follows:
mern-classroom/server/controllers/course.controller.js:
const isInstructor = (req, res, next) => { const isInstructor = req.course && req.auth &&
Building a Web-Based Classroom Application Chapter 6
[ 238 ]
req.course.instructor._id == req.auth._id if(!isInstructor){ return res.status('403').json({ error: "User is not authorized" }) } next()}
With the isInstructor method, we first check whether the signed-in user has thesame user ID as the instructor of the given course. If the user is not authorized, anerror is returned in the response, otherwise the next() middleware is invoked inorder to execute the newLesson method. This newLesson controller method isdefined as follows:
mern-classroom/server/controllers/course.controller.js:
const newLesson = async (req, res) => { try { let lesson = req.body.lesson let result = await Course.findByIdAndUpdate(req.course._id, {$push: {lessons:lesson}, updated: Date.now()}, {new: true}) .populate('instructor', '_id name') .exec() res.json(result) } catch (err) { return res.status(400).json({ error: errorHandler.getErrorMessage(err) }) }}
In this newLesson controller method, we use findByIdAndUpdate (from MongoDB)to find the corresponding course document, and we update its lessons array field bypushing the new lesson object that was received in the request body.
In order to access this API to add a new lesson in the frontend, you will also need toadd a corresponding fetch method, as we did for other API implementations.
This API will be used in a form-based component that will take input from the userfor each new lesson and then send it to the backend. We will implement this form-based component in the next section.
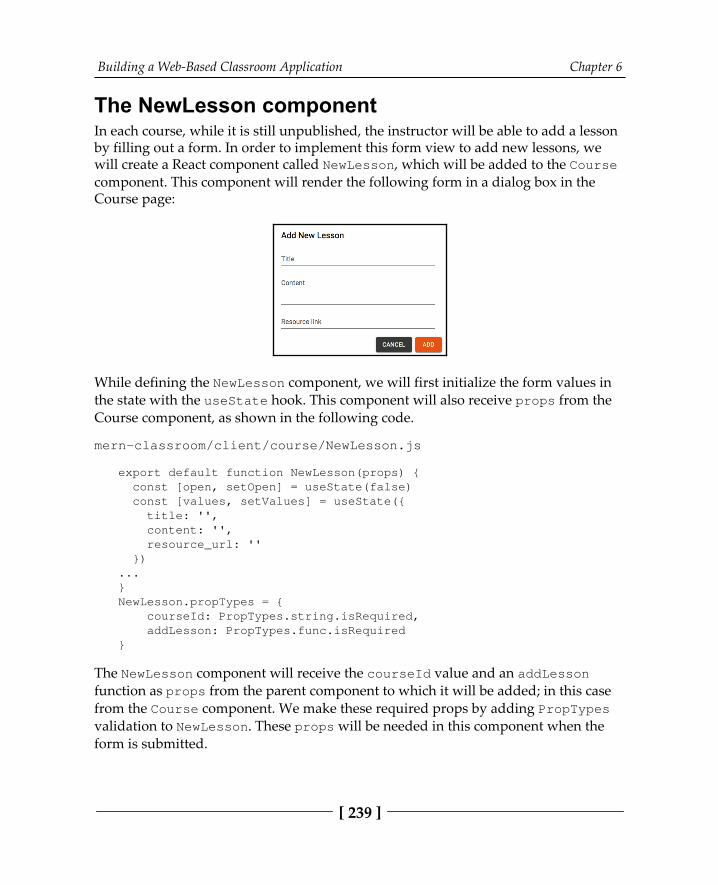
Building a Web-Based Classroom Application Chapter 6
[ 239 ]
The NewLesson componentIn each course, while it is still unpublished, the instructor will be able to add a lessonby filling out a form. In order to implement this form view to add new lessons, wewill create a React component called NewLesson, which will be added to the Coursecomponent. This component will render the following form in a dialog box in theCourse page:
While defining the NewLesson component, we will first initialize the form values inthe state with the useState hook. This component will also receive props from theCourse component, as shown in the following code.
mern-classroom/client/course/NewLesson.js
export default function NewLesson(props) { const [open, setOpen] = useState(false) const [values, setValues] = useState({ title: '', content: '', resource_url: '' })...}NewLesson.propTypes = { courseId: PropTypes.string.isRequired, addLesson: PropTypes.func.isRequired}
The NewLesson component will receive the courseId value and an addLessonfunction as props from the parent component to which it will be added; in this casefrom the Course component. We make these required props by adding PropTypesvalidation to NewLesson. These props will be needed in this component when theform is submitted.
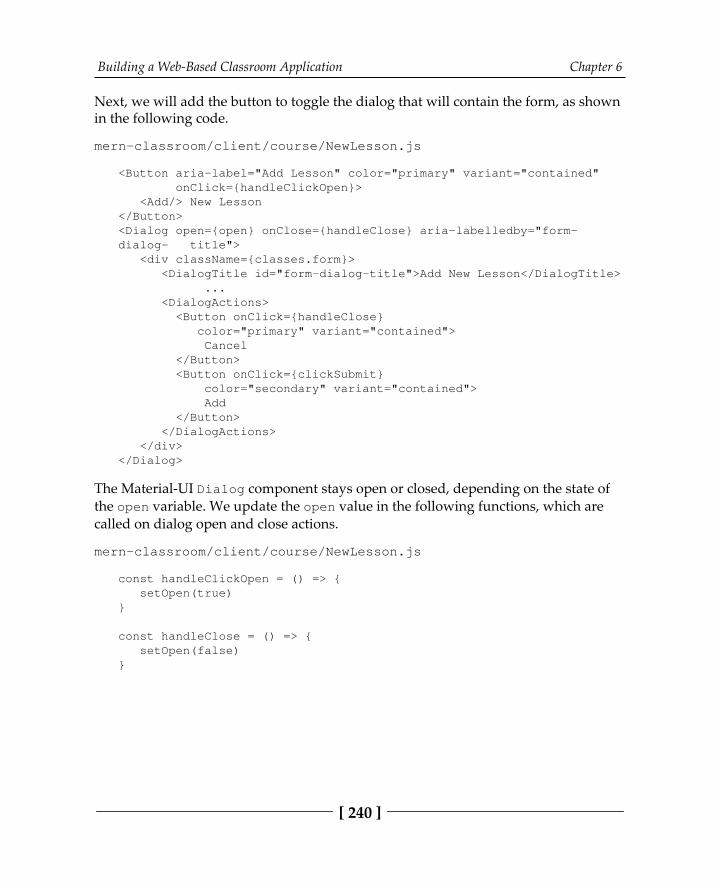
Building a Web-Based Classroom Application Chapter 6
[ 240 ]
Next, we will add the button to toggle the dialog that will contain the form, as shownin the following code.
mern-classroom/client/course/NewLesson.js
<Button aria-label="Add Lesson" color="primary" variant="contained" onClick={handleClickOpen}> <Add/> New Lesson</Button><Dialog open={open} onClose={handleClose} aria-labelledby="form-dialog- title"> <div className={classes.form}> <DialogTitle id="form-dialog-title">Add New Lesson</DialogTitle> ... <DialogActions> <Button onClick={handleClose} color="primary" variant="contained"> Cancel </Button> <Button onClick={clickSubmit} color="secondary" variant="contained"> Add </Button> </DialogActions> </div></Dialog>
The Material-UI Dialog component stays open or closed, depending on the state ofthe open variable. We update the open value in the following functions, which arecalled on dialog open and close actions.
mern-classroom/client/course/NewLesson.js
const handleClickOpen = () => { setOpen(true)}
const handleClose = () => { setOpen(false)}

Building a Web-Based Classroom Application Chapter 6
[ 241 ]
The form fields for entering the new lesson's title, content, and resource URL valuesare added inside the Dialog component using TextFields in DialogContent, asshown with the following code:
mern-classroom/client/course/NewLesson.js
<DialogContent> <TextField label="Title" type="text" fullWidth value={values.title} onChange={handleChange('title')}/> <br/> <TextField label="Content" type="text" multiline rows="5"fullWidth value={values.content}onChange={handleChange('content')}/> <br/> <TextField label="Resource link" type="text" fullWidth value={values.resource_url} onChange={handleChange('resource_url')} /> <br/></DialogContent>
Values that are entered in the input fields are captured with the handleChangefunction, which is defined as follows:
mern-classroom/client/course/NewLesson.js
const handleChange = name => event => { setValues({ ...values, [name]: event.target.value })}
Finally, when the form is submitted, we will send the new lesson details to the serverin the clickSubmit function, as shown in the following code.
mern-classroom/client/course/NewLesson.js
const clickSubmit = () => { const jwt = auth.isAuthenticated() const lesson = { title: values.title || undefined, content: values.content || undefined, resource_url: values.resource_url || undefined } newLesson({ courseId: props.courseId }, { t: jwt.token }, lesson).then((data) => {
Building a Web-Based Classroom Application Chapter 6
[ 242 ]
if (data && data.error) { setValues({...values, error: data.error}) } else { props.addLesson(data) setValues({...values, title: '', content: '', resource_url: ''}) setOpen(false) } }) }
The lesson details are sent in the request to the add lesson API with the course IDreceived as a prop from the Course component. On a successful update responsefrom the server, besides emptying the form fields, the addLesson update function,which was passed as a prop, is executed to render the latest lessons in the Coursecomponent. The addLesson function to be passed in from the Course component isdefined as follows:
mern-classroom/client/course/Course.js
const addLesson = (course) => { setCourse(course)}
The NewLesson component that is added to the Course component should onlyrender if the current user is the instructor of the course, and if the course is stillunpublished. To do this check and conditionally render the NewLesson component,we can add the following code to the Course component:
mern-classroom/client/course/Course.js
{ auth.isAuthenticated().user && auth.isAuthenticated().user._id == course.instructor._id && !course.published && (<NewLesson courseId={course._id} addLesson={addLesson}/>)}
This will allow educators on the application to add lessons to their courses. Next, wewill add the code to render these lessons on the Course page.
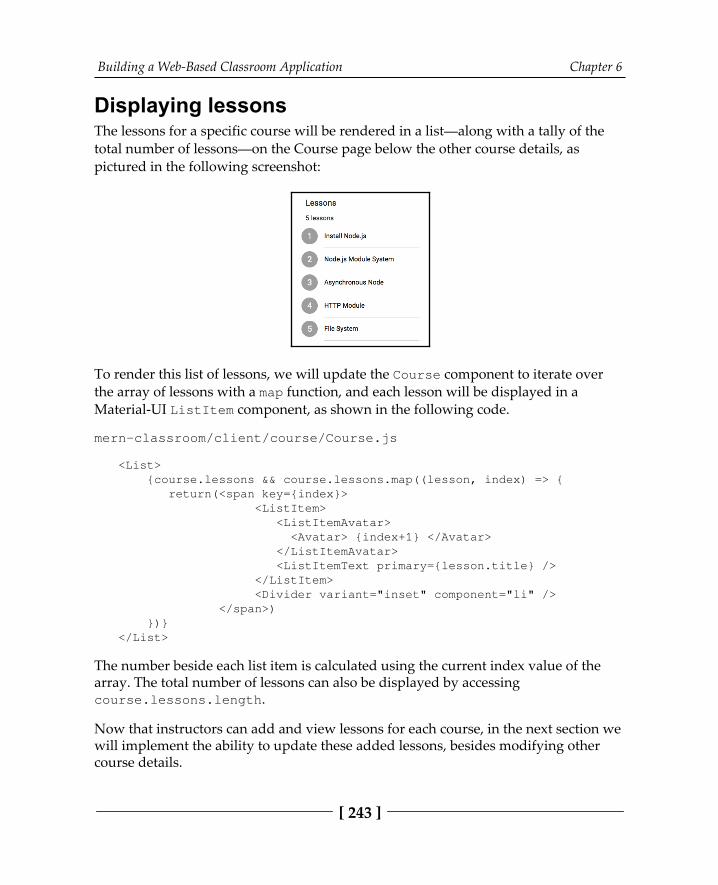
Building a Web-Based Classroom Application Chapter 6
[ 243 ]
Displaying lessonsThe lessons for a specific course will be rendered in a list—along with a tally of thetotal number of lessons—on the Course page below the other course details, aspictured in the following screenshot:
To render this list of lessons, we will update the Course component to iterate overthe array of lessons with a map function, and each lesson will be displayed in aMaterial-UI ListItem component, as shown in the following code.
mern-classroom/client/course/Course.js
<List> {course.lessons && course.lessons.map((lesson, index) => { return(<span key={index}> <ListItem> <ListItemAvatar> <Avatar> {index+1} </Avatar> </ListItemAvatar> <ListItemText primary={lesson.title} /> </ListItem> <Divider variant="inset" component="li" /> </span>) })}</List>
The number beside each list item is calculated using the current index value of thearray. The total number of lessons can also be displayed by accessingcourse.lessons.length.
Now that instructors can add and view lessons for each course, in the next section wewill implement the ability to update these added lessons, besides modifying othercourse details.
Building a Web-Based Classroom Application Chapter 6
[ 244 ]
Editing a course Once a course has been added by an educator and there are more updates to beincorporated, the educator will be able to edit the details of the course as itsinstructor. Editing a course includes the ability to update its lessons, as well. Toimplement this capability in the application, first, we will have to create a backendAPI that allows the update operation on a given course.
Then, this updated API needs to be accessed in frontend with the changed details ofthe course and its lessons. In the following sections, we will build this backend APIand the EditCourse React component, which will allow instructors to change thecourse details and lessons.
Updating the course APIIn the backend, we will need an API that allows an existing course to be updated ifthe user who is making the request is the authorized instructor of the given course.We will first declare the PUT route that accepts the update request from the client, asfollows:
mern-classroom/server/routes/course.routes.js:
router.route('/api/courses/:courseId') .put(authCtrl.requireSignin, courseCtrl.isInstructor, courseCtrl.update)
A PUT request that is received at the /api/courses/:courseId route first checks ifthe signed-in user is the instructor of the course that is associated with the courseIdprovided in the URL. If the user is found to be authorized, the update controller isinvoked. The update method in the course controller is defined as shown in thefollowing code.
mern-classroom/server/controllers/course.controller.js:
const update = (req, res) => { let form = new formidable.IncomingForm() form.keepExtensions = true form.parse(req, async (err, fields, files) => { if (err) { return res.status(400).json({ error: "Photo could not be uploaded" }) } let course = req.course
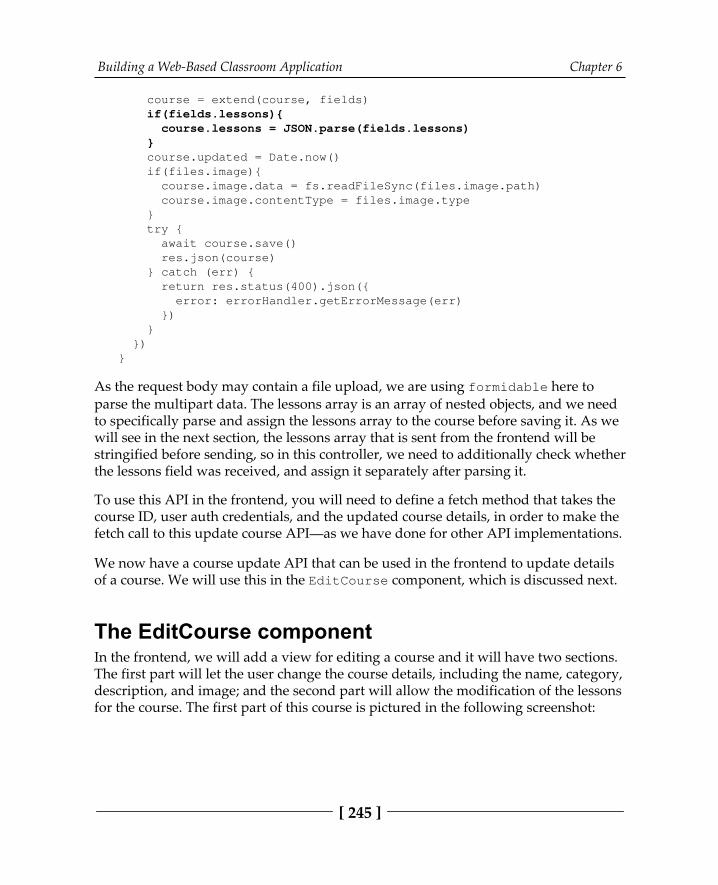
Building a Web-Based Classroom Application Chapter 6
[ 245 ]
course = extend(course, fields) if(fields.lessons){ course.lessons = JSON.parse(fields.lessons) } course.updated = Date.now() if(files.image){ course.image.data = fs.readFileSync(files.image.path) course.image.contentType = files.image.type } try { await course.save() res.json(course) } catch (err) { return res.status(400).json({ error: errorHandler.getErrorMessage(err) }) } })}
As the request body may contain a file upload, we are using formidable here toparse the multipart data. The lessons array is an array of nested objects, and we needto specifically parse and assign the lessons array to the course before saving it. As wewill see in the next section, the lessons array that is sent from the frontend will bestringified before sending, so in this controller, we need to additionally check whetherthe lessons field was received, and assign it separately after parsing it.
To use this API in the frontend, you will need to define a fetch method that takes thecourse ID, user auth credentials, and the updated course details, in order to make thefetch call to this update course API—as we have done for other API implementations.
We now have a course update API that can be used in the frontend to update detailsof a course. We will use this in the EditCourse component, which is discussed next.
The EditCourse component In the frontend, we will add a view for editing a course and it will have two sections.The first part will let the user change the course details, including the name, category,description, and image; and the second part will allow the modification of the lessonsfor the course. The first part of this course is pictured in the following screenshot:
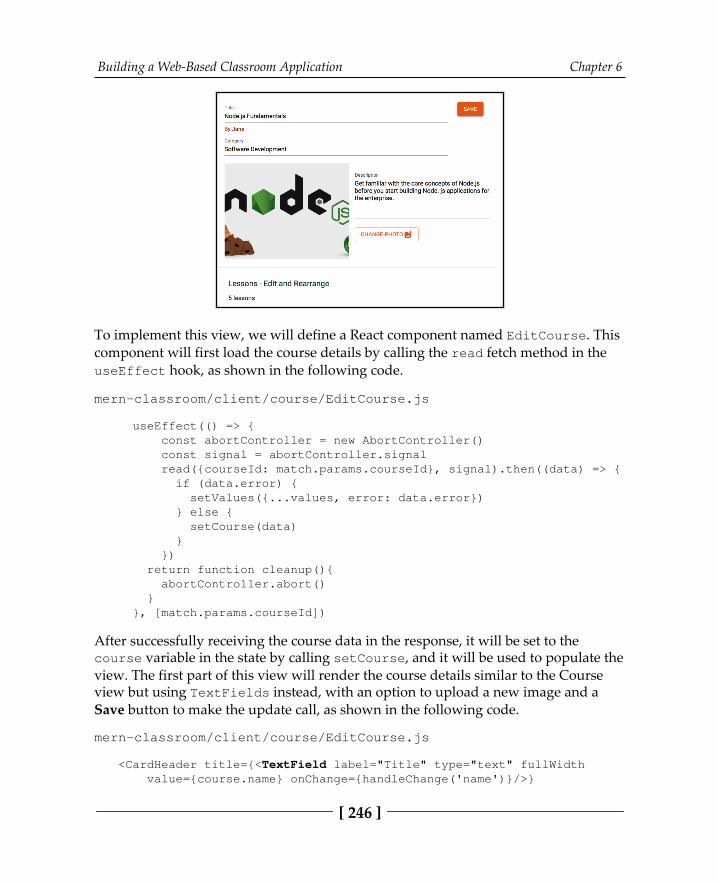
Building a Web-Based Classroom Application Chapter 6
[ 246 ]
To implement this view, we will define a React component named EditCourse. Thiscomponent will first load the course details by calling the read fetch method in theuseEffect hook, as shown in the following code.
mern-classroom/client/course/EditCourse.js
useEffect(() => { const abortController = new AbortController() const signal = abortController.signal read({courseId: match.params.courseId}, signal).then((data) => { if (data.error) { setValues({...values, error: data.error}) } else { setCourse(data) } }) return function cleanup(){ abortController.abort() } }, [match.params.courseId])
After successfully receiving the course data in the response, it will be set to thecourse variable in the state by calling setCourse, and it will be used to populate theview. The first part of this view will render the course details similar to the Courseview but using TextFields instead, with an option to upload a new image and aSave button to make the update call, as shown in the following code.
mern-classroom/client/course/EditCourse.js
<CardHeader title={<TextField label="Title" type="text" fullWidth value={course.name} onChange={handleChange('name')}/>}
Building a Web-Based Classroom Application Chapter 6
[ 247 ]
subheader={<div><Link to={"/user/"+course.instructor._id}> By {course.instructor.name} </Link> {<TextField label="Category" type="text" fullWidth value={course.category} onChange={handleChange('category')}/>} </div>} action={<Button variant="contained" color="secondary" onClick={updateCourse}>Save</Button>}/><div className={classes.flex}> <CardMedia image={imageUrl} title={course.name}/> <div className={classes.details}> <TextField multiline rows="5" label="Description" type="text" value={course.description} onChange={handleChange('description')} /><br/> <input accept="image/*" onChange={handleChange('image')} type="file" /> <label htmlFor="icon-button-file"> <Button variant="outlined" color="secondary" component="span"> Change Photo <FileUpload/> </Button> </label> <span>{course.image ? course.image.name :''}</span><br/> </div></div>
The changes to the input fields will be handled in order to capture the newly enteredvalues with the handleChange method, which is defined as follows.
mern-classroom/client/course/EditCourse.js
const handleChange = name => event => { const value = name === 'image' ? event.target.files[0] : event.target.value setCourse({ ...course, [name]: value }) }
When the Save button is clicked, we will get all the course details and set it toFormData, which will be sent in the multipart format to the backend using the courseupdate API. The clickSubmit function that is called on saving will be defined asfollows:
mern-classroom/client/course/EditCourse.js
const clickSubmit = () => {
Building a Web-Based Classroom Application Chapter 6
[ 248 ]
let courseData = new FormData() course.name && courseData.append('name', course.name) course.description && courseData.append('description' , course.description) course.image && courseData.append('image', course.image) course.category && courseData.append('category', course.category) courseData.append('lessons', JSON.stringify(course.lessons)) update({ courseId: match.params.courseId }, { t: jwt.token }, courseData).then((data) => { if (data && data.error) { console.log(data.error) setValues({...values, error: data.error}) } else { setValues({...values, redirect: true}) } }) }
The course lessons are also sent in this FormData, but as lessons are stored as anarray of nested objects and FormData only accepts simple key-value pairs, westringify the lessons value before assigning it.
In order to load EditCourse in the frontend of the application, we need to declare afrontend route for it. This component can only be viewed by a signed-in user who isalso the instructor of the course. So, we will add a PrivateRoute inthe MainRouter component, which will render this view only for authorized usersat /teach/course/edit/:courseId.
mern-marketplace/client/MainRouter.js:
<PrivateRoute path="/teach/course/edit/:courseId"component={EditCourse}/>
This link is added in the Course view in order to allow access to the EditCoursepage.
We have looked at how to update and send the course details, along with all thelessons to the backend on saving, but we are left with the interface for editing thecourse lessons. In the following section, we will finish up the EditCourse componentby looking into the implementation for updating course lessons.

Building a Web-Based Classroom Application Chapter 6
[ 249 ]
Updating lessonsIn order to allow instructors to update the lessons that they have added to a course,we will add the following section in the EditCourse component, which will allowthe user to edit the lesson details, rearrange the order of the lessons, and delete alesson:
The implementation of these lesson update features will mostly rely on arraymanipulation techniques. In the following sections, we will add the interface for anindividual lesson in the list, and discuss how the edit, move, and deletefunctionalities are implemented.
Editing lesson detailsUsers will be able to edit the details of each field in a lesson in the EditCoursecomponent. In the view, each item in the list of lessons will contain threeTextFields for each of the fields in a lesson. These will be prepopulated with theexisting values of the fields as shown in the following code.
mern-classroom/client/course/EditCourse.js
<ListItemText primary={<><TextField label="Title" type="text" fullWidth
Building a Web-Based Classroom Application Chapter 6
[ 250 ]
value={lesson.title} onChange={handleLessonChange('title', index)}/> <br/> <TextField multiline rows="5" label="Content" type="text" fullWidth value={lesson.content} onChange={handleLessonChange('content',index)}/> <br/> <TextField label="Resource link" type="text" fullWidth value={lesson.resource_url} onChange={handleLessonChange('resource_url',index)}/> <br/> </>}/>
In order to handle the changes made to the values in each field, we will define ahandleLessonChange method, which will take the field name and thecorresponding lesson's index in the array. The handleLessonChange method will bedefined as follows:
mern-classroom/client/course/EditCourse.js
const handleLessonChange = (name, index) => event => { const lessons = course.lessons lessons[index][name] = event.target.value setCourse({ ...course, lessons: lessons })}
The lessons array in the course is updated in the state, after setting the value in thespecified field of the lesson at the provided index. This updated course with themodified lesson will get saved to the database when the user clicks Save in theEditCourse view. Next, we will look at how we can allow the user to rearrange theorder of the lessons.
Moving the lessons to rearrange the orderWhile updating lessons, the user will also be able to reorder each lesson on the list.There will be an up arrow button for each lesson, except for the very first lesson. Thisbutton will be added to each lesson item in the view as follows:
mern-classroom/client/course/EditCourse.js
{ index != 0 && <IconButton color="primary" onClick={moveUp(index)}>
Building a Web-Based Classroom Application Chapter 6
[ 251 ]
<ArrowUp /> </IconButton>}
When the user clicks this button, the lesson in the current index will be moved up,and the lesson above it will be moved to its place in the array. The moveUp functionwill implement this behavior as follows:
mern-classroom/client/course/EditCourse.js
const moveUp = index => event => { const lessons = course.lessons const moveUp = lessons[index] lessons[index] = lessons[index-1] lessons[index-1] = moveUp setCourse({ ...course, lessons: lessons })}
The rearranged lessons array is then updated in the state, and will be saved to thedatabase when the user saves the changes in the EditCourse page. Next, we willimplement the option to delete a lesson from the list.
Deleting a lessonIn the EditCourse page, each item rendered in the lessons list will have a deleteoption. The Delete button will be added in the view to each list item as follows:
mern-classroom/client/course/EditCourse.js
<ListItemSecondaryAction> <IconButton edge="end" aria-label="up" color="primary" onClick={deleteLesson(index)}> <DeleteIcon /> </IconButton></ListItemSecondaryAction>}
When the Delete button is clicked, we will take the index of the lesson that is beingdeleted and remove it from the lessons array. The deleteLesson function, which iscalled when the button is clicked, is defined as follows:
mern-classroom/client/course/EditCourse.js
const deleteLesson = index => event => { const lessons = course.lessons lessons.splice(index, 1) setCourse({...course, lessons:lessons})}
Building a Web-Based Classroom Application Chapter 6
[ 252 ]
In this function, we are splicing the array to remove the lesson from the given index,then adding the updated array in the course in the state. This new lesson array will besent to the database with the course object when the user clicks the Save button in theEditCourse page.
This wraps up the three different ways an instructor can change the lessons for theircourse. With these implementations using array manipulation techniques integratedwith the React component's features, the users can now edit the details, rearrange theorder, and delete a lesson. In the next section, we will discuss the only remainingfeature for modifying a course, which is the ability to delete it from the database.
Deleting a courseIn the MERN Classroom application, instructors will be able to permanently deletecourses if the course has not been published already. In order to allow an instructor todelete a course, first, we will define a backend API for course deletion from thedatabase, and then implement a React component that makes use of this API whenthe user interacts with the frontend to perform this deletion.
The delete course APIIn order to implement a backend API that takes a request to delete a specified coursefrom the database, we will first define a DELETE route as shown in the followingcode.
mern-classroom/server/routes/course.routes.js:
router.route('/api/courses/:courseId') .delete(authCtrl.requireSignin, courseCtrl.isInstructor, courseCtrl.remove)
This DELETE route takes the course ID as a URL parameter and checks if the currentuser is signed in and authorized to perform this delete, before proceeding to theremove controller method, which is defined in the following code.
mern-classroom/server/controllers/course.controller.js:
const remove = async (req, res) => { try { let course = req.course let deleteCourse = await course.remove() res.json(deleteCourse)
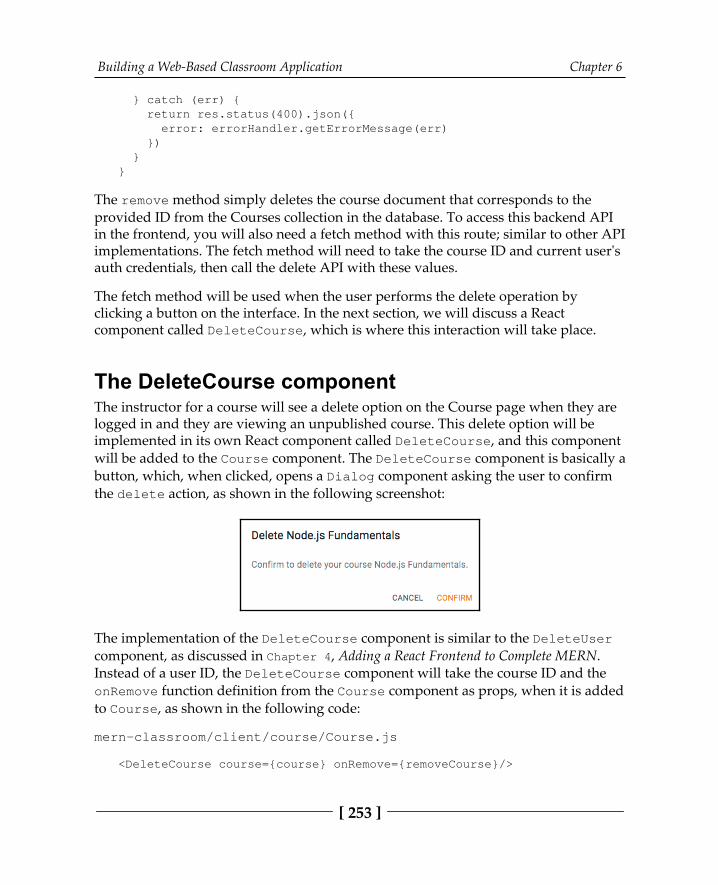
Building a Web-Based Classroom Application Chapter 6
[ 253 ]
} catch (err) { return res.status(400).json({ error: errorHandler.getErrorMessage(err) }) }}
The remove method simply deletes the course document that corresponds to theprovided ID from the Courses collection in the database. To access this backend APIin the frontend, you will also need a fetch method with this route; similar to other APIimplementations. The fetch method will need to take the course ID and current user'sauth credentials, then call the delete API with these values.
The fetch method will be used when the user performs the delete operation byclicking a button on the interface. In the next section, we will discuss a React component called DeleteCourse, which is where this interaction will take place.
The DeleteCourse componentThe instructor for a course will see a delete option on the Course page when they arelogged in and they are viewing an unpublished course. This delete option will beimplemented in its own React component called DeleteCourse, and this componentwill be added to the Course component. The DeleteCourse component is basically abutton, which, when clicked, opens a Dialog component asking the user to confirmthe delete action, as shown in the following screenshot:
The implementation of the DeleteCourse component is similar to the DeleteUsercomponent, as discussed in Chapter 4, Adding a React Frontend to Complete MERN.Instead of a user ID, the DeleteCourse component will take the course ID and theonRemove function definition from the Course component as props, when it is addedto Course, as shown in the following code:
mern-classroom/client/course/Course.js
<DeleteCourse course={course} onRemove={removeCourse}/>
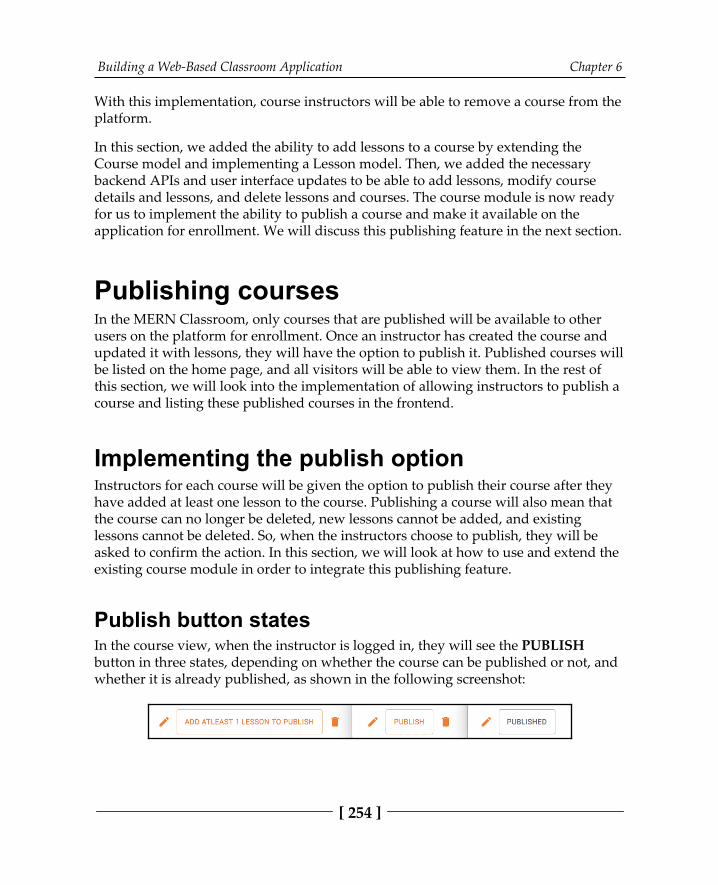
Building a Web-Based Classroom Application Chapter 6
[ 254 ]
With this implementation, course instructors will be able to remove a course from theplatform.
In this section, we added the ability to add lessons to a course by extending theCourse model and implementing a Lesson model. Then, we added the necessarybackend APIs and user interface updates to be able to add lessons, modify coursedetails and lessons, and delete lessons and courses. The course module is now readyfor us to implement the ability to publish a course and make it available on theapplication for enrollment. We will discuss this publishing feature in the next section.
Publishing coursesIn the MERN Classroom, only courses that are published will be available to otherusers on the platform for enrollment. Once an instructor has created the course andupdated it with lessons, they will have the option to publish it. Published courses willbe listed on the home page, and all visitors will be able to view them. In the rest ofthis section, we will look into the implementation of allowing instructors to publish acourse and listing these published courses in the frontend.
Implementing the publish optionInstructors for each course will be given the option to publish their course after theyhave added at least one lesson to the course. Publishing a course will also mean thatthe course can no longer be deleted, new lessons cannot be added, and existinglessons cannot be deleted. So, when the instructors choose to publish, they will beasked to confirm the action. In this section, we will look at how to use and extend theexisting course module in order to integrate this publishing feature.
Publish button statesIn the course view, when the instructor is logged in, they will see the PUBLISHbutton in three states, depending on whether the course can be published or not, andwhether it is already published, as shown in the following screenshot:
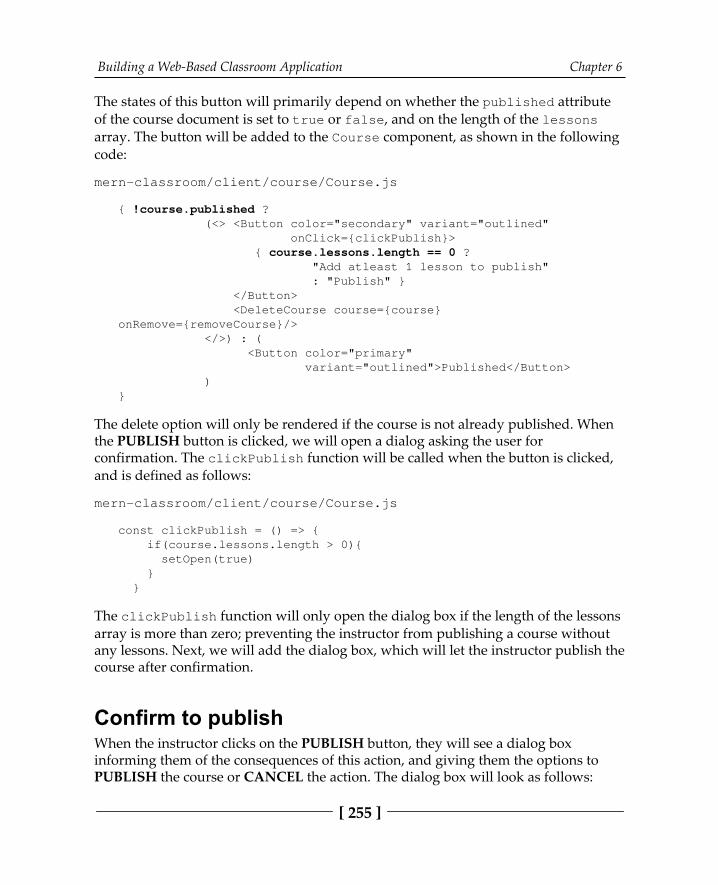
Building a Web-Based Classroom Application Chapter 6
[ 255 ]
The states of this button will primarily depend on whether the published attributeof the course document is set to true or false, and on the length of the lessonsarray. The button will be added to the Course component, as shown in the followingcode:
mern-classroom/client/course/Course.js
{ !course.published ? (<> <Button color="secondary" variant="outlined" onClick={clickPublish}> { course.lessons.length == 0 ? "Add atleast 1 lesson to publish" : "Publish" } </Button> <DeleteCourse course={course}onRemove={removeCourse}/> </>) : ( <Button color="primary" variant="outlined">Published</Button> )}
The delete option will only be rendered if the course is not already published. Whenthe PUBLISH button is clicked, we will open a dialog asking the user forconfirmation. The clickPublish function will be called when the button is clicked,and is defined as follows:
mern-classroom/client/course/Course.js
const clickPublish = () => { if(course.lessons.length > 0){ setOpen(true) } }
The clickPublish function will only open the dialog box if the length of the lessonsarray is more than zero; preventing the instructor from publishing a course withoutany lessons. Next, we will add the dialog box, which will let the instructor publish thecourse after confirmation.
Confirm to publishWhen the instructor clicks on the PUBLISH button, they will see a dialog boxinforming them of the consequences of this action, and giving them the options toPUBLISH the course or CANCEL the action. The dialog box will look as follows:
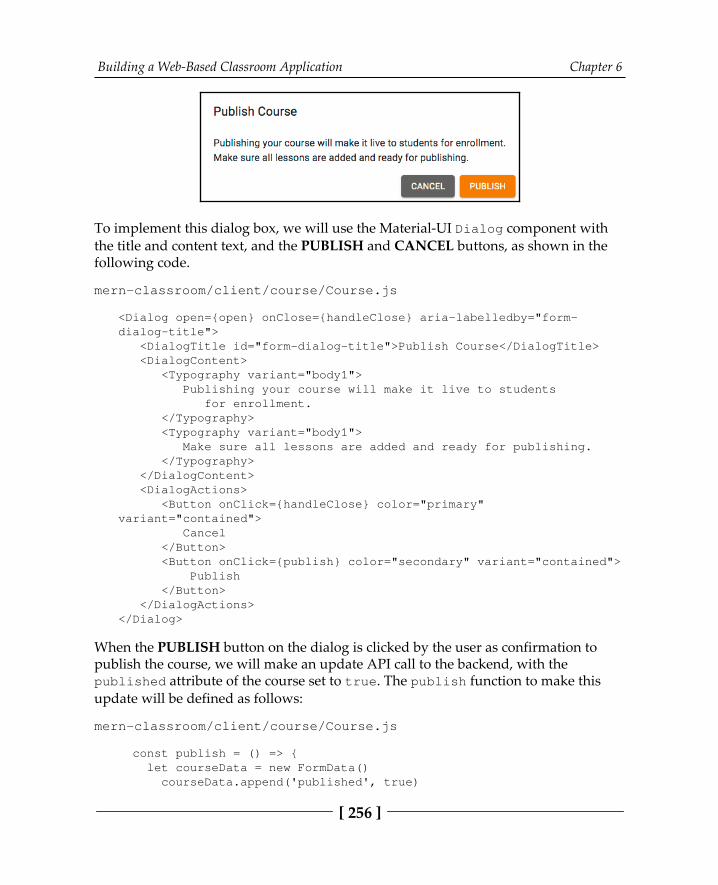
Building a Web-Based Classroom Application Chapter 6
[ 256 ]
To implement this dialog box, we will use the Material-UI Dialog component withthe title and content text, and the PUBLISH and CANCEL buttons, as shown in thefollowing code.
mern-classroom/client/course/Course.js
<Dialog open={open} onClose={handleClose} aria-labelledby="form-dialog-title"> <DialogTitle id="form-dialog-title">Publish Course</DialogTitle> <DialogContent> <Typography variant="body1"> Publishing your course will make it live to students for enrollment. </Typography> <Typography variant="body1"> Make sure all lessons are added and ready for publishing. </Typography> </DialogContent> <DialogActions> <Button onClick={handleClose} color="primary"variant="contained"> Cancel </Button> <Button onClick={publish} color="secondary" variant="contained"> Publish </Button> </DialogActions></Dialog>
When the PUBLISH button on the dialog is clicked by the user as confirmation topublish the course, we will make an update API call to the backend, with thepublished attribute of the course set to true. The publish function to make thisupdate will be defined as follows:
mern-classroom/client/course/Course.js
const publish = () => { let courseData = new FormData() courseData.append('published', true)
Building a Web-Based Classroom Application Chapter 6
[ 257 ]
update({ courseId: match.params.courseId }, { t: jwt.token }, courseData).then((data) => { if (data && data.error) { setValues({...values, error: data.error}) } else { setCourse({...course, published: true}) setOpen(false) } }) }
In this function, we are using the same update API that has already been defined andused for saving modifications to other course details from the EditCourse view.Once the backend is successfully updated with the published value, it is alsoupdated in the state of the Course component.
This published attribute in the course can be used to conditionally hide the optionsto add a new lesson, delete a course, and delete a lesson in both the Course andEditCourse components, in order to prevent the instructor from performing theseactions after the course is already published. As courses are published by instructors,these courses will be listed in a view for all users on the platform, as discussed in thefollowing section.
Listing published coursesAll visitors to the MERN Classroom application will be able to access the publishedcourses. In order to present these published courses, we will add the feature toretrieve all the published courses from the database, and display the courses in a liston the home page. In the following sections, we will implement this feature by firstdefining the backend API, which will take a request and return the list of publishedcourses. Then, we will implement the frontend component that will fetch this API andrender the courses.
Building a Web-Based Classroom Application Chapter 6
[ 258 ]
The published courses APIIn order to retrieve the list of published courses from the database, we will implementan API in the backend, by first declaring the route that will take a GET request at'/api/courses/published', as shown in the following code:
mern-classroom/server/routes/course.routes.js:
router.route('/api/courses/published') .get(courseCtrl.listPublished)
A GET request to this route will invoke the listPublished controller method,which initiates a query to the Course collection for courses that have the publishedattribute's value as true. Then, the resulting courses are returned in the response.The listPublished controller method is defined as follows:
mern-classroom/server/controllers/course.controller.js:
const listPublished = (req, res) => { Course.find({published: true}, (err, courses) => { if (err) { return res.status(400).json({ error: errorHandler.getErrorMessage(err) }) } res.json(courses) }).populate('instructor', '_id name')}
To use this list API in the frontend, we also need to define a fetch method on theclient- side, as we did for all the other API calls. Then, the fetch method will be usedin the component, which will retrieve and display the published courses. In the nextsection, we will look into the implementation of rendering the retrieved course list ina React component.
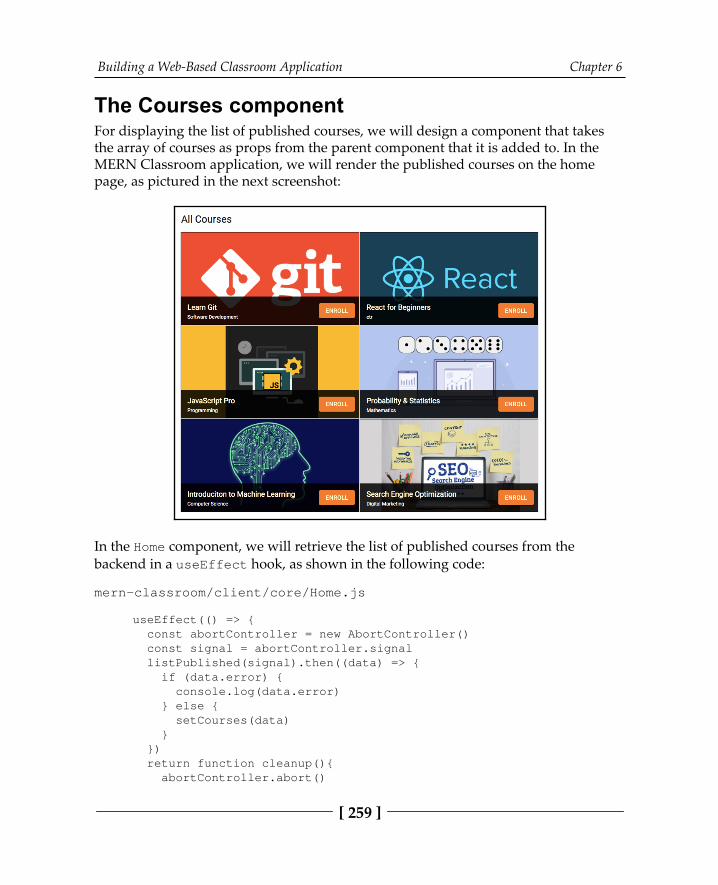
Building a Web-Based Classroom Application Chapter 6
[ 259 ]
The Courses componentFor displaying the list of published courses, we will design a component that takesthe array of courses as props from the parent component that it is added to. In theMERN Classroom application, we will render the published courses on the homepage, as pictured in the next screenshot:
In the Home component, we will retrieve the list of published courses from thebackend in a useEffect hook, as shown in the following code:
mern-classroom/client/core/Home.js
useEffect(() => { const abortController = new AbortController() const signal = abortController.signal listPublished(signal).then((data) => { if (data.error) { console.log(data.error) } else { setCourses(data) } }) return function cleanup(){ abortController.abort()

Building a Web-Based Classroom Application Chapter 6
[ 260 ]
} }, [])
Once the list of courses is received, it is set to the courses variable in the state. Wewill pass this courses array to the Courses component as props when it is added tothe Home component, as follows:
mern-classroom/client/core/Home.js
<Courses courses={courses} />
This Courses component will take these props and iterate through the array torender each course in a GridList component from Material-UI. The Coursescomponent is defined as shown in the following code:
mern-classroom/client/course/Courses.js
export default function Courses(props){ return ( <GridList cellHeight={220} cols={2}> {props.courses.map((course, i) => { return ( <GridListTile key={i} style={{padding:0}}> <Link to={"/course/"+course._id}> <img src={'/api/courses/photo/'+course._id} alt={course.name} /> </Link> <GridListTileBar title={<Link to={"/course/"+course._id}> {course.name}</Link>} subtitle={<span>{course.category}</span>} actionIcon={auth.isAuthenticated() ? <Enroll courseId={course._id}/> : <Link to="/signin"> Sign in to Enroll</Link> } /> </GridListTile>) })} </GridList> )}Courses.propTypes = { courses: PropTypes.array.isRequired}
Building a Web-Based Classroom Application Chapter 6
[ 261 ]
Each course in the list will display its name, category, and image, and will be linkedto the individual course page. The Enroll option, which will be implemented in itsown component, will also be shown for each course, but only to the users whoare signed in, and are browsing through the home page.
With courses now publishable by instructors and viewable by all visitors to theapplication, we can now start the implementation for enrollment on courses.
Enrolling on courses All visitors to the MERN Classroom application will have the option to sign in andthen enroll on any of the published courses. Enrolling on a course would give themaccess to the lesson details and would allow them to go through the lessonssystematically to complete the course. In order to implement this feature, in thissection, we will first define an Enrollment model to store enrollment details in thedatabase. Then, we will add the backend API to create new enrollments when endusers interact with the Enroll component that will be added to the frontend. Finally,we will implement the view that enables a student to see and interact with the contentfrom the course on which they are enrolled.
Defining an Enrollment modelWe will define an Enrollment schema and model in order to store the details of eachenrollment in the application. It will have fields to store the reference to the coursebeing enrolled in and the user who is enrolling as a student. It will also store an arraycorresponding to the lessons in the associated course, which will store the completionstatus of each of the lessons for this student. Additionally, we will store threetimestamp values; the first value will signify when the student enrolled, the secondvalue will indicate the last time that they completed a lesson or updated theenrollment, and finally, when they completed the course. This enrollment model willbe defined in server/models/enrollment.model.js, and the code defining theenrollment fields are given in the following list with explanations:
Course reference: The course field will store the reference to the coursedocument with which this enrollment is associated:
course: { type: mongoose.Schema.ObjectId, ref: 'Course'}
Building a Web-Based Classroom Application Chapter 6
[ 262 ]
Student reference: The student field will store the reference to the userwho created this enrollment by choosing to enroll on a course:
student: { type: mongoose.Schema.ObjectId, ref: 'User'}
Lesson status: The lessonStatus field will store an array with referencesto each lesson that is stored in the associated course in the lessons array.For each object in this lessonStatus array, we will add a complete fieldthat will store a Boolean value that indicates whether the correspondinglesson has been completed or not:
lessonStatus: [{ lesson: {type: mongoose.Schema.ObjectId, ref: 'Lesson'}, complete: Boolean}]
Enrolled at: The enrolled field will be a Date value indicating the timethat the enrollment was created; in other words, when the student enrolledon the course:
enrolled: { type: Date, default: Date.now}
Updated at: The updated field will be another Date value, which will beupdated every time a lesson is completed, indicating when was the lasttime that the user worked on the course lessons:
updated: Date
Completed at: The completed field will also be a Date type, which willonly be set when all the lessons in the course have been completed:
completed: Date
The fields in this schema definition will enable us to implement all the enrollment-related features in MERN Classroom. In the next section, we will implement theuser's ability to enroll on a course, and store details of the enrollment using thisEnrollment model.
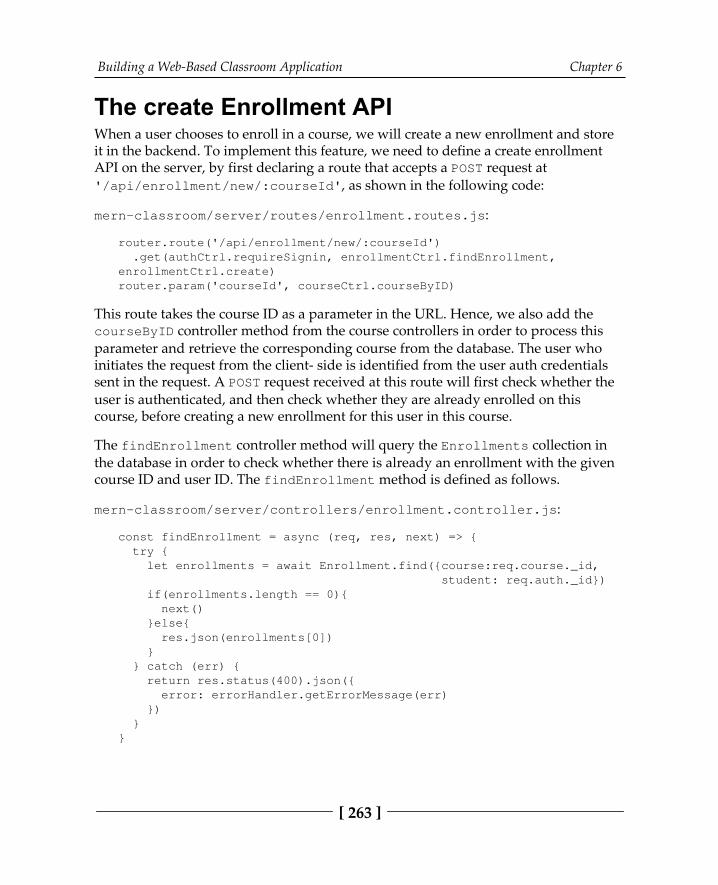
Building a Web-Based Classroom Application Chapter 6
[ 263 ]
The create Enrollment APIWhen a user chooses to enroll in a course, we will create a new enrollment and storeit in the backend. To implement this feature, we need to define a create enrollmentAPI on the server, by first declaring a route that accepts a POST request at'/api/enrollment/new/:courseId', as shown in the following code:
mern-classroom/server/routes/enrollment.routes.js:
router.route('/api/enrollment/new/:courseId') .get(authCtrl.requireSignin, enrollmentCtrl.findEnrollment,enrollmentCtrl.create)router.param('courseId', courseCtrl.courseByID)
This route takes the course ID as a parameter in the URL. Hence, we also add thecourseByID controller method from the course controllers in order to process thisparameter and retrieve the corresponding course from the database. The user whoinitiates the request from the client- side is identified from the user auth credentialssent in the request. A POST request received at this route will first check whether theuser is authenticated, and then check whether they are already enrolled on thiscourse, before creating a new enrollment for this user in this course.
The findEnrollment controller method will query the Enrollments collection inthe database in order to check whether there is already an enrollment with the givencourse ID and user ID. The findEnrollment method is defined as follows.
mern-classroom/server/controllers/enrollment.controller.js:
const findEnrollment = async (req, res, next) => { try { let enrollments = await Enrollment.find({course:req.course._id, student: req.auth._id}) if(enrollments.length == 0){ next() }else{ res.json(enrollments[0]) } } catch (err) { return res.status(400).json({ error: errorHandler.getErrorMessage(err) }) }}
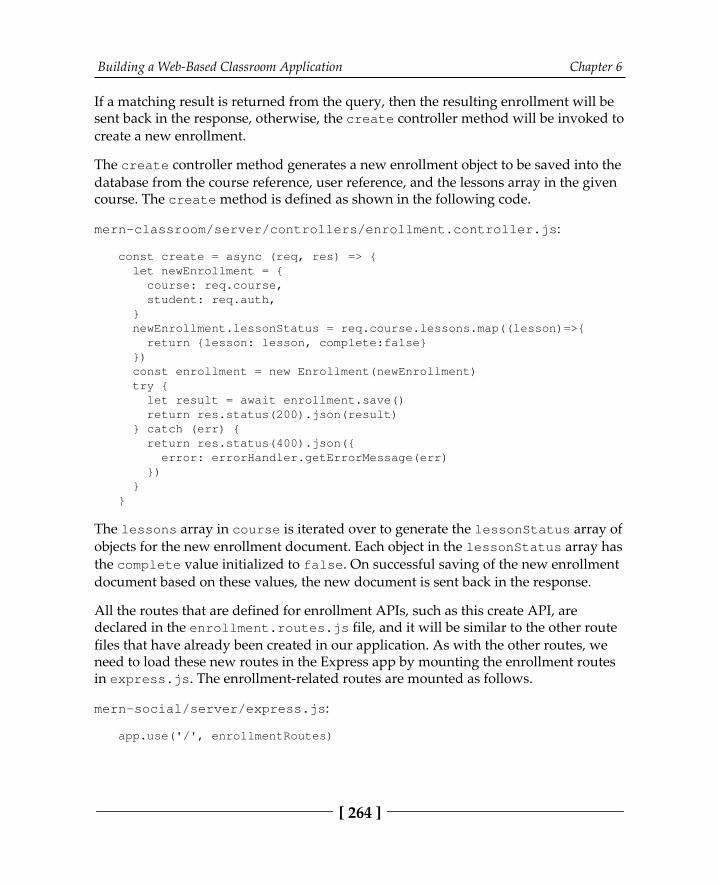
Building a Web-Based Classroom Application Chapter 6
[ 264 ]
If a matching result is returned from the query, then the resulting enrollment will besent back in the response, otherwise, the create controller method will be invoked tocreate a new enrollment.
The create controller method generates a new enrollment object to be saved into thedatabase from the course reference, user reference, and the lessons array in the givencourse. The create method is defined as shown in the following code.
mern-classroom/server/controllers/enrollment.controller.js:
const create = async (req, res) => { let newEnrollment = { course: req.course, student: req.auth, } newEnrollment.lessonStatus = req.course.lessons.map((lesson)=>{ return {lesson: lesson, complete:false} }) const enrollment = new Enrollment(newEnrollment) try { let result = await enrollment.save() return res.status(200).json(result) } catch (err) { return res.status(400).json({ error: errorHandler.getErrorMessage(err) }) }}
The lessons array in course is iterated over to generate the lessonStatus array ofobjects for the new enrollment document. Each object in the lessonStatus array hasthe complete value initialized to false. On successful saving of the new enrollmentdocument based on these values, the new document is sent back in the response.
All the routes that are defined for enrollment APIs, such as this create API, aredeclared in the enrollment.routes.js file, and it will be similar to the other routefiles that have already been created in our application. As with the other routes, weneed to load these new routes in the Express app by mounting the enrollment routesin express.js. The enrollment-related routes are mounted as follows.
mern-social/server/express.js:
app.use('/', enrollmentRoutes)
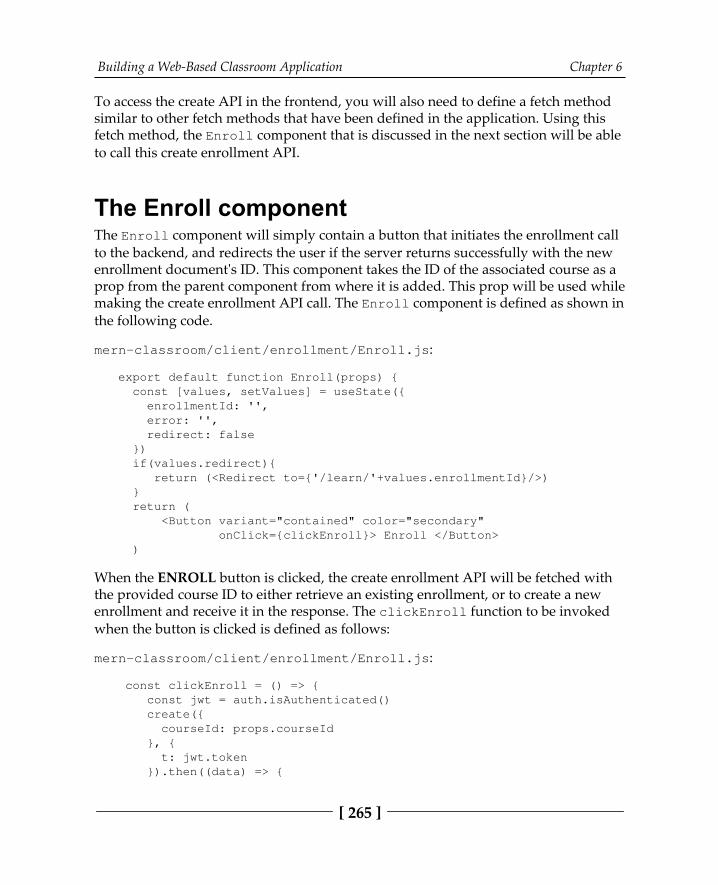
Building a Web-Based Classroom Application Chapter 6
[ 265 ]
To access the create API in the frontend, you will also need to define a fetch methodsimilar to other fetch methods that have been defined in the application. Using thisfetch method, the Enroll component that is discussed in the next section will be ableto call this create enrollment API.
The Enroll componentThe Enroll component will simply contain a button that initiates the enrollment callto the backend, and redirects the user if the server returns successfully with the newenrollment document's ID. This component takes the ID of the associated course as aprop from the parent component from where it is added. This prop will be used whilemaking the create enrollment API call. The Enroll component is defined as shown inthe following code.
mern-classroom/client/enrollment/Enroll.js:
export default function Enroll(props) { const [values, setValues] = useState({ enrollmentId: '', error: '', redirect: false }) if(values.redirect){ return (<Redirect to={'/learn/'+values.enrollmentId}/>) } return ( <Button variant="contained" color="secondary" onClick={clickEnroll}> Enroll </Button> )
When the ENROLL button is clicked, the create enrollment API will be fetched withthe provided course ID to either retrieve an existing enrollment, or to create a newenrollment and receive it in the response. The clickEnroll function to be invokedwhen the button is clicked is defined as follows:
mern-classroom/client/enrollment/Enroll.js:
const clickEnroll = () => { const jwt = auth.isAuthenticated() create({ courseId: props.courseId }, { t: jwt.token }).then((data) => {
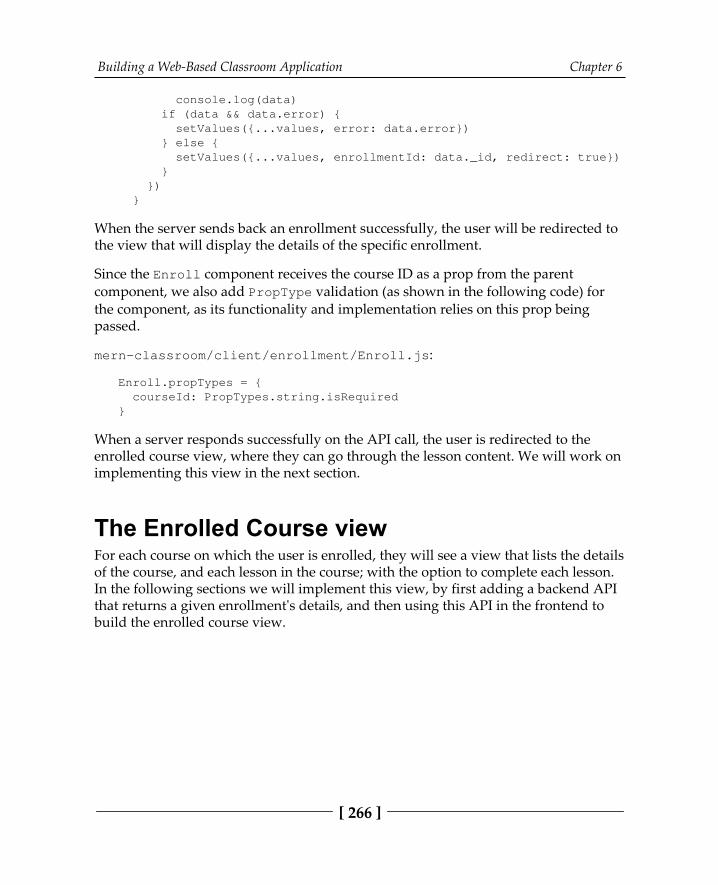
Building a Web-Based Classroom Application Chapter 6
[ 266 ]
console.log(data) if (data && data.error) { setValues({...values, error: data.error}) } else { setValues({...values, enrollmentId: data._id, redirect: true}) } }) }
When the server sends back an enrollment successfully, the user will be redirected tothe view that will display the details of the specific enrollment.
Since the Enroll component receives the course ID as a prop from the parentcomponent, we also add PropType validation (as shown in the following code) forthe component, as its functionality and implementation relies on this prop beingpassed.
mern-classroom/client/enrollment/Enroll.js:
Enroll.propTypes = { courseId: PropTypes.string.isRequired}
When a server responds successfully on the API call, the user is redirected to theenrolled course view, where they can go through the lesson content. We will work onimplementing this view in the next section.
The Enrolled Course viewFor each course on which the user is enrolled, they will see a view that lists the detailsof the course, and each lesson in the course; with the option to complete each lesson.In the following sections we will implement this view, by first adding a backend APIthat returns a given enrollment's details, and then using this API in the frontend tobuild the enrolled course view.
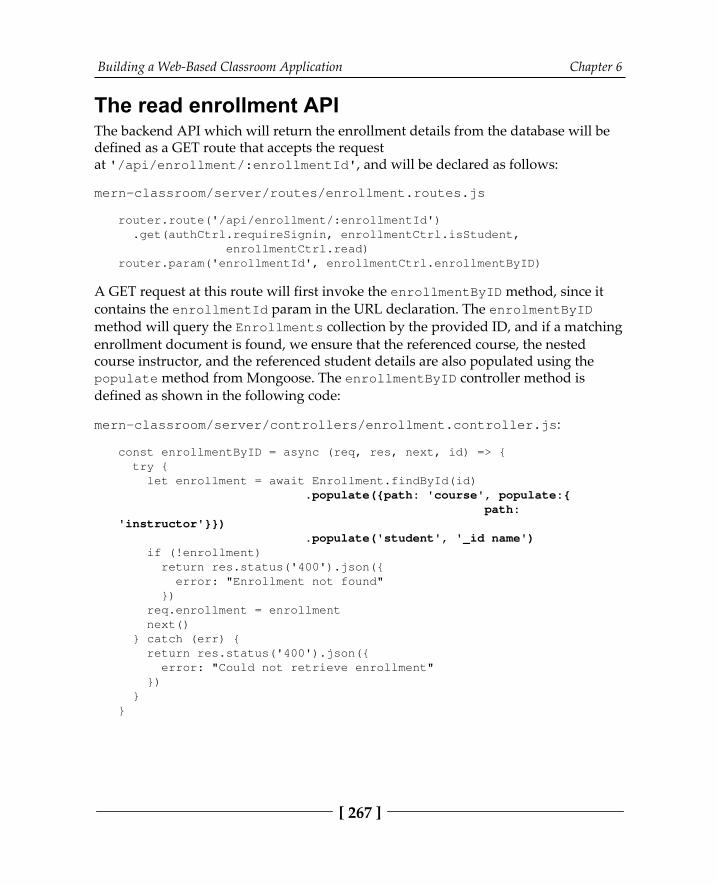
Building a Web-Based Classroom Application Chapter 6
[ 267 ]
The read enrollment APIThe backend API which will return the enrollment details from the database will bedefined as a GET route that accepts the requestat '/api/enrollment/:enrollmentId', and will be declared as follows:
mern-classroom/server/routes/enrollment.routes.js
router.route('/api/enrollment/:enrollmentId') .get(authCtrl.requireSignin, enrollmentCtrl.isStudent, enrollmentCtrl.read)router.param('enrollmentId', enrollmentCtrl.enrollmentByID)
A GET request at this route will first invoke the enrollmentByID method, since itcontains the enrollmentId param in the URL declaration. The enrolmentByIDmethod will query the Enrollments collection by the provided ID, and if a matchingenrollment document is found, we ensure that the referenced course, the nestedcourse instructor, and the referenced student details are also populated using thepopulate method from Mongoose. The enrollmentByID controller method isdefined as shown in the following code:
mern-classroom/server/controllers/enrollment.controller.js:
const enrollmentByID = async (req, res, next, id) => { try { let enrollment = await Enrollment.findById(id) .populate({path: 'course', populate:{ path:'instructor'}}) .populate('student', '_id name') if (!enrollment) return res.status('400').json({ error: "Enrollment not found" }) req.enrollment = enrollment next() } catch (err) { return res.status('400').json({ error: "Could not retrieve enrollment" }) }}
Building a Web-Based Classroom Application Chapter 6
[ 268 ]
The resulting enrollment object is attached to the request object and passed on to thenext controller method. Before returning this enrollment object in the response to theclient, we will check whether the currently signed-in user is the student who isassociated with this specific enrollment in the isStudent method, as defined in thefollowing code.
mern-classroom/server/controllers/enrollment.controller.js:
const isStudent = (req, res, next) => { const isStudent = req.auth && req.auth._id == req.enrollment.student._id if (!isStudent) { return res.status('403').json({ error: "User is not enrolled" }) } next()}
The isStudent method checks whether the user who is identified by the authcredentials that were sent in the request matches the student who is referenced in theenrollment. If the two users don't match, a 403 status is returned with an errormessage, otherwise, the next controller method is invoked in order to return theenrollment object. The next controller method is the read method, and it is defined asfollows:
mern-classroom/server/controllers/enrollment.controller.js:
const read = (req, res) => { return res.json(req.enrollment)}
To use this read enrollment API in the frontend, you will also need to define acorresponding fetch method, as implemented for all other APIs in this application.Then, this fetch method will be used to retrieve the enrollment details to be renderedin a React component that the student will interact with. We will implement thisEnrollment component in the next section.
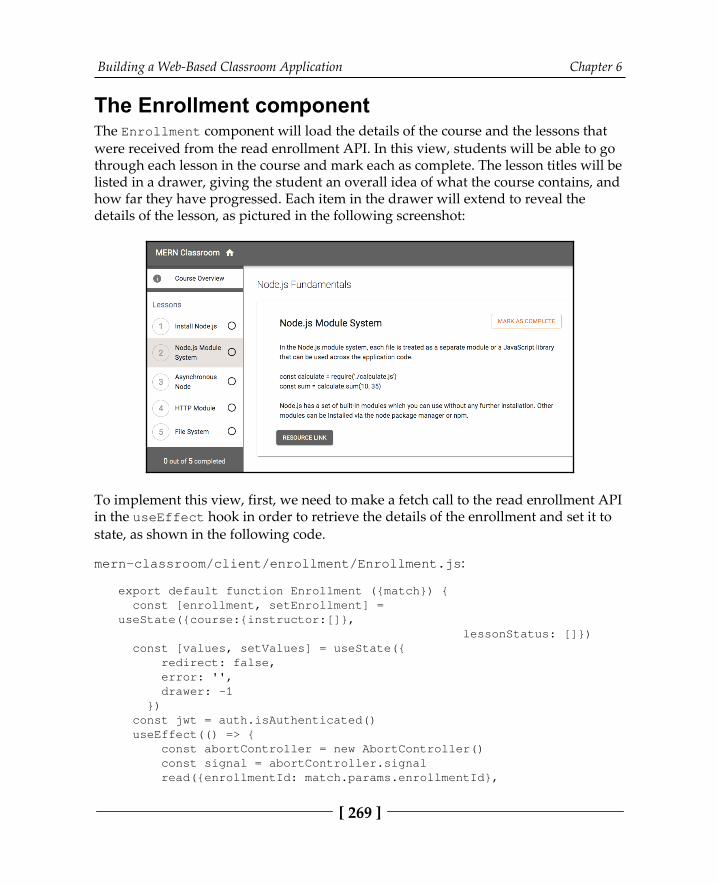
Building a Web-Based Classroom Application Chapter 6
[ 269 ]
The Enrollment componentThe Enrollment component will load the details of the course and the lessons thatwere received from the read enrollment API. In this view, students will be able to gothrough each lesson in the course and mark each as complete. The lesson titles will belisted in a drawer, giving the student an overall idea of what the course contains, andhow far they have progressed. Each item in the drawer will extend to reveal thedetails of the lesson, as pictured in the following screenshot:
To implement this view, first, we need to make a fetch call to the read enrollment APIin the useEffect hook in order to retrieve the details of the enrollment and set it tostate, as shown in the following code.
mern-classroom/client/enrollment/Enrollment.js:
export default function Enrollment ({match}) { const [enrollment, setEnrollment] =useState({course:{instructor:[]}, lessonStatus: []}) const [values, setValues] = useState({ redirect: false, error: '', drawer: -1 }) const jwt = auth.isAuthenticated() useEffect(() => { const abortController = new AbortController() const signal = abortController.signal read({enrollmentId: match.params.enrollmentId},
Building a Web-Based Classroom Application Chapter 6
[ 270 ]
{t: jwt.token}, signal).then((data) => { if (data.error) { setValues({...values, error: data.error}) } else { setEnrollment(data) } }) return function cleanup(){ abortController.abort() } }, [match.params.enrollmentId])....
We will implement the drawer layout using Material-UI's Drawer component. In thedrawer, we keep the first item as the Course Overview, which will give the user anoverview of the course details, similar to the single course page. When the user entersthis enrollment view, they will see the Course Overview first.
In the following code, after adding this first drawer item, we create a separate sectionfor the lessons, where the lessonStatus array is iterated over to list the lesson titlesin the drawer.
mern-classroom/client/enrollment/Enrollment.js:
<Drawer variant="permanent"> <div className={classes.toolbar} /> <List> <ListItem button onClick={selectDrawer(-1)} className={values.drawer == -1 ? classes.selectedDrawer : classes.unselected}> <ListItemIcon><Info /></ListItemIcon> <ListItemText primary={"Course Overview"} /> </ListItem> </List> <Divider /> <List> <ListSubheader component="div"> Lessons </ListSubheader> {enrollment.lessonStatus.map((lesson, index) => ( <ListItem button key={index} onClick={selectDrawer(index)} className={values.drawer == index ? classes.selectedDrawer :classes.unselected}> <ListItemAvatar> <Avatar> {index+1} </Avatar> </ListItemAvatar>
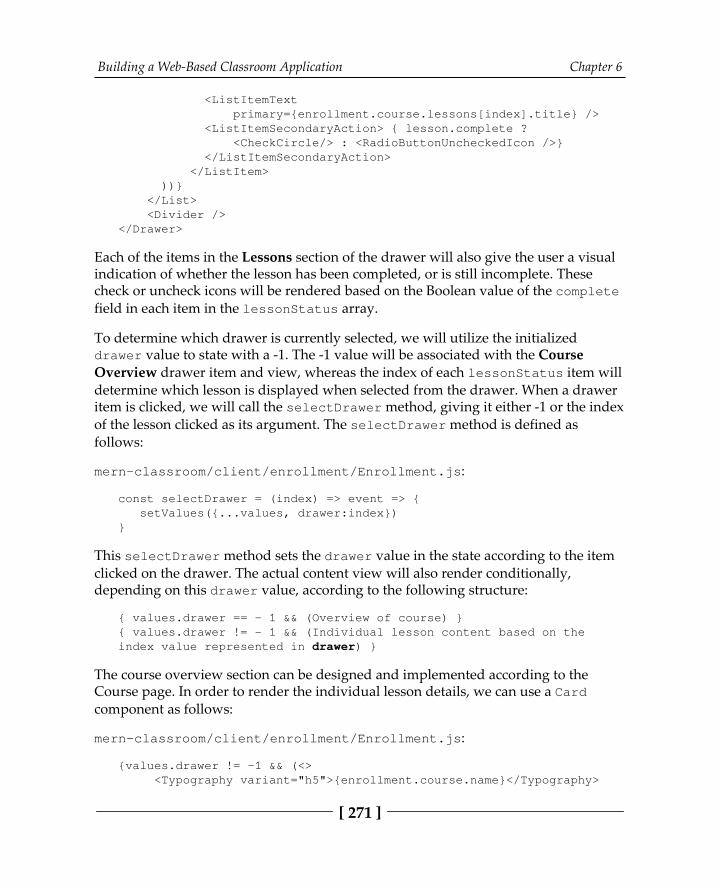
Building a Web-Based Classroom Application Chapter 6
[ 271 ]
<ListItemText primary={enrollment.course.lessons[index].title} /> <ListItemSecondaryAction> { lesson.complete ? <CheckCircle/> : <RadioButtonUncheckedIcon />} </ListItemSecondaryAction> </ListItem> ))} </List> <Divider /></Drawer>
Each of the items in the Lessons section of the drawer will also give the user a visualindication of whether the lesson has been completed, or is still incomplete. Thesecheck or uncheck icons will be rendered based on the Boolean value of the completefield in each item in the lessonStatus array.
To determine which drawer is currently selected, we will utilize the initializeddrawer value to state with a -1. The -1 value will be associated with the CourseOverview drawer item and view, whereas the index of each lessonStatus item willdetermine which lesson is displayed when selected from the drawer. When a draweritem is clicked, we will call the selectDrawer method, giving it either -1 or the indexof the lesson clicked as its argument. The selectDrawer method is defined asfollows:
mern-classroom/client/enrollment/Enrollment.js:
const selectDrawer = (index) => event => { setValues({...values, drawer:index})}
This selectDrawer method sets the drawer value in the state according to the itemclicked on the drawer. The actual content view will also render conditionally,depending on this drawer value, according to the following structure:
{ values.drawer == - 1 && (Overview of course) }{ values.drawer != - 1 && (Individual lesson content based on theindex value represented in drawer) }
The course overview section can be designed and implemented according to theCourse page. In order to render the individual lesson details, we can use a Cardcomponent as follows:
mern-classroom/client/enrollment/Enrollment.js:
{values.drawer != -1 && (<> <Typography variant="h5">{enrollment.course.name}</Typography>
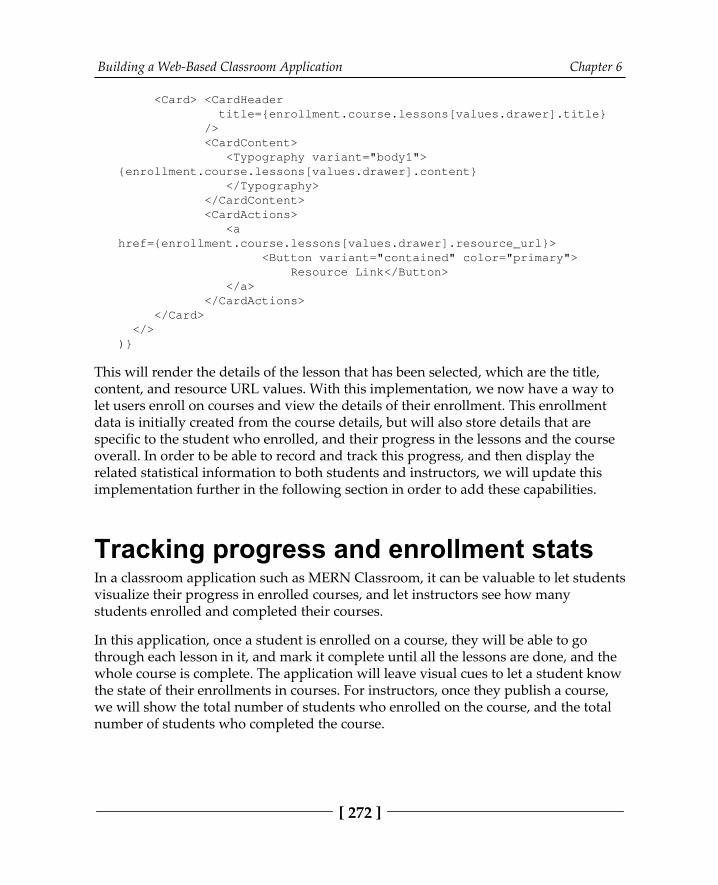
Building a Web-Based Classroom Application Chapter 6
[ 272 ]
<Card> <CardHeader title={enrollment.course.lessons[values.drawer].title} /> <CardContent> <Typography variant="body1">{enrollment.course.lessons[values.drawer].content} </Typography> </CardContent> <CardActions> <ahref={enrollment.course.lessons[values.drawer].resource_url}> <Button variant="contained" color="primary"> Resource Link</Button> </a> </CardActions> </Card> </>)}
This will render the details of the lesson that has been selected, which are the title,content, and resource URL values. With this implementation, we now have a way tolet users enroll on courses and view the details of their enrollment. This enrollmentdata is initially created from the course details, but will also store details that arespecific to the student who enrolled, and their progress in the lessons and the courseoverall. In order to be able to record and track this progress, and then display therelated statistical information to both students and instructors, we will update thisimplementation further in the following section in order to add these capabilities.
Tracking progress and enrollment statsIn a classroom application such as MERN Classroom, it can be valuable to let studentsvisualize their progress in enrolled courses, and let instructors see how manystudents enrolled and completed their courses.
In this application, once a student is enrolled on a course, they will be able to gothrough each lesson in it, and mark it complete until all the lessons are done, and thewhole course is complete. The application will leave visual cues to let a student knowthe state of their enrollments in courses. For instructors, once they publish a course,we will show the total number of students who enrolled on the course, and the totalnumber of students who completed the course.
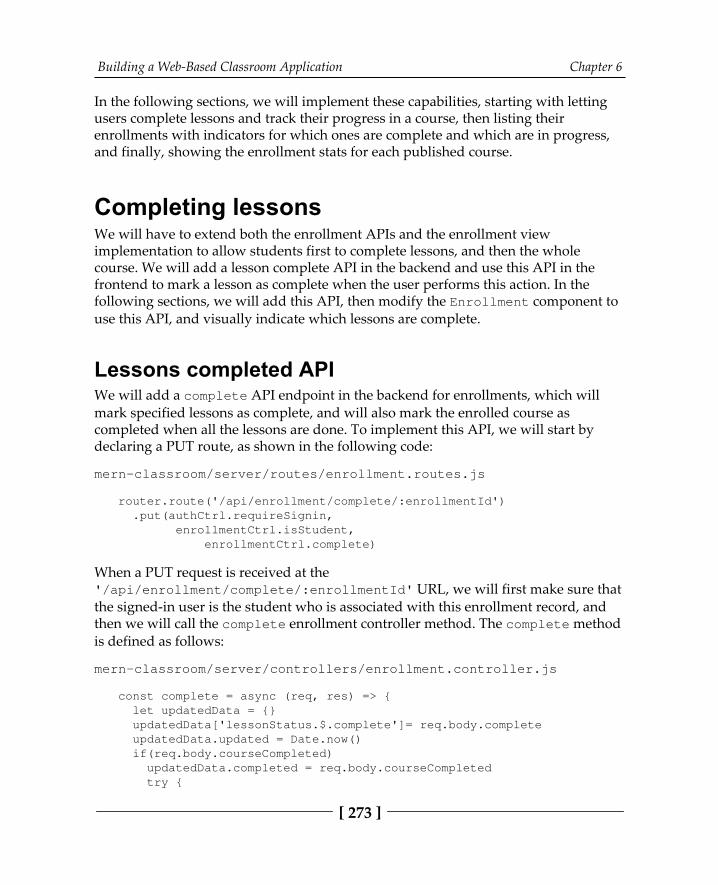
Building a Web-Based Classroom Application Chapter 6
[ 273 ]
In the following sections, we will implement these capabilities, starting with lettingusers complete lessons and track their progress in a course, then listing theirenrollments with indicators for which ones are complete and which are in progress,and finally, showing the enrollment stats for each published course.
Completing lessonsWe will have to extend both the enrollment APIs and the enrollment viewimplementation to allow students first to complete lessons, and then the wholecourse. We will add a lesson complete API in the backend and use this API in thefrontend to mark a lesson as complete when the user performs this action. In thefollowing sections, we will add this API, then modify the Enrollment component touse this API, and visually indicate which lessons are complete.
Lessons completed APIWe will add a complete API endpoint in the backend for enrollments, which willmark specified lessons as complete, and will also mark the enrolled course ascompleted when all the lessons are done. To implement this API, we will start bydeclaring a PUT route, as shown in the following code:
mern-classroom/server/routes/enrollment.routes.js
router.route('/api/enrollment/complete/:enrollmentId') .put(authCtrl.requireSignin, enrollmentCtrl.isStudent, enrollmentCtrl.complete)
When a PUT request is received at the'/api/enrollment/complete/:enrollmentId' URL, we will first make sure thatthe signed-in user is the student who is associated with this enrollment record, andthen we will call the complete enrollment controller method. The complete methodis defined as follows:
mern-classroom/server/controllers/enrollment.controller.js
const complete = async (req, res) => { let updatedData = {} updatedData['lessonStatus.$.complete']= req.body.complete updatedData.updated = Date.now() if(req.body.courseCompleted) updatedData.completed = req.body.courseCompleted try {
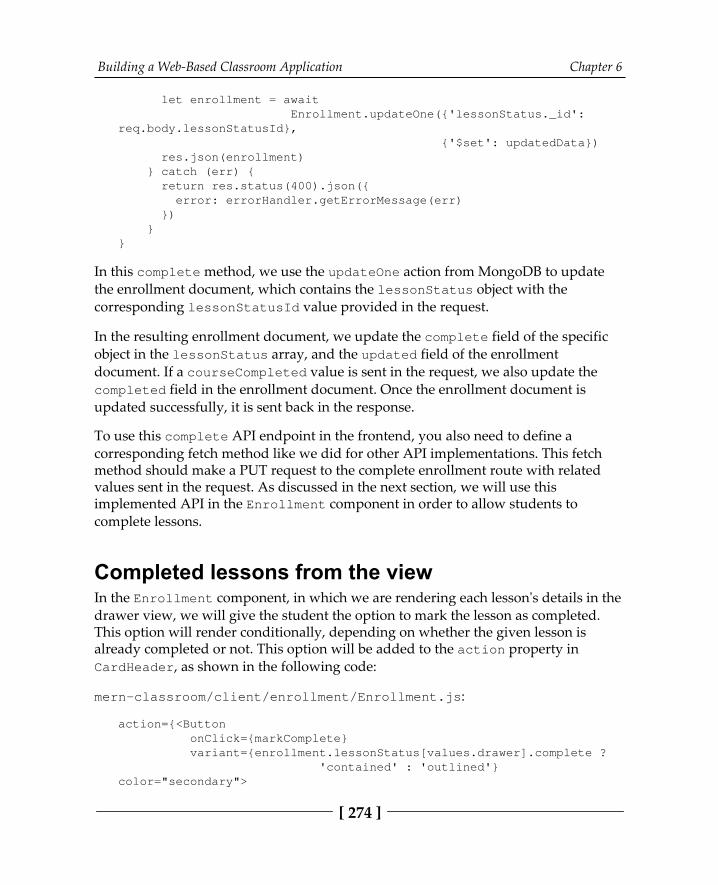
Building a Web-Based Classroom Application Chapter 6
[ 274 ]
let enrollment = await Enrollment.updateOne({'lessonStatus._id':req.body.lessonStatusId}, {'$set': updatedData}) res.json(enrollment) } catch (err) { return res.status(400).json({ error: errorHandler.getErrorMessage(err) }) }}
In this complete method, we use the updateOne action from MongoDB to updatethe enrollment document, which contains the lessonStatus object with thecorresponding lessonStatusId value provided in the request.
In the resulting enrollment document, we update the complete field of the specificobject in the lessonStatus array, and the updated field of the enrollmentdocument. If a courseCompleted value is sent in the request, we also update thecompleted field in the enrollment document. Once the enrollment document isupdated successfully, it is sent back in the response.
To use this complete API endpoint in the frontend, you also need to define acorresponding fetch method like we did for other API implementations. This fetchmethod should make a PUT request to the complete enrollment route with relatedvalues sent in the request. As discussed in the next section, we will use thisimplemented API in the Enrollment component in order to allow students tocomplete lessons.
Completed lessons from the viewIn the Enrollment component, in which we are rendering each lesson's details in thedrawer view, we will give the student the option to mark the lesson as completed.This option will render conditionally, depending on whether the given lesson isalready completed or not. This option will be added to the action property inCardHeader, as shown in the following code:
mern-classroom/client/enrollment/Enrollment.js:
action={<Button onClick={markComplete} variant={enrollment.lessonStatus[values.drawer].complete ? 'contained' : 'outlined'}color="secondary">
Building a Web-Based Classroom Application Chapter 6
[ 275 ]
{enrollment.lessonStatus[values.drawer].complete ? "Completed" : "Mark as complete"} </Button>}
If the given lessonStatus object has the complete attribute set to true, then werender a filled-out button with the text Completed, otherwise an outlined button isrendered with the text Mark as complete. Clicking on this button makes a call to themarkComplete function, which will make the API call to update the enrollment in thedatabase. This markComplete function is defined as follows:
mern-classroom/client/enrollment/Enrollment.js:
const markComplete = () => { if(!enrollment.lessonStatus[values.drawer].complete){ const lessonStatus = enrollment.lessonStatus lessonStatus[values.drawer].complete = true let count = totalCompleted(lessonStatus) let updatedData = {} updatedData.lessonStatusId = lessonStatus[values.drawer]._id updatedData.complete = true if(count == lessonStatus.length){ updatedData.courseCompleted = Date.now() } complete({ enrollmentId: match.params.enrollmentId }, { t: jwt.token }, updatedData).then((data) => { if (data && data.error) { setValues({...values, error: data.error}) } else { setEnrollment({...enrollment, lessonStatus: lessonStatus}) } }) }}
In this function, before making the API call to the backend, we prepare the values tobe sent with the request in the updatedData object. We send the lessonStatusdetails, including the ID value and complete value set to true for the lesson thatwas completed by the user. We also calculate if the total number of completed lessonsis equal to the total number of lessons, so that we can set and sendthe courseCompleted value in the request, as well.
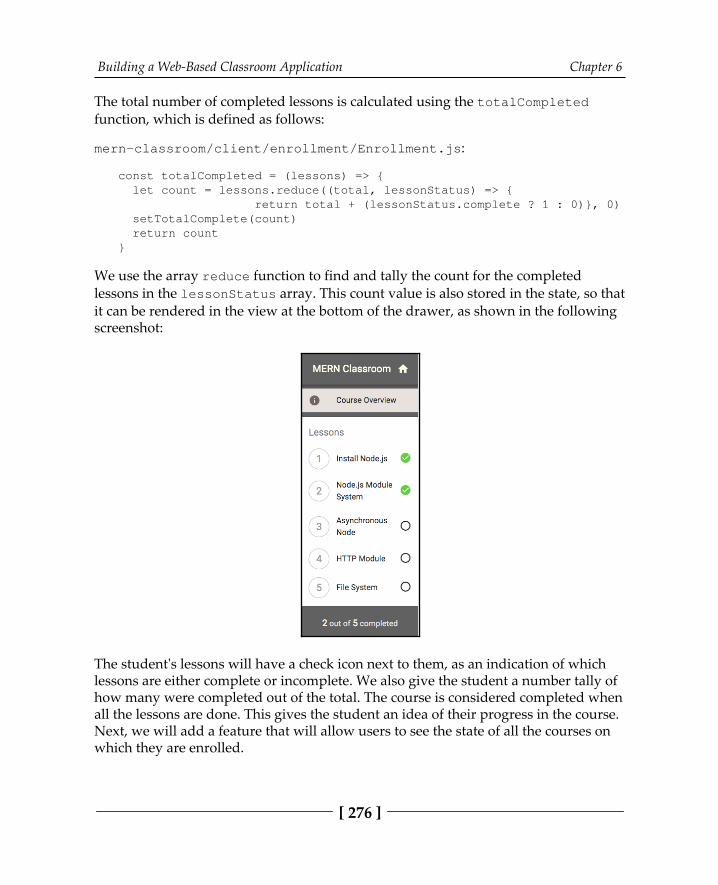
Building a Web-Based Classroom Application Chapter 6
[ 276 ]
The total number of completed lessons is calculated using the totalCompletedfunction, which is defined as follows:
mern-classroom/client/enrollment/Enrollment.js:
const totalCompleted = (lessons) => { let count = lessons.reduce((total, lessonStatus) => { return total + (lessonStatus.complete ? 1 : 0)}, 0) setTotalComplete(count) return count}
We use the array reduce function to find and tally the count for the completedlessons in the lessonStatus array. This count value is also stored in the state, so thatit can be rendered in the view at the bottom of the drawer, as shown in the followingscreenshot:
The student's lessons will have a check icon next to them, as an indication of whichlessons are either complete or incomplete. We also give the student a number tally ofhow many were completed out of the total. The course is considered completed whenall the lessons are done. This gives the student an idea of their progress in the course.Next, we will add a feature that will allow users to see the state of all the courses onwhich they are enrolled.
Building a Web-Based Classroom Application Chapter 6
[ 277 ]
Listing all enrollments for a userOnce they are signed in to MERN Classroom, students will be able to view a list of alltheir enrollments on the home page. In order to implement this feature, we will firstdefine a backend API, which returns the list of enrollments for a given user, and thenuse it in the frontend to render the list of enrollments to the user.
The list of enrollments APIThe list of enrollments API will take a GET request and query the Enrollmentscollection in order to find enrollments that have a student reference that matches withthe user who is currently signed in. To implement this API, we will first declare theGET route for '/api/enrollment/enrolled', as shown in the following code:
mern-classroom/server/routes/enrollment.routes.js
router.route('/api/enrollment/enrolled') .get(authCtrl.requireSignin, enrollmentCtrl.listEnrolled)
A GET request to this route will invoke the listEnrolled controller method, whichwill query the database and return the results in the response to the client. ThelistEnrolled method is defined as follows:
mern-classroom/server/controllers/enrollment.controller.js
const listEnrolled = async (req, res) => { try { let enrollments = await Enrollment.find({student: req.auth._id}) .sort({'completed': 1}) .populate('course', '_idname category') res.json(enrollments) } catch (err) { console.log(err) return res.status(400).json({ error: errorHandler.getErrorMessage(err) }) }}
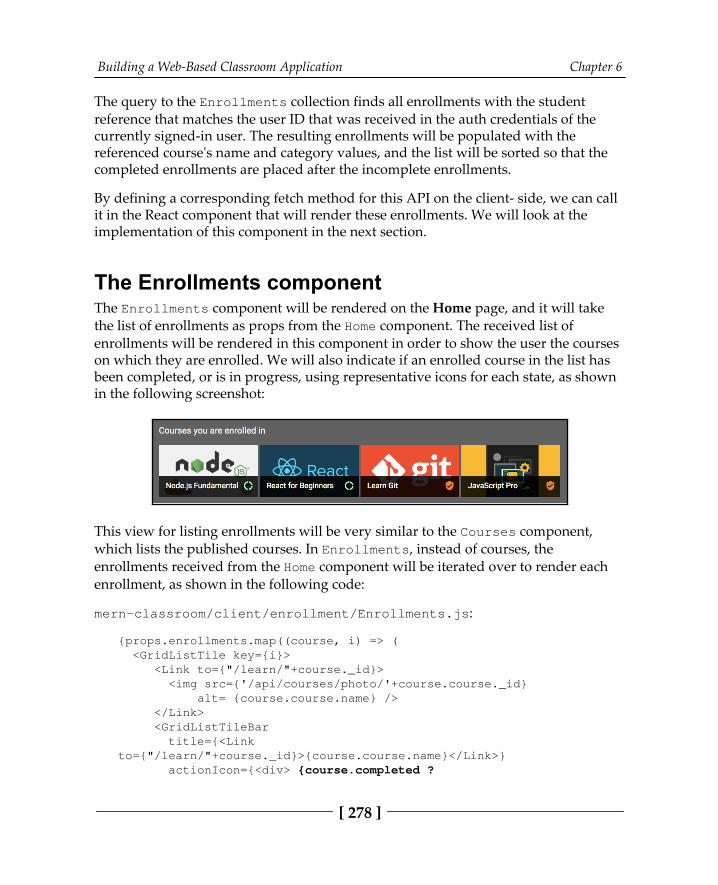
Building a Web-Based Classroom Application Chapter 6
[ 278 ]
The query to the Enrollments collection finds all enrollments with the studentreference that matches the user ID that was received in the auth credentials of thecurrently signed-in user. The resulting enrollments will be populated with thereferenced course's name and category values, and the list will be sorted so that thecompleted enrollments are placed after the incomplete enrollments.
By defining a corresponding fetch method for this API on the client- side, we can callit in the React component that will render these enrollments. We will look at theimplementation of this component in the next section.
The Enrollments componentThe Enrollments component will be rendered on the Home page, and it will takethe list of enrollments as props from the Home component. The received list ofenrollments will be rendered in this component in order to show the user the courseson which they are enrolled. We will also indicate if an enrolled course in the list hasbeen completed, or is in progress, using representative icons for each state, as shownin the following screenshot:
This view for listing enrollments will be very similar to the Courses component,which lists the published courses. In Enrollments, instead of courses, theenrollments received from the Home component will be iterated over to render eachenrollment, as shown in the following code:
mern-classroom/client/enrollment/Enrollments.js:
{props.enrollments.map((course, i) => ( <GridListTile key={i}> <Link to={"/learn/"+course._id}> <img src={'/api/courses/photo/'+course.course._id} alt= {course.course.name} /> </Link> <GridListTileBar title={<Linkto={"/learn/"+course._id}>{course.course.name}</Link>} actionIcon={<div> {course.completed ?
Building a Web-Based Classroom Application Chapter 6
[ 279 ]
(<CompletedIcon color="secondary"/>) : (<InProgressIcon/>) } </div>} /> </GridListTile>))}
Based on whether the individual enrollment already has a complete date value ornot, we will render the icons conditionally. This will give the users an idea of whichenrolled courses they have completed, and which they are yet to finish.
Now that we have implemented the features to allow students in this application toenroll on courses, complete lessons, and also track their progress, we can also provideenrollment stats about courses by extending on these implementations, as we will seenext.
Enrollment statsOnce the instructor publishes a course, and other users in the application startenrolling and completing lessons in the course, we will show the total number of enrollments and course completions as simple enrollment statistics for the course. Toimplement this feature, in the following sections we will first implement an API thatreturns the enrollment stats, and then show these stats in the view.
The enrollment stats APIIn order to implement a backend API that will query the Enrollments collection inthe database to calculate the stats for a specific course, we first need to declare a GETroute at '/api/enrollment/stats/:courseId', as shown in the following code.
mern-classroom/server/routes/enrollment.routes.js
router.route('/api/enrollment/stats/:courseId') .get(enrollmentCtrl.enrollmentStats)
A GET request at this URL will return a stats object containing the total enrollmentsand total completions for the course, as identified by the courseId provided in theURL parameter. This implementation is defined in the enrollmentStats controllermethod, as shown in the following code.
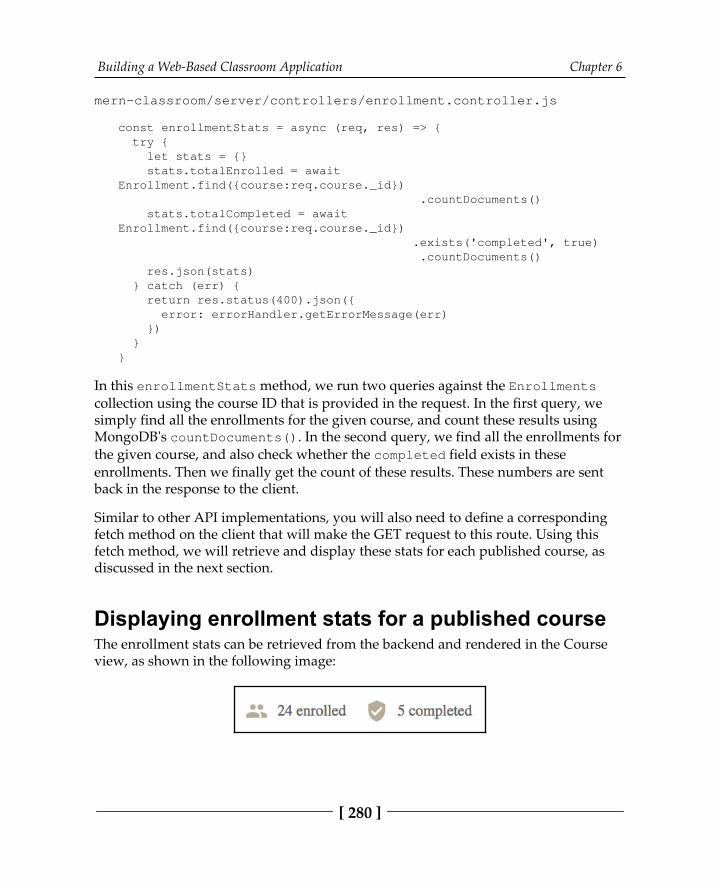
Building a Web-Based Classroom Application Chapter 6
[ 280 ]
mern-classroom/server/controllers/enrollment.controller.js
const enrollmentStats = async (req, res) => { try { let stats = {} stats.totalEnrolled = awaitEnrollment.find({course:req.course._id}) .countDocuments() stats.totalCompleted = awaitEnrollment.find({course:req.course._id}) .exists('completed', true) .countDocuments() res.json(stats) } catch (err) { return res.status(400).json({ error: errorHandler.getErrorMessage(err) }) }}
In this enrollmentStats method, we run two queries against the Enrollmentscollection using the course ID that is provided in the request. In the first query, wesimply find all the enrollments for the given course, and count these results usingMongoDB's countDocuments(). In the second query, we find all the enrollments forthe given course, and also check whether the completed field exists in theseenrollments. Then we finally get the count of these results. These numbers are sentback in the response to the client.
Similar to other API implementations, you will also need to define a correspondingfetch method on the client that will make the GET request to this route. Using thisfetch method, we will retrieve and display these stats for each published course, asdiscussed in the next section.
Displaying enrollment stats for a published courseThe enrollment stats can be retrieved from the backend and rendered in the Courseview, as shown in the following image:
Building a Web-Based Classroom Application Chapter 6
[ 281 ]
To retrieve these enrollment stats, we will add a second useEffect hook in theCourse component in order to make a fetch call to the enrollment stats API, as shownin the following code:
mern-classroom/client/course/Course.js
useEffect(() => { const abortController = new AbortController() const signal = abortController.signal enrollmentStats({courseId: match.params.courseId}, {t:jwt.token}, signal).then((data) => { if (data.error) { setValues({...values, error: data.error}) } else { setStats(data) } }) return function cleanup(){ abortController.abort() } }, [match.params.courseId])
This will receive the enrollment stats for the given course and set it to the statsvariable in state, and we can render it in the view, as shown in the following code:
mern-classroom/client/course/Course.js
{course.published && (<div> <span> <PeopleIcon /> {stats.totalEnrolled} enrolled</span> <span> <CompletedIcon/> {stats.totalCompleted} completed</span> </div>)}
With this feature added to the Course component, to any visitor who is browsingthrough courses in the MERN Classroom application, a published course in theapplication will look as shown in the following image:
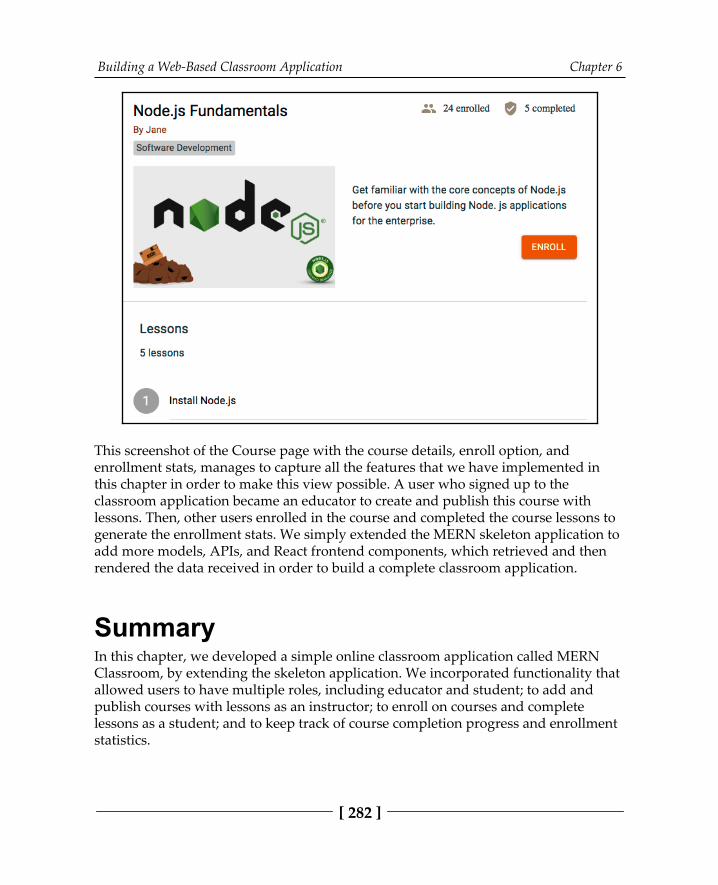
Building a Web-Based Classroom Application Chapter 6
[ 282 ]
This screenshot of the Course page with the course details, enroll option, andenrollment stats, manages to capture all the features that we have implemented inthis chapter in order to make this view possible. A user who signed up to theclassroom application became an educator to create and publish this course withlessons. Then, other users enrolled in the course and completed the course lessons togenerate the enrollment stats. We simply extended the MERN skeleton application toadd more models, APIs, and React frontend components, which retrieved and thenrendered the data received in order to build a complete classroom application.
SummaryIn this chapter, we developed a simple online classroom application called MERNClassroom, by extending the skeleton application. We incorporated functionality thatallowed users to have multiple roles, including educator and student; to add andpublish courses with lessons as an instructor; to enroll on courses and completelessons as a student; and to keep track of course completion progress and enrollmentstatistics.
Building a Web-Based Classroom Application Chapter 6
[ 283 ]
While implementing these features, we practiced how to extend the full-stackcomponent slices that make up the frontend–backend-synced application. We addednew features by simply implementing data schemas and models, adding newbackend APIs, and integrating these with new React components in the frontend tocomplete the full-stack slice. By building this application up gradually from smallerunits of implementation to complex and combined features, you should now have abetter grasp of how to combine the different parts of a MERN-based full-stackapplication.
In order to learn how to integrate even more complex features, and find solutions tothe tricky problems that you may face when developing advanced real-worldapplications with this stack, we will start building a MERN-based, feature-rich onlinemarketplace application in the next chapter.
7Exercising MERN Skills with
an Online MarketplaceWith more business being conducted over the internet than ever before, the ability tobuy and sell in an online marketplace setting has become a core requirement formany web platforms. In this and the next two chapters, we will utilize the MERNstack technologies to develop an online marketplace application complete withfeatures that enable users to buy and sell.
We will build out everything from simple to advanced features for this application,starting in this chapter with a reiteration of the full-stack development lessonslearned in previous chapters to set up a base for the marketplace platform. We will beextending the MERN skeleton application with support for seller accounts and shopswith products, to incrementally integrate marketplace functionalities such as productsearch and suggestions. By the end of this chapter, you will have a better grasp ofhow to extend, integrate, and combine the different aspects of full-stackimplementations to add complex features to your applications.
In this chapter, we will start building the online marketplace by covering thefollowing topics:
Introducing the MERN Marketplace appUsers with seller accountsAdding shops to the marketplaceAdding products to shopsSearching for products by name and category
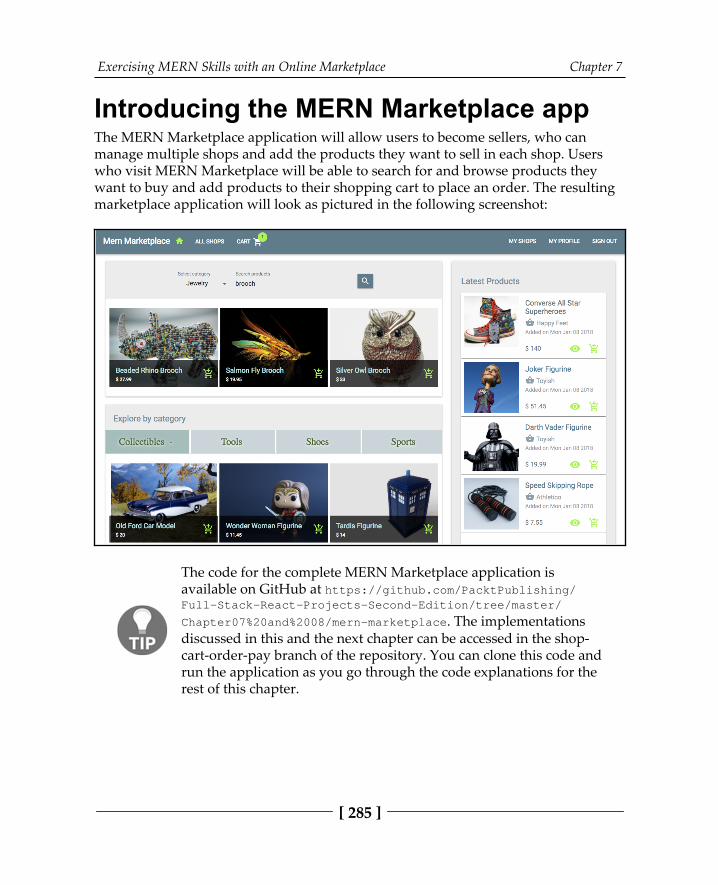
Exercising MERN Skills with an Online Marketplace Chapter 7
[ 285 ]
Introducing the MERN Marketplace appThe MERN Marketplace application will allow users to become sellers, who canmanage multiple shops and add the products they want to sell in each shop. Userswho visit MERN Marketplace will be able to search for and browse products theywant to buy and add products to their shopping cart to place an order. The resultingmarketplace application will look as pictured in the following screenshot:
The code for the complete MERN Marketplace application isavailable on GitHub at https:/ / github. com/ PacktPublishing/Full- Stack- React- Projects- Second- Edition/ tree/ master/Chapter07%20and%2008/ mern-marketplace. The implementationsdiscussed in this and the next chapter can be accessed in the shop-cart-order-pay branch of the repository. You can clone this code andrun the application as you go through the code explanations for therest of this chapter.

Exercising MERN Skills with an Online Marketplace Chapter 7
[ 286 ]
In this chapter, we will extend the MERN skeleton to build a simple version of theonline marketplace, starting with the following features:
Users with seller accountsShop managementProduct managementProduct search by name and category
The views needed for these features related to seller accounts, shops, and productswill be developed by extending and modifying the existing React components in theMERN skeleton application. The component tree pictured next shows all the customReact components that make up the MERN Marketplace frontend developed in thischapter:
We will add new React components to implement views for managing shops andproducts as well as browsing and searching for products. We will also modify existing components such as the EditProfile, Menu, and Home components todevelop the skeleton code into a marketplace application as we build out the differentfeatures in the rest of the chapter. These marketplace features will depend on theuser's ability to update their accounts into seller accounts. In the next section, we willbegin building the MERN Marketplace application by updating the existing userimplementation to enable seller account features.
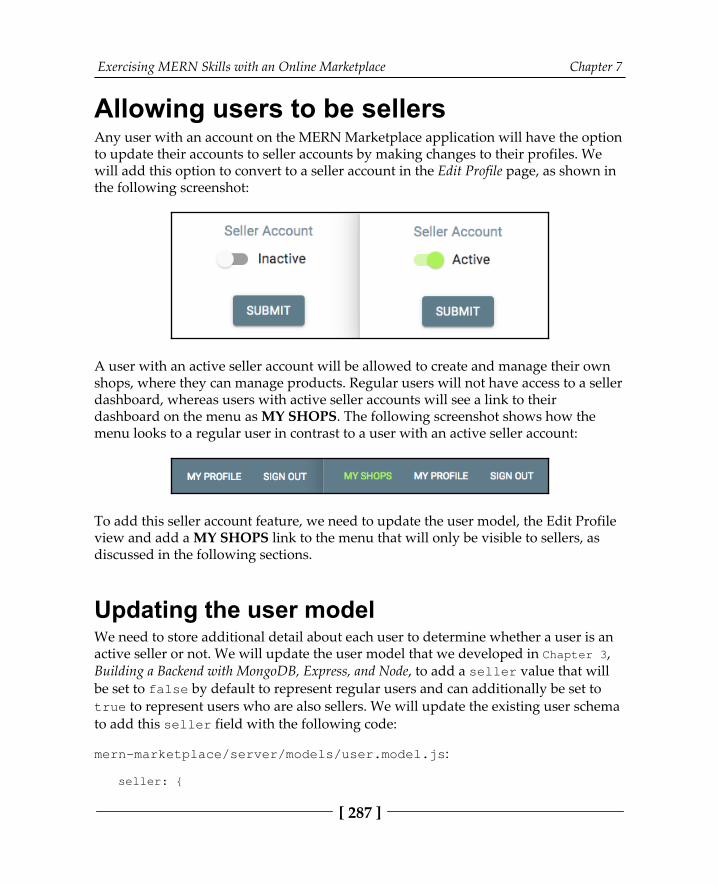
Exercising MERN Skills with an Online Marketplace Chapter 7
[ 287 ]
Allowing users to be sellersAny user with an account on the MERN Marketplace application will have the optionto update their accounts to seller accounts by making changes to their profiles. Wewill add this option to convert to a seller account in the Edit Profile page, as shown inthe following screenshot:
A user with an active seller account will be allowed to create and manage their ownshops, where they can manage products. Regular users will not have access to a sellerdashboard, whereas users with active seller accounts will see a link to theirdashboard on the menu as MY SHOPS. The following screenshot shows how themenu looks to a regular user in contrast to a user with an active seller account:
To add this seller account feature, we need to update the user model, the Edit Profileview and add a MY SHOPS link to the menu that will only be visible to sellers, asdiscussed in the following sections.
Updating the user modelWe need to store additional detail about each user to determine whether a user is anactive seller or not. We will update the user model that we developed in Chapter 3,Building a Backend with MongoDB, Express, and Node, to add a seller value that willbe set to false by default to represent regular users and can additionally be set totrue to represent users who are also sellers. We will update the existing user schemato add this seller field with the following code:
mern-marketplace/server/models/user.model.js:
seller: {
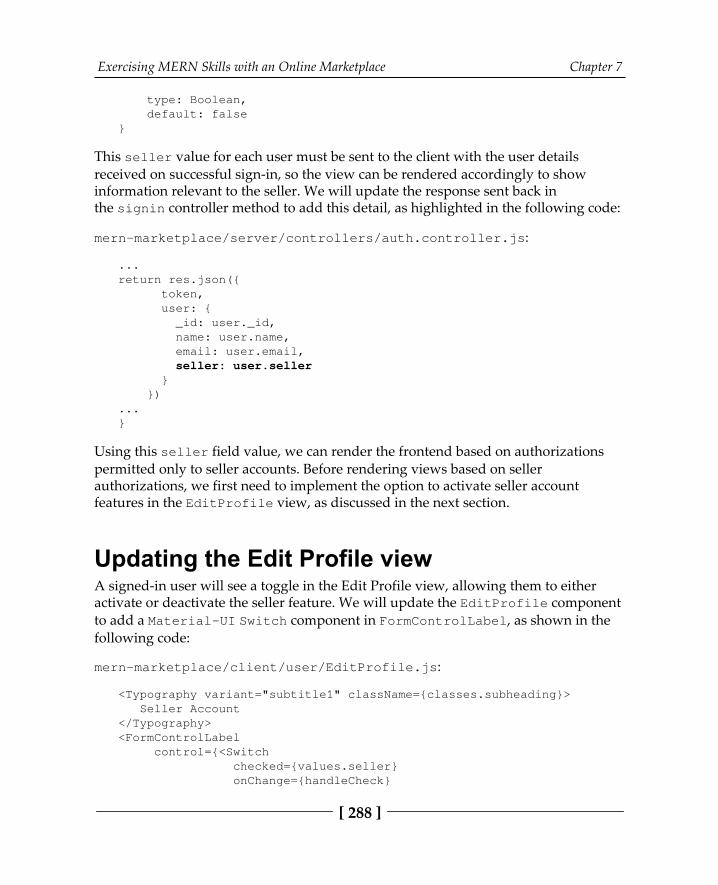
Exercising MERN Skills with an Online Marketplace Chapter 7
[ 288 ]
type: Boolean, default: false}
This seller value for each user must be sent to the client with the user detailsreceived on successful sign-in, so the view can be rendered accordingly to showinformation relevant to the seller. We will update the response sent back inthe signin controller method to add this detail, as highlighted in the following code:
mern-marketplace/server/controllers/auth.controller.js:
...return res.json({ token, user: { _id: user._id, name: user.name, email: user.email, seller: user.seller } })...}
Using this seller field value, we can render the frontend based on authorizationspermitted only to seller accounts. Before rendering views based on sellerauthorizations, we first need to implement the option to activate seller accountfeatures in the EditProfile view, as discussed in the next section.
Updating the Edit Profile viewA signed-in user will see a toggle in the Edit Profile view, allowing them to eitheractivate or deactivate the seller feature. We will update the EditProfile componentto add a Material-UI Switch component in FormControlLabel, as shown in thefollowing code:
mern-marketplace/client/user/EditProfile.js:
<Typography variant="subtitle1" className={classes.subheading}> Seller Account</Typography><FormControlLabel control={<Switch checked={values.seller} onChange={handleCheck}

Exercising MERN Skills with an Online Marketplace Chapter 7
[ 289 ]
/>} label={values.seller? 'Active' : 'Inactive'}/>
Any changes to the switch will be set to the value of the seller in state by calling thehandleCheck method. The handleCheck method is implemented as shown here:
mern-marketplace/client/user/EditProfile.js:
const handleCheck = (event, checked) => { setValues({...values, 'seller': checked})}
When the form to edit profile details is submitted, the seller value is also added todetails sent in the update to the server, as highlighted in the following code:
mern-marketplace/client/user/EditProfile.js:
const clickSubmit = () => { const jwt = auth.isAuthenticated() const user = { name: values.name || undefined, email: values.email || undefined, password: values.password || undefined, seller: values.seller || undefined } update({ userId: match.params.userId }, { t: jwt.token }, user).then((data) => { if (data && data.error) { setValues({...values, error: data.error}) } else { auth.updateUser(data, ()=>{ setValues({...values, userId: data._id, redirectToProfile:true}) }) } }) }
On successful update, the user details stored in sessionStorage for auth purposesshould also be updated. The auth.updateUser method is called to do thissessionStorage update. The implementation for the auth.updateUser methodwas discussed in Updating the Edit Profile view section of Chapter 6, Building a Web-Based Classroom Application.
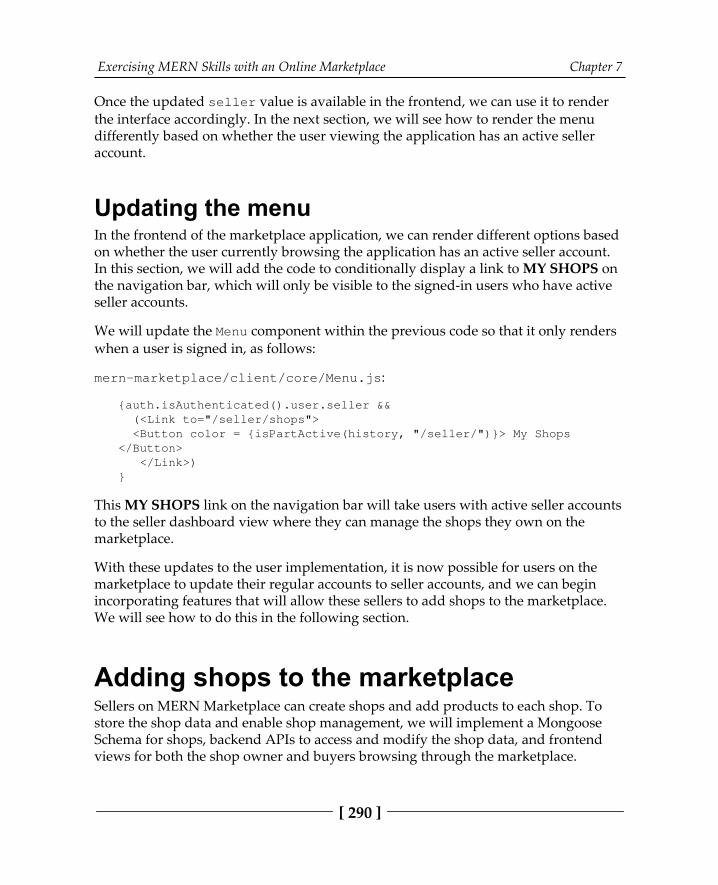
Exercising MERN Skills with an Online Marketplace Chapter 7
[ 290 ]
Once the updated seller value is available in the frontend, we can use it to renderthe interface accordingly. In the next section, we will see how to render the menudifferently based on whether the user viewing the application has an active selleraccount.
Updating the menuIn the frontend of the marketplace application, we can render different options basedon whether the user currently browsing the application has an active seller account.In this section, we will add the code to conditionally display a link to MY SHOPS onthe navigation bar, which will only be visible to the signed-in users who have activeseller accounts.
We will update the Menu component within the previous code so that it only renderswhen a user is signed in, as follows:
mern-marketplace/client/core/Menu.js:
{auth.isAuthenticated().user.seller && (<Link to="/seller/shops"> <Button color = {isPartActive(history, "/seller/")}> My Shops</Button> </Link>)}
This MY SHOPS link on the navigation bar will take users with active seller accountsto the seller dashboard view where they can manage the shops they own on themarketplace.
With these updates to the user implementation, it is now possible for users on themarketplace to update their regular accounts to seller accounts, and we can beginincorporating features that will allow these sellers to add shops to the marketplace.We will see how to do this in the following section.
Adding shops to the marketplaceSellers on MERN Marketplace can create shops and add products to each shop. Tostore the shop data and enable shop management, we will implement a MongooseSchema for shops, backend APIs to access and modify the shop data, and frontendviews for both the shop owner and buyers browsing through the marketplace.
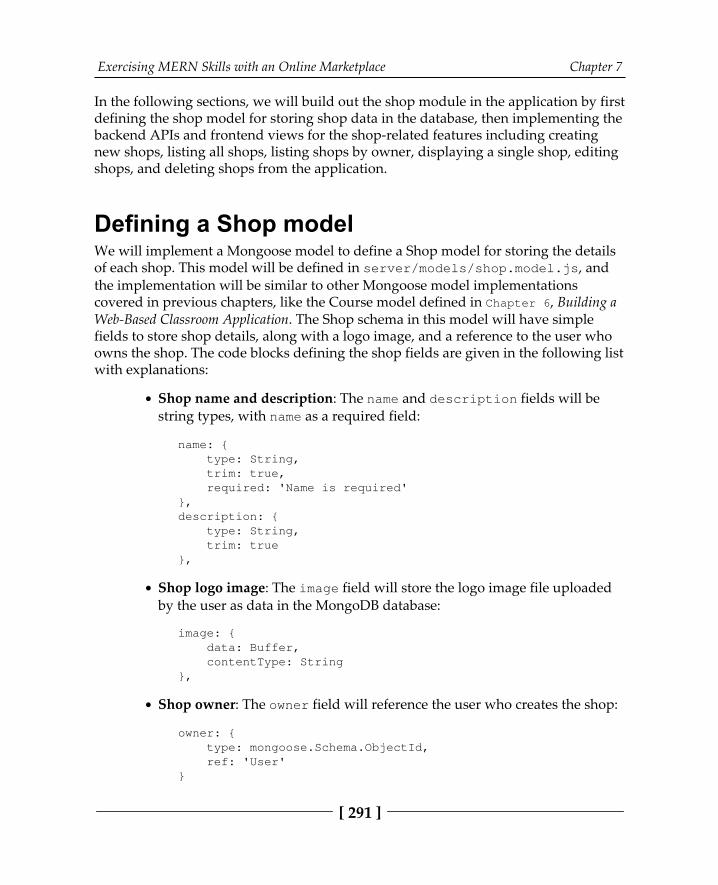
Exercising MERN Skills with an Online Marketplace Chapter 7
[ 291 ]
In the following sections, we will build out the shop module in the application by firstdefining the shop model for storing shop data in the database, then implementing thebackend APIs and frontend views for the shop-related features including creatingnew shops, listing all shops, listing shops by owner, displaying a single shop, editingshops, and deleting shops from the application.
Defining a Shop modelWe will implement a Mongoose model to define a Shop model for storing the detailsof each shop. This model will be defined in server/models/shop.model.js, andthe implementation will be similar to other Mongoose model implementationscovered in previous chapters, like the Course model defined in Chapter 6, Building aWeb-Based Classroom Application. The Shop schema in this model will have simplefields to store shop details, along with a logo image, and a reference to the user whoowns the shop. The code blocks defining the shop fields are given in the following listwith explanations:
Shop name and description: The name and description fields will bestring types, with name as a required field:
name: { type: String, trim: true, required: 'Name is required'},description: { type: String, trim: true},
Shop logo image: The image field will store the logo image file uploadedby the user as data in the MongoDB database:
image: { data: Buffer, contentType: String},
Shop owner: The owner field will reference the user who creates the shop:
owner: { type: mongoose.Schema.ObjectId, ref: 'User'}

Exercising MERN Skills with an Online Marketplace Chapter 7
[ 292 ]
Created at and updated at times: The created and updated fields will beDate types, with created generated when a new shop is added, andupdated changed when any shop details are modified:
updated: Date,created: { type: Date, default: Date.now},
The fields added in this schema definition will enable us to implement the shop-related features in MERN Marketplace. In the next section, we will start developingthese features by implementing the full-stack slice that will allow sellers to create newshops.
Creating a new shopIn MERN Marketplace, a user who is signed in and has an active seller account will beable to create new shops. To implement this feature, in the following sections we willadd a create shop API in the backend, along with a way to fetch this API in thefrontend, and a create new shop form view that takes user input for shop fields.
The create shop APIFor the implementation of the create shop API that will allow creating new shops inthe database, we will first add a POST route, as shown in the following code:
mern-marketplace/server/routes/shop.routes.js:
router.route('/api/shops/by/:userId') .post(authCtrl.requireSignin, authCtrl.hasAuthorization, userCtrl.isSeller, shopCtrl.create)
A POST request to this route at /api/shops/by/:userId will first ensure therequesting user is signed in and is also the authorized owner, in other words, it is thesame user associated with the :userId specified in the route param.
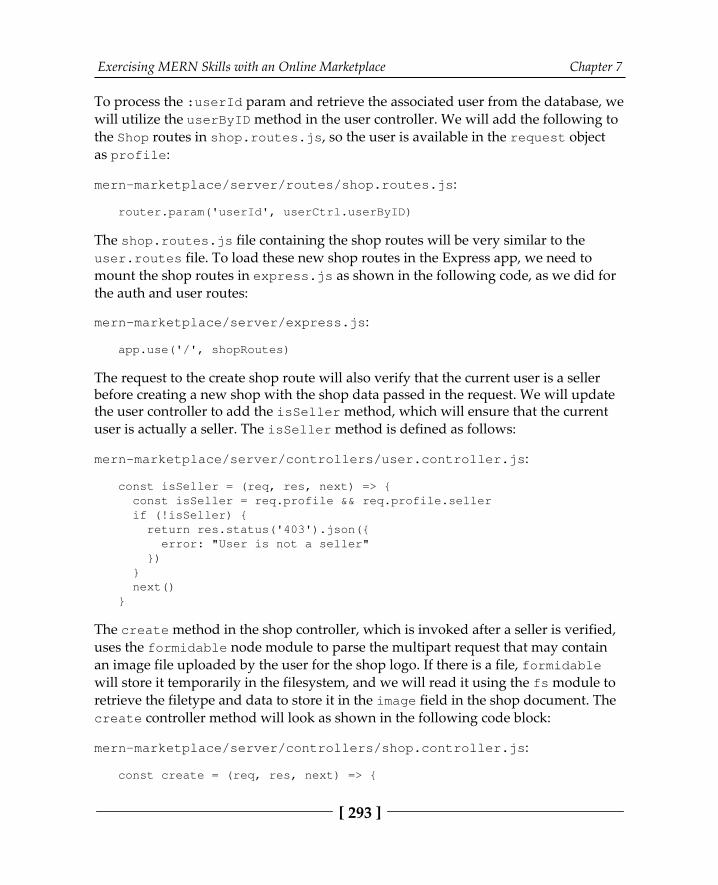
Exercising MERN Skills with an Online Marketplace Chapter 7
[ 293 ]
To process the :userId param and retrieve the associated user from the database, wewill utilize the userByID method in the user controller. We will add the following tothe Shop routes in shop.routes.js, so the user is available in the request objectas profile:
mern-marketplace/server/routes/shop.routes.js:
router.param('userId', userCtrl.userByID)
The shop.routes.js file containing the shop routes will be very similar to theuser.routes file. To load these new shop routes in the Express app, we need tomount the shop routes in express.js as shown in the following code, as we did forthe auth and user routes:
mern-marketplace/server/express.js:
app.use('/', shopRoutes)
The request to the create shop route will also verify that the current user is a sellerbefore creating a new shop with the shop data passed in the request. We will updatethe user controller to add the isSeller method, which will ensure that the currentuser is actually a seller. The isSeller method is defined as follows:
mern-marketplace/server/controllers/user.controller.js:
const isSeller = (req, res, next) => { const isSeller = req.profile && req.profile.seller if (!isSeller) { return res.status('403').json({ error: "User is not a seller" }) } next()}
The create method in the shop controller, which is invoked after a seller is verified,uses the formidable node module to parse the multipart request that may containan image file uploaded by the user for the shop logo. If there is a file, formidablewill store it temporarily in the filesystem, and we will read it using the fs module toretrieve the filetype and data to store it in the image field in the shop document. Thecreate controller method will look as shown in the following code block:
mern-marketplace/server/controllers/shop.controller.js:
const create = (req, res, next) => {

Exercising MERN Skills with an Online Marketplace Chapter 7
[ 294 ]
let form = new formidable.IncomingForm() form.keepExtensions = true form.parse(req, (err, fields, files) => { if (err) { res.status(400).json({ message: "Image could not be uploaded" }) } let shop = new Shop(fields) shop.owner= req.profile if(files.image){ shop.image.data = fs.readFileSync(files.image.path) shop.image.contentType = files.image.type } shop.save((err, result) => { if (err) { return res.status(400).json({ error: errorHandler.getErrorMessage(err) }) } res.status(200).json(result) }) })}
The logo image file for the shop is uploaded by the user and stored in MongoDB asdata. Then, in order to be shown in the views, it is retrieved from the database as animage file at a separate GET API. The GET API is set up as an Express route at/api/shops/logo/:shopId, which gets the image data from MongoDB and sends itas a file in the response. The implementation steps for file upload, storage, andretrieval are outlined in detail in the Upload profile photo section of Chapter 5, Startingwith a Simple Social Media Application.
This create shop API endpoint can now be used in the frontend to make a POSTrequest. Next, we will add a fetch method on the client side to make this requestfrom the application's client interface.
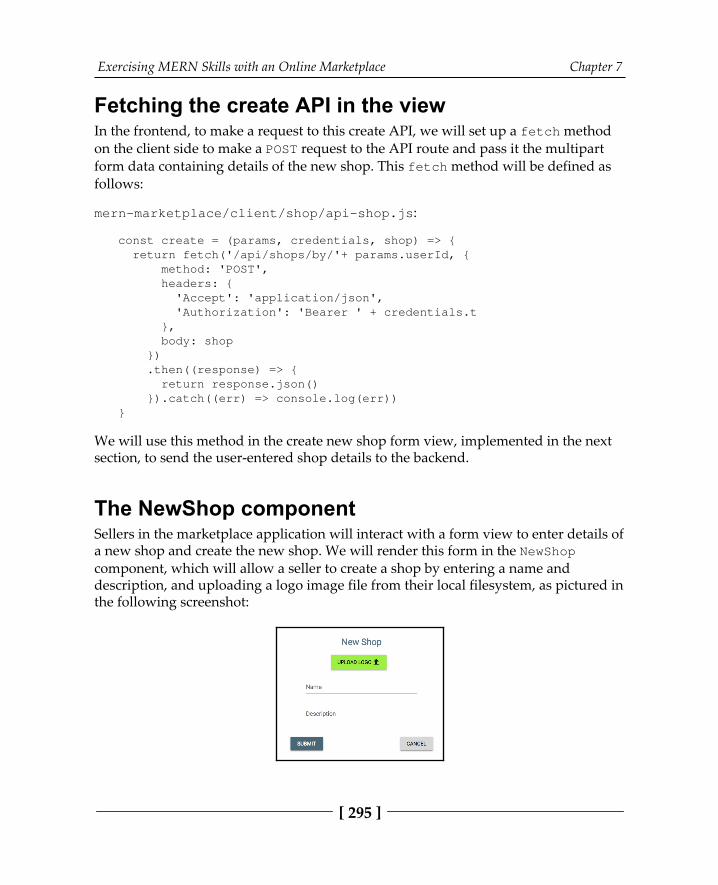
Exercising MERN Skills with an Online Marketplace Chapter 7
[ 295 ]
Fetching the create API in the viewIn the frontend, to make a request to this create API, we will set up a fetch methodon the client side to make a POST request to the API route and pass it the multipartform data containing details of the new shop. This fetch method will be defined asfollows:
mern-marketplace/client/shop/api-shop.js:
const create = (params, credentials, shop) => { return fetch('/api/shops/by/'+ params.userId, { method: 'POST', headers: { 'Accept': 'application/json', 'Authorization': 'Bearer ' + credentials.t }, body: shop }) .then((response) => { return response.json() }).catch((err) => console.log(err))}
We will use this method in the create new shop form view, implemented in the nextsection, to send the user-entered shop details to the backend.
The NewShop componentSellers in the marketplace application will interact with a form view to enter details ofa new shop and create the new shop. We will render this form in the NewShopcomponent, which will allow a seller to create a shop by entering a name anddescription, and uploading a logo image file from their local filesystem, as pictured inthe following screenshot:
Exercising MERN Skills with an Online Marketplace Chapter 7
[ 296 ]
We will implement this form in a React component named NewShop. For the view, wewill first add the file upload elements using a Material-UI button and an HTML5 fileinput element, as shown in the following code:
mern-marketplace/client/shop/NewShop.js:
<input accept="image/*" onChange={handleChange('image')} id="icon-button-file" style={display:'none'} type="file" /><label htmlFor="icon-button-file"> <Button variant="contained" color="secondary" component="span"> Upload Logo <FileUpload/> </Button></label><span>{values.image ? values.image.name : ''}</span>
Then, we add the name and description form fields with the TextField components,as shown next:
mern-marketplace/client/shop/NewShop.js:
<TextField id="name" label="Name" value={values.name} onChange={handleChange('name')}/> <br/><TextField id="multiline-flexible" label="Description" multiline rows="2" value={values.description} onChange={handleChange('description')}/>
These form field changes will be tracked with the handleChange method when auser interacts with the input fields to enter values. The handleChange function willbe defined as shown in the following code:
mern-marketplace/client/shop/NewShop.js:
const handleChange = name => event => { const value = name === 'image' ? event.target.files[0] : event.target.value setValues({ ...values, [name]: value })}
Exercising MERN Skills with an Online Marketplace Chapter 7
[ 297 ]
The handleChange method updates the state with the new values, including thename of the image file, should one be uploaded by the user.
Finally, you can complete this form view by adding a submit button that whenclicked, should send the form data to the server. We will define a clickSubmitmethod, as shown next, which will be called when the submit button is clicked by theuser:
mern-marketplace/client/shop/NewShop.js:
const clickSubmit = () => { const jwt = auth.isAuthenticated() let shopData = new FormData() values.name && shopData.append('name', values.name) values.description && shopData.append('description',values.description) values.image && shopData.append('image', values.image) create({ userId: jwt.user._id }, { t: jwt.token }, shopData).then((data) => { if (data.error) { setValues({...values, error: data.error}) } else { setValues({...values, error: '', redirect: true}) } })}
This clickSubmit function will take the input values and populate shopData,which is a FormData object that ensures the data is stored in the correct format needed for the multipart/form-data encoding type. Then the create fetchmethod is called to create the new shop in the backend with this form data. Onsuccessful shop creation, the user is redirected back to the MyShops view with thefollowing code:
mern-marketplace/client/shop/NewShop.js:
if (values.redirect) { return (<Redirect to={'/seller/shops'}/>)}
Exercising MERN Skills with an Online Marketplace Chapter 7
[ 298 ]
The NewShop component can only be viewed by a signed-in user who is also a seller.So we will add a PrivateRoute in the MainRouter component, as shown in thefollowing code block, that will render this form only for authenticated users at/seller/shop/new:
mern-marketplace/client/MainRouter.js:
<PrivateRoute path="/seller/shop/new" component={NewShop}/>
This link can be added to any of the view components that may be accessed by theseller, for example in a view where a seller manages their shops in the marketplace.Now that it is possible to add new shops in the marketplace, in the next section wewill discuss the implementations to fetch and list these shops from the database in thebackend to the application views in the frontend.
Listing shopsIn MERN Marketplace, regular users will be able to browse through a list of all theshops on the platform, and each shop owner will manage a list of their own shops. Inthe following sections, we will implement the full-stack slices for retrieving anddisplaying two different lists of shops – a list of all the shops, and the list of shopsowned by a specific user.
Listing all shopsAny user browsing through the marketplace will be able to see a list of all the shopson the marketplace. In order to implement this feature, we will have to query theshops collection to retrieve all the shops in the database and display it in a view tothe end user. We achieve this by adding a full-stack slice with the following:
A backend API to retrieve the list of shopsA fetch method in the frontend to make a request to the APIA React component to display the list of shops
Exercising MERN Skills with an Online Marketplace Chapter 7
[ 299 ]
The shops list APIIn the backend, we will define an API to retrieve all the shops from the database, sothe shops in the marketplace can be listed in the frontend. This API will accept arequest from the client to query the shops collection and return the resulting shopdocuments in the response. First, we will add a route to retrieve all the shops storedin the database when the server receives a GET request at '/api/shops'. This routeis declared as shown in the following code:
mern-marketplace/server/routes/shop.routes.js
router.route('/api/shops') .get(shopCtrl.list)
A GET request received at this route will invoke the list controller method, whichwill query the shops collection in the database to return all the shops. The listmethod is defined as follows:
mern-marketplace/server/controllers/shop.controller.js:
const list = async (req, res) => { try { let shops = await Shop.find() res.json(shops) } catch (err){ return res.status(400).json({ error: errorHandler.getErrorMessage(err) }) }}
This method will return all the shops in the database in response to the requestingclient. Next, we will see how to make a request to this shop list API from the clientside.
Fetch all shops for the viewIn order to use the shop list API in the frontend, we will define a fetch method thatcan be used by React components to load this list of shops. The list method on theclient side will use fetch to make a GET request to the API, as shown in the followingcode:
mern-marketplace/client/shop/api-shop.js:
const list = async (signal) => {
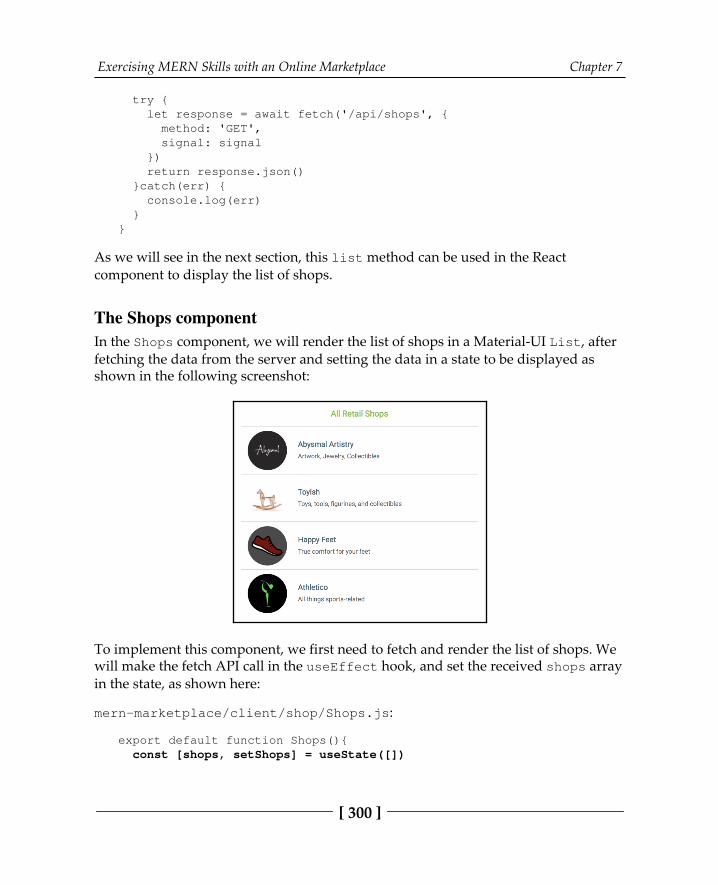
Exercising MERN Skills with an Online Marketplace Chapter 7
[ 300 ]
try { let response = await fetch('/api/shops', { method: 'GET', signal: signal }) return response.json() }catch(err) { console.log(err) }}
As we will see in the next section, this list method can be used in the Reactcomponent to display the list of shops.
The Shops componentIn the Shops component, we will render the list of shops in a Material-UI List, afterfetching the data from the server and setting the data in a state to be displayed asshown in the following screenshot:
To implement this component, we first need to fetch and render the list of shops. Wewill make the fetch API call in the useEffect hook, and set the received shops arrayin the state, as shown here:
mern-marketplace/client/shop/Shops.js:
export default function Shops(){ const [shops, setShops] = useState([])
Exercising MERN Skills with an Online Marketplace Chapter 7
[ 301 ]
useEffect(() => { const abortController = new AbortController() const signal = abortController.signal list(signal).then((data) => { if (!data.error) { setShops(data) } }) return function cleanup(){ abortController.abort() }
}, [])...}
In the Shops component view, this retrieved shops array is iterated over using map,with each shop's data rendered in the view in a Material-UI ListItem, and eachListItem is also linked to the individual shop's view, as shown in the followingcode:
mern-marketplace/client/shop/Shops.js:
{shops.map((shop, i) => { return <Link to={"/shops/"+shop._id} key={i}> <Divider/> <ListItem button> <ListItemAvatar> <Avatar src={'/api/shops/logo/'+shop._id+"?" + newDate().getTime()}/> </ListItemAvatar> <div className={classes.details}> <Typography type="headline" component="h2" color="primary"> {shop.name} </Typography> <Typography type="subheading" component="h4"> {shop.description} </Typography> </div> </ListItem> <Divider/> </Link>})}
Exercising MERN Skills with an Online Marketplace Chapter 7
[ 302 ]
The Shops component will be accessed by the end user at /shops/all, which is setup with React Router and declared in MainRouter.js as follows:
mern-marketplace/client/MainRouter.js:
<Route path="/shops/all" component={Shops}/>
Adding this link to any view in the application will redirect the user to a viewdisplaying all the shops in the marketplace. Next, we will similarly implement thefeature to list the shops owned by a specific user.
Listing shops by ownerAuthorized sellers on the marketplace will see a list of the shops they created, whichthey can manage by editing or deleting any shop on the list. In order to implementthis feature, we will have to query the shops' collection to retrieve all the shops withthe same owner and display it only to the authorized owner of the shops. We achievethis by adding a full-stack slice with the following:
A backend API that ensures the requesting user is authorized and retrievesthe relevant list of shopsA fetch method in the frontend to make a request to this APIA React component to display the list of shops to the authorized user
The shops by owner APIWe will implement an API in the backend to return the list of shops of a specificowner, so it can be rendered in the frontend for the end user. We will start by addinga route in the backend to retrieve all the shops created by a given user when theserver receives a GET request at /api/shops/by/:userId. This route is declared asshown in the following code:
mern-marketplace/server/routes/shop.routes.js:
router.route('/api/shops/by/:userId') .get(authCtrl.requireSignin, authCtrl.hasAuthorization,shopCtrl.listByOwner)
Exercising MERN Skills with an Online Marketplace Chapter 7
[ 303 ]
A GET request to this route will first ensure the requesting user is signed in and is alsothe authorized owner, before invoking the listByOwner controller method inshop.controller.js. This method will query the Shop collection in the database toget the matching shops. This listByOwner method is defined as follows:
mern-marketplace/server/controllers/shop.controller.js:
const listByOwner = async (req, res) => { try { let shops = await Shop.find({owner:req.profile._id}).populate('owner', '_id name') res.json(shops) } catch (err){ return res.status(400).json({ error: errorHandler.getErrorMessage(err) }) }}
In the query to the Shop collection, we find all the shops where the owner fieldmatches the user-specified with the userId param, then populate the referenceduser's ID and name in the owner field, and return the resulting shops in an array inthe response to the client. Next, we will see how to make a request to this API fromthe client side.
Fetch all shops owned by a user for the viewIn the frontend, to fetch the shops for a specific user using this list by owner API, wewill add a fetch method that takes the signed-in user's credentials to make a GETrequest to the API route with the specific user ID passed in the URL. This fetchmethod is defined as shown in the following code:
mern-marketplace/client/shop/api-shop.js:
const listByOwner = async (params, credentials, signal) => { try { let response = await fetch('/api/shops/by/'+params.userId, { method: 'GET', signal: signal, headers: { 'Accept': 'application/json', 'Authorization': 'Bearer ' + credentials.t } }) return response.json()
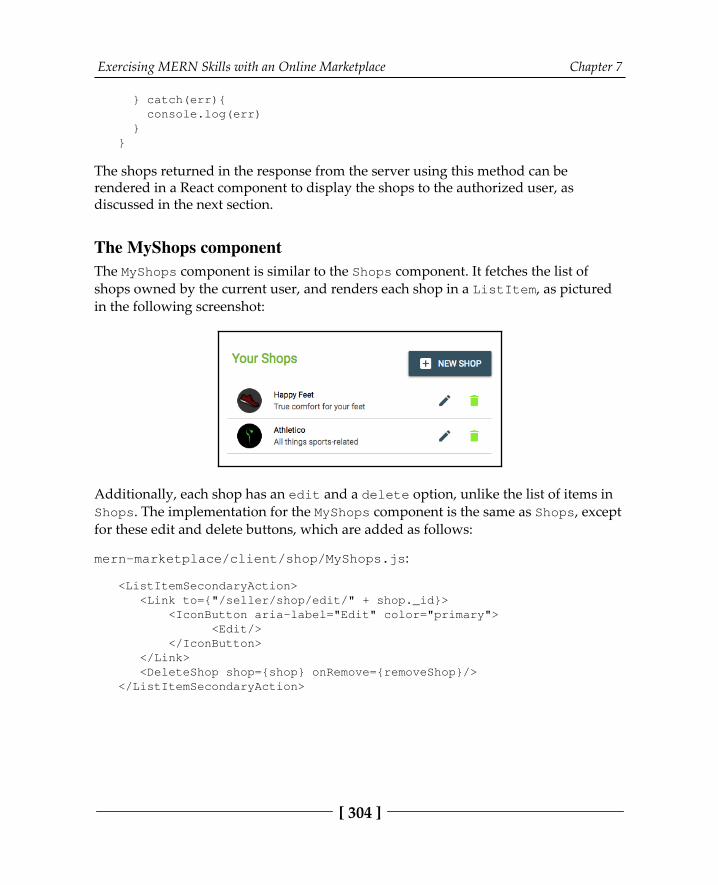
Exercising MERN Skills with an Online Marketplace Chapter 7
[ 304 ]
} catch(err){ console.log(err) }}
The shops returned in the response from the server using this method can berendered in a React component to display the shops to the authorized user, asdiscussed in the next section.
The MyShops componentThe MyShops component is similar to the Shops component. It fetches the list ofshops owned by the current user, and renders each shop in a ListItem, as picturedin the following screenshot:
Additionally, each shop has an edit and a delete option, unlike the list of items inShops. The implementation for the MyShops component is the same as Shops, exceptfor these edit and delete buttons, which are added as follows:
mern-marketplace/client/shop/MyShops.js:
<ListItemSecondaryAction> <Link to={"/seller/shop/edit/" + shop._id}> <IconButton aria-label="Edit" color="primary"> <Edit/> </IconButton> </Link> <DeleteShop shop={shop} onRemove={removeShop}/></ListItemSecondaryAction>
Exercising MERN Skills with an Online Marketplace Chapter 7
[ 305 ]
The Edit button links to an Edit Shop view, whereas the DeleteShop component,which is discussed later in the chapter, handles the delete action.The DeleteShop component updates the list by calling the removeShop methodpassed from MyShops. This removeShop method allows us to update the state withthe modified list of shops for the current user and is defined in the MyShopscomponent, as shown here:
mern-marketplace/client/shop/MyShops.js:
const removeShop = (shop) => { const updatedShops = [...shops] const index = updatedShops.indexOf(shop) updatedShops.splice(index, 1) setShops(updatedShops)}
The MyShops component can only be viewed by a signed-in user who is also a seller.So we will add a PrivateRoute in the MainRouter component, which will renderthis component only for authenticated users at /seller/shops, as shown in thefollowing code:
mern-marketplace/client/MainRouter.js:
<PrivateRoute path="/seller/shops" component={MyShops}/>
In the marketplace application, we add this link to the navigation menu to redirect asigned-in seller to the view where they can manage the shops they own by editing ordeleting a shop. Before adding the ability to edit or delete shops, next we will lookinto how to retrieve a single shop from the backend and display it to the end user.
Displaying a shopAny users visiting MERN Marketplace will be able to browse through each individualshop. In the following sections, we will implement the individual shop view byadding a read shop API to the backend, a way to call this API from the frontend, andthe React component that will display the shop details in the view.
Exercising MERN Skills with an Online Marketplace Chapter 7
[ 306 ]
The read a shop APIIn order to implement the read shop API in the backend, we will start by addinga GET route that queries the Shop collection with an ID and returns the shop in theresponse. The route is declared along with a route parameter handler, as shown in thefollowing code:
mern-marketplace/server/routes/shop.routes.js:
router.route('/api/shop/:shopId') .get(shopCtrl.read)router.param('shopId', shopCtrl.shopByID)
The:shopId param in the route URL will invoke the shopByID controller method,which is similar to the userByID controller method. It retrieves the shop from thedatabase and attaches it to the request object to be used in the next method. TheshopByID method is defined as follows:
mern-marketplace/server/controllers/shop.controller.js:
const shopByID = async (req, res, next, id) => { try { let shop = await Shop.findById(id).populate('owner', '_idname').exec() if (!shop) return res.status('400').json({ error: "Shop not found" }) req.shop = shop next() } catch (err) { return res.status('400').json({ error: "Could not retrieve shop" }) }}
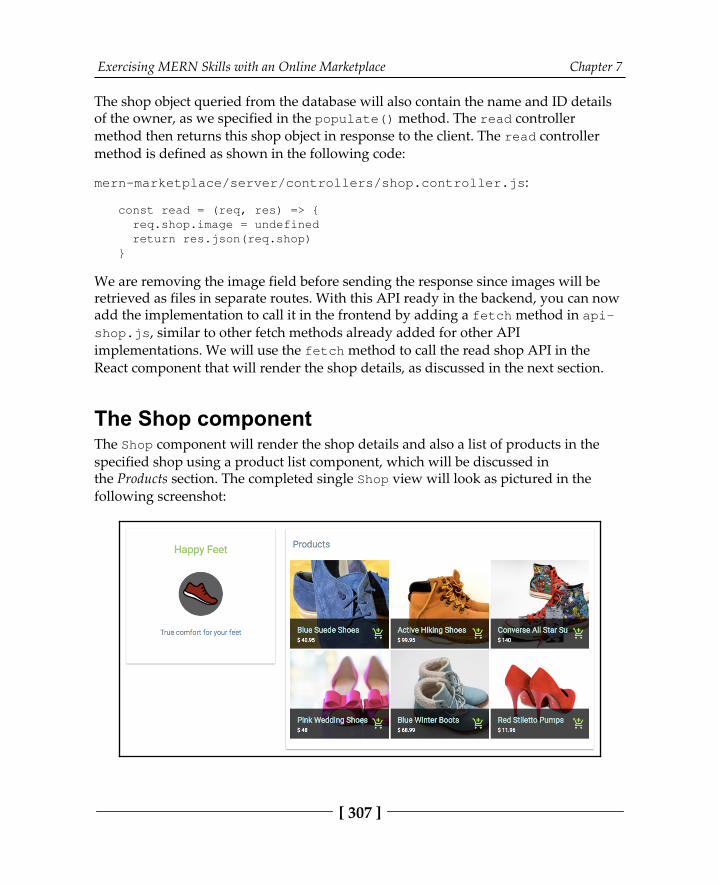
Exercising MERN Skills with an Online Marketplace Chapter 7
[ 307 ]
The shop object queried from the database will also contain the name and ID detailsof the owner, as we specified in the populate() method. The read controllermethod then returns this shop object in response to the client. The read controllermethod is defined as shown in the following code:
mern-marketplace/server/controllers/shop.controller.js:
const read = (req, res) => { req.shop.image = undefined return res.json(req.shop)}
We are removing the image field before sending the response since images will beretrieved as files in separate routes. With this API ready in the backend, you can nowadd the implementation to call it in the frontend by adding a fetch method in api-shop.js, similar to other fetch methods already added for other APIimplementations. We will use the fetch method to call the read shop API in theReact component that will render the shop details, as discussed in the next section.
The Shop component The Shop component will render the shop details and also a list of products in thespecified shop using a product list component, which will be discussed inthe Products section. The completed single Shop view will look as pictured in thefollowing screenshot:
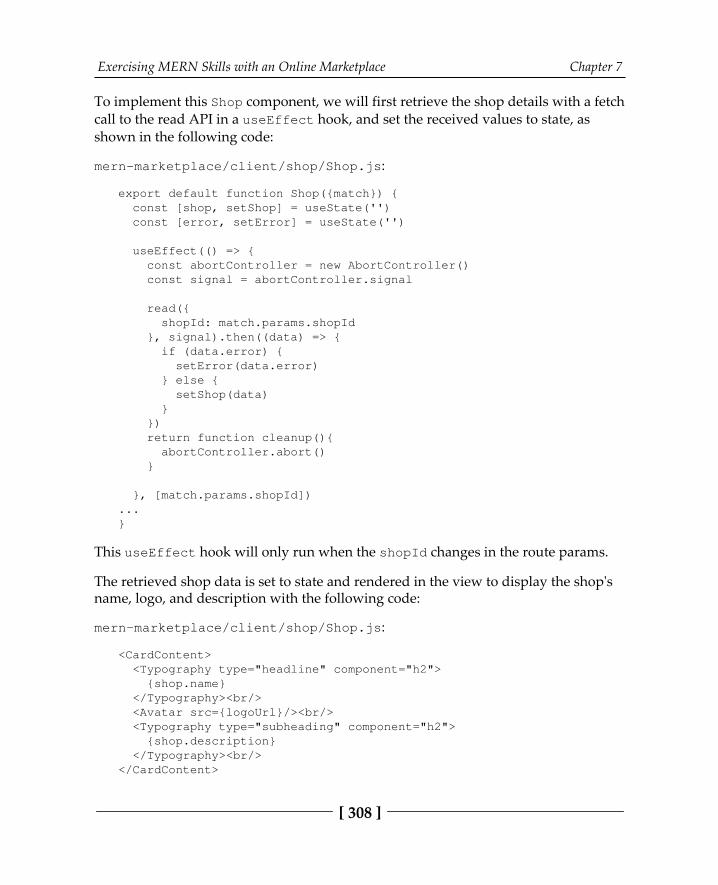
Exercising MERN Skills with an Online Marketplace Chapter 7
[ 308 ]
To implement this Shop component, we will first retrieve the shop details with a fetchcall to the read API in a useEffect hook, and set the received values to state, asshown in the following code:
mern-marketplace/client/shop/Shop.js:
export default function Shop({match}) { const [shop, setShop] = useState('') const [error, setError] = useState('')
useEffect(() => { const abortController = new AbortController() const signal = abortController.signal
read({ shopId: match.params.shopId }, signal).then((data) => { if (data.error) { setError(data.error) } else { setShop(data) } }) return function cleanup(){ abortController.abort() }
}, [match.params.shopId])...}
This useEffect hook will only run when the shopId changes in the route params.
The retrieved shop data is set to state and rendered in the view to display the shop'sname, logo, and description with the following code:
mern-marketplace/client/shop/Shop.js:
<CardContent> <Typography type="headline" component="h2"> {shop.name} </Typography><br/> <Avatar src={logoUrl}/><br/> <Typography type="subheading" component="h2"> {shop.description} </Typography><br/></CardContent>
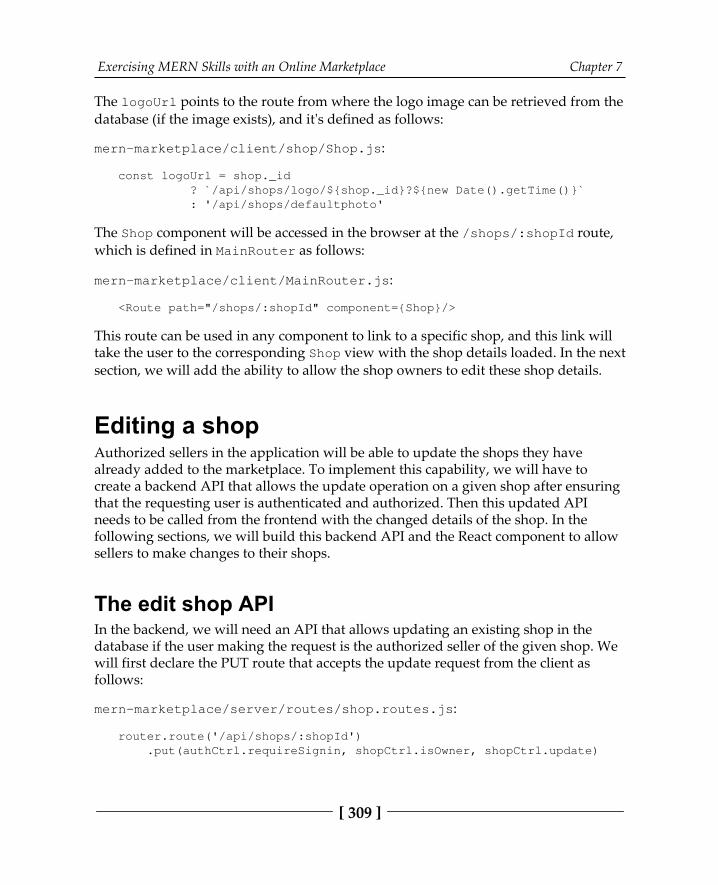
Exercising MERN Skills with an Online Marketplace Chapter 7
[ 309 ]
The logoUrl points to the route from where the logo image can be retrieved from thedatabase (if the image exists), and it's defined as follows:
mern-marketplace/client/shop/Shop.js:
const logoUrl = shop._id ? `/api/shops/logo/${shop._id}?${new Date().getTime()}` : '/api/shops/defaultphoto'
The Shop component will be accessed in the browser at the /shops/:shopId route,which is defined in MainRouter as follows:
mern-marketplace/client/MainRouter.js:
<Route path="/shops/:shopId" component={Shop}/>
This route can be used in any component to link to a specific shop, and this link willtake the user to the corresponding Shop view with the shop details loaded. In the nextsection, we will add the ability to allow the shop owners to edit these shop details.
Editing a shopAuthorized sellers in the application will be able to update the shops they havealready added to the marketplace. To implement this capability, we will have tocreate a backend API that allows the update operation on a given shop after ensuringthat the requesting user is authenticated and authorized. Then this updated APIneeds to be called from the frontend with the changed details of the shop. In thefollowing sections, we will build this backend API and the React component to allowsellers to make changes to their shops.
The edit shop APIIn the backend, we will need an API that allows updating an existing shop in thedatabase if the user making the request is the authorized seller of the given shop. Wewill first declare the PUT route that accepts the update request from the client asfollows:
mern-marketplace/server/routes/shop.routes.js:
router.route('/api/shops/:shopId') .put(authCtrl.requireSignin, shopCtrl.isOwner, shopCtrl.update)
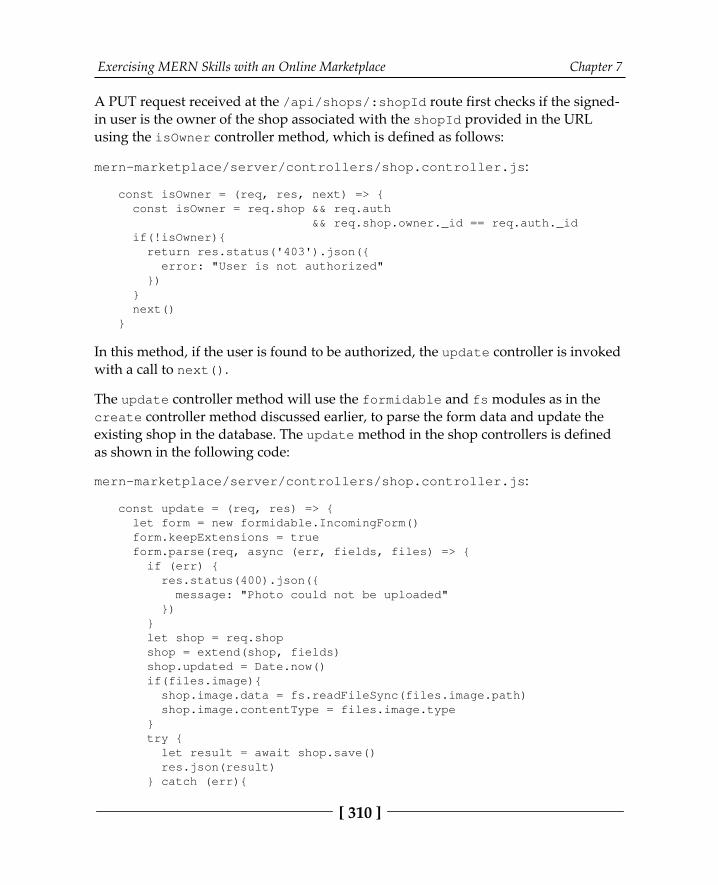
Exercising MERN Skills with an Online Marketplace Chapter 7
[ 310 ]
A PUT request received at the /api/shops/:shopId route first checks if the signed-in user is the owner of the shop associated with the shopId provided in the URLusing the isOwner controller method, which is defined as follows:
mern-marketplace/server/controllers/shop.controller.js:
const isOwner = (req, res, next) => { const isOwner = req.shop && req.auth && req.shop.owner._id == req.auth._id if(!isOwner){ return res.status('403').json({ error: "User is not authorized" }) } next()}
In this method, if the user is found to be authorized, the update controller is invokedwith a call to next().
The update controller method will use the formidable and fs modules as in thecreate controller method discussed earlier, to parse the form data and update theexisting shop in the database. The update method in the shop controllers is definedas shown in the following code:
mern-marketplace/server/controllers/shop.controller.js:
const update = (req, res) => { let form = new formidable.IncomingForm() form.keepExtensions = true form.parse(req, async (err, fields, files) => { if (err) { res.status(400).json({ message: "Photo could not be uploaded" }) } let shop = req.shop shop = extend(shop, fields) shop.updated = Date.now() if(files.image){ shop.image.data = fs.readFileSync(files.image.path) shop.image.contentType = files.image.type } try { let result = await shop.save() res.json(result) } catch (err){
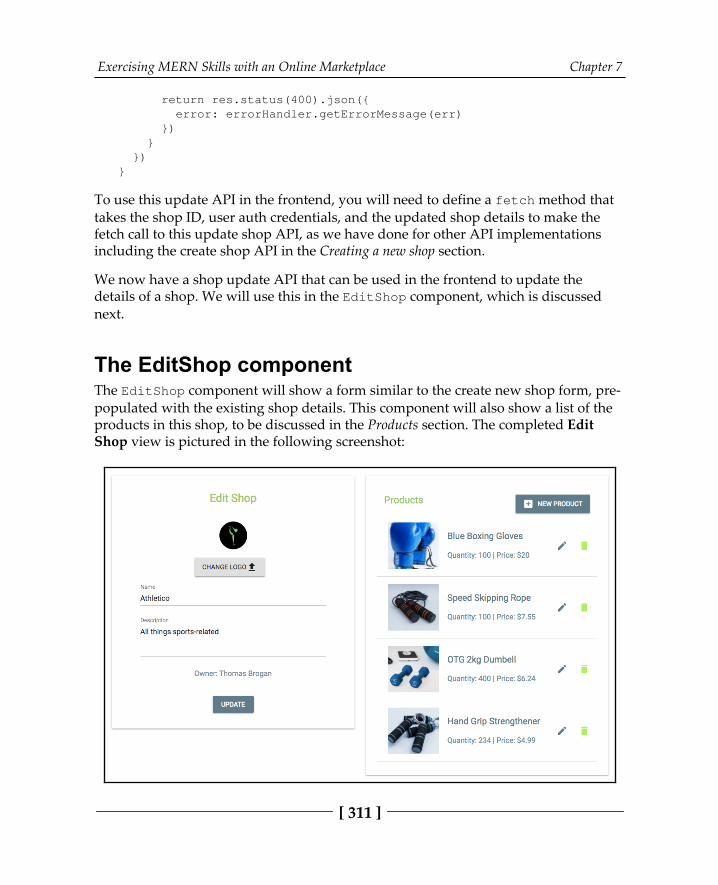
Exercising MERN Skills with an Online Marketplace Chapter 7
[ 311 ]
return res.status(400).json({ error: errorHandler.getErrorMessage(err) }) } })}
To use this update API in the frontend, you will need to define a fetch method thattakes the shop ID, user auth credentials, and the updated shop details to make the fetch call to this update shop API, as we have done for other API implementationsincluding the create shop API in the Creating a new shop section.
We now have a shop update API that can be used in the frontend to update thedetails of a shop. We will use this in the EditShop component, which is discussednext.
The EditShop componentThe EditShop component will show a form similar to the create new shop form, pre-populated with the existing shop details. This component will also show a list of theproducts in this shop, to be discussed in the Products section. The completed EditShop view is pictured in the following screenshot:
Exercising MERN Skills with an Online Marketplace Chapter 7
[ 312 ]
The form part of this view for editing shop details is similar to the form inthe NewShop component, with the same form fields and a formData object that holdsthe multipart form data to be sent with the update fetch method. In contrast to theNewShop component, in this component, we will need to utilize the read shop API tofetch the given shop's details in an useEffect hook and pre-populate the form fields.You can combine the implementations discussed for the NewShop component andShop component to complete the EditShop component.
The EditShop component will only be accessible by authorized shop owners. So wewill add a PrivateRoute in the MainRouter component as shown next, which willrender this component only for authenticated users at/seller/shop/edit/:shopId:
mern-marketplace/client/MainRouter.js:
<PrivateRoute path="/seller/shop/edit/:shopId" component={EditShop}/>
This link is added with an edit icon for each shop in the MyShops component,allowing a seller to access the edit page for each of their shops. In the MyShops view,sellers are also able to delete their shops, as implemented in the next section.
Deleting a shopAs a part of managing the shops they own, authorized sellers will have the option todelete any of their own shops. In order to allow a seller to remove a shop from themarketplace, in the following sections, first we will define a backend API for shopdeletion from the database, and then implement a React component that makes use ofthis API when the user interacts with the frontend to perform this deletion.
The delete shop APIIn order to delete a shop from the database, we will implement a delete shop API inthe backend, which will accept a DELETE request from the clientat /api/shops/:shopId. We will add the DELETE route for this API as shown in thefollowing code, which will allow an authorized seller to delete one of their ownshops:
mern-marketplace/server/routes/shop.routes.js:
router.route('/api/shops/:shopId') .delete(authCtrl.requireSignin, shopCtrl.isOwner, shopCtrl.remove)
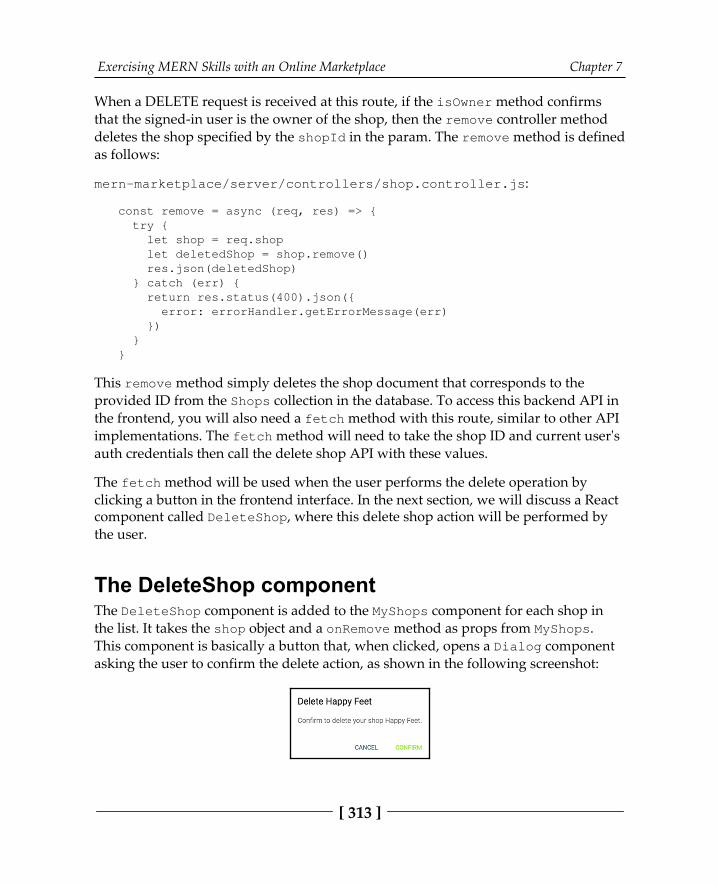
Exercising MERN Skills with an Online Marketplace Chapter 7
[ 313 ]
When a DELETE request is received at this route, if the isOwner method confirmsthat the signed-in user is the owner of the shop, then the remove controller methoddeletes the shop specified by the shopId in the param. The remove method is definedas follows:
mern-marketplace/server/controllers/shop.controller.js:
const remove = async (req, res) => { try { let shop = req.shop let deletedShop = shop.remove() res.json(deletedShop) } catch (err) { return res.status(400).json({ error: errorHandler.getErrorMessage(err) }) }}
This remove method simply deletes the shop document that corresponds to theprovided ID from the Shops collection in the database. To access this backend API inthe frontend, you will also need a fetch method with this route, similar to other APIimplementations. The fetch method will need to take the shop ID and current user'sauth credentials then call the delete shop API with these values.
The fetch method will be used when the user performs the delete operation byclicking a button in the frontend interface. In the next section, we will discuss a Reactcomponent called DeleteShop, where this delete shop action will be performed bythe user.
The DeleteShop componentThe DeleteShop component is added to the MyShops component for each shop inthe list. It takes the shop object and a onRemove method as props from MyShops.This component is basically a button that, when clicked, opens a Dialog componentasking the user to confirm the delete action, as shown in the following screenshot:
Exercising MERN Skills with an Online Marketplace Chapter 7
[ 314 ]
The implementation of the DeleteShop component is similar to the DeleteUsercomponent discussed in Chapter 4, Adding a React Frontend to Complete MERN.Instead of a user ID, the DeleteShop component will take the shop object andonRemove function definition from the MyShops component as props when it isadded to MyShops, as shown in the following code:
mern-marketplace/client/shop/MyShops.js:
<DeleteShop shop={shop} onRemove={removeShop}/>
With this implementation, authorized sellers will be able to remove a shop that theyown from the marketplace.
We have implemented the shop module for the marketplace by first defining theShop model for storing shop data, and then integrating the backend APIs andfrontend views to be able to perform CRUD operations on shops from theapplication. These shop features, with the ability to create new shops, display a shop,edit and delete shops, will allow both buyers and sellers to interact with the shops inthe marketplace. The shops will also have products, discussed next, which the ownerswill manage and the buyers will be able to browse through, with an option to addproducts to their cart.
Adding products to shopsProducts are the most crucial aspect of a marketplace application. In the MERNMarketplace, sellers can manage products in their shops, and visitors can search forand browse products. While we will implement the features to allow authorizedsellers to add, modify, and delete products from their shops, we will also incorporatefeatures to list products in ways that are meaningful to the end user. In theapplication, we will retrieve and display products by a specific shop, products relatedto a given product, and the latest products added to the marketplace. In the followingsections, we will build out the product module incorporating these features by firstdefining a product model for storing product data in the database, andthen implementing the backend APIs and frontend views for the product-relatedfeatures including adding new products to a shop, rendering different lists ofproducts, displaying a single product, editing products, and deleting products.
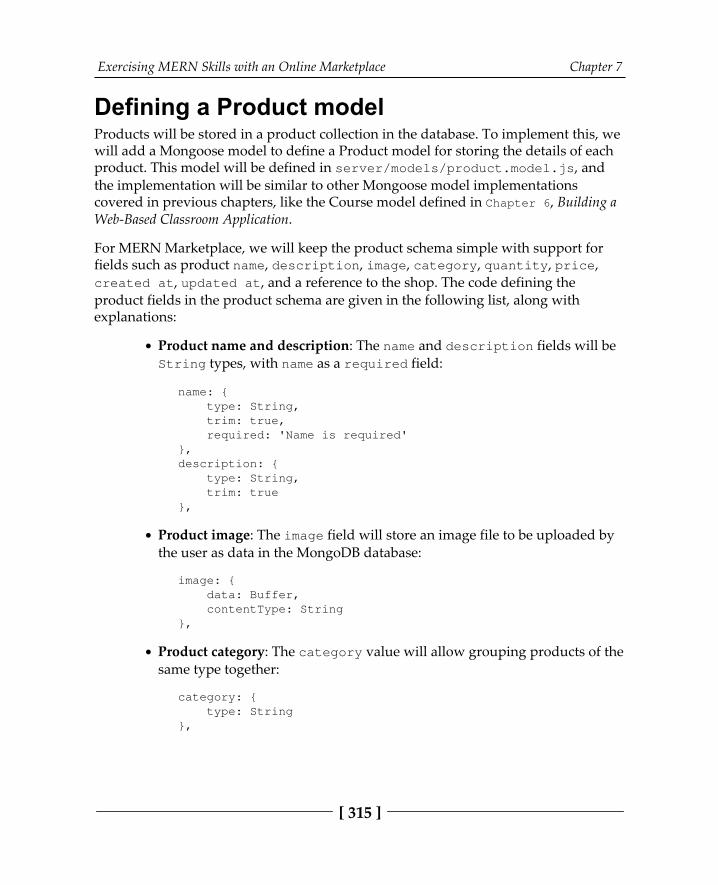
Exercising MERN Skills with an Online Marketplace Chapter 7
[ 315 ]
Defining a Product modelProducts will be stored in a product collection in the database. To implement this, wewill add a Mongoose model to define a Product model for storing the details of eachproduct. This model will be defined in server/models/product.model.js, andthe implementation will be similar to other Mongoose model implementationscovered in previous chapters, like the Course model defined in Chapter 6, Building aWeb-Based Classroom Application.
For MERN Marketplace, we will keep the product schema simple with support forfields such as product name, description, image, category, quantity, price,created at, updated at, and a reference to the shop. The code defining theproduct fields in the product schema are given in the following list, along withexplanations:
Product name and description: The name and description fields will beString types, with name as a required field:
name: { type: String, trim: true, required: 'Name is required'},description: { type: String, trim: true},
Product image: The image field will store an image file to be uploaded bythe user as data in the MongoDB database:
image: { data: Buffer, contentType: String},
Product category: The category value will allow grouping products of thesame type together:
category: { type: String},
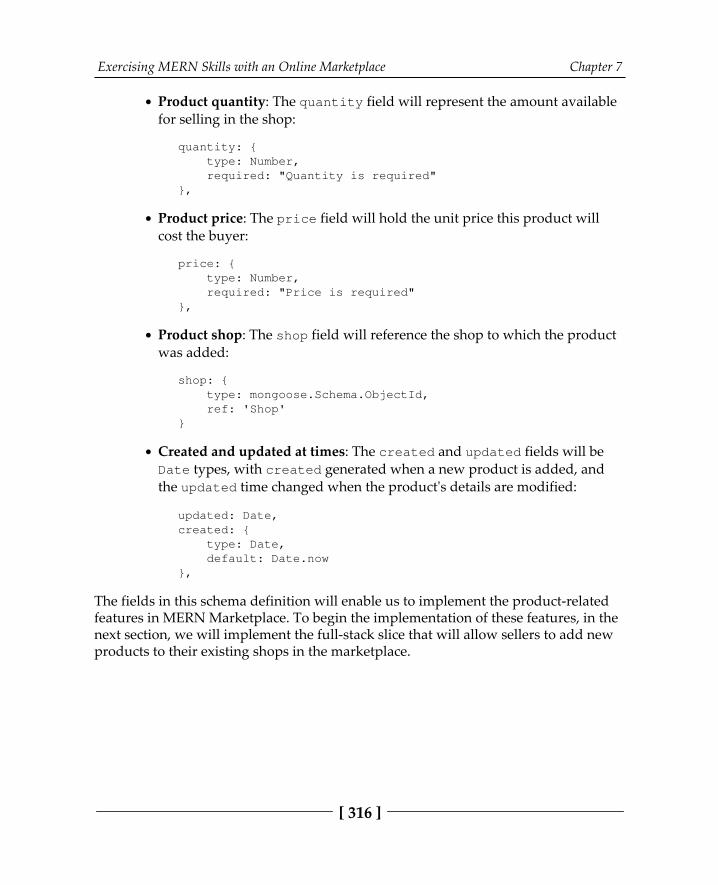
Exercising MERN Skills with an Online Marketplace Chapter 7
[ 316 ]
Product quantity: The quantity field will represent the amount availablefor selling in the shop:
quantity: { type: Number, required: "Quantity is required"},
Product price: The price field will hold the unit price this product willcost the buyer:
price: { type: Number, required: "Price is required"},
Product shop: The shop field will reference the shop to which the productwas added:
shop: { type: mongoose.Schema.ObjectId, ref: 'Shop'}
Created and updated at times: The created and updated fields will beDate types, with created generated when a new product is added, andthe updated time changed when the product's details are modified:
updated: Date,created: { type: Date, default: Date.now},
The fields in this schema definition will enable us to implement the product-relatedfeatures in MERN Marketplace. To begin the implementation of these features, in thenext section, we will implement the full-stack slice that will allow sellers to add newproducts to their existing shops in the marketplace.
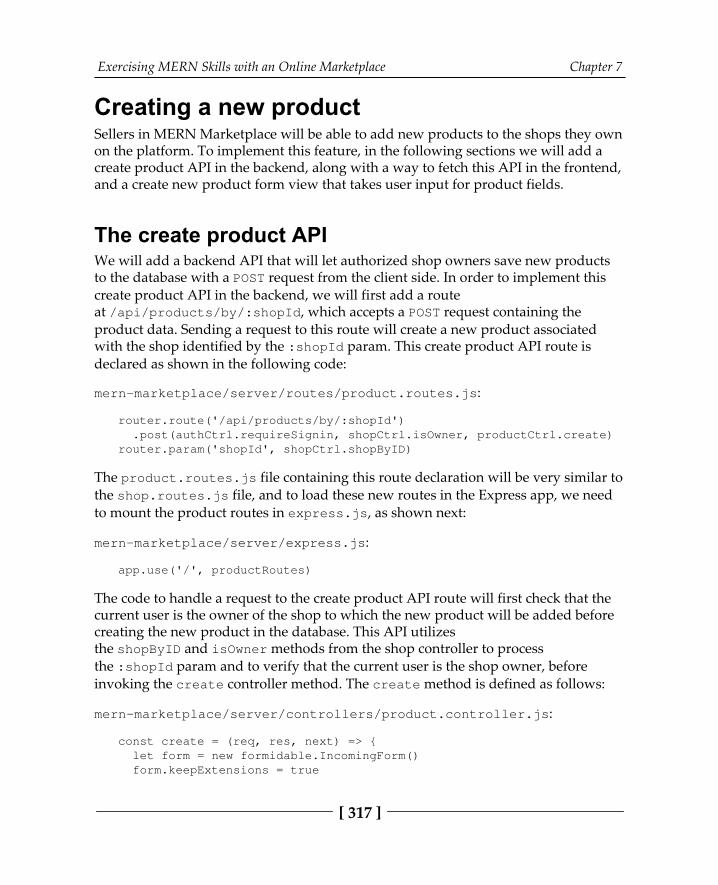
Exercising MERN Skills with an Online Marketplace Chapter 7
[ 317 ]
Creating a new productSellers in MERN Marketplace will be able to add new products to the shops they ownon the platform. To implement this feature, in the following sections we will add acreate product API in the backend, along with a way to fetch this API in the frontend,and a create new product form view that takes user input for product fields.
The create product APIWe will add a backend API that will let authorized shop owners save new productsto the database with a POST request from the client side. In order to implement this create product API in the backend, we will first add a routeat /api/products/by/:shopId, which accepts a POST request containing theproduct data. Sending a request to this route will create a new product associatedwith the shop identified by the :shopId param. This create product API route isdeclared as shown in the following code:
mern-marketplace/server/routes/product.routes.js:
router.route('/api/products/by/:shopId') .post(authCtrl.requireSignin, shopCtrl.isOwner, productCtrl.create)router.param('shopId', shopCtrl.shopByID)
The product.routes.js file containing this route declaration will be very similar tothe shop.routes.js file, and to load these new routes in the Express app, we needto mount the product routes in express.js, as shown next:
mern-marketplace/server/express.js:
app.use('/', productRoutes)
The code to handle a request to the create product API route will first check that thecurrent user is the owner of the shop to which the new product will be added beforecreating the new product in the database. This API utilizesthe shopByID and isOwner methods from the shop controller to processthe :shopId param and to verify that the current user is the shop owner, beforeinvoking the create controller method. The create method is defined as follows:
mern-marketplace/server/controllers/product.controller.js:
const create = (req, res, next) => { let form = new formidable.IncomingForm() form.keepExtensions = true
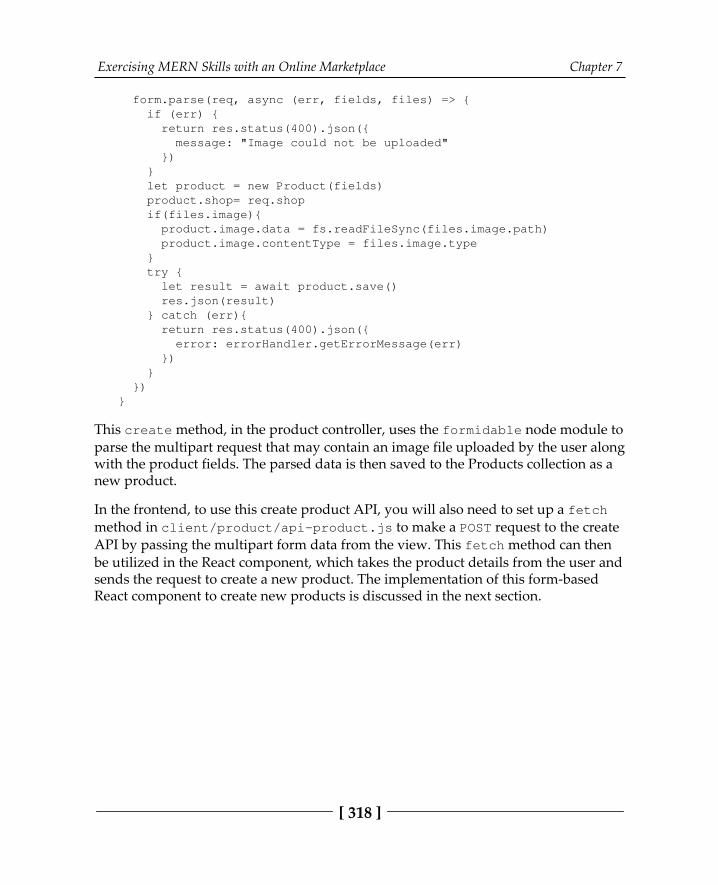
Exercising MERN Skills with an Online Marketplace Chapter 7
[ 318 ]
form.parse(req, async (err, fields, files) => { if (err) { return res.status(400).json({ message: "Image could not be uploaded" }) } let product = new Product(fields) product.shop= req.shop if(files.image){ product.image.data = fs.readFileSync(files.image.path) product.image.contentType = files.image.type } try { let result = await product.save() res.json(result) } catch (err){ return res.status(400).json({ error: errorHandler.getErrorMessage(err) }) } })}
This create method, in the product controller, uses the formidable node module toparse the multipart request that may contain an image file uploaded by the user alongwith the product fields. The parsed data is then saved to the Products collection as anew product.
In the frontend, to use this create product API, you will also need to set up a fetchmethod in client/product/api-product.js to make a POST request to the createAPI by passing the multipart form data from the view. This fetch method can thenbe utilized in the React component, which takes the product details from the user andsends the request to create a new product. The implementation of this form-basedReact component to create new products is discussed in the next section.
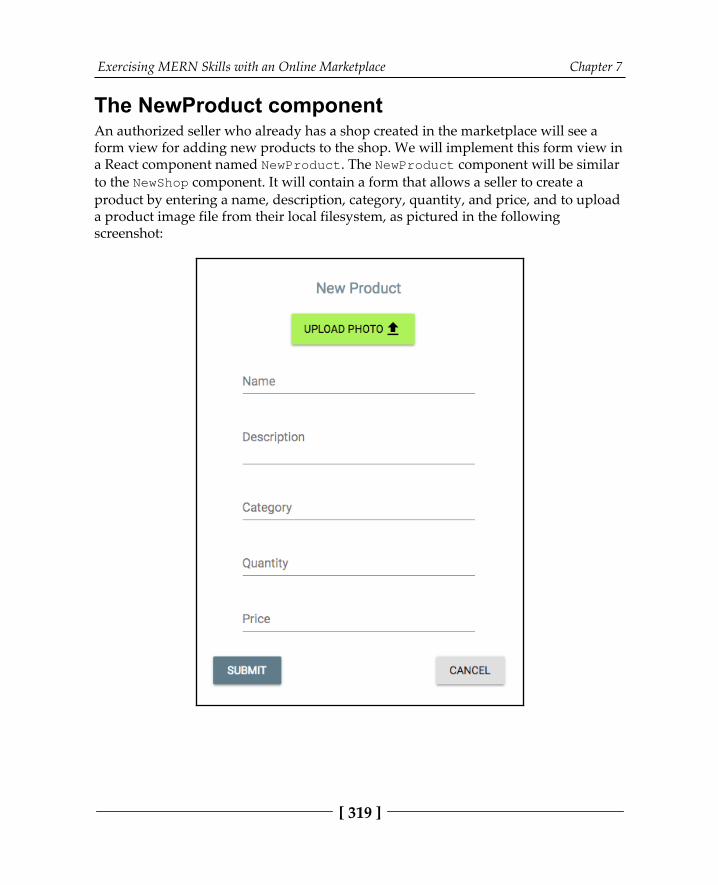
Exercising MERN Skills with an Online Marketplace Chapter 7
[ 319 ]
The NewProduct componentAn authorized seller who already has a shop created in the marketplace will see aform view for adding new products to the shop. We will implement this form view ina React component named NewProduct. The NewProduct component will be similarto the NewShop component. It will contain a form that allows a seller to create aproduct by entering a name, description, category, quantity, and price, and to uploada product image file from their local filesystem, as pictured in the followingscreenshot:
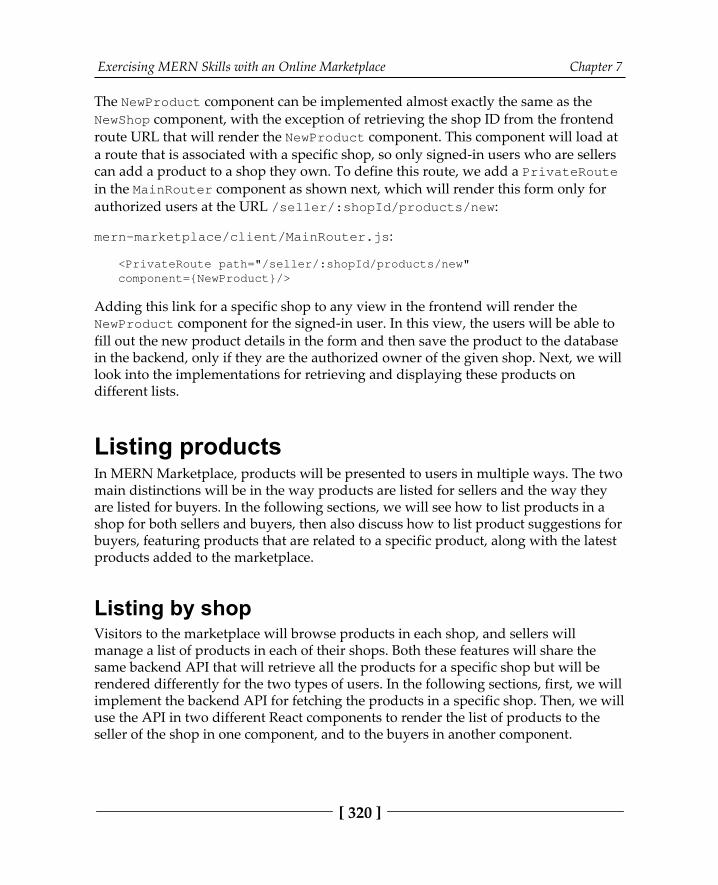
Exercising MERN Skills with an Online Marketplace Chapter 7
[ 320 ]
The NewProduct component can be implemented almost exactly the same as theNewShop component, with the exception of retrieving the shop ID from the frontendroute URL that will render the NewProduct component. This component will load ata route that is associated with a specific shop, so only signed-in users who are sellerscan add a product to a shop they own. To define this route, we add a PrivateRoutein the MainRouter component as shown next, which will render this form only forauthorized users at the URL /seller/:shopId/products/new:
mern-marketplace/client/MainRouter.js:
<PrivateRoute path="/seller/:shopId/products/new"component={NewProduct}/>
Adding this link for a specific shop to any view in the frontend will render theNewProduct component for the signed-in user. In this view, the users will be able tofill out the new product details in the form and then save the product to the databasein the backend, only if they are the authorized owner of the given shop. Next, we willlook into the implementations for retrieving and displaying these products ondifferent lists.
Listing productsIn MERN Marketplace, products will be presented to users in multiple ways. The twomain distinctions will be in the way products are listed for sellers and the way theyare listed for buyers. In the following sections, we will see how to list products in ashop for both sellers and buyers, then also discuss how to list product suggestions forbuyers, featuring products that are related to a specific product, along with the latestproducts added to the marketplace.
Listing by shopVisitors to the marketplace will browse products in each shop, and sellers willmanage a list of products in each of their shops. Both these features will share thesame backend API that will retrieve all the products for a specific shop but will berendered differently for the two types of users. In the following sections, first, we willimplement the backend API for fetching the products in a specific shop. Then, we willuse the API in two different React components to render the list of products to theseller of the shop in one component, and to the buyers in another component.
Exercising MERN Skills with an Online Marketplace Chapter 7
[ 321 ]
The products by shop APIIn order to implement the backend API to retrieve products from a specific shop inthe database, we will set up a GET route at /api/products/by/:shopId, as shownin the following code:
mern-marketplace/server/routes/product.routes.js:
router.route('/api/products/by/:shopId') .get(productCtrl.listByShop)
The listByShop controller method executed in response to this request will querythe Product collection to return the products matching the given shop'sreference. The listByShop method is defined as shown in the following code:
mern-marketplace/server/controllers/product.controller.js:
const listByShop = async (req, res) => { try { let products = await Product.find({shop: req.shop._id}) .populate('shop', '_id name').select('-image') res.json(products) } catch (err) { return res.status(400).json({ error: errorHandler.getErrorMessage(err) }) }}
Each product in the resulting products array will contain the name and ID details ofthe associated shop, and we will omit the image field since images can be retrievedvia separate API routes.
In the frontend, to fetch the products in a specific shop using this API to list by shop,we will also need to add a fetch method in api-product.js, similar to our otherAPI implementations. Then, the fetch method can be called in any React componentto render the products, for example, to display products in a shop to all buyers, asdiscussed in the next section.
Exercising MERN Skills with an Online Marketplace Chapter 7
[ 322 ]
Products component for buyersWe will build a Products component, mainly for displaying the products to visitorswho may buy the products. We can reuse this component across the application torender different product lists relevant to the buyer. It will receive the product list asprops from a parent component that displays a list of products. A rendered Productsview may look as shown in the following screenshot:
In the marketplace application, the list of products in a shop will be displayed to theuser in an individual Shop view. So this Products component is added to the Shopcomponent and given the list of relevant products as props, as shown next:
mern-marketplace/client/shop/Shop.js:
<Products products={products} searched={false}/></Card>
The searched prop relays whether this list is a result of a product search, soappropriate messages can be rendered.
In the Shop component, we need to add a call to the listByShop fetch method ina useEffect hook to retrieve the relevant products and set it to state, as shown in thefollowing code:
mern-marketplace/client/shop/Shop.js:
useEffect(() => { const abortController = new AbortController() const signal = abortController.signal
listByShop({ shopId: match.params.shopId }, signal).then((data)=>{ if (data.error) { setError(data.error) } else {

Exercising MERN Skills with an Online Marketplace Chapter 7
[ 323 ]
setProducts(data) } })
return function cleanup(){ abortController.abort() }}, [match.params.shopId])
In the Products component, if the product list sent in the props contains products,the list is iterated over and the relevant details of each product are rendered in aMaterial-UI GridListTile, with a link to the individual product view andan AddToCart component (the implementation for which is discussed in Chapter 8,Extending the Marketplace for Orders and Payments. The code to render the list ofproducts is added as follows:
mern-marketplace/client/product/Products.js:
{props.products.length > 0 ? (<div> <GridList cellHeight={200} cols={3}> {props.products.map((product, i) => ( <GridListTile key={i}> <Link to={"/product/"+product._id}> <img src={'/api/product/image/'+product._id} alt={product.name} /> </Link> <GridListTileBar title={<Link to={"/product/"+product._id}> {product.name}</Link>} subtitle={<span>$ {product.price} </span>} actionIcon={ <AddToCart item={product}/> } /> </GridListTile>)) } </GridList> </div>) : props.searched && (<Typography component="h4"> No products found!:(</Typography>)}
If the products array sent in the props is found to be empty, and this was a result ofa search action by the user, we render an appropriate message to inform the user thatno products were found.
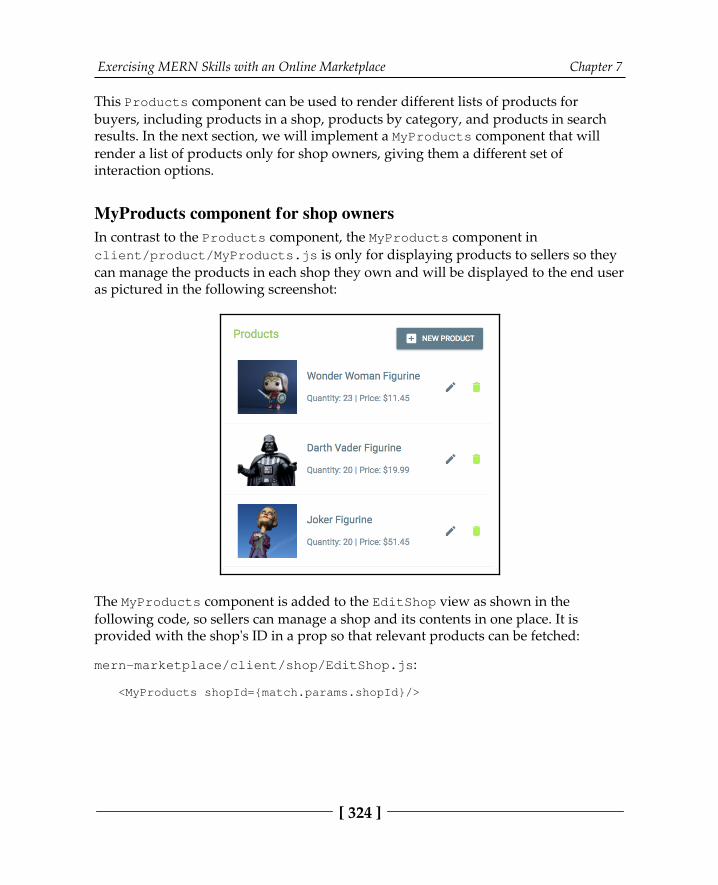
Exercising MERN Skills with an Online Marketplace Chapter 7
[ 324 ]
This Products component can be used to render different lists of products forbuyers, including products in a shop, products by category, and products in searchresults. In the next section, we will implement a MyProducts component that willrender a list of products only for shop owners, giving them a different set ofinteraction options.
MyProducts component for shop ownersIn contrast to the Products component, the MyProducts component inclient/product/MyProducts.js is only for displaying products to sellers so theycan manage the products in each shop they own and will be displayed to the end useras pictured in the following screenshot:
The MyProducts component is added to the EditShop view as shown in thefollowing code, so sellers can manage a shop and its contents in one place. It isprovided with the shop's ID in a prop so that relevant products can be fetched:
mern-marketplace/client/shop/EditShop.js:
<MyProducts shopId={match.params.shopId}/>
Exercising MERN Skills with an Online Marketplace Chapter 7
[ 325 ]
In MyProducts, the relevant products are first loaded in a state with an useEffecthook using the listByShop fetch method, as shown in the following code:
mern-marketplace/client/product/MyProducts.js:
export default function MyProducts (props){ const [products, setProducts] = useState([]) useEffect(() => { const abortController = new AbortController() const signal = abortController.signal listByShop({ shopId: props.shopId }, signal).then((data)=>{ if (data.error) { console.log(data.error) } else { setProducts(data) } }) return function cleanup(){ abortController.abort() } }, [])...}
This list of products is then iterated over with each product rendered inthe ListItem components along with edit and delete options, similar to the MyShopslist view. The edit button links to the Edit Product view. The DeleteProductcomponent handles the delete action, and reloads the list by calling an onRemovemethod passed from MyProducts to update the state with the updated list ofproducts for the current shop.
The removeProduct method, defined in MyProducts, is provided as the onRemoveprop to the DeleteProduct component. The removeProduct method is defined asfollows:
mern-marketplace/client/product/MyProducts.js:
const removeProduct = (product) => { const updatedProducts = [...products] const index = updatedProducts.indexOf(product) updatedProducts.splice(index, 1) setProducts(updatedProducts)}
Exercising MERN Skills with an Online Marketplace Chapter 7
[ 326 ]
Then it is passed as a prop to the DeleteProduct component when it is added toMyProducts as shown next:
mern-marketplace/client/product/MyProducts.js:
<DeleteProduct product={product} shopId={props.shopId} onRemove={removeProduct}/>
Implementing a separate MyProducts component this way gives the shop owner theability to see the list of products in their shop with the option to edit and delete each.In the next section, we will complete the implementation for retrieving different typesof product lists from the backend and rendering them as product suggestions forbuyers in the frontend.
Listing product suggestionsVisitors to MERN Marketplace will see product suggestions, such as the latestproducts added to the marketplace and products related to the product they arecurrently viewing. In the following sections, we will first look at the implementationof the backend APIs for retrieving the latest products and a list of products related toa given product, and then implement a React component called Suggestions to renderthese lists of products.
Latest productsOn the home page of the MERN Marketplace, we will display five of the latestproducts added to the marketplace. To fetch the latest products, we will set up abackend API that will receive a GET request at /api/products/latest, as shown inthe following code:
mern-marketplace/server/routes/product.routes.js:
router.route('/api/products/latest') .get(productCtrl.listLatest)
Exercising MERN Skills with an Online Marketplace Chapter 7
[ 327 ]
A GET request received at this route will invoke the listLatest controller method.This method will find all products, sort the list of products in the database with thecreated date field from newest to oldest, and return the first five from the sorted listin the response. This listLatest controller method is defined as follows:
mern-marketplace/server/controllers/product.controller.js:
const listLatest = async (req, res) => { try { let products = await Product.find({}).sort('-created') .limit(5).populate('shop', '_id name').exec() res.json(products) } catch (err){ return res.status(400).json({ error: errorHandler.getErrorMessage(err) }) }}
To use this API in the frontend, you will also need to set up a corresponding fetchmethod in api-product.js for this latest products API, similar to other APIimplementations. This retrieved list will then be rendered in the Suggestionscomponent to be added to the home page. Next, we will discuss a similar API forretrieving a list of related products.
Related productsIn each individual product view, we will show five related products as suggestions.To retrieve these related products, we will set up a backend API that accepts a requestat /api/products/related, as shown in the following code.
mern-marketplace/server/routes/product.routes.js:
router.route('/api/products/related/:productId') .get(productCtrl.listRelated)router.param('productId', productCtrl.productByID)
The:productId param in the route URL route will call the productByID controllermethod, which is similar to the shopByID controller method, and retrieves theproduct from the database and attaches it to the request object to be used in the nextmethod. The productByID controller method is defined as follows:
mern-marketplace/server/controllers/product.controller.js:
const productByID = async (req, res, next, id) => {
Exercising MERN Skills with an Online Marketplace Chapter 7
[ 328 ]
try { let product = await Product.findById(id) .populate('shop', '_id name').exec() if (!product) return res.status('400').json({ error: "Product not found" }) req.product = product next() } catch (err) { return res.status('400').json({ error: "Could not retrieve product" }) }}
Once the product is retrieved, the listRelated controller method is invoked. Thismethod queries the Product collection in the database to find other products withthe same category as the given product, excluding the given product, and returns thefirst five products in the resulting list. This listRelated controller method isdefined as follows:
mern-marketplace/server/controllers/product.controller.js:
const listRelated = async (req, res) => { try{ let products = await Product.find({ "_id": { "$ne": req.product }, "category": req.product.category}) .limit(5).populate('shop', '_id name').exec() res.json(products) } catch (err){ return res.status(400).json({ error: errorHandler.getErrorMessage(err) }) }}
In order to utilize this related products API in the frontend, we will set up acorresponding fetch method in api-product.js. The fetch method will be calledin the Product component with the product ID to populate the Suggestionscomponent rendered in the product view. We will look at the implementation of thisSuggestions component in the next section.
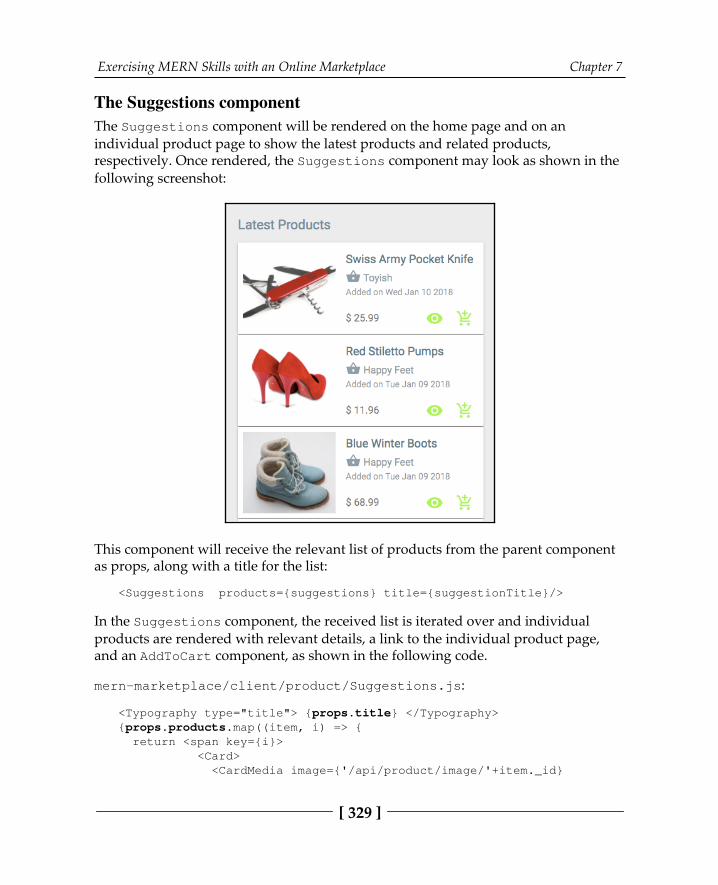
Exercising MERN Skills with an Online Marketplace Chapter 7
[ 329 ]
The Suggestions componentThe Suggestions component will be rendered on the home page and on anindividual product page to show the latest products and related products,respectively. Once rendered, the Suggestions component may look as shown in thefollowing screenshot:
This component will receive the relevant list of products from the parent componentas props, along with a title for the list:
<Suggestions products={suggestions} title={suggestionTitle}/>
In the Suggestions component, the received list is iterated over and individualproducts are rendered with relevant details, a link to the individual product page,and an AddToCart component, as shown in the following code.
mern-marketplace/client/product/Suggestions.js:
<Typography type="title"> {props.title} </Typography>{props.products.map((item, i) => { return <span key={i}> <Card> <CardMedia image={'/api/product/image/'+item._id}

Exercising MERN Skills with an Online Marketplace Chapter 7
[ 330 ]
title={item.name}/> <CardContent> <Link to={'/product/'+item._id}> <Typography type="title" component="h3"> {item.name}</Typography> </Link> <Link to={'/shops/'+item.shop._id}> <Typography type="subheading"> <Icon>shopping_basket</Icon> {item.shop.name} </Typography> </Link> <Typography component="p"> Added on {(new Date(item.created)).toDateString()} </Typography> </CardContent> <Typography type="subheading" component="h3">$ {item.price}</Typography> <Link to={'/product/'+item._id}> <IconButton color="secondary" dense="dense"> <ViewIcon className={classes.iconButton}/> </IconButton> </Link> <AddToCart item={item}/> </Card> </span>})}
This Suggestions component can be reused to render any list of products to buyers,and in this section, we have discussed how to retrieve and display two different listsof products. Each product in the lists is linked to a view that will render details of theindividual product. In the next section, we will look at the implementation of readingand displaying a single product to the end user.
Displaying a productVisitors to the MERN Marketplace will be able to view more details of each productin a separate view. In the following sections, we will implement a backend API toretrieve a single product from the database and then use it in the frontend to renderthe single product in a React component.
Exercising MERN Skills with an Online Marketplace Chapter 7
[ 331 ]
Read a product APIIn the backend, we will add an API with a GET route that queries the Productscollection with an ID and returns the product in the response. The route will bedeclared as shown in the following code:
mern-marketplace/server/routes/product.routes.js:
router.route('/api/products/:productId') .get(productCtrl.read)
The:productId param in the URL invokes the productByID controller method,which retrieves the product from the database and appends it to the request object.The product in the request object is used by the read controller method to respond tothe GET request. The read controller method is defined as follows:
mern-marketplace/server/controllers/product.controller.js:
const read = (req, res) => { req.product.image = undefined return res.json(req.product)}
To use this read product API in the frontend, we will need to add a fetch methodin client/product/api-product.js, similar to other API implementations. Thenthis fetch method can be used in the React component, which will render theindividual product details, as discussed in the next section.
Product componentWe will add a React component named Product to render the individual productdetails, along with an add to cart option. In this single product view, we will alsoshow a list of related products, as pictured in the following screenshot:
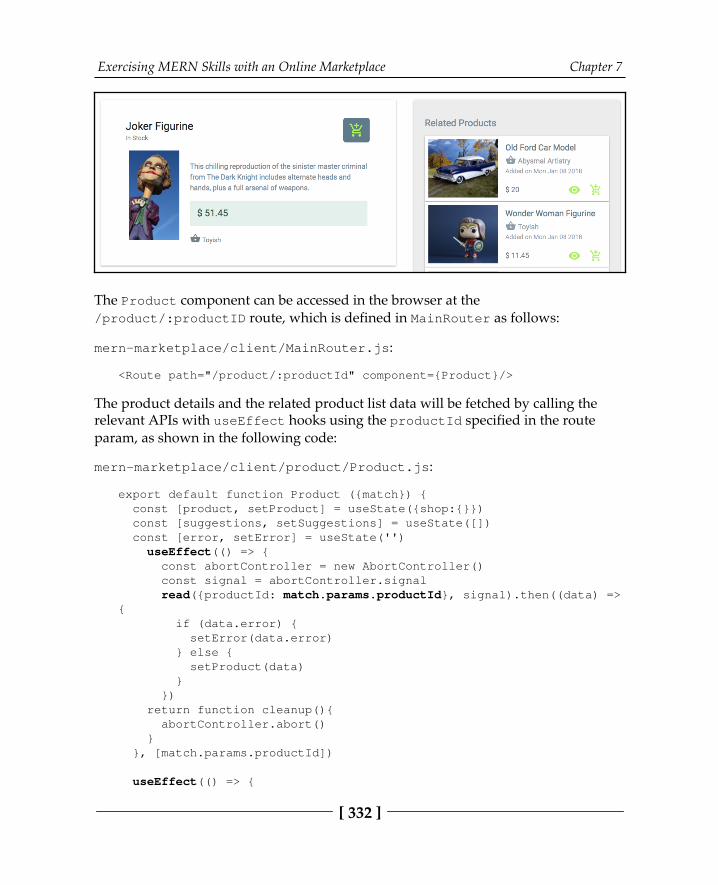
Exercising MERN Skills with an Online Marketplace Chapter 7
[ 332 ]
The Product component can be accessed in the browser at the/product/:productID route, which is defined in MainRouter as follows:
mern-marketplace/client/MainRouter.js:
<Route path="/product/:productId" component={Product}/>
The product details and the related product list data will be fetched by calling therelevant APIs with useEffect hooks using the productId specified in the routeparam, as shown in the following code:
mern-marketplace/client/product/Product.js:
export default function Product ({match}) { const [product, setProduct] = useState({shop:{}}) const [suggestions, setSuggestions] = useState([]) const [error, setError] = useState('') useEffect(() => { const abortController = new AbortController() const signal = abortController.signal read({productId: match.params.productId}, signal).then((data) =>{ if (data.error) { setError(data.error) } else { setProduct(data) } }) return function cleanup(){ abortController.abort() } }, [match.params.productId])
useEffect(() => {

Exercising MERN Skills with an Online Marketplace Chapter 7
[ 333 ]
const abortController = new AbortController() const signal = abortController.signal
listRelated({ productId: match.params.productId}, signal).then((data) => { if (data.error) { setError(data.error) } else { setSuggestions(data) } }) return function cleanup(){ abortController.abort() }}, [match.params.productId])
In the first useEffect hook, we call the read API to retrieve the specified productand set it to state. In the second hook, we call the listRelated API to get the list ofrelated products and set it to the state to be passed as a prop to a Suggestionscomponent added in the product view.
The product details part of the component displays relevant information about theproduct and an AddToCart component in a Material-UI Card component, as shownin the following code:
mern-marketplace/client/product/Product.js:
<Card> <CardHeader action={<AddToCart cartStyle={classes.addCart} item={product}/>} title={product.name} subheader={product.quantity > 0? 'In Stock': 'Out of Stock'} /> <CardMedia image={imageUrl} title={product.name}/> <Typography component="p" variant="subtitle1"> {product.description}<br/> $ {product.price} <Link to={'/shops/'+product.shop._id}> <Icon>shopping_basket</Icon> {product.shop.name} </Link> </Typography></Card>
Exercising MERN Skills with an Online Marketplace Chapter 7
[ 334 ]
The Suggestions component is added in the Product view with the related list datapassed as a prop, as shown next:
mern-marketplace/client/product/Product.js:
<Suggestions products={suggestions} title='Related Products'/>
With this view complete, visitors to the marketplace application will be able to findout more about a specific product as well as explore other similar products. In thenext section, we will discuss how to add the ability for shop owners to edit and deletethe products they added to the marketplace.
Editing and deleting a productImplementations to edit and delete products in the application are similar to editingand deleting shops, as covered in the previous sections, Editing a shop and Deleting ashop. These functionalities will require the corresponding APIs in the backend, fetchmethods in the frontend, and React component views with forms and actions. In thefollowing sections, we will highlight the frontend view, route, and backend APIendpoints for editing and deleting a product from the marketplace.
EditThe edit functionality is very similar to the create product functionality weimplemented earlier. The EditProduct form component, which can be implementedto render a form that allows product detail modification, will also only be accessibleby verified sellers at /seller/:shopId/:productId/edit.
To restrict access to this view, we can add a PrivateRoute in MainRouter to declarethe route to the EditProduct view as follows:
mern-marketplace/client/MainRouter.js:
<PrivateRoute path="/seller/:shopId/:productId/edit"component={EditProduct}/>
Exercising MERN Skills with an Online Marketplace Chapter 7
[ 335 ]
The EditProduct component contains the same form as NewProduct, but withpopulated values of the product retrieved using the read product API. On formsubmit, it uses a fetch method to send multipart form data with a PUT request to theedit product API in the backend at /api/products/by/:shopId. This backendroute declaration for the edit product API will be as follows:
mern-marketplace/server/routes/product.routes.js:
router.route('/api/product/:shopId/:productId') .put(authCtrl.requireSignin, shopCtrl.isOwner,productCtrl.update)
The update controller method is invoked when an authorized user sends a PUTrequest to this API. It is similar to the product create method and the shop updatemethod. It handles the multipart form data using formidable and extends theproduct details to save the updates to the database.
This implementation of an edit product form view integrated with an update API inthe backend will allow shop owners to modify the details of products in their shops.Next, we will look at the highlights for integrating product deletion functionality tothe application.
DeleteIn order to implement the delete product functionality, we can implementa DeleteProduct component similar to the DeleteShop component, and add it tothe MyProducts component for each product in the list. It can take the productobject, shopID, and an onRemove method as a prop from MyProducts, as discussedin the MyProducts component for shop owners section.
The component will function the same as DeleteShop, opening a dialog forconfirmation on button-click and then, when the delete intent is confirmed by theuser, calling the fetch method for delete, which makes the DELETE request to theserver at /api/product/:shopId/:productId. This backend API for deleting aproduct from the database will be declared as follows with the other product routes:
mern-marketplace/server/routes/product.routes.js:
router.route('/api/product/:shopId/:productId') .delete(authCtrl.requireSignin, shopCtrl.isOwner,productCtrl.remove)
Exercising MERN Skills with an Online Marketplace Chapter 7
[ 336 ]
The remove controller method will be invoked if an authorized user makes theDELETE request to this API, and it will delete the specified product from thedatabase, like the remove controller method for shops.
We started the implementation of the product-related features for the marketplace inthis section by first defining a schema for storing product details and then discussingthe full-stack slices for creating, listing, reading, updating, and deleting products inthe application. In the next section, we will look into how to allow users in themarketplace to search for products in varied ways, so they can easily find theproducts they are looking for.
Searching for products with name andcategoryIn MERN Marketplace, visitors will be able to search for specific products by nameand also in a specific category. In the following sections, we will discuss how thissearch functionality can be added by first looking at backend APIs that will retrievethe distinct categories from the Products collection, and perform the search queryagainst the products stored. Then, we will discuss different cases for utilizing theseAPIs, such as a view to perform the search action and a view for displaying productsby categories.
The categories APITo allow users to select a specific category to search in, we will first set up an API thatretrieves all the distinct categories present in the Products collection in the database.A GET request to /api/products/categories will return an array of uniquecategories, and this route is declared as shown here:
mern-marketplace/server/routes/product.routes.js:
router.route('/api/products/categories') .get(productCtrl.listCategories)
The listCategories controller method queries the Products collection with adistinct call against the category field, as shown in the following code:
mern-marketplace/server/controllers/product.controller.js:
const listCategories = async (req, res) => {
Exercising MERN Skills with an Online Marketplace Chapter 7
[ 337 ]
try { let products = await Product.distinct('category',{}) res.json(products) } catch (err){ return res.status(400).json({ error: errorHandler.getErrorMessage(err) }) }}
This categories API can be used in the frontend with a corresponding fetch methodto retrieve the array of distinct categories and displayed in the view. This can bepaired with a search API to allow users to search for products by its name in a specificcategory. In the next section, we will discuss this search API.
The search products APIWe can define a search products API that will take a GET request at/api/products?search=value&category=value, with query parameters in theURL to query the Products collection with the provided search text and categoryvalues. The route for this search API will be defined as follows:
mern-marketplace/server/routes/product.routes.js:
router.route('/api/products') .get(productCtrl.list)
The list controller method will first process the query parameters in the request,then find products in the given category, if any, with names that partially match withthe provided search text. This list method is defined as shown in the followingcode:
mern-marketplace/server/controllers/product.controller.js:
const list = async (req, res) => { const query = {} if(req.query.search) query.name = {'$regex': req.query.search, '$options': "i"} if(req.query.category && req.query.category != 'All') query.category = req.query.category try { let products = await Product.find(query) .populate('shop', '_id name') .select('-image').exec() res.json(products)

Exercising MERN Skills with an Online Marketplace Chapter 7
[ 338 ]
} catch (err){ return res.status(400).json({ error: errorHandler.getErrorMessage(err) }) }}
The resulting products returned against the provided query parameters in the requestare populated with shop details and downsized by removing the image field value,before being sent back in the response. To use this API in the frontend to perform aproduct search, we will need a fetch method that can construct the queryparameters in the request URL, as discussed in the next section.
Fetch search results for the viewTo utilize this search API in the frontend, we will set up a method that constructs theURL with query parameters and calls a fetch to make a request to the search productAPI. This fetch method will be defined as follows.
mern-marketplace/client/product/api-product.js:
import queryString from 'query-string'const list = (params) => { const query = queryString.stringify(params) return fetch('/api/products?'+query, { method: 'GET', }).then(response => { return response.json() }).catch((err) => console.log(err))}
In order to construct the query parameters in the correct format, we will use thequery-string node module, which will help stringify the params object into a querystring that can be attached to the request route URL. The keys and values in thisparams object will be defined by the React component where we call this listmethod. Next, we will look at the Search component, which will utilize this methodto enable the end user to search for products in the marketplace.
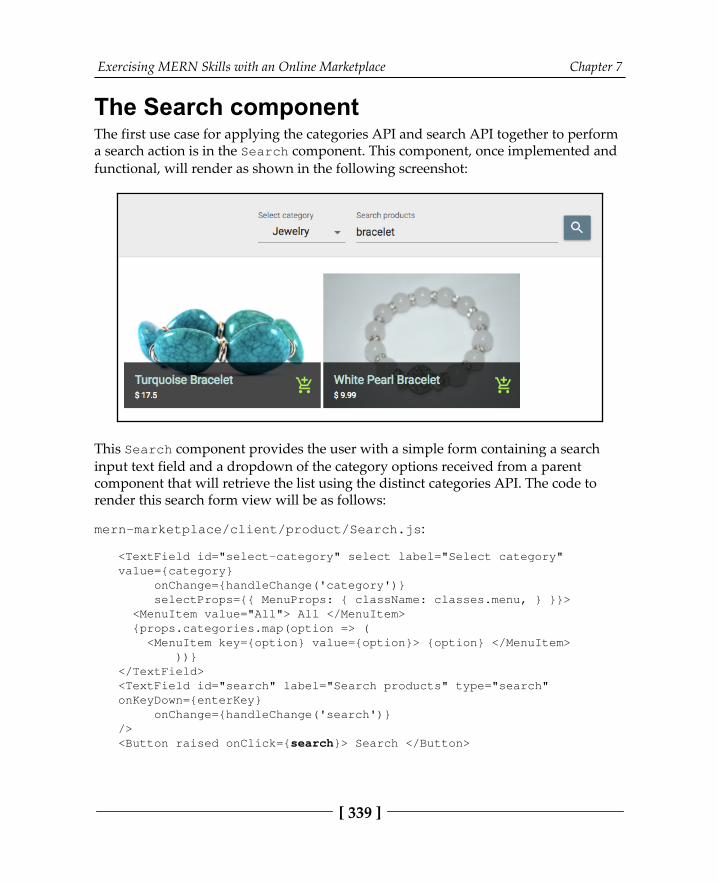
Exercising MERN Skills with an Online Marketplace Chapter 7
[ 339 ]
The Search componentThe first use case for applying the categories API and search API together to performa search action is in the Search component. This component, once implemented andfunctional, will render as shown in the following screenshot:
This Search component provides the user with a simple form containing a searchinput text field and a dropdown of the category options received from a parentcomponent that will retrieve the list using the distinct categories API. The code torender this search form view will be as follows:
mern-marketplace/client/product/Search.js:
<TextField id="select-category" select label="Select category"value={category} onChange={handleChange('category')} selectProps={{ MenuProps: { className: classes.menu, } }}> <MenuItem value="All"> All </MenuItem> {props.categories.map(option => ( <MenuItem key={option} value={option}> {option} </MenuItem> ))}</TextField><TextField id="search" label="Search products" type="search"onKeyDown={enterKey} onChange={handleChange('search')}/><Button raised onClick={search}> Search </Button>
Exercising MERN Skills with an Online Marketplace Chapter 7
[ 340 ]
Once the user enters a search text and hits Enter, we will make a call to the searchmethod. To detect that the Enter key was pressed, we use the onKeyDown attribute onthe TextField and define the enterKey handler method as follows:
mern-marketplace/client/product/Search.js:
const enterKey = (event) => { if(event.keyCode == 13){ event.preventDefault() search() }}
The search method makes a call to the search API using the list fetch method,providing it with the necessary search query parameters and values. This searchmethod is defined as shown in the following code:
mern-marketplace/client/product/Search.js:
const search = () => { if(values.search){ list({ search: values.search || undefined, category: values.category }).then((data) => { if (data.error) { console.log(data.error) } else { setValues({...values, results: data, searched:true}) } }) }}
In this method, the query parameters provided to the list method are the search textvalue, if any, and the selected category value. Then the results array received from thebackend is set to the values in state and passed as a prop to the Productscomponent, as shown next, to render the matching products underneath the searchform:
mern-marketplace/client/product/Search.js:
<Products products={results} searched={searched}/>
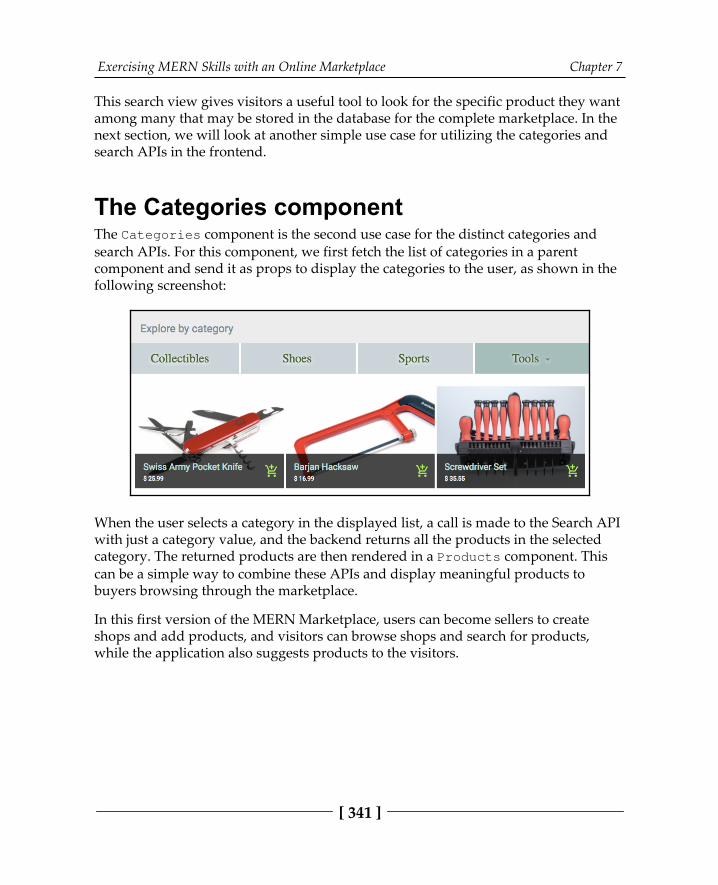
Exercising MERN Skills with an Online Marketplace Chapter 7
[ 341 ]
This search view gives visitors a useful tool to look for the specific product they wantamong many that may be stored in the database for the complete marketplace. In thenext section, we will look at another simple use case for utilizing the categories andsearch APIs in the frontend.
The Categories componentThe Categories component is the second use case for the distinct categories andsearch APIs. For this component, we first fetch the list of categories in a parentcomponent and send it as props to display the categories to the user, as shown in thefollowing screenshot:
When the user selects a category in the displayed list, a call is made to the Search APIwith just a category value, and the backend returns all the products in the selectedcategory. The returned products are then rendered in a Products component. Thiscan be a simple way to combine these APIs and display meaningful products tobuyers browsing through the marketplace.
In this first version of the MERN Marketplace, users can become sellers to createshops and add products, and visitors can browse shops and search for products,while the application also suggests products to the visitors.
Exercising MERN Skills with an Online Marketplace Chapter 7
[ 342 ]
SummaryIn this chapter, we started building an online marketplace application using theMERN stack. The MERN skeleton was extended to allow users to have active selleraccounts, so they can create shops and add products to each shop with the intentionto sell to other users. We also explored how to utilize the stack to implement featuressuch as product browsing, searching, and suggestions for regular users who areinteresting in buying.
While going through the implementations in this chapter, we explored how to laydown the foundations with full-stack implementations to be able to combine andextend interesting features such as search and suggestions. You can apply these sameapproaches while building out other full-stack applications that may require thesefeatures.
Even with these features incorporated, a marketplace application is still incompletewithout a shopping cart for checkout, order management, and payment processing.In the next chapter, we will grow our marketplace application to add these advancedfeatures and learn more about how the MERN stack can be used to implement thesecore aspects of an e-commerce application.
8Extending the Marketplace for
Orders and PaymentsProcessing payments from customers when they place orders and allowing sellers tomanage these orders are key aspects of e-commerce applications. In this chapter, we'llextend the online marketplace we built in the previous chapter by implementingcapabilities for buyers to add products to a shopping cart, a checkout, and placeorders, and for sellers to manage these orders and have payments processed from themarketplace application. Once you've gone through this chapter and added thesefeatures, besides extending the marketplace application with advanced features, youwill be able to utilize browser storage, process payments using Stripe, and integrateother technologies into this stack.
In this chapter, we will extend the online marketplace by covering the followingtopics:
Introducing a cart, payments, and orders in the MERN MarketplaceImplementing a shopping cartUsing Stripe for paymentsIntegrating the checkout processCreating a new orderListing orders for each shopViewing single-order details
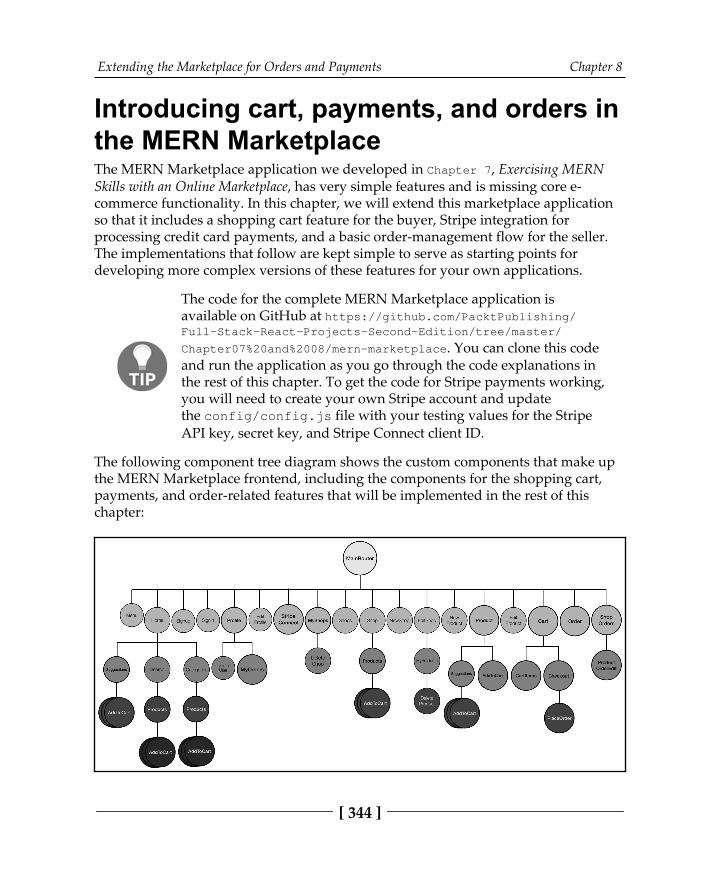
Extending the Marketplace for Orders and Payments Chapter 8
[ 344 ]
Introducing cart, payments, and orders inthe MERN MarketplaceThe MERN Marketplace application we developed in Chapter 7, Exercising MERNSkills with an Online Marketplace, has very simple features and is missing core e-commerce functionality. In this chapter, we will extend this marketplace applicationso that it includes a shopping cart feature for the buyer, Stripe integration forprocessing credit card payments, and a basic order-management flow for the seller.The implementations that follow are kept simple to serve as starting points fordeveloping more complex versions of these features for your own applications.
The code for the complete MERN Marketplace application isavailable on GitHub at https:/ / github. com/ PacktPublishing/Full- Stack- React- Projects- Second- Edition/ tree/ master/Chapter07%20and%2008/ mern-marketplace. You can clone this codeand run the application as you go through the code explanations inthe rest of this chapter. To get the code for Stripe payments working,you will need to create your own Stripe account and updatethe config/config.js file with your testing values for the StripeAPI key, secret key, and Stripe Connect client ID.
The following component tree diagram shows the custom components that make upthe MERN Marketplace frontend, including the components for the shopping cart,payments, and order-related features that will be implemented in the rest of thischapter:
Extending the Marketplace for Orders and Payments Chapter 8
[ 345 ]
The features that will be discussed in this chapter modify some of the existingcomponents, such as Profile, MyShops, Products, and Suggestions, and also addnew components, such as AddToCart, MyOrders, Cart, and ShopOrders. In the nextsection, we will begin extending the online marketplace with the implementation ofthe shopping cart.
Implementing a shopping cartVisitors to the MERN Marketplace can add products they wish to buy to a shoppingcart by clicking the add to cart button on each product. A cart icon on the menu willindicate the number of products that have already been added to their cart as the usercontinues to browse through the marketplace. They can also update the cart'scontents and begin the checkout process by opening the cart view. But to completethe checkout process and place an order, users will be required to sign in.
The shopping cart is mainly a frontend feature, so the cart details will be storedlocally on the client side until the user places the order at checkout. To implement theshopping cart features, we will set up helper methods in client/cart/cart-helper.js that will help manipulate the cart details from relevant Reactcomponents.
In the following sections, we will look at how to add products to the cart, update themenu to indicate the status of the cart, and implement the cart view where users cansee and modify all the items that have already been added to their cart beforechecking out.
Adding to the cartWhile browsing the products in the marketplace, users will see the option on eachproduct to add it to their cart. This option will be implemented with a Reactcomponent named AddToCart. This AddToCart component inclient/Cart/AddToCart.js takes a product object and a CSS style object as propsfrom the parent component it is added to. For example, in the MERN Marketplace, itis added to a Product view as follows:
<AddToCart cartStyle={classes.addCart} item={product}/>
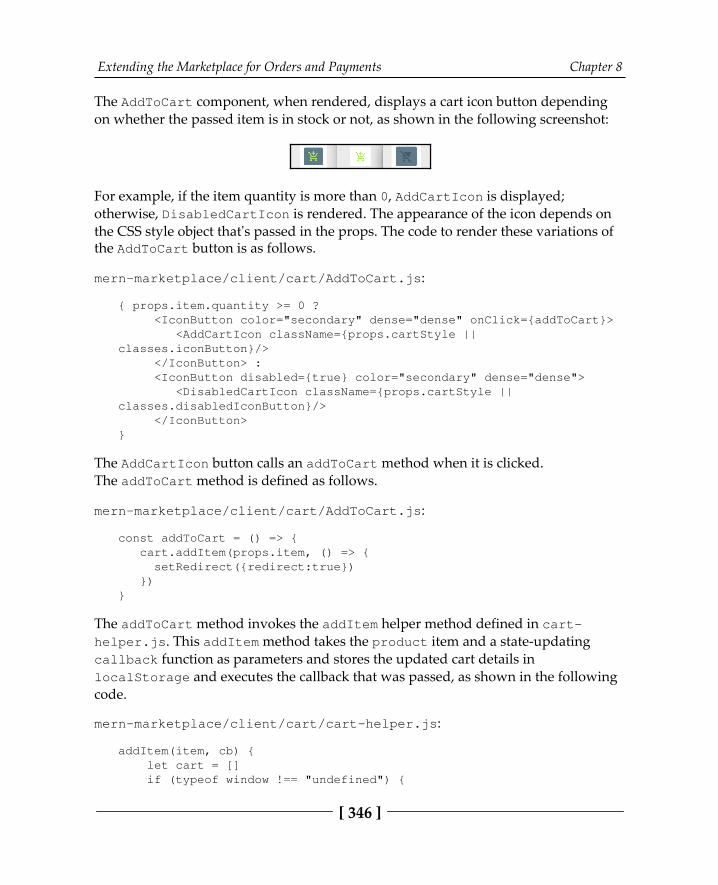
Extending the Marketplace for Orders and Payments Chapter 8
[ 346 ]
The AddToCart component, when rendered, displays a cart icon button dependingon whether the passed item is in stock or not, as shown in the following screenshot:
For example, if the item quantity is more than 0, AddCartIcon is displayed;otherwise, DisabledCartIcon is rendered. The appearance of the icon depends onthe CSS style object that's passed in the props. The code to render these variations ofthe AddToCart button is as follows.
mern-marketplace/client/cart/AddToCart.js:
{ props.item.quantity >= 0 ? <IconButton color="secondary" dense="dense" onClick={addToCart}> <AddCartIcon className={props.cartStyle ||classes.iconButton}/> </IconButton> : <IconButton disabled={true} color="secondary" dense="dense"> <DisabledCartIcon className={props.cartStyle ||classes.disabledIconButton}/> </IconButton>}
The AddCartIcon button calls an addToCart method when it is clicked.The addToCart method is defined as follows.
mern-marketplace/client/cart/AddToCart.js:
const addToCart = () => { cart.addItem(props.item, () => { setRedirect({redirect:true}) })}
The addToCart method invokes the addItem helper method defined in cart-helper.js. This addItem method takes the product item and a state-updatingcallback function as parameters and stores the updated cart details inlocalStorage and executes the callback that was passed, as shown in the followingcode.
mern-marketplace/client/cart/cart-helper.js:
addItem(item, cb) { let cart = [] if (typeof window !== "undefined") {
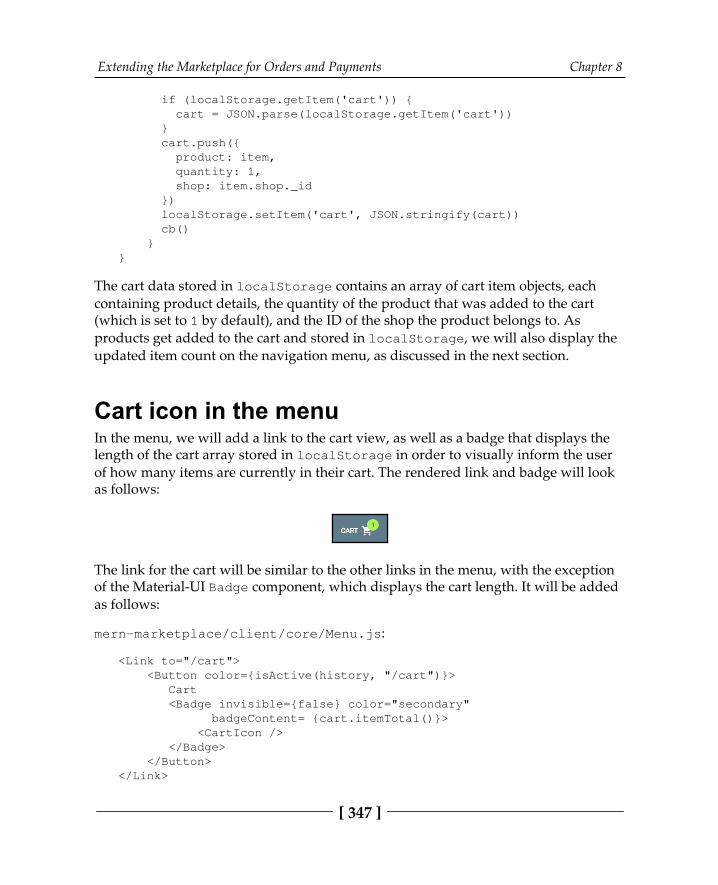
Extending the Marketplace for Orders and Payments Chapter 8
[ 347 ]
if (localStorage.getItem('cart')) { cart = JSON.parse(localStorage.getItem('cart')) } cart.push({ product: item, quantity: 1, shop: item.shop._id }) localStorage.setItem('cart', JSON.stringify(cart)) cb() }}
The cart data stored in localStorage contains an array of cart item objects, eachcontaining product details, the quantity of the product that was added to the cart(which is set to 1 by default), and the ID of the shop the product belongs to. Asproducts get added to the cart and stored in localStorage, we will also display theupdated item count on the navigation menu, as discussed in the next section.
Cart icon in the menuIn the menu, we will add a link to the cart view, as well as a badge that displays thelength of the cart array stored in localStorage in order to visually inform the userof how many items are currently in their cart. The rendered link and badge will lookas follows:
The link for the cart will be similar to the other links in the menu, with the exceptionof the Material-UI Badge component, which displays the cart length. It will be addedas follows:
mern-marketplace/client/core/Menu.js:
<Link to="/cart"> <Button color={isActive(history, "/cart")}> Cart <Badge invisible={false} color="secondary" badgeContent= {cart.itemTotal()}> <CartIcon /> </Badge> </Button></Link>
Extending the Marketplace for Orders and Payments Chapter 8
[ 348 ]
The cart length is returned by the itemTotal helper method in cart-helper.js,which reads the cart array stored in localStorage and returns the length of thearray. The itemTotal method is defined as follows.
mern-marketplace/client/cart/cart-helper.js:
itemTotal() { if (typeof window !== "undefined") { if (localStorage.getItem('cart')) { return JSON.parse(localStorage.getItem('cart')).length } } return 0}
Clicking on this cart link, with the item total displayed on the menu, will take the userto the cart view and reveal details of the items that have already been added to thecart. In the next section, we will discuss the implementation of this cart view.
The cart viewThe cart view will contain the cart items and checkout details. But initially, only thecart details will be displayed until the user is ready to check out. The code to renderthis cart view will be added as follows.
mern-marketplace/client/cart/Cart.js:
<Grid container spacing={24}> <Grid item xs={6} sm={6}> <CartItems checkout={checkout} setCheckout={showCheckout}/> </Grid> {checkout && <Grid item xs={6} sm={6}> <Checkout/> </Grid>}</Grid>
The CartItems component, which displays the items in the cart, is passed acheckout Boolean value and a state update method for this checkout value so thatthe Checkout component and its options can be rendered conditionally based on userinteraction.
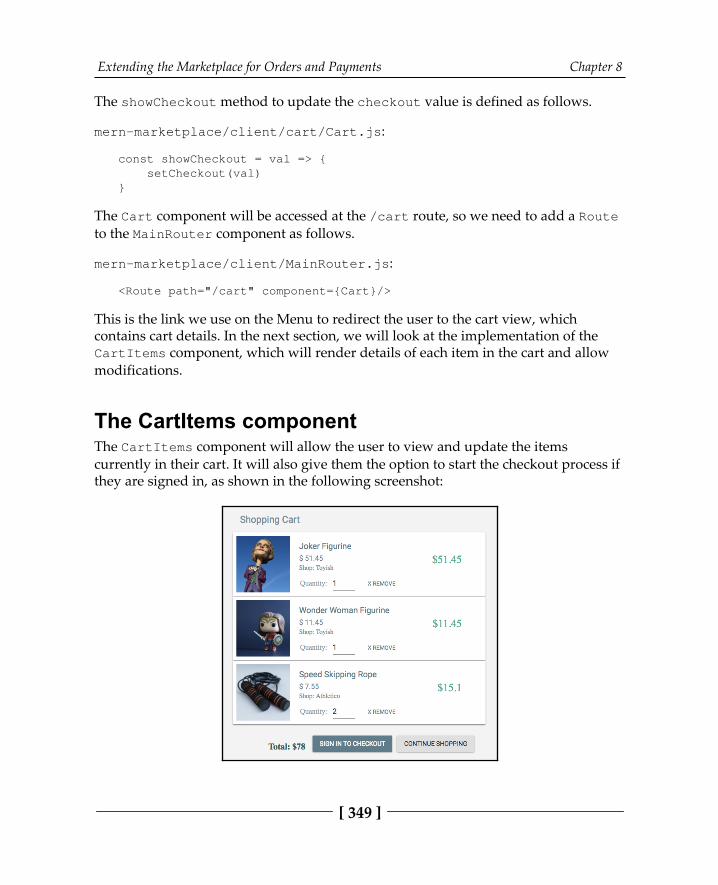
Extending the Marketplace for Orders and Payments Chapter 8
[ 349 ]
The showCheckout method to update the checkout value is defined as follows.
mern-marketplace/client/cart/Cart.js:
const showCheckout = val => { setCheckout(val)}
The Cart component will be accessed at the /cart route, so we need to add a Routeto the MainRouter component as follows.
mern-marketplace/client/MainRouter.js:
<Route path="/cart" component={Cart}/>
This is the link we use on the Menu to redirect the user to the cart view, whichcontains cart details. In the next section, we will look at the implementation of theCartItems component, which will render details of each item in the cart and allowmodifications.
The CartItems componentThe CartItems component will allow the user to view and update the itemscurrently in their cart. It will also give them the option to start the checkout process ifthey are signed in, as shown in the following screenshot:
Extending the Marketplace for Orders and Payments Chapter 8
[ 350 ]
If the cart contains items, the CartItems component iterates over the items andrenders the products in the cart. If no items have been added, the cart view justdisplays a message stating that the cart is empty. The code for this implementation isas follows.
mern-marketplace/client/cart/CartItems.js:
{cartItems.length > 0 ? <span> {cartItems.map((item, i) => { ... … Display product details … Edit quantity … Remove product option ... }) } … Show total price and Checkout options … </span> : <Typography variant="subtitle1" component="h3" color="primary"> No items added to your cart. </Typography>}
For each product item, we show the details of the product and an editable quantitytext field, along with a remove item option. Finally, we show the total price of theitems in the cart and the option to start the checkout operation. In the followingsections, we will look into the implementations of these cart item display andmodification options.
Retrieving cart detailsBefore the cart item details can be displayed, we need to retrieve the cart detailsstored in localStorage. For this purpose, we implement the getCart helpermethod in cart-helper.js, which retrieves and returns the cart details fromlocalStorage, as shown in the following code.
mern-marketplace/client/cart/cart-helper.js:
getCart() { if (typeof window !== "undefined") { if (localStorage.getItem('cart')) { return JSON.parse(localStorage.getItem('cart')) } } return []}
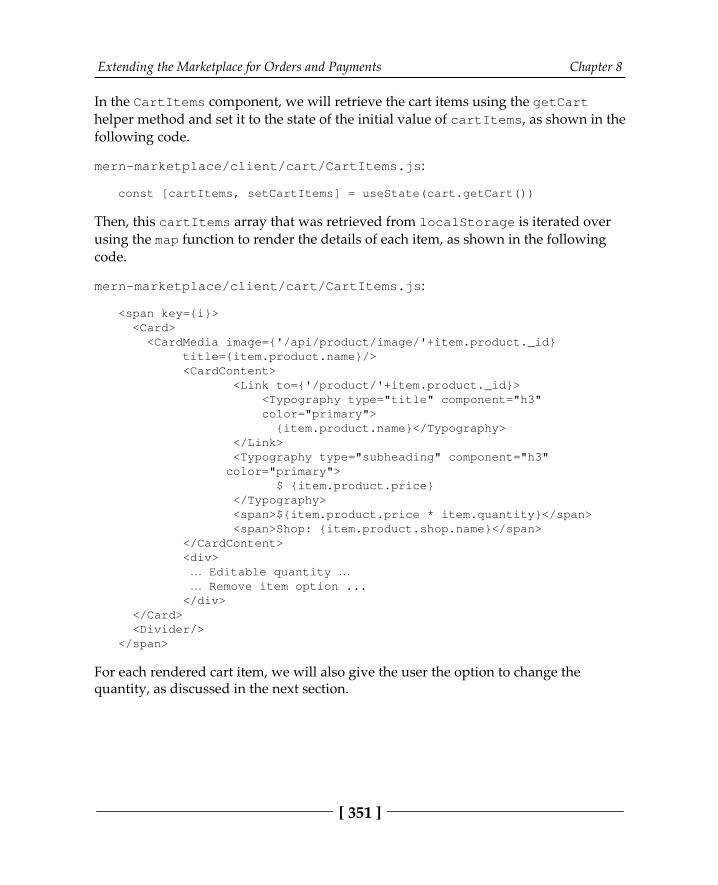
Extending the Marketplace for Orders and Payments Chapter 8
[ 351 ]
In the CartItems component, we will retrieve the cart items using the getCarthelper method and set it to the state of the initial value of cartItems, as shown in thefollowing code.
mern-marketplace/client/cart/CartItems.js:
const [cartItems, setCartItems] = useState(cart.getCart())
Then, this cartItems array that was retrieved from localStorage is iterated overusing the map function to render the details of each item, as shown in the followingcode.
mern-marketplace/client/cart/CartItems.js:
<span key={i}> <Card> <CardMedia image={'/api/product/image/'+item.product._id} title={item.product.name}/> <CardContent> <Link to={'/product/'+item.product._id}> <Typography type="title" component="h3" color="primary"> {item.product.name}</Typography> </Link> <Typography type="subheading" component="h3" color="primary"> $ {item.product.price} </Typography> <span>${item.product.price * item.quantity}</span> <span>Shop: {item.product.shop.name}</span> </CardContent> <div> … Editable quantity … … Remove item option ... </div> </Card> <Divider/></span>
For each rendered cart item, we will also give the user the option to change thequantity, as discussed in the next section.
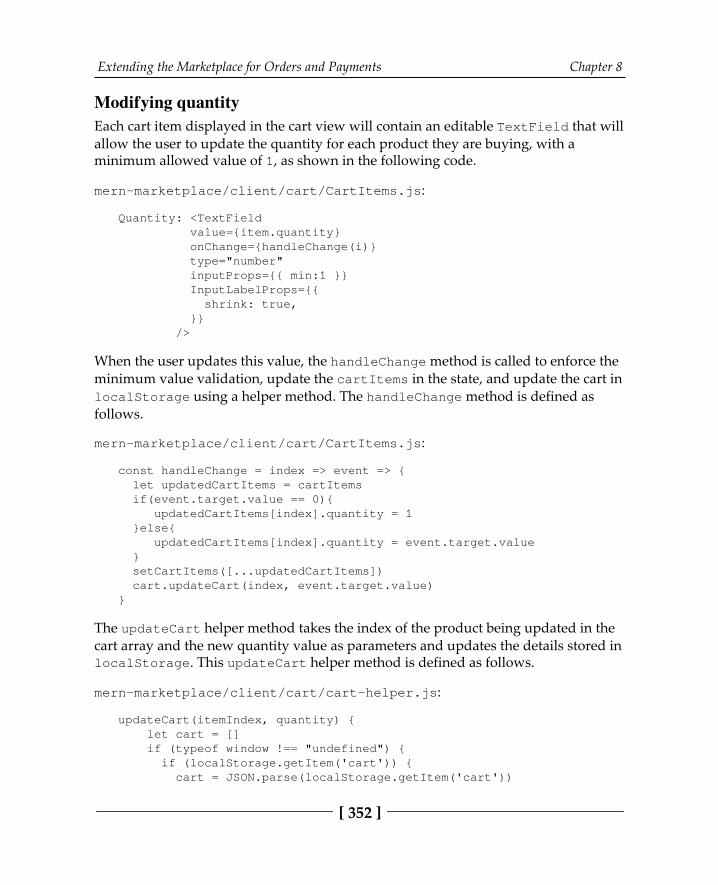
Extending the Marketplace for Orders and Payments Chapter 8
[ 352 ]
Modifying quantityEach cart item displayed in the cart view will contain an editable TextField that willallow the user to update the quantity for each product they are buying, with aminimum allowed value of 1, as shown in the following code.
mern-marketplace/client/cart/CartItems.js:
Quantity: <TextField value={item.quantity} onChange={handleChange(i)} type="number" inputProps={{ min:1 }} InputLabelProps={{ shrink: true, }} />
When the user updates this value, the handleChange method is called to enforce theminimum value validation, update the cartItems in the state, and update the cart inlocalStorage using a helper method. The handleChange method is defined asfollows.
mern-marketplace/client/cart/CartItems.js:
const handleChange = index => event => { let updatedCartItems = cartItems if(event.target.value == 0){ updatedCartItems[index].quantity = 1 }else{ updatedCartItems[index].quantity = event.target.value } setCartItems([...updatedCartItems]) cart.updateCart(index, event.target.value)}
The updateCart helper method takes the index of the product being updated in thecart array and the new quantity value as parameters and updates the details stored inlocalStorage. This updateCart helper method is defined as follows.
mern-marketplace/client/cart/cart-helper.js:
updateCart(itemIndex, quantity) { let cart = [] if (typeof window !== "undefined") { if (localStorage.getItem('cart')) { cart = JSON.parse(localStorage.getItem('cart'))
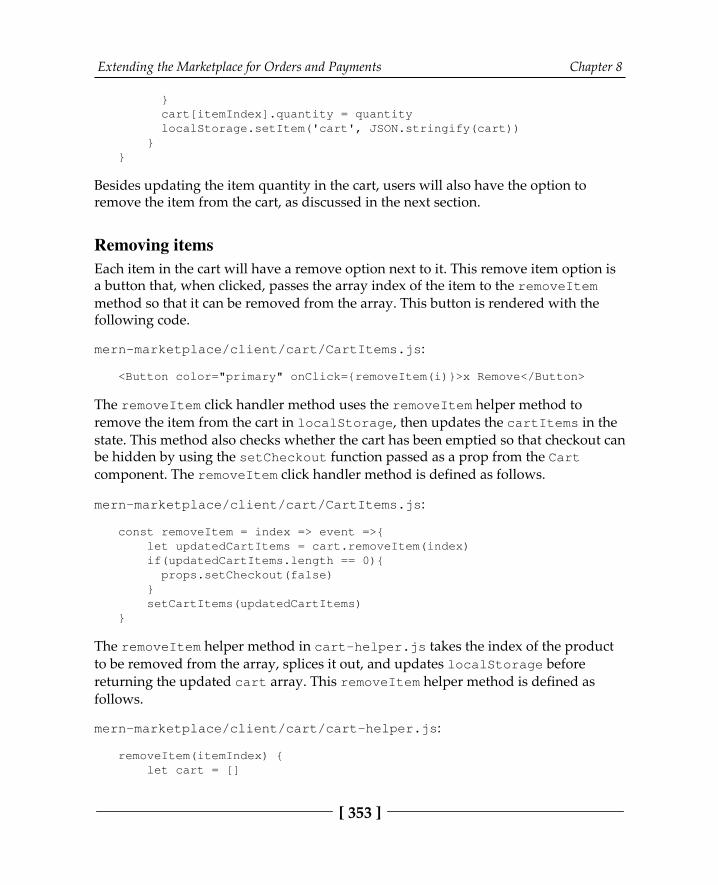
Extending the Marketplace for Orders and Payments Chapter 8
[ 353 ]
} cart[itemIndex].quantity = quantity localStorage.setItem('cart', JSON.stringify(cart)) }}
Besides updating the item quantity in the cart, users will also have the option toremove the item from the cart, as discussed in the next section.
Removing itemsEach item in the cart will have a remove option next to it. This remove item option isa button that, when clicked, passes the array index of the item to the removeItemmethod so that it can be removed from the array. This button is rendered with thefollowing code.
mern-marketplace/client/cart/CartItems.js:
<Button color="primary" onClick={removeItem(i)}>x Remove</Button>
The removeItem click handler method uses the removeItem helper method toremove the item from the cart in localStorage, then updates the cartItems in thestate. This method also checks whether the cart has been emptied so that checkout canbe hidden by using the setCheckout function passed as a prop from the Cartcomponent. The removeItem click handler method is defined as follows.
mern-marketplace/client/cart/CartItems.js:
const removeItem = index => event =>{ let updatedCartItems = cart.removeItem(index) if(updatedCartItems.length == 0){ props.setCheckout(false) } setCartItems(updatedCartItems)}
The removeItem helper method in cart-helper.js takes the index of the productto be removed from the array, splices it out, and updates localStorage beforereturning the updated cart array. This removeItem helper method is defined asfollows.
mern-marketplace/client/cart/cart-helper.js:
removeItem(itemIndex) { let cart = []
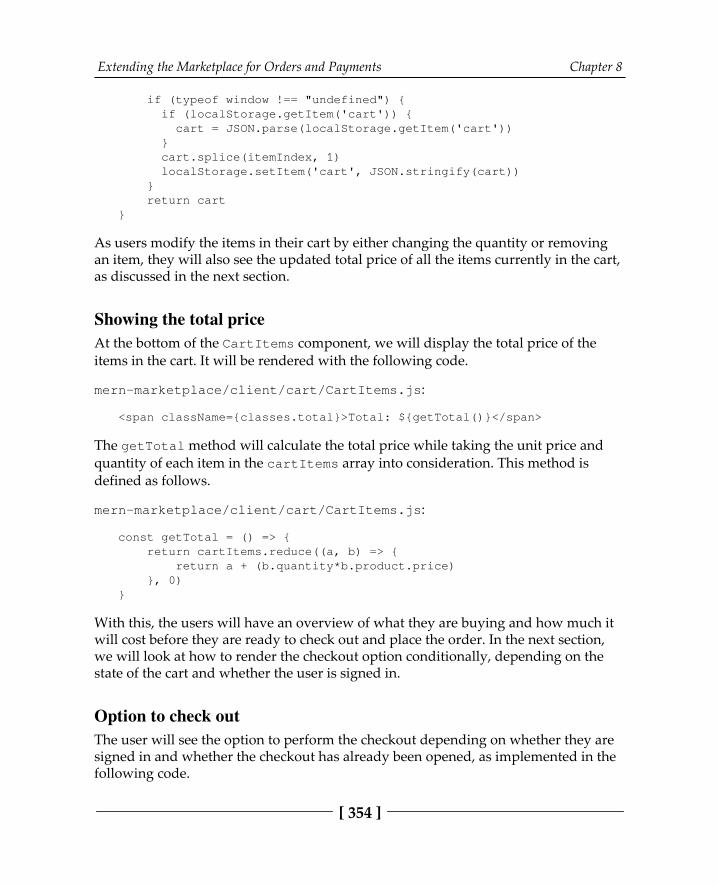
Extending the Marketplace for Orders and Payments Chapter 8
[ 354 ]
if (typeof window !== "undefined") { if (localStorage.getItem('cart')) { cart = JSON.parse(localStorage.getItem('cart')) } cart.splice(itemIndex, 1) localStorage.setItem('cart', JSON.stringify(cart)) } return cart}
As users modify the items in their cart by either changing the quantity or removingan item, they will also see the updated total price of all the items currently in the cart,as discussed in the next section.
Showing the total priceAt the bottom of the CartItems component, we will display the total price of theitems in the cart. It will be rendered with the following code.
mern-marketplace/client/cart/CartItems.js:
<span className={classes.total}>Total: ${getTotal()}</span>
The getTotal method will calculate the total price while taking the unit price andquantity of each item in the cartItems array into consideration. This method isdefined as follows.
mern-marketplace/client/cart/CartItems.js:
const getTotal = () => { return cartItems.reduce((a, b) => { return a + (b.quantity*b.product.price) }, 0)}
With this, the users will have an overview of what they are buying and how much itwill cost before they are ready to check out and place the order. In the next section,we will look at how to render the checkout option conditionally, depending on thestate of the cart and whether the user is signed in.
Option to check outThe user will see the option to perform the checkout depending on whether they aresigned in and whether the checkout has already been opened, as implemented in thefollowing code.
Extending the Marketplace for Orders and Payments Chapter 8
[ 355 ]
mern-marketplace/client/cart/CartItems.js:
{!props.checkout && (auth.isAuthenticated() ? <Button onClick={openCheckout}> Checkout </Button> : <Link to="/signin"> <Button>Sign in to checkout</Button> </Link>)}
When the checkout button is clicked, the openCheckout method will use thesetCheckout method passed as a prop to set the checkout value to true in the Cartcomponent. The openCheckout method is defined as follows.
mern-marketplace/client/cart/CartItems.js:
const openCheckout = () => { props.setCheckout(true)}
Once the checkout value is set to true in the Cart view, the Checkout componentwill be rendered to allow the user to enter the checkout details and place an order.
This will complete the buying process for a user, who is now able to add items totheir shopping cart and modify each item until they are ready to checkout. But beforegetting into the implementation of the checkout functionality, which will involvegathering and processing payment information, in the next section, we will discusshow to use Stripe in our application to add the intended payment-related features.
Using Stripe for paymentsPayment processing is required across implementations of the checkout, ordercreation, and order management processes. It also involves making updates to boththe buyer's and seller's user data. Before we delve into the implementations of thecheckout and order features, we will briefly discuss payment processing options andconsiderations using Stripe and learn how to integrate it in the MERN Marketplace.
Stripe provides an extensive set of tools that are necessary to integrate payments inany web application. These tools can be selected and used in different ways, depending on the specific type of application and the payment use case beingimplemented.
Extending the Marketplace for Orders and Payments Chapter 8
[ 356 ]
In the case of the MERN Marketplace setup, the application itself will have a platformon Stripe and will expect sellers to have connected Stripe accounts on the platform sothat the application can charge users who enter their credit card details at checkout onbehalf of the sellers. In the MERN Marketplace, a user can add products fromdifferent shops to their shopping cart so that charges on their cards will only becreated by the application for the specific product that was ordered when it isprocessed by the seller. Additionally, sellers will have complete control over thecharges that are created on their behalf from their own Stripe dashboards. We willdemonstrate how to use the tools provided by Stripe to get this payment setupworking.
Stripe provides a complete set of documentation and guidelines for each tool and alsoexposes testing data for accounts and platforms that are set up on Stripe. For thepurpose of implementing payments in the MERN Marketplace, we will be usingtesting keys and leave it up to you to extend the implementation for live payments.
In the following sections, we will discuss how to connect a Stripe account for eachseller, collect credit card details from the user with Stripe Card Elements, use StripeCustomer to record the user's payment information securely, and create a charge withStripe for processing a payment.
Stripe-connected account for each sellerTo create charges on behalf of sellers, the application will let a user, who is a seller,connect their Stripe account to their MERN Marketplace user account. In thefollowing sections, we will implement this functionality by updating the user modelso that it can store Stripe credentials, add the view components to allow users toconnect to Stripe, and add a backend API to complete Stripe OAuth before updatingthe database with the retrieved credentials from Stripe.
Updating the user modelWhen a seller connects their Stripe account to the marketplace, we will need to storetheir Stripe credentials with their other user details so that they can be used later forpayment processing when they sell products. To store the Stripe OAuth credentialsafter a user's Stripe account is successfully connected, we will update the usermodel that we developed in Chapter 3, Building a Backend with MongoDB, Express, andNode, with the following field.
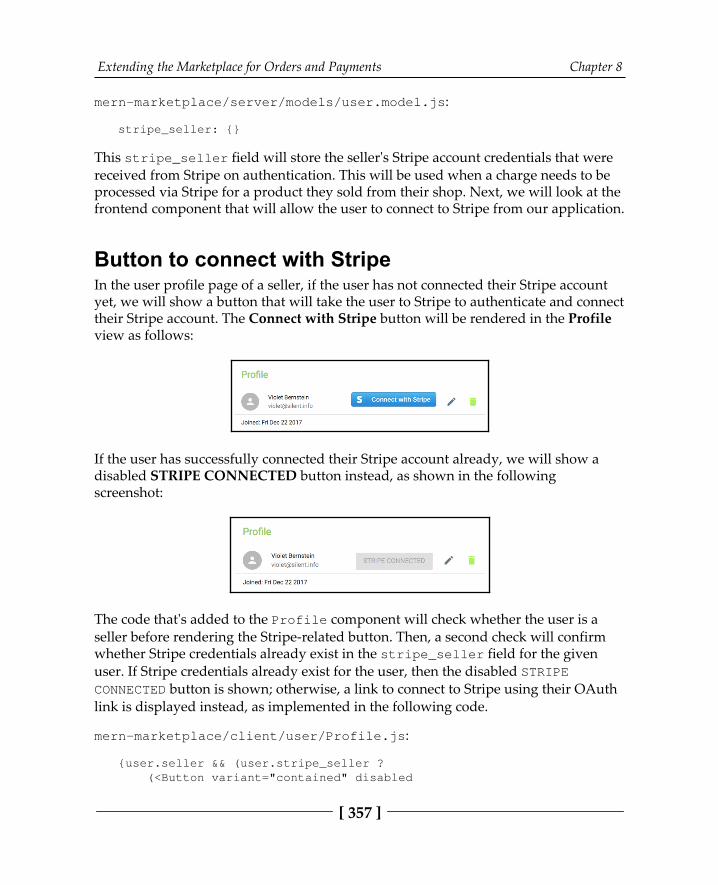
Extending the Marketplace for Orders and Payments Chapter 8
[ 357 ]
mern-marketplace/server/models/user.model.js:
stripe_seller: {}
This stripe_seller field will store the seller's Stripe account credentials that werereceived from Stripe on authentication. This will be used when a charge needs to beprocessed via Stripe for a product they sold from their shop. Next, we will look at thefrontend component that will allow the user to connect to Stripe from our application.
Button to connect with StripeIn the user profile page of a seller, if the user has not connected their Stripe accountyet, we will show a button that will take the user to Stripe to authenticate and connecttheir Stripe account. The Connect with Stripe button will be rendered in the Profileview as follows:
If the user has successfully connected their Stripe account already, we will show adisabled STRIPE CONNECTED button instead, as shown in the followingscreenshot:
The code that's added to the Profile component will check whether the user is aseller before rendering the Stripe-related button. Then, a second check will confirmwhether Stripe credentials already exist in the stripe_seller field for the givenuser. If Stripe credentials already exist for the user, then the disabled STRIPECONNECTED button is shown; otherwise, a link to connect to Stripe using their OAuthlink is displayed instead, as implemented in the following code.
mern-marketplace/client/user/Profile.js:
{user.seller && (user.stripe_seller ? (<Button variant="contained" disabled
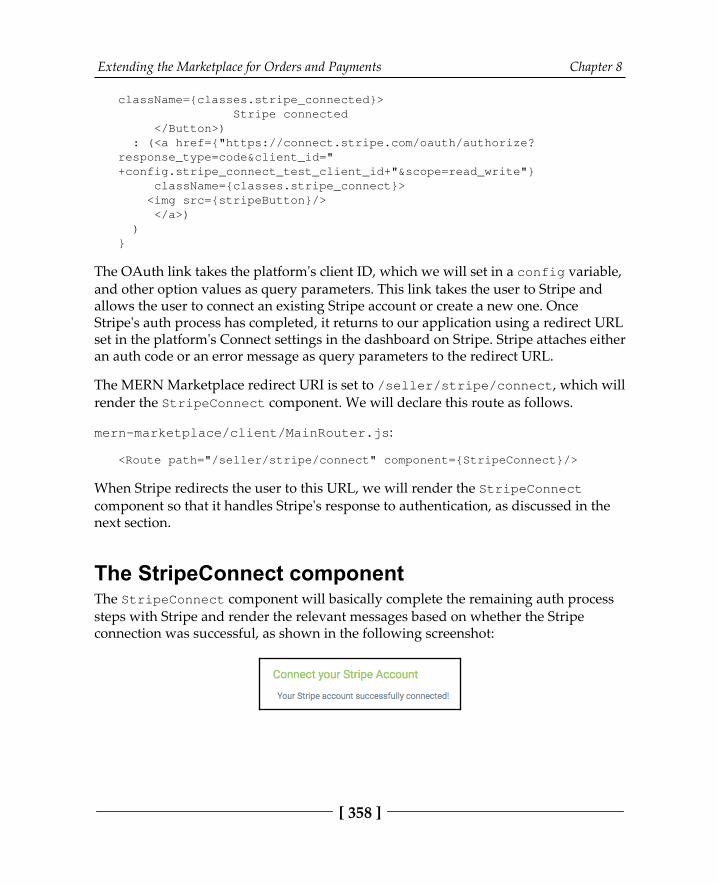
Extending the Marketplace for Orders and Payments Chapter 8
[ 358 ]
className={classes.stripe_connected}> Stripe connected </Button>) : (<a href={"https://connect.stripe.com/oauth/authorize?response_type=code&client_id="+config.stripe_connect_test_client_id+"&scope=read_write"} className={classes.stripe_connect}> <img src={stripeButton}/> </a>) )}
The OAuth link takes the platform's client ID, which we will set in a config variable,and other option values as query parameters. This link takes the user to Stripe andallows the user to connect an existing Stripe account or create a new one. OnceStripe's auth process has completed, it returns to our application using a redirect URLset in the platform's Connect settings in the dashboard on Stripe. Stripe attaches eitheran auth code or an error message as query parameters to the redirect URL.
The MERN Marketplace redirect URI is set to /seller/stripe/connect, which willrender the StripeConnect component. We will declare this route as follows.
mern-marketplace/client/MainRouter.js:
<Route path="/seller/stripe/connect" component={StripeConnect}/>
When Stripe redirects the user to this URL, we will render the StripeConnectcomponent so that it handles Stripe's response to authentication, as discussed in thenext section.
The StripeConnect componentThe StripeConnect component will basically complete the remaining auth processsteps with Stripe and render the relevant messages based on whether the Stripeconnection was successful, as shown in the following screenshot:
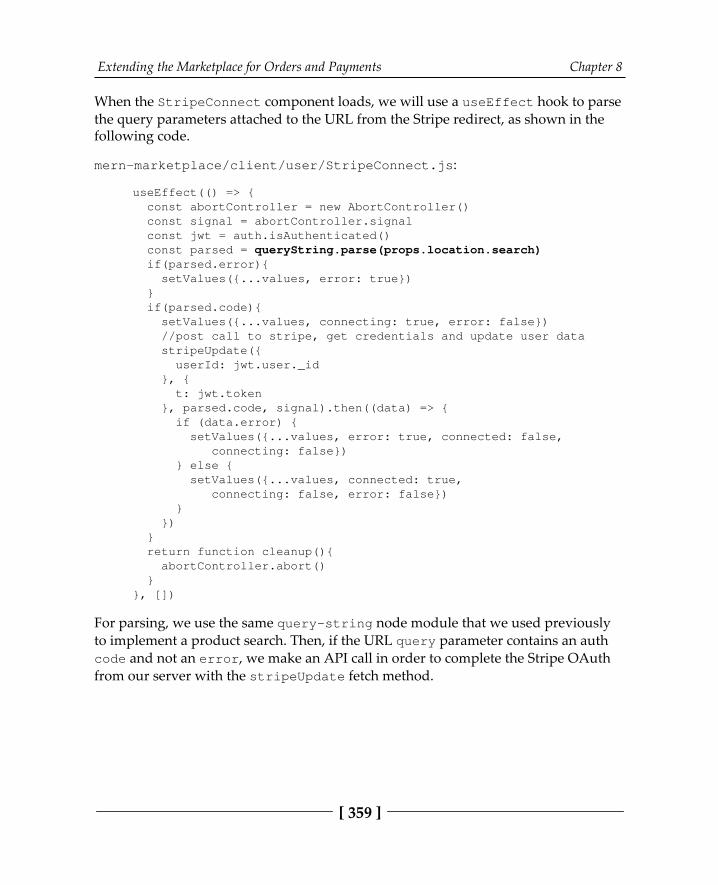
Extending the Marketplace for Orders and Payments Chapter 8
[ 359 ]
When the StripeConnect component loads, we will use a useEffect hook to parsethe query parameters attached to the URL from the Stripe redirect, as shown in thefollowing code.
mern-marketplace/client/user/StripeConnect.js:
useEffect(() => { const abortController = new AbortController() const signal = abortController.signal const jwt = auth.isAuthenticated() const parsed = queryString.parse(props.location.search) if(parsed.error){ setValues({...values, error: true}) } if(parsed.code){ setValues({...values, connecting: true, error: false}) //post call to stripe, get credentials and update user data stripeUpdate({ userId: jwt.user._id }, { t: jwt.token }, parsed.code, signal).then((data) => { if (data.error) { setValues({...values, error: true, connected: false, connecting: false}) } else { setValues({...values, connected: true, connecting: false, error: false}) } }) } return function cleanup(){ abortController.abort() } }, [])
For parsing, we use the same query-string node module that we used previouslyto implement a product search. Then, if the URL query parameter contains an authcode and not an error, we make an API call in order to complete the Stripe OAuthfrom our server with the stripeUpdate fetch method.
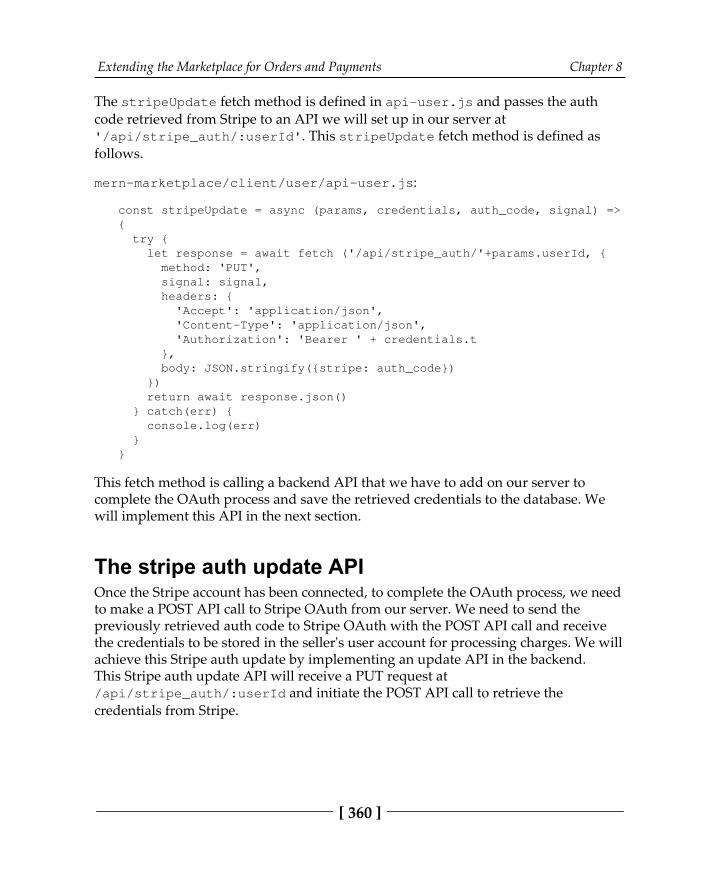
Extending the Marketplace for Orders and Payments Chapter 8
[ 360 ]
The stripeUpdate fetch method is defined in api-user.js and passes the authcode retrieved from Stripe to an API we will set up in our server at'/api/stripe_auth/:userId'. This stripeUpdate fetch method is defined asfollows.
mern-marketplace/client/user/api-user.js:
const stripeUpdate = async (params, credentials, auth_code, signal) =>{ try { let response = await fetch ('/api/stripe_auth/'+params.userId, { method: 'PUT', signal: signal, headers: { 'Accept': 'application/json', 'Content-Type': 'application/json', 'Authorization': 'Bearer ' + credentials.t }, body: JSON.stringify({stripe: auth_code}) }) return await response.json() } catch(err) { console.log(err) }}
This fetch method is calling a backend API that we have to add on our server tocomplete the OAuth process and save the retrieved credentials to the database. Wewill implement this API in the next section.
The stripe auth update APIOnce the Stripe account has been connected, to complete the OAuth process, we needto make a POST API call to Stripe OAuth from our server. We need to send thepreviously retrieved auth code to Stripe OAuth with the POST API call and receivethe credentials to be stored in the seller's user account for processing charges. We willachieve this Stripe auth update by implementing an update API in the backend. This Stripe auth update API will receive a PUT request at/api/stripe_auth/:userId and initiate the POST API call to retrieve thecredentials from Stripe.
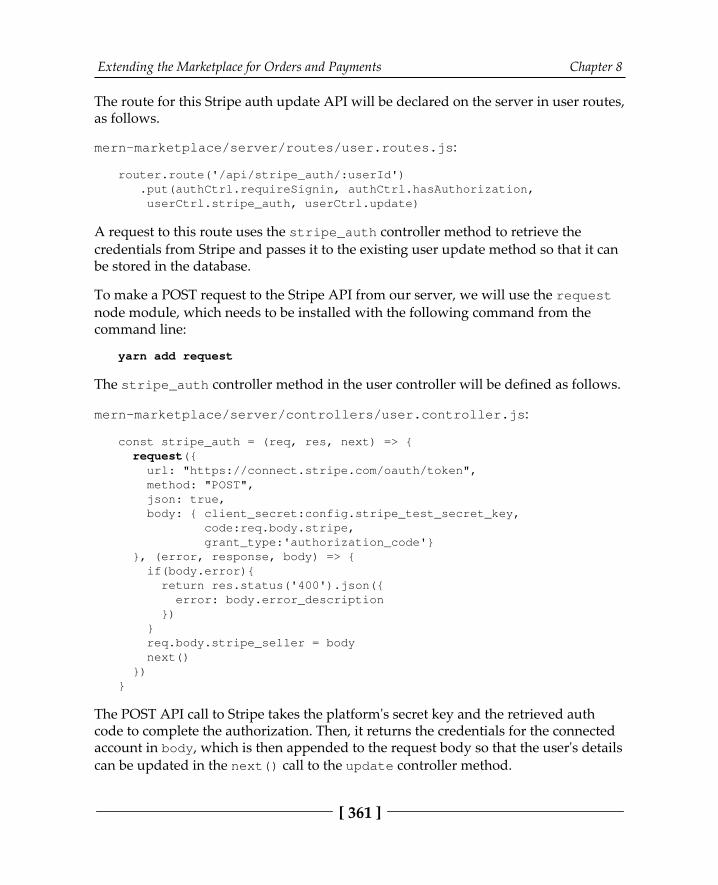
Extending the Marketplace for Orders and Payments Chapter 8
[ 361 ]
The route for this Stripe auth update API will be declared on the server in user routes,as follows.
mern-marketplace/server/routes/user.routes.js:
router.route('/api/stripe_auth/:userId') .put(authCtrl.requireSignin, authCtrl.hasAuthorization, userCtrl.stripe_auth, userCtrl.update)
A request to this route uses the stripe_auth controller method to retrieve thecredentials from Stripe and passes it to the existing user update method so that it canbe stored in the database.
To make a POST request to the Stripe API from our server, we will use the requestnode module, which needs to be installed with the following command from thecommand line:
yarn add request
The stripe_auth controller method in the user controller will be defined as follows.
mern-marketplace/server/controllers/user.controller.js:
const stripe_auth = (req, res, next) => { request({ url: "https://connect.stripe.com/oauth/token", method: "POST", json: true, body: { client_secret:config.stripe_test_secret_key, code:req.body.stripe, grant_type:'authorization_code'} }, (error, response, body) => { if(body.error){ return res.status('400').json({ error: body.error_description }) } req.body.stripe_seller = body next() })}
The POST API call to Stripe takes the platform's secret key and the retrieved authcode to complete the authorization. Then, it returns the credentials for the connectedaccount in body, which is then appended to the request body so that the user's detailscan be updated in the next() call to the update controller method.
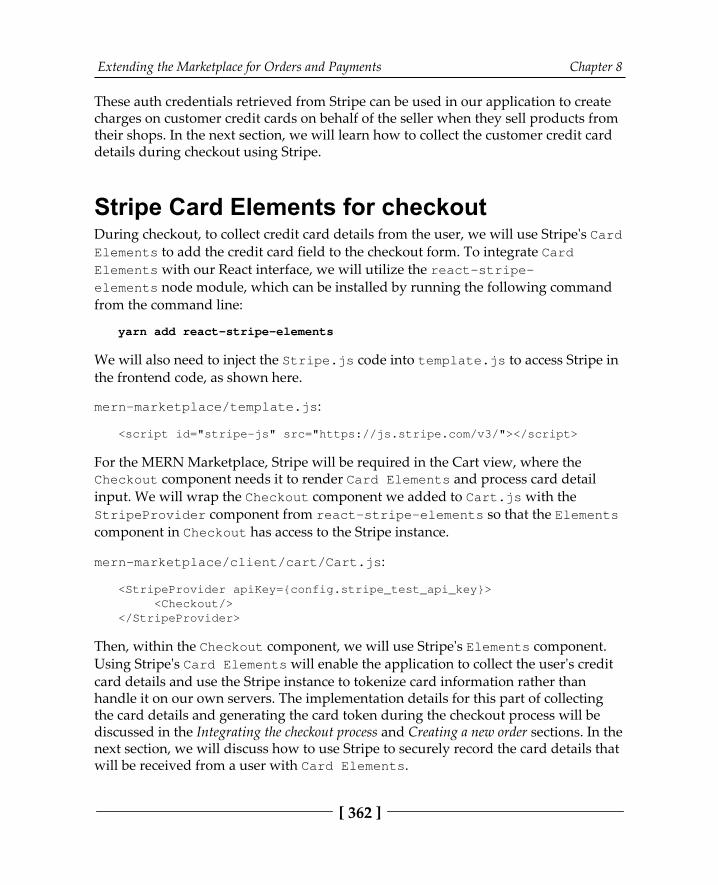
Extending the Marketplace for Orders and Payments Chapter 8
[ 362 ]
These auth credentials retrieved from Stripe can be used in our application to createcharges on customer credit cards on behalf of the seller when they sell products fromtheir shops. In the next section, we will learn how to collect the customer credit carddetails during checkout using Stripe.
Stripe Card Elements for checkoutDuring checkout, to collect credit card details from the user, we will use Stripe's CardElements to add the credit card field to the checkout form. To integrate CardElements with our React interface, we will utilize the react-stripe-elements node module, which can be installed by running the following commandfrom the command line:
yarn add react-stripe-elements
We will also need to inject the Stripe.js code into template.js to access Stripe inthe frontend code, as shown here.
mern-marketplace/template.js:
<script id="stripe-js" src="https://js.stripe.com/v3/"></script>
For the MERN Marketplace, Stripe will be required in the Cart view, where theCheckout component needs it to render Card Elements and process card detailinput. We will wrap the Checkout component we added to Cart.js with theStripeProvider component from react-stripe-elements so that the Elementscomponent in Checkout has access to the Stripe instance.
mern-marketplace/client/cart/Cart.js:
<StripeProvider apiKey={config.stripe_test_api_key}> <Checkout/></StripeProvider>
Then, within the Checkout component, we will use Stripe's Elements component.Using Stripe's Card Elements will enable the application to collect the user's creditcard details and use the Stripe instance to tokenize card information rather thanhandle it on our own servers. The implementation details for this part of collectingthe card details and generating the card token during the checkout process will bediscussed in the Integrating the checkout process and Creating a new order sections. In thenext section, we will discuss how to use Stripe to securely record the card details thatwill be received from a user with Card Elements.
Extending the Marketplace for Orders and Payments Chapter 8
[ 363 ]
Stripe Customer for recording card detailsWhen an order is being placed at the end of the checkout process, the generated cardtoken will be used to create or update a Stripe Customer (https:/ / stripe. com/ docs/api#customers) representing our user. This is a good way to store credit cardinformation (https:/ /stripe. com/ docs/ saving- cards) with Stripe for further use,such as for creating charges against specific products in the cart when a sellerprocesses the ordered product from their shop. This eliminates the complications ofhaving to store user credit card details securely on your own server. To integrateStripe Customer with our application, in the following sections, we will update theuser model so that it stores Stripe Customer details and update the user controllermethods so that we can create or update Stripe Customer information using the Stripenode module in the backend.
Updating the user modelTo use Stripe Customer to securely store the credit card information of each user andprocess payments as needed in the application, we need to store details of the StripeCustomer associated with each user. To keep track of the corresponding StripeCustomer information for a user in our database, we will update the user model withthe following field:
stripe_customer: {},
This field will store a Stripe Customer object that will allow us to create recurringcharges and track multiple charges associated with the same user in our platform. Tobe able to create or update a Stripe Customer, we need to utilize Stripe's CustomerAPI. In the next section, we will update the user controller so that we can integrateand use this Customer API from Stripe.
Updating the user controllerWe will create a new, or update an existing, Stripe Customer when the user places anorder after entering their credit card details. To implement this, we will update theuser controllers with a stripeCustomer method that will be called before the orderis created when our server receives a request to the create order API (as discussed inthe Creating a new order section).
Extending the Marketplace for Orders and Payments Chapter 8
[ 364 ]
In the stripeCustomer controller method, we will need to use the stripe nodemodule, which can be installed with the following command:
yarn add stripe
After installing the stripe module, it needs to be imported into the user controllerfile. Then, the stripe instance needs to be initialized with the application's Stripesecret key.
mern-marketplace/server/controllers/user.controller.js:
import stripe from 'stripe'const myStripe = stripe(config.stripe_test_secret_key)
The stripeCustomer controller method will check whether the current user alreadyhas a corresponding Stripe Customer stored in the database, and then use the cardtoken received from the frontend to either create a new Stripe Customer or update theexisting one, as discussed in the following sections.
Creating a new Stripe CustomerIf the current user does not have a corresponding Stripe Customer – in other words, avalue is not stored for the stripe_customer field – we will use the create a customerAPI (https://stripe. com/ docs/ api#create_ customer) from Stripe, as follows.
mern-marketplace/server/controllers/user.controller.js:
myStripe.customers.create({ email: req.profile.email, source: req.body.token }).then((customer) => { User.update({'_id':req.profile._id}, {'$set': { 'stripe_customer': customer.id }}, (err, order) => { if (err) { return res.status(400).send({ error: errorHandler.getErrorMessage(err) }) } req.body.order.payment_id = customer.id next() })})

Extending the Marketplace for Orders and Payments Chapter 8
[ 365 ]
If the Stripe Customer is successfully created, we will update the current user's databy storing the Stripe Customer ID reference in the stripe_customer field. We willalso add this Customer ID to the order being placed so that it is simpler to create acharge related to the order. Once a Stripe Customer has been created, we can updatethe Stripe Customer the next time a user enters credit card details for a new order, asdiscussed in the next section.
Updating an existing Stripe CustomerFor an existing Stripe Customer – in other words, where the current user already hasa value stored for the stripe_customer field – we will use the Stripe API to updatea Stripe Customer, as follows.
mern-marketplace/server/controllers/user.controller.js:
myStripe.customers.update(req.profile.stripe_customer, { source: req.body.token }, (err, customer) => { if(err){ return res.status(400).send({ error: "Could not update charge details" }) } req.body.order.payment_id = customer.id next() })
Once the Stripe Customer has been successfully updated, we will add the CustomerID to the order being created in the next() call. Though not covered here, the StripeCustomer feature can be used to allow users to store and update their credit cardinformation from the application. With the user's payment information securelystored and accessible, we can look into how to use this information to process apayment when an ordered product is processed by the seller.
Creating a charge for each product that'sprocessedWhen a seller updates an order by processing the product that was ordered in theirshop, the application will create a charge on behalf of the seller on the customer'scredit card for the cost of the product ordered.

Extending the Marketplace for Orders and Payments Chapter 8
[ 366 ]
To implement this, we will update the user.controller.js file with acreateCharge controller method that will use Stripe's create a charge API and needsthe seller's Stripe account ID, along with the buyer's Stripe Customer ID.The createCharge controller method will be defined as follows.
mern-marketplace/server/controllers/user.controller.js:
const createCharge = (req, res, next) => { if(!req.profile.stripe_seller){ return res.status('400').json({ error: "Please connect your Stripe account" }) } myStripe.tokens.create({ customer: req.order.payment_id, }, { stripeAccount: req.profile.stripe_seller.stripe_user_id, }).then((token) => { myStripe.charges.create({ amount: req.body.amount * 100, //amount in cents currency: "usd", source: token.id, }, { stripeAccount: req.profile.stripe_seller.stripe_user_id, }).then((charge) => { next() }) })}
If the seller has not connected their Stripe account yet, the createCharge methodwill return a 400 error response to indicate that a connected Stripe account isrequired.
To be able to charge the Stripe Customer on behalf of the seller's Stripe account, weneed to generate a Stripe token with the Customer ID and the seller's Stripe accountID and then use that token to create a charge.
The createCharge controller method will be called when the server receives arequest to update an order with a product status change to Processing (the APIimplementation for this order update request will be discussed in the Listing orders byshop section).
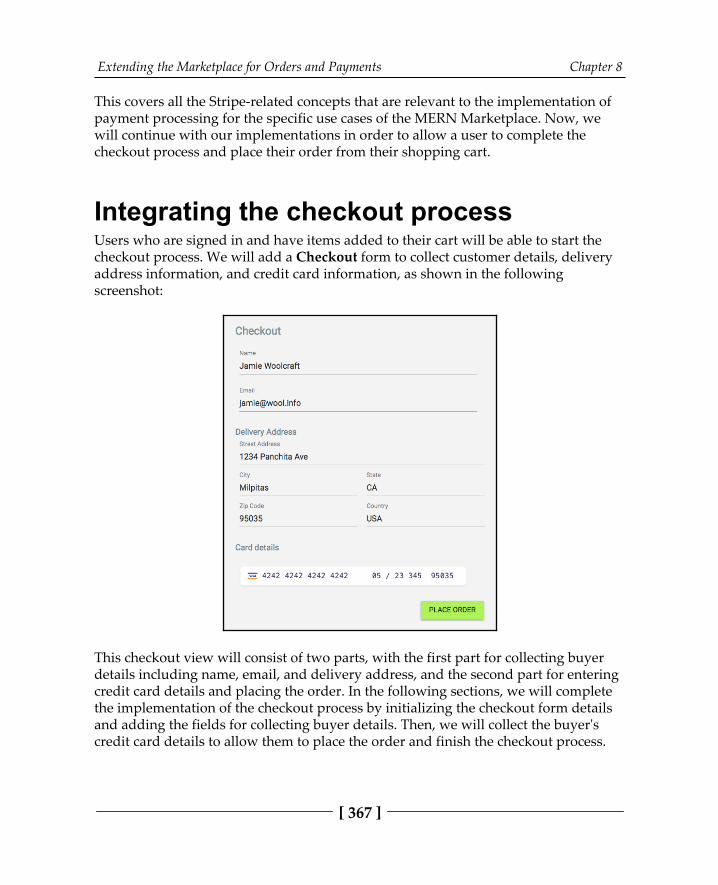
Extending the Marketplace for Orders and Payments Chapter 8
[ 367 ]
This covers all the Stripe-related concepts that are relevant to the implementation ofpayment processing for the specific use cases of the MERN Marketplace. Now, wewill continue with our implementations in order to allow a user to complete thecheckout process and place their order from their shopping cart.
Integrating the checkout processUsers who are signed in and have items added to their cart will be able to start thecheckout process. We will add a Checkout form to collect customer details, deliveryaddress information, and credit card information, as shown in the followingscreenshot:
This checkout view will consist of two parts, with the first part for collecting buyerdetails including name, email, and delivery address, and the second part for enteringcredit card details and placing the order. In the following sections, we will completethe implementation of the checkout process by initializing the checkout form detailsand adding the fields for collecting buyer details. Then, we will collect the buyer'scredit card details to allow them to place the order and finish the checkout process.
Extending the Marketplace for Orders and Payments Chapter 8
[ 368 ]
Initializing checkout detailsIn this section, we will create the checkout view, which contains the form fields andthe place order option in a Checkout component. In this component, we willinitialize the checkoutDetails object in the state before collecting the details fromthe form. We will prepopulate the customer details based on the current user's detailsand add the current cart items to checkoutDetails, as shown in the following code.
mern-marketplace/client/cart/Checkout.js:
const user = auth.isAuthenticated().user const [values, setValues] = useState({ checkoutDetails: { products: cart.getCart(), customer_name: user.name, customer_email:user.email, delivery_address: { street: '', city: '', state: '', zipcode: '', country:''} }, error: ''})
These customer information values, which are initialized in checkoutDetails, willbe updated when the user interacts with the form fields. In the following sections, wewill add the form fields and the change-handling functions for the customerinformation and delivery address details to be collected in this checkout view.
Customer informationIn the checkout form, we will have fields for collecting the customer's name and emailaddress. To add these text fields to the Checkout component, we will use thefollowing code.
mern-marketplace/client/cart/Checkout.js:
<TextField id="name" label="Name"value={values.checkoutDetails.customer_name}onChange={handleCustomerChange('customer_name')}/><TextField id="email" type="email" label="Email"value={values.checkoutDetails.customer_email}onChange={handleCustomerChange('customer_email')}/><br/>
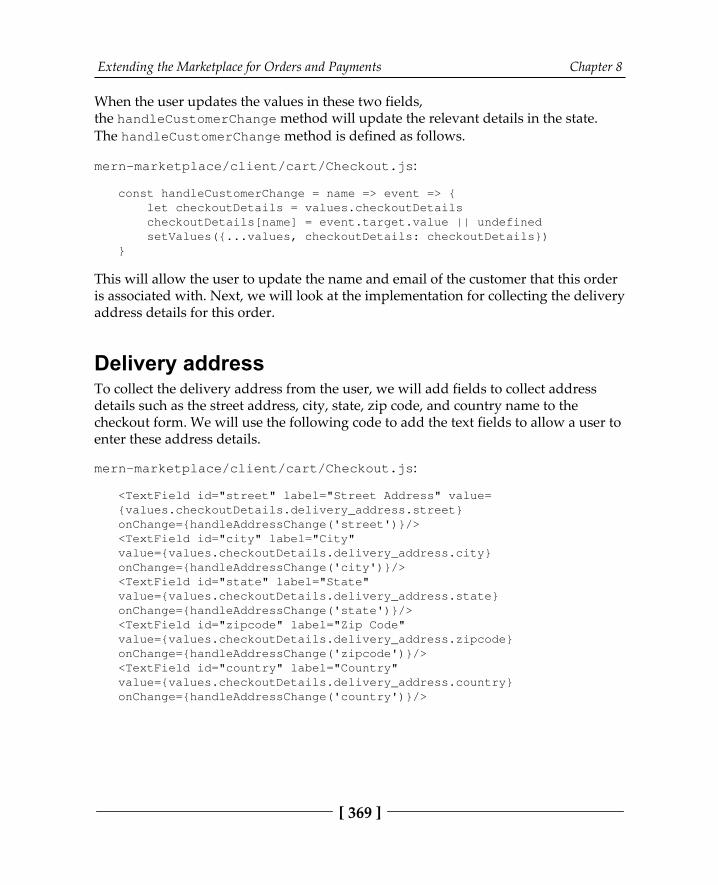
Extending the Marketplace for Orders and Payments Chapter 8
[ 369 ]
When the user updates the values in these two fields,the handleCustomerChange method will update the relevant details in the state.The handleCustomerChange method is defined as follows.
mern-marketplace/client/cart/Checkout.js:
const handleCustomerChange = name => event => { let checkoutDetails = values.checkoutDetails checkoutDetails[name] = event.target.value || undefined setValues({...values, checkoutDetails: checkoutDetails})}
This will allow the user to update the name and email of the customer that this orderis associated with. Next, we will look at the implementation for collecting the deliveryaddress details for this order.
Delivery addressTo collect the delivery address from the user, we will add fields to collect addressdetails such as the street address, city, state, zip code, and country name to thecheckout form. We will use the following code to add the text fields to allow a user toenter these address details.
mern-marketplace/client/cart/Checkout.js:
<TextField id="street" label="Street Address" value={values.checkoutDetails.delivery_address.street}onChange={handleAddressChange('street')}/><TextField id="city" label="City"value={values.checkoutDetails.delivery_address.city}onChange={handleAddressChange('city')}/><TextField id="state" label="State"value={values.checkoutDetails.delivery_address.state}onChange={handleAddressChange('state')}/><TextField id="zipcode" label="Zip Code"value={values.checkoutDetails.delivery_address.zipcode}onChange={handleAddressChange('zipcode')}/><TextField id="country" label="Country"value={values.checkoutDetails.delivery_address.country}onChange={handleAddressChange('country')}/>
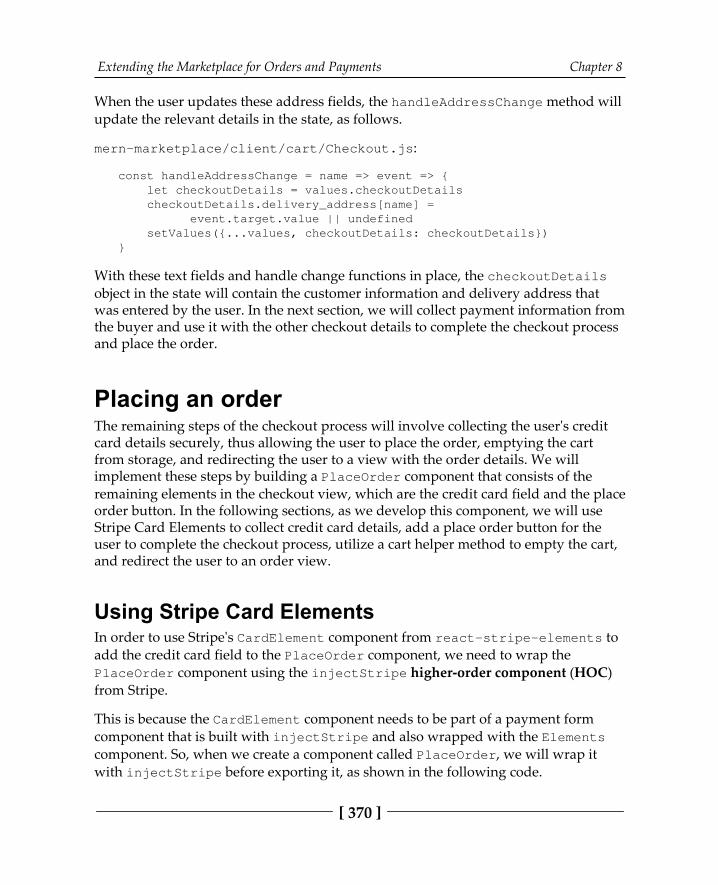
Extending the Marketplace for Orders and Payments Chapter 8
[ 370 ]
When the user updates these address fields, the handleAddressChange method willupdate the relevant details in the state, as follows.
mern-marketplace/client/cart/Checkout.js:
const handleAddressChange = name => event => { let checkoutDetails = values.checkoutDetails checkoutDetails.delivery_address[name] = event.target.value || undefined setValues({...values, checkoutDetails: checkoutDetails})}
With these text fields and handle change functions in place, the checkoutDetailsobject in the state will contain the customer information and delivery address thatwas entered by the user. In the next section, we will collect payment information fromthe buyer and use it with the other checkout details to complete the checkout processand place the order.
Placing an orderThe remaining steps of the checkout process will involve collecting the user's creditcard details securely, thus allowing the user to place the order, emptying the cartfrom storage, and redirecting the user to a view with the order details. We willimplement these steps by building a PlaceOrder component that consists of theremaining elements in the checkout view, which are the credit card field and the placeorder button. In the following sections, as we develop this component, we will useStripe Card Elements to collect credit card details, add a place order button for theuser to complete the checkout process, utilize a cart helper method to empty the cart,and redirect the user to an order view.
Using Stripe Card ElementsIn order to use Stripe's CardElement component from react-stripe-elements toadd the credit card field to the PlaceOrder component, we need to wrap thePlaceOrder component using the injectStripe higher-order component (HOC)from Stripe.
This is because the CardElement component needs to be part of a payment formcomponent that is built with injectStripe and also wrapped with the Elementscomponent. So, when we create a component called PlaceOrder, we will wrap itwith injectStripe before exporting it, as shown in the following code.
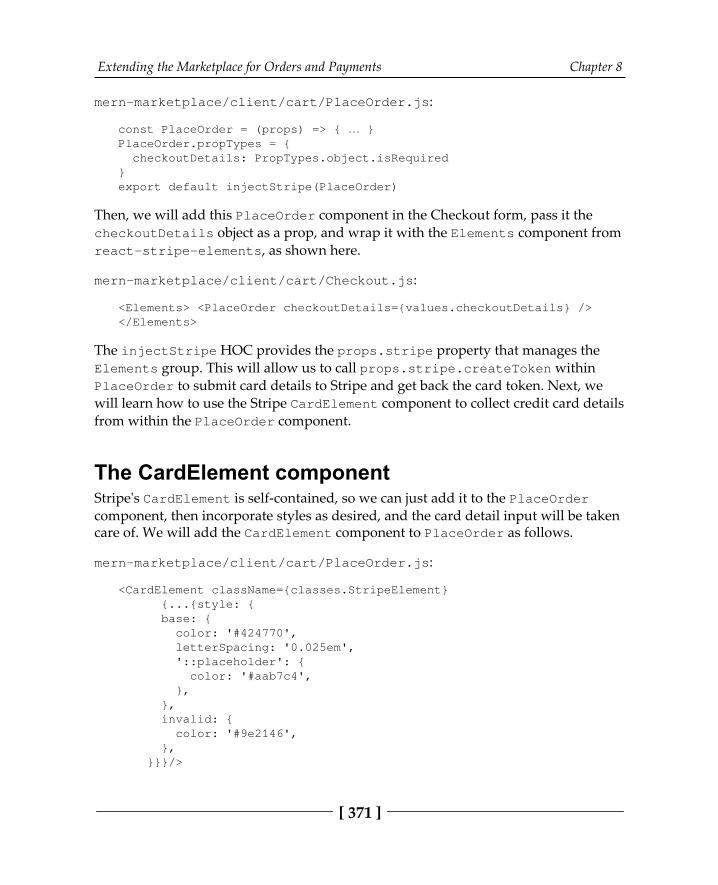
Extending the Marketplace for Orders and Payments Chapter 8
[ 371 ]
mern-marketplace/client/cart/PlaceOrder.js:
const PlaceOrder = (props) => { … }PlaceOrder.propTypes = { checkoutDetails: PropTypes.object.isRequired}export default injectStripe(PlaceOrder)
Then, we will add this PlaceOrder component in the Checkout form, pass it thecheckoutDetails object as a prop, and wrap it with the Elements component fromreact-stripe-elements, as shown here.
mern-marketplace/client/cart/Checkout.js:
<Elements> <PlaceOrder checkoutDetails={values.checkoutDetails} /></Elements>
The injectStripe HOC provides the props.stripe property that manages theElements group. This will allow us to call props.stripe.createToken withinPlaceOrder to submit card details to Stripe and get back the card token. Next, wewill learn how to use the Stripe CardElement component to collect credit card detailsfrom within the PlaceOrder component.
The CardElement componentStripe's CardElement is self-contained, so we can just add it to the PlaceOrdercomponent, then incorporate styles as desired, and the card detail input will be takencare of. We will add the CardElement component to PlaceOrder as follows.
mern-marketplace/client/cart/PlaceOrder.js:
<CardElement className={classes.StripeElement} {...{style: { base: { color: '#424770', letterSpacing: '0.025em', '::placeholder': { color: '#aab7c4', }, }, invalid: { color: '#9e2146', }, }}}/>
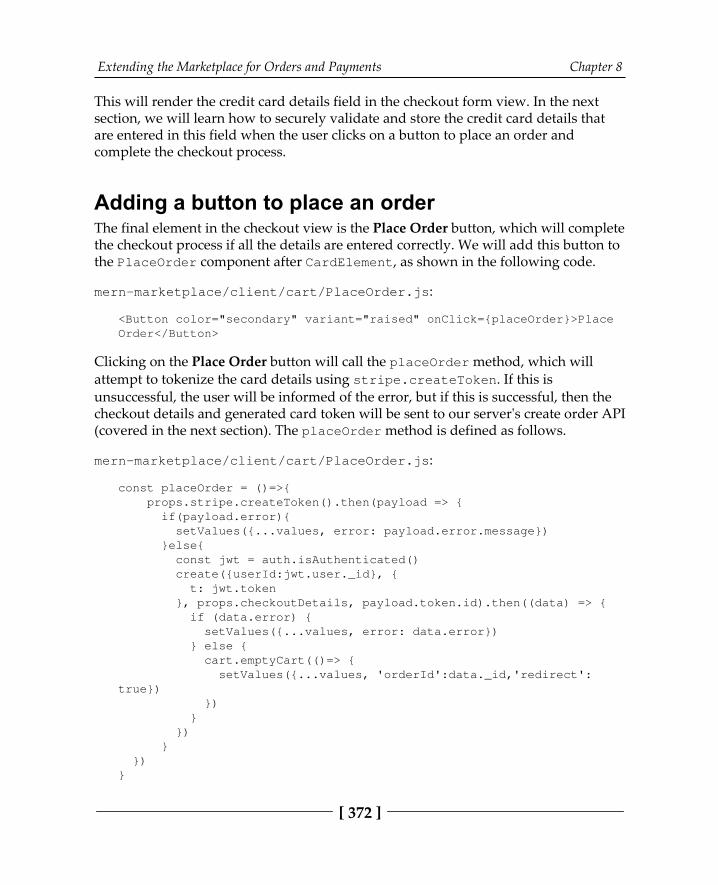
Extending the Marketplace for Orders and Payments Chapter 8
[ 372 ]
This will render the credit card details field in the checkout form view. In the nextsection, we will learn how to securely validate and store the credit card details thatare entered in this field when the user clicks on a button to place an order andcomplete the checkout process.
Adding a button to place an orderThe final element in the checkout view is the Place Order button, which will completethe checkout process if all the details are entered correctly. We will add this button tothe PlaceOrder component after CardElement, as shown in the following code.
mern-marketplace/client/cart/PlaceOrder.js:
<Button color="secondary" variant="raised" onClick={placeOrder}>PlaceOrder</Button>
Clicking on the Place Order button will call the placeOrder method, which willattempt to tokenize the card details using stripe.createToken. If this isunsuccessful, the user will be informed of the error, but if this is successful, then thecheckout details and generated card token will be sent to our server's create order API(covered in the next section). The placeOrder method is defined as follows.
mern-marketplace/client/cart/PlaceOrder.js:
const placeOrder = ()=>{ props.stripe.createToken().then(payload => { if(payload.error){ setValues({...values, error: payload.error.message}) }else{ const jwt = auth.isAuthenticated() create({userId:jwt.user._id}, { t: jwt.token }, props.checkoutDetails, payload.token.id).then((data) => { if (data.error) { setValues({...values, error: data.error}) } else { cart.emptyCart(()=> { setValues({...values, 'orderId':data._id,'redirect':true}) }) } }) } })}
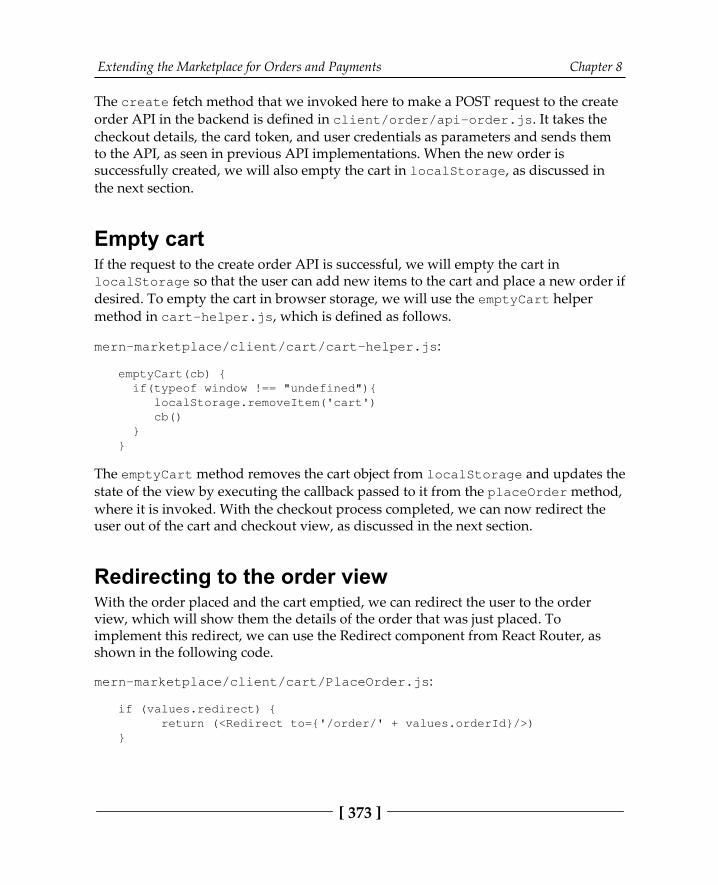
Extending the Marketplace for Orders and Payments Chapter 8
[ 373 ]
The create fetch method that we invoked here to make a POST request to the createorder API in the backend is defined in client/order/api-order.js. It takes the checkout details, the card token, and user credentials as parameters and sends themto the API, as seen in previous API implementations. When the new order issuccessfully created, we will also empty the cart in localStorage, as discussed inthe next section.
Empty cartIf the request to the create order API is successful, we will empty the cart inlocalStorage so that the user can add new items to the cart and place a new order ifdesired. To empty the cart in browser storage, we will use the emptyCart helpermethod in cart-helper.js, which is defined as follows.
mern-marketplace/client/cart/cart-helper.js:
emptyCart(cb) { if(typeof window !== "undefined"){ localStorage.removeItem('cart') cb() }}
The emptyCart method removes the cart object from localStorage and updates thestate of the view by executing the callback passed to it from the placeOrder method,where it is invoked. With the checkout process completed, we can now redirect theuser out of the cart and checkout view, as discussed in the next section.
Redirecting to the order viewWith the order placed and the cart emptied, we can redirect the user to the orderview, which will show them the details of the order that was just placed. Toimplement this redirect, we can use the Redirect component from React Router, asshown in the following code.
mern-marketplace/client/cart/PlaceOrder.js:
if (values.redirect) { return (<Redirect to={'/order/' + values.orderId}/>)}
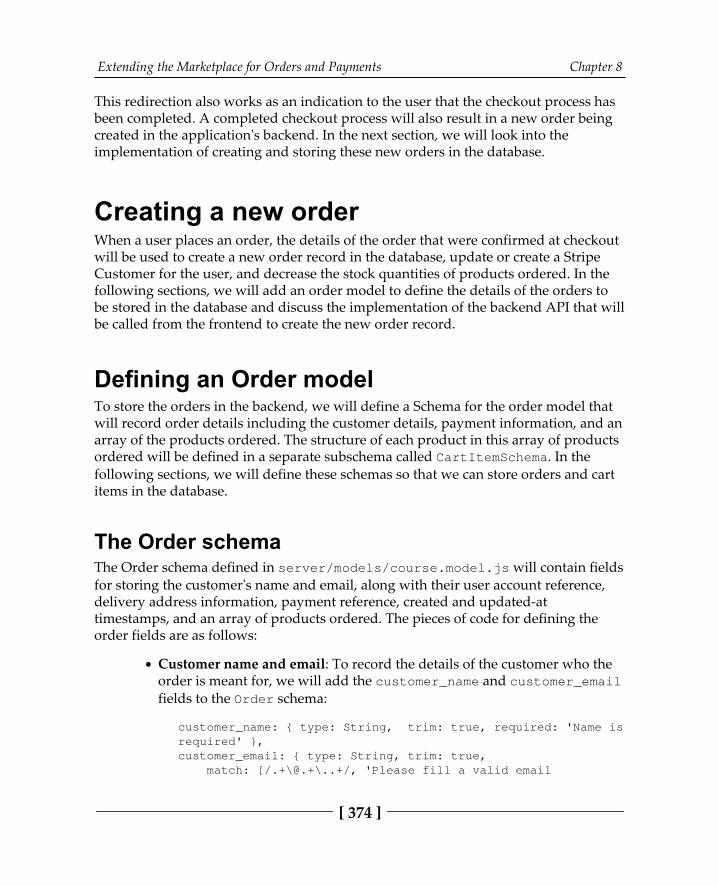
Extending the Marketplace for Orders and Payments Chapter 8
[ 374 ]
This redirection also works as an indication to the user that the checkout process hasbeen completed. A completed checkout process will also result in a new order beingcreated in the application's backend. In the next section, we will look into theimplementation of creating and storing these new orders in the database.
Creating a new orderWhen a user places an order, the details of the order that were confirmed at checkoutwill be used to create a new order record in the database, update or create a StripeCustomer for the user, and decrease the stock quantities of products ordered. In thefollowing sections, we will add an order model to define the details of the orders tobe stored in the database and discuss the implementation of the backend API that willbe called from the frontend to create the new order record.
Defining an Order modelTo store the orders in the backend, we will define a Schema for the order model thatwill record order details including the customer details, payment information, and anarray of the products ordered. The structure of each product in this array of productsordered will be defined in a separate subschema called CartItemSchema. In thefollowing sections, we will define these schemas so that we can store orders and cartitems in the database.
The Order schemaThe Order schema defined in server/models/course.model.js will contain fieldsfor storing the customer's name and email, along with their user account reference,delivery address information, payment reference, created and updated-attimestamps, and an array of products ordered. The pieces of code for defining theorder fields are as follows:
Customer name and email: To record the details of the customer who theorder is meant for, we will add the customer_name and customer_emailfields to the Order schema:
customer_name: { type: String, trim: true, required: 'Name isrequired' },customer_email: { type: String, trim: true, match: [/.+\@.+\..+/, 'Please fill a valid email
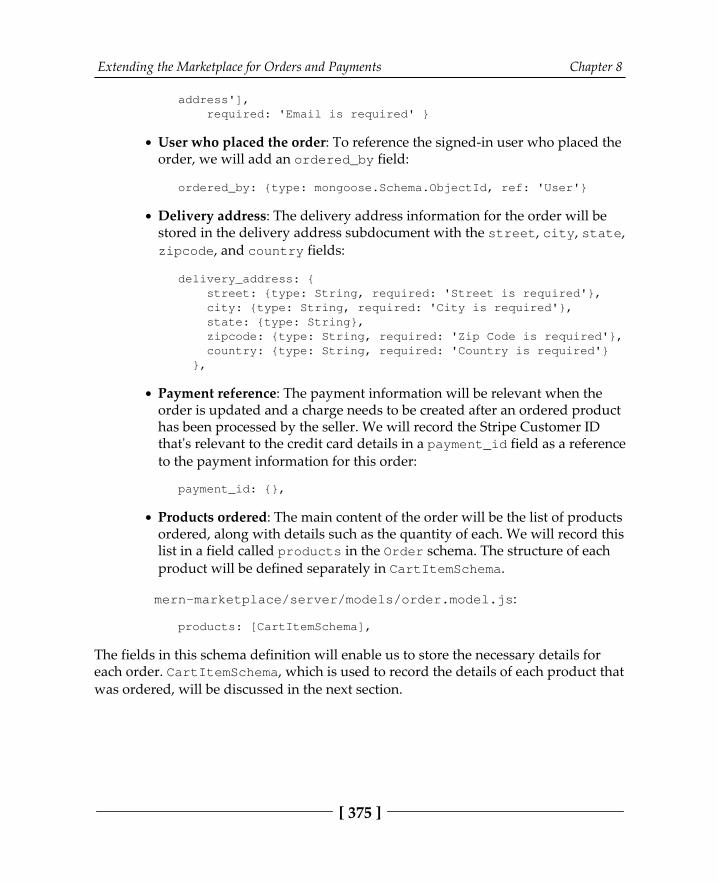
Extending the Marketplace for Orders and Payments Chapter 8
[ 375 ]
address'], required: 'Email is required' }
User who placed the order: To reference the signed-in user who placed theorder, we will add an ordered_by field:
ordered_by: {type: mongoose.Schema.ObjectId, ref: 'User'}
Delivery address: The delivery address information for the order will bestored in the delivery address subdocument with the street, city, state,zipcode, and country fields:
delivery_address: { street: {type: String, required: 'Street is required'}, city: {type: String, required: 'City is required'}, state: {type: String}, zipcode: {type: String, required: 'Zip Code is required'}, country: {type: String, required: 'Country is required'} },
Payment reference: The payment information will be relevant when theorder is updated and a charge needs to be created after an ordered producthas been processed by the seller. We will record the Stripe Customer IDthat's relevant to the credit card details in a payment_id field as a referenceto the payment information for this order:
payment_id: {},
Products ordered: The main content of the order will be the list of productsordered, along with details such as the quantity of each. We will record thislist in a field called products in the Order schema. The structure of eachproduct will be defined separately in CartItemSchema.
mern-marketplace/server/models/order.model.js:
products: [CartItemSchema],
The fields in this schema definition will enable us to store the necessary details foreach order. CartItemSchema, which is used to record the details of each product thatwas ordered, will be discussed in the next section.
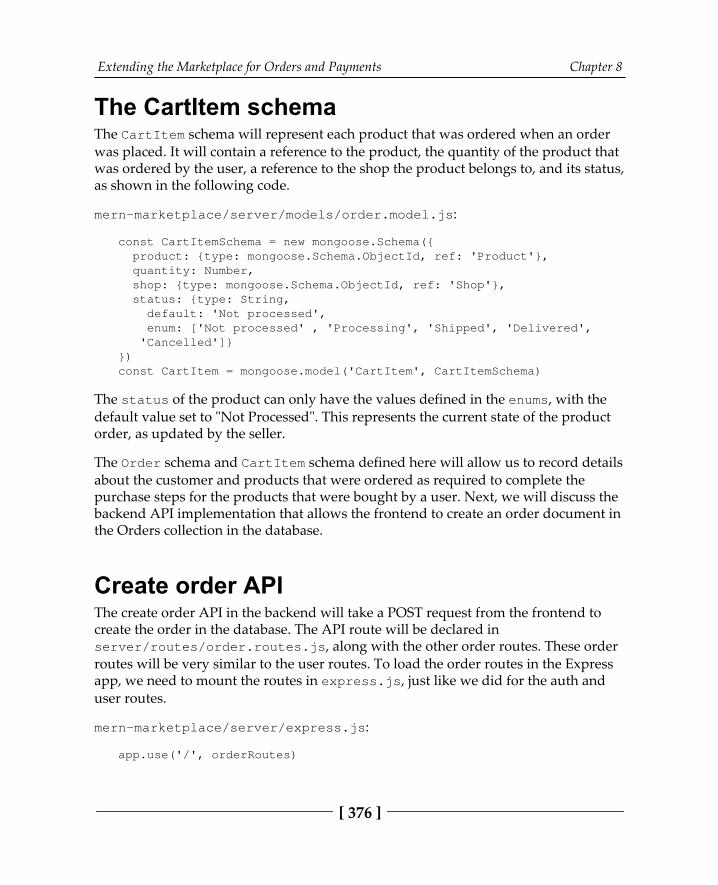
Extending the Marketplace for Orders and Payments Chapter 8
[ 376 ]
The CartItem schemaThe CartItem schema will represent each product that was ordered when an orderwas placed. It will contain a reference to the product, the quantity of the product thatwas ordered by the user, a reference to the shop the product belongs to, and its status,as shown in the following code.
mern-marketplace/server/models/order.model.js:
const CartItemSchema = new mongoose.Schema({ product: {type: mongoose.Schema.ObjectId, ref: 'Product'}, quantity: Number, shop: {type: mongoose.Schema.ObjectId, ref: 'Shop'}, status: {type: String, default: 'Not processed', enum: ['Not processed' , 'Processing', 'Shipped', 'Delivered', 'Cancelled']}})const CartItem = mongoose.model('CartItem', CartItemSchema)
The status of the product can only have the values defined in the enums, with thedefault value set to "Not Processed". This represents the current state of the productorder, as updated by the seller.
The Order schema and CartItem schema defined here will allow us to record detailsabout the customer and products that were ordered as required to complete thepurchase steps for the products that were bought by a user. Next, we will discuss thebackend API implementation that allows the frontend to create an order document inthe Orders collection in the database.
Create order APIThe create order API in the backend will take a POST request from the frontend tocreate the order in the database. The API route will be declared inserver/routes/order.routes.js, along with the other order routes. These orderroutes will be very similar to the user routes. To load the order routes in the Expressapp, we need to mount the routes in express.js, just like we did for the auth anduser routes.
mern-marketplace/server/express.js:
app.use('/', orderRoutes)
Extending the Marketplace for Orders and Payments Chapter 8
[ 377 ]
A number of actions, in the following sequence, take place when the create order APIreceives a POST request at /api/orders/:userId:
It is ensured that the current user is signed in.A Stripe Customer is either created or updated using the stripeCustomeruser controller method, which we discussed earlier in the Stripe Customer torecord card details section.The stock quantities are updated for all the ordered products using thedecreaseQuanity product controller method.The order is created in the Order collection with the create ordercontroller method.
The route for this create order API is defined as follows.
mern-marketplace/server/routes/order.routes.js:
router.route('/api/orders/:userId') .post(authCtrl.requireSignin, userCtrl.stripeCustomer, productCtrl.decreaseQuantity, orderCtrl.create)
To retrieve the user associated with the :userId parameter in the route, we will usethe userByID user controller method. We will write the code to handle thisparameter in the route URL, along with the other order route declaration.
mern-marketplace/server/routes/order.routes.js:
router.param('userId', userCtrl.userByID)
The userByID method gets the user from the User collection and attaches it to therequest object so that it can be accessed by the next few methods. Among the next fewmethods that are invoked when this API receives a request includes the productcontroller method to decrease stock quantities and the order controller method tosave a new order to the database. We will discuss the implementation of these twomethods in the following sections.

Extending the Marketplace for Orders and Payments Chapter 8
[ 378 ]
Decrease product stock quantityWhen an order is placed, we will decrease the stock quantity of each product orderedaccording to the quantity ordered by the user. This will automatically reflect theupdated quantities of the products in the associated shops after an order is placed.We will implement this decrease product quantity update inthe decreaseQuantity controller method, which will be added with the otherproduct controller methods, as follows.
mern-marketplace/server/controllers/product.controller.js:
const decreaseQuantity = async (req, res, next) => { let bulkOps = req.body.order.products.map((item) => { return { "updateOne": { "filter": { "_id": item.product._id } , "update": { "$inc": {"quantity": -item.quantity} } } } }) try { await Product.bulkWrite(bulkOps, {}) next() } catch (err){ return res.status(400).json({ error: "Could not update product" }) }}
Since the update operation, in this case, involves a bulk update of multiple productsin the collection after matching with an array of products ordered, we use thebulkWrite method in MongoDB to send multiple updateOne operations to theMongoDB server with one command. The multiple updateOne operations that arerequired are listed in bulkOps using the map function. This will be faster thansending multiple independent save or update operations because with bulkWrite(),there is only one round trip to MongoDB.
Once the product quantities have been updated by this method, the next method isinvoked to save the new order in the database. In the next section, we will see theimplementation of this method, which creates this new order.
Extending the Marketplace for Orders and Payments Chapter 8
[ 379 ]
Create controller methodThe create controller method, defined in the order controllers, is the last methodthat's invoked when the create order API receives a request. This method takes theorder details, creates a new order, and saves it to the Order collection inMongoDB. The create controller method is implemented as follows.
mern-marketplace/server/controllers/order.controller.js:
const create = async (req, res) => { try { req.body.order.user = req.profile let order = new Order(req.body.order) let result = await order.save() res.status(200).json(result) } catch (err){ return res.status(400).json({ error: errorHandler.getErrorMessage(err) }) }}
With this implemented, orders can be created and stored in the backend by anysigned-in user on the MERN Marketplace. Now, we can set up APIs to fetch lists oforders by user, orders by shop, or read an individual order and display the fetcheddata to views in the frontend. In the next section, we will learn how to list the ordersper shop so that shop owners can process and manage the orders they receive fortheir products.
Listing orders by shopAn important feature of the marketplace is allowing sellers to see and update thestatus of orders they've received for products in their shops. To implement this, wewill set up backend APIs to list orders by shop and update an order as a sellerchanges the status of a purchased product. Then, we will add some frontend viewsthat will display the orders and allow the seller to interact with each order.

Extending the Marketplace for Orders and Payments Chapter 8
[ 380 ]
The list by shop APIIn this section, we will implement an API to get orders for a specific shop so thatauthenticated sellers can view the orders for each of their shops in one place. Therequest for this API will be received at /api/orders/shop/:shopId, with the routedefined in order.routes.js, as follows.
mern-marketplace/server/routes/order.routes.js:
router.route('/api/orders/shop/:shopId') .get(authCtrl.requireSignin, shopCtrl.isOwner,orderCtrl.listByShop)router.param('shopId', shopCtrl.shopByID)
To retrieve the shop associated with the :shopId parameter in the route, we will usethe shopByID shop controller method, which gets the shop from the Shop collectionand attaches it to the request object so that it can be accessed by the next methods.
The listByShop controller method will retrieve the orders that have productspurchased with the matching shop ID, then populate the ID, name, and price fieldsfor each product, with orders sorted by date from most recent tooldest. The listByShop controller method is defined as follows.
mern-marketplace/server/controllers/order.controller.js:
const listByShop = async (req, res) => { try { let orders = await Order.find({"products.shop": req.shop._id}) .populate({path: 'products.product', select: '_id name price'}) .sort('-created') .exec() res.json(orders) } catch (err){ return res.status(400).json({ error: errorHandler.getErrorMessage(err) }) }}
To fetch this API in the frontend, we will add a corresponding listByShop methodin api-order.js, similar to our other API implementations. This fetch method willbe used in the ShopOrders component to show the orders for each shop. We willlook at the implementation of the ShopOrders component in the next section.
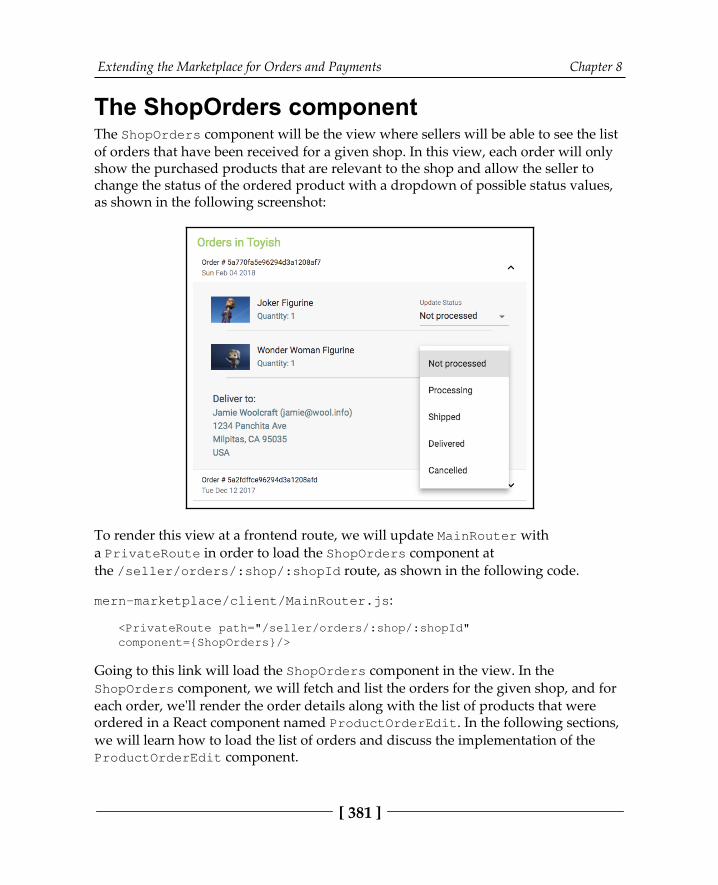
Extending the Marketplace for Orders and Payments Chapter 8
[ 381 ]
The ShopOrders componentThe ShopOrders component will be the view where sellers will be able to see the listof orders that have been received for a given shop. In this view, each order will onlyshow the purchased products that are relevant to the shop and allow the seller tochange the status of the ordered product with a dropdown of possible status values,as shown in the following screenshot:
To render this view at a frontend route, we will update MainRouter witha PrivateRoute in order to load the ShopOrders component atthe /seller/orders/:shop/:shopId route, as shown in the following code.
mern-marketplace/client/MainRouter.js:
<PrivateRoute path="/seller/orders/:shop/:shopId"component={ShopOrders}/>
Going to this link will load the ShopOrders component in the view. In theShopOrders component, we will fetch and list the orders for the given shop, and foreach order, we'll render the order details along with the list of products that wereordered in a React component named ProductOrderEdit. In the following sections,we will learn how to load the list of orders and discuss the implementation of theProductOrderEdit component.
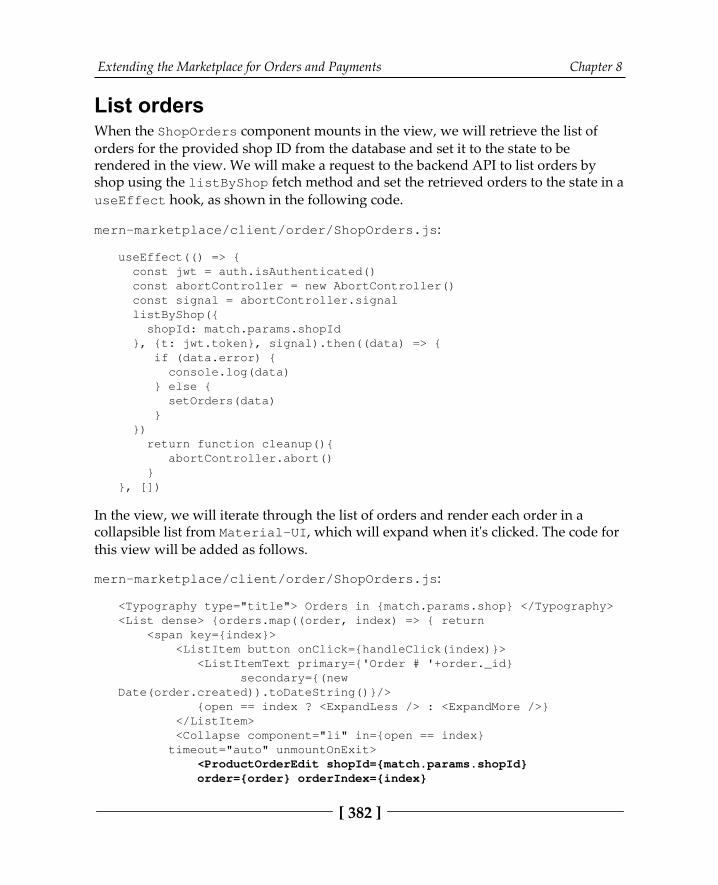
Extending the Marketplace for Orders and Payments Chapter 8
[ 382 ]
List ordersWhen the ShopOrders component mounts in the view, we will retrieve the list oforders for the provided shop ID from the database and set it to the state to berendered in the view. We will make a request to the backend API to list orders byshop using the listByShop fetch method and set the retrieved orders to the state in auseEffect hook, as shown in the following code.
mern-marketplace/client/order/ShopOrders.js:
useEffect(() => { const jwt = auth.isAuthenticated() const abortController = new AbortController() const signal = abortController.signal listByShop({ shopId: match.params.shopId }, {t: jwt.token}, signal).then((data) => { if (data.error) { console.log(data) } else { setOrders(data) } }) return function cleanup(){ abortController.abort() }}, [])
In the view, we will iterate through the list of orders and render each order in acollapsible list from Material-UI, which will expand when it's clicked. The code forthis view will be added as follows.
mern-marketplace/client/order/ShopOrders.js:
<Typography type="title"> Orders in {match.params.shop} </Typography><List dense> {orders.map((order, index) => { return <span key={index}> <ListItem button onClick={handleClick(index)}> <ListItemText primary={'Order # '+order._id} secondary={(newDate(order.created)).toDateString()}/> {open == index ? <ExpandLess /> : <ExpandMore />} </ListItem> <Collapse component="li" in={open == index} timeout="auto" unmountOnExit> <ProductOrderEdit shopId={match.params.shopId} order={order} orderIndex={index}
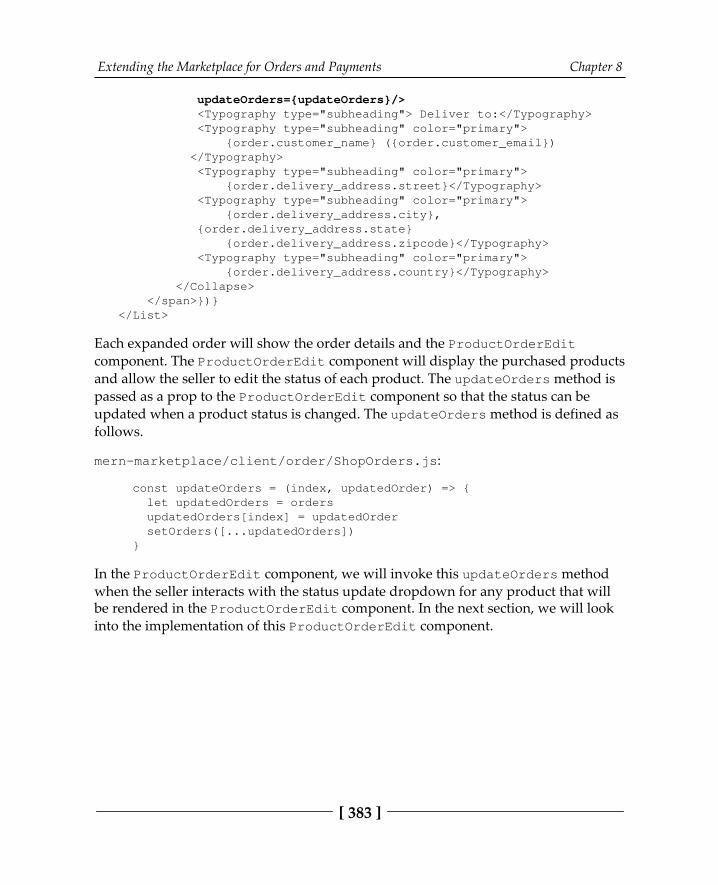
Extending the Marketplace for Orders and Payments Chapter 8
[ 383 ]
updateOrders={updateOrders}/> <Typography type="subheading"> Deliver to:</Typography> <Typography type="subheading" color="primary"> {order.customer_name} ({order.customer_email}) </Typography> <Typography type="subheading" color="primary"> {order.delivery_address.street}</Typography> <Typography type="subheading" color="primary"> {order.delivery_address.city}, {order.delivery_address.state} {order.delivery_address.zipcode}</Typography> <Typography type="subheading" color="primary"> {order.delivery_address.country}</Typography> </Collapse> </span>})}</List>
Each expanded order will show the order details and the ProductOrderEditcomponent. The ProductOrderEdit component will display the purchased productsand allow the seller to edit the status of each product. The updateOrders method ispassed as a prop to the ProductOrderEdit component so that the status can beupdated when a product status is changed. The updateOrders method is defined asfollows.
mern-marketplace/client/order/ShopOrders.js:
const updateOrders = (index, updatedOrder) => { let updatedOrders = orders updatedOrders[index] = updatedOrder setOrders([...updatedOrders]) }
In the ProductOrderEdit component, we will invoke this updateOrders methodwhen the seller interacts with the status update dropdown for any product that willbe rendered in the ProductOrderEdit component. In the next section, we will lookinto the implementation of this ProductOrderEdit component.
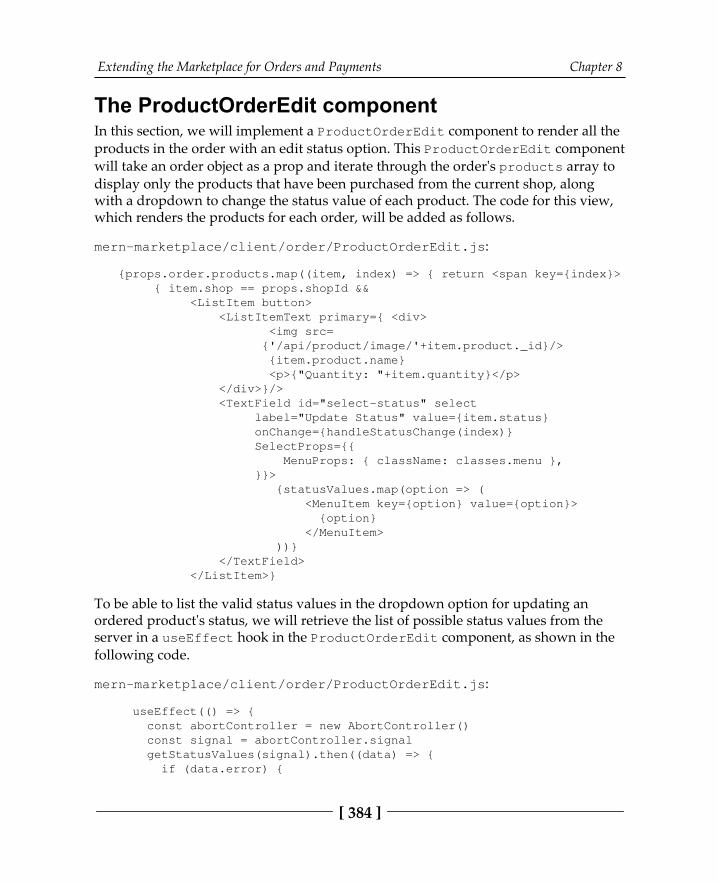
Extending the Marketplace for Orders and Payments Chapter 8
[ 384 ]
The ProductOrderEdit componentIn this section, we will implement a ProductOrderEdit component to render all theproducts in the order with an edit status option. This ProductOrderEdit componentwill take an order object as a prop and iterate through the order's products array todisplay only the products that have been purchased from the current shop, alongwith a dropdown to change the status value of each product. The code for this view,which renders the products for each order, will be added as follows.
mern-marketplace/client/order/ProductOrderEdit.js:
{props.order.products.map((item, index) => { return <span key={index}> { item.shop == props.shopId && <ListItem button> <ListItemText primary={ <div> <img src= {'/api/product/image/'+item.product._id}/> {item.product.name} <p>{"Quantity: "+item.quantity}</p> </div>}/> <TextField id="select-status" select label="Update Status" value={item.status} onChange={handleStatusChange(index)} SelectProps={{ MenuProps: { className: classes.menu }, }}> {statusValues.map(option => ( <MenuItem key={option} value={option}> {option} </MenuItem> ))} </TextField> </ListItem>}
To be able to list the valid status values in the dropdown option for updating anordered product's status, we will retrieve the list of possible status values from theserver in a useEffect hook in the ProductOrderEdit component, as shown in thefollowing code.
mern-marketplace/client/order/ProductOrderEdit.js:
useEffect(() => { const abortController = new AbortController() const signal = abortController.signal getStatusValues(signal).then((data) => { if (data.error) {
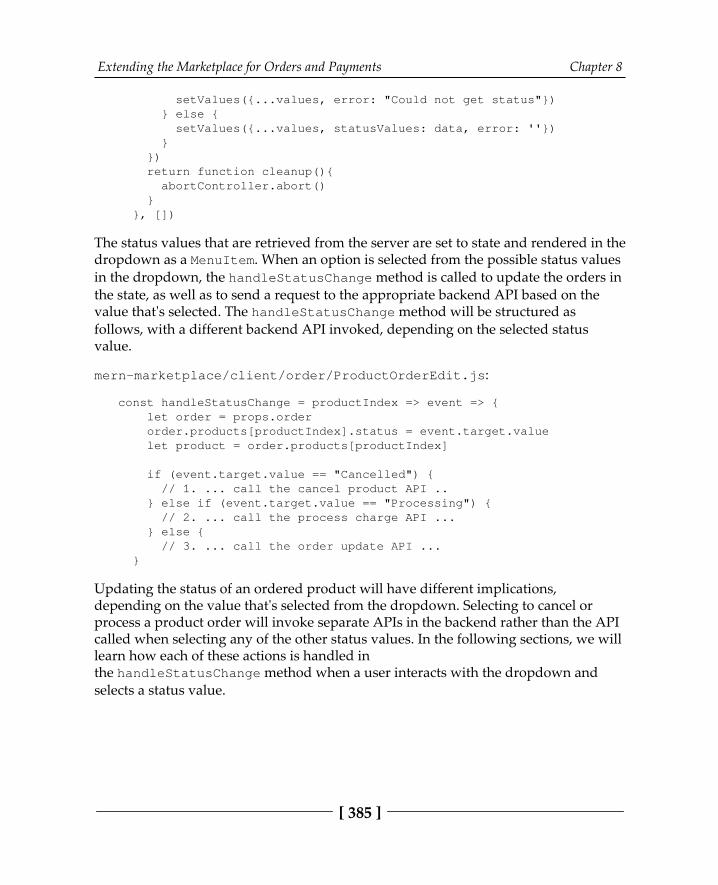
Extending the Marketplace for Orders and Payments Chapter 8
[ 385 ]
setValues({...values, error: "Could not get status"}) } else { setValues({...values, statusValues: data, error: ''}) } }) return function cleanup(){ abortController.abort() } }, [])
The status values that are retrieved from the server are set to state and rendered in thedropdown as a MenuItem. When an option is selected from the possible status valuesin the dropdown, the handleStatusChange method is called to update the orders inthe state, as well as to send a request to the appropriate backend API based on thevalue that's selected. The handleStatusChange method will be structured asfollows, with a different backend API invoked, depending on the selected statusvalue.
mern-marketplace/client/order/ProductOrderEdit.js:
const handleStatusChange = productIndex => event => { let order = props.order order.products[productIndex].status = event.target.value let product = order.products[productIndex]
if (event.target.value == "Cancelled") { // 1. ... call the cancel product API .. } else if (event.target.value == "Processing") { // 2. ... call the process charge API ... } else { // 3. ... call the order update API ... }
Updating the status of an ordered product will have different implications,depending on the value that's selected from the dropdown. Selecting to cancel orprocess a product order will invoke separate APIs in the backend rather than the APIcalled when selecting any of the other status values. In the following sections, we willlearn how each of these actions is handled inthe handleStatusChange method when a user interacts with the dropdown andselects a status value.
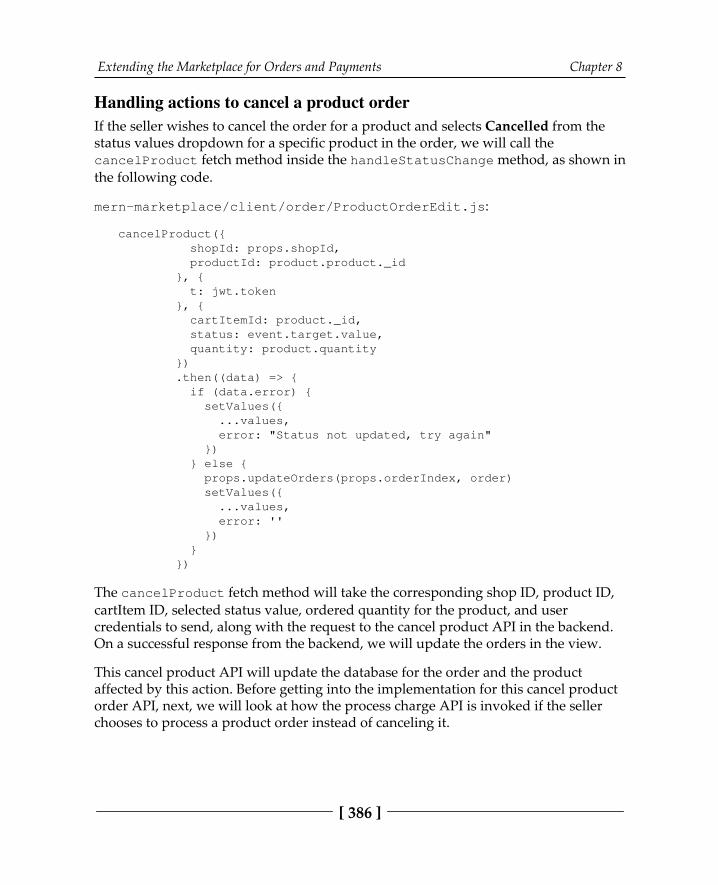
Extending the Marketplace for Orders and Payments Chapter 8
[ 386 ]
Handling actions to cancel a product orderIf the seller wishes to cancel the order for a product and selects Cancelled from thestatus values dropdown for a specific product in the order, we will call thecancelProduct fetch method inside the handleStatusChange method, as shown inthe following code.
mern-marketplace/client/order/ProductOrderEdit.js:
cancelProduct({ shopId: props.shopId, productId: product.product._id }, { t: jwt.token }, { cartItemId: product._id, status: event.target.value, quantity: product.quantity }) .then((data) => { if (data.error) { setValues({ ...values, error: "Status not updated, try again" }) } else { props.updateOrders(props.orderIndex, order) setValues({ ...values, error: '' }) } })
The cancelProduct fetch method will take the corresponding shop ID, product ID,cartItem ID, selected status value, ordered quantity for the product, and usercredentials to send, along with the request to the cancel product API in the backend.On a successful response from the backend, we will update the orders in the view.
This cancel product API will update the database for the order and the productaffected by this action. Before getting into the implementation for this cancel productorder API, next, we will look at how the process charge API is invoked if the sellerchooses to process a product order instead of canceling it.
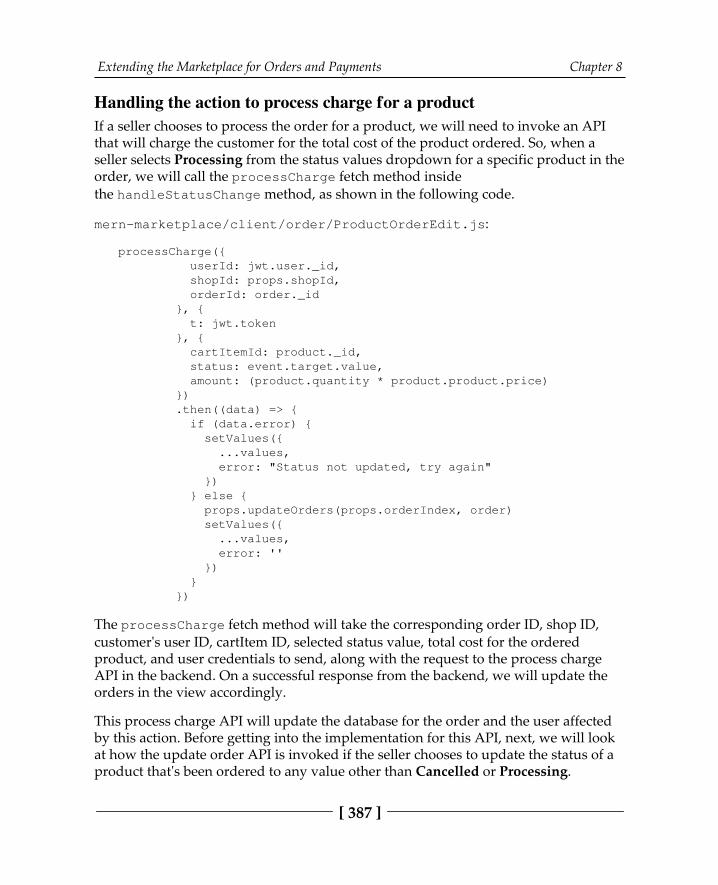
Extending the Marketplace for Orders and Payments Chapter 8
[ 387 ]
Handling the action to process charge for a productIf a seller chooses to process the order for a product, we will need to invoke an APIthat will charge the customer for the total cost of the product ordered. So, when aseller selects Processing from the status values dropdown for a specific product in theorder, we will call the processCharge fetch method insidethe handleStatusChange method, as shown in the following code.
mern-marketplace/client/order/ProductOrderEdit.js:
processCharge({ userId: jwt.user._id, shopId: props.shopId, orderId: order._id }, { t: jwt.token }, { cartItemId: product._id, status: event.target.value, amount: (product.quantity * product.product.price) }) .then((data) => { if (data.error) { setValues({ ...values, error: "Status not updated, try again" }) } else { props.updateOrders(props.orderIndex, order) setValues({ ...values, error: '' }) } })
The processCharge fetch method will take the corresponding order ID, shop ID,customer's user ID, cartItem ID, selected status value, total cost for the orderedproduct, and user credentials to send, along with the request to the process chargeAPI in the backend. On a successful response from the backend, we will update theorders in the view accordingly.
This process charge API will update the database for the order and the user affectedby this action. Before getting into the implementation for this API, next, we will lookat how the update order API is invoked if the seller chooses to update the status of aproduct that's been ordered to any value other than Cancelled or Processing.
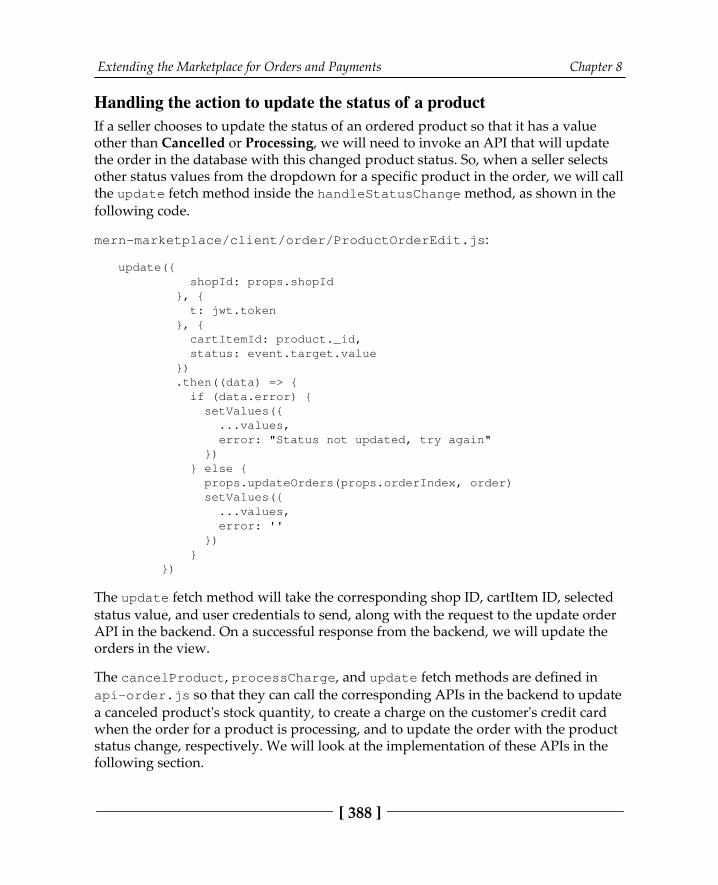
Extending the Marketplace for Orders and Payments Chapter 8
[ 388 ]
Handling the action to update the status of a productIf a seller chooses to update the status of an ordered product so that it has a valueother than Cancelled or Processing, we will need to invoke an API that will updatethe order in the database with this changed product status. So, when a seller selectsother status values from the dropdown for a specific product in the order, we will callthe update fetch method inside the handleStatusChange method, as shown in thefollowing code.
mern-marketplace/client/order/ProductOrderEdit.js:
update({ shopId: props.shopId }, { t: jwt.token }, { cartItemId: product._id, status: event.target.value }) .then((data) => { if (data.error) { setValues({ ...values, error: "Status not updated, try again" }) } else { props.updateOrders(props.orderIndex, order) setValues({ ...values, error: '' }) } })
The update fetch method will take the corresponding shop ID, cartItem ID, selectedstatus value, and user credentials to send, along with the request to the update orderAPI in the backend. On a successful response from the backend, we will update theorders in the view.
The cancelProduct, processCharge, and update fetch methods are defined inapi-order.js so that they can call the corresponding APIs in the backend to updatea canceled product's stock quantity, to create a charge on the customer's credit cardwhen the order for a product is processing, and to update the order with the productstatus change, respectively. We will look at the implementation of these APIs in thefollowing section.

Extending the Marketplace for Orders and Payments Chapter 8
[ 389 ]
APIs for products orderedAllowing sellers to update the status of a product will require having to set up fourdifferent APIs, including an API to retrieve the possible status values. Then, theactual status update actions will need APIs to handle updates to the order itself as thestatus is changed in order to initiate related actions, such as increasing the stockquantity of a canceled product, and to create a charge on the customer's credit cardwhen a product is being processed. In the following sections, we will look at the APIimplementations for retrieving possible status values, updating an order status,canceling a product order, and processing a charge for an ordered product.
Get status valuesThe possible status values of an ordered product are set as enums in the CartItemschema. To show these values as options in the dropdown view, we will set up a GETAPI route at /api/order/status_values that retrieves these values. This API routewill be declared as follows.
mern-marketplace/server/routes/order.routes.js:
router.route('/api/order/status_values') .get(orderCtrl.getStatusValues)
The getStatusValues controller method will return the enum values for thestatus field from the CartItem schema. The getStatusValues controller methodis defined as follows.
mern-marketplace/server/controllers/order.controller.js:
const getStatusValues = (req, res) => { res.json(CartItem.schema.path('status').enumValues)}
We will also need to set up a corresponding fetch method in api-order.js, whichis used in the view, in the ProductOrderEdit component, to make a request to thisAPI, retrieve the status values, and render these as options in the dropdown. In thenext section, we will look at the update order API endpoint, which needs to be calledwhen the seller selects a relevant status value from the dropdown.
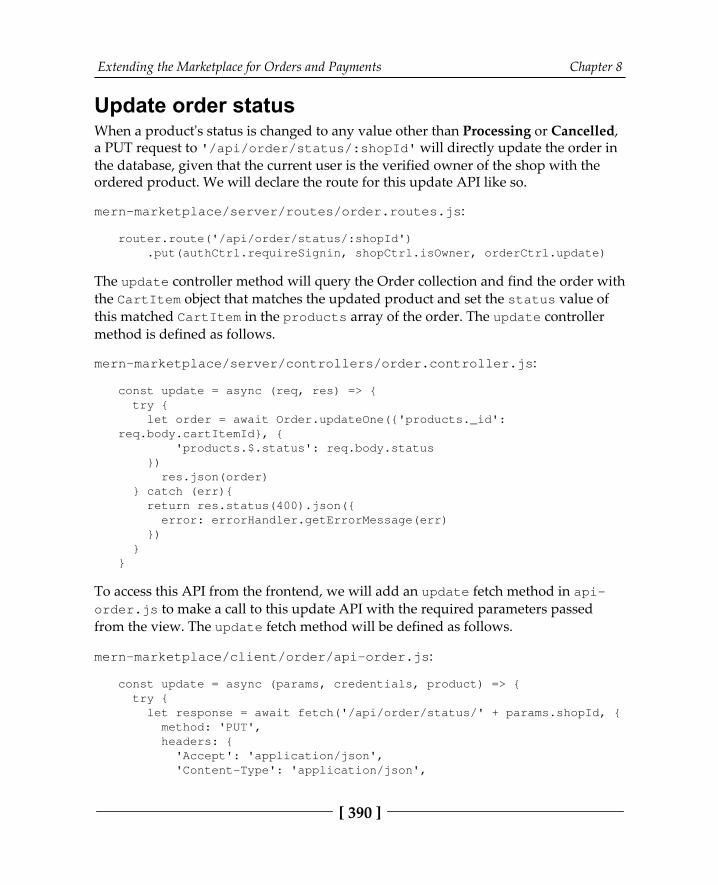
Extending the Marketplace for Orders and Payments Chapter 8
[ 390 ]
Update order statusWhen a product's status is changed to any value other than Processing or Cancelled,a PUT request to '/api/order/status/:shopId' will directly update the order inthe database, given that the current user is the verified owner of the shop with theordered product. We will declare the route for this update API like so.
mern-marketplace/server/routes/order.routes.js:
router.route('/api/order/status/:shopId') .put(authCtrl.requireSignin, shopCtrl.isOwner, orderCtrl.update)
The update controller method will query the Order collection and find the order withthe CartItem object that matches the updated product and set the status value ofthis matched CartItem in the products array of the order. The update controllermethod is defined as follows.
mern-marketplace/server/controllers/order.controller.js:
const update = async (req, res) => { try { let order = await Order.updateOne({'products._id':req.body.cartItemId}, { 'products.$.status': req.body.status }) res.json(order) } catch (err){ return res.status(400).json({ error: errorHandler.getErrorMessage(err) }) }}
To access this API from the frontend, we will add an update fetch method in api-order.js to make a call to this update API with the required parameters passedfrom the view. The update fetch method will be defined as follows.
mern-marketplace/client/order/api-order.js:
const update = async (params, credentials, product) => { try { let response = await fetch('/api/order/status/' + params.shopId, { method: 'PUT', headers: { 'Accept': 'application/json', 'Content-Type': 'application/json',
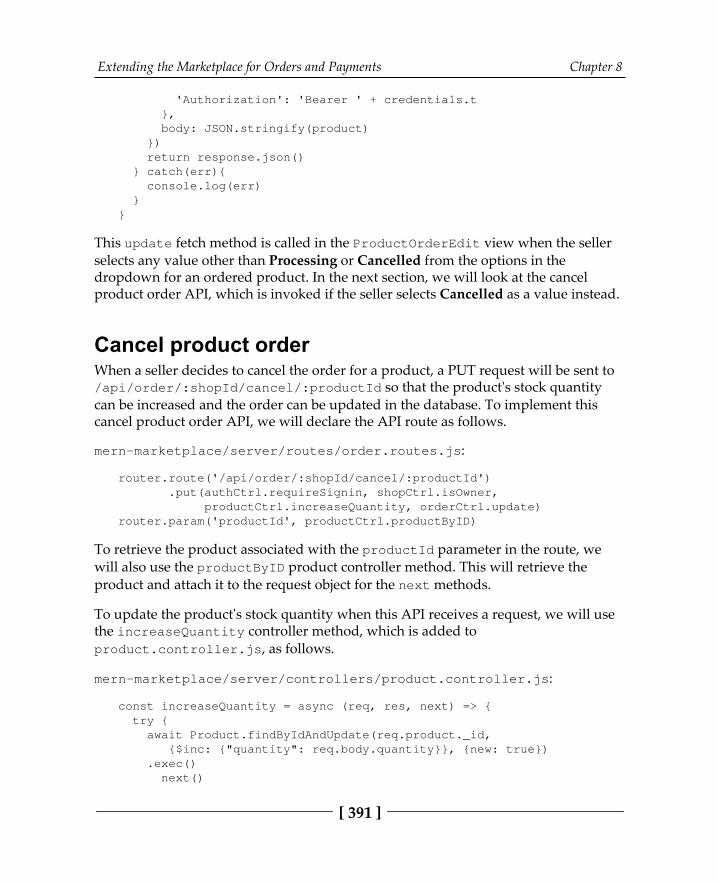
Extending the Marketplace for Orders and Payments Chapter 8
[ 391 ]
'Authorization': 'Bearer ' + credentials.t }, body: JSON.stringify(product) }) return response.json() } catch(err){ console.log(err) }}
This update fetch method is called in the ProductOrderEdit view when the sellerselects any value other than Processing or Cancelled from the options in thedropdown for an ordered product. In the next section, we will look at the cancelproduct order API, which is invoked if the seller selects Cancelled as a value instead.
Cancel product orderWhen a seller decides to cancel the order for a product, a PUT request will be sent to/api/order/:shopId/cancel/:productId so that the product's stock quantitycan be increased and the order can be updated in the database. To implement thiscancel product order API, we will declare the API route as follows.
mern-marketplace/server/routes/order.routes.js:
router.route('/api/order/:shopId/cancel/:productId') .put(authCtrl.requireSignin, shopCtrl.isOwner, productCtrl.increaseQuantity, orderCtrl.update)router.param('productId', productCtrl.productByID)
To retrieve the product associated with the productId parameter in the route, wewill also use the productByID product controller method. This will retrieve theproduct and attach it to the request object for the next methods.
To update the product's stock quantity when this API receives a request, we will usethe increaseQuantity controller method, which is added toproduct.controller.js, as follows.
mern-marketplace/server/controllers/product.controller.js:
const increaseQuantity = async (req, res, next) => { try { await Product.findByIdAndUpdate(req.product._id, {$inc: {"quantity": req.body.quantity}}, {new: true}) .exec() next()
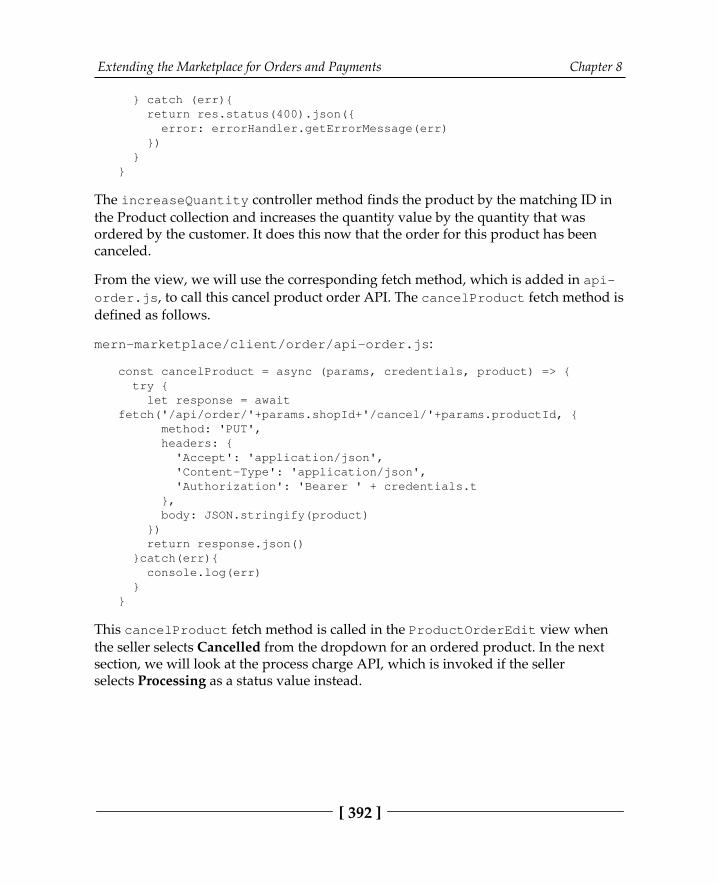
Extending the Marketplace for Orders and Payments Chapter 8
[ 392 ]
} catch (err){ return res.status(400).json({ error: errorHandler.getErrorMessage(err) }) }}
The increaseQuantity controller method finds the product by the matching ID inthe Product collection and increases the quantity value by the quantity that wasordered by the customer. It does this now that the order for this product has beencanceled.
From the view, we will use the corresponding fetch method, which is added in api-order.js, to call this cancel product order API. The cancelProduct fetch method isdefined as follows.
mern-marketplace/client/order/api-order.js:
const cancelProduct = async (params, credentials, product) => { try { let response = awaitfetch('/api/order/'+params.shopId+'/cancel/'+params.productId, { method: 'PUT', headers: { 'Accept': 'application/json', 'Content-Type': 'application/json', 'Authorization': 'Bearer ' + credentials.t }, body: JSON.stringify(product) }) return response.json() }catch(err){ console.log(err) }}
This cancelProduct fetch method is called in the ProductOrderEdit view whenthe seller selects Cancelled from the dropdown for an ordered product. In the nextsection, we will look at the process charge API, which is invoked if the sellerselects Processing as a status value instead.
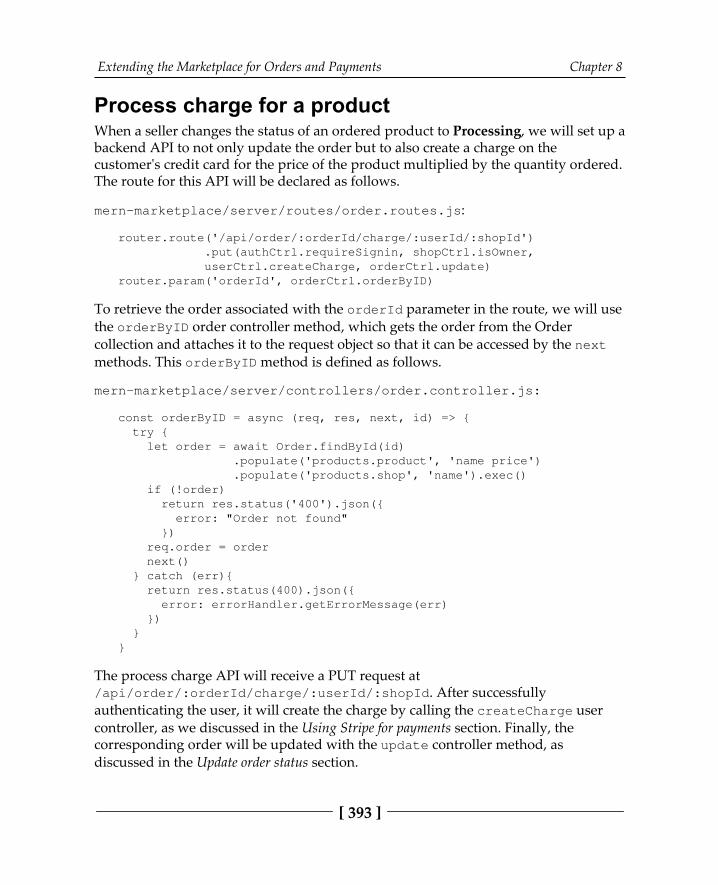
Extending the Marketplace for Orders and Payments Chapter 8
[ 393 ]
Process charge for a productWhen a seller changes the status of an ordered product to Processing, we will set up abackend API to not only update the order but to also create a charge on thecustomer's credit card for the price of the product multiplied by the quantity ordered.The route for this API will be declared as follows.
mern-marketplace/server/routes/order.routes.js:
router.route('/api/order/:orderId/charge/:userId/:shopId') .put(authCtrl.requireSignin, shopCtrl.isOwner, userCtrl.createCharge, orderCtrl.update)router.param('orderId', orderCtrl.orderByID)
To retrieve the order associated with the orderId parameter in the route, we will usethe orderByID order controller method, which gets the order from the Ordercollection and attaches it to the request object so that it can be accessed by the nextmethods. This orderByID method is defined as follows.
mern-marketplace/server/controllers/order.controller.js:
const orderByID = async (req, res, next, id) => { try { let order = await Order.findById(id) .populate('products.product', 'name price') .populate('products.shop', 'name').exec() if (!order) return res.status('400').json({ error: "Order not found" }) req.order = order next() } catch (err){ return res.status(400).json({ error: errorHandler.getErrorMessage(err) }) }}
The process charge API will receive a PUT request at/api/order/:orderId/charge/:userId/:shopId. After successfullyauthenticating the user, it will create the charge by calling the createCharge usercontroller, as we discussed in the Using Stripe for payments section. Finally, thecorresponding order will be updated with the update controller method, asdiscussed in the Update order status section.
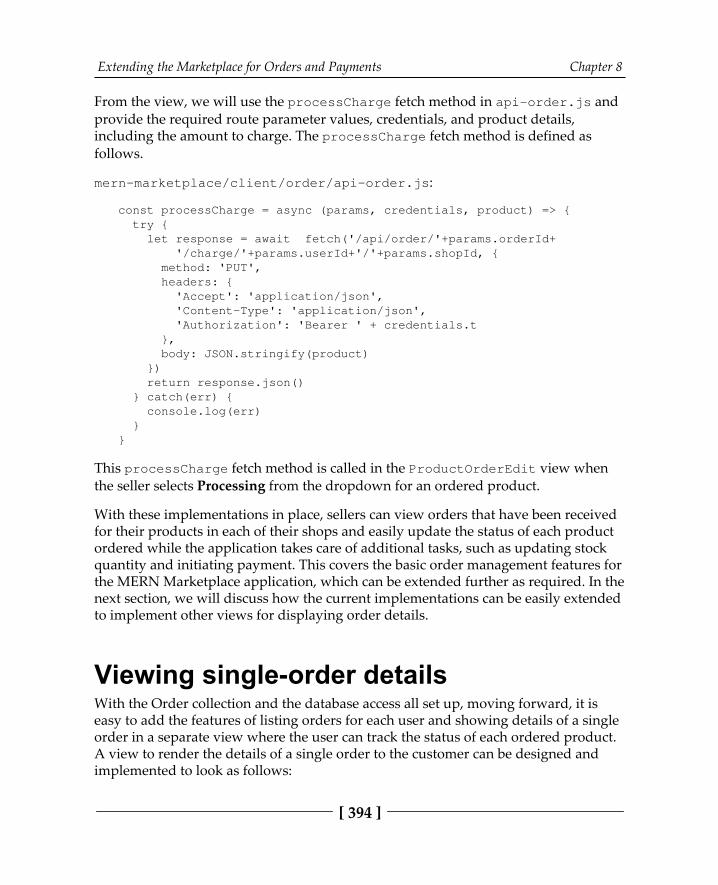
Extending the Marketplace for Orders and Payments Chapter 8
[ 394 ]
From the view, we will use the processCharge fetch method in api-order.js andprovide the required route parameter values, credentials, and product details,including the amount to charge. The processCharge fetch method is defined asfollows.
mern-marketplace/client/order/api-order.js:
const processCharge = async (params, credentials, product) => { try { let response = await fetch('/api/order/'+params.orderId+ '/charge/'+params.userId+'/'+params.shopId, { method: 'PUT', headers: { 'Accept': 'application/json', 'Content-Type': 'application/json', 'Authorization': 'Bearer ' + credentials.t }, body: JSON.stringify(product) }) return response.json() } catch(err) { console.log(err) }}
This processCharge fetch method is called in the ProductOrderEdit view whenthe seller selects Processing from the dropdown for an ordered product.
With these implementations in place, sellers can view orders that have been receivedfor their products in each of their shops and easily update the status of each productordered while the application takes care of additional tasks, such as updating stockquantity and initiating payment. This covers the basic order management features forthe MERN Marketplace application, which can be extended further as required. In thenext section, we will discuss how the current implementations can be easily extendedto implement other views for displaying order details.
Viewing single-order detailsWith the Order collection and the database access all set up, moving forward, it iseasy to add the features of listing orders for each user and showing details of a singleorder in a separate view where the user can track the status of each ordered product.A view to render the details of a single order to the customer can be designed andimplemented to look as follows:
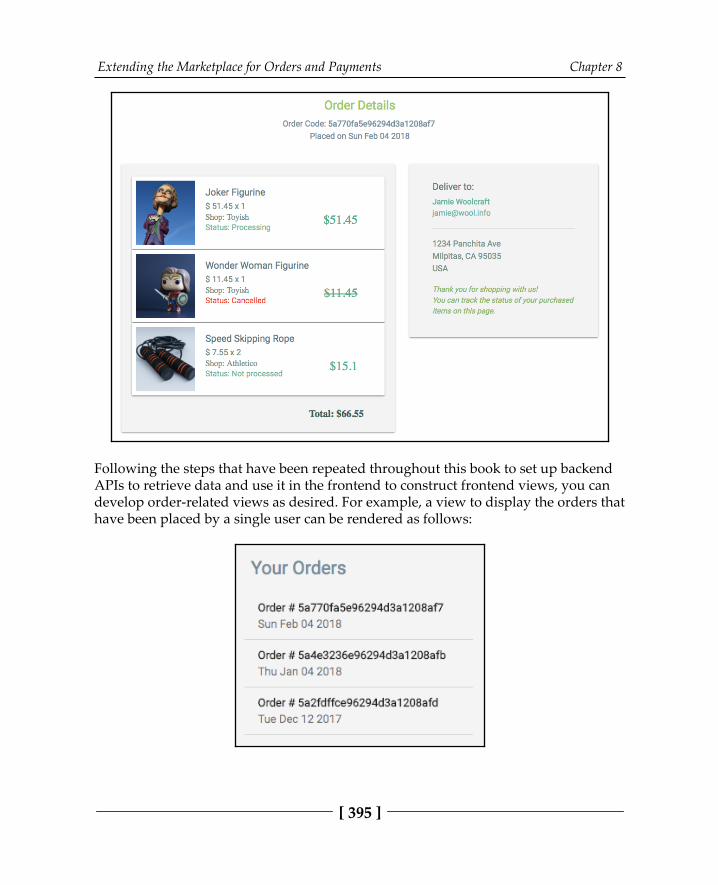
Extending the Marketplace for Orders and Payments Chapter 8
[ 395 ]
Following the steps that have been repeated throughout this book to set up backendAPIs to retrieve data and use it in the frontend to construct frontend views, you candevelop order-related views as desired. For example, a view to display the orders thathave been placed by a single user can be rendered as follows:
Extending the Marketplace for Orders and Payments Chapter 8
[ 396 ]
You can apply the lessons you learned while building out the full-stack features of theMERN Marketplace application to implement these order detail views, takinginspiration from the snapshots of these sample views from the MERN Marketplaceapplication.
The MERN Marketplace application that we developed in this chapter and Chapter7, Exercising MERN Skills with an Online Marketplace, by building on the MERNskeleton application covered the crucial features for a standard online marketplaceapplication. This, in turn, demonstrated how the MERN stack can be extended toincorporate complex features.
SummaryIn this chapter, we extended the MERN Marketplace application and explored how toadd a shopping cart for buyers, a checkout process with credit card payments, andorder management for the sellers in an online marketplace application.
We discovered how the MERN stack technologies can work well with third-partyintegrations as we implemented the cart checkout flow and processed credit cardcharges on ordered products using the tools provided by Stripe for managing onlinepayments.
We also unlocked more of what is possible with MERN, such as optimized bulk writeoperations in MongoDB for updating multiple documents in response to a single APIcall. This allowed us to decrease the stock quantities of multiple products in one go,such as when a user placed an order for multiple products from different stores.
With these new approaches and implementations that we explored, you can easilyintegrate payment processing, use offline storage in browsers, and performbulk database operations for any MERN-based application you choose to build.
The marketplace features that you developed in the MERN Marketplace applicationrevealed how this stack and structure can be utilized to design and build growingapplications by adding features that may be simple or more complex in nature.
In the next chapter, we will take the lessons we've learned so far in this book andexplore more advanced possibilities with this stack by extending this MERNMarketplace application so that it incorporates real-time bidding capabilities.
9Adding Real-Time Bidding
Capabilities to theMarketplace
In a world more connected than ever before, instant communication and real-timeupdates are expected behaviors in any application that enables interaction betweenusers. Adding real-time features to your application can keep your users engaged,and because of that, they will be spending more time on your platform. In thischapter, we will learn how to use the MERN stack technologies, along with Socket.IO,to easily integrate real-time behavior in a full-stack application. We will do thisby incorporating an auctioning feature with real-time bidding capabilities in theMERN Marketplace application that we developed in Chapter 7, Exercising MERNSkills with an Online Marketplace, and Chapter 8, Extending the Marketplace for Ordersand Payments. After going through the implementation of this auction and biddingfeature, you will know how to utilize sockets in a MERN stack application to addreal-time features of your choice.
In this chapter, we will extend the online marketplace application by covering thefollowing topics:
Introducing real-time bidding in the MERN MarketplaceAdding auctions to the marketplaceDisplaying the auction viewImplementing real-time bidding with Socket.IO
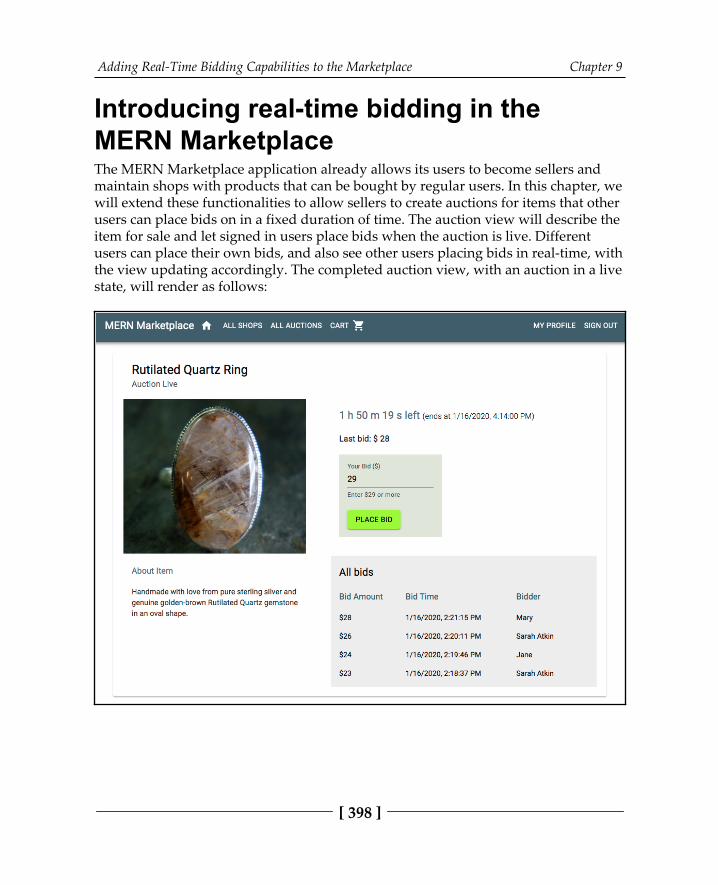
Adding Real-Time Bidding Capabilities to the Marketplace Chapter 9
[ 398 ]
Introducing real-time bidding in theMERN MarketplaceThe MERN Marketplace application already allows its users to become sellers andmaintain shops with products that can be bought by regular users. In this chapter, wewill extend these functionalities to allow sellers to create auctions for items that otherusers can place bids on in a fixed duration of time. The auction view will describe theitem for sale and let signed in users place bids when the auction is live. Differentusers can place their own bids, and also see other users placing bids in real-time, withthe view updating accordingly. The completed auction view, with an auction in a livestate, will render as follows:
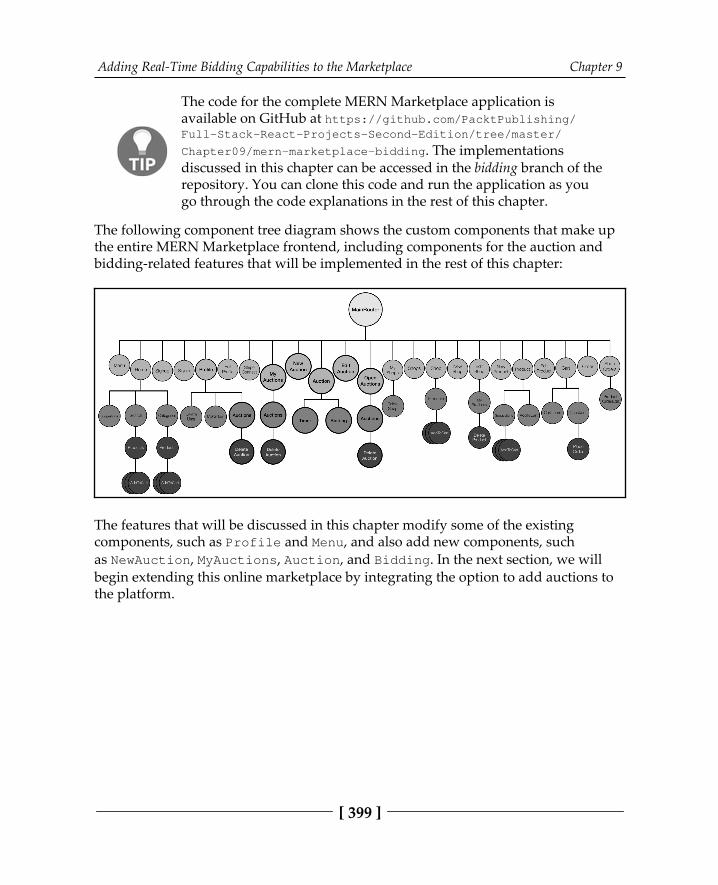
Adding Real-Time Bidding Capabilities to the Marketplace Chapter 9
[ 399 ]
The code for the complete MERN Marketplace application isavailable on GitHub at https:/ / github. com/ PacktPublishing/Full- Stack- React- Projects- Second- Edition/ tree/ master/Chapter09/ mern- marketplace- bidding. The implementationsdiscussed in this chapter can be accessed in the bidding branch of therepository. You can clone this code and run the application as yougo through the code explanations in the rest of this chapter.
The following component tree diagram shows the custom components that make upthe entire MERN Marketplace frontend, including components for the auction andbidding-related features that will be implemented in the rest of this chapter:
The features that will be discussed in this chapter modify some of the existingcomponents, such as Profile and Menu, and also add new components, suchas NewAuction, MyAuctions, Auction, and Bidding. In the next section, we willbegin extending this online marketplace by integrating the option to add auctions tothe platform.
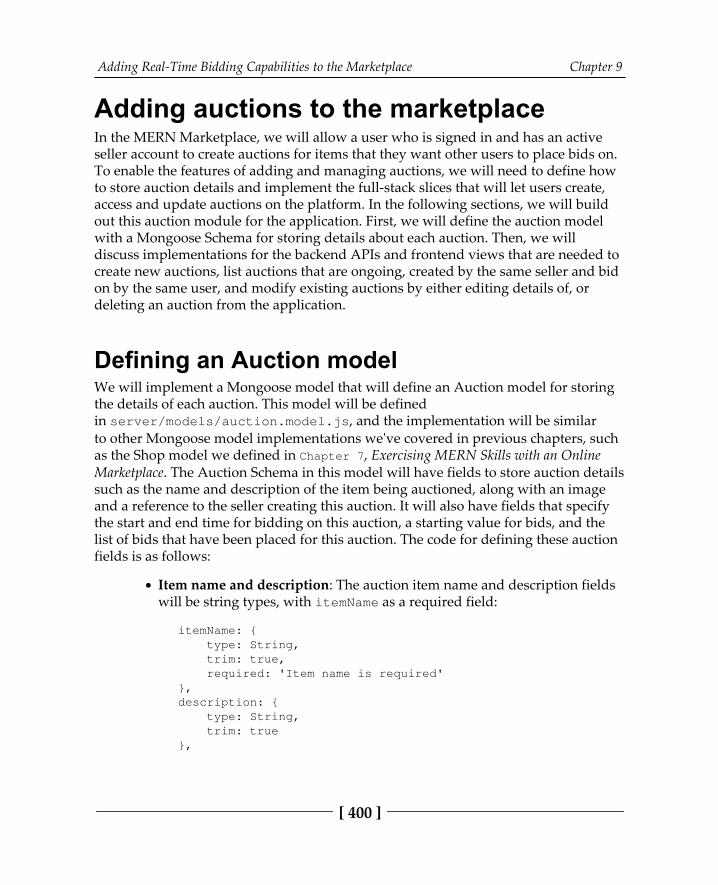
Adding Real-Time Bidding Capabilities to the Marketplace Chapter 9
[ 400 ]
Adding auctions to the marketplaceIn the MERN Marketplace, we will allow a user who is signed in and has an active seller account to create auctions for items that they want other users to place bids on.To enable the features of adding and managing auctions, we will need to define howto store auction details and implement the full-stack slices that will let users create,access and update auctions on the platform. In the following sections, we will buildout this auction module for the application. First, we will define the auction modelwith a Mongoose Schema for storing details about each auction. Then, we willdiscuss implementations for the backend APIs and frontend views that are needed tocreate new auctions, list auctions that are ongoing, created by the same seller and bidon by the same user, and modify existing auctions by either editing details of, ordeleting an auction from the application.
Defining an Auction modelWe will implement a Mongoose model that will define an Auction model for storingthe details of each auction. This model will be definedin server/models/auction.model.js, and the implementation will be similarto other Mongoose model implementations we've covered in previous chapters, suchas the Shop model we defined in Chapter 7, Exercising MERN Skills with an OnlineMarketplace. The Auction Schema in this model will have fields to store auction detailssuch as the name and description of the item being auctioned, along with an imageand a reference to the seller creating this auction. It will also have fields that specifythe start and end time for bidding on this auction, a starting value for bids, and thelist of bids that have been placed for this auction. The code for defining these auctionfields is as follows:
Item name and description: The auction item name and description fieldswill be string types, with itemName as a required field:
itemName: { type: String, trim: true, required: 'Item name is required'},description: { type: String, trim: true},
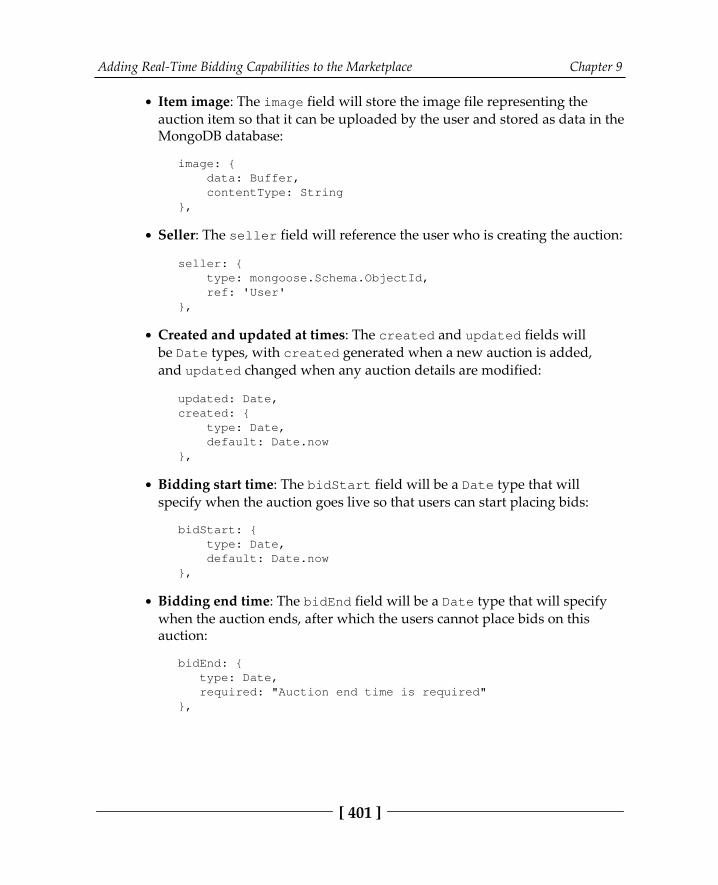
Adding Real-Time Bidding Capabilities to the Marketplace Chapter 9
[ 401 ]
Item image: The image field will store the image file representing theauction item so that it can be uploaded by the user and stored as data in theMongoDB database:
image: { data: Buffer, contentType: String},
Seller: The seller field will reference the user who is creating the auction:
seller: { type: mongoose.Schema.ObjectId, ref: 'User'},
Created and updated at times: The created and updated fields willbe Date types, with created generated when a new auction is added,and updated changed when any auction details are modified:
updated: Date,created: { type: Date, default: Date.now},
Bidding start time: The bidStart field will be a Date type that willspecify when the auction goes live so that users can start placing bids:
bidStart: { type: Date, default: Date.now},
Bidding end time: The bidEnd field will be a Date type that will specifywhen the auction ends, after which the users cannot place bids on thisauction:
bidEnd: { type: Date, required: "Auction end time is required"},
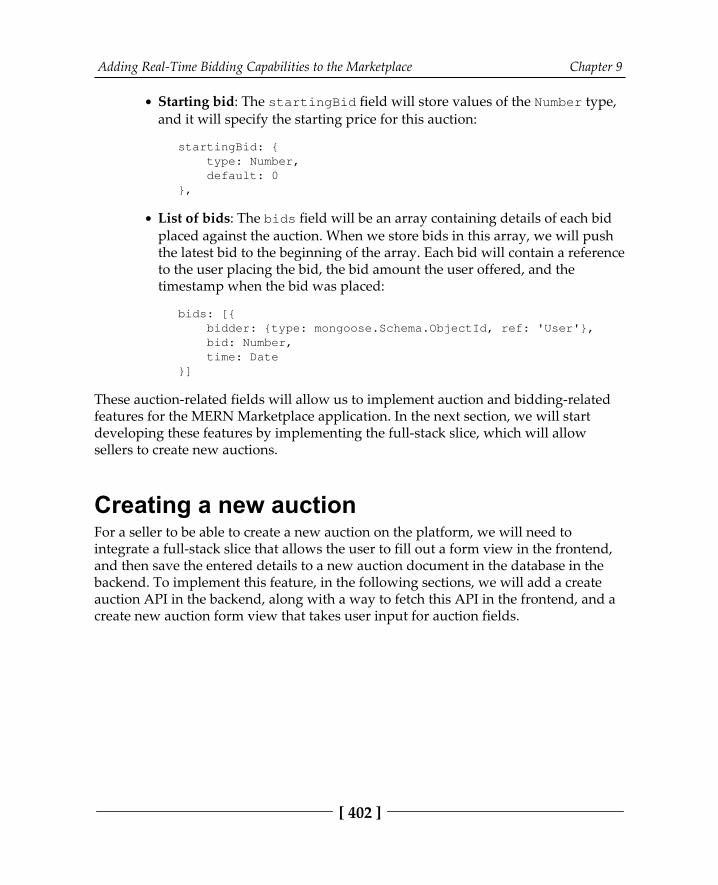
Adding Real-Time Bidding Capabilities to the Marketplace Chapter 9
[ 402 ]
Starting bid: The startingBid field will store values of the Number type,and it will specify the starting price for this auction:
startingBid: { type: Number, default: 0},
List of bids: The bids field will be an array containing details of each bidplaced against the auction. When we store bids in this array, we will pushthe latest bid to the beginning of the array. Each bid will contain a referenceto the user placing the bid, the bid amount the user offered, and thetimestamp when the bid was placed:
bids: [{ bidder: {type: mongoose.Schema.ObjectId, ref: 'User'}, bid: Number, time: Date}]
These auction-related fields will allow us to implement auction and bidding-relatedfeatures for the MERN Marketplace application. In the next section, we will startdeveloping these features by implementing the full-stack slice, which will allowsellers to create new auctions.
Creating a new auctionFor a seller to be able to create a new auction on the platform, we will need tointegrate a full-stack slice that allows the user to fill out a form view in the frontend,and then save the entered details to a new auction document in the database in thebackend. To implement this feature, in the following sections, we will add a createauction API in the backend, along with a way to fetch this API in the frontend, and acreate new auction form view that takes user input for auction fields.
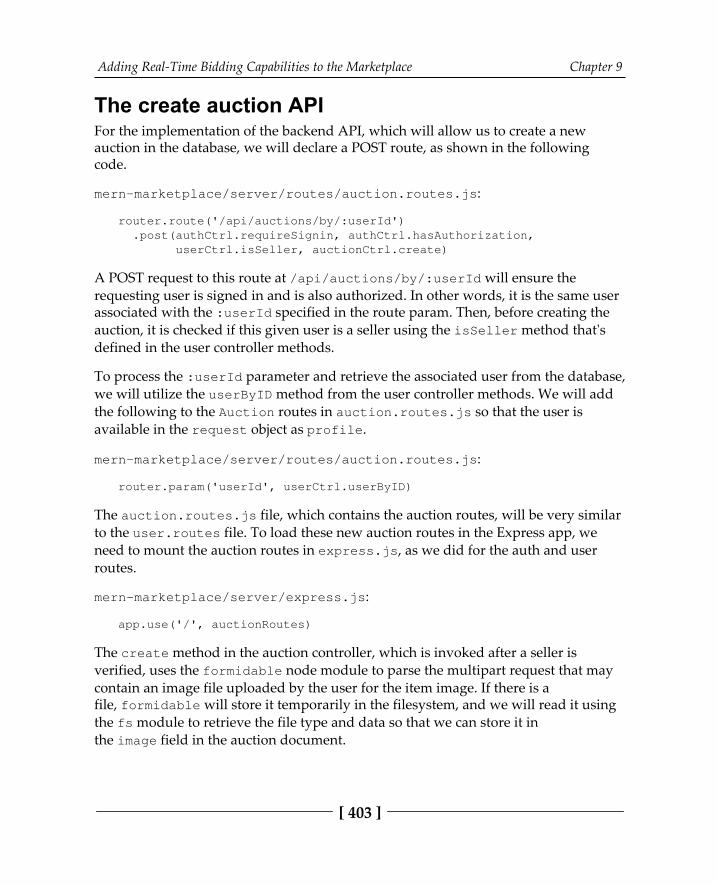
Adding Real-Time Bidding Capabilities to the Marketplace Chapter 9
[ 403 ]
The create auction APIFor the implementation of the backend API, which will allow us to create a newauction in the database, we will declare a POST route, as shown in the followingcode.
mern-marketplace/server/routes/auction.routes.js:
router.route('/api/auctions/by/:userId') .post(authCtrl.requireSignin, authCtrl.hasAuthorization, userCtrl.isSeller, auctionCtrl.create)
A POST request to this route at /api/auctions/by/:userId will ensure therequesting user is signed in and is also authorized. In other words, it is the same userassociated with the :userId specified in the route param. Then, before creating theauction, it is checked if this given user is a seller using the isSeller method that'sdefined in the user controller methods.
To process the :userId parameter and retrieve the associated user from the database,we will utilize the userByID method from the user controller methods. We will addthe following to the Auction routes in auction.routes.js so that the user isavailable in the request object as profile.
mern-marketplace/server/routes/auction.routes.js:
router.param('userId', userCtrl.userByID)
The auction.routes.js file, which contains the auction routes, will be very similarto the user.routes file. To load these new auction routes in the Express app, weneed to mount the auction routes in express.js, as we did for the auth and userroutes.
mern-marketplace/server/express.js:
app.use('/', auctionRoutes)
The create method in the auction controller, which is invoked after a seller isverified, uses the formidable node module to parse the multipart request that may contain an image file uploaded by the user for the item image. If there is afile, formidable will store it temporarily in the filesystem, and we will read it usingthe fs module to retrieve the file type and data so that we can store it inthe image field in the auction document.
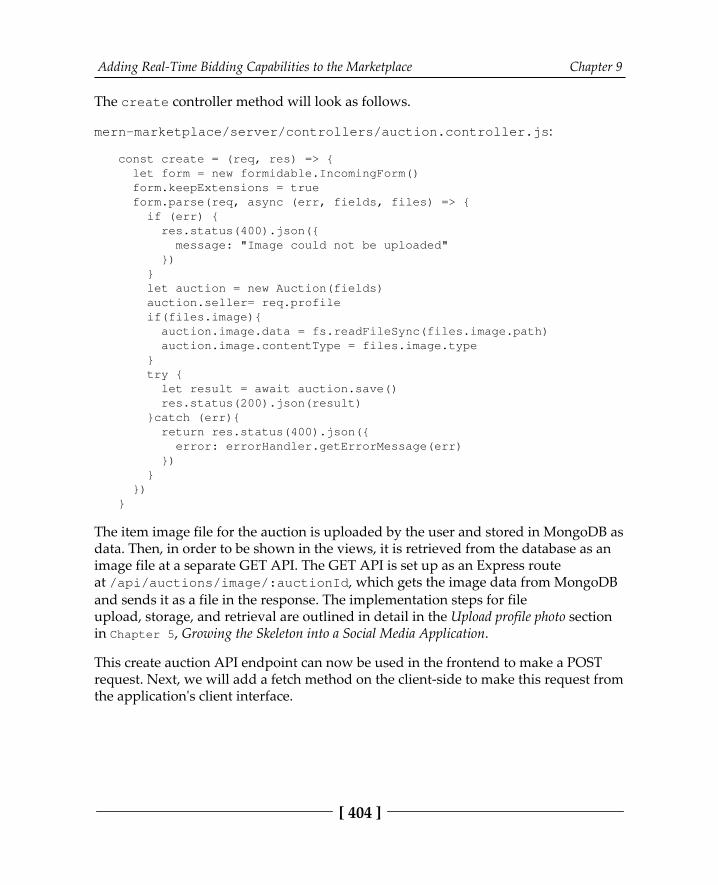
Adding Real-Time Bidding Capabilities to the Marketplace Chapter 9
[ 404 ]
The create controller method will look as follows.
mern-marketplace/server/controllers/auction.controller.js:
const create = (req, res) => { let form = new formidable.IncomingForm() form.keepExtensions = true form.parse(req, async (err, fields, files) => { if (err) { res.status(400).json({ message: "Image could not be uploaded" }) } let auction = new Auction(fields) auction.seller= req.profile if(files.image){ auction.image.data = fs.readFileSync(files.image.path) auction.image.contentType = files.image.type } try { let result = await auction.save() res.status(200).json(result) }catch (err){ return res.status(400).json({ error: errorHandler.getErrorMessage(err) }) } })}
The item image file for the auction is uploaded by the user and stored in MongoDB asdata. Then, in order to be shown in the views, it is retrieved from the database as animage file at a separate GET API. The GET API is set up as an Express routeat /api/auctions/image/:auctionId, which gets the image data from MongoDBand sends it as a file in the response. The implementation steps for fileupload, storage, and retrieval are outlined in detail in the Upload profile photo sectionin Chapter 5, Growing the Skeleton into a Social Media Application.
This create auction API endpoint can now be used in the frontend to make a POSTrequest. Next, we will add a fetch method on the client-side to make this request fromthe application's client interface.
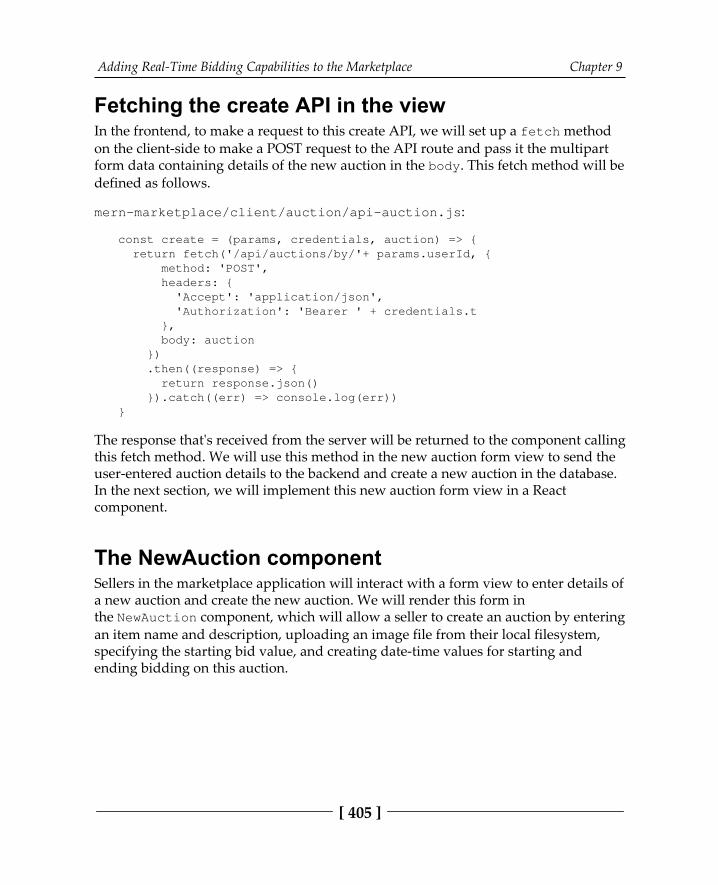
Adding Real-Time Bidding Capabilities to the Marketplace Chapter 9
[ 405 ]
Fetching the create API in the viewIn the frontend, to make a request to this create API, we will set up a fetch methodon the client-side to make a POST request to the API route and pass it the multipartform data containing details of the new auction in the body. This fetch method will bedefined as follows.
mern-marketplace/client/auction/api-auction.js:
const create = (params, credentials, auction) => { return fetch('/api/auctions/by/'+ params.userId, { method: 'POST', headers: { 'Accept': 'application/json', 'Authorization': 'Bearer ' + credentials.t }, body: auction }) .then((response) => { return response.json() }).catch((err) => console.log(err))}
The response that's received from the server will be returned to the component callingthis fetch method. We will use this method in the new auction form view to send theuser-entered auction details to the backend and create a new auction in the database.In the next section, we will implement this new auction form view in a Reactcomponent.
The NewAuction componentSellers in the marketplace application will interact with a form view to enter details ofa new auction and create the new auction. We will render this form inthe NewAuction component, which will allow a seller to create an auction by enteringan item name and description, uploading an image file from their local filesystem,specifying the starting bid value, and creating date-time values for starting andending bidding on this auction.
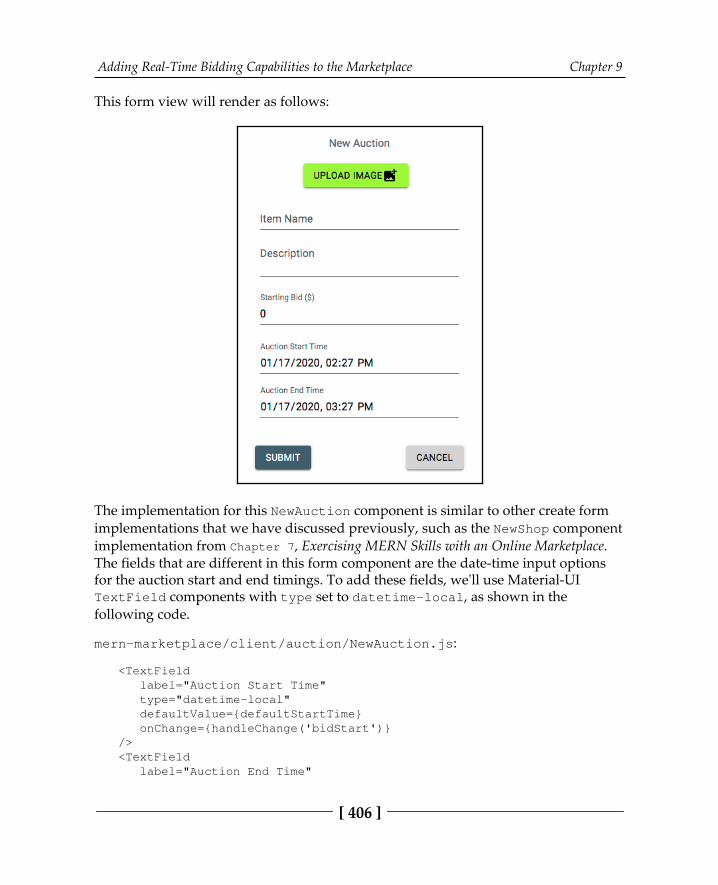
Adding Real-Time Bidding Capabilities to the Marketplace Chapter 9
[ 406 ]
This form view will render as follows:
The implementation for this NewAuction component is similar to other create formimplementations that we have discussed previously, such as the NewShop componentimplementation from Chapter 7, Exercising MERN Skills with an Online Marketplace.The fields that are different in this form component are the date-time input optionsfor the auction start and end timings. To add these fields, we'll use Material-UITextField components with type set to datetime-local, as shown in thefollowing code.
mern-marketplace/client/auction/NewAuction.js:
<TextField label="Auction Start Time" type="datetime-local" defaultValue={defaultStartTime} onChange={handleChange('bidStart')}/><TextField label="Auction End Time"

Adding Real-Time Bidding Capabilities to the Marketplace Chapter 9
[ 407 ]
type="datetime-local" defaultValue={defaultEndTime} onChange={handleChange('bidEnd')}/>
We also assign default date-time values for these fields in the format expected by thisinput component. We set the default start time to the current date-time and thedefault end time to an hour after the current date-time, as shown here.
mern-marketplace/client/auction/NewAuction.js:
const currentDate = new Date()const defaultStartTime = getDateString(currentDate)const defaultEndTime = getDateString(newDate(currentDate.setHours(currentDate.getHours()+1)))
The TextField with the type as datetime-local takes dates in the format yyyy-mm-ddThh:mm. So, we define a getDateString method that takes a JavaScript dateobject and formats it accordingly. The getDateString method is implemented asfollows.
mern-marketplace/client/auction/NewAuction.js:
const getDateString = (date) => { let year = date.getFullYear() let day = date.getDate().toString().length === 1 ? '0' +date.getDate() : date.getDate() let month = date.getMonth().toString().length === 1 ? '0' +(date.getMonth()+1) : date.getMonth() + 1 let hours = date.getHours().toString().length === 1 ? '0' +date.getHours() : date.getHours() let minutes = date.getMinutes().toString().length === 1 ? '0' +date.getMinutes() : date.getMinutes() let dateString = `${year}-${month}-${day}T${hours}:${minutes}` return dateString}
Adding Real-Time Bidding Capabilities to the Marketplace Chapter 9
[ 408 ]
In order to ensure the user has entered the dates correctly, with the start time set to avalue before the end time, we need to add a check before submitting the form detailsto the backend. The validation of the date combination can be confirmed with thefollowing code.
mern-marketplace/client/auction/NewAuction.js:
if(values.bidEnd < values.bidStart){ setValues({...values, error: "Auction cannot end before itstarts"})}
If the date combination is found to be invalid, then the user will be informed andform data will not be sent to the backend.
This NewAuction component can only be viewed by a signed-in user who is also aseller. Therefore, we will add a PrivateRoute in the MainRouter component. Thiswill render this form for authenticated users at /auction/new.
mern-marketplace/client/MainRouter.js:
<PrivateRoute path="/auction/new" component={NewAuction}/>
This link can be added to any of the view components that may be accessed by theseller, for example, in a view where a seller manages their auctions in themarketplace. Now that it is possible to add new auctions in the marketplace, in thenext section, we will discuss how to fetch these auctions from the database in thebackend so that they can be listed in the views in the frontend.
Listing auctions In the MERN Marketplace application, we will display three different lists of auctionsto the users. All users browsing through the platform will be able to view thecurrently open auctions, in other words, auctions that are live or are going to start at afuture date. The sellers will be able to view a list of auctions that they created, whilesigned in users will be able to view the list of auctions they placed bids in. The listdisplaying the open auctions to all the users will render as follows, providing asummary of each auction, along with an option so that the user can view furtherdetails in a separate view:
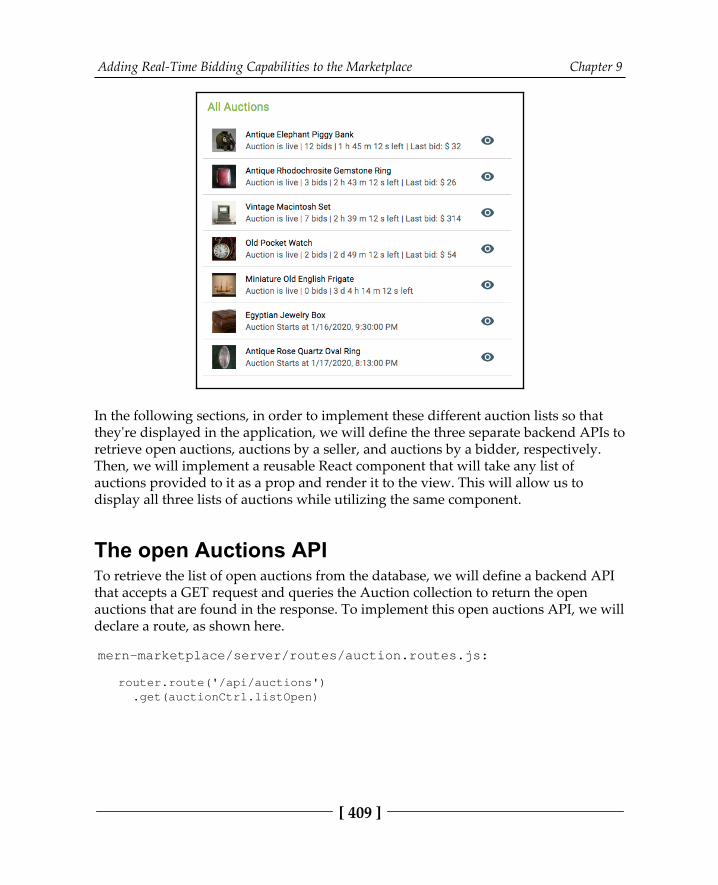
Adding Real-Time Bidding Capabilities to the Marketplace Chapter 9
[ 409 ]
In the following sections, in order to implement these different auction lists so thatthey're displayed in the application, we will define the three separate backend APIs toretrieve open auctions, auctions by a seller, and auctions by a bidder, respectively.Then, we will implement a reusable React component that will take any list ofauctions provided to it as a prop and render it to the view. This will allow us to display all three lists of auctions while utilizing the same component.
The open Auctions APITo retrieve the list of open auctions from the database, we will define a backend APIthat accepts a GET request and queries the Auction collection to return the openauctions that are found in the response. To implement this open auctions API, we willdeclare a route, as shown here.
mern-marketplace/server/routes/auction.routes.js:
router.route('/api/auctions') .get(auctionCtrl.listOpen)
Adding Real-Time Bidding Capabilities to the Marketplace Chapter 9
[ 410 ]
A GET request that's received at the /api/auctions route will invoke the listOpencontroller method, which will query the Auction collection in the database so that itreturns all the auctions with ending dates greater than the current date.The listOpen method is defined as follows.
mern-marketplace/server/controllers/auction.controller.js:
const listOpen = async (req, res) => { try { let auctions = await Auction.find({ bidEnd: { $gt: new Date() }}) .sort('bidStart') .populate('seller', '_id name') .populate('bids.bidder', '_id name') res.json(auctions) } catch (err){ return res.status(400).json({ error: errorHandler.getErrorMessage(err) }) }}
The auctions that are returned by the query in this listOpen method will be sortedby the starting date, with auctions that start earlier shown first. These auctions willalso contain the ID and name details of the seller and each bidder. The resulting arrayof auctions will be sent back in the response to the requesting client.
To fetch this API in the frontend, we will add a corresponding listOpen methodin api-auction.js, similar to other API implementations. This fetch method will beused in the frontend component that displays the open auctions to the user. Next, wewill implement another API to list all the auctions that a specific user placed bids in.
The Auctions by bidder APITo be able to display all the auctions that a given user placed bids in, we will define abackend API that accepts a GET request and queries the Auction collection so that itreturns the relevant auctions in the response. To implement this auctions by bidderAPI, we will declare a route, as shown here.
mern-marketplace/server/routes/auction.routes.js
router.route('/api/auctions/bid/:userId') .get(auctionCtrl.listByBidder)
Adding Real-Time Bidding Capabilities to the Marketplace Chapter 9
[ 411 ]
A GET request, when received at the /api/auctions/bid/:userId route, willinvoke the listByBidder controller method, which will query the Auction collectionin the database so that it returns all the auctions that contain bids with a biddermatching the user specified by the userId parameter in the route.The listByBidder method is defined as follows.
mern-marketplace/server/controllers/auction.controller.js:
const listByBidder = async (req, res) => { try { let auctions = await Auction.find({'bids.bidder':req.profile._id}) .populate('seller', '_id name') .populate('bids.bidder', '_id name') res.json(auctions) } catch (err){ return res.status(400).json({ error: errorHandler.getErrorMessage(err) }) }}
This method will return the resulting auctions in response to the requesting client,and each auction will also contain the ID and name details of the seller and eachbidder. To fetch this API in the frontend, we will add acorresponding listByBidder method in api-auction.js, similar to other APIimplementations. This fetch method will be used in the frontend component thatdisplays the auctions related to a specific bidder. Next, we will implement an API thatwill list all the auctions that a specific seller created in the marketplace.
The Auctions by seller APISellers in the marketplace will see a list of auctions that they created. To retrieve theseauctions from the database, we will define a backend API that accepts a GET requestand queries the Auction collection so that it returns the auctions by a specific seller.To implement this auctions by seller API, we will declare a route, as shown here.
mern-marketplace/server/routes/auction.routes.js:
router.route('/api/auctions/by/:userId') .get(authCtrl.requireSignin, authCtrl.hasAuthorization, auctionCtrl.listBySeller)

Adding Real-Time Bidding Capabilities to the Marketplace Chapter 9
[ 412 ]
A GET request, when received at the /api/auctions/by/:userId route, willinvoke the listBySeller controller method, which will query the Auction collectionin the database so that it returns all the auctions with sellers matching the userspecified by the userId parameter in the route. The listBySeller method isdefined as follows.
mern-marketplace/server/controllers/auction.controller.js:
const listBySeller = async (req, res) => { try { let auctions = await Auction.find({seller: req.profile._id}) .populate('seller', '_id name') .populate('bids.bidder', '_id name') res.json(auctions) } catch (err){ return res.status(400).json({ error: errorHandler.getErrorMessage(err) }) }}
This method will return the auctions for the specified seller in response to therequesting client, and each auction will also contain the ID and name details of theseller and each bidder.
To fetch this API in the frontend, we will add acorresponding listBySeller method in api-auction.js, similar to other APIimplementations. This fetch method will be used in the frontend component thatdisplays the auctions related to a specific seller. In the next section, we will look at theimplementation of the Auctions component, which will take any of these lists ofauctions and display it to the end user.
The Auctions componentThe different auction lists in the application will be rendered using a Reactcomponent that takes an array of auction objects as props. We will implement thisreusable Auctions component and add it to the views that will retrieve and displayeither the open auctions, auctions by a bidder, or auctions by a seller. The view thatretrieves and renders the list of auctions created by a specific seller using theAuctions component will look as follows:
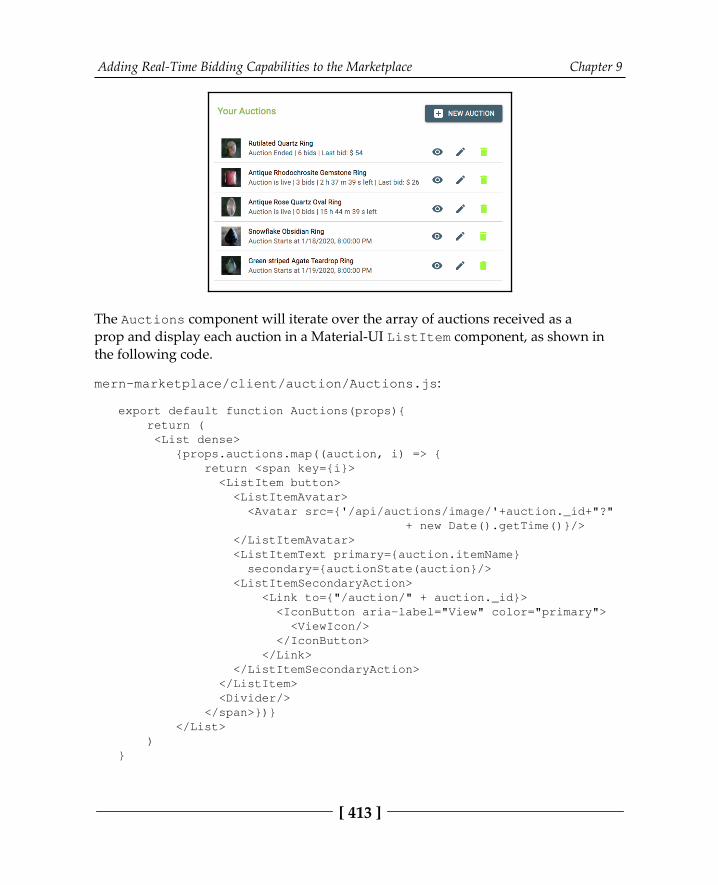
Adding Real-Time Bidding Capabilities to the Marketplace Chapter 9
[ 413 ]
The Auctions component will iterate over the array of auctions received as aprop and display each auction in a Material-UI ListItem component, as shown inthe following code.
mern-marketplace/client/auction/Auctions.js:
export default function Auctions(props){ return ( <List dense> {props.auctions.map((auction, i) => { return <span key={i}> <ListItem button> <ListItemAvatar> <Avatar src={'/api/auctions/image/'+auction._id+"?" + new Date().getTime()}/> </ListItemAvatar> <ListItemText primary={auction.itemName} secondary={auctionState(auction}/> <ListItemSecondaryAction> <Link to={"/auction/" + auction._id}> <IconButton aria-label="View" color="primary"> <ViewIcon/> </IconButton> </Link> </ListItemSecondaryAction> </ListItem> <Divider/> </span>})} </List> )}
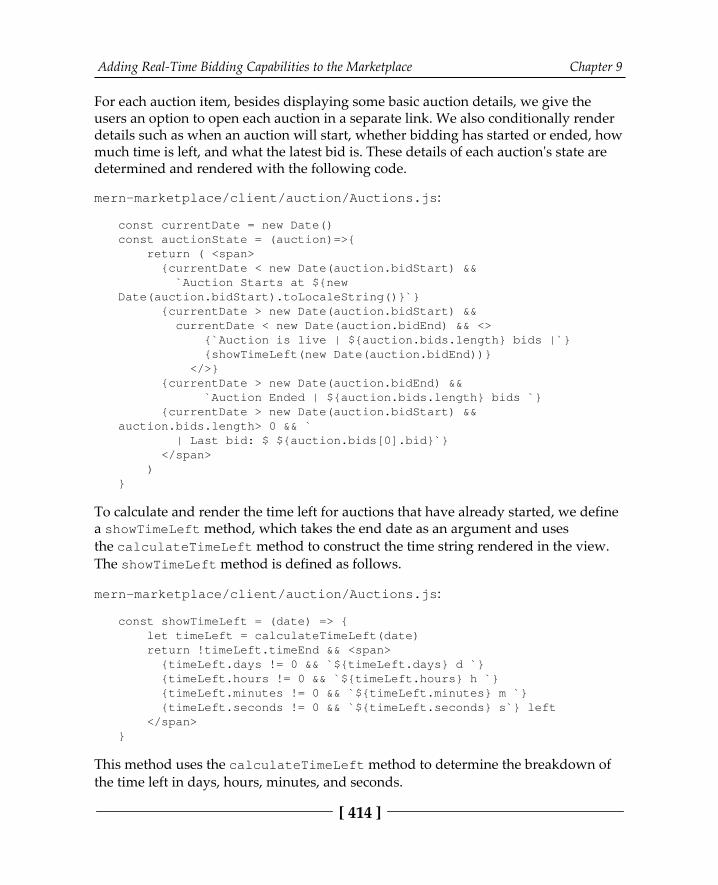
Adding Real-Time Bidding Capabilities to the Marketplace Chapter 9
[ 414 ]
For each auction item, besides displaying some basic auction details, we give theusers an option to open each auction in a separate link. We also conditionally renderdetails such as when an auction will start, whether bidding has started or ended, howmuch time is left, and what the latest bid is. These details of each auction's state aredetermined and rendered with the following code.
mern-marketplace/client/auction/Auctions.js:
const currentDate = new Date()const auctionState = (auction)=>{ return ( <span> {currentDate < new Date(auction.bidStart) && `Auction Starts at ${newDate(auction.bidStart).toLocaleString()}`} {currentDate > new Date(auction.bidStart) && currentDate < new Date(auction.bidEnd) && <> {`Auction is live | ${auction.bids.length} bids |`} {showTimeLeft(new Date(auction.bidEnd))} </>} {currentDate > new Date(auction.bidEnd) && `Auction Ended | ${auction.bids.length} bids `} {currentDate > new Date(auction.bidStart) &&auction.bids.length> 0 && ` | Last bid: $ ${auction.bids[0].bid}`} </span> )}
To calculate and render the time left for auctions that have already started, we definea showTimeLeft method, which takes the end date as an argument and usesthe calculateTimeLeft method to construct the time string rendered in the view.The showTimeLeft method is defined as follows.
mern-marketplace/client/auction/Auctions.js:
const showTimeLeft = (date) => { let timeLeft = calculateTimeLeft(date) return !timeLeft.timeEnd && <span> {timeLeft.days != 0 && `${timeLeft.days} d `} {timeLeft.hours != 0 && `${timeLeft.hours} h `} {timeLeft.minutes != 0 && `${timeLeft.minutes} m `} {timeLeft.seconds != 0 && `${timeLeft.seconds} s`} left </span>}
This method uses the calculateTimeLeft method to determine the breakdown ofthe time left in days, hours, minutes, and seconds.
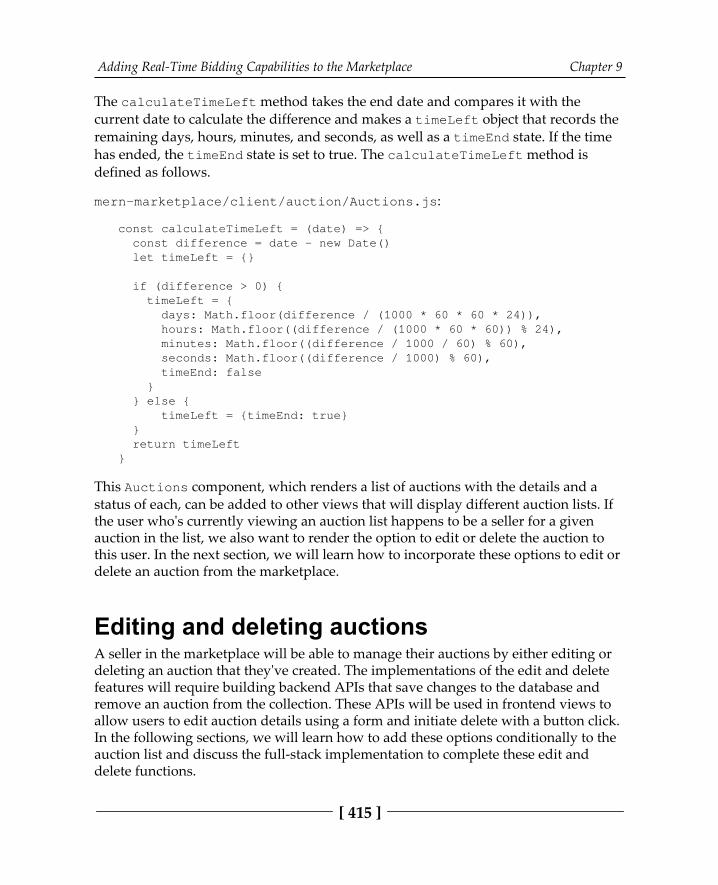
Adding Real-Time Bidding Capabilities to the Marketplace Chapter 9
[ 415 ]
The calculateTimeLeft method takes the end date and compares it with thecurrent date to calculate the difference and makes a timeLeft object that records theremaining days, hours, minutes, and seconds, as well as a timeEnd state. If the timehas ended, the timeEnd state is set to true. The calculateTimeLeft method isdefined as follows.
mern-marketplace/client/auction/Auctions.js:
const calculateTimeLeft = (date) => { const difference = date - new Date() let timeLeft = {}
if (difference > 0) { timeLeft = { days: Math.floor(difference / (1000 * 60 * 60 * 24)), hours: Math.floor((difference / (1000 * 60 * 60)) % 24), minutes: Math.floor((difference / 1000 / 60) % 60), seconds: Math.floor((difference / 1000) % 60), timeEnd: false } } else { timeLeft = {timeEnd: true} } return timeLeft}
This Auctions component, which renders a list of auctions with the details and astatus of each, can be added to other views that will display different auction lists. Ifthe user who's currently viewing an auction list happens to be a seller for a givenauction in the list, we also want to render the option to edit or delete the auction tothis user. In the next section, we will learn how to incorporate these options to edit ordelete an auction from the marketplace.
Editing and deleting auctionsA seller in the marketplace will be able to manage their auctions by either editing or deleting an auction that they've created. The implementations of the edit and deletefeatures will require building backend APIs that save changes to the database andremove an auction from the collection. These APIs will be used in frontend views toallow users to edit auction details using a form and initiate delete with a button click.In the following sections, we will learn how to add these options conditionally to theauction list and discuss the full-stack implementation to complete these edit anddelete functions.
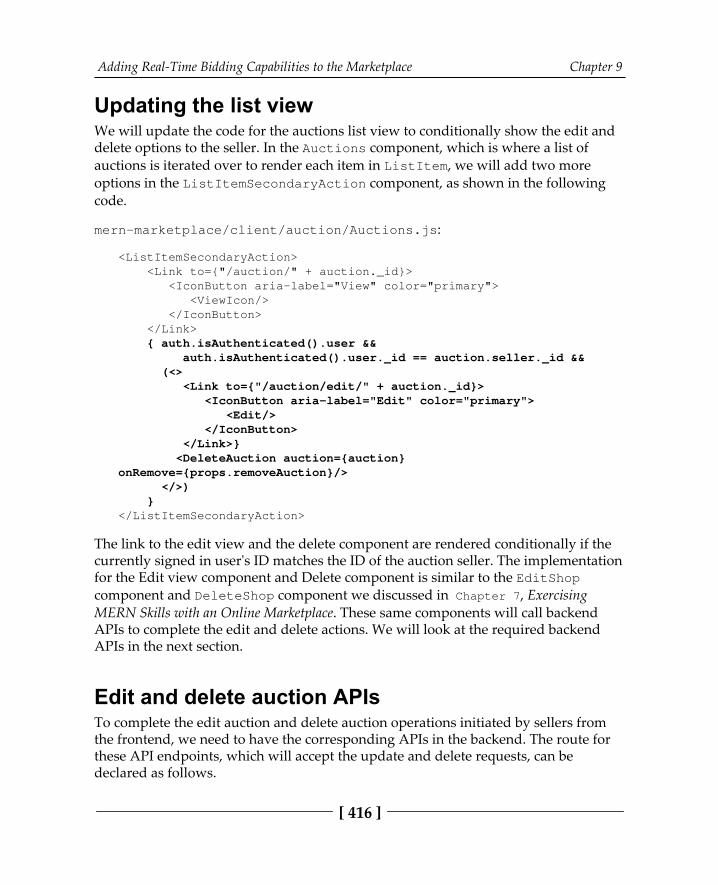
Adding Real-Time Bidding Capabilities to the Marketplace Chapter 9
[ 416 ]
Updating the list viewWe will update the code for the auctions list view to conditionally show the edit anddelete options to the seller. In the Auctions component, which is where a list ofauctions is iterated over to render each item in ListItem, we will add two moreoptions in the ListItemSecondaryAction component, as shown in the followingcode.
mern-marketplace/client/auction/Auctions.js:
<ListItemSecondaryAction> <Link to={"/auction/" + auction._id}> <IconButton aria-label="View" color="primary"> <ViewIcon/> </IconButton> </Link> { auth.isAuthenticated().user && auth.isAuthenticated().user._id == auction.seller._id && (<> <Link to={"/auction/edit/" + auction._id}> <IconButton aria-label="Edit" color="primary"> <Edit/> </IconButton> </Link>} <DeleteAuction auction={auction}onRemove={props.removeAuction}/> </>) }</ListItemSecondaryAction>
The link to the edit view and the delete component are rendered conditionally if thecurrently signed in user's ID matches the ID of the auction seller. The implementationfor the Edit view component and Delete component is similar to the EditShopcomponent and DeleteShop component we discussed in Chapter 7, ExercisingMERN Skills with an Online Marketplace. These same components will call backendAPIs to complete the edit and delete actions. We will look at the required backendAPIs in the next section.
Edit and delete auction APIs To complete the edit auction and delete auction operations initiated by sellers fromthe frontend, we need to have the corresponding APIs in the backend. The route forthese API endpoints, which will accept the update and delete requests, can bedeclared as follows.
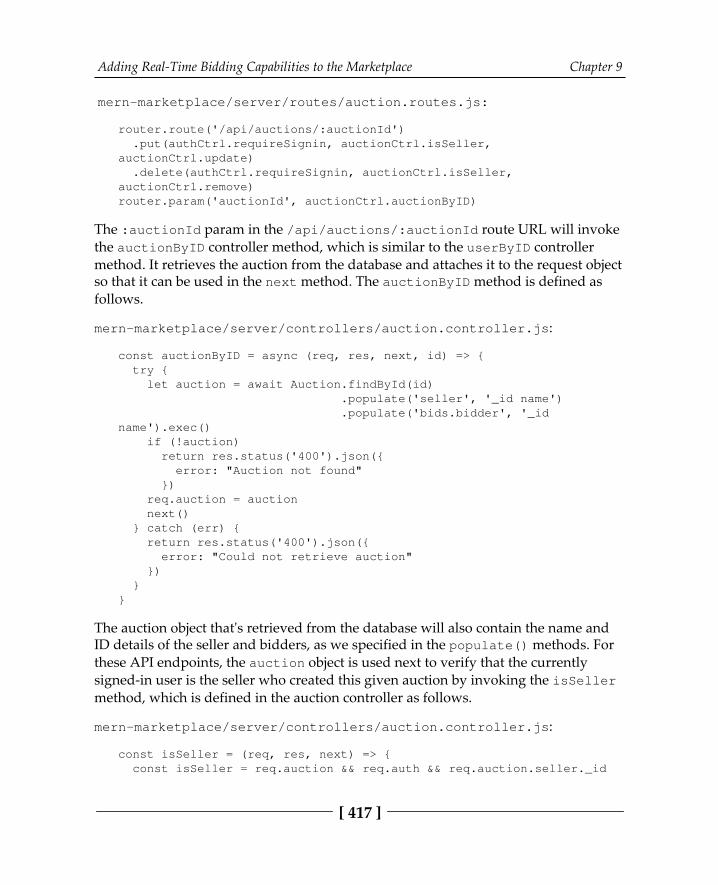
Adding Real-Time Bidding Capabilities to the Marketplace Chapter 9
[ 417 ]
mern-marketplace/server/routes/auction.routes.js:
router.route('/api/auctions/:auctionId') .put(authCtrl.requireSignin, auctionCtrl.isSeller,auctionCtrl.update) .delete(authCtrl.requireSignin, auctionCtrl.isSeller,auctionCtrl.remove)router.param('auctionId', auctionCtrl.auctionByID)
The :auctionId param in the /api/auctions/:auctionId route URL will invokethe auctionByID controller method, which is similar to the userByID controllermethod. It retrieves the auction from the database and attaches it to the request objectso that it can be used in the next method. The auctionByID method is defined asfollows.
mern-marketplace/server/controllers/auction.controller.js:
const auctionByID = async (req, res, next, id) => { try { let auction = await Auction.findById(id) .populate('seller', '_id name') .populate('bids.bidder', '_idname').exec() if (!auction) return res.status('400').json({ error: "Auction not found" }) req.auction = auction next() } catch (err) { return res.status('400').json({ error: "Could not retrieve auction" }) }}
The auction object that's retrieved from the database will also contain the name andID details of the seller and bidders, as we specified in the populate() methods. Forthese API endpoints, the auction object is used next to verify that the currentlysigned-in user is the seller who created this given auction by invoking the isSellermethod, which is defined in the auction controller as follows.
mern-marketplace/server/controllers/auction.controller.js:
const isSeller = (req, res, next) => { const isSeller = req.auction && req.auth && req.auction.seller._id
Adding Real-Time Bidding Capabilities to the Marketplace Chapter 9
[ 418 ]
== req.auth._id if(!isSeller){ return res.status('403').json({ error: "User is not authorized" }) } next()}
Once the seller has been verified, the next method is invoked to either update ordelete the auction, depending on whether a PUT or DELETE request was received.The controller methods for updating and deleting auctions are similar to the previousimplementations for update and delete, as we discussed for the edit shop API anddelete shop API in Chapter 7, Exercising MERN Skills with an Online Marketplace.
We have the auction module for the marketplace ready with an Auction model forstoring auction and bidding data and backend APIs and frontend views for creatingnew auctions, displaying different auction lists, and modifying an existing auction. Inthe next section, we will extend this module further and implement a view forindividual auctions where, besides learning more about the auction, users will also beable to see live bidding updates.
Displaying the auction view The view for displaying a single auction will contain the core functionality of thereal-time auction and bidding features for the marketplace. Before getting into theimplementation of real-time bidding, we will set up the full-stack slice for retrievingdetails of a single auction and display these details in a React component that willhouse the auction display, timer, and bidding capabilities. In the following sections,we will start by discussing the backend API for fetching a single auction. Then,we will look at the implementation of an Auction component, which will use this APIto retrieve and display the auction details, along with the state of the auction. To giveusers a real-time update of the state of the auction, we will also implement a timer inthis view to indicate the time left until a live auction ends.
Adding Real-Time Bidding Capabilities to the Marketplace Chapter 9
[ 419 ]
The read auction APITo display the details of an existing auction in a view of its own, we need to add abackend API that will receive a request for the auction from the client and return itsdetails in the response. Therefore, we will implement a read auction API in thebackend that will accept a GET request with a specified auction ID and return thecorresponding auction document from the Auction collection in the database. Wewill start adding this API endpoint by declaring a GET route, as shown in thefollowing code.
mern-marketplace/server/routes/auction.routes.js:
router.route('/api/auction/:auctionId') .get(auctionCtrl.read)
The :auctionId param in the route URL invokes the auctionByID controllermethod when a GET request is received at this route. The auctionByID controllermethod retrieves the auction from the database and attaches it to the request object tobe accessed in the read controller method, which is called next. The read controllermethod, which returns this auction object in response to the client, is defined asfollows.
mern-marketplace/server/controllers/auction.controller.js:
const read = (req, res) => { req.auction.image = undefined return res.json(req.auction)}
We are removing the image field before sending the response, since images will beretrieved as files in separate routes. With this API ready in the backend, we can nowadd the implementation to call it in the frontend by adding a fetch method in api-auction.js, similar to the other fetch methods we've discussed for completing APIimplementations. We will use the fetch method to call the read auction API in a Reactcomponent that will render the retrieved auction details. The implementation of thisReact component is discussed in the next section.
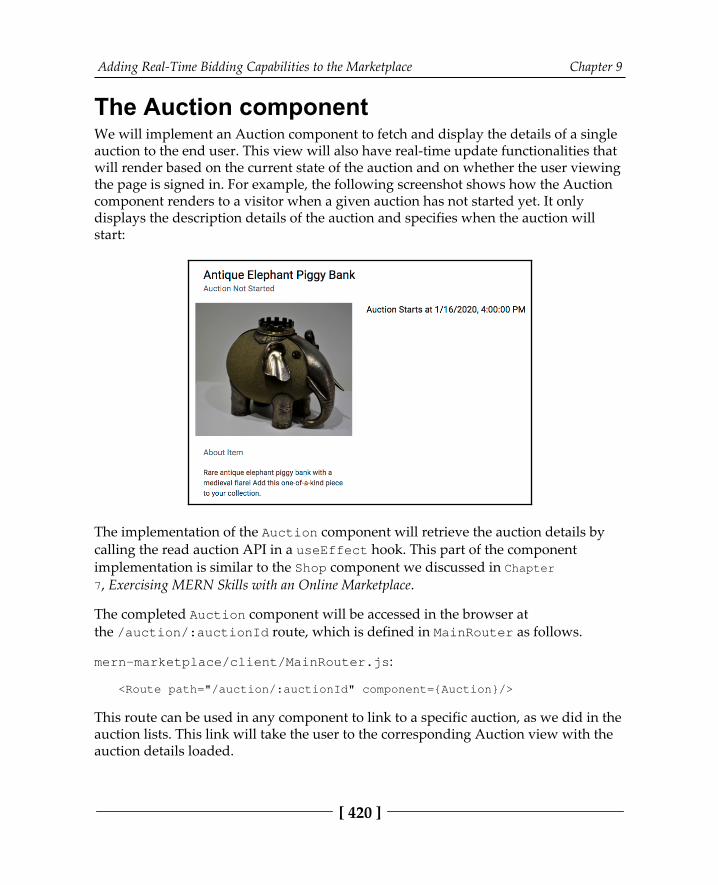
Adding Real-Time Bidding Capabilities to the Marketplace Chapter 9
[ 420 ]
The Auction componentWe will implement an Auction component to fetch and display the details of a singleauction to the end user. This view will also have real-time update functionalities thatwill render based on the current state of the auction and on whether the user viewingthe page is signed in. For example, the following screenshot shows how the Auctioncomponent renders to a visitor when a given auction has not started yet. It onlydisplays the description details of the auction and specifies when the auction willstart:
The implementation of the Auction component will retrieve the auction details bycalling the read auction API in a useEffect hook. This part of the componentimplementation is similar to the Shop component we discussed in Chapter7, Exercising MERN Skills with an Online Marketplace.
The completed Auction component will be accessed in the browser atthe /auction/:auctionId route, which is defined in MainRouter as follows.
mern-marketplace/client/MainRouter.js:
<Route path="/auction/:auctionId" component={Auction}/>
This route can be used in any component to link to a specific auction, as we did in theauction lists. This link will take the user to the corresponding Auction view with theauction details loaded.
Adding Real-Time Bidding Capabilities to the Marketplace Chapter 9
[ 421 ]
In the component view, we will render the auction state by considering the currentdate and the given auction's bidding start and end timings. The code to generate thesestates, which will be shown in the view, can be added as follows.
mern-marketplace/client/auction/Auction.js:
const currentDate = new Date()...<span> {currentDate < new Date(auction.bidStart) && 'Auction NotStarted'} {currentDate > new Date(auction.bidStart) && currentDate < newDate(auction.bidEnd) && 'Auction Live'} {currentDate > new Date(auction.bidEnd) && 'Auction Ended'}</span>
In the preceding code, if the current date is before the bidStart date, we show amessage indicating that the auction has not started yet. If the current date is betweenthe bidStart and bidEnd dates, then the auction is live. If the current date is afterthe bidEnd date, then the auction has ended.
The Auction component will also conditionally render a timer and a bidding section,depending on whether the current user is signed in, and also on the state of theauction at the moment. The code to render this part of the view will be as follows.
mern-marketplace/client/auction/Auction.js:
<Grid item xs={7} sm={7}> {currentDate > new Date(auction.bidStart) ? (<> <Timer endTime={auction.bidEnd} update={update}/> { auction.bids.length > 0 && <Typography component="p" variant="subtitle1"> {` Last bid: $ ${auction.bids[0].bid}`} </Typography> } { !auth.isAuthenticated() && <Typography> Please, <Link to='/signin'> sign in</Link> to place your bid. </Typography> } { auth.isAuthenticated() && <Bidding auction={auction} justEnded= {justEnded} updateBids={updateBids}/> } </>)
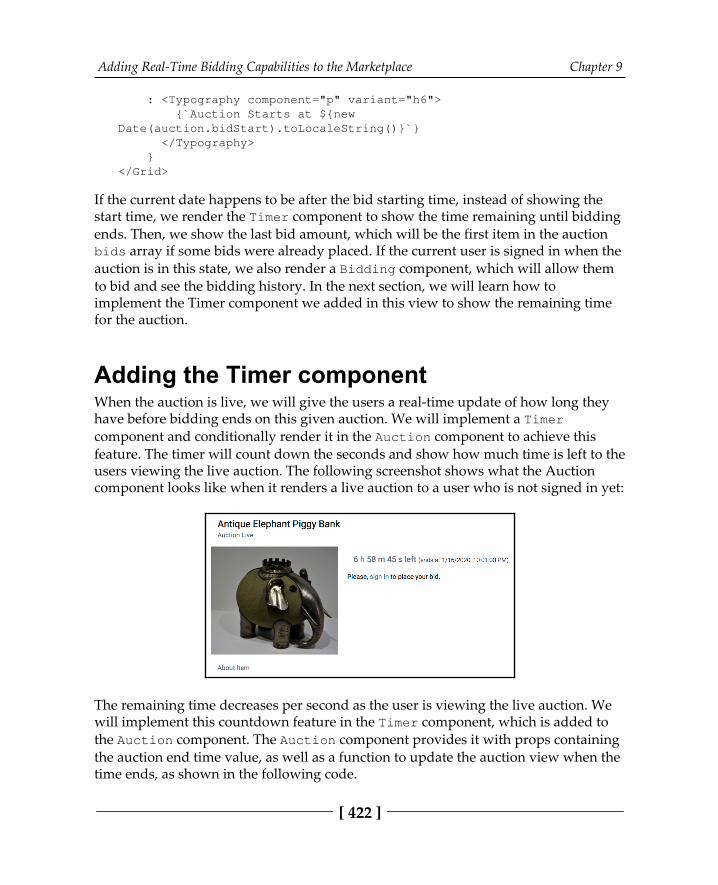
Adding Real-Time Bidding Capabilities to the Marketplace Chapter 9
[ 422 ]
: <Typography component="p" variant="h6"> {`Auction Starts at ${newDate(auction.bidStart).toLocaleString()}`} </Typography> }</Grid>
If the current date happens to be after the bid starting time, instead of showing thestart time, we render the Timer component to show the time remaining until biddingends. Then, we show the last bid amount, which will be the first item in the auctionbids array if some bids were already placed. If the current user is signed in when theauction is in this state, we also render a Bidding component, which will allow themto bid and see the bidding history. In the next section, we will learn how toimplement the Timer component we added in this view to show the remaining timefor the auction.
Adding the Timer componentWhen the auction is live, we will give the users a real-time update of how long theyhave before bidding ends on this given auction. We will implement a Timercomponent and conditionally render it in the Auction component to achieve thisfeature. The timer will count down the seconds and show how much time is left to theusers viewing the live auction. The following screenshot shows what the Auctioncomponent looks like when it renders a live auction to a user who is not signed in yet:
The remaining time decreases per second as the user is viewing the live auction. Wewill implement this countdown feature in the Timer component, which is added tothe Auction component. The Auction component provides it with props containingthe auction end time value, as well as a function to update the auction view when thetime ends, as shown in the following code.
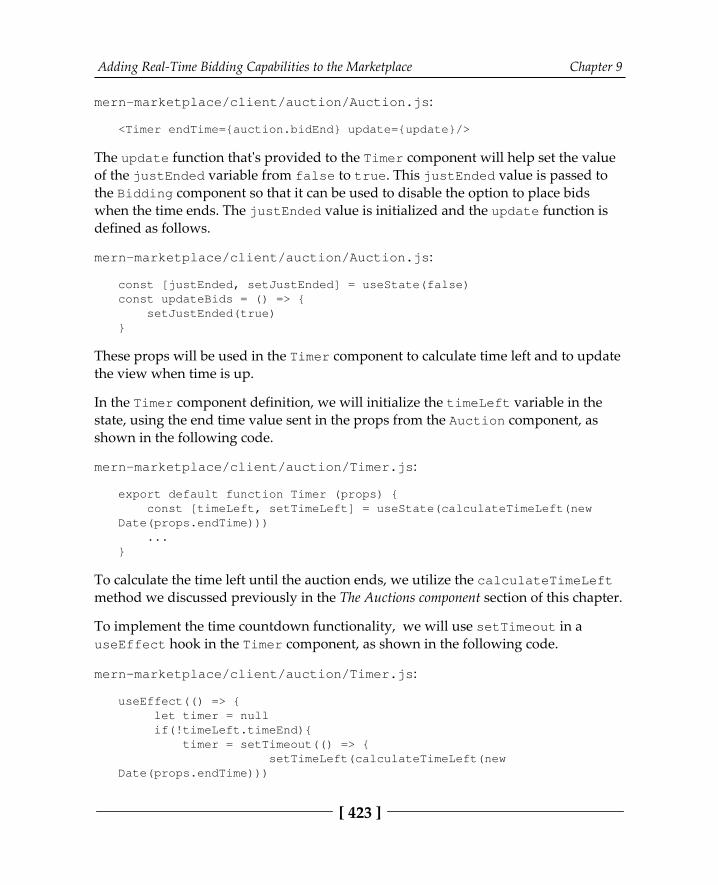
Adding Real-Time Bidding Capabilities to the Marketplace Chapter 9
[ 423 ]
mern-marketplace/client/auction/Auction.js:
<Timer endTime={auction.bidEnd} update={update}/>
The update function that's provided to the Timer component will help set the valueof the justEnded variable from false to true. This justEnded value is passed tothe Bidding component so that it can be used to disable the option to place bidswhen the time ends. The justEnded value is initialized and the update function isdefined as follows.
mern-marketplace/client/auction/Auction.js:
const [justEnded, setJustEnded] = useState(false)const updateBids = () => { setJustEnded(true)}
These props will be used in the Timer component to calculate time left and to updatethe view when time is up.
In the Timer component definition, we will initialize the timeLeft variable in thestate, using the end time value sent in the props from the Auction component, asshown in the following code.
mern-marketplace/client/auction/Timer.js:
export default function Timer (props) { const [timeLeft, setTimeLeft] = useState(calculateTimeLeft(newDate(props.endTime))) ...}
To calculate the time left until the auction ends, we utilize the calculateTimeLeftmethod we discussed previously in the The Auctions component section of this chapter.
To implement the time countdown functionality, we will use setTimeout in auseEffect hook in the Timer component, as shown in the following code.
mern-marketplace/client/auction/Timer.js:
useEffect(() => { let timer = null if(!timeLeft.timeEnd){ timer = setTimeout(() => { setTimeLeft(calculateTimeLeft(newDate(props.endTime)))
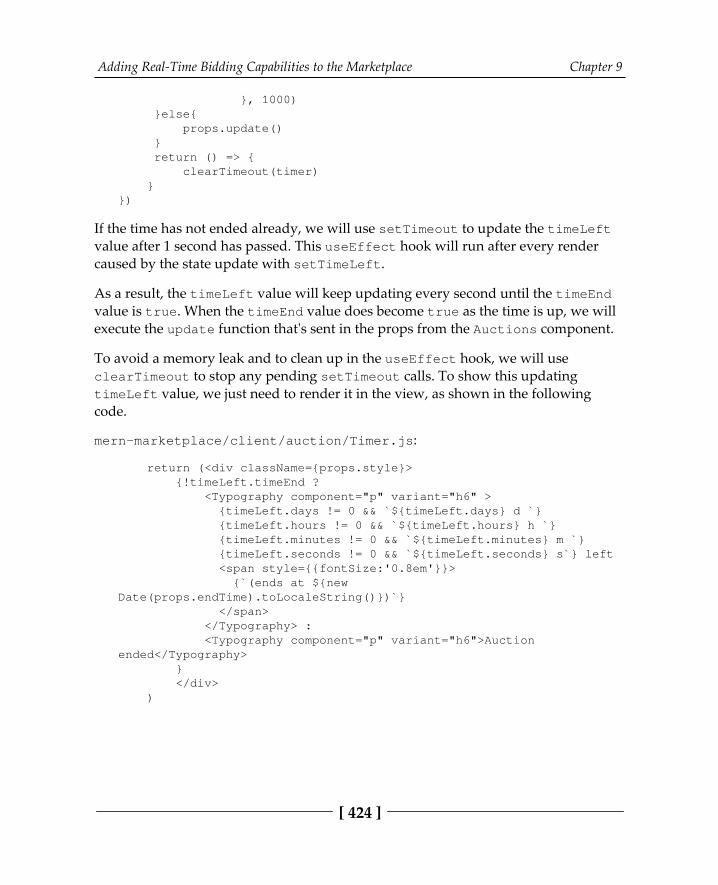
Adding Real-Time Bidding Capabilities to the Marketplace Chapter 9
[ 424 ]
}, 1000) }else{ props.update() } return () => { clearTimeout(timer) }})
If the time has not ended already, we will use setTimeout to update the timeLeftvalue after 1 second has passed. This useEffect hook will run after every rendercaused by the state update with setTimeLeft.
As a result, the timeLeft value will keep updating every second until the timeEndvalue is true. When the timeEnd value does become true as the time is up, we willexecute the update function that's sent in the props from the Auctions component.
To avoid a memory leak and to clean up in the useEffect hook, we will useclearTimeout to stop any pending setTimeout calls. To show this updatingtimeLeft value, we just need to render it in the view, as shown in the followingcode.
mern-marketplace/client/auction/Timer.js:
return (<div className={props.style}> {!timeLeft.timeEnd ? <Typography component="p" variant="h6" > {timeLeft.days != 0 && `${timeLeft.days} d `} {timeLeft.hours != 0 && `${timeLeft.hours} h `} {timeLeft.minutes != 0 && `${timeLeft.minutes} m `} {timeLeft.seconds != 0 && `${timeLeft.seconds} s`} left <span style={{fontSize:'0.8em'}}> {`(ends at ${newDate(props.endTime).toLocaleString()})`} </span> </Typography> : <Typography component="p" variant="h6">Auctionended</Typography> } </div> )
Adding Real-Time Bidding Capabilities to the Marketplace Chapter 9
[ 425 ]
If there is time left, we render the days, hours, minutes, and seconds remaining untilthe auction ends using the timeLeft object. We also indicate the exact date and timewhen the auction ends. If the time is up, we just indicate that the auction ended.
In the Auction component we've implemented so far, we are able to fetch the auctiondetails from the backend and render it along with the state of the auction. If anauction is in a live state, we are able to indicate the time left until it ends. When anauction is in this live state, users will also be able to place bids against the auction andsee the bids being placed by other users on the platform from within this view in real-time. In the next section, we will discuss how to use Socket.IO to integrate this real-time bidding feature for all live auctions on the platform.
Implementing real-time bidding withSocket.IOUsers who are signed in to the marketplace platform will be able to take part in liveauctions. They will be able to place their bids and get real-time updates in the sameview while other users on the platform are countering their bids. To implement thisfunctionality, we will integrate Socket.IO with our full-stack MERN applicationbefore implementing the frontend interface to allow users to place their bids and seethe changing bidding history.
Integrating Socket.IOSocket.IO will allow us to add the real-time bidding feature to auctions in themarketplace application. Socket.IO is a JavaScript library with a client-side modulethat runs in the browser and a server-side module that integrates with Node.js.Integrating these modules with our MERN-based application will enable bidirectionaland real-time communication between the clients and the server.
The client-side part of Socket.IO is available as the Node modulesocket.io-client, while the server-side part is available as theNode module socket.io. You can learn more about Socket.IO andtry their getting started tutorials at https:/ /socket. io.
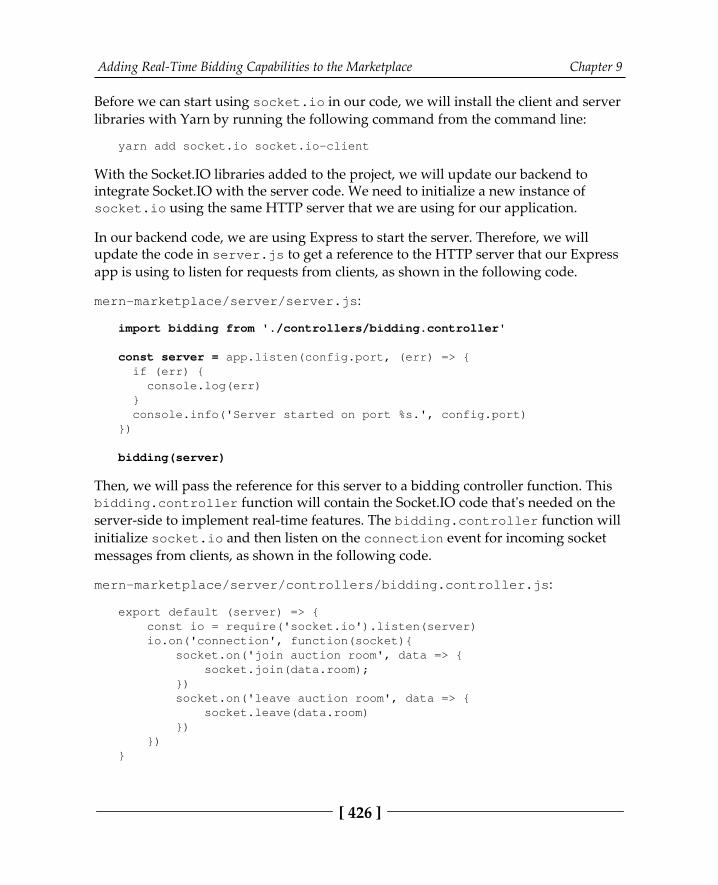
Adding Real-Time Bidding Capabilities to the Marketplace Chapter 9
[ 426 ]
Before we can start using socket.io in our code, we will install the client and serverlibraries with Yarn by running the following command from the command line:
yarn add socket.io socket.io-client
With the Socket.IO libraries added to the project, we will update our backend tointegrate Socket.IO with the server code. We need to initialize a new instance ofsocket.io using the same HTTP server that we are using for our application.
In our backend code, we are using Express to start the server. Therefore, we willupdate the code in server.js to get a reference to the HTTP server that our Expressapp is using to listen for requests from clients, as shown in the following code.
mern-marketplace/server/server.js:
import bidding from './controllers/bidding.controller'
const server = app.listen(config.port, (err) => { if (err) { console.log(err) } console.info('Server started on port %s.', config.port)})
bidding(server)
Then, we will pass the reference for this server to a bidding controller function. Thisbidding.controller function will contain the Socket.IO code that's needed on theserver-side to implement real-time features. The bidding.controller function willinitialize socket.io and then listen on the connection event for incoming socketmessages from clients, as shown in the following code.
mern-marketplace/server/controllers/bidding.controller.js:
export default (server) => { const io = require('socket.io').listen(server) io.on('connection', function(socket){ socket.on('join auction room', data => { socket.join(data.room); }) socket.on('leave auction room', data => { socket.leave(data.room) }) })}
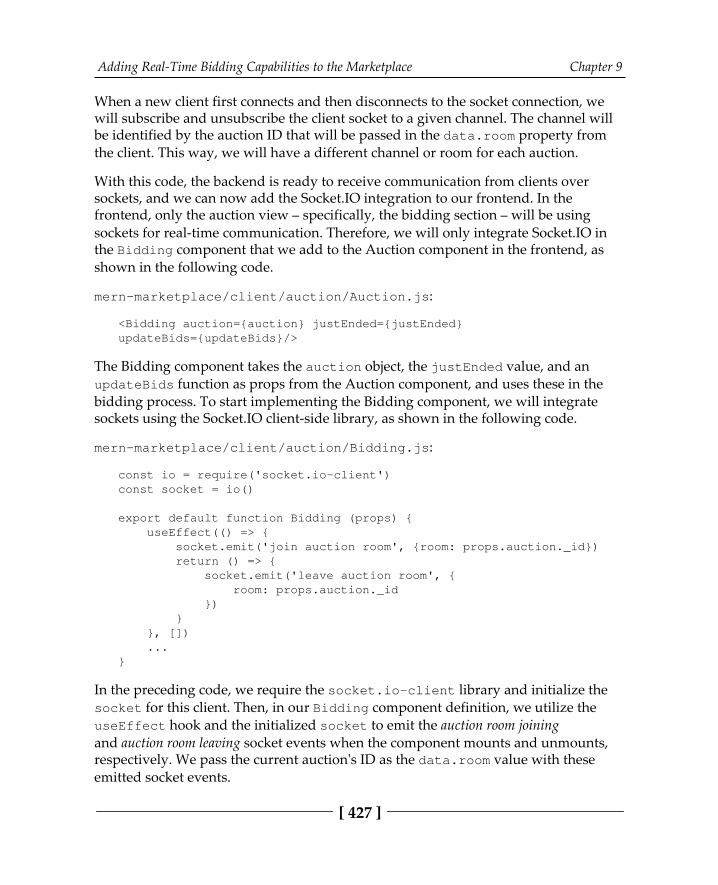
Adding Real-Time Bidding Capabilities to the Marketplace Chapter 9
[ 427 ]
When a new client first connects and then disconnects to the socket connection, wewill subscribe and unsubscribe the client socket to a given channel. The channel willbe identified by the auction ID that will be passed in the data.room property fromthe client. This way, we will have a different channel or room for each auction.
With this code, the backend is ready to receive communication from clients oversockets, and we can now add the Socket.IO integration to our frontend. In thefrontend, only the auction view – specifically, the bidding section – will be usingsockets for real-time communication. Therefore, we will only integrate Socket.IO inthe Bidding component that we add to the Auction component in the frontend, asshown in the following code.
mern-marketplace/client/auction/Auction.js:
<Bidding auction={auction} justEnded={justEnded}updateBids={updateBids}/>
The Bidding component takes the auction object, the justEnded value, and anupdateBids function as props from the Auction component, and uses these in the bidding process. To start implementing the Bidding component, we will integratesockets using the Socket.IO client-side library, as shown in the following code.
mern-marketplace/client/auction/Bidding.js:
const io = require('socket.io-client')const socket = io()
export default function Bidding (props) { useEffect(() => { socket.emit('join auction room', {room: props.auction._id}) return () => { socket.emit('leave auction room', { room: props.auction._id }) } }, []) ...}
In the preceding code, we require the socket.io-client library and initialize thesocket for this client. Then, in our Bidding component definition, we utilize theuseEffect hook and the initialized socket to emit the auction room joiningand auction room leaving socket events when the component mounts and unmounts,respectively. We pass the current auction's ID as the data.room value with theseemitted socket events.
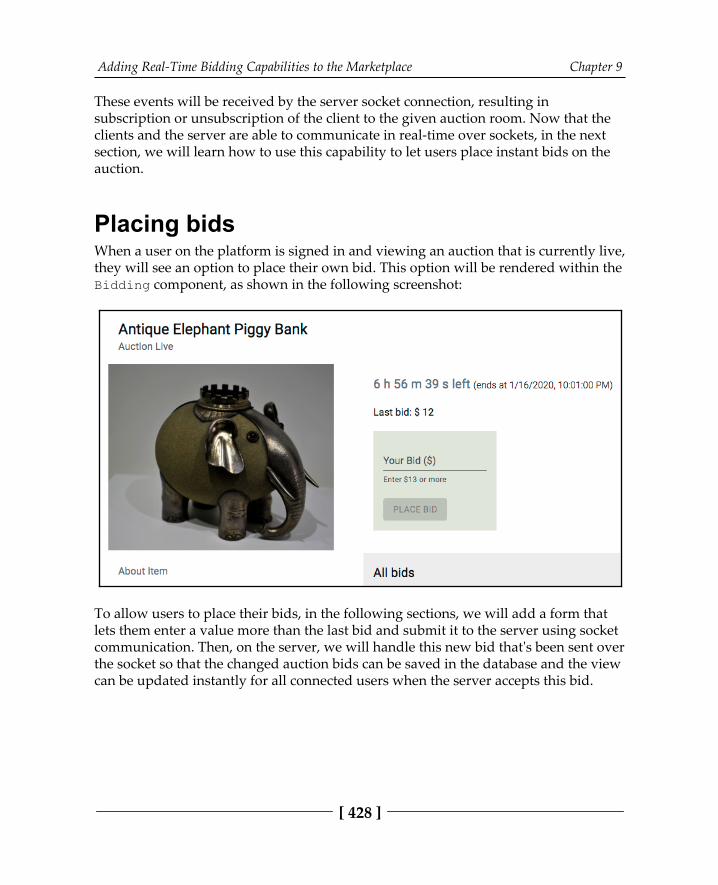
Adding Real-Time Bidding Capabilities to the Marketplace Chapter 9
[ 428 ]
These events will be received by the server socket connection, resulting insubscription or unsubscription of the client to the given auction room. Now that theclients and the server are able to communicate in real-time over sockets, in the nextsection, we will learn how to use this capability to let users place instant bids on theauction.
Placing bidsWhen a user on the platform is signed in and viewing an auction that is currently live,they will see an option to place their own bid. This option will be rendered within theBidding component, as shown in the following screenshot:
To allow users to place their bids, in the following sections, we will add a form thatlets them enter a value more than the last bid and submit it to the server using socketcommunication. Then, on the server, we will handle this new bid that's been sent overthe socket so that the changed auction bids can be saved in the database and the viewcan be updated instantly for all connected users when the server accepts this bid.
Adding Real-Time Bidding Capabilities to the Marketplace Chapter 9
[ 429 ]
Adding a form to enter a bidWe will add the form to place a bid for an auction in the Bidding component that westarted building in the previous section. Before we add the form elements in the view,we will initialize the bid value in the state, add a change handling function for theform input, and keep track of the minimum bid amount allowed, as shown in thefollowing code.
mern-marketplace/client/auction/Bidding.js:
const [bid, setBid] = useState('')
const handleChange = event => { setBid(event.target.value)}const minBid = props.auction.bids && props.auction.bids.length> 0 ? props.auction.bids[0].bid : props.auction.startingBid
The minimum bid amount is determined by checking the latest bid placed. If any bidswere placed, the minimum bid needs to be higher than the latest bid; otherwise, itneeds to be higher than the starting bid that was set by the auction seller.
The form elements for placing a bid will only render if the current date is before theauction end date. We also check if the justEnded value is false so that the form canbe hidden when the time ends in real-time as the timer counts down to 0. The formelements will contain an input field, a hint at what minimum amount should beentered, and a submit button, which will remain disabled unless a valid bid amount isentered. These elements will be added to the Bidding component view as follows.
mern-marketplace/client/auction/Bidding.js:
{!props.justEnded && new Date() < new Date(props.auction.bidEnd) && <> <TextField label="Your Bid ($)" value={bid} onChange={handleChange} type="number" margin="normal" helperText={`Enter $${Number(minBid)+1} ormore`}/><br/> <Button variant="contained" color="secondary" disabled={bid < (minBid + 1)} onClick={placeBid}>Place Bid </Button><br/></>}
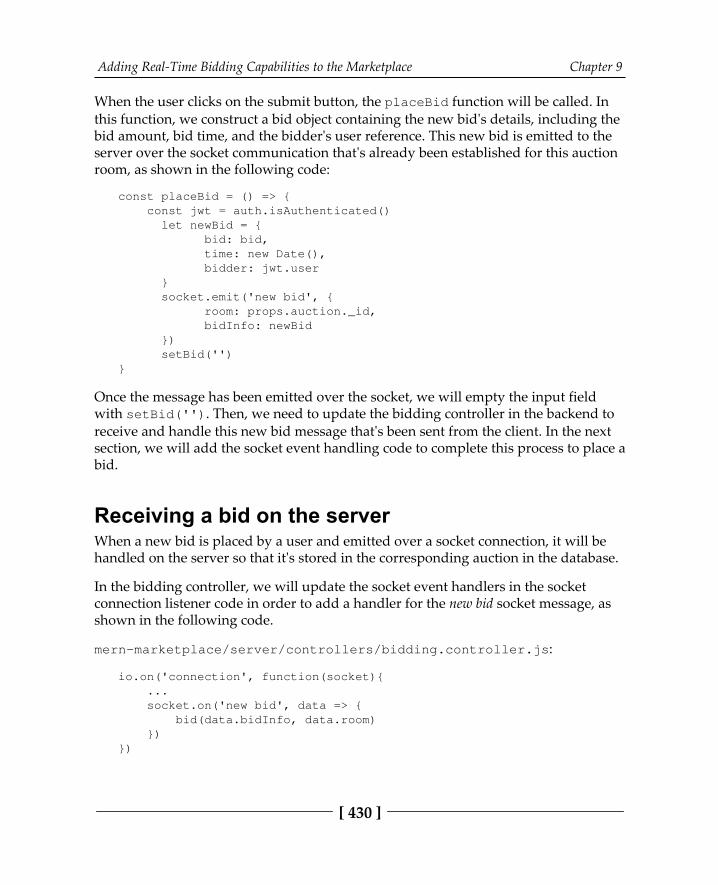
Adding Real-Time Bidding Capabilities to the Marketplace Chapter 9
[ 430 ]
When the user clicks on the submit button, the placeBid function will be called. Inthis function, we construct a bid object containing the new bid's details, including thebid amount, bid time, and the bidder's user reference. This new bid is emitted to theserver over the socket communication that's already been established for this auctionroom, as shown in the following code:
const placeBid = () => { const jwt = auth.isAuthenticated() let newBid = { bid: bid, time: new Date(), bidder: jwt.user } socket.emit('new bid', { room: props.auction._id, bidInfo: newBid }) setBid('')}
Once the message has been emitted over the socket, we will empty the input fieldwith setBid(''). Then, we need to update the bidding controller in the backend toreceive and handle this new bid message that's been sent from the client. In the nextsection, we will add the socket event handling code to complete this process to place abid.
Receiving a bid on the serverWhen a new bid is placed by a user and emitted over a socket connection, it will behandled on the server so that it's stored in the corresponding auction in the database.
In the bidding controller, we will update the socket event handlers in the socketconnection listener code in order to add a handler for the new bid socket message, asshown in the following code.
mern-marketplace/server/controllers/bidding.controller.js:
io.on('connection', function(socket){ ... socket.on('new bid', data => { bid(data.bidInfo, data.room) })})
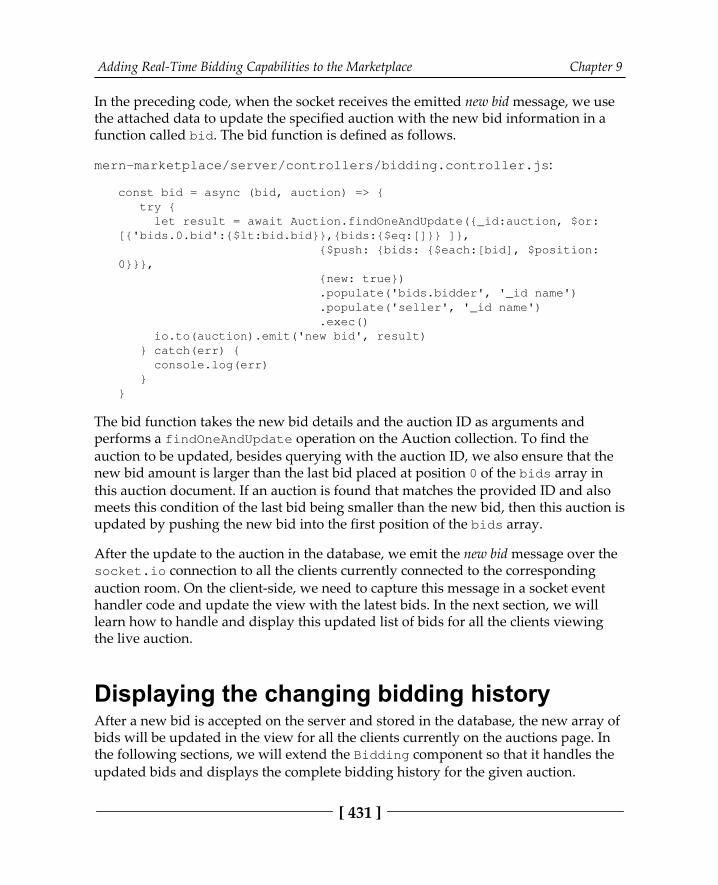
Adding Real-Time Bidding Capabilities to the Marketplace Chapter 9
[ 431 ]
In the preceding code, when the socket receives the emitted new bid message, we usethe attached data to update the specified auction with the new bid information in afunction called bid. The bid function is defined as follows.
mern-marketplace/server/controllers/bidding.controller.js:
const bid = async (bid, auction) => { try { let result = await Auction.findOneAndUpdate({_id:auction, $or:[{'bids.0.bid':{$lt:bid.bid}},{bids:{$eq:[]}} ]}, {$push: {bids: {$each:[bid], $position:0}}}, {new: true}) .populate('bids.bidder', '_id name') .populate('seller', '_id name') .exec() io.to(auction).emit('new bid', result) } catch(err) { console.log(err) }}
The bid function takes the new bid details and the auction ID as arguments andperforms a findOneAndUpdate operation on the Auction collection. To find theauction to be updated, besides querying with the auction ID, we also ensure that thenew bid amount is larger than the last bid placed at position 0 of the bids array inthis auction document. If an auction is found that matches the provided ID and alsomeets this condition of the last bid being smaller than the new bid, then this auction isupdated by pushing the new bid into the first position of the bids array.
After the update to the auction in the database, we emit the new bid message over thesocket.io connection to all the clients currently connected to the correspondingauction room. On the client-side, we need to capture this message in a socket eventhandler code and update the view with the latest bids. In the next section, we willlearn how to handle and display this updated list of bids for all the clients viewingthe live auction.
Displaying the changing bidding historyAfter a new bid is accepted on the server and stored in the database, the new array ofbids will be updated in the view for all the clients currently on the auctions page. Inthe following sections, we will extend the Bidding component so that it handles theupdated bids and displays the complete bidding history for the given auction.
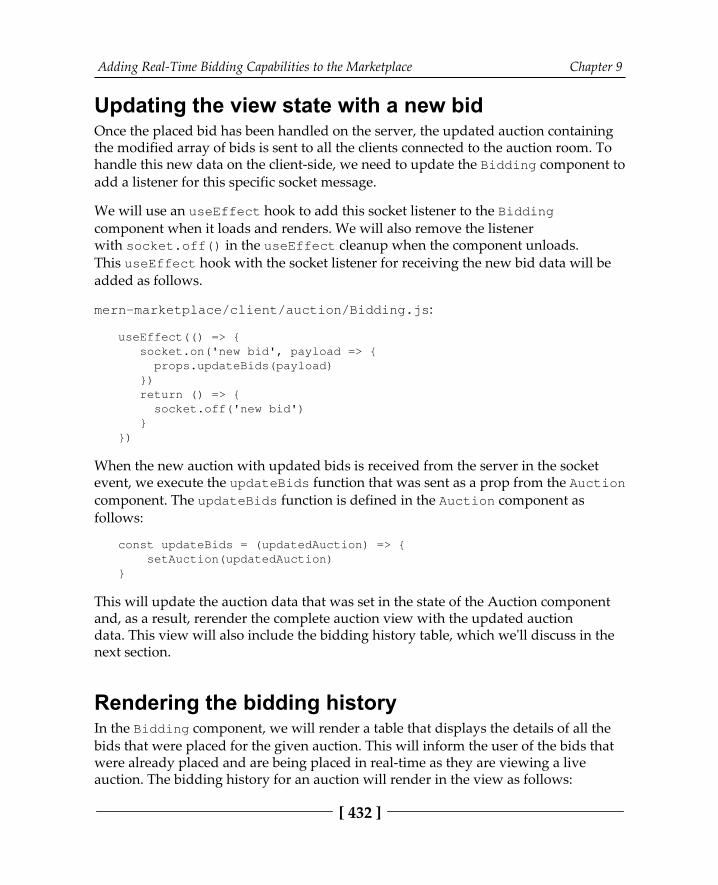
Adding Real-Time Bidding Capabilities to the Marketplace Chapter 9
[ 432 ]
Updating the view state with a new bidOnce the placed bid has been handled on the server, the updated auction containingthe modified array of bids is sent to all the clients connected to the auction room. Tohandle this new data on the client-side, we need to update the Bidding component toadd a listener for this specific socket message.
We will use an useEffect hook to add this socket listener to the Biddingcomponent when it loads and renders. We will also remove the listenerwith socket.off() in the useEffect cleanup when the component unloads.This useEffect hook with the socket listener for receiving the new bid data will beadded as follows.
mern-marketplace/client/auction/Bidding.js:
useEffect(() => { socket.on('new bid', payload => { props.updateBids(payload) }) return () => { socket.off('new bid') }})
When the new auction with updated bids is received from the server in the socketevent, we execute the updateBids function that was sent as a prop from the Auctioncomponent. The updateBids function is defined in the Auction component asfollows:
const updateBids = (updatedAuction) => { setAuction(updatedAuction)}
This will update the auction data that was set in the state of the Auction componentand, as a result, rerender the complete auction view with the updated auctiondata. This view will also include the bidding history table, which we'll discuss in thenext section.
Rendering the bidding historyIn the Bidding component, we will render a table that displays the details of all thebids that were placed for the given auction. This will inform the user of the bids thatwere already placed and are being placed in real-time as they are viewing a liveauction. The bidding history for an auction will render in the view as follows:
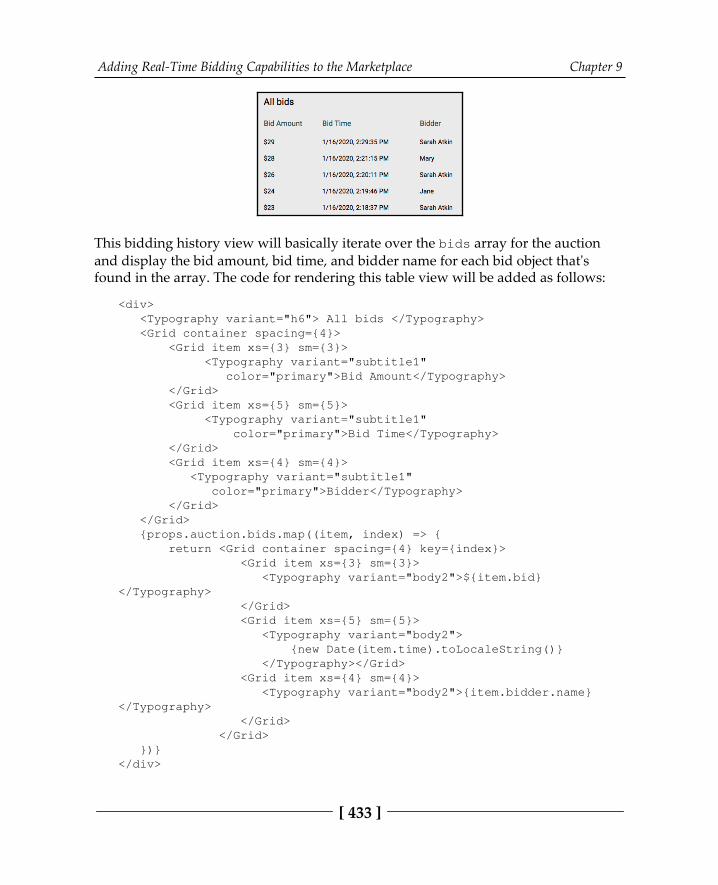
Adding Real-Time Bidding Capabilities to the Marketplace Chapter 9
[ 433 ]
This bidding history view will basically iterate over the bids array for the auctionand display the bid amount, bid time, and bidder name for each bid object that's found in the array. The code for rendering this table view will be added as follows:
<div> <Typography variant="h6"> All bids </Typography> <Grid container spacing={4}> <Grid item xs={3} sm={3}> <Typography variant="subtitle1" color="primary">Bid Amount</Typography> </Grid> <Grid item xs={5} sm={5}> <Typography variant="subtitle1" color="primary">Bid Time</Typography> </Grid> <Grid item xs={4} sm={4}> <Typography variant="subtitle1" color="primary">Bidder</Typography> </Grid> </Grid> {props.auction.bids.map((item, index) => { return <Grid container spacing={4} key={index}> <Grid item xs={3} sm={3}> <Typography variant="body2">${item.bid}</Typography> </Grid> <Grid item xs={5} sm={5}> <Typography variant="body2"> {new Date(item.time).toLocaleString()} </Typography></Grid> <Grid item xs={4} sm={4}> <Typography variant="body2">{item.bidder.name}</Typography> </Grid> </Grid> })}</div>
Adding Real-Time Bidding Capabilities to the Marketplace Chapter 9
[ 434 ]
We added table headers using Material-UI Grid components, before iterating overthe bids array to generate the table rows with individual bid details.
When a new bid is placed by any user viewing this auction and the updated auctionis received in the socket and set to state, this table containing the bidding history willupdate for all its viewers and show the latest bid at the top of the table. By doing this,it gives all the users in the auction room a real-time update of bidding. With that, wehave a complete auction and real-time bidding feature integrated with the MERNMarketplace application.
SummaryIn this chapter, we extended the MERN Marketplace application and added anauctioning feature with real-time bidding capabilities. We designed an auction modelfor storing auction and bidding details and implemented the full-stack CRUDfunctionalities that allow users to create new auctions, edit and delete auctions, andsee different lists of auctions, along with individual auctions.
We added an auction view representing a single auction where users can watch andparticipate in the auction. In the view, we calculated and rendered the current state ofthe given auction, along with a countdown timer for live auctions. Whileimplementing this timer that counts down seconds, we learned how to usesetTimeout in a React component with the useEffect hook.
For each auction, we implemented real-time bidding capabilities using Socket.IO. Wediscussed how to integrate Socket.IO on both the client-side and the server-side of theapplication to establish real-time and bidirectional communication between clientsand servers. With these approaches for extending the MERN stack to incorporate real-time communication functionalities, you can implement even more exciting real-timefeatures using sockets in your own full-stack applications.
Using the experiences you've gained here building out the different features for theMERN Marketplace application, you can also grow the auctioning feature that wascovered in this chapter and integrate it with the existing order management andpayment processing functionalities in this application.
In the next chapter, we will expand our options with the MERN stack technologies bybuilding an expense tracking application with data visualization features byextending the MERN skeleton.

4Advancing to Complex MERN
ApplicationsIn this part, we explore how to implement MERN applications with advanced andcomplex features, including data visualization, media streaming, and VR capabilities.
This section comprises the following chapters:
Chapter 10, Integrating Data Visualization with an Expense TrackingApplicationChapter 11, Building a Media Streaming ApplicationChapter 12, Customizing the Media Player and Improving SEOChapter 13, Developing a Web-Based VR GameChapter 14, Making the VR Game Dynamic using MERN

10Integrating Data Visualization
with an Expense TrackingApplication
These days, it is easy to collect and add data to applications on the internet. As moreand more data becomes available, it becomes necessary to process the data andpresent insights extracted from this data in meaningful and appealing visualizationsto end users. In this chapter, we will learn how to use MERN stack technologies alongwith Victory—a charting library for React—to easily integrate data visualizationfeatures in a full-stack application. We will extend the MERN skeleton application tobuild an expense tracking application, which will incorporate data processing andvisualization features for expense data recorded by a user over time.
After going through the implementation of these features, you should have a grasp ofhow to utilize the MongoDB aggregation framework and the Victory charting libraryto add data visualization features of your choice to any full-stack MERN webapplication.
In this chapter, we will build an expense tracking application integrated with datavisualization features by covering the following topics:
Introducing MERN Expense Tracker Adding expense recordsVisualizing expense data over time
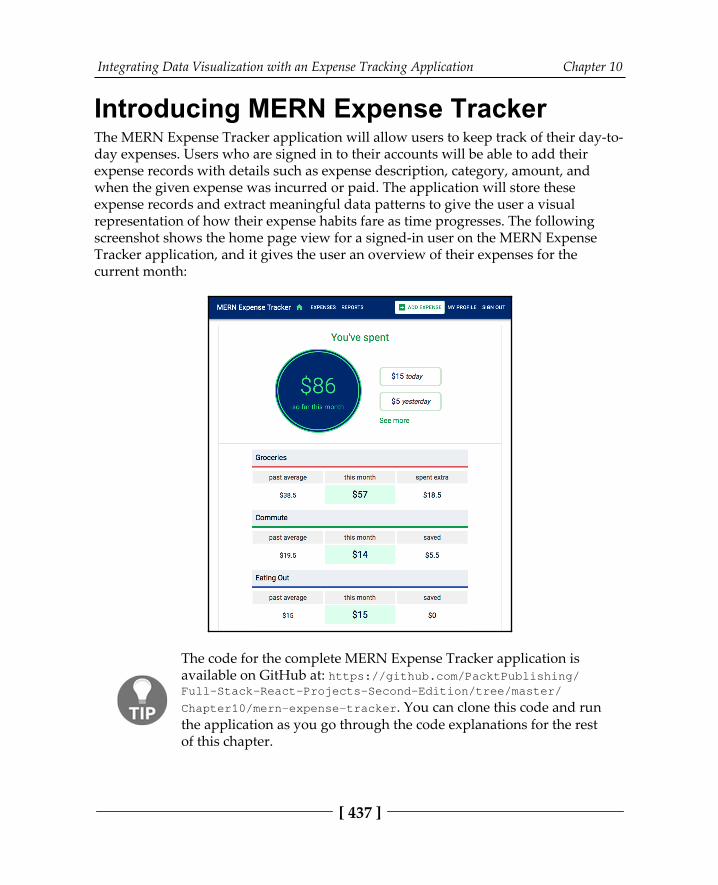
Integrating Data Visualization with an Expense Tracking Application Chapter 10
[ 437 ]
Introducing MERN Expense TrackerThe MERN Expense Tracker application will allow users to keep track of their day-to-day expenses. Users who are signed in to their accounts will be able to add theirexpense records with details such as expense description, category, amount, andwhen the given expense was incurred or paid. The application will store theseexpense records and extract meaningful data patterns to give the user a visualrepresentation of how their expense habits fare as time progresses. The followingscreenshot shows the home page view for a signed-in user on the MERN ExpenseTracker application, and it gives the user an overview of their expenses for thecurrent month:
The code for the complete MERN Expense Tracker application isavailable on GitHub at: https:/ / github. com/ PacktPublishing/Full- Stack- React- Projects- Second- Edition/ tree/ master/Chapter10/ mern- expense- tracker. You can clone this code and runthe application as you go through the code explanations for the restof this chapter.
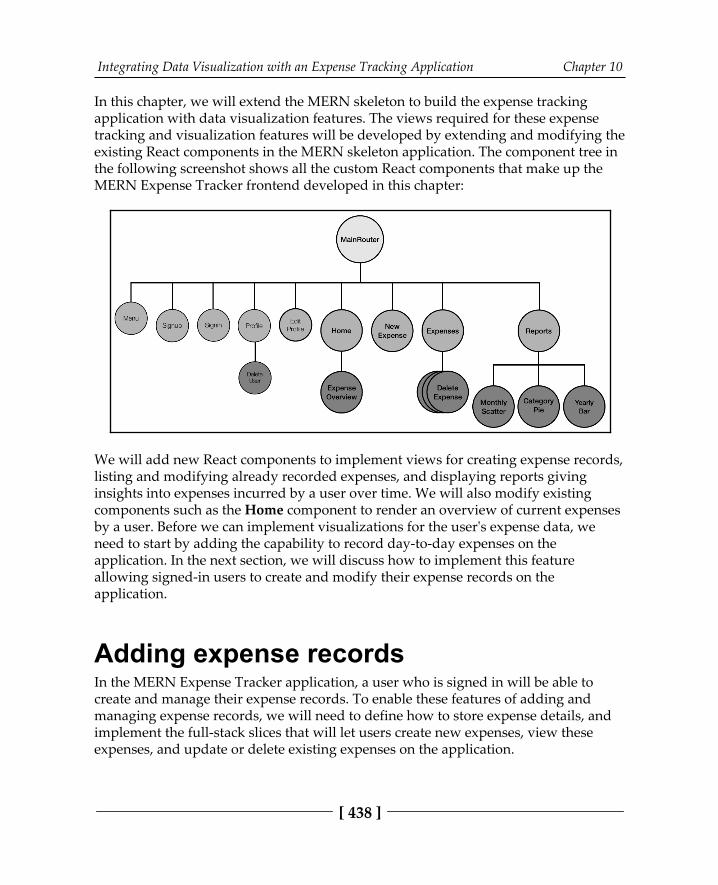
Integrating Data Visualization with an Expense Tracking Application Chapter 10
[ 438 ]
In this chapter, we will extend the MERN skeleton to build the expense trackingapplication with data visualization features. The views required for these expense tracking and visualization features will be developed by extending and modifying theexisting React components in the MERN skeleton application. The component tree inthe following screenshot shows all the custom React components that make up theMERN Expense Tracker frontend developed in this chapter:
We will add new React components to implement views for creating expense records,listing and modifying already recorded expenses, and displaying reports givinginsights into expenses incurred by a user over time. We will also modify existingcomponents such as the Home component to render an overview of current expensesby a user. Before we can implement visualizations for the user's expense data, weneed to start by adding the capability to record day-to-day expenses on theapplication. In the next section, we will discuss how to implement this featureallowing signed-in users to create and modify their expense records on theapplication.
Adding expense recordsIn the MERN Expense Tracker application, a user who is signed in will be able tocreate and manage their expense records. To enable these features of adding and managing expense records, we will need to define how to store expense details, andimplement the full-stack slices that will let users create new expenses, view theseexpenses, and update or delete existing expenses on the application.
Integrating Data Visualization with an Expense Tracking Application Chapter 10
[ 439 ]
In the following sections, first, we will define the Expense model with a MongooseSchema to store the details of each expense record. Then, we will discussimplementations for the backend APIs and frontend views that are needed to allow auser to create new expenses, view a list of their expenses, and modify existingexpenses by either editing details of or deleting an expense from the application.
Defining an Expense model We will implement a Mongoose model to define an Expense model for storing thedetails of each expense record. This model will be definedin server/models/expense.model.js, and the implementation will be similarto other Mongoose Model implementations covered in previous chapters, such as theCourse model defined in Chapter 6, Building a Web-Based Classroom Application. TheExpense schema in this model will have simple fields to store details about eachexpense, such as a title, the amount, category, and date when it was incurred, alongwith a reference to the user who created the record. The code defining the expensefields are given in the following list with explanations:
Expense title: The title field will describe the expense. It is declared to bea String type and will be a required field:
title: { type: String, trim: true, required: 'Title is required'},
Expense amount: The amount field will store the monetary cost of theexpense as a value of the Number type, and it will be a required field with aminimum allowed value of 0:
amount: { type: Number, min: 0, required: 'Amount is required'},
Integrating Data Visualization with an Expense Tracking Application Chapter 10
[ 440 ]
Expense category: The category field will define the expense type, soexpenses can be grouped by this value. It is declared to be a String typeand will be a required field:
category: { type: String, trim: true, required: 'Category is required'},
Incurred on: The incurred_on field will store the date-time when theexpense was incurred or paid. It is declared to be a Date type and willdefault to the current date-time if no value is provided:
incurred_on: { type: Date, default: Date.now},
Notes: The notes field, defined as a String type, will allowthe recording of additional details or notes for a given expense record:
notes: { type: String, trim: true},
Expense recorded by: The recorded_by field will reference the user whois creating the expense record:
recorded_by: { type: mongoose.Schema.ObjectId, ref: 'User'}
Created and updated at times: The created and updated fields willbe Date types, with created generated when a new expense is added,and updated changed when any expense details are modified:
updated: Date,created: { type: Date, default: Date.now},
Integrating Data Visualization with an Expense Tracking Application Chapter 10
[ 441 ]
The fields added to this schema definition will enable us to implement all theexpense-related features in MERN Expense Tracker. In the next section, we will startdeveloping these features by implementing the full-stack slice that will allow users tocreate new expense records.
Creating a new expense recordIn order to create a new expense record on the application, we will need to integrate afull-stack slice that allows the user to fill out a form view in the frontend, and thensave the entered details to a new expense document in the database in thebackend. To implement this feature, in the following sections, we will add a createexpense API in the backend, along with a way to fetch this API in the frontend, and acreate new expense form view that takes user input for expense details.
The create expense APIFor the implementation of the create expense API that will allow creating newexpenses in the database, we will first add a POST route, as shown in the followingcode.
mern-expense-tracker/server/routes/expense.routes.js:
router.route('/api/expenses') .post(authCtrl.requireSignin, expenseCtrl.create)
A POST request to this route at /api/expenses will first ensure that the requestinguser is signed in with the requireSignin method from the auth controllers, beforeinvoking the create method to add a new expense record in the database.This create method is defined in the following code.
mern-expense-tracker/server/controllers/expense.controller.js:
const create = async (req, res) = { try { req.body.recorded_by = req.auth._id const expense = new Expense(req.body) await expense.save() return res.status(200).json({ message: "Expense recorded!" }) } catch (err) { return res.status(400).json({ error: errorHandler.getErrorMessage(err)
Integrating Data Visualization with an Expense Tracking Application Chapter 10
[ 442 ]
}) }}
In this create method, we set the recorded_by field to the user currently signed in,before using the expense data provided in the request body to save the new expensein the Expense collection in the database.
The expense.routes.js file containing the expense routes will be very similar tothe user.routes file. To load these new expense routes in the Express app, we needto mount the expense routes in express.js, as shown in the following code, in thesame way that we did for the auth and user routes.
mern-expense-tracker/server/express.js:
app.use('/', expenseRoutes)
This create expense API endpoint is now ready in the backend and can be used in thefrontend to make a POST request. To fetch this API in the frontend, we will add acorresponding create method in api-expense.js, similar to the other APIimplementations that we discussed in previous chapters, such as the Creating a newauction section from Chapter 9, Adding Real-Time Bidding Capabilities to the Marketplace.
This fetch method will be used in the frontend component that will display a formwhere the user can enter details of the new expense and save it on the application. Inthe next section, we will implement the React component that will render the form forrecording a new expense.
The NewExpense componentSigned-in users on this expense tracking application will interact with a form view inorder to enter details of a new expense record. This form view will be rendered in theNewExpense component, which will allow users to create a new expense by enteringthe expense title, the amount spent, the category of the expense, the date-time ofwhen the expense was incurred, and any additional notes.
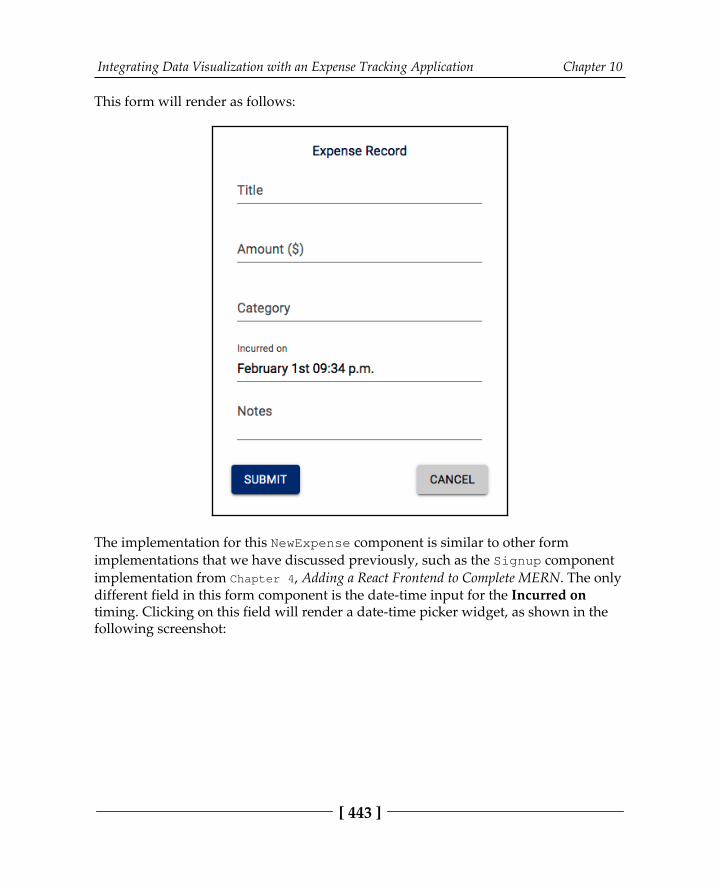
Integrating Data Visualization with an Expense Tracking Application Chapter 10
[ 443 ]
This form will render as follows:
The implementation for this NewExpense component is similar to other formimplementations that we have discussed previously, such as the Signup component implementation from Chapter 4, Adding a React Frontend to Complete MERN. The onlydifferent field in this form component is the date-time input for the Incurred ontiming. Clicking on this field will render a date-time picker widget, as shown in thefollowing screenshot:
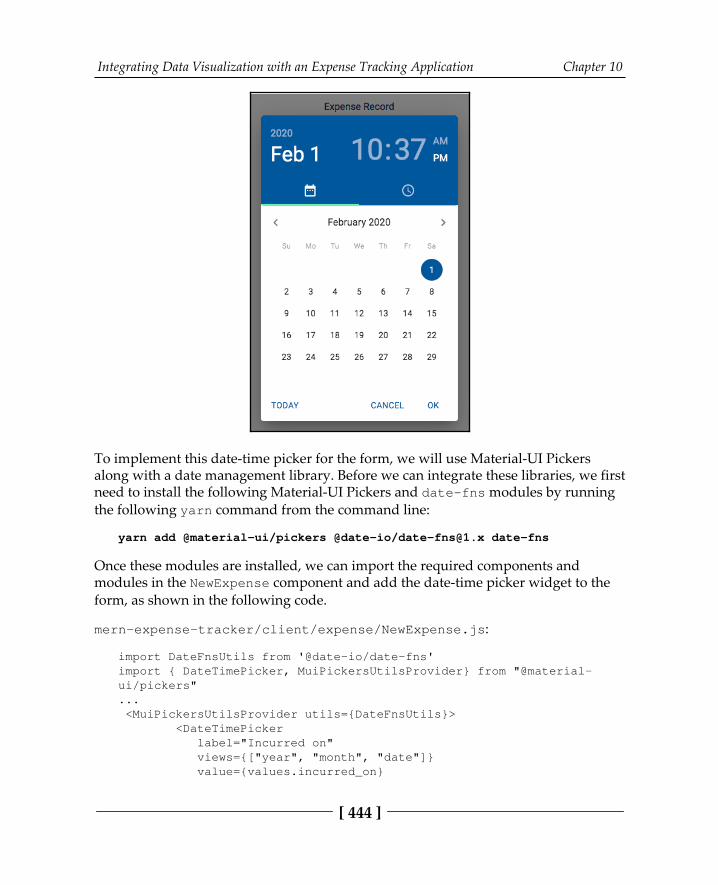
Integrating Data Visualization with an Expense Tracking Application Chapter 10
[ 444 ]
To implement this date-time picker for the form, we will use Material-UI Pickersalong with a date management library. Before we can integrate these libraries, we firstneed to install the following Material-UI Pickers and date-fns modules by runningthe following yarn command from the command line:
yarn add @material-ui/pickers @date-io/[email protected] date-fns
Once these modules are installed, we can import the required components andmodules in the NewExpense component and add the date-time picker widget to theform, as shown in the following code.
mern-expense-tracker/client/expense/NewExpense.js:
import DateFnsUtils from '@date-io/date-fns'import { DateTimePicker, MuiPickersUtilsProvider} from "@material-ui/pickers"... <MuiPickersUtilsProvider utils={DateFnsUtils}> <DateTimePicker label="Incurred on" views={["year", "month", "date"]} value={values.incurred_on}
Integrating Data Visualization with an Expense Tracking Application Chapter 10
[ 445 ]
onChange={handleDateChange} showTodayButton /> </MuiPickersUtilsProvider>
This widget will render options to pick a year, month, date, and time along with aTODAY button to set the current time as the selected value. When the user is donepicking a date-time, we will capture the value with the handleDateChange methodand set it to state with the other expense-related values collected from the form. ThehandleDateChange method is defined as follows.
mern-expense-tracker/client/expense/NewExpense.js:
const handleDateChange = date = { setValues({...values, incurred_on: date }) }
Using this, we will have a date value set for the incurred_on field in the newexpense record.
This NewExpense component can only be viewed by signed-in users. So, we will adda PrivateRoute in the MainRouter component, which will render this form only forauthenticated users at /expenses/new.
mern-expense-tracker/client/MainRouter.js:
PrivateRoute path="/expenses/new" component={NewExpense}/
This link can be added to any view, such as the Menu component, to be renderedconditionally when users are signed in. Now that it is possible to add new expense records in this expense tracking application, in the next section, we will discuss theimplementation to fetch and list these expenses from the database in the backend tothe views in the frontend.
Listing expensesIn MERN Expense Tracker, users will be able to view the list of expenses that theyalready recorded on the application and incurred within a provided date range. In thefollowing sections, we will add this ability by implementing a backend API to retrievethe list of expenses recorded by the currently signed-in user, and add a frontend viewthat will use this API to render the returned list of expenses to the end user.
Integrating Data Visualization with an Expense Tracking Application Chapter 10
[ 446 ]
The expenses by user APIWe will implement an API to get the expenses recorded by a specific user andincurred between a provided date range. The request for this API will be received at'/api/expenses', with the route defined in expense.routes.js as follows.
mern-expense-tracker/server/routes/expense.routes.js:
router.route('/api/expenses') .get(authCtrl.requireSignin, expenseCtrl.listByUser)
A GET request to this route will first ensure that the requesting user is signed in,before invoking the controller method to fetch the expenses from the database. In thisapplication, users will only be able to view their own expenses. After the userauthentication is confirmed, in the listByUser controller method we query theExpense collection in the database using date range specified in the request and theID of the user who is signed in. The listByUser method is defined in the followingcode.
mern-expense-tracker/server/controllers/expense.controller.js:
const listByUser = async (req, res) = { let firstDay = req.query.firstDay let lastDay = req.query.lastDay try { let expenses = await Expense.find({'$and':[ {'incurred_on': { '$gte': firstDay, '$lte':lastDay }}, {'recorded_by': req.auth._id } }).sort('incurred_on') .populate('recorded_by', '_id name') res.json(expenses) } catch (err){ console.log(err) return res.status(400).json({ error: errorHandler.getErrorMessage(err) }) }}
In this method, we start by gathering the first day and the last day of the date rangespecified in the request query. From the database, we then retrieve the expensesincurred by the signed-in user within these dates. The signed-in user is matchedagainst the user referenced in the recorded _by field. The find query against theExpense collection using these values will return matching expenses sorted by theincurred_on field, with the recently incurred expenses listed first.
Integrating Data Visualization with an Expense Tracking Application Chapter 10
[ 447 ]
The API to retrieve expenses recorded by a specific user can be used in the frontendto retrieve and display the expenses to the end user. To fetch this API in the frontend,we will add a corresponding listByUser method in api-expense.js, as shown inthe following code.
mern-expense-tracker/client/expense/api-expense.js:
const listByUser = async (params, credentials, signal) = { const query = queryString.stringify(params) try { let response = await fetch('/api/expenses?'+query, { method: 'GET', signal: signal, headers: { 'Accept': 'application/json', 'Authorization': 'Bearer ' + credentials.t } }) return await response.json() }catch(err){ console.log(err) } }
In this method, before making the request to the list expenses API, we form the querystring containing the date range with the queryString library. Then, this querystring is attached to the request URL.
This fetch method will be used in the Expenses component to retrieve and show theexpenses to the user. We will take a look at the implementation ofthe Expenses component in the next section.
The Expenses componentThe list of expenses retrieved from the database will be rendered using a Reactcomponent called Expenses. This component, on the initial load, will render theexpenses incurred by the signed-in user in the current month. In this view, the userwill also have the option to pick a date range to retrieve expenses incurred withinspecific dates, as shown in the following screenshot:
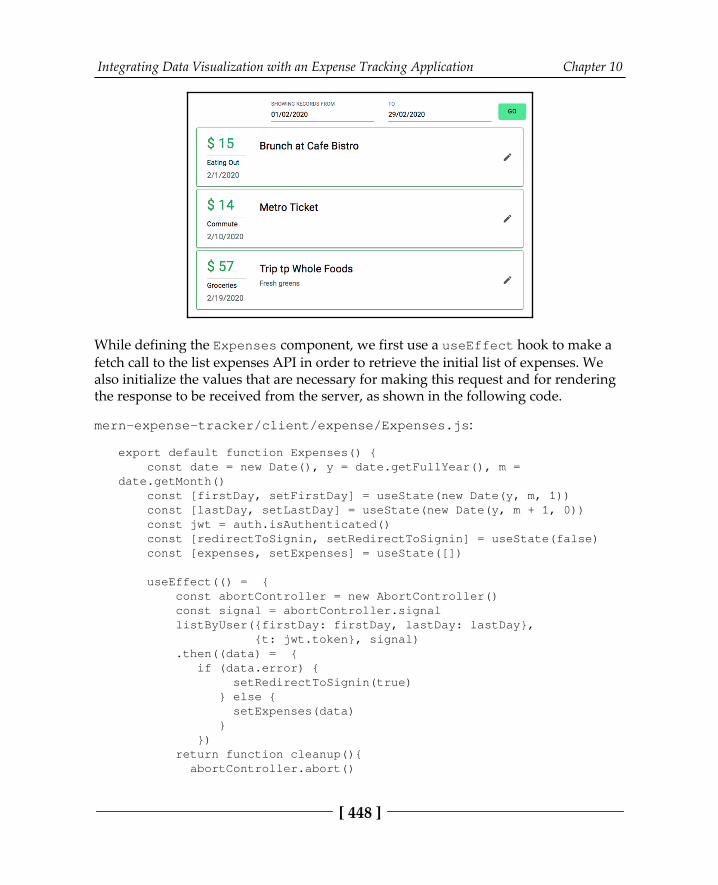
Integrating Data Visualization with an Expense Tracking Application Chapter 10
[ 448 ]
While defining the Expenses component, we first use a useEffect hook to make afetch call to the list expenses API in order to retrieve the initial list of expenses. Wealso initialize the values that are necessary for making this request and for renderingthe response to be received from the server, as shown in the following code.
mern-expense-tracker/client/expense/Expenses.js:
export default function Expenses() { const date = new Date(), y = date.getFullYear(), m =date.getMonth() const [firstDay, setFirstDay] = useState(new Date(y, m, 1)) const [lastDay, setLastDay] = useState(new Date(y, m + 1, 0)) const jwt = auth.isAuthenticated() const [redirectToSignin, setRedirectToSignin] = useState(false) const [expenses, setExpenses] = useState([])
useEffect(() = { const abortController = new AbortController() const signal = abortController.signal listByUser({firstDay: firstDay, lastDay: lastDay}, {t: jwt.token}, signal) .then((data) = { if (data.error) { setRedirectToSignin(true) } else { setExpenses(data) } }) return function cleanup(){ abortController.abort()

Integrating Data Visualization with an Expense Tracking Application Chapter 10
[ 449 ]
} }, [])...}
We first determine the dates of the first day and the last day of the current month.These dates are set in the state to be rendered in the search form fields and providedas the date range query parameters in the request to the server. Because we will onlyfetch the expenses associated with the current user, we retrieve the signed-inuser's auth credentials to be sent with the request. If the request to the server resultsin an error, we will redirect the user to the login page. Otherwise, we will set thereceived expenses in the state to be rendered in the view.
In the view part of the Expenses component, we will add a form to search by daterange, before iterating through the resulting expenses array to render individualexpense details. In the following sections, we will look at the implementation of thesearch form and expenses list in the component view.
Searching by date rangeIn the Expenses view, users will have the option to view a list of expenses incurredwithin a specific date range. To implement a search form that allows users to pick astart and end date for the range, we will use DatePicker components from Material-UI Pickers.
In the view, we will add two DatePicker components to collect the first day and thelast day of the query range, and also add a button to initiate the search, as shown inthe following code.
mern-expense-tracker/client/expense/Expenses.js:
div className={classes.search} <MuiPickersUtilsProvider utils={DateFnsUtils} <DatePicker disableFuture format="dd/MM/yyyy" label="SHOWING RECORDS FROM" views={["year", "month", "date"]} value={firstDay} onChange={handleSearchFieldChange('firstDay')} /> <DatePicker format="dd/MM/yyyy" label="TO" views={["year", "month", "date"]}
Integrating Data Visualization with an Expense Tracking Application Chapter 10
[ 450 ]
value={lastDay} onChange={handleSearchFieldChange('lastDay')} /> </MuiPickersUtilsProvider> Button variant="contained" color="secondary" onClick= {searchClicked} GO </Button> </div>
When a user interacts with the DatePicker components to select a date, we willinvoke the handleSearchFieldChange method to get the selected date value. Thismethod gets the date value and sets it to either the firstDay or lastDay value inthe state accordingly. The handleSearchFieldChange method is defined in thefollowing code.
mern-expense-tracker/client/expense/Expenses.js:
const handleSearchFieldChange = name = date = { if(name=='firstDay'){ setFirstDay(date) }else{ setLastDay(date) }}
After the two dates are selected and set in state, when the user clicks on the Searchbutton, we will invoke the searchClicked method. In this method, we makeanother call to the list expenses API with the new dates sent in the query parameters.The searchClicked method is defined as follows.
mern-expense-tracker/client/expense/Expenses.js:
const searchClicked = () = { listByUser({firstDay: firstDay, lastDay: lastDay},{t:jwt.token}).then((data) = { if (data.error) { setRedirectToSignin(true) } else { setExpenses(data) } })}
Once the expenses resulting from this new query are received from the server, we setit to the state to be rendered in the view. In the next section, we will look at theimplementation for displaying this retrieved list of expenses.
Integrating Data Visualization with an Expense Tracking Application Chapter 10
[ 451 ]
Rendering expensesIn the Expenses component view, we iterate through the list of expenses retrievedfrom the database and display each expense record to the end user in a Material-UIExpansionPanel component. In the ExpansionPanel component, we show detailsof the individual expense record in the Summary section. Then, on the expansion ofthe panel, we will give the user the option to edit details of the expense or delete theexpense, as discussed in the next section.
In the following code added to the view code after the search form elements, we usemap to iterate through the expenses array and render each expense in anExpansionPanel component.
mern-expense-tracker/client/expense/Expenses.js:
{expenses.map((expense, index) = { return span key={index} <ExpansionPanel className={classes.panel}> <ExpansionPanelSummary expandIcon={ Edit / } > <div className={classes.info} Typography className={classes.amount} $ {expense.amount}</Typography> <Divider style={{marginTop: 4, marginBottom: 4}}/> <Typography {expense.category} </Typography> <Typography className={classes.date} {new Date(expense.incurred_on).toLocaleDateString()} </Typography> </div> <div> <Typography className={classes.heading} {expense.title}</Typography> <Typography className={classes.notes} {expense.notes}</Typography> </div> </ExpansionPanelSummary> <Divider/> <ExpansionPanelDetails style={{display: 'block'}} ... </ExpansionPanelDetails> </ExpansionPanel> </span> })}
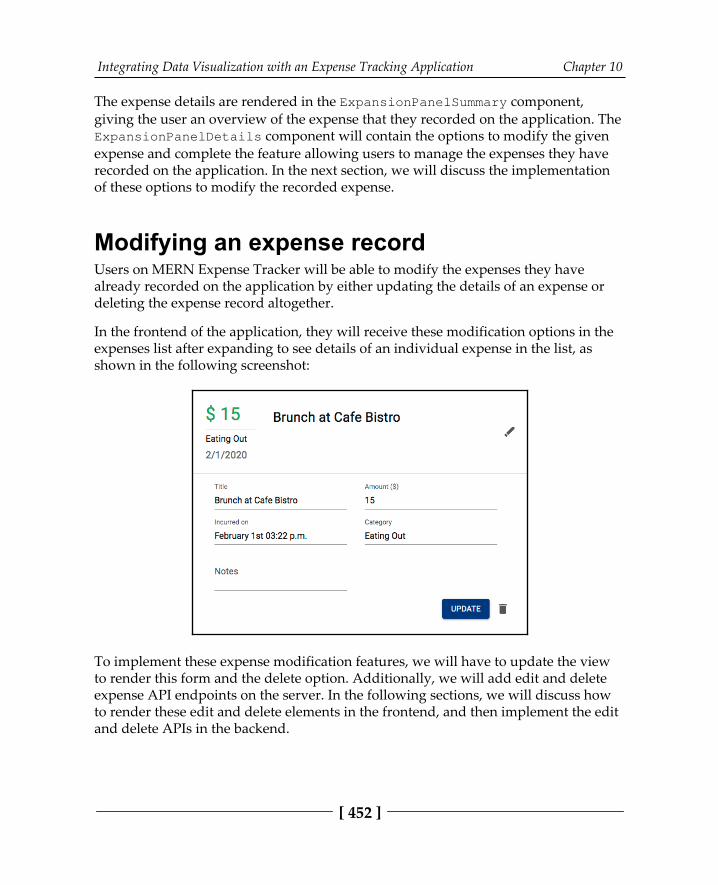
Integrating Data Visualization with an Expense Tracking Application Chapter 10
[ 452 ]
The expense details are rendered in the ExpansionPanelSummary component,giving the user an overview of the expense that they recorded on the application. TheExpansionPanelDetails component will contain the options to modify the givenexpense and complete the feature allowing users to manage the expenses they haverecorded on the application. In the next section, we will discuss the implementationof these options to modify the recorded expense.
Modifying an expense recordUsers on MERN Expense Tracker will be able to modify the expenses they havealready recorded on the application by either updating the details of an expense ordeleting the expense record altogether.
In the frontend of the application, they will receive these modification options in theexpenses list after expanding to see details of an individual expense in the list, asshown in the following screenshot:
To implement these expense modification features, we will have to update the viewto render this form and the delete option. Additionally, we will add edit and deleteexpense API endpoints on the server. In the following sections, we will discuss howto render these edit and delete elements in the frontend, and then implement the editand delete APIs in the backend.
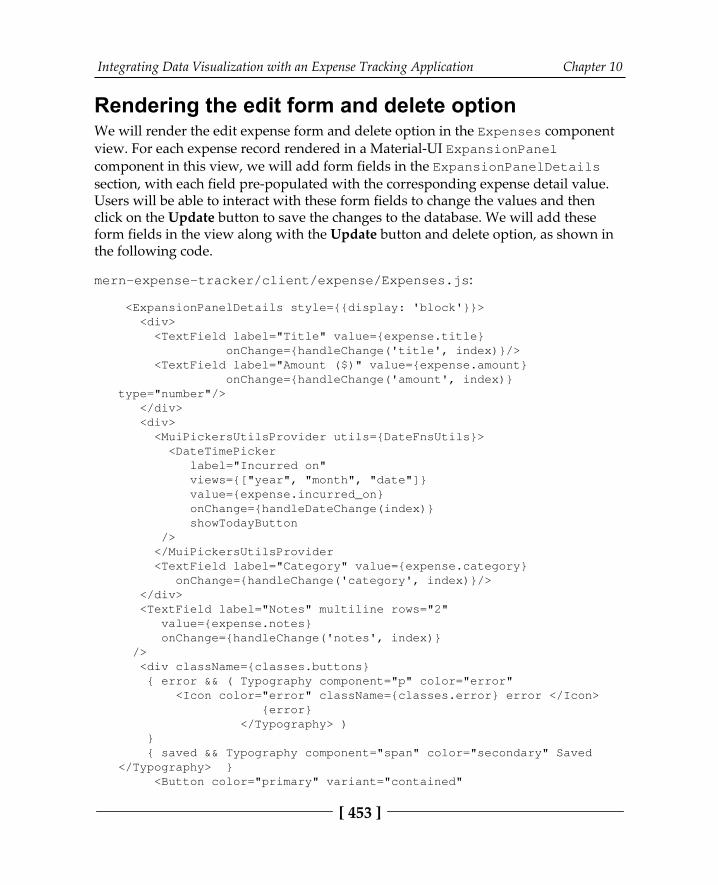
Integrating Data Visualization with an Expense Tracking Application Chapter 10
[ 453 ]
Rendering the edit form and delete optionWe will render the edit expense form and delete option in the Expenses componentview. For each expense record rendered in a Material-UI ExpansionPanelcomponent in this view, we will add form fields in the ExpansionPanelDetailssection, with each field pre-populated with the corresponding expense detail value.Users will be able to interact with these form fields to change the values and thenclick on the Update button to save the changes to the database. We will add theseform fields in the view along with the Update button and delete option, as shown inthe following code.
mern-expense-tracker/client/expense/Expenses.js:
<ExpansionPanelDetails style={{display: 'block'}}> <div> <TextField label="Title" value={expense.title} onChange={handleChange('title', index)}/> <TextField label="Amount ($)" value={expense.amount} onChange={handleChange('amount', index)}type="number"/> </div> <div> <MuiPickersUtilsProvider utils={DateFnsUtils}> <DateTimePicker label="Incurred on" views={["year", "month", "date"]} value={expense.incurred_on} onChange={handleDateChange(index)} showTodayButton /> </MuiPickersUtilsProvider <TextField label="Category" value={expense.category} onChange={handleChange('category', index)}/> </div> <TextField label="Notes" multiline rows="2" value={expense.notes} onChange={handleChange('notes', index)} /> <div className={classes.buttons} { error && ( Typography component="p" color="error" <Icon color="error" className={classes.error} error </Icon> {error} </Typography> ) } { saved && Typography component="span" color="secondary" Saved</Typography> } <Button color="primary" variant="contained"
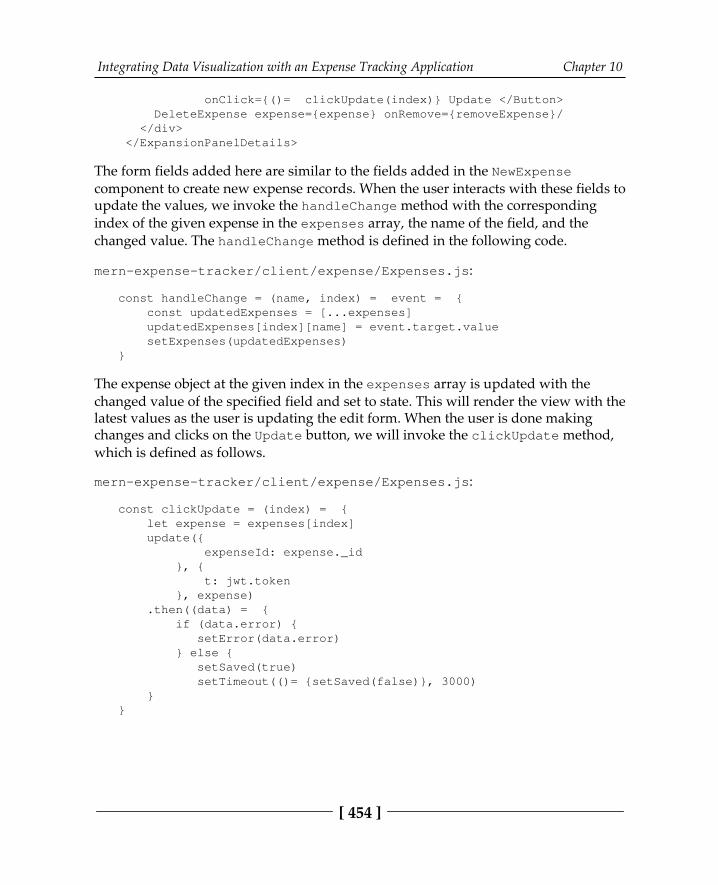
Integrating Data Visualization with an Expense Tracking Application Chapter 10
[ 454 ]
onClick={()= clickUpdate(index)} Update </Button> DeleteExpense expense={expense} onRemove={removeExpense}/ </div> </ExpansionPanelDetails>
The form fields added here are similar to the fields added in the NewExpensecomponent to create new expense records. When the user interacts with these fields toupdate the values, we invoke the handleChange method with the correspondingindex of the given expense in the expenses array, the name of the field, and thechanged value. The handleChange method is defined in the following code.
mern-expense-tracker/client/expense/Expenses.js:
const handleChange = (name, index) = event = { const updatedExpenses = [...expenses] updatedExpenses[index][name] = event.target.value setExpenses(updatedExpenses)}
The expense object at the given index in the expenses array is updated with thechanged value of the specified field and set to state. This will render the view with thelatest values as the user is updating the edit form. When the user is done makingchanges and clicks on the Update button, we will invoke the clickUpdate method,which is defined as follows.
mern-expense-tracker/client/expense/Expenses.js:
const clickUpdate = (index) = { let expense = expenses[index] update({ expenseId: expense._id }, { t: jwt.token }, expense) .then((data) = { if (data.error) { setError(data.error) } else { setSaved(true) setTimeout(()= {setSaved(false)}, 3000) }}
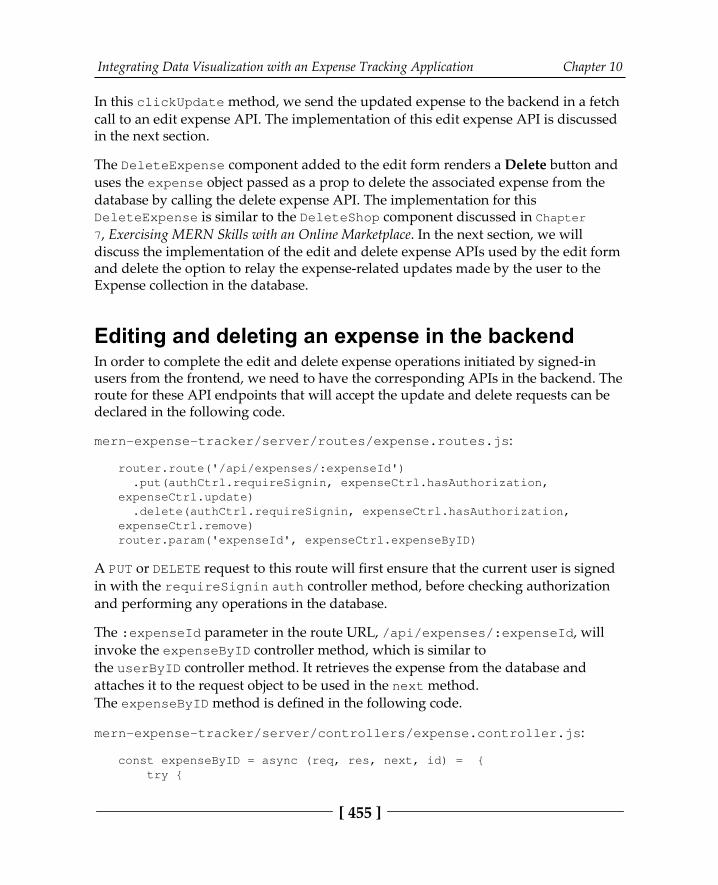
Integrating Data Visualization with an Expense Tracking Application Chapter 10
[ 455 ]
In this clickUpdate method, we send the updated expense to the backend in a fetchcall to an edit expense API. The implementation of this edit expense API is discussedin the next section.
The DeleteExpense component added to the edit form renders a Delete button anduses the expense object passed as a prop to delete the associated expense from thedatabase by calling the delete expense API. The implementation for thisDeleteExpense is similar to the DeleteShop component discussed in Chapter7, Exercising MERN Skills with an Online Marketplace. In the next section, we willdiscuss the implementation of the edit and delete expense APIs used by the edit formand delete the option to relay the expense-related updates made by the user to theExpense collection in the database.
Editing and deleting an expense in the backendIn order to complete the edit and delete expense operations initiated by signed-inusers from the frontend, we need to have the corresponding APIs in the backend. Theroute for these API endpoints that will accept the update and delete requests can bedeclared in the following code.
mern-expense-tracker/server/routes/expense.routes.js:
router.route('/api/expenses/:expenseId') .put(authCtrl.requireSignin, expenseCtrl.hasAuthorization,expenseCtrl.update) .delete(authCtrl.requireSignin, expenseCtrl.hasAuthorization,expenseCtrl.remove)router.param('expenseId', expenseCtrl.expenseByID)
A PUT or DELETE request to this route will first ensure that the current user is signedin with the requireSignin auth controller method, before checking authorizationand performing any operations in the database.
The :expenseId parameter in the route URL, /api/expenses/:expenseId, willinvoke the expenseByID controller method, which is similar tothe userByID controller method. It retrieves the expense from the database andattaches it to the request object to be used in the next method.The expenseByID method is defined in the following code.
mern-expense-tracker/server/controllers/expense.controller.js:
const expenseByID = async (req, res, next, id) = { try {
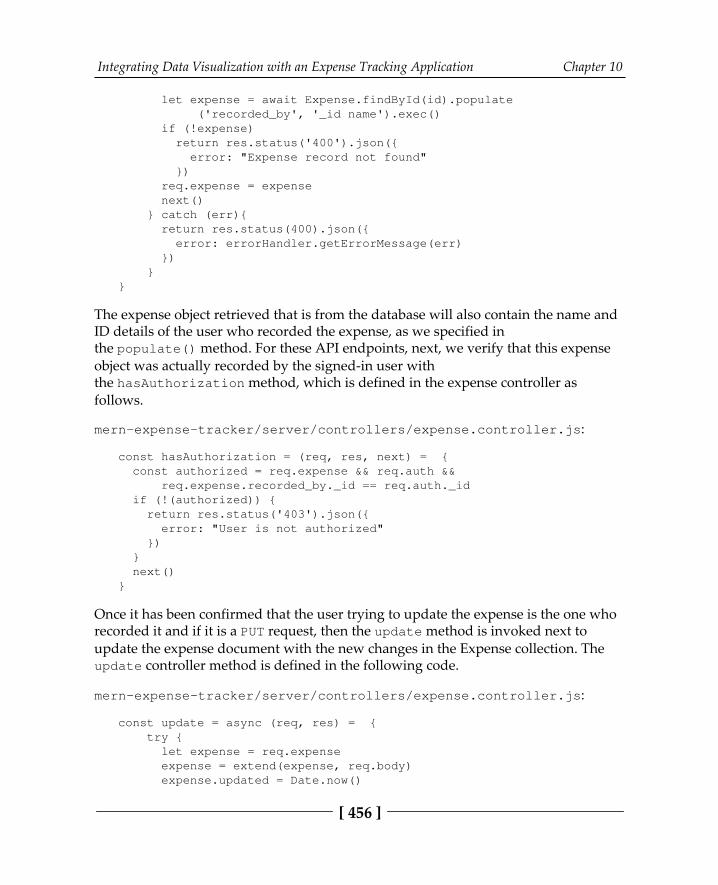
Integrating Data Visualization with an Expense Tracking Application Chapter 10
[ 456 ]
let expense = await Expense.findById(id).populate ('recorded_by', '_id name').exec() if (!expense) return res.status('400').json({ error: "Expense record not found" }) req.expense = expense next() } catch (err){ return res.status(400).json({ error: errorHandler.getErrorMessage(err) }) }}
The expense object retrieved that is from the database will also contain the name andID details of the user who recorded the expense, as we specified inthe populate() method. For these API endpoints, next, we verify that this expenseobject was actually recorded by the signed-in user withthe hasAuthorization method, which is defined in the expense controller asfollows.
mern-expense-tracker/server/controllers/expense.controller.js:
const hasAuthorization = (req, res, next) = { const authorized = req.expense && req.auth && req.expense.recorded_by._id == req.auth._id if (!(authorized)) { return res.status('403').json({ error: "User is not authorized" }) } next()}
Once it has been confirmed that the user trying to update the expense is the one whorecorded it and if it is a PUT request, then the update method is invoked next toupdate the expense document with the new changes in the Expense collection. Theupdate controller method is defined in the following code.
mern-expense-tracker/server/controllers/expense.controller.js:
const update = async (req, res) = { try { let expense = req.expense expense = extend(expense, req.body) expense.updated = Date.now()
Integrating Data Visualization with an Expense Tracking Application Chapter 10
[ 457 ]
await expense.save() res.json(expense) } catch (err) { return res.status(400).json({ error: errorHandler.getErrorMessage(err) }) }}
The method retrieves the expense details from req.expense, then usesthe lodash module to extend and merge the changes that came in the request body toupdate the expense data. Before saving this updated expense to the database,the updated field is populated with the current date to reflect the last updatedtimestamp. On the successful save of this update, the updated expense object is sentback in the response.
If it is a DELETE request instead of a PUT request, the remove method is invoked instead in order to delete the specified expense document from the collection in thedatabase. The remove controller method is defined in the following code.
mern-expense-tracker/server/controllers/expense.controller.js:
const remove = async (req, res) = { try { let expense = req.expense let deletedExpense = await expense.remove() res.json(deletedExpense) } catch (err) { return res.status(400).json({ error: errorHandler.getErrorMessage(err) }) }}
The remove operation in this method will permanently delete the expense from theapplication.

Integrating Data Visualization with an Expense Tracking Application Chapter 10
[ 458 ]
We have all the features in place for users on the application to start recording andmanaging their day-to-day expenses. We defined an Expense model for storing expense data, and backend APIs and frontend views for creating new expenses,displaying a list of expenses for a given user, and modifying an existing expense. Weare now ready to implement data visualization features based on the expense datathat will be recorded by users on the application over time. We will discuss theseimplementations in the next section.
Visualizing expense data over timeAside from allowing users to keep logs of their expenses, the MERN Expense Trackerapplication will process the collected expense data to give users insights into theirspending habits over time. We will implement simple data aggregation andvisualization features to demonstrate how the MERN stack can accommodate suchrequirements in any full-stack application. To enable these features, we will utilizeMongoDB's aggregation framework and also the React-based charting and datavisualization library—Victory—by Formidable.
In the following sections, we will first add features to summarize a user's expenses inthe current month and also show how they are doing compared to previous months.Then, we will add different Victory charts to give them a visual representation oftheir spending patterns over a month, and a year, and per expense category.
Summarizing recent expensesWhen a user signs in to their account on the application, they will see a preview of theexpenses they incurred so far in the current month. They will also see a comparison ofhow much more or less they are spending in each category in comparison to theaverages from previous months. To implement these features, we will have to addbackend APIs that will run aggregation operations on the relevant expense data in thedatabase and return the computed results to be rendered in the frontend. In thefollowing sections, we will implement the full-stack slices—first to show a preview ofall the expenses incurred so far in the current month, and then a comparison of theaverage expenses per category with respect to expenditures in the current month.
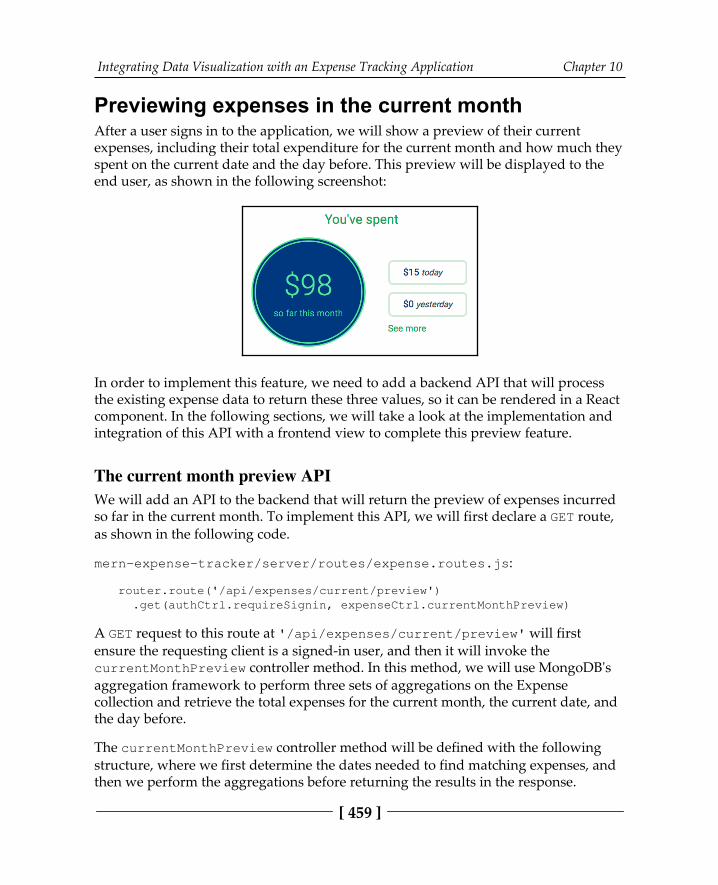
Integrating Data Visualization with an Expense Tracking Application Chapter 10
[ 459 ]
Previewing expenses in the current monthAfter a user signs in to the application, we will show a preview of their currentexpenses, including their total expenditure for the current month and how much theyspent on the current date and the day before. This preview will be displayed to theend user, as shown in the following screenshot:
In order to implement this feature, we need to add a backend API that will processthe existing expense data to return these three values, so it can be rendered in a Reactcomponent. In the following sections, we will take a look at the implementation andintegration of this API with a frontend view to complete this preview feature.
The current month preview APIWe will add an API to the backend that will return the preview of expenses incurredso far in the current month. To implement this API, we will first declare a GET route,as shown in the following code.
mern-expense-tracker/server/routes/expense.routes.js:
router.route('/api/expenses/current/preview') .get(authCtrl.requireSignin, expenseCtrl.currentMonthPreview)
A GET request to this route at '/api/expenses/current/preview' will firstensure the requesting client is a signed-in user, and then it will invoke thecurrentMonthPreview controller method. In this method, we will use MongoDB'saggregation framework to perform three sets of aggregations on the Expensecollection and retrieve the total expenses for the current month, the current date, andthe day before.
The currentMonthPreview controller method will be defined with the followingstructure, where we first determine the dates needed to find matching expenses, andthen we perform the aggregations before returning the results in the response.

Integrating Data Visualization with an Expense Tracking Application Chapter 10
[ 460 ]
mern-expense-tracker/server/controllers/expense.controller.js:
const currentMonthPreview = async (req, res) = { const date = new Date(), y = date.getFullYear(), m = date.getMonth() const firstDay = new Date(y, m, 1) const lastDay = new Date(y, m + 1, 0)
const today = new Date() today.setUTCHours(0,0,0,0) const tomorrow = new Date() tomorrow.setUTCHours(0,0,0,0) tomorrow.setDate(tomorrow.getDate()+1) const yesterday = new Date() yesterday.setUTCHours(0,0,0,0) yesterday.setDate(yesterday.getDate()-1)
try { /* ... Perform aggregation operations on the Expense collection to compute current month's numbers ... */ /* ... Send computed result in response ... */ } catch (err){ console.log(err) return res.status(400).json({ error: errorHandler.getErrorMessage(err) }) }
}
We first determine the dates for the current month's first day and last day, then thedates for today, tomorrow, and yesterday with the minutes and seconds set to zero.We will need these dates to specify the ranges for finding the matching expenses thatwere incurred in the current month, today, and yesterday. Then, with these valuesand the signed-in user's ID reference, we construct the aggregation pipelinesnecessary to retrieve the total expenses for the current month, today, and yesterday.We group these three different aggregation pipelines using the $facet stage inMongoDB's aggregation framework, as shown in the following code.
mern-expense-tracker/server/controllers/expense.controller.js:
let currentPreview = await Expense.aggregate([ { $facet: { month: [ { $match: { incurred_on: { $gte: firstDay, $lt: lastDay }, recorded_by: mongoose.Types.ObjectId(req.auth._id)}}, { $group: { _id: "currentMonth" , totalSpent: {$sum: "$amount"}}}, ],
Integrating Data Visualization with an Expense Tracking Application Chapter 10
[ 461 ]
today: [ { $match: { incurred_on: { $gte: today, $lt: tomorrow }, recorded_by: mongoose.Types.ObjectId(req.auth._id) }}, { $group: { _id: "today" , totalSpent: {$sum: "$amount"} } }, ], yesterday: [ { $match: { incurred_on: { $gte: yesterday, $lt: today }, recorded_by: mongoose.Types.ObjectId(req.auth._id) }}, { $group: { _id: "yesterday" , totalSpent: {$sum: "$amount"} } }, ] } }])let expensePreview = {month: currentPreview[0].month[0], today:currentPreview[0].today[0], yesterday: currentPreview[0].yesterday[0]}res.json(expensePreview)
For each aggregation pipeline, we first match the expenses using the date rangevalues for the incurred_on field, and also the recorded_by field with the currentuser's reference, so the aggregation is only performed on the expenses recorded bythe current user. Then, the matching expenses in each pipeline are grouped tocalculate the total amount spent.
In the faceted aggregation operation result, each pipeline has itsown field in the output document where the results are stored as anarray of documents.
After the aggregation operations are completed, we access the computed results andcompose the response to be sent back in the response to the requesting client. ThisAPI can be used in the frontend with a fetch request. You can define a correspondingfetch method to make the request, similar to other API implementations. Then, thefetch method can be used in a React component to retrieve and render theseaggregated values to the user. In the next section, we will discuss the implementationof this view to render the preview of current expenses for a user.
Rendering the preview of current expensesWe can give the user a glimpse of their current expenses in any React component,which is accessible to a signed-in user and added to the frontend of the application.To retrieve the expense totals and render these in the view, we can call the currentmonth preview API either in a useEffect hook or when a button is clicked on.
Integrating Data Visualization with an Expense Tracking Application Chapter 10
[ 462 ]
In the MERN Expense Tracker application, we render these details in a Reactcomponent that is added to the home page. We use a useEffect hook, as shown inthe following code, to retrieve the current expense preview data.
mern-expense-tracker/client/expense/ExpenseOverview.js:
useEffect(() = { const abortController = new AbortController() const signal = abortController.signal currentMonthPreview({t: jwt.token}, signal).then((data) = { if (data.error) { setRedirectToSignin(true) } else { setExpensePreview(data) } }) return function cleanup(){ abortController.abort() } }, [])
Once the data is received from the backend, we set it to state in a variable calledexpensePreview, so the information can be displayed in the view. In the view of thecomponent, we use this state variable to compose an interface with these details asdesired. In the following code, we render the total expenses for the current month, forthe current date, and for the day before.
mern-expense-tracker/client/expense/ExpenseOverview.js:
<Typography variant="h4" color="textPrimary" You've spent</Typography> <div><Typography component="span" ${expensePreview.month ? expensePreview.month.totalSpent :'0'} span so far this month </span> </Typography> <div> <Typography variant="h5" color="primary" ${expensePreview.today ? expensePreview.today.totalSpent:'0'} span today </span> </Typography> <Typography variant="h5" color="primary" ${expensePreview.yesterday ? expensePreview.yesterday.totalSpent: '0'} <span className={classes.day} yesterday </span>
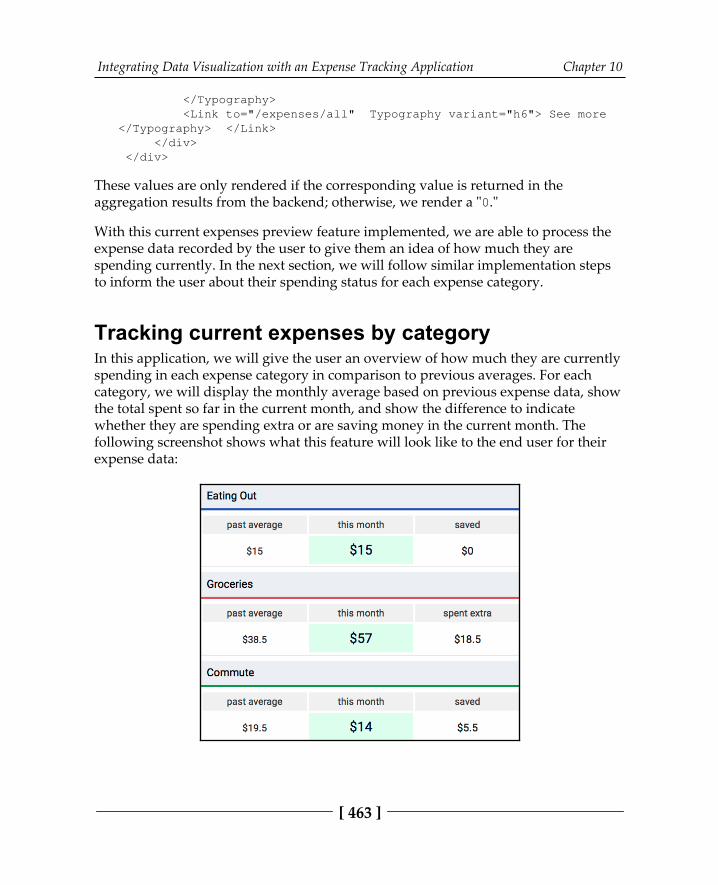
Integrating Data Visualization with an Expense Tracking Application Chapter 10
[ 463 ]
</Typography> <Link to="/expenses/all" Typography variant="h6"> See more</Typography> </Link> </div> </div>
These values are only rendered if the corresponding value is returned in theaggregation results from the backend; otherwise, we render a "0."
With this current expenses preview feature implemented, we are able to process theexpense data recorded by the user to give them an idea of how much they arespending currently. In the next section, we will follow similar implementation stepsto inform the user about their spending status for each expense category.
Tracking current expenses by categoryIn this application, we will give the user an overview of how much they are currentlyspending in each expense category in comparison to previous averages. For eachcategory, we will display the monthly average based on previous expense data, showthe total spent so far in the current month, and show the difference to indicatewhether they are spending extra or are saving money in the current month. Thefollowing screenshot shows what this feature will look like to the end user for theirexpense data:
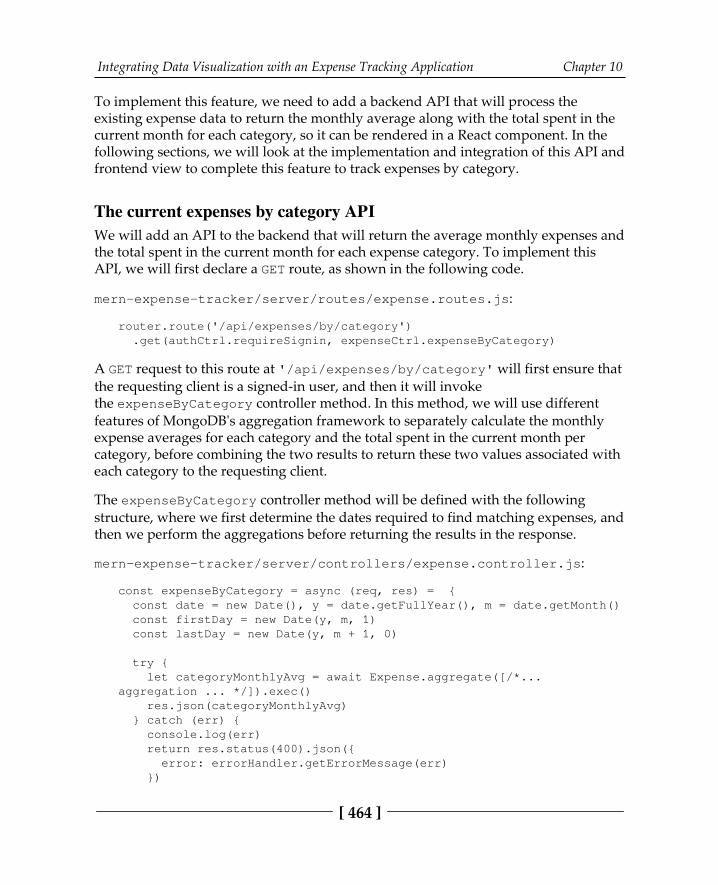
Integrating Data Visualization with an Expense Tracking Application Chapter 10
[ 464 ]
To implement this feature, we need to add a backend API that will process theexisting expense data to return the monthly average along with the total spent in the current month for each category, so it can be rendered in a React component. In thefollowing sections, we will look at the implementation and integration of this API andfrontend view to complete this feature to track expenses by category.
The current expenses by category APIWe will add an API to the backend that will return the average monthly expenses andthe total spent in the current month for each expense category. To implement thisAPI, we will first declare a GET route, as shown in the following code.
mern-expense-tracker/server/routes/expense.routes.js:
router.route('/api/expenses/by/category') .get(authCtrl.requireSignin, expenseCtrl.expenseByCategory)
A GET request to this route at '/api/expenses/by/category' will first ensure thatthe requesting client is a signed-in user, and then it will invokethe expenseByCategory controller method. In this method, we will use differentfeatures of MongoDB's aggregation framework to separately calculate the monthlyexpense averages for each category and the total spent in the current month percategory, before combining the two results to return these two values associated witheach category to the requesting client.
The expenseByCategory controller method will be defined with the followingstructure, where we first determine the dates required to find matching expenses, andthen we perform the aggregations before returning the results in the response.
mern-expense-tracker/server/controllers/expense.controller.js:
const expenseByCategory = async (req, res) = { const date = new Date(), y = date.getFullYear(), m = date.getMonth() const firstDay = new Date(y, m, 1) const lastDay = new Date(y, m + 1, 0)
try { let categoryMonthlyAvg = await Expense.aggregate([/*...aggregation ... */]).exec() res.json(categoryMonthlyAvg) } catch (err) { console.log(err) return res.status(400).json({ error: errorHandler.getErrorMessage(err) })
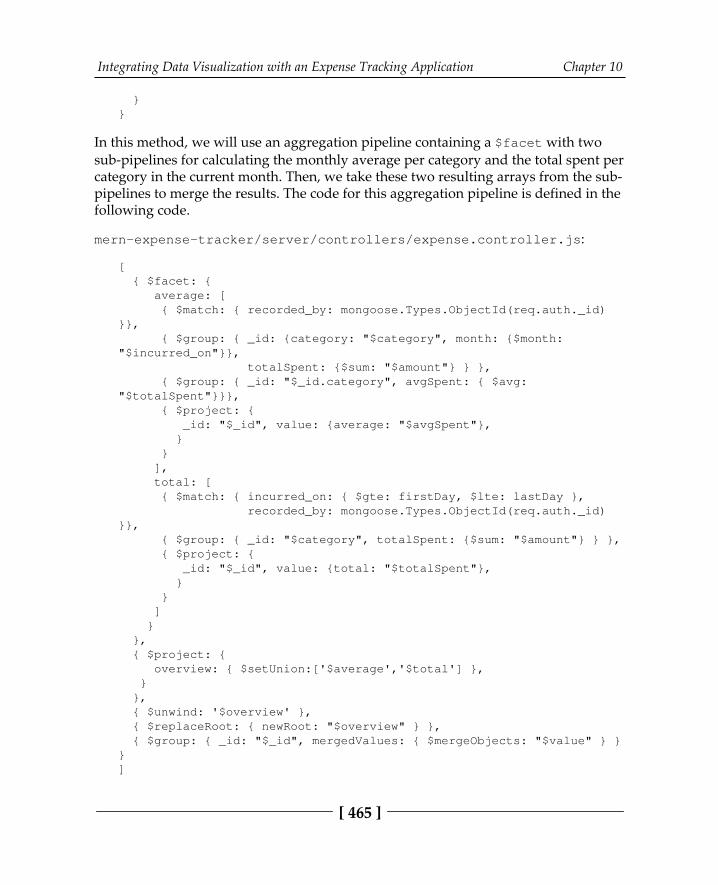
Integrating Data Visualization with an Expense Tracking Application Chapter 10
[ 465 ]
}}
In this method, we will use an aggregation pipeline containing a $facet with twosub-pipelines for calculating the monthly average per category and the total spent percategory in the current month. Then, we take these two resulting arrays from the sub-pipelines to merge the results. The code for this aggregation pipeline is defined in thefollowing code.
mern-expense-tracker/server/controllers/expense.controller.js:
[ { $facet: { average: [ { $match: { recorded_by: mongoose.Types.ObjectId(req.auth._id)}}, { $group: { _id: {category: "$category", month: {$month:"$incurred_on"}}, totalSpent: {$sum: "$amount"} } }, { $group: { _id: "$_id.category", avgSpent: { $avg:"$totalSpent"}}}, { $project: { _id: "$_id", value: {average: "$avgSpent"}, } } ], total: [ { $match: { incurred_on: { $gte: firstDay, $lte: lastDay }, recorded_by: mongoose.Types.ObjectId(req.auth._id)}}, { $group: { _id: "$category", totalSpent: {$sum: "$amount"} } }, { $project: { _id: "$_id", value: {total: "$totalSpent"}, } } ] } }, { $project: { overview: { $setUnion:['$average','$total'] }, } }, { $unwind: '$overview' }, { $replaceRoot: { newRoot: "$overview" } }, { $group: { _id: "$_id", mergedValues: { $mergeObjects: "$value" } }}]
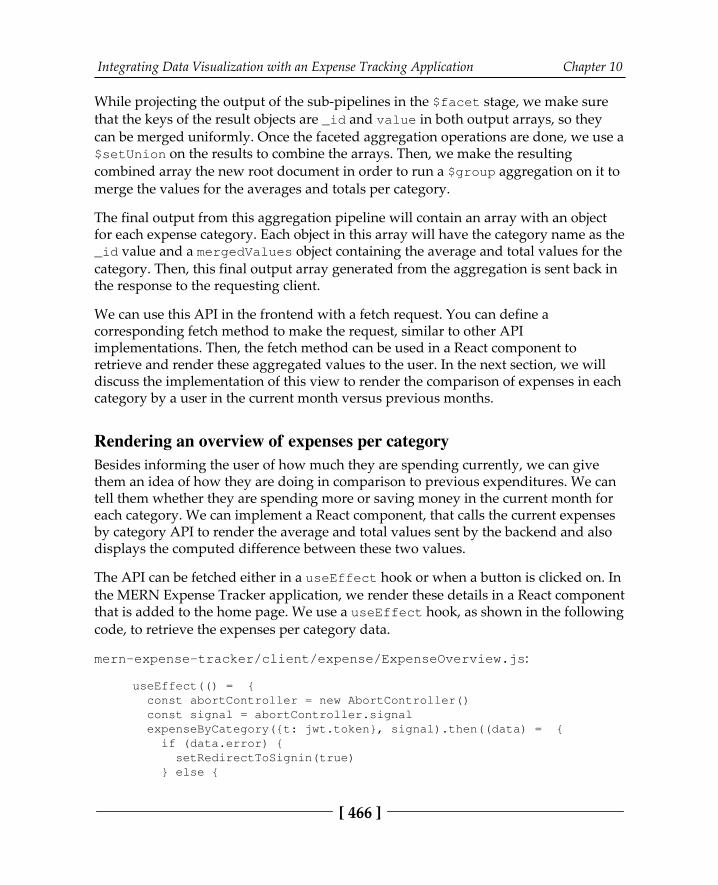
Integrating Data Visualization with an Expense Tracking Application Chapter 10
[ 466 ]
While projecting the output of the sub-pipelines in the $facet stage, we make surethat the keys of the result objects are _id and value in both output arrays, so theycan be merged uniformly. Once the faceted aggregation operations are done, we use a$setUnion on the results to combine the arrays. Then, we make the resultingcombined array the new root document in order to run a $group aggregation on it tomerge the values for the averages and totals per category.
The final output from this aggregation pipeline will contain an array with an objectfor each expense category. Each object in this array will have the category name as the_id value and a mergedValues object containing the average and total values for thecategory. Then, this final output array generated from the aggregation is sent back inthe response to the requesting client.
We can use this API in the frontend with a fetch request. You can define acorresponding fetch method to make the request, similar to other APIimplementations. Then, the fetch method can be used in a React component toretrieve and render these aggregated values to the user. In the next section, we willdiscuss the implementation of this view to render the comparison of expenses in eachcategory by a user in the current month versus previous months.
Rendering an overview of expenses per category Besides informing the user of how much they are spending currently, we can givethem an idea of how they are doing in comparison to previous expenditures. We cantell them whether they are spending more or saving money in the current month foreach category. We can implement a React component, that calls the current expensesby category API to render the average and total values sent by the backend and alsodisplays the computed difference between these two values.
The API can be fetched either in a useEffect hook or when a button is clicked on. Inthe MERN Expense Tracker application, we render these details in a React componentthat is added to the home page. We use a useEffect hook, as shown in the followingcode, to retrieve the expenses per category data.
mern-expense-tracker/client/expense/ExpenseOverview.js:
useEffect(() = { const abortController = new AbortController() const signal = abortController.signal expenseByCategory({t: jwt.token}, signal).then((data) = { if (data.error) { setRedirectToSignin(true) } else {
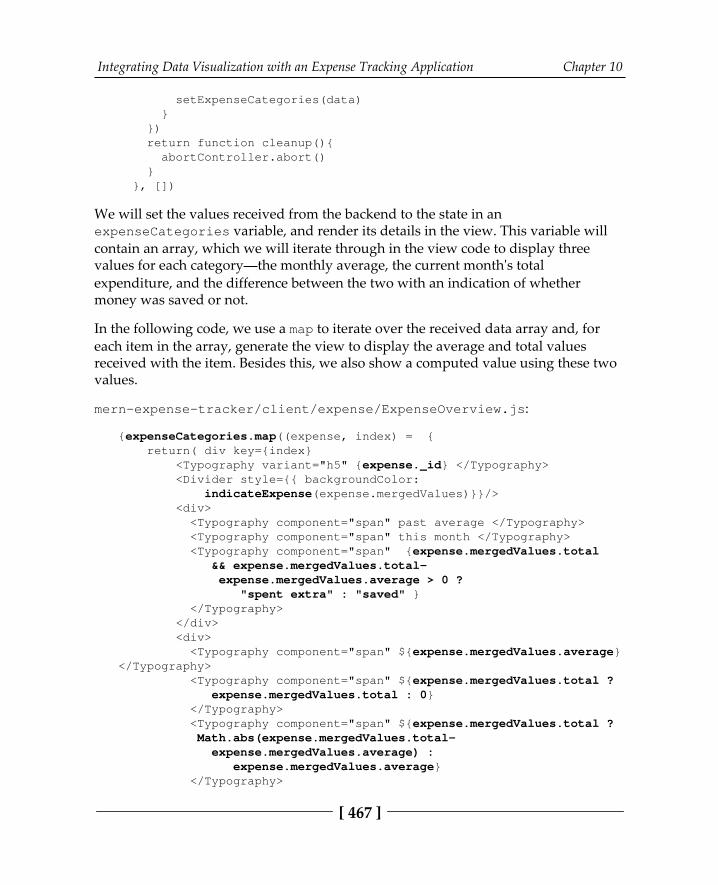
Integrating Data Visualization with an Expense Tracking Application Chapter 10
[ 467 ]
setExpenseCategories(data) } }) return function cleanup(){ abortController.abort() } }, [])
We will set the values received from the backend to the state in anexpenseCategories variable, and render its details in the view. This variable willcontain an array, which we will iterate through in the view code to display threevalues for each category—the monthly average, the current month's totalexpenditure, and the difference between the two with an indication of whethermoney was saved or not.
In the following code, we use a map to iterate over the received data array and, foreach item in the array, generate the view to display the average and total values received with the item. Besides this, we also show a computed value using these twovalues.
mern-expense-tracker/client/expense/ExpenseOverview.js:
{expenseCategories.map((expense, index) = { return( div key={index} <Typography variant="h5" {expense._id} </Typography> <Divider style={{ backgroundColor: indicateExpense(expense.mergedValues)}}/> <div> <Typography component="span" past average </Typography> <Typography component="span" this month </Typography> <Typography component="span" {expense.mergedValues.total && expense.mergedValues.total- expense.mergedValues.average > 0 ? "spent extra" : "saved" } </Typography> </div> <div> <Typography component="span" ${expense.mergedValues.average}</Typography> <Typography component="span" ${expense.mergedValues.total ? expense.mergedValues.total : 0} </Typography> <Typography component="span" ${expense.mergedValues.total ? Math.abs(expense.mergedValues.total- expense.mergedValues.average) : expense.mergedValues.average} </Typography>
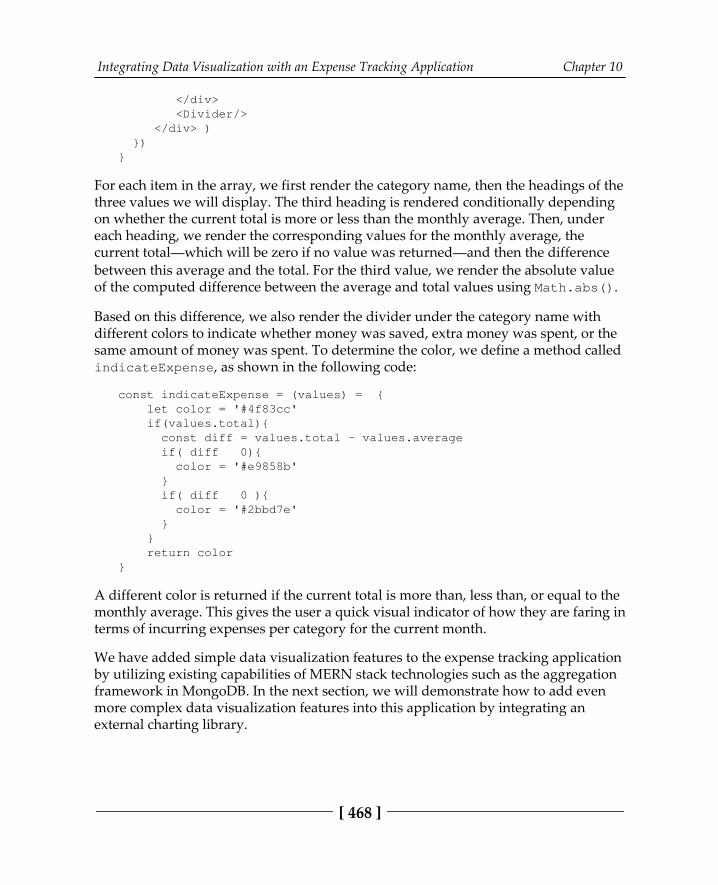
Integrating Data Visualization with an Expense Tracking Application Chapter 10
[ 468 ]
</div> <Divider/> </div> ) })}
For each item in the array, we first render the category name, then the headings of thethree values we will display. The third heading is rendered conditionally dependingon whether the current total is more or less than the monthly average. Then, undereach heading, we render the corresponding values for the monthly average, thecurrent total—which will be zero if no value was returned—and then the differencebetween this average and the total. For the third value, we render the absolute valueof the computed difference between the average and total values using Math.abs().
Based on this difference, we also render the divider under the category name withdifferent colors to indicate whether money was saved, extra money was spent, or thesame amount of money was spent. To determine the color, we define a method calledindicateExpense, as shown in the following code:
const indicateExpense = (values) = { let color = '#4f83cc' if(values.total){ const diff = values.total - values.average if( diff 0){ color = '#e9858b' } if( diff 0 ){ color = '#2bbd7e' } } return color}
A different color is returned if the current total is more than, less than, or equal to themonthly average. This gives the user a quick visual indicator of how they are faring interms of incurring expenses per category for the current month.
We have added simple data visualization features to the expense tracking applicationby utilizing existing capabilities of MERN stack technologies such as the aggregationframework in MongoDB. In the next section, we will demonstrate how to add evenmore complex data visualization features into this application by integrating anexternal charting library.
Integrating Data Visualization with an Expense Tracking Application Chapter 10
[ 469 ]
Displaying expense data chartsGraphs and charts are time-tested mechanisms for visualizing complex data patterns.In the MERN Expense Tracker application, we will add simple charts using Victory toreport expense patterns over time in graphical representations to the user.
Victory is an open source charting and data visualization library forReact and React Native developed by Formidable. Different types ofcharts are available as modular components that can be customizedand added to any React application. To learn more about Victory,visit https:/ /formidable. com/ open- source/ victory.
Before we get started with integrating Victory charts in the code, we will need toinstall the module by running the following command from the command line:
yarn add victory
In the expense tracking application, we will add three different charts as a part of theinteractive expense reports presented to the user. The three charts will include ascatter plot showing the expenses incurred in a given month, a bar chart showing thetotal expenses incurred per month in a given year, and a pie chart showing theaverage expenditure per category within a provided date range.
For each chart, we will add a corresponding backend API to retrieve the relevantexpense data and a React component to the frontend that will use the retrieved datato render the associated Victory chart. In the following sections, we will implementthe full-stack slices necessary to add a scatter plot chart for a month's expenses, a barchart showing a year's monthly expenses, and a pie chart displaying the averageexpenses per category over a given period of time.
A month's expenses in a scatter plotWe will show the expenses incurred by a user over a given month in a scatter plot.This will provide them with a visual overview of how their expenses pan out over amonth. The following screenshot shows how the scatter plot will render with userexpense data:
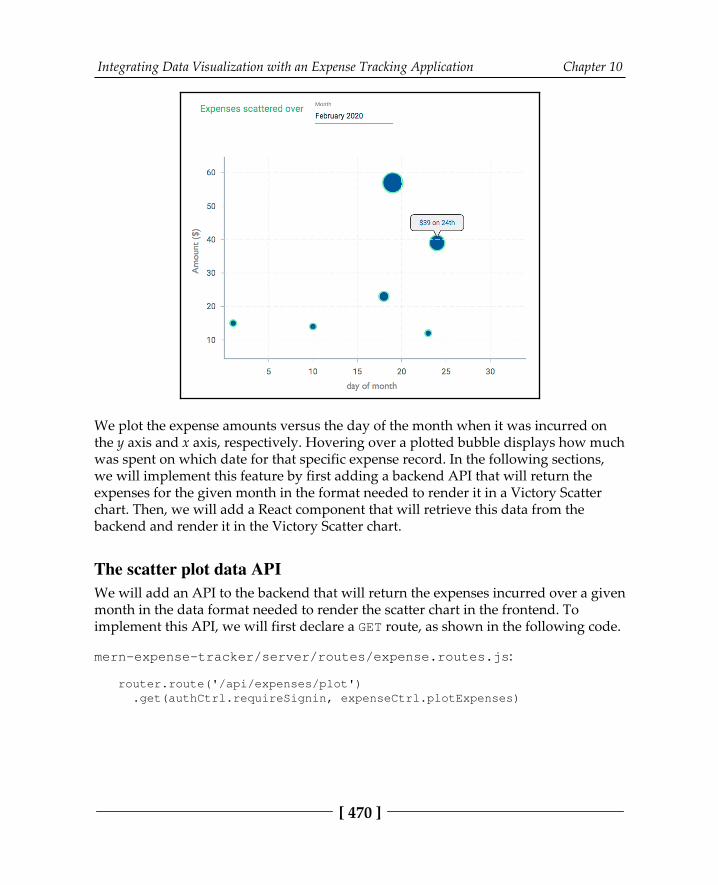
Integrating Data Visualization with an Expense Tracking Application Chapter 10
[ 470 ]
We plot the expense amounts versus the day of the month when it was incurred onthe y axis and x axis, respectively. Hovering over a plotted bubble displays how muchwas spent on which date for that specific expense record. In the following sections,we will implement this feature by first adding a backend API that will return theexpenses for the given month in the format needed to render it in a Victory Scatterchart. Then, we will add a React component that will retrieve this data from thebackend and render it in the Victory Scatter chart.
The scatter plot data APIWe will add an API to the backend that will return the expenses incurred over a givenmonth in the data format needed to render the scatter chart in the frontend. Toimplement this API, we will first declare a GET route, as shown in the following code.
mern-expense-tracker/server/routes/expense.routes.js:
router.route('/api/expenses/plot') .get(authCtrl.requireSignin, expenseCtrl.plotExpenses)
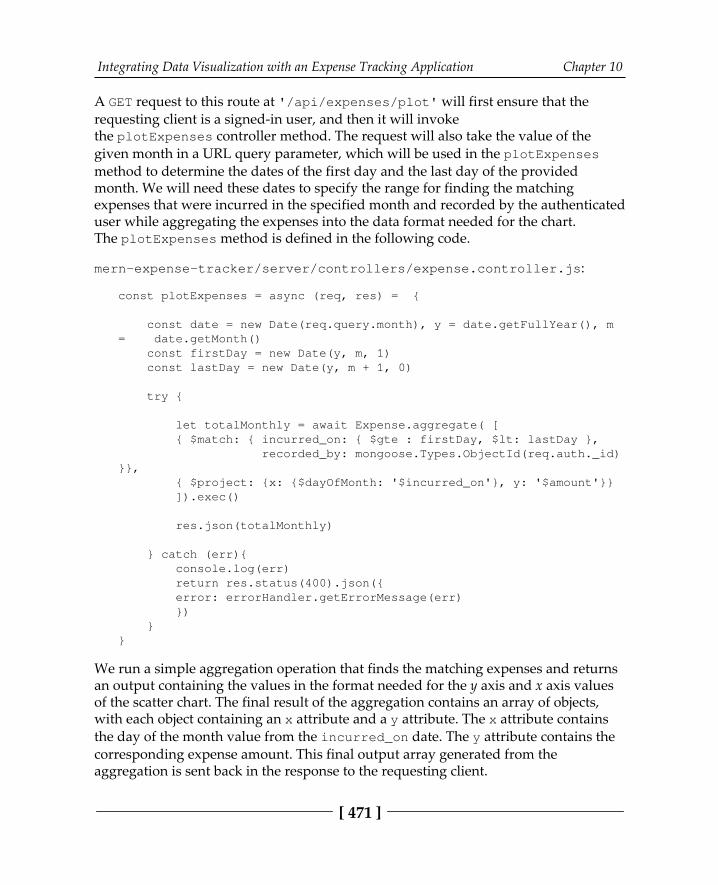
Integrating Data Visualization with an Expense Tracking Application Chapter 10
[ 471 ]
A GET request to this route at '/api/expenses/plot' will first ensure that therequesting client is a signed-in user, and then it will invokethe plotExpenses controller method. The request will also take the value of thegiven month in a URL query parameter, which will be used in the plotExpensesmethod to determine the dates of the first day and the last day of the providedmonth. We will need these dates to specify the range for finding the matchingexpenses that were incurred in the specified month and recorded by the authenticateduser while aggregating the expenses into the data format needed for the chart.The plotExpenses method is defined in the following code.
mern-expense-tracker/server/controllers/expense.controller.js:
const plotExpenses = async (req, res) = {
const date = new Date(req.query.month), y = date.getFullYear(), m= date.getMonth() const firstDay = new Date(y, m, 1) const lastDay = new Date(y, m + 1, 0)
try {
let totalMonthly = await Expense.aggregate( [ { $match: { incurred_on: { $gte : firstDay, $lt: lastDay }, recorded_by: mongoose.Types.ObjectId(req.auth._id)}}, { $project: {x: {$dayOfMonth: '$incurred_on'}, y: '$amount'}} ]).exec()
res.json(totalMonthly)
} catch (err){ console.log(err) return res.status(400).json({ error: errorHandler.getErrorMessage(err) }) }}
We run a simple aggregation operation that finds the matching expenses and returnsan output containing the values in the format needed for the y axis and x axis valuesof the scatter chart. The final result of the aggregation contains an array of objects,with each object containing an x attribute and a y attribute. The x attribute containsthe day of the month value from the incurred_on date. The y attribute contains thecorresponding expense amount. This final output array generated from theaggregation is sent back in the response to the requesting client.

Integrating Data Visualization with an Expense Tracking Application Chapter 10
[ 472 ]
We can use this API in the frontend with a fetch request. You can define acorresponding fetch method to make the request, similar to other APIimplementations. Then, the fetch method can be used in a React component toretrieve and render this array of x and y values in a scatter plot chart. In the nextsection, we will discuss the implementation of this view to render a scatter chartshowing the expenses incurred over a given month.
The MonthlyScatter componentWe will implement a React component that calls the scatter plot data API to renderthe received array of expenses incurred over a given month in a Victory Scatter chart.
The API can be fetched either in a useEffect hook or when a button is clicked on. Inthe MERN Expense Tracker application, we render this scatter chart in a Reactcomponent called MonthlyScatter. When this component loads, we render a scatterchart for expenses in the current month. We also add a DatePicker component toallow users to select the desired month and retrieve data for that month with a buttonclick. In the following code, we retrieve the initial scatter plot data witha useEffect hook when the component loads.
mern-expense-tracker/client/report/MonthlyScatter.js:
const [plot, setPlot] = useState([])const [month, setMonth] = useState(new Date())const [error, setError] = useState('')const jwt = auth.isAuthenticated()useEffect(() = { const abortController = new AbortController() const signal = abortController.signal
plotExpenses({month: month},{t: jwt.token},signal).then((data) = { if (data.error) { setError(data.error) } else { setPlot(data) } }) return function cleanup(){ abortController.abort() } }, [])
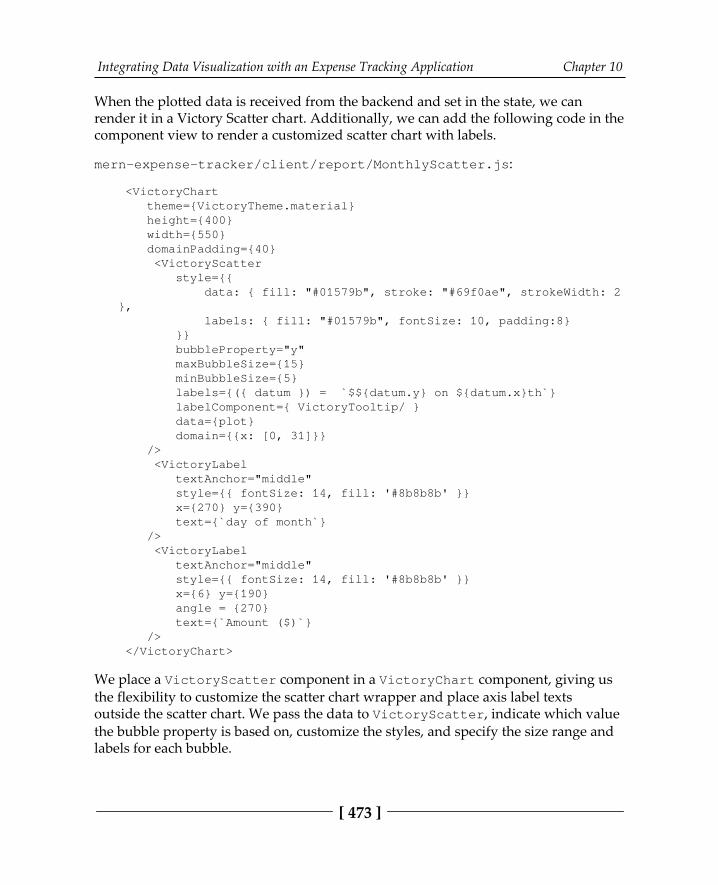
Integrating Data Visualization with an Expense Tracking Application Chapter 10
[ 473 ]
When the plotted data is received from the backend and set in the state, we canrender it in a Victory Scatter chart. Additionally, we can add the following code in thecomponent view to render a customized scatter chart with labels.
mern-expense-tracker/client/report/MonthlyScatter.js:
<VictoryChart theme={VictoryTheme.material} height={400} width={550} domainPadding={40} <VictoryScatter style={{ data: { fill: "#01579b", stroke: "#69f0ae", strokeWidth: 2}, labels: { fill: "#01579b", fontSize: 10, padding:8} }} bubbleProperty="y" maxBubbleSize={15} minBubbleSize={5} labels={({ datum }) = `$${datum.y} on ${datum.x}th`} labelComponent={ VictoryTooltip/ } data={plot} domain={{x: [0, 31]}} /> <VictoryLabel textAnchor="middle" style={{ fontSize: 14, fill: '#8b8b8b' }} x={270} y={390} text={`day of month`} /> <VictoryLabel textAnchor="middle" style={{ fontSize: 14, fill: '#8b8b8b' }} x={6} y={190} angle = {270} text={`Amount ($)`} /> </VictoryChart>
We place a VictoryScatter component in a VictoryChart component, giving usthe flexibility to customize the scatter chart wrapper and place axis label texts outside the scatter chart. We pass the data to VictoryScatter, indicate which valuethe bubble property is based on, customize the styles, and specify the size range andlabels for each bubble.
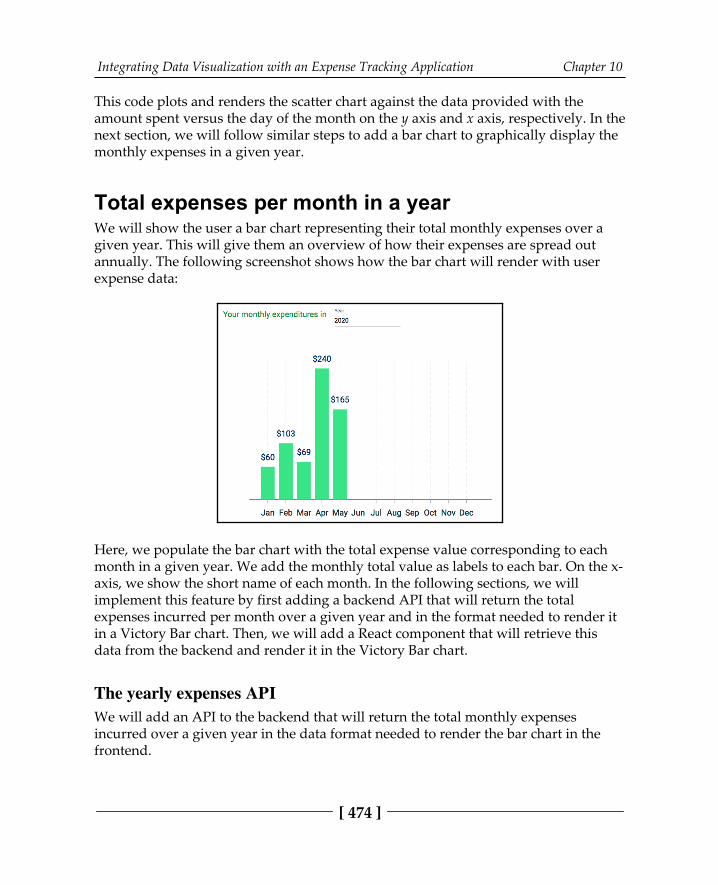
Integrating Data Visualization with an Expense Tracking Application Chapter 10
[ 474 ]
This code plots and renders the scatter chart against the data provided with theamount spent versus the day of the month on the y axis and x axis, respectively. In thenext section, we will follow similar steps to add a bar chart to graphically display themonthly expenses in a given year.
Total expenses per month in a yearWe will show the user a bar chart representing their total monthly expenses over agiven year. This will give them an overview of how their expenses are spread outannually. The following screenshot shows how the bar chart will render with userexpense data:
Here, we populate the bar chart with the total expense value corresponding to eachmonth in a given year. We add the monthly total value as labels to each bar. On the x-axis, we show the short name of each month. In the following sections, we willimplement this feature by first adding a backend API that will return the totalexpenses incurred per month over a given year and in the format needed to render itin a Victory Bar chart. Then, we will add a React component that will retrieve thisdata from the backend and render it in the Victory Bar chart.
The yearly expenses APIWe will add an API to the backend that will return the total monthly expensesincurred over a given year in the data format needed to render the bar chart in thefrontend.
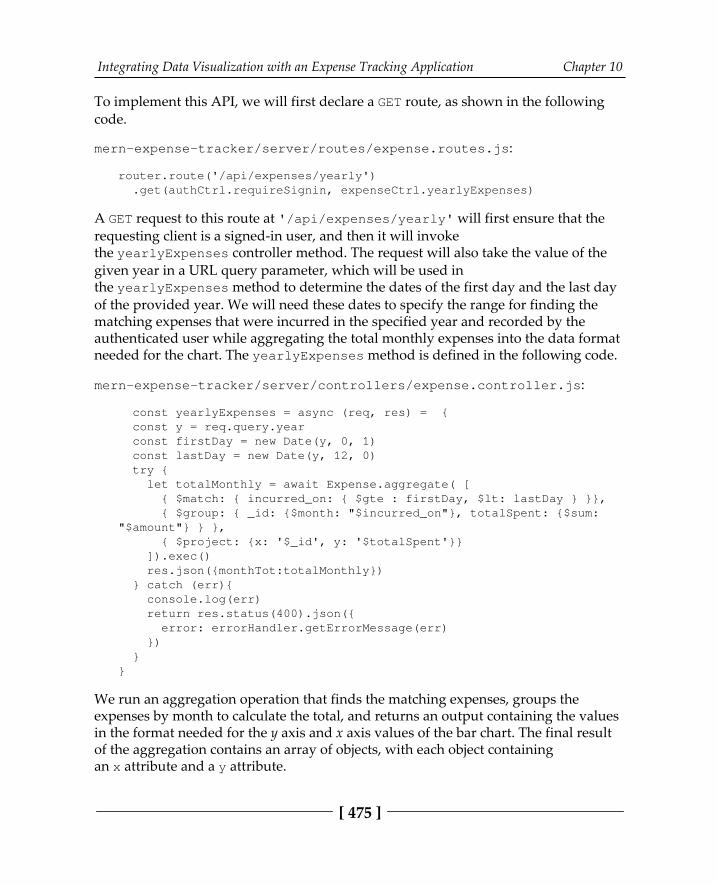
Integrating Data Visualization with an Expense Tracking Application Chapter 10
[ 475 ]
To implement this API, we will first declare a GET route, as shown in the followingcode.
mern-expense-tracker/server/routes/expense.routes.js:
router.route('/api/expenses/yearly') .get(authCtrl.requireSignin, expenseCtrl.yearlyExpenses)
A GET request to this route at '/api/expenses/yearly' will first ensure that therequesting client is a signed-in user, and then it will invokethe yearlyExpenses controller method. The request will also take the value of thegiven year in a URL query parameter, which will be used inthe yearlyExpenses method to determine the dates of the first day and the last dayof the provided year. We will need these dates to specify the range for finding thematching expenses that were incurred in the specified year and recorded by theauthenticated user while aggregating the total monthly expenses into the data formatneeded for the chart. The yearlyExpenses method is defined in the following code.
mern-expense-tracker/server/controllers/expense.controller.js:
const yearlyExpenses = async (req, res) = { const y = req.query.year const firstDay = new Date(y, 0, 1) const lastDay = new Date(y, 12, 0) try { let totalMonthly = await Expense.aggregate( [ { $match: { incurred_on: { $gte : firstDay, $lt: lastDay } }}, { $group: { _id: {$month: "$incurred_on"}, totalSpent: {$sum:"$amount"} } }, { $project: {x: '$_id', y: '$totalSpent'}} ]).exec() res.json({monthTot:totalMonthly}) } catch (err){ console.log(err) return res.status(400).json({ error: errorHandler.getErrorMessage(err) }) }}
We run an aggregation operation that finds the matching expenses, groups theexpenses by month to calculate the total, and returns an output containing the valuesin the format needed for the y axis and x axis values of the bar chart. The final resultof the aggregation contains an array of objects, with each object containingan x attribute and a y attribute.
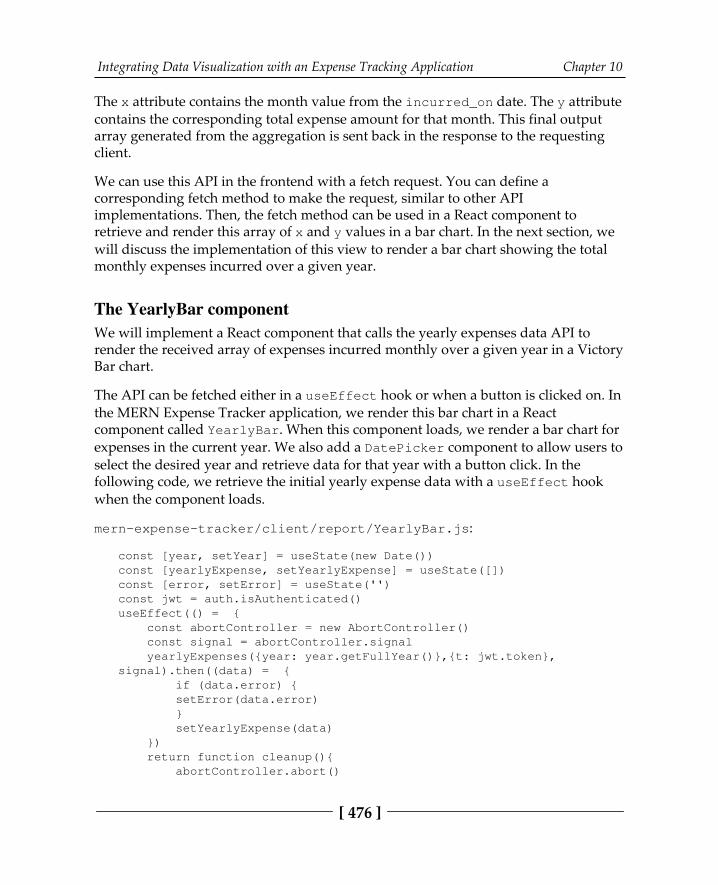
Integrating Data Visualization with an Expense Tracking Application Chapter 10
[ 476 ]
The x attribute contains the month value from the incurred_on date. The y attributecontains the corresponding total expense amount for that month. This final outputarray generated from the aggregation is sent back in the response to the requestingclient.
We can use this API in the frontend with a fetch request. You can define acorresponding fetch method to make the request, similar to other APIimplementations. Then, the fetch method can be used in a React component toretrieve and render this array of x and y values in a bar chart. In the next section, wewill discuss the implementation of this view to render a bar chart showing the totalmonthly expenses incurred over a given year.
The YearlyBar componentWe will implement a React component that calls the yearly expenses data API torender the received array of expenses incurred monthly over a given year in a VictoryBar chart.
The API can be fetched either in a useEffect hook or when a button is clicked on. Inthe MERN Expense Tracker application, we render this bar chart in a Reactcomponent called YearlyBar. When this component loads, we render a bar chart forexpenses in the current year. We also add a DatePicker component to allow users toselect the desired year and retrieve data for that year with a button click. In thefollowing code, we retrieve the initial yearly expense data with a useEffect hookwhen the component loads.
mern-expense-tracker/client/report/YearlyBar.js:
const [year, setYear] = useState(new Date())const [yearlyExpense, setYearlyExpense] = useState([])const [error, setError] = useState('')const jwt = auth.isAuthenticated()useEffect(() = { const abortController = new AbortController() const signal = abortController.signal yearlyExpenses({year: year.getFullYear()},{t: jwt.token},signal).then((data) = { if (data.error) { setError(data.error) } setYearlyExpense(data) }) return function cleanup(){ abortController.abort()
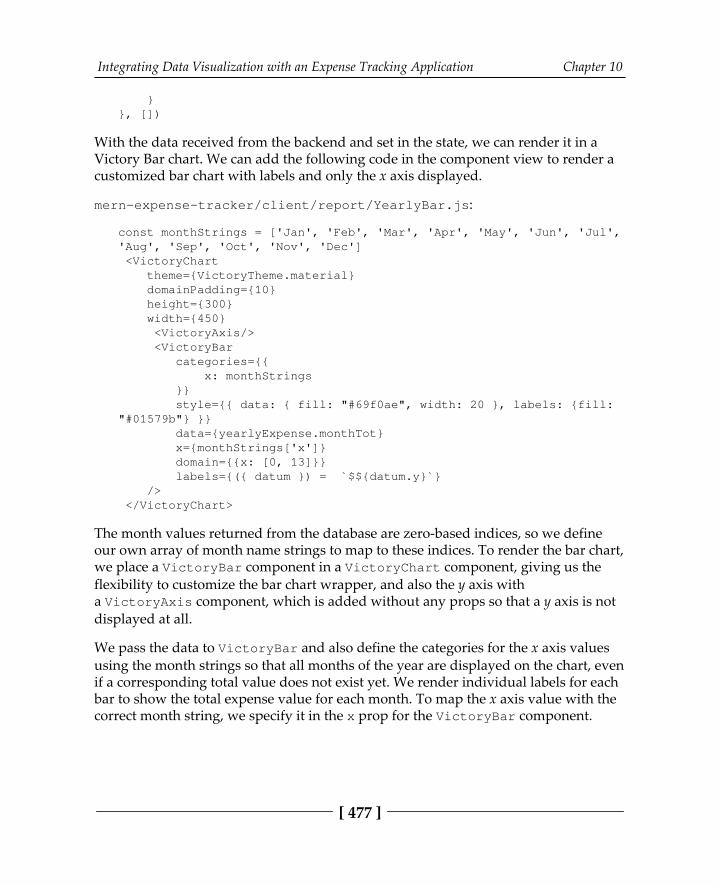
Integrating Data Visualization with an Expense Tracking Application Chapter 10
[ 477 ]
}}, [])
With the data received from the backend and set in the state, we can render it in aVictory Bar chart. We can add the following code in the component view to render a customized bar chart with labels and only the x axis displayed.
mern-expense-tracker/client/report/YearlyBar.js:
const monthStrings = ['Jan', 'Feb', 'Mar', 'Apr', 'May', 'Jun', 'Jul','Aug', 'Sep', 'Oct', 'Nov', 'Dec'] <VictoryChart theme={VictoryTheme.material} domainPadding={10} height={300} width={450} <VictoryAxis/> <VictoryBar categories={{ x: monthStrings }} style={{ data: { fill: "#69f0ae", width: 20 }, labels: {fill:"#01579b"} }} data={yearlyExpense.monthTot} x={monthStrings['x']} domain={{x: [0, 13]}} labels={({ datum }) = `$${datum.y}`} /> </VictoryChart>
The month values returned from the database are zero-based indices, so we defineour own array of month name strings to map to these indices. To render the bar chart,we place a VictoryBar component in a VictoryChart component, giving us theflexibility to customize the bar chart wrapper, and also the y axis witha VictoryAxis component, which is added without any props so that a y axis is notdisplayed at all.
We pass the data to VictoryBar and also define the categories for the x axis valuesusing the month strings so that all months of the year are displayed on the chart, evenif a corresponding total value does not exist yet. We render individual labels for eachbar to show the total expense value for each month. To map the x axis value with thecorrect month string, we specify it in the x prop for the VictoryBar component.
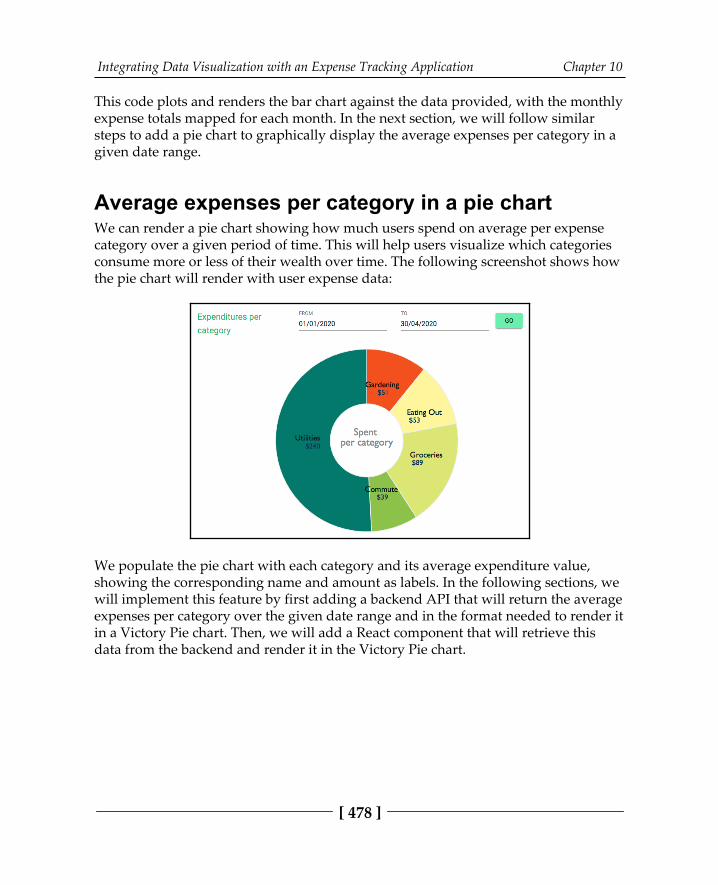
Integrating Data Visualization with an Expense Tracking Application Chapter 10
[ 478 ]
This code plots and renders the bar chart against the data provided, with the monthlyexpense totals mapped for each month. In the next section, we will follow similarsteps to add a pie chart to graphically display the average expenses per category in agiven date range.
Average expenses per category in a pie chartWe can render a pie chart showing how much users spend on average per expensecategory over a given period of time. This will help users visualize which categoriesconsume more or less of their wealth over time. The following screenshot shows howthe pie chart will render with user expense data:
We populate the pie chart with each category and its average expenditure value,showing the corresponding name and amount as labels. In the following sections, wewill implement this feature by first adding a backend API that will return the averageexpenses per category over the given date range and in the format needed to render itin a Victory Pie chart. Then, we will add a React component that will retrieve thisdata from the backend and render it in the Victory Pie chart.
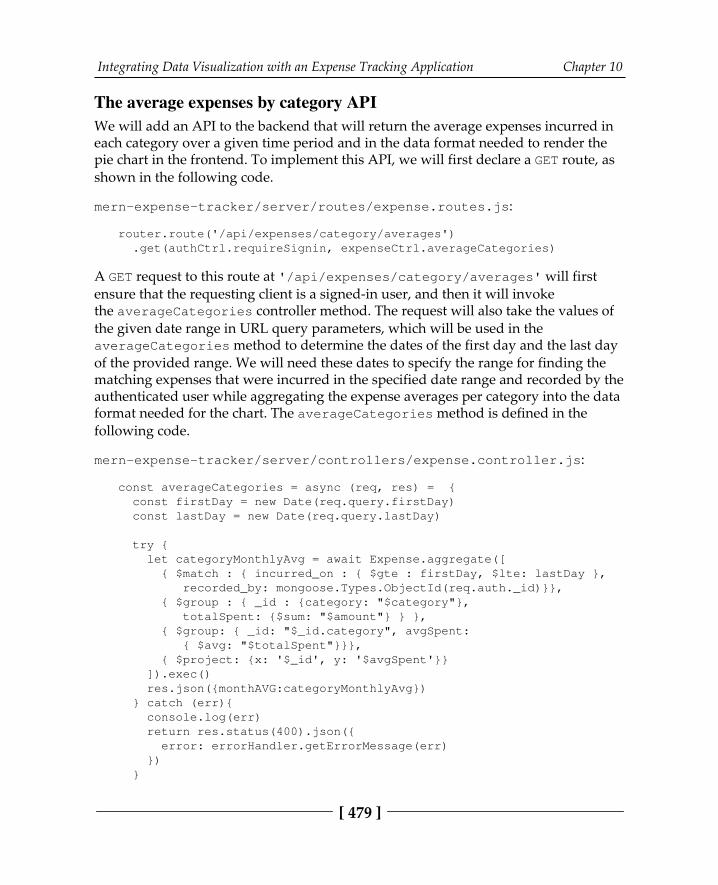
Integrating Data Visualization with an Expense Tracking Application Chapter 10
[ 479 ]
The average expenses by category APIWe will add an API to the backend that will return the average expenses incurred ineach category over a given time period and in the data format needed to render thepie chart in the frontend. To implement this API, we will first declare a GET route, asshown in the following code.
mern-expense-tracker/server/routes/expense.routes.js:
router.route('/api/expenses/category/averages') .get(authCtrl.requireSignin, expenseCtrl.averageCategories)
A GET request to this route at '/api/expenses/category/averages' will firstensure that the requesting client is a signed-in user, and then it will invokethe averageCategories controller method. The request will also take the values ofthe given date range in URL query parameters, which will be used in theaverageCategories method to determine the dates of the first day and the last dayof the provided range. We will need these dates to specify the range for finding thematching expenses that were incurred in the specified date range and recorded by theauthenticated user while aggregating the expense averages per category into the dataformat needed for the chart. The averageCategories method is defined in thefollowing code.
mern-expense-tracker/server/controllers/expense.controller.js:
const averageCategories = async (req, res) = { const firstDay = new Date(req.query.firstDay) const lastDay = new Date(req.query.lastDay)
try { let categoryMonthlyAvg = await Expense.aggregate([ { $match : { incurred_on : { $gte : firstDay, $lte: lastDay }, recorded_by: mongoose.Types.ObjectId(req.auth._id)}}, { $group : { _id : {category: "$category"}, totalSpent: {$sum: "$amount"} } }, { $group: { _id: "$_id.category", avgSpent: { $avg: "$totalSpent"}}}, { $project: {x: '$_id', y: '$avgSpent'}} ]).exec() res.json({monthAVG:categoryMonthlyAvg}) } catch (err){ console.log(err) return res.status(400).json({ error: errorHandler.getErrorMessage(err) }) }
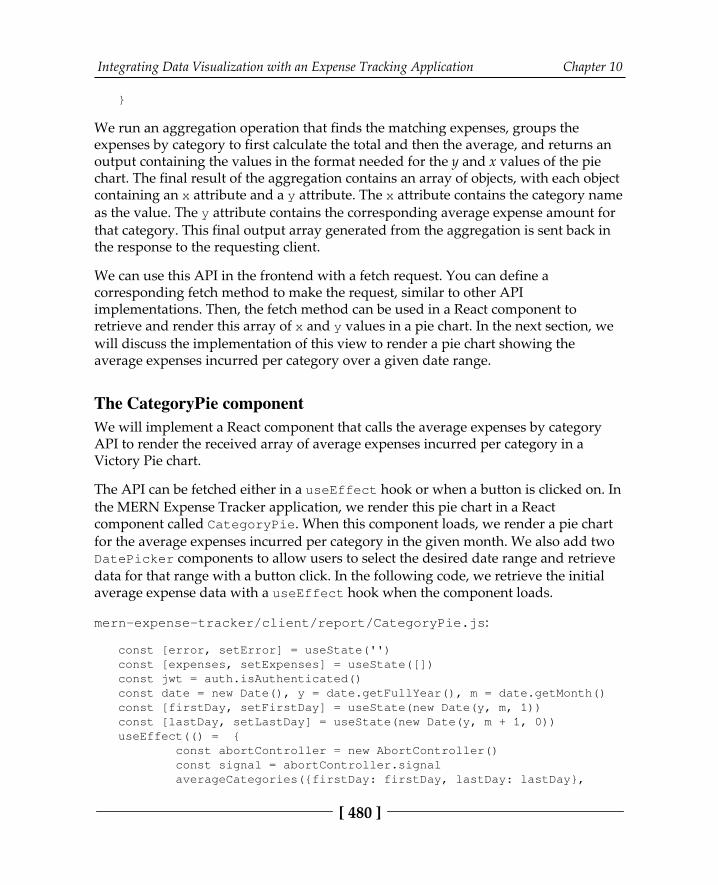
Integrating Data Visualization with an Expense Tracking Application Chapter 10
[ 480 ]
}
We run an aggregation operation that finds the matching expenses, groups theexpenses by category to first calculate the total and then the average, and returns anoutput containing the values in the format needed for the y and x values of the piechart. The final result of the aggregation contains an array of objects, with each objectcontaining an x attribute and a y attribute. The x attribute contains the category nameas the value. The y attribute contains the corresponding average expense amount forthat category. This final output array generated from the aggregation is sent back inthe response to the requesting client.
We can use this API in the frontend with a fetch request. You can define acorresponding fetch method to make the request, similar to other APIimplementations. Then, the fetch method can be used in a React component toretrieve and render this array of x and y values in a pie chart. In the next section, wewill discuss the implementation of this view to render a pie chart showing theaverage expenses incurred per category over a given date range.
The CategoryPie componentWe will implement a React component that calls the average expenses by categoryAPI to render the received array of average expenses incurred per category in aVictory Pie chart.
The API can be fetched either in a useEffect hook or when a button is clicked on. Inthe MERN Expense Tracker application, we render this pie chart in a Reactcomponent called CategoryPie. When this component loads, we render a pie chartfor the average expenses incurred per category in the given month. We also add twoDatePicker components to allow users to select the desired date range and retrievedata for that range with a button click. In the following code, we retrieve the initialaverage expense data with a useEffect hook when the component loads.
mern-expense-tracker/client/report/CategoryPie.js:
const [error, setError] = useState('')const [expenses, setExpenses] = useState([])const jwt = auth.isAuthenticated()const date = new Date(), y = date.getFullYear(), m = date.getMonth()const [firstDay, setFirstDay] = useState(new Date(y, m, 1))const [lastDay, setLastDay] = useState(new Date(y, m + 1, 0))useEffect(() = { const abortController = new AbortController() const signal = abortController.signal averageCategories({firstDay: firstDay, lastDay: lastDay},
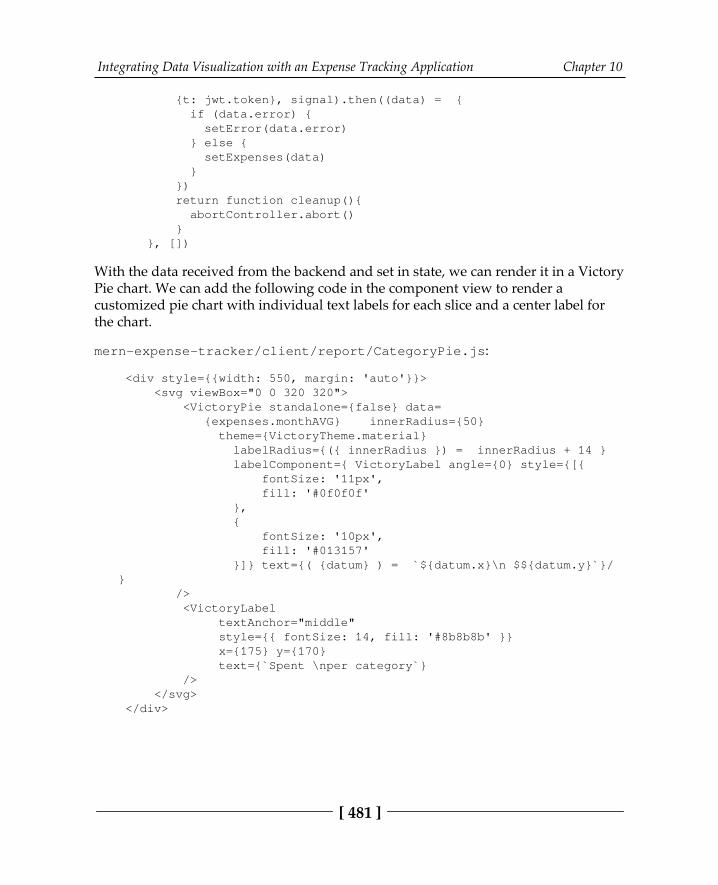
Integrating Data Visualization with an Expense Tracking Application Chapter 10
[ 481 ]
{t: jwt.token}, signal).then((data) = { if (data.error) { setError(data.error) } else { setExpenses(data) } }) return function cleanup(){ abortController.abort() } }, [])
With the data received from the backend and set in state, we can render it in a VictoryPie chart. We can add the following code in the component view to render a customized pie chart with individual text labels for each slice and a center label forthe chart.
mern-expense-tracker/client/report/CategoryPie.js:
<div style={{width: 550, margin: 'auto'}}> <svg viewBox="0 0 320 320"> <VictoryPie standalone={false} data= {expenses.monthAVG} innerRadius={50} theme={VictoryTheme.material} labelRadius={({ innerRadius }) = innerRadius + 14 } labelComponent={ VictoryLabel angle={0} style={[{ fontSize: '11px', fill: '#0f0f0f' }, { fontSize: '10px', fill: '#013157' }]} text={( {datum} ) = `${datum.x}\n $${datum.y}`}/} /> <VictoryLabel textAnchor="middle" style={{ fontSize: 14, fill: '#8b8b8b' }} x={175} y={170} text={`Spent \nper category`} /> </svg> </div>
Integrating Data Visualization with an Expense Tracking Application Chapter 10
[ 482 ]
To render the pie chart with a separate center label, we placea VictoryPie component in an svg element, giving us the flexibility to customizethe pie chart wrapping and a separate circular label using a VictoryLabel outsidethe pie chart code.
We pass the data to VictoryPie, define customized labels for each slice, and makethe pie chart standalone so that the center label can be placed over the chart. Thiscode plots and renders the pie chart against the data provided with the averageexpense displayed for each category.
We have added three different Victory charts to the application based on the user-recorded expense data, which was processed as needed and retrieved from the database in the backend. The MERN Expense Tracker application is complete withabilities that allow users to record their day-to-day expenses, and then visualize datapatterns and expenditure habits extracted from the expense data recorded over time.
SummaryIn this chapter, we extended the MERN skeleton application to develop an expensetracking application with data visualization features. We designed an Expense modelfor recording expense details and implemented the full-stack CRUD (Create, Read,Update, Delete) functionalities that allowed signed-in users to record their day-to-day expenses, see a list of their expenses, and modify existing expense records.
We added data processing and visualization features that gave users an overview oftheir current expenses and also an idea of how much more or less they are spendingper expense category. We also incorporated different types of charts to show userstheir expenditure patterns over various time ranges.
While implementing these features, we learned about some of the data processingoptions with the aggregation framework in MongoDB and also incorporated some ofthe customizable chart components from Victory. You can explore the aggregationframework and the Victory library further to incorporate more complex datavisualization features in your own full-stack applications.
In the next chapter, we will explore even more advanced possibilities with MERNstack technologies as we build a media streaming application by extending the MERNskeleton.

11Building a Media Streaming
ApplicationUploading and streaming media content, specifically video content, has been agrowing part of the internet culture for some time now. From individuals sharingpersonal video content to the entertainment industry disseminating commercialcontent on online streaming services, we all rely on web applications that enablesmooth uploading and streaming. Capabilities within the MERN stack technologiescan be used to build and integrate these core streaming features into any MERN-based full-stack application. In this chapter, we will extend the MERN skeletonapplication to build a media streaming application, while demonstrating how toutilize MongoDB GridFS and add media streaming features to your webapplications.
In this chapter, we will cover the following topics to implement basic mediauploading and streaming by extending the MERN skeleton application:
Introducing MERN MediastreamUploading videos to MongoDB GridFSStoring and retrieving media detailsStreaming videos from GridFS to a basic media playerListing, displaying, updating, and deleting media
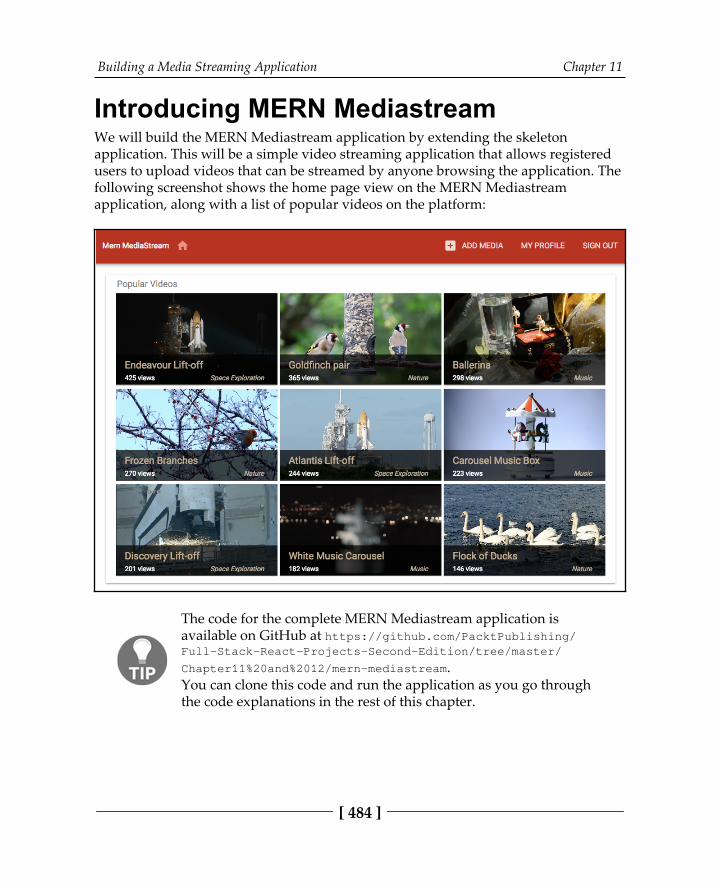
Building a Media Streaming Application Chapter 11
[ 484 ]
Introducing MERN MediastreamWe will build the MERN Mediastream application by extending the skeletonapplication. This will be a simple video streaming application that allows registeredusers to upload videos that can be streamed by anyone browsing the application. Thefollowing screenshot shows the home page view on the MERN Mediastreamapplication, along with a list of popular videos on the platform:
The code for the complete MERN Mediastream application isavailable on GitHub at https:/ / github. com/ PacktPublishing/Full- Stack- React- Projects- Second- Edition/ tree/ master/Chapter11%20and%2012/ mern-mediastream. You can clone this code and run the application as you go throughthe code explanations in the rest of this chapter.
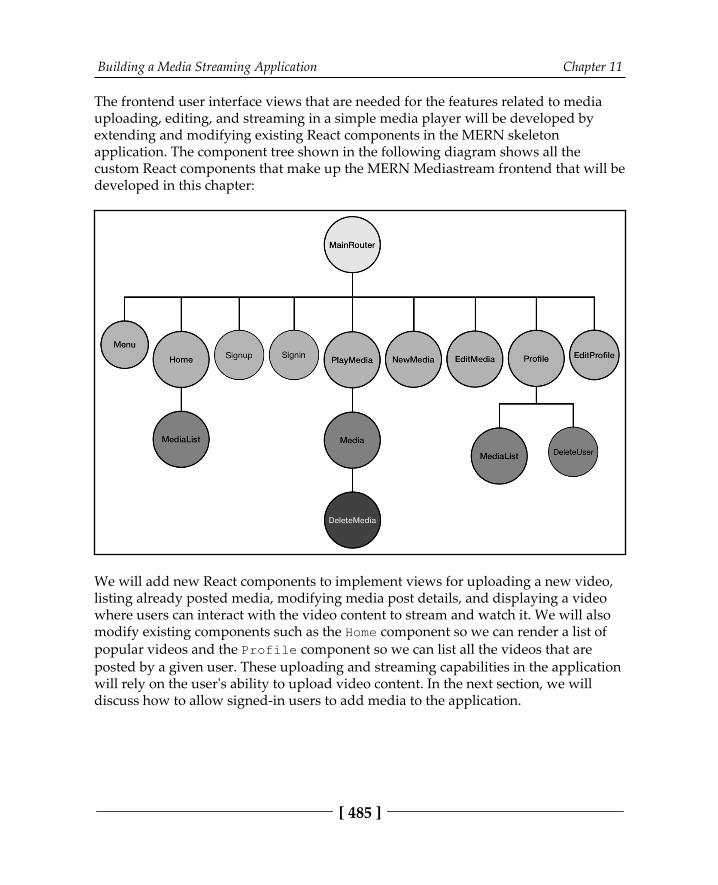
Building a Media Streaming Application Chapter 11
[ 485 ]
The frontend user interface views that are needed for the features related to mediauploading, editing, and streaming in a simple media player will be developed by extending and modifying existing React components in the MERN skeletonapplication. The component tree shown in the following diagram shows all thecustom React components that make up the MERN Mediastream frontend that will bedeveloped in this chapter:
We will add new React components to implement views for uploading a new video,listing already posted media, modifying media post details, and displaying a videowhere users can interact with the video content to stream and watch it. We will alsomodify existing components such as the Home component so we can render a list ofpopular videos and the Profile component so we can list all the videos that areposted by a given user. These uploading and streaming capabilities in the applicationwill rely on the user's ability to upload video content. In the next section, we willdiscuss how to allow signed-in users to add media to the application.
Building a Media Streaming Application Chapter 11
[ 486 ]
Uploading and storing mediaRegistered users on the MERN Mediastream application will be able to upload videosfrom their local files to store each video and related details directly on MongoDBusing GridFS. To enable uploading media content to the application, we need todefine how to store media details and the video content and implement a full-stackslice that will let users create a new media post and upload a video file. In thefollowing sections, first we will define a media model for storing the details of eachmedia post and configure GridFS to store the associated video content. Then, we willdiscuss implementations for the backend API, which will receive and store the videocontent with other media details, and the frontend form view, which will allow a userto create a new media post on the application.
Defining a Media modelWe will implement a Mongoose model to define a Media model for storing the detailsof each piece of media that's posted to the application. This model will be defined inserver/models/media.model.js, and the implementation will be similar to otherMongoose model implementations we covered in the previous chapters, such as theCourse model we defined in Chapter 6, Building a Web-Based ClassroomApplication. The Media schema in this model will have fields to record the media title,description, genre, number of views, dates of when the media was posted andupdated, and a reference to the user who posted the media. The code for defining themedia fields is as follows:
Media title: The title field is declared to be of the String type and willbe a required field for introducing the media that are uploaded to theapplication:
title: { type: String, required: 'title is required'}
Media description and genre: The description and genre fields will beof type String, and these will store additional details about the mediaposted. The genre field will also allow us to group the different mediauploaded to the application.
description: String, genre: String,
Building a Media Streaming Application Chapter 11
[ 487 ]
Number of views: The views field is defined as a Number type and willkeep track of how many times the uploaded media was viewed by users inthe application:
views: { type: Number, default: 0},
Media posted by: The postedBy field will reference the user who createdthe media post:
postedBy: { type: mongoose.Schema.ObjectId, ref: 'User' },
Created and updated at times: The created and updated fields willbe Date types, with created generated when a new media is addedand updated changed when any media details are modified:
updated: Date,created: { type: Date, default: Date.now},
The fields that were added to the schema definition will only store details about eachvideo that's posted to the application. In order to store the video content itself, we willuse MongoDB GridFS. Before getting into the implementation of uploading a videofile, in the next section we will discuss how GridFS makes it possible to store largefiles in MongoDB, and then add initialization code to start using GridFS in thisstreaming application.
Using MongoDB GridFS to store large filesIn previous chapters, we discussed how files uploaded by users could be storeddirectly in MongoDB as binary data; for example, when adding a profile photo in theUpload profile photo section in Chapter 5, Growing the Skeleton into a Social MediaApplication. But this only worked for files smaller than 16 MB. In order to store largerfiles in MongoDB, such as video files needed for this streaming application, we willneed to use GridFS.
Building a Media Streaming Application Chapter 11
[ 488 ]
GridFS is a specification in MongoDB that allows us to store large files in MongoDBby dividing a given file into several chunks. Each chunk can be a maximum of 255 KBin size, and is stored as a separate document. When the file has to be retrieved inresponse to a query to GridFS, the chunks are reassembled as needed. This opens upthe option to fetch and load only parts of the file as required, rather than retrievingthe whole file.
In the case of storing and retrieving video files for the MERN Mediastreamapplication, we will utilize GridFS to store video files and stream parts of the video,depending on which part the user skips to and starts playing from.
You can learn more about the GridFS specification and its features inthe official MongoDB documentationat https://docs.mongodb.com/manual/core/gridfs/.
To access and work with MongoDB GridFS from our backend code, we will usethe Node.js MongoDB driver's streaming API by creating a GridFSBucket with theestablished database connection.
GridFSBucket is the GridFS streaming interface that gives us accessto the streaming GridFS API. It can be used to interact with files inGridFS. You can learn more about GridFSBucket and the streamingAPI in the Node.js MongoDB Driver API documentation at https://mongodb. github. io/ node- mongodb- native/ 3.2/ api/GridFSBucket. html.
Since we are using Mongoose to establish a connection with the MongoDB databasefor our application, we will add the following code to initialize a new GridFSBucketwith this database connection after it has been established.
mern-mediastream/server/controllers/media.controller.js:
import mongoose from 'mongoose'let gridfs = nullmongoose.connection.on('connected', () => { gridfs = new mongoose.mongo.GridFSBucket(mongoose.connection.db)})
Building a Media Streaming Application Chapter 11
[ 489 ]
The gridfs object we created here will give us access to the GridFS functionalitiesthat are required to store the video file when new media is created and to fetch thefile when the media is to be streamed back to the user. In the next section, we will adda create media form view and an API in the backend, which will use this gridfsobject to save the video file that's uploaded with the request that's sent from the formview in the frontend.
Creating a new media postFor a user to be able to create a new media post on the application, we will need tointegrate a full-stack slice that allows the user to fill out a form in the frontend andthen save both the provided media details and the associated video file in thedatabase in the backend. To implement this feature, in the following sections, we willadd a create media API in the backend, along with a way to fetch this API in thefrontend. Then, we will implement a create new media form view that allows the userto input media details and select a video file from their local filesystem.
The create media APIWe will implement a create media API in the backend to allow users to create newmedia posts on the application. This API will receive a POST request at'/api/media/new/:userId' with the multipart body content containing the mediafields and the uploaded video file. First, we will declare the create media route andutilize the userByID method from the user controller, as shown in the followingcode.
mern-mediastream/server/routes/media.routes.js:
router.route('/api/media/new/:userId') .post(authCtrl.requireSignin, mediaCtrl.create)router.param('userId', userCtrl.userByID)
The userByID method processes the :userId parameter that's passed in the URLand retrieves the associated user from the database. The user object becomes availablein the request object to be used in the next method that will be executed. Similar to theuser and auth routes, we will have to mount the media routes on the Express app inexpress.js as follows.
mern-mediastream/server/express.js:
app.use('/', mediaRoutes)
Building a Media Streaming Application Chapter 11
[ 490 ]
A POST request to the create route URL, /api/media/new/:userId, will make surethe user is signed in and then initiate the create method in the media controller. Thecreate controller method will use the formidable node module to parse themultipart request body that will contain the media details and video file uploaded bythe user. You can install the module by running the following command from thecommand line:
yarn add formidable
In the create method, we will use the media fields that have been received in theform data and parsed with formidable to generate a new Media object and thensave it to the database. This create controller method is defined as follows.
mern-mediastream/server/controllers/media.controller.js:
const create = (req, res) => { let form = new formidable.IncomingForm() form.keepExtensions = true form.parse(req, async (err, fields, files) => { if (err) { return res.status(400).json({ error: "Video could not be uploaded" }) } let media = new Media(fields) media.postedBy= req.profile if(files.video){ let writestream = gridfs.openUploadStream(media._id, { contentType: files.video.type || 'binary/octet-stream'}) fs.createReadStream(files.video.path).pipe(writestream) } try { let result = await media.save() res.status(200).json(result) } catch (err){ return res.status(400).json({ error: errorHandler.getErrorMessage(err) }) } })}
Building a Media Streaming Application Chapter 11
[ 491 ]
If there is a file in the request, formidable will store it temporarily in the filesystem.We will use this temporary file and the media object's ID to create a writable streamwith gridfs.openUploadStream. Here, the temporary file will be read and thenwritten into MongoDB GridFS, while setting the filename value to the media ID.This will generate the associated chunks and file information documents inMongoDB, and when it is time to retrieve this file, we will identify it with the mediaID.
To use this create media API in the frontend, we will add a corresponding fetchmethod in api-media.js to make a POST request to the API by passing themultipart form data from the view. This method will be defined as follows.
mern-mediastream/client/media/api-media.js:
const create = async (params, credentials, media) => { try { let response = await fetch('/api/media/new/'+ params.userId, { method: 'POST', headers: { 'Accept': 'application/json', 'Authorization': 'Bearer ' + credentials.t }, body: media }) return await response.json() } catch(err) { console.log(err) }}
This create fetch method will take the current user's ID, user credentials, and themedia form data to make a POST request to the create media API in the backend. Wewill use this method when the user submits the new media form to upload a newvideo and post it on the application. In the next section, we will look at theimplementation of this form view in the frontend.
The NewMedia componentRegistered users on the MERN Mediastream application will interact with a formview to enter details of a new media post. This form view will be rendered in theNewMedia component, which will allow a signed-in user to create a media post byentering the title, description, and genre of the video and uploading a video file fromtheir local filesystem.
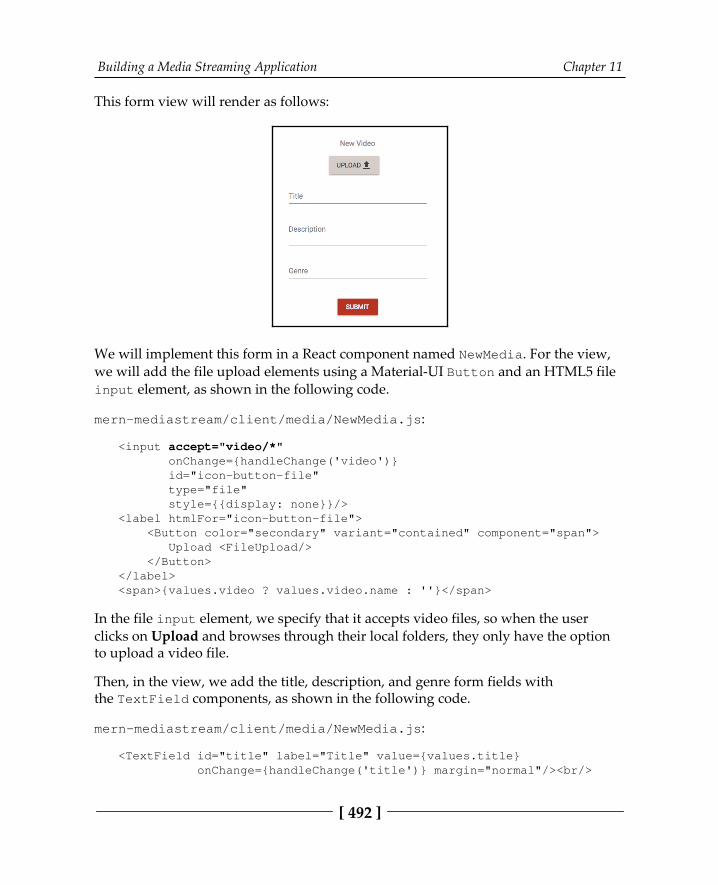
Building a Media Streaming Application Chapter 11
[ 492 ]
This form view will render as follows:
We will implement this form in a React component named NewMedia. For the view,we will add the file upload elements using a Material-UI Button and an HTML5 fileinput element, as shown in the following code.
mern-mediastream/client/media/NewMedia.js:
<input accept="video/*" onChange={handleChange('video')} id="icon-button-file" type="file" style={{display: none}}/><label htmlFor="icon-button-file"> <Button color="secondary" variant="contained" component="span"> Upload <FileUpload/> </Button></label><span>{values.video ? values.video.name : ''}</span>
In the file input element, we specify that it accepts video files, so when the userclicks on Upload and browses through their local folders, they only have the optionto upload a video file.
Then, in the view, we add the title, description, and genre form fields withthe TextField components, as shown in the following code.
mern-mediastream/client/media/NewMedia.js:
<TextField id="title" label="Title" value={values.title} onChange={handleChange('title')} margin="normal"/><br/>

Building a Media Streaming Application Chapter 11
[ 493 ]
<TextField id="multiline-flexible" label="Description" multiline rows="2" value={values.description} onChange={handleChange('description')}/><br/><TextField id="genre" label="Genre" value={values.genre} onChange={handleChange('genre')}/><br/>
These form field changes will be tracked with the handleChange method when auser interacts with the input fields to enter values. The handleChange function willbe defined as follows.
mern-mediastream/client/media/NewMedia.js:
const handleChange = name => event => { const value = name === 'video' ? event.target.files[0] : event.target.value setValues({ ...values, [name]: value })}
The handleChange method updates the state with the new values, including thename of the video file, if one is uploaded by the user.
Finally, you can complete this form view by adding a Submit button, which, whenclicked, should send the form data to the server. We will definea clickSubmit method here, which will be called when the Submit button is clickedby the user.
mern-mediastream/client/media/NewMedia.js:
const clickSubmit = () => { let mediaData = new FormData() values.title && mediaData.append('title', values.title) values.video && mediaData.append('video', values.video) values.description && mediaData.append('description', values.description) values.genre && mediaData.append('genre', values.genre) create({ userId: jwt.user._id }, { t: jwt.token }, mediaData).then((data) => { if (data.error) { setValues({...values, error: data.error}) } else { setValues({...values, error: '', mediaId: data._id, redirect: true})
Building a Media Streaming Application Chapter 11
[ 494 ]
} }) }
This clickSubmit function will take the input values and populate mediaData,which is a FormData object that ensures the data is stored in the correct format forthe multipart/form-data encoding type. Then, the create fetch method is calledto create the new media in the backend with this form data. On successful mediacreation, the user may be redirected to a different view as desired, for example, to aMedia view with the new media details, as shown in the following code.
mern-mediastream/client/media/NewMedia.js:
if (values.redirect) { return (<Redirect to={'/media/' + values.mediaId}/>)}
The NewMedia component can only be viewed by a signed-in user. Therefore, we willadd a PrivateRoute in the MainRouter component, which will render this formonly for authenticated users at /media/new.
mern-mediastream/client/MainRouter.js:
<PrivateRoute path="/media/new" component={NewMedia}/>
This link can be added to any view, such as in the Menu component, so that it'srendered conditionally when users are signed in. Now that it is possible to add newmedia posts in this media streaming application, in the next section we will discussthe implementation of retrieving and rendering the video content associated witheach media post. This will allow users to stream and view video files stored inMongoDB GridFS from the frontend of the application.
Retrieving and streaming mediaAny visitor browsing through the MERN Mediastream application will be able toview the media posted on the application by its users. Implementing this feature willrequire streaming the video files stored in MongoDB GridFS to the requesting clientand rendering the stream in a media player. In the following sections, we will set up abackend API to retrieve a single video file, which we will then use as a source in aReact-based media player to render the streaming video.
Building a Media Streaming Application Chapter 11
[ 495 ]
The video APITo retrieve the video file associated with a single media post, we will implement a getvideo API that will accept a GET request at '/api/medias/video/:mediaId' andquery both the Media collection and GridFS files. We will start implementing thisvideo API by declaring the route shown in the following code, along with a way tohandle the :mediaId parameter in the URL.
mern-mediastream/server/routes/media.routes.js:
router.route('/api/medias/video/:mediaId') .get(mediaCtrl.video)router.param('mediaId', mediaCtrl.mediaByID)
The :mediaId parameter in the route URL will be processed in the mediaByIDcontroller to fetch the associated document from the Media collection and file detailsfrom GridFS. These retrieved results are then attached to the request object so that itcan be used in the video controller method as required. This mediaByID controllermethod is defined as follows.
mern-mediastream/server/controllers/media.controller.js:
const mediaByID = async (req, res, next, id) => { try{ let media = await Media.findById(id).populate('postedBy', '_id name').exec() if (!media) return res.status('400').json({ error: "Media not found" }) req.media = media let files = await gridfs.find({filename:media._id}).toArray() if (!files[0]) { return res.status(404).send({ error: 'No video found' }) } req.file = files[0] next() }catch(err) { return res.status(404).send({ error: 'Could not retrieve media file' }) }}
Building a Media Streaming Application Chapter 11
[ 496 ]
To retrieve the relevant file details from GridFS, we use find from the MongoDBstreaming API. We query the files stored in GridFS by the filename value, which should match the corresponding media ID in the Media collection. Then, we receivethe resulting matching file records in an array and attach the first result to the requestobject so that it can be used in the next method.
The next method that's invoked when this API receives a request is the videocontroller method. In this method, depending on whether the request contains rangeheaders, we send back the correct chunks of video with the related contentinformation set as response headers. The video controller method is defined with thefollowing structure, with the response composed depending on the existence of rangeheaders in the request.
mern-mediastream/server/controllers/media.controller.js:
const video = (req, res) => { const range = req.headers["range"] if (range && typeof range === "string") { ... ... consider range headers and send only relevant chunks inresponse ... ... } else { res.header('Content-Length', req.file.length) res.header('Content-Type', req.file.contentType)
let downloadStream = gridfs.openDownloadStream(req.file._id) downloadStream.pipe(res) downloadStream.on('error', () => { res.sendStatus(404) }) downloadStream.on('end', () => { res.end() }) }}
In the preceding code, if the request does not contain range headers, we stream backthe whole video file using gridfs.openDownloadStream, which gives us a readablestream of the corresponding file stored in GridFS. This is piped with the response sentback to the client. In the response header, we set the content type and total length ofthe file.
Building a Media Streaming Application Chapter 11
[ 497 ]
If the request contains range headers – for example, when the user drags to themiddle of the video and starts playing from that point – we need to convert the received range headers to the start and end positions, which will correspond with thecorrect chunks stored in GridFS, as shown in the following code.
mern-mediastream/server/controllers/media.controller.js:
const parts = range.replace(/bytes=/, "").split("-") const partialstart = parts[0] const partialend = parts[1]
const start = parseInt(partialstart, 10) const end = partialend ? parseInt(partialend, 10) :req.file.length - 1 const chunksize = (end - start) + 1
res.writeHead(206, { 'Accept-Ranges': 'bytes', 'Content-Length': chunksize, 'Content-Range': 'bytes ' + start + '-' + end + '/' +req.file.length, 'Content-Type': req.file.contentType })
let downloadStream = gridfs.openDownloadStream(req.file._id,{start, end: end+1}) downloadStream.pipe(res) downloadStream.on('error', () => { res.sendStatus(404) }) downloadStream.on('end', () => { res.end() })
We pass the start and end values that have been extracted from the header as a rangeto gridfs.openDownloadStream. These start and end values specify the 0-basedoffset in bytes to start streaming from and stop streaming before. We also set theresponse headers with additional file details, including content length, range, andtype. The content length will now be the total size of the content within the definedrange. Therefore, the readable stream that's piped back to the response, in this case,will only contain the chunks of file data that fall within the start and end ranges.
The final readable stream that's piped to the response after a request is received atthis get video API can be rendered directly in a basic HTML5 media player or a React-flavored media player in the frontend view. In the next section, we will look at how torender this video stream in a simple React media player.
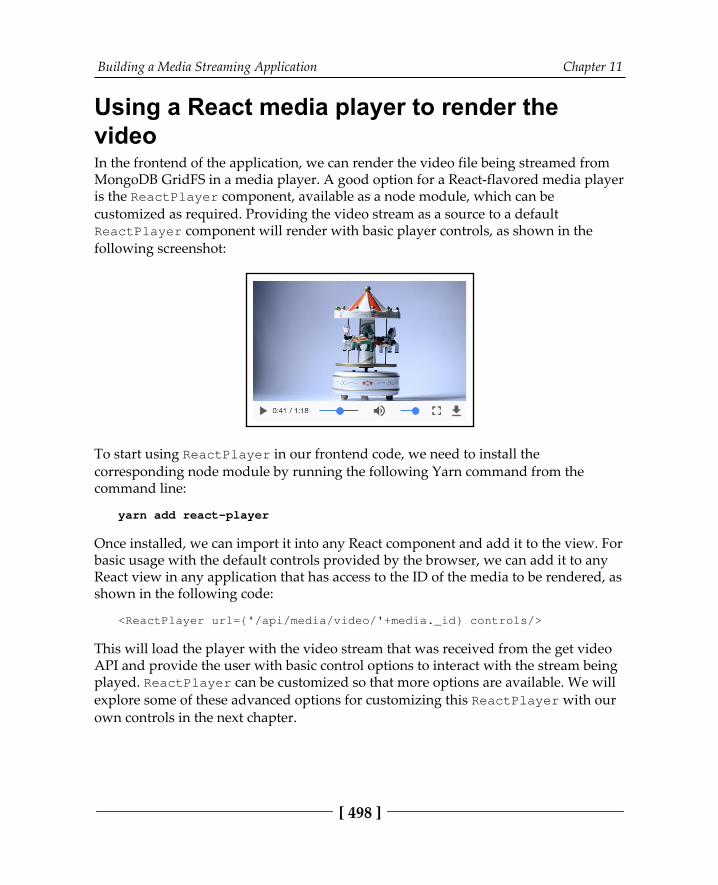
Building a Media Streaming Application Chapter 11
[ 498 ]
Using a React media player to render thevideoIn the frontend of the application, we can render the video file being streamed fromMongoDB GridFS in a media player. A good option for a React-flavored media playeris the ReactPlayer component, available as a node module, which can becustomized as required. Providing the video stream as a source to a defaultReactPlayer component will render with basic player controls, as shown in thefollowing screenshot:
To start using ReactPlayer in our frontend code, we need to install thecorresponding node module by running the following Yarn command from thecommand line:
yarn add react-player
Once installed, we can import it into any React component and add it to the view. Forbasic usage with the default controls provided by the browser, we can add it to anyReact view in any application that has access to the ID of the media to be rendered, asshown in the following code:
<ReactPlayer url={'/api/media/video/'+media._id} controls/>
This will load the player with the video stream that was received from the get videoAPI and provide the user with basic control options to interact with the stream beingplayed. ReactPlayer can be customized so that more options are available. We willexplore some of these advanced options for customizing this ReactPlayer with our own controls in the next chapter.
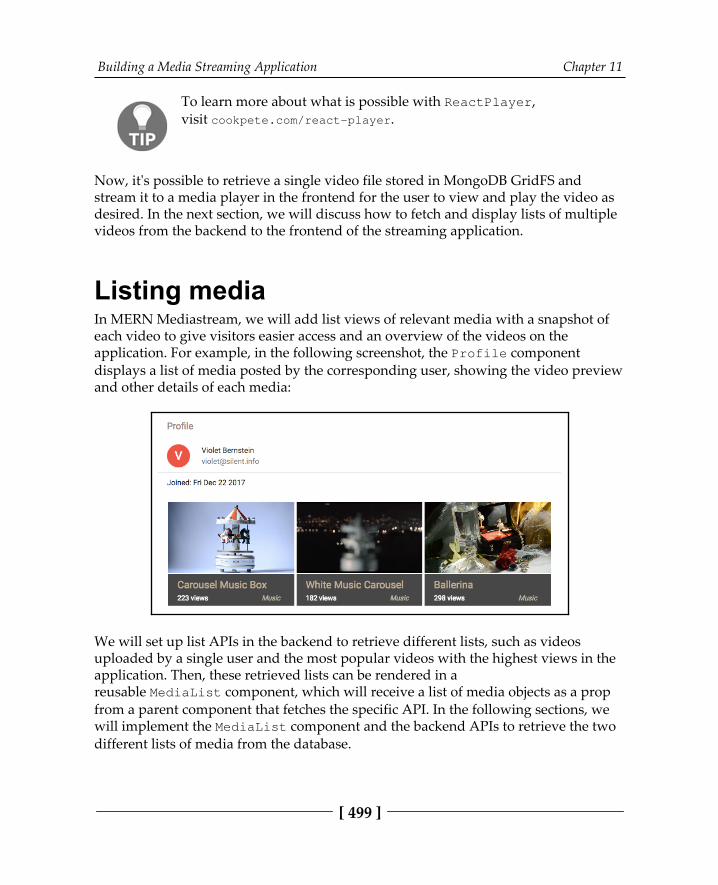
Building a Media Streaming Application Chapter 11
[ 499 ]
To learn more about what is possible with ReactPlayer,visit cookpete.com/react-player.
Now, it's possible to retrieve a single video file stored in MongoDB GridFS andstream it to a media player in the frontend for the user to view and play the video asdesired. In the next section, we will discuss how to fetch and display lists of multiplevideos from the backend to the frontend of the streaming application.
Listing mediaIn MERN Mediastream, we will add list views of relevant media with a snapshot ofeach video to give visitors easier access and an overview of the videos on theapplication. For example, in the following screenshot, the Profile componentdisplays a list of media posted by the corresponding user, showing the video previewand other details of each media:
We will set up list APIs in the backend to retrieve different lists, such as videosuploaded by a single user and the most popular videos with the highest views in theapplication. Then, these retrieved lists can be rendered in areusable MediaList component, which will receive a list of media objects as a propfrom a parent component that fetches the specific API. In the following sections, wewill implement the MediaList component and the backend APIs to retrieve the twodifferent lists of media from the database.
Building a Media Streaming Application Chapter 11
[ 500 ]
The MediaList componentThe MediaList component is a reusable component that will take a list of media anditerate through it to render each media item in the view. In MERN Mediastream, weuse it to render a list of the most popular media in the home view and a list of mediauploaded by a specific user in their profile.
In the view part of the MediaList component, we will iterate through the mediaarray that's received in props using map, as shown in the following code.
mern-mediastream/client/media/MediaList.js:
<GridList cols={3}> {props.media.map((tile, i) => ( <GridListTile key={i}> <Link to={"/media/"+tile._id}> <ReactPlayer url={'/api/media/video/'+tile._id} width='100%' height='inherit' style= {{maxHeight: '100%'}}/> </Link> <GridListTileBar title={<Link to={"/media/"+tile._id}> {tile.title} </Link>} subtitle={<span> <span>{tile.views} views</span> <span className={classes.tileGenre}> <em>{tile.genre}</em> </span> </span>} /> </GridListTile> ))}</GridList>
This MediaList component uses the Material-UI GridList components as it iteratesthrough the array of objects sent in the props and renders media details for each itemin the list. It also includes a ReactPlayer component, which renders the video URLwithout showing any controls. In the view, this gives the visitor a brief overview ofeach piece of media, as well as a glimpse of the video content.
This component can be added to any view that can provide an array of media objects.In the MERN Mediastream application, we use it to render two different lists ofmedia: a list of popular media and a list of media posted by a specific user. In the nextsection, we will look at how to retrieve a list of popular media from the database torender it in the frontend.
Building a Media Streaming Application Chapter 11
[ 501 ]
Listing popular mediaTo retrieve specific lists of media from the database, we need to set up the relevantAPIs on the server. For popular media, we will set up a route that receives a GETrequest at /api/media/popular. The route will be declared as follows.
mern-mediastream/server/routes/media.routes.js:
router.route('/api/media/popular') .get(mediaCtrl.listPopular)
A GET request to this URL will invoke the listPopular method. The listPopularcontroller method will query the Media collection and retrieve nine media documentsthat have the highest views in the whole collection. The listPopular method isdefined as follows.
mern-mediastream/server/controllers/media.controller.js:
const listPopular = async (req, res) => { try{ let media = await Media.find({}) .populate('postedBy', '_id name') .sort('-views') .limit(9) .exec() res.json(media) } catch(err){ return res.status(400).json({ error: errorHandler.getErrorMessage(err) }) }}
The result that's returned by the query to the Media collection is sorted by thenumber of views in descending order and limited to nine. Each media document inthis list will also contain the name and ID of the user who posted it since we arecalling populate to add these user attributes.
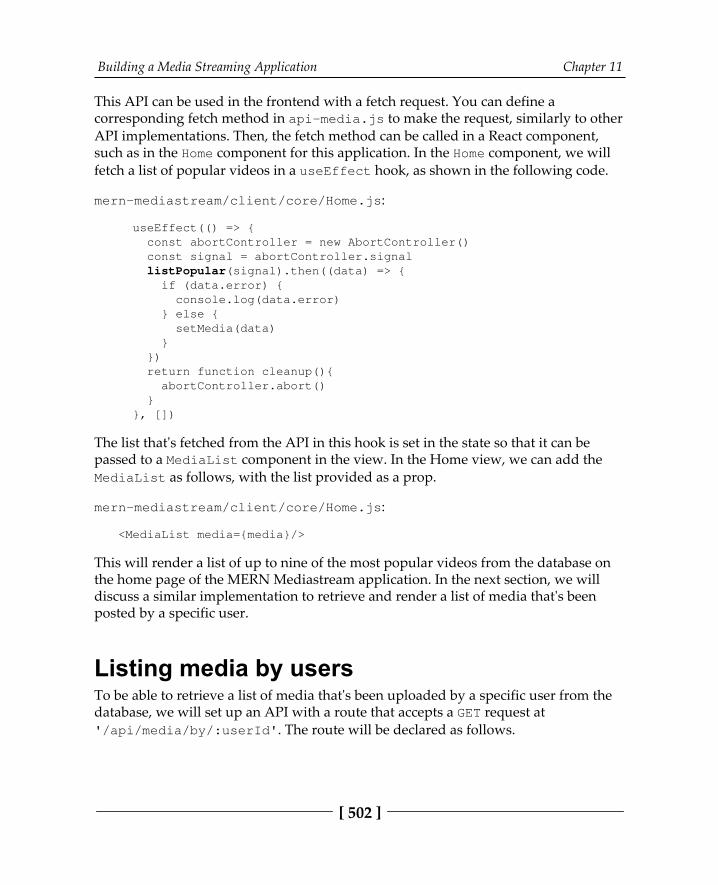
Building a Media Streaming Application Chapter 11
[ 502 ]
This API can be used in the frontend with a fetch request. You can define acorresponding fetch method in api-media.js to make the request, similarly to otherAPI implementations. Then, the fetch method can be called in a React component,such as in the Home component for this application. In the Home component, we willfetch a list of popular videos in a useEffect hook, as shown in the following code.
mern-mediastream/client/core/Home.js:
useEffect(() => { const abortController = new AbortController() const signal = abortController.signal listPopular(signal).then((data) => { if (data.error) { console.log(data.error) } else { setMedia(data) } }) return function cleanup(){ abortController.abort() } }, [])
The list that's fetched from the API in this hook is set in the state so that it can bepassed to a MediaList component in the view. In the Home view, we can add theMediaList as follows, with the list provided as a prop.
mern-mediastream/client/core/Home.js:
<MediaList media={media}/>
This will render a list of up to nine of the most popular videos from the database onthe home page of the MERN Mediastream application. In the next section, we willdiscuss a similar implementation to retrieve and render a list of media that's beenposted by a specific user.
Listing media by usersTo be able to retrieve a list of media that's been uploaded by a specific user from thedatabase, we will set up an API with a route that accepts a GET request at'/api/media/by/:userId'. The route will be declared as follows.
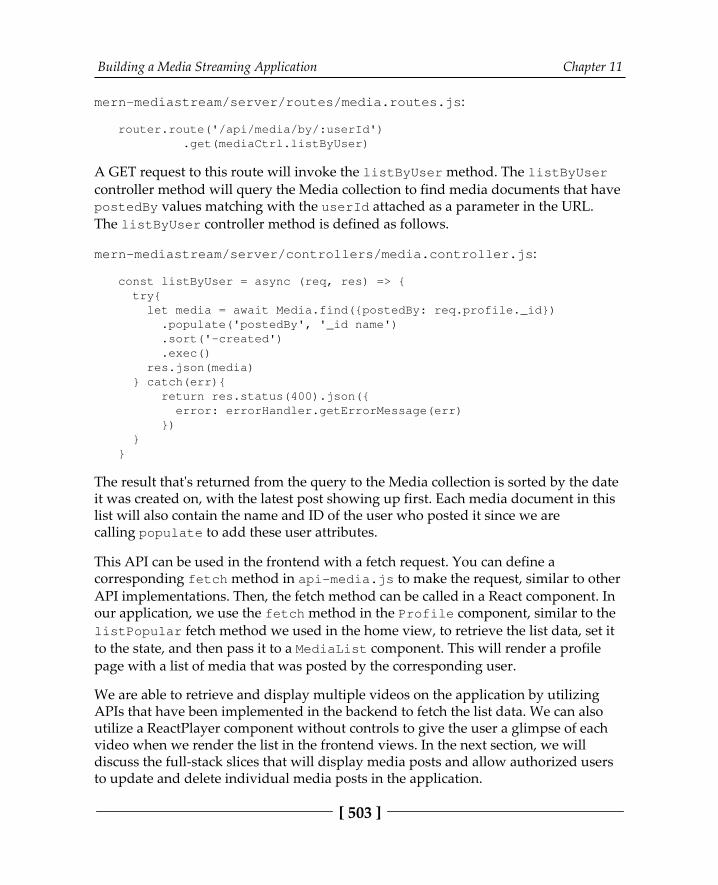
Building a Media Streaming Application Chapter 11
[ 503 ]
mern-mediastream/server/routes/media.routes.js:
router.route('/api/media/by/:userId') .get(mediaCtrl.listByUser)
A GET request to this route will invoke the listByUser method. The listByUsercontroller method will query the Media collection to find media documents that havepostedBy values matching with the userId attached as a parameter in the URL.The listByUser controller method is defined as follows.
mern-mediastream/server/controllers/media.controller.js:
const listByUser = async (req, res) => { try{ let media = await Media.find({postedBy: req.profile._id}) .populate('postedBy', '_id name') .sort('-created') .exec() res.json(media) } catch(err){ return res.status(400).json({ error: errorHandler.getErrorMessage(err) }) }}
The result that's returned from the query to the Media collection is sorted by the dateit was created on, with the latest post showing up first. Each media document in thislist will also contain the name and ID of the user who posted it since we arecalling populate to add these user attributes.
This API can be used in the frontend with a fetch request. You can define acorresponding fetch method in api-media.js to make the request, similar to otherAPI implementations. Then, the fetch method can be called in a React component. Inour application, we use the fetch method in the Profile component, similar to thelistPopular fetch method we used in the home view, to retrieve the list data, set itto the state, and then pass it to a MediaList component. This will render a profilepage with a list of media that was posted by the corresponding user.
We are able to retrieve and display multiple videos on the application by utilizingAPIs that have been implemented in the backend to fetch the list data. We can also utilize a ReactPlayer component without controls to give the user a glimpse of eachvideo when we render the list in the frontend views. In the next section, we willdiscuss the full-stack slices that will display media posts and allow authorized usersto update and delete individual media posts in the application.
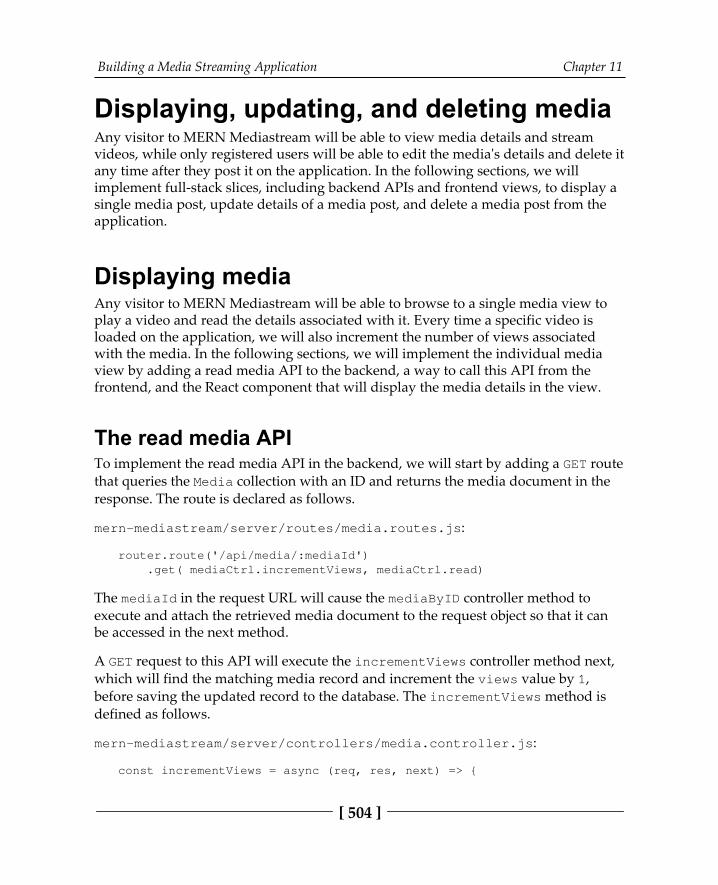
Building a Media Streaming Application Chapter 11
[ 504 ]
Displaying, updating, and deleting mediaAny visitor to MERN Mediastream will be able to view media details and streamvideos, while only registered users will be able to edit the media's details and delete itany time after they post it on the application. In the following sections, we willimplement full-stack slices, including backend APIs and frontend views, to display asingle media post, update details of a media post, and delete a media post from theapplication.
Displaying mediaAny visitor to MERN Mediastream will be able to browse to a single media view toplay a video and read the details associated with it. Every time a specific video isloaded on the application, we will also increment the number of views associatedwith the media. In the following sections, we will implement the individual mediaview by adding a read media API to the backend, a way to call this API from thefrontend, and the React component that will display the media details in the view.
The read media APITo implement the read media API in the backend, we will start by adding a GET routethat queries the Media collection with an ID and returns the media document in theresponse. The route is declared as follows.
mern-mediastream/server/routes/media.routes.js:
router.route('/api/media/:mediaId') .get( mediaCtrl.incrementViews, mediaCtrl.read)
The mediaId in the request URL will cause the mediaByID controller method toexecute and attach the retrieved media document to the request object so that it canbe accessed in the next method.
A GET request to this API will execute the incrementViews controller method next,which will find the matching media record and increment the views value by 1,before saving the updated record to the database. The incrementViews method isdefined as follows.
mern-mediastream/server/controllers/media.controller.js:
const incrementViews = async (req, res, next) => {
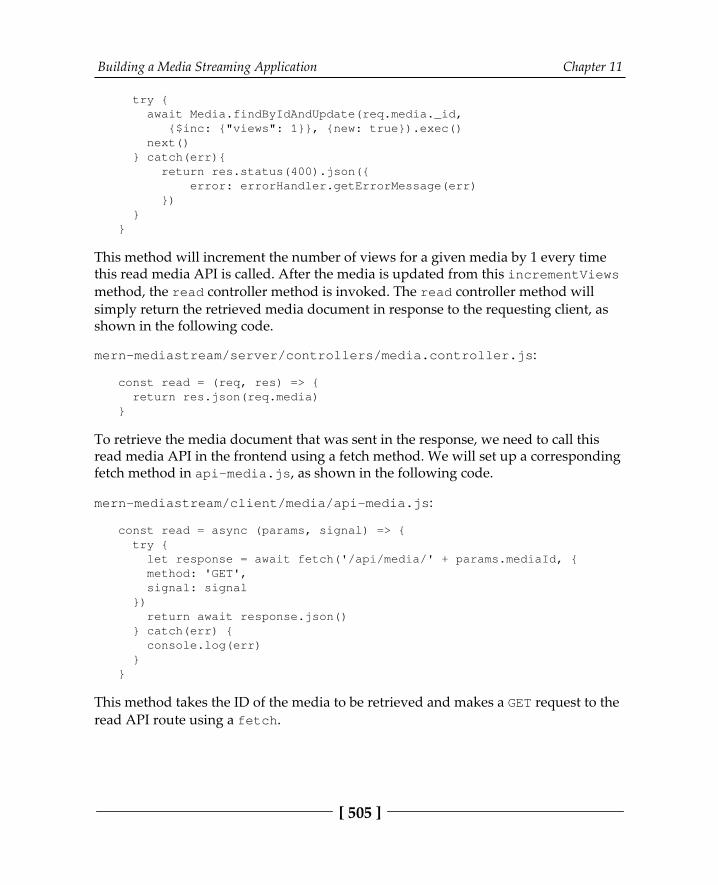
Building a Media Streaming Application Chapter 11
[ 505 ]
try { await Media.findByIdAndUpdate(req.media._id, {$inc: {"views": 1}}, {new: true}).exec() next() } catch(err){ return res.status(400).json({ error: errorHandler.getErrorMessage(err) }) }}
This method will increment the number of views for a given media by 1 every timethis read media API is called. After the media is updated from this incrementViewsmethod, the read controller method is invoked. The read controller method willsimply return the retrieved media document in response to the requesting client, asshown in the following code.
mern-mediastream/server/controllers/media.controller.js:
const read = (req, res) => { return res.json(req.media)}
To retrieve the media document that was sent in the response, we need to call thisread media API in the frontend using a fetch method. We will set up a correspondingfetch method in api-media.js, as shown in the following code.
mern-mediastream/client/media/api-media.js:
const read = async (params, signal) => { try { let response = await fetch('/api/media/' + params.mediaId, { method: 'GET', signal: signal }) return await response.json() } catch(err) { console.log(err) }}
This method takes the ID of the media to be retrieved and makes a GET request to theread API route using a fetch.
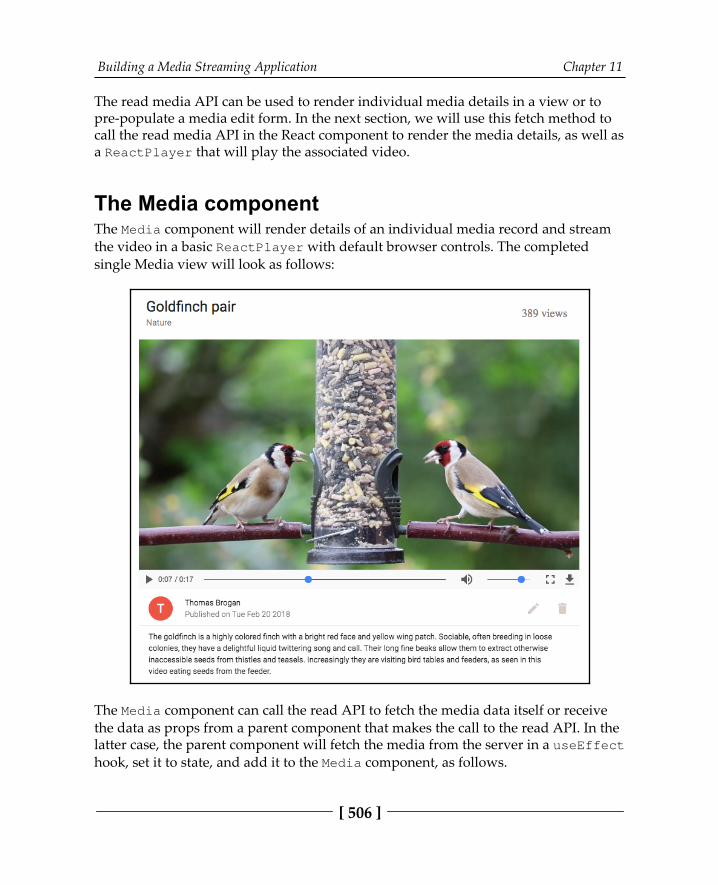
Building a Media Streaming Application Chapter 11
[ 506 ]
The read media API can be used to render individual media details in a view or topre-populate a media edit form. In the next section, we will use this fetch method tocall the read media API in the React component to render the media details, as well asa ReactPlayer that will play the associated video.
The Media componentThe Media component will render details of an individual media record and streamthe video in a basic ReactPlayer with default browser controls. The completedsingle Media view will look as follows:
The Media component can call the read API to fetch the media data itself or receivethe data as props from a parent component that makes the call to the read API. In thelatter case, the parent component will fetch the media from the server in a useEffecthook, set it to state, and add it to the Media component, as follows.
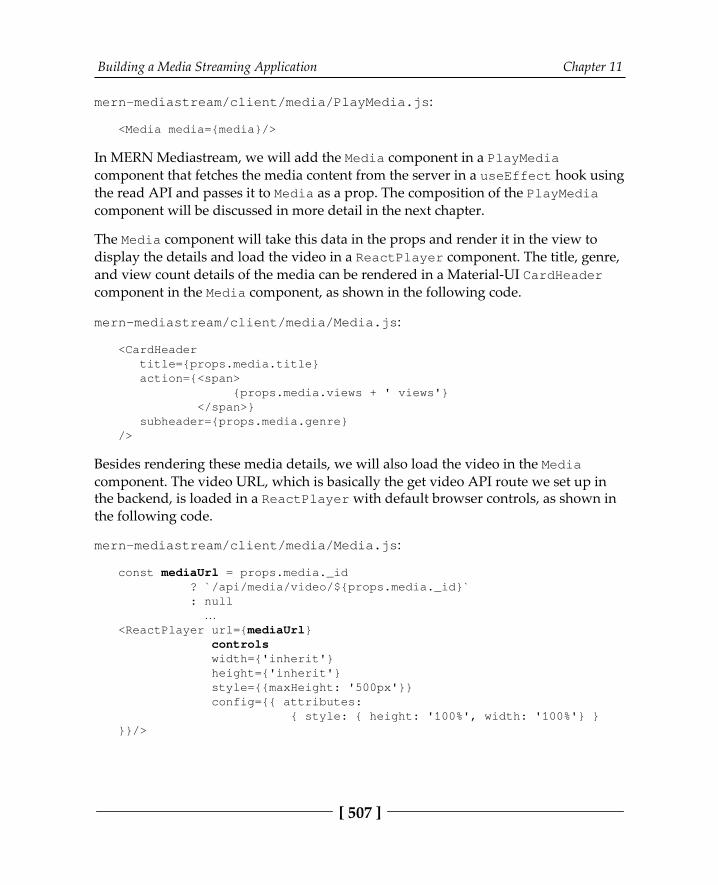
Building a Media Streaming Application Chapter 11
[ 507 ]
mern-mediastream/client/media/PlayMedia.js:
<Media media={media}/>
In MERN Mediastream, we will add the Media component in a PlayMediacomponent that fetches the media content from the server in a useEffect hook usingthe read API and passes it to Media as a prop. The composition of the PlayMediacomponent will be discussed in more detail in the next chapter.
The Media component will take this data in the props and render it in the view todisplay the details and load the video in a ReactPlayer component. The title, genre,and view count details of the media can be rendered in a Material-UI CardHeadercomponent in the Media component, as shown in the following code.
mern-mediastream/client/media/Media.js:
<CardHeader title={props.media.title} action={<span> {props.media.views + ' views'} </span>} subheader={props.media.genre}/>
Besides rendering these media details, we will also load the video in the Mediacomponent. The video URL, which is basically the get video API route we set up inthe backend, is loaded in a ReactPlayer with default browser controls, as shown inthe following code.
mern-mediastream/client/media/Media.js:
const mediaUrl = props.media._id ? `/api/media/video/${props.media._id}` : null …<ReactPlayer url={mediaUrl} controls width={'inherit'} height={'inherit'} style={{maxHeight: '500px'}} config={{ attributes: { style: { height: '100%', width: '100%'} }}}/>
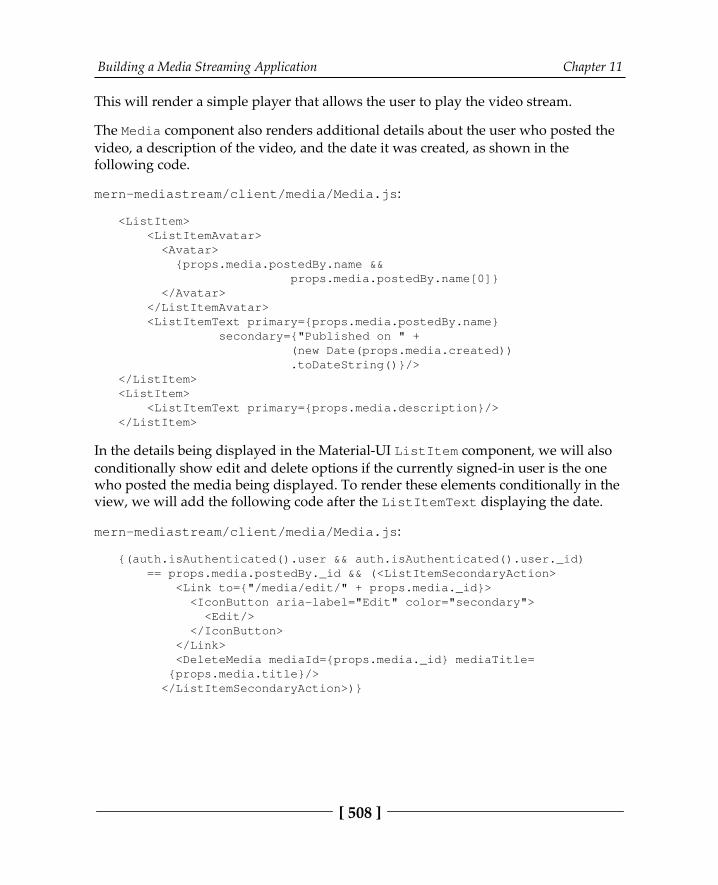
Building a Media Streaming Application Chapter 11
[ 508 ]
This will render a simple player that allows the user to play the video stream.
The Media component also renders additional details about the user who posted thevideo, a description of the video, and the date it was created, as shown in thefollowing code.
mern-mediastream/client/media/Media.js:
<ListItem> <ListItemAvatar> <Avatar> {props.media.postedBy.name && props.media.postedBy.name[0]} </Avatar> </ListItemAvatar> <ListItemText primary={props.media.postedBy.name} secondary={"Published on " + (new Date(props.media.created)) .toDateString()}/></ListItem><ListItem> <ListItemText primary={props.media.description}/></ListItem>
In the details being displayed in the Material-UI ListItem component, we will alsoconditionally show edit and delete options if the currently signed-in user is the one who posted the media being displayed. To render these elements conditionally in theview, we will add the following code after the ListItemText displaying the date.
mern-mediastream/client/media/Media.js:
{(auth.isAuthenticated().user && auth.isAuthenticated().user._id) == props.media.postedBy._id && (<ListItemSecondaryAction> <Link to={"/media/edit/" + props.media._id}> <IconButton aria-label="Edit" color="secondary"> <Edit/> </IconButton> </Link> <DeleteMedia mediaId={props.media._id} mediaTitle= {props.media.title}/> </ListItemSecondaryAction>)}
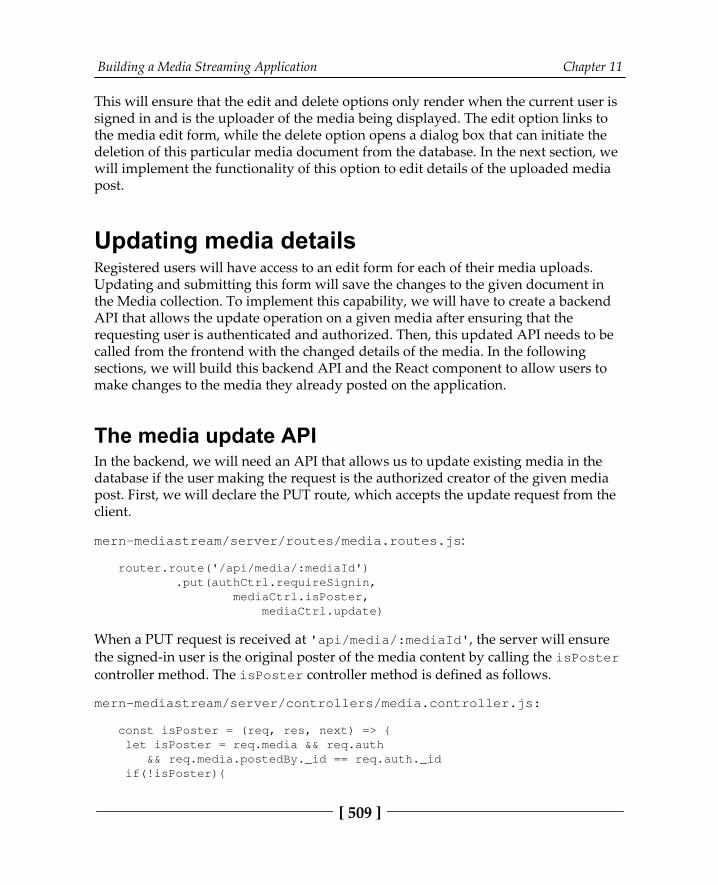
Building a Media Streaming Application Chapter 11
[ 509 ]
This will ensure that the edit and delete options only render when the current user issigned in and is the uploader of the media being displayed. The edit option links tothe media edit form, while the delete option opens a dialog box that can initiate thedeletion of this particular media document from the database. In the next section, wewill implement the functionality of this option to edit details of the uploaded mediapost.
Updating media detailsRegistered users will have access to an edit form for each of their media uploads.Updating and submitting this form will save the changes to the given document inthe Media collection. To implement this capability, we will have to create a backendAPI that allows the update operation on a given media after ensuring that therequesting user is authenticated and authorized. Then, this updated API needs to becalled from the frontend with the changed details of the media. In the followingsections, we will build this backend API and the React component to allow users tomake changes to the media they already posted on the application.
The media update APIIn the backend, we will need an API that allows us to update existing media in thedatabase if the user making the request is the authorized creator of the given mediapost. First, we will declare the PUT route, which accepts the update request from theclient.
mern-mediastream/server/routes/media.routes.js:
router.route('/api/media/:mediaId') .put(authCtrl.requireSignin, mediaCtrl.isPoster, mediaCtrl.update)
When a PUT request is received at 'api/media/:mediaId', the server will ensurethe signed-in user is the original poster of the media content by calling the isPostercontroller method. The isPoster controller method is defined as follows.
mern-mediastream/server/controllers/media.controller.js:
const isPoster = (req, res, next) => { let isPoster = req.media && req.auth && req.media.postedBy._id == req.auth._id if(!isPoster){
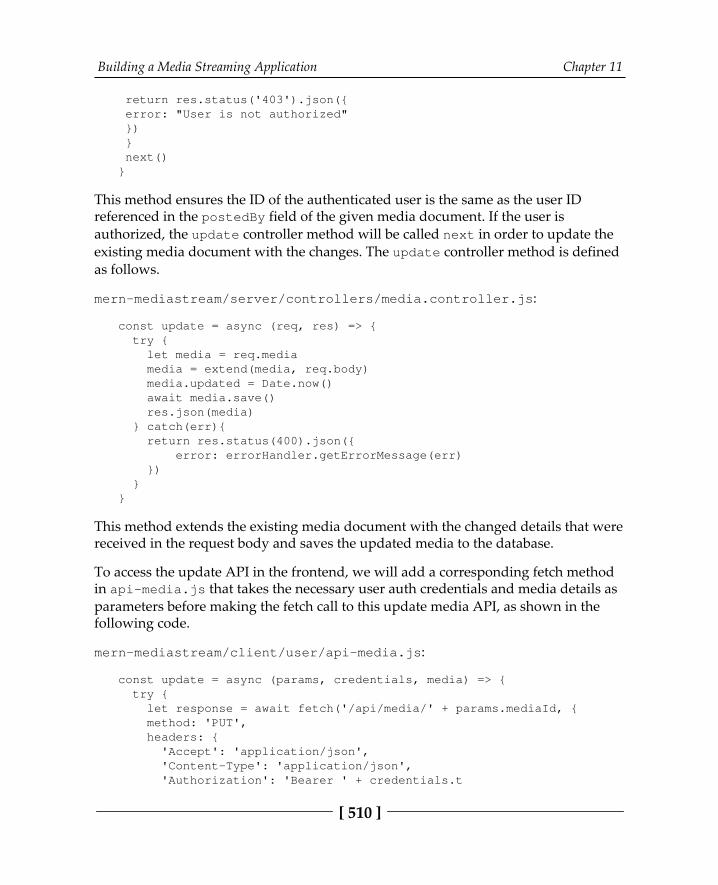
Building a Media Streaming Application Chapter 11
[ 510 ]
return res.status('403').json({ error: "User is not authorized" }) } next()}
This method ensures the ID of the authenticated user is the same as the user IDreferenced in the postedBy field of the given media document. If the user isauthorized, the update controller method will be called next in order to update theexisting media document with the changes. The update controller method is definedas follows.
mern-mediastream/server/controllers/media.controller.js:
const update = async (req, res) => { try { let media = req.media media = extend(media, req.body) media.updated = Date.now() await media.save() res.json(media) } catch(err){ return res.status(400).json({ error: errorHandler.getErrorMessage(err) }) }}
This method extends the existing media document with the changed details that werereceived in the request body and saves the updated media to the database.
To access the update API in the frontend, we will add a corresponding fetch methodin api-media.js that takes the necessary user auth credentials and media details asparameters before making the fetch call to this update media API, as shown in thefollowing code.
mern-mediastream/client/user/api-media.js:
const update = async (params, credentials, media) => { try { let response = await fetch('/api/media/' + params.mediaId, { method: 'PUT', headers: { 'Accept': 'application/json', 'Content-Type': 'application/json', 'Authorization': 'Bearer ' + credentials.t
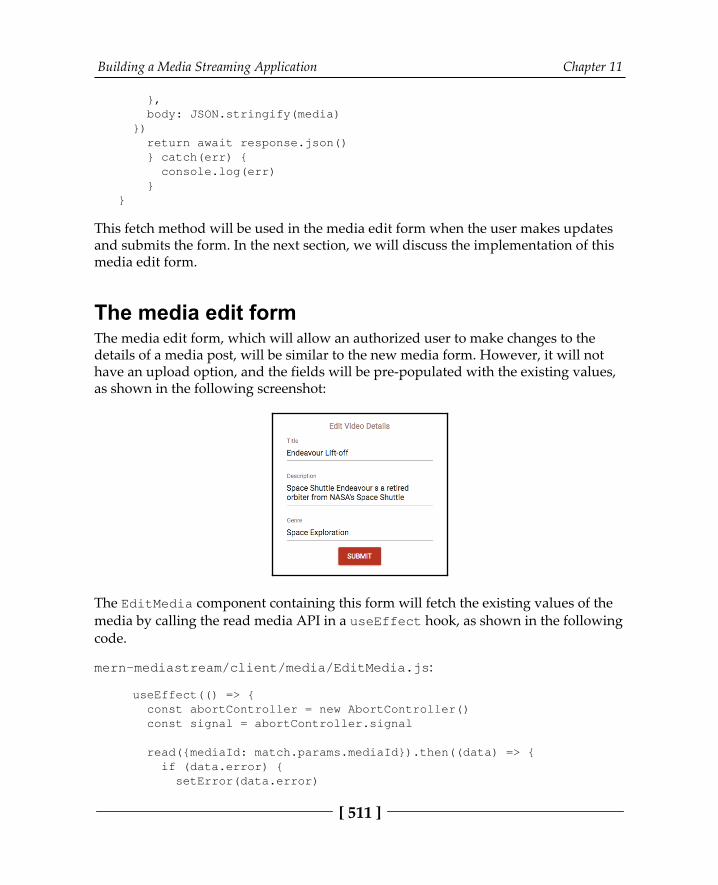
Building a Media Streaming Application Chapter 11
[ 511 ]
}, body: JSON.stringify(media) }) return await response.json() } catch(err) { console.log(err) }}
This fetch method will be used in the media edit form when the user makes updatesand submits the form. In the next section, we will discuss the implementation of thismedia edit form.
The media edit formThe media edit form, which will allow an authorized user to make changes to thedetails of a media post, will be similar to the new media form. However, it will nothave an upload option, and the fields will be pre-populated with the existing values,as shown in the following screenshot:
The EditMedia component containing this form will fetch the existing values of themedia by calling the read media API in a useEffect hook, as shown in the followingcode.
mern-mediastream/client/media/EditMedia.js:
useEffect(() => { const abortController = new AbortController() const signal = abortController.signal
read({mediaId: match.params.mediaId}).then((data) => { if (data.error) { setError(data.error)
Building a Media Streaming Application Chapter 11
[ 512 ]
} else { setMedia(data) } }) return function cleanup(){ abortController.abort() } }, [match.params.mediaId])
The retrieved media details are set to state so that the values can be rendered in thetext fields. The form field elements will be the same as in the NewMedia component.When a user updates any of the values in the form, the changes will be registered inthe media object in state with a call to the handleChange method.The handleChange method is defined as follows.
mediastream/client/media/EditMedia.js:
const handleChange = name => event => { let updatedMedia = {...media} updatedMedia[name] = event.target.value setMedia(updatedMedia) }
In this method, the specific field that's being updated in the form is reflected in thecorresponding attribute in the media object in state. When the user is done editingand clicks submit, a call will be made to the update API with the required credentialsand the changed media values. This is done by invoking the clickSubmit method,which is defined as follows.
mediastream/client/media/EditMedia.js:
const clickSubmit = () => { const jwt = auth.isAuthenticated() update({ mediaId: media._id }, { t: jwt.token }, media).then((data) => { if (data.error) { setError(data.error) } else { setRedirect(true) } }) }
Building a Media Streaming Application Chapter 11
[ 513 ]
The call to the update media API will update the media details in the correspondingmedia document in the Media collection, while the video file associated with themedia remains as it is in the database.
This EditMedia component can only be accessed by signed-in users and will berendered at '/media/edit/:mediaId'. Due to this, we will add a PrivateRoute inthe MainRouter component, like so.
mern-mediastream/client/MainRouter.js:
<PrivateRoute path="/media/edit/:mediaId" component={EditMedia}/>
This link is added with an edit icon in the Media component, allowing the user whoposted the media to access the edit page. In the Media view, the user can also chooseto delete their media post. We will implement this in the next section.
Deleting mediaAn authorized user can completely delete the media they uploaded to the application,including the media document in the Media collection and the file chunks stored inMongoDB using GridFS. To allow a user to remove the media from the application, inthe following sections, we will define a backend API for media deletion from thedatabase and implement a React component that makes use of this API when the userinteracts with the frontend to perform this deletion.
The delete media APITo delete media from the database, we will implement a delete media API in thebackend, which will accept a DELETE request from a client at/api/media/:mediaId. We will add the DELETE route for this API as follows, whichwill allow an authorized user to delete their uploaded media records.
mern-mediastream/server/routes/media.routes.js:
router.route('/api/media/:mediaId') .delete(authCtrl.requireSignin, mediaCtrl.isPoster, mediaCtrl.remove)
Building a Media Streaming Application Chapter 11
[ 514 ]
When the server receives a DELETE request at '/api/media/:mediaId', it willmake sure the signed-in user is the original poster of the media by invoking theisPoster controller method. Then, the remove controller methodwill completely delete the specified media from the database. The remove method isdefined as follows.
mern-mediastream/server/controllers/media.controller.js:
const remove = async (req, res) => { try { let media = req.media let deletedMedia = await media.remove() gridfs.delete(req.file._id) res.json(deletedMedia) } catch(err) { return res.status(400).json({ error: errorHandler.getErrorMessage(err) }) }}
Besides deleting the media record from the Media collection, we are alsousing gridfs to remove the associated file details and chunks stored in the database.
To access this backend API in the frontend, you will also need a fetch method withthis route, similar to other API implementations. The fetch method will need to takethe media ID and the current user's auth credentials in order to call the delete mediaAPI with these values.
The fetch method will be used when the user performs the delete operation byclicking a button in the frontend interface. In the next section, we will discuss a Reactcomponent called DeleteMedia, where by this delete media action will be performedby the user.
The DeleteMedia componentThe DeleteMedia component is added to the Media component and is only visible tothe signed-in user who added this specific media. This component is basically a button that, when clicked, opens a Dialog component asking the user to confirmthe delete action, as shown in the following screenshot:
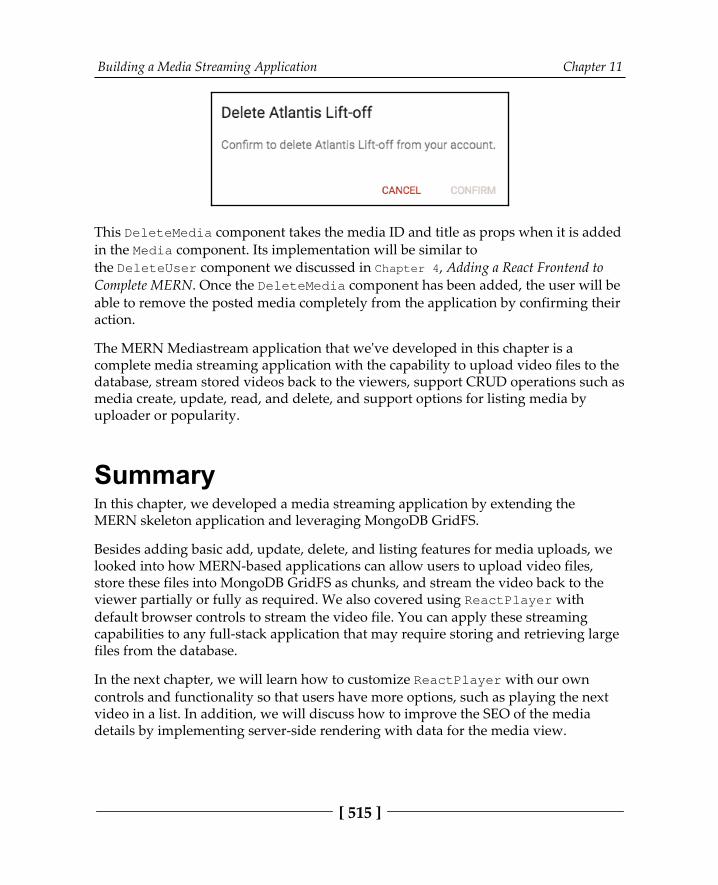
Building a Media Streaming Application Chapter 11
[ 515 ]
This DeleteMedia component takes the media ID and title as props when it is addedin the Media component. Its implementation will be similar tothe DeleteUser component we discussed in Chapter 4, Adding a React Frontend toComplete MERN. Once the DeleteMedia component has been added, the user will beable to remove the posted media completely from the application by confirming theiraction.
The MERN Mediastream application that we've developed in this chapter is acomplete media streaming application with the capability to upload video files to thedatabase, stream stored videos back to the viewers, support CRUD operations such asmedia create, update, read, and delete, and support options for listing media byuploader or popularity.
SummaryIn this chapter, we developed a media streaming application by extending theMERN skeleton application and leveraging MongoDB GridFS.
Besides adding basic add, update, delete, and listing features for media uploads, welooked into how MERN-based applications can allow users to upload video files,store these files into MongoDB GridFS as chunks, and stream the video back to theviewer partially or fully as required. We also covered using ReactPlayer withdefault browser controls to stream the video file. You can apply these streamingcapabilities to any full-stack application that may require storing and retrieving largefiles from the database.
In the next chapter, we will learn how to customize ReactPlayer with our owncontrols and functionality so that users have more options, such as playing the nextvideo in a list. In addition, we will discuss how to improve the SEO of the mediadetails by implementing server-side rendering with data for the media view.

12Customizing the Media Player
and Improving SEOUsers visit a media-streaming application mainly to play media and explore otherrelated media. This makes the media player—and the view that renders the relatedmedia details—crucial to a streaming application.
In this chapter, we will focus on developing the play media page for theMERN Mediastream application that we started building in the previous chapter,Chapter 11, Building a Media Streaming Application. We will address the followingtopics to bolster the media-playing functionalities and to help boost the presence ofthe media content across the web so that it reaches more users:
Customizing player controls on ReactPlayerPlaying the next video from a list of related videosAutoplaying a list of related mediaServer-side rendering (SSR) of the PlayMedia view with data to improvesearch engine optimization (SEO)
After completing these topics, you will be more adept at designing complexinteractions between React components in a frontend user interface, and also atimproving SEO across your full-stack React applications.
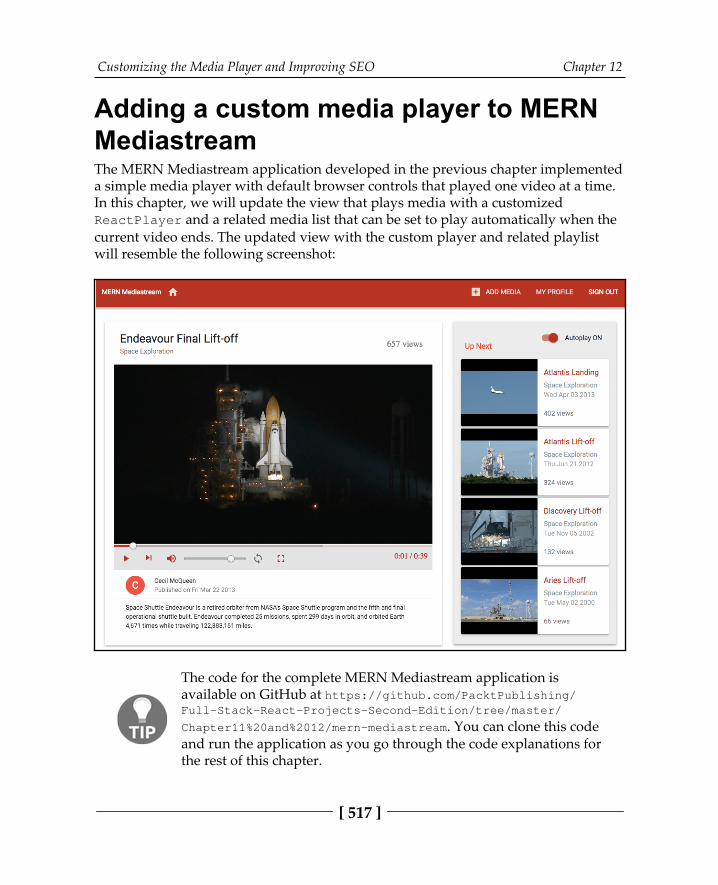
Customizing the Media Player and Improving SEO Chapter 12
[ 517 ]
Adding a custom media player to MERNMediastream The MERN Mediastream application developed in the previous chapter implementeda simple media player with default browser controls that played one video at a time.In this chapter, we will update the view that plays media with a customizedReactPlayer and a related media list that can be set to play automatically when thecurrent video ends. The updated view with the custom player and related playlistwill resemble the following screenshot:
The code for the complete MERN Mediastream application isavailable on GitHub at https:/ / github. com/ PacktPublishing/Full- Stack- React- Projects- Second- Edition/ tree/ master/Chapter11%20and%2012/ mern-mediastream. You can clone this codeand run the application as you go through the code explanations forthe rest of this chapter.
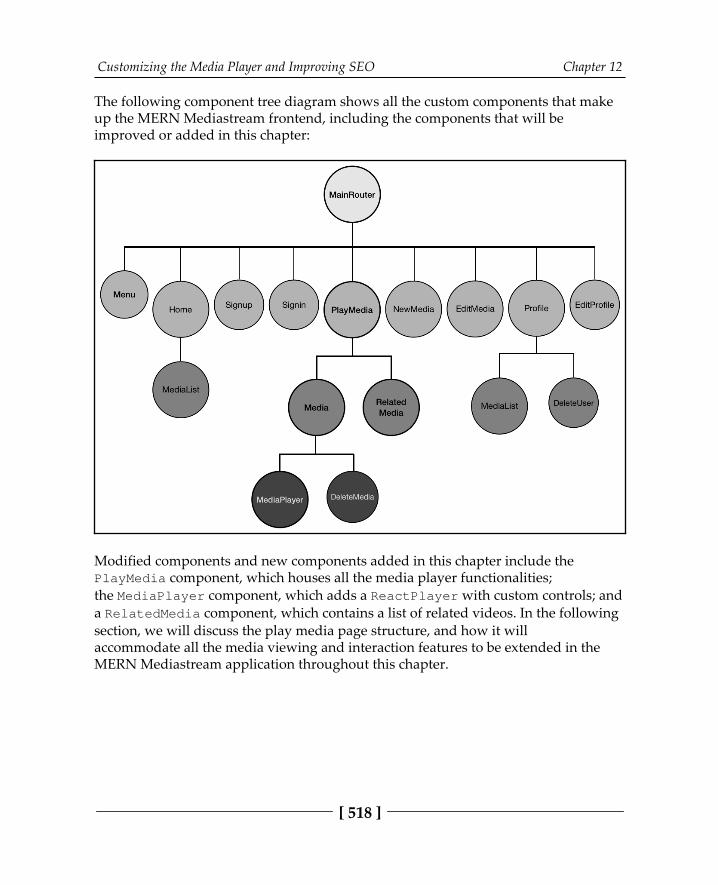
Customizing the Media Player and Improving SEO Chapter 12
[ 518 ]
The following component tree diagram shows all the custom components that makeup the MERN Mediastream frontend, including the components that will beimproved or added in this chapter:
Modified components and new components added in this chapter include thePlayMedia component, which houses all the media player functionalities;the MediaPlayer component, which adds a ReactPlayer with custom controls; anda RelatedMedia component, which contains a list of related videos. In the followingsection, we will discuss the play media page structure, and how it willaccommodate all the media viewing and interaction features to be extended in theMERN Mediastream application throughout this chapter.
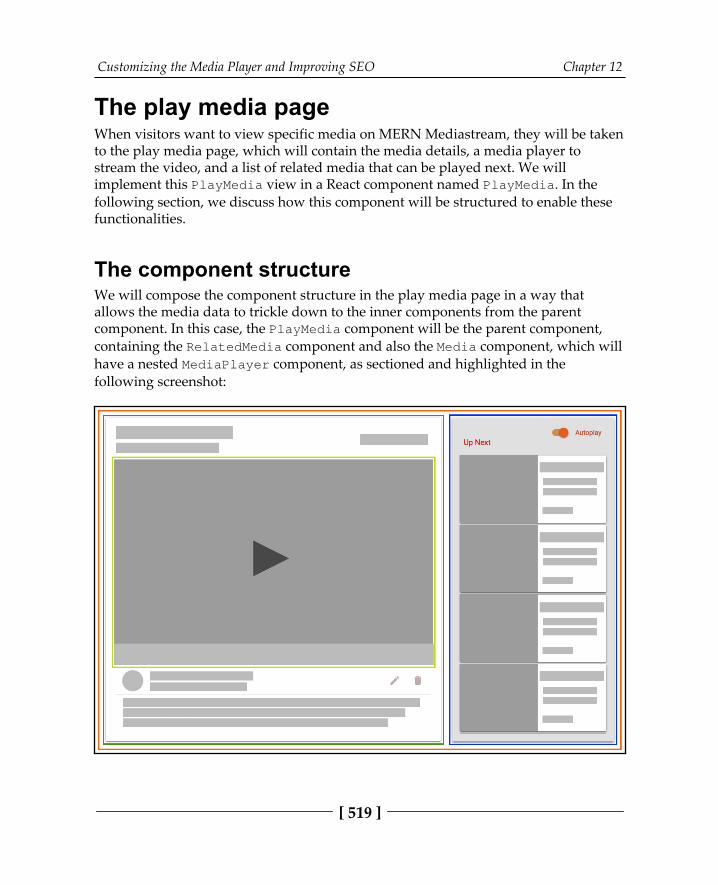
Customizing the Media Player and Improving SEO Chapter 12
[ 519 ]
The play media pageWhen visitors want to view specific media on MERN Mediastream, they will be takento the play media page, which will contain the media details, a media player tostream the video, and a list of related media that can be played next. We willimplement this PlayMedia view in a React component named PlayMedia. In thefollowing section, we discuss how this component will be structured to enable thesefunctionalities.
The component structureWe will compose the component structure in the play media page in a way thatallows the media data to trickle down to the inner components from the parentcomponent. In this case, the PlayMedia component will be the parent component,containing the RelatedMedia component and also the Media component, which willhave a nested MediaPlayer component, as sectioned and highlighted in thefollowing screenshot:
Customizing the Media Player and Improving SEO Chapter 12
[ 520 ]
When individual media links are accessed in the frontend of the application, thePlayMedia component will retrieve and load the corresponding media data and listof related media from the server. Then, the relevant details will be passed as props tothe Media and RelatedMedia child components.
The RelatedMedia component will list and link other related media, and clickingany media in this list will re-render the PlayMedia component and its innercomponents with the new data.
We will update the Media component we developed in Chapter 11, Building a Media-Streaming Application, to add a customized media player as a child component. Thiscustomized MediaPlayer component will also utilize the data passed fromPlayMedia to stream the current video and link to the next video in the related medialist.
In the PlayMedia component, we will add an autoplay toggle that will let userschoose to autoplay the videos in the related media list, one after the other. Theautoplay state will be managed from the PlayMedia component, but this feature willrequire the data available in the parent component's state to re-render when a videoends in the MediaPlayer nested child component, so it can be ensured that the nextvideo starts playing automatically while keeping track of the related list.
To achieve this, the PlayMedia component will need to provide a state updatingmethod as a prop that will be used in the MediaPlayer component to update theshared and interdependent state values across these components.
Taking this component structure into consideration, we will extend and update theMERN Mediastream application to implement a functional play media page. In thenext section, we will start by adding the feature that provides a list of related mediato the user in this PlayMedia view.
Listing related media When a user is viewing an individual media on the application, they will also see alist of related media on the same page. The related media list will consist of othermedia records that belong to the same genre as the given video and is sorted by thehighest number of views. For this feature, we will need to integrate a full-stack slicethat retrieves the relevant list from the Media collection in the backend and renders itin the frontend. In the following sections, we will add a related media list API in thebackend, along with a way to fetch this API in the frontend, and a React componentthat renders the list of media retrieved by this API.

Customizing the Media Player and Improving SEO Chapter 12
[ 521 ]
The related media list APIWe will implement an API endpoint in the backend to retrieve the list of relatedmedia from the database. The API will receive a GET request at'/api/media/related/:mediaId', and the route will be declared with the othermedia routes, as follows:
mern-mediastream/server/routes/media.routes.js
router.route('/api/media/related/:mediaId') .get(mediaCtrl.listRelated)
The :mediaId parameter in the route path will be processed by the mediaByIDmethod implemented in The video API section of Chapter 11, Building a MediaStreaming Application. It retrieves the media corresponding to this ID from thedatabase and attaches it to the request object, so it can be accessed in the nextmethod. The listRelated controller method is the next method invoked for the GETrequest at this API route. This method will query the Media collection to find recordswith the same genre as the media provided, and also exclude this given media recordfrom the results returned. The listRelated controller method is defined as shownin the following code:
mern-mediastream/server/controllers/media.controller.js
const listRelated = async (req, res) => { try { let media = await Media.find({ "_id": { "$ne": req.media }, "genre": req.media.genre}) .limit(4) .sort('-views') .populate('postedBy', '_id name') .exec() res.json(media) } catch (err) { return res.status(400).json({ error: errorHandler.getErrorMessage(err) }) }}
Customizing the Media Player and Improving SEO Chapter 12
[ 522 ]
The results returned from the query will be sorted by the highest number of viewsand limited to the top four media records. Each media object in the returned resultswill also contain the name and ID of the user who posted the media, as specified inthe populate method.
On the client side, we will set up a corresponding fetch method that will be used inthe PlayMedia component to retrieve the related list of media using this API. Thismethod will be defined as follows:
mern-mediastream/client/media/api-media.js
const listRelated = async (params, signal) => { try { let response = await fetch('/api/media/related/'+ params.mediaId,{ method: 'GET', signal: signal, headers: { 'Accept': 'application/json', 'Content-Type': 'application/json' } }) return await response.json() } catch(err) { console.log(err) }}
This listRelated fetch method will take a media ID and make a GET request to therelated media list API in the backend. We will use this method in the PlayMediacomponent to retrieve a list of media related to the current media loaded in the mediaplayer. Then this list will be rendered in the RelatedMedia component. In the nextsection, we will look at the implementation of this RelatedMedia component.
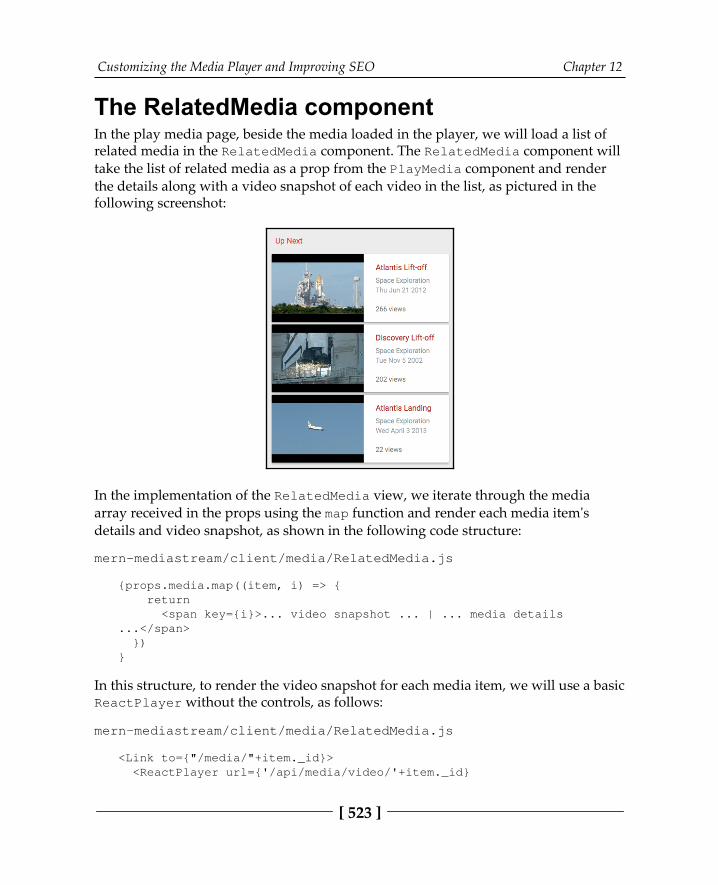
Customizing the Media Player and Improving SEO Chapter 12
[ 523 ]
The RelatedMedia componentIn the play media page, beside the media loaded in the player, we will load a list ofrelated media in the RelatedMedia component. The RelatedMedia component willtake the list of related media as a prop from the PlayMedia component and renderthe details along with a video snapshot of each video in the list, as pictured in thefollowing screenshot:
In the implementation of the RelatedMedia view, we iterate through the mediaarray received in the props using the map function and render each media item'sdetails and video snapshot, as shown in the following code structure:
mern-mediastream/client/media/RelatedMedia.js
{props.media.map((item, i) => { return <span key={i}>... video snapshot ... | ... media details...</span> })}
In this structure, to render the video snapshot for each media item, we will use a basicReactPlayer without the controls, as follows:
mern-mediastream/client/media/RelatedMedia.js
<Link to={"/media/"+item._id}> <ReactPlayer url={'/api/media/video/'+item._id}
Customizing the Media Player and Improving SEO Chapter 12
[ 524 ]
width='160px' height='140px'/></Link>
We wrap the ReactPlayer with a link to the individual view of this media. So,clicking on the given video snapshot will re-render the PlayMedia view to load thelinked media's details. Beside the snapshot, we will display the details of each videoincluding title, genre, created date, and the number of views, with the following code:
mern-mediastream/client/media/RelatedMedia.js
<Typography type="title" color="primary">{item.title}</Typography><Typography type="subheading"> {item.genre} </Typography><Typography component="p"> {(new Date(item.created)).toDateString()}</Typography><Typography type="subheading">{item.views} views</Typography>
This will render the details next to the video snapshot for each media in the relatedmedia list that is received in the props.
To render this RelatedMedia component in the play media page, we have to add itto the PlayMedia component. The PlayMedia component will use the related medialist API implemented earlier in this section to retrieve the related media from thebackend, and then pass it in the props to the RelatedMedia component. In the nextsection, we will discuss the implementation of this PlayMedia component.
The PlayMedia componentThe PlayMedia component will render the play media page. This component consistsof the Media and RelatedMedia child components along with an autoplay toggle,and it provides data to these components when it loads in the view.
To render the PlayMedia component when individual media links are accessed bythe user, we will add a Route in MainRouter and mount PlayMedia at'/media/:mediaId', as follows:
mern-mediastream/client/MainRouter.js
<Route path="/media/:mediaId" component={PlayMedia}/>
Customizing the Media Player and Improving SEO Chapter 12
[ 525 ]
When the PlayMedia component mounts, it will fetch the media data and the relatedmedia list from the server with useEffect hooks based on the mediaId parameter inthe route link.
In one useEffect hook, it will fetch the media to be loaded in the media player, asshown in the following code:
mern-mediastream/client/media/PlayMedia.js
useEffect(() => { const abortController = new AbortController() const signal = abortController.signal
read({mediaId: props.match.params.mediaId}, signal).then((data)=> { if (data && data.error) { console.log(data.error) } else { setMedia(data) } }) return function cleanup(){ abortController.abort() }}, [props.match.params.mediaId])
The media ID from the route path is accessed in the props.match received from theReact Router components. It is used in the call to the read API fetch method toretrieve the media details from the server. The received media object is set in the stateso that it can be rendered in the Media component.
In another useEffect hook, we use the same media ID to call the listRelated APIfetch method, as shown in the following code.
mern-mediastream/client/media/PlayMedia.js
useEffect(() => { const abortController = new AbortController() const signal = abortController.signal
listRelated({ mediaId: props.match.params.mediaId}, signal).then((data) => { if (data.error) { console.log(data.error) } else { setRelatedMedia(data) }
Customizing the Media Player and Improving SEO Chapter 12
[ 526 ]
}) return function cleanup(){ abortController.abort() }}, [props.match.params.mediaId])
The listRelated API fetch method retrieves the related media list from the serverand sets the values to the state so that it can be rendered in the RelatedMediacomponent.
The media and related media list values stored in the state are used to pass relevantprops to these child components that are added in the view. For example, in thefollowing code, the RelatedMedia component is only rendered if the list of relatedmedia contains any media, and the list is passed to it as a prop:
mern-mediastream/client/media/PlayMedia.js
{relatedMedia.length > 0 && (<RelatedMedia media={relatedMedia}/>)}
Later in the chapter, in the Autoplaying related media section, we will add theAutoplay toggle component above the RelatedMedia component only if the lengthof the related media list is greater than 0. We will also discuss the implementation ofthe handleAutoPlay method that will be passed as a prop to the Media component.It will also receive the media detail object, and the video URL for the first item in therelated media list, which will be treated as the next URL to play. The Mediacomponent is added to PlayMedia, along with these props, as shown in thefollowing code:
mern-mediastream/client/media/PlayMedia.js
const nextUrl = relatedMedia.length > 0 ? `/media/${relatedMedia[0]._id}` : ''<Media media={media} nextUrl={nextUrl} handleAutoplay={handleAutoplay}/>
This Media component renders the media details on the play media page, and also acustomized media player that allows viewers to control the streaming of the video. Inthe next section, we will discuss the implementation of this customized media playerand complete this core feature of the play media page.
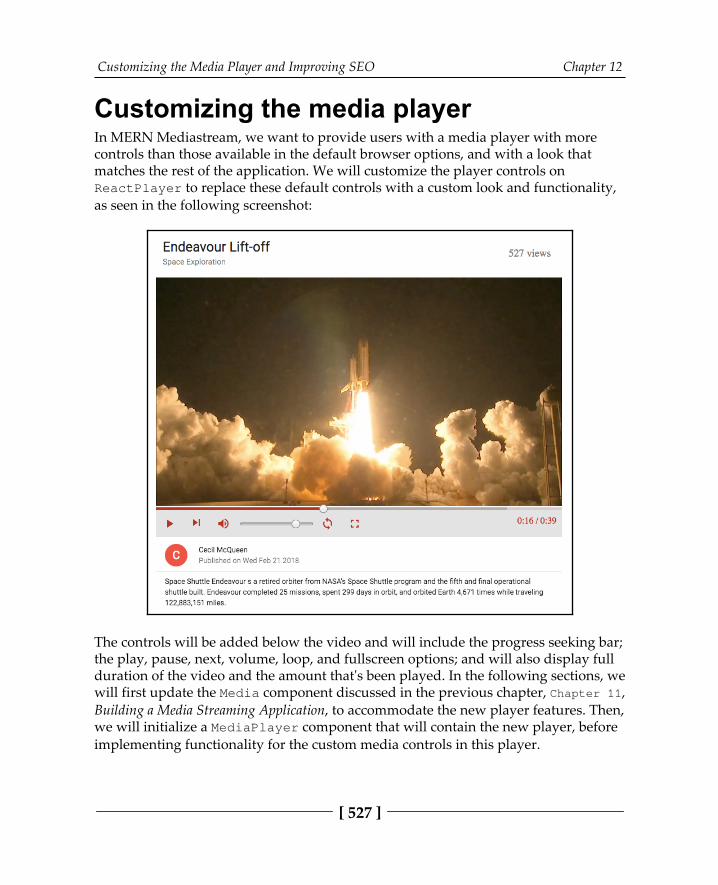
Customizing the Media Player and Improving SEO Chapter 12
[ 527 ]
Customizing the media playerIn MERN Mediastream, we want to provide users with a media player with morecontrols than those available in the default browser options, and with a look thatmatches the rest of the application. We will customize the player controls onReactPlayer to replace these default controls with a custom look and functionality,as seen in the following screenshot:
The controls will be added below the video and will include the progress seeking bar;the play, pause, next, volume, loop, and fullscreen options; and will also display fullduration of the video and the amount that's been played. In the following sections, wewill first update the Media component discussed in the previous chapter, Chapter 11,Building a Media Streaming Application, to accommodate the new player features. Then,we will initialize a MediaPlayer component that will contain the new player, beforeimplementing functionality for the custom media controls in this player.
Customizing the Media Player and Improving SEO Chapter 12
[ 528 ]
Updating the Media componentThe existing Media component contains a basic ReactPlayer with default browsercontrols for playing a given video. We will replace this ReactPlayer with a newMediaPlayer component that we will begin implementing in the next section. TheMediaPlayer component will contain a customized ReactPlayer, and it will beadded to the Media component code as follows:
mern-mediastream/client/media/Media.js
const mediaUrl = props.media._id ? `/api/media/video/${props.media._id}` : null...<MediaPlayer srcUrl={mediaUrl} nextUrl={props.nextUrl} handleAutoplay={props.handleAutoplay}/>
While adding this MediaPlayer component to the Media component, it will bepassed the current video's source URL, the next video's source URL, andthe handleAutoPlay method, which are received as props in the Media componentfrom the PlayMedia component. These URL values and the autoplay handlingmethod will be used in the MediaPlayer component to add various video-playingoptions. In the next section, we will begin implementing this MediaPlayercomponent by initializing the different values needed for adding functional controlsto the custom media player.
Initializing the media playerWe will implement the customized media player in the MediaPlayer component.This player will render the video streamed from the backend and provide the userwith different control options. We will incorporate this media-playing functionalityand the custom control options in the MediaPlayer using a ReactPlayercomponent. The ReactPlayer component, as discussed in the previous chapter,provides a range of customizations that we will leverage for the media player featuresto be added in this application.
While defining the MediaPlayer component, we will begin by initializingthe ReactPlayer component with starting values for the controls, before we add thecustom functionalities and corresponding user-action handling code for each control.
Customizing the Media Player and Improving SEO Chapter 12
[ 529 ]
The control values we customize will correspond to the propsallowed in the ReactPlayer component. To see a list of availableprops and an explanation of each,visit github.com/CookPete/react-player#props.
First, we need to set the initial control values in the component's state. We will startwith control values that correspond to the following:
The playing state of the mediaThe volume of the audioThe muted stateThe duration of the videoThe seeking stateThe playback rate of the videoThe loop valueThe fullscreen valueVideo errorsThe played, loaded, and ended states of the video getting streamed
The code to initialize these values in the component will be added as follows:
mern-mediastream/client/media/MediaPlayer.js
const [playing, setPlaying] = useState(false) const [volume, setVolume] = useState(0.8) const [muted, setMuted] = useState(false) const [duration, setDuration] = useState(0) const [seeking, setSeeking] = useState(false) const [playbackRate, setPlaybackRate] = useState(1.0) const [loop, setLoop] = useState(false) const [fullscreen, setFullscreen] = useState(false) const [videoError, setVideoError] = useState(false) const [values, setValues] = useState({ played: 0, loaded: 0, ended: false })
These values set in the state will allow us to customize the functionalities of thecorresponding controls in the ReactPlayer component, which we discuss in detail inthe next section.
Customizing the Media Player and Improving SEO Chapter 12
[ 530 ]
In the MediaPlayer component's view code, we will add this ReactPlayer withthese control values and source URL, using the prop sent from the Media component,as shown in the following code:
mern-mediastream/client/media/MediaPlayer.js
<ReactPlayer ref={ref} width={fullscreen ? '100%':'inherit'} height={fullscreen ? '100%':'inherit'} style={fullscreen ? {position:'relative'} : {maxHeight: '500px'}} config={{ attributes: { style: { height: '100%', width: '100%'} } }} url={props.srcUrl} playing={playing} loop={loop} playbackRate={playbackRate} volume={volume} muted={muted} onEnded={onEnded} onError={showVideoError} onProgress={onProgress} onDuration={onDuration}/>
Besides setting the control values, we will also add styling to the player, dependingon whether it is in fullscreen mode. We also need to get a reference to this playerelement rendered in the browser so that it can be used in the change-handling codefor the custom controls. We will use the useRef React hook to initialize the referenceto null and then set it to the corresponding player element using the ref method, asdefined in the following code:
mern-mediastream/client/media/MediaPlayer.js
let playerRef = useRef(null)const ref = player => { playerRef = player}

Customizing the Media Player and Improving SEO Chapter 12
[ 531 ]
The value in playerRef will give access to the player element rendered in thebrowser. We will use this reference to manipulate the player as required, to make the custom controls functional.
As a final step for initializing the media player, we will add code for handling errorsthrown by the player if the specified video source cannot be loaded for any reason.We will define a showVideoError method that will be invoked when a video erroroccurs. The showVideoError method will be defined as follows:
mern-mediastream/client/media/MediaPlayer.js
const showVideoError = e => { console.log(e) setVideoError(true) }
This method will render an error message in the view above the media player. Wecan show this error message conditionally by adding the following code in the viewabove the ReactPlayer:
mern-mediastream/client/media/MediaPlayer.js
{videoError && <p className={classes.videoError}>Video Error. Tryagain later.</p>}
This will render the video error message when an error occurs. As we will allow usersto play another video in the player from the related media list, we will reset the errormessage if a new video is loaded. We can hide the error message when a new videoloads with a useEffect hook, by ensuring the useEffect only runs when the videosource URL changes, as shown in the following code:
mern-mediastream/client/media/MediaPlayer.js
useEffect(() => { setVideoError(false)}, [props.srcUrl])
This will ensure the error message isn't shown when a new video is loaded andstreaming correctly.
With these initial control values set and the ReactPlayer added to thecomponent, in the next section, we can begin customizing how these controls willappear and function in our application.
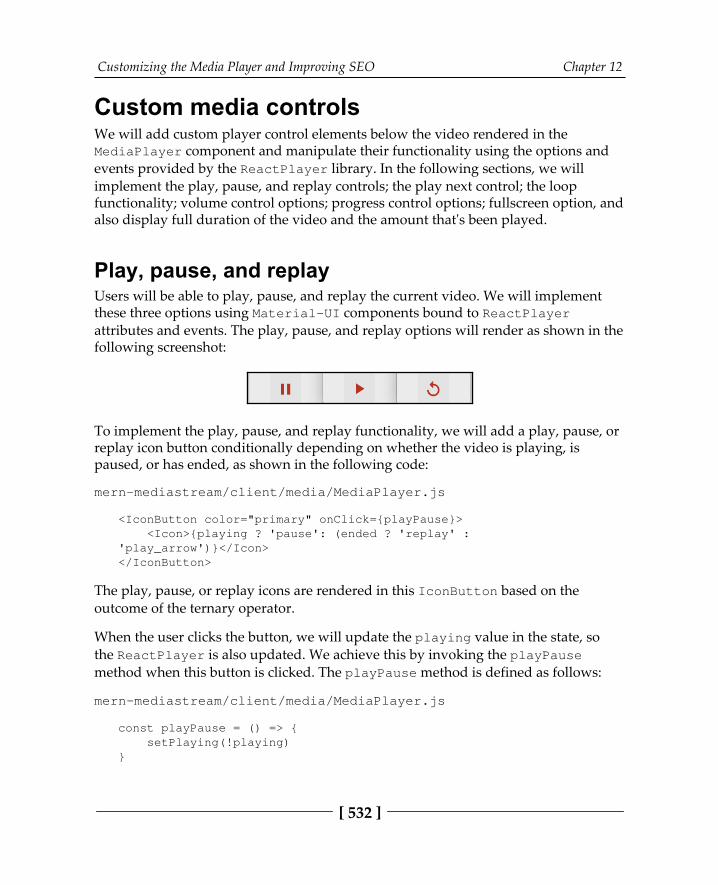
Customizing the Media Player and Improving SEO Chapter 12
[ 532 ]
Custom media controlsWe will add custom player control elements below the video rendered in theMediaPlayer component and manipulate their functionality using the options andevents provided by the ReactPlayer library. In the following sections, we willimplement the play, pause, and replay controls; the play next control; the loopfunctionality; volume control options; progress control options; fullscreen option, andalso display full duration of the video and the amount that's been played.
Play, pause, and replayUsers will be able to play, pause, and replay the current video. We will implementthese three options using Material-UI components bound to ReactPlayerattributes and events. The play, pause, and replay options will render as shown in thefollowing screenshot:
To implement the play, pause, and replay functionality, we will add a play, pause, orreplay icon button conditionally depending on whether the video is playing, ispaused, or has ended, as shown in the following code:
mern-mediastream/client/media/MediaPlayer.js
<IconButton color="primary" onClick={playPause}> <Icon>{playing ? 'pause': (ended ? 'replay' :'play_arrow')}</Icon></IconButton>
The play, pause, or replay icons are rendered in this IconButton based on theoutcome of the ternary operator.
When the user clicks the button, we will update the playing value in the state, sothe ReactPlayer is also updated. We achieve this by invoking the playPausemethod when this button is clicked. The playPause method is defined as follows:
mern-mediastream/client/media/MediaPlayer.js
const playPause = () => { setPlaying(!playing)}
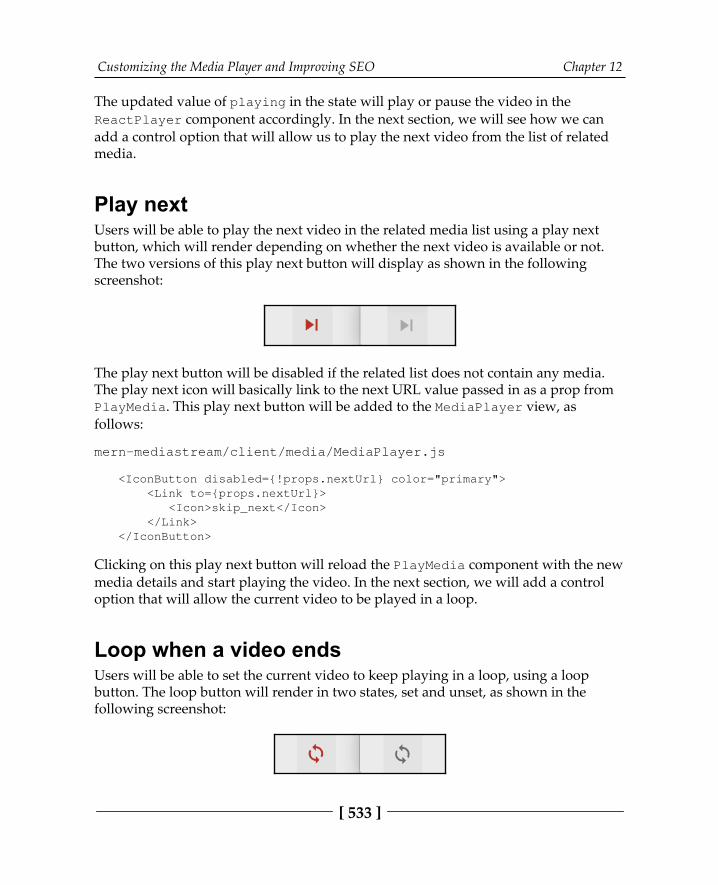
Customizing the Media Player and Improving SEO Chapter 12
[ 533 ]
The updated value of playing in the state will play or pause the video in theReactPlayer component accordingly. In the next section, we will see how we canadd a control option that will allow us to play the next video from the list of relatedmedia.
Play nextUsers will be able to play the next video in the related media list using a play nextbutton, which will render depending on whether the next video is available or not.The two versions of this play next button will display as shown in the followingscreenshot:
The play next button will be disabled if the related list does not contain any media.The play next icon will basically link to the next URL value passed in as a prop fromPlayMedia. This play next button will be added to the MediaPlayer view, asfollows:
mern-mediastream/client/media/MediaPlayer.js
<IconButton disabled={!props.nextUrl} color="primary"> <Link to={props.nextUrl}> <Icon>skip_next</Icon> </Link></IconButton>
Clicking on this play next button will reload the PlayMedia component with the newmedia details and start playing the video. In the next section, we will add a controloption that will allow the current video to be played in a loop.
Loop when a video endsUsers will be able to set the current video to keep playing in a loop, using a loopbutton. The loop button will render in two states, set and unset, as shown in thefollowing screenshot:
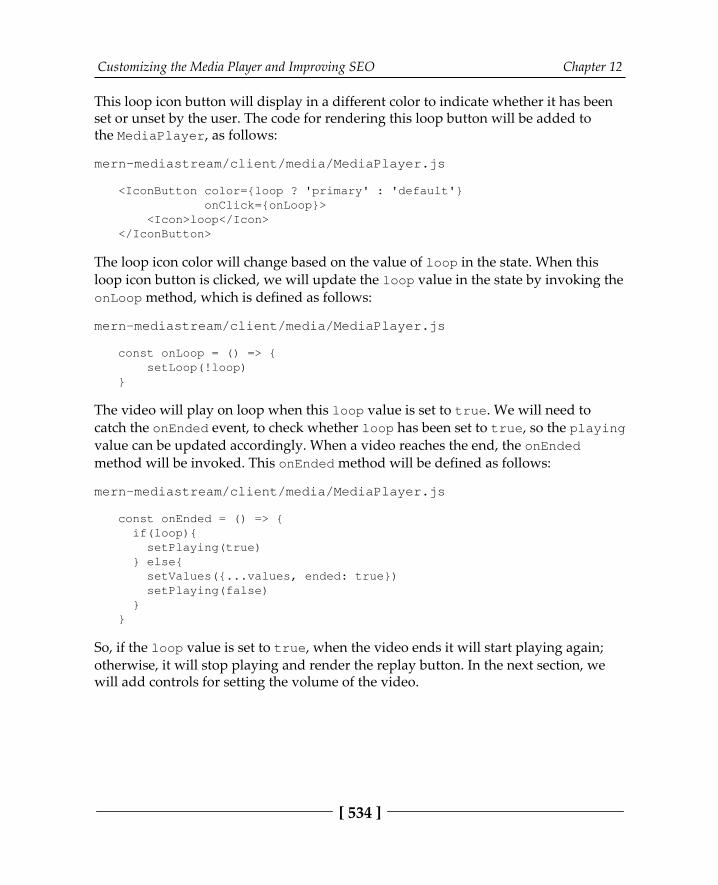
Customizing the Media Player and Improving SEO Chapter 12
[ 534 ]
This loop icon button will display in a different color to indicate whether it has beenset or unset by the user. The code for rendering this loop button will be added tothe MediaPlayer, as follows:
mern-mediastream/client/media/MediaPlayer.js
<IconButton color={loop ? 'primary' : 'default'} onClick={onLoop}> <Icon>loop</Icon></IconButton>
The loop icon color will change based on the value of loop in the state. When thisloop icon button is clicked, we will update the loop value in the state by invoking theonLoop method, which is defined as follows:
mern-mediastream/client/media/MediaPlayer.js
const onLoop = () => { setLoop(!loop)}
The video will play on loop when this loop value is set to true. We will need tocatch the onEnded event, to check whether loop has been set to true, so the playingvalue can be updated accordingly. When a video reaches the end, the onEndedmethod will be invoked. This onEnded method will be defined as follows:
mern-mediastream/client/media/MediaPlayer.js
const onEnded = () => { if(loop){ setPlaying(true) } else{ setValues({...values, ended: true}) setPlaying(false) }}
So, if the loop value is set to true, when the video ends it will start playing again;otherwise, it will stop playing and render the replay button. In the next section, wewill add controls for setting the volume of the video.
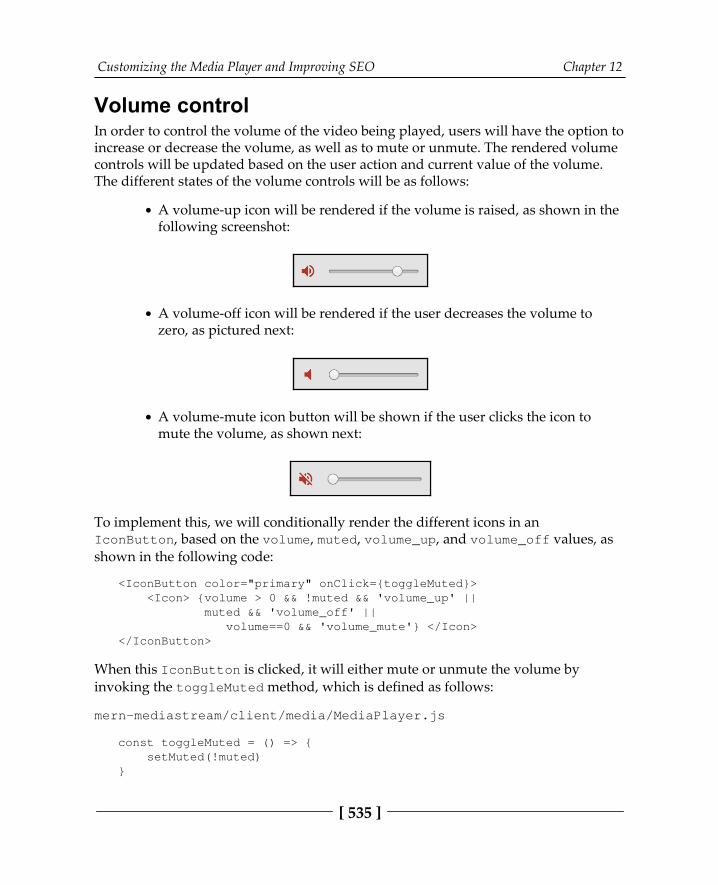
Customizing the Media Player and Improving SEO Chapter 12
[ 535 ]
Volume controlIn order to control the volume of the video being played, users will have the option toincrease or decrease the volume, as well as to mute or unmute. The rendered volumecontrols will be updated based on the user action and current value of the volume.The different states of the volume controls will be as follows:
A volume-up icon will be rendered if the volume is raised, as shown in thefollowing screenshot:
A volume-off icon will be rendered if the user decreases the volume tozero, as pictured next:
A volume-mute icon button will be shown if the user clicks the icon tomute the volume, as shown next:
To implement this, we will conditionally render the different icons in anIconButton, based on the volume, muted, volume_up, and volume_off values, asshown in the following code:
<IconButton color="primary" onClick={toggleMuted}> <Icon> {volume > 0 && !muted && 'volume_up' || muted && 'volume_off' || volume==0 && 'volume_mute'} </Icon></IconButton>
When this IconButton is clicked, it will either mute or unmute the volume byinvoking the toggleMuted method, which is defined as follows:
mern-mediastream/client/media/MediaPlayer.js
const toggleMuted = () => { setMuted(!muted)}
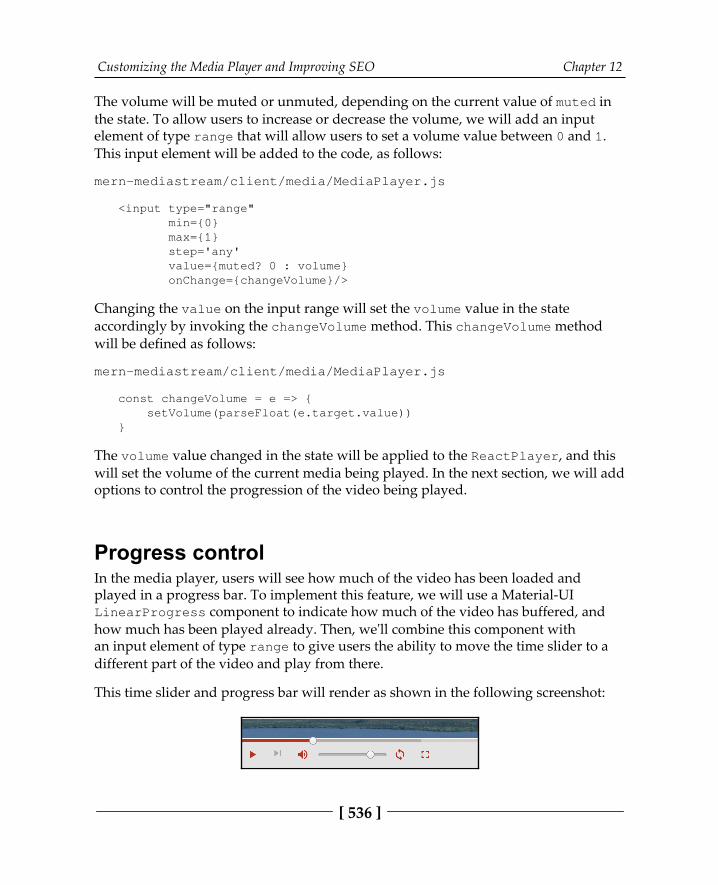
Customizing the Media Player and Improving SEO Chapter 12
[ 536 ]
The volume will be muted or unmuted, depending on the current value of muted inthe state. To allow users to increase or decrease the volume, we will add an inputelement of type range that will allow users to set a volume value between 0 and 1.This input element will be added to the code, as follows:
mern-mediastream/client/media/MediaPlayer.js
<input type="range" min={0} max={1} step='any' value={muted? 0 : volume} onChange={changeVolume}/>
Changing the value on the input range will set the volume value in the stateaccordingly by invoking the changeVolume method. This changeVolume methodwill be defined as follows:
mern-mediastream/client/media/MediaPlayer.js
const changeVolume = e => { setVolume(parseFloat(e.target.value))}
The volume value changed in the state will be applied to the ReactPlayer, and thiswill set the volume of the current media being played. In the next section, we will addoptions to control the progression of the video being played.
Progress controlIn the media player, users will see how much of the video has been loaded andplayed in a progress bar. To implement this feature, we will use a Material-UILinearProgress component to indicate how much of the video has buffered, andhow much has been played already. Then, we'll combine this component withan input element of type range to give users the ability to move the time slider to adifferent part of the video and play from there.
This time slider and progress bar will render as shown in the following screenshot:
Customizing the Media Player and Improving SEO Chapter 12
[ 537 ]
The LinearProgress component will use the played and loaded values in the stateto render these bars. It will take the played and loaded values to show each in adifferent color, as shown in the following code:
mern-mediastream/client/media/MediaPlayer.js
<LinearProgress color="primary" variant="buffer" value={values.played*100}valueBuffer={values.loaded*100} style={{width: '100%'}} classes={{ colorPrimary: classes.primaryColor, dashedColorPrimary : classes.primaryDashed, dashed: classes.dashed }}/>
The look and color for each progress bar will be determined by the styles you definefor the primaryColor, dashedColorPrimary, and dashed classes.
To update the LinearProgress component when the video is playing or loading, wewill use the onProgress event listener to set the current values for played andloaded. The onProgress method will be defined as shown in the following code:
mern-mediastream/client/media/MediaPlayer.js
const onProgress = progress => { if (!seeking) { setValues({...values, played: progress.played, loaded:progress.loaded}) }}
We only want to update the time slider if we are not currently seeking, so we firstcheck the seeking value in the state before setting the played and loaded values.
For time-sliding control, we will add the range input element and define styles, ashighlighted in the following code, to place it over the LinearProgress component.The current value of the range will update as the played value changes, so the rangevalue seems to be moving with the progression of the video. This input elementrepresenting the time slider will be added to the media player, as shown in thefollowing code:
mern-mediastream/client/media/MediaPlayer.js
<input type="range" min={0} max={1}

Customizing the Media Player and Improving SEO Chapter 12
[ 538 ]
value={values.played} step='any' onMouseDown={onSeekMouseDown} onChange={onSeekChange} onMouseUp={onSeekMouseUp} style={{ position: 'absolute', width: '100%', top: '-7px', zIndex: '999', '-webkit-appearance': 'none', backgroundColor: 'rgba(0,0,0,0)' }}/>
In the case where the user drags and sets the range picker on their own, we will addcode to handle the onMouseDown, onMouseUp, and onChange events to start thevideo from the desired position.
When the user starts dragging by holding the mouse down, we will set seeking totrue so that the progress values are not set in played and loaded. This will beachieved with the onSeekMouseDown method, which is defined as follows:
mern-mediastream/client/media/MediaPlayer.js
const onSeekMouseDown = e => { setSeeking(true)}
As the range value change occurs, we will invoke the onSeekChange method to setthe played value and also the ended value, after checking whether the user draggedthe time slider to the end of the video. This onSeekChange method will be defined asfollows:
mern-mediastream/client/media/MediaPlayer.js
const onSeekChange = e => { setValues({...values, played:parseFloat(e.target.value), ended: parseFloat(e.target.value) >= 1})}
When the user is done dragging and lifts their click on the mouse, we will setseeking to false, and set the seekTo value for the media player to the currentvalue set in the input range. The onSeekMouseUp method will be executed when theuser is done seeking, and it is defined as follows:
mern-mediastream/client/media/MediaPlayer.js
const onSeekMouseUp = e => {
Customizing the Media Player and Improving SEO Chapter 12
[ 539 ]
setSeeking(false) playerRef.seekTo(parseFloat(e.target.value))}
This way, the user will be able to select any part of the video to play from, and alsoget visual information on the time progress of the video being streamed. In the nextsection, we will add a control that will allow the user to view the video in fullscreenmode.
FullscreenUsers will be able to view the video in fullscreen mode by clicking the fullscreenbutton in the controls. The fullscreen button for the player will be rendered as shownin the following screenshot:
In order to implement a fullscreen option for the video, we will use thescreenfull Node module to track when the view is in fullscreen,and findDOMNode from react-dom to specify which Document Object Model(DOM) element will be made fullscreen with screenfull.
To set up the fullscreen code, we first install screenfull, by running thefollowing command from the command line:
yarn add screenfull
Then, we will import screenfull and findDOMNode into the MediaPlayercomponent, as shown in the following code:
mern-mediastream/client/media/MediaPlayer.js
import screenfull from 'screenfull'import { findDOMNode } from 'react-dom'
When the MediaPlayer component mounts, we will use a useEffect hook to add ascreenfull change event listener that will update the fullscreen value in the stateto indicate whether the screen is in fullscreen or not. The useEffect hook will beadded as follows, with the screenfull change listener code:
mern-mediastream/client/media/MediaPlayer.js
useEffect(() => {

Customizing the Media Player and Improving SEO Chapter 12
[ 540 ]
if (screenfull.enabled) { screenfull.on('change', () => { let fullscreen = screenfull.isFullscreen ? true : false setFullscreen(fullscreen) }) } }, [])
This fullscreen value set in the state will be updated when the user interacts withthe button for rendering the video in fullscreen mode. In the view, we will add anicon button for fullscreen with the other control buttons, as shown in thefollowing code:
mern-mediastream/client/media/MediaPlayer.js
<IconButton color="primary" onClick={onClickFullscreen}> <Icon>fullscreen</Icon></IconButton>
When the user clicks this button, we will use screenfull and findDOMNode to makethe video player fullscreen by invoking the onClickFullscreen method, which isdefined as follows:
mern-mediastream/client/media/MediaPlayer.js
const onClickFullscreen = () => { screenfull.request(findDOMNode(playerRef)) }
We access the element that renders the media player in the browser by using theplayerRef reference in findDOMNode and make it fullscreen by usingscreenfull.request. The user can then watch the video in fullscreen, where theycan press Esc at any time to exit fullscreen and get back to the PlayMedia view. In thenext section, we will implement the final customization in the media player controlsto display the total length of the video, and how much of it was already played.
Played durationIn the custom media controls section of the media player, we want to show the timethat has already passed and the total duration of the video in a readable time format,as shown in the following screenshot:
Customizing the Media Player and Improving SEO Chapter 12
[ 541 ]
To show the time, we can utilize the HTML time element, which takes a datetimevalue, and add it to the view code in MediaPlayer, as follows:
mern-mediastream/client/media/MediaPlayer.js
<time dateTime={`P${Math.round(duration * played)}S`}> {format(duration * played)}</time> /<time dateTime={`P${Math.round(duration)}S`}> {format(duration)}</time>
In the dateTime attribute for these time elements, we provide the total rounded-offseconds that represent the played duration or the total duration of the video. We willget this total duration value for a video by using the onDuration event and then setit to the state, so it can be rendered in the time element. The onDuration method isdefined as follows:
mern-mediastream/client/media/MediaPlayer.js
const onDuration = (duration) => { setDuration(duration) }
To make the duration and already played time values readable, we will use thefollowing format function:
mern-mediastream/client/media/MediaPlayer.js
const format = (seconds) => { const date = new Date(seconds * 1000) const hh = date.getUTCHours() let mm = date.getUTCMinutes() const ss = ('0' + date.getUTCSeconds()).slice(-2) if (hh) { mm = ('0' + date.getUTCMinutes()).slice(-2) return `${hh}:${mm}:${ss}` } return `${mm}:${ss}` }
This format function takes the duration value in seconds and converts it to thehh/mm/ss format, using methods from the JavaScript Date API.

Customizing the Media Player and Improving SEO Chapter 12
[ 542 ]
The controls added to this custom media player are all mostly based on some of theavailable functionality provided in the ReactPlayer module, and its examples in theofficial documentation. While implementing the custom media player for thisapplication, we updated and added the associated playing controls, looping option,volume controls, progress seeking control, fullscreen viewing option, and a display ofthe video duration. There are more options available for further customizations andextensions in ReactPlayer that may be explored depending on specific featurerequirements. With the different functionalities of the customized media playerimplemented, in the next section, we can start discussing the implementation ofautoplaying videos in this player from a list of available media.
Autoplaying related mediaIn the play media page, users will have the option to autoplay one video after theother from the related media list. To make this feature possible, the PlayMediacomponent will manage the autoplay state, which will determine the data and how itwill be rendered next in the MediaPlayer and RelatedMedia components after thecurrent video finishes streaming in the player. In the following sections, we willcomplete this autoplay functionality by adding a toggle in the PlayMedia componentand implementing the handleAutoplay method, which needs to be called when avideo ends in the MediaPlayer component.
Toggling autoplayOn the play media page, we will add an autoplay toggle option above the relatedmedia list. Besides letting the user set autoplay, the toggle will also indicate whetherit is currently set or not, as shown in the following screenshot:
Customizing the Media Player and Improving SEO Chapter 12
[ 543 ]
To add the autoplay toggle option, we will use a Material-UI Switch componentalong with a FormControlLabel, and add it to the PlayMedia component over theRelatedMedia component. It will only be rendered when there are media in therelated media list. We will add this Switch component representing the autoplaytoggle as shown in the following code:
mern-mediastream/client/media/PlayMedia.js
<FormControlLabel control={ <Switch checked={autoPlay} onChange={handleChange} color="primary" /> } label={autoPlay ? 'Autoplay ON':'Autoplay OFF'}/>
The autoplay toggle label will render according to the current value of autoPlay inthe state. To handle the change to the toggle when the user interacts with it, and toreflect this change in the state's autoPlay value, we will use the following onChangehandler function:
mern-mediastream/client/media/PlayMedia.js
const handleChange = (event) => { setAutoPlay(event.target.checked)}
This autoPlay value, which represents whether the user chose to autoplay all themedia, will determine what happens when the current video finishes streaming. Inthe next section, we will discuss how the autoplay behavior will be integrated withthe child components in PlayMedia, depending on the toggled value set forautoPlay by the user.
Handling autoplay across componentsWhen a user selects to set the Autoplay toggle to ON, the functionality desired here isthat when a video ends, if autoPlay is set to true and the current related list ofmedia is not empty, PlayMedia should load the media details of the first video in therelated list.
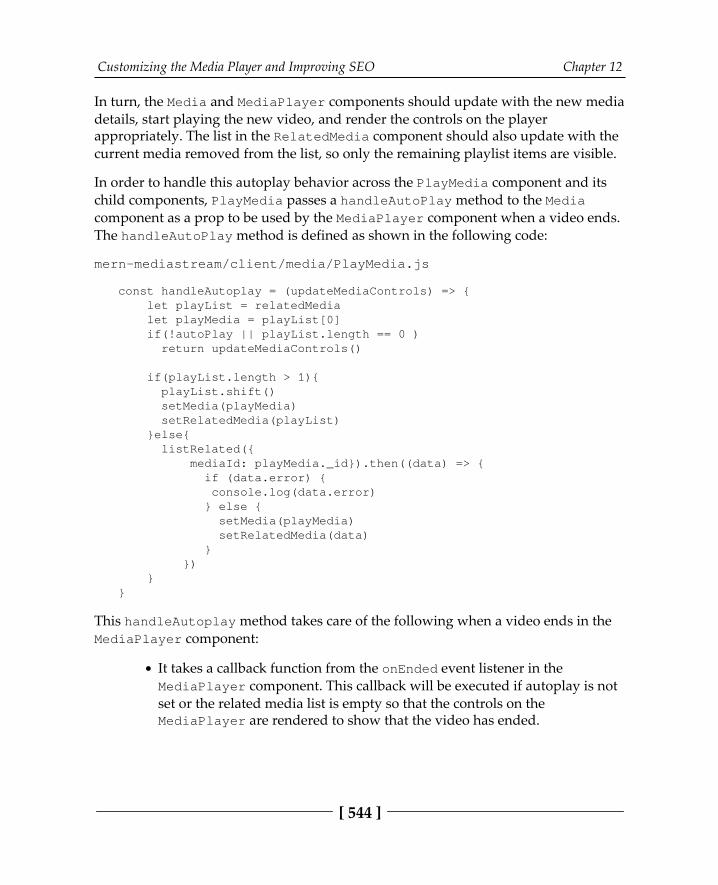
Customizing the Media Player and Improving SEO Chapter 12
[ 544 ]
In turn, the Media and MediaPlayer components should update with the new mediadetails, start playing the new video, and render the controls on the playerappropriately. The list in the RelatedMedia component should also update with thecurrent media removed from the list, so only the remaining playlist items are visible.
In order to handle this autoplay behavior across the PlayMedia component and itschild components, PlayMedia passes a handleAutoPlay method to the Mediacomponent as a prop to be used by the MediaPlayer component when a video ends.The handleAutoPlay method is defined as shown in the following code:
mern-mediastream/client/media/PlayMedia.js
const handleAutoplay = (updateMediaControls) => { let playList = relatedMedia let playMedia = playList[0] if(!autoPlay || playList.length == 0 ) return updateMediaControls()
if(playList.length > 1){ playList.shift() setMedia(playMedia) setRelatedMedia(playList) }else{ listRelated({ mediaId: playMedia._id}).then((data) => { if (data.error) { console.log(data.error) } else { setMedia(playMedia) setRelatedMedia(data) } }) }}
This handleAutoplay method takes care of the following when a video ends in theMediaPlayer component:
It takes a callback function from the onEnded event listener in theMediaPlayer component. This callback will be executed if autoplay is notset or the related media list is empty so that the controls on theMediaPlayer are rendered to show that the video has ended.
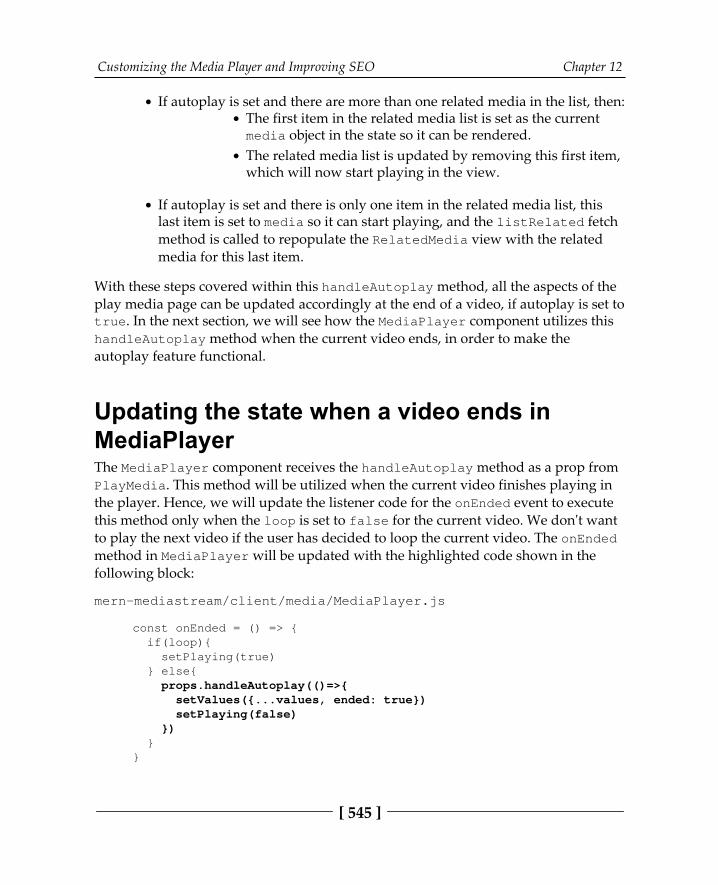
Customizing the Media Player and Improving SEO Chapter 12
[ 545 ]
If autoplay is set and there are more than one related media in the list, then:The first item in the related media list is set as the currentmedia object in the state so it can be rendered.The related media list is updated by removing this first item,which will now start playing in the view.
If autoplay is set and there is only one item in the related media list, thislast item is set to media so it can start playing, and the listRelated fetchmethod is called to repopulate the RelatedMedia view with the relatedmedia for this last item.
With these steps covered within this handleAutoplay method, all the aspects of theplay media page can be updated accordingly at the end of a video, if autoplay is set totrue. In the next section, we will see how the MediaPlayer component utilizes thishandleAutoplay method when the current video ends, in order to make theautoplay feature functional.
Updating the state when a video ends inMediaPlayerThe MediaPlayer component receives the handleAutoplay method as a prop fromPlayMedia. This method will be utilized when the current video finishes playing inthe player. Hence, we will update the listener code for the onEnded event to executethis method only when the loop is set to false for the current video. We don't wantto play the next video if the user has decided to loop the current video. The onEndedmethod in MediaPlayer will be updated with the highlighted code shown in thefollowing block:
mern-mediastream/client/media/MediaPlayer.js
const onEnded = () => { if(loop){ setPlaying(true) } else{ props.handleAutoplay(()=>{ setValues({...values, ended: true}) setPlaying(false) }) } }
Customizing the Media Player and Improving SEO Chapter 12
[ 546 ]
In this code, a callback function is passed to the handleAutoplay method, in order toset the playing value to false and render the replay icon button instead of the playor pause icon button, after it is determined in PlayMedia that the autoplay has notbeen set or that the related media list is empty.
The autoplay functionality will continue playing the related videos one after the otherwith this implementation. This implementation demonstrates another way to updatethe state across the components when the values are interdependent.
With this autoplay functionality implemented, we have a complete play media pagewith a customized media player and a related media list that the user can choose toautoplay through like a playlist. In the next section, we will make this page SEO-friendly by SSR of this view with the media data populated in the backend.
Server-side rendering with dataSEO is important for any web application that delivers content to its users and wantsto make the content easy to find. Generally, content on any web page will have abetter chance of getting more viewers if the content is easily readable to searchengines. When a search-engine bot accesses a web URL, it will get the SSR output.Hence, to make the content discoverable, the content should be part of the SSRoutput.
In MERN Mediastream, we will use the case of making media details popular acrosssearch engine results, to demonstrate how to inject data into an SSR view in a MERN-based application. We will focus on implementing SSR with data injected for thePlayMedia component that is returned at the '/media/:mediaId' path. Thegeneral implementation steps outlined here can be used to implement SSR with datafor other views.
In the following sections, we will extend the SSR implementation discussed inChapter 4, Adding a React Frontend to Complete MERN. We will first define astatic route configuration file and use it to update the existing SSR code in thebackend to inject the necessary media data from the database. Then, we will updatethe frontend code to render this server-injected data in the view, and, finally, check ifthis SSR implementation works as expected.
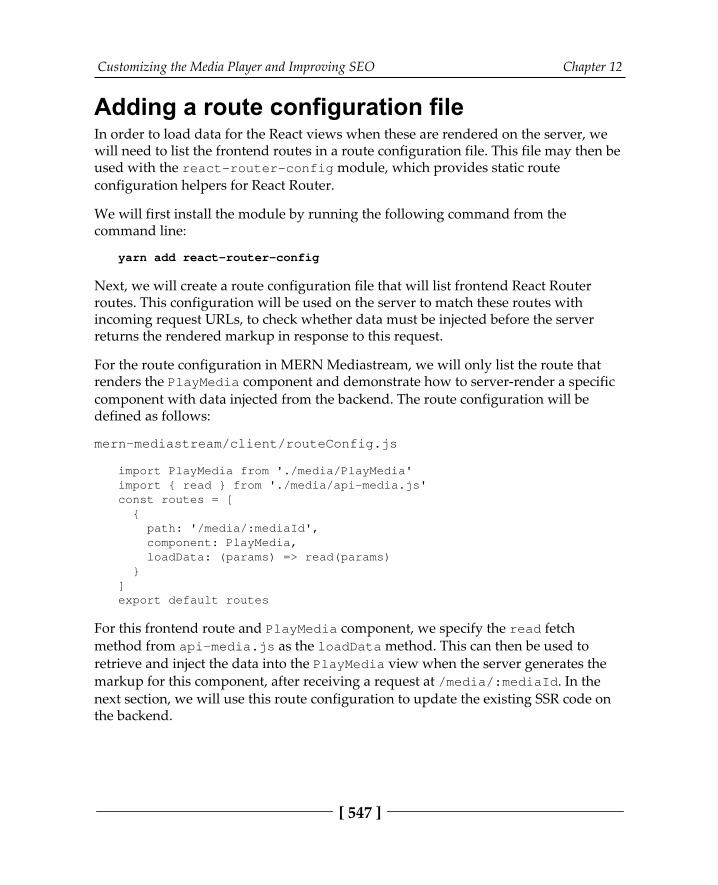
Customizing the Media Player and Improving SEO Chapter 12
[ 547 ]
Adding a route configuration fileIn order to load data for the React views when these are rendered on the server, wewill need to list the frontend routes in a route configuration file. This file may then beused with the react-router-config module, which provides static routeconfiguration helpers for React Router.
We will first install the module by running the following command from thecommand line:
yarn add react-router-config
Next, we will create a route configuration file that will list frontend React Routerroutes. This configuration will be used on the server to match these routes withincoming request URLs, to check whether data must be injected before the serverreturns the rendered markup in response to this request.
For the route configuration in MERN Mediastream, we will only list the route thatrenders the PlayMedia component and demonstrate how to server-render a specificcomponent with data injected from the backend. The route configuration will bedefined as follows:
mern-mediastream/client/routeConfig.js
import PlayMedia from './media/PlayMedia'import { read } from './media/api-media.js'const routes = [ { path: '/media/:mediaId', component: PlayMedia, loadData: (params) => read(params) }]export default routes
For this frontend route and PlayMedia component, we specify the read fetchmethod from api-media.js as the loadData method. This can then be used toretrieve and inject the data into the PlayMedia view when the server generates themarkup for this component, after receiving a request at /media/:mediaId. In thenext section, we will use this route configuration to update the existing SSR code onthe backend.
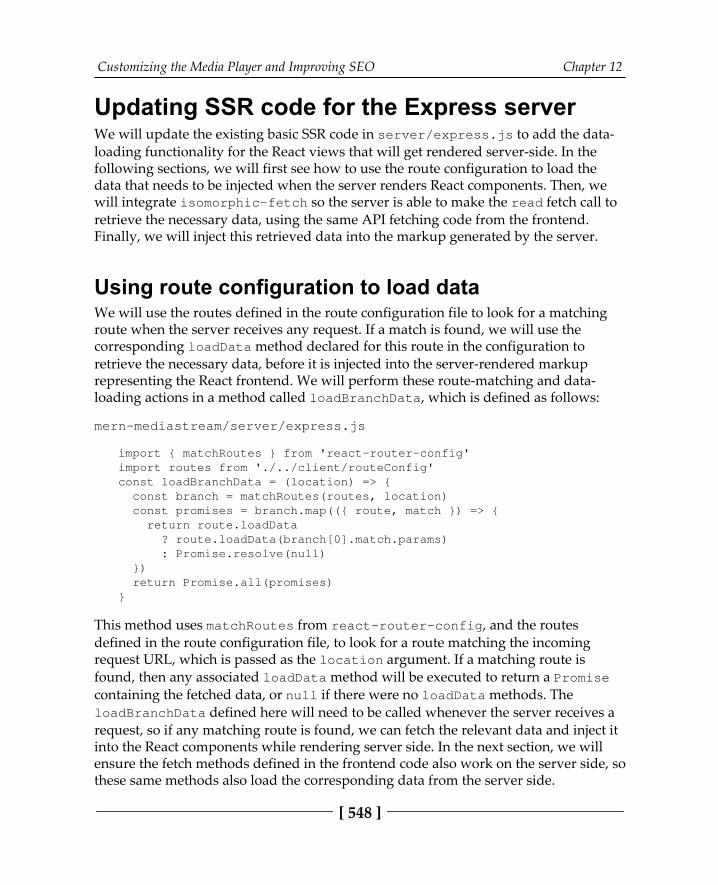
Customizing the Media Player and Improving SEO Chapter 12
[ 548 ]
Updating SSR code for the Express serverWe will update the existing basic SSR code in server/express.js to add the data-loading functionality for the React views that will get rendered server-side. In thefollowing sections, we will first see how to use the route configuration to load thedata that needs to be injected when the server renders React components. Then, wewill integrate isomorphic-fetch so the server is able to make the read fetch call toretrieve the necessary data, using the same API fetching code from the frontend.Finally, we will inject this retrieved data into the markup generated by the server.
Using route configuration to load dataWe will use the routes defined in the route configuration file to look for a matchingroute when the server receives any request. If a match is found, we will use thecorresponding loadData method declared for this route in the configuration toretrieve the necessary data, before it is injected into the server-rendered markuprepresenting the React frontend. We will perform these route-matching and data-loading actions in a method called loadBranchData, which is defined as follows:
mern-mediastream/server/express.js
import { matchRoutes } from 'react-router-config'import routes from './../client/routeConfig'const loadBranchData = (location) => { const branch = matchRoutes(routes, location) const promises = branch.map(({ route, match }) => { return route.loadData ? route.loadData(branch[0].match.params) : Promise.resolve(null) }) return Promise.all(promises)}
This method uses matchRoutes from react-router-config, and the routesdefined in the route configuration file, to look for a route matching the incomingrequest URL, which is passed as the location argument. If a matching route isfound, then any associated loadData method will be executed to return a Promisecontaining the fetched data, or null if there were no loadData methods. TheloadBranchData defined here will need to be called whenever the server receives arequest, so if any matching route is found, we can fetch the relevant data and inject itinto the React components while rendering server side. In the next section, we willensure the fetch methods defined in the frontend code also work on the server side, sothese same methods also load the corresponding data from the server side.
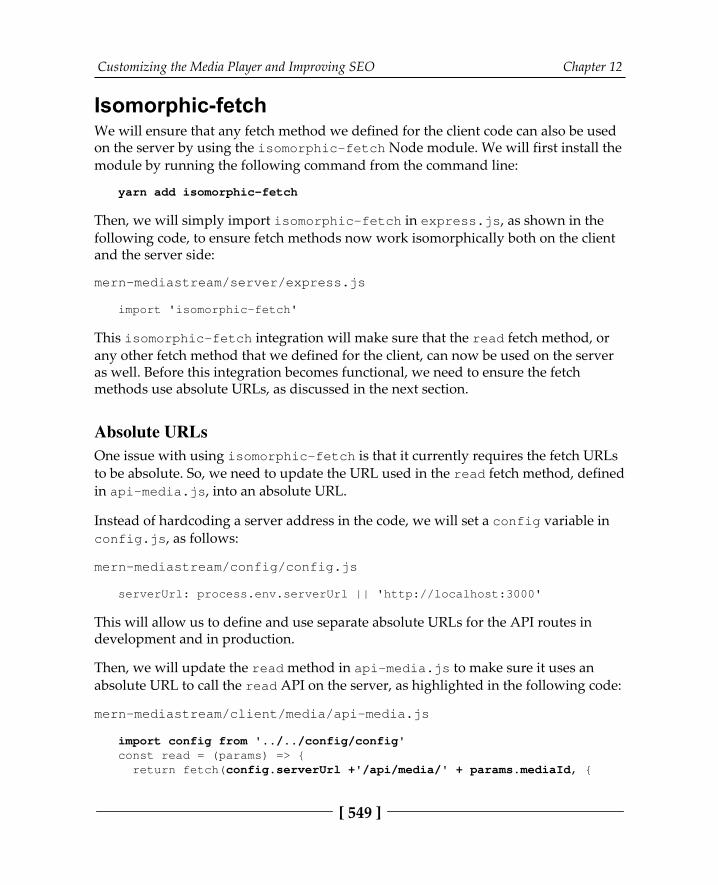
Customizing the Media Player and Improving SEO Chapter 12
[ 549 ]
Isomorphic-fetchWe will ensure that any fetch method we defined for the client code can also be usedon the server by using the isomorphic-fetch Node module. We will first install themodule by running the following command from the command line:
yarn add isomorphic-fetch
Then, we will simply import isomorphic-fetch in express.js, as shown in thefollowing code, to ensure fetch methods now work isomorphically both on the clientand the server side:
mern-mediastream/server/express.js
import 'isomorphic-fetch'
This isomorphic-fetch integration will make sure that the read fetch method, orany other fetch method that we defined for the client, can now be used on the serveras well. Before this integration becomes functional, we need to ensure the fetchmethods use absolute URLs, as discussed in the next section.
Absolute URLsOne issue with using isomorphic-fetch is that it currently requires the fetch URLsto be absolute. So, we need to update the URL used in the read fetch method, definedin api-media.js, into an absolute URL.
Instead of hardcoding a server address in the code, we will set a config variable inconfig.js, as follows:
mern-mediastream/config/config.js
serverUrl: process.env.serverUrl || 'http://localhost:3000'
This will allow us to define and use separate absolute URLs for the API routes indevelopment and in production.
Then, we will update the read method in api-media.js to make sure it uses anabsolute URL to call the read API on the server, as highlighted in the following code:
mern-mediastream/client/media/api-media.js
import config from '../../config/config'const read = (params) => { return fetch(config.serverUrl +'/api/media/' + params.mediaId, {
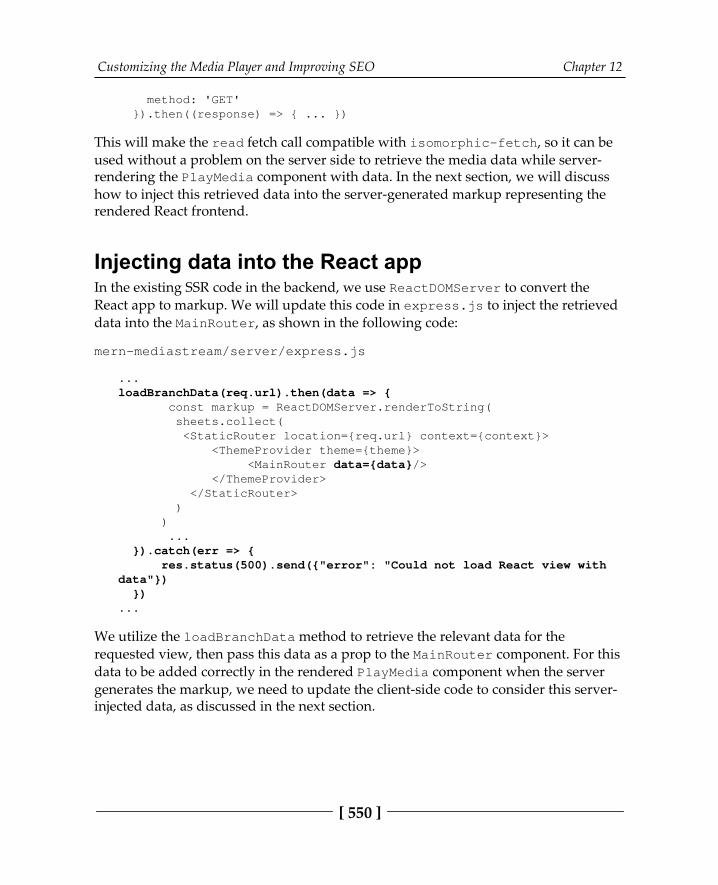
Customizing the Media Player and Improving SEO Chapter 12
[ 550 ]
method: 'GET' }).then((response) => { ... })
This will make the read fetch call compatible with isomorphic-fetch, so it can beused without a problem on the server side to retrieve the media data while server-rendering the PlayMedia component with data. In the next section, we will discusshow to inject this retrieved data into the server-generated markup representing therendered React frontend.
Injecting data into the React appIn the existing SSR code in the backend, we use ReactDOMServer to convert the React app to markup. We will update this code in express.js to inject the retrieveddata into the MainRouter, as shown in the following code:
mern-mediastream/server/express.js
...loadBranchData(req.url).then(data => { const markup = ReactDOMServer.renderToString( sheets.collect( <StaticRouter location={req.url} context={context}> <ThemeProvider theme={theme}> <MainRouter data={data}/> </ThemeProvider> </StaticRouter> ) ) ... }).catch(err => { res.status(500).send({"error": "Could not load React view withdata"}) })...
We utilize the loadBranchData method to retrieve the relevant data for therequested view, then pass this data as a prop to the MainRouter component. For thisdata to be added correctly in the rendered PlayMedia component when the servergenerates the markup, we need to update the client-side code to consider this server-injected data, as discussed in the next section.
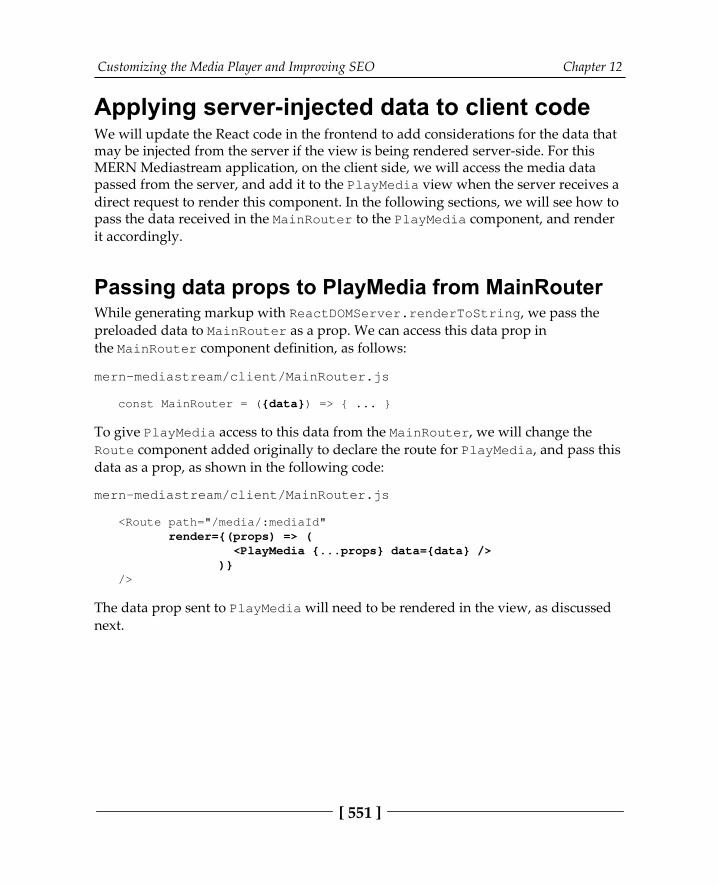
Customizing the Media Player and Improving SEO Chapter 12
[ 551 ]
Applying server-injected data to client codeWe will update the React code in the frontend to add considerations for the data thatmay be injected from the server if the view is being rendered server-side. For thisMERN Mediastream application, on the client side, we will access the media datapassed from the server, and add it to the PlayMedia view when the server receives adirect request to render this component. In the following sections, we will see how topass the data received in the MainRouter to the PlayMedia component, and renderit accordingly.
Passing data props to PlayMedia from MainRouterWhile generating markup with ReactDOMServer.renderToString, we pass the preloaded data to MainRouter as a prop. We can access this data prop inthe MainRouter component definition, as follows:
mern-mediastream/client/MainRouter.js
const MainRouter = ({data}) => { ... }
To give PlayMedia access to this data from the MainRouter, we will change theRoute component added originally to declare the route for PlayMedia, and pass thisdata as a prop, as shown in the following code:
mern-mediastream/client/MainRouter.js
<Route path="/media/:mediaId" render={(props) => ( <PlayMedia {...props} data={data} /> )}/>
The data prop sent to PlayMedia will need to be rendered in the view, as discussednext.
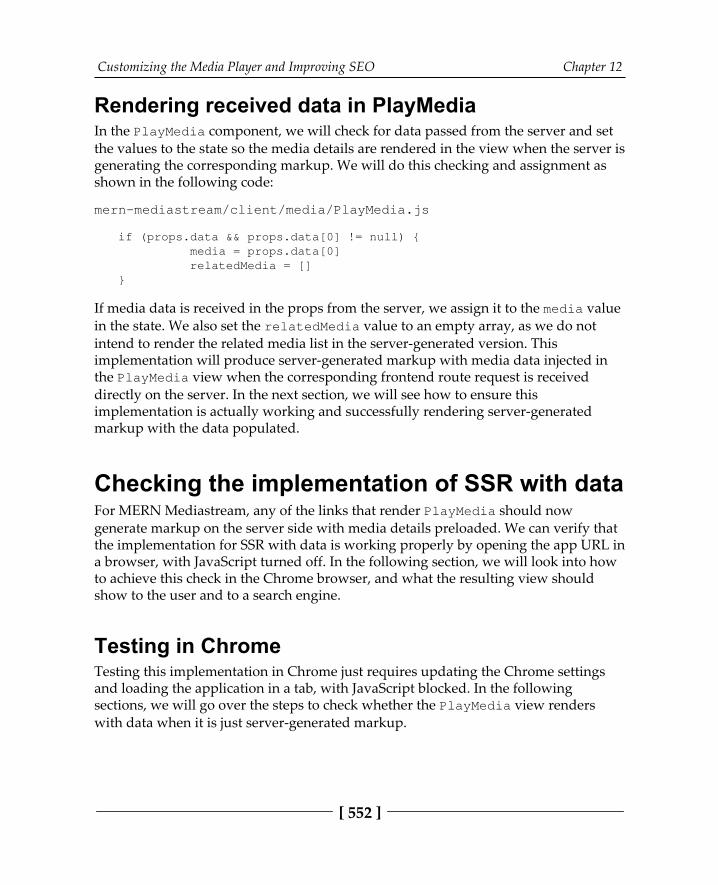
Customizing the Media Player and Improving SEO Chapter 12
[ 552 ]
Rendering received data in PlayMediaIn the PlayMedia component, we will check for data passed from the server and setthe values to the state so the media details are rendered in the view when the server isgenerating the corresponding markup. We will do this checking and assignment asshown in the following code:
mern-mediastream/client/media/PlayMedia.js
if (props.data && props.data[0] != null) { media = props.data[0] relatedMedia = []}
If media data is received in the props from the server, we assign it to the media valuein the state. We also set the relatedMedia value to an empty array, as we do notintend to render the related media list in the server-generated version. Thisimplementation will produce server-generated markup with media data injected inthe PlayMedia view when the corresponding frontend route request is receiveddirectly on the server. In the next section, we will see how to ensure thisimplementation is actually working and successfully rendering server-generatedmarkup with the data populated.
Checking the implementation of SSR with dataFor MERN Mediastream, any of the links that render PlayMedia should nowgenerate markup on the server side with media details preloaded. We can verify thatthe implementation for SSR with data is working properly by opening the app URL ina browser, with JavaScript turned off. In the following section, we will look into howto achieve this check in the Chrome browser, and what the resulting view shouldshow to the user and to a search engine.
Testing in ChromeTesting this implementation in Chrome just requires updating the Chrome settingsand loading the application in a tab, with JavaScript blocked. In the followingsections, we will go over the steps to check whether the PlayMedia view renderswith data when it is just server-generated markup.
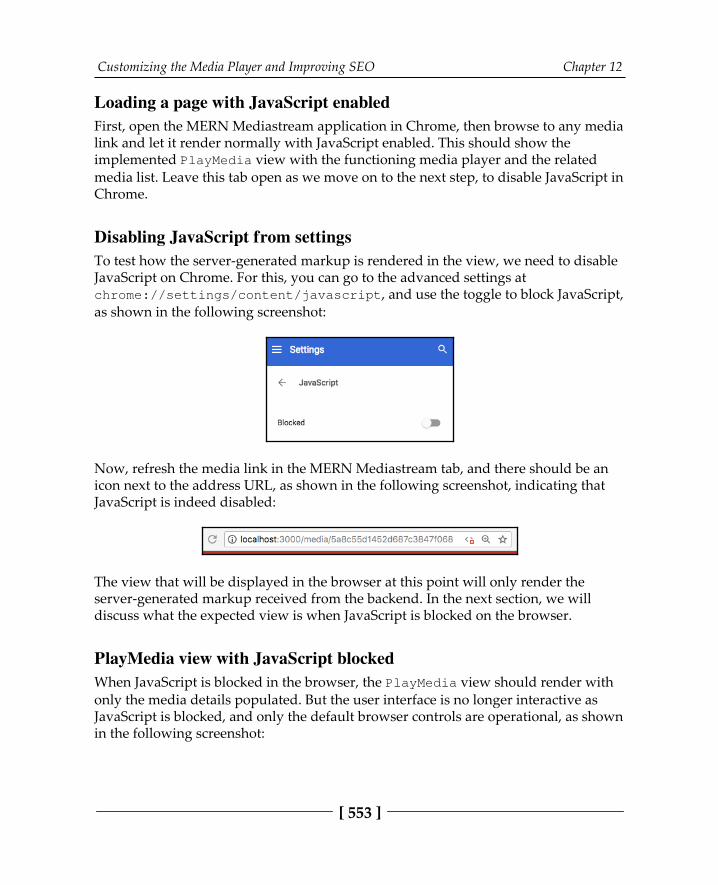
Customizing the Media Player and Improving SEO Chapter 12
[ 553 ]
Loading a page with JavaScript enabledFirst, open the MERN Mediastream application in Chrome, then browse to any medialink and let it render normally with JavaScript enabled. This should show theimplemented PlayMedia view with the functioning media player and the relatedmedia list. Leave this tab open as we move on to the next step, to disable JavaScript inChrome.
Disabling JavaScript from settingsTo test how the server-generated markup is rendered in the view, we need to disableJavaScript on Chrome. For this, you can go to the advanced settings atchrome://settings/content/javascript, and use the toggle to block JavaScript,as shown in the following screenshot:
Now, refresh the media link in the MERN Mediastream tab, and there should be anicon next to the address URL, as shown in the following screenshot, indicating thatJavaScript is indeed disabled:
The view that will be displayed in the browser at this point will only render theserver-generated markup received from the backend. In the next section, we willdiscuss what the expected view is when JavaScript is blocked on the browser.
PlayMedia view with JavaScript blockedWhen JavaScript is blocked in the browser, the PlayMedia view should render withonly the media details populated. But the user interface is no longer interactive asJavaScript is blocked, and only the default browser controls are operational, as shownin the following screenshot:
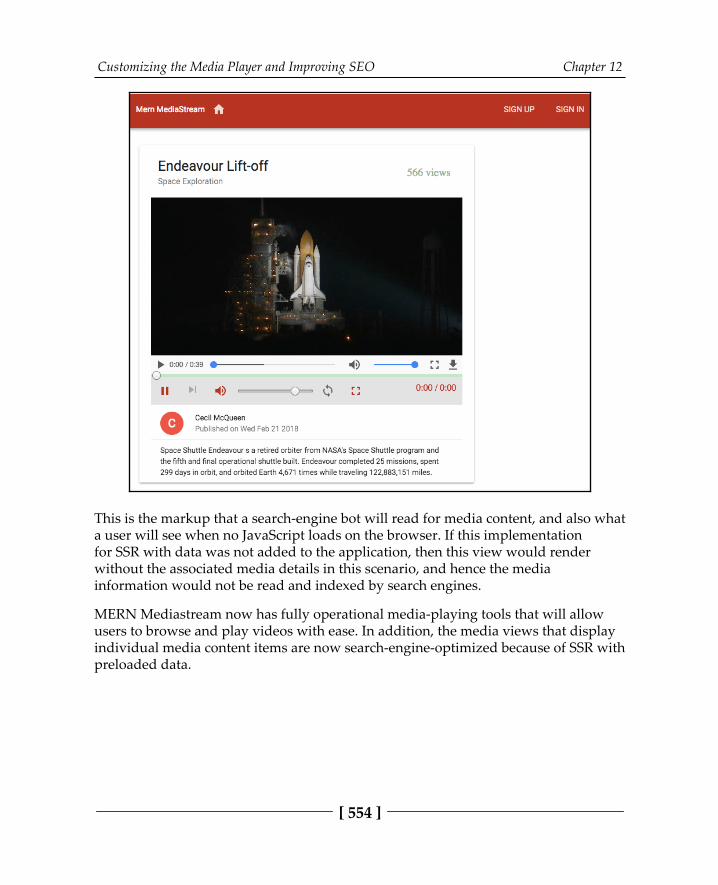
Customizing the Media Player and Improving SEO Chapter 12
[ 554 ]
This is the markup that a search-engine bot will read for media content, and also whata user will see when no JavaScript loads on the browser. If this implementationfor SSR with data was not added to the application, then this view would renderwithout the associated media details in this scenario, and hence the mediainformation would not be read and indexed by search engines.
MERN Mediastream now has fully operational media-playing tools that will allowusers to browse and play videos with ease. In addition, the media views that displayindividual media content items are now search-engine-optimized because of SSR withpreloaded data.
Customizing the Media Player and Improving SEO Chapter 12
[ 555 ]
SummaryIn this chapter, we completely upgraded the play media page on MERNMediastream. We first added custom media player controls, utilizing optionsavailable in the ReactPlayer component. Then, we incorporated the autoplayfunctionality for a related media playlist, after retrieving the related media from thedatabase. Finally, we made the media details search-engine-readable by injecting datafrom the server when the view is rendered on the server.
You can apply the techniques explored in this chapter to build the play media page,to compose and build your own complex user interface with React components thatare interdependent, and to add SSR with data for views that need to be SEO-friendlyin your applications.
We have now explored advanced capabilities, such as streaming and SEO, with theMERN stack technologies. In the next two chapters, we will test the potential of thisstack further by incorporating virtual reality (VR) elements into a full-stack webapplication using React 360.

13Developing a Web-Based VR
GameThe advent of virtual reality (VR) and augmented reality (AR) technologies is transforming how users interact with software and, in turn, the world around them.The possible applications of VR and AR are innumerable, and though thegaming industry has been an early adopter, these rapidly developing technologieshave the potential to shift paradigms across multiple disciplines and industries.
In order to demonstrate how the MERN stack paired with React 360 can easily addVR capabilities to any web application, we will discuss and develop a dynamic, web-based VR game in this and the next chapter. In this chapter, we will focus on definingthe features of the VR game. Additionally, we will go over the key 3D VR conceptsthat are relevant to implementing this VR game, before developing the game viewusing React 360.
In this chapter, we will build the VR game using React 360 by covering the followingtopics:
Introducing the MERN VR GameGetting started with React 360Key concepts for developing 3D VR applicationsDefining game detailsBuilding the game view in React 360Bundling the React 360 code to integrate with the MERN skeleton
After going over these topics, you will be able to apply 3D VR concepts and use React360 to start building your own VR-based applications.

Developing a Web-Based VR Game Chapter 13
[ 557 ]
Introducing the MERN VR GameThe MERN VR Game web application will be developed by extending the MERNskeleton and integrating VR capabilities using React 360. It will be a dynamic, web-based VR game application, in which registered users can make their own games, andany visitor to the application can play these games. The home page of this applicationwill list the games on the platform, as shown in the following screenshot:
The code to implement features of the VR game using React 360 isavailable on GitHub at https:/ / github. com/ PacktPublishing/Full- Stack- React- Projects- Second- Edition/ tree/ master/Chapter13/ MERNVR. You can clone this code and run the applicationas you go through the code explanations in the rest of this chapter.
The features of the game will be simple enough to reveal the capabilities ofintroducing VR into a MERN-based application, without delving too deeply into the advanced concepts of React 360 that may be used to implement more complex VRfeatures. In the next section, we will briefly define the features of a game in thisapplication.
Game featuresEach game in the MERN VR Game application will essentially be a different VRworld, where users can interact with 3D objects placed at different locations in a 360-degree panoramic world.

Developing a Web-Based VR Game Chapter 13
[ 558 ]
The gameplay will be similar to that of a scavenger hunt, and to complete each game,users will have to find and collect the 3D objects that are relevant to the clue ordescription for each game. This means the game world will contain some VR objectsthat can be collected by the player and some VR objects that cannot be collected, butthat may be placed by makers of the game as props or hints. Finally, the game will bewon when all of the relevant 3D objects have been collected by the user.
In this chapter, we will build these game features using React 360, focusing primarilyon VR and React 360 concepts that will be relevant to implementing the featuresdefined here. Once the game features are ready, we will discuss how the React 360code can be bundled and prepared for integration with the MERN application codedeveloped in Chapter 14, Making the VR Game Dynamic Using MERN. Before divinginto the implementation of the game features with React 360, we will first look atsetting up and getting started with React 360 in the next section.
Getting started with React 360React 360 makes it possible to build VR experiences using the same declarative andcomponent-based approach as in React. The underlying technology of React 360makes use of the Three.js JavaScript 3D engine to render 3D graphics with WebGLwithin any compatible web browser and also provides us with access to VR headsetswith the Web VR API.
Though React 360 builds on top of React and the apps run in the browser, React 360has a lot in common with React Native, thus making React 360 apps cross-platform.This also means that some concepts of React Native are also applicable to React 360.Covering all of the React 360 concepts is outside the scope of this book; therefore, wewill focus on the concepts that are required to build the game and integrate them withthe MERN stack web application. In the following section, we will begin by setting upa React 360 project, which will be extended on later in the chapter in order to buildthe game features.
Setting up a React 360 projectReact 360 provides developer tools that make it easy to start developing a new React360 project. The steps to get started are detailed in the official React 360documentation, so we will only summarize the steps here and point out the files thatare relevant to developing the game.

Developing a Web-Based VR Game Chapter 13
[ 559 ]
Since we already have Node and Yarn installed for the MERN applications, we canstart by installing the React 360 CLI tool by running the following command in thecommand line:
yarn global add react-360-cli
Then, use this React 360 CLI tool to create a new application, and install the requireddependencies by running the following command from the command line:
react-360 init MERNVR
This will add the new React 360 application with all of the necessary files into afolder, named MERNVR, in the current directory. Finally, we can go into this folder inthe command line, and run the application using the following command:
yarn start
This start command will initialize the local development server, and the defaultReact 360 application can be viewed in the browser athttp://localhost:8081/index.html.
To update this starter application and implement our game features, we will modifycode mainly in the index.js file with some minor updates in the client.js file,which can be found in the MERNVR project folder.
The default code in index.js for the starter application generated by React 360should be as follows. Note that it renders a Welcome to React 360 text in a 360-degreeworld in the browser:
import React from 'react'import { AppRegistry, StyleSheet, Text, View } from 'react-360'
export default class MERNVR extends React.Component { render() { return ( <View style={styles.panel}> <View style={styles.greetingBox}> <Text style={styles.greeting}> Welcome to React 360 </Text> </View> </View> ) }}
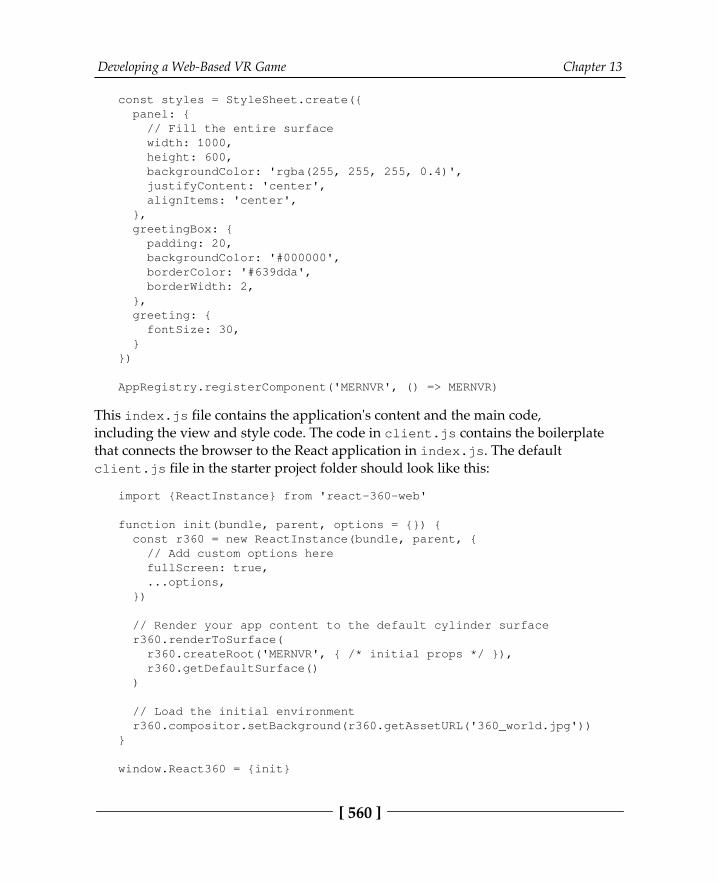
Developing a Web-Based VR Game Chapter 13
[ 560 ]
const styles = StyleSheet.create({ panel: { // Fill the entire surface width: 1000, height: 600, backgroundColor: 'rgba(255, 255, 255, 0.4)', justifyContent: 'center', alignItems: 'center', }, greetingBox: { padding: 20, backgroundColor: '#000000', borderColor: '#639dda', borderWidth: 2, }, greeting: { fontSize: 30, }})
AppRegistry.registerComponent('MERNVR', () => MERNVR)
This index.js file contains the application's content and the main code,including the view and style code. The code in client.js contains the boilerplatethat connects the browser to the React application in index.js. The defaultclient.js file in the starter project folder should look like this:
import {ReactInstance} from 'react-360-web'
function init(bundle, parent, options = {}) { const r360 = new ReactInstance(bundle, parent, { // Add custom options here fullScreen: true, ...options, })
// Render your app content to the default cylinder surface r360.renderToSurface( r360.createRoot('MERNVR', { /* initial props */ }), r360.getDefaultSurface() )
// Load the initial environment r360.compositor.setBackground(r360.getAssetURL('360_world.jpg'))}
window.React360 = {init}

Developing a Web-Based VR Game Chapter 13
[ 561 ]
This code executes the React code defined in index.js, essentially creating a newinstance of React 360 and loading the React code by attaching it to the DOM.
With this, the default React 360 starter project is set up and ready for extension.Before modifying this code to implement the game, in the next section, we will firstlook at some of the key concepts related to developing 3D VR experiences, in thecontext of how these concepts are applied with React 360.
Key concepts for developing the VRgameBefore creating VR content and an interactive 360-degree experience for the game, wewill highlight some of the relevant aspects of the virtual world, and how React 360can be used to work with these VR concepts. Given the wide range of possibilities inthe VR space and the various options available with React 360, we need to identifyand explore the specific concepts that will enable us to implement the interactive VRfeatures we defined for the game. In the following sections, we will discuss theimages that will make up the 360-degree world of the game, the 3D positioningsystem, along with the React 360 components, APIs, and input events that will beutilized to implement the game.
Equirectangular panoramic imagesThe VR world for the game will be composed of a panoramic image that is addedto the React 360 environment as a background image.
Panorama images are generally 360-degree images or spherical panoramas projectedonto a sphere that completely surrounds the viewer. A common and popular formatfor 360-degree panorama images is the equirectangular format. React 360 currentlysupports mono and stereo formats for equirectangular images.
To learn more about the 360 images and video support in React 360,refer to the React 360documentation at facebook.github.io/react-360/docs/setup.html.
The photograph shown here is an example of an equirectangular, 360-degreepanoramic image. To set the world background for a game in MERN VR Game, wewill use this kind of image:

Developing a Web-Based VR Game Chapter 13
[ 562 ]
An equirectangular panoramic image consists of a single image withan aspect ratio of 2:1, where the width is twice the height. Theseimages are created with a special 360-degree camera. An excellentsource of equirectangular images is Flickr; you just need to searchfor the equirectangular tag.
Creating the game world by setting the background scene using an equirectangularimage in a React 360 environment will make the VR experience immersive and transport the user to a virtual location. To enhance this experience and add 3D objectsin this VR world effectively, we need to learn more about the layout and coordinatesystem relevant to the 3D space, which is discussed next.
3D position – coordinates and transformsWe need to understand positioning and orientation in the VR world space, in order toplace 3D objects at the desired locations and to make the VR experience feel morereal. In the following sections, we will review the 3D coordinate system to help us todetermine the location of a virtual object in the 3D space, and the transformcapabilities in React 360, which will allow us to position, orient, and scale objects asrequired.
3D coordinate systemFor mapping in a 3D space, React 360 uses a three-dimensional meter-basedcoordinate system that is similar to the OpenGL® 3D coordinate system. This allowsindividual components to be transformed, moved, or rotated in 3D in relation to thelayout in their parent component.
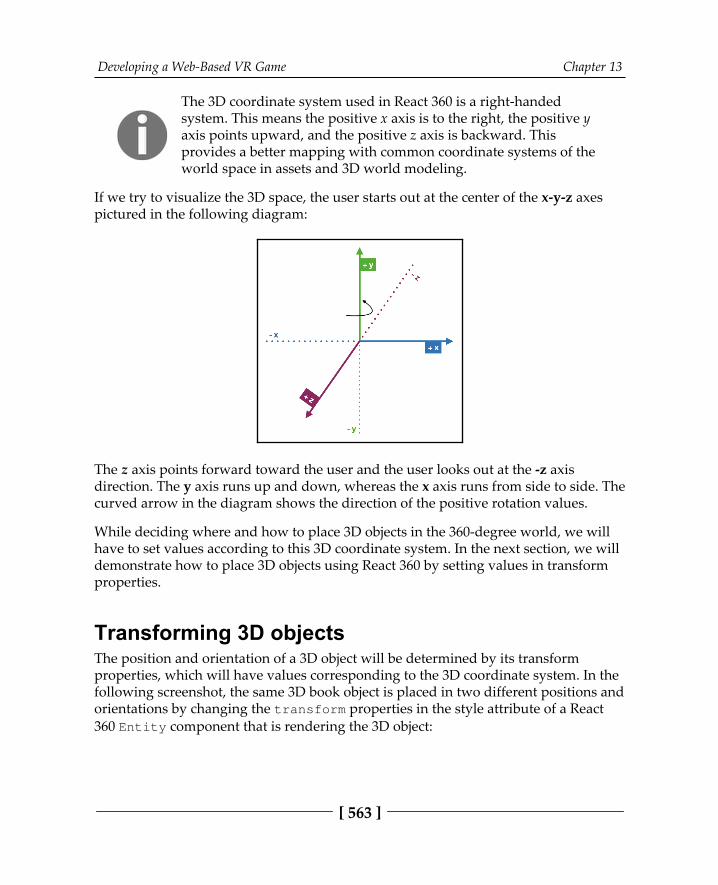
Developing a Web-Based VR Game Chapter 13
[ 563 ]
The 3D coordinate system used in React 360 is a right-handedsystem. This means the positive x axis is to the right, the positive yaxis points upward, and the positive z axis is backward. Thisprovides a better mapping with common coordinate systems of theworld space in assets and 3D world modeling.
If we try to visualize the 3D space, the user starts out at the center of the x-y-z axespictured in the following diagram:
The z axis points forward toward the user and the user looks out at the -z axisdirection. The y axis runs up and down, whereas the x axis runs from side to side. Thecurved arrow in the diagram shows the direction of the positive rotation values.
While deciding where and how to place 3D objects in the 360-degree world, we willhave to set values according to this 3D coordinate system. In the next section, we willdemonstrate how to place 3D objects using React 360 by setting values in transformproperties.
Transforming 3D objectsThe position and orientation of a 3D object will be determined by its transformproperties, which will have values corresponding to the 3D coordinate system. In thefollowing screenshot, the same 3D book object is placed in two different positions andorientations by changing the transform properties in the style attribute of a React360 Entity component that is rendering the 3D object:
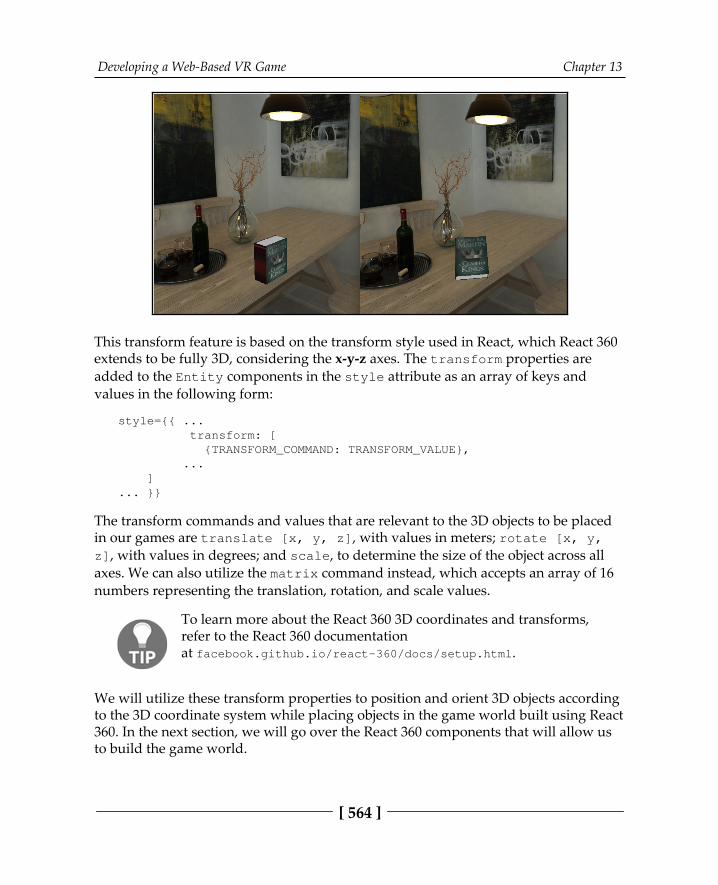
Developing a Web-Based VR Game Chapter 13
[ 564 ]
This transform feature is based on the transform style used in React, which React 360extends to be fully 3D, considering the x-y-z axes. The transform properties areadded to the Entity components in the style attribute as an array of keys andvalues in the following form:
style={{ ... transform: [ {TRANSFORM_COMMAND: TRANSFORM_VALUE}, ... ]... }}
The transform commands and values that are relevant to the 3D objects to be placedin our games are translate [x, y, z], with values in meters; rotate [x, y,z], with values in degrees; and scale, to determine the size of the object across allaxes. We can also utilize the matrix command instead, which accepts an array of 16numbers representing the translation, rotation, and scale values.
To learn more about the React 360 3D coordinates and transforms,refer to the React 360 documentationat facebook.github.io/react-360/docs/setup.html.
We will utilize these transform properties to position and orient 3D objects accordingto the 3D coordinate system while placing objects in the game world built using React360. In the next section, we will go over the React 360 components that will allow usto build the game world.
Developing a Web-Based VR Game Chapter 13
[ 565 ]
React 360 componentsReact 360 provides a range of components that can be used out of the box to create theVR user interface for the game. This range consists of basic components availablefrom React Native and also VR-specific components that will allow you to incorporatethe interactive 3D objects in the VR game. In the following sections, we willsummarize the specific components that will be used to build the game view andfeatures, including core components, such as View and Text, and VR-specificcomponents, such as Entity and VrButton.
Core componentsThe core components in React 360 include two of React Native's built-in components– the Text and View components. In the game, we will use these two components toadd content to the game world. In the following sections, we will discuss these twocore components.
ViewThe View component is the most fundamental component for building a userinterface in React Native, and it maps directly to the native view equivalent onwhatever platform React Native is running on. In our case, since the application willrender in the browser, it will map to a <div> element in the browser. The Viewcomponent can be added as follows:
<View> <Text>Hello</Text></View>
The View component is typically used as a container for other components; it can benested inside other views and can have zero-to-many children of any type.
We will use View components to hold the game world view and add 3D objectentities and text to the game. Next, we will look at the Text component, which willallow us to add text to the view.
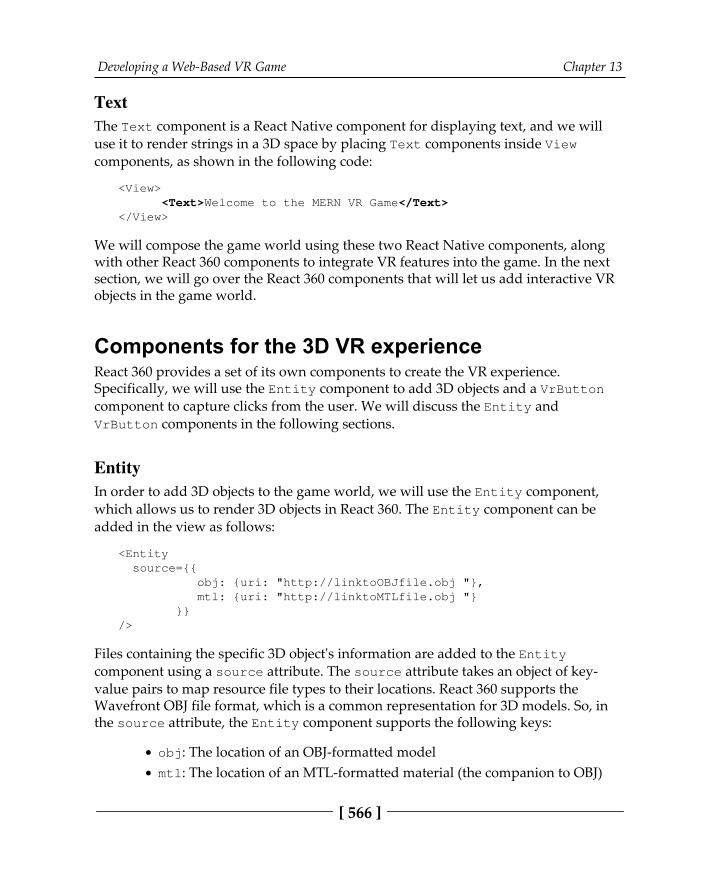
Developing a Web-Based VR Game Chapter 13
[ 566 ]
TextThe Text component is a React Native component for displaying text, and we willuse it to render strings in a 3D space by placing Text components inside Viewcomponents, as shown in the following code:
<View> <Text>Welcome to the MERN VR Game</Text></View>
We will compose the game world using these two React Native components, alongwith other React 360 components to integrate VR features into the game. In the nextsection, we will go over the React 360 components that will let us add interactive VRobjects in the game world.
Components for the 3D VR experienceReact 360 provides a set of its own components to create the VR experience.Specifically, we will use the Entity component to add 3D objects and a VrButtoncomponent to capture clicks from the user. We will discuss the Entity andVrButton components in the following sections.
EntityIn order to add 3D objects to the game world, we will use the Entity component,which allows us to render 3D objects in React 360. The Entity component can beadded in the view as follows:
<Entity source={{ obj: {uri: "http://linktoOBJfile.obj "}, mtl: {uri: "http://linktoMTLfile.obj "} }}/>
Files containing the specific 3D object's information are added to the Entitycomponent using a source attribute. The source attribute takes an object of key-value pairs to map resource file types to their locations. React 360 supports theWavefront OBJ file format, which is a common representation for 3D models. So, inthe source attribute, the Entity component supports the following keys:
obj: The location of an OBJ-formatted modelmtl: The location of an MTL-formatted material (the companion to OBJ)
Developing a Web-Based VR Game Chapter 13
[ 567 ]
The values for the obj and mtl properties point to the location of these files and canbe static strings, asset() calls, require() statements, or URI strings.
OBJ (or .OBJ) is a geometry definition file format that was firstdeveloped by Wavefront Technologies. It is a simple data formatthat represents 3D geometry as a list of vertices and texture vertices.OBJ coordinates have no units, but OBJ files can contain scaleinformation in a human-readable comment line. You can learn moreabout this format at paulbourke.net/dataformats/obj/.
MTL (or .MTL) are material library files that contains one or morematerial definitions, each of which includes the color, texture, andreflection map of individual materials. These are applied to thesurfaces and vertices of objects. You can learn more about thisformat at paulbourke.net/dataformats/mtl/.
The Entity component also takes transform property values in the style attribute,so the objects can be placed at the desired positions and orientations in the 3D worldspace.
In our MERN VR Game application, makers will add URLs pointing to the VR objectfiles (both .obj and .mtl) for each of their Entity objects in a game, and also specifythe transform property values to indicate where and how the 3D objects should beplaced in the game world.
A good source of 3D objects is https:/ /clara. io/ , with multiplefile formats available for download and use.
The Entity component will render 3D objects in the 3D world space. In order tomake these objects interactive, we need to use the VrButton component, which isdiscussed in the next section.
Developing a Web-Based VR Game Chapter 13
[ 568 ]
VrButtonThe VrButton component in React 360 will help us to implement a simple, button-style onClick behavior for the objects and Text buttons that will be added to thegame. A VrButton component is not visible in the view by default and will only actas a wrapper to capture events, but it can be styled in the same way as a Viewcomponent, as shown in the following code:
<VrButton onClick={this.clickHandler}> <View> <Text>Click me to make something happen!</Text> </View> </VrButton>
This component is a helper for managing click-type interactions from the user acrossdifferent input devices. Input events that will trigger the click event include aspacebar press on the keyboard, a left-click on the mouse, and a touch on the screen.
The Entity and VrButton components from React 360 will allow us to renderinteractive 3D objects in the game world. To integrate other VR functionalities such assetting the background scene and playing audio in the game world, we will explorerelevant options from the React 360 API in the next section.
The React 360 APIBesides the React 360 components discussed in the previous section, we will utilizethe APIs provided by React 360 to implement functionality such as setting thebackground scene, playing audio, dealing with external links, adding styles,capturing the current orientation of the user's view, and using static asset files. In thefollowing sections, we will explore the Environment API, the Audio and Locationnative modules, the StyleSheet API, the VrHeadModel module, and the assetspecification options.
EnvironmentIn the game, we will set the world or background scene with equirectangularpanoramic images. We will use the Environment API from React 360 to change thisbackground scene dynamically from the React code using its setBackgroundImagemethod. This method can be used as follows:
Environment.setBackgroundImage( {uri: 'http://linktopanoramaimage.jpg'} )
Developing a Web-Based VR Game Chapter 13
[ 569 ]
This method sets the current background image with the resource at the specifiedURL. When we integrate the React 360 game code with the MERN stack containingthe game application backend, we can use this to set the game world imagedynamically using image links provided by the user. In the next section, we willexplore native modules that will allow us to play audio in this rendered scene in thebrowser, and provide access to the browser location.
Native modulesNative modules in React 360 provide us with the ability to access functionality that isonly available in the main browser environment. In the game, we will useAudioModule in NativeModules, to play sounds in response to user activity, and theLocation module, to give us access to window.location in the browser to handleexternal links. These modules can be accessed in index.js, as follows:
import { ... NativeModules} from 'react-360'
const { AudioModule, Location } = NativeModules
We can use these imported modules in the code to manipulate the audio and locationURL in the browser. In the following sections, we will explore how these modules canbe used to implement the features of the game.
AudioModuleWhen the user interacts with the 3D objects in the game, we will play sounds basedon whether the object can be collected or not, and also whether the game has beencompleted. The AudioModule in NativeModules allows us to add sound to the VRworld as background environmental audio, one-off sound effects, and spatial audio.In our game, we will use environmental audio and one-off sound effects:
Environmental audio: To play audio on loop and set the mood when thegame is successfully completed, we will use the playEnvironmentalmethod, which takes an audio file path as the source attribute, andthe loop option as a playback parameter, as shown in the following code:
AudioModule.playEnvironmental({ source: asset('happy-bot.mp3'), loop: true})
Developing a Web-Based VR Game Chapter 13
[ 570 ]
Sound effects: To play a single sound once when the user clicks on 3Dobjects, we will use the playOneShot method that takes an audio file pathas the source attribute, as shown in the following code:
AudioModule.playOneShot({ source: asset('clog-up.mp3'),})
The source attribute in the options passed to playEnvironmental andplayOneShot takes a resource file location to load the audio. It can be an asset()statement or a resource URL declaration in the form of {uri: 'PATH'}.
We will call these AudioModule methods to play specified audio files as needed fromthe game implementation code. In the next section, we will look at how we can usethe Location module, which is another native module in React 360.
LocationAfter we integrate the React 360 code containing the game with the MERN stackcontaining the game application backend, the VR game will be launched from theMERN server at a declared route containing the specific game's ID. Then, once a usercompletes a game, they will also have the option to leave the VR space and go to aURL containing a list of other games. To handle these incoming and outgoing applinks in the React 360 code, we will utilize the Location module in NativeModules.
The Location module is essentially the Location object returned by the read-only window.location property in the browser. We will use the replace methodand the search property in the Location object to implement features related toexternal links. We will handle outgoing and incoming links as follows:
Handling outgoing links: When we want to direct the user out of the VRapplication to another link, we can use the replace method in Location,as shown in the following code:
Location.replace(url)

Developing a Web-Based VR Game Chapter 13
[ 571 ]
Handling incoming links: When the React 360 app is launched from anexternal URL and after the registered component mounts, we can access theURL and retrieve its query string part using the search property inLocation, as shown in the following code.
componentDidMount = () => { let queryString = Location.search let gameId = queryString.split('?id=')[1]}
For the purpose of integrating this React 360 component with MERN VR Game, anddynamically loading game details, we will capture this initial URL to parse the gameID from a query parameter and then use it to make a read API call to the MERNapplication server. This implementation is elaborated further in Chapter 11, Makingthe VR Game Dynamic Using MERN.
Besides using these native modules from the React 360 API, we will also use theStyleSheet API to add styling to the components rendered to make the game view.We will demonstrate how to use the StyleSheet API in the next section.
StyleSheetThe StyleSheet API from React Native can also be used in React 360 to define severalstyles in one place rather than adding styles to individual components. The styles canbe defined using StyleSheet, as shown in the following code:
const styles = StyleSheet.create({ subView: { width: 10, borderColor: '#d6d7da', }, text: { fontSize: '1em', fontWeight: 'bold', }})
These style objects defined using StyleSheet.create can be added to componentsas required, as shown in the following code:
<View style={styles.subView}> <Text style={styles.text}>hello</Text></View>
This will apply the CSS styles to the View and Text components accordingly.
Developing a Web-Based VR Game Chapter 13
[ 572 ]
The default distance units for CSS properties, such as width andheight, are in meters when mapping to 3D space in React 360,whereas the default distance units are in pixels for 2D interfaces inReact Native.
We will use StyleSheet in this way to define styles for the components that will makeup the game view. In the next section, we will discuss the VrHeadModel module inReact 360, which will allow us to figure out where the user is currently looking.
VrHeadModelVrHeadModel is a utility module in React 360 that simplifies the process of obtainingthe current orientation of the headset. Since the user is moving around in a VR space,when the desired feature requires that an object or piece of text should be placed infront of or with respect to the user's current orientation, it becomes necessary to knowexactly where the user is currently gazing.
In MERN VR Game, we will use this to show the game completed message to theuser in front of their view, no matter where they end up turning to from their initialposition. For example, the user may be looking up or down when collecting the finalobject, and the completed message should pop up wherever the user is gazing.
To implement this, we will retrieve the current head matrix as an array of numbersusing getHeadMatrix() from VrHeadModel, and set it as a value for the transformproperty in the style attribute of the View component containing the game completedmessage.
This will render the message at the location where the user is currently gazing. Wewill see the usage of this getHeadMatrix() function later in the chapter, in theBuilding the game view in React 360 section. In the next section, we will discuss howstatic assets can be loaded in React 360.
Loading assetsIn order to load any static asset files such as image or audio files in the code, we canutilize the asset method in React 360. This asset() functionality in React 360 allowsus to retrieve external resource files, including audio and image files.
Developing a Web-Based VR Game Chapter 13
[ 573 ]
For example, we will place the sound audio files for the game in the static_assetsfolder, to be retrieved using asset() for each audio added to the game, as shown inthe following code:
AudioModule.playOneShot({ source: asset('collect.mp3'),})
This will load the audio file to be played in the call to playOneShot.
With these different APIs and modules available in React 360, we will integratedifferent features for the VR game such as setting the background scene, playingaudio, adding styles, loading static files, and retrieving the user orientation. In thenext section, we will look at some of the input events available in React 360 that willallow us to make the game interactive.
React 360 input eventsIn order to make the game interface interactive, we will utilize some of the inputevent handlers exposed in React 360. Input events are collected from mouse,keyboard, touch, and gamepad interactions, and also with the gaze button click on aVR headset.
The specific input events we will work with are the onEnter, onExit, and onClickevents, as discussed in the following list:
onEnter: This event is fired whenever the platform cursor beginsintersecting with a component. We will capture this event for the VRobjects in the game, so the objects can start rotating around the y axis whenthe platform cursor enters the specific object.onExit: This event is fired whenever the platform cursor stops intersectingwith a component. It has the same properties as the onEnter event and wewill use it to stop rotating the VR object just exited.onClick: The onClick event is used with the VrButton component, andis fired when there is click interaction with VrButton. We will use this toset click event handlers on the VR objects, and also on the game completemessage to redirect the user out of the VR application to a link containing alist of games.
These events will allow us to add actions to the game, which happens when the userdoes something.
Developing a Web-Based VR Game Chapter 13
[ 574 ]
While implementing the VR game, we will apply 3D world concepts to determinehow to set the game world with equirectangular panoramic images, and position VRobjects in this world based on the 3D coordinate system. We will use React 360components such as View, Text, Entity, and VrButton to render the VR gameview. We can also use available React 360 APIs to load audio and external URLs forthe VR game in the browser environment. Finally, we can utilize available React 360events that capture user interactions to make the VR game interactive. With the VR-related concepts, React 360 components, APIs, modules, and events discussed in thissection, we are ready to define the specific game data details before we startimplementing the complete VR game using these concepts. In the next section, wewill go over the game data structure and details.
Defining game detailsEach game in MERN VR Game will be defined in a common data structure that theReact 360 application will also adhere to when rendering the individual game details.In the following sections, we will discuss the data structure for capturing a game'sdetails, and then highlight the difference between using static game data anddynamically loaded game data.
Game data structureThe game data will consist of details such as the game's name, a URL pointing to thelocation of the equirectangular image for the game world, and two arrays containingdetails for each VR object to be added to the game world. The following list indicatesthe fields corresponding to the game data attributes:
name: A string representing the name of the gameworld: A string with the URL pointing to the equirectangular image eitherhosted on cloud storage, CDNs, or stored on MongoDBanswerObjects: An array of JavaScript objects containing details of theVR objects that can be collected by the playerwrongObjects: An array of JavaScript objects containing details of theother VR objects to be placed in the VR world that cannot be collected bythe player
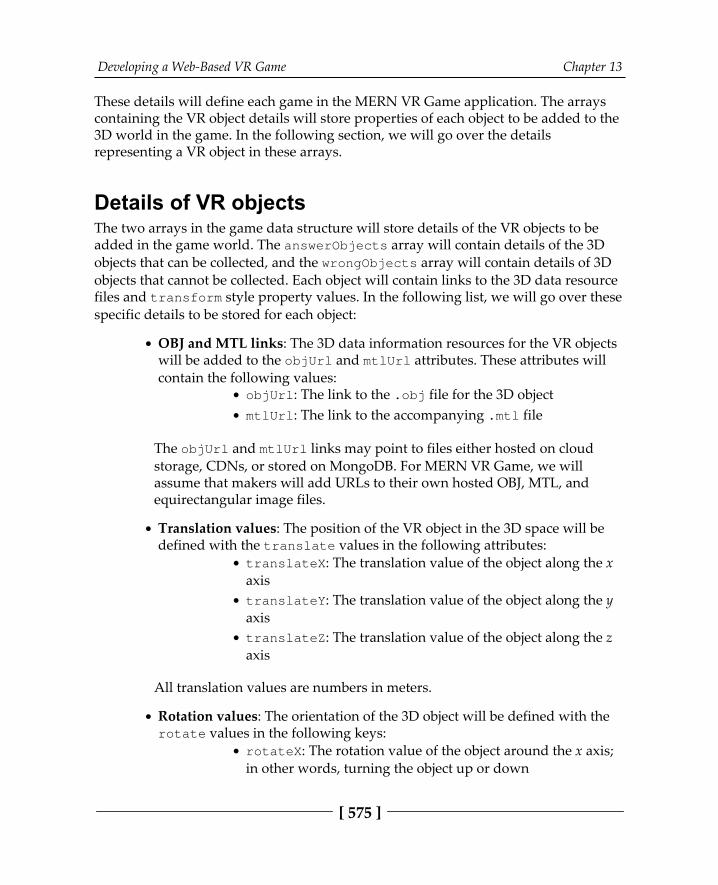
Developing a Web-Based VR Game Chapter 13
[ 575 ]
These details will define each game in the MERN VR Game application. The arrayscontaining the VR object details will store properties of each object to be added to the3D world in the game. In the following section, we will go over the detailsrepresenting a VR object in these arrays.
Details of VR objectsThe two arrays in the game data structure will store details of the VR objects to beadded in the game world. The answerObjects array will contain details of the 3Dobjects that can be collected, and the wrongObjects array will contain details of 3Dobjects that cannot be collected. Each object will contain links to the 3D data resourcefiles and transform style property values. In the following list, we will go over thesespecific details to be stored for each object:
OBJ and MTL links: The 3D data information resources for the VR objectswill be added to the objUrl and mtlUrl attributes. These attributes willcontain the following values:
objUrl: The link to the .obj file for the 3D objectmtlUrl: The link to the accompanying .mtl file
The objUrl and mtlUrl links may point to files either hosted on cloudstorage, CDNs, or stored on MongoDB. For MERN VR Game, we willassume that makers will add URLs to their own hosted OBJ, MTL, andequirectangular image files.
Translation values: The position of the VR object in the 3D space will bedefined with the translate values in the following attributes:
translateX: The translation value of the object along the xaxistranslateY: The translation value of the object along the yaxistranslateZ: The translation value of the object along the zaxis
All translation values are numbers in meters.
Rotation values: The orientation of the 3D object will be defined with therotate values in the following keys:
rotateX: The rotation value of the object around the x axis;in other words, turning the object up or down
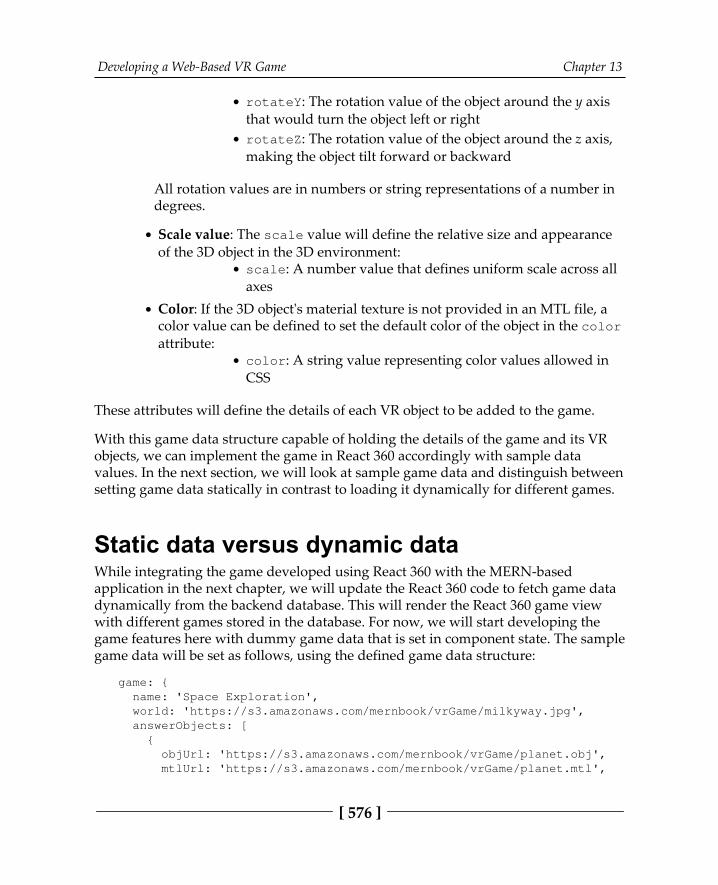
Developing a Web-Based VR Game Chapter 13
[ 576 ]
rotateY: The rotation value of the object around the y axisthat would turn the object left or rightrotateZ: The rotation value of the object around the z axis,making the object tilt forward or backward
All rotation values are in numbers or string representations of a number indegrees.
Scale value: The scale value will define the relative size and appearanceof the 3D object in the 3D environment:
scale: A number value that defines uniform scale across allaxes
Color: If the 3D object's material texture is not provided in an MTL file, acolor value can be defined to set the default color of the object in the colorattribute:
color: A string value representing color values allowed inCSS
These attributes will define the details of each VR object to be added to the game.
With this game data structure capable of holding the details of the game and its VRobjects, we can implement the game in React 360 accordingly with sample datavalues. In the next section, we will look at sample game data and distinguish betweensetting game data statically in contrast to loading it dynamically for different games.
Static data versus dynamic dataWhile integrating the game developed using React 360 with the MERN-basedapplication in the next chapter, we will update the React 360 code to fetch game datadynamically from the backend database. This will render the React 360 game viewwith different games stored in the database. For now, we will start developing thegame features here with dummy game data that is set in component state. The samplegame data will be set as follows, using the defined game data structure:
game: { name: 'Space Exploration', world: 'https://s3.amazonaws.com/mernbook/vrGame/milkyway.jpg', answerObjects: [ { objUrl: 'https://s3.amazonaws.com/mernbook/vrGame/planet.obj', mtlUrl: 'https://s3.amazonaws.com/mernbook/vrGame/planet.mtl',
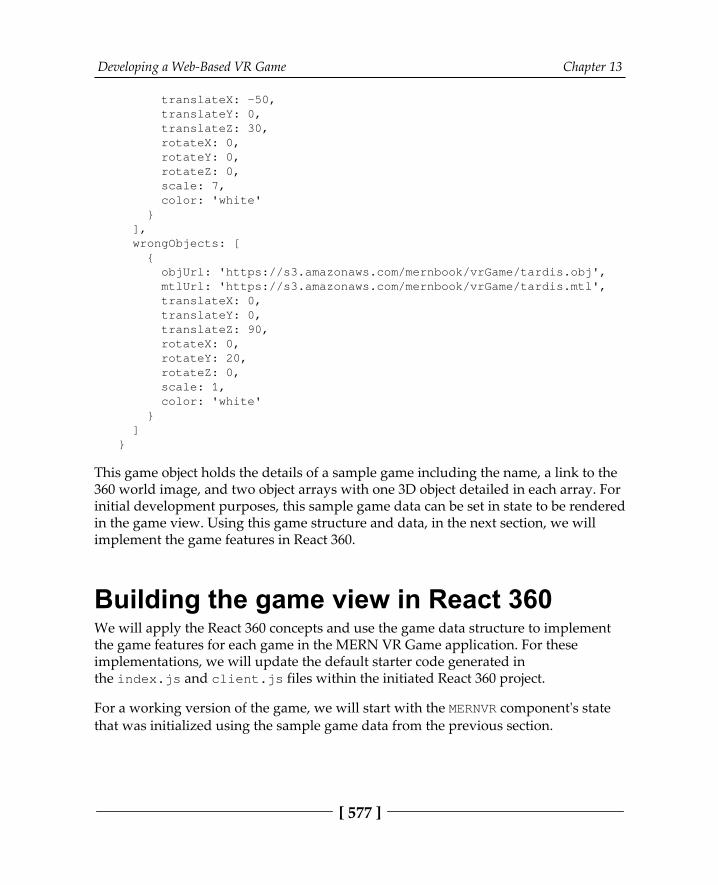
Developing a Web-Based VR Game Chapter 13
[ 577 ]
translateX: -50, translateY: 0, translateZ: 30, rotateX: 0, rotateY: 0, rotateZ: 0, scale: 7, color: 'white' } ], wrongObjects: [ { objUrl: 'https://s3.amazonaws.com/mernbook/vrGame/tardis.obj', mtlUrl: 'https://s3.amazonaws.com/mernbook/vrGame/tardis.mtl', translateX: 0, translateY: 0, translateZ: 90, rotateX: 0, rotateY: 20, rotateZ: 0, scale: 1, color: 'white' } ]}
This game object holds the details of a sample game including the name, a link to the360 world image, and two object arrays with one 3D object detailed in each array. Forinitial development purposes, this sample game data can be set in state to be renderedin the game view. Using this game structure and data, in the next section, we willimplement the game features in React 360.
Building the game view in React 360We will apply the React 360 concepts and use the game data structure to implementthe game features for each game in the MERN VR Game application. For theseimplementations, we will update the default starter code generated inthe index.js and client.js files within the initiated React 360 project.
For a working version of the game, we will start with the MERNVR component's statethat was initialized using the sample game data from the previous section.
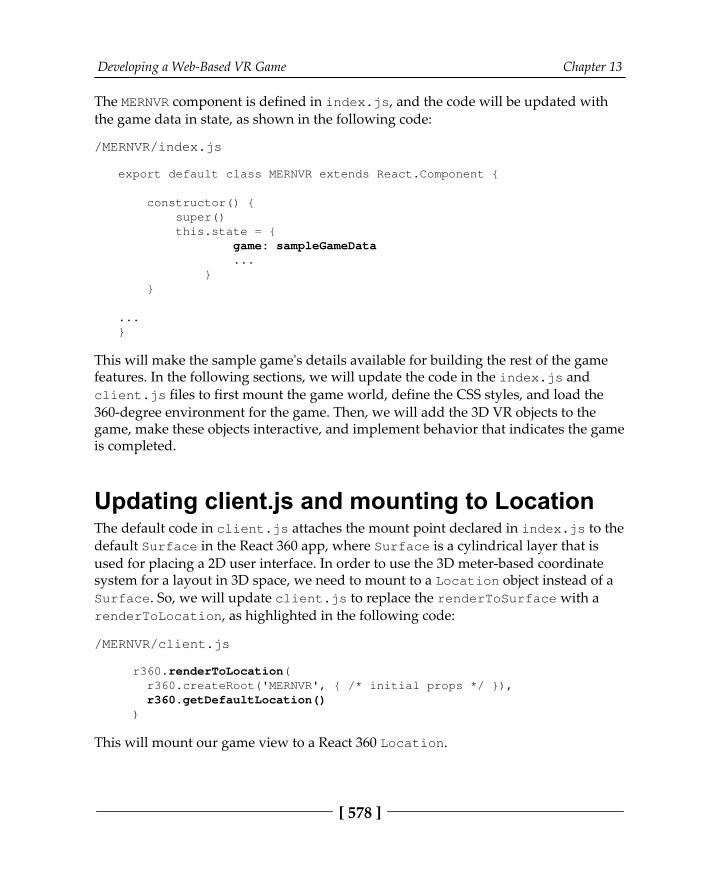
Developing a Web-Based VR Game Chapter 13
[ 578 ]
The MERNVR component is defined in index.js, and the code will be updated withthe game data in state, as shown in the following code:
/MERNVR/index.js
export default class MERNVR extends React.Component {
constructor() { super() this.state = { game: sampleGameData ... } }
...}
This will make the sample game's details available for building the rest of the gamefeatures. In the following sections, we will update the code in the index.js andclient.js files to first mount the game world, define the CSS styles, and load the360-degree environment for the game. Then, we will add the 3D VR objects to thegame, make these objects interactive, and implement behavior that indicates the gameis completed.
Updating client.js and mounting to LocationThe default code in client.js attaches the mount point declared in index.js to thedefault Surface in the React 360 app, where Surface is a cylindrical layer that isused for placing a 2D user interface. In order to use the 3D meter-based coordinatesystem for a layout in 3D space, we need to mount to a Location object instead of aSurface. So, we will update client.js to replace the renderToSurface with arenderToLocation, as highlighted in the following code:
/MERNVR/client.js
r360.renderToLocation( r360.createRoot('MERNVR', { /* initial props */ }), r360.getDefaultLocation() )
This will mount our game view to a React 360 Location.
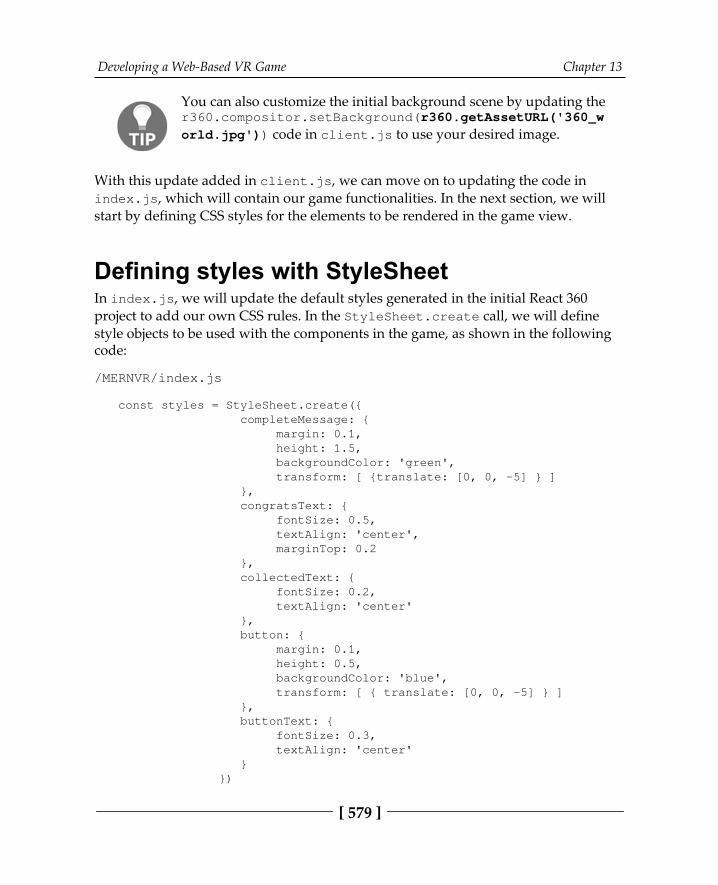
Developing a Web-Based VR Game Chapter 13
[ 579 ]
You can also customize the initial background scene by updating ther360.compositor.setBackground(r360.getAssetURL('360_w
orld.jpg')) code in client.js to use your desired image.
With this update added in client.js, we can move on to updating the code inindex.js, which will contain our game functionalities. In the next section, we willstart by defining CSS styles for the elements to be rendered in the game view.
Defining styles with StyleSheetIn index.js, we will update the default styles generated in the initial React 360project to add our own CSS rules. In the StyleSheet.create call, we will definestyle objects to be used with the components in the game, as shown in the followingcode:
/MERNVR/index.js
const styles = StyleSheet.create({ completeMessage: { margin: 0.1, height: 1.5, backgroundColor: 'green', transform: [ {translate: [0, 0, -5] } ] }, congratsText: { fontSize: 0.5, textAlign: 'center', marginTop: 0.2 }, collectedText: { fontSize: 0.2, textAlign: 'center' }, button: { margin: 0.1, height: 0.5, backgroundColor: 'blue', transform: [ { translate: [0, 0, -5] } ] }, buttonText: { fontSize: 0.3, textAlign: 'center' } })
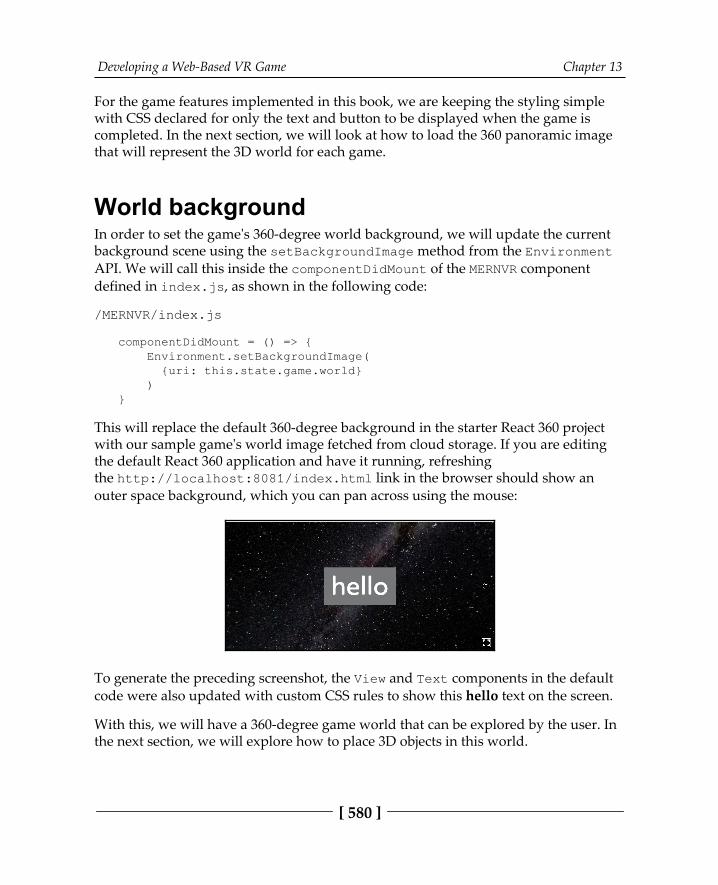
Developing a Web-Based VR Game Chapter 13
[ 580 ]
For the game features implemented in this book, we are keeping the styling simplewith CSS declared for only the text and button to be displayed when the game iscompleted. In the next section, we will look at how to load the 360 panoramic imagethat will represent the 3D world for each game.
World backgroundIn order to set the game's 360-degree world background, we will update the currentbackground scene using the setBackgroundImage method from the EnvironmentAPI. We will call this inside the componentDidMount of the MERNVR componentdefined in index.js, as shown in the following code:
/MERNVR/index.js
componentDidMount = () => { Environment.setBackgroundImage( {uri: this.state.game.world} )}
This will replace the default 360-degree background in the starter React 360 projectwith our sample game's world image fetched from cloud storage. If you are editingthe default React 360 application and have it running, refreshingthe http://localhost:8081/index.html link in the browser should show anouter space background, which you can pan across using the mouse:
To generate the preceding screenshot, the View and Text components in the defaultcode were also updated with custom CSS rules to show this hello text on the screen.
With this, we will have a 360-degree game world that can be explored by the user. Inthe next section, we will explore how to place 3D objects in this world.
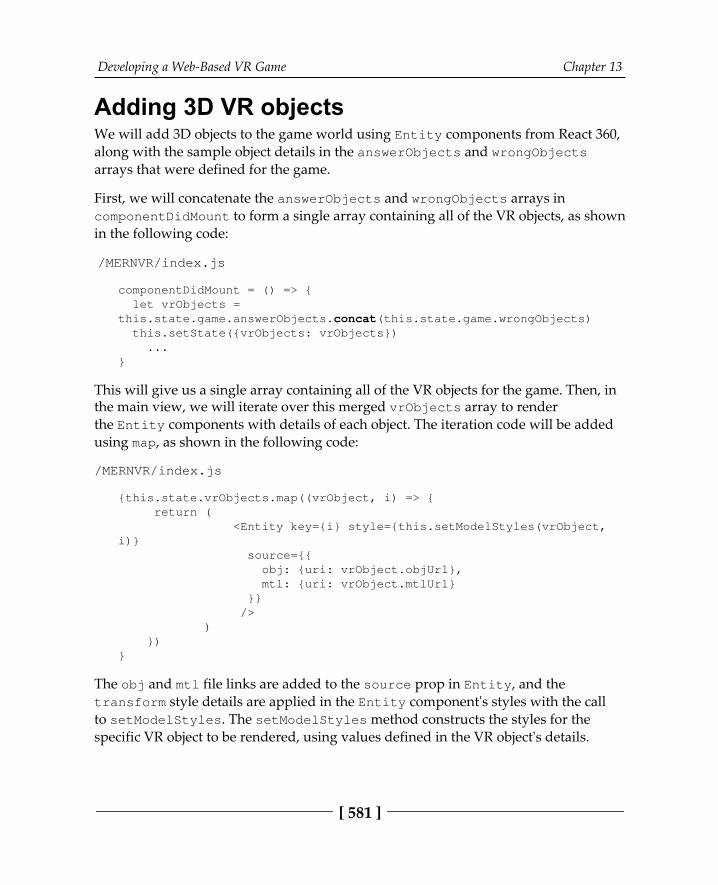
Developing a Web-Based VR Game Chapter 13
[ 581 ]
Adding 3D VR objectsWe will add 3D objects to the game world using Entity components from React 360,along with the sample object details in the answerObjects and wrongObjectsarrays that were defined for the game.
First, we will concatenate the answerObjects and wrongObjects arrays incomponentDidMount to form a single array containing all of the VR objects, as shownin the following code:
/MERNVR/index.js
componentDidMount = () => { let vrObjects =this.state.game.answerObjects.concat(this.state.game.wrongObjects) this.setState({vrObjects: vrObjects}) ...}
This will give us a single array containing all of the VR objects for the game. Then, inthe main view, we will iterate over this merged vrObjects array to renderthe Entity components with details of each object. The iteration code will be addedusing map, as shown in the following code:
/MERNVR/index.js
{this.state.vrObjects.map((vrObject, i) => { return ( <Entity key={i} style={this.setModelStyles(vrObject,i)} source={{ obj: {uri: vrObject.objUrl}, mtl: {uri: vrObject.mtlUrl} }} /> ) })}
The obj and mtl file links are added to the source prop in Entity, and thetransform style details are applied in the Entity component's styles with the callto setModelStyles. The setModelStyles method constructs the styles for thespecific VR object to be rendered, using values defined in the VR object's details.
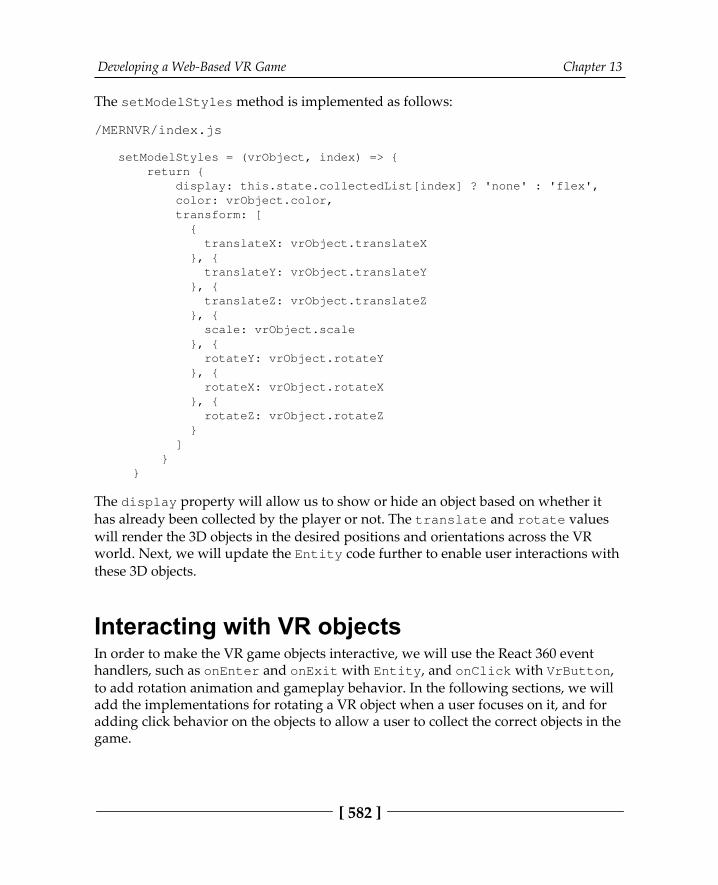
Developing a Web-Based VR Game Chapter 13
[ 582 ]
The setModelStyles method is implemented as follows:
/MERNVR/index.js
setModelStyles = (vrObject, index) => { return { display: this.state.collectedList[index] ? 'none' : 'flex', color: vrObject.color, transform: [ { translateX: vrObject.translateX }, { translateY: vrObject.translateY }, { translateZ: vrObject.translateZ }, { scale: vrObject.scale }, { rotateY: vrObject.rotateY }, { rotateX: vrObject.rotateX }, { rotateZ: vrObject.rotateZ } ] } }
The display property will allow us to show or hide an object based on whether ithas already been collected by the player or not. The translate and rotate valueswill render the 3D objects in the desired positions and orientations across the VRworld. Next, we will update the Entity code further to enable user interactions withthese 3D objects.
Interacting with VR objectsIn order to make the VR game objects interactive, we will use the React 360 eventhandlers, such as onEnter and onExit with Entity, and onClick with VrButton,to add rotation animation and gameplay behavior. In the following sections, we willadd the implementations for rotating a VR object when a user focuses on it, and foradding click behavior on the objects to allow a user to collect the correct objects in thegame.
Developing a Web-Based VR Game Chapter 13
[ 583 ]
Rotating a VR objectWe want to add a feature that starts rotating a 3D object around its y axis whenever aplayer focuses on the 3D object, that is, when the platform cursor begins intersectingwith the Entity component rendering the specific 3D object.
We will update the Entity component from the previous section to add the onEnterand onExit handlers, as shown in the following code:
/MERNVR/index.js
<Entity ... onEnter={this.rotate(i)} onExit={this.stopRotate}/>
The object rendered with this Entity component will start rotating on a cursor entryor focus on the object, and it will stop when the platform cursor exits the object and isno longer in the player's focus. In the following section, we will discuss theimplementation of this rotation animation.
Animation with requestAnimationFrameThe rotation behavior for each 3D object is implemented in the event handlers addedto the Entity component, which is rendering the 3D object. Specifically, inthe rotate(index) and stopRotate() handler methods that are called when theonEnter and onExit events occur, we will implement rotation animation behaviorusing requestAnimationFrame for smooth animations in the browser.
The window.requestAnimationFrame() method asks thebrowser to call a specified callback function to update an animationbefore the next repaint. With requestAnimationFrame, thebrowser optimizes the animations to make them smoother and moreresource-efficient.
Using the rotate method, we will update the rotateY transform value of the givenobject at a steady rate on a set time interval with requestionAnimationFrame, asshown in the following code:
/MERNVR/index.js
this.lastUpdate = Date.now()rotate = index => event => {
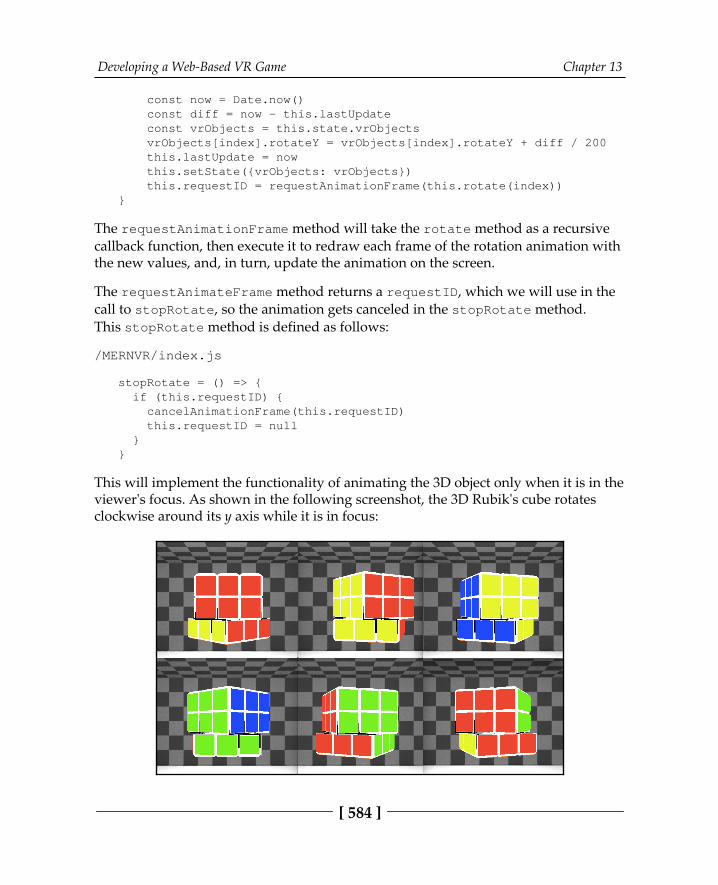
Developing a Web-Based VR Game Chapter 13
[ 584 ]
const now = Date.now() const diff = now - this.lastUpdate const vrObjects = this.state.vrObjects vrObjects[index].rotateY = vrObjects[index].rotateY + diff / 200 this.lastUpdate = now this.setState({vrObjects: vrObjects}) this.requestID = requestAnimationFrame(this.rotate(index))}
The requestAnimationFrame method will take the rotate method as a recursivecallback function, then execute it to redraw each frame of the rotation animation withthe new values, and, in turn, update the animation on the screen.
The requestAnimateFrame method returns a requestID, which we will use in thecall to stopRotate, so the animation gets canceled in the stopRotate method.This stopRotate method is defined as follows:
/MERNVR/index.js
stopRotate = () => { if (this.requestID) { cancelAnimationFrame(this.requestID) this.requestID = null }}
This will implement the functionality of animating the 3D object only when it is in theviewer's focus. As shown in the following screenshot, the 3D Rubik's cube rotatesclockwise around its y axis while it is in focus:
Developing a Web-Based VR Game Chapter 13
[ 585 ]
Though not covered here, it is also worth exploring the React 360Animated library, which can be used to compose different types ofanimations. Core components can be animated natively with thislibrary, and it is possible to animate other components usingcreateAnimatedComponent(). This library was originallyimplemented from React Native; to learn more, you can refer to theReact Native documentation.
Now the users playing the game will observe motion when they focus on any of theVR objects placed in the game world. In the next section, we will add the functionalityfor capturing user clicks on these objects.
Clicking on the 3D objectsIn order to register the click behavior on each 3D object added to the game, we needto wrap the Entity component with a VrButton component that can call theonClick handler.
We will update the Entity component added inside the vrObjects array iterationcode, to wrap it with the VrButton component, as shown in the following code:
/MERNVR/index.js
<VrButton onClick={this.collectItem(vrObject)} key={i}> <Entity … /></VrButton>
The VrButton component will call the collectItem method when clicked on, andpass it the current object's details.
When a 3D object is clicked on by a user, we need the collectItem method toperform the following actions with respect to the game features:
Check whether the clicked object is an answerObject or a wrongObject.Based on the object type, play the associated sound.If the object is an answerObject, it should be collected and removed fromview, then added to a list of collected objects.Check whether all instances of answerObject were successfully collectedwith this click:
If yes, show the game completed message to the player andplay the sound for game completed.
Developing a Web-Based VR Game Chapter 13
[ 586 ]
We will implement these actions in the collectItem method with the followingstructure and steps:
collectItem = vrObject => event => { if (vrObject is an answerObject) { ... update collected list ... ... play sound for correct object collected ... if (all answer objects collected) { ... show game completed message in front of user ... ... play sound for game completed ... } } else { ... play sound for wrong object clicked ... }}
Any time a VR object is clicked on by the user, in this method, we will first check thetype of the object before taking the related actions. We will discuss theimplementation of these steps and actions in detail in the following section.
Collecting the correct object on clickWhen a user clicks on a 3D object, we need to first check whether the clicked object isan answer object. If it is, this object will be collected and hidden from view, and a listof collected objects will be updated along with the total number to keep track of theuser's progress in the game.
To check whether the clicked VR object is an answerObject, we will use theindexOf method to find a match in the answerObjects array, as shown in thefollowing code:
let match = this.state.game.answerObjects.indexOf(vrObject)
If the vrObject is an answerObject, indexOf will return the array index of thematched object; otherwise, it will return -1 if no match is found.
To keep track of collected objects in the game, we will also maintain an array ofBoolean values in collectedList at corresponding indices, and the total number ofobjects collected so far in collectedNum, as shown in the following code:
let updateCollectedList = this.state.collectedListlet updateCollectedNum = this.state.collectedNum + 1updateCollectedList[match] = truethis.setState({collectedList: updateCollectedList, collectedNum: updateCollectedNum})
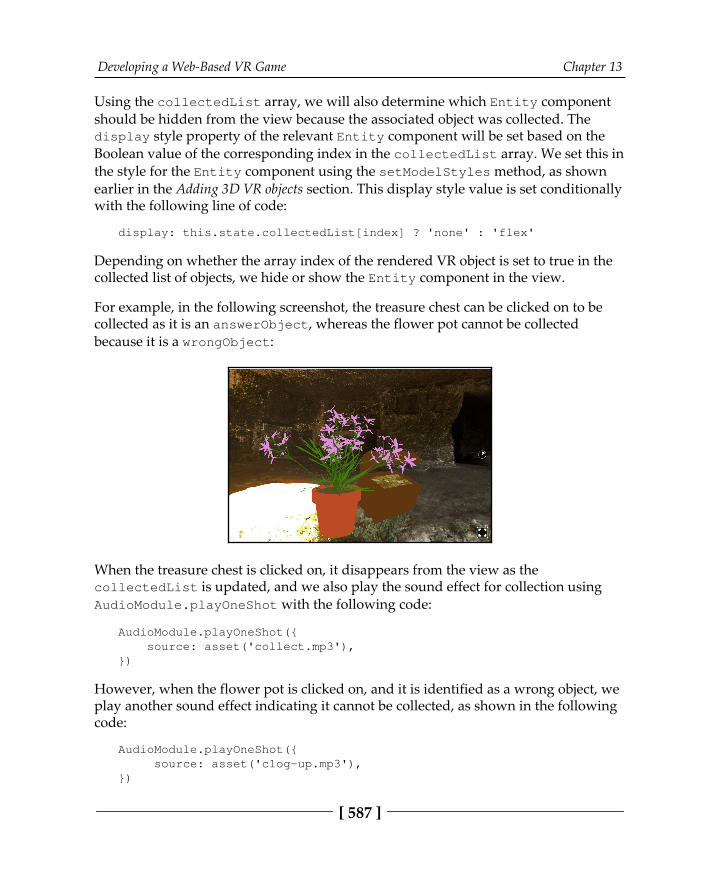
Developing a Web-Based VR Game Chapter 13
[ 587 ]
Using the collectedList array, we will also determine which Entity componentshould be hidden from the view because the associated object was collected. Thedisplay style property of the relevant Entity component will be set based on theBoolean value of the corresponding index in the collectedList array. We set this inthe style for the Entity component using the setModelStyles method, as shownearlier in the Adding 3D VR objects section. This display style value is set conditionallywith the following line of code:
display: this.state.collectedList[index] ? 'none' : 'flex'
Depending on whether the array index of the rendered VR object is set to true in thecollected list of objects, we hide or show the Entity component in the view.
For example, in the following screenshot, the treasure chest can be clicked on to becollected as it is an answerObject, whereas the flower pot cannot be collectedbecause it is a wrongObject:
When the treasure chest is clicked on, it disappears from the view as thecollectedList is updated, and we also play the sound effect for collection usingAudioModule.playOneShot with the following code:
AudioModule.playOneShot({ source: asset('collect.mp3'),})
However, when the flower pot is clicked on, and it is identified as a wrong object, weplay another sound effect indicating it cannot be collected, as shown in the followingcode:
AudioModule.playOneShot({ source: asset('clog-up.mp3'),})
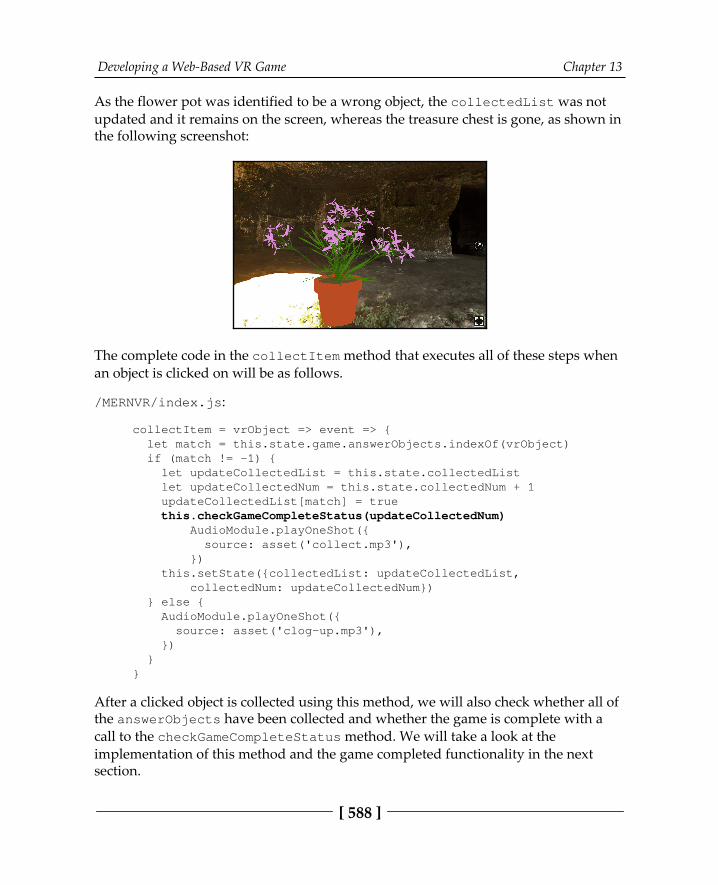
Developing a Web-Based VR Game Chapter 13
[ 588 ]
As the flower pot was identified to be a wrong object, the collectedList was notupdated and it remains on the screen, whereas the treasure chest is gone, as shown inthe following screenshot:
The complete code in the collectItem method that executes all of these steps whenan object is clicked on will be as follows.
/MERNVR/index.js:
collectItem = vrObject => event => { let match = this.state.game.answerObjects.indexOf(vrObject) if (match != -1) { let updateCollectedList = this.state.collectedList let updateCollectedNum = this.state.collectedNum + 1 updateCollectedList[match] = true this.checkGameCompleteStatus(updateCollectedNum) AudioModule.playOneShot({ source: asset('collect.mp3'), }) this.setState({collectedList: updateCollectedList, collectedNum: updateCollectedNum}) } else { AudioModule.playOneShot({ source: asset('clog-up.mp3'), }) } }
After a clicked object is collected using this method, we will also check whether all ofthe answerObjects have been collected and whether the game is complete with acall to the checkGameCompleteStatus method. We will take a look at theimplementation of this method and the game completed functionality in the nextsection.
Developing a Web-Based VR Game Chapter 13
[ 589 ]
Game completed stateEvery time an answerObject is collected, we will check whether the total number ofcollected items is equal to the total number of objects in the answerObjects array todetermine whether the game is complete. We will achieve this by callingthe checkGameCompleteStatus method, which will perform this check, as shown inthe following code:
/MERNVR/index.js
checkGameCompleteStatus = (collectedTotal) => { if (collectedTotal == this.state.game.answerObjects.length) { AudioModule.playEnvironmental({ source: asset('happy-bot.mp3'), loop: true }) this.setState({hide: 'flex', hmMatrix:VrHeadModel.getHeadMatrix()}) }}
In this method, we first confirm that the game is indeed complete, and then weperform the following actions:
Play the audio for game completed,using AudioModule.playEnvironmental.Fetch the current headMatrix value using VrHeadModel so that it can beset as the transform matrix value for the View component containing thegame completion message.Set the display style property of the View message to flex, so themessage renders to the viewer.
The View component containing the message congratulating the player forcompleting the game will be added to the parent View component as follows:
/MERNVR/index.js
<View style={this.setGameCompletedStyle}> <View style={this.styles.completeMessage}> <Text style={this.styles.congratsText}>Congratulations!</Text> <Text style={this.styles.collectedText}> You have collected all items in {this.state.game.name} </Text> </View> <VrButton onClick={this.exitGame}>
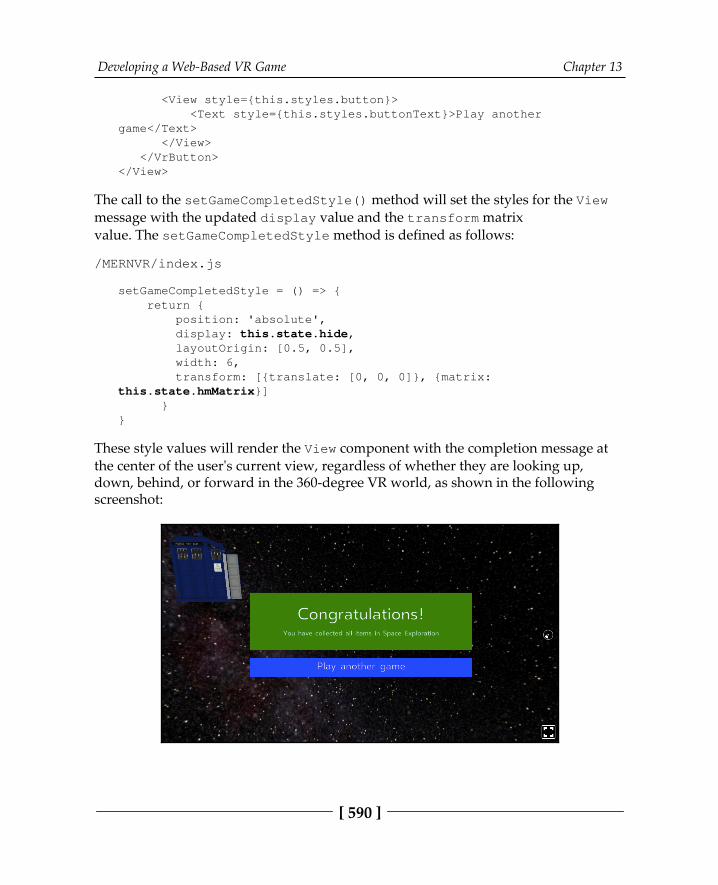
Developing a Web-Based VR Game Chapter 13
[ 590 ]
<View style={this.styles.button}> <Text style={this.styles.buttonText}>Play anothergame</Text> </View> </VrButton></View>
The call to the setGameCompletedStyle() method will set the styles for the Viewmessage with the updated display value and the transform matrixvalue. The setGameCompletedStyle method is defined as follows:
/MERNVR/index.js
setGameCompletedStyle = () => { return { position: 'absolute', display: this.state.hide, layoutOrigin: [0.5, 0.5], width: 6, transform: [{translate: [0, 0, 0]}, {matrix:this.state.hmMatrix}] }}
These style values will render the View component with the completion message atthe center of the user's current view, regardless of whether they are looking up,down, behind, or forward in the 360-degree VR world, as shown in the followingscreenshot:

Developing a Web-Based VR Game Chapter 13
[ 591 ]
The final text in the View message will act as a button, as we wrapped this View in aVrButton component that calls the exitGame method when clicked.The exitGame method is defined as follows:
/MERNVR/index.js
exitGame = () => { Location.replace('/')}
The exitGame method will use the Location.replace method to redirect the userto an external URL that may contain a list of games.
The replace method can be passed any valid URL, and once this React 360 gamecode is integrated with the MERN VR Game application in Chapter 14, Making the VRGame Dynamic Using MERN, replace('/') will take the user to the home page ofthe whole application.
The VR game functionalities are complete with these updates to the React 360 project.It is now possible to set a 360-degree panoramic background as the game world andadd interactive VR objects to this world. These 3D objects will rotate in place and canbe collected based on user interaction if the game rules allow it. In the next section,we will demonstrate how to bundle this React 360 code so that the game can beintegrated with a MERN-based web application.
Bundling for production and integrationwith MERNNow that we have features of the VR game implemented and are functional with thesample game data, we can prepare it for production and add it to our MERN-basedapplication to see how VR can be added to an existing web application. In thefollowing sections, we will look at how to bundle the React 360 code, integrate it witha MERN application, and test the integration by running the game from theapplication.
Developing a Web-Based VR Game Chapter 13
[ 592 ]
Bundling React 360 filesReact 360 tools provide a script to bundle all of the React 360 application code into afew files that we can just place on the MERN web server and serve as content at aspecified route. To create the bundled files, we can run the following command in theReact 360 project directory:
yarn bundle
This generates compiled versions of the React 360 application files in a folder calledbuild. The compiled bundle files are client.bundle.js and index.bundle.js.These two files, in addition to the index.html file and the static-assets/ folder,make up the production version of the whole React 360 application that wasdeveloped. The final production code will be in the following folder and files:
-- static_assets/
-- index.html
-- index.bundle.js
-- client.bundle.js
We will have to take these folders and files over to a MERN project directory tointegrate the game with the MERN application, as discussed in the next section.
Integrating with a MERN applicationIn order to integrate the game developed in React 360 with a MERN-based webapplication, we will first bring the React 360 production files discussed in theprevious section to our MERN application project. Then, we will update the bundlefile references in the generated index.html code to point to the new location of thebundle files, before loading the index.html code at a specified route in the Expressapp.
Developing a Web-Based VR Game Chapter 13
[ 593 ]
Adding the React 360 production filesWith consideration to the folder structure in the existing MERN skeleton application,we will add the static_assets folder and the bundle files from the React 360production files to the dist/ folder. This will keep our MERN code organized withall the bundles in the same location. The index.html file will be placed in a newfolder, named vr in the server folder, as highlighted in the following folderstructure:
-- ...-- client/-- dist/ --- static_assets/ --- ... --- client.bundle.js --- index.bundle.js-- ...-- server/ --- ... --- vr/ ---- index.html-- ...
This will bring the React 360 code over to the MERN application. However, to make itfunctional, we need to update the file references in the index.html code, asdiscussed in the next section.
Updating references in index.htmlThe index.html file, which was generated after bundling the React 360 project,references the bundle files expecting these files to be in the same folder, as shown inthe following code:
<html> <head> <title>MERNVR</title> <style>body { margin: 0 }</style> <meta name="viewport" content="width=device-width, initial-scale=1, user-scalable=no"> </head> <body> <!-- Attachment point for your app --> <div id="container"></div> <script src="./client.bundle.js"></script> <script>
Developing a Web-Based VR Game Chapter 13
[ 594 ]
// Initialize the React 360 application React360.init( 'index.bundle.js', document.getElementById('container'), { assetRoot: 'static_assets/', } ) </script> </body></html>
We need to update this index.html code to refer to the correct location ofthe client.bundle.js, index.bundle.js, and static_assets folders.
First, update the reference to client.bundle.js as follows, to point to the file weplaced in the dist folder:
<script src="/dist/client.bundle.js" type="text/javascript"></script>
Then, update the React360.init call with the correct reference toindex.bundle.js, and assetRoot set to the correct location of the static_assetsfolder, as shown in the following code:
React360.init( './../dist/index.bundle.js', document.getElementById('container'), { assetRoot: '/dist/static_assets/' } )
The assetRoot specifies where to look for asset files when we use asset() to setresources in the React 360 components.
The game view implemented with React 360 is now available in the MERNapplication. In the next section, we will try out this integration by setting up a route toload the game from the web application.
Trying out the integrationIf we set up an Express route in the MERN application to return the index.html filein the response, then visiting the route in the browser will render the React 360game. To test out this integration, we can set up an example route, as follows:
router.route('/game/play') .get((req, res) => {
Developing a Web-Based VR Game Chapter 13
[ 595 ]
res.sendFile(process.cwd()+'/server/vr/index.html')})
This declares a GET route in the '/game/play' path, which will simply return theindex.html file that we placed in the vr folder with the server code, in response tothe requesting client.
Then, we can run the MERN server and open this route in the browser atlocalhost:3000/game/play. This should render the complete React 360 gameimplemented in this chapter from within the MERN-based web application.
SummaryIn this chapter, we used React 360 to develop a web-based VR game that can be easilyintegrated into MERN applications.
We began by defining simple VR features for the gameplay. Then, we set up React360 for development and looked at key VR concepts, such as equirectangularpanoramic images, 3D positions, and coordinate systems in the 360-degree VR world.We explored the React 360 components and APIs required to implement the gamefeatures, including components such as View, Text, Entity, and VrButton, alongwith the Environment, VrHeadModel, and NativeModules APIs.
Finally, we updated the code in the starter React 360 project to implement the gamewith sample game data, then we bundled the code files and discussed how to addthese compiled files to an existing MERN application.
With these steps covered, you will now be able to build your own VR interfaces withReact 360, which can be easily integrated with any MERN-based web application.
In the next chapter, we will develop the MERN VR Game application, complete witha game database and backend APIs. This is so that we can make the game developedin this chapter dynamic by fetching data from a game collection stored in MongoDB.

14Making the VR GameDynamic using MERN
In this chapter, we will extend the MongoDB, Express.js, React.js, and Node.js(MERN) skeleton application to build the MERN VR Game application, and use it toconvert the static React 360 game developed in the previous chapter into a dynamicgame. We will achieve this by replacing the sample game data with game detailsfetched directly from the database. We will use the MERN stack technologies toimplement a game model and Create, Read, Update, and Delete (CRUD) applicationprogramming interfaces (APIs) in the backend, which will allow storage andretrieval of games, and frontend views, which will allow users to make their owngames besides playing any of the games on the platform in their browser. We willupdate and integrate the game developed with React 360 into the game platformdeveloped with MERN technologies. After completing these implementations andintegration, you will be able to design and build your own full-stack web applicationswith dynamic VR features.
To make MERN VR Game a complete and dynamic game application, we willimplement the following:
A game model schema to store game details in MongoDBAPIs for game CRUD operationsReact views for creating, editing, listing, and deleting gamesUpdating the React 360 game to fetch data with the APILoading the VR game with dynamic game data

Making the VR Game Dynamic using MERN Chapter 14
[ 597 ]
Introducing the dynamic MERN VR GameapplicationThroughout this chapter, we will develop the MERN VR Game application withMERN-stack technologies. On this platform, registered users will be able to make andmodify their own games by providing an equirectangular image for the game world,and the VR object resources, including transform property values for each object to beplaced in the game world. Any visitor to the application will be able to browsethrough all the games added by the makers and play any game, to find and collect the3D objects in the game world that are relevant to the clue or description of each game.When a registered user signs into the application, they will see a home page with allthe games listed and an option to make their own game, as pictured in the followingscreenshot:
The code for the complete MERN VR Game application is availableon GitHub at https:/ /github. com/ PacktPublishing/ Full- Stack-React- Projects- Second- Edition/ tree/ master/ Chapter14/ mern-vrgame. You can clone this code and run the application as you gothrough the code explanations for the rest of this chapter.
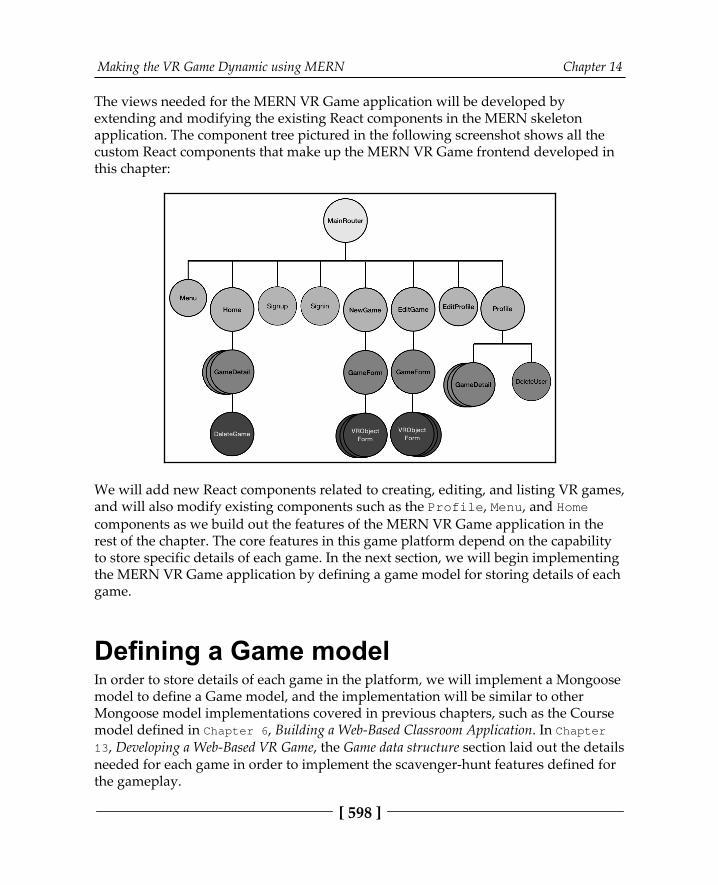
Making the VR Game Dynamic using MERN Chapter 14
[ 598 ]
The views needed for the MERN VR Game application will be developed byextending and modifying the existing React components in the MERN skeletonapplication. The component tree pictured in the following screenshot shows all thecustom React components that make up the MERN VR Game frontend developed inthis chapter:
We will add new React components related to creating, editing, and listing VR games,and will also modify existing components such as the Profile, Menu, and Homecomponents as we build out the features of the MERN VR Game application in therest of the chapter. The core features in this game platform depend on the capabilityto store specific details of each game. In the next section, we will begin implementingthe MERN VR Game application by defining a game model for storing details of eachgame.
Defining a Game modelIn order to store details of each game in the platform, we will implement a Mongoosemodel to define a Game model, and the implementation will be similar to otherMongoose model implementations covered in previous chapters, such as the Coursemodel defined in Chapter 6, Building a Web-Based Classroom Application. In Chapter13, Developing a Web-Based VR Game, the Game data structure section laid out the detailsneeded for each game in order to implement the scavenger-hunt features defined forthe gameplay.
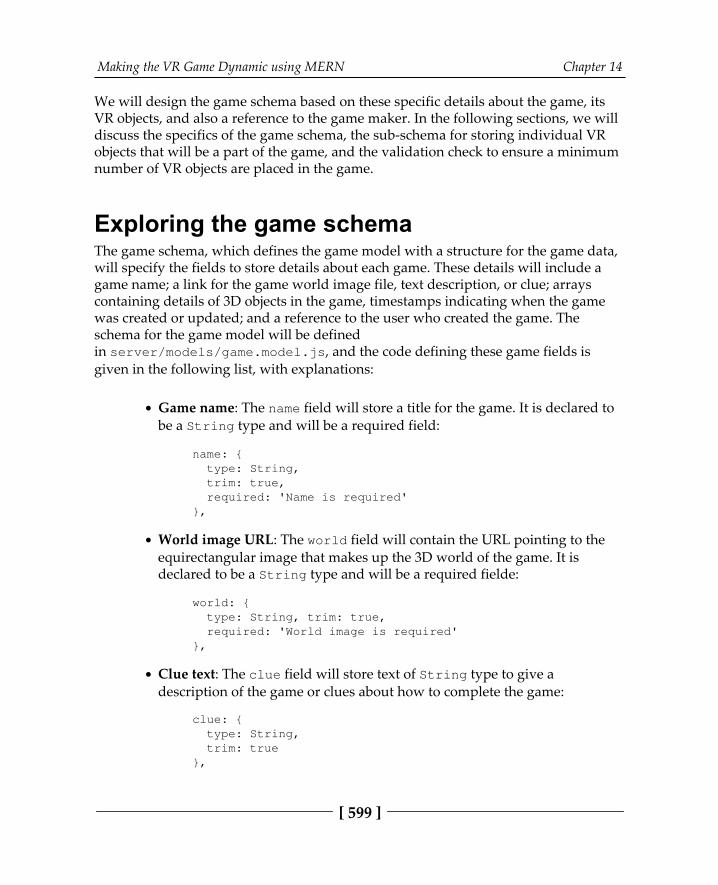
Making the VR Game Dynamic using MERN Chapter 14
[ 599 ]
We will design the game schema based on these specific details about the game, itsVR objects, and also a reference to the game maker. In the following sections, we willdiscuss the specifics of the game schema, the sub-schema for storing individual VRobjects that will be a part of the game, and the validation check to ensure a minimumnumber of VR objects are placed in the game.
Exploring the game schemaThe game schema, which defines the game model with a structure for the game data,will specify the fields to store details about each game. These details will include agame name; a link for the game world image file, text description, or clue; arrayscontaining details of 3D objects in the game, timestamps indicating when the gamewas created or updated; and a reference to the user who created the game. Theschema for the game model will be definedin server/models/game.model.js, and the code defining these game fields isgiven in the following list, with explanations:
Game name: The name field will store a title for the game. It is declared tobe a String type and will be a required field:
name: { type: String, trim: true, required: 'Name is required' },
World image URL: The world field will contain the URL pointing to theequirectangular image that makes up the 3D world of the game. It isdeclared to be a String type and will be a required fielde:
world: { type: String, trim: true, required: 'World image is required' },
Clue text: The clue field will store text of String type to give adescription of the game or clues about how to complete the game:
clue: { type: String, trim: true },
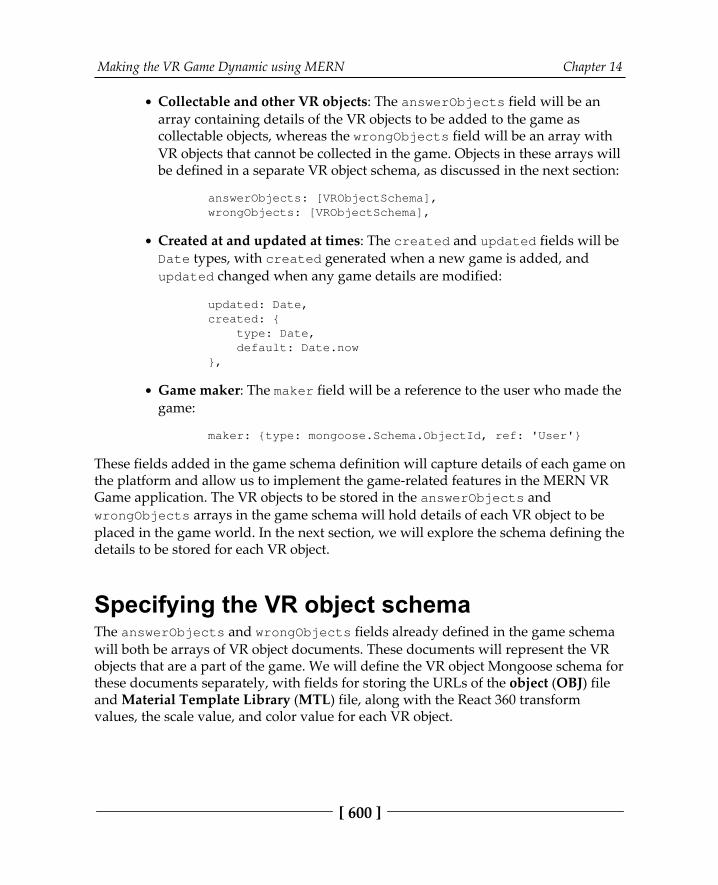
Making the VR Game Dynamic using MERN Chapter 14
[ 600 ]
Collectable and other VR objects: The answerObjects field will be anarray containing details of the VR objects to be added to the game ascollectable objects, whereas the wrongObjects field will be an array withVR objects that cannot be collected in the game. Objects in these arrays willbe defined in a separate VR object schema, as discussed in the next section:
answerObjects: [VRObjectSchema],wrongObjects: [VRObjectSchema],
Created at and updated at times: The created and updated fields will beDate types, with created generated when a new game is added, andupdated changed when any game details are modified:
updated: Date,created: { type: Date, default: Date.now},
Game maker: The maker field will be a reference to the user who made thegame:
maker: {type: mongoose.Schema.ObjectId, ref: 'User'}
These fields added in the game schema definition will capture details of each game onthe platform and allow us to implement the game-related features in the MERN VRGame application. The VR objects to be stored in the answerObjects andwrongObjects arrays in the game schema will hold details of each VR object to beplaced in the game world. In the next section, we will explore the schema defining thedetails to be stored for each VR object.
Specifying the VR object schemaThe answerObjects and wrongObjects fields already defined in the game schemawill both be arrays of VR object documents. These documents will represent the VRobjects that are a part of the game. We will define the VR object Mongoose schema forthese documents separately, with fields for storing the URLs of the object (OBJ) fileand Material Template Library (MTL) file, along with the React 360 transformvalues, the scale value, and color value for each VR object.
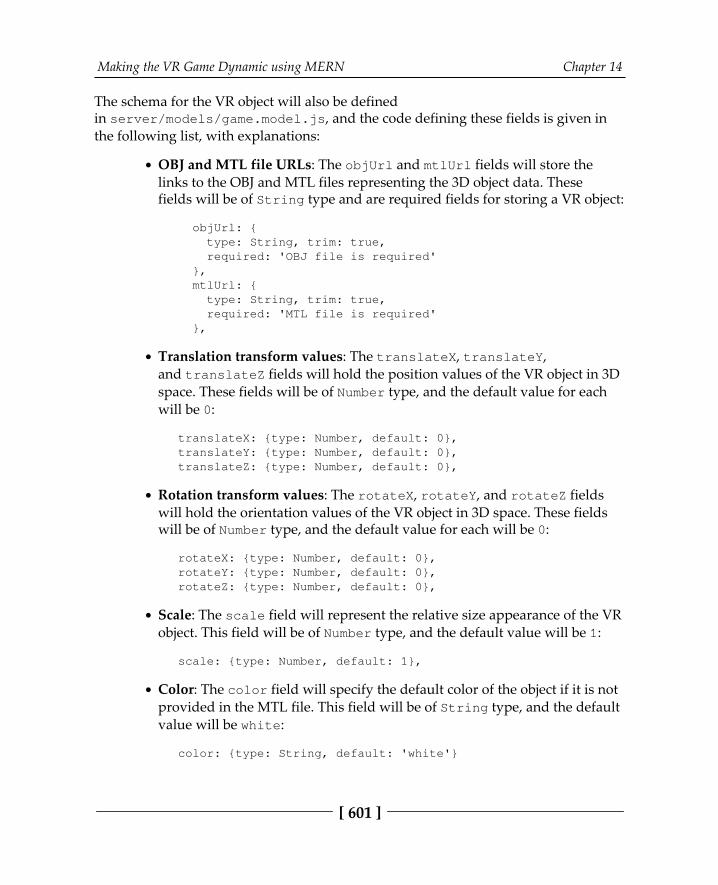
Making the VR Game Dynamic using MERN Chapter 14
[ 601 ]
The schema for the VR object will also be definedin server/models/game.model.js, and the code defining these fields is given inthe following list, with explanations:
OBJ and MTL file URLs: The objUrl and mtlUrl fields will store thelinks to the OBJ and MTL files representing the 3D object data. Thesefields will be of String type and are required fields for storing a VR object:
objUrl: { type: String, trim: true, required: 'OBJ file is required' }, mtlUrl: { type: String, trim: true, required: 'MTL file is required' },
Translation transform values: The translateX, translateY,and translateZ fields will hold the position values of the VR object in 3Dspace. These fields will be of Number type, and the default value for eachwill be 0:
translateX: {type: Number, default: 0},translateY: {type: Number, default: 0},translateZ: {type: Number, default: 0},
Rotation transform values: The rotateX, rotateY, and rotateZ fieldswill hold the orientation values of the VR object in 3D space. These fieldswill be of Number type, and the default value for each will be 0:
rotateX: {type: Number, default: 0},rotateY: {type: Number, default: 0},rotateZ: {type: Number, default: 0},
Scale: The scale field will represent the relative size appearance of the VRobject. This field will be of Number type, and the default value will be 1:
scale: {type: Number, default: 1},
Color: The color field will specify the default color of the object if it is notprovided in the MTL file. This field will be of String type, and the defaultvalue will be white:
color: {type: String, default: 'white'}
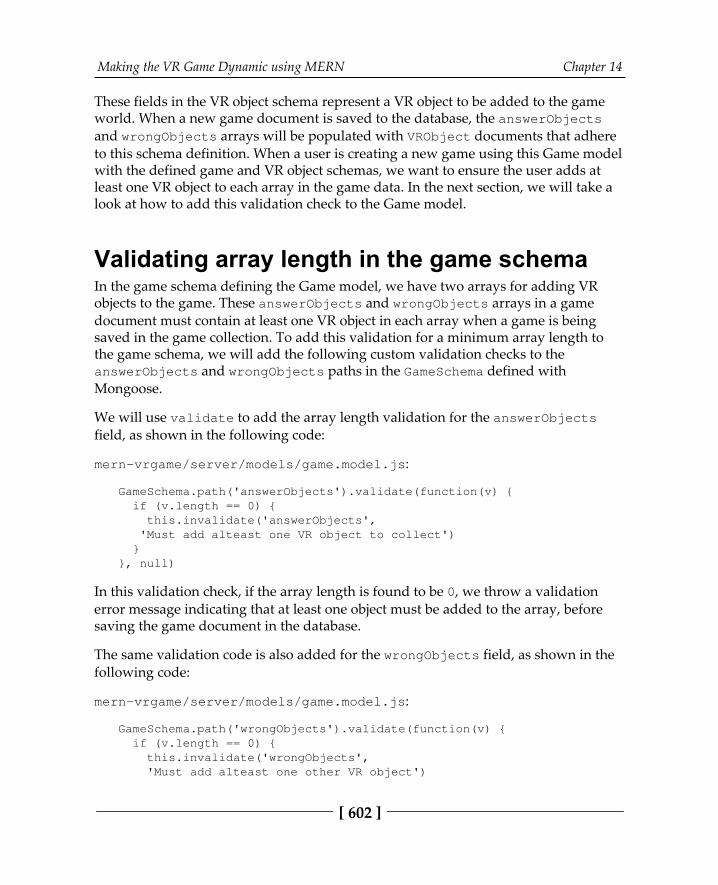
Making the VR Game Dynamic using MERN Chapter 14
[ 602 ]
These fields in the VR object schema represent a VR object to be added to the gameworld. When a new game document is saved to the database, the answerObjectsand wrongObjects arrays will be populated with VRObject documents that adhereto this schema definition. When a user is creating a new game using this Game modelwith the defined game and VR object schemas, we want to ensure the user adds atleast one VR object to each array in the game data. In the next section, we will take alook at how to add this validation check to the Game model.
Validating array length in the game schemaIn the game schema defining the Game model, we have two arrays for adding VRobjects to the game. These answerObjects and wrongObjects arrays in a gamedocument must contain at least one VR object in each array when a game is beingsaved in the game collection. To add this validation for a minimum array length tothe game schema, we will add the following custom validation checks to theanswerObjects and wrongObjects paths in the GameSchema defined withMongoose.
We will use validate to add the array length validation for the answerObjectsfield, as shown in the following code:
mern-vrgame/server/models/game.model.js:
GameSchema.path('answerObjects').validate(function(v) { if (v.length == 0) { this.invalidate('answerObjects', 'Must add alteast one VR object to collect') }}, null)
In this validation check, if the array length is found to be 0, we throw a validationerror message indicating that at least one object must be added to the array, beforesaving the game document in the database.
The same validation code is also added for the wrongObjects field, as shown in thefollowing code:
mern-vrgame/server/models/game.model.js:
GameSchema.path('wrongObjects').validate(function(v) { if (v.length == 0) { this.invalidate('wrongObjects', 'Must add alteast one other VR object')
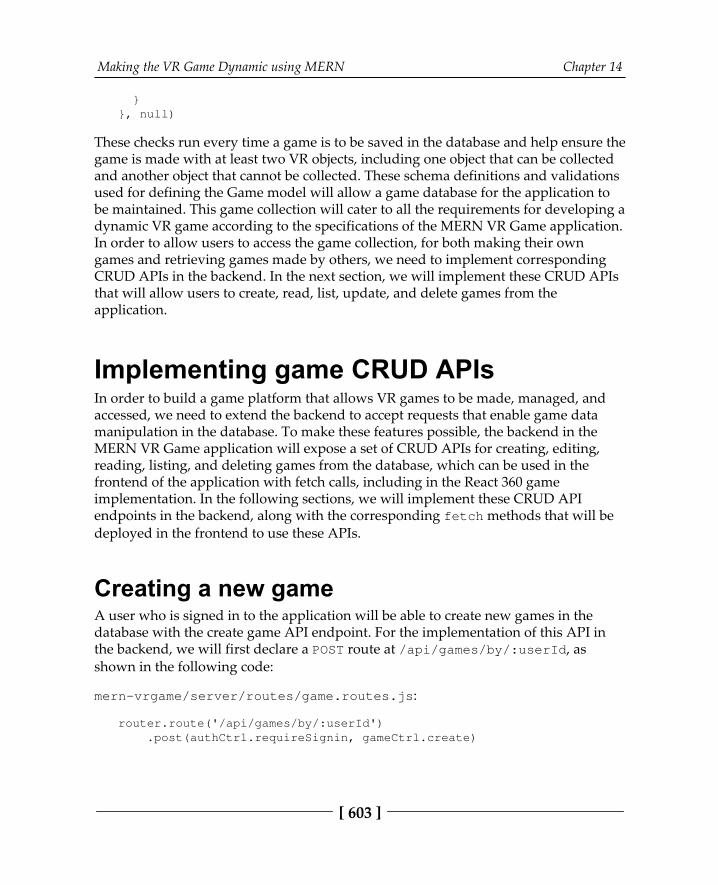
Making the VR Game Dynamic using MERN Chapter 14
[ 603 ]
}}, null)
These checks run every time a game is to be saved in the database and help ensure thegame is made with at least two VR objects, including one object that can be collectedand another object that cannot be collected. These schema definitions and validationsused for defining the Game model will allow a game database for the application tobe maintained. This game collection will cater to all the requirements for developing adynamic VR game according to the specifications of the MERN VR Game application.In order to allow users to access the game collection, for both making their owngames and retrieving games made by others, we need to implement correspondingCRUD APIs in the backend. In the next section, we will implement these CRUD APIsthat will allow users to create, read, list, update, and delete games from theapplication.
Implementing game CRUD APIsIn order to build a game platform that allows VR games to be made, managed, andaccessed, we need to extend the backend to accept requests that enable game datamanipulation in the database. To make these features possible, the backend in theMERN VR Game application will expose a set of CRUD APIs for creating, editing,reading, listing, and deleting games from the database, which can be used in thefrontend of the application with fetch calls, including in the React 360 gameimplementation. In the following sections, we will implement these CRUD APIendpoints in the backend, along with the corresponding fetch methods that will bedeployed in the frontend to use these APIs.
Creating a new gameA user who is signed in to the application will be able to create new games in thedatabase with the create game API endpoint. For the implementation of this API inthe backend, we will first declare a POST route at /api/games/by/:userId, asshown in the following code:
mern-vrgame/server/routes/game.routes.js:
router.route('/api/games/by/:userId') .post(authCtrl.requireSignin, gameCtrl.create)
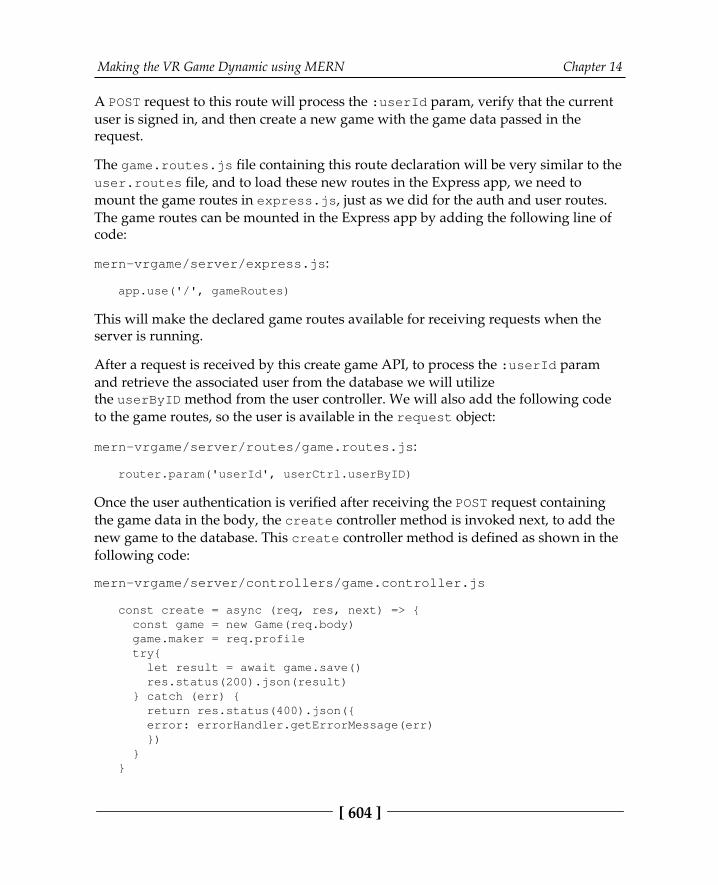
Making the VR Game Dynamic using MERN Chapter 14
[ 604 ]
A POST request to this route will process the :userId param, verify that the currentuser is signed in, and then create a new game with the game data passed in therequest.
The game.routes.js file containing this route declaration will be very similar to theuser.routes file, and to load these new routes in the Express app, we need tomount the game routes in express.js, just as we did for the auth and user routes.The game routes can be mounted in the Express app by adding the following line ofcode:
mern-vrgame/server/express.js:
app.use('/', gameRoutes)
This will make the declared game routes available for receiving requests when theserver is running.
After a request is received by this create game API, to process the :userId paramand retrieve the associated user from the database we will utilizethe userByID method from the user controller. We will also add the following codeto the game routes, so the user is available in the request object:
mern-vrgame/server/routes/game.routes.js:
router.param('userId', userCtrl.userByID)
Once the user authentication is verified after receiving the POST request containingthe game data in the body, the create controller method is invoked next, to add thenew game to the database. This create controller method is defined as shown in thefollowing code:
mern-vrgame/server/controllers/game.controller.js
const create = async (req, res, next) => { const game = new Game(req.body) game.maker = req.profile try{ let result = await game.save() res.status(200).json(result) } catch (err) { return res.status(400).json({ error: errorHandler.getErrorMessage(err) }) }}
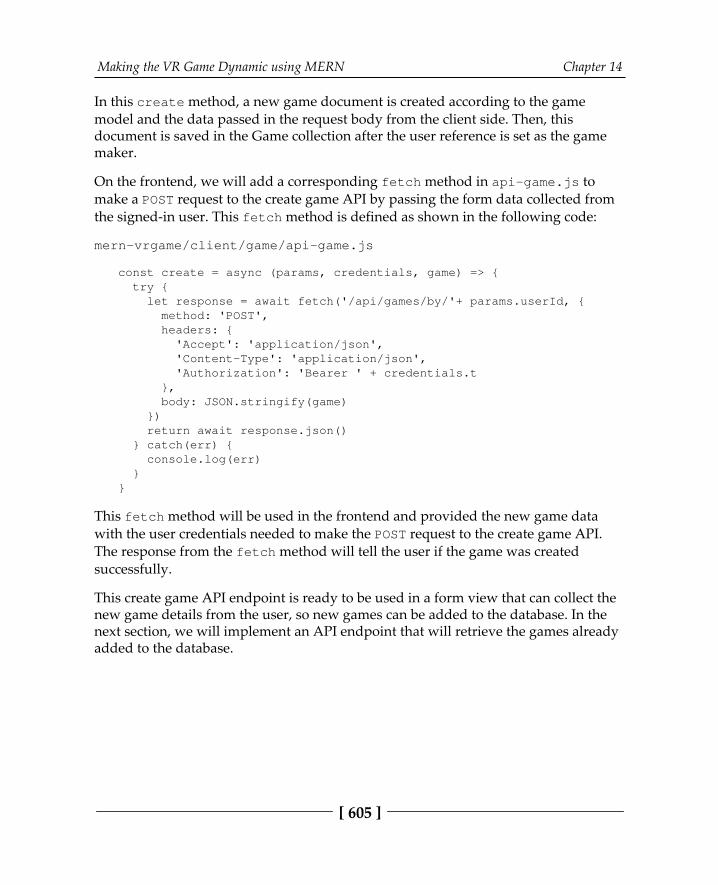
Making the VR Game Dynamic using MERN Chapter 14
[ 605 ]
In this create method, a new game document is created according to the gamemodel and the data passed in the request body from the client side. Then, thisdocument is saved in the Game collection after the user reference is set as the gamemaker.
On the frontend, we will add a corresponding fetch method in api-game.js tomake a POST request to the create game API by passing the form data collected fromthe signed-in user. This fetch method is defined as shown in the following code:
mern-vrgame/client/game/api-game.js
const create = async (params, credentials, game) => { try { let response = await fetch('/api/games/by/'+ params.userId, { method: 'POST', headers: { 'Accept': 'application/json', 'Content-Type': 'application/json', 'Authorization': 'Bearer ' + credentials.t }, body: JSON.stringify(game) }) return await response.json() } catch(err) { console.log(err) }}
This fetch method will be used in the frontend and provided the new game datawith the user credentials needed to make the POST request to the create game API.The response from the fetch method will tell the user if the game was createdsuccessfully.
This create game API endpoint is ready to be used in a form view that can collect thenew game details from the user, so new games can be added to the database. In thenext section, we will implement an API endpoint that will retrieve the games alreadyadded to the database.
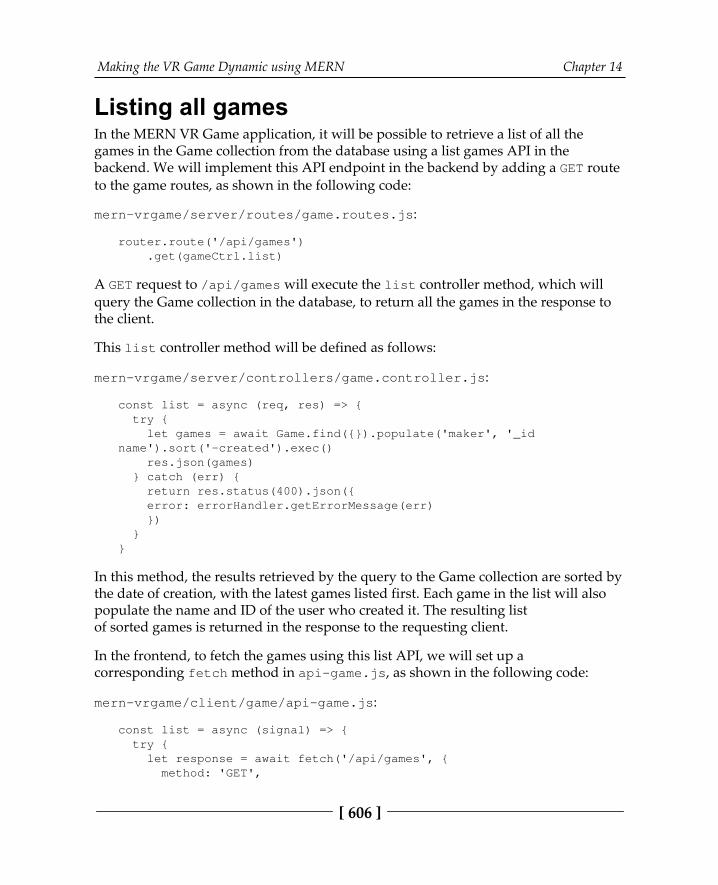
Making the VR Game Dynamic using MERN Chapter 14
[ 606 ]
Listing all gamesIn the MERN VR Game application, it will be possible to retrieve a list of all thegames in the Game collection from the database using a list games API in thebackend. We will implement this API endpoint in the backend by adding a GET routeto the game routes, as shown in the following code:
mern-vrgame/server/routes/game.routes.js:
router.route('/api/games') .get(gameCtrl.list)
A GET request to /api/games will execute the list controller method, which willquery the Game collection in the database, to return all the games in the response tothe client.
This list controller method will be defined as follows:
mern-vrgame/server/controllers/game.controller.js:
const list = async (req, res) => { try { let games = await Game.find({}).populate('maker', '_idname').sort('-created').exec() res.json(games) } catch (err) { return res.status(400).json({ error: errorHandler.getErrorMessage(err) }) }}
In this method, the results retrieved by the query to the Game collection are sorted bythe date of creation, with the latest games listed first. Each game in the list will alsopopulate the name and ID of the user who created it. The resulting listof sorted games is returned in the response to the requesting client.
In the frontend, to fetch the games using this list API, we will set up acorresponding fetch method in api-game.js, as shown in the following code:
mern-vrgame/client/game/api-game.js:
const list = async (signal) => { try { let response = await fetch('/api/games', { method: 'GET',
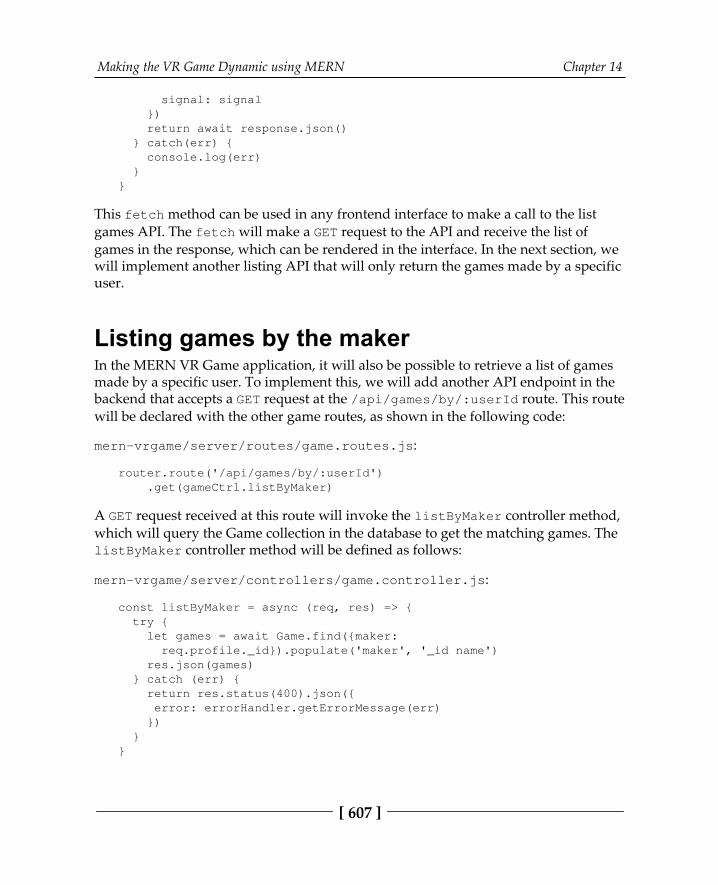
Making the VR Game Dynamic using MERN Chapter 14
[ 607 ]
signal: signal }) return await response.json() } catch(err) { console.log(err) }}
This fetch method can be used in any frontend interface to make a call to the listgames API. The fetch will make a GET request to the API and receive the list ofgames in the response, which can be rendered in the interface. In the next section, wewill implement another listing API that will only return the games made by a specificuser.
Listing games by the makerIn the MERN VR Game application, it will also be possible to retrieve a list of gamesmade by a specific user. To implement this, we will add another API endpoint in thebackend that accepts a GET request at the /api/games/by/:userId route. This routewill be declared with the other game routes, as shown in the following code:
mern-vrgame/server/routes/game.routes.js:
router.route('/api/games/by/:userId') .get(gameCtrl.listByMaker)
A GET request received at this route will invoke the listByMaker controller method,which will query the Game collection in the database to get the matching games. ThelistByMaker controller method will be defined as follows:
mern-vrgame/server/controllers/game.controller.js:
const listByMaker = async (req, res) => { try { let games = await Game.find({maker: req.profile._id}).populate('maker', '_id name') res.json(games) } catch (err) { return res.status(400).json({ error: errorHandler.getErrorMessage(err) }) }}
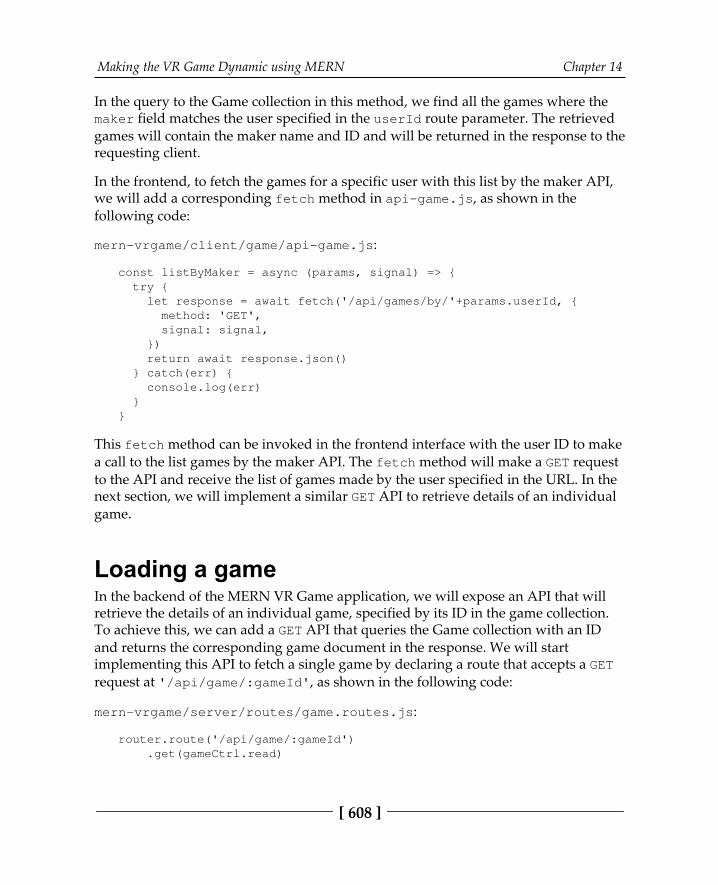
Making the VR Game Dynamic using MERN Chapter 14
[ 608 ]
In the query to the Game collection in this method, we find all the games where themaker field matches the user specified in the userId route parameter. The retrievedgames will contain the maker name and ID and will be returned in the response to therequesting client.
In the frontend, to fetch the games for a specific user with this list by the maker API,we will add a corresponding fetch method in api-game.js, as shown in thefollowing code:
mern-vrgame/client/game/api-game.js:
const listByMaker = async (params, signal) => { try { let response = await fetch('/api/games/by/'+params.userId, { method: 'GET', signal: signal, }) return await response.json() } catch(err) { console.log(err) }}
This fetch method can be invoked in the frontend interface with the user ID to makea call to the list games by the maker API. The fetch method will make a GET requestto the API and receive the list of games made by the user specified in the URL. In thenext section, we will implement a similar GET API to retrieve details of an individualgame.
Loading a gameIn the backend of the MERN VR Game application, we will expose an API that willretrieve the details of an individual game, specified by its ID in the game collection.To achieve this, we can add a GET API that queries the Game collection with an IDand returns the corresponding game document in the response. We will startimplementing this API to fetch a single game by declaring a route that accepts a GETrequest at '/api/game/:gameId', as shown in the following code:
mern-vrgame/server/routes/game.routes.js:
router.route('/api/game/:gameId') .get(gameCtrl.read)
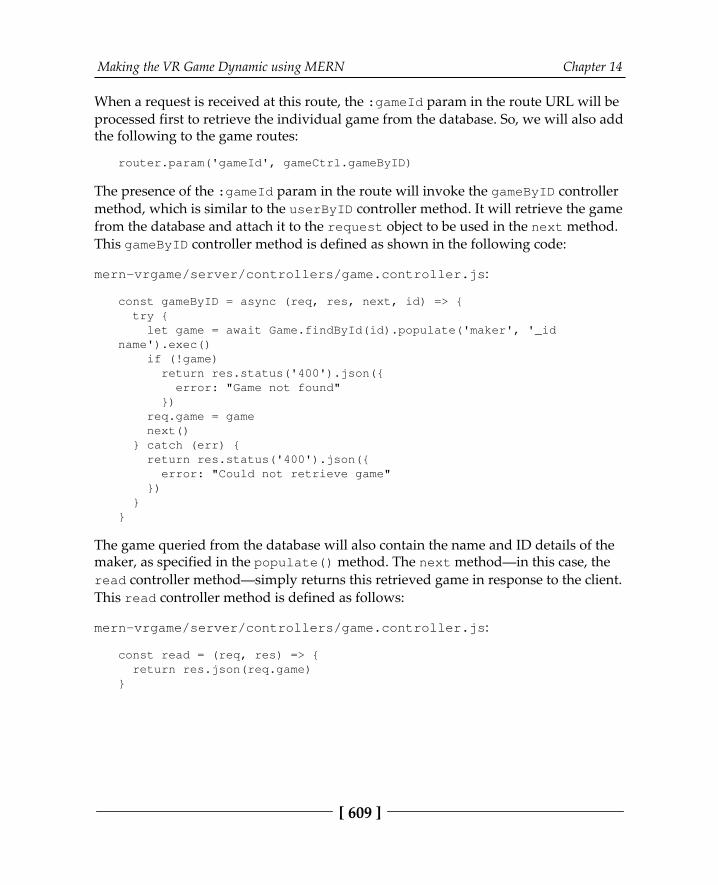
Making the VR Game Dynamic using MERN Chapter 14
[ 609 ]
When a request is received at this route, the :gameId param in the route URL will beprocessed first to retrieve the individual game from the database. So, we will also addthe following to the game routes:
router.param('gameId', gameCtrl.gameByID)
The presence of the :gameId param in the route will invoke the gameByID controllermethod, which is similar to the userByID controller method. It will retrieve the gamefrom the database and attach it to the request object to be used in the next method.This gameByID controller method is defined as shown in the following code:
mern-vrgame/server/controllers/game.controller.js:
const gameByID = async (req, res, next, id) => { try { let game = await Game.findById(id).populate('maker', '_idname').exec() if (!game) return res.status('400').json({ error: "Game not found" }) req.game = game next() } catch (err) { return res.status('400').json({ error: "Could not retrieve game" }) }}
The game queried from the database will also contain the name and ID details of themaker, as specified in the populate() method. The next method—in this case, theread controller method—simply returns this retrieved game in response to the client.This read controller method is defined as follows:
mern-vrgame/server/controllers/game.controller.js:
const read = (req, res) => { return res.json(req.game)}
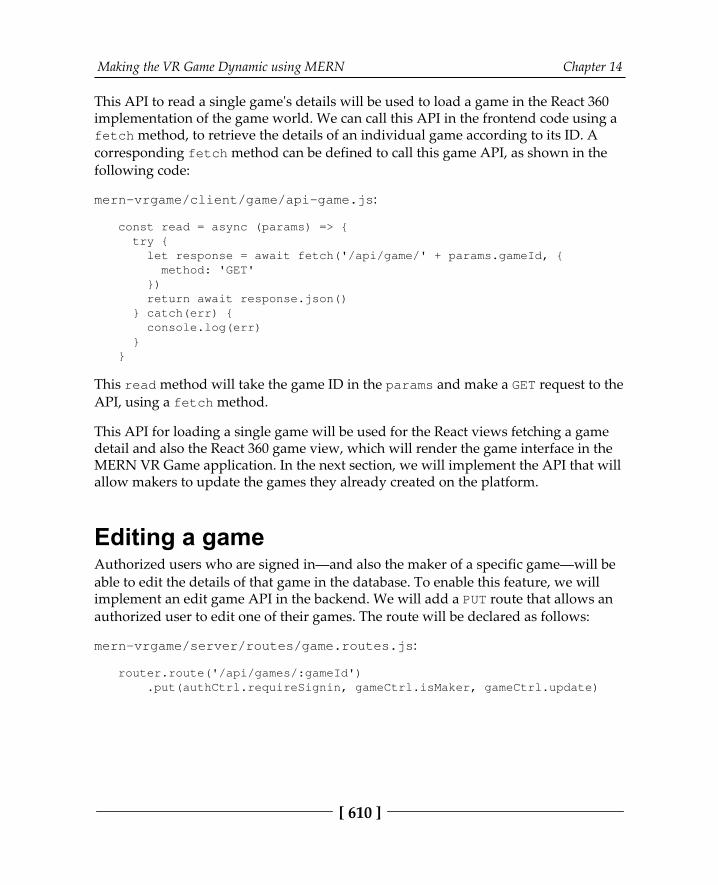
Making the VR Game Dynamic using MERN Chapter 14
[ 610 ]
This API to read a single game's details will be used to load a game in the React 360implementation of the game world. We can call this API in the frontend code using afetch method, to retrieve the details of an individual game according to its ID. Acorresponding fetch method can be defined to call this game API, as shown in thefollowing code:
mern-vrgame/client/game/api-game.js:
const read = async (params) => { try { let response = await fetch('/api/game/' + params.gameId, { method: 'GET' }) return await response.json() } catch(err) { console.log(err) }}
This read method will take the game ID in the params and make a GET request to theAPI, using a fetch method.
This API for loading a single game will be used for the React views fetching a gamedetail and also the React 360 game view, which will render the game interface in theMERN VR Game application. In the next section, we will implement the API that willallow makers to update the games they already created on the platform.
Editing a gameAuthorized users who are signed in—and also the maker of a specific game—will beable to edit the details of that game in the database. To enable this feature, we willimplement an edit game API in the backend. We will add a PUT route that allows anauthorized user to edit one of their games. The route will be declared as follows:
mern-vrgame/server/routes/game.routes.js:
router.route('/api/games/:gameId') .put(authCtrl.requireSignin, gameCtrl.isMaker, gameCtrl.update)
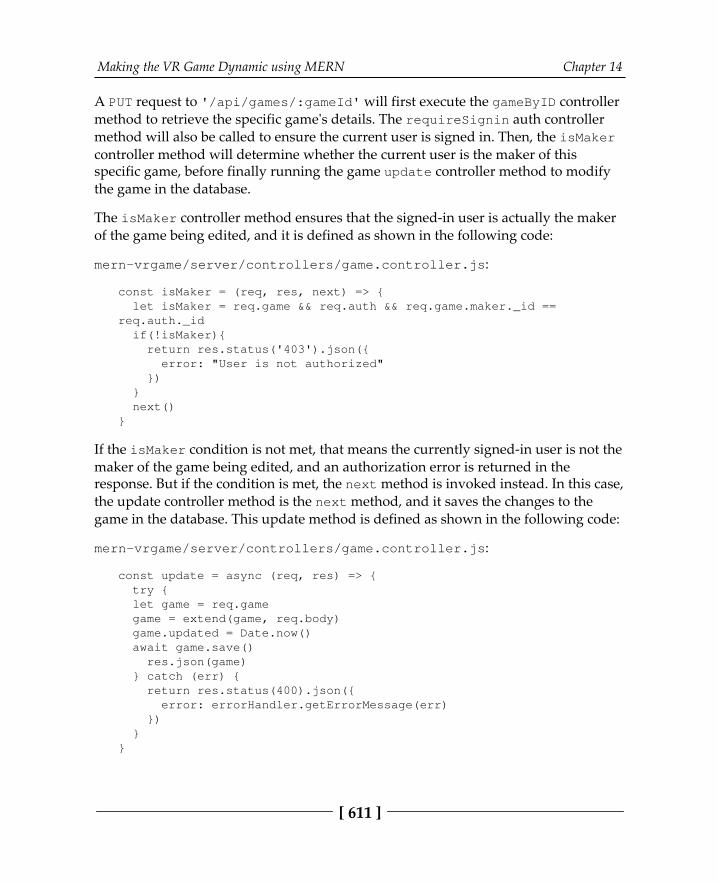
Making the VR Game Dynamic using MERN Chapter 14
[ 611 ]
A PUT request to '/api/games/:gameId' will first execute the gameByID controllermethod to retrieve the specific game's details. The requireSignin auth controllermethod will also be called to ensure the current user is signed in. Then, the isMakercontroller method will determine whether the current user is the maker of thisspecific game, before finally running the game update controller method to modifythe game in the database.
The isMaker controller method ensures that the signed-in user is actually the makerof the game being edited, and it is defined as shown in the following code:
mern-vrgame/server/controllers/game.controller.js:
const isMaker = (req, res, next) => { let isMaker = req.game && req.auth && req.game.maker._id ==req.auth._id if(!isMaker){ return res.status('403').json({ error: "User is not authorized" }) } next()}
If the isMaker condition is not met, that means the currently signed-in user is not themaker of the game being edited, and an authorization error is returned in theresponse. But if the condition is met, the next method is invoked instead. In this case,the update controller method is the next method, and it saves the changes to thegame in the database. This update method is defined as shown in the following code:
mern-vrgame/server/controllers/game.controller.js:
const update = async (req, res) => { try { let game = req.game game = extend(game, req.body) game.updated = Date.now() await game.save() res.json(game) } catch (err) { return res.status(400).json({ error: errorHandler.getErrorMessage(err) }) }}
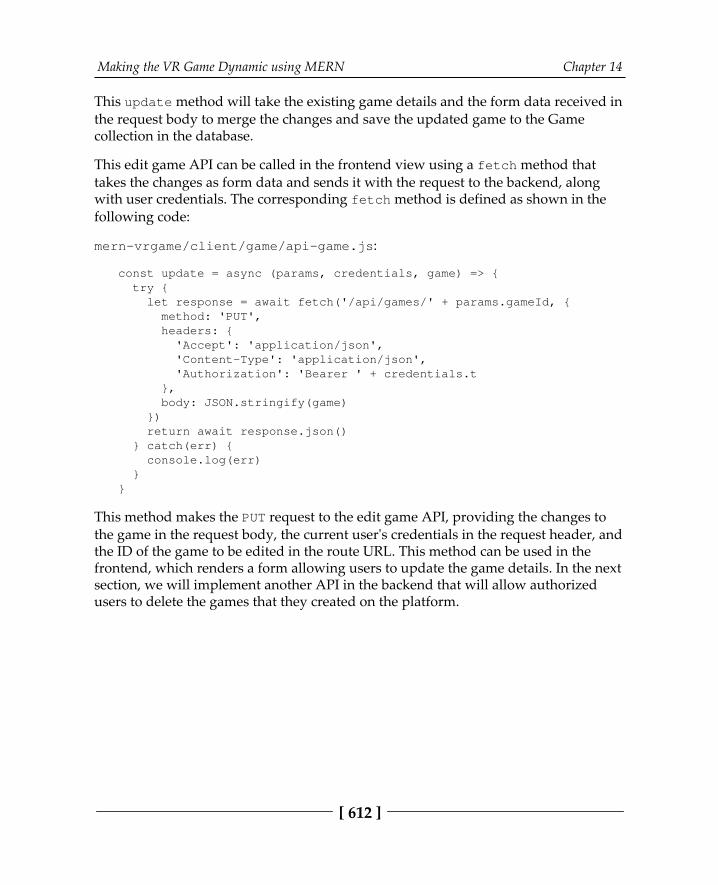
Making the VR Game Dynamic using MERN Chapter 14
[ 612 ]
This update method will take the existing game details and the form data received inthe request body to merge the changes and save the updated game to the Gamecollection in the database.
This edit game API can be called in the frontend view using a fetch method thattakes the changes as form data and sends it with the request to the backend, alongwith user credentials. The corresponding fetch method is defined as shown in thefollowing code:
mern-vrgame/client/game/api-game.js:
const update = async (params, credentials, game) => { try { let response = await fetch('/api/games/' + params.gameId, { method: 'PUT', headers: { 'Accept': 'application/json', 'Content-Type': 'application/json', 'Authorization': 'Bearer ' + credentials.t }, body: JSON.stringify(game) }) return await response.json() } catch(err) { console.log(err) }}
This method makes the PUT request to the edit game API, providing the changes tothe game in the request body, the current user's credentials in the request header, andthe ID of the game to be edited in the route URL. This method can be used in thefrontend, which renders a form allowing users to update the game details. In the nextsection, we will implement another API in the backend that will allow authorizedusers to delete the games that they created on the platform.
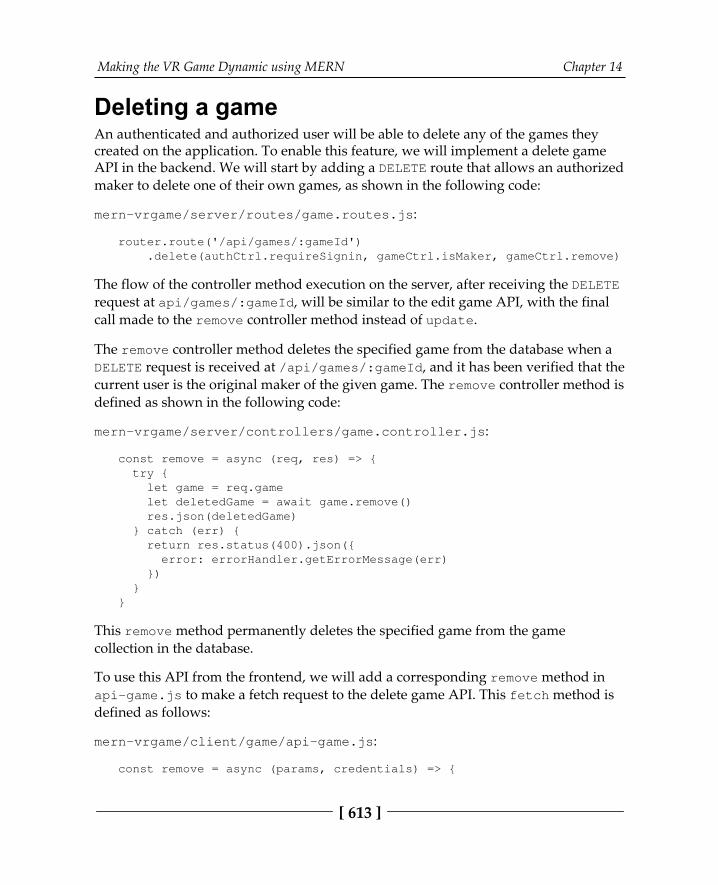
Making the VR Game Dynamic using MERN Chapter 14
[ 613 ]
Deleting a game An authenticated and authorized user will be able to delete any of the games theycreated on the application. To enable this feature, we will implement a delete gameAPI in the backend. We will start by adding a DELETE route that allows an authorizedmaker to delete one of their own games, as shown in the following code:
mern-vrgame/server/routes/game.routes.js:
router.route('/api/games/:gameId') .delete(authCtrl.requireSignin, gameCtrl.isMaker, gameCtrl.remove)
The flow of the controller method execution on the server, after receiving the DELETErequest at api/games/:gameId, will be similar to the edit game API, with the finalcall made to the remove controller method instead of update.
The remove controller method deletes the specified game from the database when aDELETE request is received at /api/games/:gameId, and it has been verified that thecurrent user is the original maker of the given game. The remove controller method isdefined as shown in the following code:
mern-vrgame/server/controllers/game.controller.js:
const remove = async (req, res) => { try { let game = req.game let deletedGame = await game.remove() res.json(deletedGame) } catch (err) { return res.status(400).json({ error: errorHandler.getErrorMessage(err) }) }}
This remove method permanently deletes the specified game from the gamecollection in the database.
To use this API from the frontend, we will add a corresponding remove method inapi-game.js to make a fetch request to the delete game API. This fetch method is defined as follows:
mern-vrgame/client/game/api-game.js:
const remove = async (params, credentials) => {

Making the VR Game Dynamic using MERN Chapter 14
[ 614 ]
try { let response = await fetch('/api/games/' + params.gameId, { method: 'DELETE', headers: { 'Accept': 'application/json', 'Content-Type': 'application/json', 'Authorization': 'Bearer ' + credentials.t } }) return await response.json() } catch(err) { console.log(err) }}
This method uses fetch to make a DELETE request to the delete game API. It takesthe game ID in the params and the user credentials that are needed by the APIendpoint in the backend to check if this current user is the authorized maker of thespecified game. If the request is successful and the corresponding game is removedfrom the database, a success message is returned in the response.
With these game CRUD APIs functional in the backend, we are ready to implementthe frontend that will use these APIs to allow users to create new games, list thegames, modify existing games, and load a single game in the React 360 game view.We can start building out this frontend in the next section, starting with the Reactviews for creating and editing games in the application.
Adding a form for creating and editinggamesUsers registered on the MERN VR Game application will be able to make new gamesand modify these games from views on the application. To implement these views,we will add React components that allow users to compose and modify the gamedetails and VR object details for each game. As the form for creating new and editingexisting games will have similar form fields for composing game details and VRobject details, we will make reusable components that can be used both for creatingand editing purposes. In the following sections, we will discuss the form views forcreating a new game and editing an existing game, and the implementation of thecommon form components in these views.
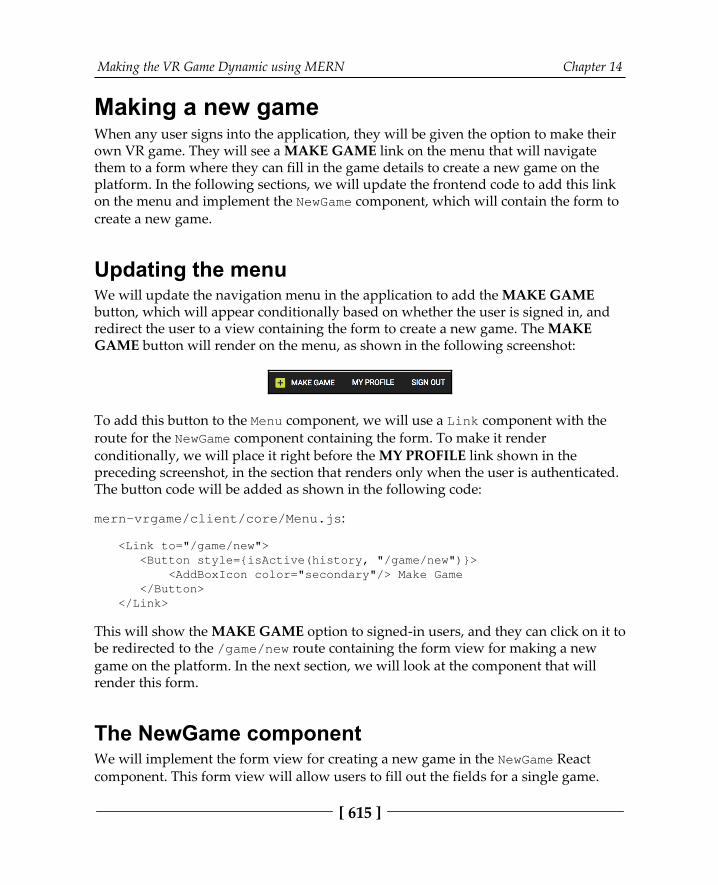
Making the VR Game Dynamic using MERN Chapter 14
[ 615 ]
Making a new gameWhen any user signs into the application, they will be given the option to make theirown VR game. They will see a MAKE GAME link on the menu that will navigatethem to a form where they can fill in the game details to create a new game on theplatform. In the following sections, we will update the frontend code to add this linkon the menu and implement the NewGame component, which will contain the form tocreate a new game.
Updating the menuWe will update the navigation menu in the application to add the MAKE GAMEbutton, which will appear conditionally based on whether the user is signed in, andredirect the user to a view containing the form to create a new game. The MAKEGAME button will render on the menu, as shown in the following screenshot:
To add this button to the Menu component, we will use a Link component with theroute for the NewGame component containing the form. To make it renderconditionally, we will place it right before the MY PROFILE link shown in thepreceding screenshot, in the section that renders only when the user is authenticated.The button code will be added as shown in the following code:
mern-vrgame/client/core/Menu.js:
<Link to="/game/new"> <Button style={isActive(history, "/game/new")}> <AddBoxIcon color="secondary"/> Make Game </Button></Link>
This will show the MAKE GAME option to signed-in users, and they can click on it tobe redirected to the /game/new route containing the form view for making a newgame on the platform. In the next section, we will look at the component that willrender this form.
The NewGame componentWe will implement the form view for creating a new game in the NewGame Reactcomponent. This form view will allow users to fill out the fields for a single game.
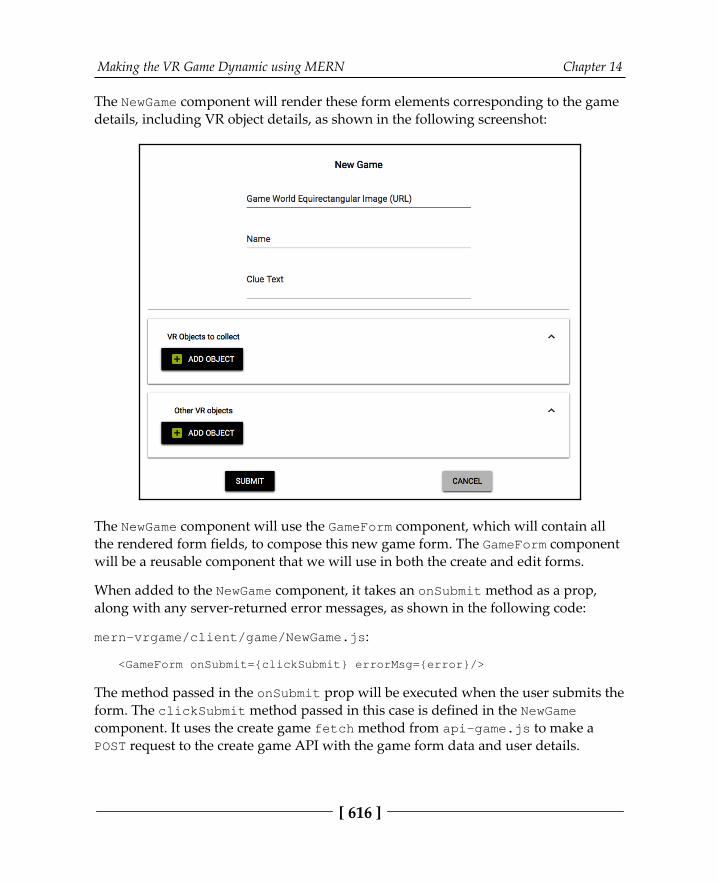
Making the VR Game Dynamic using MERN Chapter 14
[ 616 ]
The NewGame component will render these form elements corresponding to the gamedetails, including VR object details, as shown in the following screenshot:
The NewGame component will use the GameForm component, which will contain allthe rendered form fields, to compose this new game form. The GameForm componentwill be a reusable component that we will use in both the create and edit forms.
When added to the NewGame component, it takes an onSubmit method as a prop,along with any server-returned error messages, as shown in the following code:
mern-vrgame/client/game/NewGame.js:
<GameForm onSubmit={clickSubmit} errorMsg={error}/>
The method passed in the onSubmit prop will be executed when the user submits theform. The clickSubmit method passed in this case is defined in the NewGamecomponent. It uses the create game fetch method from api-game.js to make aPOST request to the create game API with the game form data and user details.
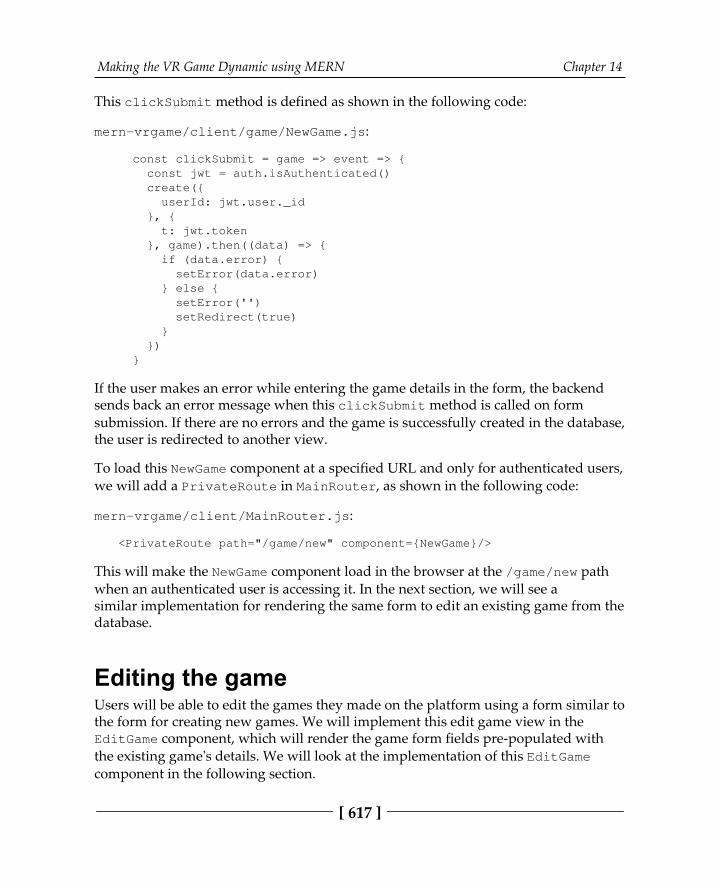
Making the VR Game Dynamic using MERN Chapter 14
[ 617 ]
This clickSubmit method is defined as shown in the following code:
mern-vrgame/client/game/NewGame.js:
const clickSubmit = game => event => { const jwt = auth.isAuthenticated() create({ userId: jwt.user._id }, { t: jwt.token }, game).then((data) => { if (data.error) { setError(data.error) } else { setError('') setRedirect(true) } }) }
If the user makes an error while entering the game details in the form, the backendsends back an error message when this clickSubmit method is called on formsubmission. If there are no errors and the game is successfully created in the database,the user is redirected to another view.
To load this NewGame component at a specified URL and only for authenticated users,we will add a PrivateRoute in MainRouter, as shown in the following code:
mern-vrgame/client/MainRouter.js:
<PrivateRoute path="/game/new" component={NewGame}/>
This will make the NewGame component load in the browser at the /game/new pathwhen an authenticated user is accessing it. In the next section, we will see asimilar implementation for rendering the same form to edit an existing game from thedatabase.
Editing the gameUsers will be able to edit the games they made on the platform using a form similar tothe form for creating new games. We will implement this edit game view in theEditGame component, which will render the game form fields pre-populated withthe existing game's details. We will look at the implementation of this EditGamecomponent in the following section.
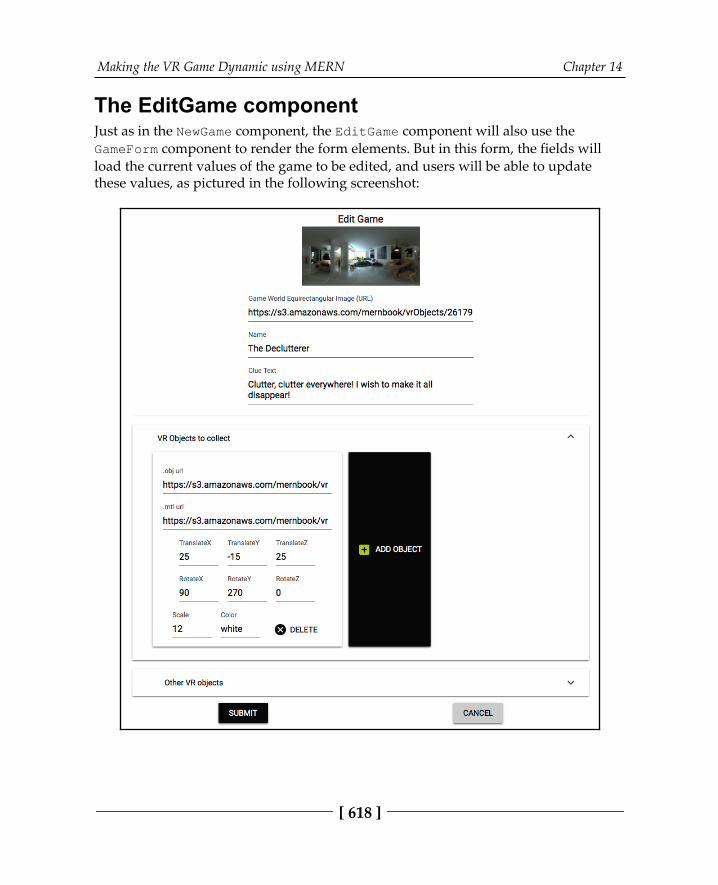
Making the VR Game Dynamic using MERN Chapter 14
[ 618 ]
The EditGame componentJust as in the NewGame component, the EditGame component will also use theGameForm component to render the form elements. But in this form, the fields willload the current values of the game to be edited, and users will be able to updatethese values, as pictured in the following screenshot:
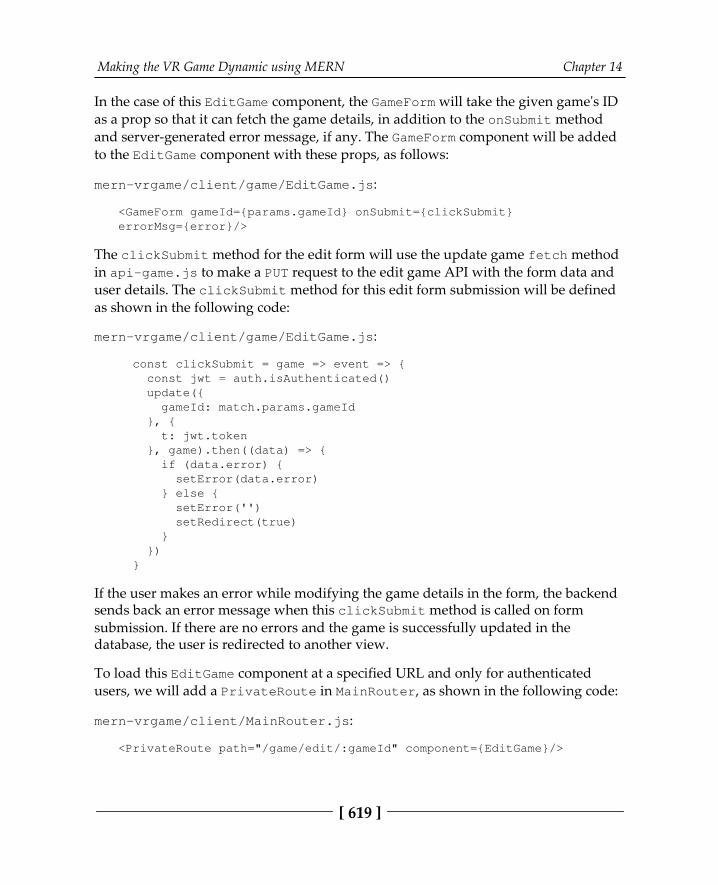
Making the VR Game Dynamic using MERN Chapter 14
[ 619 ]
In the case of this EditGame component, the GameForm will take the given game's IDas a prop so that it can fetch the game details, in addition to the onSubmit methodand server-generated error message, if any. The GameForm component will be addedto the EditGame component with these props, as follows:
mern-vrgame/client/game/EditGame.js:
<GameForm gameId={params.gameId} onSubmit={clickSubmit}errorMsg={error}/>
The clickSubmit method for the edit form will use the update game fetch methodin api-game.js to make a PUT request to the edit game API with the form data anduser details. The clickSubmit method for this edit form submission will be definedas shown in the following code:
mern-vrgame/client/game/EditGame.js:
const clickSubmit = game => event => { const jwt = auth.isAuthenticated() update({ gameId: match.params.gameId }, { t: jwt.token }, game).then((data) => { if (data.error) { setError(data.error) } else { setError('') setRedirect(true) } }) }
If the user makes an error while modifying the game details in the form, the backendsends back an error message when this clickSubmit method is called on formsubmission. If there are no errors and the game is successfully updated in thedatabase, the user is redirected to another view.
To load this EditGame component at a specified URL and only for authenticatedusers, we will add a PrivateRoute in MainRouter, as shown in the following code:
mern-vrgame/client/MainRouter.js:
<PrivateRoute path="/game/edit/:gameId" component={EditGame}/>
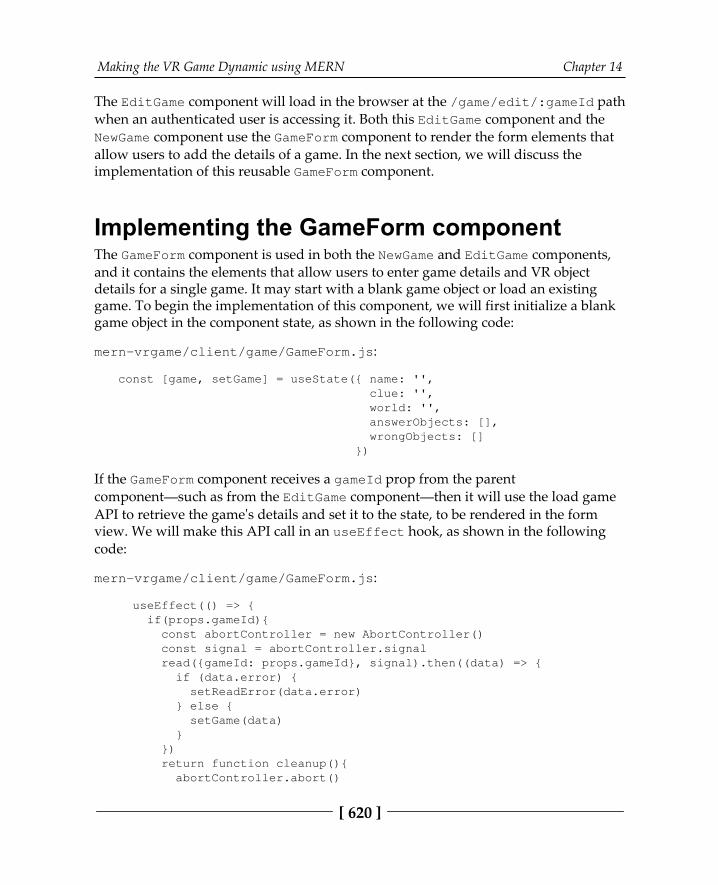
Making the VR Game Dynamic using MERN Chapter 14
[ 620 ]
The EditGame component will load in the browser at the /game/edit/:gameId pathwhen an authenticated user is accessing it. Both this EditGame component and theNewGame component use the GameForm component to render the form elements thatallow users to add the details of a game. In the next section, we will discuss theimplementation of this reusable GameForm component.
Implementing the GameForm componentThe GameForm component is used in both the NewGame and EditGame components,and it contains the elements that allow users to enter game details and VR objectdetails for a single game. It may start with a blank game object or load an existinggame. To begin the implementation of this component, we will first initialize a blankgame object in the component state, as shown in the following code:
mern-vrgame/client/game/GameForm.js:
const [game, setGame] = useState({ name: '', clue: '', world: '', answerObjects: [], wrongObjects: [] })
If the GameForm component receives a gameId prop from the parentcomponent—such as from the EditGame component—then it will use the load gameAPI to retrieve the game's details and set it to the state, to be rendered in the formview. We will make this API call in an useEffect hook, as shown in the followingcode:
mern-vrgame/client/game/GameForm.js:
useEffect(() => { if(props.gameId){ const abortController = new AbortController() const signal = abortController.signal read({gameId: props.gameId}, signal).then((data) => { if (data.error) { setReadError(data.error) } else { setGame(data) } }) return function cleanup(){ abortController.abort()
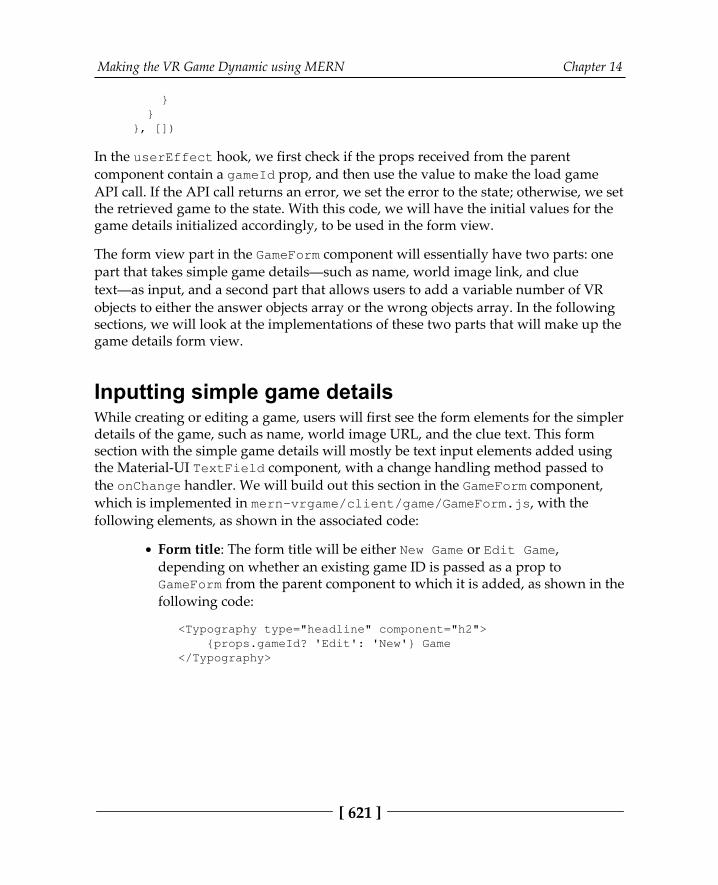
Making the VR Game Dynamic using MERN Chapter 14
[ 621 ]
} } }, [])
In the userEffect hook, we first check if the props received from the parentcomponent contain a gameId prop, and then use the value to make the load gameAPI call. If the API call returns an error, we set the error to the state; otherwise, we setthe retrieved game to the state. With this code, we will have the initial values for thegame details initialized accordingly, to be used in the form view.
The form view part in the GameForm component will essentially have two parts: onepart that takes simple game details—such as name, world image link, and cluetext—as input, and a second part that allows users to add a variable number of VRobjects to either the answer objects array or the wrong objects array. In the followingsections, we will look at the implementations of these two parts that will make up thegame details form view.
Inputting simple game detailsWhile creating or editing a game, users will first see the form elements for the simplerdetails of the game, such as name, world image URL, and the clue text. This formsection with the simple game details will mostly be text input elements added usingthe Material-UI TextField component, with a change handling method passed tothe onChange handler. We will build out this section in the GameForm component,which is implemented in mern-vrgame/client/game/GameForm.js, with thefollowing elements, as shown in the associated code:
Form title: The form title will be either New Game or Edit Game,depending on whether an existing game ID is passed as a prop toGameForm from the parent component to which it is added, as shown in thefollowing code:
<Typography type="headline" component="h2"> {props.gameId? 'Edit': 'New'} Game</Typography>
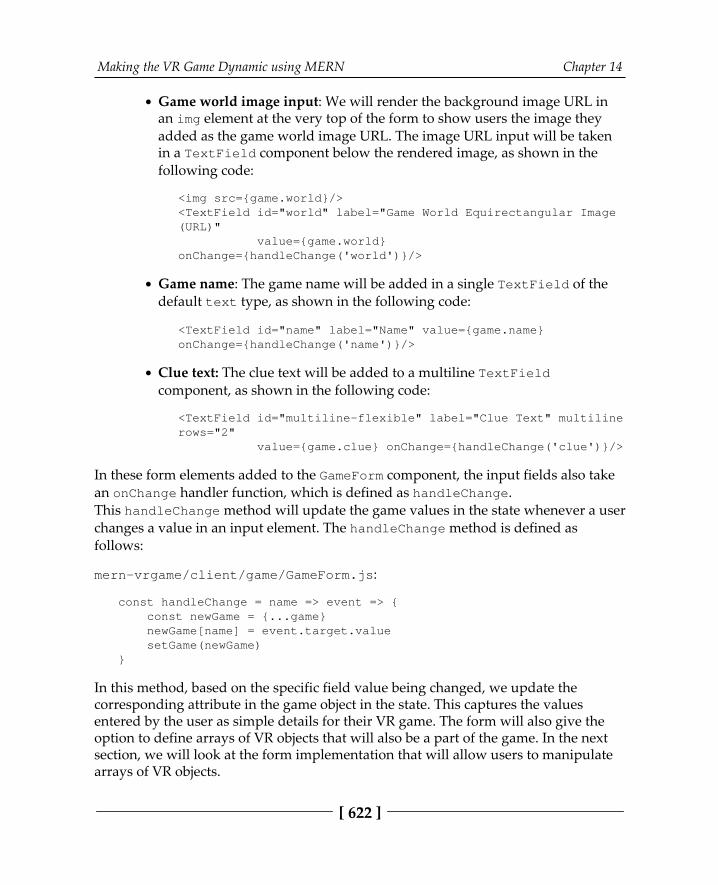
Making the VR Game Dynamic using MERN Chapter 14
[ 622 ]
Game world image input: We will render the background image URL inan img element at the very top of the form to show users the image theyadded as the game world image URL. The image URL input will be takenin a TextField component below the rendered image, as shown in thefollowing code:
<img src={game.world}/><TextField id="world" label="Game World Equirectangular Image(URL)" value={game.world}onChange={handleChange('world')}/>
Game name: The game name will be added in a single TextField of thedefault text type, as shown in the following code:
<TextField id="name" label="Name" value={game.name}onChange={handleChange('name')}/>
Clue text: The clue text will be added to a multiline TextFieldcomponent, as shown in the following code:
<TextField id="multiline-flexible" label="Clue Text" multilinerows="2" value={game.clue} onChange={handleChange('clue')}/>
In these form elements added to the GameForm component, the input fields also takean onChange handler function, which is defined as handleChange.This handleChange method will update the game values in the state whenever a userchanges a value in an input element. The handleChange method is defined asfollows:
mern-vrgame/client/game/GameForm.js:
const handleChange = name => event => { const newGame = {...game} newGame[name] = event.target.value setGame(newGame)}
In this method, based on the specific field value being changed, we update thecorresponding attribute in the game object in the state. This captures the valuesentered by the user as simple details for their VR game. The form will also give theoption to define arrays of VR objects that will also be a part of the game. In the nextsection, we will look at the form implementation that will allow users to manipulatearrays of VR objects.
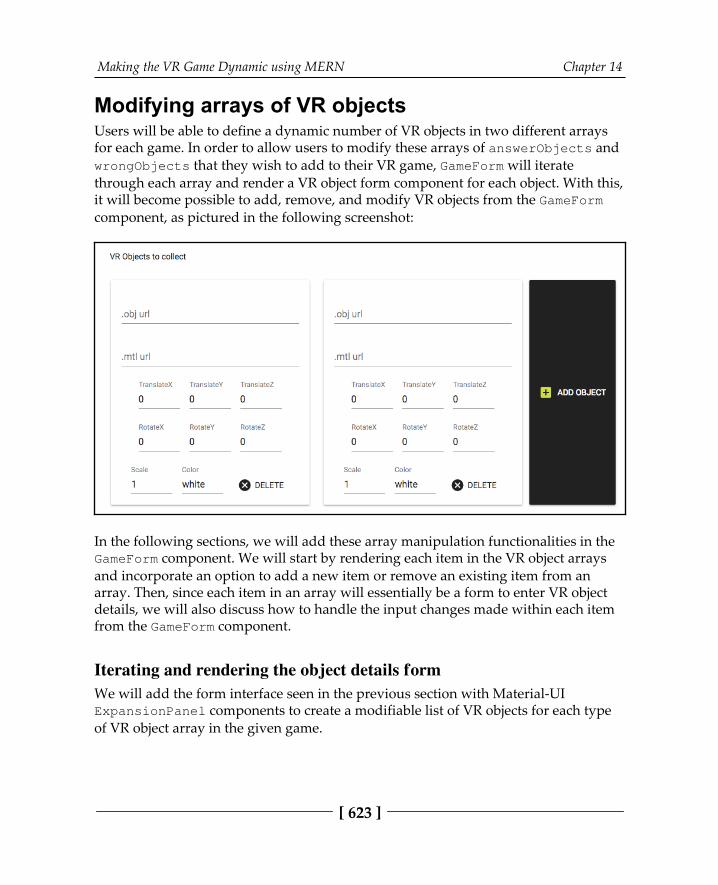
Making the VR Game Dynamic using MERN Chapter 14
[ 623 ]
Modifying arrays of VR objectsUsers will be able to define a dynamic number of VR objects in two different arraysfor each game. In order to allow users to modify these arrays of answerObjects andwrongObjects that they wish to add to their VR game, GameForm will iteratethrough each array and render a VR object form component for each object. With this,it will become possible to add, remove, and modify VR objects from the GameFormcomponent, as pictured in the following screenshot:
In the following sections, we will add these array manipulation functionalities in the GameForm component. We will start by rendering each item in the VR object arraysand incorporate an option to add a new item or remove an existing item from anarray. Then, since each item in an array will essentially be a form to enter VR objectdetails, we will also discuss how to handle the input changes made within each itemfrom the GameForm component.
Iterating and rendering the object details formWe will add the form interface seen in the previous section with Material-UIExpansionPanel components to create a modifiable list of VR objects for each typeof VR object array in the given game.
Making the VR Game Dynamic using MERN Chapter 14
[ 624 ]
Inside the nested ExpansionPanelDetails component, we will iterate through theanswerObjects array or the wrongObjects array to render a VRObjectFormcomponent for each VR object, as shown in the following code:
mern-vrgame/client/game/GameForm.js:
<ExpansionPanel> <ExpansionPanelSummary expandIcon={<ExpandMoreIcon />}> <Typography>VR Objects to collect</Typography> </ExpansionPanelSummary> <ExpansionPanelDetails> { game.answerObjects.map((item, i) => { return <div key={i}> <VRObjectForm index={i} type={'answerObjects'} handleUpdate={handleObjectChange} vrObject={item} removeObject={removeObject}/> </div> }) } ... </ExpansionPanelDetails></ExpansionPanel>
To render each object in the array, we use a VRObjectForm component. We will lookat the specific implementation of the VRObjectForm component later in the chapter.While adding VRObjectForm in this code, we pass the single vrObject item as aprop, along with the current index in the array, the type of the array, and twomethods for updating the state in GameForm when the array details are modified bychanging details or deleting an object from within the VRObjectForm component.This will render a form for each VR object in the arrays associated with the game inthe GameForm component. In the next section, we will see the implementation forincluding an option to add new objects to these arrays.
Making the VR Game Dynamic using MERN Chapter 14
[ 625 ]
Adding a new object to the arrayFor each array rendered in the game form, we will add a button that will let userspush new VR objects to the given array. This button to add an object will render anew VRObjectForm component to take the details of a new VR object. We will addthis button to the ExpansionPanelDetails component after the iteration code, asshown in the following code:
mern-vrgame/client/game/GameForm.js:
<ExpansionPanelDetails>... <Button color="primary" variant="contained" onClick={addObject('answerObjects')}> <AddBoxIcon color="secondary"/> Add Object </Button></ExpansionPanelDetails>
This ADD OBJECT button will render at the end of each list of VR object forms.When clicked on, it will add a new blank VR object form by invoking the addObjectmethod. This addObject method will be defined as follows:
mern-vrgame/client/game/GameForm.js:
const addObject = name => event => { const newGame = {...game} newGame[name].push({}) setGame(newGame) }
The addObject method is passed the array type so we know which array the userwants to add the new object to. In this method, we will just add an empty object to thearray being iterated, so an empty form is rendered in its place, which users can fill outto enter new object details. In the next section, we will see how to let users removeone of these items from a list of VR object forms.
Removing an object from the arrayEach of the items rendered in the list of VR object forms can also be removed from thelist by the user. The VRObjectForm component displaying an item will contain adelete option, which will remove the object from the given array.
Making the VR Game Dynamic using MERN Chapter 14
[ 626 ]
To implement the remove item functionality for this DELETE button, we will pass aremoveObject method as a prop to the VRObjectForm component from theparent GameForm component. This method will allow the array to be updated in theparent component's state when a user clicks DELETE on a specific VRObjectForm.This removeObject method will be defined as shown in the following code:
mern-vrgame/client/game/GameForm.js:
const removeObject = (type, index) => event => { const newGame = {...game} newGame[type].splice(index, 1) setGame(newGame) }
In this method, the VR object corresponding to the item clicked will be removed byslicing at the given index from the array with the specified array type. This updatedobject array in the game will be reflected in the view when it is set in the state, withthe deleted VR object removed from the form view. In the next section, we will look athow to handle changes to the details of a VR object when the user updates values in aVR object form, which is rendered according to items in the VR object arrays.
Handling the object detail changeThe details of any VR object in the game will be updated when the user changes inputvalues in any of the fields in the corresponding VR object form. To register thisupdate, the GameForm that houses the forms for the VR objects will pass thehandleObjectChange method to the VRObjectForm component, which will renderthe VR object form. This handleObjectChange method will be defined as follows:
mern-vrgame/client/game/GameForm.js:
const handleObjectChange = (index, type, name, val) => { var newGame = {...game} newGame[type][index][name] = val setGame(newGame)}
This handleObjectChange method will be used in the VRObjectFrom component tocapture the changed input's value and update the corresponding field of the VRobject at the specified index in the array of the given type, so it is reflected in thegame object stored in the state in GameForm.
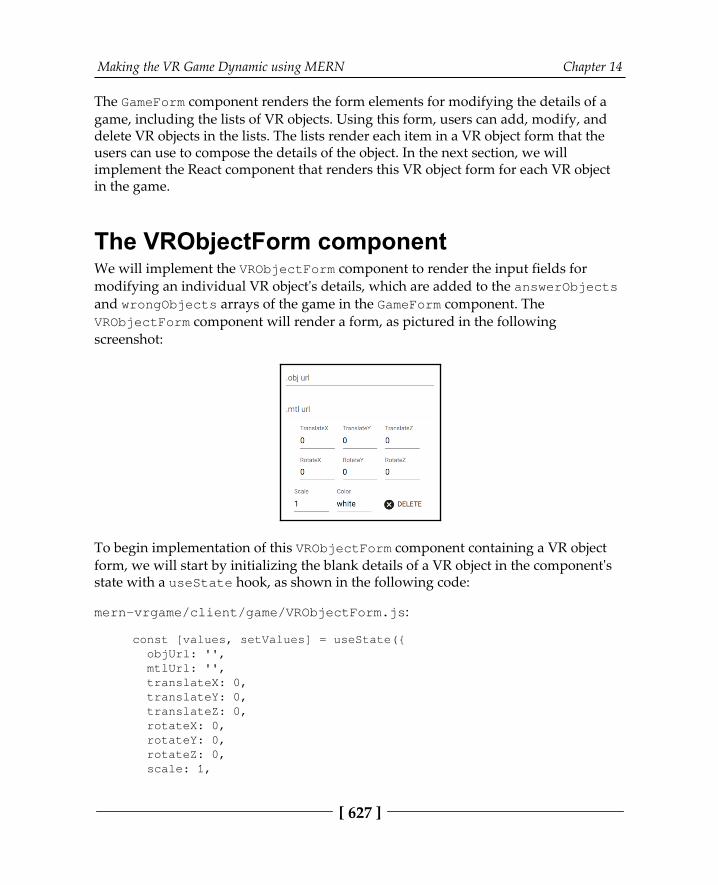
Making the VR Game Dynamic using MERN Chapter 14
[ 627 ]
The GameForm component renders the form elements for modifying the details of agame, including the lists of VR objects. Using this form, users can add, modify, anddelete VR objects in the lists. The lists render each item in a VR object form that theusers can use to compose the details of the object. In the next section, we willimplement the React component that renders this VR object form for each VR objectin the game.
The VRObjectForm componentWe will implement the VRObjectForm component to render the input fields formodifying an individual VR object's details, which are added to the answerObjectsand wrongObjects arrays of the game in the GameForm component. TheVRObjectForm component will render a form, as pictured in the followingscreenshot:
To begin implementation of this VRObjectForm component containing a VR objectform, we will start by initializing the blank details of a VR object in the component'sstate with a useState hook, as shown in the following code:
mern-vrgame/client/game/VRObjectForm.js:
const [values, setValues] = useState({ objUrl: '', mtlUrl: '', translateX: 0, translateY: 0, translateZ: 0, rotateX: 0, rotateY: 0, rotateZ: 0, scale: 1,
Making the VR Game Dynamic using MERN Chapter 14
[ 628 ]
color:'white' })
These details correspond to the schema defined for storing a VR object. Whena VRObjectForm component is added to the GameForm component, it may receive anempty VR object or a VR object populated with details, depending on whether anempty form or a form with details of an existing object is being rendered. In the casethat an existing VR object is passed as a prop, we will set the details of this object inthe component state using an useEffect hook, as shown in the following code:
mern-vrgame/client/game/VRObjectForm.js:
useEffect(() => { if(props.vrObject && Object.keys(props.vrObject).length != 0){ const vrObject = props.vrObject setValues({...values, objUrl: vrObject.objUrl, mtlUrl: vrObject.mtlUrl, translateX: Number(vrObject.translateX), translateY: Number(vrObject.translateY), translateZ: Number(vrObject.translateZ), rotateX: Number(vrObject.rotateX), rotateY: Number(vrObject.rotateY), rotateZ: Number(vrObject.rotateZ), scale: Number(vrObject.scale), color:vrObject.color }) } }, [])
In this useEffect hook, if the vrObject value passed in the prop is not an emptyobject, we set the details of the received VR object in the state. These values will beused in the input fields that make up the VR object form. We will add the input fieldscorresponding to a VR object's details, in the view of VRObjectForm using Material-UI TextField components, as shown in the code explained with the following list:
3D object file input: The OBJ and MTL file links will be collected for eachVR object as text input using the TextField components, as shown in thefollowing code:
<TextField label=".obj url" value={values.objUrl} onChange={handleChange('objUrl')} /><TextField label=".mtl url" value={values.mtlUrl} onChange={handleChange('mtlUrl')} />
Making the VR Game Dynamic using MERN Chapter 14
[ 629 ]
Translate value input: The translate values of the VR object across the x, y,and z axes will be input in the TextField components of the number type,as shown in the following code:
<TextField type="number" value={values.translateX} label="TranslateX" onChange={handleChange('translateX')}/><TextField type="number" value={values.translateY} label="TranslateY" onChange={handleChange( 'translateY')}/><TextField type="number" value={values.translateZ} label="TranslateZ" onChange={handleChange('translateZ')}/>
Rotate value input: The rotation values of the VR object around the x, y,and z axes will be input in the TextField components of the number type,as shown in the following code:
<TextField type="number" value={values.rotateX} label="RotateX" onChange={handleChange('rotateX')} /><TextField type="number" value={values.rotateY} label="RotateY" onChange={handleChange('rotateY')} /><TextField type="number" value={values.rotateZ} label="RotateZ" onChange={handleChange('rotateZ')} />
Scale value input: The scale value for the VR object will be input in aTextField component of the number type, as shown in the followingcode:
<TextField type="number" value={values.scale} label="Scale" onChange={handleChange('scale')} />
Object color input: The color value for the VR object will be input in aTextField component of the text type, as shown in the following code:
<TextField value={values.color} label="Color" onChange={handleChange('color')} />
These input fields will allow the user to set the details of a VR object in a game. Whenany of these VR object details are changed in these input fields by the user, thehandleChange method will be invoked. This handleChange method will be definedas shown in the following code:
mern-vrgame/client/game/VRObjectForm.js:
const handleChange = name => event => {
Making the VR Game Dynamic using MERN Chapter 14
[ 630 ]
setValues({...values, [name]: event.target.value}) props.handleUpdate(props.index, props.type, name,event.target.value)}
This handleChange method will update the corresponding value in the state ofthe VRObjectForm component, and use the handleUpdate method passed as a propfrom GameForm to update the VR object in the GameForm state with the changedvalue for the specific object detail.
The VRObjectForm will also contain a DELETE button that will executethe removeObject method received in the GameForm as a prop, which will allow thegiven object to be removed from the list in the game. This delete button will be addedto the view with the following code:
mern-vrgame/client/game/VRObjectForm.js:
<Button onClick={props.removeObject(props.type, props.index)}> <Icon style={{marginRight: '5px'}}>cancel</Icon> Delete</Button>
The removeObject method will take the value of the object array type and the arrayindex position, to remove the given object from the relevant VR object array inthe GameForm component's state.
With these implementations, the forms for creating and editing games are in place,complete with VR object input forms for arrays of varying sizes. We used reusablecomponents to compose the form elements needed for creating and editing games,along with adding the capability for modifying arrays of VR objects in a game. Anyregistered user can use these forms to add and edit game details on the MERN VRGame application. In the next section, we will discuss the implementation of theviews that will render different lists of games on the platform.
Adding the game list viewsVisitors to MERN VR Game will access the games on the application from listsrendered on the home page and individual user profiles. The home page will list allthe games on the application, and the games by a specific maker will be listed on theiruser profile page. These list views will iterate through game data fetched using thebackend APIs for listing games, and render details of each game in a reusable Reactcomponent.
Making the VR Game Dynamic using MERN Chapter 14
[ 631 ]
In the following sections, we will discuss the implementation for rendering all gamesand games only by a specific maker, using a reusable component for rendering eachgame on the list.
Rendering lists of gamesWe will render all the games available on the platform on the home page of theapplication. To implement this feature, the Home component will first fetch the list ofall the games from the game collection in the database using the list game API. Wewill achieve this in an useEffect hook in the Home component, as shown in thefollowing code:
mern-vrgame/client/core/Home.js:
useEffect(() => { const abortController = new AbortController() const signal = abortController.signal
list(signal).then((data) => { if (data.error) { console.log(data.error) } else { setGames(data) } }) return function cleanup(){ abortController.abort() } }, [])
The list of games retrieved from the server in this useEffect hook will be set to thestate and iterated over to render a GameDetail component for each game in the list,as shown in the following code:
mern-vrgame/client/core/Home.js:
{games.map((game, i) => { return <GameDetail key={i} game={game}updateGames={updateGames}/>})}
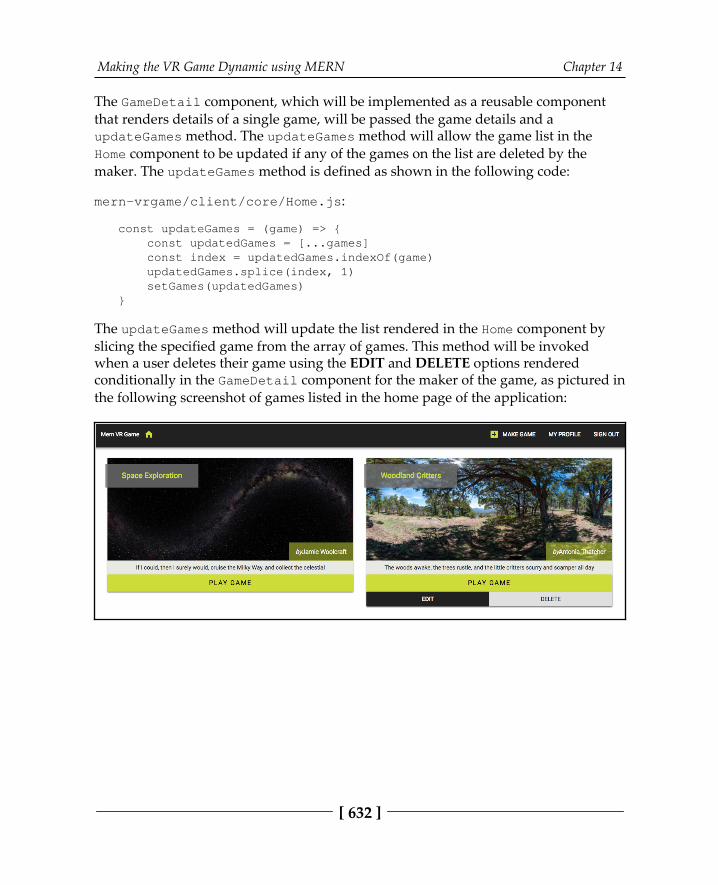
Making the VR Game Dynamic using MERN Chapter 14
[ 632 ]
The GameDetail component, which will be implemented as a reusable componentthat renders details of a single game, will be passed the game details and aupdateGames method. The updateGames method will allow the game list in theHome component to be updated if any of the games on the list are deleted by themaker. The updateGames method is defined as shown in the following code:
mern-vrgame/client/core/Home.js:
const updateGames = (game) => { const updatedGames = [...games] const index = updatedGames.indexOf(game) updatedGames.splice(index, 1) setGames(updatedGames)}
The updateGames method will update the list rendered in the Home component byslicing the specified game from the array of games. This method will be invokedwhen a user deletes their game using the EDIT and DELETE options renderedconditionally in the GameDetail component for the maker of the game, as pictured inthe following screenshot of games listed in the home page of the application:
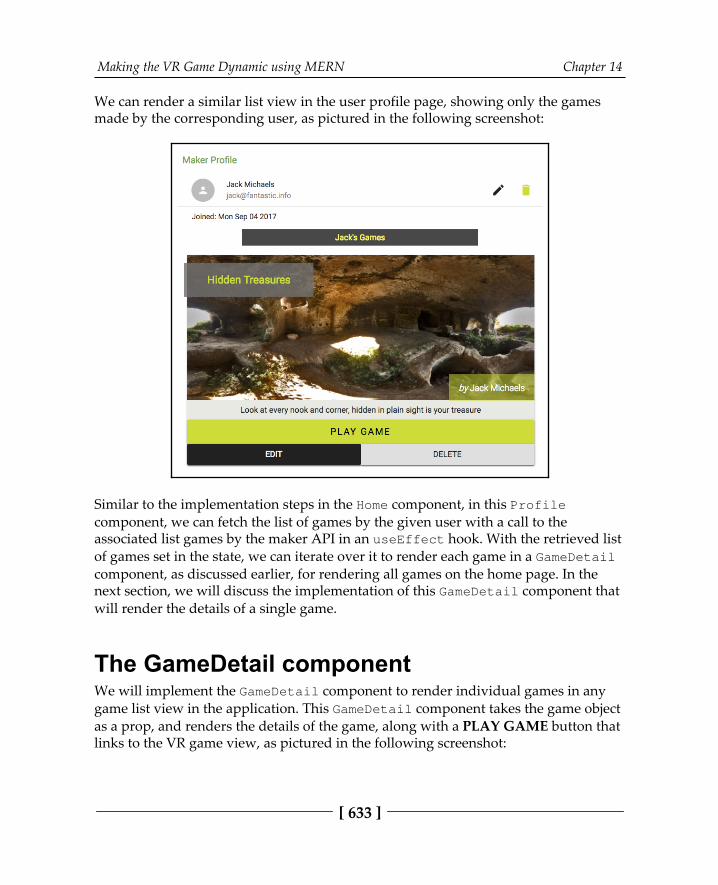
Making the VR Game Dynamic using MERN Chapter 14
[ 633 ]
We can render a similar list view in the user profile page, showing only the gamesmade by the corresponding user, as pictured in the following screenshot:
Similar to the implementation steps in the Home component, in this Profilecomponent, we can fetch the list of games by the given user with a call to theassociated list games by the maker API in an useEffect hook. With the retrieved listof games set in the state, we can iterate over it to render each game in a GameDetailcomponent, as discussed earlier, for rendering all games on the home page. In thenext section, we will discuss the implementation of this GameDetail component thatwill render the details of a single game.
The GameDetail componentWe will implement the GameDetail component to render individual games in anygame list view in the application. This GameDetail component takes the game objectas a prop, and renders the details of the game, along with a PLAY GAME button thatlinks to the VR game view, as pictured in the following screenshot:
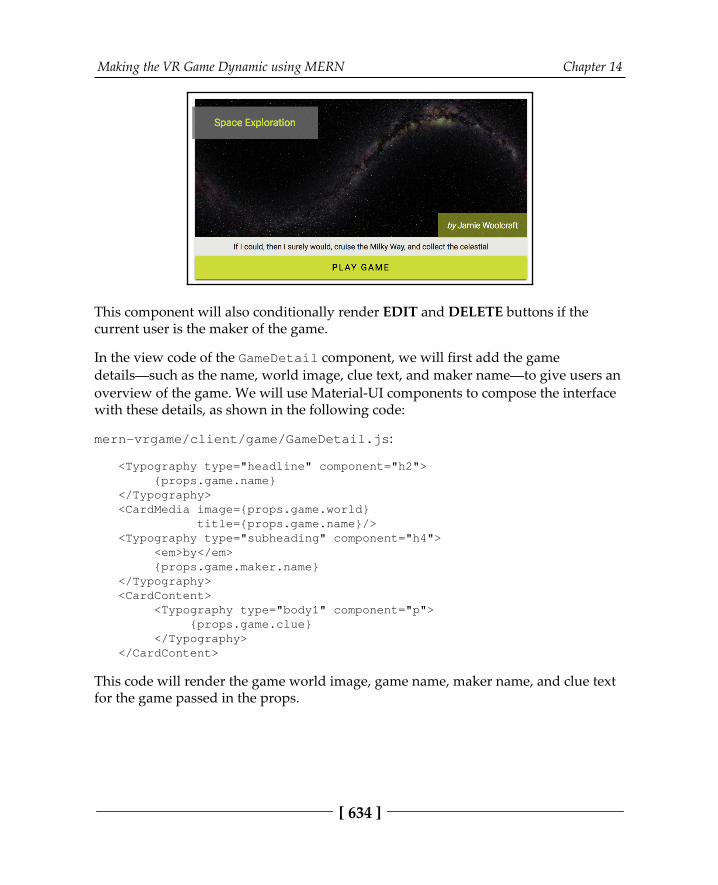
Making the VR Game Dynamic using MERN Chapter 14
[ 634 ]
This component will also conditionally render EDIT and DELETE buttons if thecurrent user is the maker of the game.
In the view code of the GameDetail component, we will first add the gamedetails—such as the name, world image, clue text, and maker name—to give users anoverview of the game. We will use Material-UI components to compose the interfacewith these details, as shown in the following code:
mern-vrgame/client/game/GameDetail.js:
<Typography type="headline" component="h2"> {props.game.name}</Typography><CardMedia image={props.game.world} title={props.game.name}/><Typography type="subheading" component="h4"> <em>by</em> {props.game.maker.name}</Typography><CardContent> <Typography type="body1" component="p"> {props.game.clue} </Typography></CardContent>
This code will render the game world image, game name, maker name, and clue textfor the game passed in the props.
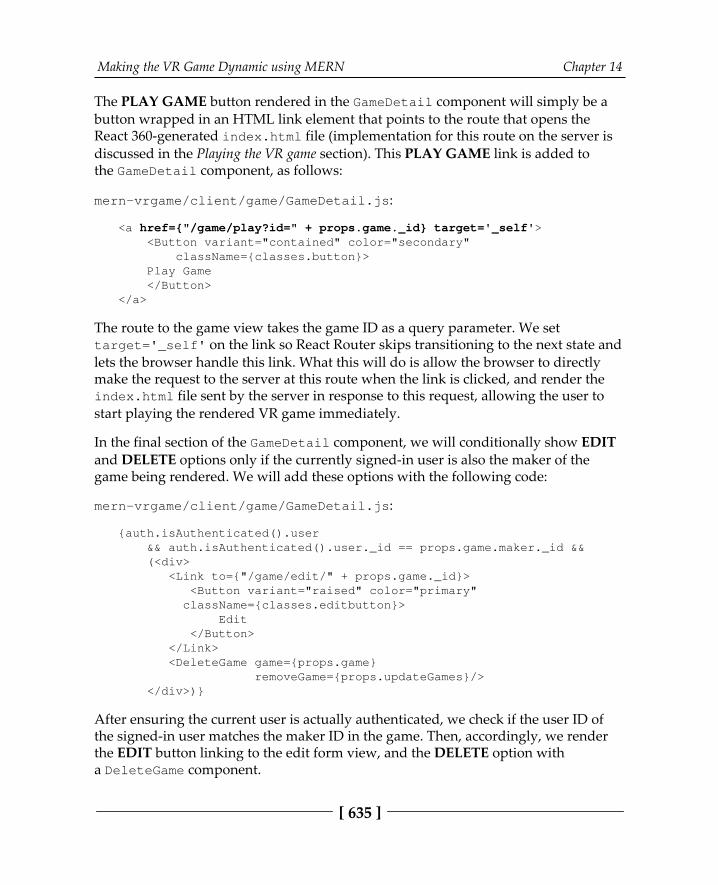
Making the VR Game Dynamic using MERN Chapter 14
[ 635 ]
The PLAY GAME button rendered in the GameDetail component will simply be abutton wrapped in an HTML link element that points to the route that opens theReact 360-generated index.html file (implementation for this route on the server isdiscussed in the Playing the VR game section). This PLAY GAME link is added tothe GameDetail component, as follows:
mern-vrgame/client/game/GameDetail.js:
<a href={"/game/play?id=" + props.game._id} target='_self'> <Button variant="contained" color="secondary" className={classes.button}> Play Game </Button></a>
The route to the game view takes the game ID as a query parameter. We settarget='_self' on the link so React Router skips transitioning to the next state andlets the browser handle this link. What this will do is allow the browser to directlymake the request to the server at this route when the link is clicked, and render theindex.html file sent by the server in response to this request, allowing the user tostart playing the rendered VR game immediately.
In the final section of the GameDetail component, we will conditionally show EDITand DELETE options only if the currently signed-in user is also the maker of thegame being rendered. We will add these options with the following code:
mern-vrgame/client/game/GameDetail.js:
{auth.isAuthenticated().user && auth.isAuthenticated().user._id == props.game.maker._id && (<div> <Link to={"/game/edit/" + props.game._id}> <Button variant="raised" color="primary" className={classes.editbutton}> Edit </Button> </Link> <DeleteGame game={props.game} removeGame={props.updateGames}/> </div>)}
After ensuring the current user is actually authenticated, we check if the user ID ofthe signed-in user matches the maker ID in the game. Then, accordingly, we renderthe EDIT button linking to the edit form view, and the DELETE option witha DeleteGame component.
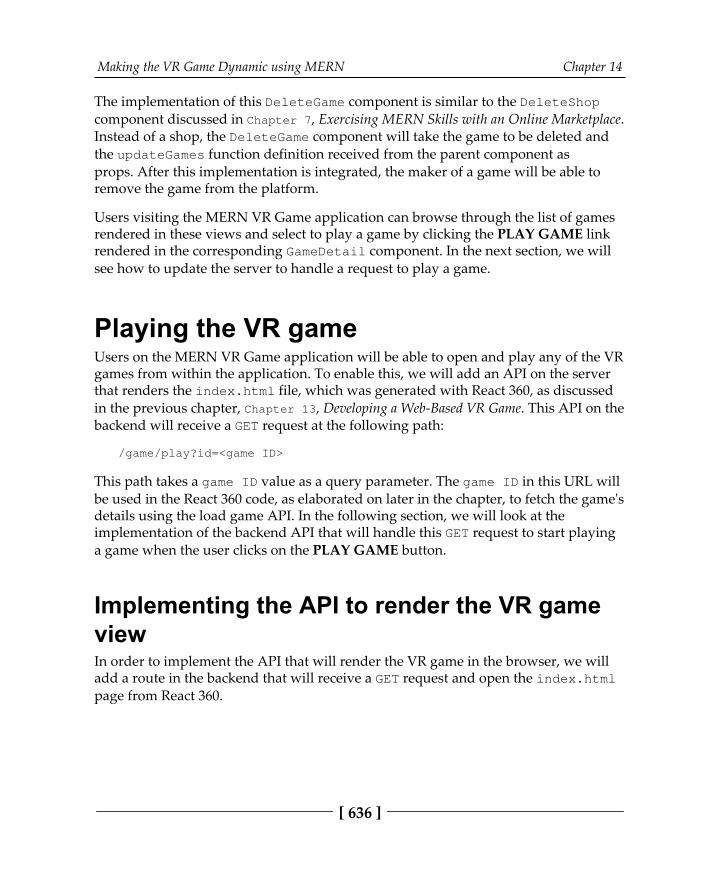
Making the VR Game Dynamic using MERN Chapter 14
[ 636 ]
The implementation of this DeleteGame component is similar to the DeleteShopcomponent discussed in Chapter 7, Exercising MERN Skills with an Online Marketplace.Instead of a shop, the DeleteGame component will take the game to be deleted andthe updateGames function definition received from the parent component asprops. After this implementation is integrated, the maker of a game will be able toremove the game from the platform.
Users visiting the MERN VR Game application can browse through the list of gamesrendered in these views and select to play a game by clicking the PLAY GAME linkrendered in the corresponding GameDetail component. In the next section, we willsee how to update the server to handle a request to play a game.
Playing the VR gameUsers on the MERN VR Game application will be able to open and play any of the VRgames from within the application. To enable this, we will add an API on the serverthat renders the index.html file, which was generated with React 360, as discussedin the previous chapter, Chapter 13, Developing a Web-Based VR Game. This API on thebackend will receive a GET request at the following path:
/game/play?id=<game ID>
This path takes a game ID value as a query parameter. The game ID in this URL willbe used in the React 360 code, as elaborated on later in the chapter, to fetch the game'sdetails using the load game API. In the following section, we will look at theimplementation of the backend API that will handle this GET request to start playinga game when the user clicks on the PLAY GAME button.
Implementing the API to render the VR gameviewIn order to implement the API that will render the VR game in the browser, we willadd a route in the backend that will receive a GET request and open the index.htmlpage from React 360.
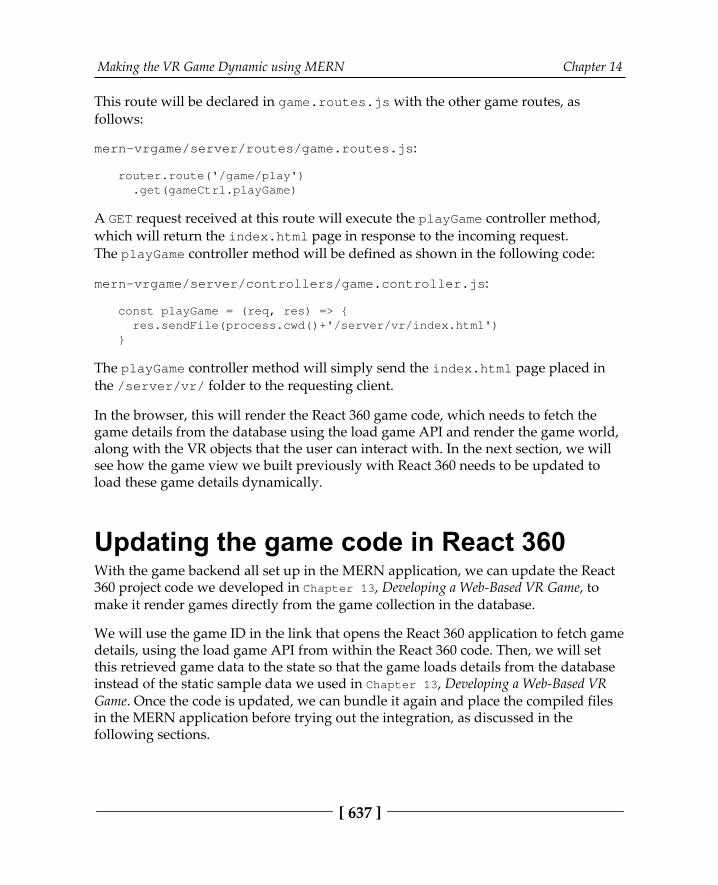
Making the VR Game Dynamic using MERN Chapter 14
[ 637 ]
This route will be declared in game.routes.js with the other game routes, asfollows:
mern-vrgame/server/routes/game.routes.js:
router.route('/game/play') .get(gameCtrl.playGame)
A GET request received at this route will execute the playGame controller method,which will return the index.html page in response to the incoming request.The playGame controller method will be defined as shown in the following code:
mern-vrgame/server/controllers/game.controller.js:
const playGame = (req, res) => { res.sendFile(process.cwd()+'/server/vr/index.html')}
The playGame controller method will simply send the index.html page placed inthe /server/vr/ folder to the requesting client.
In the browser, this will render the React 360 game code, which needs to fetch thegame details from the database using the load game API and render the game world,along with the VR objects that the user can interact with. In the next section, we willsee how the game view we built previously with React 360 needs to be updated toload these game details dynamically.
Updating the game code in React 360With the game backend all set up in the MERN application, we can update the React360 project code we developed in Chapter 13, Developing a Web-Based VR Game, tomake it render games directly from the game collection in the database.
We will use the game ID in the link that opens the React 360 application to fetch gamedetails, using the load game API from within the React 360 code. Then, we will setthis retrieved game data to the state so that the game loads details from the databaseinstead of the static sample data we used in Chapter 13, Developing a Web-Based VRGame. Once the code is updated, we can bundle it again and place the compiled filesin the MERN application before trying out the integration, as discussed in thefollowing sections.
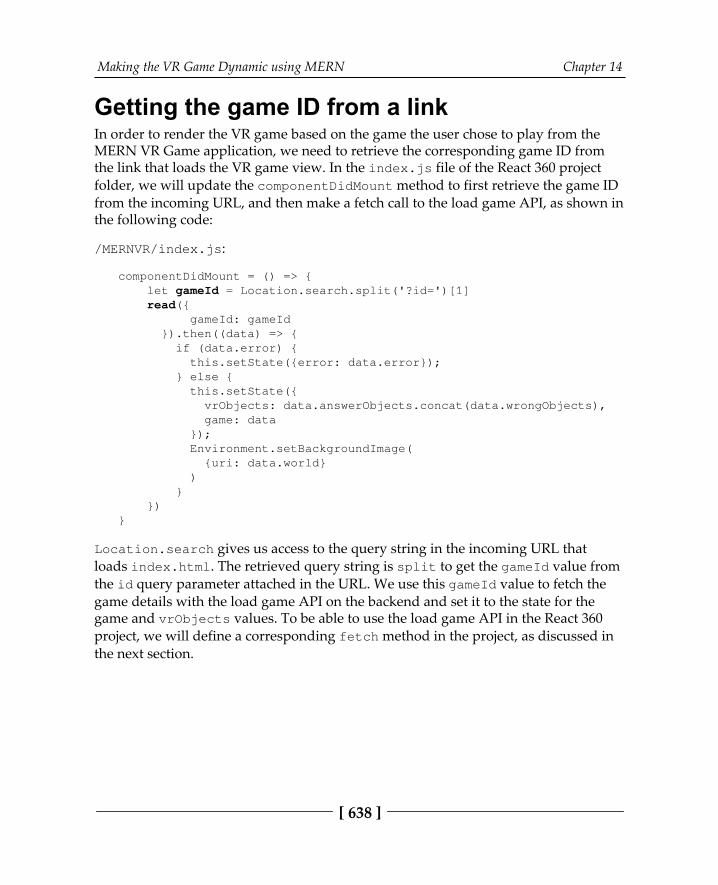
Making the VR Game Dynamic using MERN Chapter 14
[ 638 ]
Getting the game ID from a linkIn order to render the VR game based on the game the user chose to play from theMERN VR Game application, we need to retrieve the corresponding game ID fromthe link that loads the VR game view. In the index.js file of the React 360 projectfolder, we will update the componentDidMount method to first retrieve the game IDfrom the incoming URL, and then make a fetch call to the load game API, as shown inthe following code:
/MERNVR/index.js:
componentDidMount = () => { let gameId = Location.search.split('?id=')[1] read({ gameId: gameId }).then((data) => { if (data.error) { this.setState({error: data.error}); } else { this.setState({ vrObjects: data.answerObjects.concat(data.wrongObjects), game: data }); Environment.setBackgroundImage( {uri: data.world} ) } })}
Location.search gives us access to the query string in the incoming URL thatloads index.html. The retrieved query string is split to get the gameId value fromthe id query parameter attached in the URL. We use this gameId value to fetch thegame details with the load game API on the backend and set it to the state for thegame and vrObjects values. To be able to use the load game API in the React 360project, we will define a corresponding fetch method in the project, as discussed inthe next section.
Making the VR Game Dynamic using MERN Chapter 14
[ 639 ]
Fetching the game data with the load gameAPIWe want to fetch the game data from within the React 360 code. In the React 360project folder, we will add an api-game.js file that will contain a read fetch methodthat makes a call to the load game API on the server using the provided game ID.This fetch method will be defined as follows:
/MERNVR/api-game.js:
const read = (params) => { return fetch('/api/game/' + params.gameId, { method: 'GET' }).then((response) => { return response.json() }).catch((err) => console.log(err))}export { read}
This fetch method receives the game ID in the params and makes the API call toretrieve the corresponding game from the database. It is usedin componentDidMount of the React 360 entry component, which is defined in theindex.js file, to retrieve the game details, as discussed in the previous section.
This updated React 360 code is available in the branch nameddynamic-game-second-edition on the GitHub repositoryat github.com/shamahoque/MERNVR/tree/dynamic-game-second-edition.
With the React 360 code updated and capable of retrieving and rendering gamedetails based on the game ID specified in the incoming URL, we can bundle and integrate this updated code with the MERN VR Game application, as discussed in thenext section.
Bundling and integrating the updated codeWith the React 360 code updated to fetch and render game details dynamically fromthe server, we can bundle this code using the provided bundle script and place thenewly compiled files in the dist folder of the MERN VR Game project directory.

Making the VR Game Dynamic using MERN Chapter 14
[ 640 ]
To bundle the React 360 code from the command line, go to the React 360 MERNVRproject folder and run the following code:
yarn bundle
This will generate the client.bundle.js and index.bundle.js bundle files in thebuild/ folder with the updated React 360 code. These files, along with theindex.html file and static_assets folders, need to be added to the MERN VRGame application code, as discussed in Chapter 13, Developing a Web-Based VR Game,to integrate the latest VR game code.
With this integration completed, if we run the MERN VR Game application and clickthe PLAY GAME link on any of the games, it should open up the game view with thedetails of the specific game rendered in the VR scene, and allow interaction with theVR objects, as specified in the gameplay.
SummaryIn this chapter, we integrated the capabilities of the MERN stack technologies withReact 360 to develop a dynamic VR game application for the web.
We extended the MERN skeleton application to build a working backend that storesVR game details and allows us to make API calls to manipulate these details. Weadded React views that let users modify games and browse through the games, withthe option to launch and play the VR game at a specified route rendered directly bythe server.
Finally, we updated the React 360 project code to pass data between the MERNapplication and the VR game view, by retrieving query parameters from the incomingURL, and using fetch to retrieve data with the game API.
This integration of the React 360 code with the MERN stack application produced afully functioning and dynamic web-based VR game application, demonstrating howMERN stack technologies can be used and extended to create unique userexperiences. You can apply the capabilities revealed here to build your own VR-infused full-stack web applications.
In the next chapter, we will reflect on the full-stack MERN applications built in thisbook, discussing not just the best practices that were followed but also the scope forimprovements and further development.

5Going Forward with MERN
In this part, we wrap up the lessons covered in the book with additional concepts thatcan further improve MERN stack application development.
This section comprises the following chapter:
Chapter 15, Following Best Practices and Developing MERN Further

15Following Best Practices and
Developing MERN FurtherIn this chapter, we will elaborate on some of the best practices to apply when buildingthe six MERN applications in this book. Additionally, we will explore other practicesthat we have not applied in this book but that should be considered for real-worldapplications to ensure reliability and scalability as complexity grows. We will reviewthe decisions behind organizing the project code in modules, the approachesto applying frontend styling, server-side rendering with data only for selective views,and how React interfaces may be composed to manage state across components. Wewill also look at ways to improve security, add testing to the projects, and optimizebundling with webpack. Finally, we will wrap up with suggestions for enhancing,and steps for extending, the applications built. With these insights, you will be betterequipped to prepare your full-stack MERN projects for the real world.
The topics covered in this chapter include the following:
Separation of concerns with modularity in the application structureConsidering the options for CSS styling solutionsServer-side rendering with data for selected viewsUsing ES6 classes for stateful versus purely functional componentsDeciding on whether to use Redux or FluxSecurity enhancements for storing user credentialsWriting test codeOptimizing bundle sizesHow to add new features to existing applications
Following Best Practices and Developing MERN Further Chapter 15
[ 643 ]
Separation of concerns with modularityWhile building the MERN stack applications in this book, we followed a commonfolder structure across each application. We employed a modular approach bydividing and grouping the code based on relevance and common functionality. Theidea behind creating these smaller and distinct sections in the code is to make sureeach section addresses a separate concern, so individual sections can be reused, aswell as developed and updated independently. In the following section, we willreview this structure and its benefits.
Revisiting the application folder structureIn the application folder structure, we kept the client-side and server-side codeseparate with further subdivisions within these two sections. This gave us somefreedom to design and build the frontend and backend of the applicationindependently. At the project root level, the client and server folders were themain divisions, as shown in the following structure:
| mern_application/ | -- client/ | -- server/
In these client and server folders, we divided the code further into subfolders thatmapped to unique functionalities. We did this by dividing models, controllers, androutes in the server for specific features, and grouping all components related to afeature in one place on the client side. In the following sections, we will review thedivisions within the server and client folders.
Server-side codeOn the server side, we divided the code according to functionality, by separating codethat defines business models from code implementing routing logic, and controllercode that responds to client requests at these routes. Within the server folder, wemaintained three main sections, as shown in the following structure:
| -- server/ | --- controllers/ | --- models/ | --- routes/
Following Best Practices and Developing MERN Further Chapter 15
[ 644 ]
In this structure, each folder contains code with a specific purpose:
models: This folder is meant to contain all of the Mongoose schema modeldefinitions in separate files, with each file representing a single model.routes: This folder contains all routes that allow the client to interact withthe server, with routes placed in separate files that may be associated witha model in the models folder.controllers: This folder contains all of the controller functions thatdefine logic to respond to incoming requests at the defined routes. Thesecontrollers are divided into separate files corresponding to the relevantmodel and route files.
As demonstrated throughout the book, these specific separations of concerns for thecode on the server side allowed us to extend the server developed for the skeletonapplication by just adding the required model, route, and controller files. In the nextsection, we will go over the divisions in the client-side code structure.
Client-side codeThe client-side code for the MERN applications consists primarily of Reactcomponents. In order to organize the component code and related helper code in areasonable and understandable manner, we separated the code into folders related toa feature entity or unique functionality, as shown in the following structure:
| -- client/ | --- auth/ | --- core/ | --- post/ | --- user/ | --- componentFolderN/
In the preceding structure, we placed all of the auth-related components and helpercode in the auth folder; common and basic components, such as the Home and Menucomponents, in the core folder; and then we made post and user folders for all ofthe post-related or user-related components in the respective folders.
This separation and grouping of components based on features allowed us to extendthe frontend views in the skeleton application for each application that followed, byadding a new feature-related component code folder, as required, to the clientfolder.
Following Best Practices and Developing MERN Further Chapter 15
[ 645 ]
Separating the client and server code, and also modularizing the code within thesedivisions, made it easier to extend the different applications we developedthroughout the book. In the final section of this chapter, we willfurther demonstrate the advantages of this modularized approach of separating theapplication code, as we outline the general workflow that can be followed to add anew feature to any of the existing applications developed in this book. In the nextsection, we will explore the different options available for defining and applyingstyling to the frontend React components, which will be a necessary decision forevery full-stack MERN project.
Adding CSS stylesWhen discussing user interface (UI) implementations for the applications in thisbook, we chose not to focus on the details of the CSS styling code applied and insteadrelied mostly on the default Material-UI stylings. However, given that implementingany UI requires us to consider styling solutions, we will briefly look at some of theoptions that are available.
When it comes to adding CSS styles to the frontend, there are a number of options,each with pros and cons. In the following sections, we will discuss the two mostcommon options, which are external style sheets and inline styles, along with therelatively newer approach of writing CSS in JavaScript, or, more specifically, JSS,which is used in Material-UI components and hence also for the applications in thisbook.
External style sheets External style sheets allow us to define CSS rules in separate files, which can be injected into the necessary view. Placing CSS styles in external style sheets this waywas once considered the best practice because it enforced the separation of style andcontent, allowing reusability and also maintaining modularity if a separate CSS filewas created for each component.
However, as web development technologies continue evolving, the demands of betterCSS organization and performance are no longer met by this approach. For example,using external style sheets while developing frontend views with React componentslimits our control over updating styles based on the component state. Moreover,loading external CSS for React applications requires additional webpackconfigurations with css-loader and style-loader.
Following Best Practices and Developing MERN Further Chapter 15
[ 646 ]
When applications grow and share multiple style sheets, it also becomes impossibleto avoid selector conflicts because CSS has a single global namespace. Hence, thoughexternal style sheets may be enough for simple and trivial applications, as anapplication grows, other options for using CSS become more relevant. In the nextsection, we will look at the option of adding styles directly inline.
Inline stylesInline CSS is a style defined and applied directly to individual elements in the view.Although this takes care of some of the problems faced when using external stylesheets, such as eliminating the issue of selector conflicts and allowing state-dependentstyles, it takes away reusability and introduces a few problems of its own, such aslimiting the CSS features that can be applied.
Using only inline CSS for a React-based frontend has important limitations forgrowing applications, such as poor performance because all of the inline styles arerecomputed at each render, and inline styles are slower than class names, to beginwith.
Inline CSS may seem like an easy fix in some cases, but it does not serve as a goodoption for overall usage. In the next section, we will explore the option to add CSSstyles using JavaScript, which addresses some of the issues of using inline andexternal styles.
JavaScript Style Sheets (JSS)JSS allows us to write CSS styles using JavaScript in a declarative way. This alsomeans that all the features of JavaScript are now available for writing CSS, making itpossible to write reusable and maintainable styling code.
JSS works as a JS to CSS compiler that takes JS objects, where keys represent classnames and values represent corresponding CSS rules, and then generates the CSSalong with scoped class names.
In this way, JSS generates unique class names by default when it compiles JSONrepresentations to CSS, eliminating the chances of selector conflicts that could befaced with external style sheets. Moreover, unlike inline styles, the CSS rules that aredefined with JSS can be shared across multiple elements and all CSS features can beused in the definitions.
Following Best Practices and Developing MERN Further Chapter 15
[ 647 ]
Material-UI uses JSS to style its components, and, as a result, we used JSS to applyMaterial-UI themes and also custom CSS to the components developed for the frontend views in all of the applications. Based on the utility of each approach, youcan choose to use one or a combination of external style sheets, inline styles, or JSS forstyling the frontend of your full-stack application. In the next section, we will reviewthe approaches to and relevance of incorporating server-side rendering of the Reactfrontend in a full-stack MERN application.
Selective server-side rendering with dataWhen we developed the frontend of the base skeleton application in Chapter 4,Adding a React Frontend to Complete MERN, we integrated basic server-side renderingin order to load client-side routes directly from the browser address bar when therequest went to the server. In this server-side rendering implementation, whilerendering the React component's server-side, we did not consider loading the datafrom the database for the components that displayed data. The data only loads inthese components when the client-side JavaScript takes over after the initial load ofthe server side-rendered markup.
We did update this implementation to add server-side rendering with data for theindividual media detail pages in the MERN Mediastream application, which wasdiscussed in Chapter 12, Customizing the Media Player and Improving the SEO. In thiscase, we decided to render this specific view with data by injecting data into theserver side-generated markup of the React frontend. The reasoning behind thisselective server-side rendering with data only for specific views can be based oncertain desired behaviors for the view in question, as discussed in the followingsection.
Following Best Practices and Developing MERN Further Chapter 15
[ 648 ]
When is server-side rendering with datarelevant?Implementing server-side rendering with data for all of the React views in anapplication can get complicated, and will be additional work if we need to considerviews with client-side authentication or views consisting of multiple data sources. Inmany cases, it may be unnecessary to tackle these complexities if the view does notrequire server-side rendering with data. In order to judge whether a view needs to beserver-rendered with data, answer the following questions for the specific view tomake your decision:
Is it important for the data to be displayed in the initial load of the viewwhen JavaScript may not be available in the browser?Do the view and its data need to be SEO-friendly?
Loading data in the initial load of the page may be relevant from a usabilityperspective, so it really depends on the use case for the specific view. For SEO, server-side rendering with data will give search engines easier access to the data content inthe view; so, if this is crucial for the view in question, then adding server-siderendering with data is a good idea. In the next section, we will go over the variedapproaches of composing the React frontend in a full-stack application.
Using stateful versus pure functionalcomponentsWhile building a UI with React components, composing the views with more statelessfunctional components can make the frontend code manageable, clean, and easier totest. However, some components will require the state or life cycle Hooks to be morethan pure presentational components. In the following sections, we will look at whatit takes to build stateful and stateless functional React components, when to use oneor the other, and how often.
Following Best Practices and Developing MERN Further Chapter 15
[ 649 ]
Stateful React components with ES6 classesor HooksWe can define stateful React components with ES6 classes or by using Hooks withoutwriting a class. React components defined using ES6 classes have access to life cyclemethods, the this keyword, and can manage state with setState when buildingstateful components. Similarly, React components defined with a function can alsoaccess some of these features using Hooks, such as managing state with theuseState Hook, in order to build stateful components.
Stateful components allow us to build interactive components that can manage tochange data in the state, and propagate any business logic that needs to be appliedacross the UI. Generally, for complex UIs, stateful components should be higher-levelcontainer components that manage the state of the smaller, stateless functionalcomponents they are composed of. In comparison, these simpler stateless componentscan be defined as pure functions, as discussed in the next section.
Stateless React components as purefunctionsReact components can be defined as stateless functional components using the ES6class syntax or as pure functions. The main idea is that a stateless component does notmodify state and only receives props.
The following code defines a stateless component using the ES6 class syntax:
class Greeting extends React.Component { render() { return <h1>Hello, {this.props.name}</h1> }}
This component, although defined with a class, does not use state. The samecomponent can also be defined using JavaScript pure functions, as follows:
function Greeting(props) { return <h1>Hello, {props.name}</h1>}

Following Best Practices and Developing MERN Further Chapter 15
[ 650 ]
A pure function always gives the same output when given the same input withoutany side effects. Modeling React components as pure functions enforces the creationof smaller, more defined, and self-contained components that emphasize UI overbusiness logic as there is no state manipulation in these components. These kinds ofcomponents are composable, reusable, and easy to debug and test. In the next section,we will discuss how to combine stateful and stateless components when designingthe UI.
Designing the UI with stateful componentsand stateless functional componentsWhen thinking about the component composition for a UI, you can design the root ora parent component as a stateful component that will contain child components or asthe composable components that only receive props and cannot manipulate state. Allthe state-changing actions and life cycle issues will be handled by the root or parentcomponent, and the changes will be propagated to the child components.
In the applications developed for this book, there is a mixture of stateful higher-levelcomponents and smaller stateless components. For example, in the MERN Socialapplication, the Profile component modifies the state for stateless childcomponents, such as the FollowProfileButton and FollowGrid components.There is scope for refactoring some of the larger components that were developed inthis book into smaller, more self-contained components, and this should beconsidered before extending the applications to incorporate more features.
The main takeaway that can be applied to new component designs, or whenrefactoring existing components, is that as the React application grows and gets morecomplex, it is better to have more stateless functional components added to higher-level stateful components that are in charge of managing state for the innercomponents. In the next section, we will briefly discuss popular libraries and patternsthat can be utilized on top of React to handle state management across growing Reactapplications.
Following Best Practices and Developing MERN Further Chapter 15
[ 651 ]
Using Redux or Flux When React applications begin to grow and become more complex, managingcommunication between components can become problematic. When using regularReact, the way to communicate is to pass down values and callback functions asprops to the child components. However, this can be tedious if there are a lot ofintermediary components that the callback must pass through. To address these statecommunication and management-related issues as the React application grows,people turn to use React with libraries and architecture patterns such as Redux andFlux.
It is outside the scope of this book to delve into the details of integrating React withthe Redux library or the Flux architecture, but you can consider these options for theirgrowing MERN applications while keeping the following in mind:
Redux and Flux utilize patterns that enforce changing states in a Reactapplication from a central location. A trick to avoid using Redux or Flux inReact applications of manageable sizes is to move all state changes up thecomponent tree to the parent components.Smaller applications work just as well without Flux or Redux.
You can learn more about using React with Redux at https:/ /redux. js. org/ , and about using React with Flux atfacebook.github.io/flux/.
You can choose to integrate Flux or Redux based on your application size andcomplexity. In the next section, we will discuss the security implementations appliedto the MERN applications developed in this book and the possible enhancements thatcould be made.
Enhancing securityIn the MERN applications developed for this book, we kept the auth-related securityimplementations simple by using JSON web tokens (JWTs) as an authenticationmechanism and by storing hashed passwords in the user collection. The approachesfollowed in these implementations are standard practices for adding authentication toa web application. However, there are advanced options available for adding morelayers of security, if that is required for certain applications. In the following sections,we will go over the security choices made for building the applications in this bookand point to possible enhancements.
Following Best Practices and Developing MERN Further Chapter 15
[ 652 ]
JSON web tokens – client-side or server-sidestorageWith the JWT authentication mechanism, the client side becomes responsible formaintaining the user state. Once the user signs in, the token sent by the server isstored and maintained by the client-side code on browser storage, suchas sessionStorage. Hence, it is also up to the client-side code to invalidate thetoken by removing it when a user signs out or needs to be signed out. Thismechanism works out well for most applications that require minimal authenticationto protect access to resources. However, for instances where it may be necessary totrack user sign-ins, sign-outs, and to let the server know that a specific token is nolonger valid for signing in, just the client-side handling of the tokens is not enough.
For these cases, the implementation discussed for handling JWT tokens on the clientside can be extended to storage on the server side as well. In the specific case ofkeeping track of invalidated tokens, a MongoDB collection can be maintained by theserver to store these invalidated tokens as a reference, which is moderately similar tohow it is done for storing session data on the server side.
The thing to be cautious about and to keep in mind is that storing and maintainingauth-related information on both the client and server side may be overkill in mostcases. Therefore, it is entirely up to the specific use case and the related trade-offs tobe considered. In the next section, we will review our options for storing userpasswords securely.
Securing password storageWhile storing user credentials for authentication in the user collection, we made surethat the original password string provided by the user was never stored directly inthe database. Instead, we generated a hash of the password along with a salt valueusing the crypto module in Node.
In user.model.js from our applications, we defined the following functions togenerate the hashed password and salt values:
encryptPassword: function(password) { if (!password) return '' try { return crypto .createHmac('sha1', this.salt) .update(password)
Following Best Practices and Developing MERN Further Chapter 15
[ 653 ]
.digest('hex') } catch (err) { return '' } }, makeSalt: function() { return Math.round((new Date().valueOf() * Math.random())) + '' }
With this implementation, every time a user enters a password to sign in, a hash isgenerated with the salt. If the generated hash matches the stored hash, then thepassword is correct; otherwise, the password is wrong. So, in order to check whethera password is correct, the salt is required, and therefore it is stored with the userdetails in the database along with the hash.
This is the standard practice for securing passwords stored for user authentication,but there are other advanced approaches that may be explored if a specificapplication's security requirements demand it. Some options that can be consideredinclude multi-iteration hashing approaches, other secure hashing algorithms, limitingthe number of login attempts per user account, and multi-level authentication withadditional steps, such as answering security questions or entering security codes.These options can add more layers of security as needed. In the next section, we willdiscuss options for adding test code in full-stack React applications, which is essentialfor building sturdy production-ready applications.
Writing test codeThough discussing and writing test code is outside the scope of this book, it is acrucial part of developing reliable software. As full-stack JavaScript applicationsbecome more mainstream over time, the need for better testing capabilities isproducing a good number of testing tools in this ecosystem. In the following sections,we will first look at some of the popular testing tools that are available for testing thedifferent parts of a MERN-based application. Then, to help you get started withwriting test code for the MERN applications developed in this book, we will alsodiscuss an example of adding a client-side test to the MERN Social application fromChapter 5, Growing the Skeleton into a Social Media Application.

Following Best Practices and Developing MERN Further Chapter 15
[ 654 ]
Testing tools for full-stack JavaScript projectsA whole range of testing tools is available for incorporating testing and maintainingcode quality in full-stack JavaScript projects. These include tools that can help withperforming static analysis on the code to maintain readability, and with integratingunit testing, integration testing, and end-to-end testing in MERN-based applications.In the following sections, we will highlight a few of these popular testing tools thatcan be used with the projects in this book, such as ESLint for static analysis, Cypressfor frontend testing, and Jest for comprehensive testing in JavaScript applications.
Static analysis with ESLintA good practice for improving and maintaining code quality is to use a linting toolwith your project. Linting tools perform static analysis on the code to findproblematic patterns or behaviors that violate specified rules and guidelines. Lintingcode in a JavaScript project can improve overall code readability and also help you tofind syntax errors before the code is executed. For linting in MERN-based projects,you can explore ESLint, which is a JavaScript linting utility that allows developers to create their own lint rules.
You can learn more about using and customizing ESLint ateslint.org. You can choose to use the Airbnb JavaScript StyleGuide (github.com/airbnb/javascript) to define your lint ruleswith eslint-config-airbnb.
You can configure ESLint in your preferred editor and make it a seamless part of yourdevelopment workflow. This will help you to maintain standards in your code whileyou are writing it. In the next section, we will take a look at Cypress, which can helpto test any code that runs in the browser.
End-to-end testing with CypressCypress provides a complete set of tools for testing the frontend of modern webapplications. Using Cypress, we can write end-to-end tests, unit tests, and integrationtests for the frontend of our MERN-based applications. Cypress also provides its ownlocally installed test runner, allowing us to write and run tests, and debug in real timein the browser as we build the application.
Following Best Practices and Developing MERN Further Chapter 15
[ 655 ]
You can learn more about using Cypress at cypress.io to getstarted with setting up end-to-end testing for JavaScript applicationsin the browser.
Performing UI testing with Cypress will allow you to ship out your projects moreconfidently, as you will be able to catch more bugs early on before they areencountered by the end users of the application. In the next section, we will discussJest, which can be used to add tests to any JavaScript code base.
Comprehensive testing with JestJest is a comprehensive testing framework for JavaScript. Although it has been morecommonly known for testing React components, it can be used for general-purposetesting with any JavaScript library or framework. Among the many JavaScript testingsolutions in Jest, it provides support for mocking and snapshot testing, comes with anassertion library, and tests in Jest are written in the Behavior-Driven Development(BDD) style.
To learn more about Jest, read the documentation at https:/ /facebook. github. io/ jest/ docs/ en/ getting- started. html.
Besides testing the React components, Jest can be also be adapted to write test codefor the Node-Express-Mongoose-based backend as required. Hence, it is a solidtesting option to add test code for MERN applications. In the next section, we willexplore how you can use Jest to add a test to the MERN Social application, which wasdeveloped in Chapter 5, Growing the Skeleton into a Social Media Application.
Adding a test to the MERN Social applicationIn order to demonstrate how to get started with adding tests to MERN applications,we will set up Jest and use it to add a client-side test to the MERN Social application.Before defining a test case, followed by writing and running the corresponding testcode, first, we will set up for testing by installing the necessary packages, defining thetest run script, and creating a folder for the test code, as discussed in the followingsections.
Following Best Practices and Developing MERN Further Chapter 15
[ 656 ]
Installing the packagesIn order to set up Jest and integrate the test code with our projects, we first need toinstall the relevant Node packages. The following packages will be required in orderto write the test code and run the tests:
jest: To include the Jest testing frameworkbabel-jest: To compile JS code for Jestreact-test-renderer: To create a snapshot of the DOM tree rendered bya React DOM without using a browser
To install these packages as devDependencies, run the following yarn commandfrom the command line:
yarn add --dev jest babel-jest react-test-renderer
Once these packages are installed, we can start adding tests after configuring the testrunner script, as discussed in the next section.
Defining the script to run testsIn order to run any test code that we write using Jest, we will define a script command to run the tests. We will update the run scripts defined inpackage.json in order to add a script for running tests with the jest command, asshown in the following code:
"scripts": { "test": "jest" }
With this script defined, if we run yarn test from the command line, it will promptJest to find the test code in the application folders and run the tests. In the nextsection, we will add the folder that will contain the test code files for the project.
Adding a tests folderTo add the client-side test in the MERN Social application, we will create a folder,called tests, in the client folder, which will contain test files relevant to testing theReact components. When the test command is run, Jest will look for the test code inthese files.
Following Best Practices and Developing MERN Further Chapter 15
[ 657 ]
The test case for this example will be a test on the Post component in the frontend ofthe MERN Social application, and we will add tests for the Post component in a filecalled post.test.js. This file will be placed in the tests folder. Now that we havea file ready for adding the test code, in the next section, we will demonstrate how toadd an example test case.
Adding the testFor the MERN Social application, we will write a test to check whether the deletebutton on a post is only visible when the signed-in user is also the creator of the post.This means that the delete button will only be a part of the rendered Post view if the_id of the authenticated user is the same as the postedby value of the post databeing rendered.
In order to implement this test case, we will add code that takes care of the following:
Defines dummy data for a post and an auth object containingauthenticated user detailsMocks the methods in auth-helper.jsDefines the test, and, within the test definition, does the following:
Declares the post and auth variablesSets the return value of the mocked isAuthenticatedmethod to the dummy auth objectUses renderer.create to create the Post component withthe required dummy props passed and wrapped inMemoryRouter to provide the props related to react-router
Generates and matches snapshots
The code in post.test.js to incorporate the steps described for this specific testwill be as follows:
import auth from './../auth/auth-helper.js'import Post from './../post/Post.js'import React from 'react'import renderer from 'react-test-renderer'import { MemoryRouter } from 'react-router-dom'
jest.mock('./../auth/auth-helper.js')
const dummyPostObject = {"_id":"5a3cb2399bcc621874d7e42f",
Following Best Practices and Developing MERN Further Chapter 15
[ 658 ]
"postedBy":{"_id":"5a3cb1779bcc621874d7e428", "name":"Joe"}, "text":"hey!", "created":"2017-12-22T07:20:25.611Z", "comments":[], "likes":[]}const dummyAuthObject = {user: {"_id":"5a3cb1779bcc621874d7e428", "name":"Joe", "email":"[email protected]"}}
test('delete option visible only to authorized user', () => { const post = dummyPostObject const auth = dummyAuthObject
auth.isAuthenticated.mockReturnValue(auth)
const component = renderer.create( <MemoryRouter> <Post post={post} key={post._id} ></Post> </MemoryRouter> )
let tree = component.toJSON() expect(tree).toMatchSnapshot()})
In this code, we first defined dummy posts and auth objects, and then added the testcase for checking the visibility of the delete option. In this test case, we mocked theisAuthenticated method and rendered the Post component using the dummypost data. Then, we generated a snapshot with this rendered component, which willbe matched with the expected snapshot. In the next section, we will discuss howgenerated snapshots are compared in this test.
Generating a snapshot of the correct Post viewThe first time this test is run, we will provide it with the values required to generatethe correct snapshot of the Post view. The correct snapshot for this test case willcontain the delete button when the user._id of the auth object is equal to thepostedBy value of the post object. This snapshot is generated when the test is runfor the first time, and it will be used for comparison in future test executions.
This kind of snapshot testing in Jest basically records snapshots of renderedcomponent structures to compare them to future renderings. When the recordedsnapshot and the current rendering don't match, the test fails, indicating thatsomething has changed. In the next section, we will go over the steps of running thetest and checking the test output.
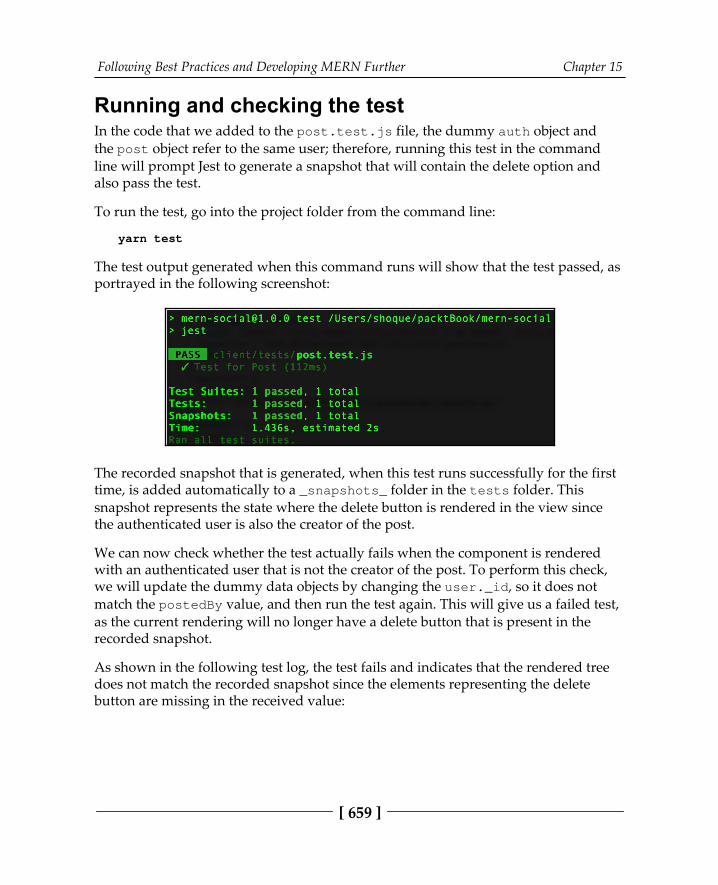
Following Best Practices and Developing MERN Further Chapter 15
[ 659 ]
Running and checking the testIn the code that we added to the post.test.js file, the dummy auth object andthe post object refer to the same user; therefore, running this test in the commandline will prompt Jest to generate a snapshot that will contain the delete option andalso pass the test.
To run the test, go into the project folder from the command line:
yarn test
The test output generated when this command runs will show that the test passed, asportrayed in the following screenshot:
The recorded snapshot that is generated, when this test runs successfully for the firsttime, is added automatically to a _snapshots_ folder in the tests folder. Thissnapshot represents the state where the delete button is rendered in the view sincethe authenticated user is also the creator of the post.
We can now check whether the test actually fails when the component is renderedwith an authenticated user that is not the creator of the post. To perform this check,we will update the dummy data objects by changing the user._id, so it does notmatch the postedBy value, and then run the test again. This will give us a failed test,as the current rendering will no longer have a delete button that is present in therecorded snapshot.
As shown in the following test log, the test fails and indicates that the rendered treedoes not match the recorded snapshot since the elements representing the deletebutton are missing in the received value:
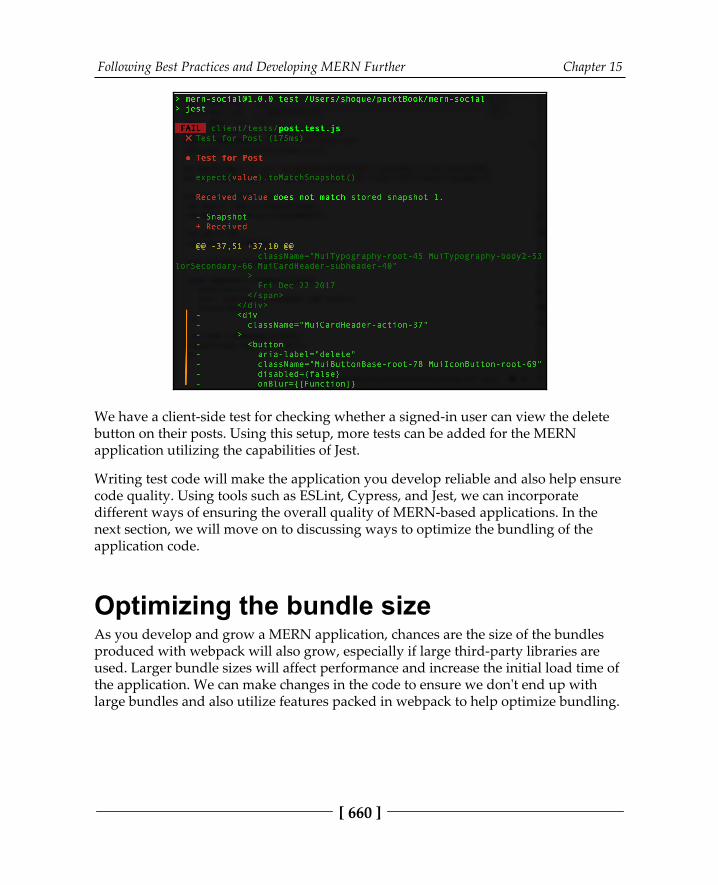
Following Best Practices and Developing MERN Further Chapter 15
[ 660 ]
We have a client-side test for checking whether a signed-in user can view the deletebutton on their posts. Using this setup, more tests can be added for the MERNapplication utilizing the capabilities of Jest.
Writing test code will make the application you develop reliable and also help ensurecode quality. Using tools such as ESLint, Cypress, and Jest, we can incorporatedifferent ways of ensuring the overall quality of MERN-based applications. In thenext section, we will move on to discussing ways to optimize the bundling of theapplication code.
Optimizing the bundle sizeAs you develop and grow a MERN application, chances are the size of the bundlesproduced with webpack will also grow, especially if large third-party libraries areused. Larger bundle sizes will affect performance and increase the initial load time ofthe application. We can make changes in the code to ensure we don't end up withlarge bundles and also utilize features packed in webpack to help optimize bundling.
Following Best Practices and Developing MERN Further Chapter 15
[ 661 ]
Before going into the code to update it for bundle size optimization,you can also get familiar with the default optimization options thatare part of webpack. In the MERN applications, we used the modeconfig to utilize the default settings for both development andproduction mode. To view an overview of the options that areavailable, please refer to the article at https:/ / medium. com/webpack/ webpack- 4- mode- and- optimization- 5423a6bc597a.
In the following section, we will highlight concepts such as code splitting anddynamic imports, which can give us control over producing smaller bundles anddecreasing load time.
Code splittingInstead of loading all the code at once in one bundle, we can use the code splittingfeature supported by webpack to lazy-load parts of the application code as currentlyneeded by the user. After we modify the application code to introduce code-splitting,webpack can create multiple bundles rather than one large bundle. These bundles canbe loaded dynamically at runtime, allowing us to improve the performance of theapplication.
To learn more about code splitting support in webpack and how tomake necessary changes to the setup and configuration, take a lookat the guidelines in the documentation athttps://webpack.js.org/guides/code-splitting/.
There are several ways to introduce code splitting for the application code, but themost important syntax you will come across for this purpose is the dynamicimport(). In the next section, we will look at how to use import() with our MERNapplications.
Following Best Practices and Developing MERN Further Chapter 15
[ 662 ]
Dynamic import()Dynamic import() is a function-like version of the regular import, and it enables thedynamic loading of JS modules. Using import(moduleSpecifier) will return apromise for the module namespace object of the requested module. When usingregular static imports, we import a module at the top of the code and then use it inthe code as follows:
import { convert } from './metric'...console.log(convert('km', 'miles', 202))
In contrast, if we were to use dynamic import() instead of adding the static importat the beginning, the code would look like this:
import('./metric').then({ convert } => { console.log( convert('km', 'miles', 202) )})
This allows us to import and load the module when the code requires it. Whilebundling the application code, webpack will treat calls to import() as split pointsand automatically start code splitting by placing the requested module and itschildren into a separate chunk from the main bundle.
In order to optimize the bundling of the frontend React code by applying codesplitting at a given component, we need to pair dynamic import() with ReactLoadable – a higher-order component for loading components with promises. As anexample, we will look at the shopping cart developed in Chapter 8, Extending theMarketplace for Orders and Payments. While building the interface of the cart, wecomposed the Cart component by importing and adding the Checkout componentto the view, as follows:
import Checkout from './Checkout'class Cart extends Component { ... render(){ ... <Checkout/> } ...}
Following Best Practices and Developing MERN Further Chapter 15
[ 663 ]
To introduce code splitting here and import the Checkout component dynamically,we can replace the static import at the beginning with a Loadable Checkout, asshown in the following code:
import Loadable from 'react-loadable'const Checkout = Loadable({ loader: () => import('./Checkout'), loading: () => <div>Loading...</div>,})
Making this change and using webpack to build the code again will produce abundle.js file of reduced size, and generate another smaller bundle file representingthe split code, which will now only load when the Cart component is rendered.
Route-based code splitting is also another option besides usingdynamic imports. It can be an effective approach for introducingcode splitting in React apps that use routes to load components inthe view. To learn more about implementing code splitting,specifically with React Router, view the article at https:/ /tylermcginnis. com/ react- router- code- splitting/ .
We can apply code-splitting mechanisms across our application code as required. Thething to keep in mind is that effective code splitting will depend on using it correctlyand applying it at the right places in the code – places that will benefit in optimizationfrom resource-load prioritization. In the next section, we will outline the steps thatcan be repeated to add new features to the MERN applications developed in thisbook.
Extending the applicationsThroughout the chapters of this book, as we developed each application, we addedfeatures by extending the existing code in a common and repeatable number of steps.In this final section, we will review those steps, setting a guideline for adding morefeatures to the current versions of the applications.
Following Best Practices and Developing MERN Further Chapter 15
[ 664 ]
Extending the server codeFor a specific feature that will require data persistence and APIs to allow the views to manipulate the data, we can start by extending the server code and adding thenecessary models, routes, and controller functions, as outlined in the followingsections.
Adding a modelFor the data persistence aspect of the feature, design the data model considering thefields and values that need to be stored. Then, define and export a Mongoose schemafor this data model in a separate file, and place it in the server/models folder. Withthe data structure defined and ready for the database, you can move on to adding theAPI endpoints for manipulating this data, as discussed next.
Implementing the APIsIn order to manipulate and access the data that will be stored in the database basedon the model, you need to design the APIs relevant for the desired feature. To startimplementing the APIs, you have to add the corresponding controller methods androute declarations, as discussed in the following sections.
Adding controllersWith the APIs decided, add the corresponding controller functions that will respondto the requests to these APIs in a separate file in the server/controllers folder.The controller functions in this file should access and manipulate the data for themodel defined for this feature. Next, we will look at how to declare the routes thatwill invoke these controller methods when the requests come in.
Adding routesTo complete the implementation of the backend APIs, corresponding routes need tobe declared and mounted on the Express app. In a separate file in theserver/routes folder, first, declare and export the routes for these APIs, assigningthe relevant controller functions that should be executed when a specific route isrequested. Then, load these new routes on the Express app in theserver/express.js file, just like the other existing routes in the application.
Following Best Practices and Developing MERN Further Chapter 15
[ 665 ]
This will produce a working version of the new backend APIs that can be run andchecked from a REST API client application. Then, these APIs can be used in thefrontend views for the feature being developed, which you will add by extending theclient code, as discussed in the next section.
Extending the client codeOn the client side, first, design the views required for the feature, and determine howthese views will incorporate user interaction with the data relevant to the feature.Then, add the fetch API code to integrate with the new backend APIs, define the newcomponents that represent these new views, and update the existing code to includethese new components in the frontend of the application, as outlined in the followingsections.
Adding the API fetch methodsBefore adding the fetch methods that will make calls to the backend APIs, you willdetermine a location for placing the new frontend code. In the client folder, create anew folder to house the components and helper code relevant to the feature modulebeing developed. Then, to integrate the new backend APIs with the frontend of theapplication, define and export the corresponding fetch methods in a separate file inthis new components folder. Finally, you can populate this folder with the Reactcomponents that will be the frontend of this feature, as discussed in the next section.
Adding componentsTo start adding the UI for the feature, you can create and export new Reactcomponents that represent views for the desired feature in separate files in the newfolder. If authentication is required, you can integrate it into these new componentsusing the existing auth-helper methods. Once the React components areimplemented, they need to be loaded into the main application view, as discussed inthe next section.
Loading new componentsIn order to incorporate these new components into the frontend, the componentseither need to be added into existing components or rendered at their own client-sideroutes.
Following Best Practices and Developing MERN Further Chapter 15
[ 666 ]
If these new components need to be rendered at individual routes, update theMainRouter.js code to add new routes that load these components at given URLpaths. Then, these URLs can be used as links to load the components from otherviews in the application, or directly by visiting the URL from the browser addressbar.
However, if the new components need to become part of existing views, then importthe components into the existing components to add them to the view as desired.
The new components can also be linked with existing components, such as in theMenu component, by linking to new components that were added with individualroutes.
With the components integrated and connected to the backend, the new featureimplementation is complete. These steps can be repeated to add on even more newfeatures to the existing MERN-based applications built throughout this book.
SummaryIn this final chapter, we reviewed and elaborated on some of the best practices thatwe used while building the MERN applications in this book, highlighted areas ofimprovement, gave pointers to address issues that may crop up when applicationsgrow, and, finally, set down steps to continue developing more features into theexisting applications.
We saw that modularizing the application's code structure helped to extend theapplication easily, choosing to use JSS over inline CSS and external style sheets keptthe styling code contained and easy to work with, and only implementing server-siderendering for specific views as required kept unnecessary complications out of thecode.
We discussed the benefits of creating fewer stateful components that are composed ofsmaller and more defined stateless functional components, and how this can beapplied while refactoring existing components or designing new components toextend the applications. For growing applications that may run into issues withmanaging and communicating state across hundreds of components, we pointed tooptions such as Redux and Flux, which may be considered to address these issues.
For applications that may have higher demands for stricter security enforcement, welooked back at our existing implementation of user authentication with JWT andpassword encryption and discussed possible extensions for improved security.
Following Best Practices and Developing MERN Further Chapter 15
[ 667 ]
We highlighted testing tools such as ESLint, Cypress, and Jest. Then, we used Jest todemonstrate how test code can be added to the MERN applications and discussedhow good practices, such as writing test code and using a linting tool, can improvecode quality besides ensuring reliability in an application.
We also looked at bundle optimization features, such as code splitting, that can helpto improve performance by reducing the initial bundle size, and by lazy-loading partsof the application as required.
Finally, we reviewed and set down the repeatable steps that were used throughoutthe book, which you can use as a guideline moving forward to extend the MERNapplications by adding more features as desired.

Other Books You May EnjoyIf you enjoyed this book, you may be interested in these other books by Packt:
ASP.NET Core 3 and ReactCarl Rippon
ISBN: 978-1-78995-022-9
Build RESTful APIs with .NET Core using API controllersCreate strongly typed, interactive, and function-based React componentsusing HooksBuild forms efficiently using reusable React componentsPerform client-side state management with Redux and the React ContextAPISecure REST APIs with ASP.NET identity and authorization policiesRun a range of automated tests on the frontend and backendImplement continuous integration (CI) and continuous delivery (CD)processes into Azure using Azure DevOps
Other Books You May Enjoy
[ 669 ]
Hands-on Full-Stack Web Development with GraphQL and ReactSebastian Grebe
ISBN: 978-1-78913-452-0
Resolve data from multi-table database and system architecturesBuild a GraphQL API by implementing models and schemas with Apolloand SequelizeSet up an Apollo Client and build front end components using ReactUse Mocha to test your full-stack applicationWrite complex React components and share data across themDeploy your application using Docker

Other Books You May Enjoy
[ 670 ]
Leave a review - let other readers knowwhat you thinkPlease share your thoughts on this book with others by leaving a review on the sitethat you bought it from. If you purchased the book from Amazon, please leave us anhonest review on this book's Amazon page. This is vital so that other potentialreaders can see and use your unbiased opinion to make purchasing decisions, we canunderstand what our customers think about our products, and our authors can seeyour feedback on the title that they have worked with Packt to create. It will only takea few minutes of your time, but is valuable to other potential customers, our authors,and Packt. Thank you!
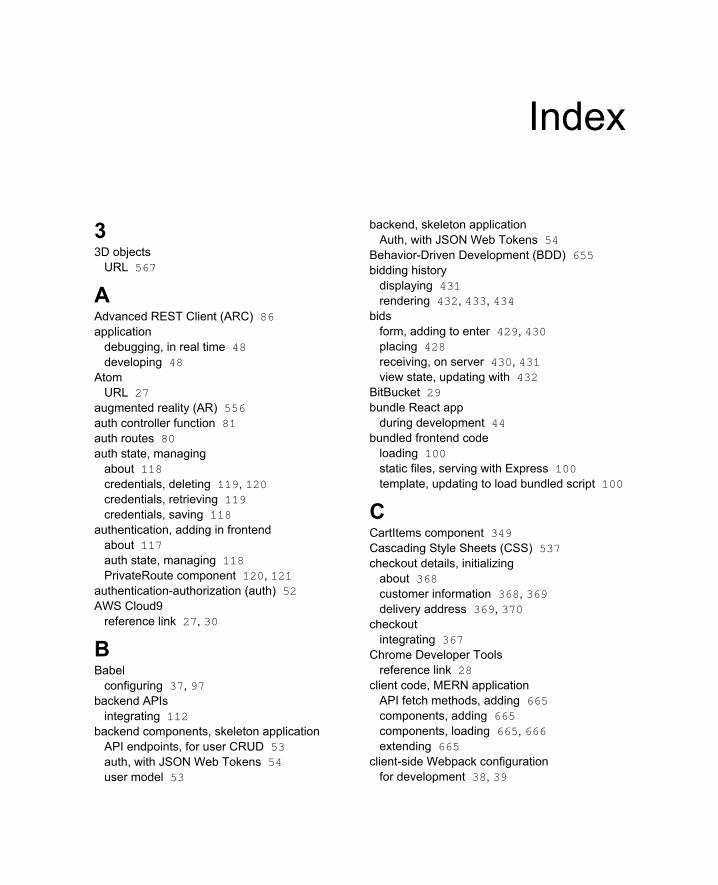
Index
33D objects URL 567
AAdvanced REST Client (ARC) 86application debugging, in real time 48 developing 48Atom URL 27augmented reality (AR) 556auth controller function 81auth routes 80auth state, managing about 118 credentials, deleting 119, 120 credentials, retrieving 119 credentials, saving 118authentication, adding in frontend about 117 auth state, managing 118 PrivateRoute component 120, 121authentication-authorization (auth) 52AWS Cloud9 reference link 27, 30
BBabel configuring 37, 97backend APIs integrating 112backend components, skeleton application API endpoints, for user CRUD 53 auth, with JSON Web Tokens 54 user model 53
backend, skeleton application Auth, with JSON Web Tokens 54Behavior-Driven Development (BDD) 655bidding history displaying 431 rendering 432, 433, 434bids form, adding to enter 429, 430 placing 428 receiving, on server 430, 431 view state, updating with 432BitBucket 29bundle React app during development 44bundled frontend code loading 100 static files, serving with Express 100 template, updating to load bundled script 100
CCartItems component 349Cascading Style Sheets (CSS) 537checkout details, initializing about 368 customer information 368, 369 delivery address 369, 370checkout integrating 367Chrome Developer Tools reference link 28client code, MERN application API fetch methods, adding 665 components, adding 665 components, loading 665, 666 extending 665client-side Webpack configuration for development 38, 39
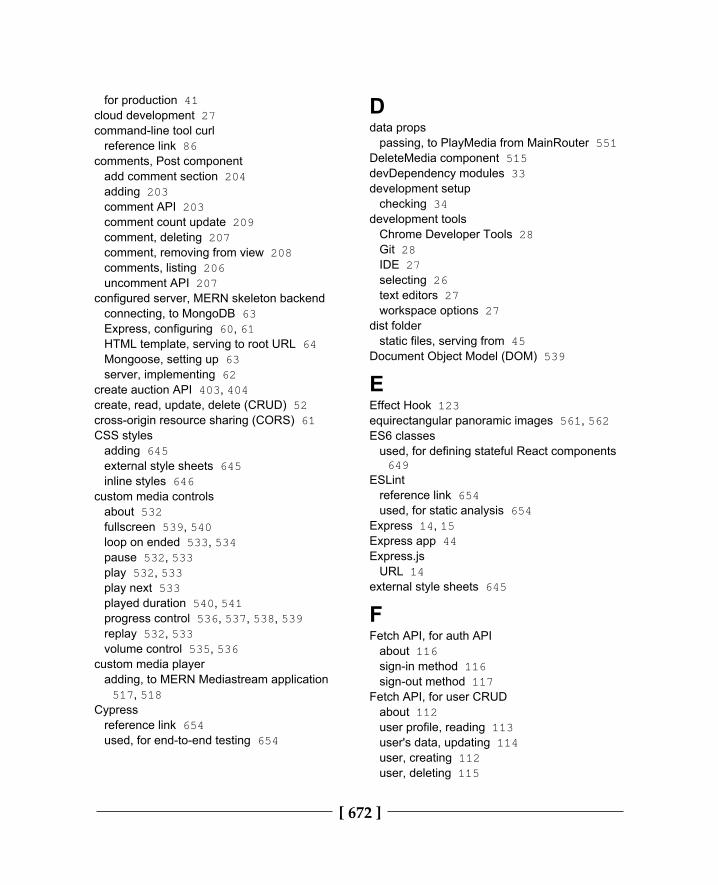
[ 672 ]
for production 41cloud development 27command-line tool curl reference link 86comments, Post component add comment section 204 adding 203 comment API 203 comment count update 209 comment, deleting 207 comment, removing from view 208 comments, listing 206 uncomment API 207configured server, MERN skeleton backend connecting, to MongoDB 63 Express, configuring 60, 61 HTML template, serving to root URL 64 Mongoose, setting up 63 server, implementing 62create auction API 403, 404create, read, update, delete (CRUD) 52cross-origin resource sharing (CORS) 61CSS styles adding 645 external style sheets 645 inline styles 646custom media controls about 532 fullscreen 539, 540 loop on ended 533, 534 pause 532, 533 play 532, 533 play next 533 played duration 540, 541 progress control 536, 537, 538, 539 replay 532, 533 volume control 535, 536custom media player adding, to MERN Mediastream application
517, 518Cypress reference link 654 used, for end-to-end testing 654
Ddata props passing, to PlayMedia from MainRouter 551DeleteMedia component 515devDependency modules 33development setup checking 34development tools Chrome Developer Tools 28 Git 28 IDE 27 selecting 26 text editors 27 workspace options 27dist folder static files, serving from 45Document Object Model (DOM) 539
EEffect Hook 123equirectangular panoramic images 561, 562ES6 classes used, for defining stateful React components
649
ESLint reference link 654 used, for static analysis 654Express 14, 15Express app 44Express.js URL 14external style sheets 645
FFetch API, for auth API about 116 sign-in method 116 sign-out method 117Fetch API, for user CRUD about 112 user profile, reading 113 user's data, updating 114 user, creating 112 user, deleting 115
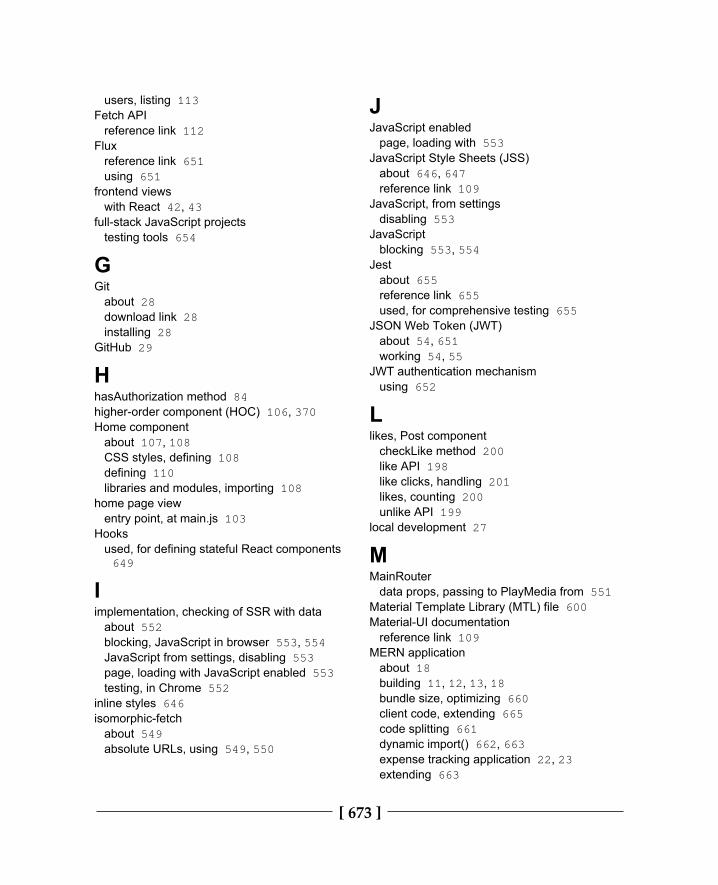
[ 673 ]
users, listing 113Fetch API reference link 112Flux reference link 651 using 651frontend views with React 42, 43full-stack JavaScript projects testing tools 654
GGit about 28 download link 28 installing 28GitHub 29
HhasAuthorization method 84higher-order component (HOC) 106, 370Home component about 107, 108 CSS styles, defining 108 defining 110 libraries and modules, importing 108home page view entry point, at main.js 103Hooks used, for defining stateful React components
649
Iimplementation, checking of SSR with data about 552 blocking, JavaScript in browser 553, 554 JavaScript from settings, disabling 553 page, loading with JavaScript enabled 553 testing, in Chrome 552inline styles 646isomorphic-fetch about 549 absolute URLs, using 549, 550
JJavaScript enabled page, loading with 553JavaScript Style Sheets (JSS) about 646, 647 reference link 109JavaScript, from settings disabling 553JavaScript blocking 553, 554Jest about 655 reference link 655 used, for comprehensive testing 655JSON Web Token (JWT) about 54, 651 working 54, 55JWT authentication mechanism using 652
Llikes, Post component checkLike method 200 like API 198 like clicks, handling 201 likes, counting 200 unlike API 199local development 27
MMainRouter data props, passing to PlayMedia from 551Material Template Library (MTL) file 600Material-UI documentation reference link 109MERN application about 18 building 11, 12, 13, 18 bundle size, optimizing 660 client code, extending 665 code splitting 661 dynamic import() 662, 663 expense tracking application 22, 23 extending 663
[ 674 ]
integrating with 592 media streaming application 23 online marketplace 21 React 360 files, bundling to integrate with
592
React 360 production files, adding 593 references, updating in index.html 593, 594 server code, extending 664 social media platform, building 19 trying out, integration 594 VR game, for web 24 web-based classroom application,
implementing 20MERN Expense Tracker about 437, 438 average expenses by category API 479, 480 average expenses per category, in pie chart
478
CategoryPie component 480, 481, 482 create expense API 441, 442 current expenses by category API 464, 465,
466
current expenses, tracking by category 463,464
current month preview API 459, 460, 461 delete option, rendering 453, 454, 455 edit expense form, rendering 453, 454, 455 expense data charts, displaying 469 expense data, visualizing over time 458 Expense model, defining 439, 440, 441 expense record, creating 441 expense record, modifying 452 expense records, adding 438 expenses by user API 446, 447 expenses component 447, 448, 449 expenses component, searching by date
range 449, 450 expenses in current month, previewing 459 expenses, deleting in backend 455, 456,
457, 458 expenses, editing in backend 455, 456, 457,
458
expenses, listing 445 expenses, rendering from database 451, 452 expenses, summarizing 458 month's expenses in scatter plot 469, 470
MonthlyScatter component 472, 473 NewExpense component 442, 443, 444, 445 overview of expenses per category, rendering
466, 467, 468 preview of current expenses, rendering 461,
463
scatter plot data API 470, 471 total expenses per month in year 474 yearly expenses API 474, 476 YearlyBar component 476, 477, 478MERN Marketplace app about 285, 286 Categories component 341 create product API 317, 318 create shop API 292, 293, 294 create shop API, fetching in view 295 delete shop API 312, 313 DeleteProduct component 335 DeleteShop component 313, 314 Edit Profile view, updating 288, 289 edit shop API 309, 311 EditProduct component 334 EditShop component 311, 312 latest products 326, 327 menu, updating 290 MyProducts component, for shop owners
324, 325, 326 MyShops component 304, 305 NewProduct component 319, 320 NewShop component 295, 296, 297, 298 Product component 331, 333, 334 Product model, defining 315, 316 products component, for buyers 322, 323 products search, fetching for view 338 products suggestions, listing 326 products, adding to shops 314 products, by shop API 321 products, categories API 336, 337 products, creating 317 products, deleting 334 products, displaying 330 products, editing 334 products, listing 320 products, listing by shops 320 products, Search component 339, 340
[ 675 ]
products, searching with category 336 products, searching with name 336 read product API 331 read shop API 306, 307 related products 327, 328 search products API 337, 338 Shop component 300, 302, 307, 308, 309 Shop model, defining 291, 292 shops list API 299 shops, adding 290 shops, by owner API 302, 303 shops, creating 292 shops, deleting 312 shops, displaying 305 shops, editing 309 shops, fetching by user for view 303 shops, fetching for view 299 shops, listing 298 shops, listing by owner 302 suggestions component 329, 330 user model, updating 287, 288 users, allowing to be sellers 287MERN Marketplace application, auction view Auction component 420 Auction components 420, 421, 422 read auction API 419 Timer component, adding 422, 423, 425MERN Marketplace application, auctions auction APIs, deleting 416, 417, 418 auction APIs, editing 416, 417, 418 list view, updating 416MERN Marketplace application about 344 action, handling to process charge for product
387
action, handling to update status of product 388
actions, handling to cancel product order 386 APIs, for products ordered 389 Auction model, defining 400, 401, 402 auction view, displaying 418 auction, creating 402 Auctions by bidder API 410, 411 Auctions by seller API 411, 412 Auctions component 412, 413, 414, 415
auctions, adding 400 auctions, deleting 415 auctions, editing 415 auctions, listing 408, 409 button, adding to place order 372, 373 CardElement component 371 cart details, retrieving 350, 351 Cart icon, on menu 347, 348 Cart view 348 cart, emptying 373 CartItem schema 376 CartItems component 349, 350 charge, creating for product 365 charge, processing for product 393, 394 checkout details, initializing 368 checkout, integrating 367 create API, fetching in view 405 create auction API 403, 404 create controller method 379 create order API 376, 377 items, removing 353 list by shop API 380 NewAuction component 405, 406, 408 open Auctions API 409, 410 option, to perform checkout 354 Order model 375 Order model, defining 374 Order schema 374 order status, updating 390, 391 order, creating 374 order, placing 370 orders, listing 382, 383 orders, listing by shop 379 product order, cancelling 391, 392 product stock quantity, decreasing 378 ProductOrderEdit component 384, 385 products, adding to cart 345, 346 quantity, modifying of products 352 real-time bidding 398, 399 redirecting, to order view 373 reference link 344 ShopOrders component 381 shopping cart, implementing 345 single-order details, viewing 394, 395, 396 status values, obtaining 389
[ 676 ]
Stripe Card Elements, for checkout 362 Stripe Card Elements, using 370 Stripe Customer, for recording card details
363
Stripe, using for payments 355, 356 Stripe-connected account, for seller 356 total price, displaying 354MERN Mediastream application, media player custom media controls 532 Media component, updating 528MERN Mediastream application, play media
page autoplay across components, handling 543,
544, 545 autoplay toggle option, adding 542, 543 state, updating when video ends in
MediaPlayer 545MERN Mediastream application building 484, 485 custom media player, adding 518 delete media API 513, 514 DeleteMedia component 514 media API, creating 489, 490, 491 media component 506, 507, 508 media details, updating 509 media edit form 511, 513 Media model, defining 486, 487 media player, customizing 527 media player, initializing 528, 529, 531 media post, creating 489 media update API 509, 510, 511 media, deleting 504, 513 media, displaying 504 media, listing 499, 501, 502 media, listing by users 502, 503 media, retrieving 494 media, storing 486 media, streaming 494 media, updating 504 media, uploading 486 MediaList component 500 MongoDB GridFS, using to store large media
files 487, 489 NewMedia component 491, 492, 494 read media API 504, 505, 506
reference link 518 related media, autoplaying 542 video API 495, 496, 497 video, rendering with react media player 498MERN Mediastream custom media player, adding 517 play media page 519MERN skeleton backend Babel modules, configuring 58 config variables 59 configured server, preparing 60 development dependencies 58 folder and file structure 56 Nodemon, using 59 package.json, adding 57 project, initializing 57 scripts, executing 60 setting up 56 Webpack, compiling 59MERN skeleton, home page view client code, running in browser 111 Home component 107, 108 home route, adding to MainRouter 106 image assets, bundling 111 rendering 102, 103 Root React component 103MERN Social about description, adding for user profile 153,
154
API calls, accessing in views 166, 167 API for posts, by user 186 APIs, adding to follow users 163 APIs, adding to unfollow users 164 checking 659, 660 correct Post view snapshot, generating 658 create post API, fetching in view 191 defining 150, 152 FindPeople component 174, 175 follow and unfollow buttons 167 followers, listing 170 FollowGrid component, making 171 followings, listing 170 FollowProfileButton component 167, 168 interacting, with Posts 197 Mongoose schema model, for Post 178
[ 677 ]
NewPost component, making 192, 193 Newsfeed API, for posts 182, 183 Newsfeed component 179, 180, 181 Newsfeed posts, fetching in view 183, 185 packages, installing 656 people, finding to follow 172 photo, displaying in view 161 post API, creating 189, 190 Post component 193 Post component layout 193 post feature 176, 177 post's photo, retrieving 190, 191 post, creating 189 post, deleting 196, 197 posts, listing 181 posts, listing by user in Profile 186 posts, listing in Newsfeed 182 Profile component, updating 168, 169 profile photo URL 160, 161 profile photo, retrieving 160 profile photo, uploading 154 running 659 script command, defining 656 test, adding 655, 657, 658 tests folder, adding 656 user model, updating 162 user posts, fetching in view 187, 188 user profile, updating 153 userByID controller method, updating 163 users not followed, fetching 172, 173 users, following 162 users, unfollowing 162MERN stack application, folder structure about 643 client-side code 644 server-side code 643MERN stack technologies about 9, 10, 11, 16 adopting 17 advanced applications 10 benefits 17 building 10 deploying 17 developing 17 extending 17
learning 17 MongoDB 29 Node.js 30 setting up 29 structure 9 web applications, developing with 10 working 17 Yarn 31MERN stack about 13 Express 14, 15 MongoDB 15 Node 13 React 16MERN VR Game application, CRUD APIs game, creating 603, 604, 605 games, deleting 613, 614 games, editing 610, 611, 612 games, listing 606, 607 games, listing by maker 607, 608 games, loading 608, 610MERN VR Game application, features building
in React 360 3D VR objects, adding 581, 582 about 577, 578 client.js, mounting to Location 578 client.js, updating 578 game completed state 589, 590, 591 interacting, with VR objects 582 styles, defining with StyleSheet 579, 580 VR object, animation with
requestAnimationFrame 583, 584, 585 VR object, clicking on 3D objects 585, 586 VR object, correct object collecting on click
586, 587, 588 VR object, rotating 583 world background 580MERN VR Game application, form view arrays, modifying of VR objects 623 EditGame component 618, 619, 620 game, editing 617 game, making 615 GameForm component, implementing 620,
621
inputting, simple game details 621, 622
[ 678 ]
menu, updating 615 NewGame component 615, 616, 617 object detail change, handling 626, 627 object details form, iterating 623 object details form, rendering 623 object, adding to array 625 object, removing from array 625, 626 VRObjectForm component 627, 628, 629,
630
MERN VR Game application, model array length, validating in game schema 602,
603
game schema, exploring 599, 600 VR object schema, specifying 600, 601, 602MERN VR Game application, views GameDetail component 633, 634, 635, 636 list, rendering of games 631, 632, 633MERN VR Game application about 557, 597, 598 API, implementing to render VR game view
636, 637 code, updating in React 360 637 features 557, 558 form, adding for creating games 614 form, adding for editing games 614 game CRUD APIs, implementing 603 game data structure 574 game data, fetching with load game API 639 game details, defining 574 game ID, obtaining from link 638 game list views, adding 630 game model, defining 598 game, playing 636 static data, versus dynamic data 576, 577 updated code, bundling 639 updated code, integrating 639 working with 558 working, with React 360 558MERN VR Game, data structure details, of VR objects 575, 576MERN, modules about 32 devDependency modules 32, 33 key modules 32middleware functionality 14
modules, server-side rendering material-UI modules and the custom theme
144
React modules 144mongo shell running 30MongoDB Atlas URL 30MongoDB GridFS reference link 488MongoDB about 15 installation guide link 30 installing 30 Node server, connecting to 46 setting up 29 URL 15Mongoose error handling 70, 72
NNode server connecting, to MongoDB 46Node version management with nvm 31Node.js modules installing 36Node.js download link 31 installing 31 setting up 30Node about 13 URL 14Nodemon configuring 42npm registry reference link 14nvm setup instructions link 31
Oobject (OBJ) file 600
[ 679 ]
Ppackage.json initializing 35password storage securing 652password authentication 68, 69 encryption 68, 69 field validation 70 for authentication 67 handling, as virtual field 68payment processing 355photo upload feature, MERN Social file input, with Material-UI 156 form submission, with file attached 157, 158 photo, uploading from edit form 155 request, processing with file upload 159 user model, updating to store photo in
MongoDB 155play media page autoplay across components, handling 543 component structure 519, 520 RelatedMedia component, implementing 523,
524
PlayMedia component 524, 525, 526PlayMedia data props, passing from MainRouter to 551 received data, rendering 552Post component layout, MERN Social actions 195 comments 195 content 194 header 194Post component, MERN Social comments 202 likes 198PropTypes used, for validating props 140
RReact 360 API 568React 360 files bundling, to integrate it with MERN
application 592
React 360 components 565 game code, updating 637 input events 573, 574 project, setting up 558, 559, 561 reference link 564React app data, injecting 550React dependencies adding 101 Material-UI, installing 102 React Router, installing 101 React, installing 101React development Babel, configuring 97 bundled frontend code, loading 100 dependencies, adding 101 setting up 96 Webpack, configuring 97React Router reference link 663React about 16 frontend views 42, 43 URL 16ReactPlayer reference link 498real-time bidding implementing, with Socket.IO 425 in MERN Marketplace application 398, 399Redux reference link 651 using 651related media list API 521, 522related media listing 520RelatedMedia component implementing 523, 524Remote Development extension, Visual Studio
Code reference link 27remote Git hosting services 29requireSignin method 84Root React component about 103
[ 680 ]
Material-UI theme, customizing 104 wrapping, with ThemeProvider and
BrowserRouter 105
Sscripts running 47security enhancing 651separation of concerns with modularity 643server code, MERN application APIs, implementing 664 controllers, adding 664 extending 664 model, adding 664 routes, adding 664server-injected data applying, in client code 551server-side rendering (SSR), with data about 546 route configuration file, adding 547server-side rendering (SSR) App.js, updating 146 CSS and markup, generating 144, 145 hydrate function, using 147 implementing 143 modules 144 template, sending with markup and CSS 145,
146
template.js, updating 146 with data 647, 648server-side Webpack configuration 40server with Express, and Node 44shopping cart implementing 345sign in controller function 82sign out controller function 83, 84single-order details viewing 394, 395, 396skeleton application backend components, defining 52 folder and file structure 95, 96 frontend, defining 94, 95
overview 52 reference link 56 use cases 52 user interface components, defining 94Socket.IO integrating 425, 426, 427, 428 real-time bidding, implementing with 425 URL 426SSR code, updating for Express server about 548 data, injecting into React app 550 isomorphic-fetch 549 route configuration, using to load data 548standalone backend checking 86 signing in 90 single user, fetching 89, 91 user list, fetching 88 user, creating 87stateful React components defining, with ES6 classes or Hooks 649 versus pure functional components 648stateless React components using, as pure functions 649static files serving, from dist folder 45Stripe auth update API 360Stripe Customer, for recording card details existing Stripe Customer, updating 365 new Stripe Customer, creating 364 user controller, updating 363, 364 user model, updating 363Stripe Customer reference link 363Stripe-connected account, for seller button, creating to connect with Stripe 357,
358
Stripe auth update API 360, 361, 362 StripeConnect component 358, 360 user model, updating 356Stripe about 355 using, for payments 355StripeConnect component 358, 360SublimeText
[ 681 ]
URL 27
Ttemplates rendering, at root 46test code writing 653
UUniform Resource Locator (URL) 521user auth routes auth error, handling for express-jwt 86 protecting 80, 84 protecting, with express-jwt 84 sign in, requisites 85 signed in users, authorizing 85user auth integrating 80user CRUD APIs adding 72 user controller 74 user ID, loading to delete 76 user ID, loading to read 76 user ID, loading to update 76 user routes 73 user, creating 75 users, listing 76User frontend completing 121 DeleteUser component 137, 139 EditProfile component 135, 136 Menu component 140, 142, 143 Profile component 131, 132, 133, 134 Signin component 129, 130 Signup component 125, 126, 128, 129 Users component 122, 123, 125user ID deleting 79 loading 77 reading 77, 78 updating 78, 79user interface (UI) about 645 designing, with stateful and stateless
functional components 650
user model implementing 65 Mongoose error handling 70, 72 password, for authentication 67 user schema definition 66user schema definition about 66 email field 66 hashed_password field 67 name field 66 salt fields 67 timestamps, creating 67 timestamps, updating 67UserSchema methods functionality 69
Vvirtual reality (VR) 10, 556Visual Studio Code URL 27VR game application, development concepts equirectangular panoramic images 562VR game application developing, key concepts 561VR game development, 3D position 3D coordinate system 562, 563 3D objects, transforming 563, 564VR game development, concepts 3D position 562 equirectangular panoramic images 561 React 360 API 568 React 360, components 565 React 360, input events 573, 574VR game development, React 360 API assets, loading 572 AudioModule, in NativeModules 569, 570 environment 568 location, using in native modules 570, 571 native modules 569 StyleSheet API 571, 572 VrHeadModel 572VR game development, React 360 components components, for 3D VR experience 566 core components 565 core components, text 566
[ 682 ]
core components, view 565 Entity component, used for 3D objects 566,
567
VrButton component, used for 3D object 568
WWeb-Based Classroom Application about 213, 214 confirm, to publish 255, 256, 257 course API, updating 244, 245 Course component 233, 234, 235, 236 Course model, defining 219, 220 course, creating 221 course, deleting 252 course, display 231 course, editing 244 Courses component 259, 261 courses, adding 219 courses, enrolling 261 courses, listing by educator 227 courses, publishing 254 courses, updating with lessons 236 create API, fetching in view 223 create course API 221, 222, 223 create Enrollment API 263, 264, 265 delete course API 252, 253 DeleteCourse component 253, 254 Edit Profile view, updating 216, 217, 218 EditCourse component 245, 246, 247, 248 Enroll component 265, 266 Enrolled Course view 266 Enrollment component 269, 271, 272, 278,
279
Enrollment model, defining 261, 262 enrollment stats 279 enrollment stats API 279 enrollment stats, displaying for published
course 280, 282 enrollments API, list 277 enrollments, listing for user 277 lesson API, adding 237, 238 lesson details, editing 249, 250 lesson, deleting 251, 252 lessons completed API 273, 274 lessons, adding 237
lessons, completing 273 lessons, completing from view 274, 275 lessons, displaying 243 lessons, moving to rearrange order 250, 251 lessons, storing 236, 237 lessons, updating 249 list API, fetching in view 228, 229 list course API 227, 228 MyCourses component 229, 230, 231 NewCourse component 223, 224, 225, 226,
227
NewLesson component 239, 240, 241, 242 option, rendering to teach 218, 219 progress and enrollment stats, tracking 272 publish button states 254, 255 publish option, implementing 254 published courses API 258 published courses, listing 257 read course API 231, 232 read enrollment API 267, 268 role, adding to user model 215, 216 user, updating with educator role 215Webpack middleware loading, for development 98, 99Webpack client-side Webpack configuration, for
development 39 client-side Webpack configuration, for
production 41 configuring 37, 98 reference link 661 server-side Webpack configuration 40WebStorm URL 27workspace options about 27 cloud development 27 local development 27
XXMLHttpRequest (XHR) 112
YYarn about 31

installation link 31 URL 14


