Embed Size (px)
Citation preview

MiniTech
High security lock for safes
USER INSTRUCTIONS
Page 2 of 20 IU_MiniTech_03
Index Information about MiniTech ........................................................................... 3 Open the lock ................................................................................................. 5
Manager (01) and users (02-49): open the lock with time delay ........................ 5 Override users (50-59): open the lock without time delay .................................. 5
Change code ................................................................................................... 6 Manager (01), users (02-49) and override user (50-59) ..................................... 6
Users management ......................................................................................... 6 Lock setup ...................................................................................................... 6
Setup through a Dallas key ............................................................................. 7 Setup through a PC ........................................................................................ 7
Dynamic codes ................................................................................................ 7 Block and unblock the lock ............................................................................. 8 Test mode ....................................................................................................... 8 Change language ............................................................................................ 9 Audit ............................................................................................................... 9
Scroll events on the LCD ................................................................................. 9 Download the audit on a Dallas key ................................................................. 9 Download the audit on a PC .......................................................................... 10
Firmware release .......................................................................................... 10 Adjust contrast ............................................................................................. 10 Time delay .................................................................................................... 10 Master menu ................................................................................................. 11
Time and date settings ................................................................................. 11 Time Lock setting ......................................................................................... 11 Weekly Time Lock setting - Add new values ................................................... 11 Weekly Time Lock setting – Verify or delete values ......................................... 12 Closing periods setting - Add new values ....................................................... 12 Closing periods setting – Verify or delete values ............................................. 13 Opening periods setting- Add new values ....................................................... 13 Opening periods setting - Verify or delete values ............................................ 14 Audit ........................................................................................................... 14 Download the audit on a Dallas key ............................................................... 14 Scroll events on the LCD ............................................................................... 15 Change Master code ..................................................................................... 15 Manager Management .................................................................................. 15 Dynamic codes ............................................................................................. 16
IU_MiniTech_03 Page 3 of 20
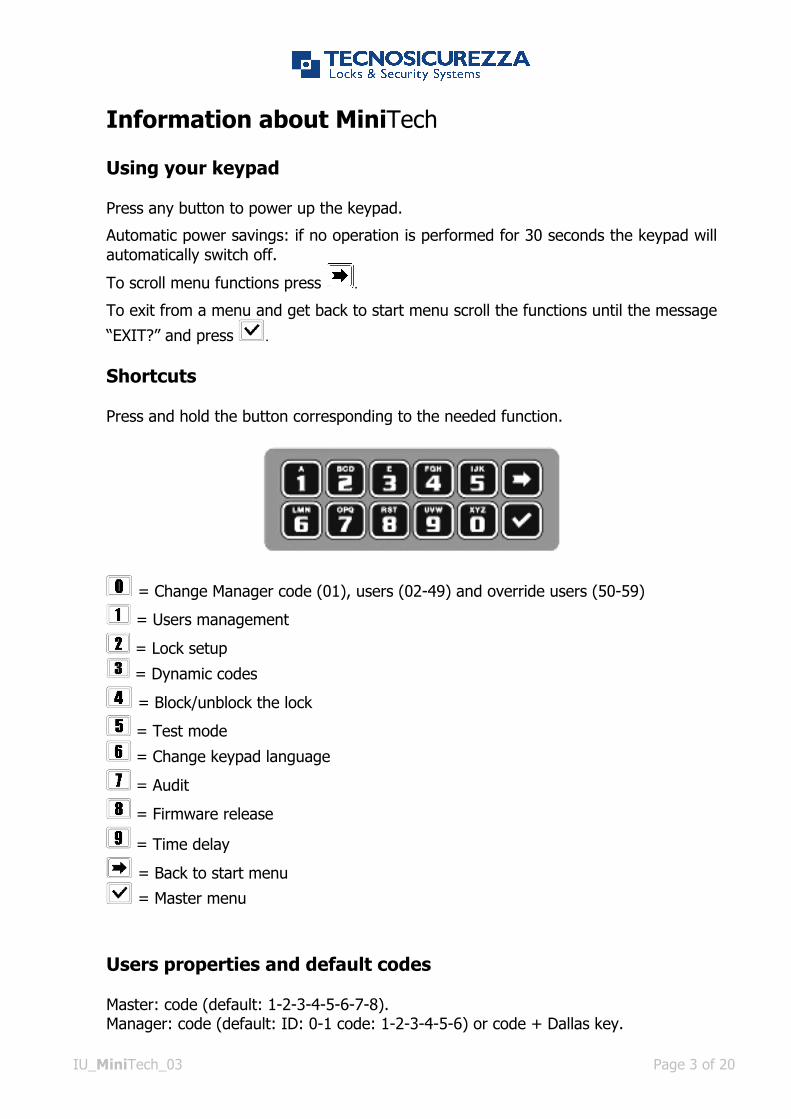
Information about MiniTech Using your keypad Press any button to power up the keypad.
Automatic power savings: if no operation is performed for 30 seconds the keypad will automatically switch off.
To scroll menu functions press .
To exit from a menu and get back to start menu scroll the functions until the message
“EXIT?” and press . Shortcuts Press and hold the button corresponding to the needed function.
= Change Manager code (01), users (02-49) and override users (50-59)
= Users management
= Lock setup
= Dynamic codes
= Block/unblock the lock
= Test mode = Change keypad language
= Audit
= Firmware release
= Time delay
= Back to start menu
= Master menu Users properties and default codes Master: code (default: 1-2-3-4-5-6-7-8). Manager: code (default: ID: 0-1 code: 1-2-3-4-5-6) or code + Dallas key.
Page 4 of 20 IU_MiniTech_03
Users 02 - 49: code (default: ID: 0-2 code: 0-2-0-2-0-2, ID 0-3 code: 0-3-0-3-0-3, etc…), code + Dallas key. Override user 50 - 59: code (default: ID 50 code: 5-0-5-0-5-0), code + Dallas key. Change default codes before operating the lock Penalty Four consecutive wrong codes initiate a four minutes penalty. During this period LCD will display the message “PENALTY” and no operation will be allowed. Time Delay Time delay 0-99 minutes; open window 1-19 minutes. Dallas keys Available as option for Manager and users (not available for Master). Power supply Lock can be powered with an ALKALINE 9V battery, with an internal large battery box (6 ALKALINE 1.5V batteries) or with power supply and dedicated interface. Low battery warning A long beep and the message “BATTERY LOW” indicate the battery is low and has to be immediately changed. Audit The lock stores the last 5.500 operations with time, date, user and operation. The keypad stores the last 250 operations with time, date, user and operation. Recommendations
• It is strongly recommended to immediately change the factory codes • For security reasons, do not chose codes which could be easy to guess (e.g. 1
2 3 4 5 6) • For your new code, do not use any personal data like birthdays or any other
data, that could be derived by knowledge of your person. • After code changing, the lock must be tested several times with door in open
state. • Do not open the lock case, otherwise you compromise the function of the lock
and warranty will be void. • In order to prevent any possibility that the code become public or known by
unauthorized persons we strongly recommend to store any data and/or code in a safety place, where only its rightful owner can access.
Never remove lock cover, this voids the warranty.
IU_MiniTech_03 Page 5 of 20
Open the lock
Manager (01) and users (02-49): open the lock with time delay
Power up the keypad. LCD will display the message: ENTER CODE
X X – X X X X X X Enter Manager or user code and the Dallas key (if set). LCD will show time delay counting.
TIME DELAY 00:59
If the entered code is wrong LCD will display the message: WRONG CODE
To stop time delay counting press and then to confirm. STOP TIME DELAY COUNTING?
After time delay counting LCD will display open window counting: OPEN WINDOW
00:01
Press , LCD will display the message: ENTER CODE X X – X X X X X X
Enter Manager or user code and the Dallas key (if set). Open within three seconds (green led).
OPEN THE LOCK
If the user is set to open in dual mode LCD will display the message: ENTER 2° CODE
X X – X X X X X X Enter second code and the Dallas key (if set). Open the lock within three seconds (green led).
OPEN THE LOCK
Override users (50-59): open the lock without time delay
Power up the keypad. LCD will display the message: ENTER CODE X X – X X X X X X
Enter override user code and the Dallas key (if set). Open the lock within three seconds (green led).
OPEN THE LOCK
If the user is set to open in dual mode LCD will display the message: ENTER 2° CODE
X X – X X X X X X Enter second code and the Dallas key (if set). Open the lock within three seconds (green led).
OPEN THE LOCK
Page 6 of 20 IU_MiniTech_03
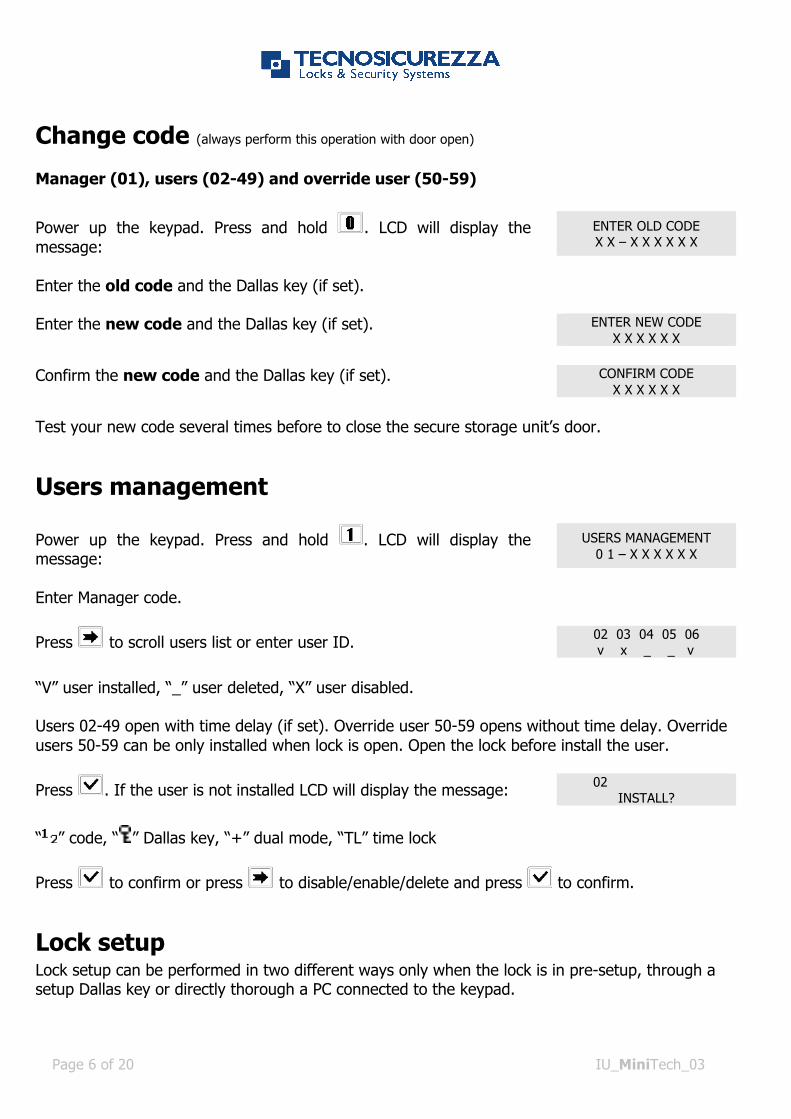
Change code (always perform this operation with door open)
Manager (01), users (02-49) and override user (50-59)
Power up the keypad. Press and hold . LCD will display the message:
ENTER OLD CODE X X – X X X X X X
Enter the old code and the Dallas key (if set).
Enter the new code and the Dallas key (if set). ENTER NEW CODE X X X X X X
Confirm the new code and the Dallas key (if set). CONFIRM CODE
X X X X X X Test your new code several times before to close the secure storage unit’s door.
Users management
Power up the keypad. Press and hold . LCD will display the message:
USERS MANAGEMENT 0 1 – X X X X X X
Enter Manager code.
Press to scroll users list or enter user ID. 02 03 04 05 06 v x _ _ v
“V” user installed, “_” user deleted, “X” user disabled.
Users 02-49 open with time delay (if set). Override user 50-59 opens without time delay. Override users 50-59 can be only installed when lock is open. Open the lock before install the user.
Press . If the user is not installed LCD will display the message: 02 INSTALL?
“ ” code, “ ” Dallas key, “+” dual mode, “TL” time lock
Press to confirm or press to disable/enable/delete and press to confirm.
Lock setup
Lock setup can be performed in two different ways only when the lock is in pre-setup, through a setup Dallas key or directly thorough a PC connected to the keypad.
IU_MiniTech_03 Page 7 of 20
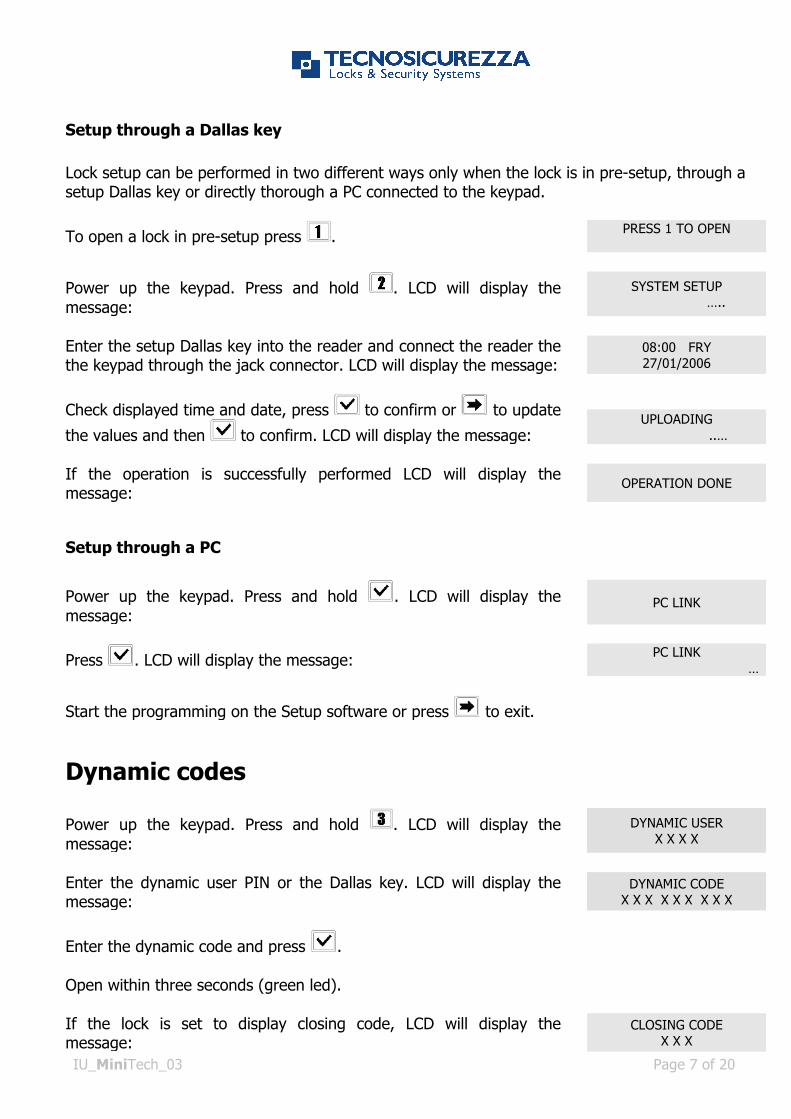
Setup through a Dallas key
Lock setup can be performed in two different ways only when the lock is in pre-setup, through a setup Dallas key or directly thorough a PC connected to the keypad.
To open a lock in pre-setup press . PRESS 1 TO OPEN
Power up the keypad. Press and hold . LCD will display the message:
SYSTEM SETUP …..
Enter the setup Dallas key into the reader and connect the reader the the keypad through the jack connector. LCD will display the message:
08:00 FRY 27/01/2006
Check displayed time and date, press to confirm or to update
the values and then to confirm. LCD will display the message:
UPLOADING
..…
If the operation is successfully performed LCD will display the message:
OPERATION DONE
Setup through a PC
Power up the keypad. Press and hold . LCD will display the message:
PC LINK
Press . LCD will display the message: PC LINK …
Start the programming on the Setup software or press to exit.
Dynamic codes
Power up the keypad. Press and hold . LCD will display the message:
DYNAMIC USER X X X X
Enter the dynamic user PIN or the Dallas key. LCD will display the message:
DYNAMIC CODE X X X X X X X X X
Enter the dynamic code and press .
Open within three seconds (green led).
If the lock is set to display closing code, LCD will display the message:
CLOSING CODE X X X
Page 8 of 20 IU_MiniTech_03
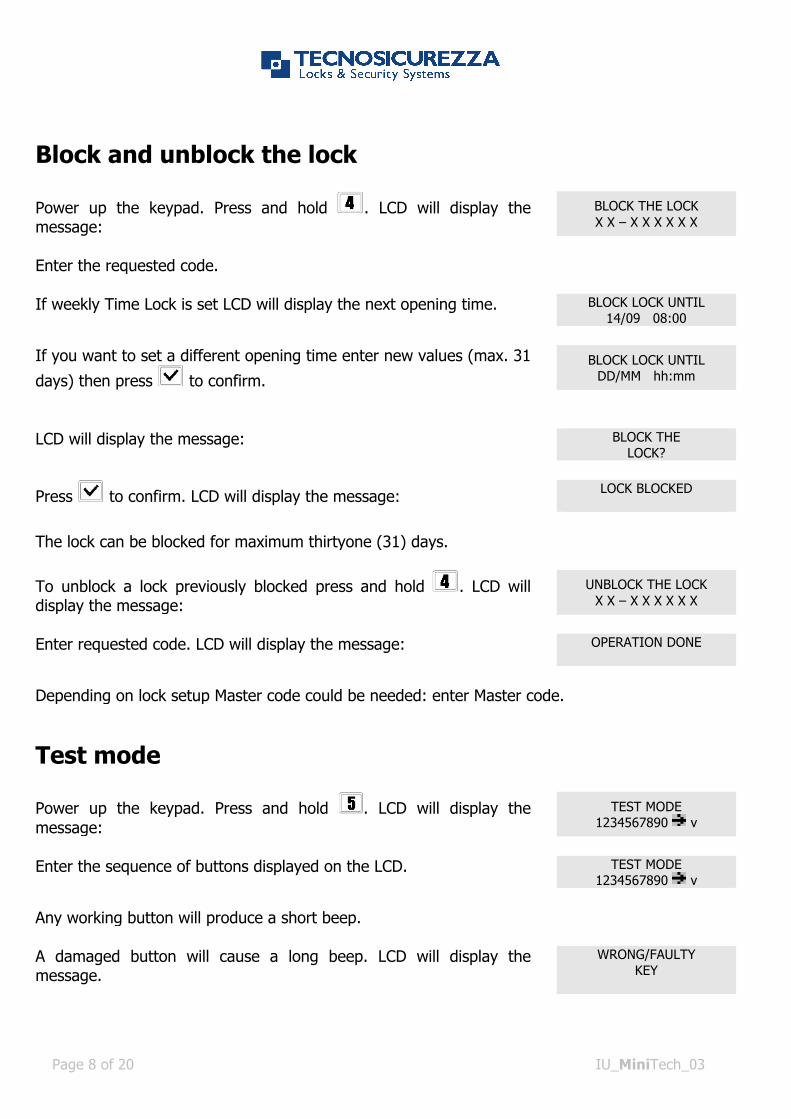
Block and unblock the lock
Power up the keypad. Press and hold . LCD will display the message:
BLOCK THE LOCK X X – X X X X X X
Enter the requested code.
If weekly Time Lock is set LCD will display the next opening time. BLOCK LOCK UNTIL
14/09 08:00 If you want to set a different opening time enter new values (max. 31
days) then press to confirm.
BLOCK LOCK UNTIL DD/MM hh:mm
LCD will display the message: BLOCK THE LOCK?
Press to confirm. LCD will display the message: LOCK BLOCKED
The lock can be blocked for maximum thirtyone (31) days.
To unblock a lock previously blocked press and hold . LCD will display the message:
UNBLOCK THE LOCK X X – X X X X X X
Enter requested code. LCD will display the message: OPERATION DONE
Depending on lock setup Master code could be needed: enter Master code.
Test mode
Power up the keypad. Press and hold . LCD will display the message:
TEST MODE 1234567890 v
Enter the sequence of buttons displayed on the LCD. TEST MODE 1234567890 v
Any working button will produce a short beep.
A damaged button will cause a long beep. LCD will display the message.
WRONG/FAULTY KEY
IU_MiniTech_03 Page 9 of 20
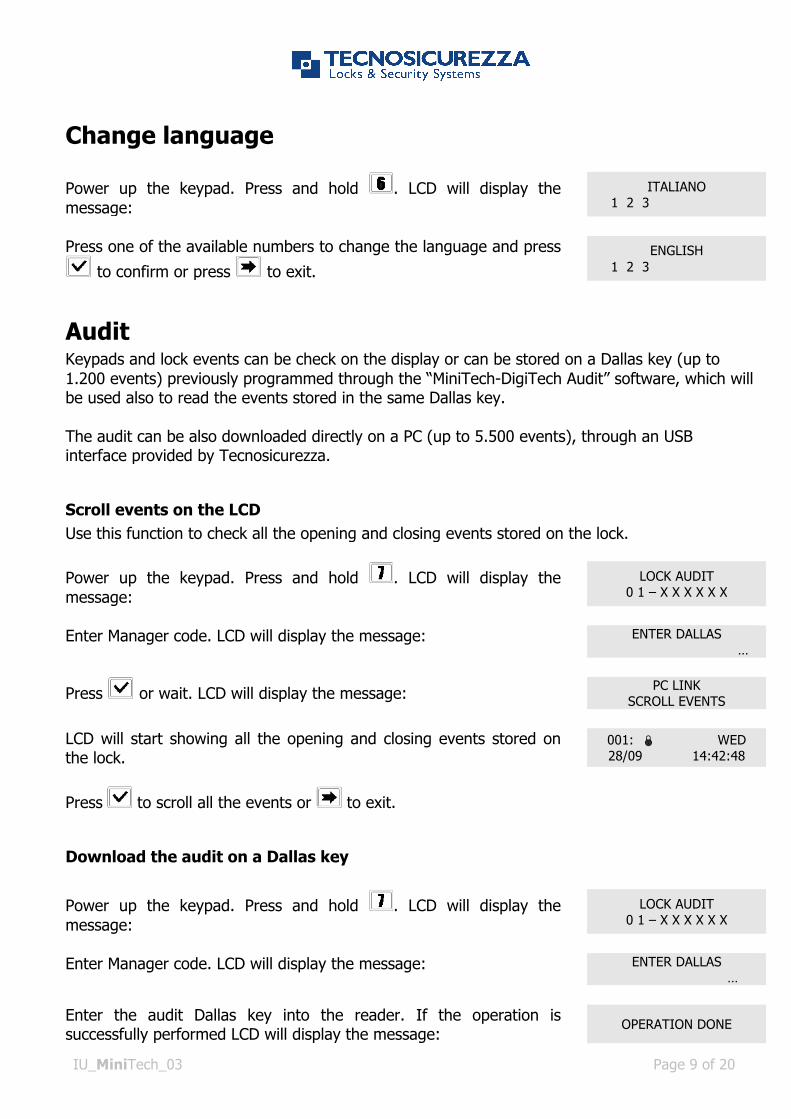
Change language
Power up the keypad. Press and hold . LCD will display the message:
ITALIANO 1 2 3
Press one of the available numbers to change the language and press
to confirm or press to exit.
ENGLISH 1 2 3
Audit
Keypads and lock events can be check on the display or can be stored on a Dallas key (up to 1.200 events) previously programmed through the “MiniTech-DigiTech Audit” software, which will be used also to read the events stored in the same Dallas key. The audit can be also downloaded directly on a PC (up to 5.500 events), through an USB interface provided by Tecnosicurezza.
Scroll events on the LCD
Use this function to check all the opening and closing events stored on the lock.
Power up the keypad. Press and hold . LCD will display the message:
LOCK AUDIT 0 1 – X X X X X X
Enter Manager code. LCD will display the message: ENTER DALLAS
…
Press or wait. LCD will display the message: PC LINK SCROLL EVENTS
LCD will start showing all the opening and closing events stored on the lock.
001: ! WED 28/09 14:42:48
Press to scroll all the events or to exit.
Download the audit on a Dallas key
Power up the keypad. Press and hold . LCD will display the message:
LOCK AUDIT 0 1 – X X X X X X
Enter Manager code. LCD will display the message: ENTER DALLAS
… Enter the audit Dallas key into the reader. If the operation is successfully performed LCD will display the message:
OPERATION DONE
Page 10 of 20 IU_MiniTech_03
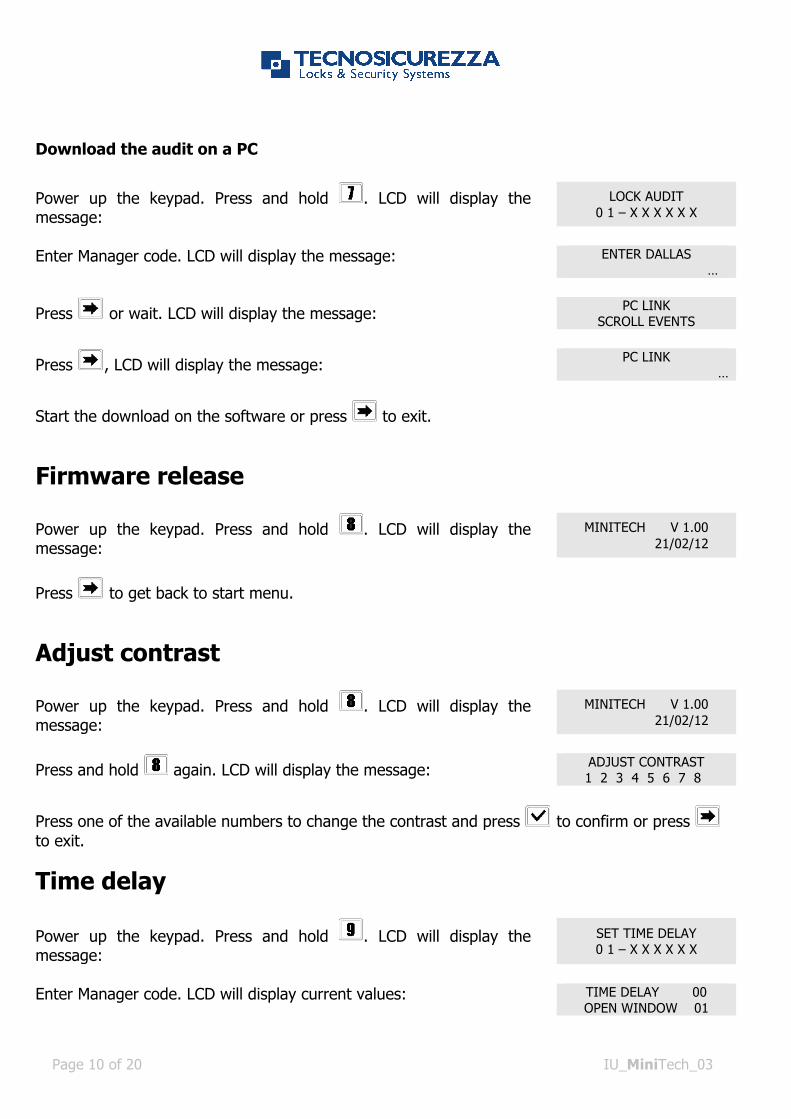
Download the audit on a PC
Power up the keypad. Press and hold . LCD will display the message:
LOCK AUDIT 0 1 – X X X X X X
Enter Manager code. LCD will display the message: ENTER DALLAS
…
Press or wait. LCD will display the message: PC LINK SCROLL EVENTS
Press , LCD will display the message: PC LINK …
Start the download on the software or press to exit.
Firmware release
Power up the keypad. Press and hold . LCD will display the message:
MINITECH V 1.00 21/02/12
Press to get back to start menu.
Adjust contrast
Power up the keypad. Press and hold . LCD will display the message:
MINITECH V 1.00 21/02/12
Press and hold again. LCD will display the message: ADJUST CONTRAST 1 2 3 4 5 6 7 8
Press one of the available numbers to change the contrast and press to confirm or press to exit.
Time delay
Power up the keypad. Press and hold . LCD will display the message:
SET TIME DELAY 0 1 – X X X X X X
Enter Manager code. LCD will display current values: TIME DELAY 00 OPEN WINDOW 01
IU_MiniTech_03 Page 11 of 20
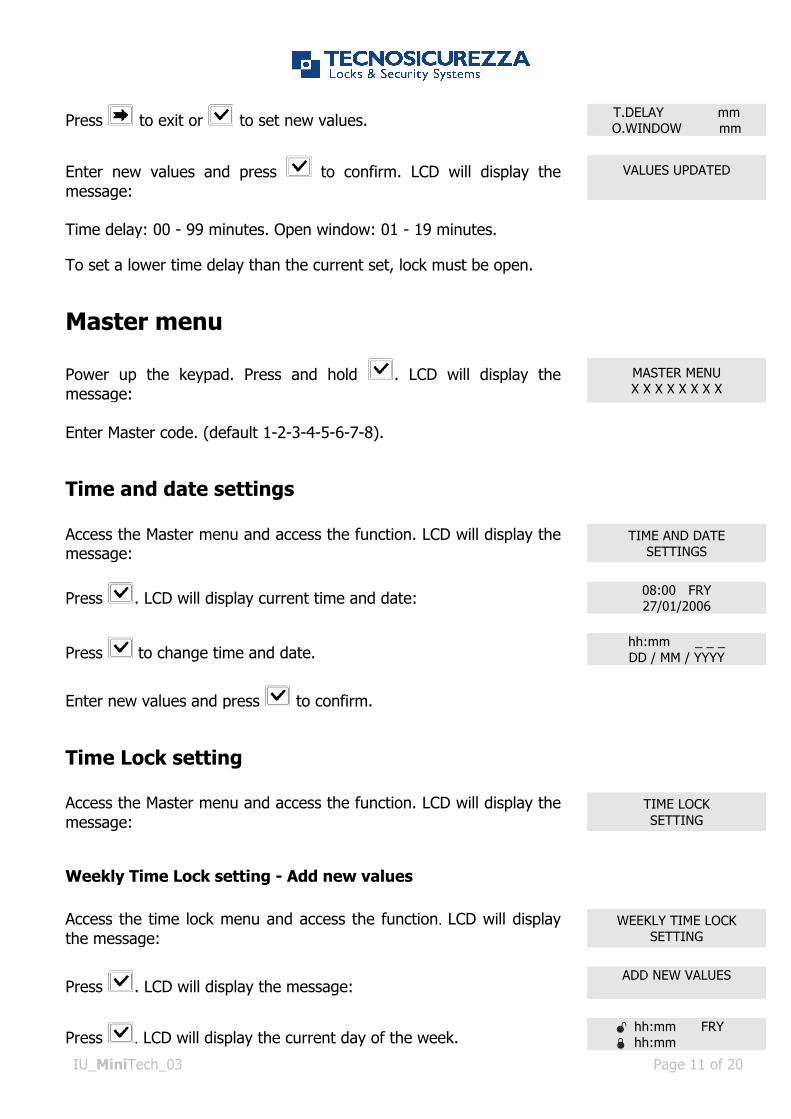
Press to exit or to set new values. T.DELAY mm O.WINDOW mm
Enter new values and press to confirm. LCD will display the message:
VALUES UPDATED
Time delay: 00 - 99 minutes. Open window: 01 - 19 minutes.
To set a lower time delay than the current set, lock must be open.
Master menu
Power up the keypad. Press and hold . LCD will display the message:
MASTER MENU X X X X X X X X
Enter Master code. (default 1-2-3-4-5-6-7-8).
Time and date settings
Access the Master menu and access the function. LCD will display the message:
TIME AND DATE SETTINGS
Press . LCD will display current time and date: 08:00 FRY 27/01/2006
Press to change time and date. hh:mm _ _ _ DD / MM / YYYY
Enter new values and press to confirm.
Time Lock setting
Access the Master menu and access the function. LCD will display the message:
TIME LOCK SETTING
Weekly Time Lock setting - Add new values
Access the time lock menu and access the function. LCD will display the message:
WEEKLY TIME LOCK SETTING
Press . LCD will display the message: ADD NEW VALUES
Press . LCD will display the current day of the week. " hh:mm FRY ! hh:mm
Page 12 of 20 IU_MiniTech_03
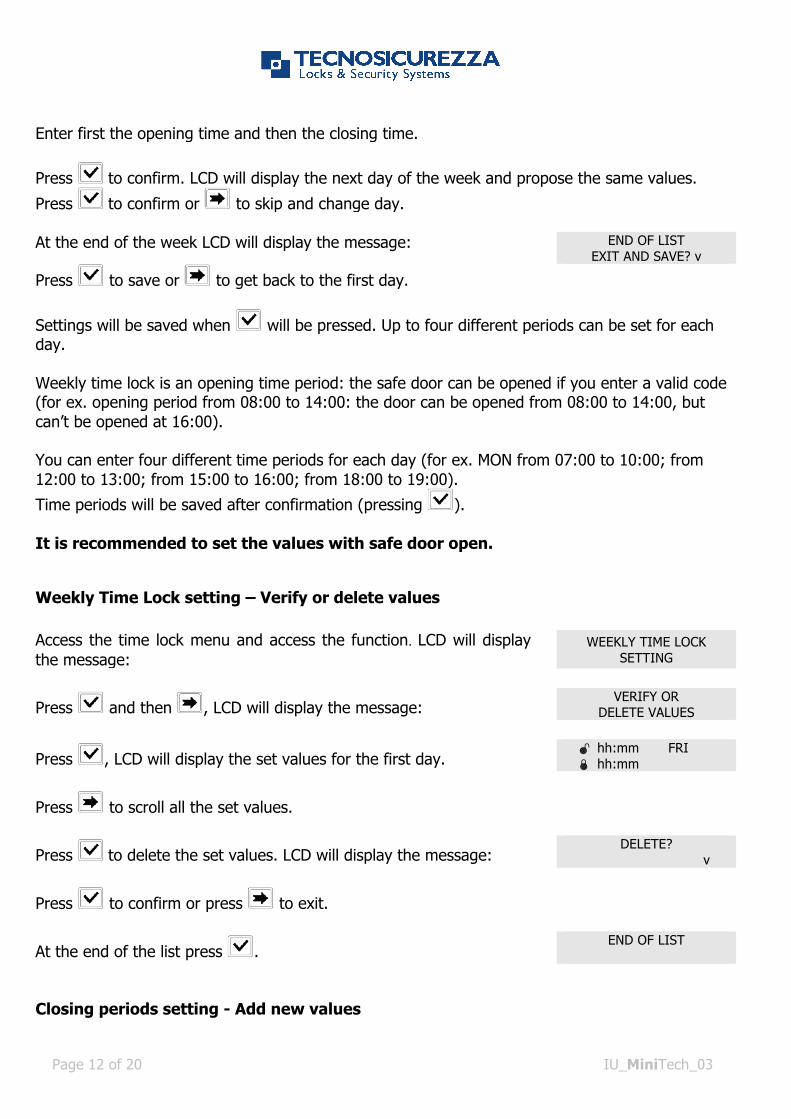
Enter first the opening time and then the closing time.
Press to confirm. LCD will display the next day of the week and propose the same values.
Press to confirm or to skip and change day. At the end of the week LCD will display the message: END OF LIST
EXIT AND SAVE? v
Press to save or to get back to the first day.
Settings will be saved when will be pressed. Up to four different periods can be set for each day. Weekly time lock is an opening time period: the safe door can be opened if you enter a valid code (for ex. opening period from 08:00 to 14:00: the door can be opened from 08:00 to 14:00, but can’t be opened at 16:00). You can enter four different time periods for each day (for ex. MON from 07:00 to 10:00; from 12:00 to 13:00; from 15:00 to 16:00; from 18:00 to 19:00).
Time periods will be saved after confirmation (pressing ). It is recommended to set the values with safe door open.
Weekly Time Lock setting – Verify or delete values
Access the time lock menu and access the function. LCD will display the message:
WEEKLY TIME LOCK SETTING
Press and then , LCD will display the message: VERIFY OR DELETE VALUES
Press , LCD will display the set values for the first day. " hh:mm FRI ! hh:mm
Press to scroll all the set values.
Press to delete the set values. LCD will display the message: DELETE? v
Press to confirm or press to exit.
At the end of the list press . END OF LIST
Closing periods setting - Add new values
IU_MiniTech_03 Page 13 of 20
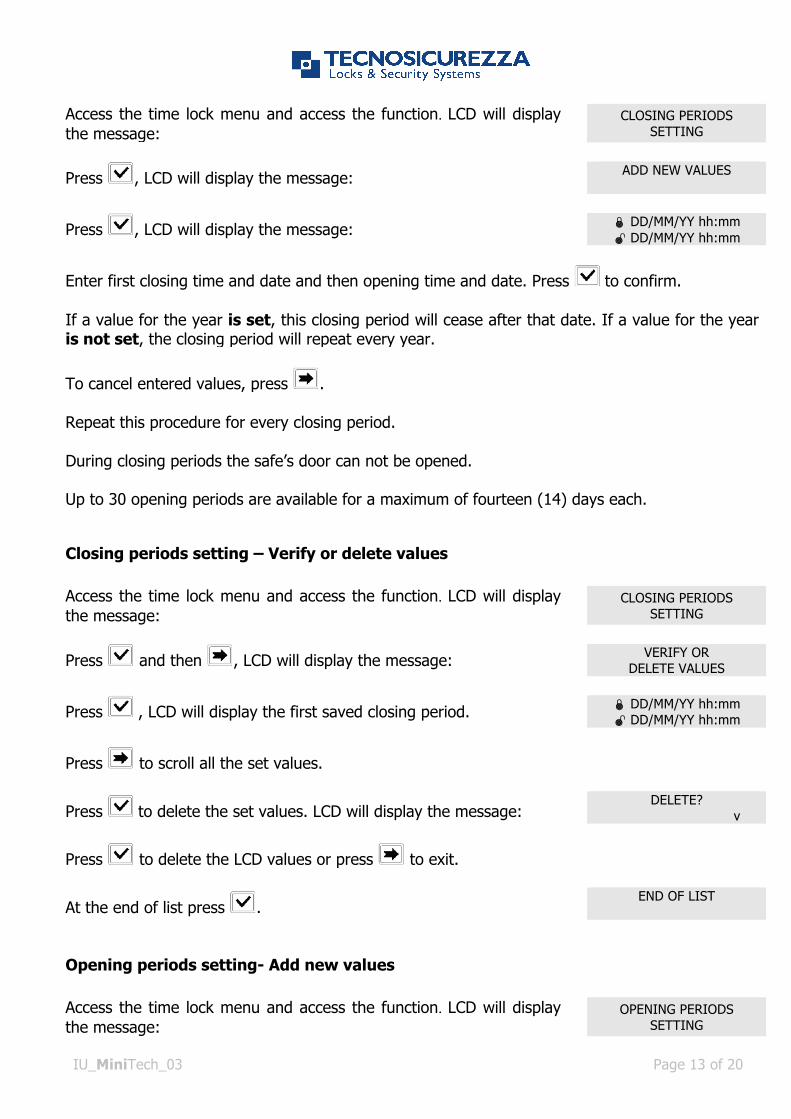
Access the time lock menu and access the function. LCD will display the message:
CLOSING PERIODS SETTING
Press , LCD will display the message: ADD NEW VALUES
Press , LCD will display the message: ! DD/MM/YY hh:mm " DD/MM/YY hh:mm
Enter first closing time and date and then opening time and date. Press to confirm.
If a value for the year is set, this closing period will cease after that date. If a value for the year is not set, the closing period will repeat every year.
To cancel entered values, press .
Repeat this procedure for every closing period.
During closing periods the safe’s door can not be opened. Up to 30 opening periods are available for a maximum of fourteen (14) days each.
Closing periods setting – Verify or delete values
Access the time lock menu and access the function. LCD will display the message:
CLOSING PERIODS SETTING
Press and then , LCD will display the message: VERIFY OR DELETE VALUES
Press , LCD will display the first saved closing period. ! DD/MM/YY hh:mm " DD/MM/YY hh:mm
Press to scroll all the set values.
Press to delete the set values. LCD will display the message: DELETE? v
Press to delete the LCD values or press to exit.
At the end of list press . END OF LIST
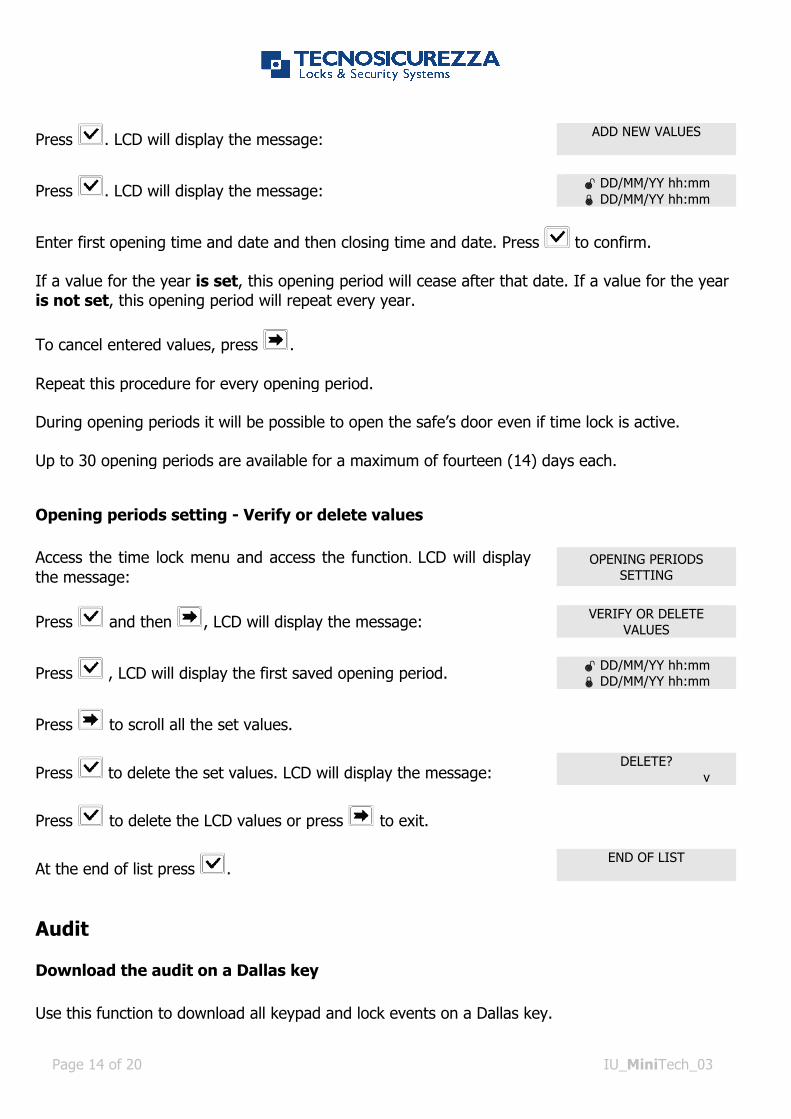
Opening periods setting- Add new values
Access the time lock menu and access the function. LCD will display the message:
OPENING PERIODS SETTING
Page 14 of 20 IU_MiniTech_03
Press . LCD will display the message: ADD NEW VALUES
Press . LCD will display the message: " DD/MM/YY hh:mm ! DD/MM/YY hh:mm
Enter first opening time and date and then closing time and date. Press to confirm. If a value for the year is set, this opening period will cease after that date. If a value for the year is not set, this opening period will repeat every year.
To cancel entered values, press .
Repeat this procedure for every opening period. During opening periods it will be possible to open the safe’s door even if time lock is active. Up to 30 opening periods are available for a maximum of fourteen (14) days each.
Opening periods setting - Verify or delete values
Access the time lock menu and access the function. LCD will display the message:
OPENING PERIODS SETTING
Press and then , LCD will display the message: VERIFY OR DELETE VALUES
Press , LCD will display the first saved opening period. " DD/MM/YY hh:mm ! DD/MM/YY hh:mm
Press to scroll all the set values.
Press to delete the set values. LCD will display the message: DELETE? v
Press to delete the LCD values or press to exit.
At the end of list press . END OF LIST
Audit
Download the audit on a Dallas key
Use this function to download all keypad and lock events on a Dallas key.
IU_MiniTech_03 Page 15 of 20
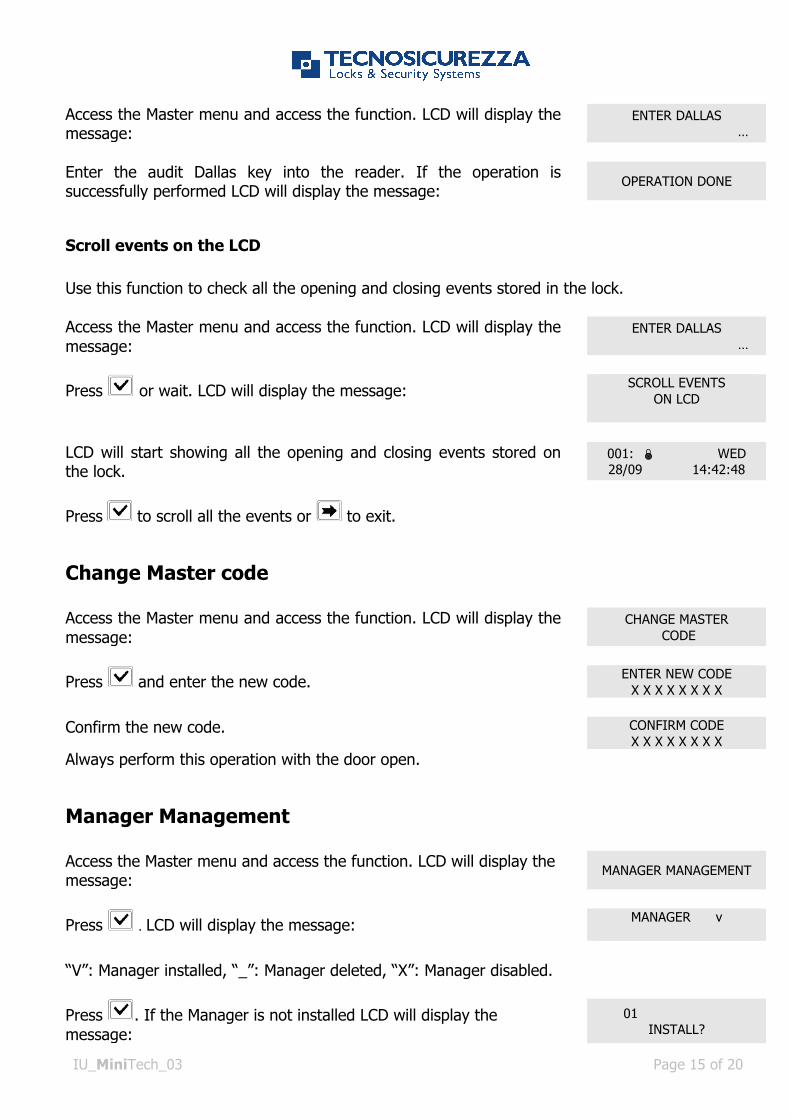
Access the Master menu and access the function. LCD will display the message:
ENTER DALLAS …
Enter the audit Dallas key into the reader. If the operation is successfully performed LCD will display the message:
OPERATION DONE
Scroll events on the LCD
Use this function to check all the opening and closing events stored in the lock. Access the Master menu and access the function. LCD will display the message:
ENTER DALLAS …
Press or wait. LCD will display the message: SCROLL EVENTS ON LCD
LCD will start showing all the opening and closing events stored on the lock.
001: ! WED 28/09 14:42:48
Press to scroll all the events or to exit.
Change Master code
Access the Master menu and access the function. LCD will display the message:
CHANGE MASTER CODE
Press and enter the new code. ENTER NEW CODE X X X X X X X X
Confirm the new code. CONFIRM CODE
X X X X X X X X Always perform this operation with the door open.
Manager Management
Access the Master menu and access the function. LCD will display the message:
MANAGER MANAGEMENT
Press . LCD will display the message: MANAGER v
“V”: Manager installed, “_”: Manager deleted, “X”: Manager disabled.
Press . If the Manager is not installed LCD will display the message:
01 INSTALL?
Page 16 of 20 IU_MiniTech_03
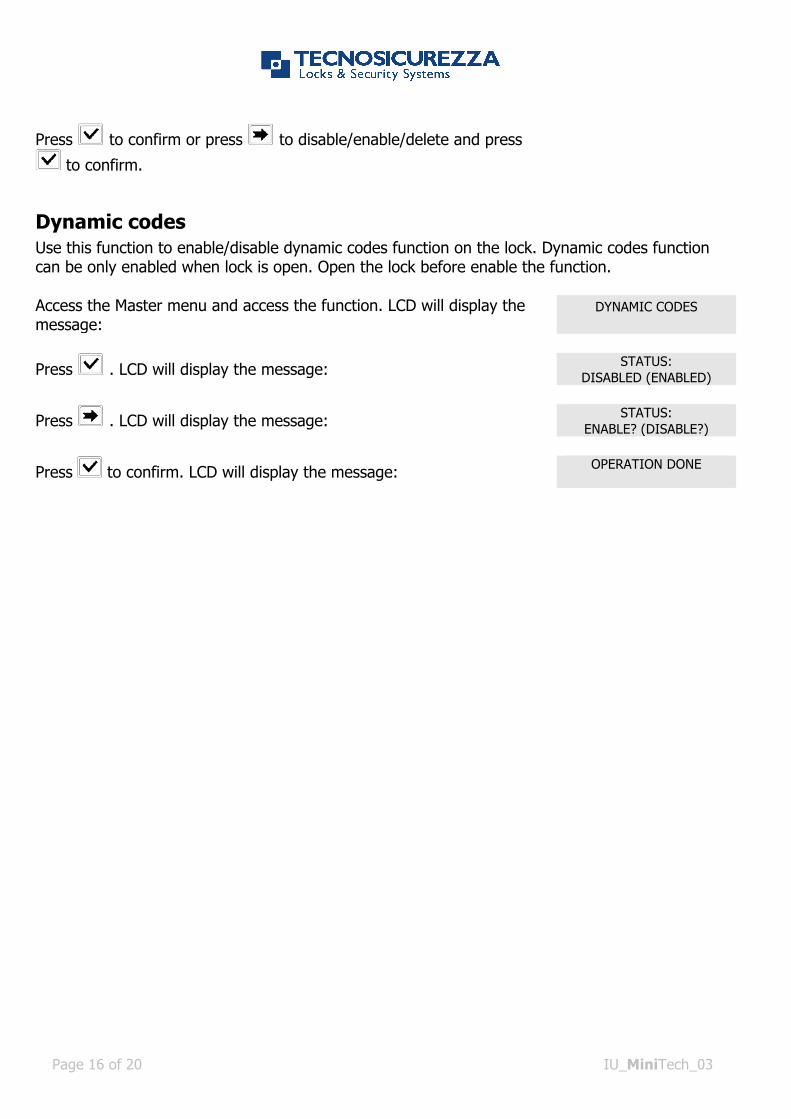
Press to confirm or press to disable/enable/delete and press
to confirm.
Dynamic codes
Use this function to enable/disable dynamic codes function on the lock. Dynamic codes function can be only enabled when lock is open. Open the lock before enable the function. Access the Master menu and access the function. LCD will display the message:
DYNAMIC CODES
Press . LCD will display the message: STATUS: DISABLED (ENABLED)
Press . LCD will display the message: STATUS: ENABLE? (DISABLE?)
Press to confirm. LCD will display the message: OPERATION DONE

IU_MiniTech_03 Page 17 of 20

Page 18 of 20 IU_MiniTech_03

IU_MiniTech_03 Page 19 of 20
TECNOSICUREZZA s.r.l. Via Cesare Battisti, 276 – 37057 S. Giovanni Lupatoto (VR) – Italy
Tel. +39 045 826 64 70 - Fax +39 045 826 64 69 mail: [email protected] - web: www.tecnosicurezza.it
Before operating the lock, please read this manual thoroughly, and retain it for future reference.
Correct disposal of this product: (Waste Electrical & Electronic Equipment) Applicable in the European Union and other European countries with separate collection systems.
This marking displayed on the product or its literature indicates that it should not be disposed with other wastes at the end of its working life. To prevent possible harm to the environment or human health from uncontrolled waste disposal, please separate this from other types of wastes and recycle it responsibly to promote the sustainable reuse of material resources.
Certified ISO 9001 : 2008


