Embed Size (px)
Citation preview
ID: #05007
myhansecontrol.c
om
MA
NUA
L
DEVELOPED IN GERMA
NY
User-friendlyManual
User manual
HOT CHOCOLATE MAKER

Dok.
/Rev
.-Nr.
1992
22_2
0210
512
1
2
9 13
1210 11
6
8
3
4
5
7
Contents
3
Contents
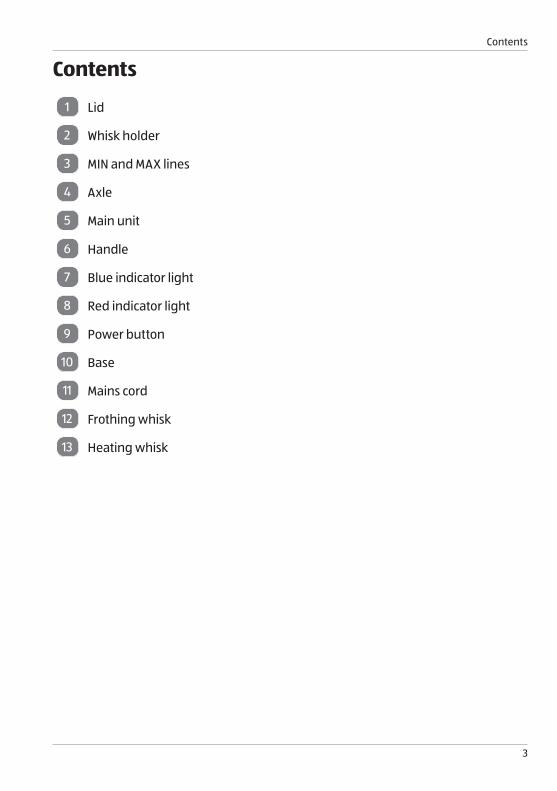
1 Lid
2 Whisk holder
3 MIN and MAX lines
4 Axle
5 Main unit
6 Handle
7 Blue indicator light
8 Red indicator light
9 Power button
10 Base
11 Mains cord
12 Frothing whisk
13 Heating whisk
Table of contents
4
Table of contentsContents .......................................................................................................... 3General information ....................................................................................... 5
Reading and storing the user manual ..................................................................5Proper use ..................................................................................................................5
Explanation of symbols .................................................................................. 5Safety ............................................................................................................... 6
Explanation of instructions .....................................................................................6General safety instructions .....................................................................................6
Product description .......................................................................................10First use .......................................................................................................... 11
Checking the product and package contents ..................................................... 11Basic cleaning ........................................................................................................... 11
Operation ....................................................................................................... 11Troubleshooting ............................................................................................14Cleaning and maintenance ...........................................................................14
Cleaning ................................................................................................................... 15Deep cleaning.......................................................................................................... 16Storage ..................................................................................................................... 16
Recipes using Frothing and Heated milk ..................................................... 17Hot chocolate ...........................................................................................................17Cappuccino ...............................................................................................................17Instant Frothy Coffee ...............................................................................................17Latte Macchiato ........................................................................................................17
Recipes with Hot Milk ....................................................................................18Hot chocolate .......................................................................................................... 18Caffe latte ................................................................................................................ 18Instant milky coffee ................................................................................................ 18
Recipes with cold milk ...................................................................................19Iced cappuccino with chocolate shavings .......................................................... 19Coconut milk with ginger ..................................................................................... 19
Technical data ............................................................................................... 20Disposal ......................................................................................................... 20
Disposing of the packaging ..................................................................................20Disposing of the product .......................................................................................20
Declaration of conformity............................................................................. 20
General information
5
General informationReading and storing the user manual
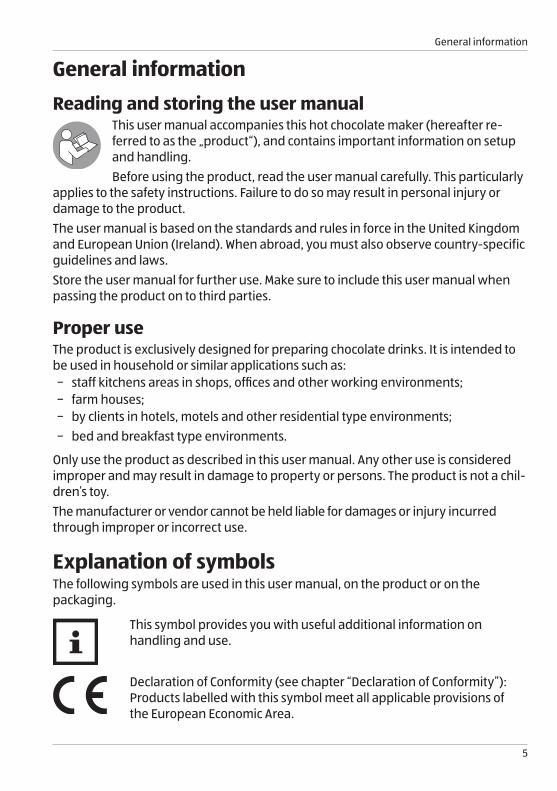
This user manual accompanies this hot chocolate maker (hereafter re-ferred to as the „product“), and contains important information on setup and handling.Before using the product, read the user manual carefully. This particularly
applies to the safety instructions. Failure to do so may result in personal injury or damage to the product. The user manual is based on the standards and rules in force in the United Kingdom and European Union (Ireland). When abroad, you must also observe country-specific guidelines and laws.Store the user manual for further use. Make sure to include this user manual when passing the product on to third parties.
Proper useThe product is exclusively designed for preparing chocolate drinks. It is intended to be used in household or similar applications such as:
− staff kitchens areas in shops, offices and other working environments; − farm houses; − by clients in hotels, motels and other residential type environments; − bed and breakfast type environments.
Only use the product as described in this user manual. Any other use is considered improper and may result in damage to property or persons. The product is not a chil-dren’s toy.The manufacturer or vendor cannot be held liable for damages or injury incurred through improper or incorrect use.
Explanation of symbolsThe following symbols are used in this user manual, on the product or on the packaging.
This symbol provides you with useful additional information on handling and use.
Declaration of Conformity (see chapter “Declaration of Conformity”): Products labelled with this symbol meet all applicable provisions of the European Economic Area.

Safety
6
Declaration of Conformity (see chapter “Declaration of Conformity”): Products labelled with this symbol meet all applicable provisions of the United Kingdom.
The symbol identifies that the material used in the product is safe for food contact.
SafetyExplanation of instructionsThe following symbols and signal words are used in this user manual.
WARNING!This signal symbol/word designates a hazard with moderate risk, which may result in death or severe injury if not avoided.
NOTICE!This signal word warns of possible damage to property.
General safety instructions
WARNING!
Risk of injury!If you do not use the product properly, there is an increased risk of injury.
− This product can be used by children aged from 8 years and above and persons with reduced physical, sensory or mental capabilities or lack of experience and knowledge if they have been given supervision or instruction concerning the use of the product in a safe way and understand the hazards in-volved. Children shall not play with the product. Cleaning and user maintenance shall not be made by children unless they are aged from 8 years and above and supervised.
− Keep children under the age of 8 away from the product and mains cord.
Safety
7
− Do not leave the product unattended while in use. − Make sure that children do not play with the plastic wrapping.
They may get caught in it when playing and suffocate. − If the mains cord of the product is damaged, the manufacturer,
the customer service team or a person with similar qualifications must replace it to avoid risks.
− Do not use the product with an external timer or separate remote control system.
− The product must not be immersed in water for cleaning. − Do not overfill the product. Boiling liquid may be ejected. − Only use the product with the provided base. − Make sure no liquids drip onto or spill over the base of the product. − When cleaning surfaces that come into contact with food,
follow the instructions as described in the chapter “Cleaning”. − Only use the product for its intended purpose. Improper use
will increase the risk of injury. − Never touch the product during or immediately after operation.
The surface is subject to residual heat after use. Make sure other users are also aware of the danger. If necessary, use oven gloves or potholders.
− Extreme caution must be used when moving a product con-taining hot liquids.
− Never use the product near curtains, walls, under cupboards or near other flammable materials.
− Always leave free space of around 20 cm around the exterior of the product while in use.
− Do not move the product during use. − Do not use the product to warm up milk for babies. − Keep away from hot steam coming from the product during use. − Always keep the lid closed during operation. − Pay attention to the maximum and minimum lines indicated
in the main unit. Always fill liquids between these lines. If the main unit is overfilled, hot liquids may spill out.
Safety
8
− WARNING: Do not remove the lid while milk is boiling. − Caution: Ensure the appliance is switched off before removing
the jug from its stand: − Do not touch the bottom of appliance immediately after
operation as there is residual heat after use. − Caution: Never fill the milk above the maximum level since hot
foaming milk might overflow during heating.
WARNING!
Risk of electric shock!A faulty electrical installation, excessive line voltage, or incorrect operation may result in an electric shock.
− Only connect the product if the line voltage of the socket corre-sponds to the data on the rating plate.
− Only connect the product to an easily accessible socket so that you can quickly disconnect it from the mains supply in the event of a problem.
− Do not use the product if it is damaged or if the mains cord or plug is defective.
− Do not open the housing; instead, have a qualified profes-sional perform repairs. Contact a qualified workshop for this. Liability and warranty claims are waived in the event of repairs performed by the user, improper connection or incorrect oper-ation.
− Only parts that comply with the original device data may be used for repairs. This product contains electrical and mechan-ical parts which are essential for providing protection against sources of danger.
− Do not immerse the product, the base or the mains cord in water or other liquids.
− Never touch the mains plug with wet or damp hands. − Do not pull the mains plug out of the socket by the mains cord;
instead, always pull it out by the plug itself.
Safety
9
− Never move, pull, or carry the product by its mains cord. − Keep the product, the base and the mains cord away from
open flames and hot surfaces. − Lay the mains cord so that it does not pose a tripping hazard. − Do not kink the mains cord and do not lay it over sharp edges. − Only use the product indoors. Do not use the product in damp
rooms or in the rain. − Do not place the product such that there is a risk of it falling
into a tub or sink. − Never reach to retrieve an electrical device if it has fallen into
water. In such a case, immediately disconnect the mains plug. − Never insert any objects into the housing. − Always switch the product off and unplug it when you are
not using it, when you intend to clean it, or in the event of a malfunction.
− If an extension cord is required, make sure it is suitable for the product with matching input power.
− If you notice any smoke, unusual noises or strange smells, switch off the product immediately and remove the mains plug from the socket. If this occurs, do not continue to use the product and have it checked by an expert.
NOTICE!
Risk of damage!Improper handling of the product may result in damage to the product.
− Do not use the product in continuous operation. Allow a pause of at least 2 minutes after each use for cooling down. There is a risk of overheating if the product is operated for longer periods.
− Place the product on an easily accessible, level, dry, heat-resistant and sufficiently stable surface. Do not place the product on the edge of the surface.

Product description
10
− Avoid the build-up of heat by not placing the product directly up against a wall or under cupboards or similar. The steam that is emitted could damage furniture.
− Never operate the product empty (without liquids). − Keep the product and the mains cord away from open flames,
such as gas or electric burners, and hot surfaces. − Do not place the product on or near a hot gas or electric burner,
in a heated oven or near any other heat sources. − Never cover the product during use. − Never attempt to clean the product by immersing the product
in water and do not use a steam cleaner to clean it. Otherwise, you could damage the product.
− Never clean the product in the dishwasher. − Stop using the product if its plastic parts exhibit cracks or
breaks or are deformed. Only replace damaged parts with corresponding original spare parts.
Product descriptionThe product is exclusively designed for preparing chocolate drinks.A
First use
11
First useChecking the product and package contents
NOTICE!
Risk of damage!If you are not cautious when opening the packaging with a sharp knife or other pointed object, you may quickly damage the product.
− For this reason, be very careful when opening it.
1. Take the product out of the packaging.2. Check to make sure that all parts are included (see chapter “Contents”).3. Check whether the product or individual parts are damaged. If this is the case, do
not use the product. Contact the manufacturer via the service address indicated on the warranty card.
Basic cleaning1. Remove the packaging material and all plastic wrappings.2. Clean all parts of the product before first use as described in the chapter
“Cleaning and maintenance”.
Operation1. Place the base 10 on a dry, stable, flat and heat-resistant surface near a suitable
mains socket.2. Completely unwind the mains cord 11 .3. Connect the plug of the mains cord to the mains socket.
Make sure the main unit 5 is removed from the base.4. Remove the lid 1 from the main unit.
Operation
12
112
5
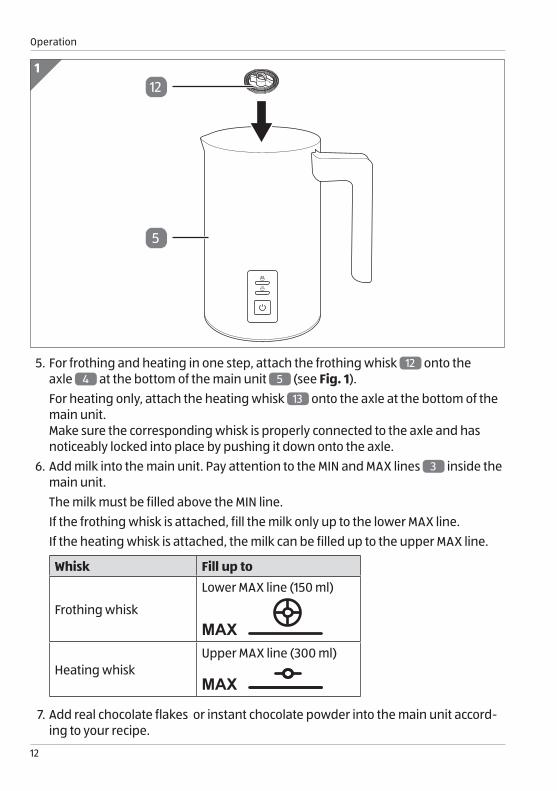
5. For frothing and heating in one step, attach the frothing whisk 12 onto the axle 4 at the bottom of the main unit 5 (see Fig. 1).For heating only, attach the heating whisk 13 onto the axle at the bottom of the main unit. Make sure the corresponding whisk is properly connected to the axle and has noticeably locked into place by pushing it down onto the axle.
6. Add milk into the main unit. Pay attention to the MIN and MAX lines 3 inside the main unit.The milk must be filled above the MIN line.If the frothing whisk is attached, fill the milk only up to the lower MAX line.If the heating whisk is attached, the milk can be filled up to the upper MAX line.
Whisk Fill up to
Frothing whisk
Lower MAX line (150 ml)
MAX
Heating whiskUpper MAX line (300 ml)
MAX
7. Add real chocolate flakes or instant chocolate powder into the main unit accord-ing to your recipe.

Operation
13
10
12
1
2
9
6
8
5
7
8. Properly close the lid 1 by pushing it onto the main unit 5 until it noticeably locks into place (see step 1 in Fig. 2).
9. Make sure the base and the underside of the main unit are dry. Place the main unit centrally onto the base 10 (see step 2 in Fig. 2).
10. Press the power button 9 . Both the blue and red indicator lights illuminate. The main unit heats up. The product automatically stops operation when frothing and heating is done. The blue indicator light 7 turns off and the red indicator light 8 keeps flashing for 30 seconds.
Frothing cold milk: This operation works without heating. After pouring cold milk into the main unit, press the power button for 1–2 seconds. The blue indicator light illuminates. The product automatically stops operation when frothing is done. The blue indicator light turns off and the red indicator light keeps flashing for 30 seconds.
11. Lift the main unit off the base by its handle 6 .12. Carefully open the lid and empty the drink from the main unit into a heat-
resistant container.13. Clean the main unit, lid and whisk after each use (see chapter “Cleaning”).14. Disconnect the base from the mains socket when the product is not in use.
Remark: Rinse completely clean with a damp cloth to ensure no milk is left inside the appliance. As dried milk will burn immediately after heating.
Troubleshooting
14
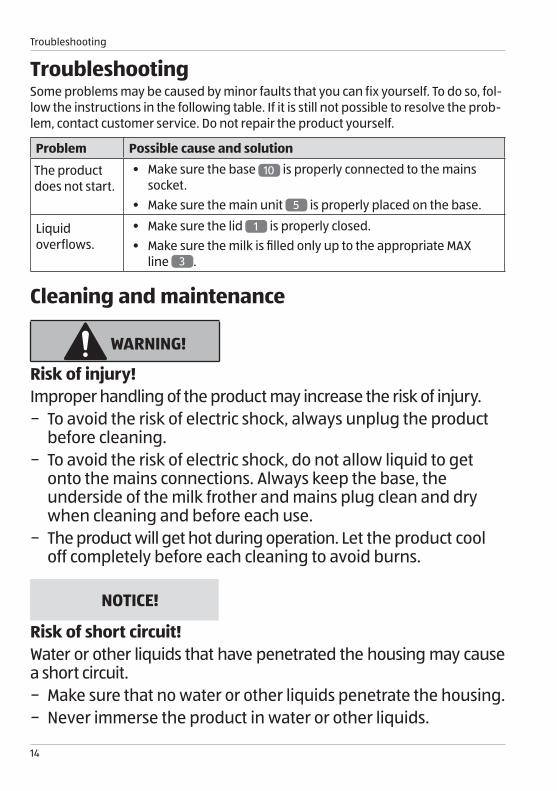
TroubleshootingSome problems may be caused by minor faults that you can fix yourself. To do so, fol-low the instructions in the following table. If it is still not possible to resolve the prob-lem, contact customer service. Do not repair the product yourself.
Problem Possible cause and solution
The product does not start.
• Make sure the base 10 is properly connected to the mains socket.
• Make sure the main unit 5 is properly placed on the base.
Liquid overflows.
• Make sure the lid 1 is properly closed.• Make sure the milk is filled only up to the appropriate MAX
line 3 .
Cleaning and maintenance
WARNING!
Risk of injury!Improper handling of the product may increase the risk of injury.
− To avoid the risk of electric shock, always unplug the product before cleaning.
− To avoid the risk of electric shock, do not allow liquid to get onto the mains connections. Always keep the base, the underside of the milk frother and mains plug clean and dry when cleaning and before each use.
− The product will get hot during operation. Let the product cool off completely before each cleaning to avoid burns.
NOTICE!
Risk of short circuit! Water or other liquids that have penetrated the housing may cause a short circuit.
− Make sure that no water or other liquids penetrate the housing. − Never immerse the product in water or other liquids.
Cleaning and maintenance
15
NOTICE!
Risk of damage!Improper handling of the product may result in damage to the prod-uct.
− Do not use any aggressive cleaners, brushes with metal or nylon bristles, or sharp or metallic cleaning utensils such as knives, hard scrapers and the like. They could damage the surfaces.
− Do not clean any parts of the product in the dishwasher, as this will destroy them.
Cleaning1. Unplug the product before cleaning.2. Let the product cool off completely.3. Remove the lid 1 and whisk 12 / 13 from the main unit 5 .4. Rinse the inside of the main unit with water. If necessary,
wipe the inside of the main unit with a soft cloth and a mild detergent before rinsing again.
5. Wipe off the housing of the main unit and the base 10 with a damp cloth. Then dry them thoroughly with a dry cloth.
6. Clean the lid and whisks in soapy water. Rinse them thoroughly and then wipe dry all parts with a dry cloth.
To remove stubborn stains, attach the frothing whisk to the axle 4 at the bottom of the main unit and fill the main unit with water and a few drops of mild liquid detergent up to the lower MAX line 3 and start operation without heating (see chapter “Operation”). Discard the soapy water and repeat the process with clear water until all soap residue is removed.
Cleaning and maintenance
16
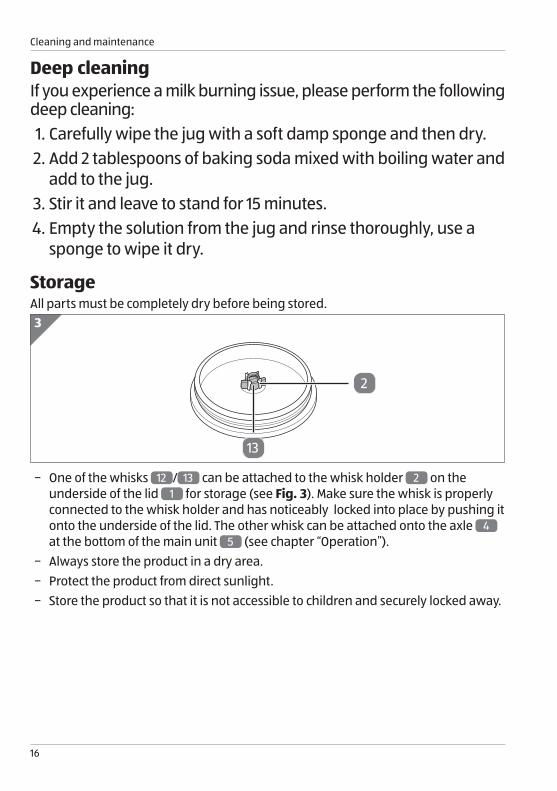
Deep cleaningIf you experience a milk burning issue, please perform the following deep cleaning:1. Carefully wipe the jug with a soft damp sponge and then dry. 2. Add 2 tablespoons of baking soda mixed with boiling water and
add to the jug. 3. Stir it and leave to stand for 15 minutes.4. Empty the solution from the jug and rinse thoroughly, use a
sponge to wipe it dry.
StorageAll parts must be completely dry before being stored.3
2
13
− One of the whisks 12 / 13 can be attached to the whisk holder 2 on the underside of the lid 1 for storage (see Fig. 3). Make sure the whisk is properly connected to the whisk holder and has noticeably locked into place by pushing it onto the underside of the lid. The other whisk can be attached onto the axle 4 at the bottom of the main unit 5 (see chapter “Operation”).
− Always store the product in a dry area. − Protect the product from direct sunlight. − Store the product so that it is not accessible to children and securely locked away.
Recipes using Frothing and Heated milk
17
Recipes using Frothing and Heated milk Hot chocolate • Milk, 115 ml• Drinking chocolate 35 ml or 35 g grated chocolate shavings• Chocolate shavings for decoration and extra indulgence
Attach the frothing whisk to the Axle at the bottom of the jug. Pour the milk into the jug followed by the chocolate flavoring, secure the lid by pushing it onto the jug. Press the power button. When the programme has finished the drink is ready to be poured into a heat resistant drinking container. Decorate with whipped cream and chocolate shavings for indulgence.
Cappuccino• Milk, 100 ml• Espresso shot, 50 ml• Unsweetened Cocoa powder for decoration
Attach the frothing whisk to the Axle at the bottom of the jug. Pour the milk into the jug followed by the Espresso shot, secure the lid by pushing it onto the jug. Press the power button. When the programme has finished the drink is ready to be poured into a heat resistant drinking container. Add cocoa powder for decoration.
Instant Frothy Coffee• Milk, 100 ml• Instant coffee granules• Sugar to taste
Attach the frothing whisk to the Axle at the bottom of the jug. Pour the milk into the jug followed by the coffee granules, secure the lid by pushing it onto the jug. Press the power button. When the programme has finished the drink is ready to be poured into a heat resistant drinking container. Add sugar to taste.
Latte Macchiato• Milk, 100 ml• Espresso shot, as required • Sugar to taste
Attach the frothing whisk to the Axle at the bottom of the jug. Pour the milk into the jug, secure the lid by pushing it onto the jug. Press the power button. When the pro-gramme has finished pour the milk into a heat resistant drinking container. Prepare the espresso and pour directly over the frothed milk. Add sugar to taste.
Recipes with Hot Milk
18
Recipes with Hot MilkHot chocolate • Milk, 115 ml• Drinking chocolate 35 ml or 35 g grated chocolate shavings• Whipped cream and chocolate shavings for decoration and extra indulgence
Attach the heating whisk to the Axle at the bottom of the jug. Pour the milk into the jug followed by the chocolate flavoring, secure the lid by pushing it onto the jug. Press the power button. When the programme has finished the drink is ready to be poured into a heat resistant drinking container. Decorate with whipped cream and chocolate shavings for indulgence.
Caffe latte • Milk, 100 ml• Espresso shot, 50 ml
Attach the heating whisk to the Axle at the bottom of the jug. Pour the milk into the jug followed by the Expresso, secure the lid by pushing it onto the jug. Press the power button. When the programme has finished the drink is ready to be poured into a heat resistant drinking container.
Instant milky coffee• Milk, 100 ml• Coffee granules, as required• Sugar to taste
Attach the heating whisk to the Axle at the bottom of the jug. Pour the milk into the jug followed by the coffee granules, secure the lid by pushing it onto the jug. Press the power button. When the programme has finished the drink is ready to be poured into a heat resistant drinking container. Add sugar to taste.
Recipes with cold milk
19
Recipes with cold milkIced cappuccino with chocolate shavings• Milk, 120 ml• Espresso coffee, 30 ml• Dark chocolate shavings, 25 g• Crushed ice as required• Liquid sweetener to taste• Unsweetened cocoa powder, to decorate
Prepare a long espresso coffee.Attach the frothing whisk to the Axle at the bottom of the jug. Pour the milk into the jug followed by the Expresso, secure the lid by pushing it onto the jug. Press the power button for 1–2 seconds.Place the crushed ice in a drinking container along with the liquid sweetener.When the milk frothing programme has finished pour the milk over the crushed ice. Add the froth, then top off your drink by sprinkling with the cocoa and chocolate shavings.
Coconut milk with ginger • Coconut milk, 150 ml• Peeled grated ginger, as required • Coconut sugar, as required• Coconut flakes, as required• Cacao Nibs, 25 gsm
Attach the frothing whisk to the Axle at the bottom of the jug. Pour the coconut milk into the jug, secure the lid by pushing it onto the jug. Press the power button for 1–2 seconds.Meanwhile, place the grated ginger into a drinking container along with the coconut sugar. When the milk frothing programme has finished pour the cold coconut milk over the grated ginger and mix. Add the froth, then top off your drink by sprinkling with the cacao nibs and coconut flakes
Technical data
20
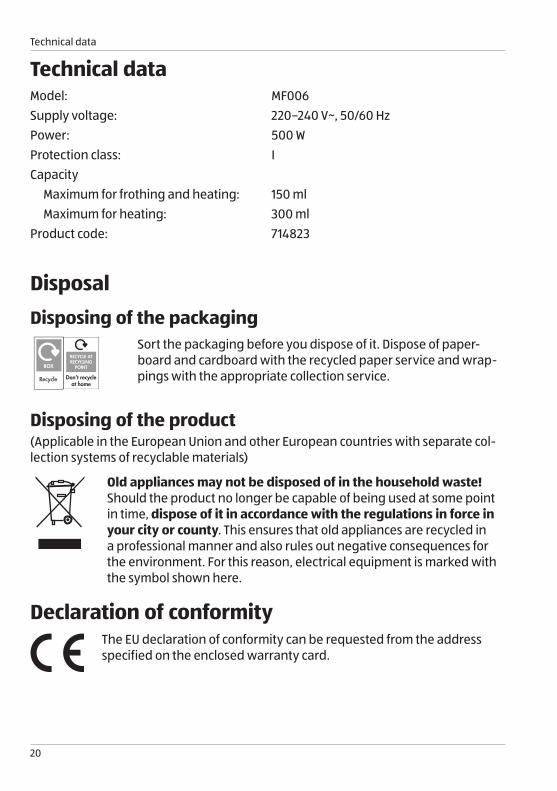
Technical dataModel: MF006Supply voltage: 220–240 V~, 50/60 HzPower: 500 WProtection class: ICapacity Maximum for frothing and heating: 150 ml Maximum for heating: 300 mlProduct code: 714823
DisposalDisposing of the packaging
Sort the packaging before you dispose of it. Dispose of paper-board and cardboard with the recycled paper service and wrap-pings with the appropriate collection service.
Disposing of the product(Applicable in the European Union and other European countries with separate col-lection systems of recyclable materials)
Old appliances may not be disposed of in the household waste! Should the product no longer be capable of being used at some point in time, dispose of it in accordance with the regulations in force in your city or county. This ensures that old appliances are recycled in a professional manner and also rules out negative consequences for the environment. For this reason, electrical equipment is marked with the symbol shown here.
Declaration of conformityThe EU declaration of conformity can be requested from the address specified on the enclosed warranty card.
Great care has gone into the manufacture of this product and it should therefore provide you with years of good service when used properly. In the event of product failure within its intended use over the course of the first 3 years after date of purchase, we will remedy the problem as quickly as possible once it has been brought to our attention. In the unlikely event of such an occurrence, or if you require any information about the product, please contact us via our helpline support services, details of which are to be found both in this manual and on the product itself.
Appliances can be used by persons with reduced physical, sensory or mental capabilities or lack of experience and knowledge if they have been given supervision or instruction concerning use of the appliance in a safe way and understand the hazards involved.
GB IE
PRODUCED IN CHINA FOR:ALDI STORES LTD. PO BOX 26, ATHERSTONEWARWICKSHIRE, CV9 2SH.
ALDI STORES (IRELAND) LTD.PO BOX 726, NAAS, CO. KILDARE.Visit us at www.aldi.com
YEARWARRANTY
3MODEL: MF006
033 0088 1108 1800 413 809
AFTER SALES SUPPORT
IEGB
714823
11/2021


