Embed Size (px)
Citation preview

Installation and Quick Start
Rack Automatic Transfer Switch (ATS)
AP4421, AP4422, AP4423, AP4424, AP4430, AP4430X914, AP4431, AP4432, AP4433, AP4434, AP4450, AP4452, AP4452X631, AP4452J, AP4453
990-5852D-001
Publication Date: 4/2020
pdu0
393c
Serial
Network
10/100
by S
ch
neid
er E
lec
tric
Serial
by S
ch
neid
er E
lec
tric
Automatic Transfer Switch
Re
se
t - W
arn
ing
- OK
- Ove
rloa
d
Network
10/100
USB
USB
Automatic Transfer Switch
Re
se
t - W
arn
ing
- OK
- Ove
rloa
d

APC by Schneider Electric Legal DisclaimerThe information presented in this manual is not warranted by APC by Schneider Electric to be authoritative, error free, or complete. This publication is not meant to be a substitute for a detailed operational and site specific development plan. Therefore, APC by Schneider Electric assumes no liability for damages, violations of codes, improper installation, system failures, or any other problems that could arise based on the use of this Publication.
The information contained in this Publication is provided as is and has been prepared solely for the purpose of evaluating data center design and construction. This Publication has been compiled in good faith by APC by Schneider Electric. However, no representation is made or warranty given, either express or implied, as to the completeness or accuracy of the information this Publication contains.
IN NO EVENT SHALL APC BY SCHNEIDER ELECTRIC, OR ANY PARENT, AFFILIATE OR SUBSIDIARY
COMPANY OF APC BY SCHNEIDER ELECTRIC OR THEIR RESPECTIVE OFFICERS, DIRECTORS, OR
EMPLOYEES BE LIABLE FOR ANY DIRECT, INDIRECT, CONSEQUENTIAL, PUNITIVE, SPECIAL, OR
INCIDENTAL DAMAGES (INCLUDING, WITHOUT LIMITATION, DAMAGES FOR LOSS OF BUSINESS,
CONTRACT, REVENUE, DATA, INFORMATION, OR BUSINESS INTERRUPTION) RESULTING FROM,
ARISING OUT, OR IN CONNECTION WITH THE USE OF, OR INABILITY TO USE THIS PUBLICATION OR
THE CONTENT, EVEN IF APC BY SCHNEIDER ELECTRIC HAS BEEN EXPRESSLY ADVISED OF THE
POSSIBILITY OF SUCH DAMAGES. APC BY SCHNEIDER ELECTRIC RESERVES THE RIGHT TO MAKE
CHANGES OR UPDATES WITH RESPECT TO OR IN THE CONTENT OF THE PUBLICATION OR THE
FORMAT THEREOF AT ANY TIME WITHOUT NOTICE.
Copyright, intellectual, and all other proprietary rights in the content (including but not limited to software, audio, video, text, and photographs) rests with APC by Schneider Electric or its licensors. All rights in the content not expressly granted herein are reserved. No rights of any kind are licensed or assigned or shall otherwise pass to persons accessing this information.
This Publication shall not be for resale in whole or in part.

Contents
Important Safety Information.................................................................... 1
Please Note. . . . . . . . . . . . . . . . . . . . . . . . . . . . . . . . . . . . . . . . . . . . . . . . . . . .1
Safety Information for the Rack ATS . . . . . . . . . . . . . . . . . . . . . . . 2
General Information................................................................................... 3
Available Power Cords . . . . . . . . . . . . . . . . . . . . . . . . . . . . . . . . . . . . . . . . . .3
Additional Documentation . . . . . . . . . . . . . . . . . . . . . . . . . . . . . . . . . . . . . . .3
Receiving Inspection . . . . . . . . . . . . . . . . . . . . . . . . . . . . . . . . . . . . . . . . . . . .3
Please Recycle . . . . . . . . . . . . . . . . . . . . . . . . . . . . . . . . . . . . . . . . . . . . . . . . .3
User Comments . . . . . . . . . . . . . . . . . . . . . . . . . . . . . . . . . . . . . . . . . . . . . . . .3
Product Inventory . . . . . . . . . . . . . . . . . . . . . . . . . . . . . . . . . . . . . . . . . . . . . .4
Front Panel Overview . . . . . . . . . . . . . . . . . . . . . . . . . . . . . . . . . . . . . . . . . . .5
Load Status LED . . . . . . . . . . . . . . . . . . . . . . . . . . . . . . . . . . . . . . . . . 6Network Status LED . . . . . . . . . . . . . . . . . . . . . . . . . . . . . . . . . . . . . . 610/100 Status LED . . . . . . . . . . . . . . . . . . . . . . . . . . . . . . . . . . . . . . . . 6
Installation ................................................................................................. 7
Cage Nuts . . . . . . . . . . . . . . . . . . . . . . . . . . . . . . . . . . . . . . . . . . . . . . . . . . . . .7
Install . . . . . . . . . . . . . . . . . . . . . . . . . . . . . . . . . . . . . . . . . . . . . . . . . . 7Remove . . . . . . . . . . . . . . . . . . . . . . . . . . . . . . . . . . . . . . . . . . . . . . . . 7
Mounting Options . . . . . . . . . . . . . . . . . . . . . . . . . . . . . . . . . . . . . . . . . . . . . .8
Horizontal mounting . . . . . . . . . . . . . . . . . . . . . . . . . . . . . . . . . . . . . . 8Recessed horizontal mounting . . . . . . . . . . . . . . . . . . . . . . . . . . . . . 8
Connect the ATS . . . . . . . . . . . . . . . . . . . . . . . . . . . . . . . . . . . . . . . . . . . . . . .9
Source Configurations . . . . . . . . . . . . . . . . . . . . . . . . . . . . . . . . . . . . 9
Quick Configuration ................................................................................ 10
TCP/IP Configuration Methods . . . . . . . . . . . . . . . . . . . . . . . . . . . . . . . . . . .10
Device IP Configuration Wizard . . . . . . . . . . . . . . . . . . . . . . . . . . . 10DHCP and BOOTP configuration . . . . . . . . . . . . . . . . . . . . . . . . . . . 11Local access to the command line interface (CLI) . . . . . . . . . . . . 12Remote access to the CLI . . . . . . . . . . . . . . . . . . . . . . . . . . . . . . . . 12Configure TCP/IP settings in the CLI . . . . . . . . . . . . . . . . . . . . . . . 13
How to Access the Rack ATS Interfaces ............................................... 14
Web UI . . . . . . . . . . . . . . . . . . . . . . . . . . . . . . . . . . . . . . . . . . . . . . . . . . . . . . .14
Command Line Interface: Telnet and SSH. . . . . . . . . . . . . . . . . . . . . . . . . .15
Telnet for basic access . . . . . . . . . . . . . . . . . . . . . . . . . . . . . . . . . . 15SSH for high-security access . . . . . . . . . . . . . . . . . . . . . . . . . . . . . 15
Rack ATS AP44xx Installation and Quick Start i

SNMP. . . . . . . . . . . . . . . . . . . . . . . . . . . . . . . . . . . . . . . . . . . . . . . . . . . . . . . .16
SNMPv1 . . . . . . . . . . . . . . . . . . . . . . . . . . . . . . . . . . . . . . . . . . . . . . . 16SNMPv3 . . . . . . . . . . . . . . . . . . . . . . . . . . . . . . . . . . . . . . . . . . . . . . . 16
FTP and SCP . . . . . . . . . . . . . . . . . . . . . . . . . . . . . . . . . . . . . . . . . . . . . . . . .16
Manage the Security of Your System. . . . . . . . . . . . . . . . . . . . . . . . . . . . . .16
How to Configure the Rack ATS............................................................. 17
Configure Sensitivity . . . . . . . . . . . . . . . . . . . . . . . . . . . . . . . . . . . . . . . . . . .17
Configure sensitivity through the Web UI . . . . . . . . . . . . . . . . . . . . 17Configure sensitivity through the CLI . . . . . . . . . . . . . . . . . . . . . . . 17
Configure Voltage Transfer Range. . . . . . . . . . . . . . . . . . . . . . . . . . . . . . . .18
Configure voltage transfer range through the Web UI . . . . . . . . . . 19Configure voltage transfer range through the CLI . . . . . . . . . . . . . 19
Recovering from a Lost Password......................................................... 20
Two-Year Factory Warranty .................................................................... 21
Terms of Warranty . . . . . . . . . . . . . . . . . . . . . . . . . . . . . . . . . . . . . . . . . . . . .21
Non-transferable Warranty . . . . . . . . . . . . . . . . . . . . . . . . . . . . . . . . . . . . . .21
Exclusions . . . . . . . . . . . . . . . . . . . . . . . . . . . . . . . . . . . . . . . . . . . . . . . . . . .21
Warranty Claims. . . . . . . . . . . . . . . . . . . . . . . . . . . . . . . . . . . . . . . . . . . . . . .22
Life-support Policy .................................................................................. 23
General policy . . . . . . . . . . . . . . . . . . . . . . . . . . . . . . . . . . . . . . . . . . . . . . . .23
Examples of life-support devices. . . . . . . . . . . . . . . . . . . . . . . . . . . . . . . . .23
Rack ATS AP44xx Installation and Quick Startii
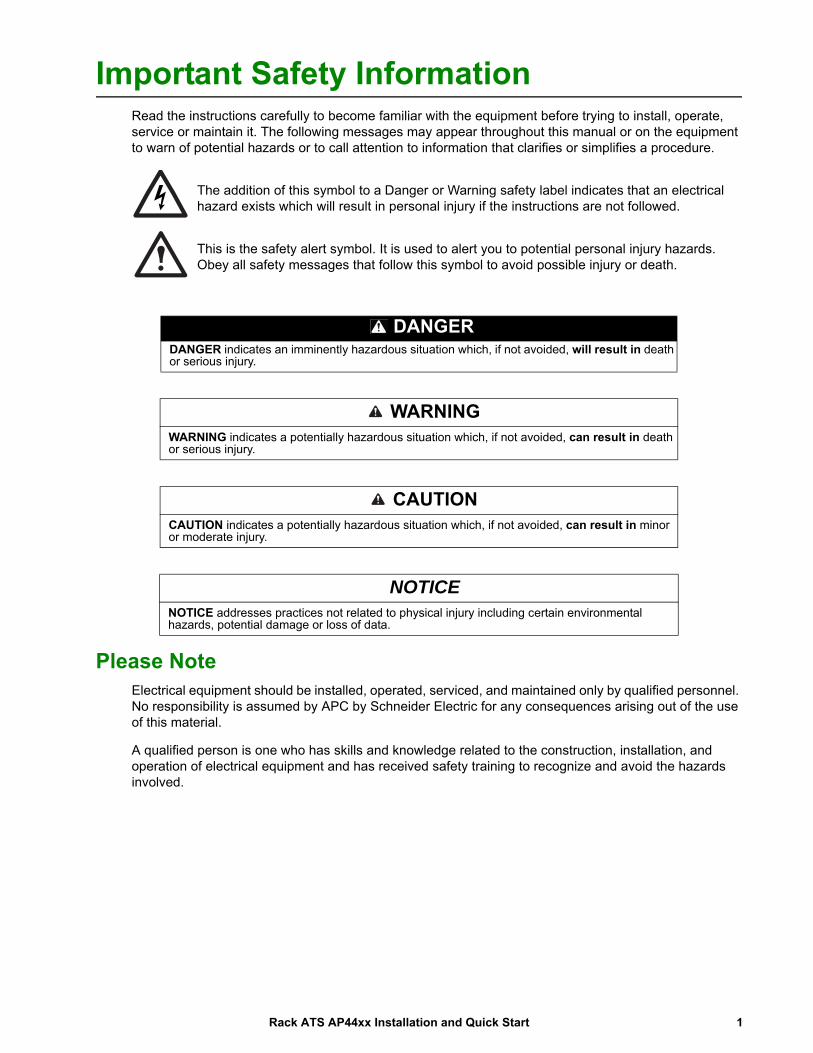
Important Safety InformationRead the instructions carefully to become familiar with the equipment before trying to install, operate, service or maintain it. The following messages may appear throughout this manual or on the equipment to warn of potential hazards or to call attention to information that clarifies or simplifies a procedure.
The addition of this symbol to a Danger or Warning safety label indicates that an electrical hazard exists which will result in personal injury if the instructions are not followed.
This is the safety alert symbol. It is used to alert you to potential personal injury hazards. Obey all safety messages that follow this symbol to avoid possible injury or death.
Please NoteElectrical equipment should be installed, operated, serviced, and maintained only by qualified personnel. No responsibility is assumed by APC by Schneider Electric for any consequences arising out of the use of this material.
A qualified person is one who has skills and knowledge related to the construction, installation, and operation of electrical equipment and has received safety training to recognize and avoid the hazards involved.
DANGERDANGER indicates an imminently hazardous situation which, if not avoided, will result in death or serious injury.
WARNINGWARNING indicates a potentially hazardous situation which, if not avoided, can result in death or serious injury.
CAUTIONCAUTION indicates a potentially hazardous situation which, if not avoided, can result in minor or moderate injury.
NOTICENOTICE addresses practices not related to physical injury including certain environmental hazards, potential damage or loss of data.
1Rack ATS AP44xx Installation and Quick Start

Safety Information for the Rack ATS
DANGERHAZARD OF ELECTRIC SHOCK, EXPLOSION, OR ARC FLASH• High leakage current from attached loads is possible. If total leakage current will exceed 3.5mA,
attach a ground wire from the Rack ATS supplementary ground (M4 thread) to a reliable ground in your facility before energizing the Rack ATS.
• Do not operate the Rack ATS with the covers removed.• No user-serviceable parts inside. Refer servicing to qualified personnel.• Use only the supplied hardware for attaching mounting and cable control accessories.• Use indoors only in a dry location. Failure to follow these instructions will result in death or serious injury.
NOTICE• The ambient operating temperature of a closed or multi-unit rack environment may be greater than
the ambient temperature of the room. Ensure the ambient operating temperature of your rack environment does not exceed the rated ambient operating temperature for the device.
• Ensure the device is mounted securely and evenly.
Rack ATS AP44xx Installation and Quick Start2

Preliminary InformationThe APC by Schneider Electric™ Rack Automatic Transfer Switch (ATS) provides reliable, redundant power to single-corded equipment loads, such as servers. The Rack ATS has two input power cords supplying power to the connected loads from both a primary and secondary power source. If the primary source becomes unavailable or goes out of the configured power range, the Rack ATS will seamlessly switch to draw power from the secondary source without interrupting critical loads. The Rack ATS has built-in network connectivity, which allows remote management via Web, Telnet, SNMP, SSH or StruxureWare™ Data Center Expert interfaces.
Available Power CordsPower cords are not provided with the following units:
• For AP4421 use a properly IEC rated, VDE/HOR certified power cord, rated 300 VAC, 3 x 1.0mm2 minimum, with approved plug and outlet, for use on listed information technology equipment.
• For AP4423 use a properly IEC rated, VDE/HOR certified power cord, rated 300 VAC, 3 x 1.5mm2 minimum, with approved plug and outlet, for use on listed information technology equipment.
• For AP4433 use a properly rated, UL Listed/CSA certified power cord, rated 300 VAC, 14 AWG minimum, with approved plug and outlet, for use on listed information technology equipment.
• For AP4434 use a properly rated, UL Listed/CSA certified power cord, rated 300 VAC, 12 AWG minimum, with approved plug and outlet, for use on listed information technology equipment.
The length of a power supply cord shall not exceed 4.5 meters, minimum length shall be 1.5 meters unless intended for special installation, such as dedicated equipment intended to be mounted near a receptacle.
Additional DocumentationYou can find relevant additional documentation for the Rack ATS, including updates to the User Guide, on the APC by Schneider Electric website, www.apc.com. Other technical publications (white papers, for example) are also available on the website.
Specification sheets: Specification sheets list electric capabilities, recommendations, physical limits, and safety approvals for individual Rack ATS models.
User Guide: The User Guide contains additional information about management interfaces, user accounts, customization, and security.
Security Handbook: The Security Handbook explains different security settings for the Rack ATS in depth.
Receiving InspectionInspect the package and contents for shipping damage, and make sure that all parts were sent. Report any shipping damage immediately to the shipping agent, and report missing contents, damage, or other problems immediately to APC by Schneider Electric or your APC by Schneider Electric reseller.
Please RecycleThe shipping materials are recyclable. Please save them for later use, or dispose of them appropriately.
User CommentsWe welcome your comments about this document. Contact www.apc.com.
3Rack ATS AP44xx Installation and Quick Start

Product Inventory
NOTE: Install the Rack ATS with front and rear rail segments for increased stability. The front/rear rail segments and cord retention bracket are available on the APC by Schneider Electric website, www.apc.com.
Rack Automatic Transfer Switch (1 U or 2 U)
Serial Communication cable, RJ12 to female DB-9
Screw
Cage nut
Clip-on retainer
1-U rack-mount bracket kit (provided with 1-U Rack ATS)
2-U rack-mount bracket kit (provided with 2-U Rack ATS)
Additional options
Front and rear rail segments AP7768 (not provided)
Cord retention bracket AP7769 (not provided)pd
u039
3b
Serial
Network
10/100
by S
ch
neid
er E
lec
tric
Serial
by S
ch
neid
er E
lec
tric
Automatic Transfer Switch
Re
se
t - W
arn
ing
- OK
- Ove
rloa
d
Network
10/100
USB
USB
Automatic Transfer Switch
Re
se
t - W
arn
ing
- OK
- Ove
rloa
d
Rack ATS AP44xx Installation and Quick Start4

Front Panel Overview
NOTE: Your Rack ATS is configured so the display backlight turns off after 10 minutes of inactivity. Press any display navigation button to illuminate the backlight.
Item Function
Preference A/B Button Press to set a preferred source: the first press sets source A, the second press sets source B, and the third press sets no preference.
Source A and B LEDs Indicates preferred source. If no source is preferred, both LEDs are illuminated. You can also see preferred source on the LCD Display.
Input Connector LEDs Provide information about input voltage from each source. If the RMS input voltage and measured frequency are within the selected tolerance range, the corresponding LED will be illuminated. In a normal operating condition (full source redundancy) both sets of LEDs are illuminated.
Output Connector LEDs Indicate which source is being used for the output (only one path will be illuminated at any time). Together, the Source Preference LEDs, the Connector LEDs, and the Output LED show the power flow through the ATS.
Output LED Shows that voltage is available at the output for the ATS.
LCD Display View ATS status, settings, and product information. See the User Guide on www.apc.com for more information on LCD display screens.
Display navigation buttons On the LCD Display, icons indicate the purpose of adjacent buttons. Home: Press to move through monitor screens or return to monitor
screens from sub-menus. Down: Press to move through monitor screens or menu items. Select: Press to select menu items or navigate to the main menu from
monitor screens.
Load Status LED See “Load Status LED” on page 6
Network status LED See “Network Status LED” on page 6
10/100 Base-T Connector Connects the ATS to the network.
10/100 Status LED See “10/100 Status LED” on page 6.
USB port Use USB drives for firmware upgrades.
Serial port Connect your computer to the ATS for local access to the command line interface. Use the supplied Serial Communication cable (APC by Schneider Electric part number 940-0144A).
Reset switch Restarts ATS network and serial communication.
pdu0
733b
- Warning
- OK
- Overload
Seria l
10/100 USB
Network
x
Reset
Preference
A/B
B
5Rack ATS AP44xx Installation and Quick Start

Load Status LED
This LED identifies overload and warning conditions for the ATS. To configure warning thresholds, see the User Guide on www.apc.com.
Network Status LED
This LED indicates the network status.
10/100 Status LED
This LED indicates the network status of the Rack ATS.
Condition Description
Green The Rack ATS current is below the Near Overload Warning threshold.
Yellow The Rack ATS current is above the Near Overload Warning threshold.
Red The Rack ATS current is above the Overload Alarm threshold.
Condition Description
Off The device that connects the Rack ATS to the network is off or not operating correctly.
Flashing Green The Rack ATS is receiving data packets from the network at 10 Megabits per second (Mbps).
Flashing Orange The Rack ATS is receiving data packets from the network at 100 Megabits per second (Mbps).
Solid Green or Orange The Rack ATS is receiving no network traffic.
Condition Description
Off The Rack ATS is connected to an unknown network.
Solid green The Rack ATS has valid TCP/IP settings.
Flashing green The Rack ATS does not have valid TCP/IP settings.1
Solid orange A hardware failure has been detected in the Rack ATS.
Flashing orange The Rack ATS is making BOOTP requests.
Flashing orange and green (alternating)
The Rack ATS is making DHCP requests.
1If you do not use a BOOTP or DHCP server, see “Local access to the command line interface(CLI)” on page 12, “Remote access to the CLI” on page 12, or the User Guide onwww.apc.com to configure the TCP/IP settings.
Rack ATS AP44xx Installation and Quick Start6

Installation
Cage NutsAPC by Schneider Electric offers a cage nut hardware kit (AR8100) for use with square holes.
Install
1. Install the cage nuts on the interior of the vertical mounting flange. Install cage nuts horizontally, with the ears engaging the sides of the square hole. Insert the cage nut into the square hole by hooking one ear of the cage nut assembly through the far side of the hole.
2. Place the cage nut tool on the other side of the cage nut and pull to snap it into position.
Remove
1. Remove any attached screw.2. Grasp the cage nut and squeeze the sides to release it
from the square hole.
DANGERHAZARD OF ELECTRIC SHOCK, EXPLOSION, OR ARC FLASH• High leakage current from attached loads is possible. If total leakage current will exceed 3.5mA,
attach a ground wire from the Rack ATS supplementary ground (M4 thread) to a reliable ground in your facility before energizing the Rack ATS.
• Do not operate the Rack ATS with the covers removed.• No user-serviceable parts inside. Refer servicing to qualified personnel.• Use only the supplied hardware for attaching mounting and cable control accessories.• Use indoors only in a dry location. Failure to follow these instructions will result in death or serious injury.
NOTICEEnsure the device is mounted securely and evenly.
CAUTIONFALLING EQUIPMENT HAZARD
Do not install cage nuts vertically with the ears engaging the top and bottom of the square hole.Failure to follow these instructions can result in injury or equipment damage.
ns17
68a
gen0
188a
7Rack ATS AP44xx Installation and Quick Start

Mounting OptionsYou can mount the Rack ATS in an APC by Schneider Electric NetShelter® or other EIA-310-D standard 483 mm (19 in.) rack.
Horizontal mounting
1. Choose a mounting position for the Rack ATS with either the digital display or the rear panel facing out of the enclosure.
2. Attach the mounting brackets to the Rack ATS using the provided flat-head screws.
3. Choose a location for the unit.The unit occupies one or two U-spaces. A notched hole on the enclosure’s vertical rail (or a number, on newer enclosures) indicates the middle of a U-space.Insert cage nuts above and below the notched hole (or number) on each vertical mounting rail in your chosen location.
4. Align the mounting holes of the brackets with the installed cage nuts. Insert and tighten screws.
Recessed horizontal mounting
You can mount the Rack ATS in a recessed configuration by attaching the brackets as shown in the following illustration:
pdu0
352a
pdu0
353a
pdu0
369a
Rack ATS AP44xx Installation and Quick Start8

Connect the ATS
Plug the ATS into two power sources that are independent of each other. The Rack ATS protects your equipment by drawing from a secondary power source when the primary source becomes unstable or unavailable. Without two independent sources, the Rack ATS is unable to protect your equipment.
Source Configurations
NOTICE• Do not plug an ATS into a generator without the protection of a Double Conversion
On-Line Uninterruptible Power Supply (UPS). • ATS models are compatible with only a Double Conversion On-Line UPS and not a Line Interactive
UPS. (See White Paper 1 on www.apc.com for more information.)
Source A: Utility A Generator A UPS ASource B: Utility A
Source A: Utility ASource B: Utility A
Source Configuration Configuration strength
AB
Utility A Generator A UPS A Utility B Generator B UPS B
Best
AB
Utility A Generator A UPS Utility B
Better
AB
Utility A Generator UPS A Utility A
Good
AB
Utility A UPS A Utility B UPS B
Good
AB
Utility A UPSUtility A
Good
AB
Utility A Utility B
Weak
AB
Utility A Utility A
Bad: sources A and B are not independent
AB
Utility A Generator A Utility B Generator B
Bad: see NOTICE
pdu0
774a
Serial
Network
10/100
by Schneider El ect r i c
USB
Automatic Transfer Switch
Reset
- Warning
- OK
- Overload
Serial
Network
10/100
by S
ch
neid
er E
lec
tric
USB
Automatic Transfer Switch
Re
se
t - W
arn
ing
- OK
- Ove
rloa
d
pdu0
774b
9Rack ATS AP44xx Installation and Quick Start

Quick ConfigurationNOTE: Disregard the procedures in this section if you have APC by Schneider Electric StruxureWare Data Center Expert or EcoStruxure as part of your system. See the documentation available on www.apc.com for more information.
NOTE: The default login and password is apc. You will be prompted to enter a new password the first time you connect to the ATS. You will be logging in as the Super User the first time you access the device. A secure password in compliance with your company’s password policy is recommended. All other user accounts (Administrator, Device User, Read-Only User and Network-Only User) are disabled by default.
You must configure the following TCP/IP settings before the Rack ATS can operate on a network:• IP address of the Rack ATS• Subnet mask• Default gateway (See the User Guide on www.apc.com for more information about the watchdog
role of the default gateway.)NOTE: If a default gateway is unavailable, use the IP address of a computer that is located on the same subnet as the Rack ATS and is usually running. The Rack ATS uses the default gateway to test the network when traffic is very light.NOTE: Do not use the loopback address (127.0.0.1) as the default gateway address. It disables the network connection of the Rack ATS and requires you to reset TCP/IP settings to their defaults using a local serial login.
TCP/IP Configuration MethodsUse one of the following methods to define the TCP/IP settings:
• APC by Schneider Electric Device IP Configuration Wizard (See Device IP Configuration Wizard on this page).
• BOOTP or DHCP server (See “DHCP and BOOTP configuration” on page 11).• Local computer (See “Local access to the command line interface (CLI)” on page 12).• Networked computer (See “Remote access to the CLI” on page 12).
Device IP Configuration Wizard
The Device IP Configuration Wizard is a Windows application designed specifically to remotely configure the basic TCP/IP settings of Network Management Cards. The Wizard runs on Microsoft® Windows® 2000, Windows Server 2003, Windows Vista, Windows XP, Windows Server® 2008, Windows 8, and Windows 10, and Window 2012. This utility supports cards that have firmware version 3.x.x or higher and is for IPv4 only. (To configure one or more Rack ATS units by exporting configuration settings from a configured Rack ATS, see the User Guide on www.apc.com.)
NOTE: Most software firewalls must be temporarily disabled for the Wizard to discover unconfigured Rack ATS units.
To install the Device IP Configuration Wizard:1. Go to www.apc.com/tools/download.2. Select your country.3. In the Filter By Software/Firmware drop-down menu, select Software Upgrades - Wizards
and Configurators.4. Download the latest version of the Network Management Device IP Configuration Wizard and run
the executable file.
Rack ATS AP44xx Installation and Quick Start10
DHCP and BOOTP configuration
In the Web User Interface (Web UI), the TCP/IP options are defined under the Configuration tab, in the Network menu. The possible settings are Manual, BOOTP, and DHCP (the default setting). The default TCP/IP configuration setting, DHCP, assumes that a properly configured DHCP server is available to provide TCP/IP settings to the Rack ATS. You can also configure the setting for BOOTP. A user configuration (INI) file can function as a BOOTP or DHCP boot file.
NOTE: If no servers are available, see “Device IP Configuration Wizard” on page 10, “Local access to the command line interface (CLI)” on page 12, or “Remote access to the CLI” on page 12 to configure the TCP/IP settings.
BOOTP: For the Rack ATS to use a BOOTP server to configure its TCP/IP settings, it must find a properly configured RFC951-compliant BOOTP server.
1. In the BOOTPTAB file of the BOOTP server, enter the Rack ATS’s MAC address, IP address, subnet mask, and default gateway, and, optionally, a bootup file name. Look for the MAC address on the bottom of the Rack ATS.
2. When the Rack ATS reboots, the BOOTP server provides it with the TCP/IP settings.– If you specified a bootup file name, the Rack ATS attempts to transfer that file from the
BOOTP server using TFTP or FTP. The Rack ATS assumes all settings specified in the bootup file.
– If you did not specify a bootup file name, you can configure the other settings of the Rack ATS remotely through its Web UI (see “Web UI” on page 14) or CLI (see “Remote access to the CLI” on page 12) The default user name and password are apc for both interfaces. You will be instructed to change your password after your initial login. To create a bootup file, see your BOOTP server documentation.
DHCP: You can use an RFC2131/RFC2132-compliant DHCP server to configure the TCP/IP settings for the Rack ATS.
1. The Rack ATS sends out a DHCP request that uses the following to identify itself:– A Vendor Class Identifier (APC by default)– A Client Identifier (by default, the MAC address of the Rack ATS)– A User Class Identifier (by default, the identification of the application firmware installed on the
Rack ATS)– A Host Name (by default, apcXXYYZZ with XXYYZZ being the last six digits of the ATS serial
number). This is known as DHCP Option 12.2. A properly configured DHCP server responds with a DHCP offer that includes all the settings that
the Rack ATS needs for network communication. The DHCP offer also includes the Vendor Specific Information option (DHCP option 43). The Rack ATS can be configured to ignore DHCP offers that do not encapsulate the APC cookie in DHCP option 43 using the following hexadecimal format. (The Rack ATS does not require this cookie by default.)
Option 43 = 01 04 31 41 50 43– The first byte (01) is the code.– The second byte (04) is the length.– The remaining bytes (31 41 50 43) are the APC cookie.
See your DHCP server documentation to add code to the Vendor Specific Information option.NOTE: By selecting Require vendor specific cookie to accept DHCP Address in the Web UI, you can require the DHCP server to provide an “APC” cookie, which supplies information to the Rack ATS.
This section summarizes communication of the Rack ATS with a DHCP server. For more detail about how a DHCP server can configure the network settings for a Rack ATS, see the User Guide on www.apc.com.
11Rack ATS AP44xx Installation and Quick Start

Local access to the command line interface (CLI)
You can use a local computer to connect to the ATS and access the CLI.1. Select a serial port at the local computer and disable any service that uses that port.2. Use the communication cable to connect the selected port to the serial port on the front panel of
the ATS.3. Run a terminal program (such as Tera Term or HyperTerminal) and configure the selected port for
9600 bps, 8 data bits, no parity, 1 stop bit, and no flow control. Save the changes.4. Press ENTER repeatedly until the User Name prompt is displayed. This usually takes up to 3
times.5. Use apc for the user name and password the first time you access the device.
NOTE: You will be logging in as the Super User the first time you access the device. You will be prompted to change the password on first use. A secure password in compliance with your company’s password policy is recommended. All other user accounts (Administrator, Device User, Read-Only User and Network-Only User) are disabled by default.
6. See “Configure TCP/IP settings in the CLI” on page 13 to finish the configuration.
Remote access to the CLI
From any computer on the same network as the Rack ATS, you can use ARP and Ping to assign an IP address to the Rack ATS and then use SSH to access the CLI of that Rack ATS and configure the other TCP/IP settings.
NOTE: After the IP address of the Rack ATS is configured, you can access the Rack ATS using Telnet or SSH, without first using ARP and Ping. You must enable Telnet before using it, so SSH is required for initial CLI configuration.
1. Use ARP to define an IP address for the Rack ATS and use the MAC address of the Rack ATS in the ARP command. For example, to define an IP address of 156.205.14.141 for a Rack ATS that has a MAC address of 00 c0 b7 63 9f 67, use one of the following commands:– Windows command format:arp -s 156.205.14.141 00-c0-b7-63-9f-67
– LINUX command format:arp -s 156.205.14.141 00:c0:b7:63:9f:67NOTE: The MAC address can be found on the bottom of the ATS.
2. Use Ping with a size of 113 bytes to assign the IP address defined by the ARP command. For example:– Windows command format:ping 156.205.14.141 -l 113
– LINUX command format:ping 156.205.14.141 -s 113
3. Use SSH to access the Rack ATS at its newly assigned IP address. For example:ssh [email protected] -c aes256-cbcwhere -c indicates the cipher (aes256-cbc or 3des-cbc).
4. Use apc for the user name and password the first time you access the device. NOTE: You will be prompted to change the password on first use.
See “Configure TCP/IP settings in the CLI” on page 13 to finish the configuration.
Rack ATS AP44xx Installation and Quick Start12
Configure TCP/IP settings in the CLI
1. Log on to the CLI. See “Local access to the command line interface (CLI)” on page 12 or “Remote access to the CLI” on page 12.
2. Contact your network administrator to obtain the IP address (if needed), subnet mask, and default gateway for the Rack ATS.
3. Use these three commands to configure network settings. (Text in italics indicates a variable.)tcpip -i yourIPaddress tcpip -s yourSubnetMask tcpip -g yourDefaultGateway
For each variable, type a numeric value that has the format xxx.xxx.xxx.xxx. For example, to set a system IP address of 156.205.14.141, type the following command and press ENTER:
tcpip -i 156.205.14.1414. Type exit, and then press ENTER. The Rack ATS restarts to apply the changes.
13Rack ATS AP44xx Installation and Quick Start

How to Access the Rack ATS InterfacesAfter the Rack ATS is running on your network, you can use the interfaces summarized here to access the unit. For more information on the interfaces, see the User Guide at www.apc.com.
Web UIYou can use the latest version of Microsoft Internet Explorer® (IE) or Edge®, Google Chrome®, Apple Safari®, or Mozilla Firefox® to access the device through its Web UI. Other commonly available browsers and versions may work but have not been fully tested.
The ATS cannot work with a proxy server. Before accessing the Web UI of the ATS, do one of the following:
• Configure the browser to disable the use of a proxy server for your ATS.• Configure the proxy server so that it does not proxy the specific IP address of your ATS.
To use the Web browser to configure Rack ATS options or to view the event and data logs, you can use either of the following protocols:
• The HTTP protocol (disabled by default), which provides authentication by user name and password but no encryption.
• The HTTPS protocol (enabled by default), which provides extra security through Secure Sockets Layer (SSL) and encrypts user names, passwords, and data being transmitted. It also provides authentication of Rack ATS units by means of digital certificates.
To access the Web UI and configure the security of your unit on the network:1. Type the IP address (or DNS name if configured) into your Web browser’s address bar.
You may receive a message that the Web page is not secure. This is normal, and you can continue to the Web UI. The warning is generated because your Web browser does not recognize the default certificate used for encryption over HTTPS. However, information transmitted over HTTPS is still encrypted. See the Security Handbook on www.apc.com for more details on HTTPS and instructions to resolve the warning.
2. Use apc for the user name and password the first time you access the device. NOTE: You will be logging in as the Super User the first time you access the device. You will be prompted to change the password on first use. A secure password in compliance with your company’s password policy is recommended. All other user accounts (Administrator, Device User, Read-Only User and Network-Only User) are disabled by default.
3. Select and configure the type of security you want by selecting the Configuration tab, and then the Security or Network menu from the top menu bar. (This option is only available for Administrators and Super Users).See the Security Handbook or User Guide, available at www.apc.com, for more information on selecting and configuring network security.
Rack ATS AP44xx Installation and Quick Start14

Command Line Interface: Telnet and SSHTo access the Command Line Interface, you can use either a local (serial) connection or a remote (Telnet or SSHv2, depending on which is enabled) connection with a computer on the same network as the Rack ATS. A Super User or Administrator can enable these access methods.
Telnet for basic access
Telnet provides the basic security of authentication by user name and password, but not the high-security benefits of encryption. Telnet is disabled by default.
To use Telnet to access the Rack ATS from any computer on the same network:1. At a command prompt, use the following command line, and then press ENTER until the User
Name prompt appears. (You may have to press ENTER up to 3 times.): telnet address
NOTE: For address, use the Rack ATS IP address (or DNS name if configured).2. Enter apc for the user name and password the first time you access the device.
NOTE: You will be prompted to change the password on first use.
SSH for high-security access
If you use the high security of SSL for the Web UI, use Secure SHell (SSH) to access the CLI. SSH encrypts user names, passwords, and transmitted data. The interface, user accounts, and user access rights are the same whether you access the CLI through SSH or Telnet, but to use SSH, you must first configure SSH and have an SSH client program installed on your computer. SSH is enabled by default.
See the Security Handbook or the User Guide on www.apc.com for more information on configuring and using SSH.
15Rack ATS AP44xx Installation and Quick Start

SNMPSNMP is disabled by default. You must be an Administrator or Super User to enable or disable SNMP access. Go to Configuration > Network > SNMPv1 or SNMPv3 > Access in the Web UI, or use the SNMP or SNMPv3 commands in the CLI. See the User Guide on www.apc.com for more information.
To use StruxureWare Data Center Expert or EcoStruxure to manage the Rack ATS, you must have SNMPv1 or SNMPv3 enabled in the unit interface. For SNMPv1, Read access allows StruxureWare devices to receive traps from the Rack ATS. Write access is required while you set the StruxureWare device as a trap receiver. See your StruxureWare Data Center Expert or EcoStruxure IT documentation for detailed instructions.
All user names, passwords, and community names for SNMPv1 are transferred over the network as plain text. If your network requires the high security of encryption, disable SNMPv1 access and use SNMPv3 instead.
SNMPv1
After you add the PowerNet® MIB to a standard SNMP MIB browser, you can use that browser for SNMP access to the Rack ATS. The community name used as an identifier when SNMPv1 traps are sent to this trap receiver. You can set a read community name and a read/write community name.
SNMPv3
NOTE: To use SNMPv3, you must have an MIB program that supports SNMPv3.
For SNMP GETs, SETs, and the trap receivers, SNMPv3 uses a system of user profiles to identify users. An SNMPv3 user must have a user profile assigned in the MIB software program to perform GETs and SETs, browse the MIB, and receive traps. The default settings are no authentication and no privacy.
FTP and SCPYou can use FTP (disabled by default) or Secure CoPy (SCP) to transfer downloaded firmware to the ATS, or to access a copy of the event or data logs of the ATS. See the User Guide on www.apc.com for details.
To enable or disable FTP Server access, you must be an Administrator. In the Web UI, click Configuration, click Network, and then click FTP server.
NOTE: FTP transfers files without encryption. For higher security, disable the FTP server, and transfer files with SCP. Selecting and configuring Secure SHell (SSH) enables SCP automatically. However, SCP will not allow a file transfer until the Super User default password (apc) is changed.
NOTE: You can use FTP or SCP to configure and update the ATS with StruxureWare Data Center Expert as long as the same protocol is enabled on both the ATS and StruxureWare. See your StruxureWare Data Center Expert documentation for details.
Manage the Security of Your SystemFor detailed information on enhancing the security of your system after installation and initial configuration, see the Security Handbook, available on the APC by Schneider Electric website, www.apc.com.
Rack ATS AP44xx Installation and Quick Start16

How to Configure the Rack ATS
Configure SensitivityThe sensitivity setting controls how tolerant the Rack ATS is of fluctuations in power before it switches to the secondary power source. When sensitivity is set to Low, the Rack ATS waits 4 milliseconds (ms) before switching to the alternate power source when there is a disturbance in the power supply. The Low setting can prevent excessive switching if your source voltage has excessive or frequent fluctuation. When sensitivity is set to High, the Rack ATS waits 2 ms before switching to the alternate power source. The default setting is High.
Configure sensitivity through the Web UI
1. Click Configuration, click ATS, and then click Frequency/Voltage. 2. Under Sensitivity, click High or Low.3. Click Apply to save or Cancel to leave the page without saving.
Configure sensitivity through the CLI
Type vSensitvty High or vSensitvty Low, and then press ENTER.
17Rack ATS AP44xx Installation and Quick Start

Configure Voltage Transfer RangeThe voltage transfer range determines the switching behavior for the Rack ATS based on source voltage. When the source voltage moves outside the specified range, the Rack ATS switches to the secondary power source. You can configure Narrow, Medium, or Wide voltage ranges and then set the ATS to the desired range.
The Rack ATS can be set to Narrow, Medium, or Wide voltage ranges, depending on the power conditions of your system. The default setting is Wide.
*220 V Korea only.
NOTE: The voltage transfer range must remain within the absolute maximum ratings of the Rack ATS: 85–265 VRMS. At any source voltage below 85 VRMS or above 265 VRMS, the Rack ATS will switch power sources regardless of configuration.
DANGERHAZARDOUS VOLTAGEDo not operate the Rack ATS outside Rated Voltage (+/- 10%). Voltage ranges in the table represent software control of switching behavior, not input voltages for use.Failure to follow these instructions will result in death or serious injury.
SKU Rated Voltage (L-N) (VAC)
Configurable Ranges (VAC)
Narrow Default Range (VAC)
Medium Default Range (VAC)
Wide Default Range (VAC)
AP4421 230 ± 16–25 ± 16 ± 20 ± 25
AP4422 230 ± 16–25 ± 16 ± 20 ± 25
AP4423 230* ± 16–25 ± 16 ± 20 ± 25
AP4424 230* ± 16–25 ± 16 ± 20 ± 25
AP4430 200/208 ± 15–30 ± 15 ± 22 ± 30
AP4431 208 ± 15–30 ± 15 ± 22 ± 30
AP4432 200/208 ± 15–30 ± 15 ± 22 ± 30
AP4433 208 ± 15–30 ± 15 ± 22 ± 30
AP4434 208 ± 15–30 ± 15 ± 22 ± 30
AP4450 100/120 ± 10–23 ± 10 ± 16 ± 23
AP4452 120 ± 10–23 ± 10 ± 16 ± 23
AP4452J 100 ± 10–15 ± 10 ± 12 ± 15
AP4453 120 ± 10–23 ± 10 ± 16 ± 23
Rack ATS AP44xx Installation and Quick Start18

Configure voltage transfer range through the Web UI
1. Click Configuration, click ATS, and then click Frequency/Voltage. 2. Type the Line VRMS and desired Wide, Medium, and Narrow ranges into the appropriate fields.3. Under Voltage Transfer Range, click Wide, Medium, or Narrow.4. Click Apply to save or Cancel to leave the page without saving.
Configure voltage transfer range through the CLI
• To set the voltage transfer range to Narrow, Medium, or Wide: type vXferRange Narrow, vXferRange Medium, or vXferRange Wide, and then press ENTER.
• To change the Narrow voltage transfer range, type vNarrowLmt NarrowTransferRange, and then press ENTER.
• To change the Medium voltage transfer range, type vMediumLmt MediumTransferRange, and then press ENTER.
• To change the Wide voltage transfer range, type vWideLmt WideTransferRange, and then press ENTER.
NOTE: For any TransferRange value, enter a whole number within the configurable range for your ATS.
19Rack ATS AP44xx Installation and Quick Start

Recovering from a Lost PasswordYou can use a local computer (a computer that connects to the Rack ATS through the serial port) to access the command line interface to reset the user name and password:
1. Select a serial port at the local computer, and disable any service that uses that port.2. Connect the serial communication cable (APC by Schneider Electric part number 940-0144A) to
the selected port on the computer and to the Serial port on the Rack ATS.3. Run a terminal program (such as Tera Term® or HyperTerminal®), and configure the selected port
for 9600 bps, 8 data bits, no parity, 1 stop bit, and no flow control.4. Press ENTER, repeatedly if necessary, to display the User Name prompt. (You may need to press
ENTER up to 3 times.) If you are unable to display the User Name prompt, verify the following:– The serial port is not in use by another application.– The terminal settings are correct as specified in step 3.– The correct cable is being used as specified in step 2.
5. Press the Reset button on the ATS. The Status LED will flash alternately orange and green within 5 to 7 seconds of pressing the Reset button. When the LED begins flashing, immediately press the Reset button a second time to temporarily reset the user name and password to their defaults.
6. Press ENTER, repeatedly if necessary, to display the User Name prompt again, then use the default user name and password, apc. (If you take longer than 30 seconds to log on after the User Name prompt is re-displayed, you must repeat step 5 and log on again.)
7. At the CLI, use the following commands to change the password from apc to a value of your choice:
user -n <user name> -pw <user password>For example, to change the Super User password to XYZ type:
user -n apc -cp apc -pw XYZ8. Type quit or exit, and then press ENTER to log off.9. Reconnect any serial cable you disconnected, and restart any service you disabled.
Rack ATS AP44xx Installation and Quick Start20

Two-Year Factory WarrantyThis warranty applies only to the products you purchase for your use in accordance with this manual.
Terms of WarrantyAPC by Schneider Electric warrants its products to be free from defects in materials and workmanship for a period of two years from the date of purchase. APC by Schneider Electric will repair or replace defective products covered by this warranty. This warranty does not apply to equipment that has been damaged by accident, negligence or misapplication or has been altered or modified in any way. Repair or replacement of a defective product or part thereof does not extend the original warranty period. Any parts furnished under this warranty may be new or factory-remanufactured.
Non-transferable Warranty This warranty extends only to the original purchaser who must have properly registered the product. The product may be registered at the APC by Schneider Electric website, www.apc.com.
ExclusionsAPC by Schneider Electric shall not be liable under the warranty if its testing and examination disclose that the alleged defect in the product does not exist or was caused by end user’s or any third person’s misuse, negligence, improper installation or testing. Further, APC by Schneider Electric shall not be liable under the warranty for unauthorized attempts to repair or modify wrong or inadequate electrical voltage or connection, inappropriate on-site operation conditions, corrosive atmosphere, repair, installation, exposure to the elements, Acts of God, fire, theft, or installation contrary to APC by Schneider Electric recommendations or specifications or in any event if the APC by Schneider Electric serial number has been altered, defaced, or removed, or any other cause beyond the range of the intended use.
THERE ARE NO WARRANTIES, EXPRESS OR IMPLIED, BY OPERATION OF LAW OR OTHERWISE, OF PRODUCTS SOLD, SERVICED OR FURNISHED UNDER THIS AGREEMENT OR IN CONNECTION HEREWITH. APC BY SCHNEIDER ELECTRIC DISCLAIMS ALL IMPLIED WARRANTIES OF MERCHANTABILITY, SATISFACTION AND FITNESS FOR A PARTICULAR PURPOSE. APC BY SCHNEIDER ELECTRIC EXPRESS WARRANTIES WILL NOT BE ENLARGED, DIMINISHED, OR AFFECTED BY AND NO OBLIGATION OR LIABILITY WILL ARISE OUT OF, APC BY SCHNEIDER ELECTRIC RENDERING OF TECHNICAL OR OTHER ADVICE OR SERVICE IN CONNECTION WITH THE PRODUCTS. THE FOREGOING WARRANTIES AND REMEDIES ARE EXCLUSIVE AND IN LIEU OF ALL OTHER WARRANTIES AND REMEDIES. THE WARRANTIES SET FORTH ABOVE CONSTITUTE APC BY SCHNEIDER ELECTRIC’S SOLE LIABILITY AND PURCHASER’S EXCLUSIVE REMEDY FOR ANY BREACH OF SUCH WARRANTIES. APC BY SCHNEIDER ELECTRIC WARRANTIES EXTEND ONLY TO PURCHASER AND ARE NOT EXTENDED TO ANY THIRD PARTIES.
IN NO EVENT SHALL APC BY SCHNEIDER ELECTRIC, ITS OFFICERS, DIRECTORS, AFFILIATES OR EMPLOYEES BE LIABLE FOR ANY FORM OF INDIRECT, SPECIAL, CONSEQUENTIAL OR PUNITIVE DAMAGES, ARISING OUT OF THE USE, SERVICE OR INSTALLATION, OF THE PRODUCTS, WHETHER SUCH DAMAGES ARISE IN CONTRACT OR TORT, IRRESPECTIVE OF FAULT, NEGLIGENCE OR STRICT LIABILITY OR WHETHER APC BY SCHNEIDER ELECTRIC HAS BEEN ADVISED IN ADVANCE OF THE POSSIBILITY OF SUCH DAMAGES. SPECIFICALLY, APC BY SCHNEIDER ELECTRIC IS NOT LIABLE FOR ANY COSTS, SUCH AS LOST PROFITS OR REVENUE, LOSS OF EQUIPMENT, LOSS OF USE OF EQUIPMENT, LOSS OF SOFTWARE, LOSS OF DATA, COSTS OF SUBSTITUENTS, CLAIMS BY THIRD PARTIES, OR OTHERWISE.
21Rack ATS AP44xx Installation and Quick Start

NO SALESMAN, EMPLOYEE OR AGENT OF APC BY SCHNEIDER ELECTRIC IS AUTHORIZED TO ADD TO OR VARY THE TERMS OF THIS WARRANTY. WARRANTY TERMS MAY BE MODIFIED, IF AT ALL, ONLY IN WRITING SIGNED BY AN APC BY SCHNEIDER ELECTRIC OFFICER AND LEGAL DEPARTMENT.
Warranty Claims Customers with warranty claims issues may access the APC by Schneider Electric customer support network through the Support page of the APC by Schneider Electric website, www.apc.com/support. Select your country from the country selection pull-down menu at the top of the Web page. Select the Support tab to obtain contact information for customer support in your region.
Rack ATS AP44xx Installation and Quick Start22

Life-support Policy
General policyAPC by Schneider Electric does not recommend the use of any of its products in the following situations:
• In life-support applications where failure or malfunction of the APC by Schneider Electric product can be reasonably expected to cause failure of the life-support device or to affect significantly its safety or effectiveness.
• In direct patient care.
APC by Schneider Electric will not knowingly sell its products for use in such applications unless it receives in writing assurances satisfactory to APC by Schneider Electric that (a) the risks of injury or damage have been minimized, (b) the customer assumes all such risks, and (c) the liability of APC by Schneider Electric is adequately protected under the circumstances.
Examples of life-support devicesThe term life-support device includes but is not limited to neonatal oxygen analyzers, nerve stimulators (whether used for anesthesia, pain relief, or other purposes), autotransfusion devices, blood pumps, defibrillators, arrhythmia detectors and alarms, pacemakers, hemodialysis systems, peritoneal dialysis systems, neonatal ventilator incubators, ventilators (for adults and infants), anesthesia ventilators, infusion pumps, and any other devices designated as “critical” by the U.S. FDA.
Hospital-grade wiring devices and leakage current protection may be ordered as options on many APC by Schneider Electric UPS systems. APC by Schneider Electric does not claim that units with these modifications are certified or listed as hospital-grade by APC by Schneider Electric or any other organization. Therefore these units do not meet the requirements for use in direct patient care
23Rack ATS AP44xx Installation and Quick Start

Rack ATS AP44xx Installation and Quick Start24

Radio Frequency InterferenceChanges or modifications to this unit not expressly approved by the party responsible for compliance could void the users authority to operate this equipment.
USA.FCC
This equipment has been tested and found to comply with the limits for a Class A digital device, pursuant to part 15 of the FCC Rules. These limits are designed to provide reasonable protection against harmful interference when the equipment is operated in a commercial environment. This equipment generates, uses, and can radiate radio frequency energy and, if not installed and used in accordance with this user manual, may cause harmful interference to radio communications. Operation of this equipment in a residential area is likely to cause harmful interference. The user will bear sole responsibility for correcting such interference.
Canada.ICES
This Class A digital apparatus complies with Canadian ICES-003.
Cet appareil numérique de la classe A est conforme à la norme NMB-003 du Canada.
Japan.VCCI
This is a Class A product based on the standard of the Voluntary Control Council for Interference by Information Technology Equipment (VCCI). If this equipment is used in a domestic environment, radio disturbance may occur, in which case, the user may be required to take corrective actions.
この装置は、情報処理装置等電波障害自主規制協議会(VCCI)の基準 に基づくクラス A 情報技術装置です。この装置を家庭環境で使用すると、電波 妨害を引き起こすことがあります。この場合には、使用者が適切な対策を講ず るように要求されることがあります。
Australia and New Zealand
Attention: This is a Class A product. In a domestic environment this product may cause radio interference in which case the user may be required to take adequate measures.
European Union
This product is in conformity with Electromagnetic Compatibility (EMC) requirements set forth by the EU directive 2014/30/EU of the European parliament and of the council of 26 February 2014 on the harmonization of the laws of the Member States relating to electromagnetic compatibility.
This product has been tested and found to comply with the limits for Class A Information Technology Equipment according to CISPR 32/EN 55032:2015 for Emissions and EN 55024:2010+A1:2015 for Immunities.
Attention: This is a Class A product. In a domestic/residential environment this product may cause radio interference in which the user may be required to take adequate measures

Worldwide Customer Support
Customer support for this or any other product is available at www.apc.com
4/2020990-5852D-001
© 2020 APC by Schneider Electric. APC, PowerNet, NetShelter, and StruxureWare are trademarks of by Schneider Electric SE or its subsidiaries. All other brands may be trademarks of their respective owners.


