Embed Size (px)
Citation preview
Laravel Up & RunningA Framework for Building Modern PHP Apps
Matt Stauffer
Second
Edition
www.EBooksWorld.ir
www.EBooksWorld.ir
Matt Stauffer
Laravel: Up & RunningA Framework for Building Modern PHP Apps
SECOND EDITION
Boston Farnham Sebastopol TokyoBeijing Boston Farnham Sebastopol TokyoBeijing
www.EBooksWorld.ir
978-1-492-04121-4
[LSI]
Laravel: Up & Runningby Matt Stauffer
Copyright © 2019 Matt Stauffer. All rights reserved.
Printed in the United States of America.
Published by O’Reilly Media, Inc., 1005 Gravenstein Highway North, Sebastopol, CA 95472.
O’Reilly books may be purchased for educational, business, or sales promotional use. Online editions arealso available for most titles (http://oreilly.com). For more information, contact our corporate/institutionalsales department: 800-998-9938 or [email protected].
Editor: Alicia YoungProduction Editor: Christopher FaucherCopyeditor: Rachel HeadProofreader: Amanda Kersey
Indexer: WordCo Indexing Services, Inc.Interior Designer: David FutatoCover Designer: Karen MontgomeryIllustrator: Rebecca Demarest
December 2016: First EditionApril 2019: Second Edition
Revision History for the Second Edition2019-04-01: First Release
See http://oreilly.com/catalog/errata.csp?isbn=9781492041214 for release details.
The O’Reilly logo is a registered trademark of O’Reilly Media, Inc. Laravel: Up & Running, the coverimage, and related trade dress are trademarks of O’Reilly Media, Inc.
The views expressed in this work are those of the author, and do not represent the publisher’s views.While the publisher and the author have used good faith efforts to ensure that the information andinstructions contained in this work are accurate, the publisher and the author disclaim all responsibilityfor errors or omissions, including without limitation responsibility for damages resulting from the use ofor reliance on this work. Use of the information and instructions contained in this work is at your ownrisk. If any code samples or other technology this work contains or describes is subject to open sourcelicenses or the intellectual property rights of others, it is your responsibility to ensure that your usethereof complies with such licenses and/or rights.
www.EBooksWorld.ir

This book is dedicated to my family.Mia, my little princess and bundle of joy and energy.
Malachi, my little prince and adventurer and empath.Tereva, my inspiration, encourager, upgrader, pusher, rib.
www.EBooksWorld.ir

www.EBooksWorld.ir
Table of Contents
Preface. . . . . . . . . . . . . . . . . . . . . . . . . . . . . . . . . . . . . . . . . . . . . . . . . . . . . . . . . . . . . . . . . . . . . . xvii
1. Why Laravel?. . . . . . . . . . . . . . . . . . . . . . . . . . . . . . . . . . . . . . . . . . . . . . . . . . . . . . . . . . . . . . . 1Why Use a Framework? 1
“I’ll Just Build It Myself ” 2Consistency and Flexibility 2
A Short History of Web and PHP Frameworks 2Ruby on Rails 2The Influx of PHP Frameworks 3The Good and the Bad of CodeIgniter 3Laravel 1, 2, and 3 3Laravel 4 4Laravel 5 4
What’s So Special About Laravel? 4The Philosophy of Laravel 5How Laravel Achieves Developer Happiness 5The Laravel Community 6
How It Works 7Why Laravel? 9
2. Setting Up a Laravel Development Environment. . . . . . . . . . . . . . . . . . . . . . . . . . . . . . . . 11System Requirements 11Composer 12Local Development Environments 12
Laravel Valet 12Laravel Homestead 13
Creating a New Laravel Project 13Installing Laravel with the Laravel Installer Tool 14
v
www.EBooksWorld.ir
Installing Laravel with Composer’s create-project Feature 14Lambo: Super-Powered “Laravel New” 14
Laravel’s Directory Structure 15The Folders 16The Loose Files 17
Configuration 18The .env File 19
Up and Running 21Testing 21TL;DR 22
3. Routing and Controllers. . . . . . . . . . . . . . . . . . . . . . . . . . . . . . . . . . . . . . . . . . . . . . . . . . . . . 23A Quick Introduction to MVC, the HTTP Verbs, and REST 23
What Is MVC? 23The HTTP Verbs 24What Is REST? 25
Route Definitions 26Route Verbs 28Route Handling 28Route Parameters 29Route Names 31
Route Groups 33Middleware 34Path Prefixes 36Fallback Routes 36Subdomain Routing 37Namespace Prefixes 37Name Prefixes 38
Signed Routes 38Signing a Route 39Modifying Routes to Allow Signed Links 40
Views 40Returning Simple Routes Directly with Route::view() 41Using View Composers to Share Variables with Every View 42
Controllers 42Getting User Input 45Injecting Dependencies into Controllers 46Resource Controllers 47API Resource Controllers 49Single Action Controllers 49
Route Model Binding 50Implicit Route Model Binding 50
vi | Table of Contents
www.EBooksWorld.ir
Custom Route Model Binding 51Route Caching 52Form Method Spoofing 52
HTTP Verbs in Laravel 52HTTP Method Spoofing in HTML Forms 53
CSRF Protection 53Redirects 55
redirect()->to() 56redirect()->route() 56redirect()->back() 57Other Redirect Methods 57redirect()->with() 57
Aborting the Request 59Custom Responses 60
response()->make() 60response()->json() and ->jsonp() 60response()->download(), ->streamDownload(), and ->file() 60
Testing 61TL;DR 62
4. Blade Templating. . . . . . . . . . . . . . . . . . . . . . . . . . . . . . . . . . . . . . . . . . . . . . . . . . . . . . . . . . 63Echoing Data 64Control Structures 65
Conditionals 65Loops 65
Template Inheritance 68Defining Sections with @section/@show and @yield 68Including View Partials 70Using Stacks 72Using Components and Slots 73
View Composers and Service Injection 75Binding Data to Views Using View Composers 76Blade Service Injection 79
Custom Blade Directives 80Parameters in Custom Blade Directives 81Example: Using Custom Blade Directives for a Multitenant App 82Easier Custom Directives for “if ” Statements 83
Testing 83TL;DR 84
5. Databases and Eloquent. . . . . . . . . . . . . . . . . . . . . . . . . . . . . . . . . . . . . . . . . . . . . . . . . . . . . 87Configuration 87
Table of Contents | vii
www.EBooksWorld.ir
Database Connections 88Other Database Configuration Options 89Defining Migrations 90Running Migrations 97
Seeding 98Creating a Seeder 98Model Factories 99
Query Builder 105Basic Usage of the DB Facade 105Raw SQL 106Chaining with the Query Builder 107Transactions 116
Introduction to Eloquent 117Creating and Defining Eloquent Models 119Retrieving Data with Eloquent 120Inserts and Updates with Eloquent 122Deleting with Eloquent 126Scopes 128Customizing Field Interactions with Accessors, Mutators, and Attribute
Casting 131Eloquent Collections 135Eloquent Serialization 137Eloquent Relationships 139Child Records Updating Parent Record Timestamps 152
Eloquent Events 154Testing 155TL;DR 157
6. Frontend Components. . . . . . . . . . . . . . . . . . . . . . . . . . . . . . . . . . . . . . . . . . . . . . . . . . . . . 159Laravel Mix 159
Mix Folder Structure 161Running Mix 161What Does Mix Provide? 162
Frontend Presets and Auth Scaffolding 169Frontend Presets 169Auth Scaffolding 170
Pagination 170Paginating Database Results 170Manually Creating Paginators 171
Message Bags 172Named Error Bags 174
String Helpers, Pluralization, and Localization 174
viii | Table of Contents
www.EBooksWorld.ir
The String Helpers and Pluralization 174Localization 175
Testing 179Testing Message and Error Bags 179Translation and Localization 179
TL;DR 180
7. Collecting and Handling User Data. . . . . . . . . . . . . . . . . . . . . . . . . . . . . . . . . . . . . . . . . . . 181Injecting a Request Object 181
$request->all() 182$request->except() and $request->only() 182$request->has() 183$request->input() 183$request->method() and ->isMethod() 184Array Input 184JSON Input (and $request->json()) 185
Route Data 186From Request 186From Route Parameters 186
Uploaded Files 187Validation 189
validate() on the Request Object 189Manual Validation 192Custom Rule Objects 192Displaying Validation Error Messages 193
Form Requests 194Creating a Form Request 194Using a Form Request 195
Eloquent Model Mass Assignment 196{{ Versus {!! 197Testing 197TL;DR 199
8. Artisan and Tinker. . . . . . . . . . . . . . . . . . . . . . . . . . . . . . . . . . . . . . . . . . . . . . . . . . . . . . . . . 201An Introduction to Artisan 201Basic Artisan Commands 202
Options 203The Grouped Commands 203
Writing Custom Artisan Commands 206A Sample Command 208Arguments and Options 209Using Input 211
Table of Contents | ix
www.EBooksWorld.ir

Prompts 213Output 214Writing Closure-Based Commands 215
Calling Artisan Commands in Normal Code 216Tinker 217Laravel Dump Server 218Testing 219TL;DR 219
9. User Authentication and Authorization. . . . . . . . . . . . . . . . . . . . . . . . . . . . . . . . . . . . . . . 221The User Model and Migration 222Using the auth() Global Helper and the Auth Facade 225The Auth Controllers 226
RegisterController 226LoginController 227ResetPasswordController 229ForgotPasswordController 229VerificationController 229
Auth::routes() 229The Auth Scaffold 231“Remember Me” 232Manually Authenticating Users 233Manually Logging Out a User 233
Invalidating Sessions on Other Devices 233Auth Middleware 234Email Verification 235Blade Authentication Directives 236Guards 236
Changing the Default Guard 237Using Other Guards Without Changing the Default 237Adding a New Guard 237Closure Request Guards 238Creating a Custom User Provider 238Custom User Providers for Nonrelational Databases 239
Auth Events 239Authorization (ACL) and Roles 240
Defining Authorization Rules 240The Gate Facade (and Injecting Gate) 241Resource Gates 242The Authorize Middleware 243Controller Authorization 243Checking on the User Instance 245
x | Table of Contents
www.EBooksWorld.ir
Blade Checks 246Intercepting Checks 246Policies 247
Testing 249TL;DR 252
10. Requests, Responses, and Middleware. . . . . . . . . . . . . . . . . . . . . . . . . . . . . . . . . . . . . . . 253Laravel’s Request Lifecycle 253
Bootstrapping the Application 254Service Providers 255
The Request Object 257Getting a Request Object in Laravel 257Getting Basic Information About a Request 258
The Response Object 262Using and Creating Response Objects in Controllers 263Specialized Response Types 264
Laravel and Middleware 269An Introduction to Middleware 269Creating Custom Middleware 270Binding Middleware 272Passing Parameters to Middleware 275
Trusted Proxies 276Testing 277TL;DR 278
11. The Container. . . . . . . . . . . . . . . . . . . . . . . . . . . . . . . . . . . . . . . . . . . . . . . . . . . . . . . . . . . . . 279A Quick Introduction to Dependency Injection 279Dependency Injection and Laravel 281The app() Global Helper 281How the Container Is Wired 282Binding Classes to the Container 283
Binding to a Closure 283Binding to Singletons, Aliases, and Instances 284Binding a Concrete Instance to an Interface 285Contextual Binding 286
Constructor Injection in Laravel Framework Files 287Method Injection 287Facades and the Container 289
How Facades Work 289Real-Time Facades 291
Service Providers 291Testing 292
Table of Contents | xi
www.EBooksWorld.ir
TL;DR 293
12. Testing. . . . . . . . . . . . . . . . . . . . . . . . . . . . . . . . . . . . . . . . . . . . . . . . . . . . . . . . . . . . . . . . . . 295Testing Basics 296Naming Tests 300The Testing Environment 301The Testing Traits 301
RefreshDatabase 302WithoutMiddleware 302DatabaseMigrations 302DatabaseTransactions 302
Simple Unit Tests 303Application Testing: How It Works 304
TestCase 304HTTP Tests 305
Testing Basic Pages with $this->get() and Other HTTP Calls 305Testing JSON APIs with $this->getJson() and Other JSON HTTP Calls 306Assertions Against $response 306Authenticating Responses 309A Few Other Customizations to Your HTTP Tests 310Handling Exceptions in Application Tests 310
Database Tests 311Using Model Factories in Tests 312Seeding in Tests 312
Testing Other Laravel Systems 312Event Fakes 312Bus and Queue Fakes 314Mail Fakes 315Notification Fakes 316Storage Fakes 317
Mocking 318A Quick Introduction to Mocking 318A Quick Introduction to Mockery 318Faking Other Facades 321
Testing Artisan Commands 322Asserting Against Artisan Command Syntax 322
Browser Tests 323Choosing a Tool 324Testing with Dusk 324
TL;DR 335
xii | Table of Contents
www.EBooksWorld.ir

13. Writing APIs. . . . . . . . . . . . . . . . . . . . . . . . . . . . . . . . . . . . . . . . . . . . . . . . . . . . . . . . . . . . . . 337The Basics of REST-Like JSON APIs 337Controller Organization and JSON Returns 339Reading and Sending Headers 342
Sending Response Headers in Laravel 343Reading Request Headers in Laravel 343
Eloquent Pagination 344Sorting and Filtering 345
Sorting Your API Results 346Filtering Your API Results 347
Transforming Results 348Writing Your Own Transformer 349Nesting and Relationships with Custom Transformers 350
API Resources 352Creating a Resource Class 352Resource Collections 354Nesting Relationships 355Using Pagination with API Resources 356Conditionally Applying Attributes 357More Customizations for API Resources 357
API Authentication with Laravel Passport 357A Brief Introduction to OAuth 2.0 358Installing Passport 358Passport’s API 360Passport’s Available Grant Types 360Managing Clients and Tokens with the Passport API and Vue Components 368Passport Scopes 371Deploying Passport 373
API Token Authentication 373Customizing 404 Responses 374
Triggering the Fallback Route 374Testing 374
Testing Passport 375TL;DR 375
14. Storage and Retrieval. . . . . . . . . . . . . . . . . . . . . . . . . . . . . . . . . . . . . . . . . . . . . . . . . . . . . . 377Local and Cloud File Managers 377
Configuring File Access 377Using the Storage Facade 378Adding Additional Flysystem Providers 380
Basic File Uploads and Manipulation 380Simple File Downloads 382
Table of Contents | xiii
www.EBooksWorld.ir
Sessions 382Accessing the Session 383Methods Available on Session Instances 383Flash Session Storage 385
Cache 386Accessing the Cache 386Methods Available on Cache Instances 387
Cookies 388Cookies in Laravel 388Accessing the Cookie Tools 389
Logging 391When and Why to Use Logs 392Writing to the Logs 392Log Channels 393
Full-Text Search with Laravel Scout 396Installing Scout 396Marking Your Model for Indexing 397Searching Your Index 397Queues and Scout 397Performing Operations Without Indexing 398Conditionally Indexing Models 398Manually Triggering Indexing via Code 398Manually Triggering Indexing via the CLI 398
Testing 399File Storage 399Session 400Cache 401Cookies 402Log 403Scout 403
TL;DR 404
15. Mail and Notifications. . . . . . . . . . . . . . . . . . . . . . . . . . . . . . . . . . . . . . . . . . . . . . . . . . . . . . 405Mail 405
“Classic” Mail 406Basic “Mailable” Mail Usage 406Mail Templates 409Methods Available in build() 410Attachments and Inline Images 410Markdown Mailables 411Rendering Mailables to the Browser 413Queues 414
xiv | Table of Contents
www.EBooksWorld.ir

Local Development 415Notifications 416
Defining the via() Method for Your Notifiables 419Sending Notifications 419Queueing Notifications 420Out-of-the-Box Notification Types 421
Testing 424Mail 425Notifications 425
TL;DR 426
16. Queues, Jobs, Events, Broadcasting, and the Scheduler. . . . . . . . . . . . . . . . . . . . . . . . . 427Queues 427
Why Queues? 428Basic Queue Configuration 428Queued Jobs 428Controlling the Queue 435Queues Supporting Other Functions 436
Laravel Horizon 436Events 437
Firing an Event 437Listening for an Event 439
Broadcasting Events over WebSockets, and Laravel Echo 442Configuration and Setup 443Broadcasting an Event 443Receiving the Message 446Advanced Broadcasting Tools 448Laravel Echo (the JavaScript Side) 452
Scheduler 457Available Task Types 457Available Time Frames 458Defining Time Zones for Scheduled Commands 459Blocking and Overlap 460Handling Task Output 460Task Hooks 461
Testing 461TL;DR 463
17. Helpers and Collections. . . . . . . . . . . . . . . . . . . . . . . . . . . . . . . . . . . . . . . . . . . . . . . . . . . . 465Helpers 465
Arrays 465Strings 467
Table of Contents | xv
www.EBooksWorld.ir
Application Paths 469URLs 470Miscellaneous 472
Collections 475The Basics 475A Few Methods 477
TL;DR 481
18. The Laravel Ecosystem. . . . . . . . . . . . . . . . . . . . . . . . . . . . . . . . . . . . . . . . . . . . . . . . . . . . . 483Tools Covered in This Book 483
Valet 483Homestead 484The Laravel Installer 484Mix 484Dusk 484Passport 484Horizon 484Echo 485
Tools Not Covered in This Book 485Forge 485Envoyer 485Cashier 486Socialite 486Nova 486Spark 487Lumen 487Envoy 487Telescope 488
Other Resources 488
Glossary. . . . . . . . . . . . . . . . . . . . . . . . . . . . . . . . . . . . . . . . . . . . . . . . . . . . . . . . . . . . . . . . . . . . . 489
Index. . . . . . . . . . . . . . . . . . . . . . . . . . . . . . . . . . . . . . . . . . . . . . . . . . . . . . . . . . . . . . . . . . . . . . . 497
xvi | Table of Contents
www.EBooksWorld.ir
Preface
The story of how I got started with Laravel is a common one: I had written PHP foryears, but I was on my way out the door, pursuing the power of Rails and othermodern web frameworks. Rails in particular had a lively community, a perfect combi‐nation of opinionated defaults and flexibility, and the power of Ruby Gems to lever‐age prepackaged common code.
Something kept me from jumping ship, and I was glad for that when I found Laravel.It offered everything I was drawn to in Rails, but it wasn’t just a Rails clone; this wasan innovative framework with incredible documentation, a welcoming community,and clear influences from many languages and frameworks.
Since that day I’ve been able to share my journey of learning Laravel through blog‐ging, podcasting, and speaking at conferences; I’ve written dozens of apps in Laravelfor work and side projects; and I’ve met thousands of Laravel developers online andin person. I have plenty of tools in my development toolkit, but I am honestly happi‐est when I sit down in front of a command line and type laravel new projectName.
What This Book Is AboutThis is not the first book about Laravel, and it won’t be the last. I don’t intend for thisto be a book that covers every line of code or every implementation pattern. I don’twant this to be the sort of book that goes out of date when a new version of Laravel isreleased. Instead, its primary purpose is to provide developers with a high-level over‐view and concrete examples to learn what they need to work in any Laravel codebasewith any and every Laravel feature and subsystem. Rather than mirroring the docs, Iwant to help you understand the foundational concepts behind Laravel.
Laravel is a powerful and flexible PHP framework. It has a thriving community and awide ecosystem of tools, and as a result it’s growing in appeal and reach. This book isfor developers who already know how to make websites and applications and want tolearn how to do so well in Laravel.
xvii
www.EBooksWorld.ir
Laravel’s documentation is thorough and excellent. If you find that I don’t cover anyparticular topic deeply enough for your liking, I encourage you to visit the onlinedocumentation and dig deeper into that particular topic.
I think you will find the book a comfortable balance between high-level introductionand concrete application, and by the end you should feel comfortable writing anentire application in Laravel, from scratch. And, if I did my job well, you’ll be excitedto try.
Who This Book Is ForThis book assumes knowledge of basic object-oriented programming practices, PHP(or at least the general syntax of C-family languages), and the basic concepts of theModel–View–Controller (MVC) pattern and templating. If you’ve never made awebsite before, you may find yourself in over your head. But as long as you havesome programming experience, you don’t have to know anything about Laravelbefore you read this book—we’ll cover everything you need to know, from the sim‐plest “Hello, world!”
Laravel can run on any operating system, but there will be some bash (shell) com‐mands in the book that are easiest to run on Linux/macOS. Windows users may havea harder time with these commands and with modern PHP development, but if youfollow the instructions to get Homestead (a Linux virtual machine) running, you’ll beable to run all of the commands from there.
How This Book Is StructuredThis book is structured in what I imagine to be a chronological order: if you’re build‐ing your first web app with Laravel, the early chapters cover the foundational compo‐nents you’ll need to get started, and the later chapters cover less foundational or moreesoteric features.
Each section of the book can be read on its own, but for someone new to the frame‐work, I’ve tried to structure the chapters so that it’s actually very reasonable to startfrom the beginning and read until the end.
Where applicable, each chapter will end with two sections: “Testing” and “TL;DR.” Ifyou’re not familiar, “TL;DR” means “too long; didn’t read.” These final sections willshow you how to write tests for the features covered in each chapter and will give ahigh-level overview of what was covered.
The book is written for Laravel 5.8, but will cover features and syntax changes back toLaravel 5.1.
xviii | Preface
www.EBooksWorld.ir
About the Second EditionThe first edition of Laravel: Up & Running came out in November 2016 and coveredLaravel versions 5.1 to 5.3. This second edition adds coverage for 5.4 to 5.8 and Lara‐vel Dusk and Horizon, and adds an 18th chapter about community resources andother non-core Laravel packages that weren’t covered in the first 17 chapters.
Conventions Used in This BookThe following typographical conventions are used in this book:
ItalicIndicates new terms, URLs, email addresses, filenames, and file extensions.
Constant width
Used for program listings, as well as within paragraphs to refer to program ele‐ments such as variable or function names, databases, data types, environmentvariables, statements, and keywords.
Constant width bold
Shows commands or other text that should be typed literally by the user.
Constant width italic
Shows code text that should be replaced with user-supplied values or by valuesdetermined by context.
{Italic in braces}Shows file names or file pathways that should be replaced with user-supplied val‐ues or by values determined by context.
This element signifies a tip or suggestion.
This element signifies a general note.
This element indicates a warning or caution.
Preface | xix
www.EBooksWorld.ir
Because this book covers Laravel from versions 5.1 to 5.8, you’ll find markersthroughout the book indicating version-specific comments. Generally speaking, theindicator is showing the version of Laravel a feature was introduced in (so you’ll see a5.3 next to a feature that’s only accessible in Laravel 5.3 and higher).
O’Reilly Online LearningFor almost 40 years, O’Reilly Media has provided technologyand business training, knowledge, and insight to help compa‐nies succeed.
Our unique network of experts and innovators share their knowledge and expertisethrough books, articles, conferences, and our online learning platform. O’Reilly’sonline learning platform gives you on-demand access to live training courses, in-depth learning paths, interactive coding environments, and a vast collection of textand video from O’Reilly and 200+ other publishers. For more information, pleasevisit http://oreilly.com.
How to Contact UsPlease address comments and questions concerning this book to the publisher:
O’Reilly Media, Inc.1005 Gravenstein Highway NorthSebastopol, CA 95472800-998-9938 (in the United States or Canada)707-829-0515 (international or local)707-829-0104 (fax)
We have a web page for this book, where we list errata, examples, and any additionalinformation. You can access this page at http://bit.ly/laravel-up-and-running-2e.
To comment or ask technical questions about this book, send email to bookques‐[email protected].
For more information about our books, courses, conferences, and news, see our web‐site at http://www.oreilly.com.
Find us on Facebook: http://facebook.com/oreilly
Follow us on Twitter: http://twitter.com/oreillymedia
Watch us on YouTube: http://www.youtube.com/oreillymedia
xx | Preface
www.EBooksWorld.ir
Acknowledgments for the First EditionThis book would not have happened without the gracious support of my amazingwife, Tereva, or the understanding (“Daddy’s writing, buddy!”) of my son Malachi.And while she wasn’t explicitly aware of it, my daughter Mia was around for almostthe entire creation of the book, so this book is dedicated to the whole family. Therewere many, many long evening hours and weekend Starbucks trips that took me awayfrom them, and I couldn’t be more grateful for their support and also their presencejust making my life awesome.
Additionally, the entire Tighten family has supported and encouraged me through thewriting of the book, several colleagues even editing code samples (Keith Damiani,editor extraordinaire) and helping me with challenging ones (Adam Wathan, King ofthe Collection Pipeline). Dan Sheetz, my partner in Tighten crime, has been graciousenough to watch me while away many a work hour cranking on this book and wasnothing but supportive and encouraging; and Dave Hicking, our operations manager,helped me arrange my schedule and work responsibilities around writing time.
Taylor Otwell deserves thanks and honor for creating Laravel—and therefore creatingso many jobs and helping so many developers love our lives that much more. Hedeserves appreciation for how he’s focused on developer happiness and how hard he’sworked to have empathy for developers and to build a positive and encouraging com‐munity. But I also want to thank him for being a kind, encouraging, and challengingfriend. Taylor, you’re a boss.
Thanks to Jeffrey Way, who is one of the best teachers on the internet. He originallyintroduced me to Laravel and introduces more people every day. He’s also, unsurpris‐ingly, a fantastic human being whom I’m glad to call a friend.
Thank you to Jess D’Amico, Shawn McCool, Ian Landsman, and Taylor for seeingvalue in me as a conference speaker early on and giving me a platform to teach from.Thanks to Dayle Rees for making it so easy for so many to learn Laravel in the earlydays.
Thanks to every person who put their time and effort into writing blog posts aboutLaravel, especially early on: Eric Barnes, Chris Fidao, Matt Machuga, Jason Lewis,Ryan Tablada, Dries Vints, Maks Surguy, and so many more.
And thanks to the entire community of friends on Twitter, IRC, and Slack who’veinteracted with me over the years. I wish I could name every name, but I would misssome and then feel awful about missing them. You all are brilliant, and I’m honoredto get to interact with you on a regular basis.
Thanks to my O’Reilly editor, Ally MacDonald, and all of my technical editors: KeithDamiani, Michael Dyrynda, Adam Fairholm, and Myles Hyson.
Preface | xxi
www.EBooksWorld.ir
And, of course, thanks to the rest of my family and friends, who supported medirectly or indirectly through this process—my parents and siblings, the Gainesvillecommunity, other business owners and authors, other conference speakers, and theinimitable DCB. I need to stop writing because by the time I run out of space here I’llbe thanking my Starbucks baristas.
Acknowledgments for the Second EditionThe second edition is very similar to the first, so all of the previous acknowledgmentsare still valid. But I’ve gotten help from a few new people this time around. My tech‐nical proofreaders have been Tate Peñaranda, Andy Swick, Mohamed Said, andSamantha Geitz, and my new O’Reilly editor has been Alicia Young, who’s kept me ontask through a lot of changes in my life and the Laravel community over the last year.Matt Hacker on the Atlas team answered all my stupid AsciiDoc formatting ques‐tions, including about the surprisingly difficult formatting for the __() method.
And I couldn’t have made it through the process of writing a second edition withoutthe help of my research assistant, Wilbur Powery. Wilbur was willing to sift throughthe last several years’ worth of changelogs and pull requests and announcements andmatch each feature up with the current structure of the book, and he even testedevery single code example in the book in Laravel 5.7 (and then, later, 5.8) so that Icould focus my limited time and energy on writing the new and updated segments.
Also, my daughter, Mia, is out of her mama’s belly now. So, let’s just add her joy andenergy and love and cuteness and adventurous spirit to my list of sources of inspira‐tion.
xxii | Preface
www.EBooksWorld.ir

CHAPTER 1
Why Laravel?
In the early days of the dynamic web, writing a web application looked a lot differentthan it does today. Developers then were responsible for writing the code for not justthe unique business logic of our applications, but also each of the components thatare so common across sites—user authentication, input validation, database access,templating, and more.
Today, programmers have dozens of application development frameworks and thou‐sands of components and libraries easily accessible. It’s a common refrain among pro‐grammers that, by the time you learn one framework, three newer (and purportedlybetter) frameworks have popped up intending to replace it.
“Just because it’s there” might be a valid justification for climbing a mountain, butthere are better reasons to choose to use a specific framework—or to use a frameworkat all. It’s worth asking the question, why frameworks? More specifically, why Laravel?
Why Use a Framework?It’s easy to see why it’s beneficial to use the individual components, or packages, thatare available to PHP developers. With packages, someone else is responsible fordeveloping and maintaining an isolated piece of code that has a well-defined job, andin theory that person has a deeper understanding of this single component than youhave time to have.
Frameworks like Laravel—and Symfony, Lumen, and Slim—prepackage a collectionof third-party components together with custom framework “glue” like configurationfiles, service providers, prescribed directory structures, and application bootstraps.So, the benefit of using a framework in general is that someone has made decisionsnot just about individual components for you, but also about how those componentsshould fit together.
1
www.EBooksWorld.ir
“I’ll Just Build It Myself”Let’s say you start a new web app without the benefit of a framework. Where do youbegin? Well, it should probably route HTTP requests, so you now need to evaluate allof the HTTP request and response libraries available and pick one. Then you’ll haveto pick a router. Oh, and you’ll probably need to set up some form of routes configu‐ration file. What syntax should it use? Where should it go? What about controllers?Where do they live, and how are they loaded? Well, you probably need a dependencyinjection container to resolve the controllers and their dependencies. But which one?
Furthermore, if you do take the time to answer all those questions and successfullycreate your application, what’s the impact on the next developer? What about whenyou have four such custom framework–based applications, or a dozen, and you haveto remember where the controllers live in each, or what the routing syntax is?
Consistency and FlexibilityFrameworks address this issue by providing a carefully considered answer to thequestion “Which component should we use here?” and ensuring that the particularcomponents chosen work well together. Additionally, frameworks provide conven‐tions that reduce the amount of code a developer new to the project has to under‐stand—if you understand how routing works in one Laravel project, for example, youunderstand how it works in all Laravel projects.
When someone prescribes rolling your own framework for each new project, whatthey’re really advocating is the ability to control what does and doesn’t go into yourapplication’s foundation. That means the best frameworks will not only provide youwith a solid foundation, but also give you the freedom to customize to your heart’scontent. And this, as I’ll show you in the rest of this book, is part of what makes Lara‐vel so special.
A Short History of Web and PHP FrameworksAn important part of being able to answer the question “Why Laravel?” is under‐standing Laravel’s history—and understanding what came before it. Prior to Laravel’srise in popularity, there were a variety of frameworks and other movements in PHPand other web development spaces.
Ruby on RailsDavid Heinemeier Hansson released the first version of Ruby on Rails in 2004, andit’s been hard to find a web application framework since then that hasn’t been influ‐enced by Rails in some way.
2 | Chapter 1: Why Laravel?
www.EBooksWorld.ir
Rails popularized MVC, RESTful JSON APIs, convention over configuration, Active‐Record, and many more tools and conventions that had a profound influence on theway web developers approached their applications—especially with regard to rapidapplication development.
The Influx of PHP FrameworksIt was clear to most developers that Rails and similar web application frameworkswere the wave of the future, and PHP frameworks, including those admittedly imitat‐ing Rails, started popping up quickly.
CakePHP was the first in 2005, and it was soon followed by Symfony, CodeIgniter,Zend Framework, and Kohana (a CodeIgniter fork). Yii arrived in 2008, and Auraand Slim in 2010. 2011 brought FuelPHP and Laravel, both of which were not quiteCodeIgniter offshoots, but instead proposed as alternatives.
Some of these frameworks were more Rails-y, focusing on database object-relationalmappers (ORMs), MVC structures, and other tools targeting rapid development.Others, like Symfony and Zend, focused more on enterprise design patterns andecommerce.
The Good and the Bad of CodeIgniterCakePHP and CodeIgniter were the two early PHP frameworks that were mostopen about how much their inspiration was drawn from Rails. CodeIgniter quicklyrose to fame and by 2010 was arguably the most popular of the independent PHPframeworks.
CodeIgniter was simple, easy to use, and boasted amazing documentation and astrong community. But its use of modern technology and patterns advanced slowly;and as the framework world grew and PHP’s tooling advanced, CodeIgniter startedfalling behind in terms of both technological advances and out-of-the-box features.Unlike many other frameworks, CodeIgniter was managed by a company, and it wasslow to catch up with PHP 5.3’s newer features like namespaces and the moves to Git‐Hub and later Composer. It was in 2010 that Taylor Otwell, Laravel’s creator, becamedissatisfied enough with CodeIgniter that he set off to write his own framework.
Laravel 1, 2, and 3The first beta of Laravel 1 was released in June 2011, and it was written completelyfrom scratch. It featured a custom ORM (Eloquent); closure-based routing (inspiredby Ruby Sinatra); a module system for extension; and helpers for forms, validation,authentication, and more.
A Short History of Web and PHP Frameworks | 3
www.EBooksWorld.ir
Early Laravel development moved quickly, and Laravel 2 and 3 were released inNovember 2011 and February 2012, respectively. They introduced controllers, unittesting, a command-line tool, an inversion of control (IoC) container, Eloquent rela‐tionships, and migrations.
Laravel 4With Laravel 4, Taylor rewrote the entire framework from the ground up. By thispoint Composer, PHP’s now-ubiquitous package manager, was showing signs ofbecoming an industry standard, and Taylor saw the value of rewriting the frameworkas a collection of components, distributed and bundled together by Composer.
Taylor developed a set of components under the code name Illuminate and, in May2013, released Laravel 4 with an entirely new structure. Instead of bundling themajority of its code as a download, Laravel now pulled in the majority of its compo‐nents from Symfony (another framework that released its components for use by oth‐ers) and the Illuminate components through Composer.
Laravel 4 also introduced queues, a mail component, facades, and database seeding.And because Laravel was now relying on Symfony components, it was announcedthat Laravel would be mirroring (not exactly, but soon after) the six-monthly releaseschedule Symfony follows.
Laravel 5Laravel 4.3 was scheduled to release in November 2014, but as development pro‐gressed it became clear that the significance of its changes merited a major release,and Laravel 5 was released in February 2015.
Laravel 5 featured a revamped directory structure, removal of the form and HTMLhelpers, the introduction of the contract interfaces, a spate of new views, Socialite forsocial media authentication, Elixir for asset compilation, Scheduler to simplify cron,dotenv for simplified environment management, form requests, and a brand newREPL (read–evaluate–print loop). Since then it’s grown in features and maturity, butthere have been no major changes like in previous versions.
What’s So Special About Laravel?So what is it that sets Laravel apart? Why is it worth having more than one PHPframework at any time? They all use components from Symfony anyway, right? Let’stalk a bit about what makes Laravel “tick.”
4 | Chapter 1: Why Laravel?
www.EBooksWorld.ir
The Philosophy of LaravelYou only need to read through the Laravel marketing materials and READMEs tostart seeing its values. Taylor uses light-related words like “Illuminate” and “Spark.”And then there are these: “Artisans.” “Elegant.” Also, these: “Breath of fresh air.”“Fresh start.” And finally: “Rapid.” “Warp speed.”
The two most strongly communicated values of the framework are to increase devel‐oper speed and developer happiness. Taylor has described the “Artisan” language asintentionally contrasting against more utilitarian values. You can see the genesis ofthis sort of thinking in his 2011 question on StackExchange in which he stated,“Sometimes I spend ridiculous amounts of time (hours) agonizing over making code‘look pretty’”—just for the sake of a better experience of looking at the code itself.And he’s often talked about the value of making it easier and quicker for developersto take their ideas to fruition, getting rid of unnecessary barriers to creating greatproducts.
Laravel is, at its core, about equipping and enabling developers. Its goal is to provideclear, simple, and beautiful code and features that help developers quickly learn, start,and develop, and write code that’s simple, clear, and lasting.
The concept of targeting developers is clear across Laravel materials. “Happy devel‐opers make the best code” is written in the documentation. “Developer happinessfrom download to deploy” was the unofficial slogan for a while. Of course, any tool orframework will say it wants developers to be happy. But having developer happinessas a primary concern, rather than secondary, has had a huge impact on Laravel’s styleand decision-making progress. Where other frameworks may target architecturalpurity as their primary goal, or compatibility with the goals and values of enterprisedevelopment teams, Laravel’s primary focus is on serving the individual developer.That doesn’t mean you can’t write architecturally pure or enterprise-ready applica‐tions in Laravel, but it won’t have to be at the expense of the readability and compre‐hensibility of your codebase.
How Laravel Achieves Developer HappinessJust saying you want to make developers happy is one thing. Doing it is another, andit requires you to question what in a framework is most likely to make developersunhappy and what is most likely to make them happy. There are a few ways Laraveltries to make developers’ lives easier.
First, Laravel is a rapid application development framework. That means it focuses ona shallow (easy) learning curve and on minimizing the steps between starting a newapp and publishing it. All of the most common tasks in building web applications,from database interactions to authentication to queues to email to caching, are madesimpler by the components Laravel provides. But Laravel’s components aren’t just
What’s So Special About Laravel? | 5
www.EBooksWorld.ir
great on their own; they provide a consistent API and predictable structures acrossthe entire framework. That means that, when you’re trying something new in Laravel,you’re more than likely going to end up saying, “… and it just works.”
This doesn’t end with the framework itself, either. Laravel provides an entire ecosys‐tem of tools for building and launching applications. You have Homestead and Valetfor local development, Forge for server management, and Envoyer for advanceddeployment. And there’s a suite of add-on packages: Cashier for payments and sub‐scriptions, Echo for WebSockets, Scout for search, Passport for API authentication,Dusk for frontend testing, Socialite for social login, Horizon for monitoring queues,Nova for building admin panels, and Spark to bootstrap your SaaS. Laravel is tryingto take the repetitive work out of developers’ jobs so they can do something unique.
Next, Laravel focuses on “convention over configuration”—meaning that if you’rewilling to use Laravel’s defaults, you’ll have to do much less work than with otherframeworks that require you to declare all of your settings even if you’re using therecommended configuration. Projects built on Laravel take less time than those builton most other PHP frameworks.
Laravel also focuses deeply on simplicity. It’s possible to use dependency injection andmocking and the Data Mapper pattern and repositories and Command QueryResponsibility Segregation and all sorts of other more complex architectural patternswith Laravel, if you want. But while other frameworks might suggest using those toolsand structures on every project, Laravel and its documentation and community leantoward starting with the simplest possible implementation—a global function here, afacade there, ActiveRecord over there. This allows developers to create the simplestpossible application to solve for their needs, without limiting its usefulness in com‐plex environments.
An interesting source of how Laravel is different from other PHP frameworks is thatits creator and its community are more connected to and inspired by Ruby and Railsand functional programming languages than by Java. There’s a strong current inmodern PHP to lean toward verbosity and complexity, embracing the more Java-esque aspects of PHP. But Laravel tends to be on the other side, embracing expressive,dynamic, and simple coding practices and language features.
The Laravel CommunityIf this book is your first exposure to the Laravel community, you have something spe‐cial to look forward to. One of the distinguishing elements of Laravel, which has con‐tributed to its growth and success, is the welcoming, teaching community thatsurrounds it. From Jeffrey Way’s Laracasts video tutorials to Laravel News to Slackand IRC and Discord channels, from Twitter friends to bloggers to podcasts to theLaracon conferences, Laravel has a rich and vibrant community full of folks who’ve
6 | Chapter 1: Why Laravel?
www.EBooksWorld.ir
been around since day one and folks who are just starting their own “day one.” Andthis isn’t an accident:
From the very beginning of Laravel, I’ve had this idea that all people want to feel likethey are part of something. It’s a natural human instinct to want to belong and beaccepted into a group of other like-minded people. So, by injecting personality into aweb framework and being really active with the community, that type of feeling cangrow in the community.
—Taylor Otwell, Product and Support interview
Taylor understood from the early days of Laravel that a successful open source projectneeded two things: good documentation and a welcoming community. And thosetwo things are now hallmarks of Laravel.
How It WorksUp until now, everything I’ve shared here has been entirely abstract. What about thecode, you ask? Let’s dig into a simple application (Example 1-1) so you can see whatworking with Laravel day to day is actually like.
Example 1-1. “Hello, World” in routes/web.php
<?php
Route::get('/', function () { return 'Hello, World!';});
The simplest possible action you can take in a Laravel application is to define a routeand return a result any time someone visits that route. If you initialize a brand newLaravel application on your machine, define the route in Example 1-1, and then servethe site from the public directory, you’ll have a fully functioning “Hello, World” exam‐ple (see Figure 1-1).
Figure 1-1. Returning “Hello, World!” with Laravel
It looks very similar with controllers, as you can see in Example 1-2.
How It Works | 7
www.EBooksWorld.ir
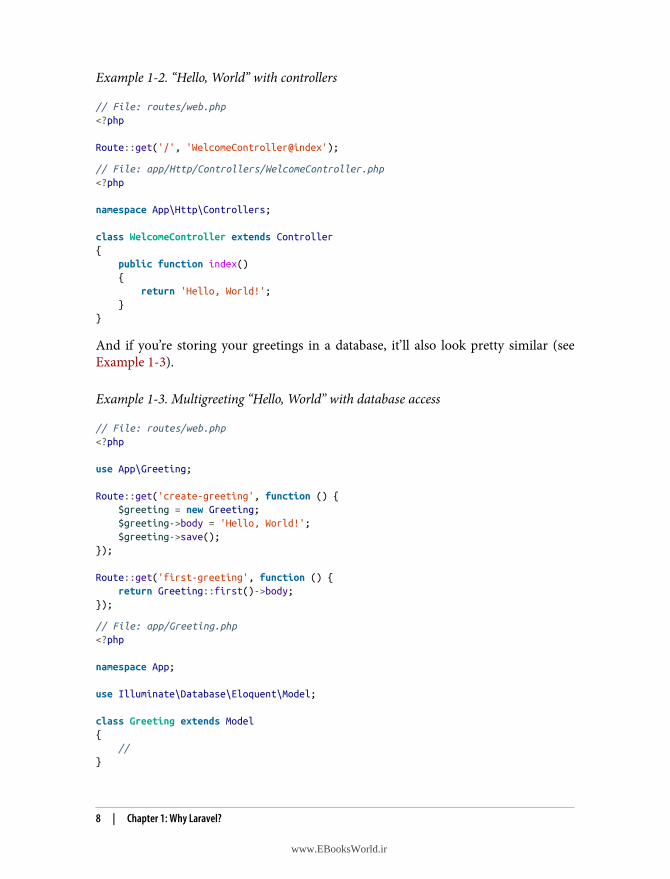
Example 1-2. “Hello, World” with controllers
// File: routes/web.php<?php
Route::get('/', 'WelcomeController@index');
// File: app/Http/Controllers/WelcomeController.php<?php
namespace App\Http\Controllers;
class WelcomeController extends Controller{ public function index() { return 'Hello, World!'; }}
And if you’re storing your greetings in a database, it’ll also look pretty similar (seeExample 1-3).
Example 1-3. Multigreeting “Hello, World” with database access
// File: routes/web.php<?php
use App\Greeting;
Route::get('create-greeting', function () { $greeting = new Greeting; $greeting->body = 'Hello, World!'; $greeting->save();});
Route::get('first-greeting', function () { return Greeting::first()->body;});
// File: app/Greeting.php<?php
namespace App;
use Illuminate\Database\Eloquent\Model;
class Greeting extends Model{ //}
8 | Chapter 1: Why Laravel?
www.EBooksWorld.ir
// File: database/migrations/2015_07_19_010000_create_greetings_table.php<?php
use Illuminate\Database\Schema\Blueprint;use Illuminate\Database\Migrations\Migration;
class CreateGreetingsTable extends Migration{ public function up() { Schema::create('greetings', function (Blueprint $table) { $table->bigIncrements('id'); $table->string('body'); $table->timestamps(); }); }
public function down() { Schema::dropIfExists('greetings'); }}
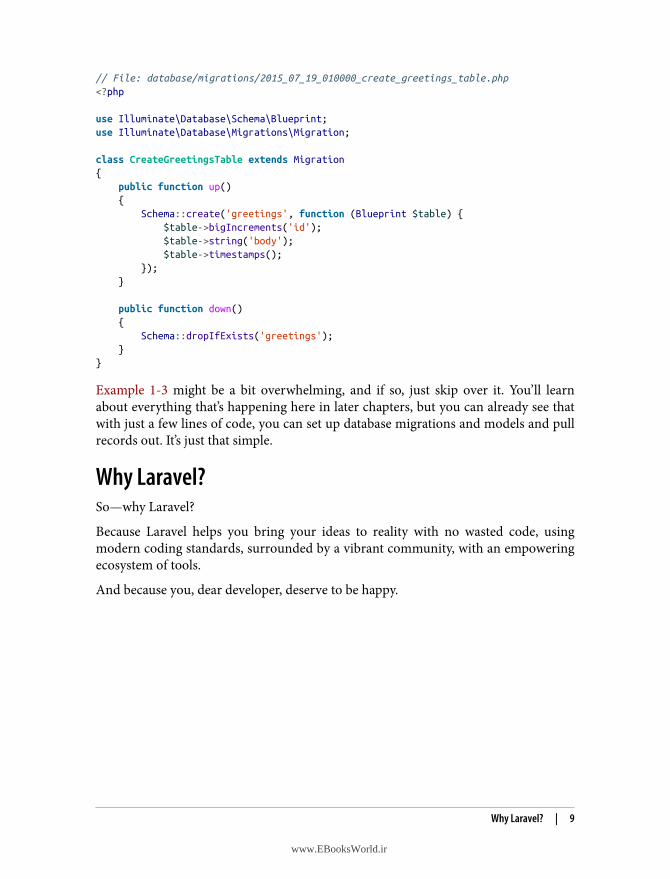
Example 1-3 might be a bit overwhelming, and if so, just skip over it. You’ll learnabout everything that’s happening here in later chapters, but you can already see thatwith just a few lines of code, you can set up database migrations and models and pullrecords out. It’s just that simple.
Why Laravel?So—why Laravel?
Because Laravel helps you bring your ideas to reality with no wasted code, usingmodern coding standards, surrounded by a vibrant community, with an empoweringecosystem of tools.
And because you, dear developer, deserve to be happy.
Why Laravel? | 9
www.EBooksWorld.ir

www.EBooksWorld.ir
CHAPTER 2
Setting Up a LaravelDevelopment Environment
Part of PHP’s success has been because it’s hard to find a web server that can’t servePHP. However, modern PHP tools have stricter requirements than those of the past.The best way to develop for Laravel is to ensure a consistent local and remote serverenvironment for your code, and thankfully, the Laravel ecosystem has a few toolsfor this.
System RequirementsEverything we’ll cover in this chapter is possible with Windows machines, but you’llneed dozens of pages of custom instructions and caveats. I’ll leave those instructionsand caveats to actual Windows users, so the examples here and in the rest of the bookwill focus on Unix/Linux/macOS developers.
Whether you choose to serve your website by installing PHP and other tools on yourlocal machine, serve your development environment from a virtual machine viaVagrant or Docker, or rely on a tool like MAMP/WAMP/XAMPP, your developmentenvironment will need to have all of the following installed in order to serve Laravelsites:
• PHP >= 7.1.3 for Laravel versions 5.6 to 5.8, PHP >= 7.0.0 for version 5.5, PHP>= 5.6.4 for version 5.4, PHP between 5.6.4 and 7.1.* for version 5.3, or PHP >=5.5.9 for versions 5.2 and 5.1
• OpenSSL PHP extension• PDO PHP extension• Mbstring PHP extension
11
www.EBooksWorld.ir
• Tokenizer PHP extension• XML PHP extension (Laravel 5.3 and higher)• Ctype PHP extension (Laravel 5.6 and higher)• JSON PHP extension (Laravel 5.6 and higher)• BCMath PHP extension (Laravel 5.7 and higher)
ComposerWhatever machine you’re developing on will need to have Composer installed glob‐ally. If you’re not familiar with Composer, it’s a tool that’s at the foundation of mostmodern PHP development. Composer is a dependency manager for PHP, much likeNPM for Node or RubyGems for Ruby. But like NPM, Composer is also the founda‐tion of much of our testing, local script loading, installation scripts, and much more.You’ll need Composer to install Laravel, update Laravel, and bring in external depen‐dencies.
Local Development EnvironmentsFor many projects, hosting your development environment using a simpler toolsetwill be enough. If you already have MAMP or WAMP or XAMPP installed on yoursystem, that will likely be fine to run Laravel. You can also just run Laravel with PHP’sbuilt-in web server, assuming your system PHP is the right version.
All you really need to get started is the ability to run PHP. Everything past that is upto you.
However, Laravel offers two tools for local development, Valet and Homestead, andwe’ll cover both briefly. If you’re unsure of which to use, I’d recommend using Valetand just becoming briefly familiar with Homestead; however, both tools are valuableand worth understanding.
Laravel ValetIf you want to use PHP’s built-in web server, your simplest option is to serve everysite from a localhost URL. If you run php -S localhost:8000 -t public from yourLaravel site’s root folder, PHP’s built-in web server will serve your site at http://local‐host:8000/. You can also run php artisan serve once you have your application setup to easily spin up an equivalent server.
But if you’re interested in tying each of your sites to a specific development domain,you’ll need to get comfortable with your operating system’s hosts file and use a toollike dnsmasq. Let’s instead try something simpler.
12 | Chapter 2: Setting Up a Laravel Development Environment
www.EBooksWorld.ir
If you’re a Mac user (there are also unofficial forks for Windows and Linux), LaravelValet takes away the need to connect your domains to your application folders. Valetinstalls dnsmasq and a series of PHP scripts that make it possible to type laravelnew myapp && open myapp.test and for it to just work. You’ll need to install a fewtools using Homebrew, which the documentation will walk you through, but the stepsfrom initial installation to serving your apps are few and simple.
Install Valet—see the docs for the latest installation instructions—and point it at oneor more directories where your sites will live. I ran valet park from my ~/Sites direc‐tory, which is where I put all of my under-development apps. Now, you can justadd .test to the end of the directory name and visit it in your browser.
Valet makes it easy to serve all folders in a given folder as {foldername}.test usingvalet park, to serve just a single folder using valet link, to open the Valet-serveddomain for a folder using valet open, to serve the Valet site with HTTPS usingvalet secure, and to open an ngrok tunnel so you can share your site with otherswith valet share.
Laravel HomesteadHomestead is another tool you might want to use to set up your local developmentenvironment. It’s a configuration tool that sits on top of Vagrant (which is a tool formanaging virtual machines) and provides a preconfigured virtual machine image thatis perfectly set up for Laravel development and mirrors the most common productionenvironment that many Laravel sites run on. Homestead is also likely the best localdevelopment environment for developers running Windows machines.
The Homestead docs are robust and kept constantly up to date, so I’ll just refer you tothem if you want to learn how it works and how to get it set up.
Vessel
It’s not an official Laravel project, but Chris Fidao of Servers forHackers and Shipping Docker has created a simple tool for creatingDocker environments for Laravel development called Vessel. Take alook at the Vessel documentation to learn more.
Creating a New Laravel ProjectThere are two ways to create a new Laravel project, but both are run from the com‐mand line. The first option is to globally install the Laravel installer tool (using Com‐poser); the second is to use Composer’s create-project feature.
You can learn about both options in greater detail on the Installation documentationpage, but I’d recommend the Laravel installer tool.
Creating a New Laravel Project | 13
www.EBooksWorld.ir

Installing Laravel with the Laravel Installer ToolIf you have Composer installed globally, installing the Laravel installer tool is as sim‐ple as running the following command:
composer global require "laravel/installer"
Once you have the Laravel installer tool installed, spinning up a new Laravel projectis simple. Just run this command from your command line:
laravel new projectName
This will create a new subdirectory of your current directory named {projectName}and install a bare Laravel project in it.
Installing Laravel with Composer’s create-project FeatureComposer also offers a feature called create-project for creating new projects witha particular skeleton. To use this tool to create a new Laravel project, issue the follow‐ing command:
composer create-project laravel/laravel projectName
Just like the installer tool, this will create a subdirectory of your current directorynamed {projectName} that contains a skeleton Laravel install, ready for you todevelop.
Lambo: Super-Powered “Laravel New”Because I often take the same series of steps after creating a new Laravel project, Imade a simple script called Lambo that automates those steps every time I create anew project.
Lambo runs laravel new and then commits your code to Git, sets up your .env cre‐dentials with reasonable defaults, opens the project in a browser, and (optionally)opens it in your editor and takes a few other helpful build steps.
14 | Chapter 2: Setting Up a Laravel Development Environment
www.EBooksWorld.ir
You can install Lambo using Composer’s global require:
composer global require tightenco/lambo
And you can use it just like laravel new:
cd Siteslambo my-new-project
Laravel’s Directory StructureWhen you open up a directory that contains a skeleton Laravel application, you’ll seethe following files and directories:
app/bootstrap/config/public/resources/routes/storage/tests/vendor/.editorconfig.env.env.example.gitattributes.gitignoreartisancomposer.jsoncomposer.lockpackage.jsonphpunit.xmlreadme.mdserver.phpwebpack.mix.js
Different Build Tools in Laravel Prior to 5.4
In projects created prior to Laravel 5.4, you’ll likely see a gulpfile.jsinstead of webpack.mix.js; this shows the project is running LaravelElixir instead of Laravel Mix.
Let’s walk through them one by one to get familiar.
Laravel’s Directory Structure | 15
www.EBooksWorld.ir

The FoldersThe root directory contains the following folders by default:
appWhere the bulk of your actual application will go. .Models, controllers, com‐mands, and your PHP domain code all go in here.
bootstrapContains the files that the Laravel framework uses to boot every time it runs.
configWhere all the configuration files live.
databaseWhere database migrations, seeds, and factories live.
publicThe directory the server points to when it’s serving the website. This containsindex.php, which is the front controller that kicks off the bootstrapping processand routes all requests appropriately. It’s also where any public-facing files likeimages, stylesheets, scripts, or downloads go.
resourcesWhere files that are needed for other scripts live. Views, language files, and(optionally) Sass/Less/source CSS and source JavaScript files live here.
routesWhere all of the route definitions live, both for HTTP routes and “consoleroutes,” or Artisan commands.
storageWhere caches, logs, and compiled system files live.
testsWhere unit and integration tests live.
vendorWhere Composer installs its dependencies. It’s Git-ignored (marked to be exclu‐ded from your version control system), as Composer is expected to run as a partof your deploy process on any remote servers.
16 | Chapter 2: Setting Up a Laravel Development Environment
www.EBooksWorld.ir
The Loose FilesThe root directory also contains the following files:
.editorconfigGives your IDE/text editor instructions about Laravel’s coding standars (e.g., thesize of indents, the charset, and whether to trim trailing whitespace). You’ll seethis in any Laravel apps running 5.5 and later.
.env and .env.exampleDictate the environment variables (variables that are expected to be different ineach environment and are therefore not committed to version con‐trol). .env.example is a template that each environment should duplicate to createits own .env file, which is Git-ignored.
.gitignore and .gitattributesGit configuration files.
artisanAllows you to run Artisan commands (see Chapter 8) from the command line.
composer.json and composer.lockConfiguration files for Composer; composer.json is user-editable and com‐poser.lock is not. These files share some basic information about the project andalso define its PHP dependencies.
package.jsonLike composer.json but for frontend assets and dependencies of the build system;it instructs NPM on which JavaScript-based dependencies to pull in.
phpunit.xmlA configuration file for PHPUnit, the tool Laravel uses for testing out of the box.
readme.mdA Markdown file giving a basic introduction to Laravel. You won’t see this file ifyou use the Laravel installer.
server.phpA backup server that tries to allow less-capable servers to still preview the Laravelapplication.
webpack.mix.jsThe (optional) configuration file for Mix. If you’re using Elixir, you’ll instead seegulpfile.js. These files are for giving your build system directions on how to com‐pile and process your frontend assets.
Laravel’s Directory Structure | 17
www.EBooksWorld.ir
ConfigurationThe core settings of your Laravel application—database connection settings, queueand mail settings, etc.—live in files in the config folder. Each of these files returns aPHP array, and each value in the array is accessible by a config key that is comprisedof the filename and all descendant keys, separated by dots (.).
So, if you create a file at config/services.php that looks like this:
// config/services.php<?phpreturn [ 'sparkpost' => [ 'secret' => 'abcdefg', ],];
you can access that config variable using config('services.sparkpost.secret').
Any configuration variables that should be distinct for each environment (and there‐fore not committed to source control) will instead live in your .env files. Let’s say youwant to use a different Bugsnag API key for each environment. You’d set the configfile to pull it from .env:
// config/services.php<?phpreturn [ 'bugsnag' => [ 'api_key' => env('BUGSNAG_API_KEY'), ],];
This env() helper function pulls a value from your .env file with that same key. Sonow, add that key to your .env (settings for this environment) and .env.example (tem‐plate for all environments) files:
# In .envBUGSNAG_API_KEY=oinfp9813410942
# In .env.exampleBUGSNAG_API_KEY=
Your .env file will already contain quite a few environment-specific variables neededby the framework, like which mail driver you’ll be using and what your basic databasesettings are.
18 | Chapter 2: Setting Up a Laravel Development Environment
www.EBooksWorld.ir
Using env() Outside of Config Files
Certain features in Laravel, including some caching and optimiza‐tion features, aren’t available if you use env() calls anywhere out‐side of config files.The best way to pull in environment variables is to set up configitems for anything you want to be environment-specific. Havethose config items read the environment variables, and then refer‐ence the config variables anywhere within your app:
// config/services.phpreturn [ 'bugsnag' => [ 'key' => env('BUGSNAG_API_KEY'), ],];
// In controller, or whatever$bugsnag = new Bugsnag(config('services.bugsnag.key'));
The .env FileLet’s take a quick look at the default contents of the .env file. The exact keys will varydepending on which version of Laravel you’re using, but take a look at Example 2-1 tosee what they look like in 5.8.
Example 2-1. The default environment variables in Laravel 5.8
APP_NAME=LaravelAPP_ENV=localAPP_KEY=APP_DEBUG=trueAPP_URL=http://localhost
LOG_CHANNEL=stack
DB_CONNECTION=mysqlDB_HOST=127.0.0.1DB_PORT=3306DB_DATABASE=homesteadDB_USERNAME=homesteadDB_PASSWORD=secret
BROADCAST_DRIVER=logCACHE_DRIVER=fileQUEUE_CONNECTION=syncSESSION_DRIVER=fileSESSION_LIFETIME=120
REDIS_HOST=127.0.0.1
Configuration | 19
www.EBooksWorld.ir
REDIS_PASSWORD=nullREDIS_PORT=6379
MAIL_DRIVER=smtpMAIL_HOST=smtp.mailtrap.ioMAIL_PORT=2525MAIL_USERNAME=nullMAIL_PASSWORD=nullMAIL_ENCRYPTION=null
AWS_ACCESS_KEY_ID=AWS_SECRET_ACCESS_KEY=
PUSHER_APP_ID=PUSHER_APP_KEY=PUSHER_APP_SECRET=PUSHER_APP_CLUSTER=mt1
MIX_PUSHER_APP_KEY="${PUSHER_APP_KEY}"MIX_PUSHER_APP_CLUSTER="${PUSHER_APP_CLUSTER}"
I won’t go into all of them, because quite a few are just groups of authentication infor‐mation for various services (Pusher, Redis, DB, Mail). Here are two important envi‐ronment variables you should know about, though:
APP_KEY
A randomly generated string that’s used to encrypt data. If this is ever empty, youmay run into the error “No application encryption key has been specified.” Inthat case, just run php artisan key:generate and Laravel will generate one foryou.
APP_DEBUG
A Boolean determining whether the users of this instance of your applicationshould see debug errors—great for local and staging environments, terrible forproduction.
The rest of the non-authentication settings (BROADCAST_DRIVER, QUEUE_CONNECTION,etc.) are given default values that work with as little reliance on external services aspossible, which is perfect for when you’re getting started.
When you start your first Laravel app, the only change you’ll likely want to make formost projects is to the database configuration settings. I use Laravel Valet, so I changeDB_DATABASE to the name of my project, DB_USERNAME to root, and DB_PASSWORD toan empty string:
DB_DATABASE=myProjectDB_USERNAME=rootDB_PASSWORD=
20 | Chapter 2: Setting Up a Laravel Development Environment
www.EBooksWorld.ir
Then, I create a database with the same name as my project in my favorite MySQLclient, and I’m ready to go.
Up and RunningYou’re now up and running with a bare Laravel install. Run git init, commit thebare files with git add . and git commit, and you’re ready to start coding. That’s it!And if you’re using Valet, you can run the following commands and instantly seeyour site live in your browser:
laravel new myProject && cd myProject && valet open
Every time I start a new project, these are the steps I take:
laravel new myProjectcd myProjectgit initgit add .git commit -m "Initial commit"
I keep all of my sites in a ~/Sites folder, which I have set up as my primary Valet direc‐tory, so in this case I’d instantly have myProject.test accessible in my browser with noadded work. I can edit .env and point it to a particular database, add that database inmy MySQL app, and I’m ready to start coding. And remember, if you use Lambo, allof these steps are already taken for you.
TestingIn every chapter after this, the “Testing” section at the end of the chapter will showyou how to write tests for the feature or features that were covered. Since this chapterdoesn’t cover a testable feature, let’s talk tests quickly. (To learn more about writingand running tests in Laravel, head over to Chapter 12.)
Out of the box, Laravel brings in PHPUnit as a dependency and is configured to runthe tests in any file in the tests directory whose name ends with Test.php (for example,tests/UserTest.php).
So, the simplest way to write tests is to create a file in the tests directory with a namethat ends with Test.php. And the easiest way to run them is to run ./vendor/bin/phpunit from the command line (in the project root).
If any tests require database access, be sure to run your tests from the machine whereyour database is hosted—so if you’re hosting your database in Vagrant, make sure tossh into your Vagrant box to run your tests from there. Again, you can learn aboutthis and much more in Chapter 12.
Up and Running | 21
www.EBooksWorld.ir
Also, some of the testing sections will use testing syntax and features that you will notbe familiar with yet if you’re reading the book for the first time. If code in any of thetesting sections is confusing, just skip it and come back to it after you’ve had a chanceto read the testing chapter.
TL;DRSince Laravel is a PHP framework, it’s very simple to serve it locally. Laravel also pro‐vides two tools for managing your local development: a simpler tool called Valet thatuses your local machine to provide your dependencies, and a preconfigured Vagrantsetup named Homestead. Laravel relies on and can be installed by Composer andcomes out of the box with a series of folders and files that reflect both its conventionsand its relationship with other open source tools.
22 | Chapter 2: Setting Up a Laravel Development Environment
www.EBooksWorld.ir
CHAPTER 3
Routing and Controllers
The essential function of any web application framework is to take requests from auser and deliver responses, usually via HTTP(S). This means defining an application’sroutes is the first and most important project to tackle when learning a web frame‐work; without routes, you have little to no ability to interact with the end user.
In this chapter we will examine routes in Laravel; you’ll see how to define them, howto point them to the code they should execute, and how to use Laravel’s routing toolsto handle a diverse array of routing needs.
A Quick Introduction to MVC, the HTTP Verbs, and RESTMost of what we’ll talk about in this chapter references how Model–View–Controller(MVC) applications are structured, and many of the examples we’ll be looking at useREST-ish route names and verbs, so let’s take a quick look at both.
What Is MVC?In MVC, you have three primary concepts:
modelRepresents an individual database table (or a record from that table)—think“Company” or “Dog.”
viewRepresents the template that outputs your data to the end user—think “the loginpage template with this given set of HTML and CSS and JavaScript.”
23
www.EBooksWorld.ir
controllerLike a traffic cop, takes HTTP requests from the browser, gets the right data outof the database and other storage mechanisms, validates user input, and eventu‐ally sends a response back to the user.
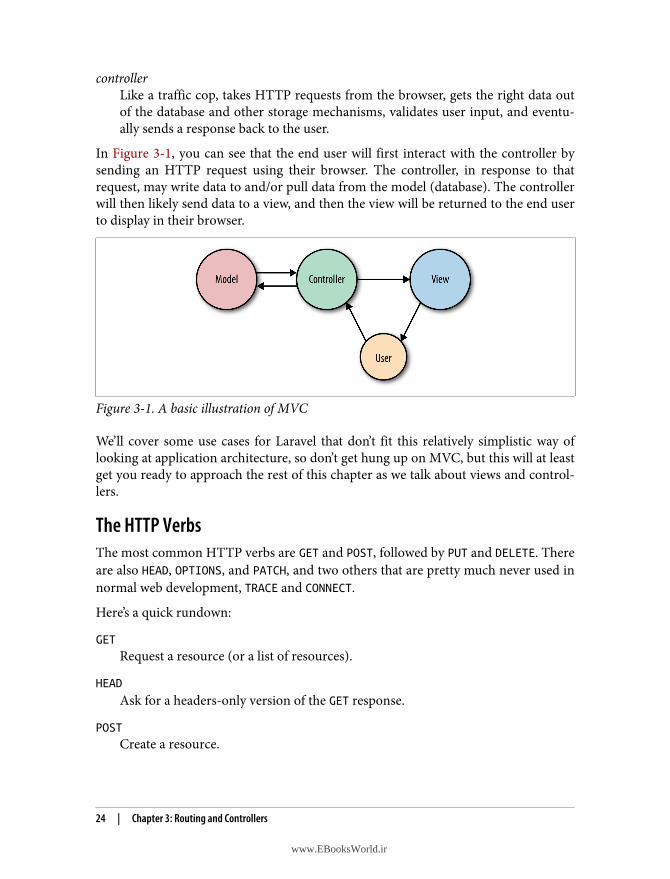
In Figure 3-1, you can see that the end user will first interact with the controller bysending an HTTP request using their browser. The controller, in response to thatrequest, may write data to and/or pull data from the model (database). The controllerwill then likely send data to a view, and then the view will be returned to the end userto display in their browser.
Figure 3-1. A basic illustration of MVC
We’ll cover some use cases for Laravel that don’t fit this relatively simplistic way oflooking at application architecture, so don’t get hung up on MVC, but this will at leastget you ready to approach the rest of this chapter as we talk about views and control‐lers.
The HTTP VerbsThe most common HTTP verbs are GET and POST, followed by PUT and DELETE. Thereare also HEAD, OPTIONS, and PATCH, and two others that are pretty much never used innormal web development, TRACE and CONNECT.
Here’s a quick rundown:
GET
Request a resource (or a list of resources).
HEAD
Ask for a headers-only version of the GET response.
POST
Create a resource.
24 | Chapter 3: Routing and Controllers
www.EBooksWorld.ir
PUT
Overwrite a resource.
PATCH
Modify a resource.
DELETE
Delete a resource.
OPTIONS
Ask the server which verbs are allowed at this URL.
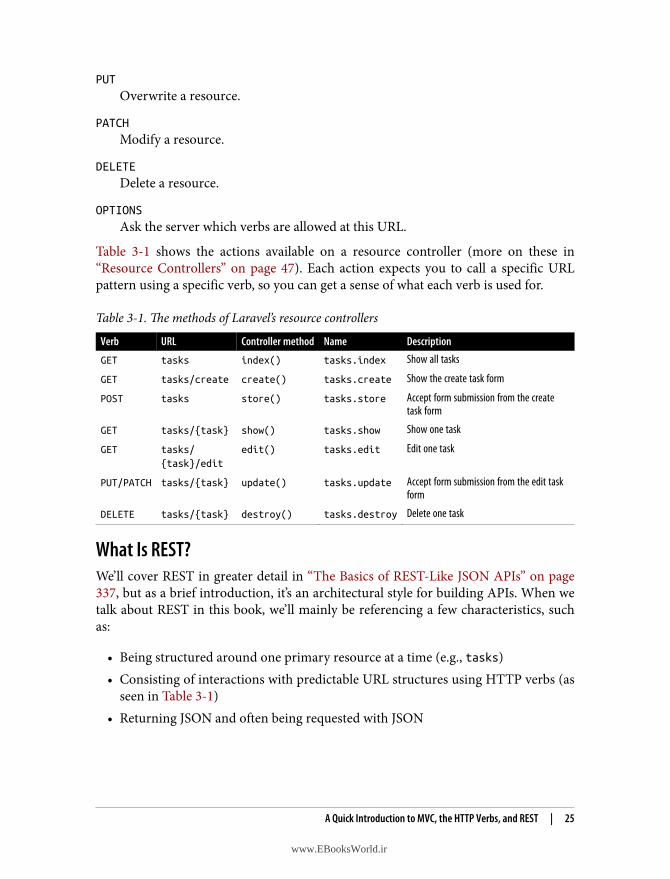
Table 3-1 shows the actions available on a resource controller (more on these in“Resource Controllers” on page 47). Each action expects you to call a specific URLpattern using a specific verb, so you can get a sense of what each verb is used for.
Table 3-1. The methods of Laravel’s resource controllers
Verb URL Controller method Name Description
GET tasks index() tasks.index Show all tasks
GET tasks/create create() tasks.create Show the create task form
POST tasks store() tasks.store Accept form submission from the createtask form
GET tasks/{task} show() tasks.show Show one task
GET tasks/{task}/edit
edit() tasks.edit Edit one task
PUT/PATCH tasks/{task} update() tasks.update Accept form submission from the edit taskform
DELETE tasks/{task} destroy() tasks.destroy Delete one task
What Is REST?We’ll cover REST in greater detail in “The Basics of REST-Like JSON APIs” on page337, but as a brief introduction, it’s an architectural style for building APIs. When wetalk about REST in this book, we’ll mainly be referencing a few characteristics, suchas:
• Being structured around one primary resource at a time (e.g., tasks)• Consisting of interactions with predictable URL structures using HTTP verbs (as
seen in Table 3-1)• Returning JSON and often being requested with JSON
A Quick Introduction to MVC, the HTTP Verbs, and REST | 25
www.EBooksWorld.ir
There’s more to it, but usually “RESTful” as it’ll be used in this book will mean “pat‐terned after these URL-based structures so we can make predictable calls likeGET /tasks/14/edit for the edit page.” This is relevant (even when not buildingAPIs) because Laravel’s routing structures are based around a REST-like structure, asyou can see in Table 3-1.
REST-based APIs follow mainly this same structure, except they don’t have a createroute or an edit route, since APIs just represent actions, not pages that prep for theactions.
Route DefinitionsIn a Laravel application, you will define your web routes in routes/web.php and your API routes in routes/api.php. Web routes are those that will be visited by your endusers; API routes are those for your API, if you have one. For now, we’ll primarilyfocus on the routes in routes/web.php.
Routes File Location in Laravel Prior to 5.3
In projects running versions of Laravel prior to 5.3, there will beonly one routes file, located at app/Http/routes.php.
The simplest way to define a route is to match a path (e.g., /) with a closure, as seenin Example 3-1.
Example 3-1. Basic route definition
// routes/web.phpRoute::get('/', function () { return 'Hello, World!';});
What’s a Closure?Closures are PHP’s version of anonymous functions. A closure is a function that youcan pass around as an object, assign to a variable, pass as a parameter to other func‐tions and methods, or even serialize.
You’ve now defined that if anyone visits / (the root of your domain), Laravel’s routershould run the closure defined there and return the result. Note that we return ourcontent and don’t echo or print it.
26 | Chapter 3: Routing and Controllers
www.EBooksWorld.ir
A Quick Introduction to Middleware
You might be wondering, “Why am I returning ‘Hello, World!’instead of echoing it?”There are quite a few answers, but the simplest is that there are alot of wrappers around Laravel’s request and response cycle,including something called middleware. When your route closureor controller method is done, it’s not time to send the output to thebrowser yet; returning the content allows it to continue flowingthrough the response stack and the middleware before it isreturned back to the user.
Many simple websites could be defined entirely within the web routes file. With a fewsimple GET routes combined with some templates, as illustrated in Example 3-2, youcan serve a classic website easily.
Example 3-2. Sample website
Route::get('/', function () { return view('welcome');});
Route::get('about', function () { return view('about');});
Route::get('products', function () { return view('products');});
Route::get('services', function () { return view('services');});
Static Calls
If you have much experience developing with PHP, you might besurprised to see static calls on the Route class. This is not actually astatic method per se, but rather service location using Laravel’sfacades, which we’ll cover in Chapter 11.If you prefer to avoid facades, you can accomplish these same defi‐nitions like this:
$router->get('/', function () { return 'Hello, World!';});
Route Definitions | 27
www.EBooksWorld.ir
Route VerbsYou might’ve noticed that we’ve been using Route::get() in our route definitions.This means we’re telling Laravel to only match for these routes when the HTTPrequest uses the GET action. But what if it’s a form POST, or maybe some JavaScriptsending PUT or DELETE requests? There are a few other options for methods to call ona route definition, as illustrated in Example 3-3.
Example 3-3. Route verbs
Route::get('/', function () { return 'Hello, World!';});
Route::post('/', function () { // Handle someone sending a POST request to this route});
Route::put('/', function () { // Handle someone sending a PUT request to this route});
Route::delete('/', function () { // Handle someone sending a DELETE request to this route});
Route::any('/', function () { // Handle any verb request to this route});
Route::match(['get', 'post'], '/', function () { // Handle GET or POST requests to this route});
Route HandlingAs you’ve probably guessed, passing a closure to the route definition is not the onlyway to teach it how to resolve a route. Closures are quick and simple, but the largeryour application gets, the clumsier it becomes to put all of your routing logic in onefile. Additionally, applications using route closures can’t take advantage of Laravel’sroute caching (more on that later), which can shave up to hundreds of millisecondsoff of each request.
The other common option is to pass a controller name and method as a string inplace of the closure, as in Example 3-4.
28 | Chapter 3: Routing and Controllers
www.EBooksWorld.ir
Example 3-4. Routes calling controller methods
Route::get('/', 'WelcomeController@index');
This is telling Laravel to pass requests to that path to the index() method of theApp\Http\Controllers\WelcomeController controller. This method will be passedthe same parameters and treated the same way as a closure you might’ve alternativelyput in its place.
Laravel’s Controller/Method Reference SyntaxLaravel has a convention for how to refer to a particular method in a given controller:ControllerName@methodName. Sometimes this is just a casual communication con‐vention, but it’s also used in real bindings, like in Example 3-4. Laravel parses what’sbefore and after the @ and uses those segments to identify the controller and method.Laravel 5.7 also introduced the “tuple” syntax (Route::get('/', [WelcomeController::class, 'index'])) but it’s still common to use ControllerName@methodNameto describe a method in written communication.
Route ParametersIf the route you’re defining has parameters—segments in the URL structure that arevariable—it’s simple to define them in your route and pass them to your closure (seeExample 3-5).
Example 3-5. Route parameters
Route::get('users/{id}/friends', function ($id) { //});
You can also make your route parameters optional by including a question mark (?)after the parameter name, as illustrated in Example 3-6. In this case, you should alsoprovide a default value for the route’s corresponding variable.
Example 3-6. Optional route parameters
Route::get('users/{id?}', function ($id = 'fallbackId') { //});
Route Definitions | 29
www.EBooksWorld.ir
And you can use regular expressions (regexes) to define that a route should onlymatch if a parameter meets particular requirements, as in Example 3-7.
Example 3-7. Regular expression route constraints
Route::get('users/{id}', function ($id) { //})->where('id', '[0-9]+');
Route::get('users/{username}', function ($username) { //})->where('username', '[A-Za-z]+');
Route::get('posts/{id}/{slug}', function ($id, $slug) { //})->where(['id' => '[0-9]+', 'slug' => '[A-Za-z]+']);
As you’ve probably guessed, if you visit a path that matches a route string but theregex doesn’t match the parameter, it won’t be matched. Since routes are matched topto bottom, users/abc would skip the first closure in Example 3-7, but it would bematched by the second closure, so it would get routed there. On the other hand,posts/abc/123 wouldn’t match any of the closures, so it would return a 404 (NotFound) error.
The Naming Relationship Between Route Parameters and Closure/Controller Method Parameters
As you can see in Example 3-5, it’s most common to use the same names for yourroute parameters ({id}) and the method parameters they inject into your route defi‐nition (function ($id)). But is this necessary?
Unless you’re using route model binding, discussed later in this chapter, no. The onlything that defines which route parameter matches with which method parameter istheir order (left to right), as you can see here:
Route::get('users/{userId}/comments/{commentId}', function ( $thisIsActuallyTheUserId, $thisIsReallyTheCommentId ) { //});
That having been said, just because you can make them different doesn’t mean youshould. I recommend keeping them the same for the sake of future developers, whocould get tripped up by inconsistent naming.
30 | Chapter 3: Routing and Controllers
www.EBooksWorld.ir
Route NamesThe simplest way to refer to these routes elsewhere in your application is just by theirpath. There’s a url() global helper to simplify that linking in your views, if you needit; see Example 3-8 for an example. The helper will prefix your route with the fulldomain of your site.
Example 3-8. The url() helper
<a href="<?php echo url('/'); ?>">// Outputs <a href="http://myapp.com/">
However, Laravel also allows you to name each route, which enables you to refer to itwithout explicitly referencing the URL. This is helpful because it means you can givesimple nicknames to complex routes, and also because linking them by name meansyou don’t have to rewrite your frontend links if the paths change (see Example 3-9).
Example 3-9. Defining route names
// Defining a route with name() in routes/web.php:Route::get('members/{id}', 'MembersController@show')->name('members.show');
// Linking the route in a view using the route() helper:<a href="<?php echo route('members.show', ['id' => 14]); ?>">
This example illustrates a few new concepts. First, we’re using fluent route definitionto add the name, by chaining the name() method after the get() method. Thismethod allows us to name the route, giving it a short alias to make it easier to refer‐ence elsewhere.
Defining Custom Routes in Laravel 5.1
Fluent route definitions don’t exist in Laravel 5.1. You’ll need toinstead pass an array to the second parameter of your route defini‐tion; check the Laravel docs to see more about how this works.Here’s Example 3-9 in Laravel 5.1:
Route::get('members/{id}', [ 'as' => 'members.show', 'uses' => 'MembersController@show',]);
In our example, we’ve named this route members.show; resourcePlural.action is acommon convention within Laravel for route and view names.
Route Definitions | 31
www.EBooksWorld.ir
Route Naming ConventionsYou can name your route anything you’d like, but the common convention is to usethe plural of the resource name, then a period, then the action. So, here are the routesmost common for a resource named photo:
photos.indexphotos.createphotos.storephotos.showphotos.editphotos.updatephotos.destroy
To learn more about these conventions, see “Resource Controllers” on page 47.
This example also introduced the route() helper. Just like url(), it’s intended to beused in views to simplify linking to a named route. If the route has no parameters,you can simply pass the route name (route('members.index')) and receive a routestring (http://myapp.com/members). If it has parameters, pass them in as an array asthe second parameter like we did in Example 3-9.
In general, I recommend using route names instead of paths to refer to your routes,and therefore using the route() helper instead of the url() helper. Sometimes it canget a bit clumsy—for example, if you’re working with multiple subdomains—but itprovides an incredible level of flexibility to later change the application’s routingstructure without major penalty.
Passing Route Parameters to the route() HelperWhen your route has parameters (e.g., users/id), you need to define those parame‐ters when you’re using the route() helper to generate a link to the route.
There are a few different ways to pass these parameters. Let’s imagine a route definedas users/userId/comments/commentId. If the user ID is 1 and the comment ID is 2,let’s look at a few options we have available to us:
Option 1:
route('users.comments.show', [1, 2])// http://myapp.com/users/1/comments/2
Option 2:
route('users.comments.show', ['userId' => 1, 'commentId' => 2])// http://myapp.com/users/1/comments/2
32 | Chapter 3: Routing and Controllers
www.EBooksWorld.ir
Option 3:
route('users.comments.show', ['commentId' => 2, 'userId' => 1])// http://myapp.com/users/1/comments/2
Option 4:
route('users.comments.show', ['userId' => 1, 'commentId' => 2, 'opt' => 'a'])// http://myapp.com/users/1/comments/2?opt=a
As you can see, nonkeyed array values are assigned in order; keyed array values arematched with the route parameters matching their keys, and anything left over isadded as a query parameter.
Route GroupsOften a group of routes share a particular characteristic—a certain authenticationrequirement, a path prefix, or perhaps a controller namespace. Defining these sharedcharacteristics again and again on each route not only seems tedious but also canmuddy up the shape of your routes file and obscure some of the structures ofyour application.
Route groups allow you to group several routes together and apply any shared config‐uration settings once to the entire group, to reduce this duplication. Additionally,route groups are visual cues to future developers (and to your own brain) that theseroutes are grouped together.
To group two or more routes together, you “surround” the route definitions with aroute group, as shown in Example 3-10. In reality, you’re actually passing a closure tothe group definition, and defining the grouped routes within that closure.
Example 3-10. Defining a route group
Route::group(function () { Route::get('hello', function () { return 'Hello'; }); Route::get('world', function () { return 'World'; });});
By default, a route group doesn’t actually do anything. There’s no difference betweenusing the group in Example 3-10 and separating a segment of your routes with codecomments.
Route Groups | 33
www.EBooksWorld.ir
MiddlewareProbably the most common use for route groups is to apply middleware to a group ofroutes. You’ll learn more about middleware in Chapter 10, but, among other things,they’re what Laravel uses for authenticating users and restricting guest users fromusing certain parts of a site.
In Example 3-11, we’re creating a route group around the dashboard and accountviews and applying the auth middleware to both. In this example, this means usershave to be logged in to the application to view the dashboard or the account page.
Example 3-11. Restricting a group of routes to logged-in users only
Route::middleware('auth')->group(function() { Route::get('dashboard', function () { return view('dashboard'); }); Route::get('account', function () { return view('account'); });});
Modifying Route Groups Prior to Laravel 5.4
Just like fluent route definition didn’t exist in Laravel prior to 5.2,fluently applying modifiers like middleware, prefixes, domains, andmore to route groups wasn’t possible prior to 5.4.Here’s Example 3-11 in Laravel 5.3 and prior:
Route::group(['middleware' => 'auth'], function () { Route::get('dashboard', function () { return view('dashboard'); }); Route::get('account', function () { return view('account'); });});
Applying middleware in controllersOften it’s clearer and more direct to attach middleware to your routes in the control‐ler instead of at the route definition. You can do this by calling the middleware()method in the constructor of your controller. The string you pass to the middleware() method is the name of the middleware, and you can optionally chain modifiermethods (only() and except()) to define which methods will receive that middle‐ware:
34 | Chapter 3: Routing and Controllers
www.EBooksWorld.ir
class DashboardController extends Controller{ public function __construct() { $this->middleware('auth');
$this->middleware('admin-auth') ->only('editUsers');
$this->middleware('team-member') ->except('editUsers'); }}
Note that if you’re doing a lot of “only” and “except” customizations, that’s often asign that you should break out a new controller for the exceptional routes.
Rate limitingIf you need to limit users to only accessing any give route(s) a certain number oftimes in a given time frame (called rate limiting, and most common with APIs),there’s an out-of-the-box middleware for that in version 5.2 and above. Apply thethrottle middleware, which takes two parameters: the first is the number of tries auser is permitted and the second is the number of minutes to wait before resetting theattempt count. Example 3-12 demonstrates its use.
Example 3-12. Applying the rate limiting middleware to a route
Route::middleware('auth:api', 'throttle:60,1')->group(function () { Route::get('/profile', function () { // });});
Dynamic rate limiting. If you’d like to differentiate one user’s rate limit from another’s,you can instruct the throttle middleware to pull the tries count (its first parameter)from the user’s Eloquent model. Instead of passing a tries count as the first parameterof throttle, instead pass the name of an attribute on the Eloquent model, and thatattribute will be used to calculate whether the user has passed their rate limit.
So, if your user model has a plan_rate_limit attribute on it, you could use the mid‐dleware with throttle:plan_rate_limit,1.
Route Groups | 35
www.EBooksWorld.ir
A Brief Introduction to EloquentWe’ll be covering Eloquent, database access, and Laravel’s query builder in depth inChapter 5, but there will be a few references between now and then that will make abasic understanding useful.
Eloquent is Laravel’s ActiveRecord database object-relational mapper (ORM), whichmakes it easy to relate a Post class (model) to the posts database table and get allrecords with a call like Post::all().
The query builder is the tool that makes it possible to make calls likePost::where('active', true)->get() or even DB::table('users')->all().You’re building a query by chaining methods one after another.
Path PrefixesIf you have a group of routes that share a segment of their path—for example, if yoursite’s dashboard is prefixed with /dashboard—you can use route groups to simplifythis structure (see Example 3-13).
Example 3-13. Prefixing a group of routes
Route::prefix('dashboard')->group(function () { Route::get('/', function () { // Handles the path /dashboard }); Route::get('users', function () { // Handles the path /dashboard/users });});
Note that each prefixed group also has a / route that represents the root of the prefix—in Example 3-13 that’s /dashboard.
Fallback RoutesIn Laravel prior to 5.6, you could define a “fallback route” (which you need to defineat the end of your routes file) to catch all unmatched paths:
Route::any('{anything}', 'CatchAllController')->where('anything', '*');
36 | Chapter 3: Routing and Controllers
www.EBooksWorld.ir
In Laravel 5.6+, you can use the Route::fallback() method instead:
Route::fallback(function () { //});
Subdomain RoutingSubdomain routing is the same as route prefixing, but it’s scoped by subdomaininstead of route prefix. There are two primary uses for this. First, you may want topresent different sections of the application (or entirely different applications) to dif‐ferent subdomains. Example 3-14 shows how you can achieve this.
Example 3-14. Subdomain routing
Route::domain('api.myapp.com')->group(function () { Route::get('/', function () { // });});
Second, you might want to set part of the subdomain as a parameter, as illustrated inExample 3-15. This is most often done in cases of multitenancy (think Slack or Har‐vest, where each company gets its own subdomain, like tighten.slack.co).
Example 3-15. Parameterized subdomain routing
Route::domain('{account}.myapp.com')->group(function () { Route::get('/', function ($account) { // }); Route::get('users/{id}', function ($account, $id) { // });});
Note that any parameters for the group get passed into the grouped routes’ methodsas the first parameter(s).
Namespace PrefixesWhen you’re grouping routes by subdomain or route prefix, it’s likely their control‐lers have a similar PHP namespace. In the dashboard example, all of the dashboardroutes’ controllers might be under a Dashboard namespace. By using the route groupnamespace prefix, as shown in Example 3-16, you can avoid long controller refer‐ences in groups like "Dashboard/UsersController@index" and "Dashboard/PurchasesController@index".
Route Groups | 37
www.EBooksWorld.ir

Example 3-16. Route group namespace prefixes
// App\Http\Controllers\UsersControllerRoute::get('/', 'UsersController@index');
Route::namespace('Dashboard')->group(function () { // App\Http\Controllers\Dashboard\PurchasesController Route::get('dashboard/purchases', 'PurchasesController@index');});
Name PrefixesThe prefixes don’t stop there. It’s common that route names will reflect the inheri‐tance chain of path elements, so users/comments/5 will be served by a route namedusers.comments.show. In this case, it’s common to use a route group around all ofthe routes that are beneath the users.comments resource.
Just like we can prefix URL segments and controller namespaces, we can also prefixstrings to the route name. With route group name prefixes, we can define that everyroute within this group should have a given string prefixed to its name. In this con‐text, we’re prefixing "users." to each route name, then "comments." (seeExample 3-17).
Example 3-17. Route group name prefixes
Route::name('users.')->prefix('users')->group(function () { Route::name('comments.')->prefix('comments')->group(function () { Route::get('{id}', function () {
})->name('show'); });});
Signed RoutesMany applications regularly send notifications about one-off actions (resetting a pass‐word, accepting an invitation, etc.) and provide simple links to take those actions.Let’s imagine sending an email confirming the recipient was willing to be added to amailing list.
There are three ways to send that link:
1. Make that URL public and hope no one else discovers the approval URL ormodifies their own approval URL to approve someone else.
38 | Chapter 3: Routing and Controllers
www.EBooksWorld.ir
2. Put the action behind authentication, link to the action, and require the user tolog in if they’re not logged in yet (which, in this case, may be impossible, as manymailing list recipients likely won’t be users).
3. “Sign” the link so that it uniquely proves that the user received the link from youremail, without them having to log in; something like http://myapp.com/invita‐tions/5816/yes?signature=030ab0ef6a8237bd86a8b8.
One simple way to accomplish the last option is to use a feature introduced in Laravel5.6.12 called signed URLs, which makes it easy to build a signature authentication sys‐tem for sending out authenticated links. These links are composed of the normalroute link with a “signature” appended that proves that the URL has not beenchanged since it was sent (and therefore that no one has modified the URL to accesssomeone else’s information).
Signing a RouteIn order to build a signed URL to access a given route, the route must have a name:
Route::get('invitations/{invitation}/{answer}', 'InvitationController') ->name('invitations');
To generate a normal link to this route you would use the route() helper, as we’vealready covered, but you could also use the URL facade to do the same thing:URL::route('invitations', ['invitation' => 12345, 'answer' => 'yes']). Togenerate a signed link to this route, simply use the signedRoute() method instead. And if you want to generate a signed route with an expiration, use temporarySignedRoute():
// Generate a normal linkURL::route('invitations', ['invitation' => 12345, 'answer' => 'yes']);
// Generate a signed linkURL::signedRoute('invitations', ['invitation' => 12345, 'answer' => 'yes']);
// Generate an expiring (temporary) signed linkURL::temporarySignedRoute( 'invitations', now()->addHours(4), ['invitation' => 12345, 'answer' => 'yes']);
Signed Routes | 39
www.EBooksWorld.ir
Using the now() Helper
Since version 5.5 Laravel has offered a now() helper that’s theequivalent of Carbon::now(); it returns a Carbon object repre‐
sentative of today, right at this second. If you’re working with Lara‐vel prior to 5.5, you can replace any instance of now() in this bookwith Carbon::now().Carbon, if you’re not familiar with it, is a datetime library that’sincluded with Laravel.
Modifying Routes to Allow Signed LinksNow that you’ve generated a link to your signed route, you need to protect againstany unsigned access. The easiest option is to apply the signed middleware (which, ifit’s not in your $routeMiddleware array in app/Http/Kernel.php, should be, backed byIlluminate\Routing\Middleware\ValidateSignature):
Route::get('invitations/{invitation}/{answer}', 'InvitationController') ->name('invitations') ->middleware('signed');
If you’d prefer, you can manually validate using the hasValidSignature() method onthe Request object instead of using the signed middleware:
class InvitationController{ public function __invoke(Invitation $invitation, $answer, Request $request) { if (! $request->hasValidSignature()) { abort(403); }
// }}
ViewsIn a few of the route closures we’ve looked at so far, we’ve seen something along thelines of return view('account'). What’s going on here?
In the MVC pattern (Figure 3-1), views (or templates) are files that describe whatsome particular output should look like. You might have views for JSON or XML oremails, but the most common views in a web framework output HTML.
In Laravel, there are two formats of view you can use out of the box: plain PHP, orBlade templates (see Chapter 4). The difference is in the filename: about.php will
40 | Chapter 3: Routing and Controllers
www.EBooksWorld.ir
be rendered with the PHP engine, and about.blade.php will be rendered with theBlade engine.
Three Ways to Load a View
There are three different ways to return a view. For now, just con‐cern yourself with view(), but if you ever see View::make(), it’s thesame thing, or you could inject the Illuminate\View\ViewFactoryif you prefer.
Once you’ve “loaded” a view with the view() helper, you have the option to simplyreturn it (as in Example 3-18), which will work fine if the view doesn’t rely on anyvariables from the controller.
Example 3-18. Simple view() usage
Route::get('/', function () { return view('home');});
This code looks for a view in resources/views/home.blade.php or resources/views/home.php, and loads its contents and parses any inline PHP or control structures untilyou have just the view’s output. Once you return it, it’s passed on to the rest of theresponse stack and eventually returned to the user.
But what if you need to pass in variables? Take a look at Example 3-19.
Example 3-19. Passing variables to views
Route::get('tasks', function () { return view('tasks.index') ->with('tasks', Task::all());});
This closure loads the resources/views/tasks/index.blade.php or resources/views/tasks/index.php view and passes it a single variable named tasks, which contains the resultof the Task::all() method. Task::all() is an Eloquent database query you’ll learnabout in Chapter 5.
Returning Simple Routes Directly with Route::view()Because it’s so common for a route to just return a view with no custom data, Laravel5.5+ allows you to define a route as a “view” route without even passing the routedefinition a closure or a controller/method reference, as you can see in Example 3-20.
Views | 41
www.EBooksWorld.ir
Example 3-20. Route::view()
// Returns resources/views/welcome.blade.phpRoute::view('/', 'welcome');
// Passing simple data to Route::view()Route::view('/', 'welcome', ['User' => 'Michael']);
Using View Composers to Share Variables with Every ViewSometimes it can become a hassle to pass the same variables over and over. Theremay be a variable that you want accessible to every view in the site, or to a certainclass of views or a certain included subview—for example, all views related to tasks,or the header partial.
It’s possible to share certain variables with every template or just certain templates,like in the following code:
view()->share('variableName', 'variableValue');
To learn more, check out “View Composers and Service Injection” on page 75.
ControllersI’ve mentioned controllers a few times, but until now most of the examples haveshown route closures. In the MVC pattern, controllers are essentially classes thatorganize the logic of one or more routes together in one place. Controllers tend togroup similar routes together, especially if your application is structured in a tradi‐tionally CRUD-like format; in this case, a controller might handle all the actions thatcan be performed on a particular resource.
What is CRUD?
CRUD stands for create, read, update, delete, which are the four pri‐mary operations that web applications most commonly provide ona resource. For example, you can create a new blog post, you canread that post, you can update it, or you can delete it.
It may be tempting to cram all of the application’s logic into the controllers, but it’sbetter to think of controllers as the traffic cops that route HTTP requests aroundyour application. Since there are other ways requests can come into your application—cron jobs, Artisan command-line calls, queue jobs, etc.—it’s wise to not rely oncontrollers for much behavior. This means a controller’s primary job is to capture theintent of an HTTP request and pass it on to the rest of the application.
42 | Chapter 3: Routing and Controllers
www.EBooksWorld.ir
So, let’s create a controller. One easy way to do this is with an Artisan command, sofrom the command line run the following:
php artisan make:controller TasksController
Artisan and Artisan Generators
Laravel comes bundled with a command-line tool called Artisan.Artisan can be used to run migrations, create users and otherdatabase records manually, and perform many other manual, one-time tasks.Under the make namespace, Artisan provides tools for generatingskeleton files for a variety of system files. That’s what allows us torun php artisan make:controller.To learn more about this and other Artisan features, see Chapter 8.
This will create a new file named TasksController.php in app/Http/Controllers, with thecontents shown in Example 3-21.
Example 3-21. Default generated controller
<?php
namespace App\Http\Controllers;
use Illuminate\Http\Request;
class TasksController extends Controller{ //}
Modify this file as shown in Example 3-22, creating a new public method calledindex(). We’ll just return some text there.
Example 3-22. Simple controller example
<?php
namespace App\Http\Controllers;
class TasksController extends Controller{ public function index() { return 'Hello, World!';
Controllers | 43
www.EBooksWorld.ir
}}
Then, like we learned before, we’ll hook up a route to it, as shown in Example 3-23.
Example 3-23. Route for the simple controller
// routes/web.php<?php
Route::get('/', 'TasksController@index');
That’s it. Visit the / route and you’ll see the words “Hello, World!”
Controller NamespacingIn Example 3-23 we referenced a controller that has the fully qualified class name ofApp\Http\Controllers\TasksController, but we only used the class name. Thisisn’t because we can simply reference controllers by their class name. Rather, we canignore the App\Http\Controllers\ when we reference controllers; by default, Laravelis configured to look for controllers within that namespace.
This means that if you have a controller with the fully qualified class name ofApp\Http\Controllers\API\ExercisesController, you’d reference it in a route def‐inition as API\ExercisesController.
The most common use of a controller method, then, will be something likeExample 3-24, which provides the same functionality as our route closure inExample 3-19.
Example 3-24. Common controller method example
// TasksController.php...public function index(){ return view('tasks.index') ->with('tasks', Task::all());}
This controller method loads the resources/views/tasks/index.blade.php or resources/views/tasks/index.php view and passes it a single variable named tasks, which con‐tains the result of the Task::all() Eloquent method.
44 | Chapter 3: Routing and Controllers
www.EBooksWorld.ir
Generating Resource Controllers
If you ever used php artisan make:controller in Laravelprior to 5.3, you might be expecting it to autogenerate methods
for all of the basic resource routes like create() and update(). Youcan bring this behavior back in Laravel 5.3+ by passing the--resource flag when you create the controller:
php artisan make:controller TasksController --resource
Getting User InputThe second most common action to perform in a controller method is to take inputfrom the user and act on it. That introduces a few new concepts, so let’s take a look ata bit of sample code and walk through the new pieces.
First, let’s bind our route; see Example 3-25.
Example 3-25. Binding basic form actions
// routes/web.phpRoute::get('tasks/create', 'TasksController@create');Route::post('tasks', 'TasksController@store');
Notice that we’re binding the GET action of tasks/create (which shows a form forcreating a new task) and the POST action of tasks/ (which is where our form willPOST to when we’re creating a new task). We can assume the create() method in ourcontroller just shows a form, so let’s look at the store() method in Example 3-26.
Example 3-26. Common form input controller method
// TasksController.php...public function store(){ Task::create(request()->only(['title', 'description']));
return redirect('tasks');}
This example makes use of Eloquent models and the redirect() functionality, andwe’ll talk about them more later, but for now let’s talk quickly about how we’re gettingour data here.
We’re using the request() helper to represent the HTTP request (more on that later)and using its only() method to pull just the title and description fields the usersubmitted.
Controllers | 45
www.EBooksWorld.ir
We’re then passing that data into the create() method of our Task model, which cre‐ates a new instance of the Task with title set to the passed-in title and descriptionset to the passed-in description. Finally, we redirect back to the page that shows alltasks.
There are a few layers of abstraction at work here, which we’ll cover in a second, butknow that the data coming from the only() method comes from the same pool ofdata all common methods used on the Request object draw from, including all()and get(). The set of data each of these methods is pulling from represents all user-provided data, whether from query parameters or POST values. So, our user filled outtwo fields on the “add task” page: “title” and “description.”
To break down the abstraction a bit, request()->only() takes an associative array ofinput names and returns them:
request()->only(['title', 'description']);// returns:[ 'title' => 'Whatever title the user typed on the previous page', 'description' => 'Whatever description the user typed on the previous page',]
And Task::create() takes an associative array and creates a new task from it:
Task::create([ 'title' => 'Buy milk', 'description' => 'Remember to check the expiration date this time, Norbert!',]);
Combining them together creates a task with just the user-provided “title” and“description” fields.
Injecting Dependencies into ControllersLaravel’s facades and global helpers present a simple interface to the most usefulclasses in Laravel’s codebase. You can get information about the current request anduser input, the session, caches, and much more.
But if you prefer to inject your dependencies, or if you want to use a service thatdoesn’t have a facade or a helper, you’ll need to find some way to bring instances ofthese classes into your controller.
This is our first exposure to Laravel’s service container. For now, if this is unfamiliar,you can think about it as a little bit of Laravel magic; or, if you want to know moreabout how it’s actually functioning, you can skip ahead to Chapter 11.
All controller methods (including the constructors) are resolved out of Laravel’s con‐tainer, which means anything you typehint that the container knows how to resolvewill be automatically injected.
46 | Chapter 3: Routing and Controllers
www.EBooksWorld.ir
Typehints in PHP
“Typehinting” in PHP means putting the name of a class or inter‐face in front of a variable in a method signature:
public function __construct(Logger $logger) {}
This typehint is telling PHP that whatever is passed into themethod must be of type Logger, which could be either an interfaceor a class.
As a nice example, what if you’d prefer having an instance of the Request objectinstead of using the global helper? Just typehint Illuminate\Http\Request in yourmethod parameters, like in Example 3-27.
Example 3-27. Controller method injection via typehinting
// TasksController.php...public function store(\Illuminate\Http\Request $request){ Task::create($request->only(['title', 'description']));
return redirect('tasks');}
So, you’ve defined a parameter that must be passed into the store() method. Andsince you typehinted it, and since Laravel knows how to resolve that class name,you’re going to have the Request object ready for you to use in your method with nowork on your part. No explicit binding, no anything else—it’s just there as the$request variable.
And, as you can tell from comparing Example 3-26 and Example 3-27, the request()helper and the Request object behave exactly the same.
Resource ControllersSometimes naming the methods in your controllers can be the hardest part of writinga controller. Thankfully, Laravel has some conventions for all of the routes of a tradi‐tional REST/CRUD controller (called a “resource controller” in Laravel); additionally,it comes with a generator out of the box and a convenience route definition thatallows you to bind an entire resource controller at once.
To see the methods that Laravel expects for a resource controller, let’s generate a newcontroller from the command line:
php artisan make:controller MySampleResourceController --resource
Controllers | 47
www.EBooksWorld.ir
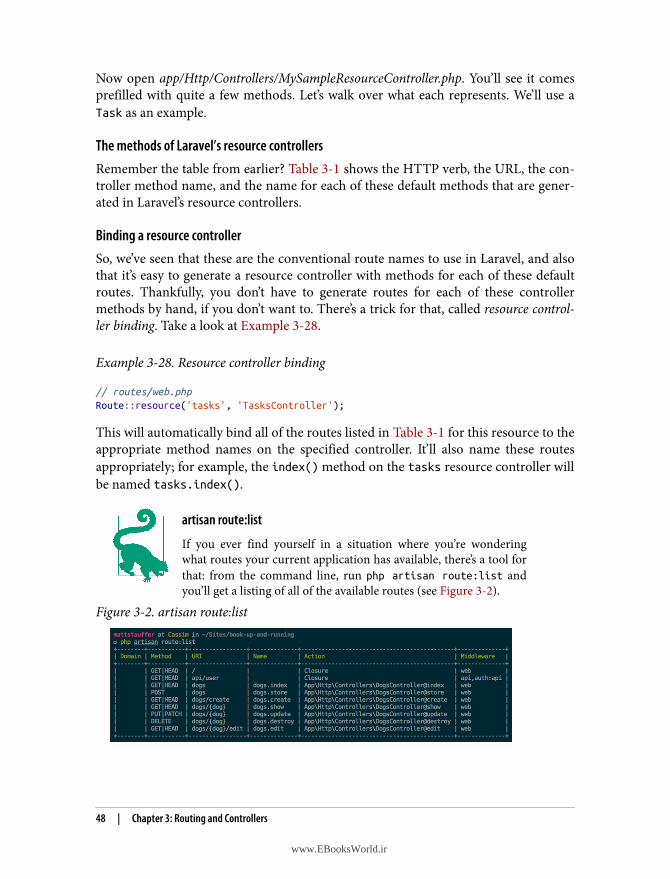
Now open app/Http/Controllers/MySampleResourceController.php. You’ll see it comesprefilled with quite a few methods. Let’s walk over what each represents. We’ll use aTask as an example.
The methods of Laravel’s resource controllersRemember the table from earlier? Table 3-1 shows the HTTP verb, the URL, the con‐troller method name, and the name for each of these default methods that are gener‐ated in Laravel’s resource controllers.
Binding a resource controllerSo, we’ve seen that these are the conventional route names to use in Laravel, and alsothat it’s easy to generate a resource controller with methods for each of these defaultroutes. Thankfully, you don’t have to generate routes for each of these controllermethods by hand, if you don’t want to. There’s a trick for that, called resource control‐ler binding. Take a look at Example 3-28.
Example 3-28. Resource controller binding
// routes/web.phpRoute::resource('tasks', 'TasksController');
This will automatically bind all of the routes listed in Table 3-1 for this resource to theappropriate method names on the specified controller. It’ll also name these routesappropriately; for example, the index() method on the tasks resource controller willbe named tasks.index().
artisan route:list
If you ever find yourself in a situation where you’re wonderingwhat routes your current application has available, there’s a tool forthat: from the command line, run php artisan route:list andyou’ll get a listing of all of the available routes (see Figure 3-2).
Figure 3-2. artisan route:list
48 | Chapter 3: Routing and Controllers
www.EBooksWorld.ir

API Resource ControllersWhen you’re working with RESTful APIs, the list of potential actions on a resource isnot the same as it is with an HTML resource controller. For example, you can send aPOST request to an API to create a resource, but you can’t really “show a create form”in an API.
Laravel 5.6 introduced a new way to generate an API resource controller, which has thesame structure as a resource controller except it excludes the create and edit actions.We can generate API resource controllers by passing the --api flag when creating acontroller:
php artisan make:controller MySampleResourceController --api
Binding an API resource controller
To bind an API resource controller, use the apiResource() method instead of theresource() method, as shown in Example 3-29.
Example 3-29. API resource controller binding
// routes/web.phpRoute::apiResource('tasks', 'TasksController');
Single Action ControllersThere will be times in your applications when a controller should only service a singleroute. You may find yourself wondering how to name the controller method for thatroute. Thankfully, you can point a single route at a single controller without concern‐ing yourself with naming the one method.
As you may already know, the __invoke() method is a PHP magic method thatallows you to “invoke” an instance of a class, treating it like a function and calling it.This is the tool Laravel’s single action controllers use to allow you to point a route to asingle controller, as you can see in Example 3-30.
Example 3-30. Using the __invoke() method
// \App\Http\Controllers\UpdateUserAvatar.phppublic function __invoke(User $user){ // Update the user's avatar image}
// routes/web.phpRoute::post('users/{user}/update-avatar', 'UpdateUserAvatar');
Controllers | 49
www.EBooksWorld.ir
Route Model BindingOne of the most common routing patterns is that the first line of any controllermethod tries to find the resource with the given ID, like in Example 3-31.
Example 3-31. Getting a resource for each route
Route::get('conferences/{id}', function ($id) { $conference = Conference::findOrFail($id);});
Laravel provides a feature that simplifies this pattern called route model binding. Thisallows you to define that a particular parameter name (e.g., {conference}) will indi‐cate to the route resolver that it should look up an Eloquent database record with thatID and then pass it in as the parameter instead of just passing the ID.
There are two kinds of route model binding: implicit and custom (or explicit).
Implicit Route Model BindingThe simplest way to use route model binding is to name your route parameter some‐thing unique to that model (e.g., name it $conference instead of $id), then typehintthat parameter in the closure/controller method and use the same variable namethere. It’s easier to show than to describe, so take a look at Example 3-32.
Example 3-32. Using an implicit route model binding
Route::get('conferences/{conference}', function (Conference $conference) { return view('conferences.show')->with('conference', $conference);});
Because the route parameter ({conference}) is the same as the method parameter($conference), and the method parameter is typehinted with a Conference model(Conference $conference), Laravel sees this as a route model binding. Every timethis route is visited, the application will assume that whatever is passed into the URLin place of {conference} is an ID that should be used to look up a Conference,and then that resulting model instance will be passed in to your closure or controllermethod.
50 | Chapter 3: Routing and Controllers
www.EBooksWorld.ir
Customizing the Route Key for an Eloquent Model
Any time an Eloquent model is looked up via a URL segment (usu‐ally because of route model binding), the default column Eloquentwill look it up by is its primary key (ID).To change the column your Eloquent model uses for URL lookups,add a method to your model named getRouteKeyName():
public function getRouteKeyName(){ return 'slug';}
Now, a URL like conferences/{conference} will expect to get anentry from the slug column instead of the ID, and will perform itslookups accordingly.
Implicit route model binding was added in Laravel 5.2, so you won’t have access to itin 5.1.
Custom Route Model BindingTo manually configure route model bindings, add a line like the one in Example 3-33to the boot() method in App\Providers\RouteServiceProvider.
Example 3-33. Adding a route model binding
public function boot() { // Just allows the parent's boot() method to still run parent::boot();
// Perform the binding Route::model('event', Conference::class); }
You’ve now specified that whenever a route has a parameter in its definition named{event}, as demonstrated in Example 3-34, the route resolver will return an instanceof the Conference class with the ID of that URL parameter.
Example 3-34. Using an explicit route model binding
Route::get('events/{event}', function (Conference $event) { return view('events.show')->with('event', $event);});
Route Model Binding | 51
www.EBooksWorld.ir
Route CachingIf you’re looking to squeeze every millisecond out of your load time, you may want totake a look at route caching. One of the pieces of Laravel’s bootstrap that can takeanywhere from a few dozen to a few hundred milliseconds is parsing the routes/* files,and route caching speeds up this process dramatically.
To cache your routes file, you need to be using all controller, redirect, view, andresource routes (no route closures). If your app isn’t using any route closures, you canrun php artisan route:cache and Laravel will serialize the results of your routes/*files. If you want to delete the cache, run php artisan route:clear.
Here’s the drawback: Laravel will now match routes against that cached file instead ofyour actual routes/* files. You can make endless changes to your routes files, and theywon’t take effect until you run route:cache again. This means you’ll have to recacheevery time you make a change, which introduces a lot of potential for confusion.
Here’s what I would recommend instead: since Git ignores the route cache file bydefault anyway, consider only using route caching on your production server, and runthe php artisan route:cache command every time you deploy new code (whethervia a Git post-deploy hook, a Forge deploy command, or as a part of whatever otherdeploy system you use). This way you won’t have confusing local development issues,but your remote environment will still benefit from route caching.
Form Method SpoofingSometimes you need to manually define which HTTP verb a form should send as.HTML forms only allow for GET or POST, so if you want any other sort of verb, you’llneed to specify that yourself.
HTTP Verbs in LaravelAs we’ve seen already, you can define which verbs a route will match in the route defi‐nition using Route::get(), Route::post(), Route::any(), or Route::match(). Youcan also match with Route::patch(), Route::put(), and Route::delete().
But how does one send a request other than GET with a web browser? First, themethod attribute in an HTML form determines its HTTP verb: if your form has amethod of "GET", it will submit via query parameters and a GET method; if the formhas a method of "POST", it will submit via the post body and a POST method.
JavaScript frameworks make it easy to send other requests, like DELETE and PATCH.But if you find yourself needing to submit HTML forms in Laravel with verbs otherthan GET or POST, you’ll need to use form method spoofing, which means spoofing theHTTP method in an HTML form.
52 | Chapter 3: Routing and Controllers
www.EBooksWorld.ir
HTTP Method Spoofing in HTML FormsTo inform Laravel that the form you’re currently submitting should be treated assomething other than a POST, add a hidden variable named _method with the value ofeither "PUT", "PATCH", or "DELETE", and Laravel will match and route that form sub‐mission as if it were actually a request with that verb.
The form in Example 3-35, since it’s passing Laravel the method of "DELETE", willmatch routes defined with Route::delete() but not those with Route::post().
Example 3-35. Form method spoofing
<form action="/tasks/5" method="POST"> <input type="hidden" name="_method" value="DELETE"> <!-- or: --> @method('DELETE')</form>
CSRF ProtectionIf you’ve tried to submit a form in a Laravel application already, including the one inExample 3-35, you’ve likely run into the dreaded TokenMismatchException.
By default, all routes in Laravel except “read-only” routes (those using GET, HEAD, orOPTIONS) are protected against cross-site request forgery (CSRF) attacks by requiringa token, in the form of an input named _token, to be passed along with each request.This token is generated at the start of every session, and every non–read-only routecompares the submitted _token against the session token.
What is CSRF?
A cross-site request forgery is when one website pretends to beanother. The goal is for someone to hijack your users’ access toyour website, by submitting forms from their website to your web‐site via the logged-in user’s browser.The best way around CSRF attacks is to protect all inbound routes—POST, DELETE, etc.—with a token, which Laravel does out ofthe box.
You have two options for getting around this CSRF error. The first, and preferred,method is to add the _token input to each of your submissions. In HTML forms,that’s simple; look at Example 3-36.
CSRF Protection | 53
www.EBooksWorld.ir
Example 3-36. CSRF tokens
<form action="/tasks/5" method="POST"> <?php echo csrf_field(); ?> <!-- or: --> <input type="hidden" name="_token" value="<?php echo csrf_token(); ?>"> <!-- or: --> @csrf</form>
CSRF Helpers in Laravel Prior to 5.6
The @csrf Blade directive is not available in projects running ver‐sions of Laravel prior to 5.6. Instead, you’ll need to use thecsrf_field() helper function.
In JavaScript applications, it takes a bit more work, but not much. The most commonsolution for sites using JavaScript frameworks is to store the token on every page in a<meta> tag like this one:
<meta name="csrf-token" content="<?php echo csrf_token(); ?>" id="token">
Storing the token in a <meta> tag makes it easy to bind it to the correct HTTP header,which you can do once globally for all requests from your JavaScript framework, likein Example 3-37.
Example 3-37. Globally binding a header for CSRF
// In jQuery:$.ajaxSetup({ headers: { 'X-CSRF-TOKEN': $('meta[name="csrf-token"]').attr('content') }});
// With Axios:window.axios.defaults.headers.common['X-CSRF-TOKEN'] = document.head.querySelector('meta[name="csrf-token"]');
Laravel will check the X-CSRF-TOKEN on every request, and valid tokens passed therewill mark the CSRF protection as satisfied.
Note that the Vue syntax for CSRF in this example is not necessary if you’re workingwith the default Vue bootstrap in a Laravel installation; it already does this work foryou.
54 | Chapter 3: Routing and Controllers
www.EBooksWorld.ir
Binding CSRF Tokens with Vue Resource
In projects running Laravel 5.3 and earlier and Vue, you may berelying on a library called Vue Resource to make Ajax calls. Boot‐strapping the CSRF token into Vue Resource looks a bit differentthan it does for Laravel; see the Vue Resource docs for examples.
RedirectsSo far the only things we’ve explicitly talked about returning from a controllermethod or route definition have been views. But there are a few other structures wecan return to give the browser instructions on how to behave.
First, let’s cover the redirect. You’ve already seen a few of these in other examples.There are two common ways to generate a redirect; we’ll use the redirect() globalhelper here, but you may prefer the facade. Both create an instance of Illuminate\Http\RedirectResponse, perform some convenience methods on it, and thenreturn it. You can also do this manually, but you’ll have to do a little more work your‐self. Take a look at Example 3-38 to see a few ways you can return a redirect.
Example 3-38. Different ways to return a redirect
// Using the global helper to generate a redirect responseRoute::get('redirect-with-helper', function () { return redirect()->to('login');});
// Using the global helper shortcutRoute::get('redirect-with-helper-shortcut', function () { return redirect('login');});
// Using the facade to generate a redirect responseRoute::get('redirect-with-facade', function () { return Redirect::to('login');});
// Using the Route::redirect shortcut in Laravel 5.5+Route::redirect('redirect-by-route', 'login');
Note that the redirect() helper exposes the same methods as the Redirect facade,but it also has a shortcut; if you pass parameters directly to the helper instead ofchaining methods after it, it’s a shortcut to the to() redirect method.
Also note that the (optional) third parameter for the Route::redirect() routehelper can be the status code (e.g., 302) for your redirect.
Redirects | 55
www.EBooksWorld.ir
redirect()->to()The method signature for the to() method for redirects looks like this:
function to($to = null, $status = 302, $headers = [], $secure = null)
$to is a valid internal path, $status is the HTTP status (defaulting to 302), $headersallows you to define which HTTP headers to send along with your redirect, and$secure allows you to override the default choice of http versus https (which is nor‐mally set based on your current request URL). Example 3-39 shows an example of itsuse.
Example 3-39. redirect()->to()
Route::get('redirect', function () { return redirect()->to('home');
// Or same, using the shortcut:
return redirect('home');});
redirect()->route()The route() method is the same as the to() method, but rather than pointing to aparticular path, it points to a particular route name (see Example 3-40).
Example 3-40. redirect()->route()
Route::get('redirect', function () { return redirect()->route('conferences.index');});
Note that, since some route names require parameters, its parameter order is a littledifferent. route() has an optional second parameter for the route parameters:
function route($to = null, $parameters = [], $status = 302, $headers = [])
So, using it might look a little like Example 3-41.
Example 3-41. redirect()->route() with parameters
Route::get('redirect', function () { return redirect()->route('conferences.show', ['conference' => 99]);});
56 | Chapter 3: Routing and Controllers
www.EBooksWorld.ir
redirect()->back()Because of some of the built-in conveniences of Laravel’s session implementation,your application will always have knowledge of what the user’s previously visited pagewas. That opens up the opportunity for a redirect()->back() redirect, which simplyredirects the user to whatever page they came from. There’s also a global shortcut forthis: back().
Other Redirect MethodsThe redirect service provides other methods that are less commonly used, but stillavailable:
home()
Redirects to a route named home. refresh()::Redirects to the same page the useris currently on. away()::Allows for redirecting to an external URL without thedefault URL validation.
secure()
Like to() with the secure parameter set to "true".
action()
Allows you to link to a controller and method in one of two ways: as a string(redirect()->action('MyController@myMethod')) or as a tuple (redirect()->action([MyController::class, 'myMethod'])).
guest()
Used internally by the authentification system (discussed in Chapter 9); when auser visits a route they’re not authenticated for, this captures the “intended” routeand then redirects the user (usually to a login page).
intended()
Also used internally by the auth system; after a successful authentication, thisgrabs the “intended” URL stored by the guest() method and redirects the userthere.
redirect()->with()While it is structured similarly to the other methods you can call on redirect(),with() is different in that it doesn’t define where you’re redirecting to, but what datayou’re passing along with the redirect. When you’re redirecting users to differentpages, you often want to pass certain data along with them. You could manually flashthe data to the session, but Laravel has some convenience methods to help you withthat.
Redirects | 57
www.EBooksWorld.ir
Most commonly, you can pass along either an array of keys and values or a single keyand value using with(), like in Example 3-42. This saves your with() data to the ses‐sion just for the next page load.
Example 3-42. Redirect with data
Route::get('redirect-with-key-value', function () { return redirect('dashboard') ->with('error', true);});
Route::get('redirect-with-array', function () { return redirect('dashboard') ->with(['error' => true, 'message' => 'Whoops!']);});
Chaining Methods on Redirects
As with many other facades, most calls to the Redirect facade canaccept fluent method chains, like the with() calls in Example 3-42.You’ll learn more about fluency in “What Is a Fluent Interface?” onpage 105.
You can also use withInput(), as in Example 3-43, to redirect with the user’s forminput flashed; this is most common in the case of a validation error, where you wantto send the user back to the form they just came from.
Example 3-43. Redirect with form input
Route::get('form', function () { return view('form');});
Route::post('form', function () { return redirect('form') ->withInput() ->with(['error' => true, 'message' => 'Whoops!']);});
The easiest way to get the flashed input that was passed with withInput() is using theold() helper, which can be used to get all old input (old()) or just the value for aparticular key as shown in the following example, with the second parameter as thedefault if there is no old value). You’ll commonly see this in views, which allows thisHTML to be used both on the “create” and the “edit” view for this form:
58 | Chapter 3: Routing and Controllers
www.EBooksWorld.ir
<input name="username" value="<?= old('username', 'Default username instructions here');?>">
Speaking of validation, there is also a useful method for passing errors along with aredirect response: withErrors(). You can pass it any “provider” of errors, which maybe an error string, an array of errors, or, most commonly, an instance of the Illumi‐nate Validator, which we’ll cover in Chapter 10. Example 3-44 shows an example ofits use.
Example 3-44. Redirect with errors
Route::post('form', function (Illuminate\Http\Request $request) { $validator = Validator::make($request->all(), $this->validationRules);
if ($validator->fails()) { return back() ->withErrors($validator) ->withInput(); }});
withErrors() automatically shares an $errors variable with the views of the page it’sredirecting to, for you to handle however you’d like.
The validate() Method on Requests
Don’t like how Example 3-44 looks? There’s a simple and powerfultool that will make it easy for you to clean up that code. Read morein “validate() on the Request Object” on page 189.
Aborting the RequestAside from returning views and redirects, the most common way to exit a route is toabort. There are a few globally available methods (abort(), abort_if(), andabort_unless()), which optionally take HTTP status codes, a message, and a headersarray as parameters.
As Example 3-45 shows, abort_if() and abort_unless() take a first parameter thatis evaluated for its truthiness and perform the abort depending on the result.
Example 3-45. 403 Forbidden aborts
Route::post('something-you-cant-do', function (Illuminate\Http\Request $request) { abort(403, 'You cannot do that!'); abort_unless($request->has('magicToken'), 403);
Aborting the Request | 59
www.EBooksWorld.ir
abort_if($request->user()->isBanned, 403);});
Custom ResponsesThere are a few other options available for us to return, so let’s go over the most com‐mon responses after views, redirects, and aborts. Just like with redirects, you can runthese methods on either the response() helper or the Response facade.
response()->make()If you want to create an HTTP response manually, just pass your data into the firstparameter of response()->make(): for example, return response()->make(Hello,World!). Once again, the second parameter is the HTTP status code and the third isyour headers.
response()->json() and ->jsonp()To create a JSON-encoded HTTP response manually, pass your JSON-able content(arrays, collections, or whatever else) to the json() method: for example returnresponse()->json(User::all()). It’s just like make(), except it +json_encode+syour content and sets the appropriate headers.
response()->download(), ->streamDownload(), and ->file()To send a file for the end user to download, pass either an SplFileInfo instance or astring filename to download(), with an optional second parameter of the downloadfilename: for example, return response()->download('file501751.pdf',
'myFile.pdf'), which would send a file that’s at file501751.pdf and rename it, as it’ssent, myFile.pdf.
To display the same file in the browser (if it’s a PDF or an image or something elsethe browser can handle), use response()->file() instead, which takes the sameparameters as response->download().
If you want to make some content from an external service available as a downloadwithout having to write it directly to your server’s disk, you can stream the downloadusing response()->streamDownload(). This method expects as parameters a closurethat echoes a string, a filename, and optionally an array of headers; see Example 3-46.
Example 3-46. Streaming downloads from external servers
return response()->streamDownload(function () { echo DocumentService::file('myFile')->getContent();}, 'myFile.pdf');
60 | Chapter 3: Routing and Controllers
www.EBooksWorld.ir
TestingIn some other communities the idea of unit-testing controller methods is common,but within Laravel (and most of the PHP community) it’s typical to rely on applica‐tion testing to test the functionality of routes.
For example, to verify that a POST route works correctly, we can write a test likeExample 3-47.
Example 3-47. Writing a simple POST route test
// tests/Feature/AssignmentTest.phppublic function test_post_creates_new_assignment(){ $this->post('/assignments', [ 'title' => 'My great assignment', ]);
$this->assertDatabaseHas('assignments', [ 'title' => 'My great assignment', ]);}
Did we directly call the controller methods? No. But we ensured that the goal of thisroute—to receive a POST and save its important information to the database—was met.
You can also use similar syntax to visit a route and verify that certain text shows upon the page, or that clicking certain buttons does certain things (see Example 3-48).
Example 3-48. Writing a simple GET route test
// AssignmentTest.phppublic function test_list_page_shows_all_assignments(){ $assignment = Assignment::create([ 'title' => 'My great assignment', ]);
$this->get('/assignments') ->assertSee('My great assignment');}
Testing | 61
www.EBooksWorld.ir
Different Names for Testing Methods Prior to Laravel 5.4
In projects running versions of Laravel prior to 5.4assertDatabaseHas() should be replaced by seeInDatabase(),and get() and assertSee() should be replaced by visit() andsee().
TL;DRLaravel’s routes are defined in routes/web.php and routes/api.php. You can define theexpected path for each route, which segments are static and which are parameters,which HTTP verbs can access the route, and how to resolve it. You can also attachmiddleware to routes, group them, and give them names.
What is returned from the route closure or controller method dictates how Laravelresponds to the user. If it’s a string or a view, it’s presented to the user; if it’s other sortsof data, it’s converted to JSON and presented to the user; and if it’s a redirect, it forcesa redirect.
Laravel provides a series of tools and conveniences to simplify common routing-related tasks and structures. These include resource controllers, route model binding,and form method spoofing.
62 | Chapter 3: Routing and Controllers
www.EBooksWorld.ir
CHAPTER 4
Blade Templating
Compared to most other backend languages, PHP actually functions relatively well asa templating language. But it has its shortcomings, and it’s also just ugly to be using<?php inline all over the place, so you can expect most modern frameworks to offer atemplating language.
Laravel offers a custom templating engine called Blade, which is inspired by .NET’sRazor engine. It boasts a concise syntax, a shallow learning curve, a powerful andintuitive inheritance model, and easy extensibility.
For a quick look at what writing Blade looks like, check out Example 4-1.
Example 4-1. Blade samples
<h1>{{ $group->title }}</h1>{!! $group->heroImageHtml() !!}
@forelse ($users as $user) • {{ $user->first_name }} {{ $user->last_name }}<br>@empty No users in this group.@endforelse
As you can see, Blade uses curly braces for its “echo” and introduces a convention inwhich its custom tags, called “directives,” are prefixed with an @. You’ll use directivesfor all of your control structures and also for inheritance and any custom functional‐ity you want to add.
Blade’s syntax is clean and concise, so at its core it’s just more pleasant and tidy towork with than the alternatives. But the moment you need anything of any complex‐ity in your templates—nested inheritance, complex conditionals, or recursion—Blade
63
www.EBooksWorld.ir
starts to really shine. Just like the best Laravel components, it takes complex applica‐tion requirements and makes them easy and accessible.
Additionally, since all Blade syntax is compiled into normal PHP code and thencached, it’s fast and it allows you to use native PHP in your Blade files if you want.However, I’d recommend avoiding usage of PHP if at all possible—usually if you needto do anything that you can’t do with Blade or a custom Blade directive, it doesn’tbelong in the template.
Using Twig with Laravel
Unlike many other Symfony-based frameworks, Laravel doesn’t useTwig by default. But if you’re just in love with Twig, there’s a TwigBridge package that makes it easy to use Twig instead of Blade.
Echoing DataAs you can see in Example 4-1, {{ and }} are used to wrap sections of PHP that you’dlike to echo. {{ $variable }} is similar to <?= $variable ?> in plain PHP.
It’s different in one way, however, and you might’ve guessed this already: Bladeescapes all echoes by default using PHP’s htmlentities() to protect your users frommalicious script insertion. That means {{ $variable }} is functionally equivalent to<?= htmlentities($variable) ?>. If you want to echo without the escaping, use {!!and !!} instead.
{{ and }} When Using a Frontend Templating FrameworkYou might’ve noticed that the echo syntax for Blade ({{ }}) is similar to the echo syn‐tax for many frontend frameworks. So how does Laravel know when you’re writingBlade versus Handlebars?
Blade will ignore any {{ that’s prefaced with an @. So, it will parse the first of the fol‐lowing examples, but the second will be echoed out directly:
// Parsed as Blade; the value of $bladeVariable is echoed to the view{{ $bladeVariable }}
// @ is removed and "{{ handlebarsVariable }}" echoed to the view directly@{{ handlebarsVariable }}
You can also wrap any large sections of script content with the @verbatim directive.
64 | Chapter 4: Blade Templating
www.EBooksWorld.ir
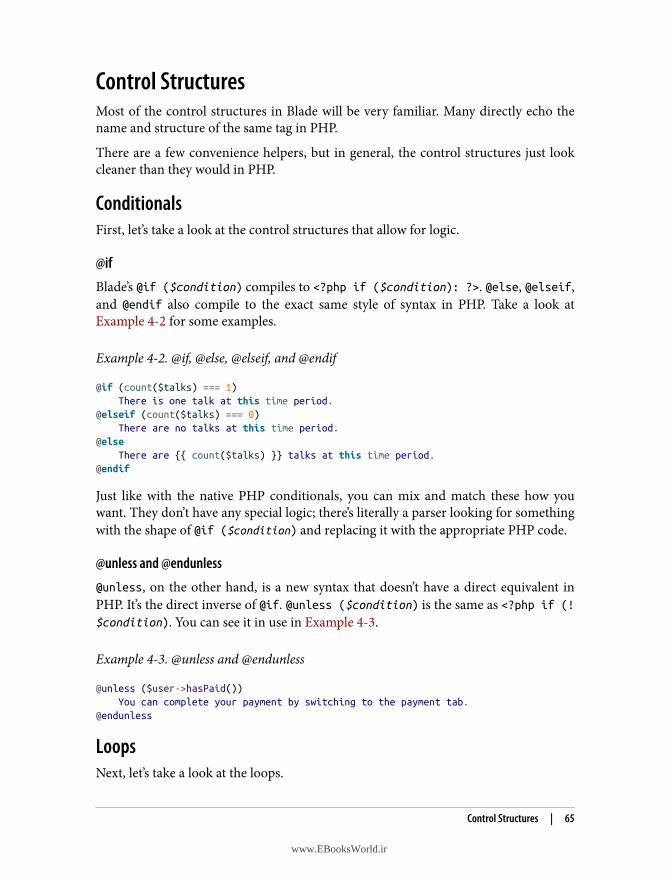
Control StructuresMost of the control structures in Blade will be very familiar. Many directly echo thename and structure of the same tag in PHP.
There are a few convenience helpers, but in general, the control structures just lookcleaner than they would in PHP.
ConditionalsFirst, let’s take a look at the control structures that allow for logic.
@if
Blade’s @if ($condition) compiles to <?php if ($condition): ?>. @else, @elseif,and @endif also compile to the exact same style of syntax in PHP. Take a look atExample 4-2 for some examples.
Example 4-2. @if, @else, @elseif, and @endif
@if (count($talks) === 1) There is one talk at this time period.@elseif (count($talks) === 0) There are no talks at this time period.@else There are {{ count($talks) }} talks at this time period.@endif
Just like with the native PHP conditionals, you can mix and match these how youwant. They don’t have any special logic; there’s literally a parser looking for somethingwith the shape of @if ($condition) and replacing it with the appropriate PHP code.
@unless and @endunless
@unless, on the other hand, is a new syntax that doesn’t have a direct equivalent inPHP. It’s the direct inverse of @if. @unless ($condition) is the same as <?php if (!$condition). You can see it in use in Example 4-3.
Example 4-3. @unless and @endunless
@unless ($user->hasPaid()) You can complete your payment by switching to the payment tab.@endunless
LoopsNext, let’s take a look at the loops.
Control Structures | 65
www.EBooksWorld.ir
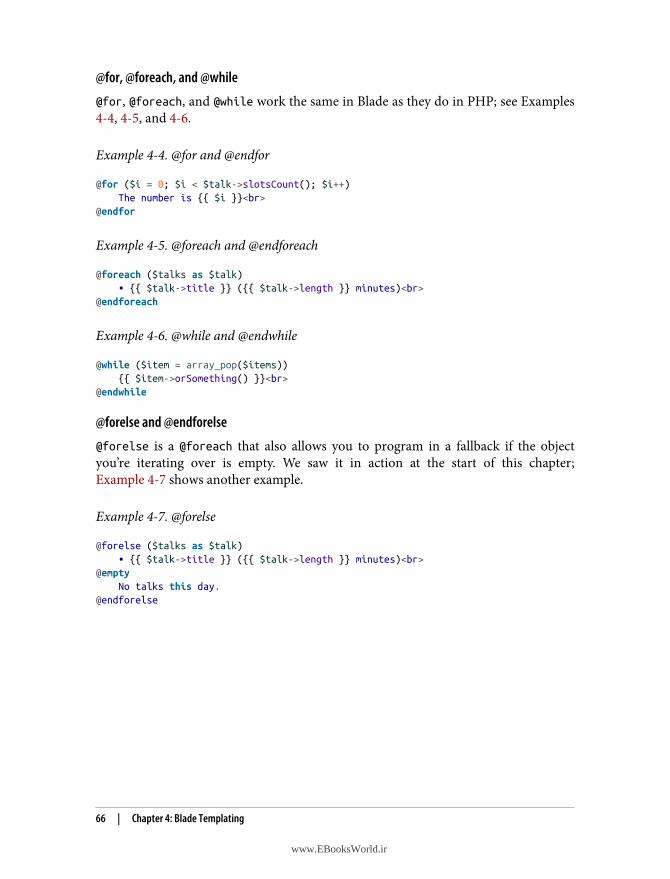
@for, @foreach, and @while
@for, @foreach, and @while work the same in Blade as they do in PHP; see Examples4-4, 4-5, and 4-6.
Example 4-4. @for and @endfor
@for ($i = 0; $i < $talk->slotsCount(); $i++) The number is {{ $i }}<br>@endfor
Example 4-5. @foreach and @endforeach
@foreach ($talks as $talk) • {{ $talk->title }} ({{ $talk->length }} minutes)<br>@endforeach
Example 4-6. @while and @endwhile
@while ($item = array_pop($items)) {{ $item->orSomething() }}<br>@endwhile
@forelse and @endforelse
@forelse is a @foreach that also allows you to program in a fallback if the objectyou’re iterating over is empty. We saw it in action at the start of this chapter;Example 4-7 shows another example.
Example 4-7. @forelse
@forelse ($talks as $talk) • {{ $talk->title }} ({{ $talk->length }} minutes)<br>@empty No talks this day.@endforelse
66 | Chapter 4: Blade Templating
www.EBooksWorld.ir
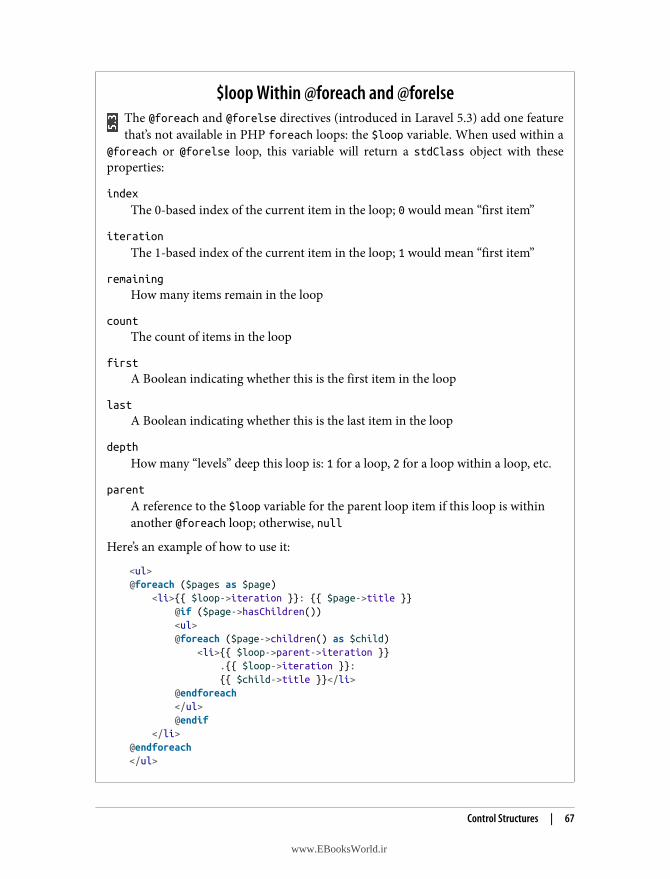
$loop Within @foreach and @forelseThe @foreach and @forelse directives (introduced in Laravel 5.3) add one featurethat’s not available in PHP foreach loops: the $loop variable. When used within a
@foreach or @forelse loop, this variable will return a stdClass object with theseproperties:
index
The 0-based index of the current item in the loop; 0 would mean “first item”
iteration
The 1-based index of the current item in the loop; 1 would mean “first item”
remaining
How many items remain in the loop
count
The count of items in the loop
first
A Boolean indicating whether this is the first item in the loop
last
A Boolean indicating whether this is the last item in the loop
depth
How many “levels” deep this loop is: 1 for a loop, 2 for a loop within a loop, etc.
parent
A reference to the $loop variable for the parent loop item if this loop is withinanother @foreach loop; otherwise, null
Here’s an example of how to use it:
<ul>@foreach ($pages as $page) <li>{{ $loop->iteration }}: {{ $page->title }} @if ($page->hasChildren()) <ul> @foreach ($page->children() as $child) <li>{{ $loop->parent->iteration }} .{{ $loop->iteration }}: {{ $child->title }}</li> @endforeach </ul> @endif </li>@endforeach</ul>
Control Structures | 67
www.EBooksWorld.ir
Template InheritanceBlade provides a structure for template inheritance that allows views to extend, mod‐ify, and include other views.
Let’s take a look at how inheritance is structured with Blade.
Defining Sections with @section/@show and @yieldLet’s start with a top-level Blade layout, like in Example 4-8. This is the definition of ageneric page wrapper that we’ll later place page-specific content into.
Example 4-8. Blade layout
<!-- resources/views/layouts/master.blade.php --><html> <head> <title>My Site | @yield('title', 'Home Page')</title> </head> <body> <div class="container"> @yield('content') </div> @section('footerScripts') <script src="app.js"></script> @show </body></html>
This looks a bit like a normal HTML page, but you can see we’ve yielded in two places(title and content) and we’ve defined a section in a third (footerScripts). We havethree Blade directives here: @yield('content') alone, @yield('title', 'Home
Page') with a defined default, and @section/@show with actual content in it.
While they each look a little different, all three function essentially the same. All threeare defining that there’s a section with a given name (the first parameter) that can beextended later, and all three are defining what to do if the section isn’t extended. Theydo this either by providing a string fallback ('Home Page'), no fallback (which willjust not show anything if it’s not extended), or an entire block fallback (in this case,<script src="app.js"></script>).
What’s different? Well, clearly, @yield('content') has no default content. But addi‐tionally, the default content in @yield('title') will only be shown if it’s never exten‐ded. If it is extended, its child sections will not have programmatic access to thedefault value. @section/@show, on the other hand, is both defining a defaultand doing so in such a way that its default contents will be available to its children,through @parent.
68 | Chapter 4: Blade Templating
www.EBooksWorld.ir
Once you have a parent layout like this, you can extend it in a new template file like inExample 4-9.
Example 4-9. Extending a Blade layout
<!-- resources/views/dashboard.blade.php -->@extends('layouts.master')
@section('title', 'Dashboard')
@section('content') Welcome to your application dashboard!@endsection
@section('footerScripts') @parent <script src="dashboard.js"></script>@endsection
@show Versus @endsection
You may have noticed that Example 4-8 uses @section/@show, butExample 4-9 uses @section/@endsection. What’s the difference?Use @show when you’re defining the place for a section, in the par‐ent template. Use @endsection when you’re defining the contentfor a template in a child template.
This child view allows us to cover a few new concepts in Blade inheritance.
@extends
In Example 4-9, with @extends('layouts.master'), we define that this view shouldnot be rendered on its own but that it instead extends another view. That means itsrole is to define the content of various sections, but not to stand alone. It’s almostmore like a series of buckets of content, rather than an HTML page. This line alsodefines that the view it’s extending lives at resources/views/layouts/master.blade.php.
Each file should only extend one other file, and the @extends call should be the firstline of the file.
@section and @endsection
With @section('title', 'Dashboard'), we provide our content for thefirst section, title. Since the content is so short, instead of using @section and @endsection, we’re just using a shortcut. This allows us to pass the content in as the sec‐
Template Inheritance | 69
www.EBooksWorld.ir
ond parameter of @section and then move on. If it’s a bit disconcerting to see@section without @endsection, you could just use the normal syntax.
With @section('content') and on, we use the normal syntax to define the contentsof the content section. We’ll just throw a little greeting in for now. Note, however,that when you’re using @section in a child view, you end it with @endsection (or itsalias @stop), instead of @show, which is reserved for defining sections in parent views.
@parent
Finally, with @section('footerScripts') and on, we use the normal syntax todefine the contents of the footerScripts section.
But remember, we actually defined that content (or, at least, its “default”) already inthe master layout. So this time, we have two options: we can either overwrite the con‐tent from the parent view, or we can add to it.
You can see that we have the option to include the content from the parent by usingthe @parent directive within the section. If we didn’t, the content of this sectionwould entirely overwrite anything defined in the parent for this section.
Including View PartialsNow that we’ve established the basics of inheritance, there are a few more tricks wecan perform.
@includeWhat if we’re in a view and want to pull in another view? Maybe we have a call-to-action “Sign up” button that we want to reuse around the site. And maybe we want tocustomize the button text every time we use it. Take a look at Example 4-10.
Example 4-10. Including view partials with @include
<!-- resources/views/home.blade.php --><div class="content" data-page-name="{{ $pageName }}"> <p>Here's why you should sign up for our app: <strong>It's Great.</strong></p>
@include('sign-up-button', ['text' => 'See just how great it is'])</div>
<!-- resources/views/sign-up-button.blade.php --><a class="button button--callout" data-page-name="{{ $pageName }}"> <i class="exclamation-icon"></i> {{ $text }}</a>
70 | Chapter 4: Blade Templating
www.EBooksWorld.ir
@include pulls in the partial and, optionally, passes data into it. Note that not onlycan you explicitly pass data to an include via the second parameter of @include, butyou can also reference any variables within the included file that are available to theincluding view ($pageName, in this example). Once again, you can do whatever youwant, but I would recommend you consider always explicitly passing every variablethat you intend to use, just for clarity.
You also use the @includeIf, @includeWhen, and @includeFirst directives, as shownin Example 4-11.
Example 4-11. Conditionally including views
{{-- Include a view if it exists --}}@includeIf('sidebars.admin', ['some' => 'data'])
{{-- Include a view if a passed variable is truth-y --}}@includeWhen($user->isAdmin(), 'sidebars.admin', ['some' => 'data'])
{{-- Include the first view that exists from a given array of views --}}@includeFirst(['customs.header', 'header'], ['some' => 'data'])
@eachYou can probably imagine some circumstances in which you’d need to loop overan array or collection and @include a partial for each item. There’s a directive forthat: @each.
Let’s say we have a sidebar composed of modules, and we want to include multiplemodules, each with a different title. Take a look at Example 4-12.
Example 4-12. Using view partials in a loop with @each
<!-- resources/views/sidebar.blade.php --><div class="sidebar"> @each('partials.module', $modules, 'module', 'partials.empty-module')</div>
<!-- resources/views/partials/module.blade.php --><div class="sidebar-module"> <h1>{{ $module->title }}</h1></div>
<!-- resources/views/partials/empty-module.blade.php --><div class="sidebar-module"> No modules :(</div>
Template Inheritance | 71
www.EBooksWorld.ir

Consider that @each syntax. The first parameter is the name of the view partial. Thesecond is the array or collection to iterate over. The third is the variable name thateach item (in this case, each element in the $modules array) will be passed to the viewas. And the optional fourth parameter is the view to show if the array or collection isempty (or, optionally, you can pass a string in here that will be used as your template).
Using StacksOne common pattern that can be difficult to manage using basic Blade includes iswhen each view in a Blade include hierarchy needs to add something to a certain sec‐tion—almost like adding an entry to an array.
The most common situation for this is when certain pages (and sometimes, morebroadly, certain sections of a website) have specific unique CSS and JavaScript filesthey need to load. Imagine you have a site-wide “global” CSS file, a “jobs section” CSSfile, and an “apply for a job” page CSS file.
Blade’s stacks are built for exactly this situation. In your parent template, define astack, which is just a placeholder. Then, in each child template you can “push” entriesonto that stack with @push/@endpush, which adds them to the bottom of the stack inthe final render. You can also use @prepend/@endprepend to add them to the top ofthe stack. Example 4-13 illustrates.
Example 4-13. Using Blade stacks
<!-- resources/views/layouts/app.blade.php --><html><head><!-- the head --></head><body> <!-- the rest of the page --> <script src="/css/global.css"></script> <!-- the placeholder where stack content will be placed --> @stack('scripts')</body></html>
<!-- resources/views/jobs.blade.php -->@extends('layouts.app')
@push('scripts') <!-- push something to the bottom of the stack --> <script src="/css/jobs.css"></script>@endpush
<!-- resources/views/jobs/apply.blade.php -->@extends('jobs')
@prepend('scripts')
72 | Chapter 4: Blade Templating
www.EBooksWorld.ir
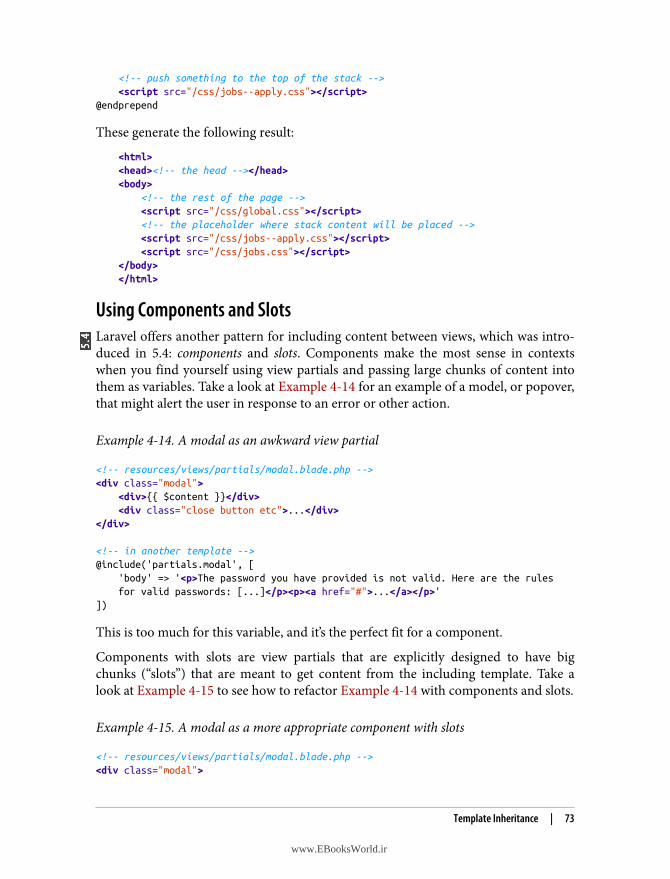
<!-- push something to the top of the stack --> <script src="/css/jobs--apply.css"></script>@endprepend
These generate the following result:
<html><head><!-- the head --></head><body> <!-- the rest of the page --> <script src="/css/global.css"></script> <!-- the placeholder where stack content will be placed --> <script src="/css/jobs--apply.css"></script> <script src="/css/jobs.css"></script></body></html>
Using Components and SlotsLaravel offers another pattern for including content between views, which was intro‐duced in 5.4: components and slots. Components make the most sense in contextswhen you find yourself using view partials and passing large chunks of content intothem as variables. Take a look at Example 4-14 for an example of a model, or popover,that might alert the user in response to an error or other action.
Example 4-14. A modal as an awkward view partial
<!-- resources/views/partials/modal.blade.php --><div class="modal"> <div>{{ $content }}</div> <div class="close button etc">...</div></div>
<!-- in another template -->@include('partials.modal', [ 'body' => '<p>The password you have provided is not valid. Here are the rules for valid passwords: [...]</p><p><a href="#">...</a></p>'])
This is too much for this variable, and it’s the perfect fit for a component.
Components with slots are view partials that are explicitly designed to have bigchunks (“slots”) that are meant to get content from the including template. Take alook at Example 4-15 to see how to refactor Example 4-14 with components and slots.
Example 4-15. A modal as a more appropriate component with slots
<!-- resources/views/partials/modal.blade.php --><div class="modal">
Template Inheritance | 73
www.EBooksWorld.ir
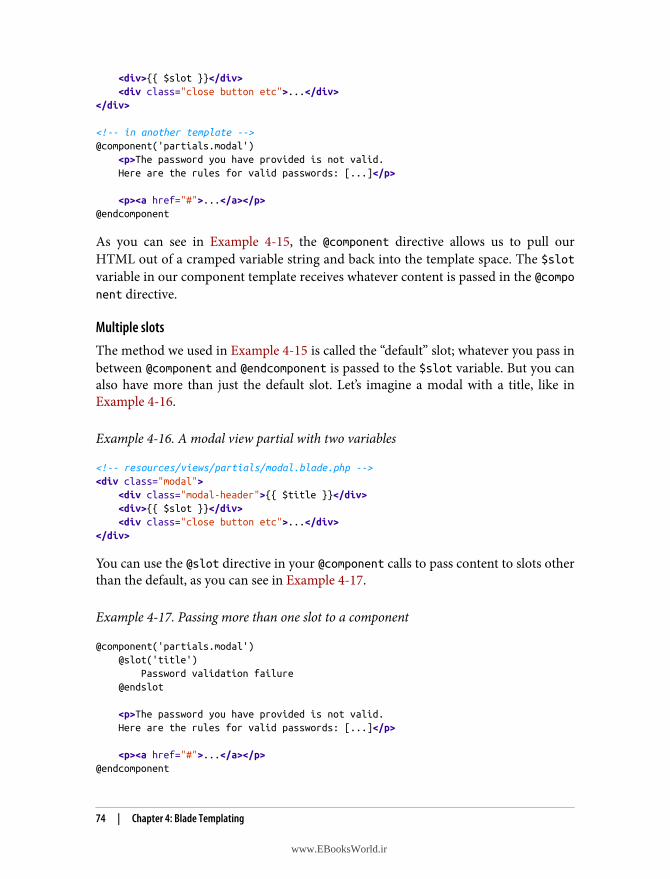
<div>{{ $slot }}</div> <div class="close button etc">...</div></div>
<!-- in another template -->@component('partials.modal') <p>The password you have provided is not valid. Here are the rules for valid passwords: [...]</p>
<p><a href="#">...</a></p>@endcomponent
As you can see in Example 4-15, the @component directive allows us to pull ourHTML out of a cramped variable string and back into the template space. The $slotvariable in our component template receives whatever content is passed in the @component directive.
Multiple slotsThe method we used in Example 4-15 is called the “default” slot; whatever you pass inbetween @component and @endcomponent is passed to the $slot variable. But you canalso have more than just the default slot. Let’s imagine a modal with a title, like inExample 4-16.
Example 4-16. A modal view partial with two variables
<!-- resources/views/partials/modal.blade.php --><div class="modal"> <div class="modal-header">{{ $title }}</div> <div>{{ $slot }}</div> <div class="close button etc">...</div></div>
You can use the @slot directive in your @component calls to pass content to slots otherthan the default, as you can see in Example 4-17.
Example 4-17. Passing more than one slot to a component
@component('partials.modal') @slot('title') Password validation failure @endslot
<p>The password you have provided is not valid. Here are the rules for valid passwords: [...]</p>
<p><a href="#">...</a></p>@endcomponent
74 | Chapter 4: Blade Templating
www.EBooksWorld.ir
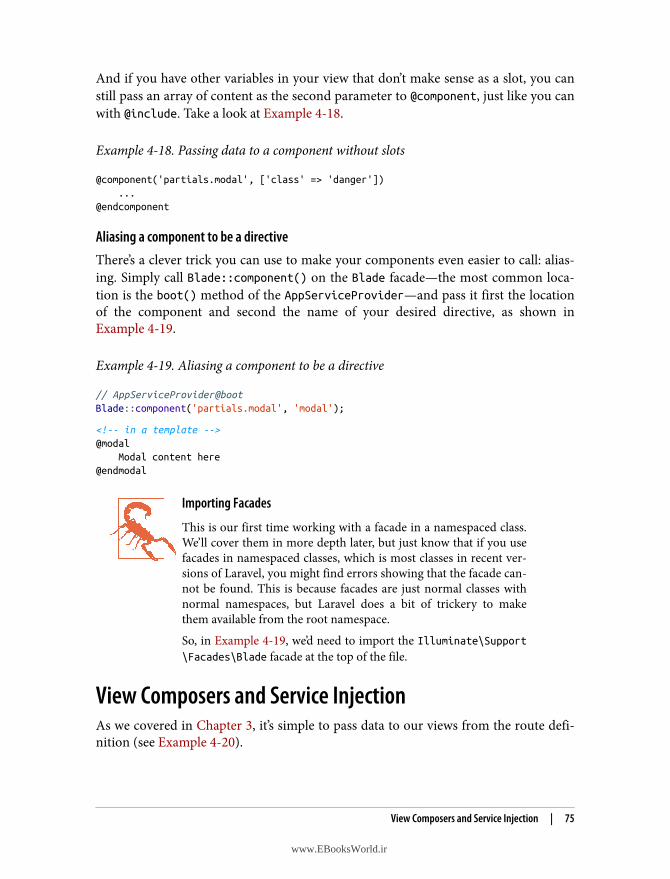
And if you have other variables in your view that don’t make sense as a slot, you canstill pass an array of content as the second parameter to @component, just like you canwith @include. Take a look at Example 4-18.
Example 4-18. Passing data to a component without slots
@component('partials.modal', ['class' => 'danger']) ...@endcomponent
Aliasing a component to be a directiveThere’s a clever trick you can use to make your components even easier to call: alias‐ing. Simply call Blade::component() on the Blade facade—the most common loca‐tion is the boot() method of the AppServiceProvider—and pass it first the locationof the component and second the name of your desired directive, as shown inExample 4-19.
Example 4-19. Aliasing a component to be a directive
// AppServiceProvider@bootBlade::component('partials.modal', 'modal');
<!-- in a template -->@modal Modal content here@endmodal
Importing Facades
This is our first time working with a facade in a namespaced class.We’ll cover them in more depth later, but just know that if you usefacades in namespaced classes, which is most classes in recent ver‐sions of Laravel, you might find errors showing that the facade can‐not be found. This is because facades are just normal classes withnormal namespaces, but Laravel does a bit of trickery to makethem available from the root namespace.So, in Example 4-19, we’d need to import the Illuminate\Support\Facades\Blade facade at the top of the file.
View Composers and Service InjectionAs we covered in Chapter 3, it’s simple to pass data to our views from the route defi‐nition (see Example 4-20).
View Composers and Service Injection | 75
www.EBooksWorld.ir
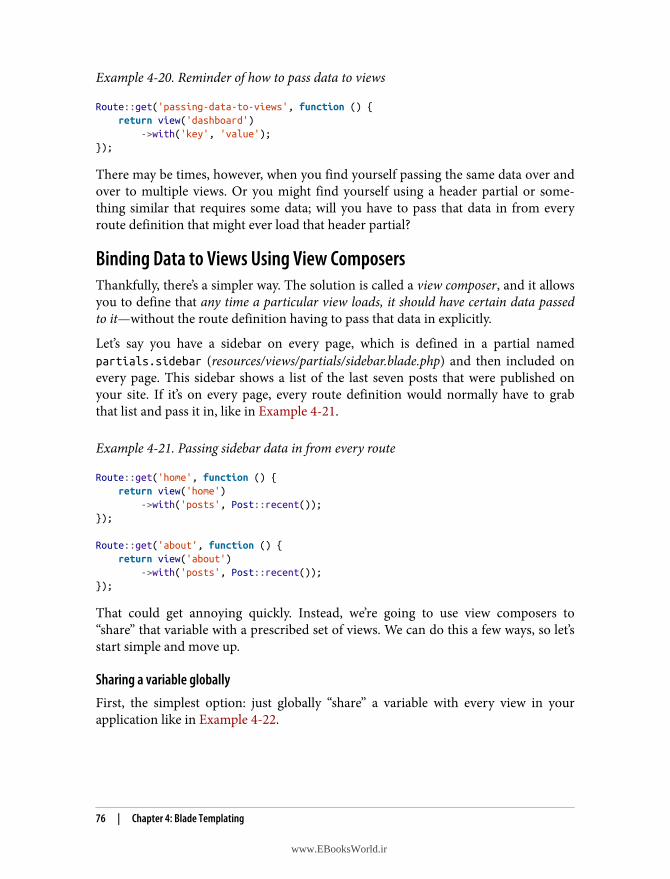
Example 4-20. Reminder of how to pass data to views
Route::get('passing-data-to-views', function () { return view('dashboard') ->with('key', 'value');});
There may be times, however, when you find yourself passing the same data over andover to multiple views. Or you might find yourself using a header partial or some‐thing similar that requires some data; will you have to pass that data in from everyroute definition that might ever load that header partial?
Binding Data to Views Using View ComposersThankfully, there’s a simpler way. The solution is called a view composer, and it allowsyou to define that any time a particular view loads, it should have certain data passedto it—without the route definition having to pass that data in explicitly.
Let’s say you have a sidebar on every page, which is defined in a partial namedpartials.sidebar (resources/views/partials/sidebar.blade.php) and then included onevery page. This sidebar shows a list of the last seven posts that were published onyour site. If it’s on every page, every route definition would normally have to grabthat list and pass it in, like in Example 4-21.
Example 4-21. Passing sidebar data in from every route
Route::get('home', function () { return view('home') ->with('posts', Post::recent());});
Route::get('about', function () { return view('about') ->with('posts', Post::recent());});
That could get annoying quickly. Instead, we’re going to use view composers to“share” that variable with a prescribed set of views. We can do this a few ways, so let’sstart simple and move up.
Sharing a variable globallyFirst, the simplest option: just globally “share” a variable with every view in yourapplication like in Example 4-22.
76 | Chapter 4: Blade Templating
www.EBooksWorld.ir
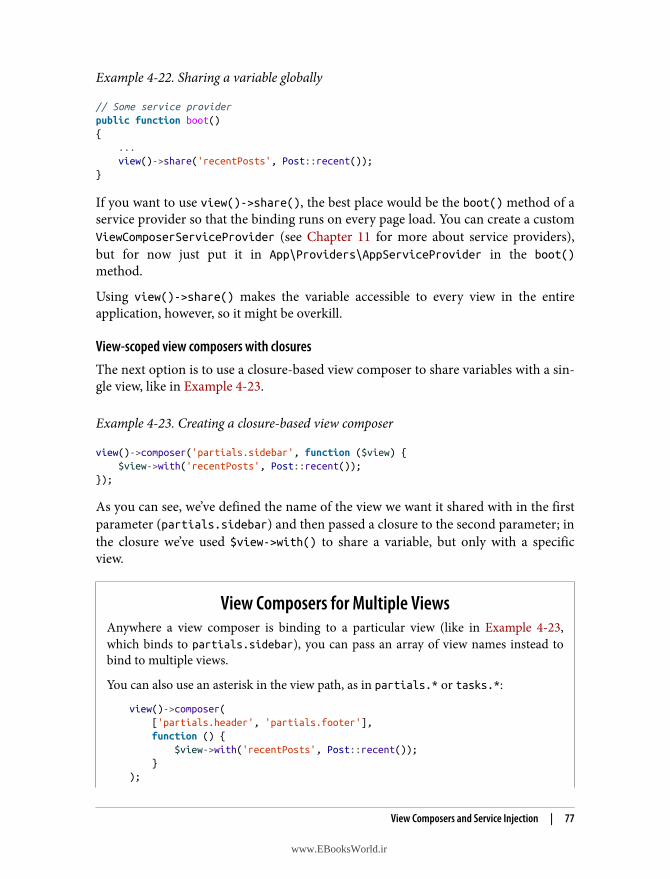
Example 4-22. Sharing a variable globally
// Some service providerpublic function boot(){ ... view()->share('recentPosts', Post::recent());}
If you want to use view()->share(), the best place would be the boot() method of aservice provider so that the binding runs on every page load. You can create a customViewComposerServiceProvider (see Chapter 11 for more about service providers),but for now just put it in App\Providers\AppServiceProvider in the boot()method.
Using view()->share() makes the variable accessible to every view in the entireapplication, however, so it might be overkill.
View-scoped view composers with closuresThe next option is to use a closure-based view composer to share variables with a sin‐gle view, like in Example 4-23.
Example 4-23. Creating a closure-based view composer
view()->composer('partials.sidebar', function ($view) { $view->with('recentPosts', Post::recent());});
As you can see, we’ve defined the name of the view we want it shared with in the firstparameter (partials.sidebar) and then passed a closure to the second parameter; inthe closure we’ve used $view->with() to share a variable, but only with a specificview.
View Composers for Multiple ViewsAnywhere a view composer is binding to a particular view (like in Example 4-23,which binds to partials.sidebar), you can pass an array of view names instead tobind to multiple views.
You can also use an asterisk in the view path, as in partials.* or tasks.*:
view()->composer( ['partials.header', 'partials.footer'], function () { $view->with('recentPosts', Post::recent()); });
View Composers and Service Injection | 77
www.EBooksWorld.ir
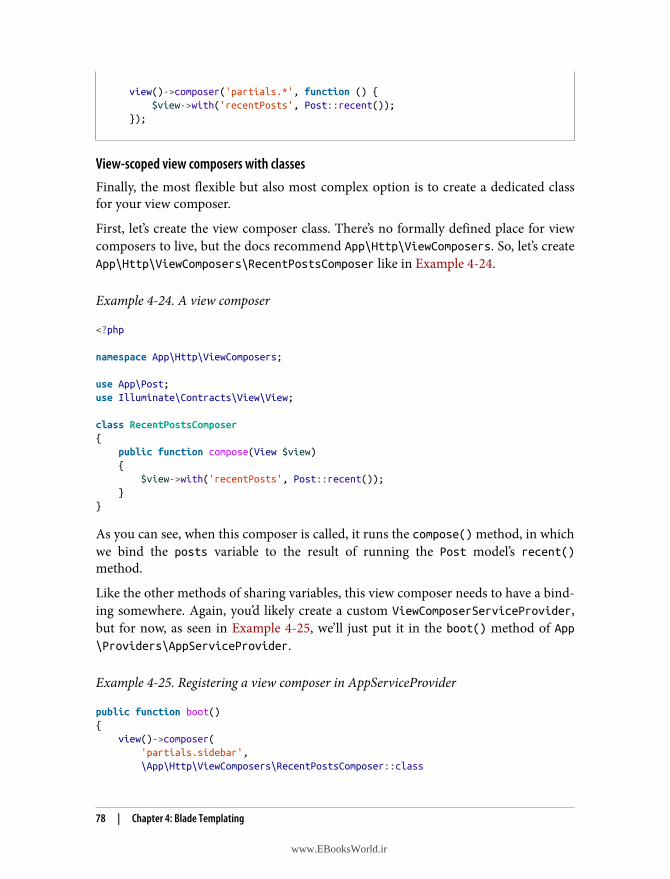
view()->composer('partials.*', function () { $view->with('recentPosts', Post::recent());});
View-scoped view composers with classesFinally, the most flexible but also most complex option is to create a dedicated classfor your view composer.
First, let’s create the view composer class. There’s no formally defined place for viewcomposers to live, but the docs recommend App\Http\ViewComposers. So, let’s createApp\Http\ViewComposers\RecentPostsComposer like in Example 4-24.
Example 4-24. A view composer
<?php
namespace App\Http\ViewComposers;
use App\Post;use Illuminate\Contracts\View\View;
class RecentPostsComposer{ public function compose(View $view) { $view->with('recentPosts', Post::recent()); }}
As you can see, when this composer is called, it runs the compose() method, in whichwe bind the posts variable to the result of running the Post model’s recent()method.
Like the other methods of sharing variables, this view composer needs to have a bind‐ing somewhere. Again, you’d likely create a custom ViewComposerServiceProvider,but for now, as seen in Example 4-25, we’ll just put it in the boot() method of App\Providers\AppServiceProvider.
Example 4-25. Registering a view composer in AppServiceProvider
public function boot(){ view()->composer( 'partials.sidebar', \App\Http\ViewComposers\RecentPostsComposer::class
78 | Chapter 4: Blade Templating
www.EBooksWorld.ir
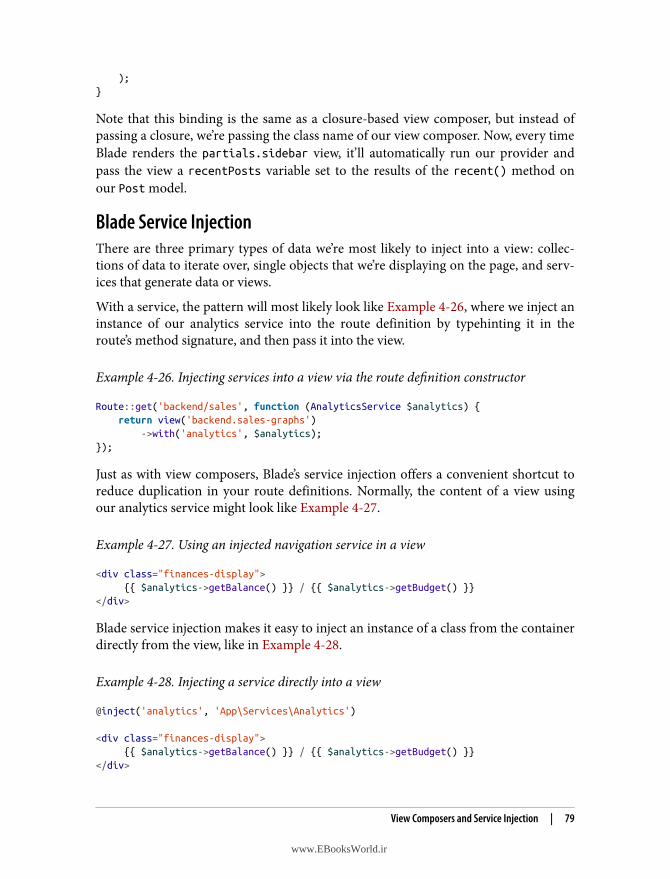
);}
Note that this binding is the same as a closure-based view composer, but instead ofpassing a closure, we’re passing the class name of our view composer. Now, every timeBlade renders the partials.sidebar view, it’ll automatically run our provider andpass the view a recentPosts variable set to the results of the recent() method onour Post model.
Blade Service InjectionThere are three primary types of data we’re most likely to inject into a view: collec‐tions of data to iterate over, single objects that we’re displaying on the page, and serv‐ices that generate data or views.
With a service, the pattern will most likely look like Example 4-26, where we inject aninstance of our analytics service into the route definition by typehinting it in theroute’s method signature, and then pass it into the view.
Example 4-26. Injecting services into a view via the route definition constructor
Route::get('backend/sales', function (AnalyticsService $analytics) { return view('backend.sales-graphs') ->with('analytics', $analytics);});
Just as with view composers, Blade’s service injection offers a convenient shortcut toreduce duplication in your route definitions. Normally, the content of a view usingour analytics service might look like Example 4-27.
Example 4-27. Using an injected navigation service in a view
<div class="finances-display"> {{ $analytics->getBalance() }} / {{ $analytics->getBudget() }}</div>
Blade service injection makes it easy to inject an instance of a class from the containerdirectly from the view, like in Example 4-28.
Example 4-28. Injecting a service directly into a view
@inject('analytics', 'App\Services\Analytics')
<div class="finances-display"> {{ $analytics->getBalance() }} / {{ $analytics->getBudget() }}</div>
View Composers and Service Injection | 79
www.EBooksWorld.ir
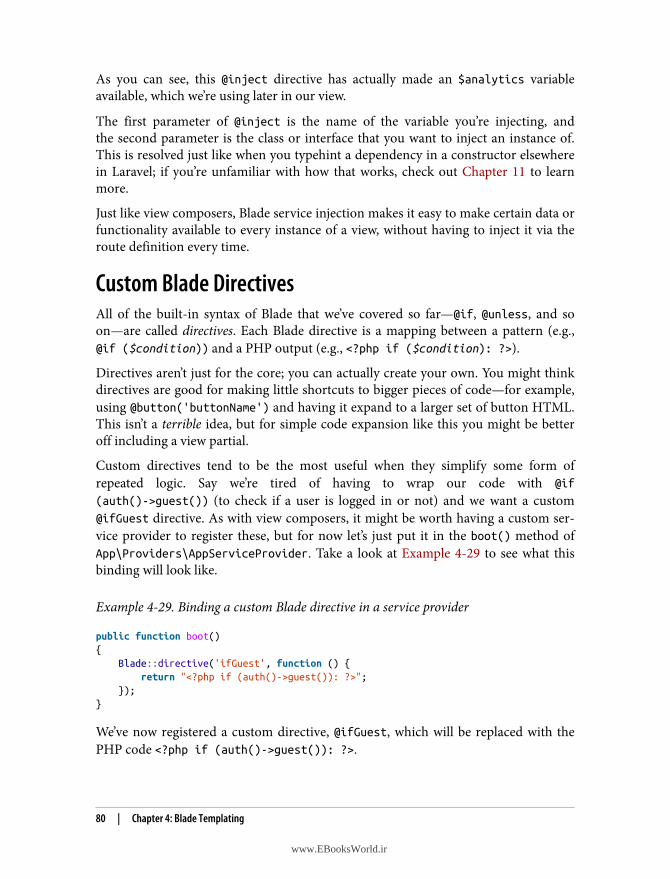
As you can see, this @inject directive has actually made an $analytics variableavailable, which we’re using later in our view.
The first parameter of @inject is the name of the variable you’re injecting, andthe second parameter is the class or interface that you want to inject an instance of.This is resolved just like when you typehint a dependency in a constructor elsewherein Laravel; if you’re unfamiliar with how that works, check out Chapter 11 to learnmore.
Just like view composers, Blade service injection makes it easy to make certain data orfunctionality available to every instance of a view, without having to inject it via theroute definition every time.
Custom Blade DirectivesAll of the built-in syntax of Blade that we’ve covered so far—@if, @unless, and soon—are called directives. Each Blade directive is a mapping between a pattern (e.g.,@if ($condition)) and a PHP output (e.g., <?php if ($condition): ?>).
Directives aren’t just for the core; you can actually create your own. You might thinkdirectives are good for making little shortcuts to bigger pieces of code—for example,using @button('buttonName') and having it expand to a larger set of button HTML.This isn’t a terrible idea, but for simple code expansion like this you might be betteroff including a view partial.
Custom directives tend to be the most useful when they simplify some form ofrepeated logic. Say we’re tired of having to wrap our code with @if
(auth()->guest()) (to check if a user is logged in or not) and we want a custom@ifGuest directive. As with view composers, it might be worth having a custom ser‐vice provider to register these, but for now let’s just put it in the boot() method ofApp\Providers\AppServiceProvider. Take a look at Example 4-29 to see what thisbinding will look like.
Example 4-29. Binding a custom Blade directive in a service provider
public function boot(){ Blade::directive('ifGuest', function () { return "<?php if (auth()->guest()): ?>"; });}
We’ve now registered a custom directive, @ifGuest, which will be replaced with thePHP code <?php if (auth()->guest()): ?>.
80 | Chapter 4: Blade Templating
www.EBooksWorld.ir
This might feel strange. You’re writing a string that will be returned and then executedas PHP. But what this means is that you can now take the complex, or ugly, or unclear,or repetitive aspects of your PHP templating code and hide them behind clear, sim‐ple, and expressive syntax.
Custom Directive Result Caching
You might be tempted to do some logic to make your custom direc‐tive faster by performing an operation in the binding and thenembedding the result within the returned string:
Blade::directive('ifGuest', function () { // Antipattern! Do not copy. $ifGuest = auth()->guest(); return "<?php if ({$ifGuest}): ?>";});
The problem with this idea is that it assumes this directive will berecreated on every page load. However, Blade caches aggressively,so you’re going to find yourself in a bad spot if you try this.
Parameters in Custom Blade DirectivesWhat if you want to accept parameters in your custom logic? Check outExample 4-30.
Example 4-30. Creating a Blade directive with parameters
// BindingBlade::directive('newlinesToBr', function ($expression) { return "<?php echo nl2br({$expression}); ?>";});
// In use<p>@newlinesToBr($message->body)</p>
The $expression parameter received by the closure represents whatever’s within theparentheses. As you can see, we then generate a valid PHP code snippet and return it.
$expression Parameter Scoping Before Laravel 5.3
Before Laravel 5.3, the $expression parameter also included theparentheses themselves. So, in Example 4-30, $expression (which is$message->body in Laravel 5.3 and later) would have instead been($message->body), and we would’ve had to write <?php echonl2br{$expression}; ?>.
Custom Blade Directives | 81
www.EBooksWorld.ir
If you find yourself constantly writing the same conditional logic over and over, youshould consider a Blade directive.
Example: Using Custom Blade Directives for a Multitenant AppLet’s imagine we’re building an application that supports multitenancy, which meansusers might be visiting the site from www.myapp.com, client1.myapp.com, cli‐ent2.myapp.com, or elsewhere.
Suppose we have written a class to encapsulate some of our multitenancy logic andnamed it Context. This class will capture information and logic about the context ofthe current visit, such as who the authenticated user is and whether the user is visitingthe public website or a client subdomain.
We’ll probably frequently resolve that Context class in our views and perform condi‐tionals on it, like in Example 4-31. app('context') is a shortcut to get an instance ofa class from the container, which we’ll learn more about in Chapter 11.
Example 4-31. Conditionals on context without a custom Blade directive
@if (app('context')->isPublic()) © Copyright MyApp LLC@else © Copyright {{ app('context')->client->name }}@endif
What if we could simplify @if (app('context')->isPublic()) to just @ifPublic?Let’s do it. Check out Example 4-32.
Example 4-32. Conditionals on context with a custom Blade directive
// BindingBlade::directive('ifPublic', function () { return "<?php if (app('context')->isPublic()): ?>";});
// In use@ifPublic © Copyright MyApp LLC@else © Copyright {{ app('context')->client->name }}@endif
Since this resolves to a simple if statement, we can still rely on the native @else and@endif conditionals. But if we wanted, we could also create a custom @elseIfClientdirective, or a separate @ifClient directive, or really whatever else we want.
82 | Chapter 4: Blade Templating
www.EBooksWorld.ir
Easier Custom Directives for “if” StatementsWhile custom Blade directives are powerful, the most common use for them is ifstatements. So there’s a simpler way to create custom “if ” directives: Blade::if().Example 4-33 shows how we could refactor Example 4-32 using the Blade::if()method:
Example 4-33. Defining a custom “if ” Blade directive
// BindingBlade::if('ifPublic', function () { return (app('context'))->isPublic();});
You’ll use the directives exactly the same way, but as you can see, defining them is abit simpler. Instead of having to manually type out PHP braces, you can just write aclosure that returns a Boolean.
TestingThe most common method of testing views is through application testing, meaningthat you’re actually calling the route that displays the views and ensuring the viewshave certain content (see Example 4-34). You can also click buttons or submit formsand ensure that you are redirected to a certain page, or that you see a certain error.(You’ll learn more about testing in Chapter 12.)
Example 4-34. Testing that a view displays certain content
// EventsTest.phppublic function test_list_page_shows_all_events(){ $event1 = factory(Event::class)->create(); $event2 = factory(Event::class)->create();
$this->get('events') ->assertSee($event1->title) ->assertSee($event2->title);}
You can also test that a certain view has been passed a particular set of data, which, ifit accomplishes your testing goals, is less fragile than checking for certain text on thepage. Example 4-35 demonstrates this approach.
Testing | 83
www.EBooksWorld.ir
Example 4-35. Testing that a view was passed certain content
// EventsTest.phppublic function test_list_page_shows_all_events(){ $event1 = factory(Event::class)->create(); $event2 = factory(Event::class)->create();
$response = $this->get('events');
$response->assertViewHas('events', Event::all()); $response->assertViewHasAll([ 'events' => Event::all(), 'title' => 'Events Page', ]); $response->assertViewMissing('dogs');}
Different Names for Testing Methods Prior to Laravel 5.4
In projects running versions of Laravel prior to 5.4, get() andassertSee() should be replaced by visit() and see().
In 5.3 we gained the ability to pass a closure to assertViewHas(), meaning we cancustomize how we want to check more complex data structures. Example 4-36 illus‐trates how we might use this.
Example 4-36. Passing a closure to assertViewHas()
// EventsTest.phppublic function test_list_page_shows_all_events(){ $event1 = factory(Event::class)->create();
$response = $this->get("events/{ $event->id }");
$response->assertViewHas('event', function ($event) use ($event1) { return $event->id === $event1->id; });}
TL;DRBlade is Laravel’s templating engine. Its primary focus is a clear, concise, and expres‐sive syntax with powerful inheritance and extensibility. Its “safe echo” brackets are{{ and }}, its unprotected echo brackets are {!! and !!}, and it has a series of customtags called directives that all begin with @ (@if and @unless, for example).
84 | Chapter 4: Blade Templating
www.EBooksWorld.ir
You can define a parent template and leave “holes” in it for content using @yieldand @section/@show. You can then teach its child views to extend it using@extends('parent.view'), and define their sections using @section/@endsection.You use @parent to reference the content of the block’s parent.
View composers make it easy to define that, every time a particular view or subviewloads, it should have certain information available to it. And service injection allowsthe view itself to request data straight from the application container.
TL;DR | 85
www.EBooksWorld.ir

www.EBooksWorld.ir
CHAPTER 5
Databases and Eloquent
Laravel provides a suite of tools for interacting with your application’s databases,but the most notable is Eloquent, Laravel’s ActiveRecord ORM (object-relationalmapper).
Eloquent is one of Laravel’s most popular and influential features. It’s a great exampleof how Laravel is different from the majority of PHP frameworks; in a world of Data‐Mapper ORMs that are powerful but complex, Eloquent stands out for its simplicity.There’s one class per table, which is responsible for retrieving, representing, and per‐sisting data in that table.
Whether or not you choose to use Eloquent, however, you’ll still get a ton of benefitfrom the other database tools Laravel provides. So, before we dig into Eloquent, we’llstart by covering the basics of Laravel’s database functionality: migrations, seeders,and the query builder.
Then we’ll cover Eloquent: defining your models; inserting, updating, and deleting;customizing your responses with accessors, mutators, and attribute casting; andfinally relationships. There’s a lot going on here, and it’s easy to get overwhelmed, butif we take it one step at a time we’ll make it through.
ConfigurationBefore we get into how to use Laravel’s database tools, let’s pause for a second and goover how to configure your database credentials and connections.
The configuration for database access lives in config/database.php and .env. Likemany other configuration areas in Laravel, you can define multiple “connections” andthen decide which the code will use by default.
87
www.EBooksWorld.ir
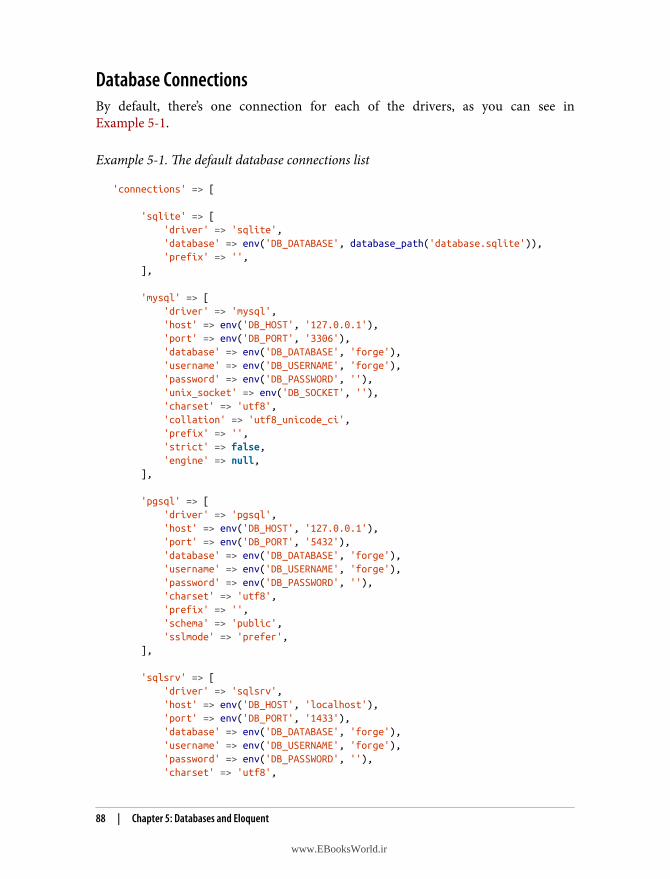
Database ConnectionsBy default, there’s one connection for each of the drivers, as you can see inExample 5-1.
Example 5-1. The default database connections list
'connections' => [
'sqlite' => [ 'driver' => 'sqlite', 'database' => env('DB_DATABASE', database_path('database.sqlite')), 'prefix' => '', ],
'mysql' => [ 'driver' => 'mysql', 'host' => env('DB_HOST', '127.0.0.1'), 'port' => env('DB_PORT', '3306'), 'database' => env('DB_DATABASE', 'forge'), 'username' => env('DB_USERNAME', 'forge'), 'password' => env('DB_PASSWORD', ''), 'unix_socket' => env('DB_SOCKET', ''), 'charset' => 'utf8', 'collation' => 'utf8_unicode_ci', 'prefix' => '', 'strict' => false, 'engine' => null, ],
'pgsql' => [ 'driver' => 'pgsql', 'host' => env('DB_HOST', '127.0.0.1'), 'port' => env('DB_PORT', '5432'), 'database' => env('DB_DATABASE', 'forge'), 'username' => env('DB_USERNAME', 'forge'), 'password' => env('DB_PASSWORD', ''), 'charset' => 'utf8', 'prefix' => '', 'schema' => 'public', 'sslmode' => 'prefer', ],
'sqlsrv' => [ 'driver' => 'sqlsrv', 'host' => env('DB_HOST', 'localhost'), 'port' => env('DB_PORT', '1433'), 'database' => env('DB_DATABASE', 'forge'), 'username' => env('DB_USERNAME', 'forge'), 'password' => env('DB_PASSWORD', ''), 'charset' => 'utf8',
88 | Chapter 5: Databases and Eloquent
www.EBooksWorld.ir
'prefix' => '', ],
]
Nothing is stopping you from deleting or modifying these named connections or cre‐ating your own. You can create new named connections, and you’ll be able to set thedrivers (MySQL, Postgres, etc.) in them. So, while there’s one connection per driverby default, that’s not a constraint; you could have five different connections, all withthe mysql driver, if you wanted.
Each connection allows you to define the properties necessary for connecting to andcustomizing each connection type.
There are a few reasons for the idea of multiple drivers. To start with, the “connec‐tions” section as it comes out of the box is a simple template that makes it easy to startapps that use any of the supported database connection types. In many apps, you canpick the database connection you’ll be using, fill out its information, and even deletethe others if you’d like. I usually just keep them all there, in case I might eventuallyuse them.
But there are also some cases where you might need multiple connections within thesame application. For example, you might use different database connections for twodifferent types of data, or you might read from one and write to another. Support formultiple connections makes this possible.
Other Database Configuration OptionsThe config/database.php configuration section has quite a few other configurationsettings. You can configure Redis access, customize the table name used for migra‐tions, determine the default connection, and toggle whether non-Eloquent callsreturn stdClass or array instances.
With any service in Laravel that allows connections from multiple sources—sessionscan be backed by the database or file storage, the cache can use Redis or Memcached,databases can use MySQL or PostgreSQL—you can define multiple connections andalso choose that a particular connection will be the “default,” meaning it will be usedany time you don’t explicitly ask for a particular connection. Here’s how you ask for aspecific connection, if you want to:
$users = DB::connection('secondary')->select('select * from users');
[role="less_space pagebreak-before"]' === Migrations
Modern frameworks like Laravel make it easy to define your database structure withcode-driven migrations. Every new table, column, index, and key can be defined in
Configuration | 89
www.EBooksWorld.ir
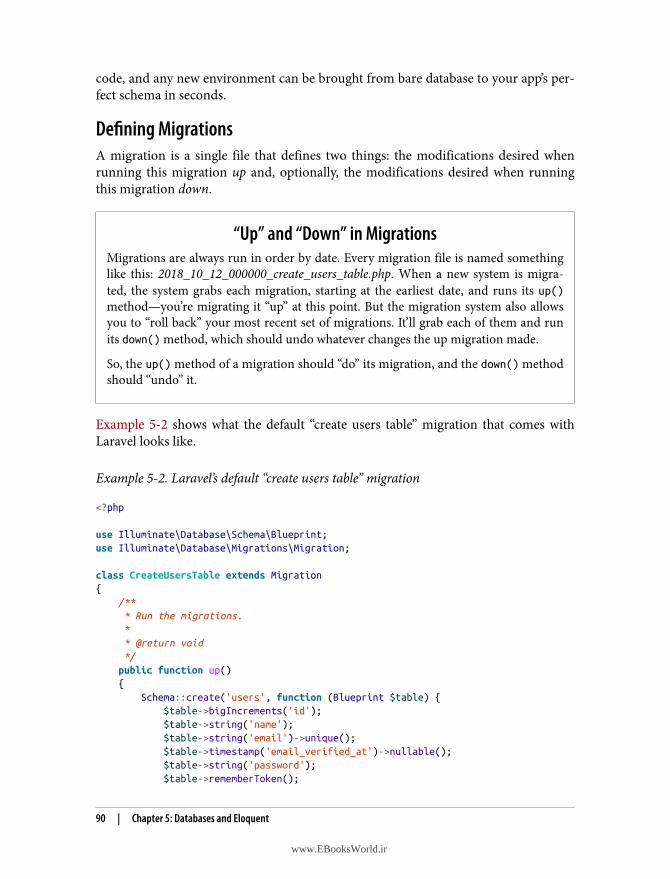
code, and any new environment can be brought from bare database to your app’s per‐fect schema in seconds.
Defining MigrationsA migration is a single file that defines two things: the modifications desired whenrunning this migration up and, optionally, the modifications desired when runningthis migration down.
“Up” and “Down” in MigrationsMigrations are always run in order by date. Every migration file is named somethinglike this: 2018_10_12_000000_create_users_table.php. When a new system is migra‐ted, the system grabs each migration, starting at the earliest date, and runs its up()method—you’re migrating it “up” at this point. But the migration system also allowsyou to “roll back” your most recent set of migrations. It’ll grab each of them and runits down() method, which should undo whatever changes the up migration made.
So, the up() method of a migration should “do” its migration, and the down() methodshould “undo” it.
Example 5-2 shows what the default “create users table” migration that comes withLaravel looks like.
Example 5-2. Laravel’s default “create users table” migration
<?php
use Illuminate\Database\Schema\Blueprint;use Illuminate\Database\Migrations\Migration;
class CreateUsersTable extends Migration{ /** * Run the migrations. * * @return void */ public function up() { Schema::create('users', function (Blueprint $table) { $table->bigIncrements('id'); $table->string('name'); $table->string('email')->unique(); $table->timestamp('email_verified_at')->nullable(); $table->string('password'); $table->rememberToken();
90 | Chapter 5: Databases and Eloquent
www.EBooksWorld.ir
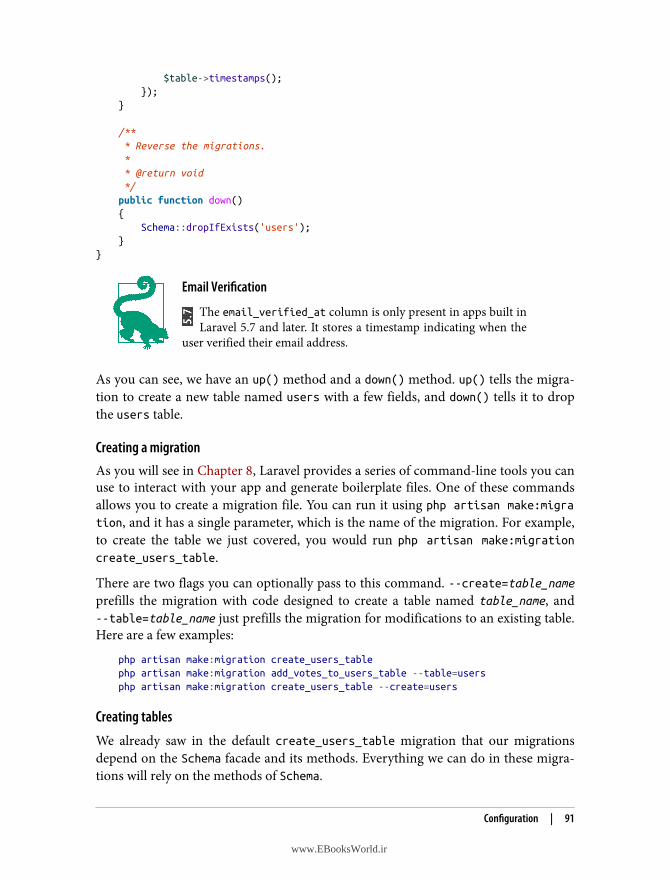
$table->timestamps(); }); }
/** * Reverse the migrations. * * @return void */ public function down() { Schema::dropIfExists('users'); }}
Email Verification
The email_verified_at column is only present in apps built inLaravel 5.7 and later. It stores a timestamp indicating when the
user verified their email address.
As you can see, we have an up() method and a down() method. up() tells the migra‐tion to create a new table named users with a few fields, and down() tells it to dropthe users table.
Creating a migrationAs you will see in Chapter 8, Laravel provides a series of command-line tools you canuse to interact with your app and generate boilerplate files. One of these commandsallows you to create a migration file. You can run it using php artisan make:migration, and it has a single parameter, which is the name of the migration. For example,to create the table we just covered, you would run php artisan make:migrationcreate_users_table.
There are two flags you can optionally pass to this command. --create=table_nameprefills the migration with code designed to create a table named table_name, and--table=table_name just prefills the migration for modifications to an existing table.Here are a few examples:
php artisan make:migration create_users_tablephp artisan make:migration add_votes_to_users_table --table=usersphp artisan make:migration create_users_table --create=users
Creating tables
We already saw in the default create_users_table migration that our migrationsdepend on the Schema facade and its methods. Everything we can do in these migra‐tions will rely on the methods of Schema.
Configuration | 91
www.EBooksWorld.ir
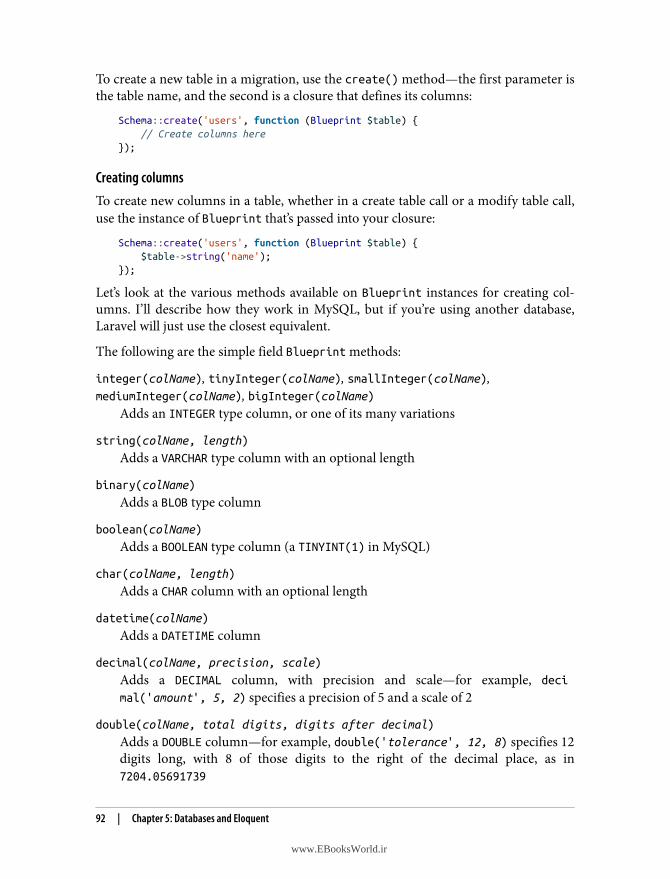
To create a new table in a migration, use the create() method—the first parameter isthe table name, and the second is a closure that defines its columns:
Schema::create('users', function (Blueprint $table) { // Create columns here});
Creating columnsTo create new columns in a table, whether in a create table call or a modify table call,use the instance of Blueprint that’s passed into your closure:
Schema::create('users', function (Blueprint $table) { $table->string('name');});
Let’s look at the various methods available on Blueprint instances for creating col‐umns. I’ll describe how they work in MySQL, but if you’re using another database,Laravel will just use the closest equivalent.
The following are the simple field Blueprint methods:
integer(colName), tinyInteger(colName), smallInteger(colName),mediumInteger(colName), bigInteger(colName)
Adds an INTEGER type column, or one of its many variations
string(colName, length)
Adds a VARCHAR type column with an optional length
binary(colName)
Adds a BLOB type column
boolean(colName)
Adds a BOOLEAN type column (a TINYINT(1) in MySQL)
char(colName, length)
Adds a CHAR column with an optional length
datetime(colName)
Adds a DATETIME column
decimal(colName, precision, scale)
Adds a DECIMAL column, with precision and scale—for example, deci
mal('amount', 5, 2) specifies a precision of 5 and a scale of 2
double(colName, total digits, digits after decimal)
Adds a DOUBLE column—for example, double('tolerance', 12, 8) specifies 12digits long, with 8 of those digits to the right of the decimal place, as in7204.05691739
92 | Chapter 5: Databases and Eloquent
www.EBooksWorld.ir
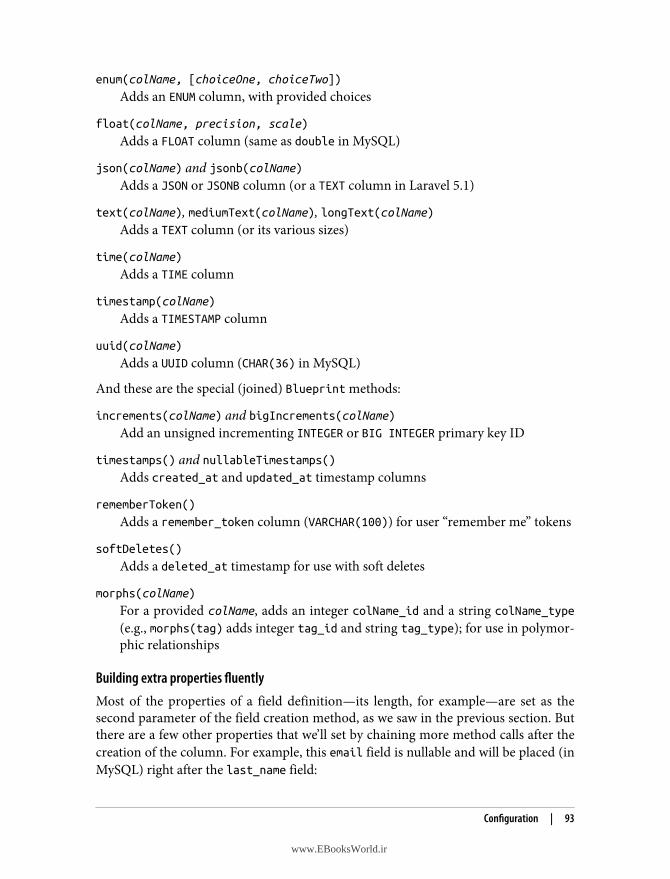
enum(colName, [choiceOne, choiceTwo])
Adds an ENUM column, with provided choices
float(colName, precision, scale)
Adds a FLOAT column (same as double in MySQL)
json(colName) and jsonb(colName)Adds a JSON or JSONB column (or a TEXT column in Laravel 5.1)
text(colName), mediumText(colName), longText(colName)Adds a TEXT column (or its various sizes)
time(colName)
Adds a TIME column
timestamp(colName)
Adds a TIMESTAMP column
uuid(colName)
Adds a UUID column (CHAR(36) in MySQL)
And these are the special (joined) Blueprint methods:
increments(colName) and bigIncrements(colName)Add an unsigned incrementing INTEGER or BIG INTEGER primary key ID
timestamps() and nullableTimestamps()Adds created_at and updated_at timestamp columns
rememberToken()
Adds a remember_token column (VARCHAR(100)) for user “remember me” tokens
softDeletes()
Adds a deleted_at timestamp for use with soft deletes
morphs(colName)
For a provided colName, adds an integer colName_id and a string colName_type(e.g., morphs(tag) adds integer tag_id and string tag_type); for use in polymor‐phic relationships
Building extra properties fluentlyMost of the properties of a field definition—its length, for example—are set as thesecond parameter of the field creation method, as we saw in the previous section. Butthere are a few other properties that we’ll set by chaining more method calls after thecreation of the column. For example, this email field is nullable and will be placed (inMySQL) right after the last_name field:
Configuration | 93
www.EBooksWorld.ir
Schema::table('users', function (Blueprint $table) { $table->string('email')->nullable()->after('last_name');});
The following methods are used to set additional properties of a field:
nullable()
Allows NULL values to be inserted into this column
default('default content')
Specifies the default content for this column if no value is provided
unsigned()
Marks integer columns as unsigned (not negative or positive, but just an integer)
first() (MySQL only)Places the column first in the column order
after(colName) (MySQL only)Places the column after another column in the column order
unique()
Adds a UNIQUE index
primary()
Adds a primary key index
index()
Adds a basic index
Note that unique(), primary(), and index() can also be used outside of the fluentcolumn building context, which we’ll cover later.
Dropping tables
If you want to drop a table, there’s a dropIfExists() method on Schema that takesone parameter, the table name:
Schema::dropIfExists('contacts');
Modifying columnsTo modify a column, just write the code you would write to create the column as if itwere new, and then append a call to the change() method after it.
Required Dependency Before Modifying Columns
Before you modify any columns (or drop any columns in SQLite),you’ll need to run composer require doctrine/dbal.
94 | Chapter 5: Databases and Eloquent
www.EBooksWorld.ir
So, if we have a string column named name that has a length of 255 and we want tochange its length to 100, this is how we would write it:
Schema::table('users', function (Blueprint $table) { $table->string('name', 100)->change();});
The same is true if we want to adjust any of its properties that aren’t defined in themethod name. To make a field nullable, we do this:
Schema::table('contacts', function (Blueprint $table) { $table->string('deleted_at')->nullable()->change();});
Here’s how we rename a column:
Schema::table('contacts', function (Blueprint $table){ $table->renameColumn('promoted', 'is_promoted');});
And this is how we drop a column:
Schema::table('contacts', function (Blueprint $table){ $table->dropColumn('votes');});
Modifying Multiple Columns at Once in SQLite
If you try to drop or modify multiple columns within a singlemigration closure and you are using SQLite, you’ll run into errors.In Chapter 12 I recommend that you use SQLite for your testingdatabase, so even if you’re using a more traditional database, youmay want to consider this a limitation for testing purposes.However, you don’t have to create a new migration for each.Instead, just create multiple calls to Schema::table() within theup() method of your migration:
public function up(){ Schema::table('contacts', function (Blueprint $table) { $table->dropColumn('is_promoted'); });
Schema::table('contacts', function (Blueprint $table) { $table->dropColumn('alternate_email'); });}
Configuration | 95
www.EBooksWorld.ir
Indexes and foreign keysWe’ve covered how to create, modify, and delete columns. Let’s move on to indexingand relating them.
If you’re not familiar with indexes, your databases can survive if you just never usethem, but they’re pretty important for performance optimization and for some dataintegrity controls with regard to related tables. I’d recommend reading up on them,but if you absolutely must, you can skip this section for now.
Adding indexes. Check out Example 5-3 for examples of how to add indexes to yourcolumn.
Example 5-3. Adding column indexes in migrations
// After columns are created...$table->primary('primary_id'); // Primary key; unnecessary if used increments()$table->primary(['first_name', 'last_name']); // Composite keys$table->unique('email'); // Unique index$table->unique('email', 'optional_custom_index_name'); // Unique index$table->index('amount'); // Basic index$table->index('amount', 'optional_custom_index_name'); // Basic index
Note that the first example, primary(), is not necessary if you’re using theincrements() or bigIncrements() methods to create your index; this will automati‐cally add a primary key index for you.
Removing indexes. We can remove indexes as shown in Example 5-4.
Example 5-4. Removing column indexes in migrations
$table->dropPrimary('contacts_id_primary');$table->dropUnique('contacts_email_unique');$table->dropIndex('optional_custom_index_name');
// If you pass an array of column names to dropIndex, it will// guess the index names for you based on the generation rules$table->dropIndex(['email', 'amount']);
Adding and removing foreign keys. To add a foreign key that defines that a particularcolumn references a column on another table, Laravel’s syntax is simple and clear:
$table->foreign('user_id')->references('id')->on('users');
Here we’re adding a foreign index on the user_id column, showing that it referencesthe id column on the users table. Couldn’t get much simpler.
96 | Chapter 5: Databases and Eloquent
www.EBooksWorld.ir

If we want to specify foreign key constraints, we can do that too, with onDelete()and onUpdate(). For example:
$table->foreign('user_id') ->references('id') ->on('users') ->onDelete('cascade');
To drop a foreign key, we can either delete it by referencing its index name (which isautomatically generated by combining the names of the columns and tables being ref‐erenced):
$table->dropForeign('contacts_user_id_foreign');
or by passing it an array of the fields that it’s referencing in the local table:
$table->dropForeign(['user_id']);
Running MigrationsOnce you have your migrations defined, how do you run them? There’s an Artisancommand for that:
php artisan migrate
This command runs all “outstanding” migrations (by running the up() method oneach). Laravel keeps track of which migrations you have run and which you haven’t.Every time you run this command, it checks whether you’ve run all available migra‐tions, and if you haven’t, it’ll run any that remain.
There are a few options in this namespace that you can work with. First, you can runyour migrations and your seeds (which we’ll cover next):
php artisan migrate --seed
You can also run any of the following commands:
migrate:install
Creates the database table that keeps track of which migrations you have andhaven’t run; this is run automatically when you run your migrations, so you canbasically ignore it.
migrate:reset
Rolls back every database migration you’ve run on this instance.
migrate:refresh
Rolls back every database migration you’ve run on this instance, and then runsevery migration available. It’s the same as running migrate:reset and thenmigrate, one after the other.
Configuration | 97
www.EBooksWorld.ir
migrate:fresh
Drops all of your tables and runs every migration again. It’s the same as refreshbut doesn’t bother with the “down” migrations—it just deletes the tables and thenruns the “up” migrations again.
migrate:rollback
Rolls back just the migrations that ran the last time you ran migrate, or, with theadded option --step=n, rolls back the number of migrations you specify.
migrate:status
Shows a table listing every migration, with a Y or N next to each showing whetheror not it has run yet in this environment.
Migrating with Homestead/Vagrant
If you’re running migrations on your local machine and your .envfile points to a database in a Vagrant box, your migrations will fail.You’ll need to ssh into your Vagrant box and then run the migra‐tions from there. The same is true for seeds and any other Artisancommands that affect or read from the database.
SeedingSeeding with Laravel is so simple, it has gained widespread adoption as a part of nor‐mal development workflows in a way it hasn’t in previous PHP frameworks. There’s adatabase/seeds folder that comes with a DatabaseSeeder class, which has a run()method that is called when you call the seeder.
There are two primary ways to run the seeders: along with a migration, or separately.
To run a seeder along with a migration, just add --seed to any migration call:
php artisan migrate --seedphp artisan migrate:refresh --seed
And to run it independently:
php artisan db:seedphp artisan db:seed --class=VotesTableSeeder
This will call the run() method of the DatabaseSeeder by default, or the seeder classspecified by --class.
Creating a SeederTo create a seeder, use the make:seeder Artisan command:
php artisan make:seeder ContactsTableSeeder
98 | Chapter 5: Databases and Eloquent
www.EBooksWorld.ir
You’ll now see a ContactsTableSeeder class show up in the database/seeds directory.Before we edit it, let’s add it to the DatabaseSeeder class, as shown in Example 5-5, soit will run when we run our seeders.
Example 5-5. Calling a custom seeder from DatabaseSeeder.php
// database/seeds/DatabaseSeeder.php... public function run() { $this->call(ContactsTableSeeder::class); }
Now let’s edit the seeder itself. The simplest thing we can do there is manually insert arecord using the DB facade, as illustrated in Example 5-6.
Example 5-6. Inserting database records in a custom seeder
<?php
use Illuminate\Database\Seeder;use Illuminate\Database\Eloquent\Model;
class ContactsTableSeeder extends Seeder{ public function run() { DB::table('contacts')->insert([ 'name' => 'Lupita Smith', 'email' => '[email protected]', ]); }}
This will get us a single record, which is a good start. But for truly functional seeds,you’ll likely want to loop over some sort of random generator and run this insert()many times, right? Laravel has a feature for that.
Model FactoriesModel factories define one (or more) patterns for creating fake entries for your data‐base tables. By default each factory is named after an Eloquent class, but you can alsojust name them after the table if you’re not going to work with Eloquent. Example 5-7shows the same factory set up both ways.
Seeding | 99
www.EBooksWorld.ir
Example 5-7. Defining model factories with Eloquent class and table name keys
$factory->define(User::class, function (Faker\Generator $faker) { return [ 'name' => $faker->name, ];});
$factory->define('users', function (Faker\Generator $faker) { return [ 'name' => $faker->name, ];});
Theoretically you can name these factories anything you like, but naming the factoryafter your Eloquent class is the most idiomatic approach.
Creating a model factoryModel factories are located in database/factories. In Laravel 5.5 and later each factoryis usually defined in its own class, with a key (name) and a closure defining how tocreate a new instance of the defined class. The $factory->define() method takes thefactory name as the first parameter and a closure that’s run for each generation as thesecond parameter.
The Model Factory File in Laravel 5.4 and Earlier
In Laravel prior to 5.5, all factories should be defined in database/factories/ModelFactory.php. There are no separate classes for eachfactory until 5.5.
To generate a new factory class, use the Artisan make:factory command; just likewith naming the factory keys, it’s also most common to name factory classes after theEloquent models they’re meant to generate instances of:
php artisan make:factory ContactFactory
This will generate a new file within the database/factories directory called ContactFac‐tory.php. The simplest factory we could define for a contact might look somethinglike Example 5-8:
Example 5-8. The simplest possible factory definition
$factory->define(Contact::class, function (Faker\Generator $faker) { return [ 'name' => 'Lupita Smith', 'email' => '[email protected]',
100 | Chapter 5: Databases and Eloquent
www.EBooksWorld.ir
];});
Now we can use the factory() global helper to create an instance of Contact in ourseeding and testing:
// Create one$contact = factory(Contact::class)->create();
// Create manyfactory(Contact::class, 20)->create();
However, if we used that factory to create 20 contacts, all 20 would have the sameinformation. That’s less useful.
We will get even more benefit from model factories when we take advantage of theinstance of Faker that’s passed into the closure; Faker makes it easy to randomize thecreation of structured fake data. The previous example now turns into Example 5-9.
Example 5-9. A simple factory, modified to use Faker
$factory->define(Contact::class, function (Faker\Generator $faker) { return [ 'name' => $faker->name, 'email' => $faker->email, ];});
Now, every time we create a fake contact using this model factory, all of our proper‐ties will be randomly generated.
Guaranteeing the Uniqueness of Randomly Generated Data
If you want to guarantee that the randomly generated values of anygiven entry are unique compared to the other randomly generatedvalues during that PHP process, you can use Faker’s unique()method:
return ['email' => $faker->unique()->email];
Using a model factoryThere are two primary contexts in which we’ll use model factories: testing, whichwe’ll cover in Chapter 12, and seeding, which we’ll cover here. Let’s write a seederusing a model factory; take a look at Example 5-10.
Seeding | 101
www.EBooksWorld.ir
Example 5-10. Using model factories
factory(Post::class)->create([ 'title' => 'My greatest post ever',]);
// Pro-level factory; but don't get overwhelmed!factory(User::class, 20)->create()->each(function ($u) use ($post) { $post->comments()->save(factory(Comment::class)->make([ 'user_id' => $u->id, ]));});
To create an object, we use the factory() global helper and pass it the name of thefactory—which, as we just saw, is the name of the Eloquent class we’re generating aninstance of. That returns the factory, and then we can run one of two methods on it:make() or create().
Both methods generate an instance of this specified model, using the definition in thefactory file. The difference is that make() creates the instance but doesn’t (yet) save itto the database, whereas create() saves it to the database instantly. You can see bothin use in the two examples in Example 5-10.
The second example will make more sense once we cover relationships in Eloquentlater in this chapter.
Overriding properties when calling a model factory. If you pass an array to either make()or create(), you can override specific keys from the factory, like we did inExample 5-10 to set the user_id on the comment and to manually set the title of ourpost.
Generating more than one instance with a model factory. If you pass a number as the sec‐ond parameter to the factory() helper, you can specify that you’re creating morethan one instance. Instead of returning a single instance, it’ll return a collection ofinstances. This means you can treat the result like an array, you can associate each ofits instances with another entity, or you can use other entity methods on eachinstance—like we used each() in Example 5-10 to add a comment from each newlycreated user.
Pro-level model factoriesNow that we’ve covered the most common uses for and arrangements of model facto‐ries, let’s dive into some of the more complicated ways we can use them.
102 | Chapter 5: Databases and Eloquent
www.EBooksWorld.ir
Attaching relationships when defining model factories. Sometimes you need to create arelated item along with the item you’re creating. You can use a closure on that prop‐erty to create a related item and pull its ID, as shown in Example 5-11.
Example 5-11. Creating a related term item in a seeder
$factory->define(Contact::class, function (Faker\Generator $faker) { return [ 'name' => 'Lupita Smith', 'email' => '[email protected]', 'company_id' => function () { return factory(App\Company::class)->create()->id; }, ];});
Each closure is passed a single parameter, which contains the array form of the gener‐ated item up until that point. This can be used in other ways, as demonstrated inExample 5-12.
Example 5-12. Using values from other parameters in a seeder
$factory->define(Contact::class, function (Faker\Generator $faker) { return [ 'name' => 'Lupita Smith', 'email' => '[email protected]', 'company_id' => function () { return factory(App\Company::class)->create()->id; }, 'company_size' => function ($contact) { // Uses the "company_id" property generated above return App\Company::find($contact['company_id'])->size; }, ];});
Defining and accessing multiple model factory states. Let’s go back to ContactFactory.php(from Example 5-8 and Example 5-9) for a second. We have a base Contact factorydefined:
$factory->define(Contact::class, function (Faker\Generator $faker) { return [ 'name' => $faker->name, 'email' => $faker->email, ];});
Seeding | 103
www.EBooksWorld.ir
But sometimes you need more than one factory for a class of object. What if we needto be able to add some contacts who are very important people (VIPs)? We can usethe state() method to define a second factory state for this, as seen in Example 5-13.The first parameter to state() is still the name of the entity you’re generating, thesecond is the name of your state, and the third is an array of any attributes you wantto specifically set for this state.
Example 5-13. Defining multiple factory states for the same model
$factory->define(Contact::class, function (Faker\Generator $faker) { return [ 'name' => $faker->name, 'email' => $faker->email, ];});
$factory->state(Contact::class, 'vip', [ 'vip' => true,]);
If the modified attributes require more than a simple static value, you can pass a clo‐sure instead of an array as the second parameter and then return an array of theattributes you want to modify, like in Example 5-14.
Example 5-14. Specifying a factory state with a closure
$factory->state(Contact::class, 'vip', function (Faker\Generator $faker) { return [ 'vip' => true, 'company' => $faker->company, ];});
Now, let’s make an instance of a specific state:
$vip = factory(Contact::class, 'vip')->create();
$vips = factory(Contact::class, 'vip', 3)->create();
Factory States Prior to Laravel 5.3
In projects running versions of Laravel prior to 5.3, factory stateswere called factory types, and you’ll want to use $factory->defineAs() instead of $factory->state(). You can learn moreabout this in the 5.2 docs.
104 | Chapter 5: Databases and Eloquent
www.EBooksWorld.ir
Whew. That was a lot. Don’t worry if that was tough to follow—the last bit was defi‐nitely higher-level stuff. Let’s get back down to the basics and talk about the core ofLaravel’s database tooling: the query builder.
Query BuilderNow that you’re connected and you’ve migrated and seeded your tables, let’s getstarted with how to use the database tools. At the core of every piece of Laravel’sdatabase functionality is the query builder, a fluent interface for interacting with sev‐eral different types of databases with a single clear API.
What Is a Fluent Interface?A fluent interface is one that primarily uses method chaining to provide a simplerAPI to the end user. Rather than expecting all of the relevant data to be passed intoeither a constructor or a method call, fluent call chains can be built gradually, withconsecutive calls. Consider this comparison:
// Non-fluent:$users = DB::select(['table' => 'users', 'where' => ['type' => 'donor']]);
// Fluent:$users = DB::table('users')->where('type', 'donor')->get();
Laravel’s database architecture can connect to MySQL, Postgres, SQLite, and SQLServer through a single interface, with just the change of a few configuration settings.
If you’ve ever used a PHP framework, you’ve likely used a tool that allows you to run“raw” SQL queries with basic escaping for security. The query builder is that, with alot of convenience layers and helpers on top. So, let’s start with some simple calls.
Basic Usage of the DB FacadeBefore we get into building complex queries with fluent method chaining, let’s take alook at a few sample query builder commands. The DB facade is used both for querybuilder chaining and for simpler raw queries, as illustrated in Example 5-15.
Example 5-15. Sample raw SQL and query builder usage
// Basic statementDB::statement('drop table users');
// Raw select, and parameter bindingDB::select('select * from contacts where validated = ?', [true]);
Query Builder | 105
www.EBooksWorld.ir
// Select using the fluent builder$users = DB::table('users')->get();
// Joins and other complex callsDB::table('users') ->join('contacts', function ($join) { $join->on('users.id', '=', 'contacts.user_id') ->where('contacts.type', 'donor'); }) ->get();
Raw SQLAs you saw in Example 5-15, it’s possible to make any raw call to the database usingthe DB facade and the statement() method: DB::statement('SQL statement
here').
But there are also specific methods for various common actions: select(), insert(),update(), and delete(). These are still raw calls, but there are differences. First,using update() and delete() will return the number of rows affected, whereasstatement() won’t; second, with these methods it’s clearer to future developersexactly what sort of statement you’re making.
Raw selects
The simplest of the specific DB methods is select(). You can run it without any addi‐tional parameters:
$users = DB::select('select * from users');
This will return a collection of stdClass objects.
Illuminate CollectionsPrior to Laravel 5.3, the DB facade returned a stdClass object for methods thatreturn only one row (like first()) and an array for any that return multiple rows
(like all()). In Laravel 5.3+, the DB facade, like Eloquent, returns a collection for anymethod that returns (or can return) multiple rows. The DB facade returns an instanceof Illuminate\Support\Collection and Eloquent returns an instance of Illuminate\Database\Eloquent\Collection, which extends Illuminate\Support\Collectionwith a few Eloquent-specific methods.
Collection is like a PHP array with superpowers, allowing you to run map(),filter(), reduce(), each(), and much more on your data. You can learn more aboutcollections in Chapter 17.
106 | Chapter 5: Databases and Eloquent
www.EBooksWorld.ir
Parameter bindings and named bindingsLaravel’s database architecture allows for the use of PDO parameter binding, whichprotects your queries from potential SQL attacks. Passing a parameter to a statementis as simple as replacing the value in your statement with a ?, then adding the value tothe second parameter of your call:
$usersOfType = DB::select( 'select * from users where type = ?', [$type]);
You can also name those parameters for clarity:
$usersOfType = DB::select( 'select * from users where type = :type', ['type' => $userType]);
Raw insertsFrom here, the raw commands all look pretty much the same. Raw inserts look likethis:
DB::insert( 'insert into contacts (name, email) values (?, ?)', ['sally', '[email protected]']);
Raw updatesUpdates look like this:
$countUpdated = DB::update( 'update contacts set status = ? where id = ?', ['donor', $id]);
Raw deletesAnd deletes look like this:
$countDeleted = DB::delete( 'delete from contacts where archived = ?', [true]);
Chaining with the Query BuilderUp until now, we haven’t actually used the query builder, per se. We’ve just used sim‐ple method calls on the DB facade. Let’s actually build some queries.
Query Builder | 107
www.EBooksWorld.ir
The query builder makes it possible to chain methods together to, you guessed it,build a query. At the end of your chain you’ll use some method—likely get()—totrigger the actual execution of the query you’ve just built.
Let’s take a look at a quick example:
$usersOfType = DB::table('users') ->where('type', $type) ->get();
Here, we built our query—users table, $type type—and then we executed the queryand got our result.
Let’s take a look at what methods the query builder allows you to chain. The methodscan be split up into what I’ll call constraining methods, modifying methods, condi‐tional methods, and ending/returning methods.
Constraining methodsThese methods take the query as it is and constrain it to return a smaller subset ofpossible data:
select()
Allows you to choose which columns you’re selecting:
$emails = DB::table('contacts') ->select('email', 'email2 as second_email') ->get();// Or$emails = DB::table('contacts') ->select('email') ->addSelect('email2 as second_email') ->get();
where()
Allows you to limit the scope of what’s being returned using WHERE. By default,the signature of the where() method is that it takes three parameters—the col‐umn, the comparison operator, and the value:
$newContacts = DB::table('contact') ->where('created_at', '>', now()->subDay()) ->get();
However, if your comparison is =, which is the most common comparison, youcan drop the second operator:
$vipContacts = DB::table('contacts')->where('vip',true)->get();
If you want to combine where() statements, you can either chain them after eachother, or pass an array of arrays:
108 | Chapter 5: Databases and Eloquent
www.EBooksWorld.ir
$newVips = DB::table('contacts') ->where('vip', true) ->where('created_at', '>', now()->subDay());// Or$newVips = DB::table('contacts')->where([ ['vip', true], ['created_at', '>', now()->subDay()],]);
orWhere()
Creates simple OR WHERE statements:
$priorityContacts = DB::table('contacts') ->where('vip', true) ->orWhere('created_at', '>', now()->subDay()) ->get();
To create a more complex OR WHERE statement with multiple conditions, passorWhere() a closure:
$contacts = DB::table('contacts') ->where('vip', true) ->orWhere(function ($query) { $query->where('created_at', '>', now()->subDay()) ->where('trial', false); }) ->get();
Query Builder | 109
www.EBooksWorld.ir
Potential Confusion with Multiple where() and orWhere() Calls
If you are using orWhere() calls in conjunction with multiplewhere() calls, you need to be very careful to ensure the query isdoing what you think it is. This isn’t because of any fault with Lara‐vel, but because a query like the following might not do whatyou expect:
$canEdit = DB::table('users') ->where('admin', true) ->orWhere('plan', 'premium') ->where('is_plan_owner', true) ->get();
SELECT * FROM users WHERE admin = 1 OR plan = 'premium' AND is_plan_owner = 1;
If you want to write SQL that says “if this OR (this and this),” whichis clearly the intention in the previous example, you’ll want to passa closure into the orWhere() call:
$canEdit = DB::table('users') ->where('admin', true) ->orWhere(function ($query) { $query->where('plan', 'premium') ->where('is_plan_owner', true); }) ->get();
SELECT * FROM users WHERE admin = 1 OR (plan = 'premium' AND is_plan_owner = 1);
whereBetween(colName, [low, high])
Allows you to scope a query to return only rows where a column is between twovalues (inclusive of the two values):
$mediumDrinks = DB::table('drinks') ->whereBetween('size', [6, 12]) ->get();
The same works for whereNotBetween(), but it will select the inverse.
whereIn(colName, [1, 2, 3])
Allows you to scope a query to return only rows where a column value is in anexplicitly provided list of options:
$closeBy = DB::table('contacts') ->whereIn('state', ['FL', 'GA', 'AL']) ->get();
The same works for whereNotIn(), but it will select the inverse.
110 | Chapter 5: Databases and Eloquent
www.EBooksWorld.ir

whereNull(colName) and whereNotNull(colName)Allow you to select only rows where a given column is NULL or is NOT NULL,respectively.
whereRaw()
Allows you to pass in a raw, unescaped string to be added after the WHERE state‐ment:
$goofs = DB::table('contacts')->whereRaw('id = 12345')->get()
Beware of SQL Injection!
Any SQL queries passed to whereRaw() will not be escaped. Usethis method carefully and infrequently; this is a prime opportunityfor SQL injection attacks in your app.
whereExists()
Allows you to select only rows that, when passed into a provided subquery,return at least one row. Imagine you only want to get those users who have left atleast one comment:
$commenters = DB::table('users') ->whereExists(function ($query) { $query->select('id') ->from('comments') ->whereRaw('comments.user_id = users.id'); }) ->get();
distinct()
Selects only rows where the selected data is unique when compared to the otherrows in the returned data. Usually this is paired with select(), because if youuse a primary key, there will be no duplicated rows:
$lastNames = DB::table('contacts')->select('city')->distinct()->get();
Modifying methodsThese methods change the way the query’s results will be output, rather than just lim‐iting its results:
orderBy(colName, direction)
Orders the results. The second parameter may be either asc (the default, ascend‐ing order) or desc (descending order):
$contacts = DB::table('contacts') ->orderBy('last_name', 'asc') ->get();
Query Builder | 111
www.EBooksWorld.ir
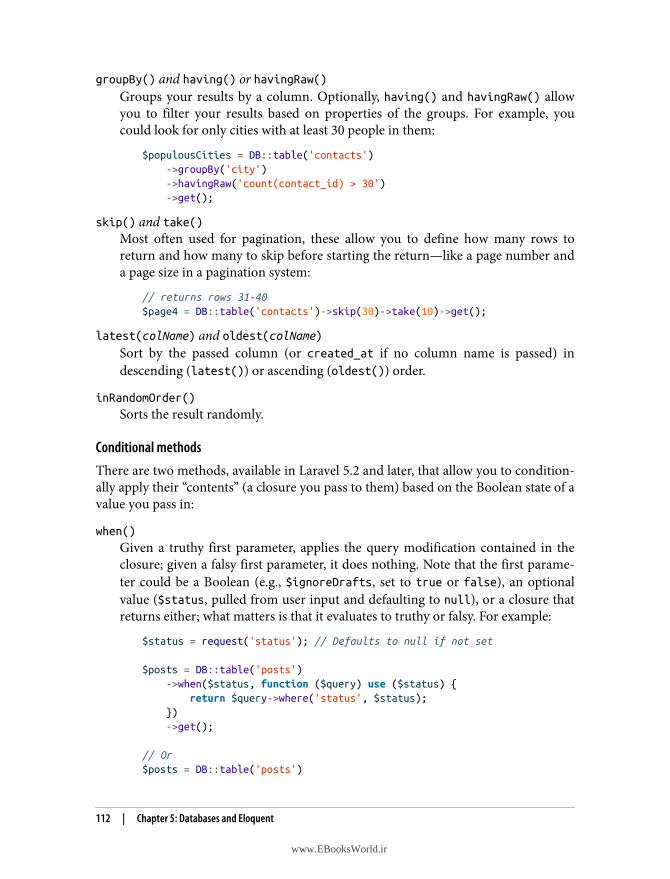
groupBy() and having() or havingRaw()Groups your results by a column. Optionally, having() and havingRaw() allowyou to filter your results based on properties of the groups. For example, youcould look for only cities with at least 30 people in them:
$populousCities = DB::table('contacts') ->groupBy('city') ->havingRaw('count(contact_id) > 30') ->get();
skip() and take()Most often used for pagination, these allow you to define how many rows toreturn and how many to skip before starting the return—like a page number anda page size in a pagination system:
// returns rows 31-40$page4 = DB::table('contacts')->skip(30)->take(10)->get();
latest(colName) and oldest(colName)Sort by the passed column (or created_at if no column name is passed) indescending (latest()) or ascending (oldest()) order.
inRandomOrder()
Sorts the result randomly.
Conditional methodsThere are two methods, available in Laravel 5.2 and later, that allow you to condition‐ally apply their “contents” (a closure you pass to them) based on the Boolean state of avalue you pass in:
when()
Given a truthy first parameter, applies the query modification contained in theclosure; given a falsy first parameter, it does nothing. Note that the first parame‐ter could be a Boolean (e.g., $ignoreDrafts, set to true or false), an optionalvalue ($status, pulled from user input and defaulting to null), or a closure thatreturns either; what matters is that it evaluates to truthy or falsy. For example:
$status = request('status'); // Defaults to null if not set
$posts = DB::table('posts') ->when($status, function ($query) use ($status) { return $query->where('status', $status); }) ->get();
// Or$posts = DB::table('posts')
112 | Chapter 5: Databases and Eloquent
www.EBooksWorld.ir
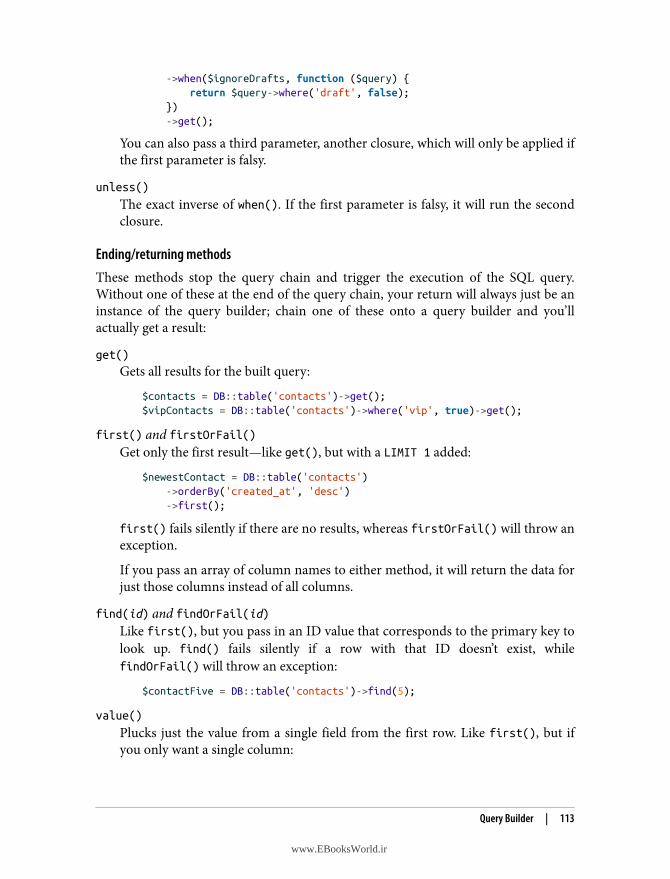
->when($ignoreDrafts, function ($query) { return $query->where('draft', false); }) ->get();
You can also pass a third parameter, another closure, which will only be applied ifthe first parameter is falsy.
unless()
The exact inverse of when(). If the first parameter is falsy, it will run the secondclosure.
Ending/returning methodsThese methods stop the query chain and trigger the execution of the SQL query.Without one of these at the end of the query chain, your return will always just be aninstance of the query builder; chain one of these onto a query builder and you’llactually get a result:
get()
Gets all results for the built query:
$contacts = DB::table('contacts')->get();$vipContacts = DB::table('contacts')->where('vip', true)->get();
first() and firstOrFail()Get only the first result—like get(), but with a LIMIT 1 added:
$newestContact = DB::table('contacts') ->orderBy('created_at', 'desc') ->first();
first() fails silently if there are no results, whereas firstOrFail() will throw anexception.
If you pass an array of column names to either method, it will return the data forjust those columns instead of all columns.
find(id) and findOrFail(id)Like first(), but you pass in an ID value that corresponds to the primary key tolook up. find() fails silently if a row with that ID doesn’t exist, whilefindOrFail() will throw an exception:
$contactFive = DB::table('contacts')->find(5);
value()
Plucks just the value from a single field from the first row. Like first(), but ifyou only want a single column:
Query Builder | 113
www.EBooksWorld.ir
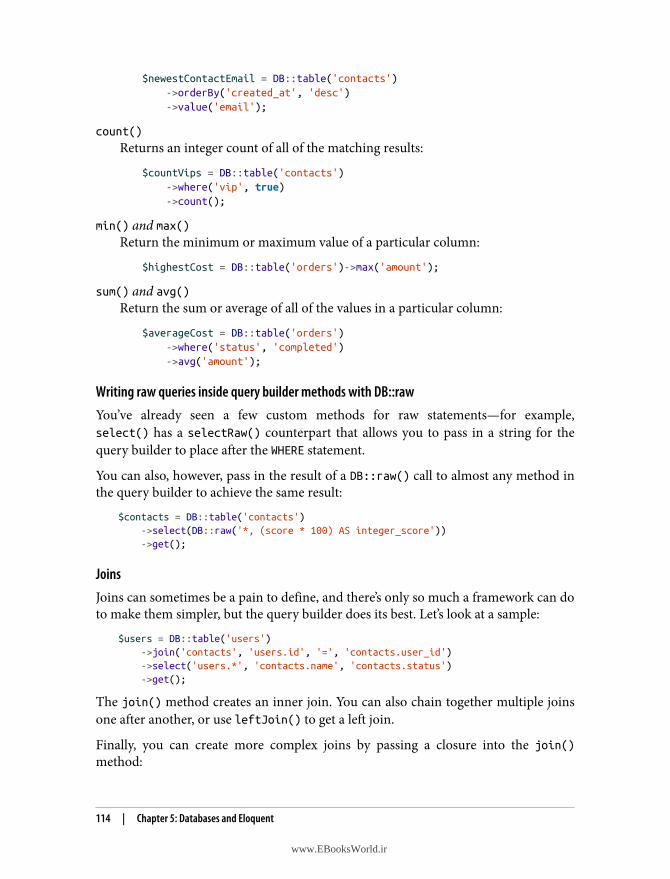
$newestContactEmail = DB::table('contacts') ->orderBy('created_at', 'desc') ->value('email');
count()
Returns an integer count of all of the matching results:
$countVips = DB::table('contacts') ->where('vip', true) ->count();
min() and max()Return the minimum or maximum value of a particular column:
$highestCost = DB::table('orders')->max('amount');
sum() and avg()Return the sum or average of all of the values in a particular column:
$averageCost = DB::table('orders') ->where('status', 'completed') ->avg('amount');
Writing raw queries inside query builder methods with DB::rawYou’ve already seen a few custom methods for raw statements—for example,select() has a selectRaw() counterpart that allows you to pass in a string for thequery builder to place after the WHERE statement.
You can also, however, pass in the result of a DB::raw() call to almost any method inthe query builder to achieve the same result:
$contacts = DB::table('contacts') ->select(DB::raw('*, (score * 100) AS integer_score')) ->get();
JoinsJoins can sometimes be a pain to define, and there’s only so much a framework can doto make them simpler, but the query builder does its best. Let’s look at a sample:
$users = DB::table('users') ->join('contacts', 'users.id', '=', 'contacts.user_id') ->select('users.*', 'contacts.name', 'contacts.status') ->get();
The join() method creates an inner join. You can also chain together multiple joinsone after another, or use leftJoin() to get a left join.
Finally, you can create more complex joins by passing a closure into the join()method:
114 | Chapter 5: Databases and Eloquent
www.EBooksWorld.ir
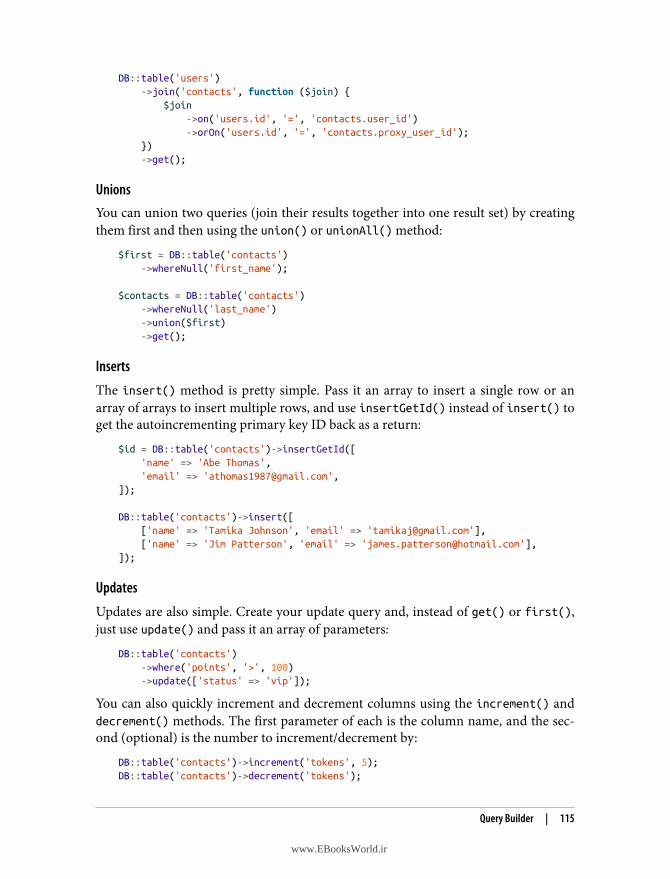
DB::table('users') ->join('contacts', function ($join) { $join ->on('users.id', '=', 'contacts.user_id') ->orOn('users.id', '=', 'contacts.proxy_user_id'); }) ->get();
UnionsYou can union two queries (join their results together into one result set) by creatingthem first and then using the union() or unionAll() method:
$first = DB::table('contacts') ->whereNull('first_name');
$contacts = DB::table('contacts') ->whereNull('last_name') ->union($first) ->get();
Inserts
The insert() method is pretty simple. Pass it an array to insert a single row or anarray of arrays to insert multiple rows, and use insertGetId() instead of insert() toget the autoincrementing primary key ID back as a return:
$id = DB::table('contacts')->insertGetId([ 'name' => 'Abe Thomas', 'email' => '[email protected]',]);
DB::table('contacts')->insert([ ['name' => 'Tamika Johnson', 'email' => '[email protected]'], ['name' => 'Jim Patterson', 'email' => '[email protected]'],]);
Updates
Updates are also simple. Create your update query and, instead of get() or first(),just use update() and pass it an array of parameters:
DB::table('contacts') ->where('points', '>', 100) ->update(['status' => 'vip']);
You can also quickly increment and decrement columns using the increment() anddecrement() methods. The first parameter of each is the column name, and the sec‐ond (optional) is the number to increment/decrement by:
DB::table('contacts')->increment('tokens', 5);DB::table('contacts')->decrement('tokens');
Query Builder | 115
www.EBooksWorld.ir
Deletes
Deletes are even simpler. Build your query and then end it with delete():
DB::table('users') ->where('last_login', '<', now()->subYear()) ->delete();
You can also truncate the table, which deletes every row and also resets the autoincre‐menting ID:
DB::table('contacts')->truncate();
JSON operationsIf you have JSON columns, you can update or select rows based on aspects of theJSON structure by using the arrow syntax to traverse children:
// Select all records where the "isAdmin" property of the "options"// JSON column is set to trueDB::table('users')->where('options->isAdmin', true)->get();
// Update all records, setting the "verified" property// of the "options" JSON column to trueDB::table('users')->update(['options->isVerified', true]);
This is a new feature since Laravel 5.3.
TransactionsIf you’re not familiar with database transactions, they’re a tool that allows you to wrapup a series of database queries to be performed in a batch, which you can choose toroll back, undoing the entire series of queries. Transactions are often used to ensurethat all or none, but not some, of a series of related queries are performed—if onefails, the ORM will roll back the entire series of queries.
With the Laravel query builder’s transaction feature, if any exceptions are thrown atany point within the transaction closure, all the queries in the transaction will be rol‐led back. If the transaction closure finishes successfully, all the queries will be com‐mitted and not rolled back.
Let’s take a look at the sample transaction in Example 5-16.
Example 5-16. A simple database transaction
DB::transaction(function () use ($userId, $numVotes) { // Possibly failing DB query DB::table('users') ->where('id', $userId) ->update(['votes' => $numVotes]);
116 | Chapter 5: Databases and Eloquent
www.EBooksWorld.ir
// Caching query that we don't want to run if the above query fails DB::table('votes') ->where('user_id', $userId) ->delete();});
In this example, we can assume we had some previous process that summarized thenumber of votes from the votes table for a given user. We want to cache that numberin the users table and then wipe those votes from the votes table. But, of course, wedon’t want to wipe the votes until the update to the users table has run successfully.And we don’t want to keep the updated number of votes in the users table if thevotes table deletion fails.
If anything goes wrong with either query, the other won’t be applied. That’s the magicof database transactions.
Note that you can also manually begin and end transactions—and this appliesboth for query builder queries and for Eloquent queries. Start withDB::beginTransaction(), end with DB::commit(), and abort with DB::rollBack():
DB::beginTransaction();
// Take database actions
if ($badThingsHappened { DB::rollBack();}
// Take other database actions
DB::commit();
Introduction to EloquentNow that we’ve covered the query builder, let’s talk about Eloquent, Laravel’s flagshipdatabase tool that’s built on the query builder.
Eloquent is an ActiveRecord ORM, which means it’s a database abstraction layer thatprovides a single interface to interact with multiple database types. “ActiveRecord”means that a single Eloquent class is responsible for not only providing the ability tointeract with the table as a whole (e.g., User::all() gets all users), but also represent‐ing an individual table row (e.g., $sharon = new User). Additionally, each instance iscapable of managing its own persistence; you can call $sharon->save() or$sharon->delete().
Eloquent has a primary focus on simplicity, and like the rest of the framework, itrelies on “convention over configuration” to allow you to build powerful models withminimal code.
Introduction to Eloquent | 117
www.EBooksWorld.ir
For example, you can perform all of the operations in Example 5-18 with the modeldefined in Example 5-17.
Example 5-17. The simplest Eloquent model
<?php
use Illuminate\Database\Eloquent\Model;
class Contact extends Model {}
Example 5-18. Operations achievable with the simplest Eloquent model
// In a controllerpublic function save(Request $request){ // Create and save a new contact from user input $contact = new Contact(); $contact->first_name = $request->input('first_name'); $contact->last_name = $request->input('last_name'); $conatct->email = $request->input('email'); $contact->save();
return redirect('contacts');}
public function show($contactId){ // Return a JSON representation of a contact based on a URL segment; // if the contact doesn't exist, throw an exception return Contact::findOrFail($contactId);}
public function vips(){ // Unnecessarily complex example, but still possible with basic Eloquent // class; adds a "formalName" property to every VIP entry return Contact::where('vip', true)->get()->map(function ($contact) { $contact->formalName = "The exalted {$contact->first_name} of the {$contact->last_name}s";
return $contact; });}
How? Convention. Eloquent assumes the table name (Contact becomes contacts),and with that you have a fully functional Eloquent model.
Let’s cover how we work with Eloquent models.
118 | Chapter 5: Databases and Eloquent
www.EBooksWorld.ir
Creating and Defining Eloquent ModelsFirst, let’s create a model. There’s an Artisan command for that:
php artisan make:model Contact
This is what we’ll get, in app/Contact.php:
<?php
namespace App;
use Illuminate\Database\Eloquent\Model;
class Contact extends Model{ //}
Creating a Migration Along with Your Model
If you want to automatically create a migration when you createyour model, pass the -m or --migration flag:
php artisan make:model Contact --migration
Table nameThe default behavior for table names is that Laravel “snake cases” and pluralizes yourclass name, so SecondaryContact would access a table named secondary_contacts.If you’d like to customize the name, set the $table property explicitly on the model:
protected $table = 'contacts_secondary';
Primary keyLaravel assumes, by default, that each table will have an autoincrementing integer pri‐mary key, and it will be named id.
If you want to change the name of your primary key, change the $primaryKey prop‐erty:
protected $primaryKey = 'contact_id';
And if you want to set it to be nonincrementing, use:
public $incrementing = false;
Introduction to Eloquent | 119
www.EBooksWorld.ir
Timestamps
Eloquent expects every table to have created_at and updated_at timestamp col‐umns. If your table won’t have them, disable the $timestamps functionality:
public $timestamps = false;
You can customize the format Eloquent uses to store your timestamps to the databaseby setting the $dateFormat class property to a custom string. The string will beparsed using PHP’s date() syntax, so the following example will store the date as sec‐onds since the Unix epoch:
protected $dateFormat = 'U';
Retrieving Data with EloquentMost of the time you pull data from your database with Eloquent, you’ll use staticcalls on your Eloquent model.
Let’s start by getting everything:
$allContacts = Contact::all();
That was easy. Let’s filter it a bit:
$vipContacts = Contact::where('vip', true)->get();
We can see that the Eloquent facade gives us the ability to chain constraints, andfrom there the constraints get very familiar:
$newestContacts = Contact::orderBy('created_at', 'desc') ->take(10) ->get();
It turns out that once you move past the initial facade name, you’re just workingwith Laravel’s query builder. You can do a lot more—we’ll cover that soon—buteverything you can do with the query builder on the DB facade you can do on yourEloquent objects.
Get one
Like we covered earlier in the chapter, you can use first() to return only the firstrecord from a query, or find() to pull just the record with the provided ID. Foreither, if you append “OrFail” to the method name, it will throw an exception if thereare no matching results. This makes findOrFail() a common tool for looking up anentity by a URL segment (or throwing an exception if a matching entity doesn’t exist),like you can see in Example 5-19.
120 | Chapter 5: Databases and Eloquent
www.EBooksWorld.ir

Example 5-19. Using an Eloquent OrFail() method in a controller method
// ContactControllerpublic function show($contactId){ return view('contacts.show') ->with('contact', Contact::findOrFail($contactId));}
Any method intended to return a single record (first(), firstOrFail(), find(), orfindOrFail()) will return an instance of the Eloquent class. So, Contact::first()will return an instance of the class Contact with the data from the first row in thetable filling it out.
Exceptions
As you can see in Example 5-19, we don’t need to catch Eloquent’smodel not found exception (Illuminate\Database\Eloquent\ModelNotFoundException) in our controllers; Laravel’s routingsystem will catch it and throw a 404 for us.You could, of course, catch that particular exception and handle it,if you’d like.
Get many
get() works with Eloquent just like it does in normal query builder calls—build aquery and call get() at the end to get the results:
$vipContacts = Contact::where('vip', true)->get();
However, there is an Eloquent-only method, all(), which you’ll often see people usewhen they want to get an unfiltered list of all data in the table:
$contacts = Contact::all();
Using get() Instead of all()
Any time you can use all(), you could use get(). Contact::get()has the same response as Contact::all(). However, the momentyou start modifying your query—adding a where() filter, for exam‐ple—all() will no longer work, but get() will continue working.So, even though all() is very common, I’d recommend usingget() for everything, and ignoring the fact that all() even exists.
The other thing that’s different about Eloquent’s get() method (versus all()) is that,prior to Laravel 5.3, it returned an array of models instead of a collection. In 5.3 andlater, they both return collections.
Introduction to Eloquent | 121
www.EBooksWorld.ir
Chunking responses with chunk()If you’ve ever needed to process a large amount (thousands or more) of records at atime, you may have run into memory or locking issues. Laravel makes it possible tobreak your requests into smaller pieces (chunks) and process them in batches, keep‐ing the memory load of your large request smaller. Example 5-20 illustrates the use ofchunk() to split a query into “chunks” of 100 records each.
Example 5-20. Chunking an Eloquent query to limit memory usage
Contact::chunk(100, function ($contacts) { foreach ($contacts as $contact) { // Do something with $contact }});
AggregatesThe aggregates that are available on the query builder are available on Eloquent quer‐ies as well. For example:
$countVips = Contact::where('vip', true)->count();$sumVotes = Contact::sum('votes');$averageSkill = User::avg('skill_level');
Inserts and Updates with EloquentInserting and updating values is one of the places where Eloquent starts to divergefrom normal query builder syntax.
InsertsThere are two primary ways to insert a new record using Eloquent.
First, you can create a new instance of your Eloquent class, set your properties man‐ually, and call save() on that instance, like in Example 5-21.
Example 5-21. Inserting an Eloquent record by creating a new instance
$contact = new Contact;$contact->name = 'Ken Hirata';$contact->email = '[email protected]';$contact->save();
// or
$contact = new Contact([ 'name' => 'Ken Hirata', 'email' => '[email protected]',
122 | Chapter 5: Databases and Eloquent
www.EBooksWorld.ir

]);$contact->save();
// or
$contact = Contact::make([ 'name' => 'Ken Hirata', 'email' => '[email protected]',]);$contact->save();
Until you save(), this instance of Contact represents the contact fully—except it hasnever been saved to the database. That means it doesn’t have an id, if the applicationquits it won’t persist, and it doesn’t have its created_at and updated_at values set.
You can also pass an array to Model::create(), as shown in Example 5-22. Unlikemake(), create() saves the instance to the database as soon as it’s called.
Example 5-22. Inserting an Eloquent record by passing an array to create()
$contact = Contact::create([ 'name' => 'Keahi Hale', 'email' => '[email protected]',]);
Also be aware that in any context where you are passing an array (to new Model(),Model::make(), Model::create(), or Model::update()), every property you set viaModel::create() has to be approved for “mass assignment,” which we’ll covershortly. This is not necessary with the first example in Example 5-21, where youassign each property individually.
Note that if you’re using Model::create(), you don’t need to save() the instance—that’s handled as a part of the model’s create() method.
UpdatesUpdating records looks very similar to inserting. You can get a specific instance,change its properties, and then save, or you can make a single call and pass an arrayof updated properties. Example 5-23 illustrates the first approach.
Example 5-23. Updating an Eloquent record by updating an instance and saving
$contact = Contact::find(1);$contact->email = '[email protected]';$contact->save();
Introduction to Eloquent | 123
www.EBooksWorld.ir
Since this record already exists, it will already have a created_at timestamp and anid, which will stay the same, but the updated_at field will be changed to the currentdate and time. Example 5-24 illustrates the second approach.
Example 5-24. Updating one or more Eloquent records by passing an array to theupdate() method
Contact::where('created_at', '<', now()->subYear()) ->update(['longevity' => 'ancient']);
// or
$contact = Contact::find(1);$contact->update(['longevity' => 'ancient']);
This method expects an array where each key is the column name and each value isthe column value.
Mass assignmentWe’ve looked at a few examples of how to pass arrays of values into Eloquent classmethods. However, none of these will actually work until you define which fields are“fillable” on the model.
The goal of this is to protect you from (possibly malicious) user input accidentallysetting new values on fields you don’t want changed. Consider the common scenarioin Example 5-25.
Example 5-25. Updating an Eloquent model using the entirety of a request’s input
// ContactControllerpublic function update(Contact $contact, Request $request){ $contact->update($request->all());}
If you’re not familiar with the Illuminate Request object, Example 5-25 will takeevery piece of user input and pass it to the update() method. That all() methodincludes things like URL parameters and form inputs, so a malicious user could easilyadd some things in there, like id and owner_id, that you likely don’t want updated.
Thankfully, that won’t actually work until you define your model’s fillable fields. Youcan either whitelist the fillable fields, or blacklist the “guarded” fields to determinewhich fields can or cannot be edited via “mass assignment”—that is, by passing anarray of values into either create() or update(). Note that nonfillable properties can
124 | Chapter 5: Databases and Eloquent
www.EBooksWorld.ir

still be changed by direct assignment (e.g., $contact->password = 'abc';).Example 5-26 shows both approaches.
Example 5-26. Using Eloquent’s fillable or guarded properties to define mass-assignablefields
class Contact{ protected $fillable = ['name', 'email'];
// or
protected $guarded = ['id', 'created_at', 'updated_at', 'owner_id'];}
Using Request::only() with Eloquent Mass Assignment
In Example 5-25, we needed Eloquent’s mass assignment guardbecause we were using the all() method on the Request object topass in the entirety of the user input.Eloquent’s mass assignment protection is a great tool here, butthere’s also a helpful trick to keep you from accepting any old inputfrom the user.The Request class has an only() method that allows you to pluckonly a few keys from the user input. So now you can do this:
Contact::create($request->only('name', 'email'));
firstOrCreate() and firstOrNew()Sometimes you want to tell your application, “Get me an instance with these proper‐ties, or if it doesn’t exist, create it.” This is where the firstOr*() methods come in.
The firstOrCreate() and firstOrNew() methods take an array of keys and values astheir first parameter:
$contact = Contact::firstOrCreate(['email' => '[email protected]']);
They’ll both look for and retrieve the first record matching those parameters, and ifthere are no matching records, they’ll create an instance with those properties;firstOrCreate() will persist that instance to the database and then return it, whilefirstOrNew() will return it without saving it.
If you pass an array of values as the second parameter, those values will be added tothe created entry (if it’s created) but won’t be used to look up whether the entry exists.
Introduction to Eloquent | 125
www.EBooksWorld.ir
Deleting with EloquentDeleting with Eloquent is very similar to updating with Eloquent, but with (optional)soft deletes, you can archive your deleted items for later inspection or even recovery.
Normal deletes
The simplest way to delete a model record is to call the delete() method on theinstance itself:
$contact = Contact::find(5);$contact->delete();
However, if you only have the ID, there’s no reason to look up an instance just todelete it; you can pass an ID or an array of IDs to the model’s destroy() method todelete them directly:
Contact::destroy(1);// orContact::destroy([1, 5, 7]);
Finally, you can delete all of the results of a query:
Contact::where('updated_at', '<', now()->subYear())->delete();
Soft deletesSoft deletes mark database rows as deleted without actually deleting them from thedatabase. This gives you the ability to inspect them later, to have records that showmore than “no information, deleted” when displaying historic information, and toallow your users (or admins) to restore some or all data.
The hard part about handcoding an application with soft deletes is that every queryyou ever write will need to exclude the soft-deleted data. Thankfully, if you use Elo‐quent’s soft deletes, every query you ever make will be scoped to ignore soft deletes bydefault, unless you explicitly ask to bring them back.
Eloquent’s soft delete functionality requires a deleted_at column to be added to thetable. Once you enable soft deletes on that Eloquent model, every query you everwrite (unless you explicitly include soft-deleted records) will be scoped to ignore soft-deleted rows.
When Should I Use Soft Deletes?Just because a feature exists, it doesn’t mean you should always use it. Many folks inthe Laravel community default to using soft deletes on every project just because thefeature is there. There are real costs to soft deletes, though. It’s pretty likely that, if youview your database directly in a tool like Sequel Pro, you’ll forget to check the
126 | Chapter 5: Databases and Eloquent
www.EBooksWorld.ir
deleted_at column at least once. And if you don’t clean up old soft-deleted records,your databases will get larger and larger.
Here’s my recommendation: don’t use soft deletes by default. Instead, use them whenyou need them, and when you do, clean out old soft deletes as aggressively as you canusing a tool like Quicksand. The soft delete feature is a powerful tool, but not worthusing unless you need it.
Enabling soft deletes. You enable soft deletes by doing three things: adding thedeleted_at column in a migration, importing the SoftDeletes trait in the model,and adding the deleted_at column to your $dates property. There’s asoftDeletes() method available on the schema builder to add the deleted_at col‐umn to a table, as you can see in Example 5-27. And Example 5-28 shows an Elo‐quent model with soft deletes enabled.
Example 5-27. Migration to add the soft delete column to a table
Schema::table('contacts', function (Blueprint $table) { $table->softDeletes();});
Example 5-28. An Eloquent model with soft deletes enabled
<?php
use Illuminate\Database\Eloquent\Model;use Illuminate\Database\Eloquent\SoftDeletes;
class Contact extends Model{ use SoftDeletes; // use the trait
protected $dates = ['deleted_at']; // mark this column as a date}
Once you make these changes, every delete() and destroy() call will now set thedeleted_at column on your row to be the current date and time instead of deletingthat row. And all future queries will exclude that row as a result.
Querying with soft deletes. So, how do we get soft-deleted items?
First, you can add soft-deleted items to a query:
$allHistoricContacts = Contact::withTrashed()->get();
Introduction to Eloquent | 127
www.EBooksWorld.ir
Next, you can use the trashed() method to see if a particular instance has been soft-deleted:
if ($contact->trashed()) { // do something}
Finally, you can get only soft-deleted items:
$deletedContacts = Contact::onlyTrashed()->get();
Restoring soft-deleted entities. If you want to restore a soft-deleted item, you can runrestore() on an instance or a query:
$contact->restore();
// or
Contact::onlyTrashed()->where('vip', true)->restore();
Force-deleting soft-deleted entities. You can delete a soft-deleted entity by callingforceDelete() on an entity or query:
$contact->forceDelete();
// or
Contact::onlyTrashed()->forceDelete();
ScopesWe’ve covered “filtered” queries, meaning any query where we’re not just returningevery result for a table. But every time we’ve written them so far in this chapter, it’sbeen a manual process using the query builder.
Local and global scopes in Eloquent allow you to define prebuilt “scopes” (filters) thatyou can use either every time a model is queried (“global”) or every time you query itwith a particular method chain (“local”).
Local scopesLocal scopes are the simplest to understand. Let’s take this example:
$activeVips = Contact::where('vip', true)->where('trial', false)->get();
First of all, if we write this combination of query methods over and over, it will gettedious. But additionally, the knowledge of how to define someone being an “activeVIP” is now spread around our application. We want to centralize that knowledge.What if we could just write this?
$activeVips = Contact::activeVips()->get();
128 | Chapter 5: Databases and Eloquent
www.EBooksWorld.ir
We can—it’s called a local scope. And it’s easy to define on the Contact class, as youcan see in Example 5-29.
Example 5-29. Defining a local scope on a model
class Contact{ public function scopeActiveVips($query) { return $query->where('vip', true)->where('trial', false); }
To define a local scope, we add a method to the Eloquent class that begins with“scope” and then contains the title-cased version of the scope name. This method ispassed a query builder and needs to return a query builder, but of course you canmodify the query before returning—that’s the whole point.
You can also define scopes that accept parameters, as shown in Example 5-30.
Example 5-30. Passing parameters to scopes
class Contact{ public function scopeStatus($query, $status) { return $query->where('status', $status); }
And you use them in the same way, just passing the parameter to the scope:
$friends = Contact::status('friend')->get();
Global scopesRemember how we talked about soft deletes only working if you scope every query onthe model to ignore the soft-deleted items? That’s a global scope. And we can defineour own global scopes, which will be applied on every query made from a givenmodel.
There are two ways to define a global scope: using a closure or using an entire class.In each, you’ll register the defined scope in the model’s boot() method. Let’s startwith the closure method, illustrated in Example 5-31.
Example 5-31. Adding a global scope using a closure
...class Contact extends Model{
Introduction to Eloquent | 129
www.EBooksWorld.ir
protected static function boot() { parent::boot();
static::addGlobalScope('active', function (Builder $builder) { $builder->where('active', true); }); }
That’s it. We just added a global scope named active, and now every query on thismodel will be scoped to only rows with active set to true.
Next, let’s try the longer way, as shown in Example 5-32. Create a class that imple‐ments Illuminate\Database\Eloquent\Scope, which means it will have an apply()method that takes an instance of a query builder and an instance of the model.
Example 5-32. Creating a global scope class
<?php
namespace App\Scopes;
use Illuminate\Database\Eloquent\Scope;use Illuminate\Database\Eloquent\Model;use Illuminate\Database\Eloquent\Builder;
class ActiveScope implements Scope{ public function apply(Builder $builder, Model $model) { return $builder->where('active', true); }}
To apply this scope to a model, once again override the parent’s boot() method andcall addGlobalScope() on the class using static, as shown in Example 5-33.
Example 5-33. Applying a class-based global scope
<?php
use App\Scopes\ActiveScope;use Illuminate\Database\Eloquent\Model;
class Contact extends Model{ protected static function boot() { parent::boot();
130 | Chapter 5: Databases and Eloquent
www.EBooksWorld.ir
static::addGlobalScope(new ActiveScope); }}
Contact with No Namespace
You may have noticed that several of these examples have used theclass Contact, with no namespace. This is abnormal, and I’ve onlydone this to save space in the book. Normally even your top-levelmodels would live at something like App\Contact.
Removing global scopes. There are three ways to remove a global scope, and all threeuse the withoutGlobalScope() or withoutGlobalScopes() methods. If you’reremoving a closure-based scope, the first parameter of that scope’s addGlobalScope()registration will be the key you used to enable it:
$allContacts = Contact::withoutGlobalScope('active')->get();
If you’re removing a single class-based global scope, you can pass the class name towithoutGlobalScope() or withoutGlobalScopes():
Contact::withoutGlobalScope(ActiveScope::class)->get();
Contact::withoutGlobalScopes([ActiveScope::class, VipScope::class])->get();
Or, you can just disable all global scopes for a query:
Contact::withoutGlobalScopes()->get();
Customizing Field Interactions with Accessors, Mutators, andAttribute CastingNow that we’ve covered how to get records into and out of the database with Elo‐quent, let’s talk about decorating and manipulating the individual attributes on yourEloquent models.
Accessors, mutators, and attribute casting all allow you to customize the way individ‐ual attributes of Eloquent instances are input or output. Without using any of these,each attribute of your Eloquent instance is treated like a string, and you can’t have anyattributes on your models that don’t exist on the database. But we can change that.
AccessorsAccessors allow you to define custom attributes on your Eloquent models for whenyou are reading data from the model instance. This may be because you want tochange how a particular column is output, or because you want to create a customattribute that doesn’t exist in the database table at all.
Introduction to Eloquent | 131
www.EBooksWorld.ir
You define an accessor by writing a method on your model with the following struc‐ture: get{PascalCasedPropertyName}Attribute. So, if your property name isfirst_name, the accessor method would be named getFirstNameAttribute.
Let’s try it out. First, we’ll decorate a preexisting column (Example 5-34).
Example 5-34. Decorating a preexisting column using Eloquent accessors
// Model definition:class Contact extends Model{ public function getNameAttribute($value) { return $value ?: '(No name provided)'; }}
// Accessor usage:$name = $contact->name;
But we can also use accessors to define attributes that never existed in the database, asseen in Example 5-35.
Example 5-35. Defining an attribute with no backing column using Eloquent accessors
// Model definition:class Contact extends Model{ public function getFullNameAttribute() { return $this->first_name . ' ' . $this->last_name; }}
// Accessor usage:$fullName = $contact->full_name;
MutatorsMutators work the same way as accessors, except they’re for determining how to pro‐cess setting the data instead of getting it. Just like with accessors, you can use them tomodify the process of writing data to existing columns, or to allow for setting col‐umns that don’t exist in the database.
You define a mutator by writing a method on your model with the following struc‐ture: set{PascalCasedPropertyName}Attribute. So, if your property name isfirst_name, the mutator method would be named setFirstNameAttribute.
132 | Chapter 5: Databases and Eloquent
www.EBooksWorld.ir
Let’s try it out. First, we’ll add a constraint to updating a preexisting column(Example 5-36).
Example 5-36. Decorating setting the value of an attribute using Eloquent mutators
// Defining the mutatorclass Order extends Model{ public function setAmountAttribute($value) { $this->attributes['amount'] = $value > 0 ? $value : 0; }}
// Using the mutator$order->amount = '15';
This reveals that the way mutators are expected to “set” data on the model is by set‐ting it in $this->attributes with the column name as the key.
Now let’s add a proxy column for setting, as shown in Example 5-37.
Example 5-37. Allowing for setting the value of a nonexistent attribute using Eloquentmutators
// Defining the mutatorclass Order extends Model{ public function setWorkgroupNameAttribute($workgroupName) { $this->attributes['email'] = "{$workgroupName}@ourcompany.com"; }}
// Using the mutator$order->workgroup_name = 'jstott';
As you can probably guess, it’s relatively uncommon to create a mutator for a non-existent column, because it can be confusing to set one property and have it change adifferent column—but it is possible.
Attribute castingYou can probably imagine writing accessors to cast all of your integer-type fields asintegers, encode and decode JSON to store in a TEXT column, or convert TINYINT 0and 1 to and from Boolean values.
Thankfully, there’s a system for that in Eloquent already. It’s called attribute casting,and it allows you to define that any of your columns should always be treated, both
Introduction to Eloquent | 133
www.EBooksWorld.ir

on read and on write, as if they are of a particular data type. The options are listed inTable 5-1.
Table 5-1. Possible attribute casting column types
Type Description
int|integer Casts with PHP (int)
real|float|double Casts with PHP (float)
string Casts with PHP (string)
bool|boolean Casts with PHP (bool)
object Parses to/from JSON, as a stdClass object
array Parses to/from JSON, as an array
collection Parses to/from JSON, as a collection
date|datetime Parses from database DATETIME to Carbon, and back
timestamp Parses from database TIMESTAMP to Carbon, and back
Example 5-38 shows how you use attribute casting in your model.
Example 5-38. Using attribute casting on an Eloquent model
class Contact{ protected $casts = [ 'vip' => 'boolean', 'children_names' => 'array', 'birthday' => 'date', ];}
Date mutators
You can choose for particular columns to be mutated as timestamp columns byadding them to the dates array, as seen in Example 5-39.
Example 5-39. Defining columns to be mutated as timestamps
class Contact{ protected $dates = [ 'met_at', ];}
By default, this array contains created_at and updated_at, so adding entries todates just adds them to the list.
134 | Chapter 5: Databases and Eloquent
www.EBooksWorld.ir
However, there’s no difference between adding columns to this list and adding themto $this->casts as timestamp, so this is becoming a bit of an unnecessary featurenow that attribute casting can cast timestamps (new since Laravel 5.2).
Eloquent CollectionsWhen you make any query call in Eloquent that has the potential to return multiplerows, instead of an array they’ll come packaged in an Eloquent collection, which is aspecialized type of collection. Let’s take a look at collections and Eloquent collections,and what makes them better than plain arrays.
Introducing the base collection
Laravel’s Collection objects (Illuminate\Support\Collection) are a little bit likearrays on steroids. The methods they expose on array-like objects are so helpful that,once you’ve been using them for a while, you’ll likely want to pull them into non-Laravel projects—which you can, with the Tightenco/Collect package.
The simplest way to create a collection is to use the collect() helper. Either pass anarray in, or use it without arguments to create an empty collection and then pushitems into it later. Let’s try it:
$collection = collect([1, 2, 3]);
Now let’s say we want to filter out any even numbers:
$odds = $collection->reject(function ($item) { return $item % 2 === 0;});
Or what if we want to get a version of the collection where each item is multiplied by10? We can do that as follows:
$multiplied = $collection->map(function ($item) { return $item * 10;});
We can even get only the even numbers, multiply them all by 10, and reduce them toa single number by sum():
$sum = $collection ->filter(function ($item) { return $item % 2 == 0; })->map(function ($item) { return $item * 10; })->sum();
As you can see, collections provide a series of methods, which can optionally bechained, to perform functional operations on your arrays. They provide the samefunctionality as native PHP methods like array_map() and array_reduce(), but you
Introduction to Eloquent | 135
www.EBooksWorld.ir
don’t have to memorize PHP’s unpredictable parameter order, and the method chain‐ing syntax is infinitely more readable.
There are more than 60 methods available on the Collection class, including meth‐ods like max(), whereIn(), flatten(), and flip(), and there’s not enough space tocover them all here. We’ll talk about more in Chapter 17, or you can check out theLaravel collections docs to see all of the methods.
Collections in the Place of Arrays
Collections can also be used in any context (except typehinting)where you can use arrays; they allow for iteration, so you can passthem to foreach, and they allow for array access, so if they’re keyedyou can try $a = $collection['a'].
What Eloquent collections addEach Eloquent collection is a normal collection, but extended for the particular needsof a collection of Eloquent results.
Once again, there’s not enough room here to cover all of the additions, but they’recentered around the unique aspects of interacting with a collection not just of genericobjects, but objects meant to represent database rows.
For example, every Eloquent collection has a method called modelKeys() that returnsan array of the primary keys of every instance in the collection. find($id) looks foran instance that has the primary key of $id.
One additional feature available here is the ability to define that any given modelshould return its results wrapped in a specific class of collection. So, if you want toadd specific methods to any collection of objects of your Order model—possiblyrelated to summarizing the financial details of your orders—you could create a cus‐tom OrderCollection that extends Illuminate\Database\Eloquent\Collection,and then register it in your model, as shown in Example 5-40.
Example 5-40. Custom Collection classes for Eloquent models
...class OrderCollection extends Collection{ public function sumBillableAmount() { return $this->reduce(function ($carry, $order) { return $carry + ($order->billable ? $order->amount : 0); }, 0); }}
136 | Chapter 5: Databases and Eloquent
www.EBooksWorld.ir
...class Order extends Model{ public function newCollection(array $models = []) { return new OrderCollection($models); }
Now, any time you get back a collection of Orders (e.g., from Order::all()), it’llactually be an instance of the OrderCollection class:
$orders = Order::all();$billableAmount = $orders->sumBillableAmount();
Eloquent SerializationSerialization is what happens when you take something complex—an array, or anobject—and convert it to a string. In a web-based context, that string is often JSON,but it could take other forms as well.
Serializing complex database records can be, well, complex, and this is one of theplaces many ORMs fall short. Thankfully, you get two powerful methods for free withEloquent: toArray() and toJson(). Collections also have toArray() and toJson(),so all of these are valid:
$contactArray = Contact::first()->toArray();$contactJson = Contact::first()->toJson();$contactsArray = Contact::all()->toArray();$contactsJson = Contact::all()->toJson();
You can also cast an Eloquent instance or collection to a string ($string = (string)$contact;), but both models and collections will just run toJson() and returnthe result.
Returning models directly from route methodsLaravel’s router eventually converts everything routes return to a string, so there’s aclever trick you can use. If you return the result of an Eloquent call in a controller, itwill be automatically cast to a string, and therefore returned as JSON. That means aJSON-returning route can be as simple as either of the ones in Example 5-41.
Example 5-41. Returning JSON from routes directly
// routes/web.phpRoute::get('api/contacts', function () { return Contact::all();});
Introduction to Eloquent | 137
www.EBooksWorld.ir
Route::get('api/contacts/{id}', function ($id) { return Contact::findOrFail($id);});
Hiding attributes from JSONIt’s very common to use JSON returns in APIs, and it’s very common to want to hidecertain attributes in these contexts, so Eloquent makes it easy to hide any attributesevery time you cast to JSON.
You can either blacklist attributes, hiding the ones you list:
class Contact extends Model{ public $hidden = ['password', 'remember_token'];
or whitelist attributes, showing only the ones you list:
class Contact extends Model{ public $visible = ['name', 'email', 'status'];
This also works for relationships:
class User extends Model{ public $hidden = ['contacts'];
public function contacts() { return $this->hasMany(Contact::class); }
Loading the Contents of a Relationship
By default, the contents of a relationship are not loaded whenyou get a database record, so it doesn’t matter whether you hidethem or not. But, as you’ll learn shortly, it’s possible to get a recordwith its related items, and in this context, those items will not beincluded in a serialized copy of that record if you choose to hidethat relationship.In case you’re curious now, you can get a User with all contacts—assuming you’ve set up the relationship correctly—with the follow‐ing call:
$user = User::with('contacts')->first();
There might be times when you want to make an attribute visible just for a single call.That’s possible, with the Eloquent method makeVisible():
$array = $user->makeVisible('remember_token')->toArray();
138 | Chapter 5: Databases and Eloquent
www.EBooksWorld.ir
Adding a Generated Column to Array and JSON Output
If you have created an accessor for a column that doesn’t exist—forexample, our full_name column from Example 5-35—add it tothe $appends array on the model to add it to the array and JSONoutput:
class Contact extends Model{ protected $appends = ['full_name'];
public function getFullNameAttribute() { return "{$this->first_name} {$this->last_name}"; }}
Eloquent RelationshipsIn a relational database model, it’s expected that you will have tables that are related toeach other—hence the name. Eloquent provides simple and powerful tools to makethe process of relating your database tables easier than ever before.
Many of our examples in this chapter have been centered around a user who hasmany contacts, a relatively common situation.
In an ORM like Eloquent, you would call this a one-to-many relationship: the oneuser has many contacts.
If it was a CRM where a contact could be assigned to many users, then this would bea many-to-many relationship: many users can be related to one contact, and each usercan be related to many contacts. A user has and belongs to many contacts.
If each contact can have many phone numbers, and a user wanted a database of everyphone number for their CRM, you would say the user has many phone numbersthrough contacts—that is, a user has many contacts, and the contact has many phonenumbers, so the contact is sort of an intermediary.
And what if each contact has an address, but you’re only interested in tracking oneaddress? You could have all the address fields on the Contact, but you might also cre‐ate an Address model—meaning the contact has one address.
Finally, what if you want to be able to star (favorite) contacts, but also events? Thiswould be a polymorphic relationship, where a user has many stars, but some may becontacts and some may be events.
So, let’s dig into how to define and access these relationships.
Introduction to Eloquent | 139
www.EBooksWorld.ir
One to one
Let’s start simple: a Contact has one PhoneNumber. This relationship is defined inExample 5-42.
Example 5-42. Defining a one-to-one relationship
class Contact extends Model{ public function phoneNumber() { return $this->hasOne(PhoneNumber::class); }
As you can tell, the methods defining relationships are on the Eloquent model itself($this->hasOne()) and take, at least in this instance, the fully qualified class name ofthe class that you’re relating them to.
How should this be defined in your database? Since we’ve defined that the Contacthas one PhoneNumber, Eloquent expects that the table supporting the PhoneNumberclass (likely phone_numbers) has a contact_id column on it. If you named it some‐thing different (for instance, owner_id), you’ll need to change your definition:
return $this->hasOne(PhoneNumber::class, 'owner_id');
Here’s how we access the PhoneNumber of a Contact:
$contact = Contact::first();$contactPhone = $contact->phoneNumber;
Notice that we define the method in Example 5-42 with phoneNumber(), butwe access it with ->phoneNumber. That’s the magic. You could also access it with->phone_number. This will return a full Eloquent instance of the related PhoneNumberrecord.
But what if we want to access the Contact from the PhoneNumber? There’s a methodfor that, too (see Example 5-43).
Example 5-43. Defining a one-to-one relationship’s inverse
class PhoneNumber extends Model{ public function contact() { return $this->belongsTo(Contact::class); }
Then we access it the same way:
$contact = $phoneNumber->contact;
140 | Chapter 5: Databases and Eloquent
www.EBooksWorld.ir
Inserting Related Items
Each relationship type has its own quirks for how to relate models,but here’s the core of how it works: pass an instance to save(), oran array of instances to saveMany(). You can also pass properties tocreate() or createMany() and they’ll make new instances for you:
$contact = Contact::first();
$phoneNumber = new PhoneNumber;$phoneNumber->number = 8008675309;$contact->phoneNumbers()->save($phoneNumber);
// or
$contact->phoneNumbers()->saveMany([ PhoneNumber::find(1), PhoneNumber::find(2),]);
// or
$contact->phoneNumbers()->create([ 'number' => '+13138675309',]);
// or
$contact->phoneNumbers()->createMany([ ['number' => '+13138675309'], ['number' => '+15556060842'],]);
The createMany() method is only available in Laravel 5.4 andlater.
One to manyThe one-to-many relationship is by far the most common. Let’s take a look at how todefine that our User has many Contacts (Example 5-44).
Example 5-44. Defining a one-to-many relationship
class User extends Model{ public function contacts() { return $this->hasMany(Contact::class); }
Introduction to Eloquent | 141
www.EBooksWorld.ir
Once again, this expects that the Contact model’s backing table (likely contacts) hasa user_id column on it. If it doesn’t, override it by passing the correct column nameas the second parameter of hasMany().
We can get a User’s Contacts as follows:
$user = User::first();$usersContacts = $user->contacts;
Just like with one to one, we use the name of the relationship method and call it as ifit were a property instead of a method. However, this method returns a collectioninstead of a model instance. And this is a normal Eloquent collection, so we can haveall sorts of fun with it:
$donors = $user->contacts->filter(function ($contact) { return $contact->status == 'donor';});
$lifetimeValue = $contact->orders->reduce(function ($carry, $order) { return $carry + $order->amount;}, 0);
Just like with one to one, we can also define the inverse (Example 5-45).
Example 5-45. Defining a one-to-many relationship’s inverse
class Contact extends Model{ public function user() { return $this->belongsTo(User::class); }
And just like with one to one, we can access the User from the Contact:
$userName = $contact->user->name;
142 | Chapter 5: Databases and Eloquent
www.EBooksWorld.ir
Attaching and Detaching Related Items from the Attached Item
Most of the time we attach an item by running save() on the par‐ent and passing in the related item, as in$user->contacts()->save($contact). But if you want to performthese behaviors on the attached (“child”) item, you can useassociate() and dissociate() on the method that returns thebelongsTo relationship:
$contact = Contact::first();
$contact->user()->associate(User::first());$contact->save();
// and later
$contact->user()->dissociate();$contact->save();
Using relationships as query builders. Until now, we’ve taken the method name (e.g.,contacts()) and called it as if were a property (e.g., $user->contacts). What hap‐pens if we call it as a method? Instead of processing the relationship, it will return apre-scoped query builder.
So if you have User 1, and you call its contacts() method, you will now have aquery builder prescoped to “all contacts that have a field user_id with the value of 1.”You can then build out a functional query from there:
$donors = $user->contacts()->where('status', 'donor')->get();
Selecting only records that have a related item. You can choose to select only recordsthat meet particular criteria with regard to their related items using has():
$postsWithComments = Post::has('comments')->get();
You can also adjust the criteria further:
$postsWithManyComments = Post::has('comments', '>=', 5)->get();
You can nest the criteria:
$usersWithPhoneBooks = User::has('contacts.phoneNumbers')->get();
And finally, you can write custom queries on the related items:
// Gets all contacts with a phone number containing the string "867-5309"$jennyIGotYourNumber = Contact::whereHas('phoneNumbers', function ($query) { $query->where('number', 'like', '%867-5309%');});
Introduction to Eloquent | 143
www.EBooksWorld.ir
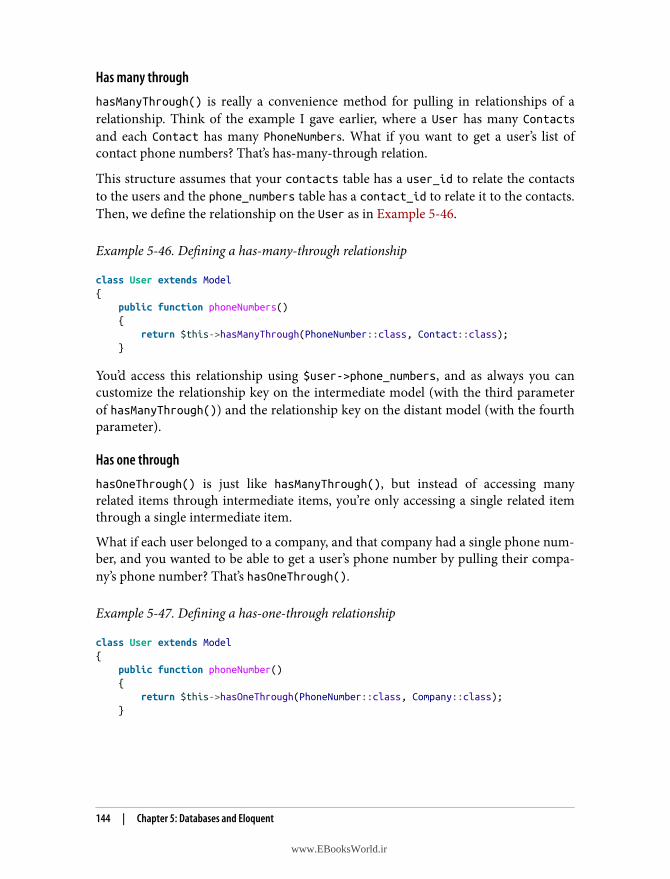
Has many through
hasManyThrough() is really a convenience method for pulling in relationships of arelationship. Think of the example I gave earlier, where a User has many Contactsand each Contact has many PhoneNumbers. What if you want to get a user’s list ofcontact phone numbers? That’s has-many-through relation.
This structure assumes that your contacts table has a user_id to relate the contactsto the users and the phone_numbers table has a contact_id to relate it to the contacts.Then, we define the relationship on the User as in Example 5-46.
Example 5-46. Defining a has-many-through relationship
class User extends Model{ public function phoneNumbers() { return $this->hasManyThrough(PhoneNumber::class, Contact::class); }
You’d access this relationship using $user->phone_numbers, and as always you cancustomize the relationship key on the intermediate model (with the third parameterof hasManyThrough()) and the relationship key on the distant model (with the fourthparameter).
Has one through
hasOneThrough() is just like hasManyThrough(), but instead of accessing manyrelated items through intermediate items, you’re only accessing a single related itemthrough a single intermediate item.
What if each user belonged to a company, and that company had a single phone num‐ber, and you wanted to be able to get a user’s phone number by pulling their compa‐ny’s phone number? That’s hasOneThrough().
Example 5-47. Defining a has-one-through relationship
class User extends Model{ public function phoneNumber() { return $this->hasOneThrough(PhoneNumber::class, Company::class); }
144 | Chapter 5: Databases and Eloquent
www.EBooksWorld.ir
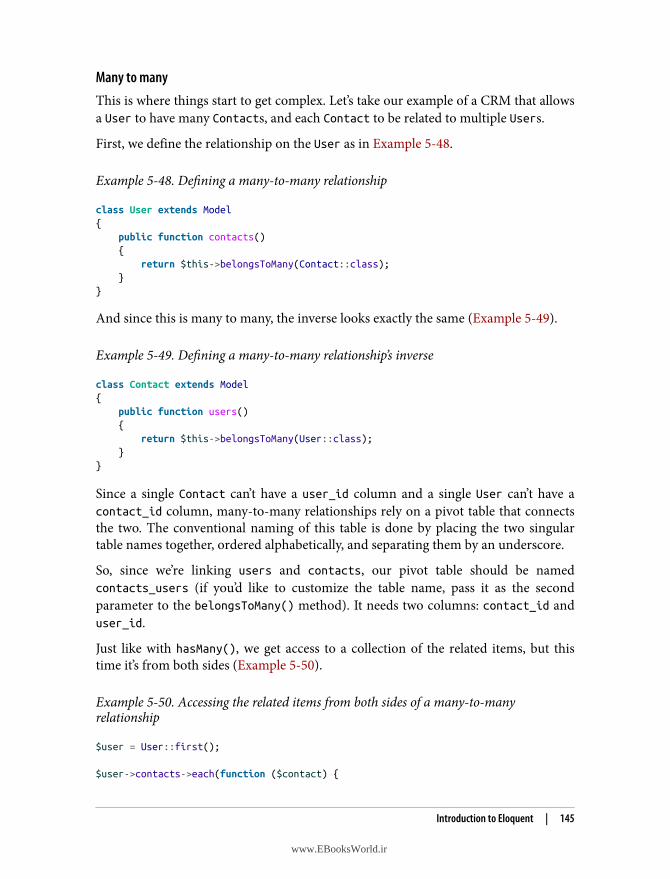
Many to manyThis is where things start to get complex. Let’s take our example of a CRM that allowsa User to have many Contacts, and each Contact to be related to multiple Users.
First, we define the relationship on the User as in Example 5-48.
Example 5-48. Defining a many-to-many relationship
class User extends Model{ public function contacts() { return $this->belongsToMany(Contact::class); }}
And since this is many to many, the inverse looks exactly the same (Example 5-49).
Example 5-49. Defining a many-to-many relationship’s inverse
class Contact extends Model{ public function users() { return $this->belongsToMany(User::class); }}
Since a single Contact can’t have a user_id column and a single User can’t have acontact_id column, many-to-many relationships rely on a pivot table that connectsthe two. The conventional naming of this table is done by placing the two singulartable names together, ordered alphabetically, and separating them by an underscore.
So, since we’re linking users and contacts, our pivot table should be namedcontacts_users (if you’d like to customize the table name, pass it as the secondparameter to the belongsToMany() method). It needs two columns: contact_id anduser_id.
Just like with hasMany(), we get access to a collection of the related items, but thistime it’s from both sides (Example 5-50).
Example 5-50. Accessing the related items from both sides of a many-to-manyrelationship
$user = User::first();
$user->contacts->each(function ($contact) {
Introduction to Eloquent | 145
www.EBooksWorld.ir
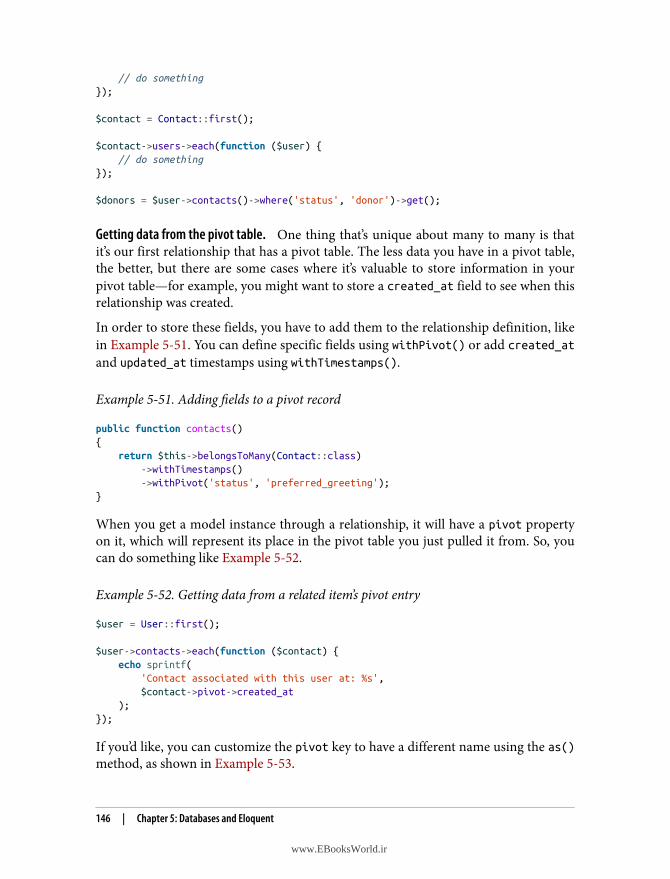
// do something});
$contact = Contact::first();
$contact->users->each(function ($user) { // do something});
$donors = $user->contacts()->where('status', 'donor')->get();
Getting data from the pivot table. One thing that’s unique about many to many is thatit’s our first relationship that has a pivot table. The less data you have in a pivot table,the better, but there are some cases where it’s valuable to store information in yourpivot table—for example, you might want to store a created_at field to see when thisrelationship was created.
In order to store these fields, you have to add them to the relationship definition, likein Example 5-51. You can define specific fields using withPivot() or add created_atand updated_at timestamps using withTimestamps().
Example 5-51. Adding fields to a pivot record
public function contacts(){ return $this->belongsToMany(Contact::class) ->withTimestamps() ->withPivot('status', 'preferred_greeting');}
When you get a model instance through a relationship, it will have a pivot propertyon it, which will represent its place in the pivot table you just pulled it from. So, youcan do something like Example 5-52.
Example 5-52. Getting data from a related item’s pivot entry
$user = User::first();
$user->contacts->each(function ($contact) { echo sprintf( 'Contact associated with this user at: %s', $contact->pivot->created_at );});
If you’d like, you can customize the pivot key to have a different name using the as()method, as shown in Example 5-53.
146 | Chapter 5: Databases and Eloquent
www.EBooksWorld.ir
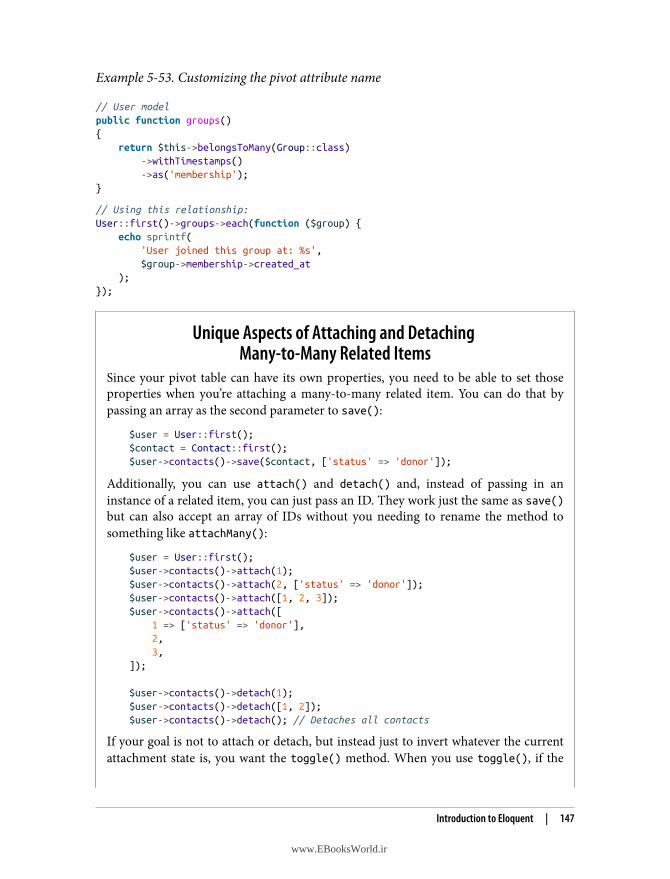
Example 5-53. Customizing the pivot attribute name
// User modelpublic function groups(){ return $this->belongsToMany(Group::class) ->withTimestamps() ->as('membership');}
// Using this relationship:User::first()->groups->each(function ($group) { echo sprintf( 'User joined this group at: %s', $group->membership->created_at );});
Unique Aspects of Attaching and Detaching Many-to-Many Related Items
Since your pivot table can have its own properties, you need to be able to set thoseproperties when you’re attaching a many-to-many related item. You can do that bypassing an array as the second parameter to save():
$user = User::first();$contact = Contact::first();$user->contacts()->save($contact, ['status' => 'donor']);
Additionally, you can use attach() and detach() and, instead of passing in aninstance of a related item, you can just pass an ID. They work just the same as save()but can also accept an array of IDs without you needing to rename the method tosomething like attachMany():
$user = User::first();$user->contacts()->attach(1);$user->contacts()->attach(2, ['status' => 'donor']);$user->contacts()->attach([1, 2, 3]);$user->contacts()->attach([ 1 => ['status' => 'donor'], 2, 3,]);
$user->contacts()->detach(1);$user->contacts()->detach([1, 2]);$user->contacts()->detach(); // Detaches all contacts
If your goal is not to attach or detach, but instead just to invert whatever the currentattachment state is, you want the toggle() method. When you use toggle(), if the
Introduction to Eloquent | 147
www.EBooksWorld.ir
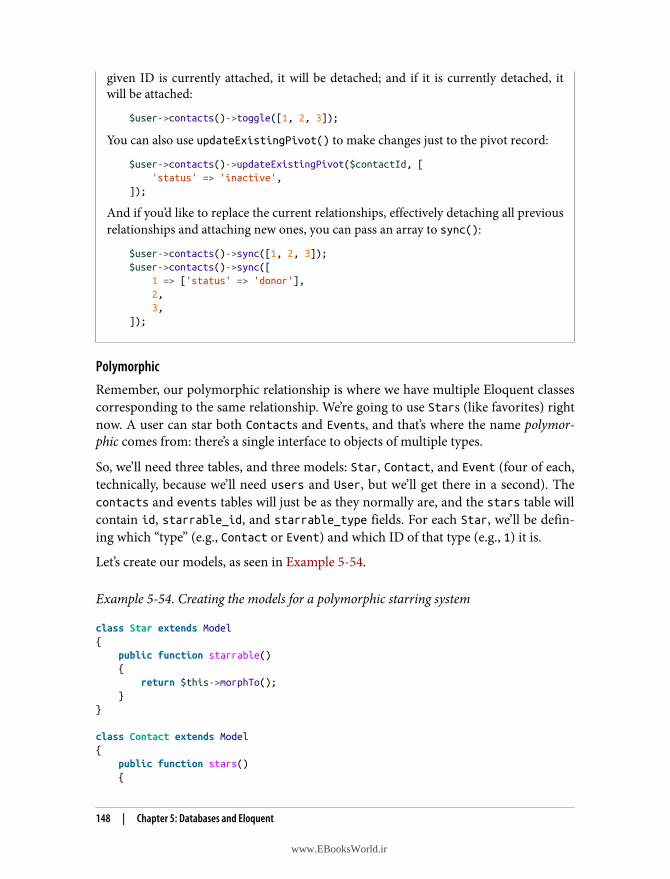
given ID is currently attached, it will be detached; and if it is currently detached, itwill be attached:
$user->contacts()->toggle([1, 2, 3]);
You can also use updateExistingPivot() to make changes just to the pivot record:
$user->contacts()->updateExistingPivot($contactId, [ 'status' => 'inactive',]);
And if you’d like to replace the current relationships, effectively detaching all previousrelationships and attaching new ones, you can pass an array to sync():
$user->contacts()->sync([1, 2, 3]);$user->contacts()->sync([ 1 => ['status' => 'donor'], 2, 3,]);
PolymorphicRemember, our polymorphic relationship is where we have multiple Eloquent classescorresponding to the same relationship. We’re going to use Stars (like favorites) rightnow. A user can star both Contacts and Events, and that’s where the name polymor‐phic comes from: there’s a single interface to objects of multiple types.
So, we’ll need three tables, and three models: Star, Contact, and Event (four of each,technically, because we’ll need users and User, but we’ll get there in a second). Thecontacts and events tables will just be as they normally are, and the stars table willcontain id, starrable_id, and starrable_type fields. For each Star, we’ll be defin‐ing which “type” (e.g., Contact or Event) and which ID of that type (e.g., 1) it is.
Let’s create our models, as seen in Example 5-54.
Example 5-54. Creating the models for a polymorphic starring system
class Star extends Model{ public function starrable() { return $this->morphTo(); }}
class Contact extends Model{ public function stars() {
148 | Chapter 5: Databases and Eloquent
www.EBooksWorld.ir
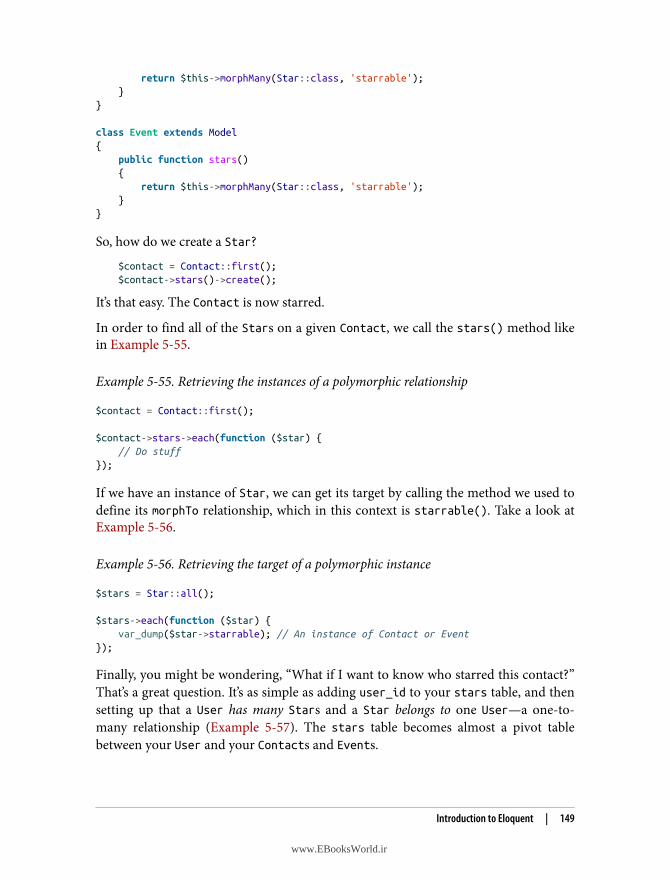
return $this->morphMany(Star::class, 'starrable'); }}
class Event extends Model{ public function stars() { return $this->morphMany(Star::class, 'starrable'); }}
So, how do we create a Star?
$contact = Contact::first();$contact->stars()->create();
It’s that easy. The Contact is now starred.
In order to find all of the Stars on a given Contact, we call the stars() method likein Example 5-55.
Example 5-55. Retrieving the instances of a polymorphic relationship
$contact = Contact::first();
$contact->stars->each(function ($star) { // Do stuff});
If we have an instance of Star, we can get its target by calling the method we used todefine its morphTo relationship, which in this context is starrable(). Take a look atExample 5-56.
Example 5-56. Retrieving the target of a polymorphic instance
$stars = Star::all();
$stars->each(function ($star) { var_dump($star->starrable); // An instance of Contact or Event});
Finally, you might be wondering, “What if I want to know who starred this contact?”That’s a great question. It’s as simple as adding user_id to your stars table, and thensetting up that a User has many Stars and a Star belongs to one User—a one-to-many relationship (Example 5-57). The stars table becomes almost a pivot tablebetween your User and your Contacts and Events.
Introduction to Eloquent | 149
www.EBooksWorld.ir
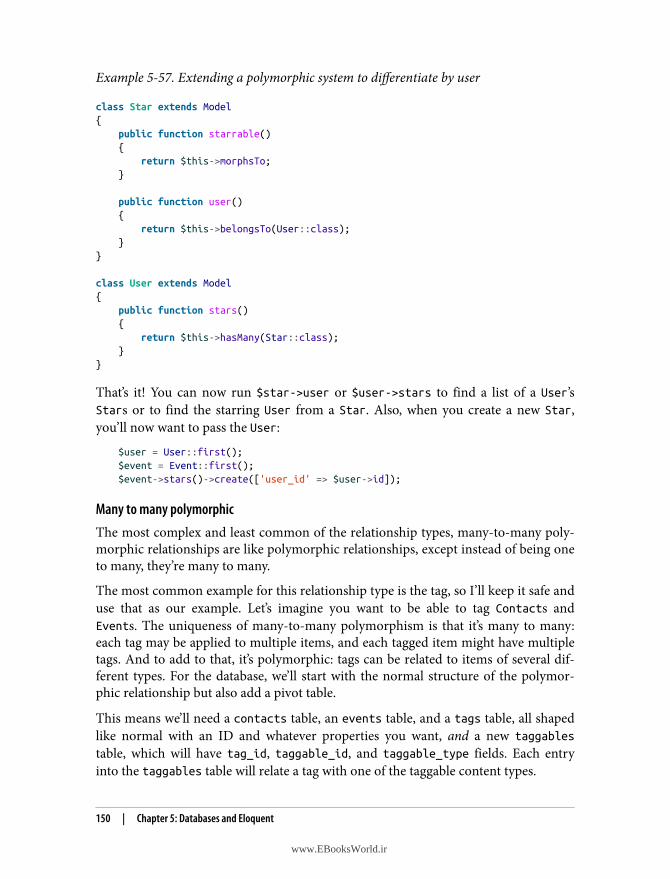
Example 5-57. Extending a polymorphic system to differentiate by user
class Star extends Model{ public function starrable() { return $this->morphsTo; }
public function user() { return $this->belongsTo(User::class); }}
class User extends Model{ public function stars() { return $this->hasMany(Star::class); }}
That’s it! You can now run $star->user or $user->stars to find a list of a User’sStars or to find the starring User from a Star. Also, when you create a new Star,you’ll now want to pass the User:
$user = User::first();$event = Event::first();$event->stars()->create(['user_id' => $user->id]);
Many to many polymorphicThe most complex and least common of the relationship types, many-to-many poly‐morphic relationships are like polymorphic relationships, except instead of being oneto many, they’re many to many.
The most common example for this relationship type is the tag, so I’ll keep it safe anduse that as our example. Let’s imagine you want to be able to tag Contacts andEvents. The uniqueness of many-to-many polymorphism is that it’s many to many:each tag may be applied to multiple items, and each tagged item might have multipletags. And to add to that, it’s polymorphic: tags can be related to items of several dif‐ferent types. For the database, we’ll start with the normal structure of the polymor‐phic relationship but also add a pivot table.
This means we’ll need a contacts table, an events table, and a tags table, all shapedlike normal with an ID and whatever properties you want, and a new taggablestable, which will have tag_id, taggable_id, and taggable_type fields. Each entryinto the taggables table will relate a tag with one of the taggable content types.
150 | Chapter 5: Databases and Eloquent
www.EBooksWorld.ir
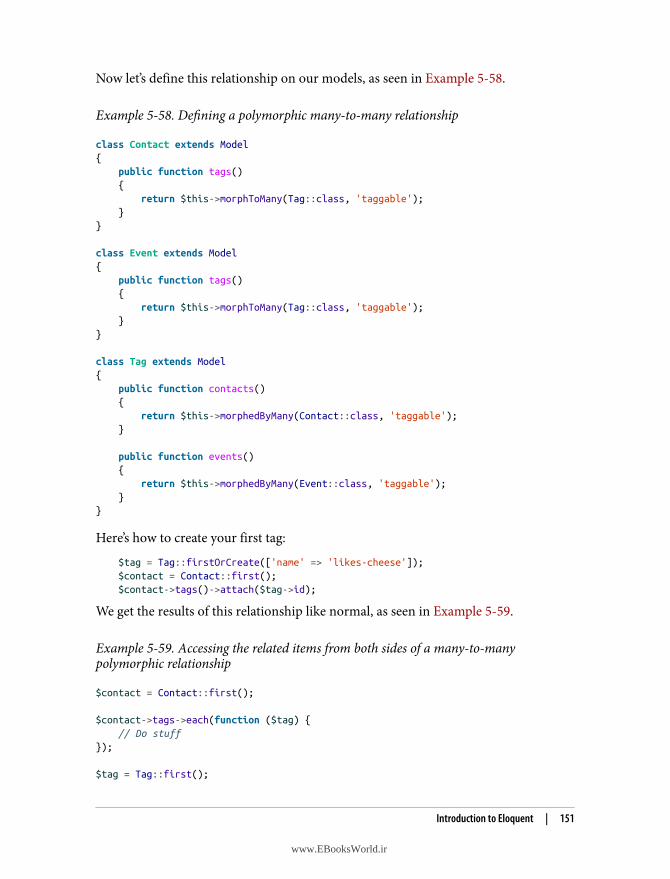
Now let’s define this relationship on our models, as seen in Example 5-58.
Example 5-58. Defining a polymorphic many-to-many relationship
class Contact extends Model{ public function tags() { return $this->morphToMany(Tag::class, 'taggable'); }}
class Event extends Model{ public function tags() { return $this->morphToMany(Tag::class, 'taggable'); }}
class Tag extends Model{ public function contacts() { return $this->morphedByMany(Contact::class, 'taggable'); }
public function events() { return $this->morphedByMany(Event::class, 'taggable'); }}
Here’s how to create your first tag:
$tag = Tag::firstOrCreate(['name' => 'likes-cheese']);$contact = Contact::first();$contact->tags()->attach($tag->id);
We get the results of this relationship like normal, as seen in Example 5-59.
Example 5-59. Accessing the related items from both sides of a many-to-manypolymorphic relationship
$contact = Contact::first();
$contact->tags->each(function ($tag) { // Do stuff});
$tag = Tag::first();
Introduction to Eloquent | 151
www.EBooksWorld.ir
$tag->contacts->each(function ($contact) { // Do stuff});
Child Records Updating Parent Record TimestampsRemember, any Eloquent models by default will have created_at and updated_attimestamps. Eloquent will set the updated_at timestamp automatically any time youmake any changes to a record.
When a related item has a belongsTo or belongsToMany relationship with anotheritem, it might be valuable to mark the other item as updated any time the related itemis updated. For example, if a PhoneNumber is updated, maybe the Contact it’s connec‐ted to should be marked as having been updated as well.
We can accomplish this by adding the method name for that relationship to a$touches array property on the child class, as in Example 5-60.
Example 5-60. Updating a parent record any time the child record is updated
class PhoneNumber extends Model{ protected $touches = ['contact'];
public function contact() { return $this->belongsTo(Contact::class); }}
Eager loadingBy default, Eloquent loads relationships using “lazy loading.” This means when youfirst load a model instance, its related models will not be loaded along with it. Rather,they’ll only be loaded once you access them on the model; they’re “lazy” and don’t doany work until called upon.
This can become a problem if you’re iterating over a list of model instances and eachhas a related item (or items) that you’re working on. The problem with lazy loading isthat it can introduce significant database load (often the N+1 problem, if you’re famil‐iar with the term; if not, just ignore this parenthetical remark). For instance, everytime the loop in Example 5-61 runs, it executes a new database query to look up thephone numbers for that Contact.
152 | Chapter 5: Databases and Eloquent
www.EBooksWorld.ir
Example 5-61. Retrieving one related item for each item in a list (N+1)
$contacts = Contact::all();
foreach ($contacts as $contact) { foreach ($contact->phone_numbers as $phone_number) { echo $phone_number->number; }}
If you are loading a model instance, and you know you’ll be working with its relation‐ships, you can instead choose to “eager-load” one or many of its sets of related items:
$contacts = Contact::with('phoneNumbers')->get();
Using the with() method with a retrieval gets all of the items related to the pulleditem(s); as you can see in this example, you pass it the name of the method the rela‐tionship is defined by.
When we use eager loading, instead of pulling the related items one at a time whenthey’re requested (e.g., selecting one contact’s phone numbers each time a foreachloop runs), we have a single query to pull the initial items (selecting all contacts) anda second query to pull all their related items (selecting all phone numbers owned bythe contacts we just pulled).
You can eager-load multiple relationships by passing multiple parameters to thewith() call:
$contacts = Contact::with('phoneNumbers', 'addresses')->get();
And you can nest eager loading to eager-load the relationships of relationships:
$authors = Author::with('posts.comments')->get();
Constraining eager loads. If you want to eager-load a relationship, but not all ofthe items, you can pass a closure to with() to define exactly which related items toeager-load:
$contacts = Contact::with(['addresses' => function ($query) { $query->where('mailable', true);}])->get();
Lazy eager loading. I know it sounds crazy, because we just defined eager loading assort of the opposite of lazy loading, but sometimes you don’t know you want to per‐form an eager-load query until after the initial instances have been pulled. In thiscontext, you’re still able to make a single query to look up all of the related items,avoiding N+1 cost. We call this “lazy eager loading”:
$contacts = Contact::all();
Introduction to Eloquent | 153
www.EBooksWorld.ir
if ($showPhoneNumbers) { $contacts->load('phoneNumbers');}
To load a relationship only when it has not already been loaded, use theloadMissing() method (available only since Laravel 5.5):
$contacts = Contact::all();
if ($showPhoneNumbers) { $contacts->loadMissing('phoneNumbers');}
Eager loading only the countIf you want to eager-load relationships but only so you can have access to the count ofitems in each relationship, you can try withCount():
$authors = Author::withCount('posts')->get();
// Adds a "posts_count" integer to each Author with a count of that// author's related posts
Eloquent EventsEloquent models fire events out into the void of your application every time certainactions happen, regardless of whether you’re listening. If you’re familiar with pub/sub, it’s this same model (you’ll learn more about Laravel’s entire event system inChapter 16).
Here’s a quick rundown of binding a listener to when a new Contact is created. We’regoing to bind it in the boot() method of AppServiceProvider, and let’s imaginewe’re notifying a third-party service every time we create a new Contact.
Example 5-62. Binding a listener to an Eloquent event
class AppServiceProvider extends ServiceProvider{ public function boot() { $thirdPartyService = new SomeThirdPartyService;
Contact::creating(function ($contact) use ($thirdPartyService) { try { $thirdPartyService->addContact($contact); } catch (Exception $e) { Log::error('Failed adding contact to ThirdPartyService; canceled.');
return false; // Cancels Eloquent create() }
154 | Chapter 5: Databases and Eloquent
www.EBooksWorld.ir
}); }
We can see a few things in Example 5-62. First, we use Modelname::eventName() asthe method, and pass it a closure. The closure gets access to the model instance that isbeing operated on. Second, we’re going to need to define this listener in a service pro‐vider somewhere. And third, if we return false, the operation will cancel and thesave() or update() will be canceled.
Here are the events that every Eloquent model fires:
• creating
• created
• updating
• updated
• saving
• saved
• deleting
• deleted
• restoring
• restored
• retrieved
Most of these should be pretty clear, except possibly restoring and restored, whichfire when you’re restoring a soft-deleted row. Also, saving is fired for both creatingand updating and saved is fired for both created and updated.
retrieved (available in Laravel 5.5 and later) is fired when an existing model isretrieved from the database.
TestingLaravel’s entire application testing framework makes it easy to test your database—not by writing unit tests against Eloquent, but by just being willing to test your entireapplication.
Take this scenario. You want to test to ensure that a particular page shows one contactbut not another. Some of that logic has to do with the interplay between the URL andthe controller and the database, so the best way to test it is an application test. Youmight be thinking about mocking Eloquent calls and trying to avoid the system hit‐ting the database. Don’t do it. Try Example 5-63 instead.
Testing | 155
www.EBooksWorld.ir
Example 5-63. Testing database interactions with simple application tests
public function test_active_page_shows_active_and_not_inactive_contacts(){ $activeContact = factory(Contact::class)->create(); $inactiveContact = factory(Contact::class)->states('inactive')->create();
$this->get('active-contacts') ->assertSee($activeContact->name) ->assertDontSee($inactiveContact->name);}
As you can see, model factories and Laravel’s application testing features are great fortesting database calls.
Alternatively, you can look for that record directly in the database, as inExample 5-64.
Example 5-64. Using assertDatabaseHas() to check for certain records in the database
public function test_contact_creation_works(){ $this->post('contacts', [ 'email' => '[email protected]' ]);
$this->assertDatabaseHas('contacts', [ 'email' => '[email protected]' ]);}
Eloquent and Laravel’s database framework are tested extensively. You don’t need totest them. You don’t need to mock them. If you really want to avoid hitting the data‐base, you can use a repository and then return unsaved instances of your Eloquentmodels. But the most important message is, test the way your application uses yourdatabase logic.
If you have custom accessors, mutators, scopes, or whatever else, you can also testthem directly, as in Example 5-65.
Example 5-65. Testing accessors, mutators, and scopes
public function test_full_name_accessor_works(){ $contact = factory(Contact::class)->make([ 'first_name' => 'Alphonse', 'last_name' => 'Cumberbund' ]);
156 | Chapter 5: Databases and Eloquent
www.EBooksWorld.ir
$this->assertEquals('Alphonse Cumberbund', $contact->fullName);}
public function test_vip_scope_filters_out_non_vips(){ $vip = factory(Contact::class)->states('vip')->create(); $nonVip = factory(Contact::class)->create();
$vips = Contact::vips()->get();
$this->assertTrue($vips->contains('id', $vip->id)); $this->assertFalse($vips->contains('id', $nonVip->id));}
Just avoid writing tests that leave you creating complex “Demeter chains” to assertthat a particular fluent stack was called on some database mock. If your testing startsto get overwhelming and complex around the database layer, it’s because you’re allow‐ing preconceived notions to force you into unnecessarily complex systems. Keepit simple.
Different Names for Testing Methods Prior to Laravel 5.4
In projects running versions of Laravel prior to 5.4,assertDatabaseHas() should be replaced by seeInDatabase(),get() should be replaced by visit(), assertSee() should bereplaced by see(), and assertDontSee() should be replaced bydontSee().
TL;DRLaravel comes with a suite of powerful database tools, including migrations, seeding,an elegant query builder, and Eloquent, a powerful ActiveRecord ORM. Laravel’sdatabase tools don’t require you to use Eloquent at all—you can access and manipu‐late the database with a thin layer of convenience without having to write SQLdirectly. But adding an ORM, whether it’s Eloquent or Doctrine or whatever else, iseasy and can work neatly with Laravel’s core database tools.
Eloquent follows the Active Record pattern, which makes it simple to define a class ofdatabase-backed objects, including which table they’re stored in and the shape oftheir columns, accessors, and mutators. Eloquent can handle every sort of normalSQL action and also complex relationships, up to and including polymorphic many-to-many relationships.
Laravel also has a robust system for testing databases, including model factories.
TL;DR | 157
www.EBooksWorld.ir

www.EBooksWorld.ir

CHAPTER 6
Frontend Components
Laravel is primarily a PHP framework, but it also has a series of components focusedon generating frontend code. Some of these, like pagination and message bags, arePHP helpers that target the frontend, but Laravel also provides a Webpack-basedbuild system called Mix and some conventions around non-PHP assets.
Laravel’s Build Tools Before and After Laravel 5.4
Prior to Laravel 5.4, Laravel’s frontend build tool was namedElixer, and it was based on Gulp. In 5.4 and later, the new build
tool is named Mix, and it’s based on Webpack.
Since Mix is at the core of the non-PHP frontend components, let’s start there.
Laravel MixMix is a build tool that provides a simple user interface and a series of conventions ontop of Webpack. Mix’s core value proposition is simplifying the most common buildand compilation Webpack tasks by means of a cleaner API and a series of naming andapplication structure conventions.
A Quick Introduction to WebpackWebpack is a JavaScript tool designed for compiling static assets; the Webpack teamdescribes its purpose as bundling “modules with dependencies” together and produc‐ing “static assets.”
Webpack is similar to Gulp or Grunt in that, like Webpack, those tools are often usedfor processing and bundling dependencies for websites. This will commonly include
159
www.EBooksWorld.ir

running a CSS preprocessor like Sass or Less or PostCSS, copying files, and concate‐nating and minifying JavaScript.
Unlike the others, Webpack is specifically focused on bundling together modules withdependencies and producing static assets as a result. Gulp and Grunt are task run‐ners, which, like Make and Rake before them, can be used to automate any activitiesthat are programmable and repeatable. They all can be used to bundle assets, butthat’s not their core focus, and as a result they can be limited in some of the morecomplex needs for asset bundling—for example, identifying which of the generatedassets won’t be used and discarding them from the final output.
At its core, Mix is just a tool in your Webpack toolbox. The “Mix file” you’ll use to setyour configurations is simply a Webpack configuration file which lives at the root ofyour project, named webpack.mix.js. However, the configuration you have to set thereis a lot simpler than most Webpack configuration is out of the box, and you’ll have todo a lot less work to get most common asset compilation tasks working.
Let’s look at a common example: running Sass to preprocess your CSS styles. In anormal Webpack environment, that might look a little bit like Example 6-1.
Example 6-1. Compiling a Sass file in Webpack, before Mix
var path = require('path');var MiniCssExtractPlugin = require("mini-css-extract-plugin");
module.exports = { entry: './src/sass/app.scss', module: { rules: [ { test: /\.s[ac]ss$/, use: [ MiniCssExtractPlugin.loader, "css-loader", "sass-loader" ] } ] }, plugins: [ new MiniCssExtractPlugin({ path: path.resolve(__dirname, './dist'), filename: 'app.css' }) ]}
160 | Chapter 6: Frontend Components
www.EBooksWorld.ir
Now, I’ve seen worse. There aren’t an unimaginable number of configuration proper‐ties, and it’s relatively clear what’s going on. But this is the sort of code that you copyfrom project to project, not code you feel comfortable writing yourself or even modi‐fying to any significant degree. Working like this can get confusing and repetitive.
Let’s try that same task in Mix (Example 6-2).
Example 6-2. Compiling a Sass file in Mix
let mix = require('laravel-mix');
mix.sass('resources/sass/app.scss', 'public/css');
That’s it. And not only is it infinitely simpler, it also covers file watching, browsersyncing, notifications, prescribed folder structures, autoprefixing, URL processing,and much more.
Mix Folder StructureMuch of Mix’s simplicity comes from the assumed directory structure. Why decidefor every new application where the source and compiled assets will live? Just stickwith Mix’s conventions, and you won’t have to think about it ever again.
Every new Laravel app comes with a resources folder, which is where Mix will expectyour frontend assets to live. Your Sass will live in resources/sass, or your Less inresources/less, or your source CSS in resources/css, and your JavaScript will live inresources/js. These will export to public/css and public/js.
The Assets Subdirectory Prior to Laravel 5.7
In versions of Laravel prior to 5.7, the sass, less, and js directorieswere nested under the resources/assets directory instead of directlyunderneath the resources directory.
Running MixSince Mix runs on Webpack, you’ll need to set up a few tools before using it:
1. First, you’ll need Node.js installed. Visit the Node website to learn how to get itrunning.Once Node (and NPM with it) is installed once, you will not have to do this againfor each project. Now you’re ready to install this project’s dependencies.
Laravel Mix | 161
www.EBooksWorld.ir
2. Open the project root in your terminal, and run npm install to installthe required packages (Laravel ships with a Mix-ready package.json file to directNPM).
You’re now set up! You can run npm run dev to run Webpack/Mix once, npm runwatch to listen for relevant file changes and run in response, or npm run prod to runMix once with production settings (such as minifying the output). You can also runnpm run watch-poll if npm run watch doesn’t work in your environment, or npmrun hot for Hot Module Replacement (HMR; discussed in the next section).
What Does Mix Provide?I’ve already mentioned that Mix can preprocess your CSS using Sass, Less, and/orPostCSS. It can also concatenate any sort of files, minify them, rename them, andcopy them, and it can copy entire directories or individual files.
Additionally, Mix can process all flavors of modern JavaScript and provide autopre‐fixing, concatenation, and minification specifically as a part of the JavaScript buildstack. It makes it easy to set up Browsersync, HMR, and versioning, and there areplug-ins available for many other common build scenarios.
The Mix documentation covers all of these options and more, but we’ll discuss a fewspecific use cases in the following sections.
Source mapsIf you’re not familiar with source maps, they work with any sort of preprocessorto teach your browser’s web inspector which files generated the compiled sourceyou’re inspecting.
By default, Mix will not generate source maps for your files. But you can enable themby chaining the sourceMaps() method after your Mix calls, as you can see inExample 6-3.
Example 6-3. Enabling source maps in Mix
let mix = require('laravel-mix');
mix.js('resources/js/app.js', 'public/js') .sourceMaps();
Once you configure Mix this way, you’ll see the source maps appear as a .{file‐name}.map file next to each generated file.
Without source maps, if you use your browser’s development tools to inspect a partic‐ular CSS rule or JavaScript action, you’ll just see a big mess of compiled code. With
162 | Chapter 6: Frontend Components
www.EBooksWorld.ir
source maps, your browser can pinpoint the exact line of the source file, whether it beSass or JavaScript or whatever else, that generated the rule you’re inspecting.
Pre- and post-processorsWe’ve already covered Sass and Less, but Mix can also handle Stylus (Example 6-4),and you can chain PostCSS onto any other style calls (Example 6-5).
Example 6-4. Preprocessing CSS with Stylus
mix.stylus('resources/stylus/app.styl', 'public/css');
Example 6-5. Post-processing CSS with PostCSS
mix.sass('resources/sass/app.scss', 'public/css') .options({ postCss: [ require('postcss-css-variables')() ] });
Preprocessorless CSSIf you don’t want to deal with a preprocessor, there’s a command for that—it will graball of your CSS files, concatenate them, and output them to the public/css directory,just as if they had been run through a preprocessor. There are a few options, whichyou can see in Example 6-6.
Example 6-6. Combining stylesheets with Mix
// Combines all files from resources/cssmix.styles('resources/css', 'public/css/all.css');
// Combines files from resources/cssmix.styles([ 'resources/css/normalize.css', 'resources/css/app.css'], 'public/css/all.css');
Concatenating JavaScriptThe options available for working with normal JavaScript files are very similar tothose available for normal CSS files. Take a look at Example 6-7.
Example 6-7. Combining JavaScript files with Mix
let mix = require('laravel-mix');
Laravel Mix | 163
www.EBooksWorld.ir
// Combines all files from resources/jsmix.scripts('resources/js', 'public/js/all.js');
// Combines files from resources/jsmix.scripts([ 'resources/js/normalize.js', 'resources/js/app.js'], 'public/js/all.js');
Processing JavaScriptIf you want to process your JavaScript—for example, to compile your ES6 code intoplain JavaScript—Mix makes it easy to use Webpack for this purpose (seeExample 6-8).
Example 6-8. Processing JavaScript files in Mix with Webpack
let mix = require('laravel-mix');
mix.js('resources/js/app.js', 'public/js');
These scripts look for the provided filename in resources/js and output to public/js/app.js.
You can use more complicated aspects of Webpack’s feature set by creating awebpack.config.js file in your project root.
Copying files or directories
To move either a single file or an entire directory, use the copy() method or the copyDirectory() method:
mix.copy('node_modules/pkgname/dist/style.css', 'public/css/pkgname.css');mix.copyDirectory('source/images', 'public/images');
VersioningMost of the tips from Steve Souders’s Even Faster Web Sites (O’Reilly) have made theirway into our everyday development practices. We move scripts to the footer, reducethe number of HTTP requests, and more, often without even realizing where thoseideas originated.
One of Steve’s tips is still very rarely implemented, though, and that is setting a verylong cache life on assets (scripts, styles, and images). Doing this means there will befewer requests to your server to get the latest version of your assets. But it also meansthat users are extremely likely to have a cached version of your assets, which willmake things get outdated, and therefore break, quickly.
164 | Chapter 6: Frontend Components
www.EBooksWorld.ir
The solution to this is versioning. Append a unique hash to each asset’s filename everytime you run your build script, and then that unique file will be cached indefinitely—or at least until the next build.
What’s the problem? Well, first you need to get the unique hashes generated andappended to your filenames. But you also will need to update your views on everybuild to reference the new filenames.
As you can probably guess, Mix handles that for you, and it’s incredibly simple. Thereare two components: the versioning task in Mix, and the mix() PHP helper. First, youcan version your assets by running mix.version() like in Example 6-9.
Example 6-9. mix.version
let mix = require('laravel-mix');
mix.sass('resources/sass/app.scss', 'public/css') .version();
The version of the file that’s generated is no different—it’s just named app.css and livesin public/css.
Versioning Assets Using Query Parameters
The way versioning is handled in Laravel is a little different fromtraditional versioning, in that the versioning is appended with aquery parameter instead of by modifying filenames. It still func‐tions the same way, because browsers read it as a “new” file, but ithandles a few edge cases with caches and load balancers.
Next, use the PHP mix() helper in your views to refer to that file like inExample 6-10.
Example 6-10. Using the mix() helper in views
<link rel="stylesheet" href="{{ mix("css/app.css") }}">
// Will output something like:
<link rel="stylesheet" href="/css/app.css?id=5ee7141a759a5fb7377a">
Laravel Mix | 165
www.EBooksWorld.ir
How Does Mix Versioning Work Behind the Scenes?Mix generates a file named public/mix-manifest.json. This stores the information themix() helper needs to find the generated file. Here’s what a sample mix-manifest.jsonlooks like:
{ "/css/app.css": "/css/app.css?id=4151cf6261b95f07227e"}
Vue and ReactMix can handle building both Vue (with single-file components) and React compo‐nents. Mix’s default js() call handles Vue, and you can replace it with a react() callif you want to build React components:
mix.react('resources/js/app.js', 'public/js');
If you take a look at the default Laravel sample app.js and the components it imports(Example 6-11), you’ll see that you don’t have to do anything special to work with Vuecomponents. A simple mix.js() call makes this possible in your app.js.
Example 6-11. App.js configured to work with Vue
window.Vue = require('vue');
Vue.component('example-component', require('./components/ExampleComponent.vue'));
const app = new Vue({ el: '#app'});
And if you switch to react(), this is all you need to run in your file for your firstcomponent:
require('./components/Example');
Both presets also bring in Axios, Lodash, and Popper.js, so you don’t have to spendany time getting your Vue or React ecosystems set up.
Hot Module ReplacementWhen you’re writing single components with Vue or React, you’re likely used toeither refreshing the page every time your build tool recompiles your components or,if you’re using something like Mix, relying on Browsersync to reload it for you.
166 | Chapter 6: Frontend Components
www.EBooksWorld.ir
That’s great, but if you’re working with single-page apps (SPAs), that means you’rebooted back to the beginning of the app; that refresh wipes any state you had built upas you navigated through the app.
Hot Module Replacement (HMR, sometimes called hot reloading) solves this prob‐lem. It’s not always easy to set up, but Mix comes with it enabled out of the box. HMRworks essentially as if you’d taught Browsersync to not reload the entire file that wasrecompiled, but instead to just reload the bits of code you changed. That means youcan get the updated code injected into your browser, but still retain the state you hadbuilt up as you got your SPA into just the right spot for testing.
To use HMR, you’ll want to run npm run hot instead of npm run watch. In order forit to work correctly, all of your <script> references have to be pulling the right ver‐sions of your JavaScript files. Essentially, Mix is booting up a small Node server atlocalhost:8080, so if your <script> tag points to a different version of the script,HMR won’t work.
The easiest way to achieve this is to just use the mix() helper to reference your scripts.This helper will handle prepending either localhost:8080 if in HMR mode or yourdomain if you’re in a normal development mode. Here’s what it looks like inline:
<body> <div id="app"></div>
<script src="{{ mix('js/app.js') }}"></script></body>
If you develop your applications on an HTTPS connection—for example, if you runvalet secure—all your assets must also be served via an HTTPS connection. This isa little bit trickier, so it’s best to consult the HMR docs.
Vendor extractionThe most common frontend bundling pattern, which Mix also encourages, ends upgenerating a single CSS file and a single JavaScript file that encompasses both the app-specific code for your project and the code for all its dependencies.
However, this means that vendor file updates require the entire file to be rebuilt andrecached, which might introduce an undesirable load time.
Mix makes it easy to extract all of the JavaScript from your app’s dependencies into aseparate vendor.js file. Simply supply a list of the vendor’s library names to theextract() method, chained after your js() call. Take a look at Example 6-12 to seehow it looks.
Laravel Mix | 167
www.EBooksWorld.ir
Example 6-12. Extracting a vendor library into a separate file
mix.js('resources/js/app.js', 'public/js') .extract(['vue'])
This outputs your existing app.js and then two new files: manifest.js, which givesinstructions to your browser about how to load the dependencies and app code, andvendor.js, which contains the vendor-specific code.
It’s important to load these files in the correct order in your frontend code—firstmanifest.js, then vendor.js, and finally app.js:
Extracting All Dependencies Using extract() in Mix 4.0+
If your project is using Laravel Mix 4.0 or greater, you can call theextract() method with no arguments. This will extract the entiredependency list for your application.
<script src="{{ mix('js/manifest.js') }}"></script><script src="{{ mix('js/vendor.js') }}"></script><script src="{{ mix('js/app.js') }}"></script>
Environment variables in MixAs Example 6-13 shows, if you prefix an environment variable (in your .env file) withMIX_, it will become available in your Mix-compiled files with the naming conventionprocess.env.ENV_VAR_NAME.
Example 6-13. Using .env variables in Mix-compiled JavaScript
# In your .env fileMIX_BUGSNAG_KEY=lj12389g08bq1234MIX_APP_NAME="Your Best App Now"
// In Mix-compiled filesprocess.env.MIX_BUGSNAG_KEY
// For example, this code:console.log("Welcome to " + process.env.MIX_APP_NAME);
// Will compile down to this:console.log("Welcome to " + "Your Best App Now");
You can also access those variables in your Webpack configuration files using Node’sdotenv package, as shown in Example 6-14.
168 | Chapter 6: Frontend Components
www.EBooksWorld.ir
Example 6-14. Using .env variables in Webpack configuration files
// webpack.mix.jslet mix = require('laravel-mix');require('dotenv').config();
let isProduction = process.env.MIX_ENV === "production";
Frontend Presets and Auth ScaffoldingAs a full-stack framework, Laravel has more connections to and opinions aboutfrontend tooling than your average backend framework. Out of the box it provides anentire build system, which we’ve already covered, but it also builds and has compo‐nents for Vue and includes Bootstrap, Axios, and Lodash.
Frontend PresetsYou can get a sense of the frontend tools that come along with each new Laravelinstall by taking a look at package.json, webpack.mix.js (or gulpfile.js in older versionsof Laravel), and the views, JavaScript files, and CSS files in the resources directory.This default set of components and files is called the Vue preset, and every new Lara‐vel project comes stocked with it.
But what if you’d rather work in React? What if you want Bootstrap but not all thatJavaScript? And what if you want to just rip it all out? Enter frontend presets, intro‐duced in Laravel 5.5: these are pre-baked scripts that modify or remove part or all ofthe Vue- and Bootstrap-loaded default presets. You can use the presets that are pro‐vided out of the box, or you can pull in third-party presets from GitHub.
To use a built-in preset, simply run php artisan present preset_name:
php artisan preset reactphp artisan preset bootstrapphp artisan preset none
There’s also a vue preset, which is what each new application has applied on a freshinstall.
Third-party frontend presetsIf you’re interested in creating your own preset, or using one created by another com‐munity member, that’s also possible with the frontend preset system. There’s a GitHuborganization designed to make it easy to find great third-party frontend presets, andthey’re easy to install. For most, the steps are as follows:
1. Install the package (e.g., composer require laravel-frontend-presets/tailwindcss).
Frontend Presets and Auth Scaffolding | 169
www.EBooksWorld.ir
2. Install the preset (e.g., php artisan preset tailwindcss).3. Just like with the built-in presets, run npm install and npm run dev.
If you want to create a preset of your own, the same organization has a skeletonrepository you can fork to make it easier.
Auth ScaffoldingAlthough they’re technically not a part of the frontend presets, Laravel has a series ofroutes and views called the auth scaffold that are, essentially, frontend presets. If yourun php artisan make:auth, you’ll get a login page, a signup page, a new mastertemplate for the “app” view of your app, routes to serve these pages, and more. Take alook at Chapter 9 to learn more.
PaginationFor something that is so common across web applications, pagination still can bewildly complicated to implement. Thankfully, Laravel has a built-in concept of pagi‐nation, and it’s also hooked into Eloquent results and the router by default.
Paginating Database ResultsThe most common place you’ll see pagination is when you are displaying the resultsof a database query and there are too many results for a single page. Eloquent and thequery builder both read the page query parameter from the current page request anduse it to provide a paginate() method on any result sets; the single parameter youshould pass paginate() is how many results you want per page. Take a look atExample 6-15 to see how this works.
Example 6-15. Paginating a query builder response
// PostsControllerpublic function index(){ return view('posts.index', ['posts' => DB::table('posts')->paginate(20)]);}
Example 6-15 specifies that this route should return 20 posts per page, and will definewhich “page” of results the current user is on based on the URL’s page query parame‐ter, if it has one. Eloquent models all have the same paginate() method.
When you display the results in your view, your collection will now have a links()method on it (or render() for Laravel 5.1) that will output the pagination controls,
170 | Chapter 6: Frontend Components
www.EBooksWorld.ir
with class names from the Bootstrap component library assigned to them by default(see Example 6-16).
Example 6-16. Rendering pagination links in a template
// posts/index.blade.php<table>@foreach ($posts as $post) <tr><td>{{ $post->title }}</td></tr>@endforeach</table>
{{ $posts->links() }}
// By default, $posts->links() will output something like this:<ul class="pagination"> <li class="page-item disabled"><span>«</span></li> <li class="page-item active"><span>1</span></li> <li class="page-item"> <a class="page-link" href="http://myapp.com/posts?page=2">2</a> </li> <li class="page-item"> <a class="page-link" href="http://myapp.com/posts?page=3">3</a> </li> <li class="page-item"> <a class="page-link" href="http://myapp.com/posts?page=2" rel="next"> » </a> </li></ul>
Customizing the Number of Pagination Links in Laravel 5.7 and Later
If you’d like to control how many links show on either side of thecurrent page, projects running Laravel 5.7 and later can customizethis number easily with the onEachSide() method:
DB::table('posts')->paginate(10)->onEachSide(3);
// Outputs:// 5 6 7 [8] 9 10 11
Manually Creating PaginatorsIf you’re not working with Eloquent or the query builder, or if you’re working with acomplex query (e.g., one using groupBy), you might find yourself needing to create apaginator manually. Thankfully, you can do that with the Illuminate\Pagination\Paginator or Illuminate\Pagination\LengthAwarePaginator classes.
Pagination | 171
www.EBooksWorld.ir
The difference between the two classes is that Paginator will only provide previousand next buttons, but no links to each page; LengthAwarePaginator needs to knowthe length of the full result so that it can generate links for each individual page. Youmay find yourself wanting to use Paginator on large result sets, so your paginatordoesn’t have to be aware of a massive count of results that might be costly to run.
Both Paginator and LengthAwarePaginator require you to manually extract the sub‐set of content that you want to pass to the view. Take a look at Example 6-17 for anexample.
Example 6-17. Manually creating a paginator
use Illuminate\Http\Request;use Illuminate\Pagination\Paginator;
Route::get('people', function (Request $request) { $people = [...]; // huge list of people
$perPage = 15; $offsetPages = $request->input('page', 1) - 1;
// The Paginator will not slice your array for you $people = array_slice( $people, $offsetPages * $perPage, $perPage );
return new Paginator( $people, $perPage );});
The Paginator syntax has changed over the last few versions of Laravel, so if you’reusing 5.1, take a look at the docs to find the correct syntax.
Message BagsAnother common but painful feature in web applications is passing messagesbetween various components of the app, when the end goal is to share them withthe user. Your controller, for example, might want to send a validation message: “Theemail field must be a valid email address.” However, that particular message doesn’tjust need to make it to the view layer; it actually needs to survive a redirect andthen end up in the view layer of a different page. How do you structure this messag‐ing logic?
172 | Chapter 6: Frontend Components
www.EBooksWorld.ir
Illuminate\Support\MessageBag is a class tasked with storing, categorizing, andreturning messages that are intended for the end user. It groups all messages by key,where the keys are likely to be something like errors and messages, and it providesconvenience methods for getting all its stored messages or only those for a particularkey and outputting these messages in various formats.
You can spin up a new instance of MessageBag manually like in Example 6-18. To behonest though, you likely won’t ever do this manually—this is just a thought exerciseto show how it works.
Example 6-18. Manually creating and using a message bag
$messages = [ 'errors' => [ 'Something went wrong with edit 1!', ], 'messages' => [ 'Edit 2 was successful.', ],];$messagebag = new \Illuminate\Support\MessageBag($messages);
// Check for errors; if there are any, decorate and echoif ($messagebag->has('errors')) { echo '<ul id="errors">'; foreach ($messagebag->get('errors', '<li><b>:message</b></li>') as $error) { echo $error; } echo '</ul>';}
Message bags are also closely connected to Laravel’s validators (you’ll learn moreabout these in “Validation” on page 189): when validators return errors, they actuallyreturn an instance of MessageBag, which you can then pass to your view or attach to aredirect using redirect('route')->withErrors($messagebag).
Laravel passes an empty instance of MessageBag to every view, assigned to the vari‐able $errors; if you’ve flashed a message bag using withErrors() on a redirect, it willget assigned to that $errors variable instead. That means every view can alwaysassume it has an $errors MessageBag it can check wherever it handles validation,which leads to Example 6-19 as a common snippet developers place on every page.
Example 6-19. Error bag snippet
// partials/errors.blade.php@if ($errors->any()) <div class="alert alert-danger">
Message Bags | 173
www.EBooksWorld.ir
<ul> @foreach ($errors as $error) <li>{{ $error }}</li> @endforeach </ul> </div>@endif
Missing $errors Variable
If you have any routes that aren’t under the web middleware group,they won’t have the session middleware, which means they won’thave this $errors variable available.
Named Error BagsSometimes you need to differentiate message bags not just by key (notices versuserrors) but also by component. Maybe you have a login form and a signup form onthe same page; how do you differentiate them?
When you send errors along with a redirect using withErrors(), the second parame‐ter is the name of the bag: redirect('dashboard')->withErrors($validator,'login'). Then, on the dashboard, you can use $errors->login to call all of themethods you saw before: any(), count(), and more.
String Helpers, Pluralization, and LocalizationAs developers, we tend to look at blocks of text as big placeholder divs, waiting forthe client to put real content into them. Seldom are we involved in any logic insidethese blocks.
But there are a few circumstances where you’ll be grateful for the tools Laravel pro‐vides for string manipulation.
The String Helpers and PluralizationLaravel has a series of helpers for manipulating strings. They’re available as methodson the Str class (e.g., Str::plural()), but most also have a global helper function(e.g., str_plural()).
The Laravel documentation covers all of them in detail, but here are a few of the mostcommonly used string helpers:
e()
A shortcut for html_entities(); encodes all HTML entities for safety.
174 | Chapter 6: Frontend Components
www.EBooksWorld.ir
starts_with(), ends_with(), str_contains()Check a string (first parameter) to see if it starts with, ends with, or containsanother string (second parameter).
str_is()
Checks whether a string (second parameter) matches a particular pattern (firstparameter)—for example, foo* will match foobar and foobaz.
str_slug()
Converts a string to a URL-type slug with hyphens.
str_plural(word, count), str_singular()Pluralizes a word or singularizes it; English-only (e.g., str_plural('dog')returns dogs; str_plural('dog', 1')) returns dog).
camel_case(), kebab_case(), snake_case(), studly_case(), title_case()Convert a provided string to a different capitalization “case”.
str_after(), str_before(), str_limit()Trim a string and provide a substring. str_after() returns everything after agiven string and str_before() everything before the given string (both acceptthe full string as the first parameter and the string you’re using to cut as the sec‐ond). str_limit() truncates a string (first parameter) to a given number of char‐acters (second parameter).
LocalizationLocalization allows you to define multiple languages and mark any strings as targetsfor translation. You can set a fallback language, and even handle pluralization varia‐tions.
In Laravel, you’ll need to set an “application locale” at some point during the pageload so the localization helpers know which bucket of translations to pull from. Each“locale” is usually connected to a translation, and will often look like “en” (forEnglish). You’ll do this with App::setLocale($localeName), and you’ll likely put itin a service provider. For now you can just put it in the boot() method ofAppServiceProvider, but you may want to create a LocaleServiceProvider if youend up with more than just this one locale-related binding.
Setting the Locale for Each RequestIt can be confusing at first to work out how Laravel “knows” the user’s locale, orprovides translations. Most of that work is down to you as the developer. Let’s look ata likely scenario.
String Helpers, Pluralization, and Localization | 175
www.EBooksWorld.ir
You’ll probably have some functionality allowing the user to choose a locale, or possi‐bly attempting to automatically detect it. Either way, your application will determinethe locale, and then you’ll store that in a URL parameter or a session cookie. Thenyour service provider—something like a LocaleServiceProvider, maybe—will grabthat key and set it as a part of Laravel’s bootstrap.
So maybe your user is at http://myapp.com/es/contacts. Your LocaleServiceProviderwill grab that es string and then run App::setLocale('es'). Going forward, everytime you ask for a translation of a string, Laravel will look for the Spanish (es meansEspañol) version of that string, which you will need to have defined somewhere.
You can define your fallback locale in config/app.php, where you should find afallback_locale key. This allows you to define a default language for your applica‐tion, which Laravel will use if it can’t find a translation for the requested locale.
Basic localization
So, how do we call for a translated string? There’s a helper function, __($key), thatwill pull the string for the current locale for the passed key or, if it doesn’t exist, grab itfrom the default locale. In Blade you can also use the @lang() directive. Example 6-20demonstrates how a basic translation works. We’ll use the example of a “back to thedashboard” link at the top of a detail page.
Example 6-20. Basic use of __()
// Normal PHP<?php echo __('navigation.back'); ?>
// Blade{{ __('navigation.back') }}
// Blade directive@lang('navigation.back')
Let’s assume we are using the es locale right now. Laravel will look for a file in resour‐ces/lang/es/navigation.php, which it will expect to return an array. It’ll look for a backkey on that array, and if it exists, it’ll return its value. Take a look at Example 6-21 fora sample.
Example 6-21. Using a translation
// resources/lang/es/navigation.phpreturn [ 'back' => 'Volver al panel',];
176 | Chapter 6: Frontend Components
www.EBooksWorld.ir
// routes/web.phpRoute::get('/es/contacts/show/{id}', function () { // Setting it manually, for this example, instead of in a service provider App::setLocale('es'); return view('contacts.show');});
// resources/views/contacts/show.blade.php<a href="/contacts">{{ __('navigation.back') }}</a>
The Translation Helper Prior to Laravel 5.4
In projects running versions of Laravel prior to 5.4, the __() helperisn’t available. You will instead have to use the trans() helper,which accesses an older translation system that works similarly towhat we’re describing here, but can’t access the JSON translationsystem.
Parameters in localizationThe preceding example was relatively simple. Let’s dig into some that are more com‐plex. What if we want to define which dashboard we’re returning to? Take a look atExample 6-22.
Example 6-22. Parameters in translations
// resources/lang/en/navigation.phpreturn [ 'back' => 'Back to :section dashboard',];
// resources/views/contacts/show.blade.php{{ __('navigation.back', ['section' => 'contacts']) }}
As you can see, prepending a word with a colon (:section) marks it as a placeholderthat can be replaced. The second, optional, parameter of __() is an array of values toreplace the placeholders with.
Pluralization in localizationWe already covered pluralization, so now just imagine you’re defining your own plu‐ralization rules. There are two ways to do it; we’ll start with the simplest, as shown inExample 6-23.
Example 6-23. Defining a simple translation with an option for pluralization
// resources/lang/en/messages.phpreturn [
String Helpers, Pluralization, and Localization | 177
www.EBooksWorld.ir
'task-deletion' => 'You have deleted a task|You have successfully deleted tasks',];
// resources/views/dashboard.blade.php@if ($numTasksDeleted > 0) {{ trans_choice('messages.task-deletion', $numTasksDeleted) }}@endif
As you can see, we have a trans_choice() method, which takes the count of itemsaffected as its second parameter; from this it will determine which string to use.
You can also use any translation definitions that are compatible with Symfony’s muchmore complex Translation component; see Example 6-24 for an example.
Example 6-24. Using the Symfony’s Translation component
// resources/lang/es/messages.phpreturn [ 'task-deletion' => "{0} You didn't manage to delete any tasks.|" . "[1,4] You deleted a few tasks.|" . "[5,Inf] You deleted a whole ton of tasks.",];
Storing the default string as the key with JSONOne common difficulty with localization is that it’s hard to ensure there’s a good sys‐tem for defining key namespacing—for example, remembering a key nested three orfour levels deep or being unsure which key a phrase used twice in the site should use.
An alternative to the slug key/string value pair system is to store your translationsusing your primary language string as the key, instead of a made-up slug. You canindicate to Laravel that you’re working this way by storing your translation files asJSON in the resources/lang directory, with the filename reflecting the locale(Example 6-25).
Example 6-25. Using JSON translations and the __() helper
// In Blade{{ __('View friends list') }}
// resources/lang/es.json{ 'View friends list': 'Ver lista de amigos'}
This is taking advantage of the fact that the __() translation helper, if it can’t find amatching key for the current language, will just display the key. If your key is the
178 | Chapter 6: Frontend Components
www.EBooksWorld.ir
string in your app’s default language, that’s a much more reasonable fallback than, forexample, widgets.friends.title.
JSON Translations Unavailable Prior to Laravel 5.4
The JSON string translation format is only available in Laravel 5.4and later.
TestingIn this chapter we focused primarily on Laravel’s frontend components. These are lesslikely the objects of unit tests, but they may at times be used in your integration tests.
Testing Message and Error BagsThere are two primary ways of testing messages passed along with message and errorbags. First, you can perform a behavior in your application tests that sets a messagethat will eventually be displayed somewhere, then redirect to that page and assert thatthe appropriate message is shown.
Second, for errors (which is the most common use case), you can assert the sessionhas errors with $this->assertSessionHasErrors($bindings = []). Take a look atExample 6-26 to see what this might look like.
Example 6-26. Asserting the session has errors
public function test_missing_email_field_errors(){ $this->post('person/create', ['name' => 'Japheth']); $this->assertSessionHasErrors(['email']);}
In order for Example 6-26 to pass, you’ll need to add input validation to that route.We’ll cover this in Chapter 7.
Translation and LocalizationThe simplest way to test localization is with application tests. Set the appropriate con‐text (whether by URL or session), “visit” the page with get(), and assert that you seethe appropriate content.
Testing | 179
www.EBooksWorld.ir
TL;DRAs a full-stack framework, Laravel provides tools and components for the frontend aswell as the backend.
Mix is a layer in front of Webpack that makes common tasks and configurationsmuch simpler. Mix makes it easy to use popular CSS pre- and post-processors, com‐mon JavaScript processing steps, and much more.
Laravel also offers other internal tools that target the frontend, including tools forimplementing pagination, message and error bags, and localization.
180 | Chapter 6: Frontend Components
www.EBooksWorld.ir
CHAPTER 7
Collecting and Handling User Data
Websites that benefit from a framework like Laravel often don’t just serve static con‐tent. Many deal with complex and mixed data sources, and one of the most common(and most complex) of these sources is user input in its myriad forms: URL paths,query parameters, POST data, and file uploads.
Laravel provides a collection of tools for gathering, validating, normalizing, and fil‐tering user-provided data. We’ll look at those here.
Injecting a Request ObjectThe most common tool for accessing user data in Laravel is injecting an instance ofthe Illuminate\Http\Request object. It offers easy access to all of the ways userscan provide input to your site: POSTed form data or JSON, GET requests (queryparameters), and URL segments.
Other Options for Accessing Request Data
There’s also a request() global helper and a Request facade, bothof which expose the same methods. Each of these options exposesthe entire Illuminate Request object, but for now we’re only goingto cover the methods that specifically relate to user data.
Since we’re planning on injecting a Request object, let’s take a quick look at how toget the $request object we’ll be calling all these methods on:
Route::post('form', function (Illuminate\Http\Request $request) { // $request->etc()});
181
www.EBooksWorld.ir
$request->all()Just like the name suggests, $request->all() gives you an array containing all of theinput the user has provided, from every source. Let’s say, for some reason, you deci‐ded to have a form POST to a URL with a query parameter—for example, sending aPOST to http://myapp.com/signup?utm=12345. Take a look at Example 7-1 to see whatyou’d get from $request->all(). (Note that $request->all() also contains informa‐tion about any files that were uploaded, but we’ll cover that later in the chapter.)
Example 7-1. $request->all()
<!-- GET route form view at /get-route --><form method="post" action="/signup?utm=12345"> @csrf <input type="text" name="first_name"> <input type="submit"></form>
// routes/web.phpRoute::post('signup', function (Request $request) { var_dump($request->all());});
// Outputs:/** * [ * '_token' => 'CSRF token here', * 'first_name' => 'value', * 'utm' => 12345, * ] */
$request->except() and $request->only()$request->except() provides the same output as $request->all(), but you canchoose one or more fields to exclude—for example, _token. You can pass it either astring or an array of strings.
Example 7-2 shows what it looks like when we use $request->except() on the sameform as in Example 7-1.
Example 7-2. $request->except()
Route::post('post-route', function (Request $request) { var_dump($request->except('_token'));});
// Outputs:/**
182 | Chapter 7: Collecting and Handling User Data
www.EBooksWorld.ir
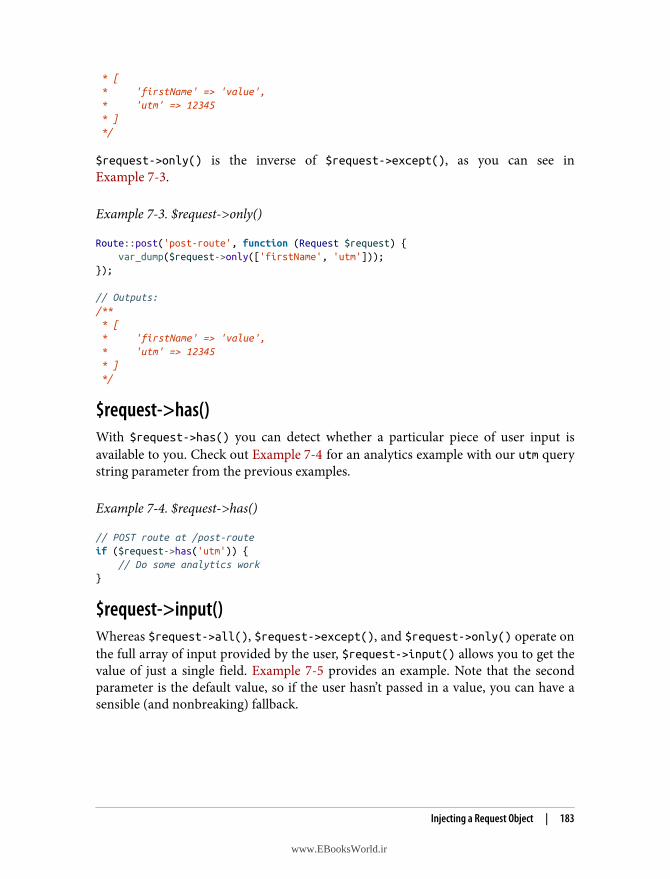
* [ * 'firstName' => 'value', * 'utm' => 12345 * ] */
$request->only() is the inverse of $request->except(), as you can see inExample 7-3.
Example 7-3. $request->only()
Route::post('post-route', function (Request $request) { var_dump($request->only(['firstName', 'utm']));});
// Outputs:/** * [ * 'firstName' => 'value', * 'utm' => 12345 * ] */
$request->has()With $request->has() you can detect whether a particular piece of user input isavailable to you. Check out Example 7-4 for an analytics example with our utm querystring parameter from the previous examples.
Example 7-4. $request->has()
// POST route at /post-routeif ($request->has('utm')) { // Do some analytics work}
$request->input()Whereas $request->all(), $request->except(), and $request->only() operate onthe full array of input provided by the user, $request->input() allows you to get thevalue of just a single field. Example 7-5 provides an example. Note that the secondparameter is the default value, so if the user hasn’t passed in a value, you can have asensible (and nonbreaking) fallback.
Injecting a Request Object | 183
www.EBooksWorld.ir
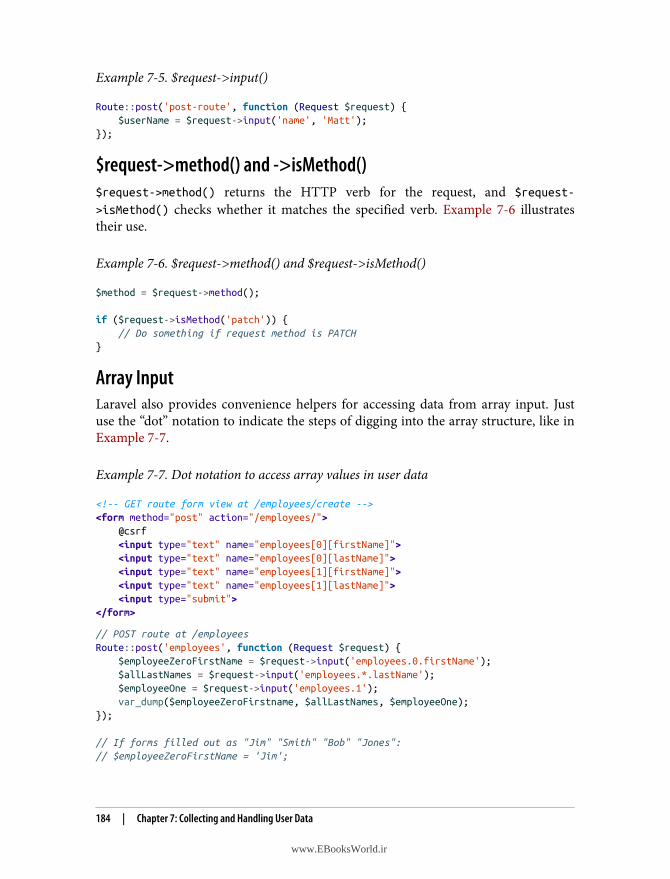
Example 7-5. $request->input()
Route::post('post-route', function (Request $request) { $userName = $request->input('name', 'Matt');});
$request->method() and ->isMethod()$request->method() returns the HTTP verb for the request, and $request->isMethod() checks whether it matches the specified verb. Example 7-6 illustratestheir use.
Example 7-6. $request->method() and $request->isMethod()
$method = $request->method();
if ($request->isMethod('patch')) { // Do something if request method is PATCH}
Array InputLaravel also provides convenience helpers for accessing data from array input. Justuse the “dot” notation to indicate the steps of digging into the array structure, like inExample 7-7.
Example 7-7. Dot notation to access array values in user data
<!-- GET route form view at /employees/create --><form method="post" action="/employees/"> @csrf <input type="text" name="employees[0][firstName]"> <input type="text" name="employees[0][lastName]"> <input type="text" name="employees[1][firstName]"> <input type="text" name="employees[1][lastName]"> <input type="submit"></form>
// POST route at /employeesRoute::post('employees', function (Request $request) { $employeeZeroFirstName = $request->input('employees.0.firstName'); $allLastNames = $request->input('employees.*.lastName'); $employeeOne = $request->input('employees.1'); var_dump($employeeZeroFirstname, $allLastNames, $employeeOne);});
// If forms filled out as "Jim" "Smith" "Bob" "Jones":// $employeeZeroFirstName = 'Jim';
184 | Chapter 7: Collecting and Handling User Data
www.EBooksWorld.ir
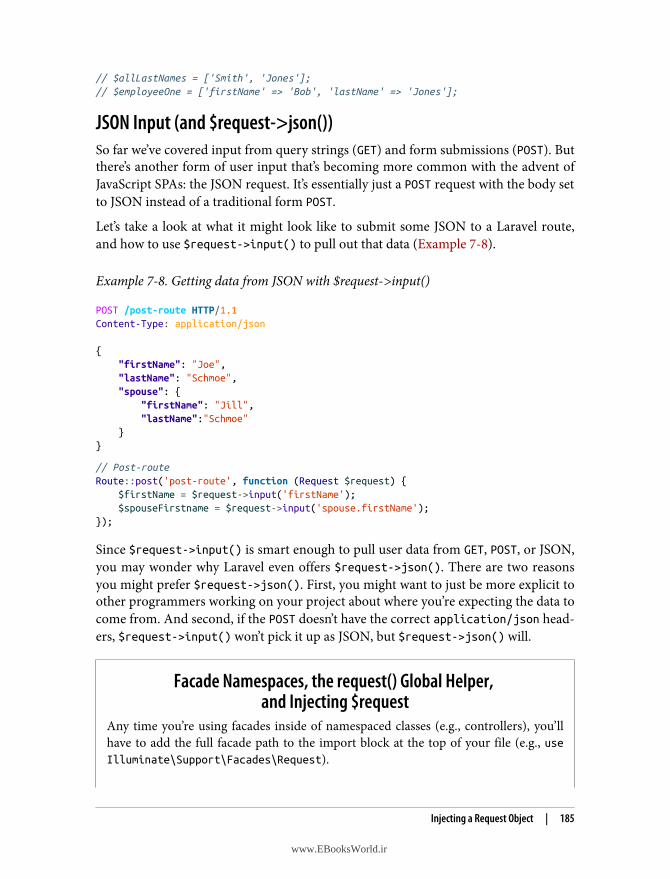
// $allLastNames = ['Smith', 'Jones'];// $employeeOne = ['firstName' => 'Bob', 'lastName' => 'Jones'];
JSON Input (and $request->json())So far we’ve covered input from query strings (GET) and form submissions (POST). Butthere’s another form of user input that’s becoming more common with the advent ofJavaScript SPAs: the JSON request. It’s essentially just a POST request with the body setto JSON instead of a traditional form POST.
Let’s take a look at what it might look like to submit some JSON to a Laravel route,and how to use $request->input() to pull out that data (Example 7-8).
Example 7-8. Getting data from JSON with $request->input()
POST /post-route HTTP/1.1Content-Type: application/json
{ "firstName": "Joe", "lastName": "Schmoe", "spouse": { "firstName": "Jill", "lastName":"Schmoe" }}
// Post-routeRoute::post('post-route', function (Request $request) { $firstName = $request->input('firstName'); $spouseFirstname = $request->input('spouse.firstName');});
Since $request->input() is smart enough to pull user data from GET, POST, or JSON,you may wonder why Laravel even offers $request->json(). There are two reasonsyou might prefer $request->json(). First, you might want to just be more explicit toother programmers working on your project about where you’re expecting the data tocome from. And second, if the POST doesn’t have the correct application/json head‐ers, $request->input() won’t pick it up as JSON, but $request->json() will.
Facade Namespaces, the request() Global Helper, and Injecting $request
Any time you’re using facades inside of namespaced classes (e.g., controllers), you’llhave to add the full facade path to the import block at the top of your file (e.g., useIlluminate\Support\Facades\Request).
Injecting a Request Object | 185
www.EBooksWorld.ir

Because of this, several of the facades also have a companion global helper function. Ifthese helper functions are run with no parameters, they expose the same syntax as thefacade (e.g., request()->has() is the same as Request::has()). They also have adefault behavior for when you pass them a parameter (e.g., request('firstName') isa shortcut to request()->input('firstName')).
With Request, we’ve been covering injecting an instance of the Request object, butyou could also use the Request facade or the request() global helper. Take a look atChapter 10 to learn more.
Route DataIt might not be the first thing you think of when you imagine “user data,” but the URLis just as much user data as anything else in this chapter.
There are two primary ways you’ll get data from the URL: via Request objects and viaroute parameters.
From RequestInjected Request objects (and the Request facade and the request() helper) haveseveral methods available to represent the state of the current page’s URL, but rightnow let’s focus on at getting information about the URL segments.
If you’re not familiar with the idea, each group of characters after the domain in aURL is called a segment. So, http://www.myapp.com/users/15/ has two segments: usersand 15.
As you can probably guess, we have two methods available to us:$request->segments() returns an array of all segments, and $request->
segment($segmentId) allows us to get the value of a single segment. Note thatsegments are returned on a 1-based index, so in the preceding example, $request->segment(1) would return users.
Request objects, the Request facade, and the request() global helper provide quite afew more methods to help us get data out of the URL. To learn more, check outChapter 10.
From Route ParametersThe other primary way we get data about the URL is from route parameters, whichare injected into the controller method or closure that is serving a current route, asshown in Example 7-9.
186 | Chapter 7: Collecting and Handling User Data
www.EBooksWorld.ir
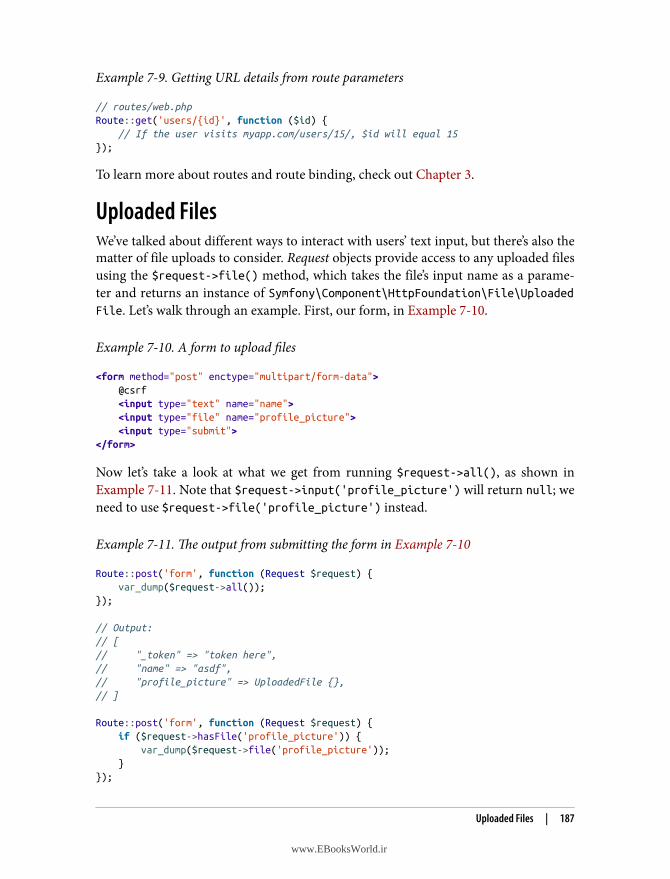
Example 7-9. Getting URL details from route parameters
// routes/web.phpRoute::get('users/{id}', function ($id) { // If the user visits myapp.com/users/15/, $id will equal 15});
To learn more about routes and route binding, check out Chapter 3.
Uploaded FilesWe’ve talked about different ways to interact with users’ text input, but there’s also thematter of file uploads to consider. Request objects provide access to any uploaded filesusing the $request->file() method, which takes the file’s input name as a parame‐ter and returns an instance of Symfony\Component\HttpFoundation\File\UploadedFile. Let’s walk through an example. First, our form, in Example 7-10.
Example 7-10. A form to upload files
<form method="post" enctype="multipart/form-data"> @csrf <input type="text" name="name"> <input type="file" name="profile_picture"> <input type="submit"></form>
Now let’s take a look at what we get from running $request->all(), as shown inExample 7-11. Note that $request->input('profile_picture') will return null; weneed to use $request->file('profile_picture') instead.
Example 7-11. The output from submitting the form in Example 7-10
Route::post('form', function (Request $request) { var_dump($request->all());});
// Output:// [// "_token" => "token here",// "name" => "asdf",// "profile_picture" => UploadedFile {},// ]
Route::post('form', function (Request $request) { if ($request->hasFile('profile_picture')) { var_dump($request->file('profile_picture')); }});
Uploaded Files | 187
www.EBooksWorld.ir

// Output:// UploadedFile (details)
Validating a File UploadAs you can see in Example 7-11, we have access to $request->hasFile() to seewhether the user uploaded a file. We can also check whether the file upload was suc‐cessful by using isValid() on the file itself:
if ($request->file('profile_picture')->isValid()) { //}
Because isValid() is called on the file itself, it will error if the user didn’t upload afile. So, to check for both, you’d need to check for the file’s existence first:
if ($request->hasFile('profile_picture') && $request->file('profile_picture')->isValid()) { //}
Symfony’s UploadedFile class extends PHP’s native SplFileInfo with methodsallowing you to easily inspect and manipulate the file. This list isn’t exhaustive, but itgives you a taste of what you can do:
• guessExtension()
• getMimeType()
• store($path, $storageDisk = default disk)
• storeAs($path, $newName, $storageDisk = default disk)
• storePublicly($path, $storageDisk = default disk)
• storePubliclyAs($path, $newName, $storageDisk = default disk)
• move($directory, $newName = null)
• getClientOriginalName()
• getClientOriginalExtension()
• getClientMimeType()
• guessClientExtension()
• getClientSize()
• getError()
• isValid()
188 | Chapter 7: Collecting and Handling User Data
www.EBooksWorld.ir
As you can see, most of the methods have to do with getting information about theuploaded file, but there’s one that you’ll likely use more than all the others: store()(available since Laravel 5.3), which takes the file that was uploaded with the requestand stores it in a specified directory on your server. Its first parameter is the destina‐tion directory, and the optional second parameter will be the storage disk (s3, local,etc.) to use to store the file. You can see a common workflow in Example 7-12.
Example 7-12. Common file upload workflow
if ($request->hasFile('profile_picture')) { $path = $request->profile_picture->store('profiles', 's3'); auth()->user()->profile_picture = $path; auth()->user()->save();}
If you need to specify the filename, you can use storeAs() instead of store(). Thefirst parameter is still the path; the second is the filename, and the optional thirdparameter is the storage disk to use.
Proper Form Encoding for File Uploads
If you get null when you try to get the contents of a file from yourrequest, you might’ve forgotten to set the encoding type on yourform. Make sure to add the attribute enctype="multipart/form-data" on your form:
<form method="post" enctype="multipart/form-data">
ValidationLaravel has quite a few ways you can validate incoming data. We’ll cover formrequests in the next section, so that leaves us with two primary options: validatingmanually or using the validate() method on the Request object. Let’s start with thesimpler, and more common, validate().
validate() on the Request ObjectThe Request object has a validate() method that provides a convenient shortcut forthe most common validation workflow. Take a look at Example 7-13.
Example 7-13. Basic usage of request validation
// routes/web.phpRoute::get('recipes/create', 'RecipesController@create');Route::post('recipes', 'RecipesController@store');
Validation | 189
www.EBooksWorld.ir
// app/Http/Controllers/RecipesController.phpclass RecipesController extends Controller{ public function create() { return view('recipes.create'); }
public function store(Request $request) { $request->validate([ 'title' => 'required|unique:recipes|max:125', 'body' => 'required' ]);
// Recipe is valid; proceed to save it }}
We only have four lines of code running our validation here, but they’re doing a lot.
First, we explicitly define the fields we expect and apply rules (here separated by thepipe character, |) to each individually.
Next, the validate() method checks the incoming data from the $request anddetermines whether or not it is valid.
If the data is valid, the validate() method ends and we can move on with the con‐troller method, saving the data or whatever else.
But if the data isn’t valid, it throws a ValidationException. This contains instruc‐tions to the router about how to handle this exception. If the request is from Java‐Script (or if it’s requesting JSON as a response), the exception will create a JSONresponse containing the validation errors. If not, the exception will return a redirectto the previous page, together with all of the user input and the validation errors—perfect for repopulating a failed form and showing some errors.
Calling the validate() Method on the Controller Prior to Laravel 5.5
In projects running versions of Laravel prior to 5.5, this validationshortcut is called on the controller (running $this->validate())instead of on the request.
190 | Chapter 7: Collecting and Handling User Data
www.EBooksWorld.ir
More on Laravel’s Validation RulesIn our examples here (like in the docs) we’re using the “pipe” syntax: 'fieldname':'rule|otherRule|anotherRule'. But you can also use the array syntax to do thesame thing: 'fieldname': ['rule', 'otherRule', 'anotherRule'].
Additionally, you can validate nested properties. This matters if you use HTML’s arraysyntax, which allows you to, for example, have multiple “users” on an HTML form,each with an associated name. Here’s how you validate that:
$request->validate([ 'user.name' => 'required', 'user.email' => 'required|email',]);
We don’t have enough space to cover every possible validation rule here, but here area few of the most common rules and their functions:
Require the fieldrequired; required_if:anotherField,equalToThisValue;required_unless:anotherField,equalToThisValue
Field must contain certain types of characteralpha; alpha_dash; alpha_num; numeric; integer
Field must contain certain patternsemail; active_url; ip
Datesafter:date; before:date (date can be any valid string that strtotime() canhandle)
Numbersbetween:min,max; min:num; max:num; size:num (size tests against length forstrings, value for integers, count for arrays, or size in KB for files)
Image dimensionsdimensions:min_width=XXX; can also use and/or combine with max_width,min_height, max_height, width, height, and ratio
Databasesexists:tableName; unique:tableName (expects to look in the same table col‐umn as the field name; see the docs for how to customize)
Validation | 191
www.EBooksWorld.ir
Manual ValidationIf you are not working in a controller, or if for some other reason the previouslydescribed flow is not a good fit, you can manually create a Validator instance usingthe Validator facade and check for success or failure like in Example 7-14.
Example 7-14. Manual validation
Route::get('recipes/create', function () { return view('recipes.create');});
Route::post('recipes', function (Illuminate\Http\Request $request) { $validator = Validator::make($request->all(), [ 'title' => 'required|unique:recipes|max:125', 'body' => 'required' ]);
if ($validator->fails()) { return redirect('recipes/create') ->withErrors($validator) ->withInput(); }
// Recipe is valid; proceed to save it});
As you can see, we create an instance of a validator by passing it our input as the firstparameter and the validation rules as the second parameter. The validator exposes afails() method that we can check against and can be passed into the withErrors()method of the redirect.
Custom Rule ObjectsIf the validation rule you need doesn’t exist in Laravel, you can create your own. Tocreate a custom rule, run php artisan make:rule RuleName and then edit that file inapp/Rules/{RuleName}.php.
You’ll get two methods in your rule out of the box: passes() and message().passes() should accept an attribute name as the first parameter and the user-provided value as the second, and then return a Boolean indicating whether or notthis input passes this validation rule. message() should return the validation errormessage; you can use :attribute as a placeholder in your message for the attributename.
Take a look at Example 7-15 as an example.
192 | Chapter 7: Collecting and Handling User Data
www.EBooksWorld.ir
Example 7-15. A sample custom rule
class WhitelistedEmailDomain implements Rule{ public function passes($attribute, $value) { return in_array(str_after($value, '@'), ['tighten.co']); }
public function message() { return 'The :attribute field is not from a whitelisted email provider.'; }}
To use this rule, just pass an instance of the rule object to your validator:
$request->validate([ 'email' => new WhitelistedEmailDomain,]);
In projects running versions of Laravel prior to 5.5, custom val‐idation rules have to be written using Validator::extend().
You can learn more about this in the docs.
Displaying Validation Error MessagesWe’ve already covered much of this in Chapter 6, but here’s a quick refresher on howto display errors from validation.
The validate() method on requests (and the withErrors() method on redirectsthat it relies on) flashes any errors to the session. These errors are made available tothe view you’re being redirected to in the $errors variable. And remember that as apart of Laravel’s magic, that $errors variable will be available every time you load theview, even if it’s just empty, so you don’t have to check if it exists with isset().
That means you can do something like Example 7-16 on every page.
Example 7-16. Echo validation errors
@if ($errors->any()) <ul id="errors"> @foreach ($errors->all() as $error) <li>{{ $error }}</li> @endforeach </ul>@endif
Validation | 193
www.EBooksWorld.ir
Form RequestsAs you build out your applications, you might start noticing some patterns in yourcontroller methods. There are certain patterns that are repeated—for example, inputvalidation, user authentication and authorization, and possible redirects. If you findyourself wanting a structure to normalize and extract these common behaviors out ofyour controller methods, you may be interested in Laravel’s form requests.
A form request is a custom request class that is intended to map to the submission ofa form, and the request takes the responsibility for validating the request, authorizingthe user, and optionally redirecting the user upon a failed validation. Each formrequest will usually, but not always, explicitly map to a single HTTP request—forexample, “Create Comment.”
Creating a Form RequestYou can create a new form request from the command line:
php artisan make:request CreateCommentRequest
You now have a form request object available at app/Http/Requests/CreateCommentRequest.php.
Every form request class provides either one or two public methods. The first isrules(), which needs to return an array of validation rules for this request. The sec‐ond (optional) method is authorize(); if this returns true, the user is authorized toperform this request, and if false, the user is rejected. Take a look at Example 7-17 tosee a sample form request.
Example 7-17. Sample form request
<?php
namespace App\Http\Requests;
use App\BlogPost;use Illuminate\Foundation\Http\FormRequest;
class CreateCommentRequest extends FormRequest{ public function authorize() { $blogPostId = $this->route('blogPost');
return auth()->check() && BlogPost::where('id', $blogPostId) ->where('user_id', auth()->id())->exists(); }
194 | Chapter 7: Collecting and Handling User Data
www.EBooksWorld.ir
public function rules() { return [ 'body' => 'required|max:1000', ]; }}
The rules() section of Example 7-17 is pretty self-explanatory, but let’s look atauthorize() briefly.
We’re grabbing the segment from the route named blogPost. That’s implying theroute definition for this route probably looks a bit like this: Route::post('blogPosts/blogPost', function () // Do stuff). As you can see, we named the routeparameter blogPost, which makes it accessible in our Request using $this->route('blogPost').
We then look at whether the user is logged in and, if so, whether any blog posts existwith that identifier that are owned by the currently logged-in user. You’ve alreadylearned some easier ways to check ownership in Chapter 5, but we’ll keep it moreexplicit here to keep it clean. We’ll cover what implications this has shortly, but theimportant thing to know is that returning true means the user is authorized to per‐form the specified action (in this case, creating a comment), and false means theuser is not authorized.
Requests Extend Userland Request Prior to Laravel 5.3
In projects running versions of Laravel prior to 5.3, form requestsextended App\Http\Requests\Request instead of Illuminate
\Foundation\Http\FormRequest.
Using a Form RequestNow that we’ve created a form request object, how do we use it? It’s a little bit of Lara‐vel magic. Any route (closure or controller method) that typehints a form request asone of its parameters will benefit from the definition of that form request.
Let’s try it out, in Example 7-18.
Example 7-18. Using a form request
Route::post('comments', function (App\Http\Requests\CreateCommentRequest $request) { // Store comment});
Form Requests | 195
www.EBooksWorld.ir

You might be wondering where we call the form request, but Laravel does it for us. Itvalidates the user input and authorizes the request. If the input is invalid, it’ll act justlike the Request object’s validate() method, redirecting the user to the previouspage with their input preserved and with the appropriate error messages passedalong. And if the user is not authorized, Laravel will return a 403 Forbidden error andnot execute the route code.
Eloquent Model Mass AssignmentUntil now, we’ve been looking at validating at the controller level, which is absolutelythe best place to start. But you can also filter the incoming data at the model level.
It’s a common (but not recommended) pattern to pass the entirety of a form’s inputdirectly to a database model. In Laravel, that might look like Example 7-19.
Example 7-19. Passing the entirety of a form to an Eloquent model
Route::post('posts', function (Request $request) { $newPost = Post::create($request->all());});
We’re assuming here that the end user is kind and not malicious, and has kept onlythe fields we want them to edit—maybe the post title or body.
But what if our end user can guess, or discern, that we have an author_id field onthat posts table? What if they used their browser tools to add an author_id field andset the ID to be someone else’s ID, and impersonated the other person by creatingfake blog posts attributed to them?
Eloquent has a concept called “mass assignment” that allows you to either whitelistfields that should be fillable (using the model’s $fillable property) or blacklist fieldsthat shouldn’t be fillable (using the model’s $guarded property) by passing them in anarray to create() or update(). See “Mass assignment” on page 124 for more infor‐mation.
In our example, we might want to fill out the model like in Example 7-20 to keep ourapp safe.
Example 7-20. Guarding an Eloquent model from mischievous mass assignment
<?php
namespace App;
use Illuminate\Database\Eloquent\Model;
196 | Chapter 7: Collecting and Handling User Data
www.EBooksWorld.ir
class Post extends Model{ // Disable mass assignment on the author_id field protected $guarded = ['author_id'];}
By setting author_id to guarded, we ensure that malicious users will no longer beable to override the value of this field by manually adding it to the contents of a formthat they’re sending to our app.
Double Protection Using $request->only()
While it’s important to do a good job of protecting our modelsfrom mass assignment, it’s also worth being careful on the assign‐ing end. Rather than using $request->all(), consider using$request->only() so you can specify which fields you’d like topass into your model:
Route::post('posts', function (Request $request) { $newPost = Post::create($request->only([ 'title', 'body', ]));});
{{ Versus {!!Any time you display content on a web page that was created by a user, you need toguard against malicious input, such as script injection.
Let’s say you allow your users to write blog posts on your site. You probably don’twant them to be able to inject malicious JavaScript that will run in your unsuspectingvisitors’ browsers, right? So, you’ll want to escape any user input that you show on thepage to avoid this.
Thankfully, this is almost entirely covered for you. If you use Laravel’s Blade templat‐ing engine, the default “echo” syntax ({{ $stuffToEcho }}) runs the output throughhtmlentities() (PHP’s best way of making user content safe to echo) automatically.You actually have to do extra work to avoid escaping the output, by using the {!!$stuffToEcho !!} syntax.
TestingIf you’re interested in testing your interactions with user input, you’re probably mostinterested in simulating valid and invalid user input and ensuring that if the input isinvalid the user is redirected, and if the input is valid it ends up in the proper place(e.g., the database).
{{ Versus {!! | 197
www.EBooksWorld.ir
Laravel’s end-to-end application testing makes this simple.
Requiring BrowserKit After Laravel 5.4
If you want to work with test specific user interactions on the pageand with your forms, and you’re working in a project running Lar‐avel 5.4 or later, you’ll want to pull in Laravel’s BrowserKit testingpackage. Simply require the package:
composer require laravel/browser-kit-testing --dev
and modify your application’s base TestCase class to extendLaravel\BrowserKitTesting\TestCase instead of Illuminate
\Foundation\Testing\TestCase.
Let’s start with an invalid route that we expect to be rejected, as in Example 7-21.
Example 7-21. Testing that invalid input is rejected
public function test_input_missing_a_title_is_rejected(){ $response = $this->post('posts', ['body' => 'This is the body of my post']); $response->assertRedirect(); $response->assertSessionHasErrors();}
Here we assert that after invalid input the user is redirected, with errors attached. Youcan see we’re using a few custom PHPUnit assertions that Laravel adds here.
Different Names for Testing Methods Prior to Laravel 5.4
Prior to Laravel 5.4, the assertRedirect() assertion was namedassertRedirectedTo().
So, how do we test our route’s success? Check out Example 7-22.
Example 7-22. Testing that valid input is processed
public function test_valid_input_should_create_a_post_in_the_database(){ $this->post('posts', ['title' => 'Post Title', 'body' => 'This is the body']); $this->assertDatabaseHas('posts', ['title' => 'Post Title']);}
Note that if you’re testing something using the database, you’ll need to learn moreabout database migrations and transactions. More on that in Chapter 12.
198 | Chapter 7: Collecting and Handling User Data
www.EBooksWorld.ir
Different Names for Testing Methods Prior to Laravel 5.4
In projects that are running versions of Laravel prior to 5.4,assertDatabaseHas() should be replaced by seeInDatabase().
TL;DRThere are a lot of ways to get the same data: using the Request facade, using therequest() global helper, and injecting an instance of Illuminate\Http\Request.Each exposes the ability to get all input, some input, or specific pieces of data, andthere can be some special considerations for files and JSON input.
URI path segments are also a possible source of user input, and they’re also accessiblevia the request tools.
Validation can be performed manually with Validator::make(), or automaticallyusing the validate() request method or form requests. Each automatic tool, uponfailed validation, redirects the user to the previous page with all old input stored anderrors passed along.
Views and Eloquent models also need to be protected from nefarious user input. Pro‐tect Blade views using the double curly brace syntax ({{ }}), which escapes userinput, and protect models by only passing specific fields into bulk methods using$request->only() and by defining the mass assignment rules on the model itself.
TL;DR | 199
www.EBooksWorld.ir

www.EBooksWorld.ir
CHAPTER 8
Artisan and Tinker
From installation onward, modern PHP frameworks expect many interactions to takeplace on the command line. Laravel provides three primary tools for command-lineinteraction: Artisan, a suite of built-in command-line actions with the ability to addmore; Tinker, a REPL or interactive shell for your application; and the installer, whichwe’ve already covered in Chapter 2.
An Introduction to ArtisanIf you’ve been reading through this book chapter by chapter, you’ve already learnedhow to use Artisan commands. They look something like this:
php artisan make:controller PostsController
If you look in the root folder of your application, you’ll see that artisan is actually justa PHP file. That’s why you’re starting your call with php artisan; you’re passing thatfile into PHP to be parsed. Everything after that is just passed into Artisan as argu‐ments.
Symfony Console Syntax
Artisan is actually a layer on top of the Symfony Console compo‐nent; so, if you’re familiar with writing Symfony Console com‐mands, you should feel right at home.
Since the list of Artisan commands for an application can be changed by a package orby the specific code of the application, it’s worth checking every new application youencounter to see what commands are available.
201
www.EBooksWorld.ir
To get a list of all available Artisan commands, you can run php artisan list fromthe project root (although if you just run php artisan with no parameters, it will dothe same thing).
Basic Artisan CommandsThere’s not enough space here to cover all of the Artisan commands, but we’ll covermany of them. Let’s get started with the basic commands:
clear-compiled
Removes Laravel’s compiled class file, which is like an internal Laravel cache; runthis as a first resort when things are going wrong and you don’t know why
down, upPuts your application in “maintenance mode” in order for you to fix an error, runmigrations, or whatever else and restore an application from maintenance mode,respectively
dump-server (5.7+)Starts the dump server (see “Laravel Dump Server” on page 218) to collect andoutput dumped variables
env
Displays which environment Laravel is running in at the moment; it’s the equiva‐lent of echoing app()->environment() in-app
help
Provides help for a command; for example, php artisan help commandName
migrate
Runs all database migrations
optimize
Clears and refreshes the configuration and route files
preset
Changes out the frontend scaffolding for another
serve
Pins up a PHP server at localhost:8000 (you can customize the host and/orport with --host and --port)
tinker
Brings up the Tinker REPL, which we’ll cover later in this chapter
202 | Chapter 8: Artisan and Tinker
www.EBooksWorld.ir
Changes to the Artisan Commands List Over time
The list of Artisan commands and their names have changed insmall ways over the lifetime of Laravel. I’ll try to note any timethey’ve changed, but everything here is current for Laravel 5.8. Ifyou’re not working in 5.8, the best way to see what’s available to youis to run php artisan from your application.
OptionsBefore we cover the rest of the commands, let’s look at a few notable options you canpass any time you run an Artisan command:
-q
Suppresses all output
-v, -vv, and -vvvSpecify the level of output verbosity (normal, verbose, and debug)
--no-interaction
Suppresses interactive questions, so the command won’t interrupt automatedprocesses running it
--env
Allows you to define which environment the Artisan command should operate in(local, production, etc.).
--version
Shows you which version of Laravel your application is running on.
You’ve probably guessed from looking at these options that Artisan commands areintended to be used much like basic shell commands: you might run them manually,but they can also function as a part of some automated process at some point.
For example, there are many automated deploy processes that might benefit from cer‐tain Artisan commands. You might want to run php artisan config:cache everytime you deploy an application. Flags like -q and --no-interaction ensure that yourdeploy scripts, not attended by a human being, can keep running smoothly.
The Grouped CommandsThe rest of the commands available out of the box are grouped by context. We won’tcover them all here, but we’ll cover each context broadly:
Basic Artisan Commands | 203
www.EBooksWorld.ir
app
This just contains app:name, which allows you to replace every instance of thedefault top-level App\ namespace with a namespace of your choosing; for exam‐ple, php artisan app:name MyApplication. I recommend avoiding this featureand keeping your app’s root namespace as App.
auth
All we have here is auth:clear-resets, which flushes all of the expired pass‐word reset tokens from the database.
cache
cache:clear clears the cache, cache:forget removes an individual item fromthe cache, and cache:table creates a database migration if you plan to use thedatabase cache driver.
config
config:cache caches your configuration settings for faster lookup; to clear thecache, use config:clear.
db
db:seed seeds your database, if you have configured database seeders.
event
event:generate builds missing event and event listener files based on the defini‐tions in EventServiceProvider. You’ll learn more about events in Chapter 16.
key
key:generate creates a random application encryption key in your .env file.
Rerunning artisan key:generate Means Losing SomeEncrypted Data
If you run php artisan key:generate more than once onyour application, every currently logged-in user will be loggedout. Additionally, any data you have manually encrypted willno longer be decryptable. To learn more, check out the article“APP_KEY and You” by fellow Tightenite Jake Bathman.
make
make:auth scaffolds out the views and corresponding routes for a landing page, auser dashboard, and login and register pages.
All the rest of the make: actions create a single item, and have parameters thatvary accordingly. To learn more about any individual command’s parameters, usehelp to read its documentation.
204 | Chapter 8: Artisan and Tinker
www.EBooksWorld.ir
For example, you could run php artisan help make:migration and learn thatyou can pass --create=tableNameHere to create a migration that already hasthe create table syntax in the file, as shown here: php artisan make:migrationcreate_posts_table --create=posts.
migrate
The migrate command used to run all migrations was mentioned earlier, butthere are several other migration-related commands. You can create the migrations table (to keep track of the migrations that are executed) withmigrate:install, reset your migrations and start from scratch withmigrate:reset, reset your migrations and run them all again withmigrate:refresh, roll back just one migration with migrate:rollback, drop alltables and rerun all the migrations with migrate:fresh, or check the status ofyour migrations with migrate:status.
notifications
notifications:table generates a migration that creates the table for databasenotifications.
package
In versions of Laravel prior to 5.5, including a new Laravel-specific package inyour app requires registering it manually in config/app.php. However, in 5.5 it’spossible for Laravel to “autodiscover” those packages so you don’t have to man‐ually register them. package:discover rebuilds Laravel’s “discovered” manifest ofthe service providers from your external packages.
queue
We’ll cover Laravel’s queues in Chapter 16, but the basic idea is that you can pushjobs up into remote queues to be executed one after another by a worker. Thiscommand group provides all the tools you need to interact with your queues, likequeue:listen to start listening to a queue, queue:table to create a migration fordatabase-backed queues, and queue:flush to flush all failed queue jobs. Thereare quite a few more, which you’ll learn about in Chapter 16.
route
If you run route:list, you’ll see the definitions of every route defined in theapplication, including each route’s verb(s), path, name, controller/closure action,and middleware. You can cache the route definitions for faster lookups withroute:cache and clear your cache with route:clear.
schedule
We’ll cover Laravel’s cron-like scheduler in Chapter 16, but in order for it towork, you need to set the system cron to run schedule:run once a minute:
Basic Artisan Commands | 205
www.EBooksWorld.ir
* * * * * php /home/myapp.com/artisan schedule:run >> /dev/null 2>&1
As you can see, this Artisan command is intended to be run regularly in order topower a core Laravel service.
session
session:table creates a migration for applications using database-backed ses‐sions.
storage
storage:link creates a symbolic link from public/storage to storage/app/public.This is a common convention in Laravel apps, to make it easy to put user uploads(or other files that commonly end up in storage/app) somewhere where they’ll beaccessible at a public URL.
vendor
Some Laravel-specific packages need to “publish” some of their assets, either sothat they can be served from your public directory or so that you can modifythem. Either way, these packages register these “publishable assets” with Laravel,and when you run vendor:publish, it publishes them to their specified locations.
view
Laravel’s view rendering engine automatically caches your views. It usually does agood job of handling its own cache invalidation, but if you ever notice it’s gottenstuck, run view:clear to clear the cache.
Writing Custom Artisan CommandsNow that we’ve covered the Artisan commands that come with Laravel out of the box,let’s talk about writing your own.
First, you should know: there’s an Artisan command for that! Running php artisanmake:command YourCommandName generates a new Artisan command in app/Console/Commands/{YourCommandName}.php.
php artisan make:command
The command signature for make:command has changed a fewtimes. It was originally command:make, but for a while in 5.2 it
was console:make and then make:console.Finally, in 5.3, it was settled: all of the generators are under themake: namespace, and the command to generate new Artisan com‐mands is now make:command.
206 | Chapter 8: Artisan and Tinker
www.EBooksWorld.ir
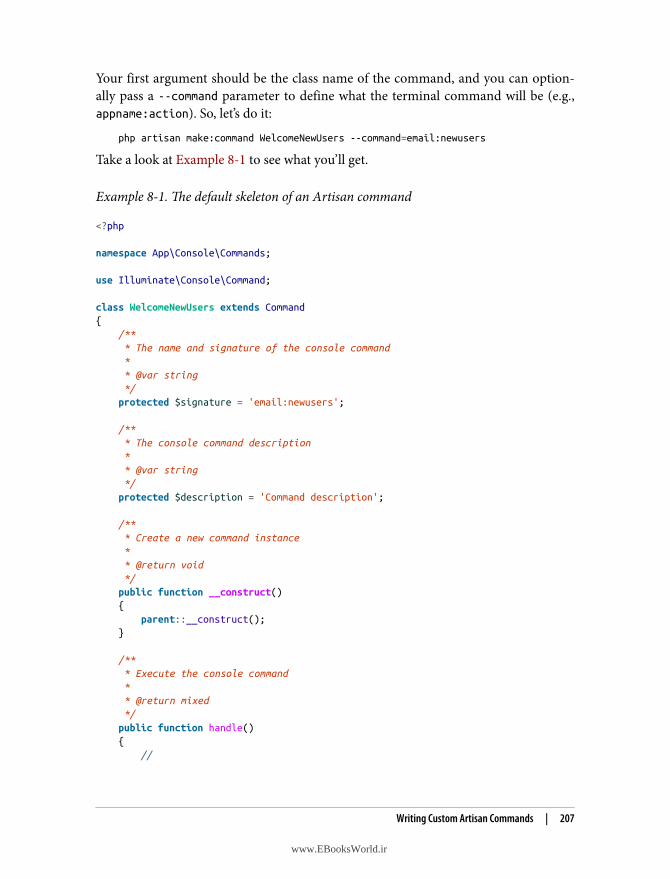
Your first argument should be the class name of the command, and you can option‐ally pass a --command parameter to define what the terminal command will be (e.g.,appname:action). So, let’s do it:
php artisan make:command WelcomeNewUsers --command=email:newusers
Take a look at Example 8-1 to see what you’ll get.
Example 8-1. The default skeleton of an Artisan command
<?php
namespace App\Console\Commands;
use Illuminate\Console\Command;
class WelcomeNewUsers extends Command{ /** * The name and signature of the console command * * @var string */ protected $signature = 'email:newusers';
/** * The console command description * * @var string */ protected $description = 'Command description';
/** * Create a new command instance * * @return void */ public function __construct() { parent::__construct(); }
/** * Execute the console command * * @return mixed */ public function handle() { //
Writing Custom Artisan Commands | 207
www.EBooksWorld.ir
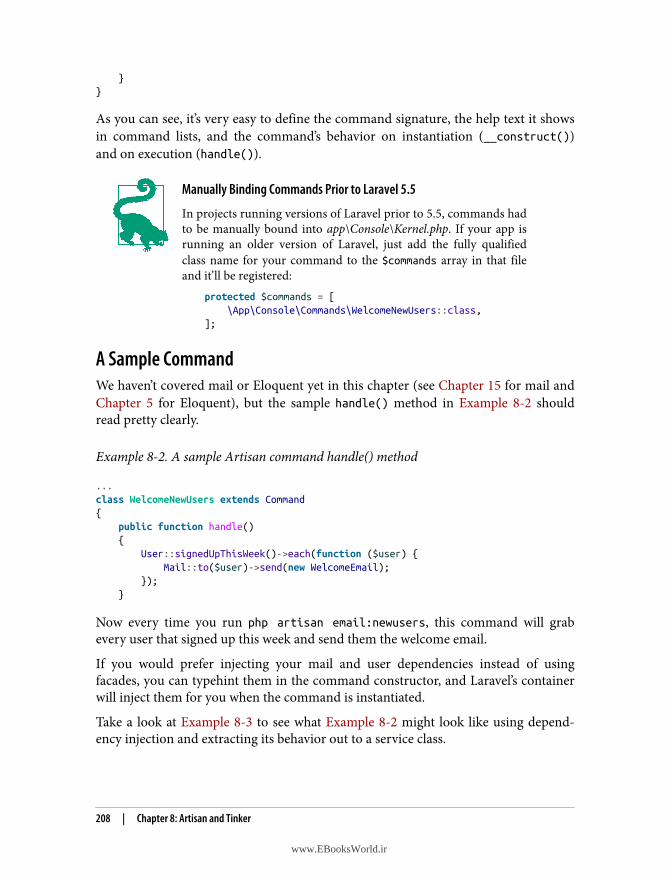
}}
As you can see, it’s very easy to define the command signature, the help text it showsin command lists, and the command’s behavior on instantiation (__construct())and on execution (handle()).
Manually Binding Commands Prior to Laravel 5.5
In projects running versions of Laravel prior to 5.5, commands hadto be manually bound into app\Console\Kernel.php. If your app isrunning an older version of Laravel, just add the fully qualifiedclass name for your command to the $commands array in that fileand it’ll be registered:
protected $commands = [ \App\Console\Commands\WelcomeNewUsers::class,];
A Sample CommandWe haven’t covered mail or Eloquent yet in this chapter (see Chapter 15 for mail andChapter 5 for Eloquent), but the sample handle() method in Example 8-2 shouldread pretty clearly.
Example 8-2. A sample Artisan command handle() method
...class WelcomeNewUsers extends Command{ public function handle() { User::signedUpThisWeek()->each(function ($user) { Mail::to($user)->send(new WelcomeEmail); }); }
Now every time you run php artisan email:newusers, this command will grabevery user that signed up this week and send them the welcome email.
If you would prefer injecting your mail and user dependencies instead of usingfacades, you can typehint them in the command constructor, and Laravel’s containerwill inject them for you when the command is instantiated.
Take a look at Example 8-3 to see what Example 8-2 might look like using depend‐ency injection and extracting its behavior out to a service class.
208 | Chapter 8: Artisan and Tinker
www.EBooksWorld.ir
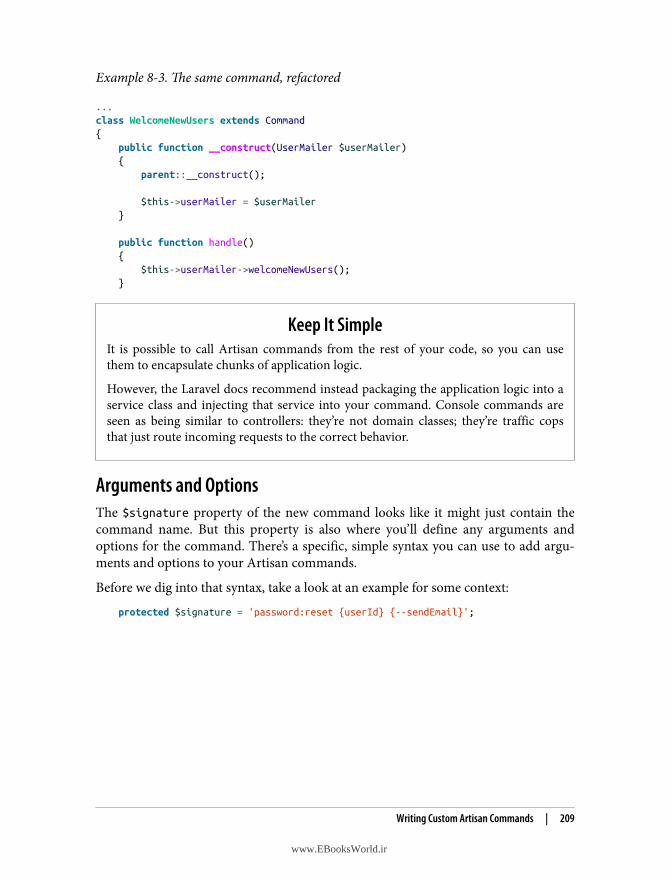
Example 8-3. The same command, refactored
...class WelcomeNewUsers extends Command{ public function __construct(UserMailer $userMailer) { parent::__construct();
$this->userMailer = $userMailer }
public function handle() { $this->userMailer->welcomeNewUsers(); }
Keep It SimpleIt is possible to call Artisan commands from the rest of your code, so you can usethem to encapsulate chunks of application logic.
However, the Laravel docs recommend instead packaging the application logic into aservice class and injecting that service into your command. Console commands areseen as being similar to controllers: they’re not domain classes; they’re traffic copsthat just route incoming requests to the correct behavior.
Arguments and OptionsThe $signature property of the new command looks like it might just contain thecommand name. But this property is also where you’ll define any arguments andoptions for the command. There’s a specific, simple syntax you can use to add argu‐ments and options to your Artisan commands.
Before we dig into that syntax, take a look at an example for some context:
protected $signature = 'password:reset {userId} {--sendEmail}';
Writing Custom Artisan Commands | 209
www.EBooksWorld.ir
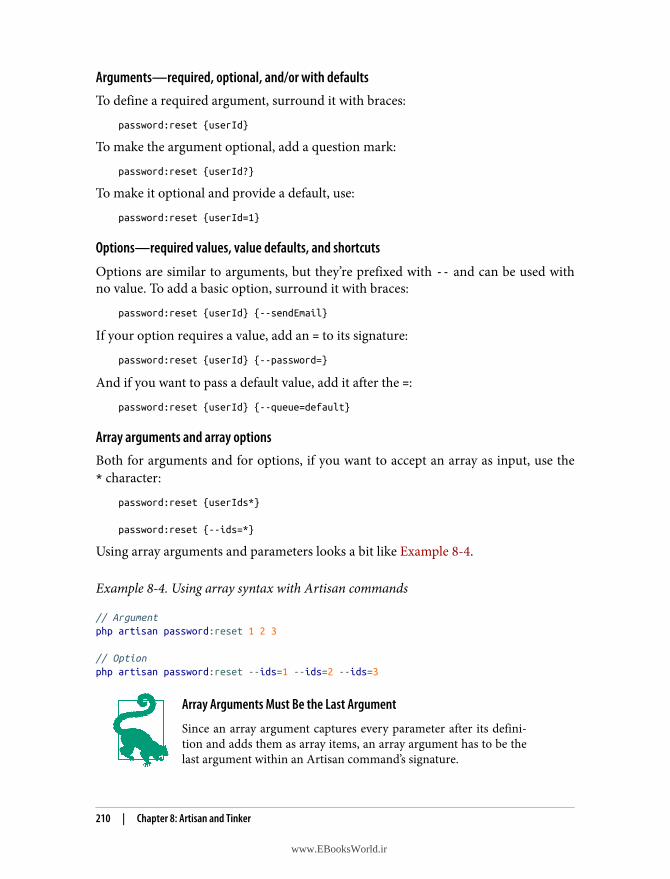
Arguments—required, optional, and/or with defaultsTo define a required argument, surround it with braces:
password:reset {userId}
To make the argument optional, add a question mark:
password:reset {userId?}
To make it optional and provide a default, use:
password:reset {userId=1}
Options—required values, value defaults, and shortcuts
Options are similar to arguments, but they’re prefixed with -- and can be used withno value. To add a basic option, surround it with braces:
password:reset {userId} {--sendEmail}
If your option requires a value, add an = to its signature:
password:reset {userId} {--password=}
And if you want to pass a default value, add it after the =:
password:reset {userId} {--queue=default}
Array arguments and array optionsBoth for arguments and for options, if you want to accept an array as input, use the* character:
password:reset {userIds*}
password:reset {--ids=*}
Using array arguments and parameters looks a bit like Example 8-4.
Example 8-4. Using array syntax with Artisan commands
// Argumentphp artisan password:reset 1 2 3
// Optionphp artisan password:reset --ids=1 --ids=2 --ids=3
Array Arguments Must Be the Last Argument
Since an array argument captures every parameter after its defini‐tion and adds them as array items, an array argument has to be thelast argument within an Artisan command’s signature.
210 | Chapter 8: Artisan and Tinker
www.EBooksWorld.ir
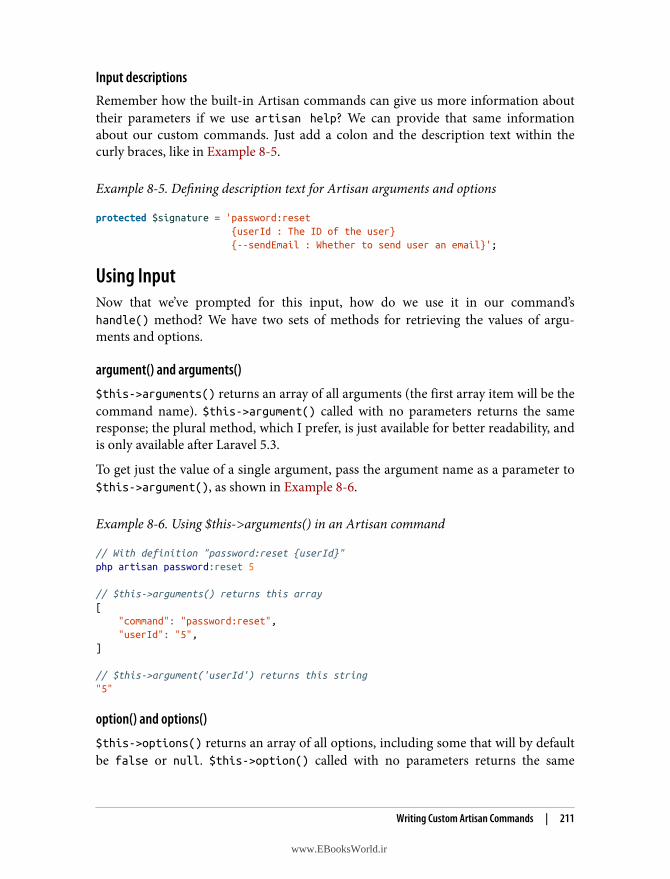
Input descriptionsRemember how the built-in Artisan commands can give us more information abouttheir parameters if we use artisan help? We can provide that same informationabout our custom commands. Just add a colon and the description text within thecurly braces, like in Example 8-5.
Example 8-5. Defining description text for Artisan arguments and options
protected $signature = 'password:reset {userId : The ID of the user} {--sendEmail : Whether to send user an email}';
Using InputNow that we’ve prompted for this input, how do we use it in our command’shandle() method? We have two sets of methods for retrieving the values of argu‐ments and options.
argument() and arguments()
$this->arguments() returns an array of all arguments (the first array item will be thecommand name). $this->argument() called with no parameters returns the sameresponse; the plural method, which I prefer, is just available for better readability, andis only available after Laravel 5.3.
To get just the value of a single argument, pass the argument name as a parameter to$this->argument(), as shown in Example 8-6.
Example 8-6. Using $this->arguments() in an Artisan command
// With definition "password:reset {userId}"php artisan password:reset 5
// $this->arguments() returns this array[ "command": "password:reset", "userId": "5",]
// $this->argument('userId') returns this string"5"
option() and options()
$this->options() returns an array of all options, including some that will by defaultbe false or null. $this->option() called with no parameters returns the same
Writing Custom Artisan Commands | 211
www.EBooksWorld.ir
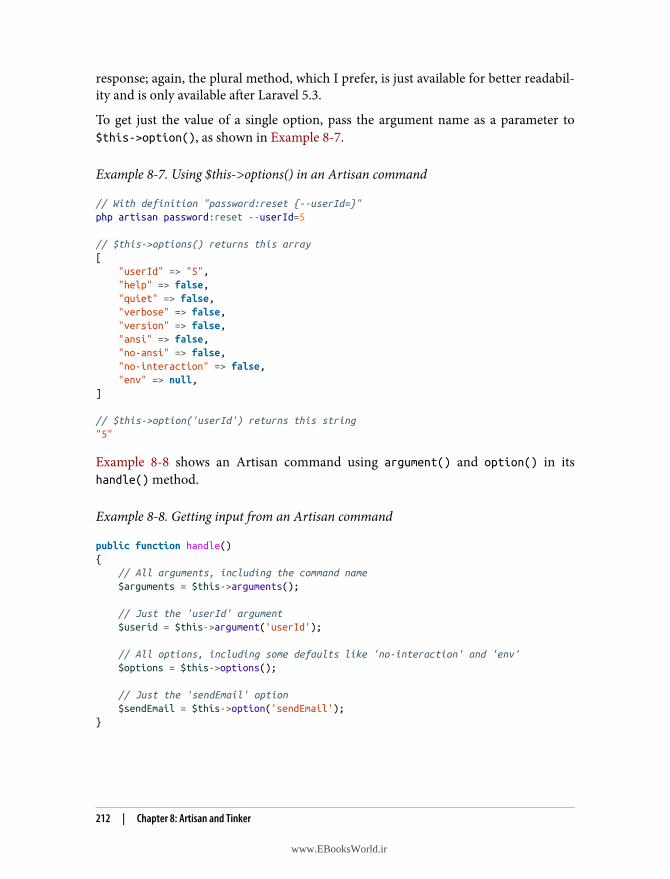
response; again, the plural method, which I prefer, is just available for better readabil‐ity and is only available after Laravel 5.3.
To get just the value of a single option, pass the argument name as a parameter to$this->option(), as shown in Example 8-7.
Example 8-7. Using $this->options() in an Artisan command
// With definition "password:reset {--userId=}"php artisan password:reset --userId=5
// $this->options() returns this array[ "userId" => "5", "help" => false, "quiet" => false, "verbose" => false, "version" => false, "ansi" => false, "no-ansi" => false, "no-interaction" => false, "env" => null,]
// $this->option('userId') returns this string"5"
Example 8-8 shows an Artisan command using argument() and option() in itshandle() method.
Example 8-8. Getting input from an Artisan command
public function handle(){ // All arguments, including the command name $arguments = $this->arguments();
// Just the 'userId' argument $userid = $this->argument('userId');
// All options, including some defaults like 'no-interaction' and 'env' $options = $this->options();
// Just the 'sendEmail' option $sendEmail = $this->option('sendEmail');}
212 | Chapter 8: Artisan and Tinker
www.EBooksWorld.ir
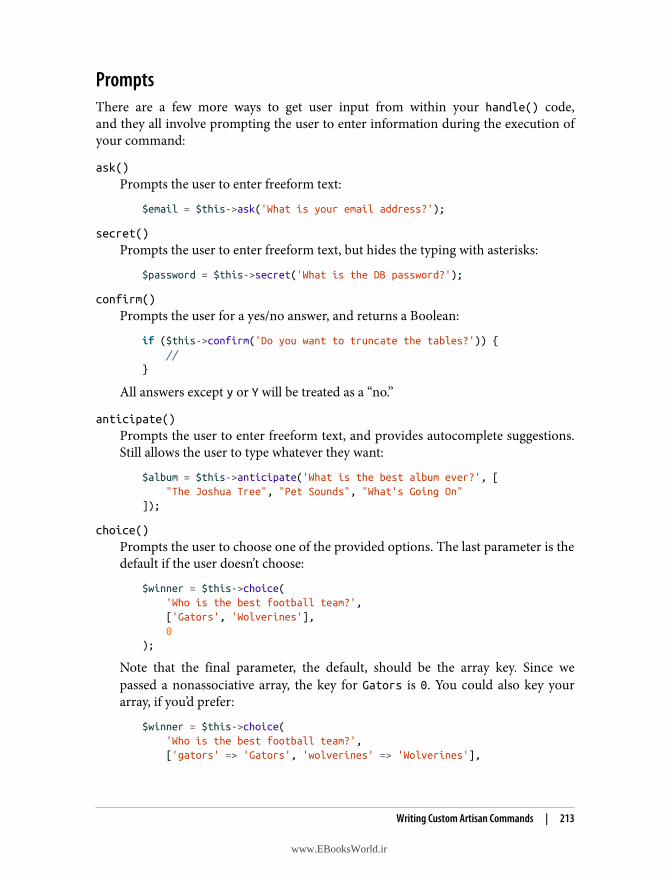
PromptsThere are a few more ways to get user input from within your handle() code,and they all involve prompting the user to enter information during the execution ofyour command:
ask()
Prompts the user to enter freeform text:
$email = $this->ask('What is your email address?');
secret()
Prompts the user to enter freeform text, but hides the typing with asterisks:
$password = $this->secret('What is the DB password?');
confirm()
Prompts the user for a yes/no answer, and returns a Boolean:
if ($this->confirm('Do you want to truncate the tables?')) { //}
All answers except y or Y will be treated as a “no.”
anticipate()
Prompts the user to enter freeform text, and provides autocomplete suggestions.Still allows the user to type whatever they want:
$album = $this->anticipate('What is the best album ever?', [ "The Joshua Tree", "Pet Sounds", "What's Going On"]);
choice()
Prompts the user to choose one of the provided options. The last parameter is thedefault if the user doesn’t choose:
$winner = $this->choice( 'Who is the best football team?', ['Gators', 'Wolverines'], 0);
Note that the final parameter, the default, should be the array key. Since wepassed a nonassociative array, the key for Gators is 0. You could also key yourarray, if you’d prefer:
$winner = $this->choice( 'Who is the best football team?', ['gators' => 'Gators', 'wolverines' => 'Wolverines'],
Writing Custom Artisan Commands | 213
www.EBooksWorld.ir
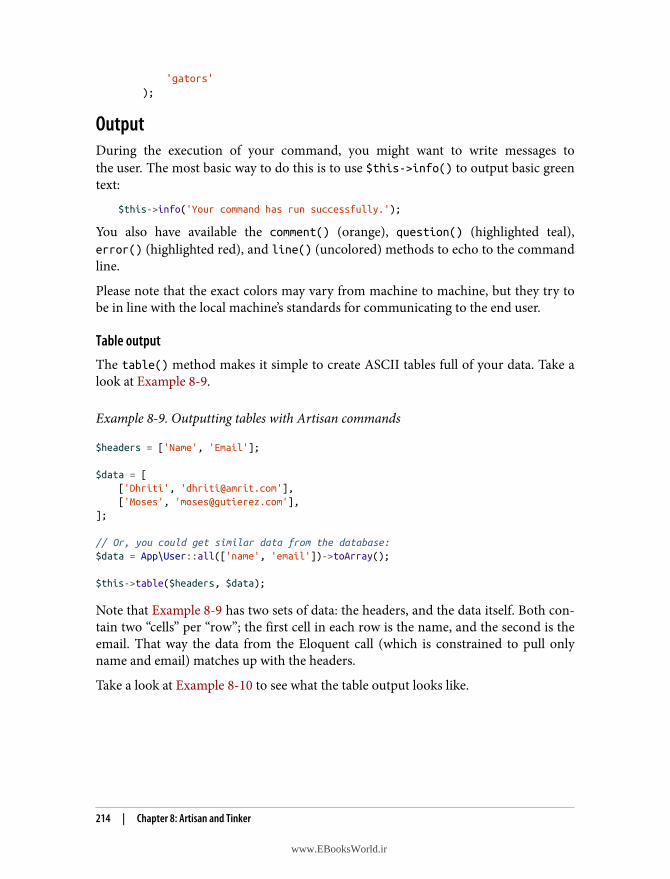
'gators');
OutputDuring the execution of your command, you might want to write messages tothe user. The most basic way to do this is to use $this->info() to output basic greentext:
$this->info('Your command has run successfully.');
You also have available the comment() (orange), question() (highlighted teal),error() (highlighted red), and line() (uncolored) methods to echo to the commandline.
Please note that the exact colors may vary from machine to machine, but they try tobe in line with the local machine’s standards for communicating to the end user.
Table output
The table() method makes it simple to create ASCII tables full of your data. Take alook at Example 8-9.
Example 8-9. Outputting tables with Artisan commands
$headers = ['Name', 'Email'];
$data = [ ['Dhriti', '[email protected]'], ['Moses', '[email protected]'],];
// Or, you could get similar data from the database:$data = App\User::all(['name', 'email'])->toArray();
$this->table($headers, $data);
Note that Example 8-9 has two sets of data: the headers, and the data itself. Both con‐tain two “cells” per “row”; the first cell in each row is the name, and the second is theemail. That way the data from the Eloquent call (which is constrained to pull onlyname and email) matches up with the headers.
Take a look at Example 8-10 to see what the table output looks like.
214 | Chapter 8: Artisan and Tinker
www.EBooksWorld.ir

Example 8-10. Sample output of an Artisan table
+---------+--------------------+| Name | Email |+---------+--------------------+| Dhriti | [email protected] || Moses | [email protected] |+---------+--------------------+
Progress bars
If you’ve ever run npm install, you’ve seen a command-line progress bar before.Let’s build one in Example 8-11.
Example 8-11. Sample Artisan progress bar
$totalUnits = 10;$this->output->progressStart($totalUnits);
for ($i = 0; $i < $totalUnits; $i++) { sleep(1);
$this->output->progressAdvance();}
$this->output->progressFinish();
What did we do here? First, we informed the system how many “units” we neededto work through. Maybe a unit is a user, and you have 350 users. The bar will thendivide the entire width it has available on your screen by 350, and increment itby 1/350th every time you run progressAdvance(). Once you’re done, runprogressFinish() so that it knows it’s done displaying the progress bar.
Writing Closure-Based CommandsIf you’d prefer to keep your command definition process simpler, you can write com‐mands as closures instead of classes by defining them in routes/console.php. Every‐thing we discuss in this chapter will apply the same way, but you will define andregister the commands in a single step in that file, as shown in Example 8-12.
Example 8-12. Defining an Artisan command using a closure
// routes/console.phpArtisan::command( 'password:reset {userId} {--sendEmail}', function ($userId, $sendEmail) { $userId = $this->argument('userId'); // Do something...
Writing Custom Artisan Commands | 215
www.EBooksWorld.ir
});
Calling Artisan Commands in Normal CodeWhile Artisan commands are designed to be run from the command line, you canalso call them from other code.
The easiest way is to use the Artisan facade. You can either call a command usingArtisan::call() (which will return the command’s exit code) or queue a commandusing Artisan::queue().
Both take two parameters: first, the terminal command (password:reset); and sec‐ond, an array of parameters to pass it. Take a look at Example 8-13 to see how itworks with arguments and options.
Example 8-13. Calling Artisan commands from other code
Route::get('test-artisan', function () { $exitCode = Artisan::call('password:reset', [ 'userId' => 15, '--sendEmail' => true, ]);});
As you can see, arguments are passed by keying to the argument name, and optionswith no value can be passed true or false.
In Laravel 5.8+, you can call Artisan commands much morenaturally from your code. Just pass the same string you’d call
from the command line into Artisan::call():Artisan::call('password:reset 15 --sendEmail')
You can also call Artisan commands from other commands using $this->call(),(which is the same as Artisan::call()) or $this->callSilent(), which is the samebut suppresses all output. See Example 8-14 for an example.
Example 8-14. Calling Artisan commands from other Artisan commands
public function handle(){ $this->callSilent('password:reset', [ 'userId' => 15, ]);}
216 | Chapter 8: Artisan and Tinker
www.EBooksWorld.ir

Finally, you can inject an instance of the Illuminate\Contracts\Console\Kernelcontract, and use its call() method.
TinkerTinker is a REPL, or read–eval–print loop. If you’ve ever used IRB in Ruby, you’ll befamiliar with how a REPL works.
REPLs give you a prompt, similar to the command-line prompt, that mimics a “wait‐ing” state of your application. You type your commands into the REPL, hit Return,and then expect what you typed to be evaluated and the response printed out.
Example 8-15 provides a quick sample to give you a sense of how it works and how itmight be useful. We start the REPL with php artisan tinker and are then presentedwith a blank prompt (>>>); every response to our commands is printed on a line pref‐aced with =>.
Example 8-15. Using Tinker
$ php artisan tinker
>>> $user = new App\User;=> App\User: {}>>> $user->email = '[email protected]';=> "[email protected]">>> $user->password = bcrypt('superSecret');=> "$2y$10$TWPGBC7e8d1bvJ1q5kv.VDUGfYDnE9gANl4mleuB3htIY2dxcQfQ5">>> $user->save();=> true
As you can see, we created a new user, set some data (hashing the password withbcrypt() for security), and saved it to the database. And this is real. If this were aproduction application, we would’ve just created a brand new user in our system.
This makes Tinker a great tool for simple database interactions, for trying out newideas, and for running snippets of code when it’d be a pain to find a place to put themin the application source files.
Tinker is powered by Psy Shell, so check that out to see what else you can do withTinker.
Tinker | 217
www.EBooksWorld.ir
Laravel Dump ServerOne common method of debugging the state of your data during development is touse Laravel’s dump() helper, which runs a decorated var_dump() on anything you passto it. This is fine, but it can often run into view issues.
In projects running Laravel 5.7 and later, you can now enable the Laravel dumpserver, which catches those dump() statements and displays them in your consoleinstead of rendering them to the page.
To run the dump server in your local console, navigate to your project’s root directoryand run php artisan dump-server:
$ php artisan dump-server
Laravel Var Dump Server=======================
[OK] Server listening on tcp://127.0.0.1:9912
// Quit the server with CONTROL-C.
Now, try using the dump() helper function in your code somewhere. To test it out, trythis code in your routes/web.php file:
Route::get('/', function () { dump('Dumped Value');
return 'Hello World';});
Without the dump server, you’d see both the dump and your “Hello World.” But withthe dump server running, you’ll only see “Hello World” in the browser. In your con‐sole, you’ll see that the dump server caught that dump(), and you can inspect it there:
GET http://myapp.test/--------------------
------------ --------------------------------- date Tue, 18 Sep 2018 22:43:10 +0000 controller "Closure" source web.php on line 20 file routes/web.php ------------ ---------------------------------
"Dumped Value"
218 | Chapter 8: Artisan and Tinker
www.EBooksWorld.ir
TestingSince you know how to call Artisan commands from code, it’s easy to do that in a testand ensure that whatever behavior you expected to be performed has been performedcorrectly, as in Example 8-16. In our tests, we use $this->artisan() instead of Artisan::call() because it has the same syntax but adds a few testing-related assertions.
Example 8-16. Calling Artisan commands from a test
public function test_empty_log_command_empties_logs_table(){ DB::table('logs')->insert(['message' => 'Did something']); $this->assertCount(1, DB::table('logs')->get());
$this->artisan('logs:empty'); // Same as Artisan::call('logs:empty'); $this->assertCount(0, DB::table('logs')->get());}
In projects running Laravel 5.7 and later, you can chain on a few new assertions toyour $this->artisan() calls that make it even easier to test Artisan commands—notjust the impact they have on the rest of your app, but also how they actually operate.Take a look at Example 8-17 to see an example of this syntax.
Example 8-17. Making assertions against the input and output of Artisan commands
public function testItCreatesANewUser(){ $this->artisan('myapp:create-user') ->expectsQuestion("What's the name of the new user?", "Wilbur Powery") ->expectsQuestion("What's the email of the new user?", "[email protected]") ->expectsQuestion("What's the password of the new user?", "secret") ->expectsOutput("User Wilbur Powery created!");
$this->assertDatabaseHas('users', [ 'email' => '[email protected]' ]);}
TL;DRArtisan commands are Laravel’s command-line tools. Laravel comes with quite a fewout of the box, but it’s also easy to create your own Artisan commands and call themfrom the command line or your own code.
Tinker is a REPL that makes it simple to get into your application environment andinteract with real code and real data, and the dump server lets you debug your codewithout stopping the code’s execution.
Testing | 219
www.EBooksWorld.ir

www.EBooksWorld.ir
CHAPTER 9
User Authentication and Authorization
Setting up a basic user authentication system—including registration, login, sessions,password resets, and access permissions—can often be one of the more time-consuming pieces of creating the foundation of an application. It’s a prime candidatefor extracting functionality out to a library, and there are quite a few such libraries.
But because of how much authentication needs vary across projects, most authentica‐tion systems grow bulky and unusable quickly. Thankfully, Laravel has found a way tomake an authentication system that’s easy to use and understand, but flexible enoughto fit in a variety of settings.
Every new install of Laravel has a create_users_table migration and a User modelbuilt in out of the box. Laravel offers an Artisan make:auth command that seeds acollection of authentication-related views and routes. And every install comes witha RegisterController, a LoginController, a ForgotPasswordController, and aResetPasswordController. The APIs are clean and clear, and the conventionsall work together to provide a simple—and seamless—authentication and authoriza‐tion system.
Differences in Auth Structure in Laravel Before 5.3
Note that in Laravel 5.1 and 5.2, most of this functionality livedin the AuthController; in 5.3 and higher, this functionality has
been split out into multiple controllers. Many of the specifics we’llcover here about how to customize redirect routes, auth guards,and such are different in 5.1 and 5.2 (though all the core function‐ality is the same). So, if you’re on 5.1 or 5.2 and want to changesome of the default authentication behaviors, you’ll likely need todig a bit into your AuthController to see how exactly you shouldcustomize it.
221
www.EBooksWorld.ir
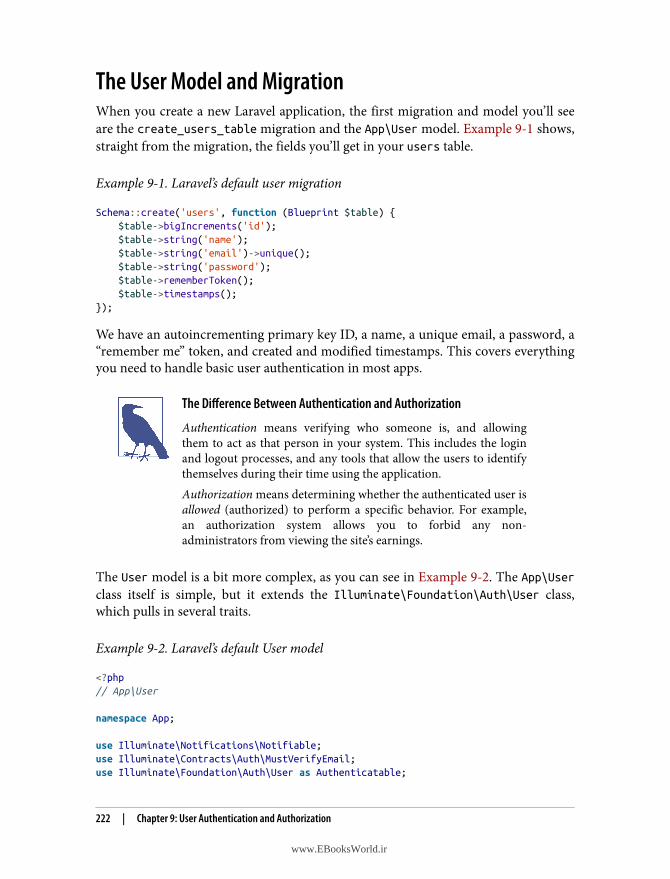
The User Model and MigrationWhen you create a new Laravel application, the first migration and model you’ll seeare the create_users_table migration and the App\User model. Example 9-1 shows,straight from the migration, the fields you’ll get in your users table.
Example 9-1. Laravel’s default user migration
Schema::create('users', function (Blueprint $table) { $table->bigIncrements('id'); $table->string('name'); $table->string('email')->unique(); $table->string('password'); $table->rememberToken(); $table->timestamps();});
We have an autoincrementing primary key ID, a name, a unique email, a password, a“remember me” token, and created and modified timestamps. This covers everythingyou need to handle basic user authentication in most apps.
The Difference Between Authentication and Authorization
Authentication means verifying who someone is, and allowingthem to act as that person in your system. This includes the loginand logout processes, and any tools that allow the users to identifythemselves during their time using the application.Authorization means determining whether the authenticated user isallowed (authorized) to perform a specific behavior. For example,an authorization system allows you to forbid any non-administrators from viewing the site’s earnings.
The User model is a bit more complex, as you can see in Example 9-2. The App\Userclass itself is simple, but it extends the Illuminate\Foundation\Auth\User class,which pulls in several traits.
Example 9-2. Laravel’s default User model
<?php// App\User
namespace App;
use Illuminate\Notifications\Notifiable;use Illuminate\Contracts\Auth\MustVerifyEmail;use Illuminate\Foundation\Auth\User as Authenticatable;
222 | Chapter 9: User Authentication and Authorization
www.EBooksWorld.ir
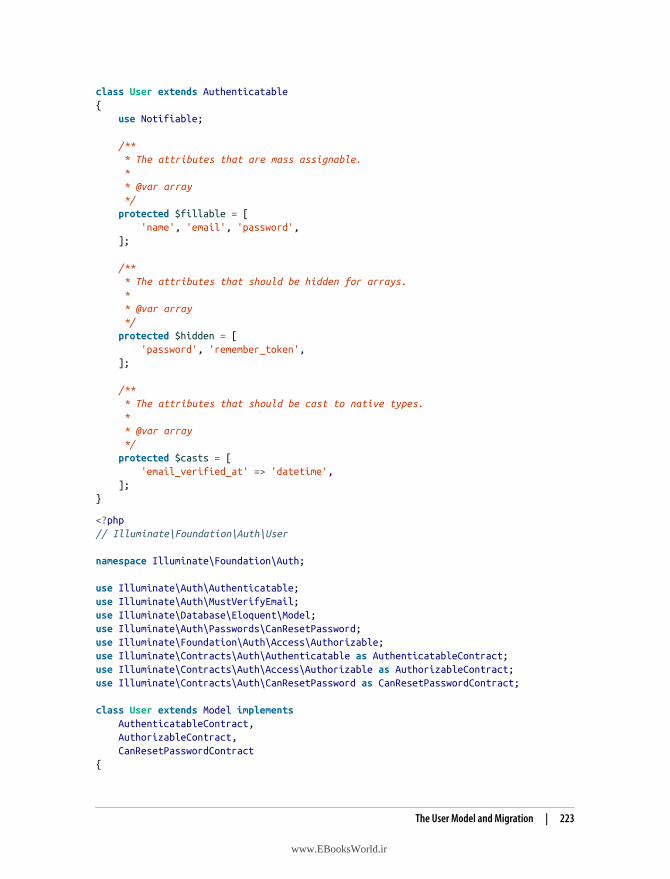
class User extends Authenticatable{ use Notifiable;
/** * The attributes that are mass assignable. * * @var array */ protected $fillable = [ 'name', 'email', 'password', ];
/** * The attributes that should be hidden for arrays. * * @var array */ protected $hidden = [ 'password', 'remember_token', ];
/** * The attributes that should be cast to native types. * * @var array */ protected $casts = [ 'email_verified_at' => 'datetime', ];}
<?php// Illuminate\Foundation\Auth\User
namespace Illuminate\Foundation\Auth;
use Illuminate\Auth\Authenticatable;use Illuminate\Auth\MustVerifyEmail;use Illuminate\Database\Eloquent\Model;use Illuminate\Auth\Passwords\CanResetPassword;use Illuminate\Foundation\Auth\Access\Authorizable;use Illuminate\Contracts\Auth\Authenticatable as AuthenticatableContract;use Illuminate\Contracts\Auth\Access\Authorizable as AuthorizableContract;use Illuminate\Contracts\Auth\CanResetPassword as CanResetPasswordContract;
class User extends Model implements AuthenticatableContract, AuthorizableContract, CanResetPasswordContract{
The User Model and Migration | 223
www.EBooksWorld.ir
use Authenticatable, Authorizable, CanResetPassword, MustVerifyEmail;}
Eloquent Model Refresher
If this is entirely unfamiliar, consider reading Chapter 5 beforecontinuing to learn how Eloquent models work.
So, what can we learn from this model? First, users live in the users table; Laravel willinfer this from the class name. We are able to fill out the name, email, and passwordproperties when creating a new user, and the password and remember_token proper‐ties are excluded when outputting the user as JSON. Looking good so far.
We also can see from the contracts and the traits in the Illuminate\Foundation\Auth version of User that there are some features in the framework (the ability toauthenticate, to authorize, and to reset passwords) that theoretically could be appliedto other models, not just the User model, and that could be applied individuallyor together.
Contracts and InterfacesYou may have noticed that sometimes I write the word “contract” and sometimes“interface,” and that almost all of the interfaces in Laravel are under the Contractsnamespace.
A PHP interface is essentially an agreement between two classes that one of theclasses will “behave” a certain way. It’s a bit like a contract between them, and thinkingabout it as a contract gives a little more inherent meaning to the name than calling itan interface does.
In the end, though, they’re the same thing: an agreement that a class will provide cer‐tain methods with a certain signature.
On a related note, the Illuminate\Contracts namespace contains a group of inter‐faces that Laravel components implement and typehint. This makes it easy to developsimilar components that implement the same interfaces and swap them into yourapplication in place of the stock Illuminate components. When the Laravel core andcomponents typehint a mailer, for example, they don’t typehint the Mailer class.Instead, they typehint the Mailer contract (interface), making it easy to provide yourown mailer. To learn more about how to do this, take a look at Chapter 11.
The Authenticatable contract requires methods (e.g., getAuthIdentifier()) thatallow the framework to authenticate instances of this model to the auth system; the
224 | Chapter 9: User Authentication and Authorization
www.EBooksWorld.ir
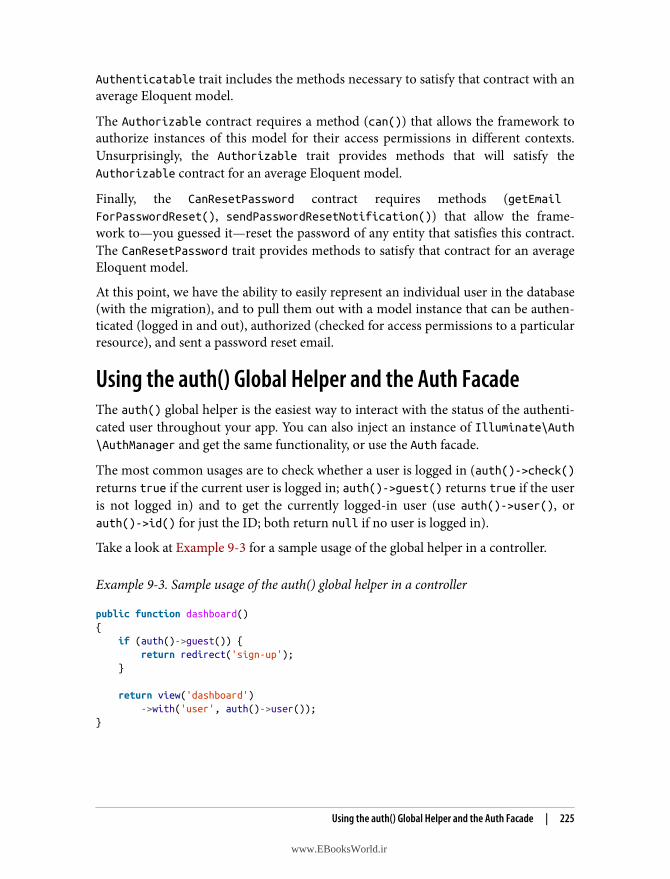
Authenticatable trait includes the methods necessary to satisfy that contract with anaverage Eloquent model.
The Authorizable contract requires a method (can()) that allows the framework toauthorize instances of this model for their access permissions in different contexts.Unsurprisingly, the Authorizable trait provides methods that will satisfy theAuthorizable contract for an average Eloquent model.
Finally, the CanResetPassword contract requires methods (getEmailForPasswordReset(), sendPasswordResetNotification()) that allow the frame‐work to—you guessed it—reset the password of any entity that satisfies this contract.The CanResetPassword trait provides methods to satisfy that contract for an averageEloquent model.
At this point, we have the ability to easily represent an individual user in the database(with the migration), and to pull them out with a model instance that can be authen‐ticated (logged in and out), authorized (checked for access permissions to a particularresource), and sent a password reset email.
Using the auth() Global Helper and the Auth FacadeThe auth() global helper is the easiest way to interact with the status of the authenti‐cated user throughout your app. You can also inject an instance of Illuminate\Auth\AuthManager and get the same functionality, or use the Auth facade.
The most common usages are to check whether a user is logged in (auth()->check()returns true if the current user is logged in; auth()->guest() returns true if the useris not logged in) and to get the currently logged-in user (use auth()->user(), orauth()->id() for just the ID; both return null if no user is logged in).
Take a look at Example 9-3 for a sample usage of the global helper in a controller.
Example 9-3. Sample usage of the auth() global helper in a controller
public function dashboard(){ if (auth()->guest()) { return redirect('sign-up'); }
return view('dashboard') ->with('user', auth()->user());}
Using the auth() Global Helper and the Auth Facade | 225
www.EBooksWorld.ir
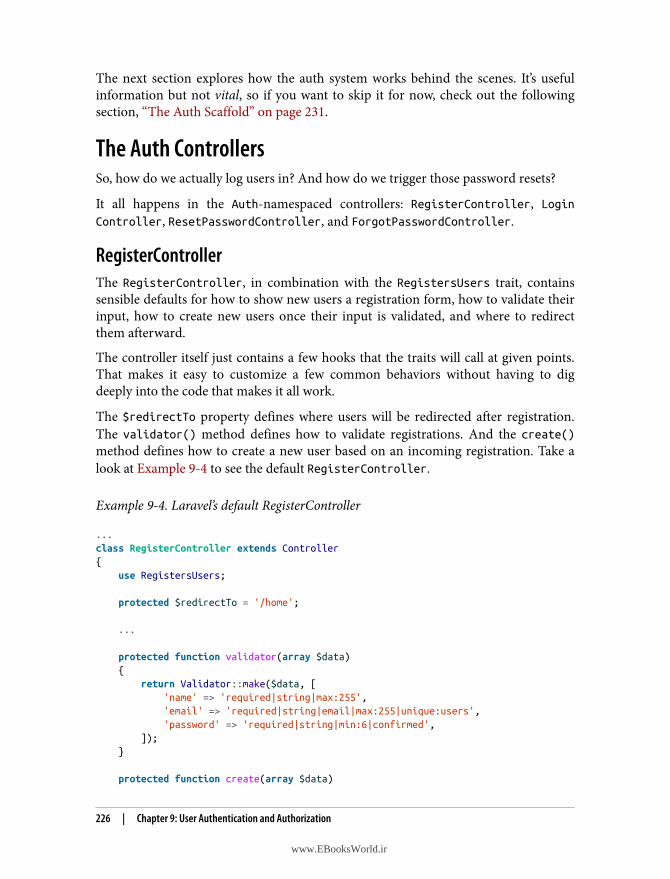
The next section explores how the auth system works behind the scenes. It’s usefulinformation but not vital, so if you want to skip it for now, check out the followingsection, “The Auth Scaffold” on page 231.
The Auth ControllersSo, how do we actually log users in? And how do we trigger those password resets?
It all happens in the Auth-namespaced controllers: RegisterController, LoginController, ResetPasswordController, and ForgotPasswordController.
RegisterControllerThe RegisterController, in combination with the RegistersUsers trait, containssensible defaults for how to show new users a registration form, how to validate theirinput, how to create new users once their input is validated, and where to redirectthem afterward.
The controller itself just contains a few hooks that the traits will call at given points.That makes it easy to customize a few common behaviors without having to digdeeply into the code that makes it all work.
The $redirectTo property defines where users will be redirected after registration.The validator() method defines how to validate registrations. And the create()method defines how to create a new user based on an incoming registration. Take alook at Example 9-4 to see the default RegisterController.
Example 9-4. Laravel’s default RegisterController
...class RegisterController extends Controller{ use RegistersUsers;
protected $redirectTo = '/home';
...
protected function validator(array $data) { return Validator::make($data, [ 'name' => 'required|string|max:255', 'email' => 'required|string|email|max:255|unique:users', 'password' => 'required|string|min:6|confirmed', ]); }
protected function create(array $data)
226 | Chapter 9: User Authentication and Authorization
www.EBooksWorld.ir
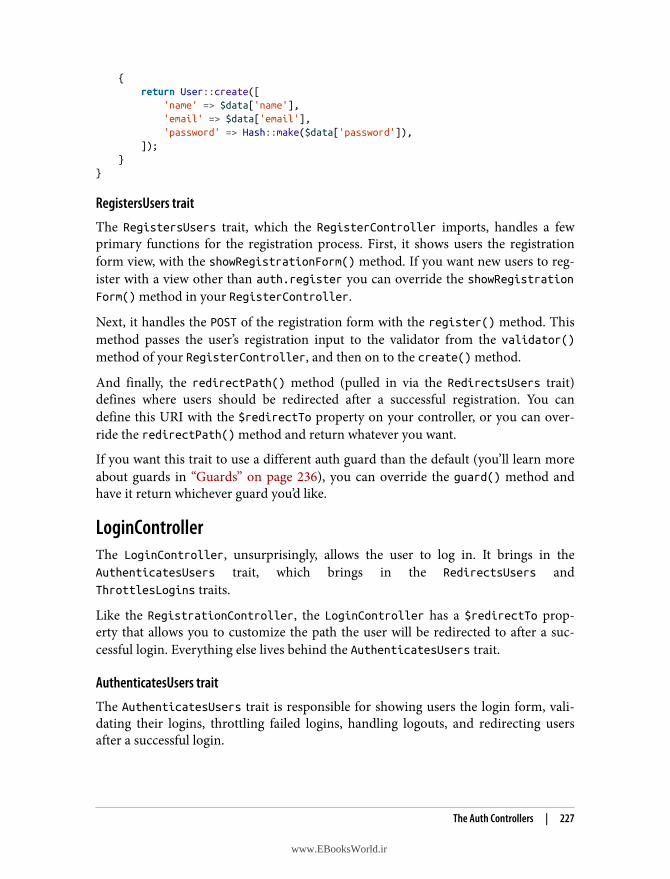
{ return User::create([ 'name' => $data['name'], 'email' => $data['email'], 'password' => Hash::make($data['password']), ]); }}
RegistersUsers trait
The RegistersUsers trait, which the RegisterController imports, handles a fewprimary functions for the registration process. First, it shows users the registrationform view, with the showRegistrationForm() method. If you want new users to reg‐ister with a view other than auth.register you can override the showRegistrationForm() method in your RegisterController.
Next, it handles the POST of the registration form with the register() method. Thismethod passes the user’s registration input to the validator from the validator()method of your RegisterController, and then on to the create() method.
And finally, the redirectPath() method (pulled in via the RedirectsUsers trait)defines where users should be redirected after a successful registration. You candefine this URI with the $redirectTo property on your controller, or you can over‐ride the redirectPath() method and return whatever you want.
If you want this trait to use a different auth guard than the default (you’ll learn moreabout guards in “Guards” on page 236), you can override the guard() method andhave it return whichever guard you’d like.
LoginControllerThe LoginController, unsurprisingly, allows the user to log in. It brings in theAuthenticatesUsers trait, which brings in the RedirectsUsers andThrottlesLogins traits.
Like the RegistrationController, the LoginController has a $redirectTo prop‐erty that allows you to customize the path the user will be redirected to after a suc‐cessful login. Everything else lives behind the AuthenticatesUsers trait.
AuthenticatesUsers trait
The AuthenticatesUsers trait is responsible for showing users the login form, vali‐dating their logins, throttling failed logins, handling logouts, and redirecting usersafter a successful login.
The Auth Controllers | 227
www.EBooksWorld.ir
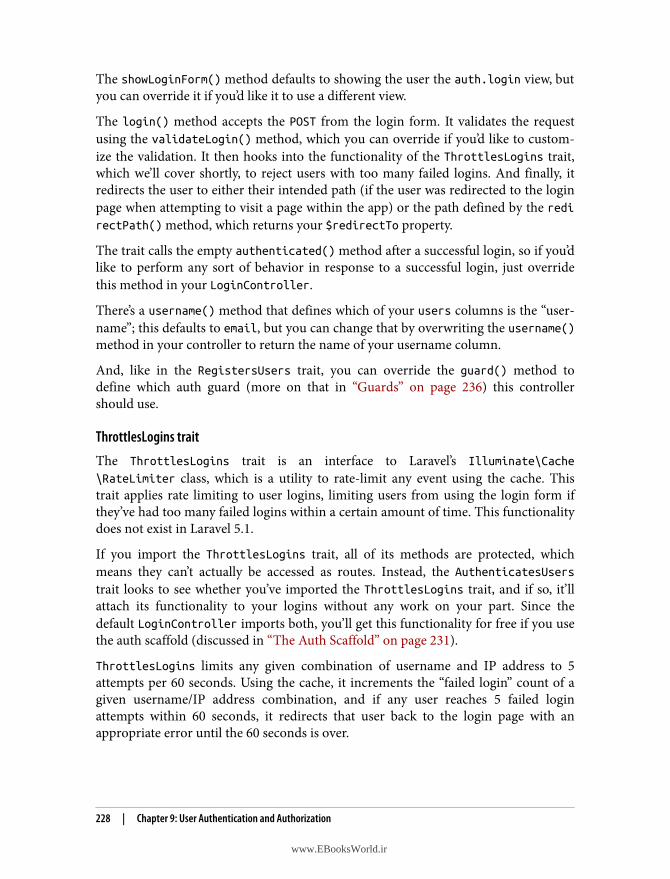
The showLoginForm() method defaults to showing the user the auth.login view, butyou can override it if you’d like it to use a different view.
The login() method accepts the POST from the login form. It validates the requestusing the validateLogin() method, which you can override if you’d like to custom‐ize the validation. It then hooks into the functionality of the ThrottlesLogins trait,which we’ll cover shortly, to reject users with too many failed logins. And finally, itredirects the user to either their intended path (if the user was redirected to the loginpage when attempting to visit a page within the app) or the path defined by the redirectPath() method, which returns your $redirectTo property.
The trait calls the empty authenticated() method after a successful login, so if you’dlike to perform any sort of behavior in response to a successful login, just overridethis method in your LoginController.
There’s a username() method that defines which of your users columns is the “user‐name”; this defaults to email, but you can change that by overwriting the username()method in your controller to return the name of your username column.
And, like in the RegistersUsers trait, you can override the guard() method todefine which auth guard (more on that in “Guards” on page 236) this controllershould use.
ThrottlesLogins trait
The ThrottlesLogins trait is an interface to Laravel’s Illuminate\Cache
\RateLimiter class, which is a utility to rate-limit any event using the cache. Thistrait applies rate limiting to user logins, limiting users from using the login form ifthey’ve had too many failed logins within a certain amount of time. This functionalitydoes not exist in Laravel 5.1.
If you import the ThrottlesLogins trait, all of its methods are protected, whichmeans they can’t actually be accessed as routes. Instead, the AuthenticatesUserstrait looks to see whether you’ve imported the ThrottlesLogins trait, and if so, it’llattach its functionality to your logins without any work on your part. Since thedefault LoginController imports both, you’ll get this functionality for free if you usethe auth scaffold (discussed in “The Auth Scaffold” on page 231).
ThrottlesLogins limits any given combination of username and IP address to 5attempts per 60 seconds. Using the cache, it increments the “failed login” count of agiven username/IP address combination, and if any user reaches 5 failed loginattempts within 60 seconds, it redirects that user back to the login page with anappropriate error until the 60 seconds is over.
228 | Chapter 9: User Authentication and Authorization
www.EBooksWorld.ir
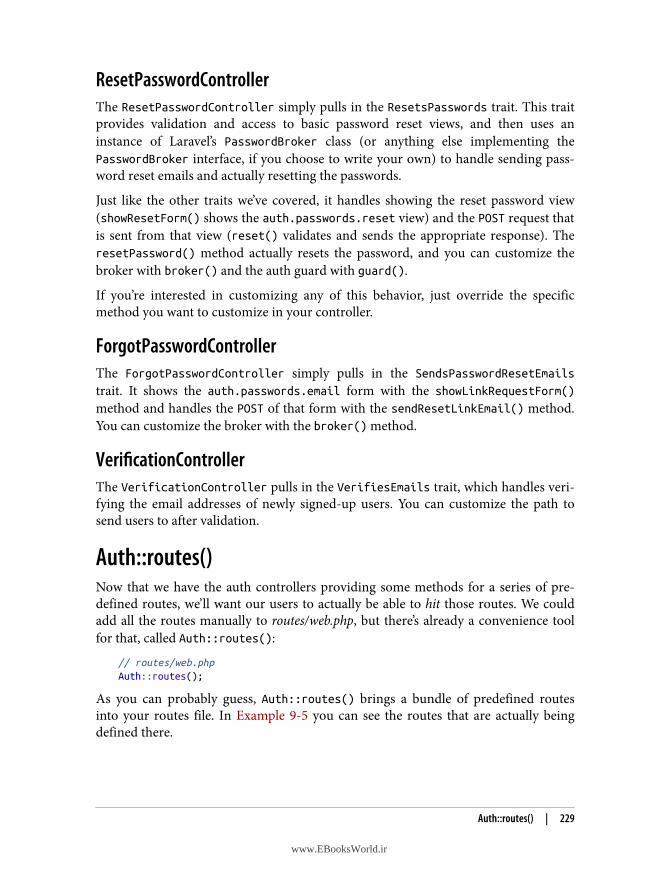
ResetPasswordControllerThe ResetPasswordController simply pulls in the ResetsPasswords trait. This traitprovides validation and access to basic password reset views, and then uses aninstance of Laravel’s PasswordBroker class (or anything else implementing thePasswordBroker interface, if you choose to write your own) to handle sending pass‐word reset emails and actually resetting the passwords.
Just like the other traits we’ve covered, it handles showing the reset password view(showResetForm() shows the auth.passwords.reset view) and the POST request thatis sent from that view (reset() validates and sends the appropriate response). TheresetPassword() method actually resets the password, and you can customize thebroker with broker() and the auth guard with guard().
If you’re interested in customizing any of this behavior, just override the specificmethod you want to customize in your controller.
ForgotPasswordControllerThe ForgotPasswordController simply pulls in the SendsPasswordResetEmailstrait. It shows the auth.passwords.email form with the showLinkRequestForm()method and handles the POST of that form with the sendResetLinkEmail() method.You can customize the broker with the broker() method.
VerificationControllerThe VerificationController pulls in the VerifiesEmails trait, which handles veri‐fying the email addresses of newly signed-up users. You can customize the path tosend users to after validation.
Auth::routes()Now that we have the auth controllers providing some methods for a series of pre-defined routes, we’ll want our users to actually be able to hit those routes. We couldadd all the routes manually to routes/web.php, but there’s already a convenience toolfor that, called Auth::routes():
// routes/web.phpAuth::routes();
As you can probably guess, Auth::routes() brings a bundle of predefined routesinto your routes file. In Example 9-5 you can see the routes that are actually beingdefined there.
Auth::routes() | 229
www.EBooksWorld.ir
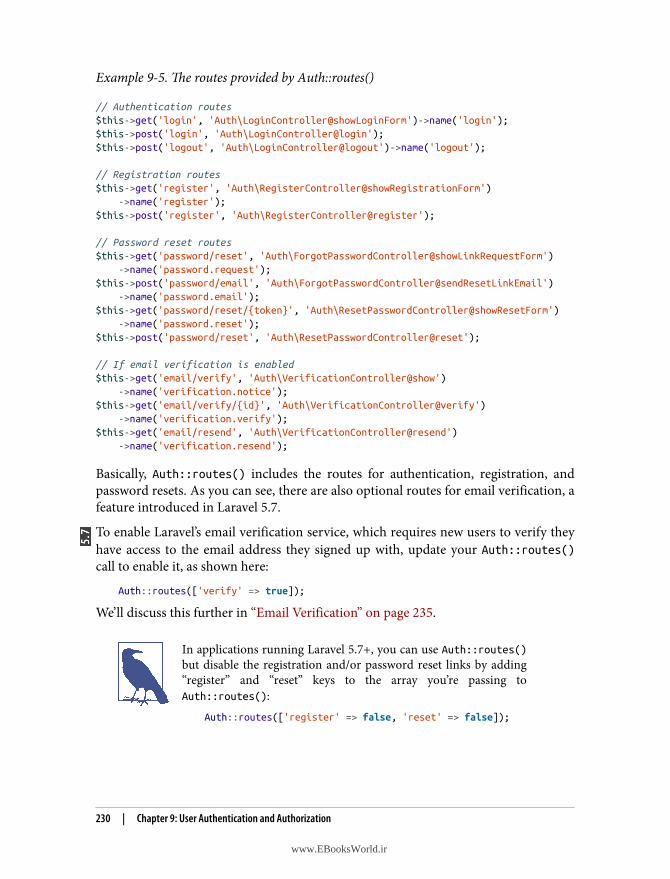
Example 9-5. The routes provided by Auth::routes()
// Authentication routes$this->get('login', 'Auth\LoginController@showLoginForm')->name('login');$this->post('login', 'Auth\LoginController@login');$this->post('logout', 'Auth\LoginController@logout')->name('logout');
// Registration routes$this->get('register', 'Auth\RegisterController@showRegistrationForm') ->name('register');$this->post('register', 'Auth\RegisterController@register');
// Password reset routes$this->get('password/reset', 'Auth\ForgotPasswordController@showLinkRequestForm') ->name('password.request');$this->post('password/email', 'Auth\ForgotPasswordController@sendResetLinkEmail') ->name('password.email');$this->get('password/reset/{token}', 'Auth\ResetPasswordController@showResetForm') ->name('password.reset');$this->post('password/reset', 'Auth\ResetPasswordController@reset');
// If email verification is enabled$this->get('email/verify', 'Auth\VerificationController@show') ->name('verification.notice');$this->get('email/verify/{id}', 'Auth\VerificationController@verify') ->name('verification.verify');$this->get('email/resend', 'Auth\VerificationController@resend') ->name('verification.resend');
Basically, Auth::routes() includes the routes for authentication, registration, andpassword resets. As you can see, there are also optional routes for email verification, afeature introduced in Laravel 5.7.
To enable Laravel’s email verification service, which requires new users to verify theyhave access to the email address they signed up with, update your Auth::routes()call to enable it, as shown here:
Auth::routes(['verify' => true]);
We’ll discuss this further in “Email Verification” on page 235.
In applications running Laravel 5.7+, you can use Auth::routes()but disable the registration and/or password reset links by adding“register” and “reset” keys to the array you’re passing toAuth::routes():
Auth::routes(['register' => false, 'reset' => false]);
230 | Chapter 9: User Authentication and Authorization
www.EBooksWorld.ir
The Auth ScaffoldAt this point you have a migration, a model, controllers, and routes for your authenti‐cation system. But what about your views?
Laravel handles these by providing an auth scaffold (available since 5.2) that’sintended to be run on a new application and provide you with even more skeletoncode to get your auth system running quickly.
The auth scaffold takes care of adding Auth::routes() to your routes file, adds aview for each route, and creates a HomeController to serve as the landing pagefor logged-in users; it also routes to the index() method of HomeController atthe /home URI.
Just run php artisan make:auth, and the following files will be made availableto you:
app/Http/Controllers/HomeController.phpresources/views/auth/login.blade.phpresources/views/auth/register.blade.phpresources/views/auth/verify.blade.phpresources/views/auth/passwords/email.blade.phpresources/views/auth/passwords/reset.blade.phpresources/views/layouts/app.blade.phpresources/views/home.blade.php
At this point, you have / returning the welcome view, /home returning the home view,and a series of auth routes for login, logout, registration, and password reset pointingto the auth controllers. Each of the seeded views has Bootstrap-based layouts andform fields for all necessary fields for login, registration, and password reset, and theyalready point to the correct routes.
You now have all of the pieces in place for every step of the normal user registrationand authentication flow. You can tweak all you want, but you’re entirely ready to reg‐ister and authenticate users.
Let’s review quickly the steps from new site to full authentication system:
laravel new MyAppcd MyApp
# Edit your .env file to specify the correct database connection details
php artisan make:authphp artisan migrate
That’s it. Run those commands, and you will have a landing page and a Bootstrap-based user registration, login, logout, and password reset system, with a basic landingpage for all authenticated users.
The Auth Scaffold | 231
www.EBooksWorld.ir
“Remember Me”The auth scaffold has this implemented out of the box, but it’s still worth learninghow it works and how to use it on your own. If you want to implement a “rememberme”–style long-lived access token, make sure you have a remember_token column onyour users table (which you will if you used the default migration).
When you’re normally logging in a user (and this is how the LoginController doesit, with the AuthenticatesUsers trait), you’ll “attempt” an authentication with theuser-provided information, like in Example 9-6.
Example 9-6. Attempting a user authentication
if (auth()->attempt([ 'email' => request()->input('email'), 'password' => request()->input('password'),])) { // Handle the successful login}
This provides you with a user login that lasts as long as the user’s session. If you wantLaravel to extend the login indefinitely using cookies (as long as the user is on thesame computer and doesn’t log out), you can pass a Boolean true as the secondparameter of the auth()->attempt() method. Take a look at Example 9-7 to see whatthat request looks like.
Example 9-7. Attempting a user authentication with a “remember me” checkbox check
if (auth()->attempt([ 'email' => request()->input('email'), 'password' => request()->input('password'),]), request()->filled('remember')) { // Handle the successful login}
You can see that we checked whether the input has a nonempty (“filled”) rememberproperty, which will return a Boolean. This allows our users to decide if they want tobe remembered with a checkbox in the login form.
And later, if you need to manually check whether the current user was authenticatedby a remember token, there’s a method for that: auth()->viaRemember() returns aBoolean indicating whether or not the current user authenticated via a remembertoken. This will allow you to prevent certain higher-sensitivity features from beingaccessible by remember token; instead, you can require users to reenter their pass‐words.
232 | Chapter 9: User Authentication and Authorization
www.EBooksWorld.ir
Manually Authenticating UsersThe most common case for user authentication is that you’ll allow the user to providetheir credentials, and then use auth()->attempt() to see whether the provided cre‐dentials match any real users. If so, you log them in.
But sometimes there are contexts where it’s valuable for you to be able to chooseto log a user in on your own. For example, you may want to allow admin users toswitch users.
There are four methods that make this possible. First, you can just pass a user ID:
auth()->loginUsingId(5);
Second, you can pass a User object (or any other object that implements theIlluminate\Contracts\Auth\Authenticatable contract):
auth()->login($user);
And third and fourth, you can choose to authenticate the given user for only the cur‐rent request, which won’t impact your session or cookies at all, using once() oronceUsingId():
auth()->once(['username' => 'mattstauffer']);// orauth()->onceUsingId(5);
Note that the array you pass to the once() method can contain any key/value pairs touniquely identify the user you’d like to authenticate as. You can even pass multiplekeys and values, if it’s what is appropriate for your project. For example:
auth()->once([ 'last_name' => 'Stauffer', 'zip_code' => 90210,])
Manually Logging Out a UserIf you ever need to log out a user manually, just call logout():
auth()->logout();
Invalidating Sessions on Other DevicesIf you’d like to log out not just a user’s current session, but also those on any otherdevices, you’ll need to prompt the user for their password and pass it to thelogoutOtherDevices() method (available in Laravel 5.6 and later). In order to dothis, you’ll have to add the (commented-out-by-default) AuthenticateSession mid‐dleware to your web group in app\Http\Kernel.php:
Manually Authenticating Users | 233
www.EBooksWorld.ir
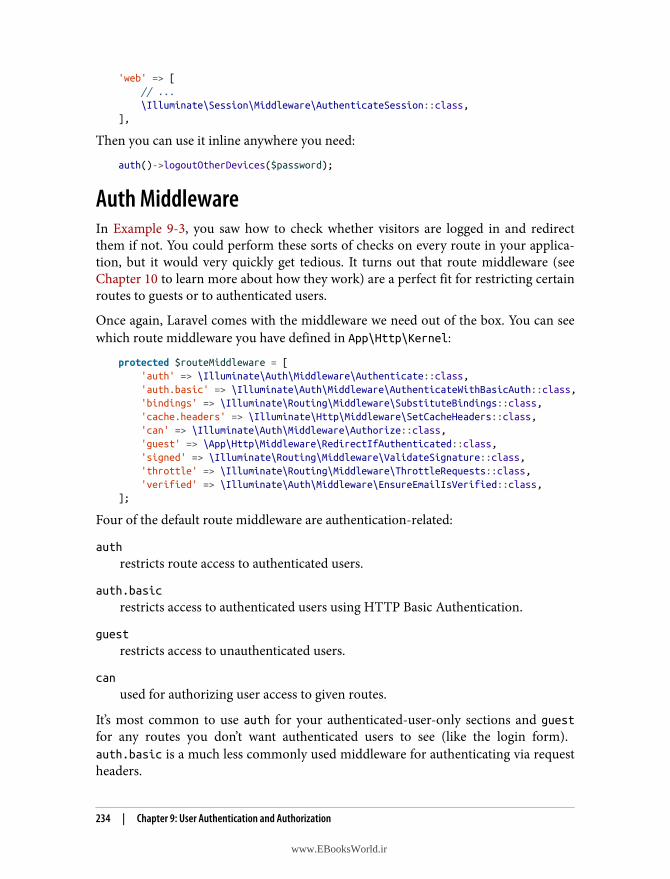
'web' => [ // ... \Illuminate\Session\Middleware\AuthenticateSession::class,],
Then you can use it inline anywhere you need:
auth()->logoutOtherDevices($password);
Auth MiddlewareIn Example 9-3, you saw how to check whether visitors are logged in and redirectthem if not. You could perform these sorts of checks on every route in your applica‐tion, but it would very quickly get tedious. It turns out that route middleware (seeChapter 10 to learn more about how they work) are a perfect fit for restricting certainroutes to guests or to authenticated users.
Once again, Laravel comes with the middleware we need out of the box. You can seewhich route middleware you have defined in App\Http\Kernel:
protected $routeMiddleware = [ 'auth' => \Illuminate\Auth\Middleware\Authenticate::class, 'auth.basic' => \Illuminate\Auth\Middleware\AuthenticateWithBasicAuth::class, 'bindings' => \Illuminate\Routing\Middleware\SubstituteBindings::class, 'cache.headers' => \Illuminate\Http\Middleware\SetCacheHeaders::class, 'can' => \Illuminate\Auth\Middleware\Authorize::class, 'guest' => \App\Http\Middleware\RedirectIfAuthenticated::class, 'signed' => \Illuminate\Routing\Middleware\ValidateSignature::class, 'throttle' => \Illuminate\Routing\Middleware\ThrottleRequests::class, 'verified' => \Illuminate\Auth\Middleware\EnsureEmailIsVerified::class,];
Four of the default route middleware are authentication-related:
auth
restricts route access to authenticated users.
auth.basic
restricts access to authenticated users using HTTP Basic Authentication.
guest
restricts access to unauthenticated users.
can
used for authorizing user access to given routes.
It’s most common to use auth for your authenticated-user-only sections and guestfor any routes you don’t want authenticated users to see (like the login form). auth.basic is a much less commonly used middleware for authenticating via requestheaders.
234 | Chapter 9: User Authentication and Authorization
www.EBooksWorld.ir
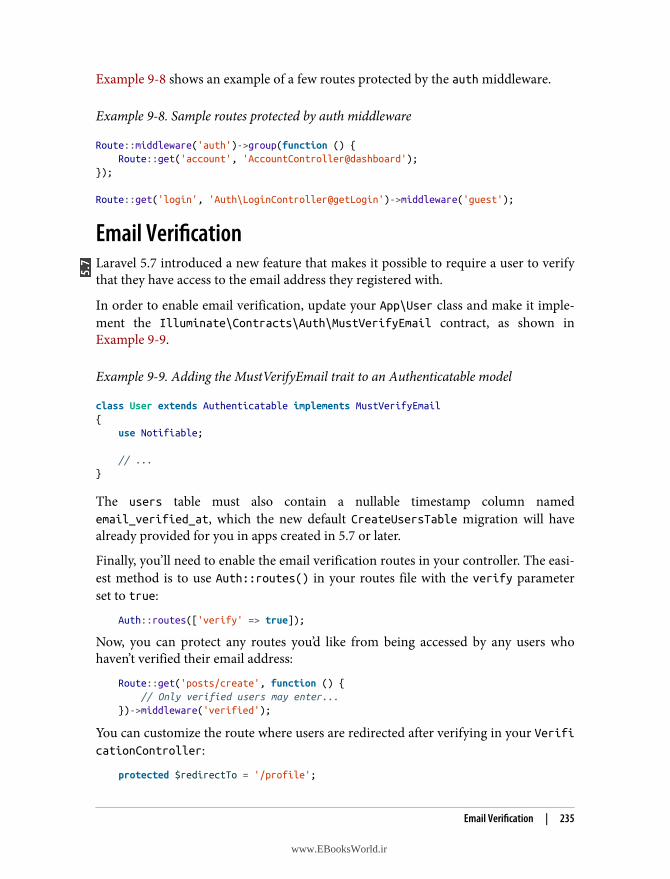
Example 9-8 shows an example of a few routes protected by the auth middleware.
Example 9-8. Sample routes protected by auth middleware
Route::middleware('auth')->group(function () { Route::get('account', 'AccountController@dashboard');});
Route::get('login', 'Auth\LoginController@getLogin')->middleware('guest');
Email VerificationLaravel 5.7 introduced a new feature that makes it possible to require a user to verifythat they have access to the email address they registered with.
In order to enable email verification, update your App\User class and make it imple‐ment the Illuminate\Contracts\Auth\MustVerifyEmail contract, as shown inExample 9-9.
Example 9-9. Adding the MustVerifyEmail trait to an Authenticatable model
class User extends Authenticatable implements MustVerifyEmail{ use Notifiable;
// ...}
The users table must also contain a nullable timestamp column namedemail_verified_at, which the new default CreateUsersTable migration will havealready provided for you in apps created in 5.7 or later.
Finally, you’ll need to enable the email verification routes in your controller. The easi‐est method is to use Auth::routes() in your routes file with the verify parameterset to true:
Auth::routes(['verify' => true]);
Now, you can protect any routes you’d like from being accessed by any users whohaven’t verified their email address:
Route::get('posts/create', function () { // Only verified users may enter...})->middleware('verified');
You can customize the route where users are redirected after verifying in your VerificationController:
protected $redirectTo = '/profile';
Email Verification | 235
www.EBooksWorld.ir
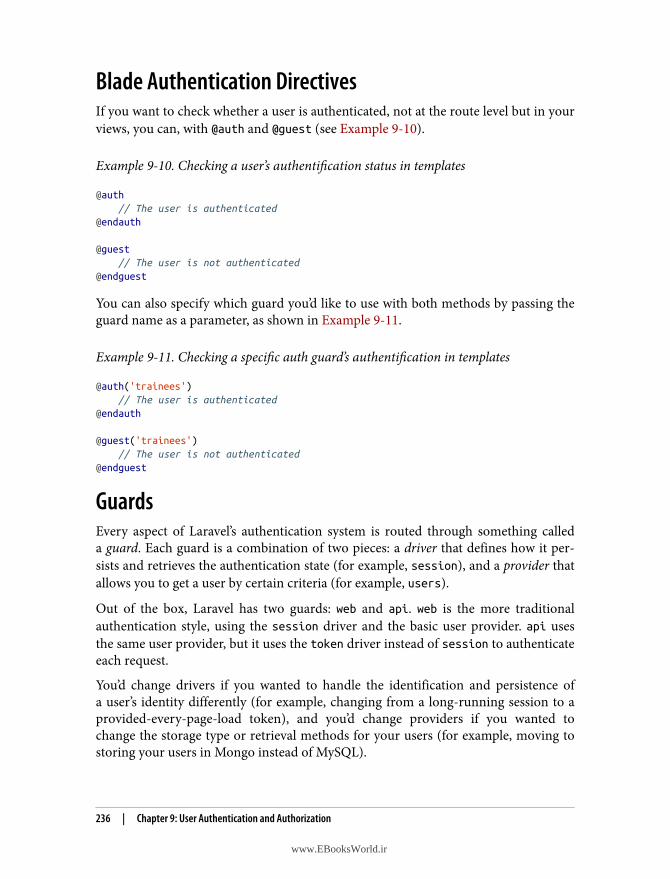
Blade Authentication DirectivesIf you want to check whether a user is authenticated, not at the route level but in yourviews, you can, with @auth and @guest (see Example 9-10).
Example 9-10. Checking a user’s authentification status in templates
@auth // The user is authenticated@endauth
@guest // The user is not authenticated@endguest
You can also specify which guard you’d like to use with both methods by passing theguard name as a parameter, as shown in Example 9-11.
Example 9-11. Checking a specific auth guard’s authentification in templates
@auth('trainees') // The user is authenticated@endauth
@guest('trainees') // The user is not authenticated@endguest
GuardsEvery aspect of Laravel’s authentication system is routed through something calleda guard. Each guard is a combination of two pieces: a driver that defines how it per‐sists and retrieves the authentication state (for example, session), and a provider thatallows you to get a user by certain criteria (for example, users).
Out of the box, Laravel has two guards: web and api. web is the more traditionalauthentication style, using the session driver and the basic user provider. api usesthe same user provider, but it uses the token driver instead of session to authenticateeach request.
You’d change drivers if you wanted to handle the identification and persistence ofa user’s identity differently (for example, changing from a long-running session to aprovided-every-page-load token), and you’d change providers if you wanted tochange the storage type or retrieval methods for your users (for example, moving tostoring your users in Mongo instead of MySQL).
236 | Chapter 9: User Authentication and Authorization
www.EBooksWorld.ir
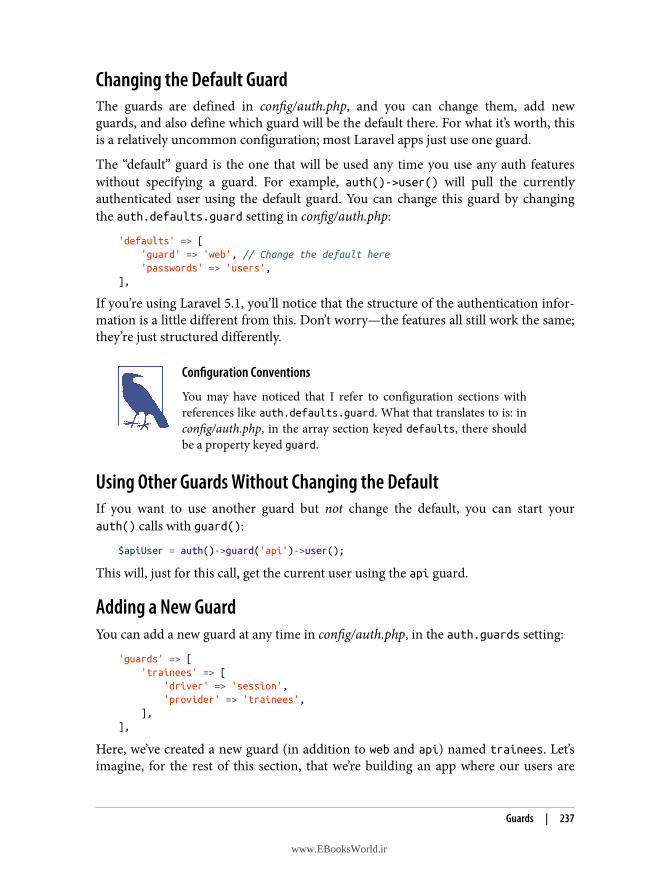
Changing the Default GuardThe guards are defined in config/auth.php, and you can change them, add newguards, and also define which guard will be the default there. For what it’s worth, thisis a relatively uncommon configuration; most Laravel apps just use one guard.
The “default” guard is the one that will be used any time you use any auth featureswithout specifying a guard. For example, auth()->user() will pull the currentlyauthenticated user using the default guard. You can change this guard by changingthe auth.defaults.guard setting in config/auth.php:
'defaults' => [ 'guard' => 'web', // Change the default here 'passwords' => 'users',],
If you’re using Laravel 5.1, you’ll notice that the structure of the authentication infor‐mation is a little different from this. Don’t worry—the features all still work the same;they’re just structured differently.
Configuration Conventions
You may have noticed that I refer to configuration sections withreferences like auth.defaults.guard. What that translates to is: inconfig/auth.php, in the array section keyed defaults, there shouldbe a property keyed guard.
Using Other Guards Without Changing the DefaultIf you want to use another guard but not change the default, you can start yourauth() calls with guard():
$apiUser = auth()->guard('api')->user();
This will, just for this call, get the current user using the api guard.
Adding a New GuardYou can add a new guard at any time in config/auth.php, in the auth.guards setting:
'guards' => [ 'trainees' => [ 'driver' => 'session', 'provider' => 'trainees', ],],
Here, we’ve created a new guard (in addition to web and api) named trainees. Let’simagine, for the rest of this section, that we’re building an app where our users are
Guards | 237
www.EBooksWorld.ir

physical trainers and they each have their own users—trainees—who can log in totheir subdomains. So, we need a separate guard for them.
The only two options for driver are token and session. Out of the box, the onlyoption for provider is users, which supports authentication against your defaultusers table, but you can create your own provider easily.
Closure Request GuardsIf you want to define a custom guard, and your guard conditions (how to look up agiven user against the request) can be described simply enough in response to anygiven HTTP request, you might just want to throw the user lookup code into a clo‐sure and not deal with creating a new custom guard class.
The viaRequest() auth method makes it possible to define a guard (named in thefirst parameter) using just a closure (defined in the second parameter) that takes theHTTP request and returns the appropriate user. To register a closure request guard,call viaRequest() in the boot() method of your AuthServiceProvider, as shown inExample 9-12.
Example 9-12. Defining a closure request guard
public function boot(){ $this->registerPolicies();
Auth::viaRequest('token-hash', function ($request) { return User::where('token-hash', $request->token)->first(); });}
Creating a Custom User ProviderJust below where guards are defined in config/auth.php, there’s an auth.providerssection that defines the available providers. Let’s create a new provider named trainees:
'providers' => [ 'users' => [ 'driver' => 'eloquent', 'model' => App\User::class, ],
'trainees' => [ 'driver' => 'eloquent', 'model' => App\Trainee::class, ],],
238 | Chapter 9: User Authentication and Authorization
www.EBooksWorld.ir
The two options for driver are eloquent and database. If you use eloquent, you’llneed a model property that contains an Eloquent class name (the model to use foryour User class); and if you use database, you’ll need a table property to definewhich table it should authenticate against.
In our example, you can see that this application has a User and a Trainee, and theyneed to be authenticated separately. This way, the code can differentiate betweenauth()->guard('users') and auth()->guard('trainees').
One last note: the auth route middleware can take a parameter that is the guardname. So, you can guard certain routes with a specific guard:
Route::middleware('auth:trainees')->group(function () { // Trainee-only routes here});
Custom User Providers for Nonrelational DatabasesThe user provider creation flow just described still relies on the same UserProviderclass, which means it’s expecting to pull the identifying information out of a relationaldatabase. But if you’re using Mongo or Riak or something similar, you’ll actually needto create your own class.
To do this, create a new class that implements the Illuminate\Contracts\Auth\UserProvider interface, and then bind it in AuthServiceProvider@boot:
auth()->provider('riak', function ($app, array $config) { // Return an instance of Illuminate\Contracts\Auth\UserProvider... return new RiakUserProvider($app['riak.connection']);});
Auth EventsWe’ll talk more about events in Chapter 16, but Laravel’s event system is a basicpub/sub framework. There are system- and user-generated events that are broadcast,and the user has the ability to create event listeners that do certain things in responseto certain events.
So, what if you wanted to send a ping to a particular security service every time a userwas locked out after too many failed login attempts? Maybe this service watches outfor a certain number of failed logins from certain geographic regions, or somethingelse. You could, of course, inject a call in the appropriate controller. But with events,you can just create an event listener that listens to the “user locked out” event, andregister that.
Take a look at Example 9-13 to see all of the events that the authentication systememits.
Auth Events | 239
www.EBooksWorld.ir
Example 9-13. Authentication events generated by the framework
protected $listen = [ 'Illuminate\Auth\Events\Registered' => [], 'Illuminate\Auth\Events\Attempting' => [], 'Illuminate\Auth\Events\Authenticated' => [], 'Illuminate\Auth\Events\Login' => [], 'Illuminate\Auth\Events\Failed' => [], 'Illuminate\Auth\Events\Logout' => [], 'Illuminate\Auth\Events\Lockout' => [], 'Illuminate\Auth\Events\PasswordReset' => [],];
As you can see, there are listeners for “user registered,” “user attempting login,” “userauthenticated,” “successful login,” “failed login,” “logout,” “lockout,” and “passwordreset.” To learn more about how to build event listeners for these events, check outChapter 16.
Authorization (ACL) and RolesFinally, let’s cover Laravel’s authorization system. It enables you to determine whethera user is authorized to do a particular thing, which you’ll check using a few primaryverbs: can, cannot, allows, and denies. The access control list (ACL) system wasintroduced in Laravel 5.2.
Most of this authorization control will be performed using the Gate facade, but thereare also convenience helpers available in your controllers, on the User model, as mid‐dleware, and as Blade directives. Take a look at Example 9-14 to get a taste of whatwe’ll be able to do.
Example 9-14. Basic usage of the Gate facade
if (Gate::denies('edit-contact', $contact)) { abort(403);}
if (! Gate::allows('create-contact', Contact::class)) { abort(403);}
Defining Authorization RulesThe default location for defining authorization rules is in the boot() method of theAuthServiceProvider, where you’ll be calling methods on the Auth facade.
240 | Chapter 9: User Authentication and Authorization
www.EBooksWorld.ir
An authorization rule is called an ability and is comprised of two things: a string key(e.g., update-contact) and a closure that returns a Boolean. Example 9-15 shows anability for updating a contact.
Example 9-15. Sample ability for updating a contact
class AuthServiceProvider extends ServiceProvider{ public function boot() { $this->registerPolicies();
Gate::define('update-contact', function ($user, $contact) { return $user->id == $contact->user_id; }); }}
Let’s walk through the steps for defining an ability.
First, you want to define a key. In naming this key, you should consider what stringmakes sense in your code’s flow to refer to the ability you’re providing to the user. Youcan see the code sample uses the convention {verb}-{modelName}: create-contact,update-contact, etc.
Second, you define the closure. The first parameter will be the currently authenticateduser, and all parameters after that will be the object(s) you’re checking for access to—in this instance, the contact.
So, given those two objects, we can check whether the user is authorized to updatethis contact. You can write this logic however you want, but in the app we’re lookingat the moment, authorization depends on being the creator of the contact row. Theclosure will return true (authorized) if the current user created the contact, andfalse (unauthorized) if not.
Just like with route definitions, you could also use a class and method instead of aclosure to resolve this definition:
$gate->define('update-contact', 'ContactACLChecker@updateContact');
The Gate Facade (and Injecting Gate)Now that you’ve defined an ability, it’s time to test against it. The simplest way is touse the Gate facade, as in Example 9-16 (or you can inject an instance of Illuminate\Contracts\Auth\Access\Gate).
Authorization (ACL) and Roles | 241
www.EBooksWorld.ir
Example 9-16. Basic Gate facade usage
if (Gate::allows('update-contact', $contact)) { // Update contact}
// orif (Gate::denies('update-contact', $contact)) { abort(403);}
You might also define an ability with multiple parameters—maybe a contact can be ingroups, and you want to authorize whether the user has access to add a contact to agroup. Example 9-17 shows how to do this.
Example 9-17. Abilities with multiple parameters
// DefinitionGate::define('add-contact-to-group', function ($user, $contact, $group) { return $user->id == $contact->user_id && $user->id == $group->user_id;});
// Usageif (Gate::denies('add-contact-to-group', [$contact, $group])) { abort(403);}
And if you need to check authorization for a user other than the currently authentica‐ted user, try forUser(), like in Example 9-18.
Example 9-18. Specifying the user for Gate
if (Gate::forUser($user)->denies('create-contact')) { abort(403);}
Resource GatesThe most common use for ACLs is to define access to individual “resources” (thinkan Eloquent model, or something you’re allowing users to administer from theiradmin panel).
The resource() method makes it possible to apply the four most common gates,view, create, update, and delete, to a single resource at once:
Gate::resource('photos', 'App\Policies\PhotoPolicy');
This is equivalent to defining the following:
242 | Chapter 9: User Authentication and Authorization
www.EBooksWorld.ir
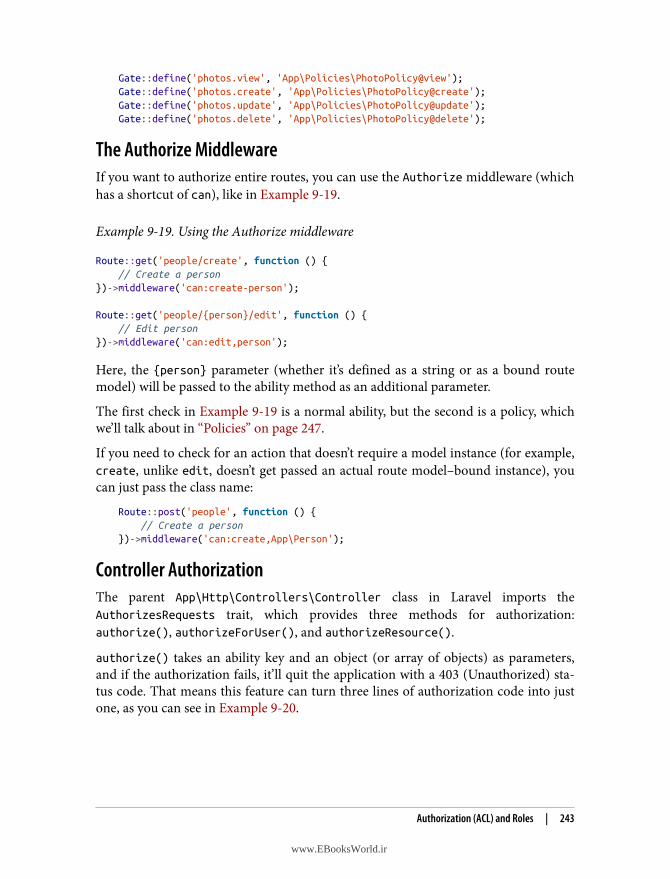
Gate::define('photos.view', 'App\Policies\PhotoPolicy@view');Gate::define('photos.create', 'App\Policies\PhotoPolicy@create');Gate::define('photos.update', 'App\Policies\PhotoPolicy@update');Gate::define('photos.delete', 'App\Policies\PhotoPolicy@delete');
The Authorize MiddlewareIf you want to authorize entire routes, you can use the Authorize middleware (whichhas a shortcut of can), like in Example 9-19.
Example 9-19. Using the Authorize middleware
Route::get('people/create', function () { // Create a person})->middleware('can:create-person');
Route::get('people/{person}/edit', function () { // Edit person})->middleware('can:edit,person');
Here, the {person} parameter (whether it’s defined as a string or as a bound routemodel) will be passed to the ability method as an additional parameter.
The first check in Example 9-19 is a normal ability, but the second is a policy, whichwe’ll talk about in “Policies” on page 247.
If you need to check for an action that doesn’t require a model instance (for example,create, unlike edit, doesn’t get passed an actual route model–bound instance), youcan just pass the class name:
Route::post('people', function () { // Create a person})->middleware('can:create,App\Person');
Controller AuthorizationThe parent App\Http\Controllers\Controller class in Laravel imports theAuthorizesRequests trait, which provides three methods for authorization:authorize(), authorizeForUser(), and authorizeResource().
authorize() takes an ability key and an object (or array of objects) as parameters,and if the authorization fails, it’ll quit the application with a 403 (Unauthorized) sta‐tus code. That means this feature can turn three lines of authorization code into justone, as you can see in Example 9-20.
Authorization (ACL) and Roles | 243
www.EBooksWorld.ir
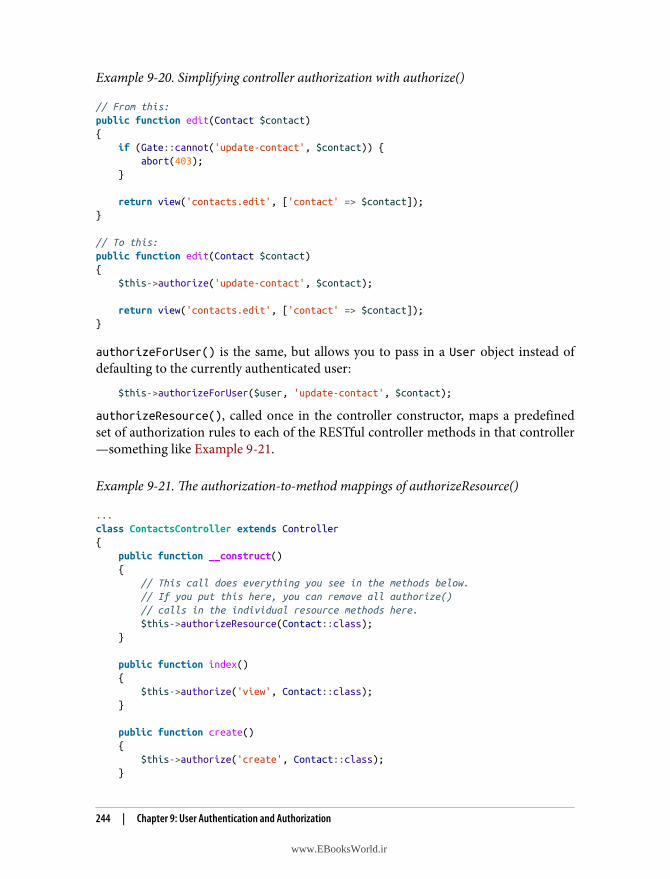
Example 9-20. Simplifying controller authorization with authorize()
// From this:public function edit(Contact $contact){ if (Gate::cannot('update-contact', $contact)) { abort(403); }
return view('contacts.edit', ['contact' => $contact]);}
// To this:public function edit(Contact $contact){ $this->authorize('update-contact', $contact);
return view('contacts.edit', ['contact' => $contact]);}
authorizeForUser() is the same, but allows you to pass in a User object instead ofdefaulting to the currently authenticated user:
$this->authorizeForUser($user, 'update-contact', $contact);
authorizeResource(), called once in the controller constructor, maps a predefinedset of authorization rules to each of the RESTful controller methods in that controller—something like Example 9-21.
Example 9-21. The authorization-to-method mappings of authorizeResource()
...class ContactsController extends Controller{ public function __construct() { // This call does everything you see in the methods below. // If you put this here, you can remove all authorize() // calls in the individual resource methods here. $this->authorizeResource(Contact::class); }
public function index() { $this->authorize('view', Contact::class); }
public function create() { $this->authorize('create', Contact::class); }
244 | Chapter 9: User Authentication and Authorization
www.EBooksWorld.ir
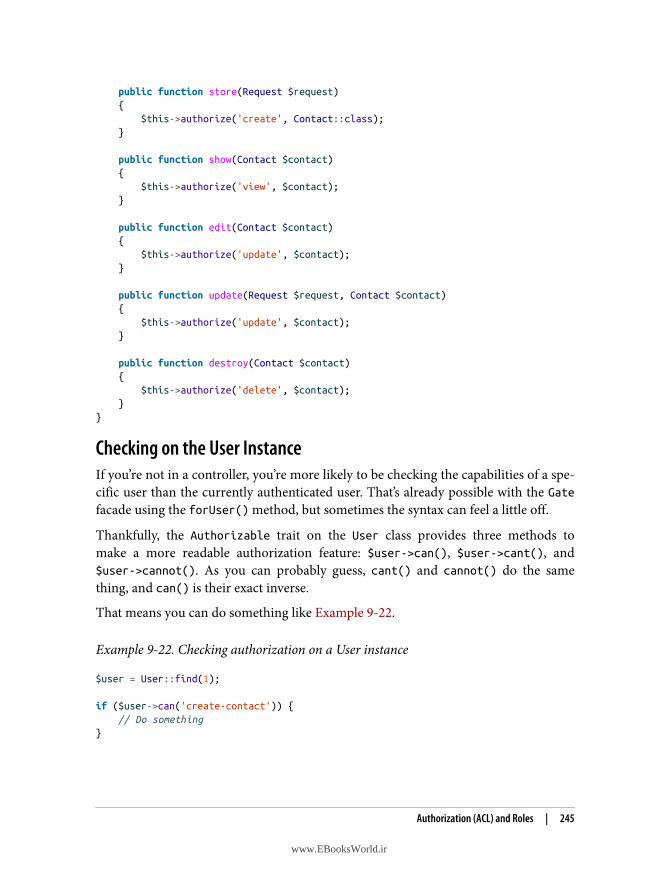
public function store(Request $request) { $this->authorize('create', Contact::class); }
public function show(Contact $contact) { $this->authorize('view', $contact); }
public function edit(Contact $contact) { $this->authorize('update', $contact); }
public function update(Request $request, Contact $contact) { $this->authorize('update', $contact); }
public function destroy(Contact $contact) { $this->authorize('delete', $contact); }}
Checking on the User InstanceIf you’re not in a controller, you’re more likely to be checking the capabilities of a spe‐cific user than the currently authenticated user. That’s already possible with the Gatefacade using the forUser() method, but sometimes the syntax can feel a little off.
Thankfully, the Authorizable trait on the User class provides three methods tomake a more readable authorization feature: $user->can(), $user->cant(), and$user->cannot(). As you can probably guess, cant() and cannot() do the samething, and can() is their exact inverse.
That means you can do something like Example 9-22.
Example 9-22. Checking authorization on a User instance
$user = User::find(1);
if ($user->can('create-contact')) { // Do something}
Authorization (ACL) and Roles | 245
www.EBooksWorld.ir
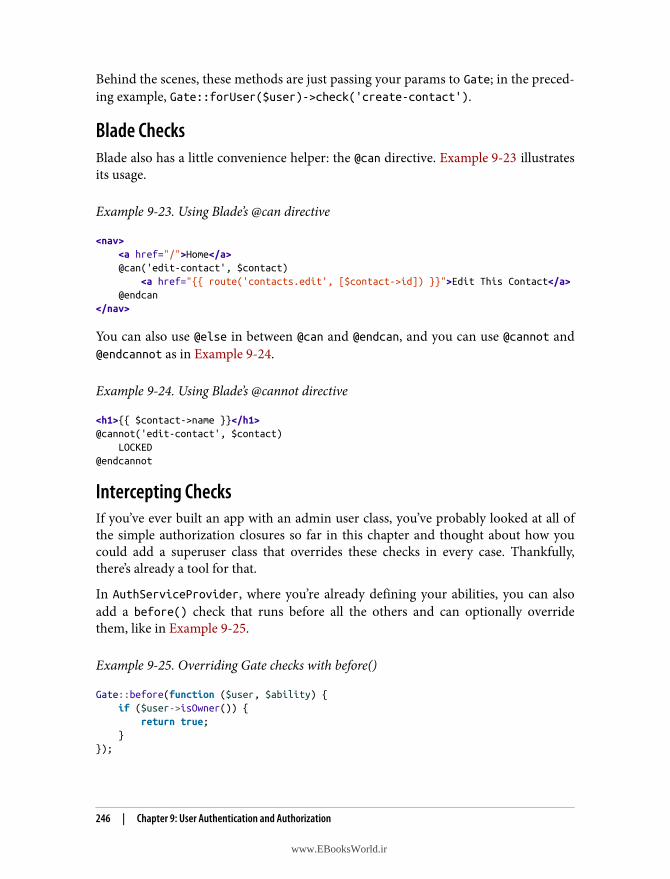
Behind the scenes, these methods are just passing your params to Gate; in the preced‐ing example, Gate::forUser($user)->check('create-contact').
Blade ChecksBlade also has a little convenience helper: the @can directive. Example 9-23 illustratesits usage.
Example 9-23. Using Blade’s @can directive
<nav> <a href="/">Home</a> @can('edit-contact', $contact) <a href="{{ route('contacts.edit', [$contact->id]) }}">Edit This Contact</a> @endcan</nav>
You can also use @else in between @can and @endcan, and you can use @cannot and@endcannot as in Example 9-24.
Example 9-24. Using Blade’s @cannot directive
<h1>{{ $contact->name }}</h1>@cannot('edit-contact', $contact) LOCKED@endcannot
Intercepting ChecksIf you’ve ever built an app with an admin user class, you’ve probably looked at all ofthe simple authorization closures so far in this chapter and thought about how youcould add a superuser class that overrides these checks in every case. Thankfully,there’s already a tool for that.
In AuthServiceProvider, where you’re already defining your abilities, you can alsoadd a before() check that runs before all the others and can optionally overridethem, like in Example 9-25.
Example 9-25. Overriding Gate checks with before()
Gate::before(function ($user, $ability) { if ($user->isOwner()) { return true; }});
246 | Chapter 9: User Authentication and Authorization
www.EBooksWorld.ir
Note that the string name for the ability is also passed in, so you can differentiateyour before() hooks based on your ability naming scheme.
PoliciesUp until this point, all of the access controls have required you to manually associateEloquent models with the ability names. You could have created an ability namedsomething like visit-dashboard that’s not related to a specific Eloquent model, butyou’ll probably have noticed that most of our examples have had to do with doingsomething to something—and in most of these cases, the something that’s the recipientof the action is an Eloquent model.
Authorization policies are organizational structures that help you group your author‐ization logic based on the resource you’re controlling access to. They make it easy tomanage defining authorization rules for behavior toward a particular Eloquent model(or other PHP class), all together in a single location.
Generating policiesPolicies are PHP classes, which can be generated with an Artisan command:
php artisan make:policy ContactPolicy
Once they’re generated, they need to be registered. The AuthServiceProvider has a$policies property, which is an array. The key of each item is the class name of theprotected resource (almost always an Eloquent class), and the value is the policy classname. Example 9-26 shows what this will look like.
Example 9-26. Registering policies in AuthServiceProvider
class AuthServiceProvider extends ServiceProvider{ protected $policies = [ Contact::class => ContactPolicy::class, ];
A policy class that’s generated by Artisan doesn’t have any special properties or meth‐ods. But every method that you add is now mapped as an ability key for this object.
Policy Auto-Discovery
In applications running Laravel 5.8+, Laravel tries to “guess” thelinks between your policies and their corresponding models. Forexample, it’ll apply the PostPolicy to your Post model automati‐cally.If you need to customize the logic Laravel uses to guess this map‐ping, check out the Policy docs.
Authorization (ACL) and Roles | 247
www.EBooksWorld.ir
Let’s define an update() method to take a look at how it works (Example 9-27).
Example 9-27. A sample update() policy method
<?php
namespace App\Policies;
class ContactPolicy{ public function update($user, $contact) { return $user->id == $contact->user_id; }}
Notice that the contents of this method look exactly like they would in a Gate defini‐tion.
Policy Methods That Don’t Take an Instance
What if you want to define a policy method that relates to theclass but not a specific instance—for example, “can this user
create contacts at all?” rather than just “can this user view this spe‐cific contact?” In Laravel 5.3, you can treat this just like a normalmethod. In Laravel 5.2, when you create that method, you’ll need toadd “Any” at the end of its name:
...class ContactPolicy{ public function createAny($user) { return $user->canCreateContacts(); }
Checking policies
If there’s a policy defined for a resource type, the Gate facade will use the first param‐eter to figure out which method to check on the policy. If you runGate::allows('update', $contact), it will check the ContactPolicy@update
method for authorization.
This also works for the Authorize middleware and for User model checking andBlade checking, as seen in Example 9-28.
248 | Chapter 9: User Authentication and Authorization
www.EBooksWorld.ir
Example 9-28. Checking authorization against a policy
// Gateif (Gate::denies('update', $contact)) { abort(403);}
// Gate if you don't have an explicit instanceif (! Gate::check('create', Contact::class)) { abort(403);}
// Userif ($user->can('update', $contact)) { // Do stuff}
// Blade@can('update', $contact) // Show stuff@endcan
Additionally, there’s a policy() helper that allows you to retrieve a policy class andrun its methods:
if (policy($contact)->update($user, $contact)) { // Do stuff}
Overriding policies
Just like with normal ability definitions, policies can define a before() method thatallows you to override any call before it’s even processed (see Example 9-29).
Example 9-29. Overriding policies with the before() method
public function before($user, $ability){ if ($user->isAdmin()) { return true; }}
TestingApplication tests often need to perform a particular behavior on behalf of a particularuser. We therefore need to be able to authenticate as a user in application tests, andwe need to test authorization rules and authentication routes.
Testing | 249
www.EBooksWorld.ir
Of course, it’s possible to write an application test that manually visits the login pageand then fills out the form and submits it, but that’s not necessary. Instead, the sim‐plest option is to use the ->be() method to simulate being logged in as a user. Take alook at Example 9-30.
Example 9-30. Authenticating as a user in application tests
public function test_it_creates_a_new_contact(){ $user = factory(User::class)->create(); $this->be($user);
$this->post('contacts', [ 'email' => '[email protected]', ]);
$this->assertDatabaseHas('contacts', [ 'email' => '[email protected]', 'user_id' => $user->id, ]);}
You can also use, and chain, the actingAs() method instead of be(), if you preferhow it reads:
public function test_it_creates_a_new_contact(){ $user = factory(User::class)->create();
$this->actingAs($user)->post('contacts', [ 'email' => '[email protected]', ]);
$this->assertDatabaseHas('contacts', [ 'email' => '[email protected]', 'user_id' => $user->id, ]);}
We can also test authorization like in Example 9-31.
Example 9-31. Testing authorization rules
public function test_non_admins_cant_create_users(){ $user = factory(User::class)->create([ 'admin' => false, ]); $this->be($user);
250 | Chapter 9: User Authentication and Authorization
www.EBooksWorld.ir
$this->post('users', ['email' => '[email protected]']);
$this->assertDatabaseMissing('users', [ 'email' => '[email protected]', ]);}
Or we can test for a 403 response like in Example 9-32.
Example 9-32. Testing authorization rules by checking status code
public function test_non_admins_cant_create_users(){ $user = factory(User::class)->create([ 'admin' => false, ]); $this->be($user);
$response = $this->post('users', ['email' => '[email protected]']);
$response->assertStatus(403);}
We need to test that our authentication (signup and sign-in) routes work too, as illus‐trated in Example 9-33.
Example 9-33. Testing authentication routes
public function test_users_can_register(){ $this->post('register', [ 'name' => 'Sal Leibowitz', 'email' => '[email protected]', 'password' => 'abcdefg123', 'password_confirmation' => 'abcdefg123', ]);
$this->assertDatabaseHas('users', [ 'name' => 'Sal Leibowitz', 'email' => '[email protected]', ]);}
public function test_users_can_log_in(){ $user = factory(User::class)->create([ 'password' => Hash::make('abcdefg123') ]);
$this->post('login', [
Testing | 251
www.EBooksWorld.ir

'email' => $user->email, 'password' => 'abcdefg123', ]);
$this->assertTrue(auth()->check()); $this->assertTrue($user->is(auth()->user()));}
We can also use the integration test features to direct the test to “click” our authenti‐cation fields and “submit” the fields to test the entire flow. We’ll talk about that morein Chapter 12.
Different Names for Testing Methods Prior to Laravel 5.4
In projects running versions of Laravel prior to 5.4,assertDatabaseHas() should be replaced by seeInDatabase(),assertDatabaseMissing() should likewise be replaced bydontSeeInDatabase(), assertDatabaseHas() should be replacedby seeInDatabase(), and assertStatus() should be called on$this instead of $response.
TL;DRBetween the default User model, the create_users_table migration, the auth con‐trollers, and the auth scaffold, Laravel provides a full user authentication system outof the box. The RegisterController handles user registration, the LoginControllerhandles user authentication, and the ResetPasswordController and theForgotPasswordController handle password resets. Each has certain properties andmethods that can be used to override some of the default behavior.
The Auth facade and the auth() global helper provide access to the current user(auth()->user()) and make it easy to check whether a user is logged in(auth()->check() and auth()->guest()).
Laravel also has an authorization system built in that allows you to define specificabilities (create-contact, visit-secret-page) or define policies for user interactionwith entire models.
You can check for authorization with the Gate facade, the can() and cannot() meth‐ods on the User class, the @can and @cannot directives in Blade, the authorize()methods on the controller, or the can middleware.
252 | Chapter 9: User Authentication and Authorization
www.EBooksWorld.ir
CHAPTER 10
Requests, Responses, and Middleware
We’ve already talked a bit about the Illuminate Request object. In Chapter 3, forexample, you saw how you can typehint it in constructors to get an instance or usethe request() helper to retrieve it, and in Chapter 7 we looked at how you can use itto get information about the user’s input.
In this chapter, you’ll learn more about what the Request object is, how it’s generatedand what it represents, and what part it plays in your application’s lifecycle. We’llalso talk about the Response object and Laravel’s implementation of the middlewarepattern.
Laravel’s Request LifecycleEvery request coming into a Laravel application, whether generated by an HTTPrequest or a command-line interaction, is immediately converted into an IlluminateRequest object, which then crosses many layers and ends up being parsed by theapplication itself. The application then generates an Illuminate Response object,which is sent back out across those layers and finally returned to the end user.
This request/response lifecycle is illustrated in Figure 10-1. Let’s take a look at what ittakes to make each of these steps happen, from the first line of code to the last.
253
www.EBooksWorld.ir
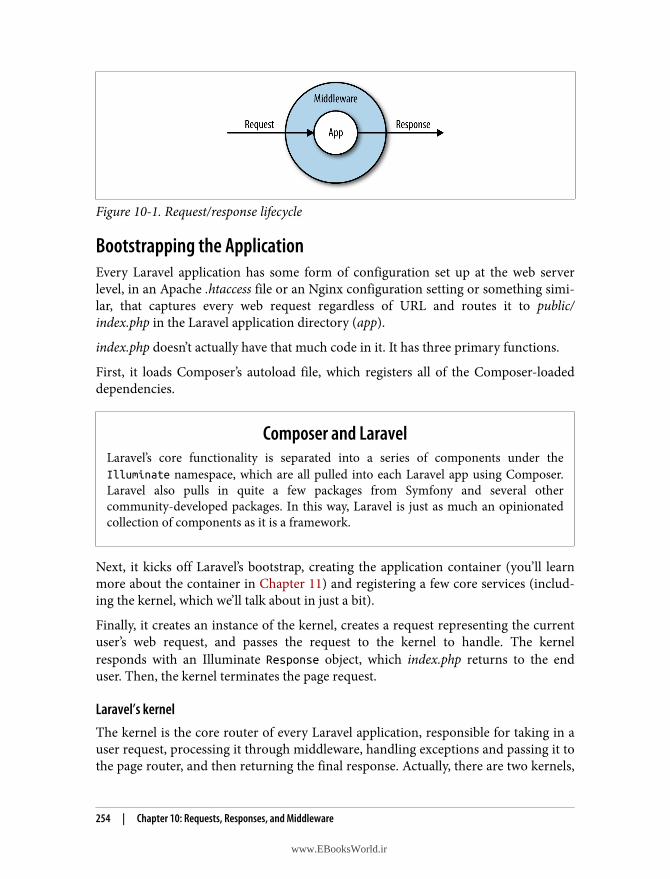
Figure 10-1. Request/response lifecycle
Bootstrapping the ApplicationEvery Laravel application has some form of configuration set up at the web serverlevel, in an Apache .htaccess file or an Nginx configuration setting or something simi‐lar, that captures every web request regardless of URL and routes it to public/index.php in the Laravel application directory (app).
index.php doesn’t actually have that much code in it. It has three primary functions.
First, it loads Composer’s autoload file, which registers all of the Composer-loadeddependencies.
Composer and LaravelLaravel’s core functionality is separated into a series of components under theIlluminate namespace, which are all pulled into each Laravel app using Composer.Laravel also pulls in quite a few packages from Symfony and several othercommunity-developed packages. In this way, Laravel is just as much an opinionatedcollection of components as it is a framework.
Next, it kicks off Laravel’s bootstrap, creating the application container (you’ll learnmore about the container in Chapter 11) and registering a few core services (includ‐ing the kernel, which we’ll talk about in just a bit).
Finally, it creates an instance of the kernel, creates a request representing the currentuser’s web request, and passes the request to the kernel to handle. The kernelresponds with an Illuminate Response object, which index.php returns to the enduser. Then, the kernel terminates the page request.
Laravel’s kernelThe kernel is the core router of every Laravel application, responsible for taking in auser request, processing it through middleware, handling exceptions and passing it tothe page router, and then returning the final response. Actually, there are two kernels,
254 | Chapter 10: Requests, Responses, and Middleware
www.EBooksWorld.ir
but only one is used for each page request. One of the routers handles web requests(the HTTP kernel) and the other handles console, cron, and Artisan requests (theconsole kernel). Each has a handle() method that’s responsible for taking in an Illu‐minate Request object and returning an Illuminate Response object.
The kernel runs all of the bootstraps that need to run before every request, includingdetermining which environment the current request is running in (staging, local, pro‐duction, etc.) and running all of the service providers. The HTTP kernel additionallydefines the list of middleware that will wrap each request, including the core middle‐ware responsible for sessions and CSRF protection.
Service ProvidersWhile there’s a bit of procedural code in these bootstraps, almost all of Laravel’s boot‐strap code is separated into something Laravel calls service providers. A service pro‐vider is a class that encapsulates logic that various parts of your application need torun in order to bootstrap their core functionality.
For example, there’s an AuthServiceProvider that bootstraps all of the registrationsnecessary for Laravel’s authentication system and a RouteServiceProvider that boot‐straps the routing system.
The concept of service providers can be a little hard to understand at first, so thinkabout it this way: many components of your application have bootstrap code thatneeds to run when the application initializes. Service providers are a tool for group‐ing that bootstrap code into related classes. If you have any code that needs to runin preparation for your application code to work, it’s a strong candidate for a serviceprovider.
For example, if you ever find that the feature you’re working on requires some classesregistered in the container (you’ll learn more about this in Chapter 11), you wouldcreate a service provider just for that piece of functionality. You might have aGitHubServiceProvider or a MailerServiceProvider.
boot(), register(), and deferring on service providers
Service providers have two important methods: boot() and register(). There’s alsoa DeferrableProvider interface (5.8+) or a $defer property (5.7 and earlier) thatyou might choose to use. Here’s how they work.
First, all of the service providers’ register() methods are called. This is where you’llwant to bind classes and aliases to the container. You don’t want to do anything inregister() that relies on the entire application being bootstrapped.
Laravel’s Request Lifecycle | 255
www.EBooksWorld.ir
Second, all of the service providers’ boot() methods are called. You can now do anyother bootstrapping here, like binding event listeners or defining routes—anythingthat may rely on the entire Laravel application having been bootstrapped.
If your service provider is only going to register bindings in the container (i.e., teachthe container how to resolve a given class or interface), but not perform any otherbootstrapping, you can “defer” its registrations, which means they won’t run unlessone of their bindings is explicitly requested from the container. This can speed upyour application’s average time to bootstrap.
If you want to defer your service provider’s registrations, in 5.8+, first implement theIlluminate\Contracts\Support\DeferrableProvider interface; or, in 5.7 and ear‐lier, first give it a protected $defer property and set it to true; and then, in all ver‐sions, give the service provider a provides() method that returns a list of bindingsthe provider provides, as shown in Example 10-1.
Example 10-1. Deferring the registration of a service provider
...use Illuminate\Contracts\Support\DeferrableProvider;
class GitHubServiceProvider extends ServiceProvider implements DeferrableProvider{ public function provides() { return [ GitHubClient::class, ]; }
More Uses for Service Providers
Service providers also have a suite of methods and configurationoptions that can provide advanced functionality to the end userwhen the provider is published as part of a Composer package.Take a look at the service provider definition in the Laravel sourceto learn more about how this can work.
Now that we’ve covered the application bootstrap, let’s take a look at the Requestobject, the most important output of the bootstrap.
256 | Chapter 10: Requests, Responses, and Middleware
www.EBooksWorld.ir

The Request ObjectThe Illuminate\Http\Request class is a Laravel-specific extension of Symfony’sHttpFoundation\Request class.
Symfony HttpFoundationIf you’re not familiar with it, Symfony’s HttpFoundation suite of classes powersalmost every PHP framework in existence at this point; this is the most popular andpowerful set of abstractions available in PHP for representing HTTP requests,responses, headers, cookies, and more.
The Request object is intended to represent every relevant piece of information youmight care to know about a user’s HTTP request.
In native PHP code, you might find yourself looking to $_SERVER, $_GET, $_POST, andother combinations of globals and processing logic to get information about the cur‐rent user’s request. What files has the user uploaded? What’s their IP address? Whatfields did they post? All of this is sprinkled around the language—and your code—ina way that’s hard to understand and harder to mock.
Symfony’s Request object instead collects all of the information necessary to repre‐sent a single HTTP request into a single object, and then tacks on conveniencemethods to make it easy to get useful information from it. The Illuminate Requestobject adds even more convenience methods to get information about the requestit’s representing.
Capturing a Request
You’ll very likely never need to do this in a Laravel app, but if youever need to capture your own Illuminate Request object directlyfrom PHP’s globals, you can use the capture() method:
$request = Illuminate\Http\Request::capture();
Getting a Request Object in LaravelLaravel creates an internal Request object for each request, and there are a few waysyou can get access to it.
First—and again, we’ll cover this more in Chapter 11—you can typehint the class inany constructor or method that’s resolved by the container. That means you can type‐hint it in a controller method or a service provider, as seen in Example 10-2.
The Request Object | 257
www.EBooksWorld.ir

Example 10-2. Typehinting in a container-resolved method to receive a Request object
...use Illuminate\Http\Request;
class PeopleController extends Controller{ public function index(Request $request) { $allInput = $request->all(); }
Alternatively, you can use the request() global helper, which allows you to call meth‐ods on it (e.g., request()->input()) and also allows you to call it on its own to getan instance of $request:
$request = request();$allInput = $request->all();// or$allInput = request()->all();
Finally, you can use the app() global method to get an instance of Request. You canpass either the fully qualified class name or the shortcut request:
$request = app(Illuminate\Http\Request::class);$request = app('request');
Getting Basic Information About a RequestNow that you know how to get an instance of Request, what can you do with it? Theprimary purpose of the Request object is to represent the current HTTP request, sothe primary functionality the Request class offers is to make it easy to get usefulinformation about the current request.
I’ve categorized the methods described here, but note that there’s certainly overlapbetween the categories, and the categories are a bit arbitrary—for example, queryparameters could just as easily be in “User and request state” as they are in “Basic userinput.” Hopefully these categories will make it easy for you to learn what’s available,and then you can throw away the categories.
Also, be aware that there are many more methods available on the Request object;these are just the most commonly used methods.
Basic user inputThe basic user input methods make it simple to get information that the users them‐selves explicitly provide—likely through submitting a form or an Ajax component.When I reference “user-provided input” here, I’m talking about input from query
258 | Chapter 10: Requests, Responses, and Middleware
www.EBooksWorld.ir

strings (GET), form submissions (POST), or JSON. The basic user input methodsinclude the following:
all()
Returns an array of all user-provided input.
input(fieldName)
Returns the value of a single user-provided input field.
only(fieldName|[array,of,field,names])
Returns an array of all user-provided input for the specified field name(s).
except(fieldName|[array,of,field,names])
Returns an array of all user-provided input except for the specified field name(s).
exists(fieldName)
Returns a Boolean indicating whether the field exists in the input. has() is analias.
filled(fieldName)
Returns a Boolean indicating whether the field exists in the input and is notempty (that is, has a value).
json()
Returns a ParameterBag if the page had JSON sent to it.
json(keyName)
Returns the value of the given key from the JSON sent to the page.
ParameterBagSometimes in Laravel you’ll run into a ParameterBag object. This class is sort of likean associative array. You can get a particular key using get():
echo $bag->get('name');
You can also use has() to check for the existence of a key, all() to get an array of allkeys and values, count() to count the number of items, and keys() to get an array ofjust the keys.
Example 10-3 gives a few quick examples of how to use the user-provided informa‐tion methods from a request.
The Request Object | 259
www.EBooksWorld.ir
Example 10-3. Getting basic user-provided information from the request
// form<form method="POST" action="/form"> @csrf <input name="name"> Name<br> <input type="submit"></form>
// Route receiving the formRoute::post('form', function (Request $request) { echo 'name is ' . $request->input('name') . '<br>'; echo 'all input is ' . print_r($request->all()) . '<br>'; echo 'user provided email address: ' . $request->has('email') ? 'true' : 'false';});
User and request stateThe user and request state methods include input that wasn’t explicitly provided bythe user through a form:
method()
Returns the method (GET, POST, PATCH, etc.) used to access this route.
path()
Returns the path (without the domain) used to access this page; for example,http://www.myapp.com/abc/def would return abc/def.
url()
Returns the URL (with the domain) used to access this page; for example, http://www.myapp.com/abc would return http://www.myapp.com/abc.
is()
Returns a Boolean indicating whether or not the current page request fuzzy-matches a provided string (e.g., /a/b/c would be matched by $request->is('*b*'), where * stands for any characters); uses a custom regex parserfound in Str::is().
ip()
Returns the user’s IP address.
header()
Returns an array of headers (e.g., ['accept-language' => ['en-
US,en;q=0.8']]), or, if passed a header name as a parameter, returns just thatheader.
260 | Chapter 10: Requests, Responses, and Middleware
www.EBooksWorld.ir
server()
Returns an array of the variables traditionally stored in $_SERVER (e.g.,REMOTE_ADDR), or, if passed a $_SERVER variable name, returns just that value.
secure()
Returns a Boolean indicating whether this page was loaded using HTTPS.
pjax()
Returns a Boolean indicating whether this page request was loaded using Pjax.
wantsJson()
Returns a Boolean indicating whether this request has any /json content types inits Accept headers.
isJson()
Returns a Boolean indicating whether this page request has any /json contenttypes in its Content-Type header.
accepts()
Returns a Boolean indicating whether this page request accepts a given contenttype.
FilesSo far, all of the input we’ve covered is either explicit (retrieved by methods likeall(), input(), etc.) or defined by the browser or referring site (retrieved by meth‐ods like pjax()). File inputs are similar to explicit user input, but they’re handledmuch differently:
file()
Returns an array of all uploaded files, or, if a key is passed (the file upload fieldname), returns just the one file.
allFiles()
Returns an array of all uploaded files; useful as opposed to file() because ofclearer naming.
hasFile()
Returns a Boolean indicating whether a file was uploaded at the specified key.
Every file that’s uploaded will be an instance of Symfony\Component\HttpFoundation\File\UploadedFile, which provides a suite of tools for validating, processing, andstoring uploaded files.
Take a look at Chapter 14 for more examples of how to handle uploaded files.
The Request Object | 261
www.EBooksWorld.ir
PersistenceThe request can also provide functionality for interacting with the session. Most ses‐sion functionality lives elsewhere, but there are a few methods that are particularlyrelevant to the current page request:
flash()
Flashes the current request’s user input to the session to be retrieved later, whichmeans it’s saved to the session but disappears after the next request.
flashOnly()
Flashes the current request’s user input for any keys in the provided array.
flashExcept()
Flashes the current request’s user input, except for any keys in the provided array.
old()
Returns an array of all previously flashed user input, or, if passed a key, returnsthe value for that key if it was previously flashed.
flush()
Wipes all previously flashed user input.
cookie()
Retrieves all cookies from the request, or, if a key is provided, retrieves just thatcookie.
hasCookie()
Returns a Boolean indicating whether the request has a cookie for the given key.
The flash*() and old() methods are used for storing user input and retrieving itlater, often after the input is validated and rejected.
The Response ObjectSimilar to the Request object, there’s an Illuminate Response object that representsthe response your application is sending to the end user, complete with headers,cookies, content, and anything else used for sending the end user’s browser instruc‐tions on rendering a page.
Just like Request, the Illuminate\Http\Response class extends a Symfony class:Symfony\Component\HttpFoundation\Response. This is a base class with a series ofproperties and methods that make it possible to represent and render a response; Illu‐minate’s Response class decorates it with a few helpful shortcuts.
262 | Chapter 10: Requests, Responses, and Middleware
www.EBooksWorld.ir
Using and Creating Response Objects in ControllersBefore we talk about how you can customize your Response objects, let’s step backand see how we most commonly work with Response objects.
In the end, any Response object returned from a route definition will be convertedinto an HTTP response. It may define specific headers or specific content, set cookies,or whatever else, but eventually it will be converted into a response your users’ brows‐ers can parse.
Let’s take a look at the simplest possible response, in Example 10-4.
Example 10-4. Simplest possible HTTP response
Route::get('route', function () { return new Illuminate\Http\Response('Hello!');});
// Same, using global function:Route::get('route', function () { return response('Hello!');});
We create a response, give it some core data, and then return it. We can also custom‐ize the HTTP status, headers, cookies, and more, like in Example 10-5.
Example 10-5. Simple HTTP response with customized status and headers
Route::get('route', function () { return response('Error!', 400) ->header('X-Header-Name', 'header-value') ->cookie('cookie-name', 'cookie-value');});
Setting headers
We define a header on a response by using the header() fluent method, like inExample 10-5. The first parameter is the header name, and the second is the headervalue.
Adding cookies
We can also set cookies directly on the Response object if we’d like. We’ll cover Lara‐vel’s cookie handling a bit more in Chapter 14, but take a look at Example 10-6 for asimple use case for attaching cookies to a response.
The Response Object | 263
www.EBooksWorld.ir
Example 10-6. Attaching a cookie to a response
return response($content) ->cookie('signup_dismissed', true);
Specialized Response TypesThere are also a few special response types for views, downloads, files, and JSON.Each is a predefined macro that makes it easy to reuse particular templates for head‐ers or content structure.
View responses
In Chapter 4, I used the global view() helper to show how to return a template—forexample, view('view.name.here') or something similar. But if you need to custom‐ize the headers, HTTP status, or anything else when returning a view, you can use theview() response type as shown in Example 10-7.
Example 10-7. Using the view() response type
Route::get('/', function (XmlGetterService $xml) { $data = $xml->get(); return response() ->view('xml-structure', $data) ->header('Content-Type', 'text/xml');});
Download responsesSometimes you want your application to force the user’s browser to download a file,whether you’re creating the file in Laravel or serving it from a database or a protectedlocation. The download() response type makes this simple.
The required first parameter is the path for the file you want the browser to down‐load. If it’s a generated file, you’ll need to save it somewhere temporarily.
The optional second parameter is the filename for the downloaded file (e.g.,export.csv). If you don’t pass a string here, it will be generated automatically. Theoptional third parameter allows you to pass an array of headers. Example 10-8 illus‐trates the use of the download() response type.
Example 10-8. Using the download() response type
public function export(){ return response() ->download('file.csv', 'export.csv', ['header' => 'value']);}
264 | Chapter 10: Requests, Responses, and Middleware
www.EBooksWorld.ir
public function otherExport(){ return response()->download('file.pdf');}
If you wish to delete the original file from the disk after returning a downloadresponse, you can chain the deleteFileAfterSend() method after the download()method:
public function export(){ return response() ->download('file.csv', 'export.csv') ->deleteFileAfterSend();}
File responsesThe file response is similar to the download response, except it allows the browser todisplay the file instead of forcing a download. This is most common with imagesand PDFs.
The required first parameter is the filename, and the optional second parameter canbe an array of headers (see Example 10-9).
Example 10-9. Using the file() response type
public function invoice($id){ return response()->file("./invoices/{$id}.pdf", ['header' => 'value']);}
JSON responsesJSON responses are so common that, even though they’re not really particularly com‐plex to program, there’s a custom response for them as well.
JSON responses convert the passed data to JSON (with json_encode()) and set theContent-Type to application/json. You can also optionally use the setCallback()method to create a JSONP response instead of JSON, as seen in Example 10-10.
Example 10-10. Using the json() response type
public function contacts(){ return response()->json(Contact::all());}
The Response Object | 265
www.EBooksWorld.ir
public function jsonpContacts(Request $request){ return response() ->json(Contact::all()) ->setCallback($request->input('callback'));}
public function nonEloquentContacts(){ return response()->json(['Tom', 'Jerry']);}
Redirect responses
Redirects aren’t commonly called on the response() helper, so they’re a bit differentfrom the other custom response types we’ve discussed already, but they’re still just adifferent sort of response. Redirects, returned from a Laravel route, send the user aredirect (often a 301) to another page or back to the previous page.
You technically can call a redirect from response(), as in return
response()->redirectTo('/'). But more commonly, you’ll use the redirect-specificglobal helpers.
There is a global redirect() function that can be used to create redirect responses,and a global back() function that is a shortcut to redirect()->back().
Just like most global helpers, the redirect() global function can either be passedparameters or be used to get an instance of its class that you then chain method callsonto. If you don’t chain, but just pass parameters, redirect() performs the same asredirect()->to(); it takes a string and redirects to that string URL. Example 10-11shows some examples of its use.
Example 10-11. Examples of using the redirect() global helper
return redirect('account/payment');return redirect()->to('account/payment');return redirect()->route('account.payment');return redirect()->action('AccountController@showPayment');
// If redirecting to an external domainreturn redirect()->away('https://tighten.co');
// If named route or controller needs parametersreturn redirect()->route('contacts.edit', ['id' => 15]);return redirect()->action('ContactsController@edit', ['id' => 15]);
You can also redirect “back” to the previous page, which is especially useful whenhandling and validating user input. Example 10-12 shows a common pattern in vali‐dation contexts.
266 | Chapter 10: Requests, Responses, and Middleware
www.EBooksWorld.ir

Example 10-12. Redirect back with input
public function store(){ // If validation fails... return back()->withInput();}
Finally, you can redirect and flash data to the session at the same time. This is com‐mon with error and success messages, like in Example 10-13.
Example 10-13. Redirect with flashed data
Route::post('contacts', function () { // Store the contact
return redirect('dashboard')->with('message', 'Contact created!');});
Route::get('dashboard', function () { // Get the flashed data from session--usually handled in Blade template echo session('message');});
Custom response macrosYou can also create your own custom response types using macros. This allows you todefine a series of modifications to make to the response and its provided content.
Let’s recreate the json() custom response type, just to see how it works. As always,you should probably create a custom service provider for these sorts of bindings, butfor now we’ll just put it in AppServiceProvider, as seen in Example 10-14.
Example 10-14. Creating a custom response macro
...class AppServiceProvider{ public function boot() { Response::macro('myJson', function ($content) { return response(json_encode($content)) ->withHeaders(['Content-Type' => 'application/json']); }); }
Then, we can use it just like we would use the predefined json() macro:
return response()->myJson(['name' => 'Sangeetha']);
The Response Object | 267
www.EBooksWorld.ir
This will return a response with the body of that array encoded for JSON, with theJSON-appropriate Content-Type header.
The Responsable interfaceIf you’d like to customize how you’re sending responses and a macro doesn’t offerenough space or enough organization, or if you want any of your objects to be capa‐ble of being returned as a “response” with their own logic of how to be displayed, theResponsable interface (introduced in Laravel 5.5) is for you.
The Responsable interface, Illuminate\Contracts\Support\Responsable, dictatesits implementors must have a toResponse() method. This needs to return an Illumi‐nate Response object. Example 10-15 illustrates how to create a Responsable object.
Example 10-15. Creating a simple Responsable object
...use Illuminate\Contracts\Support\Responsable;
class MyJson implements Responsable{ public function __construct($content) { $this->content = $content; }
public function toResponse() { return response(json_encode($this->content)) ->withHeaders(['Content-Type' => 'application/json']); }
Then, we can use it just like our custom macro:
return new MyJson(['name' => 'Sangeetha']);
This probably looks like a lot of work relative to the response macros we covered ear‐lier. But the Responsable interface really shines when you’re working with morecomplicated controller manipulations. One common example is to use it to createview models (or view objects), like in Example 10-16.
Example 10-16. Using Responsable to create a view object
...use Illuminate\Contracts\Support\Responsable;
class GroupDonationDashboard implements Responsable{ public function __construct($group)
268 | Chapter 10: Requests, Responses, and Middleware
www.EBooksWorld.ir
1 Or an ogre.
{ $this->group = $group; }
public function budgetThisYear() { // ... }
public function giftsThisYear() { // ... }
public function toResponse() { return view('groups.dashboard') ->with('annual_budget', $this->budgetThisYear()) ->with('annual_gifts_received', $this->giftsThisYear()); }
It starts to make a little bit more sense in this context—move your complex viewpreparation into a dedicated, testable object, and keep your controllers clean. Here’s acontroller that uses that Responsable object:
...class GroupController{ public function index(Group $group) { return new GroupDonationsDashboard($group); }
Laravel and MiddlewareTake a look back at Figure 10-1, at the start of this chapter.
We’ve covered the requests and responses, but we haven’t actually looked into whatmiddleware is. You may already be familiar with middleware; it’s not unique to Lara‐vel, but rather a widely used architecture pattern.
An Introduction to MiddlewareThe idea of middleware is that there is a series of layers wrapping around your appli‐cation, like a multilayer cake or an onion.1 Just as shown in Figure 10-1, every requestpasses through every middleware layer on its way into the application, and then the
Laravel and Middleware | 269
www.EBooksWorld.ir
resulting response passes back through the middleware layers on its way out to theend user.
Middleware are most often considered separate from your application logic, and usu‐ally are constructed in a way that should theoretically be applicable to any applica‐tion, not just the one you’re working on at the moment.
A middleware can inspect a request and decorate it, or reject it, based on what itfinds. That means middleware is great for something like rate limiting: it can inspectthe IP address, check how many times it’s accessed this resource in the last minute,and send back a 429 (Too Many Requests) status if a threshold is passed.
Because middleware also gets access to the response on its way out of the application,it’s great for decorating responses. For example, Laravel uses a middleware to add allof the queued cookies from a given request/response cycle to the response rightbefore it is sent to the end user.
But some of the most powerful uses of middleware come from the fact that it can benearly the first and the last thing to interact with the request/response cycle. Thatmakes it perfect for something like enabling sessions—PHP needs you to open thesession very early and close it very late, and middleware is also great for this.
Creating Custom MiddlewareLet’s imagine we want to have a middleware that rejects every request that uses theDELETE HTTP method, and also sends a cookie back for every request.
There’s an Artisan command to create custom middleware. Let’s try it out:
php artisan make:middleware BanDeleteMethod
You can now open up the file at app/Http/Middleware/BanDeleteMethod.php. Thedefault contents are shown in Example 10-17.
Example 10-17. Default middleware contents
...class BanDeleteMethod{ public function handle($request, Closure $next) { return $next($request); }}
How this handle() method represents the processing of both the incoming requestand the outgoing response is the most difficult thing to understand about middle‐ware, so let’s walk through it.
270 | Chapter 10: Requests, Responses, and Middleware
www.EBooksWorld.ir
Understanding middleware’s handle() methodFirst, remember that middleware are layered one on top of another, and then finallyon top of the app. The first middleware that’s registered gets first access to a requestwhen it comes in, then that request is passed to every other middleware in turn, thento the app; then the resulting response is passed outward through the middleware,and finally this first middleware gets last access to the response when it goes out.
Let’s imagine we’ve registered BanDeleteMethod as the first middleware to run. Thatmeans the $request coming into it is the raw request, unadulterated by any othermiddleware. Now what?
Passing that request to $next() means handing it off to the rest of the middleware.The $next() closure just takes that $request and passes it to the handle() method ofthe next middleware in the stack. It then gets passed on down the line until there areno more middleware to hand it to, and it finally ends up at the application.
Next, how does the response come out? This is where it might be hard to follow. Theapplication returns a response, which is passed back up the chain of middleware—because each middleware returns its response. So, within that same handle()method, the middleware can decorate a $request and pass it to the $next() closure,and can then choose to do something with the output it receives before finally return‐ing that output to the end user. Let’s look at some pseudocode to make this clearer(Example 10-18).
Example 10-18. Pseudocode explaining the middleware call process
...class BanDeleteMethod{ public function handle($request, Closure $next) { // At this point, $request is the raw request from the user. // Let's do something with it, just for fun. if ($request->ip() === '192.168.1.1') { return response('BANNED IP ADDRESS!', 403); }
// Now we've decided to accept it. Let's pass it on to the next // middleware in the stack. We pass it to $next(), and what is // returned is the response after the $request has been passed // down the stack of middleware to the application and the // application's response has been passed back up the stack. $response = $next($request);
// At this point, we can once again interact with the response // just before it is returned to the user $response->cookie('visited-our-site', true);
Laravel and Middleware | 271
www.EBooksWorld.ir
// Finally, we can release this response to the end user return $response; }}
Finally, let’s make the middleware do what we actually promised (Example 10-19).
Example 10-19. Sample middleware banning the delete method
...class BanDeleteMethod{ public function handle($request, Closure $next) { // Test for the DELETE method if ($request->method() === 'DELETE') { return response( "Get out of here with that delete method", 405 ); }
$response = $next($request);
// Assign cookie $response->cookie('visited-our-site', true);
// Return response return $response; }}
Binding MiddlewareWe’re not quite done yet. We need to register this middleware in one of two ways:globally or for specific routes.
Global middleware are applied to every route; route middleware are applied on aroute-by-route basis.
Binding global middlewareBoth bindings happen in app/Http/Kernel.php. To add a middleware as global, add itsclass name to the $middleware property, as in Example 10-20.
272 | Chapter 10: Requests, Responses, and Middleware
www.EBooksWorld.ir
Example 10-20. Binding global middleware
// app/Http/Kernel.phpprotected $middleware = [ \Illuminate\Foundation\Http\Middleware\CheckForMaintenanceMode::class, \App\Http\Middleware\BanDeleteMethod::class,];
Binding route middlewareMiddleware intended for specific routes can be added as a route middleware or aspart of a middleware group. Let’s start with the former.
Route middleware are added to the $routeMiddleware array in app/Http/Kernel.php.It’s similar to adding them to $middleware, except we have to give one a key that willbe used when applying this middleware to a particular route, as seen inExample 10-21.
Example 10-21. Binding route middleware
// app/Http/Kernel.phpprotected $routeMiddleware = [ 'auth' => \App\Http\Middleware\Authenticate::class, ... 'ban-delete' => \App\Http\Middleware\BanDeleteMethod::class,];
We can now use this middleware in our route definitions, like in Example 10-22.
Example 10-22. Applying route middleware in route definitions
// Doesn't make much sense for our current example...Route::get('contacts', 'ContactsController@index')->middleware('ban-delete');
// Makes more sense for our current example...Route::prefix('api')->middleware('ban-delete')->group(function () { // All routes related to an API});
Using middleware groupsLaravel 5.2 introduced the concept of middleware groups. They’re essentially pre-packaged bundles of middleware that make sense to be together in specific contexts.
Laravel and Middleware | 273
www.EBooksWorld.ir
Middleware Groups in 5.2 and 5.3
The default routes file in earlier releases of 5.2, routes.php, hadthree distinct sections: the root route (/) wasn’t under any mid‐
dleware group, and then there was a web middleware group and anapi middleware group. It was a bit confusing for new users, and itmeant the root route didn’t have access to the session or anythingelse that’s kicked off in the middleware.In later releases of 5.2 everything’s simplified: every route inroutes.php is in the web middleware group. In 5.3 and later, you geta routes/web.php file for web routes and a routes/api.php file for APIroutes. If you want to add routes in other groups, read on.
Out of the box there are two groups: web and api. web has all the middleware that willbe useful on almost every Laravel page request, including middleware for cookies,sessions, and CSRF protection. api has none of those—it has a throttling middlewareand a route model binding middleware, and that’s it. These are all defined in app/Http/Kernel.php.
You can apply middleware groups to routes just like you apply route middleware toroutes, with the middleware() fluent method:
Route::get('/', 'HomeController@index')->middleware('web');
You can also create your own middleware groups and add and remove route middle‐ware to and from preexisting middleware groups. It works just like adding route mid‐dleware normally, but you’re instead adding them to keyed groups in the$middlewareGroups array.
You might be wondering how these middleware groups match up with the twodefault routes files. Unsurprisingly, the routes/web.php file is wrapped with the webmiddleware group, and the routes/api.php file is wrapped with the api middlewaregroup.
The routes/* files are loaded in the RouteServiceProvider. Take a look at themap() method there (Example 10-23) and you’ll find a mapWebRoutes() method and amapApiRoutes() method, each of which loads its respective files already wrapped inthe appropriate middleware group.
Example 10-23. Default route service provider in Laravel 5.3+
// App\Providers\RouteServiceProviderpublic function map(){ $this->mapApiRoutes(); $this->mapWebRoutes();}
274 | Chapter 10: Requests, Responses, and Middleware
www.EBooksWorld.ir
protected function mapApiRoutes(){ Route::prefix('api') ->middleware('api') ->namespace($this->namespace) ->group(base_path('routes/api.php'));}
protected function mapWebRoutes(){ Route::middleware('web') ->namespace($this->namespace) ->group(base_path('routes/web.php'));}
As you can see in Example 10-23, we’re using the router to load a route group underthe default namespace (App\Http\Controllers) and with the web middleware group,and another under the api middleware group.
Passing Parameters to MiddlewareIt’s not common, but there are times when you need to pass parameters to a routemiddleware. For example, you might have an authentication middleware that will actdifferently depending on whether you’re guarding for the member user type or theowner user type:
Route::get('company', function () { return view('company.admin');})->middleware('auth:owner');
To make this work, you’ll need to add one or more parameters to the middleware’shandle() method and update that method’s logic accordingly, as shown inExample 10-24.
Example 10-24. Defining a route middleware that accepts parameters
public function handle($request, $next, $role){ if (auth()->check() && auth()->user()->hasRole($role)) { return $next($request); }
return redirect('login');}
Note that you can also add more than one parameter to the handle() method, andpass multiple parameters to the route definition by separating them with commas:
Laravel and Middleware | 275
www.EBooksWorld.ir
Route::get('company', function () { return view('company.admin');})->middleware('auth:owner,view');
Form Request ObjectsIn this chapter we covered how to inject an Illuminate Request object, which is thebase—and most common—request object.
However, you can also extend the Request object and inject that instead. You’ll learnmore about how to bind and inject custom classes in Chapter 11, but there’s one spe‐cial type, called the form request, that has its own set of behaviors.
See “Form Requests” on page 194 to learn more about creating and using formrequests.
Trusted ProxiesIf you use any Laravel tools to generate URLs within the app, you’ll notice that Lara‐vel detects whether the current request was via HTTP or HTTPS and will generateany links using the appropriate protocol.
However, this doesn’t always work when you have a proxy (e.g., a load balancer orother web-based proxy) in front of your app. Many proxies send nonstandard headerslike X_FORWARDED_PORT and X_FORWARDED_PROTO to your app, and expect your app to“trust” those, interpret them, and use them as a part of the process of interpreting theHTTP request. In order to make Laravel correctly treat proxied HTTPS calls likesecure calls, and in order for Laravel to process other headers from proxied requests,you need to define how it should do so.
You likely don’t just want to allow any proxy to send traffic to your app; rather, youwant to lock your app to only trust certain proxies, and even from those proxies youmay only want to trust certain forwarded headers.
Since Laravel 5.6, the package TrustedProxy is included by default with every installa‐tion of Laravel—but if you’re using an older version, you can still pull it into yourpackage. TrustedProxy makes it possible for you to whitelist certain sources of trafficand mark them as “trusted,” and also mark which forwarded headers you want totrust from those sources and how to map them to normal headers.
To configure which proxies your app will trust, you can edit the App\Http\Middleware\TrustProxies middleware and add the IP address for your load bal‐ancer or proxy to the $proxies array, as shown in Example 10-25.
276 | Chapter 10: Requests, Responses, and Middleware
www.EBooksWorld.ir
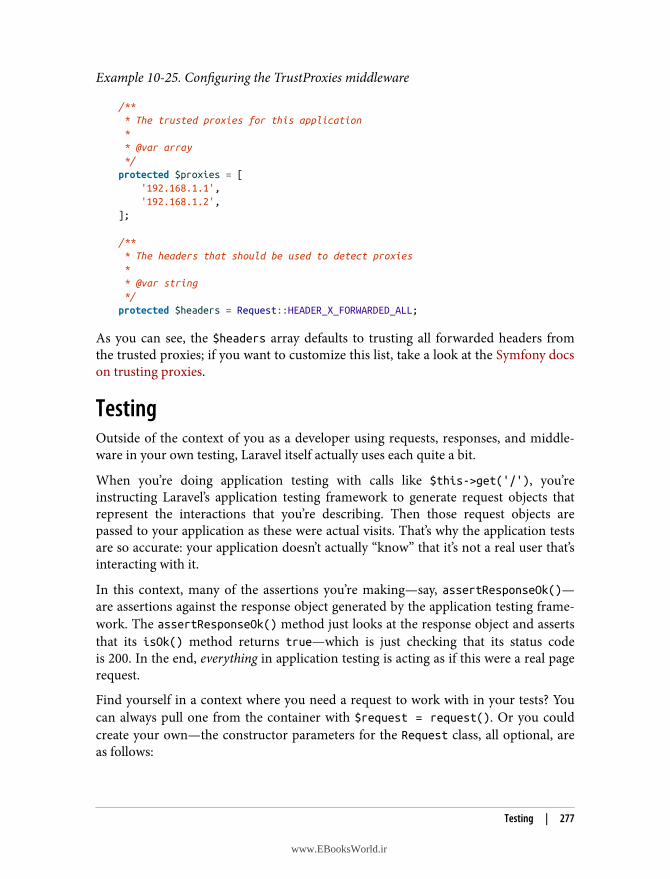
Example 10-25. Configuring the TrustProxies middleware
/** * The trusted proxies for this application * * @var array */ protected $proxies = [ '192.168.1.1', '192.168.1.2', ];
/** * The headers that should be used to detect proxies * * @var string */ protected $headers = Request::HEADER_X_FORWARDED_ALL;
As you can see, the $headers array defaults to trusting all forwarded headers fromthe trusted proxies; if you want to customize this list, take a look at the Symfony docson trusting proxies.
TestingOutside of the context of you as a developer using requests, responses, and middle‐ware in your own testing, Laravel itself actually uses each quite a bit.
When you’re doing application testing with calls like $this->get('/'), you’reinstructing Laravel’s application testing framework to generate request objects thatrepresent the interactions that you’re describing. Then those request objects arepassed to your application as these were actual visits. That’s why the application testsare so accurate: your application doesn’t actually “know” that it’s not a real user that’sinteracting with it.
In this context, many of the assertions you’re making—say, assertResponseOk()—are assertions against the response object generated by the application testing frame‐work. The assertResponseOk() method just looks at the response object and assertsthat its isOk() method returns true—which is just checking that its status codeis 200. In the end, everything in application testing is acting as if this were a real pagerequest.
Find yourself in a context where you need a request to work with in your tests? Youcan always pull one from the container with $request = request(). Or you couldcreate your own—the constructor parameters for the Request class, all optional, areas follows:
Testing | 277
www.EBooksWorld.ir
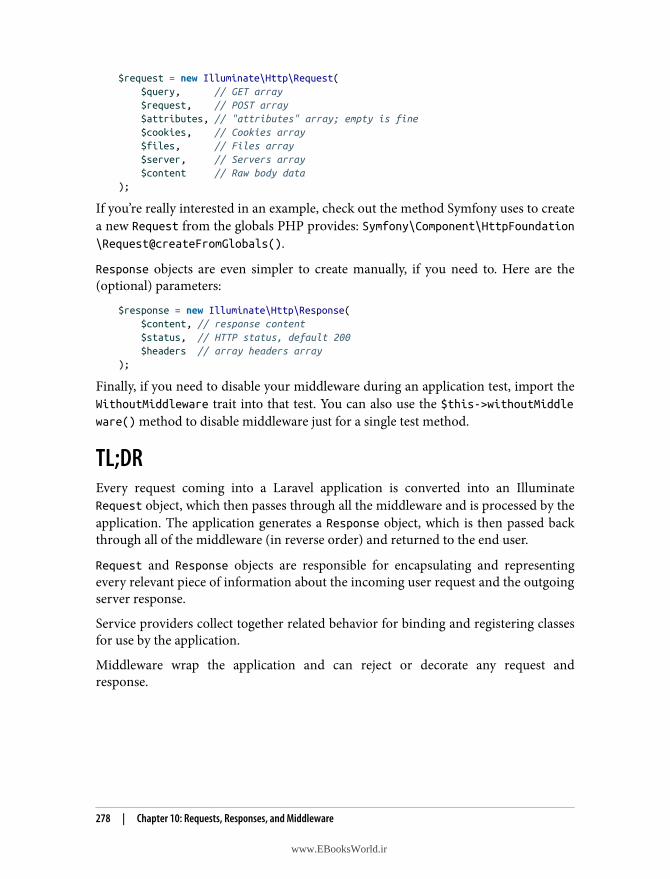
$request = new Illuminate\Http\Request( $query, // GET array $request, // POST array $attributes, // "attributes" array; empty is fine $cookies, // Cookies array $files, // Files array $server, // Servers array $content // Raw body data);
If you’re really interested in an example, check out the method Symfony uses to createa new Request from the globals PHP provides: Symfony\Component\HttpFoundation\Request@createFromGlobals().
Response objects are even simpler to create manually, if you need to. Here are the(optional) parameters:
$response = new Illuminate\Http\Response( $content, // response content $status, // HTTP status, default 200 $headers // array headers array);
Finally, if you need to disable your middleware during an application test, import theWithoutMiddleware trait into that test. You can also use the $this->withoutMiddleware() method to disable middleware just for a single test method.
TL;DREvery request coming into a Laravel application is converted into an IlluminateRequest object, which then passes through all the middleware and is processed by theapplication. The application generates a Response object, which is then passed backthrough all of the middleware (in reverse order) and returned to the end user.
Request and Response objects are responsible for encapsulating and representingevery relevant piece of information about the incoming user request and the outgoingserver response.
Service providers collect together related behavior for binding and registering classesfor use by the application.
Middleware wrap the application and can reject or decorate any request andresponse.
278 | Chapter 10: Requests, Responses, and Middleware
www.EBooksWorld.ir
CHAPTER 11
The Container
Laravel’s service container, or dependency injection container, sits at the core ofalmost every other feature. The container is a simple tool you can use to bind andresolve concrete instances of classes and interfaces, and at the same time it’s a power‐ful and nuanced manager of a network of interrelated dependencies. In this chapter,you’ll learn more about what it is, how it works, and how you can use it.
Naming and the Container
You’ll notice in this book, in the documentation, and in other edu‐cational sources that there are quite a few names folks use for thecontainer. These include:
• Application container• IoC (inversion of control) container• Service container• DI (dependency injection) container
All are useful and valid, but just know they’re all talking about thesame thing. They’re all referring to the service container.
A Quick Introduction to Dependency InjectionDependency injection means that, rather than being instantiated (“newed up”) withina class, each class’s dependencies will be injected in from the outside. This most com‐monly occurs with constructor injection, which means an object’s dependencies areinjected when it’s created. But there’s also setter injection, where the class exposes amethod specifically for injecting a given dependency, and method injection, where oneor more methods expect their dependencies to be injected when they’re called.
279
www.EBooksWorld.ir

Take a look at Example 11-1 for a quick example of constructor injection, the mostcommon type of dependency injection.
Example 11-1. Basic dependency injection
<?php
class UserMailer{ protected $mailer;
public function __construct(Mailer $mailer) { $this->mailer = $mailer; }
public function welcome($user) { return $this->mailer->mail($user->email, 'Welcome!'); }}
As you can see, this UserMailer class expects an object of type Mailer to be injectedwhen it’s instantiated, and its methods then refer to that instance.
The primary benefits of dependency injection are that it gives us the freedom tochange what we’re injecting, to mock dependencies for testing, and to instantiateshared dependencies just once for shared use.
Inversion of ControlYou may have heard the phrase “inversion of control” used in conjunction with“dependency injection,” and sometimes Laravel’s container is called the IoC container.
The two concepts are very similar. Inversion of control references the idea that, in tra‐ditional programming, the lowest-level code—specific classes, instances, and proce‐dural code—“controls” which instance of a particular pattern or interface to use. Forexample, if you’re instantiating your mailer in each class that needs it, each class getsto decide whether to use Mailgun or Mandrill or Sendgrid.
The idea of inversion of control refers to flipping that “control” the opposite end ofyour application. Now the definition of which mailer to use lives at the highest, mostabstract level of the application, often in configuration. Every instance, every piece oflow-level code, looks up to the high-level configuration to essentially “ask”: “Can yougive me a mailer?” They don’t “know” which mailer they’re getting, just that they’regetting one.
280 | Chapter 11: The Container
www.EBooksWorld.ir

Dependency injection and especially DI containers provide a great opportunity forinversion of control because, for example, you can define once which concreteinstance of the Mailer interface to provide when injecting mailers into any class thatneeds them.
Dependency Injection and LaravelAs you saw in Example 11-1, the most common pattern for dependency injectionis constructor injection, or injecting the dependencies of an object when it’s instanti‐ated (“constructed”).
Let’s take our UserMailer class from Example 11-1. Example 11-2 shows what itmight look like to create and use an instance of it.
Example 11-2. Simple manual dependency injection
$mailer = new MailgunMailer($mailgunKey, $mailgunSecret, $mailgunOptions);$userMailer = new UserMailer($mailer);
$userMailer->welcome($user);
Now let’s imagine we want our UserMailer class to be able to log messages, as well assending a notification to a Slack channel every time it sends a message. Example 11-3shows what this would look like. As you can see, it would start to get pretty unwieldyif we had to do all this work every time we wanted to create a new instance—espe‐cially when you consider that we’ll have to get all these parameters from somewhere.
Example 11-3. More complex manual dependency injection
$mailer = new MailgunMailer($mailgunKey, $mailgunSecret, $mailgunOptions);$logger = new Logger($logPath, $minimumLogLevel);$slack = new Slack($slackKey, $slackSecret, $channelName, $channelIcon);$userMailer = new UserMailer($mailer, $logger, $slack);
$userMailer->welcome($user);
Imagine having to write that code every time you wanted a UserMailer. Dependencyinjection is great, but this is a mess.
The app() Global HelperBefore we go too far into how the container actually works, let’s take a quick look atthe simplest way to get an object out of the container: the app() helper.
Dependency Injection and Laravel | 281
www.EBooksWorld.ir
Pass any string to that helper, whether it’s a fully qualified class name (FQCN, like App\ThingDoer) or a Laravel shortcut (we’ll talk about those more in a second), and it’llreturn an instance of that class:
$logger = app(Logger::class);
This is the absolute simplest way to interact with the container. It creates an instanceof this class and returns it for you, nice and easy. It’s like new Logger but, as you’ll seeshortly, much better.
Different Syntaxes for Making a Concrete InstanceThe simplest way to “make” a concrete instance of any class or interface is to use theglobal helper and pass the class or interface name directly to the helper, usingapp('FQCN').
However, if you have an instance of the container—whether it was injected some‐where, or if you’re in a service provider and using $this->app, or (a lesser-knowntrick) if you get one by just running $container = app()—there are a few ways tomake an instance from there.
The most common way is to run the make() method. $app->make('FQCN') workswell. However, you may also see other developers and the documentation use thissyntax sometimes: $app['FQCN']. Don’t worry. That’s doing the same thing; it’s just adifferent way of writing it.
Creating the Logger instance as shown here seems simple enough, but you might’venoticed that our $logger class in Example 11-3 has two parameters: $logPath and$minimumLogLevel. How does the container know what to pass here?
Short answer: it doesn’t. You can use the app() global helper to create an instance of aclass that has no parameters in its constructor, but at that point you could’ve just runnew Logger yourself. The container shines when there’s some complexity in the con‐structor, and that’s when we need to look at how exactly the container can figure outhow to construct classes with constructor parameters.
How the Container Is WiredBefore we dig further into the Logger class, take a look at Example 11-4.
Example 11-4. Laravel autowiring
class Bar{ public function __construct() {}
282 | Chapter 11: The Container
www.EBooksWorld.ir
}
class Baz{ public function __construct() {}}
class Foo{ public function __construct(Bar $bar, Baz $baz) {}}
$foo = app(Foo::class);
This looks similar to our mailer example in Example 11-3. What’s different is thatthese dependencies (Bar and Baz) are both so simple that the container can resolvethem without any further information. The container reads the typehints in the Fooconstructor, resolves an instance of both Bar and Baz, and then injects them into thenew Foo instance when it’s creating it. This is called autowiring: resolving instancesbased on typehints without the developer needing to explicitly bind those classes inthe container.
Autowiring means that, if a class has not been explicitly bound to the container (likeFoo, Bar, or Baz in this context) but the container can figure out how to resolve itanyway, the container will resolve it. This means any class with no constructor depen‐dencies (like Bar and Baz) and any class with constructor dependencies that the con‐tainer can resolve (like Foo) can be resolved out of the container.
That leaves us only needing to bind classes that have unresolvable constructor param‐eters—for example, our $logger class in Example 11-3, which has parameters relatedto our log path and log level.
For those, we’ll need to learn how to explicitly bind something to the container.
Binding Classes to the ContainerBinding a class to Laravel’s container is essentially telling the container, “If a devel‐oper asks for an instance of Logger, here’s the code to run in order to instantiate onewith the correct parameters and dependencies and then return it correctly.”
We’re teaching the container that, when someone asks for this particular string(which is usually the FQCN of a class), it should resolve it this way.
Binding to a ClosureSo, let’s look at how to bind to the container. Note that the appropriate place to bindto the container is in a service provider’s register() method (see Example 11-5).
Binding Classes to the Container | 283
www.EBooksWorld.ir
Example 11-5. Basic container binding
// In any service provider (maybe LoggerServiceProvider)public function register(){ $this->app->bind(Logger::class, function ($app) { return new Logger('\log\path\here', 'error'); });}
There are a few important things to note in this example. First, we’re running$this->app->bind(). $this->app is an instance of the container that’s always avail‐able on every service provider. The container’s bind() method is what we use to bindto the container.
The first parameter of bind() is the “key” we’re binding to. Here we’ve used theFQCN of the class. The second parameter differs depending on what you’re doing,but essentially it should be something that shows the container what to do to resolvean instance of that bound key.
So, in this example, we’re passing a closure. And now, any time someone runsapp(Logger::class), they’ll get the result of this closure. The closure is passed aninstance of the container itself ($app), so if the class you’re resolving has a depend‐ency you want resolved out of the container, you can use it in your definition as seenin Example 11-6.
Example 11-6. Using the passed $app instance in a container binding
// Note that this binding is not doing anything technically useful, since this// could all be provided by the container's auto-wiring already.$this->app->bind(UserMailer::class, function ($app) { return new UserMailer( $app->make(Mailer::class), $app->make(Logger::class), $app->make(Slack::class) );});
Note that every time you ask for a new instance of your class, this closure will be runagain and the new output returned.
Binding to Singletons, Aliases, and InstancesIf you want the output of the binding closure to be cached so that this closure isn’t re-run every time you ask for an instance, that’s the Singleton pattern, and you can run$this->app->singleton() to do that. Example 11-7 shows what this looks like.
284 | Chapter 11: The Container
www.EBooksWorld.ir
Example 11-7. Binding a singleton to the container
public function register(){ $this->app->singleton(Logger::class, function () { return new Logger('\log\path\here', 'error'); });}
You can also get similar behavior if you already have an instance of the object youwant the singleton to return, as seen in Example 11-8.
Example 11-8. Binding an existing class instance to the container
public function register(){ $logger = new Logger('\log\path\here', 'error'); $this->app->instance(Logger::class, $logger);}
Finally, if you want to alias one class to another, bind a class to a shortcut, or bind ashortcut to a class, you can just pass two strings, as shown in Example 11-9.
Example 11-9. Aliasing classes and strings
// Asked for Logger, give FirstLogger$this->app->bind(Logger::class, FirstLogger::class);
// Asked for log, give FirstLogger$this->app->bind('log', FirstLogger::class);
// Asked for log, give FirstLogger$this->app->alias(FirstLogger::class, 'log');
Note that these shortcuts are common in Laravel’s core; it provides a system of short‐cuts to classes that provide core functionality, using easy-to-remember keys like log.
Binding a Concrete Instance to an InterfaceJust like we can bind a class to another class, or a class to a shortcut, we can also bindto an interface. This is extremely powerful, because we can now typehint interfacesinstead of class names, like in Example 11-10.
Example 11-10. Typehinting and binding to an interface
...use Interfaces\Mailer as MailerInterface;
Binding Classes to the Container | 285
www.EBooksWorld.ir
class UserMailer{ protected $mailer;
public function __construct(MailerInterface $mailer) { $this->mailer = $mailer; }}
// Service providerpublic function register(){ $this->app->bind(\Interfaces\Mailer::class, function () { return new MailgunMailer(...); });}
You can now typehint Mailer or Logger interfaces all across your code, and thenchoose once in a service provider which specific mailer or logger you want to useeverywhere. That’s inversion of control.
One of the key benefits you get from using this pattern is that later, if you choose touse a different mail provider than Mailgun, as long as you have a mailer class for thatnew provider that implements the Mailer interface, you can swap it once in your ser‐vice provider and everything in the rest of your code will just work.
Contextual BindingSometimes you need to change how to resolve an interface depending on the context.You might want to log events from one place to a local syslog and from others outto an external service. So, let’s tell the container to differentiate—check outExample 11-11.
Example 11-11. Contextual binding
// In a service providerpublic function register(){ $this->app->when(FileWrangler::class) ->needs(Interfaces\Logger::class) ->give(Loggers\Syslog::class);
$this->app->when(Jobs\SendWelcomeEmail::class) ->needs(Interfaces\Logger::class) ->give(Loggers\PaperTrail::class);}
286 | Chapter 11: The Container
www.EBooksWorld.ir
Constructor Injection in Laravel Framework FilesWe’ve covered the concept of constructor injection, and we’ve looked at how the con‐tainer makes it easy to resolve instances of a class or interface out of the container.You saw how easy it is to use the app() helper to make instances, and also how thecontainer will resolve the constructor dependencies of a class when it’s creating it.
What we haven’t covered yet is how the container is also responsible for resolvingmany of the core operating classes of your application. For example, every controlleris instantiated by the container. That means if you want an instance of a logger inyour controller, you can simply typehint the logger class in your controller’s construc‐tor, and when Laravel creates the controller, it will resolve it out of the container andthat logger instance will be available to your controller. Take a look at Example 11-12.
Example 11-12. Injecting dependencies into a controller
...class MyController extends Controller{ protected $logger;
public function __construct(Logger $logger) { $this->logger = $logger; }
public function index() { // Do something $this->logger->error('Something happened'); }}
The container is responsible for resolving controllers, middleware, queue jobs, eventlisteners, and any other classes that are automatically generated by Laravel in the pro‐cess of your application’s lifecycle—so any of those classes can typehint dependenciesin their constructors and expect them to be automatically injected.
Method InjectionThere are a few places in your application where Laravel doesn’t just read the con‐structor signature: it also reads the method signature and will inject dependencies foryou there as well.
The most common place to use method injection is in controller methods. If youhave a dependency you only want to use for a single controller method, you can injectit into just that method like in Example 11-13.
Constructor Injection in Laravel Framework Files | 287
www.EBooksWorld.ir
Example 11-13. Injecting dependencies into a controller method
...class MyController extends Controller{ // Method dependencies can come after or before route parameters. public function show(Logger $logger, $id) { // Do something $logger->error('Something happened'); }}
Passing Unresolvable Constructor Parameters Using makeWith()
All of the primary tools for resolving a concrete instance of a class—app(), $container->make(), etc.—assume that all of the class’sdependencies can be resolved without passing anything in. Butwhat if your class accepts a value in its constructor, instead of adependency the container can resolve for you? Use the makeWith()method:
class Foo{ public function __construct($bar) { // ... }}
$foo = $this->app->makeWith( Foo::class, ['bar' => 'value']);
This is a bit of an edge case. Most classes that you’ll be resolvingout of the container should only have dependencies injected intotheir constructors.
You can do the same in the boot() method of service providers, and you can alsoarbitrarily call a method on any class using the container, which will allow for methodinjection there (see Example 11-14).
Example 11-14. Manually calling a class method using the container’s call() method
class Foo{ public function bar($parameter1) {}}
288 | Chapter 11: The Container
www.EBooksWorld.ir

// Calls the 'bar' method on 'Foo' with a first parameter of 'value'app()->call('Foo@bar', ['parameter1' => 'value']);
Facades and the ContainerWe’ve covered facades quite a bit so far in the book, but we haven’t actually talkedabout how they work.
Laravel’s facades are classes that provide simple access to core pieces of Laravel’s func‐tionality. There are two trademark features of facades: first, they’re all available in theglobal namespace (\Log is an alias to \Illuminate\Support\Facades\Log); and sec‐ond, they use static methods to access nonstatic resources.
Let’s take a look at the Log facade, since we’ve been looking at logging already in thischapter. In your controller or views, you could use this call:
Log::alert('Something has gone wrong!');
Here’s what it would look like to make that same call without the facade:
$logger = app('log');$logger->alert('Something has gone wrong!');
As you can see, facades translate static calls (any method call that you make on a classitself, using ::, instead of on an instance) to normal method calls on instances.
Importing Facade Namespaces
If you’re in a namespaced class, you’ll want to be sure to import thefacade at the top:
...use Illuminate\Support\Facades\Log;
class Controller extends Controller{ public function index() { // ... Log::error('Something went wrong!'); }
How Facades WorkLet’s take a look at the Cache facade and see how it actually works.
First, open up the class Illuminate\Support\Facades\Cache. You’ll see somethinglike Example 11-15.
Facades and the Container | 289
www.EBooksWorld.ir
Example 11-15. The Cache facade class
<?php
namespace Illuminate\Support\Facades;
class Cache extends Facade{ protected static function getFacadeAccessor() { return 'cache'; }}
Every facade has a single method: getFacadeAccessor(). This defines the key thatLaravel should use to look up this facade’s backing instance from the container.
In this instance, we can see that every call to the Cache facade is proxied to be a call toan instance of the cache shortcut from the container. Of course, that’s not a real classor interface name, so we know it’s one of those shortcuts I mentioned earlier.
So, here’s what’s really happening:
Cache::get('key');
// Is the same as...
app('cache')->get('key');
There are a few ways to look up exactly what class each facade accessor points to, butchecking the documentation is the easiest. There’s a table on the facades documenta‐tion page that shows you, for each facade, which container binding (shortcut, likecache) it’s connected to, and which class that returns. It looks like this:
Facade Class Service container binding
App Illuminate\Foundation\Application app
… … …
Cache Illuminate\Cache\CacheManager cache
… … …
Now that you have this reference, you can do three things.
First, you can figure out what methods are available on a facade. Just find its backingclass and look at the definition of that class, and you’ll know that any of its publicmethods are callable on the facade.
Second, you can figure out how to inject a facade’s backing class using dependencyinjection. If you ever want the functionality of a facade but prefer to use dependency
290 | Chapter 11: The Container
www.EBooksWorld.ir
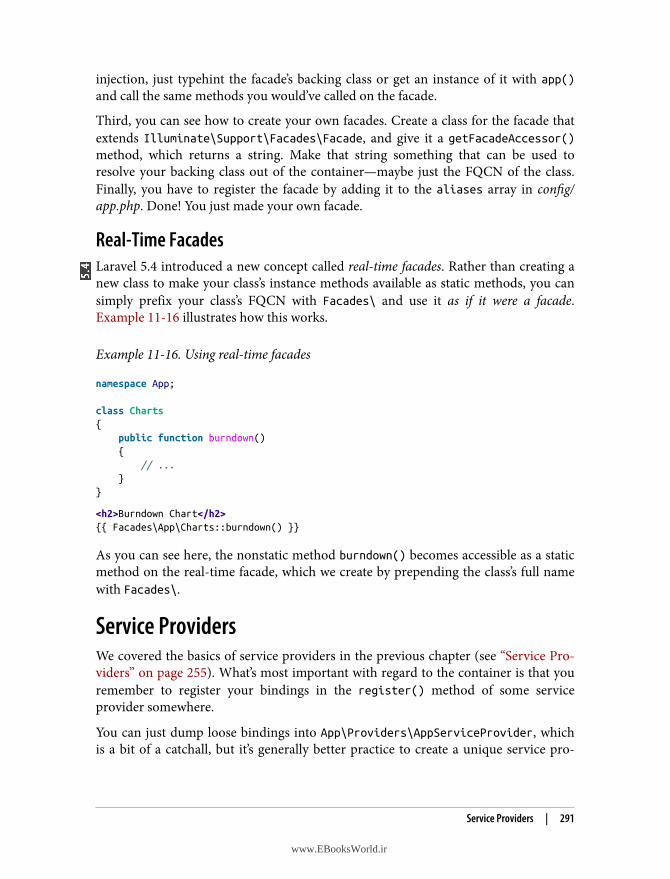
injection, just typehint the facade’s backing class or get an instance of it with app()and call the same methods you would’ve called on the facade.
Third, you can see how to create your own facades. Create a class for the facade thatextends Illuminate\Support\Facades\Facade, and give it a getFacadeAccessor()method, which returns a string. Make that string something that can be used toresolve your backing class out of the container—maybe just the FQCN of the class.Finally, you have to register the facade by adding it to the aliases array in config/app.php. Done! You just made your own facade.
Real-Time FacadesLaravel 5.4 introduced a new concept called real-time facades. Rather than creating anew class to make your class’s instance methods available as static methods, you cansimply prefix your class’s FQCN with Facades\ and use it as if it were a facade.Example 11-16 illustrates how this works.
Example 11-16. Using real-time facades
namespace App;
class Charts{ public function burndown() { // ... }}
<h2>Burndown Chart</h2>{{ Facades\App\Charts::burndown() }}
As you can see here, the nonstatic method burndown() becomes accessible as a staticmethod on the real-time facade, which we create by prepending the class’s full namewith Facades\.
Service ProvidersWe covered the basics of service providers in the previous chapter (see “Service Pro‐viders” on page 255). What’s most important with regard to the container is that youremember to register your bindings in the register() method of some serviceprovider somewhere.
You can just dump loose bindings into App\Providers\AppServiceProvider, whichis a bit of a catchall, but it’s generally better practice to create a unique service pro‐
Service Providers | 291
www.EBooksWorld.ir
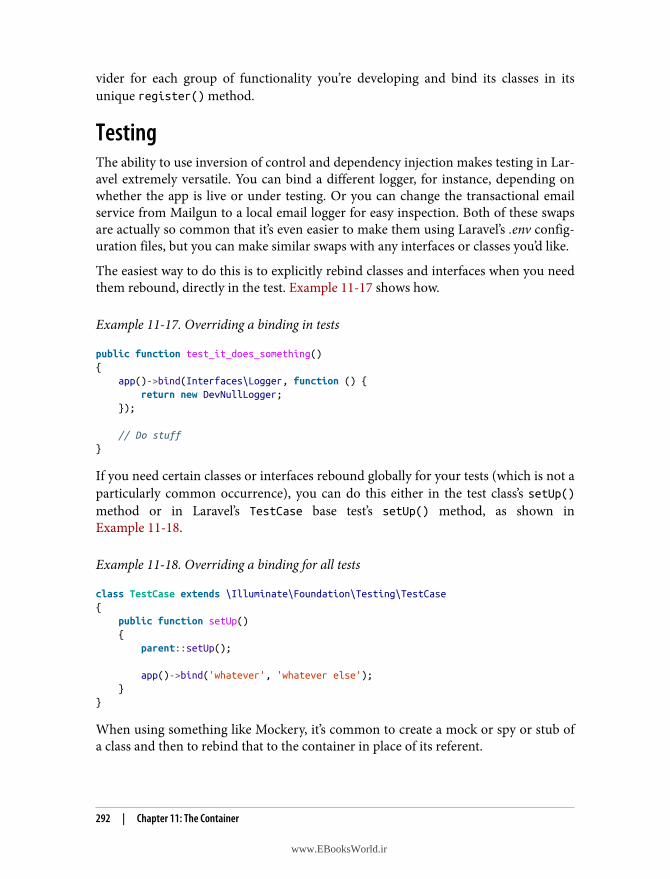
vider for each group of functionality you’re developing and bind its classes in itsunique register() method.
TestingThe ability to use inversion of control and dependency injection makes testing in Lar‐avel extremely versatile. You can bind a different logger, for instance, depending onwhether the app is live or under testing. Or you can change the transactional emailservice from Mailgun to a local email logger for easy inspection. Both of these swapsare actually so common that it’s even easier to make them using Laravel’s .env config‐uration files, but you can make similar swaps with any interfaces or classes you’d like.
The easiest way to do this is to explicitly rebind classes and interfaces when you needthem rebound, directly in the test. Example 11-17 shows how.
Example 11-17. Overriding a binding in tests
public function test_it_does_something(){ app()->bind(Interfaces\Logger, function () { return new DevNullLogger; });
// Do stuff}
If you need certain classes or interfaces rebound globally for your tests (which is not aparticularly common occurrence), you can do this either in the test class’s setUp()method or in Laravel’s TestCase base test’s setUp() method, as shown inExample 11-18.
Example 11-18. Overriding a binding for all tests
class TestCase extends \Illuminate\Foundation\Testing\TestCase{ public function setUp() { parent::setUp();
app()->bind('whatever', 'whatever else'); }}
When using something like Mockery, it’s common to create a mock or spy or stub ofa class and then to rebind that to the container in place of its referent.
292 | Chapter 11: The Container
www.EBooksWorld.ir
TL;DRLaravel’s service container has many names, but regardless of what you call it, in theend its goal is to make it easy to define how to resolve certain string names as con‐crete instances. These string names are going to be the fully qualified class names ofclasses or interfaces, or shortcuts like log.
Each binding teaches the application, given a string key (e.g., app('log')), how toresolve a concrete instance.
The container is smart enough to do recursive dependency resolution, so if you try toresolve an instance of something that has constructor dependencies, the containerwill try to resolve those dependencies based on their typehints, then pass them intoyour class, and finally return an instance.
There are a few ways to bind to the container, but in the end they all define what toreturn, given a particular string.
Facades are simple shortcuts that make it easy to use static calls on a root namespace–aliased class to call nonstatic methods on classes resolved out of the container. Real-time facades allow you to treat any class like a facade by prepending its fully qualifiedclass name with Facades\.
TL;DR | 293
www.EBooksWorld.ir

www.EBooksWorld.ir
CHAPTER 12
Testing
Most developers know that testing your code is A Good Thing. We’re supposed to doit. We likely have an idea of why it’s good, and we might’ve even read some tutorialsabout how it’s supposed to work.
But the gap between knowing why you should test and knowing how to test is wide.Thankfully, tools like PHPUnit, Mockery, and PHPSpec provide an incredible num‐ber of options for testing in PHP—but it can still be pretty overwhelming to geteverything set up.
Out of the box, Laravel comes with baked-in integrations to PHPUnit (unit testing),Mockery (mocking), and Faker (creating fake data for seeding and testing). It alsoprovides its own simple and powerful suite of application testing tools, which allowyou to “crawl” your site’s URIs, submit forms, check HTTP status codes, and validateand assert against JSON. It also provides a robust frontend testing framework calledDusk that can even interact with your JavaScript applications and test against them.In case this hasn’t made it clear, we’re going to cover a lot of ground in this chapter.
To make it easy for you to get started, Laravel’s testing setup comes with sample appli‐cation test that can run successfully the moment you create a new app. That meansyou don’t have to spend any time configuring your testing environment, and that’sone less barrier to writing your tests.
295
www.EBooksWorld.ir
Testing Basics
Testing TermsIt’s hard to get any group of programmers to agree on one set of terms to define dif‐ferent types of tests.
In this book, I’ll use four primary terms:
Unit testsUnit tests target small, relatively isolated units—a class or method, usually.
Feature testsFeature tests test the way individual units work together and pass messages.
Application testsOften called acceptance or functional tests, application tests test the entire behav‐ior of the application, usually at an outer boundary like HTTP calls.
Regression testsSimilar to application tests, regression tests are a little more focused on describ‐ing exactly what a user should be able to do and ensuring that behavior doesn’tstop working. The line between application and regression tests is thin, but thedifference is primarily based on the level of fidelity of your tests. For example, anapplication test might say “browser can POST to the people endpoint and thenthere should be a new entry in the users table” (relatively low fidelity, becauseyou are mimicking what the browser is doing), but a regression test would morelikely say “after clicking this button with this form data entered the user shouldsee that result on that page” (higher fidelity, because you’re describing the actualbehavior of your users).
Tests in Laravel live in the tests folder. There are two files in the root: TestCase.php,which is the base root test which all of your tests will extend, and CreatesApplica‐tion.php, a trait (imported by TestCase.php) which allows any class to boot a sampleLaravel application for testing.
There are also two subfolders: Features, for tests that cover the interaction betweenmultiple units, and Unit, for tests that are intended to cover just one unit of your code(class, module, function, etc.). Each of these folders contains an ExampleTest.php file,each of which has a single sample test inside it, ready to run.
296 | Chapter 12: Testing
www.EBooksWorld.ir
Differences in Testing Prior to Laravel 5.4
In projects running versions of Laravel prior to 5.4, there will beonly two files in the tests directory: ExampleTest.php, your sampletest, and TestCase.php, your base test.Additionally, if your app is pre-5.4, the syntax in all of the examplesin this chapter will not be quite right. All the ideas are the same,but the syntax is a bit different across the board. You can learnmore in the Laravel 5.3 testing docs. Here are the four biggestchanges:
1. In 5.3 and before, you’re not creating response objects; instead,you’re just calling methods on $this, and the test class storesthe responses. So, $response = $this->get('people') in5.4+ would look like $this->get('people') in 5.3 and earlier.
2. Many of the assertions have been renamed in small ways in5.4+ to make them look more like PHPUnit’s normal assertionnames; for example, assertSee() instead of see().
3. Some of the “crawling” methods that in 5.4+ have been extrac‐ted out to browser-kit-testing were built into the core inprevious versions.
4. Dusk didn’t exist prior to 5.4.
Because testing prior to 5.4 was so different, I’ve made the testingchapter for the first edition of this book available as a free PDF. Ifyou’re working with 5.3 or earlier, I’d recommend skipping thischapter in the book and using this PDF of the testing chapter fromthe first edition instead.
The ExampleTest in your Unit directory contains one simple assertion:$this->assertTrue(true). Anything in your unit tests is likely to be relatively sim‐ple PHPUnit syntax (asserting that values are equal or different, looking for entries inarrays, checking Booleans, etc.), so there’s not much to learn there.
The Basics of PHPUnit Assertions
If you’re not yet familiar with PHPUnit, most of our assertions willbe run on the $this object with this syntax:
$this->assertWHATEVER($expected, $real);
So, for example, if we’re asserting that two variables should beequal, we’ll pass it first our expected result, and second the actualoutcome of the object or system we’re testing:
$multiplicationResult = $myCalculator->multiply(5, 3);$this->assertEqual(15, $multiplicationResult);
Testing Basics | 297
www.EBooksWorld.ir
As you can see in Example 12-1, the ExampleTest in the Feature directory makes asimulated HTTP request to the page at the root path of your application and checksthat its HTTP status is 200 (successful). If it is, it’ll pass; if not, it’ll fail. Unlike youraverage PHPUnit test, we’re running these assertions on the TestResponse objectthat’s returned when we make test HTTP calls.
Example 12-1. tests/Feature/ExampleTest.php
<?php
namespace Tests\Feature;
use Tests\TestCase;use Illuminate\Foundation\Testing\RefreshDatabase;
class ExampleTest extends TestCase{ /** * A basic test example * * @return void */ public function testBasicTest() { $response = $this->get('/');
$response->assertStatus(200); }}
To run the tests, run ./vendor/bin/phpunit on the command line from the rootfolder of your application. You should see something like the output in Example 12-2.
Example 12-2. Sample ExampleTest output
PHPUnit 7.3.5 by Sebastian Bergmann and contributors.
.. 2 / 2 (100%)
Time: 139 ms, Memory: 12.00MB
OK (2 test, 2 assertions)
You just ran your first Laravel application test! Those two dots indicate that you havetwo passing tests. As you can see, you’re set up out of the box not only with a func‐tioning PHPUnit instance, but also a full-fledged application testing suite that canmake mock HTTP calls and test your application’s responses. Further, you’ll soonlearn that you have easy access to a fully featured DOM crawler (“A Quick Introduc‐
298 | Chapter 12: Testing
www.EBooksWorld.ir
tion to BrowserKit Testing” on page 324) and a regression testing tool with full Java‐Script support (“Testing with Dusk” on page 324).
In case you’re not familiar with PHPUnit, let’s take a look at what it’s like to have a testfail. Instead of modifying the previous test, we’ll make our own. Run php artisanmake:test FailingTest. This will create the file tests/Feature/FailingTest.php; youcan modify its testExample() method to look like Example 12-3.
Example 12-3. tests/Feature/FailingTest.php, edited to fail
public function testExample(){ $response = $this->get('/');
$response->assertStatus(301);}
As you can see, it’s the same as the test we ran previously, but we’re now testingagainst the wrong status. Let’s run PHPUnit again.
Generating Unit Tests
If you want your test to be generated in the Unit directory insteadof the Feature directory, pass the --unit flag:
php artisan make:test SubscriptionTest --unit
Whoops! This time the output will probably look a bit like Example 12-4.
Example 12-4. Sample failing test output
PHPUnit 7.3.5 by Sebastian Bergmann and contributors.
.F. 3 / 3 (100%)
Time: 237 ms, Memory: 12.00MB
There was 1 failure:
1) Tests\Feature\FailingTest::testExampleExpected status code 301 but received 200.Failed asserting that false is true.
/path-to-your-app/vendor/.../Foundation/Testing/TestResponse.php:124/path-to-your-app/tests/Feature/FailingTest.php:20
FAILURES!Tests: 3, Assertions: 3, Failures: 1.
Testing Basics | 299
www.EBooksWorld.ir
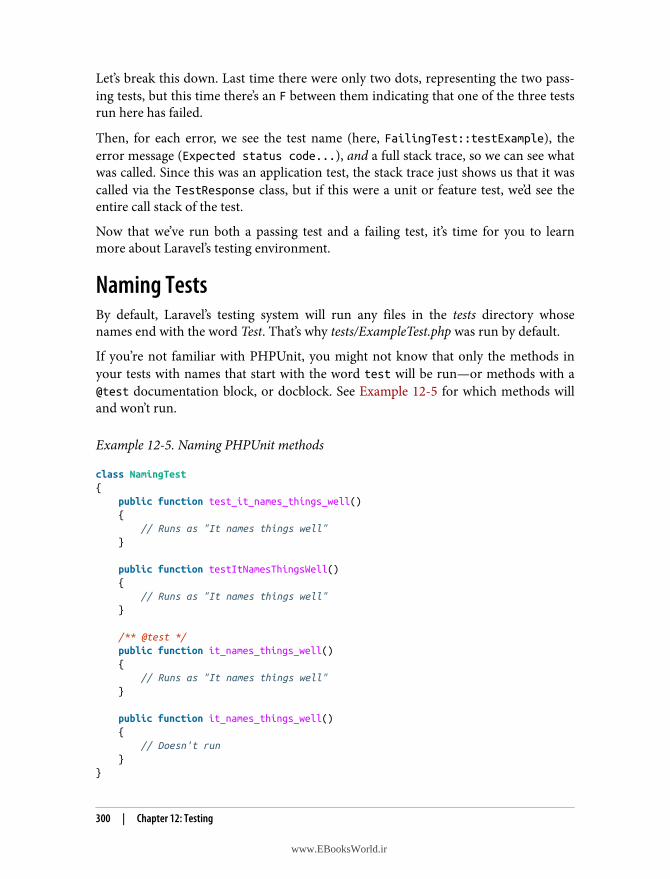
Let’s break this down. Last time there were only two dots, representing the two pass‐ing tests, but this time there’s an F between them indicating that one of the three testsrun here has failed.
Then, for each error, we see the test name (here, FailingTest::testExample), theerror message (Expected status code...), and a full stack trace, so we can see whatwas called. Since this was an application test, the stack trace just shows us that it wascalled via the TestResponse class, but if this were a unit or feature test, we’d see theentire call stack of the test.
Now that we’ve run both a passing test and a failing test, it’s time for you to learnmore about Laravel’s testing environment.
Naming TestsBy default, Laravel’s testing system will run any files in the tests directory whosenames end with the word Test. That’s why tests/ExampleTest.php was run by default.
If you’re not familiar with PHPUnit, you might not know that only the methods inyour tests with names that start with the word test will be run—or methods with a@test documentation block, or docblock. See Example 12-5 for which methods willand won’t run.
Example 12-5. Naming PHPUnit methods
class NamingTest{ public function test_it_names_things_well() { // Runs as "It names things well" }
public function testItNamesThingsWell() { // Runs as "It names things well" }
/** @test */ public function it_names_things_well() { // Runs as "It names things well" }
public function it_names_things_well() { // Doesn't run }}
300 | Chapter 12: Testing
www.EBooksWorld.ir
The Testing EnvironmentAny time a Laravel application is running, it has a current “environment” namethat represents the environment it’s running in. This name may be set to local,staging, production, or anything else you want. You can retrieve this by runningapp()->environment(), or you can run if (app()->environment('local')) orsomething similar to test whether the current environment matches the passed name.
When you run tests, Laravel automatically sets the environment to testing. Thismeans you can test for if (app()->environment('testing')) to enable or disablecertain behaviors in the testing environment.
Additionally, Laravel doesn’t load the normal environment variables from .env fortesting. If you want to set any environment variables for your tests, edit phpunit.xmland, in the <php> section, add a new <env> for each environment variable you want topass in—for example, <env name="DB_CONNECTION" value="sqlite"/>.
Using .env.testing to Exclude Testing Environment Variables from Version Control
If you want to set environment variables for your tests, you can do so in phpunit.xmlas just described. But what if you have environment variables for your tests that youwant to be different for each testing environment? Or what if you want them to beexcluded from source control?
Thankfully, handling these conditions is pretty easy. First, create an .env.testing.exam‐ple file, just like Laravel’s .env.example file. Next, add the variables you’d like to beenvironment-specific to .env.testing.example, just like they’re set in .env.example.Then, make a copy of .env.testing.example and name it .env.testing. Finally,add .env.testing to your .gitignore file just below .env and set any values you wantin .env.testing.
In most versions of Laravel, the framework will automatically load this file for you. InLaravel prior to 5.2, or in some of the earlier minor releases prior to 5.5, you mightnot have this at the framework level; I’ve written a blog post showing you how to addit when the framework doesn’t have it.
The Testing TraitsBefore we get into the methods you can use for testing, you need to know about thefour testing traits you can pull into any test class.
The Testing Environment | 301
www.EBooksWorld.ir
RefreshDatabaseIlluminate\Foundation\Testing\RefreshDatabase is imported at the top of everynewly generated test file, and it’s the most commonly used database migration trait.This trait was introduced in Laravel 5.5 and is only available in projects running onthat version or later.
The point of this, and the other database traits, is to ensure your database tables arecorrectly migrated at the start of each test.
RefreshDatabase takes two steps to do this. First, it runs your migrations on yourtest database once at the beginning of each test run (when you run phpunit, not foreach individual test method). And second, it wraps each individual test method in adatabase transaction and rolls back the transaction at the end of the test.
That means you have your database migrated for your tests and cleared out fresh aftereach test runs, without having to run your migrations again before every test—mak‐ing this the fastest possible option. When in doubt, stick with this.
WithoutMiddlewareIf you import Illuminate\Foundation\Testing\WithoutMiddleware into your testclass, it will disable all middleware for any test in that class. This means you won’thave to worry about the authentication middleware, or CSRF protection, or anythingelse that might be useful in the real application but distracting in a test.
If you’d like to disable middleware for just a single method instead of the entire testclass, call $this->withoutMiddleware() at the top of the method for that test.
DatabaseMigrationsIf you import the Illuminate\Foundation\Testing\DatabaseMigrations traitinstead of the RefreshDatabase trait, it will run your entire set of database migra‐tions fresh before each test. Laravel makes this happen by running php artisanmigrate:fresh in the setUp() method before every test runs.
DatabaseTransactionsIlluminate\Foundation\Testing\DatabaseTransactions, on the other hand,expects your database to be properly migrated before your tests start. It wraps everytest in a database transaction, which it rolls back at the end of each test. This meansthat, at the end of each test, your database will be returned to the exact same state itwas in prior to the test.
302 | Chapter 12: Testing
www.EBooksWorld.ir
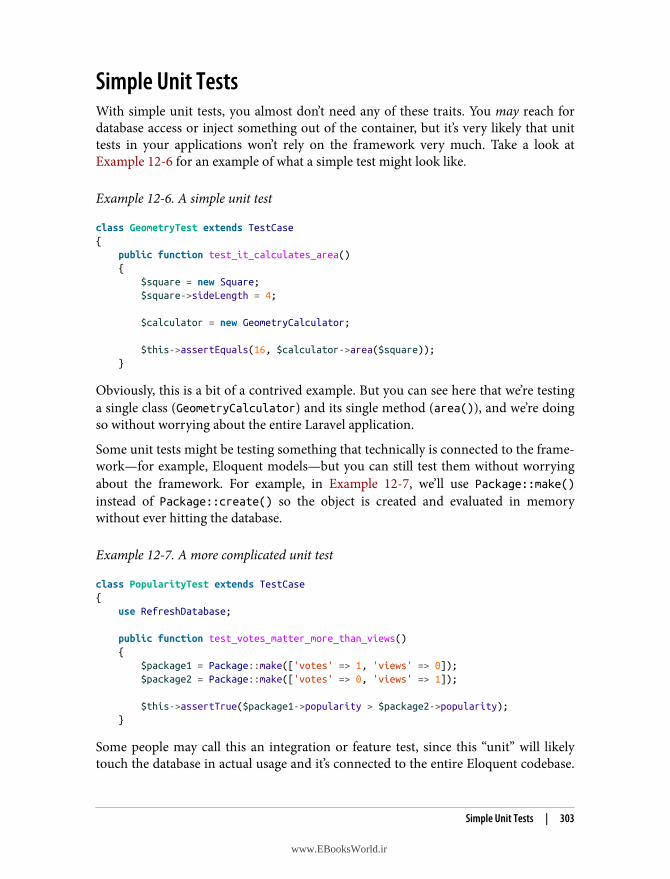
Simple Unit TestsWith simple unit tests, you almost don’t need any of these traits. You may reach fordatabase access or inject something out of the container, but it’s very likely that unittests in your applications won’t rely on the framework very much. Take a look atExample 12-6 for an example of what a simple test might look like.
Example 12-6. A simple unit test
class GeometryTest extends TestCase{ public function test_it_calculates_area() { $square = new Square; $square->sideLength = 4;
$calculator = new GeometryCalculator;
$this->assertEquals(16, $calculator->area($square)); }
Obviously, this is a bit of a contrived example. But you can see here that we’re testinga single class (GeometryCalculator) and its single method (area()), and we’re doingso without worrying about the entire Laravel application.
Some unit tests might be testing something that technically is connected to the frame‐work—for example, Eloquent models—but you can still test them without worryingabout the framework. For example, in Example 12-7, we’ll use Package::make()instead of Package::create() so the object is created and evaluated in memorywithout ever hitting the database.
Example 12-7. A more complicated unit test
class PopularityTest extends TestCase{ use RefreshDatabase;
public function test_votes_matter_more_than_views() { $package1 = Package::make(['votes' => 1, 'views' => 0]); $package2 = Package::make(['votes' => 0, 'views' => 1]);
$this->assertTrue($package1->popularity > $package2->popularity); }
Some people may call this an integration or feature test, since this “unit” will likelytouch the database in actual usage and it’s connected to the entire Eloquent codebase.
Simple Unit Tests | 303
www.EBooksWorld.ir
The most important point is that you can have simple tests that test a single class ormethod, even when the objects under test are framework-connected.
All of this said, it’s still going to be more likely that your tests—especially as you firstget started—are broader and more at the “application” level. Accordingly, for the restof the chapter we’re going to dig deeper into application testing.
Application Testing: How It WorksIn “Testing Basics” on page 296 we saw that, with a few lines of code, we can “request”URIs in our application and actually check the status of the response. But how canPHPUnit request pages as if it were a browser?
TestCaseAny application tests should extend the TestCase class (tests/TestCase.php) that’sincluded with Laravel by default. Your application’s TestCase class will extend theabstract Illuminate\Foundation\Testing\TestCase class, which brings in quite afew goodies.
The first thing the two TestCase classes (yours and its abstract parent) do is handlebooting the Illuminate application instance for you, so you have a fully bootstrappedapplication available. They also “refresh” the application between each test, whichmeans they’re not entirely recreating the application between tests, but rather makingsure you don’t have any data lingering.
The parent TestCase also sets up a system of hooks that allow callbacks to be runbefore and after the application is created, and imports a series of traits that provideyou with methods for interacting with every aspect of your application. These traitsinclude InteractsWithContainer, MakesHttpRequests, and InteractsWithConsole,and they bring in a broad variety of custom assertions and testing methods.
As a result, your application tests have access to a fully bootstrapped applicationinstance and application-test-minded custom assertions, with a series of simple andpowerful wrappers around each to make them easy to use.
That means you can write $this->get('/')->assertStatus(200) and know thatyour application is actually behaving as if it were responding to a normal HTTPrequest, and that the response is being fully generated and then checked as a browserwould check it. It’s pretty powerful stuff, considering how little work you had to do toget it running.
304 | Chapter 12: Testing
www.EBooksWorld.ir

HTTP TestsLet’s take a look at our options for writing HTTP-based tests. You’ve already seen$this->get('/'), but let’s dive deeper into how you can use that call, how you canassert against its results, and what other HTTP calls you can make.
Testing Basic Pages with $this->get() and Other HTTP CallsAt the very basic level, Laravel’s HTTP testing allows you to make simple HTTPrequests (GET, POST, etc.) and then make simple assertions about their impact orresponse.
There are more tools we’ll cover later (in “A Quick Introduction to BrowserKit Test‐ing” on page 324 and “Testing with Dusk” on page 324) that allow for more complexpage interactions and assertions, but let’s start at the base level. Here are the calls youcan make:
• $this->get($uri, $headers = [])
• $this->post($uri, $data = [], $headers = [])
• $this->put($uri, $data = [], $headers = [])
• $this->patch($uri, $data = [], $headers = [])
• $this->delete($uri, $data = [], $headers = [])
These methods are the basis of the HTTP testing framework. Each takes at least aURI (usually relative) and headers, and all but get() also allow for passing data alongwith the request.
And, importantly, each returns a $response object that represents the HTTPresponse. This response object is almost exactly the same as an Illuminate Responseobject, the same thing we return out of our controllers. However, it’s actually aninstance of Illuminate\Foundation\Testing\TestResponse, which wraps a normalResponse with some assertions for testing.
Take a look at Example 12-8 to see a common usage of post() and a commonresponse assertion.
Example 12-8. A simple use of post() in testing
public function test_it_stores_new_packages(){ $response = $this->post(route('packages.store'), [ 'name' => 'The greatest package', ]);
HTTP Tests | 305
www.EBooksWorld.ir
$response->assertOk();}
In most examples like Example 12-8, you’ll also test that the record exists in the data‐base and shows up on the index page, and maybe that it doesn’t test successfullyunless you define the package author and are logged in. But don’t worry, we’ll get toall of that. For now, you can make calls to your application routes with many differentverbs and make assertions against both the response and the state of your applicationafterward. Great!
Testing JSON APIs with $this->getJson() and Other JSON HTTP CallsYou can also do all of the same sorts of HTTP tests with your JSON APIs. There areconvenience methods for that, too:
• $this->getJson($uri, $headers = [])
• $this->postJson($uri, $data = [], $headers = [])
• $this->putJson($uri, $data = [], $headers = [])
• $this->patchJson($uri, $data = [], $headers = [])
• $this->deleteJson($uri, $data = [], $headers = [])
These methods work just the same as the normal HTTP call methods, except theyalso add JSON-specific Accept, CONTENT_LENGTH, and CONTENT_TYPE headers. Take alook at Example 12-9 to see an example.
Example 12-9. A simple use of postJSON() in testing
public function test_the_api_route_stores_new_packages(){ $response = $this->postJSON(route('api.packages.store'), [ 'name' => 'The greatest package', ], ['X-API-Version' => '17']);
$response->assertOk();}
Assertions Against $responseThere are 40 assertions available on the $response object in Laravel 5.8, so I’ll referyou to the testing docs for details on all of them. Let’s look at a few of the most impor‐tant and most common ones:
$response->assertOk()
Asserts that the response’s status code is 200:
306 | Chapter 12: Testing
www.EBooksWorld.ir
$response = $this->get('terms');$response->assertOk();
$response->assertStatus($status)
Asserts that the response’s status code is equal to the provided $status:
$response = $this->get('admin');$response->assertStatus(401); // Unauthorized
$response->assertSee($text) and $response->assertDontSee($text)Asserts that the response contains (or doesn’t contain) the provided $text:
$package = factory(Package::class)->create();$response = $this->get(route('packages.index'));$response->assertSee($package->name);
$response->assertJson(_array $json)
Asserts that the passed array is represented (in JSON format) in the returnedJSON:
$this->postJson(route('packages.store'), ['name' => 'GreatPackage2000']);$response = $this->getJson(route('packages.index'));$response->assertJson(['name' => 'GreatPackage2000']);
$response->assertViewHas($key, $value = null)
Asserts that the view on the visited page had a piece of data available at $key, andoptionally checks that the value of that variable was $value:
$package = factory(Package::class)->create();$response = $this->get(route('packages.show'));$response->assertViewHas('name', $package->name);
$response->assertSessionHas($key, $value = null)
Asserts that the session has data set at $key, and optionally checks that the valueof that data is $value:
$response = $this->get('beta/enable');$response->assertSessionHas('beta-enabled', true);
$response->assertSessionHasErrors()
With no parameters, asserts that there’s at least one error set in Laravel’s specialerrors session container. Its first parameter can be an array of key/value pairsthat define the errors that should be set and its second parameter can be thestring format that the checked errors should be formatted against, as demon‐strated here:
// Assuming the "/form" route requires an email field, and we're// posting an empty submission to it to trigger the error$response = $this->post('form', []);
HTTP Tests | 307
www.EBooksWorld.ir
$response->assertSessionHasErrors();$response->assertSessionHasErrors([ 'email' => 'The email field is required.', ]);$response->assertSessionHasErrors( ['email' => '<p>The email field is required.</p>'], '<p>:message</p>');
If you’re working with named error bags, you can pass the error bag name as thethird parameter.
$response->assertCookie($name, $value = null)
Asserts that the response contains a cookie with name $name, and optionallychecks that its value is $value:
$response = $this->post('settings', ['dismiss-warning']);$response->assertCookie('warning-dismiss', true);
$response->assertCookieExpired($name)
Asserts that the response contains a cookie with name $name and that it isexpired:
$response->assertCookieExpired('warning-dismiss');
$response->assertCookieNotExpired($name)
Asserts that the response contains a cookie with name $name and that it is notexpired:
$response->assertCookieNotExpired('warning-dismiss');
$response->assertRedirect($uri)
Asserts that the requested route returns a redirect to the given URI:
$response = $this->post(route('packages.store'), [ 'email' => 'invalid']);
$response->assertRedirect(route('packages.create'));
For each of these assertions, you can assume that there are many related assertions Ihaven’t listed here. For example, in addition to assertSessionHasErrors() there arealso assertSessionHasNoErrors() and assertSessionHasErrorsIn() assertions; aswell as assertJson(), there are also assertJsonCount(), assertJsonFragment(),assertJsonMissing(), assertJsonMissingExact(), assertJsonStructure(), andassertJsonValidationErrors() assertions. Again, take a look at the docs and makeyourself familiar with the whole list.
308 | Chapter 12: Testing
www.EBooksWorld.ir
Authenticating ResponsesOne piece of your application it’s common to test with application tests is authentica‐tion and authorization. Most of the time your needs will be met with the actingAs()chainable method, which takes a user (or other Authenticatable object, dependingon how your system is set up), as you can see in Example 12-10.
Example 12-10. Basic auth in testing
public function test_guests_cant_view_dashboard(){ $user = factory(User::class)->states('guest')->create(); $response = $this->actingAs($user)->get('dashboard'); $response->assertStatus(401); // Unauthorized}
public function test_members_can_view_dashboard(){ $user = factory(User::class)->states('member')->create(); $response = $this->actingAs($user)->get('dashboard'); $response->assertOk();}
public function test_members_and_guests_cant_view_statistics(){ $guest = factory(User::class)->states('guest')->create(); $response = $this->actingAs($guest)->get('statistics'); $response->assertStatus(401); // Unauthorized
$member = factory(User::class)->states('member')->create(); $response = $this->actingAs($member)->get('statistics'); $response->assertStatus(401); // Unauthorized}
public function test_admins_can_view_statistics(){ $user = factory(User::class)->states('admin')->create(); $response = $this->actingAs($user)->get('statistics'); $response->assertOk();}
Using Factory States for Authorization
It’s common to use model factories (discussed in “Model Factories”on page 99) in testing, and model factory states make tasks like cre‐ating users with different access levels simple.
HTTP Tests | 309
www.EBooksWorld.ir
A Few Other Customizations to Your HTTP TestsIf you’d like to set session variables on your requests, you can also chainwithSession():
$response = $this->withSession([ 'alert-dismissed' => true,])->get('dashboard');
If you’d prefer to set your request headers fluently, you can chain withHeaders():
$response = $this->withHeaders([ 'X-THE-ANSWER' => '42',])->get('the-restaurant-at-the-end-of-the-universe');
Handling Exceptions in Application TestsUsually, an exception that’s thrown inside your application when you’re makingHTTP calls will be captured by Laravel’s exception handler and processed as it wouldbe in normal application. So, the test and route in Example 12-11 would still pass,since the exception would never bubble up the whole way to our test.
Example 12-11. An exception that will be captured by Laravel’s exception handler andresult in a passing test
// routes/web.phpRoute::get('has-exceptions', function () { throw new Exception('Stop!');});
// tests/Feature/ExceptionsTest.phppublic function test_exception_in_route(){ $this->get('/has-exceptions');
$this->assertTrue(true);}
In a lot of cases, this might make sense; maybe you’re expecting a validation exceptionand you want it to be caught like it would normally be by the framework.
But if you want to temporarily disable the exception handler, that’s an option; just run$this->withoutExceptionHandling(), as shown in Example 12-12.
Example 12-12. Temporarily disabling exception handling in a single test
// tests/Feature/ExceptionsTest.phppublic function test_exception_in_route(){ // Now throws an error
310 | Chapter 12: Testing
www.EBooksWorld.ir
$this->withoutExceptionHandling();
$this->get('/has-exceptions');
$this->assertTrue(true);}
And if for some reason you need to turn it back on (maybe you turned it off insetUp() but want it back on for just one test), you can run $this->withExceptionHandling().
Database TestsOften, the effect we want to test for after our tests have run is in the database. Imag‐ine you want to test that the “create package” page works correctly. What’s the bestway? Make an HTTP call to the “store package” endpoint and then assert that thatpackage exists in the database. It’s easier and safer than inspecting the resulting “listpackages” page.
We have two primary assertions for the database: $this->assertDatabaseHas() and$this->assertDatabaseMissing(). For both, pass the table name as the first param‐eter, the data you’re looking for as the second, and, optionally, the specific databaseconnection you want to test as the third.
Take a look at Example 12-13 to see how you might use them.
Example 12-13. Sample database tests
public function test_create_package_page_stores_package(){ $this->post(route('packages.store'), [ 'name' => 'Package-a-tron', ]);
$this->assertDatabaseHas('packages', ['name' => 'Package-a-tron']);}
As you can see, the second (data) parameter of assertDatabaseHas() is structuredlike a SQL WHERE statement—you pass a key and a value (or multiple keys and values),and then Laravel looks for any records in the specified database table that match yourkey(s) and value(s).
As always, assertDatabaseMissing() is the inverse.
Database Tests | 311
www.EBooksWorld.ir

Using Model Factories in TestsModel factories are amazing tools that make it easy to seed randomized, well-structured database data for testing (or other purposes). You’ve already seen them inuse in several examples in this chapter.
We’ve already covered them in depth, so check out “Model Factories” on page 99 tolearn more.
Seeding in TestsIf you use seeds in your application, you can run the equivalent of php artisandb:seed by running $this->seed() in your test.
You can also pass a seeder class name to just seed that one class:
$this->seed(); // Seeds all$this->seed(UserSeeder::class); // Seeds users
Testing Other Laravel SystemsWhen testing Laravel systems, you’ll often want to pause their true function for theduration of the testing and instead write tests against what has happened to those sys‐tems. You can do this by “faking” different facades, such as Event, Mail, and Notification. We’ll talk more about what fakes are in “Mocking” on page 318, but first, let’slook at some examples. All of the following features in Laravel have their own set ofassertions you can make after faking them, but you can also just choose to fake themto restrict their effects.
Event FakesLet’s use event fakes as our first example of how Laravel makes it possible to mock itsinternal systems. There are likely going to be times when you want to fake events justfor the sake of suppressing their actions. For example, suppose your app pushes noti‐fications to Slack every time a new user signs up. You have a “user signed up” eventthat’s dispatched when this happens, and it has a listener that notifies a Slack channelthat a user has signed up. You don’t want those notifications to go to Slack every timeyou run your tests, but you might want to assert that the event was sent, or the lis‐tener was triggered, or something else. This is one reason for faking certain aspects ofLaravel in our tests: to pause the default behavior and instead make assertions againstthe system we’re testing.
Let’s take a look at how to suppress these events by calling the fake() method onIlluminate\Support\Facades\Event, as shown in Example 12-14.
312 | Chapter 12: Testing
www.EBooksWorld.ir
Example 12-14. Suppressing events without adding assertions
public function test_controller_does_some_thing(){ Event::fake();
// Call controller and assert it does whatever you want without // worrying about it pinging Slack}
Once we’ve run the fake() method, we can also call special assertions on the Eventfacade: namely, assertDispatched() and assertNotDispatched(). Take a look atExample 12-15 to see them in use.
Example 12-15. Making assertions against events
public function test_signing_up_users_notifies_slack(){ Event::fake();
// Sign user up
Event::assertDispatched(UserJoined::class, function ($event) use ($user) { return $event->user->id === $user->id; });
// Or sign multiple users up and assert it was dispatched twice
Event::assertDispatched(UserJoined::class, 2);
// Or sign up with validation failures and assert it wasn't dispatched
Event::assertNotDispatched(UserJoined::class);}
Note that the (optional) closure we’re passing to assertDispatched() makes it sowe’re not just asserting that the event was dispatched, but also that the dispatchedevent contains certain data.
Event::fake() Disables Eloquent Model Events
Event::fake() also disables Eloquent model events. So if you haveany important code, for example, in a model’s creating event,make sure to create your models (through your factories or how‐ever else) before calling Event::fake().
Testing Other Laravel Systems | 313
www.EBooksWorld.ir
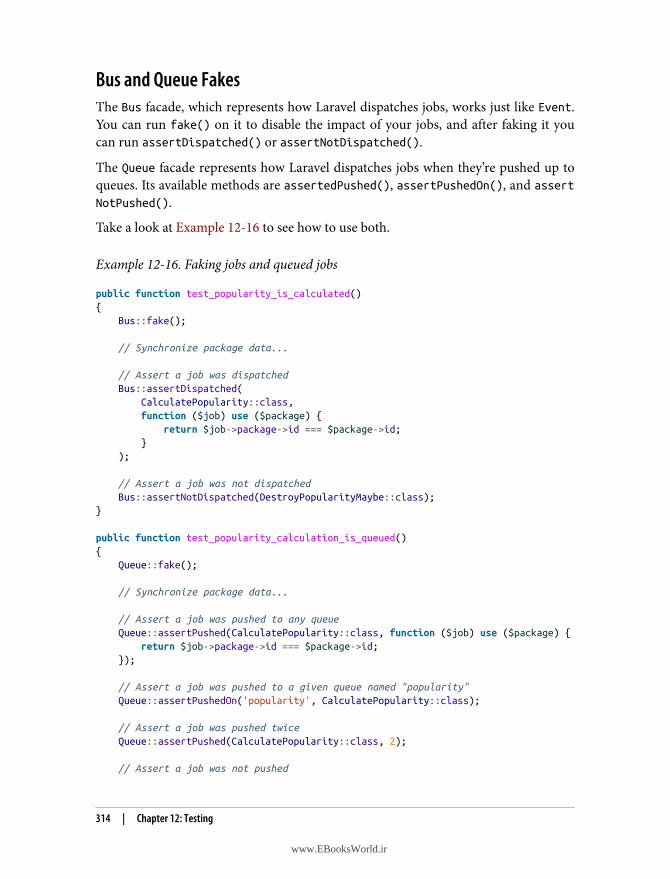
Bus and Queue FakesThe Bus facade, which represents how Laravel dispatches jobs, works just like Event.You can run fake() on it to disable the impact of your jobs, and after faking it youcan run assertDispatched() or assertNotDispatched().
The Queue facade represents how Laravel dispatches jobs when they’re pushed up toqueues. Its available methods are assertedPushed(), assertPushedOn(), and assertNotPushed().
Take a look at Example 12-16 to see how to use both.
Example 12-16. Faking jobs and queued jobs
public function test_popularity_is_calculated(){ Bus::fake();
// Synchronize package data...
// Assert a job was dispatched Bus::assertDispatched( CalculatePopularity::class, function ($job) use ($package) { return $job->package->id === $package->id; } );
// Assert a job was not dispatched Bus::assertNotDispatched(DestroyPopularityMaybe::class);}
public function test_popularity_calculation_is_queued(){ Queue::fake();
// Synchronize package data...
// Assert a job was pushed to any queue Queue::assertPushed(CalculatePopularity::class, function ($job) use ($package) { return $job->package->id === $package->id; });
// Assert a job was pushed to a given queue named "popularity" Queue::assertPushedOn('popularity', CalculatePopularity::class);
// Assert a job was pushed twice Queue::assertPushed(CalculatePopularity::class, 2);
// Assert a job was not pushed
314 | Chapter 12: Testing
www.EBooksWorld.ir
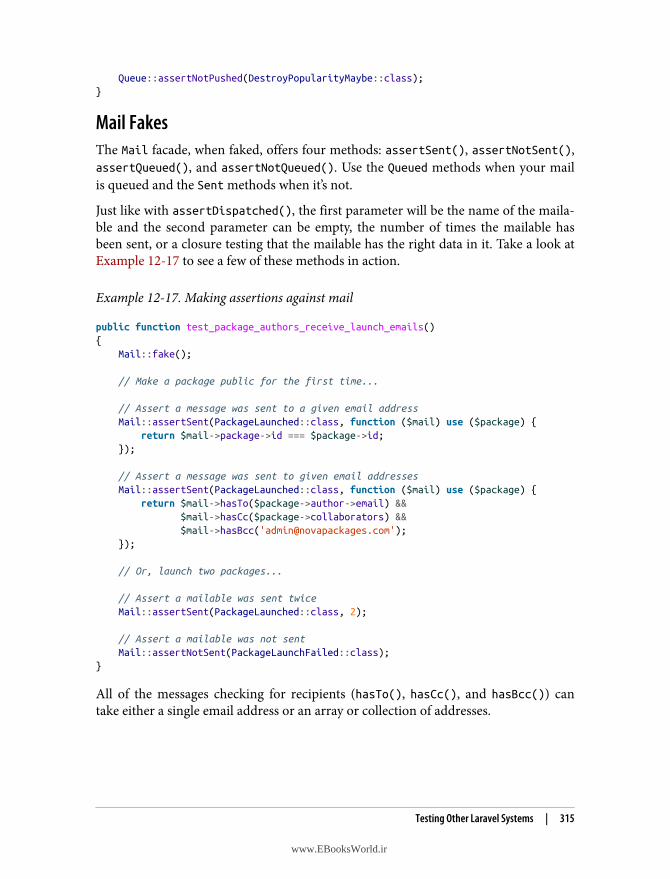
Queue::assertNotPushed(DestroyPopularityMaybe::class);}
Mail FakesThe Mail facade, when faked, offers four methods: assertSent(), assertNotSent(),assertQueued(), and assertNotQueued(). Use the Queued methods when your mailis queued and the Sent methods when it’s not.
Just like with assertDispatched(), the first parameter will be the name of the maila‐ble and the second parameter can be empty, the number of times the mailable hasbeen sent, or a closure testing that the mailable has the right data in it. Take a look atExample 12-17 to see a few of these methods in action.
Example 12-17. Making assertions against mail
public function test_package_authors_receive_launch_emails(){ Mail::fake();
// Make a package public for the first time...
// Assert a message was sent to a given email address Mail::assertSent(PackageLaunched::class, function ($mail) use ($package) { return $mail->package->id === $package->id; });
// Assert a message was sent to given email addresses Mail::assertSent(PackageLaunched::class, function ($mail) use ($package) { return $mail->hasTo($package->author->email) && $mail->hasCc($package->collaborators) && $mail->hasBcc('[email protected]'); });
// Or, launch two packages...
// Assert a mailable was sent twice Mail::assertSent(PackageLaunched::class, 2);
// Assert a mailable was not sent Mail::assertNotSent(PackageLaunchFailed::class);}
All of the messages checking for recipients (hasTo(), hasCc(), and hasBcc()) cantake either a single email address or an array or collection of addresses.
Testing Other Laravel Systems | 315
www.EBooksWorld.ir
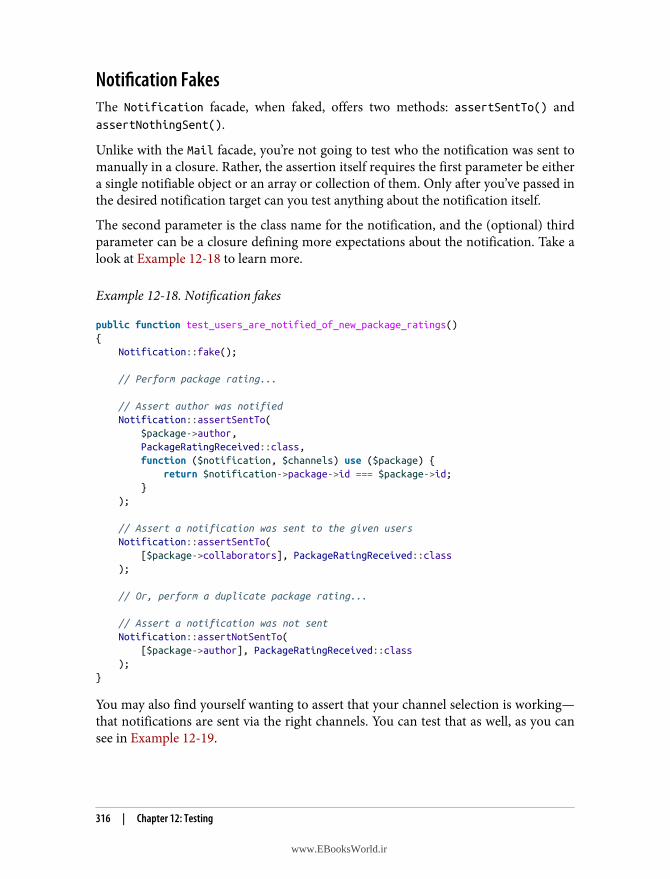
Notification FakesThe Notification facade, when faked, offers two methods: assertSentTo() andassertNothingSent().
Unlike with the Mail facade, you’re not going to test who the notification was sent tomanually in a closure. Rather, the assertion itself requires the first parameter be eithera single notifiable object or an array or collection of them. Only after you’ve passed inthe desired notification target can you test anything about the notification itself.
The second parameter is the class name for the notification, and the (optional) thirdparameter can be a closure defining more expectations about the notification. Take alook at Example 12-18 to learn more.
Example 12-18. Notification fakes
public function test_users_are_notified_of_new_package_ratings(){ Notification::fake();
// Perform package rating...
// Assert author was notified Notification::assertSentTo( $package->author, PackageRatingReceived::class, function ($notification, $channels) use ($package) { return $notification->package->id === $package->id; } );
// Assert a notification was sent to the given users Notification::assertSentTo( [$package->collaborators], PackageRatingReceived::class );
// Or, perform a duplicate package rating...
// Assert a notification was not sent Notification::assertNotSentTo( [$package->author], PackageRatingReceived::class );}
You may also find yourself wanting to assert that your channel selection is working—that notifications are sent via the right channels. You can test that as well, as you cansee in Example 12-19.
316 | Chapter 12: Testing
www.EBooksWorld.ir
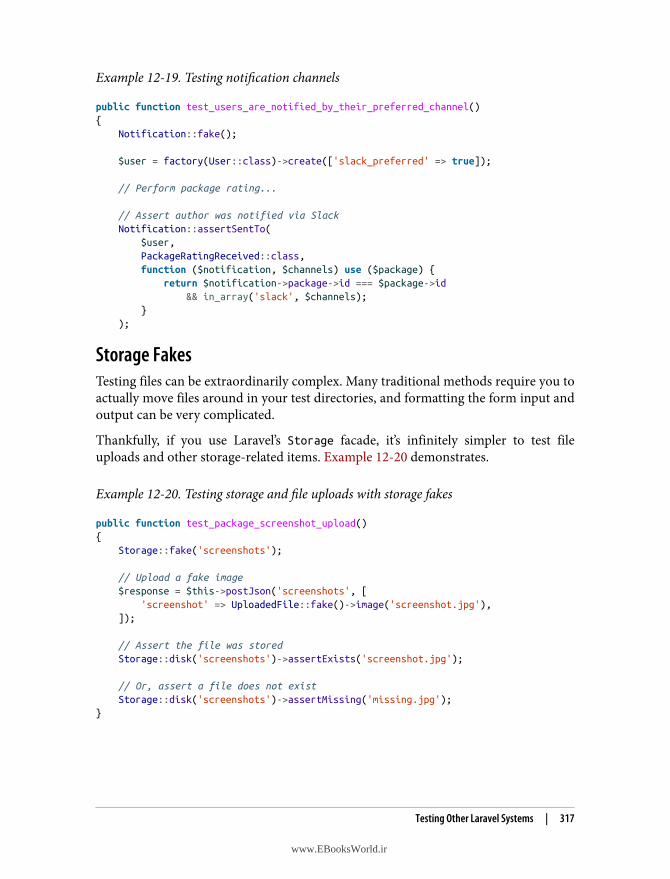
Example 12-19. Testing notification channels
public function test_users_are_notified_by_their_preferred_channel(){ Notification::fake();
$user = factory(User::class)->create(['slack_preferred' => true]);
// Perform package rating...
// Assert author was notified via Slack Notification::assertSentTo( $user, PackageRatingReceived::class, function ($notification, $channels) use ($package) { return $notification->package->id === $package->id && in_array('slack', $channels); } );
Storage FakesTesting files can be extraordinarily complex. Many traditional methods require you toactually move files around in your test directories, and formatting the form input andoutput can be very complicated.
Thankfully, if you use Laravel’s Storage facade, it’s infinitely simpler to test fileuploads and other storage-related items. Example 12-20 demonstrates.
Example 12-20. Testing storage and file uploads with storage fakes
public function test_package_screenshot_upload(){ Storage::fake('screenshots');
// Upload a fake image $response = $this->postJson('screenshots', [ 'screenshot' => UploadedFile::fake()->image('screenshot.jpg'), ]);
// Assert the file was stored Storage::disk('screenshots')->assertExists('screenshot.jpg');
// Or, assert a file does not exist Storage::disk('screenshots')->assertMissing('missing.jpg');}
Testing Other Laravel Systems | 317
www.EBooksWorld.ir
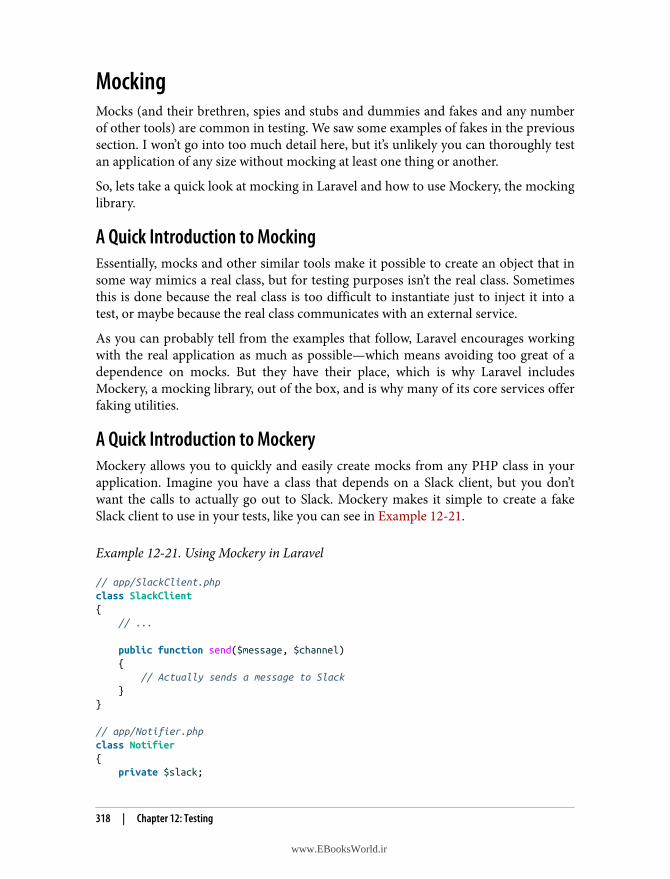
MockingMocks (and their brethren, spies and stubs and dummies and fakes and any numberof other tools) are common in testing. We saw some examples of fakes in the previoussection. I won’t go into too much detail here, but it’s unlikely you can thoroughly testan application of any size without mocking at least one thing or another.
So, lets take a quick look at mocking in Laravel and how to use Mockery, the mockinglibrary.
A Quick Introduction to MockingEssentially, mocks and other similar tools make it possible to create an object that insome way mimics a real class, but for testing purposes isn’t the real class. Sometimesthis is done because the real class is too difficult to instantiate just to inject it into atest, or maybe because the real class communicates with an external service.
As you can probably tell from the examples that follow, Laravel encourages workingwith the real application as much as possible—which means avoiding too great of adependence on mocks. But they have their place, which is why Laravel includesMockery, a mocking library, out of the box, and is why many of its core services offerfaking utilities.
A Quick Introduction to MockeryMockery allows you to quickly and easily create mocks from any PHP class in yourapplication. Imagine you have a class that depends on a Slack client, but you don’twant the calls to actually go out to Slack. Mockery makes it simple to create a fakeSlack client to use in your tests, like you can see in Example 12-21.
Example 12-21. Using Mockery in Laravel
// app/SlackClient.phpclass SlackClient{ // ...
public function send($message, $channel) { // Actually sends a message to Slack }}
// app/Notifier.phpclass Notifier{ private $slack;
318 | Chapter 12: Testing
www.EBooksWorld.ir
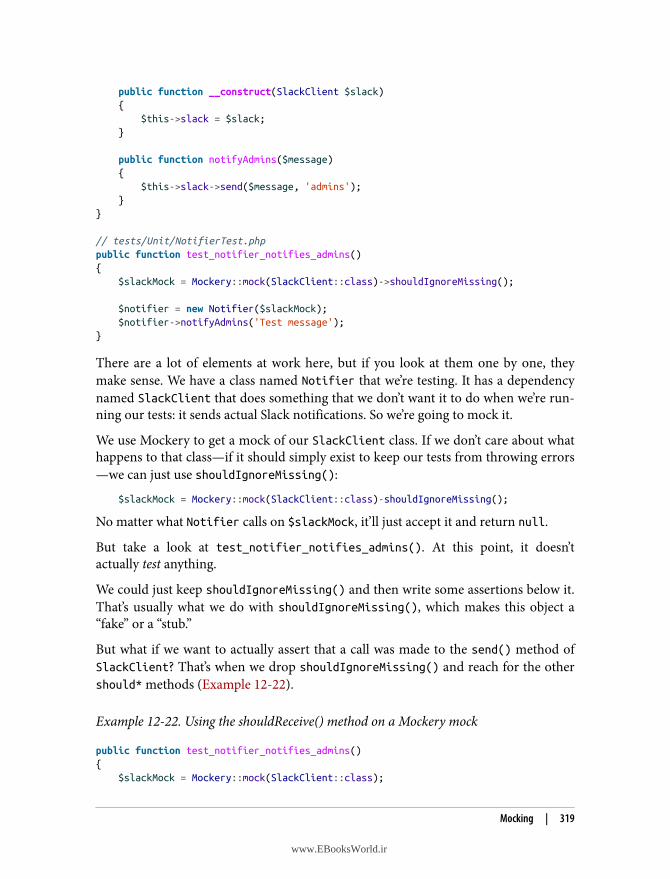
public function __construct(SlackClient $slack) { $this->slack = $slack; }
public function notifyAdmins($message) { $this->slack->send($message, 'admins'); }}
// tests/Unit/NotifierTest.phppublic function test_notifier_notifies_admins(){ $slackMock = Mockery::mock(SlackClient::class)->shouldIgnoreMissing();
$notifier = new Notifier($slackMock); $notifier->notifyAdmins('Test message');}
There are a lot of elements at work here, but if you look at them one by one, theymake sense. We have a class named Notifier that we’re testing. It has a dependencynamed SlackClient that does something that we don’t want it to do when we’re run‐ning our tests: it sends actual Slack notifications. So we’re going to mock it.
We use Mockery to get a mock of our SlackClient class. If we don’t care about whathappens to that class—if it should simply exist to keep our tests from throwing errors—we can just use shouldIgnoreMissing():
$slackMock = Mockery::mock(SlackClient::class)-shouldIgnoreMissing();
No matter what Notifier calls on $slackMock, it’ll just accept it and return null.
But take a look at test_notifier_notifies_admins(). At this point, it doesn’tactually test anything.
We could just keep shouldIgnoreMissing() and then write some assertions below it.That’s usually what we do with shouldIgnoreMissing(), which makes this object a“fake” or a “stub.”
But what if we want to actually assert that a call was made to the send() method ofSlackClient? That’s when we drop shouldIgnoreMissing() and reach for the othershould* methods (Example 12-22).
Example 12-22. Using the shouldReceive() method on a Mockery mock
public function test_notifier_notifies_admins(){ $slackMock = Mockery::mock(SlackClient::class);
Mocking | 319
www.EBooksWorld.ir
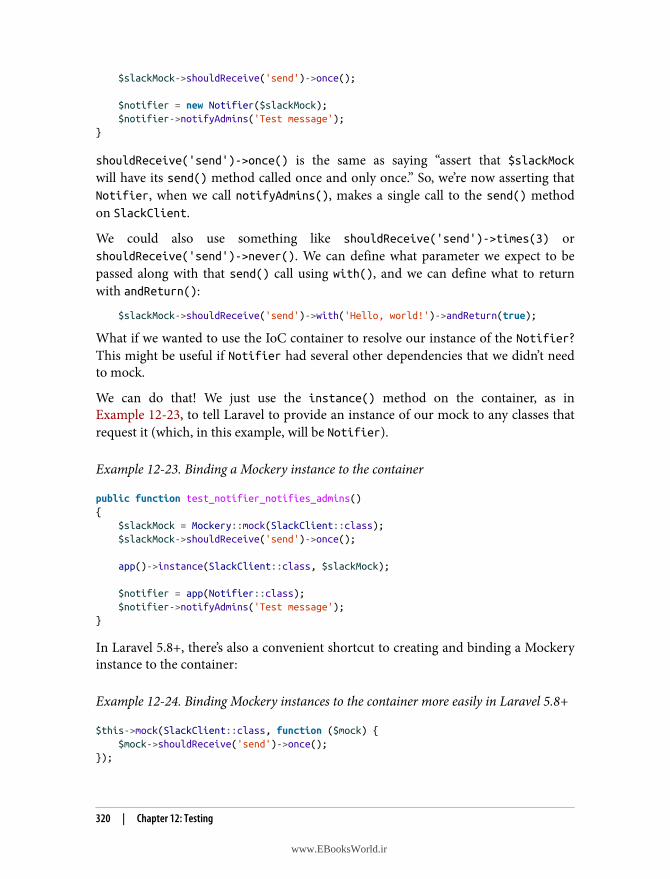
$slackMock->shouldReceive('send')->once();
$notifier = new Notifier($slackMock); $notifier->notifyAdmins('Test message');}
shouldReceive('send')->once() is the same as saying “assert that $slackMockwill have its send() method called once and only once.” So, we’re now asserting thatNotifier, when we call notifyAdmins(), makes a single call to the send() methodon SlackClient.
We could also use something like shouldReceive('send')->times(3) orshouldReceive('send')->never(). We can define what parameter we expect to bepassed along with that send() call using with(), and we can define what to returnwith andReturn():
$slackMock->shouldReceive('send')->with('Hello, world!')->andReturn(true);
What if we wanted to use the IoC container to resolve our instance of the Notifier?This might be useful if Notifier had several other dependencies that we didn’t needto mock.
We can do that! We just use the instance() method on the container, as inExample 12-23, to tell Laravel to provide an instance of our mock to any classes thatrequest it (which, in this example, will be Notifier).
Example 12-23. Binding a Mockery instance to the container
public function test_notifier_notifies_admins(){ $slackMock = Mockery::mock(SlackClient::class); $slackMock->shouldReceive('send')->once();
app()->instance(SlackClient::class, $slackMock);
$notifier = app(Notifier::class); $notifier->notifyAdmins('Test message');}
In Laravel 5.8+, there’s also a convenient shortcut to creating and binding a Mockeryinstance to the container:
Example 12-24. Binding Mockery instances to the container more easily in Laravel 5.8+
$this->mock(SlackClient::class, function ($mock) { $mock->shouldReceive('send')->once();});
320 | Chapter 12: Testing
www.EBooksWorld.ir
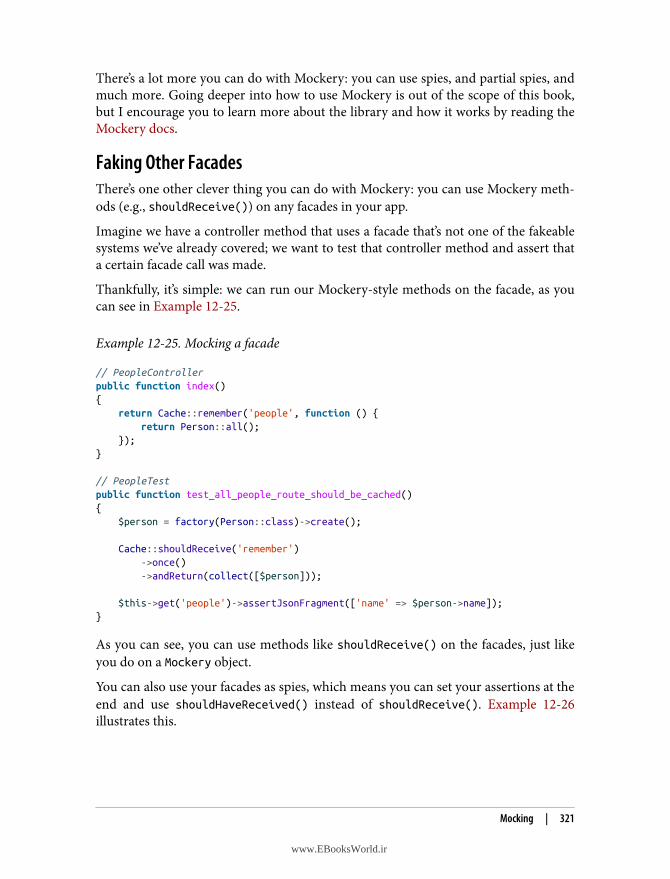
There’s a lot more you can do with Mockery: you can use spies, and partial spies, andmuch more. Going deeper into how to use Mockery is out of the scope of this book,but I encourage you to learn more about the library and how it works by reading theMockery docs.
Faking Other FacadesThere’s one other clever thing you can do with Mockery: you can use Mockery meth‐ods (e.g., shouldReceive()) on any facades in your app.
Imagine we have a controller method that uses a facade that’s not one of the fakeablesystems we’ve already covered; we want to test that controller method and assert thata certain facade call was made.
Thankfully, it’s simple: we can run our Mockery-style methods on the facade, as youcan see in Example 12-25.
Example 12-25. Mocking a facade
// PeopleControllerpublic function index(){ return Cache::remember('people', function () { return Person::all(); });}
// PeopleTestpublic function test_all_people_route_should_be_cached(){ $person = factory(Person::class)->create();
Cache::shouldReceive('remember') ->once() ->andReturn(collect([$person]));
$this->get('people')->assertJsonFragment(['name' => $person->name]);}
As you can see, you can use methods like shouldReceive() on the facades, just likeyou do on a Mockery object.
You can also use your facades as spies, which means you can set your assertions at theend and use shouldHaveReceived() instead of shouldReceive(). Example 12-26illustrates this.
Mocking | 321
www.EBooksWorld.ir
Example 12-26. Facade spies
public function test_package_should_be_cached_after_visit(){ Cache::spy();
$package = factory(Package::class)->create();
$this->get(route('packages.show', [$package->id]));
Cache::shouldHaveReceived('put') ->once() ->with('packages.' . $package->id, $package->toArray());}
Testing Artisan CommandsWe’ve covered a lot in this chapter, but we’re almost done! We have just two morepieces of Laravel’s testing arsenal to cover: Artisan and the browser.
If you’re working in Laravel prior to 5.7, the best way to test Artisan commands is tocall them with $this->artisan($commandName, $parameters) and then test theirimpact, like in Example 12-27.
Example 12-27. Simple Artisan tests
public function test_promote_console_command_promotes_user(){ $user = factory(User::class)->create();
$this->artisan('user:promote', ['userId' => $user->id]);
$this->assertTrue($user->isPromoted());}
You can also make assertions against the response code you get from Artisan, as youcan see in Example 12-28.
Example 12-28. Manually asserting Artisan exit codes
$code = $this->artisan('do:thing', ['--flagOfSomeSort' => true]);$this->assertEquals(0, $code); // 0 means "no errors were returned"
Asserting Against Artisan Command SyntaxIf you’re working with Laravel 5.7 and later, you can also chain three new methodsonto your $this->artisan() call: expectsQuestion(), expectsOutput(), andassertExitCode(). The expects* methods will work on any of the interactive
322 | Chapter 12: Testing
www.EBooksWorld.ir
prompts, including confirm(), and anticipate(), and the assertExitCode()method is a shortcut to what we saw in Example 12-28.
Take a look at Example 12-29 to see how it works.
Example 12-29. Basic Artisan “expects” tests
// routes/console.phpArtisan::command('make:post {--expanded}', function () { $title = $this->ask('What is the post title?'); $this->comment('Creating at ' . str_slug($title) . '.md');
$category = $this->choice('What category?', ['technology', 'construction'], 0);
// Create post here
$this->comment('Post created');});
// Test filepublic function test_make_post_console_commands_performs_as_expected(){ $this->artisan('make:post', ['--expanded' => true]) ->expectsQuestion('What is the post title?', 'My Best Post Now') ->expectsOutput('Creating at my-best-post-now.md') ->expectsQuestion('What category?', 'construction') ->expectsOutput('Post created') ->assertExitCode(0);}
As you can see, the first parameter of expectsQuestion() is the text we’re expectingto see from the question, and the second parameter is the text we’re answering with.expectsOutput() just tests that the passed string is returned.
Browser TestsWe’ve made it to browser tests! These allow you to actually interact with the DOM ofyour pages: in browser tests you can click buttons, fill out and submit forms, and,with Dusk, even interact with JavaScript.
Laravel actually has two separate browser testing tools: BrowserKit Testing and Dusk.Only Dusk is actively maintained; BrowserKit Testing seems to have become a bit of asecond-class citizen, but it’s still available on GitHub and still works at the time of thiswriting.
Browser Tests | 323
www.EBooksWorld.ir
Choosing a ToolFor browser testing, I suggest you use the core application testing tools wheneverpossible (those we’ve covered up to this point). If your app is not JavaScript-basedand you need to test actual DOM manipulation or form UI elements, use BrowserKit.If you’re developing a JavaScript-heavy app, you’ll likely want to use Dusk, which we’llcover next.
However, there will also be many instances where you’ll want to use a JavaScript-based test stack (which is out of scope for this book) based on something like Jest andvue-test-utils. This toolset can be very useful for Vue component testing, and Jest’ssnapshot functionality simplifies the process of keeping API and frontend test data insync. To learn more, check out Caleb Porzio’s “Getting Started” blog post and Saman‐tha Geitz’s 2018 Laracon talk.
If you’re working with a JavaScript framework other than Vue, there are no currentlypreferred frontend testing solutions in the Laravel world. However, the broad Reactworld seems to have settled on Jest and Enzyme.
A Quick Introduction to BrowserKit TestingThe BrowserKit Testing package is the code from Laravel pre-5.4 application testingpulled out into a separate package. BrowserKit is a component that parses the DOMand allows you to “select” DOM elements and interact with them. This is great forsimple page interactions like clicking links and filling out forms, but it doesn’t workfor JavaScript.
BrowserKit Testing hasn’t been abandoned, but it’s also not ever mentioned in thedocs, and it definitely has the feel of deprecated legacy code. For this reason, andbecause of the robustness of the built-in application testing suite, I’m going to skipcovering it here. However, the first edition of this book covered it extensively, so ifyou are interested in working with Browserkit Testing, check out the free PDF of thefirst edition’s testing chapter.
Testing with DuskDusk is a Laravel tool (installable as a Composer package) that makes it easy to writeSelenium-style directions for a ChromeDriver-based browser to interact with yourapp. Unlike most other Selenium-based tools, Dusk’s API is simple and it’s easy towrite code to interact with it by hand. Take a look:
$this->browse(function ($browser) { $browser->visit('/register') ->type('email', '[email protected]') ->type('password', 'secret')
324 | Chapter 12: Testing
www.EBooksWorld.ir
->press('Sign Up') ->assertPathIs('/dashboard');});
With Dusk, there’s an actual browser spinning up your entire application and inter‐acting with it. That means you can have complex interactions with your JavaScriptand get screenshots of failure states—but it also means everything’s a bit slower andit’s more prone to failure than Laravel’s base application testing suite.
Personally, I’ve found that Dusk is most useful as a regression testing suite, and itworks better than something like Selenium. Rather than using it for any sort of test-driven development, I use it to assert that the user experience hasn’t broken(“regressed”) as the app continues to develop. Think of this more like writing testsabout your user interface after the interface is built.
The Dusk docs are robust, so I’m not going to go into great depth here, but I want toshow you the basics of working with Dusk.
Installing DuskTo install Dusk, run these two commands:
composer require --dev laravel/duskphp artisan dusk:install
Then edit your .env file to set your APP_URL variable to the same URL you use to viewyour site in your local browser; something like http://mysite.test.
To run your Dusk tests, just run php artisan dusk. You can pass in all the sameparameters you’re used to from PHPUnit (for example, php artisan dusk --
filter=my_best_test).
Writing Dusk testsTo generate a new Dusk test, use a command like the following:
php artisan dusk:make RatingTest
This test will be placed in tests/Browser/RatingTest.php.
Customizing Dusk Environment Variables
You can customize the environment variables for Dusk by creatinga new file named .env.dusk.local (and you can replace .local if you’reworking in a different environment, like “staging”).
To write your Dusk tests, imagine that you’re directing one or more web browsers tovisit your application and take certain actions. That’s what the syntax will look like, asyou can see in Example 12-30.
Browser Tests | 325
www.EBooksWorld.ir
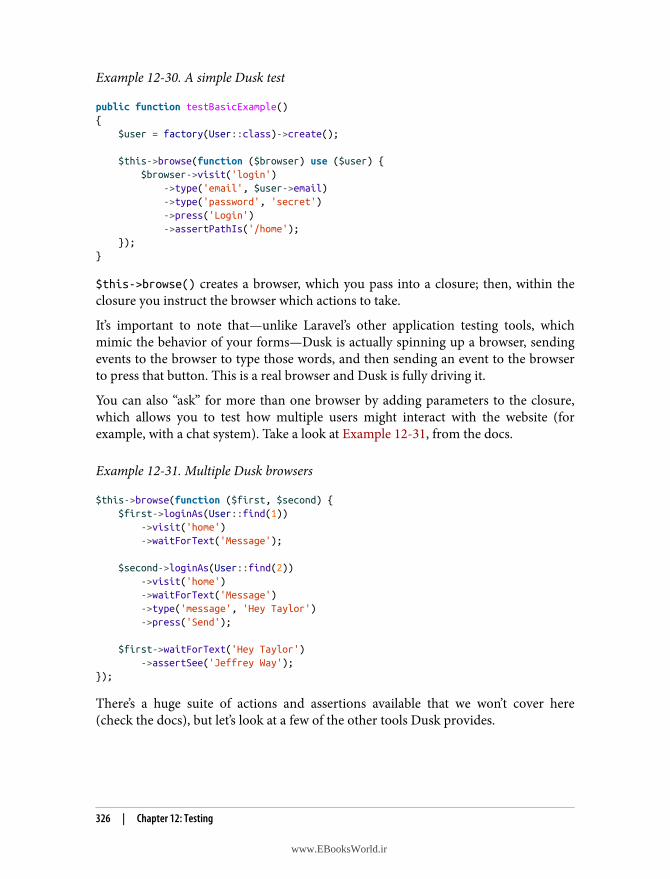
Example 12-30. A simple Dusk test
public function testBasicExample(){ $user = factory(User::class)->create();
$this->browse(function ($browser) use ($user) { $browser->visit('login') ->type('email', $user->email) ->type('password', 'secret') ->press('Login') ->assertPathIs('/home'); });}
$this->browse() creates a browser, which you pass into a closure; then, within theclosure you instruct the browser which actions to take.
It’s important to note that—unlike Laravel’s other application testing tools, whichmimic the behavior of your forms—Dusk is actually spinning up a browser, sendingevents to the browser to type those words, and then sending an event to the browserto press that button. This is a real browser and Dusk is fully driving it.
You can also “ask” for more than one browser by adding parameters to the closure,which allows you to test how multiple users might interact with the website (forexample, with a chat system). Take a look at Example 12-31, from the docs.
Example 12-31. Multiple Dusk browsers
$this->browse(function ($first, $second) { $first->loginAs(User::find(1)) ->visit('home') ->waitForText('Message');
$second->loginAs(User::find(2)) ->visit('home') ->waitForText('Message') ->type('message', 'Hey Taylor') ->press('Send');
$first->waitForText('Hey Taylor') ->assertSee('Jeffrey Way');});
There’s a huge suite of actions and assertions available that we won’t cover here(check the docs), but let’s look at a few of the other tools Dusk provides.
326 | Chapter 12: Testing
www.EBooksWorld.ir
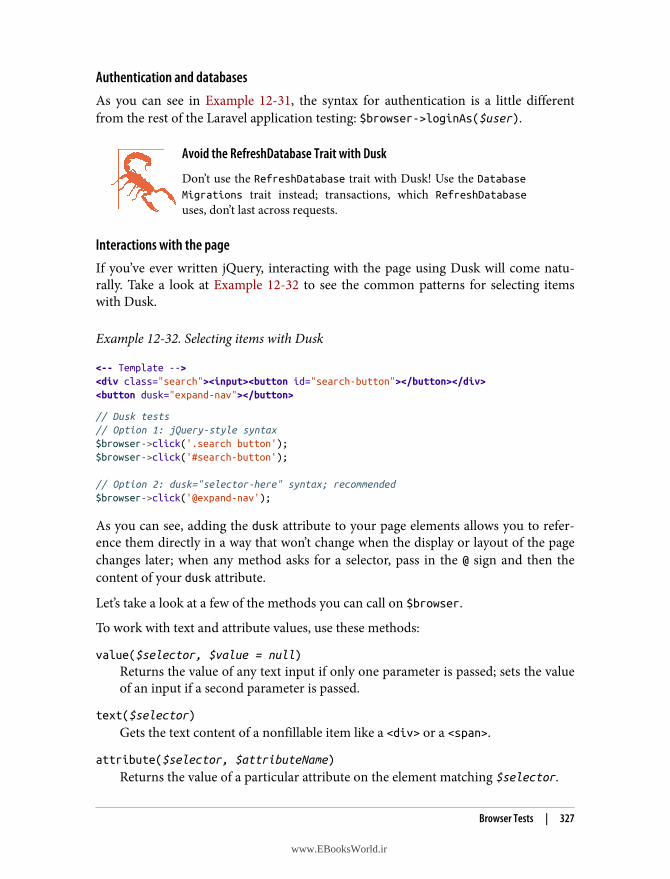
Authentication and databasesAs you can see in Example 12-31, the syntax for authentication is a little differentfrom the rest of the Laravel application testing: $browser->loginAs($user).
Avoid the RefreshDatabase Trait with Dusk
Don’t use the RefreshDatabase trait with Dusk! Use the DatabaseMigrations trait instead; transactions, which RefreshDatabaseuses, don’t last across requests.
Interactions with the pageIf you’ve ever written jQuery, interacting with the page using Dusk will come natu‐rally. Take a look at Example 12-32 to see the common patterns for selecting itemswith Dusk.
Example 12-32. Selecting items with Dusk
<-- Template --><div class="search"><input><button id="search-button"></button></div><button dusk="expand-nav"></button>
// Dusk tests// Option 1: jQuery-style syntax$browser->click('.search button');$browser->click('#search-button');
// Option 2: dusk="selector-here" syntax; recommended$browser->click('@expand-nav');
As you can see, adding the dusk attribute to your page elements allows you to refer‐ence them directly in a way that won’t change when the display or layout of the pagechanges later; when any method asks for a selector, pass in the @ sign and then thecontent of your dusk attribute.
Let’s take a look at a few of the methods you can call on $browser.
To work with text and attribute values, use these methods:
value($selector, $value = null)
Returns the value of any text input if only one parameter is passed; sets the valueof an input if a second parameter is passed.
text($selector)
Gets the text content of a nonfillable item like a <div> or a <span>.
attribute($selector, $attributeName)
Returns the value of a particular attribute on the element matching $selector.
Browser Tests | 327
www.EBooksWorld.ir
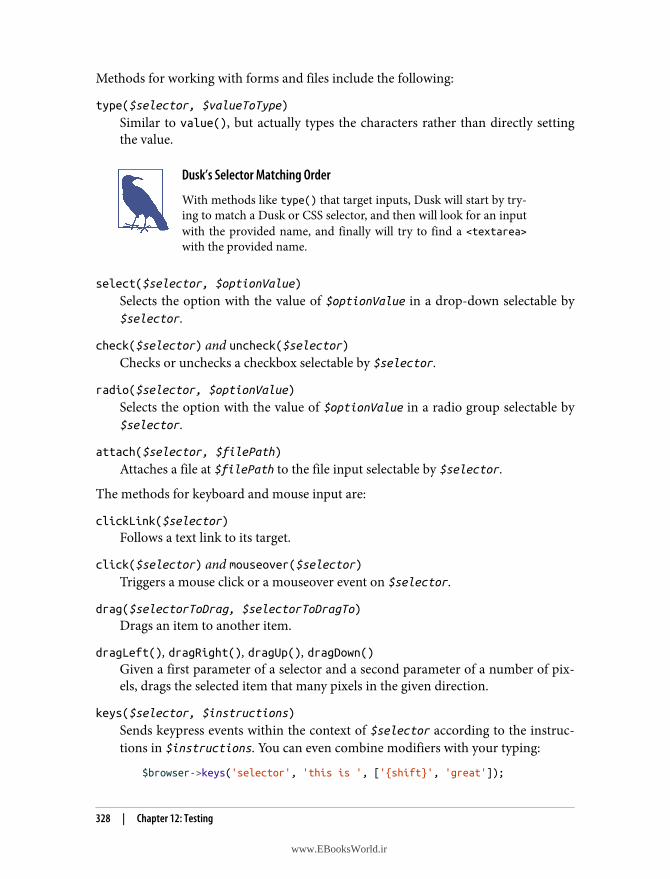
Methods for working with forms and files include the following:
type($selector, $valueToType)
Similar to value(), but actually types the characters rather than directly settingthe value.
Dusk’s Selector Matching Order
With methods like type() that target inputs, Dusk will start by try‐ing to match a Dusk or CSS selector, and then will look for an inputwith the provided name, and finally will try to find a <textarea>with the provided name.
select($selector, $optionValue)
Selects the option with the value of $optionValue in a drop-down selectable by$selector.
check($selector) and uncheck($selector)Checks or unchecks a checkbox selectable by $selector.
radio($selector, $optionValue)
Selects the option with the value of $optionValue in a radio group selectable by$selector.
attach($selector, $filePath)
Attaches a file at $filePath to the file input selectable by $selector.
The methods for keyboard and mouse input are:
clickLink($selector)
Follows a text link to its target.
click($selector) and mouseover($selector)Triggers a mouse click or a mouseover event on $selector.
drag($selectorToDrag, $selectorToDragTo)
Drags an item to another item.
dragLeft(), dragRight(), dragUp(), dragDown()Given a first parameter of a selector and a second parameter of a number of pix‐els, drags the selected item that many pixels in the given direction.
keys($selector, $instructions)
Sends keypress events within the context of $selector according to the instruc‐tions in $instructions. You can even combine modifiers with your typing:
$browser->keys('selector', 'this is ', ['{shift}', 'great']);
328 | Chapter 12: Testing
www.EBooksWorld.ir
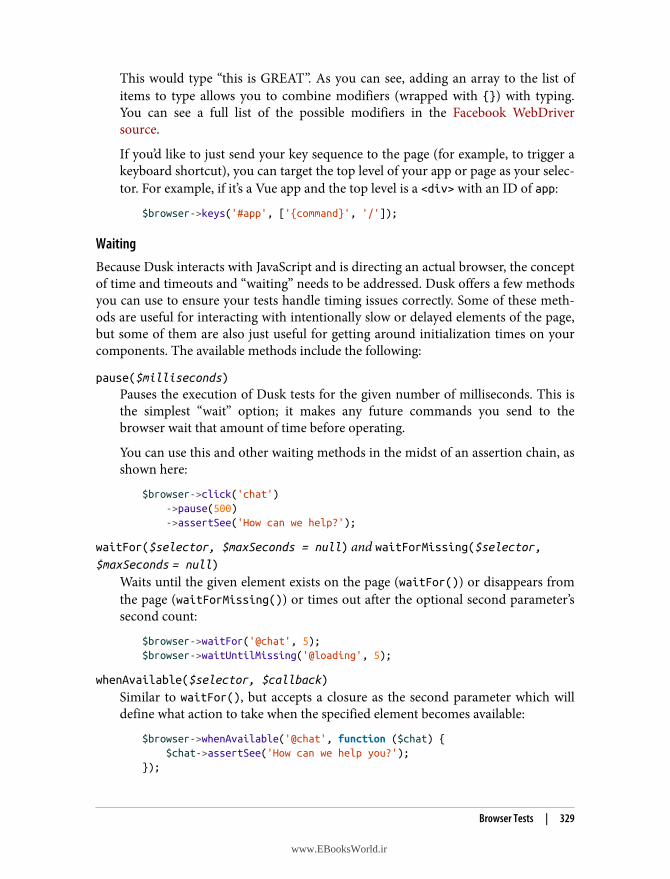
This would type “this is GREAT”. As you can see, adding an array to the list ofitems to type allows you to combine modifiers (wrapped with {}) with typing.You can see a full list of the possible modifiers in the Facebook WebDriversource.
If you’d like to just send your key sequence to the page (for example, to trigger akeyboard shortcut), you can target the top level of your app or page as your selec‐tor. For example, if it’s a Vue app and the top level is a <div> with an ID of app:
$browser->keys('#app', ['{command}', '/']);
WaitingBecause Dusk interacts with JavaScript and is directing an actual browser, the conceptof time and timeouts and “waiting” needs to be addressed. Dusk offers a few methodsyou can use to ensure your tests handle timing issues correctly. Some of these meth‐ods are useful for interacting with intentionally slow or delayed elements of the page,but some of them are also just useful for getting around initialization times on yourcomponents. The available methods include the following:
pause($milliseconds)
Pauses the execution of Dusk tests for the given number of milliseconds. This isthe simplest “wait” option; it makes any future commands you send to thebrowser wait that amount of time before operating.
You can use this and other waiting methods in the midst of an assertion chain, asshown here:
$browser->click('chat') ->pause(500) ->assertSee('How can we help?');
waitFor($selector, $maxSeconds = null) and waitForMissing($selector,$maxSeconds = null)
Waits until the given element exists on the page (waitFor()) or disappears fromthe page (waitForMissing()) or times out after the optional second parameter’ssecond count:
$browser->waitFor('@chat', 5);$browser->waitUntilMissing('@loading', 5);
whenAvailable($selector, $callback)
Similar to waitFor(), but accepts a closure as the second parameter which willdefine what action to take when the specified element becomes available:
$browser->whenAvailable('@chat', function ($chat) { $chat->assertSee('How can we help you?');});
Browser Tests | 329
www.EBooksWorld.ir
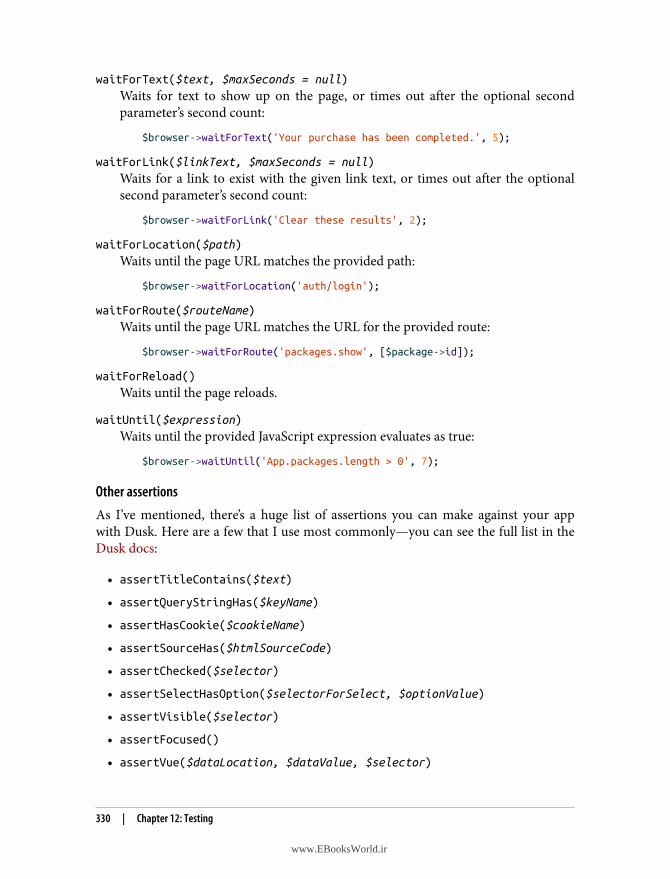
waitForText($text, $maxSeconds = null)
Waits for text to show up on the page, or times out after the optional secondparameter’s second count:
$browser->waitForText('Your purchase has been completed.', 5);
waitForLink($linkText, $maxSeconds = null)
Waits for a link to exist with the given link text, or times out after the optionalsecond parameter’s second count:
$browser->waitForLink('Clear these results', 2);
waitForLocation($path)
Waits until the page URL matches the provided path:
$browser->waitForLocation('auth/login');
waitForRoute($routeName)
Waits until the page URL matches the URL for the provided route:
$browser->waitForRoute('packages.show', [$package->id]);
waitForReload()
Waits until the page reloads.
waitUntil($expression)
Waits until the provided JavaScript expression evaluates as true:
$browser->waitUntil('App.packages.length > 0', 7);
Other assertionsAs I’ve mentioned, there’s a huge list of assertions you can make against your appwith Dusk. Here are a few that I use most commonly—you can see the full list in theDusk docs:
• assertTitleContains($text)
• assertQueryStringHas($keyName)
• assertHasCookie($cookieName)
• assertSourceHas($htmlSourceCode)
• assertChecked($selector)
• assertSelectHasOption($selectorForSelect, $optionValue)
• assertVisible($selector)
• assertFocused()
• assertVue($dataLocation, $dataValue, $selector)
330 | Chapter 12: Testing
www.EBooksWorld.ir
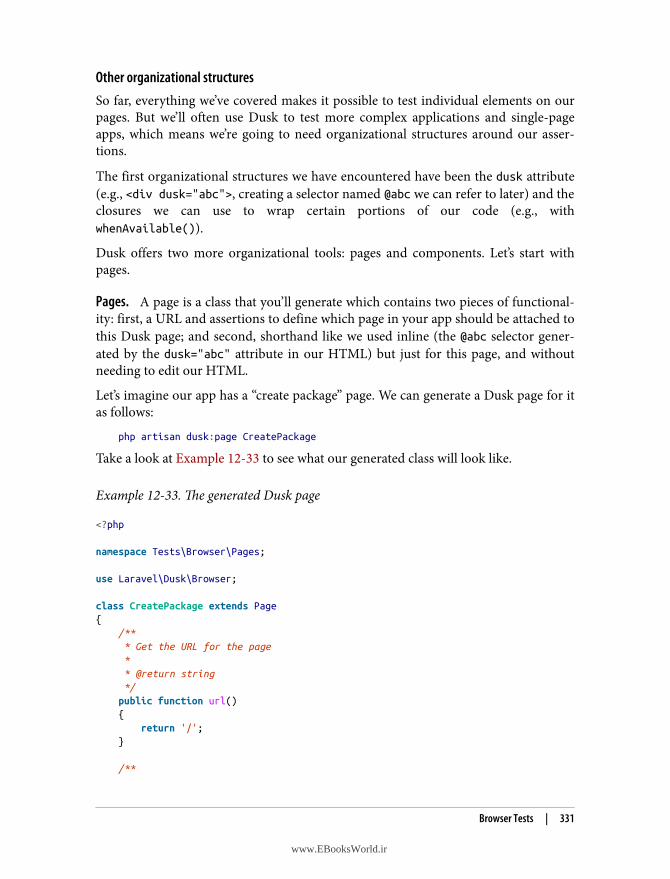
Other organizational structuresSo far, everything we’ve covered makes it possible to test individual elements on ourpages. But we’ll often use Dusk to test more complex applications and single-pageapps, which means we’re going to need organizational structures around our asser‐tions.
The first organizational structures we have encountered have been the dusk attribute(e.g., <div dusk="abc">, creating a selector named @abc we can refer to later) and theclosures we can use to wrap certain portions of our code (e.g., withwhenAvailable()).
Dusk offers two more organizational tools: pages and components. Let’s start withpages.
Pages. A page is a class that you’ll generate which contains two pieces of functional‐ity: first, a URL and assertions to define which page in your app should be attached tothis Dusk page; and second, shorthand like we used inline (the @abc selector gener‐ated by the dusk="abc" attribute in our HTML) but just for this page, and withoutneeding to edit our HTML.
Let’s imagine our app has a “create package” page. We can generate a Dusk page for itas follows:
php artisan dusk:page CreatePackage
Take a look at Example 12-33 to see what our generated class will look like.
Example 12-33. The generated Dusk page
<?php
namespace Tests\Browser\Pages;
use Laravel\Dusk\Browser;
class CreatePackage extends Page{ /** * Get the URL for the page * * @return string */ public function url() { return '/'; }
/**
Browser Tests | 331
www.EBooksWorld.ir
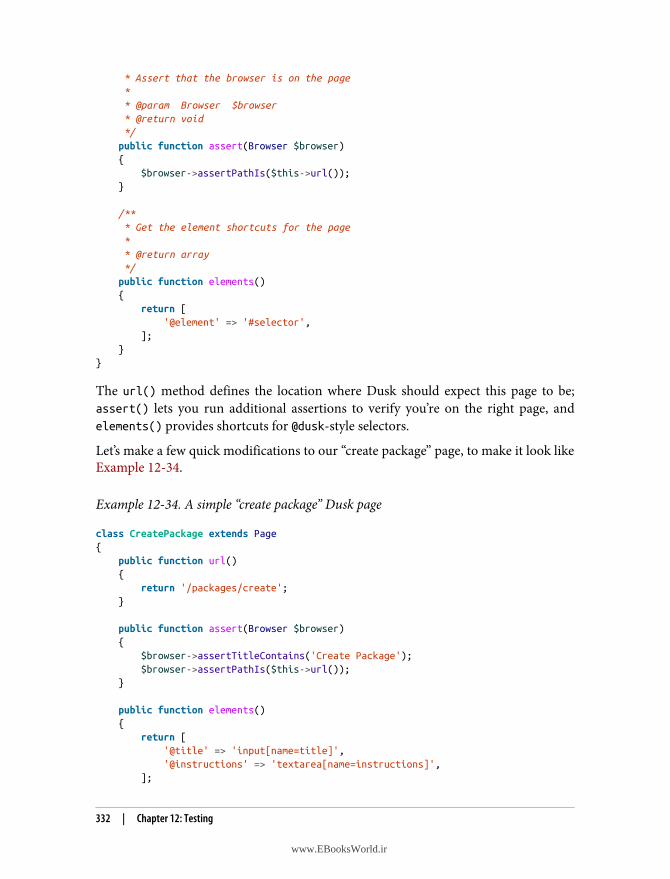
* Assert that the browser is on the page * * @param Browser $browser * @return void */ public function assert(Browser $browser) { $browser->assertPathIs($this->url()); }
/** * Get the element shortcuts for the page * * @return array */ public function elements() { return [ '@element' => '#selector', ]; }}
The url() method defines the location where Dusk should expect this page to be;assert() lets you run additional assertions to verify you’re on the right page, andelements() provides shortcuts for @dusk-style selectors.
Let’s make a few quick modifications to our “create package” page, to make it look likeExample 12-34.
Example 12-34. A simple “create package” Dusk page
class CreatePackage extends Page{ public function url() { return '/packages/create'; }
public function assert(Browser $browser) { $browser->assertTitleContains('Create Package'); $browser->assertPathIs($this->url()); }
public function elements() { return [ '@title' => 'input[name=title]', '@instructions' => 'textarea[name=instructions]', ];
332 | Chapter 12: Testing
www.EBooksWorld.ir
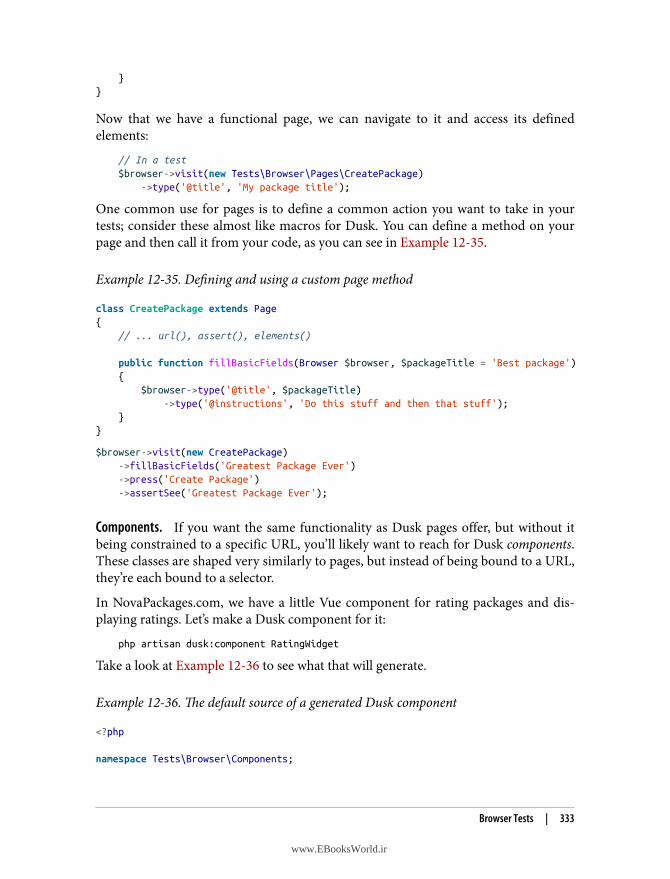
}}
Now that we have a functional page, we can navigate to it and access its definedelements:
// In a test$browser->visit(new Tests\Browser\Pages\CreatePackage) ->type('@title', 'My package title');
One common use for pages is to define a common action you want to take in yourtests; consider these almost like macros for Dusk. You can define a method on yourpage and then call it from your code, as you can see in Example 12-35.
Example 12-35. Defining and using a custom page method
class CreatePackage extends Page{ // ... url(), assert(), elements()
public function fillBasicFields(Browser $browser, $packageTitle = 'Best package') { $browser->type('@title', $packageTitle) ->type('@instructions', 'Do this stuff and then that stuff'); }}
$browser->visit(new CreatePackage) ->fillBasicFields('Greatest Package Ever') ->press('Create Package') ->assertSee('Greatest Package Ever');
Components. If you want the same functionality as Dusk pages offer, but without itbeing constrained to a specific URL, you’ll likely want to reach for Dusk components.These classes are shaped very similarly to pages, but instead of being bound to a URL,they’re each bound to a selector.
In NovaPackages.com, we have a little Vue component for rating packages and dis‐playing ratings. Let’s make a Dusk component for it:
php artisan dusk:component RatingWidget
Take a look at Example 12-36 to see what that will generate.
Example 12-36. The default source of a generated Dusk component
<?php
namespace Tests\Browser\Components;
Browser Tests | 333
www.EBooksWorld.ir
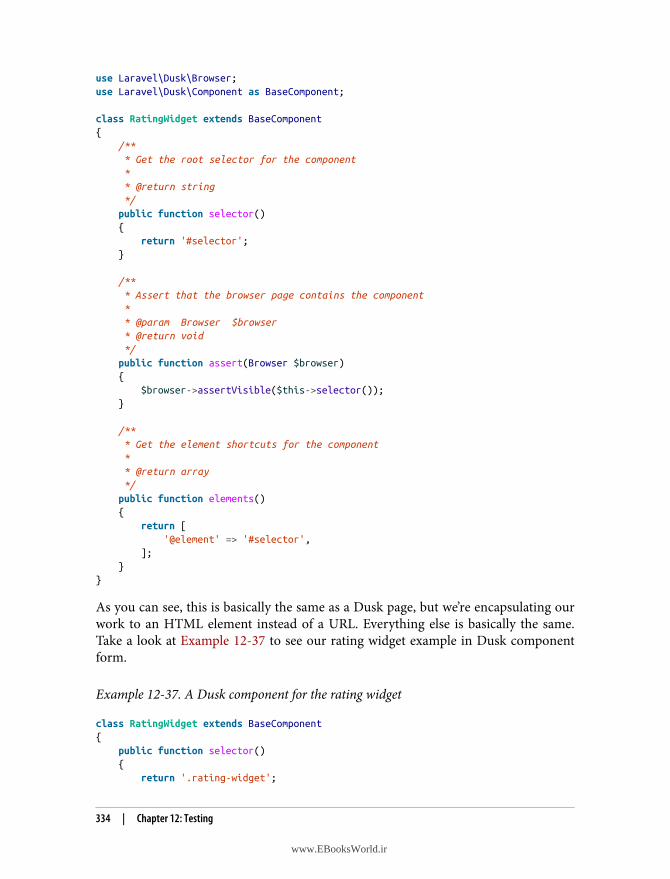
use Laravel\Dusk\Browser;use Laravel\Dusk\Component as BaseComponent;
class RatingWidget extends BaseComponent{ /** * Get the root selector for the component * * @return string */ public function selector() { return '#selector'; }
/** * Assert that the browser page contains the component * * @param Browser $browser * @return void */ public function assert(Browser $browser) { $browser->assertVisible($this->selector()); }
/** * Get the element shortcuts for the component * * @return array */ public function elements() { return [ '@element' => '#selector', ]; }}
As you can see, this is basically the same as a Dusk page, but we’re encapsulating ourwork to an HTML element instead of a URL. Everything else is basically the same.Take a look at Example 12-37 to see our rating widget example in Dusk componentform.
Example 12-37. A Dusk component for the rating widget
class RatingWidget extends BaseComponent{ public function selector() { return '.rating-widget';
334 | Chapter 12: Testing
www.EBooksWorld.ir
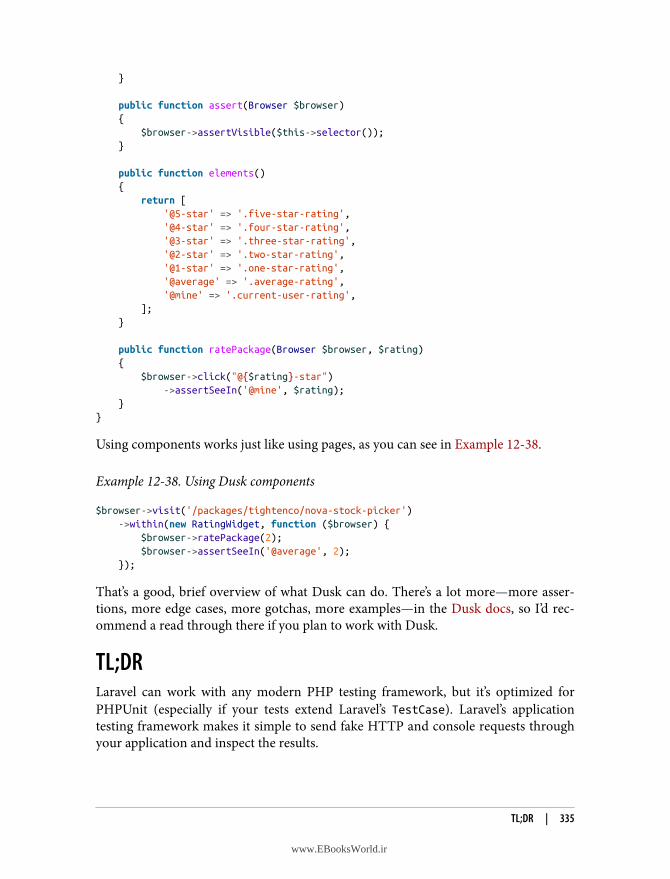
}
public function assert(Browser $browser) { $browser->assertVisible($this->selector()); }
public function elements() { return [ '@5-star' => '.five-star-rating', '@4-star' => '.four-star-rating', '@3-star' => '.three-star-rating', '@2-star' => '.two-star-rating', '@1-star' => '.one-star-rating', '@average' => '.average-rating', '@mine' => '.current-user-rating', ]; }
public function ratePackage(Browser $browser, $rating) { $browser->click("@{$rating}-star") ->assertSeeIn('@mine', $rating); }}
Using components works just like using pages, as you can see in Example 12-38.
Example 12-38. Using Dusk components
$browser->visit('/packages/tightenco/nova-stock-picker') ->within(new RatingWidget, function ($browser) { $browser->ratePackage(2); $browser->assertSeeIn('@average', 2); });
That’s a good, brief overview of what Dusk can do. There’s a lot more—more asser‐tions, more edge cases, more gotchas, more examples—in the Dusk docs, so I’d rec‐ommend a read through there if you plan to work with Dusk.
TL;DRLaravel can work with any modern PHP testing framework, but it’s optimized forPHPUnit (especially if your tests extend Laravel’s TestCase). Laravel’s applicationtesting framework makes it simple to send fake HTTP and console requests throughyour application and inspect the results.
TL;DR | 335
www.EBooksWorld.ir

Tests in Laravel can easily and powerfully interact with and assert against the data‐base, cache, session, filesystem, mail, and many other systems. Quite a few of thesesystems have fakes built in to make them even easier to test. You can test DOM andbrowser-like interactions with BrowserKit Testing or Dusk.
Laravel brings in Mockery in case you need mocks, stubs, spies, dummies, or any‐thing else, but the testing philosophy of Laravel is to use real collaborators as much aspossible. Don’t fake it unless you have to.
336 | Chapter 12: Testing
www.EBooksWorld.ir
CHAPTER 13
Writing APIs
One of the most common tasks Laravel developers are given is to create an API, usu‐ally JSON and REST or REST-like, that allows third parties to interact with the Lara‐vel application’s data.
Laravel makes it incredibly easy to work with JSON, and its resource controllers arealready structured around REST verbs and patterns. In this chapter you’ll learn aboutsome basic API-writing concepts, the tools Laravel provides for writing APIs, andsome external tools and organizational systems you’ll want to consider when writingyour first Laravel API.
The Basics of REST-Like JSON APIsRepresentational State Transfer (REST) is an architectural style for building APIs.Technically, REST is either a broad definition that could apply to almost the entiretyof the internet or something so specific that no one actually uses it, so don’t let your‐self get overwhelmed by the definition or caught in an argument with a pedant.When we talk about RESTful or REST-like APIs in the Laravel world, we’re generallytalking about APIs with a few common characteristics:
• They’re structured around “resources” that can be uniquely represented by URIs,like /cats for all cats, /cats/15 for a single cat with the ID of 15, etc.
• Interactions with resources primarily take place using HTTP verbs(GET /cats/15 versus DELETE /cats/15).
• They’re stateless, meaning there’s no persistent session authentication betweenrequests; each request must uniquely authenticate itself.
337
www.EBooksWorld.ir
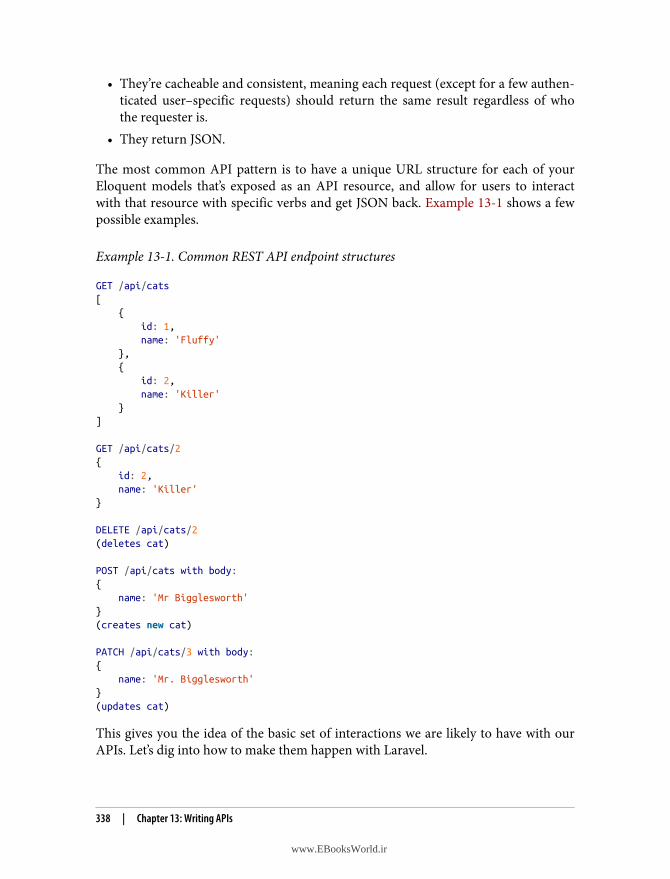
• They’re cacheable and consistent, meaning each request (except for a few authen‐ticated user–specific requests) should return the same result regardless of whothe requester is.
• They return JSON.
The most common API pattern is to have a unique URL structure for each of yourEloquent models that’s exposed as an API resource, and allow for users to interactwith that resource with specific verbs and get JSON back. Example 13-1 shows a fewpossible examples.
Example 13-1. Common REST API endpoint structures
GET /api/cats[ { id: 1, name: 'Fluffy' }, { id: 2, name: 'Killer' }]
GET /api/cats/2{ id: 2, name: 'Killer'}
DELETE /api/cats/2(deletes cat)
POST /api/cats with body:{ name: 'Mr Bigglesworth'}(creates new cat)
PATCH /api/cats/3 with body:{ name: 'Mr. Bigglesworth'}(updates cat)
This gives you the idea of the basic set of interactions we are likely to have with ourAPIs. Let’s dig into how to make them happen with Laravel.
338 | Chapter 13: Writing APIs
www.EBooksWorld.ir
Controller Organization and JSON ReturnsLaravel’s API resource controllers are like normal resource controllers (see “ResourceControllers” on page 47) but modified to align with RESTful API routes. For example,they exclude the create() and edit() methods, both of which are irrelevant in anAPI. Let’s get started there. First we’ll create a new controller for our resource, whichwe’ll route at /api/dogs:
php artisan make:controller Api\DogsController --api
Escaping Slashes in Artisan Commands Prior to Laravel 5.3
In versions of Laravel prior to 5.3, you need to escape the \ innamespace separators with a forward slash in Artisan commands,like this:
php artisan make:controller Api/\DogsController --api
Note that in projects running versions of Laravel prior to 5.5, the concepts of APIresource controllers and API resource routes don’t exist. You can still just use regularresource controllers and resource routes instead; they’re almost exactly the same buthave a few view-related routes that aren’t used in APIs. Example 13-2 shows what ourAPI resource controller will look like.
Example 13-2. A generated API resource controller
<?php
namespace App\Http\Controllers\Api;
use Illuminate\Http\Request;use App\Http\Controllers\Controller;
class DogsController extends Controller{ /** * Display a listing of the resource * * @return \Illuminate\Http\Response */ public function index() { // }
/** * Store a newly created resource in storage * * @param \Illuminate\Http\Request $request
Controller Organization and JSON Returns | 339
www.EBooksWorld.ir
* @return \Illuminate\Http\Response */ public function store(Request $request) { // }
/** * Display the specified resource * * @param int $id * @return \Illuminate\Http\Response */ public function show($id) { // }
/** * Update the specified resource in storage * * @param \Illuminate\Http\Request $request * @param int $id * @return \Illuminate\Http\Response */ public function update(Request $request, $id) { // }
/** * Remove the specified resource from storage * * @param int $id * @return \Illuminate\Http\Response */ public function destroy($id) { // }}
The docblocks pretty much tell the story. index() lists all of the dogs, show() lists asingle dog, store() stores a new dog, update() updates a dog, and destroy()removes a dog.
Let’s quickly make a model and a migration so we can work with it:
php artisan make:model Dog --migrationphp artisan migrate
Great! Now we can fill out our controller methods.
340 | Chapter 13: Writing APIs
www.EBooksWorld.ir
Database Requirements for These Code Samples to Work
If you want the code we’re writing here to actually work, you’llwant to add a string() column to the migration named name andanother named breed, and either add those columns to the Elo‐quent model’s fillable property or just set the guarded propertyof that model equal to an empty array ([]).
We can take advantage of a great feature of Eloquent here: if you echo an Eloquentresults collection, it’ll automatically convert itself to JSON (using the __toString()magic method, if you’re curious). That means if you return a collection of resultsfrom a route, you’ll in effect be returning JSON. So, as Example 13-3 demonstrates,this will be some of the simplest code you’ll ever write.
Example 13-3. A sample API resource controller for the Dog entity
...class DogsController extends Controller{ public function index() { return Dog::all(); }
public function store(Request $request) { return Dog::create($request->only(['name', 'breed'])); }
public function show($id) { return Dog::findOrFail($id); }
public function update(Request $request, $id) { $dog = Dog::findOrFail($id); $dog->update($request->only(['name', 'breed'])); return $dog; }
public function destroy($id) { Dog::findOrFail($id)->delete(); }}
Controller Organization and JSON Returns | 341
www.EBooksWorld.ir
Example 13-4 shows how we can link this up in our routes file. As you can see, wecan use Route::apiResource() to automatically map all of these default methods totheir appropriate routes and HTTP verbs.
Example 13-4. Binding the routes for a resource controller
// routes/api.phpRoute::namespace('Api')->group(function () { Route::apiResource('dogs', 'DogsController');});
There you have it! Your first RESTful API in Laravel. Of course, you’ll need muchmore nuance: pagination, sorting, authentication, more defined response headers.But this is the foundation of everything else.
Reading and Sending HeadersREST APIs often read, and send, non-content information using headers. For exam‐ple, any request to GitHub’s API will return headers detailing the current user’s ratelimiting status:
X-RateLimit-Limit: 5000X-RateLimit-Remaining: 4987X-RateLimit-Reset: 1350085394
X-* HeadersYou might be wondering why the GitHub rate limiting headers are prefixed with X-,especially if you see them in the context of other headers returned with the samerequest:
HTTP/1.1 200 OKServer: nginxDate: Fri, 12 Oct 2012 23:33:14 GMTContent-Type: application/json; charset=utf-8Connection: keep-aliveStatus: 200 OKETag: "a00049ba79152d03380c34652f2cb612"X-GitHub-Media-Type: github.v3X-RateLimit-Limit: 5000X-RateLimit-Remaining: 4987X-RateLimit-Reset: 1350085394Content-Length: 5Cache-Control: max-age=0, private, must-revalidateX-Content-Type-Options: nosniff
342 | Chapter 13: Writing APIs
www.EBooksWorld.ir
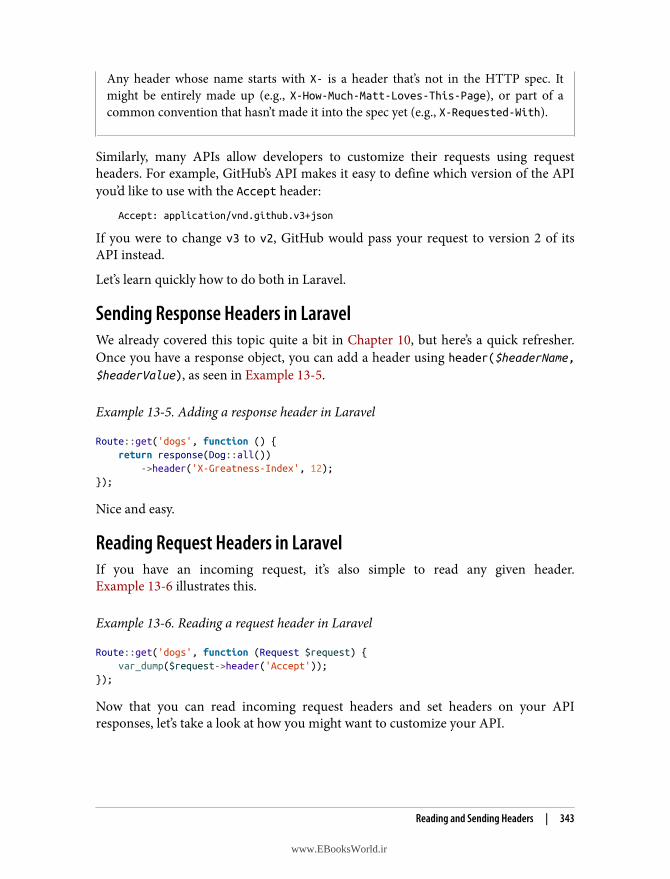
Any header whose name starts with X- is a header that’s not in the HTTP spec. Itmight be entirely made up (e.g., X-How-Much-Matt-Loves-This-Page), or part of acommon convention that hasn’t made it into the spec yet (e.g., X-Requested-With).
Similarly, many APIs allow developers to customize their requests using requestheaders. For example, GitHub’s API makes it easy to define which version of the APIyou’d like to use with the Accept header:
Accept: application/vnd.github.v3+json
If you were to change v3 to v2, GitHub would pass your request to version 2 of itsAPI instead.
Let’s learn quickly how to do both in Laravel.
Sending Response Headers in LaravelWe already covered this topic quite a bit in Chapter 10, but here’s a quick refresher.Once you have a response object, you can add a header using header($headerName,$headerValue), as seen in Example 13-5.
Example 13-5. Adding a response header in Laravel
Route::get('dogs', function () { return response(Dog::all()) ->header('X-Greatness-Index', 12);});
Nice and easy.
Reading Request Headers in LaravelIf you have an incoming request, it’s also simple to read any given header.Example 13-6 illustrates this.
Example 13-6. Reading a request header in Laravel
Route::get('dogs', function (Request $request) { var_dump($request->header('Accept'));});
Now that you can read incoming request headers and set headers on your APIresponses, let’s take a look at how you might want to customize your API.
Reading and Sending Headers | 343
www.EBooksWorld.ir
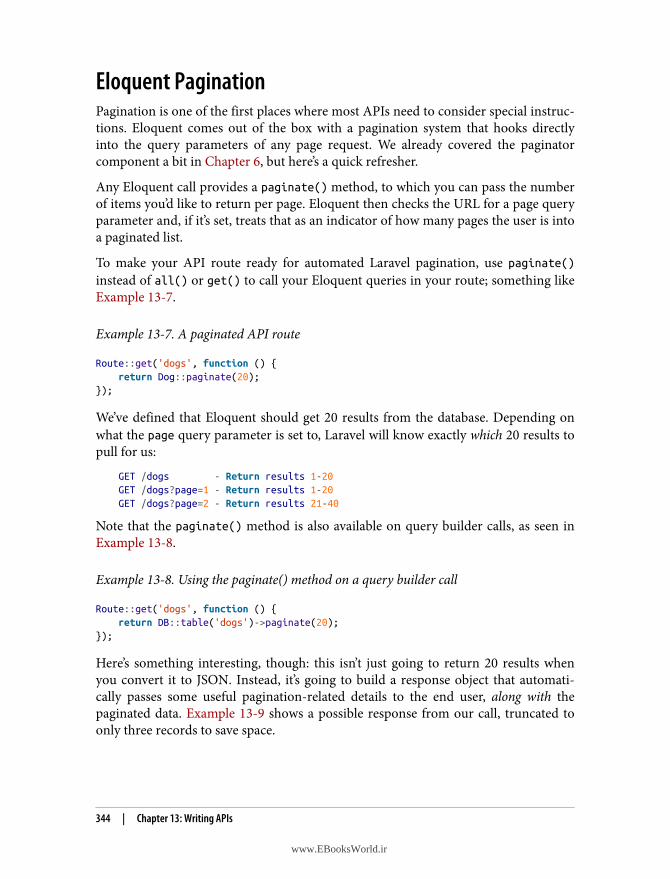
Eloquent PaginationPagination is one of the first places where most APIs need to consider special instruc‐tions. Eloquent comes out of the box with a pagination system that hooks directlyinto the query parameters of any page request. We already covered the paginatorcomponent a bit in Chapter 6, but here’s a quick refresher.
Any Eloquent call provides a paginate() method, to which you can pass the numberof items you’d like to return per page. Eloquent then checks the URL for a page queryparameter and, if it’s set, treats that as an indicator of how many pages the user is intoa paginated list.
To make your API route ready for automated Laravel pagination, use paginate()instead of all() or get() to call your Eloquent queries in your route; something likeExample 13-7.
Example 13-7. A paginated API route
Route::get('dogs', function () { return Dog::paginate(20);});
We’ve defined that Eloquent should get 20 results from the database. Depending onwhat the page query parameter is set to, Laravel will know exactly which 20 results topull for us:
GET /dogs - Return results 1-20GET /dogs?page=1 - Return results 1-20GET /dogs?page=2 - Return results 21-40
Note that the paginate() method is also available on query builder calls, as seen inExample 13-8.
Example 13-8. Using the paginate() method on a query builder call
Route::get('dogs', function () { return DB::table('dogs')->paginate(20);});
Here’s something interesting, though: this isn’t just going to return 20 results whenyou convert it to JSON. Instead, it’s going to build a response object that automati‐cally passes some useful pagination-related details to the end user, along with thepaginated data. Example 13-9 shows a possible response from our call, truncated toonly three records to save space.
344 | Chapter 13: Writing APIs
www.EBooksWorld.ir
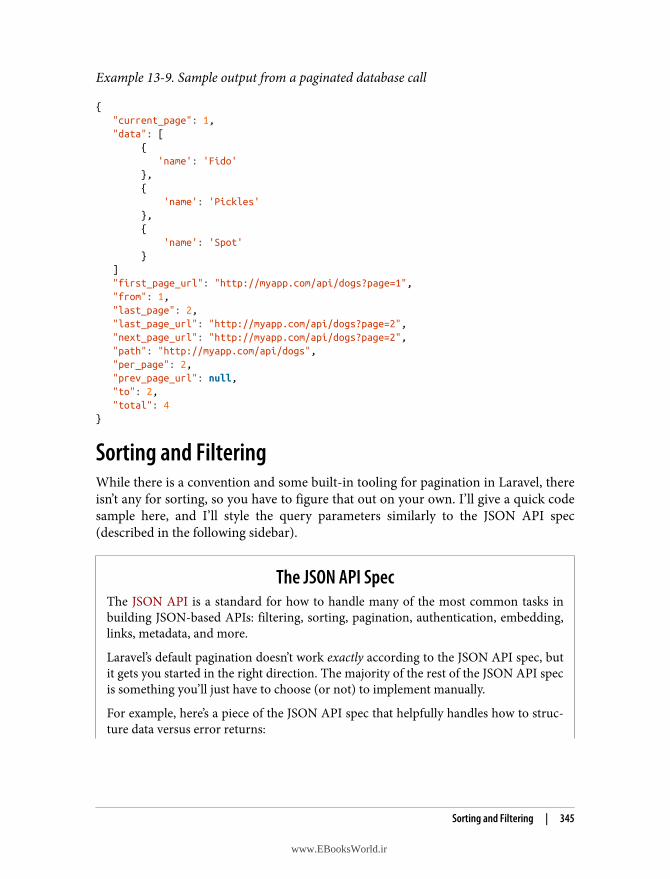
Example 13-9. Sample output from a paginated database call
{ "current_page": 1, "data": [ { 'name': 'Fido' }, { 'name': 'Pickles' }, { 'name': 'Spot' } ] "first_page_url": "http://myapp.com/api/dogs?page=1", "from": 1, "last_page": 2, "last_page_url": "http://myapp.com/api/dogs?page=2", "next_page_url": "http://myapp.com/api/dogs?page=2", "path": "http://myapp.com/api/dogs", "per_page": 2, "prev_page_url": null, "to": 2, "total": 4}
Sorting and FilteringWhile there is a convention and some built-in tooling for pagination in Laravel, thereisn’t any for sorting, so you have to figure that out on your own. I’ll give a quick codesample here, and I’ll style the query parameters similarly to the JSON API spec(described in the following sidebar).
The JSON API SpecThe JSON API is a standard for how to handle many of the most common tasks inbuilding JSON-based APIs: filtering, sorting, pagination, authentication, embedding,links, metadata, and more.
Laravel’s default pagination doesn’t work exactly according to the JSON API spec, butit gets you started in the right direction. The majority of the rest of the JSON API specis something you’ll just have to choose (or not) to implement manually.
For example, here’s a piece of the JSON API spec that helpfully handles how to struc‐ture data versus error returns:
Sorting and Filtering | 345
www.EBooksWorld.ir
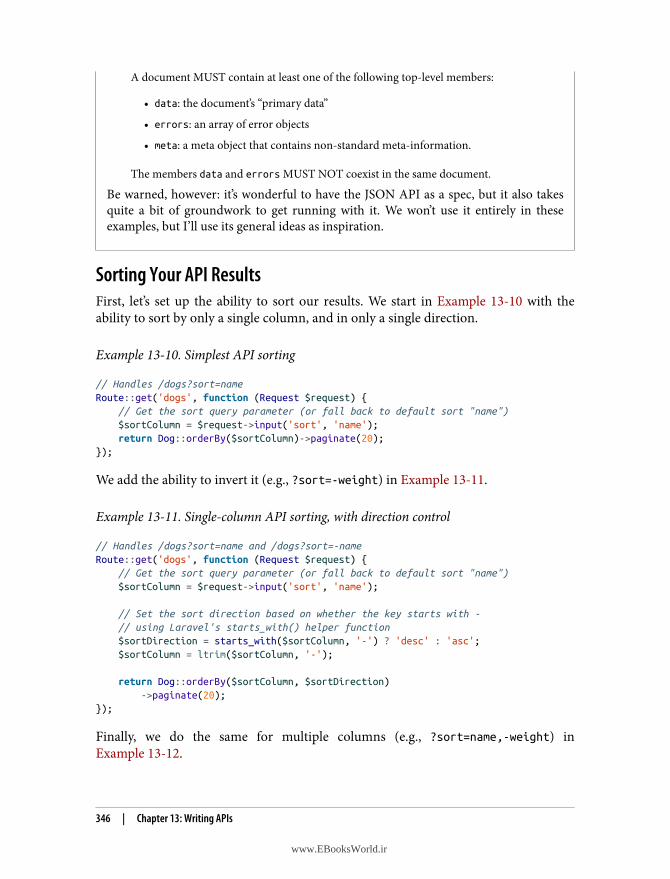
A document MUST contain at least one of the following top-level members:
• data: the document’s “primary data”
• errors: an array of error objects
• meta: a meta object that contains non-standard meta-information.
The members data and errors MUST NOT coexist in the same document.
Be warned, however: it’s wonderful to have the JSON API as a spec, but it also takesquite a bit of groundwork to get running with it. We won’t use it entirely in theseexamples, but I’ll use its general ideas as inspiration.
Sorting Your API ResultsFirst, let’s set up the ability to sort our results. We start in Example 13-10 with theability to sort by only a single column, and in only a single direction.
Example 13-10. Simplest API sorting
// Handles /dogs?sort=nameRoute::get('dogs', function (Request $request) { // Get the sort query parameter (or fall back to default sort "name") $sortColumn = $request->input('sort', 'name'); return Dog::orderBy($sortColumn)->paginate(20);});
We add the ability to invert it (e.g., ?sort=-weight) in Example 13-11.
Example 13-11. Single-column API sorting, with direction control
// Handles /dogs?sort=name and /dogs?sort=-nameRoute::get('dogs', function (Request $request) { // Get the sort query parameter (or fall back to default sort "name") $sortColumn = $request->input('sort', 'name');
// Set the sort direction based on whether the key starts with - // using Laravel's starts_with() helper function $sortDirection = starts_with($sortColumn, '-') ? 'desc' : 'asc'; $sortColumn = ltrim($sortColumn, '-');
return Dog::orderBy($sortColumn, $sortDirection) ->paginate(20);});
Finally, we do the same for multiple columns (e.g., ?sort=name,-weight) inExample 13-12.
346 | Chapter 13: Writing APIs
www.EBooksWorld.ir
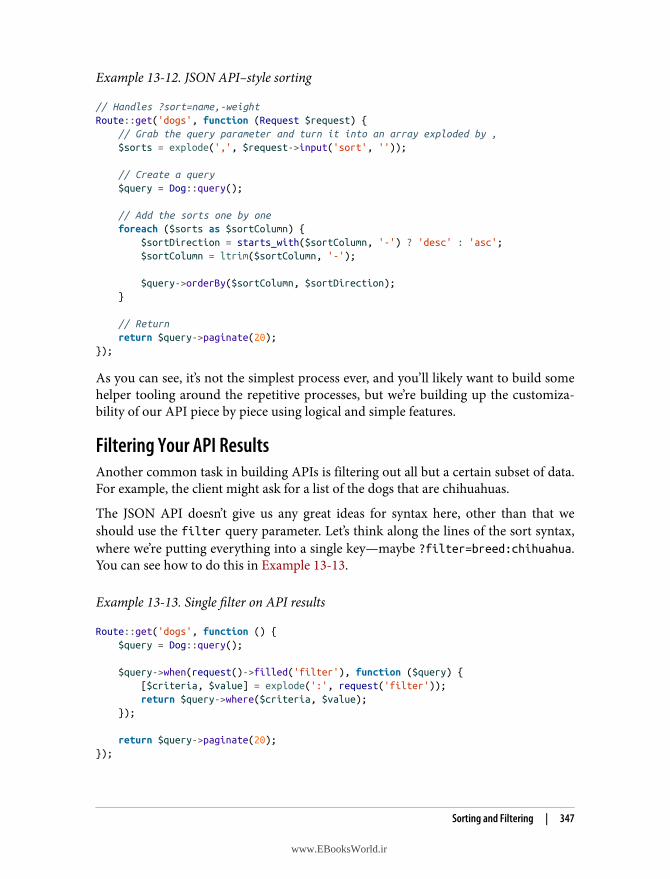
Example 13-12. JSON API–style sorting
// Handles ?sort=name,-weightRoute::get('dogs', function (Request $request) { // Grab the query parameter and turn it into an array exploded by , $sorts = explode(',', $request->input('sort', ''));
// Create a query $query = Dog::query();
// Add the sorts one by one foreach ($sorts as $sortColumn) { $sortDirection = starts_with($sortColumn, '-') ? 'desc' : 'asc'; $sortColumn = ltrim($sortColumn, '-');
$query->orderBy($sortColumn, $sortDirection); }
// Return return $query->paginate(20);});
As you can see, it’s not the simplest process ever, and you’ll likely want to build somehelper tooling around the repetitive processes, but we’re building up the customiza‐bility of our API piece by piece using logical and simple features.
Filtering Your API ResultsAnother common task in building APIs is filtering out all but a certain subset of data.For example, the client might ask for a list of the dogs that are chihuahuas.
The JSON API doesn’t give us any great ideas for syntax here, other than that weshould use the filter query parameter. Let’s think along the lines of the sort syntax,where we’re putting everything into a single key—maybe ?filter=breed:chihuahua.You can see how to do this in Example 13-13.
Example 13-13. Single filter on API results
Route::get('dogs', function () { $query = Dog::query();
$query->when(request()->filled('filter'), function ($query) { [$criteria, $value] = explode(':', request('filter')); return $query->where($criteria, $value); });
return $query->paginate(20);});
Sorting and Filtering | 347
www.EBooksWorld.ir
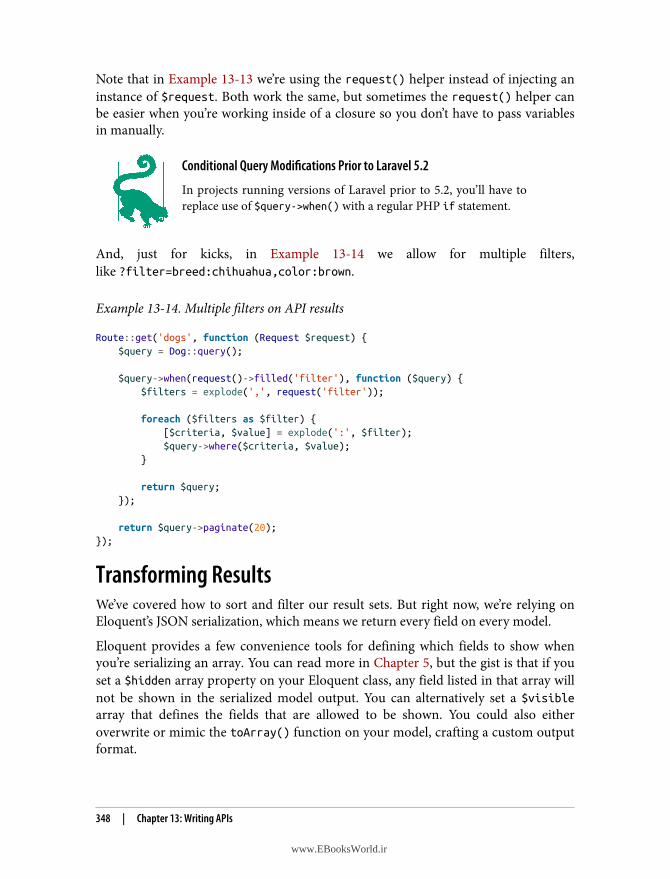
Note that in Example 13-13 we’re using the request() helper instead of injecting aninstance of $request. Both work the same, but sometimes the request() helper canbe easier when you’re working inside of a closure so you don’t have to pass variablesin manually.
Conditional Query Modifications Prior to Laravel 5.2
In projects running versions of Laravel prior to 5.2, you’ll have toreplace use of $query->when() with a regular PHP if statement.
And, just for kicks, in Example 13-14 we allow for multiple filters,like ?filter=breed:chihuahua,color:brown.
Example 13-14. Multiple filters on API results
Route::get('dogs', function (Request $request) { $query = Dog::query();
$query->when(request()->filled('filter'), function ($query) { $filters = explode(',', request('filter'));
foreach ($filters as $filter) { [$criteria, $value] = explode(':', $filter); $query->where($criteria, $value); }
return $query; });
return $query->paginate(20);});
Transforming ResultsWe’ve covered how to sort and filter our result sets. But right now, we’re relying onEloquent’s JSON serialization, which means we return every field on every model.
Eloquent provides a few convenience tools for defining which fields to show whenyou’re serializing an array. You can read more in Chapter 5, but the gist is that if youset a $hidden array property on your Eloquent class, any field listed in that array willnot be shown in the serialized model output. You can alternatively set a $visiblearray that defines the fields that are allowed to be shown. You could also eitheroverwrite or mimic the toArray() function on your model, crafting a custom outputformat.
348 | Chapter 13: Writing APIs
www.EBooksWorld.ir
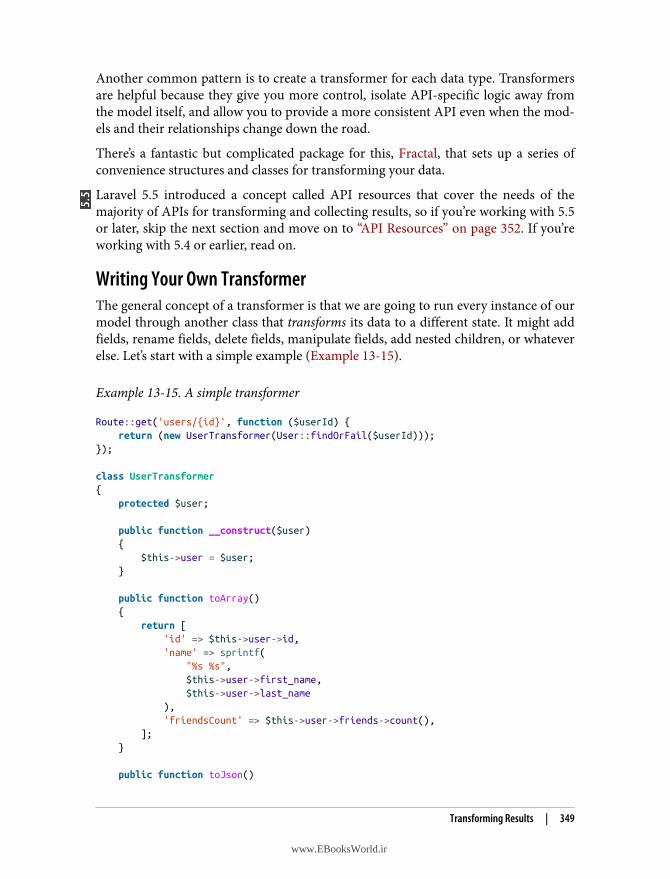
Another common pattern is to create a transformer for each data type. Transformersare helpful because they give you more control, isolate API-specific logic away fromthe model itself, and allow you to provide a more consistent API even when the mod‐els and their relationships change down the road.
There’s a fantastic but complicated package for this, Fractal, that sets up a series ofconvenience structures and classes for transforming your data.
Laravel 5.5 introduced a concept called API resources that cover the needs of themajority of APIs for transforming and collecting results, so if you’re working with 5.5or later, skip the next section and move on to “API Resources” on page 352. If you’reworking with 5.4 or earlier, read on.
Writing Your Own TransformerThe general concept of a transformer is that we are going to run every instance of ourmodel through another class that transforms its data to a different state. It might addfields, rename fields, delete fields, manipulate fields, add nested children, or whateverelse. Let’s start with a simple example (Example 13-15).
Example 13-15. A simple transformer
Route::get('users/{id}', function ($userId) { return (new UserTransformer(User::findOrFail($userId)));});
class UserTransformer{ protected $user;
public function __construct($user) { $this->user = $user; }
public function toArray() { return [ 'id' => $this->user->id, 'name' => sprintf( "%s %s", $this->user->first_name, $this->user->last_name ), 'friendsCount' => $this->user->friends->count(), ]; }
public function toJson()
Transforming Results | 349
www.EBooksWorld.ir
{ return json_encode($this->toArray()); }
public function __toString() { return $this->toJson(); }}
Classic Transformers
A more classic transformer would probably offer a transform()method that takes a $user parameter. This would likely spit out anarray or JSON directly.However, I’ve been using this pattern, which we sometimes call“API objects,” for a few years and really love how much more powerand flexibility it provides.
As you can see in Example 13-15, transformers accept the model they’re transformingas a parameter and then manipulate that model—and its relationships—to create thefinal output that you want to send to the API.
Nesting and Relationships with Custom TransformersWhether, and how, to nest relationships in APIs is an issue of much debate. Thank‐fully, people more experienced than me have written on this at length; I’d recommendreading Phil Sturgeon’s Build APIs You Won’t Hate (Leanpub) to learn more about thisand about REST APIs in general.
There are a few primary ways to approach nesting relationships. These examples willassume your primary resource is a user and your related resource is a friend:
• Include related resources directly in the primary resource (e.g., the users/5resource has its friends nested in it).
• Include just the foreign keys in the primary resource (e.g., the users/5 resourcehas an array of friend IDs nested in it).
• Allow the user to query the related resource filtered by the originating resource(e.g., /friends?user=5, or “give me all friends who are related to user #5”).
• Create a subresource (e.g., /users/5/friends).• Allow optional including (e.g., /users/5 does not include, but /users/5?include=friends does include; so does /users/5?include=friends,dogs).
350 | Chapter 13: Writing APIs
www.EBooksWorld.ir
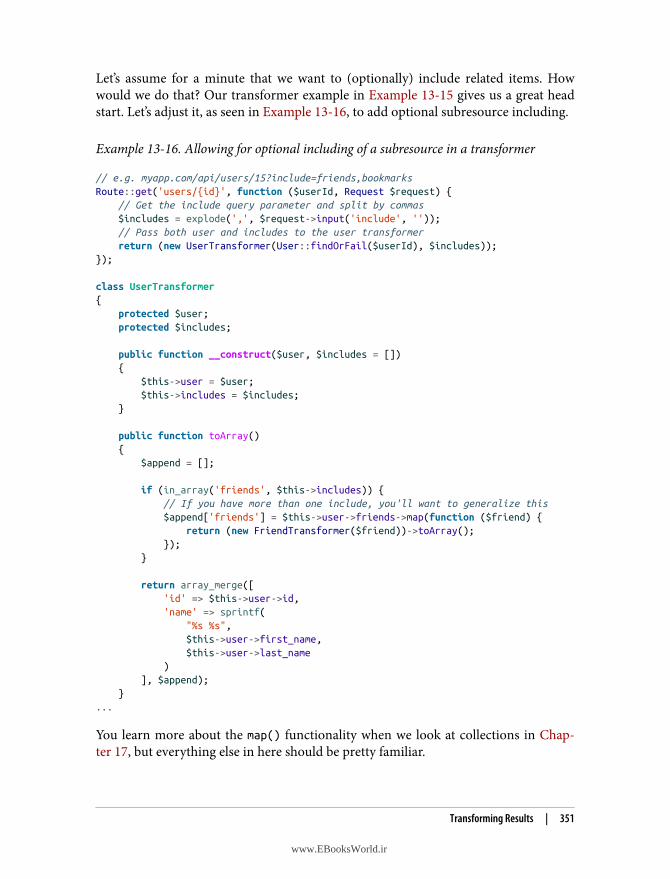
Let’s assume for a minute that we want to (optionally) include related items. Howwould we do that? Our transformer example in Example 13-15 gives us a great headstart. Let’s adjust it, as seen in Example 13-16, to add optional subresource including.
Example 13-16. Allowing for optional including of a subresource in a transformer
// e.g. myapp.com/api/users/15?include=friends,bookmarksRoute::get('users/{id}', function ($userId, Request $request) { // Get the include query parameter and split by commas $includes = explode(',', $request->input('include', '')); // Pass both user and includes to the user transformer return (new UserTransformer(User::findOrFail($userId), $includes));});
class UserTransformer{ protected $user; protected $includes;
public function __construct($user, $includes = []) { $this->user = $user; $this->includes = $includes; }
public function toArray() { $append = [];
if (in_array('friends', $this->includes)) { // If you have more than one include, you'll want to generalize this $append['friends'] = $this->user->friends->map(function ($friend) { return (new FriendTransformer($friend))->toArray(); }); }
return array_merge([ 'id' => $this->user->id, 'name' => sprintf( "%s %s", $this->user->first_name, $this->user->last_name ) ], $append); }...
You learn more about the map() functionality when we look at collections in Chap‐ter 17, but everything else in here should be pretty familiar.
Transforming Results | 351
www.EBooksWorld.ir
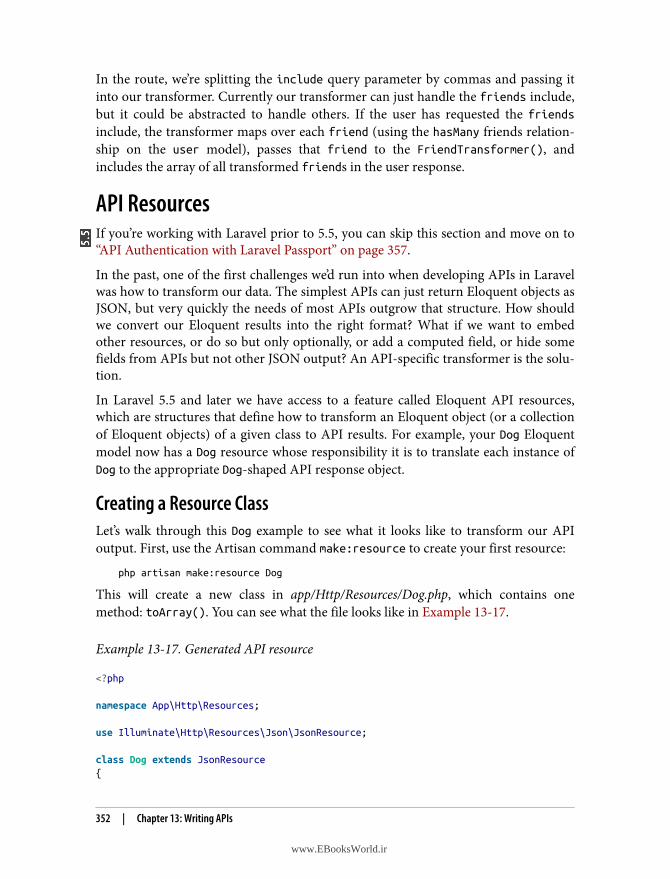
In the route, we’re splitting the include query parameter by commas and passing itinto our transformer. Currently our transformer can just handle the friends include,but it could be abstracted to handle others. If the user has requested the friendsinclude, the transformer maps over each friend (using the hasMany friends relation‐ship on the user model), passes that friend to the FriendTransformer(), andincludes the array of all transformed friends in the user response.
API ResourcesIf you’re working with Laravel prior to 5.5, you can skip this section and move on to“API Authentication with Laravel Passport” on page 357.
In the past, one of the first challenges we’d run into when developing APIs in Laravelwas how to transform our data. The simplest APIs can just return Eloquent objects asJSON, but very quickly the needs of most APIs outgrow that structure. How shouldwe convert our Eloquent results into the right format? What if we want to embedother resources, or do so but only optionally, or add a computed field, or hide somefields from APIs but not other JSON output? An API-specific transformer is the solu‐tion.
In Laravel 5.5 and later we have access to a feature called Eloquent API resources,which are structures that define how to transform an Eloquent object (or a collectionof Eloquent objects) of a given class to API results. For example, your Dog Eloquentmodel now has a Dog resource whose responsibility it is to translate each instance ofDog to the appropriate Dog-shaped API response object.
Creating a Resource ClassLet’s walk through this Dog example to see what it looks like to transform our APIoutput. First, use the Artisan command make:resource to create your first resource:
php artisan make:resource Dog
This will create a new class in app/Http/Resources/Dog.php, which contains onemethod: toArray(). You can see what the file looks like in Example 13-17.
Example 13-17. Generated API resource
<?php
namespace App\Http\Resources;
use Illuminate\Http\Resources\Json\JsonResource;
class Dog extends JsonResource{
352 | Chapter 13: Writing APIs
www.EBooksWorld.ir
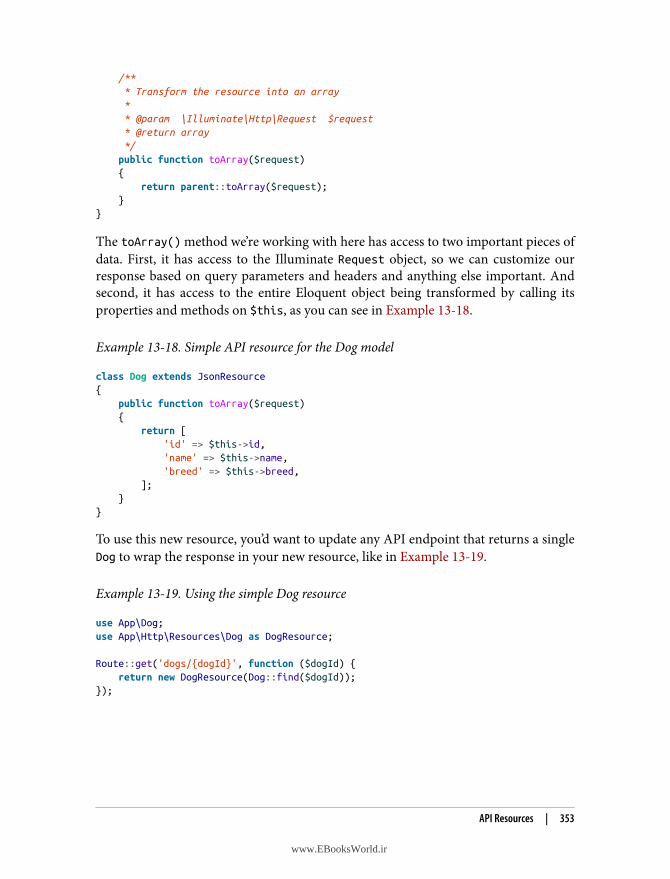
/** * Transform the resource into an array * * @param \Illuminate\Http\Request $request * @return array */ public function toArray($request) { return parent::toArray($request); }}
The toArray() method we’re working with here has access to two important pieces ofdata. First, it has access to the Illuminate Request object, so we can customize ourresponse based on query parameters and headers and anything else important. Andsecond, it has access to the entire Eloquent object being transformed by calling itsproperties and methods on $this, as you can see in Example 13-18.
Example 13-18. Simple API resource for the Dog model
class Dog extends JsonResource{ public function toArray($request) { return [ 'id' => $this->id, 'name' => $this->name, 'breed' => $this->breed, ]; }}
To use this new resource, you’d want to update any API endpoint that returns a singleDog to wrap the response in your new resource, like in Example 13-19.
Example 13-19. Using the simple Dog resource
use App\Dog;use App\Http\Resources\Dog as DogResource;
Route::get('dogs/{dogId}', function ($dogId) { return new DogResource(Dog::find($dogId));});
API Resources | 353
www.EBooksWorld.ir
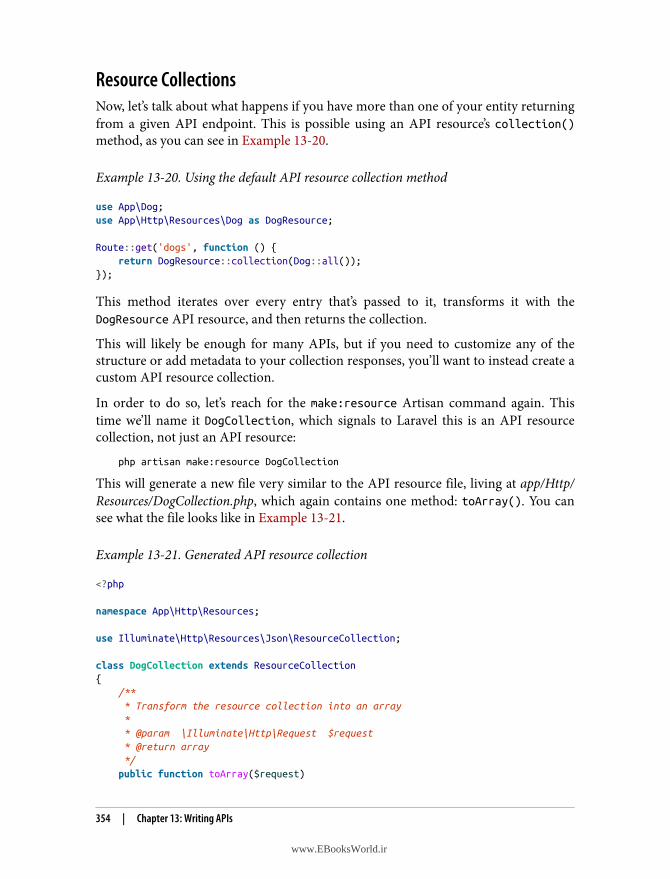
Resource CollectionsNow, let’s talk about what happens if you have more than one of your entity returningfrom a given API endpoint. This is possible using an API resource’s collection()method, as you can see in Example 13-20.
Example 13-20. Using the default API resource collection method
use App\Dog;use App\Http\Resources\Dog as DogResource;
Route::get('dogs', function () { return DogResource::collection(Dog::all());});
This method iterates over every entry that’s passed to it, transforms it with theDogResource API resource, and then returns the collection.
This will likely be enough for many APIs, but if you need to customize any of thestructure or add metadata to your collection responses, you’ll want to instead create acustom API resource collection.
In order to do so, let’s reach for the make:resource Artisan command again. Thistime we’ll name it DogCollection, which signals to Laravel this is an API resourcecollection, not just an API resource:
php artisan make:resource DogCollection
This will generate a new file very similar to the API resource file, living at app/Http/Resources/DogCollection.php, which again contains one method: toArray(). You cansee what the file looks like in Example 13-21.
Example 13-21. Generated API resource collection
<?php
namespace App\Http\Resources;
use Illuminate\Http\Resources\Json\ResourceCollection;
class DogCollection extends ResourceCollection{ /** * Transform the resource collection into an array * * @param \Illuminate\Http\Request $request * @return array */ public function toArray($request)
354 | Chapter 13: Writing APIs
www.EBooksWorld.ir
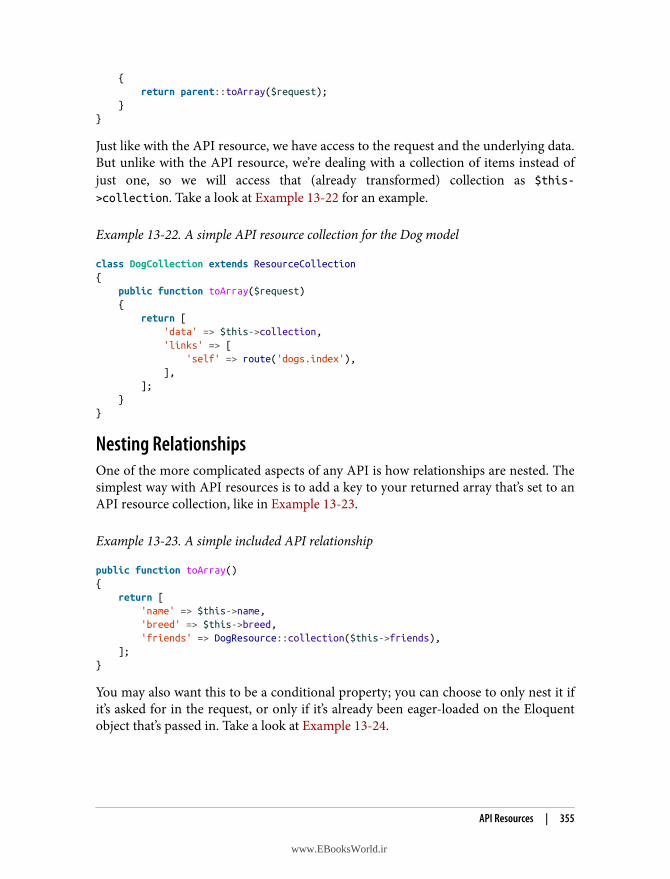
{ return parent::toArray($request); }}
Just like with the API resource, we have access to the request and the underlying data.But unlike with the API resource, we’re dealing with a collection of items instead ofjust one, so we will access that (already transformed) collection as $this-
>collection. Take a look at Example 13-22 for an example.
Example 13-22. A simple API resource collection for the Dog model
class DogCollection extends ResourceCollection{ public function toArray($request) { return [ 'data' => $this->collection, 'links' => [ 'self' => route('dogs.index'), ], ]; }}
Nesting RelationshipsOne of the more complicated aspects of any API is how relationships are nested. Thesimplest way with API resources is to add a key to your returned array that’s set to anAPI resource collection, like in Example 13-23.
Example 13-23. A simple included API relationship
public function toArray(){ return [ 'name' => $this->name, 'breed' => $this->breed, 'friends' => DogResource::collection($this->friends), ];}
You may also want this to be a conditional property; you can choose to only nest it ifit’s asked for in the request, or only if it’s already been eager-loaded on the Eloquentobject that’s passed in. Take a look at Example 13-24.
API Resources | 355
www.EBooksWorld.ir
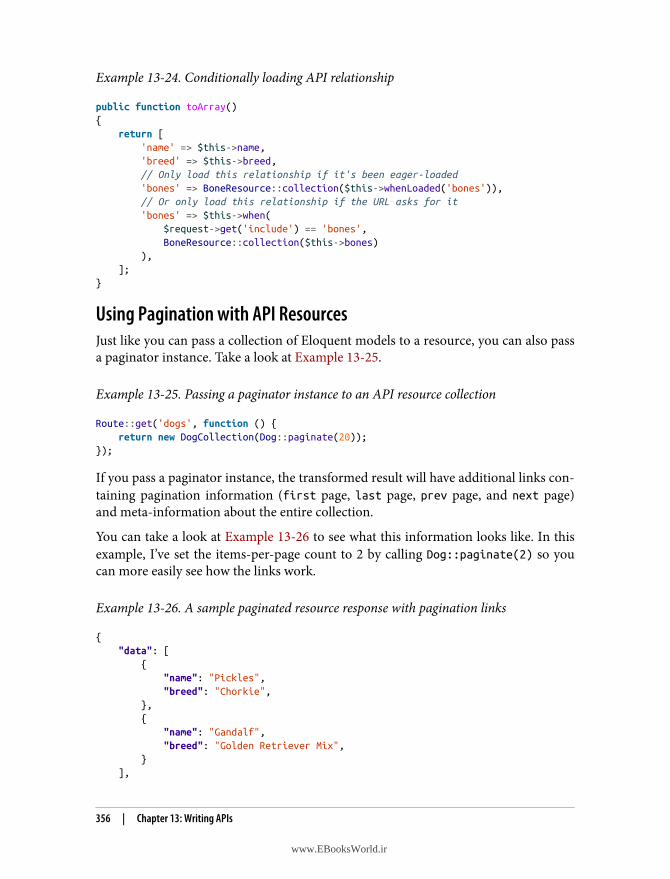
Example 13-24. Conditionally loading API relationship
public function toArray(){ return [ 'name' => $this->name, 'breed' => $this->breed, // Only load this relationship if it's been eager-loaded 'bones' => BoneResource::collection($this->whenLoaded('bones')), // Or only load this relationship if the URL asks for it 'bones' => $this->when( $request->get('include') == 'bones', BoneResource::collection($this->bones) ), ];}
Using Pagination with API ResourcesJust like you can pass a collection of Eloquent models to a resource, you can also passa paginator instance. Take a look at Example 13-25.
Example 13-25. Passing a paginator instance to an API resource collection
Route::get('dogs', function () { return new DogCollection(Dog::paginate(20));});
If you pass a paginator instance, the transformed result will have additional links con‐taining pagination information (first page, last page, prev page, and next page)and meta-information about the entire collection.
You can take a look at Example 13-26 to see what this information looks like. In thisexample, I’ve set the items-per-page count to 2 by calling Dog::paginate(2) so youcan more easily see how the links work.
Example 13-26. A sample paginated resource response with pagination links
{ "data": [ { "name": "Pickles", "breed": "Chorkie", }, { "name": "Gandalf", "breed": "Golden Retriever Mix", } ],
356 | Chapter 13: Writing APIs
www.EBooksWorld.ir
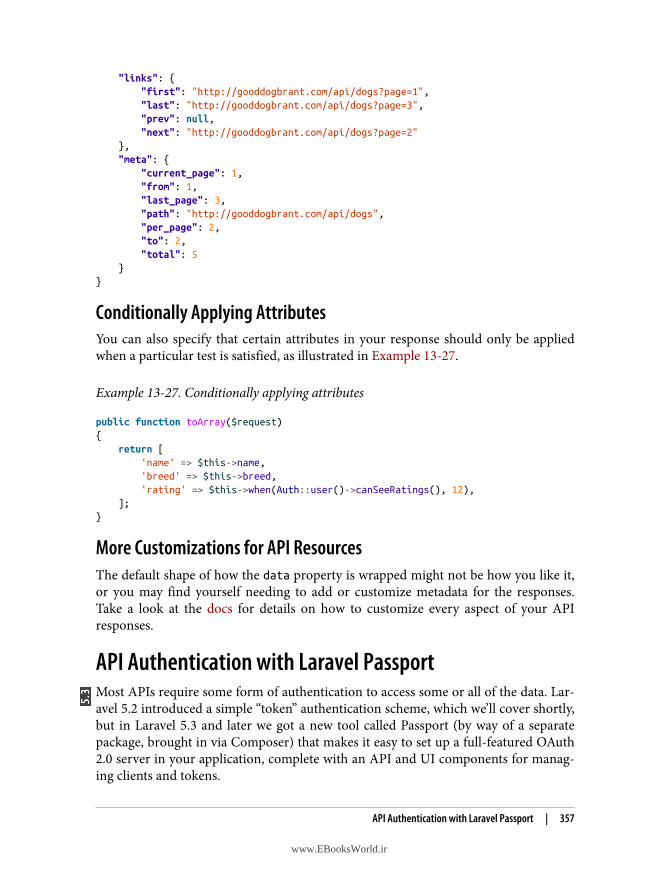
"links": { "first": "http://gooddogbrant.com/api/dogs?page=1", "last": "http://gooddogbrant.com/api/dogs?page=3", "prev": null, "next": "http://gooddogbrant.com/api/dogs?page=2" }, "meta": { "current_page": 1, "from": 1, "last_page": 3, "path": "http://gooddogbrant.com/api/dogs", "per_page": 2, "to": 2, "total": 5 }}
Conditionally Applying AttributesYou can also specify that certain attributes in your response should only be appliedwhen a particular test is satisfied, as illustrated in Example 13-27.
Example 13-27. Conditionally applying attributes
public function toArray($request){ return [ 'name' => $this->name, 'breed' => $this->breed, 'rating' => $this->when(Auth::user()->canSeeRatings(), 12), ];}
More Customizations for API ResourcesThe default shape of how the data property is wrapped might not be how you like it,or you may find yourself needing to add or customize metadata for the responses.Take a look at the docs for details on how to customize every aspect of your APIresponses.
API Authentication with Laravel PassportMost APIs require some form of authentication to access some or all of the data. Lar‐avel 5.2 introduced a simple “token” authentication scheme, which we’ll cover shortly,but in Laravel 5.3 and later we got a new tool called Passport (by way of a separatepackage, brought in via Composer) that makes it easy to set up a full-featured OAuth2.0 server in your application, complete with an API and UI components for manag‐ing clients and tokens.
API Authentication with Laravel Passport | 357
www.EBooksWorld.ir
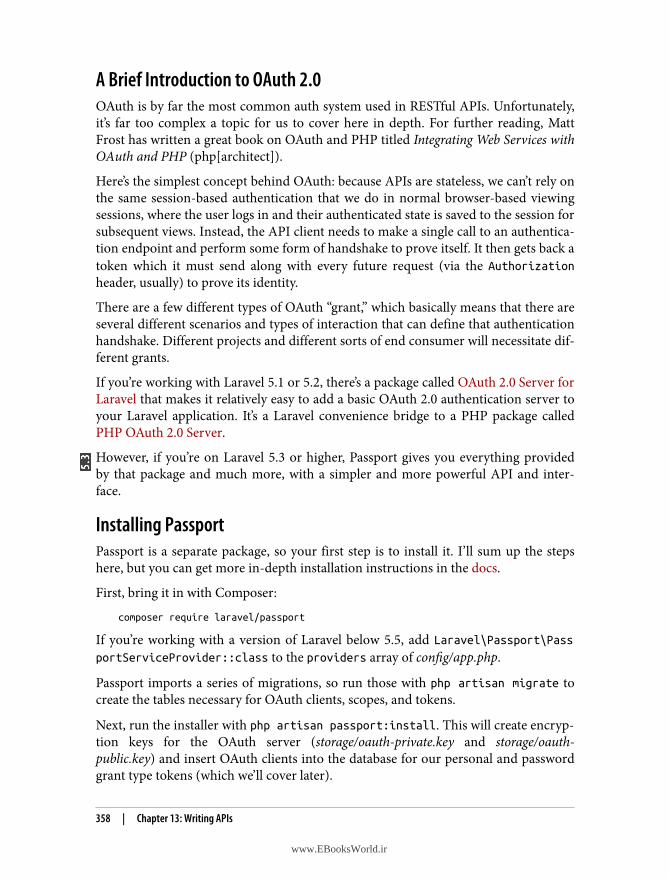
A Brief Introduction to OAuth 2.0OAuth is by far the most common auth system used in RESTful APIs. Unfortunately,it’s far too complex a topic for us to cover here in depth. For further reading, MattFrost has written a great book on OAuth and PHP titled Integrating Web Services withOAuth and PHP (php[architect]).
Here’s the simplest concept behind OAuth: because APIs are stateless, we can’t rely onthe same session-based authentication that we do in normal browser-based viewingsessions, where the user logs in and their authenticated state is saved to the session forsubsequent views. Instead, the API client needs to make a single call to an authentica‐tion endpoint and perform some form of handshake to prove itself. It then gets back atoken which it must send along with every future request (via the Authorizationheader, usually) to prove its identity.
There are a few different types of OAuth “grant,” which basically means that there areseveral different scenarios and types of interaction that can define that authenticationhandshake. Different projects and different sorts of end consumer will necessitate dif‐ferent grants.
If you’re working with Laravel 5.1 or 5.2, there’s a package called OAuth 2.0 Server forLaravel that makes it relatively easy to add a basic OAuth 2.0 authentication server toyour Laravel application. It’s a Laravel convenience bridge to a PHP package calledPHP OAuth 2.0 Server.
However, if you’re on Laravel 5.3 or higher, Passport gives you everything providedby that package and much more, with a simpler and more powerful API and inter‐face.
Installing PassportPassport is a separate package, so your first step is to install it. I’ll sum up the stepshere, but you can get more in-depth installation instructions in the docs.
First, bring it in with Composer:
composer require laravel/passport
If you’re working with a version of Laravel below 5.5, add Laravel\Passport\PassportServiceProvider::class to the providers array of config/app.php.
Passport imports a series of migrations, so run those with php artisan migrate tocreate the tables necessary for OAuth clients, scopes, and tokens.
Next, run the installer with php artisan passport:install. This will create encryp‐tion keys for the OAuth server (storage/oauth-private.key and storage/oauth-public.key) and insert OAuth clients into the database for our personal and passwordgrant type tokens (which we’ll cover later).
358 | Chapter 13: Writing APIs
www.EBooksWorld.ir
You’ll need to import the Laravel\Passport\HasApiTokens trait into your Usermodel; this will add OAuth client- and token-related relationships to each User, aswell as a few token-related helper methods. Next, add a call to Laravel\Passport\Passport::routes() in the boot() method of the AuthServiceProvider. This willadd the following routes:
• oauth/authorize
• oauth/clients
• oauth/clients/client_id
• oauth/personal-access-tokens
• oauth/personal-access-tokens/token_id
• oauth/scopes
• oauth/token
• oauth/token/refresh
• oauth/tokens
• oauth/tokens/token_id
Finally, look for the api guard in config/auth.php. By default this guard will use thetoken driver (which we’ll cover shortly), but we’ll change that to be the passportdriver instead.
You now have a fully functional OAuth 2.0 server! You can create new clients withphp artisan passport:client, and you have an API for managing your clients andtokens available under the /oauth route prefix.
To protect a route behind your Passport auth system, add the auth:api middlewareto the route or route group, as shown in Example 13-28.
Example 13-28. Protecting an API route with the Passport auth middleware
// routes/api.phpRoute::get('/user', function (Request $request) { return $request->user();})->middleware('auth:api');
In order to authenticate to these protected routes, your client apps will need to pass atoken (we’ll cover how to get one shortly) as a Bearer token in the Authorizationheader. Example 13-29 shows what this would look like if you were making a requestusing the Guzzle HTTP library.
API Authentication with Laravel Passport | 359
www.EBooksWorld.ir
Example 13-29. Making a sample API request with a Bearer token
$http = new GuzzleHttp\Client;$response = $http->request('GET', 'http://tweeter.test/api/user', [ 'headers' => [ 'Accept' => 'application/json', 'Authorization' => 'Bearer ' . $accessToken, ],]);
Now, let’s take a closer look at how it all works.
Passport’s APIPassport exposes an API in your application under the /oauth route prefix. The APIprovides two primary functions: first, to authorize users with OAuth 2.0 authoriza‐tion flows (/oauth/authorize and /oauth/token), and second, to allow users tomanage their clients and tokens (the rest of the routes).
This is an important distinction, especially if you’re unfamiliar with OAuth. EveryOAuth server needs to expose the ability for consumers to authenticate with yourserver; that’s the entire point of the service. But Passport also exposes an API formanaging the state of your OAuth server’s clients and tokens. This means you caneasily build a frontend to let your users manage their information in your OAuthapplication, and Passport actually comes with Vue-based manager components thatyou can either use or use for inspiration.
We’ll cover the API routes that allow you to manage clients and tokens, and the Vuecomponents that Passport ships with to make it easy, but first let’s dig into the variousways your users can authenticate with your Passport-protected API.
Passport’s Available Grant TypesPassport makes it possible for you to authenticate users in four different ways. Twoare traditional OAuth 2.0 grants (the password grant and authorization code grant)and two are convenience methods that are unique to Passport (the personal tokenand synchronizer token).
Password grantThe password grant, while less common than the authorization code grant, is muchsimpler. If you want users to be able to authenticate directly with your API using theirusername and password—for example, if you have a mobile app for your companyconsuming your own API—you can use the password grant.
360 | Chapter 13: Writing APIs
www.EBooksWorld.ir
Creating a Password Grant Client
In order to use the password grant flow, you need a password grantclient in your database. This is because every request to an OAuthserver needs to be made by a client. Usually, the client identifieswhich app or site the user is authenticating against—for example, ifyou used Facebook to log in to a third-party website, that websitewould be the client.With the password grant flow, however, there is no client comingalong with the request, so you have to make one—and that’s thepassword grant client. One will have been added when you ran phpartisan passport:install, but if you ever need to generate a newpassword grant client for any reason, you can do so as follows:
$php artisan passport:client --password
What should we name the password grant client? [My Application Password Grant Client]: > Client_name
Password grant client created successfully.Client ID: 3Client Secret: Pg1EEzt18JAnFoUIM9n38Nqewg1aekB4rvFk2Pma
With the password grant type, there is just one step to getting a token: sending theuser’s credentials to the /oauth/token route, like in Example 13-30.
Example 13-30. Making a request with the password grant type
// Routes/web.php in the *consuming application*Route::get('tweeter/password-grant-auth', function () { $http = new GuzzleHttp\Client;
// Make call to "Tweeter," our Passport-powered OAuth server $response = $http->post('http://tweeter.test/oauth/token', [ 'form_params' => [ 'grant_type' => 'password', 'client_id' => config('tweeter.id'), 'client_secret' => config('tweeter.secret'), 'username' => '[email protected]', 'password' => 'my-tweeter-password', 'scope' => '', ], ]);
$thisUsersTokens = json_decode((string) $response->getBody(), true); // Do stuff with the tokens});
API Authentication with Laravel Passport | 361
www.EBooksWorld.ir
This route will return an access_token and a refresh_token. You can now savethose tokens to use to authenticate with the API (access token) and to request moretokens later (refresh token).
Note that the ID and secret we’d use for the password grant type would be those inthe oauth_clients database table of our Passport app in the row whose namematches that of our Passport grant client. You’ll also see entries in this table for thetwo clients that are generated by default when you run passport:install: “LaravelPersonal Access Client” and “Laravel Password Grant Client.”
Authorization code grantThe most common OAuth 2.0 auth workflow is also the most complex one Passportsupports. Let’s imagine we’re developing an application that’s like Twitter but forsound clips; we’ll call it Tweeter. And we’ll imagine another website, a social networkfor science fiction fans, called SpaceBook. SpaceBook’s developer wants to let peopleembed their Tweeter data into their SpaceBook newsfeeds. We’re going to install Pass‐port in our Tweeter app so that other apps—SpaceBook, for example—can allow theirusers to authenticate with their Tweeter information.
In the authorization code grant type, each consuming website—SpaceBook, in thisexample—needs to create a client in our Passport-enabled app. In most scenarios, theother sites’ admins will have user accounts at Tweeter, and we’ll build tools for themto create clients there. But for starters, we can just manually create a client for theSpaceBook admins:
$php artisan passport:clientWhich user ID should the client be assigned to?: > 1
What should we name the client?: > SpaceBook Where should we redirect the request after authorization? [http://tweeter.test/auth/callback]: > http://spacebook.test/tweeter/callback
New client created successfully. Client ID: 4 Client secret: 5rzqKpeCjIgz3MXpi3tjQ37HBnLLykrgWgmc18uH
Every client needs to be assigned to a user in your app. Imagine user #1 is writingSpaceBook; they’ll be the “owner” of this client we’re creating.
Now we have the ID and secret for the SpaceBook client. At this point, SpaceBookcan use this ID and secret to build tooling allowing an individual SpaceBook user(who is also a Tweeter user) to get an auth token from Tweeter for use when Space‐Book wants to make API calls to Tweeter on that user’s behalf. Example 13-31 illus‐
362 | Chapter 13: Writing APIs
www.EBooksWorld.ir
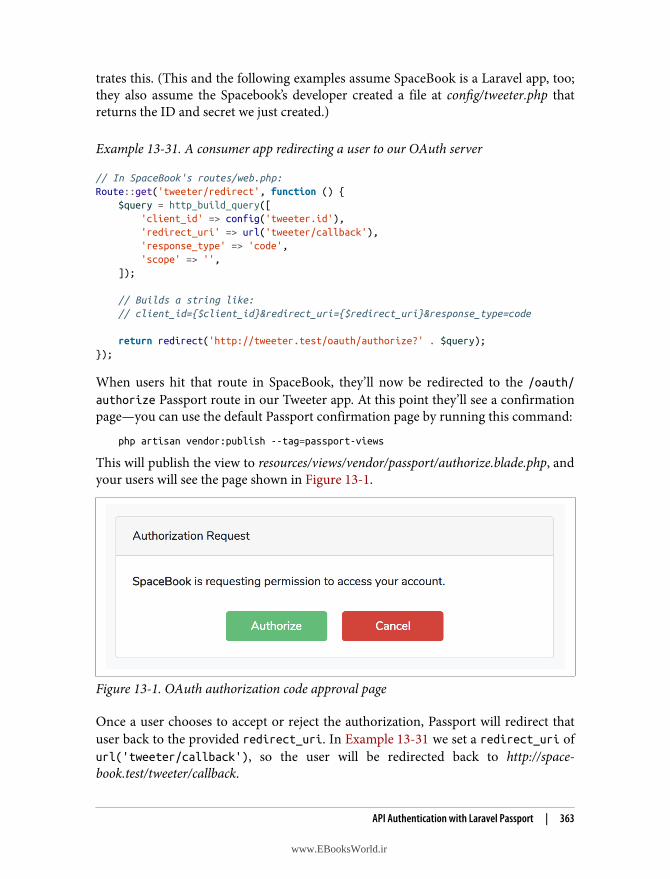
trates this. (This and the following examples assume SpaceBook is a Laravel app, too;they also assume the Spacebook’s developer created a file at config/tweeter.php thatreturns the ID and secret we just created.)
Example 13-31. A consumer app redirecting a user to our OAuth server
// In SpaceBook's routes/web.php:Route::get('tweeter/redirect', function () { $query = http_build_query([ 'client_id' => config('tweeter.id'), 'redirect_uri' => url('tweeter/callback'), 'response_type' => 'code', 'scope' => '', ]);
// Builds a string like: // client_id={$client_id}&redirect_uri={$redirect_uri}&response_type=code
return redirect('http://tweeter.test/oauth/authorize?' . $query);});
When users hit that route in SpaceBook, they’ll now be redirected to the /oauth/authorize Passport route in our Tweeter app. At this point they’ll see a confirmationpage—you can use the default Passport confirmation page by running this command:
php artisan vendor:publish --tag=passport-views
This will publish the view to resources/views/vendor/passport/authorize.blade.php, andyour users will see the page shown in Figure 13-1.
Figure 13-1. OAuth authorization code approval page
Once a user chooses to accept or reject the authorization, Passport will redirect thatuser back to the provided redirect_uri. In Example 13-31 we set a redirect_uri ofurl('tweeter/callback'), so the user will be redirected back to http://space‐book.test/tweeter/callback.
API Authentication with Laravel Passport | 363
www.EBooksWorld.ir
An approval request will contain a code that our consumer app’s callback route cannow use to get a token back from our Passport-enabled app, Tweeter. A rejectionrequest will contain an error. SpaceBook’s callback route might look something likeExample 13-32.
Example 13-32. The authorization callback route in the sample consuming app
// In SpaceBook's routes/web.php:Route::get('tweeter/callback', function (Request $request) { if ($request->has('error')) { // Handle error condition }
$http = new GuzzleHttp\Client;
$response = $http->post('http://tweeter.test/oauth/token', [ 'form_params' => [ 'grant_type' => 'authorization_code', 'client_id' => config('tweeter.id'), 'client_secret' => config('tweeter.secret'), 'redirect_uri' => url('tweeter/callback'), 'code' => $request->code, ], ]);
$thisUsersTokens = json_decode((string) $response->getBody(), true); // Do stuff with the tokens});
What the SpaceBook developer has done here is build a Guzzle HTTP request tothe /oauth/token Passport route on Tweeter. They then send a POST request contain‐ing the authorization code they received when the user approved access, and Tweeterwill return a JSON response containing a few keys:
access_token
the token SpaceBook will want to save for this user. This token is what the userwill use to authenticate in future requests to Tweeter (using the Authorizationheader).
refresh_token
a token SpaceBook will need if you decide to set your tokens to expire. By default,Passport’s access tokens last for one year.
expires_in
the number of seconds until an access_token expires (needs to be refreshed).
364 | Chapter 13: Writing APIs
www.EBooksWorld.ir
token_type
the type of token you’re getting back, which will be Bearer; this means you pass aheader with all future requests with the name of Authorization and the value ofBearer YOURTOKENHERE.
Using Refresh TokensIf you’d like to force users to reauthenticate more often, you need to set a shorterrefresh time on the tokens, and then you can use the refresh_token to request a newaccess_token when needed—most likely whenever you receive a 401 (Unauthorized)response from an API call.
Example 13-33 illustrates how to set a shorter refresh time.
Example 13-33. Defining token refresh times
// AuthServiceProvider's boot() methodpublic function boot(){ $this->registerPolicies();
Passport::routes();
// How long a token lasts before needing refreshing Passport::tokensExpireIn( now()->addDays(15) );
// How long a refresh token will last before re-auth Passport::refreshTokensExpireIn( now()->addDays(30) );}
To request a new token using a refresh token, the consuming application will need tohave first saved the refresh_token from the initial auth response in Example 13-32.Once it’s time to refresh, it will make a call similar to that example, but modifiedslightly as shown in Example 13-34.
Example 13-34. Requesting a new token using a refresh token
// In SpaceBook's routes/web.php:Route::get('tweeter/request-refresh', function (Request $request) { $http = new GuzzleHttp\Client;
$params = [ 'grant_type' => 'refresh_token', 'client_id' => config('tweeter.id'), 'client_secret' => config('tweeter.secret'), 'redirect_uri' => url('tweeter/callback'),
API Authentication with Laravel Passport | 365
www.EBooksWorld.ir
'refresh_token' => $theTokenYouSavedEarlier, 'scope' => '', ];
$response = $http->post( 'http://tweeter.test/oauth/token', ['form_params' => $params] );
$thisUsersTokens = json_decode( (string) $response->getBody(), true );
// Do stuff with the tokens});
In the response, the consuming app will receive a fresh set of tokens to save to itsuser.
You now have all the tools you need to perform basic authorization code flows. We’llcover how to build an admin panel for your clients and tokens later, but first, let’s takea quick look at the other grant types.
Personal access tokensThe authorization code grant is great for your users’ apps and the password codegrant is great for your own apps, but what if your users want to create tokens forthemselves to test out your API or to use when they’re developing their apps? That’swhat personal tokens are for.
Creating a Personal Access Client
In order to create personal tokens, you need a personal access cli‐ent in your database. Running php artisan passport:installwill have added one already, but if you ever need to generate a newpersonal access client for any reason, you can run php artisanpassport:client --personal:
$php artisan passport:client --personal
What should we name the personal access client? [My Application Personal Access Client]: > My Application Personal Access Client
Personal access client created successfully.
366 | Chapter 13: Writing APIs
www.EBooksWorld.ir
Personal access tokens are not quite a “grant” type; there’s no OAuth-prescribed flowhere. Rather, they’re a convenience method that Passport adds to make it easy to havea single client registered in your system that exists solely to facilitate the creation ofconvenience tokens for your users who are developers.
For example, maybe you have a user who’s developing a competitor to SpaceBooknamed RaceBook (it’s for marathon runners), and they want to toy around with theTweeter API a bit to figure out how it works before starting to code. Does this devel‐oper have the facility to create tokens using the authorization code flow? Not yet—they haven’t even written any code yet! That’s what personal access tokens are for.
You can create personal access tokens through the JSON API, which we’ll covershortly, but you can also create one for your user directly in code:
// Creating a token without scopes$token = $user->createToken('Token Name')->accessToken;
// Creating a token with scopes$token = $user->createToken('My Token', ['place-orders'])->accessToken;
Your users can use these tokens just as if they were tokens created with the authoriza‐tion code grant flow. We’ll talk more about scopes in “Passport Scopes” on page 371.
Tokens from Laravel session authentication (synchronizer tokens)There’s one final way for your users to get tokens to access your API, and it’s anotherconvenience method that Passport adds but normal OAuth servers don’t provide.This method is for when your users are already authenticated because they’ve loggedin to your Laravel app like normal, and you want your app’s JavaScript to be able toaccess the API. It’d be a pain to have to reauthenticate the users with the authorizationcode or password grant flow, so Laravel provides a helper for that.
If you add the Laravel\Passport\Http\Middleware\CreateFreshApiToken middle‐ware to your web middleware group (in app/Http/Kernel.php), every response Laravelsends to your authenticated users will have a cookie named laravel_token attachedto it. This cookie is a JSON Web Token (JWT) that contains encoded informationabout the CSRF token. Now, if you send the normal CSRF token with your JavaScriptrequests in the X-CSRF-TOKEN header and also send the X-Requested-With headerwith any API requests you make, the API will compare your CSRF token with thiscookie and this will authenticate your users to the API just like any other token.
JSON Web Tokens (JWT)JWT is a relatively new format for “representing claims securely between two parties”that has gained prominence over the last few years. A JSON Web Token is a JSONobject containing all of the information necessary to determine a user’s authentication
API Authentication with Laravel Passport | 367
www.EBooksWorld.ir
state and access permissions. This JSON object is digitally signed using a keyed-hashmessage authentication code (HMAC) or RSA, which is what makes it trustworthy.
The token is usually encoded and then delivered via URL or POST request, or in aheader. Once a user authenticates with the system somehow, every HTTP requestafter that will contain the token, describing the user’s identity and authorization.
JSON Web Tokens consist of three Base64-encoded strings separated by dots (.);something like xxx.yyy.zzz. The first section is a Base64-encoded JSON object con‐taining information about which hashing algorithm is being used; the second sectionis a series of “claims” about the user’s authorization and identity; and the third is thesignature, or the first and second sections encrypted and signed using the algorithmspecified in the first section.
To learn more about JWT, check out JWT.IO or the jwt-auth Laravel package.
The default JavaScript bootstrap setup that Laravel comes bundled with sets up thisheader for you, but if you’re using a different framework, you’ll need to set it up man‐ually. Example 13-35 shows how to do it with jQuery.
Example 13-35. Setting jQuery to pass Laravel’s CSRF tokens and the X-Requested-Withheader with all Ajax requests
$.ajaxSetup({ headers: { 'X-CSRF-TOKEN': "{{ csrf_token() }}", 'X-Requested-With': 'XMLHttpRequest' }});
If you add the CreateFreshApiToken middleware to your web middleware group andpass those headers with every JavaScript request, your JavaScript requests will be ableto hit your Passport-protected API routes without worrying about any of the com‐plexity of the authorization code or password grants.
Managing Clients and Tokens with the Passport API andVue ComponentsNow that we’ve covered how to manually create clients and tokens and how toauthorize as a consumer, let’s take a look at the aspects of the Passport API that makeit possible to build user interface elements allowing your users to manage their clientsand tokens.
368 | Chapter 13: Writing APIs
www.EBooksWorld.ir
The routesThe easiest way to dig into the API routes is by looking at how the sample providedVue components work and which routes they rely on, so I’ll just give a brief overview:
/oauth/clients (GET, POST)/oauth/clients/{id} (DELETE, PUT)/oauth/personal-access-tokens (GET, POST)/oauth/personal-access-tokens/{id} (DELETE)/oauth/scopes (GET)/oauth/tokens (GET)/oauth/tokens/{id} (DELETE)
As you can see, we have a few entities here (clients, personal access tokens, scopes,and tokens). We can list all of them; we can create some (you can’t create scopes, sincethey’re defined in code, and you can’t create tokens, because they’re created in theauthorization flow); and we can delete and update (PUT) some.
The Vue componentsPassport comes with a set of Vue components out of the box that make it easy toallow your users to administer their clients (those they’ve created), authorized clients(those they’ve allowed access to their account), and personal access tokens (for theirown testing purposes).
To publish these components into your application, run this command:
php artisan vendor:publish --tag=passport-components
You’ll now have three new Vue components in resources/js/components/passport. Toadd them to your Vue bootstrap so they’re accessible in your templates, register themin your resources/js/app.js file, as shown in Example 13-36.
Example 13-36. Importing Passport’s Vue components into app.js
require('./bootstrap');
Vue.component( 'passport-clients', require('./components/passport/Clients.vue'));
Vue.component( 'passport-authorized-clients', require('./components/passport/AuthorizedClients.vue'));
Vue.component( 'passport-personal-access-tokens', require('./components/passport/PersonalAccessTokens.vue'));
API Authentication with Laravel Passport | 369
www.EBooksWorld.ir
const app = new Vue({ el: '#app'});
You now get three components that you can use anywhere in your application:
<passport-clients></passport-clients><passport-authorized-clients></passport-authorized-clients><passport-personal-access-tokens></passport-personal-access-tokens>
<passport-clients> shows your users all of the clients they’ve created. This meansSpaceBook’s creator will see the SpaceBook client listed here when they log into Tweeter.
<passport-authorized-clients> shows your users all of the clients they’ve author‐ized to have access to their accounts. This means any users of both SpaceBook andTweeter who have given SpaceBook access to their Tweeter account will see Space‐Book listed here.
<passport-personal-access-tokens> shows your users any personal access tokensthey’ve created. For example, the creator of RaceBook, SpaceBook’s competitor, willsee the personal access token they’ve been using to test out the Tweeter API.
If you are on a fresh install of Laravel and want to test these out, there are a few stepsto take to get it working:
1. Follow the instructions given earlier in this chapter to get Passport installed.2. In your terminal, run the following commands:
php artisan vendor:publish --tag=passport-componentsnpm installnpm run devphp artisan make:auth
3. Open resources/views/home.blade.php and add the Vue component references(e.g., <passport-clients></passport-clients>) just below the <div
class="card-body">.
If you’d like, you can just use those components as they are. But you can also usethem as reference points to understand how to use the API and create your ownfrontend components in whatever format you’d like.
Compiling Passport’s Frontend Components Using Laravel Elixer
A few of these commands and directions will look different ifyou’re using Laravel Elixir. Check the Passport and Elixir docs
to learn more.
370 | Chapter 13: Writing APIs
www.EBooksWorld.ir
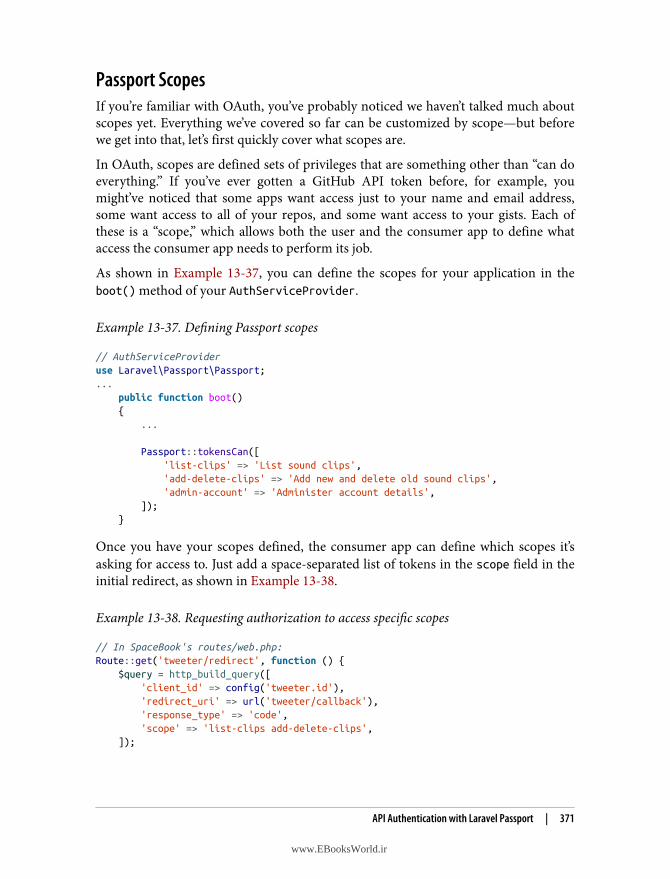
Passport ScopesIf you’re familiar with OAuth, you’ve probably noticed we haven’t talked much aboutscopes yet. Everything we’ve covered so far can be customized by scope—but beforewe get into that, let’s first quickly cover what scopes are.
In OAuth, scopes are defined sets of privileges that are something other than “can doeverything.” If you’ve ever gotten a GitHub API token before, for example, youmight’ve noticed that some apps want access just to your name and email address,some want access to all of your repos, and some want access to your gists. Each ofthese is a “scope,” which allows both the user and the consumer app to define whataccess the consumer app needs to perform its job.
As shown in Example 13-37, you can define the scopes for your application in theboot() method of your AuthServiceProvider.
Example 13-37. Defining Passport scopes
// AuthServiceProvideruse Laravel\Passport\Passport;... public function boot() { ...
Passport::tokensCan([ 'list-clips' => 'List sound clips', 'add-delete-clips' => 'Add new and delete old sound clips', 'admin-account' => 'Administer account details', ]); }
Once you have your scopes defined, the consumer app can define which scopes it’sasking for access to. Just add a space-separated list of tokens in the scope field in theinitial redirect, as shown in Example 13-38.
Example 13-38. Requesting authorization to access specific scopes
// In SpaceBook's routes/web.php:Route::get('tweeter/redirect', function () { $query = http_build_query([ 'client_id' => config('tweeter.id'), 'redirect_uri' => url('tweeter/callback'), 'response_type' => 'code', 'scope' => 'list-clips add-delete-clips', ]);
API Authentication with Laravel Passport | 371
www.EBooksWorld.ir

return redirect('http://tweeter.test/oauth/authorize?' . $query);});
When the user tries to authorize with this app, it’ll present the list of requestedscopes. This way, the user will know whether “SpaceBook is requesting to see youremail address” or “SpaceBook is requesting access to post as you and delete yourposts and message your friends.”
You can check for scope using middleware or on the User instance. Example 13-39shows how to check on the User.
Example 13-39. Checking whether the token a user authenticated with can perform agiven action
Route::get('/events', function () { if (auth()->user()->tokenCan('add-delete-clips')) { // }});
There are two middleware you can use for this too, scope and scopes. To use these inyour app, add them to $routeMiddleware in your app/Http/Kernel.php file:
'scopes' => \Laravel\Passport\Http\Middleware\CheckScopes::class,'scope' => \Laravel\Passport\Http\Middleware\CheckForAnyScope::class,
You can now use the middleware as illustrated in Example 13-40. scopes requires allof the defined scopes to be on the user’s token in order for the user to access theroute, while scope requires at least one of the defined scopes to be on the user’s token.
Example 13-40. Using middleware to restrict access based on token scopes
// routes/api.phpRoute::get('clips', function () { // Access token has both the "list-clips" and "add-delete-clips" scopes})->middleware('scopes:list-clips,add-delete-clips');
// or
Route::get('clips', function () { // Access token has at least one of the listed scopes})->middleware('scope:list-clips,add-delete-clips')
If you haven’t defined any scopes, the app will just work as if they don’t exist. Themoment you use scopes, however, your consumer apps will have to explicitly definewhich scopes they’re requesting access with. The one exception to this rule is that ifyou’re using the password grant type, your consumer app can request the * scope,which gives the token access to everything.
372 | Chapter 13: Writing APIs
www.EBooksWorld.ir
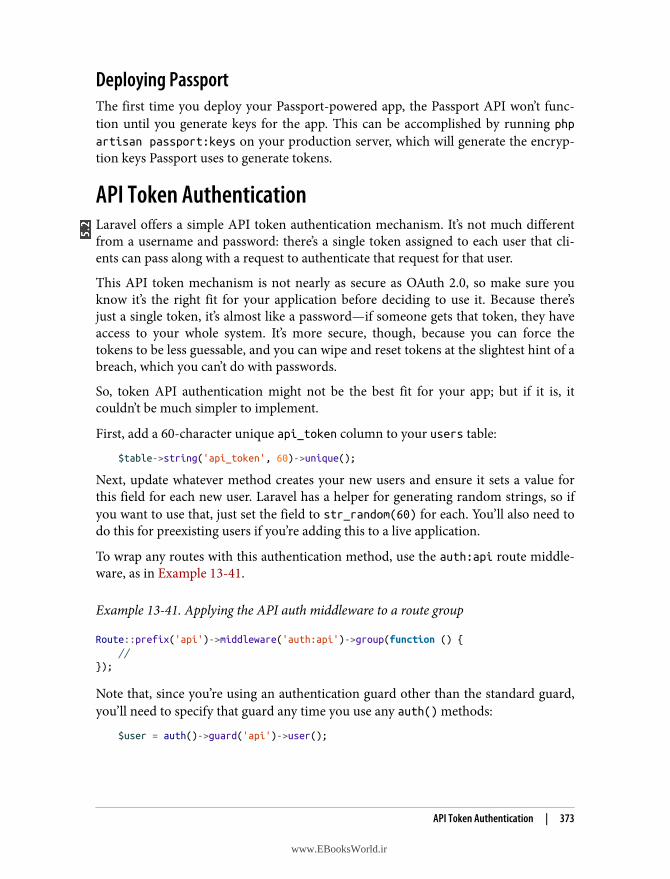
Deploying PassportThe first time you deploy your Passport-powered app, the Passport API won’t func‐tion until you generate keys for the app. This can be accomplished by running phpartisan passport:keys on your production server, which will generate the encryp‐tion keys Passport uses to generate tokens.
API Token AuthenticationLaravel offers a simple API token authentication mechanism. It’s not much differentfrom a username and password: there’s a single token assigned to each user that cli‐ents can pass along with a request to authenticate that request for that user.
This API token mechanism is not nearly as secure as OAuth 2.0, so make sure youknow it’s the right fit for your application before deciding to use it. Because there’sjust a single token, it’s almost like a password—if someone gets that token, they haveaccess to your whole system. It’s more secure, though, because you can force thetokens to be less guessable, and you can wipe and reset tokens at the slightest hint of abreach, which you can’t do with passwords.
So, token API authentication might not be the best fit for your app; but if it is, itcouldn’t be much simpler to implement.
First, add a 60-character unique api_token column to your users table:
$table->string('api_token', 60)->unique();
Next, update whatever method creates your new users and ensure it sets a value forthis field for each new user. Laravel has a helper for generating random strings, so ifyou want to use that, just set the field to str_random(60) for each. You’ll also need todo this for preexisting users if you’re adding this to a live application.
To wrap any routes with this authentication method, use the auth:api route middle‐ware, as in Example 13-41.
Example 13-41. Applying the API auth middleware to a route group
Route::prefix('api')->middleware('auth:api')->group(function () { //});
Note that, since you’re using an authentication guard other than the standard guard,you’ll need to specify that guard any time you use any auth() methods:
$user = auth()->guard('api')->user();
API Token Authentication | 373
www.EBooksWorld.ir
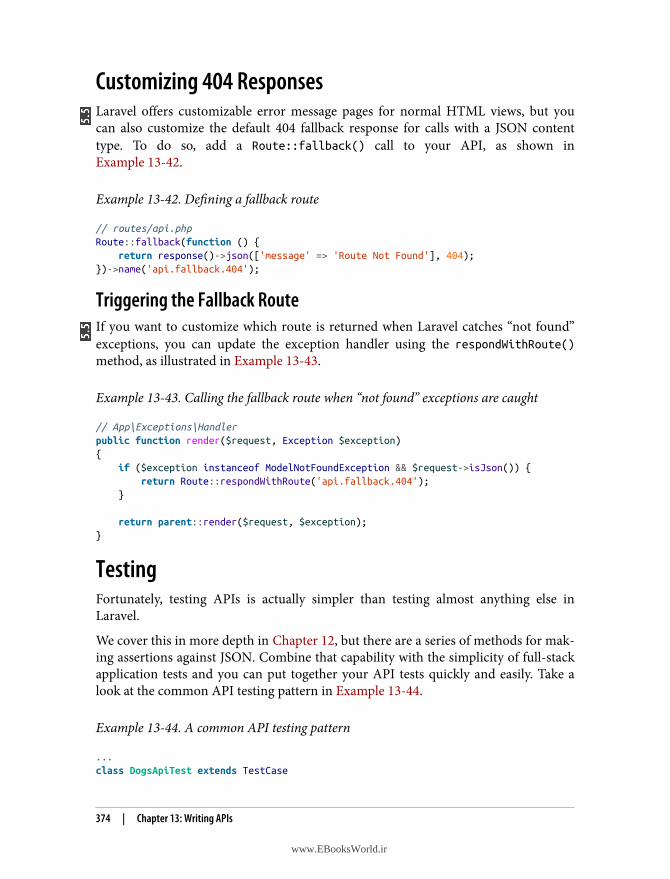
Customizing 404 ResponsesLaravel offers customizable error message pages for normal HTML views, but youcan also customize the default 404 fallback response for calls with a JSON contenttype. To do so, add a Route::fallback() call to your API, as shown inExample 13-42.
Example 13-42. Defining a fallback route
// routes/api.phpRoute::fallback(function () { return response()->json(['message' => 'Route Not Found'], 404);})->name('api.fallback.404');
Triggering the Fallback RouteIf you want to customize which route is returned when Laravel catches “not found”exceptions, you can update the exception handler using the respondWithRoute()method, as illustrated in Example 13-43.
Example 13-43. Calling the fallback route when “not found” exceptions are caught
// App\Exceptions\Handlerpublic function render($request, Exception $exception){ if ($exception instanceof ModelNotFoundException && $request->isJson()) { return Route::respondWithRoute('api.fallback.404'); }
return parent::render($request, $exception);}
TestingFortunately, testing APIs is actually simpler than testing almost anything else inLaravel.
We cover this in more depth in Chapter 12, but there are a series of methods for mak‐ing assertions against JSON. Combine that capability with the simplicity of full-stackapplication tests and you can put together your API tests quickly and easily. Take alook at the common API testing pattern in Example 13-44.
Example 13-44. A common API testing pattern
...class DogsApiTest extends TestCase
374 | Chapter 13: Writing APIs
www.EBooksWorld.ir
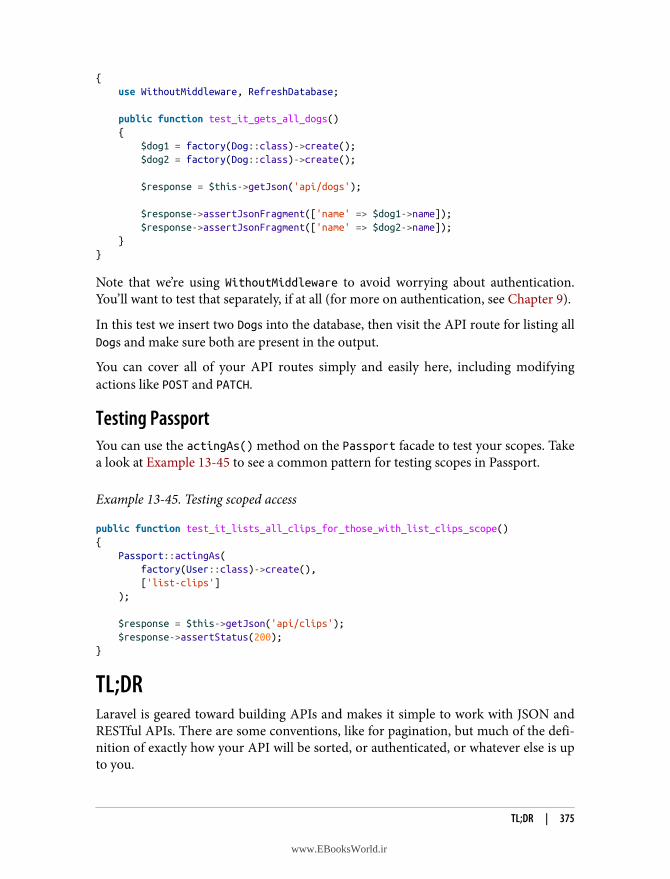
{ use WithoutMiddleware, RefreshDatabase;
public function test_it_gets_all_dogs() { $dog1 = factory(Dog::class)->create(); $dog2 = factory(Dog::class)->create();
$response = $this->getJson('api/dogs');
$response->assertJsonFragment(['name' => $dog1->name]); $response->assertJsonFragment(['name' => $dog2->name]); }}
Note that we’re using WithoutMiddleware to avoid worrying about authentication.You’ll want to test that separately, if at all (for more on authentication, see Chapter 9).
In this test we insert two Dogs into the database, then visit the API route for listing allDogs and make sure both are present in the output.
You can cover all of your API routes simply and easily here, including modifyingactions like POST and PATCH.
Testing PassportYou can use the actingAs() method on the Passport facade to test your scopes. Takea look at Example 13-45 to see a common pattern for testing scopes in Passport.
Example 13-45. Testing scoped access
public function test_it_lists_all_clips_for_those_with_list_clips_scope(){ Passport::actingAs( factory(User::class)->create(), ['list-clips'] );
$response = $this->getJson('api/clips'); $response->assertStatus(200);}
TL;DRLaravel is geared toward building APIs and makes it simple to work with JSON andRESTful APIs. There are some conventions, like for pagination, but much of the defi‐nition of exactly how your API will be sorted, or authenticated, or whatever else is upto you.
TL;DR | 375
www.EBooksWorld.ir
Laravel provides tools for authentication and testing, easy manipulation and readingof headers, and working with JSON, even automatically encoding all Eloquent resultsto JSON if they’re returned directly from a route.
Laravel Passport is a separate package that makes it simple to create and manage anOAuth server in your Laravel apps.
376 | Chapter 13: Writing APIs
www.EBooksWorld.ir
CHAPTER 14
Storage and Retrieval
We looked at how to store data in relational databases in Chapter 5, but there’s a lotmore that can be stored, both locally and remotely. In this chapter we’ll cover filesys‐tem and in-memory storage, file uploads and manipulation, nonrelational data stores,sessions, the cache, logging, cookies, and full-text search.
Local and Cloud File ManagersLaravel provides a series of file manipulation tools through the Storage facade, and afew helper functions.
Laravel’s filesystem access tools can connect to the local filesystem as well as S3, Rack‐space, and FTP. The S3 and Rackspace file drivers are provided by Flysystem, and it’ssimple to add additional Flysystem providers to your Laravel app—for example,Dropbox or WebDAV.
Configuring File AccessThe definitions for Laravel’s file manager live in config/filesystems.php. Each connec‐tion is called a “disk,” and Example 14-1 lists the disks that are available out ofthe box.
Example 14-1. Default available storage disks
...'disks' => [ 'local' => [ 'driver' => 'local', 'root' => storage_path('app'), ],
377
www.EBooksWorld.ir
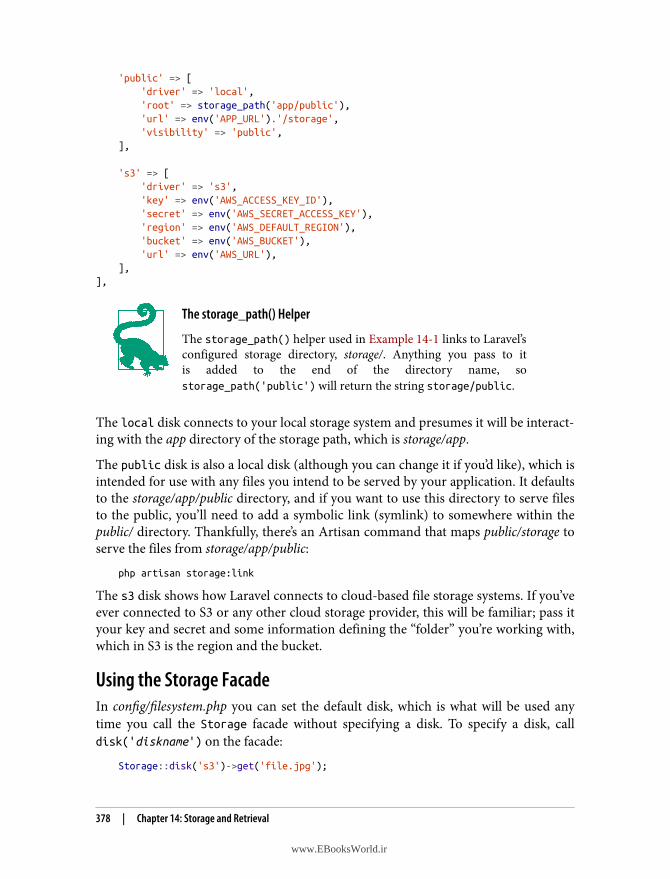
'public' => [ 'driver' => 'local', 'root' => storage_path('app/public'), 'url' => env('APP_URL').'/storage', 'visibility' => 'public', ],
's3' => [ 'driver' => 's3', 'key' => env('AWS_ACCESS_KEY_ID'), 'secret' => env('AWS_SECRET_ACCESS_KEY'), 'region' => env('AWS_DEFAULT_REGION'), 'bucket' => env('AWS_BUCKET'), 'url' => env('AWS_URL'), ],],
The storage_path() Helper
The storage_path() helper used in Example 14-1 links to Laravel’sconfigured storage directory, storage/. Anything you pass to itis added to the end of the directory name, sostorage_path('public') will return the string storage/public.
The local disk connects to your local storage system and presumes it will be interact‐ing with the app directory of the storage path, which is storage/app.
The public disk is also a local disk (although you can change it if you’d like), which isintended for use with any files you intend to be served by your application. It defaultsto the storage/app/public directory, and if you want to use this directory to serve filesto the public, you’ll need to add a symbolic link (symlink) to somewhere within thepublic/ directory. Thankfully, there’s an Artisan command that maps public/storage toserve the files from storage/app/public:
php artisan storage:link
The s3 disk shows how Laravel connects to cloud-based file storage systems. If you’veever connected to S3 or any other cloud storage provider, this will be familiar; pass ityour key and secret and some information defining the “folder” you’re working with,which in S3 is the region and the bucket.
Using the Storage FacadeIn config/filesystem.php you can set the default disk, which is what will be used anytime you call the Storage facade without specifying a disk. To specify a disk, calldisk('diskname') on the facade:
Storage::disk('s3')->get('file.jpg');
378 | Chapter 14: Storage and Retrieval
www.EBooksWorld.ir
The filesystems each provide the following methods:
get('file.jpg')
Retrieves the file at file.jpg
put('file.jpg', $contentsOrStream)
Puts the given file contents to file.jpg
putFile('myDir', $file)
Puts the contents of a provided file (in the form of an instance of eitherIlluminate\Http\File or Illuminate\Http\UploadedFile) to the myDir direc‐tory, but with Laravel managing the entire streaming process and naming the file
exists('file.jpg')
Returns a Boolean indicating whether file.jpg exists
getVisibility('myPath')
Gets the visibility for the given path (“public” or “private”)
setVisibility('myPath')
Sets the visibility for the given path (“public” or “private”)
copy('file.jpg', 'newfile.jpg')
Copies file.jpg to newfile.jpg
move('file.jpg', 'newfile.jpg')
Moves file.jpg to newfile.jpg
prepend('my.log', 'log text')
Adds content at the beginning of my.log
append('my.log', 'log text')
Adds content to the end of my.log
delete('file.jpg')
Deletes file.jpg
size('file.jpg')
Returns the size in bytes of file.jpg
lastModified('file.jpg')
Returns the Unix timestamp when file.jpg was last modified
files('myDir')
Returns an array of filenames in the directory myDir
allFiles('myDir')
Returns an array of filenames in the directory myDir and all subdirectories
Local and Cloud File Managers | 379
www.EBooksWorld.ir
directories('myDir')
Returns an array of directory names in the directory myDir
allDirectories('myDir')
Returns an array of directory names in the directory myDir and all subdirectories
makeDirectory('myDir')
Creates a new directory
deleteDirectory('myDir')
Deletes myDir
Injecting an Instance
If you’d prefer injecting an instance instead of using the Filefacade, typehint or inject Illuminate\Filesystem\Filesystemand you’ll have all the same methods available to you.
Adding Additional Flysystem ProvidersIf you want to add an additional Flysystem provider, you’ll need to “extend” Laravel’snative storage system. In a service provider somewhere—it could be the boot()method of AppServiceProvider, but it’d be more appropriate to create a unique ser‐vice provider for each new binding—use the Storage facade to add new storage sys‐tems, as seen in Example 14-2.
Example 14-2. Adding additional Flysystem providers
// Some service providerpublic function boot(){ Storage::extend('dropbox', function ($app, $config) { $client = new DropboxClient( $config['accessToken'], $config['clientIdentifier'] );
return new Filesystem(new DropboxAdapter($client)); });}
Basic File Uploads and ManipulationOne of the more common usages for the Storage facade is accepting file uploadsfrom your application’s users. Let’s look at a common workflow for that, inExample 14-3.
380 | Chapter 14: Storage and Retrieval
www.EBooksWorld.ir
Example 14-3. Common user upload workflow
...class DogsController{ public function updatePicture(Request $request, Dog $dog) { Storage::put( "dogs/{$dog->id}", file_get_contents($request->file('picture')->getRealPath()) ); }}
We put() to a file named dogs/id, and we grab our contents from the uploaded file. Every uploaded file is a descendant of the SplFileInfo class, which provides agetRealPath() method that returns the path to the file’s location. So, we get the tem‐porary upload path for the user’s uploaded file, read it with file_get_contents(),and pass it into Storage::put().
Since we have this file available to us here, we can do anything we want to the filebefore we store it—use an image manipulation package to resize it if it’s an image,validate it and reject it if it doesn’t meet our criteria, or whatever else we like.
If we wanted to upload this same file to S3 and we had our credentials storedin config/filesystems.php, we could just adjust Example 14-3 to callStorage::disk('s3')->put(); we’ll now be uploading to S3. Take a look atExample 14-4 to see a more complex upload example.
Example 14-4. A more complex example of file uploads, using Intervention
...class DogsController{ public function updatePicture(Request $request, Dog $dog) { $original = $request->file('picture');
// Resize image to max width 150 $image = Image::make($original)->resize(150, null, function ($constraint) { $constraint->aspectRatio(); })->encode('jpg', 75);
Storage::put( "dogs/thumbs/{$dog->id}", $image->getEncoded() ); }
Basic File Uploads and Manipulation | 381
www.EBooksWorld.ir
I used an image library called Intervention in Example 14-4 just as an example; youcan use any library you want. The important point is that you have the freedom tomanipulate the files however you want before you store them.
Using store() and storeAs() on the Uploaded File
Laravel 5.3 introduced the ability to store an uploaded file usingthe file itself. Learn more in Example 7-12.
Simple File DownloadsJust like Storage makes it easy to accept uploads from users, it also simplifies the taskof returning files to them. Take a look at Example 14-5 for the simplest example.
Example 14-5. Simple file downloads
public function downloadMyFile(){ return Storage::download('my-file.pdf');}
SessionsSession storage is the primary tool we use in web applications to store state betweenpage requests. Laravel’s session manager supports session drivers using files, cookies,a database, Memcached or Redis, or in-memory arrays (which expire after the pagerequest and are only good for tests).
You can configure all of your session settings and drivers in config/session.php. Youcan choose whether or not to encrypt your session data, select which driver to use(file is the default), and specify more connection-specific details like the length ofsession storage and which files or database tables to use. Take a look at the sessiondocs to learn about specific dependencies and settings you need to prepare forwhichever driver you choose to use.
The general API of the session tools allows you to save and retrieve data based onindividual keys: session()->put('user_id') and session()->get('user_id'), forexample. Make sure to avoid saving anything to a flash session key, since Laraveluses that internally for flash (only available for the next page request) session storage.
382 | Chapter 14: Storage and Retrieval
www.EBooksWorld.ir
Accessing the SessionThe most common way to access the session is using the Session facade:
session()->get('user_id');
But you can also use the session() method on any given Illuminate Request object,as in Example 14-6.
Example 14-6. Using the session() method on a Request object
Route::get('dashboard', function (Request $request) { $request->session()->get('user_id');});
Or you can inject an instance of Illuminate\Session\Store, as in Example 14-7.
Example 14-7. Injecting the backing class for sessions
Route::get('dashboard', function (Illuminate\Session\Store $session) { return $session->get('user_id');});
Finally, you can use the global session() helper. Use it with no parameters to get asession instance, with a single string parameter to “get” from the session, or with anarray to “put” to the session, as demonstrated in Example 14-8.
Example 14-8. Using the global session() helper
// Get$value = session()->get('key');$value = session('key');// Putsession()->put('key', 'value');session(['key', 'value']);
If you’re new to Laravel and not sure which to use, I’d recommend using the globalhelper.
Methods Available on Session InstancesThe two most common methods are get() and put(), but let’s take a look at each ofthe available methods and their parameters:
session()->get($key, $fallbackValue)
get() pulls the value of the provided key out of the session. If there is no valueattached to that key, it will return the fallback value instead (and if you don’t pro‐
Sessions | 383
www.EBooksWorld.ir
vide a fallback, it will return null). The fallback value can be a string or a closure,as you can see in the following examples:
$points = session()->get('points');
$points = session()->get('points', 0);
$points = session()->get('points', function () { return (new PointGetterService)->getPoints();});
session()->put($key, $value)
put() stores the provided value in the session at the provided key:
session()->put('points', 45);
$points = session()->get('points');
session()->push($key, $value)
If any of your session values are arrays, you can use push() to add a value to thearray:
session()->put('friends', ['Saúl', 'Quang', 'Mechteld']);
session()->push('friends', 'Javier');
session()->has($key)
has() checks whether there’s a value set at the provided key:
if (session()->has('points')) { // Do something}
You can also pass an array of keys, and it only returns true if all of the keys exist.
session()->has() and Null Values
If a session value is set but the value is null,session()->has() will return false.
session()->exists($key)
exists() checks whether there’s a value set at the provided key, like has(), butunlike has(), it will return true even if the set value is null:
if (session()->exists('points')) { // returns true even if 'points' is set to null}
384 | Chapter 14: Storage and Retrieval
www.EBooksWorld.ir
session()->all()
all() returns an array of everything that’s in the session, including those valuesset by the framework. You’ll likely see values under keys like _token (CSRFtokens), _previous (previous page, for back() redirects), and flash (for flashstorage).
session()->forget($key) and session()->flush()forget() removes a previously set session value. flush() removes every sessionvalue, even those set by the framework:
session()->put('a', 'awesome');session()->put('b', 'bodacious');
session()->forget('a');// a is no longer set; b is still setsession()->flush();// Session is now empty
session()->pull($key, $fallbackValue)
pull() is the same as get(), except that it deletes the value from the session afterpulling it.
session()->regenerate()
It’s not common, but if you need to regenerate your session ID, regenerate() isthere for you.
Flash Session StorageThere are three more methods we haven’t covered yet, and they all have to do withsomething called “flash” session storage.
One very common pattern for session storage is to set a value that you only wantavailable for the next page load. For example, you might want to store a message like“Updated post successfully.” You could manually get that message and then wipe it onthe next page load, but if you use this pattern a lot it can get wasteful. Enter flash ses‐sion storage: keys that are expected to only last for a single page request.
Laravel handles the work for you, and all you need to do is use flash() instead ofput(). These are the useful methods here:
session()->flash($key, $value)
flash() sets the session key to the provided value for just the next page request.
session()->reflash() and session()->keep($key)If you need the previous page’s flash session data to stick around for one morerequest, you can use reflash() to restore all of it for the next request or
Sessions | 385
www.EBooksWorld.ir
keep($key) to just restore a single flash value for the next request. keep() canalso accept an array of keys to reflash.
CacheCaches are structured very similarly to sessions. You provide a key and Laravel storesit for you. The biggest difference is that the data in a cache is cached per application,and the data in a session is cached per user. That means caches are more commonlyused for storing results from database queries, API calls, or other slow queries thatcan stand to get a little bit “stale.”
The cache configuration settings are available at config/cache.php. Just like with a ses‐sion, you can set the specific configuration details for any of your drivers, and alsochoose which will be your default. Laravel uses the file cache driver by default, butyou can also use Memcached or Redis, APC, or a database, or write your own cachedriver. Take a look at the cache docs to learn about specific dependencies and settingsyou need to prepare for whichever driver you choose to use.
Example 14-9. Minutes or seconds for cache length
In versions of Laravel prior to 5.8, if you passed an integer to any cache methods todefine the cache duration, it’d represent the number of minutes to cache the item. In5.8+, as you’ll learn in the following section, it represents seconds.
Accessing the CacheJust like with sessions, there are a few different ways to access a cache. You can usethe facade:
$users = Cache::get('users');
Or you can get an instance from the container, as in Example 14-10.
Example 14-10. Injecting an instance of the cache
Route::get('users', function (Illuminate\Contracts\Cache\Repository $cache) { return $cache->get('users');});
You can also use the global cache() helper (introduced in Laravel 5.3), as inExample 14-11.
Example 14-11. Using the global cache() helper
// Get from cache$users = cache('key', 'default value');
386 | Chapter 14: Storage and Retrieval
www.EBooksWorld.ir
$users = cache()->get('key', 'default value');// Put for $seconds duration$users = cache(['key' => 'value'], $seconds);$users = cache()->put('key', 'value', $seconds);
If you’re new to Laravel and not sure which to use, I’d recommend using the globalhelper.
Methods Available on Cache InstancesLet’s take a look at the methods you can call on a Cache instance:
cache()->get($key, $fallbackValue) and cache()->pull($key, $fallbackValue)
get() makes it easy to retrieve the value for any given key. pull() is the same asget() except it removes the cached value after retrieving it.
cache()->put($key, $value, $secondsOrExpiration)
put() sets the value of the specified key for a given number of seconds. If you’dprefer setting an expiration date/time instead of a number of seconds, you canpass a Carbon object as the third parameter:
cache()->put('key', 'value', now()->addDay());
cache()->add($key, $value)
add() is similar to put(), except if the value already exists, it won’t set it. Also,the method returns a Boolean indicating whether or not the value was actuallyadded:
$someDate = now();cache()->add('someDate', $someDate); // returns true$someOtherDate = now()->addHour();cache()->add('someDate', $someOtherDate); // returns false
cache()->forever($key, $value)
forever() saves a value to the cache for a specific key; it’s the same as put(),except the values will never expire (until they’re removed with forget()).
cache()->has($key)
has() returns a Boolean indicating whether or not there’s a value at the providedkey.
cache()->remember($key, $seconds, $closure) and cache()->rememberForever($key, $closure)
remember() provides a single method to handle a very common flow: look upwhether a value exists in the cache for a certain key, and if it doesn’t, get thatvalue somehow, save it to the cache, and return it.
Cache | 387
www.EBooksWorld.ir
remember() lets you provide a key to look up, the number of seconds it should besaved for, and a closure to define how to look it up, in case the key has no valueset. rememberForever() is the same, except it doesn’t need you to set the numberof seconds it should expire after. Take a look at the following example to see acommon user scenario for remember():
// Either returns the value cached at "users" or gets "User::all()",// caches it at "users", and returns it$users = cache()->remember('users', 7200, function () { return User::all();});
cache()->increment($key, $amount) and cache()->decrement($key, $amount)increment() and decrement() allow you to increment and decrement integervalues in the cache. If there is no value at the given key, it’ll be treated as if it were0, and if you pass a second parameter to increment or decrement, it’ll incrementor decrement by that amount instead of by 1.
cache()->forget($key) and cache()->flush()forget() works just like Session’s forget() method: pass it a key and it’ll wipethat key’s value. flush() wipes the entire cache.
CookiesYou might expect cookies to work the same as sessions and the cache. A facade and aglobal helper are available for these too, and our mental models of all three are simi‐lar: you can get or set their values in the same way.
But because cookies are inherently attached to the requests and responses, you’llneed to interact with cookies differently. Let’s look really briefly at what makes cook‐ies different.
Cookies in LaravelCookies can exist in three places in Laravel. They can come in via the request, whichmeans the user had the cookie when they visited the page. You can read that with theCookie facade, or you can read it off of the request object.
They can also be sent out with a response, which means the response will instruct theuser’s browser to save the cookie for future visits. You can do this by adding thecookie to your response object before returning it.
And lastly, a cookie can be queued. If you use the Cookie facade to set a cookie, youhave put it into a “CookieJar” queue, and it will be removed and added to theresponse object by the AddQueuedCookiesToResponse middleware.
388 | Chapter 14: Storage and Retrieval
www.EBooksWorld.ir
Accessing the Cookie ToolsYou can get and set cookies in three places: the Cookie facade, the cookie() globalhelper, and the request and response objects.
The Cookie facade
The Cookie facade is the most full-featured option, allowing you to not only read andmake cookies, but also to queue them to be added to the response. It provides thefollowing methods:
Cookie::get($key)
To pull the value of a cookie that came in with the request, you can just runCookie::get('cookie-name'). This is the simplest option.
Cookie::has($key)
You can check whether a cookie came in with the request usingCookie::has('cookie-name'), which returns a Boolean.
Cookie::make(...params)
If you want to make a cookie without queueing it anywhere, you can useCookie::make(). The most likely use for this would be to make a cookie andthen manually attach it to the response object, which we’ll cover in a bit.
Here are the parameters for make(), in order:
• $name is the name of the cookie.• $value is the content of the cookie.• $minutes specifies how many minutes the cookie should live.• $path is the path under which your cookie should be valid.• $domain lists the domains for which your cookie should work.• $secure indicates whether the cookie should only be transmitted over a
secure (HTTPS) connection.• $httpOnly indicates whether the cookie will be made accessible only through
the HTTP protocol.• $raw indicates whether the cookie should be sent without URL encoding.• $sameSite indicates whether the cookie should be available for cross-site
requests; options are lax, strict, or null.
Cookie::make()
Returns an instance of Symfony\Component\HttpFoundation\Cookie.
Cookies | 389
www.EBooksWorld.ir
Default Settings for Cookies
The CookieJar that the Cookie facade instance uses reads itsdefaults from the session config. So, if you change any of theconfiguration values for the session cookie in config/session.php, those same defaults will be applied to all of yourcookies that you create using the Cookie facade.
Cookie::queue(Cookie || params)
If you use Cookie::make(), you’ll still need to attach the cookie to your response,which we’ll cover shortly. Cookie::queue() has the same syntax asCookie::make(), but it enqueues the created cookie to be automatically attachedto the response by middleware.
If you’d like, you can also just pass a cookie you’ve created yourself intoCookie::queue().
Here’s the simplest possible way to add a cookie to the response in Laravel:
Cookie::queue('dismissed-popup', true, 15);
When Your Queued Cookies Won’t Get Set
Cookies can only be returned as part of a response. So, if youenqueue cookies with the Cookie facade and then yourresponse isn’t returned correctly—for example, if you usePHP’s exit() or something halts the execution of your script—your cookies won’t be set.
The cookie() global helper
The cookie() global helper will return a CookieJar instance if you call it with noparameters. However, two of the most convenient methods on the Cookie facade—has() and get()—exist only on the facade, not on the CookieJar. So, in this context,I think the global helper is actually less useful than the other options.
The one task for which the cookie() global helper is useful is creating a cookie. If youpass parameters to cookie(), they’ll be passed directly to the equivalent ofCookie::make(), so this is the fastest way to create a cookie:
$cookie = cookie('dismissed-popup', true, 15);
Injecting an Instance
You can also inject an instance of Illuminate\Cookie\CookieJaranywhere in the app, but you’ll have the same limitations discussedhere.
390 | Chapter 14: Storage and Retrieval
www.EBooksWorld.ir
Cookies on Request and Response objectsSince cookies come in as a part of the request and are set as a part of the response,those Illuminate objects are the places they actually live. The Cookie facade’s get(),has(), and queue() methods are just proxies to interact with the Request andResponse objects.
So, the simplest way to interact with cookies is to pull cookies from the request andset them on the response.
Reading cookies from Request objects. Once you have a copy of your Request object—ifyou don’t know how to get one, just try app('request')—you can use the Requestobject’s cookie() method to read its cookies, as shown in Example 14-12.
Example 14-12. Reading a cookie from a Request object
Route::get('dashboard', function (Illuminate\Http\Request $request) { $userDismissedPopup = $request->cookie('dismissed-popup', false);});
As you can see in this example, the cookie() method has two parameters: the cook‐ie’s name and, optionally, the fallback value.
Setting cookies on Response objects. Whenever you have your Response object ready,you can use the cookie() method (or the withCookie() method in Laravel prior to5.3) on it to add a cookie to the response, like in Example 14-13.
Example 14-13. Setting a cookie on a Response object
Route::get('dashboard', function () { $cookie = cookie('saw-dashboard', true);
return Response::view('dashboard') ->cookie($cookie);});
If you’re new to Laravel and not sure which option to use, I’d recommend settingcookies on the Request and Response objects. It’s a bit more work, but will lead tofewer surprises if future developers don’t understand the CookieJar queue.
LoggingWe’ve seen a few really brief examples of logging so far in this book when we weretalking about other concepts like the container and facades, but let’s briefly look atwhat options you have with logging beyond just Log::info('Message').
Logging | 391
www.EBooksWorld.ir
The purpose of logs is to increase “discoverability,” or your ability to understandwhat’s going on at any given moment in your application.
Logs are short messages, sometimes with some data embedded in a human-readableform, that your code will generate for the sake of understanding what was happeningduring the execution of the app. Each log must be captured at a specific level, whichcan vary from emergency (something very bad happened) to debug (something ofalmost no significance happened).
Without any modifications, your app will write any log statements to a file located atstorage/logs/laravel.log, and each log statement will look a little bit like this:
[2018-09-22 21:34:38] local.ERROR: Something went wrong.
You can see we have the date, time, environment, error level, and message, all on oneline. However, Laravel also (by default) logs any uncaught exceptions, and in that caseyou’ll see the entire stack trace inline.
We’ll cover how to log, why to log, and how to log elsewhere (for example, in Slack)in the following section.
When and Why to Use LogsThe most common use case for logs is to act as a semidisposable record of things thathave happened that you may care about later, but to which you don’t definitively needprogrammatic access. The logs are more about learning what’s going on in the appand less about creating structured data your app can consume.
For example, if you want to have code that consumes a record of every user login anddoes something interesting with it, that’s a use case for a logins database table. How‐ever, if you have a casual interest in those logins but you’re not entirely certainwhether you care or whether you need that information programmatically, you mayjust throw a debug- or info-level log on it and forget about it.
Logs are also common when you need to see the value of something at the moment itgoes wrong, or at a certain time of day, or something else that means you want thedata at a time when you’re not around. Throw a log statement in the code, get thedata you need out of the logs, and either keep it in the code for later usage or justdelete it again.
Writing to the LogsThe simplest way to write a log entry in Laravel is to use the Log facade, and use themethod on that facade that matches the severity level you’d like to record. The levelsare the same as those defined in RFC 5424:
Log::emergency($message);Log::alert($message);
392 | Chapter 14: Storage and Retrieval
www.EBooksWorld.ir
Log::critical($message);Log::error($message);Log::warning($message);Log::notice($message);Log::info($message);Log::debug($message);
You can also, optionally, pass a second parameter that’s an array of connected data:
Log::error('Failed to upload user image.', ['user' => $user]);
This additional information may be captured differently by different log destinations,but here’s how this looks in the default local log (although it will be just a single linein the log):
[2018-09-27 20:53:31] local.ERROR: Failed to upload user image. { "user":"[object] (App\\User: { \"id\":1, \"name\":\"Matt\", \"email\":\"[email protected]\", \"email_verified_at\":null, \"api_token\":\"long-token-here\", \"created_at\":\"2018-09-22 21:39:55\", \"updated_at\":\"2018-09-22 21:40:08\" })"}
Log ChannelsIn Laravel 5.6, the way we configure and capture logs was changed pretty significantlyto introduce the idea of multiple channels and drivers. If you’re working in 5.5 or ear‐lier, you can skip on to “Full-Text Search with Laravel Scout” on page 396.
Like many other aspects of Laravel (file storage, database, mail, etc.), you can config‐ure your logs to use one or more predefined log types, which you define in the configfile. Using each type involves passing various configuration details to a specific logdriver.
These log types are called channels, and out of the box you’ll have options for stack,single, daily, slack, stderr, syslog, and errorlog. Each channel is connected to asingle driver; the available drivers are single, daily, slack, syslog, errorlog, monolog, custom, or stack.
We’ll cover the most common channels, here: stack, single, daily, and slack. Tolearn more about the drivers and the full list of channels available, take a look at thelogging docs.
Logging | 393
www.EBooksWorld.ir
The single channel
The single channel writes every log entry to a single file, which you’ll define in thepath key. You can see its default configuration here in Example 14-14:
Example 14-14. Default configuration for the single channel
'single' => [ 'driver' => 'single', 'path' => storage_path('logs/laravel.log'), 'level' => 'debug',],
This means it’ll only log events at the debug level or higher, and it will write them allto a single file, storage/logs/laravel.log.
The daily channel
The daily channel splits out a new file for each day. You can see its default confighere in Example 14-15.
Example 14-15. Default configuation for the daily channel
'daily' => [ 'driver' => 'daily', 'path' => storage_path('logs/laravel.log'), 'level' => 'debug', 'days' => 7,],
It’s similar to single, but we now can set how many days of logs to keep beforethey’re cleaned up, and the date will be appended to the filename we specify. Forexample, the preceding config will generate a file named storage/logs/laravel-{yyyy-mm-dd}.log.
The slack channel
The slack channel makes it easy to send your logs (or, more likely, only certain logs)over to Slack.
It also illustrates that you’re not limited to just the handlers that come out of the boxwith Laravel. We’ll cover this in a second, but this isn’t a custom Slack implementa‐tion; it’s just Laravel building a log driver that connects to the Monolog Slack handler,and if you can use any Monolog handler, you have a lot of options available to you.
The default configuration for this channel is shown in Example 14-16.
394 | Chapter 14: Storage and Retrieval
www.EBooksWorld.ir
Example 14-16. Default configuation for the slack channel
'slack' => [ 'driver' => 'slack', 'url' => env('LOG_SLACK_WEBHOOK_URL'), 'username' => 'Laravel Log', 'emoji' => ':boom:', 'level' => 'critical',],
The stack channel
The stack channel is the channel that’s enabled by default on your application. Itsdefault configuation in 5.7+ is shown in Example 14-17.
Example 14-17. Default configuration for the stack channel
'stack' => [ 'driver' => 'stack', 'channels' => ['daily'], 'ignore_exceptions' => false,],
The stack channel allows you to send all your logs to more than one channel (listedin the channels array). So, while this is the channel that’s configured by default onyour Laravel apps, because its channels array is set to daily by default in 5.8+, inreality your app is just using the daily log channel.
But what if you wanted everything of the level info and above to go to the daily files,but you wanted critical and higher log messages to go to Slack? It’s easy with thestack driver, as Example 14-18 demonstrates.
Example 14-18. Customizing the stack driver
'channels' => [ 'stack' => [ 'driver' => 'stack', 'channels' => ['daily', 'slack'], ],
'daily' => [ 'driver' => 'daily', 'path' => storage_path('logs/laravel.log'), 'level' => 'info', 'days' => 14, ],
'slack' => [ 'driver' => 'slack',
Logging | 395
www.EBooksWorld.ir
'url' => env('LOG_SLACK_WEBHOOK_URL'), 'username' => 'Laravel Log', 'emoji' => ':boom:', 'level' => 'critical', ],
Writing to specific log channelsThere may also be times when you want to control exactly which log messages gowhere. You can do that, too. Just specify the channel when you call the Log facade:
Log::channel('slack')->info("This message will go to Slack.");
Advanced Log Configuration
If you’d like to customize how each log is sent to each channel, orimplement custom Monolog handlers, check out the logging docsto learn more.
Full-Text Search with Laravel ScoutLaravel Scout is a separate package that you can bring into your Laravel apps to addfull-text search to your Eloquent models. Scout makes it easy to index and search thecontents of your Eloquent models; it ships with an Algolia driver, but there are alsocommunity packages for other providers. I’ll assume you’re using Algolia.
Installing ScoutFirst, pull in the package in any Laravel 5.3+ app:
composer require laravel/scout
Manually Registering Service Providers Prior to Laravel 5.5
If you’re using a version of Laravel prior to 5.5, you will need tomanually register the service provider by adding Laravel\Scout\ScoutServiceProvider::class to the providers section of con‐fig/app.php.
Next you’ll want to set up your Scout configuration. Run this command:
php artisan vendor:publish --provider="Laravel\Scout\ScoutServiceProvider"
and paste your Algolia credentials in config/scout.php.
Finally, install the Algolia SDK:
composer require algolia/algoliasearch-client-php
396 | Chapter 14: Storage and Retrieval
www.EBooksWorld.ir
Marking Your Model for IndexingIn your model (we’ll use Review, for a book review, for this example), import theLaravel\Scout\Searchable trait.
You can define which properties are searchable using the toSearchableArray()method (it defaults to mirroring toArray()), and define the name of the model’sindex using the searchableAs() method (it defaults to the table name).
Scout subscribes to the create/delete/update events on your marked models. Whenyou create, update, or delete any rows, Scout will sync those changes up to Algolia.It’ll either make those changes synchronously with your updates or, if you configureScout to use a queue, queue the updates.
Searching Your IndexScout’s syntax is simple. For example, to find any Review with the word Llew in it:
Review::search('Llew')->get();
You can also modify your queries as you would with regular Eloquent calls:
// Get all records from the Review that match the term "Llew",// limited to 20 per page and reading the page query parameter,// just like Eloquent paginationReview::search('Llew')->paginate(20);
// Get all records from the Review that match the term "Llew"// and have the account_id field set to 2Review::search('Llew')->where('account_id', 2)->get();
What comes back from these searches? A collection of Eloquent models, rehydratedfrom your database. The IDs are stored in Algolia, which returns a list of matchedIDs; Scout then pulls the database records for those and returns them as Eloquentobjects.
You don’t have full access to the complexity of SQL WHERE commands, but it providesa basic framework for comparison checks like you can see in the code samples here.
Queues and ScoutAt this point your app will be making HTTP requests to Algolia on every request thatmodifies any database records. This can slow down your application quickly, which iswhy Scout makes it easy to push all of its actions onto a queue.
In config/scout.php, set queue to true so that these updates are set to be indexed asyn‐chronously. Your full-text index is now operating under “eventual consistency”; yourdatabase records will receive the updates immediately, and the updates to your searchindexes will be queued and updated as fast as your queue worker allows.
Full-Text Search with Laravel Scout | 397
www.EBooksWorld.ir
Performing Operations Without IndexingIf you need to perform a set of operations and avoid triggering the indexingin response, wrap the operations in the withoutSyncingToSearch() method on yourmodel:
Review::withoutSyncingToSearch(function () { // Make a bunch of reviews, e.g. factory(Review::class, 10)->create();});
Conditionally Indexing ModelsSometimes you might only want to index records if they meet a certain condition.You may use the shouldBeSearchable() method on the model class to achieve this:
public function shouldBeSearchable(){ return $this->isApproved();}
Manually Triggering Indexing via CodeIf you want to manually trigger indexing your model, you can do it using code inyour app or via the command line.
To manually trigger indexing from your code, add searchable() to the end of anyEloquent query and it will index all of the records that were found in that query:
Review::all()->searchable();
You can also choose to scope the query to only those records you want to index.However, Scout is smart enough to insert new records and update old records, so youmay choose to just reindex the entire contents of the model’s database table.
You can also run searchable() on relationship methods:
$user->reviews()->searchable();
If you want to unindex any records with the same sort of query chaining, just useunsearchable() instead:
Review::where('sucky', true)->unsearchable();
Manually Triggering Indexing via the CLIYou can also trigger indexing with an Artisan command:
php artisan scout:import "App\Review"
This will chunk all of the Review models and index them all.
398 | Chapter 14: Storage and Retrieval
www.EBooksWorld.ir
TestingTesting most of these features is as simple as using them in your tests; no need tomock or stub. The default configuration will already work—for example, take a lookat phpunit.xml to see that your session driver and cache driver have been set to valuesappropriate for tests.
However, there are a few convenience methods and a few gotchas that you shouldknow about before you attempt to test them all.
File StorageTesting file uploads can be a bit of a pain, but follow these steps and it will be clear.
Uploading fake files
First, let’s look at how to manually create an Illuminate\Http\UploadedFile objectfor use in our application testing (Example 14-19).
Example 14-19. Creating a fake UploadedFile for testing
public function test_file_should_be_stored(){ Storage::fake('public');
$file = UploadedFile::fake()->image('avatar.jpg');
$response = $this->postJson('/avatar', [ 'avatar' => $file, ]);
// Assert the file was stored Storage::disk('public')->assertExists("avatars/{$file->hashName()}");
// Assert a file does not exist Storage::disk('public')->assertMissing('missing.jpg');}
We’ve created a new instance of UploadedFile that refers to our testing file, and wecan now use it to test our routes.
Returning fake filesIf your route is expecting a real file to exist, sometimes the best way to make ittestable is to make that real file actually exist. Let’s say every user must have a profilepicture.
Testing | 399
www.EBooksWorld.ir
First, let’s set up the model factory for the user to use Faker to make a copy of thepicture, as in Example 14-20.
Example 14-20. Returning fake files with Faker
$factory->define(User::class, function (Faker\Generator $faker) { return [ 'picture' => $faker->file( storage_path('tests'), // Source directory storage_path('app'), // Target directory false // Return just filename, not full path ), 'name' => $faker->name, ];});
Faker’s file() method picks a random file from the source directory and copies it tothe target directory, and then returns the filename. So, we’ve just picked a random filefrom the storage/tests directory, copied it to the storage/app directory, and set its file‐name as the picture property on our User. At this point we can use a User in tests onroutes that expect the User to have a picture, as seen in Example 14-21.
Example 14-21. Asserting that an image’s URL is echoed
public function test_user_profile_picture_echoes_correctly(){ $user = factory(User::class)->create();
$response = $this->get(route('users.show', $user->id));
$response->assertSee($user->picture);}
Of course, in many contexts you can just generate a random string there without evencopying a file. But if your routes check for the file’s existence or run any operations onthe file, this is your best option.
SessionIf you need to assert something has been set in the session, you can use some conve‐nience methods Laravel makes available in every test. All of these methods are avail‐able in your tests on the Illuminate\Foundation\Testing\TestResponse object:
assertSessionHas($key, $value = null)
Asserts that the session has a value for a particular key, and, if the second param‐eter is passed, that that key is a particular value:
400 | Chapter 14: Storage and Retrieval
www.EBooksWorld.ir
public function test_some_thing(){ // Do stuff that ends up with a $response object... $response->assertSessionHas('key', 'value');}
assertSessionHasAll(array $bindings)
If passed an array of key/value pairs, asserts that all of the keys are equal to all ofthe values. If one or more of the array entries is just a value (with PHP’s defaultnumeric key), it will just be checked for existence in the session:
$check = [ 'has', 'hasWithThisValue' => 'thisValue',];
$response->assertSessionHasAll($check);
assertSessionMissing($key)
Asserts that the session does not have a value for a particular key.
assertSessionHasErrors($bindings = [], $format = null)
Asserts that the session has an errors value. This is the key Laravel uses to senderrors back from validation failures.
If the array contains just keys, it will check that errors are set with those keys:
$response = $this->post('test-route', ['failing' => 'data']);$response->assertSessionHasErrors(['name', 'email']);
You can also pass values for those keys, and optionally a $format, to check thatthe messages for those errors came back the way you expected:
$response = $this->post('test-route', ['failing' => 'data']);$response->assertSessionHasErrors([ 'email' => '<strong>The email field is required.</strong>',], '<strong>:message</strong>');
CacheThere’s nothing special about testing your features that use the cache—just do it:
Cache::put('key', 'value', 900);
$this->assertEquals('value', Cache::get('key'));
Laravel uses the array cache driver by default in your testing environment, which juststores your cache values in memory.
Testing | 401
www.EBooksWorld.ir

CookiesWhat if you need to set a cookie before testing a route in your application tests? Youcan manually pass cookies to one of the parameters of the call() method. To learnmore about call(), check out Chapter 12.
Excluding Your Cookie from Encryption During Testing
Your cookies won’t work in your tests unless you exclude themfrom Laravel’s cookie encryption middleware. You can do this byteaching the EncryptCookies middleware to temporarily disableitself for those cookies:
use Illuminate\Cookie\Middleware\EncryptCookies;...
$this->app->resolving( EncryptCookies::class, function ($object) { $object->disableFor('cookie-name'); });
// ...run test
That means you can set and check against a cookie with something likeExample 14-22.
Example 14-22. Running unit tests against cookies
public function test_cookie(){ $this->app->resolving(EncryptCookies::class, function ($object) { $object->disableFor('my-cookie'); });
$response = $this->call( 'get', 'route-echoing-my-cookie-value', [], ['my-cookie' => 'baz'] ); $response->assertSee('baz');}
If you want to test that a response has a cookie set, you can use assertCookie() totest for the cookie:
$response = $this->get('cookie-setting-route');$response->assertCookie('cookie-name');
402 | Chapter 14: Storage and Retrieval
www.EBooksWorld.ir
Or you could use assertPlainCookie() to test for the cookie and to assert that it’snot encrypted.
Different Names for Testing Methods Prior to Laravel 5.4
In projects running versions of Laravel 5.4 assertCookie() shouldbe replaced by seeCookie(), and assertPlainCookie() should bereplaced by seePlainCookie().
LogThe simplest way to test that a certain log was written is by making assertions againstthe Log facade (learn more in “Faking Other Facades” on page 321). Example 14-23shows how this works.
Example 14-23. Making assertions against the Log facade
// Test filepublic function test_new_accounts_generate_log_entries(){ Log::shouldReceive('info') ->once() ->with('New account created!');
// Create a new account $this->post(route('accounts.store'), ['email' => '[email protected]']);}
// AccountsControllerpublic function store(){ // Create account
Log::info('New account created!');}
There’s also a package called Log Fake that expands on what you can do with thefacade testing shown here and allows you to write more customized assertions againstyour logs.
ScoutIf you need to test code that uses Scout data, you’re probably not going to want yourtests triggering indexing actions or reading from Scout. Simply add an environmentvariable to your phpunit.xml to disable Scout’s connection to Algolia:
<env name="SCOUT_DRIVER" value="null"/>
Testing | 403
www.EBooksWorld.ir
TL;DRLaravel provides simple interfaces to many common storage operations: filesystemaccess, sessions, cookies, the cache, and search. Each of these APIs is the same regard‐less of which provider you use, which Laravel enables by allowing multiple “drivers”to serve the same public interface. This makes it simple to switch providers depend‐ing on the environment, or as the needs of the application change.
404 | Chapter 14: Storage and Retrieval
www.EBooksWorld.ir
CHAPTER 15
Mail and Notifications
Sending an application’s users notifications via email, Slack, SMS, or another notifica‐tion system is a common but surprisingly complex requirement. Laravel’s mail andnotification features provide consistent APIs that abstract away the need to pay tooclose attention to any particular provider. Just like in Chapter 14, you’ll write yourcode once and choose at the configuration level which provider you’ll use to sendyour email or notifications.
MailLaravel’s mail functionality is a convenience layer on top of Swift Mailer, and out ofthe box Laravel comes with drivers for Mailgun, Mandrill, Sparkpost, SES, SMTP,PHP Mail, and Sendmail.
For all of the cloud services, you’ll set your authentication information inconfig/services.php. However, if you take a look you’ll see there are already keys there—and in config/mail.php—that allow you to customize your application’s mail func‐tionality in .env using variables like MAIL_DRIVER and MAILGUN_SECRET.
Cloud-based API Driver Dependencies
If you’re using any of the cloud-based API drivers, you’ll need tobring Guzzle in with Composer. You can run the following com‐mand to add it:
composer require guzzlehttp/guzzle
If you use the SES driver, you’ll need to run the following com‐mand:
composer require aws/aws-sdk-php:~3.0
405
www.EBooksWorld.ir
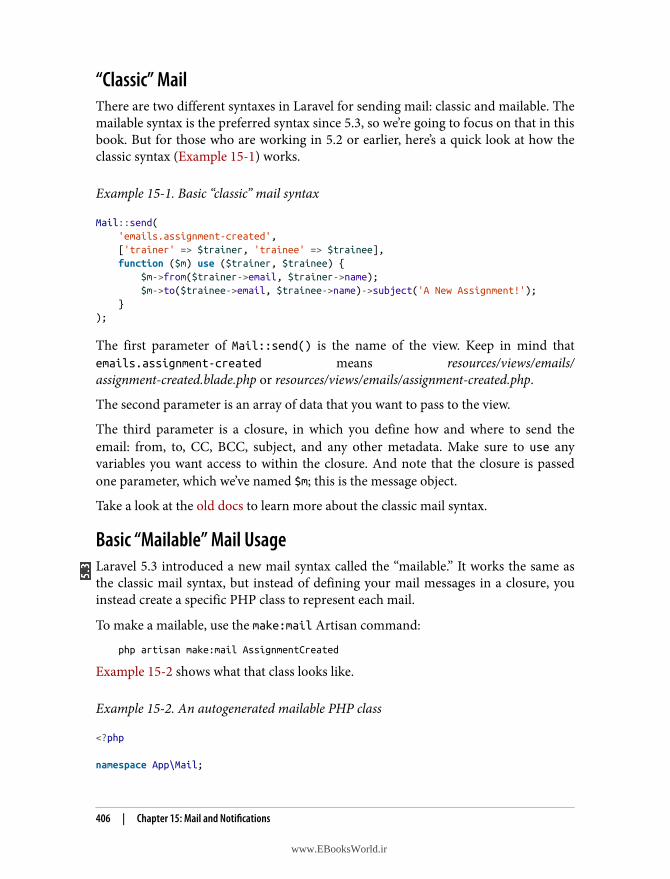
“Classic” MailThere are two different syntaxes in Laravel for sending mail: classic and mailable. Themailable syntax is the preferred syntax since 5.3, so we’re going to focus on that in thisbook. But for those who are working in 5.2 or earlier, here’s a quick look at how theclassic syntax (Example 15-1) works.
Example 15-1. Basic “classic” mail syntax
Mail::send( 'emails.assignment-created', ['trainer' => $trainer, 'trainee' => $trainee], function ($m) use ($trainer, $trainee) { $m->from($trainer->email, $trainer->name); $m->to($trainee->email, $trainee->name)->subject('A New Assignment!'); });
The first parameter of Mail::send() is the name of the view. Keep in mind thatemails.assignment-created means resources/views/emails/assignment-created.blade.php or resources/views/emails/assignment-created.php.
The second parameter is an array of data that you want to pass to the view.
The third parameter is a closure, in which you define how and where to send theemail: from, to, CC, BCC, subject, and any other metadata. Make sure to use anyvariables you want access to within the closure. And note that the closure is passedone parameter, which we’ve named $m; this is the message object.
Take a look at the old docs to learn more about the classic mail syntax.
Basic “Mailable” Mail UsageLaravel 5.3 introduced a new mail syntax called the “mailable.” It works the same asthe classic mail syntax, but instead of defining your mail messages in a closure, youinstead create a specific PHP class to represent each mail.
To make a mailable, use the make:mail Artisan command:
php artisan make:mail AssignmentCreated
Example 15-2 shows what that class looks like.
Example 15-2. An autogenerated mailable PHP class
<?php
namespace App\Mail;
406 | Chapter 15: Mail and Notifications
www.EBooksWorld.ir
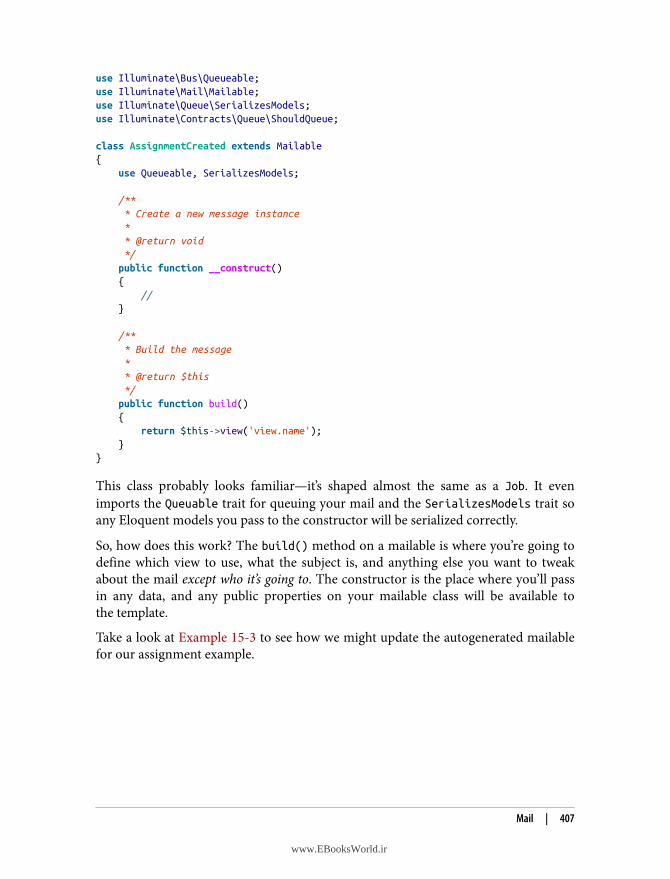
use Illuminate\Bus\Queueable;use Illuminate\Mail\Mailable;use Illuminate\Queue\SerializesModels;use Illuminate\Contracts\Queue\ShouldQueue;
class AssignmentCreated extends Mailable{ use Queueable, SerializesModels;
/** * Create a new message instance * * @return void */ public function __construct() { // }
/** * Build the message * * @return $this */ public function build() { return $this->view('view.name'); }}
This class probably looks familiar—it’s shaped almost the same as a Job. It evenimports the Queuable trait for queuing your mail and the SerializesModels trait soany Eloquent models you pass to the constructor will be serialized correctly.
So, how does this work? The build() method on a mailable is where you’re going todefine which view to use, what the subject is, and anything else you want to tweakabout the mail except who it’s going to. The constructor is the place where you’ll passin any data, and any public properties on your mailable class will be available tothe template.
Take a look at Example 15-3 to see how we might update the autogenerated mailablefor our assignment example.
Mail | 407
www.EBooksWorld.ir
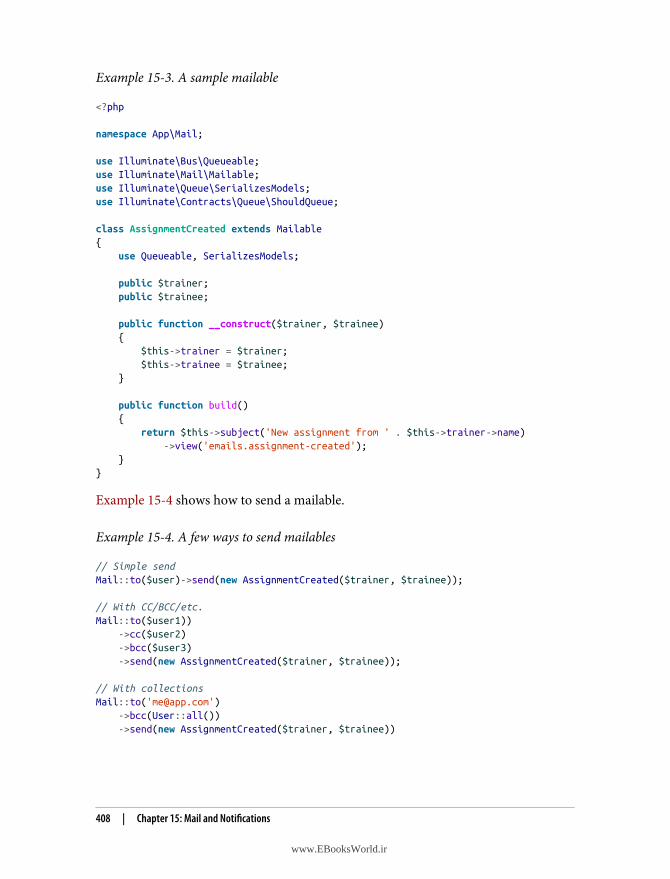
Example 15-3. A sample mailable
<?php
namespace App\Mail;
use Illuminate\Bus\Queueable;use Illuminate\Mail\Mailable;use Illuminate\Queue\SerializesModels;use Illuminate\Contracts\Queue\ShouldQueue;
class AssignmentCreated extends Mailable{ use Queueable, SerializesModels;
public $trainer; public $trainee;
public function __construct($trainer, $trainee) { $this->trainer = $trainer; $this->trainee = $trainee; }
public function build() { return $this->subject('New assignment from ' . $this->trainer->name) ->view('emails.assignment-created'); }}
Example 15-4 shows how to send a mailable.
Example 15-4. A few ways to send mailables
// Simple sendMail::to($user)->send(new AssignmentCreated($trainer, $trainee));
// With CC/BCC/etc.Mail::to($user1)) ->cc($user2) ->bcc($user3) ->send(new AssignmentCreated($trainer, $trainee));
// With collectionsMail::to('[email protected]') ->bcc(User::all()) ->send(new AssignmentCreated($trainer, $trainee))
408 | Chapter 15: Mail and Notifications
www.EBooksWorld.ir
Mail TemplatesMail templates are just like any other template. They can extend other templates, usesections, parse variables, contain conditional or looping directives, and do anythingelse you can do in a normal Blade view.
Take a look at Example 15-5 to see a possible emails.assignment-created templatefor Example 15-3.
Example 15-5. Sample assignment created email template
<!-- resources/views/emails/assignment-created.blade.php --><p>Hey {{ $trainee->name }}!</p>
<p>You have received a new training assignment from <b>{{ $trainer->name }}</b>.Check out your <a href="{{ route('training-dashboard') }}">trainingdashboard</a> now!</p>
In Example 15-3, both $trainer and $trainee are public properties on your maila‐ble, which makes them available to the template.
If you want to explicitly define which variables are passed to the template, you canchain the with() method onto your build() call as in Example 15-6.
Example 15-6. Customizing the template variables
public function build(){ return $this->subject('You have a new assignment!') ->view('emails.assignment') ->with(['assignment' => $this->event->name]);}
HTML Versus Plain-text Emails
So far we’ve used the view() method in our build() call stacks.This expects the template we’re referencing to pass back HTML. Ifyou’d like to pass a plain-text version, the text() method definesyour plain-text view:
public function build(){ return $this->view('emails.reminder') ->text('emails.reminder_plain');}
Mail | 409
www.EBooksWorld.ir
Methods Available in build()Here are a few of the methods available to you to customize your message in thebuild() method of your mailable:
from($address, $name = null)
Sets the “from” name and address—represents the author
subject($subject)
Sets the email subject
attach($file, array $options = [])
Attaches a file; valid options are mime for MIME type and as for display name
attachData($data, $name, array $options = [])
Attaches a file from a raw string; same options as attach()
attachFromStorage($path, $name = null, array $options = [])
Attaches a file stored on any of your filesystem disks
priority($level = n)
Set the email’s priority, where 1 is the highest and 5 is the lowest
Finally, if you want to perform any manual modifications on the underlying Swiftmessage, you can do that using withSwiftMessage(), as shown in Example 15-7.
Example 15-7. Modifying the underlying SwiftMessage object
public function build(){ return $this->subject('Howdy!') ->withSwiftMessage(function ($swift) { $swift->setReplyTo('[email protected]'); }) ->view('emails.howdy');}
Attachments and Inline ImagesExample 15-8 shows three options for how to attach files or raw data to your email.
Example 15-8. Attaching files or data to mailables
// Attach a file using the local filenamepublic function build(){ return $this->subject('Your whitepaper download') ->attach(storage_path('pdfs/whitepaper.pdf'), [
410 | Chapter 15: Mail and Notifications
www.EBooksWorld.ir
'mime' => 'application/pdf', // Optional 'as' => 'whitepaper-barasa.pdf', // Optional ]) ->view('emails.whitepaper');}
// Attach a file passing the raw datapublic function build(){ return $this->subject('Your whitepaper download') ->attachData( file_get_contents(storage_path('pdfs/whitepaper.pdf')), 'whitepaper-barasa.pdf', [ 'mime' => 'application/pdf', // Optional ] ) ->view('emails.whitepaper');}
// Attach a file stored on one of your filesystem disks, like S3public function build(){ return $this->subject('Your whitepaper download') ->view('emails.whitepaper') ->attachFromStorage('/pdfs/whitepaper.pdf');}
And you can see how to embed images directly into your email in Example 15-9.
Example 15-9. Inlining images
<!-- emails/image.blade.php -->Here is an image:
<img src="{{ $message->embed(storage_path('embed.jpg')) }}">
Or, the same image embedding the data:
<img src="{{ $message->embedData( file_get_contents(storage_path('embed.jpg')), 'embed.jpg') }}">
Markdown MailablesMarkdown mailables allow you to write your email content in Markdown, afterwhich it will be converted into full HTML (and plain-text) emails with Laravel’s built-in, responsive HTML templates. You can also tweak these templates to make a cus‐tomized email template that it’s simple for your developers and nondevelopers tocreate content for.
Mail | 411
www.EBooksWorld.ir
First, run the make:mail Artisan command with the markdown flag:
php artisan make:mail AssignmentCreated --markdown=emails.assignment-created
You can see an example of what the mail file it’ll generate looks like in Example 15-10.
Example 15-10. Generated Markdown mailable
class AssignmentCreated extends Mailable{ // ...
public function build() { return $this->markdown('emails.assignment-created'); }}
As you can see, this is almost exactly the same as a normal mailable file in Laravel. The main difference is that you’re calling the markdown() method instead of theview() method. Also note that the template you’re referencing should represent aMarkdown template, not a normal Blade template.
The difference is that, whereas a normal email template may be expected—with theuse of includes and inheritance like any Blade file—to generate a full HTML email,Markdown templates simply pass Markdown content to a few predefined compo‐nents. Framework and package-level components in Laravel are often nested with apackage::component naming style, and as such the main body of your Markdownemail should be passed into a component named mail::message. Take a look atExample 15-11 to see an example of a simple Markdown mail template.
Example 15-11. Simple assignment Markdown email
{{-- resources/views/emails/assignment-created.blade.php --}}@component('mail::message')# Hey {{ $trainee->name }}!
You have received a new training assignment from **{{ $trainer->name }}**
@component('mail::button', ['url' => route('training-dashboard')])View Your Assigment@endcomponent
Thanks,<br>{{ config('app.name') }}@endcomponent
412 | Chapter 15: Mail and Notifications
www.EBooksWorld.ir
As you can see in Example 15-11, there’s a parent mail::message component towhich you pass the body of your email, but you’re also provided with other smallercomponents you can sprinkle into your emails. We used the mail::button compo‐nent here, which takes a body (“View Your Assignment”) but also requires parame‐ters to be passed, as an array to the second parameter of the @component directive.
Markdown componentsThere are three types of components available:
ButtonGenerates a centered button link. The button component requires a url attributeand allows an optional color attribute, to which you can pass primary, success,or error.
PanelRenders the provided text with a slightly lighter background than the rest of themessage.
TableConverts the content passed into it via the Markdown table syntax.
Customizing the Components
These Markdown components are built into the core of the Laravelframework, but if you need to customize how they work, you canpublish their files and edit them:
php artisan vendor:publish --tag=laravel-mail
You can learn more about customizing these files and their themes in the Laraveldocs.
Rendering Mailables to the BrowserWhen you’re developing emails in your applications, it’s helpful to be able to previewhow they’ll render. You can rely on a tool like Mailtrap for this, and that is a usefultool, but it can also be helpful to render the mails directly in your browser and seeyour changes made immediately.
Take a look at Example 15-12 to see a sample route you can add to your application torender a given mailable.
Example 15-12. Rendering a mailable to a route
Route::get('preview-assignment-created-mailable', function () { $trainer = Trainer::first();
Mail | 413
www.EBooksWorld.ir
$trainee = Trainee::first();
return new \App\Mail\AssignmentCreated($trainer, $trainee);});
QueuesSending email is a time-consuming task that can cause applications to slow down, soit’s common to move it to a background queue. It’s so common, in fact, that Laravelhas a set of built-in tools to make it easier to queue your messages without writingqueue jobs for each email:
queue()To queue a mail object instead of sending it immediately, simply pass your maila‐ble object to Mail::queue() instead of Mail::send():
Mail::queue(new AssignmentCreated($trainer, $trainee));
later()Mail::later() works the same as Mail::queue(), but it allows you to add adelay—either in minutes, or at a specific time by passing an instance of DateTimeor Carbon—specifying when the email will be pulled from the queue and sent:
$when = now()->addMinutes(30); Mail::later($when, new AssignmentCreated($trainer, $trainee));
Configuring Queues
Your queues must be configured correctly for these methods towork. Take a look at Chapter 16 to learn more about how queueswork and how to get them running in your application.
For both queue() and later(), if you’d like to specify which queue or queue connec‐tion your mail is added to, use the onConnection() and onQueue() methods on yourmailable object:
$message = (new AssignmentCreated($trainer, $trainee)) ->onConnection('sqs') ->onQueue('emails');
Mail::to($user)->queue($message);
If you’d like to direct that a given mailable should always be queued, you can makethe mailable implement the Illuminate\Contracts\Queue\ShouldQueue interface.
414 | Chapter 15: Mail and Notifications
www.EBooksWorld.ir
Local DevelopmentThis is all well and good for sending mail in your production environments. But howdo you test it all out? There are three primary tools you’ll want to consider: Laravel’slog driver, a Software as a Service (SaaS) app named Mailtrap, and the so-called “uni‐versal to” configuration option.
The log driver
Laravel provides a log driver that logs every email you try to send to your local lara‐vel.log file (which is, by default, in storage/logs).
If you want to use this, edit .env and set MAIL_DRIVER to log. Now open up ortail storage/logs/laravel.log and send an email from your app. You’ll see somethinglike this:
Message-ID: <04ee2e97289c68f0c9191f4b04fc0de1@localhost>Date: Tue, 17 May 2016 02:52:46 +0000Subject: Welcome to our app!From: Matt Stauffer <[email protected]>To: [email protected]: 1.0Content-Type: text/html; charset=utf-8Content-Transfer-Encoding: quoted-printable
Welcome to our app!
In Laravel 5.7+, you can optionally specify that logged mail gets sent to a different logchannel than the rest of your logs. Either modify config/mail.php or set theMAIL_LOG_CHANNEL variable in your .env file to the name of any existing log channel.
Mailtrap.ioMailtrap is a service for capturing and inspecting emails in development environ‐ments. You send your mail to the Mailtrap servers via SMTP, but instead of sendingthose emails off to the intended recipients, Mailtrap captures them all and providesyou with a web-based email client for inspecting them, regardless of which emailaddress is in the to field.
To set up Mailtrap, sign up for a free account and visit the base dashboard for yourdemo. Copy your username and password from the SMTP column.
Then edit your app’s .env file and set the following values in the mail section:
MAIL_DRIVER=smtpMAIL_HOST=mailtrap.ioMAIL_PORT=2525MAIL_USERNAME=your_username_from_mailtrap_hereMAIL_PASSWORD=your_password_from_mailtrap_hereMAIL_ENCRYPTION=null
Mail | 415
www.EBooksWorld.ir
Now, any email you send from your app will show up in your Mailtrap inbox.
Universal to
If you’d like to inspect the emails in your preferred client, you can override the tofield on each message with the “universal to” configuration setting. To set this up,add a to key to your config/mail.php file that looks something like this:
'to' => [ 'address' => '[email protected]', 'name' => 'Matt Testing My Application'],
Note that you’ll need to actually set up a real email driver with something like Mail‐gun or Sendmail in order to use this.
NotificationsMost of the mail that’s sent from web apps really has the purpose of notifying usersthat a particular action has happened or needs to happen. As users’ communicationpreferences grow more and more diverse, we gather ever more—and more disparate—packages to communicate via Slack, SMS, and other means.
Laravel 5.3 introduced a new concept in Laravel called, fittingly, notifications. Just likea mailable, a notification is a PHP class that represents a single communication thatyou might want to send to your users. For now, let’s imagine we’re notifying users ofour physical training app that they have a new workout available.
Each class represents all of the information necessary to send notifications to yourusers using one or many notification channels. A single notification could send anemail, send an SMS via Nexmo, send a WebSockets ping, add a record to a database,send a message to a Slack channel, and much more.
So, let’s create our notification:
php artisan make:notification WorkoutAvailable
Example 15-13 shows what that gives us.
Example 15-13. An autogenerated notification class
<?php
namespace App\Notifications;
use Illuminate\Bus\Queueable;use Illuminate\Notifications\Notification;use Illuminate\Contracts\Queue\ShouldQueue;use Illuminate\Notifications\Messages\MailMessage;
416 | Chapter 15: Mail and Notifications
www.EBooksWorld.ir
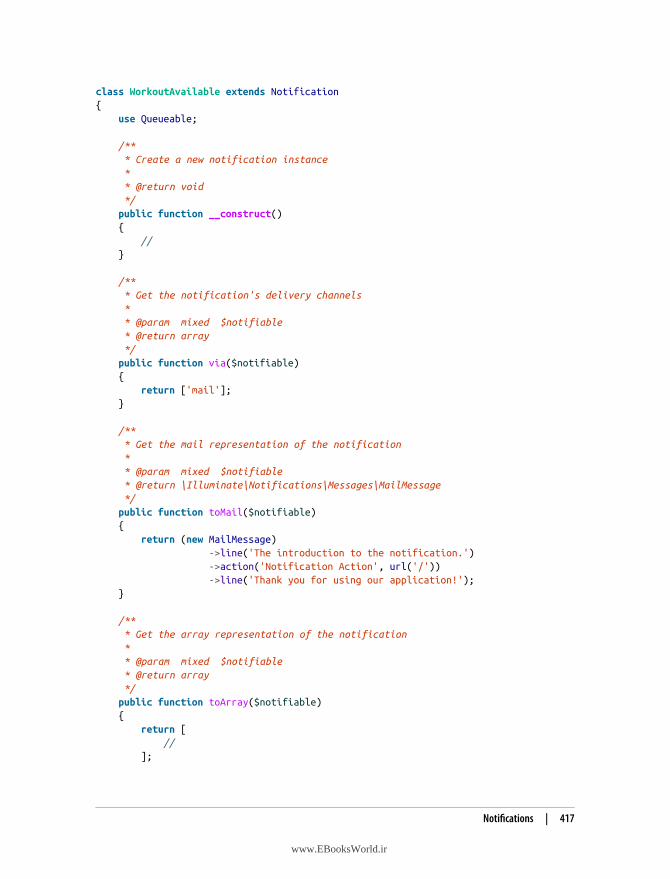
class WorkoutAvailable extends Notification{ use Queueable;
/** * Create a new notification instance * * @return void */ public function __construct() { // }
/** * Get the notification's delivery channels * * @param mixed $notifiable * @return array */ public function via($notifiable) { return ['mail']; }
/** * Get the mail representation of the notification * * @param mixed $notifiable * @return \Illuminate\Notifications\Messages\MailMessage */ public function toMail($notifiable) { return (new MailMessage) ->line('The introduction to the notification.') ->action('Notification Action', url('/')) ->line('Thank you for using our application!'); }
/** * Get the array representation of the notification * * @param mixed $notifiable * @return array */ public function toArray($notifiable) { return [ // ];
Notifications | 417
www.EBooksWorld.ir
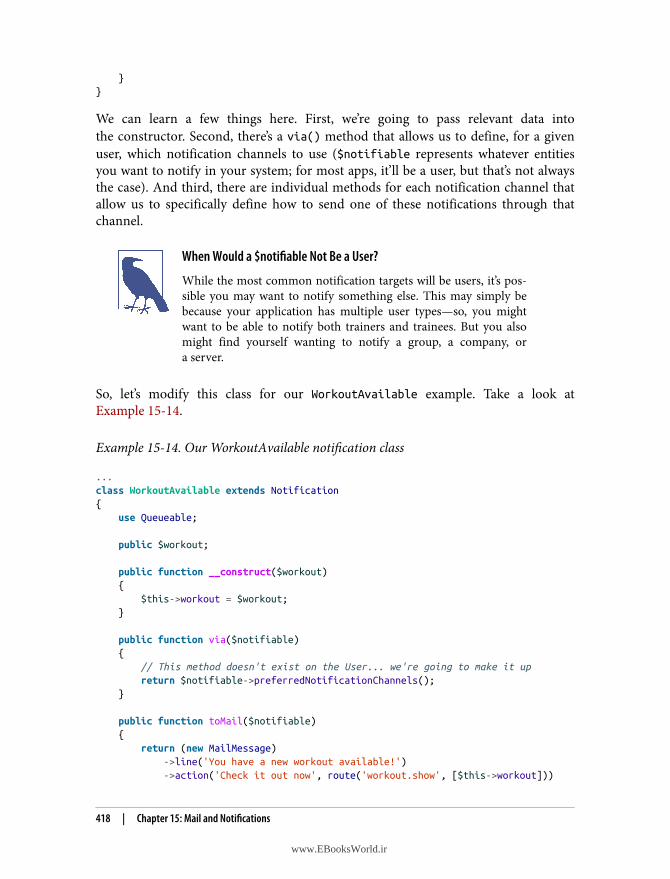
}}
We can learn a few things here. First, we’re going to pass relevant data intothe constructor. Second, there’s a via() method that allows us to define, for a givenuser, which notification channels to use ($notifiable represents whatever entitiesyou want to notify in your system; for most apps, it’ll be a user, but that’s not alwaysthe case). And third, there are individual methods for each notification channel thatallow us to specifically define how to send one of these notifications through thatchannel.
When Would a $notifiable Not Be a User?
While the most common notification targets will be users, it’s pos‐sible you may want to notify something else. This may simply bebecause your application has multiple user types—so, you mightwant to be able to notify both trainers and trainees. But you alsomight find yourself wanting to notify a group, a company, ora server.
So, let’s modify this class for our WorkoutAvailable example. Take a look atExample 15-14.
Example 15-14. Our WorkoutAvailable notification class
...class WorkoutAvailable extends Notification{ use Queueable;
public $workout;
public function __construct($workout) { $this->workout = $workout; }
public function via($notifiable) { // This method doesn't exist on the User... we're going to make it up return $notifiable->preferredNotificationChannels(); }
public function toMail($notifiable) { return (new MailMessage) ->line('You have a new workout available!') ->action('Check it out now', route('workout.show', [$this->workout]))
418 | Chapter 15: Mail and Notifications
www.EBooksWorld.ir
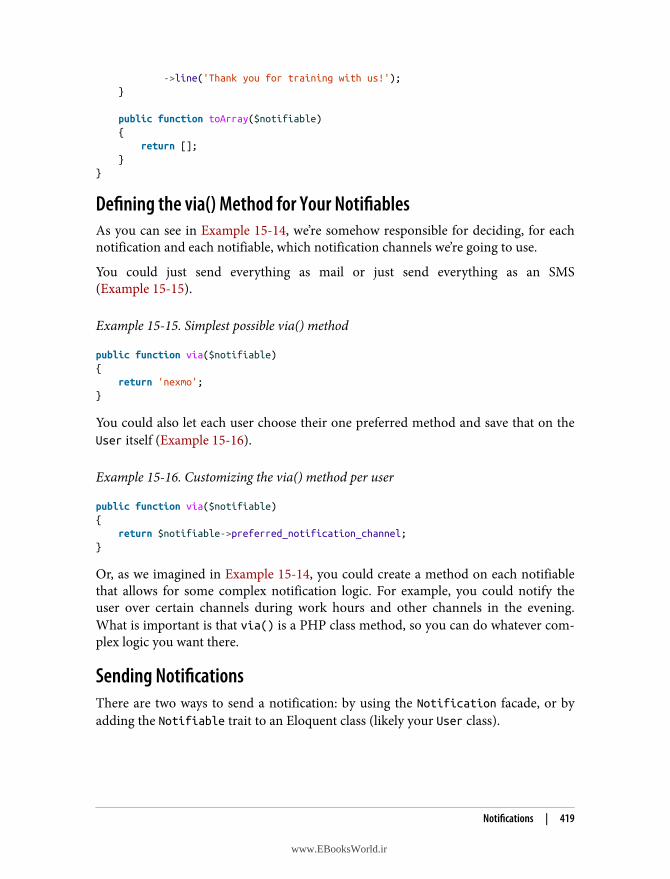
->line('Thank you for training with us!'); }
public function toArray($notifiable) { return []; }}
Defining the via() Method for Your NotifiablesAs you can see in Example 15-14, we’re somehow responsible for deciding, for eachnotification and each notifiable, which notification channels we’re going to use.
You could just send everything as mail or just send everything as an SMS(Example 15-15).
Example 15-15. Simplest possible via() method
public function via($notifiable){ return 'nexmo';}
You could also let each user choose their one preferred method and save that on theUser itself (Example 15-16).
Example 15-16. Customizing the via() method per user
public function via($notifiable){ return $notifiable->preferred_notification_channel;}
Or, as we imagined in Example 15-14, you could create a method on each notifiablethat allows for some complex notification logic. For example, you could notify theuser over certain channels during work hours and other channels in the evening.What is important is that via() is a PHP class method, so you can do whatever com‐plex logic you want there.
Sending NotificationsThere are two ways to send a notification: by using the Notification facade, or byadding the Notifiable trait to an Eloquent class (likely your User class).
Notifications | 419
www.EBooksWorld.ir
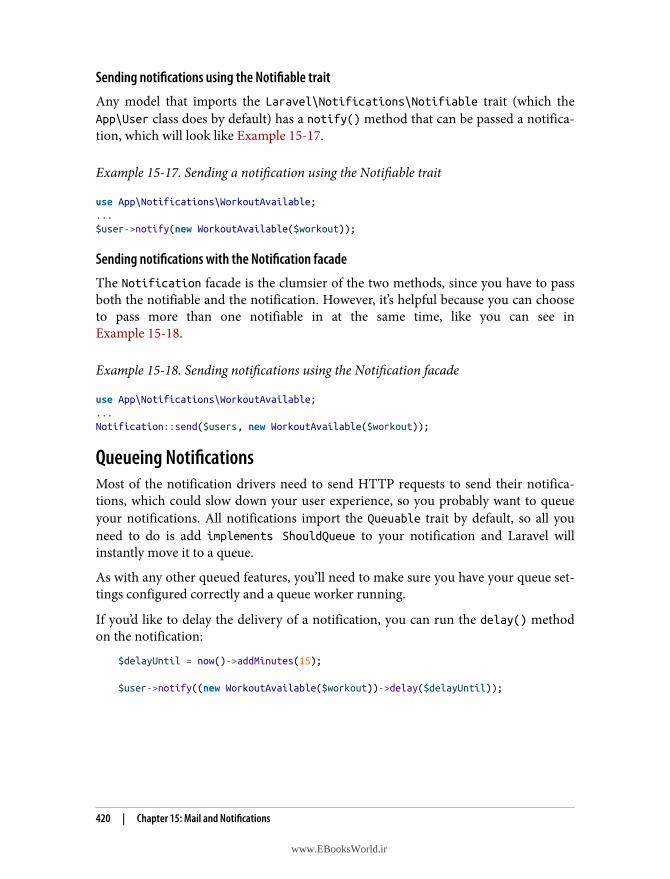
Sending notifications using the Notifiable trait
Any model that imports the Laravel\Notifications\Notifiable trait (which theApp\User class does by default) has a notify() method that can be passed a notifica‐tion, which will look like Example 15-17.
Example 15-17. Sending a notification using the Notifiable trait
use App\Notifications\WorkoutAvailable;...$user->notify(new WorkoutAvailable($workout));
Sending notifications with the Notification facade
The Notification facade is the clumsier of the two methods, since you have to passboth the notifiable and the notification. However, it’s helpful because you can chooseto pass more than one notifiable in at the same time, like you can see inExample 15-18.
Example 15-18. Sending notifications using the Notification facade
use App\Notifications\WorkoutAvailable;...Notification::send($users, new WorkoutAvailable($workout));
Queueing NotificationsMost of the notification drivers need to send HTTP requests to send their notifica‐tions, which could slow down your user experience, so you probably want to queueyour notifications. All notifications import the Queuable trait by default, so all youneed to do is add implements ShouldQueue to your notification and Laravel willinstantly move it to a queue.
As with any other queued features, you’ll need to make sure you have your queue set‐tings configured correctly and a queue worker running.
If you’d like to delay the delivery of a notification, you can run the delay() methodon the notification:
$delayUntil = now()->addMinutes(15);
$user->notify((new WorkoutAvailable($workout))->delay($delayUntil));
420 | Chapter 15: Mail and Notifications
www.EBooksWorld.ir
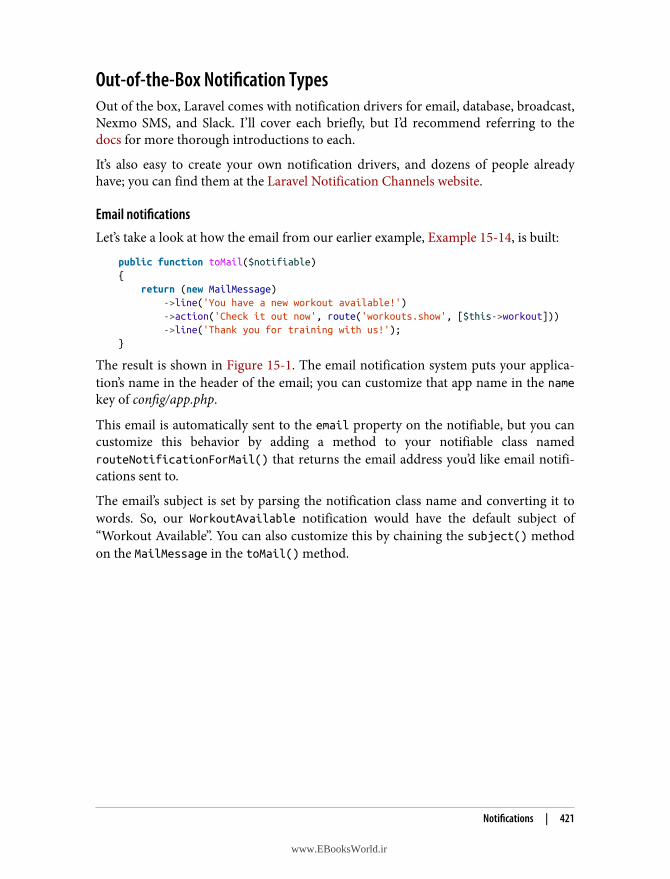
Out-of-the-Box Notification TypesOut of the box, Laravel comes with notification drivers for email, database, broadcast,Nexmo SMS, and Slack. I’ll cover each briefly, but I’d recommend referring to thedocs for more thorough introductions to each.
It’s also easy to create your own notification drivers, and dozens of people alreadyhave; you can find them at the Laravel Notification Channels website.
Email notificationsLet’s take a look at how the email from our earlier example, Example 15-14, is built:
public function toMail($notifiable){ return (new MailMessage) ->line('You have a new workout available!') ->action('Check it out now', route('workouts.show', [$this->workout])) ->line('Thank you for training with us!');}
The result is shown in Figure 15-1. The email notification system puts your applica‐tion’s name in the header of the email; you can customize that app name in the namekey of config/app.php.
This email is automatically sent to the email property on the notifiable, but you cancustomize this behavior by adding a method to your notifiable class namedrouteNotificationForMail() that returns the email address you’d like email notifi‐cations sent to.
The email’s subject is set by parsing the notification class name and converting it towords. So, our WorkoutAvailable notification would have the default subject of“Workout Available”. You can also customize this by chaining the subject() methodon the MailMessage in the toMail() method.
Notifications | 421
www.EBooksWorld.ir
Figure 15-1. An email sent with the default notification template
If you want to modify the templates, publish them and edit to your heart’s content:
php artisan vendor:publish --tag=laravel-notifications
Markdown mail notifications. If you like working with Markdown emails (see “Mark‐down Mailables” on page 411), you can also use the same markdown() method in yournotifications, as shown in Example 15-19:
Example 15-19. Using the markdown() method with notifications
public function toMail($notifiable){ return (new MailMessage) ->subject('Workout Available') ->markdown('emails.workout-available', ['workout' => $this->workout]);}
You can also change the style of the default template to be an “error” message, whichuses a bit of different language and changes the primary button color to red. Just adda call to the error() method to your MailMessage call chain in the toMail() method.
422 | Chapter 15: Mail and Notifications
www.EBooksWorld.ir
Database notifications
You can send notifications to a database table using the database notification chan‐nel. First, create your table with php artisan notifications:table. Next, create atoDatabase() method on your notification and return an array of data there. Thisdata will be encoded as JSON and stored in the database table’s data column.
The Notifiable trait adds a notifications relationship to any model it’s importedin, allowing you to easily access records in the notifications table. So if you’re usingdatabase notifications, you could so something like Example 15-20:
Example 15-20. Iterating over a user’s database notifications
User::first()->notifications->each(function ($notification) { // Do something});
The database notification channel also has the concept of whether or not a notifica‐tion is “read.” You can scope to only the “unread” notifications as shown inExample 15-21:
Example 15-21. Iterating over a user’s unread database notifications
User::first()->unreadNotifications->each(function ($notification) { // Do something});
And you can mark one or all notifications as read, as Example 15-22 demonstrates:
Example 15-22. Marking database notifications as read
// IndividualUser::first()->unreadNotifications->each(function ($notification) { if ($condition) { $notification->markAsRead(); }});
// AllUser::first()->unreadNotifications->markAsRead();
Broadcast notifications
The broadcast channel sends notifications out using Laravel’s event broadcastingfeatures, which are powered by WebSockets (we’ll learn more about these in “Broad‐casting Events over WebSockets, and Laravel Echo” on page 442).
Notifications | 423
www.EBooksWorld.ir
Create a toBroadcast() method on your notification and return array of data, and ifyour app is correctly configured for event broadcasting, that data will be broadcast ona private channel named notifiable.id. The id will be the ID of the notifiable, andnotifiable will be the notifiable’s fully qualified class name, with the slashes replacedby periods—for example, the private channel for the App\User with the ID of 1 will beApp.User.1.
SMS notificationsSMS notifications are sent via Nexmo, so if you want to send SMS notifications, signup for a Nexmo account and follow the instructions in the docs. Like with the otherchannels, you’ll be setting up a toNexmo() method and customizing the SMS messagethere.
SMS Notification Package Extracted in 5.8+
In Laravel 5.8+, the SMS notification channel is a first-partypackage. If you want to use Nexmo SMS notifications, simply
require this package with Composer:composer require laravel/nexmo-notification-channel
Slack notifications
The slack notification channel allows you to customize the appearance of your noti‐fications and even attach files to your notifications. Like with the other channels,you’ll set up a toSlack() method and customize the message there.
Slack notification package extracted in 5.8+
In Laravel 5.8+, the Slack notification channel is a first-partypackage. If you want to use Slack notifications, simply require
this package with Composer.composer require laravel/slack-notification-channel
Other notificationsLooking to send your notifications through other channels than those that come outof the box? There’s a robust community effort to provide an incredible variety of noti‐fication channels; check out what’s on offer at the Laravel Notifications Channelswebsite.
TestingLet’s take a look at how to test mail and notifications.
424 | Chapter 15: Mail and Notifications
www.EBooksWorld.ir
MailThere are two options for testing mail in Laravel. If you’re using the traditional mailsyntax (which is, by the way, not the preferred method in Laravel 5.3 and later), I’drecommend using a tool called MailThief, which Adam Wathan wrote for Tighten.Once you bring MailThief into your application with Composer, you can useMailThief::hijack() in your tests to make MailThief capture any calls to the Mailfacade or any mailer classes.
MailThief then makes it possible to make assertions against the senders, recipients,CC and BCC values, and even content and attachments of your mail. Take a look atthe GitHub repo to learn more, or bring it into your app:
composer require tightenco/mailthief --dev
If you’re using mailables, there’s a simple syntax for writing assertions against yoursent mail (Example 15-23).
Example 15-23. Asserting against mailables
public function test_signup_triggers_welcome_email(){ Mail::fake();
Mail::assertSent(WelcomeEmail::class, function ($mail) { return $mail->subject == 'Welcome!'; });
// You can also use assertSentTo() to explicitly test the recipients, and // you can use assertNotSent() to test that a specific mail wasn't sent.}
NotificationsLaravel provides a built-in set of assertions for testing your notifications.Example 15-24 demonstrates.
Example 15-24. Asserting notifications were sent
public function test_new_signups_triggers_admin_notification(){ Notification::fake();
Notification::assertSentTo($user, NewUsersSignedup::class, function ($notification, $channels) { return $notification->user->email == '[email protected]' && $channels == ['mail']; });
Testing | 425
www.EBooksWorld.ir
// Assert that the email was sent to a given user Notification::assertSentTo( [$user], NewUsersSignedup::class );
// You can also use assertNotSentTo() Notification::assertNotSentTo( [$userDidntSignUp], NewUsersSignedup::class );}
TL;DRLaravel’s mail and notification features provide simple, consistent interfaces to a vari‐ety of messaging systems. Laravel’s mail system uses “mailables,” PHP classes that rep‐resent emails, to provide a consistent syntax to different mail drivers. The notificationsystem makes it easy to build a single notification that can be delivered in many dif‐ferent media—from emails to SMS messages to physical postcards.
426 | Chapter 15: Mail and Notifications
www.EBooksWorld.ir
CHAPTER 16
Queues, Jobs, Events, Broadcasting,and the Scheduler
So far we’ve covered some of the most common structures that power web applica‐tions: databases, mail, filesystems, and more. All of these are common across a major‐ity of applications and frameworks.
Laravel also provides facilities for some less common architecture patterns and appli‐cation structures. In this chapter we’ll cover Laravel’s tools for implementing queues,queued jobs, events, and WebSocket event publishing. We’ll also cover Laravel’sscheduler, which makes manually edited cron schedules a thing of the past.
QueuesTo understand what a queue is, just think about the idea of “queueing up” in a line atthe bank. Even if there are multiple lines—queues—only one person is being servedat a time from each queue, and each person will eventually reach the front and beserved. In some banks, it’s a strict first-in-first-out sort of policy, but in other banks,there’s not an exact guarantee that someone won’t cut ahead of you in line at somepoint. Essentially, someone can get added to the queue, be removed from the queueprematurely, or be successfully “processed” and then removed. Someone might evenhit the front of the queue, not be able to be served correctly, return to the queue for atime, and then be processed again.
Queues in programming are very similar. Your application adds a “job” to a queue,which is a chunk of code that tells the application how to perform a particular behav‐ior. Then some other separate application structure, usually a “queue worker,” takesthe responsibility for pulling jobs off of the queue one at a time and performing the
427
www.EBooksWorld.ir
appropriate behavior. Queue workers can delete the jobs, return them to the queuewith a delay, or mark them as successfully processed.
Laravel makes it easy to serve your queues using Redis, beanstalkd, Amazon’s SimpleQueue Service (SQS), or a database table. You can also choose the sync driver to havethe jobs run right in your application without actually being queued, or the nulldriver for jobs to just be discarded; these two are usually used in local development ortesting environments.
Why Queues?Queues make it easy to remove a costly or slow process from any synchronous call.The most common example is sending mail—doing so can be slow, and you don’twant your users to have to wait for mail to send in response to their actions. Instead,you can trigger a “send mail” queued job and let the users get on with their day. Andsometimes you may not be worried about saving your users time, but you might havea process like a cron job or a webhook that has a lot of work to get through; ratherthan letting it all run at once (and potentially time out), you may choose to queue itsindividual pieces and let the queue worker process them one at a time.
Additionally, if you have some heavy processing that’s more than your server canhandle, you can spin up more than one queue worker to work through your queuefaster than your normal application server could on its own.
Basic Queue ConfigurationLike many other Laravel features that abstract multiple providers, queues have theirown dedicated config file (config/queue.php) that allows you to set up multiple driversand define which will be the default. This is also where you’ll store your SQS, Redis,or beanstalkd authentication information.
Simple Redis Queues on Laravel Forge
Laravel Forge is a hosting management service provided by TaylorOtwell, the creator of Laravel, that makes serving queues withRedis a breeze. Every server you create has Redis configured auto‐matically, so if you visit any site’s Forge console, you can just go tothe Queue tab and hit Start Worker and you’re ready to use Redisas your queue driver; you can leave all the default settings, and noother work is necessary.
Queued JobsRemember our bank analogy? Each person in the bank’s queue (line) is, in program‐ming terms, a job. Queued jobs can, depending on the environment, take many
428 | Chapter 16: Queues, Jobs, Events, Broadcasting, and the Scheduler
www.EBooksWorld.ir
shapes, like arrays of data or simple strings. In Laravel, they will each be a collectionof information containing the job name, the data payload, the number of attemptsthat have been made so far to process this job, and some other simple metadata.
But you don’t need to worry about any of that in your interactions with Laravel. Lara‐vel provides a structure called a Job, which is intended to encapsulate a single task—abehavior that your application can be commanded to do—and allow it to be added toand pulled from a queue. There are also simple helpers to make it easy to queue Arti‐san commands and mail.
Let’s start with an example where, every time a user changes their plan with your SaaSapp, you want to rerun some calculations about your overall profit.
Creating a jobAs always, there’s an Artisan command for that:
php artisan make:job CrunchReports
Take a look at Example 16-1 to see what you’ll get.
Example 16-1. The default template for jobs in Laravel
<?php
namespace App\Jobs;
use Illuminate\Bus\Queueable;use Illuminate\Queue\SerializesModels;use Illuminate\Queue\InteractsWithQueue;use Illuminate\Contracts\Queue\ShouldQueue;use Illuminate\Foundation\Bus\Dispatchable;
class CrunchReports implements ShouldQueue{ use Dispatchable, InteractsWithQueue, Queueable, SerializesModels;
/** * Create a new job instance * * @return void */ public function __construct() { // }
/** * Execute the job * * @return void
Queues | 429
www.EBooksWorld.ir
*/ public function handle() { // }}
As you can see, this template imports the Dispatchable, Queueable, InteractsWithQueue, and SerializesModels traits, and implements the ShouldQueue interface.Prior to Laravel 5.3, some of this functionality came in through the parent App\Jobsclass.
We also get two methods from this template: the constructor, which you’ll want to useto attach data to the job, and the handle() method, which is where the job’s logicshould reside (and is also the method signature you’ll use to inject dependencies).
The traits and interface provide the class with the ability to be added to, and interactwith, the queue. Dispatchable gives it methods to dispatch itself; Queueable allowsyou to specify how Laravel should push this job to the queue; InteractsWithQueueallows each job, while being handled, to control its relationship with the queue,including deleting or requeueing itself; and SerializesModels gives the job the abil‐ity to serialize and deserialize Eloquent models.
Serializing Models
The SerializesModels trait gives jobs the ability to serialize (con‐vert to a flatter format that can be stored in a data store like a data‐base or queue system) injected models so that your job’s handle()method will have access to them. However, because it’s too difficultto reliably serialize an entire Eloquent object, the trait ensures thatjust the primary keys of any attached Eloquent objects are serial‐ized when the job is pushed onto the queue. When the job is dese‐rialized and handled, the trait pulls those Eloquent models freshfrom the database by their primary key. This means that when yourjob runs, it will be pulling a fresh instance of this model, not what‐ever state it was in when you queued the job.
Let’s fill out the methods for our sample class, as in Example 16-2.
Example 16-2. An example job
...use App\ReportGenerator;
class CrunchReports implements ShouldQueue{ use Dispatchable, InteractsWithQueue, Queueable, SerializesModels;
430 | Chapter 16: Queues, Jobs, Events, Broadcasting, and the Scheduler
www.EBooksWorld.ir
protected $user;
public function __construct($user) { $this->user = $user; }
public function handle(ReportGenerator $generator) { $generator->generateReportsForUser($this->user);
Log::info('Generated reports.'); }}
We’re expecting the User instance to be injected when we create the job, and thenwhen it’s handled we’re typehinting a ReportGenerator class (which we presumablywrote) and a Logger (which Laravel provides). Laravel will read both typehints andinject those dependencies automatically.
Pushing a job onto a queueThere are multiple methods by which you can dispatch a job, including some meth‐ods available to every controller and a global dispatch() helper. But since Laravel5.5, we’ve had a simpler and preferred method: calling the dispatch() method on thejob itself. So, if you’re running Laravel 5.5+, just ignore the other options, as we’ll dofor the rest of this chapter.
In order to dispatch your job, you can just create an instance of it and then call itsdispatch() method, passing any necessary data directly into that method. Take alook at Example 16-3 for an example.
Example 16-3. Dispatching jobs
$user = auth()->user();$daysToCrunch = 7;\App\Jobs\CrunchReports::dispatch($user, $daysToCrunch);
There are three settings you can control in order to customize exactly how you dis‐patch a job: the connection, the queue, and the delay.
Customizing the connection. If you ever have multiple queue connections in place atonce, you can customize the connection by chaining onConnection() after thedispatch() method:
DoThingJob::dispatch()->onConnection('redis');
Queues | 431
www.EBooksWorld.ir
Customizing the queue. Within queue servers, you can specify which named queueyou’re pushing a job onto. For example, you may differentiate your queues based ontheir importance, naming one low and one high.
You can customize which queue you’re pushing a job onto with the onQueue()method:
DoThingJob::dispatch()->onQueue('high');
Customizing the delay. You can customize the amount of time your queue workersshould wait before processing a job with the delay() method, which accepts either aninteger representing the number of seconds to delay a job or a DateTime/Carboninstance:
// Delays five minutes before releasing the job to queue workers$delay = now()->addMinutes(5);DoThingJob::dispatch()->delay($delay);
Note that Amazon SQS doesn’t allow delays longer than 15 minutes.
Running a Queue WorkerSo what is a queue worker, and how does it work? In Laravel, it’s an Artisan com‐mand that stays running forever (until it’s stopped manually) and takes the responsi‐bility for pulling down jobs from your queue and running them:
php artisan queue:work
This command starts a daemon “listening” to your queue; every time there are jobson the queue, it will pull down the first job, handle it, delete it, and move on to thenext. If at any point there are no jobs, it “sleeps” for a configurable amount of timebefore checking again to see if there are any more jobs.
You can define how many seconds a job should be able to run before the queue lis‐tener stops it (--timeout), how many seconds the listener should “sleep” when thereare no jobs left (--sleep), how many tries each job should be allowed before beingdeleted (--tries), which connection the worker should listen to (the first parameterafter queue:work), and which queues it should listen to (--queue=):
php artisan queue:work redis --timeout=60 --sleep=15 --tries=3 --queue=high,medium
You can also process just a single job with php artisan queue:work.
432 | Chapter 16: Queues, Jobs, Events, Broadcasting, and the Scheduler
www.EBooksWorld.ir
Handling ErrorsSo, what happens when something goes wrong with your job when it’s in the middleof processing?
Exceptions in handlingIf an exception is thrown, the queue listener will release that job back onto the queue.The job will be rereleased to be processed again and again until it is able to finish suc‐cessfully or until it has been attempted the maximum number of times allowed byyour queue listener.
Limiting the number of tries
The maximum number of tries is defined by the --tries switch passed to thequeue:listen or queue:work Artisan command.
The Danger of Infinite Retries
If you don’t set --tries, or if you set it to 0, the queue listener willallow infinite retries. That means if there are any circumstances inwhich a job can just never be completed—for example, if it relies ona tweet that has since been deleted—your app will slowly crawl to ahalt as it retries forever.The documentation and Laravel Forge both show 3 as the recom‐mended starting point for the maximum number of retries. So, incase of confusion, start there and adjust:
php artisan queue:work --tries=3
If at any point you’d like to check how many times a job has been attempted already,use the attempts() method on the job itself, as in Example 16-4.
Example 16-4. Checking how many times a job has already been tried
public function handle(){ ... if ($this->attempts() > 3) { // }}
Queues | 433
www.EBooksWorld.ir
Handling failed jobsOnce a job has exceeded its allowable number of retries, it’s considered a “failed” job.Before you do anything else—even if all you want to do is limit the number of times ajob can be tried—you’ll need to create the “failed jobs” database table.
There’s an Artisan command to create the migration (and you’ll then want tomigrate):
php artisan queue:failed-tablephp artisan migrate
Any job that has surpassed its maximum number of allowed attempts will be dumpedthere. But there are quite a few things you can do with your failed jobs.
First, you can define a failed() method on the job itself, which will run when thatjob fails (see Example 16-5).
Example 16-5. Defining a method to run when a job fails
...class CrunchReports implements ShouldQueue{ ...
public function failed() { // Do whatever you want, like notify an admin }}
Next, you can register a global handler for failed jobs. Somewhere in the application’sbootstrap—if you don’t know where to put it, just put it in the boot() method ofAppServiceProvider—place the code in Example 16-6 to define a listener.
Example 16-6. Registering a global handler to handle failed jobs
// Some service provideruse Illuminate\Support\Facades\Queue;use Illuminate\Queue\Events\JobFailed;... public function boot() { Queue::failing(function (JobFailed $event) { // $event->connectionName // $event->job // $event->exception }); }
434 | Chapter 16: Queues, Jobs, Events, Broadcasting, and the Scheduler
www.EBooksWorld.ir
There is also a suite of Artisan tools for interacting with the failed jobs table.
queue:failed shows you a list of your failed jobs:
php artisan queue:failed
The list will look something like this:
+----+------------+---------+----------------------+---------------------+| ID | Connection | Queue | Class | Failed At |+----+------------+---------+----------------------+---------------------+| 9 | database | default | App\Jobs\AlwaysFails | 2018-08-26 03:42:55 |+----+------------+---------+----------------------+---------------------+
From there, you can grab the ID of any individual failed job and retry it withqueue:retry:
php artisan queue:retry 9
If you’d rather retry all of the jobs, pass all instead of an ID:
php artisan queue:retry all
You can delete an individual failed job with queue:forget:
php artisan queue:forget 5
And you can delete all of your failed jobs with queue:flush:
php artisan queue:flush
Controlling the QueueSometimes, from within the handling of a job, you’ll want to add conditions that willpotentially either release the job to be restarted later or delete the job forever.
To release a job back into the queue, use the release() method, as in Example 16-7.
Example 16-7. Releasing a job back onto the queue
public function handle(){ ... if (condition) { $this->release($numberOfSecondsToDelayBeforeRetrying); }}
If you want to delete a job during its handling, you can just return at any point, asseen in Example 16-8; that’s the signal to the queue that the job was handled appro‐priately and should not be returned to the queue.
Queues | 435
www.EBooksWorld.ir
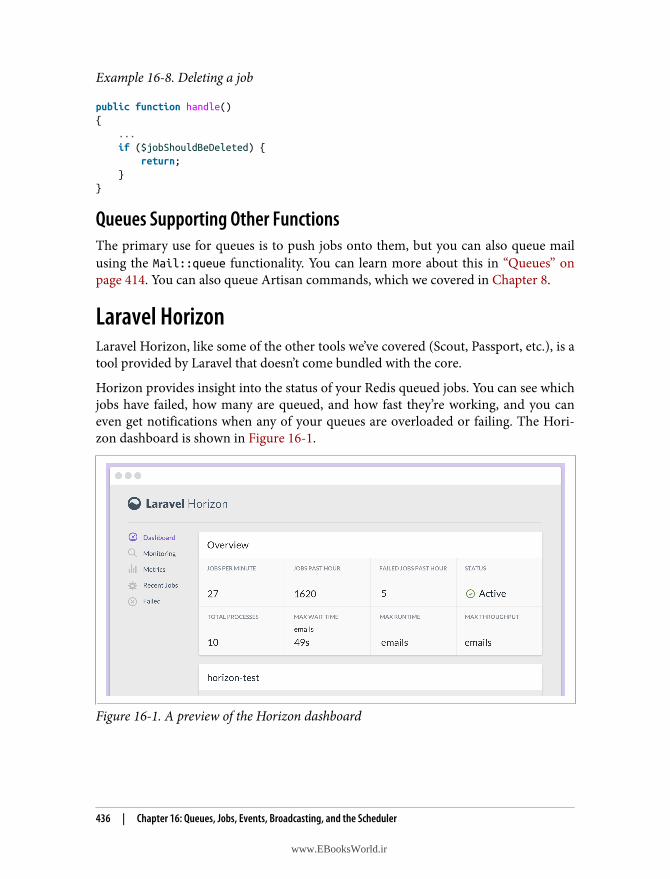
Example 16-8. Deleting a job
public function handle(){ ... if ($jobShouldBeDeleted) { return; }}
Queues Supporting Other FunctionsThe primary use for queues is to push jobs onto them, but you can also queue mailusing the Mail::queue functionality. You can learn more about this in “Queues” onpage 414. You can also queue Artisan commands, which we covered in Chapter 8.
Laravel HorizonLaravel Horizon, like some of the other tools we’ve covered (Scout, Passport, etc.), is atool provided by Laravel that doesn’t come bundled with the core.
Horizon provides insight into the status of your Redis queued jobs. You can see whichjobs have failed, how many are queued, and how fast they’re working, and you caneven get notifications when any of your queues are overloaded or failing. The Hori‐zon dashboard is shown in Figure 16-1.
Figure 16-1. A preview of the Horizon dashboard
436 | Chapter 16: Queues, Jobs, Events, Broadcasting, and the Scheduler
www.EBooksWorld.ir
Installing and running Horizon is pretty straightforward and the documentation isthorough, so if you’re interested, take a look at the Horizon docs to learn how toinstall, configure, and deploy it.
Please note that you will need to have Laravel 5.5+ and PHP 7.1+ in order to runHorizon.
EventsWith jobs, the calling code informs the application that it should do something:CrunchReports, or NotifyAdminOfNewSignup.
With an event, the calling code instead informs the application that something hap‐pened: UserSubscribed, or UserSignedUp, or ContactWasAdded. Events are notifica‐tions that something has taken place.
Some of these events may be “fired” by the framework itself. For example, Eloquentmodels fire events when they are saved, or created, or deleted. But some events canalso be manually triggered by the application’s code.
An event being fired doesn’t do anything on its own. However, you can bind eventlisteners, whose sole purpose is to listen for the broadcasting of specific events and toact in response. Any event can have anywhere from zero to many event listeners.
Laravel’s events are structured like the observer, or “pub/sub,” pattern. Many eventsare fired out into the application; some may never be listened for, and others mayhave a dozen listeners. The events don’t know or care.
Firing an EventThere are three ways to fire an event. You can use the Event facade, inject theDispatcher, or use the event() global helper, as illustrated in Example 16-9.
Example 16-9. Three ways to fire an event
Event::fire(new UserSubscribed($user, $plan));// or$dispatcher = app(Illuminate\Contracts\Events\Dispatcher::class);$dispatcher->fire(new UserSubscribed($user, $plan));// orevent(new UserSubscribed($user, $plan));
If in doubt, I’d recommend using the global helper function.
To create an event to fire, use the make:event Artisan command:
php artisan make:event UserSubscribed
Events | 437
www.EBooksWorld.ir
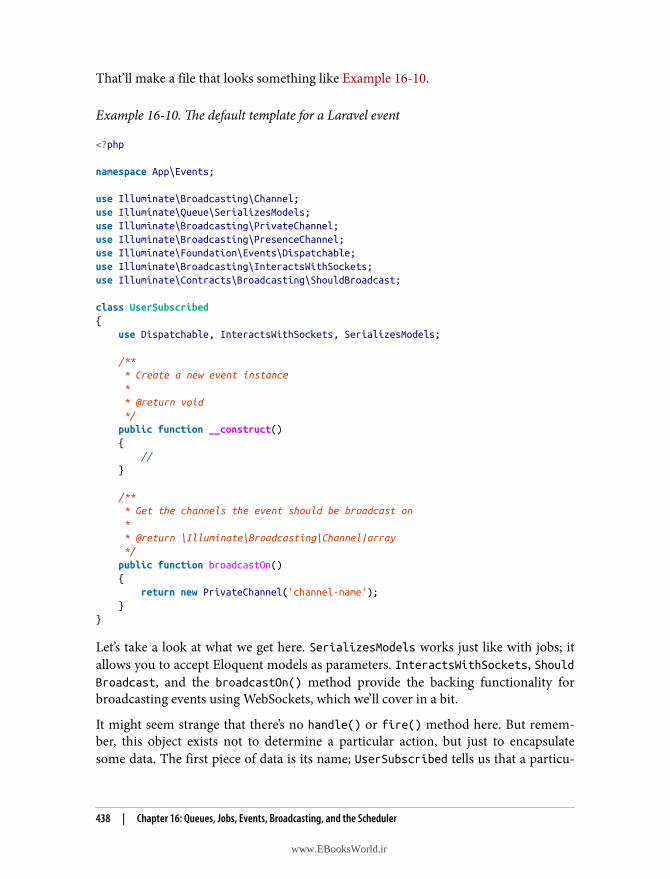
That’ll make a file that looks something like Example 16-10.
Example 16-10. The default template for a Laravel event
<?php
namespace App\Events;
use Illuminate\Broadcasting\Channel;use Illuminate\Queue\SerializesModels;use Illuminate\Broadcasting\PrivateChannel;use Illuminate\Broadcasting\PresenceChannel;use Illuminate\Foundation\Events\Dispatchable;use Illuminate\Broadcasting\InteractsWithSockets;use Illuminate\Contracts\Broadcasting\ShouldBroadcast;
class UserSubscribed{ use Dispatchable, InteractsWithSockets, SerializesModels;
/** * Create a new event instance * * @return void */ public function __construct() { // }
/** * Get the channels the event should be broadcast on * * @return \Illuminate\Broadcasting\Channel|array */ public function broadcastOn() { return new PrivateChannel('channel-name'); }}
Let’s take a look at what we get here. SerializesModels works just like with jobs; itallows you to accept Eloquent models as parameters. InteractsWithSockets, ShouldBroadcast, and the broadcastOn() method provide the backing functionality forbroadcasting events using WebSockets, which we’ll cover in a bit.
It might seem strange that there’s no handle() or fire() method here. But remem‐ber, this object exists not to determine a particular action, but just to encapsulatesome data. The first piece of data is its name; UserSubscribed tells us that a particu‐
438 | Chapter 16: Queues, Jobs, Events, Broadcasting, and the Scheduler
www.EBooksWorld.ir
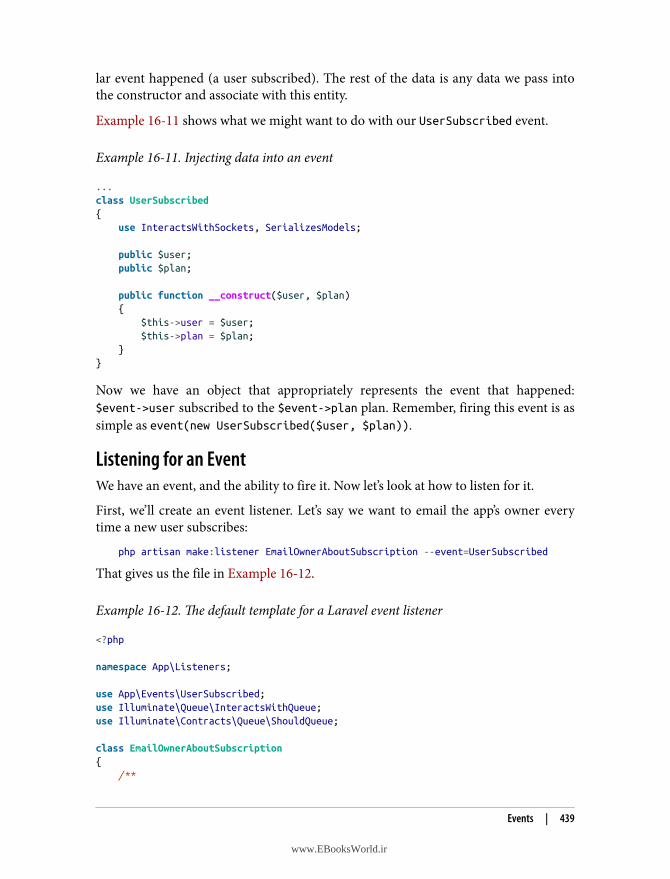
lar event happened (a user subscribed). The rest of the data is any data we pass intothe constructor and associate with this entity.
Example 16-11 shows what we might want to do with our UserSubscribed event.
Example 16-11. Injecting data into an event
...class UserSubscribed{ use InteractsWithSockets, SerializesModels;
public $user; public $plan;
public function __construct($user, $plan) { $this->user = $user; $this->plan = $plan; }}
Now we have an object that appropriately represents the event that happened:$event->user subscribed to the $event->plan plan. Remember, firing this event is assimple as event(new UserSubscribed($user, $plan)).
Listening for an EventWe have an event, and the ability to fire it. Now let’s look at how to listen for it.
First, we’ll create an event listener. Let’s say we want to email the app’s owner everytime a new user subscribes:
php artisan make:listener EmailOwnerAboutSubscription --event=UserSubscribed
That gives us the file in Example 16-12.
Example 16-12. The default template for a Laravel event listener
<?php
namespace App\Listeners;
use App\Events\UserSubscribed;use Illuminate\Queue\InteractsWithQueue;use Illuminate\Contracts\Queue\ShouldQueue;
class EmailOwnerAboutSubscription{ /**
Events | 439
www.EBooksWorld.ir
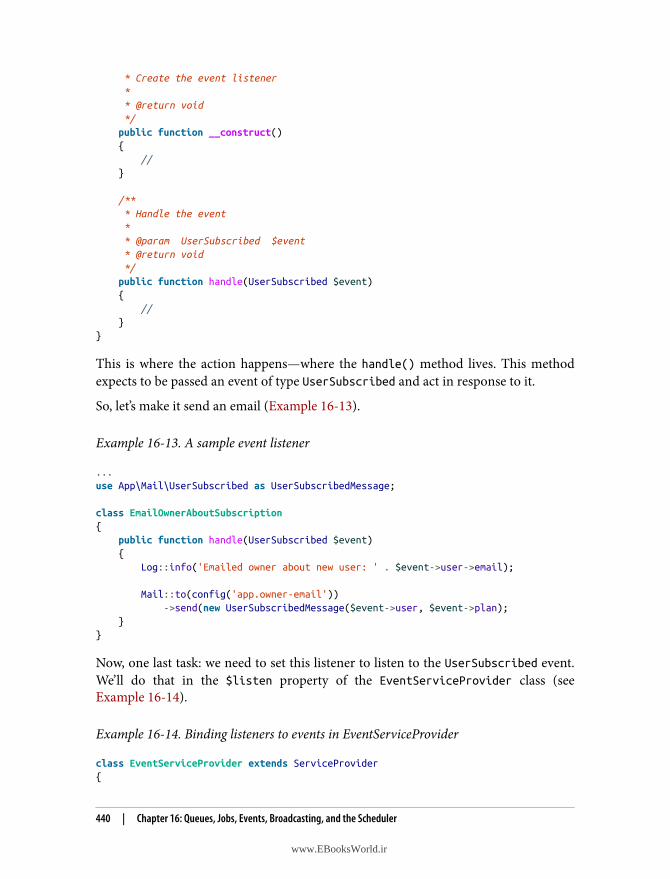
* Create the event listener * * @return void */ public function __construct() { // }
/** * Handle the event * * @param UserSubscribed $event * @return void */ public function handle(UserSubscribed $event) { // }}
This is where the action happens—where the handle() method lives. This methodexpects to be passed an event of type UserSubscribed and act in response to it.
So, let’s make it send an email (Example 16-13).
Example 16-13. A sample event listener
...use App\Mail\UserSubscribed as UserSubscribedMessage;
class EmailOwnerAboutSubscription{ public function handle(UserSubscribed $event) { Log::info('Emailed owner about new user: ' . $event->user->email);
Mail::to(config('app.owner-email')) ->send(new UserSubscribedMessage($event->user, $event->plan); }}
Now, one last task: we need to set this listener to listen to the UserSubscribed event.We’ll do that in the $listen property of the EventServiceProvider class (seeExample 16-14).
Example 16-14. Binding listeners to events in EventServiceProvider
class EventServiceProvider extends ServiceProvider{
440 | Chapter 16: Queues, Jobs, Events, Broadcasting, and the Scheduler
www.EBooksWorld.ir
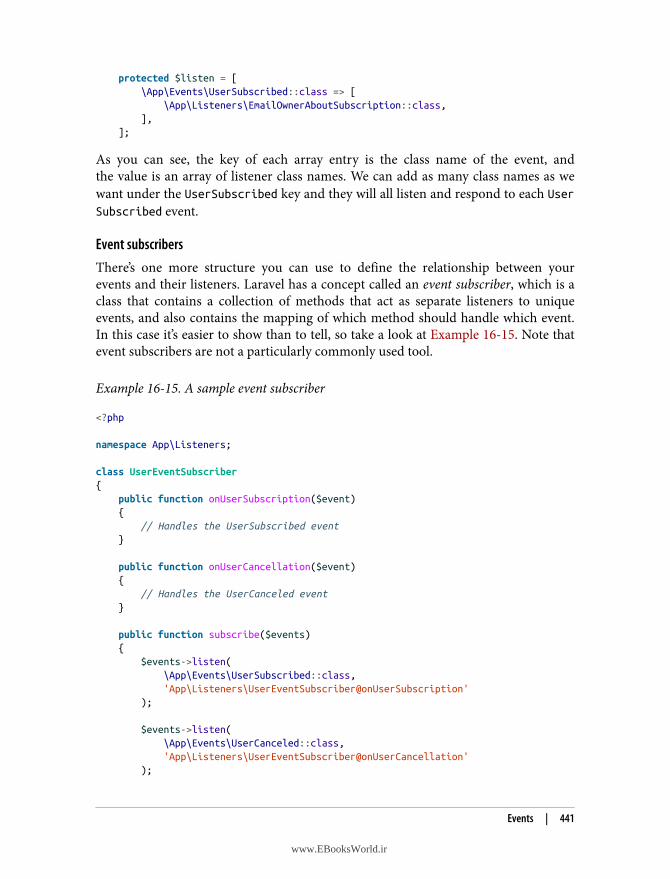
protected $listen = [ \App\Events\UserSubscribed::class => [ \App\Listeners\EmailOwnerAboutSubscription::class, ], ];
As you can see, the key of each array entry is the class name of the event, andthe value is an array of listener class names. We can add as many class names as wewant under the UserSubscribed key and they will all listen and respond to each UserSubscribed event.
Event subscribersThere’s one more structure you can use to define the relationship between yourevents and their listeners. Laravel has a concept called an event subscriber, which is aclass that contains a collection of methods that act as separate listeners to uniqueevents, and also contains the mapping of which method should handle which event.In this case it’s easier to show than to tell, so take a look at Example 16-15. Note thatevent subscribers are not a particularly commonly used tool.
Example 16-15. A sample event subscriber
<?php
namespace App\Listeners;
class UserEventSubscriber{ public function onUserSubscription($event) { // Handles the UserSubscribed event }
public function onUserCancellation($event) { // Handles the UserCanceled event }
public function subscribe($events) { $events->listen( \App\Events\UserSubscribed::class, 'App\Listeners\UserEventSubscriber@onUserSubscription' );
$events->listen( \App\Events\UserCanceled::class, 'App\Listeners\UserEventSubscriber@onUserCancellation' );
Events | 441
www.EBooksWorld.ir
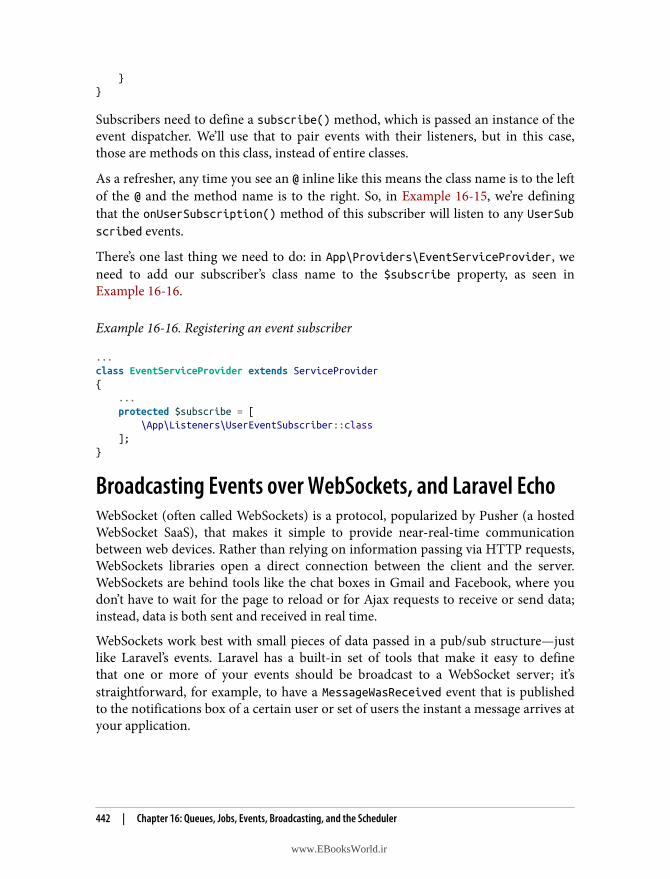
}}
Subscribers need to define a subscribe() method, which is passed an instance of theevent dispatcher. We’ll use that to pair events with their listeners, but in this case,those are methods on this class, instead of entire classes.
As a refresher, any time you see an @ inline like this means the class name is to the leftof the @ and the method name is to the right. So, in Example 16-15, we’re definingthat the onUserSubscription() method of this subscriber will listen to any UserSubscribed events.
There’s one last thing we need to do: in App\Providers\EventServiceProvider, weneed to add our subscriber’s class name to the $subscribe property, as seen inExample 16-16.
Example 16-16. Registering an event subscriber
...class EventServiceProvider extends ServiceProvider{ ... protected $subscribe = [ \App\Listeners\UserEventSubscriber::class ];}
Broadcasting Events over WebSockets, and Laravel EchoWebSocket (often called WebSockets) is a protocol, popularized by Pusher (a hostedWebSocket SaaS), that makes it simple to provide near-real-time communicationbetween web devices. Rather than relying on information passing via HTTP requests,WebSockets libraries open a direct connection between the client and the server.WebSockets are behind tools like the chat boxes in Gmail and Facebook, where youdon’t have to wait for the page to reload or for Ajax requests to receive or send data;instead, data is both sent and received in real time.
WebSockets work best with small pieces of data passed in a pub/sub structure—justlike Laravel’s events. Laravel has a built-in set of tools that make it easy to definethat one or more of your events should be broadcast to a WebSocket server; it’sstraightforward, for example, to have a MessageWasReceived event that is publishedto the notifications box of a certain user or set of users the instant a message arrives atyour application.
442 | Chapter 16: Queues, Jobs, Events, Broadcasting, and the Scheduler
www.EBooksWorld.ir

Laravel EchoLaravel also has a more powerful tool designed for more complex event broadcasting.If you need presence notification, or want to keep your rich frontend data model insync with your Laravel app, check out Laravel Echo, which we’ll cover in “AdvancedBroadcasting Tools” on page 448. Much of what comprises Echo is built into the Lara‐vel core, but some of it requires pulling in the external JavaScript Echo library, whichwe cover in “Laravel Echo (the JavaScript Side)” on page 452.
Configuration and SetupTake a look at config/broadcasting.php to find the configuration settings for yourevent broadcasting. Laravel supports three drivers for broadcasting: Pusher, a paidSaaS offering; Redis, for locally running WebSocket servers; and log, for local devel‐opment and debugging.
Queue Listeners
In order for event broadcasting to move quickly, Laravel pushes theinstruction to broadcast them onto a queue. That means you’llneed to have a queue worker running (or use the sync queue driverfor local development). See “Running a Queue Worker” on page432 to learn how to run a queue worker.Laravel suggests a default delay of three seconds before the queueworker looks for new jobs. However, with event broadcasting, youmay notice some events take a second or two to broadcast. Tospeed this up, update your queue settings to only wait one secondbefore looking for new jobs.
Broadcasting an EventTo broadcast an event, you need to mark that event as a broadcast event by having itimplement the Illuminate\Contracts\Broadcasting\ShouldBroadcast interface. This interface requires you to add the broadcastOn() method, which will return anarray of either strings or Channel objects, each representing a WebSocket channel.
Broadcasting Events over WebSockets, and Laravel Echo | 443
www.EBooksWorld.ir
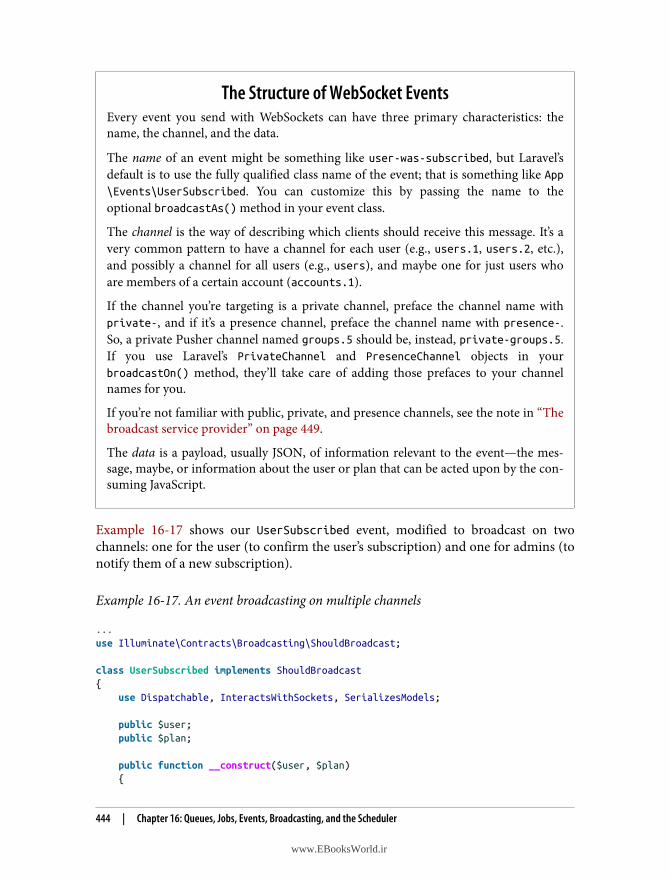
The Structure of WebSocket EventsEvery event you send with WebSockets can have three primary characteristics: thename, the channel, and the data.
The name of an event might be something like user-was-subscribed, but Laravel’sdefault is to use the fully qualified class name of the event; that is something like App\Events\UserSubscribed. You can customize this by passing the name to theoptional broadcastAs() method in your event class.
The channel is the way of describing which clients should receive this message. It’s avery common pattern to have a channel for each user (e.g., users.1, users.2, etc.),and possibly a channel for all users (e.g., users), and maybe one for just users whoare members of a certain account (accounts.1).
If the channel you’re targeting is a private channel, preface the channel name withprivate-, and if it’s a presence channel, preface the channel name with presence-.So, a private Pusher channel named groups.5 should be, instead, private-groups.5.If you use Laravel’s PrivateChannel and PresenceChannel objects in yourbroadcastOn() method, they’ll take care of adding those prefaces to your channelnames for you.
If you’re not familiar with public, private, and presence channels, see the note in “Thebroadcast service provider” on page 449.
The data is a payload, usually JSON, of information relevant to the event—the mes‐sage, maybe, or information about the user or plan that can be acted upon by the con‐suming JavaScript.
Example 16-17 shows our UserSubscribed event, modified to broadcast on twochannels: one for the user (to confirm the user’s subscription) and one for admins (tonotify them of a new subscription).
Example 16-17. An event broadcasting on multiple channels
...use Illuminate\Contracts\Broadcasting\ShouldBroadcast;
class UserSubscribed implements ShouldBroadcast{ use Dispatchable, InteractsWithSockets, SerializesModels;
public $user; public $plan;
public function __construct($user, $plan) {
444 | Chapter 16: Queues, Jobs, Events, Broadcasting, and the Scheduler
www.EBooksWorld.ir
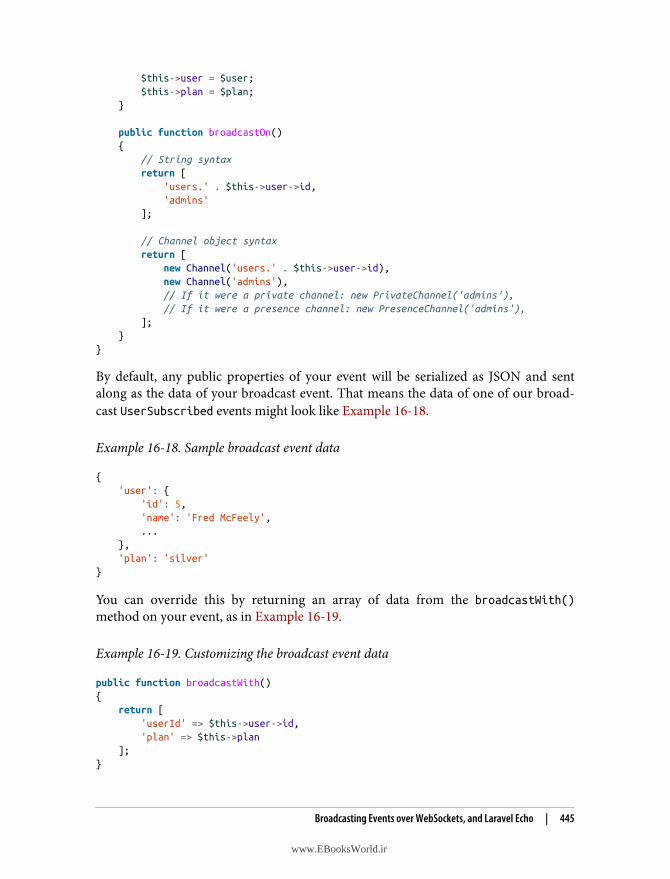
$this->user = $user; $this->plan = $plan; }
public function broadcastOn() { // String syntax return [ 'users.' . $this->user->id, 'admins' ];
// Channel object syntax return [ new Channel('users.' . $this->user->id), new Channel('admins'), // If it were a private channel: new PrivateChannel('admins'), // If it were a presence channel: new PresenceChannel('admins'), ]; }}
By default, any public properties of your event will be serialized as JSON and sentalong as the data of your broadcast event. That means the data of one of our broad‐cast UserSubscribed events might look like Example 16-18.
Example 16-18. Sample broadcast event data
{ 'user': { 'id': 5, 'name': 'Fred McFeely', ... }, 'plan': 'silver'}
You can override this by returning an array of data from the broadcastWith()method on your event, as in Example 16-19.
Example 16-19. Customizing the broadcast event data
public function broadcastWith(){ return [ 'userId' => $this->user->id, 'plan' => $this->plan ];}
Broadcasting Events over WebSockets, and Laravel Echo | 445
www.EBooksWorld.ir
You can customize which queue your event is pushed onto by setting the $broadcastQueue property on the event class:
public $broadcastQueue = 'websockets-for-faster-processing';
You may choose to do this so you can keep other queue items from slowing downyour event broadcast; real-time WebSockets aren’t much fun if a long-running jobthat’s higher in the queue keeps the events from going out in time.
You can also force a given event to skip the queue entirely (using the “sync” queuedriver, which is processed by the current PHP thread), by having it implement theShouldBroadcastNow contract (Example 16-20).
Example 16-20. Forcing an event to skip the broadcast queue
use Illuminate\Contracts\Broadcasting\ShouldBroadcastNow;
class UserSubscribed implements ShouldBroadcastNow{ //}
And, finally, you can choose to customize whether a given event should be broadcastat all by giving it a broadcastWhen() method as in Example 16-21:
Example 16-21. Conditionally determining whether an event should be broadcast
public function broadcastWhen(){ // Notify me only when users sign up from the White House return str_contains($this->user->email, 'whitehouse.gov');}
Receiving the MessageIf you choose to host your own Redis WebSockets server, the Laravel docs have agreat walkthrough on how to set that up using socket.io and ioredis.
As of this book’s publication, the most common solution Laravel developers use isPusher. Plans over a certain size cost money, but there’s a generous free plan. Pushermakes it incredibly easy to set up a simple WebSocket server, and its JavaScript SDKhandles all of the authentication and channel management with almost no work onyour part. SDKs are available for iOS, Android, and many more platforms, languages,and frameworks.
There’s also a new tool announced just before the publication of this book called Lar‐avel WebSockets that lets you host your own Laravel-based, Pusher-compatible Web‐
446 | Chapter 16: Queues, Jobs, Events, Broadcasting, and the Scheduler
www.EBooksWorld.ir
Sockets server. You can install the package into your current Laravel app (the sameapp you’re broadcasting from) or into a separate microservice.
If you choose to work with a Laravel WebSockets server, you’ll follow all of the direc‐tions in this book as if you were working with Pusher, but your configuration settingswill be a bit different.
Simple WebSockets listening with PusherIt’s helpful to understand how to listen to Laravel’s broadcast events without Echoeven if you choose to use Echo in the end, but because much of the code here is notnecessary if you use Echo, I’d recommend reading this section, and then reading“Laravel Echo (the JavaScript Side)” on page 452 before you start implementing anyof it; you can decide which way you prefer and then write your code from there.
To get started, pull in Pusher’s library, get an API key from your Pusher account, andsubscribe to any events on any channels with code like that in Example 16-22.
Example 16-22. Basic usage of Pusher
...<script src="https://js.pusher.com/4.3/pusher.min.js"></script><script>// Enable Pusher logging - don't include this in productionPusher.logToConsole = true;
// Globally, perhaps; just a sample of how to get data invar App = { 'userId': {{ auth()->id() }}, 'pusherKey': '{{ config('broadcasting.connections.pusher.key') }}'};
// Locallyvar pusher = new Pusher(App.pusherKey, { cluster: '{{ config('broadcasting.connections.pusher.options.cluster') }}', encrypted: {{ config('broadcasting.connections.pusher.options.encrypted') }}});
var pusherChannel = pusher.subscribe('users.' + App.userId);
pusherChannel.bind('App\\Events\\UserSubscribed', (data) => { console.log(data.user, data.plan);});</script>
Broadcasting Events over WebSockets, and Laravel Echo | 447
www.EBooksWorld.ir
Escaping Backslashes in JavaScript
Since \ is a control character in JavaScript, you need to write \\ torepresent a backslash in your strings, which is why there are twobackslashes between each namespace segment in Example 16-22.
To publish to Pusher from Laravel, get your Pusher key, secret, cluster, and app IDfrom your Pusher account dashboard, and then set them in your .env file under thekeys PUSHER_KEY, PUSHER_SECRET, PUSHER_APP_CLUSTER, and PUSHER_APP_ID.
If you serve your app, visit a page with the JavaScript from Example 16-22 embeddedin it in one window, push a broadcast event in another window or from your termi‐nal, have a queue listener running or are using the sync driver, and all of yourauthentication information is set up correctly, you should see event logs popping upin your JavaScript window’s console in near real time.
With this power, it’s now easy for you to keep your users up to date with what’s hap‐pening with their data any time they’re in your app. You can notify users of theactions of other users, of long-running processes that have just finished, or of yourapplication’s responses to external actions like incoming emails or webhooks. Thepossibilities are endless.
Requirements
If you want to broadcast with Pusher or Redis, you’ll need to bringin these dependencies:
• Pusher: pusher/pusher-php-server "~3.0"• Redis: predis/predis
Advanced Broadcasting ToolsLaravel has a few more tools to make it possible to perform more complex interac‐tions in event broadcasting. These tools, a combination of framework features and aJavaScript library, are called Laravel Echo.
These framework features work best when you use Laravel Echo in your JavaScriptfrontend (which we’ll cover in “Laravel Echo (the JavaScript Side)” on page 452), butyou can still enjoy some of the benefits of Echo without using the JavaScript compo‐nents. Echo will work with both Pusher and Redis, but I’m going to use Pusher forany examples.
448 | Chapter 16: Queues, Jobs, Events, Broadcasting, and the Scheduler
www.EBooksWorld.ir
Excluding the current user from broadcast eventsEvery connection to Pusher is assigned a unique “socket ID” identifying that socketconnection. And it’s easy to define that any given socket (user) should be excludedfrom receiving a specified broadcast event.
This feature makes it possible to define that certain events should not be broadcast tothe user who fired them. Let’s say every user in a team gets notified when other userscreate a task; would you want to be notified of a task you just created? No, and that’swhy we have the toOthers() method.
To implement this, there are two steps to follow. First, you need to set up your Java‐Script to send a certain POST to /broadcasting/socket when your WebSocket con‐nection is initialized. This attaches your socket_id to your Laravel session. Echodoes this for you, but you can also do it manually—take a look at the Echo source tosee how it works.
Next, you’ll want to update every request that your JavaScript makes to have an X-Socket-ID header that contains that socket_id. Example 16-23 shows how to do thatwith Axios or in jQuery. Note that your event must use the Illuminate\Broadcasting\InteractsWithSockets trait in order to call the toOthers() method.
Example 16-23. Sending the socket ID along with each Ajax request with Axios or injQuery
// Run this right after you initialize Echo// With Axioswindow.axios.defaults.headers.common['X-Socket-Id'] = Echo.socketId();
// With jQuery$.ajaxSetup({ headers: { 'X-Socket-Id': Echo.socketId() }});
Once you’ve handled this, you can exclude any event from being broadcast to the userwho triggered it by using the broadcast() global helper instead of the event() globalhelper and then chaining toOthers() after it:
broadcast(new UserSubscribed($user, $plan))->toOthers();
The broadcast service providerAll of the other features that Echo provides require your JavaScript to authenticatewith the server. Take a look at App\Providers\BroadcastServiceProvider, whereyou’ll define how to authorize users’ access to your private and presence channels.
Broadcasting Events over WebSockets, and Laravel Echo | 449
www.EBooksWorld.ir
The two primary actions you can take are to define the middleware that will be usedon your broadcasting auth routes, and to define the authorization settings foryour channels.
If you’re going to use these features, you’ll need to uncomment the App\Providers\BroadcastServiceProvider::class line in config/app.php.
And if you’ll be using these features without Laravel Echo, you’ll either need to man‐ually handle sending CSRF tokens along with your authentication requests, orexclude /broadcasting/auth and /broadcasting/socket from CSRF protection byadding them to the $except property of the VerifyCsrfToken middleware.
Binding authorization definitions for WebSocket channels. Private and presence Web‐Socket channels need to be able to ping your application to learn whether the currentuser is authorized for that channel. You’ll use the Broadcast::channel() method todefine the rules for this authorization in your routes/channels.php file.
Public, Private, and Presence Channels
There are three types of channels in WebSockets: public, private,and presence.Public channels can be subscribed to by any user, authenticatedor not.Private channels require the end user’s JavaScript to authenticateagainst the application to prove that the user is both authenticatedand authorized to join this channel.Presence channels are a type of private channel, but instead ofallowing for message passing, they simply keep track of which usersjoin and leave the channel, and make this information available tothe application’s frontend.
Broadcast::channel() takes two parameters: first, a string representing the chan‐nel(s) you want it to match, and second, a closure that defines how to authorize usersfor any channel matching that string. The closure will be passed an Eloquent modelof the current user as its first parameter, and any matched variableNameHere seg‐ments as additional parameters. For example, a channel authorization definition witha string of teams.teamId, when matched against the channel teams.5, will pass itsclosure $user as the first parameter and 5 as the second parameter.
If you’re defining the rules for a private channel, your Broadcast::channel() closurewill need to return a Boolean: is this user authorized for this channel or not? If you’redefining the rules for a presence channel, your closure should return an array of datayou want available to the presence channel for any users that you want to show up inthe channel. Example 16-24 illustrates defining rules for both kinds of channel.
450 | Chapter 16: Queues, Jobs, Events, Broadcasting, and the Scheduler
www.EBooksWorld.ir
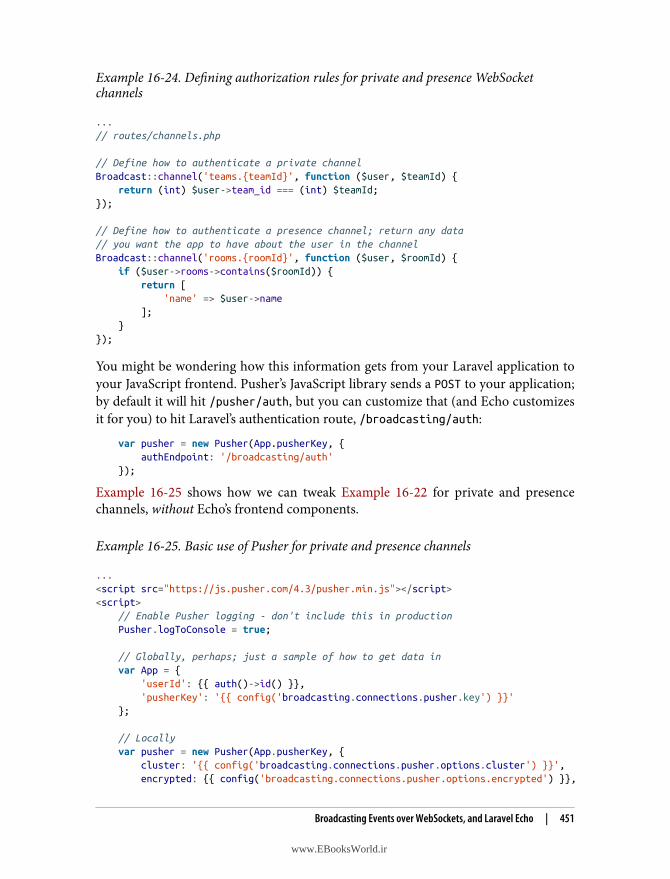
Example 16-24. Defining authorization rules for private and presence WebSocketchannels
...// routes/channels.php
// Define how to authenticate a private channelBroadcast::channel('teams.{teamId}', function ($user, $teamId) { return (int) $user->team_id === (int) $teamId;});
// Define how to authenticate a presence channel; return any data// you want the app to have about the user in the channelBroadcast::channel('rooms.{roomId}', function ($user, $roomId) { if ($user->rooms->contains($roomId)) { return [ 'name' => $user->name ]; }});
You might be wondering how this information gets from your Laravel application toyour JavaScript frontend. Pusher’s JavaScript library sends a POST to your application;by default it will hit /pusher/auth, but you can customize that (and Echo customizesit for you) to hit Laravel’s authentication route, /broadcasting/auth:
var pusher = new Pusher(App.pusherKey, { authEndpoint: '/broadcasting/auth'});
Example 16-25 shows how we can tweak Example 16-22 for private and presencechannels, without Echo’s frontend components.
Example 16-25. Basic use of Pusher for private and presence channels
...<script src="https://js.pusher.com/4.3/pusher.min.js"></script><script> // Enable Pusher logging - don't include this in production Pusher.logToConsole = true;
// Globally, perhaps; just a sample of how to get data in var App = { 'userId': {{ auth()->id() }}, 'pusherKey': '{{ config('broadcasting.connections.pusher.key') }}' };
// Locally var pusher = new Pusher(App.pusherKey, { cluster: '{{ config('broadcasting.connections.pusher.options.cluster') }}', encrypted: {{ config('broadcasting.connections.pusher.options.encrypted') }},
Broadcasting Events over WebSockets, and Laravel Echo | 451
www.EBooksWorld.ir
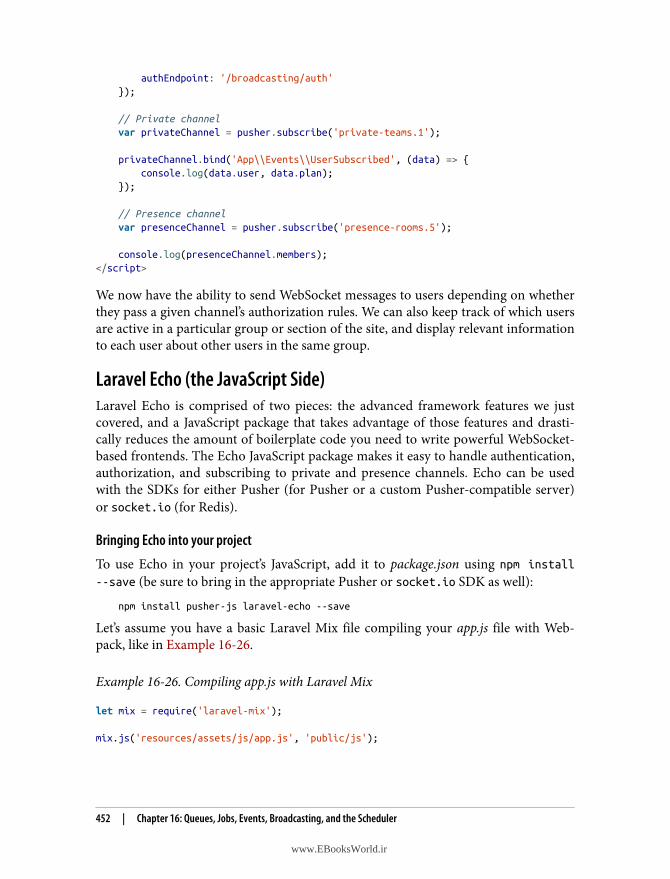
authEndpoint: '/broadcasting/auth' });
// Private channel var privateChannel = pusher.subscribe('private-teams.1');
privateChannel.bind('App\\Events\\UserSubscribed', (data) => { console.log(data.user, data.plan); });
// Presence channel var presenceChannel = pusher.subscribe('presence-rooms.5');
console.log(presenceChannel.members);</script>
We now have the ability to send WebSocket messages to users depending on whetherthey pass a given channel’s authorization rules. We can also keep track of which usersare active in a particular group or section of the site, and display relevant informationto each user about other users in the same group.
Laravel Echo (the JavaScript Side)Laravel Echo is comprised of two pieces: the advanced framework features we justcovered, and a JavaScript package that takes advantage of those features and drasti‐cally reduces the amount of boilerplate code you need to write powerful WebSocket-based frontends. The Echo JavaScript package makes it easy to handle authentication,authorization, and subscribing to private and presence channels. Echo can be usedwith the SDKs for either Pusher (for Pusher or a custom Pusher-compatible server)or socket.io (for Redis).
Bringing Echo into your project
To use Echo in your project’s JavaScript, add it to package.json using npm install--save (be sure to bring in the appropriate Pusher or socket.io SDK as well):
npm install pusher-js laravel-echo --save
Let’s assume you have a basic Laravel Mix file compiling your app.js file with Web‐pack, like in Example 16-26.
Example 16-26. Compiling app.js with Laravel Mix
let mix = require('laravel-mix');
mix.js('resources/assets/js/app.js', 'public/js');
452 | Chapter 16: Queues, Jobs, Events, Broadcasting, and the Scheduler
www.EBooksWorld.ir
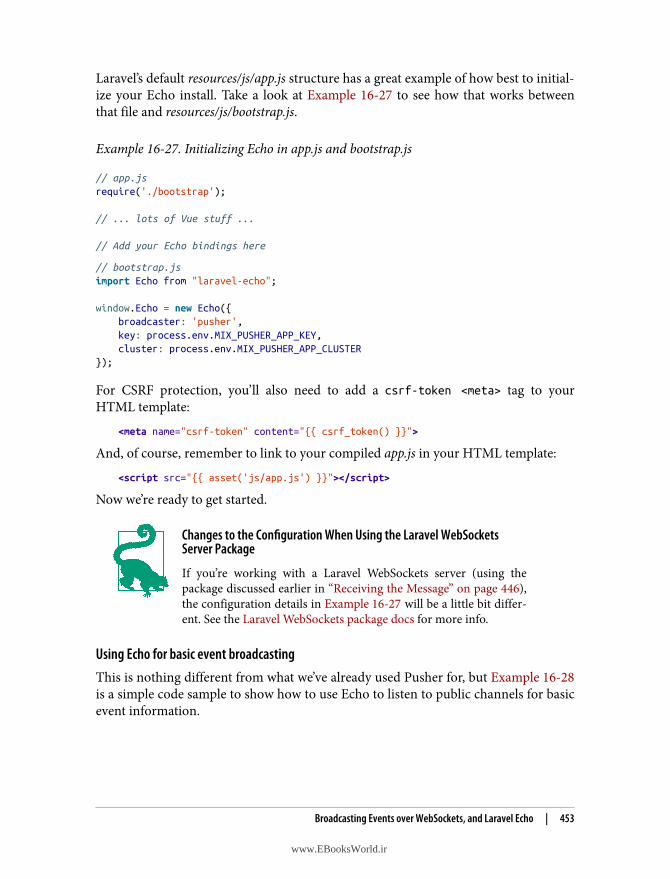
Laravel’s default resources/js/app.js structure has a great example of how best to initial‐ize your Echo install. Take a look at Example 16-27 to see how that works betweenthat file and resources/js/bootstrap.js.
Example 16-27. Initializing Echo in app.js and bootstrap.js
// app.jsrequire('./bootstrap');
// ... lots of Vue stuff ...
// Add your Echo bindings here
// bootstrap.jsimport Echo from "laravel-echo";
window.Echo = new Echo({ broadcaster: 'pusher', key: process.env.MIX_PUSHER_APP_KEY, cluster: process.env.MIX_PUSHER_APP_CLUSTER});
For CSRF protection, you’ll also need to add a csrf-token <meta> tag to yourHTML template:
<meta name="csrf-token" content="{{ csrf_token() }}">
And, of course, remember to link to your compiled app.js in your HTML template:
<script src="{{ asset('js/app.js') }}"></script>
Now we’re ready to get started.
Changes to the Configuration When Using the Laravel WebSocketsServer Package
If you’re working with a Laravel WebSockets server (using thepackage discussed earlier in “Receiving the Message” on page 446),the configuration details in Example 16-27 will be a little bit differ‐ent. See the Laravel WebSockets package docs for more info.
Using Echo for basic event broadcastingThis is nothing different from what we’ve already used Pusher for, but Example 16-28is a simple code sample to show how to use Echo to listen to public channels for basicevent information.
Broadcasting Events over WebSockets, and Laravel Echo | 453
www.EBooksWorld.ir
Example 16-28. Listening to a public channel with Echo
var currentTeamId = 5; // Likely set elsewhere
Echo.channel(`teams.${currentTeamId}`) .listen('UserSubscribed', (data) => { console.log(data); });
Echo provides a few methods for subscribing to various types of channels; channel()will subscribe you to a public channel. Note that when you listen to an event withEcho, you can ignore the full event namespace and just listen for the unique classname of this event.
We now have access to the public data that’s passed along with our event, representedin the data object. We can also chain listen() handlers, as in Example 16-29.
Example 16-29. Chaining event listeners in Echo
Echo.channel(`teams.${currentTeamId}`) .listen('UserSubscribed', (data) => { console.log(data); }) .listen('UserCanceled', (data) => { console.log(data); });
Remember to Compile and Include!
Did you try these code samples and not see anything change inyour browser? Make sure to run npm run dev (if you’re running itonce) or npm run watch (to run a listener) to compile your code.And, if you haven’t yet, be sure to actually include app.js in yourtemplate somewhere.
Private channels and basic authentication
Echo also has a method for subscribing to private channels: private(). It works thesame as channel(), but it requires you to have set up channel authorization defini‐tions in routes/channel.php, like we covered earlier. Additionally, unlike with theSDKs, you don’t need to put private- in front of your channel name.
Example 16-30 shows what it looks like to listen to a private channel named private-teams.5.
454 | Chapter 16: Queues, Jobs, Events, Broadcasting, and the Scheduler
www.EBooksWorld.ir
Example 16-30. Listening to a private channel with Echo
var currentTeamId = 5; // Likely set elsewhere
Echo.private(`teams.${currentTeamId}`) .listen('UserSubscribed', (data) => { console.log(data); });
Presence channelsEcho makes it much simpler to join and listen to events in presence channels. Thistime you’ll want to use the join() method to bind to the channel, as inExample 16-31.
Example 16-31. Joining a presence channel
var currentTeamId = 5; // Likely set elsewhere
Echo.join(`teams.${currentTeamId}`) .here((members) => { console.log(members); });
join() subscribes to the presence channel, and here() allows you to define thebehavior when the user joins and also when any other users join or leave the presencechannel.
You can think of a presence channel like a “who’s online” sidebar in a chat room.When you first join a presence channel, your here() callback will be called and pro‐vided a list of all the members at that time. And any time any members join or leave,that callback will be called again with the updated list. There’s no messaging happen‐ing here, but you can play sounds, update the on-page list of members, or do what‐ever else you want in response to these actions.
There are also specific methods for individual events, which you can use individuallyor chained (see Example 16-32).
Example 16-32. Listening for specific presence events
var currentTeamId = 5; // Likely set elsewhere
Echo.join('teams.' + currentTeamId) .here((members) => { // Runs when you join console.table(members); }) .joining((joiningMember, members) => {
Broadcasting Events over WebSockets, and Laravel Echo | 455
www.EBooksWorld.ir
// Runs when another member joins console.table(joiningMember); }) .leaving((leavingMember, members) => { // Runs when another member leaves console.table(leavingMember); });
Excluding the current userWe covered this previously in the chapter, but if you want to exclude the current user,you can use the broadcast() global helper instead of the event() global helper andthen chain the toOthers() method after your broadcast call. But with Echo, the Java‐Script side of this is already handled for you. It’ll just work.
As you can see, the Echo JavaScript library doesn’t do anything you couldn’t do onyour own—but it makes a lot of common tasks much simpler, and provides a cleaner,more expressive syntax for common WebSocket tasks.
Subscribing to notifications with EchoLaravel’s notifications come with a broadcast driver out of the box that pushes notifi‐cations out as broadcast events. You can subscribe to these notifications with Echousing Echo.notification(), as in Example 16-33.
Example 16-33. Subscribing to a notification with Echo
Echo.private(`App.User.${userId}`) .notification((notification) => { console.log(notification.type); });
Client eventsIf you’d like to send quick, performant messages between your users without the mes‐sages even hitting your Laravel application—for example, to send “typing…” notifica‐tions—you can use Echo’s whisper() method, as shown in Example 16-34.
Example 16-34. Bypassing the Laravel server using Echo’s whisper() method
Echo.private('room') .whisper('typing', { name: this.user.name });
And then use listenForWhisper() to listen, as in Example 16-35.:
456 | Chapter 16: Queues, Jobs, Events, Broadcasting, and the Scheduler
www.EBooksWorld.ir
Example 16-35. Listening for whisper events with Echo
Echo.private('room') .listenForWhisper('typing', (e) => { console.log(e.name); });
SchedulerIf you’ve ever written a cron job before, you likely already wish for a better tool. Notonly is the syntax onerous and frustratingly difficult to remember, but it’s one signifi‐cant aspect of your application that can’t be stored in version control.
Laravel’s scheduler makes handling scheduled tasks simple. You’ll write your sched‐uled tasks in code, and then point one cron job at your app: once per minute, run phpartisan schedule:run. Every time this Artisan command is run, Laravel checksyour schedule definitions to find out if any scheduled tasks should run.
Here’s the cron job to define that command:
* * * * * cd /home/myapp.com && php artisan schedule:run >> /dev/null 2>&1
There are many task types you can schedule and many time frames you can use toschedule them.
app/Console/Kernel.php has a method named schedule(), which is where you’lldefine any tasks you’d like to schedule.
Available Task TypesFirst, let’s take a look at the simplest option: a closure, run every minute(Example 16-36). Every time the cron job hits the schedule:run command, it will callthis closure.
Example 16-36. Scheduling a closure to run once every minute
// app/Console/Kernel.phppublic function schedule(Schedule $schedule){ $schedule->call(function () { CalculateTotals::dispatch(); })->everyMinute();}
There are two other types of tasks you can schedule: Artisan and shell commands.
You can schedule Artisan commands by passing their syntax exactly as you would callthem from the command line:
Scheduler | 457
www.EBooksWorld.ir
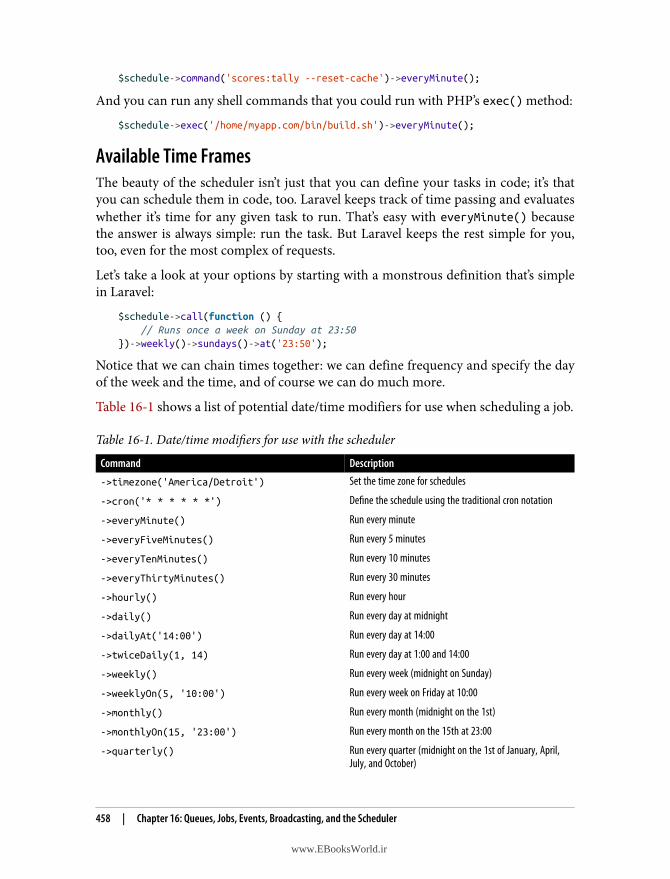
$schedule->command('scores:tally --reset-cache')->everyMinute();
And you can run any shell commands that you could run with PHP’s exec() method:
$schedule->exec('/home/myapp.com/bin/build.sh')->everyMinute();
Available Time FramesThe beauty of the scheduler isn’t just that you can define your tasks in code; it’s thatyou can schedule them in code, too. Laravel keeps track of time passing and evaluateswhether it’s time for any given task to run. That’s easy with everyMinute() becausethe answer is always simple: run the task. But Laravel keeps the rest simple for you,too, even for the most complex of requests.
Let’s take a look at your options by starting with a monstrous definition that’s simplein Laravel:
$schedule->call(function () { // Runs once a week on Sunday at 23:50})->weekly()->sundays()->at('23:50');
Notice that we can chain times together: we can define frequency and specify the dayof the week and the time, and of course we can do much more.
Table 16-1 shows a list of potential date/time modifiers for use when scheduling a job.
Table 16-1. Date/time modifiers for use with the scheduler
Command Description
->timezone('America/Detroit') Set the time zone for schedules
->cron('* * * * * *') Define the schedule using the traditional cron notation
->everyMinute() Run every minute
->everyFiveMinutes() Run every 5 minutes
->everyTenMinutes() Run every 10 minutes
->everyThirtyMinutes() Run every 30 minutes
->hourly() Run every hour
->daily() Run every day at midnight
->dailyAt('14:00') Run every day at 14:00
->twiceDaily(1, 14) Run every day at 1:00 and 14:00
->weekly() Run every week (midnight on Sunday)
->weeklyOn(5, '10:00') Run every week on Friday at 10:00
->monthly() Run every month (midnight on the 1st)
->monthlyOn(15, '23:00') Run every month on the 15th at 23:00
->quarterly() Run every quarter (midnight on the 1st of January, April,July, and October)
458 | Chapter 16: Queues, Jobs, Events, Broadcasting, and the Scheduler
www.EBooksWorld.ir
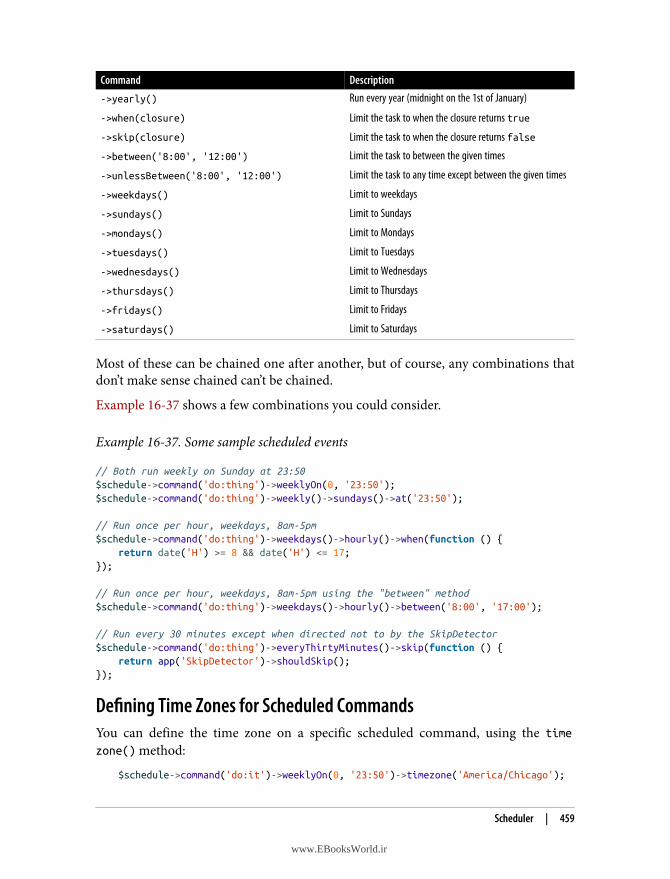
Command Description
->yearly() Run every year (midnight on the 1st of January)
->when(closure) Limit the task to when the closure returns true
->skip(closure) Limit the task to when the closure returns false
->between('8:00', '12:00') Limit the task to between the given times
->unlessBetween('8:00', '12:00') Limit the task to any time except between the given times
->weekdays() Limit to weekdays
->sundays() Limit to Sundays
->mondays() Limit to Mondays
->tuesdays() Limit to Tuesdays
->wednesdays() Limit to Wednesdays
->thursdays() Limit to Thursdays
->fridays() Limit to Fridays
->saturdays() Limit to Saturdays
Most of these can be chained one after another, but of course, any combinations thatdon’t make sense chained can’t be chained.
Example 16-37 shows a few combinations you could consider.
Example 16-37. Some sample scheduled events
// Both run weekly on Sunday at 23:50$schedule->command('do:thing')->weeklyOn(0, '23:50');$schedule->command('do:thing')->weekly()->sundays()->at('23:50');
// Run once per hour, weekdays, 8am-5pm$schedule->command('do:thing')->weekdays()->hourly()->when(function () { return date('H') >= 8 && date('H') <= 17;});
// Run once per hour, weekdays, 8am-5pm using the "between" method$schedule->command('do:thing')->weekdays()->hourly()->between('8:00', '17:00');
// Run every 30 minutes except when directed not to by the SkipDetector$schedule->command('do:thing')->everyThirtyMinutes()->skip(function () { return app('SkipDetector')->shouldSkip();});
Defining Time Zones for Scheduled CommandsYou can define the time zone on a specific scheduled command, using the timezone() method:
$schedule->command('do:it')->weeklyOn(0, '23:50')->timezone('America/Chicago');
Scheduler | 459
www.EBooksWorld.ir
And in apps running Laravel 5.8+, you can also set a default time zone (separate fromthe application timezone) that all of your scheduled times will be defined in, by defin‐ing the scheduleTimezone() method in App\Console\Kernel:
protected function scheduleTimezone(){ return 'America/Chicago';}
Blocking and OverlapIf you want to avoid your tasks overlapping each other—for example, if you have atask running every minute that may sometimes take longer than a minute to run—end the schedule chain with the withoutOverlapping() method. This method skips atask if the previous instance of that task is still running:
$schedule->command('do:thing')->everyMinute()->withoutOverlapping();
Handling Task OutputSometimes the output from your scheduled task is important, whether for logging,notifications, or just ensuring that the task ran.
If you want to write the returned output of a task to a file, use sendOutputTo():
$schedule->command('do:thing')->daily()->sendOutputTo($filePath);
If you want to append it to a file instead, use appendOutputTo():
$schedule->command('do:thing')->daily()->appendOutputTo($filePath);
And if you want to email the output to a designated recipient, write it to a file firstand then add emailOutputTo():
$schedule->command('do:thing') ->daily() ->sendOutputTo($filePath) ->emailOutputTo('[email protected]');
Make sure that your email settings are configured correctly in Laravel’s basic emailconfiguration.
Closure Scheduled Events Can’t Send Output
The sendOutputTo(), appendOutputTo(), and emailOutputTo()methods only work for command()- scheduled tasks. You can’t usethem for closures, unfortunately.
You may also want to send some output to a webhook to verify that your tasks rancorrectly. There are a few services that provide this sort of uptime monitoring, most
460 | Chapter 16: Queues, Jobs, Events, Broadcasting, and the Scheduler
www.EBooksWorld.ir
significantly Laravel Envoyer, a zero-downtime deployment service that also providescron uptime monitoring, and Dead Man’s Snitch, a tool designed purely for monitor‐ing cron job uptime.
These services don’t expect something to be emailed to them, but rather expect anHTTP “ping,” so Laravel makes that easy with pingBefore() and thenPing():
$schedule->command('do:thing') ->daily() ->pingBefore($beforeUrl) ->thenPing($afterUrl);
If you want to use the ping features, you’ll need to pull in Guzzle using Composer:
composer require guzzlehttp/guzzle
Task HooksSpeaking of running something before and after your task, there are hooks for that,with before() and after():
$schedule->command('do_thing') ->daily() ->before(function () { // Prepare }) ->after(function () { // Cleanup });
TestingTesting queued jobs (or anything else in the queue) is easy. In phpunit.xml, which isthe configuration file for your tests, the QUEUE_DRIVER environment variable is set tosync by default. That means your tests will run your jobs or other queued tasks syn‐chronously, directly in your code, without relying on a queue system of any sort. Youcan test them just like any other code.
However, if you’d just like to check that a job was fired, you can do that with theexpectsJobs() method, as in Example 16-38.
Example 16-38. Asserting that a job of the specified class was dispatched
public function test_changing_number_of_subscriptions_crunches_reports(){ $this->expectsJobs(\App\Jobs\CrunchReports::class);
...}
Testing | 461
www.EBooksWorld.ir
Or, in projects running Laravel 5.3 and above, you can assert against the specific jobitself, as in Example 16-39.
Example 16-39. Using a closure to verify that a dispatched job meets given criteria
use Illuminate\Support\Facades\Bus;...public function test_changing_subscriptions_triggers_crunch_job(){ ... Bus::fake();
Bus::assertDispatched(CrunchReports::class, function ($job) { return $job->subscriptions->contains(5); });
// Also can use assertNotDispatched()}
To test that an event fired, you have three options. First, you can just test that thebehavior you expected happened, without concerning yourself with the event itself.
Second, in Laravel 5.2 and above, you can explicitly assert that the event fired, as inExample 16-40.
Example 16-40. Asserting that an event of the specified class was fired
public function test_usersubscribed_event_fires(){ $this->expectsEvents(\App\Events\UserSubscribed::class);
...}
Finally, you can run a test against the event that was fired, as in Example 16-41. Thisis available in Laravel 5.3 and above.
Example 16-41. Using a closure to verify that a fired event meets given criteria
use Illuminate\Support\Facades\Event;...public function test_usersubscribed_event_fires(){ Event::fake();
...
Event::assertDispatched(UserSubscribed::class, function ($e) { return $e->user->email = '[email protected]';
462 | Chapter 16: Queues, Jobs, Events, Broadcasting, and the Scheduler
www.EBooksWorld.ir
});
// Also can use assertNotDispatched()}
Another common scenario is that you’re testing code that incidentally fires events,and you want to disable the event listeners during that test. You can disable the eventsystem with the withoutEvents() method, as in Example 16-42.
Example 16-42. Disabling event listeners during a test
public function test_something_subscription_related(){ $this->withoutEvents();
...}
TL;DRQueues allow you to separate chunks of your application’s code from the synchronousflow of user interactions out to a list of commands to be processed by a “queueworker.” This allows your users to resume interactions with your application whileslower processes are handled asynchronously in the background.
Jobs are classes that are structured with the intention of encapsulating a chunk ofapplication behavior so that it can be pushed onto a queue.
Laravel’s event system follows the pub/sub or observer pattern, allowing you to sendout notifications of an event from one part of your application, and elsewhere bindlisteners to those notifications to define what behavior should happen in response tothem. Using WebSockets, events can also be broadcast to frontend clients.
Laravel’s scheduler simplifies scheduling tasks. Point an every-minute cron job tophp artisan schedule:run and then schedule your tasks with even the most com‐plex of time requirements using the scheduler, and Laravel will handle all the timingsfor you.
TL;DR | 463
www.EBooksWorld.ir

www.EBooksWorld.ir
CHAPTER 17
Helpers and Collections
We’ve already covered many global functions throughout the book: these are littlehelpers that make it easier to perform common tasks, like dispatch() for jobs,event() for events, and app() for dependency resolution. We also talked a bit aboutLaravel’s collections, or arrays on steroids, in Chapter 5.
In this chapter we’ll cover some of the more common and powerful helpers and someof the basics of programming with collections.
HelpersYou can find a full list of the helpers Laravel offers in the docs, but we’re going tocover a few of the most useful functions here.
Laravel 5.8 deprecated all global helpers that start with array_or str_. The helpers will be removed in Laravel 5.9 but will be
made available in a package for backward compatibility. Each ofthese helpers is backed by a method on the Arr or Str facades, soyou can prepare for this future either by using Facade calls or justplanning to pull in the first-party package when it’s made available.
ArraysPHP’s native array manipulation functions give us a lot of power, but sometimes thereare standard manipulations we want to make that require unwieldy loops and logicchecks. Laravel’s array helpers make a few common array manipulations much sim‐pler:
465
www.EBooksWorld.ir
array_first($array, $callback, $default = null)
Returns the first array value that passes a test, defined in a callback closure. Youcan optionally set the default value as the third parameter. Here’s an example:
$people = [ [ 'email' => '[email protected]', 'name' => 'Malcolm Me' ], [ 'email' => '[email protected]', 'name' => 'James Jo' ], ];
$value = array_first($people, function ($person, $key) { return $person['email'] == '[email protected]'; });
array_get($array, $key, $default = null)
Makes it easy to get values out of an array, with two added benefits: it won’tthrow an error if you ask for a key that doesn’t exist (and you can providedefaults with the third parameter), and you can use dot notation to traverse nes‐ted arrays. For example:
$array = ['owner' => ['address' => ['line1' => '123 Main St.']]];
$line1 = array_get($array, 'owner.address.line1', 'No address'); $line2 = array_get($array, 'owner.address.line2');
array_has($array, $keys)
Makes it easy to check whether an array has a particular value set using dot nota‐tion for traversing nested arrays. The $keys parameter can be a single entry or anarray of entries, which will check whether every entry in the array exists:
$array = ['owner' => ['address' => ['line1' => '123 Main St.']]];
if (array_has($array, 'owner.address.line2')) { // Do stuff }
array_pluck($array, $value, $key = null)
Returns an array of the values corresponding to the provided key:
$array = [ ['owner' => ['id' => 4, 'name' => 'Tricia']], ['owner' => ['id' => 7, 'name' => 'Kimberly']], ];
$array = array_pluck($array, 'owner.name');
466 | Chapter 17: Helpers and Collections
www.EBooksWorld.ir
// Returns ['Tricia', 'Kimberly'];
If you want the returned array to be keyed by another value from the sourcearray, you can pass that value’s dot-notated reference as the third parameter:
$array = array_pluck($array, 'owner.name', 'owner.id');
// Returns [4 => 'Tricia', 7 => 'Kimberly'];
array_random($array, $num = null)
Returns a random item from the provided array. If you provide a $num parameter,it will pull an array of that many results, randomly selected:
$array = [ ['owner' => ['id' => 4, 'name' => 'Tricia']], ['owner' => ['id' => 7, 'name' => 'Kimberly']], ];
$randomOwner = array_random($array);
StringsJust like with arrays, there are some string manipulations and checks that are possiblewith native PHP functions, but can be cumbersome. Laravel’s helpers make a fewcommon string operations faster and simpler:
e($string)
An alias to htmlentities(); prepares a (often user-provided) string for safe echo‐ing on an HTML page. For example:
e('<script>do something nefarious</script>');
// Returns <script>do something nefarious</script>
starts_with($haystack, $needle), ends_with($haystack, $needle), andstr_contains($haystack, $needle)
Return a Boolean indicating whether the provided $haystack string starts with,ends with, or contains the provided $needle string:
if (starts_with($url, 'https')) { // Do something }
if (ends_with($abstract, '...')) { // Do something }
if (str_contains($description, '1337 h4x0r')) { // Run away }
Helpers | 467
www.EBooksWorld.ir
str_limit($value, $limit = 100, $end = '...')
Limits a string to the provided number of characters. If the string’s length is lessthan the limit, just returns the string; if it’s greater, trims to the number of charac‐ters provided and then appends either ... or the provided $end string. For exam‐ple:
$abstract = str_limit($loremIpsum, 30);
// Returns "Lorem ipsum dolor sit amet, co..."
$abstract = str_limit($loremIpsum, 30, "…");
// Returns "Lorem ipsum dolor sit amet, co…"
str_is($pattern, $value)
Returns a Boolean indicating whether or not a given string matches a given pat‐tern. The pattern can be a regex pattern, or you can use asterisks to indicate wild‐card positions:
str_is('*.dev', 'myapp.dev'); // true str_is('*.dev', 'myapp.dev.co.uk'); // false str_is('*dev*', 'myapp.dev'); // true str_is('*myapp*', 'www.myapp.dev'); // true str_is('my*app', 'myfantasticapp'); // true str_is('my*app', 'myapp'); // true
How to Pass a Regex to str_is()
If you’re curious about what regex patterns are acceptable to pass tostr_is(), check out the function definition here (shortened forspace) to see how it works. Note that it’s an alias of Illuminate\Support\Str::is():
public function is($pattern, $value){ if ($pattern == $value) return true;
$pattern = preg_quote($pattern, '#'); $pattern = str_replace('\*', '.*', $pattern); if (preg_match('#^'.$pattern.'\z#u', $value) === 1) { return true; }
return false;}
str_random($length = n)
Returns a random string of alphanumeric mixed-case characters of the lengthspecified:
468 | Chapter 17: Helpers and Collections
www.EBooksWorld.ir
$hash = str_random(64);
// Sample: J40uNWAvY60wE4BPEWxu7BZFQEmxEHmGiLmQncj0ThMGJK7O5Kfgptyb9ulwspmh
str_slug($title, $separator = '-', $language = 'en')
Returns a URL-friendly slug from a string—often used for creating a URL seg‐ment for a name or title:
str_slug('How to Win Friends and Influence People');
// Returns 'how-to-win-friends-and-influence-people'
str_plural($value, $count = n)
Converts a string to its plural form. This function currently only supports theEnglish language:
str_plural('book');
// Returns books
str_plural('person');
// Returns people
str_plural('person', 1);
// Returns person
__($key, $replace = [], $locale = null)
Translates the given translation string or translation key using your localizationfiles:
echo __('Welcome to your dashboard');
echo __('messages.welcome');
Application PathsWhen you’re dealing with the filesystem, it can often be tedious to make links to cer‐tain directories for getting and saving files. These helpers give you quick access tofind the fully qualified paths to some of the most important directories in your app.
Note that each of these can be called with no parameters, but if a parameter is passed,it will be appended to the normal directory string and returned as a whole:
app_path($append = '')
Returns the path for the app directory:
app_path();
// Returns /home/forge/myapp.com/app
Helpers | 469
www.EBooksWorld.ir
base_path($path = '')
Returns the path for the root directory of your app:
base_path();
// Returns /home/forge/myapp.com
config_path($path = '')
Returns the path for configuration files in your app:
config_path();
// Returns /home/forge/myapp.com/config
database_path($path = '')
Returns the path for database files in your app:
database_path();
// Returns /home/forge/myapp.com/database
storage_path($path = '')
Returns the path for the storage directory in your app:
storage_path();
// Returns /home/forge/myapp.com/storage
URLsSome frontend file paths are consistent but at times annoying to type—for example,paths to assets—and it’s helpful to have convenient shortcuts to them, which we’llcover here. But some can actually vary as route definitions move or new files are ver‐sioned with Mix, so some of these helpers are vital in making sure all of your linksand assets work correctly:
action($action, $parameters = [], $absolute = true)
Assuming a controller method has a single URL mapped to it, returns the correctURL given a controller and method name pair (separated by @) or using tuplenotation:
<a href="{{ action('PeopleController@index') }}">See all People</a> // Or, using tuple notation: <a href= "{{ action([App\Http\Controllers\PeopleController::class, 'index']) }}"> See all People </a>
// Returns <a href="http://myapp.com/people">See all People</a>
470 | Chapter 17: Helpers and Collections
www.EBooksWorld.ir
If the controller method requires parameters, you can pass them in as the secondparameter (as an array, if there’s more than one required parameter). You cankey them if you want for clarity, but what matters is just that they’re in the rightorder:
<a href="{{ action('PeopleController@show', ['id' => 3] }}">See Person #3</a> // or <a href="{{ action('PeopleController@show', [3] }}">See Person #3</a>
// Returns <a href="http://myapp.com/people/3">See Person #3</a>
If you pass false to the third parameter, your links will generate as relative(/people/3) instead of absolute (http://myapp.com/people/3).
route($name, $parameters = [], $absolute = true)
If a route has a name, returns the URL for that route:
// routes/web.php Route::get('people', 'PeopleController@index')->name('people.index');
// A view somewhere <a href="{{ route('people.index') }}">See all People</a>
// Returns <a href="http://myapp.com/people">See all People</a>
If the route definition requires parameters, you can pass them in as the secondparameter (as an array if more than one parameter is required). Again, you cankey them if you want for clarity, but what matters is just that they’re in the rightorder:
<a href="{{ route('people.show', ['id' => 3]) }}">See Person #3</a> // or <a href="{{ route('people.show', [3]) }}">See Person #3</a>
// Returns <a href="http://myapp.com/people/3">See Person #3</a>
If you pass false to the third parameter, your links will generate as relativeinstead of absolute.
url($string) and secure_url($string)Given any path string, converts to a fully qualified URL. (secure_url() is thesame as url() but forces HTTPS):
url('people/3');
// Returns http://myapp.com/people/3
If no parameters are passed, this instead gives an instance of Illuminate\Routing\UrlGenerator, which makes method chaining possible:
Helpers | 471
www.EBooksWorld.ir
url()->current(); // Returns http://myapp.com/abc
url()->full(); // Returns http://myapp.com/abc?order=reverse
url()->previous(); // Returns http://myapp.com/login
// And many more methods available on the UrlGenerator...
mix($path, $manifestDirectory = '')
If assets are versioned with Elixir’s versioning system, given the nonversionedpath name, returns the fully qualified URL for the versioned file:
<link rel="stylesheet" href="{{ mix('css/app.css') }}">
// Returns something like /build/css/app-eb555e38.css
Using the elixir() Helper Prior to Laravel 5.4
In projects running versions of Laravel prior to 5.4, you’ll want touse the elixir() helper instead of the mix() helper. Check thedocs for more info.
MiscellaneousThere are a few other global helpers that I’d recommend getting familiar with. Ofcourse, you should check out the whole list, but the ones mentioned here are defi‐nitely worth taking a look at:
abort($code, $message, $headers), abort_unless($boolean, $code, $message,$headers), and abort_if($boolean, $code, $message, $headers)
Throw HTTP exceptions. abort() throws the exception defined,abort_unless() throws it if the first parameter is false, and abort_if() throwsit if the first parameter is true:
public function controllerMethod(Request $request) { abort(403, 'You shall not pass'); abort_unless(request()->filled('magicToken'), 403); abort_if(request()->user()->isBanned, 403); }
auth()
Returns an instance of the Laravel authenticator. Like the Auth facade, you canuse this to get the current user, to check for login state, and more:
$user = auth()->user(); $userId = auth()->id();
472 | Chapter 17: Helpers and Collections
www.EBooksWorld.ir
if (auth()->check()) { // Do something }
back()
Generates a “redirect back” response, sending the user to the previous location:
Route::get('post', function () { ...
if ($condition) { return back(); } });
collect($array)
Takes an array and returns the same data, converted to a collection:
$collection = collect(['Rachel', 'Hototo']);
We’ll cover collections in just a bit.
config($key)
Returns the value for any dot-notated configuration item:
$defaultDbConnection = config('database.default');
csrf_field() and csrf_token()Return a full HTML hidden input field (csrf_field()) or just the appropriatetoken value (csrf_token()) for adding CSRF verification to your form submis‐sion:
<form> {{ csrf_field() }} </form>
// or
<form> <input type="hidden" name="_token" value="{{ csrf_token() }}"> </form>
dd($variable...)
Short for “dump and die,” runs var_dump() on all provided parameters and thenexit() to quit the application (this is used for debugging):
... dd($var1, $var2, $state); // Why is this not working???
env($key, $default = null)
Returns the environment variable for the given key:
Helpers | 473
www.EBooksWorld.ir
$key = env('API_KEY', '');
Remember not to ever use +env()+ outside of config files.
dispatch($job)
Dispatches a job:
dispatch(new EmailAdminAboutNewUser($user));
event($event)
Fires an event:
event(new ContactAdded($contact));
factory($entityClass)
Returns an instance of the factory builder for the given class:
$contact = factory(App\Contact::class)->make();
old($key = null, $default = null)
Returns the old value (from the last user form submission) for this form key, ifit exists:
<input name="name" value="{{ old('value', 'Your name here') }}"
redirect($path)
Returns a redirect response to the given path:
Route::get('post', function () { ...
return redirect('home'); });
Without parameters, this generates an instance of the Illuminate\Routing\Redirector class.
response($content, $status = 200, $headers)
If passed with parameters, returns a prebuilt instance of Response. If passed withno response, it returns an instance of the Response factory:
return response('OK', 200, ['X-Header-Greatness' => 'Super great']);
return response()->json(['status' => 'success']);
view($viewPath)
Returns a view instance:
Route::get('home', function () { return view('home'); // Gets /resources/views/home.blade.php });
474 | Chapter 17: Helpers and Collections
www.EBooksWorld.ir
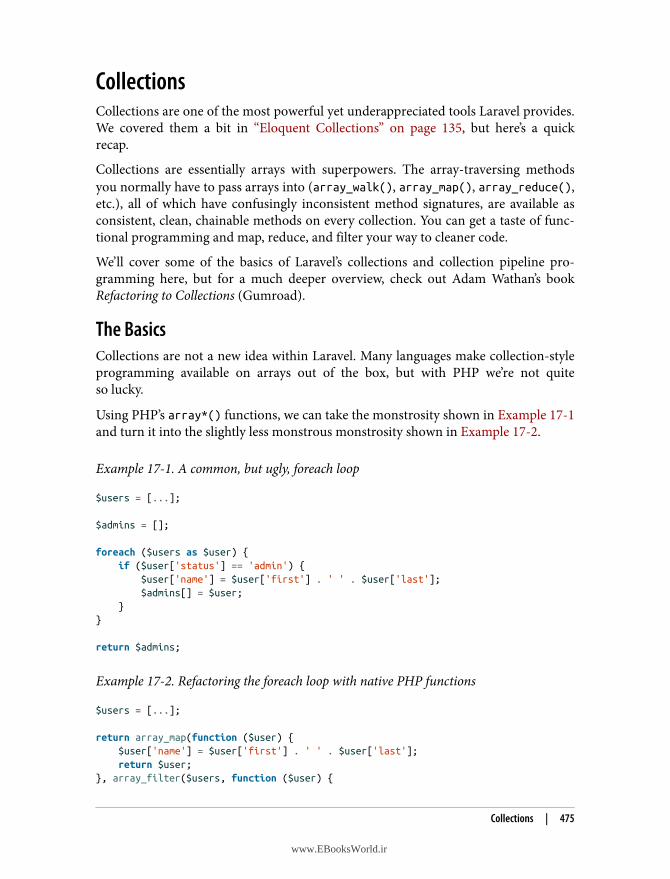
CollectionsCollections are one of the most powerful yet underappreciated tools Laravel provides.We covered them a bit in “Eloquent Collections” on page 135, but here’s a quickrecap.
Collections are essentially arrays with superpowers. The array-traversing methodsyou normally have to pass arrays into (array_walk(), array_map(), array_reduce(),etc.), all of which have confusingly inconsistent method signatures, are available asconsistent, clean, chainable methods on every collection. You can get a taste of func‐tional programming and map, reduce, and filter your way to cleaner code.
We’ll cover some of the basics of Laravel’s collections and collection pipeline pro‐gramming here, but for a much deeper overview, check out Adam Wathan’s bookRefactoring to Collections (Gumroad).
The BasicsCollections are not a new idea within Laravel. Many languages make collection-styleprogramming available on arrays out of the box, but with PHP we’re not quiteso lucky.
Using PHP’s array*() functions, we can take the monstrosity shown in Example 17-1and turn it into the slightly less monstrous monstrosity shown in Example 17-2.
Example 17-1. A common, but ugly, foreach loop
$users = [...];
$admins = [];
foreach ($users as $user) { if ($user['status'] == 'admin') { $user['name'] = $user['first'] . ' ' . $user['last']; $admins[] = $user; }}
return $admins;
Example 17-2. Refactoring the foreach loop with native PHP functions
$users = [...];
return array_map(function ($user) { $user['name'] = $user['first'] . ' ' . $user['last']; return $user;}, array_filter($users, function ($user) {
Collections | 475
www.EBooksWorld.ir

return $user['status'] == 'admin';}));
Here, we’ve gotten rid of a temporary variable ($admins) and converted one confus‐ing foreach loop into two distinct actions: map and filter.
The problem is, PHP’s array manipulation functions are awful and confusing. Justlook at this example; array_map() takes the closure first and the array second, butarray_filter() takes the array first and the closure second. In addition, if we addedany complexity to this, we’d have functions wrapping functions wrapping functions.It’s a mess.
Laravel’s collections take the power of PHP’s array manipulation methods and givethem a clean, fluent syntax—and they add many methods that don’t even exist inPHP’s array manipulation toolbox. Using the collect() helper method that turns anarray into a Laravel collection, we can do what’s shown in Example 17-3.
Example 17-3. Refactoring the foreach loop with Laravel’s collections
$users = collect([...]);
return $users->filter(function ($user) { return $user['status'] == 'admin';})->map(function ($user) { $user['name'] = $user['first'] . ' ' . $user['last']; return $user;});
This isn’t the most extreme of examples. There are plenty where the reduction in linesof code and the increased simplicity would make an even stronger case. But this righthere is so common.
Look at the original example and how muddy it is. It’s not entirely clear until youunderstand the entire code sample what any given piece is there for.
The biggest benefit collections provide, over anything else, is breaking the actionsyou’re taking to manipulate an array into simple, discrete, understandable tasks. Youcan now do something like this:
$users = [...]$countAdmins = collect($users)->filter(function ($user) { return $user['status'] == 'admin';})->count();
or something like this:
$users = [...];$greenTeamPoints = collect($users)->filter(function ($user) { return $user['team'] == 'green';})->sum('points');
476 | Chapter 17: Helpers and Collections
www.EBooksWorld.ir
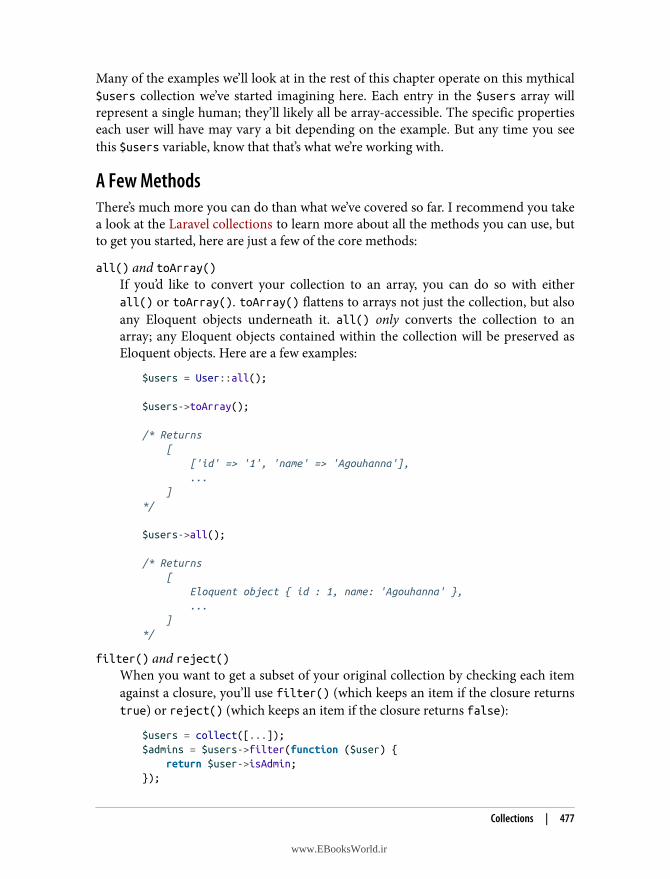
Many of the examples we’ll look at in the rest of this chapter operate on this mythical$users collection we’ve started imagining here. Each entry in the $users array willrepresent a single human; they’ll likely all be array-accessible. The specific propertieseach user will have may vary a bit depending on the example. But any time you seethis $users variable, know that that’s what we’re working with.
A Few MethodsThere’s much more you can do than what we’ve covered so far. I recommend you takea look at the Laravel collections to learn more about all the methods you can use, butto get you started, here are just a few of the core methods:
all() and toArray()If you’d like to convert your collection to an array, you can do so with eitherall() or toArray(). toArray() flattens to arrays not just the collection, but alsoany Eloquent objects underneath it. all() only converts the collection to anarray; any Eloquent objects contained within the collection will be preserved asEloquent objects. Here are a few examples:
$users = User::all();
$users->toArray();
/* Returns [ ['id' => '1', 'name' => 'Agouhanna'], ... ]*/
$users->all();
/* Returns [ Eloquent object { id : 1, name: 'Agouhanna' }, ... ]*/
filter() and reject()When you want to get a subset of your original collection by checking each itemagainst a closure, you’ll use filter() (which keeps an item if the closure returnstrue) or reject() (which keeps an item if the closure returns false):
$users = collect([...]);$admins = $users->filter(function ($user) { return $user->isAdmin;});
Collections | 477
www.EBooksWorld.ir
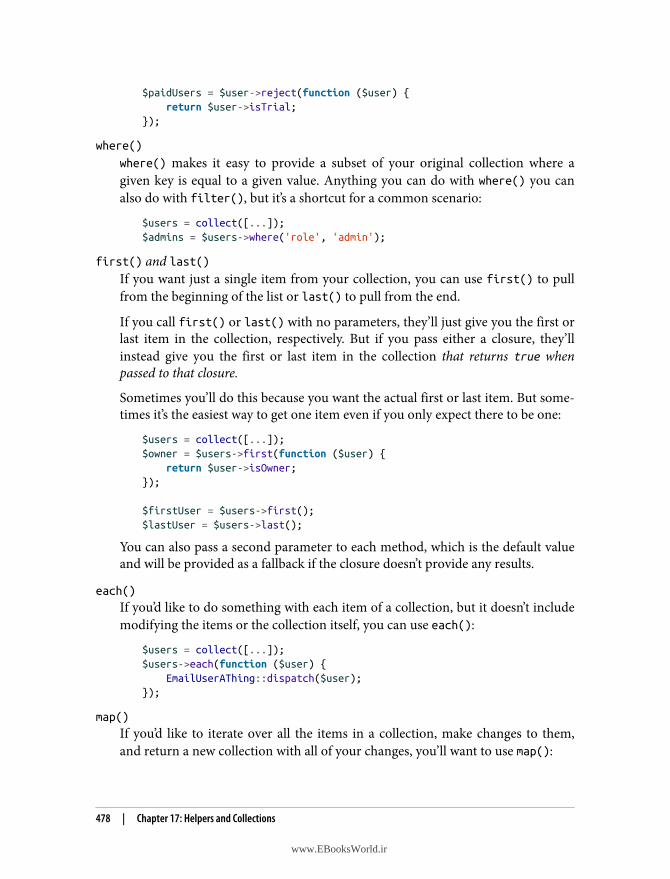
$paidUsers = $user->reject(function ($user) { return $user->isTrial;});
where()
where() makes it easy to provide a subset of your original collection where agiven key is equal to a given value. Anything you can do with where() you canalso do with filter(), but it’s a shortcut for a common scenario:
$users = collect([...]);$admins = $users->where('role', 'admin');
first() and last()If you want just a single item from your collection, you can use first() to pullfrom the beginning of the list or last() to pull from the end.
If you call first() or last() with no parameters, they’ll just give you the first orlast item in the collection, respectively. But if you pass either a closure, they’llinstead give you the first or last item in the collection that returns true whenpassed to that closure.
Sometimes you’ll do this because you want the actual first or last item. But some‐times it’s the easiest way to get one item even if you only expect there to be one:
$users = collect([...]);$owner = $users->first(function ($user) { return $user->isOwner;});
$firstUser = $users->first();$lastUser = $users->last();
You can also pass a second parameter to each method, which is the default valueand will be provided as a fallback if the closure doesn’t provide any results.
each()
If you’d like to do something with each item of a collection, but it doesn’t includemodifying the items or the collection itself, you can use each():
$users = collect([...]);$users->each(function ($user) { EmailUserAThing::dispatch($user);});
map()
If you’d like to iterate over all the items in a collection, make changes to them,and return a new collection with all of your changes, you’ll want to use map():
478 | Chapter 17: Helpers and Collections
www.EBooksWorld.ir
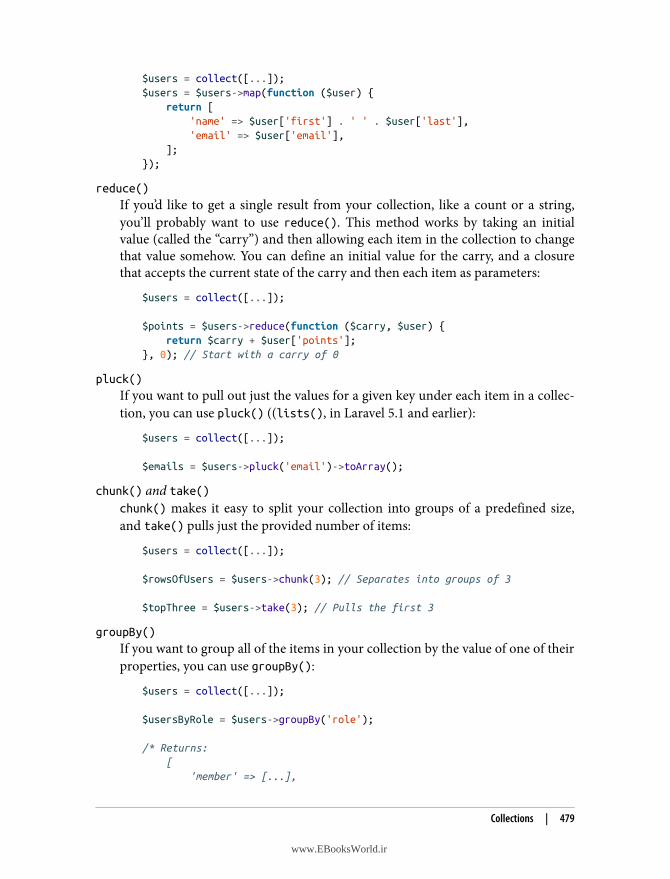
$users = collect([...]);$users = $users->map(function ($user) { return [ 'name' => $user['first'] . ' ' . $user['last'], 'email' => $user['email'], ];});
reduce()
If you’d like to get a single result from your collection, like a count or a string,you’ll probably want to use reduce(). This method works by taking an initialvalue (called the “carry”) and then allowing each item in the collection to changethat value somehow. You can define an initial value for the carry, and a closurethat accepts the current state of the carry and then each item as parameters:
$users = collect([...]);
$points = $users->reduce(function ($carry, $user) { return $carry + $user['points'];}, 0); // Start with a carry of 0
pluck()
If you want to pull out just the values for a given key under each item in a collec‐tion, you can use pluck() ((lists(), in Laravel 5.1 and earlier):
$users = collect([...]);
$emails = $users->pluck('email')->toArray();
chunk() and take()chunk() makes it easy to split your collection into groups of a predefined size,and take() pulls just the provided number of items:
$users = collect([...]);
$rowsOfUsers = $users->chunk(3); // Separates into groups of 3
$topThree = $users->take(3); // Pulls the first 3
groupBy()
If you want to group all of the items in your collection by the value of one of theirproperties, you can use groupBy():
$users = collect([...]);
$usersByRole = $users->groupBy('role');
/* Returns: [ 'member' => [...],
Collections | 479
www.EBooksWorld.ir
'admin' => [...], ]*/
You can also pass a closure, and whatever you return from the closure will bewhat’s used to group the records:
$heroes = collect([...]);
$heroesByAbilityType = $heroes->groupBy(function ($hero) { if ($hero->canFly() && $hero->isInvulnerable()) { return 'Kryptonian'; }
if ($hero->bitByARadioactiveSpider()) { return 'Spidermanesque'; }
if ($hero->color === 'green' && $hero->likesSmashing()) { return 'Hulk-like'; }
return 'Generic';});
reverse() and shuffle()reverse() reverses the order of the items in your collection, and shuffle() ran‐domizes them:
$numbers = collect([1, 2, 3]);
$numbers->reverse()->toArray(); // [3, 2, 1]$numbers->shuffle()->toArray(); // [2, 3, 1]
sort(), sortBy(), and sortByDesc()If your items are simple strings or integers, you can use sort() to sort them:
$sortedNumbers = collect([1, 7, 6])->sort()->toArray(); // [1, 6, 7]
If they’re more complex, you can pass a string (representing the property) or aclosure to sortBy() or sortByDesc() to define your sorting behavior:
$users = collect([...]);
// Sort an array of users by their 'email' property$users->sort('email');
// Sort an array of users by their 'email' property$users->sortBy(function ($user, $key) { return $user['email'];});
480 | Chapter 17: Helpers and Collections
www.EBooksWorld.ir
count(), isEmpty(), and isNotEmpty()You can see how many items there are in your collection using count(),isEmpty(), or isNotEmpty():
$numbers = collect([1, 2, 3]);
$numbers->count(); // 3$numbers->isEmpty(); // false$numbers->isNotEmpty() // true
avg() and sum()If you’re working with a collection of numbers, avg() and sum() do what theirmethod names say and don’t require any parameters:
collect([1, 2, 3])->sum(); // 6collect([1, 2, 3])->avg(); // 2
But if you’re working with arrays, you can pass the key of the property you’d liketo pull from each array to operate on:
$users = collect([...]);
$sumPoints = $users->sum('points');$avgPoints = $users->avg('points');
Using Collections Outside of Laravel
Have you fallen in love with collections, and do you want to usethem on your non-Laravel projects? With Taylor’s blessing, I splitout just the collections functionality from Laravel into a separateproject called Collect, and developers at my company keep it up todate with Laravel’s releases.Just use the composer require tightenco/collect command andyou’ll have the Illuminate\Support\Collection class ready to usein your code—along with the collect() helper.
TL;DRLaravel provides a suite of global helper functions that make it simpler to do all sortsof tasks. They make it easier to manipulate and inspect arrays and strings, they facili‐tate generating paths and URLs, and they provide simple access to some consistentand vital functionality.
Laravel’s collections are powerful tools that bring the possibility of collection pipe‐lines to PHP.
TL;DR | 481
www.EBooksWorld.ir

www.EBooksWorld.ir
CHAPTER 18
The Laravel Ecosystem
As Laravel has grown, Taylor has built a suite of tools to support and simplify thelives and workflows of Laravel developers. Much of the new work has gone straightinto the core, but there are quite a few packages and SaaS offerings that aren’t part ofthe core but are still very much a part of the Laravel experience.
We’ve already covered quite a few of them, and for those I’ll provide pointers towhere to go in the book for more information. For the tools we haven’t covered, I’llgive each a quick description and a link to the relevant website.
Tools Covered in This BookWe’ve already taken a look at these, but here are some brief reminders of what theyare and links to where you can find the relevant sources in the book.
ValetValet is a local development server (for Mac, but with forks for Windows and Linux)that makes it quick and easy to serve all of your projects to your browser with almostno effort. You’ll install Valet globally on your local development machine via Com‐poser.
With a few commands you can have Nginx, MySQL, Redis, and more serving everyLaravel app on your machine at a .test domain.
Valet is covered in “Laravel Valet” on page 12.
483
www.EBooksWorld.ir
HomesteadHomestead is a configuration layer on top of Vagrant that makes it simple to servemultiple Laravel applications from a Laravel-friendly Vagrant setup.
Horizon was introduced briefly in “Laravel Homestead” on page 13.
The Laravel InstallerThe Laravel installer is a package installed globally on your local developmentmachine (via Composer) that makes it easy and quick to set up a new Laravel project.
The installer is covered in “Installing Laravel with the Laravel Installer Tool” on page14.
MixMix is a Webpack-based frontend build system. It can run Babel, Browsersync, andyour favorite CSS pre- and post-processors, and provides Hot Module Replacement,code splitting, versioning, and much more. Mix replaced Elixir, a Gulp-based toolused for the same purposes, in Laravel.
Mix is covered in “Laravel Mix” on page 159.
DuskDusk is a frontend testing framework built for testing your entire application, Java‐Script and all. It’s a powerful package you can pull into your application via Com‐poser and that drives actual browsers with ChromeDriver.
Dusk is covered in “Testing with Dusk” on page 324.
PassportPassport is a powerful, simple-to-set-up OAuth2 server for authenticating clients toyour APIs. You’ll install it in each application as a Composer package, and with verylittle work you can have a full OAuth2 flow accessible to your users.
Passport is covered in “API Authentication with Laravel Passport” on page 357.
HorizonHorizon is a queue monitoring package you can install into each application viaComposer. It exposes a full user interface for monitoring the health, performance,failures, and history of your Redis queued jobs.
Horizon is introduced briefly in “Laravel Horizon” on page 436.
484 | Chapter 18: The Laravel Ecosystem
www.EBooksWorld.ir
EchoEcho is a JavaScript library (introduced along with a series of improvements to Lara‐vel’s notification system) that makes it simple to subscribe to events and channelsbroadcast from your Laravel app via WebSockets.
Echo is covered in “Laravel Echo (the JavaScript Side)” on page 452.
Tools Not Covered in This BookThese are a few tools that I did not cover because they are beyond the scope of thisbook. Some of these are just for use in special circumstances (Cashier for taking pay‐ments, Socialite for social login, etc.) but some I use every day (Forge, especially).
Here’s a brief introduction, beginning with the ones you’re most likely to encounter inyour work. Note that this list is not exhaustive!
ForgeForge is a paid SaaS tool for creating and managing virtual servers on hosts like Digi‐talOcean, Linode, AWS, and more. It provisions Laravel-ready servers (and individualsites on those servers) with all the tools you need to run them, from queues andqueue workers to Let’s Encrypt SSL certs. It can also set up simple shell scripts toautodeploy your sites when you push up new code to GitHub or Bitbucket.
Forge is incredibly useful for spinning up sites quickly and easily, but it’s not so mini‐mal that you can’t also run your apps on it in the longer term or at larger scale. Youcan scale up your server sizes, add load balancers, and manage private networkingbetween your servers, all within Forge.
EnvoyerEnvoyer is paid SaaS tool that’s branded as offering “zero downtime PHP deploy‐ment.” Unlike Forge, Envoyer doesn’t spin up your servers or manage them. Its pri‐mary job is to listen to triggers—usually when you push new code, but you can alsomanually trigger deploys or trigger them with webhooks—and perform your deploysteps in response.
There are three ways that Envoyer does this much better than Forge’s push-to-deploytool and most other push-to-deploy solutions:
1. It has a robust toolset for building out your deploy pipeline as a simple but pow‐erful multistage process.
2. It deploys your app using Capistrano-style zero-downtime deploys; each newdeploy is built into its own folder, and only once the build process has completed
Tools Not Covered in This Book | 485
www.EBooksWorld.ir
successfully is that deploy folder symlinked to your actual web root. Because ofthis, there’s no moment when your server is broken while Composer installs orNPM builds.
3. Because of this folder-based system, it’s easy and quick to roll back any breakingchanges to a previous release; Envoyer just updates the symlink back to a previ‐ous deploy folder and it’s immediately serving an older build.
You can also set up regular health checks (pings against your servers that reporterrors to you if the pings don’t get back a 200 HTTP response), expectations that yourcron jobs will ping Envoyer on a regular schedule, and chat-based notifications of anysignificant events.
Envoyer is more of a niche tool than Forge. I don’t know many Laravel developerswho don’t use Forge, but those who pay for Envoyer are more likely to have websitesthat will suffer if they can’t immediately roll back a problematic commit, or who getenough traffic (or important enough traffic) that 10 seconds of downtime here andthere can be a big issue. If your site is in that category, Envoyer will feel like magic.
CashierCashier is a free package that provides a simple interface in front of Stripe’s andBraintree’s subscription billing offerings. Cashier handles much of the basic function‐ality of subscribing users, changing their plans, giving them access to invoices, han‐dling webhook callbacks from the billing service, managing cancellation graceperiods, and more.
If you want to allow your users to sign up for subscriptions using Stripe or Braintree,Cashier will make your life a lot easier.
SocialiteSocialite is a free package that makes it incredibly simple to add social login (forexample, via GitHub or Facebook) to your apps.
NovaNova is a paid package for building admin panels. If you imagine your average com‐plex Laravel app, it may have a few parts: the public-facing website or customer view,the administration section for making changes to the core data or customer list, andmaybe an API.
Nova drastically simplifies the process of building the admin panel part of the siteusing Vue and a Laravel API. It makes it easy to generate CRUD (create, read, update,delete) pages for all of your resources, together with more complex custom views for
486 | Chapter 18: The Laravel Ecosystem
www.EBooksWorld.ir
your data, custom actions and relationships on each of your resources, and even cus‐tom tools for adding non-CRUD tooling to the same general admin space.
SparkSpark is a paid package for generating a SaaS that accepts payments and makes it easyto manage users, teams, and subscriptions. It provides Stripe integration, invoices,two-factor authentication, profile photos for your users, team management and bill‐ing, password resets, announcements, API token authentication, and more.
Spark is both a series of routes and a series of Vue components. You’ll use Spark toscaffold the basis of a new project, so don’t plan to add it to your existing apps afterthe fact.
LumenLumen is a free API-focused microframework built from Laravel parts. Because it’sfor APIs, many of the conveniences Laravel offers that target non-API calls (forexample, Blade templating) have been stripped out.
That makes for a leaner framework with a few less of the niceties, but with the benefitof speed improvements.
My general approach to Lumen is that, unless you have built APIs in Laravel andfound them too slow, or unless you’re definitely building a microservice-style API thatwill absolutely never have need for any views or any of the other niceties Laraveloffers, you should stick with Laravel.
But when you find yourself developing microservice-style APIs in Laravel and youneed to eke out more speed at the millisecond level, that’s the right time to look atLumen.
EnvoyEnvoy is a local task runner that makes it easy to define common tasks that will runon your remote servers, commit those tasks’ definitions to version control, and runthem simply and predictably.
Take a look at Example 18-1 to get a sense of what a common Envoy task looks like.
Example 18-1. A common Envoy task
@servers(['web-1' => '192.168.1.1', 'web-2' => '192.168.1.2'])
@task('deploy', ['on' => ['web-1', 'web-2']]) cd mysite.com git pull origin {{ $branch }}
Tools Not Covered in This Book | 487
www.EBooksWorld.ir
php artisan migrate php artisan route:cache@endtask
To run Example 18-1, you’d run the following command from your local terminal:
envoy run deploy --branch=master
TelescopeTelescope is a free debugging tool, installable as a package, for Laravel applicationsrunning version 5.7.7+. It generates a dashboard where you can dig into the currentstatus of jobs, queue workers, HTTP requests, database queries, and much more.
Other ResourcesI’ve mentioned many of these already, but here’s a nonexhaustive list of resourcesfolks often turn to to learn Laravel:
• Laravel News• Laracasts• @TaylorOtwell and @LaravelPHP on Twitter• Adam Wathan’s courses• Chris Fidao’s courses• The Laravel Podcast• The many Laravel chats; at the time of writing, the Laravel Discord server is the
primary location where Taylor and other contributors are accessible, but thereare also unofficial channels on Slack and IRC (#laravel on Freenode)
There are many blogs (I have one at mattstauffer.com and Tighten has one attighten.co, and there are plenty of others that are incredibly useful), many excellentTwitter-ers, many superb package authors, and far too many Laravel practitionerswho I respect to fit into a list here. This is a rich, diverse, and giving community, fullof developers who love to share everything they’re learning; the hard part is not find‐ing good content but finding the time to consume it all.
I can’t list every person or resource you should look to in your journey as a Laraveldeveloper, but if you start with the resources and folks listed here, you will be off to agreat start in getting up and running with Laravel.
488 | Chapter 18: The Laravel Ecosystem
www.EBooksWorld.ir
Glossary
AccessorA method defined on an Eloquent modelthat customizes how a given property willbe returned. Accessors make it possible todefine that getting a given property from amodel will return a different (or, morelikely, differently formatted) value thanwhat is stored in the database for thatproperty.
ActiveRecordA common database ORM pattern, andalso the pattern that Laravel’s Eloquentuses. In ActiveRecord the same modelclass defines both how to retrieve and per‐sist database records and how to representthem. Additionally, each database recordis represented by a single entity in theapplication, and each entity in the applica‐tion is mapped to a single database record.
APITechnically application programminginterface, but most commonly used torefer to a series of endpoints (and instruc‐tions on how to use them) that can beused to make HTTP-based calls to readand modify data from outside of a system.Sometimes, the term API is also used todescribe the set of interfaces, or affordan‐ces, any given package or library or classexposes to its consumers.
Application testOften called acceptance or functionaltests, application tests test the entire
behavior of the application, usually at anouter boundary, by employing somethinglike a DOM crawler—which is exactlywhat Laravel’s application test suite offers.
Argument (Artisan)Arguments are parameters that can bepassed to Artisan console commands.Arguments aren’t prefaced with -- or fol‐lowed by =, but instead just accept a singlevalue.
ArtisanThe tool that makes it possible to interactwith Laravel applications from the com‐mand line.
AssertionIn testing, an assertion is the core of thetest: you are asserting that somethingshould be equal to (or less than or greaterthan) something else, or that it shouldhave a given count, or whatever else youlike. Assertions are the things that caneither pass or fail.
AuthenticationCorrectly identifying oneself as a mem‐ber/user of an application is the act ofauthentication. Authentication doesn’tdefine what you may do, but simply whoyou are (or aren’t).
AuthorizationAssuming you’ve either succeeded orfailed at authenticating yourself, authori‐
489
www.EBooksWorld.ir
zation defines what you’re allowed to dogiven your particular identification.Authorization is about access and control.
AutowiringWhen a dependency injection containerwill inject an instance of a resolvable classwithout a developer having explicitlytaught it how to resolve that class, that’scalled autowiring. With a container thatdoesn’t have autowiring, you can’t eveninject a plain PHP object with no depen‐dencies until you have explicitly bound itto the container. With autowiring, youonly have to explicitly bind something tothe container if its dependencies are toocomplex or vague for the container to fig‐ure out on its own.
beanstalkdBeanstalk is a work queue. It’s simple andexcels at running multiple asynchronoustasks—which makes it a common driverfor Laravel’s queues. beanstalkd is its dae‐mon.
BladeLaravel’s templating engine.
BrowserKitLaravel’s pre-5.4 testing facilities forDOM-based interactions, available as aComposer package for 5.4+ apps.
CarbonA PHP package that makes working withdates much easier and more expressive.
CashierA Laravel package that makes billing withStripe or Braintree, especially in subscrip‐tion contexts, easier and more consistentand powerful.
ClosureClosures are PHP’s version of anonymousfunctions. A closure is a function that youcan pass around as an object, assign to avariable, pass as a parameter to otherfunctions and methods, or even serialize.
CodeIgniterAn older PHP framework that Laravel wasinspired by.
CollectionThe name of a development pattern andalso Laravel’s tool that implements it. Likearrays on steroids, collections providemap, reduce, filter, and many other pow‐erful operations that PHP’s native arraysdon’t.
CommandThe name for a custom Artisan consoletask.
ComposerPHP’s dependency manager. Like RubyGems or NPM.
ContainerSomewhat of a catchall word, in Laravel“container” refers to the application con‐tainer that’s responsible for dependencyinjection. Accessible via app() and alsoresponsible for resolving calls to control‐lers, events, jobs, and commands, the con‐tainer is the glue that holds each Laravelapp together.
ContractAnother name for an interface.
ControllerA class that is responsible for routing userrequests through to the application’s serv‐ices and data, and returning some form ofuseful response back to the user.
CSRF (cross-site request forgery)A malicious attack where an external sitemakes requests against your applicationby hijacking your users’ browsers (withJavaScript, likely) while they’re still loggedin to your site. Protected against byadding a token (and a check for that tokenon the POST side) to every form on thesite.
Dependency injectionA development pattern where dependen‐cies are injected in from the outside—usu‐
Autowiring
490 | Glossary
www.EBooksWorld.ir
ally through the constructor—instead ofbeing instantiated in the class.
DirectiveBlade syntax options like @if, @unless,etc.
Dot notationNavigating down inheritance trees using .to reference a jump down to a new level. Ifyou have an array like ['owner' =>
['address' => ['line1' => '123 Main
St.']]], you have three levels of nesting.Using dot notation, you would represent“123 Main St.” as "owner.address.line1".
DuskLaravel’s frontend testing package that cantest JavaScript (primarily Vue) and DOMinteractions by spinning up Chrome‐Driver to run the tests.
Eager loadingAvoiding N+1 problems by adding a sec‐ond smart query to your first query to geta set of related items. Usually you have afirst query that gets a collection of thingA. But each A has many Bs, and so everytime you get the Bs from an A, you need anew query. Eager loading means doingtwo queries: first you get all the As, andthen you get all the Bs related to all thoseAs, in a single query. Two queries, andyou’re done.
EchoA Laravel product that makes WebSocketauthentication and syncing of data simple.
ElixirLaravel’s old build tool, since replaced byMix; a wrapper around Gulp.
EloquentLaravel’s ActiveRecord ORM. The toolyou’ll use to define and query somethinglike a User model.
Environment variablesVariables that are defined in an .env filethat is expected to be excluded from ver‐sion control. This means that they don’t
sync between environments and thatthey’re also kept safe.
EnvoyA Laravel package for writing scripts torun common tasks on remote servers.Envoy provides a syntax for defining tasksand servers and a command-line utilityfor running the tasks.
EnvoyerA Laravel SaaS product for zero-down-time deployment, multiserver deploys,and server and cron health checks.
EventLaravel’s tool for implementing a pub/subor observer pattern. Each event representsthat an event happened: the name of theevent describes what happened (e.g., UserSubscribed) and the payload allows forattaching relevant information. Designedto be “fired” and then “listened” for (orpublished and subscribed, if you preferthe pub/sub concept).
FacadeA tool in Laravel for simplifying access tocomplex tools. Facades provide staticaccess to core services in Laravel. Sinceevery facade is backed by a class in thecontainer, you could replace any call tosomething like Cache::put(); with atwo-line call to something like $cache =app('cache'); $cache->put();.
FakerA PHP package that makes it easy to gen‐erate random data. You can request datain different categories, like names,addresses, and timestamps.
FlagA parameter anywhere that is on or off(Boolean).
FluentMethods that can be chained one afteranother are said to be fluent. In order toprovide a fluent syntax, each method mustreturn the instance, preparing it to bechained again. This allows for something
Fluent
Glossary | 491
www.EBooksWorld.ir
like People::where('age', '>', 14)-
>orderBy('name')->get().
FlysystemThe package that Laravel uses to facilitateits local and cloud file access.
ForgeA Laravel product that makes it easy tospin up and manage virtual servers onmajor cloud providers like DigitalOceanand AWS.
FQCN (fully qualified class name)The full namespaced name of any givenclass, trait, or interface. Controller is theclass name; Illuminate\Routing
\Controller is the FQCN.
GulpA JavaScript-based build tool.
HelperA globally accessible PHP function thatmakes some other functionality easier—for example, array_get() simplifies thelogic of looking up results from arrays.
HMR (Hot Module Replacement)A technology that makes it possible toreload just pieces of an active website’sfrontend dependencies without reloadingthe entire file.
HomesteadA Laravel tool that wraps Vagrant andmakes it easier to spin up Forge-parallelvirtual servers for local Laravel develop‐ment.
HorizonA Laravel package that provides toolingfor managing queues with greater nuancethan Laravel’s defaults, and also providesinsight into the current and historic oper‐ating state of the queue workers and theirjobs.
IlluminateThe top-level namespace of all Laravelcomponents.
Integration testIntegration tests test the way individualunits work together and pass messages.
IoC (inversion of control)The concept of giving “control” over howto make a concrete instance of an inter‐face to the higher-level code of the pack‐age instead of the lower-level code.Without IoC, each individual controllerand class might decide what instance ofMailer it wanted to create. IoC makes itso that the low-level code—those control‐lers and classes—just get to ask for aMailer, and some high-level configura‐tion code defines once per applicationwhich instance should be provided to sat‐isfy that request.
JobA class that intends to encapsulate a singletask. Jobs are intended to be able to bepushed onto a queue and run asynchro‐nously.
JSON (JavaScript Object Notation)A syntax for data representation.
JWT (JSON Web Token)A JSON object containing all of the infor‐mation necessary to determine a user’sauthentication state and access permis‐sions. This JSON object is digitally signed,which is what makes it trustworthy, usingHMAC or RSA. Usually delivered in theheader.
MailableAn architectural pattern designed toencompass the functionality of sendingmail into a single “sendable” class.
MarkdownA formatting language designed for for‐matting plain text and outputting to mul‐tiple output formats. Commonly used forformatting text that has a good chance ofbeing processed by a script or read byhumans in its raw form—for example, GitREADMEs.
Flysystem
492 | Glossary
www.EBooksWorld.ir
Mass assignmentThe ability to pass many parameters atonce to create or update an Eloquentmodel, using a keyed array.
MemcachedAn in-memory data store designed toprovide simple but fast data storage.Memcached only supports basic key/valuestorage.
MiddlewareA series of wrappers around an applica‐tion that filter and decorate its inputs andoutputs.
MigrationA manipulation to the state of the data‐base, stored in and run from code.
MixA frontend build tool based on Webpack.Replaced Elixir in Laravel 5.4 and can beused to concatenate, minify, and pre-process your frontend assets, and muchmore.
MockeryA library included with Laravel thatmakes it easy to mock PHP classes in yourtests.
ModelA class used to represent a given databasetable in your system. In ActiveRecordORMs like Laravel’s Eloquent, this class isused both to represent a single recordfrom the system, and to interact with thedatabase table.
Model factoryA tool for defining how the applicationcan generate an instance of your model ifneeded for testing or seeding. Usuallypaired with a fake data generator likeFaker.
MultitenancyA single app serving multiple clients, eachof which has its customers. Multitenancyoften suggests that each client of yourapplication gets its own theming and
domain name with which to differentiateits service to its customers vis-à-vis yourother clients’ potential services.
MutatorA tool in Eloquent that allows you tomanipulate the data being saved to amodel property before it is saved to thedatabase.
NginxA web server similar to Apache.
NotificationA Laravel framework tool allowing a sin‐gle message to be sent via myriad notifica‐tion channels (e.g., email, Slack, SMS) toone or more recipients.
NovaA paid Laravel package for buildingadmin panels for your Laravel apps.
NPM (Node Package Manager)A central web-based repository for Nodepackages, at npmjs.org; also a utility usedon your local machine to install a project’sfrontend dependencies into thenode_modules directory based on thespecifications of package.json.
OAuthThe most common authentication frame‐work for APIs. OAuth has multiple granttypes, each of which describes a differentflow of how consumers retrieve, use, andrefresh the “tokens” that identify themafter the initial authentication handshake.
Option (Artisan)Like arguments, options are parametersthat can be passed to Artisan commands.They’re prefaced with -- and can be usedas a flag (--force) or to provide data(--userId=5).
ORM (object-relational mapper)A design pattern that is centered aroundusing objects in a programming languageto represent data, and its relationships, ina relational database.
ORM (object-relational mapper)
Glossary | 493
www.EBooksWorld.ir

PassportA Laravel package that can be used toeasily add an OAuth authentication serverto your Laravel app.
PHPSpecA PHP testing framework.
PHPUnitA PHP testing framework. The most com‐mon and connected to the most of Lara‐vel’s custom testing code.
PolymorphicIn database terms, able to interact withmultiple database tables with similar char‐acteristics. A polymorphic relationshipwill allow entities of multiple models to beattached in the same way.
PreprocessorA build tool that takes in a special form ofa language (for CSS, one special form isLESS) and generates code with just thenormal language (CSS). Preprocessorsbuild in tools and features that are not inthe core language.
Primary keyMost database tables have a single columnthat is intended to represent each row.This is called the primary key and is com‐monly named id.
QueueA stack onto which jobs can be added.Usually associated with a queue worker,which pulls jobs one at a time from aqueue, works on them, and then discardsthem.
ReactA JavaScript framework. Created andmaintained by Facebook.
Real-time facadesSimilar to facades, but without requiring aseparate class. Real-time facades can beused to make any class’s methods callableas static methods by importing that classwith Facades\ in front of its namespace.
RedisLike Memcached, a data store simplerthan most relational databases but power‐ful and fast. Redis supports a very limitedset of structures and data types but makesup for it in speed and scalability.
REST (Representational State Transfer)The most common format for APIs thesedays. Usually suggests that interactionswith an API should each authenticate sep‐arately and should be “stateless”; also usu‐ally suggests that the HTTP verbs are usedfor basic differentiation of requests.
RouteA definition of a way or ways the usermight visit a web application. A route is apattern definition; it can be somethinglike /users/5, or /users, or /users/id.
S3 (Simple Storage Service)Amazon’s “object storage” service, whichmakes it easy to use AWS’s incrediblecomputing power to store and serve files.
SaaS (Software as a Service)Web-based applications that you paymoney to use.
ScopeIn Eloquent, a tool for defining how toconsistently and simply narrow down aquery.
ScoutA Laravel package for full-text search onEloquent models.
SerializationThe process of converting more complexdata (usually an Eloquent model) tosomething simpler (in Laravel, usually anarray or JSON).
Service providerA structure in Laravel that registers andboots classes and container bindings.
SocialiteA Laravel package making it simple to addsocial authentication (e.g., login via Face‐book) to Laravel apps.
Passport
494 | Glossary
www.EBooksWorld.ir
Soft deleteMarking a database row as “deleted”without actually deleting it; usually pairedwith an ORM that by default hides all“deleted” rows.
SparkA Laravel tool that makes it easy to spinup a new subscription-based SaaS app.
SymfonyA PHP framework that focuses on build‐ing excellent components and makingthem accessible to others. Symfony’sHTTP Foundation is at the core of Laraveland every other modern PHP framework.
TelescopeA Laravel package for adding a debuggingassistant to Laravel apps.
TinkerLaravel’s REPL, or read–evaluate–printloop. It’s a tool that allows you to performcomplex PHP operations within the fullcontext of your app from the commandline.
TL;DRToo long; didn’t read. “Summary.”
TypehintingPrefacing a variable name in a methodsignature with a class or interface name.Tells PHP (and Laravel, and other devel‐opers) that the only thing that’s allowed tobe passed in that parameter is an objectwith the given class or interface.
Unit testUnit tests target small, relatively isolatedunits—a class or method, usually.
VagrantA command-line tool that makes it easy tobuild virtual machines on your local com‐puter using predefined images.
ValetA Laravel package (for Mac OS users, butthere are forks for macOS and Windows)that makes it easy to serve your applica‐tions from your development folder ofchoice, without worrying about Vagrantor virtual machines.
ValidationEnsuring that user input matchesexpected patterns.
ViewAn individual file that takes data from thebackend system or framework and con‐verts it into HTML.
View composerA tool that defines that, every time a givenview is loaded, it will be provided a cer‐tain set of data.
VueA JavaScript framework. Preferred by Lar‐avel. Written by Evan You.
WebpackTechnically a “module bundler,” Webpackis a tool commonly used to run frontendbuild tasks, especially those that involveprocessing CSS and JavaScript and otherfrontend source files and outputting themin a more production-ready format.
Webpack
Glossary | 495
www.EBooksWorld.ir

www.EBooksWorld.ir
Index
Symbols* (asterisk), following array arguments or
options, 210- - (hyphen, double), preceding Artisan com‐
mand options, 210-> ,=> (arrow)
-> chaining methods, 31, 36-> traversing JSON structure, 116=> preceding Tinker responses, 217
. (period), dot notation, 491/ (slash), escaping in Artisan commands, 339:: (colon, double), in facades, 289= (equal sign), in Artisan argument definition,
210? (question mark)
following optional Artisan command argu‐ments, 209
following optional parameters, 29query parameters, 107
@ (at sign)preceding Blade directives, 63preceding Blade echo syntax, 64
\ (backslash), escaping in Artisan commands,448
__() helper, 469{ } (braces)
enclosing Artisan command arguments, 209enclosing route parameters, 50, 186{ !! !!}, Blade echo syntax, not escaped, 64,
197{ { }}, Blade echo syntax, escaped, 64, 197
Aabilities (rules) for authorization, 240
abort() helper, 59, 472abort_if() helper, 59, 472abort_unless() helper, 59, 472acceptance tests (see application tests)accepts() method, Request, 261accessors, 131, 139, 156, 489ACL (access control list), 240, 242
(see also authorization)actingAs() method, 309, 375action() helper, 57, 470ActiveRecord pattern, 117, 489
(see also Eloquent)add() method, Cache, 387addGlobalScope() method, 130after() method, Blueprint, 94after() method, tasks, 461Ajax, 55Algolia SDK, 396aliases, binding to, 285aliasing, of component, 75all() method, collection, 477all() method, Eloquent, 121all() method, ParameterBag, 259all() method, Request, 182, 197, 259all() method, Session, 385allDirectories() method, Storage, 380allFiles() method, Request, 261allFiles() method, Storage, 379anonymous functions (see closures)anticipate() method, 213api guard, 236api middleware group, 274API resource controllers, 49API routes, 26
497
www.EBooksWorld.ir
(see also routes)api.php file, 26APIs, 337-376
authentication with API tokens, 373authentication with Passport, 358-373customizing 404 responses, 374defined, 489Eloquent API resources, 352-357fallback route, 374filtering results, 347JSON for, 338, 341, 345Lumen for, 487nesting relationships between resources,
350-352paginating results, 344request headers, reading, 342, 343resource controllers, 339-342response headers, sending, 342REST style of, 337-338sorting results, 345-347testing, 374transforming results, 348-352
app commands, Artisan, 204app folder, 16app() helper, 258, 281app.js file, 452app.php file in config, 396, 450append() method, Storage, 379appendOutputTo() method, tasks, 460application
bootstrapping, 254exiting, 473kernel, 254lifecycle, 253-256
application container (see container)application tests, 304
defined, 296, 489exception handling, 310TestCase class, 304
AppServiceProvider, 291app_path() helper, 469argument()/arguments() methods, Artisan, 211,
489arrays
as Artisan arguments or options, 210collections as alternative to, 136collections compared to, 475converting to collections, 473helpers for, 465-467
array_filter() method, 476array_first() helper, 466array_get() helper, 466array_has() helper, 466array_map() method, 476array_pluck() helper, 466array_random() function, 467arrow
-> chaining methods, 31, 36-> traversing JSON structure, 116=> preceding Tinker responses, 217
Artisan commands, 201-217asserting against Artisan command syntax,
322basic commands, 202calling from code, 209, 216custom, 206-215defined, 490escaping slashes in, 339options for, 203output during execution of, 214-215progress bars for, 215prompting for user input, 213queueing, 205, 436sample command, 208scheduling as tasks, 457testing, 219, 322-323using input from, 211-213
Artisan facade, 216artisan file, 17artisan() method, 219artisan() method, TestCase, 322Artisan, defined, 489as() method, Eloquent, 146ask() method, 213assert() method, Dusk, 332assertCookie() method, TestCase, 308, 402assertCookieExpired() method, TestCase, 308assertCookieNotExpired() method, TestCase,
308assertDatabaseHas() method, TestCase, 311assertDatabaseMissing() method, TestCase, 311assertDispatched() method, TestCase, 313assertDontSee() method, TestCase, 307assertion, defined, 489assertJson() method, TestCase, 307assertNotDispatched() method, TestCase, 313assertNothingSent() method, TestCase, 316assertNotSent() method, notification, 425
498 | Index
www.EBooksWorld.ir
assertOk() method, TestCase, 306assertPlainCookie() method, TestCase, 403assertRedirect() method, TestCase, 308assertSee() method, TestCase, 307assertSent() method, notification, 425assertSentTo() method, TestCase, 316assertSessionHas() method, TestCase, 307, 400assertSessionHasAll() method, TestCase, 401assertSessionHasErrors() method, TestCase,
307, 401assertSessionMissing() method, TestCase, 401assertStatus() method, TestCase, 307assertViewHas() method, TestCase, 84, 307assets folder, 161associate() method, Eloquent, 143asterisk (*), following array arguments or
options, 210at sign (@)
preceding Blade directives, 63preceding Blade echo syntax, 64
attach() method, Dusk, 328attach() method, Eloquent, 147attach() method, mailable, 410attachData() method, mailable, 410attachFromStorage() method, mailable, 410attempt() method, authentication, 232attempts() method, jobs, 433attribute casting, 133attribute() method, Dusk, 327auth commands, Artisan, 204@auth directive, 236Auth facade, 225auth middleware, 234auth scaffold, 231auth scaffolding, 170auth() helper, 225, 472auth.basic middleware, 234auth.php file, 237, 359Auth::routes() facade, 229, 230, 235AuthController, 221Authenticatable contract, 224AuthenticateSession middleware, 233authentication, 221-240
APIs for, 358-373Blade directives, 236contracts, 224defined, 222, 489Dusk and, 327events, 239
ForgotPasswordController, 229guards for, 236-238invalidating sessions on other devices, 233LoginController, 227-228manual authentication, 233manually logging out a user, 233MustVerifyEmail trait, 235RegisterController, 226-227RegistersUsers trait, 227remember me access token, 232ResetPasswordController, 229route middleware for, 234routes for, 229testing, 249-252, 309VerificationController, 229views for, 231WebSocket (see Echo)
Authorizable contract, 225Authorizable trait, 245authorization, 240-249
Authorizable contract, 225AuthorizesRequests trait, 243Blade checks, 246checking user capabilities, 245defined, 222, 489defining rules for, 240Gate facade, 241intercepting checks, 246policies, 247-249resource gates, 242route middleware for, 243testing, 249-252
authorization code grant, Passport, 362-366authorize() method, AuthorizesRequests trait,
243authorize() method, form request, 194authorizeForUser() method, AuthorizesRe‐
quests trait, 243authorizeResource() method, AuthorizesRe‐
quests trait, 243AuthorizesRequests trait, 243AuthServiceProvider, 240, 246, 255, 371autowiring, 282, 490avg() method, collection, 481avg() method, DB, 114away() method, redirects, 57
Bback() helper, 57, 266, 473
Index | 499
www.EBooksWorld.ir
backslash (\), escaping in Artisan commands,448
base_path() helper, 470be() method, TestCase, 250beanstalkd queues, 428, 490before() method, tasks, 461beginTransaction() method, DB, 117belongsTo() method, Eloquent, 140, 142, 149belongsToMany() method, Eloquent, 145bigIncrements() method, Blueprint, 93bigInteger() method, Blueprint, 92billing (see Cashier)binary() method, Blueprint, 92bind() method, 284, 284binding
API resource controllers, 49classes to container, 283-286data to views, 76-79PDO parameter binding, 107route model binding, 50-51
Blade, 63-85authentication directives, 236basics, 63checks using, 246components and slots, 73-75conditionals, 65control structures, 65-67custom directives, 80-83defined, 490directives for, 63echoing PHP in, 64included view partials, 70-72loops, 65-67, 71multitenancy using, 82sections, 68-70service injection, 79-80stacks, 72template inheritance, 68-75templates, 40view composers, 76-79
Blade::if() method, 83Blueprint class, 92-94boolean() method, Blueprint, 92boot() method, Eloquent model, 130boot() method, service providers, 51, 238, 240,
255, 371bootstrap folder, 16bootstrapping application, 254braces ({ })
enclosing Artisan command arguments, 209enclosing route parameters, 50, 186{ !! !!}, Blade echo syntax, not escaped, 64,
197{{ }}, Blade echo syntax, escaped, 64, 197
broadcast notifications, 423broadcast() helper, 449, 456broadcastAs() method, events, 444broadcasting events (see WebSockets)broadcasting.php file, 443broadcastOn() method, events, 438, 443BroadcastServiceProvider, 449broadcastWith() method, events, 445browse() method, Dusk, 326browser tests, 323-335
BrowserKit Testing package, 324Dusk for, 324-335
(see also Dusk)tool choice, 324
BrowserKit testing package, 198, 324, 490build() method, mailable, 407, 410Bus facade
testing, 314
Ccache commands, Artisan, 204Cache facade, 386cache() helper, 386caches
accessing, 204, 386-388data stores used by, 89for custom directive results, 81for routes, 52testing, 401
call() method, Artisan, 216call() method, container, 288call() method, TestCase, 402camel_case() helper, 175@can directive, 246can() method, Authorizable, 245@cannot directive, 246cannot() method, Authorizable, 245CanResetPassword contract, 225cant() method, Authorizable, 245capture() method, Request, 257Carbon package, 387, 490Carbon::now(), 40Cashier, 486, 490chaining methods, 31, 36
500 | Index
www.EBooksWorld.ir

channel() method, Broadcast, 450channel() method, Echo, 454channels, log, 393-396char() method, Blueprint, 92check() method, authorization, 225check() method, Dusk, 328choice() method, 213chunk() method, collection, 479chunk() method, Eloquent, 122classes
FQCN for, 492view composers using, 78
clear-compiled command, Artisan, 202click() method, Dusk, 328clickLink() method, Dusk, 328closure request guard, 238closures
binding to, 283defined, 26, 490defining Artisan commands as, 215defining routes using, 26view composers using, 77
Cloud storage (see storage)cloud-based mail, 405CodeIgniter, 490collect() helper, 135, 473, 476Collection class, 106, 135-137collection() method, API resource, 354collections, 475-481
compared to arrays, 475converting to arrays, 476defined, 490returned by Eloquent, 135-137serialization, 137using outside Laravel, 481
colon, double (::), in facades, 289columns, creating, 92-94commands, Artisan (see Artisan commands)comment() method, Artisan, 214commit() method, DB, 117@component directive, Blade, 74components, Blade, 73-75components, Dusk, 333-335Composer, 12, 254
commands for, 14creating new projects, 14defined, 490service provider features with, 256
composer.json file, 17
composer.lock file, 17conditionals (Blade), 65config commands, Artisan, 204config folder, 16, 18config() helper, 473config/app.php file, 396, 450config/cache.php file, 386config/scout.php file, 396config/session.php file, 382configuration files, 16, 18, 236, 470config_path() helper, 470confirm() method, Artisan, 213Console component, Symfony, 201constructor injection, 279, 281, 287container, 46
accessing facade backing class from, 290accessing objects from, 281autowiring, 282binding classes to, 283-286constructor injection, 287defined, 490dependency injection, 279-281method injection, 287registering bindings for, 291
contextual binding, 286contracts, 490
(see also interfaces)Contracts namespace, 224controllers, 42-49
API resource controllers, 49applying middleware using, 34controller/method reference syntax, 29creating, 43-45defined, 490getting and handling user input, 45-46handling routes using, 28in MVC, 24injecting dependencies into, 46namespaces for, 44resource controllers, 47-49, 339-342single action, 49
Cookie facade, 389cookie() helper, Cookies, 390cookie() method, Request, 262, 391cookie() method, Response, 391CookieJar class, 390cookies, 388-391
accessing with Cookie facade, 389accessing with cookie() helper, 390
Index | 501
www.EBooksWorld.ir
accessing with Request and Response, 391configuring, 390encryption for, 402locations of, 388testing, 402
copy() method, Mix, 164copy() method, Storage, 379copyDirectory() method, Mix, 164count() method, collection, 481count() method, DB, 114count() method, ParameterBag, 259create() method, model factories, 102, 123, 124create() method, resource controllers, 25create() method, Schema, 91create, read, update, delete (see CRUD)CreateFreshApiToken middleware, 367, 368create_users_table migration, 90, 222cron jobs, scheduler as alternative to, 457CRUD (create, read, update, delete), 42
(see also resource controllers)CSRF (cross-site request forgery), 53-55, 453,
490csrf_field() helper, 473csrf_token() helper, 473CSS
Blade stacks for, 72postprocessor for, 163preprocessor for, 160, 163preprocessorless, in Mix, 163
custom route model binding, 51
Ddaily log channel, 394database folder, 16database notifications, 423database tests, 311, 327DatabaseMigrations trait, 302databases, 87-157
(see also Eloquent)configuring connections to, 87-89custom guard providers for, 239migrations, 89-98paginating results from, 170query builder, 105-117seeders, 98-105testing, 155-157Tinker interacting with, 217
DatabaseSeeder class, 98DatabaseTransactions trait, 302
database_path() helper, 470date mutators, 134dates and times (see Carbon package) (see
scheduler) (see timestamps)datetime() method, Blueprint, 92db commands, Artisan, 204DB facade, 105dd() helper, 473Dead Man’s Snitch, 460debugging
dump server for, 218Telescope for, 488
decimal() method, Blueprint, 92decrement() method, Cache, 388decrement() method, DB, 115default() method, Blueprint, 94$defer property, 255DeferrableProvider interface, 255define() method, model factories, 100delay() method, jobs, 432delay() method, notification, 420DELETE method, 25
for resource controllers, 25routes based on, 28
delete() method, DB, 107, 116delete() method, Eloquent, 126-128delete() method, Storage, 379deleteDirectory() method, Storage, 380deleted_at column, 127deleteFileAfterSend() method, Response, 265dependency injection, 279-281
constructor injection, 279, 281, 287defined, 490method injection, 279, 287setter injection, 279-279testing using, 292
destroy() method, resource controllers, 25detach() method, Eloquent, 147development environments, 12-17DI (dependency injection) container (see con‐
tainer)directives (Blade), 63
aliasing components to be, 75defined, 491
directories() method, Storage, 380disk() method, Storage, 378, 381dispatch() helper, 431, 474Dispatchable trait, 430dissociate() method, Eloquent, 143
502 | Index
www.EBooksWorld.ir
distinct() method, DB, 111dnsmasq tool, 13dot notation, 491double() method, Blueprint, 92down command, Artisan, 202down() method, migrations, 90download responses, 264download() method, Response, 60, 264downloads, 382drag() method, Dusk, 328dragDown() method, Dusk, 328dragLeft() method, Dusk, 328dragRight() method, Dusk, 328dragUp() method, Dusk, 328dump server, 218dump() helper, 218dump-server command, Artisan, 202, 218Dusk, 324-335
as part of Laravel ecosystem, 484assertions, 330authentication and databases, 327components, 333-335customizing environment variables, 325defined, 491installing, 325interactions with page, 327-329page class, 331-333selector matching order, 328waiting methods, 329writing tests, 325
dynamic rate limiting, 35
Ee() helper, 174, 467@each directive, Blade, 71each() method, collection, 478eager loading, 152, 491Echo, 443, 447-448
as part of Laravel ecosystem, 485authorization for channels, 450-452client events, 456defined, 491event broadcasting, 453excluding user from events, 449, 456JavaScript package for, 452-456listening for events, 453presence channels, 455private channels, 454service provider configuration, 449-452
subscribing to channels, 454subscribing to notifications, 456
ecosystem, Laravel, 483-488edit() method, resource controllers, 25elements() method, Dusk, 332Elixer, 484
(see also Mix build tool)Elixir
compiling Passport frontend components,370
defined, 491elixir() helper, 472Eloquent, 36, 87, 117-155
accessors, 131aggregates, 122API resources, 352-357attribute casting, 133child records updating parent record time‐
stamps, 152-154collections returned by, 135-137customizing route key for, 51date mutators, 134defined, 491deletes, 126-128eager loading, 152events, 154-155exceptions thrown by, 121filtering API results, 347full-text search for, 396-398inserts, 122JSON results for APIs, 341mass assignment, 124, 196migration, creating with model, 119model creation, 119mutators, 132pagination for, 170-172, 344primary keys, 119relationships, 139-151retrieving data, 120-122scopes (filters), 128-131serialization, 137-139sorting results, 345-347table names, 119timestamps, 120, 152-154transforming results, 348-352updates, 123-125user input from, 196
Eloquent API resourcesconditionally applying attributes, 357
Index | 503
www.EBooksWorld.ir
creating a resource class, 352nesting relationships, 355pagination, 356resource collections, 354
@else directive, Blade, 65, 246@elseif directive, Blade, 65email notifications, 419email verification
migrations and, 91MustVerifyEmail trait, 235VerificationController, 229
emailOutputTo() method, tasks, 460EncryptCookies middleware, 402encryption
for cookies, 402generating keys for OAuth server, 358key:generate and, 204of session data, 382
@endcan directive, 246@endcannot directive, 246@endif directive, Blade, 65@endsection directive, Blade, 69ends_with() helper, 175, 467@endunless directive, Blade, 65enum() method, Blueprint, 93env command, Artisan, 202.env file, 17, 18, 19, 168env() helper, 18, 473.env.example file, 17.env.test file, 301environment variables
defined, 491Mix, 168returning, 473setting for tests, 301
environment() method, 301Envoy, 487, 491Envoyer, 460, 485, 491equal sign (=), in Artisan argument definition,
210error bags, 174, 179error() method, 214error() method, notification, 422errors and exceptions
from Eloquent, 121from HTTP, 472from jobs in queue, 433-435from session, testing for, 401from user input, 193
in message and error bags, 174, 179$errors variable, 174ES6, JavaScript, 164event commands, Artisan, 204Event facade, 437event fakes, 312event() helper, 437, 474Event::fake() method, Eloquent, 313events, 437-442
authentication, 239broadcasting over WebSockets (see Web‐
Sockets)creating, 437-439creating listeners for, 439-442defined, 491Eloquent, 154-155firing, 437-439, 474pub/sub pattern used by, 437subscribers for, 441testing, 462
ExampleTest.php file, 296except() method, Request, 182, 259exception handling, HTTP tests, 310exceptions (see errors and exceptions)exists() method, Request, 259exists() method, Session, 384exists() method, Storage, 379expectsOutput() method, TestCase, 322expectsQuestion() method, TestCase, 322$expression parameter, Blade, 81@extends directive, Blade, 69extract() method, 167
Ffacades, 289-291
accessing backing class of, 290creating, 291defined, 491importing, 75importing namespaces for, 289injecting backing class of, 290namespaces for, 185static calls using, 27
factory() helper, 101, 474failed() method, jobs, 434fake() method, 312Faker, 295, 400, 491fallback routes, 36feature tests, 296
504 | Index
www.EBooksWorld.ir
File facade, 380file responses, 265file() method, Faker, 400file() method, Request, 187, 261file() method, Response, 60, 265files() method, Storage, 379filesystem storage (see storage)filesystems.php file, 377file_get_contents() function, 381filled() method, Request, 259filter() method, collection, 477filtering API results, 347filters (see scopes)find() method, DB, 113find() method, Eloquent, 120findOrFail() method, DB, 113findOrFail() method, Eloquent, 120first() method, Blueprint, 94first() method, collection, 478first() method, DB, 113first() method, Eloquent, 120firstOrCreate() method, Eloquent, 125firstOrFail() method, DB, 113firstOrFail() method, Eloquent, 120firstOrNew() method, Eloquent, 125flag, defined, 491flash session storage, 385flash() method, Request, 262flash() method, Session, 385flashExcept() method, Request, 262flashOnly() method, Request, 262float() method, Blueprint, 93fluent interface, 105fluent, defined, 491flush() method, Cache, 388flush() method, Request, 262flush() method, Session, 385Flysystem package, 377, 380, 492@for directive, Blade, 66forceDelete() method, Eloquent, 128@foreach directive, Blade, 66@forelse directive, Blade, 66forever() method, Cache, 387Forge, 428, 485, 492forget() method, Cache, 388forget() method, Session, 385ForgotPasswordController, 229form encoding, 189form method spoofing, 52
form requests, 194-196, 276forUser() method, Gate, 242FQCN (fully qualified class name), 492Fractal package, 349frameworks, 1-4
(see also Laravel)from() method, mailable, 410frontend components, 169
(see also Mix build tool)full-text search, Scout package for, 396-398functional tests (see application tests)functions (see helper functions)
GGate facade, 241GET method, 24
for resource controllers, 25routes based on, 28
get() method, Cache, 387get() method, Cookie, 389get() method, DB, 108, 113get() method, Eloquent, 121get() method, ParameterBag, 259get() method, Route, 31get() method, Session, 383get() method, Storage, 379get() method, TestCase, 305getFacadeAccessor() method, 290getJson() method, 306getRealPath() method, SplFileInfo, 381getVisibility() method, Storage, 379.gitignore file, 17global scopes, 129-131grant types, Passport, 360-368groupBy() method, collection, 479groupBy() method, DB, 112Grunt, 159guard() method, 237guards, 236-238
adding, 237changing default, 237closure request guards, 238custom user providers, 238driver for, 236, 238provider for, 236-238
@guest directive, 236guest middleware, 234guest() method, 225guest() method, redirects, 57
Index | 505
www.EBooksWorld.ir
Gulp, 159, 492gulpfile.js file, 15
Hhandle() method, events, 440handle() method, jobs, 430handle() method, requests, 255, 270-272, 275has() method, Cache, 387has() method, Cookie, 389has() method, Eloquent, 143has() method, ParameterBag, 259has() method, Request, 183has() method, Session, 384HasApiTokens trait, 359hasCookie() method, Request, 262hasFile() method, Request, 188, 261hasMany() method, Eloquent, 142hasManyThrough() method, Eloquent, 144hasOne() method, Eloquent, 140hasOneThrough() method, Eloquent, 144having() method, DB, 112havingRaw() method, DB, 112HEAD method, 24header() method, Request, 260, 343header() method, Response, 343headers (see request headers) (see response
headers)$headers array, 277help command, Artisan, 202helper functions, 465-474
(see also specific helpers)defined, 492for arrays, 465-467for paths, 469for strings, 467-469for URLs, 470-472
here() method, Echo, 455$hidden property, 348HMR (Hot Module Replacement; hot reload‐
ing), 167, 492home() method, redirects, 57Homestead, 13, 484, 492Horizon, 436, 484, 492Hot Module Replacement (HMR), 166, 492.htaccess file, 254htmlentities() function, 64, 467HTTP method spoofing, 53HTTP methods (verbs), 24, 28, 52HTTP redirects, 55-59, 473, 474
HTTP requests, 59, 253-262, 276-277(see also Request object)
HTTP responses, 60, 262-269, 474(see also Response object)
HTTP tests, 305-311authenticating responses, 309basic page, 305customizations, 310exception handling, 310JSON testing, 306$response object assertions, 306
HttpFoundation classes, 257HTTPS requests, 276-277hyphen, double (- -), preceding Artisan com‐
mand options, 210
Iid() method, 225@if directive, Blade, 65if statements, 83illuminate collections, 106illuminate namespace, 492implicit route model binding, 50@include directive, Blade, 70increment() method, Cache, 388increment() method, DB, 115increments() method, Blueprint, 93index() method, Blueprint, 94index() method, resource controllers, 25index.php file, 254info() method, 214@inject directive, Blade, 80input() method, Request, 183, 185, 259inRandomOrder() method, DB, 112insert() method, DB, 107, 115insertGetId() method, DB, 115installer tool, 14, 21, 484instance() method, Mockery, 320instances, binding to, 285integer() method, Blueprint, 92integration tests, 303, 492intended() method, redirects, 57InteractsWithQueue trait, 430InteractsWithSockets trait, 449interfaces (contracts), 224, 285Intervention library, 381invoke() method, 49IoC (inversion of control), 280, 292, 492IoC container (see container)
506 | Index
www.EBooksWorld.ir
ip() method, Request, 260is() method, Request, 260isEmpty() method, collection, 481isJson() method, Request, 261isMethod() method, Request, 184isNotEmpty() method, collection, 481isValid() method, File, 188
JJavaScript
concatenating, in Mix, 163Echo JavaScript package, 452-456
(see also Echo)escaping backslashes in, 448processing, in Mix, 164vendor extraction, in Mix, 167
JavaScript ES6, 164JavaScript files, Blade stacks for, 72JavaScript Object Notation (see JSON)jobs, 428-432
(see also queues)creating, 429-431defined, 427, 492deleting, 435dispatching, 474failed, 433-435number of tries for, 433pushing onto queue, 431releasing back to queue, 435
join() method, DB, 114join() method, Echo, 455js() method, Mix, 166JSON (JavaScript Object Notation)
API pattern for, 338API spec for, 345defined, 492operations, 116, 137-139responses, 265storing default string as key with, 178testing, 306
JSON Web Token (JWT), 367, 492json() method, Blueprint, 93json() method, Request, 185, 259json() method, Response, 60, 265jsonb() method, Blueprint, 93jsonp() method, Response, 60JWT (JSON Web Token), 367, 492
Kkebab_case() helper, 175keep() method, Session, 385kernel, 254Kernel.php file, 272key commands, Artisan, 204key, storing default string as, 178keys() method, Dusk, 328keys() method, ParameterBag, 259
LLambo package, 14Laravel
advantages of, 4-6community for, 6documentation for, xviiiecosystem for, 483-488installer, 14, 21, 484local development environments for, 12-17online resources, 488PHP versions and extensions for, 11starting, 21system requirements, xviii, 11versions of (see versions of Laravel)
Laravel Cashier, 486, 490Laravel Dusk (see Dusk)Laravel Echo (see Echo)Laravel Envoy, 487Laravel Envoyer (see Envoyer)Laravel Forge (see Forge)Laravel Homestead (see Homestead)Laravel Horizon (see Horizon)Laravel Lumen, 487Laravel Mix (see Mix build tool)laravel new command (Laravel installer), 14, 21Laravel Nova, 486, 493Laravel Passport (see Passport package)Laravel Socialite, 486, 494Laravel Spark, 487, 495Laravel Telescope, 488, 495Laravel Valet (see Valet package)laravel.log file, 415last() method, collection, 478lastModified() method, Storage, 379later() method, Mail, 414latest() method, DB, 112lazy loading, 152, 153LengthAwarePaginator class, 171lifecycle of application, 253-256
Index | 507
www.EBooksWorld.ir
line() method, 214links() method, 170listen() method, Echo, 454listeners, for events, 439-443listenForWhisper() method, Echo, 456loadMissing() method, Eloquent, 154local development environments, 12-17local disk, 378local scopes, 128localization, 175-179
basic, 176parameters in, 177pluralization in, 177storing default string as key with JSON, 178
Log facade, 289-291Log Fake package, 403logging, 289-291, 391-396, 415
channels, 393-396daily channel, 394reasons to use, 392single channel, 394slack channel, 394stack channel, 395testing, 403writing to logs, 392
logging out, manually, 233login() method, 228, 233loginAs() method, Dusk, 327LoginController, 227-228loginUsingId() method, 233logoutOtherDevices() method, 233longText() method, Blueprint, 93$loop variable, 67loops (Blade), 65-67, 71Lumen, 487
Mmail, 405-426
attachments, 410capturing, 415classic mail, 406configuring, 405creating, 406-408customizing, 410drivers supported, 405HTML vs. plain-text, 409inline images, 410local development, 415logging, 415
mailable mail, 406-408manually modifying, 410Markdown mailables, 411-413notifications, 416-424queues for, 414, 436rendering mailables to the browser, 413sending, 408templates, 409testing, 415, 425universal to, 416
Mail facade, testing, 315mail.php file, 405, 416mailables, 492
(see also Markdown)MailThief, 425Mailtrap, 415make commands, Artisan, 204, 206make() method, app, 282make() method, Cookie, 389make() method, model factories, 102make() method, Response, 60make:auth command, Artisan, 231make:controller command, Artisan, 43, 45, 47make:event command, Artisan, 437make:factory command, Artisan, 100make:job command, Artisan, 429make:mail command, Artisan, 406, 412make:middleware command, Artisan, 270make:migration command, Artisan, 91make:model command, Artisan, 119, 340make:policy command, Artisan, 247make:resource command, Artisan, 352make:seeder command, Artisan, 98makeDirectory() method, Storage, 380makeVisible() method, Eloquent, 138makeWith() method, app, 288many to many polymorphic relationships, 150many-to-many relationships, 139, 145-148map() method, collection, 478mapApiRoutes() method, RouteServicePro‐
vider, 274mapWebRoutes() method, RouteServicePro‐
vider, 274Markdown
components, 413defined, 492mailables, 411-413notifications, 422
markdown() method, 412, 422
508 | Index
www.EBooksWorld.ir
mass assignment, 124, 196, 493max() method, DB, 114Mbstring PHP extension, 11mediumInteger() method, Blueprint, 92mediumText() method, Blueprint, 93Memcached data store, 89, 493message bags, 172-174, 179message() method, Request, 192MessageBag class, 172-174method injection, 279, 287method() method, Request, 184, 260methods, 31
(see also specific methods)chaining, 31, 36controller/method reference syntax, 29HTTP methods (verbs), 24, 28
middleware, 27, 269-276binding, 272-275custom, 270-272defined, 493for authentication, 234for authorization, 243groups, 273passing parameters to, 275route groups for, 34-36trusted proxies, 276-277
middleware() method, 34, 274migrate command, Artisan, 97, 202, 205, 340migrate:fresh command, Artisan, 302migrations, 89-98
columns, creating, 92-94columns, modifying, 94-97creating with Eloquent model, 119defined, 493defining, 90-97field properties, 93foreign keys, 96indexes, adding, 96indexes, removing, 96running, 97tables, creating, 91tables, dropping, 94
min() method, DB, 114Mix build tool, 159-168
as part of Laravel ecosystem, 484copying files or directories, 164defined, 493directory structure for, 161environment variables, 168
HMR, 166JavaScript, concatenating, 163JavaScript, processing, 164pre- and post-processors, 163preprocessorless CSS, 163running, 161source maps, generating, 162vendor extraction, 167versioning, 164-166Vue and React components, 166
mix() helper, 165, 167mix.version() method, 165Mockery library, 295, 318-321, 493mocking, 318-321model
defined, 493in MVC, 23
model factories, 99-104, 312, 493Model-View-Controller (MVC) pattern (see
MVC pattern)modelKeys() method, collection, 136morphs() method, Blueprint, 93move() method, Storage, 379multitenancy, 82, 493mutators, 132, 493MVC (Model-View-Controller) pattern, 23
(see also controllers; views)primary concepts, 23views in, 40
Nname prefixes, route groups for, 38name() method, 31namespace prefixes, route groups for, 37namespaces
default App namespace, replacing, 204escaping backslashes in JavaScript, 448facades for namespaced classes, 75for contracts, 224for controllers, 44for facades, 185, 289Illuminate, 254make namespace, for Artisan, 206
Nexmo, 424Nginx, 493Node.js, installing, 161Notifiable trait, 419Notification facade, 316, 419notifications, 416-424
Index | 509
www.EBooksWorld.ir
broadcast notifications, 423channels for, 418creating, 416-418database notifications, 423defined, 493drivers supported, 421Markdown, 422queueing, 420sending, 419Slack notifications, 424SMS notifications, 424subscribing to, 456testing, 425
notifications commands, Artisan, 205notify() method, Notifiable, 420Nova, 486, 493now() helper, 40NPM (Node Package Manager), 493npm install command, 452nullable() method, Blueprint, 94nullableTimestamps() method, Blueprint, 93
OOAuth 2.0, 358, 493
(see also Passport package)object-relational mapper (ORM), 36, 493
(see also Eloquent)old() helper, 58, 474old() method, Request, 262oldest() method, DB, 112once() method, 233onceUsingId() method, 233onConnection() method, jobs, 431onConnection() method, mailable, 414one-to-many relationships, 139, 141-143one-to-one relationships, 140-141online resources
facades documentation, 290Laravel documentation, xviiiValet documentation, 13
only() method, Request, 125, 182, 197, 259onlyTrashed() method, Eloquent, 128onQueue() method, events, 432onQueue() method, jobs, 432onQueue() method, mailable, 414onUserSubscription() method, events, 442OpenSSL PHP extension, 11operating system requirements, xviii, 11optimize command, Artisan, 202
option()/options() methods, Artisan, 211, 493OPTIONS method, 25orderBy() method, DB, 111orderBy() method, Eloquent, 120ORM (object-relational mapper), 36, 493
(see also Eloquent)orWhere() method, DB, 109
Ppackage commands, Artisan, 205package.json file, 17Package::make() method, Eloquent, 303page class, Dusk, 331-333page tests, 305paginate() method, 170, 344pagination, 170-172, 356Paginator class, 172parameter binding, PDO, 107ParameterBag class, 259@parent directive, Blade, 70passes() method, Request, 192Passport package, 358-373
as part of Laravel ecosystem, 484defined, 494deploying, 373grant types for, 360-368installing, 358routes for, 359, 369scopes, 371-372Vue components, 369-370
passport:keys command, Artisan, 373PassportServiceProvider, 358password grant, Passport, 360PATCH method, 25path prefixes, route groups for, 36path() method, Request, 260paths
for facades, 185helpers for, 469
pause() method, Dusk, 329PDO parameter binding, 107PDO PHP extension, 11personal access client, 366personal access tokens, Passport, 366PHP
versions and extensions for, 11views rendered with, 40
PHPSpec, 494PHPUnit testing framework, 21, 295, 494
510 | Index
www.EBooksWorld.ir
assertions syntax, 297method naming, 300
phpunit.xml file, 17, 301pingBefore() method, tasks, 461pivot table, 145-148pjax() method, Request, 261pluck() method, collection, 479pluralization, 174, 177polymorphic relationships, 139, 148-151, 494POST method, 24
for resource controllers, 25getting user input from, 45routes based on, 28
prepend() method, Storage, 379preprocessor, 494preset command, Artisan, 202primary key, 494primary() method, Blueprint, 94priority() method, mailable, 410private() method, Echo, 454progress bars, 215progressAdvance() method, 215progressFinish() method, 215projects
configuring, 18creating, 13directory structure for, 15-17
provides() method, service providers, 256$proxies array, 276proxies, trusted, 276-277pub/sub pattern, 437, 442public disk, 378public folder, 16pull() method, Cache, 387pull() method, Session, 385push() method, Session, 384Pusher, 442, 446-452PUT method, 25
for resource controllers, 25routes based on, 28
put() method, Cache, 387put() method, Session, 384put() method, Storage, 379, 381putFile() method, Storage, 379
Qquery builder, 105-117
(see also Eloquent)aggregates, 122
chaining methods with, 107-116conditional methods, 112constraining queries, 108-111DB facade for, 105deletes, 116inserts, 115joins, 114JSON operations, 116modifying queries, 111multiple query results, format for, 106pagination for, 170, 344parameter binding, 107raw SQL queries, 106, 114relationships as, 143returning results, 113transactions, 116unions, 115updates, 115
query parameters, versioning assets with, 165question mark (?)
following optional Artisan command argu‐ments, 209
following optional parameters, 29query parameters, 107
question() method, 214queue commands, Artisan, 205Queue facade, testing, 314queue() method, Cookie, 390queue() method, Mail, 414queue.php file, 428queue:failed command, Artisan, 435queue:failed-table command, Artisan, 434queue:flush command, Artisan, 435queue:forget command, Artisan, 435queue:listen command, Artisan, 433queue:retry all command, Artisan, 435queue:retry command, Artisan, 435queue:work command, Artisan, 432, 433Queueable trait, 430queues, 427-436
benefits of, 428configuring, 428creating jobs in, 429-431defined, 494deleting jobs in, 435dispatching jobs in, 474error handling, 433-435for Artisan commands, 205, 436for jobs, 428-432
Index | 511
www.EBooksWorld.ir
for mail, 414, 436number of tries for jobs, 433providers and drivers for, 428pushing jobs onto, 431releasing jobs back to, 435testing, 461-463workers, 432
Rradio() method, Dusk, 328randomly generated data, 101rate limiting, 35raw() method, DB, 114React, 166, 494react() method, Mix, 166read-evaluate-print-loop (REPL) (see Tinker)readme.md file, 17real-time facades, 291, 494redirect() helper, 55-59, 266, 474redirectPath() method, 227redirects, 55-59Redis, 89, 436, 446, 448, 494reduce() method, collection, 479reflash() method, Session, 385refresh tokens, 365refresh() method, redirects, 57RefreshDatabase trait, 302regenerate() method, Session, 385register() method, RegisterUsers, 227register() method, service providers, 255, 283,
291RegisterController, 226-227RegistersUsers trait, 227regression tests, 296
(see also Dusk)regular expressions
passing to str_is(), 468route constraints using, 30
reject() method, collection, 477relationships, 139-151
as query builders, 143eager loading, 152inserting related items, 141lazy eager loading, 153serialization of, 138when defining model factories, 103
release() method, jobs, 435remember me access token, 232remember() method, Cache, 387
rememberForever() method, Cache, 387rememberToken() method, Blueprint, 93render() method, pagination, 170REPL (read-evaluate-print-loop) (see Tinker)Representational State Transfer (REST),
337-338Request facade, 181request headers, 342, 343Request object, 181-186, 257-262
accessing, 257-262array input, accessing, 184capturing directly, 257file handling methods, 261form requests, 276headers for, 342, 343JSON input, accessing, 185lifecycle of, 253-255persistence of, for session interaction, 262reading cookies from, 391testing, 277-278typehinting in constructors, 47user and request state methods, 260user input methods, 258validate() on, 189
request() helper, 181, 185, 258, 348reset() method, 229resetPassword() method, 229ResetPasswordController, 229resource controller binding, 48resource controllers, 47-49, 339-342resource gates, 242resource() method, 242resources folder, 16, 161resources, API, 337, 350-352resources, online (see online resources)respondWithRoute() method, API resource,
374Responsable interface, 268-269response headers, 343Response object, 262-269
creating, 263custom, 60custom response macros, 267download responses, 264file responses, 265headers for, 343JSON responses, 265lifecycle of, 253-255redirect responses, 266-267
512 | Index
www.EBooksWorld.ir
Responsable interface, 268-269setting cookies on, 391testing, 277-278view responses, 264
$response object, 305-308response() helper, 60, 266, 474REST (Representational State Transfer), 25,
337-338, 494restore() method, Eloquent, 128reverse() method, collection, 480right angle bracket, triple (> > > ), Tinker
prompt, 217rollBack() method, DB, 117route commands, Artisan, 205route groups, 33-38
(see also controllers)defining, 33fallback routes, 36middleware applied to, 34-36name prefixes, 38namespace prefixes using, 37path prefixes using, 36rate limiting, 35subdomain routing using, 37
route middleware, 234, 243, 273route model binding, 50-51route() helper, 32, 471route() method, 56Route::apiResource() method, 342Route::fallback() method, 374Route::view(), 41route:cache command, Artisan, 52route:list command, Artisan, 48routes
caching, 52data from URL, 186defined, 494defining, 26-33exiting, 59fluent definitions of, 31handling, 28modifying to allow signed links, 40naming, 31parameters for, 29, 50-51, 186signed, 38-40testing, 61verbs for, 28
routes folder, 16routes() method, Auth, 229
routes.php file, 26, 274RouteServiceProvider, 255, 274rules (abilities) for authorization, 240rules() method, form request, 194
SS3 cloud storage, 378, 494s3 disk, 378SaaS (Software as a Service), 494Sass, 160save() method, Eloquent, 122schedule commands, Artisan, 205schedule:run command, Artisan, 457scheduler, 457-461
Artisan commands as tasks, 457avoiding tasks overlapping, 460closures as tasks, 457, 460defining time zones for scheduled com‐
mands, 460shell commands as tasks, 457task output, handling, 460task types, 457time frames for, setting, 458
scheduleTimezone() method, tasks, 460scopes (filters), Eloquent, 128-131, 494scopes (privileges), OAuth, 371-372Scout package, 396-398
conditional indexing, 398defined, 494drivers supported, 396installing and configuring, 396manually triggering, 398marking model for indexing, 397performing operations without indexing,
398queuing actions of, 397searching index, 397testing, 403
ScoutServiceProvider, 396script injection, 197Searchable trait, 397searchable() method, 398searchableAs() method, 397secret() method, 213@section directive, Blade, 68-70sections, Blade, 68-70secure() method, redirects, 57secure() method, Request, 261security
Index | 513
www.EBooksWorld.ir
authentication (see authentication)authorization (see authorization)CSRF (cross-site request forgery), 53-55,
453encryption (see encryption)mass assignment, 124, 196script injection, 197
seeCookie() method, TestCase, 403seeders, 98-105
creating, 98model factories for, 99-104
seeding, 312seePlainCookie() method, TestCase, 403segment() method, Request, 186segments() method, Request, 186select() method, DB, 106, 108select() method, Dusk, 328selectRaw() method, DB, 114send() method, Mail, 406sendOutputTo() method, tasks, 460serialization, 137-139, 494SerializesModels trait, 430serve command, Artisan, 202server() method, Request, 261server.php file, 17service container (see container)service providers, 255-256, 291, 494
(see also specific service providers)services, injecting into a view, 79-80services.php file, 405session commands, Artisan, 206Session facade, 383session() helper, 383session() method, Request, 383sessions, 382-386
accessing, 383configuring, 382drivers supported, 382flash session storage, 385testing, 400
setter injection, 279-279setUp() method, 292setVisibility() method, Storage, 379share() method, 77shell commands, scheduling as tasks, 457shouldBeSearchable() method, 398ShouldBroadcast interface, 443ShouldBroadcastNow contract, 446shouldHaveReceived() method, Mockery, 321
shouldIgnoreMissing() method, Mockery, 319shouldReceive() method, Mockery, 320@show directive, Blade, 68show() method, resource controllers, 25showLinkRequestForm() method, 229showLoginForm() method, 228showRegistrationForm() method, 227showResetForm() method, 229shuffle() method, collection, 480signed routes, 38-40signed URLs, 39signedRoute() method, 39single action controllers, 49single log channel, 394singleton() method, 284singletons, binding to, 284size() method, Storage, 379skip() method, DB, 112slack log channel, 394Slack notifications, 424slash (/), escaping in Artisan commands, 339@slot directive, Blade, 74slots, Blade, 73-75smallInteger() method, Blueprint, 92SMS notifications, 424snake_case() helper, 175Socialite, 486, 494soft deletes, 126-128, 495softDeletes() method, Blueprint, 93, 127sort() method, collection, 480sortBy() method, collection, 480sortByDesc() method, collection, 480sorting API results, 345-347source maps, Mix, 162Spark, 487, 495SplFileInfo class, 381SQL queries, raw, 106
(see also query builder)SQLite
dependencies for, 94modifying multiple columns, 95
stack log channel, 395stacks, Blade, 72starts_with() helper, 175, 467state() method, model factories, 104stateless APIs, 337statement() method, DB, 106static calls, 27stdClass object
514 | Index
www.EBooksWorld.ir

returned by DB facade, 106returned by loops, 67
storage, 377-404(see also databases)adding providers, 380cache, 386-388configuring file access, 377cookies, 388-391downloads, 382file managers, 377-380flash session storage, 385injecting instance for, 380logging, 391-396session storage, 382-386Storage facade methods for, 378-380testing, 399-403uploads and manipulation, 380-382
storage commands, Artisan, 206Storage facade, 317, 378-380storage folder, 16storage:link command, Artisan, 378storage_path() helper, 378, 470Store class, 383store() method, resource controllers, 25store() method, UploadedFile, 189, 382storeAs() method, UploadedFile, 189, 382streamDownload() method, Response, 60string() method, Blueprint, 92strings
helpers for, 467-469localization, 175-179pluralization, 174, 177string helpers, 174
str_contains() helper, 175, 467str_is() helper, 175, 468str_limit() helper, 468str_plural() helper, 175, 469str_random() helper, 468str_singular() helper, 175str_slug() helper, 175, 469studly_case() helper, 175subdomain routing, 37subject() method, mailable, 410subscribe() method, events, 442sum() method, collection, 481sum() method, DB, 114Symfony, 4, 495
Console component, 201HttpFoundation classes, 257
Translation component, 178sync() method, Eloquent, 148synchronizer tokens, Passport, 367-368system requirements, xviii, 11
Ttable() method, 214take() method, collection, 479take() method, DB, 112Task::all() query, 41, 44tasks, scheduling (see scheduler)Telescope, 488, 495templates (see Blade) (see views)temporarySignedRoute() method, 39@test docblock, 300TestCase class, 304TestCase.php file, 296testing, 295-336
APIs, 374Artisan commands, 219, 322-323authentication and authorization, 249-252basics, 296-300browsers, 323-335bus fakes, 314cache, 401cookies, 402database operations, 155-157database tests, 311dependency injection in, 292environment for, 301event fakes, 312failed test results, 299frontend components, 179HTTP tests, 305-311inversion of control in, 292log, 403mail, 425mail fakes, 315mocking, 318-321model factories in, 312names for methods prior to Laravel 5.4, 252naming tests, 300notification fakes, 316notifications, 425queue fakes, 314queues, 461-463requests and responses, 277-278routes, 61running tests, 21
Index | 515
www.EBooksWorld.ir
Scout, 403seeding in, 312sessions, 400storage, 399-403Storage fakes, 317traits for, 301-302user input, 197views, 83-84writing tests, 21
tests folder, 16, 296text() method, Blueprint, 93text() method, Dusk, 327text() method, mailable, 409thenPing() method, tasks, 461time() method, Blueprint, 93times and dates (see Carbon package) (see
scheduler) (see timestamps)timestamp() method, Blueprint, 93timestamps, 93, 124
child records updating parent record time‐stamps, 152-154
data mutators and, 134timestamps() method, Blueprint, 93timezone() method, tasks, 459Tinker, 217, 495tinker command, Artisan, 202tinyInteger() method, Blueprint, 92title_case() helper, 175TL;DR, xviii, 495to() method, 56toArray() method, API resource, 352toArray() method, collection, 477toArray() method, Eloquent, 137toBroadcast() method, notification, 424toDatabase() method, notification, 423toJson() method, Eloquent, 137Tokenizer PHP extension, 11tokens, CSRF, 53-55toMail() method, notification, 421toNexmo() method, notification, 424toOthers() method, events, 449, 456toResponse() method, Response, 268toSearchableArray() method, 397toSlack() method, notification, 424trans() helper, 177transaction() method, DB, 117transactions, 116translation (see localization)Translation component, Symfony, 178
trashed() method, Eloquent, 128truncate() method, DB, 116TrustedProxy package, 276-277Twig Bridge package, 64
(see also Blade)type() method, Dusk, 328typehint, 46, 495typehinting, 285
Uuncheck() method, Dusk, 328union() method, DB, 115unionAll() method, DB, 115unique() method, Blueprint, 94unique() method, Faker, 101unit tests
defined, 296, 495generating in PHPUnit, 299simple, 303
universal to, for mail, 416@unless directive, Blade, 65unless() parameter, DB, 113unsearchable() method, 398unsigned() method, Blueprint, 94up command, Artisan, 202up() method, migrations, 90update() method, DB, 107, 115update() method, Eloquent, 123-125update() method, resource controllers, 25updateExistingPivot() method, Eloquent, 148uploaded files, 187-189, 380-382, 399UploadedFile class, 188, 261, 399url() helper, 31, 471url() method, Dusk, 332url() method, Request, 260URLs
helpers for, 470-472user input from route parameters, 186user input from URL segments, 186
user authentication (see authentication)user authorization (see authorization)user input
Artisan commands, 211-213custom rule objects, 192Eloquent model, 196form requests, 194-196getting and handling with controllers, 45-46Request object, 181-186, 258route parameters, 186
516 | Index
www.EBooksWorld.ir

testing, 197uploaded files, 187-189URLs, 186validating, 189-191
User model, 222user() method, 225, 237username() method, 228uuid() method, Blueprint, 93
VVagrant, 98
(see also Homestead)defined, 495migrations with, 98
Valet package, 12, 483, 495validate() method, 59validate() method, controller, 189-193validateLogin() method, 228validation of user input, 189-191
custom rule objects, 192defined, 495displaying error messages, 193manual validation, 192validate() method, controller, 189-193validation rules, 191
Validator class, 192validator() method, 227validators, 173value() method, DB, 113value() method, Dusk, 327vendor commands, Artisan, 206vendor folder, 16vendor.js file, 167VerificationController, 229VerifiesEmails, 229versioning, in Mix, 164-166versions of Laravel, xixversions of Laravel, after 5.1
ACL (access control list), 240versions of Laravel, after 5.2
policy methods, 248versions of Laravel, after 5.3
real-time facades, 291versions of Laravel, after 5.4
API resources, 349Browserkit, 198RefreshDatabase trait, 302testing method nomenclature, 198
versions of Laravel, after 5.5
invalidating sessions on other devices, 233TrustedProxy package, 276
versions of Laravel, after 5.6Artisan command testing, 218Auth::routes() in, 230email verification, 230, 235mail logging, 415
versions of Laravel, after 5.7assertions against $response, 306binding Mockery instances to the container,
320calling Artisan commands, 216DeferrableProvider interface, 255defining cache duration, 386defining time zones for scheduled com‐
mands, 460helper functions, 465policy auto-discovery, 247SMS notifications, 424stack log channel, 395
versions of Laravel, prior to 5.2authentication guards, 237conditional query modifications, 348.env testing, 301fluent route definitions, 31middleware groups, 273render() method, pagination, 170
versions of Laravel, prior to 5.3API token authentication, 373assertViewHas() method, 84authentication controllers, 221classic mail, 406DB facade results, 106Eloquent results, 121$expression parameter, 81factory states, 104form requests, 195generating resource controllers, 45$loop variable, 67PHP and extensions, 11policy methods, 248routes file, 26withCookie() method, Response, 391
versions of Laravel, prior to 5.4elixir() helper, 472route group modifications, 34testing, 297testing method names, 84, 157, 252, 403testing methods, 62
Index | 517
www.EBooksWorld.ir
translation helper, 177versions of Laravel, prior to 5.5
calling validate() method on controller, 190manual package registration, 205manually binding commands, 208model factory file, 100resource controllers/routes in, 339service provider registration, 396
versions of Laravel, prior to 5.6CSREF helpers in, 54fallback routes, 36
versions of Laravel, prior to 5.7Artisan tests, 322assets folder, 161
versions of Laravel, prior to 5.8changes to Artisan commands, 203
via() method, notification, 418, 419viaRemember() method, 232viaRequest() auth method, 238view commands, Artisan, 206view composers, 42, 76-79, 495view partials, 70-72view responses, 264view() helper, 77, 264, 474view() method, Response, 264views, 40-42
binding data to, 76-79defined, 495in MVC, 23, 40loading, 41passing variables to, 41, 75testing, 83-84
$visible property, 348Vue, 166, 369-370, 495Vue Resource, 55
WwaitFor() method, Dusk, 329waitForLink() method, Dusk, 330waitForLocation() method, Dusk, 330waitForMissing() method, Dusk, 329waitForReload() method, Dusk, 330waitForRoute() method, Dusk, 330waitForText() method, Dusk, 330waitUntil() method, Dusk, 330wantsJson() method, Request, 261web guard, 236web middleware group, 274web routes, 26
(see also routes)web.php file, 26Webpack, 159, 164, 495webpack.mix.js file, 17, 159website resources (see online resources)WebSocket authentication (see Echo)WebSockets, 442-456
authorization for channels, 450-452broadcasting events, 443-446channels for, 444, 450-452configuring, 443drivers supported, 443Echo for, 447event structure for, 444excluding user from events, 449pub/sub pattern used by, 442receiving event messages, 446-456service provider configuration, 449-452
when() parameter, DB, 112whenAvailable() method, Dusk, 329where() method, collection, 478where() method, DB, 108where() method, Eloquent, 121whereBetween() method, DB, 110whereExists() method, DB, 111whereIn() method, DB, 110whereNull() method, DB, 111whereRaw() method, DB, 111@while directive, Blade, 66whisper() method, Echo, 456with() method, 57-59, 77with() method, Eloquent, 153withCookie() method, Response, 391withcount() method, Eloquent, 154withErrors() method, 174withExceptionHandling() method, 311withHeaders() method, 310withInput() method, 58withoutExceptionHandling() method, 310withoutGlobalScope() method, 131withoutGlobalScopes() method, 131WithoutMiddleware trait, 302withoutOverlapping() method, tasks, 460withoutSyncingToSearch() method, 398withPivot() method, Eloquent, 146withSession() method, 310withSwiftMessage() method, mailable, 410withTrashed() method, Eloquent, 127workers for queues, 432
518 | Index
www.EBooksWorld.ir
XX- preceding header names, 342
Y@yield directive, Blade, 68
Index | 519
www.EBooksWorld.ir
About the AuthorMatt Stauffer is a developer and a teacher. He is a partner and technical director atTighten, blogs at mattstauffer.com, and hosts the Laravel Podcast and the Five-MinuteGeek Show.
ColophonThe animal on the cover of Laravel: Up & Running is a gemsbok (Oryx gazella). Thislarge antelope is native to the deserts of South Africa, Botswana, Zimbabwe, andNamibia, where it is featured on the country’s coat of arms.
Gemsbok measure about 5 feet 7 inches tall at the shoulder and can weigh from 250to 390 pounds. They are typically pale gray or brown, with black and white facialmarkings and long black tails. A black stripe extends from the chin to the lower edgeof the neck. The gemsbok’s impressive straight horns, used in defensive maneuvers,average 33 inches in length and are regarded as charms in many cultures. In medievalEngland, they were often marketed as unicorn horns.
Although these horns make the gemsbok a highly sought trophy animal, the popula‐tion remains stable throughout Southern Africa. In 1969, gemsbok were introducedto southern New Mexico, where their current population is around 3,000.
Gemsbok are well suited to such desert environments, with the ability to survivewithout drinking water for most of the year. To achieve this, they do not pant orsweat, allowing their body temperature to rise several degrees above normal on hotdays. Their lifespan is approximately 18 years in the wild.
Many of the animals on O’Reilly covers are endangered; all of them are important tothe world. To learn more about how you can help, go to animals.oreilly.com.
The cover illustration is by Karen Montgomery, based on a black and white engravingfrom Riverside Natural History. The cover fonts are Gilroy Semibold and GuardianSans. The text font is Adobe Minion Pro; the heading font is Adobe Myriad Con‐densed; and the code font is Dalton Maag’s Ubuntu Mono.
www.EBooksWorld.ir


