Embed Size (px)
Citation preview

Operating and installationinstructionsFridge-freezer
To avoid the risk of accidents or damage to the appliance it is essen-tial to read these instructions before it is installed and used for thefirst time.
en-GB M.-Nr. 10 758 871

Contents
2
Warning and Safety instructions ...................................................................... 5
Caring for the environment .............................................................................. 14
Saving energy .................................................................................................... 15
Guide to the appliance ...................................................................................... 17Control panel ....................................................................................................... 17Display LEDs and symbols in the display ........................................................... 18
Accessories ....................................................................................................... 20Accessories supplied .......................................................................................... 20Optional accessories........................................................................................... 21
Before using for the first time .......................................................................... 23Before using for the first time.............................................................................. 23
Cleaning the appliance................................................................................... 23
Switching on and off ......................................................................................... 24Operating the appliance ...................................................................................... 24Switching the refrigeration appliance on............................................................. 24Switching off the whole refrigeration appliance .................................................. 25Switching off for longer periods of time .............................................................. 25
The correct temperature................................................................................... 26... in the refrigerator section ................................................................................ 26... in the freezer section ....................................................................................... 26Temperature display ............................................................................................ 27Setting the temperature....................................................................................... 27
Temperature range ......................................................................................... 27
Using Super cool, Super freeze and DynaCool .............................................. 28Super freeze function ..................................................................................... 28Super cool function ......................................................................................... 28DynaCool function .......................................................................................... 28Switching a function on or off ............................................................................. 29
Temperature and door alarm............................................................................ 30Temperature alarm............................................................................................... 30Door alarm........................................................................................................... 30
Selecting further settings ................................................................................. 32Selecting further settings .................................................................................... 32
Settings overview ........................................................................................... 32Sabbath mode..................................................................................................... 32Changing the temperature unit (°C/°F) ................................................................ 33

Contents
3
Activating or deactivating the lock ...................................................................... 34
Storing food in the refrigerator section........................................................... 35Different storage zones ....................................................................................... 35Food which is not suitable for storage in the refrigerator section ....................... 36Notes on buying food.......................................................................................... 36Storing food correctly.......................................................................................... 36
Fruit and vegetable drawers ........................................................................... 36Protein-rich food............................................................................................. 36
Adjusting the interior fittings (refrigerator section) ....................................... 37Moving the shelves.............................................................................................. 37Adjusting the bottle rack ..................................................................................... 37Removing fruit and vegetable drawers on rollers................................................ 38Adjusting the door shelf/bottle shelf ................................................................... 38Adjusting the bottle holder .................................................................................. 39Moving the charcoal filters .................................................................................. 39
Freezing and storing food................................................................................. 40Maximum freezing capacity ................................................................................ 40Freezing fresh food.............................................................................................. 40Storing frozen food.............................................................................................. 40Home freezing ..................................................................................................... 41
Storage time for frozen food........................................................................... 43Defrosting frozen goods ................................................................................. 43
Adjusting the interior fittings................................................................................ 44Using accessories ............................................................................................... 44
Defrosting........................................................................................................... 46
Cleaning and care ............................................................................................. 47Cleaning agents................................................................................................... 47Preparing the refrigeration appliance for cleaning .............................................. 48Cleaning the interior and accessories ................................................................. 48Cleaning the front of the appliance and the side panels..................................... 49Cleaning the door seal ........................................................................................ 50After cleaning ...................................................................................................... 50Replacing the charcoal filters .............................................................................. 51
Problem solving guide ...................................................................................... 52
Noises................................................................................................................. 60
Service................................................................................................................ 61Contact in the event of a fault ............................................................................. 61

Contents
4
EPREL database ................................................................................................. 61Warranty .............................................................................................................. 61
Installation.......................................................................................................... 62Installation ........................................................................................................... 62
Side-by-side installation................................................................................. 62Location.......................................................................................................... 62Ventilation....................................................................................................... 63Door opening angle limiter ............................................................................. 63Fitting wall spacers supplied.......................................................................... 64Installing the refrigeration appliance .............................................................. 64Installing the refrigeration appliance in a run of kitchen units ........................ 66Appliance dimensions .................................................................................... 68
Changing the door hinging.................................................................................. 70Aligning the appliance doors............................................................................... 81Electrical connection ........................................................................................... 83

Warning and Safety instructions
5
This refrigeration appliance complies with current safety require-ments. Inappropriate use can, however, lead to personal injury andmaterial damage.
Please read the operating and installation instructions carefully be-fore using the refrigeration appliance for the first time. They con-tain important information on safety, installation, use and mainten-ance. This is to protect yourself from injury, and from damagingyour refrigeration appliance.
In accordance with standard IEC 60335-1, Miele expressly andstrongly advises that you read and follow all information providedon installing the refrigeration appliance, as well as the safety notesand warnings.
Miele cannot be held liable for injury or damage caused by non-compliance with these instructions.
Keep these operating and installation instructions in a safe placeand pass them on to any future owner.
Correct application
This refrigeration appliance is intended for use in the home and insimilar environments, for example– in shops, offices and similar work settings – by the guests in hotels, motels, bed & breakfasts and other typicalhome settings.This refrigeration appliance is not intended for outdoor use.
This appliance is intended for domestic use only for cooling andstoring food and drink as well as for storing deep frozen food, freez-ing fresh food and for making ice.Any other usage is not supported by the manufacturer and could bedangerous.

Warning and Safety instructions
6
This refrigeration appliance is not suitable for storing and keepingcool medicines, blood plasma, laboratory preparations or similarsubstances or products that are subject to the Medical Device Dir-ective. Incorrect use of the refrigeration appliance for such purposesmay cause deterioration of the items stored. The refrigeration appli-ance is also not suitable for use in areas where there is a risk of ex-plosion.Miele cannot be held liable for damage caused by improper or incor-rect use or operation of the appliance.
The appliance can only be used by people with reduced physical,sensory or mental capabilities, or lack of experience and knowledge,if they are supervised whilst using it, or have been shown how to useit in a safe way and recognise and understand the consequences ofincorrect operation.
Safety with children
Children under 8 years of age must be kept away from the refri-geration appliance unless they are constantly supervised.
Children 8 years and older may only use the appliance unsuper-vised if they have been shown how to use it in a safe way and recog-nise and understand the consequences of incorrect operation.
Children must not be allowed to clean or maintain the applianceunsupervised.
Please supervise children in the vicinity of the appliance and donot let them play with it.
Danger of suffocation! Whilst playing, children could become en-tangled in packaging (such as plastic wrapping) or pull it over theirhead and suffocate. Keep packaging material away from children.

Warning and Safety instructions
7
Technical safety
The coolant circuit has been checked for leaks. The refrigerationappliance complies with statutory safety requirements and the ap-propriate EU directives.
This refrigeration appliance contains the refrigerant isobutane(R600a), a natural gas which is environmentally friendly but flam-mable. The refrigerant does not damage the ozone layer and doesnot contribute to the greenhouse effect.The use of this refrigerant has, however, led to a slight increase inthe noise level of the appliance. In addition to the noise of the com-pressor, you might be able to hear the refrigerant flowing around thecooling circuit. Unfortunately, this cannot be avoided, but it does notaffect the performance of the refrigeration appliance.When transporting and installing the refrigeration appliance, ensurethat no parts of the cooling circuit are damaged. Splashes of refri-gerant can damage the eyes.In the event of damage:
- Avoid naked flames or anything which creates a spark.
- Disconnect the refrigeration appliance from the mains electricitysupply.
- Ventilate the room where the refrigeration appliance is located forseveral minutes.
- Contact the Miele Customer Service Department.
The more coolant there is in a refrigeration appliance, the largerthe room it should be installed in. In the event of a leakage, if the ap-pliance is in a small room, there is the danger of a combustible gas/air mixture building up. For every 11 g of coolant at least 1 m3 ofroom space is required. The amount of coolant in the refrigerationappliance is stated on the data plate inside the appliance.

Warning and Safety instructions
8
To avoid the risk of damage to the appliance, make sure that theconnection data (fuse rating, frequency and voltage) on the dataplate corresponds to the household supply.Check that this is the case before connecting the appliance. Consulta qualified electrician if in any doubt.
The electrical safety of this appliance can only be guaranteedwhen correctly earthed. It is essential that this standard safety re-quirement is met. If in any doubt please have the electrical installa-tion tested by a qualified electrician.
Reliable and safe operation of this appliance can only be assuredif it has been connected to the mains electricity supply.
If the electrical connection cable is faulty it must only be replacedby a Miele authorised service technician to protect the user fromdanger.
Do not connect the appliance to the mains electrical supply by amulti-socket adapter or extension lead. These are a fire hazard anddo not guarantee the required safety of the appliance.
If moisture gets into electrical components or into the mains con-nection cable, it could cause a short circuit. Therefore, do not oper-ate this refrigeration appliance in areas which are exposed to mois-ture (e.g in a garage or utility room).
This appliance must not be used in a non-stationary location (e.g.on a ship).
Do not use a damaged appliance. It could be dangerous. Checkthe appliance for visible signs of damage.
This refrigeration appliance is not intended for use as a built-in ap-pliance.
The appliance must be isolated from the electricity supply duringinstallation, maintenance and repair work.

Warning and Safety instructions
9
Unauthorised installation, maintenance and repairs can causeconsiderable danger for the user.Installation, maintenance and repairs must only be carried out by aMiele authorised technician.
While the appliance is under warranty, repairs should only be un-dertaken by a Miele authorised service technician. Otherwise thewarranty is invalidated.
Faulty components must only be replaced with genuine Miele ori-ginal spare parts. Miele can only guarantee the safety standards ofthe appliance when Miele replacement parts are used.
This refrigeration appliance is supplied with a special lamp tocope with particular conditions (e.g. temperature, moisture, chemicalresistance, abrasion resistance and vibration). This lamp must onlybe used for the purpose for which it is intended. The lamp is not suit-able for room lighting. Replacement lamps may only be fitted by aMiele authorised technician or by the Miele Customer Service De-partment. This refrigeration appliance contains several light sourceswith at least energy efficiency class G.
In areas which may be subject to infestation by cockroaches orother vermin, pay particular attention to keeping the appliance andits surroundings clean at all times. Any damage caused by cock-roaches or other vermin will not be covered by the warranty.
Correct use
This refrigeration appliance is designed for use within specific am-bient temperatures (climate range). Do not use in ambient temperat-ures for which it is not designed. The climate range is stated on thedata plate in the interior cabinet of the refrigeration appliance. Alower ambient temperature will cause the compressor to switch offfor longer periods, meaning that the refrigeration appliance is unableto maintain the required temperature.

Warning and Safety instructions
10
Do not cover or block the air vents as this could impair the effi-ciency of the appliance, increase the electricity consumption andcould cause damage to the components.
If storing food which contains a lot of fat or oil in the appliance orthe door, make sure that it does not come into contact with plasticcomponents as this could cause stress cracks or break the plastic.
Risk of fire and explosion. Do not store explosive materials in therefrigeration appliance or any products containing propellants (e.g.spray cans). Electrical components can cause flammable mixes ofgases to ignite.
Danger of explosion. Do not operate any electrical equipment (e.g.an electric ice-cream maker) inside the refrigeration appliance.Danger of sparking and explosion.
Danger of injury and damage to the appliance. Do not store cansor bottles containing carbonated drinks or liquids which could freezein the freezer zone. Otherwise they could burst.
Danger of injury and damage to the appliance. When coolingdrinks quickly in the freezer zone, make sure bottles are not left in formore than one hour. Otherwise they could burst.
Danger of injury. Never handle frozen food or the metal parts ofthe appliance with wet hands. Your hands may freeze to the frozenfood or to the metal.
Danger of injury. Do not take ice cubes out with your bare handsand never place ice cubes or ice lollies in your mouth straight fromthe freezer zone. The very low temperature of the frozen food cancause frost burn to the lips and tongue.
Do not refreeze partially or fully defrosted food. Consume defros-ted food as soon as possible, as it will lose its nutritional value andspoil if left for too long. Defrosted food may only be re-frozen after ithas been cooked.

Warning and Safety instructions
11
Observe the manufacturer's “use-by” dates and storage instruc-tions given on food to avoid the risk of food poisoning. Storage timeswill depend on several factors, including the freshness and quality ofthe food, as well as the temperature at which it is stored.
Stainless steel appliances
Adhesives will damage the stainless steel surface and cause it tolose its dirt-repellent protective coating. Do not use sticky notes,transparent adhesive tape, masking tape or other types of adhesiveon the stainless steel surface.
The surface is susceptible to scratching. Even magnets can causescratching.
Accessories and spare parts
Only use genuine original Miele accessories and spare parts withthis appliance. Using accessories or spare parts from other manu-facturers will invalidate the warranty, and Miele cannot accept liabil-ity.
Miele will guarantee to supply functional spare parts for a min-imum of 10 years and up to 15 years following the discontinuation ofyour refrigeration appliance.
Cleaning and care
Do not use any oils or grease on the door seals, as these willcause the seals to deteriorate and become porous with time.
Do not use a steam cleaning appliance to clean or defrost this ap-pliance. Steam could reach electrical components and cause a short circuit.
Sharp edged or pointed objects will damage the evaporator, caus-ing irreversible damage to the appliance. Do not use sharp edged orpointed objects to
- remove frost and ice,

Warning and Safety instructions
12
- separate frozen food or remove ice trays.
Do not place electric heaters or candles in the appliance to de-frost it. These can damage the plastic parts.
Do not use defrosting sprays or de-icers, as they could containsubstances which could damage the plastic parts or which mightcause the build-up of gases and pose a danger to health.

Warning and Safety instructions
13
Transport
Always transport the appliance in an upright position and in its ori-ginal transport packaging to avoid damage in transit.
Danger of injury and damage to the appliance. The refrigerationappliance is very heavy and must be transported by two people.
Disposal of your old appliance
If your old refrigeration appliance has a door lock, destroy it. Thiswill prevent the risk of children playing accidentally locking them-selves in and endangering their lives.
Splashes of coolant can damage the eyes. Be careful not to dam-age any part of the pipework whilst awaiting disposal, e.g. by
- puncturing the coolant channels in the condenser,
- bending any pipework, or
- scratching the surface coating.
Symbol on the compressor (depending on model)
This information is only relevant for recycling. There is no risk during normal oper-ation.
The oil in the compressor can be fatal if swallowed or if it penet-rates the airways.

Caring for the environment
14
Disposal of the packing mater-ialThe packaging is designed to protectthe appliance from damage duringtransportation. The packaging materialsused are selected from materials whichare environmentally friendly for disposaland should be recycled.
Recycling the packaging reduces theuse of raw materials in the manufactur-ing process and also reduces theamount of waste in landfill sites.
Disposing of your old appli-anceElectronic and electrical appliancescontain many valuable materials. Theyalso contain certain materials, com-pounds and components which wereessential for their correct functioningand safety. These could be hazardousto your health and to the environment ifdisposed of with general waste or ifhandled incorrectly. Please do not,therefore, dispose of your old appliancewith general waste.
Instead, please make use of officiallydesignated collection and disposalpoints to dispose of and recycle elec-trical and electronic appliances in yourlocal community, with your dealer orwith Miele. By law, you are solely re-sponsible for deleting any personal datafrom the appliance prior to disposal.
Take care not to damage your refrigera-tion appliance’s pipework before or dur-ing transportation to an authorised col-lection depot.This is to ensure that coolant in thecooling circuit and oil in the compressoris contained, and will not leak into theenvironment.
Please ensure that your old applianceposes no risk to children while beingstored prior to disposal. For further in-formation, see “Warning and Safety in-structions” in these operating and in-stallation instructions.

Saving energy
15
Normal energy consump-tion
Increased energy con-sumption
Installation /Maintenance
In a ventilated room. In an enclosed, unventilatedroom.
Protected from direct sun-light.
In direct sunlight.
Not near to a heat source(radiator, oven).
Near to a heat source (radi-ator, oven).
Where the ideal ambientroom temperature is approx.20 °C.
Where the ambient roomtemperature is above 25 °C.
Ventilation gaps uncoveredand dusted regularly.
Ventilation gaps covered ordusty.
Compressor and metal grille(heat exchanger) at the backof the appliance dusted atleast once a year.
Dust build-up on the com-pressor and metal grille (heatexchanger).
Temperaturesetting
Refrigerator section 4 to5 °C
The lower the temperature,the higher the energy con-sumption.
Freezer section -18 °C

Saving energy
16
Normal energy consump-tion
Increased energy con-sumption
Use Drawers and shelves ar-ranged as they were whenthe appliance was delivered.
Only open the door whennecessary and for as short atime as possible. Store foodin an organised way.
Frequent opening of doorsfor long periods will cause aloss of coldness. The appli-ance will try to cool downand the compressor will runfor longer periods.
Take an insulated cool bagwhen shopping, and loadfood in the appliance assoon as possible.Replace any food removedas quickly as possible, be-fore it warms up too much.Allow hot food and drinks tocool down before placingthem in the appliance.
Hot food or food at roomtemperature raises the tem-perature inside the appli-ance. The appliance will tryto cool down and the com-pressor will run for longerperiods.
Store food well packaged orcovered.
The evaporation or condens-ation of liquids in the refri-gerator section will cause aloss of coldness.
Place frozen food in the refri-gerator to defrost.
Do not over-fill the applianceto allow air to circulate.
Poor air circulation willcause a loss of coldness.

Guide to the appliance
17
Control panel
Sensor controls for refrigerator sec-tion
a For switching the DynaCool functionon and off
b For switching the SuperCool functionon and off
c On sensor for the whole appliance/Off sensor for the refrigerator section
d For setting the temperature( for warmer)
e For setting the temperature( for colder)
f Display LEDs (see “Display LEDs” ta-ble for explanation)
g Display with temperature and sym-bols (symbols only visible during use;see “Symbols in the display” table forexplanation)
Sensor controls for the freezer sec-tion
h For setting the temperature( for warmer)
i For setting the temperature( for colder)
j For switching the whole appliance onand off
k For switching the Super freeze func-tion on and off
l For switching the door or temperat-ure alarm off in the event of a powercut

Guide to the appliance
18
Display LEDs and symbols in the display
Display LED Meaning
Super cool symbol (onthe left)/ Super freezesymbol (on the right)
Function can be selected depending on sec-tion (see “Using Super cool, Super freezeand DynaCool”).
Power failure Flashes during a power cut
Safety lock Lock to prevent the appliance from beingswitched off by mistake
DynaCool Function can be selected (see “Using Supercool, Super freeze and DynaCool”).
Alarm Flashes when the door or temperature alarmis triggered
Message/symbol in the display Meaning
DEMO Demonstration mode The demonstration mode has been activated(see “Problem solving guide – Display warn-ings”).
Sabbath mode For switching Sabbath mode on and off
MENU Settings mode Lights up when settings are being selected
°C Temperature unit The factory default setting is °C; this can bechanged to °F

Guide to the appliance
19
This drawing is for illustration purposes only.
a Control panel with display
b Interior lighting
c Fan
d Bottle rack
e Door shelf / Egg tray
f Holder with active charcoal filter (Active AirClean)
g Adjustable shelf
h Fruit and vegetable containers
i Bottle shelf with bottle holder
j Frost Free module
k Freezer drawers
For easier installation there are trans-port handles on the back at the top andtransport wheels underneath the appli-ance.

Accessories
20
Accessories supplied
Egg tray
Butter dish
Bottle rack
Bottles can be stored horizontally usingthe bottle rack to save space.The bottle rack can be placed at differ-ent positions in the refrigerator section.
Bottle holder
Attach the bottle holder to the rear edgeof the bottle shelf.
The bottle holder can be moved left orright. This way the bottles will be moresecure when the appliance door isopened and closed.
KKF-FF Active AirClean charcoal fil-ters with holder
The charcoal filters neutralise unpleas-ant odours in the refrigerator section forimproved air quality.

Accessories
21
Ice cube tray
Cool pack
The cool pack prevents the temperaturein the freezer section from rising tooquickly in the event of a power cut. Thiscan help prolong the storage life.
The cool pack will be at its most effect-ive after it has been in the freezer forapprox. 24 hours.
Optional accessoriesA range of useful Miele accessories andcare products are available for your ap-pliance.
Multi-purpose microfibre cloth
The microfibre cloth is suitable for re-moving fingerprints and light soilingfrom surfaces such as stainless steel,glass, plastic and chrome without theuse of chemicals.
MicroCloth Kit
The MicroCloth Kit contains a universalcloth, a glass cloth and a polishingcloth. These cloths are extremely resistant totearing and very robust. Thanks to veryfine microfibres these cloths achieve anexcellent cleaning performance.
KKF-RF replacement filters(Active AirClean)
Replacement filters to the fit the holderare available. We recommend replacingthe charcoal filters every 6 months.

Accessories
22
KKF-FF charcoal filter with holder(Active AirClean)
Charcoal filters neutralise unpleasantodours in the fridge zone for improvedair quality.
Accessories are available to order viathe Miele Webshop, from Miele dir-ectly (see back cover for contact de-tails) or from your Miele dealer.

Before using for the first time
23
Before using for the first time
Packaging material
Remove all packaging material fromthe inside of the appliance.
Protective foil
The stainless steel trim to the interiorshelves and the door shelves has alayer of protective foil to prevent dam-age during transportation. The appli-ance doors, and side panels where ap-plicable, have a protective foil.
Do not remove the foil until the appli-ance has been positioned in its finallocation.
Cleaning the appliance
Please refer to the relevant instruc-tions in “Cleaning and care”.
Clean the inside of the appliance andthe accessories.

Switching on and off
24
Operating the applianceA light touch of the finger on thesensors is all that is required to operatethis appliance.
Switching the refrigeration ap-pliance onThe freezer section and the refrigeratorsection can be switched on at the sametime using the two On/Off controls.
To enable the temperature to get suffi-ciently cold inside the refrigeration ap-pliance, allow the appliance to run forapprox. 3-5 hours (depending on am-bient temperature) before placing foodin it. Do not place food in the freezer sec-tion until it has reached the requiredcoldness (at least -18 °C).
Touch one of the two On/Off con-trols until the temperature displaylights up.
The refrigeration appliance will beswitched on and the interior lighting willcome on in the refrigerator section.
The temperature display for the refriger-ator section indicates the temperaturein the refrigerator section.
- If the temperature in the freezer sec-tion is above 0 °C, dashes will flash inthe temperature display for thefreezer section.
- As soon as the temperature dropsbelow 0 °C the temperature in thefreezer section will flash in the dis-play.
- The LED in the display will flashuntil the set temperature has beenreached in the freezer section.
The appliance will gradually reach thepre-set temperatures:
- Temperature in the refrigerator sec-tion = 3 °C
- Temperature in the freezer sec-tion =-18 °C

Switching on and off
25
Switching off the whole refri-geration appliance Touch the right-hand On/Off con-
trol until all of the indicators go out.
If this does not work, the safety lock isactivated (see “Selecting further set-tings – Activating and deactivating thesafety lock”). The refrigerator section in-terior lighting will go out and the coolingprocess will be switched off.
Switching off the refrigerator sectionseparately
The refrigerator section can beswitched off without having to switchoff the freezer section. The freezer sec-tion cannot be turned off separately.
Touch the left-hand On/Off controluntil the temperature display for therefrigerator section goes off.
If this is does not happen, the safetylock is still activated (see "Selecting fur-ther settings - Activating and deactivat-ing the safety lock).The refrigerator section is switched off.The temperature in the freezer sectionwill still be shown in the display. The re-frigerator section interior lighting will goout.
Switching the refrigerator section onseparately (if previously switched off)
Touch the left-hand On/Off control to switch on the refrigerator section.
The refrigerator section will be switchedon and will start to cool down. It willreach the set temperature. The interiorlighting will come on when the refriger-ator section door is opened.
Switching off for longer peri-ods of time
If, during a long absence, the refri-geration appliance is switched offbut not cleaned and the door(s) leftshut, there is a risk of mould forminginside the appliance.It is essential to clean the refrigera-tion appliance.
If the refrigeration appliance is not go-ing to be used for a longer period oftime, observe the following:
Switch the refrigeration appliance off.
Switch the appliance off at the wallsocket and pull the plug out of thesocket, or disconnect the fuse.
Clean the refrigeration appliance andleave the door ajar to air the appli-ance and avoid odours building up in-side.
It is also advisable to carry out the lasttwo instructions if you are switchingthe refrigerator section off for a longerperiod of time.

The correct temperature
26
It is very important to set the correcttemperature for storing food in the ap-pliance. Bacteria will cause food whichis not stored at the correct temperatureto deteriorate rapidly. Temperature influ-ences the growth rate of these bacteria.Reducing the temperature reduces theirgrowth rate.
The temperature in the refrigeration ap-pliance will rise:
- The more often the appliance door isopened and the longer it is kept open
- The more food that is stored in it
- The warmer the food is which is be-ing put into it
- The higher the ambient temperaturesurrounding the refrigeration appli-ance. This refrigeration appliance isdesigned for use within specific am-bient temperatures (climate range).Do not use in ambient temperaturesfor which it is not designed.
... in the refrigerator sectionWe recommend a temperature of 4 °Cin the refrigerator section.
... in the freezer sectionTo freeze fresh food and to store frozenfood for long periods, a temperature of-18 °C is required. At this temperaturethe growth of bacteria is generally hal-ted. As soon as the temperature risesabove -10 °C, the bacteria become act-ive in the food again so it cannot bekept as long. For this reason, partiallydefrosted or defrosted food must not bere-frozen. Food may be re-frozen once ithas been cooked , as the high temper-atures achieved when cooking destroymost bacteria.

The correct temperature
27
Temperature display
In normal operation the upper temper-ature display shows the average, cur-rent temperature in the refrigeratorsection and the lower temperaturedisplay the highest temperature inthe freezer section.
Depending on the ambient temperatureand the temperature setting, it can takethe appliance a few hours to reach thetemperature required and for this tem-perature to then be shown as a con-stant temperature in the display.
Setting the temperature Use the and arrow sensors to
set the temperature higher or lower.
The following information shows in thedisplay while the sensors are beingtouched:
- Touching a sensor once: the lasttemperature selected flashes.
- Each subsequent touch of thesensor: adjusts the temperatureshown in 1 °C increments.
- Keeping a finger on the sensorchanges the temperature continu-ously.
Approximately 5 seconds after the lasttime a sensor has been touched, thecurrent temperature inside the appli-ance is automatically shown.
Temperature range
- The temperature in the refrigeratorsection can be adjusted from 2 °C to7 °C.
- The temperature in the freezer sec-tion can be adjusted from -14 °C to-27 °C.
Tip: If you have adjusted the temperat-ure, wait for approx. 6 hours if the ap-pliance is not very full and for approx.24 hours if the appliance is full beforechecking the temperature display, as itwill take this long for the appliance togive an accurate reading.
If, after this time, the temperature isstill too high or too low, you will needto adjust it again.

Using Super cool, Super freeze and DynaCool
28
The following functions are availabledepending on section:
- Refrigerator sectionSuper cool and DynaCool
- Freezer sectionSuper freeze
See the following pages for more in-formation on these functions and howto switch them on.
Super freeze function For optimum results switch on the Su-per freeze function before putting freshfood into the freezer section. This helpsfood to freeze quickly and retain its nu-trients, vitamins, flavours and appear-ance.
Exceptions:
- When placing food in the freezer thatis already frozen
- When freezing up to 2 kg of freshfood daily
The SuperFreeze function should beswitched on 6 hours before placingfood in the freezer section. When freezing the maximum amountof food the SuperFreeze functionshould be switched on 24 hours be-forehand.
When SuperFreeze is switched on, theappliance will work at full power tolower the temperature in the freezer.
The SuperFreeze function will switch it-self off automatically after approx.65 hours. The quantity of fresh foodplaced in the freezer will determine thetime before the SuperFreeze functionturns off.
Tip: To save energy, you can manuallyswitch off SuperFreeze once the freezerreaches a constant temperature of-18 °C or colder. Monitor the temperat-ure in the freezer section.
When SuperFreeze is switched off, theappliance will run at normal poweragain.
Super cool function The Super cool function can be used torapidly reduce the temperature in therefrigerator section to its lowest setting(depending on the room temperature).
Tip: Super cool is particularly recom-mended for the rapid chilling of largeamounts of fresh food or drink.
When Super cool is switched on, theappliance will work at full power tolower the temperature in the appliance.
It switches itself off automatically afterapprox. 12 hours.
Tip: To save energy, you can switch theSuper cool function off yourself oncefood and drinks are sufficiently chilled.
After switching Super cool off the appli-ance reverts to working at normalpower.
DynaCool function When the DynaCool function is notswitched on, the natural circulation ofair in the appliance will cause differenttemperature zones in the refrigerator asthe cold, heavy air will sink to the low-est section of the appliance. You shouldbear this in mind when placing food inthe appliance (see “Storing food in therefrigerator section”).However, if you are placing a large
Using Super cool, Super freeze and DynaCool
29
amount of food in the refrigerator at anyone time, (e.g. after the weekly shop) itis a good idea to switch DynaCool on.This way you can distribute the temper-ature inside the appliance to all areasmore evenly so that all the food will bechilled to about the same degree.The temperature is set as normal.
DynaCool should also be selectedwhen:
- the ambient temperature in the roomis high (above approx. 30 °C), and
- the room humidity level is high.
With DynaCool switched on, the fan isready: when the compressor switcheson, the fan also switches on automat-ically.
Tip: Because DynaCool requires moreenergy, you should switch it off undernormal conditions.
To save energy, the fan switches offautomatically whilst the door is open.
Switching a function on or off Touch the sensor for the function you
want.
- The display LED next to the corres-ponding symbol will light up and thefunction will be switched on.
- The display LED next to the corres-ponding symbol will go out and thefunction will be switched off.
After an interruption to the power sup-ply any function that was previouslyswitched on will be switched off.

Temperature and door alarm
30
The appliance has a warning systemwhich ensures that the temperature inthe freezer cannot rise unnoticed and toavoid energy being wasted if a door isleft open.
Temperature alarmAn alarm will sound if the temperaturein the freezer section becomes toowarm. The LED in the displayflashes.
The audible and visual signals will beactivated if:
- You switch on the refrigeration appli-ance and the temperature in a tem-perature zone differs greatly from theset temperature.
- A lot of warm room air enters thefreezer when you are rearranging ortaking out frozen goods.
- You are freezing large amounts offood at once.
- You are freezing warm food.
- There was a mains outage.
- The refrigeration appliance has afault.
The alarm will stop and the display willgo out as soon as the reason for thealarm has been resolved.
Health risk caused by decom-posing food.If the temperature in the freezer sec-tion remains above -18 °C for a longtime, the frozen goods can start todefrost. This will reduce the storagelife of the food.Check whether the frozen goodshave started to defrost. If they have,check that the food is safe to useand if it is, then use it as soon aspossible or cook it before freezing itagain.
Switching the temperature alarm offearly
If the noise disturbs you, you canswitch the alarm off if you wish.
Touch the sensor.
The alarm will stop. The display LEDwill continue to flash until the cause ofthe alarm has been resolved.
Door alarmThe appliance is fitted with a warningsystem to avoid increased energy con-sumption and food becoming warm ifthe door is left open.
An alarm will sound if the appliancedoor has been left open for longer than60 seconds.
The alarm will stop and the display willgo out as soon as the door is closed.
Switching the door alarm off early
If the noise disturbs you, you canswitch the alarm off if you wish.
Touch the sensor.

Temperature and door alarm
31
The alarm will stop.

Selecting further settings
32
Selecting further settingsIn Settings mode, certain settings canbe adjusted and functions selected, al-lowing you to adjust the refrigerationappliance to suit your requirements.
See the following pages for more in-formation on these settings.
The door alarm and other warningsare automatically suppressed whenyou are in Settings mode. No alarmwill sound. Exception: If there is an ap-pliance fault (F+numbers), Settingsmode will be exited automatically. Thefault code will be shown on the dis-play and an alarm will sound (see“Problem solving guide – Displaywarnings”).
The freezer section control panel (tothe right-hand side of the display)must be used to apply the desired set-tings.
Settings overview
Switching Sabbath mode on andoff
Setting display brightness
Changing the temperature unit (°C/°F)
Activating or deactivating the lock
Sabbath modeThe appliance offers a Sabbath pro-gramme for the purposes of religiousobservance.
The following are switched off:
- the interior lighting when the door isopened,
- all acoustic and visual signals,
- temperature displays,
- DynaCool, Super cool and Superfreeze (if previously selected).
When Settings mode is activated theSuper freeze control can still be selec-ted.
The Sabbath mode function will switchoff automatically after approx.120 hours.
Ensure that the doors are properlyclosed, as visual and audible alarmsare switched off.
Any power failure during this time isnot shown in the display. After apower failure the appliance restarts inSabbath mode.

Selecting further settings
33
Danger of food contamination!Any power failure during Sabbathmode is not shown in the display.After a power failure the appliancewill restart in Sabbath mode. Whenpower is restored, no notification ofthe power failure will appear in thedisplay.If there is an interruption to thepower supply during Sabbath mode,check the quality of the food. Do notconsume any defrosted food.
Switching Sabbath mode on/off
Touch the SuperFreeze control onthe right of the display for approx.5 s.
MENU lights up in the display and flashes.Settings mode is now activated.
Touch the SuperFreeze control toaccess the Sabbath mode function.
Available settings:
- : Sabbath mode is deactivated
- : Sabbath mode is activated
If Sabbath mode was previouslyswitched off, is offered.
If Sabbath mode was previouslyswitched on, is offered.
Touch the SuperFreeze control toconfirm the setting.
MENU lights up in the display and flashes.
Touch the On/Off control to exitSettings mode.
When Sabbath mode is active, willflash in the display.
Switch off Sabbath mode after theSabbath has passed.
Changing the temperature unit(°C/°F)The temperature can be displayed ineither Fahrenheit (°F) or Celsius (°C).
Touch the SuperFreeze control onthe right of the display for approx.5 s.
MENU lights up in the display and flashes.Settings mode is now activated.
Touch one of the sensor controls forsetting the temperature ( and ) re-peatedly until appears in the dis-play.
Touch the SuperFreeze control toconfirm your selection.
Available settings:
- : degrees Celsius
- : degrees Fahrenheit
If was previously set, is nowoffered.
If was previously set, is nowoffered.
Touch the SuperFreeze control toconfirm the setting.
MENU lights up in the display and flashes.
Touch the On/Off control to exitSettings mode.

Selecting further settings
34
The desired temperature unit will be set.
Activating or deactivating thelockThe safety lock function can be activ-ated to prevent the refrigeration appli-ance being switched off by mistake.
Touch the SuperFreeze control onthe right of the display for approx.5 s.
MENU lights up in the display and flashes.Settings mode is now activated.
Touch one of the sensor controls forsetting the temperature and re-peatedly until appears in the dis-play.
Touch the SuperFreeze control toconfirm your selection.
Available settings:
- : The safety lock is deactivated
- : The safety lock is activated
If the safety lock was previously deac-tivated, is offered.
If the safety lock was previously activ-ated, is offered.
Touch the SuperFreeze control toconfirm the setting.
MENU lights up in the display and flashes.
Touch the On/Off control to exitSettings mode.
The display LED lights up when thesafety lock is activated.

Storing food in the refrigerator section
35
Risk of explosion due to flam-mable mixes of gases.Electrical components can causeflammable mixes of gases to ignite.Do not store explosive materials inthe refrigeration appliance or anyproducts containing propellants (e.g.spray cans).
Risk of damage due to greasy oroily food.If storing food which contains a lot offat or oil in the refrigeration applianceor the appliance door, make surethat it does not come into contactwith plastic components as thiscould cause stress cracks or breakthe plastic.Make sure that no fat or oil leaksonto the plastic parts of the refrigera-tion appliance.
Different storage zonesDue to natural air circulation, there aredifferent temperature zones in the refri-gerator section.
Cold, heavy air sinks to the lowest sec-tion of the refrigeration section. Makeuse of the different zones when placingfood in the appliance.
Tip: To allow air to circulate efficiently,do not pack food too closely together inthe appliance.
If there is insufficient air circulation,the cooling performance will de-crease and energy consumption willincrease.Do not cover the fan in the rear wallof the appliance.
Tip: Do not store food in such a waythat it touches the rear wall of the refri-gerator section as it may freeze to therear wall.
This appliance has Dynamic cooling,which helps to keep an even temper-ature when the fan is running, makingthe difference between the variouszones less pronounced.
Warmest area
The warmest area in the refrigeratorsection is at the top in the front areaand in the door. Use this for storing but-ter and cheese.
Coldest area
The coldest area in the refrigerator sec-tion is directly above the fruit and ve-getable drawers and at the back.
Use these areas to store all delicate andhighly perishable food such as:
- Fish, meat, poultry
- Cold cuts, ready meals
- Dishes or baked goods containingeggs or cream
- Fresh dough, cake mixtures, pizza orquiche dough
- Raw milk cheese and other raw milkproducts
- Pre-packed vegetables
- Other fresh food with a label stating itshould be kept at a temperature ofapprox. 4 °C

Storing food in the refrigerator section
36
Food which is not suitable forstorage in the refrigerator sec-tionNot all food is suitable for refrigerationat temperatures below 5 °C, because itmay be sensitive to cold. Depending onthe type of food, the appearance, con-sistency, flavour and/or vitamin contentmay be altered if stored at too cold atemperature.
Food which is sensitive to cold in-cludes:
- Pineapples, avocados, bananas,pomegranates, mangoes, melons,papayas, passionfruit, citrus fruitsuch as lemons, oranges, mandarins,grapefruit
- Fruit (which is not yet ripe)
- Aubergines, cucumbers, potatoes,peppers, tomatoes, courgettes
- Hard cheeses (e.g. Parmesan, moun-tain cheese)
Notes on buying foodThe freshness of the food when it is firstplaced in the appliance is the most im-portant factor for how long it staysfresh.Take into account the use-by date andthe correct storage temperature.Time out of the refrigerator, e.g. trans-porting food in a warm car, should bekept to a minimum.
Storing food correctlyEnsure that food stored in the refriger-ator section is covered or wrappedproperly. This will prevent food odoursfrom affecting other foods, food from
drying out, and also any cross-contam-ination of bacteria. This is particularlyimportant when storing meat products.By ensuring that the temperature set-tings are correct and by taking appro-priate hygiene measures you can pro-long the storage life of your food con-siderably.
Fruit and vegetable drawers
Fruit and vegetables can be storedloose in the fruit and vegetable drawers.
Protein-rich food
Please note that food rich in protein de-teriorates faster than other types offood. Shellfish, for example, deterior-ates faster than fish, and fish deterior-ates faster than meat.

Adjusting the interior fittings (refrigerator section)
37
Moving the shelves
Stoppers prevent the shelves from be-ing dislodged by mistake.
The shelves can be adjusted accord-ing to the height of the refrigeratedgoods:
1. Lift the shelf up slightly at the front.
2. Pull it forwards a little and lift it untilthe notch at the side is in line withthe shelf support. It can then beraised or lowered to the requiredlevel.
The raised edge on the protective stripat the back must face upwards to pre-vent food from touching the back ofthe appliance and freezing to it.
Adjusting the bottle rack
The bottle rack can be placed at differ-ent positions in the appliance.
Raise the bottle rack slightly at thefront, and pull it forwards a little untilthe notch at the side is in line with theshelf support. It can then be raised orlowered to the required level.
The rear rail must face upwards to pre-vent bottles from touching the back ofthe appliance.
Stoppers prevent the bottle rack frombeing dislodged by mistake.

Adjusting the interior fittings (refrigerator section)
38
Removing fruit and vegetabledrawers on rollersThe fruit and vegetable drawers are onrollers and can be completely pulled outfor loading and emptying.
The roller plates can be removed forcleaning.
Adjusting the door shelf/bottleshelf
Only move the appliance doorshelves/bottle shelves when they areempty.
Lift the clip-on container up and outof the stainless steel frame to remove.
Push the stainless steel frame up andremove it by pulling it forward.
Replace the stainless steel frame inthe required position. Ensure that it issecurely pushed back in the correctposition.
Some stainless steel frames areeasier to remove and replace whenyou take hold of them together withthe slat at the back and remove bypulling upward.
Replace the clip-on container in thestainless steel frame.
You can remove the clip-on containerscompletely from the door shelves to filland empty them and then replacethem. The clip-on containers can alsobe taken to the table with the food stillin them and used as a serving tray.

Adjusting the interior fittings (refrigerator section)
39
Adjusting the bottle holderThe bottle holder can be moved left orright. This way the bottles will be moresecure when the appliance door isopened and closed.
The bottle holder can be removed com-pletely (for example for cleaning):
To do this, push the front edge of thebottle holder up and disengage it.
Moving the charcoal filters
When storing very strong smellingfood (e.g. very ripe cheese):
- Place the holder with the charcoal fil-ters on the shelf where this food iskept.
- Change the filters sooner if neces-sary.
- Use more charcoal filters (with hold-ers) in the appliance (see “Accessor-ies - Optional accessories”).
The holder for the charcoal filters sitson the protective strip at the back of theshelf.
Pull the charcoal filter holder upwardsto remove it from the protective strip.
Refit it on the protective strip of theshelf you wish to use it on.
Freezing and storing food
40
Maximum freezing capacityTo ensure that fresh food placed in thefreezer freezes through to the core asquickly as possible, the maximumfreezing capacity must not be ex-ceeded. The maximum freezing capa-city for freezing within a 24-hour periodis given on the data plate: “Freezing ca-pacity ... kg/24 hrs”.
Freezing fresh foodFresh food should be frozen as quicklyas possible. This way the nutritionalvalue of the food, its vitamin content,appearance and taste are not impaired.
Food which takes a long time to freezewill lose more water from its cells,which then shrink. During the defrostingprocess, only some of this water is re-absorbed by the cells. What this meansin practice is that the food loses moremoisture. You can see this in the largeamount of water that collects aroundthe food when it defrosts.
If food is frozen quickly, the cells haveless time to lose moisture, so theyshrink less. As there is not so muchmoisture loss, it is easier for the food toreabsorb it during the defrosting pro-cess, and very little water collectsaround the defrosted food.
Storing frozen food
Never re-freeze partially or fully de-frosted food. Defrosted food mayonly be re-frozen after it has beencooked.
When buying frozen food to store inyour freezer, check:
- That the packaging is not damaged
- The use-by date
- The temperature at which the frozenfood is being stored in the shop.
The length of time food can be keptis reduced if it has been stored at atemperature warmer than -18 °C.
Buy frozen food once you have fin-ished the rest of your shopping andwrap it in newspaper or use a coolbag or cool box to transport it.
Put it into the freezer as soon as pos-sible.

Freezing and storing food
41
Home freezing
Only freeze fresh food which is in agood condition.
Hints on home freezing
- The following types of food are suit-able for freezing:Fresh meat, poultry, game, fish, ve-getables, herbs, fresh fruit, dairyproducts, cakes, leftovers, egg yolks,egg whites and a range of pre-cooked meals.
- The following types of food are notsuitable for freezing:Grapes, lettuce, radishes, souredcream, mayonnaise, eggs in theirshells, onions, whole raw apples andpears.
- To retain colour, taste, aroma and vit-amin C, vegetables should beblanched before they are frozen. Todo so place them portion by portioninto boiling water for 2–3 minutes.Remove, and plunge into ice-coldwater to cool quickly. Drain and packready for freezing.
- Lean meat freezes better than fattymeat, and can be stored for consid-erably longer.
- Separate chops, steaks, cutlets etc.with a sheet of plastic freezer film.This prevents them from freezing to-gether in a block.
- Do not salt or season raw food orblanched vegetables before freezing.Cooked food should only be lightlysalted and seasoned. Some herbs in-tensify the taste of food when frozen.
- Placing hot foods or drinks in thefreezer causes food that is alreadyfrozen to partially thaw and increasesenergy consumption. Allow hot foodsand drinks to cool down before pla-cing them in the freezer.
Packaging food for freezing
Freeze food in portions.
– Suitable packing material
- Plastic freezer bags
- Tubular polythene freezer bags
- Aluminum foil
- Freezer containers
– Unsuitable packing material
- Wrapping paper
- Greaseproof paper
- Cellophane
- Bin bags
- Plastic carrier bags
Expel as much air as possible fromthe packaging.
Close the packaging tightly with
- Rubber bands
- Plastic clips
- String
- Freezer tape
Tip: Freezer bags may also be sealedusing home heat sealing kits.
Make a note of the contents and thedate of freezing on the packaging.

Freezing and storing food
42
Before placing food in the appliance
When freezing more than 2 kg offresh food, switch on the SuperFreezefunction for some time before placingthe food in the freezer (see “Super-Freeze function” in “Using Super-Freeze and DynaCool”).
This helps food which is already storedin the freezer to stay frozen.
Placing frozen food in the freezer
Risk of damage caused by load-ing too much food.Loading food which is too heavy cancause damage to the freezer draw-ers/glass shelves.Do not exceed the relevant maximumload size:Freezer drawer = 25 kgGlass shelf = 35 kg
Unfrozen food should not touchfrozen food as this will cause thefrozen food to begin to thaw.
To prevent food sticking togetherwhen frozen, make sure that thepackaging and containers are dry.
– Freezing small amounts of food
Place the food in the lower freezerdrawers.
Place the food flat in the bottom ofthe freezer drawers so that it freezesthrough to the core as quickly as pos-sible.
– Freezing the maximum amount offood (see data plate)
If the ventilation slots are blocked thecooling performance will decreaseand energy consumption will in-crease.When placing food in the freezer,make sure that the ventilation slotsare not blocked.
Remove the upper freezer drawers.
Place the food flat on the upper glassshelves so that it freezes through tothe core as quickly as possible.
Once frozen:
Place the frozen food in the freezerdrawer and push it back in.

Freezing and storing food
43
Storage time for frozen food
Food group Storage time(Months)
Ice cream 2 to 6
Bread, baked goods 2 to 6
Cheese 2 to 4
Fish, oily 1 to 2
Fish, lean 1 to 5
Sausage, ham 1 to 3
Game, pork 1 to 12
Poultry, beef 2 to 10
Vegetables, fruit 6 to 18
Herbs 6 to 10
The storage times given are guidelines only.
For standard freezing results, follow theadvice on packaging.
By keeping the freezer zone at a con-stant temperature of -18 °C and takingappropriate hygiene measures you canmaximise the storage life of your foodand avoid food waste.
Defrosting frozen goods
Never re-freeze partially or fully de-frosted food. Defrosted food may onlybe re-frozen after it has been cooked.
Frozen goods can be defrosted in differ-ent ways:
- In a microwave oven
- In an oven using “Fan heat” or the“Defrost” setting
- At room temperature
- In the refrigerator zone (the coldgiven off by the frozen food helps tokeep the other food cold)
- In a steam oven
Flat pieces of partially thawed meator fish can be placed directly into a hotfrying pan.
Meat and poultry (e.g. mince, chicken,fish fillets) should not come into contactwith other foods while defrosting. Catchthe liquid from defrosting and disposeof it carefully.
Fruit should be defrosted at room tem-perature in its packaging, or in acovered bowl.
Most vegetables can be cooked whilestill frozen. Just put straight into boilingwater or hot fat. The cooking time isslightly less than that of fresh veget-ables due to changes in the cell struc-ture.

Freezing and storing food
44
Cooling drinks quickly
To cool drinks quickly, place them in therefrigerator section and switch on theSuper cool function.
When cooling drinks quickly in thefreezer, make sure bottles are not left infor more than one hour. Otherwisethey could burst.
Adjusting the interior fittings
Removing the drawers and glassplates from the freezer section
The drawers can be removed for filling,emptying or cleaning purposes.
You can also use the space in thefreezer section more flexibly. If you wishto freeze large items such as a turkey orgame, the glass cold plates betweenthe drawers can be removed.
Pull out the drawers as far as they willgo, and then lift them up and out.
Lift the glass plate slightly, pull it for-wards and out.
Using accessories
Using the cool pack
The cool pack prevents the temperaturein the freezer zone from rising tooquickly in the event of a power cut. Thiscan help prolong the storage life.
Place the cool pack in the top drawerof the freezer zone.
The cool pack will be at its most effect-ive after it has been in the freezer forapprox. 24 hours.
– In the event of a power cut
Place the frozen cool pack directly ontop of the frozen food in the front ofthe top drawer.
Tip: When placing fresh food in thefreezer, use the cool pack to separatethe fresh food from the food which isalready frozen so that the frozen fooddoes not begin to thaw.

Freezing and storing food
45
Making ice cubes
Fill the ice cube tray three quartersfull with water and place it on the bot-tom of one of the freezer drawers.
Once frozen, use a blunt instrument,for example a spoon handle, to re-move the ice tray from the freezer if itis stuck.
Tip: Ice cubes can be removed easilyfrom the tray by holding it under runningwater for a short time.

Defrosting
46
Refrigerator sectionThe refrigerator section defrosts auto-matically.
Condensate and frost can build up onthe back wall of the refrigerator sectionwhilst the compressor is running. Youdo not need to remove this. The con-densate is drained away through achannel and drain hole, then fed into anevaporation system at the back of theappliance where it evaporates automat-ically with the warmth generated by thecompressor.
Freezer sectionThe appliance is equipped with a“NoFrost” system. The freezer defrostsautomatically.
The moisture generated in the appli-ance collects on the condenser and isautomatically defrosted and dissipatedfrom time to time.
This automatic defrosting system en-ables the freezer to remain permanentlyice-free. Food stored in the freezer willnot defrost with this system.

Cleaning and care
47
Do not let water get into the elec-tronic module or the lighting.
Risk of damage due to moistureingress.The steam from a steam cleaner candamage plastic and and electricalcomponents.Do not use a steam cleaner to cleanthe refrigeration appliance.
Cleaning water must not get into thedrain hole.
The data plate located inside the in-terior cabinet of the refrigeration appli-ance must not be removed. It containsinformation which is required in theevent of a fault.
Cleaning agents
Cleaning and conditioning agentsused inside the appliance must befood safe.
To avoid damaging all the surfaces ofyour appliance, do not use:
- cleaning agents containing soda, am-monia, acids or chlorides
- cleaning agents containing descalingagents
- abrasive cleaning agents, e.g.powder cleaners and cream cleaners
- solvent-based cleaning agents
- stainless steel cleaning agents
- dishwasher cleaner
- oven sprays
- glass cleaning agents
- hard, abrasive sponges and brushes,e.g. pot scourers
- melamine eraser blocks
- sharp metal scrapers
We recommend using a clean sponge,lukewarm water with a little washing-upliquid to clean surfaces of the appli-ance.
The following pages contain importantinformation on cleaning.

Cleaning and care
48
Preparing the refrigeration ap-pliance for cleaning Switch the refrigeration appliance off.
appears in the display and cooling isswitched off.
Take any food out of the refrigerationappliance and store it in a cool place.
Remove the shelves and bottle shelffrom the door.
Take out the freezer drawers andglass plates.
Take out all other removable parts forcleaning.
Dismantling an adjustable shelf
Before cleaning the shelf remove theplastic trim and protective strip at theback of the shelf. To do this:
Place the shelf on a worktop coveredwith a soft material (e.g. a tea towel).
Then pull the protective strip off.
After cleaning the shelf reattach theprotective strip.
Cleaning the interior and ac-cessories
The refrigeration appliance should becleaned regularly (at least once amonth).
Remove soiling immediately to pre-vent it from drying on.
Clean the interior with a cleansponge, lukewarm water and a littlewashing-up liquid.
After cleaning, wipe with clean waterand dry with a soft cloth.
Remove the trim before cleaning thedoor shelf in a dishwasher.
The following parts cannot be cleanedin a dishwasher:
- stainless steel frames of adjustableshelves
- the protective strips at the back ofthe adjustable shelves
- all drawers and the compartment lid(depending on model)
- the bottle rack
- the roller plates under the fruit andvegetable drawers
- the cool pack
These accessories should all be handwashed.

Cleaning and care
49
Risk of damage as a result of ex-cessively high dishwasher temperat-ures.Parts of the refrigeration appliancemay become unusable, e.g. deform,if they are washed in the dishwasherat more than 55 °C.For dishwasher-safe parts, only usedishwasher programmes with a max-imum temperature of 55 °C.
Contact with natural dyes from car-rots, tomatoes and ketchup, etc., maydiscolour the plastic parts in the dish-washer. This discolouration does notaffect the stability of the parts.
The following parts can be cleaned inthe dishwasher:
- the bottle holder, butter dish, eggtray, ice cube tray(depending on model)
- the bottle shelf and shelves in thedoor (with stainless steel trim re-moved)
- the adjustable shelves (without whiteprotective strips)
- the holder for the charcoal filters
Leave the door open to air the appli-ance for a short while and to preventodours building up.
Cleaning the front of the appli-ance and the side panels
If soiling is left on for any length oftime, it may become impossible toremove. Surfaces may suffer discol-ouration or damage.Therefore, it is best to remove soilingfrom the appliance front and sidepanels immediately.
All surfaces are susceptible toscratching. Contact with unsuitablecleaning agents can alter or discol-our the surfaces.See the information on “Cleaningagents” at the beginning of this sec-tion.
Clean the surfaces with a cleansponge and a solution of warm waterand washing-up liquid. A clean, dampmicrofibre cloth without cleaningagent can also be used.
After cleaning, wipe with clean waterand dry with a soft cloth.
Cleaning and care
50
Appliance front
Risk of damage as a result of in-correct cleaning.The front finish (CleanSteel) will bedamaged.Do not use a stainless steel clean-ing agent on this surface.
The appliance front has a high quality,special finish (CleanSteel). It is resistantto soiling and is very easy to clean.
Cleaning the door seal
If the door seal is damaged or hasslipped out of its groove, the appli-ance door may not close properlyand cooling performance will be re-duced. As a result, condensate willbuild up in the interior cabinet andthis can cause a build-up of ice.Do not damage the door seal andensure it does not slip out of itsgroove.
Risk of damage as a result of in-correct cleaning.If you treat the door seal with oils orgrease, it can become porous.Do not use any oils or grease on thedoor seal.
The door seal should be cleaned reg-ularly with clean water and thenwiped dry with a cloth.
After cleaning Replace all shelves and accessories
in the appliance.
Switch the refrigeration appliance on.
Switch on the Super freeze functionfor a while so that the freezer sectioncan cool down quickly.
Switch on the Super cool function fora while so that the refrigerator sectioncan cool down quickly.
Place food in the refrigerator sectionand close the door.
Place the freezer drawers with thefrozen food back in the freezer sec-tion and close the door.
When the temperature in the freezersection is a constant -18 °C or colderpress the Super freeze button toswitch the Super freeze function off.

Cleaning and care
51
Replacing the charcoal filtersReplace the charcoal filters in theholder every 6 months.
Replacement KKF-RF charcoal filterscan be obtained from the Miele Cus-tomer Service Department, from yourretailer or from Miele's website.
Tip: The charcoal filter holder is dish-washer-safe.
Pull the charcoal filter holder upwardsto remove it from the adjustable shelf.
When in position, the charcoal filtersmust not touch the rear wall of therefrigeration appliance as the mois-ture could cause them to stick to it.Insert the new charcoal filters deepenough in the holder to ensure thatthey do not protrude over the edgeof the holder.
Remove both charcoal filters andplace the new filters with the sur-rounding edge pointing downwards inthe holder.
Place the holder in the middle of theraised edge at the back of the ad-justable shelf, so that it clicks into po-sition.

Problem solving guide
52
Many malfunctions and faults that can occur in daily operation can be easilyremedied. Time and money will be saved because a service call will not beneeded.
The following guide may help you to find the reason for a malfunction or a fault,and to correct it.
To prevent unnecessary loss of temperature it is advisable not to open the doorwhile waiting for the appliance to be serviced.
Problem Cause and remedy
The appliance is notgetting cold and the in-terior lighting does notcome on when the dooris opened.
The appliance has not been switched on. Switch the appliance on.
The mains plug is not inserted in the socket correctlyor the plug connector is not inserted into the socketat the back of the appliance correctly. Insert the mains plug into the mains socket and
the plug connector into the appliance socket cor-rectly and switch on.
Check whether the mains fuse has tripped. Therecould be a fault with the appliance, the householdelectrical wiring or another electrical appliance. Contact a qualified electrician or Miele.
The compressor runscontinuously.
This is not a fault. To save energy, the compressorruns at a lower speed, but for longer, when lesscooling is required.
The compressor isswitching on more fre-quently and for longerperiods of time. Thetemperature in the refri-geration appliance istoo low.
The ventilation gaps have been covered or becometoo dusty. Do not block the ventilation gaps. Dust the ventilation gaps regularly.
The appliance doors have been opened too fre-quently, or a large amount of fresh food has beenplaced inside and/or frozen at the same time. Only open the appliance doors when necessary
and for as short a time as possible.
After a while, the temperature will return to normal byitself.
The appliance doors are not closed properly. A thicklayer of ice may have formed in the freezer. Close the appliance doors.

Problem solving guide
53
Problem Cause and remedy
After a while, the temperature will return to normal byitself.
If a thick layer of ice has already formed, this will af-fect cooling and increase energy consumption. Defrost the refrigeration appliance and clean it.
The ambient room temperature is too high. Thehigher the ambient temperature, the longer the com-pressor has to run. See “Installation – Location”.
The temperature setting in the refrigeration applianceis too low. Correct the temperature setting.
A large amount of food is being frozen at once. See “Freezing and storing food”.
The SuperCool function is still switched on. You can switch off the SuperCool function earlier
to save energy.
The SuperFreeze function is still switched on. You can switch off the SuperFreeze function earlier
to save energy.
The compressor comeson less and less oftenand for shorter periodsof time. The temperat-ure in the refrigerationappliance rises.
This is not a fault. The temperature setting is toohigh. Correct the temperature setting. Check the temperature again after 24 hours.
The frozen food begins to defrost. The ambient temperature is too low for this refrigera-tion appliance. If the ambient temperature is too low, the com-pressor will run less frequently. This may cause thefreezer section to become too warm. See the information in “Installation – Installation
site”. Increase the ambient temperature.
The door seal is dam-aged or needs to be re-placed.
No tools are required to change the door seal. Change the door seal. A replacement is available
from Miele or from specialist retailers.

Problem solving guide
54
Problem Cause and remedy
Ice or condensation hasbuilt up inside the refri-geration appliance. Theappliance door may notclose correctly.
The door seal has come out of its groove. Check that the door seal is correctly positioned in
the groove.
The door seal is damaged. Check whether the door seal is damaged.
An LED indicator light isflashing at the back ofthe refrigeration appli-ance at the bottom nearthe compressor (de-pending on model). The electronic unit forthe compressor isequipped with an oper-ation and fault dia-gnosis LED indicatorlight.
The indicator light flashes several times every5 seconds. A fault has occurred. Call the Miele Customer Service Department.
The indicator light flashes regularly every15 seconds. Not a fault. This flashing is normal.

Problem solving guide
55
Display warnings
Message Cause and remedy
DEMO is shown in thedisplay. The refrigera-tion appliance does notget cold, although theappliance controls areworking.
Demo mode is switched on. This allows the refriger-ation appliance to be presented in the showroomwithout the cooling system being switched on. Donot activate this setting for domestic use. Call the Customer Service Department.
The temperature displayis dark and is shownin the display.
Sabbath mode is switched on. The interior lighting isswitched off and the refrigeration appliance is coolingdown. You can switch off Sabbath Mode at any time (see
“Selecting additional settings” – “Switching Sab-bath Mode on and off”).
The LED is lit up inthe display and the re-frigeration appliancecannot be used.
The safety lock has been activated. Completely deactivate the safety lock (see “Select-
ing further settings – Activating and deactivatingthe safety lock”).
An alarm is sounding. The door alarm has been activated (see “Dooralarm” in “Temperature and door alarm”). Close the appliance door.
The alarm will stop.
Problem solving guide
56
Message Cause and remedy
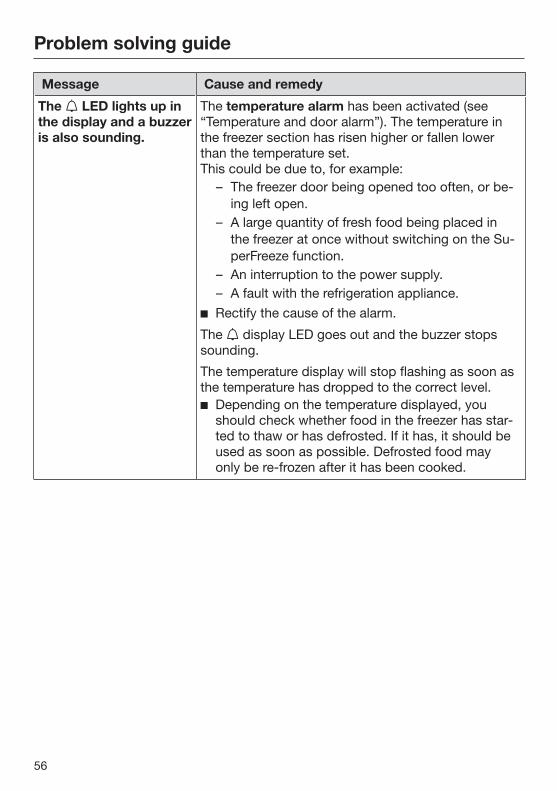
The LED lights up inthe display and a buzzeris also sounding.
The temperature alarm has been activated (see“Temperature and door alarm”). The temperature inthe freezer section has risen higher or fallen lowerthan the temperature set.This could be due to, for example:
– The freezer door being opened too often, or be-ing left open.
– A large quantity of fresh food being placed inthe freezer at once without switching on the Su-perFreeze function.
– An interruption to the power supply.– A fault with the refrigeration appliance.
Rectify the cause of the alarm.
The display LED goes out and the buzzer stopssounding.
The temperature display will stop flashing as soon asthe temperature has dropped to the correct level. Depending on the temperature displayed, you
should check whether food in the freezer has star-ted to thaw or has defrosted. If it has, it should beused as soon as possible. Defrosted food mayonly be re-frozen after it has been cooked.

Problem solving guide
57
Message Cause and remedy
The LED lights up inthe display and a buzzeris also sounding. Thetemperature display forthe freezer section isflashing.
Indication of an interruption to the power supply:the temperature in the appliance over the last fewdays or hours has risen too high because of a powercut or interruption to the power supply.The appliance will go back to the last temperaturesetting when the power is back on. Touch the sensor.
The warmest temperature recorded in the freezersection will flash for about 1 minute in the temperat-ure display for the freezer section. Touch the sensor.
The warmest temperature displayed will disappear.The display will then revert to showing the currenttemperature in the freezer section. Depending on the temperature displayed, you
should check whether food in the freezer has star-ted to thaw or has defrosted. If it has, it should beused as soon as possible. Defrosted food mayonly be re-frozen after it has been cooked.
“F0 to F9” appears inthe display.
There is a fault. Call Service.
There is an appliance fault: this display always haspriority over any settings which have just been selec-ted.
An appliance fault has priority over any current doorand/or temperature alarms displayed.

Problem solving guide
58
The interior lighting is not working.
Problem Cause and remedy
The interior lighting isnot working.
The refrigeration appliance has not been switchedon. Switch the refrigeration appliance on.
Sabbath mode is switched on: the temperature dis-play is dark and is shown in the display. You can switch off Sabbath Mode at any time (see
“Selecting additional settings” – “Switching Sab-bath Mode on and off”).
To avoid overheating, the lighting switches itself offautomatically after approx. 15 minutes if the appli-ance door is left open. If this is not the case, thenthere is a fault.
Risk of electric shock due to exposed, liveelectrical components.When removing the lighting cover, there is a risk ofcoming into contact with live electrical compon-ents.Do not remove the lighting cover. The LED lightingmay only be repaired or replaced by the CustomerService Department.
Danger of injury from LED lighting.This lighting corresponds to risk group RG 2. If thecover is defective, there is a danger of eye injury.If the lighting cover is defective, do not look from aclose range directly into the lighting with optical in-struments (e.g. magnifying glass or similar).
Call the Customer Service Department.

Problem solving guide
59
Other problems
Problem Cause and remedy
Food has frozen to-gether.
The food packaging was not dry when placed in thefreezer. Use a blunt instrument, e.g. a spoon handle or
plastic scraper, to prise it apart carefully.
The external walls ofthe appliance feelwarm.
This is not a fault. The heat created by the evapor-ator is used to prevent condensation.

Noises
60
Normalnoises
What causes them
Brrrrr ... A humming noise is made by the motor (compressor). This noisecan get louder for brief periods when the motor switches on.
Blubb,blubb ...
A gurgling noise can be heard when coolant is circulatingthrough the pipes.
Click ... Clicking sounds are made when the thermostat switches themotor on and off.
Sssrrrrr ... You can sometimes just hear the sound of the fan inside the ap-pliance.
Crack ... A cracking sound can be heard when materials expand insidethe appliance.
Remember that the noise of the compressor and the coolant circulating in thesystem is unavoidable.
Noises Cause and remedy
Rattling, vi-brating
The appliance is uneven. Realign the appliance using a spiritlevel. Do so by raising or lowering the screw feet underneath theappliance or place something underneath it.
The appliance is touching another appliance or piece of fur-niture. Move it away.
Drawers or shelves are unstable or sticking. Check all removableitems and refit them correctly.
Bottles or containers are touching each other. Separate them.
The transport cable clips are hanging loose at the back of theappliance. Remove them.

Service
61
Contact in the event of a faultIn the event of any faults which youcannot remedy yourself, please contactyour Miele dealer or the Miele CustomerService Department.
You can book a Miele Customer Ser-vice Department call-out online atwww.miele.com/service.
Contact information for the Miele Cus-tomer Service Department can befound at the end of this document.
Please quote the model identifier andserial number of your appliance (Fabr./SN/Nr.) when contacting the Miele Cus-tomer Service Department. This inform-ation can be found on the data plate.
Please note that telephone calls may bemonitored and recorded for trainingpurposes and that a call-out charge willbe applied to service visits where theproblem could have been resolved asdescribed in this booklet.
The data plate can be found inside theappliance.
EPREL databaseFrom 1 March 2021, information on en-ergy labelling and ecodesign require-ments will be available in the EuropeanProduct Database (EPREL). You canfind the product database at the follow-ing link https://eprel.ec.europa.eu/. Youwill be asked to enter the model identi-fier.
The model identifier can be found onthe data plate.
SN-ST
R600a:
XXXXXX Nr. XX/ XXXXXXXXX.
XXX lXXg
WarrantyThe appliance warranty is valid for 2years from date of purchase. In the UK,you must activate your cover by calling0330 160 6640 or registering online atwww.miele.co.uk.
For more information on country-spe-cific warranty terms and conditions,please contact Miele Customer Service.

Installation
*INSTALLATION*
62
Installation
Fire risk and risk of damage fromappliances which give off heat.Appliances which give off heat cancatch fire and set fire to the refrigera-tion appliance.Do not place appliances which giveoff heat, such as mini-ovens, doubleburner hobs or toasters on the refri-geration appliance.
Fire risk and danger of damagefrom open flames.Open flames can set fire to the refri-geration appliance.Keep open flames (e.g. a candle)away from the refrigeration appli-ance.
Side-by-side installation
Risk of damage due to condens-ation on external appliance panels.In environments with high humidity,condensation can build up on ex-ternal appliance panels, which cancause corrosion.Do not place different refrigerationappliance models directly next to oron top of one other.
However your refrigeration appliancecan be installed “side-by-side” becauseit is equipped with built-in heating unitsin the side panels.
Please contact your dealer for specificinformation about which combinationswill work with your appliance.
Location
This appliance should be installed in adry, well-ventilated room.
When deciding where to install your re-frigeration appliance please bear inmind that it will use more energy if in-stalled near to a heater, a cooker orother appliance that gives off heat. Dir-ect sunlight should also be avoided.The higher the room temperature, thelonger the compressor runs and thehigher the energy consumption is.
When installing the appliance, pleasenote:
- The socket must be easily accessiblein an emergency, not concealed be-hind the appliance.
- The plug and cable must not touchthe rear of the appliance as theycould be damaged by vibrations fromthe appliance.
- Do not plug in other appliances be-hind this appliance.
Risk of damage due to corrosion.In environments with high humidity,condensation can build up on ex-ternal refrigeration appliance panels.This condensate can cause corrosionon external appliance panels.Install the refrigeration appliance in adry and/or air-conditioned room withsufficient ventilation.After installation, make sure that theappliance doors close properly, theventilation gaps are not covered andthat the refrigeration appliance hasbeen installed in accordance withthese installation instructions.

Installation
*INSTALLATION*
63
Climate range
This refrigeration appliance is designedfor use within specific ambient temper-atures (climate range). Do not use inambient temperatures for which it is notdesigned. The climate range is statedon the data plate in the interior cabinetof the refrigeration appliance.
Climate range Ambient temper-ature
SN +10 to +32 °C
N +16 to +32 °C
ST +16 to +38 °C
T +16 to +43 °C
A lower ambient temperature leads tothe compressor switching off for longerperiods. This can cause the internaltemperature in the refrigeration appli-ance to rise with the risk of food deteri-orating and going off.
Ventilation
Risk of fire and damage due toinsufficient ventilation.If the refrigeration appliance is notventilated sufficiently, the com-pressor will run more frequently andfor longer periods. This will result inincreased energy consumption and ahigher operating temperature for thecompressor. This may, in turn, causedamage to the compressor.Please ensure that there is adequateventilation around the refrigerationappliance.It is essential to observe the requiredventilation gaps.The ventilation gaps must not becovered or blocked in any way.They must also be regularly dusted.
Air at the back of the refrigeration appli-ance gets warm.
Door opening angle limiter
The opening angle of the appliancedoors can be limited to approx. 90° or110° using the door opening angle lim-iter. This will prevent an appliance doorfrom hitting an adjacent wall and beingdamaged when opened, for example.
The door opening angle limiter is avail-able from Miele or your Miele dealer.

Installation
*INSTALLATION*
64
Fitting wall spacers supplied
The wall spacers supplied must beused in order to achieve declared en-ergy consumption values and to pre-vent the build-up of condensation athigh ambient temperatures. Appliancedepth is increased by approx. 35 mmwith the wall spacers fitted. If the wallspacers are not used the functionalityof the appliance is not affected. En-ergy consumption is only slightly in-creased with less distance betweenthe appliance and the wall.
Fit the wall spacers onto the back ofthe appliance on the top left andright.
Installing the refrigeration appliance
Danger of injury and damagedue to the refrigeration appliance tip-ping over.There is an increased danger of in-jury and damage if the refrigerationappliance is installed by a single per-son.Two people are required for installingthe refrigeration appliance.
Risk of damaging the floor.Moving the refrigeration appliancecan cause damage to the floor.Move the refrigeration appliancecarefully on floors that are sensitiveto scratching.
For easier installation, there are trans-port handles on the back at the topand transport wheels underneath therefrigeration appliance.
Tip: The refrigeration appliance must beempty when it is installed.
Prepare the refrigeration appliance forinstallation as close as possible to itsintended installation location.
Release the mains cable from theback of the appliance.
Remove the cable clip from the backof the appliance first.
Move the refrigeration appliancecarefully to its intended installationlocation.
Position the refrigeration appliancewith the wall spacers (if used) or theback close to the wall.

Installation
*INSTALLATION*
65
Aligning the appliance
SW19/10
To align the appliance, adjust thefront feet using the spanner supplied.
SW5
If necessary, also align the two rearadjustable feet using the two front ad-justing devices (located beside thefront adjustable feet).
Turn the adjusting device clockwiseusing a socket wrench to raise theappliance up at the back.
Levelling the appliance door
Risk of damage and injurycaused by the appliance door fallingout or the refrigeration appliance tip-ping over.If the additional adjustable foot onthe hinge plate at the bottom is notresting firmly on the floor, the appli-ance door can fall out or the refriger-ation appliance can tip over.Use the open spanner supplied withthe appliance to unscrew the ad-justable foot until it is resting on thefloor.Then unscrew the adjustable foot bya further quarter turn.

Installation
*INSTALLATION*
66
Installing the refrigeration appliancein a run of kitchen units
Risk of fire and damage due toinsufficient ventilation.If the refrigeration appliance is notventilated sufficiently, the com-pressor will run more frequently andfor longer periods. This will result inincreased energy consumption and ahigher operating temperature for thecompressor. This may, in turn, causedamage to the compressor.Please ensure that there is adequateventilation around the refrigerationappliance.It is essential to observe the requiredventilation gaps. The ventilation gapsmust not be covered or blocked inany way.
Top box Refrigeration appliance Housing unit Wall
* The appliance depth is increased byapprox. 35 mm for refrigeration appli-ances with wall spacers fitted.
The refrigeration appliance can be builtinto any run of kitchen units and in-stalled directly next to a kitchen fur-niture housing unit. The appliance frontmust protrude in front of furniture frontsby at least 34 mm* at the sides and byat least 55 mm* in the middle. This en-ables the appliance door to be openedand shut without being obstructed. Tomatch the height of the rest of the kit-chen units, the refrigeration appliancecan be fitted with a suitable top box .

Installation
*INSTALLATION*
67
When installed next to a wall , a dis-tance of at least 55 mm must be main-tained on the hinge side between thewall and the refrigeration appli-ance .
The larger the ventilation gap, themore economically the compressorwill work.
- A ventilation gap of at least 50 mmdepth must be provided at the backof the refrigeration appliance behindthe whole width of the top box for airto circulate.
- The ventilation gap under the ceilingmust be at least 300 cm2 to ensurethat warm air can escape without ob-struction.

Installation
*INSTALLATION*
68
Appliance dimensions
* Dimensions without wall spacers. Appliance depth is increased by 35 mm with the wallspacers supplied fitted.

Installation
*INSTALLATION*
69
* Dimensions without wall spacers. Appliance depth is increased by 35 mm with the wallspacers supplied fitted.
A[mm]
B[mm]
C[mm]
KFN 15842 D edt/cs 1840 1852 1860
KFN 15943 D edt/cs 2000 2012 2020

Installation
*INSTALLATION*
70
Changing the door hingingThe refrigeration appliance is suppliedwith hinges on the right. If left-handhinging is required, the hinges must bechanged.
Danger of injury and damagewhen changing the door hinging.There is an increased danger of in-jury and damage if the refrigerationappliance is installed by a single per-son.Always change the door hinging withthe help of a second person.
If the door seal is damaged or hasslipped out of its groove, the appli-ance door may not close properlyand cooling performance will be re-duced. Condensate will build up inthe interior cabinet and this cancause a build-up of ice.Do not damage the door seal andensure it does not slip out of itsgroove.
Preparing to change the door hinging
To change the door hinging, you willneed the following tools:
Place a suitable cover on the floor infront of the appliance to protect theappliance doors and your floor fromdamage.
Remove the shelves/bottle shelf fromthe appliance door.
Removing the door handles
When you pull the door handle , thesidebar slides back.
Pull sidebar firmly to the back outof the guides on the mounting plate.
Now loosen the four screws (TX15) inthe mounting plate and remove thehandle.
Remove the cover caps from the op-posite side, and fit them into theempty holes.

Installation
*INSTALLATION*
71
Removing the upper soft-closemechanism
Open the upper appliance door.
Loosen the panel from the soft-close mechanism by inserting a flat-head screwdriver into the gaps frombelow and, taking care, gradually liftthe panel off.
Push the panel toward the refriger-ation appliance and leave it hangingthere between the door and appli-ance to start with.
Place the safety device (suppliedwith the refrigeration appliance) onthe soft-close mechanism so thatit engages.
The safety device prevents the hingefrom snapping shut.
Do not remove the red safety deviceuntil instructed to do so.
Gently loosen the cover from thelatch by inserting a flat-head screw-driver from above and below.

Installation
*INSTALLATION*
72
Push the pin up and out from be-low using a flat-head screwdriver.
Remove the cover .
Now the soft-close mechanism and therefrigeration appliance are no longerconnected.
Remove the panel .
Push the soft-close mechanismbracket as far as it will go towardthe handle side.
Loosen the screw in the soft-closemechanism and spacer.
Lever out the housing together withthe soft-close mechanism using aflat-head screwdriver in the middle.
Then, lever the housing together withthe soft-close mechanism out of thelatch from the appliance side.
Put the soft-close mechanism to oneside.
Push the spacer towards the hingeside and out.
Place the spacer to one side.

Installation
*INSTALLATION*
73
Removing the upper appliance door
Loosen the cover by carefully in-serting a flat-head screwdriver intothe gap from below, and then removeit.
Unscrew the hinge part , turn it180°, and fit it on the opposite side. Ifnecessary, drill holes for the screws.
Remove the upper cover by slidingit forward from the back and then lift-ing it up and off.
Remove the cover by lifting it upand off.
Close the upper appliance door.
Danger of injury when removingthe appliance door.The appliance door is not secureonce the screws in the hinge platehave been removed.The appliance door must be held bya second person.
Loosen the screws in the upperhinge plate and pull the hinge plateup and off.
Danger of injury when removingthe upper appliance door.As soon as the hinge pin is located inthe upper appliance door rather thanin the middle hinge plate, the lowerdoor is not secured and could fall off.Ensure that the hinge pin remainslocated in the middle hinge plate andin the lower appliance door.
Carefully lift the upper appliance doorup and off, and put it to one side.
Fit the cover on the opposite side.
Attach the cover on the oppositeside.

Installation
*INSTALLATION*
74
Removing the lower soft-close mech-anism
Open the lower appliance door.
Loosen the panel from the soft-close mechanism by inserting a flat-head screwdriver into the gaps fromabove and, taking care, gradually lift-ing the panel off.
Push the panel toward the refriger-ation appliance and leave it hangingthere between the door and appli-ance to start with.
Place the safety device (suppliedwith the refrigeration appliance) onthe soft-close mechanism .
The safety device prevents the hingefrom snapping shut.
Do not remove the red safety deviceuntil instructed to do so.
Use a flat-head screwdriver to care-fully remove the cover from theside.

Installation
*INSTALLATION*
75
Tip the refrigeration appliance backslightly with the help of another per-son if required.
Push the pin up and out from be-low.
Now the soft-close mechanism and therefrigeration appliance are no longerconnected.
Remove the panel .
Push the soft-close mechanismbracket as far as it will go towardthe handle side.
Loosen the screw in the soft-closemechanism and spacer.
Lever out the housing together withthe soft-close mechanism using aflat-head screwdriver in the middle.
Then, lever the housing together withthe soft-close mechanism out of thelatch from the appliance side.
Put the soft-close mechanism to oneside.
Push the spacer towards the hingeside and out.
Place the spacer to one side.

Installation
*INSTALLATION*
76
Removing the lower appliance door
Close the lower appliance door.
Danger of injury when removingthe lower appliance door.As soon as the hinge pin is removedfrom the lower appliance door in thefollowing instructions, the appliancedoor is no longer secured.The appliance door must be held bya second person.
Remove the hinge pin from themiddle of the appliance by pulling itup.
Tip: Please note that the grey plasticcover on the middle hinge plate canfall off when the appliance door is beingremoved.
Carefully lift the lower appliance dooroff and place it to one side.
Pull the cover off.
Unscrew the hinge plate , turn it180°, and screw it into place on theopposite side.
Turn the plastic cap 180° and refitit in the middle of the hinge plate .
Attach the cover on the oppositeside.
Lift the stoppers for both appli-ance doors from their bearing bushesand reinsert them on the oppositeside.

Installation
*INSTALLATION*
77
Refitting the lower appliance door
Pull the hinge pin complete withwasher and adjustable foot up-ward to remove.
Remove the stopper .
Undo the screws and remove thehinge plate .
Unscrew the hinge part from thehinge plate , turn it 180°, and screwit into the opposite hole in the hingeplate.
Insert the stopper into the otherhole.
Remove the cover .
Take the screw out and screw itinto the outside hole on the oppositeside.
Turn the cover by 180° and refit itin the holes on the opposite side.
Screw the hinge plate into placeon the opposite side using the twoouter slots only. Do not use the screwin the middle because otherwise youwill not be able to align the appliancedoor with the outer slots later on.
Important. Screw the adjustablefoot into the hinge pin as far asit will go.
Reinsert the hinge pin completewith washer and adjustablefoot .
Important. The lug on the hinge pinmust point to the back again.
Place the lower door on the hingepin from above.
Close the lower appliance door.
In the middle of the appliance, insertthe hinge pin through the hingeplate and into the lower appliancedoor.

Installation
*INSTALLATION*
78
Inserting the lower soft-close mech-anism
Remove cover from panel , turnit 180°, and reinsert it on the otherside.
Hook the spacer into latch (A) on thehandle side.
Hook the soft-close mechanism intolatch (B) on the appliance side.
Push both parts out so that they arefirmly engaged.
Use screw to secure the spacerand soft-close mechanism in place.
Attach panel onto soft-closemechanism bracket .
Pull soft-close mechanism bracket toward the hinge plate and insertpin from above so that the squaresits in the depression.
Fit cover back into place so that itengages.
Make sure that cover fits properlyso that the door can be closed withouthindrance and the pin is secured.
Remove the safety aid .

Installation
*INSTALLATION*
79
Replace panel onto the soft-closemechanism from above, clicking itback into place first at the bottomand then at the top.
Close the lower door.
Refitting the upper door
Fit the upper door onto hinge pin in the middle of the appliance.
Close the upper door.
0
2
3
Fit hinge plate on the oppositeside and secure it in place withscrews .
Tip: If necessary, drill holes for thescrews.
Refit cover on the opposite side.
Align the appliance door with the ap-pliance housing using the slots in thelower hinge plate. Then tighten thescrews.
Inserting the upper soft-close mech-anism
Remove cover from panel , turnit 180°, and reinsert it on the otherside.
Hook the spacer into latch (A) on thehandle side.
Hook the soft-close mechanism intolatch (B) on the appliance side.
Push both parts out so that they arefirmly engaged.

Installation
*INSTALLATION*
80
Use screw to secure the spacerand soft-close mechanism in place.
Attach panel onto soft-closemechanism bracket .
Slide cover on from the side sothat the openings for pin arealigned.
Pull soft-close mechanism bracket toward the hinge plate and insertpin from above so that the squaresits in the depression.
Snap cover completely into place.
Make sure that cover fits properlyso that the door can be closed withouthindrance and the pin is secured.
Remove the safety aid .
Replace panel onto the soft-closemechanism from above, clicking itback into place first at the bottomand then at the top.
Close the upper door.

Installation
*INSTALLATION*
81
Refitting the handle
Risk of damage as a result of in-correct assembly.The door seal can be damaged if thehandle is fitted incorrectly.Please make sure you follow the in-structions below carefully when yourefit the handle.
Loosely attach the door handle to theopposite side with the two frontscrews to start with.
The mounting plate must be posi-tioned on the door housing so thatwhen the door is closed it is flush withthe outer wall of the appliance.
Firmly tighten all 4 screws .
From the appliance side, slide thesidebar into the guide on themounting plate until it audibly clicksinto place.
Make sure that the sidebar doesnot come into contact with the doorseal when the door is opened. Thiscan cause permanent damage to thedoor seal.
Aligning the appliance doorsThe appliance doors can be alignedwith the appliance housing after theyhave been fitted.
In the following illustration the door isnot shown in the closed position tomake it easier to see what you have todo.
To align the lower door use the longouter slots in the lower hinge plate:
Remove centre screw from thehinge plate.
Slightly loosen both outer screws .
Align the door by sliding the hingeplate to the left or right.
Then tighten screws again.Screw does not need to be refit-ted.

Installation
*INSTALLATION*
82
Align the upper door using the longouter slots in the middle hinge plate:
Slightly loosen both screws .
Align the door by sliding the hingeplate to the left or right.
Then tighten screws .

Installation
*INSTALLATION*
83
Electrical connectionThe appliance is supplied with a mainscable and moulded plug ready for con-nection to an AC single-phase 220–240 V 50 Hz supply.
The fuse rating must be at least 10 A.
This appliance must be connected to asuitable switched socket. The electricalinstallation must be in compliance withcurrent local and national safety regula-tions, (e.g. VDE 0100 in Germany / BS7671 in the UK). We recommend theuse of a suitable RCD .
The socket must not be concealed be-hind the appliance and must be easilyaccessible so that the appliance can bequickly disconnected from the electricalsupply in case of an emergency.
If the socket is no longer accessibleafter installation, an additional means ofdisconnection must be provided for allpoles. Suitable means of disconnectioninclude switches with an all-pole con-tact gap of at least 3 mm. These in-clude miniature circuit breakers, fusesand contactors (EN 60335).
The mains plug and mains connectioncable must not come into contact withthe back of the appliance as vibrationscan cause damage to these compon-ents. This could result in a short circuit.
Do not plug in other appliances behindthis appliance.
Do not connect the appliance to themains electricity supply by an extensionlead. Extension leads do not guaranteethe required safety of the appliance(e.g. danger of overheating).
Do not connect the appliance to astand-alone inverter such as those usedwith an autonomous energy source e.g.solar power.When the appliance is switched on,power surges could result in a safetyswitch-off. This could damage the elec-tronic module. The appliance must notbe used with so-called energy savingdevices either. These reduce theamount of energy supplied to the appli-ance, causing it to overheat.
If the mains cable needs to be replaced,this must be performed by a qualifiedelectrician.


United KingdomMiele Co. Ltd., Fairacres, Marcham Road, Abingdon, Oxon, OX14 1TWTel: 0330 160 6600, Internet: www.miele.co.uk/service, E-mail: [email protected]
AustraliaMiele Australia Pty. Ltd.ACN 005 635 398ABN 96 005 635 3981 Gilbert Park DriveKnoxfield, VIC 3180Tel: 1300 464 353Internet: www.miele.com.au
Miele Electrical Appliances Co., Ltd.1-3 Floor, No. 82 Shi Men Yi RoadJing' an District200040 Shanghai, PRCTel: +86 21 6157 3500Fax: +86 21 6157 3511E-mail: [email protected],Internet: www.miele.cn
China Mainland
Miele (Hong Kong) Ltd.41/F - 4101, Manhattan Place23 Wang Tai RoadKowloon Bay, Hong KongTel: (852) 2610 1025Fax: (852) 3579 1404Email:[email protected]: www.miele.hk
Hong Kong, China
Miele India Pvt. Ltd.1st Floor, Copia Corporate Suites,Commercial Plot 9,Mathura Road, Jasola, New Delhi - 110025E-mail: [email protected]: www.miele.in
India
Miele Ireland Ltd.2024 Bianconi AvenueCitywest Business CampusDublin 24Tel: (01) 461 07 10Fax: (01) 461 07 97E-Mail: [email protected]: www.miele.ie
Ireland
MalaysiaMiele Sdn BhdSuite 12-2, Level 12Menara Sapura KencanaPetroleumSolaris Dutamas No. 1Jalan Dutamas 150480 Kuala Lumpur, MalaysiaPhone: +603-6209-0288Fax: +603-6205-3768
Miele New Zealand LimitedIRD 98 463 6318 College HillFreemans Bay, Auckland 1011New ZealandTel: 0800 464 353Internet: www.miele.co.nz
New Zealand
Miele Pte. Ltd.29 Media Circle#11-04 ALICE@MediapolisSingapore 138565sTel: +65 6735 1191Fax: +65 6735 1161E-Mail: [email protected]: www.miele.sg
Singapore
Miele (Pty) Ltd.63 Peter PlaceBryanston 2194P.O. Box 69434Bryanston 2021Tel: (011) 875 9000Fax: (011) 875 9035E-mail: [email protected]: www.miele.co.za
South Africa
Miele Appliances Ltd.Showroom 1Eiffel 1 Building
P.O. Box 114782 - DubaiTel. +971 4 3044 999Fax. +971 4 3418 852800-MIELE (64353)E-Mail: [email protected]: www.miele.ae
United Arab Emirates
Manufacturer: Miele & Cie. KG, Carl-Miele-Straße 29, 33332 Gütersloh, Germany
ThailandMiele Appliances Ltd.BHIRAJ TOWER at EmQuartier43rd Floor Unit 4301-4303 689 Sukhumvit RoadNorth Klongton Sub-DistrictVadhana DistrictBangkok 10110, Thailand
Sheikh Zayed Road, Umm Al Sheif

M.-Nr. 10 758 871 / 04en-GB
KFN 15842 D edt/cs, KFN 15943 D edt/cs


