Embed Size (px)
Citation preview
TEACHER GUIDE
www.caloes.ca.gov/preparednessambassadors
February 2021 Governor’s Office of Emergency Services (Cal OES)
iiiPreparedness Ambassadors – Teacher Guide
PREPAREDNESS AMBASSADORSDisaster Preparedness for California’s Fourth Graders
iv Preparedness Ambassadors – Teacher Guide
Acknowledgments
The Preparedness Ambassadors curriculum was developed by the California Governor’s Office of Emergency Services (Cal OES) in partnership with the California Department of Education (CDE), CalRecycle, and the Sacramento County Office of Education (SCOE). Jonathan Rhodea, Science Curriculum Specialist at SCOE, led the effort on researching, writing, and aligning this program with the California Health Education Standards, integrating it with the California Science and English Language Arts (ELA) Standards, developing content, and overseeing layout and design.
Providing content, guidance, review, and subject matter expertise were:
• Lynne Olson, Program Manager I, Cal OES
• Nick Murray, Emergency Services Coordinator, Cal OES
• Melanie Slootweg, Program Manager, Communications Office, SCOE
• Phil Romig, Science Curriculum Specialist, SCOE
• Christine Anderson, ELA Curriculum Specialist, SCOE
• Dareen Khatib, Health and Wellness Administrator, Orange County Office of Education (OCOE)
• Nadia Moya, Program Specialist, Health Sciences, OCOE
• Janis Price, Program Specialist, Health Sciences, OCOE
• Jennifer Bentley, Education Programs Consultant, CDE
• Cliff Rudnick, Education Administrator, CDE
• Bryan Boyd, Education Programs Consultant, CDE
• Juan Mireles, Director of School Facilities and Transportation Services Division, CDE
• Christy Porter, Senior Environmental Scientist, CalRecycle
• Kaye Schwartz, Science Curriculum Specialist, Elk Grove Unified School District
• Justin Knighten, Co-Chair, Listos California Emergency Preparedness Campaign
• Cal OES Earthquake, Tsunami, and Volcano Program
• California Department of Water Resources
• National Weather Service
Special thank you to the San Diego County Office of Emergency Services and the San Diego County Office of Education whose “Be Aware! Be Prepared!” Natural Disaster Fourth Grade Program was the inspiration for this statewide program.
vPreparedness Ambassadors – Teacher Guide
Disaster Preparedness for California’s Fourth Graders
Introduction .............................................................................................................. 1
Unit Pacing, Instruction Sequence, and Integrated Standards Map ................. 3
Preparing to Teach the Unit .................................................................................... 8
Prior Health Instruction .................................................................................... 9
Curriculum, Support, and Materials ............................................................... 9
Preparing the Room ........................................................................................ 10
Engage: What Do You Notice, Wonder, and Feel? .............................................. 13
Explore ...................................................................................................................... 16
What Is a Disaster? .......................................................................................... 16
Community Data Collection .......................................................................... 22
Mapping Disaster Data and Land Features ................................................. 24
Researching Natural Disaster Case Studies .................................................. 33
Case Studies (CS) ............................................................................................ 43
CS1:Wildfire ............................................................................................. 44
CS2: Flood ................................................................................................ 48
CS3:Earthquake ...................................................................................... 52
CS4:Tsunami ............................................................................................ 57
CS5:Volcano ........................................................................................... 61
CS6:Tornado ........................................................................................... 66
CS7:PowerOutage ................................................................................ 70
Explain: Creating Home, School, and Community Disaster Guidelines ............ 73
Elaborate: Take Action ............................................................................................ 78
Take Action Level 1: Prepare Our Homes and School ................................ 80
Take Action Level 2: Inform the Community ................................................ 82
Take Action Level 3: Create an Emergency Community Support Network .............................................................................................. 85
Table of Contents
vi Preparedness Ambassadors – Teacher Guide
Disaster Preparedness for California’s Fourth Graders
Evaluate .................................................................................................................... 86
Promoting Preparedness Self-Assessment .................................................... 86
Awarding the Preparedness Ambassador Certificate ................................ 87
Ceremony Planning ........................................................................................ 87
Supplemental Materials (SM) ................................................................................. 89
SM1: Alerts, Shelter-in-Place, and Evacuations ............................................ 90
SM2: Active Shooter/Intruder Preparedness ................................................ 96
SM3: Classroom and Home Emergency Supplies ........................................ 99
SM4: Close Reading ........................................................................................ 103
SM5: Distance Learning .................................................................................. 105
Resources ................................................................................................................. 109
Glossary .................................................................................................................... 117
References ................................................................................................................ 121
Table of Contents, continued
1Preparedness Ambassadors – Teacher Guide
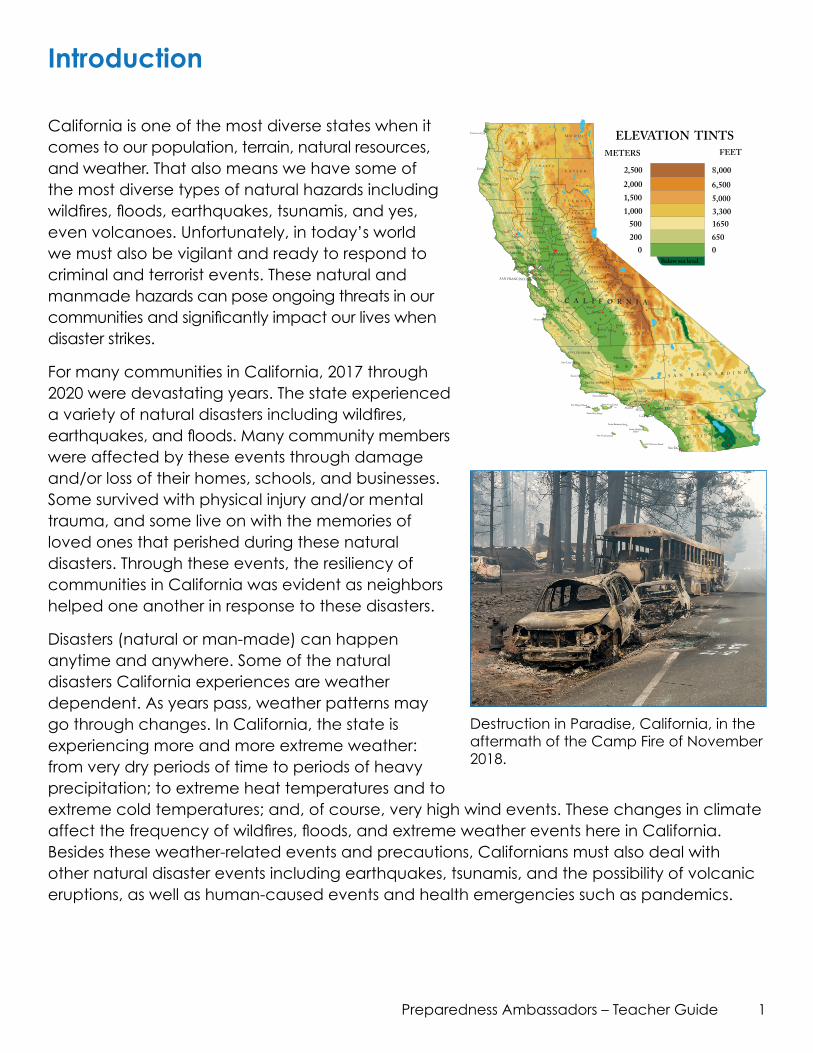
California is one of the most diverse states when it comes to our population, terrain, natural resources, and weather. That also means we have some of the most diverse types of natural hazards including wildfires, floods, earthquakes, tsunamis, and yes, even volcanoes. Unfortunately, in today’s world we must also be vigilant and ready to respond to criminal and terrorist events. These natural and manmade hazards can pose ongoing threats in our communities and significantly impact our lives when disaster strikes.
For many communities in California, 2017 through 2020 were devastating years. The state experienced a variety of natural disasters including wildfires, earthquakes, and floods. Many community members were affected by these events through damage and/or loss of their homes, schools, and businesses. Some survived with physical injury and/or mental trauma, and some live on with the memories of loved ones that perished during these natural disasters. Through these events, the resiliency of communities in California was evident as neighbors helped one another in response to these disasters.
Disasters (natural or man-made) can happen anytime and anywhere. Some of the natural disasters California experiences are weather dependent. As years pass, weather patterns may go through changes. In California, the state is experiencing more and more extreme weather: from very dry periods of time to periods of heavy precipitation; to extreme heat temperatures and to extreme cold temperatures; and, of course, very high wind events. These changes in climate affect the frequency of wildfires, floods, and extreme weather events here in California. Besides these weather-related events and precautions, Californians must also deal with other natural disaster events including earthquakes, tsunamis, and the possibility of volcanic eruptions, as well as human-caused events and health emergencies such as pandemics.
Introduction
Destruction in Paradise, California, in the aftermath of the Camp Fire of November 2018.
2 Preparedness Ambassadors – Teacher Guide
Unfortunately, we must also be prepared for human-caused events. Terrorists can strike at anytime, anywhere, by any means. Criminal activity can happen around school campuses requiring schools to lockdown for student safety. Additionally, schools must also prepare for active shooter or intruder events on their campuses.
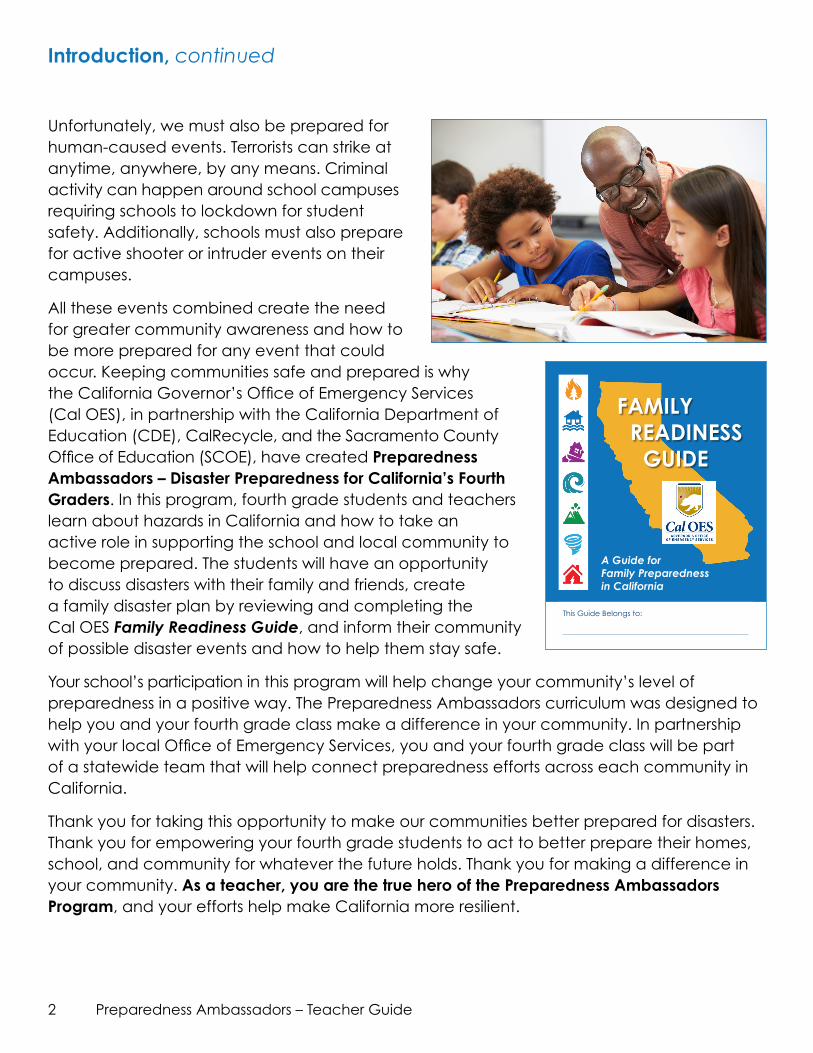
All these events combined create the need for greater community awareness and how to be more prepared for any event that could occur. Keeping communities safe and prepared is why the California Governor’s Office of Emergency Services (Cal OES), in partnership with the California Department of Education (CDE), CalRecycle, and the Sacramento County Office of Education (SCOE), have created Preparedness Ambassadors – Disaster Preparedness for California’s Fourth Graders. In this program, fourth grade students and teachers learn about hazards in California and how to take an active role in supporting the school and local community to become prepared. The students will have an opportunity to discuss disasters with their family and friends, create a family disaster plan by reviewing and completing the Cal OES Family Readiness Guide, and inform their community of possible disaster events and how to help them stay safe.
Your school’s participation in this program will help change your community’s level of preparedness in a positive way. The Preparedness Ambassadors curriculum was designed to help you and your fourth grade class make a difference in your community. In partnership with your local Office of Emergency Services, you and your fourth grade class will be part of a statewide team that will help connect preparedness efforts across each community in California.
Thank you for taking this opportunity to make our communities better prepared for disasters. Thank you for empowering your fourth grade students to act to better prepare their homes, school, and community for whatever the future holds. Thank you for making a difference in your community. As a teacher, you are the true hero of the Preparedness Ambassadors Program, and your efforts help make California more resilient.
Introduction, continued
FAMILY READINESS GUIDE
A Guide for Family Preparedness in California
This Guide Belongs to:
3Preparedness Ambassadors – Teacher Guide
Unit Pacing, Instruction Sequence, and Integrated Standards Map
The purpose of the Preparedness Ambassadors curriculum is to engage fourth grade students in the task of developing and promoting disaster preparedness guidelines for their homes, school, and local community. The idea of enlisting fourth grade students to develop preparedness guidelines for a community sounds challenging; however, this is accomplished in a way that their ideas about staying safe during a disaster event are merged with the advice of professionals from the California Governor’s Office of Emergency Services (Cal OES). It is important for students to experience the process used in preparedness guideline development, including gathering and using data, reading case studies about actual disaster events, and reflecting on which behaviors may help contribute to a person staying safe during these disaster events.
The culminating tasks for the students is to compare and contrast their preparedness guidelines with that of the Cal OES Family Readiness Guide, to review and fill out the guide with their own family unit, and to promote its use across the community. The instructional sequence of the Preparedness Ambassadors curriculum accomplishes this by following the 5E instructional model (Engage, Explore, Explain, Elaborate, Evaluate) as outlined in the chart that follows. For more information on the 5E model, please see the 2016 ScienceFrameworkforCaliforniaPublicSchools, Chapter 11, titled “Instructional Strategies for CA NGSS Teaching and Learning in the Twenty-First Century.” https://www.cde.ca.gov/ci/sc/cf/documents/scifwchapter11.pdf
The chart that follows has descriptions of what the students will do through each segment of the 5Es. It also lists the standards that students will use to complete each segment. This curriculum was designed to focus on the California health content area of Injury Prevention and Safety for fourth grade students and emphasizes the standard of Health Promotion. Yet in addition to Health Education Content Standards, this curriculum may help build student knowledge of certain Performance Expectations (P.E.s) of the California Science Standards and the California Environmental Principles and Concepts (EP&Cs). Both science P.E.s and EP&Cs are listed in the standards column as are the California English Language Arts Standards that are used by the students to complete each 5E segment. As you read through the chart, it should become apparent that the Preparedness Ambassadors curriculum is more than a supplemental health curriculum—it is an integrated, project-based curriculum.
Science FrameworkFOR CALIFORNIA PUBLIC SCHOOLSKindergarten Through Grade Twelve
Adopted by the California State Board of Education November 2016
Published by the California Department of Education Sacramento, 2017
4 Preparedness Ambassadors – Teacher Guide
Instructional Segment
Description California Standards
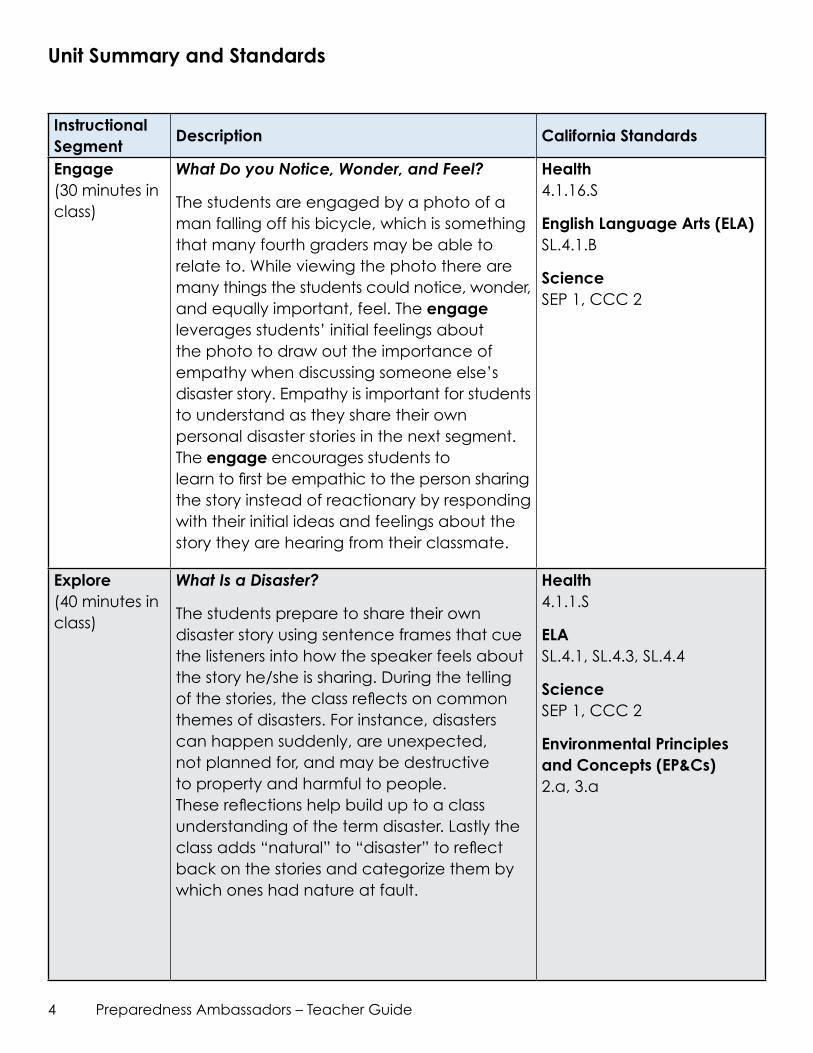
Engage (30 minutes in class)
What Do you Notice, Wonder, and Feel?
The students are engaged by a photo of a man falling off his bicycle, which is something that many fourth graders may be able to relate to. While viewing the photo there are many things the students could notice, wonder, and equally important, feel. The engage leverages students’ initial feelings about the photo to draw out the importance of empathy when discussing someone else’s disaster story. Empathy is important for students to understand as they share their own personal disaster stories in the next segment. The engage encourages students to learn to first be empathic to the person sharing the story instead of reactionary by responding with their initial ideas and feelings about the story they are hearing from their classmate.
Health 4.1.16.S
English Language Arts (ELA) SL.4.1.B
Science SEP 1, CCC 2
Explore (40 minutes in class)
What Is a Disaster?
The students prepare to share their own disaster story using sentence frames that cue the listeners into how the speaker feels about the story he/she is sharing. During the telling of the stories, the class reflects on common themes of disasters. For instance, disasters can happen suddenly, are unexpected, not planned for, and may be destructive to property and harmful to people.These reflections help build up to a class understanding of the term disaster. Lastly the class adds “natural” to “disaster” to reflect back on the stories and categorize them by which ones had nature at fault.
Health 4.1.1.S
ELA SL.4.1, SL.4.3, SL.4.4
Science SEP 1, CCC 2
Environmental Principles and Concepts (EP&Cs) 2.a, 3.a
Unit Summary and Standards
5Preparedness Ambassadors – Teacher Guide
Instructional Segment
Description California Standards
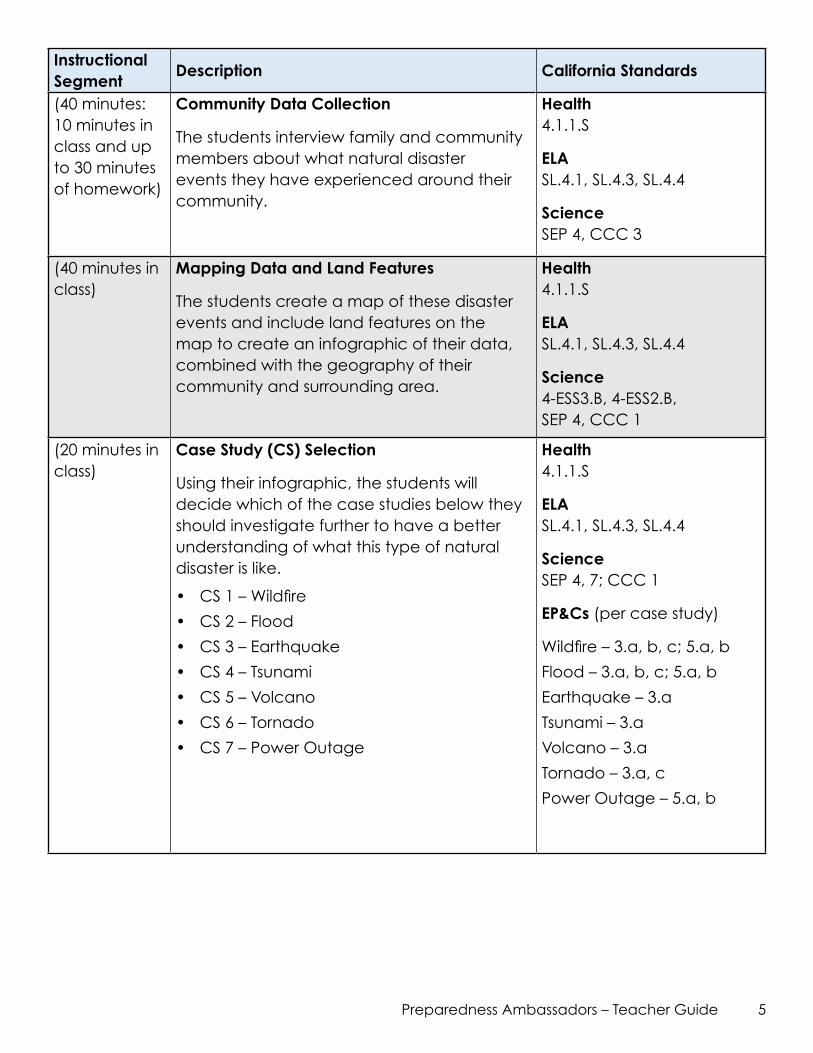
(40 minutes: 10 minutes in class and up to 30 minutes of homework)
Community Data Collection
The students interview family and community members about what natural disaster events they have experienced around their community.
Health 4.1.1.S
ELA SL.4.1, SL.4.3, SL.4.4
Science SEP 4, CCC 3
(40 minutes in class)
Mapping Data and Land Features
The students create a map of these disaster events and include land features on the map to create an infographic of their data, combined with the geography of their community and surrounding area.
Health 4.1.1.S
ELA SL.4.1, SL.4.3, SL.4.4
Science 4-ESS3.B, 4-ESS2.B, SEP 4, CCC 1
(20 minutes in class)
Case Study (CS) Selection
Using their infographic, the students will decide which of the case studies below they should investigate further to have a better understanding of what this type of natural disaster is like.
• CS 1 – Wildfire
• CS 2 – Flood
• CS 3 – Earthquake
• CS 4 – Tsunami
• CS 5 – Volcano
• CS 6 – Tornado
• CS 7 – Power Outage
Health 4.1.1.S
ELA SL.4.1, SL.4.3, SL.4.4
Science SEP 4, 7; CCC 1
EP&Cs (per case study)
Wildfire – 3.a, b, c; 5.a, b
Flood – 3.a, b, c; 5.a, b
Earthquake – 3.a
Tsunami – 3.a
Volcano – 3.a
Tornado – 3.a, c
Power Outage – 5.a, b
6 Preparedness Ambassadors – Teacher Guide
Instructional Segment
Description California Standards
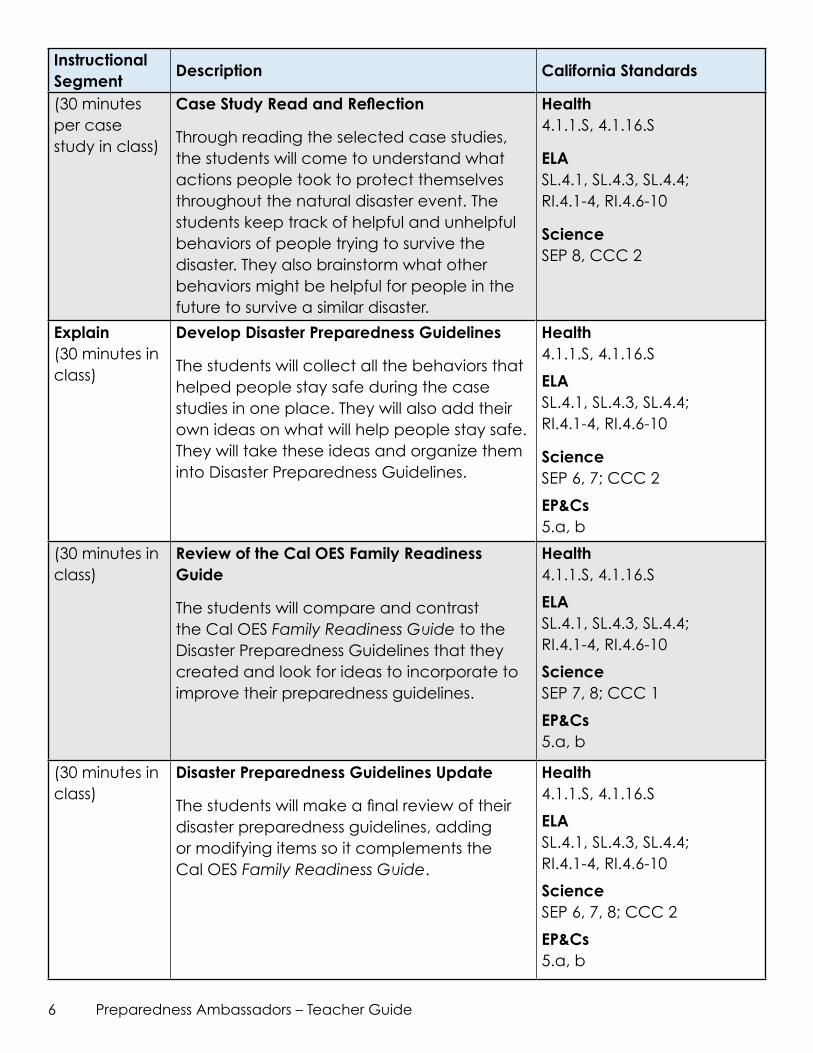
(30 minutes per case study in class)
Case Study Read and Reflection
Through reading the selected case studies, the students will come to understand what actions people took to protect themselves throughout the natural disaster event. The students keep track of helpful and unhelpful behaviors of people trying to survive the disaster. They also brainstorm what other behaviors might be helpful for people in the future to survive a similar disaster.
Health 4.1.1.S, 4.1.16.S
ELA SL.4.1, SL.4.3, SL.4.4; RI.4.1-4, RI.4.6-10
Science SEP 8, CCC 2
Explain (30 minutes in class)
Develop Disaster Preparedness Guidelines
The students will collect all the behaviors that helped people stay safe during the case studies in one place. They will also add their own ideas on what will help people stay safe. They will take these ideas and organize them into Disaster Preparedness Guidelines.
Health 4.1.1.S, 4.1.16.S
ELA SL.4.1, SL.4.3, SL.4.4; RI.4.1-4, RI.4.6-10
Science SEP 6, 7; CCC 2
EP&Cs 5.a, b
(30 minutes in class)
Review of the Cal OES Family Readiness Guide
The students will compare and contrast the Cal OES FamilyReadinessGuide to the Disaster Preparedness Guidelines that they created and look for ideas to incorporate to improve their preparedness guidelines.
Health 4.1.1.S, 4.1.16.S
ELA SL.4.1, SL.4.3, SL.4.4; RI.4.1-4, RI.4.6-10
Science SEP 7, 8; CCC 1
EP&Cs 5.a, b
(30 minutes in class)
Disaster Preparedness Guidelines Update
The students will make a final review of their disaster preparedness guidelines, adding or modifying items so it complements the Cal OES FamilyReadinessGuide.
Health 4.1.1.S, 4.1.16.S
ELA SL.4.1, SL.4.3, SL.4.4; RI.4.1-4, RI.4.6-10
Science SEP 6, 7, 8; CCC 2
EP&Cs 5.a, b
7Preparedness Ambassadors – Teacher Guide
Instructional Segment
Description California Standards
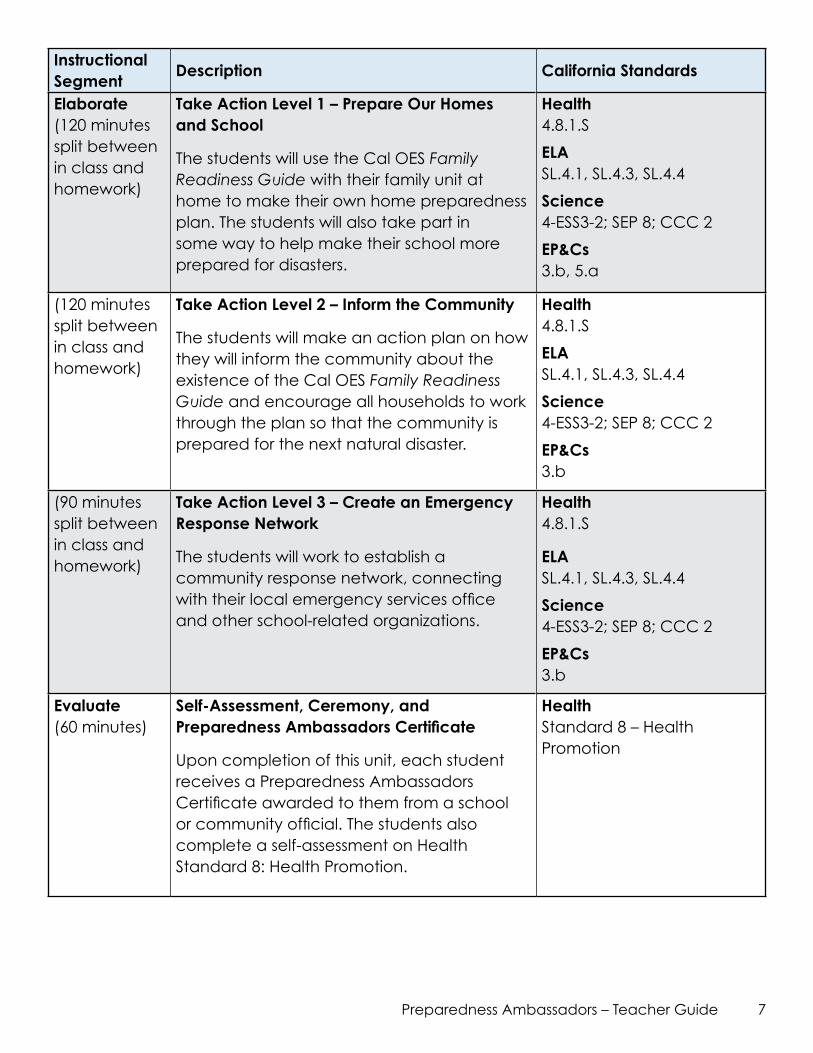
Elaborate (120 minutes split between in class and homework)
Take Action Level 1 – Prepare Our Homes and School
The students will use the Cal OES FamilyReadinessGuide with their family unit at home to make their own home preparedness plan. The students will also take part in some way to help make their school more prepared for disasters.
Health 4.8.1.S
ELA SL.4.1, SL.4.3, SL.4.4
Science 4-ESS3-2; SEP 8; CCC 2
EP&Cs 3.b, 5.a
(120 minutes split between in class and homework)
Take Action Level 2 – Inform the Community
The students will make an action plan on how they will inform the community about the existence of the Cal OES FamilyReadinessGuide and encourage all households to work through the plan so that the community is prepared for the next natural disaster.
Health 4.8.1.S
ELA SL.4.1, SL.4.3, SL.4.4
Science 4-ESS3-2; SEP 8; CCC 2
EP&Cs 3.b
(90 minutes split between in class and homework)
Take Action Level 3 – Create an Emergency Response Network
The students will work to establish a community response network, connecting with their local emergency services office and other school-related organizations.
Health 4.8.1.S
ELA SL.4.1, SL.4.3, SL.4.4
Science 4-ESS3-2; SEP 8; CCC 2
EP&Cs 3.b
Evaluate (60 minutes)
Self-Assessment, Ceremony, and Preparedness Ambassadors Certificate
Upon completion of this unit, each student receives a Preparedness Ambassadors Certificate awarded to them from a school or community official. The students also complete a self-assessment on Health Standard 8: Health Promotion.
Health Standard 8 – Health Promotion
8 Preparedness Ambassadors – Teacher Guide
Preparing to Teach the Unit
Prior Health Instruction
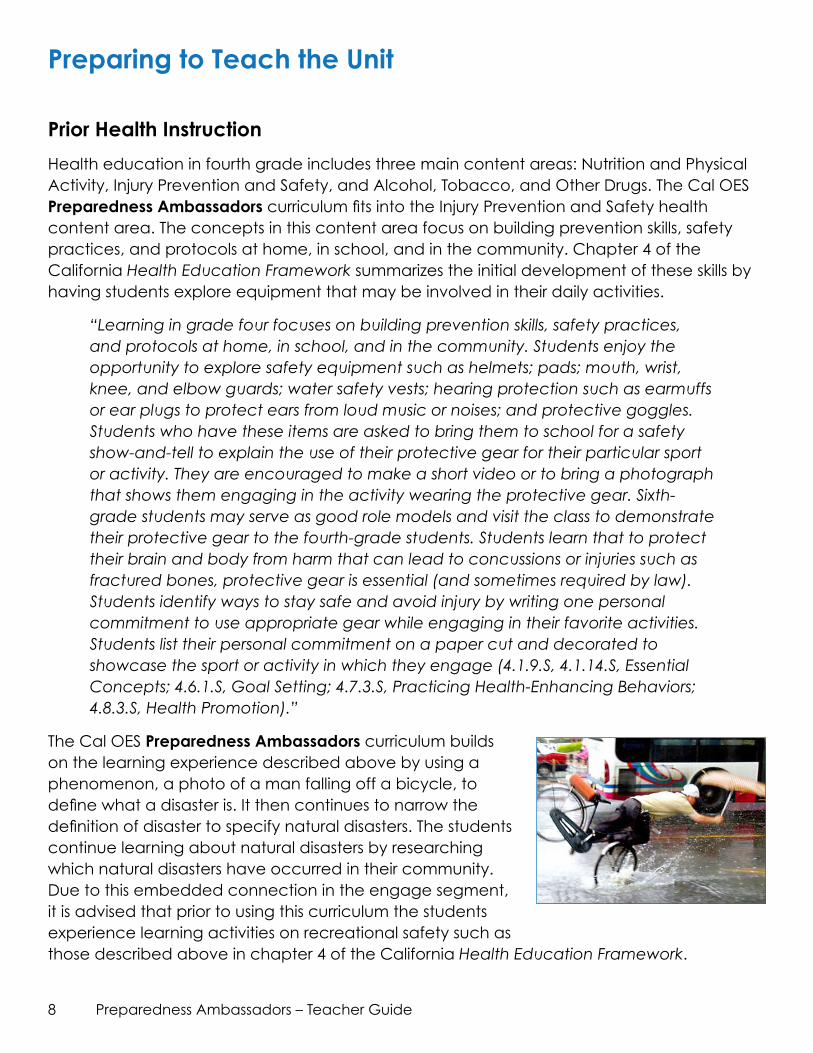
Health education in fourth grade includes three main content areas: Nutrition and Physical Activity, Injury Prevention and Safety, and Alcohol, Tobacco, and Other Drugs. The Cal OES Preparedness Ambassadors curriculum fits into the Injury Prevention and Safety health content area. The concepts in this content area focus on building prevention skills, safety practices, and protocols at home, in school, and in the community. Chapter 4 of the California HealthEducationFramework summarizes the initial development of these skills by having students explore equipment that may be involved in their daily activities.
“Learningingradefourfocusesonbuildingpreventionskills,safetypractices,andprotocolsathome,inschool,andinthecommunity.Studentsenjoytheopportunitytoexploresafetyequipmentsuchashelmets;pads;mouth,wrist,knee,andelbowguards;watersafetyvests;hearingprotectionsuchasearmuffsorearplugstoprotectearsfromloudmusicornoises;andprotectivegoggles.Studentswhohavetheseitemsareaskedtobringthemtoschoolforasafetyshow-and-telltoexplaintheuseoftheirprotectivegearfortheirparticularsportoractivity.Theyareencouragedtomakeashortvideoortobringaphotographthatshowsthemengagingintheactivitywearingtheprotectivegear.Sixth-gradestudentsmayserveasgoodrolemodelsandvisittheclasstodemonstratetheirprotectivegeartothefourth-gradestudents.Studentslearnthattoprotecttheirbrainandbodyfromharmthatcanleadtoconcussionsorinjuriessuchasfracturedbones,protectivegearisessential(andsometimesrequiredbylaw).Studentsidentifywaystostaysafeandavoidinjurybywritingonepersonalcommitmenttouseappropriategearwhileengagingintheirfavoriteactivities.Studentslisttheirpersonalcommitmentonapapercutanddecoratedtoshowcasethesportoractivityinwhichtheyengage(4.1.9.S,4.1.14.S,EssentialConcepts;4.6.1.S,GoalSetting;4.7.3.S,PracticingHealth-EnhancingBehaviors;4.8.3.S,HealthPromotion).”
The Cal OES Preparedness Ambassadors curriculum builds on the learning experience described above by using a phenomenon, a photo of a man falling off a bicycle, to define what a disaster is. It then continues to narrow the definition of disaster to specify natural disasters. The students continue learning about natural disasters by researching which natural disasters have occurred in their community. Due to this embedded connection in the engage segment, it is advised that prior to using this curriculum the students experience learning activities on recreational safety such as those described above in chapter 4 of the California HealthEducationFramework.
9Preparedness Ambassadors – Teacher Guide
Curriculum, Support, and Materials
CURRICULUM
The Preparedness Ambassadors Teacher Guide, Cal OES Family Readiness Guide, Case Studies, and Student Notebook are freely available at www.caloes.ca.gov/preparednessambassadors. Hardcopies may be printed out for classroom use. Prior to teaching these lessons, please read through the entire curriculum to familiarize yourself with the learning progression.
TIME
The unit will require 11–15 hours of student engagement time, including approximately 9 hours of in-class instructional time. The remaining hours of work will be done at home and in the community by the students.
ASK FOR SUPPORT
• Contact your local city or county Office of Emergency Services (OES) and share with them that the fourth grade students are participating in the Preparedness Ambassadors curriculum. Invite them to support your students in the process. They may offer to send an expert in disaster preparedness to visit your classroom and talk to your students. An appropriate time in the curriculum for this to occur would be prior to Elaborate Take Action 1, so that after the talk the students would take the Cal OES Family Readiness Guide home with them. Also, it might be motivating for your students to meet an OES disaster expert before they share the Cal OES Family Readiness Guide out to the community in Elaborate Take Action 2. Lastly your local OES office can offer suggestions in helping your students create an emergency response network for Elaborate Take Action 3. Another opportunity for your local OES to support is to be present at the end of the unit to award your class a Preparedness Ambassadors Certificate of Completion. If local OES personnel are unavailable for the certificate ceremony, it is perfectly fine to line up a community leader or first responder from another agency or a district school administrator/school board member to award the certificate to the students.
• Invite the Principal to take an active role in the program with your students. Your students will create a Regional Disaster Infographic during the Explore segment of the curriculum and they will also create Disaster Preparedness Guidelines for their school community. These products could be presented in a public space at the school site with the support of your principal. Further, in Elaborate Take Action 1, the students will play a role in helping your school be prepared for disasters. Your principal may have ideas for how the students can help the student body be more prepared.
• Invite the school’s parent teacher organization to help plan the student activities for Elaborate Take Action Levels 2 and 3. Level 2 is focused on the students helping to inform the community about being prepared for disasters with their main assignment to share the Cal OES Family Readiness Guide with the community. Level 2 is extremely important for the community, for without it, only families that happen to have fourth grade students
10 Preparedness Ambassadors – Teacher Guide
may end up using the guide. This would leave many community members being unprepared. Level 3 is focused on developing a community support network that can respond in the event of a disaster. Parent teacher organizations are great at establishing community networks, and they can assist your class in creating a response network that could be useful to the school, local OES, and the community.
RESOURCES AND MATERIALS
• Colored sticker dots (yellow, green, red, blue, and orange)
• Highlighters (yellow, green, red, blue, and orange)
• Construction paper for the wallboards
• Scissors for wallboard construction
• Stapler and/or tape for wallboard construction
• Computers on Wheels (COW) for student research
• Resource List of web sites and videos that will support lessons and enhance the learning experience
• A slide show with information and pictures is available on the Cal OES Preparedness Ambassadors website in addition to other resources that may be helpful while preparing to teach this curriculum.
Preparing the Room
This unit suggests the use of three main designated areas on your classroom walls. These areas include: 1) a Word Wall; 2) a large California Region Map (north, or south); and 3) a Disaster Preparedness Guidelines wall.
The word wall will be in the classroom; however, it is possible that the map and/or the guidelines be put up in a more public space at the school site. The benefit of displaying the infographic map and the guidelines in a public space is that more of the student body will take notice of the artifacts and learn from the work of the fourth grade students. It also may help the fourth graders become proud of their work which may make the information they learned more memorable.
WORD WALL
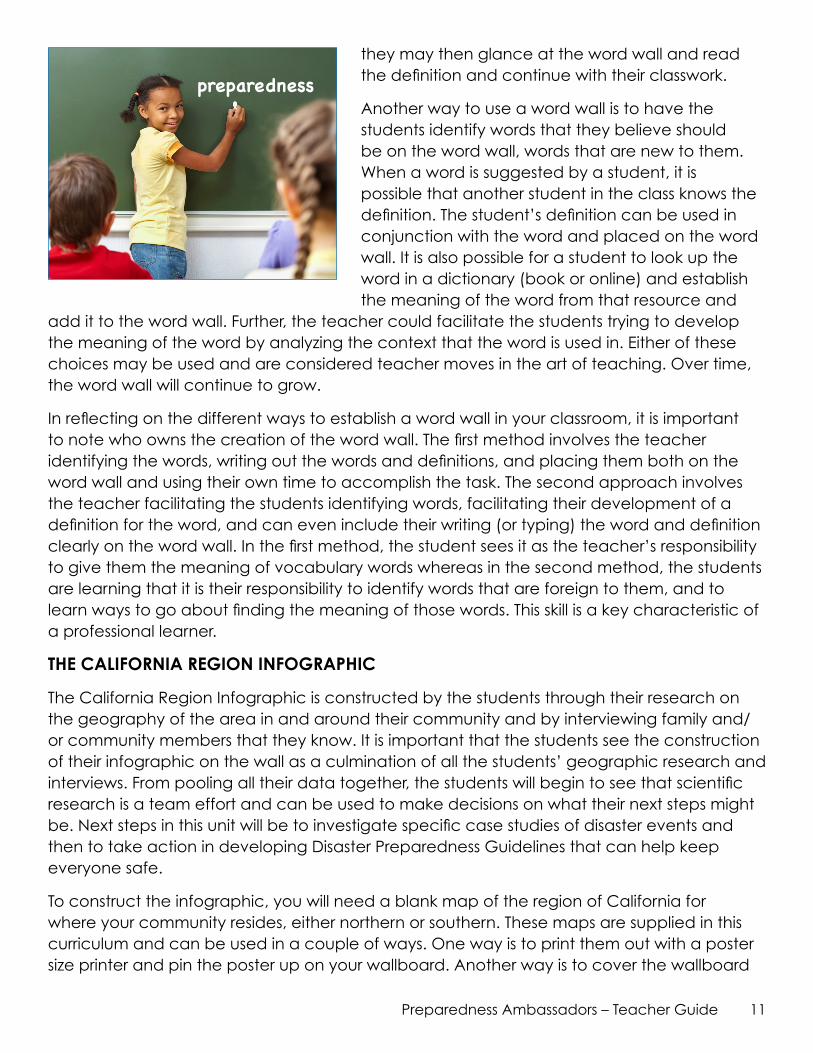
A word wall can help students become familiar with new vocabulary words. There are a couple of approaches in creating a word wall. One is that the teacher anticipates words that will be new to the students and populates the word wall before the unit with the words the students will come across during the unit. When the students come across that word,
Support for Distance Learning
During times of disaster or pandemic, schools may need to continue education through distance learning instead of in-person instruction. Although the Preparedness Ambassadors Program is designed for in-person instruction, the program may be delivered via distance learning. See Supplemental Materials 5 (Distance Learning) for additional delivery ideas.
11Preparedness Ambassadors – Teacher Guide
they may then glance at the word wall and read the definition and continue with their classwork.
Another way to use a word wall is to have the students identify words that they believe should be on the word wall, words that are new to them. When a word is suggested by a student, it is possible that another student in the class knows the definition. The student’s definition can be used in conjunction with the word and placed on the word wall. It is also possible for a student to look up the word in a dictionary (book or online) and establish the meaning of the word from that resource and
add it to the word wall. Further, the teacher could facilitate the students trying to develop the meaning of the word by analyzing the context that the word is used in. Either of these choices may be used and are considered teacher moves in the art of teaching. Over time, the word wall will continue to grow.
In reflecting on the different ways to establish a word wall in your classroom, it is important to note who owns the creation of the word wall. The first method involves the teacher identifying the words, writing out the words and definitions, and placing them both on the word wall and using their own time to accomplish the task. The second approach involves the teacher facilitating the students identifying words, facilitating their development of a definition for the word, and can even include their writing (or typing) the word and definition clearly on the word wall. In the first method, the student sees it as the teacher’s responsibility to give them the meaning of vocabulary words whereas in the second method, the students are learning that it is their responsibility to identify words that are foreign to them, and to learn ways to go about finding the meaning of those words. This skill is a key characteristic of a professional learner.
THE CALIFORNIA REGION INFOGRAPHIC
The California Region Infographic is constructed by the students through their research on the geography of the area in and around their community and by interviewing family and/or community members that they know. It is important that the students see the construction of their infographic on the wall as a culmination of all the students’ geographic research and interviews. From pooling all their data together, the students will begin to see that scientific research is a team effort and can be used to make decisions on what their next steps might be. Next steps in this unit will be to investigate specific case studies of disaster events and then to take action in developing Disaster Preparedness Guidelines that can help keep everyone safe.
To construct the infographic, you will need a blank map of the region of California for where your community resides, either northern or southern. These maps are supplied in this curriculum and can be used in a couple of ways. One way is to print them out with a poster size printer and pin the poster up on your wallboard. Another way is to cover the wallboard
preparedness
12 Preparedness Ambassadors – Teacher Guide
with construction paper and use a projector to project the image onto the wall board. With the image projected and with a black marker, you can trace the outline of your region onto the construction paper.
To make this map into an infographic, it will need a key. A sample key is provided for you in the curriculum on the Mapping Disaster Data and Land Features HO4. Also provided are cutouts of the symbols of features and events used in the key. To make this map into an infographic, you will need to add information about the events to the map. The Gathering Data HO3 that the students take home to interview their family/community members, can be cut into event strips that are stapled to the event cutout. If there is not enough room for these event strips, feel free to use yarn to extend the information to the side of the map. Finish the infographic off with a title and congratulate your students for doing the work actual Office of Emergency Service members do in researching how to keep people safe from disasters.
THE DISASTER PREPAREDNESS GUIDELINES DISPLAY
The DisasterPreparednessGuidelines will be developed by the students during the Explain segment of the unit. These guidelines may be placed on the wall in the classroom, in a public space at the school site, or both. One of the easiest ways to create the display is to transpose the students’ guidelines into a Microsoft Word document and print them using a large poster size printer. Another way to make the DisasterPreparednessGuidelines wall is to divide the guidelines up among the students and give them each a large sentence strip on which to write a guideline. Once each student has completed writing his/her guideline on a sentence strip, you may collect the strips and affix them onto the wallboard to complete the DisasterPreparednessGuidelines display.
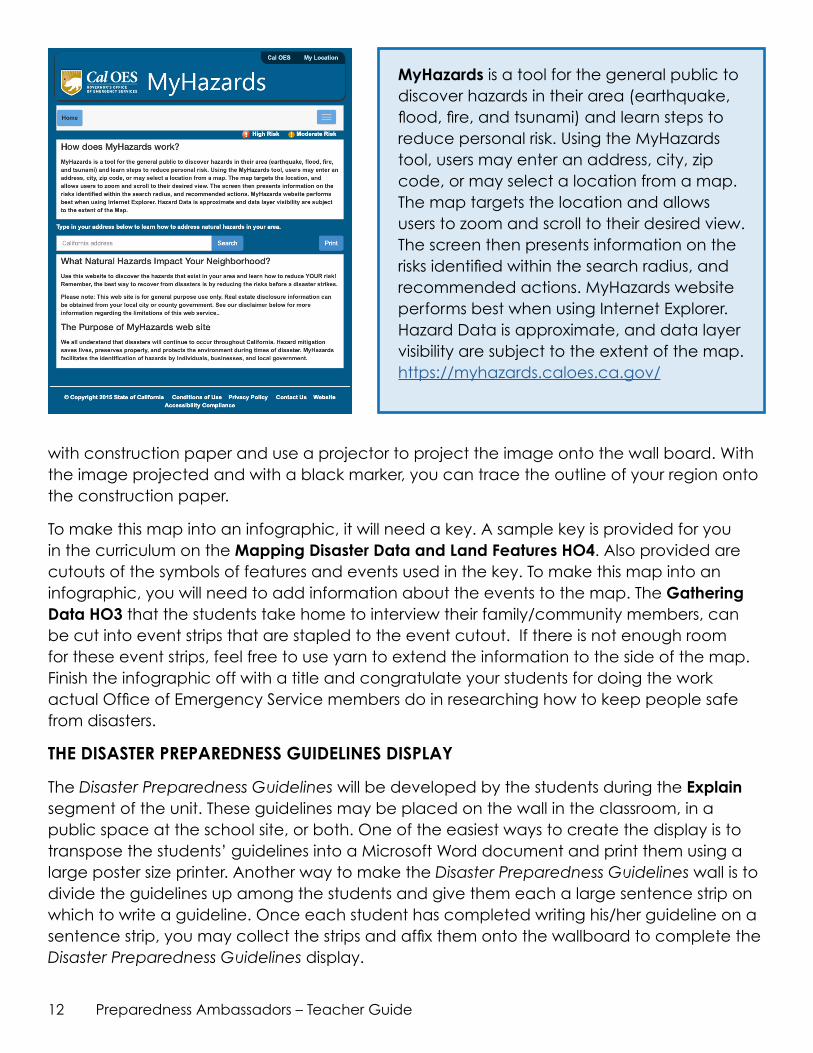
MyHazards is a tool for the general public to discover hazards in their area (earthquake, flood, fire, and tsunami) and learn steps to reduce personal risk. Using the MyHazards tool, users may enter an address, city, zip code, or may select a location from a map. The map targets the location and allows users to zoom and scroll to their desired view. The screen then presents information on the risks identified within the search radius, and recommended actions. MyHazards website performs best when using Internet Explorer. Hazard Data is approximate, and data layer visibility are subject to the extent of the map. https://myhazards.caloes.ca.gov/
13Preparedness Ambassadors – Teacher Guide
Engage: What Do You Notice, Wonder, and Feel?
Time: 30 Minutes
Standards: CA Health 4.1.16.S Identify ways to reduce risk of injuries from fires, around water, while riding a motor vehicle, as a pedestrian, on the playground, and from falls.
Materials:
• Notice, Wonder, and Feel Handout HO1 for students
• Notice, Wonder, and Feel Handout HO1 poster or projection in front of the room
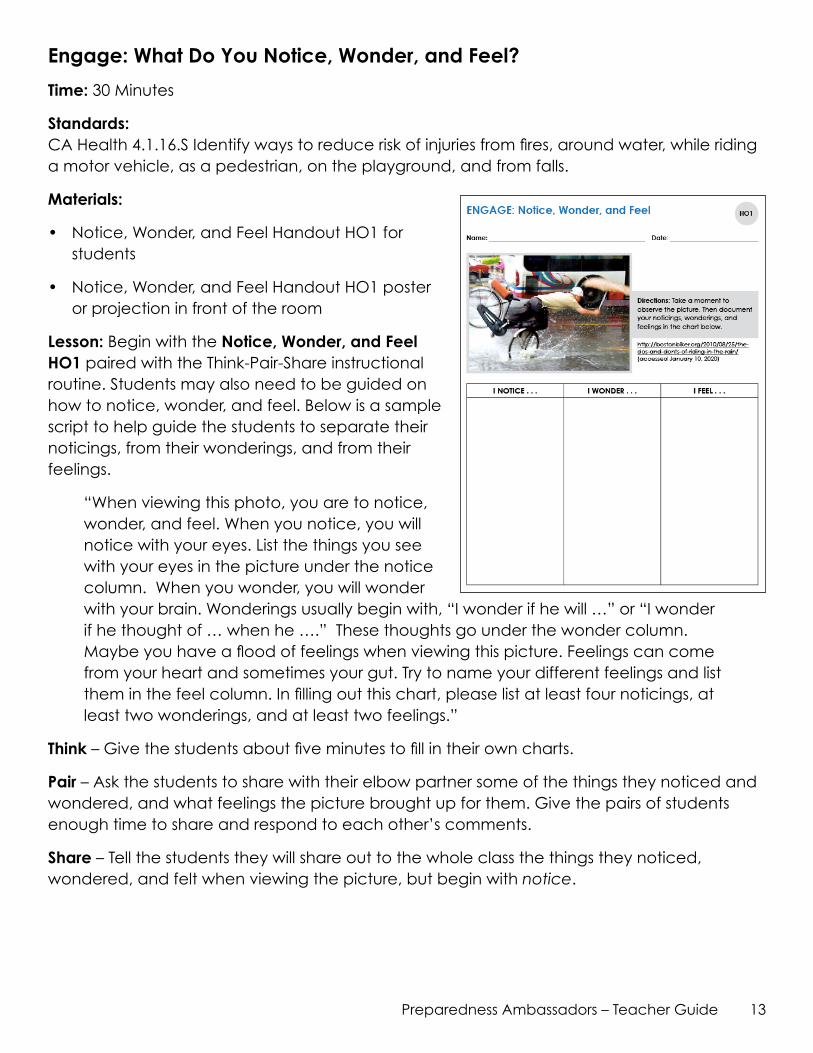
Lesson: Begin with the Notice, Wonder, and Feel HO1 paired with the Think-Pair-Share instructional routine. Students may also need to be guided on how to notice, wonder, and feel. Below is a sample script to help guide the students to separate their noticings, from their wonderings, and from their feelings.
“When viewing this photo, you are to notice, wonder, and feel. When you notice, you will notice with your eyes. List the things you see with your eyes in the picture under the notice column. When you wonder, you will wonder with your brain. Wonderings usually begin with, “I wonder if he will …” or “I wonder if he thought of … when he ….” These thoughts go under the wonder column. Maybe you have a flood of feelings when viewing this picture. Feelings can come from your heart and sometimes your gut. Try to name your different feelings and list them in the feel column. In filling out this chart, please list at least four noticings, at least two wonderings, and at least two feelings.”
Think – Give the students about five minutes to fill in their own charts.
Pair – Ask the students to share with their elbow partner some of the things they noticed and wondered, and what feelings the picture brought up for them. Give the pairs of students enough time to share and respond to each other’s comments.
Share – Tell the students they will share out to the whole class the things they noticed, wondered, and felt when viewing the picture, but begin with notice.
14 Preparedness Ambassadors – Teacher Guide
Possible Teacher Questions:
• What did you notice about the picture?
• Did anyone else notice this too?
• Give me a thumbs up if you noticed this too.
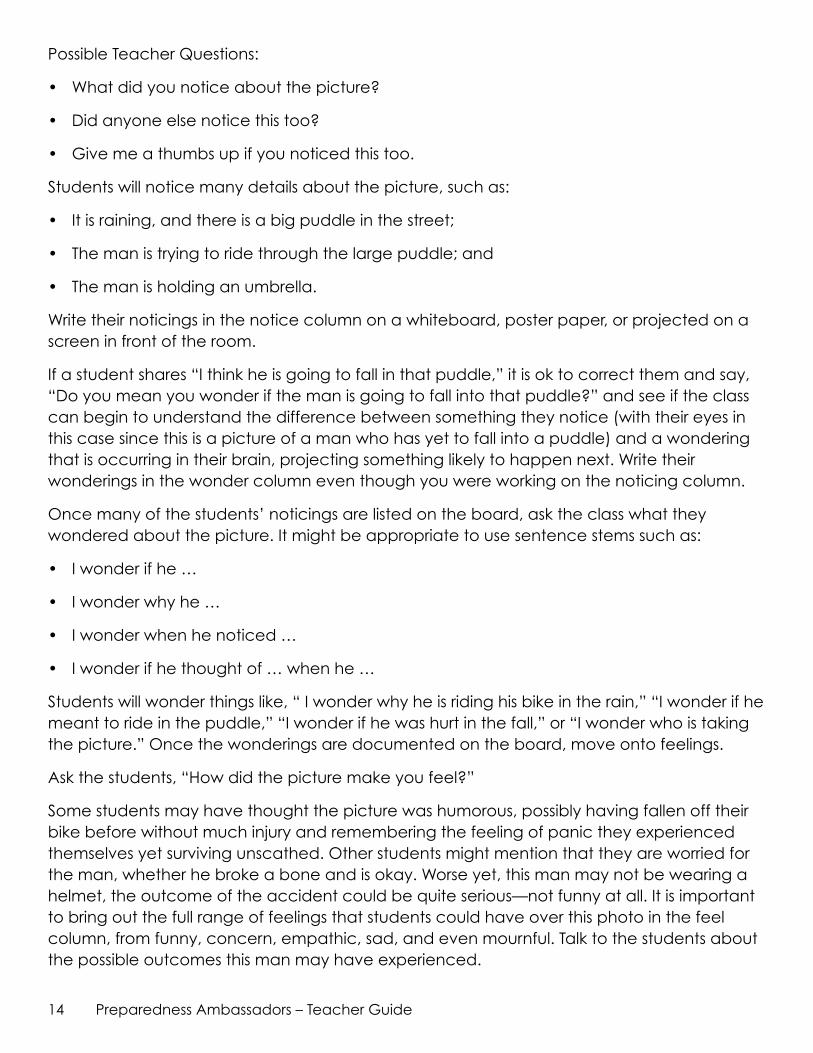
Students will notice many details about the picture, such as:
• It is raining, and there is a big puddle in the street;
• The man is trying to ride through the large puddle; and
• The man is holding an umbrella.
Write their noticings in the notice column on a whiteboard, poster paper, or projected on a screen in front of the room.
If a student shares “I think he is going to fall in that puddle,” it is ok to correct them and say, “Do you mean you wonder if the man is going to fall into that puddle?” and see if the class can begin to understand the difference between something they notice (with their eyes in this case since this is a picture of a man who has yet to fall into a puddle) and a wondering that is occurring in their brain, projecting something likely to happen next. Write their wonderings in the wonder column even though you were working on the noticing column.
Once many of the students’ noticings are listed on the board, ask the class what they wondered about the picture. It might be appropriate to use sentence stems such as:
• I wonder if he …
• I wonder why he …
• I wonder when he noticed …
• I wonder if he thought of … when he …
Students will wonder things like, “ I wonder why he is riding his bike in the rain,” “I wonder if he meant to ride in the puddle,” “I wonder if he was hurt in the fall,” or “I wonder who is taking the picture.” Once the wonderings are documented on the board, move onto feelings.
Ask the students, “How did the picture make you feel?”
Some students may have thought the picture was humorous, possibly having fallen off their bike before without much injury and remembering the feeling of panic they experienced themselves yet surviving unscathed. Other students might mention that they are worried for the man, whether he broke a bone and is okay. Worse yet, this man may not be wearing a helmet, the outcome of the accident could be quite serious—not funny at all. It is important to bring out the full range of feelings that students could have over this photo in the feel column, from funny, concern, empathic, sad, and even mournful. Talk to the students about the possible outcomes this man may have experienced.
15Preparedness Ambassadors – Teacher Guide
Below is a sample to use as a guide.
“If this man were to enter in the room at this moment, our feelings toward this picture could change depending on his persona or expressions. If he entered the room and saw the classroom of students looking at his photo and began to laugh, we would know that it is ok to comment on our feelings of this being a slightly humorous event. I mean, falling off a bicycle and into a puddle is something we could see in a cartoon! Yet, if he came in the classroom and saw the picture, let out a sigh, and began rubbing his arm, we might know that our feelings of empathy for him were more appropriate. We may even ask him if he was hurt in the fall, if he recovered well, and what advice does he have for us as we ride our bikes around town. However, he could enter into the classroom with a cane or in a wheelchair, look up at the picture, and have a tear run down his check. At that moment, it would be normal for us to feel a little ashamed for having thought the picture was humorous at all, we would feel sad, and that would be appropriate. He might be ready to share with us about what happened to him after the photo was taken, but he also might not be ready to share with us because physical loss is emotionally traumatic. With any of these three possible scenarios, we as a class would need to have empathy and be very sensitive to the feelings that this man has around his accident. We would need to be supportive and kind.”
Let the students know that the next segment, Explore, is a time where they may share their own personal disaster events. The events students decide to share are up to them, and it is okay not to share the events that bring up a lot of emotional hurt or are too embarrassing. Tell them to share events they are comfortable with sharing to the class. Events that they would only share with a close friend and/or family member are not the events they will share in the next segment.
Give the students 3–5 minutes to complete their Journal Entry HO1J for Engage in their student notebook.
Journal Entry: How did the picture make you feel? What could someone have done or said to help you feel better?
Support for English Learners
Naming and expressing feelings can be a complex task for students, especially for those learning through a new language. Review with EL students a list of feelings that could come up when viewing the photograph so that when the students see the photograph for the first time, they have knowledge of the vocabulary they could use to express themselves.
16 Preparedness Ambassadors – Teacher Guide
Explore: What Is a Disaster?
Time: 40 minutes
Standards: 4.1.1.S Describe safety hazards, including those related to fire, water, dangerous objects, being home alone, and using the Internet.
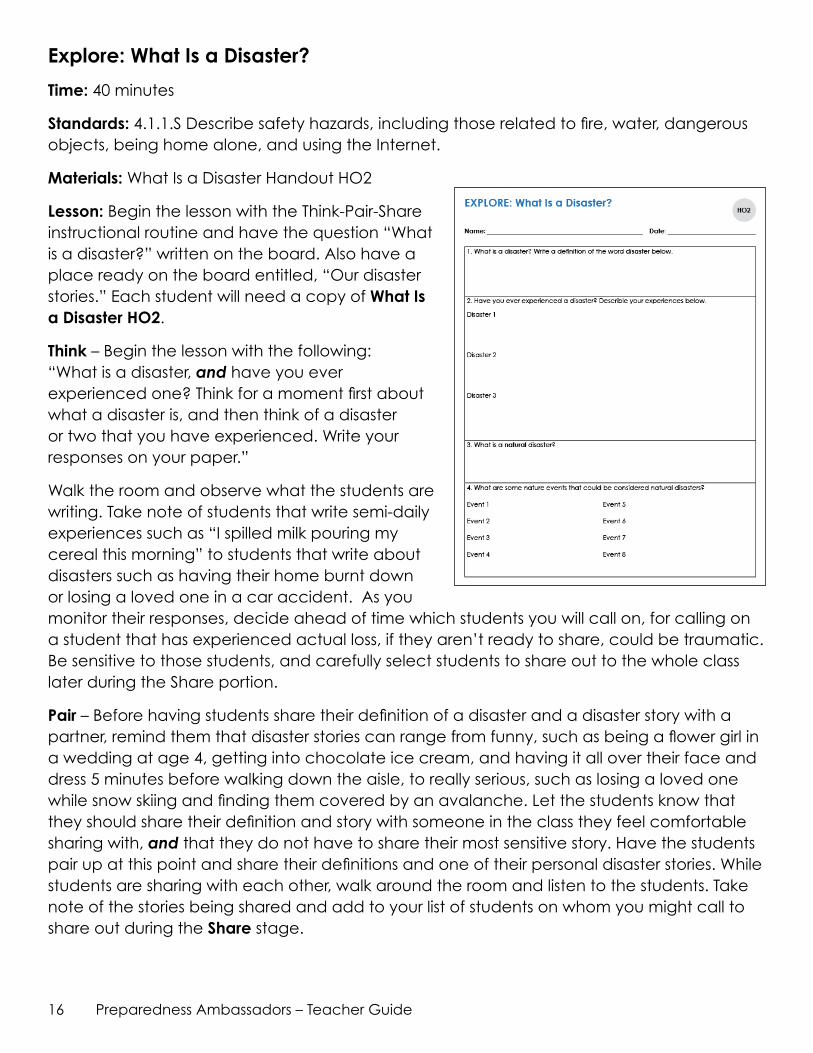
Materials: What Is a Disaster Handout HO2
Lesson: Begin the lesson with the Think-Pair-Share instructional routine and have the question “What is a disaster?” written on the board. Also have a place ready on the board entitled, “Our disaster stories.” Each student will need a copy of What Is a Disaster HO2.
Think – Begin the lesson with the following: “What is a disaster, and have you ever experienced one? Think for a moment first about what a disaster is, and then think of a disaster or two that you have experienced. Write your responses on your paper.”
Walk the room and observe what the students are writing. Take note of students that write semi-daily experiences such as “I spilled milk pouring my cereal this morning” to students that write about disasters such as having their home burnt down or losing a loved one in a car accident. As you monitor their responses, decide ahead of time which students you will call on, for calling on a student that has experienced actual loss, if they aren’t ready to share, could be traumatic. Be sensitive to those students, and carefully select students to share out to the whole class later during the Share portion.
Pair – Before having students share their definition of a disaster and a disaster story with a partner, remind them that disaster stories can range from funny, such as being a flower girl in a wedding at age 4, getting into chocolate ice cream, and having it all over their face and dress 5 minutes before walking down the aisle, to really serious, such as losing a loved one while snow skiing and finding them covered by an avalanche. Let the students know that they should share their definition and story with someone in the class they feel comfortable sharing with, and that they do not have to share their most sensitive story. Have the students pair up at this point and share their definitions and one of their personal disaster stories. While students are sharing with each other, walk around the room and listen to the students. Take note of the stories being shared and add to your list of students on whom you might call to share out during the Share stage.
17Preparedness Ambassadors – Teacher Guide
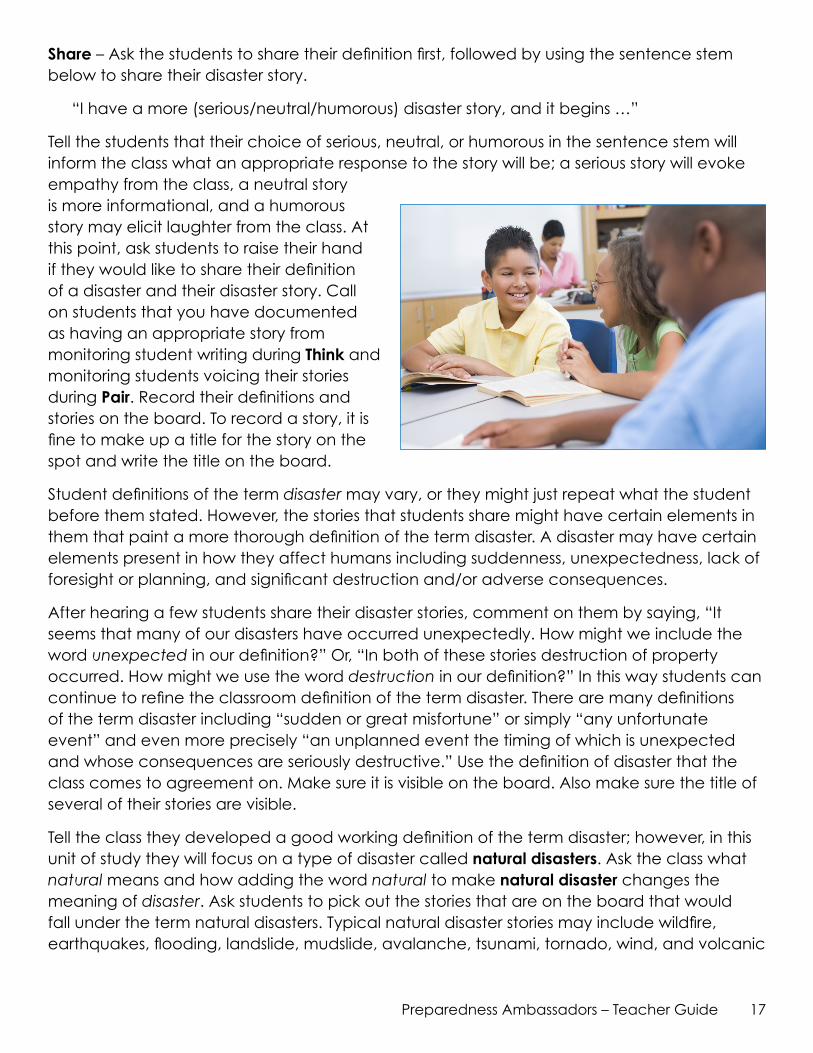
Share – Ask the students to share their definition first, followed by using the sentence stem below to share their disaster story.
“I have a more (serious/neutral/humorous) disaster story, and it begins …”
Tell the students that their choice of serious, neutral, or humorous in the sentence stem will inform the class what an appropriate response to the story will be; a serious story will evoke empathy from the class, a neutral story is more informational, and a humorous story may elicit laughter from the class. At this point, ask students to raise their hand if they would like to share their definition of a disaster and their disaster story. Call on students that you have documented as having an appropriate story from monitoring student writing during Think and monitoring students voicing their stories during Pair. Record their definitions and stories on the board. To record a story, it is fine to make up a title for the story on the spot and write the title on the board.
Student definitions of the term disaster may vary, or they might just repeat what the student before them stated. However, the stories that students share might have certain elements in them that paint a more thorough definition of the term disaster. A disaster may have certain elements present in how they affect humans including suddenness, unexpectedness, lack of foresight or planning, and significant destruction and/or adverse consequences.
After hearing a few students share their disaster stories, comment on them by saying, “It seems that many of our disasters have occurred unexpectedly. How might we include the word unexpected in our definition?” Or, “In both of these stories destruction of property occurred. How might we use the word destruction in our definition?” In this way students can continue to refine the classroom definition of the term disaster. There are many definitions of the term disaster including “sudden or great misfortune” or simply “any unfortunate event” and even more precisely “an unplanned event the timing of which is unexpected and whose consequences are seriously destructive.” Use the definition of disaster that the class comes to agreement on. Make sure it is visible on the board. Also make sure the title of several of their stories are visible.
Tell the class they developed a good working definition of the term disaster; however, in this unit of study they will focus on a type of disaster called natural disasters. Ask the class what natural means and how adding the word natural to make natural disaster changes the meaning of disaster. Ask students to pick out the stories that are on the board that would fall under the term natural disasters. Typical natural disaster stories may include wildfire, earthquakes, flooding, landslide, mudslide, avalanche, tsunami, tornado, wind, and volcanic
18 Preparedness Ambassadors – Teacher Guide
eruptions. Label the title of the student stories that are in fact natural disasters with the nature event that caused the disaster. If none of the student stories included disasters caused by nature, use the example of the skier being caught in an avalanche and the non-example of the flower girl having chocolate all over her dress at the time of the wedding.
Working on What Is a Disaster HO2, have students make a list of all the different types of Natural Disasters they can think of. This can be done by the students individually or in pairs. Call on students to share out one natural disaster type at a time until they agree they have a complete list of natural disasters.
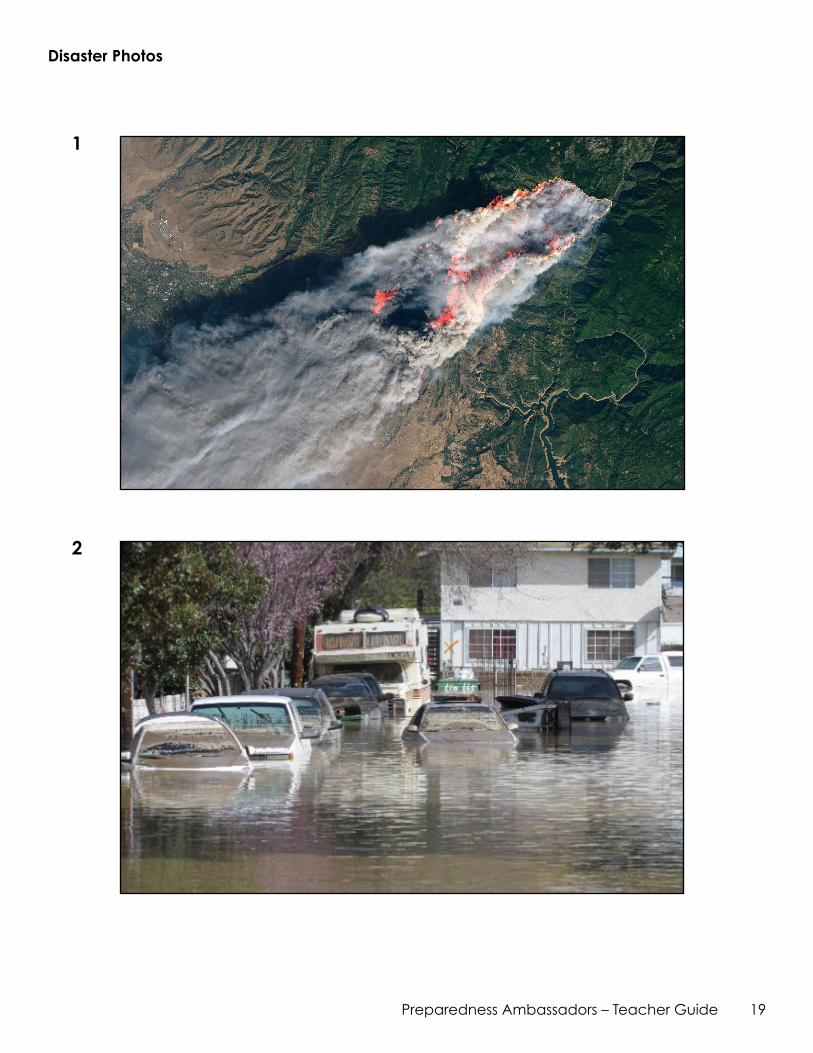
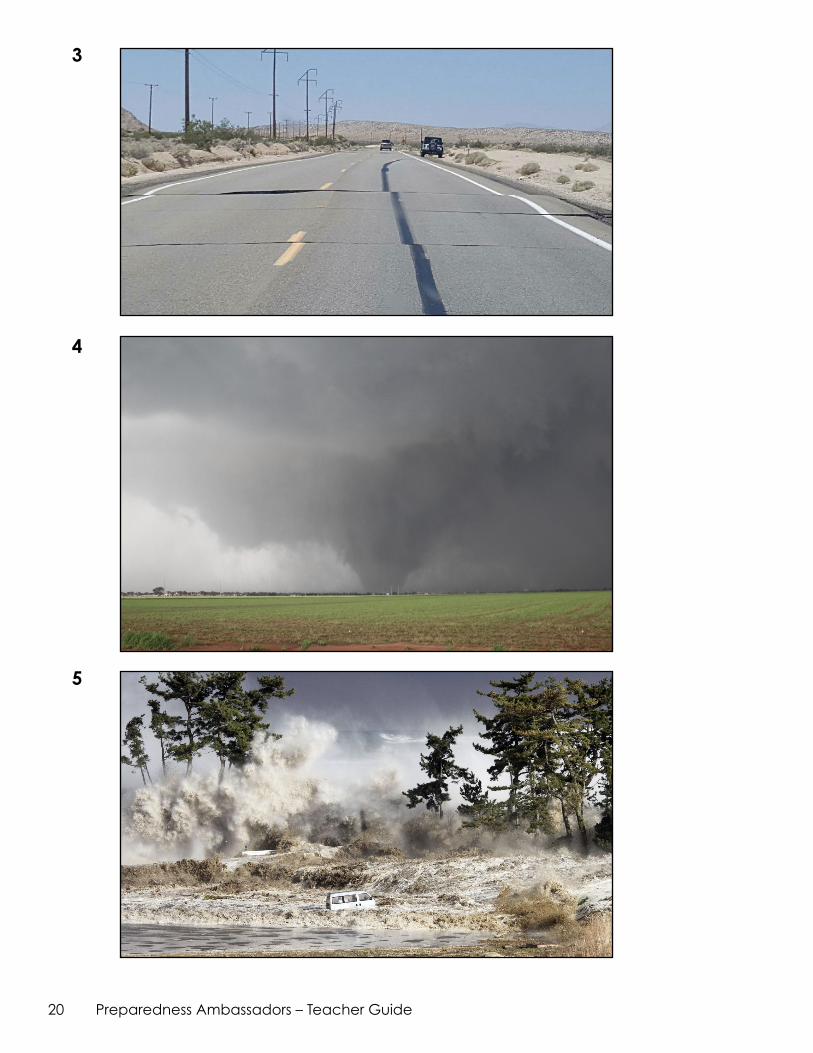
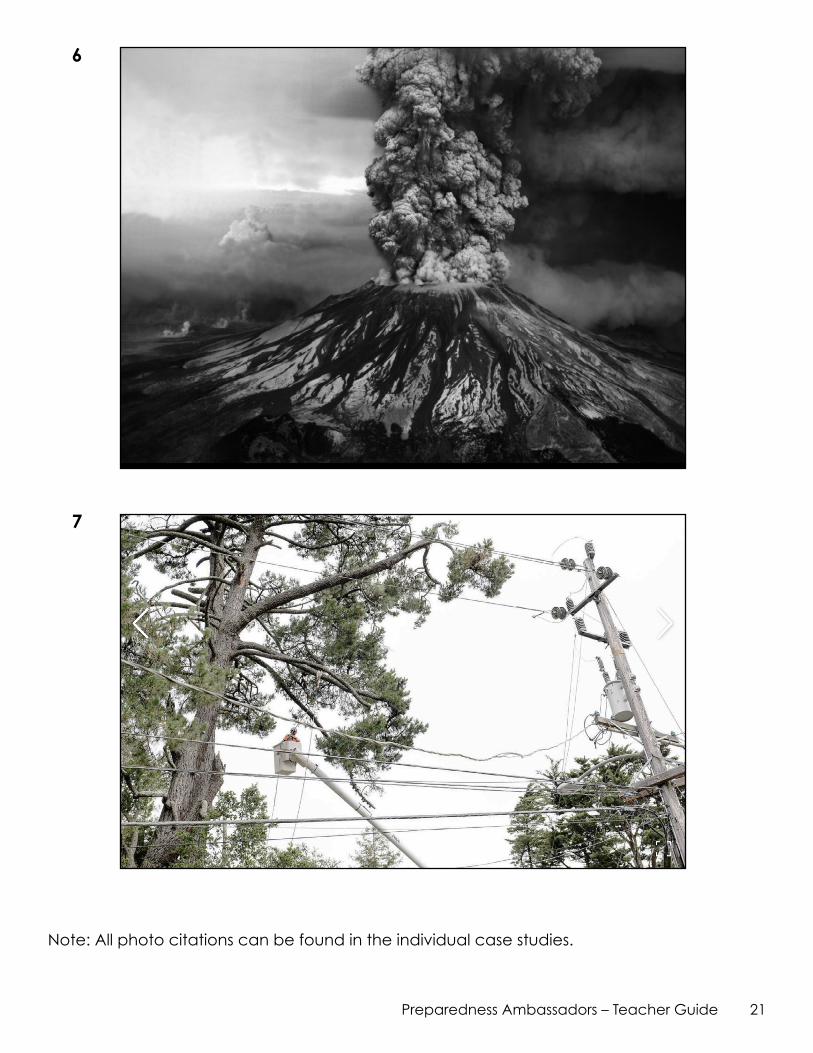
Next, project the natural disaster pictures (following pages) as a self-check to see if the students identified the main natural disaster types. For each picture, ask the students, “What nature event might be the cause of the disaster in this photo?” Add this nature event to your handout if you do not have it on your list. End class by asking for volunteers to share out their definition of natural disaster as written on their handouts. Accept answers such as “Natural Disaster – an unplanned nature event the timing of which is unexpected and whose consequences are seriously destructive.”
For your convenience, you can locate and download a slide show containing these pictures on the Cal OES Preparedness Ambassadors website at www.caloes.ca.gov/preparednessambassadors.
Answer Key for disaster photos: 1) Wildfire 2) Flood 3) Earthquake 4) Tornado 5) Tsunami 6) Volcano 7) Power Outage
Support for Social and Emotional Learning
Students have a need to be accepted and valued by others. Participating in activities that are designed so that every person can be heard and seen without judgment can help to build relationships with others and with content. If doing this activity early in the school year, or if students might not yet have healthy relationships with one another, consider having students build relationships through inclusion activities as outlined on page 10 of the SEL Signature Practices Playbook from CASEL. https://drive.google.com/file/d/1U0fCsMmiXEibLblrUcgSXvBlsk4ldKRU/view
Give the students 3–5 minutes to complete their Journal Entry HO2J for Explore in their student notebook.
Journal Entry: Share a time or place where you experienced a natural disaster. If not in person, it could be something you experienced through a movie or television show you have watched, or a book you have read.
19Preparedness Ambassadors – Teacher Guide
1
2
Disaster Photos
20 Preparedness Ambassadors – Teacher Guide
3
4
5
21Preparedness Ambassadors – Teacher Guide
6
7
Note: All photo citations can be found in the individual case studies.
22 Preparedness Ambassadors – Teacher Guide
Explore: Community Data Collection
Time: 10 minutes in class, 30 minutes of homework
Standards: 4.1.1.S Describe safety hazards, including those related to fire, water, dangerous objects, being home alone, and using the Internet.
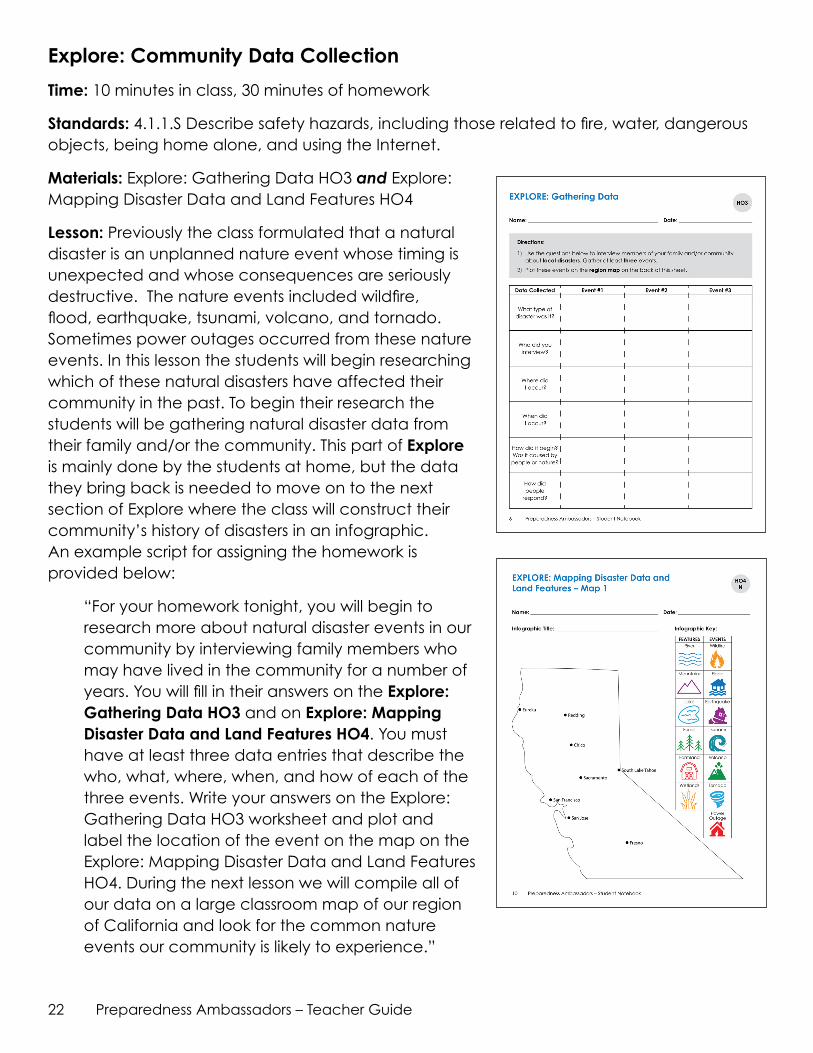
Materials: Explore: Gathering Data HO3 and Explore: Mapping Disaster Data and Land Features HO4
Lesson: Previously the class formulated that a natural disaster is an unplanned nature event whose timing is unexpected and whose consequences are seriously destructive. The nature events included wildfire, flood, earthquake, tsunami, volcano, and tornado. Sometimes power outages occurred from these nature events. In this lesson the students will begin researching which of these natural disasters have affected their community in the past. To begin their research the students will be gathering natural disaster data from their family and/or the community. This part of Explore is mainly done by the students at home, but the data they bring back is needed to move on to the next section of Explore where the class will construct their community’s history of disasters in an infographic. An example script for assigning the homework is provided below:
“For your homework tonight, you will begin to research more about natural disaster events in our community by interviewing family members who may have lived in the community for a number of years. You will fill in their answers on the Explore: Gathering Data HO3 and on Explore: Mapping Disaster Data and Land Features HO4. You must have at least three data entries that describe the who, what, where, when, and how of each of the three events. Write your answers on the Explore: Gathering Data HO3 worksheet and plot and label the location of the event on the map on the Explore: Mapping Disaster Data and Land Features HO4. During the next lesson we will compile all of our data on a large classroom map of our region of California and look for the common nature events our community is likely to experience.”
23Preparedness Ambassadors – Teacher Guide
Teacher Tip
Make copies (single-sided) of Explore: Gathering Data HO3 and Explore: Mapping Disaster Data and Land Features HO4.* Staple them together before handing them out to students. When students are interviewing people they know from the community about natural disaster events, have them also plot the symbol of the natural disaster type on the map. This will help the student know the location for where the event took place and help him/her communicate where to place the symbol on the whole-class map the following day. Also, having the two sheets separate will enable the students to cut the data strips out from Explore: Gathering Data HO3 and staple the information directly onto the classroom map, removing the need to rewrite the information a second time onto the classroom map.
* Included in the student notebook are outlines of Northern and Southern California. Choose to print the handout of the region where your community is located.
Support for Equity and Access
Students and guardians will vary in their knowledge of the geography of the region where the community is located. Some family units are more stationary while others travel and migrate to new locations often. Plotting your community on the map, along with noting the location of other major cities or landmarks with the students before taking the assignment home, can help the student guide the family unit into plotting their own natural disaster events successfully.
Give the students 3–5 minutes to complete their Journal Entry HO3J for Explore in their student notebook.
Journal Entry: Why do you think it is important to learn about past events?
24 Preparedness Ambassadors – Teacher Guide
Explore: Mapping Disaster Data and Land Features
Time: 40 minutes mapping and 15 minutes selecting case studies
Standards: 4.1.1.S Describe safety hazards, including those related to fire, water, dangerous objects, being home alone, and using the Internet.
Materials:
• Completed student version of Mapping Disaster Data and Land Features Handout HO4
• Colored pencils
• Prepared Region Map on a classroom/public wall
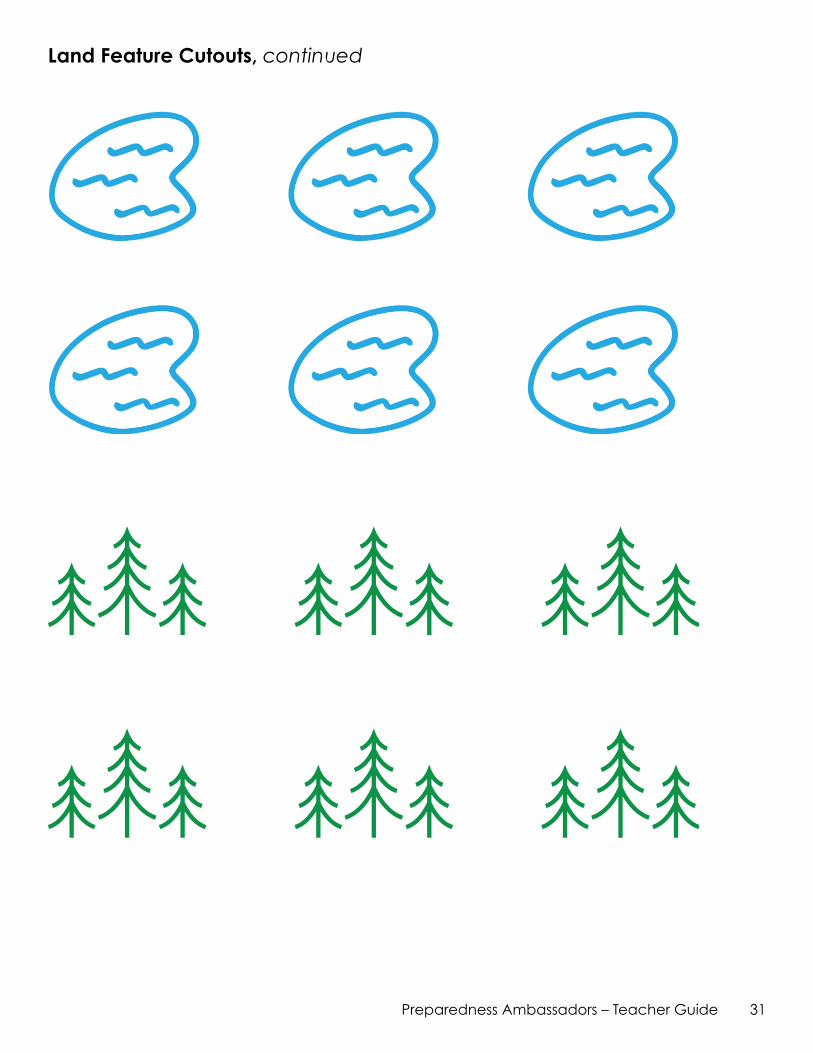
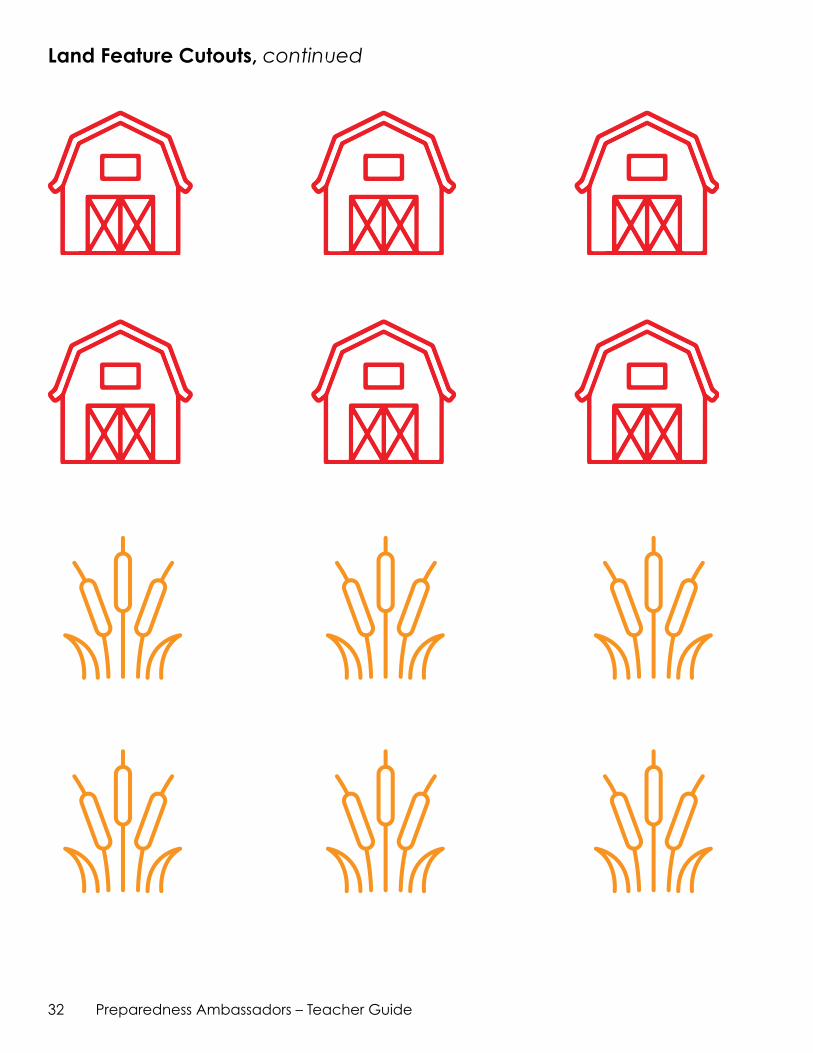
• Map Key Icon cutouts
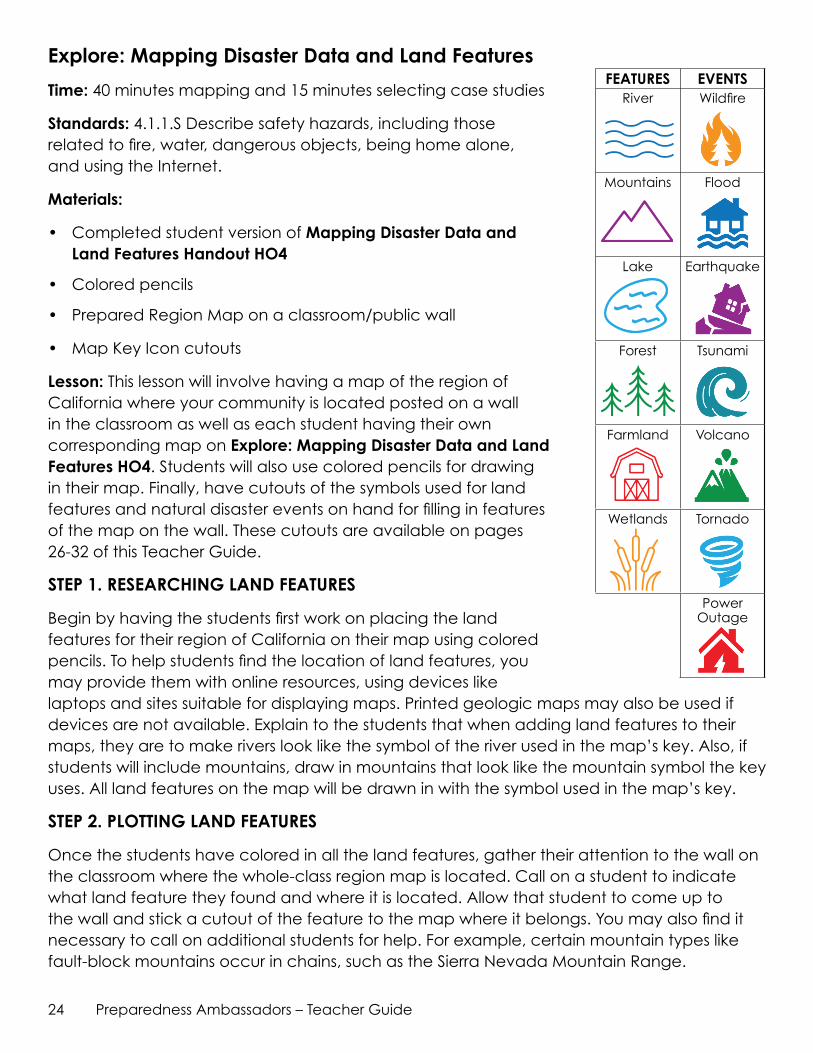
Lesson: This lesson will involve having a map of the region of California where your community is located posted on a wall in the classroom as well as each student having their own corresponding map on Explore: Mapping Disaster Data and Land Features HO4. Students will also use colored pencils for drawing in their map. Finally, have cutouts of the symbols used for land features and natural disaster events on hand for filling in features of the map on the wall. These cutouts are available on pages 26-32 of this Teacher Guide.
STEP 1. RESEARCHING LAND FEATURES
Begin by having the students first work on placing the land features for their region of California on their map using colored pencils. To help students find the location of land features, you may provide them with online resources, using devices like laptops and sites suitable for displaying maps. Printed geologic maps may also be used if devices are not available. Explain to the students that when adding land features to their maps, they are to make rivers look like the symbol of the river used in the map’s key. Also, if students will include mountains, draw in mountains that look like the mountain symbol the key uses. All land features on the map will be drawn in with the symbol used in the map’s key.
STEP 2. PLOTTING LAND FEATURES
Once the students have colored in all the land features, gather their attention to the wall on the classroom where the whole-class region map is located. Call on a student to indicate what land feature they found and where it is located. Allow that student to come up to the wall and stick a cutout of the feature to the map where it belongs. You may also find it necessary to call on additional students for help. For example, certain mountain types like fault-block mountains occur in chains, such as the Sierra Nevada Mountain Range.
FEATURES EVENTSRiver Wildfire
Mountains Flood
Lake Earthquake
Forest Tsunami
Farmland Volcano
Wetlands Tornado
Power Outage
25Preparedness Ambassadors – Teacher Guide
One cutout wouldn’t be enough to indicate a chain of mountains. You might call on five students to come up and place mountain cutouts to the map to represent a chain of mountains. However, Mt. Shasta, a stratovolcano, stands alone so one mountain cutout would be sufficient. Continue calling on student volunteers until all the important land features are represented on the map with cutouts.
STEP 3. PLOTTING DISASTER DATA
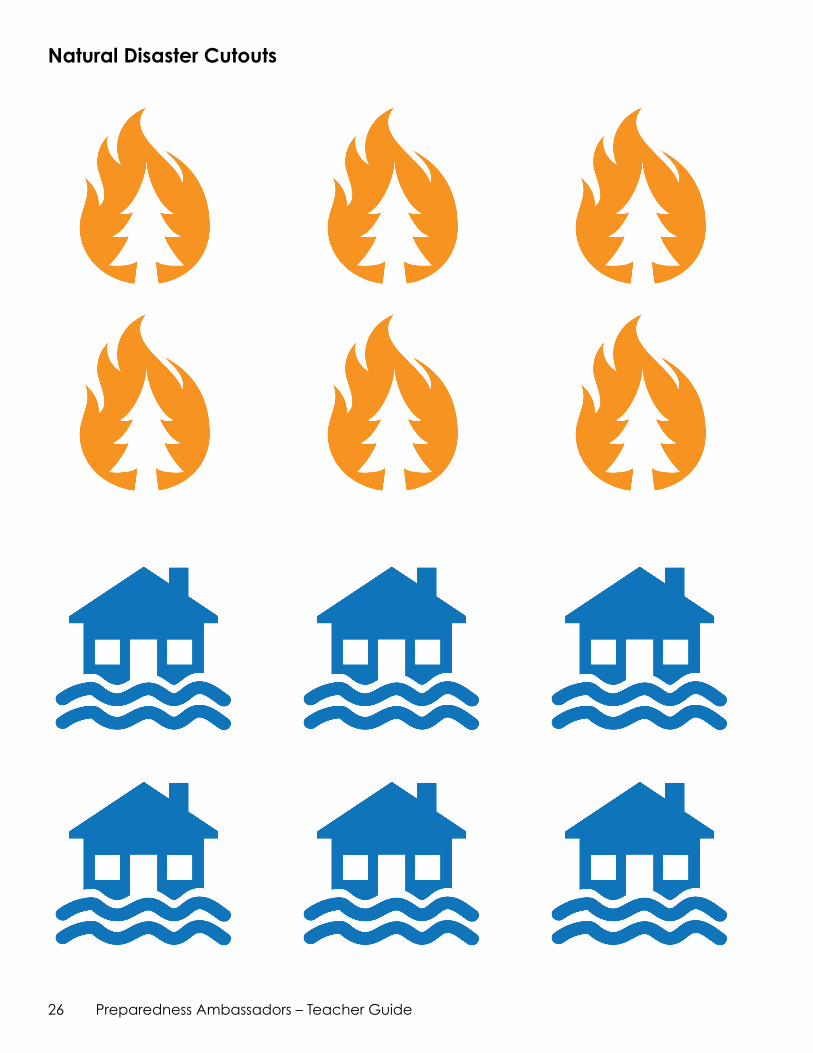
With the land features now plotted move on to plotting the natural disaster data. Have the students use the Explore: Gathering Data HO3 worksheets they completed by interviewing people in the community. Notice the dotted lines on the data sheet. They are there as guides for the students to cut their data into data strips. Again, call on students one by one to place the natural disaster key symbol on the large region map with their data strip (the students should have plotted the location of their natural disasters already on their region maps when they conducted interviews). Be aware that it is quite possible that many students will have the same event on their data strips. For example, if the school community is in Northern California, many students may have interviewed people that recalled the Camp Fire. In this case collect all the data strips for the Camp Fire and staple them together on the map in flipbook fashion. Only one fire cutout on the map will be needed for the Camp Fire natural disaster. Continue to place natural disaster events on the map until all the student data strips are stapled to the map.
STEP 4. CASE STUDY SELECTION
In the next section the students will read case studies and reports of actual natural disaster events. The key on the region map includes seven disaster event types: wildfire, flood, earthquake, tsunami, volcano, tornado, and power outage. There is one case study per disaster type included in the curriculum. The Natural Disaster Region Infographic now posted on the classroom wall may not have all seven disaster types represented. Further, there might be many data strips of only a few types of natural disasters. The most important part of the case study selection will be that the students see the link between collecting data, creating a data display (the infographic), and selecting case studies to research based on what the data suggests are the most common and dangerous types of events the community could actually face in the future.
By selecting case studies that appear most frequently on the infographic, the list of seven case studies may be reduced to a few of the most relevant disaster types, and those are the case studies the students will read. Even though it is not necessary to read all the case studies, student interest might determine that they would like to read about tornados or volcanic eruptions (California experiences very few tornados, tsunamis, or volcanic eruptions) in addition to the ones the data on the infographic suggests. In this case, add the tornado, tsunami, or volcanic eruption case study as an additional one for the students to read, but do not replace one of the case studies your infographic indicates is a danger to your community. Once the students in the class agree on which case studies to read (based on the data), congratulate the students on conducting work just like local and state emergency managers.
26 Preparedness Ambassadors – Teacher Guide
Natural Disaster Cutouts
27Preparedness Ambassadors – Teacher Guide
Natural Disaster Cutouts, continued
28 Preparedness Ambassadors – Teacher Guide
Natural Disaster Cutouts, continued
29Preparedness Ambassadors – Teacher Guide
Natural Disaster Cutouts, continued
30 Preparedness Ambassadors – Teacher Guide
Land Feature Cutouts
31Preparedness Ambassadors – Teacher Guide
Land Feature Cutouts, continued
32 Preparedness Ambassadors – Teacher Guide
Land Feature Cutouts, continued
33Preparedness Ambassadors – Teacher Guide
Explore: Researching Natural Disaster Case Studies
Time: 30–40 minutes per case study
Standard(s): 4.1.1.S Describe safety hazards, including those related to fire, water, dangerous objects, being home alone, and using the Internet.
4.1.16.S Identify ways to reduce risk of injuries from fires, around water, while riding a motor vehicle, as a pedestrian, on the playground, and from falls.
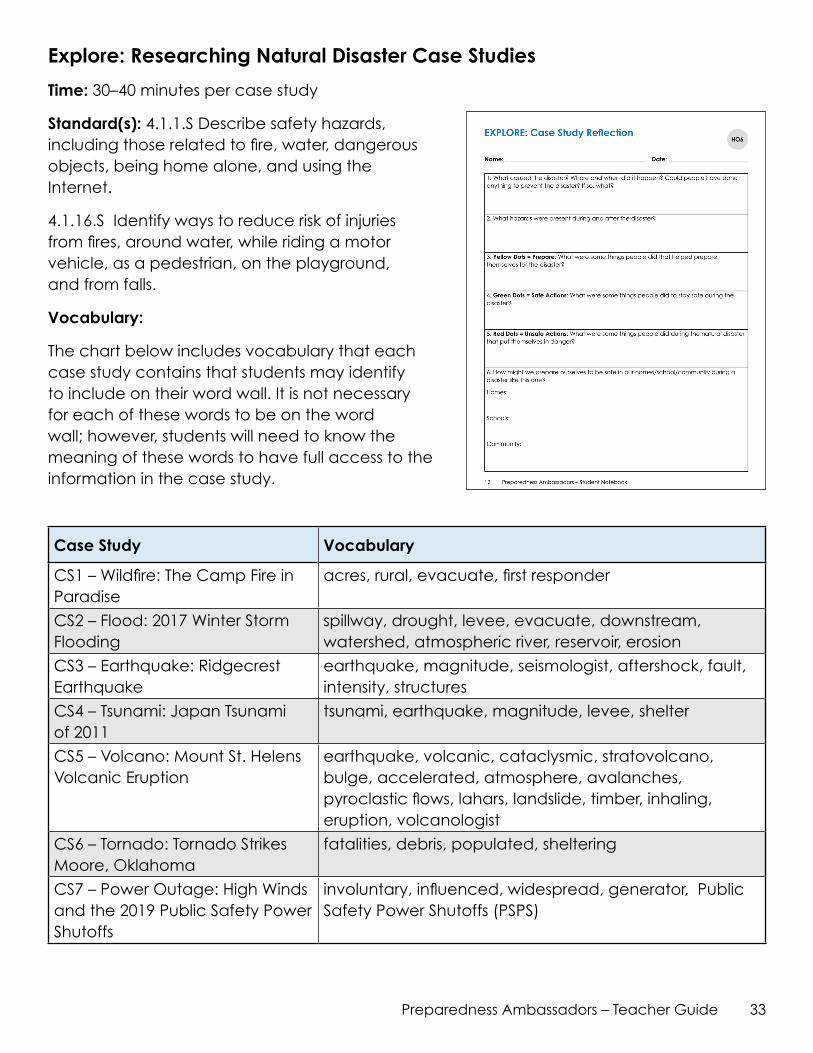
Vocabulary:
The chart below includes vocabulary that each case study contains that students may identify to include on their word wall. It is not necessary for each of these words to be on the word wall; however, students will need to know the meaning of these words to have full access to the information in the case study.
Case Study Vocabulary
CS1 – Wildfire: The Camp Fire in Paradise
acres, rural, evacuate, first responder
CS2 – Flood: 2017 Winter Storm Flooding
spillway, drought, levee, evacuate, downstream, watershed, atmospheric river, reservoir, erosion
CS3 – Earthquake: Ridgecrest Earthquake
earthquake, magnitude, seismologist, aftershock, fault, intensity, structures
CS4 – Tsunami: Japan Tsunami of 2011
tsunami, earthquake, magnitude, levee, shelter
CS5 – Volcano: Mount St. Helens Volcanic Eruption
earthquake, volcanic, cataclysmic, stratovolcano, bulge, accelerated, atmosphere, avalanches, pyroclastic flows, lahars, landslide, timber, inhaling, eruption, volcanologist
CS6 – Tornado: Tornado Strikes Moore, Oklahoma
fatalities, debris, populated, sheltering
CS7 – Power Outage: High Winds and the 2019 Public Safety Power Shutoffs
involuntary, influenced, widespread, generator, Public Safety Power Shutoffs (PSPS)
34 Preparedness Ambassadors – Teacher Guide
Materials:
• Pencil
• Selected Case Studies from CS1 through CS7
• One Case Study Reflection Handout HO6 per case study selected
• Highlighters, crayons, or markers colored yellow, green, and red
• Colored Sticker Dots - yellow, green and red
LESSON: READING THE CASE STUDIES
Determine a Purpose for Reading
People respond to the threat of a disaster in different ways. Some of the behaviors people have help to keep them safe during the disaster, and some of the behaviors put them in harm’s way. Some people will prepare ahead of time to help keep themselves safe during the disaster. This is the purpose of the Preparedness Ambassadors Program: to help people prepare ahead of time to help keep themselves safe during the disaster. Communicate to the students that keeping track of human behavior and whether the behavior led to a safe outcome for the person is the main purpose of reading the case studies.
Analyze the Text
Each of the case studies is unique. Read the case study ahead of time and make some decisions about how best to support your students.
• What essential parts at the start of the text, if not understood, will lead students astray?
• What excerpts are particularly critical or difficult because of complexity or vocabulary that students will need to read more than once and possibly with support?
• Should students first hear a particularly critical or difficult passage read aloud? (If so, students should read along). Or, can students first read themselves, independently, and then discuss?
The following is an instructional sequence that may be fitting to use with your students. However, there are reading options beyond what is suggested below. Please reference the Close Reading SM4 sequence on page 103 for additional support in how to support your students in reading the case studies.
35Preparedness Ambassadors – Teacher Guide
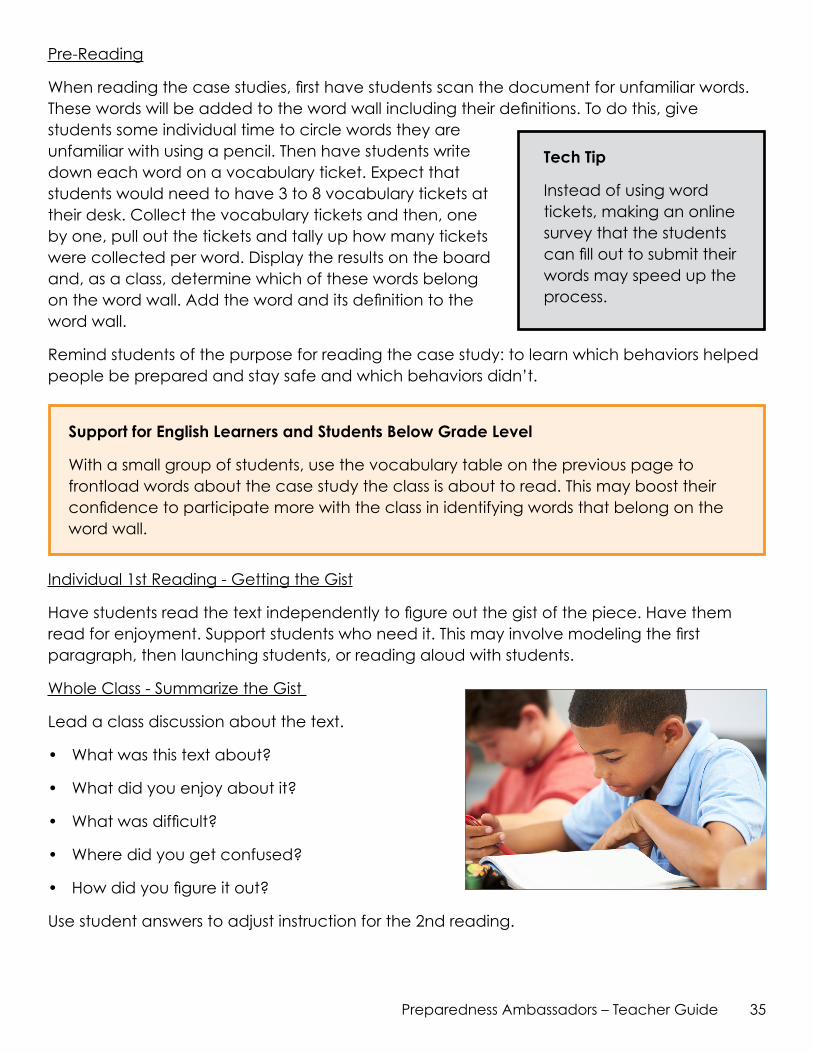
Pre-Reading
When reading the case studies, first have students scan the document for unfamiliar words. These words will be added to the word wall including their definitions. To do this, give students some individual time to circle words they are unfamiliar with using a pencil. Then have students write down each word on a vocabulary ticket. Expect that students would need to have 3 to 8 vocabulary tickets at their desk. Collect the vocabulary tickets and then, one by one, pull out the tickets and tally up how many tickets were collected per word. Display the results on the board and, as a class, determine which of these words belong on the word wall. Add the word and its definition to the word wall.
Remind students of the purpose for reading the case study: to learn which behaviors helped people be prepared and stay safe and which behaviors didn’t.
Individual 1st Reading - Getting the Gist
Have students read the text independently to figure out the gist of the piece. Have them read for enjoyment. Support students who need it. This may involve modeling the first paragraph, then launching students, or reading aloud with students.
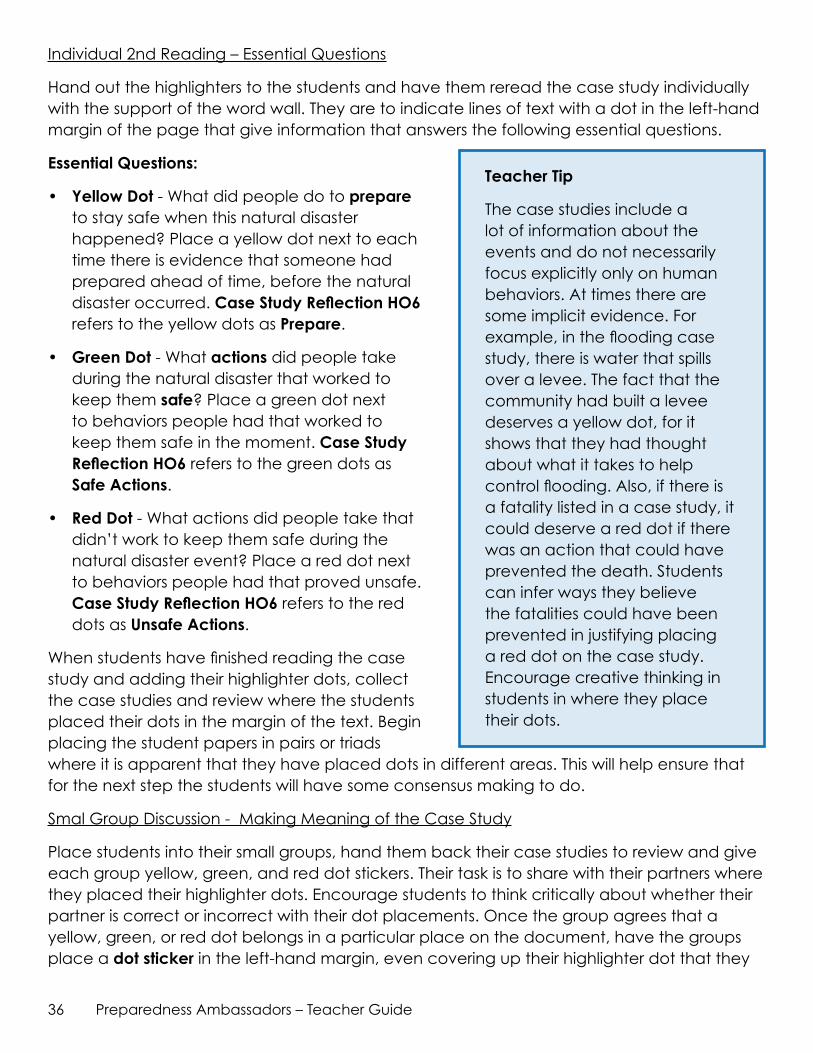
Whole Class - Summarize the Gist
Lead a class discussion about the text.
• What was this text about?
• What did you enjoy about it?
• What was difficult?
• Where did you get confused?
• How did you figure it out?
Use student answers to adjust instruction for the 2nd reading.
Tech Tip
Instead of using word tickets, making an online survey that the students can fill out to submit their words may speed up the process.
Support for English Learners and Students Below Grade Level
With a small group of students, use the vocabulary table on the previous page to frontload words about the case study the class is about to read. This may boost their confidence to participate more with the class in identifying words that belong on the word wall.
36 Preparedness Ambassadors – Teacher Guide
Individual 2nd Reading – Essential Questions
Hand out the highlighters to the students and have them reread the case study individually with the support of the word wall. They are to indicate lines of text with a dot in the left-hand margin of the page that give information that answers the following essential questions.
Essential Questions:
• Yellow Dot - What did people do to prepare to stay safe when this natural disaster happened? Place a yellow dot next to each time there is evidence that someone had prepared ahead of time, before the natural disaster occurred. Case Study Reflection HO6 refers to the yellow dots as Prepare.
• Green Dot - What actions did people take during the natural disaster that worked to keep them safe? Place a green dot next to behaviors people had that worked to keep them safe in the moment. Case Study Reflection HO6 refers to the green dots as Safe Actions.
• Red Dot - What actions did people take that didn’t work to keep them safe during the natural disaster event? Place a red dot next to behaviors people had that proved unsafe. Case Study Reflection HO6 refers to the red dots as Unsafe Actions.
When students have finished reading the case study and adding their highlighter dots, collect the case studies and review where the students placed their dots in the margin of the text. Begin placing the student papers in pairs or triads where it is apparent that they have placed dots in different areas. This will help ensure that for the next step the students will have some consensus making to do.
Smal Group Discussion - Making Meaning of the Case Study
Place students into their small groups, hand them back their case studies to review and give each group yellow, green, and red dot stickers. Their task is to share with their partners where they placed their highlighter dots. Encourage students to think critically about whether their partner is correct or incorrect with their dot placements. Once the group agrees that a yellow, green, or red dot belongs in a particular place on the document, have the groups place a dot sticker in the left-hand margin, even covering up their highlighter dot that they
Teacher Tip
The case studies include a lot of information about the events and do not necessarily focus explicitly only on human behaviors. At times there are some implicit evidence. For example, in the flooding case study, there is water that spills over a levee. The fact that the community had built a levee deserves a yellow dot, for it shows that they had thought about what it takes to help control flooding. Also, if there is a fatality listed in a case study, it could deserve a red dot if there was an action that could have prevented the death. Students can infer ways they believe the fatalities could have been prevented in justifying placing a red dot on the case study. Encourage creative thinking in students in where they place their dots.
37Preparedness Ambassadors – Teacher Guide
drew earlier. This way, if the group had a yellow dot where a green dot should have gone, the student can cover up the yellow highlighter dot with a green sticker dot. This enables all students to make consensus with their group even if they had differing answers.
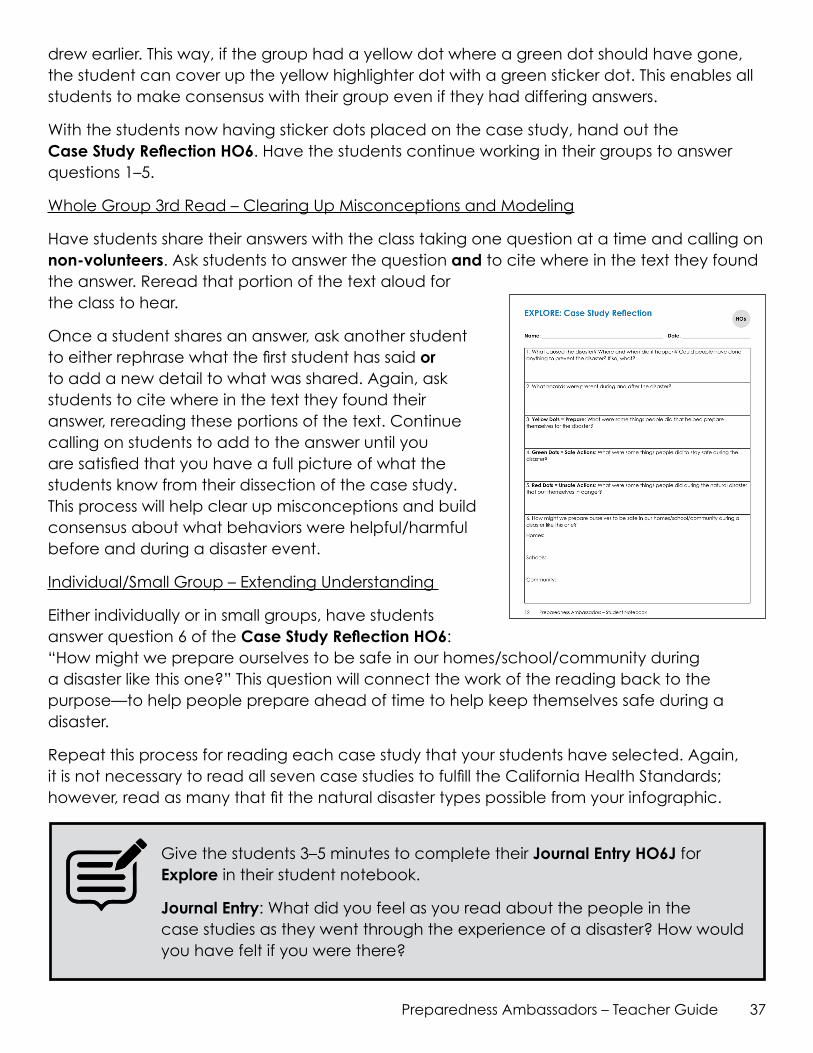
With the students now having sticker dots placed on the case study, hand out the Case Study Reflection HO6. Have the students continue working in their groups to answer questions 1–5.
Whole Group 3rd Read – Clearing Up Misconceptions and Modeling
Have students share their answers with the class taking one question at a time and calling on non-volunteers. Ask students to answer the question and to cite where in the text they found the answer. Reread that portion of the text aloud for the class to hear.
Once a student shares an answer, ask another student to either rephrase what the first student has said or to add a new detail to what was shared. Again, ask students to cite where in the text they found their answer, rereading these portions of the text. Continue calling on students to add to the answer until you are satisfied that you have a full picture of what the students know from their dissection of the case study. This process will help clear up misconceptions and build consensus about what behaviors were helpful/harmful before and during a disaster event.
Individual/Small Group – Extending Understanding
Either individually or in small groups, have students answer question 6 of the Case Study Reflection HO6: “How might we prepare ourselves to be safe in our homes/school/community during a disaster like this one?” This question will connect the work of the reading back to the purpose—to help people prepare ahead of time to help keep themselves safe during a disaster.
Repeat this process for reading each case study that your students have selected. Again, it is not necessary to read all seven case studies to fulfill the California Health Standards; however, read as many that fit the natural disaster types possible from your infographic.
Give the students 3–5 minutes to complete their Journal Entry HO6J for Explore in their student notebook.
Journal Entry: What did you feel as you read about the people in the case studies as they went through the experience of a disaster? How would you have felt if you were there?
38 Preparedness Ambassadors – Teacher Guide
Supporting Students Through Equity and Access
All students need an opportunity to take part in reading the case studies to identify helpful actions people used to stay safe from the disaster event and actions that were unsafe. To ensure equity for all students while dissecting the case studies, it is important to provide opportunity for students to have individual work time, collaborative group work time, and an opportunity to share their results through whole class discussions. Inform students ahead of time of this process and give them warning when a transition is about to take place. For more information on transition techniques, see page 19 of the SEL 3 Signature Practices Playbook by CASEL. https://drive.google.com/file/d/1U0fCsMmiXEibLblrUcgSXvBlsk4ldKRU/view
INDIVIDUAL WORK TIME
Walk around the room to make sure each student is focused on completing the task at hand. Redirect students to the instructions if it appears they have misinterpreted them. Monitor their responses and look for patterns across student work; note unique ideas by students to have them share later during whole class discussions.
GROUP WORK TIME
Arrange the groups ahead of time by thinking of groupings that will generate the most success from each student. Listen to the student conversations, and be available as a resource. Even as a resource, try to redirect questions back to other students to answer.
GROUP WORK TIME – SUPPORTS FOR STUDENTS WHO STRUGGLE WITH READING
Place students into mixed ability groups and monitor each group. It may be helpful for students who are struggling readers to hear fluent reading and have practice reading themselves. By pairing students with fluent readers, students with special needs can build their skills. In these activities, both students get practice modeling good reading and working together.
WHOLE CLASS DISCUSSIONS
Calling on non-volunteers may create equity in the classroom if performed in an order that engages all students. First read the question, giving everyone a long moment to think about their answer. Then announce who will answer the question. It is very important to announce who is going to answer the question after the quiet think time so that all students will consider the question seriously; if the announcement of who is going to answer the question comes before the question, then it is possible that only the one student announced may take the question seriously. The rest of the students might coast through the question because the pressure is off their shoulders. Follow-up questions will also go more smoothly since all students will have used the quiet think time to consider their own answers to the question.
39Preparedness Ambassadors – Teacher Guide
Answer Key
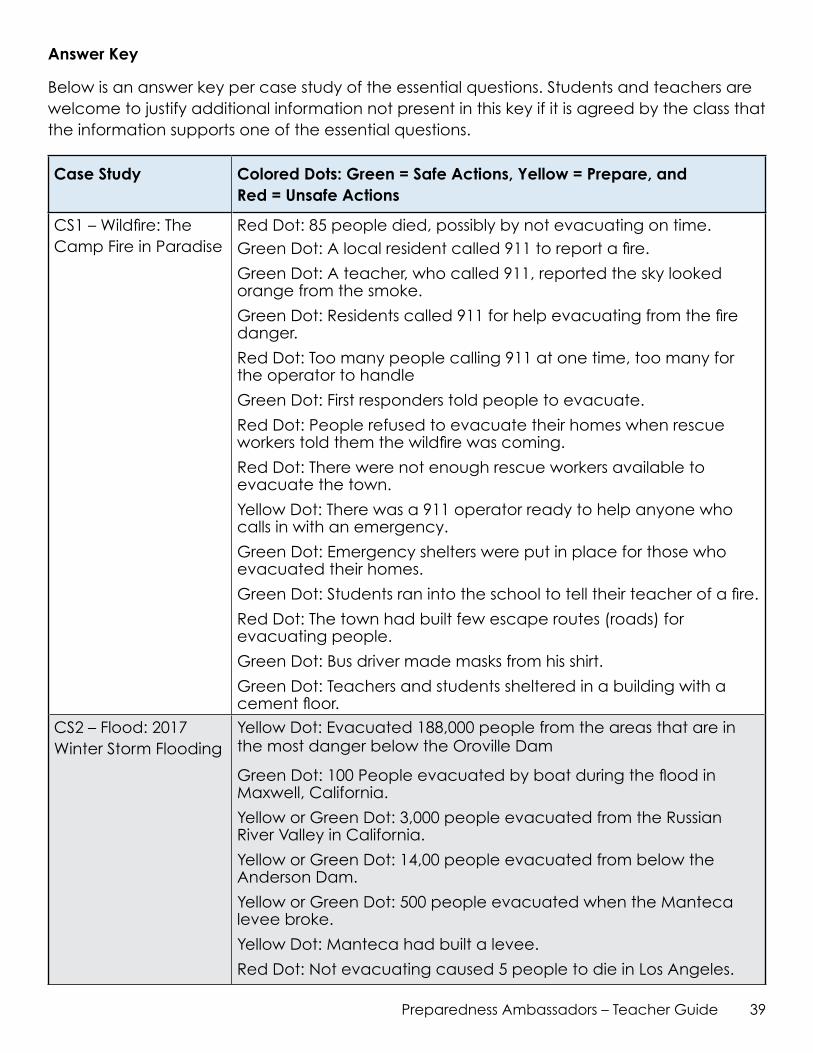
Below is an answer key per case study of the essential questions. Students and teachers are welcome to justify additional information not present in this key if it is agreed by the class that the information supports one of the essential questions.
Case Study Colored Dots: Green = Safe Actions, Yellow = Prepare, and Red = Unsafe Actions
CS1 – Wildfire: The Camp Fire in Paradise
Red Dot: 85 people died, possibly by not evacuating on time.Green Dot: A local resident called 911 to report a fire.
Green Dot: A teacher, who called 911, reported the sky looked orange from the smoke.
Green Dot: Residents called 911 for help evacuating from the fire danger.
Red Dot: Too many people calling 911 at one time, too many for the operator to handle
Green Dot: First responders told people to evacuate.
Red Dot: People refused to evacuate their homes when rescue workers told them the wildfire was coming.
Red Dot: There were not enough rescue workers available to evacuate the town.
Yellow Dot: There was a 911 operator ready to help anyone who calls in with an emergency.
Green Dot: Emergency shelters were put in place for those who evacuated their homes.
Green Dot: Students ran into the school to tell their teacher of a fire.
Red Dot: The town had built few escape routes (roads) for evacuating people.
Green Dot: Bus driver made masks from his shirt.
Green Dot: Teachers and students sheltered in a building with a cement floor.
CS2 – Flood: 2017 Winter Storm Flooding
Yellow Dot: Evacuated 188,000 people from the areas that are in the most danger below the Oroville Dam
Green Dot: 100 People evacuated by boat during the flood in Maxwell, California.
Yellow or Green Dot: 3,000 people evacuated from the Russian River Valley in California.
Yellow or Green Dot: 14,00 people evacuated from below the Anderson Dam.
Yellow or Green Dot: 500 people evacuated when the Manteca levee broke.
Yellow Dot: Manteca had built a levee.
Red Dot: Not evacuating caused 5 people to die in Los Angeles.
40 Preparedness Ambassadors – Teacher Guide
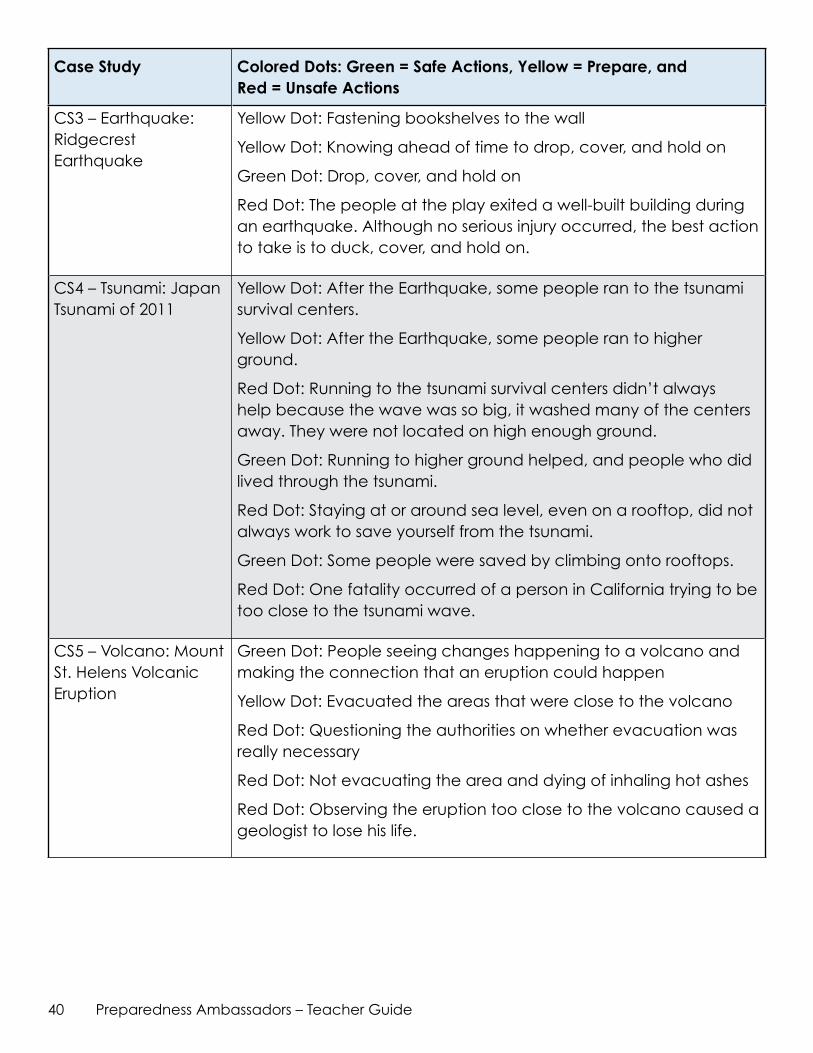
Case Study Colored Dots: Green = Safe Actions, Yellow = Prepare, and Red = Unsafe Actions
CS3 – Earthquake: Ridgecrest Earthquake
Yellow Dot: Fastening bookshelves to the wall
Yellow Dot: Knowing ahead of time to drop, cover, and hold on
Green Dot: Drop, cover, and hold on
Red Dot: The people at the play exited a well-built building during an earthquake. Although no serious injury occurred, the best action to take is to duck, cover, and hold on.
CS4 – Tsunami: Japan Tsunami of 2011
Yellow Dot: After the Earthquake, some people ran to the tsunami survival centers.
Yellow Dot: After the Earthquake, some people ran to higher ground.
Red Dot: Running to the tsunami survival centers didn’t always help because the wave was so big, it washed many of the centers away. They were not located on high enough ground.
Green Dot: Running to higher ground helped, and people who did lived through the tsunami.
Red Dot: Staying at or around sea level, even on a rooftop, did not always work to save yourself from the tsunami.
Green Dot: Some people were saved by climbing onto rooftops.
Red Dot: One fatality occurred of a person in California trying to be too close to the tsunami wave.
CS5 – Volcano: Mount St. Helens Volcanic Eruption
Green Dot: People seeing changes happening to a volcano and making the connection that an eruption could happen
Yellow Dot: Evacuated the areas that were close to the volcano
Red Dot: Questioning the authorities on whether evacuation was really necessary
Red Dot: Not evacuating the area and dying of inhaling hot ashes
Red Dot: Observing the eruption too close to the volcano caused a geologist to lose his life.
41Preparedness Ambassadors – Teacher Guide
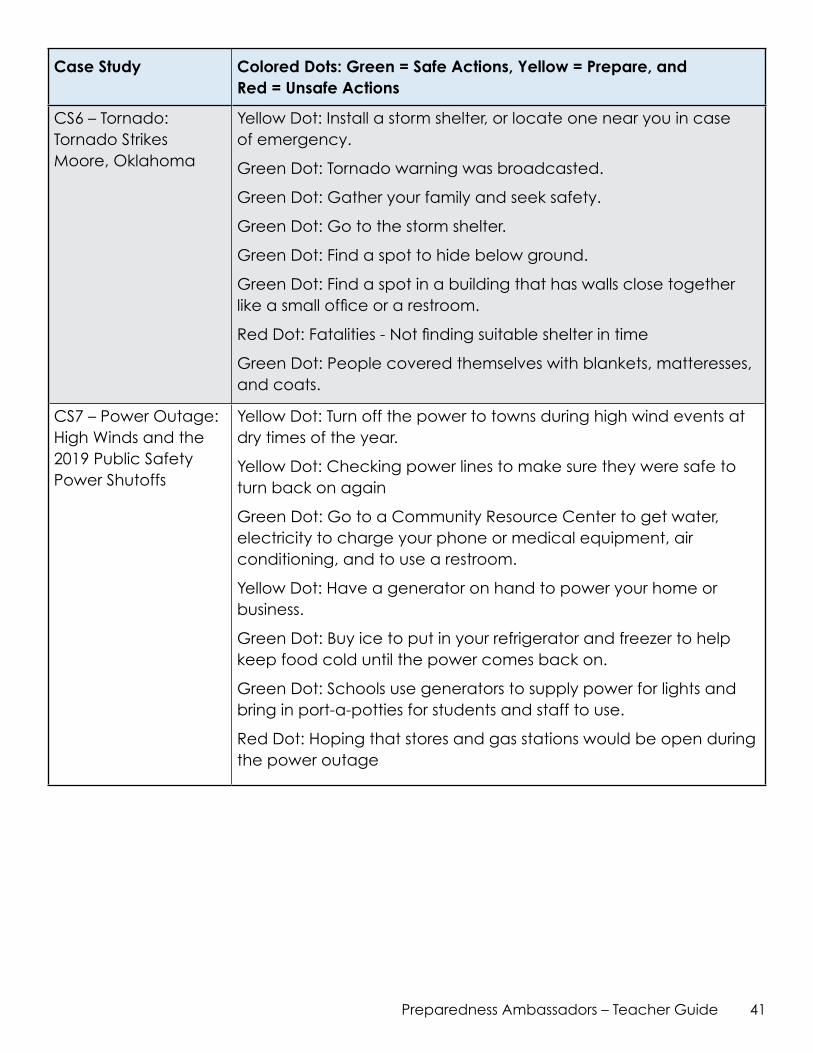
Case Study Colored Dots: Green = Safe Actions, Yellow = Prepare, and Red = Unsafe Actions
CS6 – Tornado: Tornado Strikes Moore, Oklahoma
Yellow Dot: Install a storm shelter, or locate one near you in case of emergency.
Green Dot: Tornado warning was broadcasted.
Green Dot: Gather your family and seek safety.
Green Dot: Go to the storm shelter.
Green Dot: Find a spot to hide below ground.
Green Dot: Find a spot in a building that has walls close together like a small office or a restroom.
Red Dot: Fatalities - Not finding suitable shelter in time
Green Dot: People covered themselves with blankets, matteresses, and coats.
CS7 – Power Outage: High Winds and the 2019 Public Safety Power Shutoffs
Yellow Dot: Turn off the power to towns during high wind events at dry times of the year.
Yellow Dot: Checking power lines to make sure they were safe to turn back on again
Green Dot: Go to a Community Resource Center to get water, electricity to charge your phone or medical equipment, air conditioning, and to use a restroom.
Yellow Dot: Have a generator on hand to power your home or business.
Green Dot: Buy ice to put in your refrigerator and freezer to help keep food cold until the power comes back on.
Green Dot: Schools use generators to supply power for lights and bring in port-a-potties for students and staff to use.
Red Dot: Hoping that stores and gas stations would be open during the power outage

42 Preparedness Ambassadors – Teacher Guide
This page intentionally left blank for printing purposes.
43Preparedness Ambassadors – Teacher Guide
CASE STUDIES
Referencesforthefollowingcasestudiescanbefoundin theReferencessectionattheendofthisTeacherGuide.
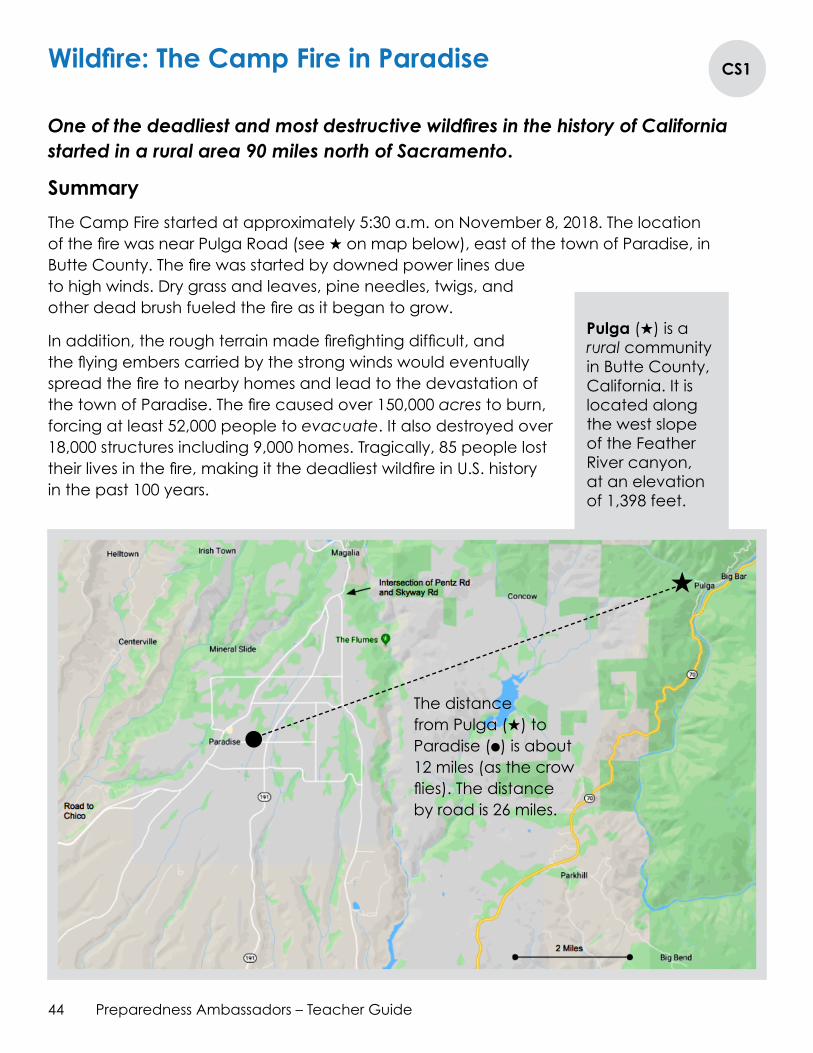
44 Preparedness Ambassadors – Teacher Guide
Pulga (★) is a rural community in Butte County, California. It is located along the west slope of the Feather River canyon, at an elevation of 1,398 feet.
Wildfire: The Camp Fire in Paradise CS1
One of the deadliest and most destructive wildfires in the history of California started in a rural area 90 miles north of Sacramento.
Summary
The Camp Fire started at approximately 5:30 a.m. on November 8, 2018. The location of the fire was near Pulga Road (see ★ on map below), east of the town of Paradise, in Butte County. The fire was started by downed power lines due to high winds. Dry grass and leaves, pine needles, twigs, and other dead brush fueled the fire as it began to grow.
In addition, the rough terrain made firefighting difficult, and the flying embers carried by the strong winds would eventually spread the fire to nearby homes and lead to the devastation of the town of Paradise. The fire caused over 150,000 acres to burn, forcing at least 52,000 people to evacuate. It also destroyed over 18,000 structures including 9,000 homes. Tragically, 85 people lost their lives in the fire, making it the deadliest wildfire in U.S. history in the past 100 years.
★
The distance from Pulga (★) to Paradise (●) is about 12 miles (as the crow flies). The distance by road is 26 miles.
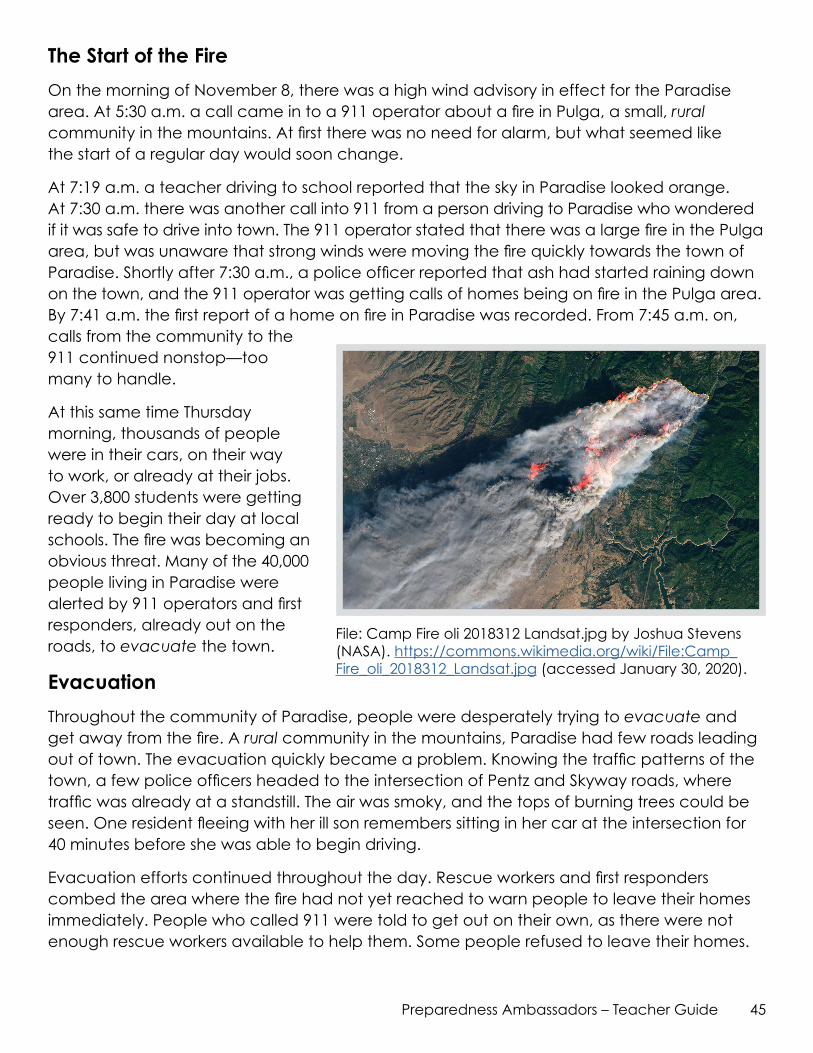
45Preparedness Ambassadors – Teacher Guide
The Start of the Fire
On the morning of November 8, there was a high wind advisory in effect for the Paradise area. At 5:30 a.m. a call came in to a 911 operator about a fire in Pulga, a small, rural community in the mountains. At first there was no need for alarm, but what seemed like the start of a regular day would soon change.
At 7:19 a.m. a teacher driving to school reported that the sky in Paradise looked orange. At 7:30 a.m. there was another call into 911 from a person driving to Paradise who wondered if it was safe to drive into town. The 911 operator stated that there was a large fire in the Pulga area, but was unaware that strong winds were moving the fire quickly towards the town of Paradise. Shortly after 7:30 a.m., a police officer reported that ash had started raining down on the town, and the 911 operator was getting calls of homes being on fire in the Pulga area. By 7:41 a.m. the first report of a home on fire in Paradise was recorded. From 7:45 a.m. on, calls from the community to the 911 continued nonstop—too many to handle.
At this same time Thursday morning, thousands of people were in their cars, on their way to work, or already at their jobs. Over 3,800 students were getting ready to begin their day at local schools. The fire was becoming an obvious threat. Many of the 40,000 people living in Paradise were alerted by 911 operators and first responders, already out on the roads, to evacuate the town.
Evacuation
Throughout the community of Paradise, people were desperately trying to evacuate and get away from the fire. A rural community in the mountains, Paradise had few roads leading out of town. The evacuation quickly became a problem. Knowing the traffic patterns of the town, a few police officers headed to the intersection of Pentz and Skyway roads, where traffic was already at a standstill. The air was smoky, and the tops of burning trees could be seen. One resident fleeing with her ill son remembers sitting in her car at the intersection for 40 minutes before she was able to begin driving.
Evacuation efforts continued throughout the day. Rescue workers and first responders combed the area where the fire had not yet reached to warn people to leave their homes immediately. People who called 911 were told to get out on their own, as there were not enough rescue workers available to help them. Some people refused to leave their homes.
File: Camp Fire oli 2018312 Landsat.jpg by Joshua Stevens (NASA). https://commons.wikimedia.org/wiki/File:Camp_Fire_oli_2018312_Landsat.jpg (accessed January 30, 2020).
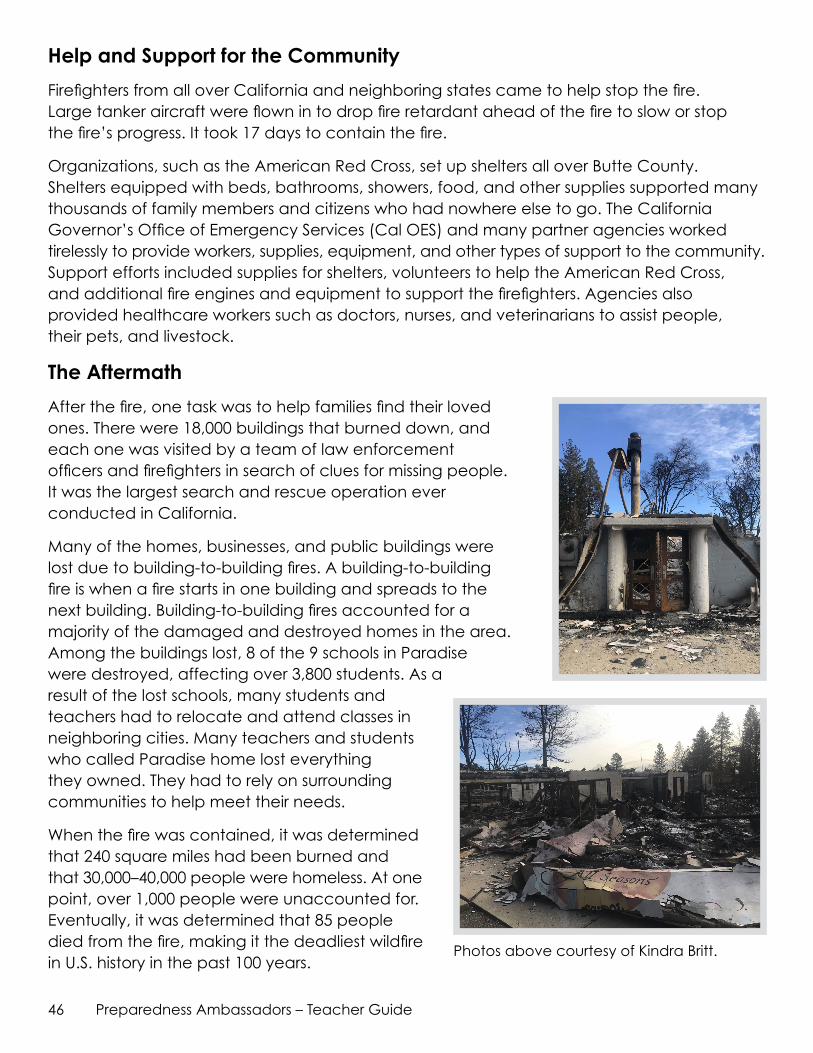
46 Preparedness Ambassadors – Teacher Guide
Help and Support for the Community
Firefighters from all over California and neighboring states came to help stop the fire. Large tanker aircraft were flown in to drop fire retardant ahead of the fire to slow or stop the fire’s progress. It took 17 days to contain the fire.
Organizations, such as the American Red Cross, set up shelters all over Butte County. Shelters equipped with beds, bathrooms, showers, food, and other supplies supported many thousands of family members and citizens who had nowhere else to go. The California Governor’s Office of Emergency Services (Cal OES) and many partner agencies worked tirelessly to provide workers, supplies, equipment, and other types of support to the community. Support efforts included supplies for shelters, volunteers to help the American Red Cross, and additional fire engines and equipment to support the firefighters. Agencies also provided healthcare workers such as doctors, nurses, and veterinarians to assist people, their pets, and livestock.
The Aftermath
After the fire, one task was to help families find their loved ones. There were 18,000 buildings that burned down, and each one was visited by a team of law enforcement officers and firefighters in search of clues for missing people. It was the largest search and rescue operation ever conducted in California.
Many of the homes, businesses, and public buildings were lost due to building-to-building fires. A building-to-building fire is when a fire starts in one building and spreads to the next building. Building-to-building fires accounted for a majority of the damaged and destroyed homes in the area. Among the buildings lost, 8 of the 9 schools in Paradise were destroyed, affecting over 3,800 students. As a result of the lost schools, many students and teachers had to relocate and attend classes in neighboring cities. Many teachers and students who called Paradise home lost everything they owned. They had to rely on surrounding communities to help meet their needs.
When the fire was contained, it was determined that 240 square miles had been burned and that 30,000–40,000 people were homeless. At one point, over 1,000 people were unaccounted for. Eventually, it was determined that 85 people died from the fire, making it the deadliest wildfire in U.S. history in the past 100 years.
Photos above courtesy of Kindra Britt.
47Preparedness Ambassadors – Teacher Guide
Wildfire Story 1Atoneelementaryschool,childrenonthe playgroundranbackintotheschoolbuildingtotelltheirteacherthatbrancheswereonfireandlandingwherethey wereplaying.Thewindwasthatstrong.Teacherswereinstructedtomovethechildrenfromtheschoolbuildingonto abusandtoevacuatethetown. Immediatelytheywerecaughtinthetrafficstandstill.Thebuswashotandsmokywithbuildingsburningoneithersideofthebus.Itwassodarkonthebusat10:00a.m.thattheyoungchildrenaskedifitwasnighttime.Thebustraveleddownanarrowroadwithtalltreesonbothsidesuntilthetrafficstoppedagain.Smokewasnowcausingthestudentstofallasleep.Thinkingstrategically,thebusdrivertookoffhiscottonshirtandtoldtheteacherstotearituptomakeairfiltersforthestudents.Theyhadasinglebottleofwateronthebus,andtheyusedittowettheshirtfabricforthemakeshiftairfilters.Thesebravestudentsandadultswereonthatbusforsixhoursbeforetheyreachedasafeareaoutsideofthefire’sreach.
Wildfire Story 2 Atanotherlocationintown,by10:42a.m.itwasalreadytoolatetoevacuate. TheSkywayRoadescaperoutewasonfire,andabout150peopleweretrappedintheircarsatthecornerofSkywayandClark.Rescueworkersusedmegaphonestotellpeopletoabandon theircarsandevacuateonfootas80-footflamesapproachedthetown.However,therewasnowheretorun. Therescueworkerslookedoverthesituationanddeterminedthebestplacetogowasanearbybuilding.Theybrokeinanddirectedthepeopletoliedownonthecementslabofthebuildingfloor.Therewasapropanetankstoragefieldnextdoor.Asthefireapproachedthebuilding,thesetanksbegantoexplodeduetotheheat.Theexplosionssoundedlikebombsgoingoff,andthevibrationscouldbefeltbyeveryone.Forhoursthepeoplewaitedandprayedasthefireragedaroundthem.Miraculously,thebuildinginwhichtheyweresheltereddidnotburn.
The Camp Fire caused the evacuation of over 52,000 people. This is approximately the seating capacity of a professional football stadium. Each of these people has a story about the fire and his or her evacuation. The two stories that follow share a glimpse of what November 8 was like for two different groups of people.
Wildfire Hazard Risk in California
Wildfires are the third most prolific hazard in the state of California, with many people living in or near fire hazard areas. Many homes and businesses are under threat due to their proximity to the wildland-urban interface in which community developments are situated next to high vegetation areas. In recent decades, more acreage has burned than in the past 60 years and as the climate continues to change, these fires are expected to worsen in future years.
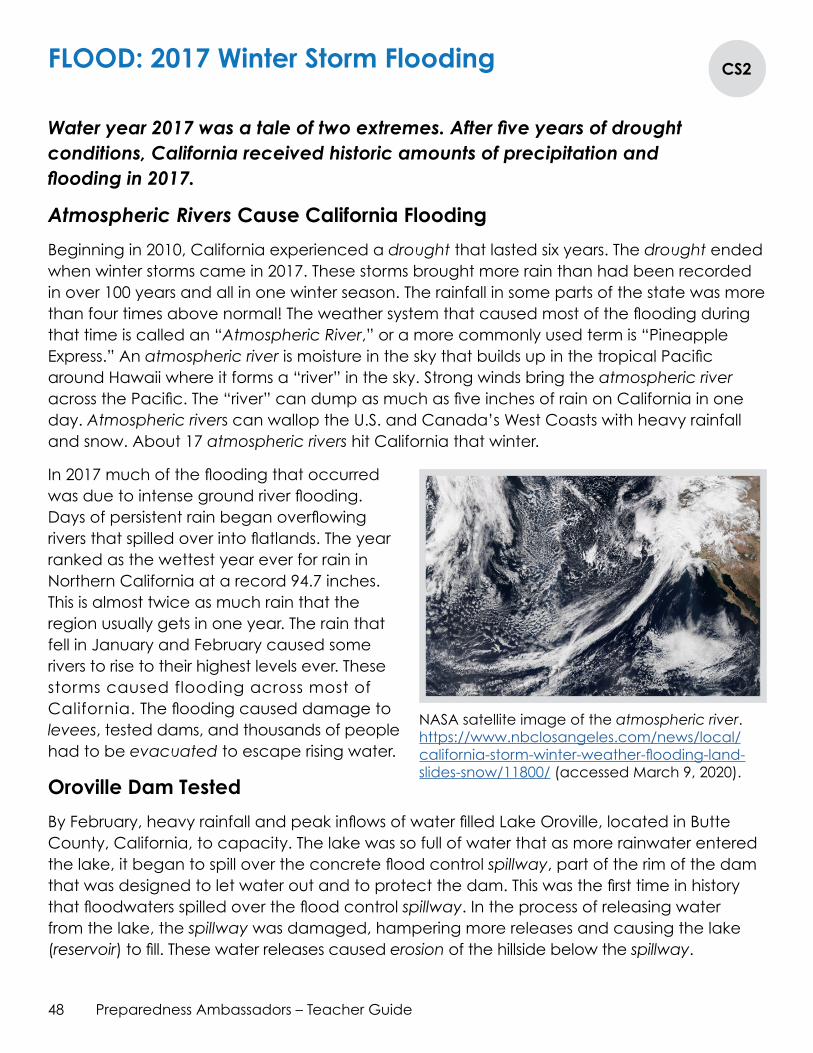
48 Preparedness Ambassadors – Teacher Guide
FLOOD: 2017 Winter Storm Flooding
Water year 2017 was a tale of two extremes. After five years of drought conditions, California received historic amounts of precipitation and flooding in 2017.
Atmospheric Rivers Cause California Flooding
Beginning in 2010, California experienced a drought that lasted six years. The drought ended when winter storms came in 2017. These storms brought more rain than had been recorded in over 100 years and all in one winter season. The rainfall in some parts of the state was more than four times above normal! The weather system that caused most of the flooding during that time is called an “AtmosphericRiver,” or a more commonly used term is “Pineapple Express.” An atmosphericriver is moisture in the sky that builds up in the tropical Pacific around Hawaii where it forms a “river” in the sky. Strong winds bring the atmosphericriver across the Pacific. The “river” can dump as much as five inches of rain on California in one day. Atmosphericrivers can wallop the U.S. and Canada’s West Coasts with heavy rainfall and snow. About 17 atmosphericrivershit California that winter.
In 2017 much of the flooding that occurred was due to intense ground river flooding. Days of persistent rain began overflowing rivers that spilled over into flatlands. The year ranked as the wettest year ever for rain in Northern California at a record 94.7 inches. This is almost twice as much rain that the region usually gets in one year. The rain that fell in January and February caused some rivers to rise to their highest levels ever. These storms caused flooding across most of California. The flooding caused damage to levees, tested dams, and thousands of people had to be evacuated to escape rising water.
Oroville Dam Tested
By February, heavy rainfall and peak inflows of water filled Lake Oroville, located in Butte County, California, to capacity. The lake was so full of water that as more rainwater entered the lake, it began to spill over the concrete flood control spillway, part of the rim of the dam that was designed to let water out and to protect the dam. This was the first time in history that floodwaters spilled over the flood control spillway. In the process of releasing water from the lake, the spillway was damaged, hampering more releases and causing the lake (reservoir) to fill. These water releases caused erosion of the hillside below the spillway.
CS2
NASA satellite image of the atmosphericriver. https://www.nbclosangeles.com/news/local/california-storm-winter-weather-flooding-land-slides-snow/11800/ (accessed March 9, 2020).
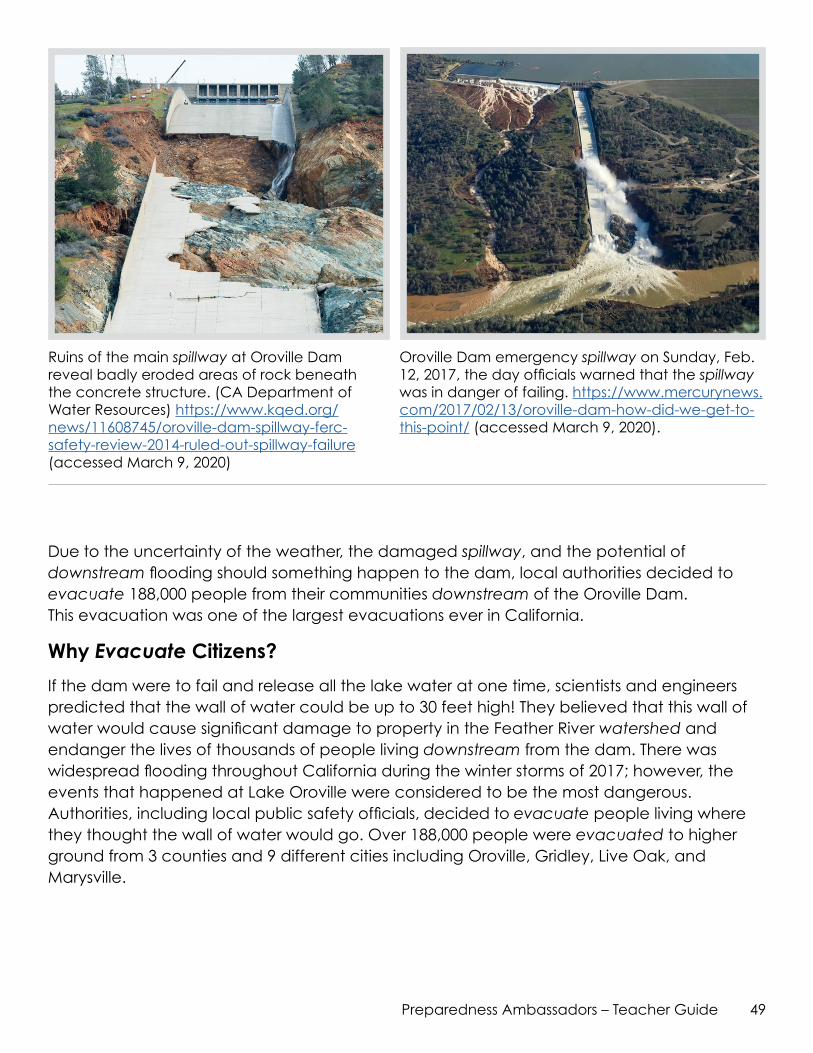
49Preparedness Ambassadors – Teacher Guide
Due to the uncertainty of the weather, the damaged spillway, and the potential of downstream flooding should something happen to the dam, local authorities decided to evacuate 188,000 people from their communities downstream of the Oroville Dam. This evacuation was one of the largest evacuations ever in California.
Why Evacuate Citizens?
If the dam were to fail and release all the lake water at one time, scientists and engineers predicted that the wall of water could be up to 30 feet high! They believed that this wall of water would cause significant damage to property in the Feather River watershed and endanger the lives of thousands of people living downstream from the dam. There was widespread flooding throughout California during the winter storms of 2017; however, the events that happened at Lake Oroville were considered to be the most dangerous. Authorities, including local public safety officials, decided to evacuate people living where they thought the wall of water would go. Over 188,000 people were evacuated to higher ground from 3 counties and 9 different cities including Oroville, Gridley, Live Oak, and Marysville.
Oroville Dam emergency spillway on Sunday, Feb. 12, 2017, the day officials warned that the spillway was in danger of failing. https://www.mercurynews.com/2017/02/13/oroville-dam-how-did-we-get-to-this-point/ (accessed March 9, 2020).
Ruins of the main spillway at Oroville Dam reveal badly eroded areas of rock beneath the concrete structure. (CA Department of Water Resources) https://www.kqed.org/news/11608745/oroville-dam-spillway-ferc-safety-review-2014-ruled-out-spillway-failure (accessed March 9, 2020)
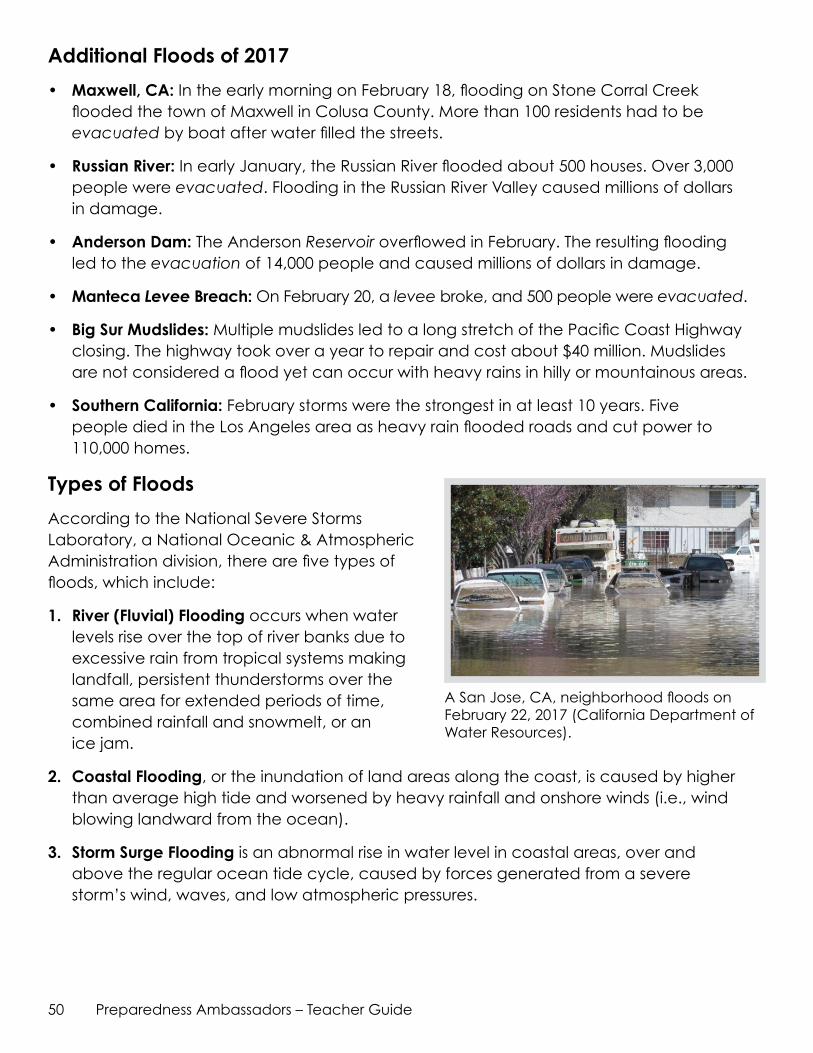
50 Preparedness Ambassadors – Teacher Guide
Additional Floods of 2017
• Maxwell, CA: In the early morning on February 18, flooding on Stone Corral Creek flooded the town of Maxwell in Colusa County. More than 100 residents had to be evacuated by boat after water filled the streets.
• Russian River: In early January, the Russian River flooded about 500 houses. Over 3,000 people were evacuated. Flooding in the Russian River Valley caused millions of dollars in damage.
• Anderson Dam: The Anderson Reservoir overflowed in February. The resulting flooding led to theevacuation of 14,000 people and caused millions of dollars in damage.
• Manteca Levee Breach: On February 20, a levee broke, and 500 people were evacuated.
• Big Sur Mudslides: Multiple mudslides led to a long stretch of the Pacific Coast Highway closing. The highway took over a year to repair and cost about $40 million. Mudslides are not considered a flood yet can occur with heavy rains in hilly or mountainous areas.
• Southern California: February storms were the strongest in at least 10 years. Five people died in the Los Angeles area as heavy rain flooded roads and cut power to 110,000 homes.
Types of Floods
According to the National Severe Storms Laboratory, a National Oceanic & Atmospheric Administration division, there are five types of floods, which include:
1. River (Fluvial) Flooding occurs when water levels rise over the top of river banks due to excessive rain from tropical systems making landfall, persistent thunderstorms over the same area for extended periods of time, combined rainfall and snowmelt, or an ice jam.
2. Coastal Flooding, or the inundation of land areas along the coast, is caused by higher than average high tide and worsened by heavy rainfall and onshore winds (i.e., wind blowing landward from the ocean).
3. Storm Surge Flooding is an abnormal rise in water level in coastal areas, over and above the regular ocean tide cycle, caused by forces generated from a severe storm’s wind, waves, and low atmospheric pressures.
A San Jose, CA, neighborhood floods on February 22, 2017 (California Department of Water Resources).
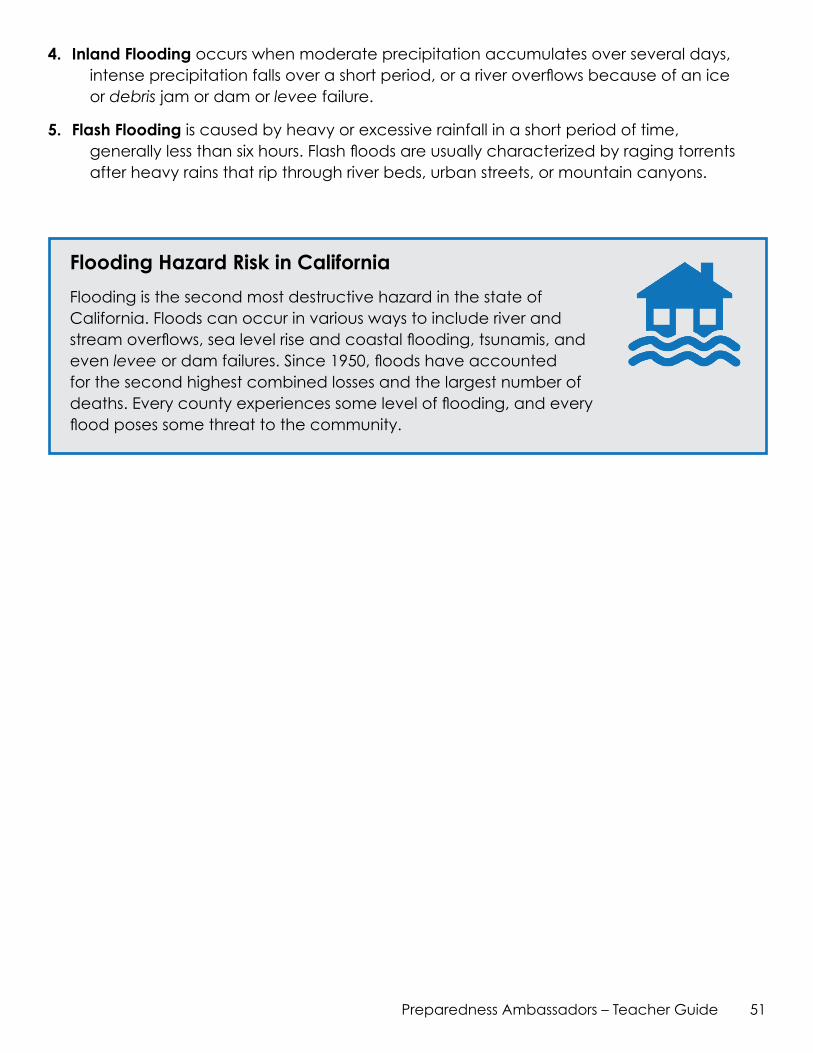
51Preparedness Ambassadors – Teacher Guide
4. Inland Flooding occurs when moderate precipitation accumulates over several days, intense precipitation falls over a short period, or a river overflows because of an ice or debris jam or dam or levee failure.
5. Flash Flooding is caused by heavy or excessive rainfall in a short period of time, generally less than six hours. Flash floods are usually characterized by raging torrents after heavy rains that rip through river beds, urban streets, or mountain canyons.
Flooding Hazard Risk in California
Flooding is the second most destructive hazard in the state of California. Floods can occur in various ways to include river and stream overflows, sea level rise and coastal flooding, tsunamis, and even levee or dam failures. Since 1950, floods have accounted for the second highest combined losses and the largest number of deaths. Every county experiences some level of flooding, and every flood poses some threat to the community.
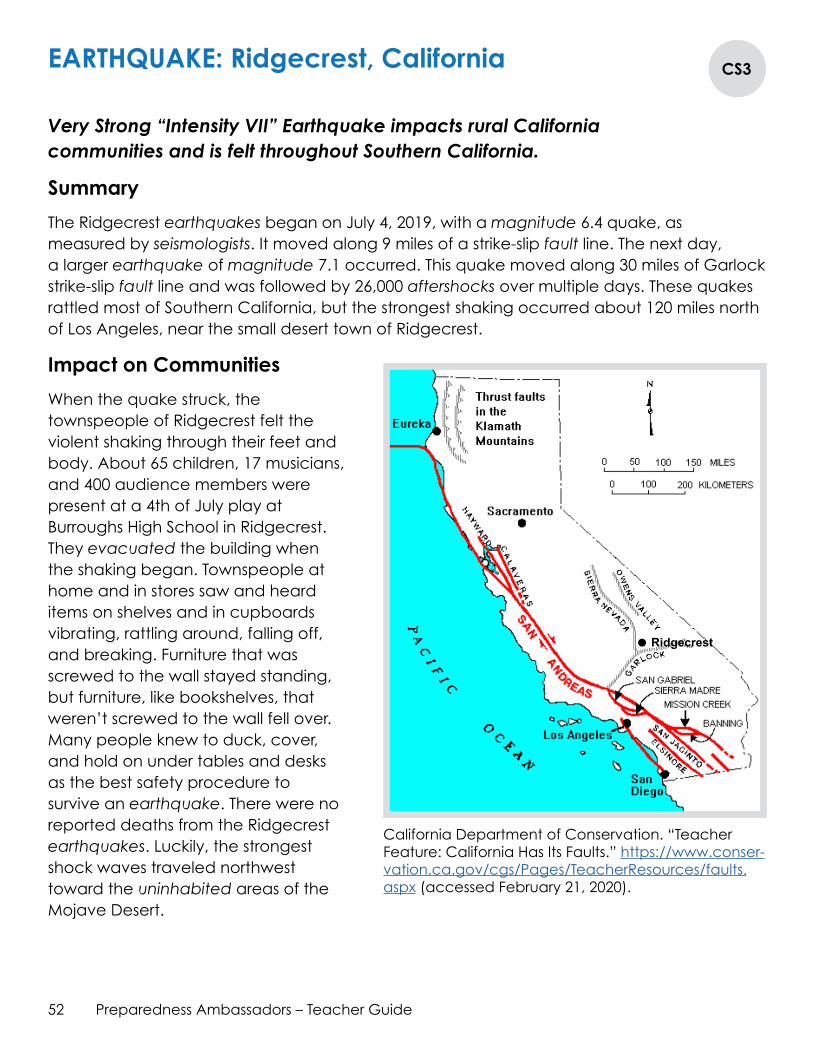
52 Preparedness Ambassadors – Teacher Guide
EARTHQUAKE: Ridgecrest, California CS3
Very Strong “Intensity VII” Earthquake impacts rural California communities and is felt throughout Southern California.
Summary
The Ridgecrest earthquakes began on July 4, 2019, with a magnitude 6.4 quake, as measured by seismologists. It moved along 9 miles of a strike-slip fault line. The next day, a larger earthquake of magnitude 7.1 occurred. This quake moved along 30 miles of Garlock strike-slipfault line and was followed by 26,000 aftershocksover multiple days. These quakes rattled most of Southern California, but the strongest shaking occurred about 120 miles north of Los Angeles, near the small desert town of Ridgecrest.
Impact on Communities
When the quake struck, the townspeople of Ridgecrest felt the violent shaking through their feet and body. About 65 children, 17 musicians, and 400 audience members were present at a 4th of July play at Burroughs High School in Ridgecrest. They evacuatedthe building when the shaking began. Townspeople at home and in stores saw and heard items on shelves and in cupboards vibrating, rattling around, falling off, and breaking. Furniture that was screwed to the wall stayed standing, but furniture, like bookshelves, that weren’t screwed to the wall fell over. Many people knew to duck, cover, and hold on under tables and desks as the best safety procedure to survive an earthquake. There were no reported deaths from the Ridgecrest earthquakes. Luckily, the strongest shock waves traveled northwest toward the uninhabited areas of the Mojave Desert.
California Department of Conservation. “Teacher Feature: California Has Its Faults.” https://www.conser-vation.ca.gov/cgs/Pages/TeacherResources/faults.aspx (accessed February 21, 2020).
•Ridgecrest
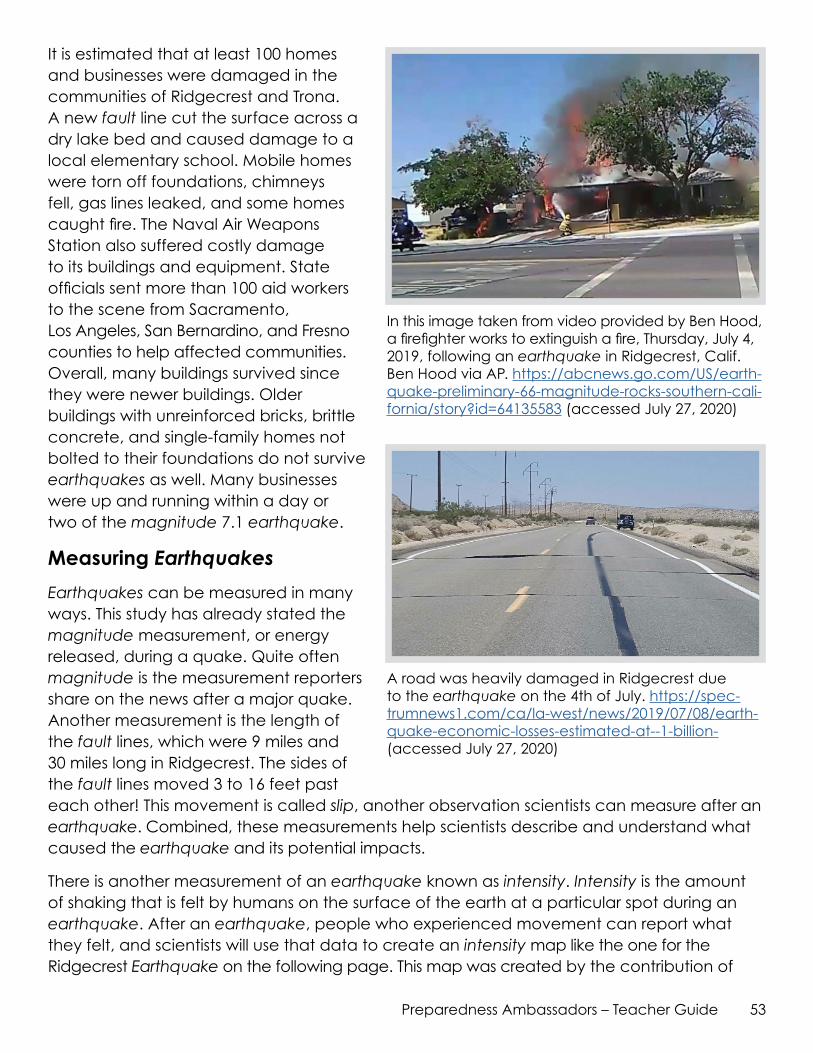
53Preparedness Ambassadors – Teacher Guide
It is estimated that at least 100 homes and businesses were damaged in the communities of Ridgecrest and Trona. A new fault line cut the surface across a dry lake bed and caused damage to a local elementary school. Mobile homes were torn off foundations, chimneys fell, gas lines leaked, and some homes caught fire. The Naval Air Weapons Station also suffered costly damage to its buildings and equipment. State officials sent more than 100 aid workers to the scene from Sacramento, Los Angeles, San Bernardino, and Fresno counties to help affected communities. Overall, many buildings survived since they were newer buildings. Older buildings with unreinforced bricks, brittle concrete, and single-family homes not bolted to their foundations do not survive earthquakes as well. Many businesses were up and running within a day or two of the magnitude 7.1 earthquake.
Measuring Earthquakes
Earthquakes can be measured in many ways. This study has already stated the magnitudemeasurement, or energy released, during a quake. Quite often magnitude is the measurement reporters share on the news after a major quake. Another measurement is the length of the fault lines, which were 9 miles and 30 miles long in Ridgecrest. The sides of the fault lines moved 3 to 16 feet past each other! This movement is called slip, another observation scientists can measure after an earthquake. Combined, these measurements help scientists describe and understand what caused the earthquake and its potential impacts.
There is another measurement of an earthquake known as intensity. Intensity is the amount of shaking that is felt by humans on the surface of the earth at a particular spot during an earthquake. After an earthquake, people who experienced movement can report what they felt, and scientists will use that data to create an intensity map like the one for the Ridgecrest Earthquake on the following page. This map was created by the contribution of
In this image taken from video provided by Ben Hood, a firefighter works to extinguish a fire, Thursday, July 4, 2019, following an earthquake in Ridgecrest, Calif. Ben Hood via AP. https://abcnews.go.com/US/earth-quake-preliminary-66-magnitude-rocks-southern-cali-fornia/story?id=64135583 (accessed July 27, 2020)
A road was heavily damaged in Ridgecrest due to the earthquake on the 4th of July. https://spec-trumnews1.com/ca/la-west/news/2019/07/08/earth-quake-economic-losses-estimated-at--1-billion- (accessed July 27, 2020)
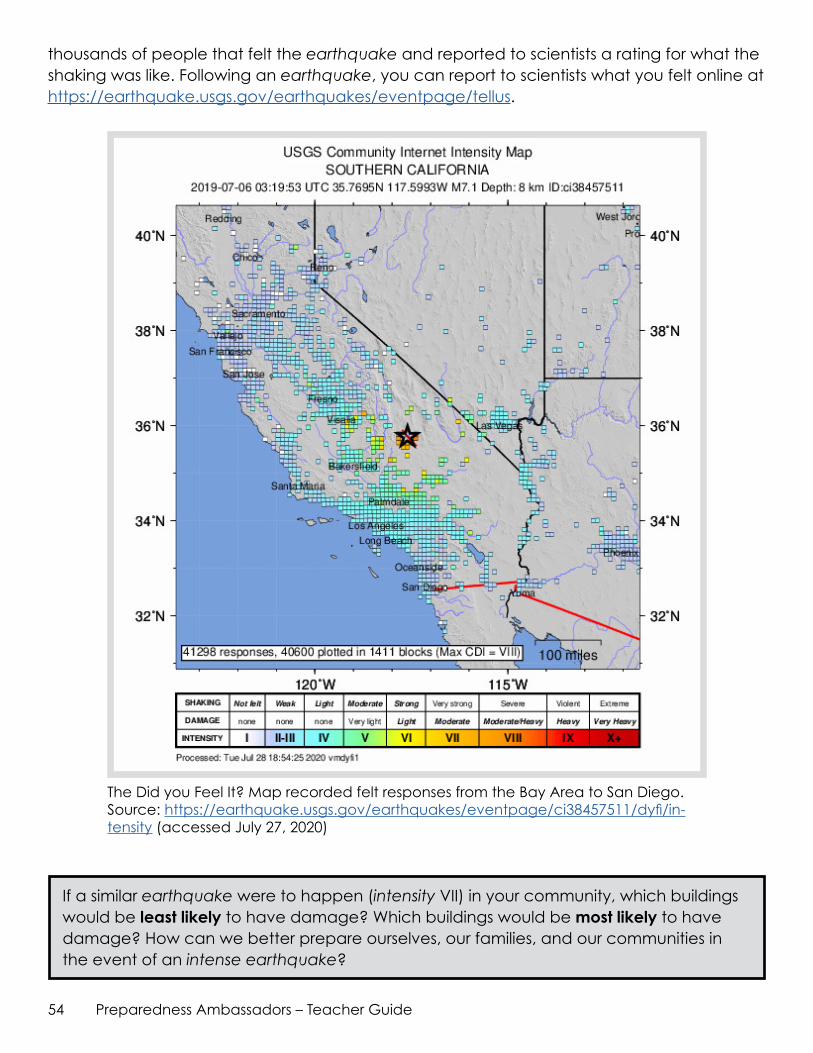
54 Preparedness Ambassadors – Teacher Guide
The Did you Feel It? Map recorded felt responses from the Bay Area to San Diego. Source: https://earthquake.usgs.gov/earthquakes/eventpage/ci38457511/dyfi/in-tensity (accessed July 27, 2020)
thousands of people that felt the earthquake and reported to scientists a rating for what the shaking was like. Following an earthquake, you can report to scientists what you felt online at https://earthquake.usgs.gov/earthquakes/eventpage/tellus.
If a similar earthquake were to happen (intensity VII) in your community, which buildings would be least likely to have damage? Which buildings would be most likely to have damage? How can we better prepare ourselves, our families, and our communities in the event of an intense earthquake?
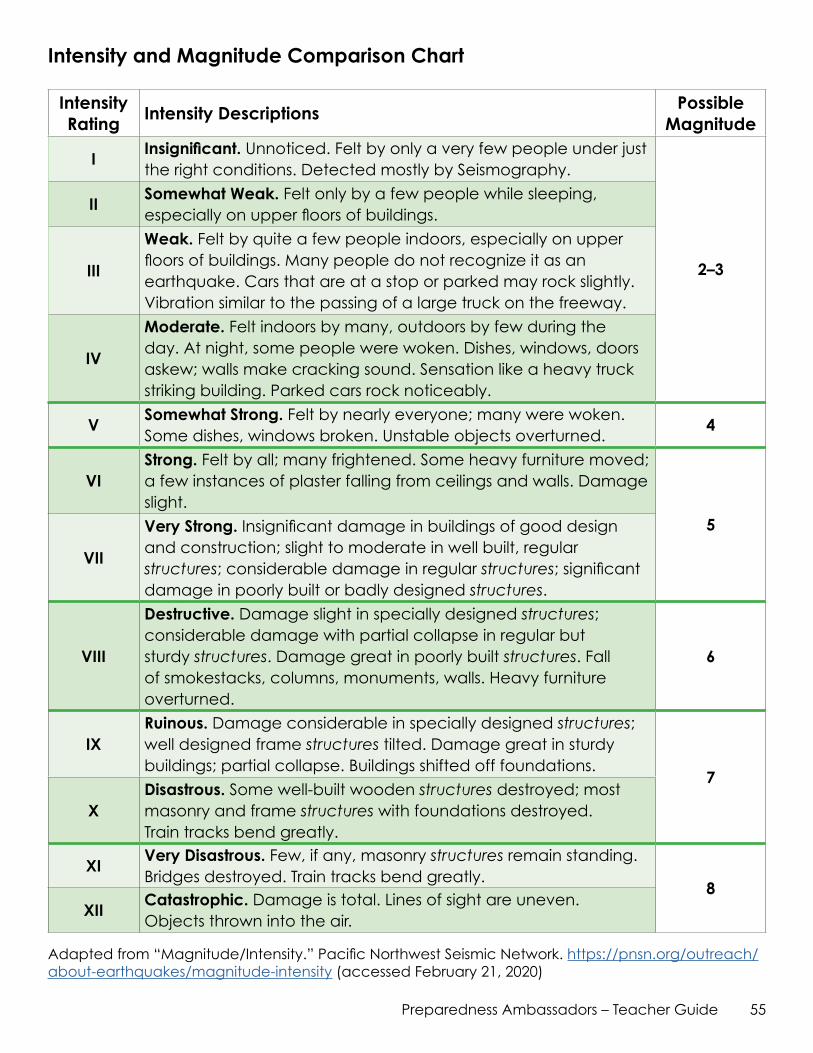
55Preparedness Ambassadors – Teacher Guide
Intensity and Magnitude Comparison Chart
Intensity Rating
Intensity DescriptionsPossible
Magnitude
IInsignificant. Unnoticed. Felt by only a very few people under just the right conditions. Detected mostly by Seismography.
2–3
IISomewhat Weak. Felt only by a few people while sleeping, especially on upper floors of buildings.
III
Weak. Felt by quite a few people indoors, especially on upper floors of buildings. Many people do not recognize it as an earthquake. Cars that are at a stop or parked may rock slightly. Vibration similar to the passing of a large truck on the freeway.
IV
Moderate. Felt indoors by many, outdoors by few during the day. At night, some people were woken. Dishes, windows, doors askew; walls make cracking sound. Sensation like a heavy truck striking building. Parked cars rock noticeably.
VSomewhat Strong. Felt by nearly everyone; many were woken. Some dishes, windows broken. Unstable objects overturned.
4
VIStrong. Felt by all; many frightened. Some heavy furniture moved; a few instances of plaster falling from ceilings and walls. Damage slight.
5
VII
Very Strong. Insignificant damage in buildings of good design and construction; slight to moderate in well built, regular structures; considerable damage in regular structures; significant damage in poorly built or badly designed structures.
VIII
Destructive. Damage slight in specially designed structures; considerable damage with partial collapse in regular but sturdy structures. Damage great in poorly built structures. Fall of smokestacks, columns, monuments, walls. Heavy furniture overturned.
6
IXRuinous. Damage considerable in specially designed structures; well designed frame structures tilted. Damage great in sturdy buildings; partial collapse. Buildings shifted off foundations.
7
XDisastrous. Some well-built wooden structures destroyed; most masonry and frame structures with foundations destroyed. Train tracks bend greatly.
XIVery Disastrous. Few, if any, masonry structures remain standing. Bridges destroyed. Train tracks bend greatly.
8XII
Catastrophic. Damage is total. Lines of sight are uneven. Objects thrown into the air.
Adapted from “Magnitude/Intensity.” Pacific Northwest Seismic Network. https://pnsn.org/outreach/about-earthquakes/magnitude-intensity (accessed February 21, 2020)
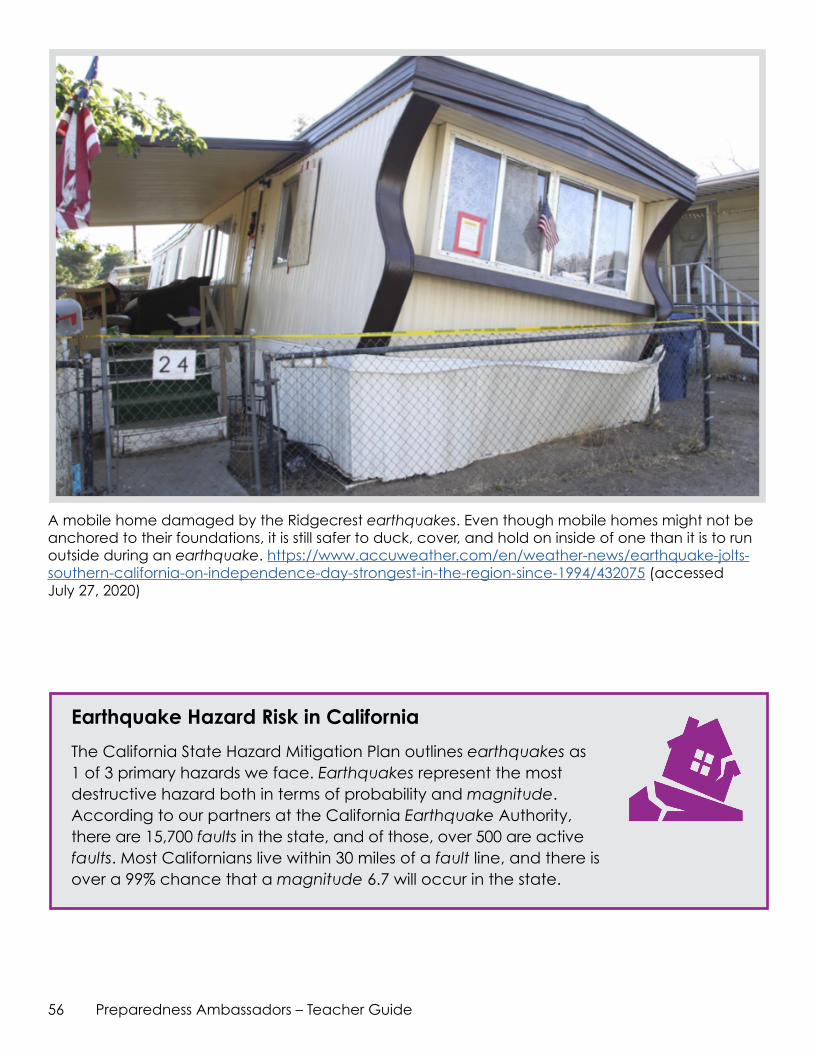
56 Preparedness Ambassadors – Teacher Guide
A mobile home damaged by the Ridgecrest earthquakes. Even though mobile homes might not be anchored to their foundations, it is still safer to duck, cover, and hold on inside of one than it is to run outside during an earthquake. https://www.accuweather.com/en/weather-news/earthquake-jolts-southern-california-on-independence-day-strongest-in-the-region-since-1994/432075 (accessed July 27, 2020)
Earthquake Hazard Risk in California
The California State Hazard Mitigation Plan outlines earthquakes as 1 of 3 primary hazards we face. Earthquakes represent the most destructive hazard both in terms of probability and magnitude. According to our partners at the California Earthquake Authority, there are 15,700faults in the state, and of those, over 500 are active faults. Most Californians live within 30 miles of a fault line, and there is over a 99% chance that a magnitude 6.7 will occur in the state.
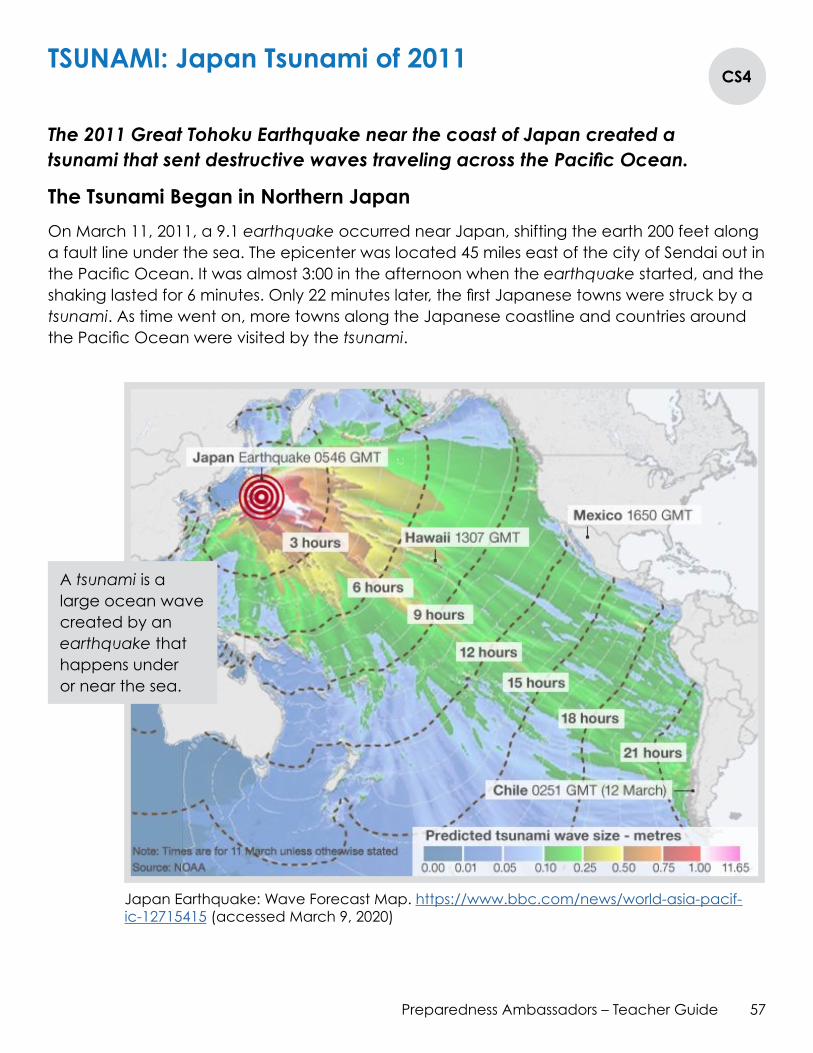
57Preparedness Ambassadors – Teacher Guide
TSUNAMI: Japan Tsunami of 2011CS4
The 2011 Great Tohoku Earthquake near the coast of Japan created a tsunami that sent destructive waves traveling across the Pacific Ocean.
The Tsunami Began in Northern Japan
On March 11, 2011, a 9.1 earthquake occurred near Japan, shifting the earth 200 feet along a fault line under the sea. The epicenter was located 45 miles east of the city of Sendai out in the Pacific Ocean. It was almost 3:00 in the afternoon when the earthquake started, and the shaking lasted for 6 minutes. Only 22 minutes later, the first Japanese towns were struck by a tsunami. As time went on, more towns along the Japanese coastline and countries around the Pacific Ocean were visited by the tsunami.
Japan Earthquake: Wave Forecast Map. https://www.bbc.com/news/world-asia-pacif-ic-12715415 (accessed March 9, 2020)
A tsunami is a large ocean wave created by an earthquake that happens under or near the sea.
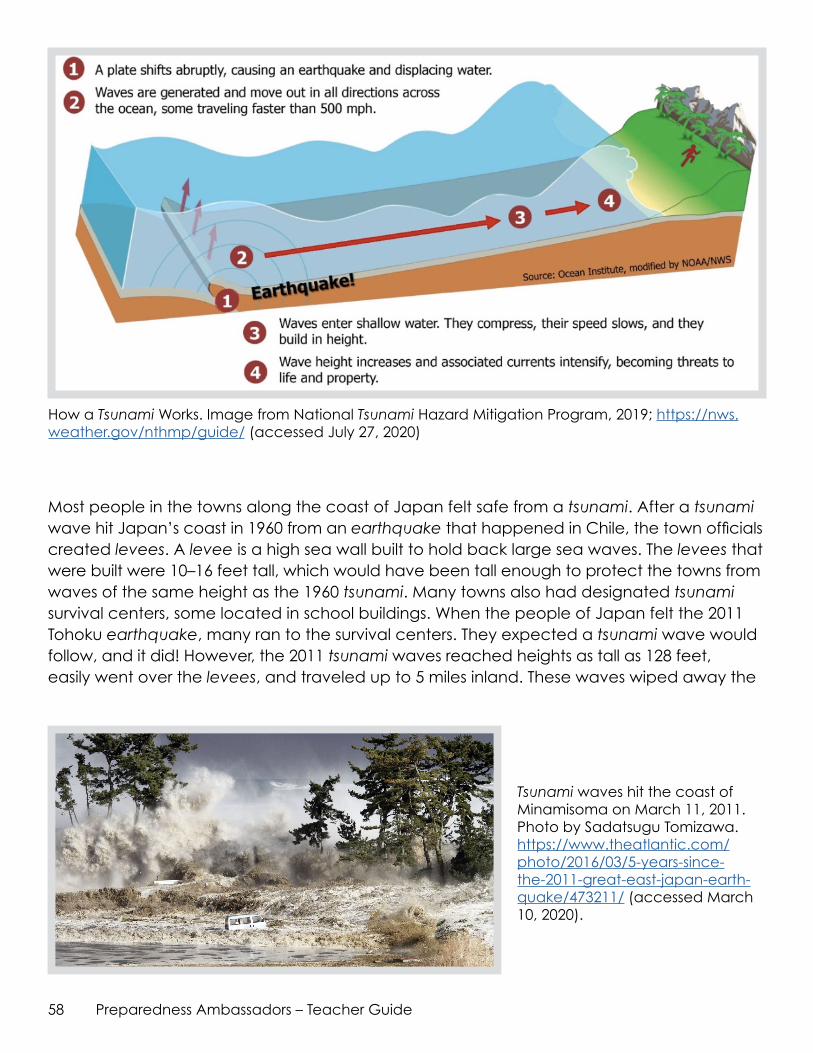
58 Preparedness Ambassadors – Teacher Guide
Most people in the towns along the coast of Japan felt safe from a tsunami. After a tsunami wave hit Japan’s coast in 1960 from an earthquake that happened in Chile, the town officials created levees. A levee is a high sea wall built to hold back large sea waves. The levees that were built were 10–16 feet tall, which would have been tall enough to protect the towns from waves of the same height as the 1960 tsunami. Many towns also had designated tsunami survival centers, some located in school buildings. When the people of Japan felt the 2011 Tohoku earthquake, many ran to the survival centers. They expected a tsunami wave would follow, and it did! However, the 2011 tsunami waves reached heights as tall as 128 feet, easily went over the levees, and traveled up to 5 miles inland. These waves wiped away the
Tsunami waves hit the coast of Minamisoma on March 11, 2011. Photo by Sadatsugu Tomizawa. https://www.theatlantic.com/photo/2016/03/5-years-since-the-2011-great-east-japan-earth-quake/473211/ (accessed March 10, 2020).
How a Tsunami Works. Image from National Tsunami Hazard Mitigation Program, 2019; https://nws.weather.gov/nthmp/guide/ (accessed July 27, 2020)
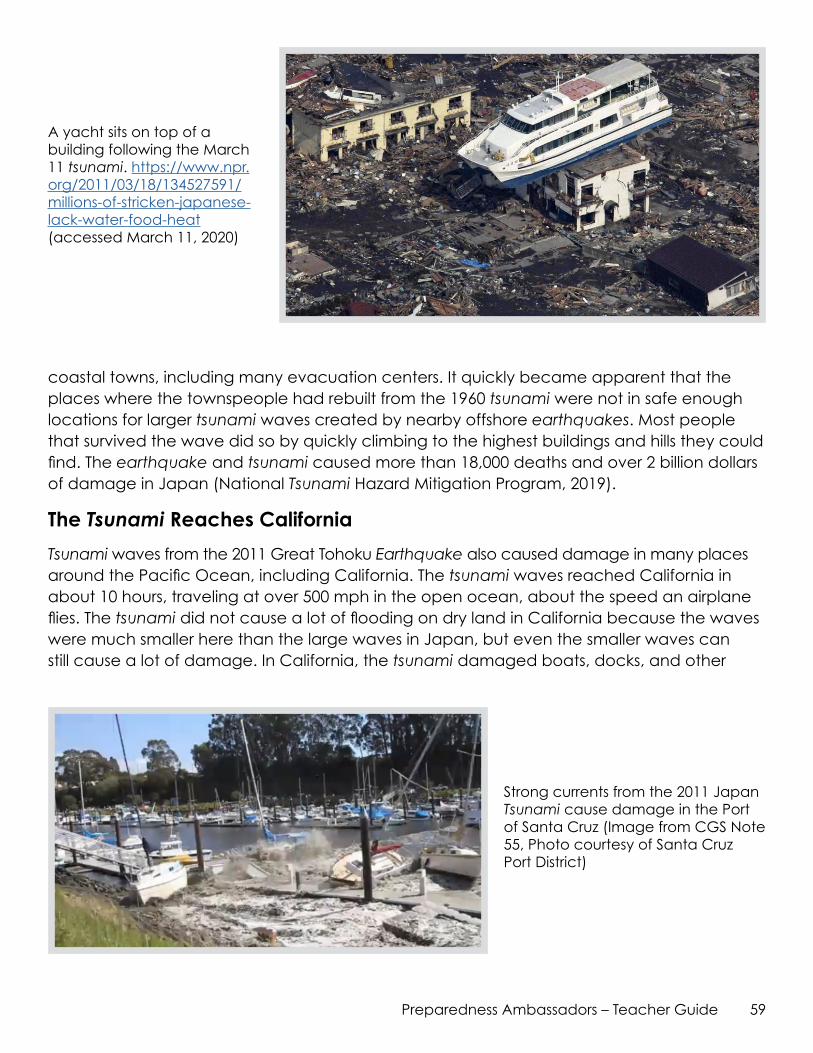
59Preparedness Ambassadors – Teacher Guide
coastal towns, including many evacuation centers. It quickly became apparent that the places where the townspeople had rebuilt from the 1960 tsunami were not in safe enough locations for larger tsunami waves created by nearby offshore earthquakes. Most people that survived the wave did so by quickly climbing to the highest buildings and hills they could find. The earthquake and tsunami caused more than 18,000 deaths and over 2 billion dollars of damage in Japan (National Tsunami Hazard Mitigation Program, 2019).
The Tsunami Reaches California
Tsunami waves from the 2011 Great Tohoku Earthquake also caused damage in many places around the Pacific Ocean, including California. The tsunami waves reached California in about 10 hours, traveling at over 500 mph in the open ocean, about the speed an airplane flies. The tsunami did not cause a lot of flooding on dry land in California because the waves were much smaller here than the large waves in Japan, but even the smaller waves can still cause a lot of damage. In California, the tsunami damaged boats, docks, and other
A yacht sits on top of a building following the March 11 tsunami. https://www.npr.org/2011/03/18/134527591/millions-of-stricken-japanese-lack-water-food-heat (accessed March 11, 2020)
Strong currents from the 2011 Japan Tsunami cause damage in the Port of Santa Cruz (Image from CGS Note 55, Photo courtesy of Santa Cruz Port District)
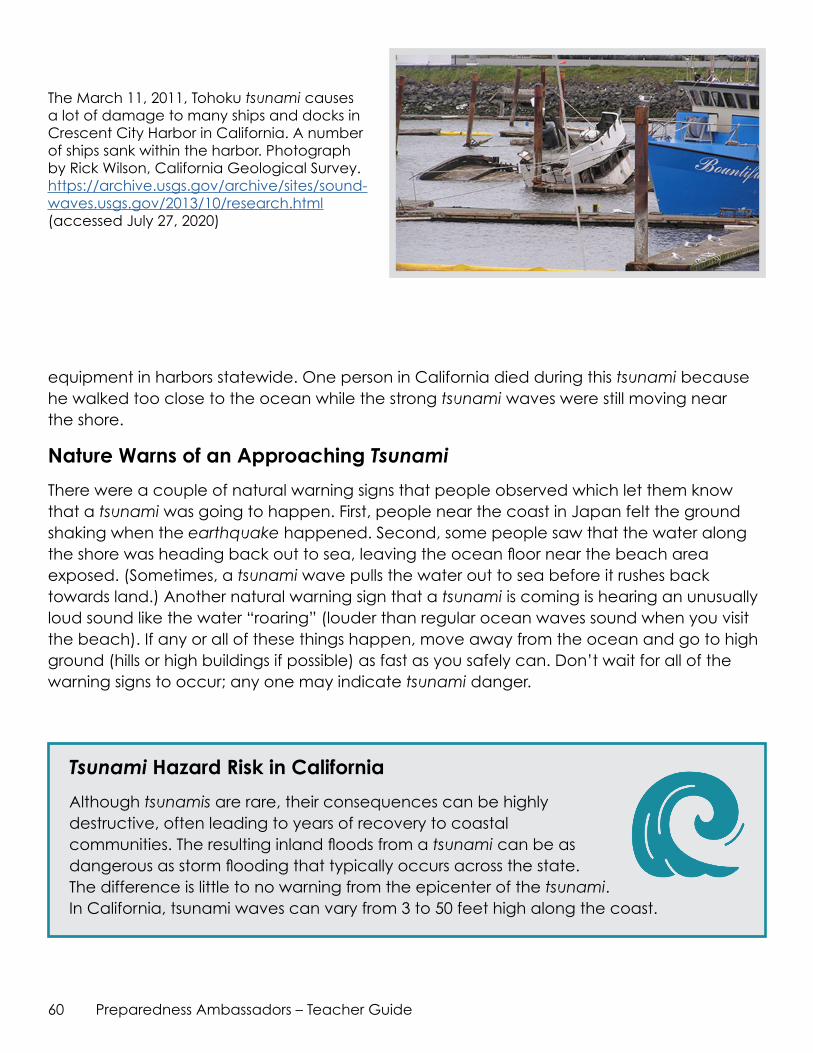
60 Preparedness Ambassadors – Teacher Guide
equipment in harbors statewide. One person in California died during this tsunami because he walked too close to the ocean while the strong tsunami waves were still moving near the shore.
Nature Warns of an Approaching Tsunami
There were a couple of natural warning signs that people observed which let them know that a tsunami was going to happen. First, people near the coast in Japan felt the ground shaking when the earthquake happened. Second, some people saw that the water along the shore was heading back out to sea, leaving the ocean floor near the beach area exposed. (Sometimes, a tsunami wave pulls the water out to sea before it rushes back towards land.) Another natural warning sign that a tsunami is coming is hearing an unusually loud sound like the water “roaring” (louder than regular ocean waves sound when you visit the beach). If any or all of these things happen, move away from the ocean and go to high ground (hills or high buildings if possible) as fast as you safely can. Don’t wait for all of the warning signs to occur; any one may indicate tsunami danger.
The March 11, 2011, Tohoku tsunami causes a lot of damage to many ships and docks in Crescent City Harbor in California. A number of ships sank within the harbor. Photograph by Rick Wilson, California Geological Survey. https://archive.usgs.gov/archive/sites/sound-waves.usgs.gov/2013/10/research.html (accessed July 27, 2020)
Tsunami Hazard Risk in California
Although tsunamisare rare, their consequences can be highly destructive, often leading to years of recovery to coastal communities. The resulting inland floods from a tsunami can be as dangerous as storm flooding that typically occurs across the state. The difference is little to no warning from the epicenter of the tsunami.In California, tsunami waves can vary from 3 to 50 feet high along the coast.
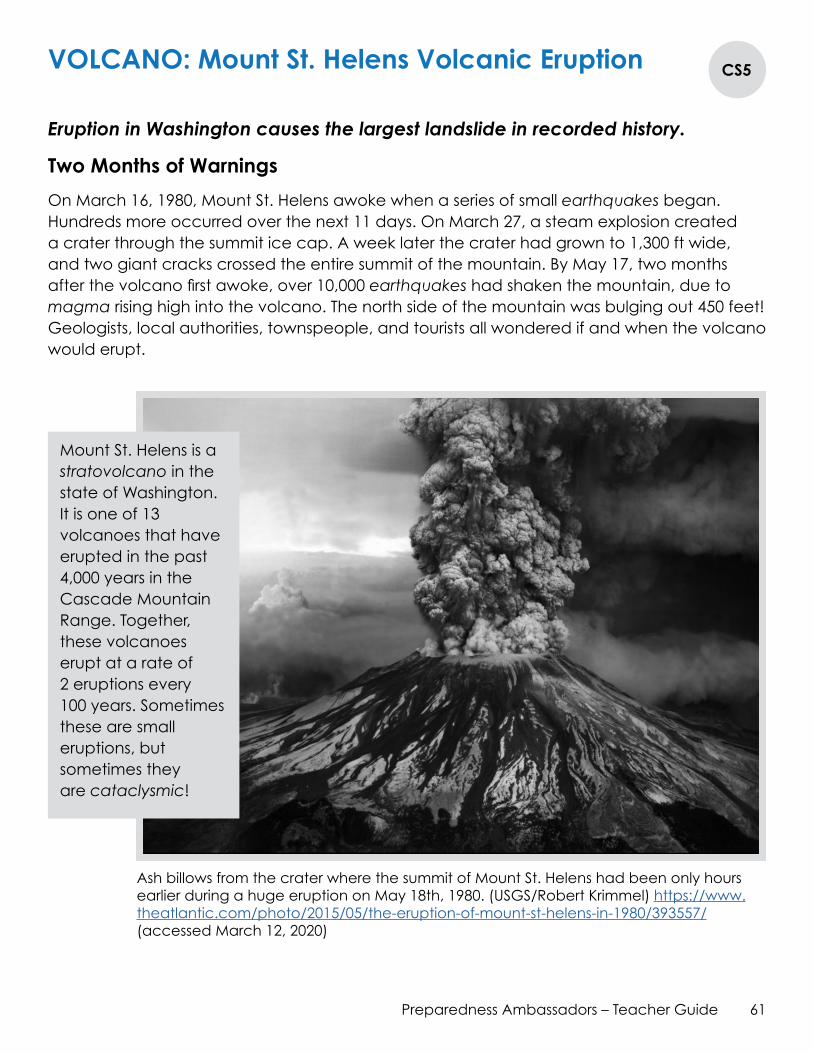
61Preparedness Ambassadors – Teacher Guide
VOLCANO: Mount St. Helens Volcanic Eruption CS5
Eruption in Washington causes the largest landslide in recorded history.
Two Months of Warnings
On March 16, 1980, Mount St. Helens awoke when a series of small earthquakes began. Hundreds more occurred over the next 11 days. On March 27, a steam explosion created a crater through the summit ice cap. A week later the crater had grown to 1,300 ft wide, and two giant cracks crossed the entire summit of the mountain. By May 17, two months after the volcano first awoke, over 10,000earthquakeshad shaken the mountain, due to magma rising high into the volcano. The north side of the mountain was bulging out 450 feet! Geologists, local authorities, townspeople, and tourists all wondered if and when the volcano would erupt.
Ash billows from the crater where the summit of Mount St. Helens had been only hours earlier during a huge eruption on May 18th, 1980. (USGS/Robert Krimmel) https://www.theatlantic.com/photo/2015/05/the-eruption-of-mount-st-helens-in-1980/393557/ (accessed March 12, 2020)
Mount St. Helens is a stratovolcano in the state of Washington. It is one of 13 volcanoes that have erupted in the past 4,000 years in the Cascade Mountain Range. Together, these volcanoes erupt at a rate of 2 eruptions every 100 years. Sometimes these are small eruptions, but sometimes they are cataclysmic!
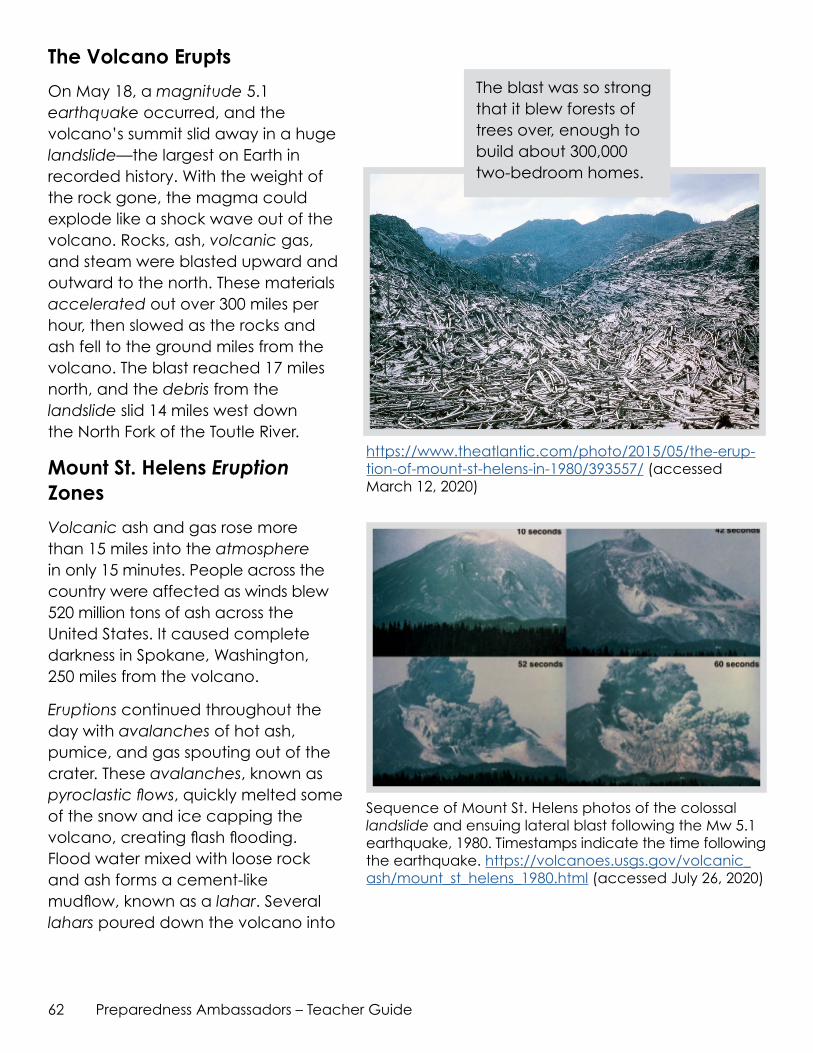
62 Preparedness Ambassadors – Teacher Guide
Sequence of Mount St. Helens photos of the colossal landslide and ensuing lateral blast following the Mw 5.1 earthquake, 1980. Timestamps indicate the time following the earthquake. https://volcanoes.usgs.gov/volcanic_ash/mount_st_helens_1980.html (accessed July 26, 2020)
The Volcano Erupts
On May 18, a magnitude 5.1 earthquake occurred, and the volcano’s summit slid away in a huge landslide—the largest on Earth in recorded history. With the weight of the rock gone, the magma could explode like a shock wave out of the volcano. Rocks, ash, volcanic gas, and steam were blasted upward and outward to the north. These materials accelerated out over 300 miles per hour, then slowed as the rocks and ash fell to the ground miles from the volcano. The blast reached 17 miles north, and the debris from the landslide slid 14 miles west down the North Fork of the Toutle River.
Mount St. Helens Eruption Zones
Volcanic ash and gas rose more than 15 miles into the atmosphere in only 15 minutes. People across the country were affected as winds blew 520 million tons of ash across the United States. It caused complete darkness in Spokane, Washington, 250 miles from the volcano.
Eruptions continued throughout the day with avalanches of hot ash, pumice, and gas spouting out of the crater. These avalanches, known as pyroclasticflows, quickly melted some of the snow and ice capping the volcano, creating flash flooding. Flood water mixed with loose rock and ash forms a cement-like mudflow, known as a lahar. Several lahars poured down the volcano into
https://www.theatlantic.com/photo/2015/05/the-erup-tion-of-mount-st-helens-in-1980/393557/ (accessed March 12, 2020)
The blast was so strong that it blew forests of trees over, enough to build about 300,000 two-bedroom homes.
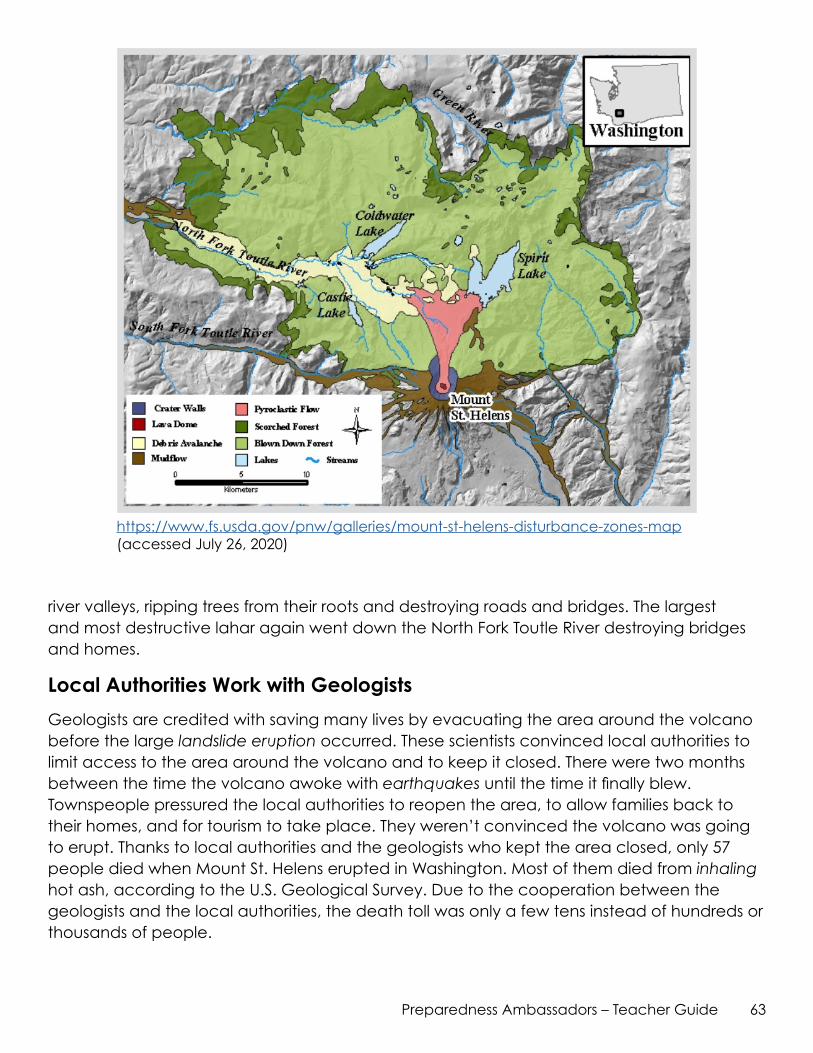
63Preparedness Ambassadors – Teacher Guide
https://www.fs.usda.gov/pnw/galleries/mount-st-helens-disturbance-zones-map (accessed July 26, 2020)
river valleys, ripping trees from their roots and destroying roads and bridges. The largest and most destructive lahar again went down the North Fork Toutle River destroying bridges and homes.
Local Authorities Work with Geologists
Geologists are credited with saving many lives by evacuating the area around the volcano before the large landslide eruption occurred. These scientists convinced local authorities to limit access to the area around the volcano and to keep it closed. There were two months between the time the volcano awoke with earthquakesuntil the time it finally blew. Townspeople pressured the local authorities to reopen the area, to allow families back to their homes, and for tourism to take place. They weren’t convinced the volcano was going to erupt. Thanks to local authorities and the geologists who kept the area closed, only 57 people died when Mount St. Helens erupted in Washington. Most of them died from inhaling hot ash, according to the U.S. Geological Survey. Due to the cooperation between the geologists and the local authorities, the death toll was only a few tens instead of hundreds or thousands of people.

64 Preparedness Ambassadors – Teacher Guide
A mudflow deposit covers Washington State Highway 504, near the town of Toutle, northwest of Mt. Saint Helens, to a depth of 2m (6 feet). Geologist for scale. (USGS/R.L. Schuster) http://archive.boston.com/bigpicture/2010/05/mount_st_helens_30_years_ago.html (accessed March 12, 2020)
David Johnston, volcanologist, observes Mount St. Helens before the eruption. He was observing too close to the volcano and passed away moments after the volcano erupted. (USGS/Harry Glicken). https://www.usatoday.com/story/news/nation-now/2015/05/17/mount-st-hel-ens-people-stayed/27311467/ (accessed March 12, 2020)
Volcano Hazard Risk in California
California is home to dozens of volcanoes with three of them listed as “Very High Threat”: Mount Shasta, Lassen Volcanic Center, and Long Valley Caldera. Volcanoes listed as “High Threat” include Mono-Inyo Craters, Clear Lake Volcanic Field, Medicine Lake, and the Salton Buttes. About ten eruptions have occurred in the past 1,000 years, making the probability of an eruption about once every 100 years. Many of California’s volcanoes show signs of activity daily—without incident—ranging from small earthquakes to sluggish explosions that are rarely considered a large eruption. Those living nearest a volcano should know the hazards of a volcano; however if one were to erupt, ash and fallout can affect nearby states and travel for hundreds of miles affecting the air quality for long periods of time. Find California volcanoes near your community using the map on the next page.
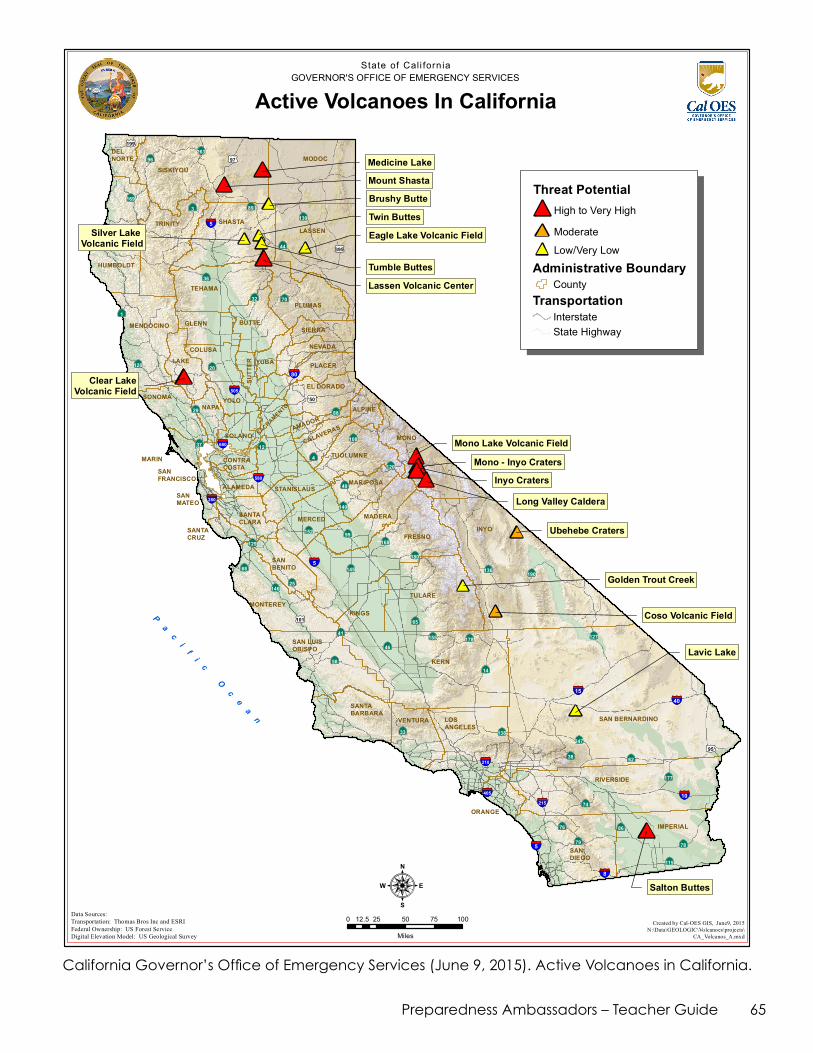
65Preparedness Ambassadors – Teacher Guide
##
#
## ##
#
####
#
#
#
#
#
#
SISKIYOU
DELNORTE MODOC
HUMBOLDT
LASSEN
PLUMAS
BUTTEMENDOCINO GLENNSIERRA
YUBALAKE
NEVADACOLUSA
PLACER
SUTT
ER
EL DORADO
ALPINEYOLO
NAPASONOMA
SACRAMENTO
MONOAMADOR
SOLANOCALAVERAS
MARIN CONTRACOSTA
STANISLAUSMARIPOSA
MADERA
SANMATEO
MERCEDSANTACLARA
SANTACRUZ
SANBENITO
TULARE
KINGS
SAN BERNARDINO
KERN
SAN LUISOBISPO
SANTABARBARA
VENTURA LOSANGELES
RIVERSIDE
SANDIEGO
IMPERIAL
MONTEREY
FRESNO
TUOLUMNE
SHASTATRINITY
TEHAMA
INYO
SANFRANCISCO
ALAMEDA
ORANGE
§̈¦210
§̈¦5
§̈¦80
§̈¦15
§̈¦505
§̈¦8
§̈¦280
§̈¦215
§̈¦580
§̈¦680
§̈¦10
§̈¦5
§̈¦405
§̈¦40
£¤95
£¤97
£¤395
£¤50
£¤101
£¤199
·|}46
·|}78
·|}74
·|}33
·|}79
·|}115
·|}155
·|}96
·|}146
·|}38
·|}145
·|}62
·|}76
·|}14
·|}86
·|}139
·|}44
·|}127
·|}138
·|}180
·|}99
·|}65
·|}178·|}41
·|}263
·|}25
·|}58
·|}136
·|}169
·|}177
·|}247
·|}3 ·|}89
·|}190§̈¦5
·|}1
·|}36
·|}32 ·|}70
·|}20·|}128
·|}29
·|}37 ·|}12
·|}4
·|}88
·|}108
·|}120
·|}49
·|}140
·|}152
·|}129
·|}68
·|}168
Mount Shasta
Tumble Buttes
Lassen Volcanic Center
Silver Lake Volcanic Field
Medicine Lake
Brushy Butte
Twin Buttes
Eagle Lake Volcanic Field
Clear LakeVolcanic Field
Mono Lake Volcanic Field
Mono - Inyo Craters
Inyo Craters
Long Valley Caldera
Ubehebe Craters
Golden Trout Creek
Coso Volcanic Field
Lavic Lake
Salton Buttes
0 25 50 75 10012.5
Miles
:Created by Cal-OES GIS, June9, 2015
N:\Data\GEOLOGIC\Volcanoes\projects\CA_Volcanos_A.mxd
Data Sources:Transportation: Thomas Bros Inc and ESRIFederal Ownership: US Forest ServiceDigital Elevation Model: US Geological Survey
Active Volcanoes In CaliforniaGOVERNOR'S OFFICE OF EMERGENCY SERVICES
State of Cali forn ia
Threat Potential# High to Very High
# Moderate
# Low/Very Low
Administrative BoundaryCounty
TransportationInterstateState Highway
Pa
ci
fi
c
Oc
ea
n
California Governor’s Office of Emergency Services (June 9, 2015). Active Volcanoes in California.
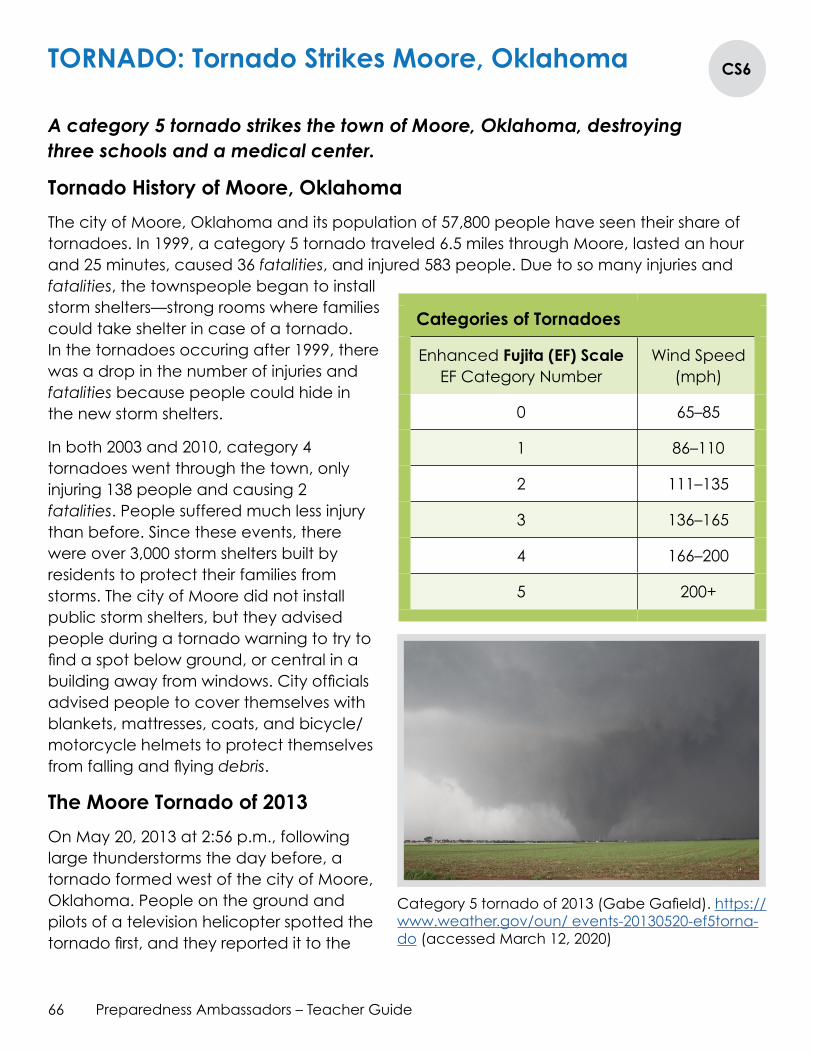
66 Preparedness Ambassadors – Teacher Guide
TORNADO: Tornado Strikes Moore, Oklahoma CS6
A category 5 tornado strikes the town of Moore, Oklahoma, destroying three schools and a medical center.
Tornado History of Moore, Oklahoma
The city of Moore, Oklahoma and its population of 57,800 people have seen their share of tornadoes. In 1999, a category 5 tornado traveled 6.5 miles through Moore, lasted an hour and 25 minutes, caused 36 fatalities, and injured 583 people. Due to so many injuries and fatalities, the townspeople began to install storm shelters—strong rooms where families could take shelter in case of a tornado. In the tornadoes occuring after 1999, there was a drop in the number of injuries and fatalities because people could hide in the new storm shelters.
In both 2003 and 2010, category 4 tornadoes went through the town, only injuring 138 people and causing 2 fatalities. People suffered much less injury than before. Since these events, there were over 3,000 storm shelters built by residents to protect their families from storms. The city of Moore did not install public storm shelters, but they advised people during a tornado warning to try to find a spot below ground, or central in a building away from windows. City officials advised people to cover themselves with blankets, mattresses, coats, and bicycle/motorcycle helmets to protect themselves from falling and flying debris.
The Moore Tornado of 2013
On May 20, 2013 at 2:56 p.m., following large thunderstorms the day before, a tornado formed west of the city of Moore, Oklahoma. People on the ground and pilots of a television helicopter spotted the tornado first, and they reported it to the
Categories of Tornadoes
Enhanced Fujita (EF) Scale EF Category Number
Wind Speed (mph)
0 65–85
1 86–110
2 111–135
3 136–165
4 166–200
5 200+
Category 5 tornado of 2013 (Gabe Gafield). https://www.weather.gov/oun/ events-20130520-ef5torna-do (accessed March 12, 2020)
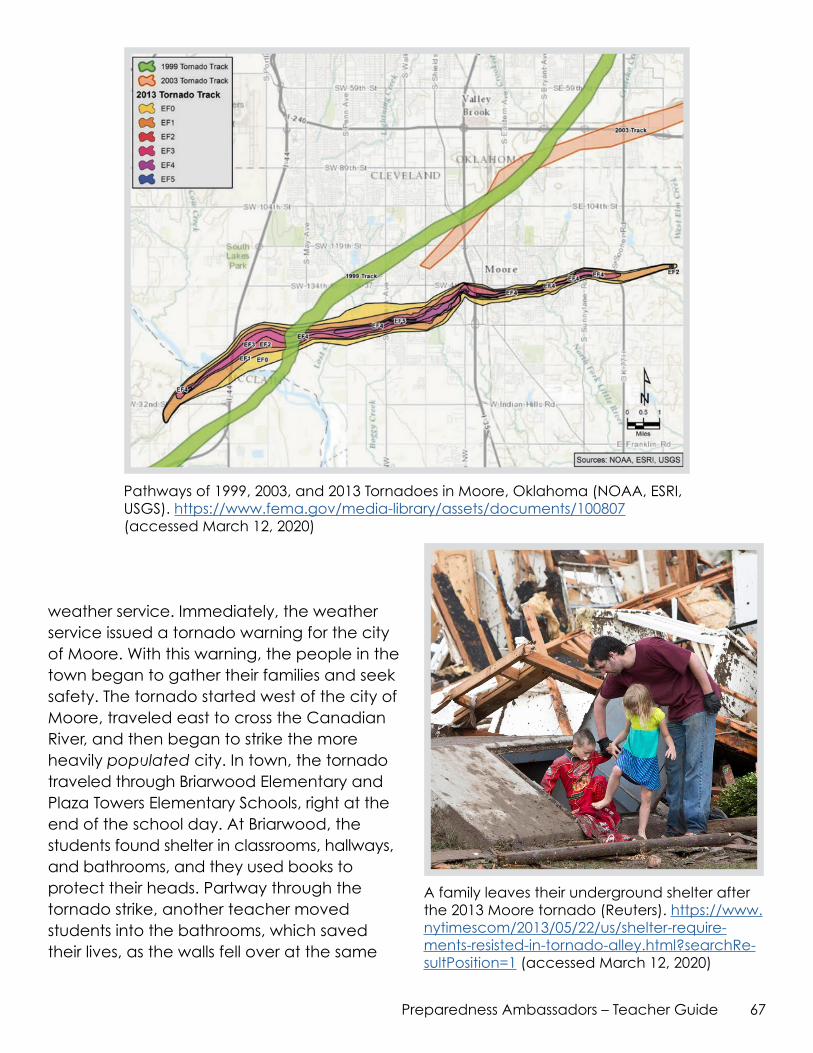
67Preparedness Ambassadors – Teacher Guide
A family leaves their underground shelter after the 2013 Moore tornado (Reuters). https://www.nytimescom/2013/05/22/us/shelter-require-ments-resisted-in-tornado-alley.html?searchRe-sultPosition=1 (accessed March 12, 2020)
Pathways of 1999, 2003, and 2013 Tornadoes in Moore, Oklahoma (NOAA, ESRI, USGS). https://www.fema.gov/media-library/assets/documents/100807 (accessed March 12, 2020)
weather service. Immediately, the weather service issued a tornado warning for the city of Moore. With this warning, the people in the town began to gather their families and seek safety. The tornado started west of the city of Moore, traveled east to cross the Canadian River, and then began to strike the more heavily populated city. In town, the tornado traveled through Briarwood Elementary and Plaza Towers Elementary Schools, right at the end of the school day. At Briarwood, the students found shelter in classrooms, hallways, and bathrooms, and they used books to protect their heads. Partway through the tornado strike, another teacher moved students into the bathrooms, which saved their lives, as the walls fell over at the same
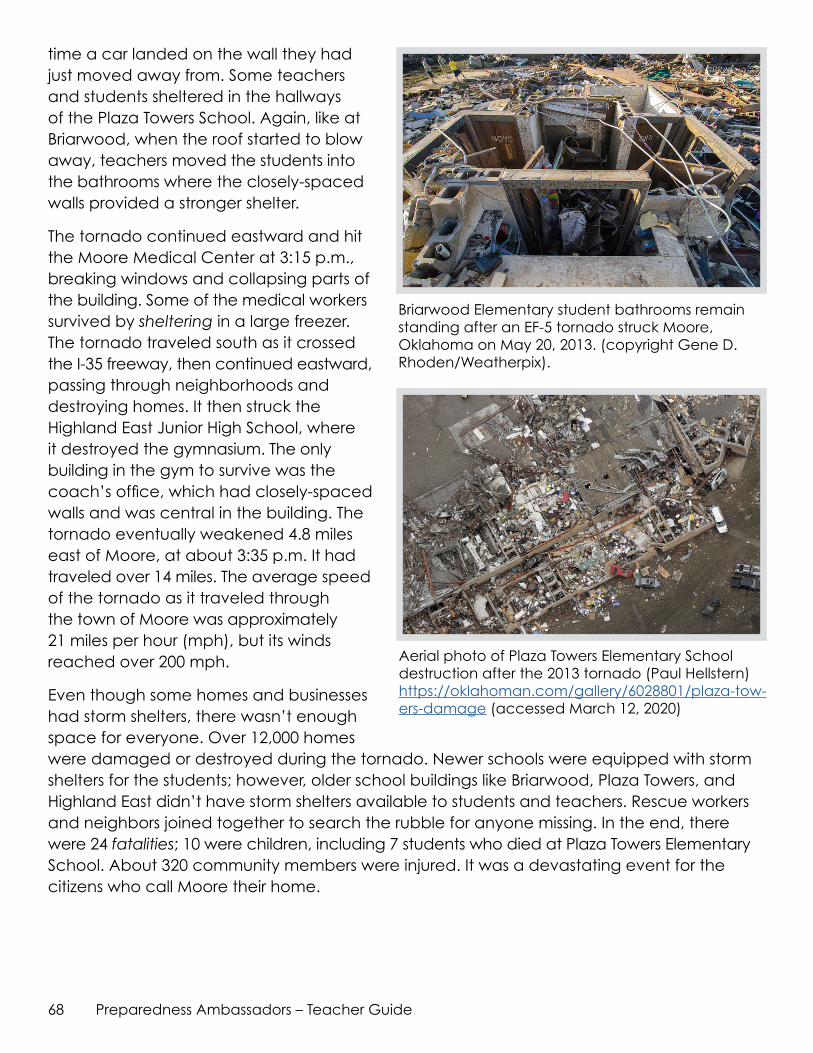
68 Preparedness Ambassadors – Teacher Guide
time a car landed on the wall they had just moved away from. Some teachers and students sheltered in the hallways of the Plaza Towers School. Again, like at Briarwood, when the roof started to blow away, teachers moved the students into the bathrooms where the closely-spaced walls provided a stronger shelter.
The tornado continued eastward and hit the Moore Medical Center at 3:15 p.m., breaking windows and collapsing parts of the building. Some of the medical workers survived by sheltering in a large freezer. The tornado traveled south as it crossed the I-35 freeway, then continued eastward, passing through neighborhoods and destroying homes. It then struck the Highland East Junior High School, where it destroyed the gymnasium. The only building in the gym to survive was the coach’s office, which had closely-spaced walls and was central in the building. The tornado eventually weakened 4.8 miles east of Moore, at about 3:35 p.m. It had traveled over 14 miles. The average speed of the tornado as it traveled through the town of Moore was approximately 21 miles per hour (mph), but its winds reached over 200 mph.
Even though some homes and businesses had storm shelters, there wasn’t enough space for everyone. Over 12,000 homes were damaged or destroyed during the tornado. Newer schools were equipped with storm shelters for the students; however, older school buildings like Briarwood, Plaza Towers, and Highland East didn’t have storm shelters available to students and teachers. Rescue workers and neighbors joined together to search the rubble for anyone missing. In the end, there were 24 fatalities; 10 were children, including 7 students who died at Plaza Towers Elementary School. About 320 community members were injured. It was a devastating event for the citizens who call Moore their home.
Aerial photo of Plaza Towers Elementary School destruction after the 2013 tornado (Paul Hellstern) https://oklahoman.com/gallery/6028801/plaza-tow-ers-damage (accessed March 12, 2020)
Briarwood Elementary student bathrooms remain standing after an EF-5 tornado struck Moore, Oklahoma on May 20, 2013. (copyright Gene D. Rhoden/Weatherpix).

69Preparedness Ambassadors – Teacher Guide
Tornado Hazard Risk in California
Tornadoes here in California are not as threatening as the ones seen in the Midwest states, but should still be considered dangerous. Most California tornadoes last only a few minutes or less and cause very little damage; however, wind speeds near a tornado event can still cause bodily harm with flying objects. In recent history, a majority of the tornadoes have been reported in the central valley and have not always resulted in touchdowns or generally occur in sparsely-populated areas.
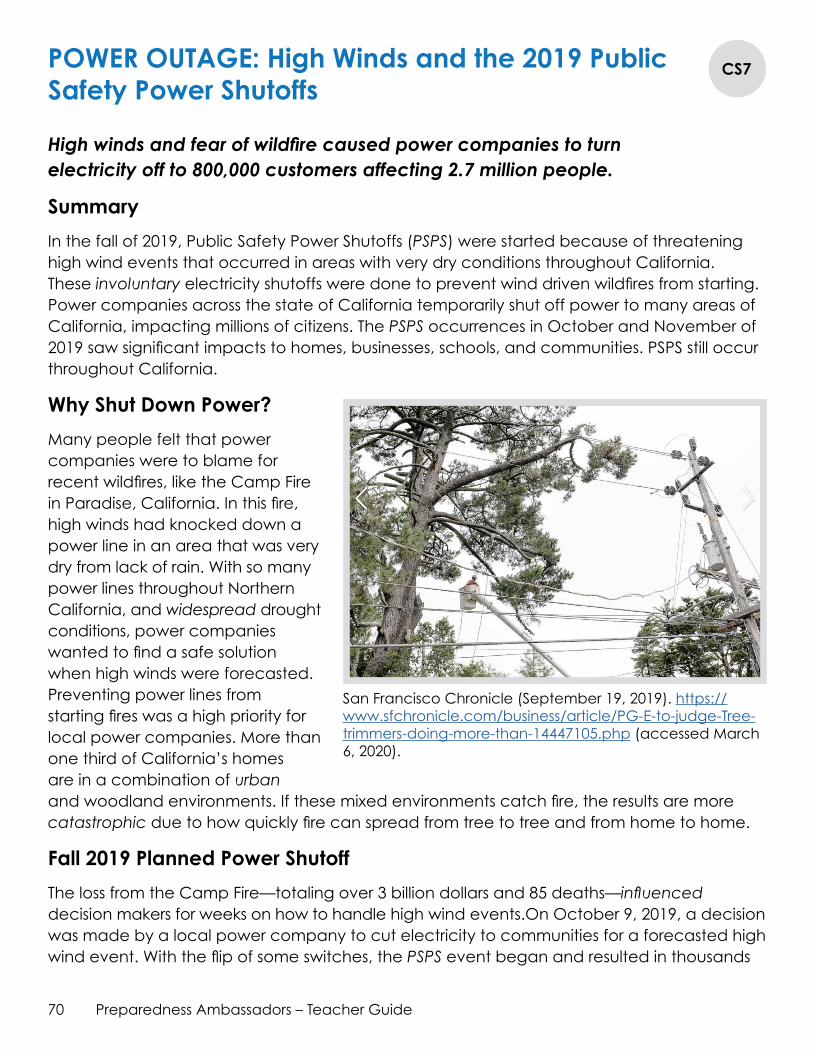
70 Preparedness Ambassadors – Teacher Guide
POWER OUTAGE: High Winds and the 2019 Public Safety Power Shutoffs
CS7
High winds and fear of wildfire caused power companies to turn electricity off to 800,000 customers affecting 2.7 million people.
Summary
In the fall of 2019, Public Safety Power Shutoffs (PSPS) were started because of threatening high wind events that occurred in areas with very dry conditions throughout California. These involuntary electricity shutoffs were done to prevent wind driven wildfires from starting. Power companies across the state of California temporarily shut off power to many areas of California, impacting millions of citizens. The PSPS occurrences in October and November of 2019 saw significant impacts to homes, businesses, schools, and communities. PSPS still occur throughout California.
Why Shut Down Power?
Many people felt that power companies were to blame for recent wildfires, like the Camp Fire in Paradise, California. In this fire, high winds had knocked down a power line in an area that was very dry from lack of rain. With so many power lines throughout Northern California, and widespread drought conditions, power companies wanted to find a safe solution when high winds were forecasted. Preventing power lines from starting fires was a high priority for local power companies. More than one third of California’s homes are in a combination of urban and woodland environments. If these mixed environments catch fire, the results are more catastrophic due to how quickly fire can spread from tree to tree and from home to home.
Fall 2019 Planned Power Shutoff
The loss from the Camp Fire—totaling over 3 billion dollars and 85 deaths—influenced decision makers for weeks on how to handle high wind events.On October 9, 2019, a decision was made by a local power company to cut electricity to communities for a forecasted high wind event. With the flip of some switches, the PSPS event began and resulted in thousands
San Francisco Chronicle (September 19, 2019). https://www.sfchronicle.com/business/article/PG-E-to-judge-Tree-trimmers-doing-more-than-14447105.php (accessed March 6, 2020).
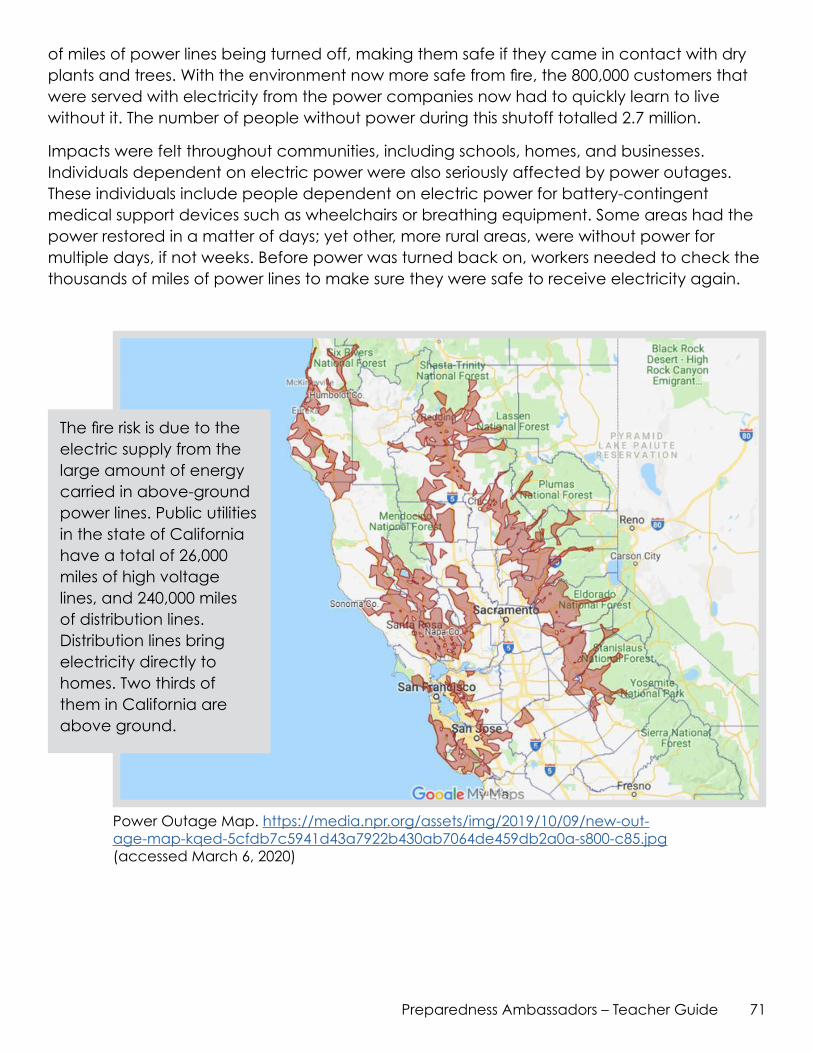
71Preparedness Ambassadors – Teacher Guide
of miles of power lines being turned off, making them safe if they came in contact with dry plants and trees. With the environment now more safe from fire, the 800,000 customers that were served with electricity from the power companies now had to quickly learn to live without it. The number of people without power during this shutoff totalled 2.7 million.
Impacts were felt throughout communities, including schools, homes, and businesses. Individuals dependent on electric power were also seriously affected by power outages. These individuals include people dependent on electric power for battery-contingent medical support devices such as wheelchairs or breathing equipment. Some areas had the power restored in a matter of days; yet other, more rural areas, were without power for multiple days, if not weeks. Before power was turned back on, workers needed to check the thousands of miles of power lines to make sure they were safe to receive electricity again.
Power Outage Map. https://media.npr.org/assets/img/2019/10/09/new-out-age-map-kqed-5cfdb7c5941d43a7922b430ab7064de459db2a0a-s800-c85.jpg (accessed March 6, 2020)
The fire risk is due to the electric supply from the large amount of energy carried in above-ground power lines. Public utilities in the state of California have a total of 26,000 miles of high voltage lines, and 240,000 miles of distribution lines. Distribution lines bring electricity directly to homes. Two thirds of them in California are above ground.
72 Preparedness Ambassadors – Teacher Guide
Help and Community Supports
To help support the affected communities, utility companies opened over 50 community resource centers. The centers were equipped to provide water, phone charging stations, air-conditioned seating for people, and restrooms. In addition, people were encouraged to keep emergency kits with flashlights, fresh batteries, first aid supplies, cash, and have backup charging methods for phones.
Homes and businesses with electric generatorswere able to keep their refrigerators working, preventing their food from spoiling. If a home or business didn’t have a generator, owners would attempt to buy ice at a market or gas station to put in their refrigerators to preserve food. During the power shutoff, many neighbors who owned generators helped those who didn’t so they would have a fresh food supply.
Many schools attempted to reopen even if they didn’t have electricity. They brought in generators, fresh drinking water, emergency lighting, and port-a-potties. This was a big help for families under stressful conditions; children needed to learn, and parents needed to go back to work.
Power Disruption Hazard Risk in California
Power disruptions can affect every person in the state, including those across state lines, depending on where their power originates. Power disruptions, planned or unplanned, can affect many facets of life including public safety, utilities, medical and health services, and other critical lifelines we all depend on. The risk for power disruptions varies depending on the situation. Unplanned instances of natural disasters, such as severe storms or earthquakes, pose extreme risks to power distribution networks and cause customers to be without power for extended periods of time. Planned power disruptions such as Public Safety Power Shutoffs are used to deter disasters such as wildfires and are often temporary, causing minor inconveniences to customers.
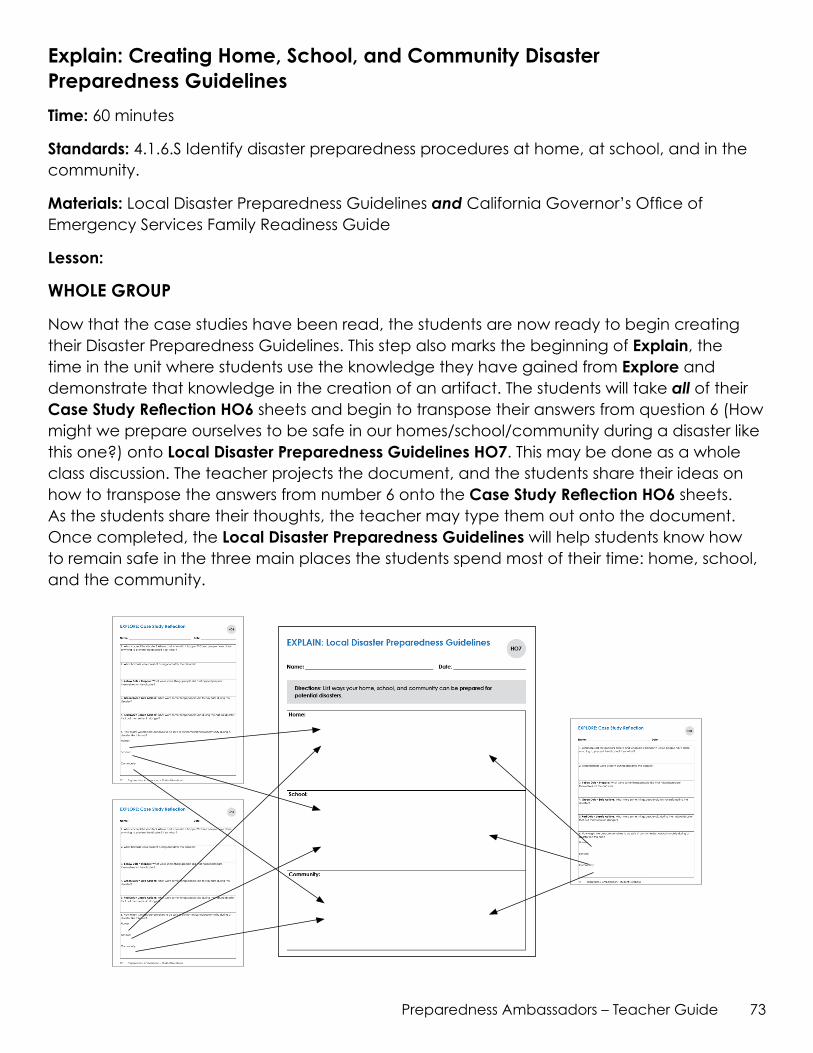
73Preparedness Ambassadors – Teacher Guide
Explain: Creating Home, School, and Community Disaster Preparedness Guidelines
Time: 60 minutes
Standards: 4.1.6.S Identify disaster preparedness procedures at home, at school, and in the community.
Materials: Local Disaster Preparedness Guidelines and California Governor’s Office of Emergency Services Family Readiness Guide
Lesson:
WHOLE GROUP
Now that the case studies have been read, the students are now ready to begin creating their Disaster Preparedness Guidelines. This step also marks the beginning of Explain, the time in the unit where students use the knowledge they have gained from Explore and demonstrate that knowledge in the creation of an artifact. The students will take all of their Case Study Reflection HO6 sheets and begin to transpose their answers from question 6 (How might we prepare ourselves to be safe in our homes/school/community during a disaster like this one?) onto Local Disaster Preparedness Guidelines HO7. This may be done as a whole class discussion. The teacher projects the document, and the students share their ideas on how to transpose the answers from number 6 onto the Case Study Reflection HO6 sheets. As the students share their thoughts, the teacher may type them out onto the document. Once completed, the Local Disaster Preparedness Guidelines will help students know how to remain safe in the three main places the students spend most of their time: home, school, and the community.

74 Preparedness Ambassadors – Teacher Guide
Give the students 3–5 minutes to complete their Journal Entry HO7J for Explain in their student notebook.
Journal Entry: When you create a list of helpful behaviors for people to follow before a disaster happens, how can that help a community?
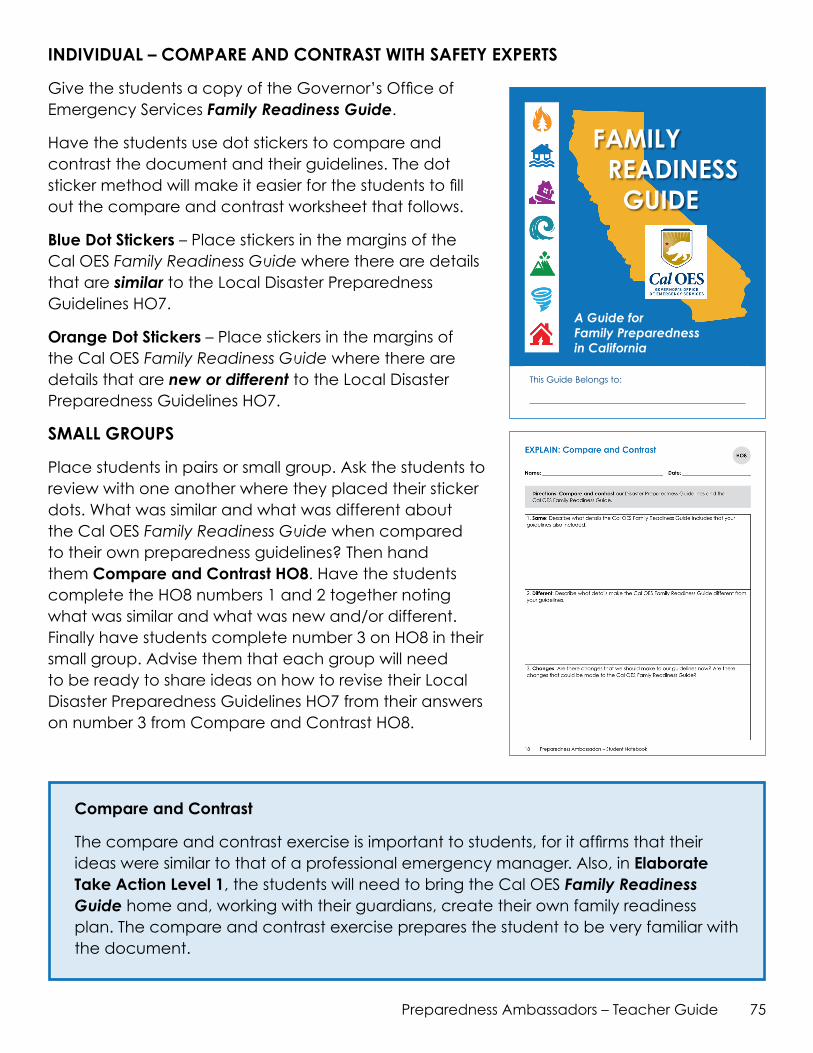
75Preparedness Ambassadors – Teacher Guide
INDIVIDUAL – COMPARE AND CONTRAST WITH SAFETY EXPERTS
Give the students a copy of the Governor’s Office of Emergency Services Family Readiness Guide.
Have the students use dot stickers to compare and contrast the document and their guidelines. The dot sticker method will make it easier for the students to fill out the compare and contrast worksheet that follows.
Blue Dot Stickers – Place stickers in the margins of the Cal OES FamilyReadinessGuide where there are details that are similar to the Local Disaster Preparedness Guidelines HO7.
Orange Dot Stickers – Place stickers in the margins of the Cal OES FamilyReadinessGuide where there are details that are new or different to the Local Disaster Preparedness Guidelines HO7.
SMALL GROUPS
Place students in pairs or small group. Ask the students to review with one another where they placed their sticker dots. What was similar and what was different about the Cal OES FamilyReadinessGuide when compared to their own preparedness guidelines? Then hand them Compare and Contrast HO8. Have the students complete the HO8 numbers 1 and 2 together noting what was similar and what was new and/or different. Finally have students complete number 3 on HO8 in their small group. Advise them that each group will need to be ready to share ideas on how to revise their Local Disaster Preparedness Guidelines HO7 from their answers on number 3 from Compare and Contrast HO8.
FAMILY READINESS GUIDE
A Guide for Family Preparedness in California
This Guide Belongs to:
Compare and Contrast
The compare and contrast exercise is important to students, for it affirms that their ideas were similar to that of a professional emergency manager. Also, in Elaborate Take Action Level 1, the students will need to bring the Cal OES Family Readiness Guide home and, working with their guardians, create their own family readiness plan. The compare and contrast exercise prepares the student to be very familiar with the document.
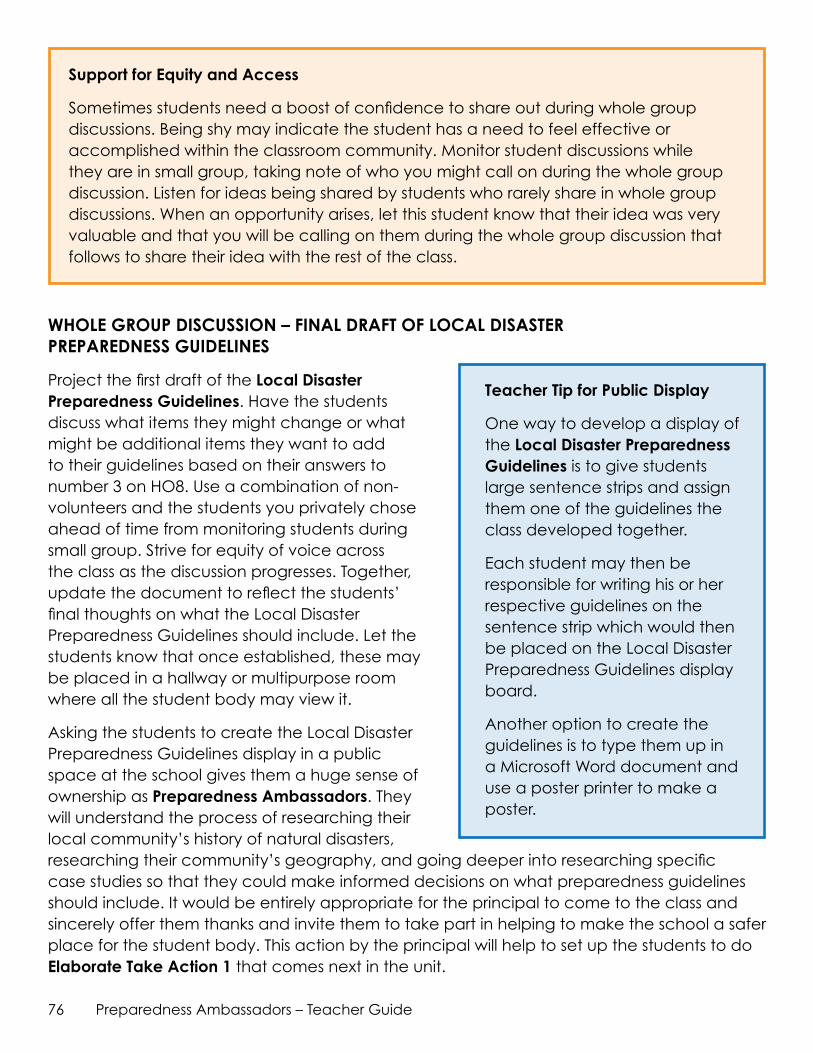
76 Preparedness Ambassadors – Teacher Guide
WHOLE GROUP DISCUSSION – FINAL DRAFT OF LOCAL DISASTER PREPAREDNESS GUIDELINES
Project the first draft of the Local Disaster Preparedness Guidelines. Have the students discuss what items they might change or what might be additional items they want to add to their guidelines based on their answers to number 3 on HO8. Use a combination of non-volunteers and the students you privately chose ahead of time from monitoring students during small group. Strive for equity of voice across the class as the discussion progresses. Together, update the document to reflect the students’ final thoughts on what the Local Disaster Preparedness Guidelines should include. Let the students know that once established, these may be placed in a hallway or multipurpose room where all the student body may view it.
Asking the students to create the Local Disaster Preparedness Guidelines display in a public space at the school gives them a huge sense of ownership as Preparedness Ambassadors. They will understand the process of researching their local community’s history of natural disasters, researching their community’s geography, and going deeper into researching specific case studies so that they could make informed decisions on what preparedness guidelines should include. It would be entirely appropriate for the principal to come to the class and sincerely offer them thanks and invite them to take part in helping to make the school a safer place for the student body. This action by the principal will help to set up the students to do Elaborate Take Action 1 that comes next in the unit.
Teacher Tip for Public Display
One way to develop a display of the Local Disaster Preparedness Guidelines is to give students large sentence strips and assign them one of the guidelines the class developed together.
Each student may then be responsible for writing his or her respective guidelines on the sentence strip which would then be placed on the Local Disaster Preparedness Guidelines display board.
Another option to create the guidelines is to type them up in a Microsoft Word document and use a poster printer to make a poster.
Support for Equity and Access
Sometimes students need a boost of confidence to share out during whole group discussions. Being shy may indicate the student has a need to feel effective or accomplished within the classroom community. Monitor student discussions while they are in small group, taking note of who you might call on during the whole group discussion. Listen for ideas being shared by students who rarely share in whole group discussions. When an opportunity arises, let this student know that their idea was very valuable and that you will be calling on them during the whole group discussion that follows to share their idea with the rest of the class.
77Preparedness Ambassadors – Teacher Guide
Give the students 3–5 minutes to complete their Journal Entry HO8J for Explain in their student notebook.
Journal Entry: Many safety officials and scientists worked together at Cal OES to create the FamilyReadinessGuide. The Guide outlines actions to take to be better prepared for a disaster and how to stay safe during a disaster. Which disaster type (wildfire, flood, earthquake, tsunami, volcano, tornado, or power outage) would you want to become an expert on? What do you find exciting about this kind of disaster?
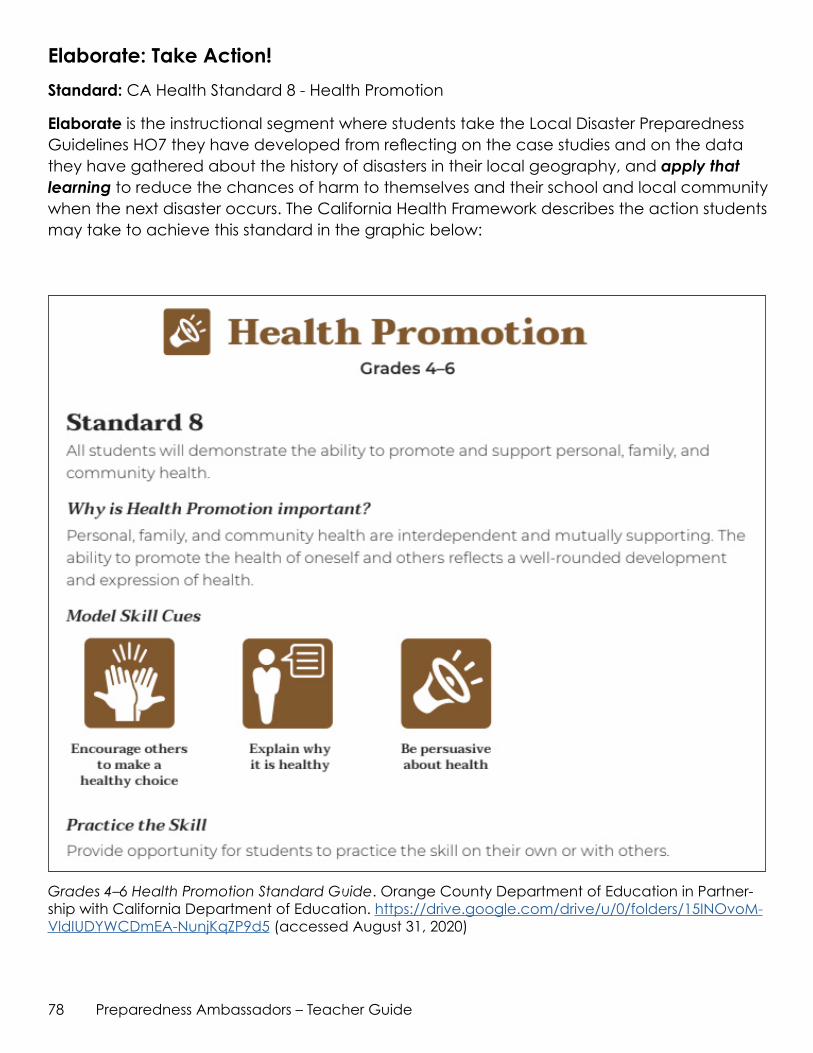
78 Preparedness Ambassadors – Teacher Guide
Elaborate: Take Action!
Standard: CA Health Standard 8 - Health Promotion
Elaborate is the instructional segment where students take the Local Disaster Preparedness Guidelines HO7 they have developed from reflecting on the case studies and on the data they have gathered about the history of disasters in their local geography, and apply that learning to reduce the chances of harm to themselves and their school and local community when the next disaster occurs. The California Health Framework describes the action students may take to achieve this standard in the graphic below:
Grades4–6HealthPromotionStandardGuide. Orange County Department of Education in Partner-ship with California Department of Education. https://drive.google.com/drive/u/0/folders/15INOvoM-VldIUDYWCDmEA-NunjKqZP9d5 (accessed August 31, 2020)

79Preparedness Ambassadors – Teacher Guide
There are three action levels the students will plan with the help of their teacher to complete the Elaborate segment.
Take Action Level 1: Prepare Our Homes and School - The first level focuses on promoting safety by helping prepare the places students spend most of their time: home and school.
Take Action Level 2: Inform the Community - The second level is promoting to the community the resource available to them to prepare their households; the Cal OES Family Readiness Guide.
Take Action Level 3: Create an Emergency Response Network - The third level is coordinating a network of support that can be used to organize local organizations and volunteers in the event a natural disaster does occur.
With relevant action taken in all three levels, the fourth grade class can receive a Preparedness Ambassadors Certificate from a local government or school official.
There are many ways students may accomplish these three levels of action, and students and teachers can decide as a class on how to fulfill each of them to best meet their community’s needs. Please note, however, that each plan must use the Cal OES Family Readiness Guide for their homes in Level 1, and they must share this resource with their community in Level 2.
80 Preparedness Ambassadors – Teacher Guide
Take Action Level 1: Prepare Our Homes and School
Time: 60 minutes
In Take Action Level 1, each student will complete, with their guardian(s), the Cal OES Family Readiness Guide. Students also need to know and reflect on their school’s safety procedures and decide how they can help support their school in the event of a natural disaster. By having a preparedness plan for both home and school (the two places where fourth grade students spend most of their time), students can be assured that they are well prepared for the most likely types of natural disasters that may occur in their community.
PREPARE OUR HOMES
Previously, in Explain, the students finalized Local Disaster Preparedness Guidelines HO7 to protect their residences from natural disasters that they determined were potentially hazardous to their community. Students finalized these guidelines by comparing and contrasting them to the Cal OES Family Readiness Guide. Now, the teacher will assign the Cal OES FamilyReadinessGuide to the students as homework, to be completed with their parents or guardians. The students’ parents/guardians will sign the homework completion ticket, located in the back of the Cal OES FamilyReadinessGuide, to verify that their households have reviewed and filled out the guide to be better prepared for disaster(s) that may occur. Let the students know that obtaining these signed tickets from each student is key to receiving the Cal OES Preparedness Ambassadors certificate at the end of Elaborate.
PREPARE OUR SCHOOL
The fourth grade students will also help prepare their school for potential disasters. For example, they might create a video of how to evacuate the building during a fire drill. They could visit the other grades’ classrooms and explain the importance of the school’s evacuation procedures and lead those classrooms as they are practicing evacuation procedures. Additionally, since each classroom is to have evacuation maps, exit signs, and emergency kits as part of the school emergency plans, the students could visit each classroom to make sure they have the required equipment and are prepared. Any one of the above activities can serve as an action step for the fourth graders helping to prepare their school. Other activities can meet this criterion: feel free to be as creative as you want! The Prepare Our School action affords students the opportunity to serve their student body as they help to ensure disaster preparedness in their school community. The teacher has the final say on what meets the criteria for Level 1 as students help prepare the school.
FAMILY READINESS GUIDE
A Guide for Family Preparedness in California
This Guide Belongs to:
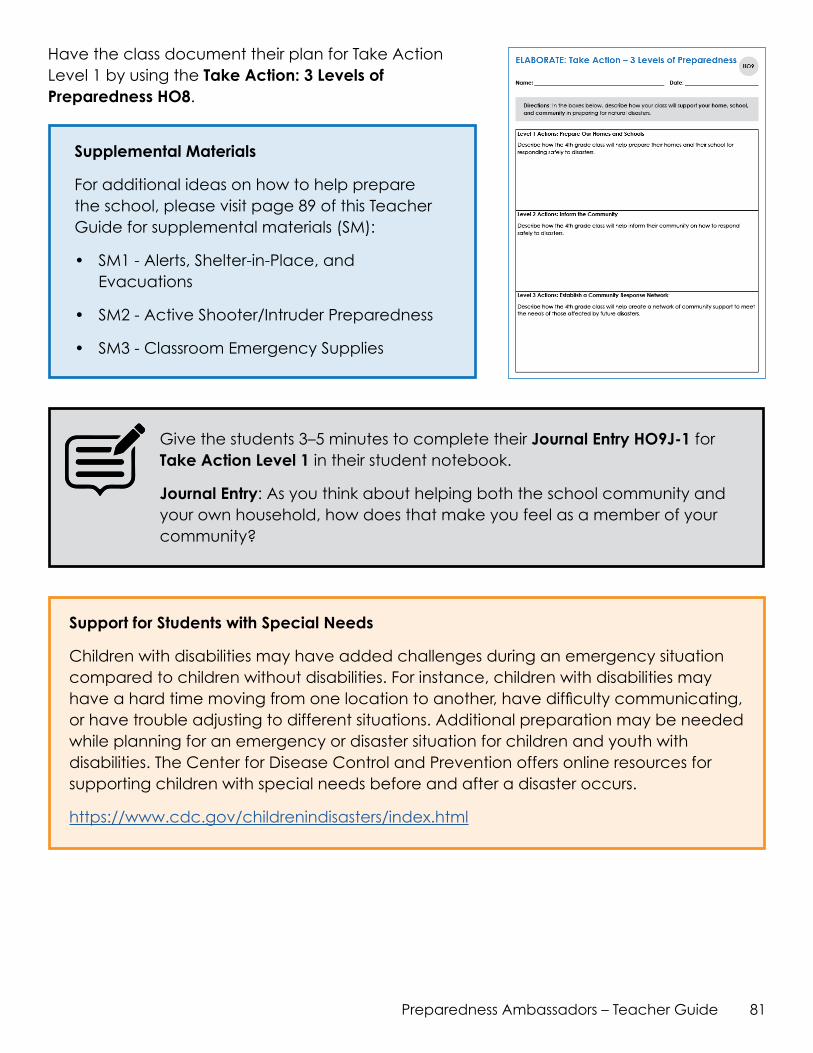
81Preparedness Ambassadors – Teacher Guide
Support for Students with Special Needs
Children with disabilities may have added challenges during an emergency situation compared to children without disabilities. For instance, children with disabilities may have a hard time moving from one location to another, have difficulty communicating, or have trouble adjusting to different situations. Additional preparation may be needed while planning for an emergency or disaster situation for children and youth with disabilities. The Center for Disease Control and Prevention offers online resources for supporting children with special needs before and after a disaster occurs.
https://www.cdc.gov/childrenindisasters/index.html
Have the class document their plan for Take Action Level 1 by using the Take Action: 3 Levels of Preparedness HO8.
Supplemental Materials
For additional ideas on how to help prepare the school, please visit page 89 of this Teacher Guide for supplemental materials (SM):
• SM1 - Alerts, Shelter-in-Place, and Evacuations
• SM2 - Active Shooter/Intruder Preparedness
• SM3 - Classroom Emergency Supplies
Give the students 3–5 minutes to complete their Journal Entry HO9J-1 for Take Action Level 1 in their student notebook.
Journal Entry: As you think about helping both the school community and your own household, how does that make you feel as a member of your community?
82 Preparedness Ambassadors – Teacher Guide
Take Action Level 2: Inform the Community
Time: 60 minutes
At this point, the families in the community that have fourth grade students now have Family Readiness Plans established for their households! Great work, Preparedness Ambassadors! There are still many families/households that do not have readiness plans established, and they may not even know that Cal OES has a planning document they can download and use to help them develop their own readiness plan.
In Take Action Level 2, the fourth grade students will take it upon themselves to advertise the Cal OES Family Readiness Guide in their community. There are a number of ways they can do this, and it is important to have an open conversation with the class to discuss different ideas they have about how to inform the community. Whatever idea they develop, a link to the Cal OES planning document must be included in this section, such as the QR code on the right (Also located in the Resources section). Following is an example of how you could model your activity to meet the certificate requirement for Take Action Level 2.
The teacher instructed the class, “Raise your hand if you have a neighbor who does not have a fourth grader living with them.” Then “Show me on your fingers how many neighbors you have that do not have a fourth grader living with them.” Tally the total number of neighbors that fall into this category. The teacher writes all the numbers on the board from reading the students’ hands. Next the teacher asks, “What is the sum of all these numbers?” Students think for a moment, report sums, and describe how they mentally added up the numbers including strategies such as making tens (assume the answer was 87). The teacher says, “We know of 87 neighbors in our community who do not have fourth graders. How many of these 87 neighbors might not have Family Readiness Plans for their household and family? How many of these 87 neighbors might not know that there is a planning document available from the California Governor’s Office of Emergency Services? If we have a natural disaster, will they be prepared?”
The teacher leads students to take action: “What can we do to help our community, our neighbors, prepare their families for natural disasters?” Students take this time to think about what actions they could take to help inform the community of their preparedness guidelines and of the Cal OES Family Readiness Guide. As they have ideas, the teacher provides the students with whiteboards to document their thoughts. After a time, the teacher gathers the whiteboards and places them facing outward on the marker tray in front of the class for all students to read the ideas. Their whiteboards included handing out the Cal OES Family Readiness Guide door-to-door, having a stack of them available at the local library, making posters of the guidelines and placing them around town, and creating a commercial and playing it on local television as a Public Safety Announcement (PSA).
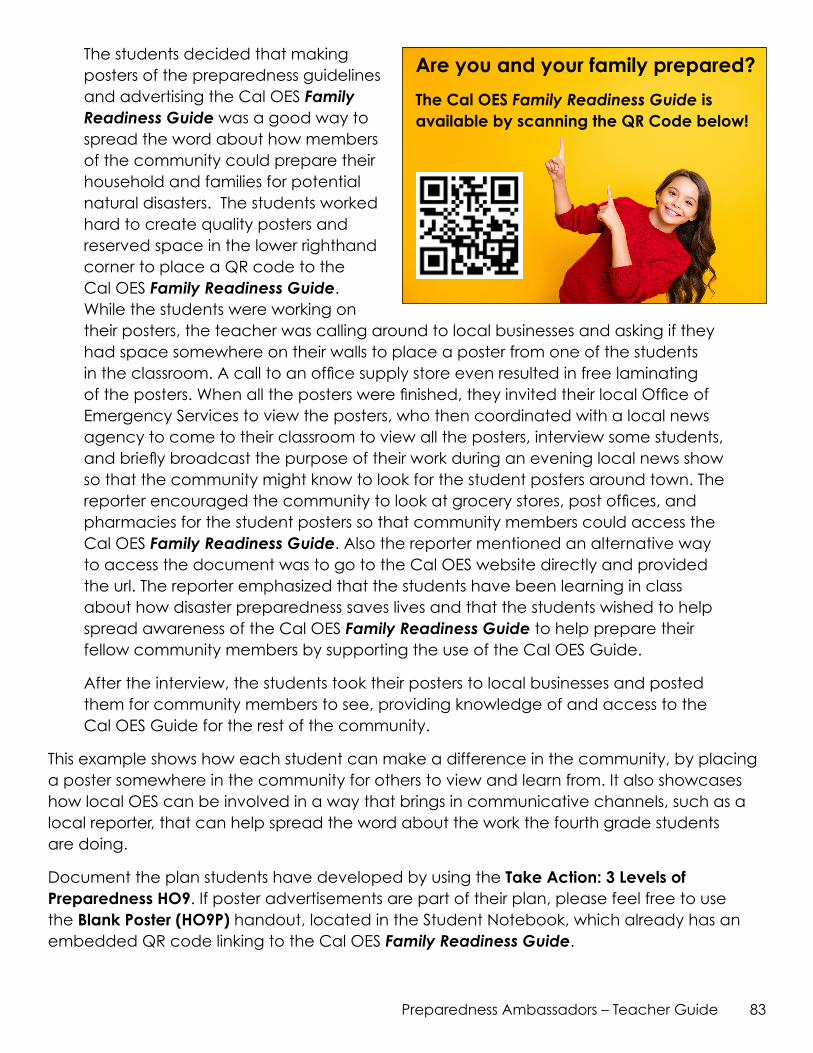
83Preparedness Ambassadors – Teacher Guide
The students decided that making posters of the preparedness guidelines and advertising the Cal OES Family Readiness Guide was a good way to spread the word about how members of the community could prepare their household and families for potential natural disasters. The students worked hard to create quality posters and reserved space in the lower righthand corner to place a QR code to the Cal OES Family Readiness Guide. While the students were working on their posters, the teacher was calling around to local businesses and asking if they had space somewhere on their walls to place a poster from one of the students in the classroom. A call to an office supply store even resulted in free laminating of the posters. When all the posters were finished, they invited their local Office of Emergency Services to view the posters, who then coordinated with a local news agency to come to their classroom to view all the posters, interview some students, and briefly broadcast the purpose of their work during an evening local news show so that the community might know to look for the student posters around town. The reporter encouraged the community to look at grocery stores, post offices, and pharmacies for the student posters so that community members could access the Cal OES Family Readiness Guide. Also the reporter mentioned an alternative way to access the document was to go to the Cal OES website directly and provided the url. The reporter emphasized that the students have been learning in class about how disaster preparedness saves lives and that the students wished to help spread awareness of the Cal OES Family Readiness Guide to help prepare their fellow community members by supporting the use of the Cal OES Guide.
After the interview, the students took their posters to local businesses and posted them for community members to see, providing knowledge of and access to the Cal OES Guide for the rest of the community.
This example shows how each student can make a difference in the community, by placing a poster somewhere in the community for others to view and learn from. It also showcases how local OES can be involved in a way that brings in communicative channels, such as a local reporter, that can help spread the word about the work the fourth grade students are doing.
Document the plan students have developed by using the Take Action: 3 Levels of Preparedness HO9. If poster advertisements are part of their plan, please feel free to use the Blank Poster (HO9P) handout, located in the Student Notebook, which already has an embedded QR code linking to the Cal OES Family Readiness Guide.
Are you and your family prepared?
The Cal OES Family Readiness Guide is available by scanning the QR Code below!

84 Preparedness Ambassadors – Teacher Guide
Give the students 3–5 minutes to complete their Journal Entry HO9J-2 for Take Action Level 2 in their student notebook.
Journal Entry: Describe one method you have thought of to share the Cal OES FamilyReadinessGuide with your whole community. How successful do you think your class would be using this method to reach the whole community?
85Preparedness Ambassadors – Teacher Guide
Take Action Level 3: Create an Emergency Community Support Network
Time: 60 minutes
If the community experiences a disaster, there will be people in the community who need help. What will the immediate needs of community members be, and how can the school coordinate with their community to meet those needs? Creating a network of support is the purpose of Take Action Level 3. There are many ways students can help complete this step, and it is up to the teacher and the students to decide what their action will be.
Some examples are listed below.
1. The students could write letters to their local businesses and ask them how they could support the community in the event of a disaster. Each business could be asked to return helpful information, such as a contact person and one idea for how they may be able to help in the event of an emergency. This information will result in a list of contacts and ideas that fourth graders could use in order to help meet the needs of community members after a disaster.
2. The students could communicate their desire to create an Emergency Community Support Network to their school’s parent teacher organization (PTO) who could then help support the effort as an add-on to other school events. For example, sporting events can be places where community members gather, and the PTO often has a role in the event. At the event, the fourth graders could conduct the singing of the National Anthem and announce they will run a booth where community members can visit and pledge their support to help in the event of a disaster.
3. The students could create an electronic form and have it linked to the monthly PTO newsletter, where it is advertised as an avenue to help meet the needs of the school community in the event of a disaster.
Again, these are only suggested activities, as there are many ways to complete this task. When students engage their communities in an action, the lessons learned will be lifelong: we all must act together to help others in times of need. Please discuss this with your students and develop a plan of action with them. Completing this step is their final step toward being awarded a Preparedness Ambassador certificate.
Give the students 3–5 minutes to complete their Journal Entry HO9J-3 for Take Action Level 3 in their student notebook.
Journal Entry: In what ways is a response network important to the community? Can you think of a scenario where this could be very important to help protect people and property?
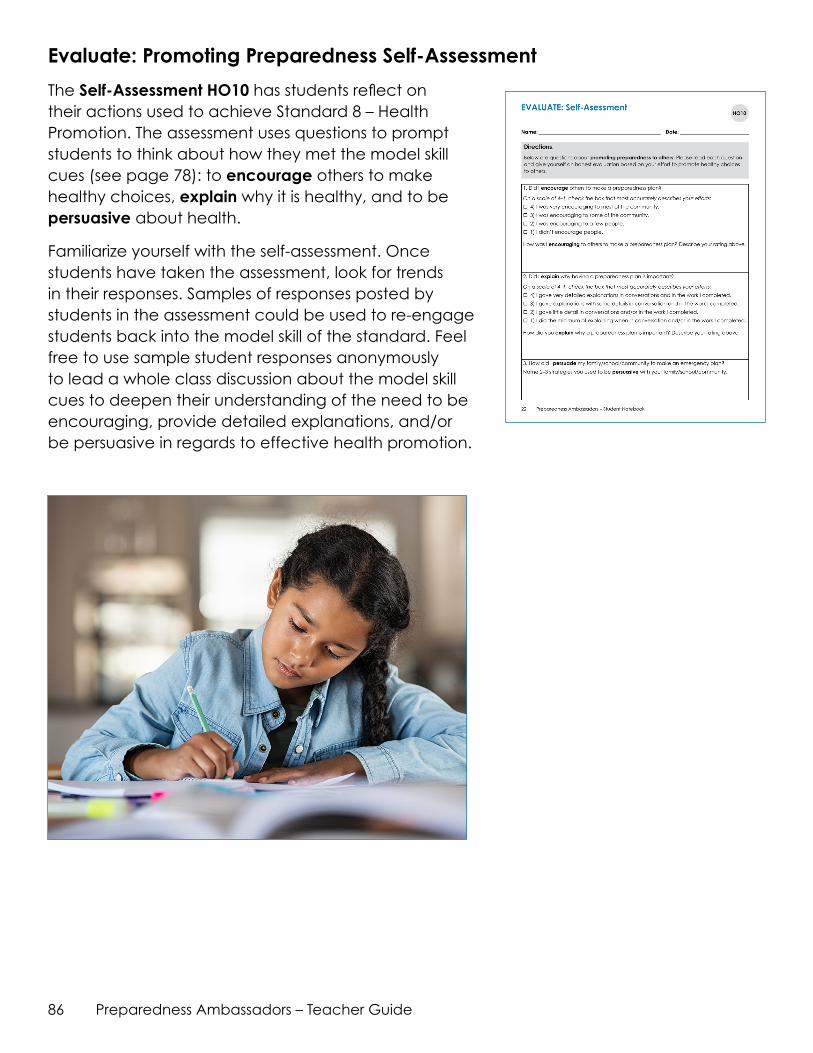
86 Preparedness Ambassadors – Teacher Guide
Evaluate: Promoting Preparedness Self-Assessment
The Self-Assessment HO10 has students reflect on their actions used to achieve Standard 8 – Health Promotion. The assessment uses questions to prompt students to think about how they met the model skill cues (see page 78): to encourage others to make healthy choices, explain why it is healthy, and to be persuasive about health.
Familiarize yourself with the self-assessment. Once students have taken the assessment, look for trends in their responses. Samples of responses posted by students in the assessment could be used to re-engage students back into the model skill of the standard. Feel free to use sample student responses anonymously to lead a whole class discussion about the model skill cues to deepen their understanding of the need to be encouraging, provide detailed explanations, and/or be persuasive in regards to effective health promotion.
87Preparedness Ambassadors – Teacher Guide
Evaluate: Awarding the Preparedness Ambassador Certificate
Congratulations on completing the Preparedness Ambassadors curriculum—Disaster Preparedness for California’s Fourth Graders! Because of the strategic efforts your class of students took to prepare their homes, school, and community, a greater number of people in the community are now more prepared for disasters when they occur. The California Governor’s Office of Emergency Services sincerely thanks the students, teachers, principal, and school partners for their efforts to prepare and unite the community in disaster preparedness. Thank you all!
Provided in this curriculum is a certificate for each student in the fourth grade class to thank them for becoming Preparedness Ambassadors. It would mean a great deal to Cal OES to plan a time where this certificate can be awarded to the students in honor of the work they did to prepare themselves and the community. Inviting a Cal OES official, other emergency official, and/or school administrator to award the certificate to the class of students is warranted after the completion of all three levels of actions in Elaborate.
Please take note of the four ceremony planning steps outlined below. The ceremony would take approximately 10–20 minutes to complete and may be added to an existing school event, possibly during a school board meeting, or during the school day. In scheduling the ceremony, please consider when community members might be able to be present to observe the students as they receive the Preparedness Ambassadors certificate.
Evaluate: Ceremony Planning
1. Introduce the fourth grade class to the audience.
2. Summarize the steps the class took in Explore and Explain to create their own Disaster Preparedness Guidelines. Present photos of students working on the Regional Disaster Infographic, reflecting on the case studies, and creating their Disaster Preparedness Guidelines. Congratulate the students for conducting work similar to that of scientists and public safety officials by giving them all a round of applause.
3. Describe the three levels of Take Action activities the class planned and executed in Elaborate to promote disaster preparedness in their homes, school, and community. Include photos of students and student work. Include photos of community partners that helped the students complete their tasks. Let the students know that their planning and taking action has helped make their community a safer place when the next disaster occurs. Give the students another round of applause.
4. Award each student a certificate and thank the entire class one last time on behalf of the California Governor’s Office of Emergency Services (Cal OES). Certificates can be downloaded and personalized at the Preparedness Ambassadors web site.
5. Cal OES is very interested in your feedback and experiences regarding this program. Please let us know what you think. Additionally, we are interested in the number of students participating in this program, seeing pictures of your students in action, and
88 Preparedness Ambassadors – Teacher Guide
Give the students 3–5 minutes to complete their Journal Entry HO10 for Evaluate in their student notebook.
Journal Entry: Name two different feelings that you had while becoming a Preparedness Ambassador. What about becoming a Preparedness Ambassador made you feel this way?
hearing stories of how students helped to prepare their families, school, and communities to be prepared for disasters. We may even add them to the web site for other teachers to see and learn from your experiences. Visit the Cal OES Preparedness Ambassadors website to learn where to send your pictures and stories.
to all for becoming Preparedness Ambassadors!
THANK YOU

89Preparedness Ambassadors – Teacher Guide
SUPPLEMENTAL MATERIALS
90 Preparedness Ambassadors – Teacher Guide
Alerts, Shelter-in-Place, and Evacuations - SM1Depending on the disaster, you may need to Shelter-in-Place or Evacuate. That is why it is important to be informed of emergencies in your area by subscribing to your county’s emergency alert and warning system. The alert and warning system(s) can aid you in your decision to Shelter-In-Place or Evacuate.
Alerts and Warnings
Generally local emergency officials will issue one of several orders depending on the type of disaster. Most commonly, officials will send out a Shelter-in-Place order, an Evacuation Warning, or an Evacuation order. Each of these notices should be followed and are designed to save lives and prevent harm to the public. Other types of disasters such as earthquakes, floods, tornados, and tsunamis have their own type of warning systems as they can have regional or statewide impacts.
DISASTER SPECIFIC ALERTS AND WARNINGS
Earthquake – Currently there is no earthquake prediction technology in existence. However, ShakeAlert® is an earthquake early warning (EEW) system that detects significant earthquakes so quickly that alerts can reach many people before shaking arrives.
Floods
• Flood Advisory is issued when a specific weather event that is forecast to occur may become a nuisance. A Flood Advisory is issued when flooding is not expected to be bad enough to issue a warning. However, it may cause significant inconvenience, and if caution is not exercised, it could lead to situations that may threaten life and/or property.
• Flood Watch is issued when conditions are favorable for a specific hazardous weather event to occur. A Flood Watch is issued when conditions are favorable for flooding. It does not mean flooding will occur, but it is possible.
• Flood Warning is issued when the hazardous weather event is imminent or already happening. A Flood Warning is also issued when flooding is imminent or occurring.
• Flash Flood Warning is issued when a flash flood is imminent or occurring. If you are in a flood prone area move immediately to high ground. A flash flood is a sudden violent flood that can take from minutes to hours to develop. It is even possible to experience a flash flood in areas not immediately receiving rain.
Tornado
• Tornado Watch means a Tornado is possible; be prepared.
• Tornado Warning means a Tornado is expected; seek shelter!
91Preparedness Ambassadors – Teacher Guide
Tsunami
• Tsunami Watch means a tsunami has not yet been verified but could exist and may be as little as an hour away.
• Tsunami Warning means a tsunami may have been generated and could be close to your area.
Shelter-in-Place Orders
Shelter-in-Place occurs when conditions require you to seek protection in your home, place of work/business, or other locations. Reasons to seek shelter include chemical/pollutants in the air, during an earthquake, tornado or hurricane, and active shooter threats.
To effectively Shelter-in-Place, you must first consider the hazard and then choose a place in your residence or building that is safe for that hazard.
If instructed by emergency officials to Shelter-in-Place you should:
• Bring your family and pets inside immediately.
• Tune in to emergency broadcast stations to stay informed.
• If necessary, lock doors and windows.
• If sealing is required, use duct tape and plastic to seal off doorways, air vents, outlets, windows, and fireplace dampers. Turn off air conditioning, forced-air heating systems, exhaust fans, ceilings fans, and clothes dryers. Cover the space under the door with a wet towel.
• If your children are at school, do not pick them up unless requested to do so, as they may be Sheltering-in-Place until emergency officials release them.
Situations that generally result in a Shelter-In-Place Order:
• Earthquake – The safest action a person can do is to Drop, Cover, and Hold On until the shaking stops. Get under a desk or table if possible and don’t run outside. Once the shaking stops it may be safe to evacuate to a safer location. Avoid exterior walls, windows, power lines, and structures that appear compromised as they may collapse if shaking occurs.
• Tornado – High winds that occur in and around a tornado can hurl objects at high speeds causing serious injury or death. The safest action is to stay low to the ground and seek shelter in an internal room of building/structure that is away from windows. Remain in shelter until the tornado ends or warnings are lifted.
• Power outages – Outages can occur in many forms from localized, temporary outages due to accidents or maintenance to regional power failures due to disasters. Power utility providers working with emergency officials will often advise customers to shelter-in-
92 Preparedness Ambassadors – Teacher Guide
place until power is restored. This will help keep people off roads avoiding potential traffic hazards as well as
• Pandemic – Although not considered a true, shelter-in-place order, a pandemic could invoke a Stay-At-Home order which limits social interactions and slows the spread of the disease until public health and emergency response officials deem safe to engage in social activities.
Evacuation Warnings and Orders
Evacuation warning and orders occur when the current environment becomes too dangerous that Sheltering-in-Place is not safe. Disasters such as wildfire, floods, earthquakes, tsunamis, and volcanic eruptions may require escape from an area deemed unsafe.
Evacuations can generally occur one of two ways. First via an Evacuation Warning (voluntary/advisory) or second, via an Evacuation Order (mandatory). Local law enforcement agencies will issue the warning or order if the situation requires it. If you believe your safety may be compromised, evacuate early. There is no need to wait for an evacuation warning or order to leave. There are NO SET STANDARDS for Evacuation Warnings or Evacuation Orders so check with your local law enforcement or emergency services office for more information.
• Evacuation Warning: This is time to prepare you, your family, your pets, or your school to leave. It is generally a voluntary order given when emergency officials believe the disaster or its effects may expand into your area. They should be taken seriously as many factors can affect the spread of an incident. If you have any access and functional needs, such as medical or mobility issues, you should prepare to leave once an Evacuation Warning is issued.
• Evacuation Order: This is the official order to leave because the disaster is spreading to your area. These orders should be taken seriously as failure to follow an evacuation order unnecessarily endangers the lives of you and your family. Only when the evacuation order has been lifted can you return to you residence.
Evacuation warnings and orders can happen at any time. Pay attention to evacuation signs and emergency personnel such as law enforcement or fire officials as they direct traffic out of an evacuation area.
Some jurisdictions will establish assembly points where people can gather and utilize public transportation to evacuate. Check with your local emergency management office or first responders for more information.
Situations that could trigger an Evacuation:
• Flooding or Tsunamis – Although tsunamis are typically caused by underwater earthquakes, many times they result in onshore flooding. Generally flooding occurs due to extreme levels of rain fall or water overflows along rivers and streams. Flooding presents
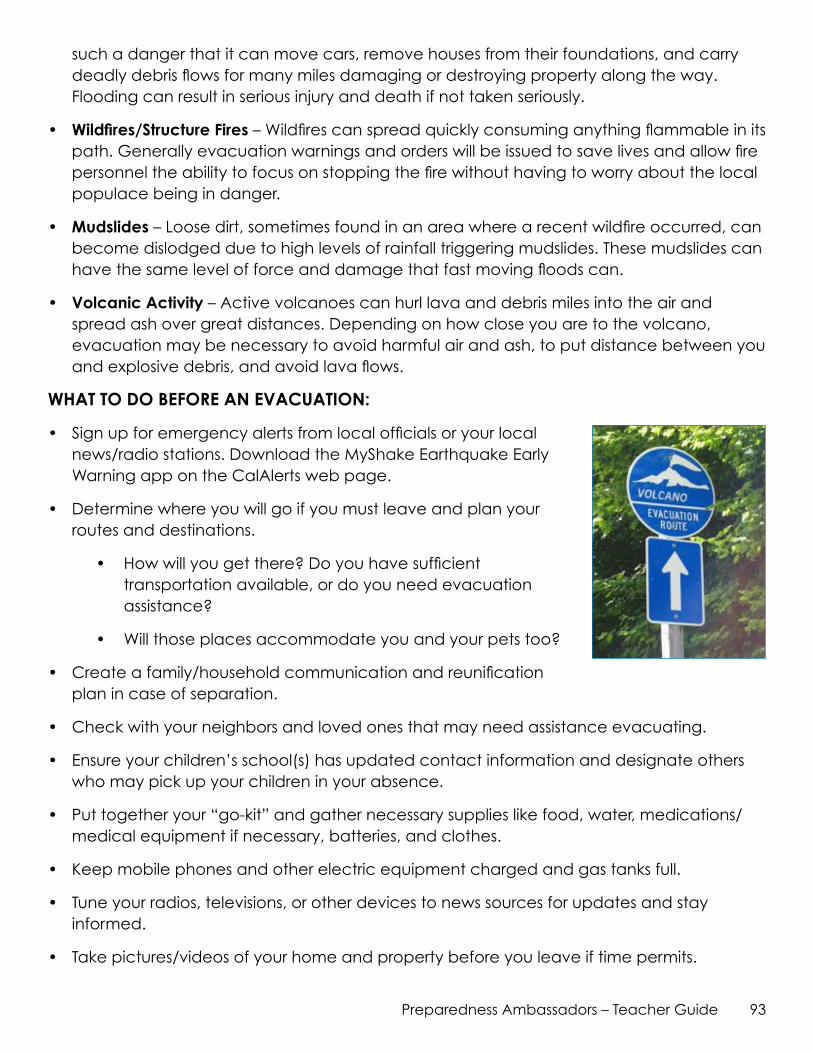
93Preparedness Ambassadors – Teacher Guide
such a danger that it can move cars, remove houses from their foundations, and carry deadly debris flows for many miles damaging or destroying property along the way. Flooding can result in serious injury and death if not taken seriously.
• Wildfires/Structure Fires – Wildfires can spread quickly consuming anything flammable in its path. Generally evacuation warnings and orders will be issued to save lives and allow fire personnel the ability to focus on stopping the fire without having to worry about the local populace being in danger.
• Mudslides – Loose dirt, sometimes found in an area where a recent wildfire occurred, can become dislodged due to high levels of rainfall triggering mudslides. These mudslides can have the same level of force and damage that fast moving floods can.
• Volcanic Activity – Active volcanoes can hurl lava and debris miles into the air and spread ash over great distances. Depending on how close you are to the volcano, evacuation may be necessary to avoid harmful air and ash, to put distance between you and explosive debris, and avoid lava flows.
WHAT TO DO BEFORE AN EVACUATION:
• Sign up for emergency alerts from local officials or your local news/radio stations. Download the MyShake Earthquake Early Warning app on the CalAlerts web page.
• Determine where you will go if you must leave and plan your routes and destinations.
• How will you get there? Do you have sufficient transportation available, or do you need evacuation assistance?
• Will those places accommodate you and your pets too?
• Create a family/household communication and reunification plan in case of separation.
• Check with your neighbors and loved ones that may need assistance evacuating.
• Ensure your children’s school(s) has updated contact information and designate others who may pick up your children in your absence.
• Put together your “go-kit” and gather necessary supplies like food, water, medications/medical equipment if necessary, batteries, and clothes.
• Keep mobile phones and other electric equipment charged and gas tanks full.
• Tune your radios, televisions, or other devices to news sources for updates and stay informed.
• Take pictures/videos of your home and property before you leave if time permits.
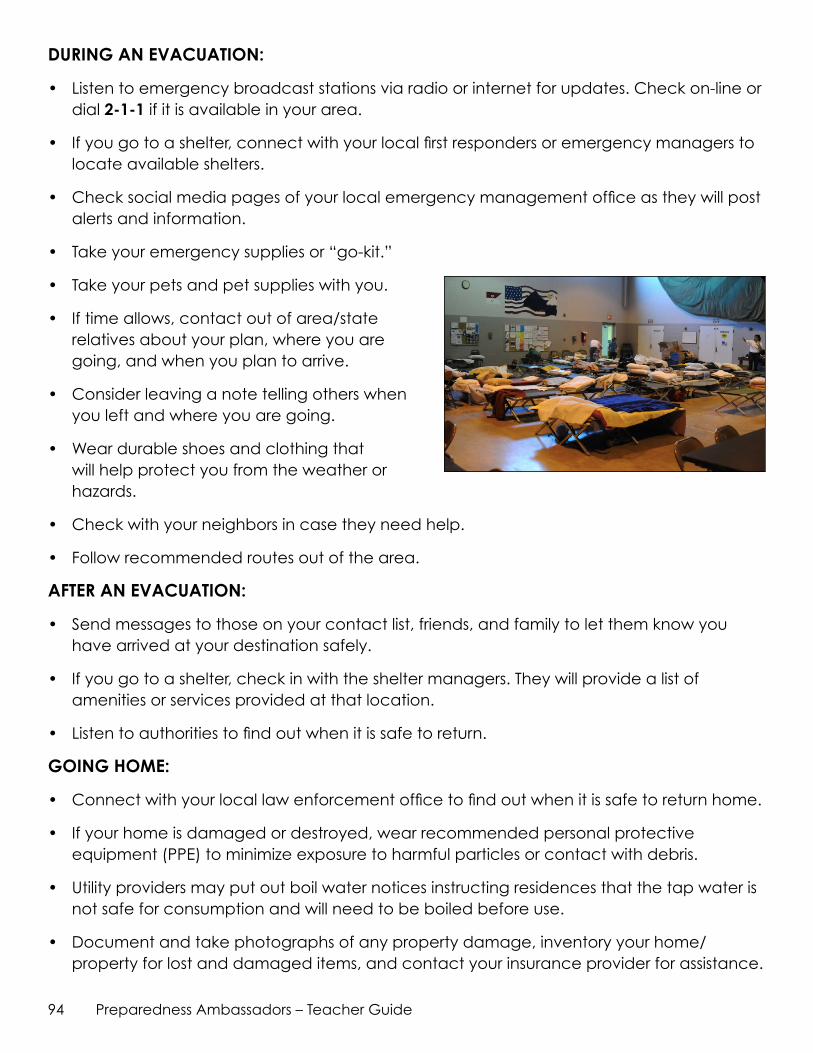
94 Preparedness Ambassadors – Teacher Guide
DURING AN EVACUATION:
• Listen to emergency broadcast stations via radio or internet for updates. Check on-line or dial 2-1-1 if it is available in your area.
• If you go to a shelter, connect with your local first responders or emergency managers to locate available shelters.
• Check social media pages of your local emergency management office as they will post alerts and information.
• Take your emergency supplies or “go-kit.”
• Take your pets and pet supplies with you.
• If time allows, contact out of area/state relatives about your plan, where you are going, and when you plan to arrive.
• Consider leaving a note telling others when you left and where you are going.
• Wear durable shoes and clothing that will help protect you from the weather or hazards.
• Check with your neighbors in case they need help.
• Follow recommended routes out of the area.
AFTER AN EVACUATION:
• Send messages to those on your contact list, friends, and family to let them know you have arrived at your destination safely.
• If you go to a shelter, check in with the shelter managers. They will provide a list of amenities or services provided at that location.
• Listen to authorities to find out when it is safe to return.
GOING HOME:
• Connect with your local law enforcement office to find out when it is safe to return home.
• If your home is damaged or destroyed, wear recommended personal protective equipment (PPE) to minimize exposure to harmful particles or contact with debris.
• Utility providers may put out boil water notices instructing residences that the tap water is not safe for consumption and will need to be boiled before use.
• Document and take photographs of any property damage, inventory your home/property for lost and damaged items, and contact your insurance provider for assistance.
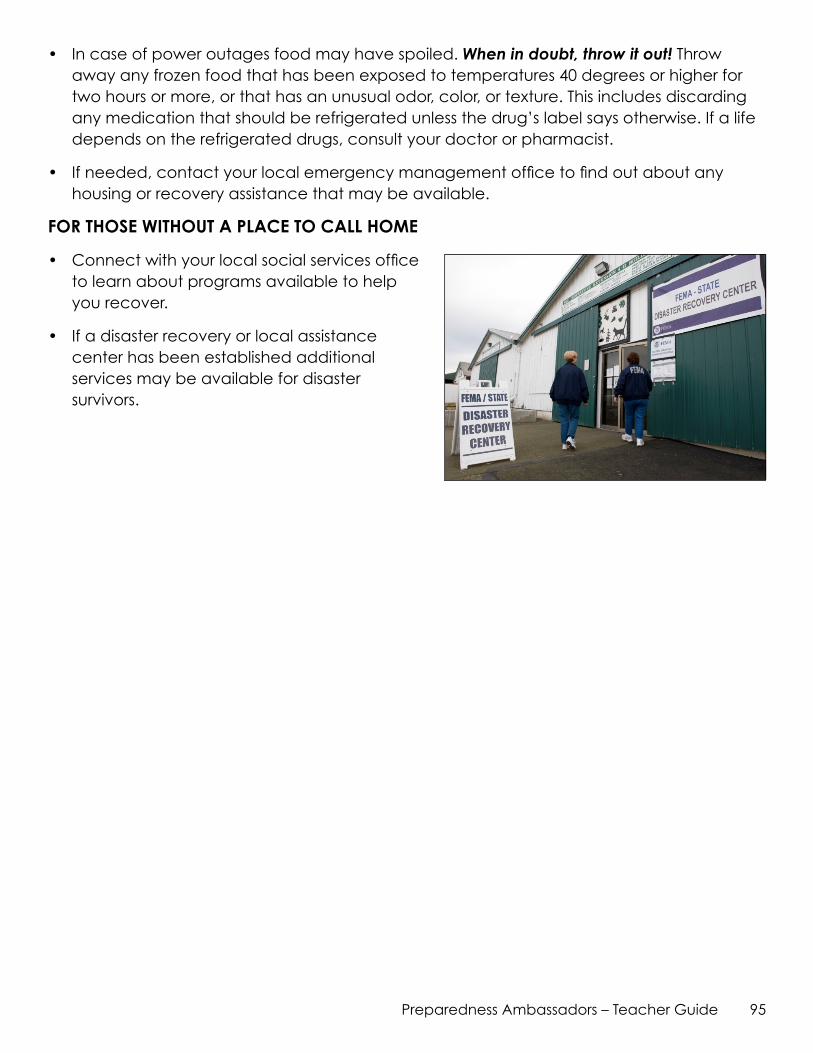
95Preparedness Ambassadors – Teacher Guide
• In case of power outages food may have spoiled. When in doubt, throw it out! Throw away any frozen food that has been exposed to temperatures 40 degrees or higher for two hours or more, or that has an unusual odor, color, or texture. This includes discarding any medication that should be refrigerated unless the drug’s label says otherwise. If a life depends on the refrigerated drugs, consult your doctor or pharmacist.
• If needed, contact your local emergency management office to find out about any housing or recovery assistance that may be available.
FOR THOSE WITHOUT A PLACE TO CALL HOME
• Connect with your local social services office to learn about programs available to help you recover.
• If a disaster recovery or local assistance center has been established additional services may be available for disaster survivors.
96 Preparedness Ambassadors – Teacher Guide
Active Shooter/Intruder Preparedness – SM2Among the variety of disasters California faces, schools should also be prepared for the potential of active shooter or intruder situations. These incidents, much like natural disasters can occur any time and without warning. An active shooter or intruder is an individual actively engaged in killing or attempting to kill people in a confined and populated area. In most cases, active shooters use firearms(s) and there is no pattern or method to their selection of victims. Active shooter situations are unpredictable and evolve quickly.
Before an Incident Occurs
Here are several things your staff and organization can do:
• Know what your organization’s policies are for active shooter/intruder incidents and what safety measures are in place already.
• Review and update your organization’s security policies, as needed.
• Consider access cards and badges that limit access on your property if applicable.
• Consider taking active shooter training to better prepare your staff.
• Discuss active shooter or intruder incidents with your students and develop a plan on what your class would do.
When the Incident Begins
When an active shooter is in the vicinity, individuals should quickly determine the most reasonable way to protect their own life.
Call 9-1-1 immediately or when safe to do so!
Typically, the best response to an active shooter situation will be for individuals to either: Run (Evacuate); Hide; or Fight (Take action against the active shooter within their ability).
Run (Evacuate): The absolute best, most ideal response to an active shooter situation will be to evacuate the premises and get out of harm’s way or get to a safe location.
Everyone should understand when evacuating during an active shooter scenario, individuals need to:
• Know where emergency exits are within the property.
• Evacuate regardless of whether others agree to follow.
• Leave all non-lifesaving belongings behind.
• Help others escape, (if possible use “buddy system”).
• Prevent individuals from entering an area where the active shooter may be.
• Keep their hands open and visible so law enforcement can see them.
97Preparedness Ambassadors – Teacher Guide
• Follow the instructions of any law enforcement or first responders.
• Do not attempt to move wounded people.
Hide: When evacuating the premises is not possible, individuals in an active shooter situation should hide for safety.
Consider the following when thinking about potential areas for concealment:
• Hiding places should be out of the active shooter’s view.
• An ideal hiding place will not trap the individual or restrict individual’s options for movement.
• The area should provide protection if shots are fired in individual’s direction.
• Silence cell phones (turn off vibrate).
• Turn off any source of noise (i.e., computers, radios, televisions).
• Pull down shades or window coverings.
• Hide behind large or hard items (i.e., cabinets, desks).
• Blockade the door with heavy furniture.
• Remain quiet.
• Lock the door.
• Turn off lights.
Fight (taking action against the active shooter): When evacuating the premises is not possible, hiding is not an option and an individual’s life is in imminent danger, the last resort should be to disrupt and/or incapacitate the active shooter(s).
Consider the following when thinking about taking action:
• Improvising weapons from nearby items (e.g. fire extinguisher).
• Yelling and throwing items.
• Fighting as best you can within your ability.
• Having a “Not Today” attitude (deciding that today is not the day you are going to die).
LAW ENFORCEMENT ARRIVAL TO THE INCIDENT
When encountering law enforcement it is important to remain calm and comply with commands of the officers on scene. Individuals in an active shooter situation can assist law enforcement during their response by doing the following:
• Putting down any items in their hands (e.g., cell phone, bags, jackets).
98 Preparedness Ambassadors – Teacher Guide
• If possible, immediately raising their hands and spreading fingers.
• Keeping hands visible at all times.
• Avoiding quick movements toward officers, such as holding on to them for safety.
• Avoiding pointing, screaming and/or yelling.
• Avoiding asking officers for help or directions.
COMMUNICATING WITH LAW ENFORCEMENT
Law enforcement officers are responding to an active, dynamic, and often chaotic scene and may not know or have all the information about the location or the shooter(s) involved. It is important when communicating with law enforcement or 911 dispatchers to provide the following information if available:
• Location of the active shooter(s).
• Number of shooters, if more than one.
• Physical description of shooter(s).
• Number and type of weapons held by the shooter(s).
• Number of potential victims at the location.
Although there are many other considerations when dealing with an active shooter or an armed intruder, the most important actions you can take is doing what you can to preserve life and assist law enforcement in stopping the threat.
For additional information on active shooter or intruder preparedness contact your local law enforcement agency for training materials and best practices.
Active Shooter Resources
• Cal OES Active Shooter Awareness Guidance https://www.caloes.ca.gov/AccessFunctionalNeedsSite/Documents/CalOES-active-shooter-awareness-Feb-2018.pdf
• Ready.Gov’s Active Shooter Guidance https://www.ready.gov/active-shooter
• U.S. Department of Homeland Security, Active Shooter, How to Respond https://www.dhs.gov/xlibrary/assets/active_shooter_booklet.pdf
99Preparedness Ambassadors – Teacher Guide
Classroom Emergency Supplies – SM3Planning and preparing for a disaster will always have a reliance on supplies in order to keep your class healthy and ready for challenging situations. This means keeping stock of water, blankets, and other essential items to keep your class comfortable in uncomfortable times. Whether you are sheltering in class or evacuating to a safe zone, having these essential items will help to keep your class calm and safe until you are out of danger. These items should be stored and maintained in an accessible, central location.
Classroom Kit
This list of basic supplies for a classroom should be scaled to meet the needs of students and staff that occupy the classroom on a daily basis:
• Clipboard/binder with the following:
• Roster of students/staff
• Photos of students/staff
• List of students with special needs or medications, marked confidential or private
• Copy of school emergency procedures
• Safety vest or hat for identification
• First aid kit designed for at least 25 people with first aid manual
• Flashlight with extra batteries
• Handheld radio/walkie-talkie set to school’s emergency channel
• Whistle/air horn
• Water - 1 to 2 bottles of water per student/staff
• Space blankets – 1 per student/staff
• Dispensable hand sanitizer/disinfectant
• Bucket with these items:
• Trash bags
• Moist towelettes
• Toilet paper
• Cat Litter
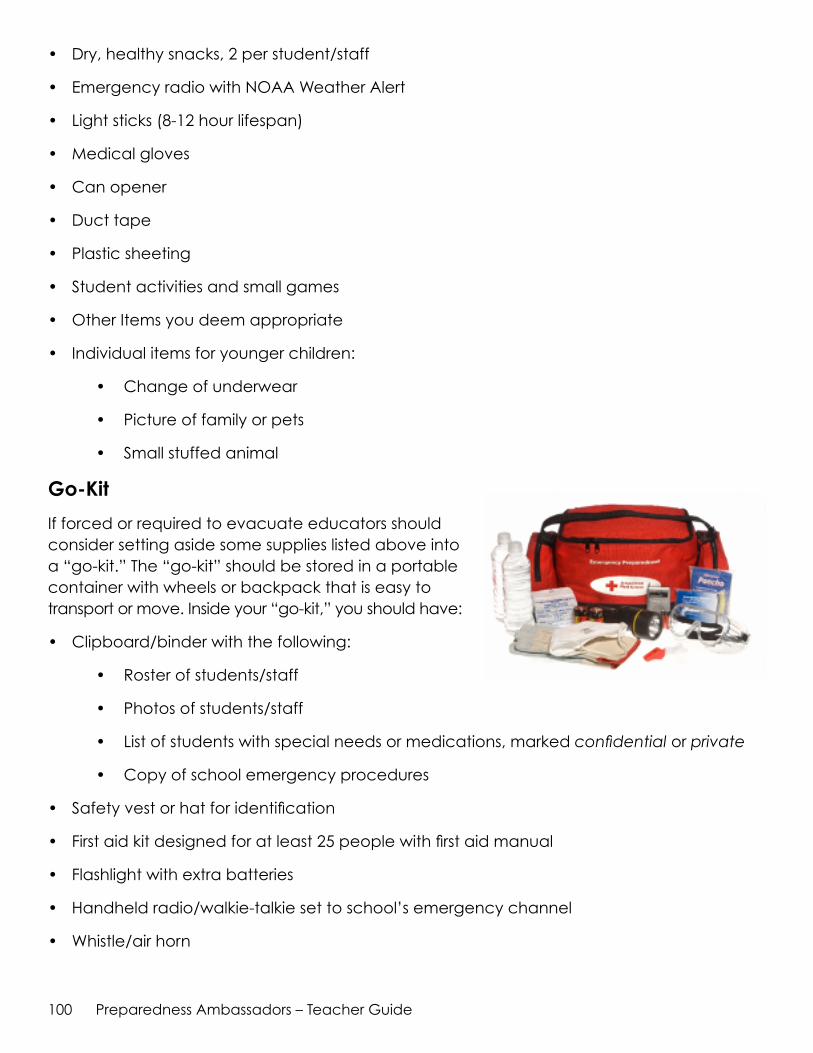
100 Preparedness Ambassadors – Teacher Guide
• Dry, healthy snacks, 2 per student/staff
• Emergency radio with NOAA Weather Alert
• Light sticks (8-12 hour lifespan)
• Medical gloves
• Can opener
• Duct tape
• Plastic sheeting
• Student activities and small games
• Other Items you deem appropriate
• Individual items for younger children:
• Change of underwear
• Picture of family or pets
• Small stuffed animal
Go-Kit
If forced or required to evacuate educators should consider setting aside some supplies listed above into a “go-kit.” The “go-kit” should be stored in a portable container with wheels or backpack that is easy to transport or move. Inside your “go-kit,” you should have:
• Clipboard/binder with the following:
• Roster of students/staff
• Photos of students/staff
• List of students with special needs or medications, marked confidential or private
• Copy of school emergency procedures
• Safety vest or hat for identification
• First aid kit designed for at least 25 people with first aid manual
• Flashlight with extra batteries
• Handheld radio/walkie-talkie set to school’s emergency channel
• Whistle/air horn
101Preparedness Ambassadors – Teacher Guide
Home Supplies – SM3Emergencies and disasters can occur at any time. Being prepared at work as well as at home will help to keep you safe and prepared. We have compiled a basic list of common things you should conider whether you Shelter-In-Place or Evacuate. Add to this list as you identify other supplies that may be especially useful in your region.
Basic Household Supplies:
• Water – at least one gallon of water per person, per day, for at least three days for drinking and sanitation
• Food – at least a 3-day supply of non-perishable food and a manual can opener
• Infant formula, diapers, soothing supplies
• Pet food and extra water for your pet(s)
• Prescription medication and glasses, copies of prescriptions
• Immunization and allergy records
• Battery-powered or hand-crank radio and a National Oceanic and Atmospheric Administration (NOAA) Weather Radio with Tone Alert
• Cell phone(s) with charger and a backup battery
• Flashlight(s)
• Extra Batteries
• First aid kits
• Personal hygiene products/moist towelettes, garbage bags and plastic ties for personal sanitation
• Whistle to signal for help
• Wrench or pliers to turn off utilities
• Local maps
• Important family documents such as recent photos of you and your family members in case of separation, copies of identification, financial and insurance information, copies of contact lists, and any other important records. These should be kept in a waterproof, portable container or saved on a thumb or external hard drive
• Cash or travelers’ checks
• Sleeping bags or blankets for each person

102 Preparedness Ambassadors – Teacher Guide
Other Examples of Emergency Supply Kits
• American Red Cross Emergency Preparedness for Kids https://www.redcross.org/get-help/how-to-prepare-for-emergencies/emergency-preparedness-for-kids.html
• Center for Disease Control Emergency Supplies for Earthquake Preparedness https://www.cdc.gov/disasters/earthquakes/supplies.html
• National Safety Council Emergency Supplies for the Home https://www.nsc.org/home-safety/safety-topics/emergency-preparedness/home-supply-kit
• Readiness and Emergency Management for Schools Technical Assistance Center School Emergency Supplies List https://rems.ed.gov/Docs/SchoolEmergencySuppliesList.pdf
• Ready.gov Build a Kit https://www.ready.gov/kit
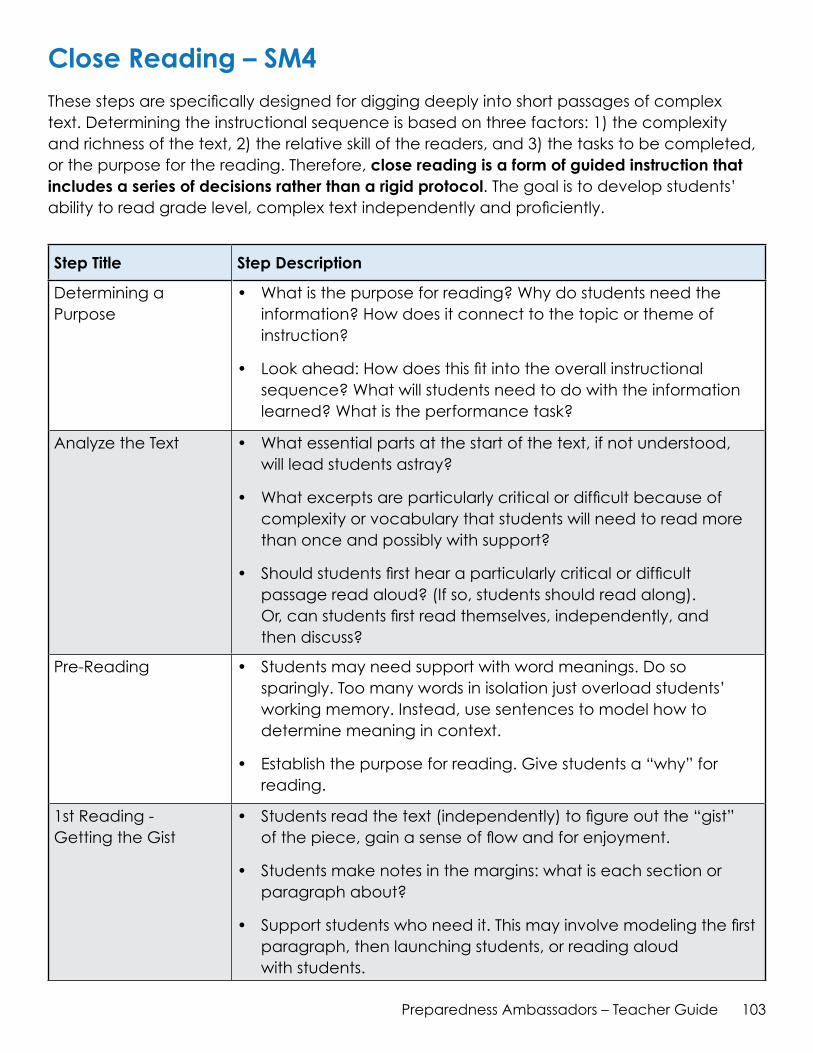
103Preparedness Ambassadors – Teacher Guide
Close Reading – SM4These steps are specifically designed for digging deeply into short passages of complex text. Determining the instructional sequence is based on three factors: 1) the complexity and richness of the text, 2) the relative skill of the readers, and 3) the tasks to be completed, or the purpose for the reading. Therefore, close reading is a form of guided instruction that includes a series of decisions rather than a rigid protocol. The goal is to develop students’ ability to read grade level, complex text independently and proficiently.
Step Title Step Description
Determining a Purpose
• What is the purpose for reading? Why do students need the information? How does it connect to the topic or theme of instruction?
• Look ahead: How does this fit into the overall instructional sequence? What will students need to do with the information learned? What is the performance task?
Analyze the Text • What essential parts at the start of the text, if not understood, will lead students astray?
• What excerpts are particularly critical or difficult because of complexity or vocabulary that students will need to read more than once and possibly with support?
• Should students first hear a particularly critical or difficult passage read aloud? (If so, students should read along). Or, can students first read themselves, independently, and then discuss?
Pre-Reading • Students may need support with word meanings. Do so sparingly. Too many words in isolation just overload students’ working memory. Instead, use sentences to model how to determine meaning in context.
• Establish the purpose for reading. Give students a “why” for reading.
1st Reading - Getting the Gist
• Students read the text (independently) to figure out the “gist” of the piece, gain a sense of flow and for enjoyment.
• Students make notes in the margins: what is each section or paragraph about?
• Support students who need it. This may involve modeling the first paragraph, then launching students, or reading aloud with students.
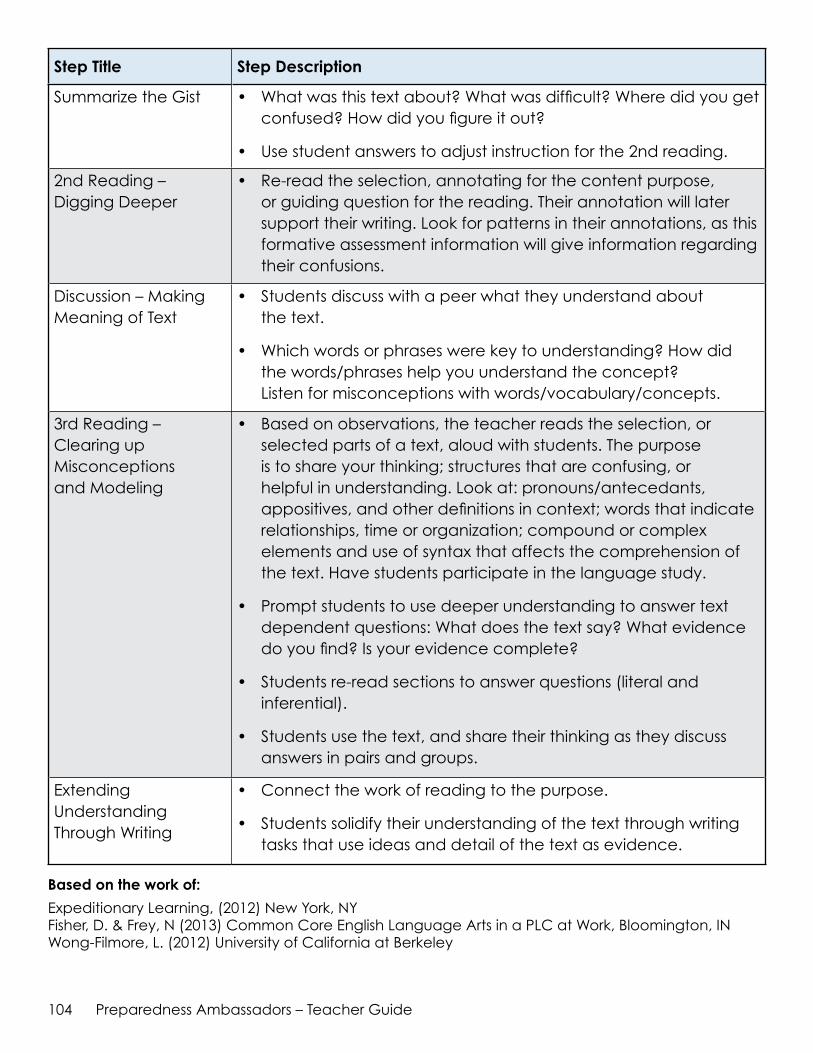
104 Preparedness Ambassadors – Teacher Guide
Step Title Step Description
Summarize the Gist • What was this text about? What was difficult? Where did you get confused? How did you figure it out?
• Use student answers to adjust instruction for the 2nd reading.
2nd Reading – Digging Deeper
• Re-read the selection, annotating for the content purpose, or guiding question for the reading. Their annotation will later support their writing. Look for patterns in their annotations, as this formative assessment information will give information regarding their confusions.
Discussion – Making Meaning of Text
• Students discuss with a peer what they understand about the text.
• Which words or phrases were key to understanding? How did the words/phrases help you understand the concept? Listen for misconceptions with words/vocabulary/concepts.
3rd Reading – Clearing up Misconceptions and Modeling
• Based on observations, the teacher reads the selection, or selected parts of a text, aloud with students. The purpose is to share your thinking; structures that are confusing, or helpful in understanding. Look at: pronouns/antecedants, appositives, and other definitions in context; words that indicate relationships, time or organization; compound or complex elements and use of syntax that affects the comprehension of the text. Have students participate in the language study.
• Prompt students to use deeper understanding to answer text dependent questions: What does the text say? What evidence do you find? Is your evidence complete?
• Students re-read sections to answer questions (literal and inferential).
• Students use the text, and share their thinking as they discuss answers in pairs and groups.
Extending Understanding Through Writing
• Connect the work of reading to the purpose.
• Students solidify their understanding of the text through writing tasks that use ideas and detail of the text as evidence.
Based on the work of:
Expeditionary Learning, (2012) New York, NY Fisher, D. & Frey, N (2013) Common Core English Language Arts in a PLC at Work, Bloomington, IN Wong-Filmore, L. (2012) University of California at Berkeley
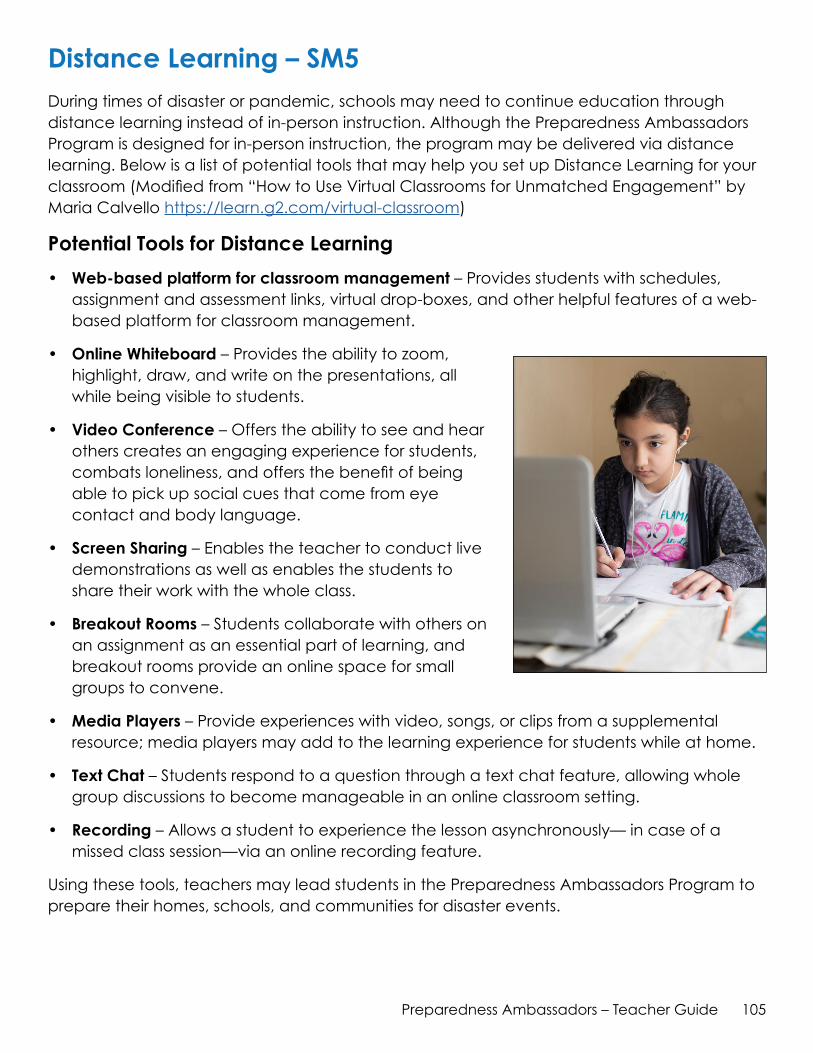
105Preparedness Ambassadors – Teacher Guide
Distance Learning – SM5During times of disaster or pandemic, schools may need to continue education through distance learning instead of in-person instruction. Although the Preparedness Ambassadors Program is designed for in-person instruction, the program may be delivered via distance learning. Below is a list of potential tools that may help you set up Distance Learning for your classroom (Modified from “How to Use Virtual Classrooms for Unmatched Engagement” by Maria Calvello https://learn.g2.com/virtual-classroom)
Potential Tools for Distance Learning
• Web-based platform for classroom management – Provides students with schedules, assignment and assessment links, virtual drop-boxes, and other helpful features of a web-based platform for classroom management.
• Online Whiteboard – Provides the ability to zoom, highlight, draw, and write on the presentations, all while being visible to students.
• Video Conference – Offers the ability to see and hear others creates an engaging experience for students, combats loneliness, and offers the benefit of being able to pick up social cues that come from eye contact and body language.
• Screen Sharing – Enables the teacher to conduct live demonstrations as well as enables the students to share their work with the whole class.
• Breakout Rooms – Students collaborate with others on an assignment as an essential part of learning, and breakout rooms provide an online space for small groups to convene.
• Media Players – Provide experiences with video, songs, or clips from a supplemental resource; media players may add to the learning experience for students while at home.
• Text Chat – Students respond to a question through a text chat feature, allowing whole group discussions to become manageable in an online classroom setting.
• Recording – Allows a student to experience the lesson asynchronously— in case of a missed class session—via an online recording feature.
Using these tools, teachers may lead students in the Preparedness Ambassadors Program to prepare their homes, schools, and communities for disaster events.
106 Preparedness Ambassadors – Teacher Guide
Sample Lesson Modifications for Distance Learning
• HO1 ENGAGE: Notice, Wonder, and Feel – Try conducting the Notice, Wonder, and Feel discussion using the chat box feature of your distance learning platform.
• HO2 EXPLORE: What Is a Disaster? – Use a shared slide deck where students may place their three disasters on their own slide.
• HO2 EXPLORE: What Is a Disaster? – Create a Kahoot to quiz students on the different types of disasters.
• HO3 EXPLORE: Gathering Data – Create a form where students may fill out their three events gathered from interviewing family and community members. Organize the data by disaster event and share the results with the class for use on HO4 EXPLORE: Mapping Disaster Data and Land Features.
• HO4 EXPLORE: Mapping Disaster Data and Land Features – Have students create their own infographics at home, plotting the top 10–15 disaster events from their results on the form. Have students take a picture of their infographics and add them to a shared slide show.
• HO5 EXPLORE: Case Study Selection – Using a Flipgrid, students could identify their top two or three case studies for the class to review in detail based on the results illustrated in their infographics.
• HO6 EXPLORE: Case Study Reflection – Ask students to read the selected case studies with a parent or guardian and work through the reflection questions together. It might be easier for students to fill in their answers to the reflection if HO6 is made into a form.
• HO7 EXPLAIN: Local Disaster Preparedness Guidelines – If HO6 has been made into a form, then copy and paste the student answers from question 6 into a document and share this document with the students. Hold an online discussion during which students read their answers for safety guidelines for their homes, schools, and communities, and make adjustments to the wording as needed. Congratulate the students on a job well done!
• HO8 EXPLAIN: Compare and Contrast – Provide the students with links to the polished HO7 document and to the FamilyReadinessGuide. Direct the students to work through HO8 with a parent or guardian. It might be helpful to make HO8 into an online form.
• HO9 ELABORATE: Take Action, Level 1 - Have students complete the FamilyReadinessGuide with their parents or guardians.
• HO9P ELABORATE: Take Action, Level 2 – Inform Our Community – Have students create a poster advertising to the community the need for households to complete the FamilyReadinessGuide. Have students submit a picture of themselves with their posters displayed somewhere in the community.
107Preparedness Ambassadors – Teacher Guide
• HO9J ELABORATE: Take Action, Level 3 – Create a Community Emergency Response Network – Ask students to create a list of organizations in the community that are there to help others when disaster strikes. Have them share their lists with their classmates during an online class discussion. Have the class make thank you cards and mail them to the community organizations.
• HO10: EVALUATE: Self-Assessment – Have the students complete the self-assessment in an online form.
• JOURNAL ENTRIES - Have the students complete journal entries in an online form.
The following is a list of distance learning resources. One resource, The5KeyPrinciplesforaQualityDistanceLearningApproach, will go into greater detail to support educators in making the transition to distance learning.
Distance Learning Resources
• 5 Key Principles for a Quality Distance Learning Approach (Contra Costa County Office of Education) bit.ly/CCCOE5KeyPD
• Guidance on Culturally Responsive-Sustaining Remote Education (NYU Metro Center) https://static1.squarespace.com/static/5bc5da7c3560c36b7dab1922/t/5e7a26b60fdceb59f9749c3c/1585063606912/NYU+Metro+Center+Guidance+on+Culturally+Responsive-Sustaining+Remote+Teaching+and+Learning+%282020%29+%281%29+%281%29.pdf
• Guidance on Culturally Responsive-Sustaining School Reopenings (NYU Metro Center) https://static1.squarespace.com/static/5bc5da7c3560c36b7dab1922/t/5ec68ebc23cff3478cd25f12/1590070973440/GUIDANCE+ON+CULTURALLY+RESPONSIVE-+SUSTAINING+RE-OPENING+%281%29.pdf
• How to Use Virtual Classrooms for Unmatched Engagement (Learning Hub May 2020) https://learn.g2.com/virtual-classroom
• Lead with Equity (PACE July 2020) https://edpolicyinca.org/publications/lead-with-equity
• Sacramento County Office of Education Remote Learning Resources https://www.scoe.net/divisions/administration/communications/coronavirus/resources/remote/
• Supporting Learning in the COVID-19 Context (PACE July 2020) https://edpolicyinca.org/publications/supporting-learning-covid-19-context

108 Preparedness Ambassadors – Teacher Guide
This page intentionally left blank for printing purposes.
109Preparedness Ambassadors – Teacher Guide
RESOURCES
110 Preparedness Ambassadors – Teacher Guide
Resources
Educational Resources
California Governor’s Office of Emergency Services
• Preparedness Ambassador’s Curriculum (Website) www.caloes.ca.gov/preparednessambassadors
• Cal OES Family Readiness Guide https://www.caloes.ca.gov/PlanningPreparednessSite/Documents/Cal_OES_Family_Readiness_Guide(ENG).pdf
California Department of Education (Website)
• CA Health Framework https://www.cde.ca.gov/ci/he/cf/
• CA Science Framework https://www.cde.ca.gov/ci/sc/cf/cascienceframework2016.asp
• CA English Language Arts/English Language Development (ELA/ELD) Framework https://www.cde.ca.gov/ci/rl/cf/elaeldfrmwrksbeadopted.asp
CalRecycle
• CA Environmental Principles and Concepts (Website) https://www.californiaeei.org/epc/
• CA Education and the Environment Initiative Curriculum (Website) https://www.californiaeei.org/curriculum/
• School Waste Reduction Programs (Website) https://www.calrecycle.ca.gov/ReduceWaste/Schools/
Collaborative for Academic, Social, and Emotional Learning (CASEL) (Website) https://casel.org/
• Social and Emotional Learning 3 Signature Practices Playbook (Website) https://schoolguide.casel.org/uploads/2018/12/CASEL_SEL-3-Signature-Practices-Playbook-V3.pdf
111Preparedness Ambassadors – Teacher Guide
Distance Learning Resources
• 5 Key Principles for a Quality Distance Learning Approach (Contra Costa County Office of Education) bit.ly/CCCOE5KeyPD
• Guidance on Culturally Responsive-Sustaining Remote Education (NYU Metro Center) https://static1.squarespace.com/static/5bc5da7c3560c36b7dab1922/t/5e7a26b60fdceb59f9749c3c/1585063606912/NYU+Metro+Center+Guidance+on+Culturally+Responsive-Sustaining+Remote+Teaching+and+Learning+%282020%29+%281%29+%281%29.pdf
• Guidance on Culturally Responsive-Sustaining School Reopenings (NYU Metro Center) https://static1.squarespace.com/static/5bc5da7c3560c36b7dab1922/t/5ec68ebc23cff3478cd25f12/1590070973440/GUIDANCE+ON+CULTURALLY+RESPONSIVE-+SUSTAINING+RE-OPENING+%281%29.pdf
• How to Use Virtual Classrooms for Unmatched Engagement (Learning Hub May 2020) https://learn.g2.com/virtual-classroom
• Lead with Equity (PACE July 2020) https://edpolicyinca.org/publications/lead-with-equity
• Sacramento County Office of Education Remote Learning Resources https://www.scoe.net/divisions/administration/communications/coronavirus/resources/remote/
• Supporting Learning in the COVID-19 Context (PACE July 2020) https://edpolicyinca.org/publications/supporting-learning-covid-19-context
Emergency Preparedness Resources
California Office of Emergency Services (Cal OES) (Website) https://www.caloes.ca.gov/
• National Preparedness Month (Website) www.caloes.ca.gov/prepare
• Cal OES My Hazards: Discover Hazards in Your Area (Website) http://myhazards.caloes.ca.gov/
• Listos California (Website) https://www.listoscalifornia.org/
CalAlerts (Website) http://calalerts.org/
112 Preparedness Ambassadors – Teacher Guide
American Red Cross (Website) https://www.redcross.org
• Disaster Preparedness for Teachers (Website) https://www.redcross.org/get-help/how-to-prepare-for-emergencies/emergency-preparedness-for-kids/disaster-preparedness-for-teachers.html
• American Red Cross Preparedness for Kids (Website) https://www.redcross.org/get-help/how-to-prepare-for-emergencies/emergency-preparedness-for-kids.html
CDC: Caring for Children in a Disaster
• Children and Youth with Special Healthcare Needs in Emergencies (Website) https://www.cdc.gov/childrenindisasters/children-with-special-healthcare-needs.html
FEMA – Ready.gov for Kids (Website) https://www.ready.gov/kids
• Earthquakes https://www.ready.gov/kids/disaster-facts/earthquakes
• Floods https://www.ready.gov/floods-0
• Tsunamis https://www.ready.gov/tsunamis-0
• Volcanoes https://www.ready.gov/volcanoes-0
• Wildfires https://www.ready.gov/kids/disaster-facts/wildfires
Rocket’s Rules for Safety (Website) https://rocketrules.org/
• Staying Safe in an Earthquake (Video 5:41) https://www.youtube.com/watch?v=ay5lTN81u1Q&feature=youtu.be
• Staying Safe in a Flood (Video 4:27) https://www.youtube.com/watch?v=7ZkFGl22Znc
• Staying Safe during a Fire (Video 4:36) https://www.youtube.com/watch?v=K4nnzz3B_-I
113Preparedness Ambassadors – Teacher Guide
Wildfires
60 Minutes “Paradise Lost: Inside California’s Camp Fire” (Video 13:51) https://www.bing.com/videos/
CALFIRE Ready for Wildfire (Website) https://www.readyforwildfire.org/
National Fire Protection Association (Website) https://www.nfpa.org/Public-Education/Fire-causes-and-risks/Wildfire/Wildfire-safety-tips
National Fire Protection Association: Kids (Website) http://www.sparky.org/
Smokey Bear (Website) https://smokeybear.com/en
SMOKEY BEAR - THE Story (Video 5:36) https://www.youtube.com/watch?v=bh3DPq50S0c
The “Three Ps: Prevent, Plan, and Practice” (Website) http://www.firesafekids.org/safety.html
US Fire Administration (Website) https://www.usfa.fema.gov/prevention/outreach/
Floods
California Flood Preparedness Week - Flood Risk Resources for Kids & Teens (Website) https://sites.google.com/view/cfpw/resources/resources-for-kids-teens
National Weather Service Flood Safety (Website) https://www.weather.gov/safety/flood
Science of Floods (Website) http://www.pbs.org/newshour/extra/1997/09/the-science-of-floods/
Earthquakes
California Earthquake Early Warning (Website) https://earthquake.ca.gov/
Earthquake Country Alliance (Website) https://www.earthquakecountry.org/
114 Preparedness Ambassadors – Teacher Guide
Earthquake Country Alliance – Earthquake Preparedness Information for Those with Disabilities or Access and Functional Needs (Website) https://www.earthquakecountry.org/disability/
Earthquake Country Alliance – Seven Steps to Earthquake Safety (Website) https://www.earthquakecountry.org/sevensteps/
Earthquake Country Alliance – Website in Spanish (Website) https://www.terremotos.org/
Earthquake Hazards (Website) https://www.usgs.gov/natural-hazards/earthquake-hazards/earthquakes
Earthquakes (Website) http://www.weatherwizkids.com/weather-earthquake.htm
National Geographic: Understanding Earthquakes (Video 2:58) http://www.youtube.com/watch?v=cavq2HFBa-U#action=share
National Geographic: Earthquakes 101 (Video 2:39) http://youtu.be/VSgB1IWr6O4
ShakeOut for Schools (Website) https://www.shakeout.org/schools/
USGS: Causes of Earthquakes (Website) http://earthquake.usgs.gov/learn/kids/eqscience.php
USGS for Teachers (Website) https://earthquake.usgs.gov/education/shakingsimulations/classroom.php
USGS Magnitude 2.5+ Earthquakes, Past Day Map (Website) http://earthquake.usgs.gov/earthquakes/map/
Tsunamis
California Department of Conservation (Website) www.tsunami.ca.gov
California Tsunami Preparedness Guide (Website and Video) https://cadoc.maps.arcgis.com/apps/MapSeries/index html?appid=61bc8d30b53e4fb5927ae199d31f5aef
County of San Diego OES Tsunamis – Know What To Do (Video 7:53) http://www.youtube.com/watch?v=UzR0Rt3i4kc#action=share
Lessons Save Lives: The Story of Tilly Smith (Video 5:05) http://www.youtube.com/watch?v=V0s2i7Cc7wA
115Preparedness Ambassadors – Teacher Guide
NOAA/NWS Tsunami Warning Centers (Website) www.tsunami.gov
NOAA Tsunami Fast Draw (Video 1:46) https://www.youtube.com/watch?v=gZaUABl8JC4
NOAA Tsunami Teacher USA – Tsunami Basics (Video 6:36) http://www.youtube.com/watch?v=tUN_UTY0GNo#action=share
The Tsunami Zone (Website) www.Tsunamizone.org/California
Volcanoes
California Governor’s Office of Emergency Services (Website) https://www.caloes.ca.gov/cal-oes-divisions/earthquake-tsunami-volcano-programs/volcano-about
California Volcano Observatory (CalVO) (Website) https://volcanoes.usgs.gov/observatories/calvo/
California Volcano Observatory: Volcanic Hazards in California (Website) https://www.usgs.gov/observatories/california-volcano-observatory/california-has-active-and-hazardous-volcanoes
Mount St. Helen’s: A Catalyst for Change (Video 6:47) http://www.youtube.com/watch?v=sC9JnuDuBsU#t=14
National Geographic: How Volcanoes Form (Video 3:06) http://www.youtube.com/watch?v=jRfEGvp6wDU#action=share
USGS California Volcano Observatory: Mount Lassen: Includes information on the 1915 Mount Lassen Eruption (Website) https://www.usgs.gov/volcanoes/lassen-volcanic-center
USGS Use in the Classroom (Website) https://www.usgs.gov/observatories/cascades-volcano-observatory/website-use-classroom USGS Volcano Hazards Program (Website) https://www.usgs.gov/natural-hazards/volcano-hazards/education
Volcanoes (Website) http://www.weatherwizkids.com/weather-volcano.htm
116 Preparedness Ambassadors – Teacher Guide
Tornadoes
National Geographic: Tornado Destruction (Video 1:23) https://www.youtube.com/watch?v=43VoMesUd2Q
National Weather Service for Kids (Website) https://www.weather.gov/cae/justforkids.html
Power Outages
Power Outage US: California Power Outage Map (Real Time Website) https://poweroutage.us/area/state/california
Public Safety Power Shutoffs (Website) https://prepareforpowerdown.com/
The Power of Being Prepared Fact Sheet (Website) https://prepareforpowerdown.com/wp-content/uploads/2019/05/Statewide_FactSheet_0503.pdf

117Preparedness Ambassadors – Teacher Guide
GLOSSARY
118 Preparedness Ambassadors – Teacher Guide
Glossary
Ambassador a diplomatic official of the highest rank representing an organization and carrying out its important mission
Accelerated to move or go faster; increase in speed
Acres a common measurement of land area; 640 acres equals one square mile
Aftershock a small earthquake or tremor that follows a major earthquake
Atmosphere the gaseous envelope surrounding the earth; the air
Atmospheric River long, narrow regions in the atmosphere, like rivers in the sky; they transport water vapor outside of the tropics
Avalanche a large mass of snow, ice, etc., detached from a mountain slope and sliding or falling suddenly downward
Bulge a rounded projection, bend, or protruding part; hump
Debris the remains of anything broken down or destroyed; ruins; rubble
Downstream with or in the direction of the current of a stream
Drought a period of dry weather, especially a long one that is injurious to crops
Earthquake a series of vibrations in the earth’s crust created by the breaking of rock
Empathy the ability to understand and share the feelings of another
Erosion the process by which the surface of the earth is worn away by the action of water, glaciers, winds, waves, etc.
Eruption the ejection of molten rock, steam, etc., as from a volcano or geyser
Evacuation the removal of persons or things from an endangered area
Fatalities the number of deaths that occurred due to an event
Fault a fracture line separating two blocks of rock
First Responder a person who is certified to provide medical care in emergencies before more highly trained medical personnel arrive on the scene
Generator a machine that converts one form of energy into another, especially mechanical energy into electrical energy
Humorous causing lighthearted laughter and amusement; comic
Influenced the process of producing effects on the actions, behavior, opinions, etc., of another or others
119Preparedness Ambassadors – Teacher Guide
Infographic a visual image such as a chart or diagram used to represent information or data
Inhaling to breathe in
Intensity the degree or extent to which something is intense
Involuntary not by one’s own choice
Lahar a landslide of wet volcanic debris on the side of a volcano
Landslide the downward sliding of a mass of soil or rock on or from a steep slope
Levee an embankment designed to prevent the flooding of a river
Magnitude greatness of size or amount
Populated to inhabit; live in
Public Safety Power Shutoff (PSPS) power shutoff conducted proactively by utility companies due to high risk of wildfire
Pyroclastic Flows fast-moving current of hot gas and volcanic matter (known as tephra) that flows along the ground away from a volcano
Region an area or division of a country or state
Reservoirs a natural or artificial place where water is collected and stored for use, especially water for supplying a community, irrigating land, furnishing power, etc.
Rural areas outside of cities; the countryside
Seismologist a scientist that studies earthquakes
Shelter place that provides protection from the elements
Sheltering the act of staying in a shelter
Spillway a passageway through which surplus water escapes from a reservoir or lake
Structural related to the supports that hold up a building
Timber the wood of growing trees, suitable for structural uses
Traumatic emotionally disturbing or distressing
Tsunami an unusually large sea wave produced by an earthquake or undersea volcanic eruption
Volcanic related to a volcano
Volcanologist a scientist that studies volcanos
Watershed the region or area drained by a river, stream, etc.; drainage area
Widespread distributed over a wide region, or occurring in many places or among many persons or individuals

120 Preparedness Ambassadors – Teacher Guide
This page intentionally left blank for printing purposes.

121Preparedness Ambassadors – Teacher Guide
REFERENCES
122 Preparedness Ambassadors – Teacher Guide
Definition of Disaster in “Explore”
University of Missouri System. (2019) “What is a disaster?” https://www.umsystem.edu/ums/fa/management/records/disaster-guide-disaster
Wildfire
Bizjack, T., Bollag, S., and Sabalow, R. (2019, May 15). “PG&E caused Camp Fire that destroyed Paradise and killed 85, Cal Fire says.” TheSacramentoBee: https://www.sacbee.com/news/local/article230445554.html
Butte County. Camp Fire Information. https://www.arcgis.com/apps/MapSeries/index.html?appid=af7e5bb3960a48c096ed910c640a30b3
CalFire. (2019). Camp Fire. California Department of Forestry & Fire Protection. https://www.fire.ca.gov/incidents/2018/11/8/camp-fire
Curwen, T. and J. Serna. (2018, November 20). “The Camp fire burned homes but left trees standing. The science behind the fire’s path.” LosAngelesTimes. https://www.latimes.com/local/california/la-me-camp-fire-lessons-20181120-story.html
Escalante, E. (2018, November 13). “Why California’s wildfire mutual aid system may be the ‘best in the world.’” ABC10 KXTV-TV. https://www.abc10.com/article/news/local/wildfires/why-californias-wildfire-mutual-aid-system-may-be-the-best-in-the-world/103-613856495
Ortiz, J. L. (2019, December 4). ‘Deeply sorry’ PG&E takes blame for California’s deadliest wildfire, seeks ‘technologies’ to limit future risks. USAToday: https://www.usatoday.com/story/news/nation/2019/12/03/pg-e-camp-fire-california-regulators/2602300001/
Flood
Brekke, Dan. (2017, August 19). “Panel Weighed Oroville Spillway Failure in 2014—and Called It ‘Highly Unlikely.’” KQED Television. https://www.kqed.org/news/11608745/oroville-dam-spillway-ferc-safety-review-2014-ruled-out-spillway-failure (accessed March 9, 2020)
Heise, S. (2017, February 14). “Evacuations for 180K+ people near Lake Oroville to stay in place.” https://www.kcra.com/article/water-stops-spilling-over-oroville-auxiliary-spillway/8736758
KCRA Channel 3. “Evacuation orders remain for more than 180K as officials monitor Lake Oroville.” (2017, February 13). https://www.kcra.com/article/evacuation-orders-issued-for-low-levels-of-oroville/8735215#
References
123Preparedness Ambassadors – Teacher Guide
Kurhi, Eric. (2017, February 14). “Oroville Dam: How did we get to this point?” TheMercuryNews. https://www.mercurynews.com/2017/02/13/oroville-dam-how-did-we-get-to-this-point/ (accessed March 9, 2020).
NASA satellite image of the atmospheric river. https://www.nbclosangeles.com/news/local/california-storm-winter-weather-flooding-landslides-snow/11800/ (accessed March 9, 2020)
National Oceanic and Atmospheric Administration (NOAA). (2020, April 9). What is the Pineapple Express? https://oceanservice.noaa.gov/facts/pineapple-express.html
Earthquake
Byrne, Kevin. (2019, July 4). “Earthquake jolts Southern California on Independence Day; Strongest in the region since 1994.” https://www.accuweather.com/en/weather-news/earthquake-jolts-southern-california-on-independence-day-strongest-in-the-region-since-1994/432075
CBS Los Angeles. (2019, August 14). “Following Recent Problems, LA Unveils Updated Earthquake Alert App.” https://losangeles.cbslocal.com/2019/08/14/after-failing-to-alert-residents-la-unveils-updated-earthquake-alert-app/
Incorporated Research Institutions for Seismology. https://www.iris.edu/hq/inclass/animation/fault_strike_slip_direction_left_lateral
NASA Jet Propulsion Laboratory. (2019, October 17). “Caltech, NASA Find Web of Ruptures in Ridgecrest Quake.” https://www.jpl.nasa.gov/news/news.php?feature=7520
Southern California Earthquake Center. (2019, August 14). “Performance of the ShakeAlert Earthquake Early Warning System During the Ridgecrest Sequence.” https://www.scec.org/publication/9607
United States Geological Survey. (2019, July 4). M 6.4 - Ridgecrest Earthquake Sequence https://earthquake.usgs.gov/earthquakes/eventpage/ci38443183/executive
United States Geological Survey. (2019, July 5). M 5.4 - 16 km W of Searles Valley, CA. https://earthquake.usgs.gov/earthquakes/eventpage/ci38450263/executive
United States Geological Survey. (2019, July 6). M7.1 - 2019 Ridgecrest Earthquake Sequence. https://earthquake.usgs.gov/earthquakes/eventpage/ci38457511/executive
United States Geological Survey. Earthquake Glossary: strike-slip. https://earthquake.usgs.gov/learn/glossary/?term=strike-slip
United States Geological Survey. (2019). Infographic: 2019 Ridgecrest Earthquake Sequence: July 4, 2019–July 16, 2019. https://www.usgs.gov/media/images/2019-ridgecrest-earthquake-sequence-july-4-2019-july-16-2019-0
VIDEO: California earthquake terrifies children during July 4 play. (2019, July 5). TheDailyIndependent. https://www.ridgecrestca.com/news/20190705/video-california-earthquake-terrifies-children-during-july-4-play
124 Preparedness Ambassadors – Teacher Guide
Tsunami
BBC News Services. (2011, March 11). “Japan earthquake: Tsunami hits north-east.” https://www.bbc.com/news/world-asia-pacific-12709598
Bendix, Aria. (2020, January 15). “Photos of the abandoned Fukushima exclusion zone show wild animals thriving, despite lingering radiation.” BusinessInsider. https://www.businessinsider.com/animals-fukushima-exclusion-zone-surviving-radiation-2020-1
California Department of Conservation. “Tsunamis.” https://www.conservation.ca.gov/cgs/tsunami
Ecological Society of America (ESA). (2020, January 6) “Rewilding of Fukushima’s human evacuation zone.” https://esajournals.onlinelibrary.wiley.com/doi/epdf/10.1002/fee.2149?referrer_access_token=aAM4wBbkiSloovoSd_L7HU4keas67K9QMdWULTWMo8PEVdk4KjojJTmbtOiov-PGlxsabwFcGoKvIyDLx7isbgeBaZsUZXSRx0V__k6u_zTJmWlJbmEWGeOjhVHm4MhzokEu98xUG4RYvYJTSjujcQ%3D%3D
McCurry, Justin. (2011, March 15). “Japan earthquake: 100,000 children displaced, says charity.” TheGuardian. https://www.theguardian.com/world/2011/mar/15/japan-earthquake-children-displaced-charity
National Public Radio (NPR). (2011, March 14). “Millions Of Stricken Japanese Lack Water, Food, Heat.” https://www.npr.org/2011/03/18/134527591/millions-of-stricken-japanese-lack-water-food-heat
Offer of Assistance from Foreign Countries, Regions and International Organizations (as of September 15). https://www.mofa.go.jp/j_info/visit/incidents/pdfs/offer_assistance.pdf
Phillips, Campbell. (2011, March 16). “The 10 most destructive tsunamis in history.” https://www.australiangeographic.com.au/topics/science-environment/2011/03/the-10-most-destructive-tsunamis-in-history/
reliefweb. (2020, February 6). “Recovery and reconstruction works for the 2011 Tohoku earthquake have reached a successful conclusion.” https://reliefweb.int/report/japan/recovery-and-reconstruction-works-2011-tohoku-earthquake-have-reached-successful
Vervaeck, Armand, and Dr. James Daniell. (2012, March 10). “Japan - 366 days after the Quake... 19000 lives lost, 1.2 million buildings damaged, $574 billion.” https://earthquake-report.com/2012/03/10/japan-366-days-after-the-quake-19000-lives-lost-1-2-million-buildings-damaged-574-billion/

125Preparedness Ambassadors – Teacher Guide
Volcano
Bagley, Mary. (2018, October 16). “Mount St. Helens Eruption: Facts & Information.” LiveScience. https://www.livescience.com/27553-mount-st-helens-eruption.html
California Governor’s Office of Emergency Services. (2015, June 9). Active Volcanoes in California (map).
Gawel, Jim (2014, September). “What role do floating logs play in lake ecology?” Waterline. Washington State Lake Protection Association (WALPA). http://www.walpa.org/waterline/september-2014/what-role-do-floating-logs-play-in-lake-ecology/
Gordon, Gary (2015, November 29). “Disaster Case Study Analysis - Mount St. Helens, Washington, 1980 & Bridge Collapse, Minnesota, 2007.” University of Massachusetts. https://www.google.com/url?sa=t&rct=j&q=&esrc=s&source=web&cd=17&cad=rja&uact=8&ved=2ahUKEwjyjs2Ny-rnAhWUsJ4KHZznD1Q4ChAWMAZ6BAgIEAE&url=http%3A%2F%2Ffaculty.uml.edu%2Fgary_gordon%2FTeaching%2Fdocuments%2FDisasterCaseStudyExample3.pdf&usg=AOvVaw24VEhDkwA5HSQom_X9Q7ds
Prengaman, Kate. (2015, May 18). “Planning, Coordination Have Come a Long Way Since Eruption of Mount St. Helens.” YakimaHerald-Republic. https://www.govtech.com/em/training/Planning-Coordination-Eruption-Mount-St-Helens.html
Tilling, Robert I., Lyn Topinka, and Donald A. Swanson. (1990) “Eruptions of Mount St. Helens: past, present, and future.” USGS. https://ttu-ir.tdl.org/handle/2346/64004
USGS: Cascades Volcano Observatory. (1981). “The Legacy of David A. Johnston.” https://volcanoes.usgs.gov/observatories/cvo/david_johnston.html
USGS: Volcanic Ashfall Impacts Working Group. (2015, December 17). Mt St Helens 1980. https://volcanoes.usgs.gov/volcanic_ash/mount_st_helens_1980.html
Williams, Hill. (1990, May 18). “6 Thunderous Minutes That Were Frozen In Time For State And The World.” TheSeattleTimes. https://archive.seattletimes.com/archive/?date=19900518&slug=1072451
Tornado
Data Central Tornado Archive. A history of twisters: Tornadoes in California since 1950. https://data.redding.com/tornado-archive/
National Oceanic and Atmospheric Administration (NOAA). (2013, August). Tornadoes. https://www.noaa.gov/education/resource-collections/weather-atmosphere-education-resources/tornadoes
National Weather Service. The Enhanced Fujita Scale (EF Scale). https://www.weather.gov/oun/efscale
126 Preparedness Ambassadors – Teacher Guide
National Weather Service. Tornado Safety. https://www.weather.gov/safety/tornado
National Weather Service. Tornado Survivor Stories. https://www.weather.gov/safety/tornado-survivors
Scijinks. (2020, August 31). Tornado Simulator. https://scijinks.gov/tornado-simulation
Power Outage
Booker, Brakkton. (2019, October 9). “Utility Giant PG&E Voluntarily Shuts Off Power, Could Impact 800,000 Calif. Customers.” https://www.npr.org/2019/10/09/768544316/utility-giant-pg-e-voluntarily-shuts-off-power-could-impact-800-000-californians
California Public Utilities Commission. (2020). Public Safety Power Shutoff (PSPS)/De-Energization. https://www.cpuc.ca.gov/deenergization/
Galloway, Kayla. (2019, October 10). “Will PG&E reimburse customers for losses or spoiled food during power shutoffs?” https://www.kron4.com/news/bay-area/will-pge-reimburse-customers-for-losses-or-spoiled-food-during-power-shutoffs-probably-not/
Meigs, James B. (2019, October 11). “California Goes Dark: Multiple factors have led to planned electricity blackouts across the Golden State.” https://www.city-journal.org/planned-electricity-blackouts-california?
National Public Radio (NPR). Power Outage Map. https://media.npr.org/assets/img/2019/10/09/new-outage-map-kqed-5cfdb7c5941d43a7922b430ab7064de459db2a0a-s800-c85.jpg
Pacific Gas & Electric (PG&E). Public Safety Power Shutoff. https://www.pge.com/en_US/safety/emergency-preparedness/natural-disaster/wildfires/public-safety-power-shutoff-faq.page
Silverman, Hollie. (2019, November 19). “PG&E may shut off power to more than 300,000 customers in California due to wind starting Wednesday.” https://www.cnn.com/2019/11/18/us/california-wind-pge-power-shutoff/index.html
Stevens, Pippa (2019, October 10). “PG&E power outage could cost the California economy more than $2 billion.” https://www.cnbc.com/2019/10/10/pge-power-outage-could-cost-the-california-economy-more-than-2-billion.html
YubaNet. (2019, October 8). The PSPS Edition – October 2019. https://yubanet.com/regional/psps1019/

“This program was brought to you by the Department of Homeland Security’s FY 2018 Homeland Security Grant Program (HSGP) funds.”


