Embed Size (px)
Citation preview
Winter: A Time to Reflect and Plan
Gardening was the bright spot in 2020. Despite all the
challenges, we had more time to tend and expand our gardens,
and many first-time gardeners started vegetable gardens that
helped them stay well and happy. The Master Gardener
Demonstration Garden at Ida Lee Park recorded a record number
of visitors this season, underscoring the benefits people derived
from being outside in nature.
In this issue, we are fortunate to have articles by Master
Gardeners following up on their gardening projects. Nancy
Feeney checks in to report on her five-year experiment growing
Korean tea plants in Virginia. Katie Conaway delights us with a
photo essay of her companion planting project begun this
summer.
We have articles on two traditional holiday flowers: poinsettias
and amaryllis. Included is information on how to get both of
these plants to rebloom another year. This is reasonably easy for
amaryllis. The poinsettia articles provide you with justification for
throwing them out when the blooms are spent and buying new
ones next year—guilt-free.
Lectures, Symposium, Plant Sale Resume
In an effort to snatch back some normalcy, lectures, the
Symposium, and the spring plant sale are returning. The lectures
hosted by Rust Library are resuming via Zoom in February.
Check the left-hand column and the Master Gardener website
Events Calendar for details. In March, the Symposium will be
held via Zoom webinar with a recording available if you miss the
live event. This will present outstanding lectures that you can
attend from anywhere. Details are on the following page. Finally,
check out the article on the last page that explains our plan to
get vegetable plants to you safely and efficiently in May.
In the meantime, stay safe and healthy.
Trumpet Vine Knowledge for the Community From Loudoun County Extension
Master Gardeners
Winter 2020-21
Volume XVII, Issue 1 www.loudouncountymastergardeners.org
LOUDOUN COUNTY
EXTENSION MASTER GARDENER
LECTURE SERIES
FREE VIRTUAL LECTURES VIA
ZOOM,
7 P.M. HOSTED BY RUST LIBRARY.
FOR ADDITIONAL INFORMATION ON
EACH LECTURE, VISIT THE
CALENDAR ON OUR WEBSITE
LOUDOUNCOUNTYMASTERGARDENE
RS.ORG.
Feb. 2, Julie Borneman, owner, Watermark Woods
Native Plants, speaks on Using Native Plants in Your
Existing Landscape.
Join Zoom Meeting https://virginiatech.zoom.us/j/8649
5610346?pwd=ODhPZGJiVVhMM3VB
K2JZV3ZZM2pHUT09
Passcode: 378589
April 1, Normalee Martin,
LCEMG, Why Save Seeds?
Join Zoom Meeting
https://virginiatech.zoom.us/j/8310
8695328
Passcode: 263428
Visit us on Facebook: Extension Master Gardeners
of Loudoun County, Virginia.
Help Desk: [email protected] 1

Trumpet Vine Winter 2020-2021
Master Gardener Annual Symposium Goes Virtual!
The Loudoun County Master Gardeners’ Annual Symposium will be presented via Zoom Webinar
on March 20, 2021. The presentations will be recorded and available to anyone who registered, for 10 days following the Symposium–until March 30. So, you can attend the Symposium from
anywhere on March 20 and at anytime after that until March 30. Three speakers from last year’s
cancelled event are returning and we have a wonderful new additional speaker, William Cullina!
William Cullina, Executive Director at the Morris Arboretum of the University of Pennsylvania.
Sugar, Sex, and Poison: Shocking Plant Secrets Caught on Camera Bill Cullina will show how plants’ world of pollen, poisons, pigments, pheromones, sugars and sex translates to sound organic practices we all can benefit from. Cullina
is a recognized authority on North American native plants, writer, and lecturer. Early in his career, he was the nursery director and head propagator at the New England
Wildflower Society in Massachusetts. He has authored five major gardening books, Wildflowers; Native Trees, Shrubs, and Vines; Understanding Orchids; Native Ferns,
Mosses, and Grasses; and Understanding Perennials.
Sam Droege, Wildlife Biologist at the Patuxent Wildlife Research Center, USGS.
Introduction to the Native Bees of the Mid Atlantic
Sam will introduce us to the native bees of our area, their fascinating habits, the plants that they prefer, and how to make your property welcoming to
native bees. Sam is widely published in journals and has been the editor of numerous government publications on birds and insects. He is an authority on
native bees. He is a frequent speaker and gave a June 2017 Ted Talk on native
bees.
Ira Wallace, Worker/owner of the cooperative Southern Exposure Seed Exchange.
Grow Great Vegetables in Virginia
Learn tips and Techniques for growing garden-fresh salads, vine ripened
tomatoes, crisp green peppers and dozens of other delicious edible year-round in your Virginia garden. Ira will cover soil building, planting dates, succession
sowing, mulch, managing water, selecting the best varieties and more for
abundant harvests across the state. In addition to her role at Southern Exposure Seed Exchange, Ira is the founder of the Heritage Harvest Festival, held each
fall at Monticello. Her latest book is Grow Great Vegetables in Virginia.
Ginger Woolrich – Landscape architect, garden consultant, and writer.
Woody Shrubs: Making Quick and Confident Choices
Ginger will discuss the benefits of native trees and shrubs and their resilience
in the face of a changing climate.
Woolridge is co-author with Tony Dove of Essential Native Trees and Shrubs
for the Eastern United States: The Guide to Creating a Sustainable Landscape, published in 2018. This authoritative catalog of 85 native species highlights
the attributes of native plants and their importance in the food web.
On-line registration opens February 1st. Registration Cost: $40.
See our website now for more information and to register beginning on February 1st.
http://loudouncountymastergardeners.org/events/annual-symposium/
Help Desk: [email protected] 2
Trumpet Vine Winter 2020-2021
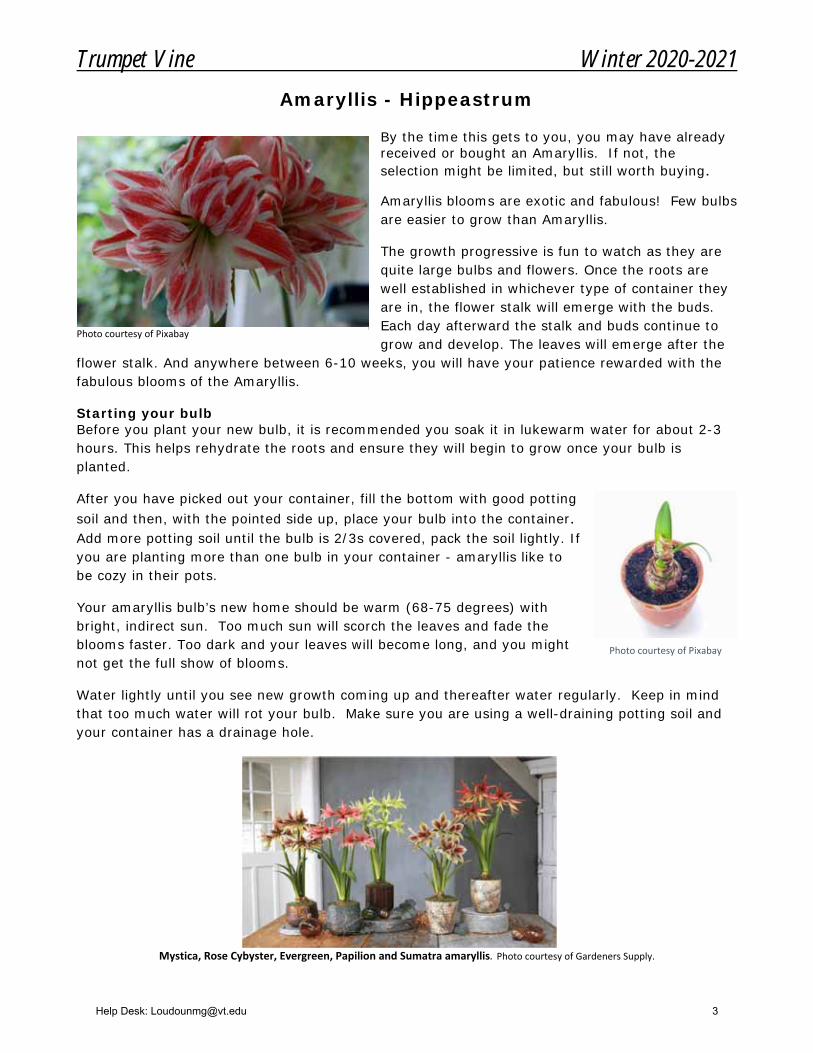
Amaryllis - Hippeastrum
By the time this gets to you, you may have already received or bought an Amaryllis. If not, the selection might be limited, but still worth buying.
Amaryllis blooms are exotic and fabulous! Few bulbs are easier to grow than Amaryllis.
The growth progressive is fun to watch as they are quite large bulbs and flowers. Once the roots are well established in whichever type of container they are in, the flower stalk will emerge with the buds. Each day afterward the stalk and buds continue to grow and develop. The leaves will emerge after the
flower stalk. And anywhere between 6-10 weeks, you will have your patience rewarded with the fabulous blooms of the Amaryllis.
Starting your bulb Before you plant your new bulb, it is recommended you soak it in lukewarm water for about 2-3 hours. This helps rehydrate the roots and ensure they will begin to grow once your bulb is planted.
After you have picked out your container, fill the bottom with good potting soil and then, with the pointed side up, place your bulb into the container. Add more potting soil until the bulb is 2/3s covered, pack the soil lightly. If you are planting more than one bulb in your container - amaryllis like to be cozy in their pots.
Your amaryllis bulb’s new home should be warm (68-75 degrees) with bright, indirect sun. Too much sun will scorch the leaves and fade the blooms faster. Too dark and your leaves will become long, and you might not get the full show of blooms.
Water lightly until you see new growth coming up and thereafter water regularly. Keep in mind that too much water will rot your bulb. Make sure you are using a well-draining potting soil and your container has a drainage hole.
Mystica, Rose Cybyster, Evergreen, Papilion and Sumatra amaryllis. Photo courtesy of Gardeners Supply.
Photo courtesy of Pixabay
Photo courtesy of Pixabay
Help Desk: [email protected] 3
Trumpet Vine Winter 2020-2021
Containers to use -
You have a choice of planting your bulb in the soil in a container or using glass marbles to support it - place your bulb in a vase.
The look of amaryllis in a tall glass vase can be stunning. Containers can also be stunning or funky as you can use any container as long as the drainage is good.
Amaryllis bulbs are heavy and as the flower grows they get heavier. Your container needs to have some good weight to it, otherwise, you might wake up to a fallen bulb.
Some amaryllis will get quite tall and could do with the help of a stake. This can be as simple as a small bamboo stake or like the DIY shown at Gardeningknowhow.com. Instructions are also shown at this link.
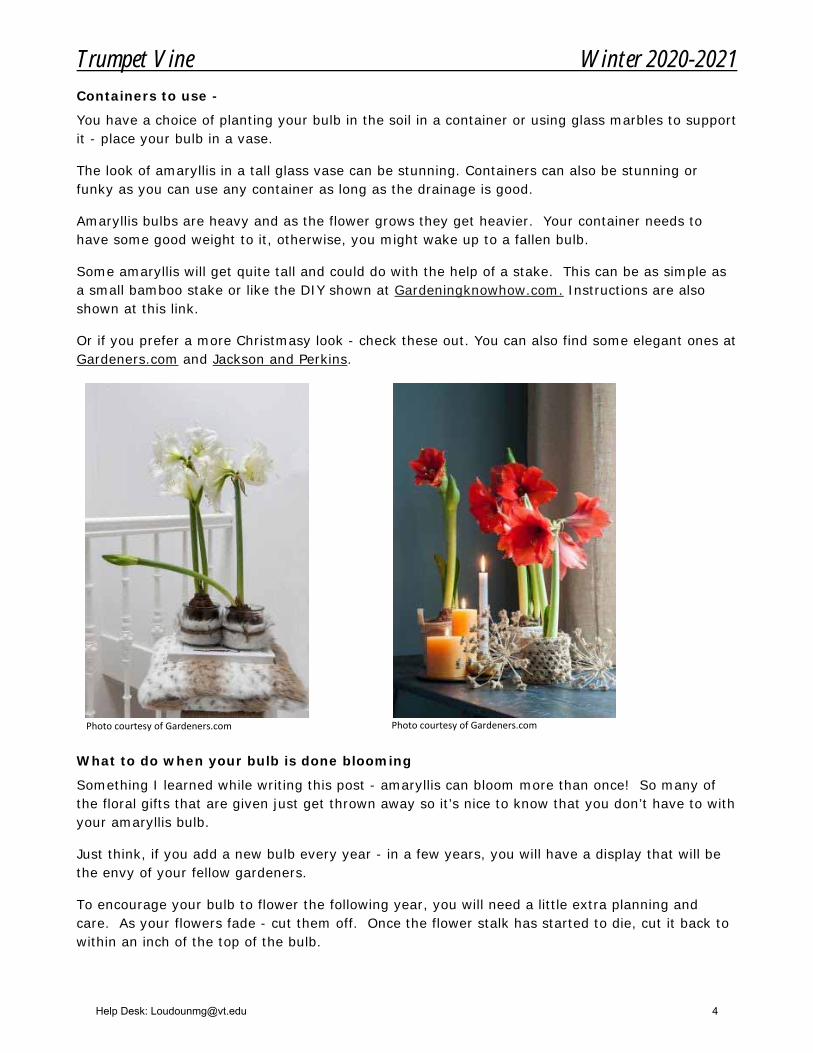
Or if you prefer a more Christmasy look - check these out. You can also find some elegant ones at Gardeners.com and Jackson and Perkins.
Photo courtesy of Gardeners.com
What to do when your bulb is done blooming
Something I learned while writing this post - amaryllis can bloom more than once! So many of the floral gifts that are given just get thrown away so it’s nice to know that you don’t have to with your amaryllis bulb.
Just think, if you add a new bulb every year - in a few years, you will have a display that will be the envy of your fellow gardeners.
To encourage your bulb to flower the following year, you will need a little extra planning and care. As your flowers fade - cut them off. Once the flower stalk has started to die, cut it back to within an inch of the top of the bulb.
Photo courtesy of Gardeners.com
Help Desk: [email protected] 4
Trumpet Vine Winter 2020-2021
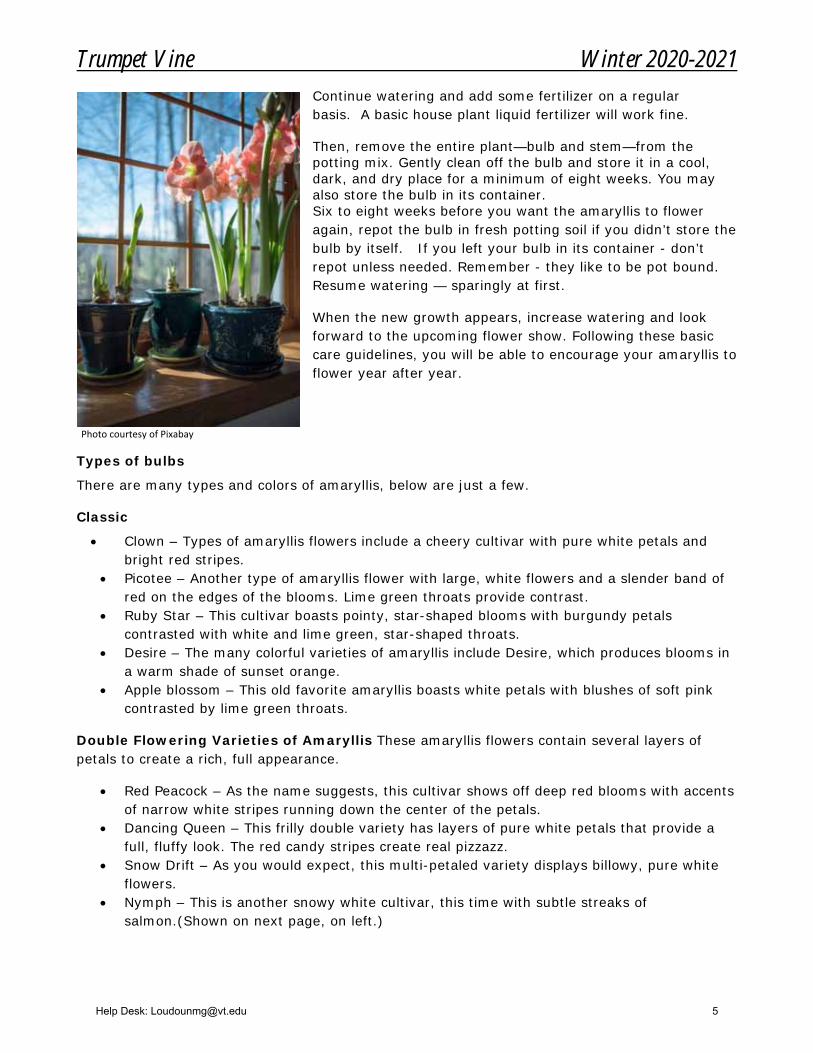
Continue watering and add some fertilizer on a regular basis. A basic house plant liquid fertilizer will work fine.
Then, remove the entire plant—bulb and stem—from the potting mix. Gently clean off the bulb and store it in a cool, dark, and dry place for a minimum of eight weeks. You may also store the bulb in its container. Six to eight weeks before you want the amaryllis to flower again, repot the bulb in fresh potting soil if you didn’t store the bulb by itself. If you left your bulb in its container - don’t repot unless needed. Remember - they like to be pot bound. Resume watering — sparingly at first.
When the new growth appears, increase watering and look forward to the upcoming flower show. Following these basic care guidelines, you will be able to encourage your amaryllis to flower year after year.
Types of bulbs
There are many types and colors of amaryllis, below are just a few.
Classic
Clown – Types of amaryllis flowers include a cheery cultivar with pure white petals and bright red stripes.
Picotee – Another type of amaryllis flower with large, white flowers and a slender band of red on the edges of the blooms. Lime green throats provide contrast.
Ruby Star – This cultivar boasts pointy, star-shaped blooms with burgundy petals contrasted with white and lime green, star-shaped throats.
Desire – The many colorful varieties of amaryllis include Desire, which produces blooms in a warm shade of sunset orange.
Apple blossom – This old favorite amaryllis boasts white petals with blushes of soft pink contrasted by lime green throats.
Double Flowering Varieties of Amaryllis These amaryllis flowers contain several layers of petals to create a rich, full appearance.
Red Peacock – As the name suggests, this cultivar shows off deep red blooms with accents of narrow white stripes running down the center of the petals.
Dancing Queen – This frilly double variety has layers of pure white petals that provide a full, fluffy look. The red candy stripes create real pizzazz.
Snow Drift – As you would expect, this multi-petaled variety displays billowy, pure white flowers.
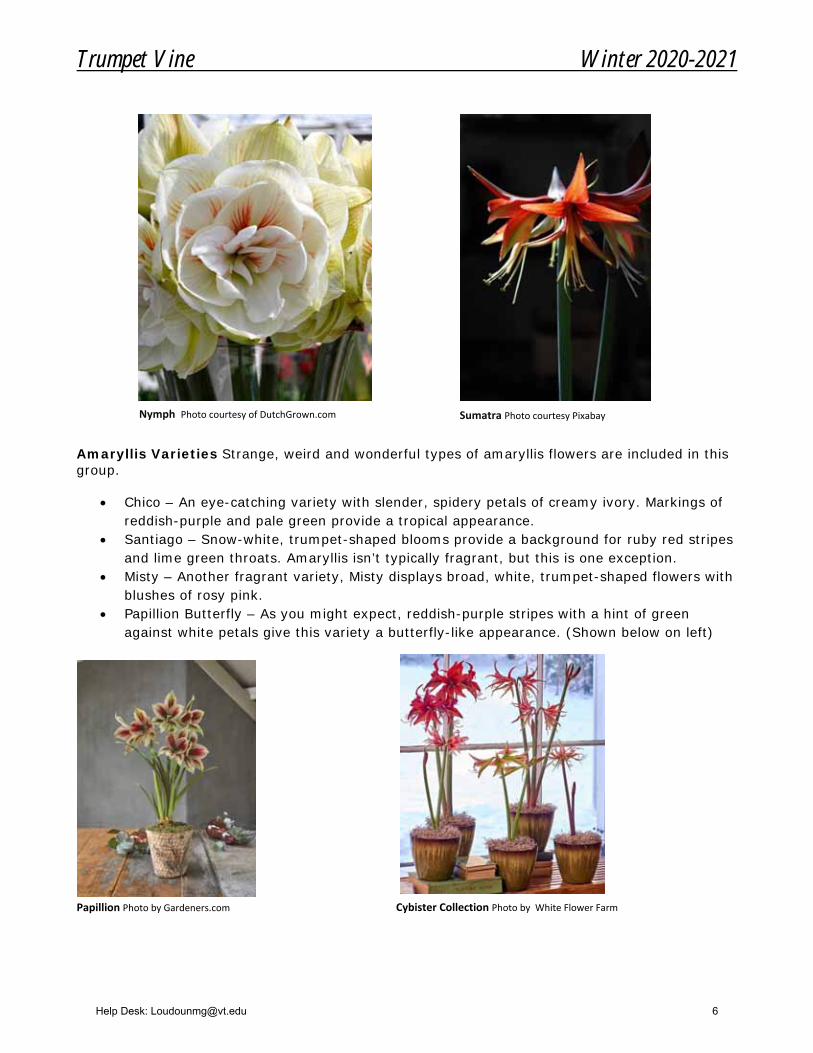
Nymph – This is another snowy white cultivar, this time with subtle streaks of salmon.(Shown on next page, on left.)
Photo courtesy of Pixabay
Help Desk: [email protected] 5
Trumpet Vine Winter 2020-2021
Amaryllis Varieties Strange, weird and wonderful types of amaryllis flowers are included in this group.
Chico – An eye-catching variety with slender, spidery petals of creamy ivory. Markings of reddish-purple and pale green provide a tropical appearance.
Santiago – Snow-white, trumpet-shaped blooms provide a background for ruby red stripes and lime green throats. Amaryllis isn’t typically fragrant, but this is one exception.
Misty – Another fragrant variety, Misty displays broad, white, trumpet-shaped flowers with blushes of rosy pink.
Papillion Butterfly – As you might expect, reddish-purple stripes with a hint of green against white petals give this variety a butterfly-like appearance. (Shown below on left)
Nymph Photo courtesy of DutchGrown.com
Cybister Collection Photo by White Flower Farm Papillion Photo by Gardeners.com
Sumatra Photo courtesy Pixabay
Help Desk: [email protected] 6

Trumpet Vine Winter 2020-2021
Frequently Asked Questions
Q. All I am seeing is leaves, no flower stem yet. Does this mean it won't bloom?
A. Some amaryllis bulbs sprout leaves first, and then the flower stalk emerges a little later. Others send up the flower stalk first, followed by the leaves. You should see the flower stalk peeking up between the leaves soon
Q. Do I need to fertilize my amaryllis?
A. The stored bulb contains all the "food" your amaryllis needs to sprout and bloom. If you decide to keep your amaryllis for reblooming next year, you'll need to fertilize it like you would any houseplant.
Q. Can I use the blooms as cut flowers?
A. Yes! Amaryllis are becoming popular cut flowers, and, surprisingly, they often last longer in a vase — up to two weeks! — then they do best when left growing on the plant. Instead of relegating tall amaryllis to a windowsill or sideboard, you can create a dramatic dining table centerpiece by using a relatively low vase and combining your amaryllis blooms with other flowers and foliage.
Q. How many flower stalks will my bulb produce?
A. This depends on the variety of amaryllis and the quality and size of the bulb. In general, the larger the bulb (for the particular variety) the more flower stalks you'll get. When it comes to amaryllis bulbs, bigger is better.
Q. Do I leave the faded flowers on the plant or "deadhead" like I do my outdoor plants?
A. As individual flowers start to fade, you can carefully snip them off. Once all flowers on a flower stalk have faded, cut the stem back to within a few inches of the bulb.
Diagnosing problems with your bulb
Want to learn more? Gardeningknowhow.com has plenty of knowledge to share including this post on diagnosing problems with your bulb.
Becky Phillips, Loudoun County Extension Master Gardener
Help Desk: [email protected] 7

Trumpet Vine Winter 2020-2021
Delicious Winter Recipes Move over apple pie—these savory recipes show off another side of the treasured tree fruit. All recipes from: Julia Rutland, Apples: 50 Tried and True Recipes (Adventure Publications, 2020). Apple Cheddar Biscuits Makes 1 dozen
Ideal Apple: Choose any firm baking apple or one of these: Honeycrisp, Golden Delicious, or Jonagold.
Consider keeping extra ingredients on hand because these light and highly flavorful biscuits will disappear fast. Best right out of the oven, they reheat well and make a nice addition to light lunches of soup and salad.
2 cups all-purpose flour
1 tablespoon baking powder
1 tablespoon granulated sugar
½ teaspoon salt
½ teaspoon coarsely ground black pepper
3 green onions, chopped
1 cup (4 ounces) shredded cheddar cheese
1 stick (8 tablespoons) butter, melted
1 cup sour cream
1 large apple, any variety
Preheat oven to 400°. Line a baking sheet with a silicone baking mat, nonstick aluminum foil, or lightly greased foil.
Combine flour, baking powder, sugar, salt, pepper, and onion in a large bowl, stirring until well blended. Add cheese, tossing to coat.
Combine butter and sour cream in a large bowl. Grate apple over bowl, avoiding the core. Stir until well blended. Stir butter mixture into flour mixture.
Pat dough out to 3/4- to 1-inch thickness on a floured surface. Cut biscuits with a 2-inch cutter, patting scraps and cutting as necessary.
Place biscuits on prepared baking sheet and bake 15 minutes or until lightly browned.
Help Desk: [email protected] 8
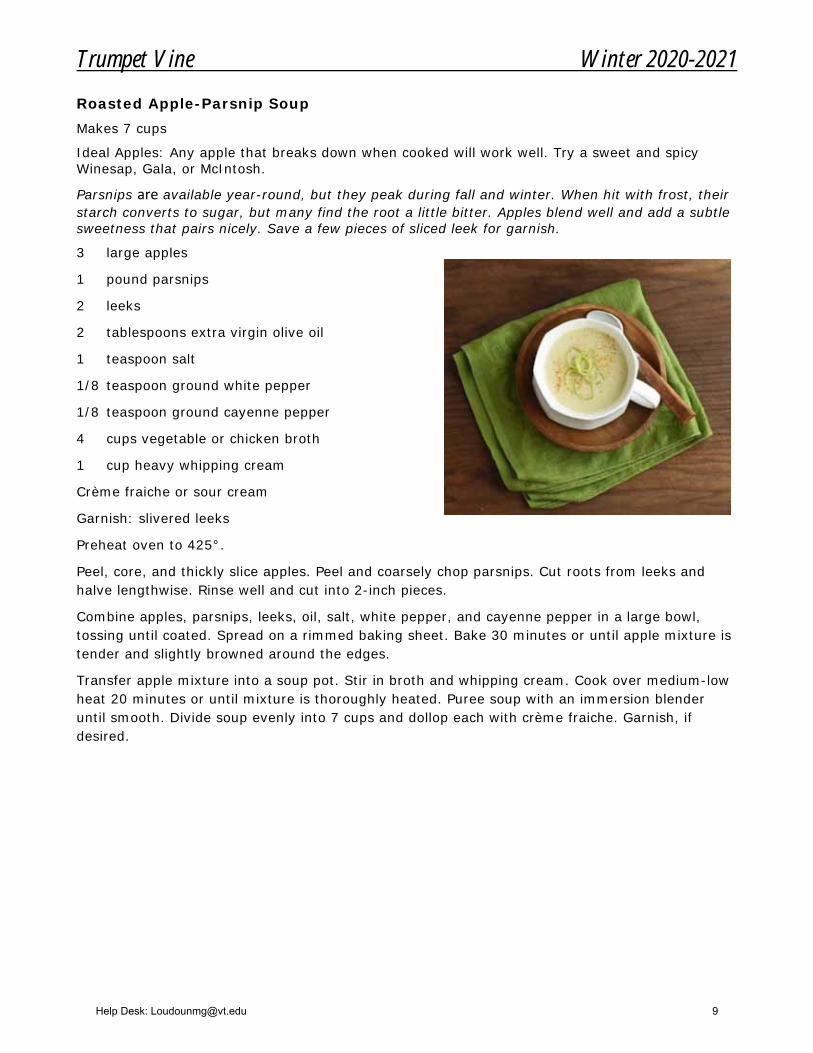
Trumpet Vine Winter 2020-2021 Roasted Apple-Parsnip Soup Makes 7 cups
Ideal Apples: Any apple that breaks down when cooked will work well. Try a sweet and spicy Winesap, Gala, or McIntosh.
Parsnips are available year-round, but they peak during fall and winter. When hit with frost, their starch converts to sugar, but many find the root a little bitter. Apples blend well and add a subtle sweetness that pairs nicely. Save a few pieces of sliced leek for garnish.
3 large apples
1 pound parsnips
2 leeks
2 tablespoons extra virgin olive oil
1 teaspoon salt
1/8 teaspoon ground white pepper
1/8 teaspoon ground cayenne pepper
4 cups vegetable or chicken broth
1 cup heavy whipping cream
Crème fraiche or sour cream
Garnish: slivered leeks
Preheat oven to 425°.
Peel, core, and thickly slice apples. Peel and coarsely chop parsnips. Cut roots from leeks and halve lengthwise. Rinse well and cut into 2-inch pieces.
Combine apples, parsnips, leeks, oil, salt, white pepper, and cayenne pepper in a large bowl, tossing until coated. Spread on a rimmed baking sheet. Bake 30 minutes or until apple mixture is tender and slightly browned around the edges.
Transfer apple mixture into a soup pot. Stir in broth and whipping cream. Cook over medium-low heat 20 minutes or until mixture is thoroughly heated. Puree soup with an immersion blender until smooth. Divide soup evenly into 7 cups and dollop each with crème fraiche. Garnish, if desired.
Help Desk: [email protected] 9

Trumpet Vine Winter 2020-2021 Apple-Sausage-Cheddar Cornbread Makes 8 servings
Ideal Apples: Select a variety that holds up during baking so the apple bits will be noticeable. Granny Smith, Honeycrisp, Golden Delicious, Rome, and Fuji are popular options. Make it easy and keep the peel on.
I started making a version of this cornbread for a Southern-style dressing, but it’s too tasty to save for holiday meals. The recipe morphed into a skillet bread that is hearty enough to eat as an entrée, especially if served with a simple salad. Leftovers are yummy, and I try to save some for a quick portable breakfast.
1 pound bulk pork or turkey sausage
2 apples
1½ cups (6 ounces) shredded cheddar
cheese
1 cup yellow cornmeal
1 cup all‐purpose flour
1 tablespoon baking powder
½ teaspoon ground sage
½ teaspoon salt
1¼ cups buttermilk
1 large egg
4 tablespoons butter
Chopped fresh parsley or green onions
Preheat oven to 425°.
Cook sausage in a 10‐inch cast iron skillet over medium‐high heat until browned and crumbly. Drain and transfer sausage to a large bowl; wipe skillet with a paper towel.
Core and finely chop apples. Stir apples and cheese into sausage.
In a separate bowl, combine cornmeal, flour, baking powder, sage, and salt. Whisk buttermilk and egg together in a small bowl or measuring cup.
Place butter in skillet and place skillet in oven until butter melts.
While butter melts, stir cornmeal mixture into sausage mixture. Add buttermilk mixture, stirring until well blended.
Remove skillet from oven and spoon in sausage mixture. Bake 30 minutes or until cooked through and light golden brown. Sprinkle with parsley or green onions.
Julia Rutland, Loudoun County Extension Master Gardener
Help Desk: [email protected] 10
Trumpet Vine Winter 2020-2021
Poinsettia–The Christmas Flower
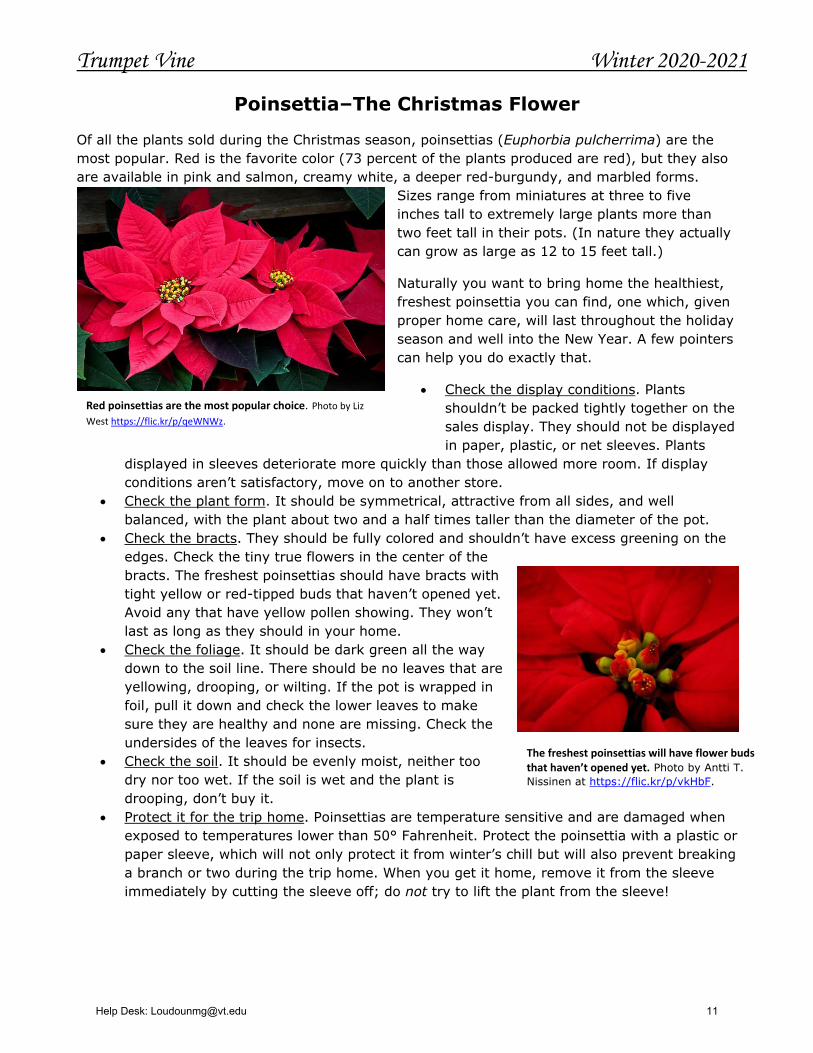
Of all the plants sold during the Christmas season, poinsettias (Euphorbia pulcherrima) are the
most popular. Red is the favorite color (73 percent of the plants produced are red), but they also
are available in pink and salmon, creamy white, a deeper red-burgundy, and marbled forms.
Sizes range from miniatures at three to five
inches tall to extremely large plants more than
two feet tall in their pots. (In nature they actually
can grow as large as 12 to 15 feet tall.)
Naturally you want to bring home the healthiest,
freshest poinsettia you can find, one which, given
proper home care, will last throughout the holiday
season and well into the New Year. A few pointers
can help you do exactly that.
• Check the display conditions. Plants
shouldn’t be packed tightly together on the
sales display. They should not be displayed
in paper, plastic, or net sleeves. Plants
displayed in sleeves deteriorate more quickly than those allowed more room. If display
conditions aren’t satisfactory, move on to another store.
• Check the plant form. It should be symmetrical, attractive from all sides, and well
balanced, with the plant about two and a half times taller than the diameter of the pot.
• Check the bracts. They should be fully colored and shouldn’t have excess greening on the
edges. Check the tiny true flowers in the center of the
bracts. The freshest poinsettias should have bracts with
tight yellow or red-tipped buds that haven’t opened yet.
Avoid any that have yellow pollen showing. They won’t
last as long as they should in your home.
• Check the foliage. It should be dark green all the way
down to the soil line. There should be no leaves that are
yellowing, drooping, or wilting. If the pot is wrapped in
foil, pull it down and check the lower leaves to make
sure they are healthy and none are missing. Check the
undersides of the leaves for insects.
• Check the soil. It should be evenly moist, neither too
dry nor too wet. If the soil is wet and the plant is
drooping, don’t buy it.
• Protect it for the trip home. Poinsettias are temperature sensitive and are damaged when
exposed to temperatures lower than 50° Fahrenheit. Protect the poinsettia with a plastic or
paper sleeve, which will not only protect it from winter’s chill but will also prevent breaking
a branch or two during the trip home. When you get it home, remove it from the sleeve
immediately by cutting the sleeve off; do not try to lift the plant from the sleeve!
Red poinsettias are the most popular choice. Photo by Liz
West https://flic.kr/p/qeWNWz.
The freshest poinsettias will have flower buds that haven’t opened yet. Photo by Antti T.
Nissinen at https://flic.kr/p/vkHbF.
Help Desk: [email protected] 11
Trumpet Vine Winter 2020-2021
Caring for your poinsettia: Once you get your poinsettia home, caring for it is very simple.
• Accidents: If you have active children or pets, try to keep
the plant in an area where they won’t knock it over and
break it when they’re playing. It happens!
• Light: Place your poinsettia in an area that gets bright but
indirect, natural light, such as near a south, east, or west
window. About six hours of good light a day is perfect. If you
place it on a windowsill, don’t let it touch the cold glass.
• Temperature: Ideally, poinsettias prefer daytime
temperatures ranging from 65° to 70° Fahrenheit and
nighttime temperatures ranging from about 60° to 65° F.
Avoid cold drafts (such as might occur near some windows
or in a front hall near an exterior door). Also avoid hot air (such as that blowing from a
space heater or HVAC ducts) and excessive heat (such as from a radiator or fireplace).
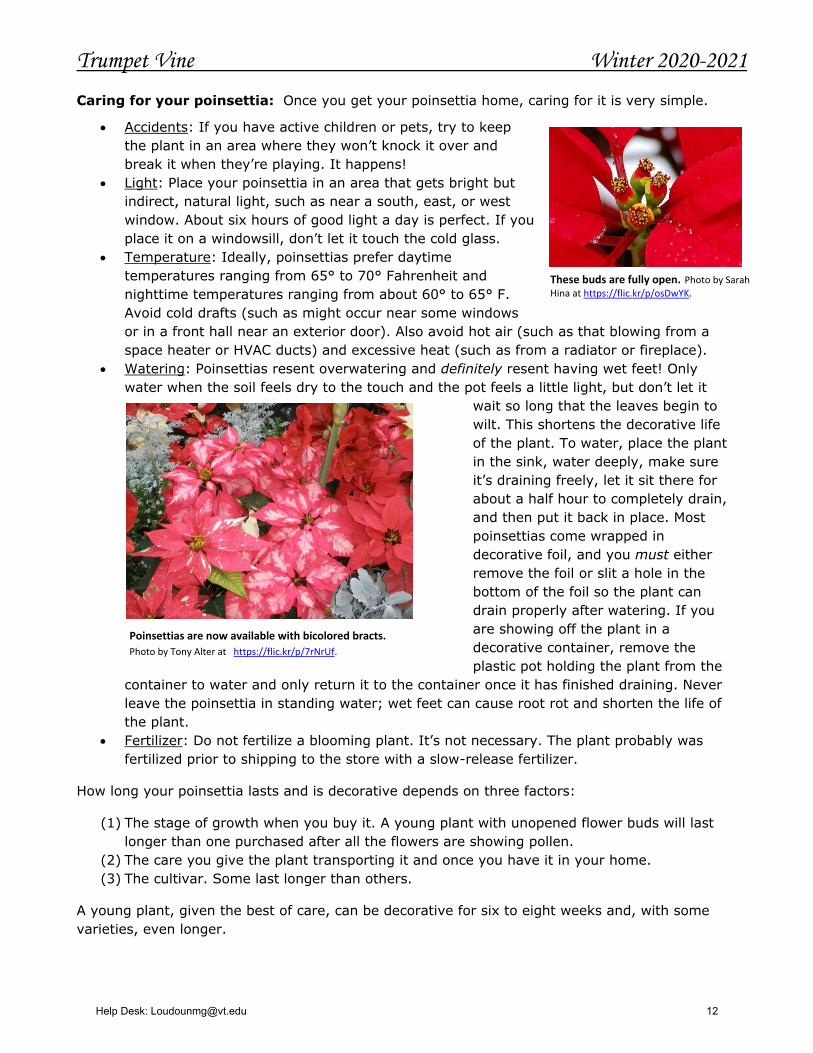
• Watering: Poinsettias resent overwatering and definitely resent having wet feet! Only
water when the soil feels dry to the touch and the pot feels a little light, but don’t let it
wait so long that the leaves begin to
wilt. This shortens the decorative life
of the plant. To water, place the plant
in the sink, water deeply, make sure
it’s draining freely, let it sit there for
about a half hour to completely drain,
and then put it back in place. Most
poinsettias come wrapped in
decorative foil, and you must either
remove the foil or slit a hole in the
bottom of the foil so the plant can
drain properly after watering. If you
are showing off the plant in a
decorative container, remove the
plastic pot holding the plant from the
container to water and only return it to the container once it has finished draining. Never
leave the poinsettia in standing water; wet feet can cause root rot and shorten the life of
the plant.
• Fertilizer: Do not fertilize a blooming plant. It’s not necessary. The plant probably was
fertilized prior to shipping to the store with a slow-release fertilizer.
How long your poinsettia lasts and is decorative depends on three factors:
(1) The stage of growth when you buy it. A young plant with unopened flower buds will last
longer than one purchased after all the flowers are showing pollen.
(2) The care you give the plant transporting it and once you have it in your home.
(3) The cultivar. Some last longer than others.
A young plant, given the best of care, can be decorative for six to eight weeks and, with some
varieties, even longer.
Poinsettias are now available with bicolored bracts.
Photo by Tony Alter at https://flic.kr/p/7rNrUf.
These buds are fully open. Photo by Sarah
Hina at https://flic.kr/p/osDwYK.
Help Desk: [email protected] 12
Trumpet Vine Winter 2020-2021
Poinsettias as cut flowers: In warm areas such as Florida where poinsettias are hardy and
grow as shrubs or small trees, florists and homeowners can step outside and cut a few blooms for
arrangements. Here in Virginia where we must buy potted plants, however, this really isn’t
practical unless you absolutely must have a poinsettia flower or two in a very special
arrangement. Of course, you could accidentally break a branch on your poinsettia, in which case
it’s helpful to know how you can try to save it, perhaps for a bud vase.
First, trim the broken stem on a slant (or cut the stem to the length you want it to be) and
remove any leaves that will be below the water level in your vase. The milky sap will immediately
start oozing from the cut stem. Quickly sear the cut end in the flame of a candle for about five
seconds. This will stop the oozing but the stem will still be able to take up water. After searing,
place the stem in lukewarm water with a floral preservative. This is the procedure most
commonly recommended by florists, and I have had success with it in the past on a broken stem.
A video demonstrating this method is at https://www.youtube.com/watch?v=oQgU5dSdI6s.
Alternatively, you can stop the oozing sap by immersing the cut stem end in a cup of boiling
water for about twenty seconds, then immediately placing it in cold water to seal in the sap. This
procedure is recommended by the British Florists Association, which says it supersedes the
searing procedure they previously used. A video demonstrating the technique is at
https://www.youtube.com/watch?v=mUZsr3Rt3Dg. Note that in this video from the United
Kingdom they don’t use boiling water; they use water at 60° Celsius, or only 140° Fahrenheit,
which is different from United States florists’ recommendations.
A third procedure is to immediately place the stem in a vase of fresh water and cut it under water
on a slant. Let the sap drain. Once the sap has stopped draining (in about half an hour), remove
it from the vase and use in your arrangement. This method is recommended by the Duval County
Extension Service, University of Florida/IFAS.
Poinsettias can be finicky; occasionally a flower will wilt, and you’ll just have to try again with a
different flower. Once it’s clear that you have successfully hardened the flower (about half an
hour), you can use it in an arrangement with floral foam or show it off as a single bloom in a bud
vase. Treated in one of these three ways, poinsettia flowers can last for at least a week--
sometimes as long as two weeks if kept away from cool drafts or heat sources.
Lina Burton, Loudoun County Extension Master Gardener
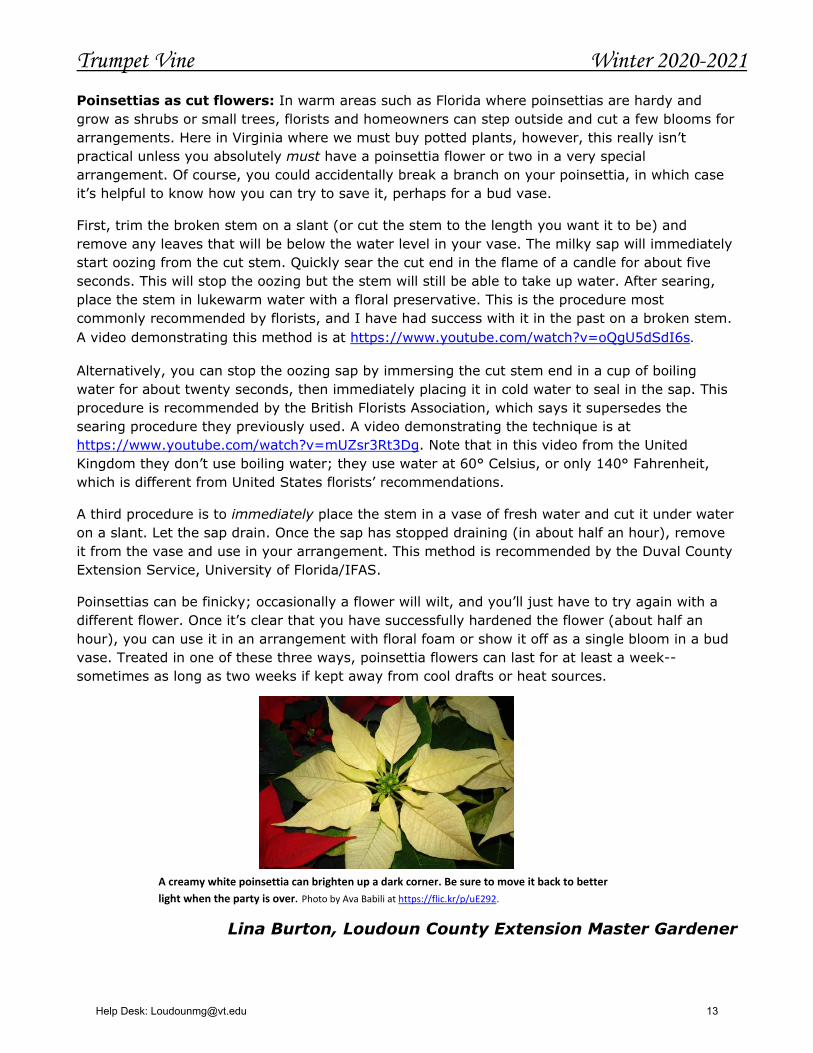
A creamy white poinsettia can brighten up a dark corner. Be sure to move it back to better
light when the party is over. Photo by Ava Babili at https://flic.kr/p/uE292.
Help Desk: [email protected] 13
Trumpet Vine Winter 2020-2021
Poinsettias–Reblooming Next Year
Reblooming–it’s possible, but not easy. Once poinsettias become unattractive in late winter or early spring, most people throw them away. There are two reasons people don’t try to rebloom poinsettias for the following year: (1) it isn’t easy under normal home conditions to make them bloom, right on schedule, for Christmas the following year; and (2) even if you are successful, the plant will never have the quality of a newly purchased plant, which has its growth regulated by various chemicals growers use during the production process.
Nevertheless, if you want to try it, here are some guidelines:
January to March: When you no longer want to include the plant in your household décor, or the plant begins to look a little sad, it’s time to let it go into dormancy. Depending on the cultivar and your household conditions, that could be anyplace between January and March. Until that time, continue to treat it the same way you did during the holiday season. Remove from the pot any leaves that die and periodically check for insects, particularly whiteflies. If roots start to show above the soil, add a little soil, just enough to cover them. To initiate dormancy, gradually withhold water but not so drastically that the stems shrivel! The leaves will yellow and fall off, with the colored bracts falling last. Put the plant in a cool, dark, dry place, at about 60°, until spring.
March to early May: When it’s time to break dormancy, you will be faced with a leggy bunch of bare stems. Prune them back to three to six inches above the soil line, leaving at least two nodes (from which the new shoots will emerge) on each stem. This is a good time to repot it, using a good commercial potting soil, in a pot two to four inches larger than the one in which it has been growing. If there are several plants in the pot, now is the time to separate them. Gradually increase watering as new shoots start to grow and move the plant to a bright spot, like a sunny south window, with a nighttime temperature of about 60°. When new growth is about one to two inches long, start fertilizing every two to three weeks with an all-purpose fertilizer for potted flowering plants (10-10-10, 20-20-20, or 20-10-20 are all recommended by various authorities) according to package directions. When the new growth reaches four to five inches, pinch the tips of the branches to encourage bushiness.
May: After all danger of frost is past and night temperatures exceed 60°, place the plant outside in a sheltered place. Poinsettias are wind sensitive. Keep the plant in shade for a couple of weeks to harden it off, then move it gradually to a place where it gets a minimum of six hours of sun each day, preferably morning sun and afternoon shade. Rotate the pot one-quarter turn a week so growth is balanced on all sides. (Continue rotating until December.) Increase water and fertilizer. Pinch again when new growth is two to three inches long. You may need to pinch the stems yet again if the plant grows rapidly.
Summer: Continue fertilizing every two to three weeks with a fertilizer for flowering pot plants, following directions on the fertilizer package. Stop pinching in mid-August. In early September, decrease the amount of fertilizer, to about one quarter the strength recommended on the package and don’t fertilize as often.
Help Desk: [email protected] 14
Trumpet Vine Winter 2020-2021
Late September: Depending on the weather, bring the plant inside in mid-to-late
September, checking for and correcting any insect problems (particularly whiteflies, mealybugs, red spider mites, and scale) when you do. Plants must not be exposed to temperatures below about 60°. Continue to fertilize at a reduced rate. Plants growing in reduced indoor lighting don’t need as much fertilizer as those growing outside. Put the plant in a draft-free place where it receives abundant natural daylight (such as in or near a south, east, or west window) and temperatures at about 60° to 62° at night and 70° to 75° during the day.
September 21 to October 1: This is the tricky part! To initiate flowering, the plant must have a maximum 10 hours of daylight and a minimum of 14 hours of total darkness each day for eight to ten weeks. No exceptions! Briefly opening the door of an otherwise dark closet; street lights coming through the window; the car lights sweeping through the otherwise dark room; the glow from a TV screen, iPad, or iPhone--even these small amounts of light will be enough to interrupt the initiation process and either delay flowering or prevent it altogether. Place the plant in a dark place (or cover with a light-proof box or bag) from 5 p.m. to 8 a.m. Continue watering and fertilizing at the reduced rate. Nighttime temperatures should be no lower than 60°, with daytime temperatures no higher than 70°. Any deviation from these two extremes can delay or even prevent flower initiation. Depending on the cultivar, temperature, and light, it can take eight to ten weeks from the time the dark-light cycle begins before color starts to appear on the leaves. Patience is required.
November: After Thanksgiving, color should start to show in the bracts indicating that flower initiation has begun. At this point you can discontinue the dark-light treatment or, preferably, you can wait until the bracts have fully expanded, then move the plant permanently to an area that gets at least six hours of direct light each day. Continue watering but at a reduced rate. Stop fertilizing.
December: If all goes well, enjoy your blooming poinsettia!
Lina Burton, Loudoun County Extension Master Gardener
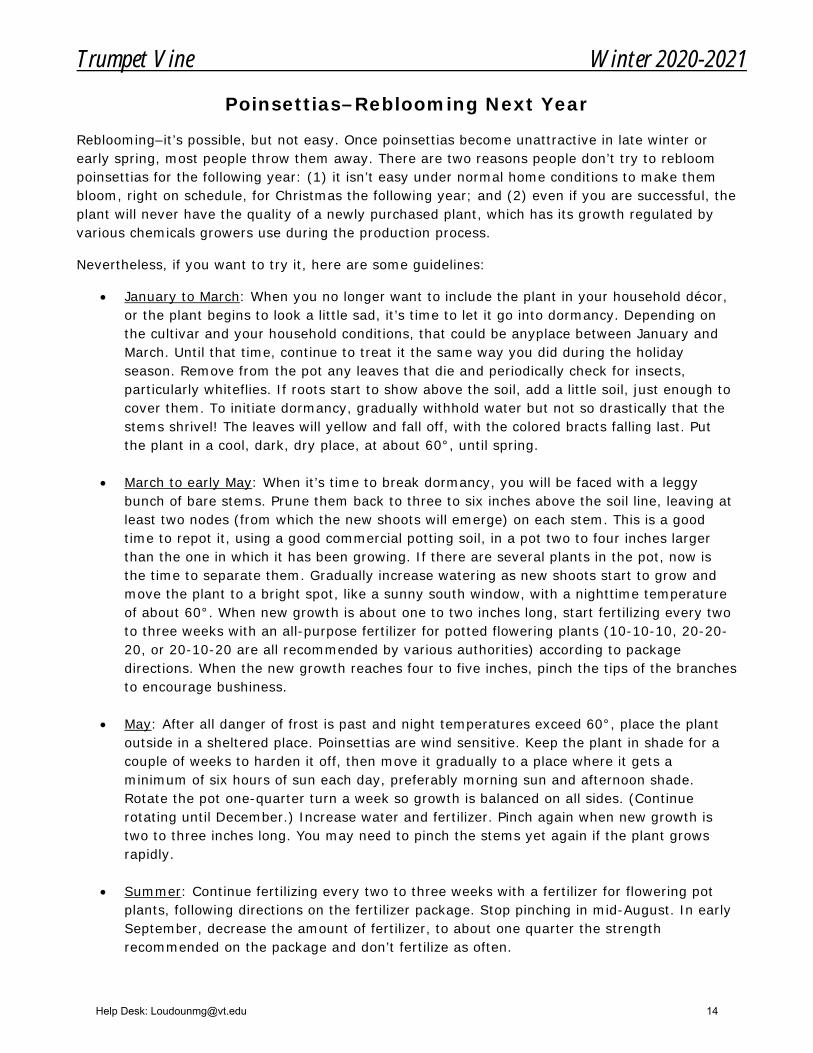
Wild poinsettias can grow into a rather loose shrub, 12 to 15 feet tall. These are in the Canary Islands. Photo by Frank Vincentz.
Help Desk: [email protected] 15
Trumpet Vine Winter 2020-2021
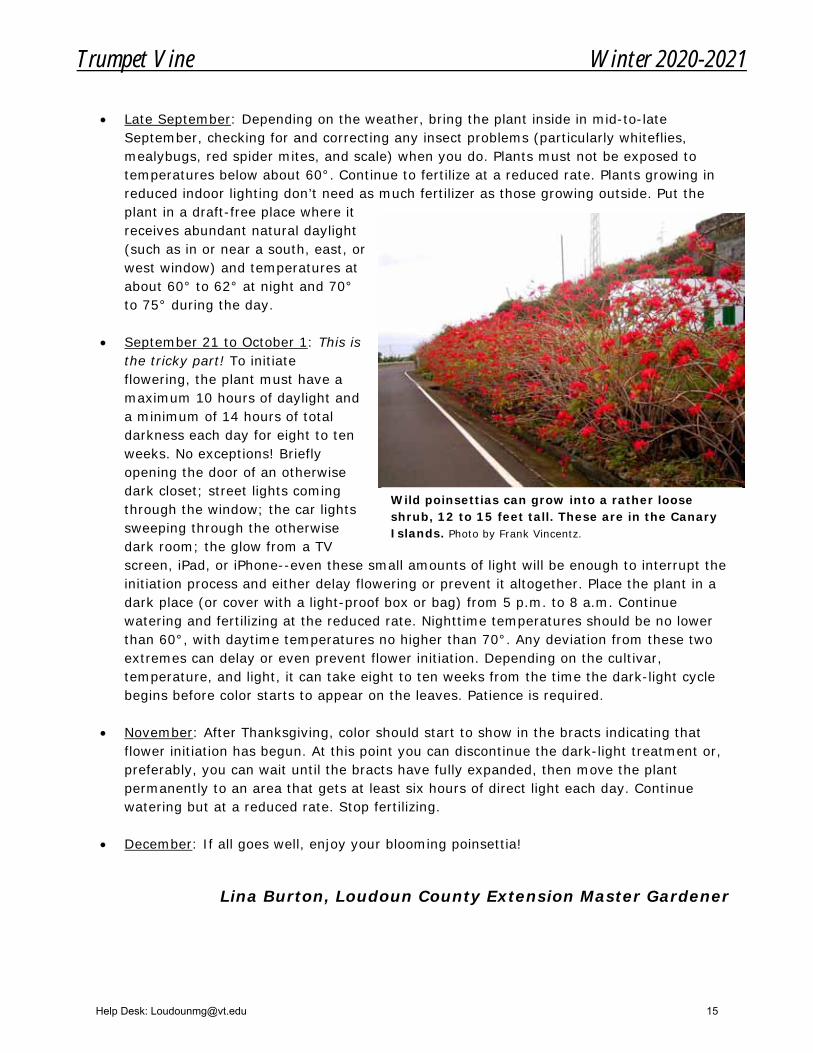
Goose and goslings Photo courtesy Pixabay
Meet the Canada Goose The Canada goose is one of the largest birds in North America. Its proper name is Canada goose, NOT Canadian goose. Two subspecies are the most familiar. The smaller of the two are often known as “cackling geese” and the larger are known as “honkers.” The American Ornithologist Union has divided eight subspecies between the cackling geese and the honkers. The various subspecies of this bird vary widely in size and plumage details, but all are recognizable as Canada geese.
The Canada goose belongs to the family Anatidae of the waterfowl order Anseriformes. It is native to arctic and temperate regions of North America, and its migration occasionally reaches northern Europe. It breeds in Canada and the northern United States in a wide range of habitats. A large population of the Canada goose can be found in the Great Lakes region. Large flocks of Canada geese have established permanent residence along the Pacific coast of North America, south to the San Francisco Bay area of Northern California. They are also found on Chesapeake Bay, in the James River region of Virginia, and in North Carolina. They are taking up permanent homes as far south as Florida because of the numerous retention ponds found there in apartment complexes.
The larger goose wingspan is second in size only to that of the trumpeter swan among common waterfowl. The largest wild goose of any species weighed 24 pounds and had a wingspan of 7.3 feet. The Canada goose exhibits a lifespan of 10 to 24 years in the wild. Larger birds tend to live longer than smaller birds.
All Canada geese have the diagnostic white “chinstrap” and are varying shades of brown. The young look much like the adults. The female looks virtually identical to the male but is slightly lighter and smaller. Their calls are similar with the female call being shorter and more high-pitched than the honk of the male.
They are extraordinarily strong, swift fliers and can cover 1,500 miles in 24 hours when riding wind currents.
Canada geese often fly in a distinctive V formation that aids streamlining, and family groups stay together throughout the winter. The geese often call to one another as they fly, their honking chorus sounding at a distance like a pack of hounds. They fly at a maximum altitude of 3,000 feet for migration flight. The maximum ceiling of Canada geese is unknown, but they have been reported at 29,000 feet.
They fly adhering to a rigid migratory path with traditional stopover and wintering areas. They are primarily herbivorous and normally migratory, usually found close to fresh water. Their autumn migration can be seen from September to the beginning of November.
The Canada goose diet includes green vegetation and grains, and sometimes small insects and fish. They eat a variety of grasses while on land. They will also eat beans and grains such as wheat, rice, and corn depending on availability. The Canada goose also feeds on aquatic plant-like algae, such as seaweeds. They are known to eat out of garbage dumpsters when in urban areas
Help Desk: [email protected] 16
Trumpet Vine Winter 2020-2021
and parks, and they will usually graze in open areas with wide clearance to avoid potential predators.
Adult Canada geese are rarely preyed upon because of their large size and aggressive behavior. Predators of the Canada goose include coyotes, Arctic foxes, northern raccoons, red foxes, large gulls, common ravens, American crows, carrion crows, and both brown and American black bears. These predators will also eat both the eggs and goslings of the Canada goose.
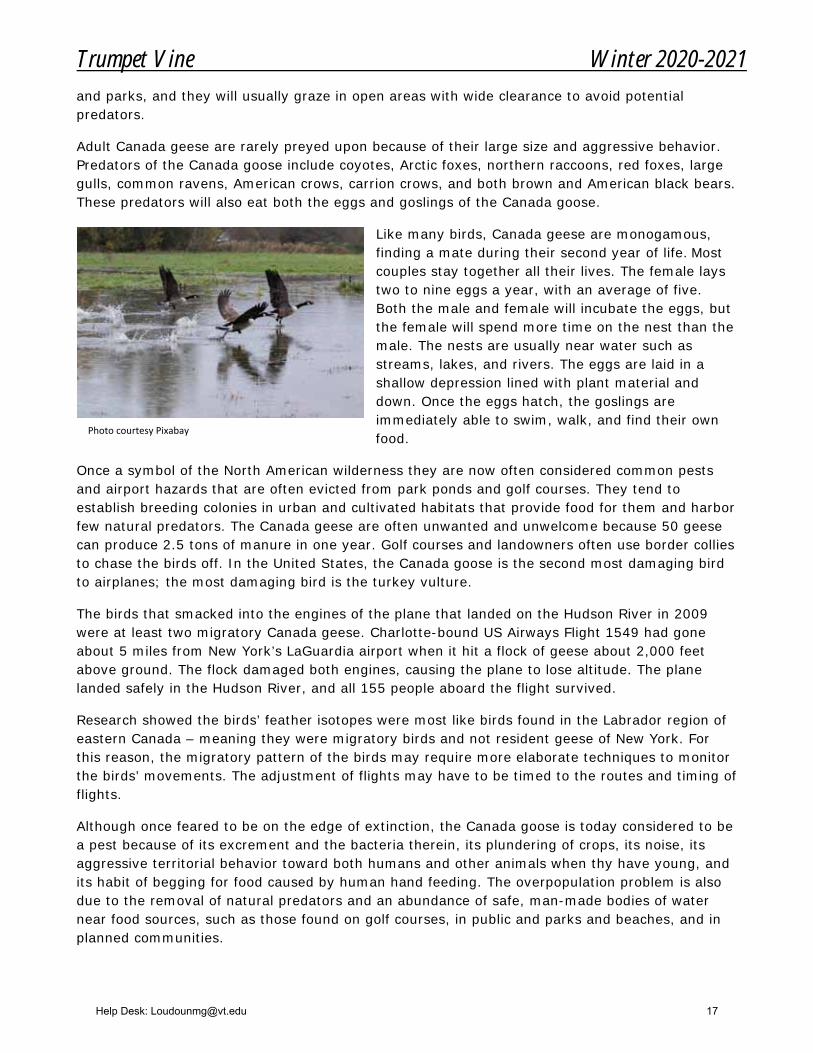
Like many birds, Canada geese are monogamous, finding a mate during their second year of life. Most couples stay together all their lives. The female lays two to nine eggs a year, with an average of five. Both the male and female will incubate the eggs, but the female will spend more time on the nest than the male. The nests are usually near water such as streams, lakes, and rivers. The eggs are laid in a shallow depression lined with plant material and down. Once the eggs hatch, the goslings are immediately able to swim, walk, and find their own food.
Once a symbol of the North American wilderness they are now often considered common pests and airport hazards that are often evicted from park ponds and golf courses. They tend to establish breeding colonies in urban and cultivated habitats that provide food for them and harbor few natural predators. The Canada geese are often unwanted and unwelcome because 50 geese can produce 2.5 tons of manure in one year. Golf courses and landowners often use border collies to chase the birds off. In the United States, the Canada goose is the second most damaging bird to airplanes; the most damaging bird is the turkey vulture.
The birds that smacked into the engines of the plane that landed on the Hudson River in 2009 were at least two migratory Canada geese. Charlotte-bound US Airways Flight 1549 had gone about 5 miles from New York’s LaGuardia airport when it hit a flock of geese about 2,000 feet above ground. The flock damaged both engines, causing the plane to lose altitude. The plane landed safely in the Hudson River, and all 155 people aboard the flight survived.
Research showed the birds’ feather isotopes were most like birds found in the Labrador region of eastern Canada – meaning they were migratory birds and not resident geese of New York. For this reason, the migratory pattern of the birds may require more elaborate techniques to monitor the birds’ movements. The adjustment of flights may have to be timed to the routes and timing of flights.
Although once feared to be on the edge of extinction, the Canada goose is today considered to be a pest because of its excrement and the bacteria therein, its plundering of crops, its noise, its aggressive territorial behavior toward both humans and other animals when thy have young, and its habit of begging for food caused by human hand feeding. The overpopulation problem is also due to the removal of natural predators and an abundance of safe, man-made bodies of water near food sources, such as those found on golf courses, in public and parks and beaches, and in planned communities.
Photo courtesy Pixabay
Help Desk: [email protected] 17

Trumpet Vine Winter 2020-2021
Today the resident population of these birds is estimated at well over one million birds and increasing. Canada geese are among the birds that have thrived in urban areas across much of North America. In the year 2000, the North American population of Canada geese was estimated to be between 4 and 5 million birds.
The Canada Goose Egg Addling Protocol of the Humane Society of the United States (HSUS) helps with the population overgrowth of these birds. Goose egg addling is a term used for rubbing oil on eggs to keep them from hatching. The oil blocks air from entering or exiting the egg, stopping inside development. Eggs can be tested by a “float test” that determines how much air is inside the egg. Eggs of Canada geese that are less than 14 days old can be addled humanely.
To keep geese away from your pond, one of the best long-term Canada goose control tactics is landscape modification. Geese avoid areas where fox and other predators can hide. A 20- to 30-foot-wide barrier of
shrubs, native and ornamental grasses, and tall perennials near the water will help keep the geese out of the area and most importantly keep geese excrement out of the pond water. Needless to say, don’t feed the geese.
Heather Keith, Loudoun County Extension Master Gardener
Photo courtesy Pixabay.
Help Desk: [email protected] 18
Trumpet Vine Winter 2020-2021
Goodbye Mum!
I must admit that for my entire adult life I have been drawn into the beauty of the fall
chrysanthemum. I have purchased more than I can count. Mostly I have killed them through
neglect. Some have made it into the ground. And many have been given away. When they
managed to survive to see the following summer, I have spent far too long clipping back their
buds in mid summer to make them fuller and bloom later. Fussing over them like a beloved pet.
I have been dreadfully enamored of them.
Since becoming an Extension Master Gardener three years ago, I have learned an enormous
amount about native plants. Not just that they do better here because they are supposed to be
here, but because the soil and the insects and the food chain knows them. They evolved together
and operate in a symbiotic manner within their ecosphere.
But then fall came… and I bought another mum (no, they are not native to Virginia). Why did I
buy one? Because I did not know that there could be a native plant that would make me just as
happy. But there is! And this year it came into full bloom outside my office window. It’s scientific
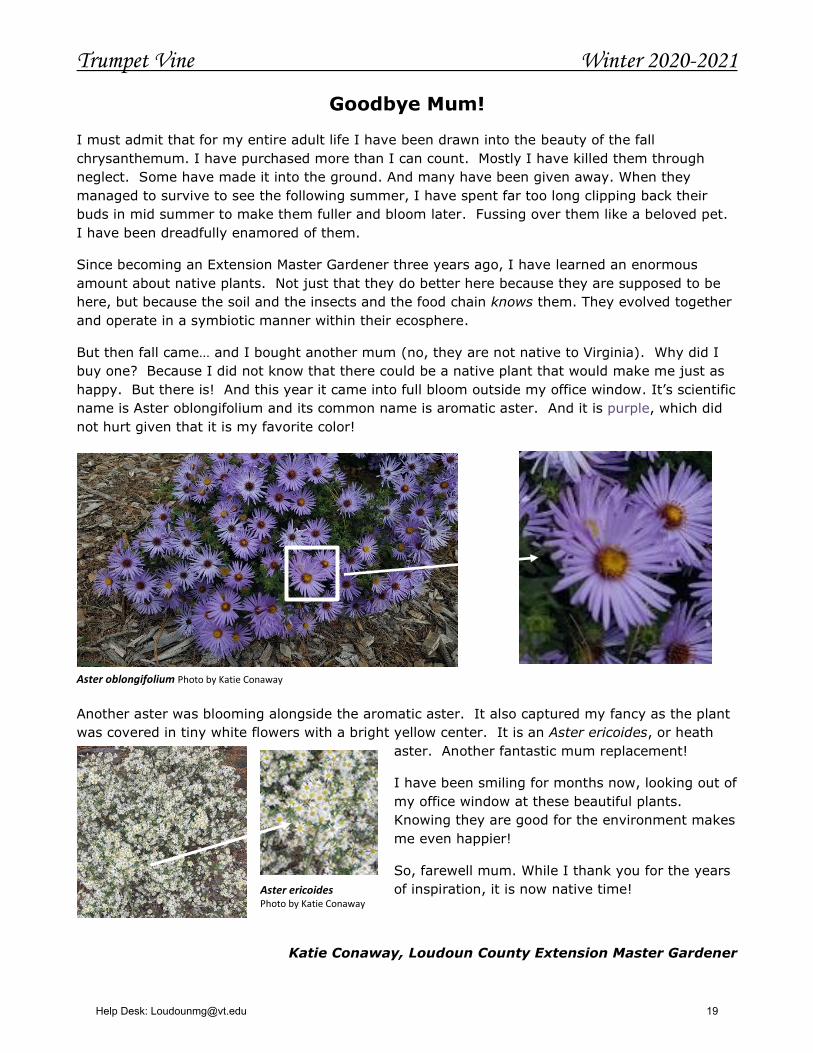
name is Aster oblongifolium and its common name is aromatic aster. And it is purple, which did
not hurt given that it is my favorite color!
Another aster was blooming alongside the aromatic aster. It also captured my fancy as the plant
was covered in tiny white flowers with a bright yellow center. It is an Aster ericoides, or heath
aster. Another fantastic mum replacement!
I have been smiling for months now, looking out of
my office window at these beautiful plants.
Knowing they are good for the environment makes
me even happier!
So, farewell mum. While I thank you for the years
of inspiration, it is now native time!
Katie Conaway, Loudoun County Extension Master Gardener
Aster oblongifolium Photo by Katie Conaway
Aster ericoides Photo by Katie Conaway
Help Desk: [email protected] 19

Trumpet Vine Winter 2020-2021
“There Is a New Shrub in Town: The Tea Plant From Seed to
Plant, A Journey--Year Five”
The previous articles, (Fall 2015 and Fall 2016) discussed raising tea plants from seed to small
bushes. The future vision for the plant in Virginia both commercially and in the garden is
promising, as I will discuss below.
Seeds! Seeds! We Have Seeds!
In September 2020, I was watering my five-year-old tea plants and found the first seeds. This
was a great discovery for me because I was not sure if Korean tea seeds could be grown in
Virginia. An actual Virginia-grown seed would represent a full cycle of propagation.
Since 2014, this tea growing experiment in Northern Virginia has exhibited many ups and downs.
With the cold winters, deer browsing, wind issues, and unknown reasons of tea plant die off, each
year I have learned more and more.
Tea plants are slow starters and require patience. Each year the plants were grown in a dappled
sun garden and grew taller and wider.
The winters were hard on them especially, determined by their location in the garden. The plants
on a hillside with a western view opened to wind, lost most of their leaves in the cold frigid days
of February. However, when spring came and the nights were above 55 degrees, usually by mid-
May or early June, new leaves would sprout and by summer the bush would be full and growing.
The plants that were in the upper garden next to a pond and sheltered by the wind kept most of
their leaves to be evergreen all winter.
Both garden sites produced flowers in October. This feature of growing tea was a pleasant
surprise to me and to the local bees and insects. The flowers were all over the bushes and the
bush would hum with the bees collecting pollen and nectar. The flowers were the last of the
season and provided a special place for the local bees and other insects.
After pollination, the flowers went to seed. It seems that it takes a full season for the seeds to
mature on the plant. The seed pods come with three seeds that open and darken as they ripen. I
picked the seeds as they were about to open and will save them over the winter months for
planting next May. These seeds are a result of five years of effort, from first seed planted.
The seeds can be stored in two ways. One way is to find a safe place (away from squirrels and
other critters) and store them in the ground covered with dirt and mulch to protect them from the
Bumblebee, ant, and honeybee on tea flowers.
Help Desk: [email protected] 20
Trumpet Vine Winter 2020-2021
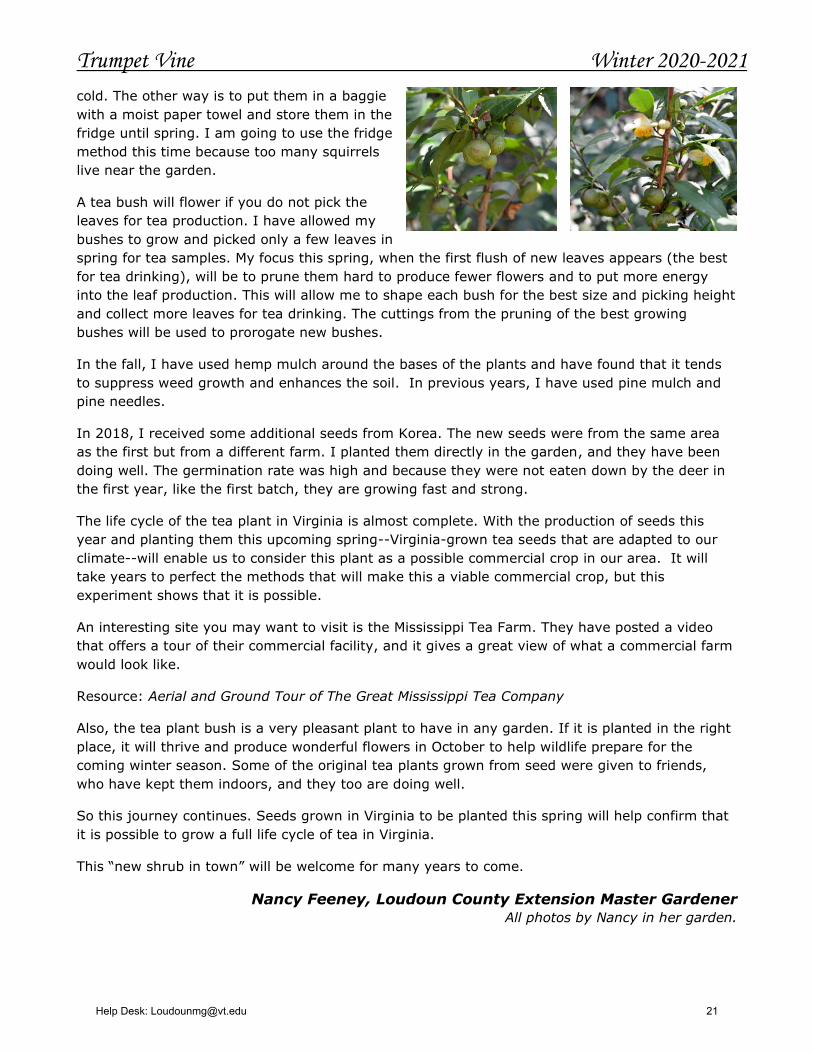
cold. The other way is to put them in a baggie
with a moist paper towel and store them in the
fridge until spring. I am going to use the fridge
method this time because too many squirrels
live near the garden.
A tea bush will flower if you do not pick the
leaves for tea production. I have allowed my
bushes to grow and picked only a few leaves in
spring for tea samples. My focus this spring, when the first flush of new leaves appears (the best
for tea drinking), will be to prune them hard to produce fewer flowers and to put more energy
into the leaf production. This will allow me to shape each bush for the best size and picking height
and collect more leaves for tea drinking. The cuttings from the pruning of the best growing
bushes will be used to prorogate new bushes.
In the fall, I have used hemp mulch around the bases of the plants and have found that it tends
to suppress weed growth and enhances the soil. In previous years, I have used pine mulch and
pine needles.
In 2018, I received some additional seeds from Korea. The new seeds were from the same area
as the first but from a different farm. I planted them directly in the garden, and they have been
doing well. The germination rate was high and because they were not eaten down by the deer in
the first year, like the first batch, they are growing fast and strong.
The life cycle of the tea plant in Virginia is almost complete. With the production of seeds this
year and planting them this upcoming spring--Virginia-grown tea seeds that are adapted to our
climate--will enable us to consider this plant as a possible commercial crop in our area. It will
take years to perfect the methods that will make this a viable commercial crop, but this
experiment shows that it is possible.
An interesting site you may want to visit is the Mississippi Tea Farm. They have posted a video
that offers a tour of their commercial facility, and it gives a great view of what a commercial farm
would look like.
Resource: Aerial and Ground Tour of The Great Mississippi Tea Company
Also, the tea plant bush is a very pleasant plant to have in any garden. If it is planted in the right
place, it will thrive and produce wonderful flowers in October to help wildlife prepare for the
coming winter season. Some of the original tea plants grown from seed were given to friends,
who have kept them indoors, and they too are doing well.
So this journey continues. Seeds grown in Virginia to be planted this spring will help confirm that
it is possible to grow a full life cycle of tea in Virginia.
This “new shrub in town” will be welcome for many years to come.
Nancy Feeney, Loudoun County Extension Master Gardener
All photos by Nancy in her garden.
Help Desk: [email protected] 21
Trumpet Vine Winter 2020-2021
Those Pesky Animals!--Backyard Gardener #3 Gardens are great in so many ways. A garden is a way to relieve stress and also to make your
property look nice (which drives up your property’s value). So, go ahead, fill your flowerbeds with
colorful perennials and line your driveway and deck with pots of beautiful flowery annuals. Plant a
vegetable garden and grow your own veggies. But beware! Suburbia is full of wildlife that would
love to eat all those lovely flowers and tasty vegetables. They are very determined, and your
beautiful yard looks so yummy. The destruction caused by resident animals erases the positive
things about gardens. Your property won’t look as pretty or desirable when the flowers and plants
have been nibbled right down to the ground. Not to mention that your stress level goes up as
your flower and vegetable plants are consumed by these pesky critters.
So let’s take a look at some of the things a backyard gardener can do to try to keep pesky
animals at bay, so your garden has a chance to grow.
Squirrels and Chipmunks
Squirrels and chipmunks are members of the rodent family and are very active all year.
Chipmunks are omnivores that eat grains, nuts, berries, seeds, and insects. They also like to eat
flower bulbs, fruits, and seedlings--all found in your garden. Chipmunks are burrowing animals.
They like to burrow under patios, stairs, retention walls, and foundations. They can burrow right
under that fence around your vegetable garden to get inside to those juicy tomatoes. Squirrels
are most active in the mornings and evenings; they eat all kinds of food but prefer nuts and
seeds. Female squirrels have babies twice a year, usually in February and August. Although they
most often make their nests high up in trees, they love your attic because it’s warm and dry. And
while it’s perfect for raising squirrel babies, it’s not ideal for homeowners who have to contend
with chewed wood, beams, and power lines, which can create a fire hazard. Their nesting
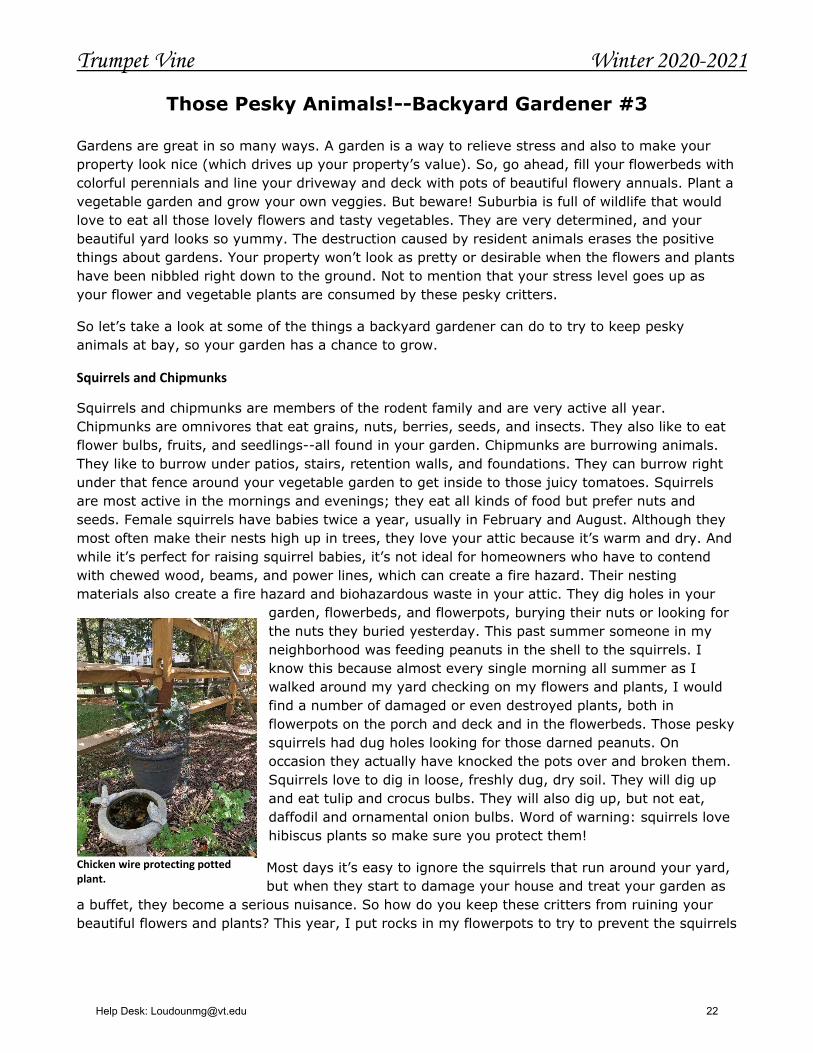
materials also create a fire hazard and biohazardous waste in your attic. They dig holes in your
garden, flowerbeds, and flowerpots, burying their nuts or looking for
the nuts they buried yesterday. This past summer someone in my
neighborhood was feeding peanuts in the shell to the squirrels. I
know this because almost every single morning all summer as I
walked around my yard checking on my flowers and plants, I would
find a number of damaged or even destroyed plants, both in
flowerpots on the porch and deck and in the flowerbeds. Those pesky
squirrels had dug holes looking for those darned peanuts. On
occasion they actually have knocked the pots over and broken them.
Squirrels love to dig in loose, freshly dug, dry soil. They will dig up
and eat tulip and crocus bulbs. They will also dig up, but not eat,
daffodil and ornamental onion bulbs. Word of warning: squirrels love
hibiscus plants so make sure you protect them!
Most days it’s easy to ignore the squirrels that run around your yard,
but when they start to damage your house and treat your garden as
a buffet, they become a serious nuisance. So how do you keep these critters from ruining your
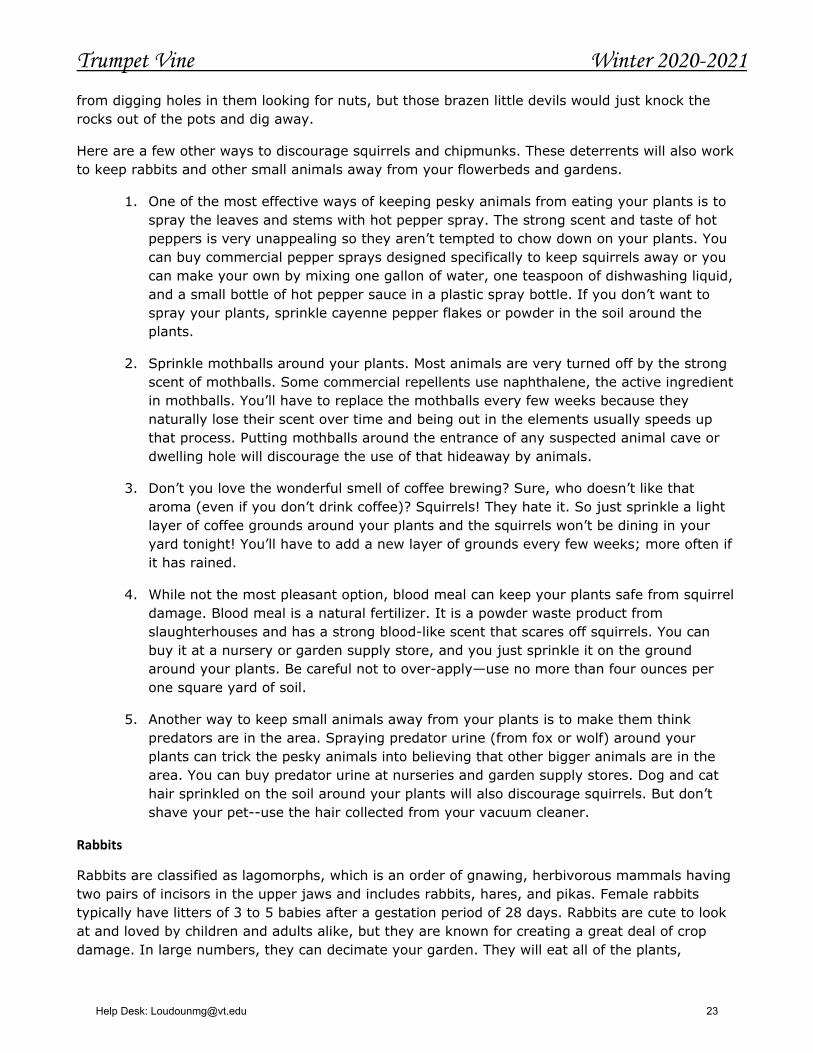
beautiful flowers and plants? This year, I put rocks in my flowerpots to try to prevent the squirrels
Chicken wire protecting potted plant.
Help Desk: [email protected] 22
Trumpet Vine Winter 2020-2021
from digging holes in them looking for nuts, but those brazen little devils would just knock the
rocks out of the pots and dig away.
Here are a few other ways to discourage squirrels and chipmunks. These deterrents will also work
to keep rabbits and other small animals away from your flowerbeds and gardens.
1. One of the most effective ways of keeping pesky animals from eating your plants is to
spray the leaves and stems with hot pepper spray. The strong scent and taste of hot
peppers is very unappealing so they aren’t tempted to chow down on your plants. You
can buy commercial pepper sprays designed specifically to keep squirrels away or you
can make your own by mixing one gallon of water, one teaspoon of dishwashing liquid,
and a small bottle of hot pepper sauce in a plastic spray bottle. If you don’t want to
spray your plants, sprinkle cayenne pepper flakes or powder in the soil around the
plants.
2. Sprinkle mothballs around your plants. Most animals are very turned off by the strong
scent of mothballs. Some commercial repellents use naphthalene, the active ingredient
in mothballs. You’ll have to replace the mothballs every few weeks because they
naturally lose their scent over time and being out in the elements usually speeds up
that process. Putting mothballs around the entrance of any suspected animal cave or
dwelling hole will discourage the use of that hideaway by animals.
3. Don’t you love the wonderful smell of coffee brewing? Sure, who doesn’t like that
aroma (even if you don’t drink coffee)? Squirrels! They hate it. So just sprinkle a light
layer of coffee grounds around your plants and the squirrels won’t be dining in your
yard tonight! You’ll have to add a new layer of grounds every few weeks; more often if
it has rained.
4. While not the most pleasant option, blood meal can keep your plants safe from squirrel
damage. Blood meal is a natural fertilizer. It is a powder waste product from
slaughterhouses and has a strong blood-like scent that scares off squirrels. You can
buy it at a nursery or garden supply store, and you just sprinkle it on the ground
around your plants. Be careful not to over-apply—use no more than four ounces per
one square yard of soil.
5. Another way to keep small animals away from your plants is to make them think
predators are in the area. Spraying predator urine (from fox or wolf) around your
plants can trick the pesky animals into believing that other bigger animals are in the
area. You can buy predator urine at nurseries and garden supply stores. Dog and cat
hair sprinkled on the soil around your plants will also discourage squirrels. But don’t
shave your pet--use the hair collected from your vacuum cleaner.
Rabbits
Rabbits are classified as lagomorphs, which is an order of gnawing, herbivorous mammals having
two pairs of incisors in the upper jaws and includes rabbits, hares, and pikas. Female rabbits
typically have litters of 3 to 5 babies after a gestation period of 28 days. Rabbits are cute to look
at and loved by children and adults alike, but they are known for creating a great deal of crop
damage. In large numbers, they can decimate your garden. They will eat all of the plants,
Help Desk: [email protected] 23
Trumpet Vine Winter 2020-2021
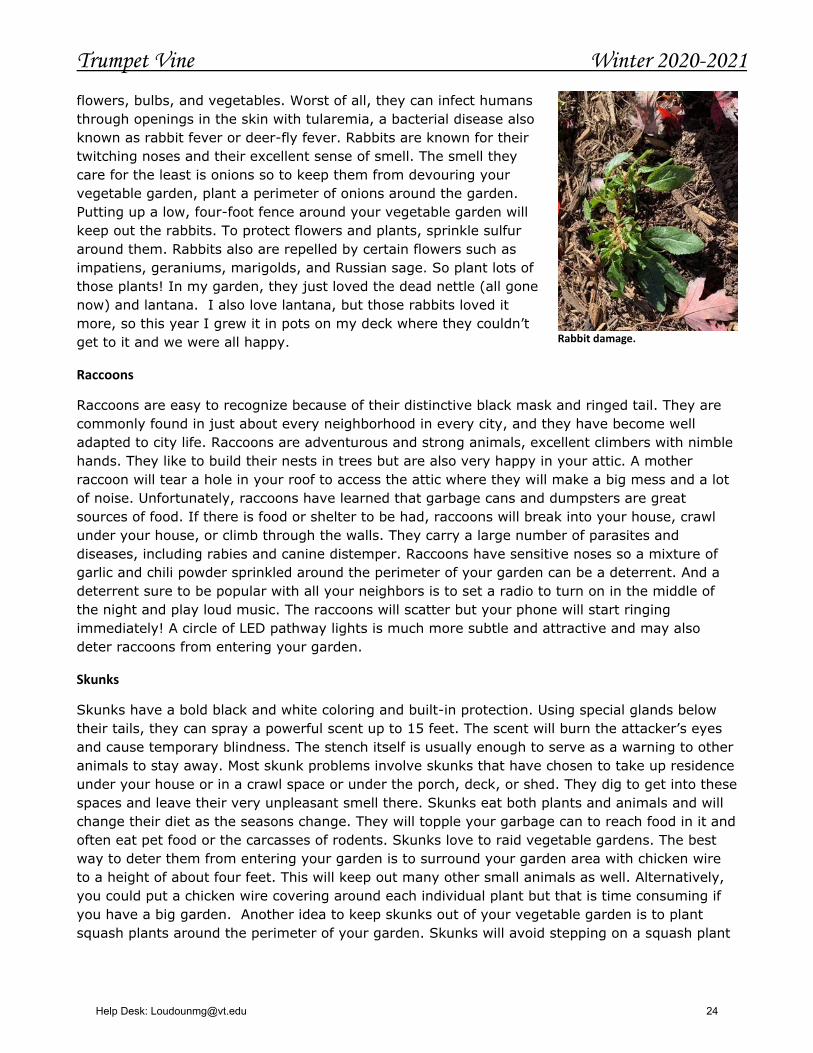
flowers, bulbs, and vegetables. Worst of all, they can infect humans
through openings in the skin with tularemia, a bacterial disease also
known as rabbit fever or deer-fly fever. Rabbits are known for their
twitching noses and their excellent sense of smell. The smell they
care for the least is onions so to keep them from devouring your
vegetable garden, plant a perimeter of onions around the garden.
Putting up a low, four-foot fence around your vegetable garden will
keep out the rabbits. To protect flowers and plants, sprinkle sulfur
around them. Rabbits also are repelled by certain flowers such as
impatiens, geraniums, marigolds, and Russian sage. So plant lots of
those plants! In my garden, they just loved the dead nettle (all gone
now) and lantana. I also love lantana, but those rabbits loved it
more, so this year I grew it in pots on my deck where they couldn’t
get to it and we were all happy.
Raccoons
Raccoons are easy to recognize because of their distinctive black mask and ringed tail. They are
commonly found in just about every neighborhood in every city, and they have become well
adapted to city life. Raccoons are adventurous and strong animals, excellent climbers with nimble
hands. They like to build their nests in trees but are also very happy in your attic. A mother
raccoon will tear a hole in your roof to access the attic where they will make a big mess and a lot
of noise. Unfortunately, raccoons have learned that garbage cans and dumpsters are great
sources of food. If there is food or shelter to be had, raccoons will break into your house, crawl
under your house, or climb through the walls. They carry a large number of parasites and
diseases, including rabies and canine distemper. Raccoons have sensitive noses so a mixture of
garlic and chili powder sprinkled around the perimeter of your garden can be a deterrent. And a
deterrent sure to be popular with all your neighbors is to set a radio to turn on in the middle of
the night and play loud music. The raccoons will scatter but your phone will start ringing
immediately! A circle of LED pathway lights is much more subtle and attractive and may also
deter raccoons from entering your garden.
Skunks
Skunks have a bold black and white coloring and built-in protection. Using special glands below
their tails, they can spray a powerful scent up to 15 feet. The scent will burn the attacker’s eyes
and cause temporary blindness. The stench itself is usually enough to serve as a warning to other
animals to stay away. Most skunk problems involve skunks that have chosen to take up residence
under your house or in a crawl space or under the porch, deck, or shed. They dig to get into these
spaces and leave their very unpleasant smell there. Skunks eat both plants and animals and will
change their diet as the seasons change. They will topple your garbage can to reach food in it and
often eat pet food or the carcasses of rodents. Skunks love to raid vegetable gardens. The best
way to deter them from entering your garden is to surround your garden area with chicken wire
to a height of about four feet. This will keep out many other small animals as well. Alternatively,
you could put a chicken wire covering around each individual plant but that is time consuming if
you have a big garden. Another idea to keep skunks out of your vegetable garden is to plant
squash plants around the perimeter of your garden. Skunks will avoid stepping on a squash plant
Rabbit damage.
Help Desk: [email protected] 24
Trumpet Vine Winter 2020-2021
because the leaves have hairs on them that can irritate a skunk’s paws. Putting mothballs around
the plants in your garden is another way to discourage skunks (as well as other animals).
Deer
It’s amazing how many deer live in residential subdivisions. Personally, I feel sorry for them.
We’ve taken their habitat and built houses and eight-lane highways. This has diminished their
natural food supply making them look elsewhere for food. Those tasty-looking beans and big fat
squash look very good growing in your garden. And that four-foot fence around the garden? Piece
of cake! And how about those day lilies growing in the front flowerbed? Deer love those! Deer will
eat a large variety of plants and vegetation. Over and above all other concerns about deer,
however, is that they are carriers of deer ticks and are responsible for the spread of Lyme
disease.
The very first thing you should do to keep deer away from your yard is to buy plants and shrubs
that are labeled “deer resistant,” such as foxglove, mint, rosemary, crape myrtle, African lily,
fountain grass, hens and chicks, and many more. To protect plants already growing in your
garden that might not be deer resistant, think fences, fences, fences! Barriers are the key to
keeping deer out of your garden. The height of the fence depends on the type of deer in your
neighborhood. White-tail deer may not jump a six-foot fence, but a mule deer will definitely jump
it. Deer are less likely to jump a solid fence because they can’t see the other side. They are also
likely to avoid a double fence. If you choose to put up a double fence, surround your important
plants (vegetables, roses) with two five-foot fences with a five-foot space between them. Use hog
wire and sturdy four-by-four posts so the deer can’t knock the fences down. Use the inner fence
as a trellis for beans, peas, nasturtiums, or sweet peas. The five-foot space between the fences
can accommodate plants or a pathway.
Realistically, you can’t totally keep deer out of your yard, especially if you live in a subdivision
that has rules about the height of a fence on your property. You need to find a way to make your
garden and flowers as UNAPPEALING as possible to the deer. They have a great sense of smell so
they avoid overly fragrant plants such as sage, lavender, bearded iris, and other herbs. Definitely
plant a few of these plants around your yard. They also don’t like the prickly leaves of lamb’s ear.
Lamb’s ear spreads very fast and will take over and go beyond its space so be careful where you
plant it. But growing these plants can help to keep the deer out of
your yard and add to the beauty of your garden. Many gardeners
swear by Irish Spring soap as a deer deterrent. Just scrape off pieces
and put it around the plants you want to protect. Deer apparently
don’t like the smell of the soap and will avoid the area. Obviously if it
rains a lot, you will have to replace the soap pieces more frequently.
Finally, let’s talk about electric fences. They are very effective at
keeping deer (or anything) out of your yard, but they are not allowed
by most subdivision HOA covenants. In addition, electric fences are
almost always regulated by stringent city and county zoning
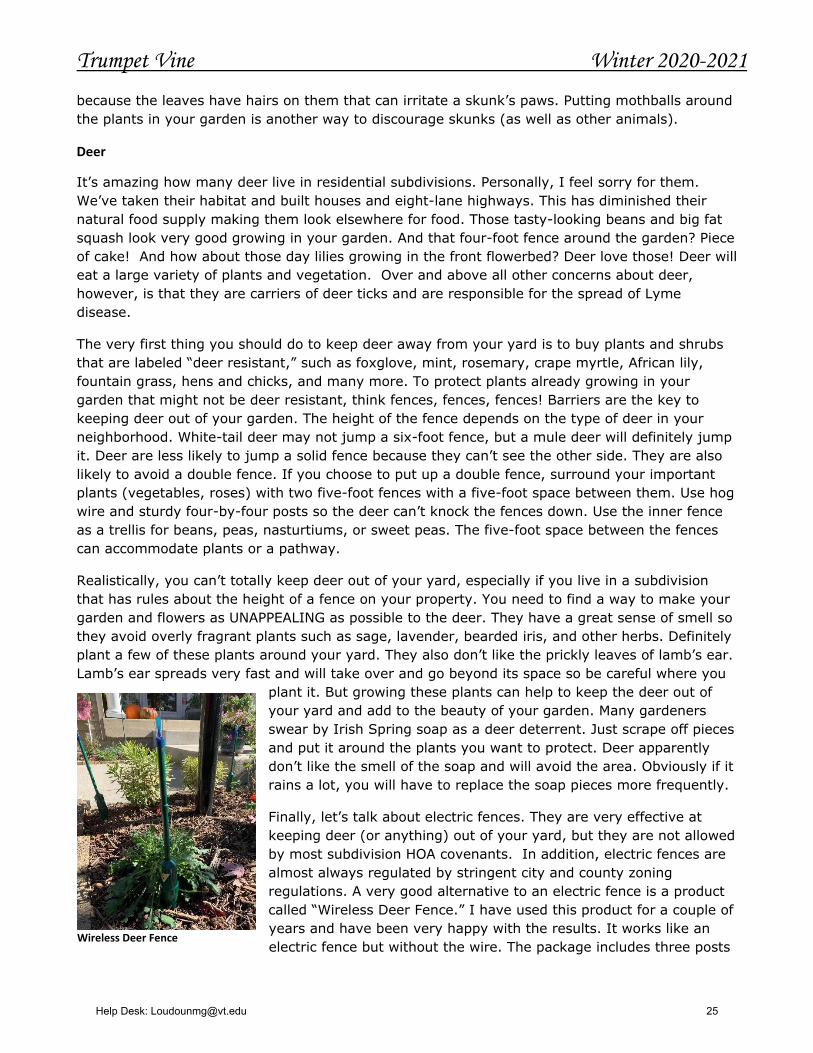
regulations. A very good alternative to an electric fence is a product
called “Wireless Deer Fence.” I have used this product for a couple of
years and have been very happy with the results. It works like an
electric fence but without the wire. The package includes three posts Wireless Deer Fence
Help Desk: [email protected] 25
Trumpet Vine Winter 2020-2021
and each post contains a miniature charging circuit. At the top are bare wire electrodes and a
scented resin attractant. When a deer is attracted by the scent to touch the post, it will receive a
startling little shock and will immediately flee the area. The deer will then associate the shock
discomfort with your garden and flowerbeds and will usually be afraid to return to the area. Each
post uses two AA batteries that last for the whole growing season. I’ve touched the live posts a
number of times by accident and the shock is definitely startling but not harmful or debilitating.
The Electric Deer Fence costs a bit more than other deterrents but I think the price is definitely
worth the results. I’ve tried a number of deer deterrents and this is the one that has worked the
best for me. Here is the link if you’re interested: https://wirelessdeerfence.com/
Neighborhood Dog and Cats Every neighborhood has at least one neighbor who lets their dog or cat run around outside, no
matter how dangerous that is for the dog or cat. Cats see a wide expanse of bare soil or a nice
soft area of fresh mulch and they see a litter box. For a while a few years ago, there were several
outdoor cats roaming around in my neighborhood. The bunny population declined drastically, and
the cats ate my catnip plants and used my newly mulched flowerbeds for a litter box. To deter
cats and make your garden unattractive to them, make the ground as uneven as possible
because cats don’t like to walk on uneven ground. In open areas, lay out slightly crunched up
pieces of chicken wire, or lay sticks in a crosswise pattern. Scatter orange or lemon peels around
your garden; cats don’t like the citrusy smell. Most importantly—indoor-only cats live long, happy,
well-cared-for lives so please consider keeping your cat inside.
Many city and county ordinances state that dog owners must keep their pets on a leash or inside
a fenced area and owners are required to clean up after their dogs whether in their own back
yards or in public. So in a perfect world, your garden, flowers, and lawn would be safe from dogs
that are allowed to run free in the neighborhood. But, Captain Obvious, the world is NOT perfect.
Fences, of course, will keep dogs out of your yard as will a number of products that contain garlic,
red pepper, and peppermint oil and are sold at stores like Walmart and Lowe’s. These products
serve a multiple purpose as most also repel cats, squirrels, and rabbits. A motion-activated
sprinkler will also keep dogs off your lawn.
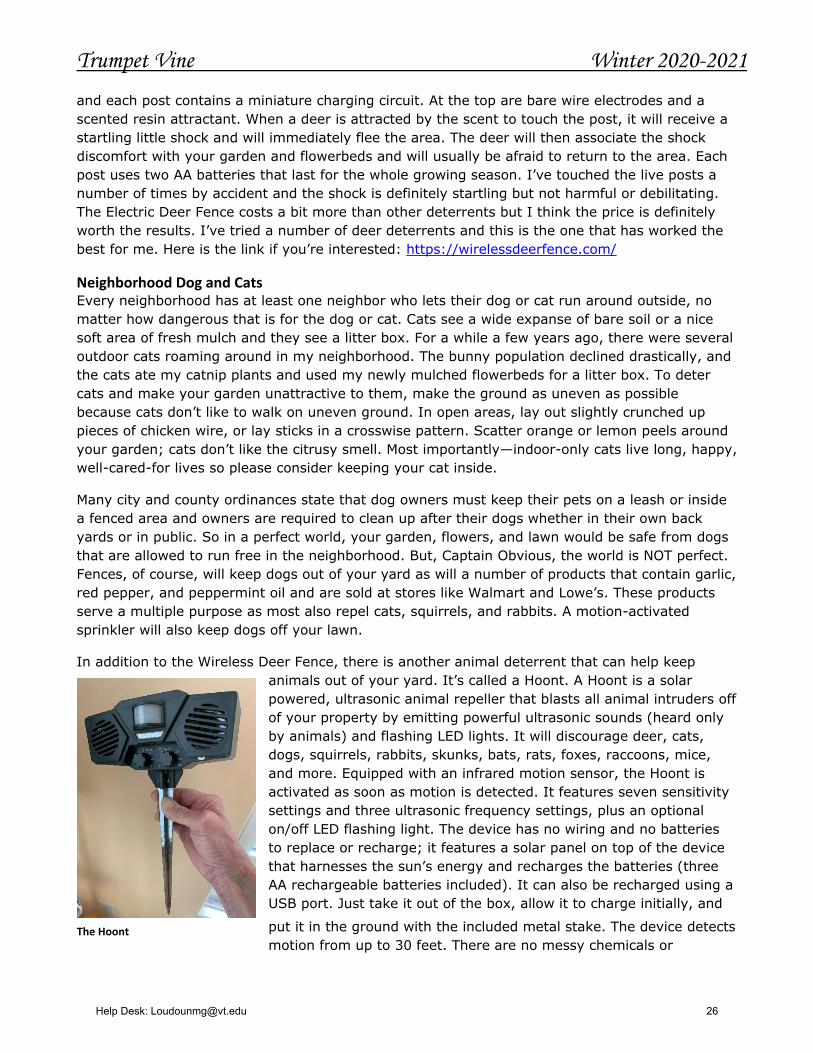
In addition to the Wireless Deer Fence, there is another animal deterrent that can help keep
animals out of your yard. It’s called a Hoont. A Hoont is a solar
powered, ultrasonic animal repeller that blasts all animal intruders off
of your property by emitting powerful ultrasonic sounds (heard only
by animals) and flashing LED lights. It will discourage deer, cats,
dogs, squirrels, rabbits, skunks, bats, rats, foxes, raccoons, mice,
and more. Equipped with an infrared motion sensor, the Hoont is
activated as soon as motion is detected. It features seven sensitivity
settings and three ultrasonic frequency settings, plus an optional
on/off LED flashing light. The device has no wiring and no batteries
to replace or recharge; it features a solar panel on top of the device
that harnesses the sun’s energy and recharges the batteries (three
AA rechargeable batteries included). It can also be recharged using a
USB port. Just take it out of the box, allow it to charge initially, and
put it in the ground with the included metal stake. The device detects
motion from up to 30 feet. There are no messy chemicals or The Hoont
Help Desk: [email protected] 26

Trumpet Vine Winter 2020-2021
pesticides, no traps, no dead animals. The Hoont is a solid hard plastic construction for
withstanding years of rain, snow, ice, and wind.
I don’t live in the country surrounded by acres of woods or farmland. I live in a large subdivision
in Leesburg. The houses are close together, lots of children playing outside, plenty of dogs
barking and patrolling their backyards. Yet I have observed a lot of beautiful wildlife in my yard
through the years. Although they are all beautiful animals in their own way, it’s sad that we have
turned them into “pesky animals.” We’ve paved over their habitat (“They paved paradise, put up
a parking lot”—Joni Mitchell, 1970) and greatly reduced their food supply. Pesky animals in your
yard are just a fact of life. As long as we grow plants, flowers, and vegetables in our yards, the
critters are going to stick around. Please be kind to them so we can all live together in peace.
Jayne Collins, Loudoun County Extension Master Gardener All photos were taken by Jayne Collins on her property.
Help Desk: [email protected] 27
Trumpet Vine Winter 2020-2021
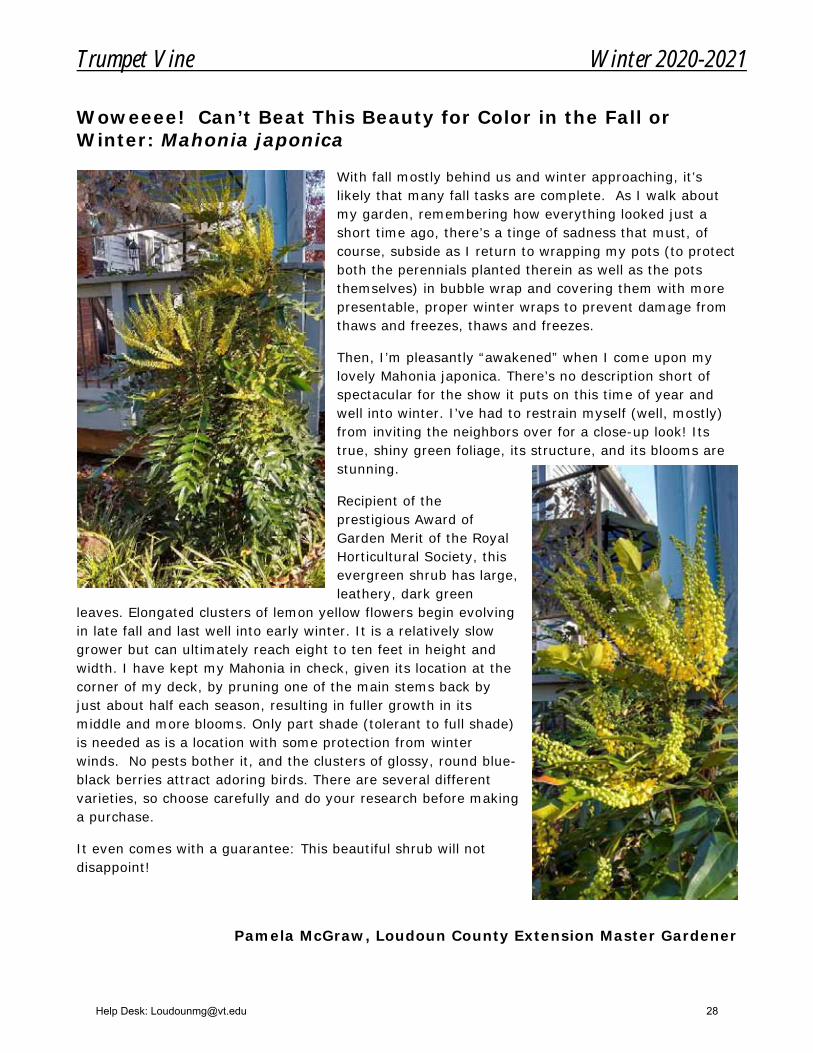
Woweeee! Can’t Beat This Beauty for Color in the Fall or Winter: Mahonia japonica
With fall mostly behind us and winter approaching, it’s likely that many fall tasks are complete. As I walk about my garden, remembering how everything looked just a short time ago, there’s a tinge of sadness that must, of course, subside as I return to wrapping my pots (to protect both the perennials planted therein as well as the pots themselves) in bubble wrap and covering them with more presentable, proper winter wraps to prevent damage from thaws and freezes, thaws and freezes.
Then, I’m pleasantly “awakened” when I come upon my lovely Mahonia japonica. There’s no description short of spectacular for the show it puts on this time of year and well into winter. I’ve had to restrain myself (well, mostly) from inviting the neighbors over for a close-up look! Its true, shiny green foliage, its structure, and its blooms are stunning.
Recipient of the prestigious Award of Garden Merit of the Royal Horticultural Society, this evergreen shrub has large, leathery, dark green
leaves. Elongated clusters of lemon yellow flowers begin evolving in late fall and last well into early winter. It is a relatively slow grower but can ultimately reach eight to ten feet in height and width. I have kept my Mahonia in check, given its location at the corner of my deck, by pruning one of the main stems back by just about half each season, resulting in fuller growth in its middle and more blooms. Only part shade (tolerant to full shade) is needed as is a location with some protection from winter winds. No pests bother it, and the clusters of glossy, round blue-black berries attract adoring birds. There are several different varieties, so choose carefully and do your research before making a purchase.
It even comes with a guarantee: This beautiful shrub will not disappoint!
Pamela McGraw, Loudoun County Extension Master Gardener
Help Desk: [email protected] 28
Trumpet Vine Winter 2020-2021
Ornamental Cherry Leaf Spot
This year has been a hard one for ornamental cherry trees. I noticed that a neighbor’s cherry tree had lost its leaves early in September. After looking around for some of the leaves that had fallen, I found that the leaves had seemed to start to turn color and were riddled with holes. This is when I did some investigating. I noticed that this early leaf drop was happening all over the county and that only a few more protected trees still had their leaves that would drop during the normal fall time period. So, being a tree steward, I researched what the problem might be. This led me to cherry leaf spot.
Cherry leaf spot is usually considered a disease of low concern. If your tree has been healthy and no other problems exist, with sanitation, the tree will usually come back the next year without difficulty. If the tree has other stress factors such as splitting, damaged bark, extreme suckering, cankers, mechanical damage, or old age, then pay close attention to helping it through the next several years. Sanitation requires that you remove and destroy fallen leaves to eradicate as much of the inconspicuous spore bearing structures as possible. To further reduce the infection rate, add a layer of straw mulch to the ground once all the leaves have fallen.
Read more at Gardening Know How: Cherry Leaf Spot Issues--What Causes Leaf Spots on Cherries https://www.gardeningknowhow.com/edible/fruits/cherry/leaf-spots-on-cherries.htm.
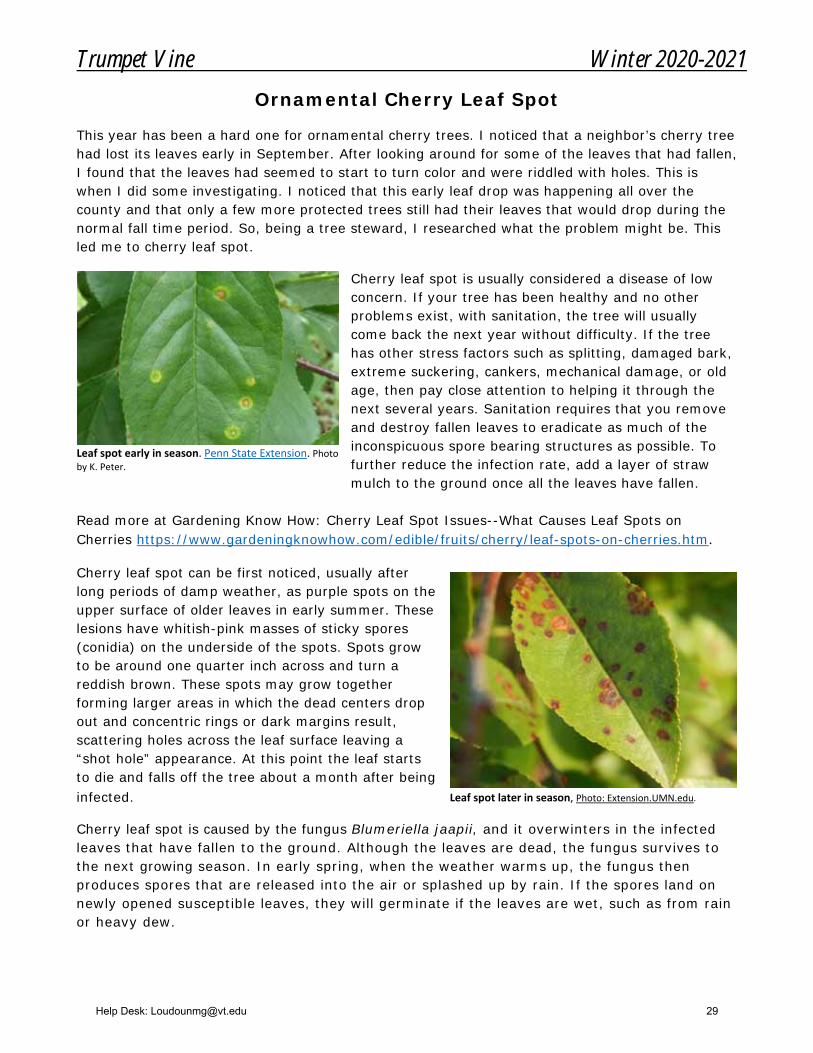
Cherry leaf spot can be first noticed, usually after long periods of damp weather, as purple spots on the upper surface of older leaves in early summer. These lesions have whitish-pink masses of sticky spores (conidia) on the underside of the spots. Spots grow to be around one quarter inch across and turn a reddish brown. These spots may grow together forming larger areas in which the dead centers drop out and concentric rings or dark margins result, scattering holes across the leaf surface leaving a “shot hole” appearance. At this point the leaf starts to die and falls off the tree about a month after being infected.
Cherry leaf spot is caused by the fungus Blumeriella jaapii, and it overwinters in the infected leaves that have fallen to the ground. Although the leaves are dead, the fungus survives to the next growing season. In early spring, when the weather warms up, the fungus then produces spores that are released into the air or splashed up by rain. If the spores land on newly opened susceptible leaves, they will germinate if the leaves are wet, such as from rain or heavy dew.
Leaf spot early in season. Penn State Extension. Photo by K. Peter.
Leaf spot later in season, Photo: Extension.UMN.edu.
Help Desk: [email protected] 29

Trumpet Vine Winter 2020-2021
When a year starts with frequent rains in May and June as 2020 did, the fungus can spread very quickly. Usually by the end of July, most cherry trees have stopped forming new leaves. If they have been infected, they could lose all their leaves early on in late summer. Severe defoliation such as this reduces winter hardiness and can possibly shorten the life of the tree due to stress.
This is where sanitation is critical. You need to rake up and remove all the dropped leaves in September or October to keep the disease spores from reinfecting the tree. If your trees have dropped most of their leaves before September, for several years in a row, fungicides can be used to protect leaves. Prolonging leaf retention by controlling the disease will improve winter hardiness.
The fungicide recommended for cherry leaf spot is Chlorothalonil. Fungicide applications should be at regular intervals, starting when leaves first become fully mature and continuing until late summer. Fungicides work best if combined with sanitation. Remember to clean the area frequently of any diseased leaves, bag and dispose. Do not compost. Don’t let any diseased leaves overwinter under the trees.
As with using any pesticide, be sure to read the whole label and apply the fungicide during the time periods and temperatures recommended.
Cathy Anderson, Loudoun County Extension Master Gardener, Tree Steward
Help Desk: [email protected] 30
Trumpet Vine Winter 2020-2021
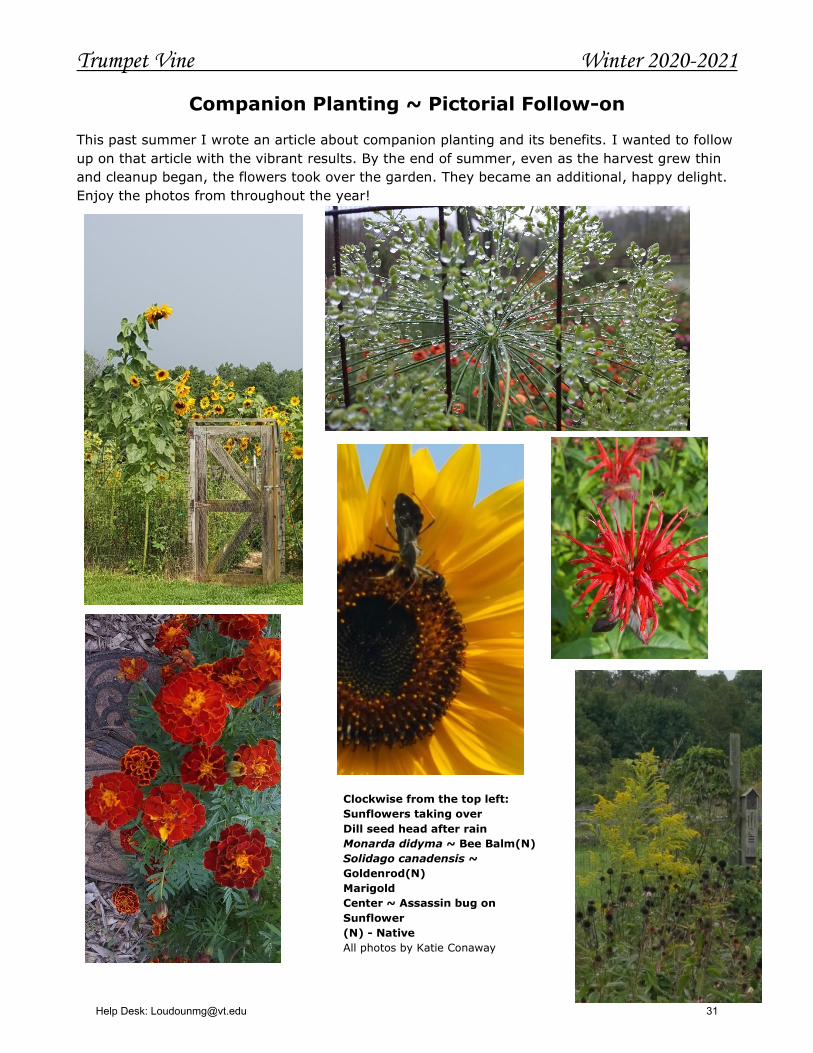
Companion Planting ~ Pictorial Follow-on
This past summer I wrote an article about companion planting and its benefits. I wanted to follow
up on that article with the vibrant results. By the end of summer, even as the harvest grew thin
and cleanup began, the flowers took over the garden. They became an additional, happy delight.
Enjoy the photos from throughout the year!
Clockwise from the top left:
Sunflowers taking over
Dill seed head after rain
Monarda didyma ~ Bee Balm(N)
Solidago canadensis ~
Goldenrod(N)
Marigold
Center ~ Assassin bug on
Sunflower
(N) - Native
All photos by Katie Conaway
Help Desk: [email protected] 31
Trumpet Vine Winter 2020-2021
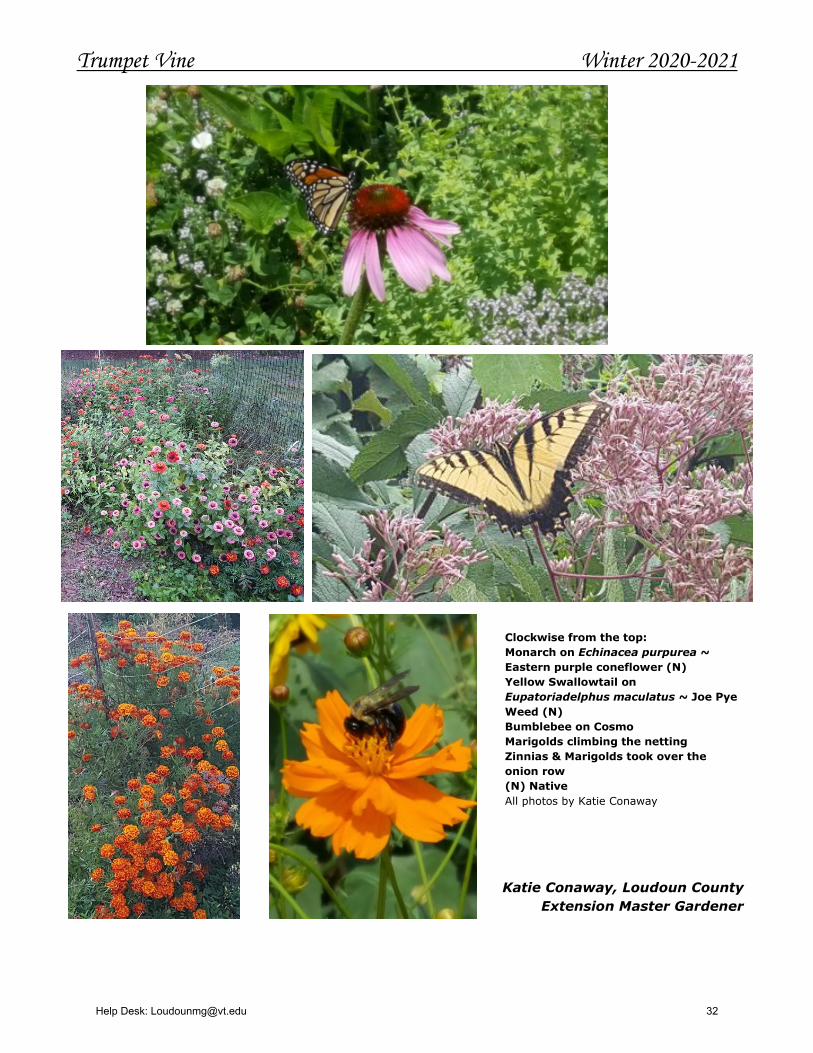
Clockwise from the top:
Monarch on Echinacea purpurea ~
Eastern purple coneflower (N)
Yellow Swallowtail on
Eupatoriadelphus maculatus ~ Joe Pye
Weed (N)
Bumblebee on Cosmo
Marigolds climbing the netting
Zinnias & Marigolds took over the
onion row
(N) Native
All photos by Katie Conaway
Katie Conaway, Loudoun County
Extension Master Gardener
Help Desk: [email protected] 32

Trumpet Vine Winter 2020-2021
Loudoun County Master Gardeners Association
Spring Plant Sale Update
Given our experience with a very different type of spring plant “event” this year, the LCMGA is undertaking a different format for our annual plant sale in 2021. Historically this event has taken place at the Leesburg Flower & Garden Festival in April of each year. We are still unsure if this event will be held in 2021. Therefore, we are taking the main plant portion of our event to an online sale and pickup event in May 2021. That does not mean that we do not plan on being at the Leesburg Flower and Garden Festival. If they hold the event, we will be there!
Here is how we are currently planning on this unfolding…
Leesburg Flower and Garden Festival
Little Lovely Container plants for sale Merchandise & Gently used garden books for sale Garden Clinic to answer all your garden questions Pre order your Tomato, Pepper or Herb plants with the help of one of our EMGs
Plant Pickup scheduled for a Saturday in mid-May
Pre order your Tomato, Pepper or Herb plants along with a selection of merchandise, online prior to the event date.
Our EMGs will put your order together for pick-up The pick-up event will be held at the Virginia Cooperative Extension parking lot. Time and date TBD Drive up and we will bring your order to your vehicle
This entire plan is subject to change as the State of Virginia changes the guidelines under which we must operate. Our goal is to get your vegetable plants into your gardens as safely and efficiently as we can!
Keep an eye on our website for future updates and when the event will open to the public for online purchases.
www.loudouncountymastergardeners.org
Thank you for your support! By purchasing from us, you help our Extension Master Gardeners continue to provide environmental stewardship education and information to Loudoun County homeowners.
Katie Conaway
Loudoun County Extension Master Gardener
Help Desk: [email protected] 33
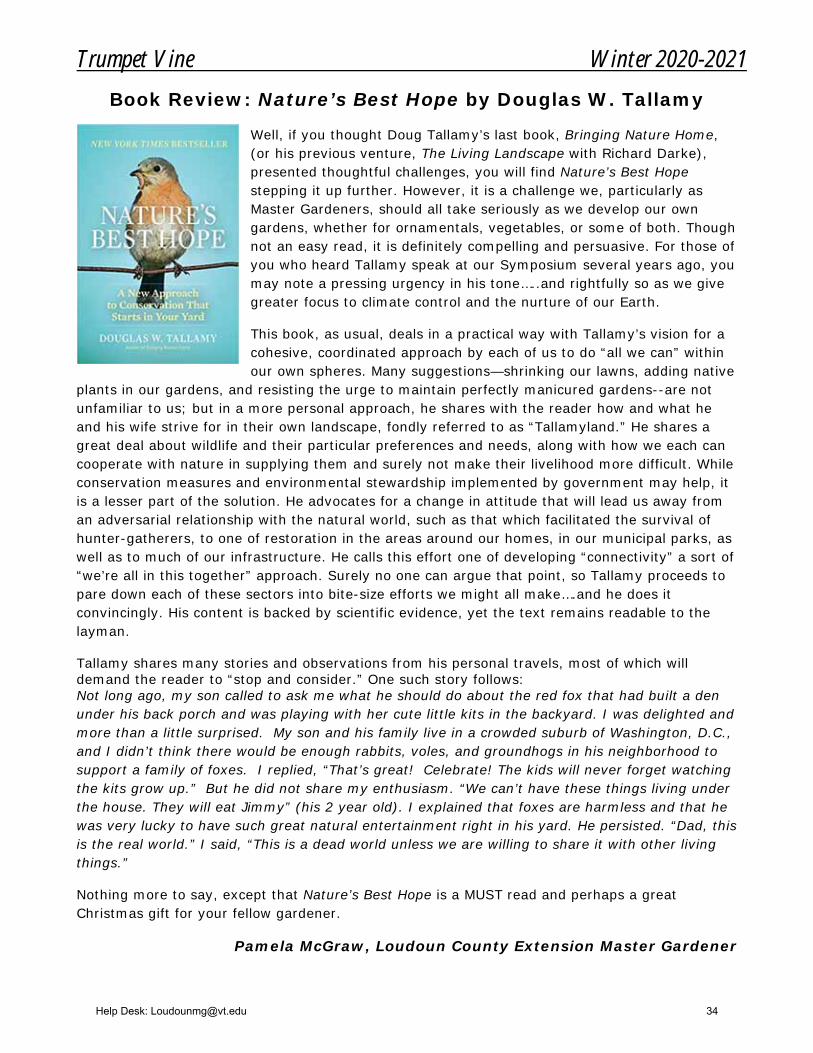
Trumpet Vine Winter 2020-2021
Book Review: Nature’s Best Hope by Douglas W. Tallamy Well, if you thought Doug Tallamy’s last book, Bringing Nature Home, (or his previous venture, The Living Landscape with Richard Darke), presented thoughtful challenges, you will find Nature’s Best Hope stepping it up further. However, it is a challenge we, particularly as Master Gardeners, should all take seriously as we develop our own gardens, whether for ornamentals, vegetables, or some of both. Though not an easy read, it is definitely compelling and persuasive. For those of you who heard Tallamy speak at our Symposium several years ago, you may note a pressing urgency in his tone…..and rightfully so as we give greater focus to climate control and the nurture of our Earth.
This book, as usual, deals in a practical way with Tallamy’s vision for a cohesive, coordinated approach by each of us to do “all we can” within our own spheres. Many suggestions—shrinking our lawns, adding native
plants in our gardens, and resisting the urge to maintain perfectly manicured gardens--are not unfamiliar to us; but in a more personal approach, he shares with the reader how and what he and his wife strive for in their own landscape, fondly referred to as “Tallamyland.” He shares a great deal about wildlife and their particular preferences and needs, along with how we each can cooperate with nature in supplying them and surely not make their livelihood more difficult. While conservation measures and environmental stewardship implemented by government may help, it is a lesser part of the solution. He advocates for a change in attitude that will lead us away from an adversarial relationship with the natural world, such as that which facilitated the survival of hunter-gatherers, to one of restoration in the areas around our homes, in our municipal parks, as well as to much of our infrastructure. He calls this effort one of developing “connectivity” a sort of “we’re all in this together” approach. Surely no one can argue that point, so Tallamy proceeds to pare down each of these sectors into bite-size efforts we might all make….and he does it convincingly. His content is backed by scientific evidence, yet the text remains readable to the layman.
Tallamy shares many stories and observations from his personal travels, most of which will demand the reader to “stop and consider.” One such story follows: Not long ago, my son called to ask me what he should do about the red fox that had built a den under his back porch and was playing with her cute little kits in the backyard. I was delighted and more than a little surprised. My son and his family live in a crowded suburb of Washington, D.C., and I didn’t think there would be enough rabbits, voles, and groundhogs in his neighborhood to support a family of foxes. I replied, “That’s great! Celebrate! The kids will never forget watching the kits grow up.” But he did not share my enthusiasm. “We can’t have these things living under the house. They will eat Jimmy” (his 2 year old). I explained that foxes are harmless and that he was very lucky to have such great natural entertainment right in his yard. He persisted. “Dad, this is the real world.” I said, “This is a dead world unless we are willing to share it with other living things.”
Nothing more to say, except that Nature’s Best Hope is a MUST read and perhaps a great Christmas gift for your fellow gardener.
Pamela McGraw, Loudoun County Extension Master Gardener
Help Desk: [email protected] 34


