Embed Size (px)
Citation preview
4H EGL 61
Teacher
Edition
Steps in Ach"eving
Viab e nergy
Introduction Page 1
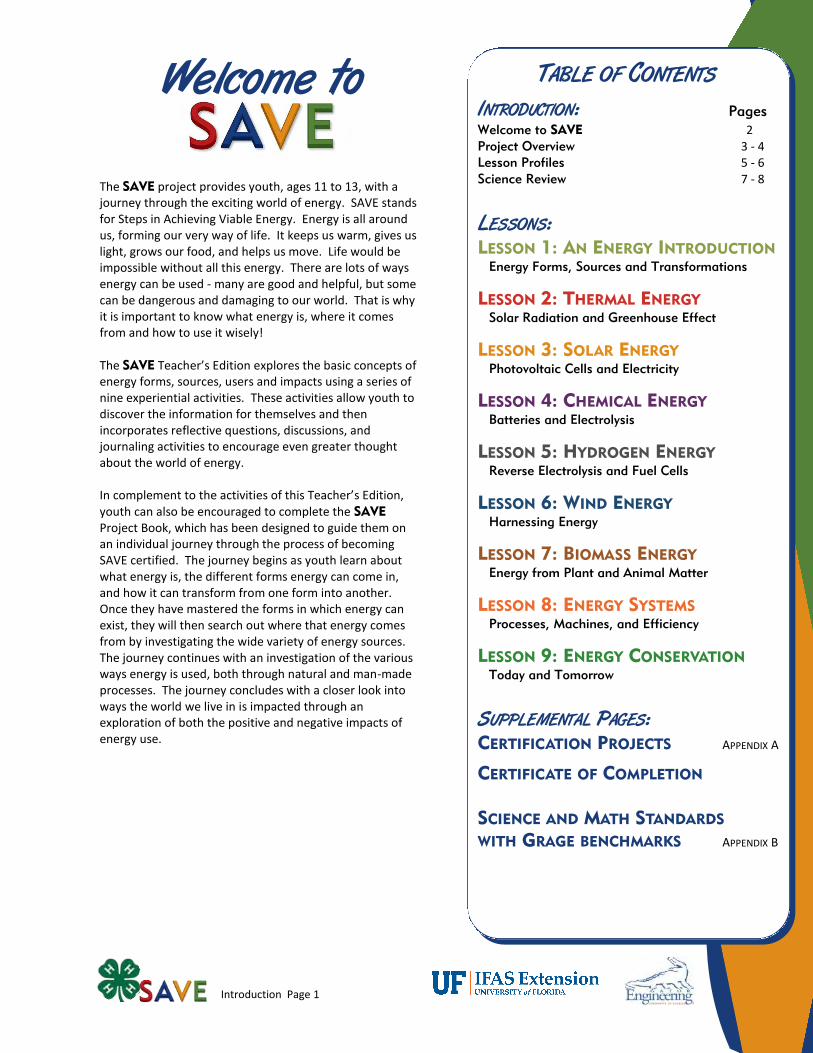
Welcome to
The SAVE project provides youth, ages 11 to 13, with a journey through the exciting world of energy. SAVE stands for Steps in Achieving Viable Energy. Energy is all around us, forming our very way of life. It keeps us warm, gives us light, grows our food, and helps us move. Life would be impossible without all this energy. There are lots of ways energy can be used - many are good and helpful, but some can be dangerous and damaging to our world. That is why it is important to know what energy is, where it comes from and how to use it wisely!
The SAVE Teacher’s Edition explores the basic concepts of energy forms, sources, users and impacts using a series of nine experiential activities. These activities allow youth to discover the information for themselves and then incorporates reflective questions, discussions, and journaling activities to encourage even greater thought about the world of energy.
In complement to the activities of this Teacher’s Edition, youth can also be encouraged to complete the SAVE
Project Book, which has been designed to guide them on an individual journey through the process of becoming SAVE certified. The journey begins as youth learn about what energy is, the different forms energy can come in, and how it can transform from one form into another. Once they have mastered the forms in which energy can exist, they will then search out where that energy comes from by investigating the wide variety of energy sources. The journey continues with an investigation of the various ways energy is used, both through natural and man-made processes. The journey concludes with a closer look into ways the world we live in is impacted through an exploration of both the positive and negative impacts of energy use.
TABLE OF CONTENTS INTRODUCTION: Pages
Welcome to SAVE 2 Project Overview 3 - 4 Lesson Profiles 5 - 6 Science Review 7 - 8
LESSONS:LESSON 1: AN ENERGY INTRODUCTION
Energy Forms, Sources and Transformations
LESSON 2: THERMAL ENERGY
Solar Radiation and Greenhouse Effect
LESSON 3: SOLAR ENERGY
Photovoltaic Cells and Electricity
LESSON 4: CHEMICAL ENERGY
Batteries and Electrolysis
LESSON 5: HYDROGEN ENERGY
Reverse Electrolysis and Fuel Cells
LESSON 6: WIND ENERGY
Harnessing Energy
LESSON 7: BIOMASS ENERGY
Energy from Plant and Animal Matter
LESSON 8: ENERGY SYSTEMS
Processes, Machines, and Efficiency
LESSON 9: ENERGY CONSERVATION
Today and Tomorrow
SUPPLEMENTAL PAGES:CERTIFICATION PROJECTS APPENDIX A
CERTIFICATE OF COMPLETION
SCIENCE AND MATH STANDARDS
WITH GRAGE BENCHMARKS APPENDIX B
Introduction Page 2
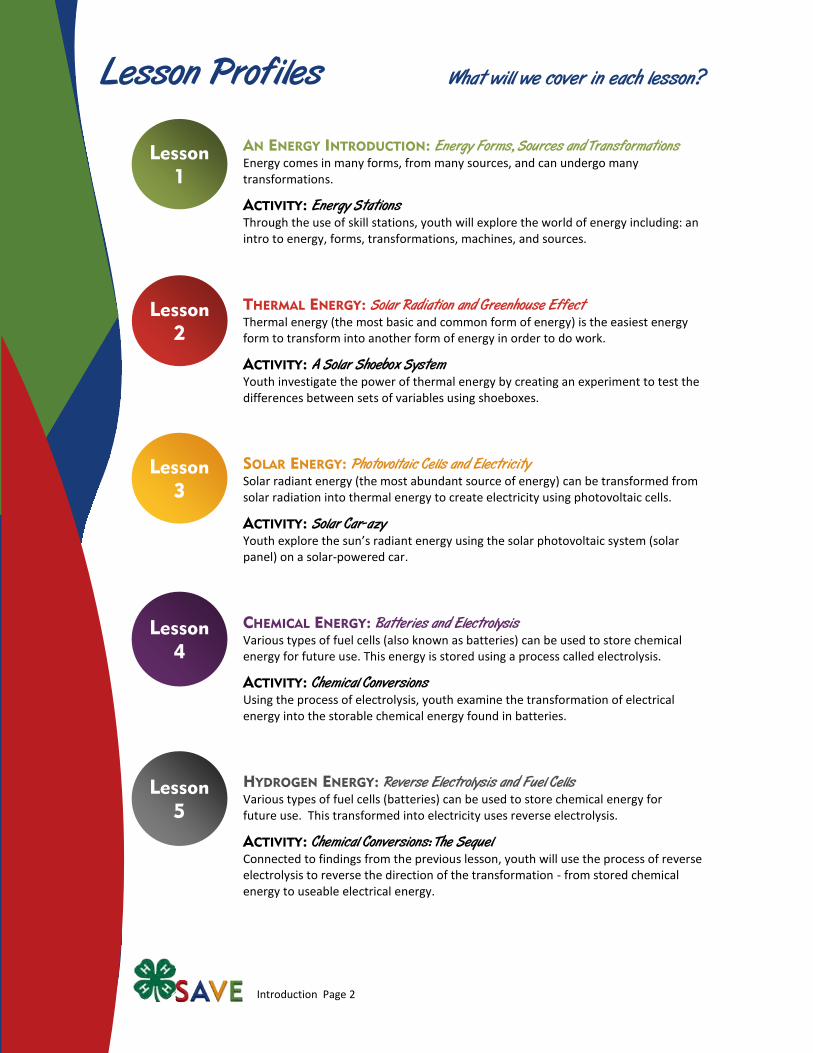
AN ENERGY INTRODUCTION: Energy Forms, Sources and Transformations
Energy comes in many forms, from many sources, and can undergo many transformations.
ACTIVITY: Energy Stations Through the use of skill stations, youth will explore the world of energy including: an intro to energy, forms, transformations, machines, and sources.
THERMAL ENERGY: Solar Radiation and Greenhouse Effect
Thermal energy (the most basic and common form of energy) is the easiest energy form to transform into another form of energy in order to do work.
ACTIVITY: A Solar Shoebox System Youth investigate the power of thermal energy by creating an experiment to test the differences between sets of variables using shoeboxes.
SOLAR ENERGY: Photovoltaic Cells and Electricity
Solar radiant energy (the most abundant source of energy) can be transformed from solar radiation into thermal energy to create electricity using photovoltaic cells.
ACTIVITY: Solar Car-azy Youth explore the sun’s radiant energy using the solar photovoltaic system (solar panel) on a solar-powered car.
CHEMICAL ENERGY: Batteries and Electrolysis
Various types of fuel cells (also known as batteries) can be used to store chemical energy for future use. This energy is stored using a process called electrolysis.
ACTIVITY: Chemical Conversions Using the process of electrolysis, youth examine the transformation of electrical energy into the storable chemical energy found in batteries.
HYDROGEN ENERGY: Reverse Electrolysis and Fuel Cells
Various types of fuel cells (batteries) can be used to store chemical energy for future use. This transformed into electricity uses reverse electrolysis.
ACTIVITY: Chemical Conversions: The Sequel Connected to findings from the previous lesson, youth will use the process of reverse electrolysis to reverse the direction of the transformation - from stored chemical energy to useable electrical energy.
Lesson
2
Lesson
1
Lesson
3
Lesson
4
Lesson
5
Lesson Profiles What will we cover in each lesson?
Introduction Page 3
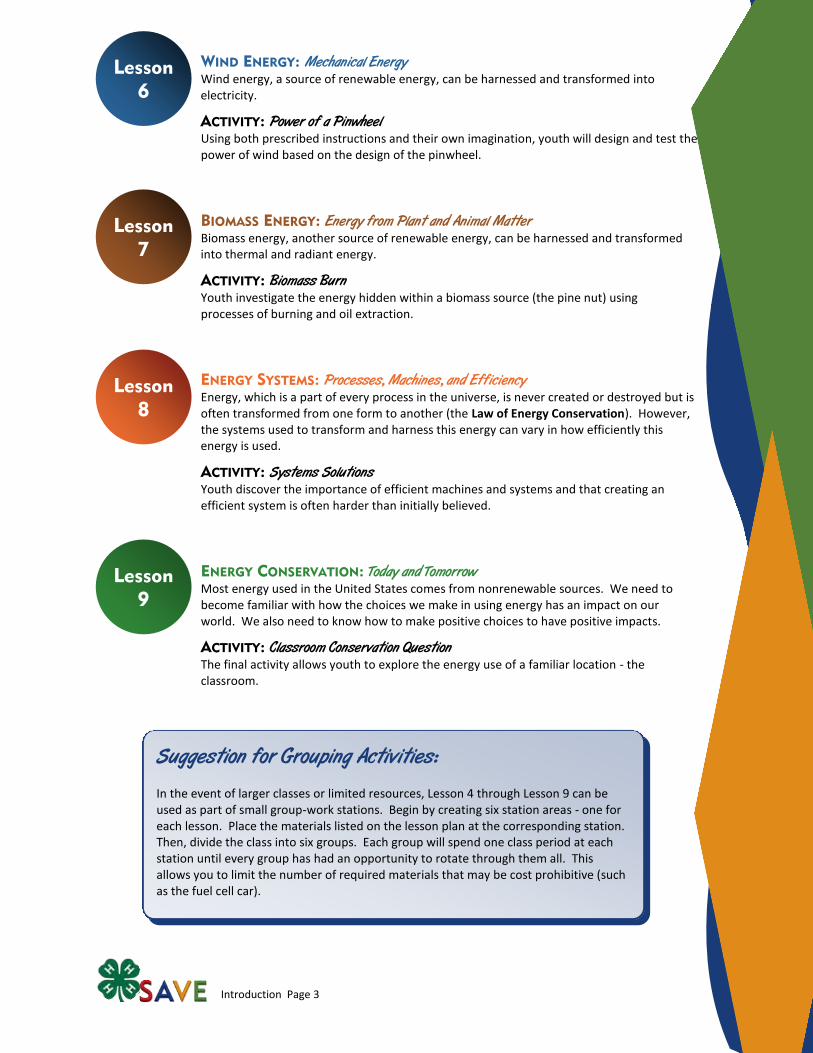
WIND ENERGY: Mechanical Energy
Wind energy, a source of renewable energy, can be harnessed and transformed into electricity.
ACTIVITY: Power of a Pinwheel Using both prescribed instructions and their own imagination, youth will design and test the power of wind based on the design of the pinwheel.
BIOMASS ENERGY: Energy from Plant and Animal MatterBiomass energy, another source of renewable energy, can be harnessed and transformed into thermal and radiant energy.
ACTIVITY: Biomass Burn Youth investigate the energy hidden within a biomass source (the pine nut) using processes of burning and oil extraction.
ENERGY SYSTEMS: Processes, Machines, and EfficiencyEnergy, which is a part of every process in the universe, is never created or destroyed but is often transformed from one form to another (the Law of Energy Conservation). However, the systems used to transform and harness this energy can vary in how efficiently this energy is used.
ACTIVITY: Systems Solutions Youth discover the importance of efficient machines and systems and that creating an efficient system is often harder than initially believed.
ENERGY CONSERVATION: Today and Tomorrow
Most energy used in the United States comes from nonrenewable sources. We need to become familiar with how the choices we make in using energy has an impact on our world. We also need to know how to make positive choices to have positive impacts.
ACTIVITY: Classroom Conservation Question The final activity allows youth to explore the energy use of a familiar location - the classroom.
Lesson
9
Lesson
8
Lesson
7
Lesson
6
Suggestion for Grouping Activities:
In the event of larger classes or limited resources, Lesson 4 through Lesson 9 can be used as part of small group-work stations. Begin by creating six station areas - one for each lesson. Place the materials listed on the lesson plan at the corresponding station. Then, divide the class into six groups. Each group will spend one class period at each station until every group has had an opportunity to rotate through them all. This allows you to limit the number of required materials that may be cost prohibitive (such as the fuel cell car).
Introduction Page 4
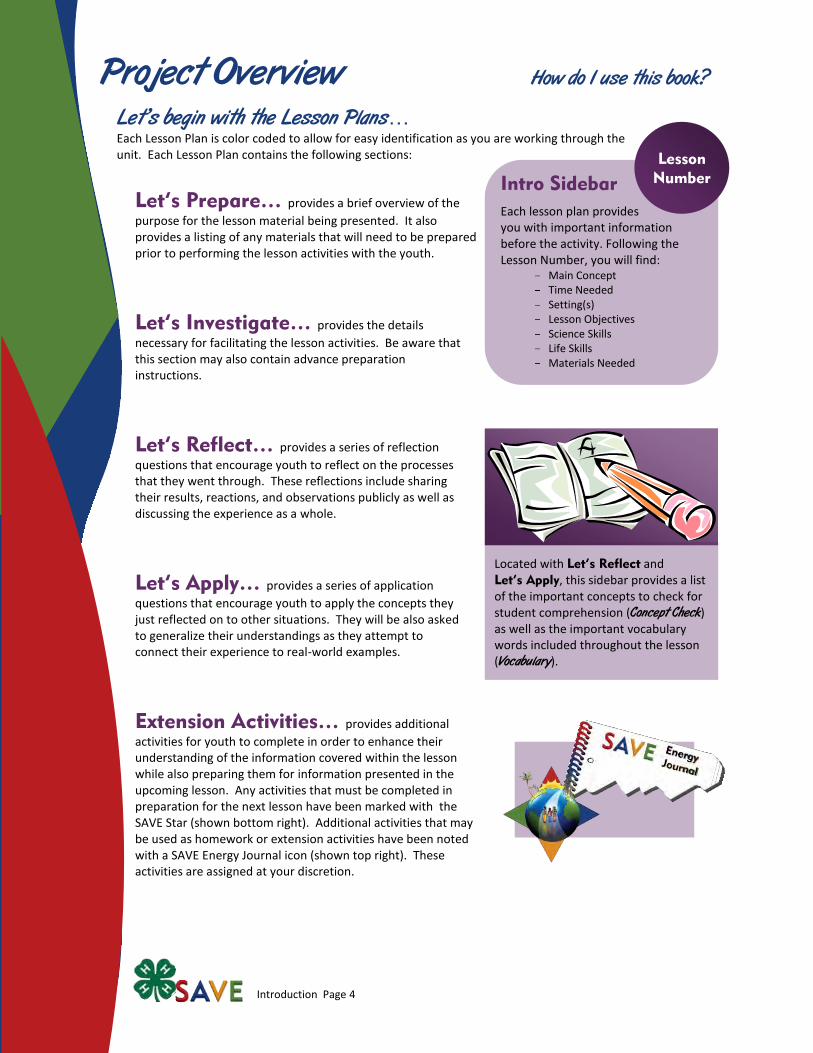
Project Overview How do I use this book?
Let’s begin with the Lesson Plans… Each Lesson Plan is color coded to allow for easy identification as you are working through the unit. Each Lesson Plan contains the following sections:
Let’s Prepare… provides a brief overview of the
purpose for the lesson material being presented. It also provides a listing of any materials that will need to be prepared prior to performing the lesson activities with the youth.
Let’s Investigate… provides the details
necessary for facilitating the lesson activities. Be aware that this section may also contain advance preparation instructions.
Let’s Reflect… provides a series of reflection
questions that encourage youth to reflect on the processes that they went through. These reflections include sharing their results, reactions, and observations publicly as well as discussing the experience as a whole.
Let’s Apply… provides a series of application
questions that encourage youth to apply the concepts they just reflected on to other situations. They will be also asked to generalize their understandings as they attempt to connect their experience to real-world examples.
Extension Activities… provides additional
activities for youth to complete in order to enhance their understanding of the information covered within the lesson while also preparing them for information presented in the upcoming lesson. Any activities that must be completed in preparation for the next lesson have been marked with the SAVE Star (shown bottom right). Additional activities that may be used as homework or extension activities have been noted with a SAVE Energy Journal icon (shown top right). These activities are assigned at your discretion.
Located with Let’s Reflect and Let’s Apply, this sidebar provides a list of the important concepts to check for student comprehension (Concept Check) as well as the important vocabulary words included throughout the lesson (Vocabulary).
Intro Sidebar
Each lesson plan provides you with important information before the activity. Following the Lesson Number, you will find:
Main Concept Time Needed Setting(s) Lesson Objectives Science Skills Life Skills Materials Needed
Lesson
Number

Introduction Page 5
Supplemental activities… Youth are also encouraged to participate in these other activities.
Creating the SAVE Display Board… This unit-wide class project
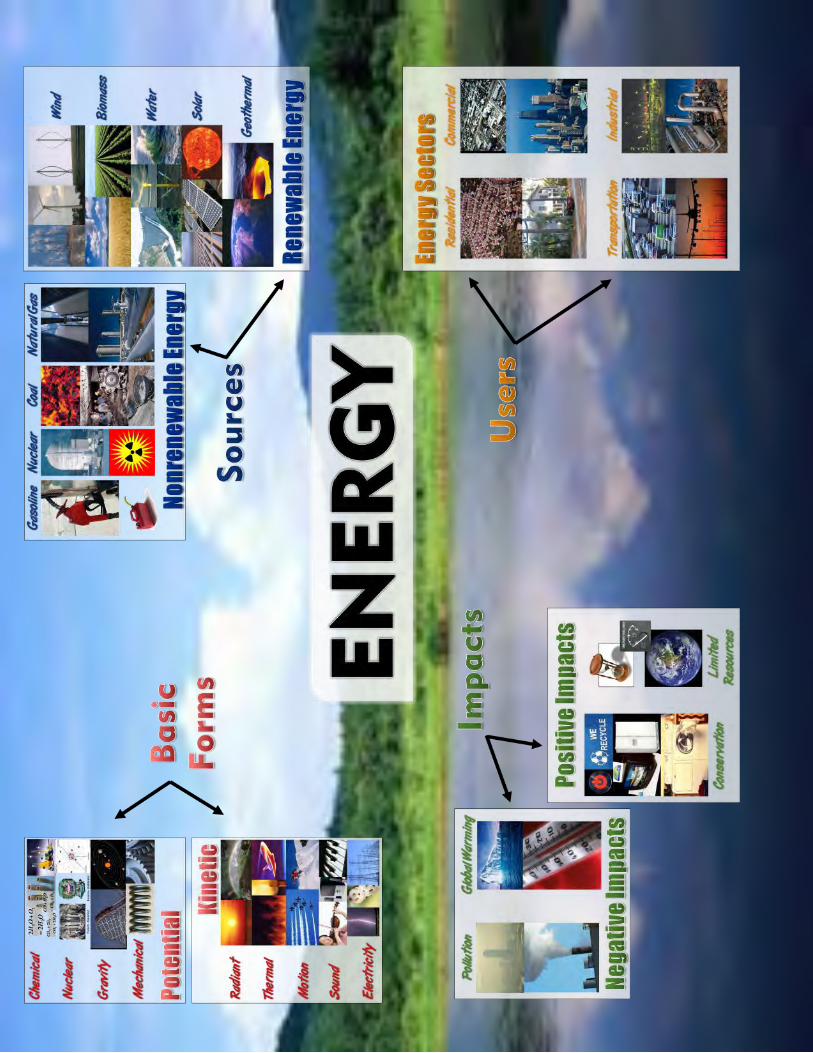
(also referred to throughout the unit as the Energy Concept Map) can be used to reinforce the information that youth will be learning throughout the unit using the SAVE Concept Map. The first activity in Lesson 1 allows youth to discover the four energy areas that will be examined in this unit: Forms, Sources, Users, and Impacts. Once this activity is complete, take the title plates (available at the project web site as Lesson 1 - Supplement 1) used for the activity to create the basis for your display board. Then, as youth move through the unit, encourage them to take photos, find images, or create artistic representations of the energy that exists around them and then add them to the board. If space is available, you can also include the six questions of energy (available at the project web site as Intro - Supplement 1). Diagrams have been included on the inside covers to provide guidance on creating the board. NOTE: Though the use of the Display Board as a unit-wide class project is preferable, the teacher may, instead, individually create a display similar to the diagrams provided. This information is used at the beginning of each lesson for review purposes and therefore needs to be present. Files have been designed to assist you in creating this display if deemed necessary (available at the project web site as Intro - Supplement 2).
SAVE Certification In addition to the activities throughout the unit, youth are also encouraged to participate in becoming SAVE Certified. The certification process requires them to accomplish a certain number of activities in addition to the ones that they are already completing. You can choose whether to make this optional or to include it into the plans for your class. Opting to have youth use the individual SAVE Project Book builds certification into their required activities.
Activities that youth may choose from in order to complete the certification requirements are found in Appendix A. These activities have been grouped into the four main categories of energy study for this unit. The subject areas built within these activities include math, reading, writing, and the research process. Reminders are included on the handout for each lesson. These reminders also indicate any special instructions or requirements that are needed for that particular SAVE Certification Activity. In order to prepare, you will need to create a SAVE Project Board from which youth can select their activities. There are a number of ways that the board can be created. Two of the most popular are listed below:
1. Using the SAVE Project Cards (available at the project web site as Intro - Supplement 2), create pockets from which youth can draw their activities.
2. Make copies Appendix A and adhere these to the Project Board and allow youth to view the lists at an appropriate time during the day’s activity.
One possible alternative to this would be to integrate the Display Board (mentioned above) and the Project Board. This provides a convenient location since youth will be interacting with the Display Board at the beginning of every lesson as they review the energy concepts. In addition to the project board, each youth will need to create a SAVE Energy Journal. This can be housed in a twin-pocket portfolio (with or without fasteners) or a 1” 3-ring binder. To create the Energy Journal, either provide youth with multiple copies of the Energy Journal Page (available on the web site under Supplemental Materials) or have them place lined notebook paper in their journal for the SAVE activities. A Certificate of Recognition for youth who have completed the SAVE Certification requirements is available at www.florida4h.org/SAVE/Certification.
Certification Reminder

Introduction Page 6
Materials In SAVE Kit
Non-consumables Quantity Lessons
1 2 3 4 5 6 7 8 9
Timer/Stopwatch 1 • • •
Thermometers 4 •
Pre-built solar car with mounted solar panel 1 •
Multimeter with wire leads 1 • •
Lamp 1 •
60-watt bulb 1 •
100-watt bulb 1 •
Small Electric fan 1 •
Ruler 1 • • •
Plastic Container (also acts as storage bin) 1 • •
Wires with alligator clips 2 •
3-volt battery pack 1 • •
Test tube 1 •
Grill lighter 1 • •
Fuel cell car 1 •
Syringe 1 •
75W halogen spotlight 1 •
Garlic Press 1 •
Tea lights 2 •
Scissors 1 • • •
AAA battery 1 •
Energy meter 1 •
Below is a listing of the materials to create a SAVE teaching kit. When preparing for the lesson, please remember that one kit is needed for every small group.
Activity Materials What materials do I need for this unit?
Introduction Page 7
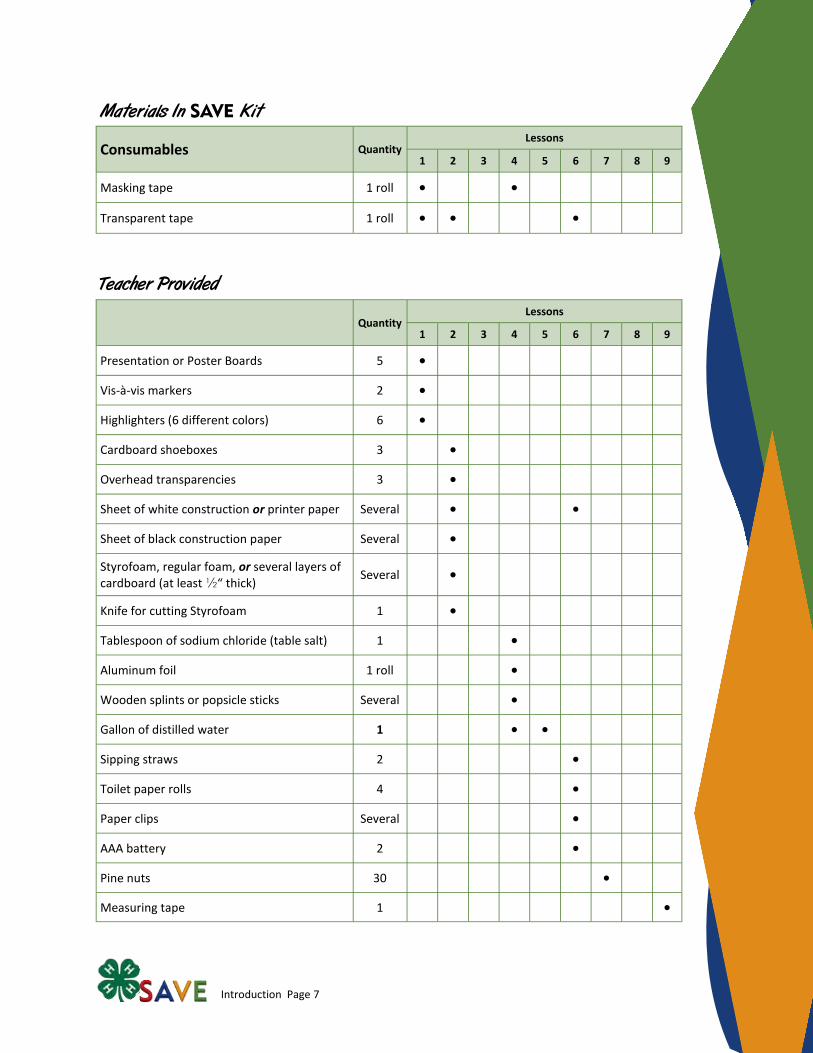
Materials In SAVE Kit
Consumables Quantity Lessons
1 2 3 4 5 6 7 8 9
Masking tape 1 roll • •
Transparent tape 1 roll • • •
Teacher Provided
Quantity Lessons
1 2 3 4 5 6 7 8 9
Presentation or Poster Boards 5 •
Vis-à-vis markers 2 •
Highlighters (6 different colors) 6 •
Cardboard shoeboxes 3 •
Overhead transparencies 3 •
Sheet of white construction or printer paper Several • •
Sheet of black construction paper Several •
Styrofoam, regular foam, or several layers of cardboard (at least ½“ thick)
Several •
Knife for cutting Styrofoam 1 •
Tablespoon of sodium chloride (table salt) 1 •
Aluminum foil 1 roll •
Wooden splints or popsicle sticks Several •
Gallon of distilled water 1 • •
Sipping straws 2 •
Toilet paper rolls 4 •
Paper clips Several •
AAA battery 2 •
Pine nuts 30 •
Measuring tape 1 •
Introduction Page 8
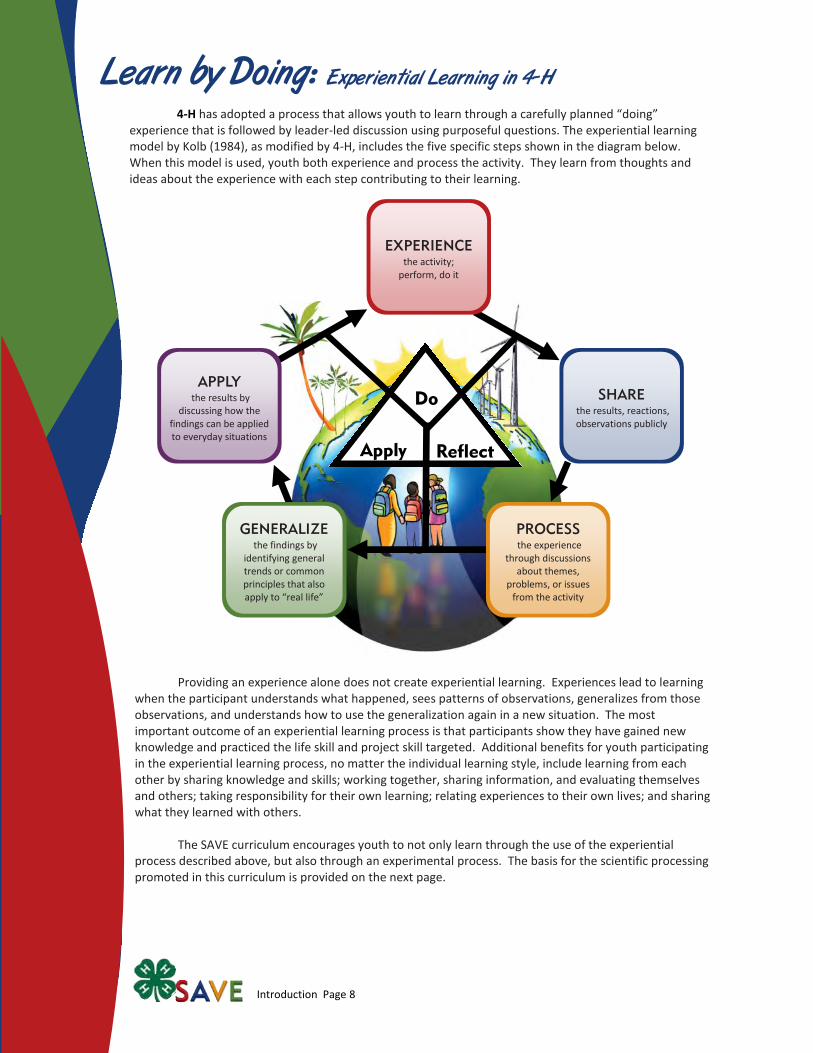
Learn by Doing: Experiential Learning in 4-H
4-H has adopted a process that allows youth to learn through a carefully planned “doing” experience that is followed by leader-led discussion using purposeful questions. The experiential learning model by Kolb (1984), as modified by 4-H, includes the five specific steps shown in the diagram below. When this model is used, youth both experience and process the activity. They learn from thoughts and ideas about the experience with each step contributing to their learning.
Providing an experience alone does not create experiential learning. Experiences lead to learning when the participant understands what happened, sees patterns of observations, generalizes from those observations, and understands how to use the generalization again in a new situation. The most important outcome of an experiential learning process is that participants show they have gained new knowledge and practiced the life skill and project skill targeted. Additional benefits for youth participating in the experiential learning process, no matter the individual learning style, include learning from each other by sharing knowledge and skills; working together, sharing information, and evaluating themselves and others; taking responsibility for their own learning; relating experiences to their own lives; and sharing what they learned with others.
The SAVE curriculum encourages youth to not only learn through the use of the experiential
process described above, but also through an experimental process. The basis for the scientific processing promoted in this curriculum is provided on the next page.
Do
Reflect Apply
APPLY
the results by discussing how the
findings can be applied to everyday situations
GENERALIZE
the findings by identifying general trends or common principles that also apply to “real life”
PROCESS the experience
through discussions about themes,
problems, or issues from the activity
SHARE the results, reactions, observations publicly
EXPERIENCE the activity;
perform, do it
Introduction Page 9
The Nature
of Science
Both the SAVE Project Book and Teacher’s Book use various science terms, concepts, and processes necessary for the building of important science skills. The information given to the youth in the Project Book is provided below and addresses the scientific perspective adopted within this curriculum.
The first question that comes to mind is: What is science? There are a number of possible answers to
that question. Some people believe that the term “science” simply refers to a body of knowledge (what we know about our world). Others see “science” as a specific method for investigating the world (how we know what we know). Still others define “science” as a way of knowing about our world which is linked to values and beliefs that form the foundation for the development of all scientific knowledge. As you can see, there are many different opinions found in science. But that is okay! It is those differences in opinions that often drive scientists to discover new and wonderful things about this world. The last definition for science is also called the Nature of Science and is foundational concept of this project book. There are key characteristics that you must know about the nature of science before you begin looking at the world of energy.
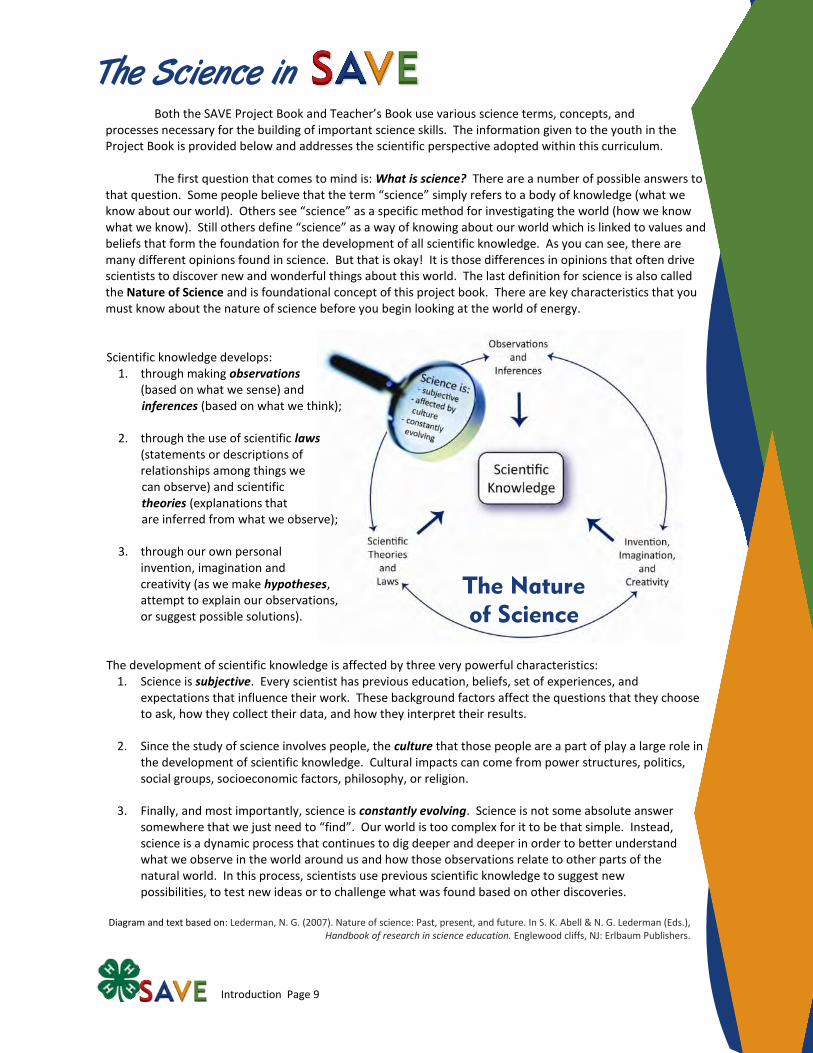
Scientific knowledge develops: 1. through making observations
(based on what we sense) and inferences (based on what we think);
2. through the use of scientific laws (statements or descriptions of relationships among things we can observe) and scientific theories (explanations that are inferred from what we observe);
3. through our own personal invention, imagination and creativity (as we make hypotheses, attempt to explain our observations, or suggest possible solutions).
The development of scientific knowledge is affected by three very powerful characteristics: 1. Science is subjective. Every scientist has previous education, beliefs, set of experiences, and
expectations that influence their work. These background factors affect the questions that they choose to ask, how they collect their data, and how they interpret their results.
2. Since the study of science involves people, the culture that those people are a part of play a large role in the development of scientific knowledge. Cultural impacts can come from power structures, politics, social groups, socioeconomic factors, philosophy, or religion.
3. Finally, and most importantly, science is constantly evolving. Science is not some absolute answer somewhere that we just need to “find”. Our world is too complex for it to be that simple. Instead, science is a dynamic process that continues to dig deeper and deeper in order to better understand what we observe in the world around us and how those observations relate to other parts of the natural world. In this process, scientists use previous scientific knowledge to suggest new possibilities, to test new ideas or to challenge what was found based on other discoveries.
Diagram and text based on: Lederman, N. G. (2007). Nature of science: Past, present, and future. In S. K. Abell & N. G. Lederman (Eds.), Handbook of research in science education. Englewood cliffs, NJ: Erlbaum Publishers.
The Science in

Introduction Page 10
The first thing to know in asking this question is that there is NO ONE WAY TO DO SCIENCE! There is no step-by-step manual to teach you how. But, there are different tools that scientists use to investigate the world around them.
The process of gathering scientific knowledge often begins with questions that a scientist has
about an observation. Scientists often look at the world around them and begin to ask questions. These questions can come from a practical problem, a surprising observation, or out of simple curiosity. Research questions could be simple like “What is that?” or “Where did that come from?” or “How could that work better?” to more complicated questions like “What relationship exists between the force of the wind and the shape of the blade on a windmill?” Scientists often are looking to answer questions about things that they don’t understand or want to know more about. But they are not alone. Scientists work together by sharing questions and thoughts with one another in order to generate stronger ideas and possible solutions, as well as to look at the issue from multiple points of view.
Once scientists have a question (or set of questions), they begin the process of finding answers.
Often scientists have an idea about what they think will happen or an explanation of what they will observe. This hypothesis focuses the research process and leads them in creating ways to test possible solutions in hopes of providing evidence for the answers they will give. This testing results in data collected from additional observations that either supports the scientist’s hypothesis, opposes the hypothesis, inspires a new or revised hypothesis, or bring to light problems with assumptions the scientist may have made. From these results come the discovery of new ideas or solutions for a variety of problems, as well as new questions and hypotheses for the scientist to explore.
Text based on: Lederman (2007) and Year of Science (2009)
So, are YOU a scientist? The previous two sections told you important information about scientists. Now it’s your turn. Write a brief paragraph to describe what you think it takes to be a scientist. Have your youth do this activity as well and compare the answers that are generated.
So, how do scientists “do science”?

Introduction Page 11
Welcome to The Toolbox
The Toolbox provides you with definitions and prompting questions to help youth better understand the scientific concepts covered throughout the lessons.
Definition Prompt Observation: a statement that describe natural phenomena - observations must be based on information from your senses and able to be confirmed by other observers with ease.
Research Question: a main question that drives and guides the research. Prompt: What question are you trying to answer?
Hypothesis (pl. Hypotheses): a possible explanation for some observation, phenomenon, or scientific problem that can be tested.
Prompt: What do you think the answer is to that question?
Test (or Experiment): a particular process or method used to investigate answers to the questions posed in the research.
Variables: a factor or condition within the test which is likely to change or vary when testing a hypothesis.
Prompt: What parts of your test are going to change in order as you perform your experiment?
Independent Variable: a variable whose value is independent of changes in the values of any other variable; it is the variable that you change on purpose; the variable you are testing the effect of.
Prompt: What variables were changed on purpose during this test?
Dependent Variable: a variable whose value is affected by changes made to any other variables.
Prompt: What changed because of the changes you made to your independent variable?
Control: the standard of comparison used in an experiment; what you compare your results to.
Prompt: What is the measurement that you are going to compare your other results to?
Data: facts, collected from observations, and from which conclusions can be made.
Prompt: Can you reproduce your measurements at different times?
Reliability: whether the measurements for a test will give the same results.
Prompt: Can you reproduce your measurements at different times?
Precision: the number of times an experimenter is able to generate the same measurement
Prompt: How often are you able to reproduce your measurements?
Accuracy: the degree of closeness a measured quantity is to the true or actual value
Prompt: How close are your measurements to the true value of what’s being measured?
Validity: the extent to which a measure accurately reflects the concept that it is intended to measure
Prompt: How well would your findings apply to situations other than the one you tested?
Assumptions: something that is taken for granted before or during the scientific process which may or may not be true.
Inferences: a logical conclusion based on the observations made.
Introduction Page 12
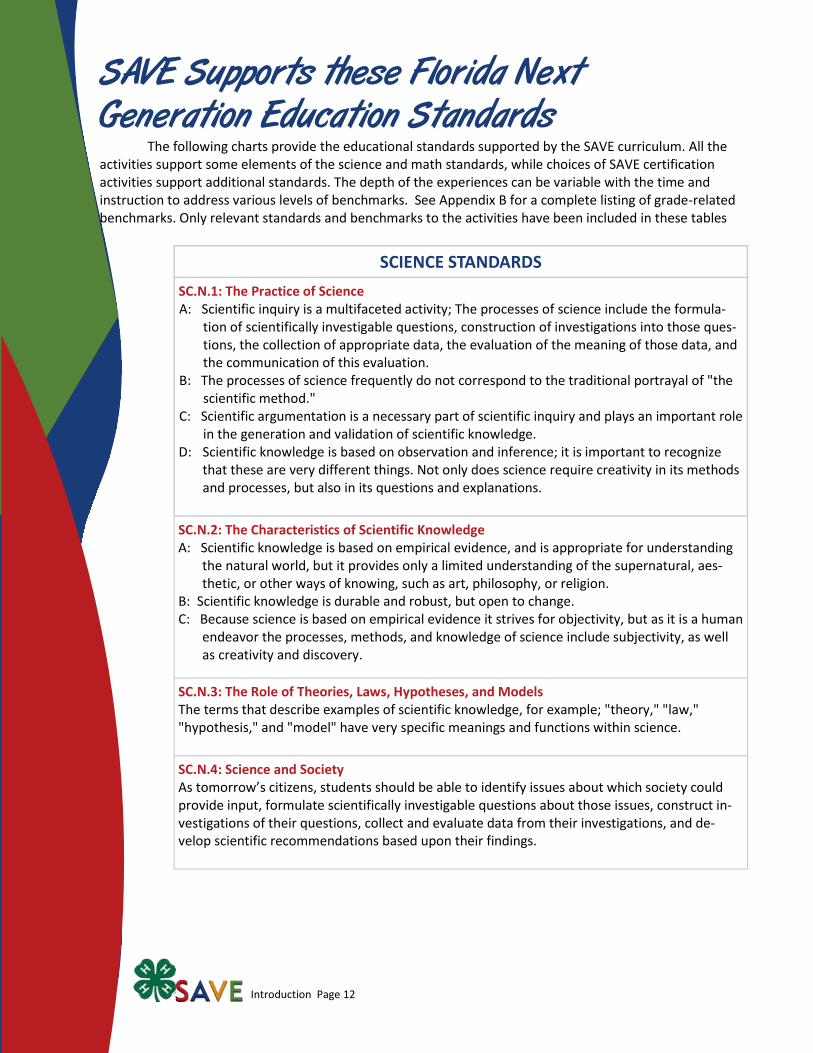
SAVE Supports these Florida Next Generation Education Standards The following charts provide the educational standards supported by the SAVE curriculum. All the activities support some elements of the science and math standards, while choices of SAVE certification activities support additional standards. The depth of the experiences can be variable with the time and instruction to address various levels of benchmarks. See Appendix B for a complete listing of grade-related benchmarks. Only relevant standards and benchmarks to the activities have been included in these tables
SCIENCE STANDARDS
SC.N.1: The Practice of Science A: Scientific inquiry is a multifaceted activity; The processes of science include the formula-
tion of scientifically investigable questions, construction of investigations into those ques-tions, the collection of appropriate data, the evaluation of the meaning of those data, and the communication of this evaluation.
B: The processes of science frequently do not correspond to the traditional portrayal of "the scientific method."
C: Scientific argumentation is a necessary part of scientific inquiry and plays an important role in the generation and validation of scientific knowledge.
D: Scientific knowledge is based on observation and inference; it is important to recognize that these are very different things. Not only does science require creativity in its methods and processes, but also in its questions and explanations.
SC.N.2: The Characteristics of Scientific Knowledge A: Scientific knowledge is based on empirical evidence, and is appropriate for understanding
the natural world, but it provides only a limited understanding of the supernatural, aes-thetic, or other ways of knowing, such as art, philosophy, or religion.
B: Scientific knowledge is durable and robust, but open to change. C: Because science is based on empirical evidence it strives for objectivity, but as it is a human
endeavor the processes, methods, and knowledge of science include subjectivity, as well as creativity and discovery.
SC.N.3: The Role of Theories, Laws, Hypotheses, and Models The terms that describe examples of scientific knowledge, for example; "theory," "law," "hypothesis," and "model" have very specific meanings and functions within science.
SC.N.4: Science and Society As tomorrow’s citizens, students should be able to identify issues about which society could provide input, formulate scientifically investigable questions about those issues, construct in-vestigations of their questions, collect and evaluate data from their investigations, and de-velop scientific recommendations based upon their findings.
Introduction Page 13
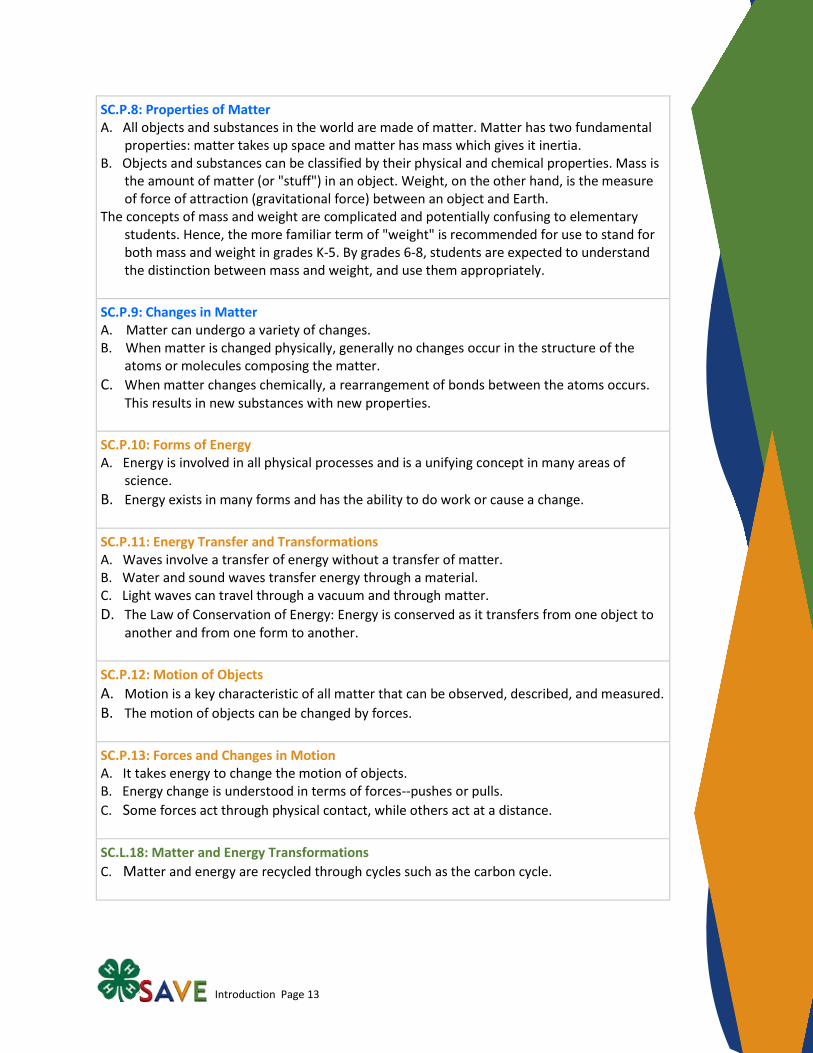
SC.P.8: Properties of Matter A. All objects and substances in the world are made of matter. Matter has two fundamental
properties: matter takes up space and matter has mass which gives it inertia. B. Objects and substances can be classified by their physical and chemical properties. Mass is
the amount of matter (or "stuff") in an object. Weight, on the other hand, is the measure of force of attraction (gravitational force) between an object and Earth.
The concepts of mass and weight are complicated and potentially confusing to elementary students. Hence, the more familiar term of "weight" is recommended for use to stand for both mass and weight in grades K-5. By grades 6-8, students are expected to understand the distinction between mass and weight, and use them appropriately.
SC.P.9: Changes in Matter A. Matter can undergo a variety of changes. B. When matter is changed physically, generally no changes occur in the structure of the
atoms or molecules composing the matter.
C. When matter changes chemically, a rearrangement of bonds between the atoms occurs. This results in new substances with new properties.
SC.P.10: Forms of Energy A. Energy is involved in all physical processes and is a unifying concept in many areas of
science.
B. Energy exists in many forms and has the ability to do work or cause a change.
SC.P.11: Energy Transfer and Transformations A. Waves involve a transfer of energy without a transfer of matter. B. Water and sound waves transfer energy through a material. C. Light waves can travel through a vacuum and through matter.
D. The Law of Conservation of Energy: Energy is conserved as it transfers from one object to another and from one form to another.
SC.P.12: Motion of Objects
A. Motion is a key characteristic of all matter that can be observed, described, and measured. B. The motion of objects can be changed by forces.
SC.P.13: Forces and Changes in Motion A. It takes energy to change the motion of objects. B. Energy change is understood in terms of forces--pushes or pulls.
C. Some forces act through physical contact, while others act at a distance.
SC.L.18: Matter and Energy Transformations
C. Matter and energy are recycled through cycles such as the carbon cycle.

Introduction Page 14
MATH STANDARDS
MA.A.1: Develop an understanding of and fluency with multiplication and division of fractions and decimals.
MA.A.2: 6th Grade: Connect ratio and rates to multiplication and division. 7th Grade: Develop an understanding of and use formulas to determine surface areas and vol-
umes of three-dimensional shapes. 8th Grade: Analyze two- and three-dimensional figures by using distance and angle.
MA.A.3: Write, interpret, and use mathematical expressions and equations. MA.G.4–5: Geometry and Measurement
MA.A.5: Number and Operations
MA.S.6: Data Analysis—Analyze and summarize data sets. MA.P.7: Probability
Lesson 1 - Page 1
Lesson
1
Main Concept: Energy comes in many forms, from many sources, and can undergo many transformations.
Time: 45 minutes—1 hour
Setting: Classroom for activities Lesson Objectives:
To explore basic information about energy including forms, sources, and transformations.
Science Skills: Critical Thinking
Life Skill: Teamwork
Materials Needed (for concept connections) Images of various
representations of energy forms, sources, users, and impacts
Envelopes for each image Transparent tape (for small-group skill stations) 1 timer 5 presentation (or poster) boards Masking tape (for hanging poster
boards onto walls) Transparent tape (for mounting
skill station pieces to boards) Erasable marker (for Station 2) 6 different colored highlighters
or light-colored markers (for Station 5)
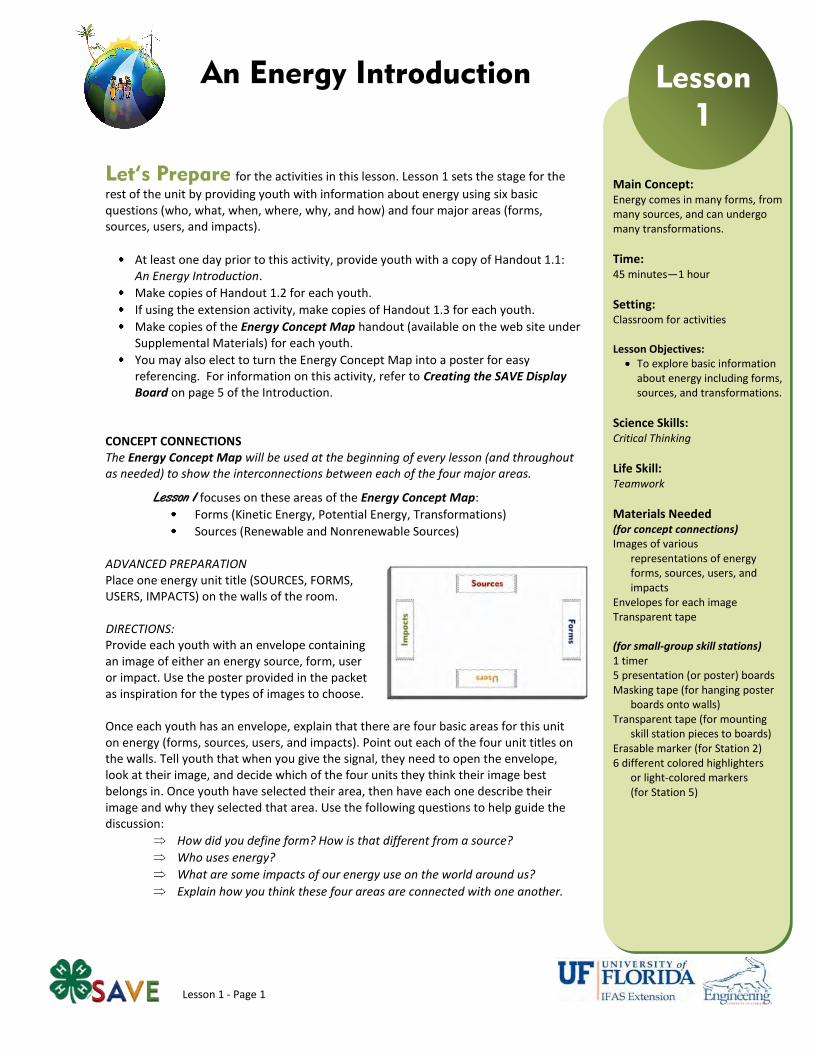
An Energy Introduction
Let’s Prepare for the activities in this lesson. Lesson 1 sets the stage for the
rest of the unit by providing youth with information about energy using six basic questions (who, what, when, where, why, and how) and four major areas (forms, sources, users, and impacts).
At least one day prior to this activity, provide youth with a copy of Handout 1.1: An Energy Introduction.
Make copies of Handout 1.2 for each youth.
If using the extension activity, make copies of Handout 1.3 for each youth.
Make copies of the Energy Concept Map handout (available on the web site under Supplemental Materials) for each youth.
You may also elect to turn the Energy Concept Map into a poster for easy referencing. For information on this activity, refer to Creating the SAVE Display Board on page 5 of the Introduction.
CONCEPT CONNECTIONS The Energy Concept Map will be used at the beginning of every lesson (and throughout as needed) to show the interconnections between each of the four major areas.
Lesson 1 focuses on these areas of the Energy Concept Map:
Forms (Kinetic Energy, Potential Energy, Transformations)
Sources (Renewable and Nonrenewable Sources) ADVANCED PREPARATION Place one energy unit title (SOURCES, FORMS, USERS, IMPACTS) on the walls of the room. DIRECTIONS: Provide each youth with an envelope containing an image of either an energy source, form, user or impact. Use the poster provided in the packet as inspiration for the types of images to choose. Once each youth has an envelope, explain that there are four basic areas for this unit on energy (forms, sources, users, and impacts). Point out each of the four unit titles on the walls. Tell youth that when you give the signal, they need to open the envelope, look at their image, and decide which of the four units they think their image best belongs in. Once youth have selected their area, then have each one describe their image and why they selected that area. Use the following questions to help guide the discussion:
How did you define form? How is that different from a source?
Who uses energy?
What are some impacts of our energy use on the world around us?
Explain how you think these four areas are connected with one another.
Lesson 1 - Page 2
Let’s Investigate basic information about energy forms, sources, and transformations.
SKILL STATIONS- ADVANCED PREPARATION Details for each of the five stations described below (including photos, station instructions, and resources) are available at the project web site: http://florida4h.org/projects/SAVE/Lesson1_SkillStation.shtml. Instructions and resources for performing this activity as a 4-H Skill-a-thon are also available at the site. The instructions below assume that the leader will be creating table-top versions of the stations. However, resources are available on the web site in Power Point form for larger versions (such as for the use of presentation boards). STATION 1 - FORMS
Cut out and secure the Title Bar and Instruction cards (page 1) to your poster board. Cut out the Photo and Form/Category cards (pages 1 to 3) and place on a table in front of the station.
STATION 2 - SOURCES Cut out and secure the Title Bar, Instructions, and Pie Chart/Key (pages 4 to 5) to your poster board. Cut out the Percentages and Sources cards (pages 6 to 7) and place on a table in front of the station. Cut out and laminate both Calculated Percentage of Sources cards (bottom of pages 6 and 7). If a laminator is not available, make copies of these cards for each small group.
STATION 3 - TRANSFORMATIONS Cut out and secure the Title Bar, Instructions, and Photo cards (pages 8) to your poster board. Cut out the Arrow and Transformation cards (page 9 to 11) and place on a table in front of the station.
STATION 4 - MACHINES Cut out and secure the Title Bar, Instructions, and Example cards (pages 12 to 13) to your poster board. Make enough copies of the Our Machine card page (page 14) so that each small group will have two cards during their turn. Place them on a table in front of the station. Have various machines on the table (i.e. toaster, toy car, battery, whistle, light bulb, can opener, grill lighter)
STATION 5 - INTRO TO ENERGY Cut out and secure the Title Bar and Instruction cards (pages 15) to your poster board. Copy and cut out the Question Cards (page 16). It would be preferable to copy these cards onto cardstock to prevent the text from bleeding through the paper. Place them upside down on a table in front of the station. Make a copy of the handout An Introduction to Energy (in this lesson, Handout 1.1). Place it on a table in front of the station along with six (6) different colored highlighters or light-colored markers.
SKILL STATIONS TASK OVERVIEW AND SPECIAL DIRECTIONS FOR EACH STATION Separate youth into small groups (3-5 youth per group). Prior to sending the groups to their stations, review the directions for each one (see below). STATION 1 - FORMS
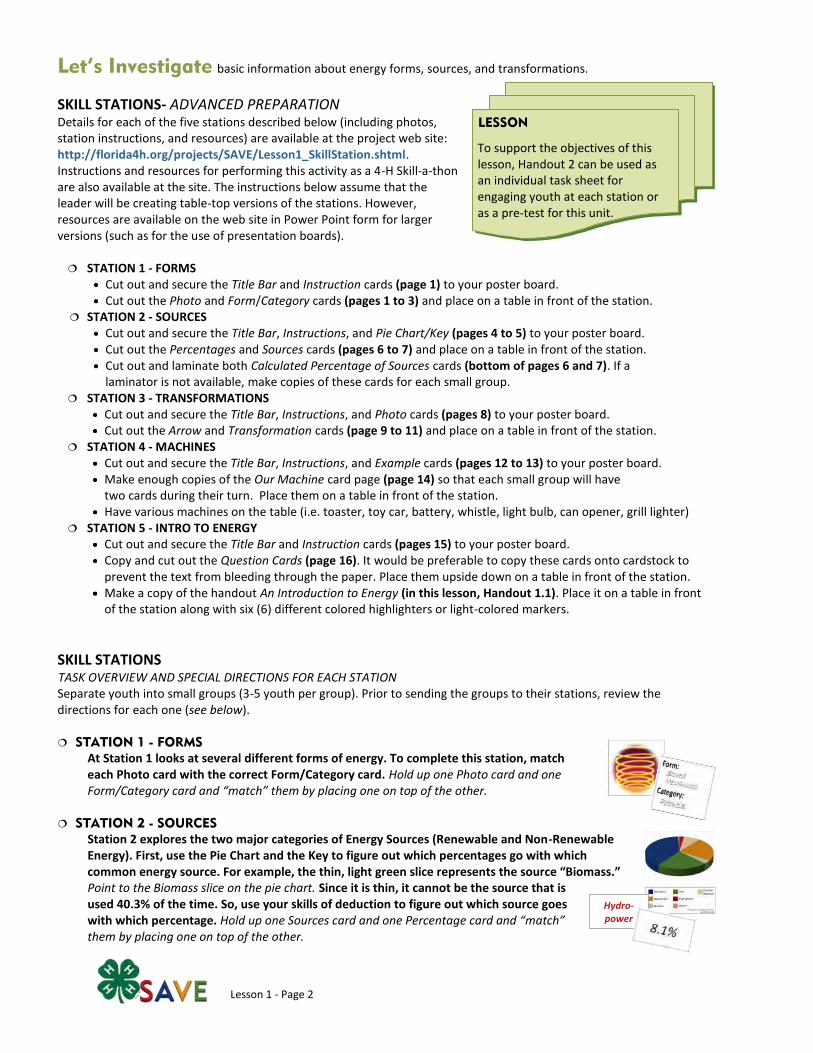
At Station 1 looks at several different forms of energy. To complete this station, match each Photo card with the correct Form/Category card. Hold up one Photo card and one Form/Category card and “match” them by placing one on top of the other.
STATION 2 - SOURCES
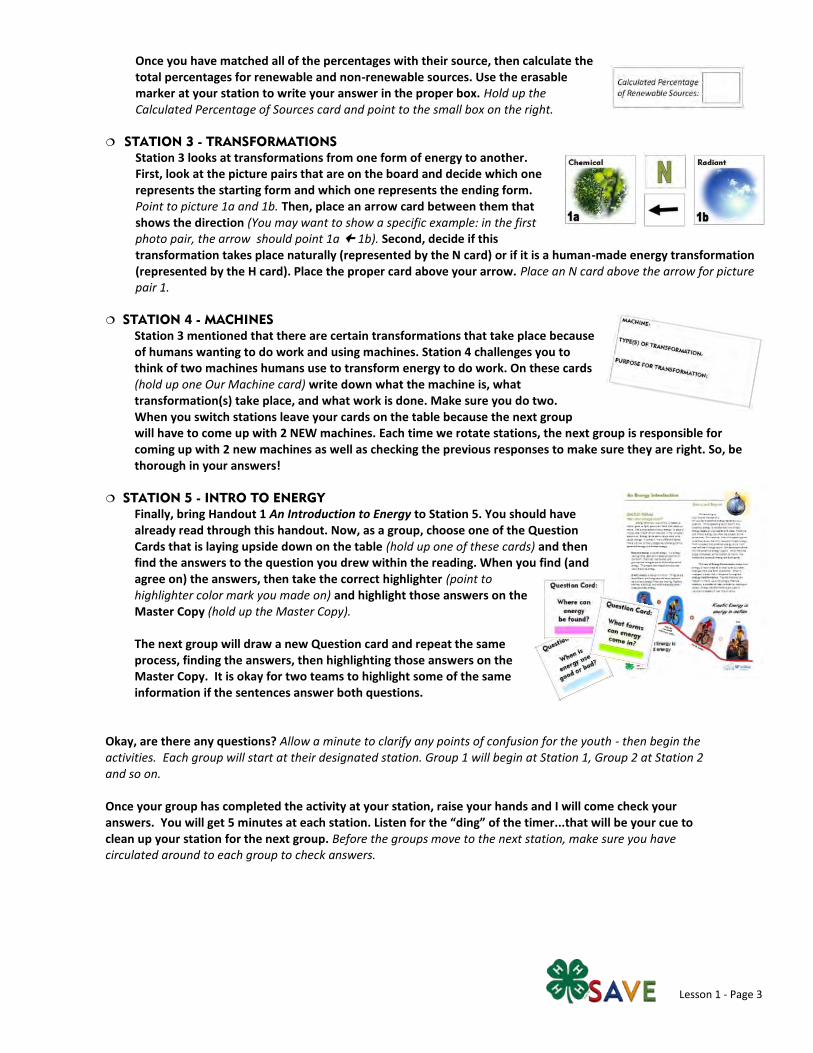
Station 2 explores the two major categories of Energy Sources (Renewable and Non-Renewable Energy). First, use the Pie Chart and the Key to figure out which percentages go with which common energy source. For example, the thin, light green slice represents the source “Biomass.” Point to the Biomass slice on the pie chart. Since it is thin, it cannot be the source that is used 40.3% of the time. So, use your skills of deduction to figure out which source goes with which percentage. Hold up one Sources card and one Percentage card and “match” them by placing one on top of the other.
Hydro-power
LESSON
To support the objectives of this lesson, Handout 2 can be used as an individual task sheet for engaging youth at each station or as a pre-test for this unit.
Lesson 1 - Page 3
Once you have matched all of the percentages with their source, then calculate the total percentages for renewable and non-renewable sources. Use the erasable marker at your station to write your answer in the proper box. Hold up the Calculated Percentage of Sources card and point to the small box on the right.
STATION 3 - TRANSFORMATIONS
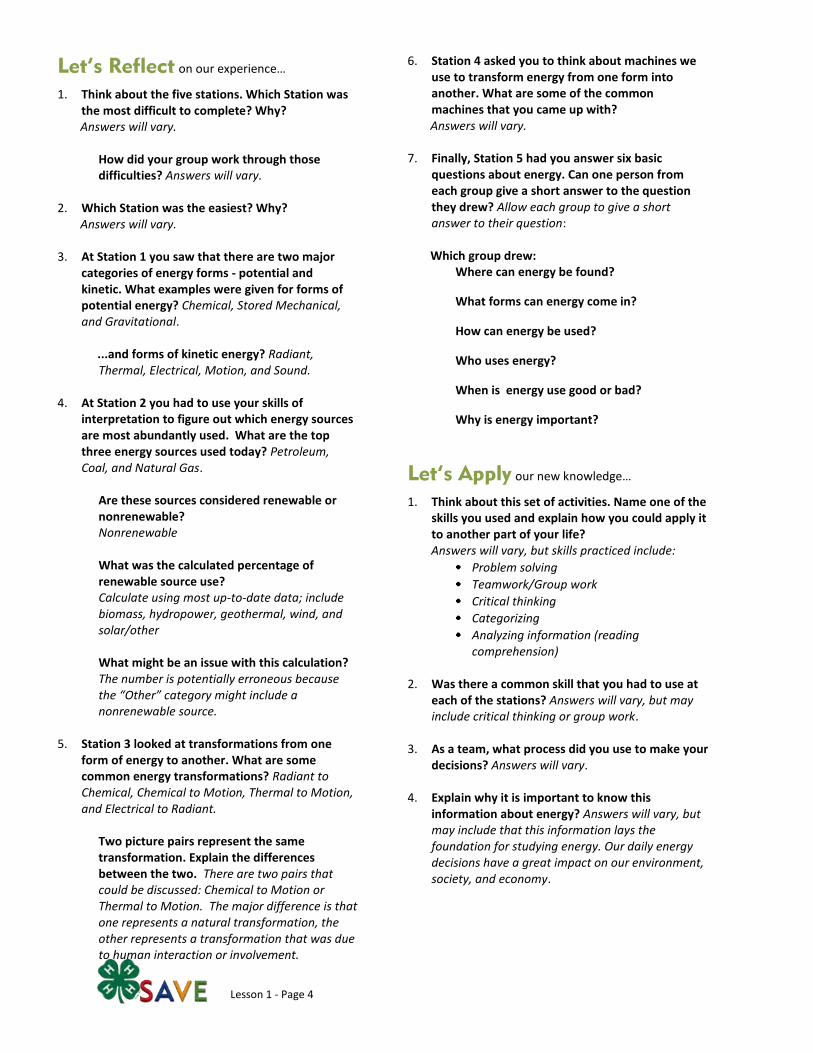
Station 3 looks at transformations from one form of energy to another. First, look at the picture pairs that are on the board and decide which one represents the starting form and which one represents the ending form. Point to picture 1a and 1b. Then, place an arrow card between them that shows the direction (You may want to show a specific example: in the first photo pair, the arrow should point 1a 1b). Second, decide if this transformation takes place naturally (represented by the N card) or if it is a human-made energy transformation (represented by the H card). Place the proper card above your arrow. Place an N card above the arrow for picture pair 1.
STATION 4 - MACHINES
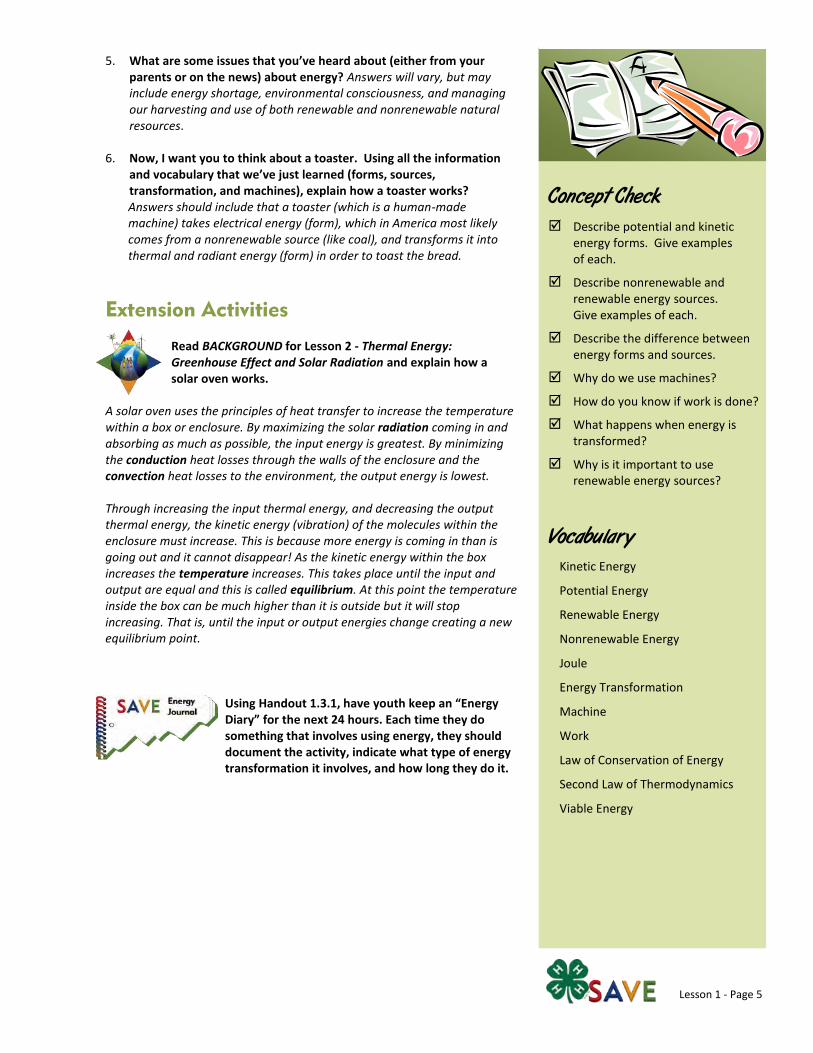
Station 3 mentioned that there are certain transformations that take place because of humans wanting to do work and using machines. Station 4 challenges you to think of two machines humans use to transform energy to do work. On these cards (hold up one Our Machine card) write down what the machine is, what transformation(s) take place, and what work is done. Make sure you do two. When you switch stations leave your cards on the table because the next group will have to come up with 2 NEW machines. Each time we rotate stations, the next group is responsible for coming up with 2 new machines as well as checking the previous responses to make sure they are right. So, be thorough in your answers!
STATION 5 - INTRO TO ENERGY
Finally, bring Handout 1 An Introduction to Energy to Station 5. You should have already read through this handout. Now, as a group, choose one of the Question Cards that is laying upside down on the table (hold up one of these cards) and then find the answers to the question you drew within the reading. When you find (and agree on) the answers, then take the correct highlighter (point to highlighter color mark you made on) and highlight those answers on the Master Copy (hold up the Master Copy). The next group will draw a new Question card and repeat the same process, finding the answers, then highlighting those answers on the Master Copy. It is okay for two teams to highlight some of the same information if the sentences answer both questions.
Okay, are there any questions? Allow a minute to clarify any points of confusion for the youth - then begin the activities. Each group will start at their designated station. Group 1 will begin at Station 1, Group 2 at Station 2 and so on. Once your group has completed the activity at your station, raise your hands and I will come check your answers. You will get 5 minutes at each station. Listen for the “ding” of the timer...that will be your cue to clean up your station for the next group. Before the groups move to the next station, make sure you have circulated around to each group to check answers.
Lesson 1 - Page 4
Let’s Reflect on our experience…
1. Think about the five stations. Which Station was the most difficult to complete? Why? Answers will vary.
How did your group work through those difficulties? Answers will vary.
2. Which Station was the easiest? Why?
Answers will vary.
3. At Station 1 you saw that there are two major categories of energy forms - potential and kinetic. What examples were given for forms of potential energy? Chemical, Stored Mechanical, and Gravitational.
...and forms of kinetic energy? Radiant, Thermal, Electrical, Motion, and Sound.
4. At Station 2 you had to use your skills of
interpretation to figure out which energy sources are most abundantly used. What are the top three energy sources used today? Petroleum, Coal, and Natural Gas.
Are these sources considered renewable or nonrenewable? Nonrenewable What was the calculated percentage of renewable source use? Calculate using most up-to-date data; include biomass, hydropower, geothermal, wind, and solar/other
What might be an issue with this calculation? The number is potentially erroneous because the “Other” category might include a nonrenewable source.
5. Station 3 looked at transformations from one
form of energy to another. What are some common energy transformations? Radiant to Chemical, Chemical to Motion, Thermal to Motion, and Electrical to Radiant.
Two picture pairs represent the same transformation. Explain the differences between the two. There are two pairs that could be discussed: Chemical to Motion or Thermal to Motion. The major difference is that one represents a natural transformation, the other represents a transformation that was due to human interaction or involvement.
6. Station 4 asked you to think about machines we use to transform energy from one form into another. What are some of the common machines that you came up with? Answers will vary.
7. Finally, Station 5 had you answer six basic questions about energy. Can one person from each group give a short answer to the question they drew? Allow each group to give a short answer to their question: Which group drew: Where can energy be found?
What forms can energy come in?
How can energy be used?
Who uses energy?
When is energy use good or bad?
Why is energy important?
Let’s Apply our new knowledge…
1. Think about this set of activities. Name one of the skills you used and explain how you could apply it to another part of your life? Answers will vary, but skills practiced include:
Problem solving
Teamwork/Group work
Critical thinking
Categorizing
Analyzing information (reading comprehension)
2. Was there a common skill that you had to use at
each of the stations? Answers will vary, but may include critical thinking or group work.
3. As a team, what process did you use to make your
decisions? Answers will vary. 4. Explain why it is important to know this
information about energy? Answers will vary, but may include that this information lays the foundation for studying energy. Our daily energy decisions have a great impact on our environment, society, and economy.
Lesson 1 - Page 5
Concept Check
Describe potential and kinetic energy forms. Give examples of each.
Describe nonrenewable and renewable energy sources. Give examples of each.
Describe the difference between energy forms and sources.
Why do we use machines?
How do you know if work is done?
What happens when energy is transformed?
Why is it important to use renewable energy sources?
Vocabulary
Kinetic Energy
Potential Energy
Renewable Energy
Nonrenewable Energy
Joule
Energy Transformation
Machine
Work
Law of Conservation of Energy
Second Law of Thermodynamics
Viable Energy
5. What are some issues that you’ve heard about (either from your parents or on the news) about energy? Answers will vary, but may include energy shortage, environmental consciousness, and managing our harvesting and use of both renewable and nonrenewable natural resources.
6. Now, I want you to think about a toaster. Using all the information and vocabulary that we’ve just learned (forms, sources, transformation, and machines), explain how a toaster works? Answers should include that a toaster (which is a human-made machine) takes electrical energy (form), which in America most likely comes from a nonrenewable source (like coal), and transforms it into thermal and radiant energy (form) in order to toast the bread.
Extension Activities
Read BACKGROUND for Lesson 2 - Thermal Energy: Greenhouse Effect and Solar Radiation and explain how a solar oven works.
A solar oven uses the principles of heat transfer to increase the temperature within a box or enclosure. By maximizing the solar radiation coming in and absorbing as much as possible, the input energy is greatest. By minimizing the conduction heat losses through the walls of the enclosure and the convection heat losses to the environment, the output energy is lowest. Through increasing the input thermal energy, and decreasing the output thermal energy, the kinetic energy (vibration) of the molecules within the enclosure must increase. This is because more energy is coming in than is going out and it cannot disappear! As the kinetic energy within the box increases the temperature increases. This takes place until the input and output are equal and this is called equilibrium. At this point the temperature inside the box can be much higher than it is outside but it will stop increasing. That is, until the input or output energies change creating a new equilibrium point.
Using Handout 1.3.1, have youth keep an “Energy Diary” for the next 24 hours. Each time they do something that involves using energy, they should document the activity, indicate what type of energy transformation it involves, and how long they do it.
An Energy Introduction
Basics and Beyond
Kinetic (motion)
Potential (stored)
Kinetic Energy is energy in motion
Potential Energy is stored energy
None (at rest)
Potential and Kinetic (stored and motion)
ENERGY FORMS
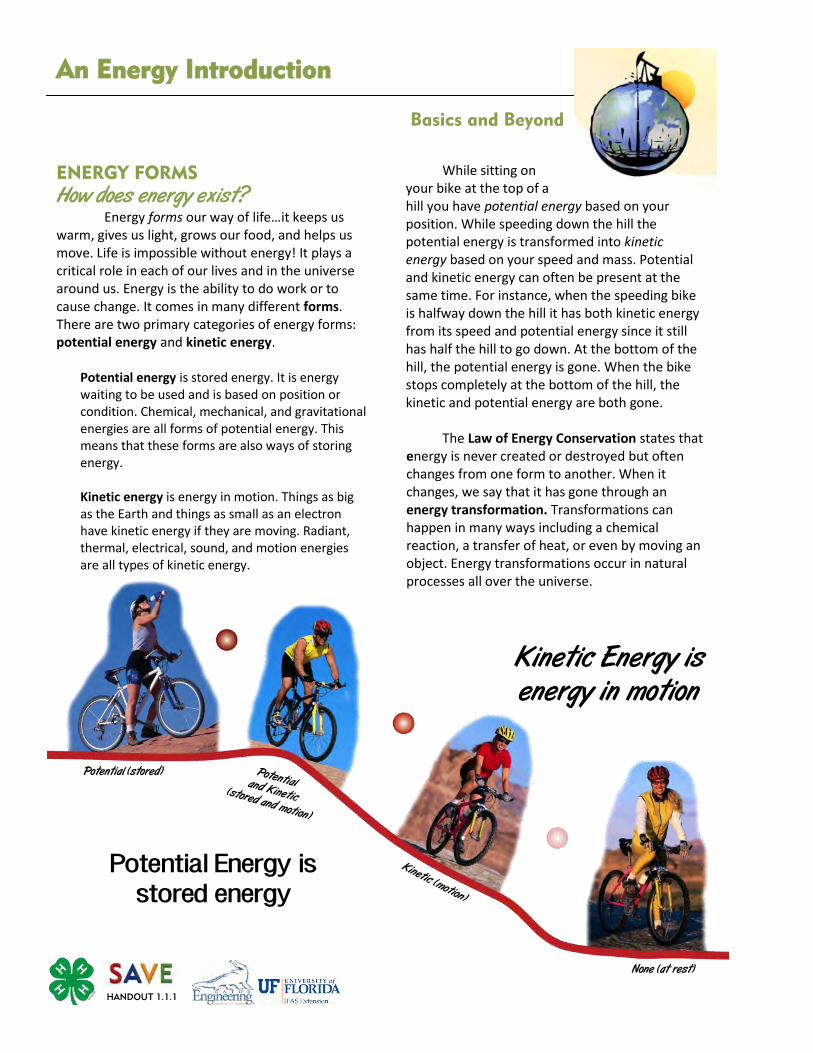
How does energy exist? Energy forms our way of life…it keeps us warm, gives us light, grows our food, and helps us move. Life is impossible without energy! It plays a critical role in each of our lives and in the universe around us. Energy is the ability to do work or to cause change. It comes in many different forms. There are two primary categories of energy forms: potential energy and kinetic energy.
Potential energy is stored energy. It is energy waiting to be used and is based on position or condition. Chemical, mechanical, and gravitational energies are all forms of potential energy. This means that these forms are also ways of storing energy. Kinetic energy is energy in motion. Things as big as the Earth and things as small as an electron have kinetic energy if they are moving. Radiant, thermal, electrical, sound, and motion energies are all types of kinetic energy.
While sitting on your bike at the top of a hill you have potential energy based on your position. While speeding down the hill the potential energy is transformed into kinetic energy based on your speed and mass. Potential and kinetic energy can often be present at the same time. For instance, when the speeding bike is halfway down the hill it has both kinetic energy from its speed and potential energy since it still has half the hill to go down. At the bottom of the hill, the potential energy is gone. When the bike stops completely at the bottom of the hill, the kinetic and potential energy are both gone. The Law of Energy Conservation states that energy is never created or destroyed but often changes from one form to another. When it changes, we say that it has gone through an energy transformation. Transformations can happen in many ways including a chemical reaction, a transfer of heat, or even by moving an object. Energy transformations occur in natural processes all over the universe.
HANDOUT 1.1.1
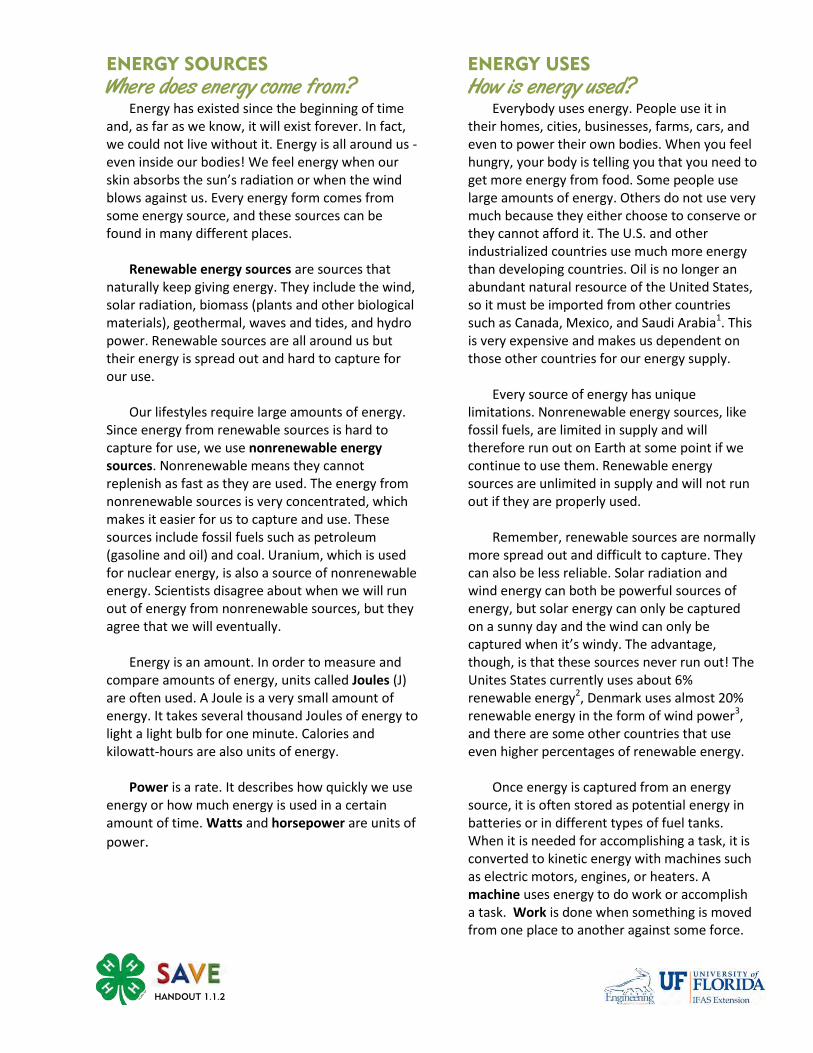
ENERGY SOURCES
Where does energy come from? Energy has existed since the beginning of time and, as far as we know, it will exist forever. In fact, we could not live without it. Energy is all around us - even inside our bodies! We feel energy when our skin absorbs the sun’s radiation or when the wind blows against us. Every energy form comes from some energy source, and these sources can be found in many different places. Renewable energy sources are sources that naturally keep giving energy. They include the wind, solar radiation, biomass (plants and other biological materials), geothermal, waves and tides, and hydro power. Renewable sources are all around us but their energy is spread out and hard to capture for our use. Our lifestyles require large amounts of energy. Since energy from renewable sources is hard to capture for use, we use nonrenewable energy sources. Nonrenewable means they cannot replenish as fast as they are used. The energy from nonrenewable sources is very concentrated, which makes it easier for us to capture and use. These sources include fossil fuels such as petroleum (gasoline and oil) and coal. Uranium, which is used for nuclear energy, is also a source of nonrenewable energy. Scientists disagree about when we will run out of energy from nonrenewable sources, but they agree that we will eventually. Energy is an amount. In order to measure and compare amounts of energy, units called Joules (J) are often used. A Joule is a very small amount of energy. It takes several thousand Joules of energy to light a light bulb for one minute. Calories and kilowatt-hours are also units of energy. Power is a rate. It describes how quickly we use energy or how much energy is used in a certain amount of time. Watts and horsepower are units of
power.
ENERGY USES
How is energy used? Everybody uses energy. People use it in their homes, cities, businesses, farms, cars, and even to power their own bodies. When you feel hungry, your body is telling you that you need to get more energy from food. Some people use large amounts of energy. Others do not use very much because they either choose to conserve or they cannot afford it. The U.S. and other industrialized countries use much more energy than developing countries. Oil is no longer an abundant natural resource of the United States, so it must be imported from other countries such as Canada, Mexico, and Saudi Arabia1. This is very expensive and makes us dependent on those other countries for our energy supply. Every source of energy has unique limitations. Nonrenewable energy sources, like fossil fuels, are limited in supply and will therefore run out on Earth at some point if we continue to use them. Renewable energy sources are unlimited in supply and will not run out if they are properly used. Remember, renewable sources are normally more spread out and difficult to capture. They can also be less reliable. Solar radiation and wind energy can both be powerful sources of energy, but solar energy can only be captured on a sunny day and the wind can only be captured when it’s windy. The advantage, though, is that these sources never run out! The Unites States currently uses about 6% renewable energy2, Denmark uses almost 20% renewable energy in the form of wind power3, and there are some other countries that use even higher percentages of renewable energy. Once energy is captured from an energy source, it is often stored as potential energy in batteries or in different types of fuel tanks. When it is needed for accomplishing a task, it is converted to kinetic energy with machines such as electric motors, engines, or heaters. A machine uses energy to do work or accomplish a task. Work is done when something is moved from one place to another against some force.
HANDOUT 1.1.2
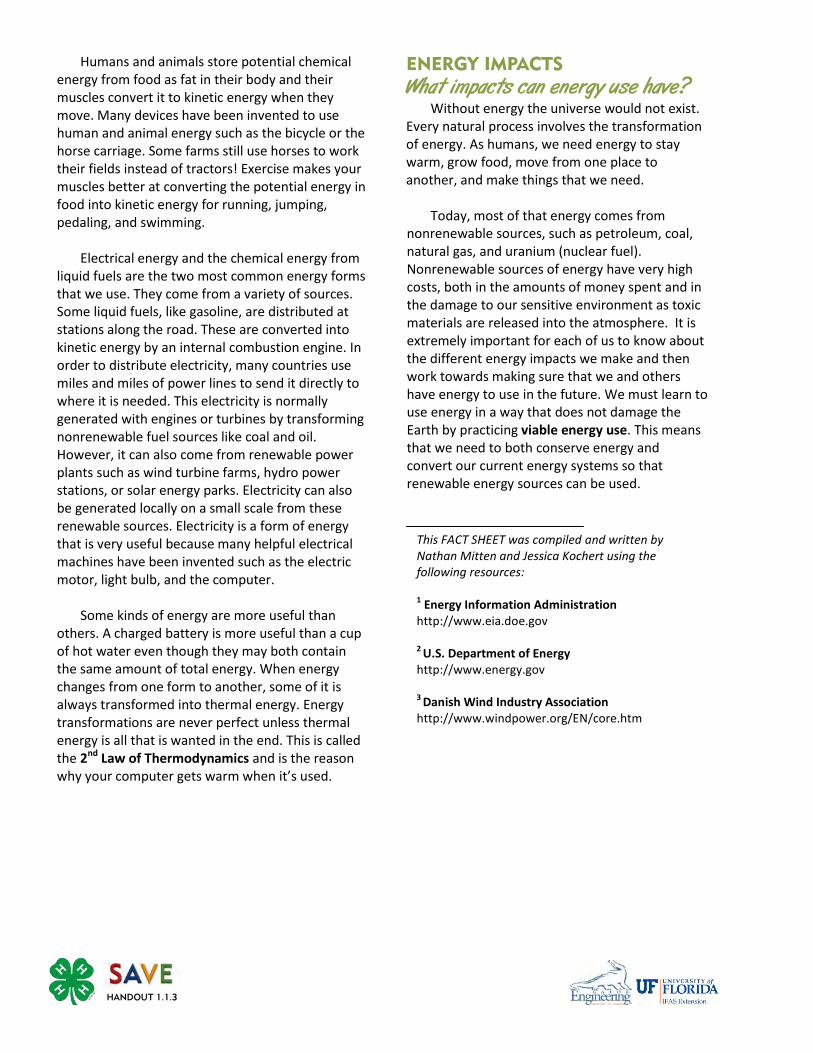
Humans and animals store potential chemical energy from food as fat in their body and their muscles convert it to kinetic energy when they move. Many devices have been invented to use human and animal energy such as the bicycle or the horse carriage. Some farms still use horses to work their fields instead of tractors! Exercise makes your muscles better at converting the potential energy in food into kinetic energy for running, jumping, pedaling, and swimming. Electrical energy and the chemical energy from liquid fuels are the two most common energy forms that we use. They come from a variety of sources. Some liquid fuels, like gasoline, are distributed at stations along the road. These are converted into kinetic energy by an internal combustion engine. In order to distribute electricity, many countries use miles and miles of power lines to send it directly to where it is needed. This electricity is normally generated with engines or turbines by transforming nonrenewable fuel sources like coal and oil. However, it can also come from renewable power plants such as wind turbine farms, hydro power stations, or solar energy parks. Electricity can also be generated locally on a small scale from these renewable sources. Electricity is a form of energy that is very useful because many helpful electrical machines have been invented such as the electric motor, light bulb, and the computer. Some kinds of energy are more useful than others. A charged battery is more useful than a cup of hot water even though they may both contain the same amount of total energy. When energy changes from one form to another, some of it is always transformed into thermal energy. Energy transformations are never perfect unless thermal energy is all that is wanted in the end. This is called the 2nd Law of Thermodynamics and is the reason why your computer gets warm when it’s used.
ENERGY IMPACTS
What impacts can energy use have? Without energy the universe would not exist. Every natural process involves the transformation of energy. As humans, we need energy to stay warm, grow food, move from one place to another, and make things that we need. Today, most of that energy comes from nonrenewable sources, such as petroleum, coal, natural gas, and uranium (nuclear fuel). Nonrenewable sources of energy have very high costs, both in the amounts of money spent and in the damage to our sensitive environment as toxic materials are released into the atmosphere. It is extremely important for each of us to know about the different energy impacts we make and then work towards making sure that we and others have energy to use in the future. We must learn to use energy in a way that does not damage the Earth by practicing viable energy use. This means that we need to both conserve energy and convert our current energy systems so that renewable energy sources can be used.
HANDOUT 1.1.3
This FACT SHEET was compiled and written by Nathan Mitten and Jessica Kochert using the following resources: 1 Energy Information Administration http://www.eia.doe.gov 2 U.S. Department of Energy http://www.energy.gov 3 Danish Wind Industry Association http://www.windpower.org/EN/core.htm

Each group will need to complete each of the following energy stations. Each station will have instructions posted that you will need to follow. Be sure to read each set of instructions before you begin each station’s activity.
Materials Most of the materials you will need are already at each station.
You will need: Pencil This Handout An Energy Introduction Handout
Label each picture with the correct form and category (potential or kinetic).
Form:
Motion Category:
Kinetic
Form: Category:
Form: Category:
Form: Category:
Form: Category:
Form: Category:
Form: Category:
Form: Category:
STATION 1: FORMS
HANDOUT 1.2.1
An Energy Skill-a-thon!
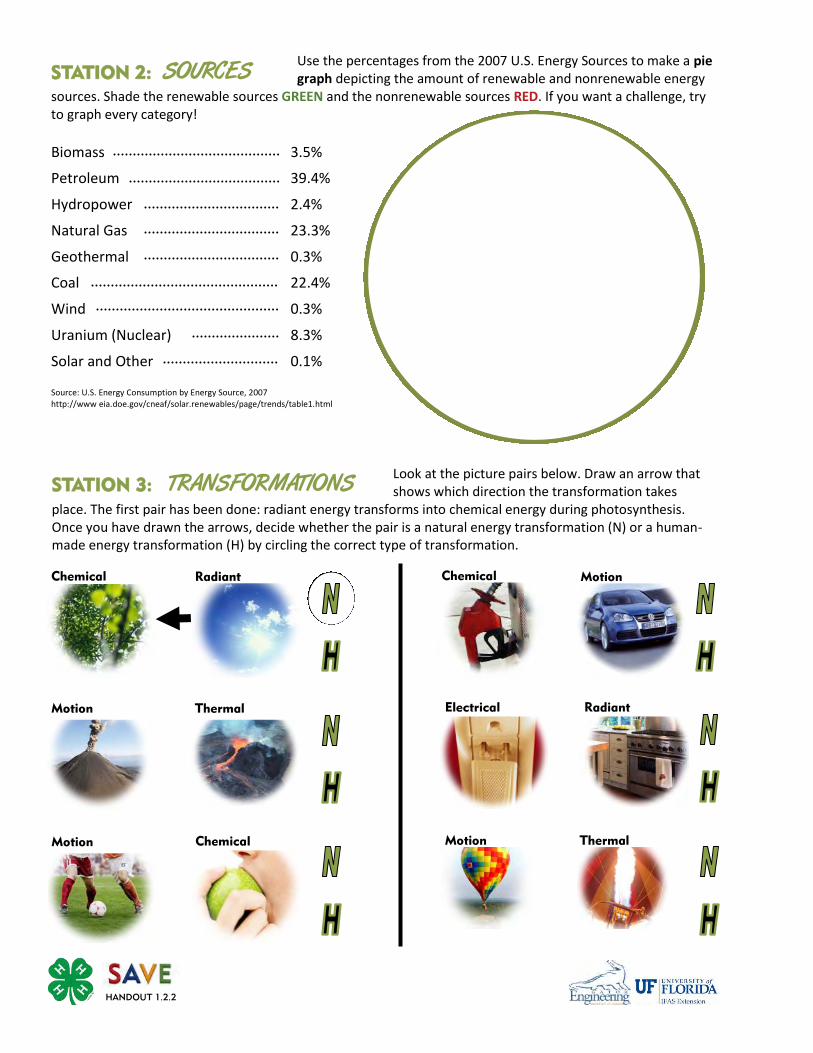
Look at the picture pairs below. Draw an arrow that shows which direction the transformation takes
place. The first pair has been done: radiant energy transforms into chemical energy during photosynthesis. Once you have drawn the arrows, decide whether the pair is a natural energy transformation (N) or a human-made energy transformation (H) by circling the correct type of transformation.
STATION 3: TRANSFORMATIONS
Radiant Chemical Chemical Motion
Electrical Motion Thermal
Thermal Motion
Radiant
Motion Chemical
Use the percentages from the 2007 U.S. Energy Sources to make a pie graph depicting the amount of renewable and nonrenewable energy
sources. Shade the renewable sources GREEN and the nonrenewable sources RED. If you want a challenge, try to graph every category!
Biomass 3.5%
Petroleum 39.4%
Hydropower 2.4%
Natural Gas 23.3%
Geothermal 0.3%
Coal 22.4%
Wind 0.3%
Uranium (Nuclear) 8.3%
Solar and Other 0.1% Source: U.S. Energy Consumption by Energy Source, 2007 http://www eia.doe.gov/cneaf/solar.renewables/page/trends/table1.html
STATION 2: SOURCES
HANDOUT 1.2.2
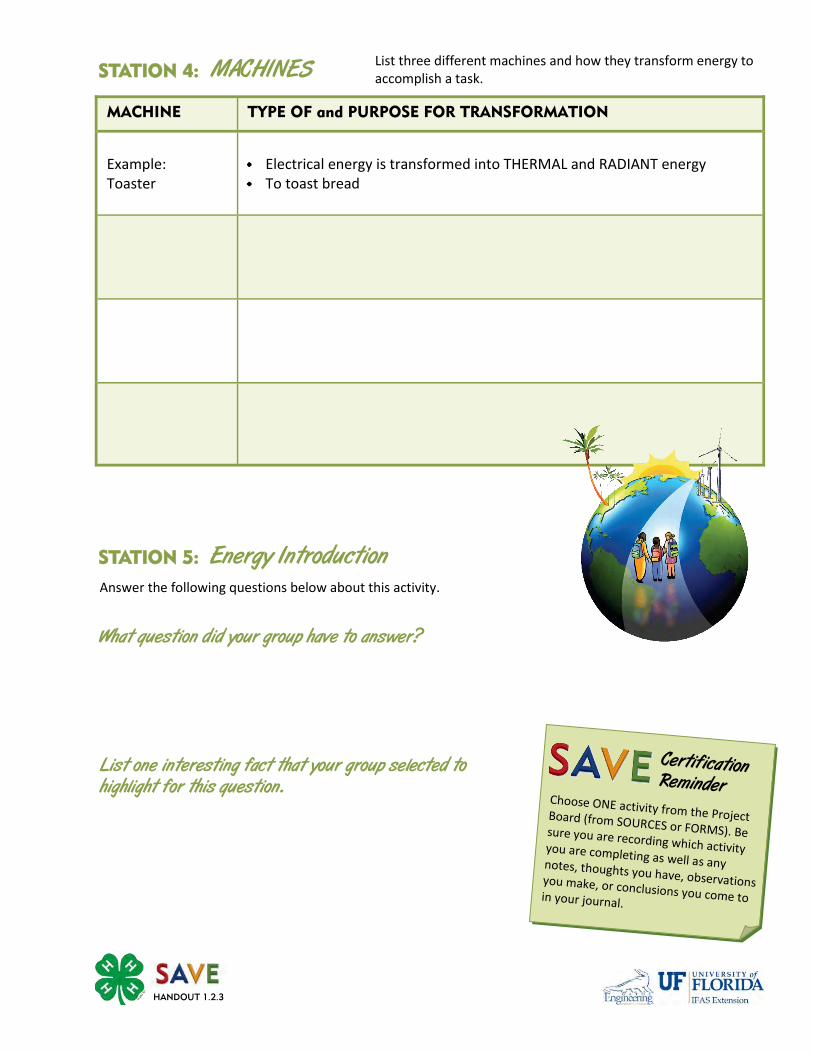
List three different machines and how they transform energy to accomplish a task. STATION 4: MACHINES
MACHINE TYPE OF and PURPOSE FOR TRANSFORMATION
Example: Toaster
Electrical energy is transformed into THERMAL and RADIANT energy To toast bread
HANDOUT 1.2.3
Answer the following questions below about this activity.
STATION 5: Energy Introduction
Certification Reminder Choose ONE activity from the Project Board (from SOURCES or FORMS). Be sure you are recording which activity you are completing as well as any notes, thoughts you have, observations you make, or conclusions you come to in your journal.
What question did your group have to answer? List one interesting fact that your group selected to highlight for this question.
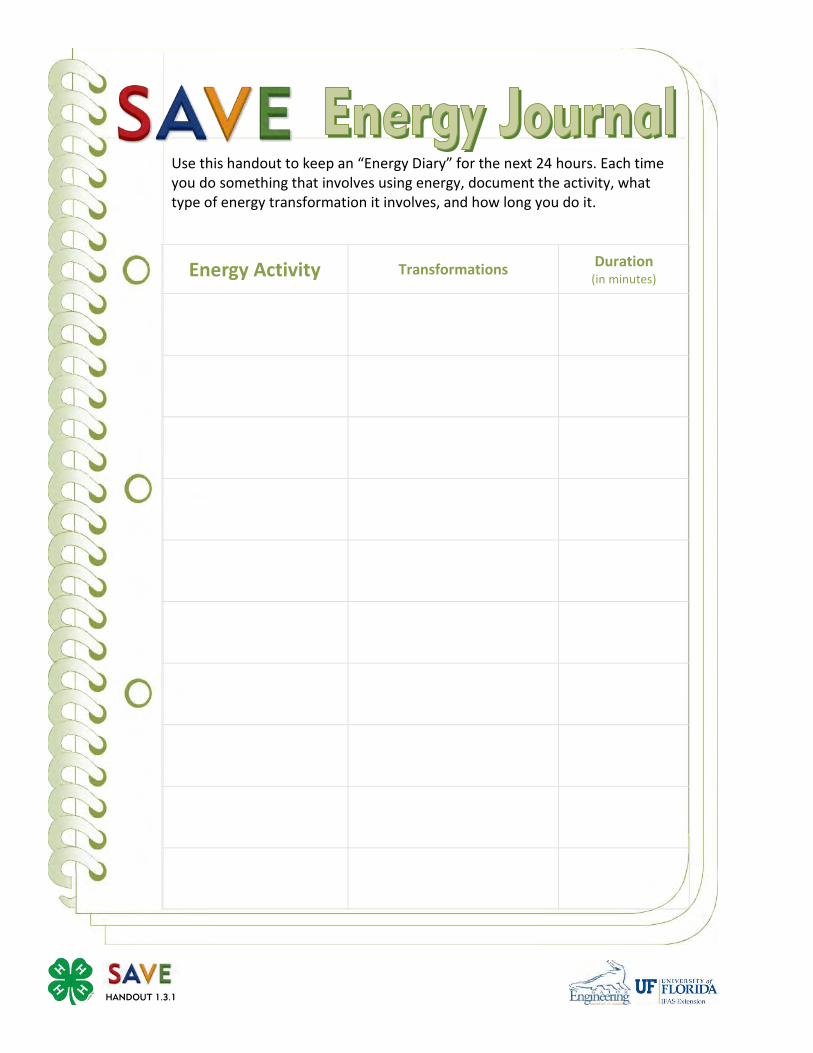
Energy Activity Transformations Duration
(in minutes)
Use this handout to keep an “Energy Diary” for the next 24 hours. Each time you do something that involves using energy, document the activity, what type of energy transformation it involves, and how long you do it.
HANDOUT 1.3.1
Lesson 2 - Page 1
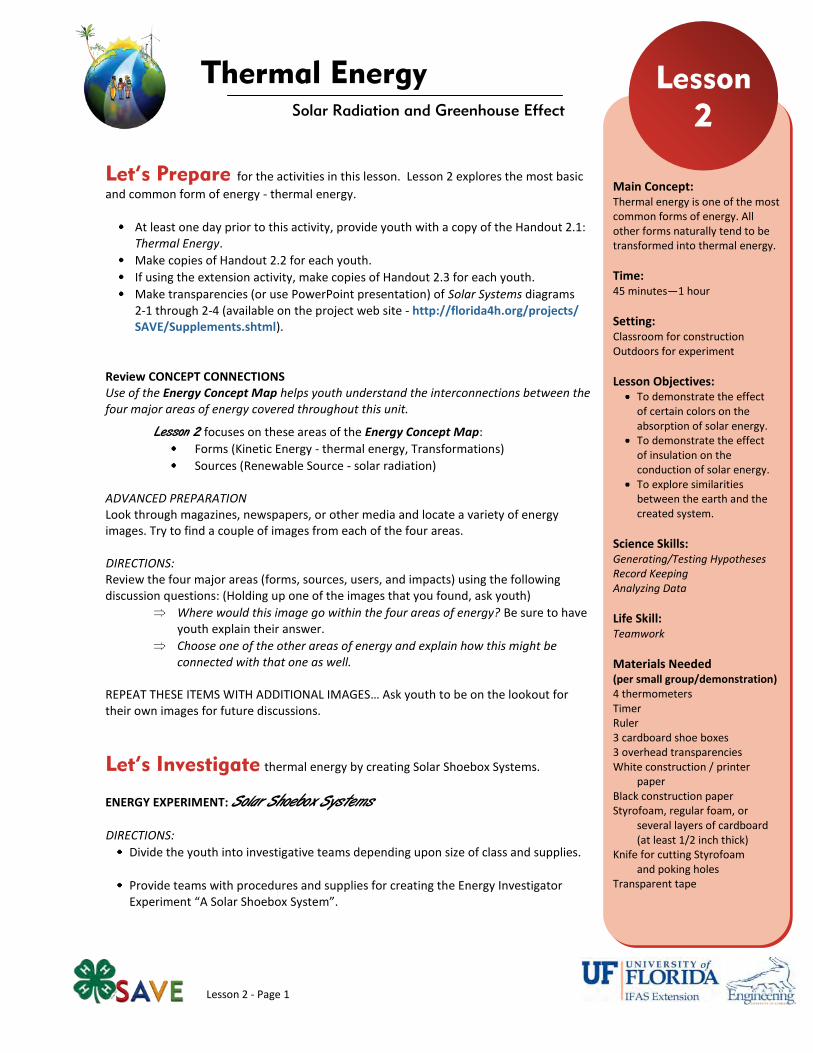
Main Concept: Thermal energy is one of the most common forms of energy. All other forms naturally tend to be transformed into thermal energy.
Time: 45 minutes—1 hour
Setting: Classroom for construction Outdoors for experiment
Lesson Objectives: To demonstrate the effect of certain colors on the absorption of solar energy. To demonstrate the effect of insulation on the conduction of solar energy. To explore similarities between the earth and the created system.
Science Skills: Generating/Testing Hypotheses Record Keeping Analyzing Data
Life Skill: Teamwork
Materials Needed (per small group/demonstration) 4 thermometers Timer Ruler 3 cardboard shoe boxes 3 overhead transparencies White construction / printer
paper Black construction paper Styrofoam, regular foam, or
several layers of cardboard (at least 1/2 inch thick)
Knife for cutting Styrofoam and poking holes
Transparent tape
Solar Radiation and Greenhouse Effect
Let’s Prepare for the activities in this lesson. Lesson 2 explores the most basic
and common form of energy - thermal energy.
At least one day prior to this activity, provide youth with a copy of the Handout 2.1: Thermal Energy.
Make copies of Handout 2.2 for each youth.
If using the extension activity, make copies of Handout 2.3 for each youth.
Make transparencies (or use PowerPoint presentation) of Solar Systems diagrams 2-1 through 2-4 (available on the project web site - http://florida4h.org/projects/SAVE/Supplements.shtml).
Review CONCEPT CONNECTIONS Use of the Energy Concept Map helps youth understand the interconnections between the four major areas of energy covered throughout this unit.
Lesson 2 focuses on these areas of the Energy Concept Map:
Forms (Kinetic Energy - thermal energy, Transformations)
Sources (Renewable Source - solar radiation) ADVANCED PREPARATION Look through magazines, newspapers, or other media and locate a variety of energy images. Try to find a couple of images from each of the four areas.
DIRECTIONS: Review the four major areas (forms, sources, users, and impacts) using the following discussion questions: (Holding up one of the images that you found, ask youth)
Where would this image go within the four areas of energy? Be sure to have youth explain their answer.
Choose one of the other areas of energy and explain how this might be connected with that one as well.
REPEAT THESE ITEMS WITH ADDITIONAL IMAGES… Ask youth to be on the lookout for their own images for future discussions.
Let’s Investigate thermal energy by creating Solar Shoebox Systems.
ENERGY EXPERIMENT: Solar Shoebox Systems
DIRECTIONS:
Divide the youth into investigative teams depending upon size of class and supplies.
Provide teams with procedures and supplies for creating the Energy Investigator Experiment “A Solar Shoebox System”.
Lesson
2
Thermal Energy
Lesson 2 - Page 2
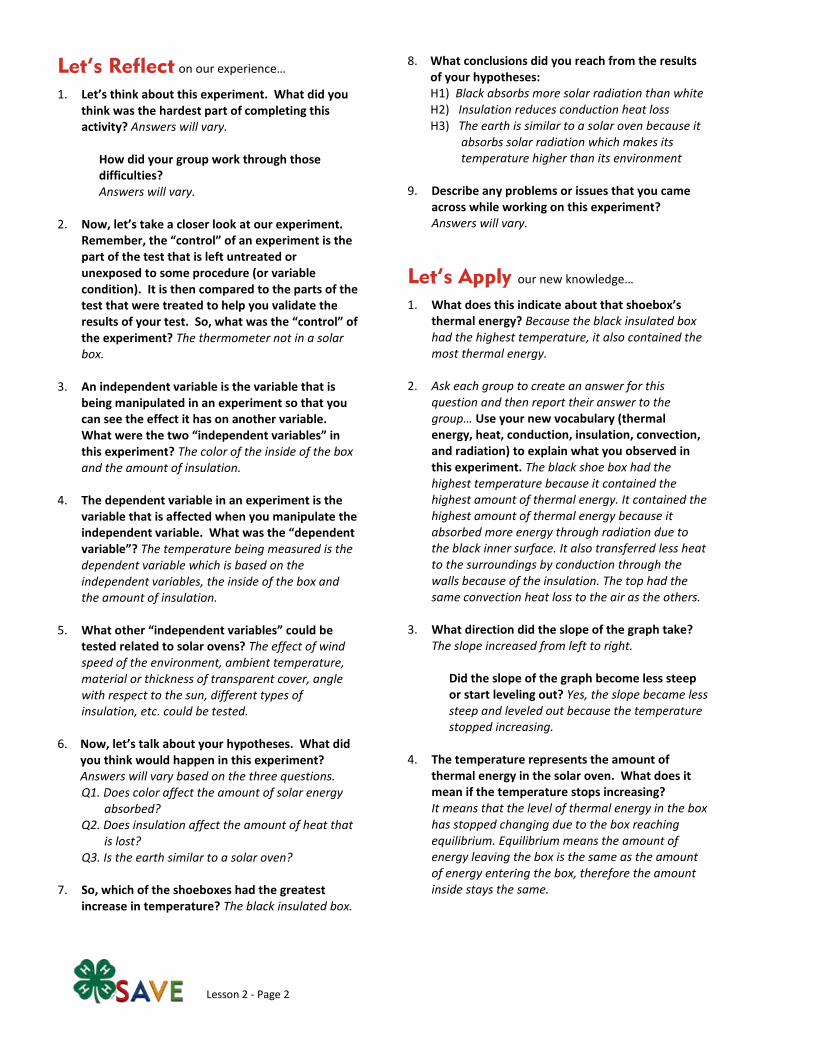
Let’s Reflect on our experience…
1. Let’s think about this experiment. What did you think was the hardest part of completing this activity? Answers will vary.
How did your group work through those difficulties? Answers will vary.
2. Now, let’s take a closer look at our experiment.
Remember, the “control” of an experiment is the part of the test that is left untreated or unexposed to some procedure (or variable condition). It is then compared to the parts of the test that were treated to help you validate the results of your test. So, what was the “control” of the experiment? The thermometer not in a solar box.
3. An independent variable is the variable that is being manipulated in an experiment so that you can see the effect it has on another variable. What were the two “independent variables” in this experiment? The color of the inside of the box and the amount of insulation.
4. The dependent variable in an experiment is the
variable that is affected when you manipulate the independent variable. What was the “dependent variable”? The temperature being measured is the dependent variable which is based on the independent variables, the inside of the box and the amount of insulation.
5. What other “independent variables” could be
tested related to solar ovens? The effect of wind speed of the environment, ambient temperature, material or thickness of transparent cover, angle with respect to the sun, different types of insulation, etc. could be tested.
6. Now, let’s talk about your hypotheses. What did
you think would happen in this experiment? Answers will vary based on the three questions. Q1. Does color affect the amount of solar energy
absorbed? Q2. Does insulation affect the amount of heat that
is lost? Q3. Is the earth similar to a solar oven?
7. So, which of the shoeboxes had the greatest increase in temperature? The black insulated box.
8. What conclusions did you reach from the results of your hypotheses: H1) Black absorbs more solar radiation than white H2) Insulation reduces conduction heat loss H3) The earth is similar to a solar oven because it
absorbs solar radiation which makes its temperature higher than its environment
9. Describe any problems or issues that you came
across while working on this experiment? Answers will vary.
Let’s Apply our new knowledge…
1. What does this indicate about that shoebox’s thermal energy? Because the black insulated box had the highest temperature, it also contained the most thermal energy.
2. Ask each group to create an answer for this
question and then report their answer to the group… Use your new vocabulary (thermal energy, heat, conduction, insulation, convection, and radiation) to explain what you observed in this experiment. The black shoe box had the highest temperature because it contained the highest amount of thermal energy. It contained the highest amount of thermal energy because it absorbed more energy through radiation due to the black inner surface. It also transferred less heat to the surroundings by conduction through the walls because of the insulation. The top had the same convection heat loss to the air as the others.
3. What direction did the slope of the graph take?
The slope increased from left to right.
Did the slope of the graph become less steep or start leveling out? Yes, the slope became less steep and leveled out because the temperature stopped increasing.
4. The temperature represents the amount of
thermal energy in the solar oven. What does it mean if the temperature stops increasing? It means that the level of thermal energy in the box has stopped changing due to the box reaching equilibrium. Equilibrium means the amount of energy leaving the box is the same as the amount of energy entering the box, therefore the amount inside stays the same.
Lesson 2 - Page 3
Concept Check
How is heat transferred by conduction?
How is heat transferred by convection?
How is heat transferred by radiation?
How is energy transferred from the sun to the Earth?
What are some applications of solar thermal energy today?
How does the greenhouse effect cause global warming?
How do human activities impact global warming?
Vocabulary Terms
5. What changes could be made to make a better solar oven (materials, design, etc.)? Some changes include: larger area to absorb solar radiation, reflect more radiation into the box using a mirror, thicker or more effective insulation, more absorbing material for inside surface, thicker or more effective transparent covering, and/or system for ensuring that the oven faced the sun perfectly perpendicularly.
6. How did the sunlight conditions affect the thermal energy
being absorbed by the solar ovens? Cloudy or hazy conditions caused less radiation to be absorbed and transformed to thermal energy. Direct sunlight caused the most radiation to be absorbed.
How did you know this from your data? It could be seen if the conditions changed during the experiment by the temperature rising more quickly, less quickly, or even dropping.
7. Using the terms radiation, thermal energy, greenhouse
effect and global warming, explain how a solar oven compares to the earth?
Both a solar oven and the earth absorb solar radiation and transform it into thermal energy.
The sun does this due to the greenhouse effect. In this process, a layer of gases around the Earth let solar radiation in where it is absorbed by the atmosphere and surface of the earth.
If too much thermal energy gets trapped in and is not let out the Earth’s temperature will rise which is called global warming.
Similarly, a solar oven lets solar radiation in and transforms it to thermal energy which causes the temperature to rise inside.
8. How could solar energy be used to heat a home in the
winter? Maximize the solar radiation input through the windows, use a black roof or wall surfaces to absorb solar radiation, and/or use good insulation to reduce conductive losses.
9. How could solar energy be blocked from heating a home in the summer? Minimize the solar radiation input through the roof and walls and what is let in by the windows, especially those windows facing east or west. Shade windows and surfaces or use white-colored surfaces that do not absorb as well. Use insulation to keep heat from conducting in from the outside.
10. Think about the materials used in this experiment. What new experiment do you think you could develop to further explain the process of capturing solar radiation? Answers will vary. Encourage them to think about the different variables that they could test or change.
General Terms:
Thermal Energy
Solar Radiation
Heat
Equilibrium
Temperature
Ambient Temperature
Conduction
Conductors/Insulators
Convection
Radiation
Greenhouse Effect
Greenhouse Gases
Global Warming
Carbon Dioxide
Inquiry Terms:
Research Question
Hypothesis (pl. Hypotheses)
Variables Dependent
Independent
Control
Lesson 2 - Page 4
Extension Activities
Read BACKGROUND for Lesson 3 - Solar Photovoltaic Energy and give two advantages and two disadvantages of using photovoltaic panels. Once they are made, they transform solar radiation directly to electricity, there are also no continual emissions and no depletion of natural resources, and they require very little maintenance. However, they are expensive, do not provide electricity unless there is sunlight, and can also take a lot of area.
Define and give an example of each type of thermal energy transport. Look in your science book or on the Internet for clues.
Conduction Definition: thermal energy transported through a solid Example: the handle to a pot getting very hot from the burner Convection Definition: thermal energy transported by the flowing and mixing of a fluid Example: a clothes dryer which dries clothes by using hot air Radiation Definition: radiant energy transported by electromagnetic waves or particles Example: a car getting hot inside due to the solar radiation coming through the windows and being absorbed by the interior
Molecules within a substance (whether a solid, liquid or gas) vibrate rapidly, back and forth. This type of kinetic energy is also known as thermal energy. Thermal energy is the most basic and common form of energy. It is very easy to transform various forms of energy into thermal energy, because thermal energy is very disorganized! We use thermal energy to stay warm and to cook our food. Stoves, heaters and campfires all transform some energy form into thermal energy. So, if thermal energy is so disorganized, can it be used to do work? In order to do work, machines (like engines and turbines) transform large amounts of disorganized thermal energy into a smaller amount of organized kinetic energy. This energy can do work. An engine transforms chemical fuel energy into thermal energy using a process called combustion. Then it transforms the thermal energy into motion energy when the hot combustion gases push against a piston. The piston then spins a shaft which then performs a task such as moving a car. One source of thermal energy comes from our stellar neighbor - the Sun. Solar radiation, better known as sunlight, travels through space and collides with the earth. This sunlight is either absorbed or reflected by whatever it hits. If the sunlight is absorbed, we call it solar thermal energy. This is the most abundant energy source on earth. On a sunny day, the sun can radiate up to a 1000 Watts of solar power within 1 square meter (1000W/m2). We can collect this energy and use it to provide heat directly or we can transform it in order to do some work.
We measure thermal energy by measuring the
temperature of the substance. Hot things have more thermal energy and, therefore, a higher temperature. Cold things contain less thermal energy and a lower temperature.
Transferring thermal energy from one source to another is called heat transfer. Thermal energy transfers always move from a higher temperature to a lower temperature. Pick up a cold pebble off the ground. As you hold on to this pebble, it will eventually become warmer. This is because the thermal energy in your hand (higher thermal energy) was transferred to the pebble (lower thermal energy). The speed of this process depends on the temperature difference. The bigger the difference, the faster thermal energy will transfer. This is because the thermal energy is trying to be balanced, trying to make everything the same temperature. This desire for balance eventually creates an equilibrium.
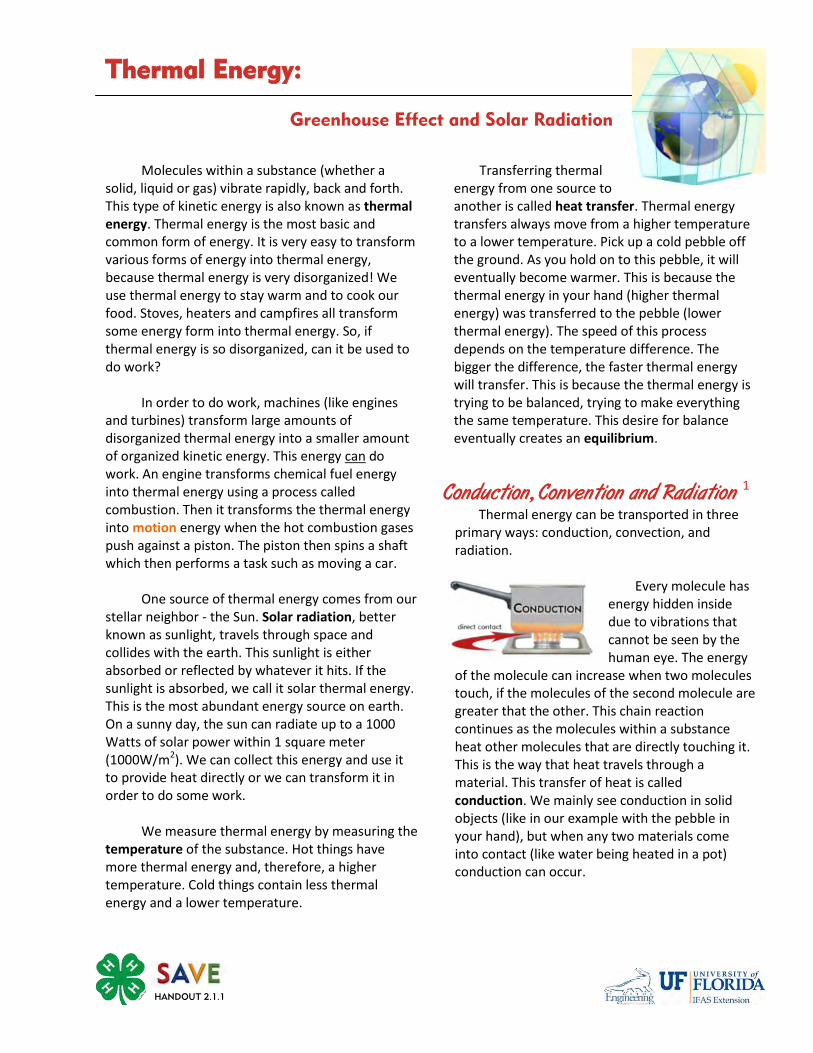
Conduction, Convention and Radiation 1
Thermal energy can be transported in three primary ways: conduction, convection, and radiation.
Every molecule has energy hidden inside due to vibrations that cannot be seen by the human eye. The energy
of the molecule can increase when two molecules touch, if the molecules of the second molecule are greater that the other. This chain reaction continues as the molecules within a substance heat other molecules that are directly touching it. This is the way that heat travels through a material. This transfer of heat is called conduction. We mainly see conduction in solid objects (like in our example with the pebble in your hand), but when any two materials come into contact (like water being heated in a pot) conduction can occur.
Thermal Energy:
Greenhouse Effect and Solar Radiation
HANDOUT 2.1.1
Certain materials conduct heat better than others. These materials, which we call conductors, have higher thermal conductivity. Materials that have low thermal conductivities are called insulators. What materials can you think of that would be insulators or conductors? Now, imagine placing one end of a metal rod over a burner on the stove. The thermal energy from the end being heated should travel through the rod and, in turn, heat up the other end. A rod made out of foam or wood will not do this. When looking for good conductors of heat, think about materials that conduct electricity well. These materials are often good conductors of heat. Also, thermal energy is easier to pass between atoms that are packed close together. So, dense materials can normally transfer heat better than less dense ones. It’s like being in the bleachers of a stadium, watching your favorite team. When everyone is packed tightly into the bleachers, you could pass a drink from one side of the stadium to the other simply by passing it to the person next to you. If there were fewer people, this would become more difficult and require more effort from the people who are there.
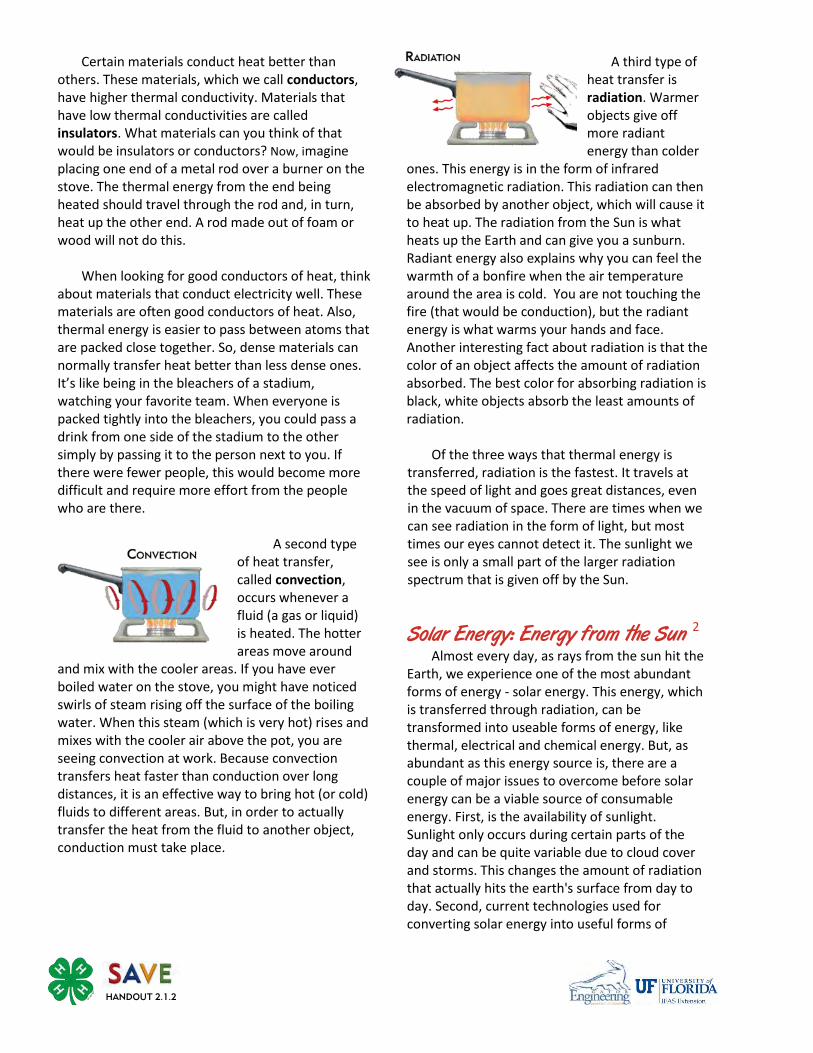
A second type of heat transfer, called convection, occurs whenever a fluid (a gas or liquid) is heated. The hotter areas move around
and mix with the cooler areas. If you have ever boiled water on the stove, you might have noticed swirls of steam rising off the surface of the boiling water. When this steam (which is very hot) rises and mixes with the cooler air above the pot, you are seeing convection at work. Because convection transfers heat faster than conduction over long distances, it is an effective way to bring hot (or cold) fluids to different areas. But, in order to actually transfer the heat from the fluid to another object, conduction must take place.
A third type of heat transfer is radiation. Warmer objects give off more radiant energy than colder
ones. This energy is in the form of infrared electromagnetic radiation. This radiation can then be absorbed by another object, which will cause it to heat up. The radiation from the Sun is what heats up the Earth and can give you a sunburn. Radiant energy also explains why you can feel the warmth of a bonfire when the air temperature around the area is cold. You are not touching the fire (that would be conduction), but the radiant energy is what warms your hands and face. Another interesting fact about radiation is that the color of an object affects the amount of radiation absorbed. The best color for absorbing radiation is black, white objects absorb the least amounts of radiation. Of the three ways that thermal energy is transferred, radiation is the fastest. It travels at the speed of light and goes great distances, even in the vacuum of space. There are times when we can see radiation in the form of light, but most times our eyes cannot detect it. The sunlight we see is only a small part of the larger radiation spectrum that is given off by the Sun.
Solar Energy: Energy from the Sun 2
Almost every day, as rays from the sun hit the Earth, we experience one of the most abundant forms of energy - solar energy. This energy, which is transferred through radiation, can be transformed into useable forms of energy, like thermal, electrical and chemical energy. But, as abundant as this energy source is, there are a couple of major issues to overcome before solar energy can be a viable source of consumable energy. First, is the availability of sunlight. Sunlight only occurs during certain parts of the day and can be quite variable due to cloud cover and storms. This changes the amount of radiation that actually hits the earth's surface from day to day. Second, current technologies used for converting solar energy into useful forms of
HANDOUT 2.1.2
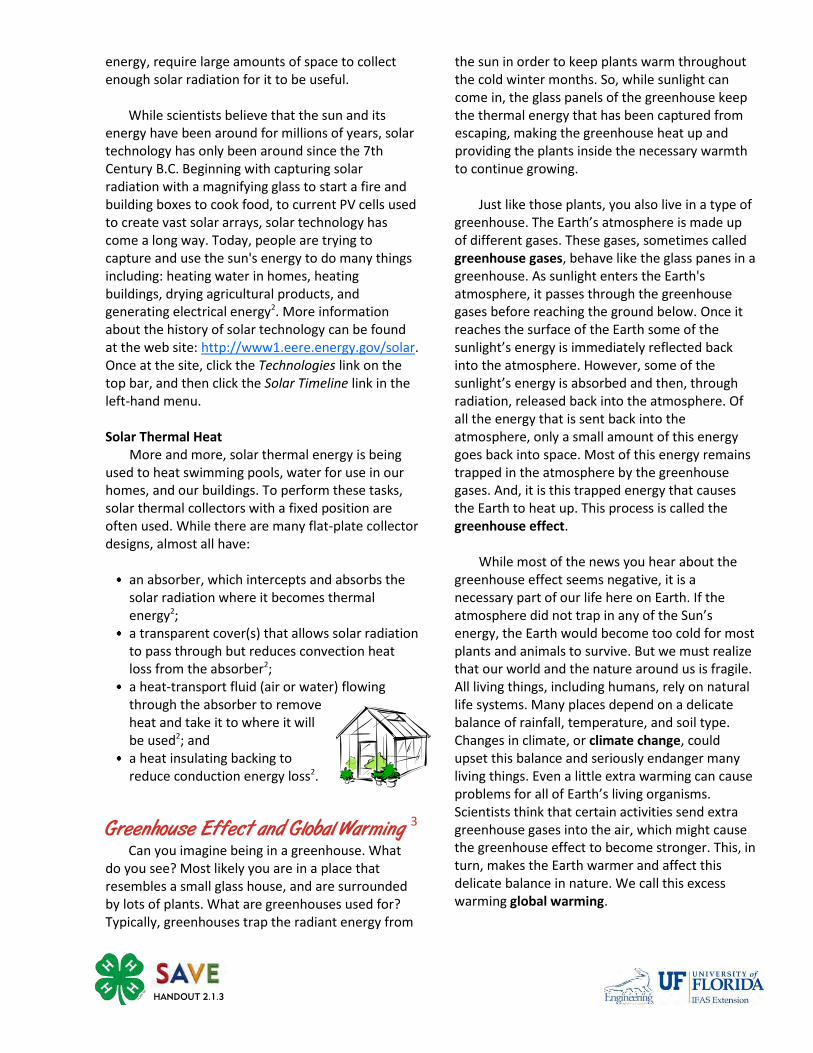
energy, require large amounts of space to collect enough solar radiation for it to be useful. While scientists believe that the sun and its energy have been around for millions of years, solar technology has only been around since the 7th Century B.C. Beginning with capturing solar radiation with a magnifying glass to start a fire and building boxes to cook food, to current PV cells used to create vast solar arrays, solar technology has come a long way. Today, people are trying to capture and use the sun's energy to do many things including: heating water in homes, heating buildings, drying agricultural products, and generating electrical energy2. More information about the history of solar technology can be found at the web site: http://www1.eere.energy.gov/solar. Once at the site, click the Technologies link on the top bar, and then click the Solar Timeline link in the left-hand menu. Solar Thermal Heat More and more, solar thermal energy is being used to heat swimming pools, water for use in our homes, and our buildings. To perform these tasks, solar thermal collectors with a fixed position are often used. While there are many flat-plate collector designs, almost all have:
an absorber, which intercepts and absorbs the solar radiation where it becomes thermal energy2; a transparent cover(s) that allows solar radiation to pass through but reduces convection heat loss from the absorber2; a heat-transport fluid (air or water) flowing through the absorber to remove heat and take it to where it will be used2; and a heat insulating backing to reduce conduction energy loss2.
Greenhouse Effect and Global Warming 3
Can you imagine being in a greenhouse. What do you see? Most likely you are in a place that resembles a small glass house, and are surrounded by lots of plants. What are greenhouses used for? Typically, greenhouses trap the radiant energy from
the sun in order to keep plants warm throughout the cold winter months. So, while sunlight can come in, the glass panels of the greenhouse keep the thermal energy that has been captured from escaping, making the greenhouse heat up and providing the plants inside the necessary warmth to continue growing. Just like those plants, you also live in a type of greenhouse. The Earth’s atmosphere is made up of different gases. These gases, sometimes called greenhouse gases, behave like the glass panes in a greenhouse. As sunlight enters the Earth's atmosphere, it passes through the greenhouse gases before reaching the ground below. Once it reaches the surface of the Earth some of the sunlight’s energy is immediately reflected back into the atmosphere. However, some of the sunlight’s energy is absorbed and then, through radiation, released back into the atmosphere. Of all the energy that is sent back into the atmosphere, only a small amount of this energy goes back into space. Most of this energy remains trapped in the atmosphere by the greenhouse gases. And, it is this trapped energy that causes the Earth to heat up. This process is called the greenhouse effect. While most of the news you hear about the greenhouse effect seems negative, it is a necessary part of our life here on Earth. If the atmosphere did not trap in any of the Sun’s energy, the Earth would become too cold for most plants and animals to survive. But we must realize that our world and the nature around us is fragile. All living things, including humans, rely on natural life systems. Many places depend on a delicate balance of rainfall, temperature, and soil type. Changes in climate, or climate change, could upset this balance and seriously endanger many living things. Even a little extra warming can cause problems for all of Earth’s living organisms. Scientists think that certain activities send extra greenhouse gases into the air, which might cause the greenhouse effect to become stronger. This, in turn, makes the Earth warmer and affect this delicate balance in nature. We call this excess warming global warming.
HANDOUT 2.1.3

This FACT SHEET was compiled and written by Nathan Mitten and Jessica Kochert using the following resources: 1 School for Champions http://www.school-for-champions.com/science/heat_transfer.htm
2 EIA Energy Kid’s Page http://www.eia.doe.gov/kids/energyfacts/sources/renewable/solar.html
3 EPA Global Warming Kids Site http://www.epa.gov/globalwarming/kids/greenhouse.html
One of the most common greenhouse gases, carbon dioxide (CO2), is released into the atmosphere when fuels are burned for energy. Large amounts of CO2 come out of the exhaust pipe of a car or the smoke stack of a power plant. You might remember that plants absorb carbon dioxide for photosynthesis, but there are not enough plants to use all of the CO2 that we produce. Because of the greenhouse effect, we must lower the amount of CO2 and other greenhouse gases that we put into the atmosphere in order to slow down or stop global warming. The best way to do this is to conserve the energy we use and reduce the greenhouse gases emitted from engines and power plants.
HANDOUT 2.1.4
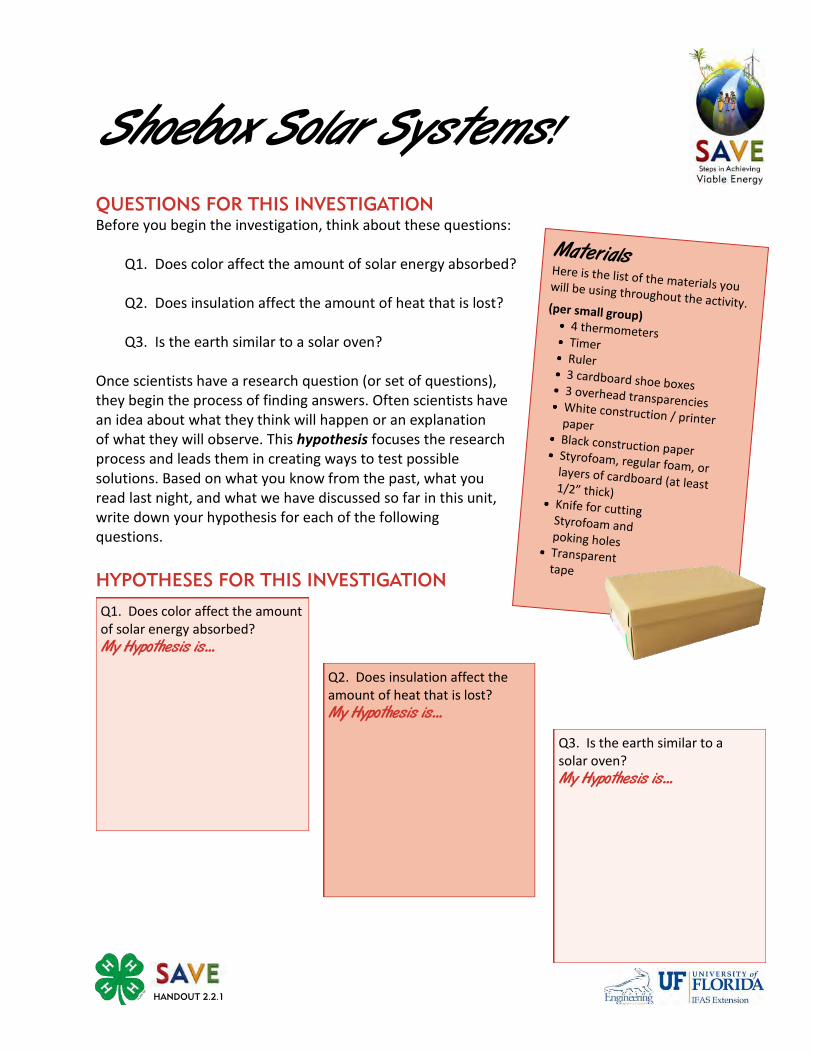
QUESTIONS FOR THIS INVESTIGATION
Before you begin the investigation, think about these questions: Q1. Does color affect the amount of solar energy absorbed? Q2. Does insulation affect the amount of heat that is lost? Q3. Is the earth similar to a solar oven?
Once scientists have a research question (or set of questions), they begin the process of finding answers. Often scientists have an idea about what they think will happen or an explanation of what they will observe. This hypothesis focuses the research process and leads them in creating ways to test possible solutions. Based on what you know from the past, what you read last night, and what we have discussed so far in this unit, write down your hypothesis for each of the following questions.
HYPOTHESES FOR THIS INVESTIGATION
Q1. Does color affect the amount of solar energy absorbed? My Hypothesis is...
Q2. Does insulation affect the amount of heat that is lost? My Hypothesis is...
Q3. Is the earth similar to a solar oven? My Hypothesis is...
HANDOUT 2.2.1
Shoebox Solar Systems!
Materials Here is the list of the materials you will be using throughout the activity. (per small group)
4 thermometers Timer Ruler 3 cardboard shoe boxes 3 overhead transparencies White construction / printer paper
Black construction paper Styrofoam, regular foam, or layers of cardboard (at least 1/2” thick) Knife for cutting Styrofoam and poking holes Transparent tape
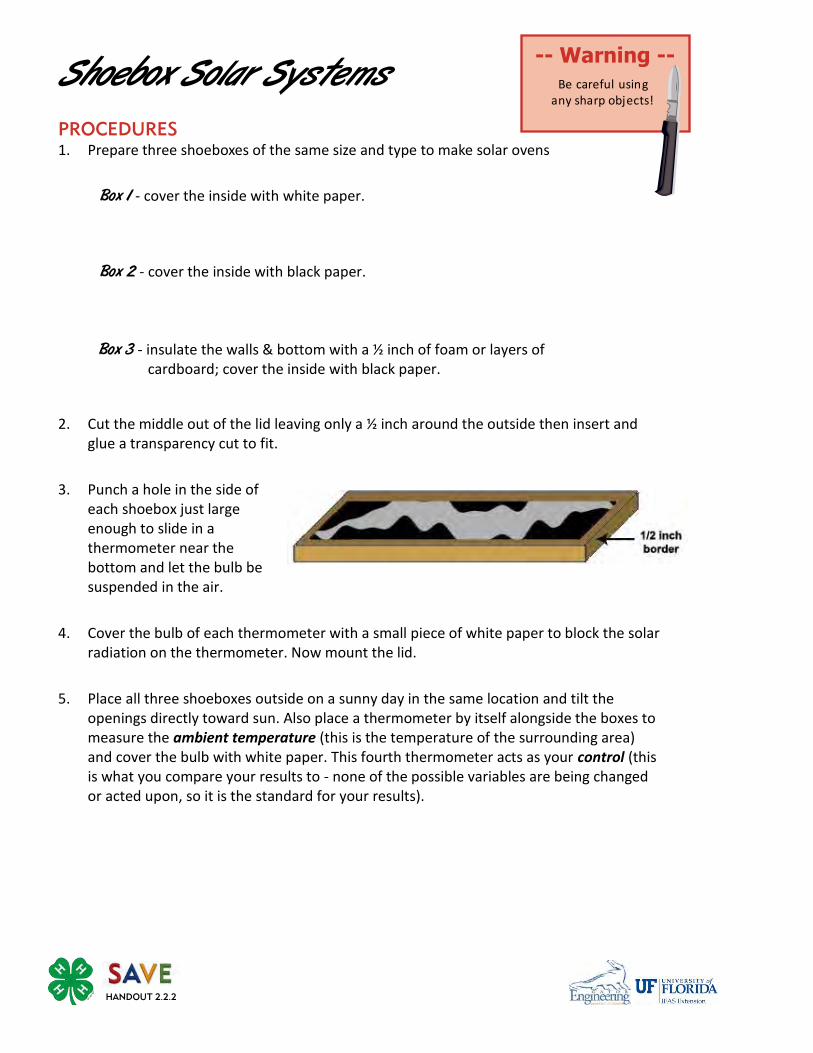
Shoebox Solar Systems
PROCEDURES
1. Prepare three shoeboxes of the same size and type to make solar ovens
Box 1 - cover the inside with white paper. Box 2 - cover the inside with black paper. Box 3 - insulate the walls & bottom with a ½ inch of foam or layers of
cardboard; cover the inside with black paper.
2. Cut the middle out of the lid leaving only a ½ inch around the outside then insert and glue a transparency cut to fit.
3. Punch a hole in the side of each shoebox just large enough to slide in a thermometer near the bottom and let the bulb be suspended in the air.
4. Cover the bulb of each thermometer with a small piece of white paper to block the solar radiation on the thermometer. Now mount the lid.
5. Place all three shoeboxes outside on a sunny day in the same location and tilt the openings directly toward sun. Also place a thermometer by itself alongside the boxes to measure the ambient temperature (this is the temperature of the surrounding area) and cover the bulb with white paper. This fourth thermometer acts as your control (this is what you compare your results to - none of the possible variables are being changed or acted upon, so it is the standard for your results).
-- Warning --
Be careful using any sharp objects!
HANDOUT 2.2.2
HANDOUT 2.2.3
6. For twenty minutes, measure the temperature in each shoebox every minute along with the ambient temperature and record it below. Also record the condition (clear sun, hazy sun, cloud-covered).
7. Using the data collected, graph the results in different colors under the Analysis and Conclusion section. Label the graph and use the proper units of measurement. You may also use a computer spreadsheet program like Excel.
PHOTOS OF YOUR SOLAR SHOEBOX SYSTEMS
One great way to document the experimental setup is through photos. If you have access to a camera, take a couple photos of your experiment and place the best ones here…
Solar Systems Setup
PHOTO - 3” X 5”
PHOTO - 3” X 5”

RECORD YOUR OBSERVATIONS
Time (min)
Box 1 Temp (°C/°F)
Box 2 Temp (°C/°F)
Box 3 Temp (°C/°F)
Ambient (°C/°F)
Conditions
0
1
2
3
4
5
6
7
8
9
10
11
12
13
14
15
16
17
18
19
20
HANDOUT 2.2.4
HANDOUT 2.2.5
ANALYSIS AND CONCLUSION
Graph the temperature vs. time for each box using different colors to show different boxes. Give the graph a title, a legend, and label the axis appropriately. Choose a proper scale.
What conclusions did you make about your predictions (Hypotheses)? H1
H2
H3
Certification Reminder Choose ONE activity from the Project Board (either one from SOURCES, FORMS, USERS, or IMPACTS). Be sure you are recording which activity you are completing as well as any notes, thoughts you have, observations you make, or conclusions you come to in your journal.
Answer the following question and be prepared to share your answer during the reflection time. Use the space below or on a separate sheet of paper to write down your thoughts to this question.
Use your new vocabulary (thermal energy, heat, conduction, insulation, convection, and radiation) to explain what you observed in this experiment.
HANDOUT 2.3.1
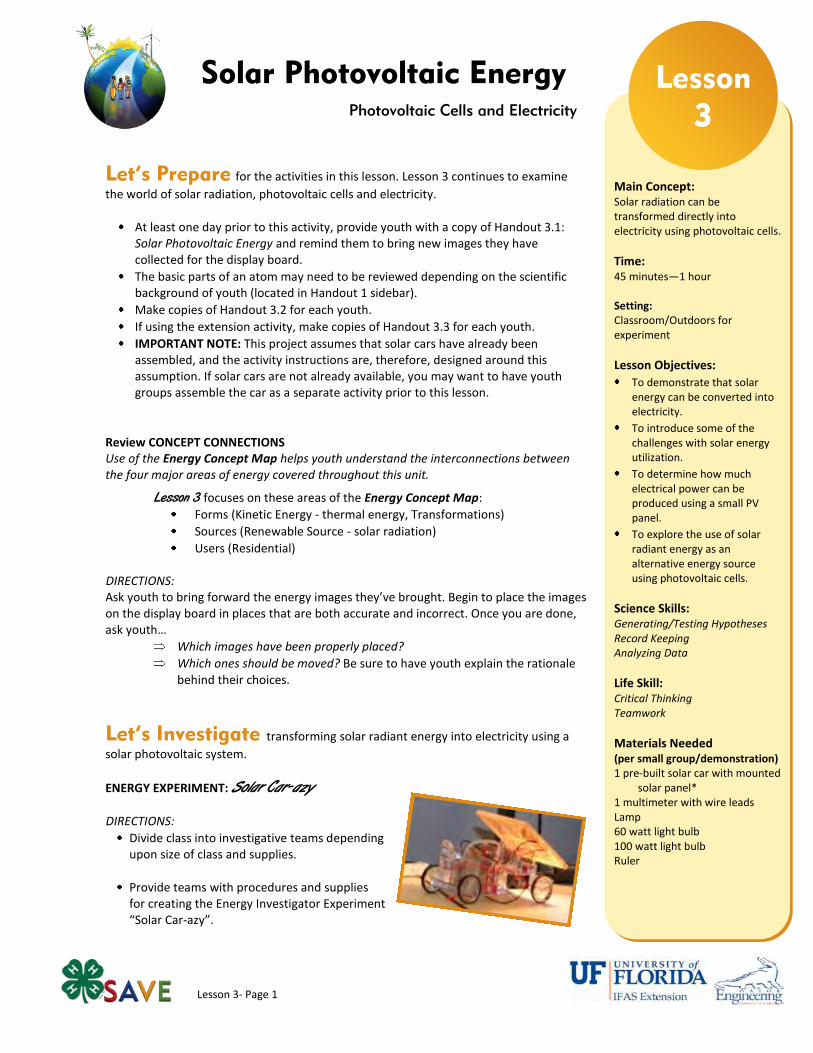
Lesson 3- Page 1
Let’s Prepare for the activities in this lesson. Lesson 3 continues to examine
the world of solar radiation, photovoltaic cells and electricity.
At least one day prior to this activity, provide youth with a copy of Handout 3.1: Solar Photovoltaic Energy and remind them to bring new images they have collected for the display board.
The basic parts of an atom may need to be reviewed depending on the scientific background of youth (located in Handout 1 sidebar).
Make copies of Handout 3.2 for each youth.
If using the extension activity, make copies of Handout 3.3 for each youth.
IMPORTANT NOTE: This project assumes that solar cars have already been assembled, and the activity instructions are, therefore, designed around this assumption. If solar cars are not already available, you may want to have youth groups assemble the car as a separate activity prior to this lesson.
Review CONCEPT CONNECTIONS Use of the Energy Concept Map helps youth understand the interconnections between the four major areas of energy covered throughout this unit.
Lesson 3 focuses on these areas of the Energy Concept Map:
Forms (Kinetic Energy - thermal energy, Transformations)
Sources (Renewable Source - solar radiation)
Users (Residential) DIRECTIONS: Ask youth to bring forward the energy images they’ve brought. Begin to place the images on the display board in places that are both accurate and incorrect. Once you are done, ask youth…
Which images have been properly placed?
Which ones should be moved? Be sure to have youth explain the rationale behind their choices.
Let’s Investigate transforming solar radiant energy into electricity using a
solar photovoltaic system.
ENERGY EXPERIMENT: Solar Car-azy
DIRECTIONS:
Divide class into investigative teams depending upon size of class and supplies.
Provide teams with procedures and supplies for creating the Energy Investigator Experiment “Solar Car-azy”.
Lesson
3
Main Concept: Solar radiation can be transformed directly into electricity using photovoltaic cells.
Time: 45 minutes—1 hour Setting: Classroom/Outdoors for experiment
Lesson Objectives:
To demonstrate that solar energy can be converted into electricity.
To introduce some of the challenges with solar energy utilization.
To determine how much electrical power can be produced using a small PV panel.
To explore the use of solar radiant energy as an alternative energy source using photovoltaic cells.
Science Skills: Generating/Testing Hypotheses Record Keeping Analyzing Data
Life Skill: Critical Thinking Teamwork
Materials Needed (per small group/demonstration) 1 pre-built solar car with mounted
solar panel* 1 multimeter with wire leads Lamp 60 watt light bulb 100 watt light bulb Ruler
Photovoltaic Cells and Electricity
Solar Photovoltaic Energy

Lesson 3- Page 2
Let’s Reflect on our experience…
1. Let’s think about this experiment. What did you think was the hardest part of completing this activity? Answers will vary. How did your group work through those difficulties? Answers will vary.
2. Which part would you say was the easiest? Why?
Answers will vary. 3. Now, let’s talk about your hypotheses. What did
you think would happen in this experiment? Answers will vary based on the four questions. Q1. Can sunlight (solar energy) be directly
converted into electricity? Q2. Can light from other sources be directly
converted into electricity? Q3. How much electrical power can our PV panel
produce (watts)? Q4. Can the electricity from a PV panel do work?
Can it move something? 4. Was there any part of your experimental process
that might have affected the precision, reliability or validity of your results? Answers will vary.
How could your team have avoided this? Answers will vary.
5. So, what conclusions did you reach from the
results of your hypotheses: H1) Photovoltaic panels convert solar radiation
directly into electricity H2) PV panels can convert various forms of
radiation to electricity H3) The electrical power produced by a solar panel
is dependent on its size, its efficiency, and how much radiation it receives
H4) The radiant energy converted to electrical energy by a solar PV panel can be converted to many other forms of energy, can be used to do work by moving something. It can also be transformed into other forms of energy.
Let’s Apply our new knowledge…
1. Explain how the observed power of the speed of the wheel rotation is related to the measured power. More electrical power causes the motor to rotate faster. Rotation power is based on torque and the speed of rotation.
2. Based on your calculations and knowledge of energy transformations, would you be able to power a flashlight using a solar panel that only received light from that same flashlight? Why or why not? (Draw a diagram if it helps.) This would not work. Energy is always lost to heat (disorder) in energy transformations. They are never 100% efficient. Our solar panel is around 10% efficient. If it was possible, it would be called a “perpetual motion machine” - no such thing exists.
3. PV arrays are especially good for certain uses.
Name some. They are especially good in places that receive a lot of direct sunlight. One very good use is for electrical needs such as air conditioning. The sunnier is it, the more electricity they provide for air conditioning. They are also good for remote locations that do not have access to the utility grid.
4. What is one main problem with PV panels that makes them unreliable for providing electricity? They only provide electricity when it is sunny.
What could help with this problem? A battery or fuel cell energy storage system would help with this problem. A grid-tied system can help by use the grid to transport electricity from where it’s generated to where it is needed.
5. Can electricity from a PV panel be used in your
house as it is? Electricity from a PV panel could be used, but it depends on what voltage is needed. Electrical sockets are 120 volts AC and most solar panels are much less voltage and DC. Therefore, they need special equipment, called an inverter, in order to use regular electrical appliances. More easily, they can be hooked up directly to low voltage DC appliances and batteries.
How would you design a PV array to give the most power output? What considerations would go into your design? The system would be designed to avoid shading by nearby trees and buildings. The panels would be tilted at an optimal angle towards the sun. A tracking system could be used to track the sun through the day.
6. Think about the materials used in this
experiment. What new experiment do you think you could develop to further explain the process of transforming solar radiation into electricity using a PV cell? Answers will vary. Encourage them to think about the different variables that they could test or change.

Lesson 3- Page 3
Concept Check
What is a photovoltaic (PV) cell?
How does a PV cell turn solar energy into electrical energy?
What is the relationship between the performance of a PV cell and the sunlight hitting it?
How efficient are PV cells at converting sunlight into electricity?
What are some of the advantages and disadvantages of a PV system for generating electricity?
How is the flow of electrons in a wire like the flow of water in a pipe?
Vocabulary Terms
General Terms:
Solar Radiant Energy
Solar Collector
Photons
Photovoltaic (Solar) Cell
Photovoltaic Array
Payback Period
Molecules
Atoms
Multimeter
Current
Voltage
Wattage
Inquiry Terms:
Precision
Validity
Reliability
Accuracy
Extension Activities
Read BACKGROUND for Lesson 4 - Chemical Energy and then describe the different parts of a battery and what they do.
The first two paragraphs of the Background Information will provide an in-depth answer for this question. However, all answers should include a discussion about anodes, cathodes, electrolytes, and the electric circuit. If a PV system is in your town, take a field trip to see it at work.
Web search: 1. Visit the web site: http://data.energywhiz.com/6-8/index.php
2. Select the real-time solar panel data for the Gainesville Electrical JATC.
3. List four types of data measurements that can be viewed.
Irradiance (solar radiation per area) DC current (for systems 1 and 2) DC voltage (for systems 1 and 2) AC power (for systems 1 and 2)
4. Record the time of the day when the System #1 DC voltage was highest (might be for several hours).
approx. 11am to 3pm 5. Record the pounds (lbs) of CO2 saved by using the solar
panel instead of coal power for the day (lower portion of web page).
20-30lbs 6. Display the irradiation (solar radiation per area) by
selecting it and then updating the graph. Record the max irradiation for two days (like August 20th and August 21st) by changing the date of the data displayed.
Today: approx. 700-950 W/m2 Yesterday: approx. 700-950 W/m2
7. What was the irradiance at the time of the experiment according to the Internet data? Was the irradiance we assumed for the experiment calculations (1000W) a good estimate?
The difference should be within 100-200 Watts, or 10-20% which is a reasonably good estimate. The calculations could be done again with the Internet data.
8. Display the System 1 AC Power (watts of usable power) by selecting it and then updating the graph. Record the max power for two days (like August 20th and August 21st) by changing the date of the data displayed.
Today: approx. 1000-1300 Watts Yesterday: approx. 1000-1300 Watts
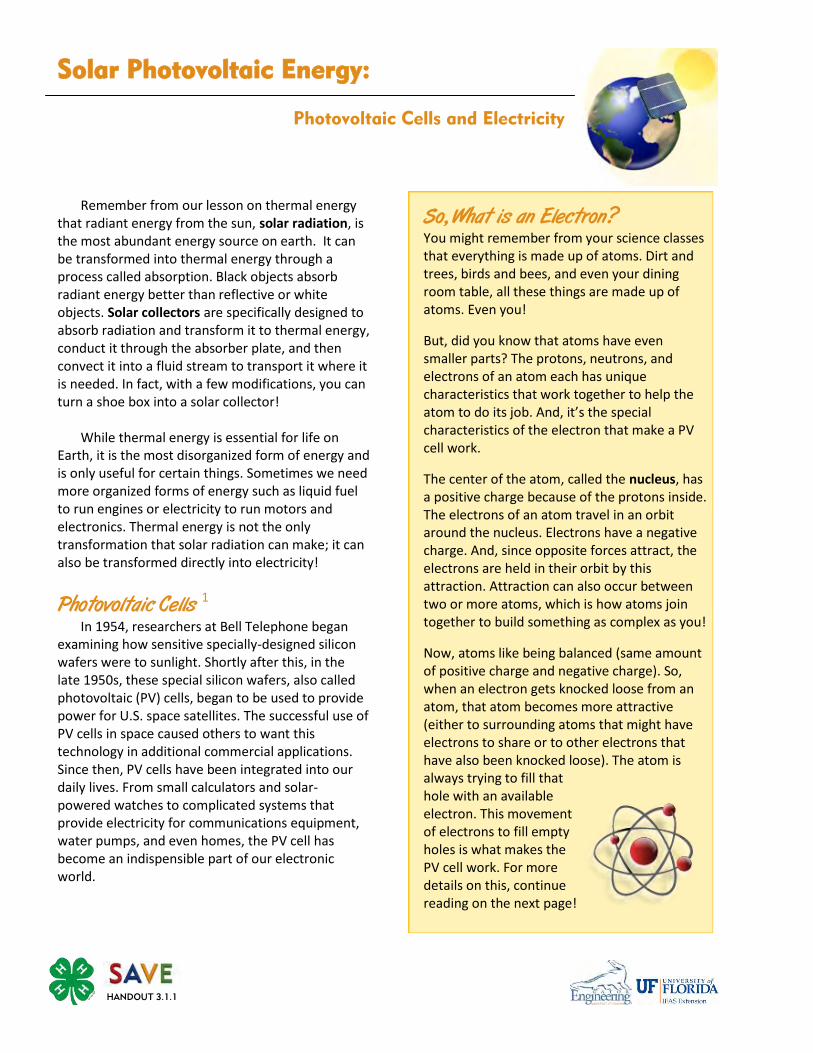
Remember from our lesson on thermal energy that radiant energy from the sun, solar radiation, is the most abundant energy source on earth. It can be transformed into thermal energy through a process called absorption. Black objects absorb radiant energy better than reflective or white objects. Solar collectors are specifically designed to absorb radiation and transform it to thermal energy, conduct it through the absorber plate, and then convect it into a fluid stream to transport it where it is needed. In fact, with a few modifications, you can turn a shoe box into a solar collector! While thermal energy is essential for life on Earth, it is the most disorganized form of energy and is only useful for certain things. Sometimes we need more organized forms of energy such as liquid fuel to run engines or electricity to run motors and electronics. Thermal energy is not the only transformation that solar radiation can make; it can also be transformed directly into electricity!
Photovoltaic Cells 1 In 1954, researchers at Bell Telephone began examining how sensitive specially-designed silicon wafers were to sunlight. Shortly after this, in the late 1950s, these special silicon wafers, also called photovoltaic (PV) cells, began to be used to provide power for U.S. space satellites. The successful use of PV cells in space caused others to want this technology in additional commercial applications. Since then, PV cells have been integrated into our daily lives. From small calculators and solar-powered watches to complicated systems that provide electricity for communications equipment, water pumps, and even homes, the PV cell has become an indispensible part of our electronic world.
Solar Photovoltaic Energy:
Photovoltaic Cells and Electricity
So, What is an Electron? You might remember from your science classes that everything is made up of atoms. Dirt and trees, birds and bees, and even your dining room table, all these things are made up of atoms. Even you!
But, did you know that atoms have even smaller parts? The protons, neutrons, and electrons of an atom each has unique characteristics that work together to help the atom to do its job. And, it’s the special characteristics of the electron that make a PV cell work.
The center of the atom, called the nucleus, has a positive charge because of the protons inside. The electrons of an atom travel in an orbit around the nucleus. Electrons have a negative charge. And, since opposite forces attract, the electrons are held in their orbit by this attraction. Attraction can also occur between two or more atoms, which is how atoms join together to build something as complex as you!
Now, atoms like being balanced (same amount of positive charge and negative charge). So, when an electron gets knocked loose from an atom, that atom becomes more attractive (either to surrounding atoms that might have electrons to share or to other electrons that have also been knocked loose). The atom is always trying to fill that hole with an available electron. This movement of electrons to fill empty holes is what makes the PV cell work. For more details on this, continue reading on the next page!
HANDOUT 3.1.1
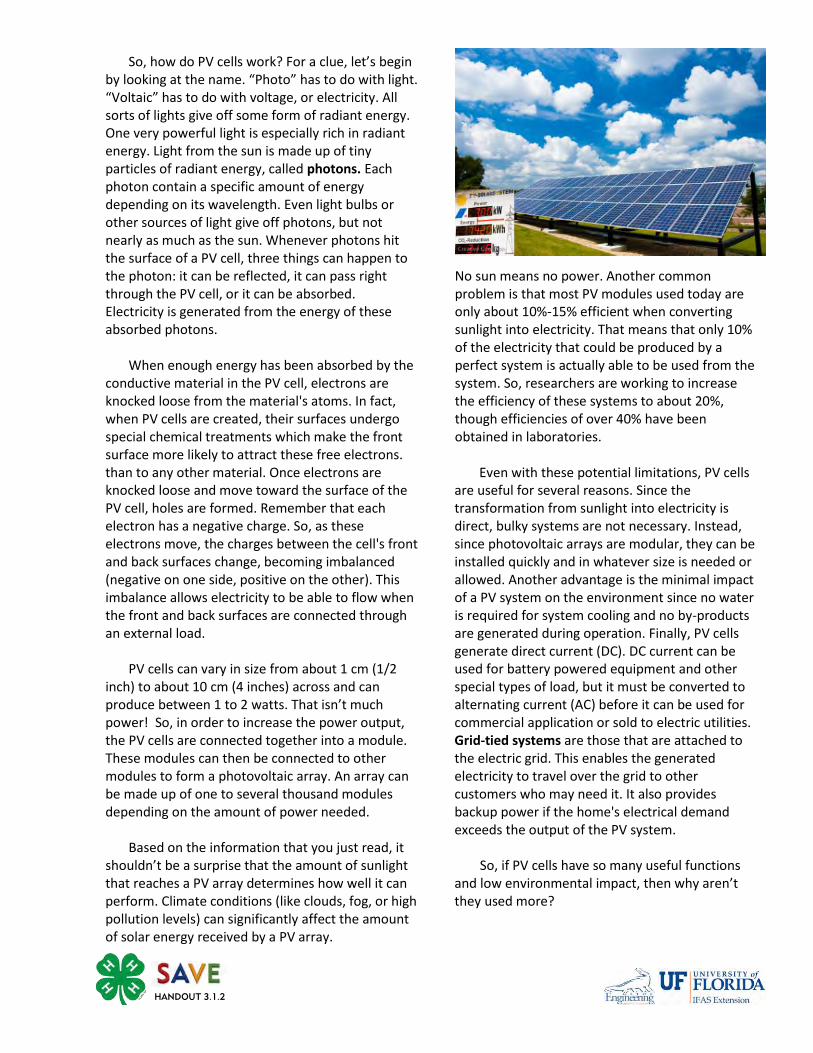
So, how do PV cells work? For a clue, let’s begin by looking at the name. “Photo” has to do with light. “Voltaic” has to do with voltage, or electricity. All sorts of lights give off some form of radiant energy. One very powerful light is especially rich in radiant energy. Light from the sun is made up of tiny particles of radiant energy, called photons. Each photon contain a specific amount of energy depending on its wavelength. Even light bulbs or other sources of light give off photons, but not nearly as much as the sun. Whenever photons hit the surface of a PV cell, three things can happen to the photon: it can be reflected, it can pass right through the PV cell, or it can be absorbed. Electricity is generated from the energy of these absorbed photons. When enough energy has been absorbed by the conductive material in the PV cell, electrons are knocked loose from the material's atoms. In fact, when PV cells are created, their surfaces undergo special chemical treatments which make the front surface more likely to attract these free electrons. than to any other material. Once electrons are knocked loose and move toward the surface of the PV cell, holes are formed. Remember that each electron has a negative charge. So, as these electrons move, the charges between the cell's front and back surfaces change, becoming imbalanced (negative on one side, positive on the other). This imbalance allows electricity to be able to flow when the front and back surfaces are connected through an external load. PV cells can vary in size from about 1 cm (1/2 inch) to about 10 cm (4 inches) across and can produce between 1 to 2 watts. That isn’t much power! So, in order to increase the power output, the PV cells are connected together into a module. These modules can then be connected to other modules to form a photovoltaic array. An array can be made up of one to several thousand modules depending on the amount of power needed. Based on the information that you just read, it shouldn’t be a surprise that the amount of sunlight that reaches a PV array determines how well it can perform. Climate conditions (like clouds, fog, or high pollution levels) can significantly affect the amount of solar energy received by a PV array.
No sun means no power. Another common problem is that most PV modules used today are only about 10%-15% efficient when converting sunlight into electricity. That means that only 10% of the electricity that could be produced by a perfect system is actually able to be used from the system. So, researchers are working to increase the efficiency of these systems to about 20%, though efficiencies of over 40% have been obtained in laboratories. Even with these potential limitations, PV cells are useful for several reasons. Since the transformation from sunlight into electricity is direct, bulky systems are not necessary. Instead, since photovoltaic arrays are modular, they can be installed quickly and in whatever size is needed or allowed. Another advantage is the minimal impact of a PV system on the environment since no water is required for system cooling and no by-products are generated during operation. Finally, PV cells generate direct current (DC). DC current can be used for battery powered equipment and other special types of load, but it must be converted to alternating current (AC) before it can be used for commercial application or sold to electric utilities. Grid-tied systems are those that are attached to the electric grid. This enables the generated electricity to travel over the grid to other customers who may need it. It also provides backup power if the home's electrical demand exceeds the output of the PV system.
So, if PV cells have so many useful functions
and low environmental impact, then why aren’t they used more?
HANDOUT 3.1.2

The Science Behind It All substances (solid, liquid, or gas) are made up of molecules. Molecules are bonded combinations of atoms. Atoms consist of electrons, protons, and neutrons. Electrons have a negative electrical charge, protons have a positive electrical charge, and neutrons have no electrical charge (neutral). Like charges repel each other, and opposite charges attract. Protons and neutrons are in the nucleus of an atom and normally cannot move, but electrons are on the outside and can be passed from one atom to another.
Electrical energy is the kinetic (motion) energy of electrons that are being passed from one atom to the next. Electrons are very small and do not possess much energy by themselves. But, when millions of them are moving, together they can possess enough energy to accomplish many things! Electrons move through electrical circuits just like water moves through pipes. If electrons do not have a closed path (circuit) to travel through, they will stop moving, just like water stops moving if a pipe is blocked. Electrical devices only work when they are part of an electric circuit that has a source of electricity, such as a battery or PV cell which provide the flow of electrons. The flow of electrons is called the current (I) and we measure it in units of amperes or amps. Electrons only want to move from where atoms have extra electrons (a negatively charged area) to where atoms need electrons (a positively charged area). This difference in charge is created by the electric source (your battery or PV array) and is called the electrical potential. Electrical potential is also called voltage and is measured in volts (V). Voltage and current are often measured using a device called a multimeter.
The power of the electric flow, or wattage, is measured in Watts (W). The power of the energy flow per time is equal to the current multiplied by the voltage. So:
Power = Current x Voltage Watts = Amps x Volts (Units)
Energy is measured in units of Joules, which is a very small amount of energy. Electric energy is normally calculated by multiplying the electrical power (watts) by the time (seconds) that the power is used. One watt of power multiplied by one second of time equals one Joule of energy. A 60 watt light bulb uses 60 Joules of energy every second. Electric energy is what we buy from the power company and is normally measured in kilowatt-hours (kWh), which equals 3.6 million Joules. So:
Energy = Power x Time Joules = Watts x Seconds (Units)
or Kilowatt-hours = Kilowatts x Hours (Units)
Power = Energy / Time
Watts = Joules / Seconds (Units) or
Kilowatts = Kilowatt-hours / Hours (Units)
HANDOUT 3.2.2
This FACT SHEET was compiled and written by Nathan Mitten and Jessica Kochert using the following resources: 1 EIA Energy Kid’s Page http://www.eia.doe.gov/kids/energyfacts/sources/renewable/solar.html
PV Panel Graphic supplied by
http://www.flickr.com/photos/nikonvscanon/3166595271/
under Creative Commons License
http://creativecommons.org/licenses/by/2.0/deed.en
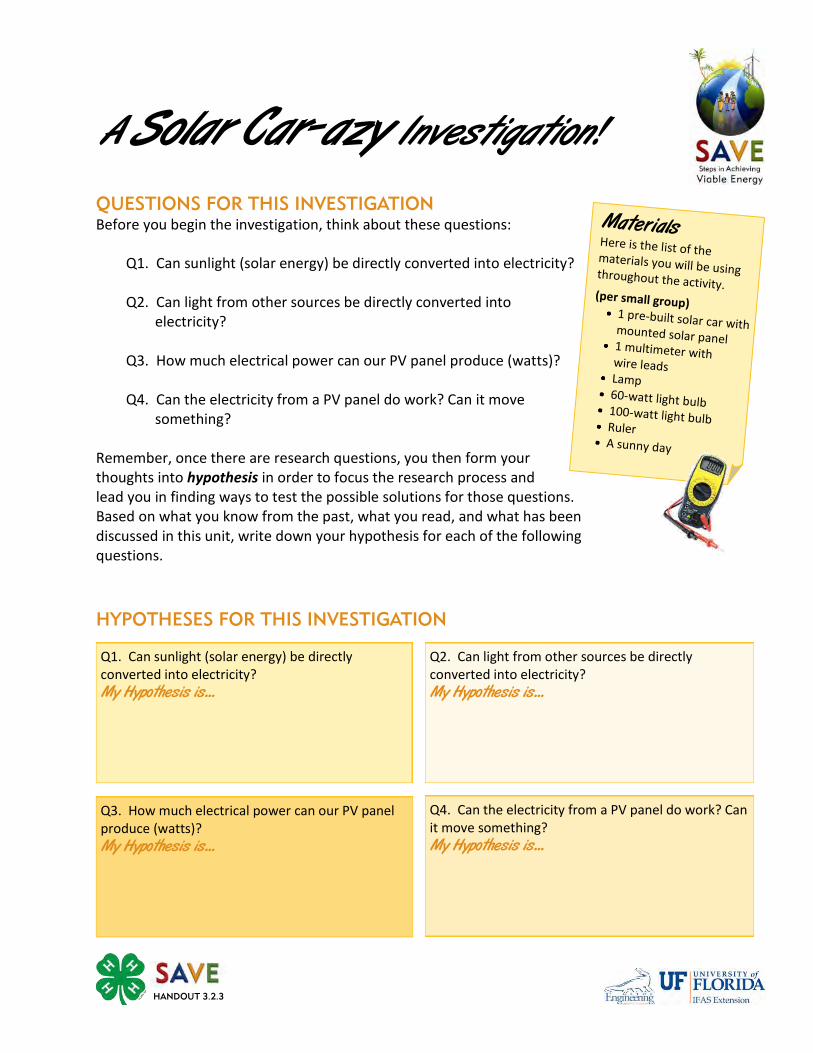
QUESTIONS FOR THIS INVESTIGATION
Before you begin the investigation, think about these questions:
Q1. Can sunlight (solar energy) be directly converted into electricity? Q2. Can light from other sources be directly converted into
electricity? Q3. How much electrical power can our PV panel produce (watts)? Q4. Can the electricity from a PV panel do work? Can it move
something?
Remember, once there are research questions, you then form your thoughts into hypothesis in order to focus the research process and lead you in finding ways to test the possible solutions for those questions. Based on what you know from the past, what you read, and what has been discussed in this unit, write down your hypothesis for each of the following questions.
HYPOTHESES FOR THIS INVESTIGATION
Q1. Can sunlight (solar energy) be directly converted into electricity? My Hypothesis is...
Q2. Can light from other sources be directly converted into electricity? My Hypothesis is...
Q3. How much electrical power can our PV panel produce (watts)? My Hypothesis is...
Q4. Can the electricity from a PV panel do work? Can it move something? My Hypothesis is...
Materials Here is the list of the materials you will be using throughout the activity.
(per small group) 1 pre-built solar car with mounted solar panel 1 multimeter with
wire leads Lamp 60-watt light bulb 100-watt light bulb Ruler A sunny day
A Solar Car-azy Investigation!
HANDOUT 3.2.3
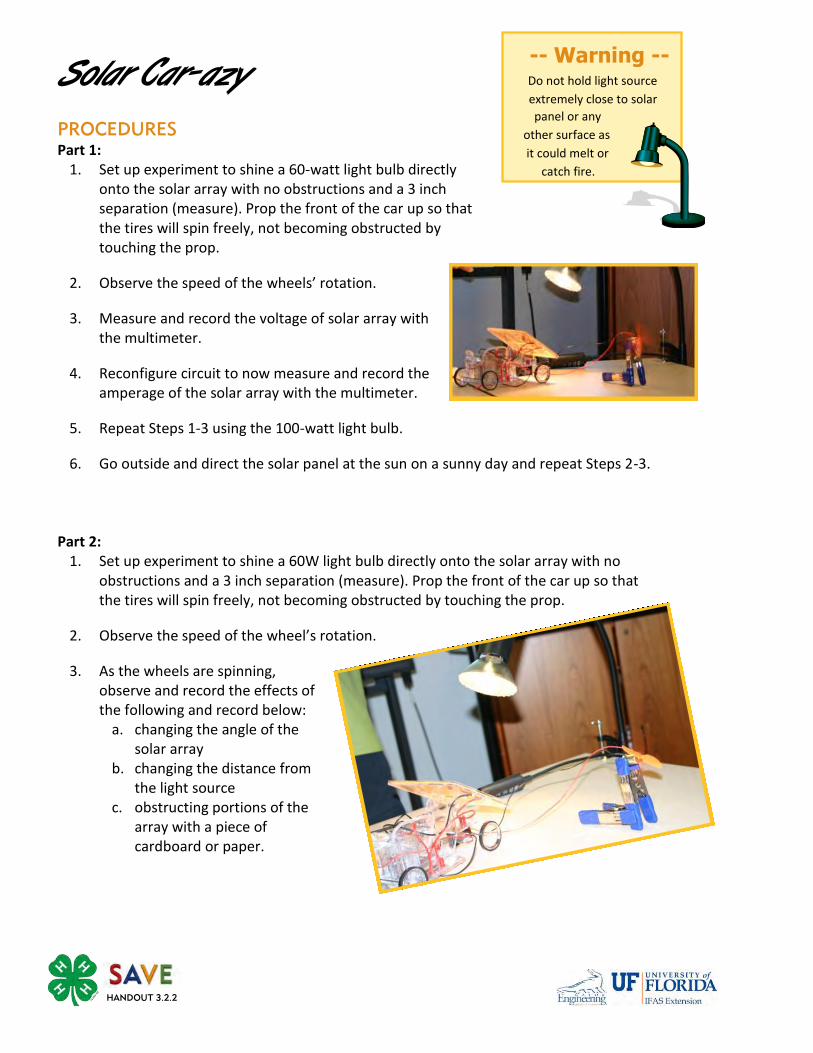
Solar Car-azy
PROCEDURES
Part 1: 1. Set up experiment to shine a 60-watt light bulb directly
onto the solar array with no obstructions and a 3 inch separation (measure). Prop the front of the car up so that the tires will spin freely, not becoming obstructed by touching the prop.
2. Observe the speed of the wheels’ rotation.
3. Measure and record the voltage of solar array with the multimeter.
4. Reconfigure circuit to now measure and record the amperage of the solar array with the multimeter.
5. Repeat Steps 1-3 using the 100-watt light bulb.
6. Go outside and direct the solar panel at the sun on a sunny day and repeat Steps 2-3. Part 2:
1. Set up experiment to shine a 60W light bulb directly onto the solar array with no obstructions and a 3 inch separation (measure). Prop the front of the car up so that the tires will spin freely, not becoming obstructed by touching the prop.
2. Observe the speed of the wheel’s rotation.
3. As the wheels are spinning, observe and record the effects of the following and record below:
a. changing the angle of the solar array
b. changing the distance from the light source
c. obstructing portions of the array with a piece of cardboard or paper.
-- Warning --
Do not hold light source extremely close to solar panel or any
other surface as it could melt or
catch fire.
HANDOUT 3.2.2
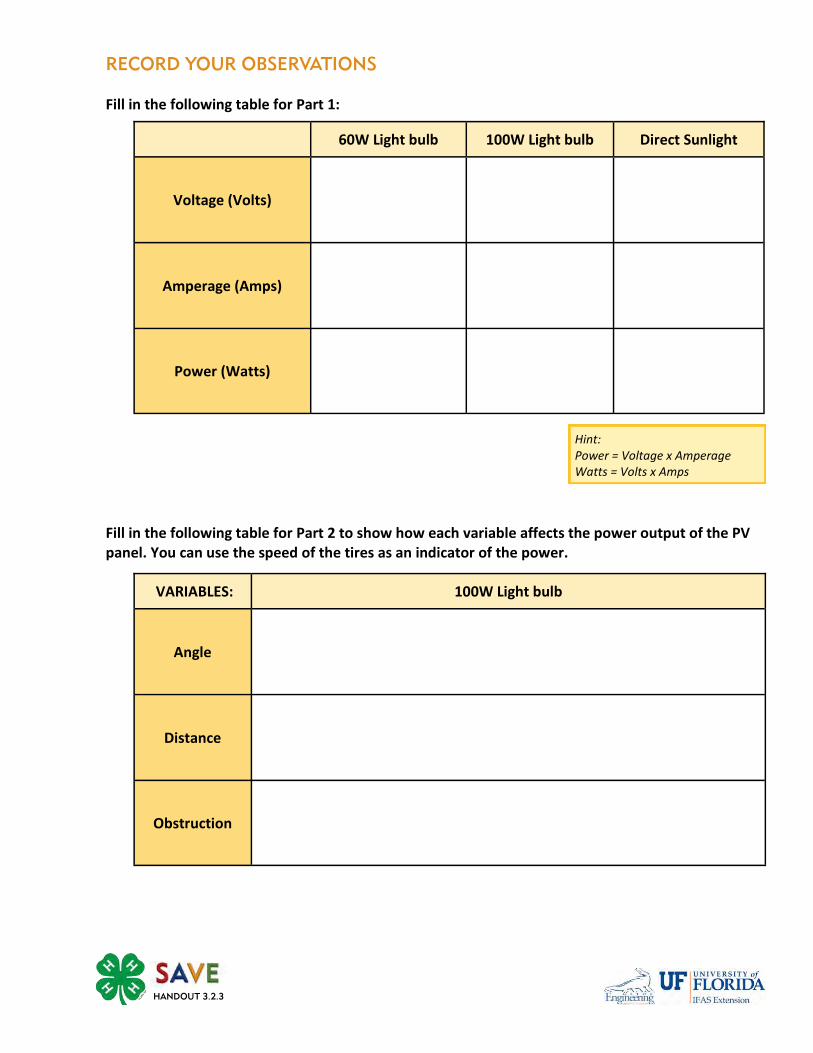
Hint: Power = Voltage x Amperage Watts = Volts x Amps
RECORD YOUR OBSERVATIONS
Fill in the following table for Part 1: Fill in the following table for Part 2 to show how each variable affects the power output of the PV panel. You can use the speed of the tires as an indicator of the power.
60W Light bulb 100W Light bulb Direct Sunlight
Voltage (Volts)
Amperage (Amps)
Power (Watts)
VARIABLES: 100W Light bulb
Angle
Distance
Obstruction
HANDOUT 3.2.3
ANALYSIS AND CONCLUSION
Let’s calculate the efficiency of the PV panel from your experiment based on Part 1, Step 6.
To calculate efficiency you need some information: First, we need to measure the length and width of the PV panel so that we can calculate the area. Be sure to convert your units into METERS for this calculation. Remember to use the metric measurements on your ruler.
(Length )(Width) = Surface Area (m2) Next, let’s assume that the amount of solar energy striking the surface on a clear sunny day is 1000 watts of radiation per square meter (1000W/m2). Use the following equation to calculate the actual solar power input the PV panel was receiving from the sun:
(Area of PV Panel)( 1000W/m2) = Solar Power Input (Watts)
Look at your tables on the previous page to find the measured electrical power of the PV panel. Divide that number by the number you calculated for the surface area.
(Measured Electrical Power Output) = Electrical Power Output (Watts) (Surface Area of PV Panel)
Finally, use the following equation to figure out the PV panel’s efficiency.
(Electrical Power Output) x 100% = Efficiency (Solar Power Input)
What conclusions did you make about your predictions (Hypotheses)? H1
H2
H3
H4
Certification Reminder Choose ONE activity from the Project Board (either one from SOURCES, FORMS, USERS, or IMPACTS). Be sure you are recording which activity you are completing as well as any notes, thoughts you have, observations you make, or conclusions you come to in your journal.
HANDOUT 3.1.3
Complete the following web search activity below:
1. Visit the web site: http://data.energywhiz.com/6-8/index.php 2. Select the real-time solar panel data for the Gainesville Electrical JATC.
3. List four types of data measurements that can be viewed. 4. Record the time of the day when the System #1 DC voltage was
highest (might be for several hours). 5. Record the pounds (lbs) of CO2 saved by using the solar panel instead of
coal power for the day (lower portion of web page).
HANDOUT 3.3.1

6. Display the irradiation (solar radiation per area) by selecting it and then updating the graph. Record the max irradiation for two days (like August 20th and August 21st) by changing the date of the data displayed. Be sure to write down which days you selected.
Day 1: Date Irradiation
Day 2: Date Irradiation
7. What was the irradiance at the time of the experiment according to
the Internet data? Was the irradiance we assumed for the experiment calculations (1000W) a good estimate?
8. Now, display the System 1 AC Power and record the max power for the
same times as the recorded irradiance values above.
Day 1: Date Power (Watts)
Day 2: Date Power (Watts)
9. Based on the data from questions 6 and 8, calculate the efficiency of the PV system.
HANDOUT 3.3.2
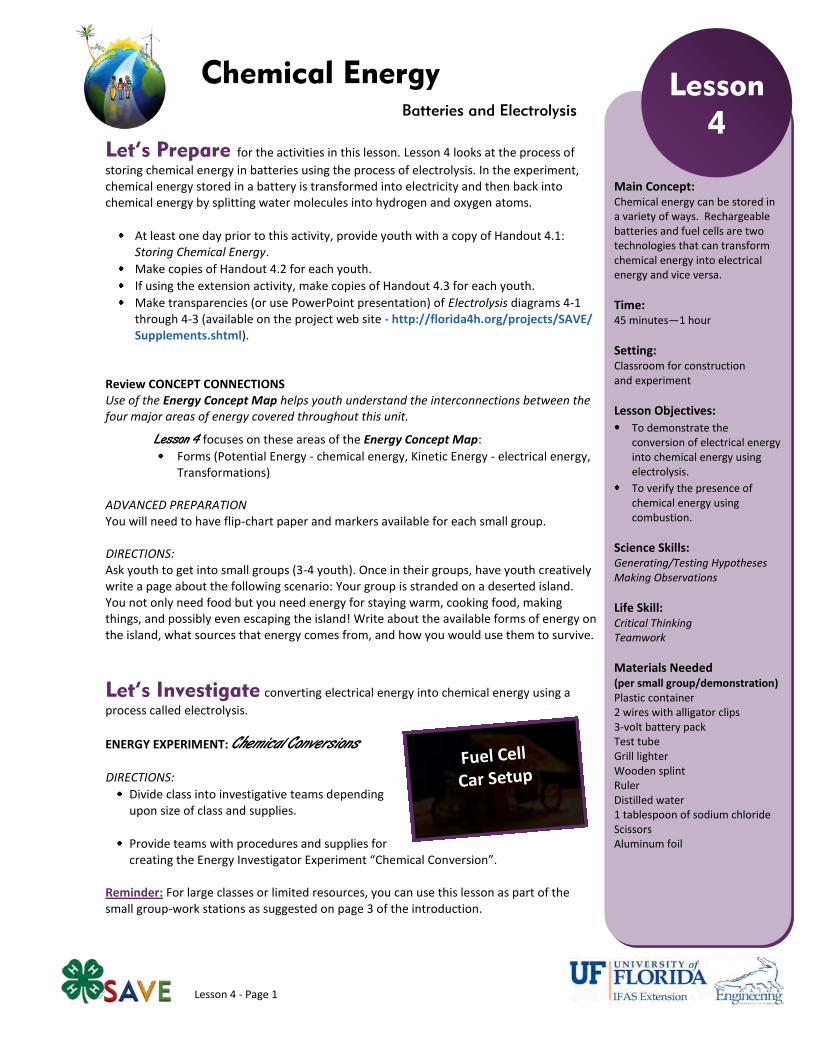
Lesson 4 - Page 1
Let’s Prepare for the activities in this lesson. Lesson 4 looks at the process of
storing chemical energy in batteries using the process of electrolysis. In the experiment, chemical energy stored in a battery is transformed into electricity and then back into chemical energy by splitting water molecules into hydrogen and oxygen atoms.
At least one day prior to this activity, provide youth with a copy of Handout 4.1: Storing Chemical Energy.
Make copies of Handout 4.2 for each youth.
If using the extension activity, make copies of Handout 4.3 for each youth.
Make transparencies (or use PowerPoint presentation) of Electrolysis diagrams 4-1 through 4-3 (available on the project web site - http://florida4h.org/projects/SAVE/Supplements.shtml).
Review CONCEPT CONNECTIONS Use of the Energy Concept Map helps youth understand the interconnections between the four major areas of energy covered throughout this unit.
Lesson 4 focuses on these areas of the Energy Concept Map:
Forms (Potential Energy - chemical energy, Kinetic Energy - electrical energy, Transformations)
ADVANCED PREPARATION You will need to have flip-chart paper and markers available for each small group. DIRECTIONS: Ask youth to get into small groups (3-4 youth). Once in their groups, have youth creatively write a page about the following scenario: Your group is stranded on a deserted island. You not only need food but you need energy for staying warm, cooking food, making things, and possibly even escaping the island! Write about the available forms of energy on the island, what sources that energy comes from, and how you would use them to survive.
Let’s Investigate converting electrical energy into chemical energy using a
process called electrolysis.
ENERGY EXPERIMENT: Chemical Conversions
DIRECTIONS:
Divide class into investigative teams depending upon size of class and supplies.
Provide teams with procedures and supplies for creating the Energy Investigator Experiment “Chemical Conversion”.
Reminder: For large classes or limited resources, you can use this lesson as part of the small group-work stations as suggested on page 3 of the introduction.
Main Concept: Chemical energy can be stored in a variety of ways. Rechargeable batteries and fuel cells are two technologies that can transform chemical energy into electrical energy and vice versa.
Time: 45 minutes—1 hour
Setting: Classroom for construction and experiment
Lesson Objectives:
To demonstrate the conversion of electrical energy into chemical energy using electrolysis.
To verify the presence of chemical energy using combustion.
Science Skills: Generating/Testing Hypotheses Making Observations
Life Skill: Critical Thinking Teamwork
Materials Needed (per small group/demonstration) Plastic container 2 wires with alligator clips 3-volt battery pack Test tube Grill lighter Wooden splint Ruler Distilled water 1 tablespoon of sodium chloride Scissors Aluminum foil
Batteries and Electrolysis
Chemical Energy Lesson
4
Fuel Cell
Car Setup
Lesson 4 - Page 2
Let’s Reflect on our experience…
1. Let’s think about this experiment. What did you think was the hardest part of completing this activity? Answers will vary.
How did your group work through those difficulties? Answers will vary.
2. Now, let’s take a closer look at our experiment.
What did you see happening at the aluminum foil terminals that were under water? Bubbles were being formed.
So, if you saw that, what does that mean was taking place? Chemical reactions were taking place. Oxidation was happening at the anode and giving electrons. Reduction was happening at the cathode and taking electrons.
3. Which side were electrons repelled from, the
cathode or anode? They were repelled from the anode, the negative terminal.
Why did that take place? Because both the electrons and the terminal are negatively charged - and therefore repel.
4. What was the purpose for the electrolyte? The
electrolyte transported the electrons or electric current.
5. Let’s think about the chemical reaction that took
place at the anode. What gas filled the test tube? Hydrogen ions in the salt-water solution receive an electron being given and form a hydrogen atom. Two hydrogen atoms then combine to form a hydrogen molecule. Hydrogen molecules then bubble up to the surface in bundles.
6. Describe what happened when the burning splint
was inserted into the test tube? Answers will vary, but if it has filled with hydrogen (as it should have at this point), it will “pop” due to combustion of the hydrogen.
What might you be able to conclude about this specific gas? The temperature of the hydrogen gas was increased enough that it combusted. So, it contains chemical energy and is combustible.
7. What type of energy transformation took place?
Chemical energy was transformed to thermal and radiant energy!
8. Now, let’s talk about your hypothesis. What did you think would happen in this experiment? Answers will vary based on the question. Q1. Can electrolysis be used to convert electrical
energy into chemical energy?
9. So, what conclusions did you reach from the results of your hypothesis: H1) Electrolysis uses electricity to split the
hydrogen atom from the two oxygen atoms in water. These separated atoms represent stored chemical energy since they can be rejoined later to produce electricity. The chemical energy, now in the form of hydrogen, can be converted into thermal energy by combustion which is both visible and audible.
10. Was there any part of your experimental process
that might have affected the precision, reliability or validity of your results? Answers will vary.
How could your team have avoided this? Answers will vary.
Let’s Apply our new knowledge…
1. What practical considerations about storing and using hydrogen can be drawn from your observations of its properties? Hydrogen is a gas, not a liquid, at atmospheric temperature and pressure. Since it is combustible, it can be very dangerous! Since it is a gas with a very low density, large amounts of hydrogen energy take large amounts of space which can be a constraint.
2. What are the similarities between rechargeable
batteries and fuel cells? They both transform back and forth between electrical energy and chemical energy. They both have similar components in order to do the energy transformation such as a cathode and anode. They both can be used many times without “dying” or wearing out.
3. What are the differences between batteries and
fuel cells? Rechargeable batteries such as nickel-cadmium, nickel-metal-hydride and lithium-ion use many chemicals, but fuel cells normally use water which is completely clean and less expensive. Fuel cells store the chemical energy separately and rechargeable batteries store it inside.

Lesson 4 - Page 3
Concept Check
What happens when a rechargeable battery is recharged?
What is an electrode? What are the negative and positive electrodes called?
Why does distilled water not conduct electric current?
What happens during electrolysis? How is it like recharging a battery?
Vocabulary Terms
Battery
Electrodes
Anodes
Cathodes
Electrolyte
Electricity
Voltaic Cell
Fuel Cell
Electrolysis
Reverse Electrolysis
4. Compare and contrast hydrogen and gasoline? How are hydrogen fuel cells like gasoline engines (fuel storage)? Both hydrogen and gasoline are forms of chemical energy. Hydrogen is a gas at atmospheric pressure and temperature, while gasoline is a liquid which means gasoline has more energy per volume. Hydrogen is an energy carrier and must be produced through transforming some of the energy source while gasoline (or fossil fuel) is actually an energy source itself.
5. How could the energy needed to separate hydrogen from
oxygen be supplied by renewable energy sources? The electricity could come directly from solar panels, from a wind turbine running a generator, from burning biomass instead of fossil fuel in a power plant, or many other ways.
6. Knowing that water resources are limited, what is a
concern we should have about hydrogen production? Since hydrogen production requires a source of water, it is important to consider available water supplies when considering hydrogen production. This is especially important because there is a growing demand for fresh water while fresh water supplies are not increasing. Water shortages are already a concern in many areas and will probably continue to be in more and more places.
7. Think about the materials used in this experiment. What new experiment do you think you could develop to further explain the process of electrolysis? Answers will vary. Encourage them to think about the different variables that they could test or change.
Lesson 4 - Page 4
Extension Activities
Read BACKGROUND for Lesson 5 - Hydrogen Energy, then describe a fuel cell stack. A fuel cell stack is a series of individual fuel cells added together in order to produce a higher voltage and transform large amounts of energy.
Choose one of the following to complete: 1. In your energy journal, draw a diagram showing the process of electrolysis including:
- cathode - electricity source - anode - direction of current flow - H2 gas - electrolyte
2. List three devices or machines at your house that transform chemical energy into another form of energy and
include how each machine stores the chemical energy and the transformations that it performs. 1) A portable CD player stores chemical energy in batteries and transforms it to electrical energy which is then transformed to motion energy to turn the CD and sound energy. 2) A lawn mower stores chemical energy as gasoline in the fuel tank and transforms it to thermal energy by combustion in the engine which transforms it to motion energy to spin the blade and cut the grass. 3) A grill lighter stores chemical energy as butane or some other type of fuel and transforms it to thermal energy in a flame in order to light the grill. (suggestion: demo grill lighter included in kit)
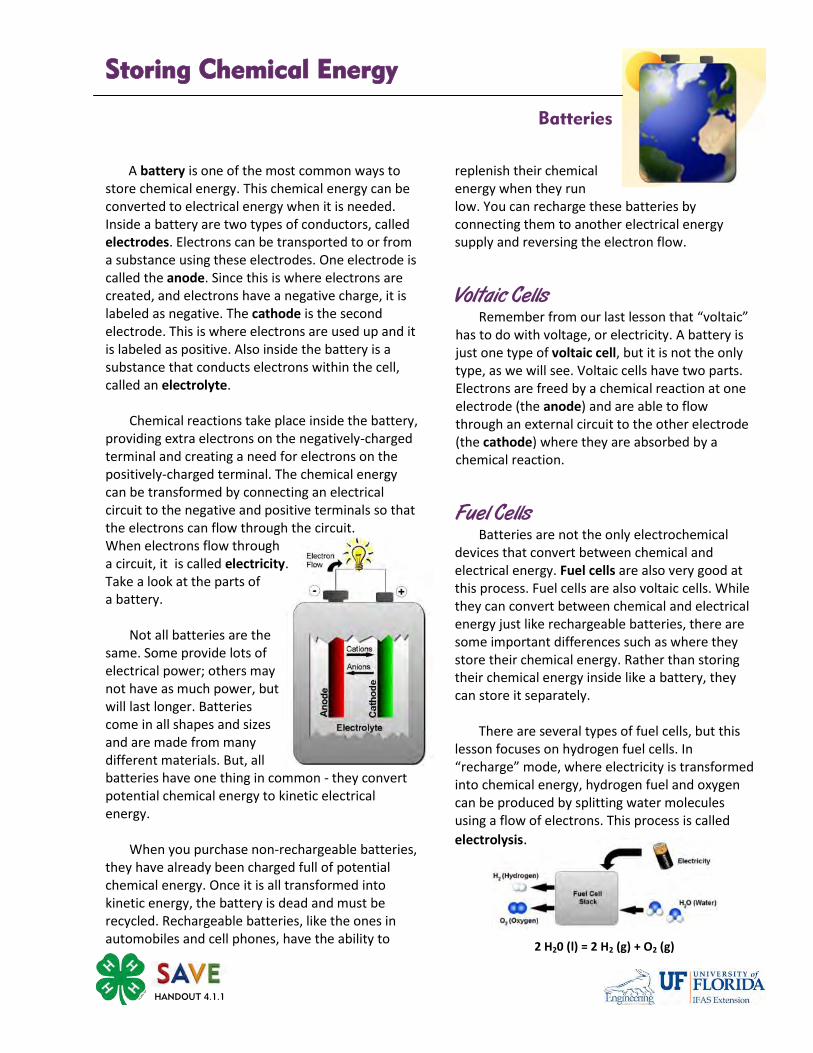
Storing Chemical Energy
Batteries
A battery is one of the most common ways to store chemical energy. This chemical energy can be converted to electrical energy when it is needed. Inside a battery are two types of conductors, called electrodes. Electrons can be transported to or from a substance using these electrodes. One electrode is called the anode. Since this is where electrons are created, and electrons have a negative charge, it is labeled as negative. The cathode is the second electrode. This is where electrons are used up and it is labeled as positive. Also inside the battery is a substance that conducts electrons within the cell, called an electrolyte. Chemical reactions take place inside the battery, providing extra electrons on the negatively-charged terminal and creating a need for electrons on the positively-charged terminal. The chemical energy can be transformed by connecting an electrical circuit to the negative and positive terminals so that the electrons can flow through the circuit. When electrons flow through a circuit, it is called electricity. Take a look at the parts of a battery. Not all batteries are the same. Some provide lots of electrical power; others may not have as much power, but will last longer. Batteries come in all shapes and sizes and are made from many different materials. But, all batteries have one thing in common - they convert potential chemical energy to kinetic electrical energy. When you purchase non-rechargeable batteries, they have already been charged full of potential chemical energy. Once it is all transformed into kinetic energy, the battery is dead and must be recycled. Rechargeable batteries, like the ones in automobiles and cell phones, have the ability to
replenish their chemical energy when they run low. You can recharge these batteries by connecting them to another electrical energy supply and reversing the electron flow.
Voltaic Cells Remember from our last lesson that “voltaic” has to do with voltage, or electricity. A battery is just one type of voltaic cell, but it is not the only type, as we will see. Voltaic cells have two parts. Electrons are freed by a chemical reaction at one electrode (the anode) and are able to flow through an external circuit to the other electrode (the cathode) where they are absorbed by a chemical reaction.
Fuel Cells Batteries are not the only electrochemical devices that convert between chemical and electrical energy. Fuel cells are also very good at this process. Fuel cells are also voltaic cells. While they can convert between chemical and electrical energy just like rechargeable batteries, there are some important differences such as where they store their chemical energy. Rather than storing their chemical energy inside like a battery, they can store it separately. There are several types of fuel cells, but this lesson focuses on hydrogen fuel cells. In “recharge” mode, where electricity is transformed into chemical energy, hydrogen fuel and oxygen can be produced by splitting water molecules using a flow of electrons. This process is called
electrolysis.
HANDOUT 4.1.1
2 H20 (l) = 2 H2 (g) + O2 (g)
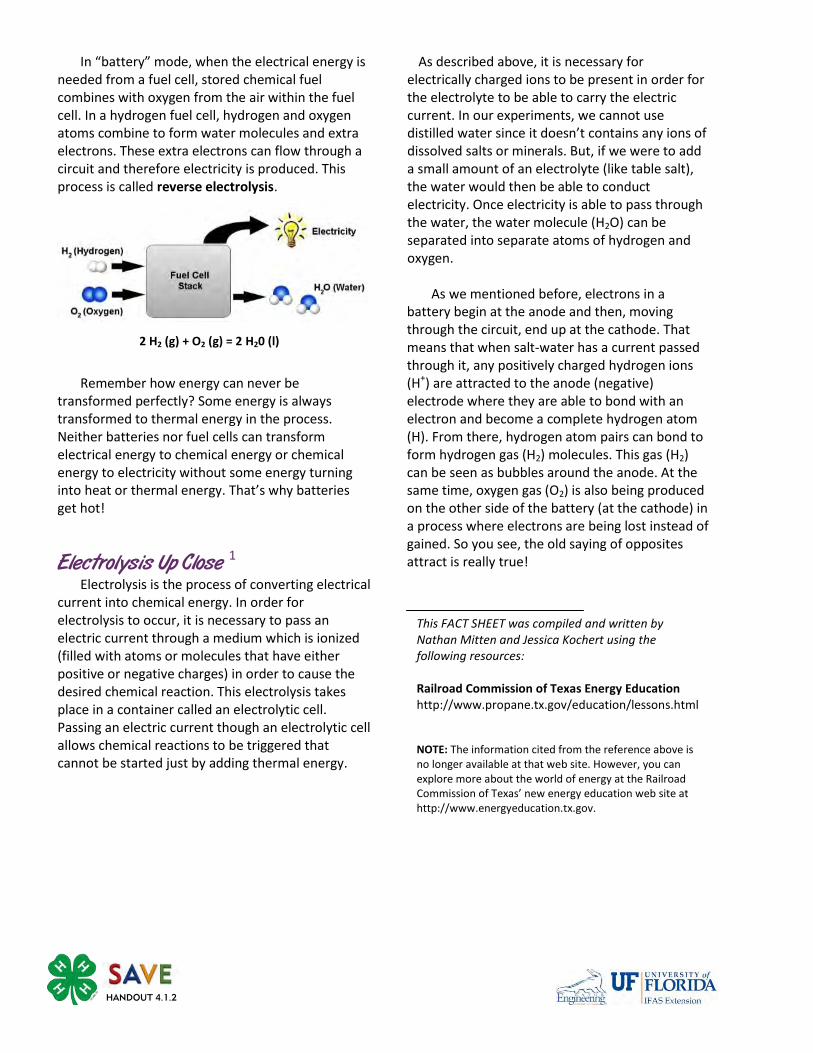
In “battery” mode, when the electrical energy is needed from a fuel cell, stored chemical fuel combines with oxygen from the air within the fuel cell. In a hydrogen fuel cell, hydrogen and oxygen atoms combine to form water molecules and extra electrons. These extra electrons can flow through a circuit and therefore electricity is produced. This process is called reverse electrolysis.
Remember how energy can never be transformed perfectly? Some energy is always transformed to thermal energy in the process. Neither batteries nor fuel cells can transform electrical energy to chemical energy or chemical energy to electricity without some energy turning into heat or thermal energy. That’s why batteries get hot!
Electrolysis Up Close 1
Electrolysis is the process of converting electrical current into chemical energy. In order for electrolysis to occur, it is necessary to pass an electric current through a medium which is ionized (filled with atoms or molecules that have either positive or negative charges) in order to cause the desired chemical reaction. This electrolysis takes place in a container called an electrolytic cell. Passing an electric current though an electrolytic cell allows chemical reactions to be triggered that cannot be started just by adding thermal energy.
As described above, it is necessary for electrically charged ions to be present in order for the electrolyte to be able to carry the electric current. In our experiments, we cannot use distilled water since it doesn’t contains any ions of dissolved salts or minerals. But, if we were to add a small amount of an electrolyte (like table salt), the water would then be able to conduct electricity. Once electricity is able to pass through the water, the water molecule (H2O) can be separated into separate atoms of hydrogen and oxygen. As we mentioned before, electrons in a battery begin at the anode and then, moving through the circuit, end up at the cathode. That means that when salt-water has a current passed through it, any positively charged hydrogen ions (H+) are attracted to the anode (negative) electrode where they are able to bond with an electron and become a complete hydrogen atom (H). From there, hydrogen atom pairs can bond to form hydrogen gas (H2) molecules. This gas (H2) can be seen as bubbles around the anode. At the same time, oxygen gas (O2) is also being produced on the other side of the battery (at the cathode) in a process where electrons are being lost instead of gained. So you see, the old saying of opposites attract is really true!
HANDOUT 4.1.2
This FACT SHEET was compiled and written by Nathan Mitten and Jessica Kochert using the following resources: Railroad Commission of Texas Energy Education http://www.propane.tx.gov/education/lessons.html
NOTE: The information cited from the reference above is no longer available at that web site. However, you can explore more about the world of energy at the Railroad Commission of Texas’ new energy education web site at http://www.energyeducation.tx.gov.
2 H2 (g) + O2 (g) = 2 H20 (l)
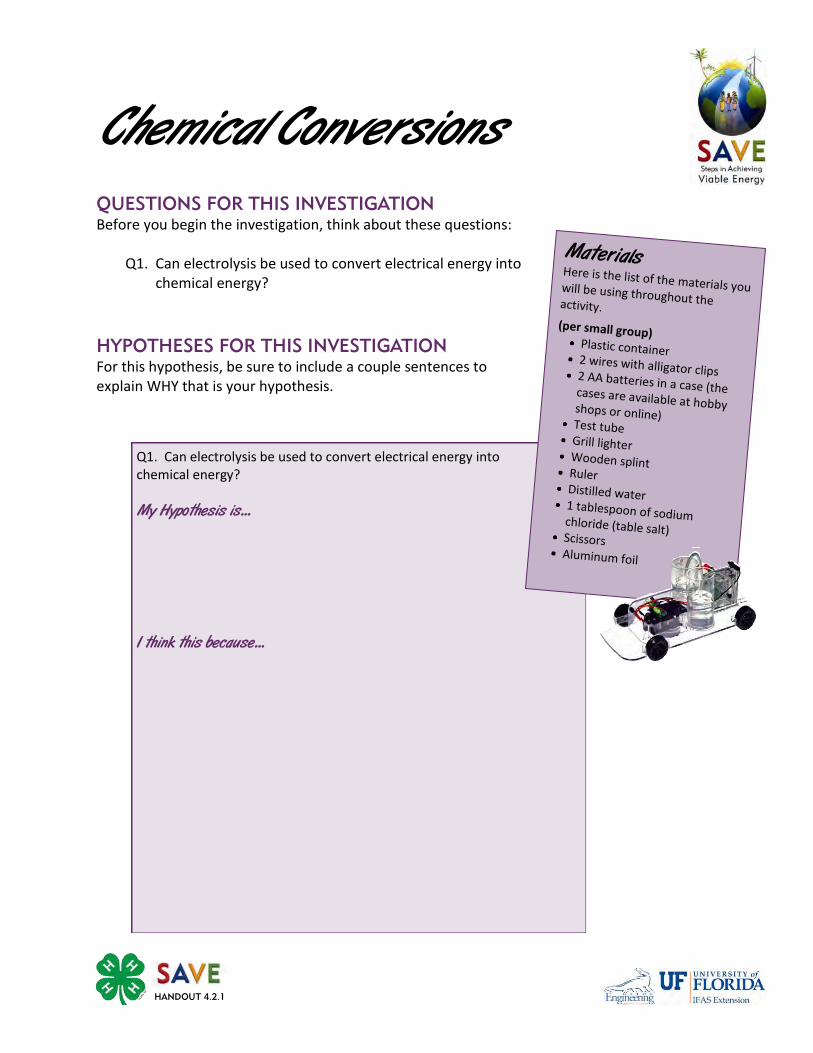
HANDOUT 4.2.1
QUESTIONS FOR THIS INVESTIGATION
Before you begin the investigation, think about these questions: Q1. Can electrolysis be used to convert electrical energy into
chemical energy?
HYPOTHESES FOR THIS INVESTIGATION
For this hypothesis, be sure to include a couple sentences to explain WHY that is your hypothesis.
Chemical Conversions
Q1. Can electrolysis be used to convert electrical energy into chemical energy? My Hypothesis is...
I think this because...
Materials Here is the list of the materials you will be using throughout the activity.
(per small group) Plastic container 2 wires with alligator clips 2 AA batteries in a case (the cases are available at hobby shops or online)
Test tube Grill lighter Wooden splint Ruler Distilled water 1 tablespoon of sodium chloride (table salt) Scissors Aluminum foil
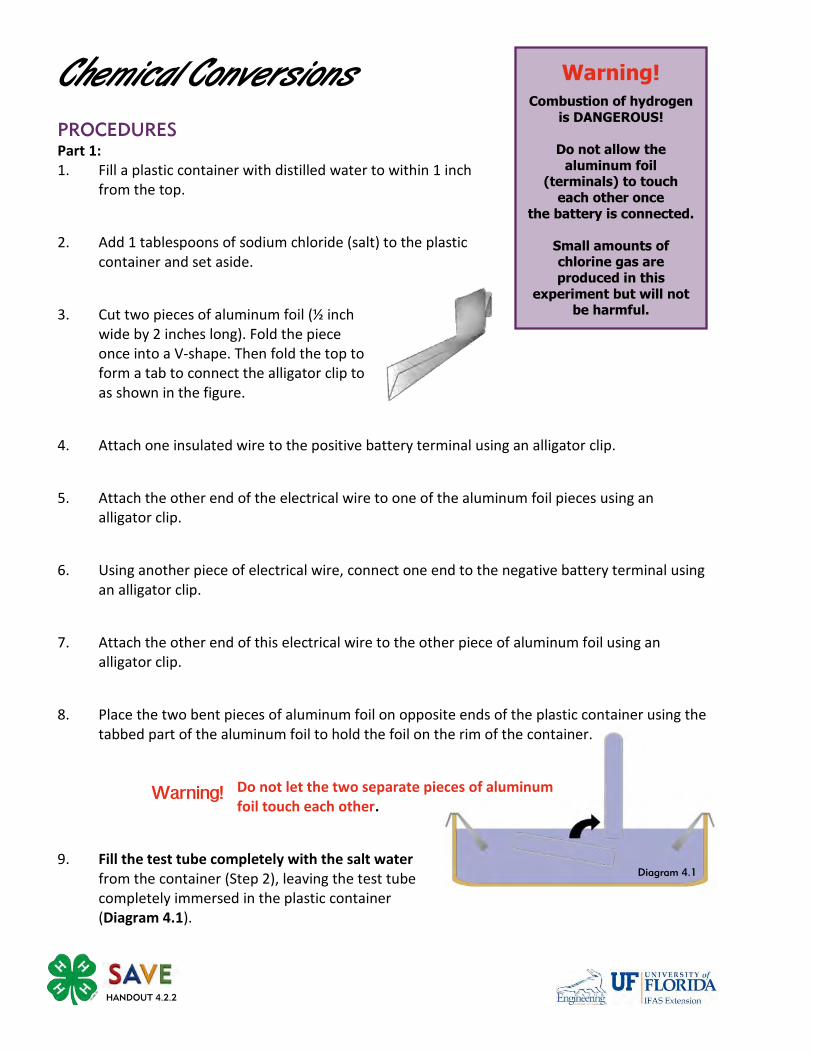
Diagram 4.1
Chemical Conversions
PROCEDURES
Part 1: 1. Fill a plastic container with distilled water to within 1 inch
from the top.
2. Add 1 tablespoons of sodium chloride (salt) to the plastic container and set aside.
3. Cut two pieces of aluminum foil (½ inch wide by 2 inches long). Fold the piece once into a V-shape. Then fold the top to form a tab to connect the alligator clip to as shown in the figure.
4. Attach one insulated wire to the positive battery terminal using an alligator clip.
5. Attach the other end of the electrical wire to one of the aluminum foil pieces using an alligator clip.
6. Using another piece of electrical wire, connect one end to the negative battery terminal using an alligator clip.
7. Attach the other end of this electrical wire to the other piece of aluminum foil using an alligator clip.
8. Place the two bent pieces of aluminum foil on opposite ends of the plastic container using the tabbed part of the aluminum foil to hold the foil on the rim of the container.
Do not let the two separate pieces of aluminum foil touch each other.
9. Fill the test tube completely with the salt water from the container (Step 2), leaving the test tube completely immersed in the plastic container (Diagram 4.1).
Warning!
Warning!
Combustion of hydrogen
is DANGEROUS!
Do not allow the
aluminum foil (terminals) to touch
each other once
the battery is connected.
Small amounts of chlorine gas are
produced in this
experiment but will not be harmful.
HANDOUT 4.2.2

Part 2: 1. Lift the full test tube by the bottom and take it almost completely out of the water leaving only
the opening still in the water without letting any air in.
2. Hold the full test tube over the aluminum cathode (which is connected to the negative side of the battery) in order to catch the hydrogen gas bubbles. The gas will begin to displace the water and collect within the test tube (Diagram 4.2).
3. After the tube has filled with hydrogen gas, unhook the battery from the electrical wires.
4. Light the wooden splint with the grill lighter and allow an ember to develop. Blow out the flame. The splint should still be glowing.
5. Slowly lift the test tube away from the plastic container making sure not to tip the test tube to the side allowing the gas to escape.
6. Put the glowing splint up into the test tube and observe the reaction (Diagram 4.3).
Diagram 4.2
Diagram 4.3
HANDOUT 4.2.3

RECORD YOUR OBSERVATIONS
Part 1: Diagram your setup for Part 1. Describe in words what you observed during this process.
Diagram:
Description:
HANDOUT 4.2.4
Certification Reminder Choose ONE activity from the Project Board (either one from SOURCES, FORMS, USERS, or IMPACTS). Be sure you are recording which activity you are completing as well as any notes, thoughts you have, observations you make, or conclusions you come to in your journal.
Part 2: Sketch a picture and then describe in words what you observed during Part 2 of this process.
Sketch:
Description:
ANALYSIS AND CONCLUSION
What conclusions did you make about your prediction (Hypothesis)?
HANDOUT 4.2.5
Complete one of the following activities: 1. Draw a diagram showing the process of electrolysis including:
-cathode -electricity source -anode -direction of current flow -H2 gas -electrolyte
2. List three devices or machines at your house that transform chemical
energy into another form of energy and include how each machine stores the chemical energy and the transformations that it performs.
HANDOUT 4.3.1
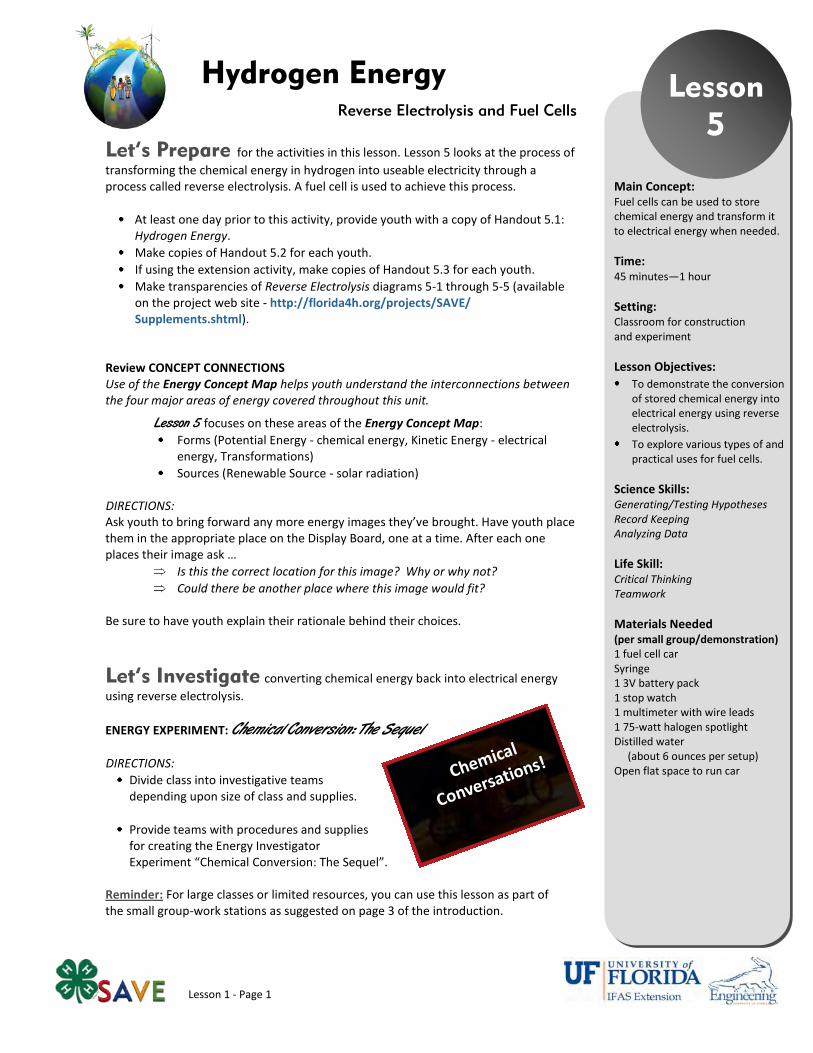
Lesson 1 - Page 1
Let’s Prepare for the activities in this lesson. Lesson 5 looks at the process of
transforming the chemical energy in hydrogen into useable electricity through a process called reverse electrolysis. A fuel cell is used to achieve this process.
At least one day prior to this activity, provide youth with a copy of Handout 5.1: Hydrogen Energy.
Make copies of Handout 5.2 for each youth.
If using the extension activity, make copies of Handout 5.3 for each youth.
Make transparencies of Reverse Electrolysis diagrams 5-1 through 5-5 (available on the project web site - http://florida4h.org/projects/SAVE/Supplements.shtml).
Review CONCEPT CONNECTIONS Use of the Energy Concept Map helps youth understand the interconnections between the four major areas of energy covered throughout this unit.
Lesson 5 focuses on these areas of the Energy Concept Map:
Forms (Potential Energy - chemical energy, Kinetic Energy - electrical energy, Transformations)
Sources (Renewable Source - solar radiation) DIRECTIONS: Ask youth to bring forward any more energy images they’ve brought. Have youth place them in the appropriate place on the Display Board, one at a time. After each one places their image ask …
Is this the correct location for this image? Why or why not?
Could there be another place where this image would fit?
Be sure to have youth explain their rationale behind their choices.
Let’s Investigate converting chemical energy back into electrical energy
using reverse electrolysis.
ENERGY EXPERIMENT: Chemical Conversion: The Sequel DIRECTIONS:
Divide class into investigative teams depending upon size of class and supplies.
Provide teams with procedures and supplies for creating the Energy Investigator Experiment “Chemical Conversion: The Sequel”.
Reminder: For large classes or limited resources, you can use this lesson as part of the small group-work stations as suggested on page 3 of the introduction.
Lesson
5 Reverse Electrolysis and Fuel Cells
Hydrogen Energy
Main Concept: Fuel cells can be used to store chemical energy and transform it to electrical energy when needed.
Time: 45 minutes—1 hour
Setting: Classroom for construction and experiment
Lesson Objectives:
To demonstrate the conversion of stored chemical energy into electrical energy using reverse electrolysis.
To explore various types of and practical uses for fuel cells.
Science Skills: Generating/Testing Hypotheses Record Keeping Analyzing Data
Life Skill: Critical Thinking Teamwork
Materials Needed (per small group/demonstration) 1 fuel cell car Syringe 1 3V battery pack 1 stop watch 1 multimeter with wire leads 1 75-watt halogen spotlight Distilled water (about 6 ounces per setup) Open flat space to run car
Chemical
Conversations!
Lesson 1 - Page 2
Let’s Reflect on our experience…
1. Let’s think about this experiment. What did you think was the hardest part of completing this activity? Answers will vary.
How did your group work through those difficulties? Answers will vary.
2. Which part would you say was the easiest? Why?
Answers will vary. 3. Now, let’s talk about your hypotheses. What did
you think would happen in this experiment? Answers will vary based on the two questions. Q1. Can a fuel cell convert electricity to hydrogen
fuel and then convert the hydrogen fuel back into electricity?
Q2. Can a fuel cell make a renewable energy source more reliable?
4. So, what conclusions did you reach from the
results of your hypotheses: H1) A fuel cell can transform energy back and
forth between hydrogen chemical energy and electricity, but each conversion loses some energy to other forms of energy since it is not 100% efficient.
H2) Fuel cells can produce hydrogen when electricity is available from renewable energy sources (solar, wind, etc.) and the hydrogen can be stored until it needs to be converted back to electricity to meet demand.
5. Compare the battery’s electrical power output to
the solar panel’s electrical power output while producing hydrogen during the electrolysis process. The battery electrical power was significantly greater than the solar panel electrical power. The battery gave X Watts and the solar panel only gave Y Watts of electrical power.
6. How long did it take to produce 3mL of hydrogen
from the battery source and from the solar panel source? It takes much less time with the battery source because the power is greater.
Why is it different? The production rate is dependent on the power source.
7. Now, think about how much electrical energy was needed to produce hydrogen from the battery. How does that compare to the amount used from the PV panel? The energy used is based on the power and the time of production. The battery gave more power but for a shorter period of time. The overall energy transformations were very similar. The battery gave X Joules and the solar panel gave Y Joules of electrical energy.
8. Was there a difference in the fuel cell power
output and motor running time between Part 3 (when charged by the battery) and Part 5 (when charged by the solar panel). They should be the same or very similar.
How can you explain this? This happens because regardless of how the hydrogen is produced, 3mL of hydrogen possesses the same amount of chemical energy. The power is based on the specific fuel cell, which is the same in both cases. The energy is based on the volume of hydrogen which is the same in both cases.
9. Let’s calculate the total efficiency of the fuel cell
when it transforms electrical energy from the solar panel to hydrogen and then transforms the hydrogen back into electricity to run the motor. Efficiency = (energy out ) x 100% (energy in) Efficiency for this experiment: (Part 5 energy) x 100% = Efficiency (Part 4 energy)
10. So, based on the results of our experiment, does the method of hydrogen production (electrolysis) affect how the hydrogen is used after storage (reverse electrolysis)? No! They are separate and independent!
Let’s Apply our new knowledge…
1. Is hydrogen an energy source? Explain. No, hydrogen is not a primary energy source; instead it is an energy carrier. It can be used to store and transport energy that comes from an energy source.

Lesson 1 - Page 3
Concept Check
What is an energy carrier?
What is an electrochemical energy conversion device?
What two energy transformations does a fuel cell perform? What are these processes called?
There are some major disadvantages and challenges to overcome to using renewable energy sources. How can using hydrogen help?
Does hydrogen have to be used in a fuel cell? How else can it be used?
How do fuel cells and rechargeable batteries compare?
Vocabulary Terms
Energy Carriers
Electrochemical Device
Energy Density
Fuel Cell
Fuel Cell Stack
Multimeter
2. What are some of the advantages that exist in using fuel cells with hydrogen storage?
Hydrogen can be produced with any energy source and can be used for many purposes. It can be used to store large amounts of energy and can be stored in external tanks, unlike most batteries. When the hydrogen is burned as a fuel or transformed back to electrical energy, there are no harmful byproducts.
3. How do fuel cells with hydrogen storage increase energy
reliability and flexibility rather than simply attaching a solar panel directly to the motor? If hydrogen is produced using the fuel cell, it can be used at anytime to power the motor. If the panel is connected directly, it can only be used to power the motor when there is a light source. Using the fuel cell, the radiant energy is transformed to chemical energy for use whenever it is needed. Although, this does reduce the overall efficiency compared to the direct connection.
4. How does the fact that electrolysis needs water as an
input effect using hydrogen as an energy carrier on a large scale? Water sources can be scarce in many places and water demands are consistently increases. This is a disadvantage of using hydrogen on a large scale. Other energy sources use water as well, such as gasoline refinement.
5. Why is hydrogen energy called clean energy? Why is this an important benefit of using hydrogen as an energy carrier? When hydrogen is used in a fuel cell or burned in an engine, the only byproduct is water. There is no output of greenhouse gases or harmful emissions. In some cases, these might be produced from the process that originally produced the hydrogen, but not in the case of solar panels or wind turbines.
6. The last several lessons have allowed you to practice working as a team to complete a task. How can the skills needed for successful teamwork be used in other areas of your life? Answers will vary.
7. Think about the materials used in this experiment. What new experiment do you think you could develop to further explain the process of reverse electrolysis? Answers will vary. Encourage them to think about the different variables that they could test or change.
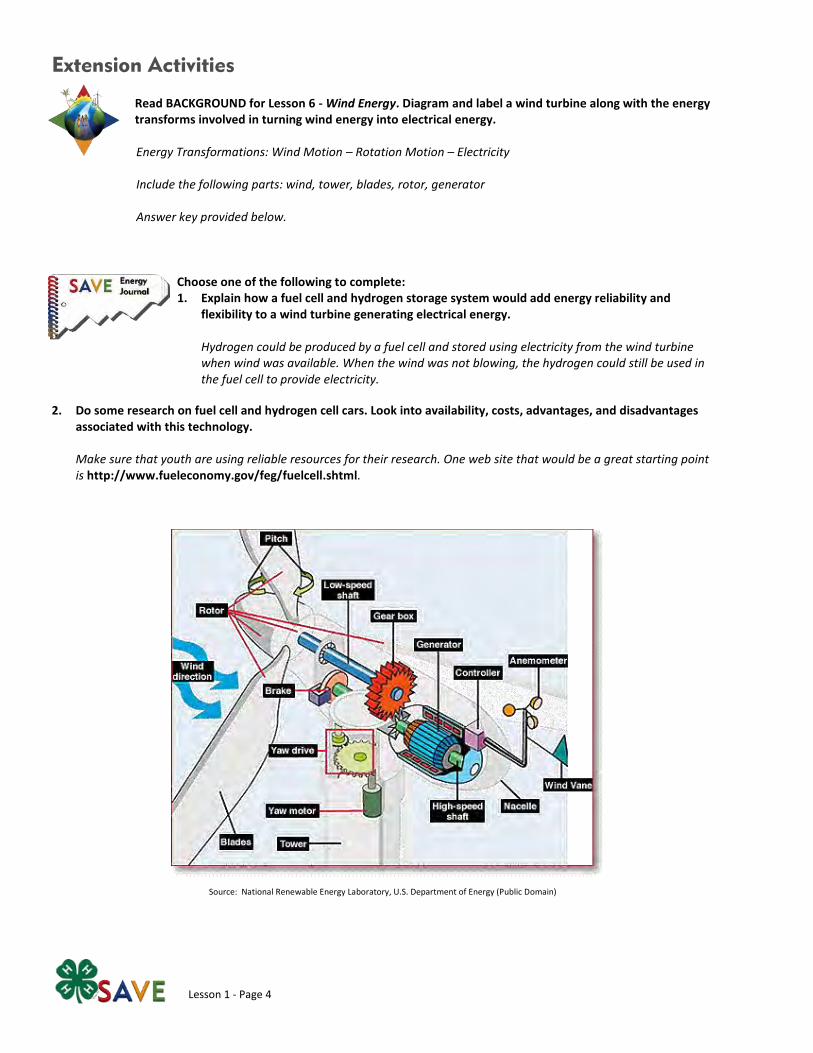
Lesson 1 - Page 4
Extension Activities
Read BACKGROUND for Lesson 6 - Wind Energy. Diagram and label a wind turbine along with the energy transforms involved in turning wind energy into electrical energy. Energy Transformations: Wind Motion – Rotation Motion – Electricity Include the following parts: wind, tower, blades, rotor, generator Answer key provided below.
Choose one of the following to complete: 1. Explain how a fuel cell and hydrogen storage system would add energy reliability and
flexibility to a wind turbine generating electrical energy.
Hydrogen could be produced by a fuel cell and stored using electricity from the wind turbine when wind was available. When the wind was not blowing, the hydrogen could still be used in the fuel cell to provide electricity.
2. Do some research on fuel cell and hydrogen cell cars. Look into availability, costs, advantages, and disadvantages
associated with this technology.
Make sure that youth are using reliable resources for their research. One web site that would be a great starting point is http://www.fueleconomy.gov/feg/fuelcell.shtml.
Source: National Renewable Energy Laboratory, U.S. Department of Energy (Public Domain)
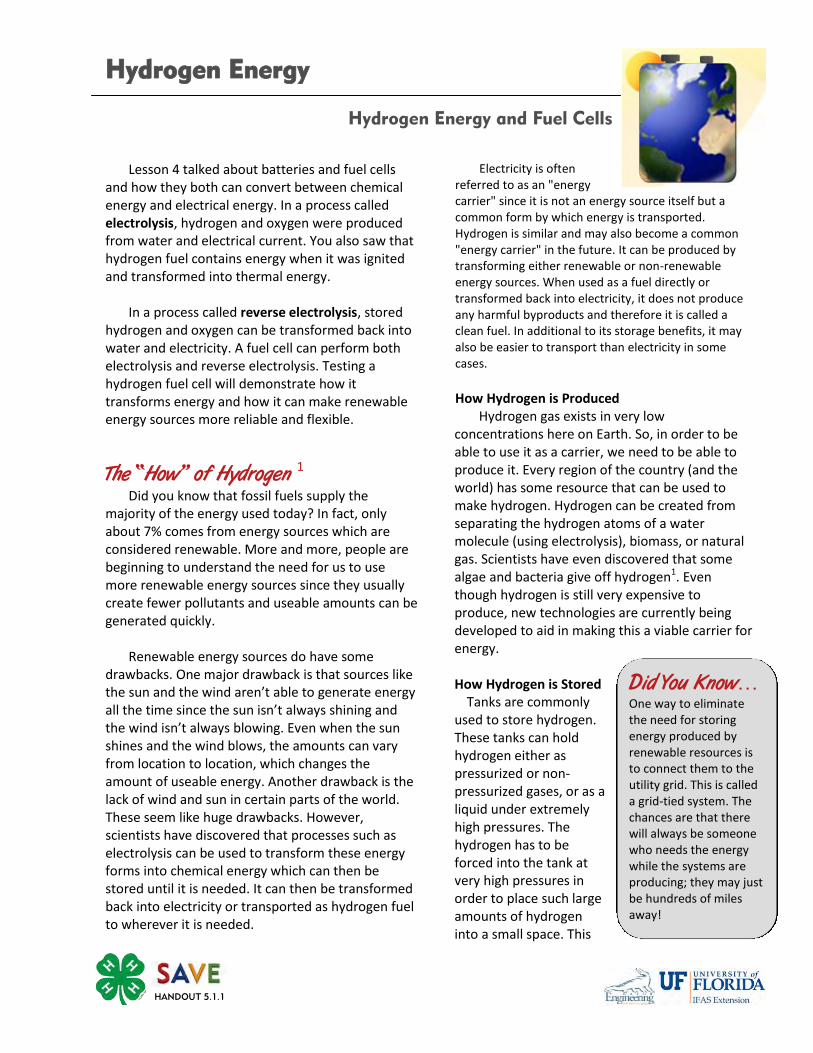
Lesson 4 talked about batteries and fuel cells and how they both can convert between chemical energy and electrical energy. In a process called electrolysis, hydrogen and oxygen were produced from water and electrical current. You also saw that hydrogen fuel contains energy when it was ignited and transformed into thermal energy.
In a process called reverse electrolysis, stored hydrogen and oxygen can be transformed back into water and electricity. A fuel cell can perform both electrolysis and reverse electrolysis. Testing a hydrogen fuel cell will demonstrate how it transforms energy and how it can make renewable energy sources more reliable and flexible.
The “How” of Hydrogen 1
Did you know that fossil fuels supply the majority of the energy used today? In fact, only about 7% comes from energy sources which are considered renewable. More and more, people are beginning to understand the need for us to use more renewable energy sources since they usually create fewer pollutants and useable amounts can be generated quickly.
Renewable energy sources do have some drawbacks. One major drawback is that sources like the sun and the wind aren’t able to generate energy all the time since the sun isn’t always shining and the wind isn’t always blowing. Even when the sun shines and the wind blows, the amounts can vary from location to location, which changes the amount of useable energy. Another drawback is the lack of wind and sun in certain parts of the world. These seem like huge drawbacks. However, scientists have discovered that processes such as electrolysis can be used to transform these energy forms into chemical energy which can then be stored until it is needed. It can then be transformed back into electricity or transported as hydrogen fuel to wherever it is needed.
Electricity is often referred to as an "energy carrier" since it is not an energy source itself but a common form by which energy is transported. Hydrogen is similar and may also become a common "energy carrier" in the future. It can be produced by transforming either renewable or non-renewable energy sources. When used as a fuel directly or transformed back into electricity, it does not produce any harmful byproducts and therefore it is called a clean fuel. In additional to its storage benefits, it may also be easier to transport than electricity in some cases.
How Hydrogen is Produced Hydrogen gas exists in very low concentrations here on Earth. So, in order to be able to use it as a carrier, we need to be able to produce it. Every region of the country (and the world) has some resource that can be used to make hydrogen. Hydrogen can be created from separating the hydrogen atoms of a water molecule (using electrolysis), biomass, or natural gas. Scientists have even discovered that some algae and bacteria give off hydrogen1. Even though hydrogen is still very expensive to produce, new technologies are currently being developed to aid in making this a viable carrier for energy. How Hydrogen is Stored Tanks are commonly used to store hydrogen. These tanks can hold hydrogen either as pressurized or non-pressurized gases, or as a liquid under extremely high pressures. The hydrogen has to be forced into the tank at very high pressures in order to place such large amounts of hydrogen into a small space. This
Hydrogen Energy
Hydrogen Energy and Fuel Cells
HANDOUT 5.1.1
Did You Know… One way to eliminate the need for storing energy produced by renewable resources is to connect them to the utility grid. This is called a grid-tied system. The chances are that there will always be someone who needs the energy while the systems are producing; they may just be hundreds of miles away!
high storage pressure is a major problem with using hydrogen with certain applications. This is one significant advantage that batteries have over fuel cells for energy storage.
Uses of Hydrogen Did you know that the United States currently produces about nine million tons of hydrogen per year? That is enough to power either 20-30 million cars or 5-8 million homes. Instead of using this energy carrier in the transportation or residential sectors, most hydrogen is being used in the industrial sector. Can you guess the number one user of hydrogen as an energy carrier? It is actually NASA. The space program has used hydrogen for years as they burn hydrogen fuel to lift the space shuttle into orbit. The space shuttle also uses hydrogen fuel cells instead of batteries to power the electrical systems. One interesting advantage to using hydrogen on the space shuttle is that the only by-product is pure water, which the crew uses as drinking water1. Hydrogen as a Fuel Since it is still expensive to make hydrogen, power plants that use only hydrogen won’t be built for a while. It is possible, however, that the pollution from current power plants may be reduced by adding hydrogen to natural gas. An increase in vehicle performance and reduced pollution may also occur as hydrogen is added to gasoline. Hydrogen Fuel Cell One other use of hydrogen is in the hydrogen fuel cells. These fuel cells are devices that transform chemical energy into electricity. If they run in reverse, they transform electricity into chemical energy, which can then be stored. Currently, hydrogen fuel cells are used to power some new electric cars, laptops and cell phones. They are even being used in some large power plants. Fuel cells can have a very high energy density, which means they can store and transform a lot of energy for a given size.
Fuel cells are like batteries because they convert chemical energy (hydrogen fuel and oxygen) to electrical energy. Instead of needing to be recharged like batteries, they will continue to produce electricity as long as they have a source of hydrogen fuel and oxygen. Since a single fuel cell only produces about 0.7 volts (compared to a 1.5V AA battery), fuel cells are often added together to form a fuel cell stack which has a higher voltage and can transform large amounts of energy.
The Future of Hydrogen 2
A great deal of work needs to be done before hydrogen can become a significant energy carrier in the United States. We will need to be able to make, store and move hydrogen in a practical way, which means developing pipelines and economical fuel cells. In addition to these systems, consumers will need to have hydrogen-capable technology and an understanding of how to use it. Each of these systems will be expensive and require large amounts of energy. However, the goal of the U.S. Department of Energy’s Hydrogen Program is for hydrogen to produce ten percent of our energy by the year 20302. Hydrogen could definitely play a part in a viable energy future of renewable energy sources and clean energy carriers.
HANDOUT 5.1.2
This FACT SHEET was compiled and written by Nathan Mitten and Jessica Kochert using the following resources: 1 EIA Energy Kid’s Page http://www.eia.doe.gov/kids/energyfacts/sources/renewable/solar.html
2 NEED Project http://www.need.org
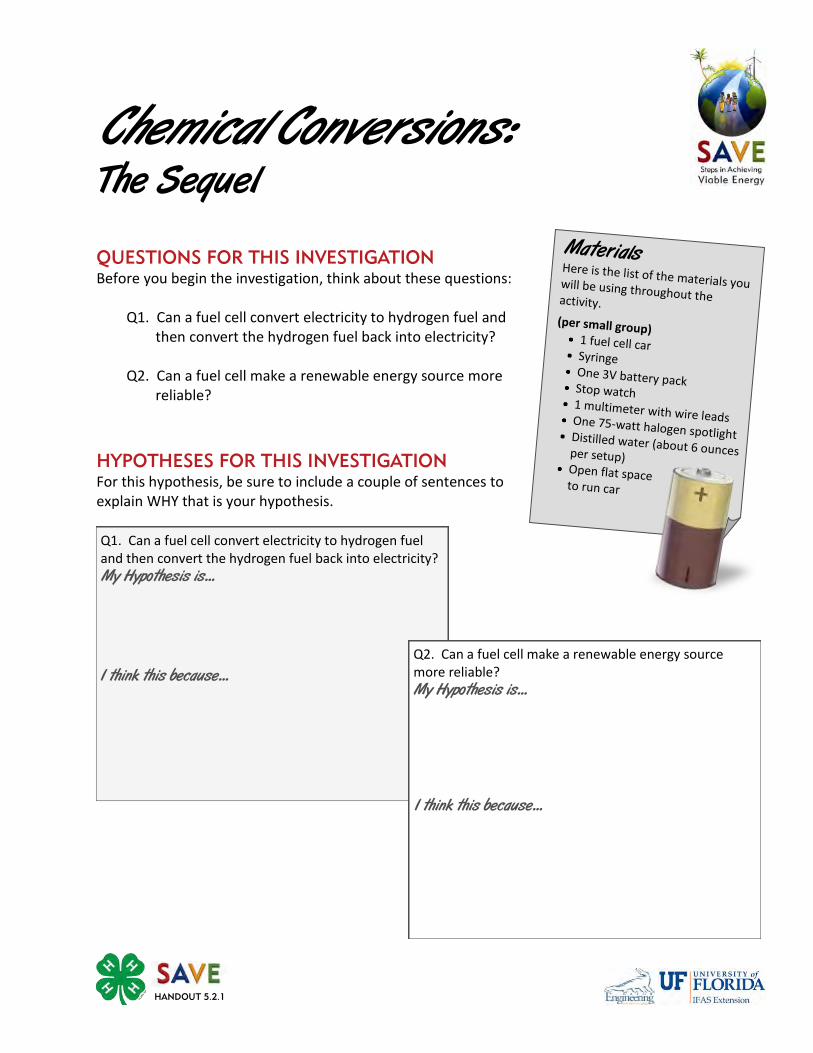
Q1. Can a fuel cell convert electricity to hydrogen fuel and then convert the hydrogen fuel back into electricity? My Hypothesis is...
I think this because...
Q2. Can a fuel cell make a renewable energy source more reliable? My Hypothesis is...
I think this because...
HANDOUT 5.2.1
QUESTIONS FOR THIS INVESTIGATION
Before you begin the investigation, think about these questions: Q1. Can a fuel cell convert electricity to hydrogen fuel and
then convert the hydrogen fuel back into electricity? Q2. Can a fuel cell make a renewable energy source more
reliable?
HYPOTHESES FOR THIS INVESTIGATION
For this hypothesis, be sure to include a couple of sentences to explain WHY that is your hypothesis.
Chemical Conversions: The Sequel
Materials Here is the list of the materials you will be using throughout the activity.
(per small group) 1 fuel cell car Syringe One 3V battery pack Stop watch 1 multimeter with wire leads One 75-watt halogen spotlight Distilled water (about 6 ounces per setup)
Open flat space to run car

Chemical Conversion: The Sequel
PROCEDURES
Part 1: Fuel Cell Priming 1. Prime the fuel cell using the following steps:
a. fill the reservoir with distilled water
b. remove red plug and connect syringe to one of the tubes on the top end of the fuel cell and draw distilled water through both gas tanks and up through the fuel cell
c. pinch tube while disconnecting syringe and replacing red plug
d. repeat Steps b and c for the tube on the other side of the fuel cell
Remember to record all your observations on the OBSERVATIONS page
Part 2: Battery / Fuel Cell Electrolysis 1. Refill reservoir about two-thirds with distilled water and elevate
vehicle so the drive wheels are off the ground.
2. Complete battery / fuel cell circuit (Diagram 5-1) and observe electrolysis (bubbles of hydrogen and oxygen moving through tubes and filling tanks).
3. Measure and record voltage and amperage of the circuit (Diagram 5-4 and Diagram 5-5).
4. Using a stop watch, measure and record the time required to produce 3 milliliters (mL) of hydrogen. Take time measurement between any two tick marks on hydrogen tank scale, and be sure to view gas level in tank from the correct eye level. Also record amount of oxygen produced.
Part 3: Fuel Cell / Motor Reverse Electrolysis 1. Elevate the two drive wheels of the fuel cell car by placing the syringe tube under the car
between the motor casing and plastic body.
2. Complete fuel cell/motor circuit (Diagram 5-2). Measure the time required to deplete 3mL of hydrogen.
Warning!
Only distilled water may be used in the
fuel cell or it will be
damaged.
Do not hold the light source extremely
close to the solar
panel or any other surface as it could
melt or catch fire.
Light bulbs are extremely hot
after use.
HANDOUT 5.2.2
Find LARGER
diagrams on
5.2.4 & 5.2.5
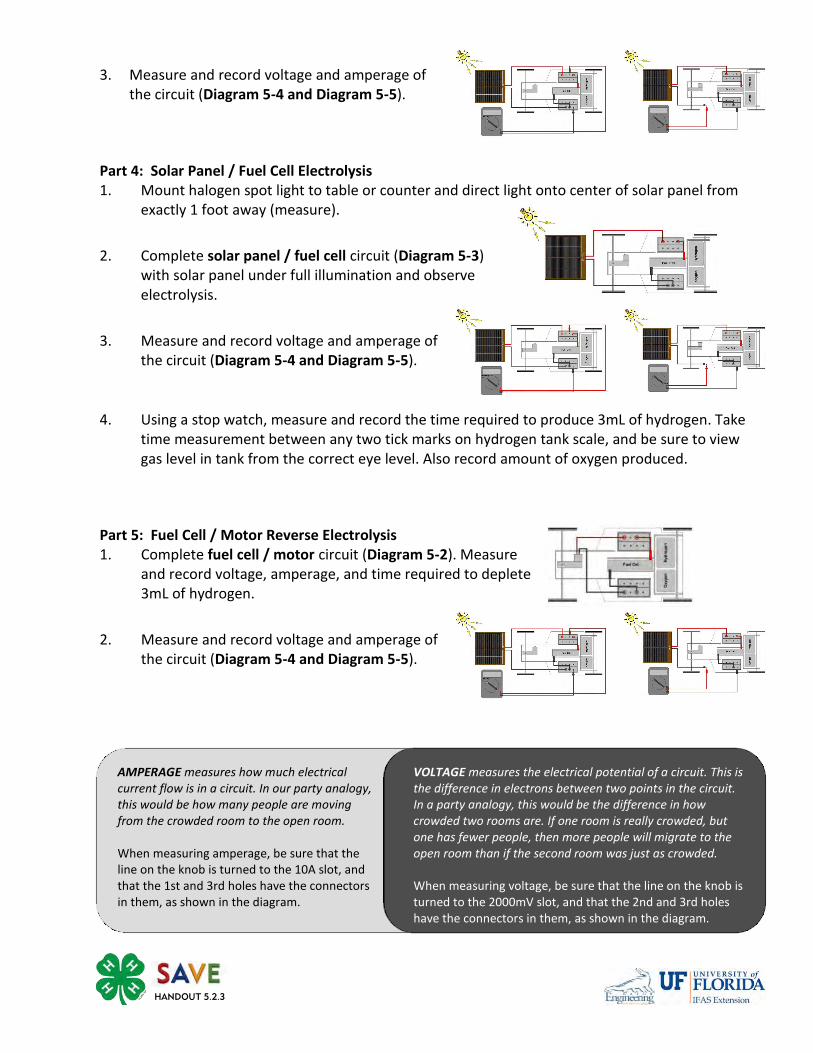
3. Measure and record voltage and amperage of the circuit (Diagram 5-4 and Diagram 5-5).
Part 4: Solar Panel / Fuel Cell Electrolysis 1. Mount halogen spot light to table or counter and direct light onto center of solar panel from
exactly 1 foot away (measure).
2. Complete solar panel / fuel cell circuit (Diagram 5-3) with solar panel under full illumination and observe electrolysis.
3. Measure and record voltage and amperage of the circuit (Diagram 5-4 and Diagram 5-5).
4. Using a stop watch, measure and record the time required to produce 3mL of hydrogen. Take time measurement between any two tick marks on hydrogen tank scale, and be sure to view gas level in tank from the correct eye level. Also record amount of oxygen produced.
Part 5: Fuel Cell / Motor Reverse Electrolysis 1. Complete fuel cell / motor circuit (Diagram 5-2). Measure
and record voltage, amperage, and time required to deplete 3mL of hydrogen.
2. Measure and record voltage and amperage of the circuit (Diagram 5-4 and Diagram 5-5).
HANDOUT 5.2.3
AMPERAGE measures how much electrical current flow is in a circuit. In our party analogy, this would be how many people are moving from the crowded room to the open room. When measuring amperage, be sure that the line on the knob is turned to the 10A slot, and that the 1st and 3rd holes have the connectors in them, as shown in the diagram.
VOLTAGE measures the electrical potential of a circuit. This is the difference in electrons between two points in the circuit. In a party analogy, this would be the difference in how crowded two rooms are. If one room is really crowded, but one has fewer people, then more people will migrate to the open room than if the second room was just as crowded. When measuring voltage, be sure that the line on the knob is turned to the 2000mV slot, and that the 2nd and 3rd holes have the connectors in them, as shown in the diagram.
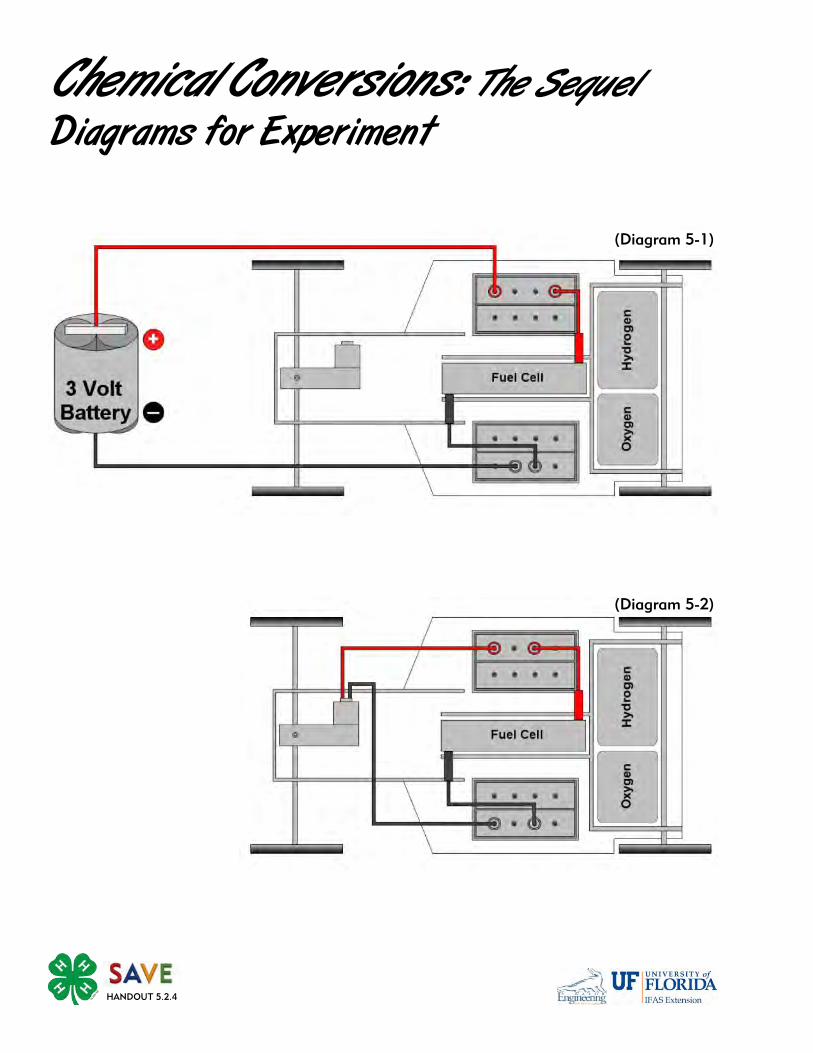
HANDOUT 5.2.4
(Diagram 5-2)
(Diagram 5-1)
Chemical Conversions: The Sequel Diagrams for Experiment
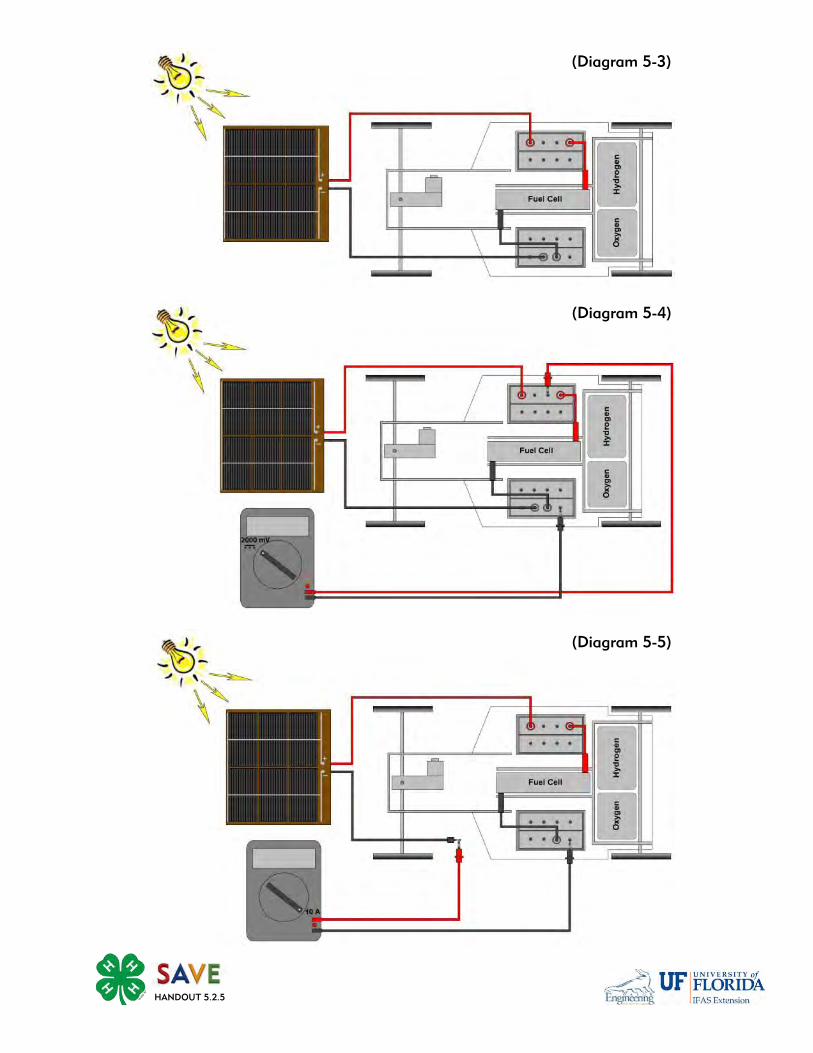
(Diagram 5-3)
(Diagram 5-5)
(Diagram 5-4)
HANDOUT 5.2.5

RECORD YOUR OBSERVATIONS
Part 2: Battery / Fuel Cell Electrolysis Part 3: Fuel Cell / Motor Reverse Electrolysis Part 4: Solar Panel / Fuel Cell Electrolysis Part 5: Fuel Cell / Motor Reverse Electrolysis
HANDOUT 5.2.6

ANALYSIS AND CONCLUSION
Complete the following table: Remember: Power (Watts) = Voltage (Volts) x Amperage (Amp)
Energy (Joules) = Power (Watts) x Time (seconds)
What conclusions can you make about your predictions (Hypotheses)? H1
H2
Part 2: Battery /
Fuel Cell Part 3:
Fuel Cell / Motor Part 4: Solar
Panel / Fuel Cell Part 5:
Fuel Cell / Motor
Voltage (V)
Amperage (A)
Power (W)
Time (s)
Joules (J)
HANDOUT 5.2.7
Certification Reminder Choose ONE activity from the Project Board (either one from SOURCES, FORMS, USERS, or IMPACTS). Be sure you are recording which activity you are completing as well as any notes, thoughts you have, observations you make, or conclusions you come to in your journal.

HANDOUT 5.3.1
Complete one of the following activities: 1. Explain how a fuel cell and hydrogen storage system would add
energy reliability and flexibility to a wind turbine generating electrical energy.
2. Now that you understand fuel cells pretty well, research batteries on
your own and then discuss the advantages and disadvantages between fuel cells and batteries in electric cars. Which do you think will be more popular in the future and why?
Lesson 6 - Page 1
Let’s Prepare for the activities in this lesson. Lesson 6 looks at the process of
transforming the energy of wind movement into mechanical energy.
One great resource for additional wind activities is the National 4-H curriculum The Power of the Wind. This curriculum, as well as additional wind activities, are available on the web site: http://online.4-hcurriculum.org/curriculum/wind.
At least one day prior to this activity, provide youth with a copy of Handout 6.1: Wind Energy.
Using a metric scale, measure the mass of each item you have chosen to lift with your turbines prior to beginning the exercise. Provide each group with those measurements in kilograms (unless your youth are familiar with converting grams into kilograms).
Make copies of Handout 6.2 for each youth.
If using the extension activity, make copies of Handout 6.3 for each youth.
Review CONCEPT CONNECTIONS Use of the Energy Concept Map helps youth understand the interconnections between the four major areas of energy covered throughout this unit.
Lesson 6 focuses on these areas of the Energy Concept Map:
Forms (Kinetic Energy - mechanical energy, Transformations)
Sources (Renewable Source - wind)
Users DIRECTIONS: Begin today’s Concept Connection by having youth sit in a circle. Have the first person start the game by naming a form of energy. The next person has to name a source that comes from. The third person then explains how that energy is used by people. The fourth person explain any transformations that might be necessary in order for the energy to be used. The fifth person would then name an impact that the energy use can have on our planet. The sixth person would then begin again with a new form. See how many times around the circle your group can make it.
Let’s Investigate converting wind energy into electrical energy.
ENERGY EXPERIMENT: Power of a Pinwheel DIRECTIONS:
Divide class into investigative teams depending upon size of class and supplies.
Provide teams with procedures and supplies for creating the Energy Investigator Experiment “Power of a Pinwheel”.
Reminder: For large classes or limited resources, you can use this lesson as part of the small group-work stations as suggested on page 3 of the introduction.
Lesson
6 Mechanical Energy
Wind Energy
Power of a Pinwheel!
Main Concept: Wind energy, a source of renewable energy, can be harnessed and transformed into electricity.
Time: 45 minutes—1 hour
Setting: Classroom for construction and experiment
Lesson Objectives:
To demonstrate the energy contained within wind.
To explore the advantages and disadvantages associated with using wind as a source of energy.
Science Skills: Generating/Testing Hypotheses Engineering/Building
Life Skill: Critical Thinking Problem Solving Teamwork
Materials Needed: (per group or demonstration) Straws Round pencils Cardboard or index cards Cardstock String (cotton works best) Scissors Transparent tape Fan or hairdryer with
“cool” setting Paper clips Paper or plastic cups Pennies Stop watch

Lesson 6 - Page 2
Let’s Reflect on our experience…
1. Let’s start by talking about your hypotheses. What did you think would happen in this experiment? Answers vary based on the questions. Q1. Using the items in front of you, can you create
a wind turbine that can capture enough energy lift a weight?
Q2. Does the shape of the turbine blades affect the amount of weight that can be lifted?
2. Let’s think about this experiment. What did you
think was the hardest part of completing this activity? How did your group work through those difficulties? Answers will vary.
3. What part would you say was easiest? Why?
Answers will vary. 4. Now, let’s talk about your hypotheses. What did
you think would happen in this experiment? Answers will vary based on the two questions. Q1. Using the items in front of you, can you create
a device that will transform the mechanical energy of wind into mechanical energy for lifting a weight?
Q2. Does the shape of the turbine blades affect the amount of weight that can be lifted?
5. How did your group go about deciding on your
two designs? Answers will vary.
6. Compare your two designs. What were the differences between the two? Answers will vary.
What were the similarities? Answers will vary.
7. Were there any issues that you discovered while
testing your pinwheels? Answers will vary.
8. So, based on your findings, which of your pinwheels worked the best? Answers will vary.
9. So, what conclusions did you reach from the results of your hypotheses: H1) If created properly, these items can be used to
build a wind turbine that transforms the mechanical energy of wind into mechanical energy for lifting a mass.
H2) The shape of the blades does affect the amount of mechanical energy transformed by the turbine.
Let’s Apply our new knowledge…
1. If you took your pinwheel outside so that real wind could blow on it, how do you think this would impact the way your turbine worked? Answers will vary.
2. What are some advantages that exist in using wind energy? Wind is a powerful force that can be transformed into electricity. This means that we can use wind to power the many types of electronics we use every day. And, because wind is an effect of the sun's rays, it is a renewable energy - it will always be there. Also, although wind turbines are expensive to build, wind is free!
3. What are some disadvantages? Because the earth is always being unevenly heated by the sun, wind is always there. Even when the sun goes down it causes wind, because the earth unevenly cools down. The sun reheats the earth every day, and the earth is allowed to cool down again every night. Since the sun unevenly heats the earth, wind patterns develop, giving some places on earth much more wind than others. Also, wind turbines are expensive to build.
Can you think of some way to make wind a reliable source of energy? Answers will vary.
4. Think about the geography and weather in the
United States. Where do you think you would most likely find wind turbines being used to capture and transform wind’s energy into electricity? Answers will vary, but should include areas such as Pacific states (California, Oregon, Washington, Alaska) and Central states (Colorado, Iowa, Wyoming, Kansas, Texas, etc.)
5. Think about the materials used in this experiment. What new experiment could you develop to further explain the process of wind energy being used to do work? Answers will vary. Encourage them think about the different variables that they could test or change.

Lesson 6 - Page 3
Concept Check
Where does wind come from?
Why is wind considered a renewable energy source?
What is the device which turns rotational energy into electrical energy called?
Vocabulary Terms
Generator
Wind Turbine
Extension Activities
Read BACKGROUND for Lesson 7 - Biomass Energy and then explain how biomass can impact the environment.
Biomass can pollute the air when it is burned, though not as much as burning fossil fuels. Burning biomass fuels does not produce pollutants like sulfur, that can cause acid rain. When burned, biomass does release carbon dioxide, a greenhouse gas. But when biomass crops are grown, a nearly equivalent amount of carbon dioxide is captured through photosynthesis. Each of the different forms and uses of biomass impact the environment in a different way. See the background information for Biomass for details about each of these.
Use the internet to explore the geography of wind. Find out where wind is the strongest as well as what countries best use this renewable source.
Remind youth to be wise in their selection of resources when surfing the web. One web site wind energy resource that may be valuable is http://www.world-wind-energy.info.

Wind is amazing. Early explorers used this powerful force to take them across the oceans of the world. Yet, wind is gentle enough to carry small grains of pollen from flower to flower, helping spread plant life over most of the planet. Wind can even be used to make electricity, which means we can use wind to power electronics we use every day. And, because wind is an effect of the sun's rays, it is a renewable energy. It will always be there.
Basics of Wind Wind is created when the sun unevenly heats the earth. Since the Earth is round, areas that are near the equator are usually hotter than in Florida. The sunlight that warms the equator has a more direct path than the sunlight that warms Florida. This more direct path of sunlight is the same reason that Florida is usually warmer than Alaska. As the sun warms the earth, the air in our atmosphere also heats up. Air expands when it is heated (like a balloon). Because the air around the equator is heated more than ours, the air around the equator has also expanded more. As the air around the equator expands it needs more space, and in pushes itself away from the equator. This moving air is wind. Because the earth is always being unevenly heated by the sun, wind is always there. Even when the sun goes down it causes wind, because the earth unevenly cools down. The sun reheats the earth every day, and the earth is allowed to cool down again every night. Since the sun unevenly heats the earth, wind patterns develop, giving some places on earth much more wind than others.
Electricity From Wind We can use wind to make electricity. But, on the way to explaining how wind can make electricity, let's first look at how we can make electricity by rotating things.
Magnets and wires can help us make electricity. Magnets emit an invisible force called a magnetic field. We can use this magnetic field to move other magnets and some metals (because not all metals are magnetic). We can also use this magnetic field to cause electricity to flow. When a wire moves in a magnetic field, electricity flows though the wire. A wire that is simply being moved around next to a normal magnet only makes a small amount of electricity. Devices that convert mechanical energy, such as rotation, into electricity are called generators. By moving the wire though the magnetic field at a faster speed or by increasing the strength of the magnetic field we can produce more electricity. One way to do this is to rotate strong magnets around a bundle of wire. This is how generators are made. Making all the electricity we need by spinning magnets ourselves would take a lot of effort. We can use wind to rotate the magnets instead. So let's think about how we can get wind to rotate something. Actually, people have been using wind to spin things for a long time. Before electricity was common, people often used wind to mill grain (chop grains, like wheat, into little a powder), lift water, rotate saws to cut wood. These people were using the energy in the wind to rotate things. In the same way we use wind today to rotate magnets in a wind turbine.
Wind Mill
Wind Energy:
Mechanical Energy
Wind Turbine
HANDOUT 6.1.1
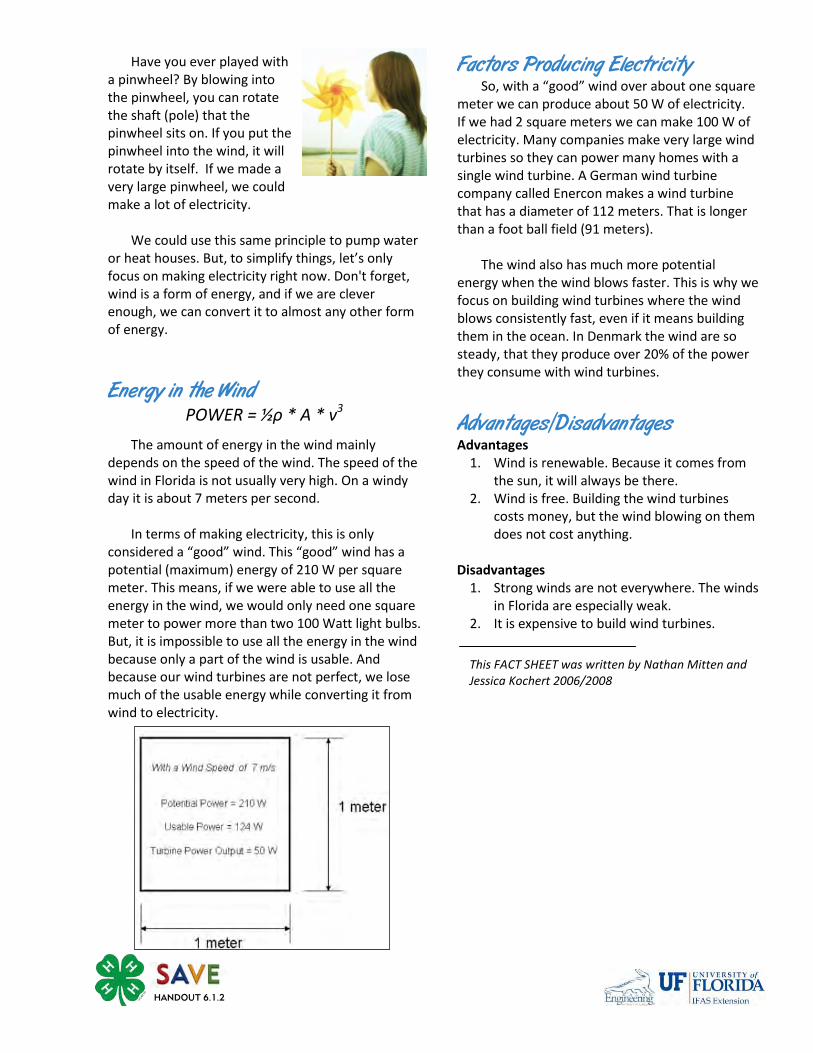
Have you ever played with a pinwheel? By blowing into the pinwheel, you can rotate the shaft (pole) that the pinwheel sits on. If you put the pinwheel into the wind, it will rotate by itself. If we made a very large pinwheel, we could make a lot of electricity. We could use this same principle to pump water or heat houses. But, to simplify things, let’s only focus on making electricity right now. Don't forget, wind is a form of energy, and if we are clever enough, we can convert it to almost any other form of energy.
Energy in the Wind POWER = ½ρ * A * v3
The amount of energy in the wind mainly depends on the speed of the wind. The speed of the wind in Florida is not usually very high. On a windy day it is about 7 meters per second. In terms of making electricity, this is only considered a “good” wind. This “good” wind has a potential (maximum) energy of 210 W per square meter. This means, if we were able to use all the energy in the wind, we would only need one square meter to power more than two 100 Watt light bulbs. But, it is impossible to use all the energy in the wind because only a part of the wind is usable. And because our wind turbines are not perfect, we lose much of the usable energy while converting it from wind to electricity.
Factors Producing Electricity So, with a “good” wind over about one square meter we can produce about 50 W of electricity. If we had 2 square meters we can make 100 W of electricity. Many companies make very large wind turbines so they can power many homes with a single wind turbine. A German wind turbine company called Enercon makes a wind turbine that has a diameter of 112 meters. That is longer than a foot ball field (91 meters). The wind also has much more potential energy when the wind blows faster. This is why we focus on building wind turbines where the wind blows consistently fast, even if it means building them in the ocean. In Denmark the wind are so steady, that they produce over 20% of the power they consume with wind turbines.
Advantages/Disadvantages Advantages
1. Wind is renewable. Because it comes from the sun, it will always be there.
2. Wind is free. Building the wind turbines costs money, but the wind blowing on them does not cost anything.
Disadvantages
1. Strong winds are not everywhere. The winds in Florida are especially weak.
2. It is expensive to build wind turbines.
This FACT SHEET was written by Nathan Mitten and Jessica Kochert 2006/2008
HANDOUT 6.1.2

Materials Here is the list of the materials you will be using throughout the activity.
(per small group) Straws Round pencils Cardboard or index cards Cardstock String (cotton works best) Scissors Transparent tape Fan or hairdryer with “cool” setting Paper clips Paper or plastic cups Pennies Stop watch Q1. Using the items in front of you, can you create a wind turbine that
can capture enough energy to lift a weight? My Hypothesis is...
WHY I think that...
HANDOUT 6.2.1
QUESTIONS FOR THIS INVESTIGATION
Before you begin the investigation, think about these questions: Q1. Using the items in front of you, can you create a wind turbine
that can capture enough energy lift a weight? Q2. Does the shape of the turbine blades affect the amount of
weight that can be lifted?
HYPOTHESES FOR THIS INVESTIGATION
For this hypothesis, be sure to include a couple sentences to explain WHY that is your hypothesis.
Power of a Pinwheel
Q2. Does the shape of the turbine blades affect the amount of weight that can be lifted? My Hypothesis is...
WHY I think that...
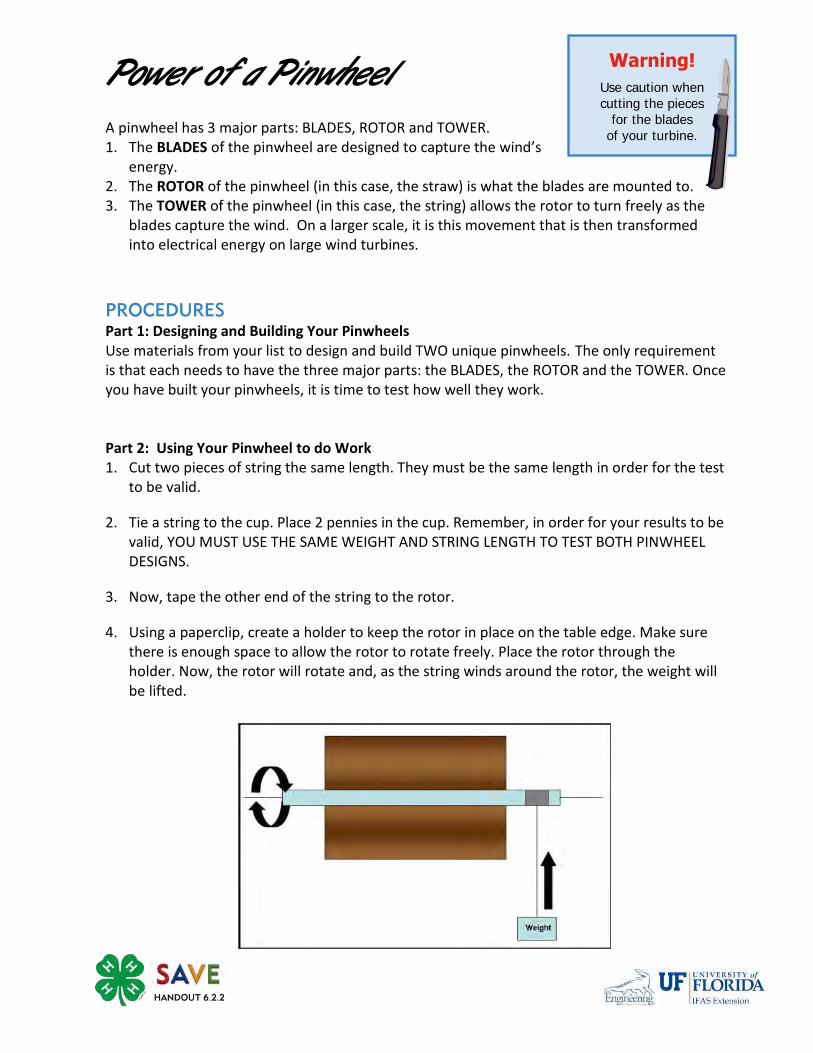
Power of a Pinwheel
A pinwheel has 3 major parts: BLADES, ROTOR and TOWER. 1. The BLADES of the pinwheel are designed to capture the wind’s
energy. 2. The ROTOR of the pinwheel (in this case, the straw) is what the blades are mounted to. 3. The TOWER of the pinwheel (in this case, the string) allows the rotor to turn freely as the
blades capture the wind. On a larger scale, it is this movement that is then transformed into electrical energy on large wind turbines.
PROCEDURES
Part 1: Designing and Building Your Pinwheels Use materials from your list to design and build TWO unique pinwheels. The only requirement is that each needs to have the three major parts: the BLADES, the ROTOR and the TOWER. Once you have built your pinwheels, it is time to test how well they work. Part 2: Using Your Pinwheel to do Work 1. Cut two pieces of string the same length. They must be the same length in order for the test
to be valid.
2. Tie a string to the cup. Place 2 pennies in the cup. Remember, in order for your results to be valid, YOU MUST USE THE SAME WEIGHT AND STRING LENGTH TO TEST BOTH PINWHEEL DESIGNS.
3. Now, tape the other end of the string to the rotor.
4. Using a paperclip, create a holder to keep the rotor in place on the table edge. Make sure there is enough space to allow the rotor to rotate freely. Place the rotor through the holder. Now, the rotor will rotate and, as the string winds around the rotor, the weight will be lifted.
Warning!
Use caution when
cutting the pieces for the blades
of your turbine.
HANDOUT 6.2.2

RECORD YOUR OBSERVATIONS
Draw a diagram for both of your pinwheel designs:
PINWHEEL 1 PINWHEEL 2
HANDOUT 6.2.3

To calculate how much work has been done for both of your pinwheels, you must first know the mass of the object you choose to lift, and the length of the string going from the weight to the rotor (straw).
Now blow on the wind turbine again, but this time use a stop watch to measure how much time it takes you to lift the weight.
Now using this data we can calculate the energy and power for both of your designs. This will allow us to make a comparison between the designs.
PINWHEEL 1
Mass of Weight mass = kg
Length of String length = cm
PINWHEEL 1
Time time = sec
PINWHEEL 2
Mass of Weight mass = kg
Length of String length = cm
PINWHEEL 2
Time time = sec
HANDOUT 6.2.4
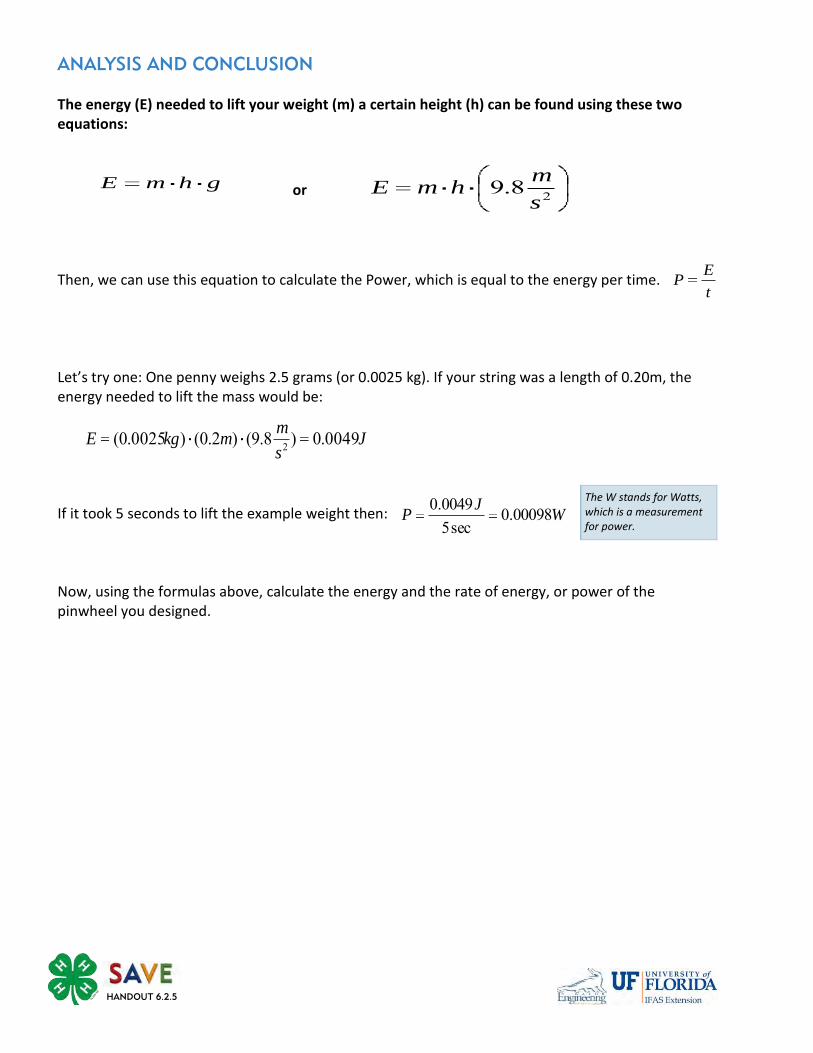
ANALYSIS AND CONCLUSION
The energy (E) needed to lift your weight (m) a certain height (h) can be found using these two equations: Then, we can use this equation to calculate the Power, which is equal to the energy per time. Let’s try one: One penny weighs 2.5 grams (or 0.0025 kg). If your string was a length of 0.20m, the energy needed to lift the mass would be: If it took 5 seconds to lift the example weight then: Now, using the formulas above, calculate the energy and the rate of energy, or power of the pinwheel you designed.
t
EP
ghmE28.9
s
mhmEor
WJ
P 00098.0sec5
0049.0
Js
mmkgE 0049.0)8.9()2.0()0025.0( 2
The W stands for Watts, which is a measurement for power.
HANDOUT 6.2.5
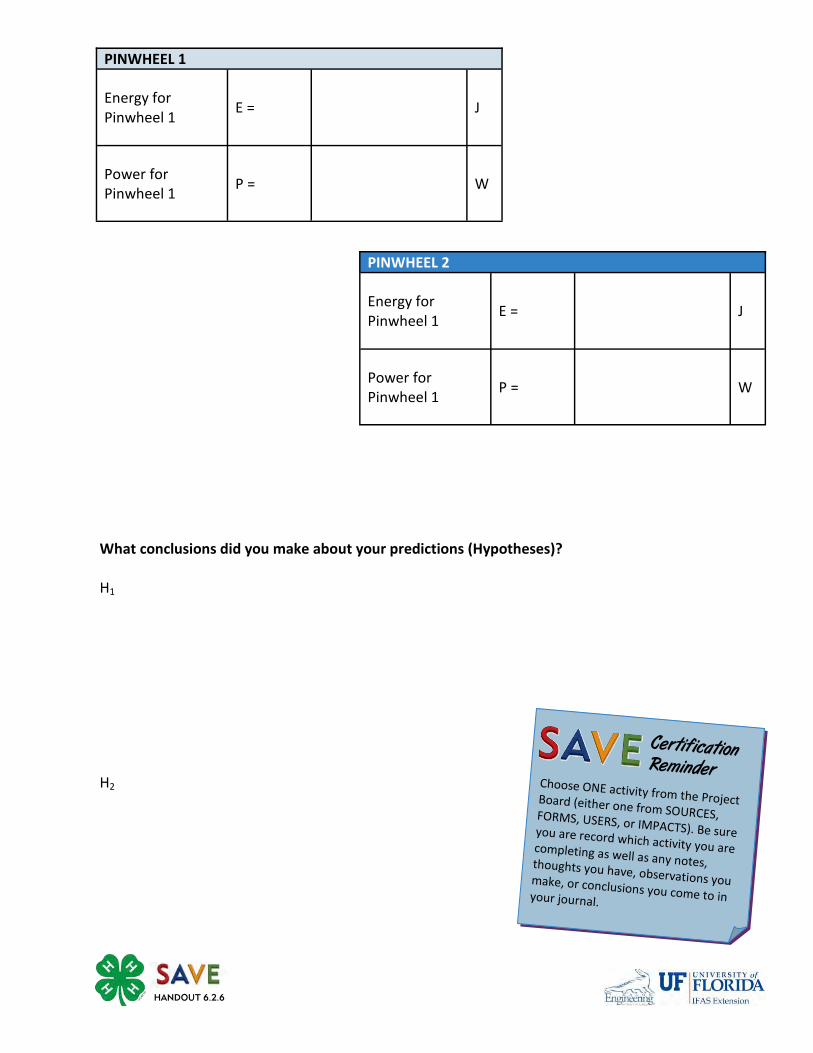
What conclusions did you make about your predictions (Hypotheses)? H1
H2
PINWHEEL 1
Energy for Pinwheel 1
E = J
Power for Pinwheel 1
P = W
PINWHEEL 2
Energy for Pinwheel 1
E = J
Power for Pinwheel 1
P = W
HANDOUT 6.2.6
Certification Reminder Choose ONE activity from the Project Board (either one from SOURCES, FORMS, USERS, or IMPACTS). Be sure you are record which activity you are completing as well as any notes, thoughts you have, observations you make, or conclusions you come to in your journal.
HANDOUT 6.3.1
Use the internet to explore the geography of wind. Find out where wind is the strongest as well as what countries best use this renewable source.
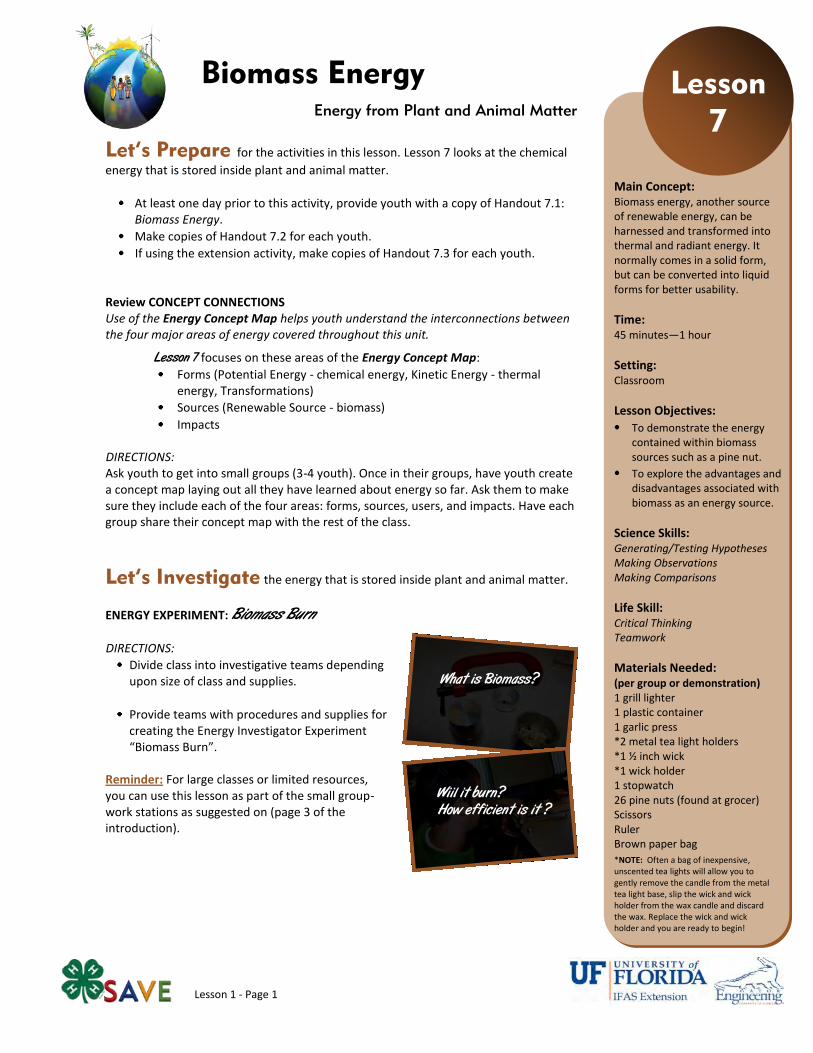
Lesson 1 - Page 1
Main Concept: Biomass energy, another source of renewable energy, can be harnessed and transformed into thermal and radiant energy. It normally comes in a solid form, but can be converted into liquid forms for better usability.
Time: 45 minutes—1 hour
Setting: Classroom
Lesson Objectives:
To demonstrate the energy contained within biomass sources such as a pine nut.
To explore the advantages and disadvantages associated with biomass as an energy source.
Science Skills: Generating/Testing Hypotheses Making Observations Making Comparisons
Life Skill: Critical Thinking Teamwork
Materials Needed: (per group or demonstration) 1 grill lighter 1 plastic container 1 garlic press *2 metal tea light holders *1 ½ inch wick *1 wick holder 1 stopwatch 26 pine nuts (found at grocer) Scissors Ruler Brown paper bag
*NOTE: Often a bag of inexpensive, unscented tea lights will allow you to gently remove the candle from the metal tea light base, slip the wick and wick holder from the wax candle and discard the wax. Replace the wick and wick holder and you are ready to begin!
Let’s Prepare for the activities in this lesson. Lesson 7 looks at the chemical
energy that is stored inside plant and animal matter.
At least one day prior to this activity, provide youth with a copy of Handout 7.1: Biomass Energy.
Make copies of Handout 7.2 for each youth.
If using the extension activity, make copies of Handout 7.3 for each youth.
Review CONCEPT CONNECTIONS Use of the Energy Concept Map helps youth understand the interconnections between the four major areas of energy covered throughout this unit.
Lesson 7 focuses on these areas of the Energy Concept Map:
Forms (Potential Energy - chemical energy, Kinetic Energy - thermal energy, Transformations)
Sources (Renewable Source - biomass)
Impacts DIRECTIONS: Ask youth to get into small groups (3-4 youth). Once in their groups, have youth create a concept map laying out all they have learned about energy so far. Ask them to make sure they include each of the four areas: forms, sources, users, and impacts. Have each group share their concept map with the rest of the class.
Let’s Investigate the energy that is stored inside plant and animal matter.
ENERGY EXPERIMENT: Biomass Burn
DIRECTIONS:
Divide class into investigative teams depending upon size of class and supplies.
Provide teams with procedures and supplies for creating the Energy Investigator Experiment “Biomass Burn”.
Reminder: For large classes or limited resources, you can use this lesson as part of the small group-work stations as suggested on (page 3 of the introduction).
Lesson
7 Energy from Plant and Animal Matter
Biomass Energy
What is Biomass?
Wiil it burn? How efficient is it ?
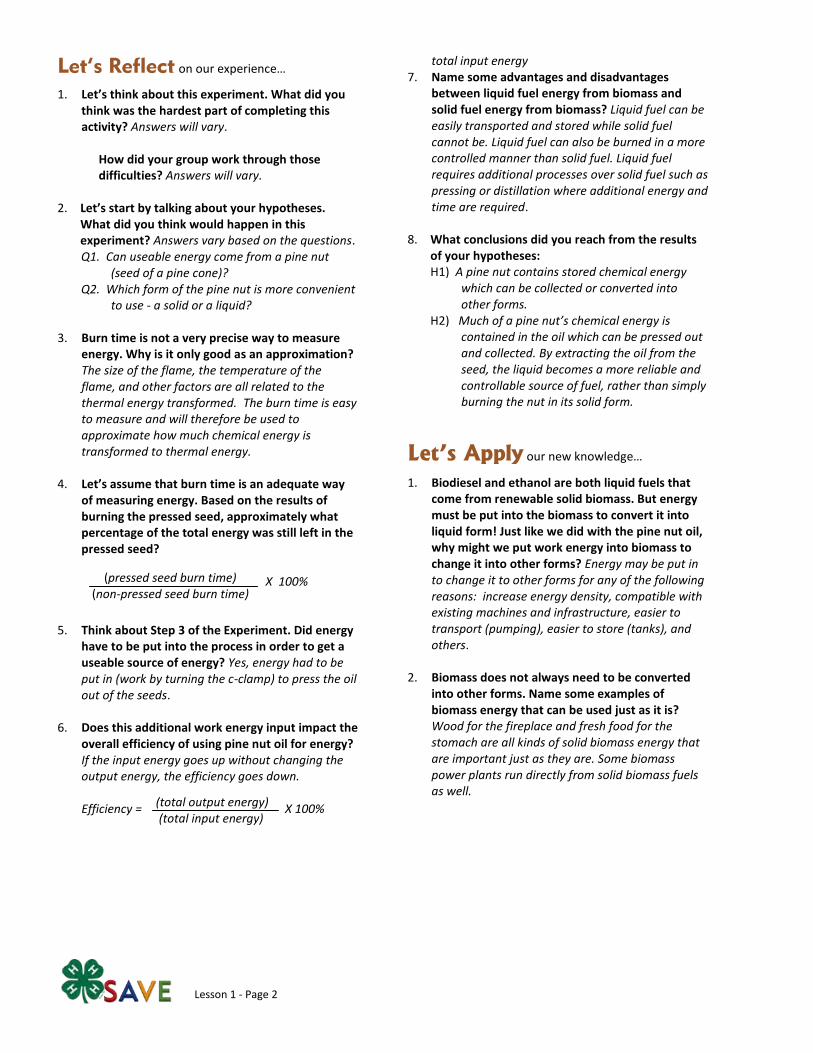
Lesson 1 - Page 2
Let’s Reflect on our experience…
1. Let’s think about this experiment. What did you think was the hardest part of completing this activity? Answers will vary.
How did your group work through those difficulties? Answers will vary.
2. Let’s start by talking about your hypotheses.
What did you think would happen in this experiment? Answers vary based on the questions. Q1. Can useable energy come from a pine nut
(seed of a pine cone)? Q2. Which form of the pine nut is more convenient
to use - a solid or a liquid? 3. Burn time is not a very precise way to measure
energy. Why is it only good as an approximation? The size of the flame, the temperature of the flame, and other factors are all related to the thermal energy transformed. The burn time is easy to measure and will therefore be used to approximate how much chemical energy is transformed to thermal energy.
4. Let’s assume that burn time is an adequate way
of measuring energy. Based on the results of burning the pressed seed, approximately what percentage of the total energy was still left in the pressed seed?
X 100% 5. Think about Step 3 of the Experiment. Did energy
have to be put into the process in order to get a useable source of energy? Yes, energy had to be put in (work by turning the c-clamp) to press the oil out of the seeds.
6. Does this additional work energy input impact the
overall efficiency of using pine nut oil for energy? If the input energy goes up without changing the output energy, the efficiency goes down.
Efficiency = X 100%
total input energy 7. Name some advantages and disadvantages
between liquid fuel energy from biomass and solid fuel energy from biomass? Liquid fuel can be easily transported and stored while solid fuel cannot be. Liquid fuel can also be burned in a more controlled manner than solid fuel. Liquid fuel requires additional processes over solid fuel such as pressing or distillation where additional energy and time are required.
8. What conclusions did you reach from the results
of your hypotheses: H1) A pine nut contains stored chemical energy
which can be collected or converted into other forms.
H2) Much of a pine nut’s chemical energy is contained in the oil which can be pressed out and collected. By extracting the oil from the seed, the liquid becomes a more reliable and controllable source of fuel, rather than simply burning the nut in its solid form.
Let’s Apply our new knowledge…
1. Biodiesel and ethanol are both liquid fuels that come from renewable solid biomass. But energy must be put into the biomass to convert it into liquid form! Just like we did with the pine nut oil, why might we put work energy into biomass to change it into other forms? Energy may be put in to change it to other forms for any of the following reasons: increase energy density, compatible with existing machines and infrastructure, easier to transport (pumping), easier to store (tanks), and others.
2. Biomass does not always need to be converted
into other forms. Name some examples of biomass energy that can be used just as it is? Wood for the fireplace and fresh food for the stomach are all kinds of solid biomass energy that are important just as they are. Some biomass power plants run directly from solid biomass fuels as well.
(pressed seed burn time) (non-pressed seed burn time)
(total output energy) (total input energy)

Lesson 1 - Page 3
Concept Check
What is the form of energy contained in biomass and where does it come from originally?
Why is biomass energy considered renewable?
Why is it said that biomass energy has zero “net” CO2 emissions?
What might a solid fuel source be converted into a liquid fuel?
Vocabulary Terms
Photosynthesis
Biomass
Methane
Ethanol
Biodiesel
Carbon Cycle
3. If one acre of corn produces 300 gallons of ethanol per year after all the corn is processed, calculate how many acres of corn would be needed to produce enough fuel to power one car for a year? The car’s fuel economy averages 25 miles/gallon and it is driven 12,000 miles per year. Car fuel consumption per year (gallons): 12,000/25 = 480 gallons Acres of corn needed to produce gallons above: 480/300 = 1.6 acres
4. What are the advantages and disadvantages with using a food
crop such as corn for fuel? What other types of biomass could be a source of energy that we do not need for eating? The advantage of using food crops for transportation fuel is that production is already well developed and established. The disadvantage is that as demand increases, supplies go down and price goes up. Two critical needs, food supply and energy supply might have to compete. Different types of grasses, trees, and beans are not as critical for food supply as corn, but have great potential for being an energy supply. Potential biomass crops should be fast-growing, not requiring large amounts of irrigation or fertilizers, and easily converted to liquid fuel.
5. Think about the materials used in this experiment. What new experiment could you develop to further explain the process of converting biomass energy into other forms? Answers will vary. Encourage them to think about the different variables that they could test or change.
6. The last several lessons have allowed you to practice working as a team to complete a task. Each activity or experiment has allowed you to work with different people. Discuss what you have learned about working with people who may have different ideas, opinions, or styles of learning. Answers will vary.

Lesson 1 - Page 4
Extension Activities
Read BACKGROUND for Lesson 8 - Energy Systems and Efficiency and then explain the relationship between the 2nd Law of Thermodynamics and the efficiency of a system. The 2nd Law of Thermodynamics and energy efficiency have a direct relationship. The 2nd Law of Thermodynamics states that any time energy goes through a process of transformation, some if it turns into
the energy form that is wanted such as electricity or motion energy, but some of it ALWAYS turns into thermal energy (heat). Without the 2nd Law of Thermodynamics, all the input energy would be transformed into the desired energy form and the process would be 100% energy efficient!
Think about the experiment that you just performed for biomass. In order to make the pine nut more useable, you had to extract the oils from the nuts. Design another way to extract oil from the nuts and then test it to see if you were able to extract more than using the garlic press.
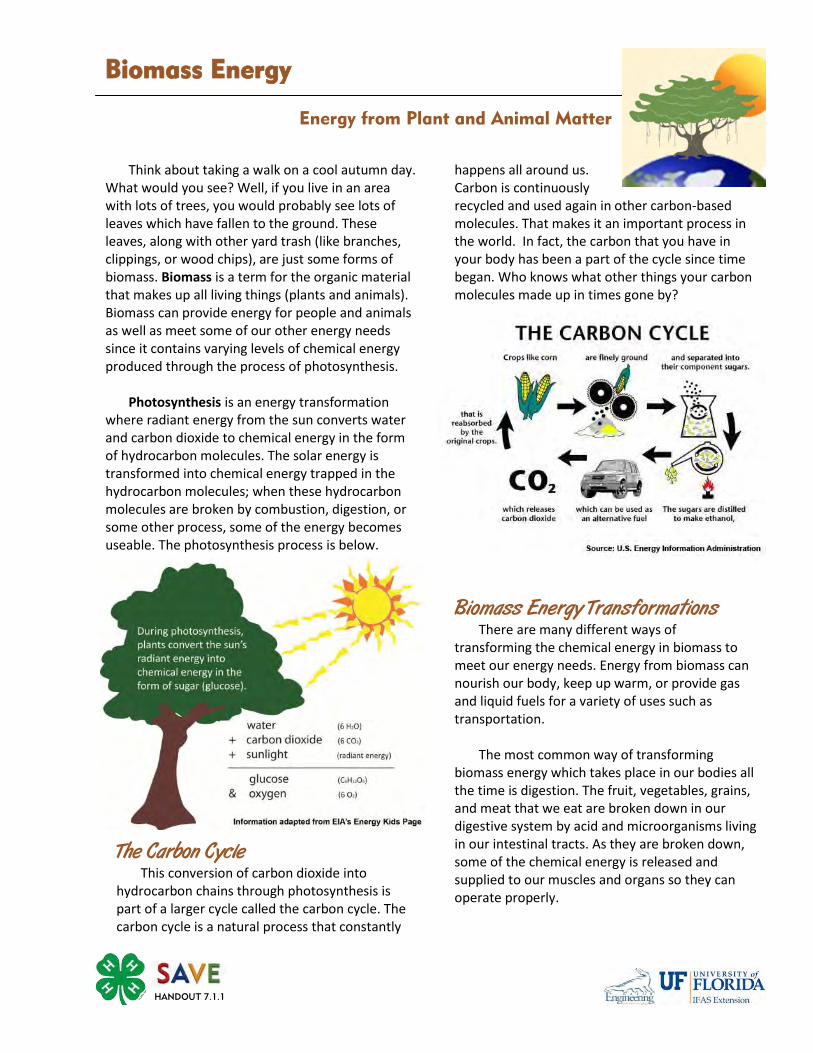
Think about taking a walk on a cool autumn day. What would you see? Well, if you live in an area with lots of trees, you would probably see lots of leaves which have fallen to the ground. These leaves, along with other yard trash (like branches, clippings, or wood chips), are just some forms of biomass. Biomass is a term for the organic material that makes up all living things (plants and animals). Biomass can provide energy for people and animals as well as meet some of our other energy needs since it contains varying levels of chemical energy produced through the process of photosynthesis. Photosynthesis is an energy transformation where radiant energy from the sun converts water and carbon dioxide to chemical energy in the form of hydrocarbon molecules. The solar energy is transformed into chemical energy trapped in the hydrocarbon molecules; when these hydrocarbon molecules are broken by combustion, digestion, or some other process, some of the energy becomes useable. The photosynthesis process is below.
The Carbon Cycle This conversion of carbon dioxide into hydrocarbon chains through photosynthesis is part of a larger cycle called the carbon cycle. The carbon cycle is a natural process that constantly
happens all around us. Carbon is continuously recycled and used again in other carbon-based molecules. That makes it an important process in the world. In fact, the carbon that you have in your body has been a part of the cycle since time began. Who knows what other things your carbon molecules made up in times gone by?
Biomass Energy Transformations There are many different ways of transforming the chemical energy in biomass to meet our energy needs. Energy from biomass can nourish our body, keep up warm, or provide gas and liquid fuels for a variety of uses such as transportation. The most common way of transforming biomass energy which takes place in our bodies all the time is digestion. The fruit, vegetables, grains, and meat that we eat are broken down in our digestive system by acid and microorganisms living in our intestinal tracts. As they are broken down, some of the chemical energy is released and supplied to our muscles and organs so they can operate properly.
Biomass Energy
Energy from Plant and Animal Matter
HANDOUT 7.1.1
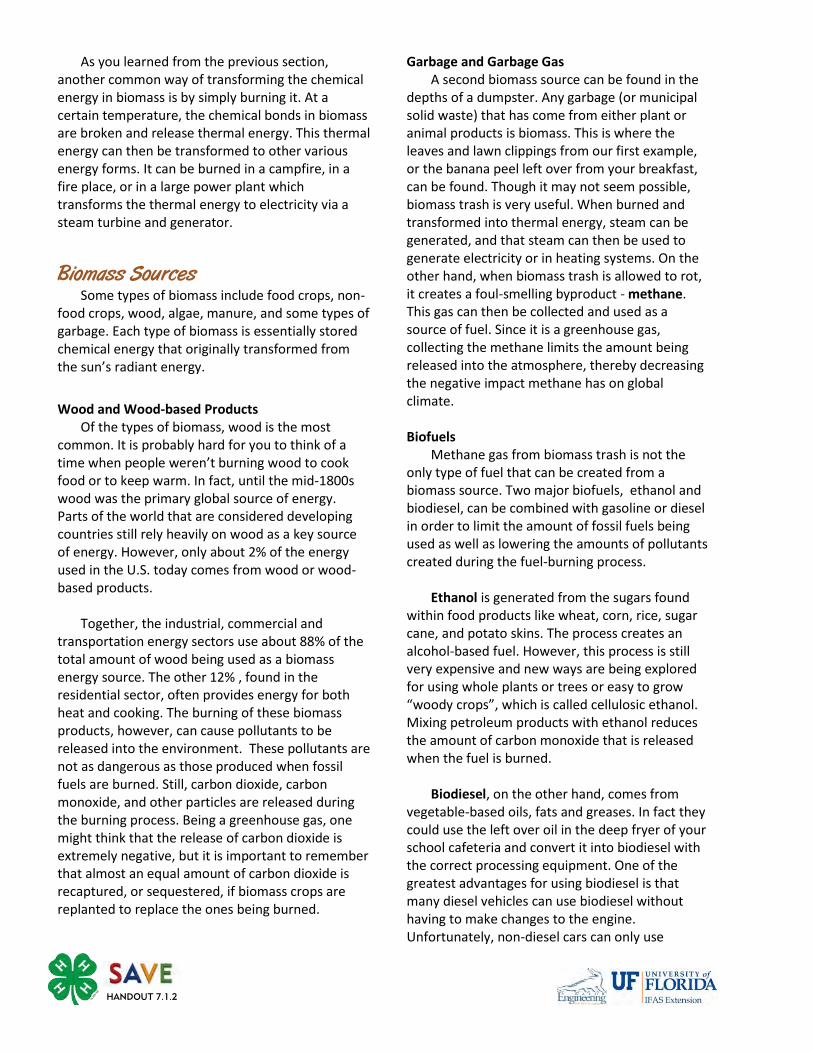
HANDOUT 7.1.2
As you learned from the previous section, another common way of transforming the chemical energy in biomass is by simply burning it. At a certain temperature, the chemical bonds in biomass are broken and release thermal energy. This thermal energy can then be transformed to other various energy forms. It can be burned in a campfire, in a fire place, or in a large power plant which transforms the thermal energy to electricity via a steam turbine and generator.
Biomass Sources Some types of biomass include food crops, non-food crops, wood, algae, manure, and some types of garbage. Each type of biomass is essentially stored chemical energy that originally transformed from the sun’s radiant energy.
Wood and Wood-based Products Of the types of biomass, wood is the most common. It is probably hard for you to think of a time when people weren’t burning wood to cook food or to keep warm. In fact, until the mid-1800s wood was the primary global source of energy. Parts of the world that are considered developing countries still rely heavily on wood as a key source of energy. However, only about 2% of the energy used in the U.S. today comes from wood or wood-based products. Together, the industrial, commercial and transportation energy sectors use about 88% of the total amount of wood being used as a biomass energy source. The other 12% , found in the residential sector, often provides energy for both heat and cooking. The burning of these biomass products, however, can cause pollutants to be released into the environment. These pollutants are not as dangerous as those produced when fossil fuels are burned. Still, carbon dioxide, carbon monoxide, and other particles are released during the burning process. Being a greenhouse gas, one might think that the release of carbon dioxide is extremely negative, but it is important to remember that almost an equal amount of carbon dioxide is recaptured, or sequestered, if biomass crops are replanted to replace the ones being burned.
Garbage and Garbage Gas A second biomass source can be found in the depths of a dumpster. Any garbage (or municipal solid waste) that has come from either plant or animal products is biomass. This is where the leaves and lawn clippings from our first example, or the banana peel left over from your breakfast, can be found. Though it may not seem possible, biomass trash is very useful. When burned and transformed into thermal energy, steam can be generated, and that steam can then be used to generate electricity or in heating systems. On the other hand, when biomass trash is allowed to rot, it creates a foul-smelling byproduct - methane. This gas can then be collected and used as a source of fuel. Since it is a greenhouse gas, collecting the methane limits the amount being released into the atmosphere, thereby decreasing the negative impact methane has on global climate. Biofuels Methane gas from biomass trash is not the only type of fuel that can be created from a biomass source. Two major biofuels, ethanol and biodiesel, can be combined with gasoline or diesel in order to limit the amount of fossil fuels being used as well as lowering the amounts of pollutants created during the fuel-burning process. Ethanol is generated from the sugars found within food products like wheat, corn, rice, sugar cane, and potato skins. The process creates an alcohol-based fuel. However, this process is still very expensive and new ways are being explored for using whole plants or trees or easy to grow “woody crops”, which is called cellulosic ethanol. Mixing petroleum products with ethanol reduces the amount of carbon monoxide that is released when the fuel is burned. Biodiesel, on the other hand, comes from vegetable-based oils, fats and greases. In fact they could use the left over oil in the deep fryer of your school cafeteria and convert it into biodiesel with the correct processing equipment. One of the greatest advantages for using biodiesel is that many diesel vehicles can use biodiesel without having to make changes to the engine. Unfortunately, non-diesel cars can only use

This FACT SHEET was compiled by Nathan Mitten and Jessica Kochert using the following resources: References EIA Energy Kid’s Page http://www.eia.doe.gov/kids/energy.cfm?page=biomass_home-basics
HANDOUT 7.1.3
products mixed with ethanol and often only in low mixture proportions without having to first change the engine in order to run on higher percentages of ethanol. Even though burning biodiesel produces an increase in nitrogen oxide emissions, there is a reduction of almost every other pollutant (carbon dioxide, carbon monoxide, sulfur oxides, and particulates).
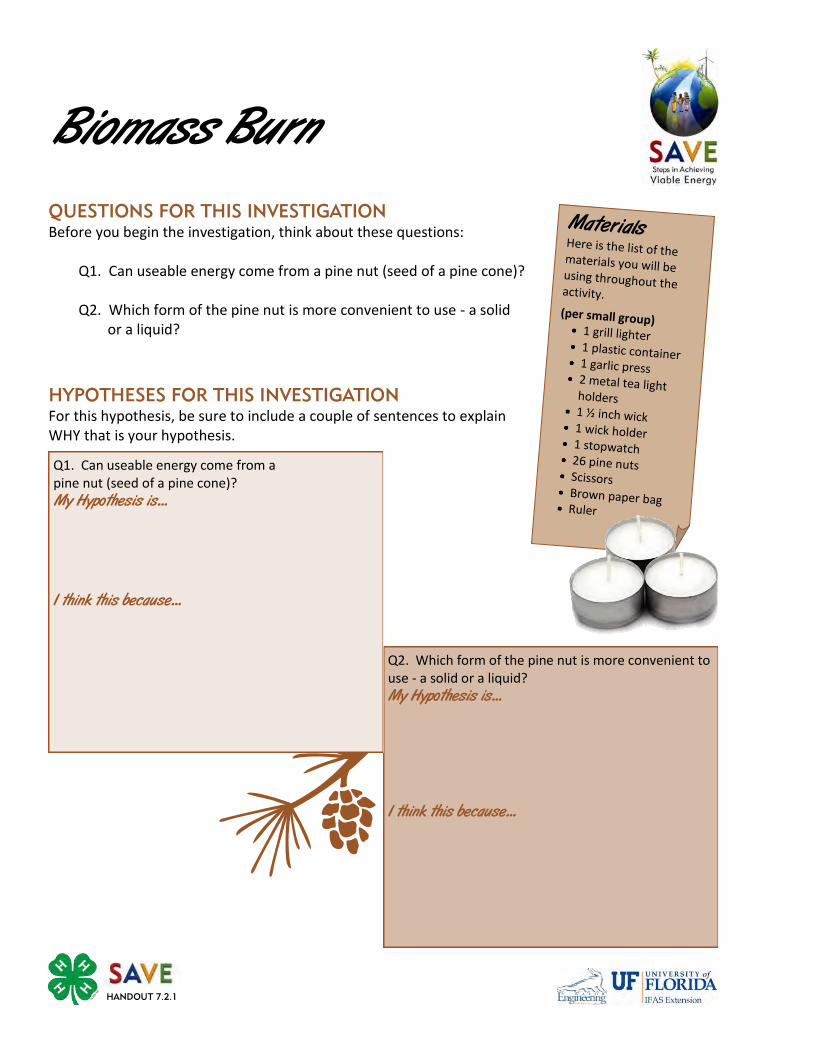
QUESTIONS FOR THIS INVESTIGATION
Before you begin the investigation, think about these questions: Q1. Can useable energy come from a pine nut (seed of a pine cone)? Q2. Which form of the pine nut is more convenient to use - a solid
or a liquid?
HYPOTHESES FOR THIS INVESTIGATION
For this hypothesis, be sure to include a couple of sentences to explain WHY that is your hypothesis.
Biomass Burn
Materials Here is the list of the materials you will be using throughout the activity.
(per small group) 1 grill lighter 1 plastic container 1 garlic press 2 metal tea light holders 1 ½ inch wick 1 wick holder 1 stopwatch 26 pine nuts Scissors Brown paper bag Ruler
HANDOUT 7.2.1
Q2. Which form of the pine nut is more convenient to use - a solid or a liquid? My Hypothesis is...
I think this because...
Q1. Can useable energy come from a pine nut (seed of a pine cone)? My Hypothesis is...
I think this because...

HANDOUT 7.2.2
Biomass Burn
PROCEDURES
Part 1: 1. Fill plastic container with tap water. Extinguish any
uncontrolled flames in water if needed.
2. Place one pine nut in the center of a tea light holder.
3. Light the pine nut on fire trying to keep the flame height at a moderate level by letting it burn from the top down. Measure the burn time with the stopwatch. Record burn time and observations such as ease of lighting, flame height, flame color, and smoke level.
Part 2: 1. Place 25 pine nuts in the bottom of the garlic press.
2. Press as tightly as possible, trying to get out as much oil as possible from the seeds.
3. Collect oil in the tea light tray. Additional oil may come out around the edges so try to catch it in the tray.
4. Once you have collected as much oil as possible, place the remaining seed remnants on a piece of brown paper (like from a brown paper grocery bag). Carefully remove the pressed seeds from the press. Repeat Step 3 in Part 1 using the remnants from the pressed seed. Be sure to record burn time and observations for ease of lighting, flame height, flame color, and smoke level.
Part 3: 1. Place the wick and wick holder (with the wick sticking straight up) in the tea light holder.
Allow the oil to soak up through the wick (2-3 minutes). Based on your observations so far, record how long you think the pressed oil will burn.
2. Light the oil-saturated wick on fire and measure the burn time with the stopwatch. Again, record burn time and observations for ease of lighting, flame height, flame color, and smoke level.
-- Warning --
Because this procedure
involves open flames, high temperature surfaces, and
moderate levels of smoke, be sure to have proper
ventilation and safety measures.
Higher levels of smoke will occur when multiple
setups are being used or air vents are blowing on
the experimental setup.
INSERT PICTURES OF EXPERIMENT? INSERT PICTURES OF EXPERIMENT?

RECORD YOUR OBSERVATIONS
Part 1: Record observations for burning whole seed:
Ease of ignition: 1 (very hard) -5 (very easy) Flame color Smoke amount 1 (low) -5 (high) Flame duration (sec) Flame height (cm)
Part 3: 1. Approximate burn time estimate:
Explanation:
2. Record observations for pressed seed:
Ease of ignition: 1 (very hard) -5 (very easy) Flame color Smoke amount 1 (low) -5 (high) Flame duration (sec) Flame height (cm)
3. Record observations for seed oil:
Ease of ignition: 1 (very hard) -5 (very easy) Flame color Smoke amount 1 (low) -5 (high) Flame duration (sec) Flame height (cm)
4. Follow these steps to calculate the burn time of oil in one seed:
Total number of pressed pine nuts (seeds): Total burn time (sec): Burn time per seed (seconds / seeds):
HANDOUT 7.2.3

HANDOUT 7.2.4
ANALYSIS AND CONCLUSION
Complete the following table: What conclusions did you make about your predictions (Hypotheses)? H1
H2
Whole Seed
Oil of 1 Seed (divide the total burn time
by the number of seeds used to produce the oil)
Pressed Seed
Burn Time (sec)
Certification Reminder Choose ONE activity from the Project Board (either one from SOURCES, FORMS, USERS, or IMPACTS). Be sure you are recording which activity you are completing as well as any notes, thoughts you have, observations you make, or conclusions you come to in your journal.

HANDOUT 7.3.1
Think about the experiment that you just performed for biomass. In order to make the pine nut more useable, you had to extract the oils from the nuts. Design another way to extract oil from the nuts and then test it to see if you were able to extract more than using the garlic press.
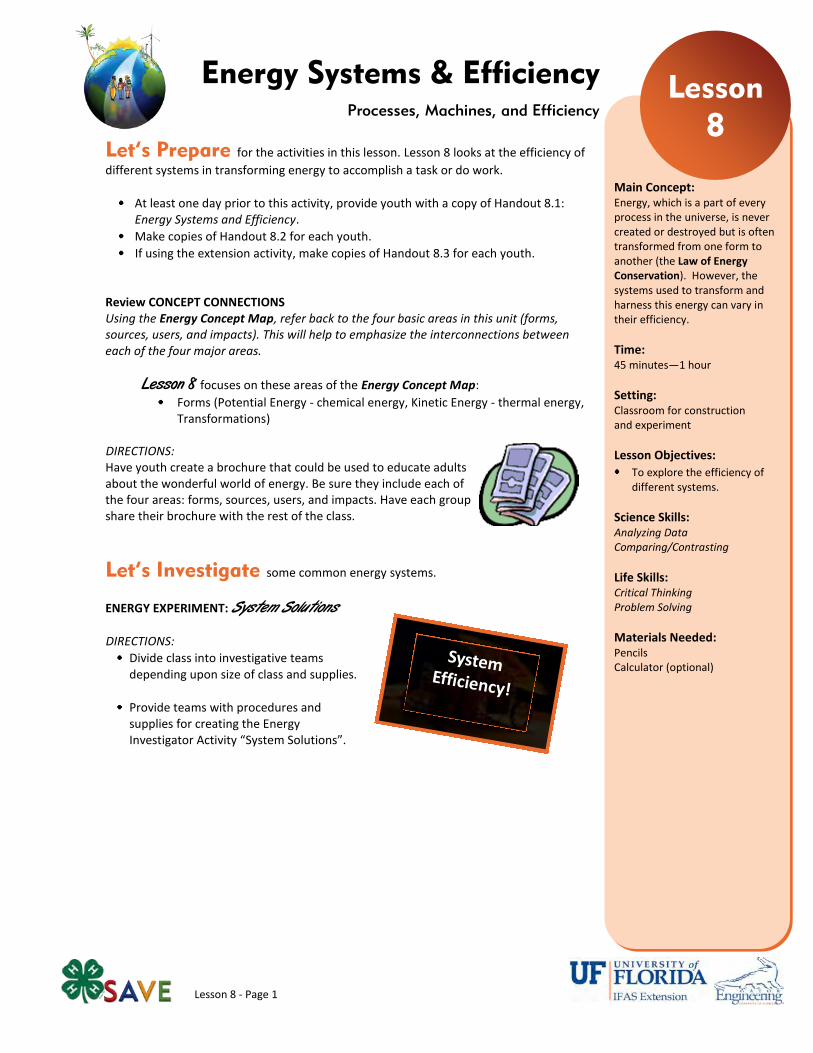
Lesson 8 - Page 1
Let’s Prepare for the activities in this lesson. Lesson 8 looks at the efficiency of
different systems in transforming energy to accomplish a task or do work.
At least one day prior to this activity, provide youth with a copy of Handout 8.1: Energy Systems and Efficiency.
Make copies of Handout 8.2 for each youth.
If using the extension activity, make copies of Handout 8.3 for each youth.
Review CONCEPT CONNECTIONS Using the Energy Concept Map, refer back to the four basic areas in this unit (forms, sources, users, and impacts). This will help to emphasize the interconnections between each of the four major areas.
Lesson 8 focuses on these areas of the Energy Concept Map:
Forms (Potential Energy - chemical energy, Kinetic Energy - thermal energy, Transformations)
DIRECTIONS: Have youth create a brochure that could be used to educate adults about the wonderful world of energy. Be sure they include each of the four areas: forms, sources, users, and impacts. Have each group share their brochure with the rest of the class.
Let’s Investigate some common energy systems.
ENERGY EXPERIMENT: System Solutions DIRECTIONS:
Divide class into investigative teams depending upon size of class and supplies.
Provide teams with procedures and supplies for creating the Energy Investigator Activity “System Solutions”.
Lesson
8 Processes, Machines, and Efficiency
Energy Systems & Efficiency
Main Concept: Energy, which is a part of every process in the universe, is never created or destroyed but is often transformed from one form to another (the Law of Energy Conservation). However, the systems used to transform and harness this energy can vary in their efficiency.
Time: 45 minutes—1 hour
Setting: Classroom for construction and experiment
Lesson Objectives:
To explore the efficiency of different systems.
Science Skills: Analyzing Data Comparing/Contrasting
Life Skills: Critical Thinking Problem Solving
Materials Needed: Pencils Calculator (optional)
System Efficiency!
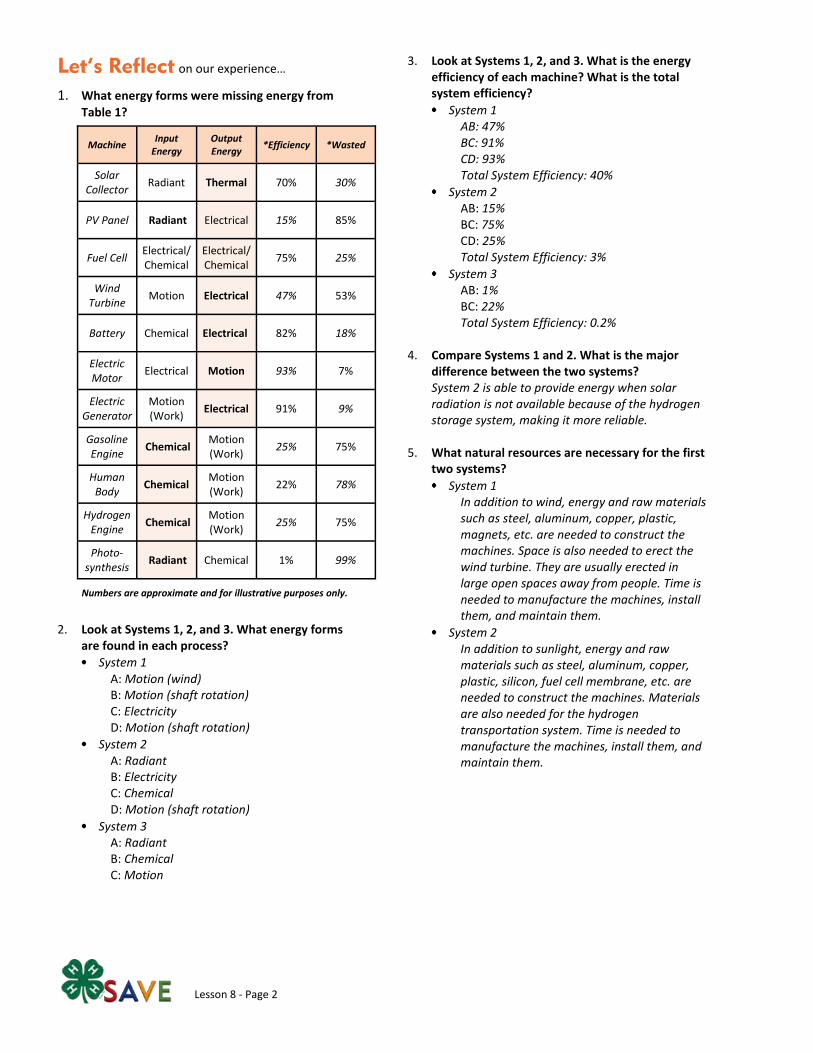
Lesson 8 - Page 2
Let’s Reflect on our experience…
1. What energy forms were missing energy from
Table 1?
2. Look at Systems 1, 2, and 3. What energy forms
are found in each process?
System 1 A: Motion (wind) B: Motion (shaft rotation) C: Electricity D: Motion (shaft rotation)
System 2 A: Radiant B: Electricity C: Chemical D: Motion (shaft rotation)
System 3 A: Radiant B: Chemical C: Motion
3. Look at Systems 1, 2, and 3. What is the energy efficiency of each machine? What is the total system efficiency?
System 1 AB: 47% BC: 91% CD: 93% Total System Efficiency: 40%
System 2 AB: 15% BC: 75% CD: 25% Total System Efficiency: 3%
System 3 AB: 1% BC: 22% Total System Efficiency: 0.2%
4. Compare Systems 1 and 2. What is the major difference between the two systems? System 2 is able to provide energy when solar radiation is not available because of the hydrogen storage system, making it more reliable.
5. What natural resources are necessary for the first two systems?
System 1 In addition to wind, energy and raw materials such as steel, aluminum, copper, plastic, magnets, etc. are needed to construct the machines. Space is also needed to erect the wind turbine. They are usually erected in large open spaces away from people. Time is needed to manufacture the machines, install them, and maintain them.
System 2 In addition to sunlight, energy and raw materials such as steel, aluminum, copper, plastic, silicon, fuel cell membrane, etc. are needed to construct the machines. Materials are also needed for the hydrogen transportation system. Time is needed to manufacture the machines, install them, and maintain them.
Machine Input
Energy Output Energy
*Efficiency *Wasted
Solar Collector
Radiant Thermal 70% 30%
PV Panel Radiant Electrical 15% 85%
Fuel Cell Electrical/Chemical
Electrical/Chemical
75% 25%
Wind Turbine
Motion Electrical 47% 53%
Battery Chemical Electrical 82% 18%
Electric Motor
Electrical Motion 93% 7%
Electric Generator
Motion (Work)
Electrical 91% 9%
Gasoline Engine
Chemical Motion (Work)
25% 75%
Human Body
Chemical Motion (Work)
22% 78%
Hydrogen Engine
Chemical Motion (Work)
25% 75%
Photo- synthesis
Radiant Chemical 1% 99%
Numbers are approximate and for illustrative purposes only.
Lesson 8 - Page 3
Concept Check
What happens as energy is transformed?
What are some types of resources and why is it important that we use them wisely?
What are the components of a process?
What do we call a series of machines working together?
What is efficiency? How can it be improved?
What two laws govern all energy processes. Describe them in your own words.
Vocabulary Terms
Law of Energy Conservation
2nd Law of Thermodynamics
Process
Viable process
Natural resource
Machine
System
Efficiency
6. Now, compare the first two systems to the third system. What makes System 3 less efficient than the first 2 systems? System 3 is less efficient because it is has such a high wasted amount of energy for both photosynthesis and human body.
Even though there is such a low efficiency, are there any advantages to System 3? The main advantage to System 3 is that solar radiation is free and available almost anywhere. Also, plants that store chemical energy can grow naturally without having
manufacturing costs like most machines do. This is the basis for human survival!
Let’s Apply our new knowledge…
1. What chemical energy have you put into your body today? Any and all food with a caloric value.
2. What types of motion energy have you produced today?
Running
Walking
Jumping
Writing
Breathing
3. Why are farmers so important to System 3? Farmers plant, fertilize, irrigate, and harvest food crops from the field. They play a critical role in providing the food that humans need to survive.
4. Is system energy efficiency as important for transforming renewable energy sources as it is for nonrenewable energy sources? Efficiency is more important when a finite resource is being transformed than when the resource is infinite. Other resources such as time, material, and space are still important because they determine the cost.

Lesson 8 - Page 4
Extension Activities
Read BACKGROUND for Lesson 9 - Energy Conservation and then explain why it is important for people to care about conserving.
Today, most of the energy comes from nonrenewable sources, such as petroleum, coal, natural gas, and
uranium (nuclear fuel). Not only does energy cost money, but when we use these nonrenewable resources we normally send a lot of toxic materials into the atmosphere. This can cause people to get sick, problems such as acid rain, and for the average world temperature to rise (global warming). Researchers at the University of Florida and all over the world are looking for ways to meet our energy needs from renewable resources. We have learned many ways to utilize renewable resources, but for now we will concentrate on how we can help reduce energy use and harmful emissions by conservation.
Look more closely at System 3. Investigate all the processes that go into getting food crops from the field to our stomach. Draw a diagram showing the journey of a food crop from its beginning stage as a seed up until it is eaten. Include the resources that are used at each step.
All the possible processes listed above (more could be added) involve one or more of the discussed resources; energy, material, time, and space. The diagrams can vary greatly, but encouragement of creative thought and careful attention to resource utilization is the primary objective.
Seed extraction Seed transporting Plowing / tilling field Fertilization Seed planting Irrigation Pesticide treatment Solar radiation Harvest
Processing / extraction of desired por-tion Distribution / Transportation Storage Consumer purchase Consumer transport Consumer storage (refrigeration) Consumer preparation (cooking, etc) Consumption…ahhhh
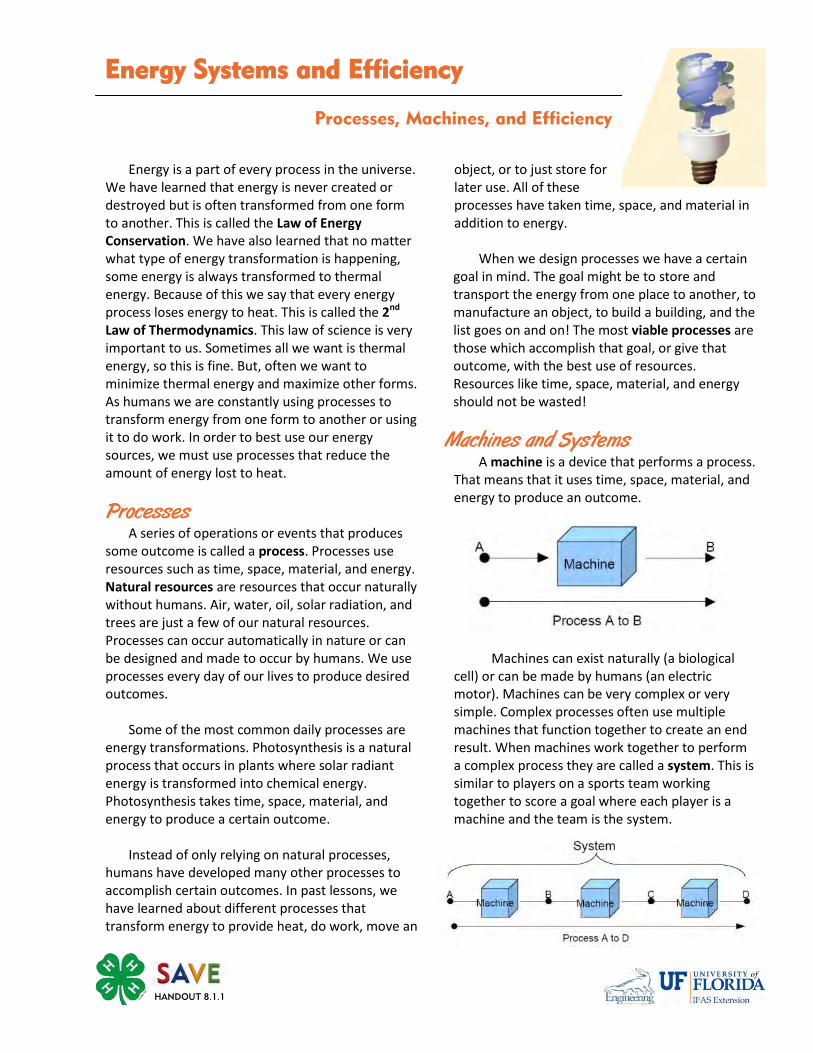
Energy is a part of every process in the universe. We have learned that energy is never created or destroyed but is often transformed from one form to another. This is called the Law of Energy Conservation. We have also learned that no matter what type of energy transformation is happening, some energy is always transformed to thermal energy. Because of this we say that every energy process loses energy to heat. This is called the 2nd Law of Thermodynamics. This law of science is very important to us. Sometimes all we want is thermal energy, so this is fine. But, often we want to minimize thermal energy and maximize other forms. As humans we are constantly using processes to transform energy from one form to another or using it to do work. In order to best use our energy sources, we must use processes that reduce the amount of energy lost to heat.
Processes A series of operations or events that produces some outcome is called a process. Processes use resources such as time, space, material, and energy. Natural resources are resources that occur naturally without humans. Air, water, oil, solar radiation, and trees are just a few of our natural resources. Processes can occur automatically in nature or can be designed and made to occur by humans. We use processes every day of our lives to produce desired outcomes. Some of the most common daily processes are energy transformations. Photosynthesis is a natural process that occurs in plants where solar radiant energy is transformed into chemical energy. Photosynthesis takes time, space, material, and energy to produce a certain outcome. Instead of only relying on natural processes, humans have developed many other processes to accomplish certain outcomes. In past lessons, we have learned about different processes that transform energy to provide heat, do work, move an
object, or to just store for later use. All of these processes have taken time, space, and material in addition to energy. When we design processes we have a certain goal in mind. The goal might be to store and transport the energy from one place to another, to manufacture an object, to build a building, and the list goes on and on! The most viable processes are those which accomplish that goal, or give that outcome, with the best use of resources. Resources like time, space, material, and energy should not be wasted!
Machines and Systems
A machine is a device that performs a process. That means that it uses time, space, material, and energy to produce an outcome.
Machines can exist naturally (a biological cell) or can be made by humans (an electric motor). Machines can be very complex or very simple. Complex processes often use multiple machines that function together to create an end result. When machines work together to perform a complex process they are called a system. This is similar to players on a sports team working together to score a goal where each player is a machine and the team is the system.
Energy Systems and Efficiency
Processes, Machines, and Efficiency
HANDOUT 8.1.1
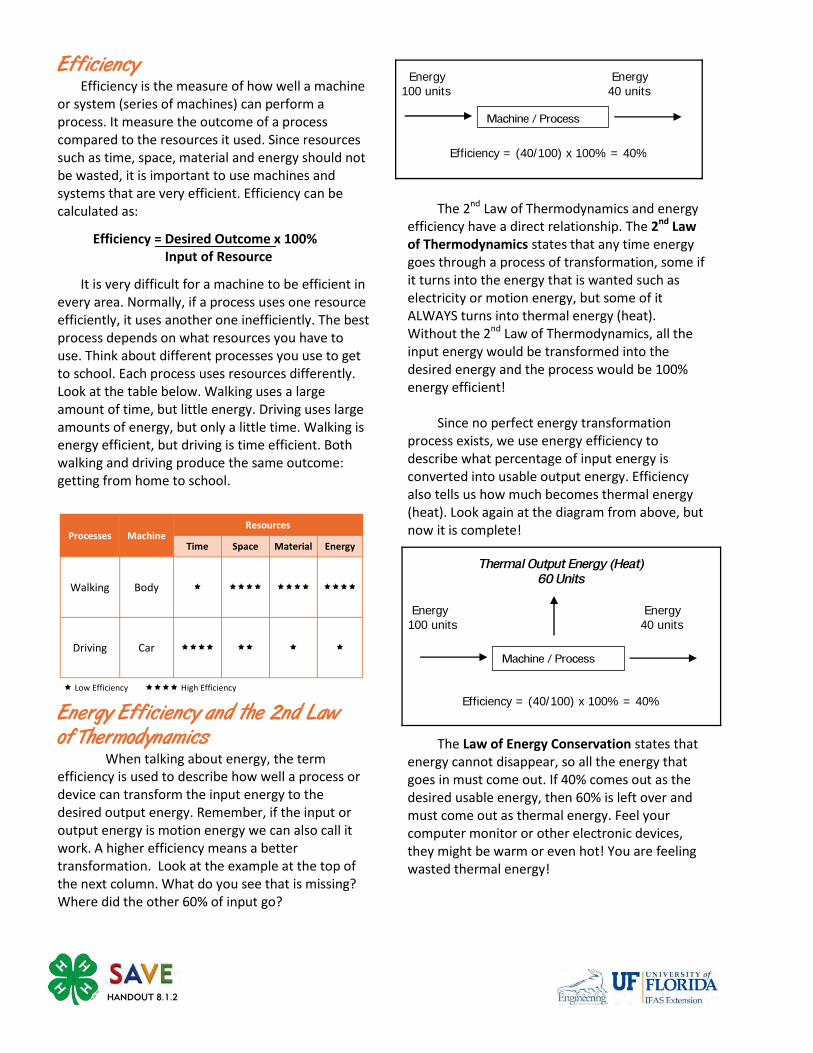
Efficiency
Efficiency is the measure of how well a machine or system (series of machines) can perform a process. It measure the outcome of a process compared to the resources it used. Since resources such as time, space, material and energy should not be wasted, it is important to use machines and systems that are very efficient. Efficiency can be calculated as:
Efficiency = Desired Outcome x 100% Input of Resource
It is very difficult for a machine to be efficient in every area. Normally, if a process uses one resource efficiently, it uses another one inefficiently. The best process depends on what resources you have to use. Think about different processes you use to get to school. Each process uses resources differently. Look at the table below. Walking uses a large amount of time, but little energy. Driving uses large amounts of energy, but only a little time. Walking is energy efficient, but driving is time efficient. Both walking and driving produce the same outcome: getting from home to school.
Energy Efficiency and the 2nd Law of Thermodynamics When talking about energy, the term efficiency is used to describe how well a process or device can transform the input energy to the desired output energy. Remember, if the input or output energy is motion energy we can also call it work. A higher efficiency means a better transformation. Look at the example at the top of the next column. What do you see that is missing? Where did the other 60% of input go?
The 2nd Law of Thermodynamics and energy efficiency have a direct relationship. The 2nd Law of Thermodynamics states that any time energy goes through a process of transformation, some if it turns into the energy that is wanted such as electricity or motion energy, but some of it ALWAYS turns into thermal energy (heat). Without the 2nd Law of Thermodynamics, all the input energy would be transformed into the desired energy and the process would be 100% energy efficient! Since no perfect energy transformation process exists, we use energy efficiency to describe what percentage of input energy is converted into usable output energy. Efficiency also tells us how much becomes thermal energy (heat). Look again at the diagram from above, but now it is complete!
The Law of Energy Conservation states that energy cannot disappear, so all the energy that goes in must come out. If 40% comes out as the desired usable energy, then 60% is left over and must come out as thermal energy. Feel your computer monitor or other electronic devices, they might be warm or even hot! You are feeling wasted thermal energy!
Energy Energy 100 units 40 units
Efficiency = (40/100) x 100% = 40%
Machine / Process
HANDOUT 8.1.2
Thermal Output Energy (Heat) 60 Units
Energy Energy 100 units 40 units
Efficiency = (40/100) x 100% = 40%
Machine / Process
Processes Machine Resources
Time Space Material Energy
Walking Body
Driving Car
Low Efficiency High Efficiency
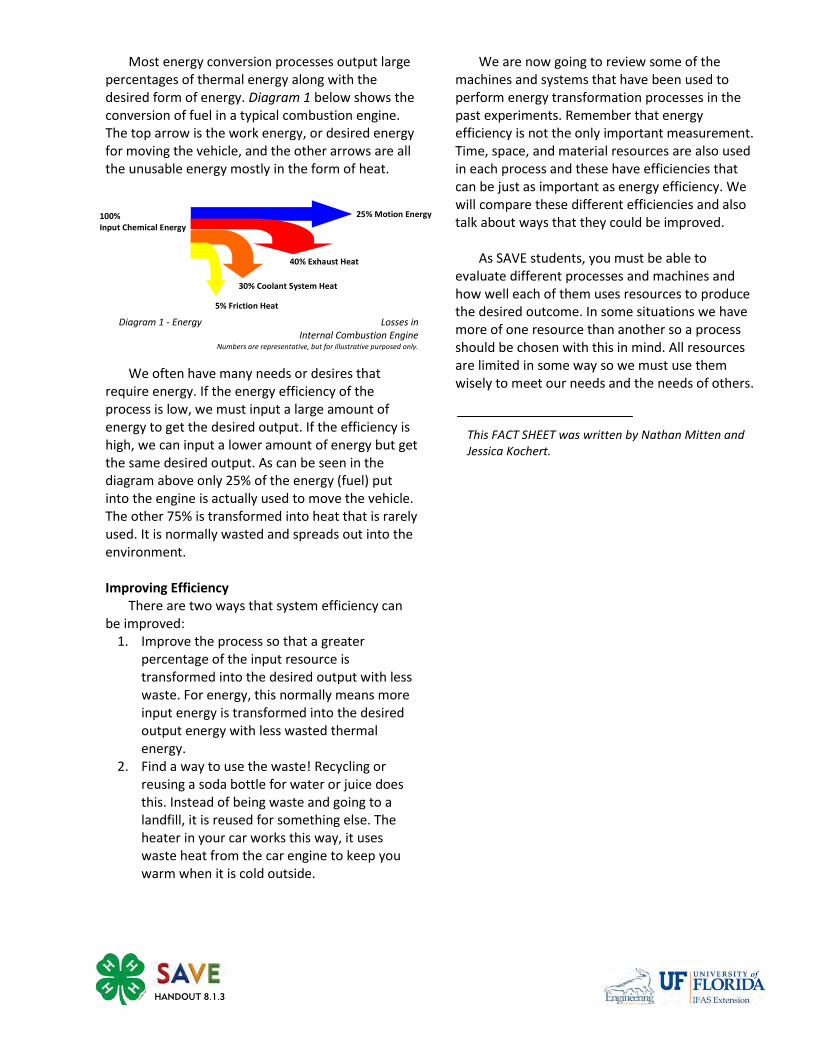
Most energy conversion processes output large percentages of thermal energy along with the desired form of energy. Diagram 1 below shows the conversion of fuel in a typical combustion engine. The top arrow is the work energy, or desired energy for moving the vehicle, and the other arrows are all the unusable energy mostly in the form of heat.
Diagram 1 - Energy Losses in
Internal Combustion Engine Numbers are representative, but for illustrative purposed only.
We often have many needs or desires that require energy. If the energy efficiency of the process is low, we must input a large amount of energy to get the desired output. If the efficiency is high, we can input a lower amount of energy but get the same desired output. As can be seen in the diagram above only 25% of the energy (fuel) put into the engine is actually used to move the vehicle. The other 75% is transformed into heat that is rarely used. It is normally wasted and spreads out into the environment. Improving Efficiency There are two ways that system efficiency can be improved:
1. Improve the process so that a greater percentage of the input resource is transformed into the desired output with less waste. For energy, this normally means more input energy is transformed into the desired output energy with less wasted thermal energy.
2. Find a way to use the waste! Recycling or reusing a soda bottle for water or juice does this. Instead of being waste and going to a landfill, it is reused for something else. The heater in your car works this way, it uses waste heat from the car engine to keep you warm when it is cold outside.
We are now going to review some of the machines and systems that have been used to perform energy transformation processes in the past experiments. Remember that energy efficiency is not the only important measurement. Time, space, and material resources are also used in each process and these have efficiencies that can be just as important as energy efficiency. We will compare these different efficiencies and also talk about ways that they could be improved. As SAVE students, you must be able to evaluate different processes and machines and how well each of them uses resources to produce the desired outcome. In some situations we have more of one resource than another so a process should be chosen with this in mind. All resources are limited in some way so we must use them wisely to meet our needs and the needs of others.
25% Motion Energy 100% Input Chemical Energy
40% Exhaust Heat
30% Coolant System Heat
5% Friction Heat
HANDOUT 8.1.3
This FACT SHEET was written by Nathan Mitten and Jessica Kochert.
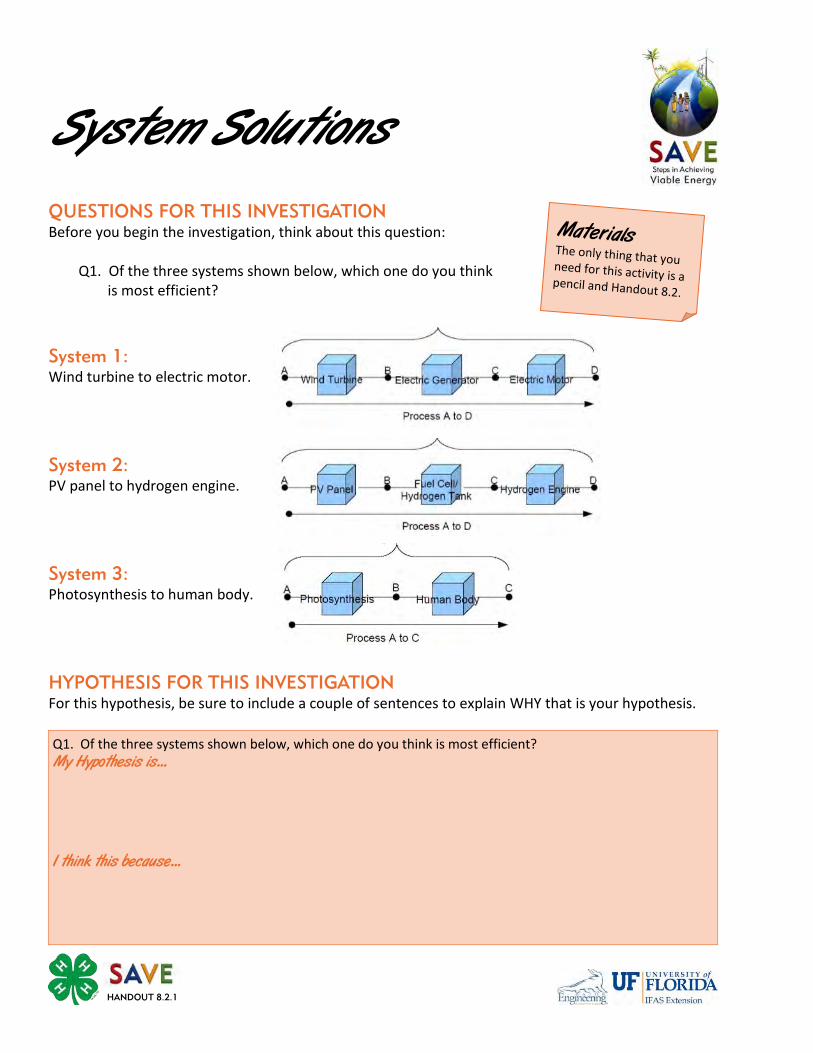
HANDOUT 8.2.1
QUESTIONS FOR THIS INVESTIGATION
Before you begin the investigation, think about this question: Q1. Of the three systems shown below, which one do you think
is most efficient?
System 1:
Wind turbine to electric motor.
System 2:
PV panel to hydrogen engine.
System 3:
Photosynthesis to human body.
HYPOTHESIS FOR THIS INVESTIGATION
For this hypothesis, be sure to include a couple of sentences to explain WHY that is your hypothesis.
System Solutions
Materials The only thing that you need for this activity is a pencil and Handout 8.2.
Q1. Of the three systems shown below, which one do you think is most efficient? My Hypothesis is...
I think this because...
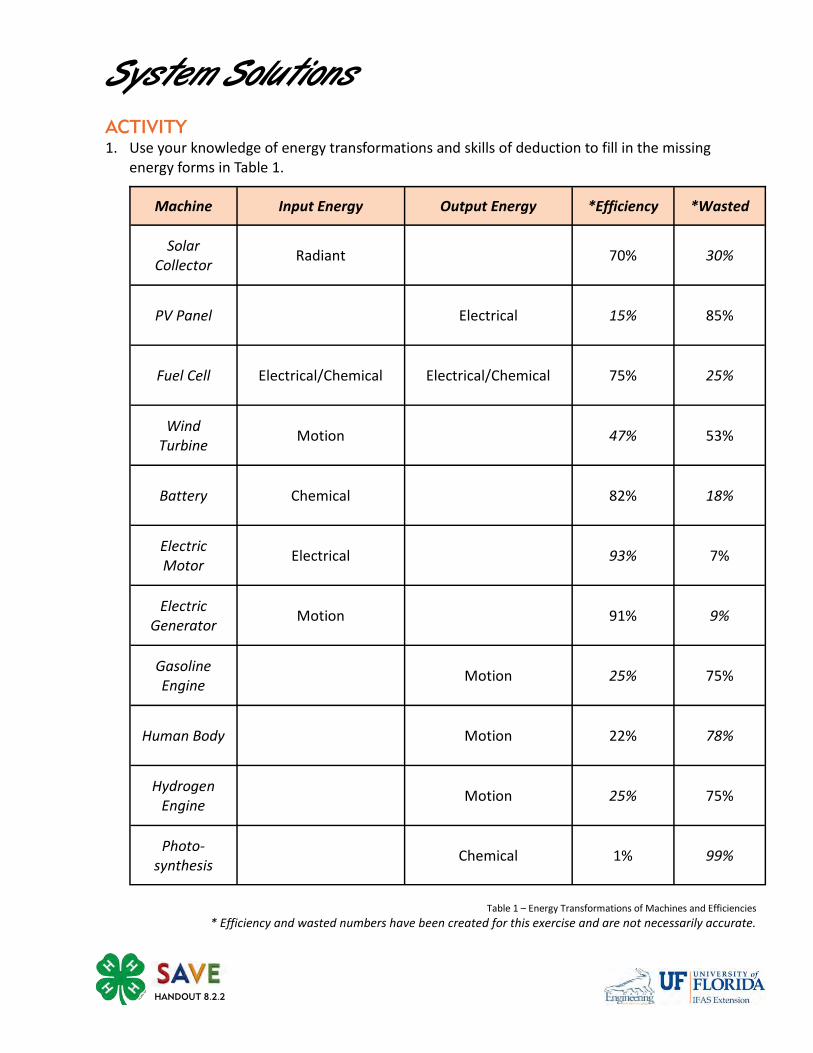
System Solutions
ACTIVITY
1. Use your knowledge of energy transformations and skills of deduction to fill in the missing energy forms in Table 1.
Table 1 – Energy Transformations of Machines and Efficiencies
* Efficiency and wasted numbers have been created for this exercise and are not necessarily accurate.
Machine Input Energy Output Energy *Efficiency *Wasted
Solar Collector
Radiant 70% 30%
PV Panel Electrical 15% 85%
Fuel Cell Electrical/Chemical Electrical/Chemical 75% 25%
Wind Turbine
Motion 47% 53%
Battery Chemical 82% 18%
Electric Motor
Electrical 93% 7%
Electric Generator
Motion 91% 9%
Gasoline Engine
Motion 25% 75%
Human Body Motion 22% 78%
Hydrogen Engine
Motion 25% 75%
Photo- synthesis
Chemical 1% 99%
HANDOUT 8.2.2
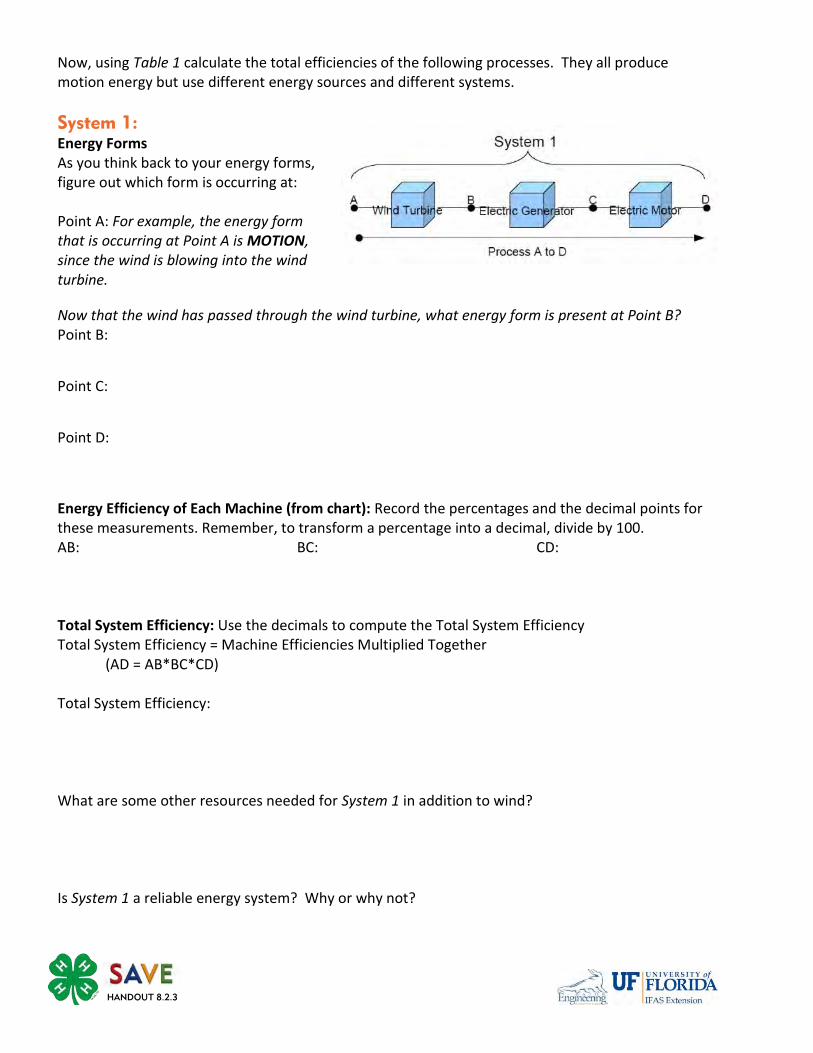
Now, using Table 1 calculate the total efficiencies of the following processes. They all produce motion energy but use different energy sources and different systems.
System 1:
Energy Forms As you think back to your energy forms, figure out which form is occurring at: Point A: For example, the energy form that is occurring at Point A is MOTION, since the wind is blowing into the wind turbine.
Now that the wind has passed through the wind turbine, what energy form is present at Point B? Point B:
Point C:
Point D:
Energy Efficiency of Each Machine (from chart): Record the percentages and the decimal points for these measurements. Remember, to transform a percentage into a decimal, divide by 100. AB: BC: CD:
Total System Efficiency: Use the decimals to compute the Total System Efficiency Total System Efficiency = Machine Efficiencies Multiplied Together (AD = AB*BC*CD) Total System Efficiency: What are some other resources needed for System 1 in addition to wind? Is System 1 a reliable energy system? Why or why not?
HANDOUT 8.2.3
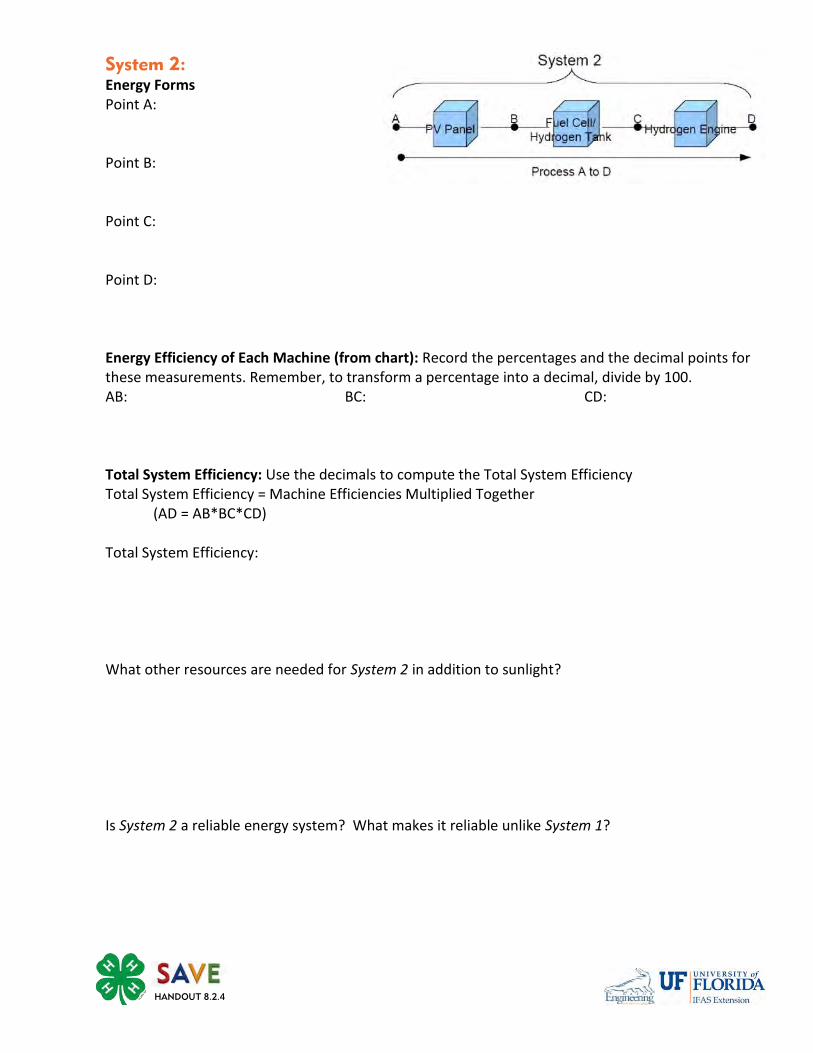
System 2:
Energy Forms Point A:
Point B:
Point C:
Point D:
Energy Efficiency of Each Machine (from chart): Record the percentages and the decimal points for these measurements. Remember, to transform a percentage into a decimal, divide by 100. AB: BC: CD:
Total System Efficiency: Use the decimals to compute the Total System Efficiency Total System Efficiency = Machine Efficiencies Multiplied Together (AD = AB*BC*CD) Total System Efficiency: What other resources are needed for System 2 in addition to sunlight? Is System 2 a reliable energy system? What makes it reliable unlike System 1?
HANDOUT 8.2.4
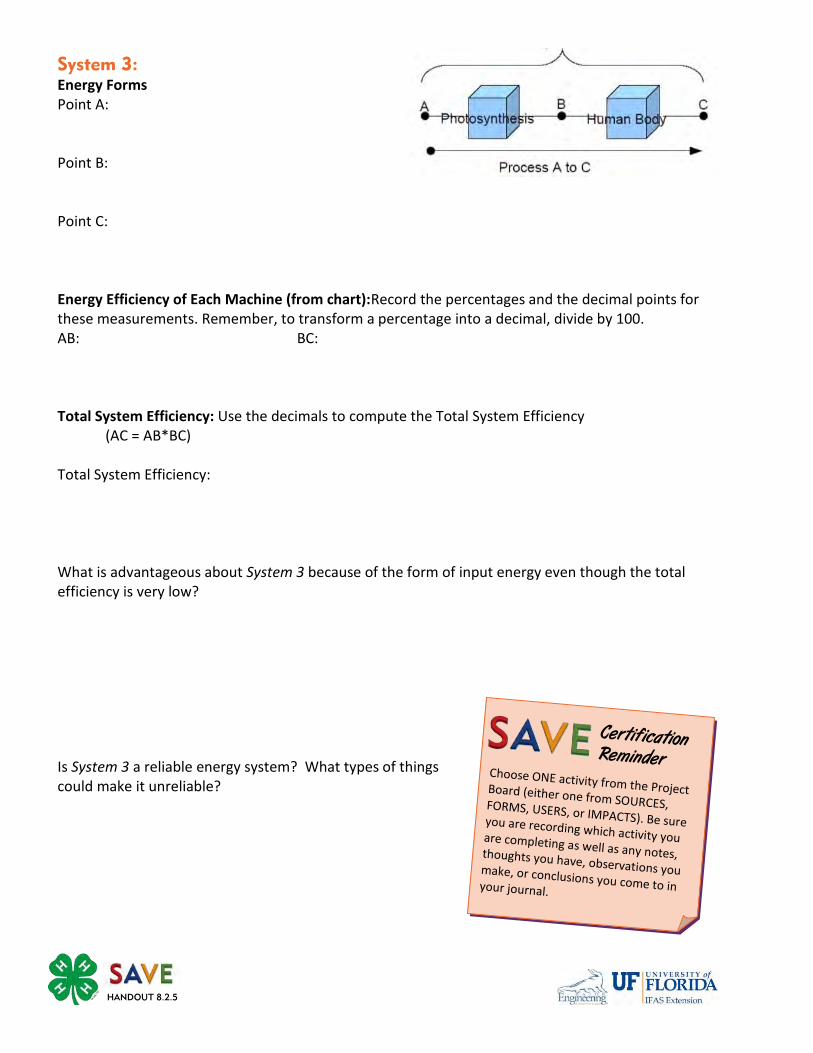
System 3:
Energy Forms Point A:
Point B:
Point C:
Energy Efficiency of Each Machine (from chart):Record the percentages and the decimal points for these measurements. Remember, to transform a percentage into a decimal, divide by 100. AB: BC:
Total System Efficiency: Use the decimals to compute the Total System Efficiency (AC = AB*BC) Total System Efficiency: What is advantageous about System 3 because of the form of input energy even though the total efficiency is very low? Is System 3 a reliable energy system? What types of things could make it unreliable?
HANDOUT 8.2.5
Certification Reminder Choose ONE activity from the Project Board (either one from SOURCES, FORMS, USERS, or IMPACTS). Be sure you are recording which activity you are completing as well as any notes, thoughts you have, observations you make, or conclusions you come to in your journal.
Look more closely at System 3. Investigate all the processes that go into getting food crops from the field to our stomach. Draw a diagram showing the journey of a food crop from its beginning stage as a seed up until it is eaten. Include the resources that are used at each step.
HANDOUT 8.3.1

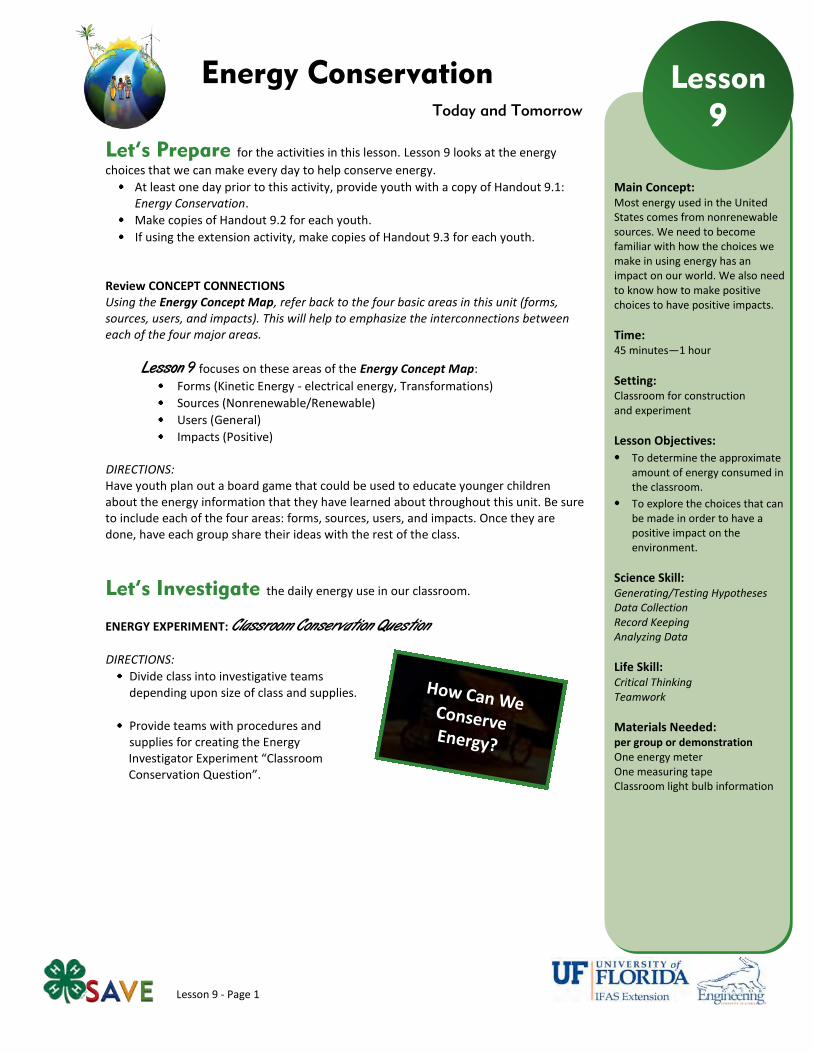
Lesson 9 - Page 1
Main Concept: Most energy used in the United States comes from nonrenewable sources. We need to become familiar with how the choices we make in using energy has an impact on our world. We also need to know how to make positive choices to have positive impacts.
Time: 45 minutes—1 hour
Setting: Classroom for construction and experiment
Lesson Objectives:
To determine the approximate amount of energy consumed in the classroom.
To explore the choices that can be made in order to have a positive impact on the environment.
Science Skill: Generating/Testing Hypotheses Data Collection Record Keeping Analyzing Data
Life Skill: Critical Thinking Teamwork
Materials Needed: per group or demonstration One energy meter One measuring tape Classroom light bulb information
Lesson
9 Today and Tomorrow
Energy Conservation
Let’s Prepare for the activities in this lesson. Lesson 9 looks at the energy
choices that we can make every day to help conserve energy.
At least one day prior to this activity, provide youth with a copy of Handout 9.1: Energy Conservation.
Make copies of Handout 9.2 for each youth.
If using the extension activity, make copies of Handout 9.3 for each youth.
Review CONCEPT CONNECTIONS Using the Energy Concept Map, refer back to the four basic areas in this unit (forms, sources, users, and impacts). This will help to emphasize the interconnections between each of the four major areas.
Lesson 9 focuses on these areas of the Energy Concept Map:
Forms (Kinetic Energy - electrical energy, Transformations)
Sources (Nonrenewable/Renewable)
Users (General)
Impacts (Positive) DIRECTIONS: Have youth plan out a board game that could be used to educate younger children about the energy information that they have learned about throughout this unit. Be sure to include each of the four areas: forms, sources, users, and impacts. Once they are done, have each group share their ideas with the rest of the class.
Let’s Investigate the daily energy use in our classroom.
ENERGY EXPERIMENT: Classroom Conservation Question DIRECTIONS:
Divide class into investigative teams depending upon size of class and supplies.
Provide teams with procedures and supplies for creating the Energy Investigator Experiment “Classroom Conservation Question”.
How Can We Conserve Energy?

Lesson 9- Page 2
Let’s Reflect on our experience…
1. Let’s start by talking about your hypotheses. What did you think would happen as we did this experiment? Answers will vary based on the two questions. Q1. How much energy is used in our classroom on a hot day? Q2. What electrical devices use the most energy?
2. How much energy is being used in your classroom on a hot day?
Use the calculations from the Recording Charts to calculate a class average.
3. Let’s think about this experiment. What did you think was the
hardest part of completing this activity? Answers will vary.
How did your group work through those difficulties? Answers will vary.
4. Was there a measurement that surprised you?
Answers will vary. If yes, why were you surprised? Did you think that it would be higher or lower than what you measured? Answers will vary. Was there something specific that made you think that? Answers will vary.
5. What conclusions did you reach from the results of your
hypotheses: H1) More energy is being consumed than on a mild day because
of the air conditioning being used more often. H2) Lights, computers and air conditioners use the most energy.
Let’s Apply our new knowledge…
1. List one specific change in habit that can be done for each category. For the first two categories approximate percentage of total energy savings each change would give?
Computers could be shut off unless they are being used.
Lights could be shut off when students leave the classroom.
The thermostat could be adjusted several degrees to save on energy.
2. What are some energy uses associated with your classroom,
school, or getting to school that were not included in the energy analysis? Try to include everything!
Fuel used for heating the building in winter
Driving to school in a bus or car or even by bike
Energy used for making supplies and equipment
Food eaten at lunch and snacks
Energy used by humans
Others
Concept Check
What does it mean to conserve energy? Why should we conserve energy? What are the two main categories of
conservation?
Vocabulary Terms
Conservation
Efficient
Compact fluorescent light bulb (CFL)
ENERGY STAR
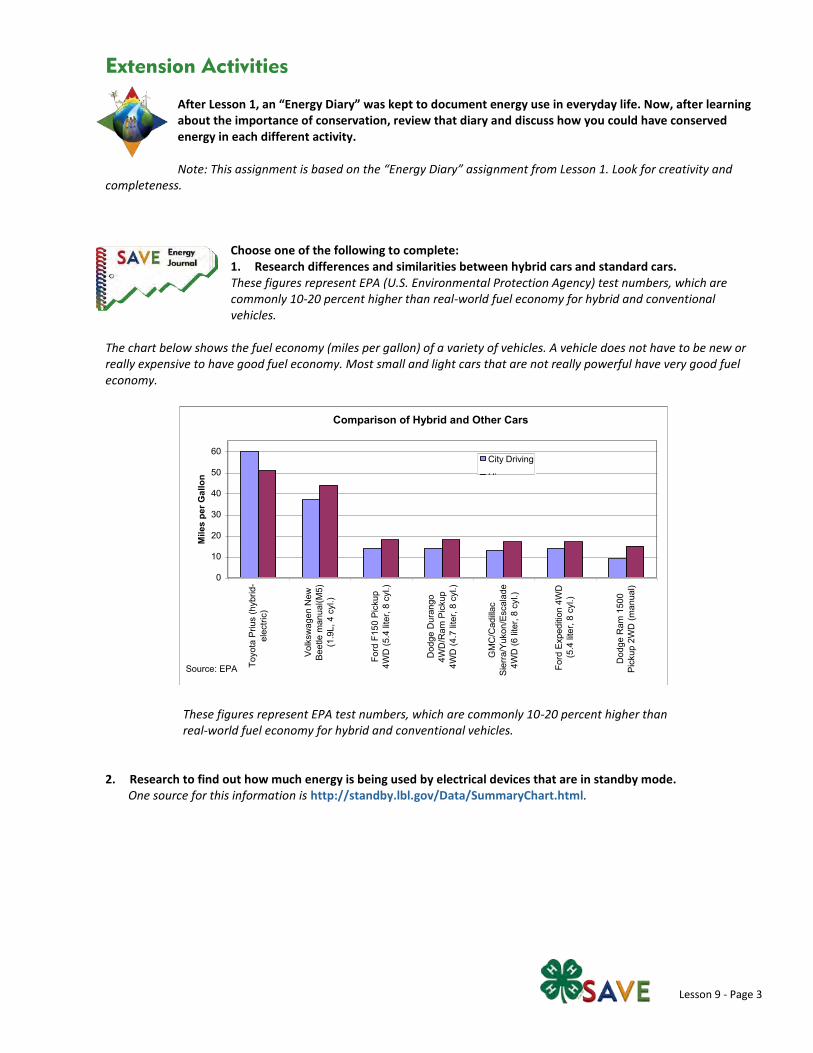
Lesson 9 - Page 3
Extension Activities
After Lesson 1, an “Energy Diary” was kept to document energy use in everyday life. Now, after learning about the importance of conservation, review that diary and discuss how you could have conserved energy in each different activity. Note: This assignment is based on the “Energy Diary” assignment from Lesson 1. Look for creativity and
completeness.
Choose one of the following to complete: 1. Research differences and similarities between hybrid cars and standard cars. These figures represent EPA (U.S. Environmental Protection Agency) test numbers, which are commonly 10-20 percent higher than real-world fuel economy for hybrid and conventional vehicles.
The chart below shows the fuel economy (miles per gallon) of a variety of vehicles. A vehicle does not have to be new or really expensive to have good fuel economy. Most small and light cars that are not really powerful have very good fuel economy.
These figures represent EPA test numbers, which are commonly 10-20 percent higher than real-world fuel economy for hybrid and conventional vehicles.
2. Research to find out how much energy is being used by electrical devices that are in standby mode.
One source for this information is http://standby.lbl.gov/Data/SummaryChart.html.
Comparison of Hybrid and Other Cars
0
10
20
30
40
50
60
Toyo
ta P
rius
(hyb
rid-
elec
tric)
Volk
swag
en N
ewBe
etle
man
ual(M
5)(1
.9L,
4 c
yl.)
Ford
F15
0 Pi
ckup
4WD
(5.4
lite
r, 8
cyl.)
Dod
ge D
uran
go4W
D/R
am P
icku
p4W
D (4
.7 li
ter,
8 cy
l.)
GM
C/C
adilla
cSi
erra
/Yuk
on/E
scal
ade
4WD
(6 li
ter,
8 cy
l.)
Ford
Exp
editi
on 4
WD
(5.4
lite
r, 8
cyl.)
Dod
ge R
am 1
500
Pick
up 2
WD
(man
ual)
Mile
s pe
r Gal
lon
City Driving
Hi
Source: EPA
People are very fortunate today to have many helpful machines that use electricity and fuel. Lights help to see when it would normally be dark, TVs entertain, computers manage information, air conditioners cool, and vehicles transport. These machines and systems were made to benefit us, but they also have a negative side. They all require energy in the form of electricity or chemical fuel to operate. Today, most of that energy comes from nonrenewable sources, such as petroleum, coal, natural gas, and uranium (nuclear fuel). Not only does energy cost money, but when we use these nonrenewable resources we normally send a lot of toxic materials into the atmosphere. This can cause people to get sick, problems such as acid rain, and for the average world temperature to rise (global warming). Researchers at the University of Florida and all over the world are looking for ways to meet our energy needs from renewable resources. We have learned many ways to utilize renewable resources, but for now we will concentrate on how we can help reduce energy use and harmful emissions by conservation. Conservation is simply reducing the use of a resource, in this case energy. It can be accomplished by reducing wasteful habits and using more efficient technologies.
Conservation Comparison How well do we conserve energy compared to others? Here in the USA we tend to use much more energy than people in other countries. Many countries do not have the same access to electricity, fuel, or many of the things we have, but many countries do have the same access yet still use much less energy. In many countries, conserving energy and fuel is much more important than it is in the USA. This does not mean we are bad people, but it does show that we can conserve a lot more than we do. People in other countries do it every day by changing wasteful habits and using efficient technologies.
Conservation Concepts The places where everyone can make the largest changes in energy consumption is in our homes, schools, businesses, and transportation. The primary way to save energy is to change wasteful habits. Another important way to save electricity and fuel is to use energy efficient devices. Efficient means the device does the same thing normal devices do, but wastes less energy. With just a few small changes, you can reduce your own energy use by half. Here are a few tips to help you reduce your energy consumption. 1. Use low energy light bulbs
The next time your parents have to buy light bulbs, tell them about lower energy using light bulbs called compact fluorescent light (CFL) bulbs. They can emit as much light as the normal incandescent light bulbs, but consume less energy. They also last longer than incandescent bulbs, which makes these low energy light bulbs actually cheaper. Light emitting diodes (LEDs) use even less energy than CFLs and last even longer. In addition to this technology, you can also try to use sunlight instead of light bulbs whenever possible! *CFLs should not be thrown in the regular trash because
they have mercury inside them which will pollute the landfill.
2. Turn off unnecessary
lights The last one out of a room should turn off the lights. Also, don’t install more lights in a room than are needed.
Energy Conservation
Why Should We Conserve?
HANDOUT 9.1.1
3. Unplug your power adapters Power Adapters change the power in our walls (AC Power) into power electronics need (DC Power). Unfortunately, most power adapters cannot be turned off. So unplug power adapters if they are not in use. If you are not sure if a device is using energy or not, check to see if it warm. If it is warm it is using electricity.
4. Turn off your computer when not in use
An average desktop computer uses 150 W when completely on (a laptop uses less).1 If your computer is on, it is using power, even if it is in stand-by or sleep mode. If you are not going to be using your computer for a while, turn it completely off.
5. Take showers instead of baths
It takes a lot of energy to treat water to make it usable and also to heat it. Taking a bath often uses more water than taking a shower. So take a shower instead of a bath, and you will save energy and water. Using a low-flow showerhead will further reduce the amount of hot water consumed. Also, turn the faucet off when you are not using it. Only use warm and hot water when you need to.
6. Unplug stand-by electronics Many electronics are on all the time, often in "Stand-by" mode. If you have a living room with a TV, VCR, DVD Player, Satellite Receiver, and Cable box, you could be using 100 W all the time, even when they are not turned on! If your devices have "off' switches, turn them off. If they don’t have off switches, consider hooking these devices to a single power strip, and turning the power strip off. Be sure not to overload the power strip.
7. Choose clothes lines over the clothes dryer Instead of using an energy demanding dryer to dry your clothes, hang them on the clothes line and let solar and wind energy do the job.
8. Bike, walk, or take the bus
Cars use up a lot of energy, so use a bike or walk whenever you can. Riding a bike or walking uses up energy, too. However, this amount of energy is much less and comes from food which is renewable. Plus, it’s good exercise and fun! Cars use gasoline or diesel fuel which is not renewable and pollutes the environment. When you do need to take a car, smaller and lighter cars are more efficient and use less nonrenewable fuel. Carpooling or taking the bus means fewer cars are driven.
9. Make wise choices If your parents plan on buying a new refrigerator, oven, dish-washer, monitor, or even a light bulb, make sure they know how they can protect the environment by buying energy efficient devices. Many energy efficient devices are specially labeled with an ENERGY STAR logo. Also, it also takes energy to make things, so by simply not buying extra things you don’t need conserves energy.
HANDOUT 9.1.2
The Future of Conservation Conserving energy is so important that companies and researchers all over the world are developing ways to conserve more. You might be able to live in a zero energy home very soon! Low and Zero Energy Home With just a few improvements to traditional houses we can make low energy homes. Some homes even make as much or more electricity than they use by using renewable energy sources with solar PV panels or wind turbines and conserving energy! If everybody had a house like that, the world would be a much cleaner place. Efficient Vehicles A lot of the energy we use is consumed in our cars. Many of the cars already being sold are much more efficient than conventional cars. Some cars and trucks today burn biogas or biodiesel instead of normal gas and diesel. Since bio-fuels come from plants which are constantly re-grown, they are a renewable source of energy. Hybrid vehicles are more efficient because they recycle energy that is normally lost during braking and idling. Electric vehicles powered by batteries or fuel cells can be less polluting than conventional vehicles because they can be charged with electricity generated by renewable sources such as solar, wind, or biomass.
HANDOUT 9.1.3
This FACT SHEET was written by Nathan Mitten and Jessica Kochert.
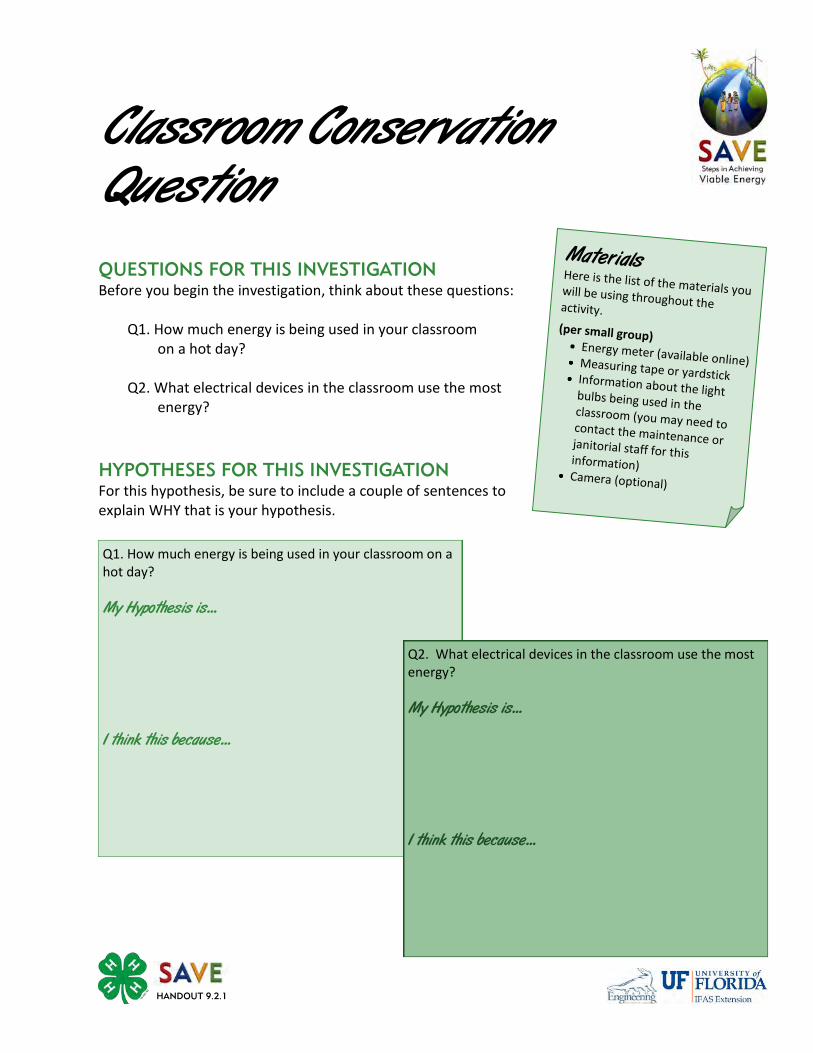
HANDOUT 9.2.1
QUESTIONS FOR THIS INVESTIGATION
Before you begin the investigation, think about these questions: Q1. How much energy is being used in your classroom
on a hot day? Q2. What electrical devices in the classroom use the most
energy?
HYPOTHESES FOR THIS INVESTIGATION
For this hypothesis, be sure to include a couple of sentences to explain WHY that is your hypothesis.
Classroom Conservation Question
Materials Here is the list of the materials you will be using throughout the activity.
(per small group) Energy meter (available online) Measuring tape or yardstick Information about the light bulbs being used in the classroom (you may need to contact the maintenance or janitorial staff for this information)
Camera (optional)
Q1. How much energy is being used in your classroom on a hot day? My Hypothesis is...
I think this because...
Q2. What electrical devices in the classroom use the most energy? My Hypothesis is...
I think this because...
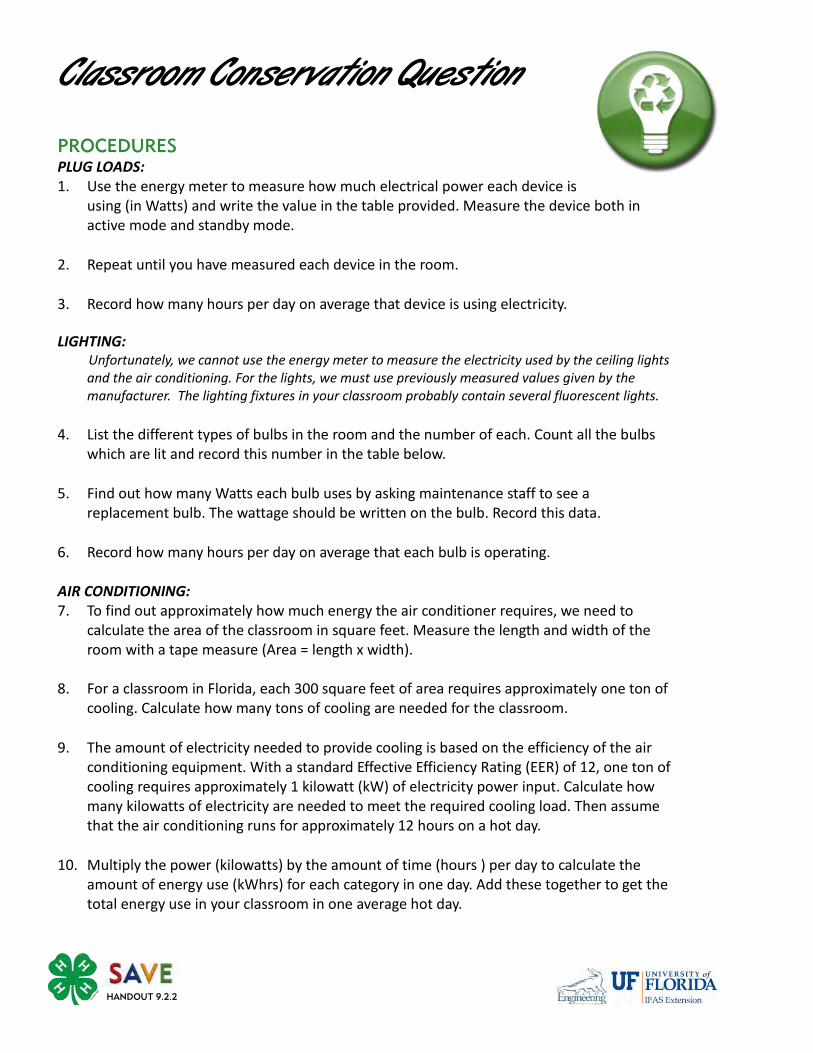
Classroom Conservation Question
PROCEDURES
PLUG LOADS: 1. Use the energy meter to measure how much electrical power each device is
using (in Watts) and write the value in the table provided. Measure the device both in active mode and standby mode.
2. Repeat until you have measured each device in the room.
3. Record how many hours per day on average that device is using electricity.
LIGHTING: Unfortunately, we cannot use the energy meter to measure the electricity used by the ceiling lights and the air conditioning. For the lights, we must use previously measured values given by the manufacturer. The lighting fixtures in your classroom probably contain several fluorescent lights.
4. List the different types of bulbs in the room and the number of each. Count all the bulbs which are lit and record this number in the table below.
5. Find out how many Watts each bulb uses by asking maintenance staff to see a replacement bulb. The wattage should be written on the bulb. Record this data.
6. Record how many hours per day on average that each bulb is operating. AIR CONDITIONING: 7. To find out approximately how much energy the air conditioner requires, we need to
calculate the area of the classroom in square feet. Measure the length and width of the room with a tape measure (Area = length x width).
8. For a classroom in Florida, each 300 square feet of area requires approximately one ton of
cooling. Calculate how many tons of cooling are needed for the classroom.
9. The amount of electricity needed to provide cooling is based on the efficiency of the air conditioning equipment. With a standard Effective Efficiency Rating (EER) of 12, one ton of cooling requires approximately 1 kilowatt (kW) of electricity power input. Calculate how many kilowatts of electricity are needed to meet the required cooling load. Then assume that the air conditioning runs for approximately 12 hours on a hot day.
10. Multiply the power (kilowatts) by the amount of time (hours ) per day to calculate the amount of energy use (kWhrs) for each category in one day. Add these together to get the total energy use in your classroom in one average hot day.
HANDOUT 9.2.2
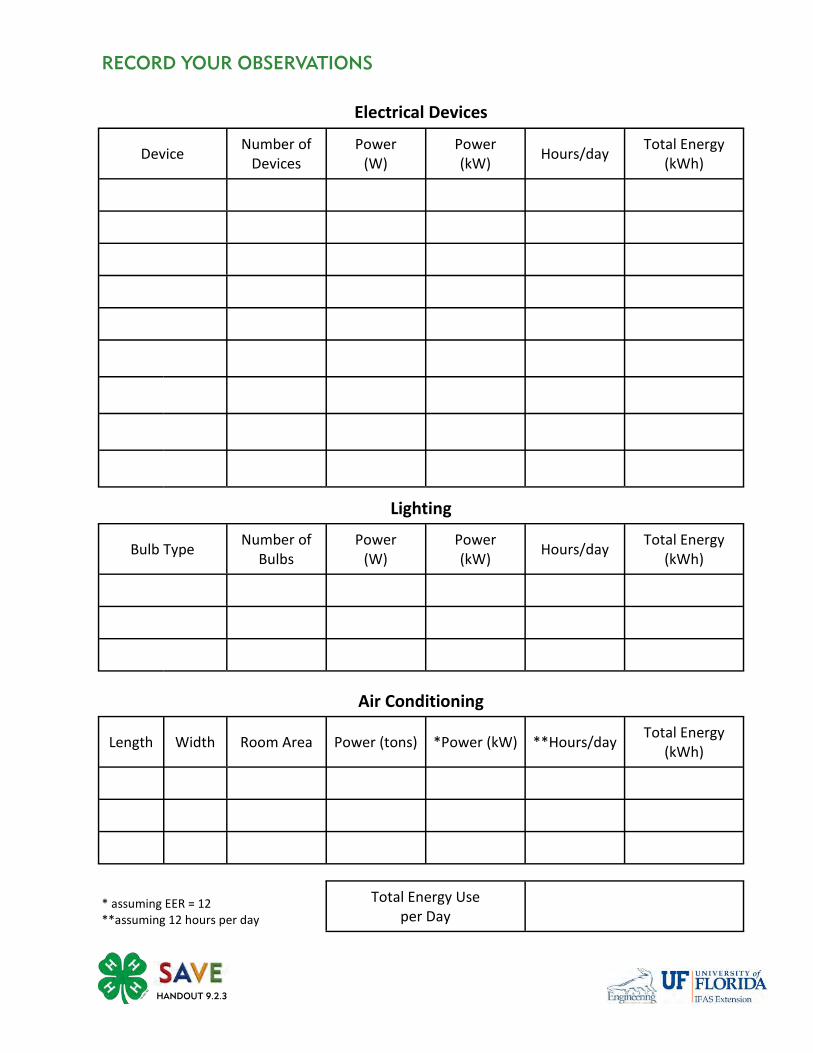
RECORD YOUR OBSERVATIONS
Electrical Devices
Device Number of
Devices Power
(W) Power (kW)
Hours/day Total Energy
(kWh)
Lighting
Bulb Type Number of
Bulbs Power
(W) Power (kW)
Hours/day Total Energy
(kWh)
Air Conditioning
Length Width Room Area Power (tons) *Power (kW) **Hours/day Total Energy
(kWh)
* assuming EER = 12 **assuming 12 hours per day
Total Energy Use per Day
HANDOUT 9.2.3
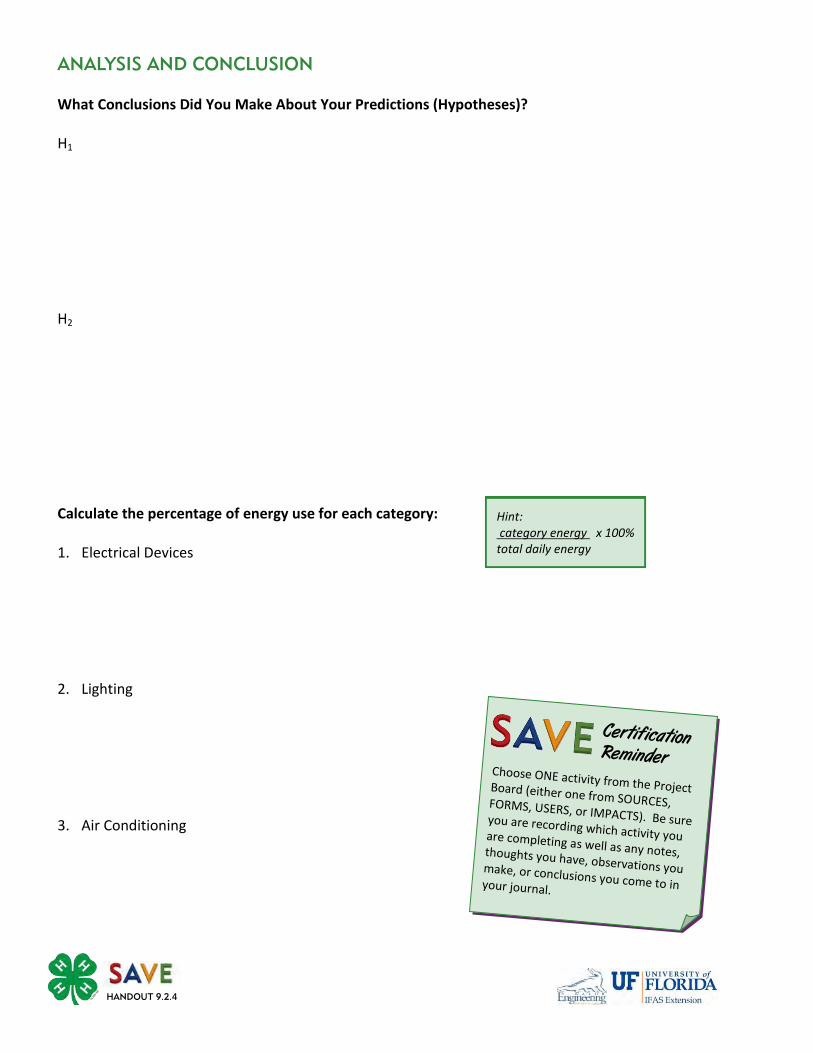
ANALYSIS AND CONCLUSION
What Conclusions Did You Make About Your Predictions (Hypotheses)? H1
H2
Calculate the percentage of energy use for each category: 1. Electrical Devices
2. Lighting
3. Air Conditioning
Hint: category energy x 100% total daily energy
Certification Reminder Choose ONE activity from the Project Board (either one from SOURCES, FORMS, USERS, or IMPACTS). Be sure you are recording which activity you are completing as well as any notes, thoughts you have, observations you make, or conclusions you come to in your journal.
HANDOUT 9.2.4
HANDOUT 9.3.1
After Lesson 1, an “Energy Diary” was kept to document energy use in everyday life. Now, after learning about the importance of conservation, review that diary and discuss how you could have conserved energy in each different activity.
HANDOUT 9.3.1
Complete one of the following activities: 1. Research differences and similarities between hybrid cars and
standard cars. 2. Research to find out how much energy is being used by electrical
devices that are in standby mode.

APPENDIX A
Forms P1 - Make a poster: draw a timeline from the 1600’s until today. Be sure to Include significant events,
people, and sources of energy used.
R1 - Read a book or encyclopedia article about a famous inventor whose inventions help us use energy to
accomplish things (Thomas Edison, John Vincent Atanasoff, Alexander Graham Bell, Nikola Tesla, Nikolaus August Otto, and many others!). Write a one paragraph summary about their invention and why it is helpful. Include the bibliographical information of the book.
R5 - Find a book or an article on the Internet, in a magazine, or in the newspaper that talks about a new
technological invention that relates to using energy better. Read it and write a paragraph about how this invention will help people better use energy. Cut it out and use it to create a presentation, demonstration or exhibit for your 4-H Club.
W3 - Keep the energy journal you completed for homework #1 for two more days. At the end of each day
write a paragraph about wise energy decisions you made and the unwise energy decisions you made.
Sources
M4 - Use the internet to research a variety of nations throughout the world, comparing their use of renewable
and nonrenewable energy sources. Create a bar chart to display which countries use more renewable sources than others.
P2 - Make a computer presentation on energy sources. Be sure to include: an introduction, types of
nonrenewable energy sources, advantages and disadvantages of nonrenewable energy sources, types of renewable energy sources, advantages and disadvantages of renewable energy sources, and conclusion and personal statement about your beliefs.
P5 - Make your own advertisement video for a particular renewable energy source. Be creative in
communicating to your viewers that it is an important subject. Give accurate information but don’t be boring!
P9 - Make a picture collage of energy sources and energy technologies. Print them from the Internet or cut
them out of newspapers and magazines.
R8 - Find a book or an article on the Internet, in a magazine, or in the newspaper that talks about energy
from biomass (ethanol, biodiesel, solid waste). Read it and write a one paragraph summary of what it says. Cut it out and use it to create a presentation, demonstration or exhibit for your 4-H Club.
W2 - Creatively write a page about the following scenario: You and a friend are stranded on a deserted
island. You not only need food but you need energy for staying warm, cooking food, making things, and possibly even escaping the island! Write about what sources of energy would you use and how would you use them?
W4 - Compare and contrast different energy sources, both nonrenewable and renewable. Talk about
where they come from, how they are used, and whether or not they are reliable.
Certification Activities
APP
END
IX A

APPENDIX A
Sources (continued)
WS2 - Find out what geographical location in the world are best for wind generation and what
countries are actually using the most wind energy. Give web site addresses of where you find the information and why you think the information is reliable.
WS3 - Where are the main hydroelectric power plants in the United States and what are their
names. How do hydroelectric power plants work? Give web site addresses of where you find the information and why you think the information is reliable.
WS5 - Search for national and international competitions in the area of renewable energy. Make a
list of at least five and briefly describe the objective of each one. Give web site addresses of where you find the information and why you think the information is reliable.
Users M2 - Make a bar graph by hand or with a computer comparing the electricity usage of all the electronic
devices and appliances in your home.
M3 - Compare fuel mileage. If you car is 25% efficient and goes 30 miles on one gallon of gasoline,
how many miles could it go on one gallon of gasoline if it was 35% efficient (keeping all other conditions the same)? How far would it go on one gallon of ethanol? Why is it different?
W5 - Write one page about the current energy policy of the United States. What types of energy
technologies are we trying to develop? What ways are the government using to encourage people to use energy wisely. Would you do anything different if you were in the government?
W6 - Choose a country besides the United States and learn about what sources of energy they use.
Write one page about what sources they use, why they use them, and what advantages and disadvantages they have. Are they working to do anything differently?
WS1 - Compare fuel cell, electric, internal combustion engine, and hybrid vehicles. What are the main
power system differences as well as their advantages and disadvantages. Give web site addresses of where you find the information and why you think the information is reliable.
WS4 - Why should be use all our resources wisely? List 10 things you can do at school and at home that
reduce wasted energy. List 5 things you can do at school and at home that reduce wasted water. Give web site addresses of where you find the information and why you think the information is reliable.
WS6 - Search for companies that design machines and systems that utilize some type of alternative
energy. Give the name, location and the main services and/or products that each company provides. Give web site addresses of where you find the information and why you think the information is reliable.
List continues on next page…

APPENDIX A
Impacts M1 - How many kilowatt-hours (kWh) of energy does your family use at home each day? List each
activity, its power use in watts and the number of hours it is used each day. Then calculate the number of kWh each activity uses per day and the total.
P3 - Invent and build a prototype of something that helps conserve energy at home (less heating and cooling,
using heating and cooling more efficiently to reduce waste, less lighting needed, using lighting more efficiently).
P4 - Invent and build a prototype of something that conserves energy in transportation (less traveling by car,
makes car more efficient, improves other modes of transportation like biking, walking, or taking the bus).
P6 - Make a video documentary of a business or person around your hometown who is using energy or other
resources wisely. Be sure to ask permission before videotaping in public!
P7 - Write song lyrics and/or compose music about energy. You may use a popular song and change the
lyrics to your own. If you compose music instead of writing lyrics, explain what you are trying to communicate with your music.
P8 - Draw or paint a picture of a beautiful landscape where people live in harmony with the environment and
where they do no damage to where they live.
R2 - Find a book or an article on the Internet, in a magazine, or in the newspaper that talks about energy
conservation. Read it and write a one paragraph summary of what it says. Cut it out and use it to create a presentation, demonstration or exhibit for your 4-H Club.
R3 - Find a book or an article on the Internet, in a magazine, or in the newspaper that talks about global
warming. Read it and write a one paragraph summary of what it says. Cut it out and use it to create a presentation, demonstration or exhibit for your 4-H Club.
R4 - Find a book or an article on the Internet, in a magazine, or in the newspaper that talks about current
global energy policy. Read it and write a paragraph about how the United States is involved. Cut it out and use it to create a presentation, demonstration or exhibit for your 4-H Club.
R6 - Find a book or an article on the Internet, in a magazine, or in the newspaper that talks about global
water shortage. Read it and write a one paragraph summary of what it says. Cut it out and use it to create a presentation, demonstration or exhibit for your 4-H Club.
R7 - Find a book or an article on the Internet, in a magazine, or in the newspaper that talks about recycling.
Read it and write a one paragraph summary of what it says. Cut it out and use it to create a presentation, demonstration or exhibit for your 4-H Club.
W1 - Creatively write a page about the following scenario:
All fossil fuels completely ran out! You are the scientist that has to decide what energy sources we are going to use and how we are going to use them. Write about how you come up with the best solution to meet everyone's needs. How do you get everyone to only use the energy they need and not waste it?
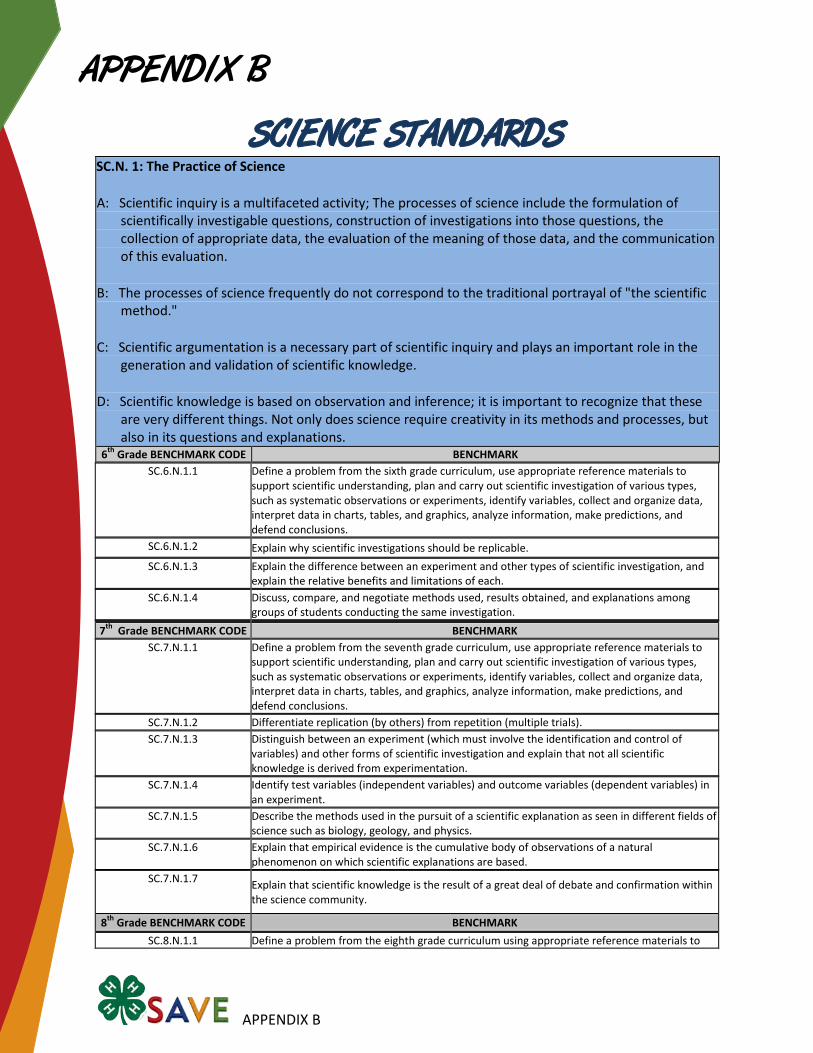
APPENDIX B
SCIENCE STANDARDS SC.N. 1: The Practice of Science
A: Scientific inquiry is a multifaceted activity; The processes of science include the formulation of scientifically investigable questions, construction of investigations into those questions, the collection of appropriate data, the evaluation of the meaning of those data, and the communication of this evaluation.
B: The processes of science frequently do not correspond to the traditional portrayal of "the scientific method."
C: Scientific argumentation is a necessary part of scientific inquiry and plays an important role in the generation and validation of scientific knowledge.
D: Scientific knowledge is based on observation and inference; it is important to recognize that these are very different things. Not only does science require creativity in its methods and processes, but also in its questions and explanations.
6th Grade BENCHMARK CODE BENCHMARK SC.6.N.1.1 Define a problem from the sixth grade curriculum, use appropriate reference materials to
support scientific understanding, plan and carry out scientific investigation of various types, such as systematic observations or experiments, identify variables, collect and organize data, interpret data in charts, tables, and graphics, analyze information, make predictions, and defend conclusions.
SC.6.N.1.2 Explain why scientific investigations should be replicable. SC.6.N.1.3 Explain the difference between an experiment and other types of scientific investigation, and
explain the relative benefits and limitations of each. SC.6.N.1.4 Discuss, compare, and negotiate methods used, results obtained, and explanations among
groups of students conducting the same investigation. 7th Grade BENCHMARK CODE BENCHMARK
SC.7.N.1.1 Define a problem from the seventh grade curriculum, use appropriate reference materials to support scientific understanding, plan and carry out scientific investigation of various types, such as systematic observations or experiments, identify variables, collect and organize data, interpret data in charts, tables, and graphics, analyze information, make predictions, and defend conclusions.
SC.7.N.1.2 Differentiate replication (by others) from repetition (multiple trials). SC.7.N.1.3 Distinguish between an experiment (which must involve the identification and control of
variables) and other forms of scientific investigation and explain that not all scientific knowledge is derived from experimentation.
SC.7.N.1.4 Identify test variables (independent variables) and outcome variables (dependent variables) in an experiment.
SC.7.N.1.5 Describe the methods used in the pursuit of a scientific explanation as seen in different fields of science such as biology, geology, and physics.
SC.7.N.1.6 Explain that empirical evidence is the cumulative body of observations of a natural phenomenon on which scientific explanations are based.
SC.7.N.1.7 Explain that scientific knowledge is the result of a great deal of debate and confirmation within the science community.
8th Grade BENCHMARK CODE BENCHMARK SC.8.N.1.1 Define a problem from the eighth grade curriculum using appropriate reference materials to
APPENDIX B

APPENDIX B
support scientific understanding, plan and carry out scientific investigations of various types, such as systematic observations or experiments, identify variables, collect and organize data, interpret data in charts, tables, and graphics, analyze information, make predictions, and defend conclusions.
SC.8.N.1.2 Design and conduct a study using repeated trials and replication. SC.8.N.1.3 Use phrases such as "results support" or "fail to support" in science, understanding that science
does not offer conclusive 'proof' of a knowledge claim. SC.8.N.1.4 Explain how hypotheses are valuable if they lead to further investigations, even if they turn out
not to be supported by the data. SC.8.N.1.5 Analyze the methods used to develop a scientific explanation as seen in different fields of
science. SC.8.N.1.6 Understand that scientific investigations involve the collection of relevant empirical evidence,
the use of logical reasoning, and the application of imagination in devising hypotheses, predictions, explanations and models to make sense of the collected evidence.
SC.N. 2: The Characteristics of Scientific Knowledge
A: Scientific knowledge is based on empirical evidence, and is appropriate for understanding the natural world, but it provides only a limited understanding of the supernatural, aesthetic, or other ways of knowing, such as art, philosophy, or religion.
B: Scientific knowledge is durable and robust, but open to change.
C: Because science is based on empirical evidence it strives for objectivity, but as it is a human endeavor the processes, methods, and knowledge of science include subjectivity, as well as creativity and discovery.
6th Grade BENCHMARK CODE BENCHMARK SC.6.N.2.1 Distinguish science from other activities involving thought. SC.6.N.2.2 Explain that scientific knowledge is durable because it is open to change as new evidence or
interpretations are encountered.: Moderate SC.6.N.2.3 Recognize that scientists who make contributions to scientific knowledge come from all kinds of
backgrounds and possess varied talents, interests, and goals. 7th Grade BENCHMARK CODE BENCHMARK
SC.7.N.2.1 Identify an instance from the history of science in which scientific knowledge has changed when new evidence or new interpretations are encountered.
8th Graded BENCHMARK CODE BENCHMARK SC.8.N.2.1 Distinguish between scientific and pseudoscientific ideas.
SC.8.N.2.2 Discuss what characterizes science and its methods.
SC.N. 3: The Role of Theories, Laws, Hypotheses, and Models
The terms that describe examples of scientific knowledge, for example; "theory," "law," "hypothesis," and "model" have very specific meanings and functions within science. 6th Grade BENCHMARK CODE BENCHMARK
SC.6.N.3.1 Recognize and explain that a scientific theory is a well-supported and widely accepted explanation of nature and is not simply a claim posed by an individual. Thus, the use of the term theory in science is very different than how it is used in everyday life.
SC.6.N.3.2 Recognize and explain that a scientific law is a description of a specific relationship under given
conditions in the natural world. Thus, scientific laws are different from societal laws. SC.6.N.3.3 Give several examples of scientific laws. SC.6.N.3.4 Identify the role of models in the context of the sixth grade science benchmarks.
APPENDIX B

APPENDIX B
7th Grade BENCHMARK CODE BENCHMARK SC.7.N.3.1 Recognize and explain the difference between theories and laws and give several examples of
scientific theories and the evidence that supports them. SC.7.N.3.2 Identify the benefits and limitations of the use of scientific models.
8th Grade BENCHMARK CODE BENCHMARK SC.8.N.3.1 Select models useful in relating the results of their own investigations. SC.8.N.3.2 Explain why theories may be modified but are rarely discarded.
SC.N. 4: Science and Society
As tomorrow’s citizens, students should be able to identify issues about which society could provide input, formulate scientifically investigable questions about those issues, construct investigations of their questions, collect and evaluate data from their investigations, and develop scientific recommendations based upon their findings. 8th Grade BENCHMARK CODE BENCHMARK
SC.8.N.4.1 Explain that science is one of the processes that can be used to inform decision making at the community, state, national, and international levels.
SC.8.N.4.2 Explain how political, social, and economic concerns can affect science, and vice versa. SC.P.8: Properties of Matter
A. All objects and substances in the world are made of matter. Matter has two fundamental properties: matter takes up space and matter has mass which gives it inertia.
B. Objects and substances can be classified by their physical and chemical properties. Mass is the amount of matter (or "stuff") in an object. Weight, on the other hand, is the measure of force of attraction (gravitational force) between an object and Earth.
The concepts of mass and weight are complicated and potentially confusing to elementary students. Hence, the more familiar term of "weight" is recommended for use to stand for both mass and weight in grades K-5. By grades 6-8, students are expected to understand the distinction between mass and weight, and use them appropriately. 8th Grade BENCHMARK CODE BENCHMARK
SC.8.P.8.1 Explore the scientific theory of atoms (also known as atomic theory) by using models to explain the motion of particles in solids, liquids, and gases.
SC.8.P.8.2 Differentiate between weight and mass recognizing that weight is the amount of gravitational pull on an object and is distinct from, though proportional to, mass.
SC.8.P.8.3 Explore and describe the densities of various materials through measurement of their masses and volumes.
SC.8.P.8.4 Classify and compare substances on the basis of characteristic physical properties that can be demonstrated or measured; for example, density, thermal or electrical conductivity, solubility, magnetic properties, melting and boiling points, and know that these properties are independent of the amount of the sample.
SC.8.P.8.7 Explore the scientific theory of atoms (also known as atomic theory) by recognizing that atoms are the smallest unit of an element and are composed of sub-atomic particles (electrons surrounding a nucleus containing protons and neutrons).
SC.8.P.8.8 Identify basic examples of and compare and classify the properties of compounds, including acids, bases, and salts.
SC.8.P.8.9 Distinguish among mixtures (including solutions) and pure substances.
APPENDIX B
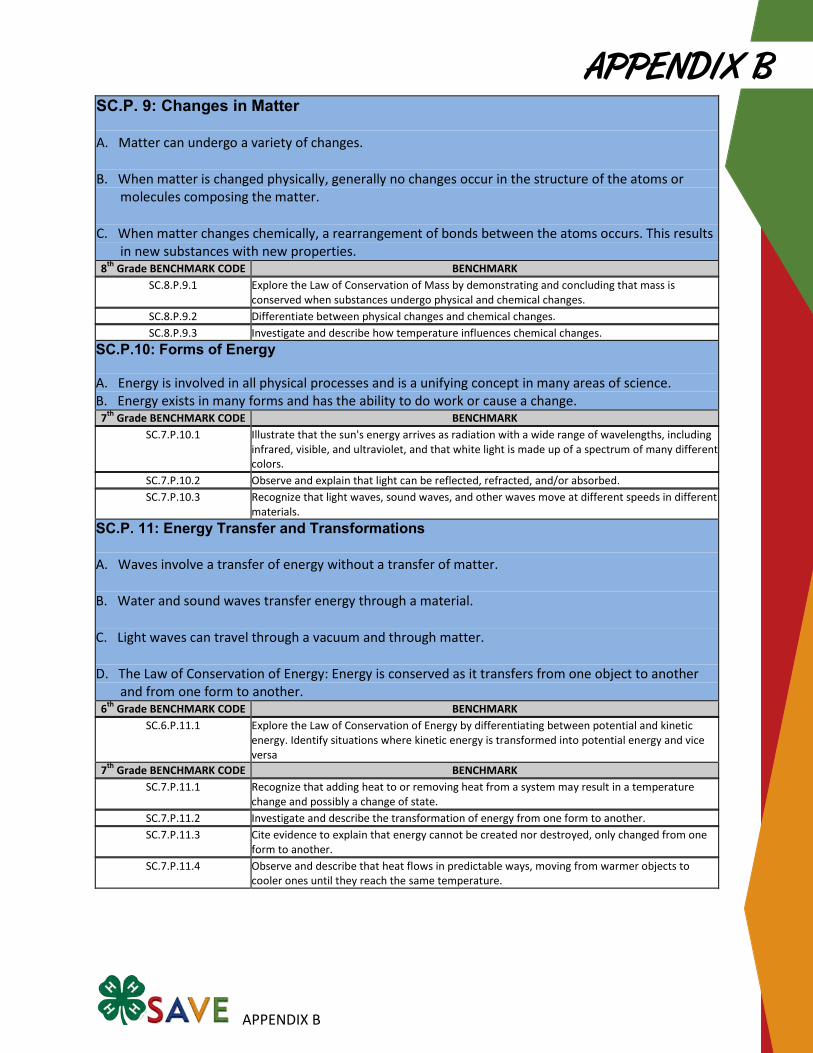
APPENDIX B
SC.P. 9: Changes in Matter
A. Matter can undergo a variety of changes.
B. When matter is changed physically, generally no changes occur in the structure of the atoms or molecules composing the matter.
C. When matter changes chemically, a rearrangement of bonds between the atoms occurs. This results in new substances with new properties.
8th Grade BENCHMARK CODE BENCHMARK SC.8.P.9.1 Explore the Law of Conservation of Mass by demonstrating and concluding that mass is
conserved when substances undergo physical and chemical changes. SC.8.P.9.2 Differentiate between physical changes and chemical changes. SC.8.P.9.3 Investigate and describe how temperature influences chemical changes.
SC.P.10: Forms of Energy
A. Energy is involved in all physical processes and is a unifying concept in many areas of science. B. Energy exists in many forms and has the ability to do work or cause a change. 7th Grade BENCHMARK CODE BENCHMARK
SC.7.P.10.1 Illustrate that the sun's energy arrives as radiation with a wide range of wavelengths, including infrared, visible, and ultraviolet, and that white light is made up of a spectrum of many different colors.
SC.7.P.10.2 Observe and explain that light can be reflected, refracted, and/or absorbed. SC.7.P.10.3 Recognize that light waves, sound waves, and other waves move at different speeds in different
materials. SC.P. 11: Energy Transfer and Transformations
A. Waves involve a transfer of energy without a transfer of matter.
B. Water and sound waves transfer energy through a material.
C. Light waves can travel through a vacuum and through matter.
D. The Law of Conservation of Energy: Energy is conserved as it transfers from one object to another and from one form to another.
6th Grade BENCHMARK CODE BENCHMARK SC.6.P.11.1 Explore the Law of Conservation of Energy by differentiating between potential and kinetic
energy. Identify situations where kinetic energy is transformed into potential energy and vice versa
7th Grade BENCHMARK CODE BENCHMARK SC.7.P.11.1 Recognize that adding heat to or removing heat from a system may result in a temperature
change and possibly a change of state. SC.7.P.11.2 Investigate and describe the transformation of energy from one form to another. SC.7.P.11.3 Cite evidence to explain that energy cannot be created nor destroyed, only changed from one
form to another. SC.7.P.11.4 Observe and describe that heat flows in predictable ways, moving from warmer objects to
cooler ones until they reach the same temperature.
APPENDIX B

APPENDIX B
SC.P.12: Motion of Objects
A. Motion is a key characteristic of all matter that can be observed, described, and measured.
B. The motion of objects can be changed by forces. 6th Grade BENCHMARK CODE BENCHMARK
SC.6.P.12.1 Measure and graph distance versus time for an object moving at a constant speed. Interpret this relationship.
SC.P.13: Forces and Changes in Motion
A. It takes energy to change the motion of objects.
B. Energy change is understood in terms of forces--pushes or pulls.
C. Some forces act through physical contact, while others act at a distance. 6th Grade BENCHMARK CODE BENCHMARK
SC.6.P.13.1 Investigate and describe types of forces including contact forces and forces acting at a distance, such as electrical, magnetic, and gravitational.
SC.6.P.13.2 Explore the Law of Gravity by recognizing that every object exerts gravitational force on every other object and that the force depends on how much mass the objects have and how far apart they are.
SC.6.P.13.3 Investigate and describe that an unbalanced force acting on an object changes its speed, or direction of motion, or both.
SC.L. 18: Matter and Energy Transformations
C. Matter and energy are recycled through cycles such as the carbon cycle.
8th Grade BENCHMARK CODE BENCHMARK SC.8.L.18.3 Construct a scientific model of the carbon cycle to show how matter and energy are
continuously transferred within and between organisms and their physical environment.
APPENDIX B
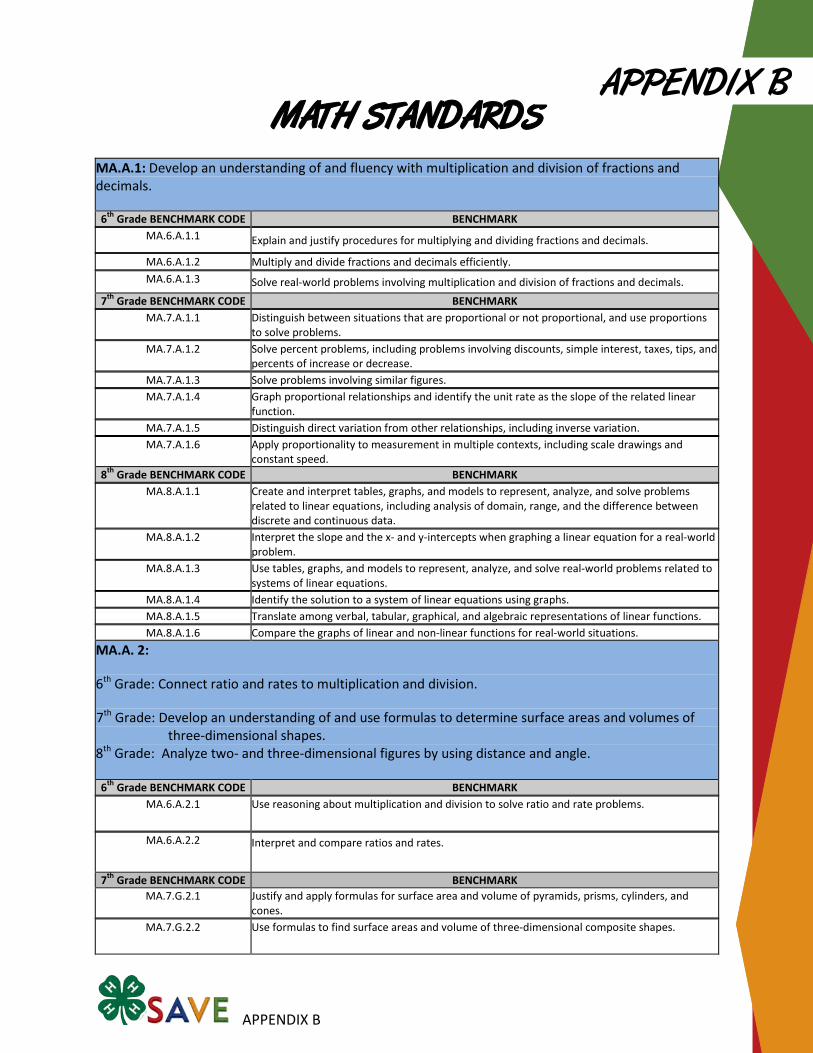
APPENDIX B
MATH STANDARDS
MA.A.1: Develop an understanding of and fluency with multiplication and division of fractions and decimals.
6th Grade BENCHMARK CODE BENCHMARK MA.6.A.1.1 Explain and justify procedures for multiplying and dividing fractions and decimals. MA.6.A.1.2 Multiply and divide fractions and decimals efficiently. MA.6.A.1.3 Solve real-world problems involving multiplication and division of fractions and decimals.
7th Grade BENCHMARK CODE BENCHMARK MA.7.A.1.1 Distinguish between situations that are proportional or not proportional, and use proportions
to solve problems. MA.7.A.1.2 Solve percent problems, including problems involving discounts, simple interest, taxes, tips, and
percents of increase or decrease. MA.7.A.1.3 Solve problems involving similar figures. MA.7.A.1.4 Graph proportional relationships and identify the unit rate as the slope of the related linear
function. MA.7.A.1.5 Distinguish direct variation from other relationships, including inverse variation. MA.7.A.1.6 Apply proportionality to measurement in multiple contexts, including scale drawings and
constant speed. 8th Grade BENCHMARK CODE BENCHMARK
MA.8.A.1.1 Create and interpret tables, graphs, and models to represent, analyze, and solve problems related to linear equations, including analysis of domain, range, and the difference between discrete and continuous data.
MA.8.A.1.2 Interpret the slope and the x- and y-intercepts when graphing a linear equation for a real-world problem.
MA.8.A.1.3 Use tables, graphs, and models to represent, analyze, and solve real-world problems related to systems of linear equations.
MA.8.A.1.4 Identify the solution to a system of linear equations using graphs. MA.8.A.1.5 Translate among verbal, tabular, graphical, and algebraic representations of linear functions. MA.8.A.1.6 Compare the graphs of linear and non-linear functions for real-world situations.
MA.A. 2:
6th Grade: Connect ratio and rates to multiplication and division.
7th Grade: Develop an understanding of and use formulas to determine surface areas and volumes of three-dimensional shapes.
8th Grade: Analyze two- and three-dimensional figures by using distance and angle. 6th Grade BENCHMARK CODE BENCHMARK
MA.6.A.2.1 Use reasoning about multiplication and division to solve ratio and rate problems.
MA.6.A.2.2 Interpret and compare ratios and rates.
7th Grade BENCHMARK CODE BENCHMARK
MA.7.G.2.1 Justify and apply formulas for surface area and volume of pyramids, prisms, cylinders, and cones.
MA.7.G.2.2 Use formulas to find surface areas and volume of three-dimensional composite shapes.
APPENDIX B

APPENDIX B
MA.A. 3: Write, interpret, and use mathematical expressions and equations.
6th Grade BENCHMARK CODE BENCHMARK MA.6.A.3.1 Write and evaluate mathematical expressions that correspond to given situations. MA.6.A.3.2 Write, solve, and graph one- and two- step linear equations and inequalities. MA.6.A.3.3 Work backward with two-step function rules to undo expressions. MA.6.A.3.4 Solve problems given a formula. MA.6.A.3.5 Apply the Commutative, Associative, and Distributive Properties to show that two expressions
are equivalent. MA.6.A.3.6
Construct and analyze tables, graphs, and equations to describe linear functions and other simple relations using both common language and algebraic notation.
7th Grade BENCHMARK CODE BENCHMARK MA.7.A.3.1 Use and justify the rules for adding, subtracting, multiplying, dividing, and finding the absolute
value of integers. MA.7.A.3.2 Add, subtract, multiply, and divide integers, fractions, and terminating decimals, and perform
exponential operations with rational bases and whole number exponents including solving problems in everyday contexts.
MA.7.A.3.3 Formulate and use different strategies to solve one-step and two-step linear equations, including equations with rational coefficients.
MA.7.A.3.4 Use the properties of equality to represent an equation in a different way and to show that two equations are equivalent in a given context.
8th Grade BENCHMARK CODE BENCHMARK MA.8.A.4.1 Solve literal equations for a specified variable. MA.8.A.4.2 Solve and graph one- and two-step inequalities in one variable.
MA.G. 4-5: Geometry and Measurement
6th Grade BENCHMARK CODE BENCHMARK MA.6.G.4.2 Find the perimeters and areas of composite two-dimensional figures, including non-rectangular
figures (such as semicircles) using various strategies. 7th Grade BENCHMARK CODE BENCHMARK
MA.7.G.4.4 Compare, contrast, and convert units of measure between different measurement systems (US customary or metric (SI)), dimensions, and derived units to solve problems.
8th Grade BENCHMARK CODE BENCHMARK MA.8.G.5.1 Compare, contrast, and convert units of measure between different measurement systems (US
customary or metric (SI)) and dimensions including temperature, area, volume, and derived units to solve problems.
MA.A.5: Number and Operations
6ht Grade BENCHMARK CODE BENCHMARK MA.6.A.5.1 Use equivalent forms of fractions, decimals, and percents to solve problems. MA.6.A.5.2 Compare and order fractions, decimals, and percents, including finding their approximate
location on a number line. MA.6.A.5.3 Estimate the results of computations with fractions, decimals, and percents, and judge the
reasonableness of the results. 7th Grade BENCHMARK CODE BENCHMARK
MA.7.A.5.1 Express rational numbers as terminating or repeating decimals. MA.7.A.5.2 Solve non-routine problems by working backwards.
8th Grade BENCHMARK CODE BENCHMARK MA.8.A.6.1 Use exponents and scientific notation to write large and small numbers and vice versa and to
solve problems. MA.8.A.6.2 Make reasonable approximations of square roots and mathematical expressions that include
square roots, and use them to estimate solutions to problems and to compare mathematical
APPENDIX B

APPENDIX B
expressions involving real numbers and radical expressions. MA.8.A.6.3 Simplify real number expressions using the laws of exponents. MA.8.A.6.4 Perform operations on real numbers (including integer exponents, radicals, percents, scientific
notation, absolute value, rational numbers, and irrational numbers) using multi-step and real world problems.
MA.S. 6: Data Analysis--Analyze and summarize data sets.
6th Grade BENCHMARK CODE BENCHMARK MA.6.S.6.1 Determine the measures of central tendency (mean, median, mode) and variability (range) for a
given set of data. MA.6.S.6.2 Select and analyze the measures of central tendency or variability to represent, describe,
analyze, and/or summarize a data set for the purposes of answering questions appropriately. 7th Grade BENCHMARK CODE BENCHMARK
MA.7.S.6.1 Evaluate the reasonableness of a sample to determine the appropriateness of generalizations made about the population.
MA.7.S.6.2 Construct and analyze histograms, stem-and-leaf plots, and circle graphs. 8th Grade BENCHMARK CODE BENCHMARK
MA.8.S.3.1 Select, organize and construct appropriate data displays, including box and whisker plots, scatter plots, and lines of best fit to convey information and make conjectures about possible relationships.
MA.P.7: Probability
7th Grade BENCHMARK CODE BENCHMARK MA.7.P.7.1 Determine the outcome of an experiment and predict which events are likely or unlikely, and if
the experiment is fair or unfair. MA.7.P.7.2 Determine, compare, and make predictions based on experimental or theoretical probability of
independent or dependent events.
APPENDIX B

I certify that has
successfully completed the requirements of the
Students Achieving Viable Energy
Certification Program
Teacher’s Signature:
Date:

The 4-H Motto
To make the best better.
The 4-H Pledge I pledge
my head to clearer thinking,
my heart to greater loyalty,
my hands to larger service, and
my health to better living,
for my club, my community,
my country and my world.
Visit the 4-H Web site for more information:
www.florida4h.org/projects/SAVE.shmtl
This document is 4H EGL 61, one of a series of the 4-H Youth Development Department, UF/IFAS Extension. Original publication date January 2011. Reviewed January 2018. Visit the EDIS website at http://edis.ifas.ufl.edu.
This 4-H publication SAVE: Steps in Achieving Viable Energy—Leader’s Guide [4H ESL 60] to support the Youth Project Guide [4H ESM 50] was developed by Nathan Mitten, graduate student, and H.A. (Skip) Ingley, associate professor, Department of Mechanical and Aerospace Engineering; Jessica Kochert, graduate student, and Joy Jordan, associate professor and 4-H curriculum specialist, Department of Family, Youth and Community Sciences; UF/IFAS Extension; Gainesville 32611.
Special thanks to the reviewers and pilot sites: Kathleen Ruppert, Extension Scientist—Program for Resource Efficient Communities, Department of Agricultural and Biological Engineering; Julie Dillard, Washington County Julie Dillard, Washington County 4-H Agent, Suzanne Wilson, Walton County 4-H Agent and Jackson County 4-H Program pilot sites.
The Institute of Food and Agricultural Sciences (IFAS) is an Equal Opportunity Institution authorized to provide research, educational information and other services only to individuals and institutions that function with non-discrimination with respect to race, creed, color, religion, age, disability, sex, sexual orientation, marital status, national origin, political opinions or affiliations. For more information on obtaining other UF/IFAS Extension publications, contact your county’s UF/IFAS Extension office.
U.S. Department of Agriculture, UF/IFAS Extension Service, University of Florida, IFAS, Florida A & M University Cooperative Extension Program, and Boards of County Commissioners Cooperating. Nick T. Place, dean for UF/IFAS Extension.
[Use of this information by any person constitutes an agreement to hold the authors/their affiliates, the Institute of Food and Agricultural Sciences, Florida 4-H, and University of Florida harmles for any liability claims, damages, or expenses that may be incurred by any person as a result of reference to or reliance on the information contained in this publication.]


