Embed Size (px)
Citation preview
Web-Based Authentication on Cisco Catalyst 9800 Series ControllersFirst Published: 2021-04-27
Americas HeadquartersCisco Systems, Inc.170 West Tasman DriveSan Jose, CA 95134-1706USAhttp://www.cisco.comTel: 408 526-4000
800 553-NETS (6387)Fax: 408 527-0883

© 2021 Cisco Systems, Inc. All rights reserved.
C O N T E N T S
What is Web-Based Authentication? 1C H A P T E R 1
What is Web-Based Authentication 1
Why Web-Based Authentication? 3C H A P T E R 2
Why Web-Based Authentication? 3
How does Web-Based Authentication Work? 5C H A P T E R 3
How does Web-Based Authentication Work? 5
Devices and Roles in Local Web Authentication 6
Authentication Process 7
Web Authentication Types 8
Web Authentication Features 8
Features and Supported Releases 11C H A P T E R 4
Features and Supported Releases 11
Guidelines for Configuring Web-Based Authentication 13C H A P T E R 5
Guidelines for Setting Custom Web Authentication Pages 13
Guidelines for Setting Redirection URL 14
Guidelines for Configuring Secure HTTP Access 14
Configure Local Web Authentication 17C H A P T E R 6
Configure Local Web Authentication using the CLI 18
Configure AAA Server and Server Groups 18
Configure Local Authentication and Authorization 20
Configure Parameter Maps 22
Web-Based Authentication on Cisco Catalyst 9800 Series Controllersiii
Configure WLAN Security Parameters 25
Create Wireless Policy Profile 27
Create a Policy Tag 28
Configure a Site Tag 29
Assign a Policy Tag to an AP 30
Enable the HTTP/HTTPS Server for Web Authentication 31
Configure Local Web Authentication using the WebUI 32
Configure AAA Server and Server Groups 32
Configure Local Authentication and Authorization 34
Configure Local Guest User Credentials 35
Configure Parameter Maps 35
Configure Web Authentication WLAN 38
Create Wireless Policy Profile 39
Configure a Policy Tag 40
Assign a Policy Tag to an AP 40
Configure External Web Authentication 43C H A P T E R 7
Configure External Web Authentication using the CLI 44
Configure AAA Server and Server Groups 44
Configure Local Authentication and Authorization 46
Configure Pre-Authentication ACL 48
Configure Parameter Maps 49
Configure WLAN Security Parameters 52
Configuring the URLFilter List 54
Create Wireless Policy Profile 55
Create a Policy Tag 56
Configure a Site Tag 57
Assign a Policy Tag to an AP 58
Enable the HTTP/HTTPS Server for Web Authentication 59
Configure External Web Authentication using the WebUI 60
Configure AAA Server and Server Groups 60
Configure Local Authentication and Authorization 61
Configuring Pre-Authentication ACL 62
Configure Local Guest User Credentials 63
Web-Based Authentication on Cisco Catalyst 9800 Series Controllersiv
Contents
Configure Parameter Maps 64
Configure Web Authentication WLAN 66
Configuring the URL Filter List 67
Create Wireless Policy Profile 68
Configure a Policy Tag 68
Assign a Policy Tag to an AP 69
Validate Configuration Tasks for Web Authentication 71C H A P T E R 8
Validate Configuration Tasks for Web Authentication 71
Configuration Examples for Web-Based Authentication 75C H A P T E R 9
Example for Configuring Local Web Authentication in Local Mode 75
Example for Configuring Local Web Authentication in Flex Mode 76
Example for Configuring Local Web Authentication in Local Mode 77
Example for Configuring External Web Authentication in Flex Mode 78
Troubleshoot Common Issues for Web Authentication 81C H A P T E R 1 0
Troubleshoot Common Issues for Web Authentication 81
Web-Based Authentication on Cisco Catalyst 9800 Series Controllersv
Contents

Web-Based Authentication on Cisco Catalyst 9800 Series Controllersvi
Contents
C H A P T E R 1What is Web-Based Authentication?
• What is Web-Based Authentication, on page 1
What is Web-Based AuthenticationWeb authentication is a Layer 3 security solution designed for providing easy and secure guest access to hostson WLANwith open authentication or appropriate layer 2 security methods. Web authentication allows usersto get authenticated through a web browser on a wireless client, with minimal configuration on the client side.It allows users to associate with an open SSID without having to set up a user profile. The host receives anIP address and DNS information from the DHCP server, however cannot access any of the network resourcesuntil they authenticate successfully. When the host connects to the guest network, the WLC redirects the hostto an authentication web page where the user needs to enter valid credentials. The credentials are authenticatedby the WLC or an external authentication server and if authenticated successfully is given full access to thenetwork. Hosts can also be given limited access to particular network resources before authentication forwhich the pre-authentication ACL functionality needs to be configured.
The following are the different types of web authentication methods:
• LocalWebAuthentication (LWA): Configured as Layer 3 security on the controller, the web authenticationpage and the pre-authentication ACL are locally configured on the controller. The controller interceptshtttp(s) traffic and redirects the client to the internal web page for authentication. The credentials enteredby the client on the login page is authenticated by the controller locally or through a RADIUS or LDAPserver.
• External Web Authentication (EWA): Configured as Layer 3 security on the controller, the controllerintercepts htttp(s) traffic and redirects the client to the login page hosted on the external web server. Thecredentials entered by the client on the login page is authenticated by the controller locally or through aRADIUS or LDAP server. The pre-authentication ACL is configured statically on the controller.
• Central Web Authentication (CWA): Configured mostly as Layer 2 security on the controller, theredirectionURL and the pre-authenticationACL reside on ISE and are pushed during layer 2 authenticationto the controller. The controller redirects all web traffic from the client to the ISE login page. ISE validatesthe credentials entered by the client through HTTPS and authenticates the user.
Web-Based Authentication on Cisco Catalyst 9800 Series Controllers1

Web-Based Authentication on Cisco Catalyst 9800 Series Controllers2
What is Web-Based Authentication?What is Web-Based Authentication

C H A P T E R 2Why Web-Based Authentication?
• Why Web-Based Authentication?, on page 3
Why Web-Based Authentication?• To authenticate guest users
It is essential for organizations to provide network access to temporary users such as guests and contractors.Guest users are most likely to use devices that are beyond the control of an organization’s IT services.As a result, temporary users are not going to have endpoints configured for IEEE 802.1X. Webauthentication is a convenient mechanism to have such users authenticate and sign an acceptable userpolicy. Authenticating temporary access users also has the added benefit of making it possible to monitortheir activities, allowing organizations to meet compliance requirements.
• As a fall back authentication mechanism for regular network users
Often, regular network users with devices configured for IEEE 802.1X devices are likely to failauthentication. This can happen for various reasons like expiration of passwords or certificates andmisconfigured supplicants.Web authentication provides a means for such users to authenticate themselvesand remediate issues that are preventing them from authenticating through IEEE 802.1X.
• Device registration
Users often have personal devices, like tablets and smartphones, that they use to access the Internet andother corporate applications. It is increasingly important for IT to be able to link every such device to auser to help ensure that it has appropriate access to network resources. Web authentication can be usedas a means to allow users to register their personal devices. Once registered, the device can be eithergiven full or limited access to network resources based on the organization’s security policy and theuser’s role in the organization.
Web-Based Authentication on Cisco Catalyst 9800 Series Controllers3

Web-Based Authentication on Cisco Catalyst 9800 Series Controllers4
Why Web-Based Authentication?Why Web-Based Authentication?
C H A P T E R 3How does Web-Based Authentication Work?
• How does Web-Based Authentication Work?, on page 5
How does Web-Based Authentication Work?When you initiate an HTTP session, web authentication intercepts ingress HTTP packets from the host andsends an HTML login page to the users. The users enter their credentials, which the web-based authenticationfeature sends to the authentication, authorization, and accounting (AAA) server for authentication. Ifauthentication succeeds, web authentication sends a Login-Successful HTML page to the host and applies theaccess policies returned by the AAA server. If authentication fails, web authentication forwards a Login-FailHTML page to the user, prompting the user to retry the login. If the user exceeds the maximum number ofattempts, a Login-Expired HTML page is sent to the host, and the user is excluded with the exclusion reasonas Web authentication failure.
Database for Authentication
The user accounts used for authentication can either be added locally on the WLC, on a RADIUS server oron an LDAP server. The choice of server to be used for authentication and the precedence can be configuredon the WLC by the administrator.
• Local database: The controller stores the credentials (username and password) of all the local networkusers and these credentials are then used to authenticate the users.
• LDAP database: Lightweight Directory Access Protocol or LDAP stores the credentials of the users inthe LDAP backend database. The controller queries the LDAP server for the credentials of a particularuser in the database and these credentials are then used to authenticate the users.
• RADIUS database: Remote Authentication Dial-In User Service (RADIUS) serves as the backenddatabase for storing the credentials of the users. The controller requests the RADIUS server for credentialsthat can be used to authenticate the users.
Based on where the web pages are hosted, web authentication can be categorized as follows:
• Internal: The internal default HTML pages (Login, Success, Fail, and Expire) in the controller are usedduring authentication.
• Custom: The customizedweb pages (Login, Success, Fail, and Expire) are downloaded onto the controllerand used during authentication.
Web-Based Authentication on Cisco Catalyst 9800 Series Controllers5
• External: The customized web pages are hosted on an external web server instead of using the in-builtor customized web pages.
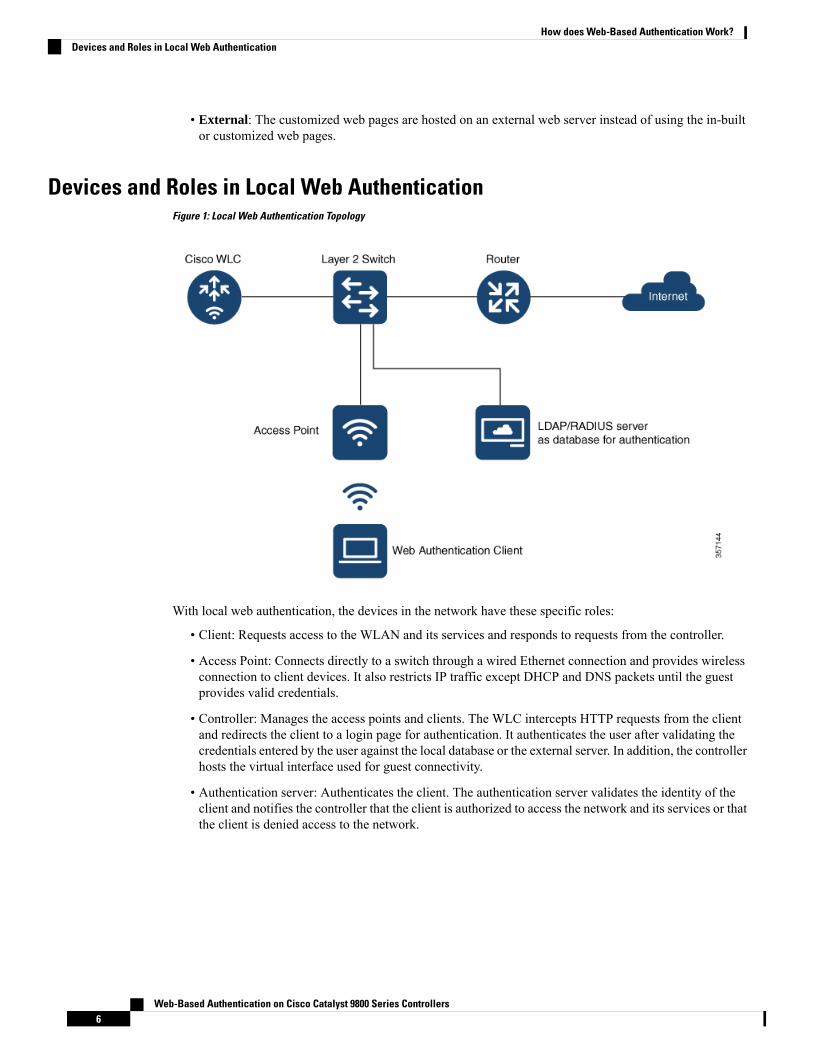
Devices and Roles in Local Web AuthenticationFigure 1: Local Web Authentication Topology
With local web authentication, the devices in the network have these specific roles:
• Client: Requests access to the WLAN and its services and responds to requests from the controller.
• Access Point: Connects directly to a switch through a wired Ethernet connection and provides wirelessconnection to client devices. It also restricts IP traffic except DHCP and DNS packets until the guestprovides valid credentials.
• Controller: Manages the access points and clients. The WLC intercepts HTTP requests from the clientand redirects the client to a login page for authentication. It authenticates the user after validating thecredentials entered by the user against the local database or the external server. In addition, the controllerhosts the virtual interface used for guest connectivity.
• Authentication server: Authenticates the client. The authentication server validates the identity of theclient and notifies the controller that the client is authorized to access the network and its services or thatthe client is denied access to the network.
Web-Based Authentication on Cisco Catalyst 9800 Series Controllers6
How does Web-Based Authentication Work?Devices and Roles in Local Web Authentication
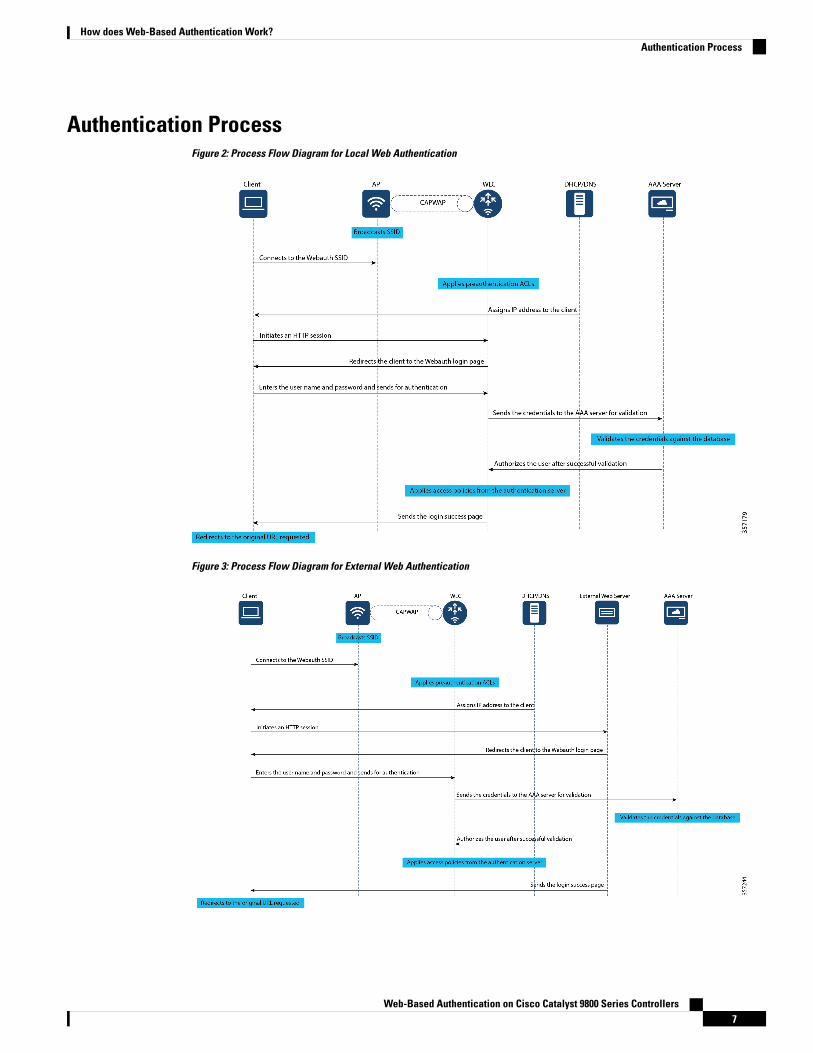
Authentication ProcessFigure 2: Process Flow Diagram for Local Web Authentication
Figure 3: Process Flow Diagram for External Web Authentication
Web-Based Authentication on Cisco Catalyst 9800 Series Controllers7
How does Web-Based Authentication Work?Authentication Process
Web Authentication TypesBased on the various types of web authentication pages, web-based authentication is classified as follows:
• Webauth: This is the basic web authentication method where the controller presents a policy page withthe user name and password. You need to enter the correct credentials to access the network.
• Authbypass: The controller uses the MAC address as the client identity and validates this with theauthentication server that has a database of client MAC addresses that are allowed network access.
• Consent (web-passthrough): The controller redirects you to a usage policy page without promptingyou to enter any credentials for user authentication. To access the network, you must accept the policy.
• Webconsent: This is a combination of webauth and consent web authentication types in which thecontroller redirects you to a usage policy page with Accept or Deny buttons along with user name orpassword. You need to enter the correct credentials and accept the usage policy to access the network.
Web Authentication Features
Secure HTTP Access for Web Authentication
For local web authentication to work, you must enable HTTP access on the controller. By default, webauthentication starts when the controller intercepts the first TCP HTTP GET packet from the client. Whenthe client sends the first HTTP GET to TCP port 80, the controller redirects the client to https: <virtualIP>/login.html and displays the web authentication login page.
On a secure HTTP connection, data to and from an HTTP server is encrypted before being sent over theInternet. With secure authentication enabled, the login page always uses HTTPS even if the client sends anHTTP request.
The virtual interface IP address (IPv4 or IPv6) is used only in communications between the controller andwireless clients. It serves as the redirect address for the web authentication login page. It is recommended thatyou configure a nonroutable IP address for the virtual interface, ideally not overlapping with the networkinfrastructure addresses. Use one of the options proposed in RFC 5737, for example, 192.0.2.0/24,198.51.100.0/24, and 203.0.113.0/24 networks.
WLC Certificate Validation
In a wireless network, each wireless device (controller, access point, and client) has its own authenticationcertificate that validates its identity. TheWLC and access points are shipped with a Cisco-installed CertificateAuthority (CA) certificate that is used to sign and validate device certificates. When the guest users try toaccess a URL, they receive a security warning because of the standard self-signed certificate that is installedon the WLC, by default. To avoid this warning, we recommend you install a third-party certificate signed bya trusted certificate authority on the controller.
To use a third-party certificate issued by a trusted CA, you must download the following certificates from theCA server to the controller and the clients.
• Device Certificate for the WLC and the clients
• Root Certificate of the Public Key Infrastructure (PKI) for the WLC
• CA Certificate for the clients
Web-Based Authentication on Cisco Catalyst 9800 Series Controllers8
How does Web-Based Authentication Work?Web Authentication Types
These digital certificates are configured and held in containers called trustpoints and used when the devicesinitiate a secure communication with the other network devices. A trustpoint includes the identity of the CAthat signed the device certificate, CA-specific trustpoint configuration parameters, and an association withone, enrolled identity (device) certificate.
For more information about certificates, see Trustpoints in Cisco 9800 chapter.
Custom Webauth Login Portal
Web authentication allows customization of the login portal for user login. The administrator has an optionto have the user view a Cisco default login page from the internal web server of the controller, a customizedlogin page from the internal web server of the controller or a customized page residing on an external webserver. The custom login pages allow you to create web pages that include your corporate logo, backgrounds,fonts, cascading style sheets, legalese and so on.
To create custom pages, you must download the webauth bundle from the software downloads page oncisco.com. The webauth bundle is a GNU tar file that contains HTML and GIF files. The main file in the webauth bundle is the login.html file which you can modify to create your custom web page. After you havecreated your HTML pages or modified the existing login.html file from the webauth bundle, you have tobundle the files in a GNU standard tar file and upload to the controller or to the local web server.We recommendyou to customize a bundle that exists instead of creating a new bundle.
Custom Web Browser Banners
You can customize the web browser banners that appears when you log on to a switch, by modifying the titleand the body of the default banner. The banner appears on both the login page and the authentication resultpop-up page.
The banner title, Welcome to the Cisco Web-Authentication network and a body text appears by defaultwhen you are redirected to the login page. However, you can customize the title and the body text using theCLI or the Web user interface.
Cisco Systems and one of the following authentication messages appear on the authentication result pop-uppage.
• Authentication Successful
• Authentication Failed
• Authentication Expired
If you do not enable a banner, only the username and password dialog boxes appear in the web authenticationlogin screen, and no banner appears when you log in to the switch.
Custom Authentication Proxy Web Pages
During local web authentication process, the internal HTTP server on the controller hosts four HTML pagesto deliver to an authenticating client. The server uses these pages to notify the client of the four authenticationprocess states. Custom Authentication Proxy Web Pages lets you display four user-defined HTML pages tousers in place of the switch’s internal default HTML pages during web-based authentication. You can alsospecify a URL to which users are redirected after authentication occurs, which replaces the internal Successpage.
• Login—Your credentials are requested.
• Success—The login was successful.
Web-Based Authentication on Cisco Catalyst 9800 Series Controllers9
How does Web-Based Authentication Work?Web Authentication Features
• Fail—The login failed.
• Expire—The login session has expired because of excessive login failures.
The configured authentication proxy web pages supports both HTTP and SSL.
Preauthentication Access Control Lists and URLFilters
To determine the data requests that are allowed or blocked for a guest user, you need to configurepreauthentication ACLs on the controller. You need to configure the allowed URLs or denied URLs for theACLs. The URLs need to be pre-configured on the ACL. With Preauthentication ACLs configured, the clientwhen in registration phase is allowed to connect to the configured URLs.
When using an external web server for web authentication, you must configure a pre-authentication ACL forpermitting the clients to access the external web server. For local web authentication, configuringpre-authentication ACL is not mandatory. However, it is a good practice to configure a pre-authenticationACL if you want to give the client access to any non-HTTP resources before authentication.
Configuring URLfilter lists helps you to add specific URLs to the allowed list on the controller or the AP.Authentication is not required to access the allowed list of URLs. When you try to access sites that are not inallowed list, you are redirected to the Login page.
Web-Based Authentication on Cisco Catalyst 9800 Series Controllers10
How does Web-Based Authentication Work?Web Authentication Features

C H A P T E R 4Features and Supported Releases
• Features and Supported Releases, on page 11
Features and Supported ReleasesThis section provides information about the different features that are supported on web authentication andthe release in which they were introduced.
Table 1: Web Authentication Features and Releases
Introductory ReleaseFeature DescriptionFeature Name
Cisco IOS XE Amsterdam 17.3.1The following commands havebeen introduced to manage HTTPand HTTPS requests for webauthentication.
• secure-webauth-disable
• webauth-http-enable
HTTP/HTTPS access for Webauthentication
Cisco IOS XE Amsterdam 17.3.1Automatic upload of custom webauthentication HTML files on tothe flash on the active and memberswitches through the Web UI.
Auto upload of custom pages
Cisco IOS XE Bengaluru - 17.4.1Support for layer 2 multiauthentication methods have beenintroduced for LWA and EWA.
Multi authentication methods
Cisco IOS XE Gibraltar - 16.11.1Support for configuring IPv6ACLsfor web authentication have beenintroduced.
IPv6 ACLs for Webauthentication
Cisco IOS XE Gibraltar - 16.10.1Local Web Authentication (LWA)and External Web Authentication(EWA) features are introduced.
Local and external Webauthentication
Web-Based Authentication on Cisco Catalyst 9800 Series Controllers11
Web-Based Authentication on Cisco Catalyst 9800 Series Controllers12
Features and Supported ReleasesFeatures and Supported Releases
C H A P T E R 5Guidelines for Configuring Web-BasedAuthentication
• Guidelines for Setting Custom Web Authentication Pages, on page 13• Guidelines for Setting Redirection URL, on page 14• Guidelines for Configuring Secure HTTP Access, on page 14
Guidelines for Setting Custom Web Authentication PagesRead the following guidelines before you configure custom web authentication pages for login, succesfullogin, failed login and expired login pages.
• Ensure that the custom pages are in HTML format .
• You must configure all four custom HTML files. If fewer than four files are configured, the internaldefault HTML pages will be used.
• You must copy the four custom HTML files to the disk or flash of the switch. When you are using aswitch stack, you can copy the pages on to the flash on the active and member switches. For example,the login page can be on the flash on the active switch, and the success and failure pages can be on theflash on a member switch.
When using the CLI, you must manually copy the custom HTMLfiles on to the flash of the active and standby swithces. However,when you upload the customer web auth bundle file in tar formatthrough the Web UI, the system will untar and place the customHTML files on both the active and standby switches.
Note
• You must include an HTML redirect command in the success page to access a specific URL.
• You must configure a virtual IP in the global parameter map.
• If you configure customweb pages for HTTP authentication, theymust also include the HTML commandsto set the page time out, hidden password, or to confirm that the same page is not submitted twice.
• You cannot configure web authentication banners after configuring custom web authentication pages.
Web-Based Authentication on Cisco Catalyst 9800 Series Controllers13
• All of the logo files such as image, flash, audio, video, and so on that are stored in the system directory(for example, flash, disk0, or disk) and that must be displayed on the login page must useweb_auth_<filename> as the file name.
Guidelines for Setting Redirection URLWhen configuring a redirection URL for successful login, consider these guidelines:
• If the custom authentication proxy web pages feature is enabled, the redirection URL feature is disabledand is not available in the CLI. You can perform redirection in the custom-login success page.
• If the CLI command redirecting users to specific URL after authentication occurs is entered and then thecommand configuring web pages is entered, the CLI command redirecting users to a specific URL doesnot take effect.
• If the redirection URL feature is enabled, a configured auth-proxy-banner is not used.
• To remove the specification of a redirection URL, use the no form of the command.
• If the redirection URL is required after the web-based authentication client is successfully authenticated,then the URL string must start with a valid URL (for example, http://) followed by the URL information.If only the URL is given without http://, then the redirection URL on successful authentication mightcause page not found or similar errors on a web browser.
Guidelines for Configuring Secure HTTP AccessWith the introduction of webauth-http-enable and secure-webauth-disable commands, you can controlhow HTTP and HTTPS requests are handled for web authentication. Earlier, with ip http server and ip httpsecure-server global commands, you could configure HTTP and secure HTTP access only for the web userinterface and not specifically for web authentication.
By default, ip http secure-server command enables secure access globally for accessing the web user interfaceand for web authentication. Enabling HTTPS globally secures the data to and from an HTTP server byencrypting the data before transmitting over the Internet. However, in situations where you want to disablesecure HTTP access for web authentication, and still want to enable secure access for the user interface, youmust run secure-webauth-disable command. Configuring secure-webauth-disable overrides the global iphttp secure-server command and lets you disable HTTPS for web authentication.
Alternatively, in certain situations, you might have to disable HTTP access for port 80 in order to disableaccessing the web user interface through port 80 and still enable the port for web authentication. You canachieve this by disabling port 80 using the global command, no ip http server and enable web authenticationon port 80 using the webauth-http-enable command.
The secure-webauth-disable and webauth-http-enable commands are not enabled by default; you mustconfigure them explicitly.
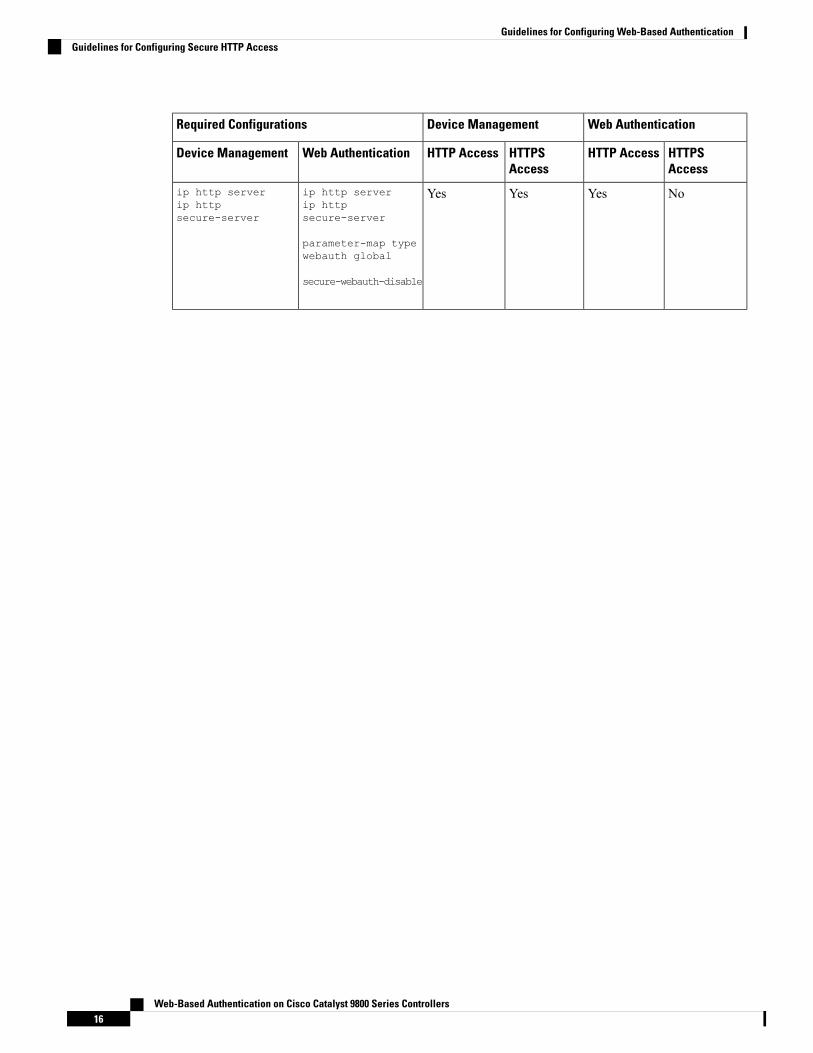
The following are the allowed CLI combinations and respective system behaviour while connfiguringHTTP/HTTPS access for web authentication and device management using the web user interface.
Web-Based Authentication on Cisco Catalyst 9800 Series Controllers14
Guidelines for Configuring Web-Based AuthenticationGuidelines for Setting Redirection URL
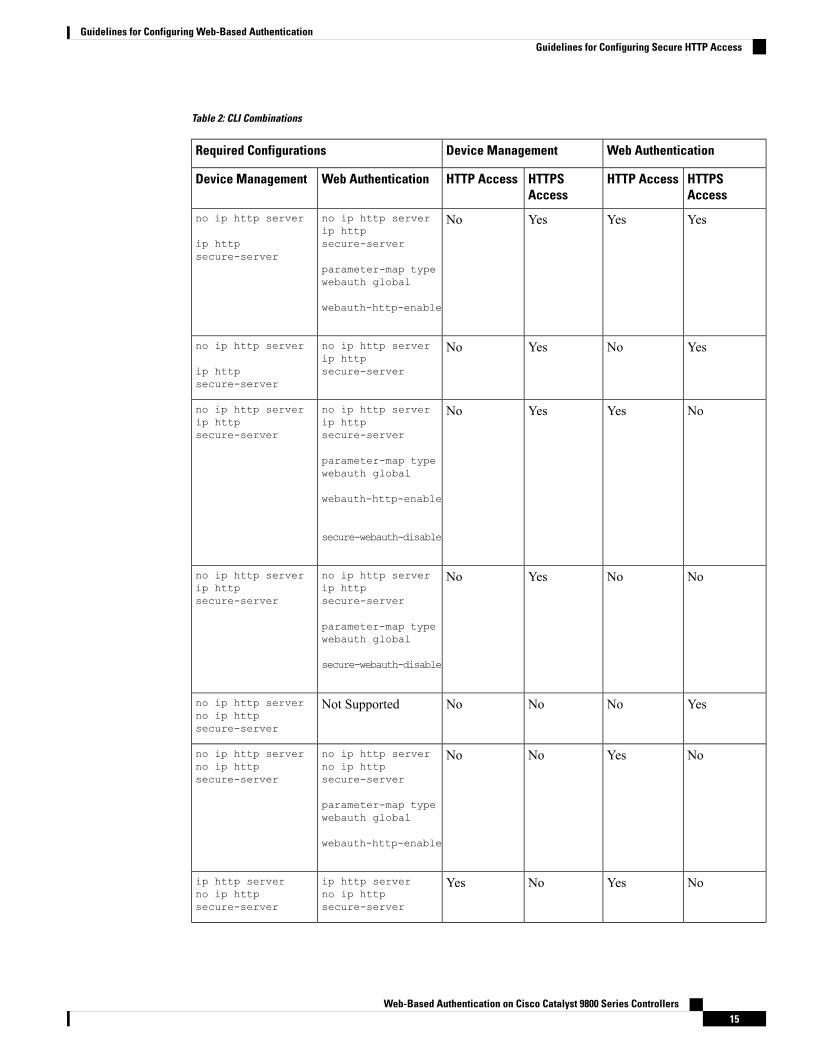
Table 2: CLI Combinations
Web AuthenticationDevice ManagementRequired Configurations
HTTPSAccess
HTTP AccessHTTPSAccess
HTTP AccessWeb AuthenticationDevice Management
YesYesYesNono ip http serverip httpsecure-server
parameter-map typewebauth global
webauth-http-enable
no ip http server
ip httpsecure-server
YesNoYesNono ip http serverip httpsecure-server
no ip http server
ip httpsecure-server
NoYesYesNono ip http serverip httpsecure-server
parameter-map typewebauth global
webauth-http-enable
secure-webauth-disable
no ip http serverip httpsecure-server
NoNoYesNono ip http serverip httpsecure-server
parameter-map typewebauth global
secure-webauth-disable
no ip http serverip httpsecure-server
YesNoNoNoNot Supportedno ip http serverno ip httpsecure-server
NoYesNoNono ip http serverno ip httpsecure-server
parameter-map typewebauth global
webauth-http-enable
no ip http serverno ip httpsecure-server
NoYesNoYesip http serverno ip httpsecure-server
ip http serverno ip httpsecure-server
Web-Based Authentication on Cisco Catalyst 9800 Series Controllers15
Guidelines for Configuring Web-Based AuthenticationGuidelines for Configuring Secure HTTP Access
Web AuthenticationDevice ManagementRequired Configurations
HTTPSAccess
HTTP AccessHTTPSAccess
HTTP AccessWeb AuthenticationDevice Management
NoYesYesYesip http serverip httpsecure-server
parameter-map typewebauth global
secure-webauth-disable
ip http serverip httpsecure-server
Web-Based Authentication on Cisco Catalyst 9800 Series Controllers16
Guidelines for Configuring Web-Based AuthenticationGuidelines for Configuring Secure HTTP Access
C H A P T E R 6Configure Local Web Authentication
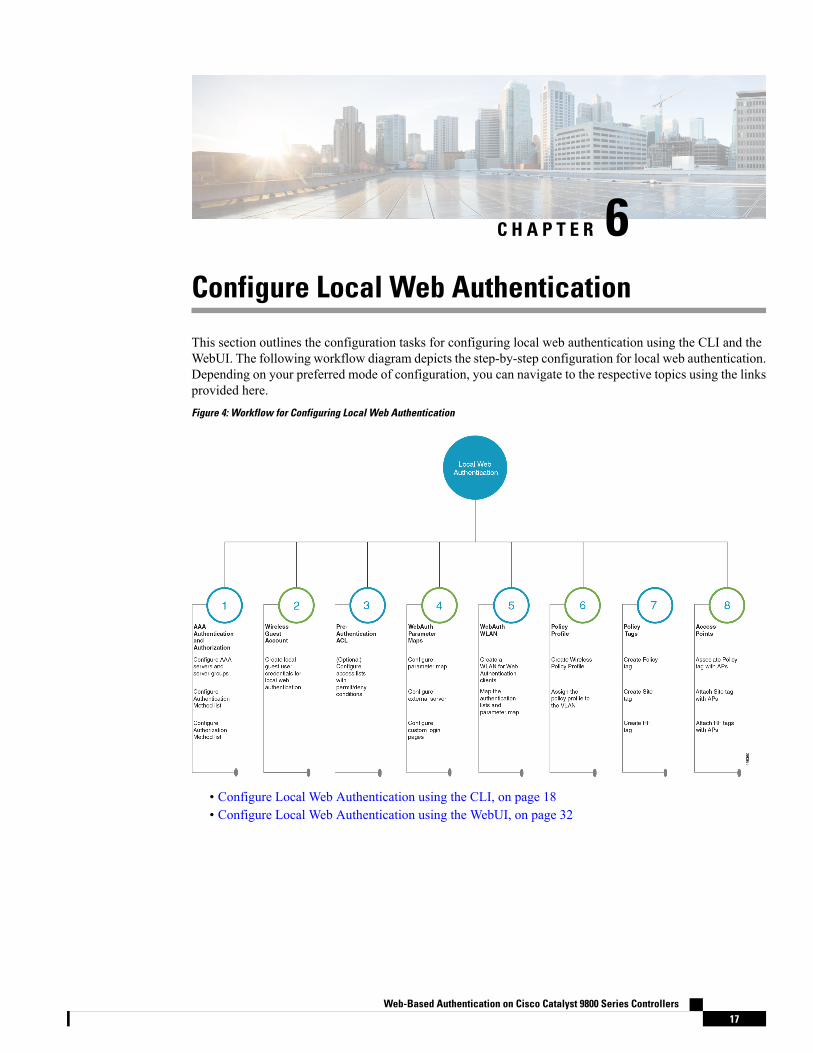
This section outlines the configuration tasks for configuring local web authentication using the CLI and theWebUI. The following workflow diagram depicts the step-by-step configuration for local web authentication.Depending on your preferred mode of configuration, you can navigate to the respective topics using the linksprovided here.
Figure 4: Workflow for Configuring Local Web Authentication
• Configure Local Web Authentication using the CLI, on page 18• Configure Local Web Authentication using the WebUI, on page 32
Web-Based Authentication on Cisco Catalyst 9800 Series Controllers17

Configure Local Web Authentication using the CLI
Configure AAA Server and Server GroupsWhen trying to access the WLC, you will be prompted to enter a username and password in order to let youconnect to the guest network. By default, these credentials are validated against the local database of userson the controller. Alternatively, you can set up a remote AAA RADIUS or LDAP server for authentication.
Step 1 enable
Example:
Device> enable
Enables privileged EXEC mode.
• Enter your password if prompted.
Step 2 configure terminal
Example:
Device# configure terminal
Enters global configuration mode.
Step 3 To configure LDAP server, do the following:a) ldap server server-name
Example:
Device(config)#ldap server WEBAUTHSERVER
Defines a LDAP server and enters LDAP server configuration mode.b) ipv4 ipv4-address
Example:Device(config-ldap-server)# ipv4 192.168.1.192
Specifies the LDAP server IP address using IPv4.c) bind authenticate root-dn password [0 string | 7 string] string
Example:Device(config-ldap-server)#bind authenticate root-dn admin password 6 Cisco12345
Use 0 line option to configure an unencrypted shared secret. Use 7 line option to configure an encrypted shared secret.
Specifies a shared secret text string used between the controller and LDAP server.d) base-dn string
Example:Device(config-ldap-server)#base-dn CN=Users,DC=lab,DC=com
Web-Based Authentication on Cisco Catalyst 9800 Series Controllers18
Configure Local Web AuthenticationConfigure Local Web Authentication using the CLI
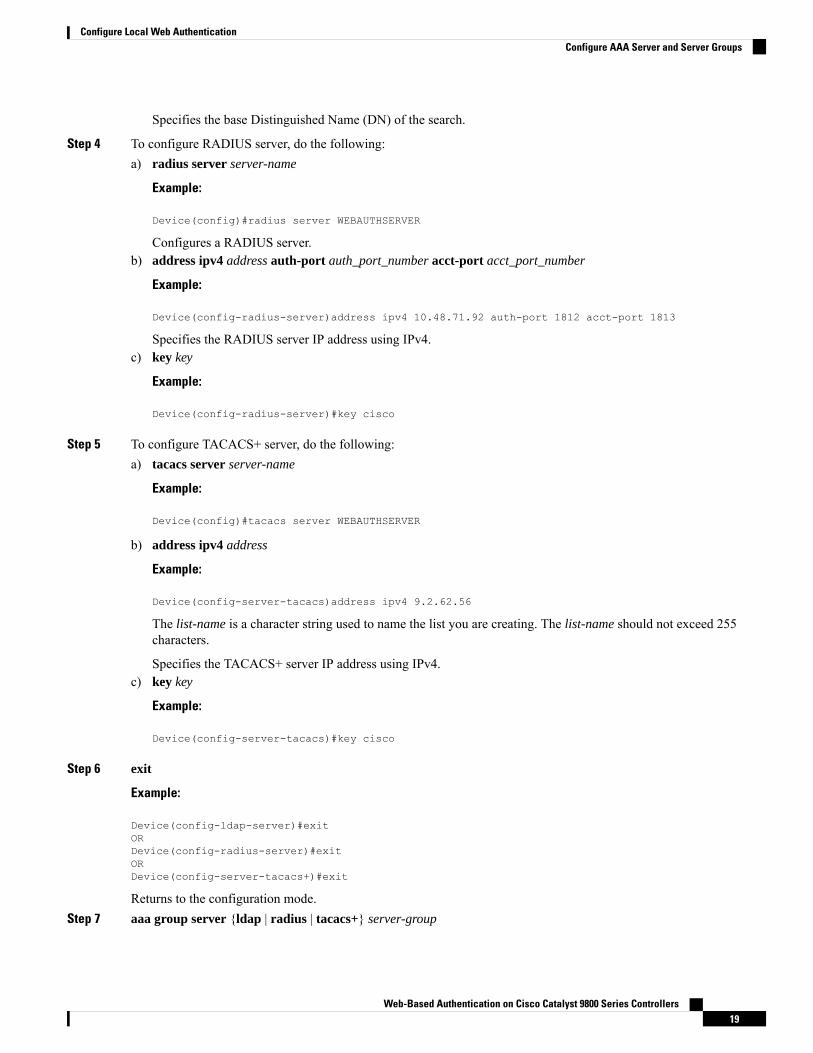
Specifies the base Distinguished Name (DN) of the search.
Step 4 To configure RADIUS server, do the following:a) radius server server-name
Example:
Device(config)#radius server WEBAUTHSERVER
Configures a RADIUS server.b) address ipv4 address auth-port auth_port_number acct-port acct_port_number
Example:
Device(config-radius-server)address ipv4 10.48.71.92 auth-port 1812 acct-port 1813
Specifies the RADIUS server IP address using IPv4.c) key key
Example:
Device(config-radius-server)#key cisco
Step 5 To configure TACACS+ server, do the following:a) tacacs server server-name
Example:
Device(config)#tacacs server WEBAUTHSERVER
b) address ipv4 address
Example:
Device(config-server-tacacs)address ipv4 9.2.62.56
The list-name is a character string used to name the list you are creating. The list-name should not exceed 255characters.
Specifies the TACACS+ server IP address using IPv4.c) key key
Example:
Device(config-server-tacacs)#key cisco
Step 6 exit
Example:
Device(config-ldap-server)#exitORDevice(config-radius-server)#exitORDevice(config-server-tacacs+)#exit
Returns to the configuration mode.Step 7 aaa group server {ldap | radius | tacacs+} server-group
Web-Based Authentication on Cisco Catalyst 9800 Series Controllers19
Configure Local Web AuthenticationConfigure AAA Server and Server Groups

Example:
Device(config-ldap-sg)#aaa group server ldap LDAPGROUPORDevice(config-sg-radius)#aaa group server radius RADGROUPORDevice(config-sg-tacacs+)#aaa group server tacacs+ TACGROUP
server-group refers to the server group name with a maximum length of 32 strings.
Creates a server-group identification.Step 8 server name server-name
Example:
Device(config-ldap-sg)#server name WEBAUTHSERVERORDevice(config-sg-radius)#server name WEBAUTHSERVERORDevice(config-sg-tacacs+)#server name WEBAUTHSERVER
Maps the LDAP/RADIUS/TACACS+ server to the server group.
If you have multiple LDAP/RADIUS/TACACS+ servers that can be used for authentication, it is recommended to mapall these servers to the same server group. The WLC handles load balancing different authentications among the serversin the server group.
Step 9 end
Example:
Device(config-ldap-sg)#endORDevice(config-sg-radius)#endORDevice(config-sg-tacacs+)#end
Exits the global configuration mode and returns to privileged EXEC mode.
Configure Local Authentication and AuthorizationA method list is a sequential list describing the authentication and authorization methods to be queried toauthenticate a user. Method lists enable you to designate one or more security protocols to be used forauthentication and authorization, thus ensuring a backup system in case the initial method fails.
Configure the following steps to specify the local username database as the method of user authentication atlogin.
Step 1 enable
Example:
Device> enable
Enables privileged EXEC mode.
Web-Based Authentication on Cisco Catalyst 9800 Series Controllers20
Configure Local Web AuthenticationConfigure Local Authentication and Authorization

• Enter your password, if prompted.
Step 2 configure terminal
Example:
Device# configure terminal
Enters global configuration mode.
Step 3 aaa new-model
Example:
Device(config)# aaa new-model
Enables AAA functionality.
Step 4 aaa authentication login {default | list-name} local group AAA-server-group
Example:
Device(config)#aaa authentication login WIRELESS_LWA_AUTHENTICATION local
The list-name is a character string used to name the list you are creating. The list-name should not exceed 255 characters.
group AAA_server_group lets you specify the AAA server group that you have created for authorization.
Sets the login authentication to use the local username database. The default keyword applies the local user databaseauthentication to all ports.
Step 5 aaa authorization network {default | list-name} local group AAA_server_group
Example:
Device(config)#aaa authorization network WIRELESS_LWA_AUTHORIZATION local
group AAA_server_group lets you specify the AAA server group that you have created for authorization.
Creates an authorization method list for external web-based authorization.Step 6 user-name user name
Example:
Device(config)#username guest
Creates guest user name in the local database, and establishes a username-based authentication system.
For user-name, specify the user ID as one word. Spaces and quotation marks are not allowed.
Step 7 password {encryption-type | password}
Example:
Device(config-user-name)#password cisco123
Web-Based Authentication on Cisco Catalyst 9800 Series Controllers21
Configure Local Web AuthenticationConfigure Local Authentication and Authorization
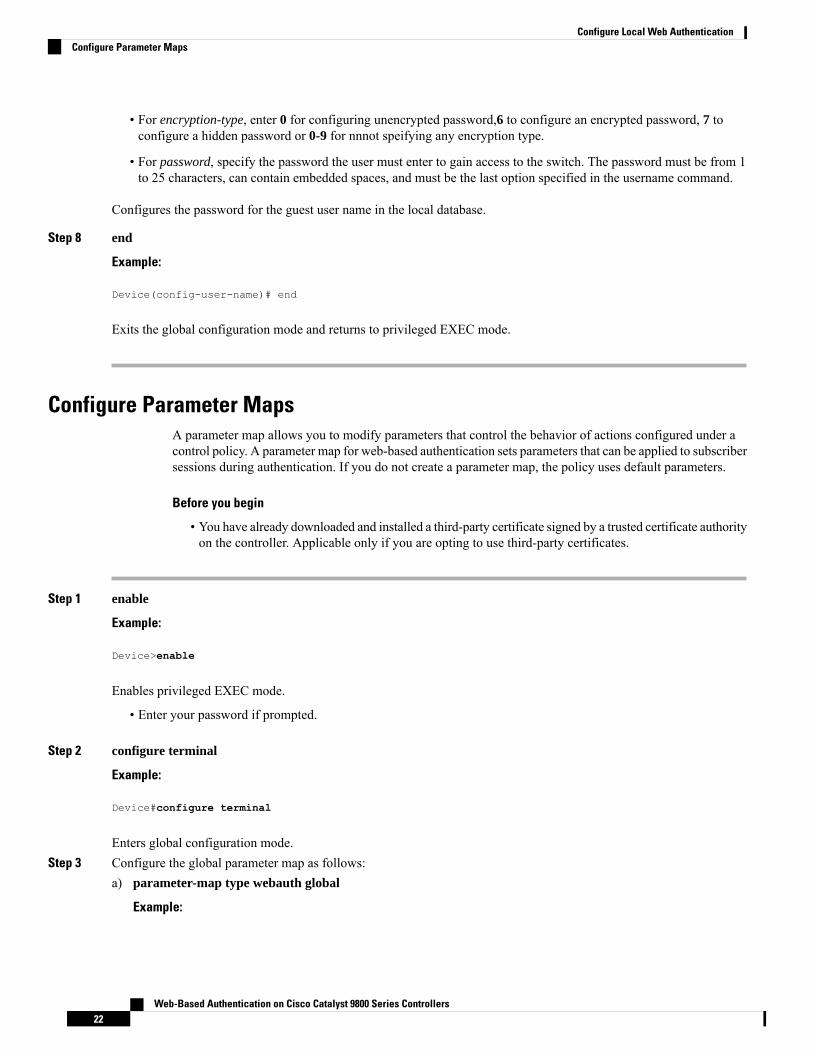
• For encryption-type, enter 0 for configuring unencrypted password,6 to configure an encrypted password, 7 toconfigure a hidden password or 0-9 for nnnot speifying any encryption type.
• For password, specify the password the user must enter to gain access to the switch. The password must be from 1to 25 characters, can contain embedded spaces, and must be the last option specified in the username command.
Configures the password for the guest user name in the local database.
Step 8 end
Example:
Device(config-user-name)# end
Exits the global configuration mode and returns to privileged EXEC mode.
Configure Parameter MapsA parameter map allows you to modify parameters that control the behavior of actions configured under acontrol policy. A parameter map for web-based authentication sets parameters that can be applied to subscribersessions during authentication. If you do not create a parameter map, the policy uses default parameters.
Before you begin
• You have already downloaded and installed a third-party certificate signed by a trusted certificate authorityon the controller. Applicable only if you are opting to use third-party certificates.
Step 1 enable
Example:
Device>enable
Enables privileged EXEC mode.
• Enter your password if prompted.
Step 2 configure terminal
Example:
Device#configure terminal
Enters global configuration mode.Step 3 Configure the global parameter map as follows:
a) parameter-map type webauth global
Example:
Web-Based Authentication on Cisco Catalyst 9800 Series Controllers22
Configure Local Web AuthenticationConfigure Parameter Maps

Device(config)#parameter-map type webauth global
The parameter-map-name must not exceed 99 characters.
Creates the global parameter map.b) (Optional) virtual-ip {ipv4 | ipv6} virtual-ip-address virtual-host virtual-host-name
Example:
Device(config-params-parameter-map)#virtual-ip ipv4 192.0.2.1 virtual-host wlc.dnasapaces.com
You must configure an IPv6 vritual ip address in a dual-stack configuration that includes both IPv4 andIPv6 traffic.
Note
It is optional to configure a virtual ip address while configuring local web authentication. However if you are usingcustom web pages, you must configure a virtual ip address using the global parameter map.
The Virtual IP address for the WLC must be configured as a non-routable IP address. You must ensure it does notoverlap with the network infrastructure. The address can be configured to use an IP address from the internal allocatednetworks. Defined on RFC1918.
Configures a virtual IP address for redirecting the clients to the login page of the controller.c) webauth-http-enable
Example:
Device(config-params-parameter-map)#webauth-http-enable
Enables HTTP server for web authentication.d) intercept-https-enable
Example:
Device(config-params-parameter-map)# intercept-https-enable
This command is applicable only if you have configured virtual-ip and(or) ip http secure-server commands.Note
Enables the clients to redirect to the webauthentication login page when trying to manually access an HTTPSwebsite.e) trustpoint trustpoint-name
Example:Device(config-params-parameter-map)# trustpoint trustpoint-name
Configures the trustpoint for HTTPS login page. The trustpoint corresponds to the device certificate the WLC willuse in conjunction with the virtual IP and hostname.
f) (Optional) sleeping-client timeout timeout-in-minutes
Example:Device(config-params-parameter-map)# sleeping-client timeout
The valid timeout range is between 10 minutes and 43200minutes. If you do not use the timeout keyword, the sleepingclient is configured with the default timeout value of 720 minutes.
Web-Based Authentication on Cisco Catalyst 9800 Series Controllers23
Configure Local Web AuthenticationConfigure Parameter Maps
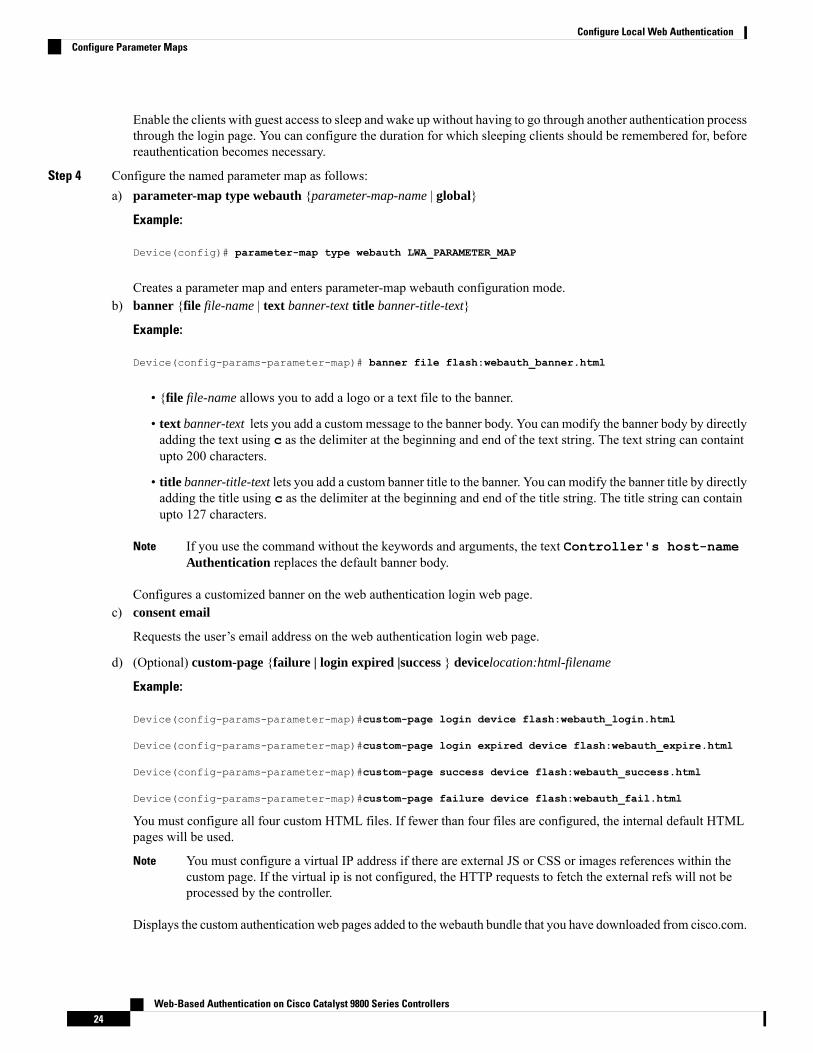
Enable the clients with guest access to sleep and wake up without having to go through another authentication processthrough the login page. You can configure the duration for which sleeping clients should be remembered for, beforereauthentication becomes necessary.
Step 4 Configure the named parameter map as follows:a) parameter-map type webauth {parameter-map-name | global}
Example:
Device(config)# parameter-map type webauth LWA_PARAMETER_MAP
Creates a parameter map and enters parameter-map webauth configuration mode.b) banner {file file-name | text banner-text title banner-title-text}
Example:
Device(config-params-parameter-map)# banner file flash:webauth_banner.html
• {file file-name allows you to add a logo or a text file to the banner.
• text banner-text lets you add a custommessage to the banner body. You can modify the banner body by directlyadding the text using c as the delimiter at the beginning and end of the text string. The text string can containtupto 200 characters.
• title banner-title-text lets you add a custom banner title to the banner. You can modify the banner title by directlyadding the title using c as the delimiter at the beginning and end of the title string. The title string can containupto 127 characters.
If you use the command without the keywords and arguments, the text Controller's host-nameAuthentication replaces the default banner body.
Note
Configures a customized banner on the web authentication login web page.c) consent email
Requests the user’s email address on the web authentication login web page.
d) (Optional) custom-page {failure | login expired |success } devicelocation:html-filename
Example:
Device(config-params-parameter-map)#custom-page login device flash:webauth_login.html
Device(config-params-parameter-map)#custom-page login expired device flash:webauth_expire.html
Device(config-params-parameter-map)#custom-page success device flash:webauth_success.html
Device(config-params-parameter-map)#custom-page failure device flash:webauth_fail.html
You must configure all four custom HTML files. If fewer than four files are configured, the internal default HTMLpages will be used.
You must configure a virtual IP address if there are external JS or CSS or images references within thecustom page. If the virtual ip is not configured, the HTTP requests to fetch the external refs will not beprocessed by the controller.
Note
Displays the custom authentication web pages added to the webauth bundle that you have downloaded from cisco.com.
Web-Based Authentication on Cisco Catalyst 9800 Series Controllers24
Configure Local Web AuthenticationConfigure Parameter Maps
e) (Optional) max-http-connections number
Example:
Device(config-params-parameter-map)#max-http-connections 5
Specifies the maximum number of HTTP connections for each web authentication client.f) (Optional) redirect {{for-login | on-failure | on-success} url | portal {ipv4 ipv4-address | ipv6 ipv6-address}}
Example:
Device(config-params-parameter-map)# redirect on-failure http://10.10.3.34/~sample/failure.html
Device(config-params-parameter-map)# redirect portal ipv6 FE80::1
portal {ipv4 ipv4-address | ipv6 ipv6-address}}: Specify the IP address of the web server in the ipv4-address oripv6-addressvariables, if you are planning to use an external web server for redirection.
Redirects the users to a particular URL after authentication.g) (Optional) timeout init-state sec seconds
Example:Device(config-params-parameter-map)# timeout init-state sec 60
Sets the timeout period for a user to complete the authentication.h) type {authbypass | consent | webauth | webconsent}
Example:
Device(config-params-parameter-map)# type webauth
Note that authbypass is not supported on wireless web authentication.Note
Configures the type of web authentication, such as authentication bypass, consent, webauth, or webconsent.
Enables you to configure the global and user-defined parameter maps which is required for external andinternal Web Authentication
Configure WLAN Security ParametersWLAN profile defines the properties of aWLAN such as Profile Name, Status,WLAN ID, L2 and L3 Securityparameters, AAA Server associated with this SSID and other parameters that are specific to a particularWLAN.
Before you begin
• Ensure that you have configured a parameter map for web authentication.
• Ensure that you have configured a authentication method list for web authentication.
• Run the show wlan summary command to view the configured security types.
Web-Based Authentication on Cisco Catalyst 9800 Series Controllers25
Configure Local Web AuthenticationConfigure WLAN Security Parameters
Step 1 enable
Example:
Device>enable
Enables privileged EXEC mode.
• Enter your password, if prompted.
Step 2 configure terminal
Example:
Device#configure terminal
Enters global configuration mode.
Step 3 wlan profile-name wlan-id ssid-name
Example:
Device(config)#wlan wlan_lwa_local 34 WLAN_LWA_LOCAL
Specifies the WLAN name and ID.
profile-name is the WLAN name which can contain 32 alphanumeric characters.
wlan-id is the wireless LAN identifier. The valid range is from 1 to 512.
ssid-name is the SSID which can contain 32 alphanumeric characters.
Step 4 no security wpa
Example:
Device(config-wlan)#no security wpa
Disables the WPA security, if configured.
Step 5 Configure layer 2 security, as required. You can configure open authentication or a combination of any of the followingsupported security methods.
• MAB
• MAB Failure
• 802.1X
• PSK
• iPSK
• MAB Failure + PSK
• MAB Failure + OWE
Web-Based Authentication on Cisco Catalyst 9800 Series Controllers26
Configure Local Web AuthenticationConfigure WLAN Security Parameters

• MAB Failure + SAE
Step 6 security web-auth
Example:Device(config-wlan)#security web-auth
Enables web authentication for WLAN.
Step 7 security web-auth {authentication-list authentication-list-name}
Example:Device(config-wlan)#security web-auth authentication-list WIRELESS_LWA_AUTHENTICATION
Enables authentication list for for web authentication.
authentication-list authentication-list-name: Sets the authentication list for IEEE 802.1X.
We recommend you to create named authentication list.Note
Step 8 security web-auth {authorization-list authorization-list-name}
Example:Device(config-wlan)#security web-auth authorization-list WIRELESS_LWA_AUTHORIZATION
Enables authorization list for for web authentication.
authorization-list authorization-list-name: Sets the override-authorization list for IEEE 802.1X.
We recommend you to create named authorization list.Note
Step 9 security web-auth parameter-map parameter-map-name}
Example:Device(config-wlan)#security web-auth parameter-map LWA_PARAMETER_MAP
Maps the parameter map to the WLAN.
We recommend you to create a named parameter map.Note
Step 10 end
Example:Device(config-wlan)#end
Returns to privileged EXEC mode.
Create Wireless Policy ProfilePolicy profile contains policy to be associated with the WLAN. It specifies the settings for client VLAN,Authentication, Authorization, and Accounting (AAA), Access Control Lists (ACLs), session and idle timeoutsettings and so on.
Before you begin
Ensure you have created the VLANs for assigning the wireless clients.
Web-Based Authentication on Cisco Catalyst 9800 Series Controllers27
Configure Local Web AuthenticationCreate Wireless Policy Profile
Step 1 enable
Example:
Device> enable
Enables privileged EXEC mode.
• Enter your password, if prompted.
Step 2 configure terminal
Example:
Device# configure terminal
Enters global configuration mode.
Step 3 wireless profile policy profile-name
Example:Device(config)#wireless profile wlan_lwa_local
Configures the WLAN policy profile.
Step 4 vlan vlan-name
Example:Device(config-wireless-policy)#vlan 100
Assigns the profile policy to the VLAN.
Step 5 no shutdown
Example:Device(config-wireless-policy)# no shutdown
Restarts the WLAN.
Step 6 end
Example:Device(config)# end
Returns to privileged EXEC mode.
Create a Policy TagA policy tag constitutes mapping of the WLAN profile to the policy profile. The WLAN profile defines thewireless characteristics of the WLAN. The policy profile defines the network policies and the switchingpolicies for the client.
Web-Based Authentication on Cisco Catalyst 9800 Series Controllers28
Configure Local Web AuthenticationCreate a Policy Tag
You can either create a new policy tag or use the default policy tag. The default policy tag automatically mapsany SSID with a WLAN ID between 1 to 16 to the default policy profile. It cannot be modified nor deleted.If you have a WLAN with ID 17 or higher, the default policy tag cannot be used.
Before you begin
• Ensure you have configured a WLAN for web authentication.
• Ensure you have configured a WLAN policy profile.
Step 1 configure terminal
Example:Device#configure terminal
Enters global configuration mode.
Step 2 wireless tag policy policy-tag-name
Example:Device(config)#wireless tag policy lwa_policy_tag
Configures a policy tag and enters policy tag configuration mode.
Step 3 wlan wlan-name policy profile-policy-name
Example:Device(config-policy-tag)#wlan wlan_lwa_local policy wlan_lwa_local
Maps the WLAN policy profile to a WLAN profile.
Step 4 end
Example:Device(config-policy-tag)# end
Saves the configuration, exits configuration mode, and returns to privileged EXEC mode.
Configure a Site TagSite tag assigns the AP join profile settings to the AP and determines if the site is a local site, in which casethe APs will be in local mode.
To get the best performance from your 9800 Series wireless controller, it is recommended that you:
• Use custom site tags and not the default site tag
• Assign the same site tag to all the APs in the same roaming domain
• Limit the number of APs to 500 per site tag for best performance
• Not exceed the recommended maximum number of APs per site tag based on the controller model
Web-Based Authentication on Cisco Catalyst 9800 Series Controllers29
Configure Local Web AuthenticationConfigure a Site Tag
Step 1 configure terminal
Example:Device#configure terminal
Enters global configuration mode.
Step 2 wireless tag site site-tag
Example:Device(config)#wireless tag site site_lwa
Configures site tag and enters site tag configuration mode. The site is configured as a local site, by default. To configurethe site tag as Flexconnect, run the no local-site command.
Step 3 description description
Example:Device(config-site-tag)# description default site tag
Adds a description for the site tag.
Step 4 end
Example:Device(config-site-tag)# end
Returns to privileged EXEC mode.
Assign a Policy Tag to an APAccess Points are tagged based on the broadcast domain, the site it belongs to, and the desired RF characteristics.Once tagged, the AP gets a list of WLANs to be broadcast along with the properties of the respective SSIDs,properties of the APs on the local/remote site, and the RF properties of the network.
Each access point is assigned three unique tags: a policy, site, and RF tag. By default, when an AP joins theCisco Catalyst 9800Wireless Controller, it gets default tags; the default policy tag, default site tag, and defaultRF tag. Users can make changes to the default tags or create custom tags. For more information about tags,see "Tags, Profiles, and SSIDs" chapter in the Cisco Catalyst 9800 Series Wireless Controller SoftwareConfiguration Guide.
Before you begin
• Ensure you have created a policy tag that maps the WLAN profile to the policy profile.
• Ensure you have created a site tag.
Step 1 configure terminal
Example:Device#configure terminal
Web-Based Authentication on Cisco Catalyst 9800 Series Controllers30
Configure Local Web AuthenticationAssign a Policy Tag to an AP
Enters the global configuration mode.
Step 2 ap mac-address
Example:Device (config)#ap 28ac.9eb7.7220
Configures an AP and enters the ap tag configuration mode.
Use the Ethernet MAC address.Note
Step 3 policy-tag policy-tag-name
Example:Device (config-ap-tag)#policy-tag lwa_policy_tag
Maps a policy tag to an AP.
Step 4 site-tag site-tag-name
Example:Device (config-ap-tag)#site-tag site_lwa
Maps a site tag to an AP.
Step 5 end
Example:Device (config-ap-tag)#end
Exits the configuration mode and returns to privileged EXEC mode.
Enable the HTTP/HTTPS Server for Web Authentication
Before you begin
Ensure that you have reviewed the Guidelines for Configuring Secure HTTP Access, on page 14.
Step 1 configure terminal
Example:Device#configure terminal
Enters global configuration mode.
Step 2 ip http server
Example:
Device(config)#ip http server
Enables the HTTP server. The local web authentication feature uses the HTTP server to communicate with the hosts foruser authentication.
Web-Based Authentication on Cisco Catalyst 9800 Series Controllers31
Configure Local Web AuthenticationEnable the HTTP/HTTPS Server for Web Authentication
It is mandatory to enable ip http server for web authentication.Note
Step 3 ip http secure-server
Example:
Device(config)#ip http secure-server
Enables secure authentication. With secure authentication enabled, the login page always uses HTTPS even if the clientsends an HTTP request.
You can configure custom authentication proxy web pages or specify a redirection URL for successful login.
To ensure secure authentication when you enter the ip http secure-server command, the login page is alwaysin HTTPS (secure HTTP) even if the user sends an HTTP request.
Note
Step 4 end
Example:Device(config)# end
Exits configuration mode.
Configure Local Web Authentication using the WebUI
Configure AAA Server and Server GroupsIf you are planning to use an AAA server for authenticating the guest users, configure external servers andserver groups as follows.
Step 1 Choose Configuration > Security > AAA and click Servers/Groups.Step 2 To create a new RADIUS server, go to the Servers tab, click RADIUS and click + Add.
The Create AAA RADIUS Server window, configure the following details.
a) In the Name field, enter the name of the RADIUS server.b) In the Server Address field, enter the IPv4 or IPv6 address, or hostname.c) To enable the Protected Access Credential (PAC) authentication key, check the PAC Key check box.d) From the Key Type drop-down list, choose the authentication key type.
The key types are Clear Text, Encrypted, and Hidden.
e) In the Key and Confirm Key fields, enter the authentication key.f) In the Auth Port field, enter the authorization port number.g) the Acct Port field, enter the accounting port number.h) In the Server Timeout field, enter the timeout duration, in seconds.i) In the Retry Count field, enter the number of retries.j) Use the Support for CoA toggle button to enable or disable change of authorization (CoA).
Web-Based Authentication on Cisco Catalyst 9800 Series Controllers32
Configure Local Web AuthenticationConfigure Local Web Authentication using the WebUI
k) Click Apply to Device.
Step 3 To create a new TACACS+ server, go to the Servers tab, click TACACS+ and click + Add.a) In the Name field, enter the name of the TACACS+ server.b) In the Server Address field, enter the IPv4 or IPv6 address, or hostname.c) In the Key and Confirm Key fields, enter the authentication key.d) In the Port field, enter the port number.e) In the Server Timeout field, enter the timeout duration, in seconds.f) Click Apply to Device.
Step 4 To create a new LDAP server, go to the Servers tab, click LDAP and click + Add.a) In the Server Name field, enter the LDAP server name.b) In the Server Address field, enter the IPv4 or IPv6 address, or hostname.c) In the Port Number field, enter the port number to use.d) From the Simple Bind drop-down list, choose the authentication key type.e) In the User Base DN field, enter the details.f) From the User Attribute drop-down list, choose the user attribute.g) In the User Object Type field, enter the object type details and click the + icon.
The objects that have been added are listed in the area below. Use the x mark adjacent to each object to remove it.
h) In the Server Timeout field, enter the timeout duration, in seconds.i) Check the Secure Mode check box to enable secure mode.
Checking this enables the Trustpoint Name drop-down list.
j) From the Trustpoint Name drop-down list, choose the trustpoint.k) Click Apply to Device.
Step 5 Choose Configuration > Security > AAA > Server Groups.
You can configure servers of different types in one group. The list of servers in a server group is an ordered list. The firstavailable server in the list is used for authentication.
Step 6 To create a new RADIUS server, go to the Server Groups tab, click RADIUS and click + Add.
The Create AAA RADIUS Server Group window displays.
a) In the Name field, enter the name of the RADIUS server group.b) From the MAC-Delimiter drop-down list, choose the delimiter to be used in the MAC addresses that are sent to the
RADIUS servers.c) From the MAC Filtering drop-down list, choose a value based on which to filter MAC addresses.d) To configure the dead time for the server group and direct AAA traffic to alternative groups of servers that have
different operational characteristics, in the Dead-Time field, enter the amount of time, in minutes, after which aserver is assumed to be dead.
e) Choose the servers that you want to include in the server group from the Available Servers list and move them tothe Assigned Servers list.
f) Click Apply to Device.
Step 7 To create a new TACACS+ server, go to the Server Groups tab, click TACACS+ and click + Add.
The Create AAA TACACS Server Group window displays.
a) In the Name field, enter the name of the TACACS+ server group.
Web-Based Authentication on Cisco Catalyst 9800 Series Controllers33
Configure Local Web AuthenticationConfigure AAA Server and Server Groups
b) Choose the servers that you want to include in the server group from the Available Servers list and move them tothe Assigned Servers list.
c) Click Apply to Device.
Step 8 To create a new LDAP server, go to the Server Groups tab, click LDAP and click + Add.
The Create AAA LDAP Server Group window displays.
a) In the Name field, enter the name of the LDAP server group.b) Choose the servers that you want to include in the server group from the Available Servers list and move them to
the Assigned Servers list.c) Click Apply to Device.
Configure Local Authentication and Authorization
Step 1 Configure authentication method list as follows. Authentication is the process by which a system or network verifies theidentity of a user who wishes to access it.a) Choose Configuration > Security > AAA.b) Go to AAA Method List tab, click Authentication on the left side and then click + Add.c) In theQuick Setup: AAA Authenticationwindow that is displayed, enter a name for your method list in theMethod
List Name field.
The name can contain alphanumeric characters including underscores and hyphens. Do not include space.
d) From the Type drop-down list, choose login to enable web authentication.e) From the Group Type drop-down list, choose local to enable local authentication.
The options are group and local. You have to choose group to enable authentication on an AAA server. To enableauthentication locally on the controller, choose local.
f) If you want to configure a local server as a fallback method when the servers in the groups are unavailable, checkthe Fallback to local checkbox.
The Fallback to local checkbox is enabled only if you select the group type as group.
g) From the Available Server Groups box, select the server groups that you have created in Step 1.h) Click Apply to Device.
Step 2 To provide access to system or network resources based on their identity, configure authorization method list as follows:a) Choose Configuration > Security > AAA.b) Go to AAA Method List tab, click Authorization on the left side and then click + Add.c) In theQuick Setup: AAA Authorizationwindow that is displayed, enter a name for your method list in theMethod
List Name field.
The name can contain alphanumeric characters including underscores and hyphens. Do not include space.
d) From the Type drop-down list, choose login to enable web authentication.e) From the Group Type drop-down list, choose login to enable local authentication.
The options are group and local. You have to choose group to enable authentication on an AAA server. To enableauthentication locally on the controller, choose local.
Web-Based Authentication on Cisco Catalyst 9800 Series Controllers34
Configure Local Web AuthenticationConfigure Local Authentication and Authorization
f) If you want to configure a local server as a fallback method when the servers in the groups are unavailable, checkthe Fallback to local checkbox.
The Fallback to local checkbox is enabled only if you select the group type as group.
g) From the Available Server Groups box, select the server groups that you have created in Step 1.h) Click Apply to Device.
Configure Local Guest User CredentialsThis is applicable only if you are configuring local web authentication. For external web authentication, createthe user credentials on the external AAA server.
Before you begin
Step 1 Choose Administration > User Administration.Step 2 To create a new guest user account, click + Add.Step 3 In the Create User Administration window that is displayed, configure the following mandatory fields, as required.
a) User Name: Enter a unique user name.
It can contain alphanumeric characters including underscores and hyphens. Space is not allowed.
b) Choose the privilege level for the guest user from the Privilege drop-down list.
The options are Admin, Read Only, No Access and Lobby Admin.
Click Go to Advanced Mode to view the privilege level number assgined to a particular user.
c) Type the password in the Password and Confirm Password fields.
The password must contain a mininum of 6 characters and a maximum of 127 characters.
Step 4 Click Apply to Device.
Configure Parameter Maps
Before you begin
Depending on your configuration options, ensure you have taken care of the following before starting thisprocedure.
• The virtual gateway IP address of the WLC that it uses for its communication with the wireless clientsis available.
• You have already installed a third-party certificate signed by a trusted certificate authority on the controller.Applicable only if you are opting to use third-party certificates.
• The external AAA server is configured for web authentication and the URL is available.
• The customHTML pages for authentication are uploaded to the controller or external server, as applicable.
Web-Based Authentication on Cisco Catalyst 9800 Series Controllers35
Configure Local Web AuthenticationConfigure Local Guest User Credentials
Step 1 Configure the Global parameter map as follows:a) On the Web Auth page, in the list of parameter maps displayed, click global.b) To set the redirect address for web authentication login page, enter the virtual IP address in theVirtual IPv4 Address.
If the client uses an IPv6 address, enter the IPv6 address in the Virtual IPv6 Address field.
It is recommended that you configure a nonroutable IP address for the virtual interface, ideally not overlapping withthe network infrastructure addresses.
c) To specify the hostname for the Virtual IP address used for web authentication, enter the hostname in the VirtualIPv4 Hostname field.
Configures hostname for the virtual IP address for web authetication.
For web authentication, ensure you configure a hostname that is different from the hostname configuredfor the management IP address of the WLC, if configured already.
Note
d) To use third party certificates for secure communication, in the Trustpoint drop-down list, choose the trustpointlabel that you have generated for web authentication.
Maps the third party certificate that you have imported in to the controller to the parameter map. A trustpoint containsthe device identity certificate along with the corresponding CA certificate. For information about configuring atrustpoint for web authentication, see "Trustpoint Configuration on 9800" section inConfiguring Trustpoints on CiscoCatalyst 9800 Series Wireless Controllers.
e) To enable secure authentication for the login page, check Web Auth intercept HTTPs checkbox.
Intercepts HTTPS requests and passes credentials over an encrypted link.
f) To configure settings for failed login attempts, check Watch List Enable checkbox and enter the watch list timeoutperiod in the Watch List Expiry Timeout field.
If watch list is enabled, the host is added to the watch list if a user fails to authenticate after the maximum numberof login attempts. After the host's IP address is on the watch list, the controller does not intercept HTTP packets fromthat host or perform WebAuth processing until the expiry timer has expired.
g) Click Update & Apply.
Step 2 Create a named parameter map as follows:a) Choose Configuration > Security > Web Auth.b) On the Web Auth page, click Add.c) In the Create Web Auth Parameter window that is displayed, enter a name for the parameter map in the
Parameter-map name field.d) In theMaximum HTTP connections field, enter the maximum number of HTTP connections that you want to allow.
The range of value is 1-200.e) In the Init-State Timeout field, enter the time after which the init state timer should expire due to the user’s failure
to enter valid credentials on the login page. The range is 60-3932100.f) In the Type drop-down list, choose the type of Web Authentication page that is displayed during the login process.
The following are the options available:
• Webauth: The controller presents a policy page with the user name and password. You need to enter the correctcredentials to access the network.
• Consent: The controller redirects you to a usage policy page with Accept button. You need to click accept thepolicy to access the network.
Web-Based Authentication on Cisco Catalyst 9800 Series Controllers36
Configure Local Web AuthenticationConfigure Parameter Maps
• Webconsent: The controller redirects you to a usage policy page with Accept or Deny buttons along with username or password. You need to enter the correct credentials and accept the usage policy to access the network.
• Authbypass: This is not supported.
g) Click Apply to Device.
The newly created named parameter map appears in the list of parameter maps in the Web Auth page.
Step 3 Edit a named parameter map as follows:a) On the Web Auth page, click the name of the parameter map that you created in step 2.b) In the Edit Web Auth Parameter window that is displayed, choose the required Banner Type.
The banner types available are:
• None
• Banner Text: Click the radio button and enter the required banner text to be displayed in the Banner Text field.
• File Name: Click the radio button and in the File Name field, specify the path of the file from which the bannertext has to be fetched.
c) To set the maximum number of HTTP connections allowed, enter the number in Maximum HTTP connectionsfield.
d) To enable authentication of sleeping clients and then specify the sleeping client timeout, check the Sleeping ClientStatus checkbox and enter the timeout period in the Sleeping Client Timeuot field.
Allows successfully authenticated host devices to stay logged in for a configured period without re-authentication.
The valid range is between 10 minutes and 43200 minutes.
e) Click Update & Apply.
A pop-up with Configuration Successfully Applied message appears.
Step 4 Configure an external server for authentication as follows:a) On the Web Auth page, click the name of the parameter map that you created in step 2.b) In the Edit Web Auth Parameter window that is displayed, go to the Advanced tab.c) Under Redirect to external server, enter the URL of the external server that will host the authentication pages for
the login, succesful login and login failure pages.
• Redirect for log-in
• Redirect On-Success
• Redirect On-Failure
d) In the Portal IPV4 Address field, enter the IPv4 address of the external server to send redirects.e) If the external server uses an IPv6 address, in the Portal IPV6 Address field, enter the IPv6 address of the portal to
send redirects.f) Click Update & Apply.
A pop-up with Configuration Successfully Applied message appears.
Step 5 Configure custom authentication pages on the controller as follows:a) On the Web Auth page, click the name of the parameter map that you created in step 2.
Web-Based Authentication on Cisco Catalyst 9800 Series Controllers37
Configure Local Web AuthenticationConfigure Parameter Maps
b) In the Edit Web Auth Parameter window that is displayed, go to the Advanced tab.c) UnderCustomized page, configure the following custom pages, as required. Ensure you have copied all the customized
HTML pages to the to the disk or flash of the controller.
• Login Failed Page
• Login Page
• Logout Page
• Login Successful Page
d) Choose the HTML pages that you have copied to the flash drive of the controller for each of the options.e) Click Update & Apply.
A pop-up with Configuration Successfully Applied message appears.
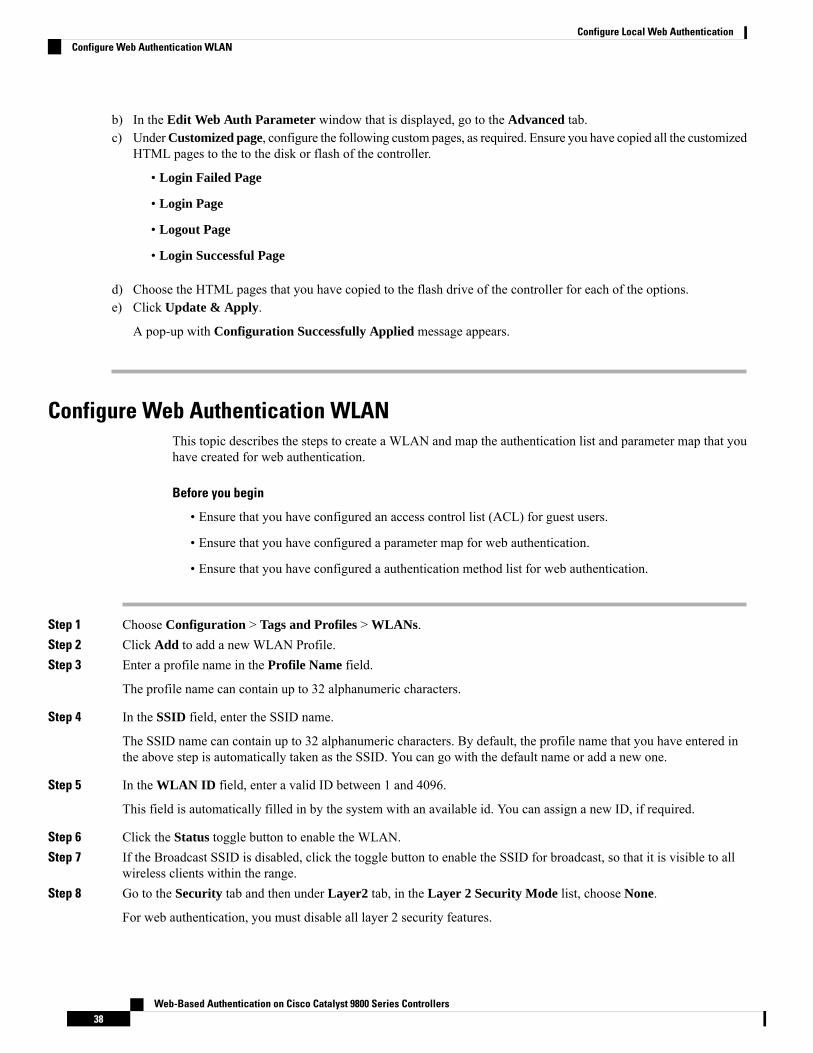
Configure Web Authentication WLANThis topic describes the steps to create a WLAN and map the authentication list and parameter map that youhave created for web authentication.
Before you begin
• Ensure that you have configured an access control list (ACL) for guest users.
• Ensure that you have configured a parameter map for web authentication.
• Ensure that you have configured a authentication method list for web authentication.
Step 1 Choose Configuration > Tags and Profiles > WLANs.Step 2 Click Add to add a new WLAN Profile.Step 3 Enter a profile name in the Profile Name field.
The profile name can contain up to 32 alphanumeric characters.
Step 4 In the SSID field, enter the SSID name.
The SSID name can contain up to 32 alphanumeric characters. By default, the profile name that you have entered inthe above step is automatically taken as the SSID. You can go with the default name or add a new one.
Step 5 In the WLAN ID field, enter a valid ID between 1 and 4096.
This field is automatically filled in by the system with an available id. You can assign a new ID, if required.
Step 6 Click the Status toggle button to enable the WLAN.Step 7 If the Broadcast SSID is disabled, click the toggle button to enable the SSID for broadcast, so that it is visible to all
wireless clients within the range.Step 8 Go to the Security tab and then under Layer2 tab, in the Layer 2 Security Mode list, choose None.
For web authentication, you must disable all layer 2 security features.
Web-Based Authentication on Cisco Catalyst 9800 Series Controllers38
Configure Local Web AuthenticationConfigure Web Authentication WLAN
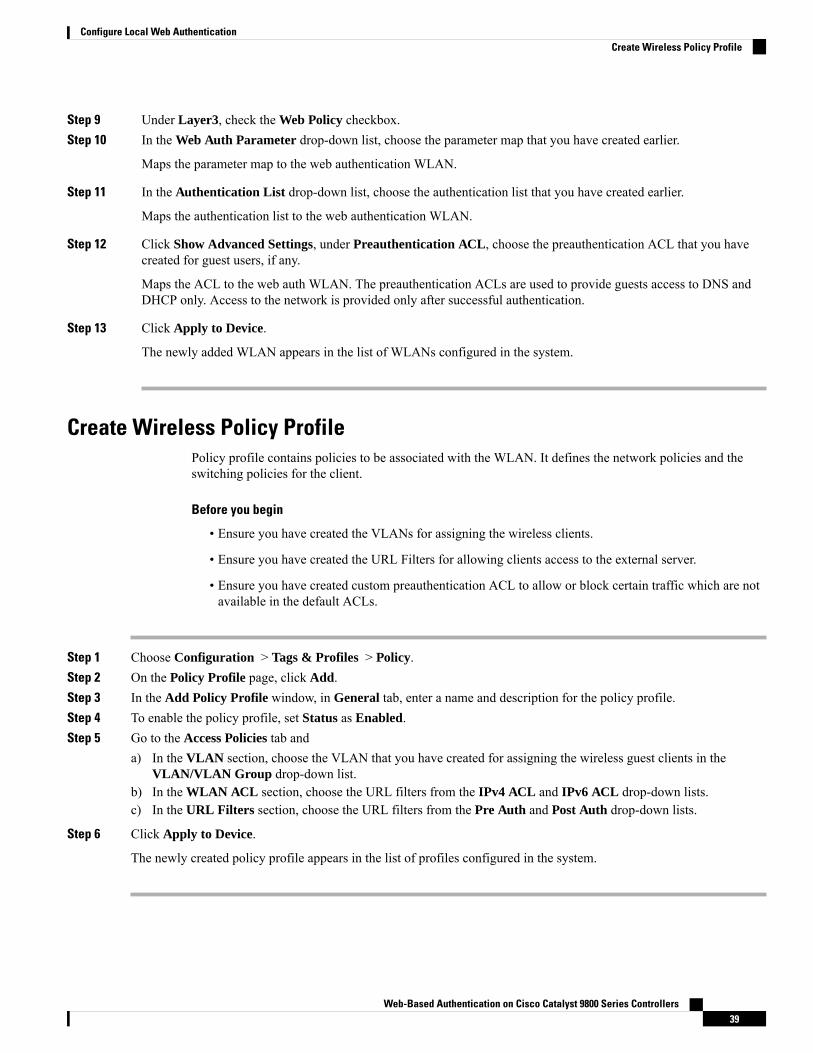
Step 9 Under Layer3, check the Web Policy checkbox.Step 10 In the Web Auth Parameter drop-down list, choose the parameter map that you have created earlier.
Maps the parameter map to the web authentication WLAN.
Step 11 In the Authentication List drop-down list, choose the authentication list that you have created earlier.
Maps the authentication list to the web authentication WLAN.
Step 12 Click Show Advanced Settings, under Preauthentication ACL, choose the preauthentication ACL that you havecreated for guest users, if any.
Maps the ACL to the web auth WLAN. The preauthentication ACLs are used to provide guests access to DNS andDHCP only. Access to the network is provided only after successful authentication.
Step 13 Click Apply to Device.
The newly added WLAN appears in the list of WLANs configured in the system.
Create Wireless Policy ProfilePolicy profile contains policies to be associated with the WLAN. It defines the network policies and theswitching policies for the client.
Before you begin
• Ensure you have created the VLANs for assigning the wireless clients.
• Ensure you have created the URL Filters for allowing clients access to the external server.
• Ensure you have created custom preauthentication ACL to allow or block certain traffic which are notavailable in the default ACLs.
Step 1 Choose Configuration > Tags & Profiles > Policy.Step 2 On the Policy Profile page, click Add.Step 3 In the Add Policy Profile window, in General tab, enter a name and description for the policy profile.Step 4 To enable the policy profile, set Status as Enabled.Step 5 Go to the Access Policies tab and
a) In the VLAN section, choose the VLAN that you have created for assigning the wireless guest clients in theVLAN/VLAN Group drop-down list.
b) In the WLAN ACL section, choose the URL filters from the IPv4 ACL and IPv6 ACL drop-down lists.c) In the URL Filters section, choose the URL filters from the Pre Auth and Post Auth drop-down lists.
Step 6 Click Apply to Device.
The newly created policy profile appears in the list of profiles configured in the system.
Web-Based Authentication on Cisco Catalyst 9800 Series Controllers39
Configure Local Web AuthenticationCreate Wireless Policy Profile
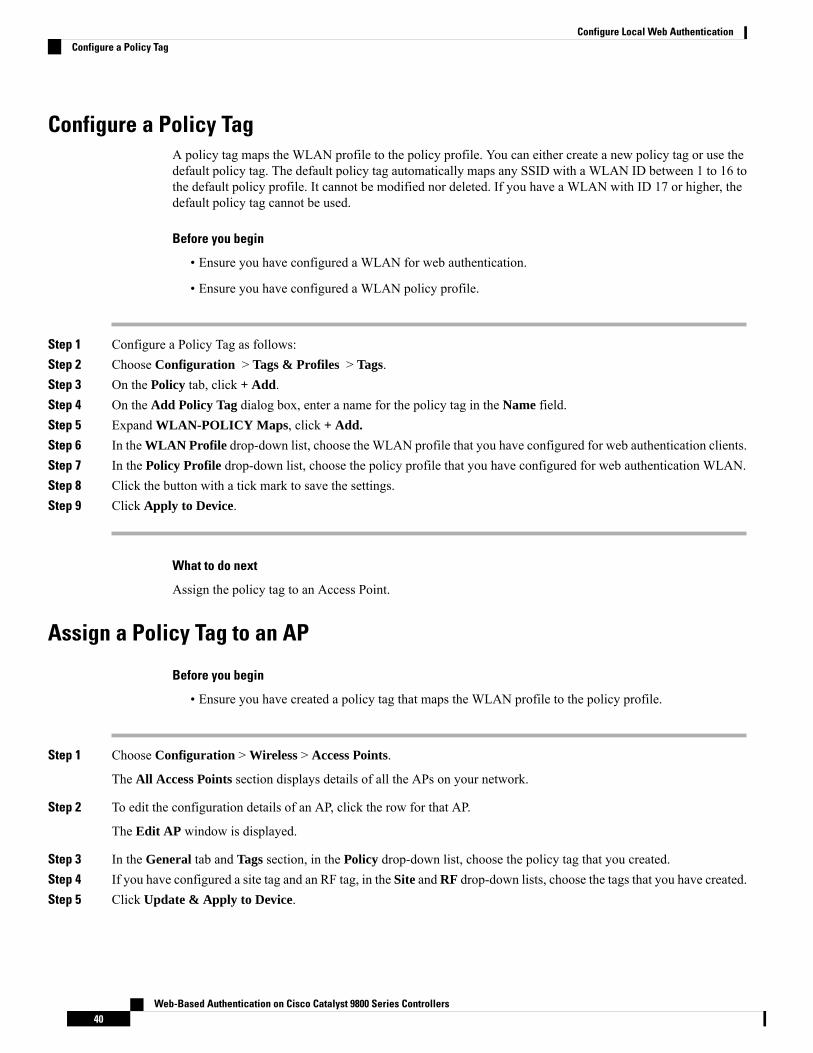
Configure a Policy TagA policy tag maps the WLAN profile to the policy profile. You can either create a new policy tag or use thedefault policy tag. The default policy tag automatically maps any SSID with a WLAN ID between 1 to 16 tothe default policy profile. It cannot be modified nor deleted. If you have a WLAN with ID 17 or higher, thedefault policy tag cannot be used.
Before you begin
• Ensure you have configured a WLAN for web authentication.
• Ensure you have configured a WLAN policy profile.
Step 1 Configure a Policy Tag as follows:Step 2 Choose Configuration > Tags & Profiles > Tags.Step 3 On the Policy tab, click + Add.Step 4 On the Add Policy Tag dialog box, enter a name for the policy tag in the Name field.Step 5 Expand WLAN-POLICY Maps, click + Add.
Step 6 In the WLAN Profile drop-down list, choose the WLAN profile that you have configured for web authentication clients.Step 7 In the Policy Profile drop-down list, choose the policy profile that you have configured for web authentication WLAN.Step 8 Click the button with a tick mark to save the settings.Step 9 Click Apply to Device.
What to do next
Assign the policy tag to an Access Point.
Assign a Policy Tag to an AP
Before you begin
• Ensure you have created a policy tag that maps the WLAN profile to the policy profile.
Step 1 Choose Configuration > Wireless > Access Points.
The All Access Points section displays details of all the APs on your network.
Step 2 To edit the configuration details of an AP, click the row for that AP.
The Edit AP window is displayed.
Step 3 In the General tab and Tags section, in the Policy drop-down list, choose the policy tag that you created.Step 4 If you have configured a site tag and an RF tag, in the Site andRF drop-down lists, choose the tags that you have created.Step 5 Click Update & Apply to Device.
Web-Based Authentication on Cisco Catalyst 9800 Series Controllers40
Configure Local Web AuthenticationConfigure a Policy Tag
Step 6 To apply the tags to multiple APs, in the Advanced tab, select the access points by checking the checkboxes for the APsand click + Tag APs.
Step 7 In the Tag APs dialog box, choose the policy tag, site tag and RF tag that you want to assign to the access points andclick Apply to Device.
Web-Based Authentication on Cisco Catalyst 9800 Series Controllers41
Configure Local Web AuthenticationAssign a Policy Tag to an AP
Web-Based Authentication on Cisco Catalyst 9800 Series Controllers42
Configure Local Web AuthenticationAssign a Policy Tag to an AP
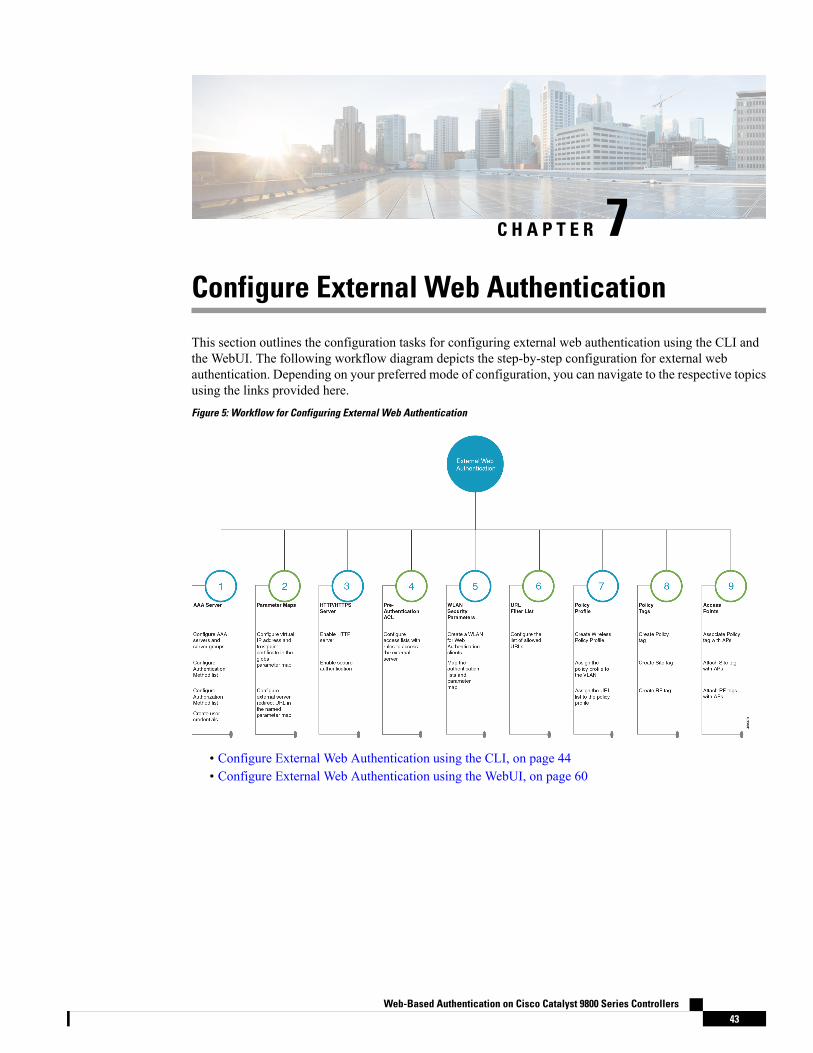
C H A P T E R 7Configure External Web Authentication
This section outlines the configuration tasks for configuring external web authentication using the CLI andthe WebUI. The following workflow diagram depicts the step-by-step configuration for external webauthentication. Depending on your preferred mode of configuration, you can navigate to the respective topicsusing the links provided here.
Figure 5: Workflow for Configuring External Web Authentication
• Configure External Web Authentication using the CLI, on page 44• Configure External Web Authentication using the WebUI, on page 60
Web-Based Authentication on Cisco Catalyst 9800 Series Controllers43
Configure External Web Authentication using the CLI
Configure AAA Server and Server GroupsWhen trying to access the WLC, you will be prompted to enter a username and password in order to let youconnect to the guest network. By default, these credentials are validated against the local database of userson the controller. Alternatively, you can set up a remote AAA RADIUS or LDAP server for authentication.
Step 1 enable
Example:
Device> enable
Enables privileged EXEC mode.
• Enter your password if prompted.
Step 2 configure terminal
Example:
Device# configure terminal
Enters global configuration mode.
Step 3 To configure LDAP server, do the following:a) ldap server server-name
Example:
Device(config)#ldap server WEBAUTHSERVER
Defines a LDAP server and enters LDAP server configuration mode.b) ipv4 ipv4-address
Example:Device(config-ldap-server)# ipv4 192.168.1.192
Specifies the LDAP server IP address using IPv4.c) bind authenticate root-dn password [0 string | 7 string] string
Example:Device(config-ldap-server)#bind authenticate root-dn admin password 6 Cisco12345
Use 0 line option to configure an unencrypted shared secret. Use 7 line option to configure an encrypted shared secret.
Specifies a shared secret text string used between the controller and LDAP server.d) base-dn string
Example:Device(config-ldap-server)#base-dn CN=Users,DC=lab,DC=com
Web-Based Authentication on Cisco Catalyst 9800 Series Controllers44
Configure External Web AuthenticationConfigure External Web Authentication using the CLI
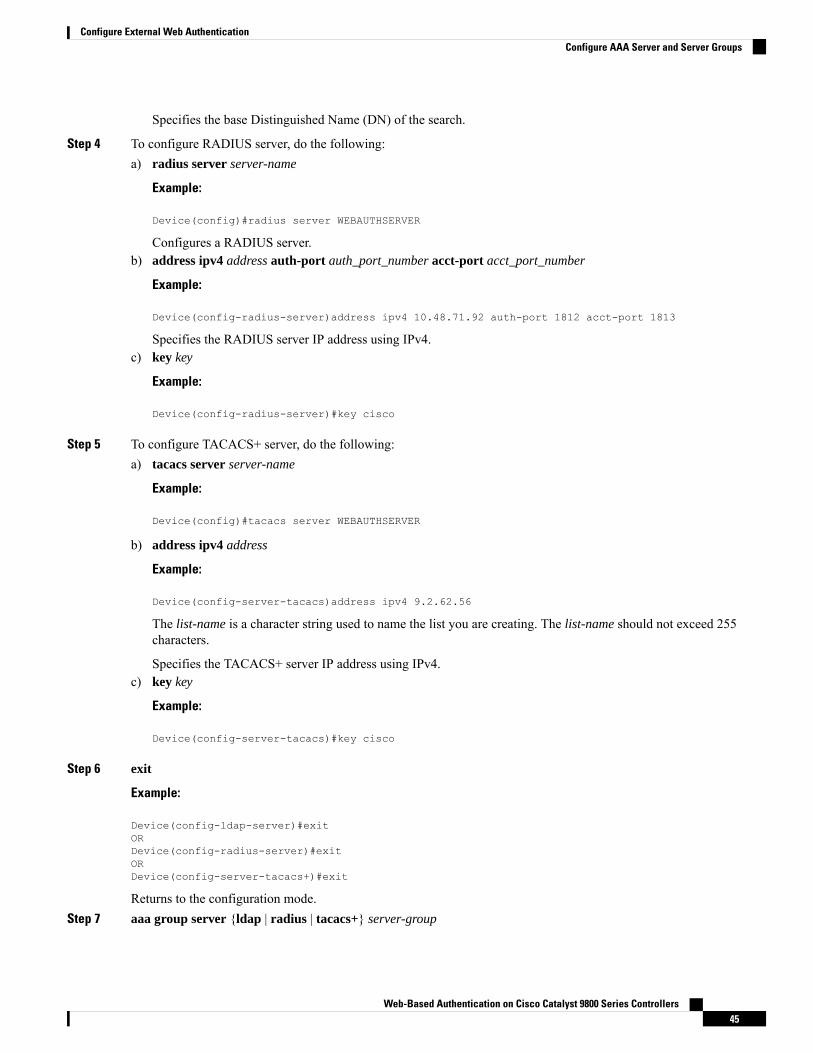
Specifies the base Distinguished Name (DN) of the search.
Step 4 To configure RADIUS server, do the following:a) radius server server-name
Example:
Device(config)#radius server WEBAUTHSERVER
Configures a RADIUS server.b) address ipv4 address auth-port auth_port_number acct-port acct_port_number
Example:
Device(config-radius-server)address ipv4 10.48.71.92 auth-port 1812 acct-port 1813
Specifies the RADIUS server IP address using IPv4.c) key key
Example:
Device(config-radius-server)#key cisco
Step 5 To configure TACACS+ server, do the following:a) tacacs server server-name
Example:
Device(config)#tacacs server WEBAUTHSERVER
b) address ipv4 address
Example:
Device(config-server-tacacs)address ipv4 9.2.62.56
The list-name is a character string used to name the list you are creating. The list-name should not exceed 255characters.
Specifies the TACACS+ server IP address using IPv4.c) key key
Example:
Device(config-server-tacacs)#key cisco
Step 6 exit
Example:
Device(config-ldap-server)#exitORDevice(config-radius-server)#exitORDevice(config-server-tacacs+)#exit
Returns to the configuration mode.Step 7 aaa group server {ldap | radius | tacacs+} server-group
Web-Based Authentication on Cisco Catalyst 9800 Series Controllers45
Configure External Web AuthenticationConfigure AAA Server and Server Groups
Example:
Device(config-ldap-sg)#aaa group server ldap LDAPGROUPORDevice(config-sg-radius)#aaa group server radius RADGROUPORDevice(config-sg-tacacs+)#aaa group server tacacs+ TACGROUP
server-group refers to the server group name with a maximum length of 32 strings.
Creates a server-group identification.Step 8 server name server-name
Example:
Device(config-ldap-sg)#server name WEBAUTHSERVERORDevice(config-sg-radius)#server name WEBAUTHSERVERORDevice(config-sg-tacacs+)#server name WEBAUTHSERVER
Maps the LDAP/RADIUS/TACACS+ server to the server group.
If you have multiple LDAP/RADIUS/TACACS+ servers that can be used for authentication, it is recommended to mapall these servers to the same server group. The WLC handles load balancing different authentications among the serversin the server group.
Step 9 end
Example:
Device(config-ldap-sg)#endORDevice(config-sg-radius)#endORDevice(config-sg-tacacs+)#end
Exits the global configuration mode and returns to privileged EXEC mode.
Configure Local Authentication and AuthorizationA method list is a sequential list describing the authentication and authorization methods to be queried toauthenticate a user. Method lists enable you to designate one or more security protocols to be used forauthentication and authorization, thus ensuring a backup system in case the initial method fails.
Configure the following steps to specify the local username database as the method of user authentication atlogin.
Step 1 enable
Example:
Device> enable
Enables privileged EXEC mode.
Web-Based Authentication on Cisco Catalyst 9800 Series Controllers46
Configure External Web AuthenticationConfigure Local Authentication and Authorization
• Enter your password, if prompted.
Step 2 configure terminal
Example:
Device# configure terminal
Enters global configuration mode.
Step 3 aaa new-model
Example:
Device(config)# aaa new-model
Enables AAA functionality.
Step 4 aaa authentication login {default | list-name} local group AAA-server-group
Example:
Device(config)#aaa authentication login WIRELESS_LWA_AUTHENTICATION local
The list-name is a character string used to name the list you are creating. The list-name should not exceed 255 characters.
group AAA_server_group lets you specify the AAA server group that you have created for authorization.
Sets the login authentication to use the local username database. The default keyword applies the local user databaseauthentication to all ports.
Step 5 aaa authorization network {default | list-name} local group AAA_server_group
Example:
Device(config)#aaa authorization network WIRELESS_LWA_AUTHORIZATION local
group AAA_server_group lets you specify the AAA server group that you have created for authorization.
Creates an authorization method list for external web-based authorization.Step 6 user-name user name
Example:
Device(config)#username guest
Creates guest user name in the local database, and establishes a username-based authentication system.
For user-name, specify the user ID as one word. Spaces and quotation marks are not allowed.
Step 7 password {encryption-type | password}
Example:
Device(config-user-name)#password cisco123
Web-Based Authentication on Cisco Catalyst 9800 Series Controllers47
Configure External Web AuthenticationConfigure Local Authentication and Authorization
• For encryption-type, enter 0 for configuring unencrypted password,6 to configure an encrypted password, 7 toconfigure a hidden password or 0-9 for nnnot speifying any encryption type.
• For password, specify the password the user must enter to gain access to the switch. The password must be from 1to 25 characters, can contain embedded spaces, and must be the last option specified in the username command.
Configures the password for the guest user name in the local database.
Step 8 end
Example:
Device(config-user-name)# end
Exits the global configuration mode and returns to privileged EXEC mode.
Configure Pre-Authentication ACLPre-authentication ACL is used in web authentication to allow certain types of traffic before the authenticationis complete. This allows the clients limited access to particular network resources before authentication.Whenusing an external web server for web authentication, you need to configure a pre-authentication ACL for theexternal web server.
Before you begin
Ensure that you have configured the WLAN.
Step 1 enable
Example:
Device> enable
Enables privileged EXEC mode.
• Enter your password, if prompted.
Step 2 configure terminal
Example:
Device# configure terminal
Enters global configuration mode.
Step 3 ip access-list extended access-list-name
Example:
Device(config)#ip access-list extended EWA_ACL
Web-Based Authentication on Cisco Catalyst 9800 Series Controllers48
Configure External Web AuthenticationConfigure Pre-Authentication ACL
Defines an extended access list using a name, and enters the access-list configuration mode.
Step 4 {permit | deny} protocol {source [source-wildcard] | host source | any} {destination [destination-wildcard] | hostdestination | any}
Specifies a permit or deny statement in named IP access list configuration mode.
The source is the source address of the network or host from which the packet is being sent specified as:
• The 32-bit quantity in dotted-decimal format.
• The keyword any as an abbreviation for source and source-wildcard of 0.0.0.0 255.255.255.255. You do not needto enter a source-wildcard.
• The keyword host as an abbreviation for source and source-wildcard of source 0.0.0.0.
(Optional) The source-wildcard applies wildcard bits to the source.
Example:Device(config-ext-nacl)# permit ip any host 193.43.158.111
Step 5 end
Example:Device(config-wlan)#end
Returns to privileged EXEC mode.
Configure Parameter MapsA parameter map allows you to modify parameters that control the behavior of actions configured under acontrol policy. A parameter map for web-based authentication sets parameters that can be applied to subscribersessions during authentication. If you do not create a parameter map, the policy uses default parameters.
Before you begin
• You have already downloaded and installed a third-party certificate signed by a trusted certificate authorityon the controller. Applicable only if you are opting to use third-party certificates.
Step 1 enable
Example:
Device> enable
Enter your password if prompted.Note
Enables privileged EXEC mode.Step 2 configure terminal
Example:
Web-Based Authentication on Cisco Catalyst 9800 Series Controllers49
Configure External Web AuthenticationConfigure Parameter Maps
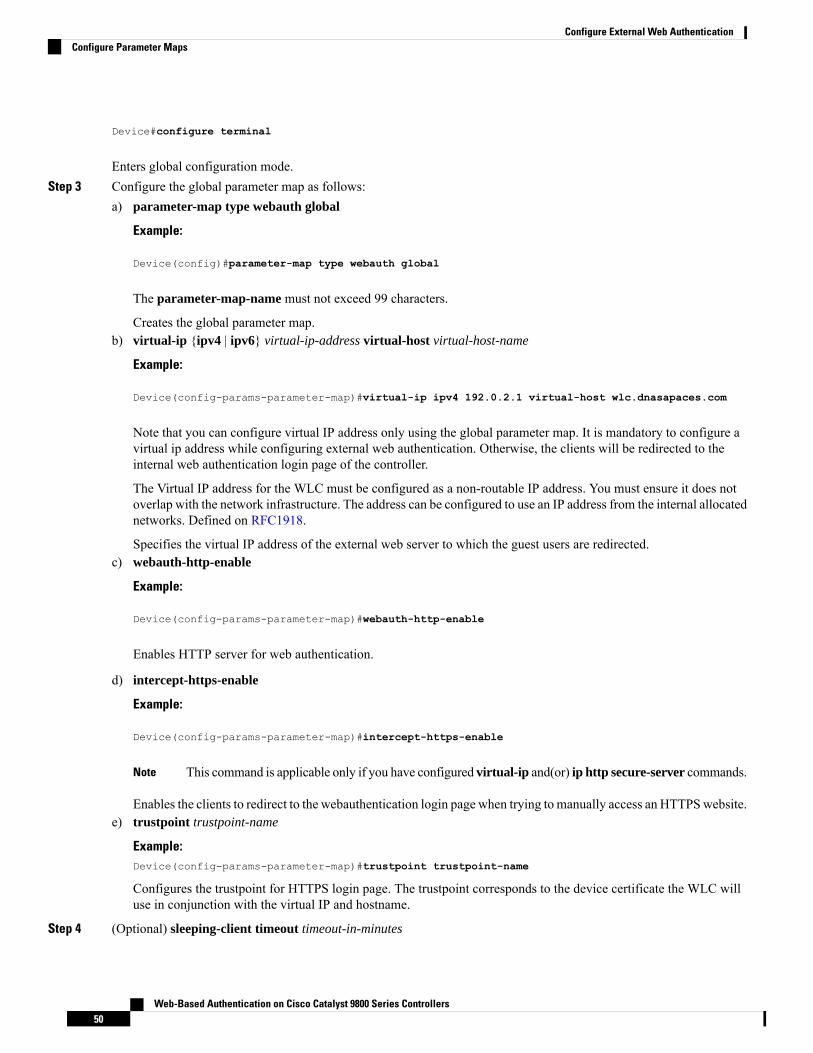
Device#configure terminal
Enters global configuration mode.Step 3 Configure the global parameter map as follows:
a) parameter-map type webauth global
Example:
Device(config)#parameter-map type webauth global
The parameter-map-name must not exceed 99 characters.
Creates the global parameter map.b) virtual-ip {ipv4 | ipv6} virtual-ip-address virtual-host virtual-host-name
Example:
Device(config-params-parameter-map)#virtual-ip ipv4 192.0.2.1 virtual-host wlc.dnasapaces.com
Note that you can configure virtual IP address only using the global parameter map. It is mandatory to configure avirtual ip address while configuring external web authentication. Otherwise, the clients will be redirected to theinternal web authentication login page of the controller.
The Virtual IP address for the WLC must be configured as a non-routable IP address. You must ensure it does notoverlap with the network infrastructure. The address can be configured to use an IP address from the internal allocatednetworks. Defined on RFC1918.
Specifies the virtual IP address of the external web server to which the guest users are redirected.c) webauth-http-enable
Example:
Device(config-params-parameter-map)#webauth-http-enable
Enables HTTP server for web authentication.
d) intercept-https-enable
Example:
Device(config-params-parameter-map)#intercept-https-enable
This command is applicable only if you have configured virtual-ip and(or) ip http secure-server commands.Note
Enables the clients to redirect to the webauthentication login page when trying to manually access an HTTPSwebsite.e) trustpoint trustpoint-name
Example:Device(config-params-parameter-map)#trustpoint trustpoint-name
Configures the trustpoint for HTTPS login page. The trustpoint corresponds to the device certificate the WLC willuse in conjunction with the virtual IP and hostname.
Step 4 (Optional) sleeping-client timeout timeout-in-minutes
Web-Based Authentication on Cisco Catalyst 9800 Series Controllers50
Configure External Web AuthenticationConfigure Parameter Maps
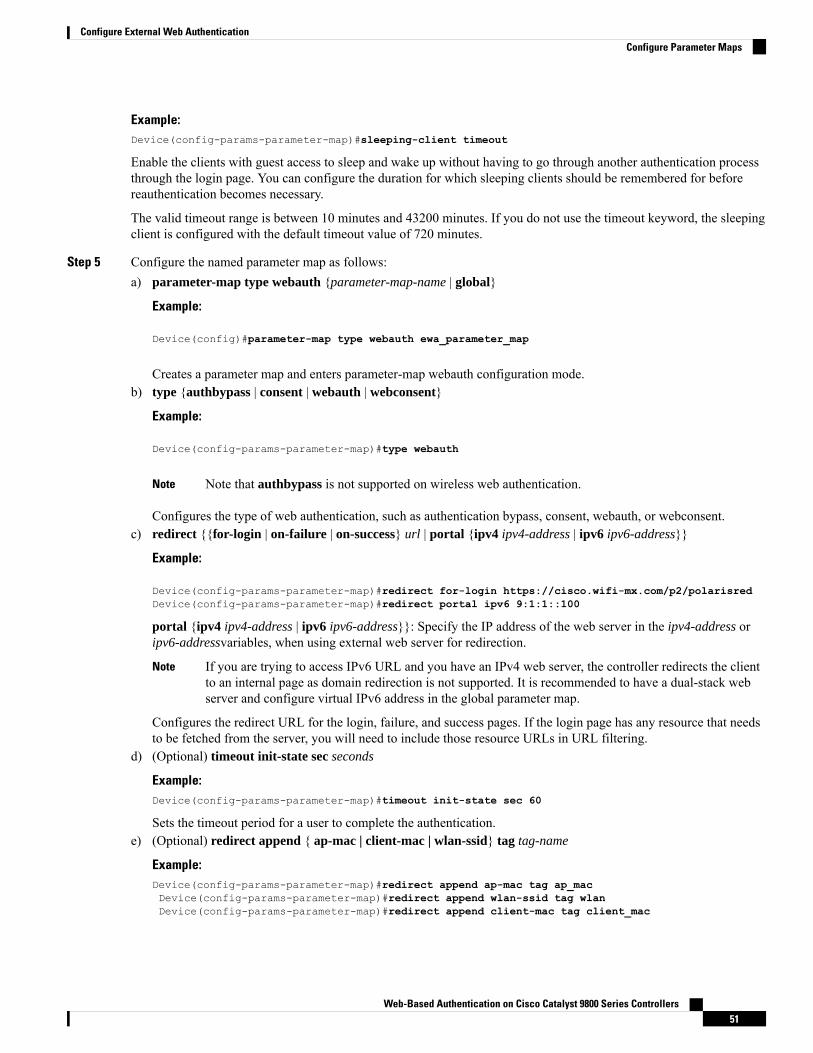
Example:Device(config-params-parameter-map)#sleeping-client timeout
Enable the clients with guest access to sleep and wake up without having to go through another authentication processthrough the login page. You can configure the duration for which sleeping clients should be remembered for beforereauthentication becomes necessary.
The valid timeout range is between 10 minutes and 43200 minutes. If you do not use the timeout keyword, the sleepingclient is configured with the default timeout value of 720 minutes.
Step 5 Configure the named parameter map as follows:a) parameter-map type webauth {parameter-map-name | global}
Example:
Device(config)#parameter-map type webauth ewa_parameter_map
Creates a parameter map and enters parameter-map webauth configuration mode.b) type {authbypass | consent | webauth | webconsent}
Example:
Device(config-params-parameter-map)#type webauth
Note that authbypass is not supported on wireless web authentication.Note
Configures the type of web authentication, such as authentication bypass, consent, webauth, or webconsent.c) redirect {{for-login | on-failure | on-success} url | portal {ipv4 ipv4-address | ipv6 ipv6-address}}
Example:
Device(config-params-parameter-map)#redirect for-login https://cisco.wifi-mx.com/p2/polarisredDevice(config-params-parameter-map)#redirect portal ipv6 9:1:1::100
portal {ipv4 ipv4-address | ipv6 ipv6-address}}: Specify the IP address of the web server in the ipv4-address oripv6-addressvariables, when using external web server for redirection.
If you are trying to access IPv6 URL and you have an IPv4 web server, the controller redirects the clientto an internal page as domain redirection is not supported. It is recommended to have a dual-stack webserver and configure virtual IPv6 address in the global parameter map.
Note
Configures the redirect URL for the login, failure, and success pages. If the login page has any resource that needsto be fetched from the server, you will need to include those resource URLs in URL filtering.
d) (Optional) timeout init-state sec seconds
Example:Device(config-params-parameter-map)#timeout init-state sec 60
Sets the timeout period for a user to complete the authentication.e) (Optional) redirect append { ap-mac | client-mac | wlan-ssid} tag tag-name
Example:Device(config-params-parameter-map)#redirect append ap-mac tag ap_macDevice(config-params-parameter-map)#redirect append wlan-ssid tag wlanDevice(config-params-parameter-map)#redirect append client-mac tag client_mac
Web-Based Authentication on Cisco Catalyst 9800 Series Controllers51
Configure External Web AuthenticationConfigure Parameter Maps
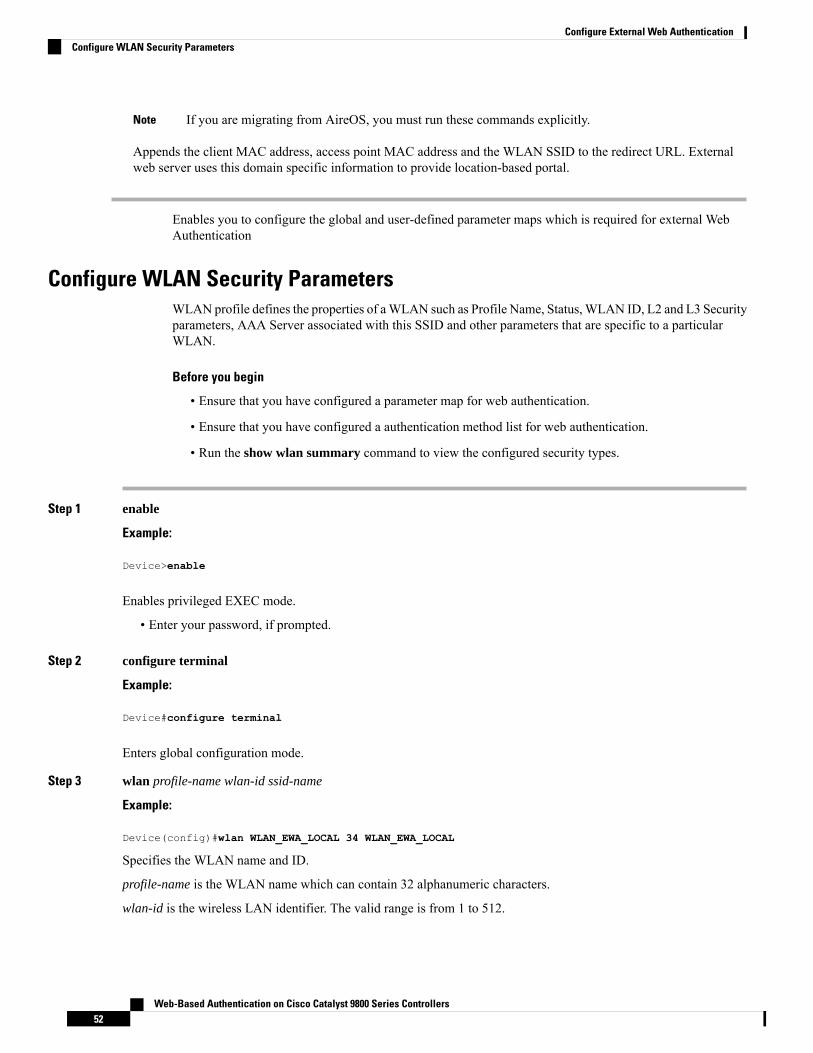
If you are migrating from AireOS, you must run these commands explicitly.Note
Appends the client MAC address, access point MAC address and the WLAN SSID to the redirect URL. Externalweb server uses this domain specific information to provide location-based portal.
Enables you to configure the global and user-defined parameter maps which is required for external WebAuthentication
Configure WLAN Security ParametersWLAN profile defines the properties of aWLAN such as Profile Name, Status,WLAN ID, L2 and L3 Securityparameters, AAA Server associated with this SSID and other parameters that are specific to a particularWLAN.
Before you begin
• Ensure that you have configured a parameter map for web authentication.
• Ensure that you have configured a authentication method list for web authentication.
• Run the show wlan summary command to view the configured security types.
Step 1 enable
Example:
Device>enable
Enables privileged EXEC mode.
• Enter your password, if prompted.
Step 2 configure terminal
Example:
Device#configure terminal
Enters global configuration mode.
Step 3 wlan profile-name wlan-id ssid-name
Example:
Device(config)#wlan WLAN_EWA_LOCAL 34 WLAN_EWA_LOCAL
Specifies the WLAN name and ID.
profile-name is the WLAN name which can contain 32 alphanumeric characters.
wlan-id is the wireless LAN identifier. The valid range is from 1 to 512.
Web-Based Authentication on Cisco Catalyst 9800 Series Controllers52
Configure External Web AuthenticationConfigure WLAN Security Parameters
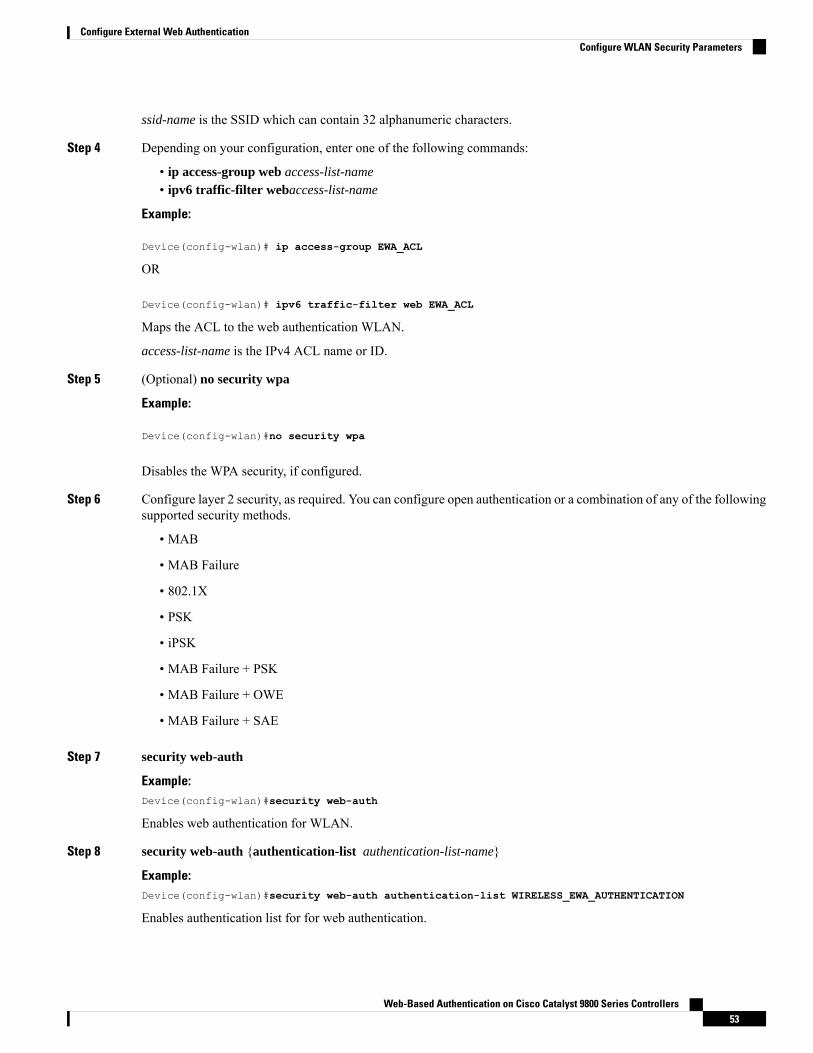
ssid-name is the SSID which can contain 32 alphanumeric characters.
Step 4 Depending on your configuration, enter one of the following commands:
• ip access-group web access-list-name• ipv6 traffic-filter webaccess-list-name
Example:
Device(config-wlan)# ip access-group EWA_ACL
OR
Device(config-wlan)# ipv6 traffic-filter web EWA_ACL
Maps the ACL to the web authentication WLAN.
access-list-name is the IPv4 ACL name or ID.
Step 5 (Optional) no security wpa
Example:
Device(config-wlan)#no security wpa
Disables the WPA security, if configured.
Step 6 Configure layer 2 security, as required. You can configure open authentication or a combination of any of the followingsupported security methods.
• MAB
• MAB Failure
• 802.1X
• PSK
• iPSK
• MAB Failure + PSK
• MAB Failure + OWE
• MAB Failure + SAE
Step 7 security web-auth
Example:Device(config-wlan)#security web-auth
Enables web authentication for WLAN.
Step 8 security web-auth {authentication-list authentication-list-name}
Example:Device(config-wlan)#security web-auth authentication-list WIRELESS_EWA_AUTHENTICATION
Enables authentication list for for web authentication.
Web-Based Authentication on Cisco Catalyst 9800 Series Controllers53
Configure External Web AuthenticationConfigure WLAN Security Parameters
authentication-list authentication-list-name: Sets the authentication list for IEEE 802.1X.
We recommend you to create named authentication list.Note
Step 9 security web-auth {authorization-list authorization-list-name}
Example:Device(config-wlan)#security web-auth authorization-list WIRELESS_EWA_AUTHORIZATION
Enables authorization list for for web authentication.
authorization-list authorization-list-name: Sets the override-authorization list for IEEE 802.1X.
We recommend you to create named authorization list.Note
Step 10 security web-auth parameter-map parameter-map-name
Example:Device(config-wlan)#security web-auth parameter-map EWA_PARAMETER_MAP
Maps the parameter map to the WLAN.
We recommend you to create a named parameter map.Note
Step 11 no shutdown
Example:Device(config-wlan)# no shutdown
Enables the WLAN.
Step 12 end
Example:Device(config-wlan)#end
Returns to privileged EXEC mode.
Configuring the URLFilter List
Step 1 configure terminal
Example:Device# configure terminal
Enters global configuration mode.
Step 2 urlfilter list url-filterlist-name
Example:Device(config)# urlfilter list urllist_local_preauth
Configures the URL filter list.
url-filterlist-name refers to the URL filter list name. The list name must not exceed 32 alphanumeric characters.
Web-Based Authentication on Cisco Catalyst 9800 Series Controllers54
Configure External Web AuthenticationConfiguring the URLFilter List

Step 3 action permit
Example:Device(config-urlfilter-params)#action permit
Configures the list of allowed URLs.
Step 4 url url
Example:Device(config-urlfilter-params)#url url1.dns.com
Configures a URL.
Create Wireless Policy ProfilePolicy profile contains policy to be associated with theWLAN. It specifies the settings for client VLAN, URLfilters, session and idle timeout settings and so on.
Before you begin
• Ensure you have created the VLANs for assigning the wireless clients.
• Ensure you have defined pre-authentication URL Filter list for the URLs.
Step 1 enable
Example:
Device> enable
Enables privileged EXEC mode.
• Enter your password, if prompted.
Step 2 configure terminal
Example:
Device# configure terminal
Enters global configuration mode.
Step 3 wireless profile policy profile-name
Example:Device(config)#wireless profile policy EWA_POLICY_PROFILE
Configures the WLAN policy profile.
Step 4 urlfilter list pre-auth-filter name
Web-Based Authentication on Cisco Catalyst 9800 Series Controllers55
Configure External Web AuthenticationCreate Wireless Policy Profile

Example:Device(config-wireless-policy)#urlfilter list pre-auth-filter urllist_local_preauth
Applies the URL list to the policy profile.
Step 5 vlan vlan-name
Example:Device(config-wireless-policy)#vlan 100
Assigns the profile policy to the VLAN.
Step 6 no shutdown
Example:Device(config-wireless-policy)# no shutdown
Restarts the WLAN.
Step 7 end
Example:Device(config)# end
Returns to privileged EXEC mode.
Create a Policy TagA policy tag constitutes mapping of the WLAN profile to the policy profile. The WLAN profile defines thewireless characteristics of the WLAN. The policy profile defines the network policies and the switchingpolicies for the client.
You can either create a new policy tag or use the default policy tag. The default policy tag automatically mapsany SSID with a WLAN ID between 1 to 16 to the default policy profile. It cannot be modified nor deleted.If you have a WLAN with ID 17 or higher, the default policy tag cannot be used.
Before you begin
• Ensure you have configured a WLAN for web authentication.
• Ensure you have configured a WLAN policy profile.
Step 1 configure terminal
Example:Device#configure terminal
Enters global configuration mode.
Step 2 wireless tag policy policy-tag-name
Example:Device(config)#wireless tag policy lwa_policy_tag
Web-Based Authentication on Cisco Catalyst 9800 Series Controllers56
Configure External Web AuthenticationCreate a Policy Tag
Configures a policy tag and enters policy tag configuration mode.
Step 3 wlan wlan-name policy profile-policy-name
Example:Device(config-policy-tag)#wlan wlan_lwa_local policy wlan_lwa_local
Maps the WLAN policy profile to a WLAN profile.
Step 4 end
Example:Device(config-policy-tag)# end
Saves the configuration, exits configuration mode, and returns to privileged EXEC mode.
Configure a Site TagSite tag assigns the AP join profile settings to the AP and determines if the site is a local site, in which casethe APs will be in local mode.
To get the best performance from your 9800 Series wireless controller, it is recommended that you:
• Use custom site tags and not the default site tag
• Assign the same site tag to all the APs in the same roaming domain
• Limit the number of APs to 500 per site tag for best performance
• Not exceed the recommended maximum number of APs per site tag based on the controller model
Step 1 configure terminal
Example:Device#configure terminal
Enters global configuration mode.
Step 2 wireless tag site site-tag
Example:Device(config)#wireless tag site site_lwa
Configures site tag and enters site tag configuration mode. The site is configured as a local site, by default. To configurethe site tag as Flexconnect, run the no local-site command.
Step 3 description description
Example:Device(config-site-tag)# description default site tag
Adds a description for the site tag.
Step 4 end
Web-Based Authentication on Cisco Catalyst 9800 Series Controllers57
Configure External Web AuthenticationConfigure a Site Tag
Example:Device(config-site-tag)# end
Returns to privileged EXEC mode.
Assign a Policy Tag to an APAccess Points are tagged based on the broadcast domain, the site it belongs to, and the desired RF characteristics.Once tagged, the AP gets a list of WLANs to be broadcast along with the properties of the respective SSIDs,properties of the APs on the local/remote site, and the RF properties of the network.
Each access point is assigned three unique tags: a policy, site, and RF tag. By default, when an AP joins theCisco Catalyst 9800Wireless Controller, it gets default tags; the default policy tag, default site tag, and defaultRF tag. Users can make changes to the default tags or create custom tags. For more information about tags,see "Tags, Profiles, and SSIDs" chapter in the Cisco Catalyst 9800 Series Wireless Controller SoftwareConfiguration Guide.
Before you begin
• Ensure you have created a policy tag that maps the WLAN profile to the policy profile.
• Ensure you have created a site tag.
Step 1 configure terminal
Example:Device#configure terminal
Enters the global configuration mode.
Step 2 ap mac-address
Example:Device (config)#ap 28ac.9eb7.7220
Configures an AP and enters the ap tag configuration mode.
Use the Ethernet MAC address.Note
Step 3 policy-tag policy-tag-name
Example:Device (config-ap-tag)#policy-tag lwa_policy_tag
Maps a policy tag to an AP.
Step 4 site-tag site-tag-name
Example:Device (config-ap-tag)#site-tag site_lwa
Maps a site tag to an AP.
Web-Based Authentication on Cisco Catalyst 9800 Series Controllers58
Configure External Web AuthenticationAssign a Policy Tag to an AP

Step 5 end
Example:Device (config-ap-tag)#end
Exits the configuration mode and returns to privileged EXEC mode.
Enable the HTTP/HTTPS Server for Web Authentication
Before you begin
Ensure that you have reviewed the Guidelines for Configuring Secure HTTP Access, on page 14.
Step 1 configure terminal
Example:Device#configure terminal
Enters global configuration mode.
Step 2 ip http server
Example:
Device(config)#ip http server
Enables the HTTP server. The local web authentication feature uses the HTTP server to communicate with the hosts foruser authentication.
It is mandatory to enable ip http server for web authentication.Note
Step 3 ip http secure-server
Example:
Device(config)#ip http secure-server
Enables secure authentication. With secure authentication enabled, the login page always uses HTTPS even if the clientsends an HTTP request.
You can configure custom authentication proxy web pages or specify a redirection URL for successful login.
To ensure secure authentication when you enter the ip http secure-server command, the login page is alwaysin HTTPS (secure HTTP) even if the user sends an HTTP request.
Note
Step 4 end
Example:Device(config)# end
Web-Based Authentication on Cisco Catalyst 9800 Series Controllers59
Configure External Web AuthenticationEnable the HTTP/HTTPS Server for Web Authentication

Exits configuration mode.
Configure External Web Authentication using the WebUI
Configure AAA Server and Server GroupsIf you are planning to use an AAA server for authenticating the guest users, configure external servers andserver groups as follows.
Step 1 Choose Configuration > Security > AAA and click Servers/Groups.Step 2 To create a new RADIUS server, go to the Servers tab, click RADIUS and click + Add.
The Create AAA RADIUS Server window, configure the following details.
a) In the Name field, enter the name of the RADIUS server.b) In the Server Address field, enter the IPv4 or IPv6 address, or hostname.c) To enable the Protected Access Credential (PAC) authentication key, check the PAC Key check box.d) From the Key Type drop-down list, choose the authentication key type.
The key types are Clear Text, Encrypted, and Hidden.
e) In the Key and Confirm Key fields, enter the authentication key.f) In the Auth Port field, enter the authorization port number.g) the Acct Port field, enter the accounting port number.h) In the Server Timeout field, enter the timeout duration, in seconds.i) In the Retry Count field, enter the number of retries.j) Use the Support for CoA toggle button to enable or disable change of authorization (CoA).k) Click Apply to Device.
Step 3 To create a new TACACS+ server, go to the Servers tab, click TACACS+ and click + Add.a) In the Name field, enter the name of the TACACS+ server.b) In the Server Address field, enter the IPv4 or IPv6 address, or hostname.c) In the Key and Confirm Key fields, enter the authentication key.d) In the Port field, enter the port number.e) In the Server Timeout field, enter the timeout duration, in seconds.f) Click Apply to Device.
Step 4 To create a new LDAP server, go to the Servers tab, click LDAP and click + Add.a) In the Server Name field, enter the LDAP server name.b) In the Server Address field, enter the IPv4 or IPv6 address, or hostname.c) In the Port Number field, enter the port number to use.d) From the Simple Bind drop-down list, choose the authentication key type.e) In the User Base DN field, enter the details.f) From the User Attribute drop-down list, choose the user attribute.g) In the User Object Type field, enter the object type details and click the + icon.
Web-Based Authentication on Cisco Catalyst 9800 Series Controllers60
Configure External Web AuthenticationConfigure External Web Authentication using the WebUI
The objects that have been added are listed in the area below. Use the x mark adjacent to each object to remove it.
h) In the Server Timeout field, enter the timeout duration, in seconds.i) Check the Secure Mode check box to enable secure mode.
Checking this enables the Trustpoint Name drop-down list.
j) From the Trustpoint Name drop-down list, choose the trustpoint.k) Click Apply to Device.
Step 5 Choose Configuration > Security > AAA > Server Groups.
You can configure servers of different types in one group. The list of servers in a server group is an ordered list. The firstavailable server in the list is used for authentication.
Step 6 To create a new RADIUS server, go to the Server Groups tab, click RADIUS and click + Add.
The Create AAA RADIUS Server Group window displays.
a) In the Name field, enter the name of the RADIUS server group.b) From the MAC-Delimiter drop-down list, choose the delimiter to be used in the MAC addresses that are sent to the
RADIUS servers.c) From the MAC Filtering drop-down list, choose a value based on which to filter MAC addresses.d) To configure the dead time for the server group and direct AAA traffic to alternative groups of servers that have
different operational characteristics, in the Dead-Time field, enter the amount of time, in minutes, after which aserver is assumed to be dead.
e) Choose the servers that you want to include in the server group from the Available Servers list and move them tothe Assigned Servers list.
f) Click Apply to Device.
Step 7 To create a new TACACS+ server, go to the Server Groups tab, click TACACS+ and click + Add.
The Create AAA TACACS Server Group window displays.
a) In the Name field, enter the name of the TACACS+ server group.b) Choose the servers that you want to include in the server group from the Available Servers list and move them to
the Assigned Servers list.c) Click Apply to Device.
Step 8 To create a new LDAP server, go to the Server Groups tab, click LDAP and click + Add.
The Create AAA LDAP Server Group window displays.
a) In the Name field, enter the name of the LDAP server group.b) Choose the servers that you want to include in the server group from the Available Servers list and move them to
the Assigned Servers list.c) Click Apply to Device.
Configure Local Authentication and Authorization
Step 1 Configure authentication method list as follows. Authentication is the process by which a system or network verifies theidentity of a user who wishes to access it.
Web-Based Authentication on Cisco Catalyst 9800 Series Controllers61
Configure External Web AuthenticationConfigure Local Authentication and Authorization
a) Choose Configuration > Security > AAA.b) Go to AAA Method List tab, click Authentication on the left side and then click + Add.c) In theQuick Setup: AAA Authenticationwindow that is displayed, enter a name for your method list in theMethod
List Name field.
The name can contain alphanumeric characters including underscores and hyphens. Do not include space.
d) From the Type drop-down list, choose login to enable web authentication.e) From the Group Type drop-down list, choose local to enable local authentication.
The options are group and local. You have to choose group to enable authentication on an AAA server. To enableauthentication locally on the controller, choose local.
f) If you want to configure a local server as a fallback method when the servers in the groups are unavailable, checkthe Fallback to local checkbox.
The Fallback to local checkbox is enabled only if you select the group type as group.
g) From the Available Server Groups box, select the server groups that you have created in Step 1.h) Click Apply to Device.
Step 2 To provide access to system or network resources based on their identity, configure authorization method list as follows:a) Choose Configuration > Security > AAA.b) Go to AAA Method List tab, click Authorization on the left side and then click + Add.c) In theQuick Setup: AAA Authorizationwindow that is displayed, enter a name for your method list in theMethod
List Name field.
The name can contain alphanumeric characters including underscores and hyphens. Do not include space.
d) From the Type drop-down list, choose login to enable web authentication.e) From the Group Type drop-down list, choose login to enable local authentication.
The options are group and local. You have to choose group to enable authentication on an AAA server. To enableauthentication locally on the controller, choose local.
f) If you want to configure a local server as a fallback method when the servers in the groups are unavailable, checkthe Fallback to local checkbox.
The Fallback to local checkbox is enabled only if you select the group type as group.
g) From the Available Server Groups box, select the server groups that you have created in Step 1.h) Click Apply to Device.
Configuring Pre-Authentication ACLWhile configuring External Web Authentication, you must define ACL rules that will allow the clients toaccess the external web server.
Step 1 Choose Configuration > Security > ACL.Step 2 In the ACL Name field, enter a name for the ACL that you are configuring.
The SSID name can contain up to 32 alphanumeric characters. By default, the profile name that you have entered inthe above step is automatically taken as the SSID. You can go with the default name or add a new one.
Web-Based Authentication on Cisco Catalyst 9800 Series Controllers62
Configure External Web AuthenticationConfiguring Pre-Authentication ACL
Step 3 In the ACL Type drop-down list, choose IPV4 Extended.
Maps the authentication list to the web authentication WLAN.
Step 4 In the Sequence field, enter a sequence value to specify the sequence number for the access list statement.
The valid range is between 100 and 199 or 2000 and 26991
Step 5 In the Action drop-down list, choose Premit or Deny, as applicable.Step 6 In the Source Type drop-down list, choose the required source type. The options available are any,Host andNetwork.
If you choose the source type as Host, then you must enter the Host Name/IP.
If you choose the source type as Network, then you must specify the Source IP address and Source Wildcard mask.
Step 7 In the Destination Type drop-down list, choose the required destination type. The options available are any, Host andNetwork.
If you choose the destination type as Host, then you must enter the Host Name/IP.
If you choose the destination type as Network, then you must specify the Destination IP address and DestinationWildcard mask.
Step 8 In the Protocol drop-down list, choose a protocol.Step 9 Click Add.Step 10 Add all the rules, as applicable and click Apply to Device.
Configure Local Guest User CredentialsThis is applicable only if you are configuring local web authentication. For external web authentication, createthe user credentials on the external AAA server.
Before you begin
Step 1 Choose Administration > User Administration.Step 2 To create a new guest user account, click + Add.Step 3 In the Create User Administration window that is displayed, configure the following mandatory fields, as required.
a) User Name: Enter a unique user name.
It can contain alphanumeric characters including underscores and hyphens. Space is not allowed.
b) Choose the privilege level for the guest user from the Privilege drop-down list.
The options are Admin, Read Only, No Access and Lobby Admin.
Click Go to Advanced Mode to view the privilege level number assgined to a particular user.
c) Type the password in the Password and Confirm Password fields.
The password must contain a mininum of 6 characters and a maximum of 127 characters.
Step 4 Click Apply to Device.
Web-Based Authentication on Cisco Catalyst 9800 Series Controllers63
Configure External Web AuthenticationConfigure Local Guest User Credentials
Configure Parameter Maps
Before you begin
Depending on your configuration options, ensure you have taken care of the following before starting thisprocedure.
• The virtual gateway IP address of the WLC that it uses for its communication with the wireless clientsis available.
• You have already installed a third-party certificate signed by a trusted certificate authority on the controller.Applicable only if you are opting to use third-party certificates.
• The external AAA server is configured for web authentication and the URL is available.
• The customHTML pages for authentication are uploaded to the controller or external server, as applicable.
Step 1 Configure the Global parameter map as follows:a) On the Web Auth page, in the list of parameter maps displayed, click global.b) To set the redirect address for web authentication login page, enter the virtual IP address in theVirtual IPv4 Address.
If the client uses an IPv6 address, enter the IPv6 address in the Virtual IPv6 Address field.
It is recommended that you configure a nonroutable IP address for the virtual interface, ideally not overlapping withthe network infrastructure addresses.
c) To specify the hostname for the Virtual IP address used for web authentication, enter the hostname in the VirtualIPv4 Hostname field.
Configures hostname for the virtual IP address for web authetication.
For web authentication, ensure you configure a hostname that is different from the hostname configuredfor the management IP address of the WLC, if configured already.
Note
d) To use third party certificates for secure communication, in the Trustpoint drop-down list, choose the trustpointlabel that you have generated for web authentication.
Maps the third party certificate that you have imported in to the controller to the parameter map. A trustpoint containsthe device identity certificate along with the corresponding CA certificate. For information about configuring atrustpoint for web authentication, see "Trustpoint Configuration on 9800" section inConfiguring Trustpoints on CiscoCatalyst 9800 Series Wireless Controllers.
e) To enable secure authentication for the login page, check Web Auth intercept HTTPs checkbox.
Intercepts HTTPS requests and passes credentials over an encrypted link.
f) To configure settings for failed login attempts, check Watch List Enable checkbox and enter the watch list timeoutperiod in the Watch List Expiry Timeout field.
If watch list is enabled, the host is added to the watch list if a user fails to authenticate after the maximum numberof login attempts. After the host's IP address is on the watch list, the controller does not intercept HTTP packets fromthat host or perform WebAuth processing until the expiry timer has expired.
g) Click Update & Apply.
Step 2 Create a named parameter map as follows:a) Choose Configuration > Security > Web Auth.
Web-Based Authentication on Cisco Catalyst 9800 Series Controllers64
Configure External Web AuthenticationConfigure Parameter Maps
b) On the Web Auth page, click Add.c) In the Create Web Auth Parameter window that is displayed, enter a name for the parameter map in the
Parameter-map name field.d) In theMaximum HTTP connections field, enter the maximum number of HTTP connections that you want to allow.
The range of value is 1-200.e) In the Init-State Timeout field, enter the time after which the init state timer should expire due to the user’s failure
to enter valid credentials on the login page. The range is 60-3932100.f) In the Type drop-down list, choose the type of Web Authentication page that is displayed during the login process.
The following are the options available:
• Webauth: The controller presents a policy page with the user name and password. You need to enter the correctcredentials to access the network.
• Consent: The controller redirects you to a usage policy page with Accept button. You need to click accept thepolicy to access the network.
• Webconsent: The controller redirects you to a usage policy page with Accept or Deny buttons along with username or password. You need to enter the correct credentials and accept the usage policy to access the network.
• Authbypass: This is not supported.
g) Click Apply to Device.
The newly created named parameter map appears in the list of parameter maps in the Web Auth page.
Step 3 Edit a named parameter map as follows:a) On the Web Auth page, click the name of the parameter map that you created in step 2.b) In the Edit Web Auth Parameter window that is displayed, choose the required Banner Type.
The banner types available are:
• None
• Banner Text: Click the radio button and enter the required banner text to be displayed in the Banner Text field.
• File Name: Click the radio button and in the File Name field, specify the path of the file from which the bannertext has to be fetched.
c) To set the maximum number of HTTP connections allowed, enter the number in Maximum HTTP connectionsfield.
d) To enable authentication of sleeping clients and then specify the sleeping client timeout, check the Sleeping ClientStatus checkbox and enter the timeout period in the Sleeping Client Timeuot field.
Allows successfully authenticated host devices to stay logged in for a configured period without re-authentication.
The valid range is between 10 minutes and 43200 minutes.
e) Click Update & Apply.
A pop-up with Configuration Successfully Applied message appears.
Step 4 Configure an external server for authentication as follows:a) On the Web Auth page, click the name of the parameter map that you created in step 2.b) In the Edit Web Auth Parameter window that is displayed, go to the Advanced tab.
Web-Based Authentication on Cisco Catalyst 9800 Series Controllers65
Configure External Web AuthenticationConfigure Parameter Maps
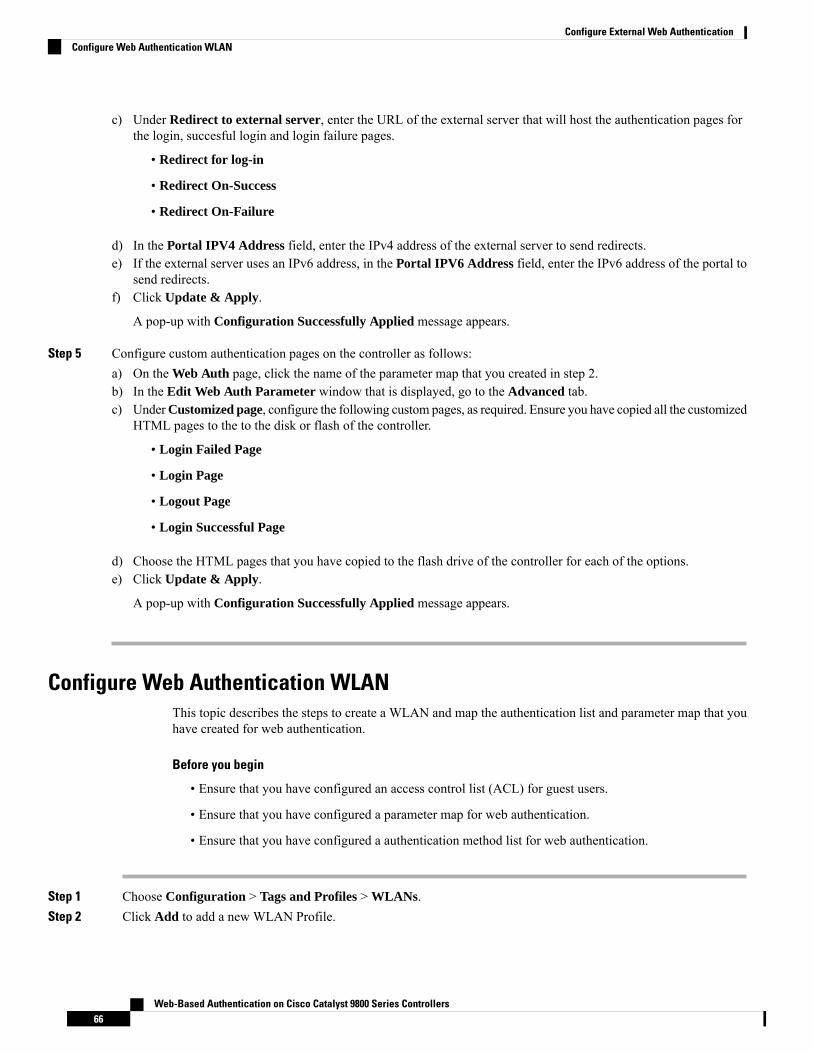
c) Under Redirect to external server, enter the URL of the external server that will host the authentication pages forthe login, succesful login and login failure pages.
• Redirect for log-in
• Redirect On-Success
• Redirect On-Failure
d) In the Portal IPV4 Address field, enter the IPv4 address of the external server to send redirects.e) If the external server uses an IPv6 address, in the Portal IPV6 Address field, enter the IPv6 address of the portal to
send redirects.f) Click Update & Apply.
A pop-up with Configuration Successfully Applied message appears.
Step 5 Configure custom authentication pages on the controller as follows:a) On the Web Auth page, click the name of the parameter map that you created in step 2.b) In the Edit Web Auth Parameter window that is displayed, go to the Advanced tab.c) UnderCustomized page, configure the following custom pages, as required. Ensure you have copied all the customized
HTML pages to the to the disk or flash of the controller.
• Login Failed Page
• Login Page
• Logout Page
• Login Successful Page
d) Choose the HTML pages that you have copied to the flash drive of the controller for each of the options.e) Click Update & Apply.
A pop-up with Configuration Successfully Applied message appears.
Configure Web Authentication WLANThis topic describes the steps to create a WLAN and map the authentication list and parameter map that youhave created for web authentication.
Before you begin
• Ensure that you have configured an access control list (ACL) for guest users.
• Ensure that you have configured a parameter map for web authentication.
• Ensure that you have configured a authentication method list for web authentication.
Step 1 Choose Configuration > Tags and Profiles > WLANs.Step 2 Click Add to add a new WLAN Profile.
Web-Based Authentication on Cisco Catalyst 9800 Series Controllers66
Configure External Web AuthenticationConfigure Web Authentication WLAN

Step 3 Enter a profile name in the Profile Name field.
The profile name can contain up to 32 alphanumeric characters.
Step 4 In the SSID field, enter the SSID name.
The SSID name can contain up to 32 alphanumeric characters. By default, the profile name that you have entered inthe above step is automatically taken as the SSID. You can go with the default name or add a new one.
Step 5 In the WLAN ID field, enter a valid ID between 1 and 4096.
This field is automatically filled in by the system with an available id. You can assign a new ID, if required.
Step 6 Click the Status toggle button to enable the WLAN.Step 7 If the Broadcast SSID is disabled, click the toggle button to enable the SSID for broadcast, so that it is visible to all
wireless clients within the range.Step 8 Go to the Security tab and then under Layer2 tab, in the Layer 2 Security Mode list, choose None.
For web authentication, you must disable all layer 2 security features.
Step 9 Under Layer3, check the Web Policy checkbox.Step 10 In the Web Auth Parameter drop-down list, choose the parameter map that you have created earlier.
Maps the parameter map to the web authentication WLAN.
Step 11 In the Authentication List drop-down list, choose the authentication list that you have created earlier.
Maps the authentication list to the web authentication WLAN.
Step 12 Click Show Advanced Settings, under Preauthentication ACL, choose the preauthentication ACL that you havecreated for guest users, if any.
Maps the ACL to the web auth WLAN. The preauthentication ACLs are used to provide guests access to DNS andDHCP only. Access to the network is provided only after successful authentication.
Step 13 Click Apply to Device.
The newly added WLAN appears in the list of WLANs configured in the system.
Configuring the URL Filter List
Step 1 Choose Configuration > Security > URL Filters.The URL Filters page is displayed.
Step 2 Click the Add button.The Add URL Filters window is displayed.
Step 3 In the List Name box, type a name for the URL Filter list that you are creating.Step 4 From the Type drop-down list, choose either PRE-AUTH or POST-AUTH.
a) POST-AUTH: Specify the Redirect Servers for IPv4 and IPv6.
Step 5 In the Action field, use the slider to Permit or Deny the URLs.Step 6 Specify the URLs in the URLs box. Enter every URL on a new line.
Web-Based Authentication on Cisco Catalyst 9800 Series Controllers67
Configure External Web AuthenticationConfiguring the URL Filter List
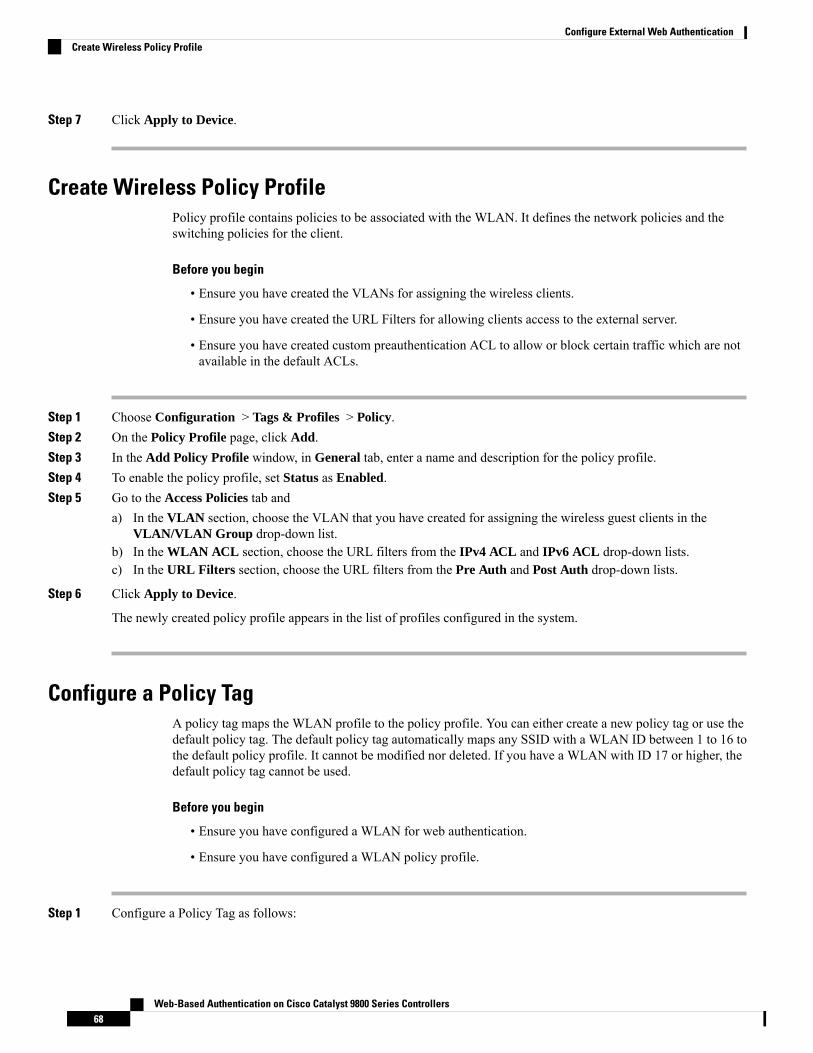
Step 7 Click Apply to Device.
Create Wireless Policy ProfilePolicy profile contains policies to be associated with the WLAN. It defines the network policies and theswitching policies for the client.
Before you begin
• Ensure you have created the VLANs for assigning the wireless clients.
• Ensure you have created the URL Filters for allowing clients access to the external server.
• Ensure you have created custom preauthentication ACL to allow or block certain traffic which are notavailable in the default ACLs.
Step 1 Choose Configuration > Tags & Profiles > Policy.Step 2 On the Policy Profile page, click Add.Step 3 In the Add Policy Profile window, in General tab, enter a name and description for the policy profile.Step 4 To enable the policy profile, set Status as Enabled.Step 5 Go to the Access Policies tab and
a) In the VLAN section, choose the VLAN that you have created for assigning the wireless guest clients in theVLAN/VLAN Group drop-down list.
b) In the WLAN ACL section, choose the URL filters from the IPv4 ACL and IPv6 ACL drop-down lists.c) In the URL Filters section, choose the URL filters from the Pre Auth and Post Auth drop-down lists.
Step 6 Click Apply to Device.
The newly created policy profile appears in the list of profiles configured in the system.
Configure a Policy TagA policy tag maps the WLAN profile to the policy profile. You can either create a new policy tag or use thedefault policy tag. The default policy tag automatically maps any SSID with a WLAN ID between 1 to 16 tothe default policy profile. It cannot be modified nor deleted. If you have a WLAN with ID 17 or higher, thedefault policy tag cannot be used.
Before you begin
• Ensure you have configured a WLAN for web authentication.
• Ensure you have configured a WLAN policy profile.
Step 1 Configure a Policy Tag as follows:
Web-Based Authentication on Cisco Catalyst 9800 Series Controllers68
Configure External Web AuthenticationCreate Wireless Policy Profile
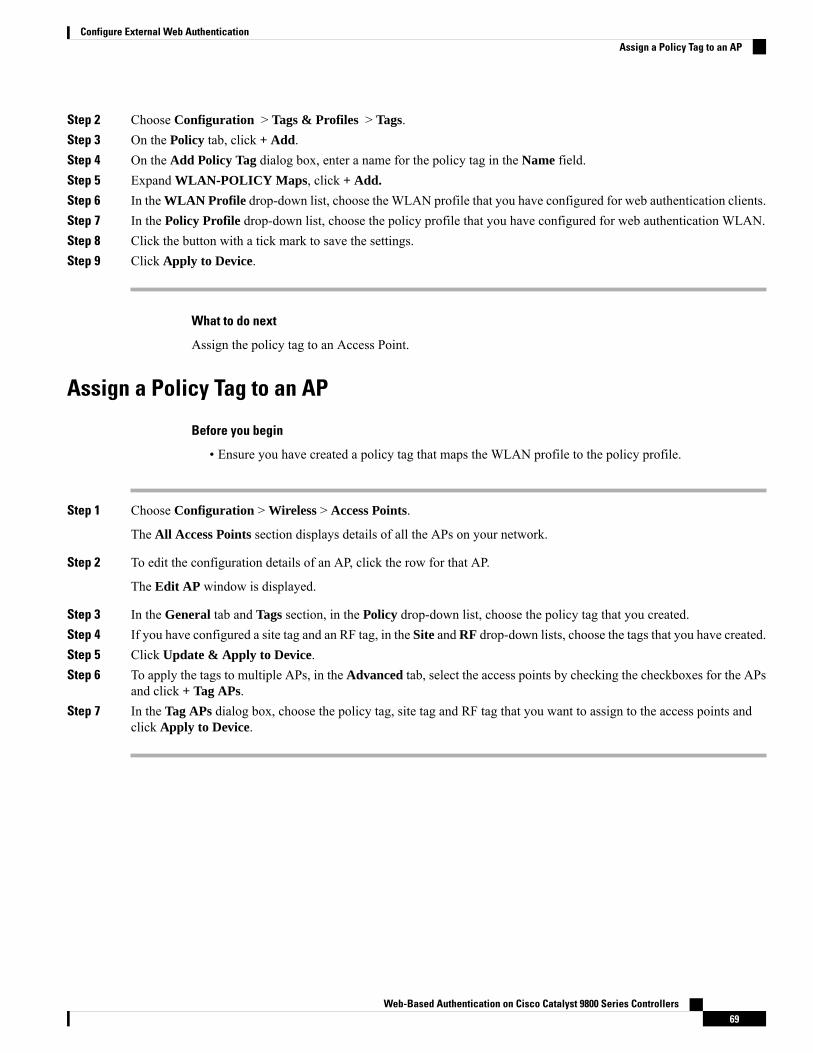
Step 2 Choose Configuration > Tags & Profiles > Tags.Step 3 On the Policy tab, click + Add.Step 4 On the Add Policy Tag dialog box, enter a name for the policy tag in the Name field.Step 5 Expand WLAN-POLICY Maps, click + Add.
Step 6 In the WLAN Profile drop-down list, choose the WLAN profile that you have configured for web authentication clients.Step 7 In the Policy Profile drop-down list, choose the policy profile that you have configured for web authentication WLAN.Step 8 Click the button with a tick mark to save the settings.Step 9 Click Apply to Device.
What to do next
Assign the policy tag to an Access Point.
Assign a Policy Tag to an AP
Before you begin
• Ensure you have created a policy tag that maps the WLAN profile to the policy profile.
Step 1 Choose Configuration > Wireless > Access Points.
The All Access Points section displays details of all the APs on your network.
Step 2 To edit the configuration details of an AP, click the row for that AP.
The Edit AP window is displayed.
Step 3 In the General tab and Tags section, in the Policy drop-down list, choose the policy tag that you created.Step 4 If you have configured a site tag and an RF tag, in the Site andRF drop-down lists, choose the tags that you have created.Step 5 Click Update & Apply to Device.Step 6 To apply the tags to multiple APs, in the Advanced tab, select the access points by checking the checkboxes for the APs
and click + Tag APs.Step 7 In the Tag APs dialog box, choose the policy tag, site tag and RF tag that you want to assign to the access points and
click Apply to Device.
Web-Based Authentication on Cisco Catalyst 9800 Series Controllers69
Configure External Web AuthenticationAssign a Policy Tag to an AP

Web-Based Authentication on Cisco Catalyst 9800 Series Controllers70
Configure External Web AuthenticationAssign a Policy Tag to an AP
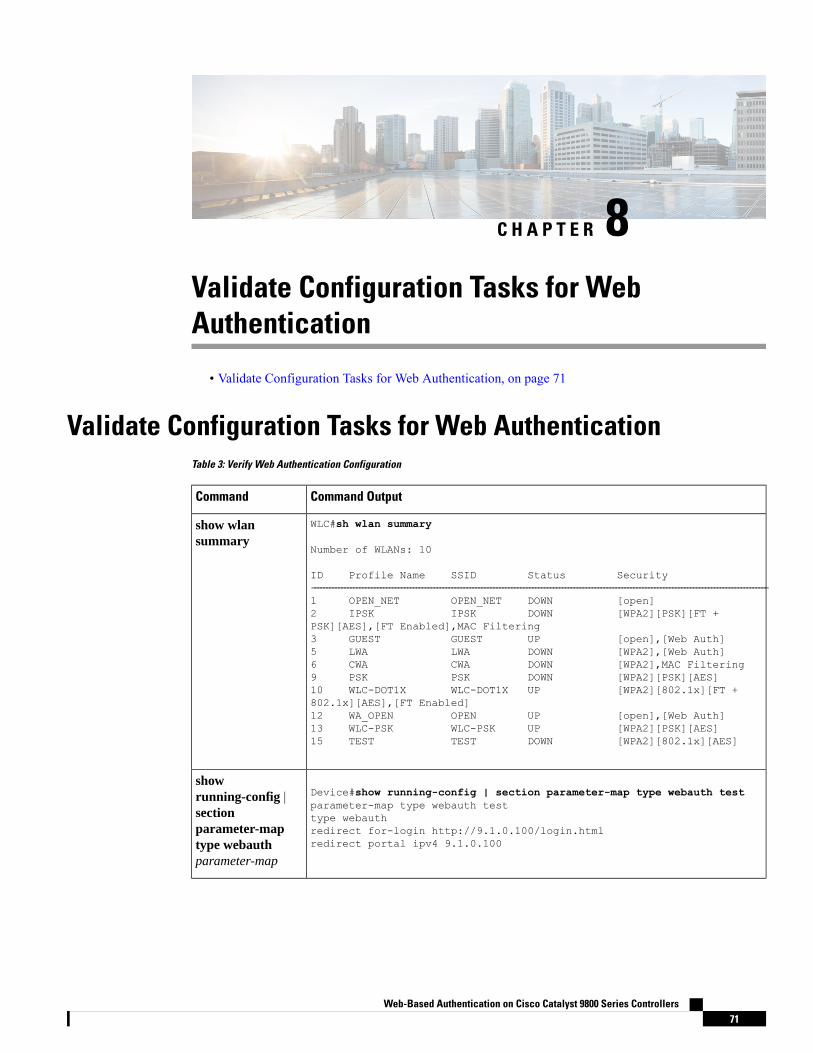
C H A P T E R 8Validate Configuration Tasks for WebAuthentication
• Validate Configuration Tasks for Web Authentication, on page 71
Validate Configuration Tasks for Web AuthenticationTable 3: Verify Web Authentication Configuration
Command OutputCommand
WLC#sh wlan summary
Number of WLANs: 10
ID Profile Name SSID Status Security---------------------------------------------------------------------------------------------------------------------------------------------------------1 OPEN_NET OPEN_NET DOWN [open]2 IPSK IPSK DOWN [WPA2][PSK][FT +PSK][AES],[FT Enabled],MAC Filtering3 GUEST GUEST UP [open],[Web Auth]5 LWA LWA DOWN [WPA2],[Web Auth]6 CWA CWA DOWN [WPA2],MAC Filtering9 PSK PSK DOWN [WPA2][PSK][AES]10 WLC-DOT1X WLC-DOT1X UP [WPA2][802.1x][FT +802.1x][AES],[FT Enabled]12 WA_OPEN OPEN UP [open],[Web Auth]13 WLC-PSK WLC-PSK UP [WPA2][PSK][AES]15 TEST TEST DOWN [WPA2][802.1x][AES]
show wlansummary
Device#show running-config | section parameter-map type webauth testparameter-map type webauth testtype webauthredirect for-login http://9.1.0.100/login.htmlredirect portal ipv4 9.1.0.100
showrunning-config |sectionparameter-maptype webauthparameter-map
Web-Based Authentication on Cisco Catalyst 9800 Series Controllers71

Command OutputCommand
Device#show crypto pki trustpoints certTrustpoint cert:
Subject Name:[email protected]=sthaliya-lnxou=WNBUo=Ciscol=SanJosest=Californiac=USSerial Number (hex): 00Certificate configured.
show crypto pkitrustpointscertificates
Web-Based Authentication on Cisco Catalyst 9800 Series Controllers72
Validate Configuration Tasks for Web AuthenticationValidate Configuration Tasks for Web Authentication
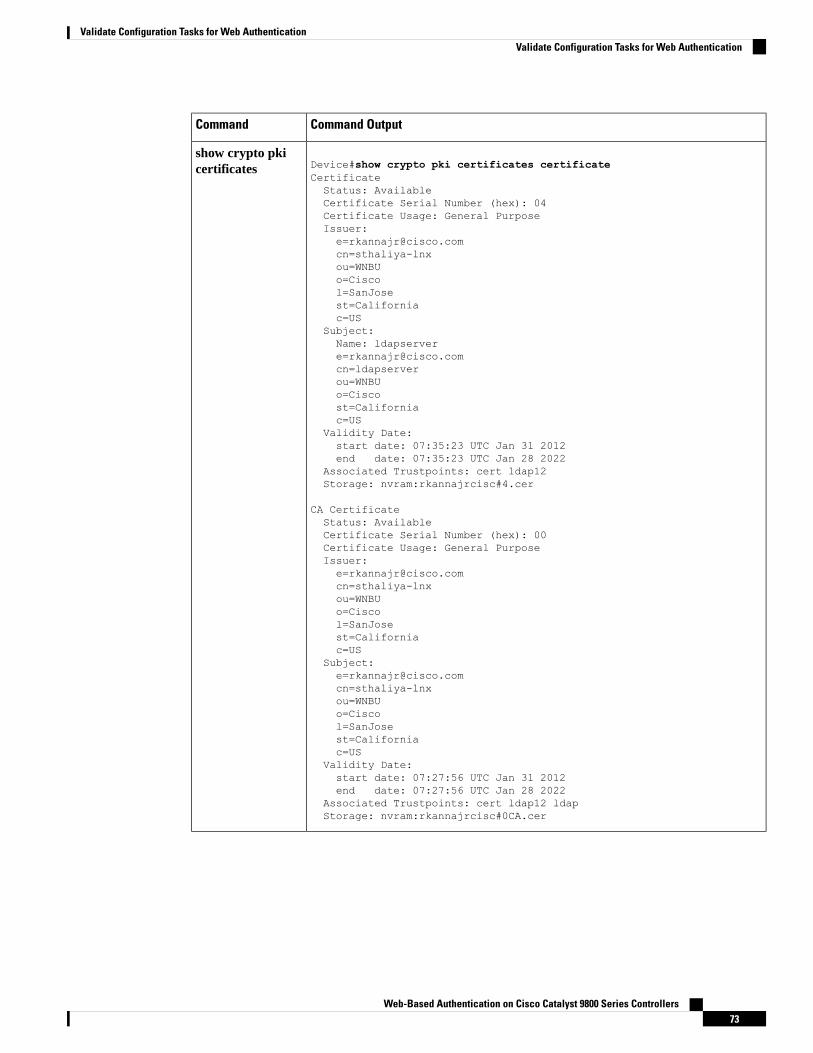
Command OutputCommand
Device#show crypto pki certificates certificateCertificateStatus: AvailableCertificate Serial Number (hex): 04Certificate Usage: General PurposeIssuer:[email protected]=sthaliya-lnxou=WNBUo=Ciscol=SanJosest=Californiac=US
Subject:Name: [email protected]=ldapserverou=WNBUo=Ciscost=Californiac=US
Validity Date:start date: 07:35:23 UTC Jan 31 2012end date: 07:35:23 UTC Jan 28 2022
Associated Trustpoints: cert ldap12Storage: nvram:rkannajrcisc#4.cer
CA CertificateStatus: AvailableCertificate Serial Number (hex): 00Certificate Usage: General PurposeIssuer:[email protected]=sthaliya-lnxou=WNBUo=Ciscol=SanJosest=Californiac=US
Subject:[email protected]=sthaliya-lnxou=WNBUo=Ciscol=SanJosest=Californiac=US
Validity Date:start date: 07:27:56 UTC Jan 31 2012end date: 07:27:56 UTC Jan 28 2022
Associated Trustpoints: cert ldap12 ldapStorage: nvram:rkannajrcisc#0CA.cer
show crypto pkicertificates
Web-Based Authentication on Cisco Catalyst 9800 Series Controllers73
Validate Configuration Tasks for Web AuthenticationValidate Configuration Tasks for Web Authentication
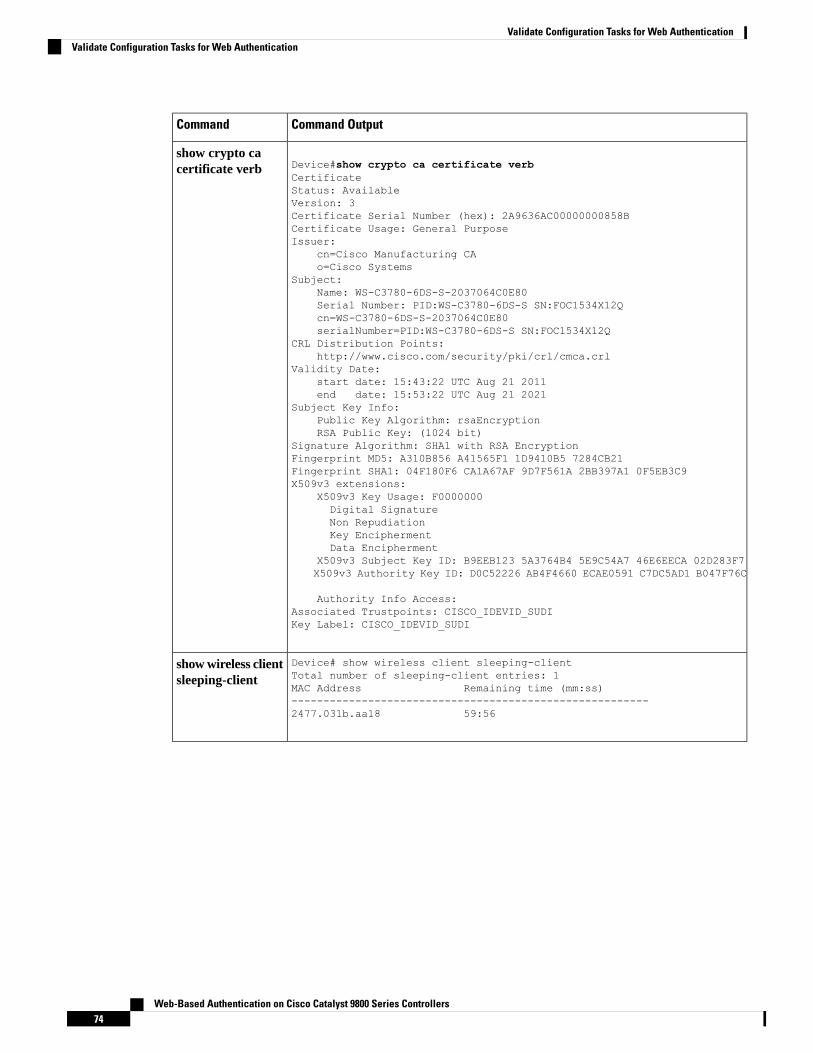
Command OutputCommand
Device#show crypto ca certificate verbCertificateStatus: AvailableVersion: 3Certificate Serial Number (hex): 2A9636AC00000000858BCertificate Usage: General PurposeIssuer:
cn=Cisco Manufacturing CAo=Cisco Systems
Subject:Name: WS-C3780-6DS-S-2037064C0E80Serial Number: PID:WS-C3780-6DS-S SN:FOC1534X12Qcn=WS-C3780-6DS-S-2037064C0E80serialNumber=PID:WS-C3780-6DS-S SN:FOC1534X12Q
CRL Distribution Points:http://www.cisco.com/security/pki/crl/cmca.crl
Validity Date:start date: 15:43:22 UTC Aug 21 2011end date: 15:53:22 UTC Aug 21 2021
Subject Key Info:Public Key Algorithm: rsaEncryptionRSA Public Key: (1024 bit)
Signature Algorithm: SHA1 with RSA EncryptionFingerprint MD5: A310B856 A41565F1 1D9410B5 7284CB21Fingerprint SHA1: 04F180F6 CA1A67AF 9D7F561A 2BB397A1 0F5EB3C9X509v3 extensions:
X509v3 Key Usage: F0000000Digital SignatureNon RepudiationKey EnciphermentData Encipherment
X509v3 Subject Key ID: B9EEB123 5A3764B4 5E9C54A7 46E6EECA 02D283F7X509v3 Authority Key ID: D0C52226 AB4F4660 ECAE0591 C7DC5AD1 B047F76C
Authority Info Access:Associated Trustpoints: CISCO_IDEVID_SUDIKey Label: CISCO_IDEVID_SUDI
show crypto cacertificate verb
Device# show wireless client sleeping-clientTotal number of sleeping-client entries: 1MAC Address Remaining time (mm:ss)--------------------------------------------------------2477.031b.aa18 59:56
show wireless clientsleeping-client
Web-Based Authentication on Cisco Catalyst 9800 Series Controllers74
Validate Configuration Tasks for Web AuthenticationValidate Configuration Tasks for Web Authentication
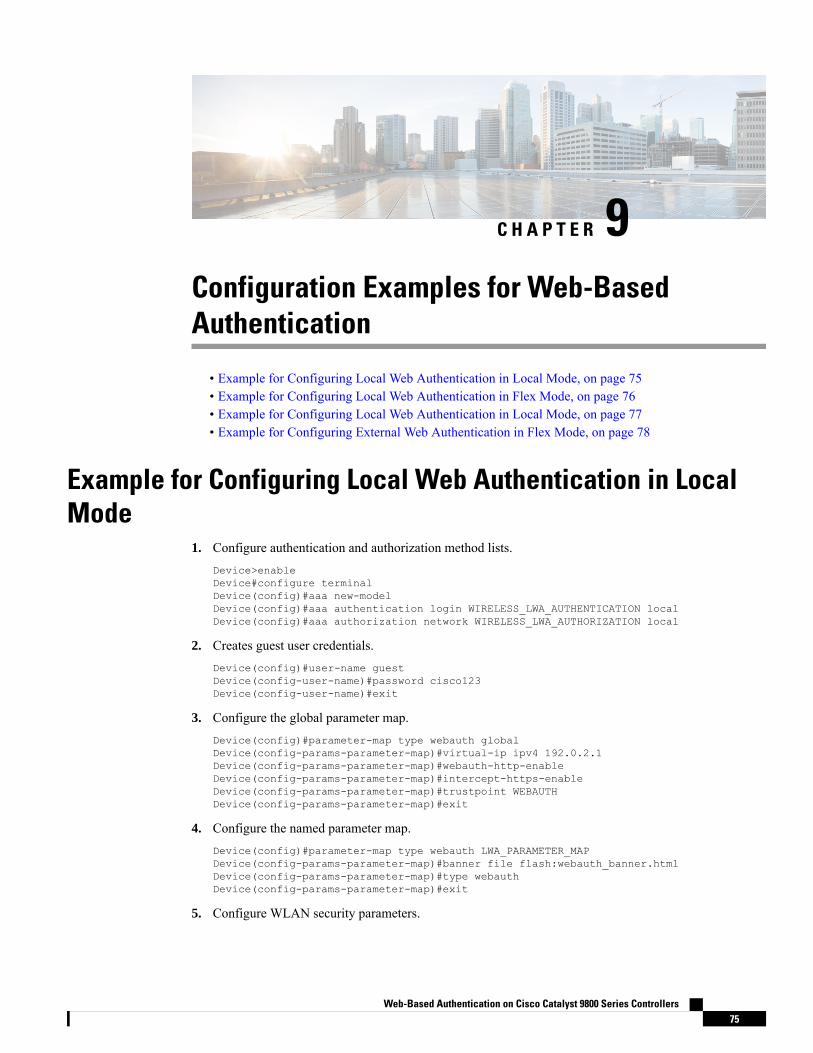
C H A P T E R 9Configuration Examples for Web-BasedAuthentication
• Example for Configuring Local Web Authentication in Local Mode, on page 75• Example for Configuring Local Web Authentication in Flex Mode, on page 76• Example for Configuring Local Web Authentication in Local Mode, on page 77• Example for Configuring External Web Authentication in Flex Mode, on page 78
Example for Configuring Local Web Authentication in LocalMode
1. Configure authentication and authorization method lists.Device>enableDevice#configure terminalDevice(config)#aaa new-modelDevice(config)#aaa authentication login WIRELESS_LWA_AUTHENTICATION localDevice(config)#aaa authorization network WIRELESS_LWA_AUTHORIZATION local
2. Creates guest user credentials.Device(config)#user-name guestDevice(config-user-name)#password cisco123Device(config-user-name)#exit
3. Configure the global parameter map.Device(config)#parameter-map type webauth globalDevice(config-params-parameter-map)#virtual-ip ipv4 192.0.2.1Device(config-params-parameter-map)#webauth-http-enableDevice(config-params-parameter-map)#intercept-https-enableDevice(config-params-parameter-map)#trustpoint WEBAUTHDevice(config-params-parameter-map)#exit
4. Configure the named parameter map.Device(config)#parameter-map type webauth LWA_PARAMETER_MAPDevice(config-params-parameter-map)#banner file flash:webauth_banner.htmlDevice(config-params-parameter-map)#type webauthDevice(config-params-parameter-map)#exit
5. Configure WLAN security parameters.
Web-Based Authentication on Cisco Catalyst 9800 Series Controllers75

Device(config)#wlan WLAN_LWA_LOCAL 15 WLAN_LWA_LOCALDevice(config-wlan)#no security wpaDevice(config-wlan)#no security wpa wpa2 ciphers aesDevice(config-wlan)#no security wpa akm dot1xDevice(config-wlan)#security web-authDevice(config-wlan)#security web-auth authentication-list WIRELESS_LWA_AUTHENTICATIONDevice(config-wlan)#security web-auth authorization-list WIRELESS_LWA_AUTHORIZATIONDevice(config-wlan)#security web-auth parameter-map LWA_PARAMETER_MAPDevice(config-wlan)#exit
6. Configure wireless policy profile.Device(config)#wireless profile policy WLAN_LWA_LOCALDevice(config-wireless-policy)#vlan 100Device(config-wireless-policy)# no shutdownDevice(config-wlan)#exit
7. Create a policy tag.Device(config)#wireless tag policy LWA_POLICY_TAGDevice(config-policy-tag)#wlan WLAN_LWA_LOCAL policy WLAN_LWA_LOCALDevice(config-wlan)#exit
8. Configure a site tag.Device(config)#wireless tag site SITE_LWADevice(config-site-tag)#exit
9. Assign the policy tag to an Access Point.Device(config)#ap 28ac.9eb7.7220Device(config-ap-tag)#policy-tag LWA_POLICY_TAGDevice(config-ap-tag)#site-tag SITE_LWADevice(config-ap-tag)#exit
ExampleforConfiguringLocalWebAuthenticationinFlexMode1. Configure authentication and authorization method lists.
Device>enableDevice#configure terminalDevice(config)#aaa new-modelDevice(config)#aaa authentication login LOCAL_WEBAUTH localDevice(config)#aaa authorization network LOCAL_WEBAUTH local
2. Creates guest user credentials.Device(config)#user-name guestDevice(config-user-name)#password cisco123Device(config-user-name)#exit
3. Configure the global parameter map.Device(config)#parameter-map type webauth globalDevice(config-params-parameter-map)#virtual-ip ipv4 192.0.2.1Device(config-params-parameter-map)#virtual-ip ipv6 fd:1:1::1Device(config-params-parameter-map)#webauth-http-enableDevice(config-params-parameter-map)#intercept-https-enableDevice(config-params-parameter-map)#trustpoint WEBAUTHDevice(config-params-parameter-map)#exit
4. Configure the named parameter map.
Web-Based Authentication on Cisco Catalyst 9800 Series Controllers76
Configuration Examples for Web-Based AuthenticationExample for Configuring Local Web Authentication in Flex Mode

Device(config)#parameter-map type webauth PARAM-INTERNAL-AUTHDevice(config-params-parameter-map)#type webauthDevice(config-params-parameter-map)#exit
5. Configure WLAN security parameters.Device(config)#wlan FLEX_LWA 11 FLEX_LWADevice(config-wlan)#no security wpaDevice(config-wlan)#no security wpa akm dot1xDevice(config-wlan)#wpa wpa2Device(config-wlan)#no security wpa wpa2 ciphers aesDevice(config-wlan)#security web-authDevice(config-wlan)#security web-auth authentication-list LOCAL_WEBAUTHDevice(config-wlan)#security web-auth authorization-list LOCAL_WEBAUTHDevice(config-wlan)#security web-auth parameter-map PARAM-INTERNAL-AUTHDevice(config-wlan)#no shutdownDevice(config-wlan)#exit
6. Configure wireless policy profile.Device(config)#wireless profile policy FLEX_LWADevice(config-wireless-policy)#no central associationDevice(config-wireless-policy)#no central switchingDevice(config-wireless-policy)#vlan 100Device(config-wireless-policy)#no shutdownDevice(config-wlan)#exit
7. Create a policy tag.Device(config)#wireless tag policy LWA_POLICY_FLEXDevice(config-policy-tag)#wlan FLEX_LWA policy FLEX_LWADevice(config-wlan)#exit
8. Configure a site tag.Device(config)#wireless tag site LWA_FLEX_SITEDevice(config-site-tag)#no local-siteDevice(config-site-tag)#exit
9. Assign the policy tag to an Access Point.Device(config)#ap 28ac.9eb7.7220Device(config-ap-tag)#policy-tag LWA_POLICY_FLEXDevice(config-ap-tag)#site-tag LWA_FLEX_SITEDevice(config-ap-tag)#exit
Example for Configuring Local Web Authentication in LocalMode
1. Configure authentication and authorization method lists.Device>enableDevice#configure terminalDevice(config)#aaa new-modelDevice(config)#aaa authentication login WIRELESS_LWA_AUTHENTICATION localDevice(config)#aaa authorization network WIRELESS_LWA_AUTHORIZATION local
2. Creates guest user credentials.Device(config)#user-name guestDevice(config-user-name)#password cisco123Device(config-user-name)#exit
Web-Based Authentication on Cisco Catalyst 9800 Series Controllers77
Configuration Examples for Web-Based AuthenticationExample for Configuring Local Web Authentication in Local Mode
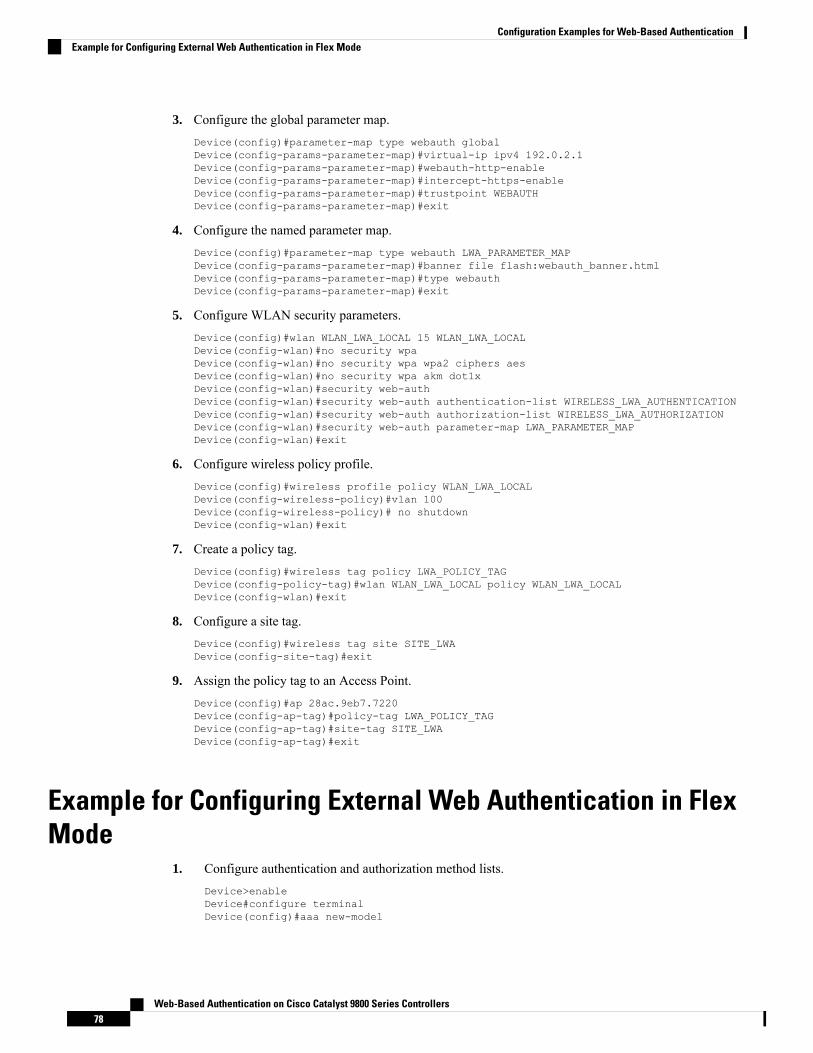
3. Configure the global parameter map.Device(config)#parameter-map type webauth globalDevice(config-params-parameter-map)#virtual-ip ipv4 192.0.2.1Device(config-params-parameter-map)#webauth-http-enableDevice(config-params-parameter-map)#intercept-https-enableDevice(config-params-parameter-map)#trustpoint WEBAUTHDevice(config-params-parameter-map)#exit
4. Configure the named parameter map.Device(config)#parameter-map type webauth LWA_PARAMETER_MAPDevice(config-params-parameter-map)#banner file flash:webauth_banner.htmlDevice(config-params-parameter-map)#type webauthDevice(config-params-parameter-map)#exit
5. Configure WLAN security parameters.Device(config)#wlan WLAN_LWA_LOCAL 15 WLAN_LWA_LOCALDevice(config-wlan)#no security wpaDevice(config-wlan)#no security wpa wpa2 ciphers aesDevice(config-wlan)#no security wpa akm dot1xDevice(config-wlan)#security web-authDevice(config-wlan)#security web-auth authentication-list WIRELESS_LWA_AUTHENTICATIONDevice(config-wlan)#security web-auth authorization-list WIRELESS_LWA_AUTHORIZATIONDevice(config-wlan)#security web-auth parameter-map LWA_PARAMETER_MAPDevice(config-wlan)#exit
6. Configure wireless policy profile.Device(config)#wireless profile policy WLAN_LWA_LOCALDevice(config-wireless-policy)#vlan 100Device(config-wireless-policy)# no shutdownDevice(config-wlan)#exit
7. Create a policy tag.Device(config)#wireless tag policy LWA_POLICY_TAGDevice(config-policy-tag)#wlan WLAN_LWA_LOCAL policy WLAN_LWA_LOCALDevice(config-wlan)#exit
8. Configure a site tag.Device(config)#wireless tag site SITE_LWADevice(config-site-tag)#exit
9. Assign the policy tag to an Access Point.Device(config)#ap 28ac.9eb7.7220Device(config-ap-tag)#policy-tag LWA_POLICY_TAGDevice(config-ap-tag)#site-tag SITE_LWADevice(config-ap-tag)#exit
Example for Configuring External Web Authentication in FlexMode
1. Configure authentication and authorization method lists.Device>enableDevice#configure terminalDevice(config)#aaa new-model
Web-Based Authentication on Cisco Catalyst 9800 Series Controllers78
Configuration Examples for Web-Based AuthenticationExample for Configuring External Web Authentication in Flex Mode
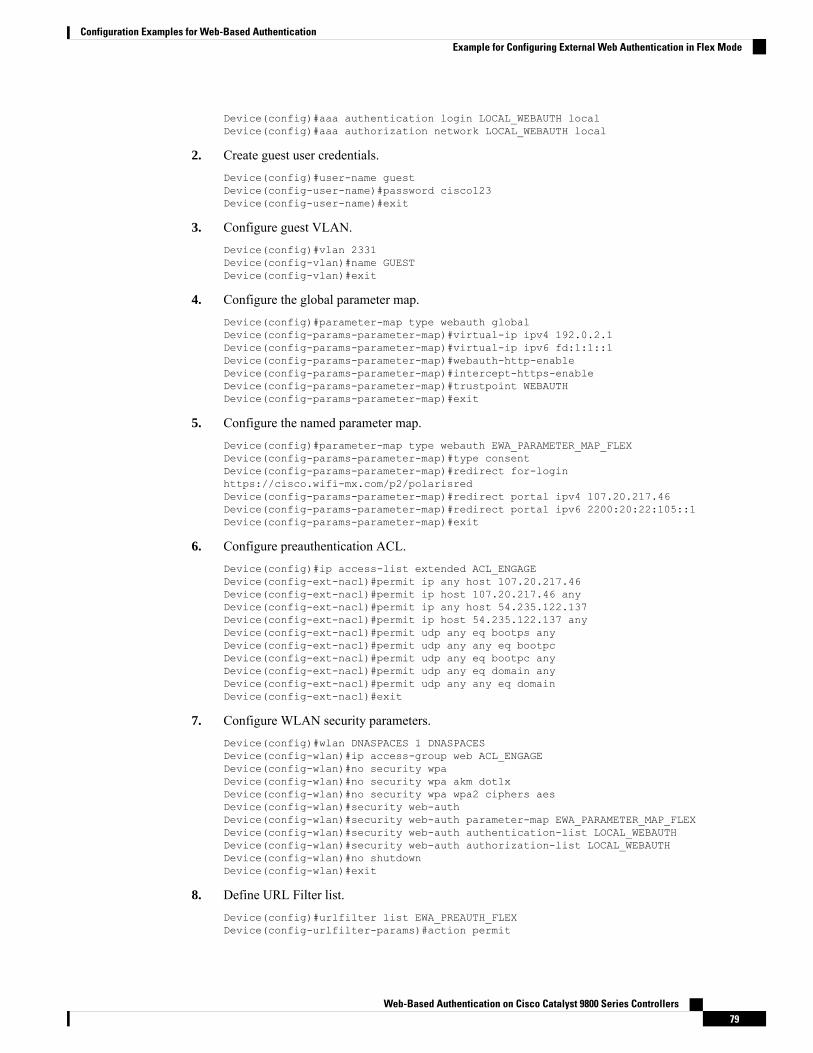
Device(config)#aaa authentication login LOCAL_WEBAUTH localDevice(config)#aaa authorization network LOCAL_WEBAUTH local
2. Create guest user credentials.Device(config)#user-name guestDevice(config-user-name)#password cisco123Device(config-user-name)#exit
3. Configure guest VLAN.Device(config)#vlan 2331Device(config-vlan)#name GUESTDevice(config-vlan)#exit
4. Configure the global parameter map.Device(config)#parameter-map type webauth globalDevice(config-params-parameter-map)#virtual-ip ipv4 192.0.2.1Device(config-params-parameter-map)#virtual-ip ipv6 fd:1:1::1Device(config-params-parameter-map)#webauth-http-enableDevice(config-params-parameter-map)#intercept-https-enableDevice(config-params-parameter-map)#trustpoint WEBAUTHDevice(config-params-parameter-map)#exit
5. Configure the named parameter map.Device(config)#parameter-map type webauth EWA_PARAMETER_MAP_FLEXDevice(config-params-parameter-map)#type consentDevice(config-params-parameter-map)#redirect for-loginhttps://cisco.wifi-mx.com/p2/polarisredDevice(config-params-parameter-map)#redirect portal ipv4 107.20.217.46Device(config-params-parameter-map)#redirect portal ipv6 2200:20:22:105::1Device(config-params-parameter-map)#exit
6. Configure preauthentication ACL.Device(config)#ip access-list extended ACL_ENGAGEDevice(config-ext-nacl)#permit ip any host 107.20.217.46Device(config-ext-nacl)#permit ip host 107.20.217.46 anyDevice(config-ext-nacl)#permit ip any host 54.235.122.137Device(config-ext-nacl)#permit ip host 54.235.122.137 anyDevice(config-ext-nacl)#permit udp any eq bootps anyDevice(config-ext-nacl)#permit udp any any eq bootpcDevice(config-ext-nacl)#permit udp any eq bootpc anyDevice(config-ext-nacl)#permit udp any eq domain anyDevice(config-ext-nacl)#permit udp any any eq domainDevice(config-ext-nacl)#exit
7. Configure WLAN security parameters.Device(config)#wlan DNASPACES 1 DNASPACESDevice(config-wlan)#ip access-group web ACL_ENGAGEDevice(config-wlan)#no security wpaDevice(config-wlan)#no security wpa akm dot1xDevice(config-wlan)#no security wpa wpa2 ciphers aesDevice(config-wlan)#security web-authDevice(config-wlan)#security web-auth parameter-map EWA_PARAMETER_MAP_FLEXDevice(config-wlan)#security web-auth authentication-list LOCAL_WEBAUTHDevice(config-wlan)#security web-auth authorization-list LOCAL_WEBAUTHDevice(config-wlan)#no shutdownDevice(config-wlan)#exit
8. Define URL Filter list.Device(config)#urlfilter list EWA_PREAUTH_FLEXDevice(config-urlfilter-params)#action permit
Web-Based Authentication on Cisco Catalyst 9800 Series Controllers79
Configuration Examples for Web-Based AuthenticationExample for Configuring External Web Authentication in Flex Mode
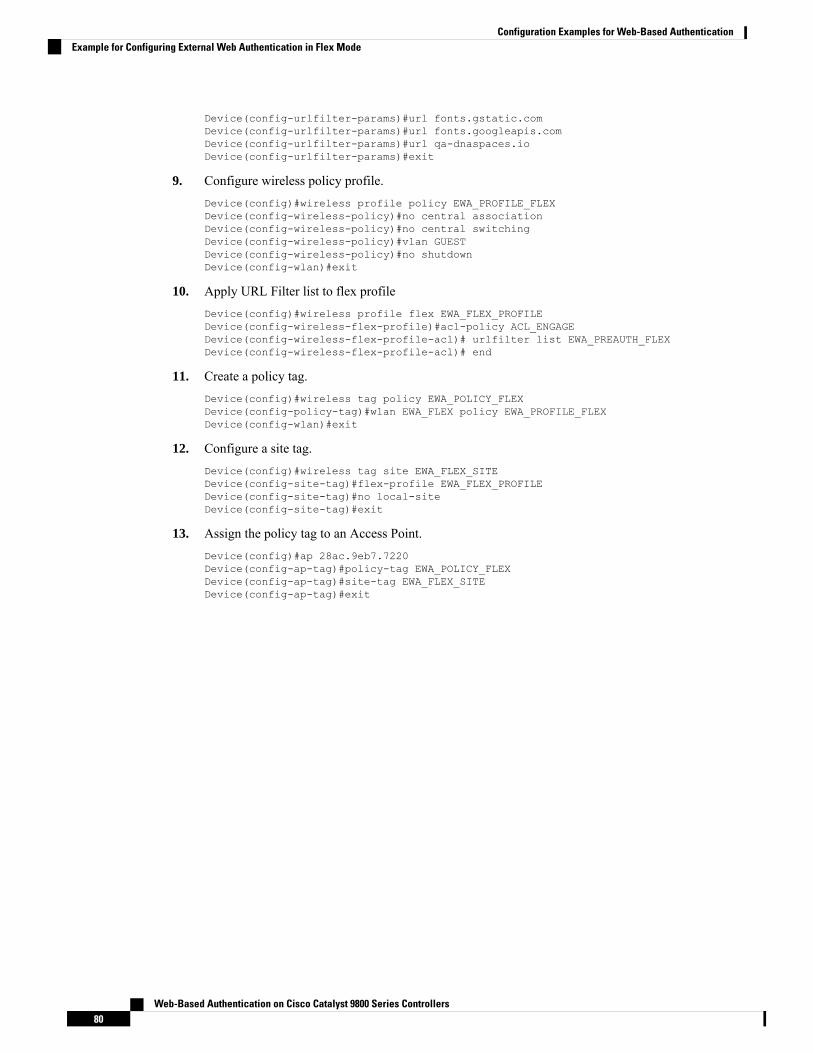
Device(config-urlfilter-params)#url fonts.gstatic.comDevice(config-urlfilter-params)#url fonts.googleapis.comDevice(config-urlfilter-params)#url qa-dnaspaces.ioDevice(config-urlfilter-params)#exit
9. Configure wireless policy profile.Device(config)#wireless profile policy EWA_PROFILE_FLEXDevice(config-wireless-policy)#no central associationDevice(config-wireless-policy)#no central switchingDevice(config-wireless-policy)#vlan GUESTDevice(config-wireless-policy)#no shutdownDevice(config-wlan)#exit
10. Apply URL Filter list to flex profileDevice(config)#wireless profile flex EWA_FLEX_PROFILEDevice(config-wireless-flex-profile)#acl-policy ACL_ENGAGEDevice(config-wireless-flex-profile-acl)# urlfilter list EWA_PREAUTH_FLEXDevice(config-wireless-flex-profile-acl)# end
11. Create a policy tag.Device(config)#wireless tag policy EWA_POLICY_FLEXDevice(config-policy-tag)#wlan EWA_FLEX policy EWA_PROFILE_FLEXDevice(config-wlan)#exit
12. Configure a site tag.Device(config)#wireless tag site EWA_FLEX_SITEDevice(config-site-tag)#flex-profile EWA_FLEX_PROFILEDevice(config-site-tag)#no local-siteDevice(config-site-tag)#exit
13. Assign the policy tag to an Access Point.Device(config)#ap 28ac.9eb7.7220Device(config-ap-tag)#policy-tag EWA_POLICY_FLEXDevice(config-ap-tag)#site-tag EWA_FLEX_SITEDevice(config-ap-tag)#exit
Web-Based Authentication on Cisco Catalyst 9800 Series Controllers80
Configuration Examples for Web-Based AuthenticationExample for Configuring External Web Authentication in Flex Mode
C H A P T E R 10Troubleshoot Common Issues for WebAuthentication
• Troubleshoot Common Issues for Web Authentication, on page 81
Troubleshoot Common Issues for Web AuthenticationCustom Web Authentication Login Page Fails to Load
Recommended Solution: When adding the customized HTML files to the webauth bundle, add files one ata time to build the package. Adding files incrementally helps you identify the problem. Also as a best practise,customize a bundle that exists instead of creating a new bundle.
Redirection URL does not Work
Recommended Solution: For any redirection issues in custom WebAuth, Cisco recommends to check theWebAuth bundle which has variable within the bundle that allows the redirection. If you enter a redirect URLwith += in the WLCWeb UI, this could overwrite or add to the URL defined inside the bundle. For example,in the WLC Web UI, the redirectURL field is set to www.cisco.com. However, in the bundle it shows asredirectURL+= 'www.google.com'. The += redirects users to www.cisco.comwww.google.com, whichis an invalid URL.
Guest users cannot connect to the guest WLAN
Recommended Solution: Check the client configuration and security settings on theWLAN, if enabled. Alsocheck if the radios are active and operative.
Users do not Obtain an IP Address
Recommended Solution: Check the DHCP configuration and connectivity. Check if the other WLANs canuse the same DHCP server without any problem.
Redirection to the Web Authentication Login Page Fails
Recommended Solution:
In situations where the redirection to the login page does not happen, check the following:
Web-Based Authentication on Cisco Catalyst 9800 Series Controllers81
• If a valid DNS server is assigned to the client through DHCP. Run the command ipconfig/all and verifythe DHCP and DNS server configurations.
• If the DNS server is reachable from the client. Run the command nslookup www.website.com in theCommand Prompt/Terminal and check if it returns an IP address for the domain.
• If you have entered a valid URL in order to be redirected. For example, if you have enteredhttp://localhost:2002, the redirection will fail as you have entered port 2002 instead of 80.
In scenarios where the web authentication login page does not display even after redirection takes place, youmust check if the firewall installed on the client computer is blocking the login page. Disable the firewall andtry to access the login page. The firewall can be enabled after web authentication is complete.
This problem can also arise due to non responsive WLC or due to a problem with TLS handshake for the webauthentication page. Capture a sniffer trace on the client computer to check if the WLC responds and tries toredirect. For handshake issues, verify if the security settings of the client browser allow SSLv3, and also howstringent the certificate validation settings are.
After Successful Authentication, Guest Users Fail to Get Access to the Internet
Recommended Solution: Remove WebAuth from the security of the WLAN, and change the guest networkstatus to open, as follows:
1. Choose Configuration > Tags and Profiles > WLANs.
2. Click on the guest WLAN name from the list of WLANs and in the Edit WLAN dialog box, go to theSecurity tab.
3. Under Layer3 tab, clear the Web Policy check box and click Update & Apply to Device.
Try accessing the internet and if you still experience issues accessing the network, remove WebAuth settingscompletely and check the interfaces configuration.
Error Extracting WebAuth Files
Verify if all the HTML files and images required for the customized web page are bundled into a .tar filebefore uploading to the WLC. Ensure that one of the files included in the .tar bundle is login.html.
Web-Based Authentication on Cisco Catalyst 9800 Series Controllers82
Troubleshoot Common Issues for Web AuthenticationTroubleshoot Common Issues for Web Authentication


