Embed Size (px)
Citation preview

WELCOME TOWELCOME TOBABYLON CLOUDBABYLON CLOUD
GUIDEGUIDEBABYLON CLOUD ADMIN PORTAL GUIDEBABYLON CLOUD ADMIN PORTAL GUIDE
NOVEMBER 2021NOVEMBER 2021
BABYLON CLOUD ADMIN PORTAL GUIDENOVEMBER 2021
Here are the most important things you need to know about backing up your data.
Babylon Cloud Admin portal offers an advanced feature set, such as:
1.1 Add user1.2 Add other users1.3 Add a new subgroup 1.4 Change group configurations1.5 Retention policies1.6 Group scheduling policy 1.7 Group file filter1.8 Alarm management
Helpdesk
LET’S START!
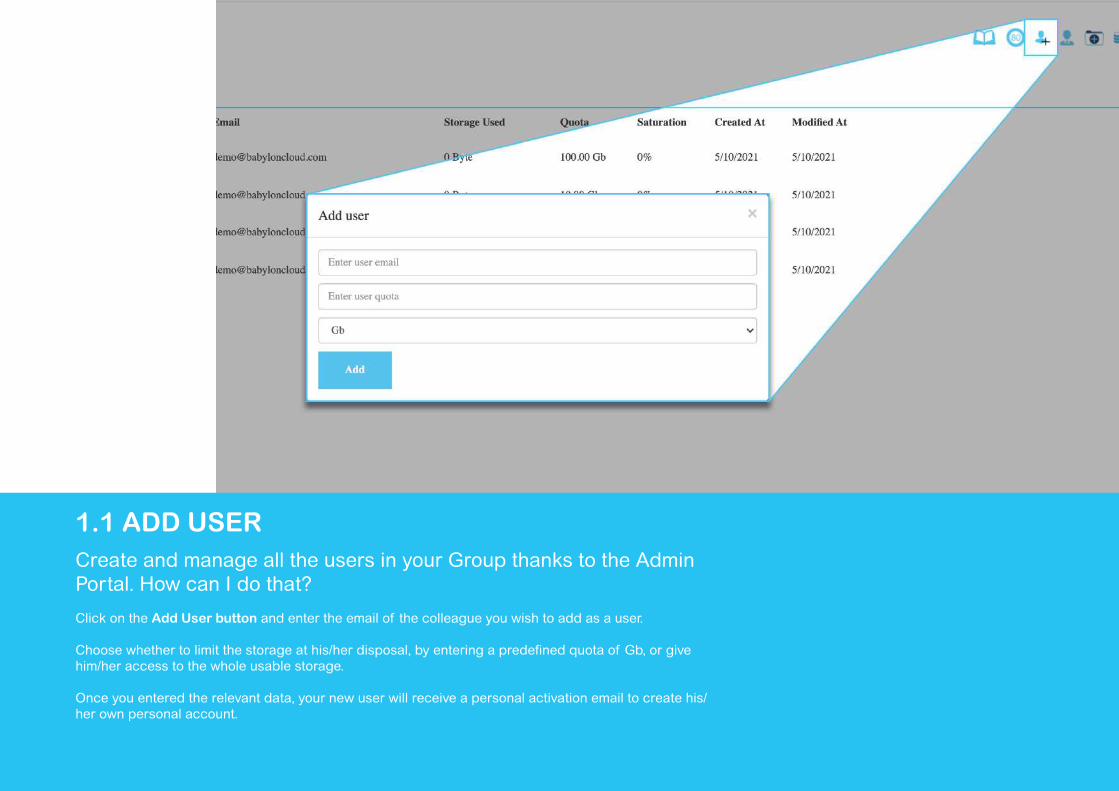
Create and manage all the users in your Group thanks to the Admin Portal. How can I do that?
Click on the Add User button and enter the email of the colleague you wish to add as a user.
Choose whether to limit the storage at his/her disposal, by entering a predefined quota of Gb, or give him/her access to the whole usable storage.
Once you entered the relevant data, your new user will receive a personal activation email to create his/her own personal account.
1.1 ADD USER
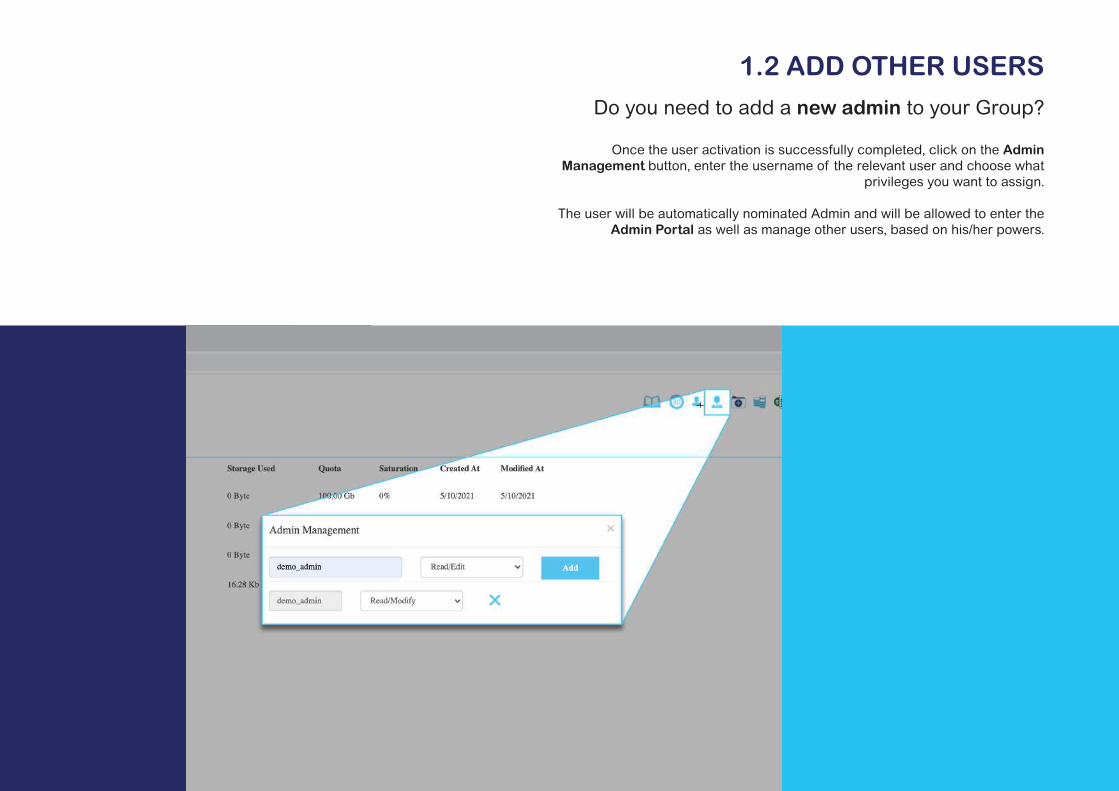
Do you need to add a new admin to your Group?
Once the user activation is successfully completed, click on the Admin Management button, enter the username of the relevant user and choose what
privileges you want to assign.
The user will be automatically nominated Admin and will be allowed to enter the Admin Portal as well as manage other users, based on his/her powers.
1.2 ADD OTHER USERS
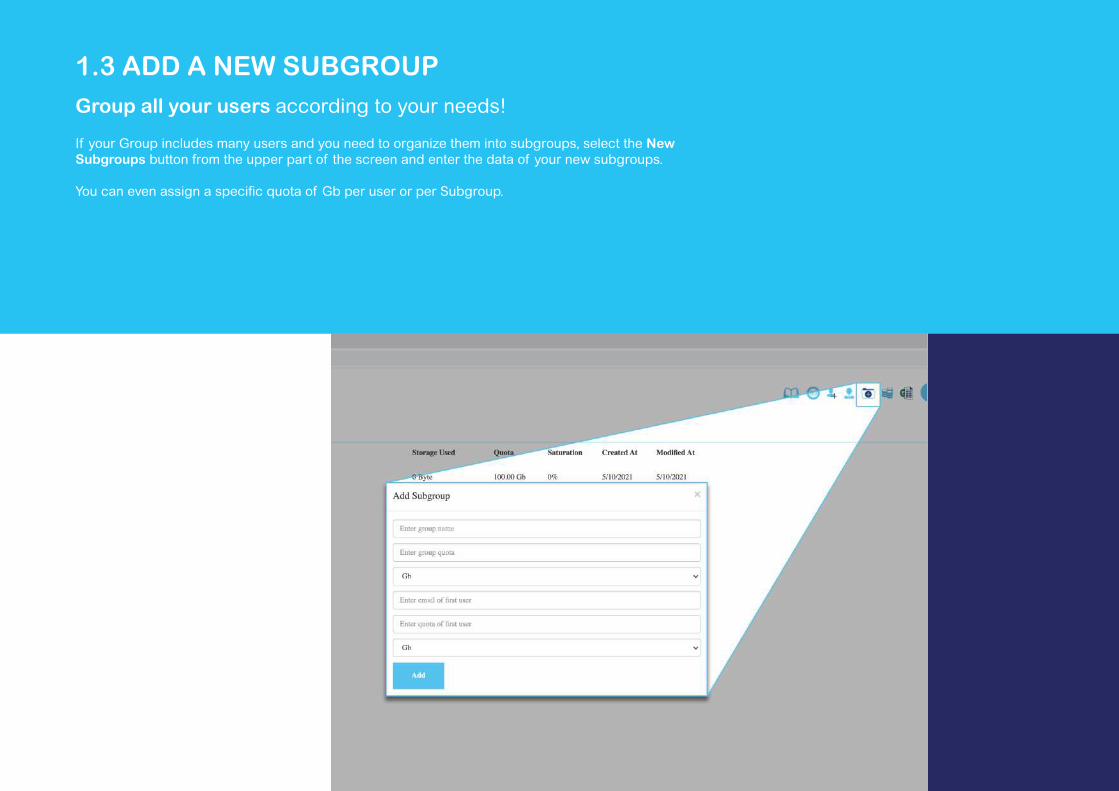
1.3 ADD A NEW SUBGROUPGroup all your users according to your needs!
If your Group includes many users and you need to organize them into subgroups, select the New Subgroups button from the upper part of the screen and enter the data of your new subgroups.
You can even assign a specific quota of Gb per user or per Subgroup.

1.4 CHANGE GROUP CONFIGURATIONS
Administrators can change the group configuration policies for each user within the Group.
To do so, simply click on Change Group Configurations.
By selecting the proper icon on the right part of the screen, you will be able to select one of the following policies and propagate them across users within your Group:
Group Retention policyGroup scheduling policy
Group File FiltersAlarm Management
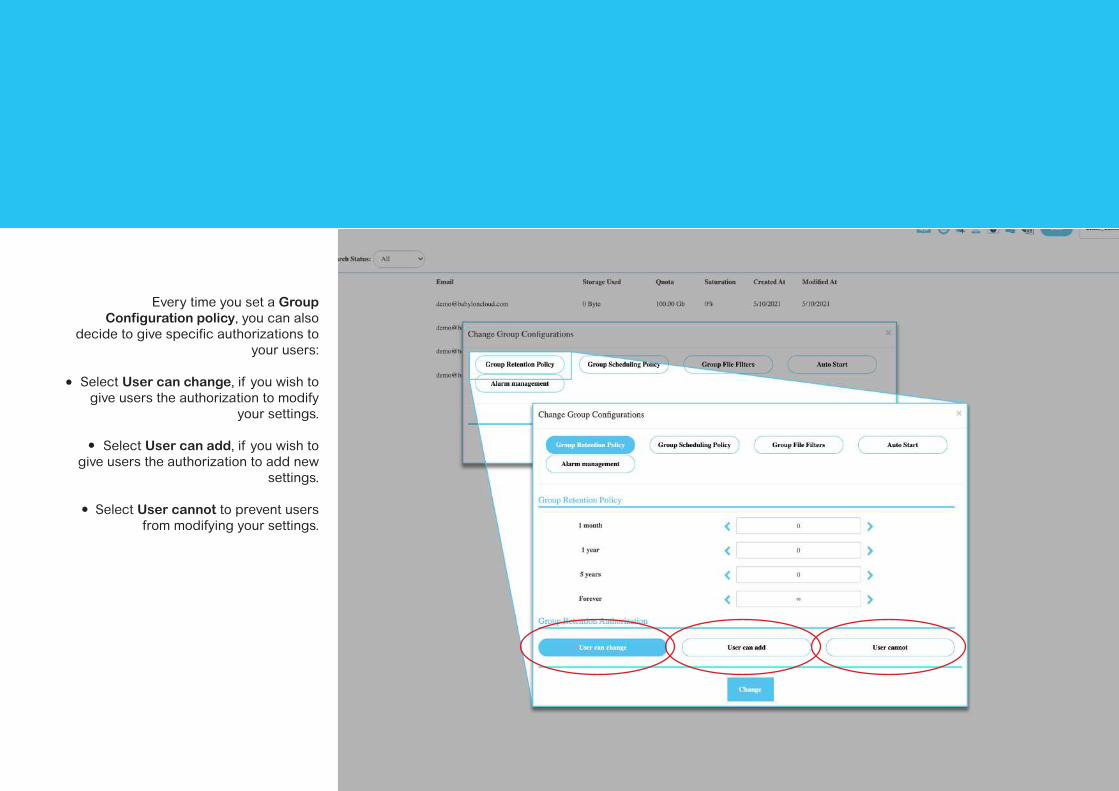
Every time you set a Group Configuration policy, you can also
decide to give specific authorizations to your users:
Select User can change, if you wish to give users the authorization to modify
your settings.
Select User can add, if you wish to give users the authorization to add new
settings.
Select User cannot to prevent users from modifying your settings.
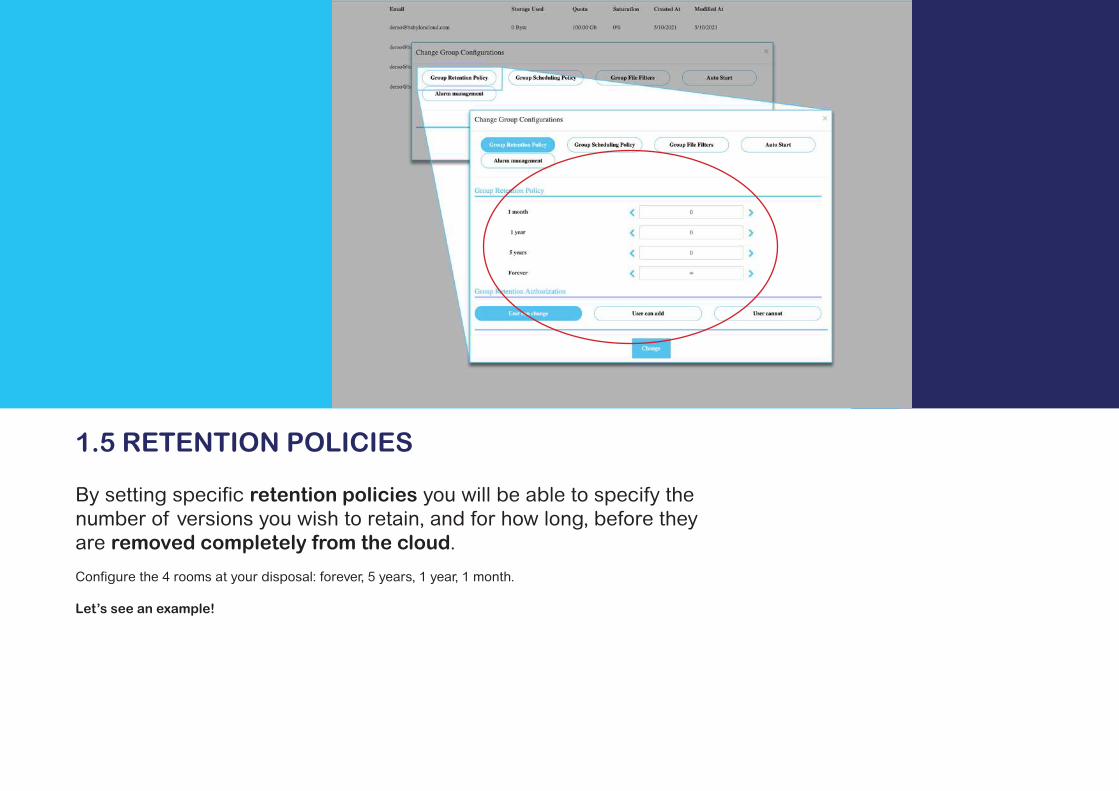
1.5 RETENTION POLICIES
By setting specific retention policies you will be able to specify the number of versions you wish to retain, and for how long, before they are removed completely from the cloud.
Configure the 4 rooms at your disposal: forever, 5 years, 1 year, 1 month.
Let’s see an example!
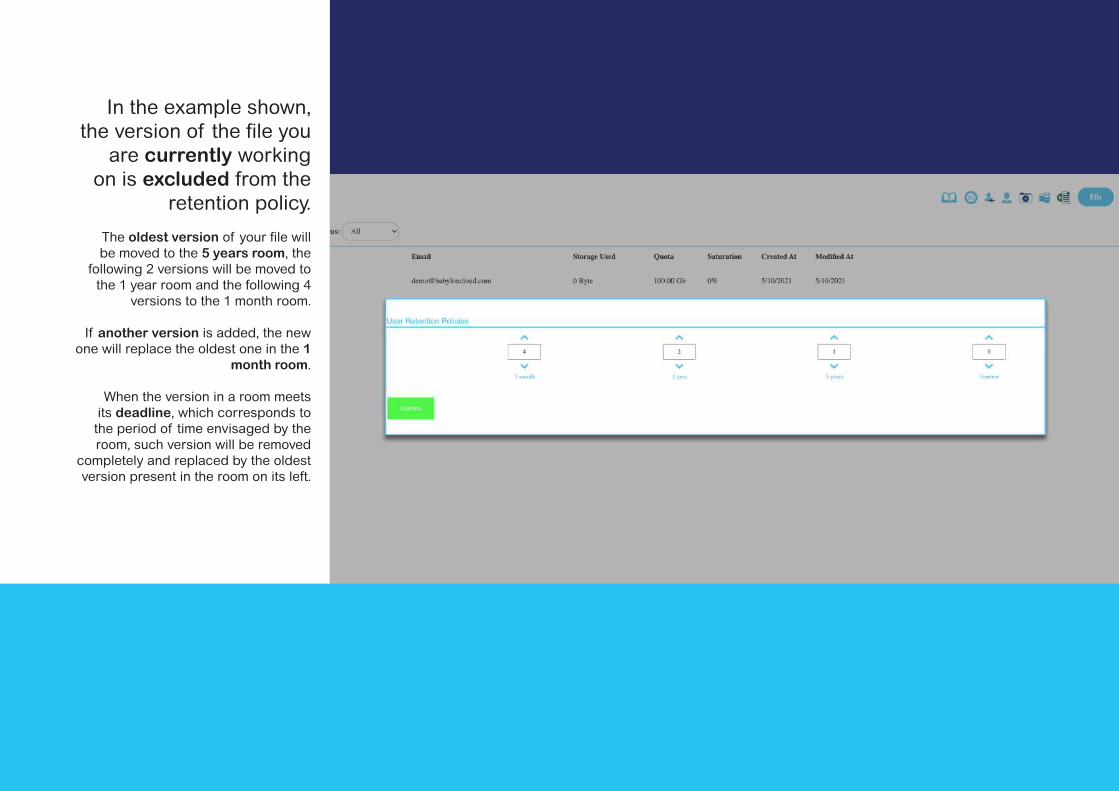
In the example shown, the version of the file you
are currently working on is excluded from the
retention policy.
The oldest version of your file will be moved to the 5 years room, the
following 2 versions will be moved to the 1 year room and the following 4
versions to the 1 month room.
If another version is added, the new one will replace the oldest one in the 1
month room.
When the version in a room meets its deadline, which corresponds to
the period of time envisaged by the room, such version will be removed
completely and replaced by the oldest version present in the room on its left.
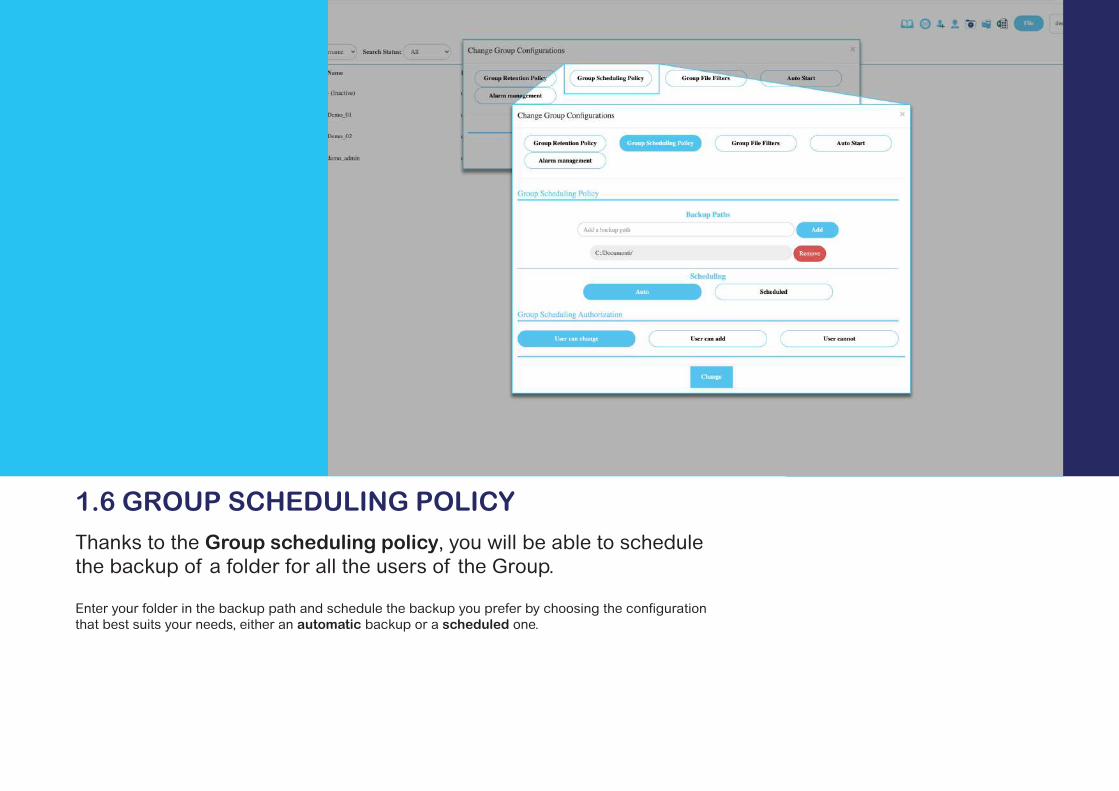
1.6 GROUP SCHEDULING POLICYThanks to the Group scheduling policy, you will be able to schedule the backup of a folder for all the users of the Group.
Enter your folder in the backup path and schedule the backup you prefer by choosing the configuration that best suits your needs, either an automatic backup or a scheduled one.
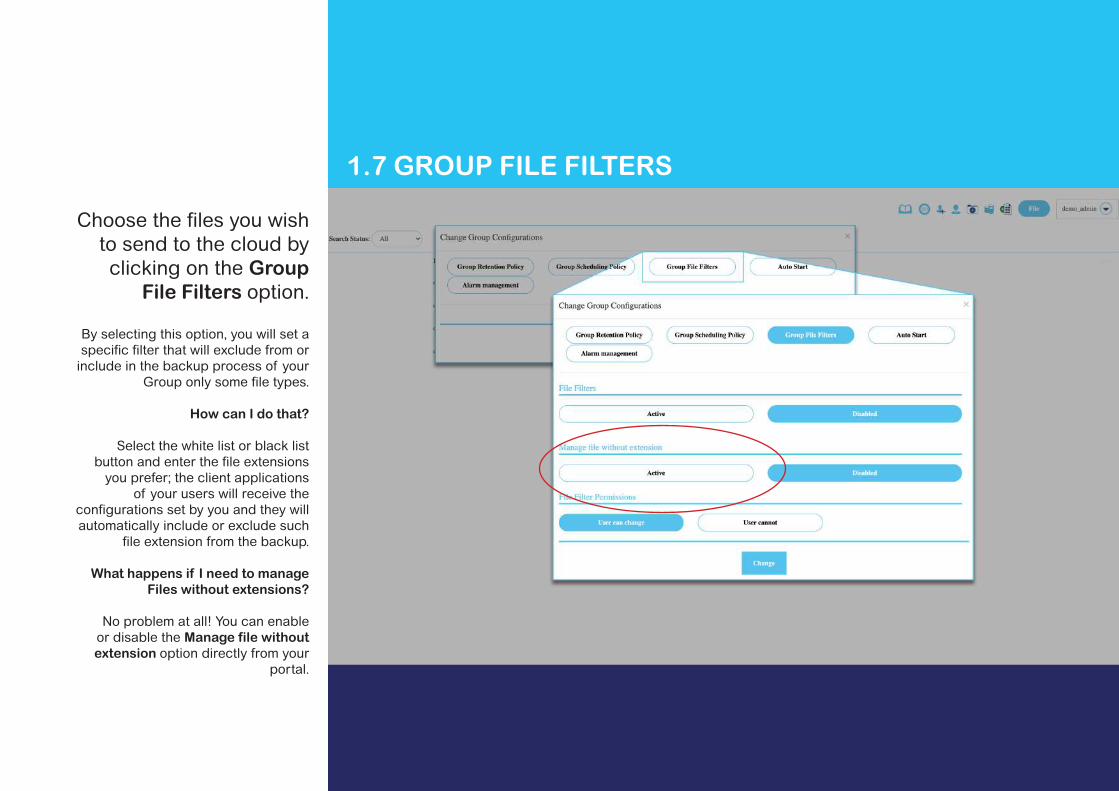
1.7 GROUP FILE FILTERS
Choose the files you wish to send to the cloud by clicking on the Group
File Filters option.
By selecting this option, you will set a specific filter that will exclude from or
include in the backup process of your Group only some file types.
How can I do that?
Select the white list or black list button and enter the file extensions
you prefer; the client applications of your users will receive the
configurations set by you and they will automatically include or exclude such
file extension from the backup.
What happens if I need to manage Files without extensions?
No problem at all! You can enable or disable the Manage file without extension option directly from your
portal.
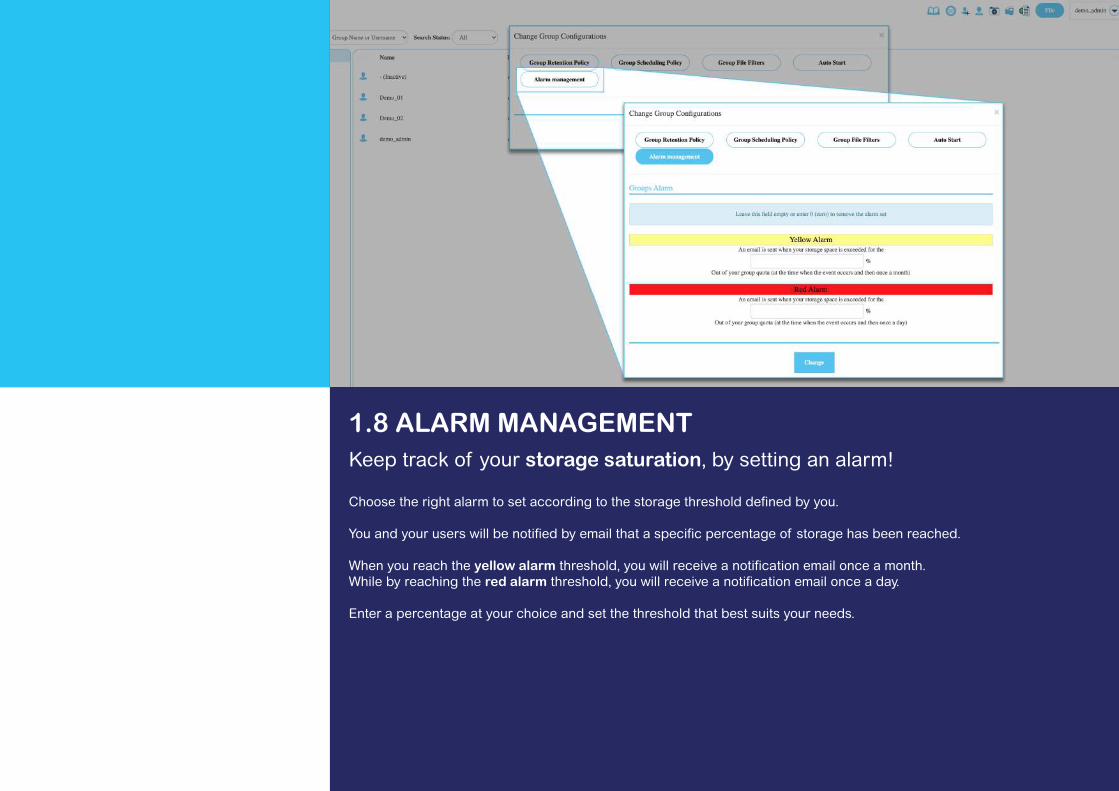
1.8 ALARM MANAGEMENTKeep track of your storage saturation, by setting an alarm!
Choose the right alarm to set according to the storage threshold defined by you.
You and your users will be notified by email that a specific percentage of storage has been reached.
When you reach the yellow alarm threshold, you will receive a notification email once a month. While by reaching the red alarm threshold, you will receive a notification email once a day.
Enter a percentage at your choice and set the threshold that best suits your needs.

Babylon Cloud customer serviceis at your disposal:
HELPDESK: +39 06 4520 0406E-MAIL: [email protected]
www.babyloncloud.com


